


The battery on your iPhone can go from 10% to completely dead in a matter of minutes, or at least it can feel that way. Apple does prepare you with an alert when you hit the 20% and 10% mark, but it's easy to forget to charge your iPhone before it dies even with those notifications. That's why you should also be notified when your battery's down to 5% remaining.
Some people may dislike these low battery alerts, but they come in handy when you're not focused on your battery level and need your smartphone to stay alive.
Oddly enough, Apple does indeed give alerts when you only have 5% battery left, but that's only on iPads; it doesn't do that on iPhones. So if you're on iPadOS, you don't have to worry. If you're on an iPhone, there is a way to activate 5% alerts.
In less than a minute, you can create an automation in the Shortcuts app that automatically sends out a personalized notification every time your battery drops below 5%. With this ultra-low battery notification, you're warned right before your iPhone dies and have a chance to connect it to a charger or put it into Low Power or Airplane Mode to conserve battery.
Requirements
- iOS 14: The automation feature we're going to use was introduced in iOS 14, so you won't be able to create the same thing in iOS 13.
- Shortcuts app: If you deleted it for some reason, you can re-install it from the App Store.
Create a New Automation
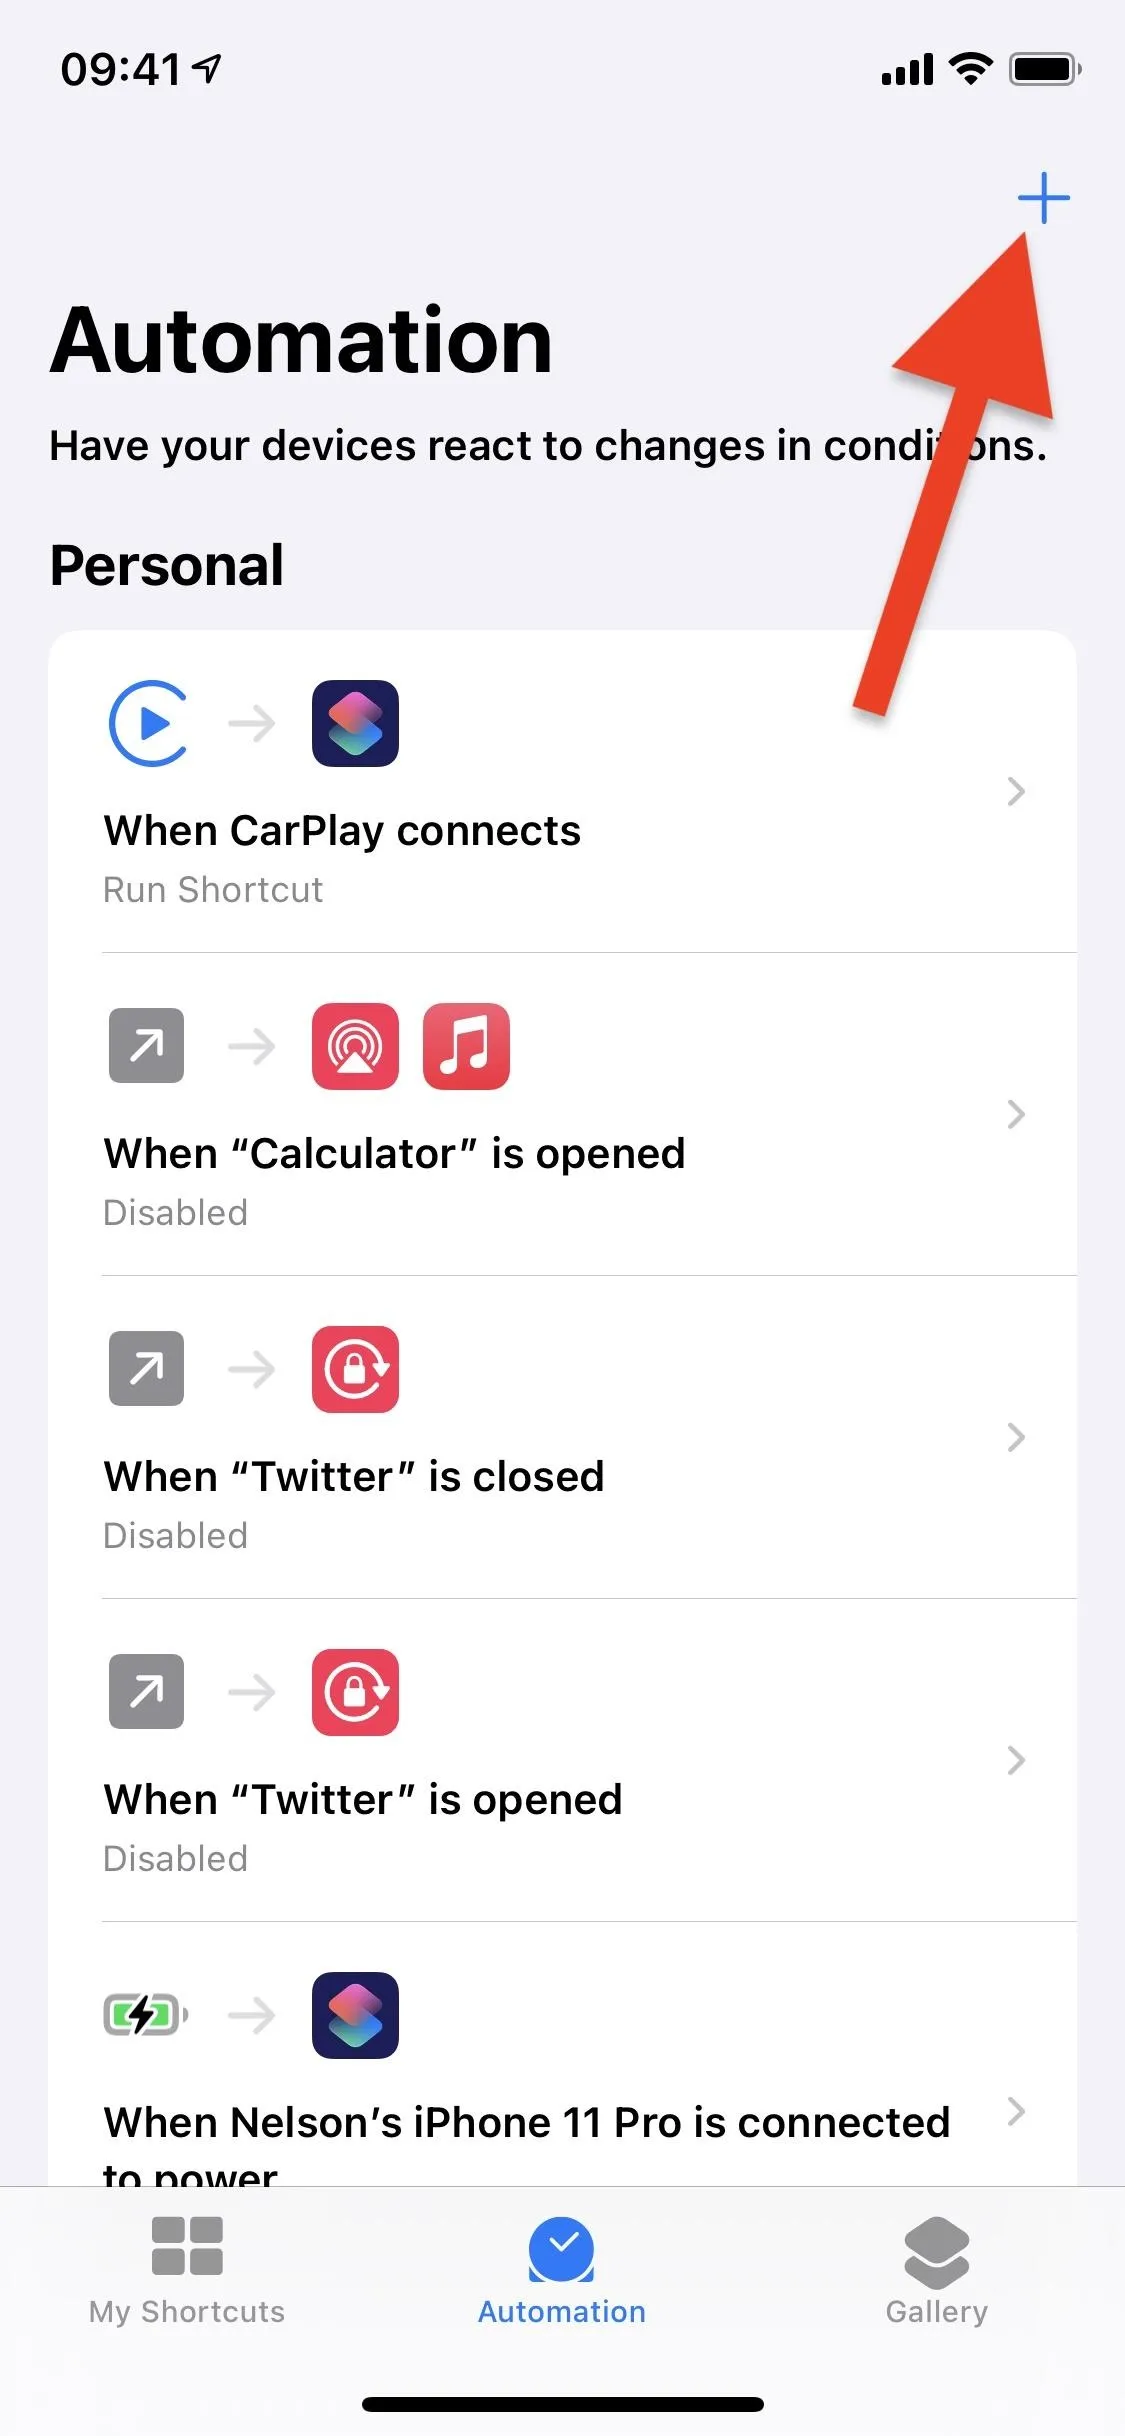
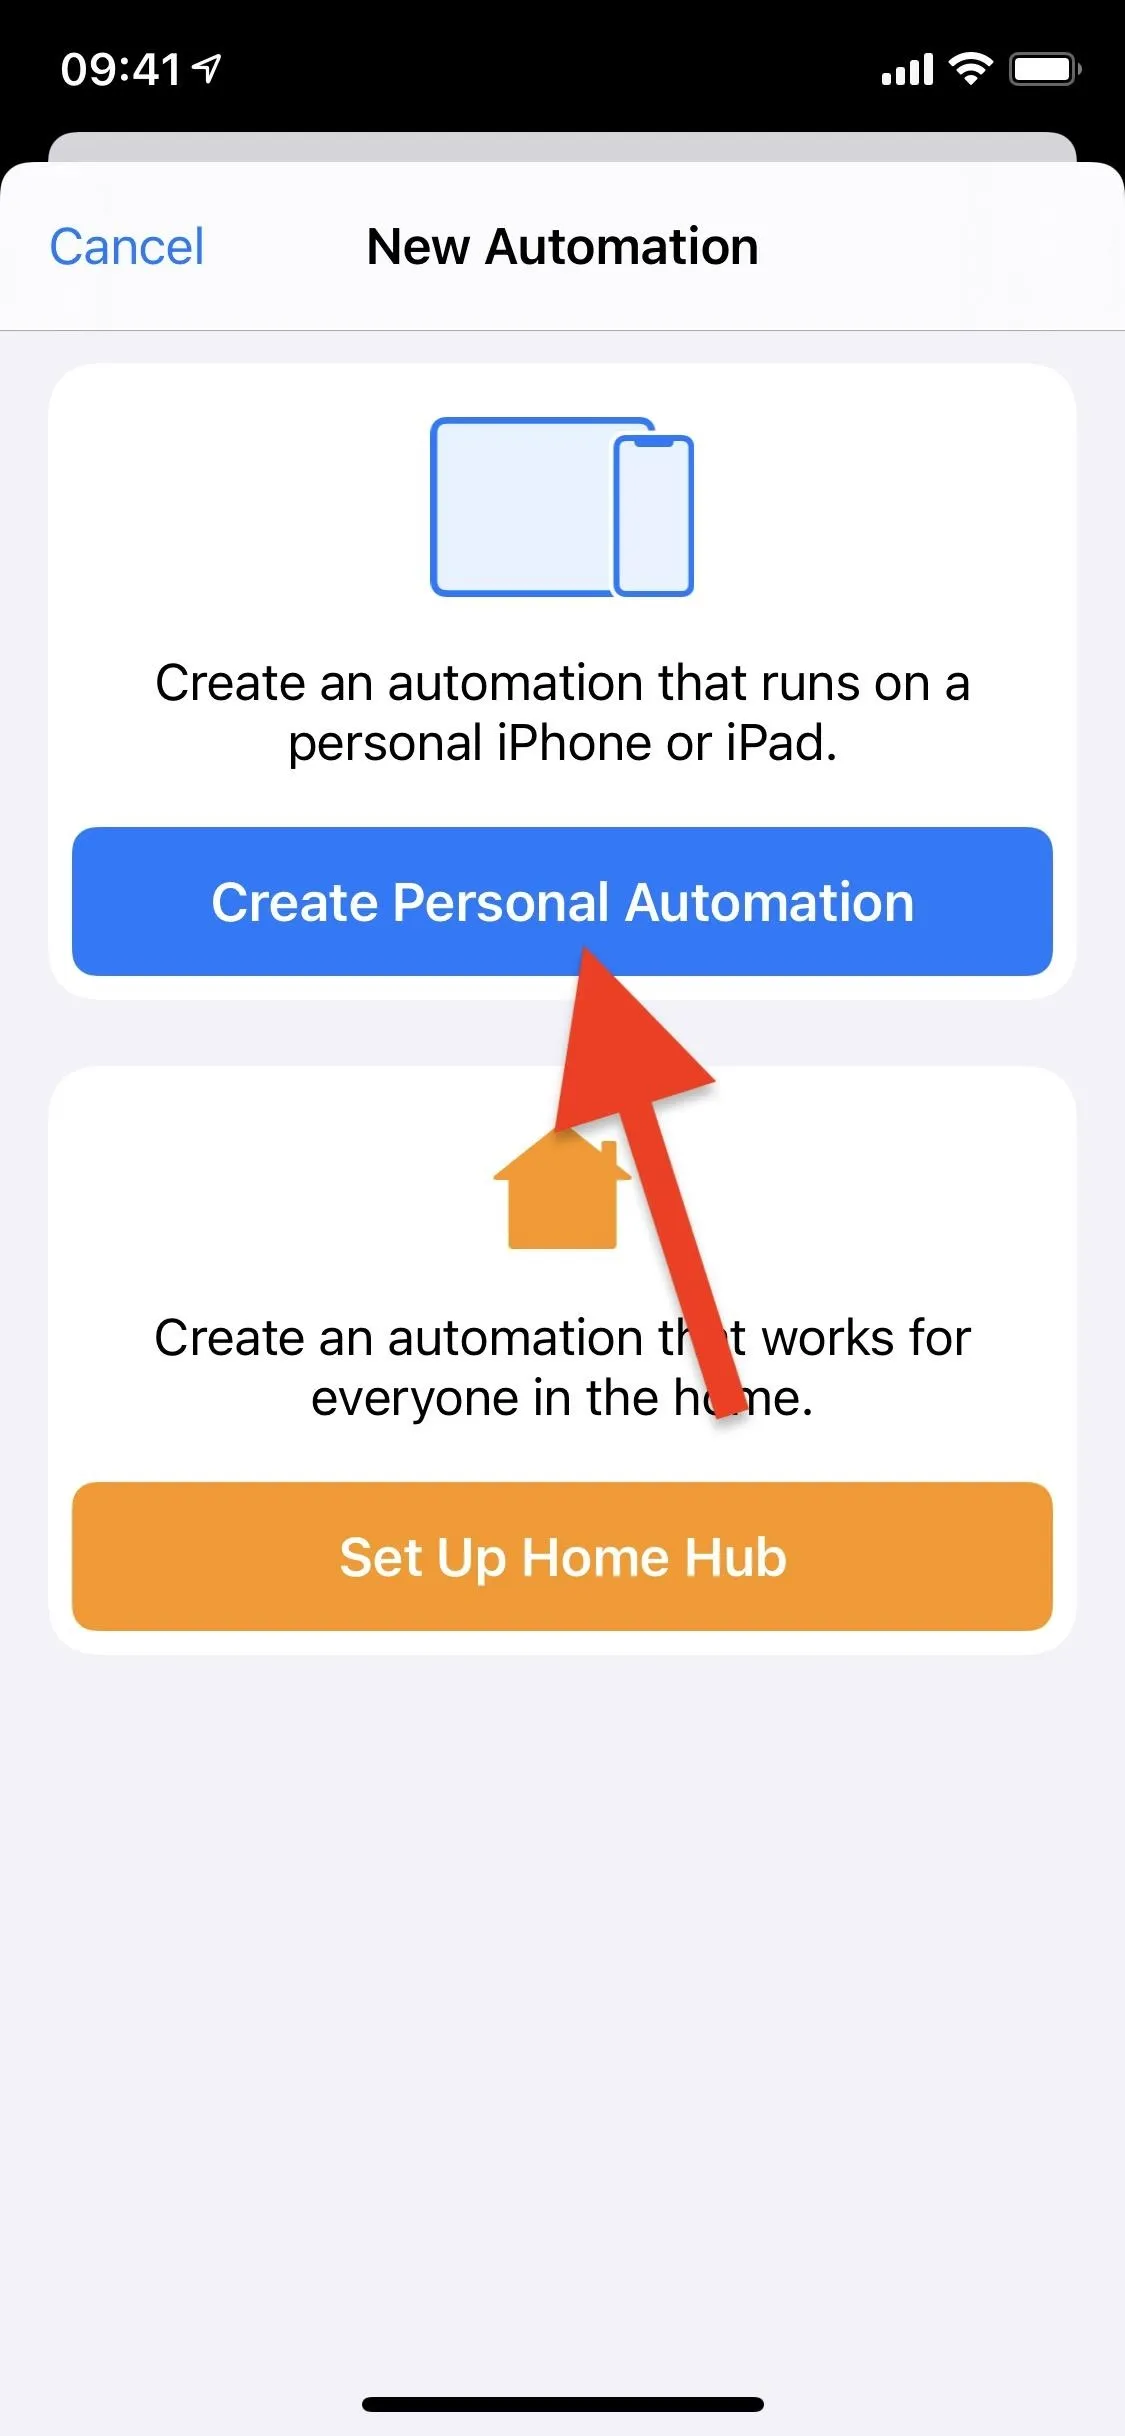
Open Shortcuts and navigate to the "Automation" page. If you've never created an automation before, you tap the blue "Create Personal Automation" button. If you had created automations before, a list of your automations would appear; hit the plus (+) button in the top right, then on "Create Personal Automation" to start a new one.
Pick the Battery Level Trigger
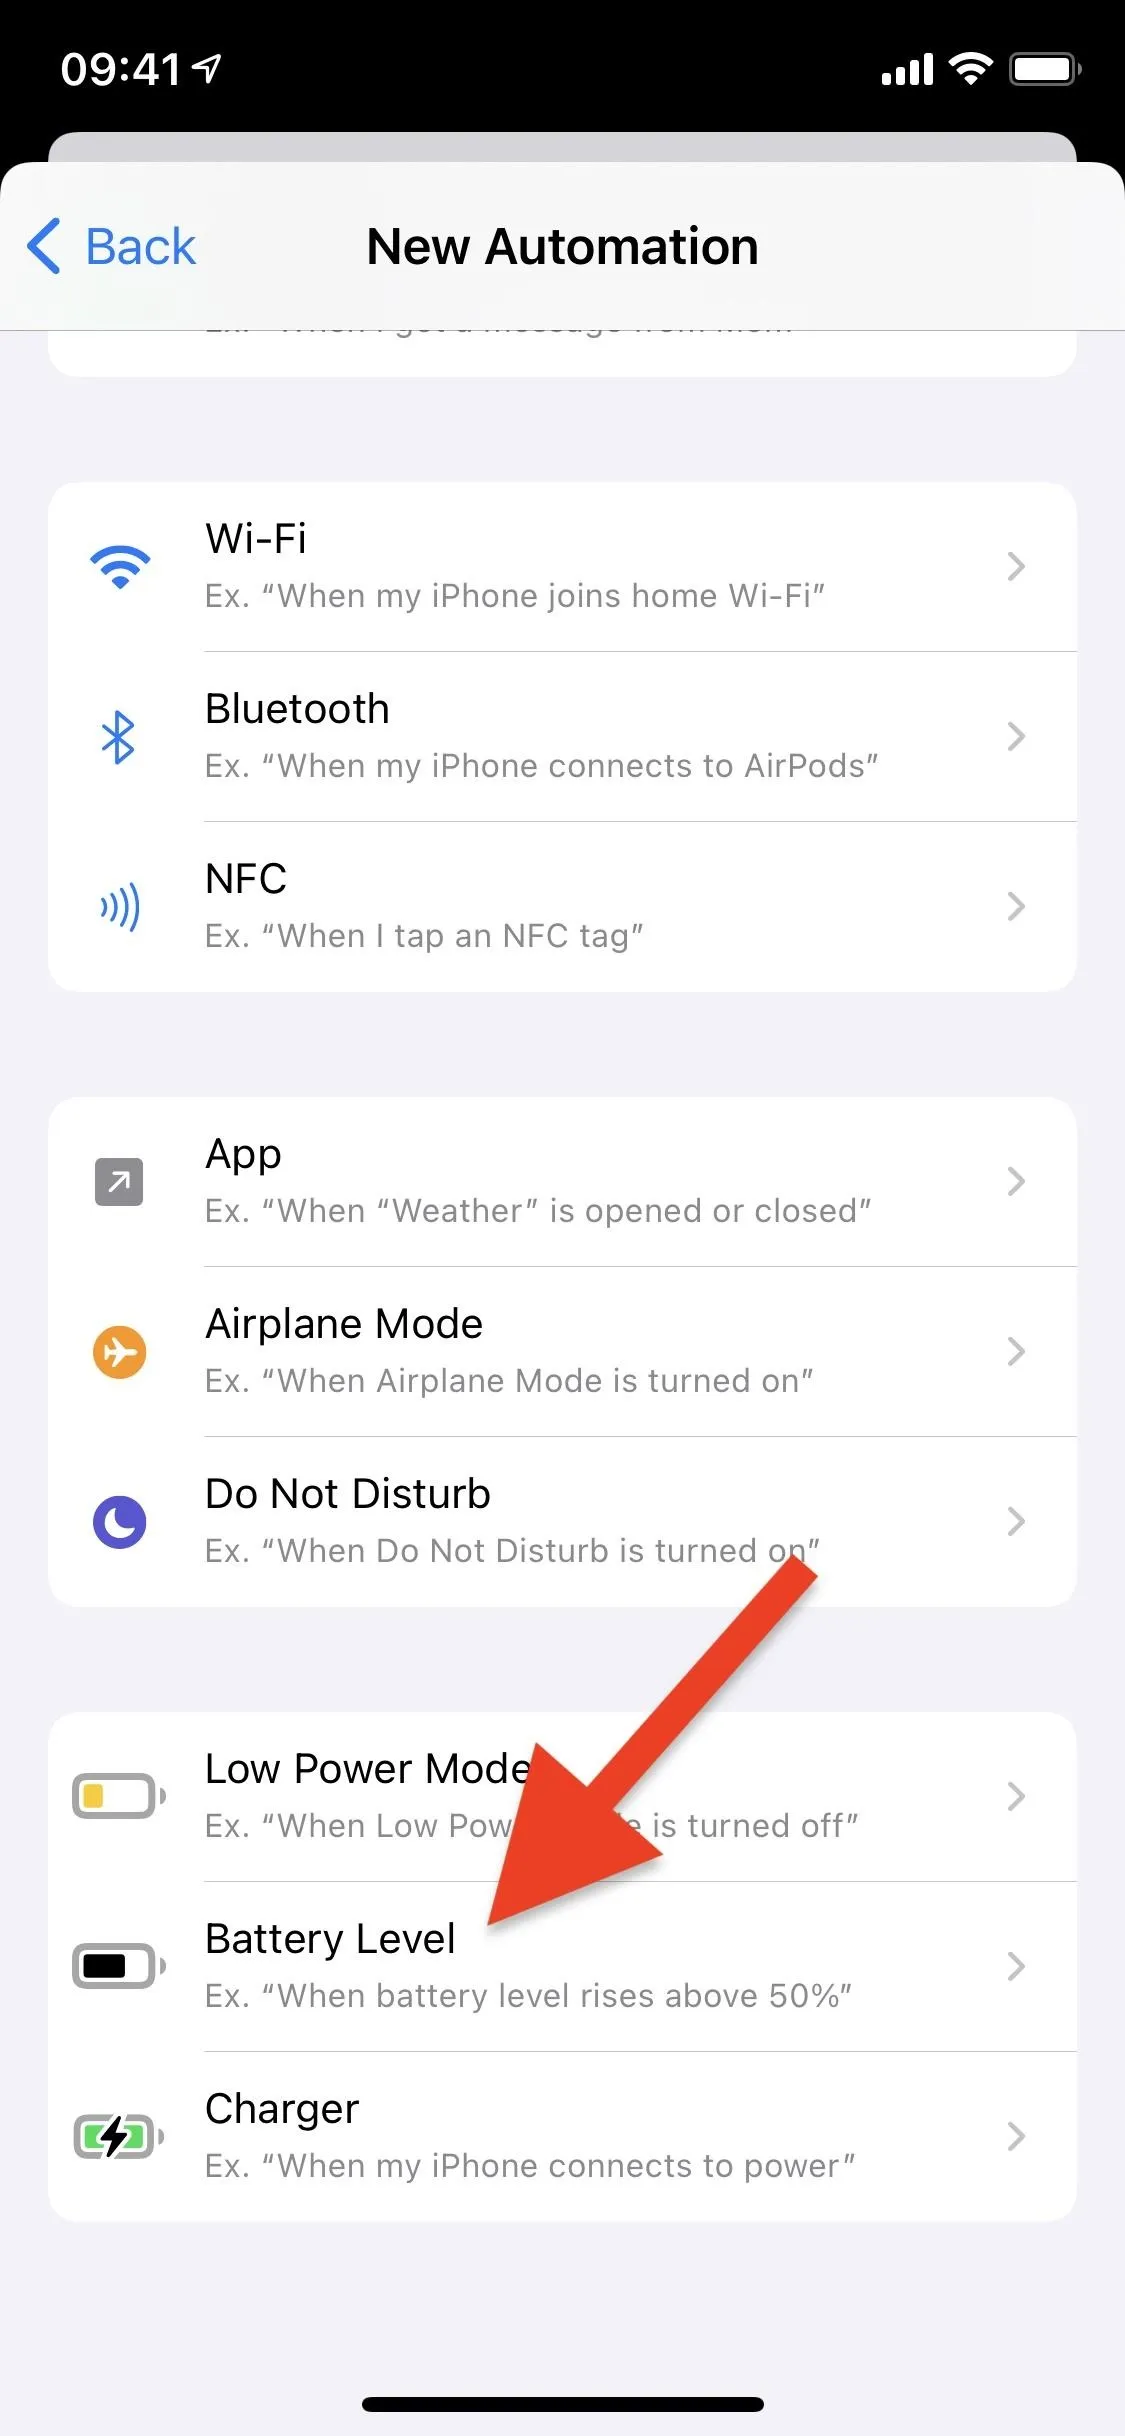
Now, you'll need to choose a trigger to run your automation in the background. For this, select the "Battery Level" option, which was first added in iOS 14.
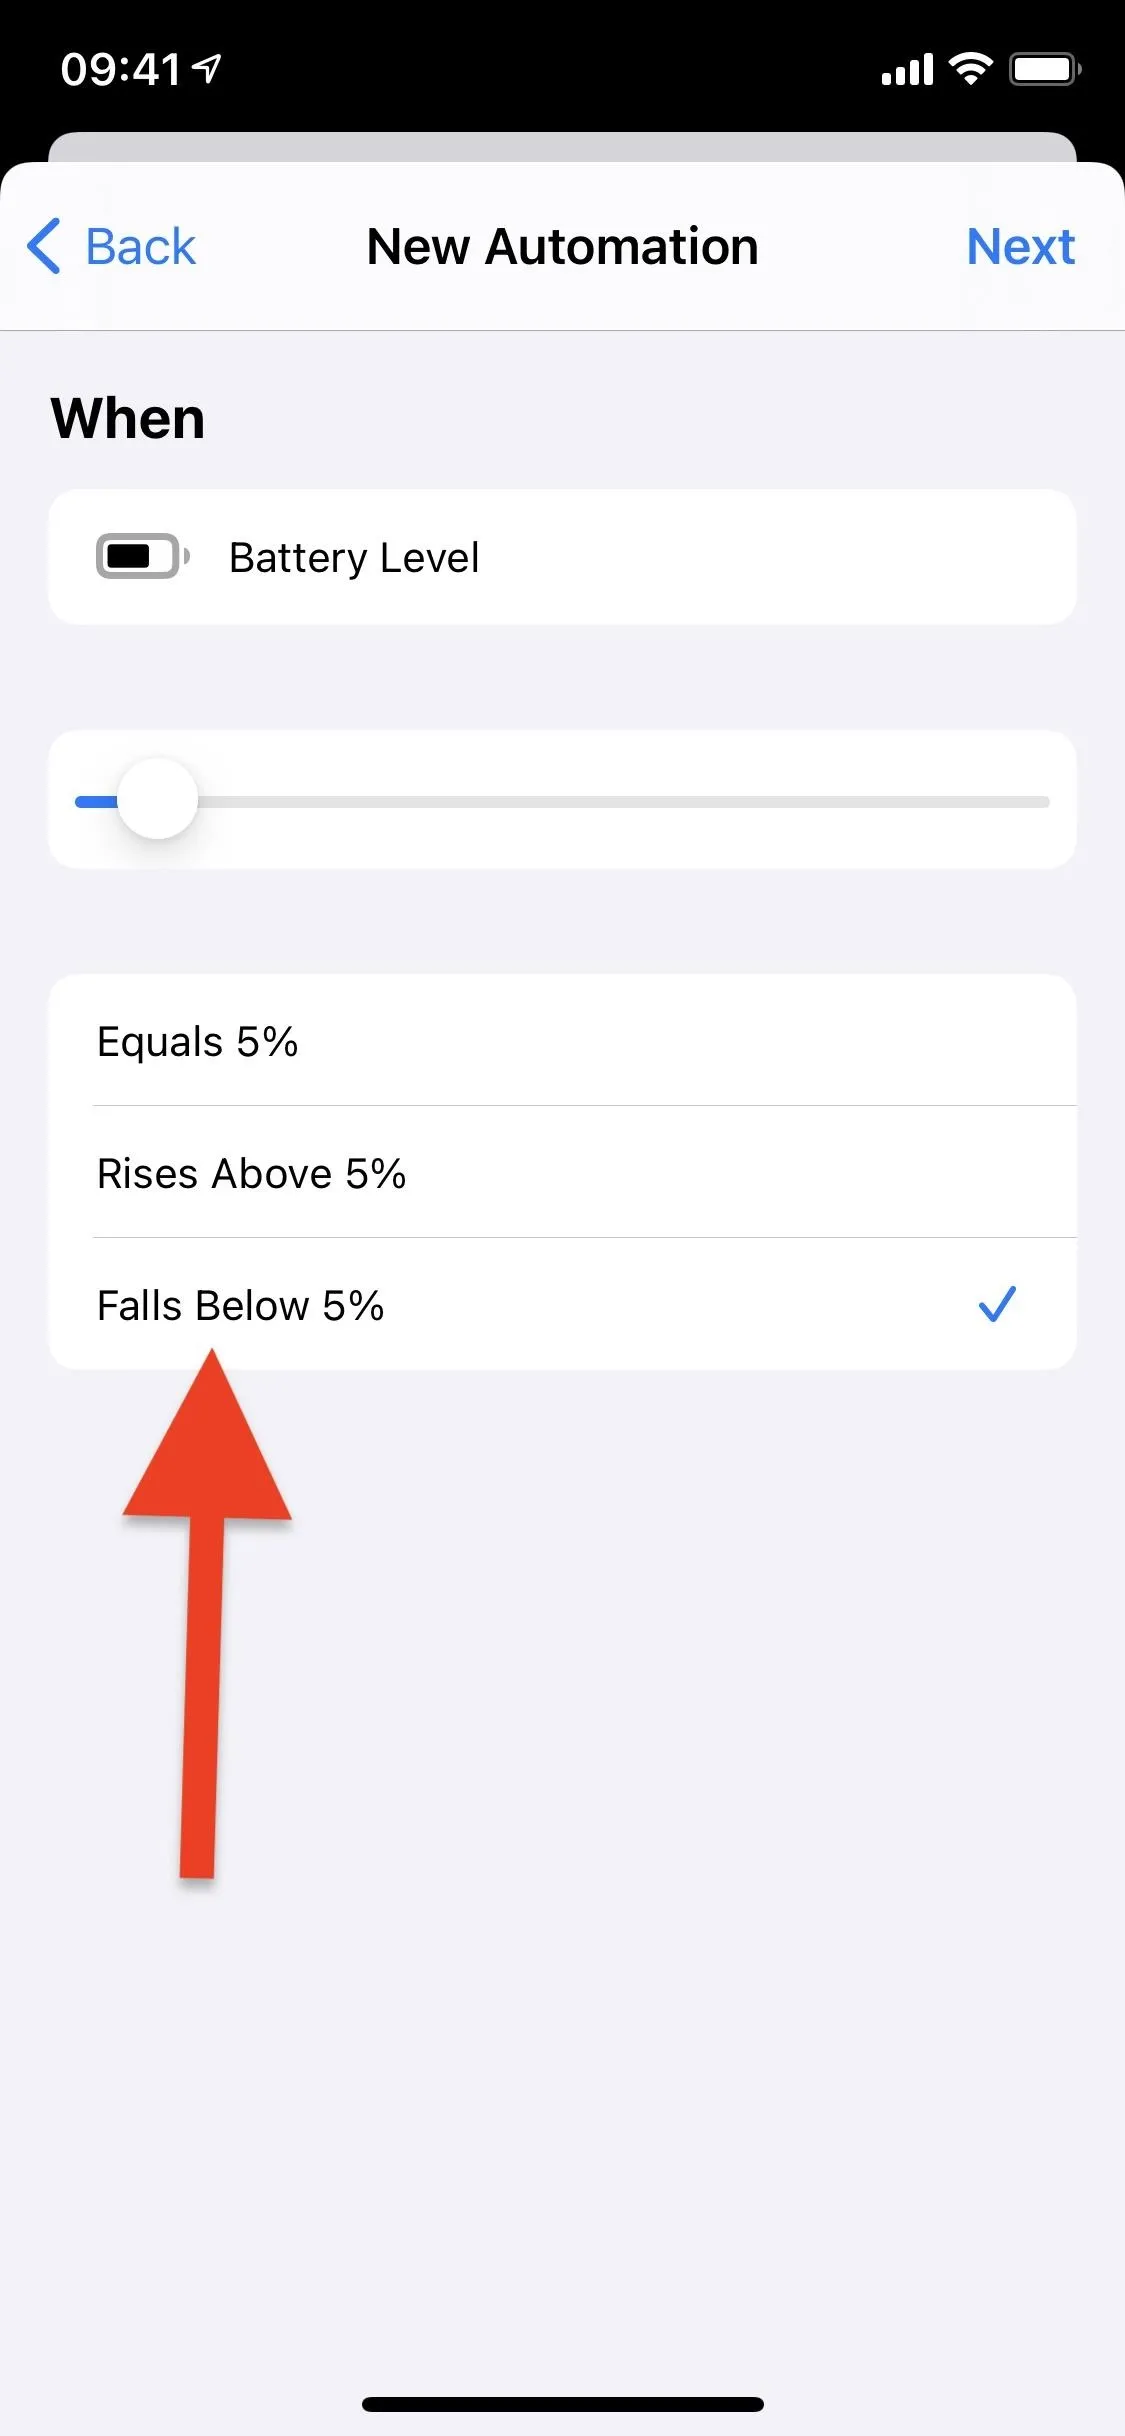
In the battery level settings, move the slider almost completely to the left until it says 5%, then whatever option you choose below the slider is up to you, depending on your preference. Tap "Next" whenever you've made your changes.
- Equals 5%: Use this if you want the automation to run when your iPhone first gets down to 5% battery life remaining.
- Rises Above 5%: Don't use this one since it's for when you're charging and want to know when it reaches a peak amount you set.
- Falls Below 5%: Use this if you want the automation to run when your iPhone first drops to 4% battery life remaining, i.e., when it just exits the 5% zone. This is the one I'm using below.
Add an Action to Perform When Triggered
Now we need to add an action, and this is where things get interesting.
Technically, you could pick any action you want, and that's because Shortcuts will push an alert to you whenever the automation runs in the background. So you could get a notification that Shortcuts ran the shortcut, but to make it more obvious, it's better to choose an action that shoves a specific notification in your face.
At least one action must be selected, or you'll get an error alert reminding you so.
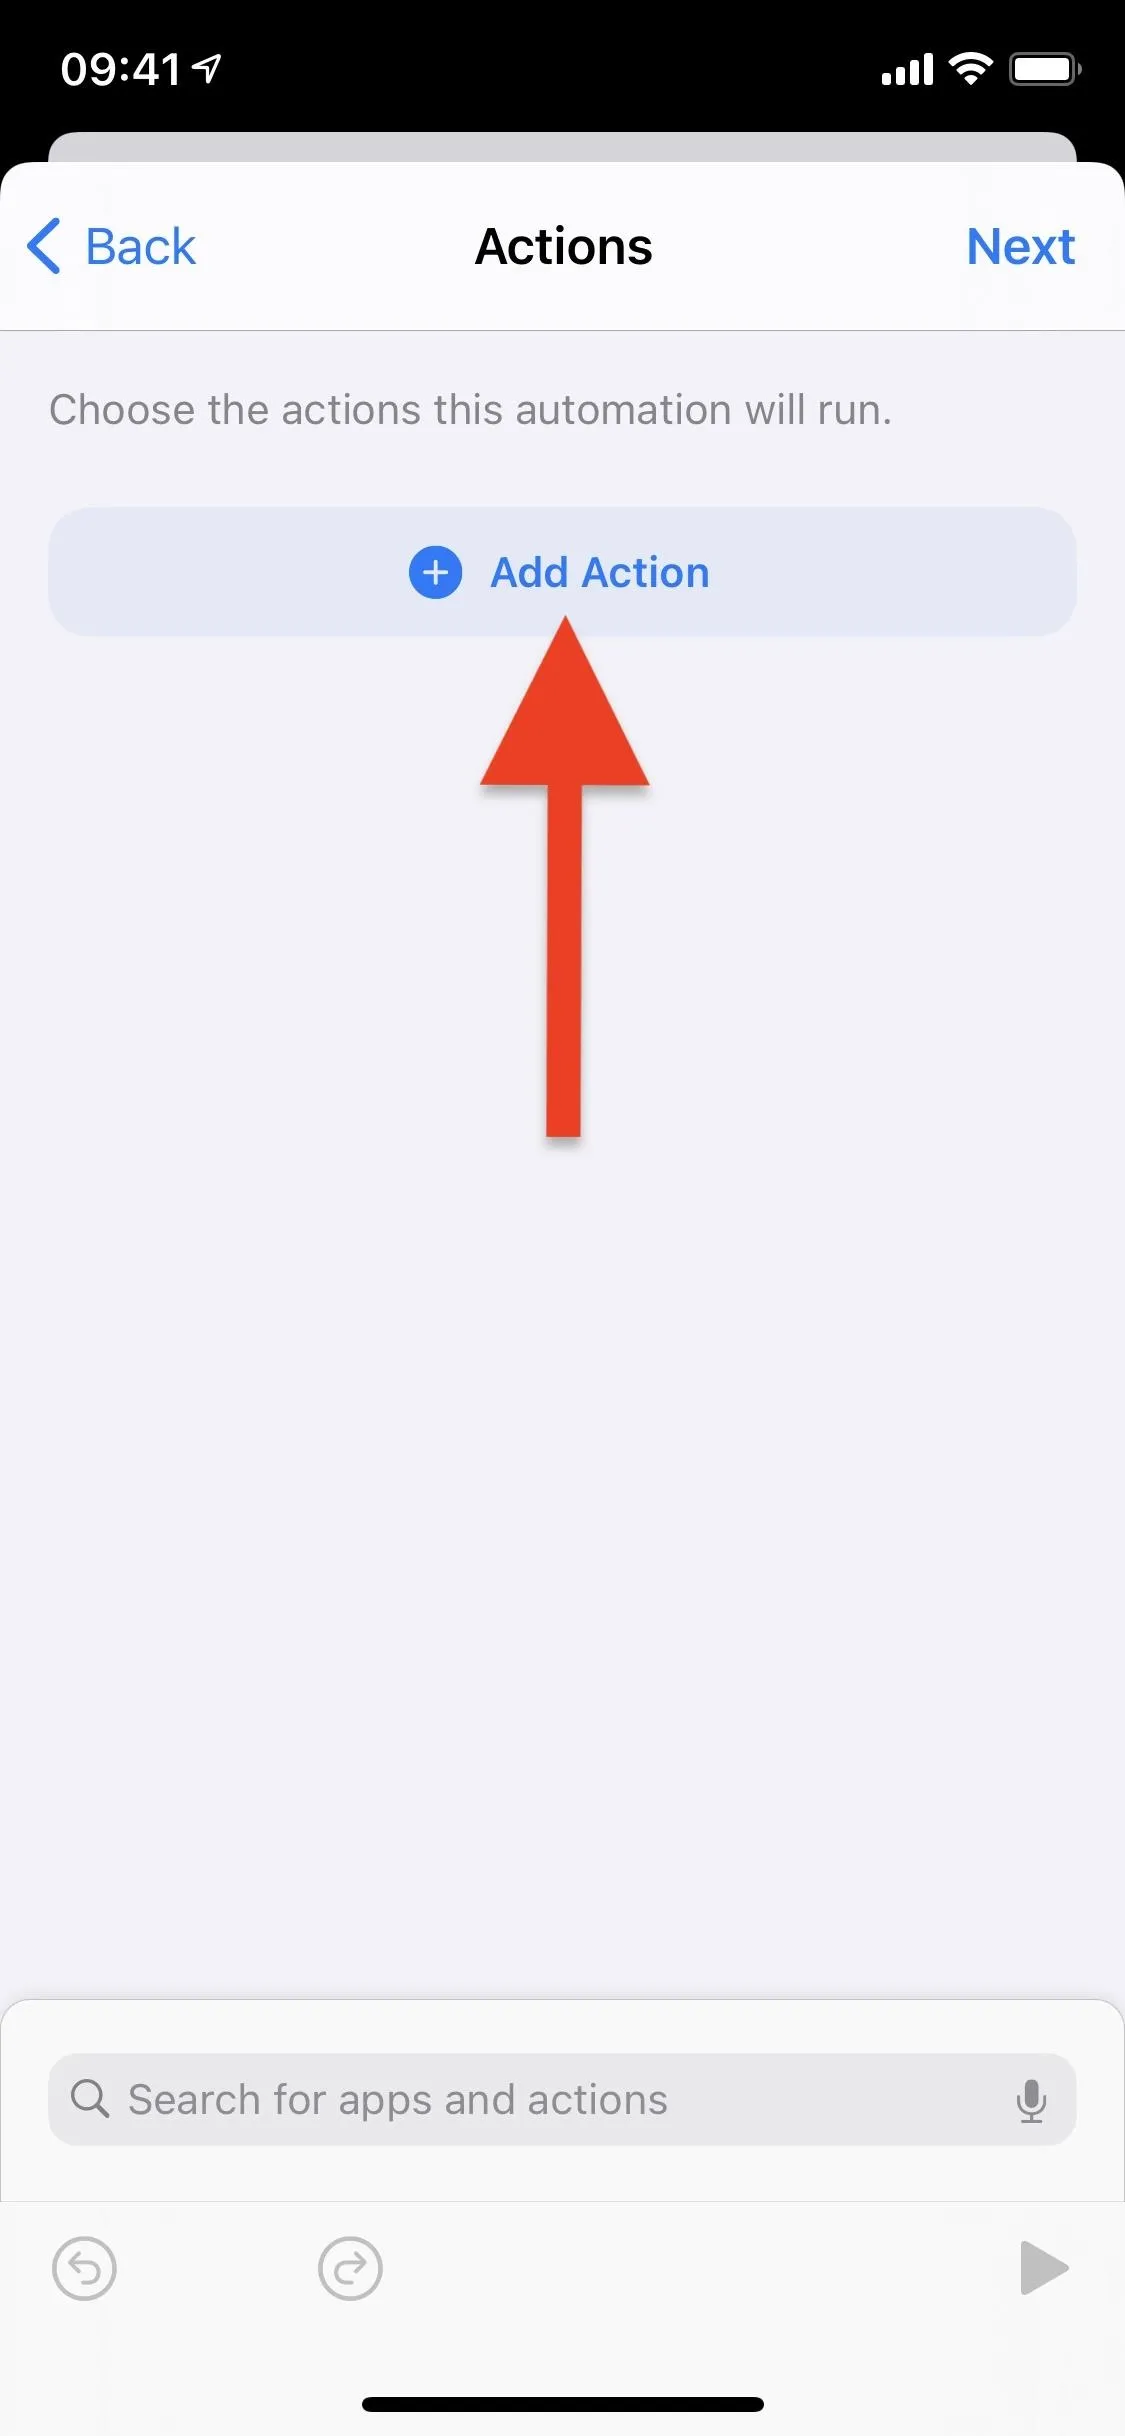
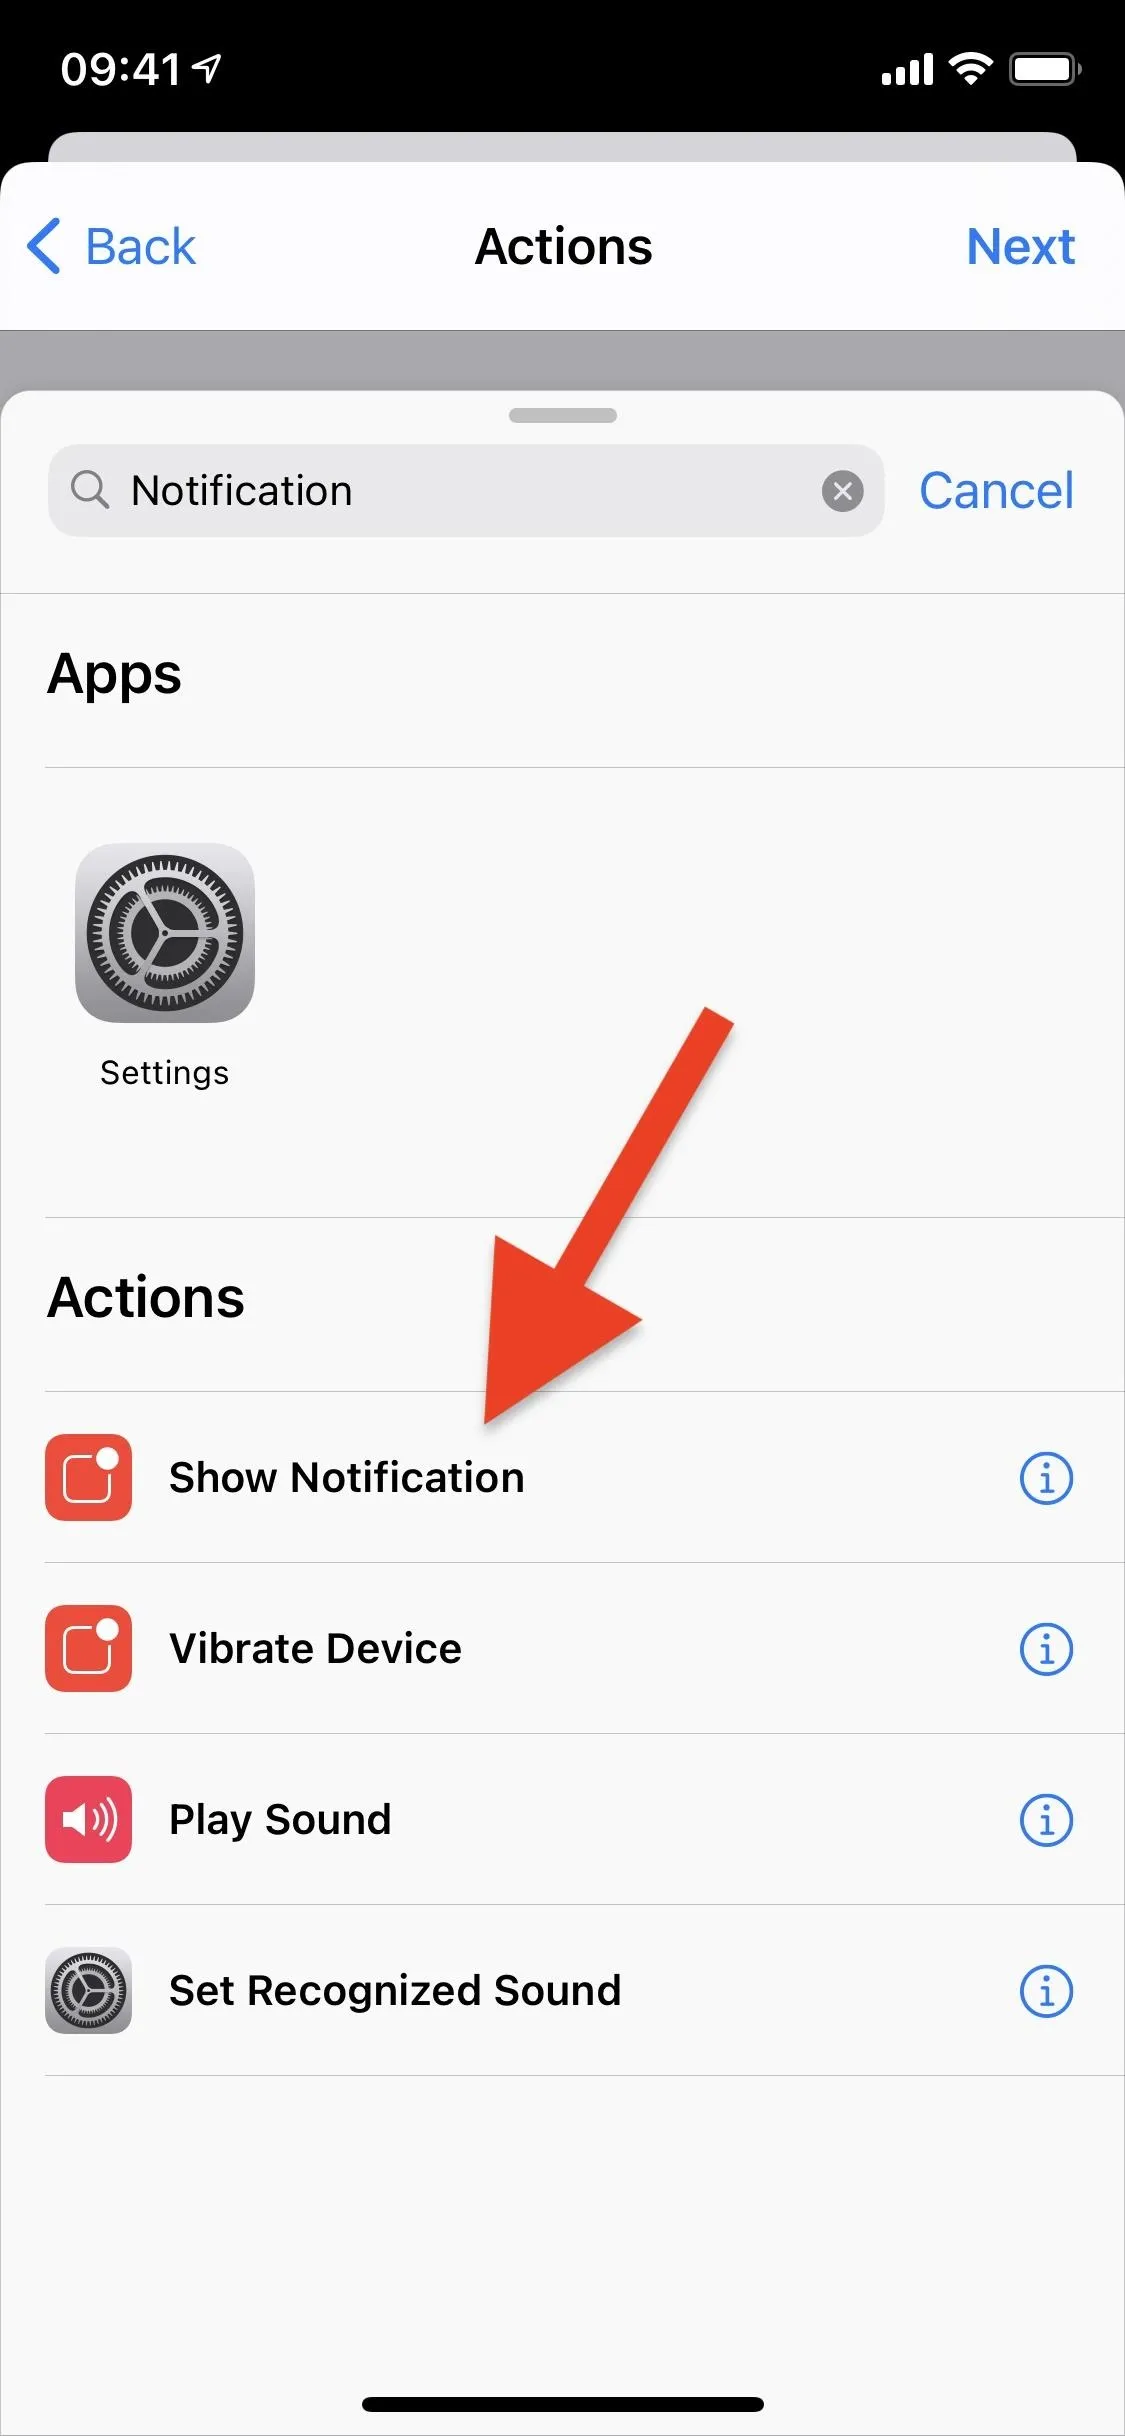
You can choose something like "Play Sound," which plays a sound when the automation runs, but I want a personalized notification to show up on-screen. For that, the "Show Notification" action works well since you can edit what appears in the alert. Tap "Add Action" or the search bar, then find and pick "Show Notification."
Customize Your Action's Preferences
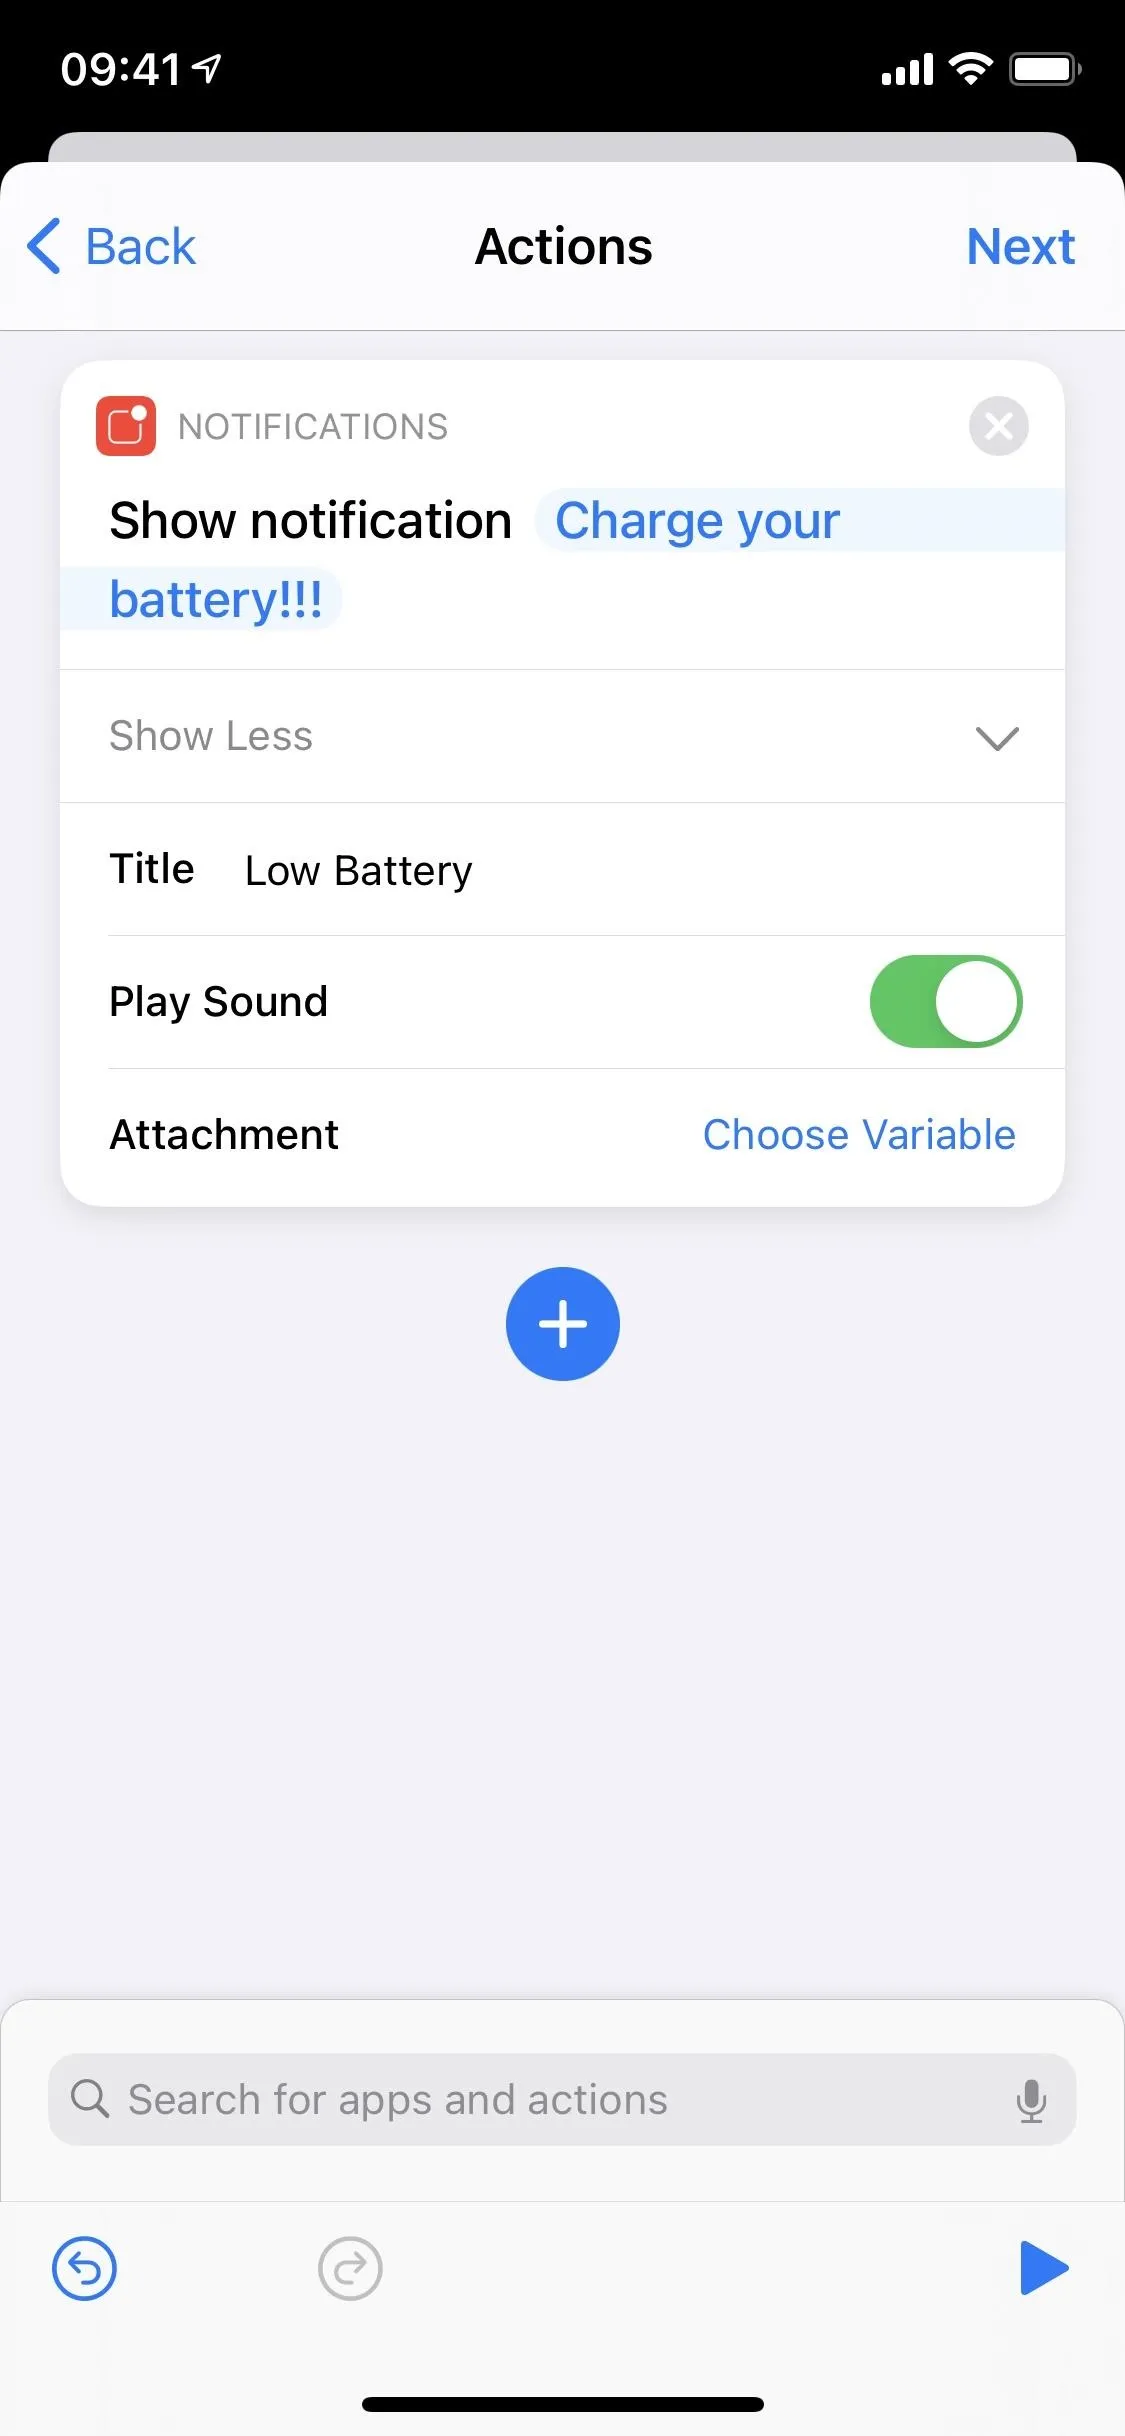
In the actions box that appears in your workflow, you can adjust various notification settings. First, tap "Hello World" and type whatever message you want to appear on-screen to remind you to charge your iPhone or conserve battery power.
Second, tap "Show More." Here, you can add a "Title," which will appear just above your personalized notification text. You can also keep the "Play Sound" switch on so that you hear a sound with the alert. And there's room to add an attachment, but that's overkill IMO.
When you're finished, hit "Next."

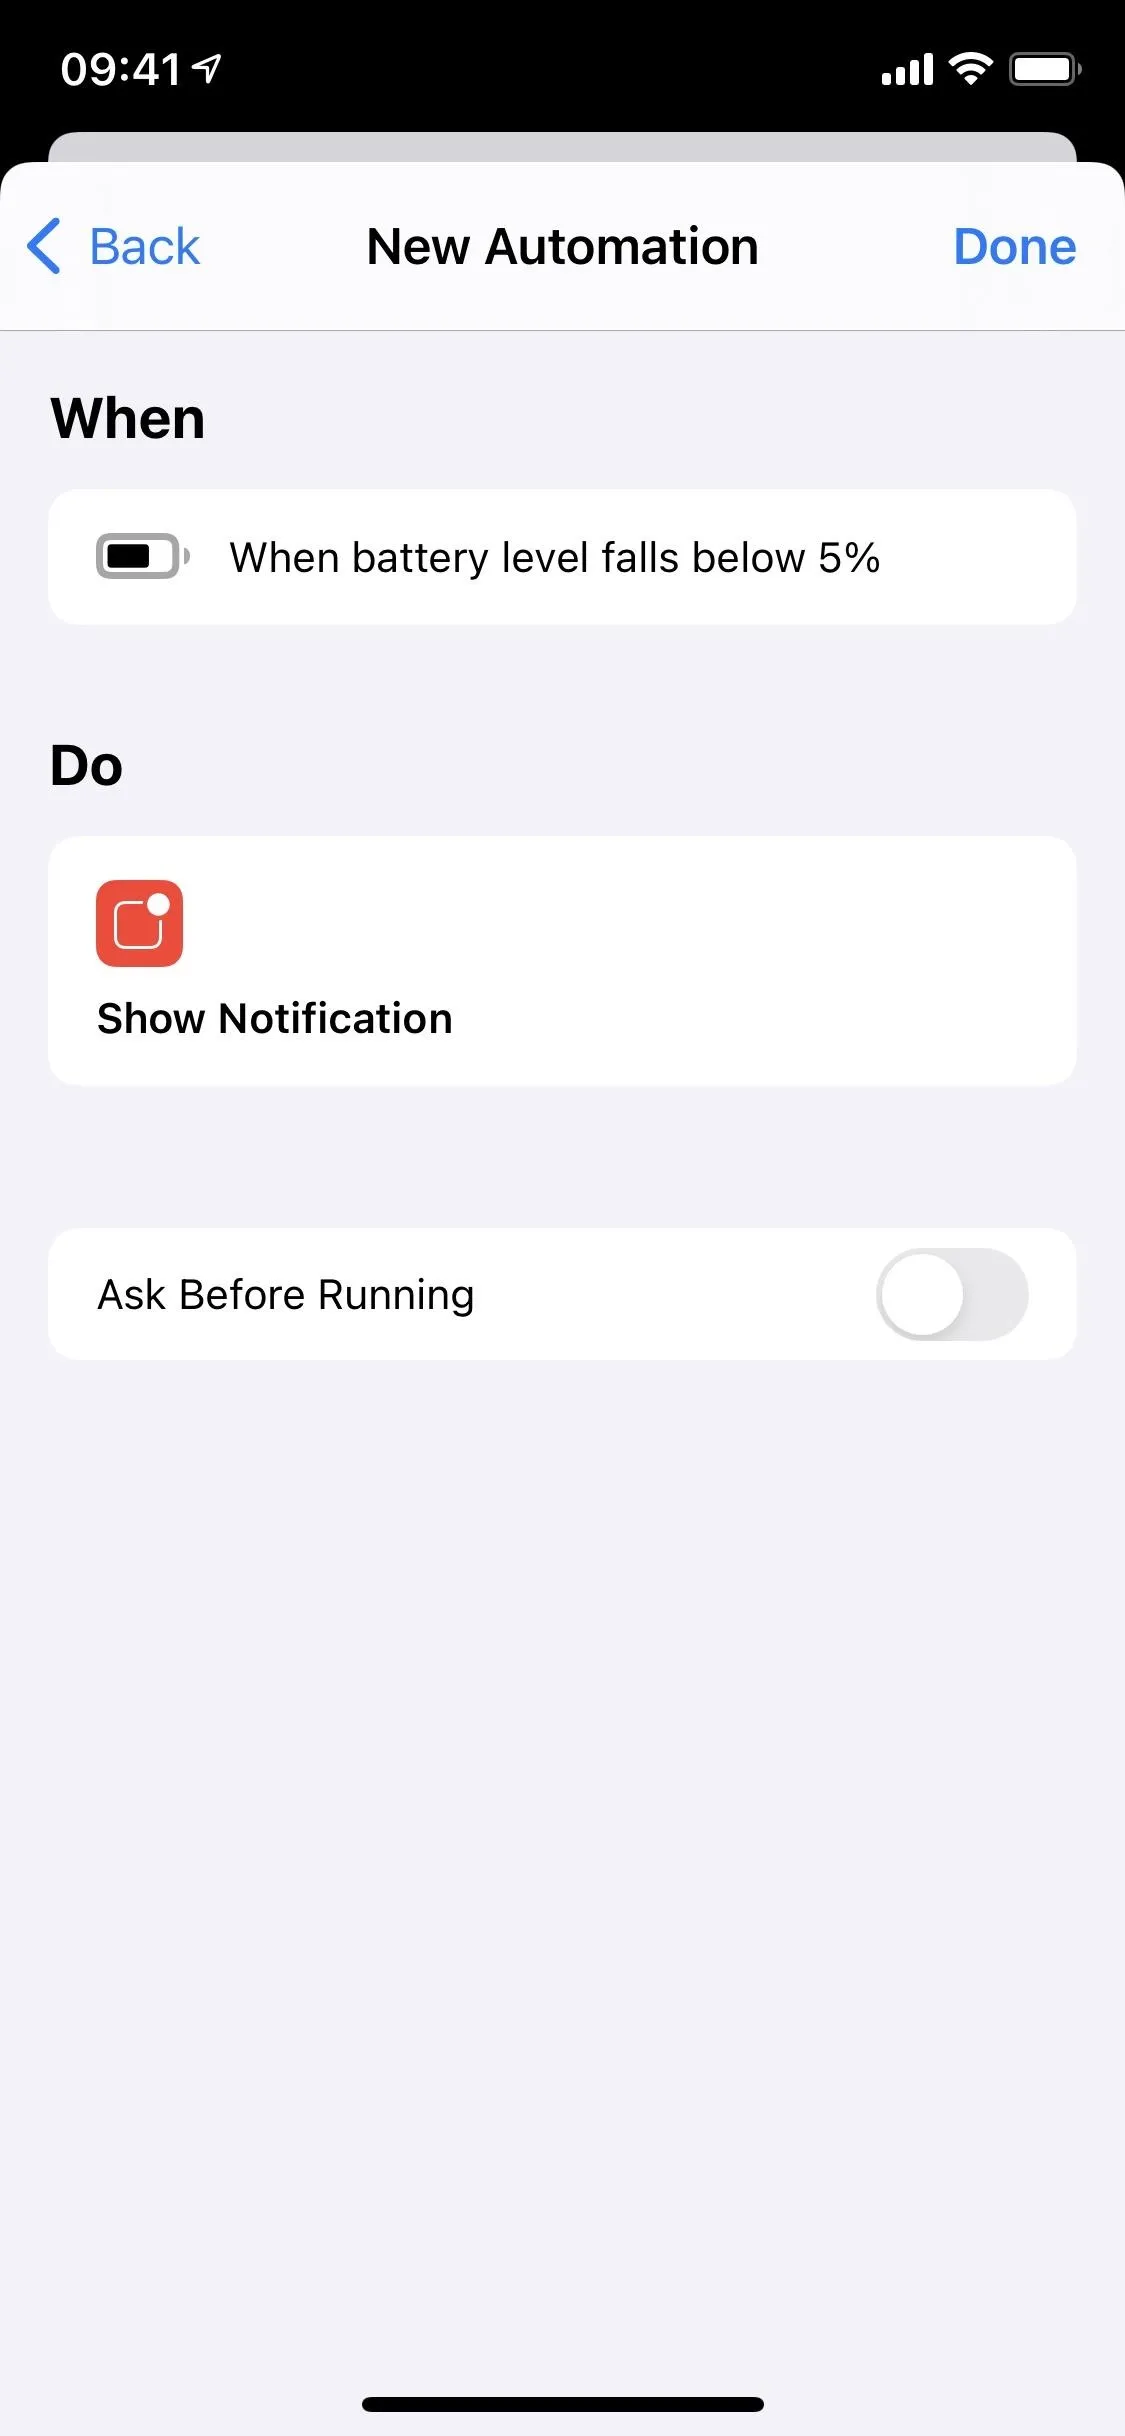
Save Your Finished Automation
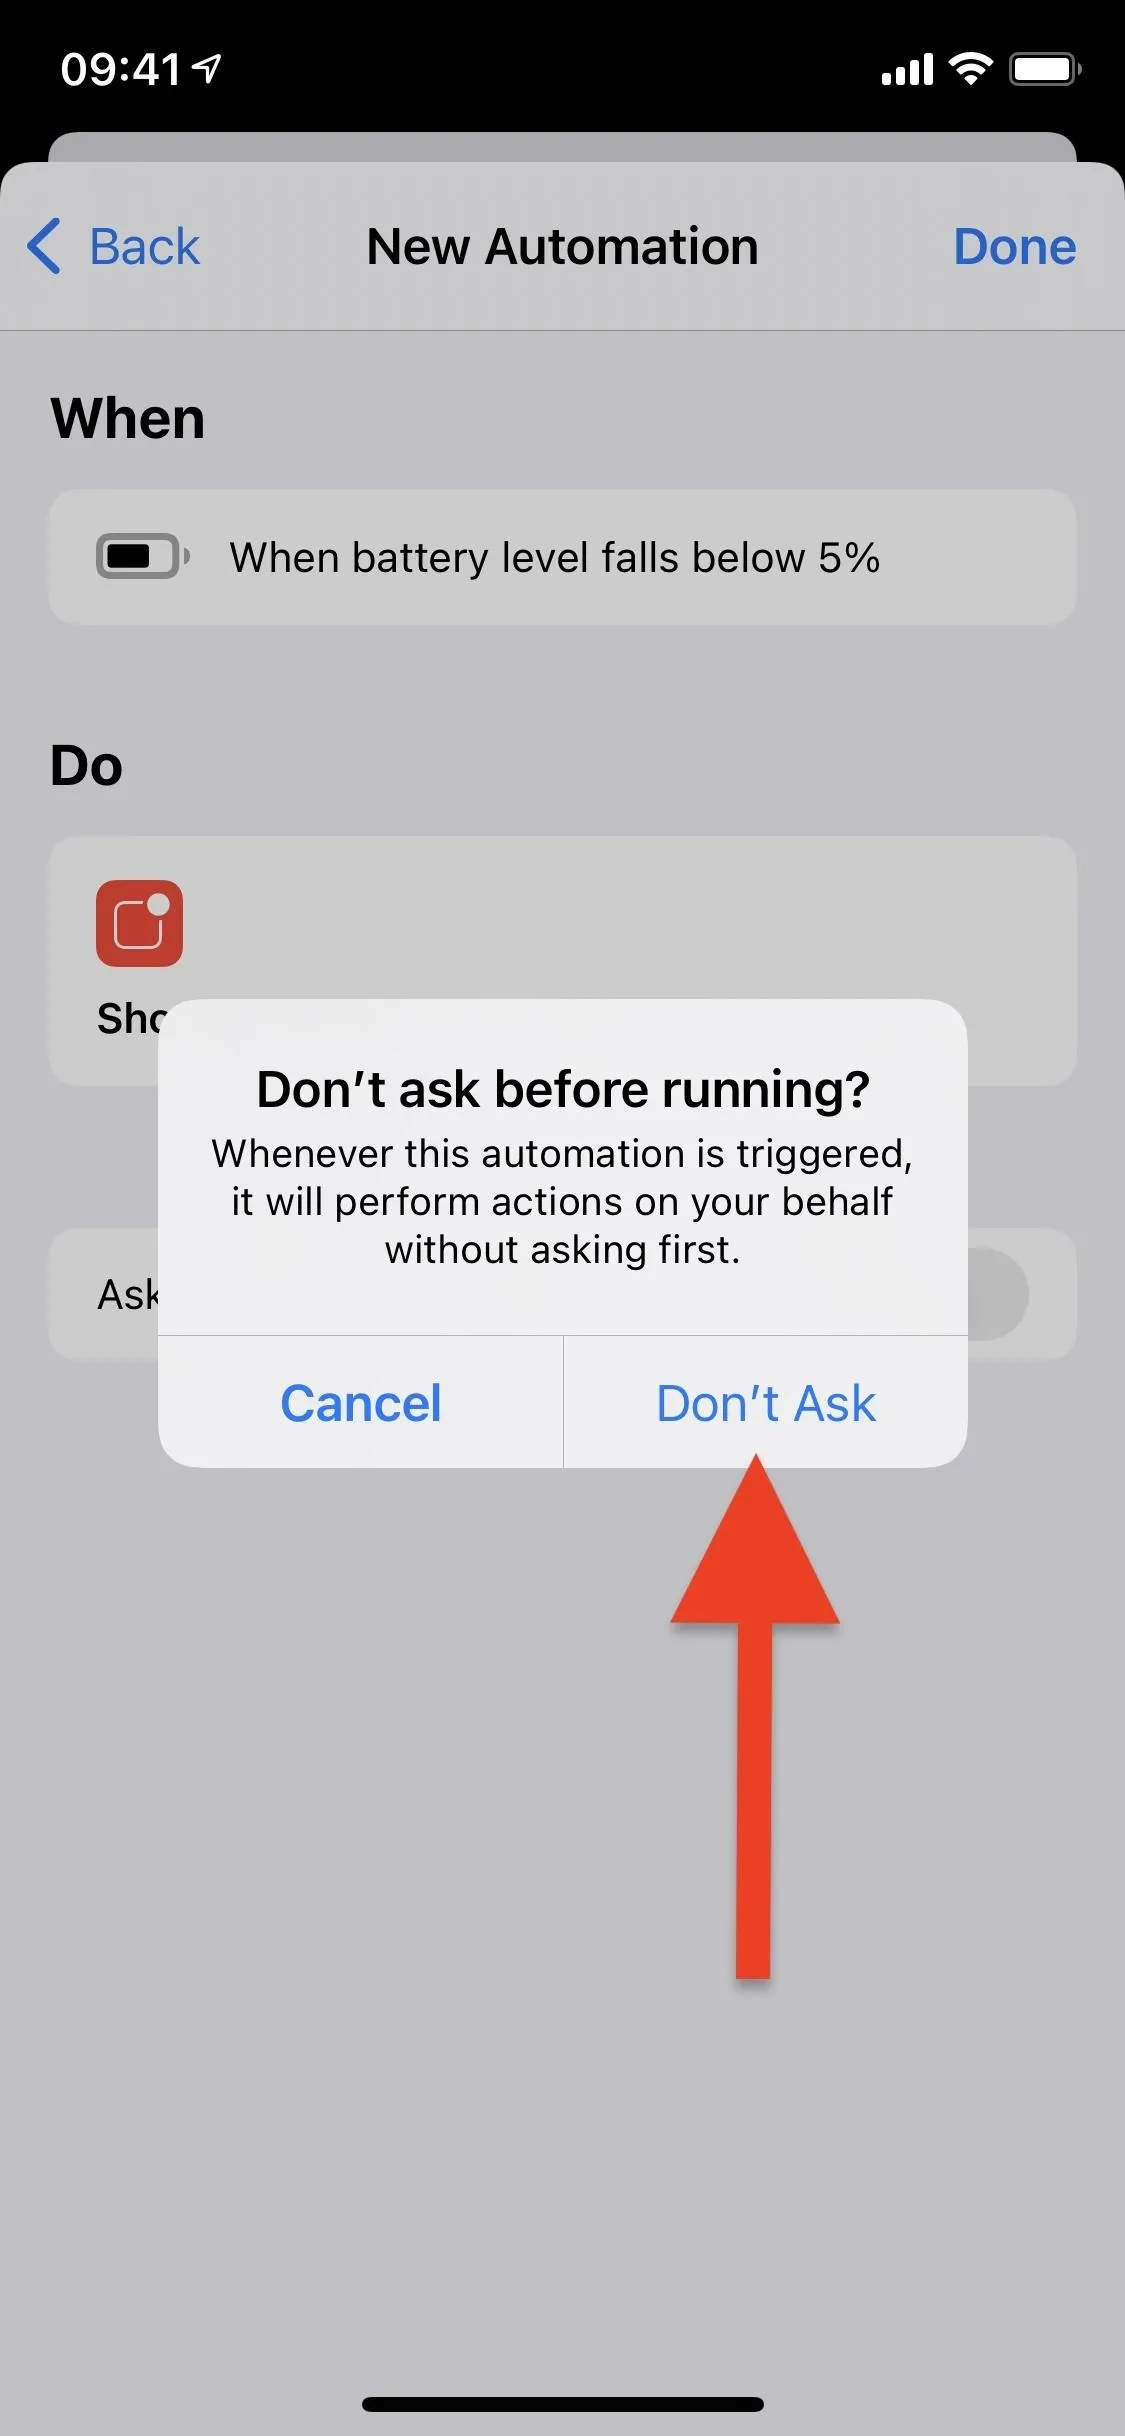
To allow the notification to run without your permission, toggle off "Ask Before Running" and tap "Don't Ask." This way, the automation runs in the background unsupervised. Select "Done" to save the automation.

Test Your New Automation Out
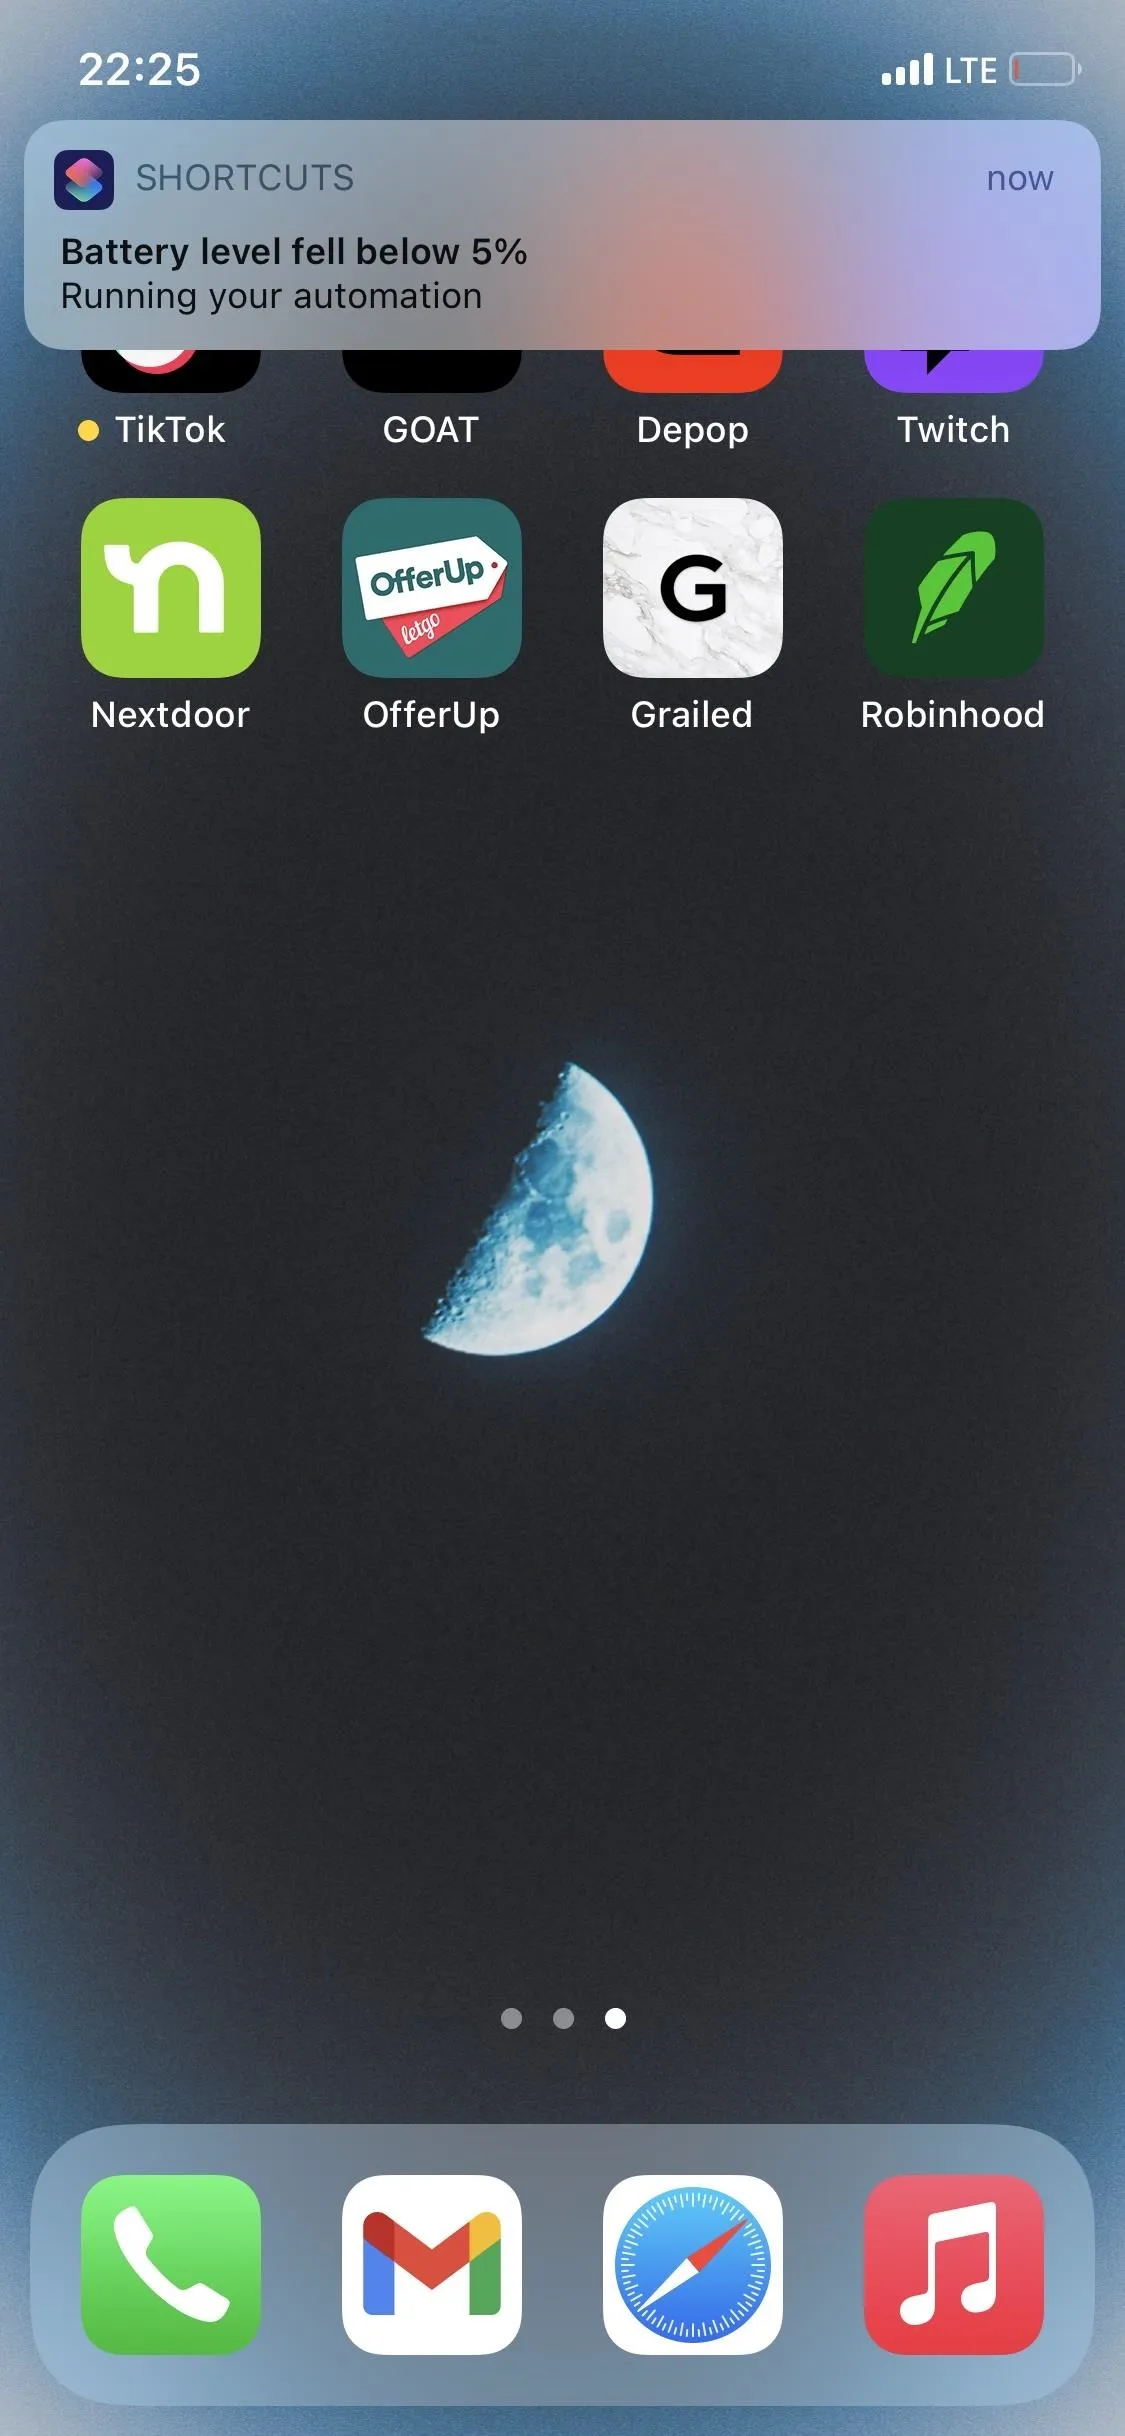
Anytime your battery drops to 5% or just below 5%, depending on what you chose earlier, the notification you created will appear on your screen as a banner alert.
You will also see a second notification letting you know that Shortcuts ran the automation successfully. If you don't mind that, you're good. If it does bother you, you could go back to Step 3 and choose another action, such as "Play Sound," so that you only see one of these for a brief moment:
- Battery level fell below 5% — Running your automation
- Battery level equals 5% — Running your automation
Below, you can see my personalized notification (left) and the default one (right).

There are a few ways to block Shortcut's default notifications, but they can cause a lot of confusion for some shortcuts. For instance, you could disable notifications for Shortcuts in Screen Time, but that will also disable your customized banner alert for the 5% battery warning.
Cover photo and screenshots by Nelson Aguilar/Gadget Hacks


Comments
Be the first, drop a comment!