


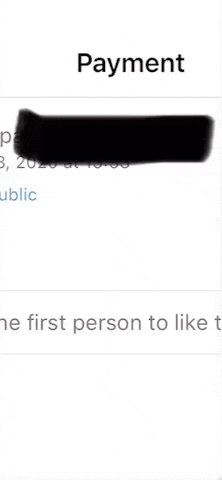
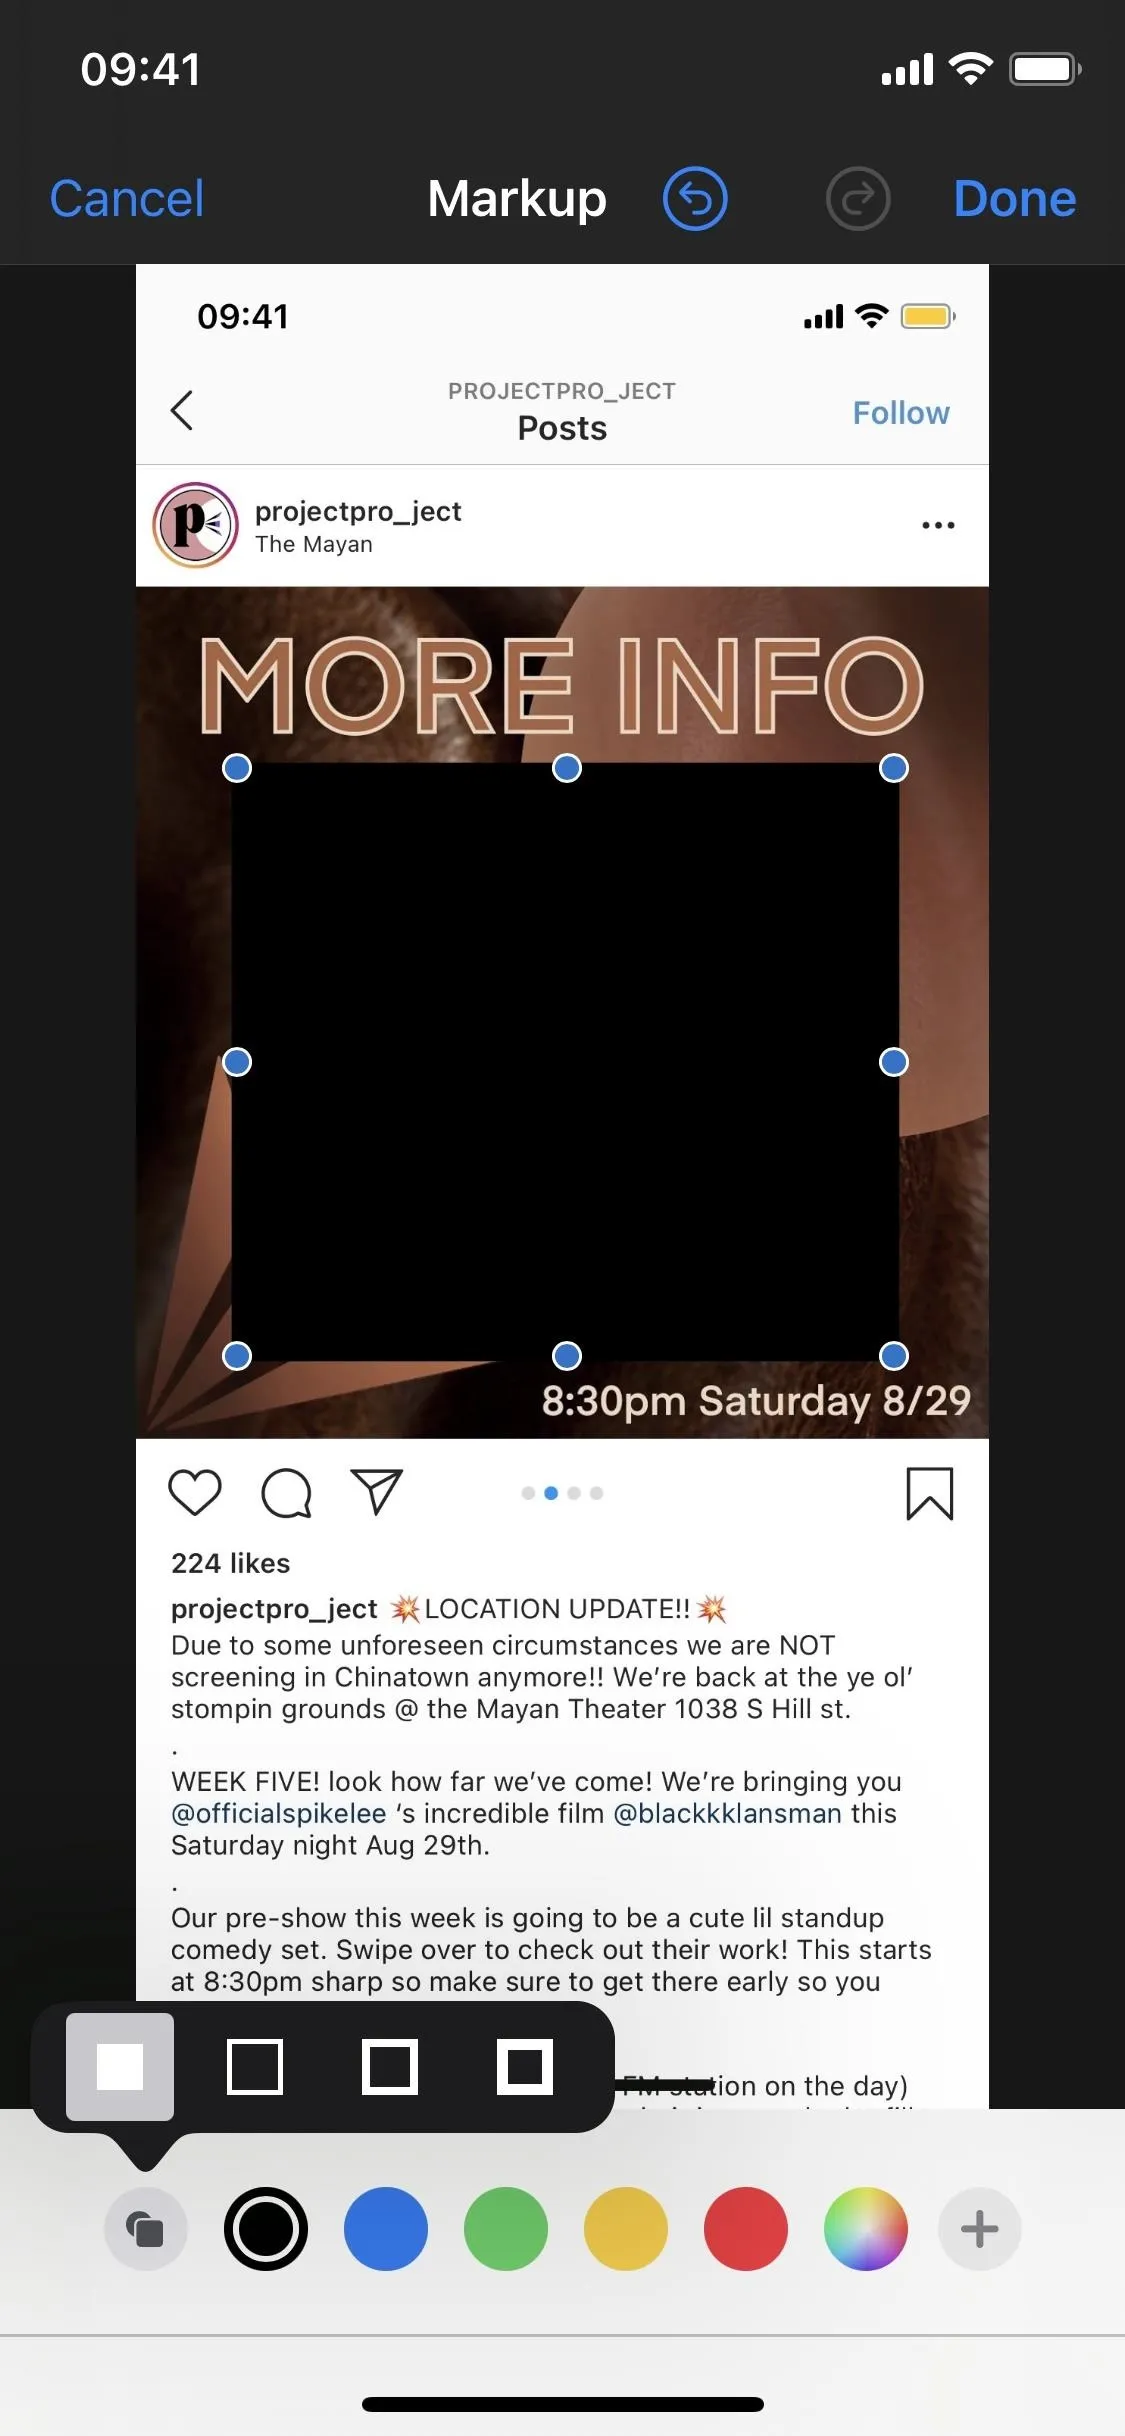
These days, most images we post online or share with others come from our smartphones. Whenever personal data is in them, such as debit card numbers, addresses, phone numbers, passwords, and other sensitive information, it's easy to jump into your iPhone's markup tools to black out the text before sharing. But a digital marker may not hide everything.
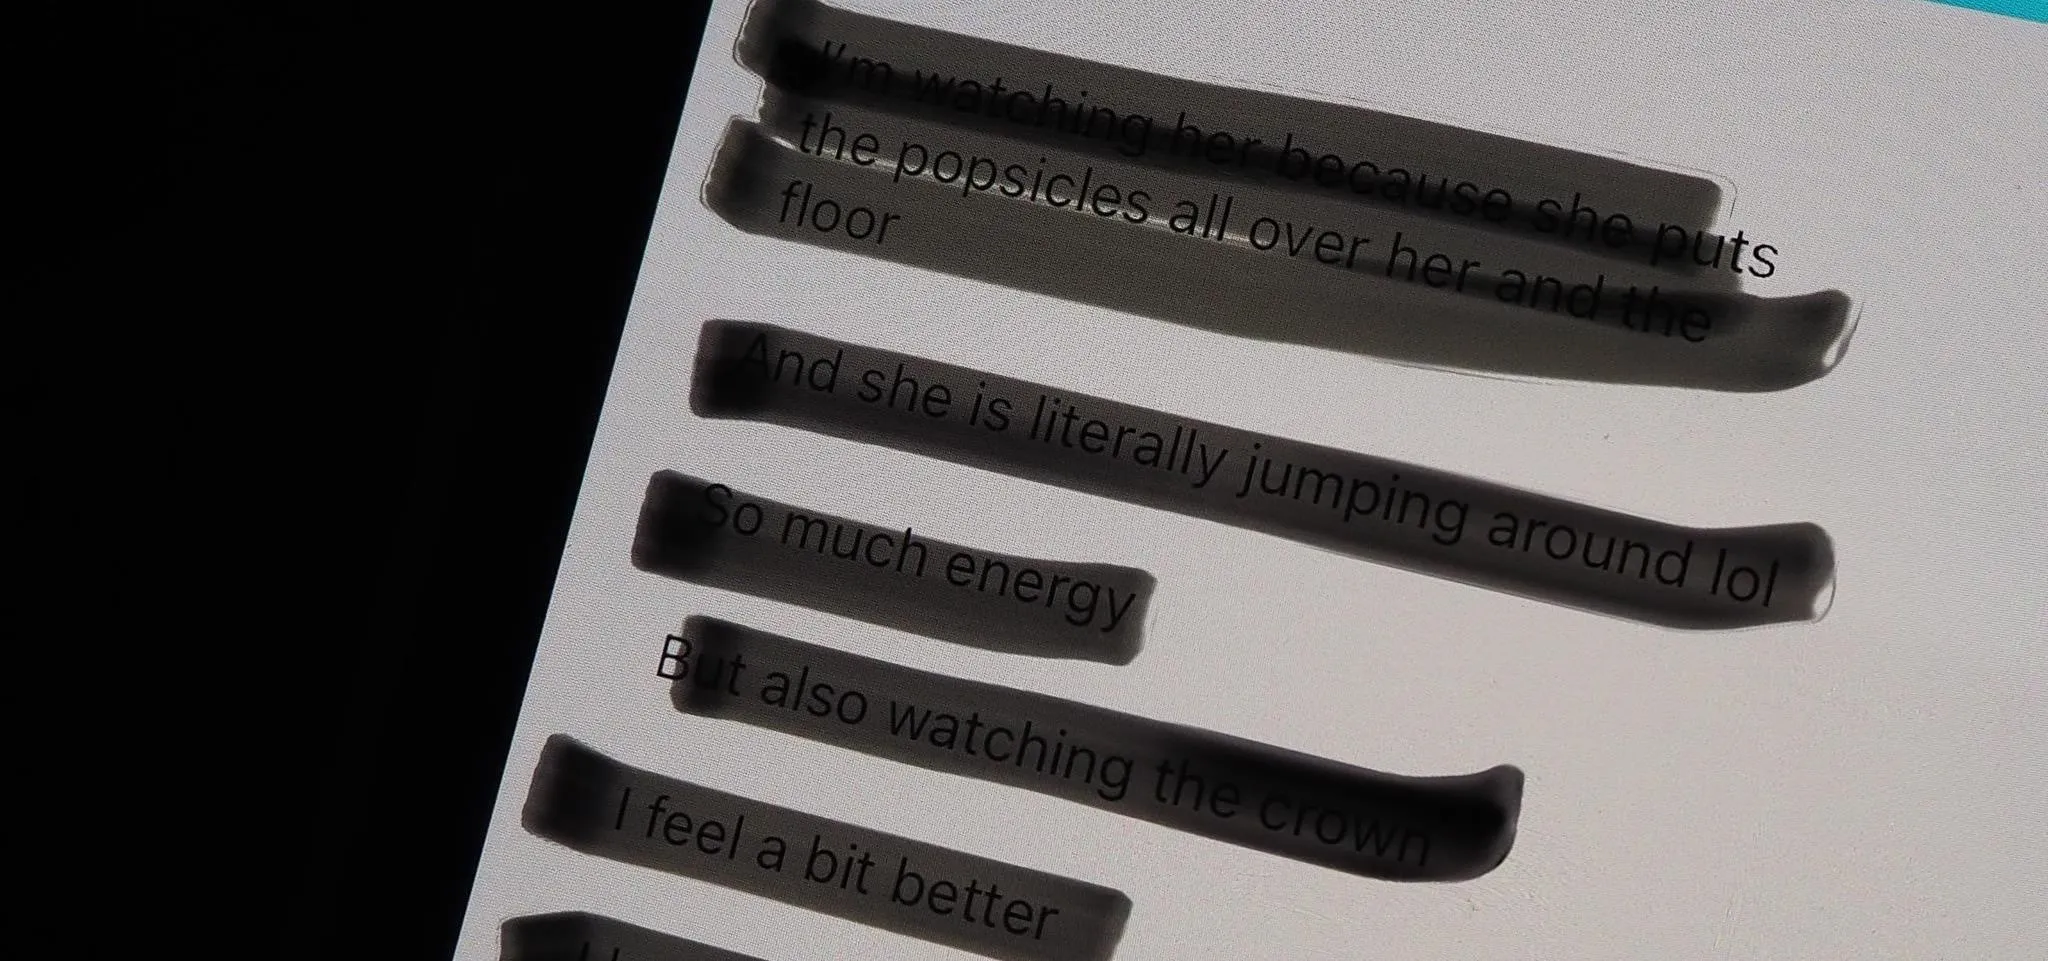
When using Markup in iOS, whether it's from Photos, Files, Mail, or another app, or right in the screenshot editor, you may only be partially hiding data you want to keep a secret. The marker, aka highlighter, is a popular tool for quick obfuscation because of its thick strokes, but it has an opacity problem that's not visible to the naked eye.
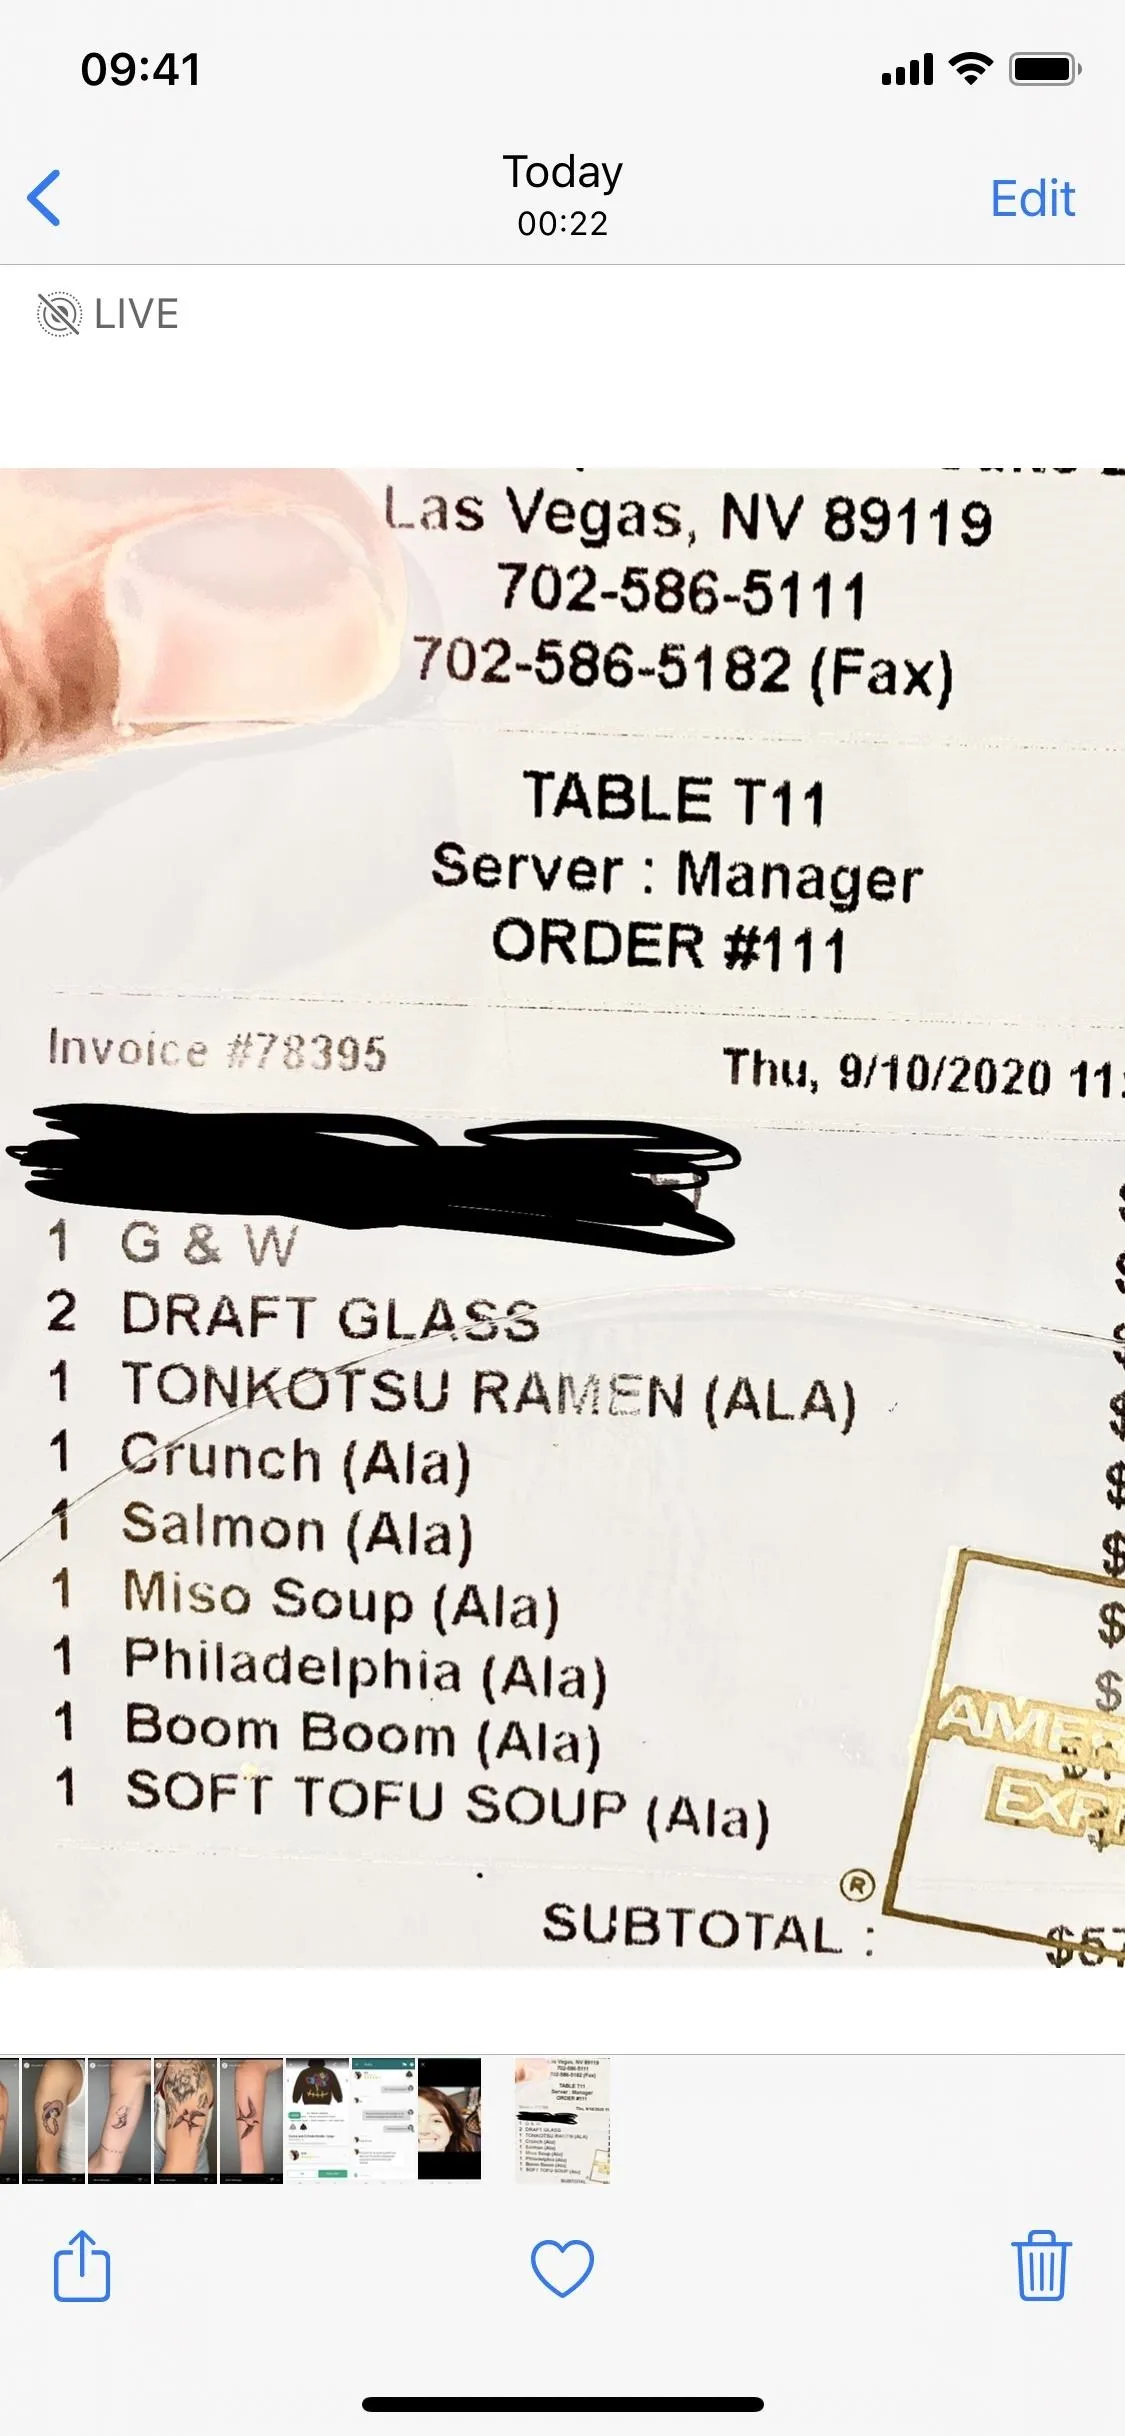
Since it's a highlighter and not a solid marker, one swipe with your finger will create a transparent layer over the text, effectively highlighting it — even with the opacity at 100 percent. If you move your finger back and forth a few times, it layers the effect, seemingly creating a non-transparent solid line that looks like it's hiding the stuff underneath it. But for many colors, and most importantly, black and white, you can adjust the marker in editing to reveal the sensitive information it's hiding.
Affected iOS versions: iOS 15, iOS 14, iOS 13, iOS 12, iOS 11.
Blacking Out Text with the Markup Tools
To test it out, use the highlighter in Markup to obscure some text in a photo or screenshot. If you already have some obfuscated images, skip to the next section to see how to reveal what's hidden.
Take a screenshot and tap its thumbnail — or open an image or document in an app like Photos, Files, or Mail — then find the Markup tools. Once you do, tap the highlighter tool, which looks like a thick marker. Tap the highlighter again to set the thickness and opacity (make sure the slider is to the far right). Next, tap the color picker and choose black, which is the most common color for obfuscation.
- Don't Miss: Wipe & Obfuscate Identifying Information in Your Protest Photos for More Anonymous Sharing
Using your finger, draw over the information you want to hide, back and forth a few times, until you can't see what's there. You might have to apply a few layers to conceal the text adequately. When ready, save the image or document as you usually would.
Removing Highlighter Obfuscation from Images
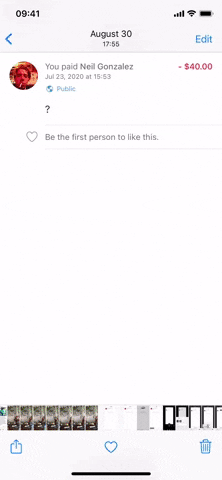
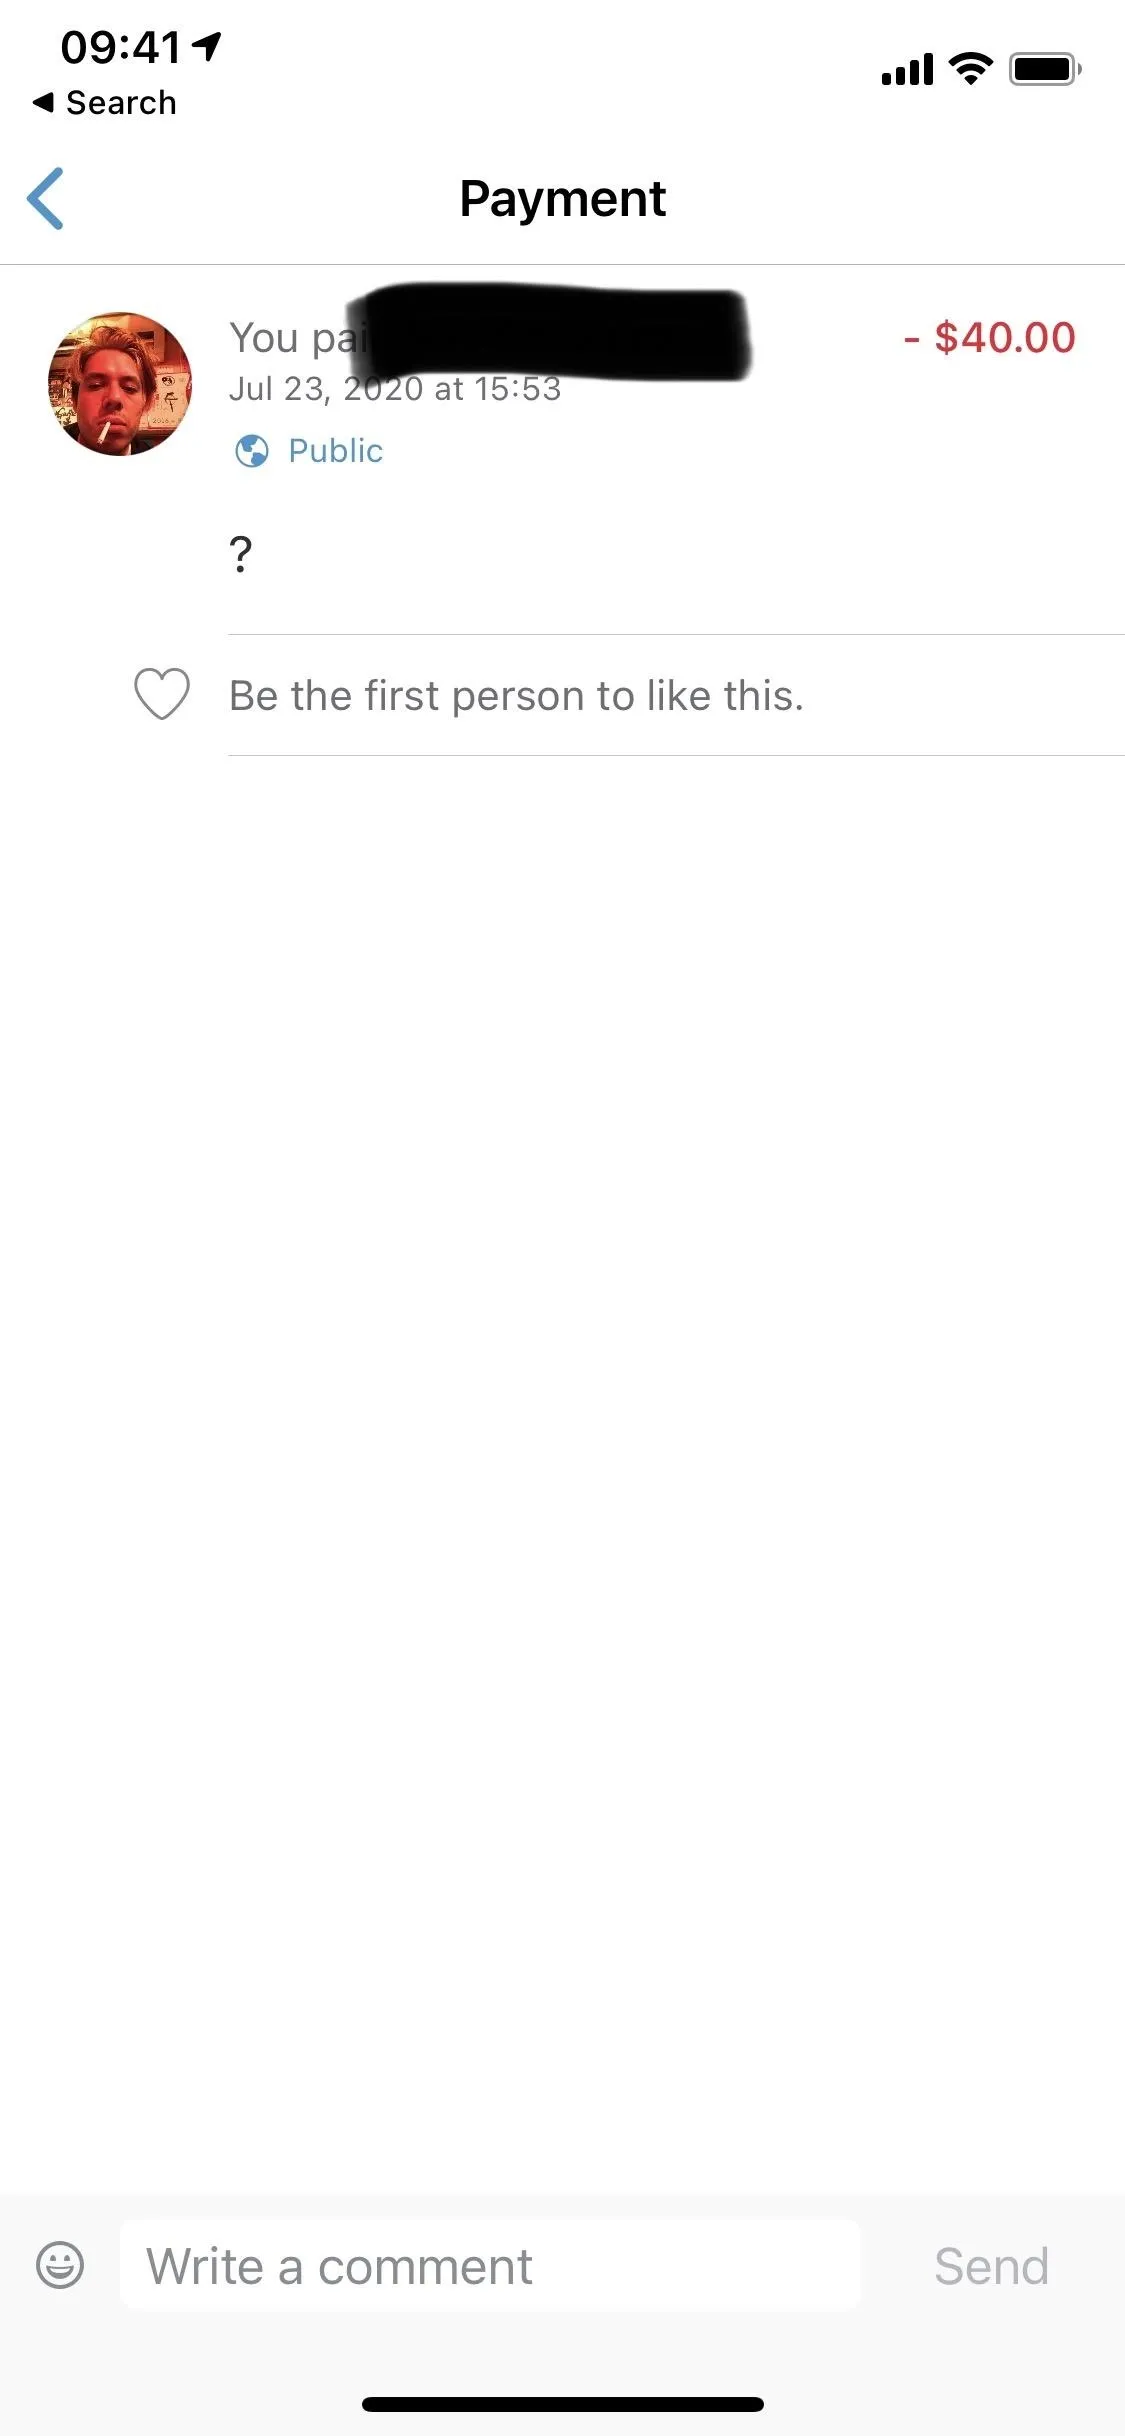
Now for the fun part. Find an image that has blacked-out text, open it in the Photos app, and tap "Edit" in the top right to open the image editor. You'll be using the tools at the bottom to remove the highlighter. Depending on how many black strokes are hiding the text, you can reveal the hidden information with two to six adjustments. Try these out and see what happens:
- Brilliance: 100%
- Shadows: 100%
- Brightness: 100%
If you still can't make out what's there very well, try adding one or all of these:
- Exposure: 100%
- Highlights: 100%
- Contrast: –100%
Zoom in to the highlighted area if necessary to see it better. Although you won't be able to distinguish everything underneath the black highlighter, you should see enough. If it's a phone number, email, password, or address, you'll have a good chance at making out most of it — if not all of it.
Several other variables may make this process easier or more difficult. If the black highlighter isn't very thick, you might be able to remove it somewhat with just two or three different adjustment tools instead of all six listed above.
Also, the color of the text and the background could make the process more difficult. It'll be easier to remove the highlighter if you're dealing with black or dark text with a light background. But if the text is a light color, like yellow, and the background is also light-colored, you could have difficulty viewing what's underneath the black highlighter.
Trying It Out on Different Background & Highlighter Colors
Depending on the highlighter color, you may have to use other photo editing tools or adjust the same tools up or down. For example, try using Brightness (100) on a red highlighter. If that doesn't work, also try Highlights (100). Still a no-go? Then try some of the other adjustment tools out.
For white highlighter, try Sharpness (100), Brightness (–100), Contrast (–100), and Brilliance (100). Below you can see several different highlighter colors and how the photo editing tools affect them.
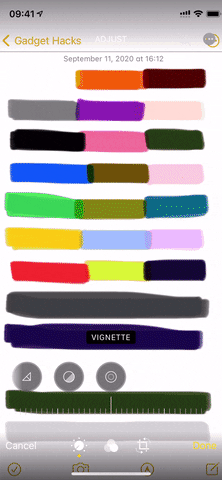
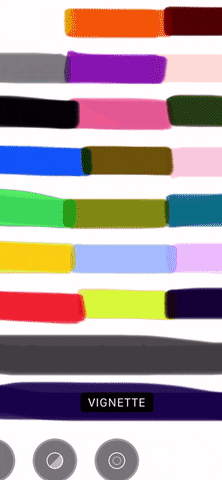
If you're in Dark Mode, it doesn't make much of a difference. Taking the same steps as mentioned before, black highlighter and white highlighter will disappear with the right tools, as seen below.


Making It Harder for People to Reveal Your Private Info
To hide sensitive data, you don't have to leave the Markup tools in the dust. It's still possible to keep the stuff you're making disappear never come back again. And if all else fails, there are third-party solutions.
Add More Highlighter Layers
The highlighter, which gives you the best look, can still be used to hide content. You just need to use more layers. Instead of just swiping back and forth over what you're trying to hide, lift your finger off the screen before each new swipe. Doing so will add heavier layers of highlighter, making it much harder to reveal with simple adjustment tweaks.
Use Highlighter on Certain Settings Pages
Believe it or not, but if you take a screenshot of specific information on your iPhone, iOS will help obfuscate that data when you're using Markup tools. It seems to work better when you're obfuscating from an app like Photos, not from the screenshot editor, so be careful.
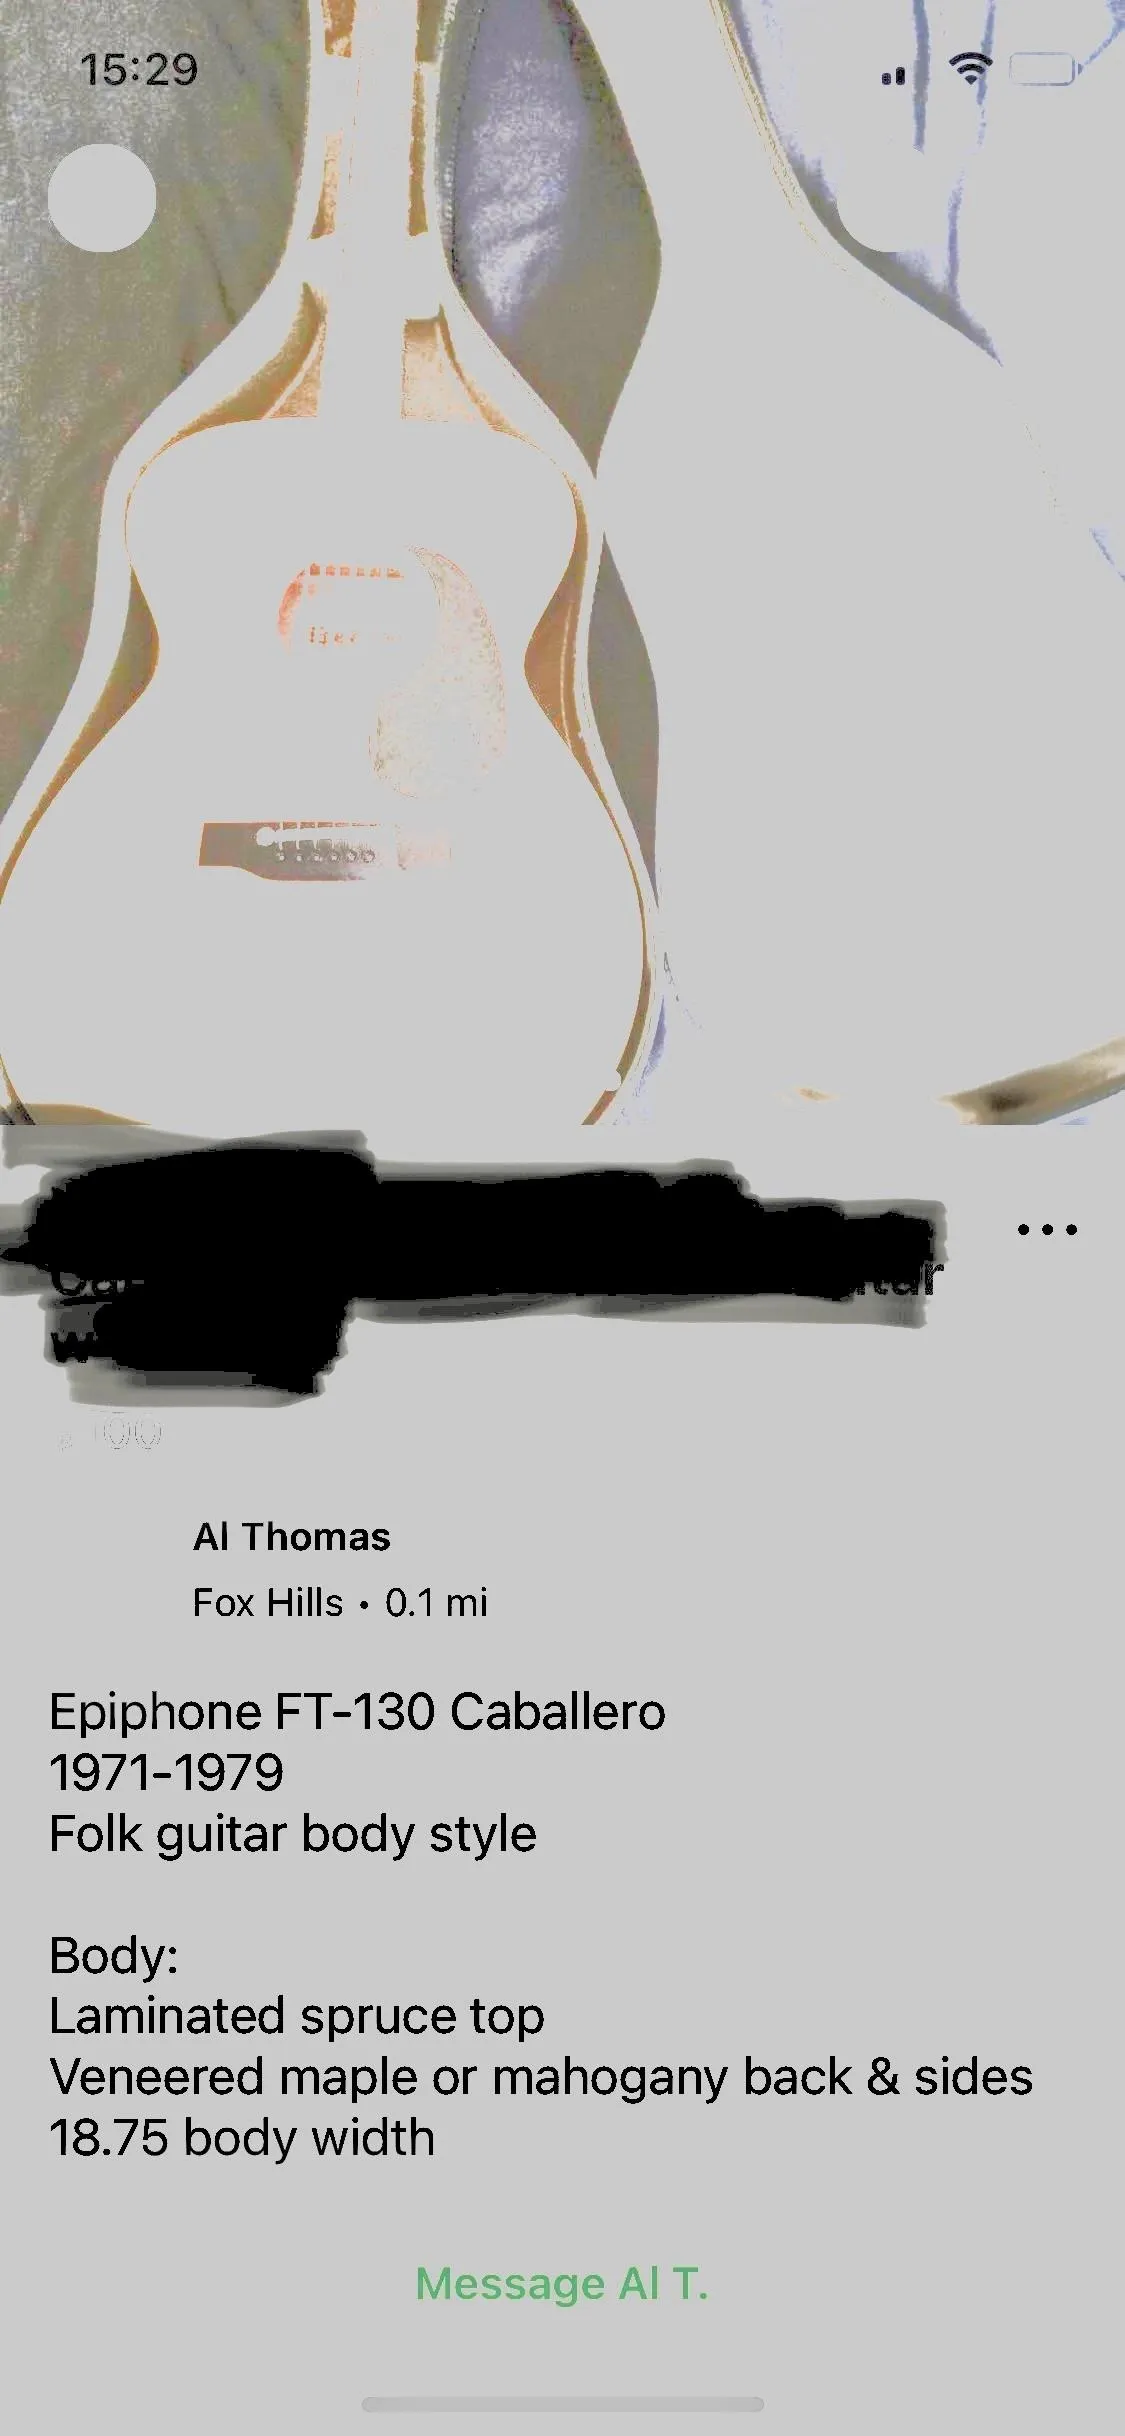
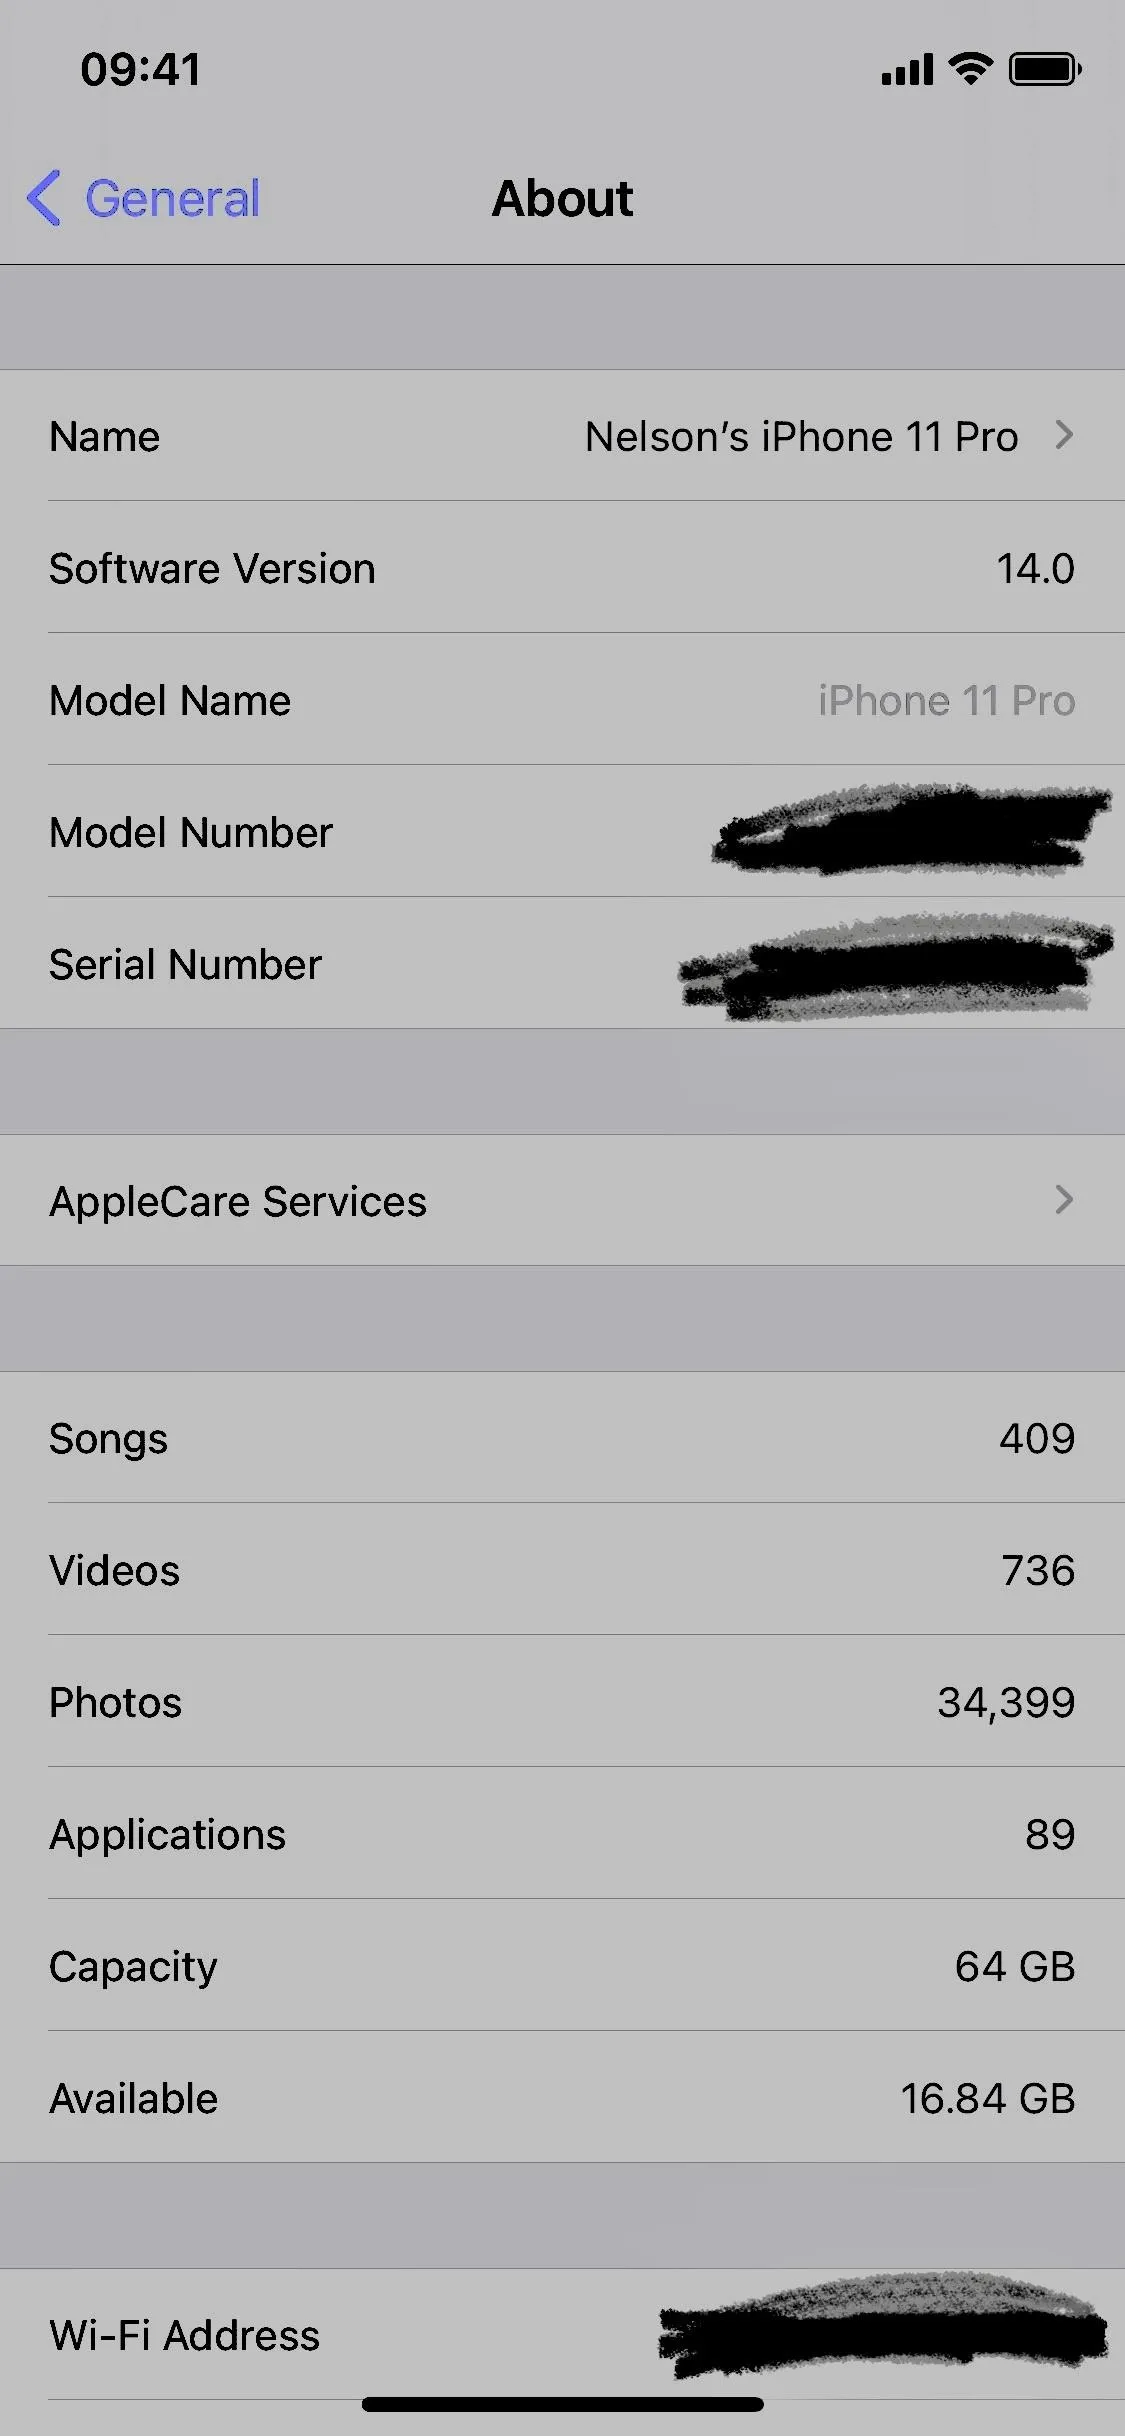
For example, the "About" page Settings –> General. If you swipe once or twice on, say, your serial number or IMEI, iOS will think you're highlighting it. But swipe three or four times, and iOS will believe you are trying to hide it and will help you out by making it impossible to see. Sometimes it only takes two swipes.
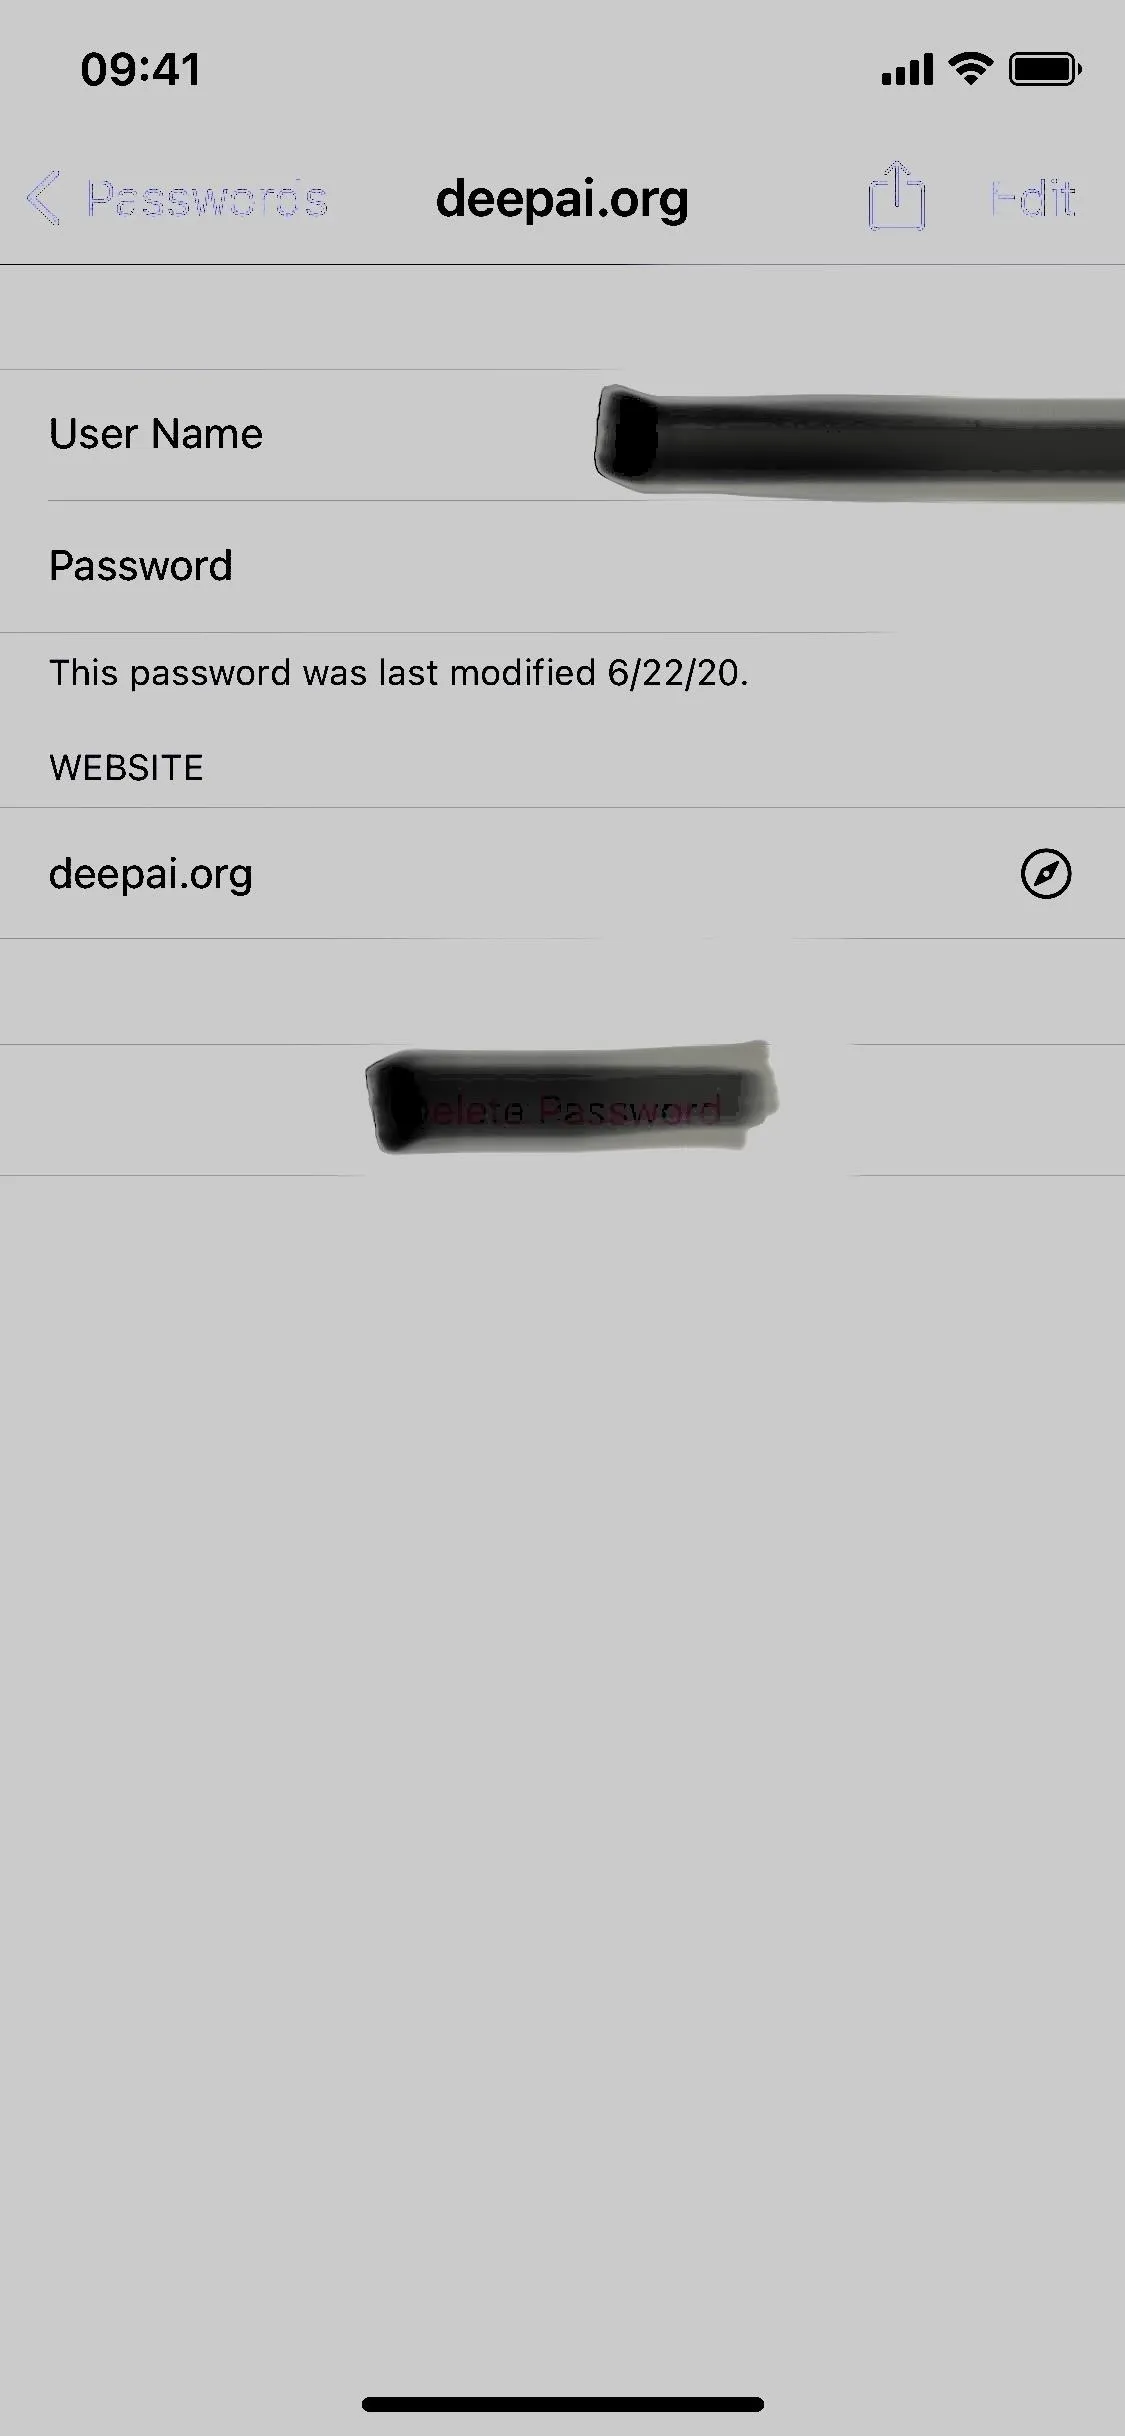
In "Passwords" (iOS 14, iOS 15), "Passwords & Accounts" (iOS 12, iOS 13), or "Accounts & Passwords" (iOS 11) in Settings, a screenshot removes the password from the page automatically — a nice security feature. But you can also use three or four swipes to obfuscate the username.
Use the Pen Tool Instead
The pen tool in Markup, the icon at the far left, is a solid "marker." When set at 100% opacity, a single layer of the pen in any color is enough to hide what's underneath from prying eyes and image editing tools.
A pencil tool is also an option, but it acts more like a highlighter since you need several layers to obfuscate something effectively. If the layers are thin, someone might be able to reveal the information later. So it's best to stick with the pen when you need 100% certainty.
Or Even the Shape Tool
You could also use another Markup tool to hide information. Instead of using the drawing tools, tap on the plus (+) sign in the bottom right, and choose one of the shapes available. Situate it over the text to be hidden, then tap the icon in the bottom left to see more options.
For the arrow tool, you can make it a thick line instead. For the comment box, square, and circle, you can fill it in, so it's all a solid color. Then, you can choose a color if the current one isn't what you want. No matter what you do in the image editing tools later, there's no way to reveal what's underneath.
Use a Third-Party App Designed to Obfuscate Personal Info
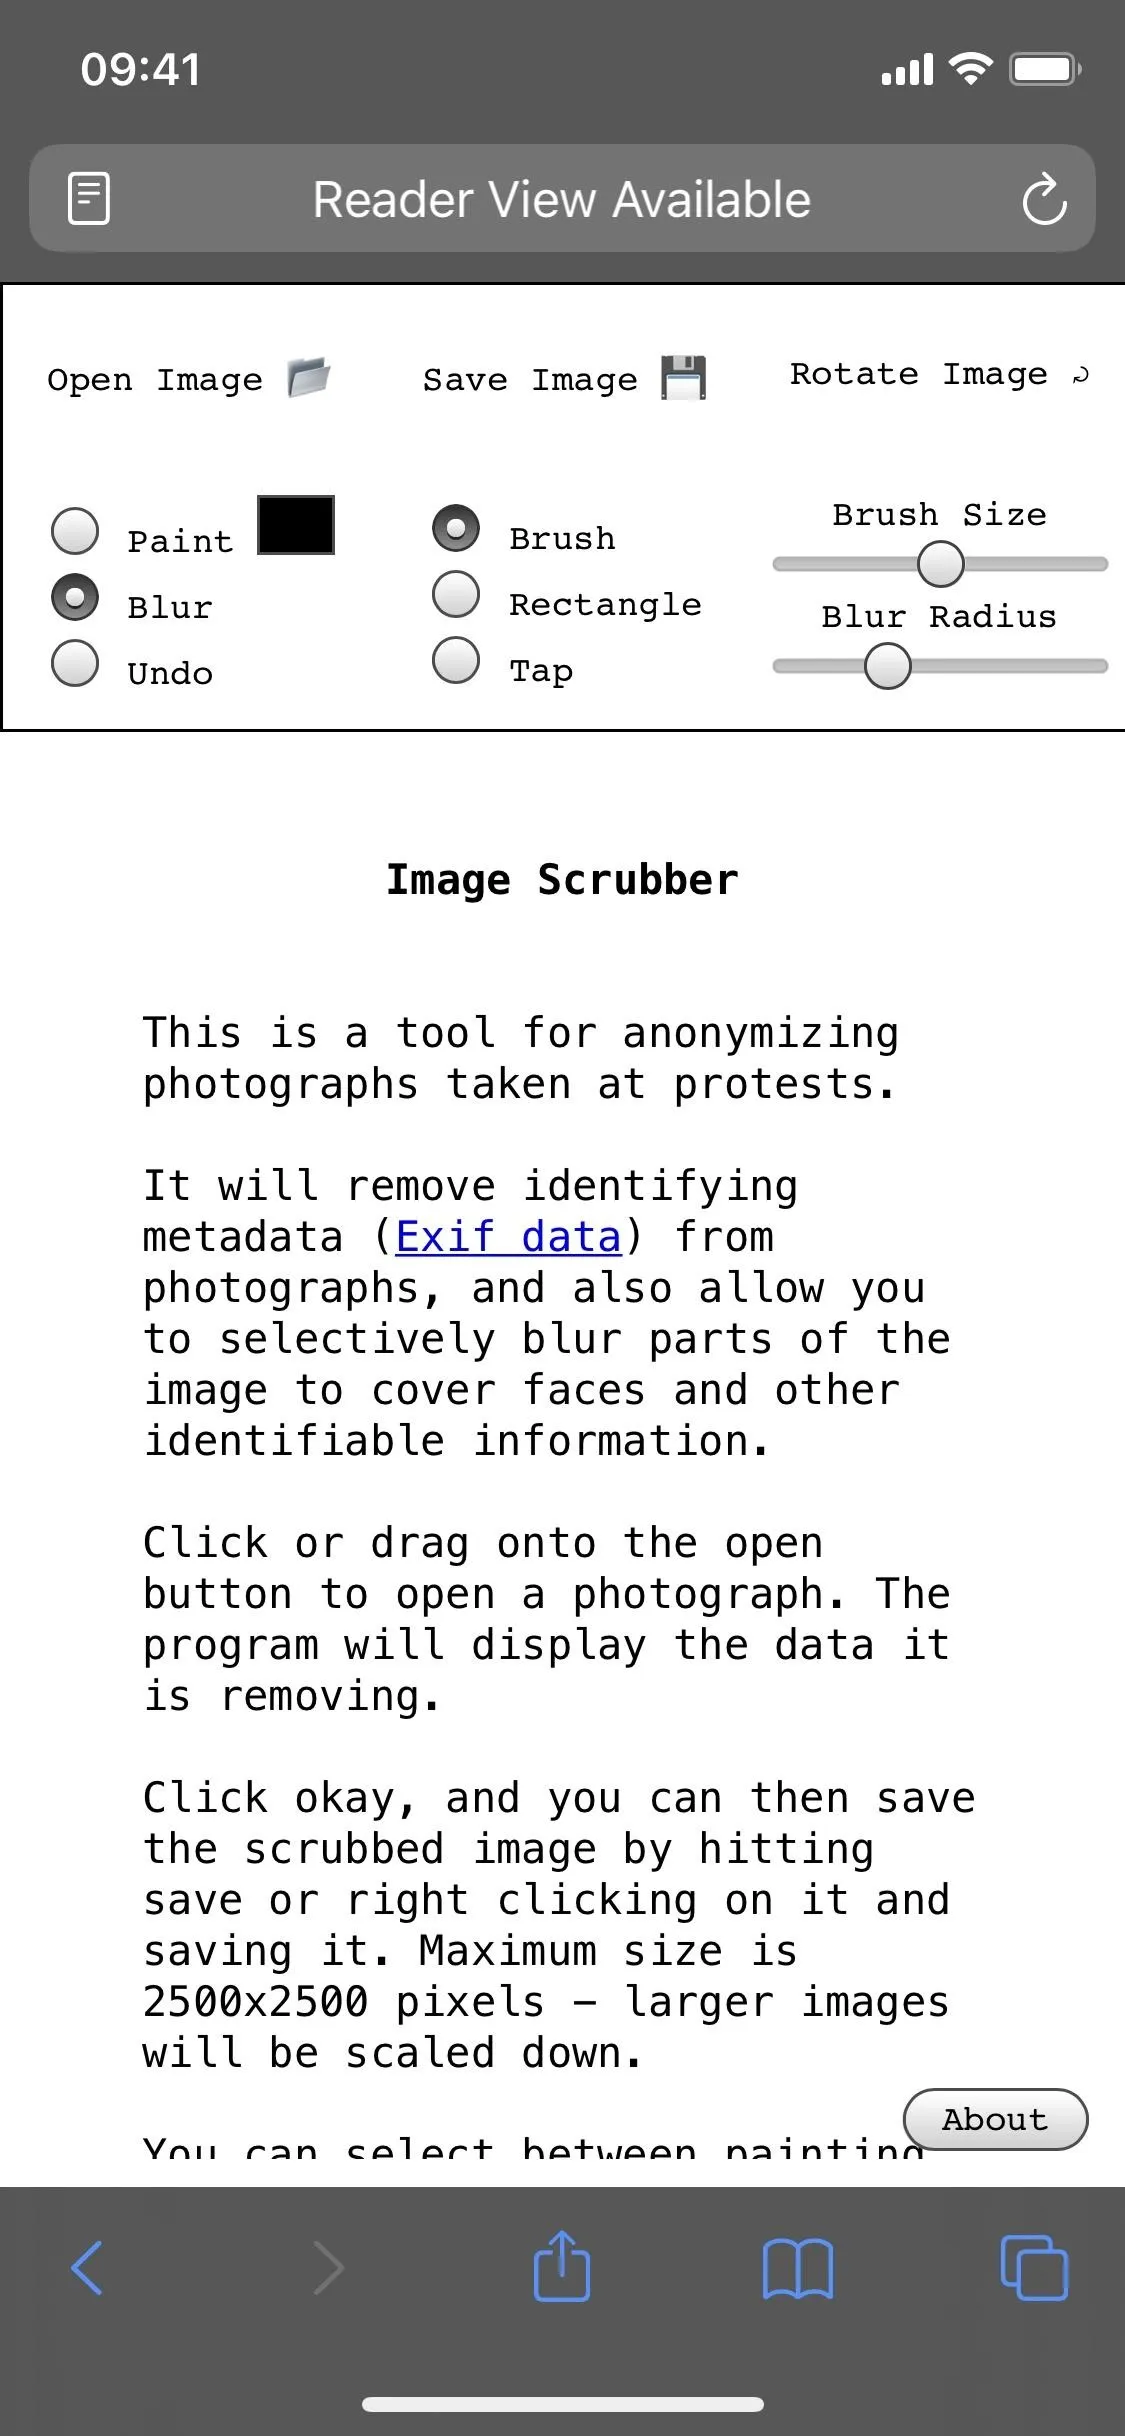
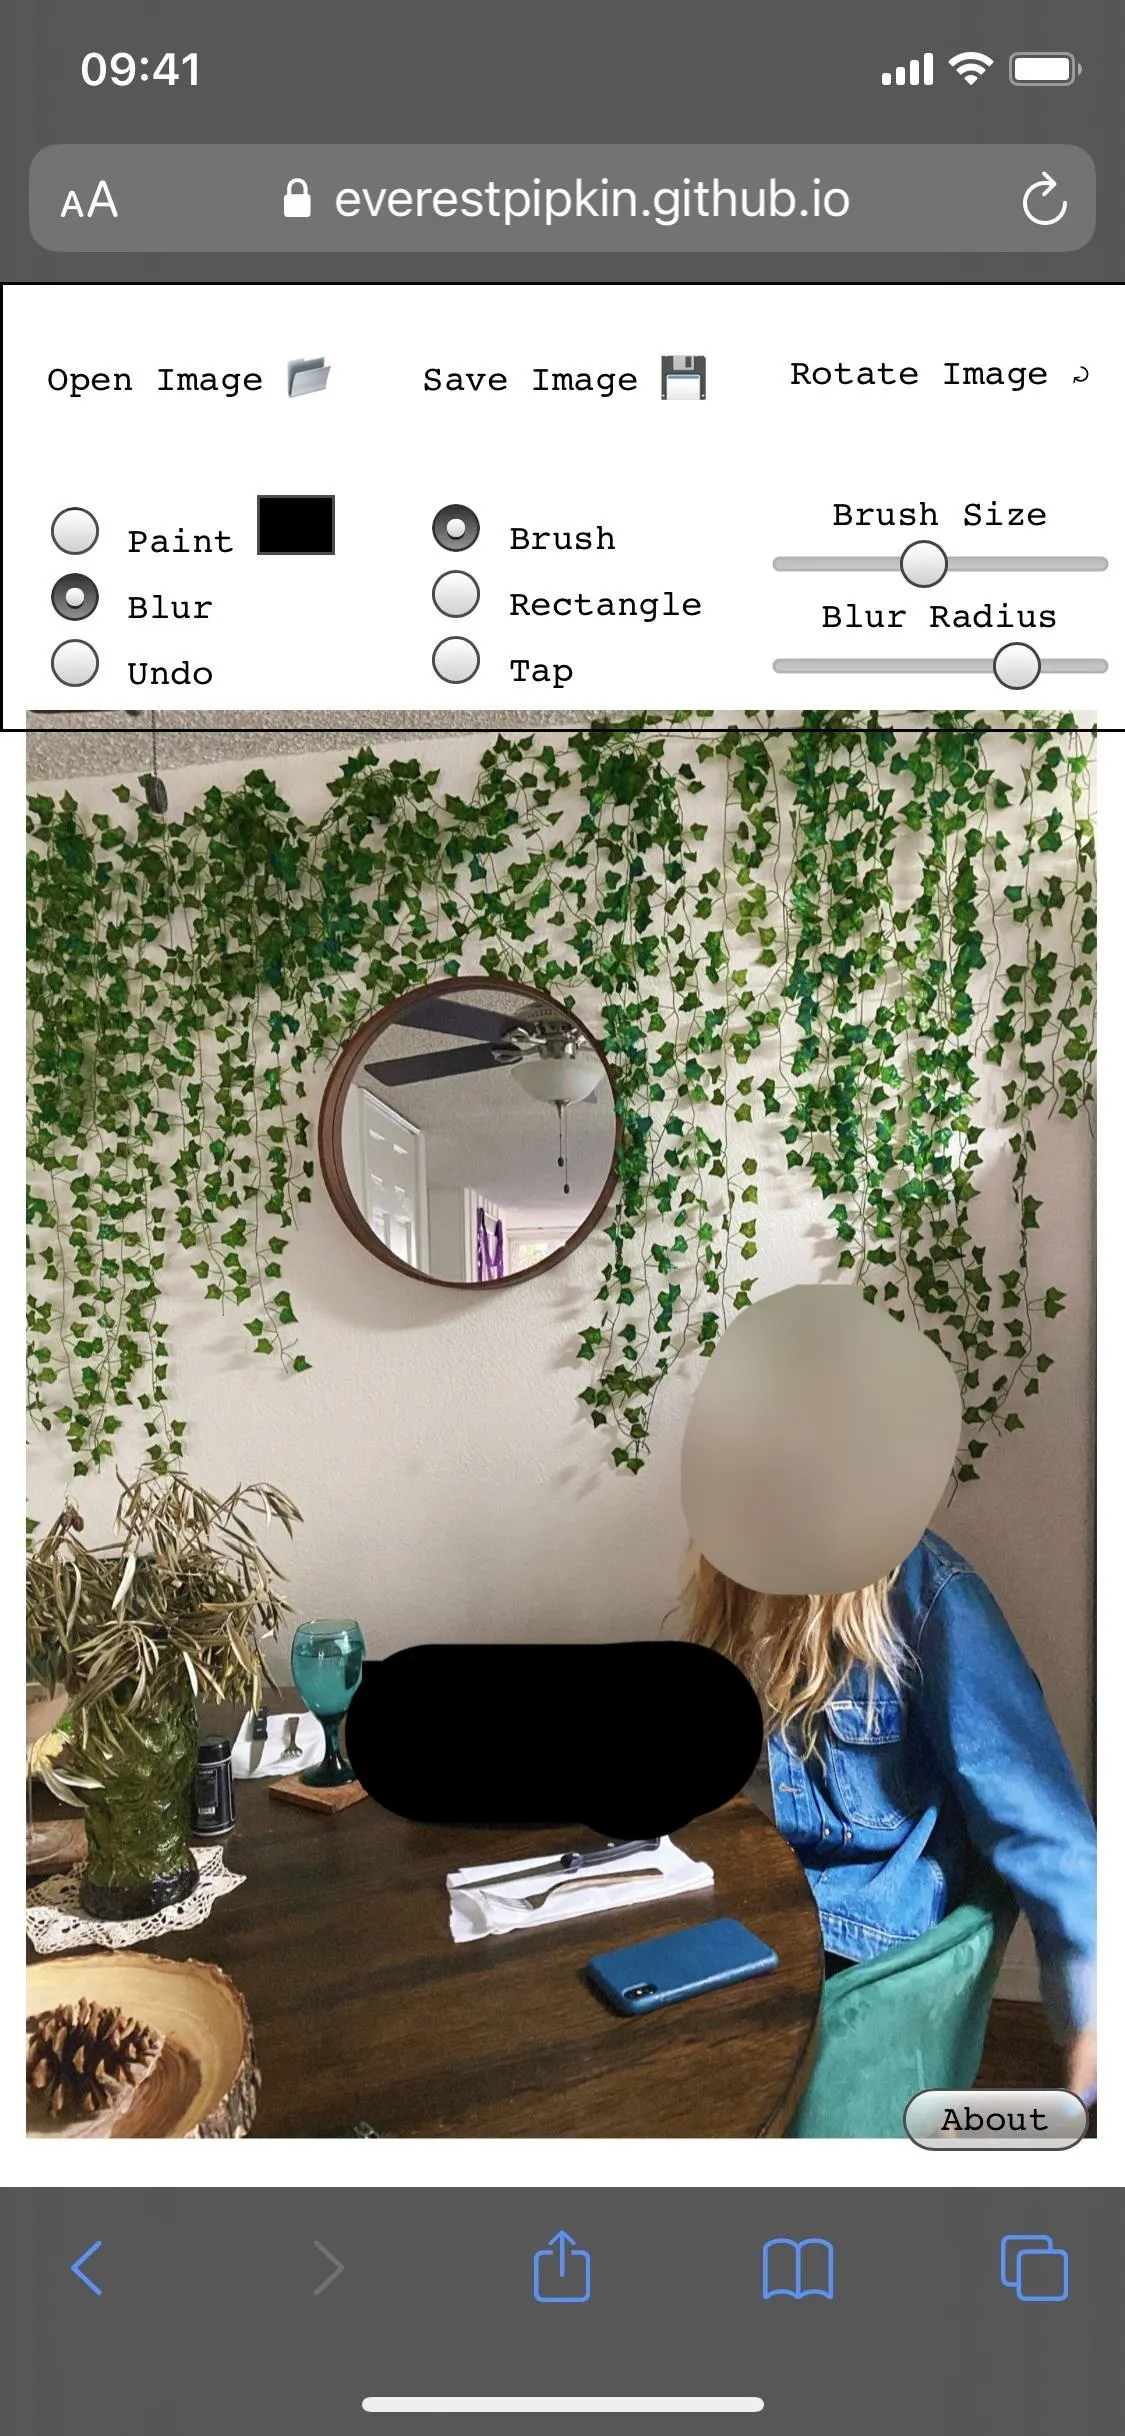
Better yet, you could use professional software to obfuscate private information and faces. Using Image Scrubber, by developer Everest Pipkin, you can use a heavy-duty marker to hide information, as well as an excellent blur tool to hide faces. You can even remove location metadata from a photo so that people can't trace it back to where you took it. There are other apps out there, but this web tool is our favorite right now.
Cover photo, screenshots, and GIFs by Nelson Aguilar/Gadget Hacks


Comments
Be the first, drop a comment!