


Your iPhone's built-in Voice Memos app is a great way to record the audio around you, whether it be conversations, lectures, meetings, interviews, discussions, chitchat, gossip, or other kinds of talks. But if your goal is to record audio on the down-low without being noticed, you'll need to know the hidden shortcut.
Typically, to make an audio recording in Voice Memos, you open the app, hit record, and then tap the stop button to save. If you've added the Voice Memos control to Control Center, you could long-press it and tap "New Recording," then tap stop in the app. You could even ask Siri, but it will only open Voice Memos for you, not start a recording, so you would have to hit record yourself, then stop.
No matter which of those methods you use, somebody will likely spot you trying to secretly record a conversation since you have to fumble around with your iPhone. When you finally start a recording, you can turn off the display, and it'll still record, so at least there's that. But that's not enough to remain unnoticed.
- Don't Miss: Use Your iPhone to Hear the World Around You Better, Spy on Conversations, Troubleshoot Weird Sounds & More
The Trick to Sneaky Audio Recordings:
There are third-party audio and voice recording apps with features that make secret recordings easier, but that just means another app on your iPhone. Instead, you can create a shortcut using the preinstalled Shortcuts app to start a covert audio recording faster. You can even skip the Voice Memos app and save directly to one of your cloud storage accounts with a shortcut.
So what makes a shortcut faster? Back Tap.
By unlocking and utilizing Back Tap, the accessibility feature in iOS 14 and later, you can make it so that you can start recording audio simply by tapping on the back of your iPhone. For an even stealthier performance, add an action to lower your screen brightness so that no one but you can see what you're doing on your device.
Required:
- iPhone 8 or newer
- iOS 14 or later
- Shortcuts (preinstalled)
- App to save audio files to (see Step 1)
Important Note
Federal law says that it's OK to record someone or a group of people without their knowledge as long as you're a part of the conversation and have no criminal or tortious intent. If you're not, you need just one person from the group to give you permission. Washington, D.C. and 38 states have similar laws.
However, 12 states require consent from all parties involved. Those states are California, Connecticut, Florida, Illinois, Maryland, Massachusetts, Michigan, Montana, Nevada, New Hampshire, Pennsylvania, and Washington.
If it's legal where you are, undercover spy recordings of conversations are helpful for many things. For example, to prove someone said what they said, incriminate somebody of wrongdoing, take audio notes, understand things you couldn't hear the first time, and more.
Choose Your Save Location
Before you build the shortcut, you must choose your recording method; You can record audio directly to the Voice Memos app or straight to the Files app.
- Record to Voice Memos: The shortcut will redirect you to the Voice Memos app, where it will immediately begin capturing audio in M4A format (Apple MPEG-4 audio). With Voice Memos, you can enhance the audio, save files with the current address (unless you've disabled it), and continue capturing sounds while you use other apps on your iPhone.
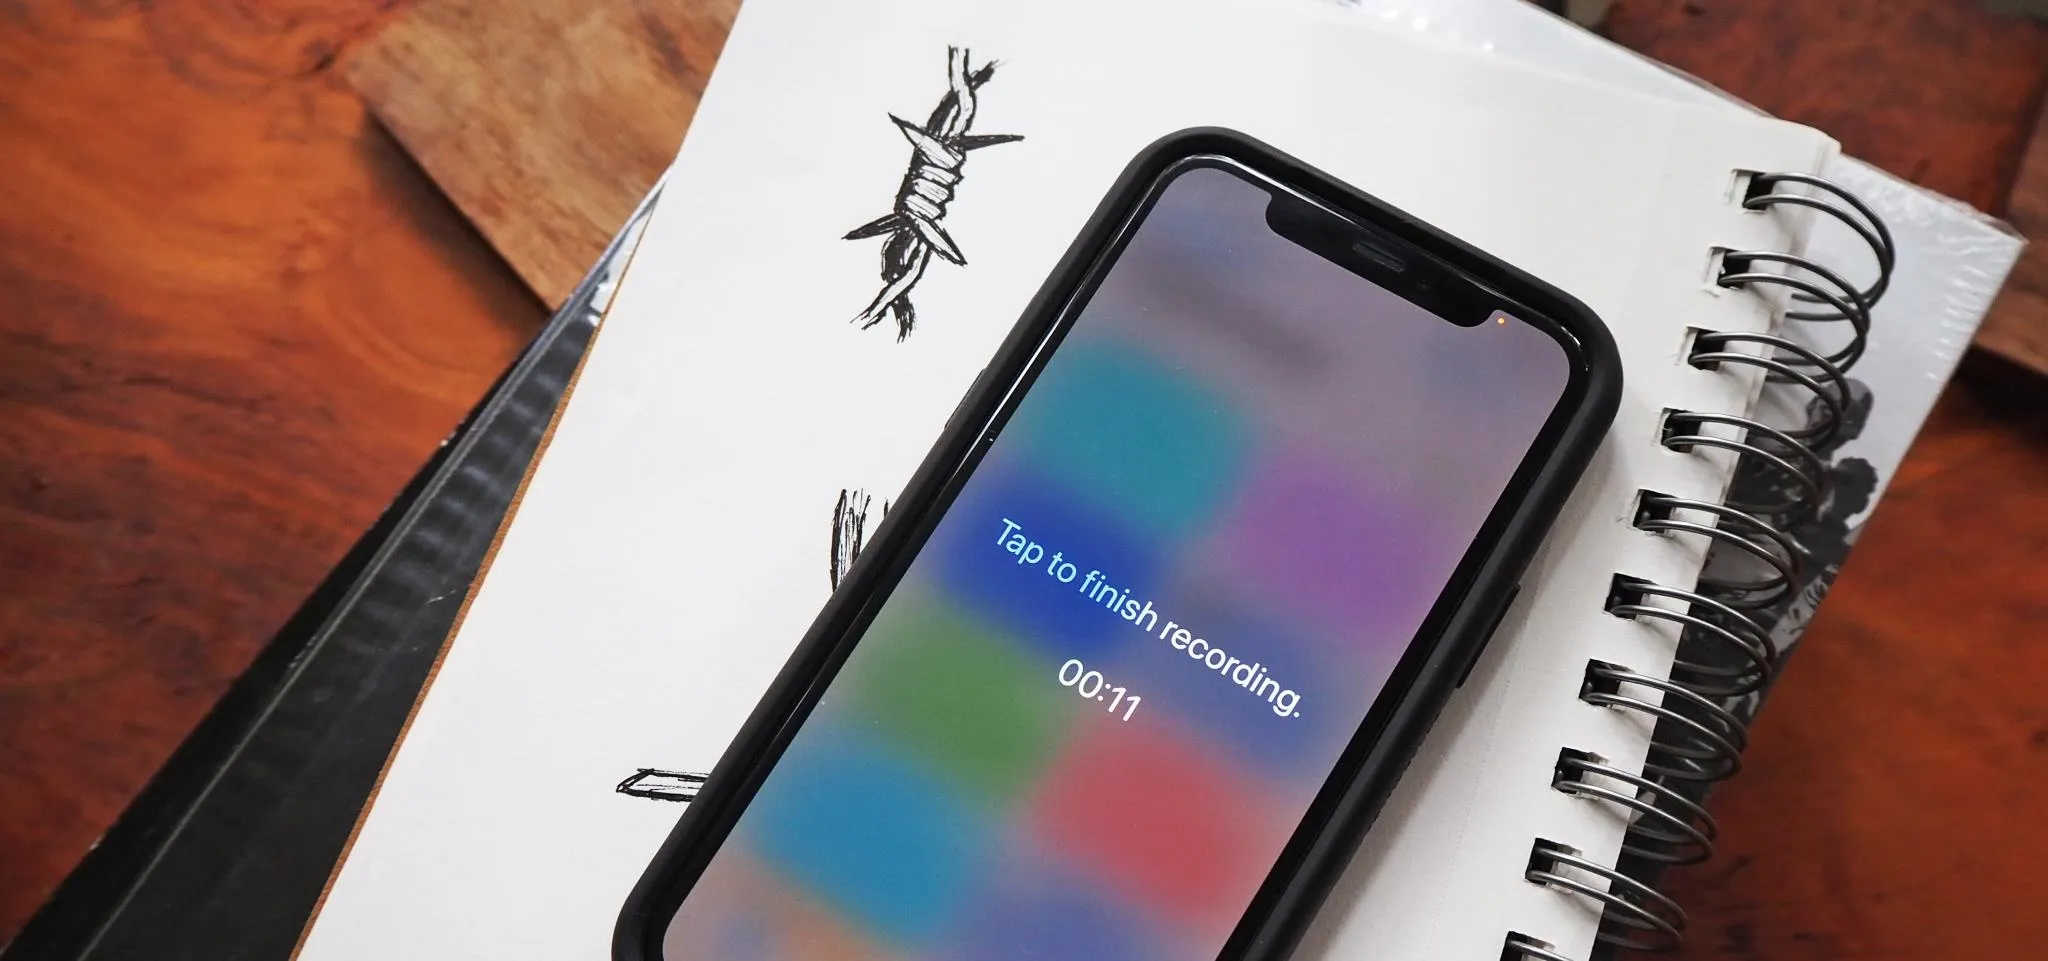
- Record to Files: The shortcut will produce a full-screen recording window to let you know it is recording, and recordings are saved to a specified directory in the Files app in M4A format (Apple MPEG-4 audio). That location can be locally or on iCloud. The tool also provides an easier way to stop recordings (by setting a timer or tapping anywhere on the screen). While you can't choose Box, Dropbox, OneDrive, Google Drive, or other cloud services to save your recordings on, you can easily transfer saved files from iCloud in the Files app to one of those connected accounts. Or, if you use Dropbox, you can swap out the "Save File" action with the "Save Dropbox File" action.
Start a New Custom Shortcut
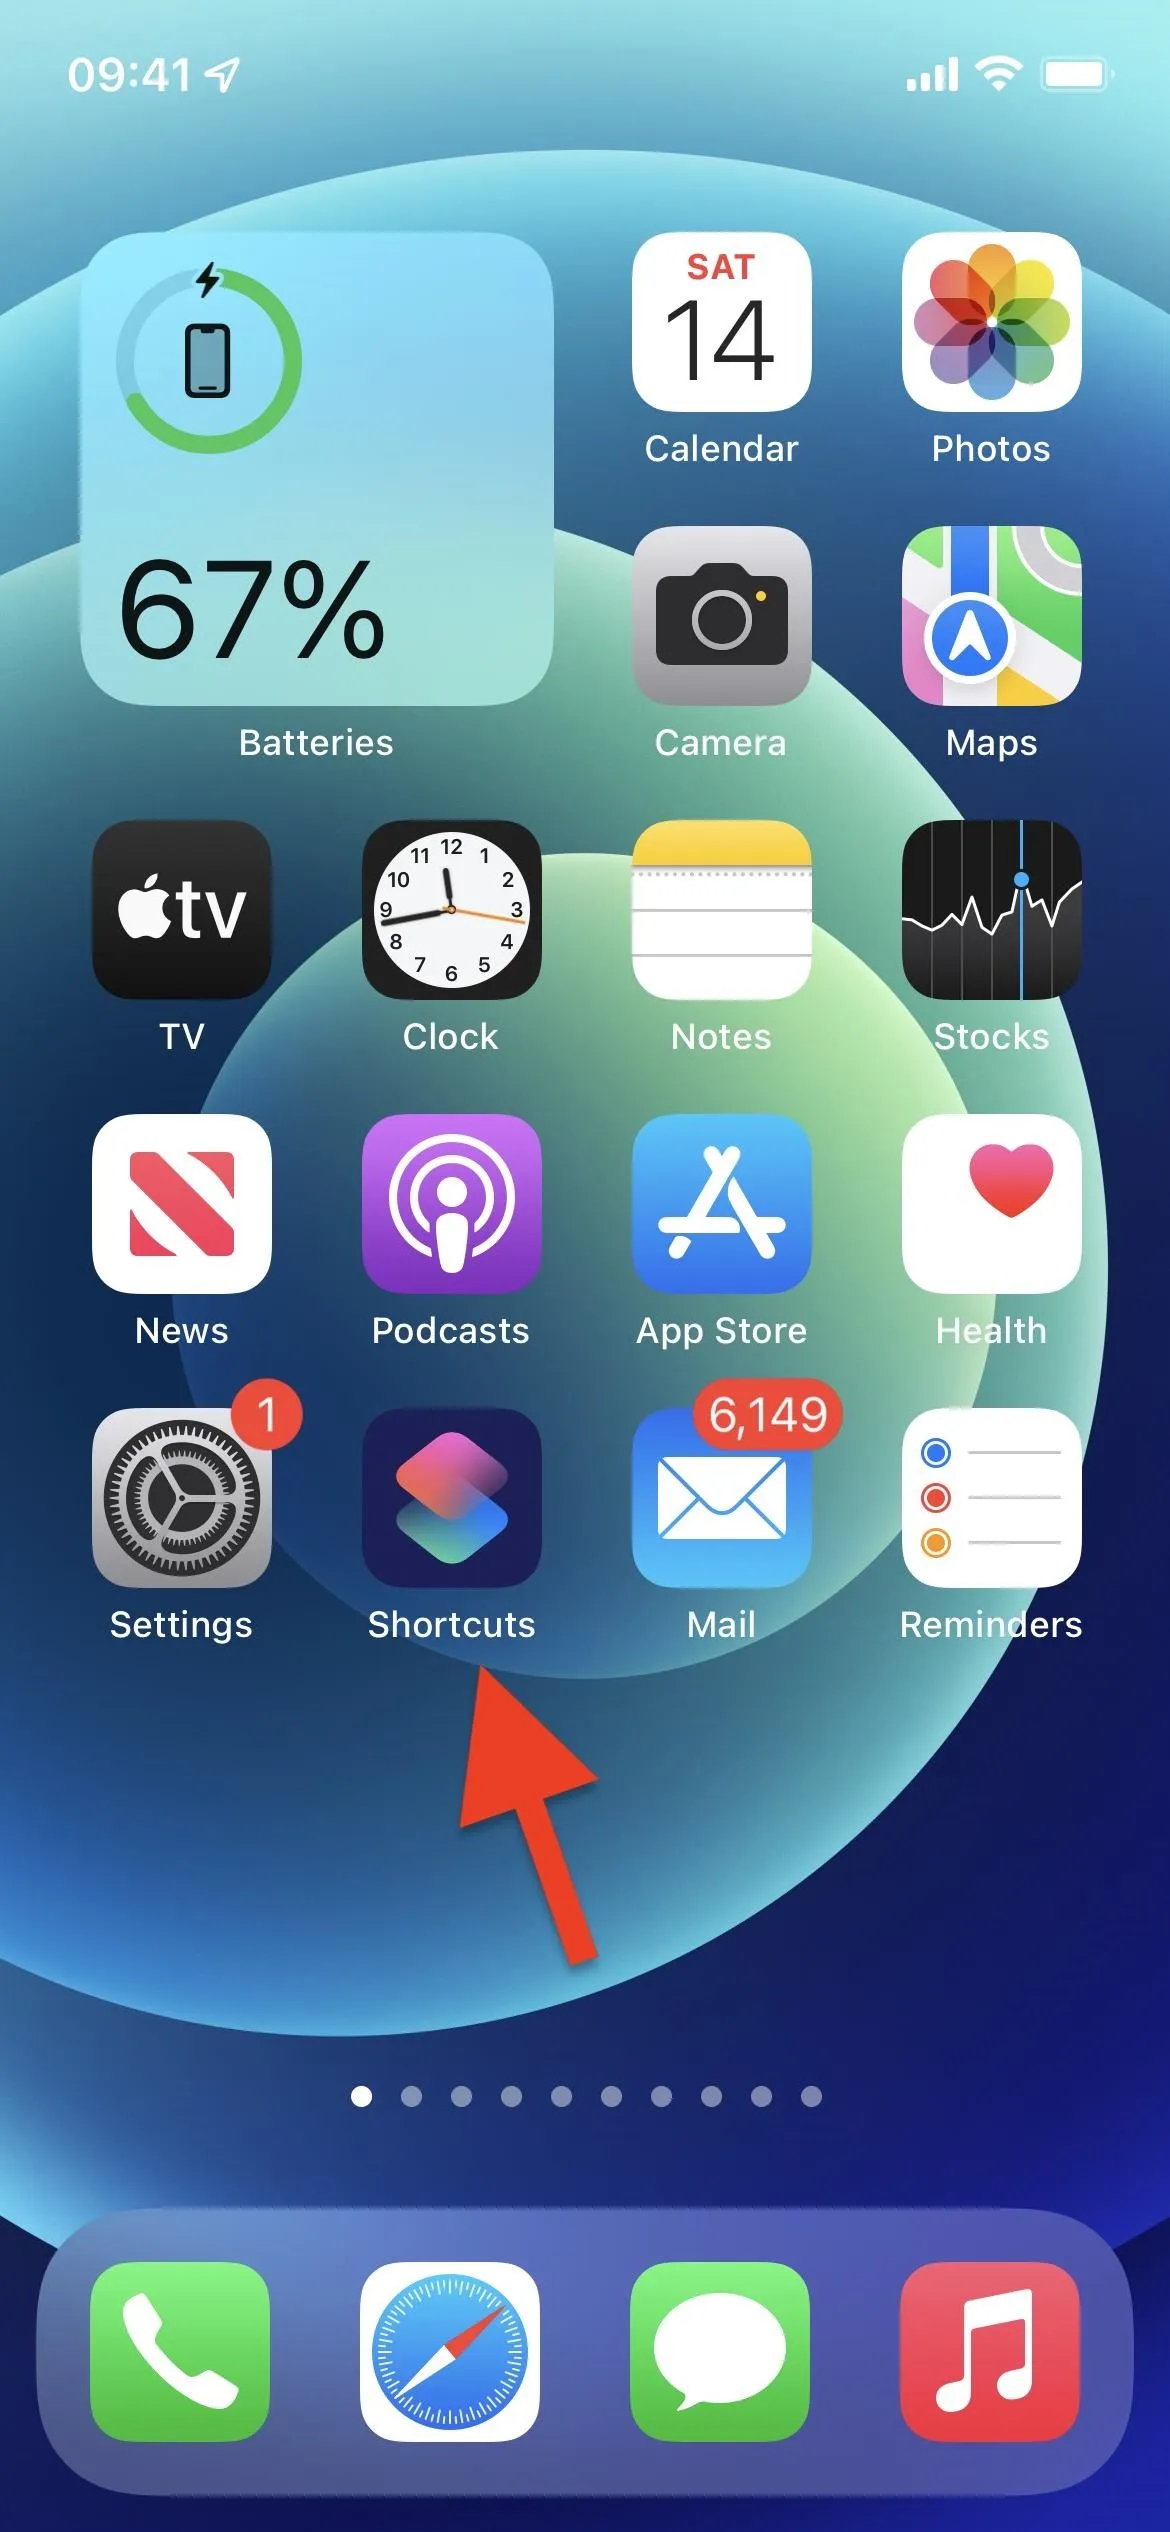
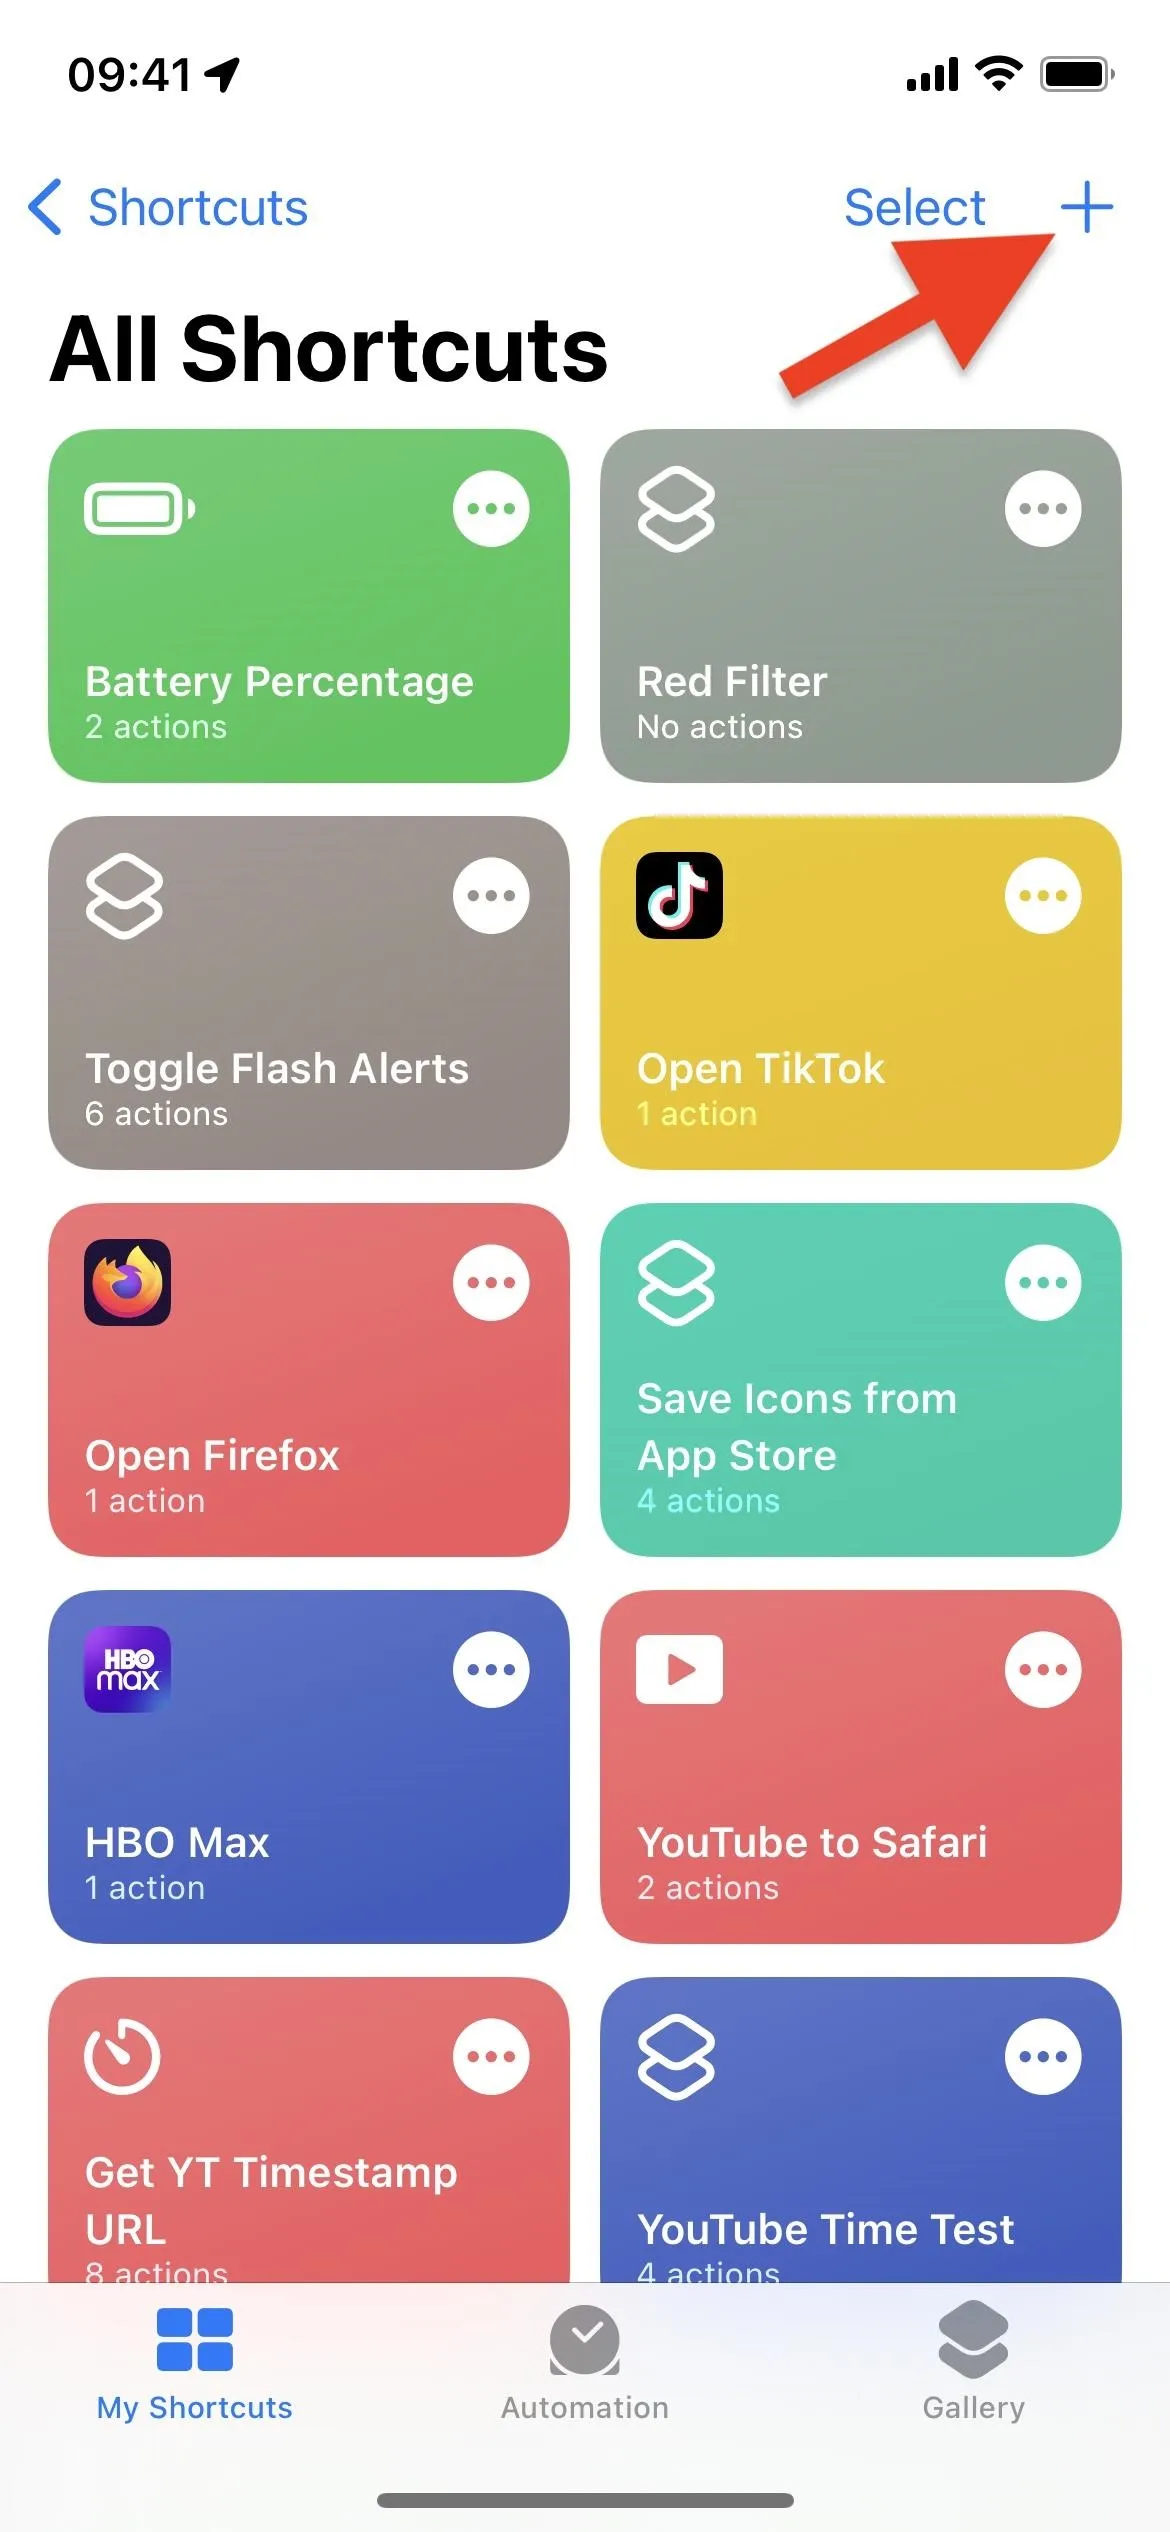
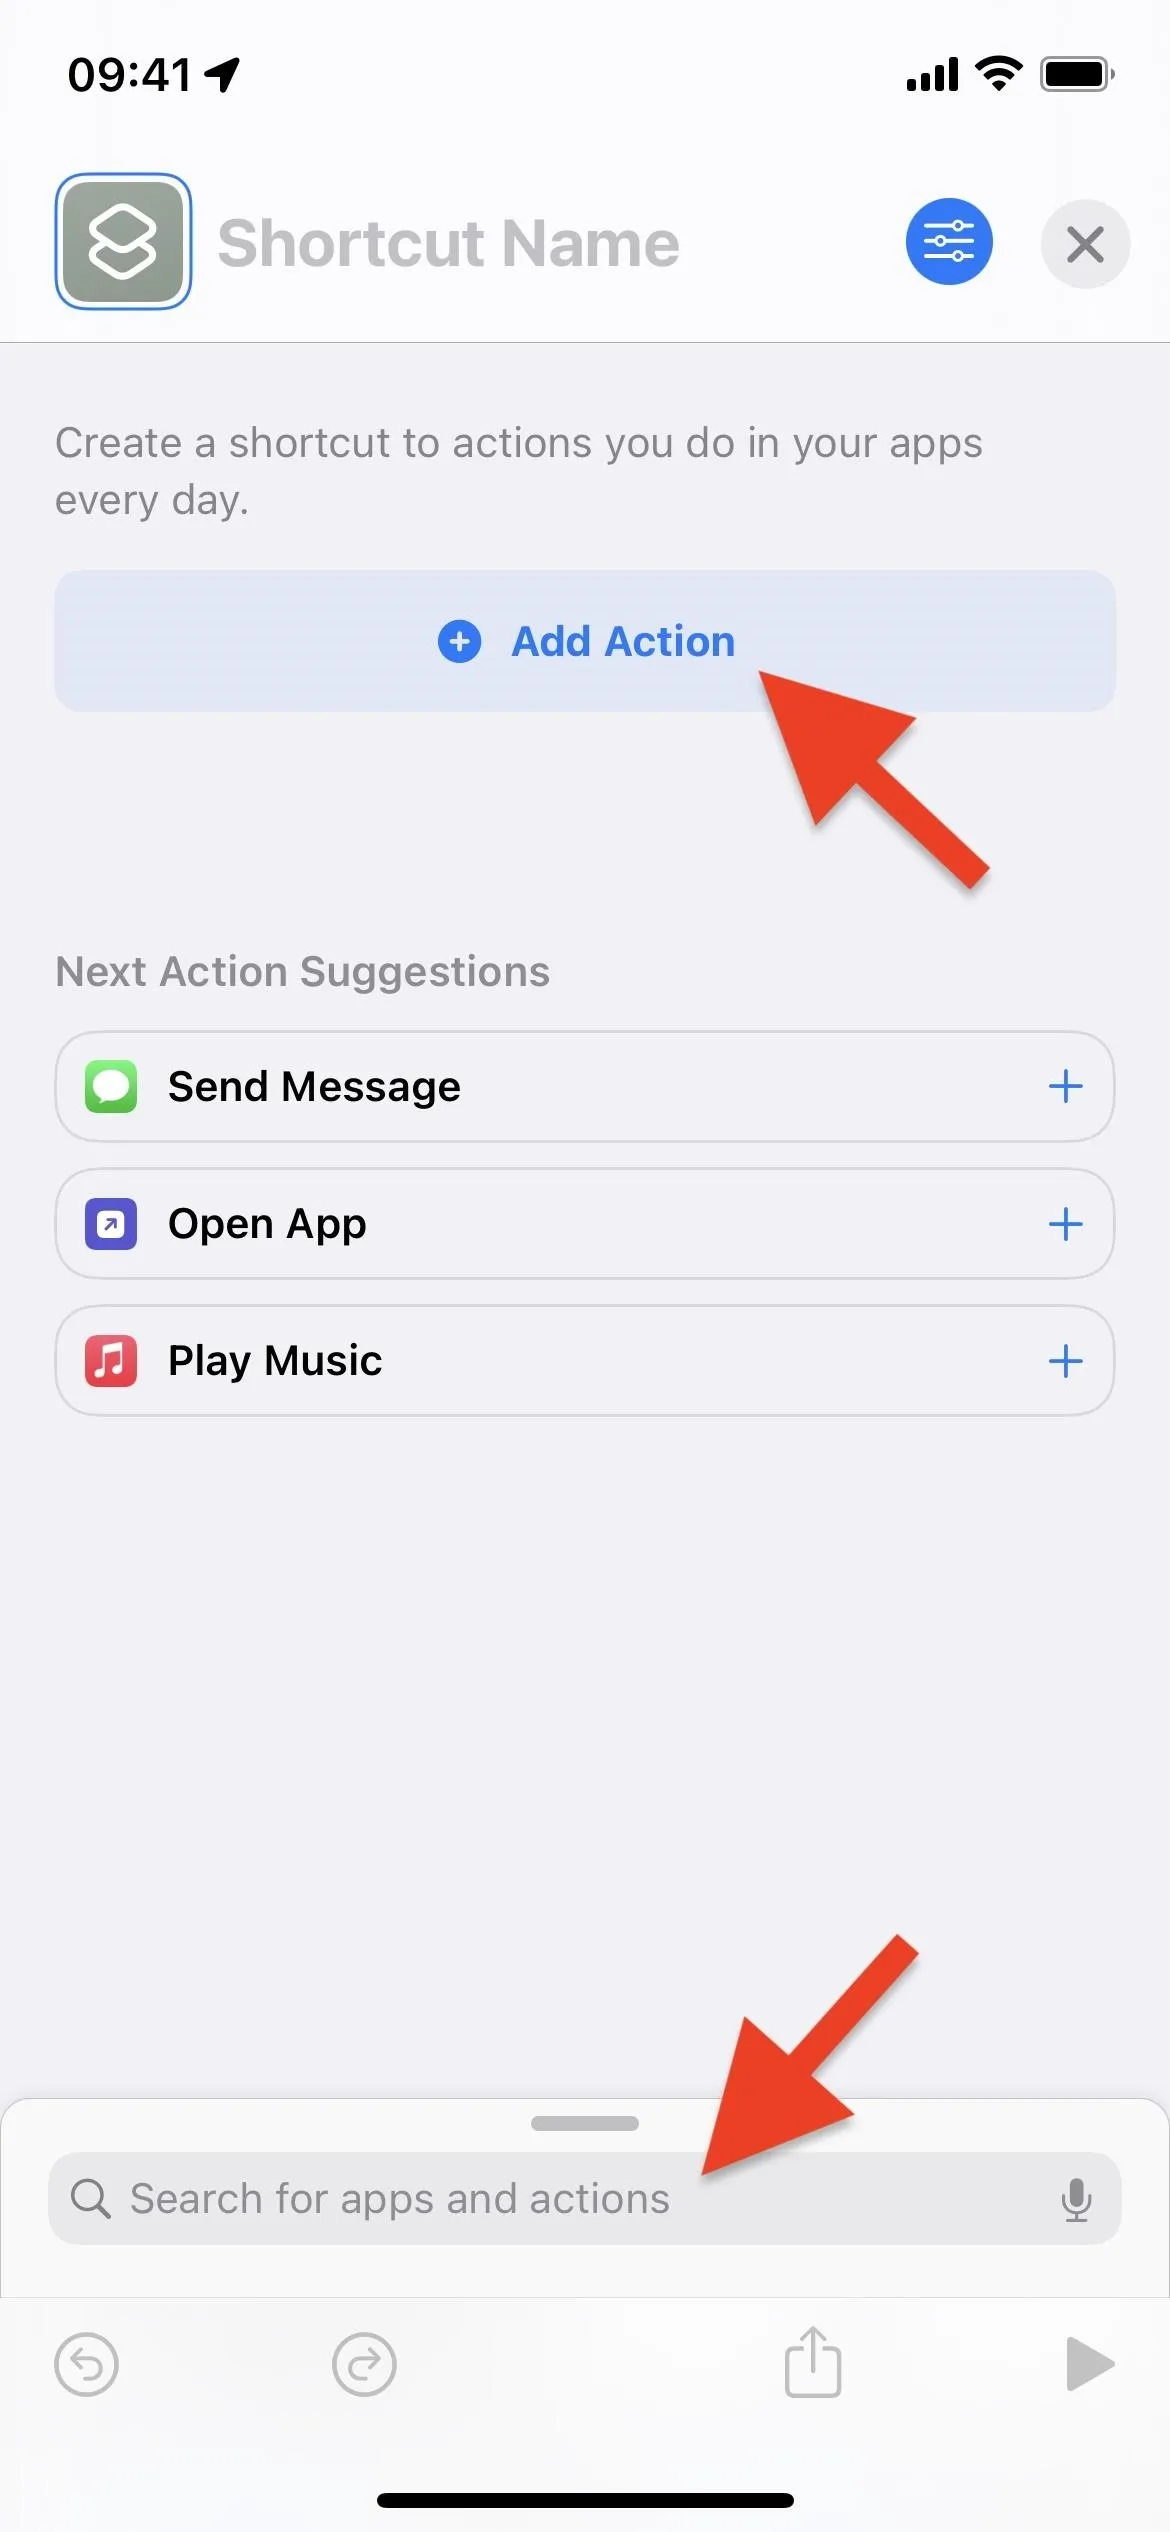
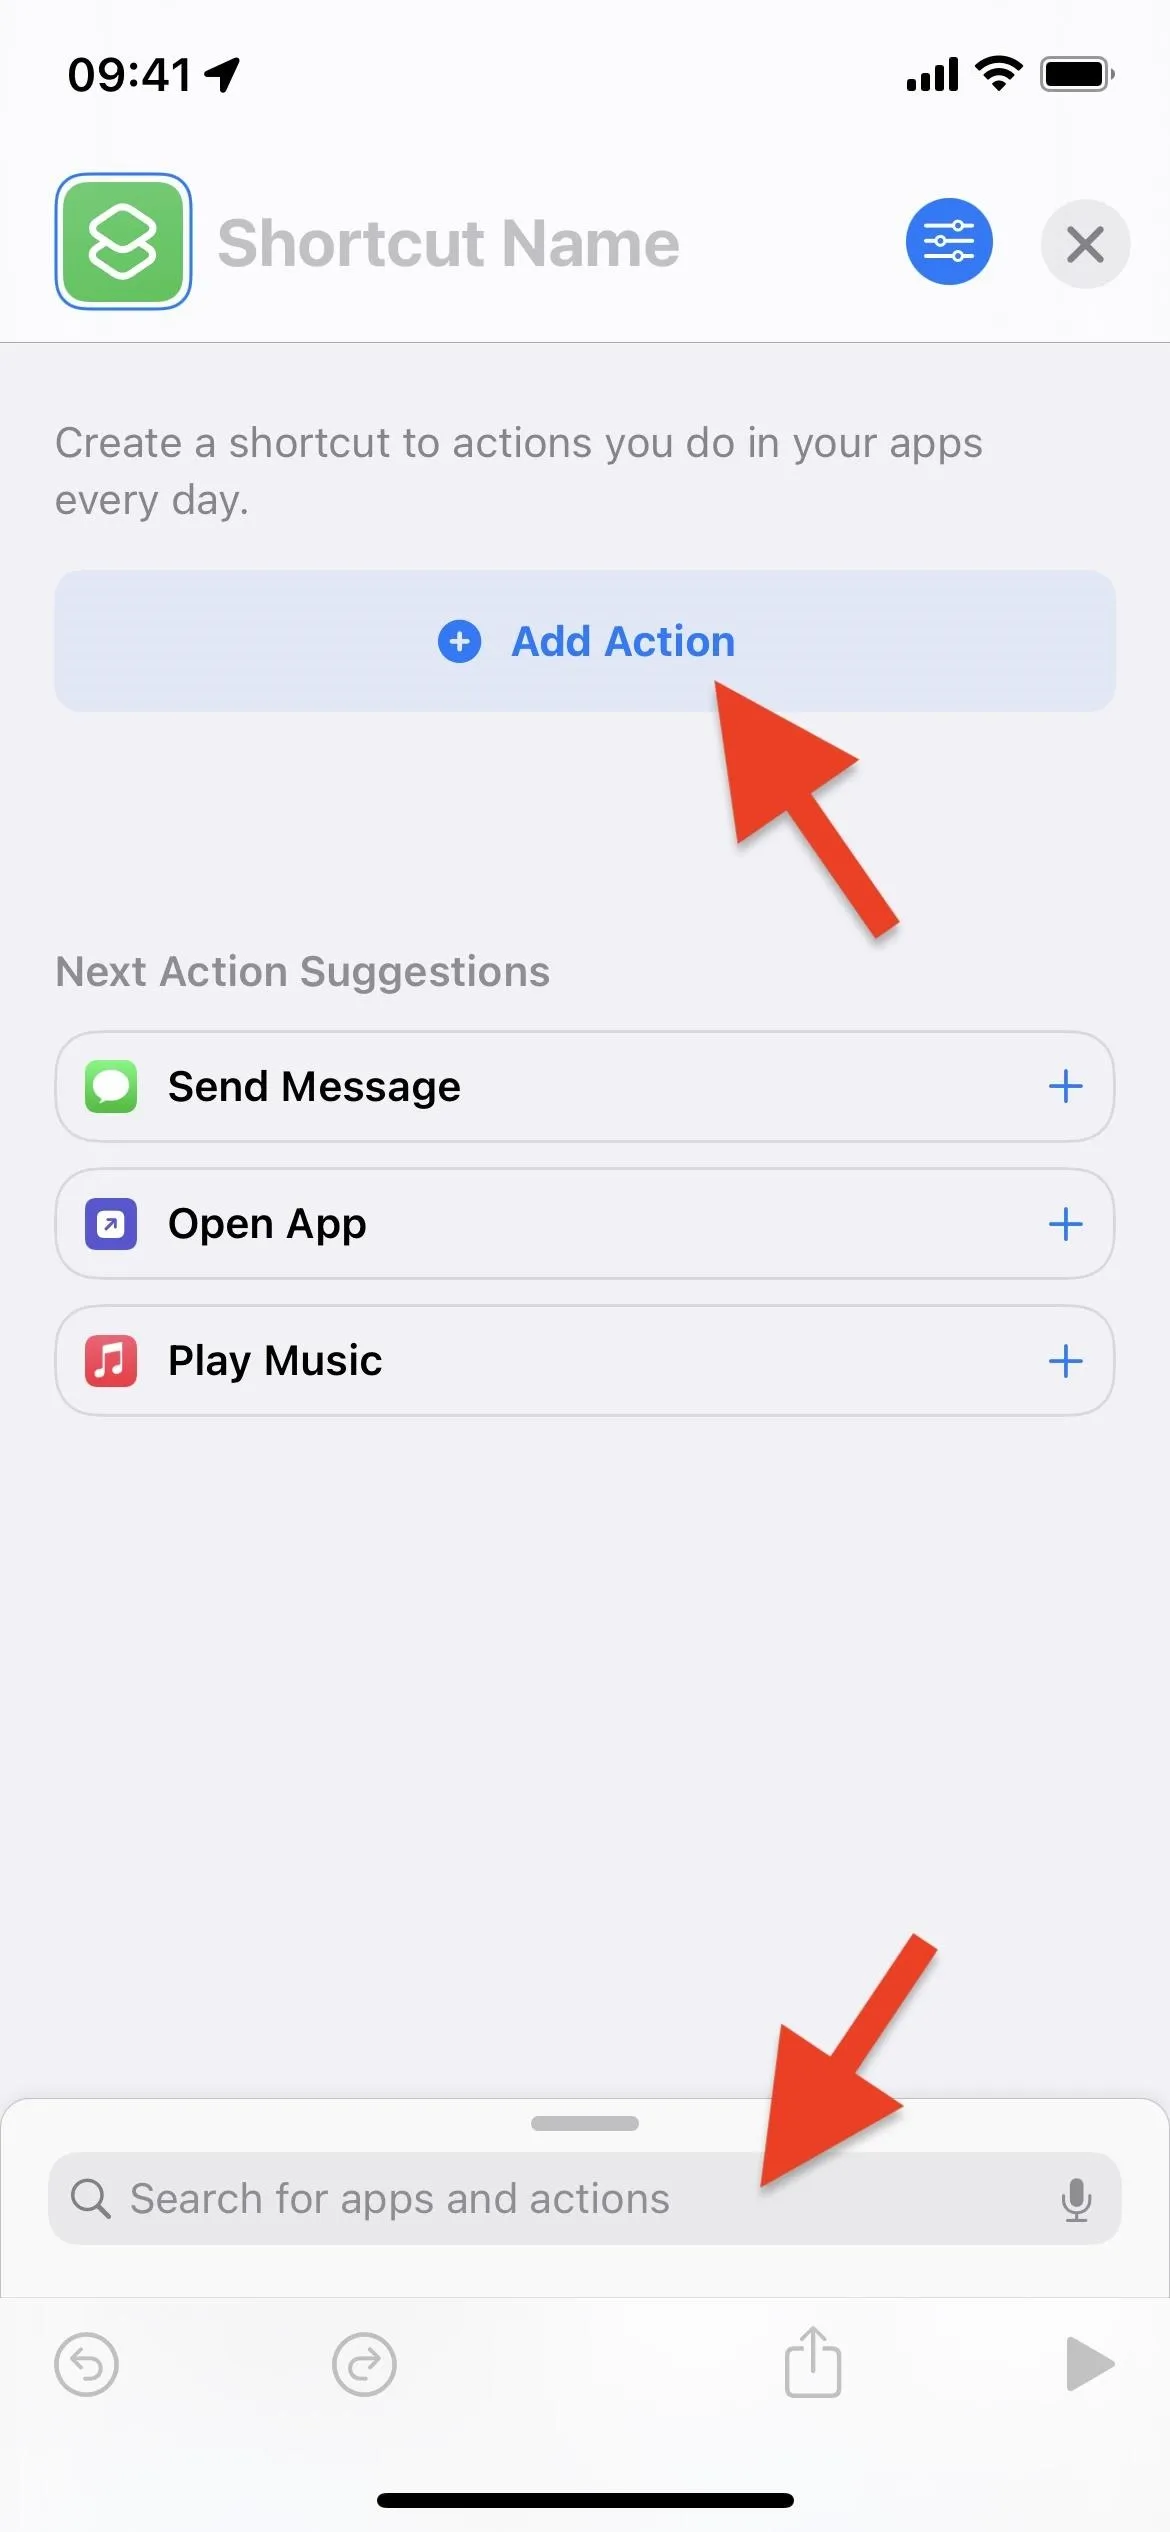
There are no default actions for Back Tap that use Voice Memos, so you'll have to build a shortcut to assign to one of the Back Tap gestures. Launch Shortcuts, go to "My Shortcuts," and tap on the plus (+) icon to start a new workflow.
Build the Shortcut for Voice Memos or Files
How you build the shortcut depends on what save location you chose in the first step above, Voice Memos or Files. Jump to the correct section below for the method you want to use.
Record and Save with Voice Memos
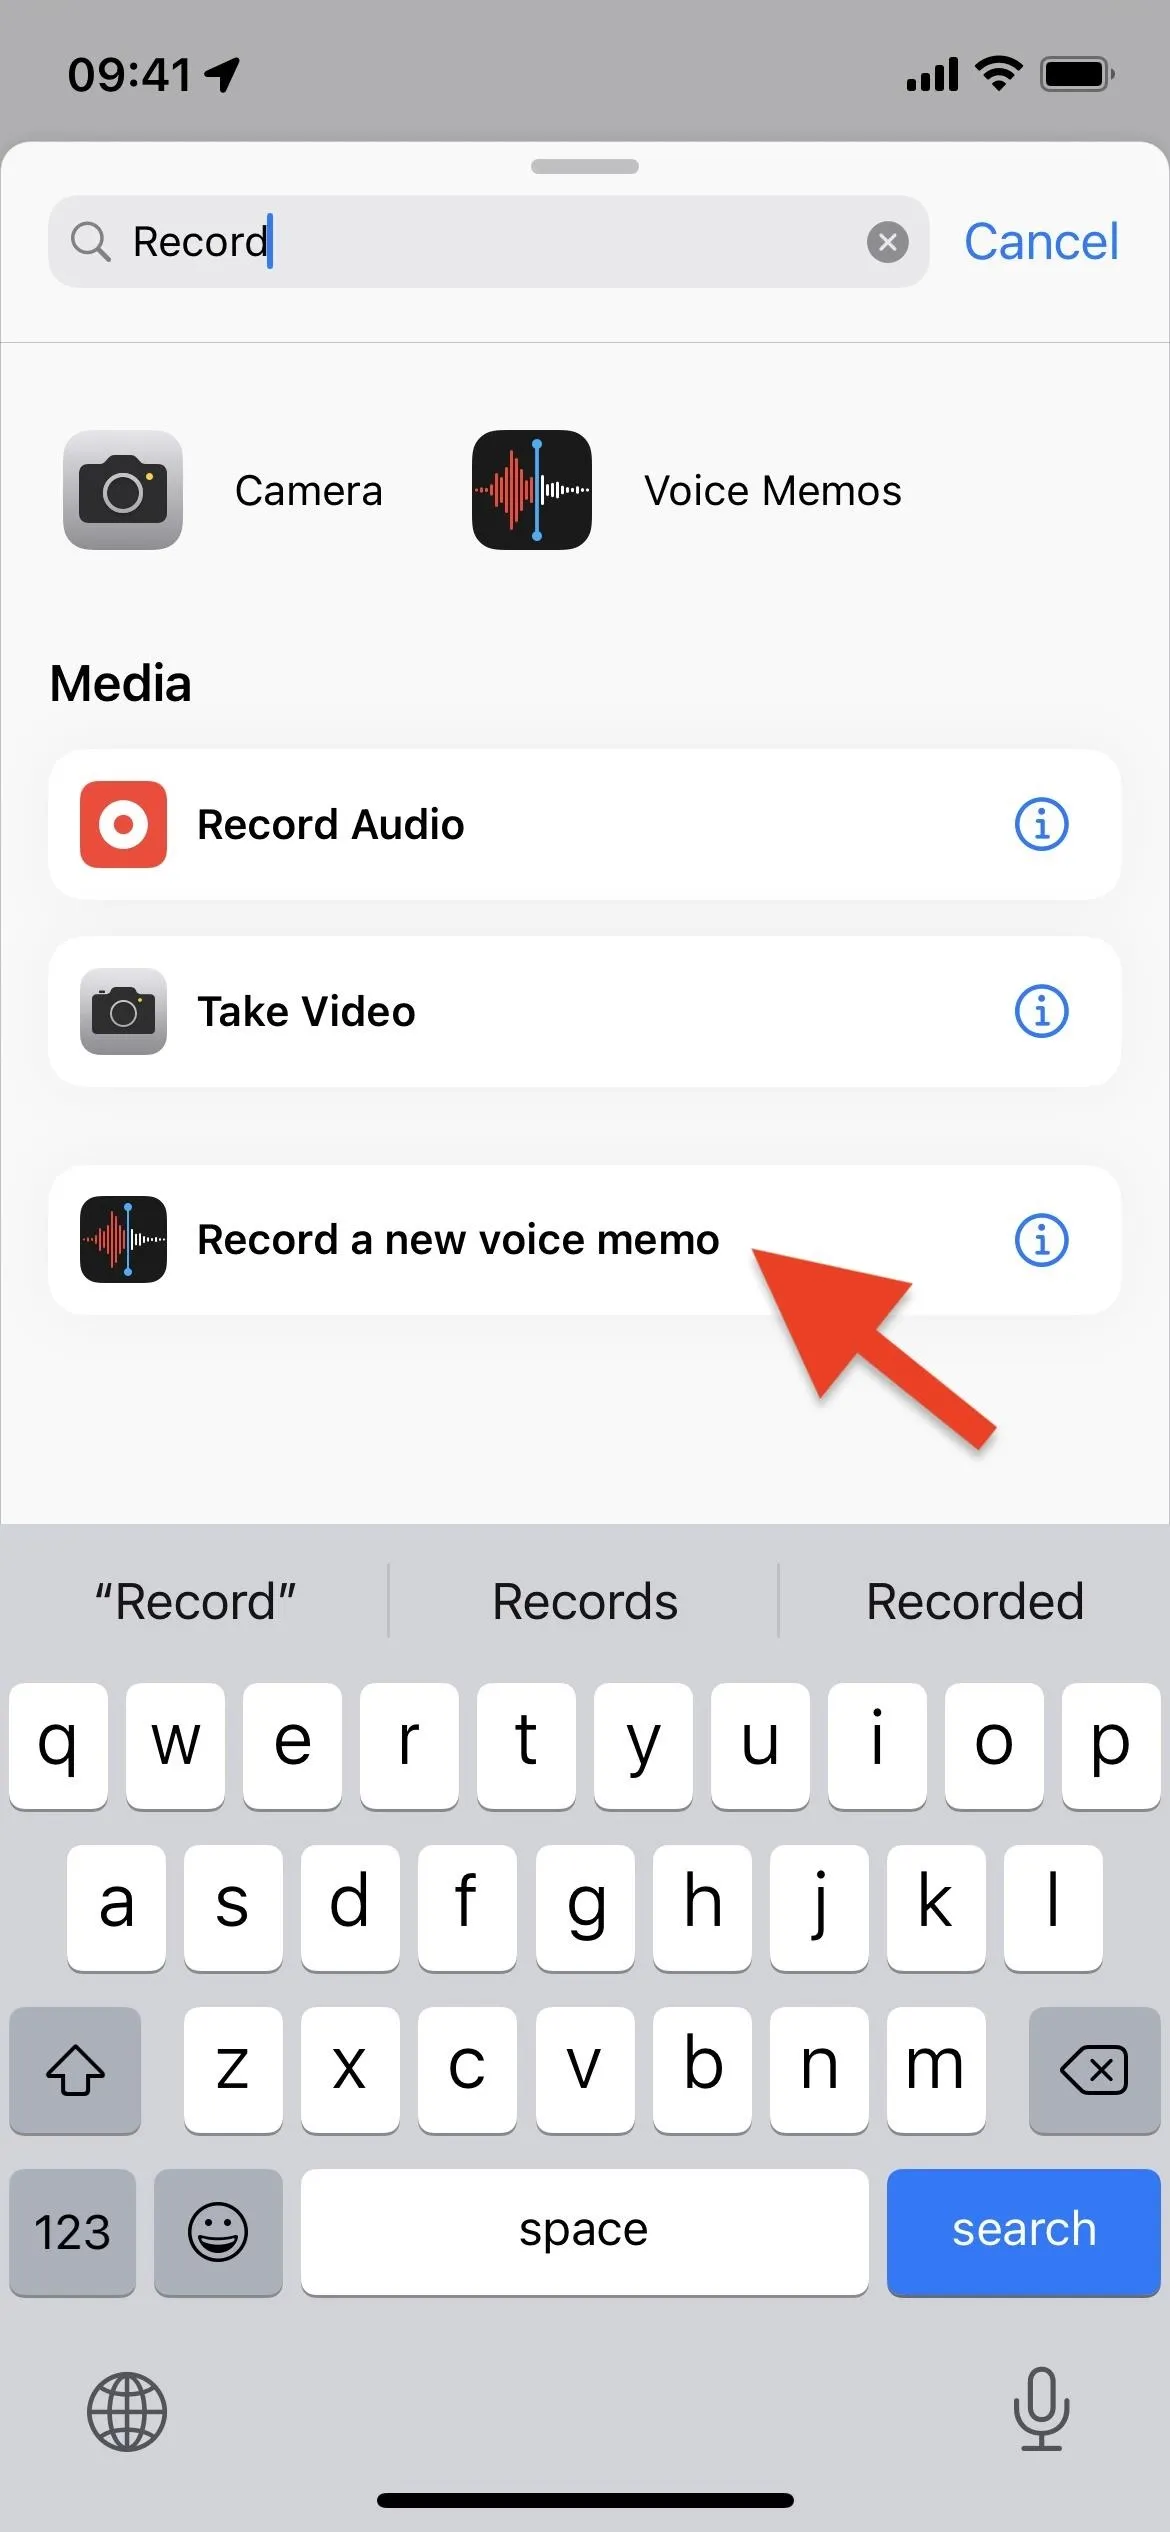
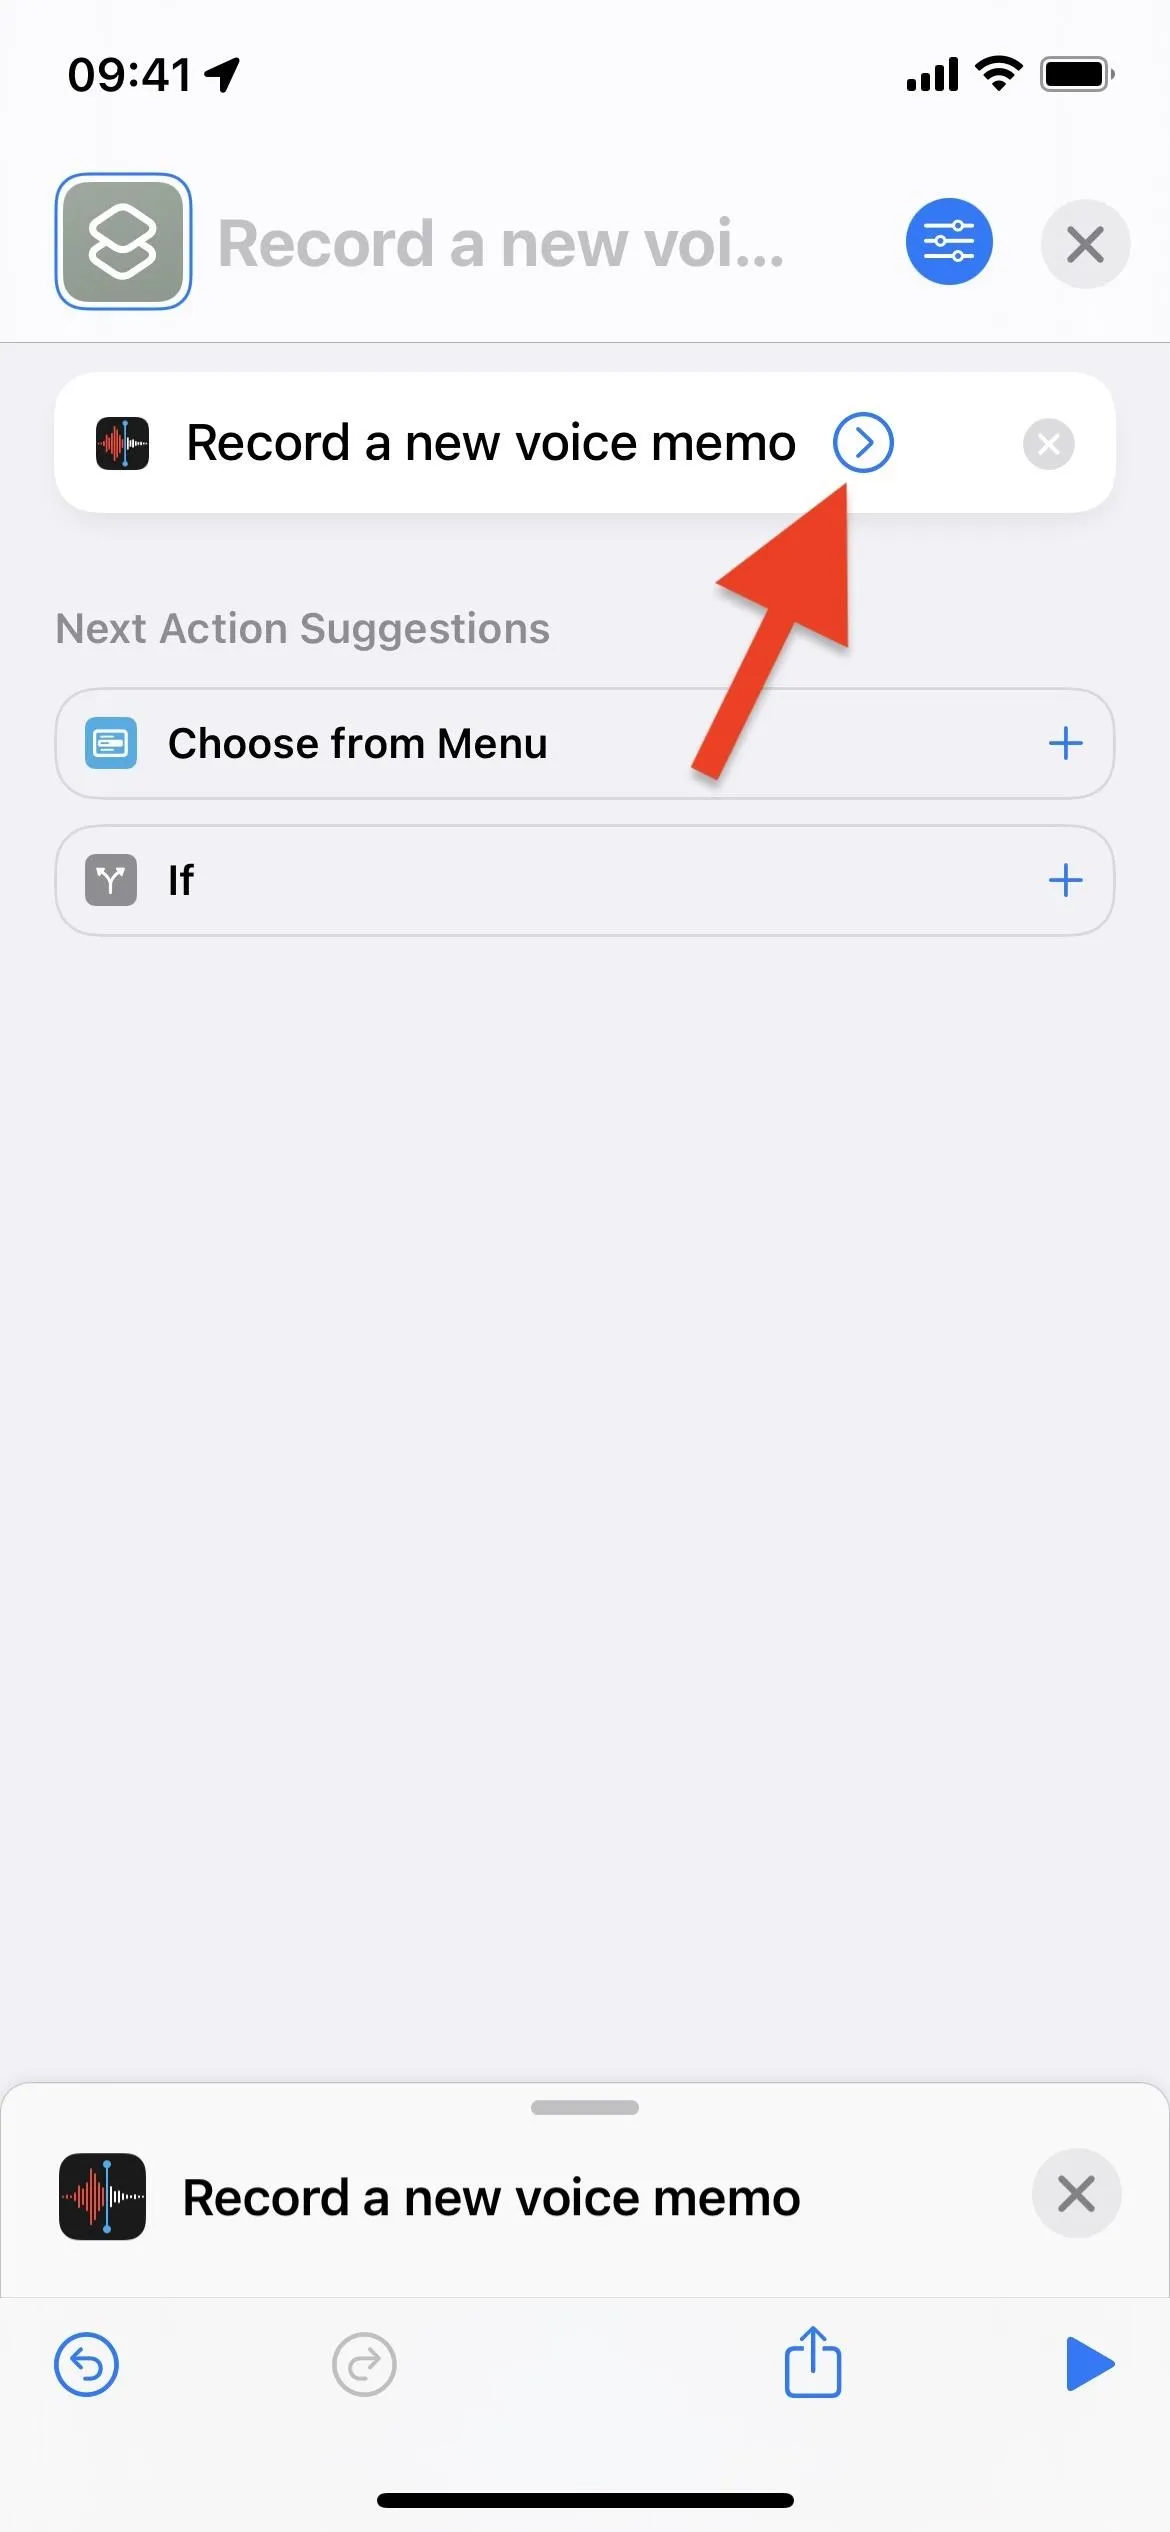
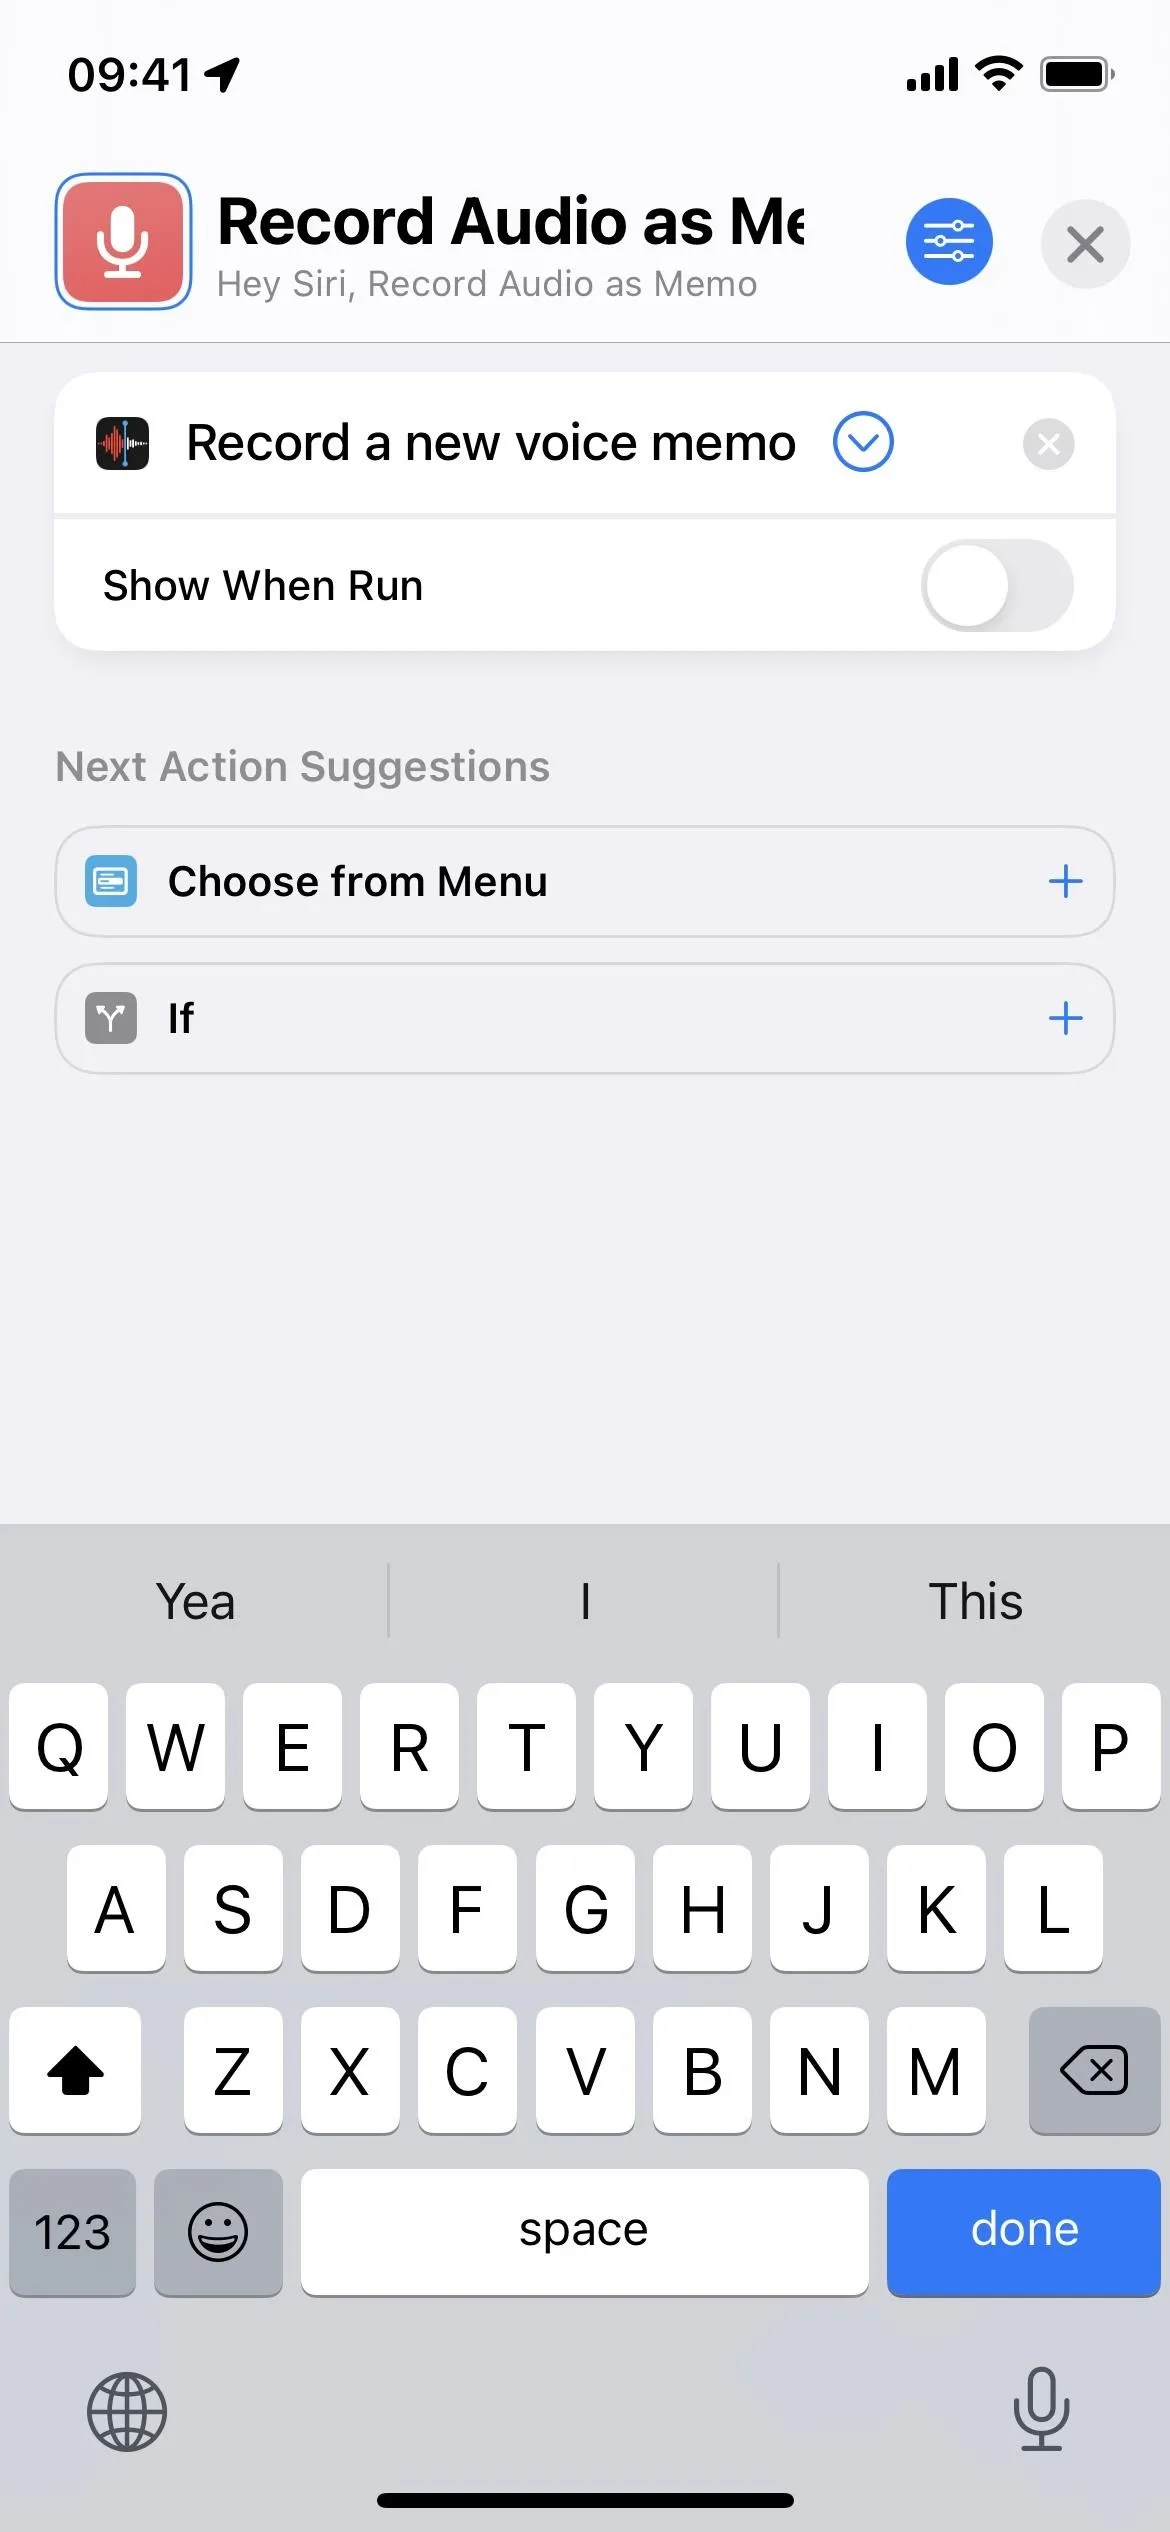
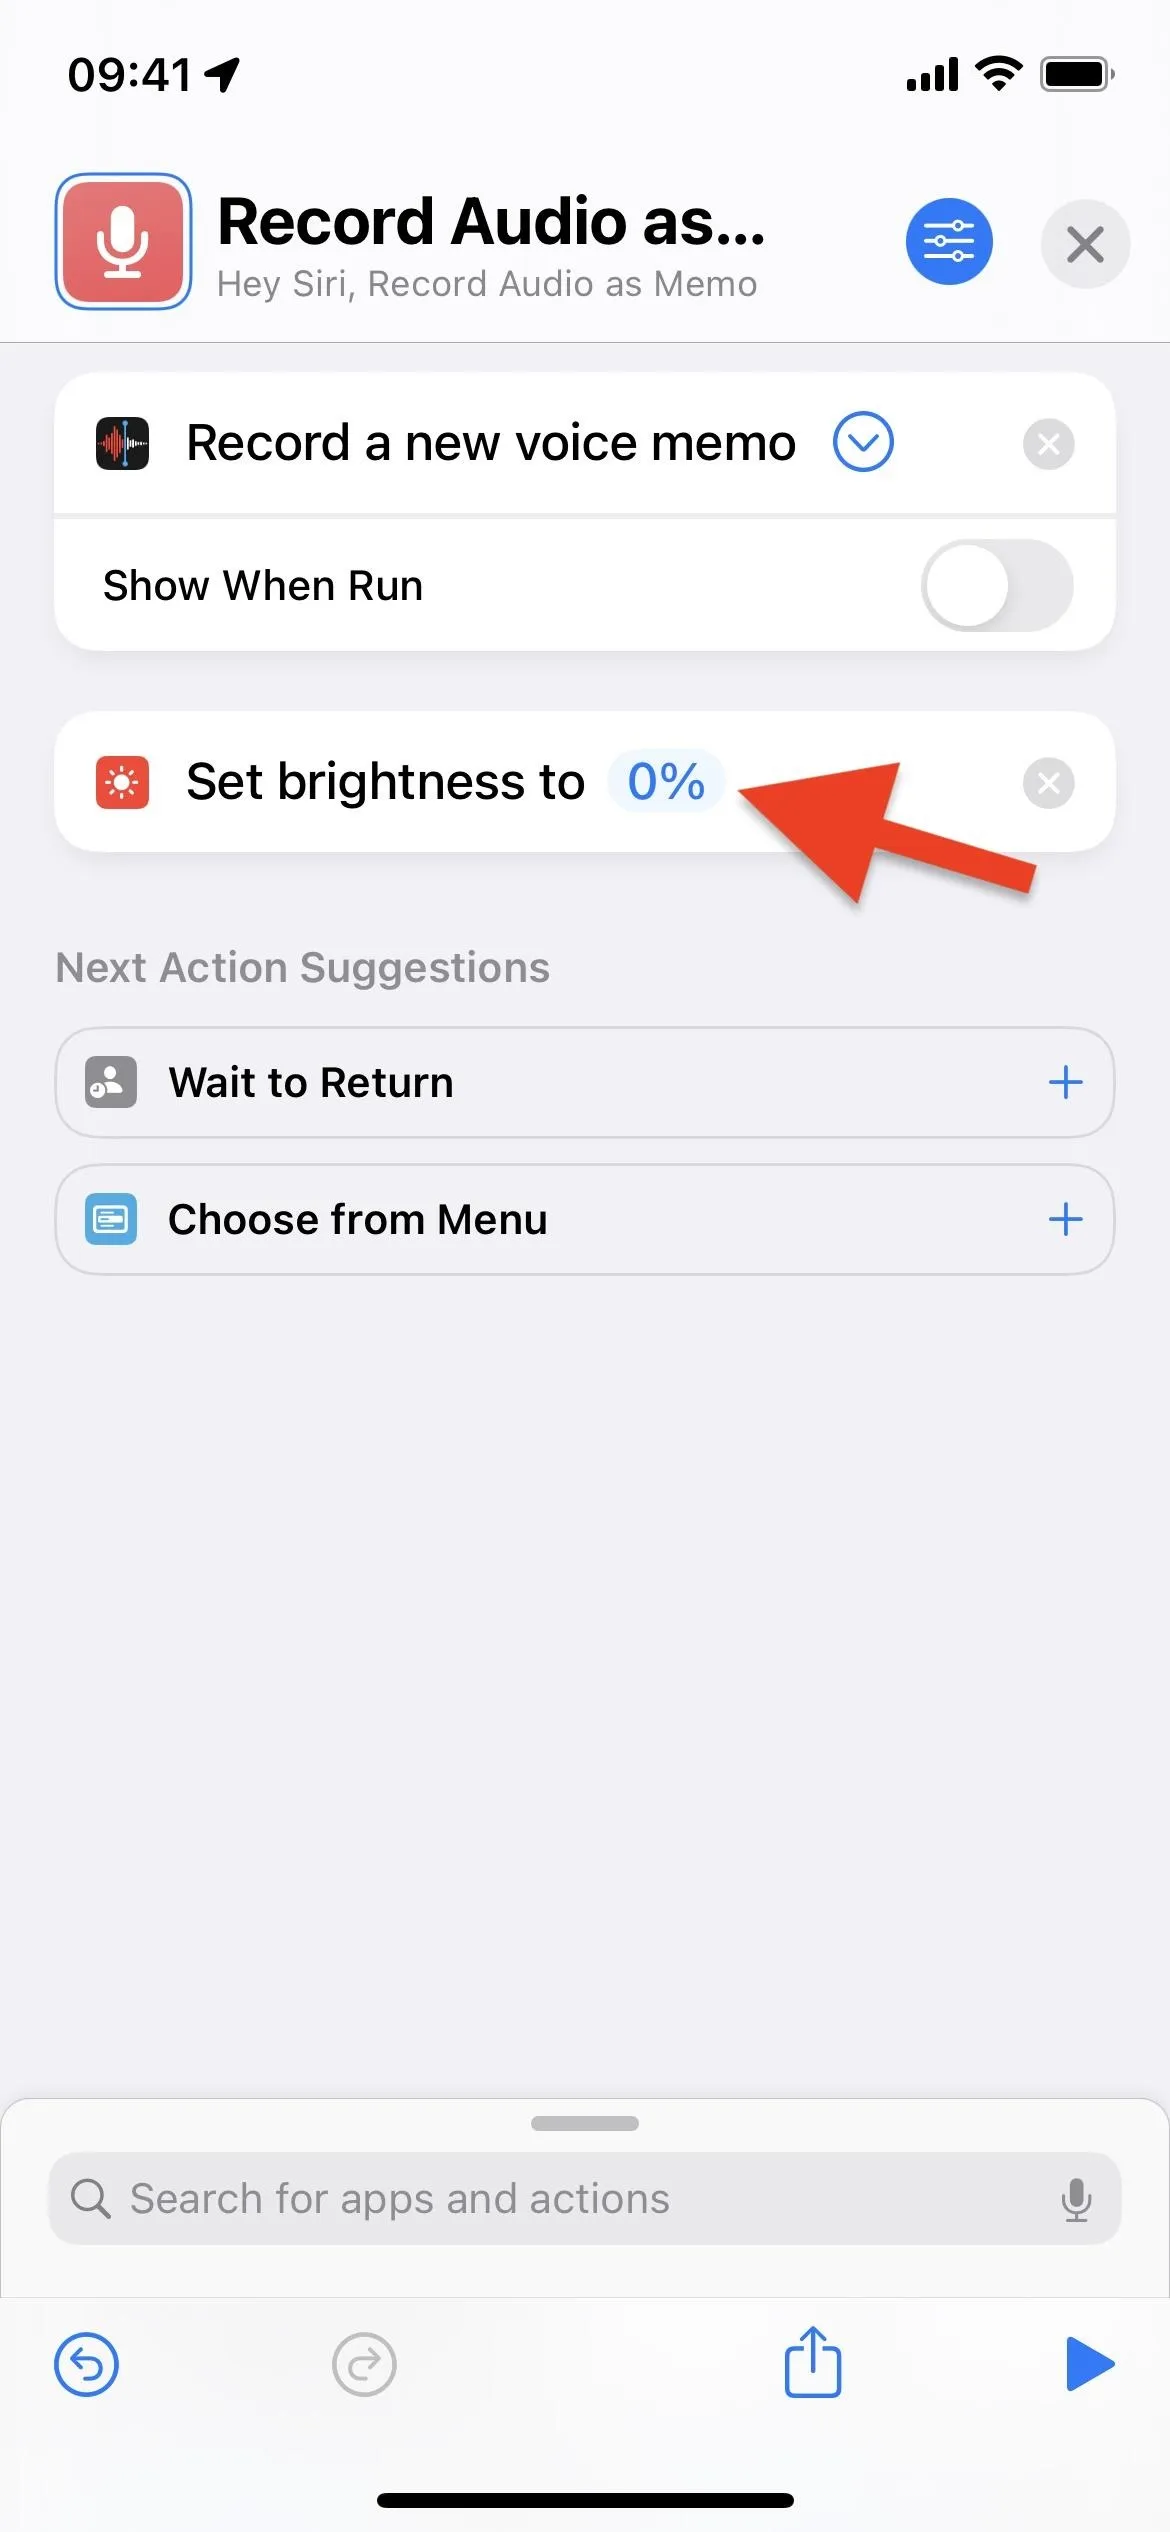
In the shortcut's draft, tap "Add Action" or the search bar at the bottom, then find and add the "Record a new voice memo" action. After adding it, tap the expand button on the action box to show its options.
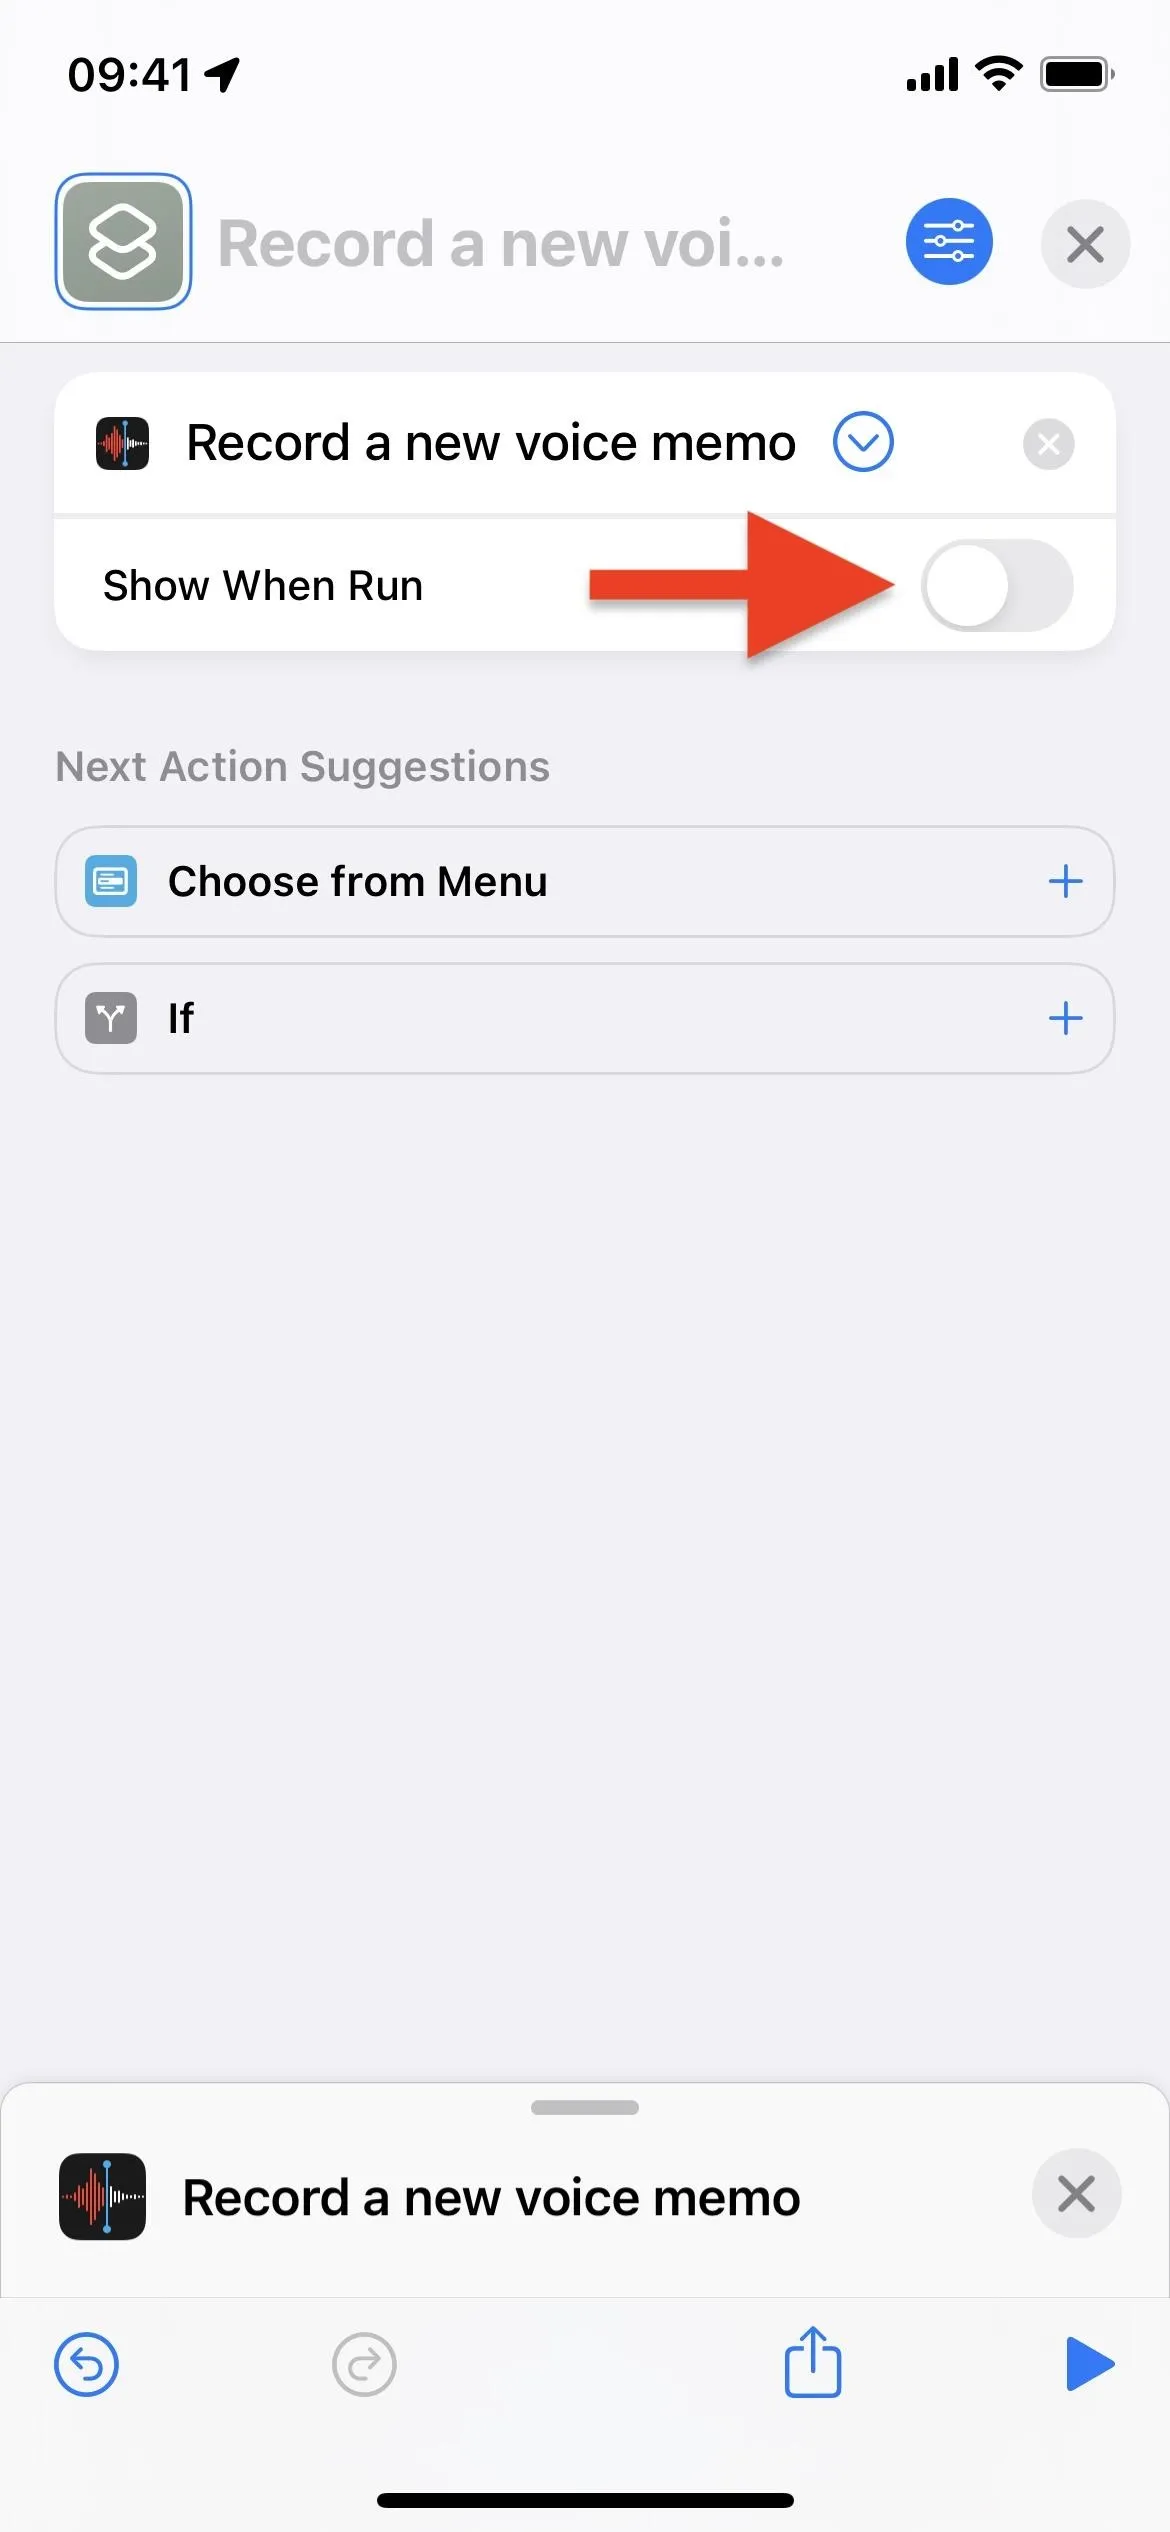
Next, disable the "Show When Run" toggle to make the shortcut more discreet. You can now close the shortcut to save it as "Record a new voice memo." That's literally all there is to the Voice Memos shortcut.
If you'd like, you can choose a new name before closing the editor, as well as a new icon and color. However, since Voice Memos is the only action, the icon in the Shortcuts app will appear as the Voice Memos app icon; It will show up as your custom icon if you add the shortcut to your Home Screen.
Record and Save with Files
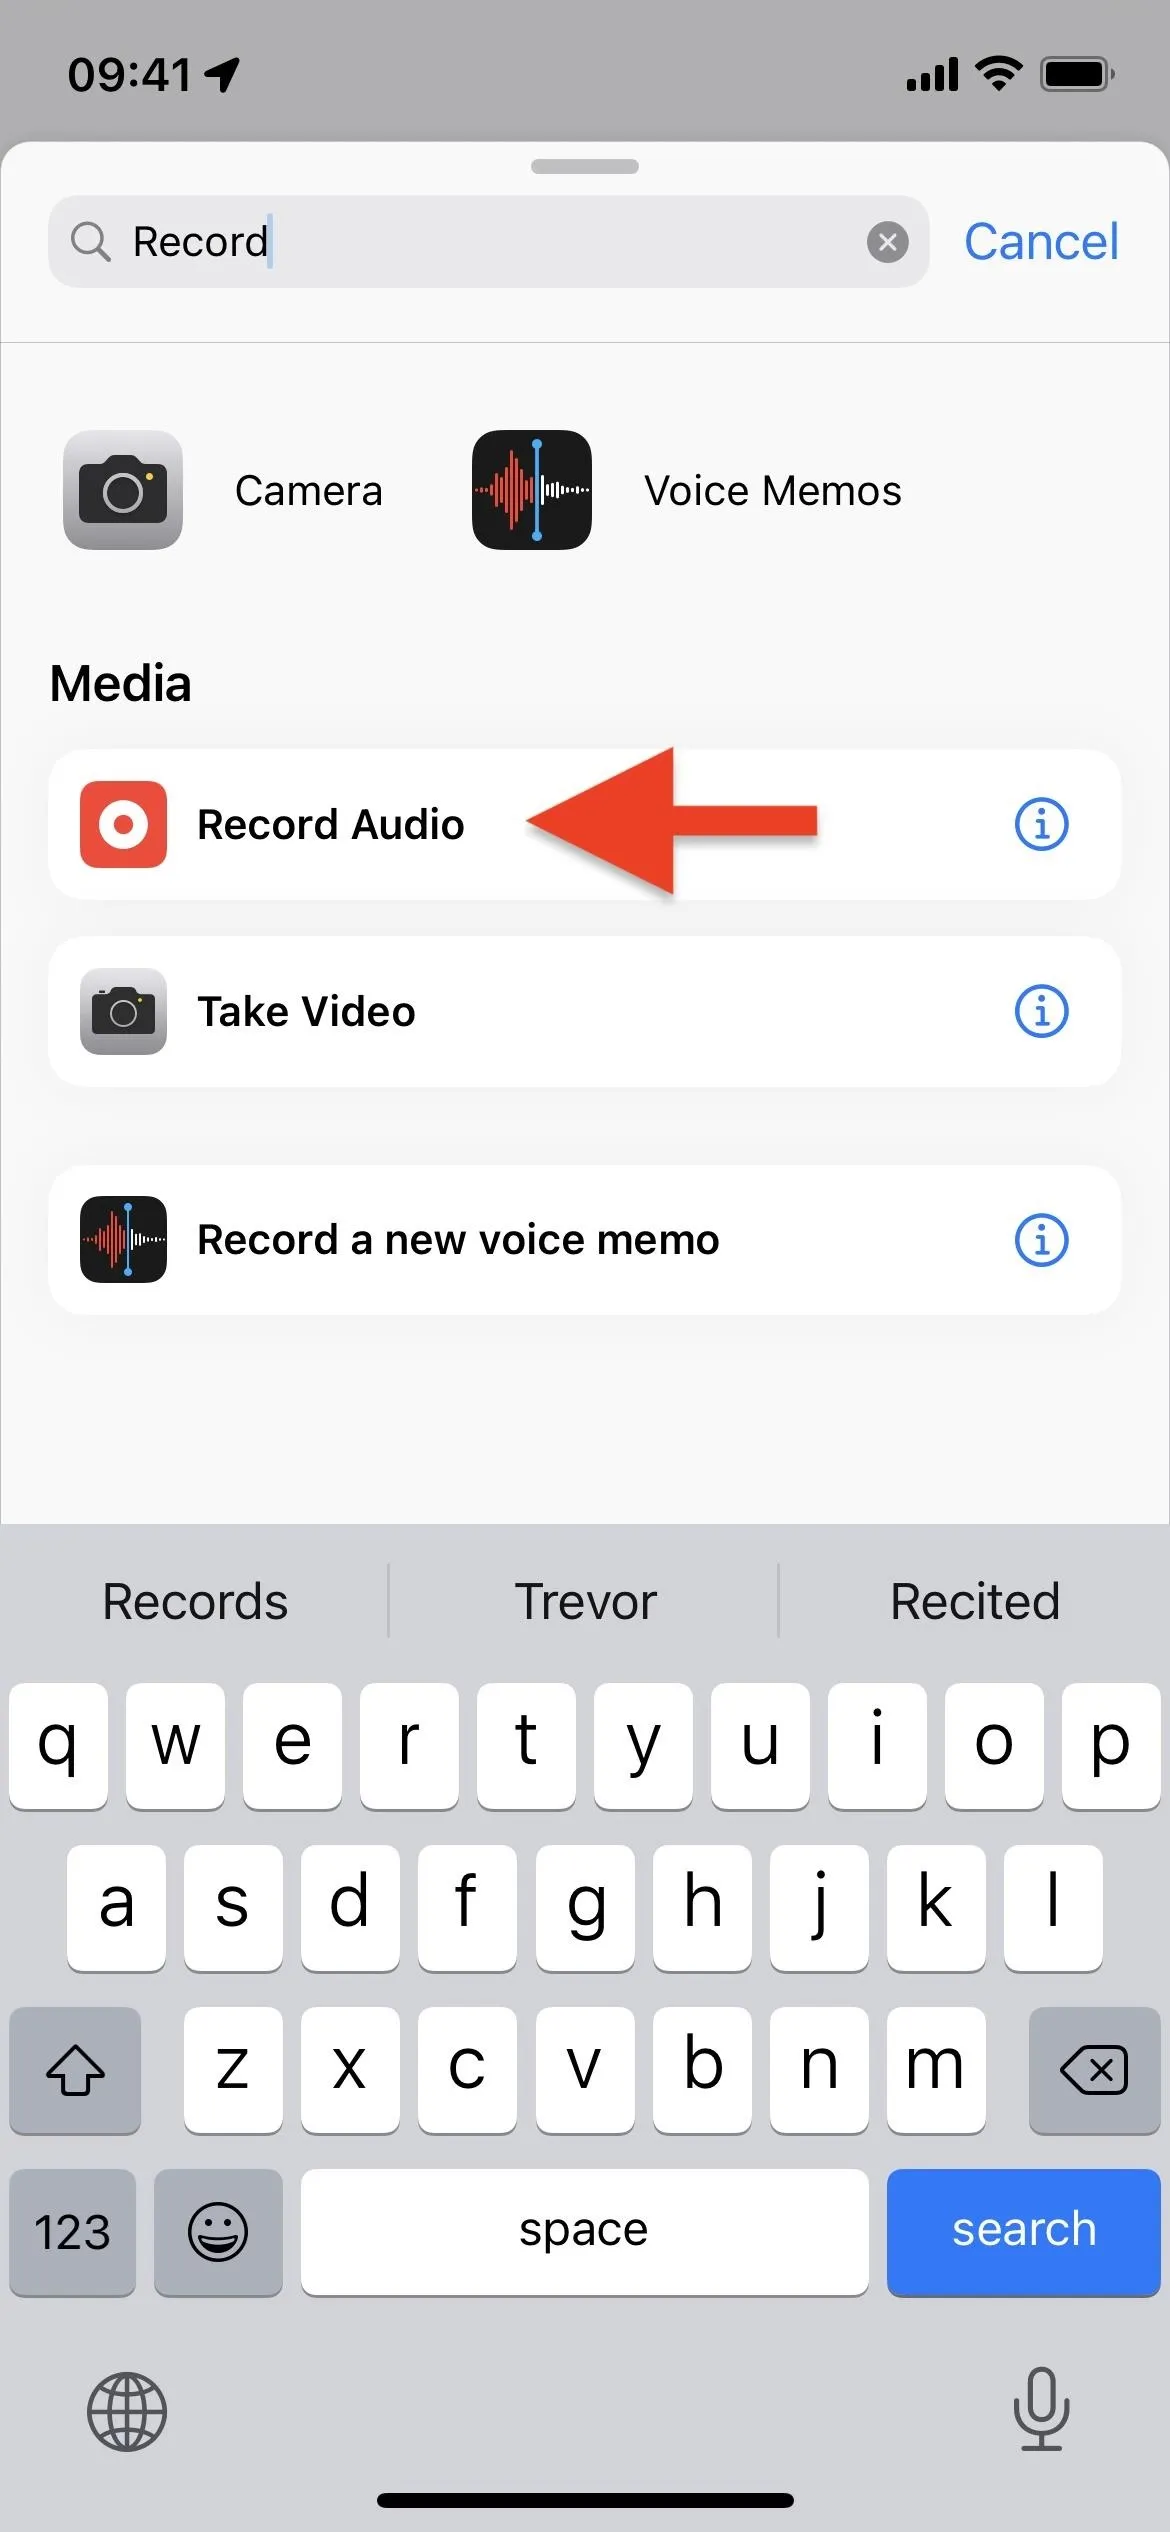
In the shortcut's draft, tap "Add Action" or the search bar at the bottom, then find and add the "Record Audio" action. After adding it, tap the expand button on the action box to show its options.
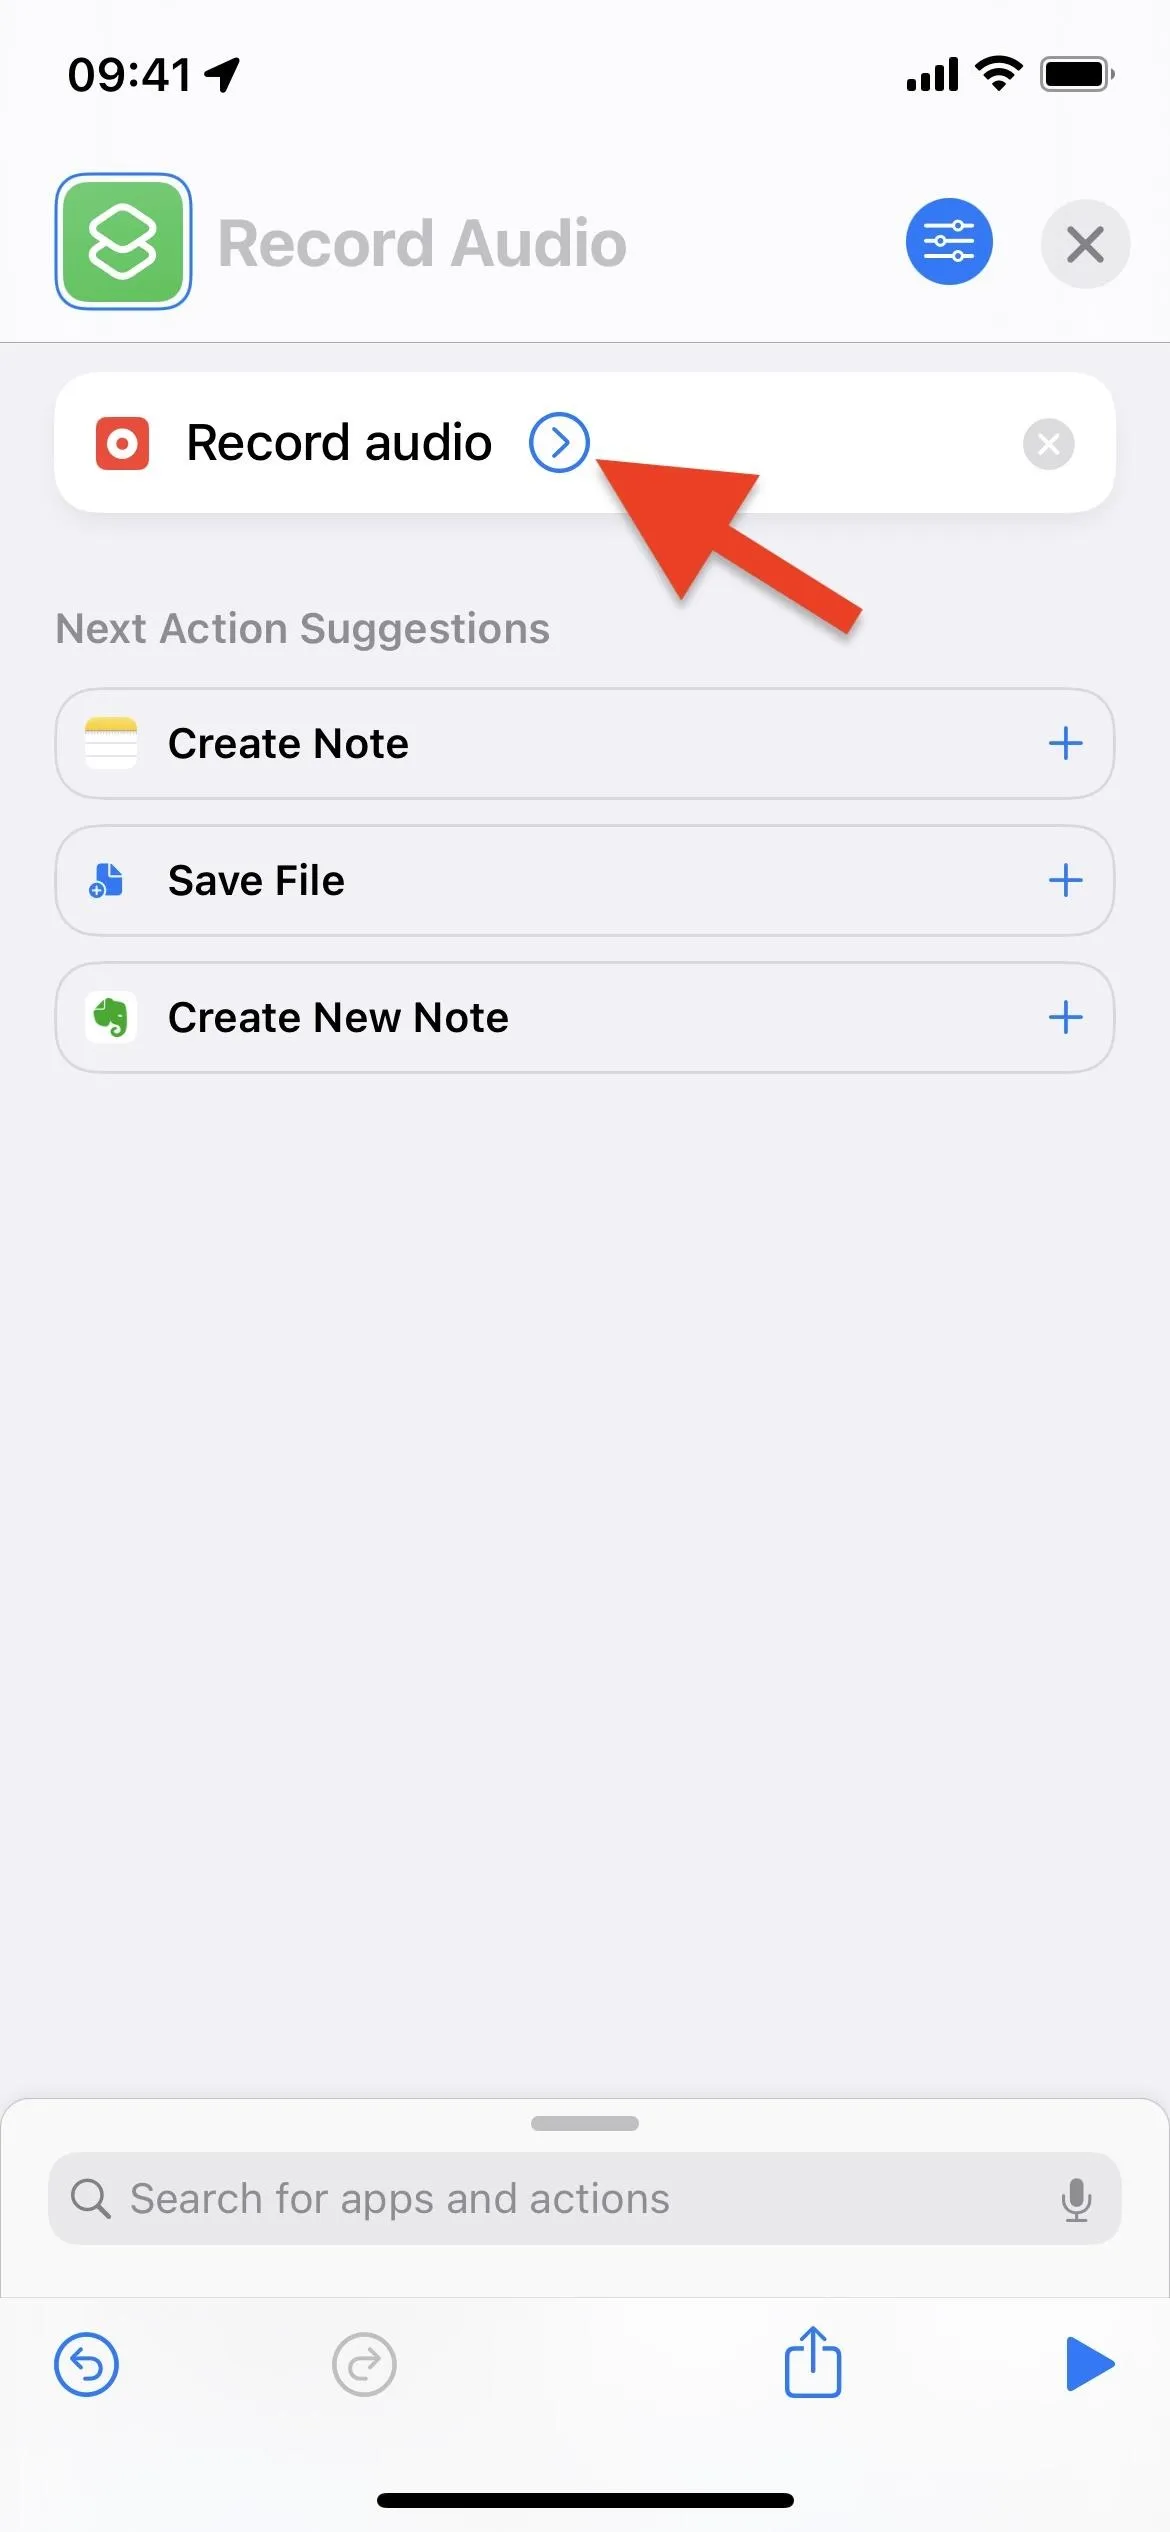
Next, you can configure the following settings.
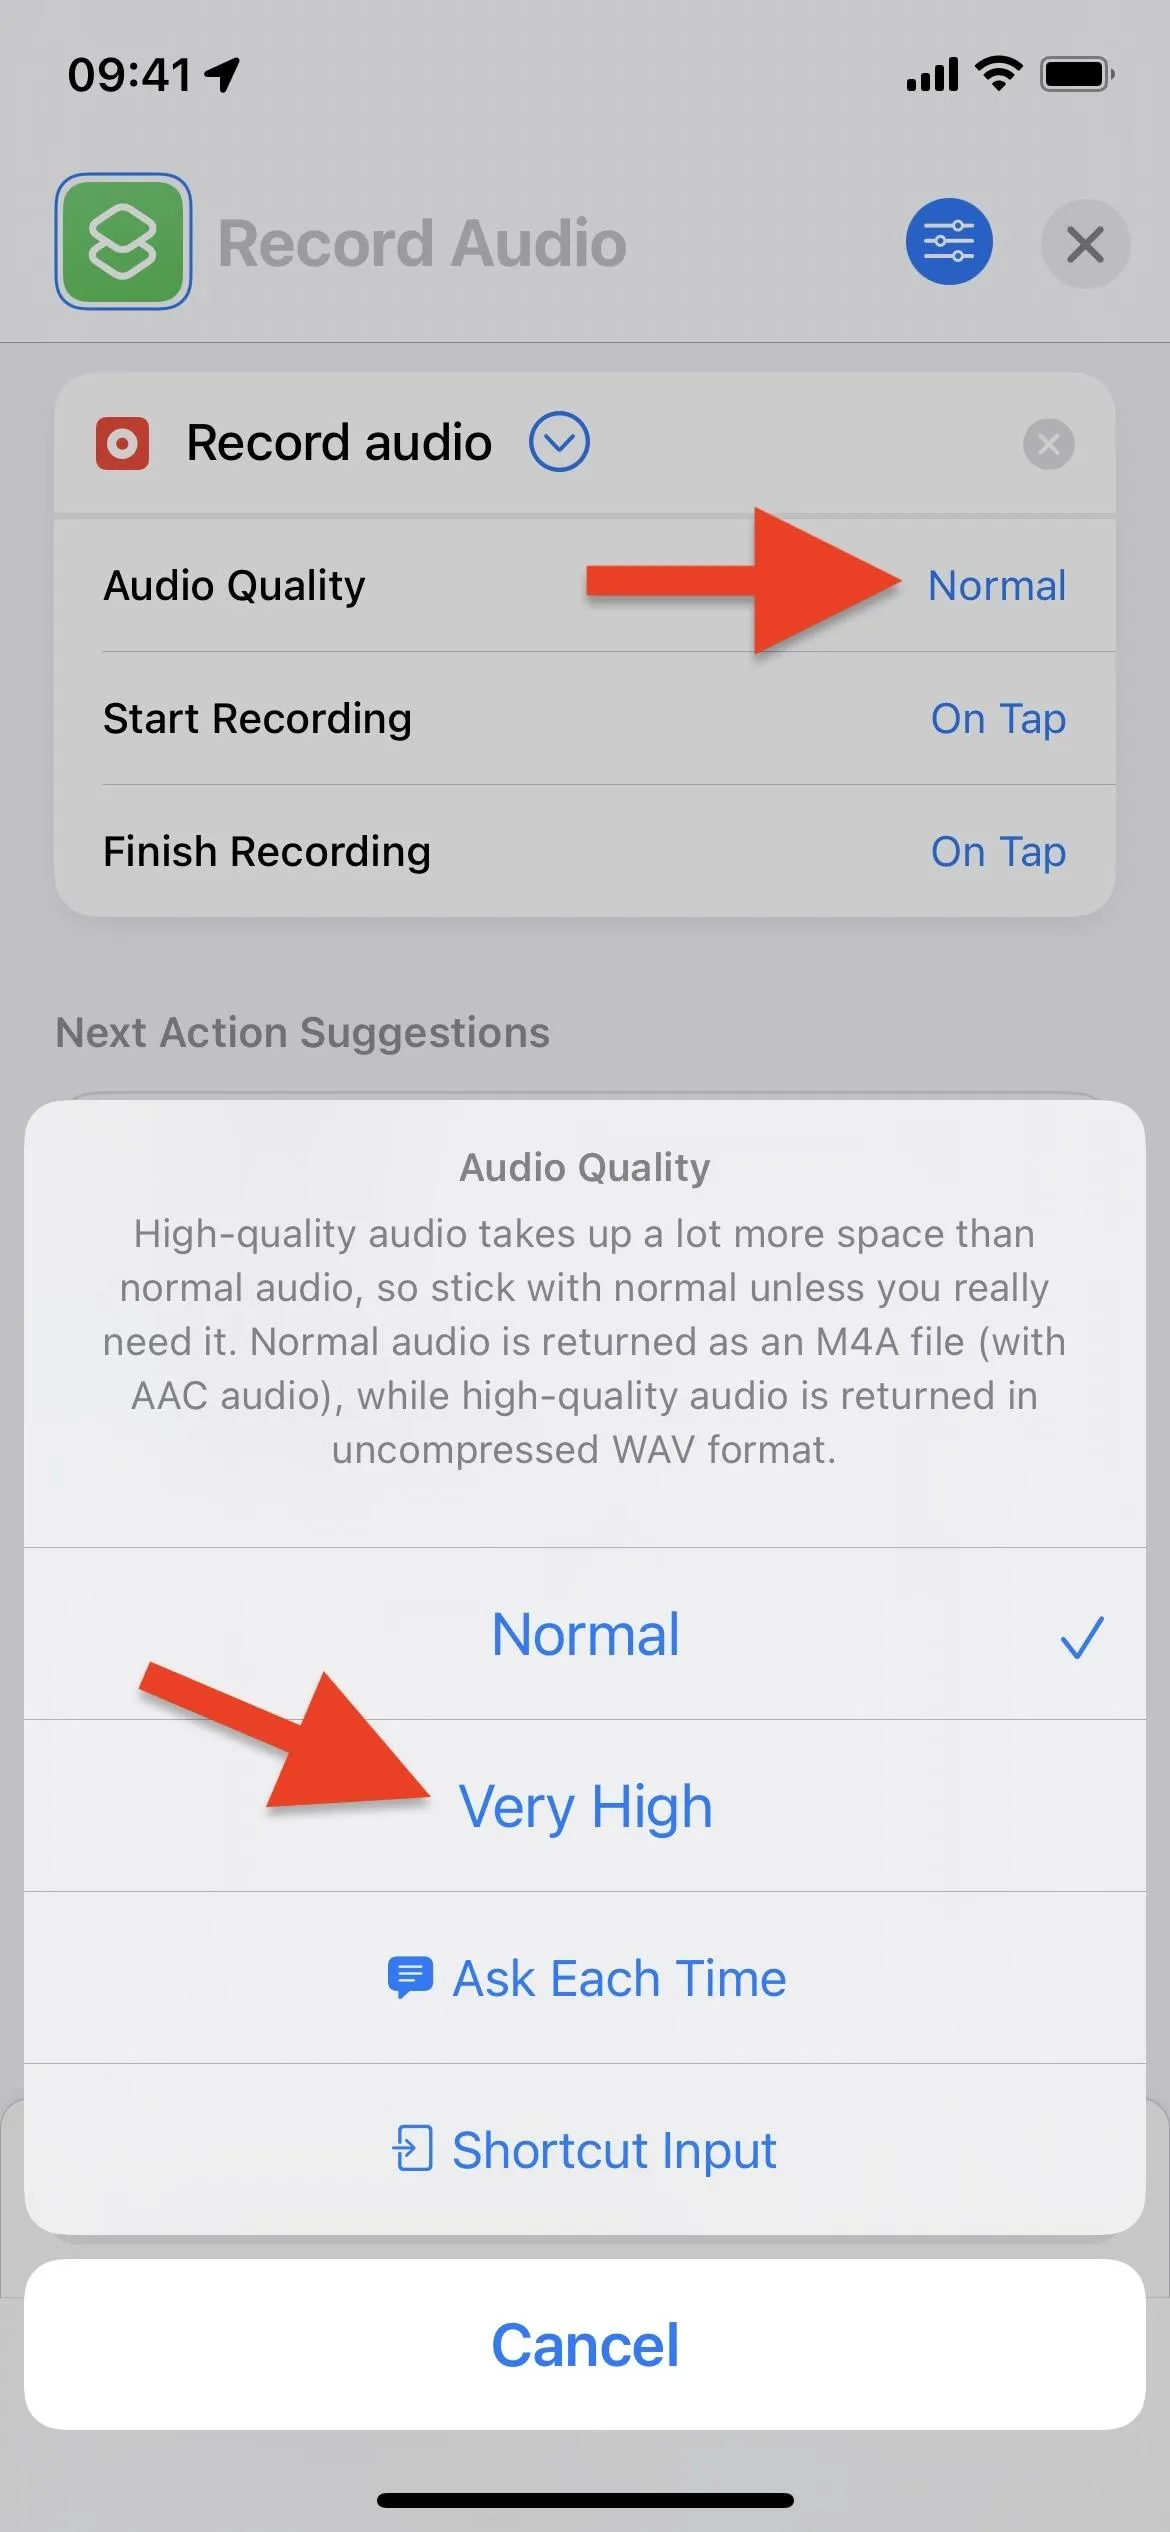
- Audio Quality: It's set to "Normal" by default, but you can choose "Very High" if you want a better recording that takes up slightly more space.
- Start Recording: It's set to "On Tap" by default, but that's not quick enough for a secret recording. Use "Immediately" instead.
- Finish Recording: It's set to "On Tap" by default, and that's a good option if you have no idea how long the conversation or talk will be that you want to capture. When you're ready to stop recording, just tap the screen. If you know how long you want to capture the audio, you can switch it to "After Time," then enter the duration in minutes and seconds. Then, you can just let it shut down and save on its own instead of having to tap anymore.


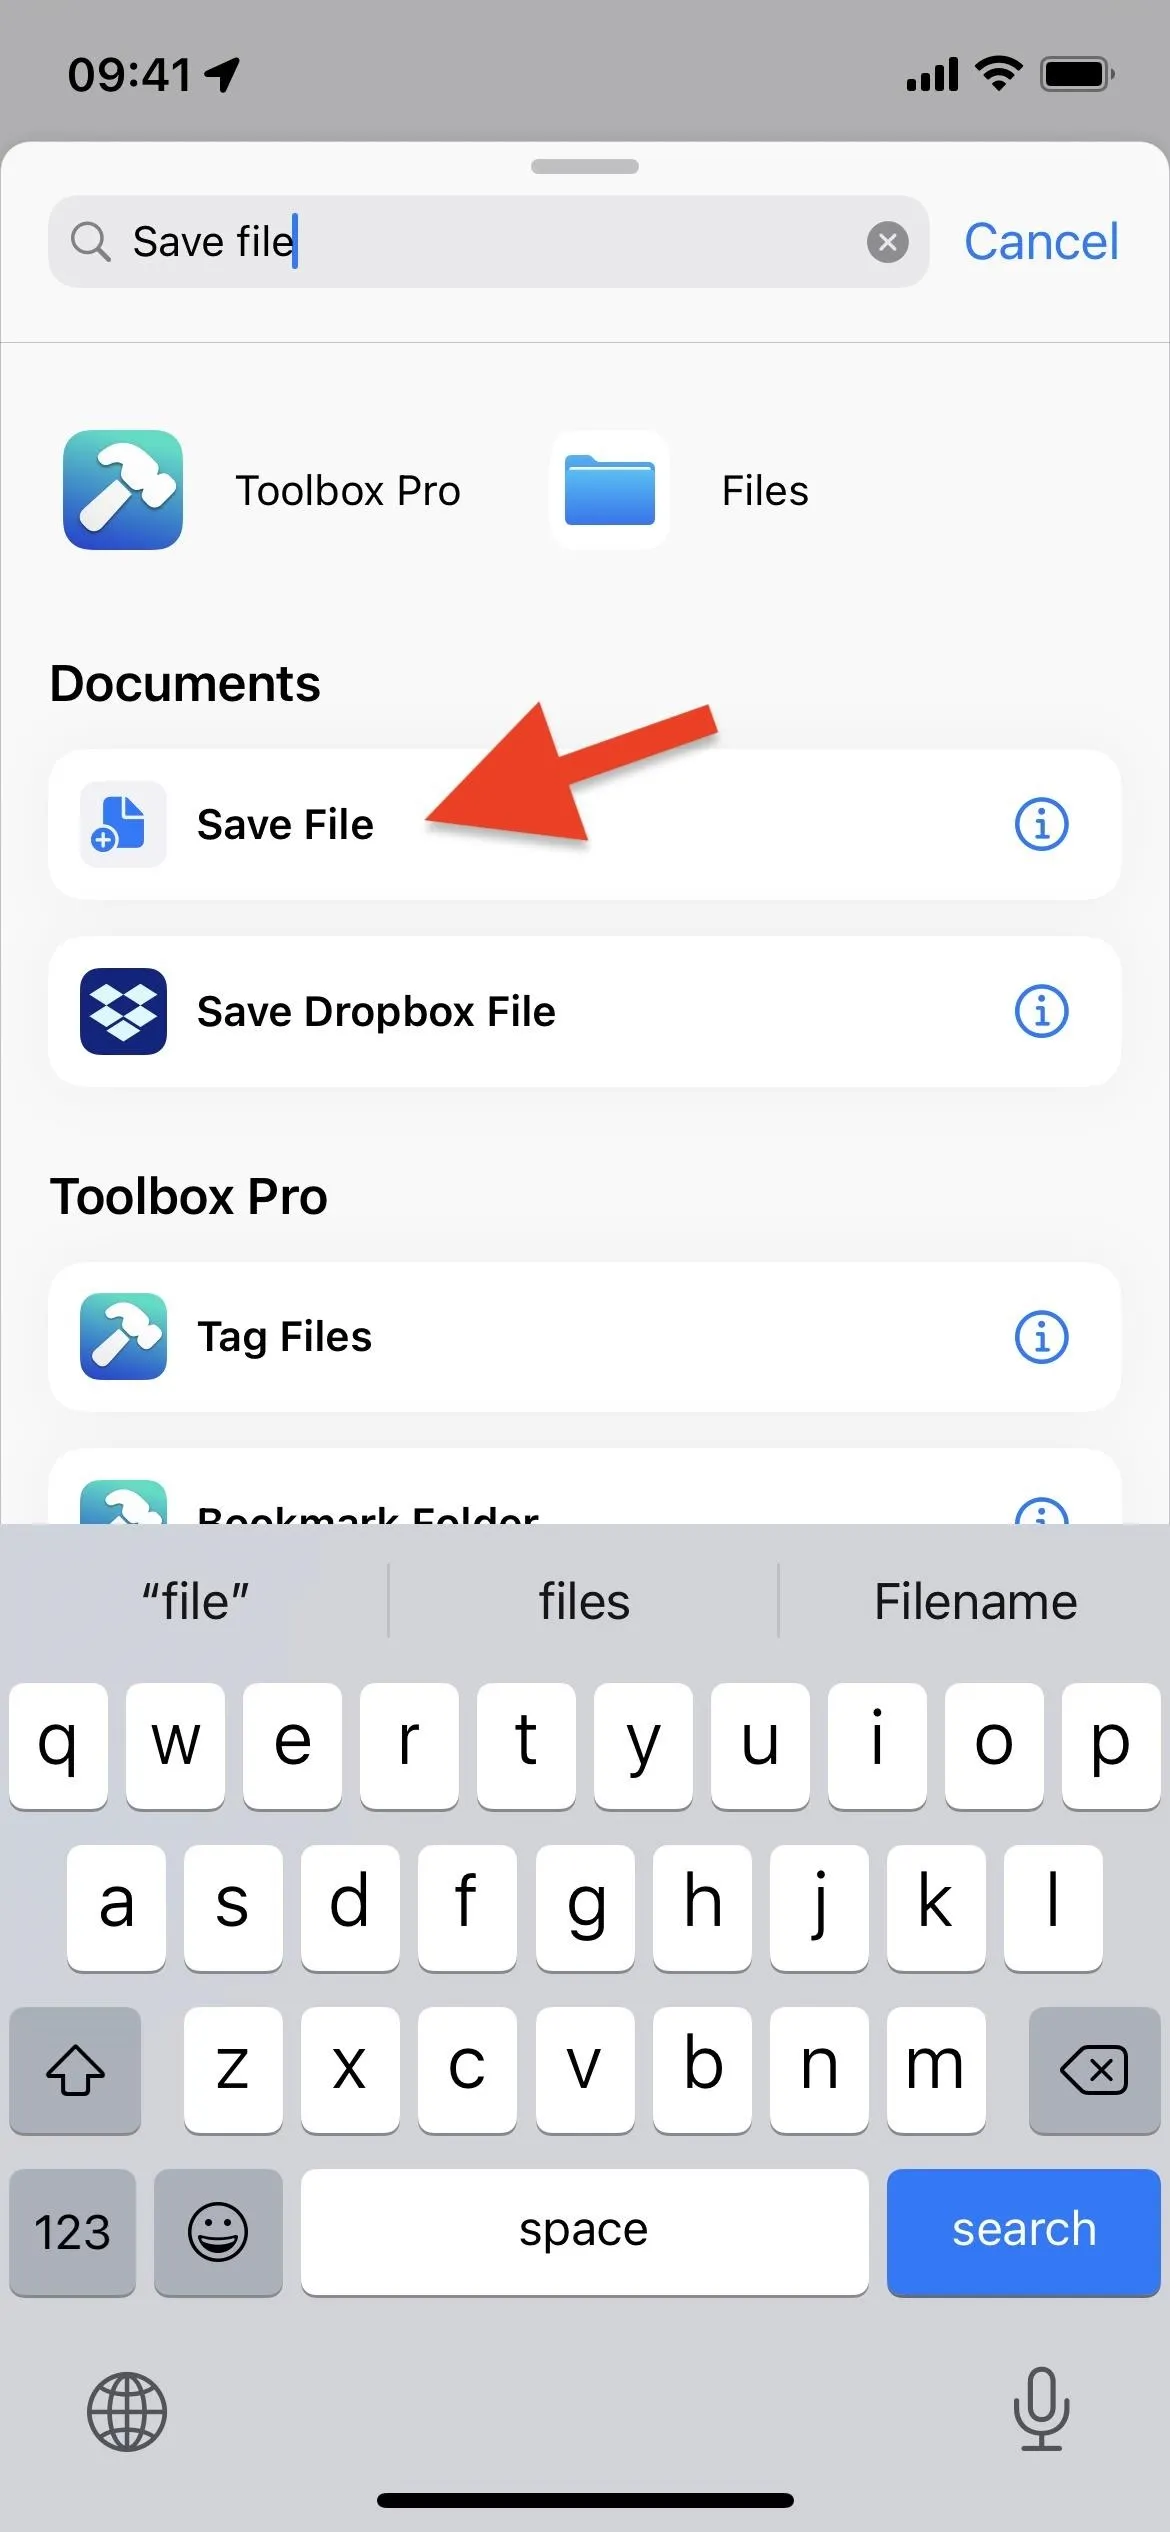
Now, tap "Save File" from the list of suggestions under your first action. If you don't see it there, tap the search bar at the bottom, then find and add "Save File." After adding it, tap the expand button on the action box to show its options. You can customize the following options.
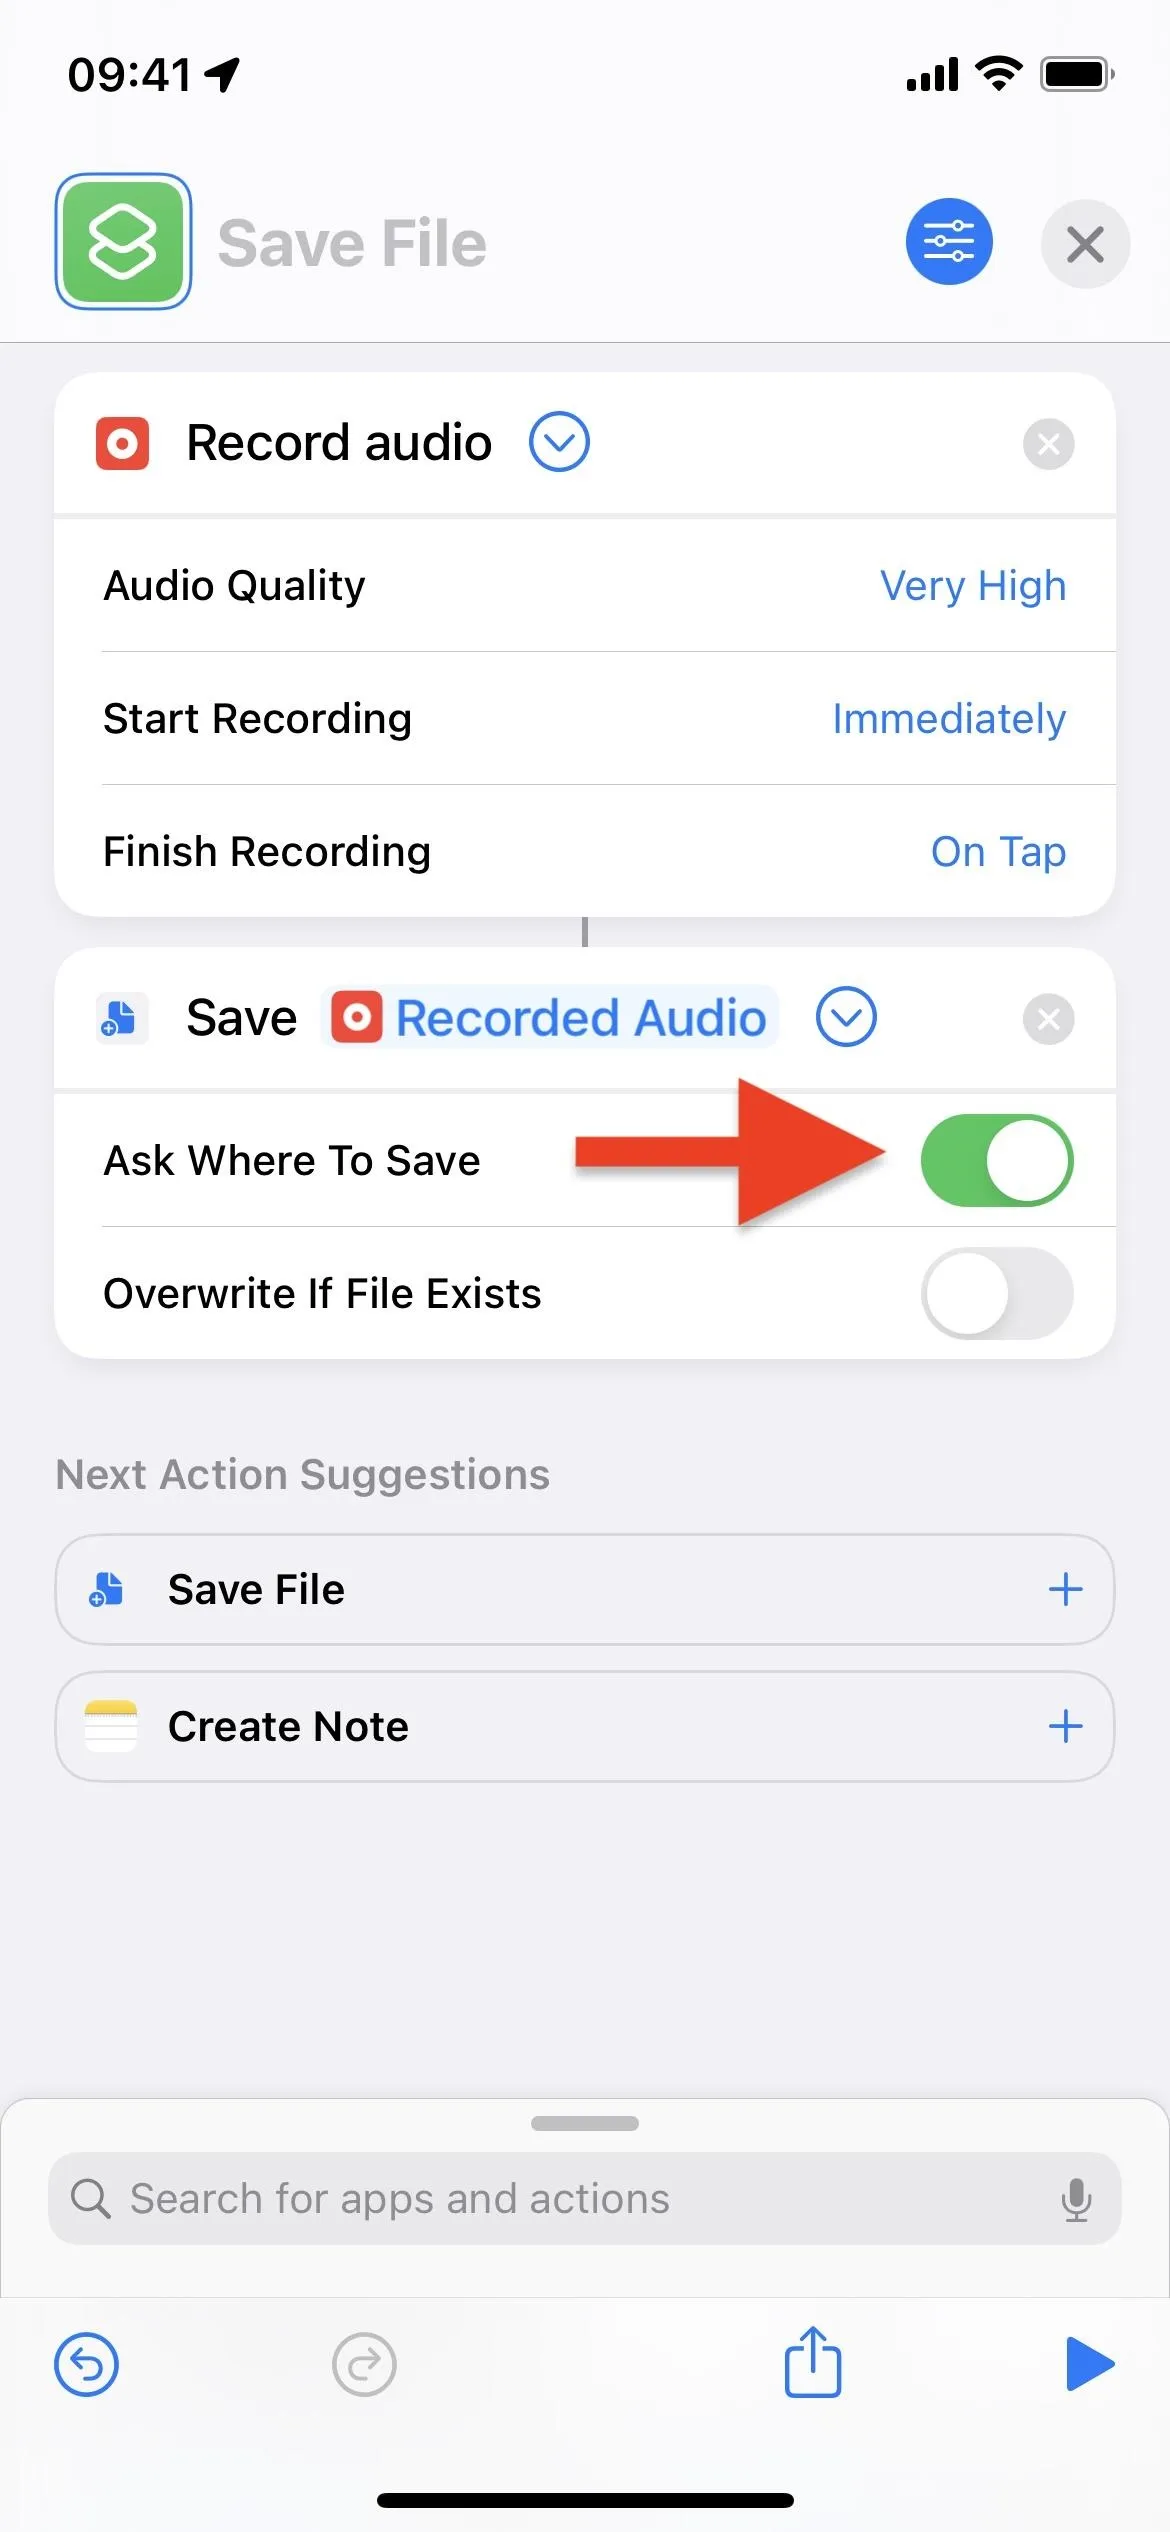
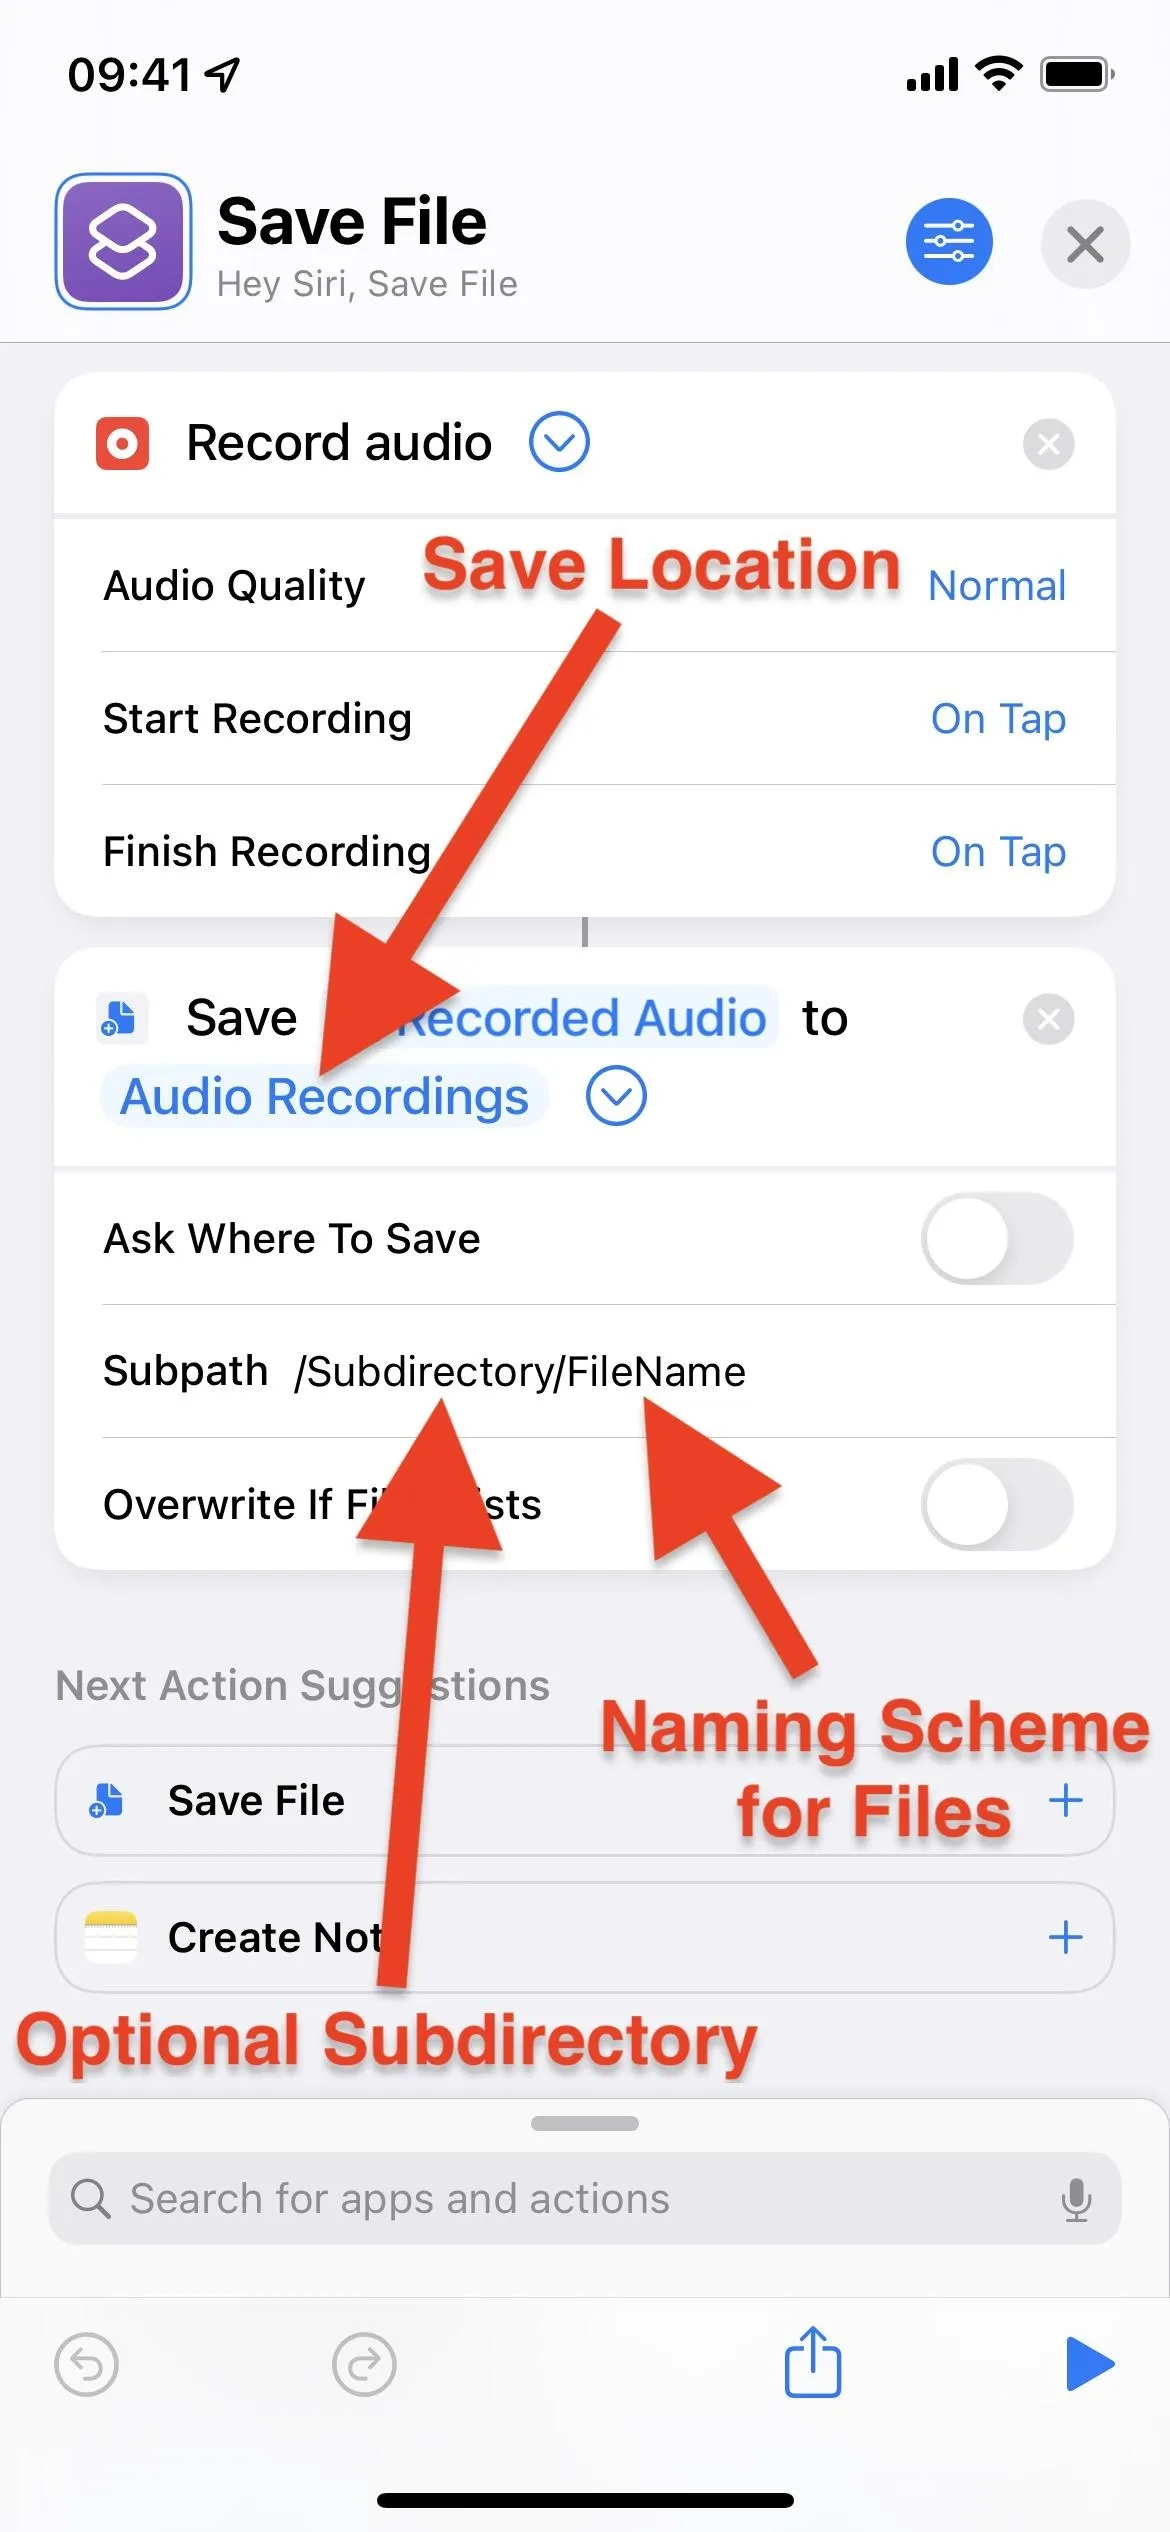
- Ask Where to Save: It's on by default, and that's not good for a secret recording. Instead, toggle it off so you can choose a location to save the file automatically.
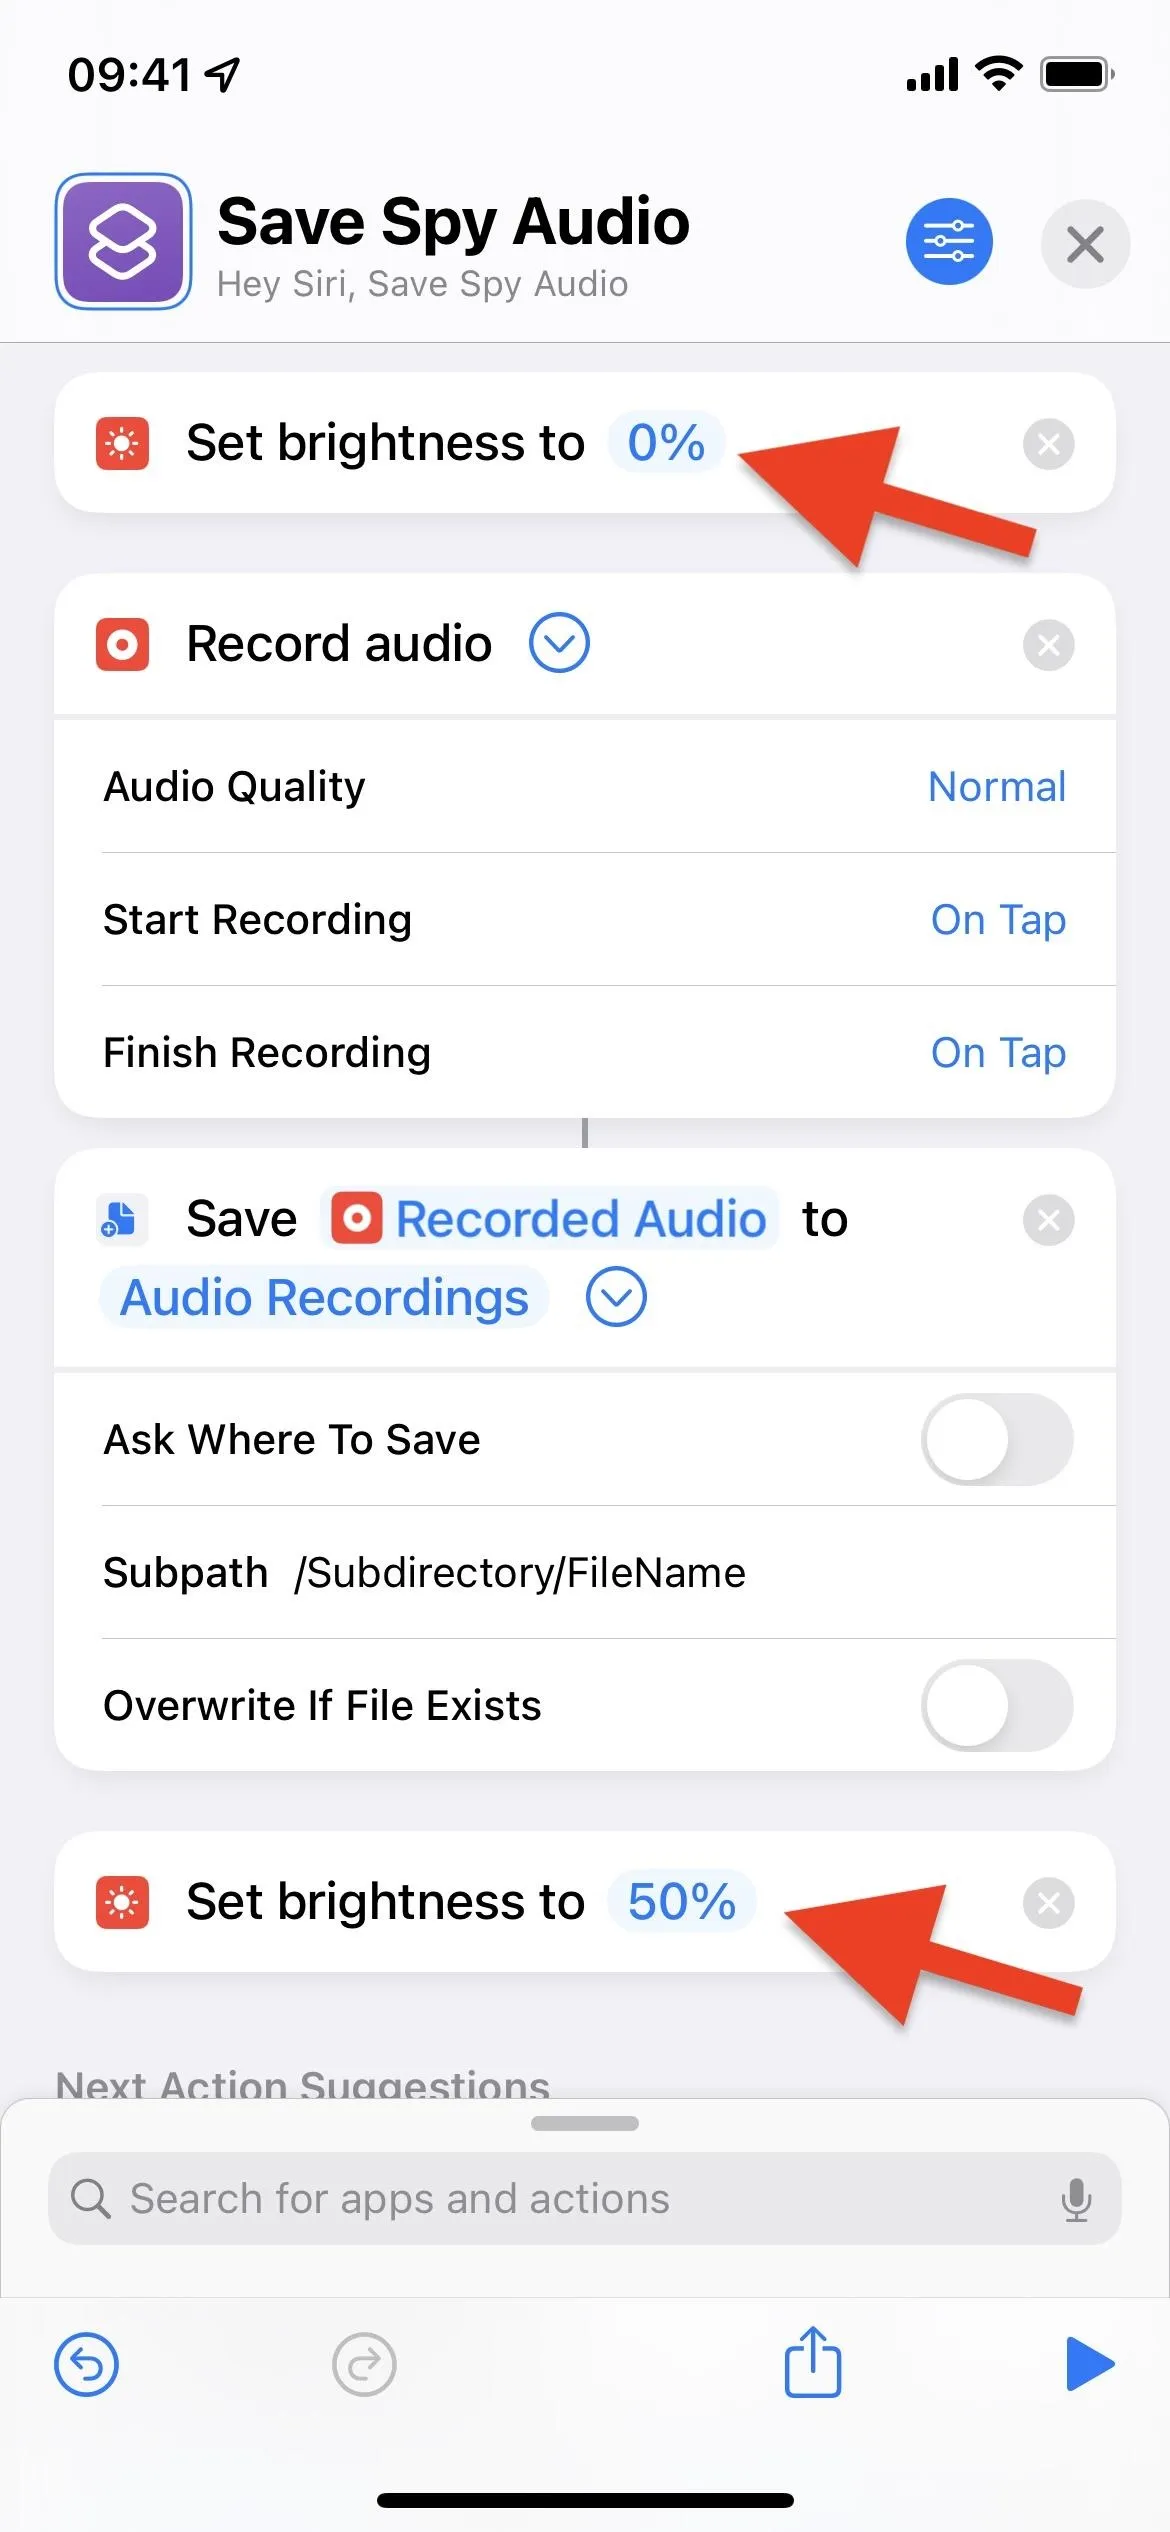
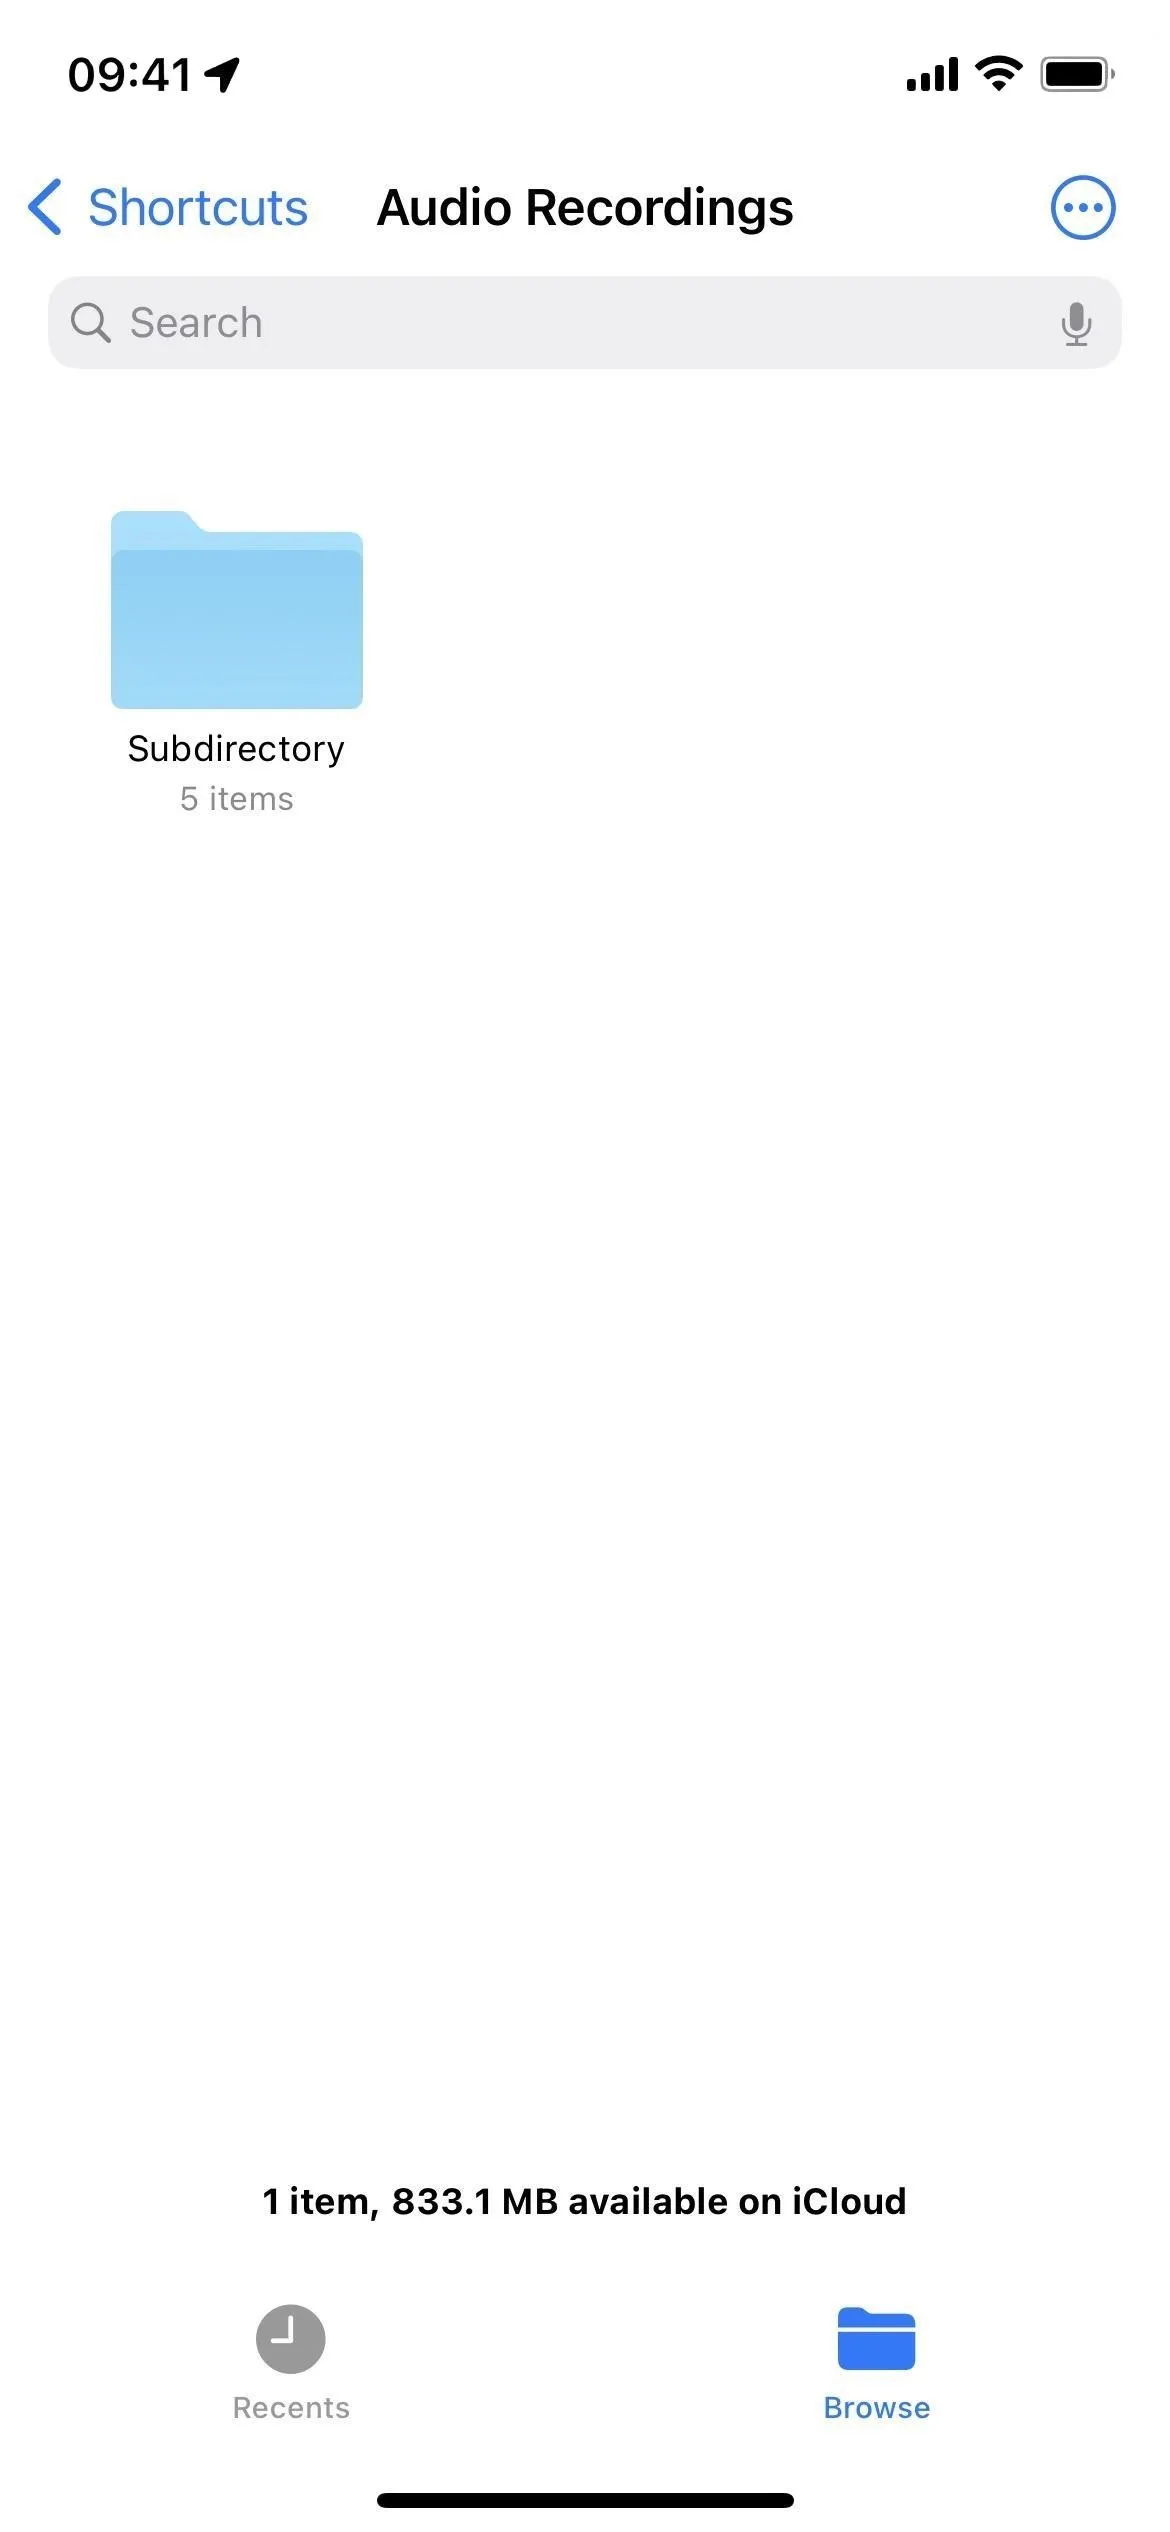
- Shortcuts: When you toggle off the "Ask Where to Save" switch, the action will change from "Save Recorded Audio" to "Save Recorded Audio to Shortcuts" because the Shortcuts folder on iCloud is the default save location. Tap "Shortcuts" and then "Replace" if you want to change the directory. I'm using an "Audio Recordings" folder that I added to the Shortcuts folder. Once you've chosen a folder on iCloud Drive or On My iPhone, hit "Done."
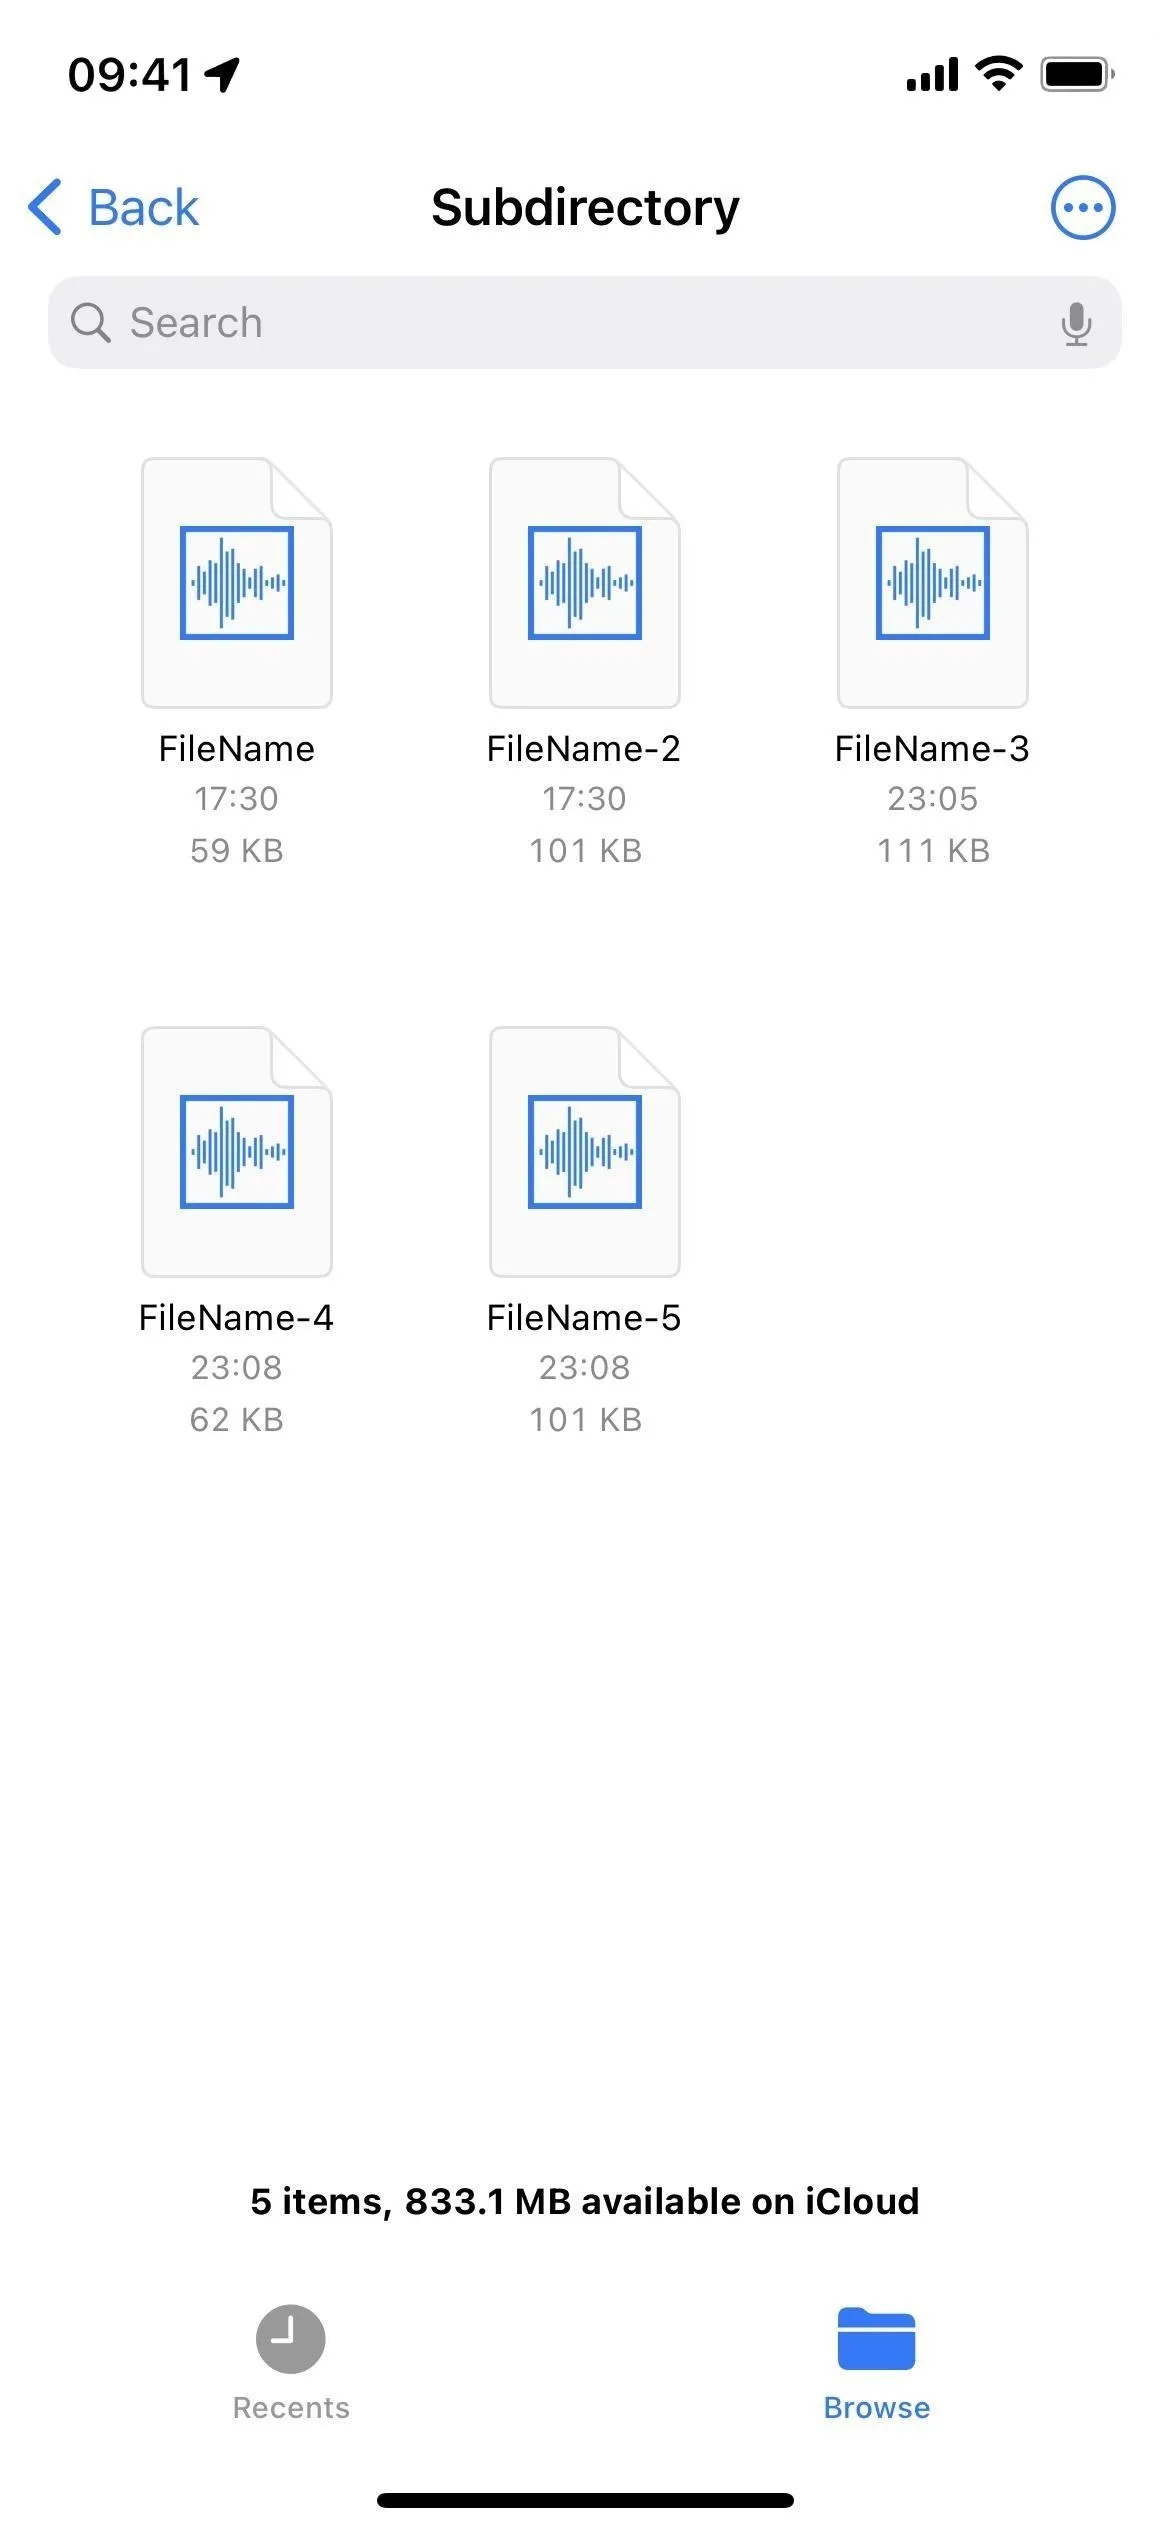
- Subpath: It's blank by default, but you can use it to set a naming scheme for all the files. You can also use it to select a subdirectory or even create a new one. If you add a slash (/) followed by a word, Shortcuts will use that word as the naming scheme. For example, if you wrote in /secret-audio, your first file will be named "secret-audio," your second will be "secret-audio-2," your third will be "secret-audio-3," and so on. If you add a directory in front of that, such as /Recordings/secret-audio, Shortcuts would save those files to the "Recordings" folder in the destination you selected above. If the folder doesn't exist yet, Shortcuts will create it. If you only want to add a folder without a file-naming scheme, add another slash (/) after the folder name. For example, /Recordings/ would save files to the "Recordings" folder. Without designating a file-naming scheme, Shortcuts will use "Audio Recording YYYY-MM-DD at HH.MM.SS.m4a." That may be easier to keep track of since it has the date and time listed.
- Overwrite If File Exists: It's off by default, but you can enable it if you want each secret recording to erase the last one. When on, you won't have "Audio," "Audio-2," "Audio-3," etc. as file names — you'll just have one "Audio." Shortcuts will write over that file with the new audio each time you record.
You can now close the shortcut to save it as whatever default name Shortcuts chose for it. In my case, that was the last action, "Save File." Instead, it's better to choose a new name before closing the editor, as well as a new icon and color if you want.
Add a Screen Dimmer (Optional)
To make the shortcut more stealthy, you may want to add an action that dims the screen so nearby people can't tell what's on your iPhone's display. Without it, you can click the Side button on your iPhone to make the display sleep as soon as the shortcut starts, but a dimmer action will be even less conspicuous.
In the "My Shortcuts" menu, tap the ellipsis (•••) icon on the card for your Voice Memos or Files shortcut to open the editor if you're not already there. Next, tap the search bar at the bottom, then find and add "Set Brightness."
- Record to Files Shortcut: Make "Set Brightness" the first action in the shortcut, then change it from 50% to 0% brightness. That way, no one will be able to see the recording tool on the screen. Since zero is a low number, making the display very hard to see in daylight, I'd suggest adding another "Set Brightness" action at the end of the shortcut and setting it to something like the 50% default setting. When you run the shortcut, your display will dim to zero, Shortcuts will begin recording to Files after you tap anywhere on the screen, then the file will save and the display will go to 50% brightness after you tap anywhere on the screen again.
- Record to Voice Memos Shortcut: Unlike the Files shortcut, you can't add the "Set Brightness" action to the top of the shortcut. When Voice Memos opens, it will change the screen brightness so that everything is visible. Apple likely baked it in as privacy protection for those around you. You're only option is to make it the last action, then change it from 50% to 0% brightness. When you run the shortcut, Voice Memos will open and start recording, and the display should darken to zero simultaneously. Then, you need to brighten the screen manually and stop the recording, or stop the recording and then brighten the screen manually.
Add Your Shortcuts to Back Tap
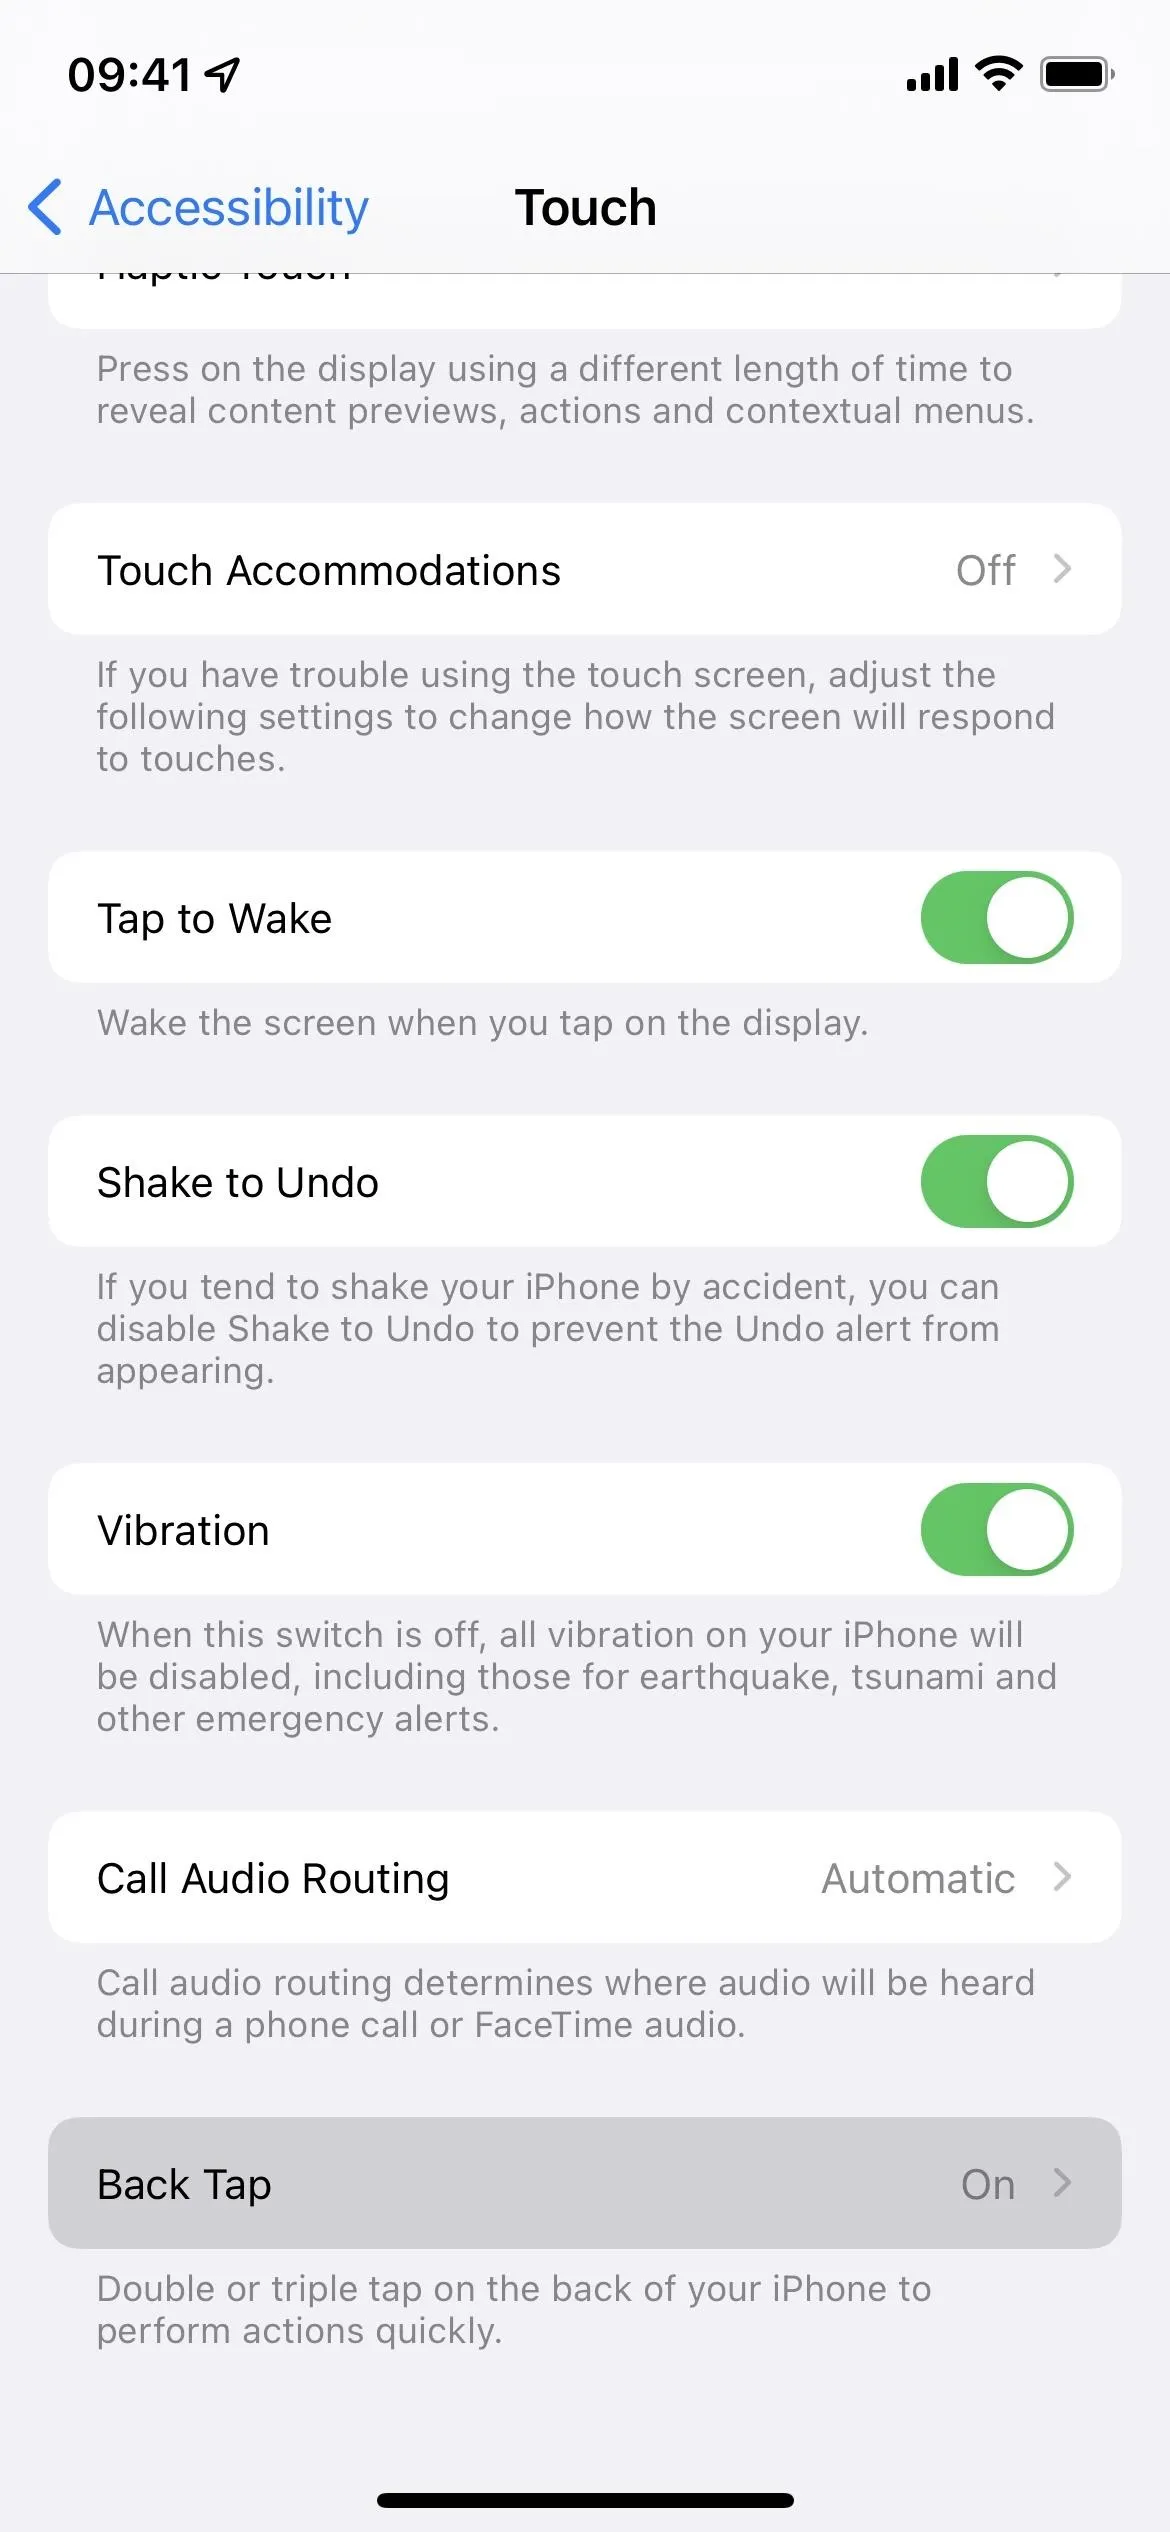
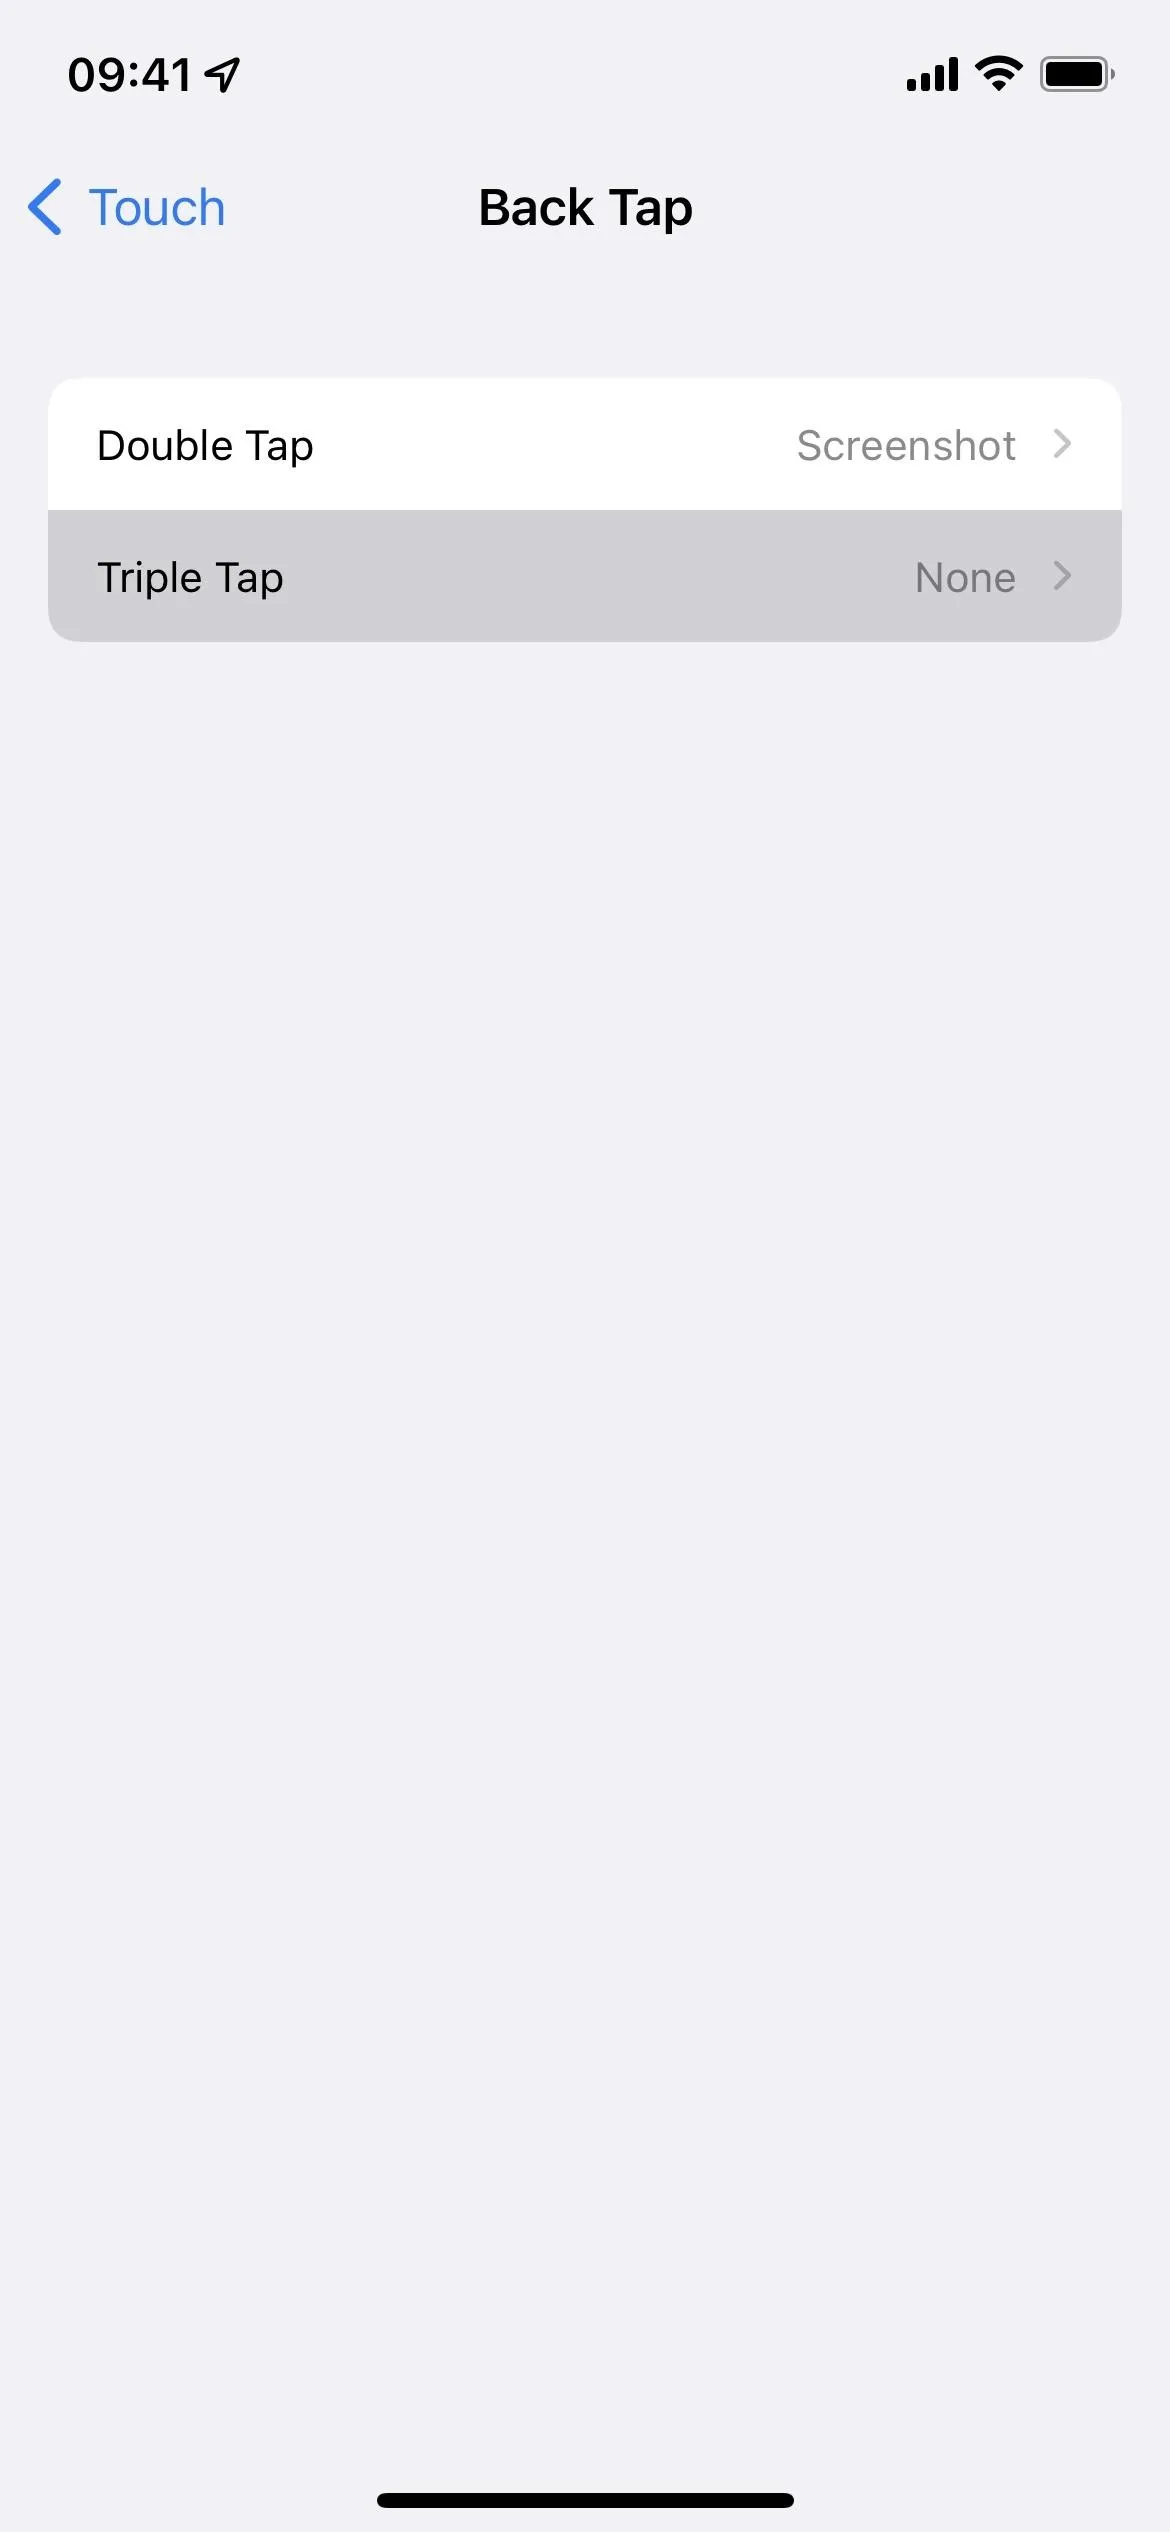
Now it's time to add your shortcut to a Back Tap gesture. Navigate to Settings –> Accessibility –> Touch –> Back Tap, then choose "Double Tap" or "Triple Tap." Double means you tap the back of your iPhone twice, and triple means three times. A double tap is easier to trigger accidentally, so you might want to choose three taps. In either option, find your shortcut's name and select it.

Run the Shortcut Using Back Tap
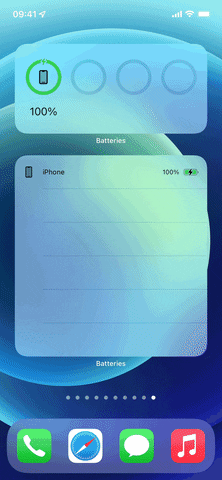
It's time to test everything you just set up. Tap the back of your iPhone two or three times, depending on the gesture you chose, and watch everything fall into place. Below you can see the two shortcuts in action, with Files on the left and Voice Memos on the right.

View Your Audio Recordings
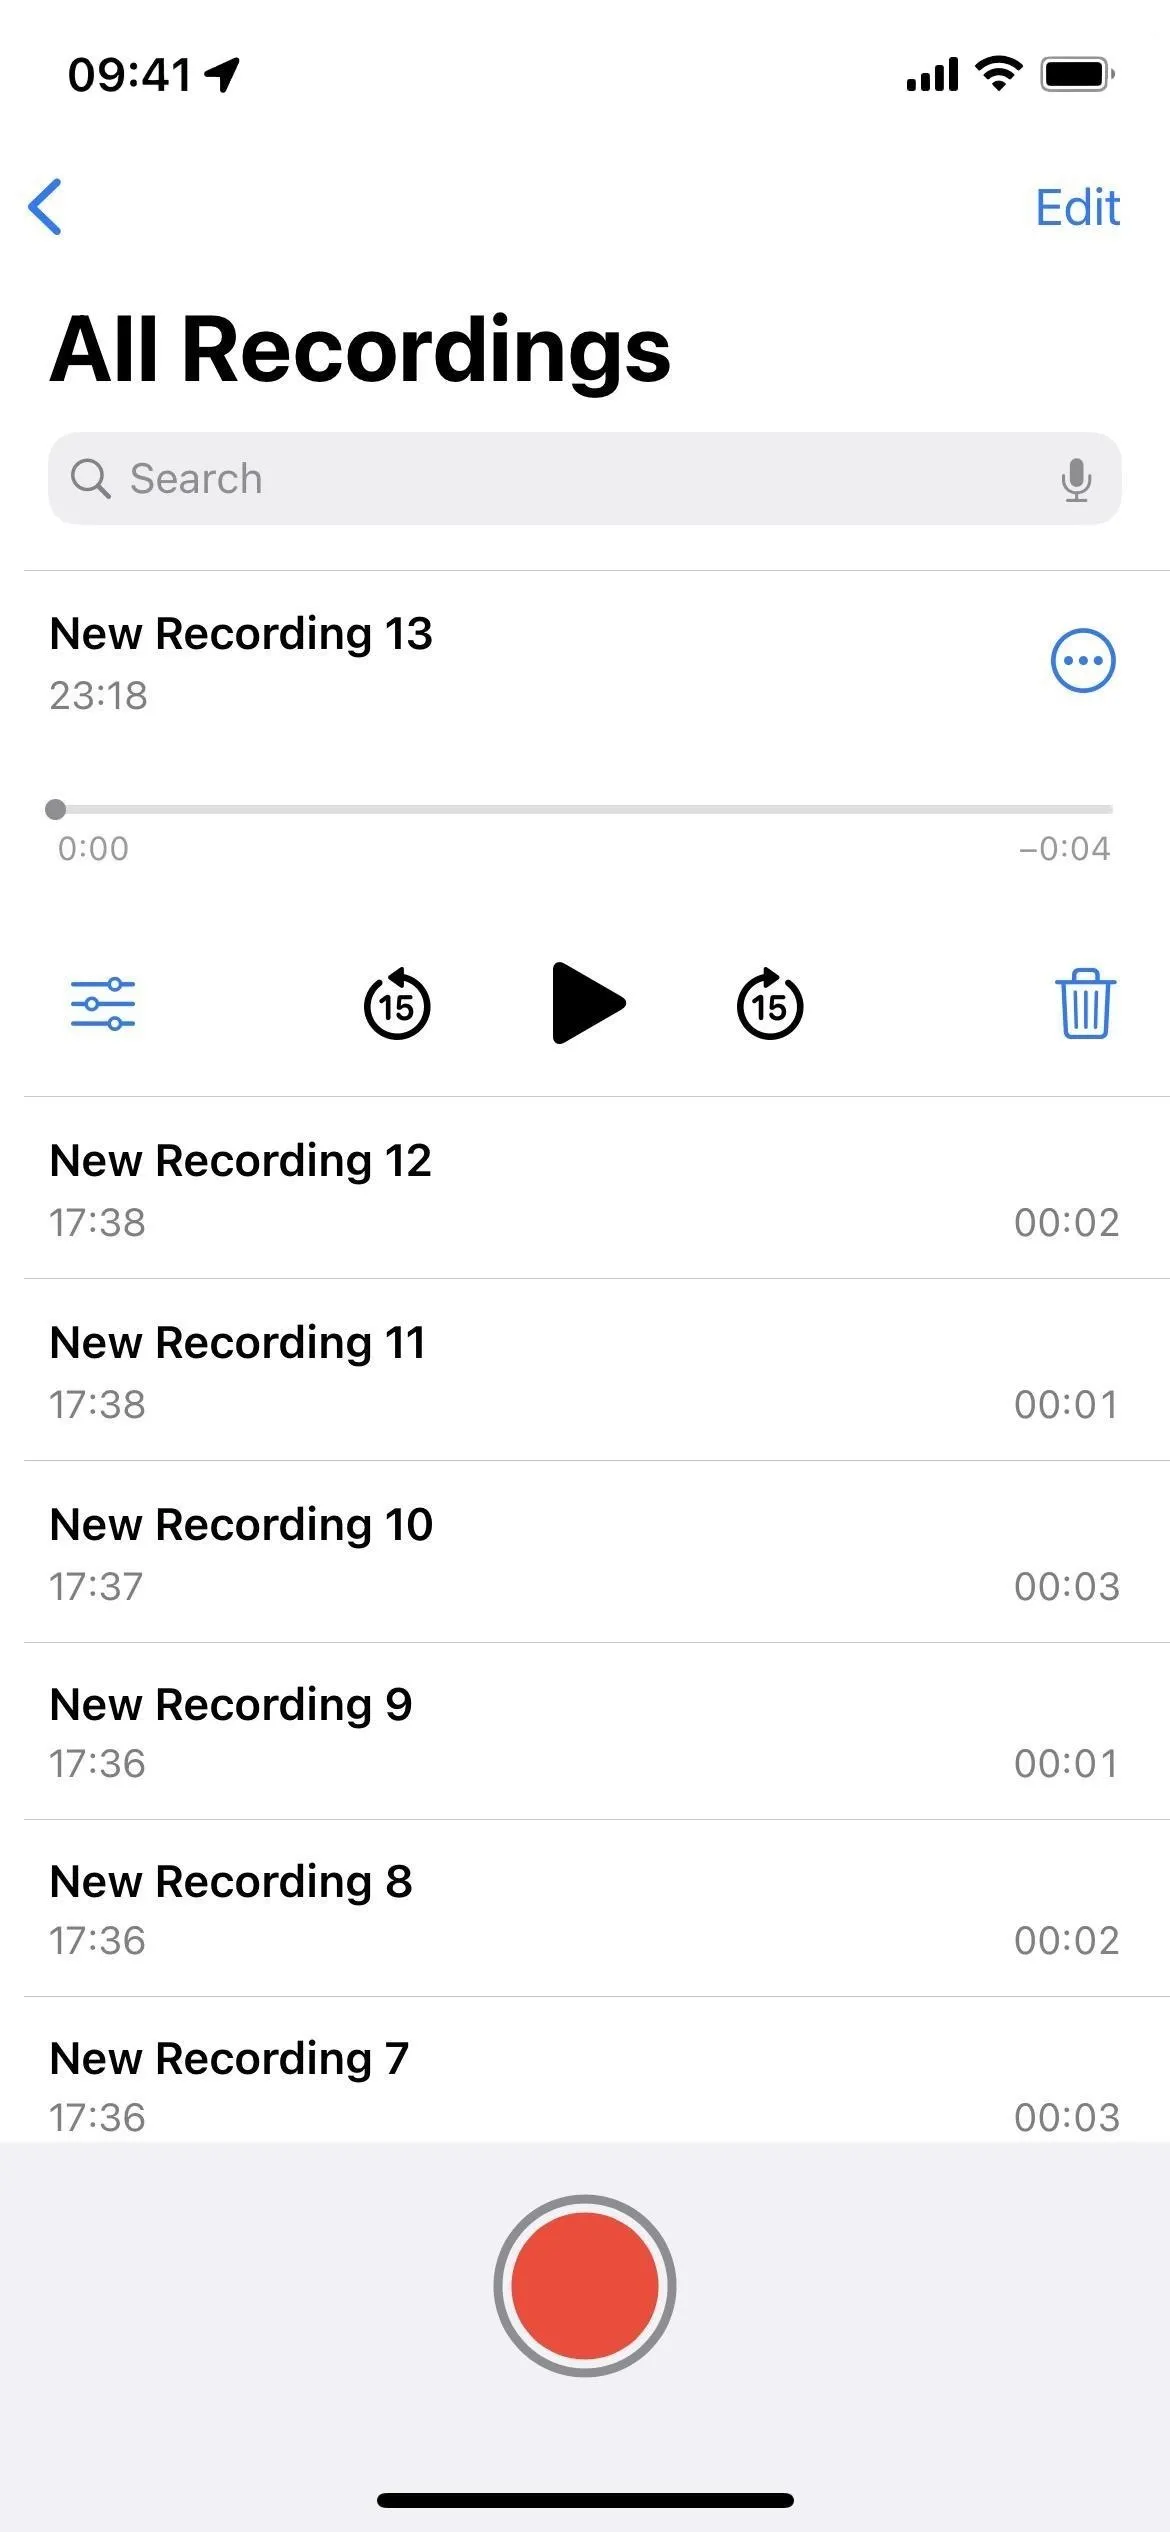
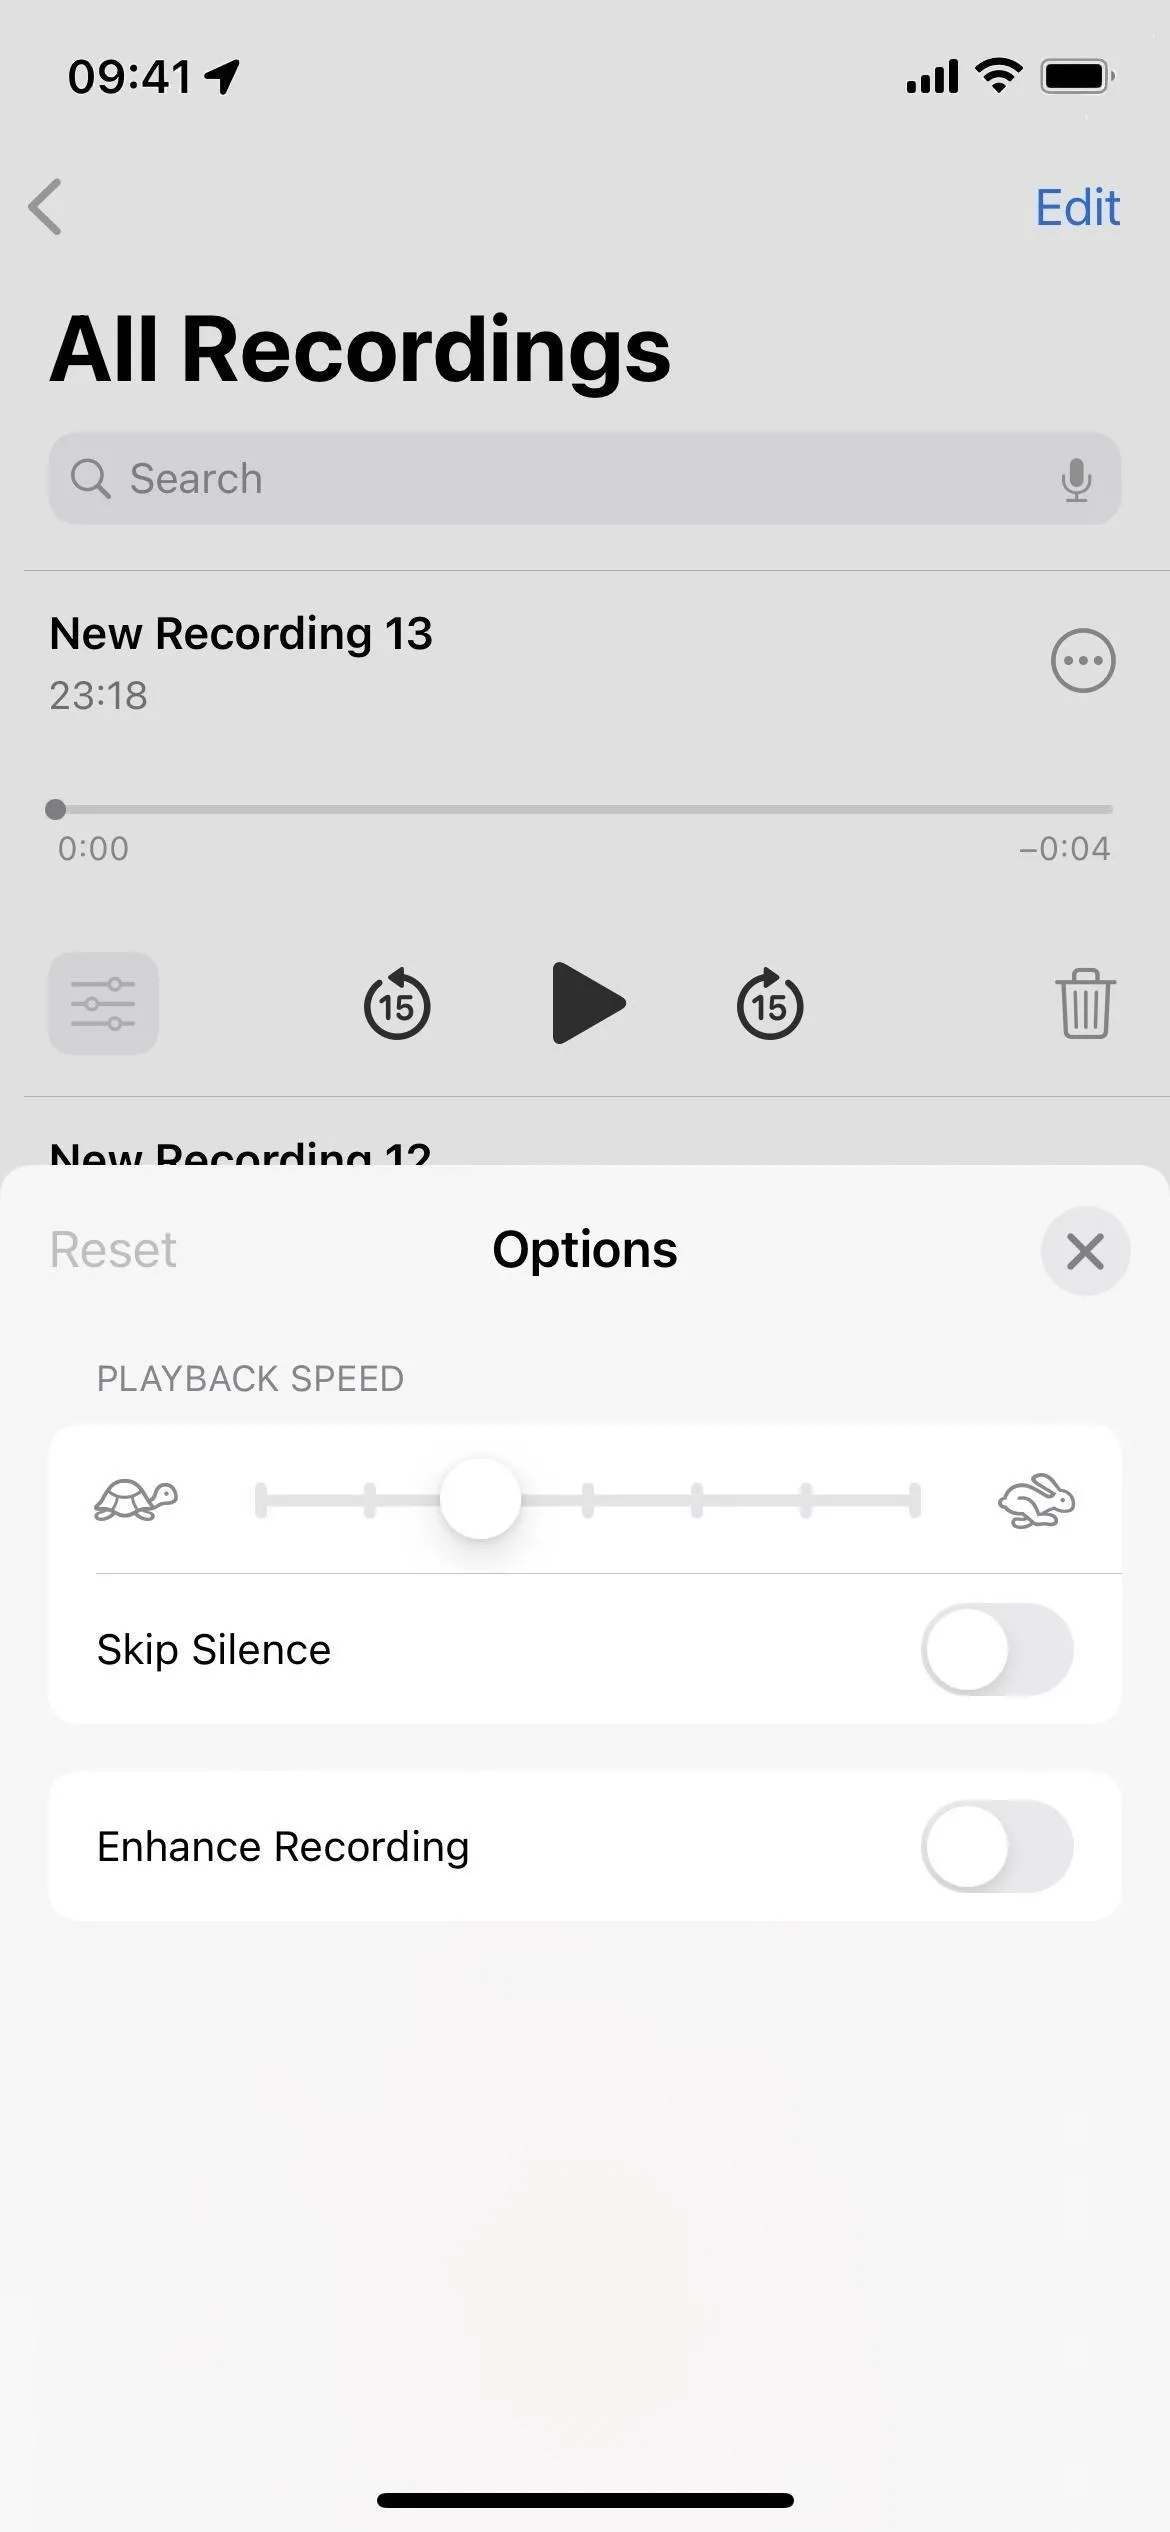
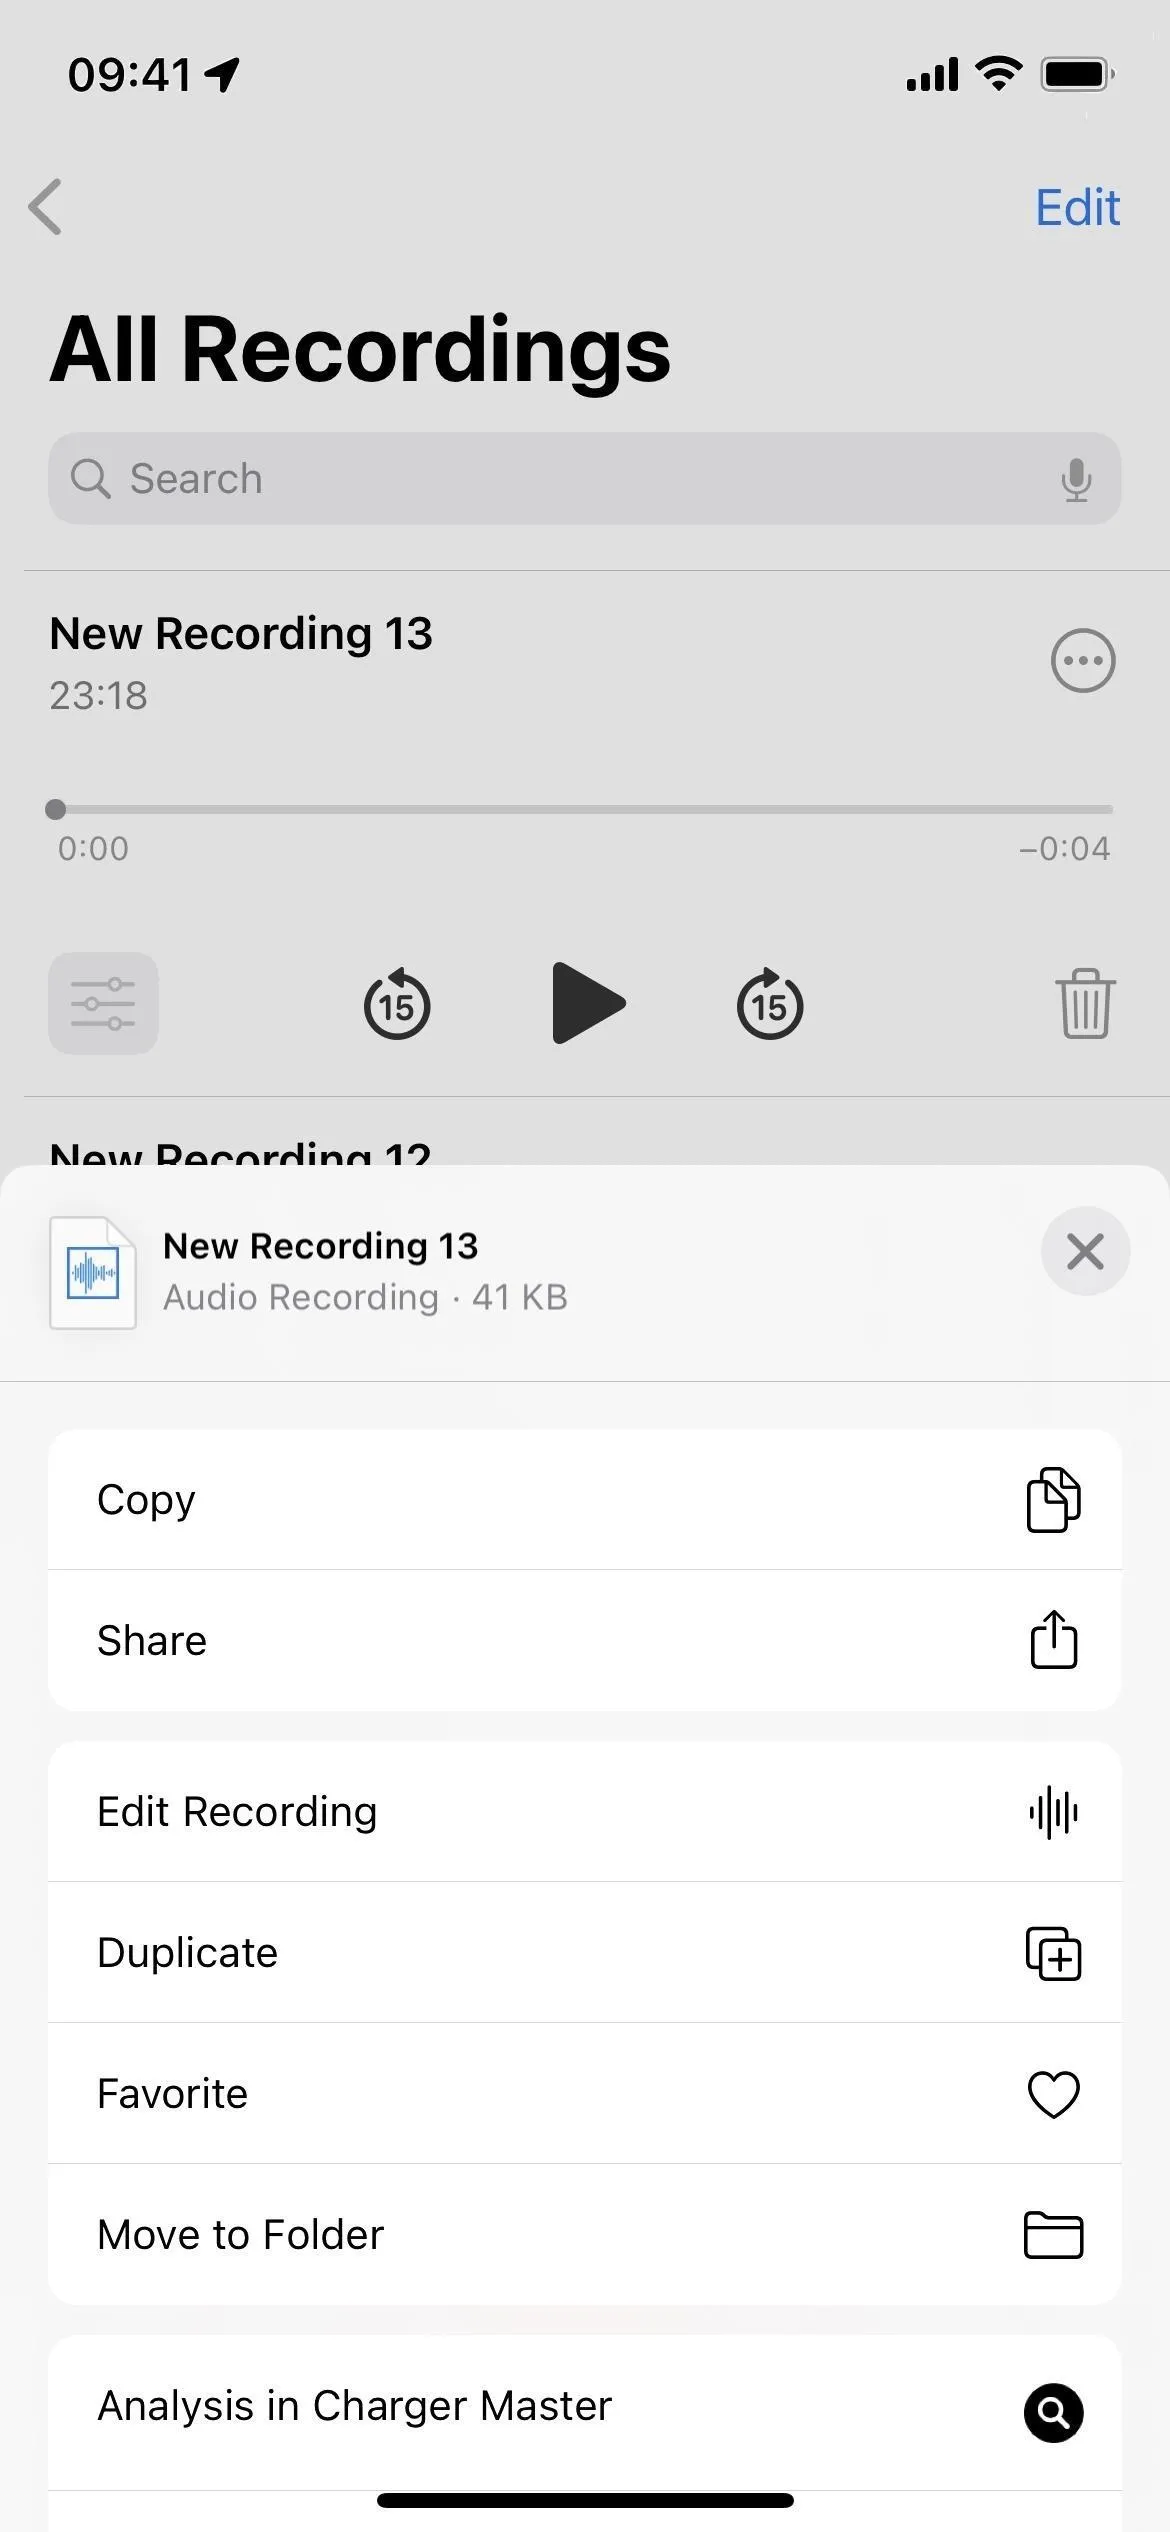
Now it's time to view and listen to your recordings. If you used Voice Memos, open the Voice Memos app, and you should see your recordings at the top of the list if they're the most recent files. You can then tap on a file's ellipsis (•••) button to edit the recording, copy it to your clipboard, share it, save it to Files, etc. Tapping the settings icon will let you adjust the playback speed, skip silence, and enhance the recording.
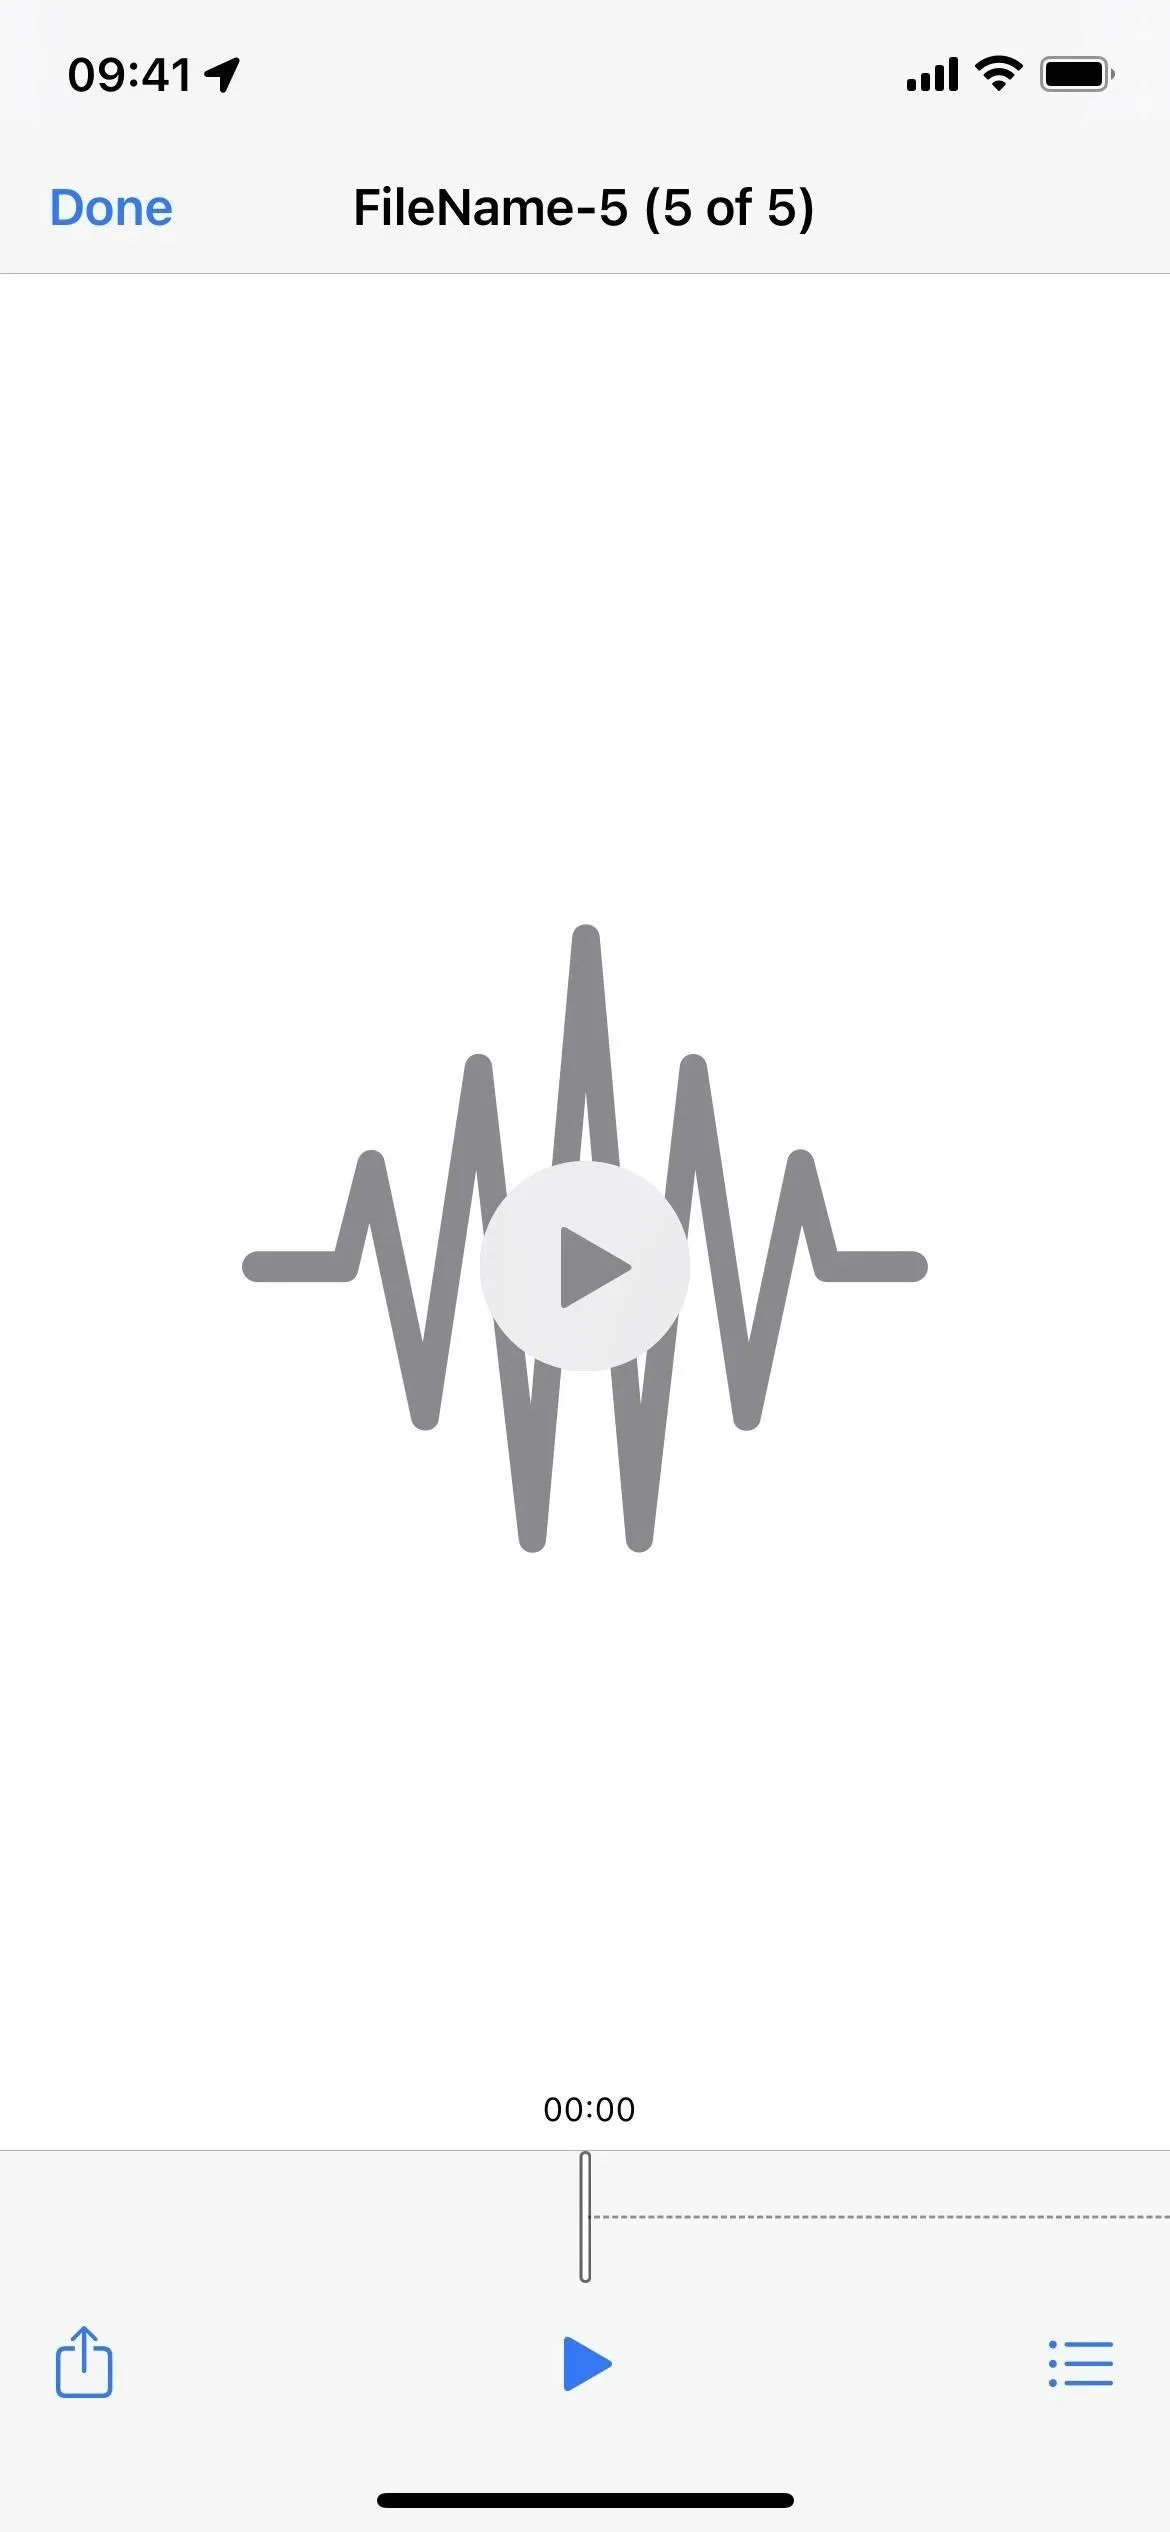
If you used Files, open the Files app and navigate to the destination path you chose when creating the shortcut. If you didn't specify a name for your recordings in the shortcut, the audio recordings would have the date and time in the title, and you can tap on it to listen to it. You can also use the Share button to share it with friends and family or copy the file to your clipboard.
Cover photo by Nelson Aguilar/Gadget Hacks; screenshots and GIFs by Justin Meyers/Gadget Hacks


Comments
Be the first, drop a comment!