


You may know the traditional way to take a screenshot on your iPhone, but it may not be the best action for your needs. There are faster ways to capture an image of your iPhone's screen, methods for capturing overlays and other elements that won't show in regular screenshots, and even options for blocking screenshot thumbnail previews from appearing.
With seven of the options below, you'll see a flash on your screen indicating the screenshot was successful, along with a capture sound if Silent Mode is off. Six of those will also show a preview thumbnail in the bottom left of your iPhone's screen — tap it to open up the screenshot editor, long-press it to share the image right away, swipe it off the screen to get it out of the way, or just let it disappear on its own. There are also ways to take iPhone screenshots using external sources.
You can jump to a specific section below or scroll through them all to see the benefits each has to offer.
- Option 1: Use Your iPhone's Hardware Buttons
- Option 2: Use Siri, Hey Siri, or Type to Siri
- Option 3: Use a Back Tap Gesture
- Option 4: Use a Custom Shortcut
- Option 5: Use Voice Control
- Option 6: Use AssistiveTouch
- Option 7: Use Screen Mirroring
- Option 8: Use QuickTime Player
- Option 9: Use an External Keyboard
Use Your iPhone's Hardware Buttons
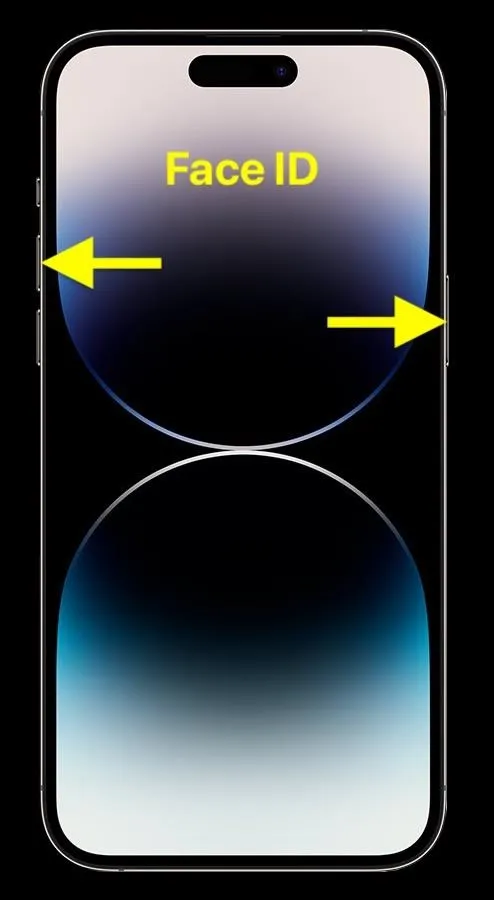
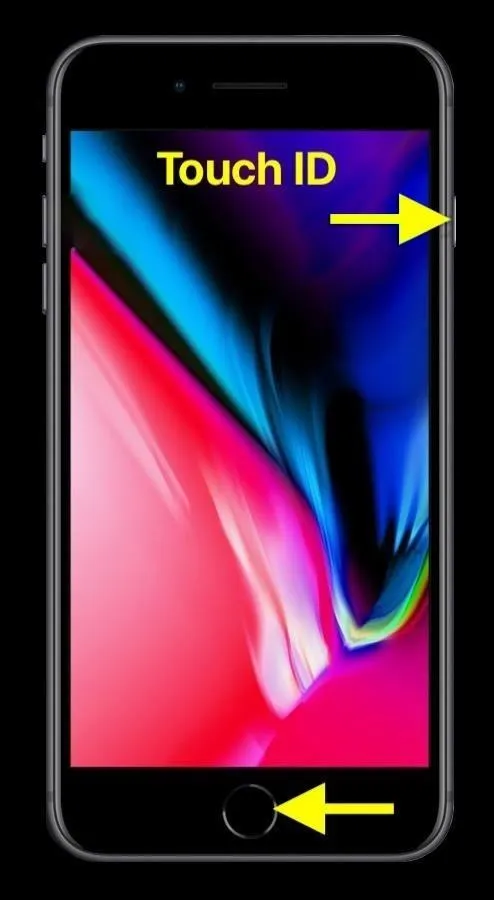
The simplest way to take screenshots on your iPhone is by using its hardware buttons. Face ID and Touch ID models use different button combinations, but the process for triggering screenshots is the same no matter which iOS version you're running.
- Face ID models: Press Side + Volume Up simultaneously and release quickly.
- Touch ID models: Press Side + Home simultaneously and release quickly.
If you have a first-generation iPhone SE or an iPhone 5S or earlier, use the Top and Home buttons since there aren't any Side buttons on these older models.
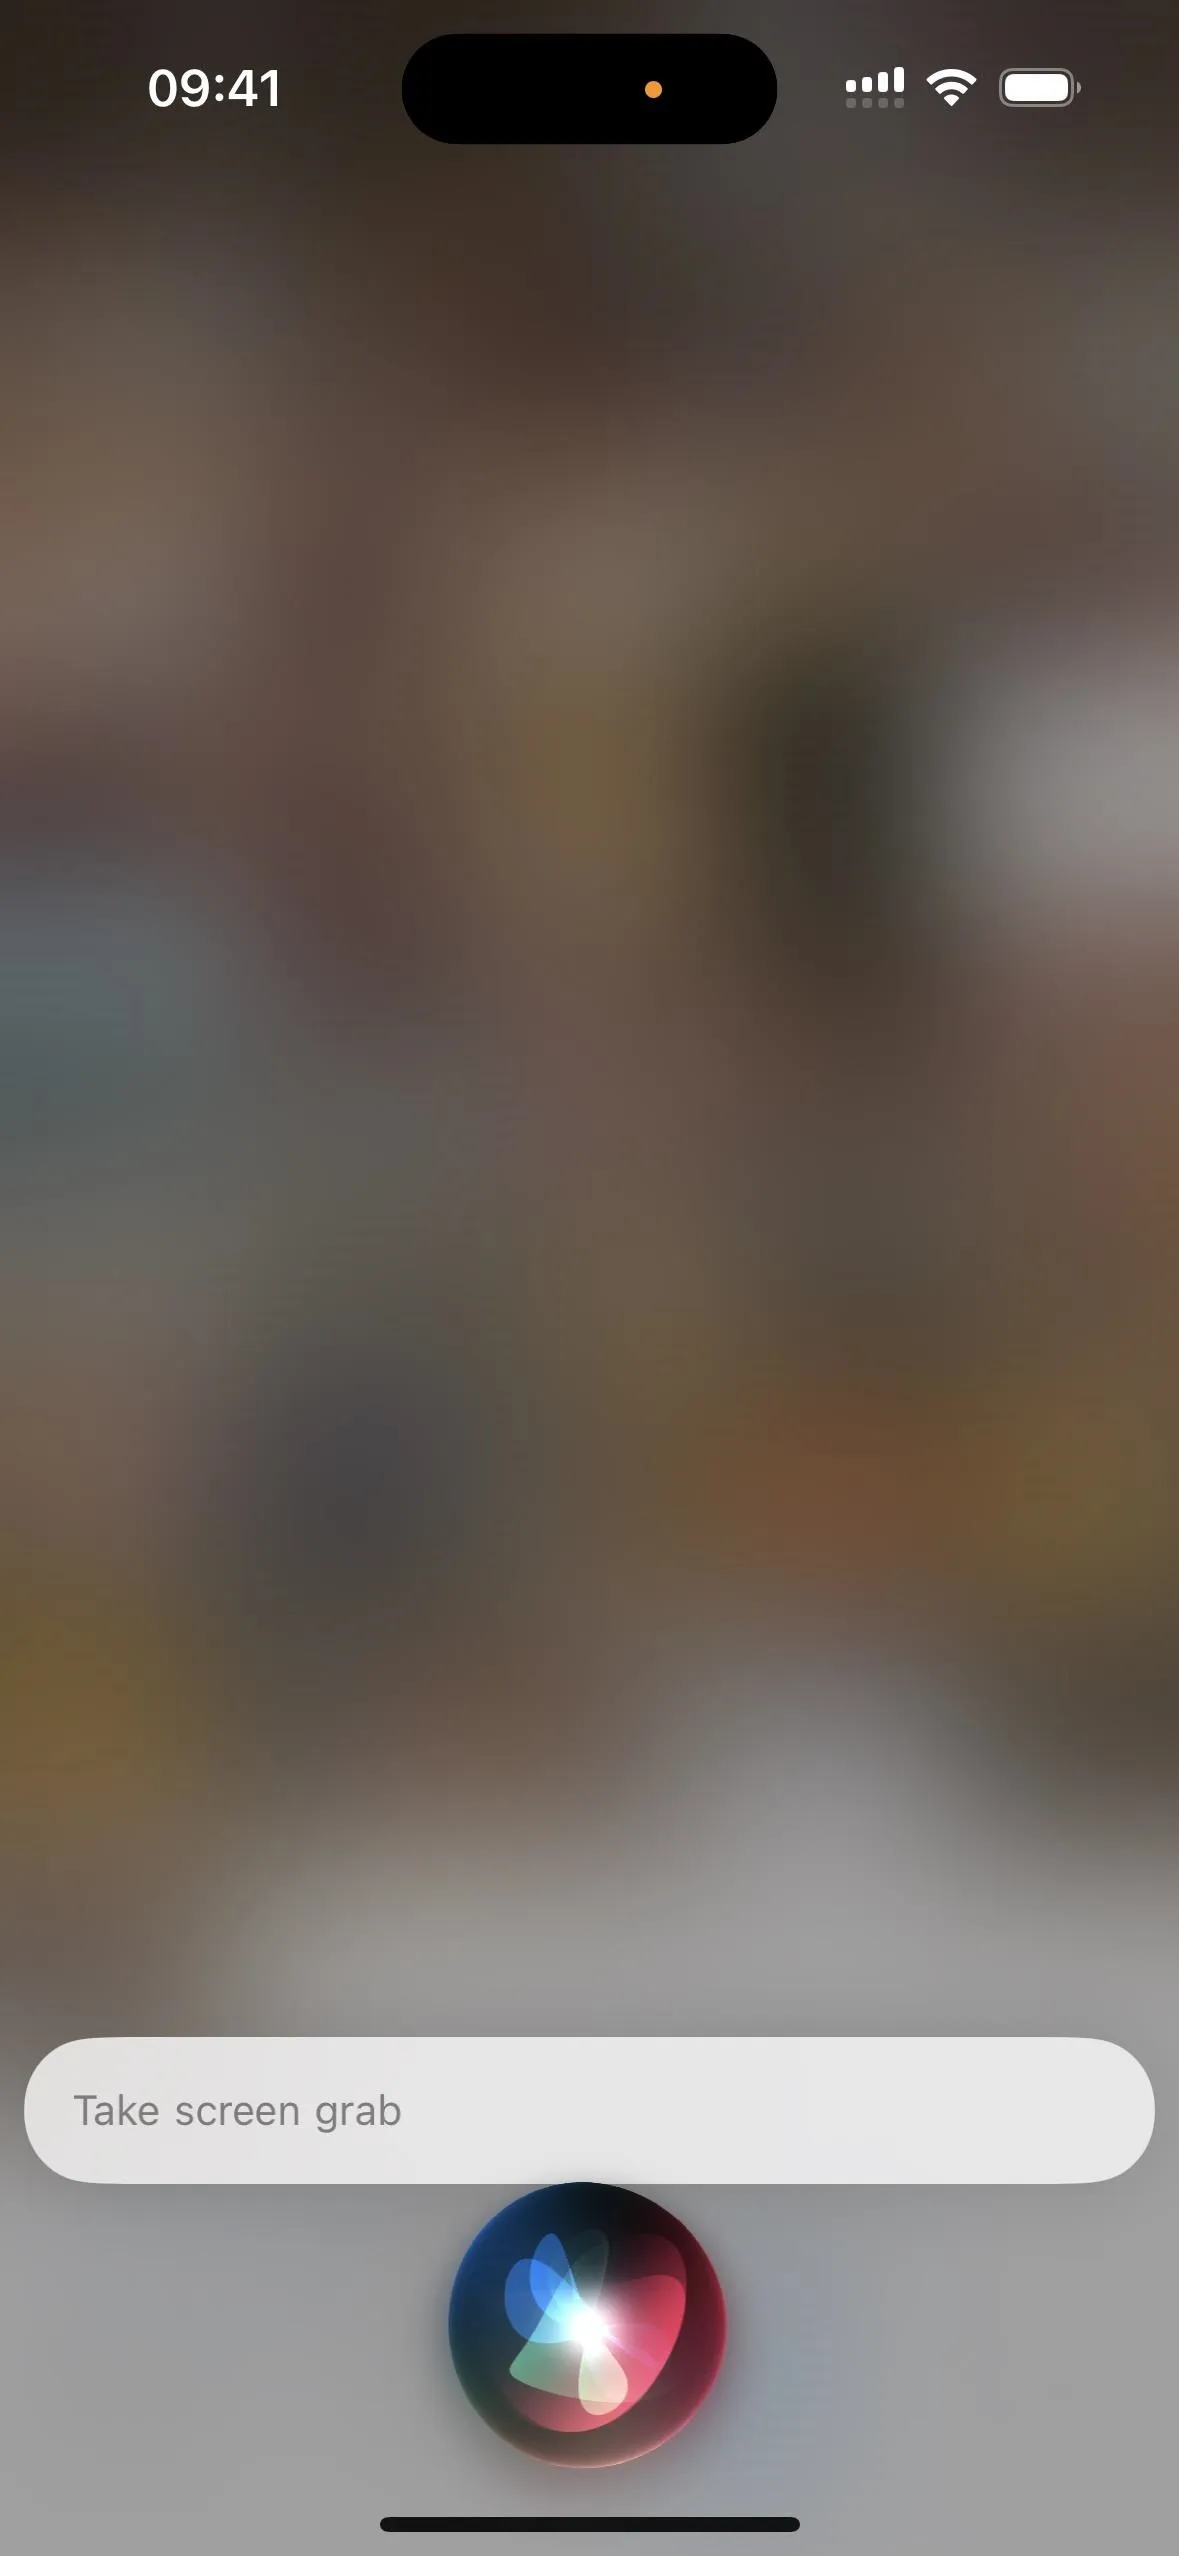
Use Siri, Hey Siri, or Type to Siri
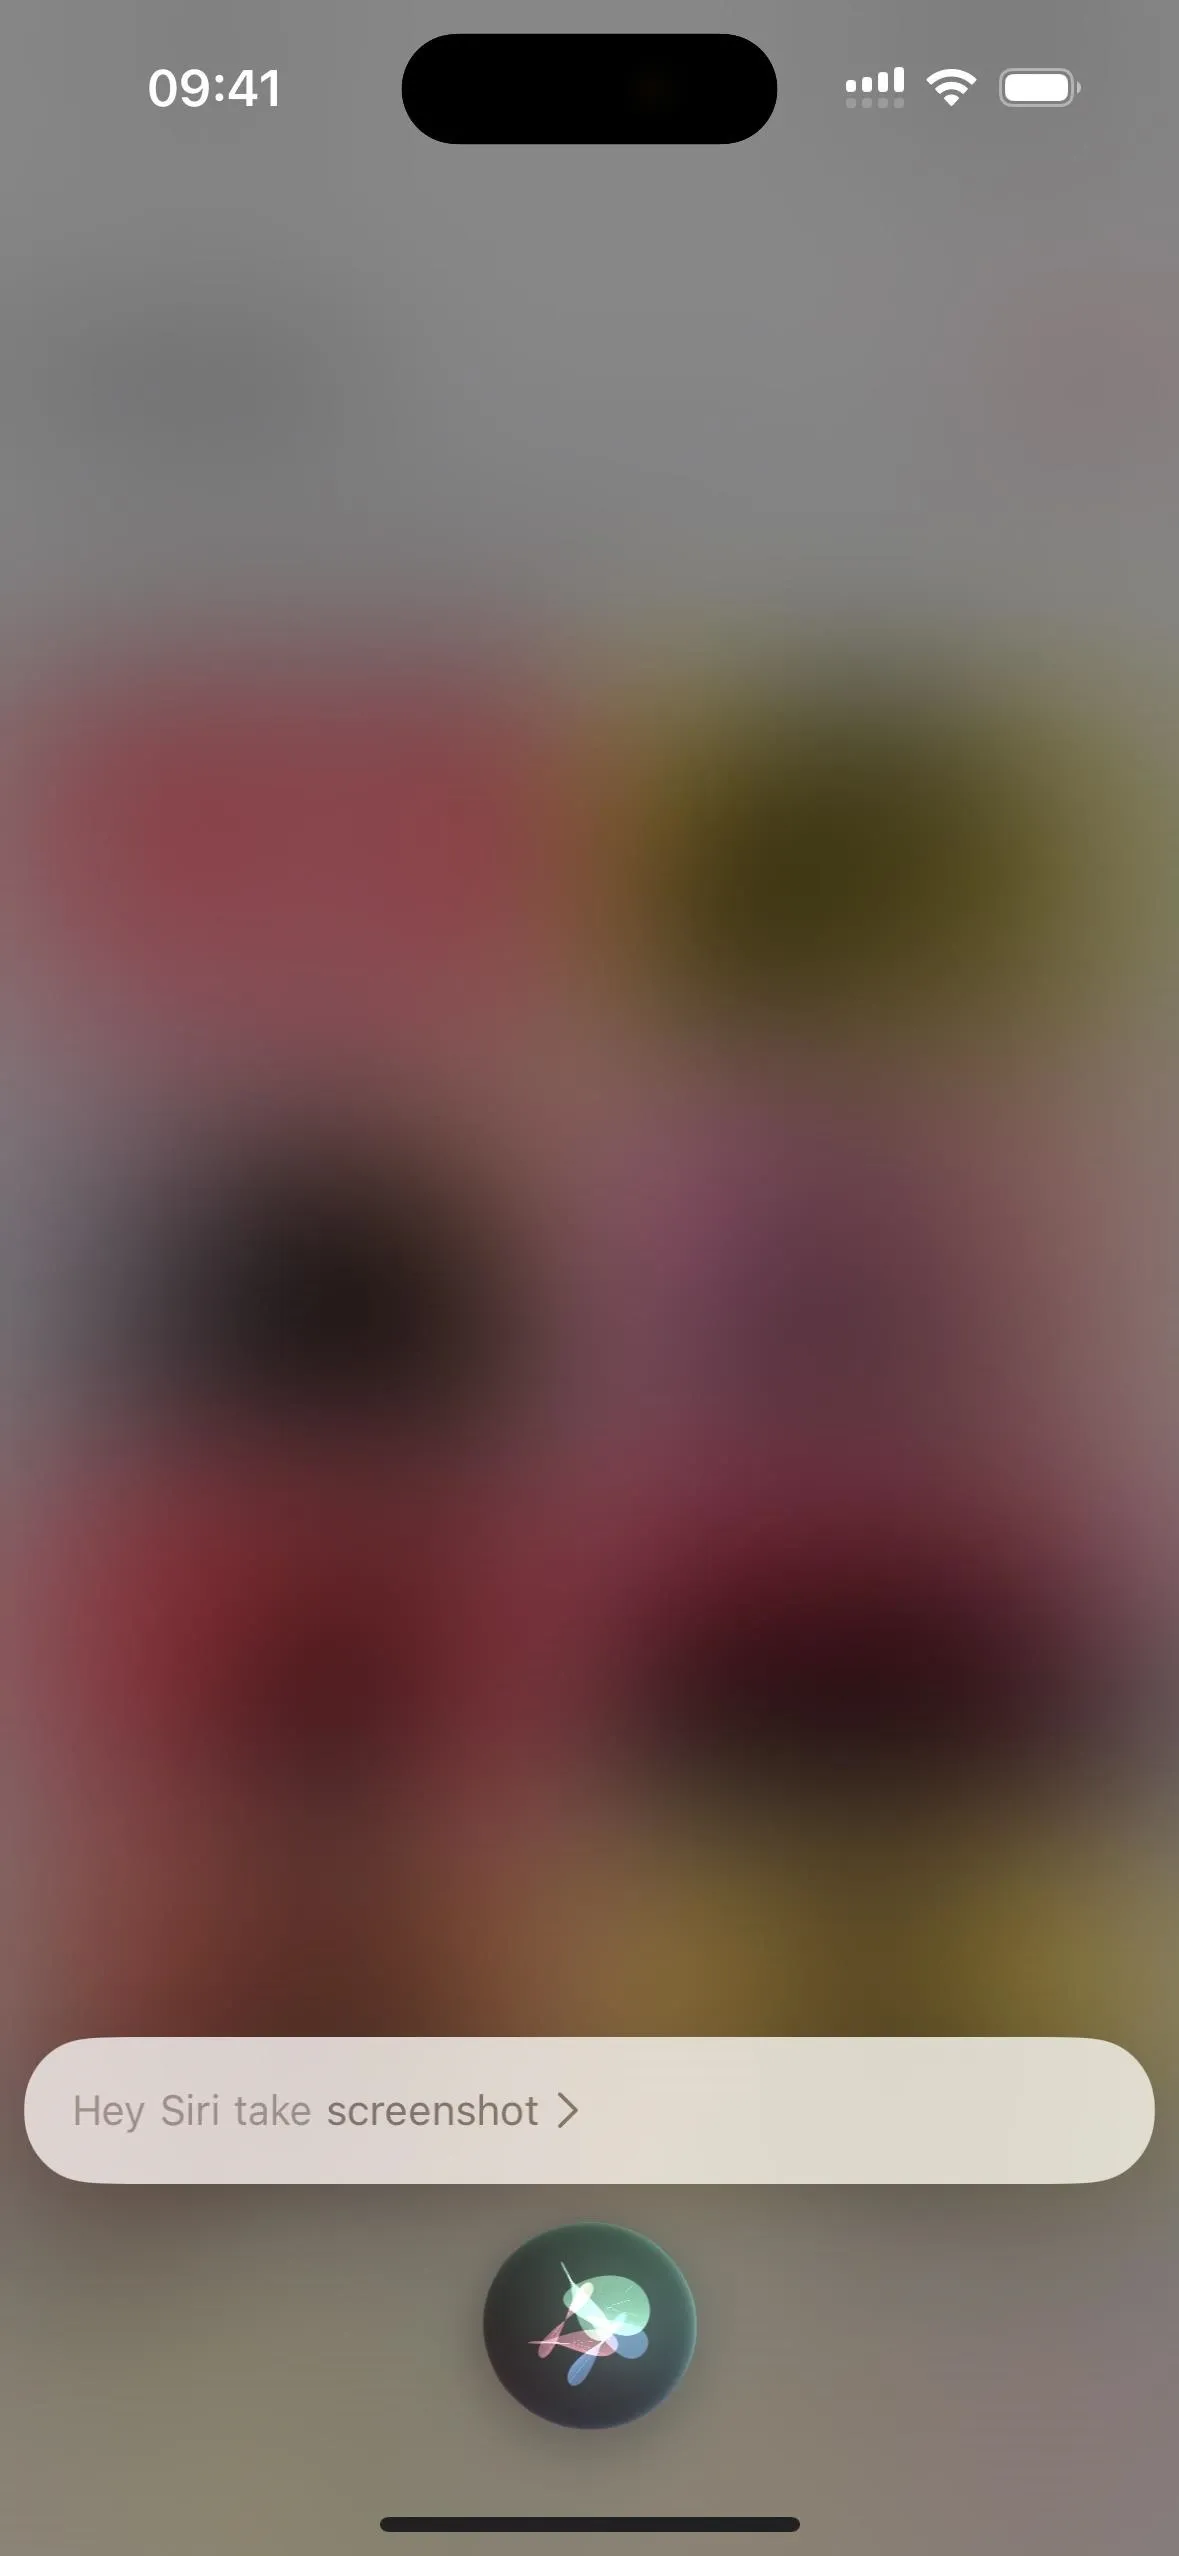
Siri can take screenshots for you as long as you're running iOS 14 or later on your iPhone, and it works no matter how you use Siri. If the Siri interface is visible when you ask it to take a screenshot, it will disappear right before the snapshot is created, leaving all Siri elements out of the image.
- Siri: If the Side or Home button shortcut is enabled for Siri, long-press the Side or Home button to trigger Siri, then say "Take a screenshot," "Take screenshot," or just "Screenshot." This is useful when you only want to use one finger.
- Hey Siri: If Hey Siri is enabled, say "Hey Siri, take a screenshot," "Hey Siri, take screenshot," or just "Hey Siri, screenshot." This is useful for entirely hands-free screenshots.
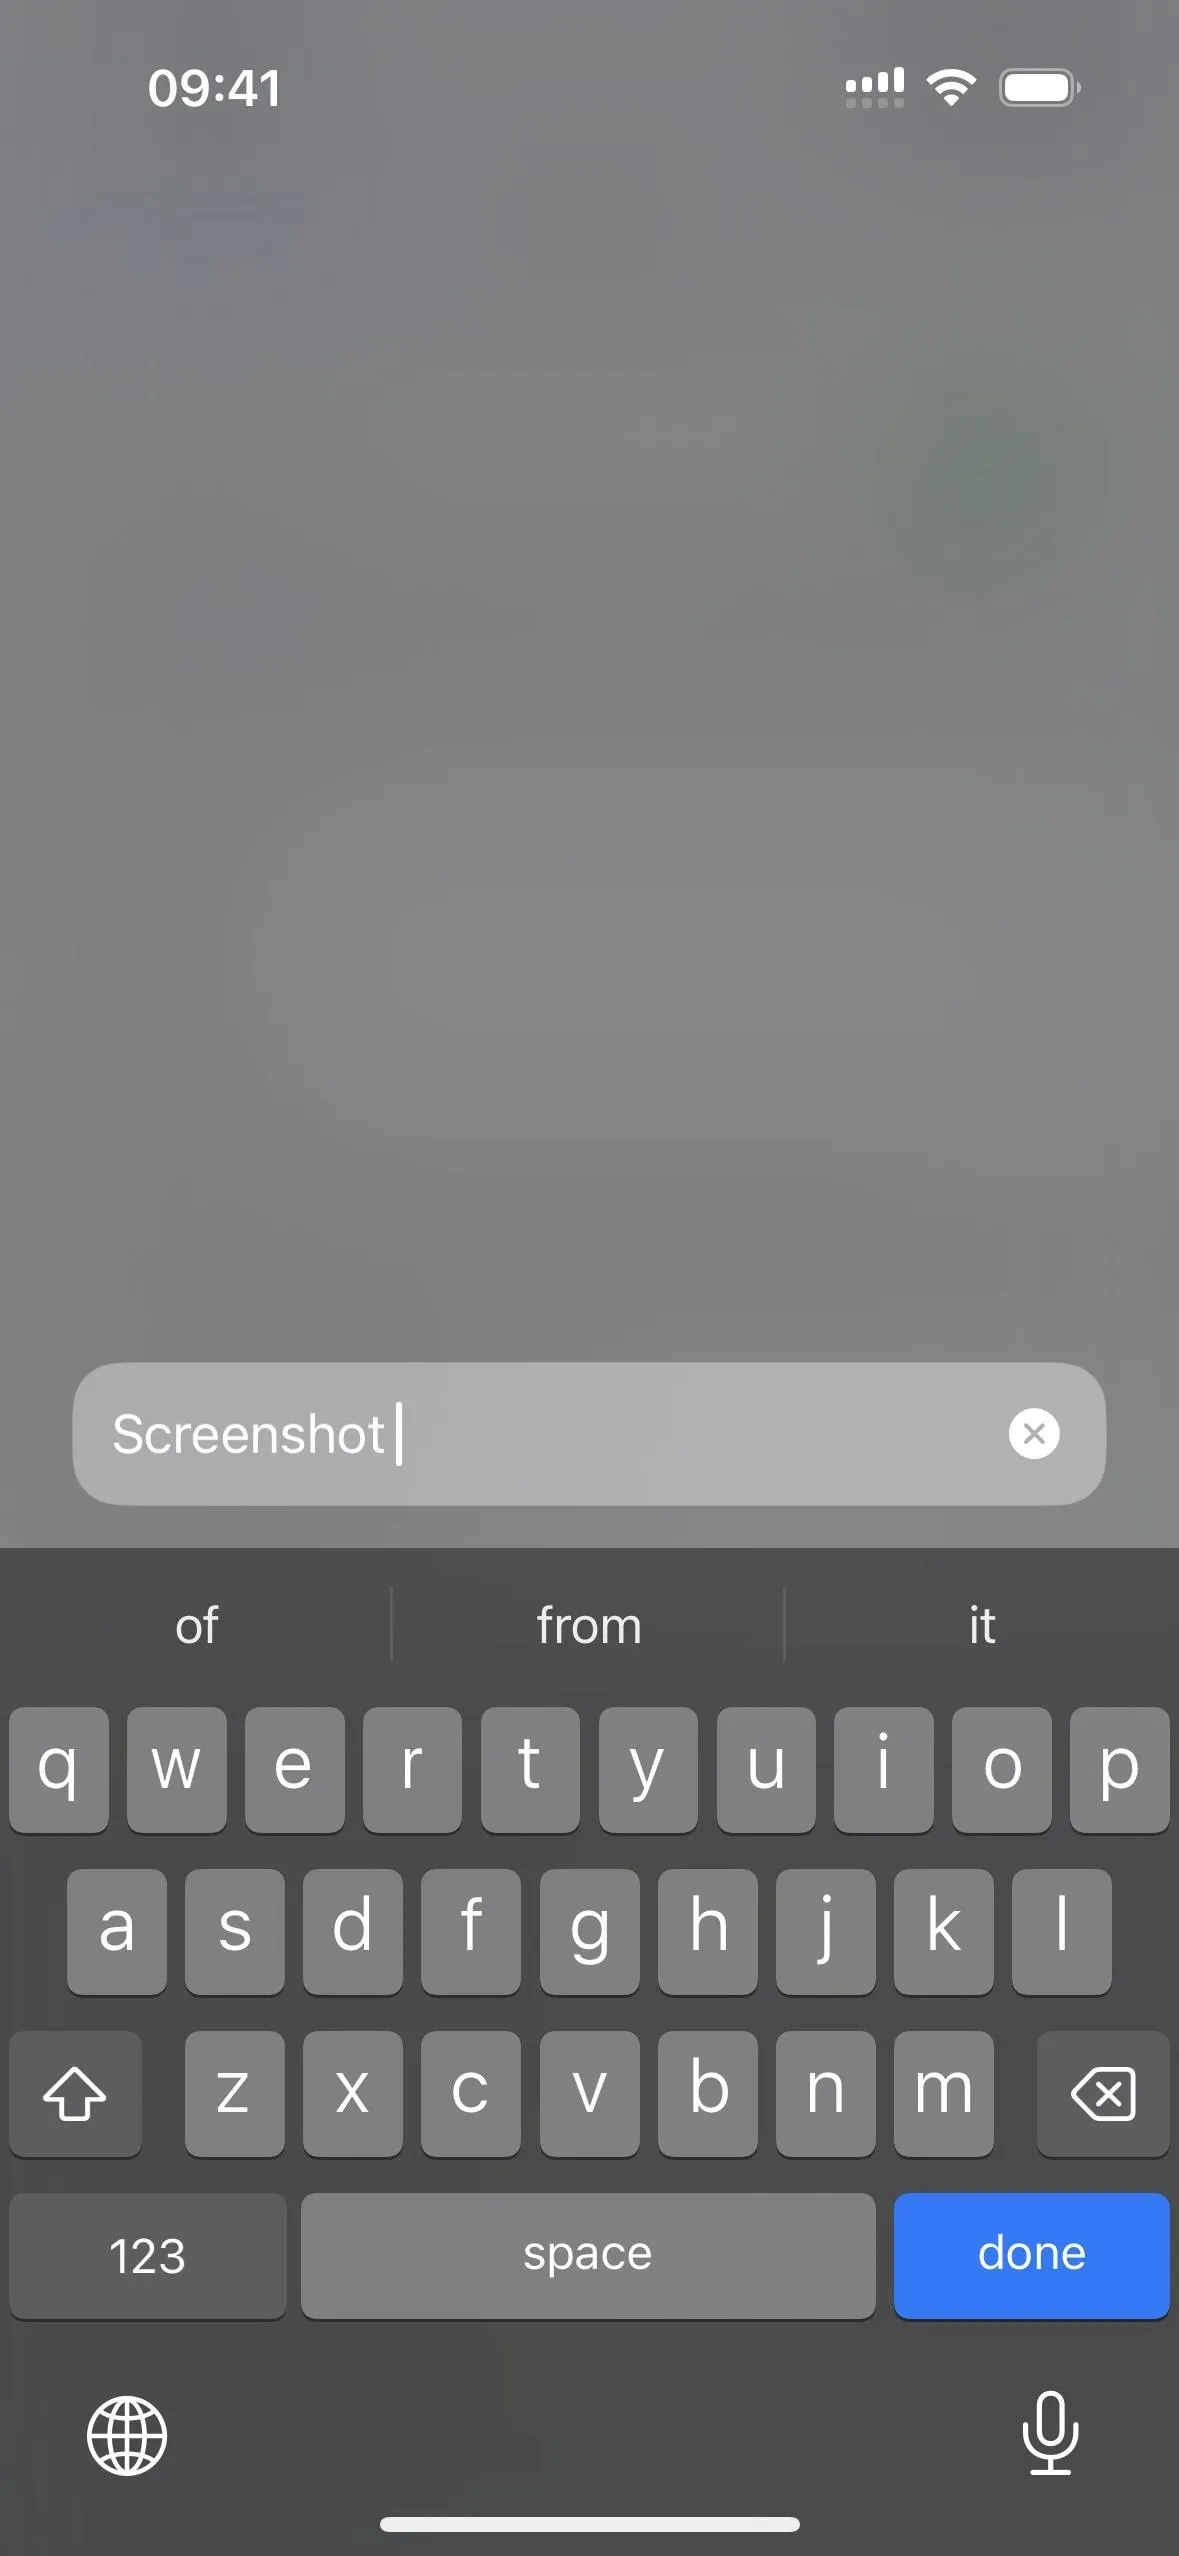
- Type to Siri: If Type to Siri is enabled, long-press the Side or Home button to trigger Type to Siri, then type "screenshot" and tap the "done" key. This is useful if typing is easier when you don't want to talk.
You could also use "screengrab" or "screen grab" instead of "screenshot." Other possible triggers include "screen capture," "screen image," and "screen picture." No matter which Siri keywords you use, if your goal is to get the Siri interface in the screenshot, you'll have to use another screenshot method in this guide.
- Don't Miss: 18 Siri Commands Every iPhone Owner Should Know
Use a Back Tap Gesture
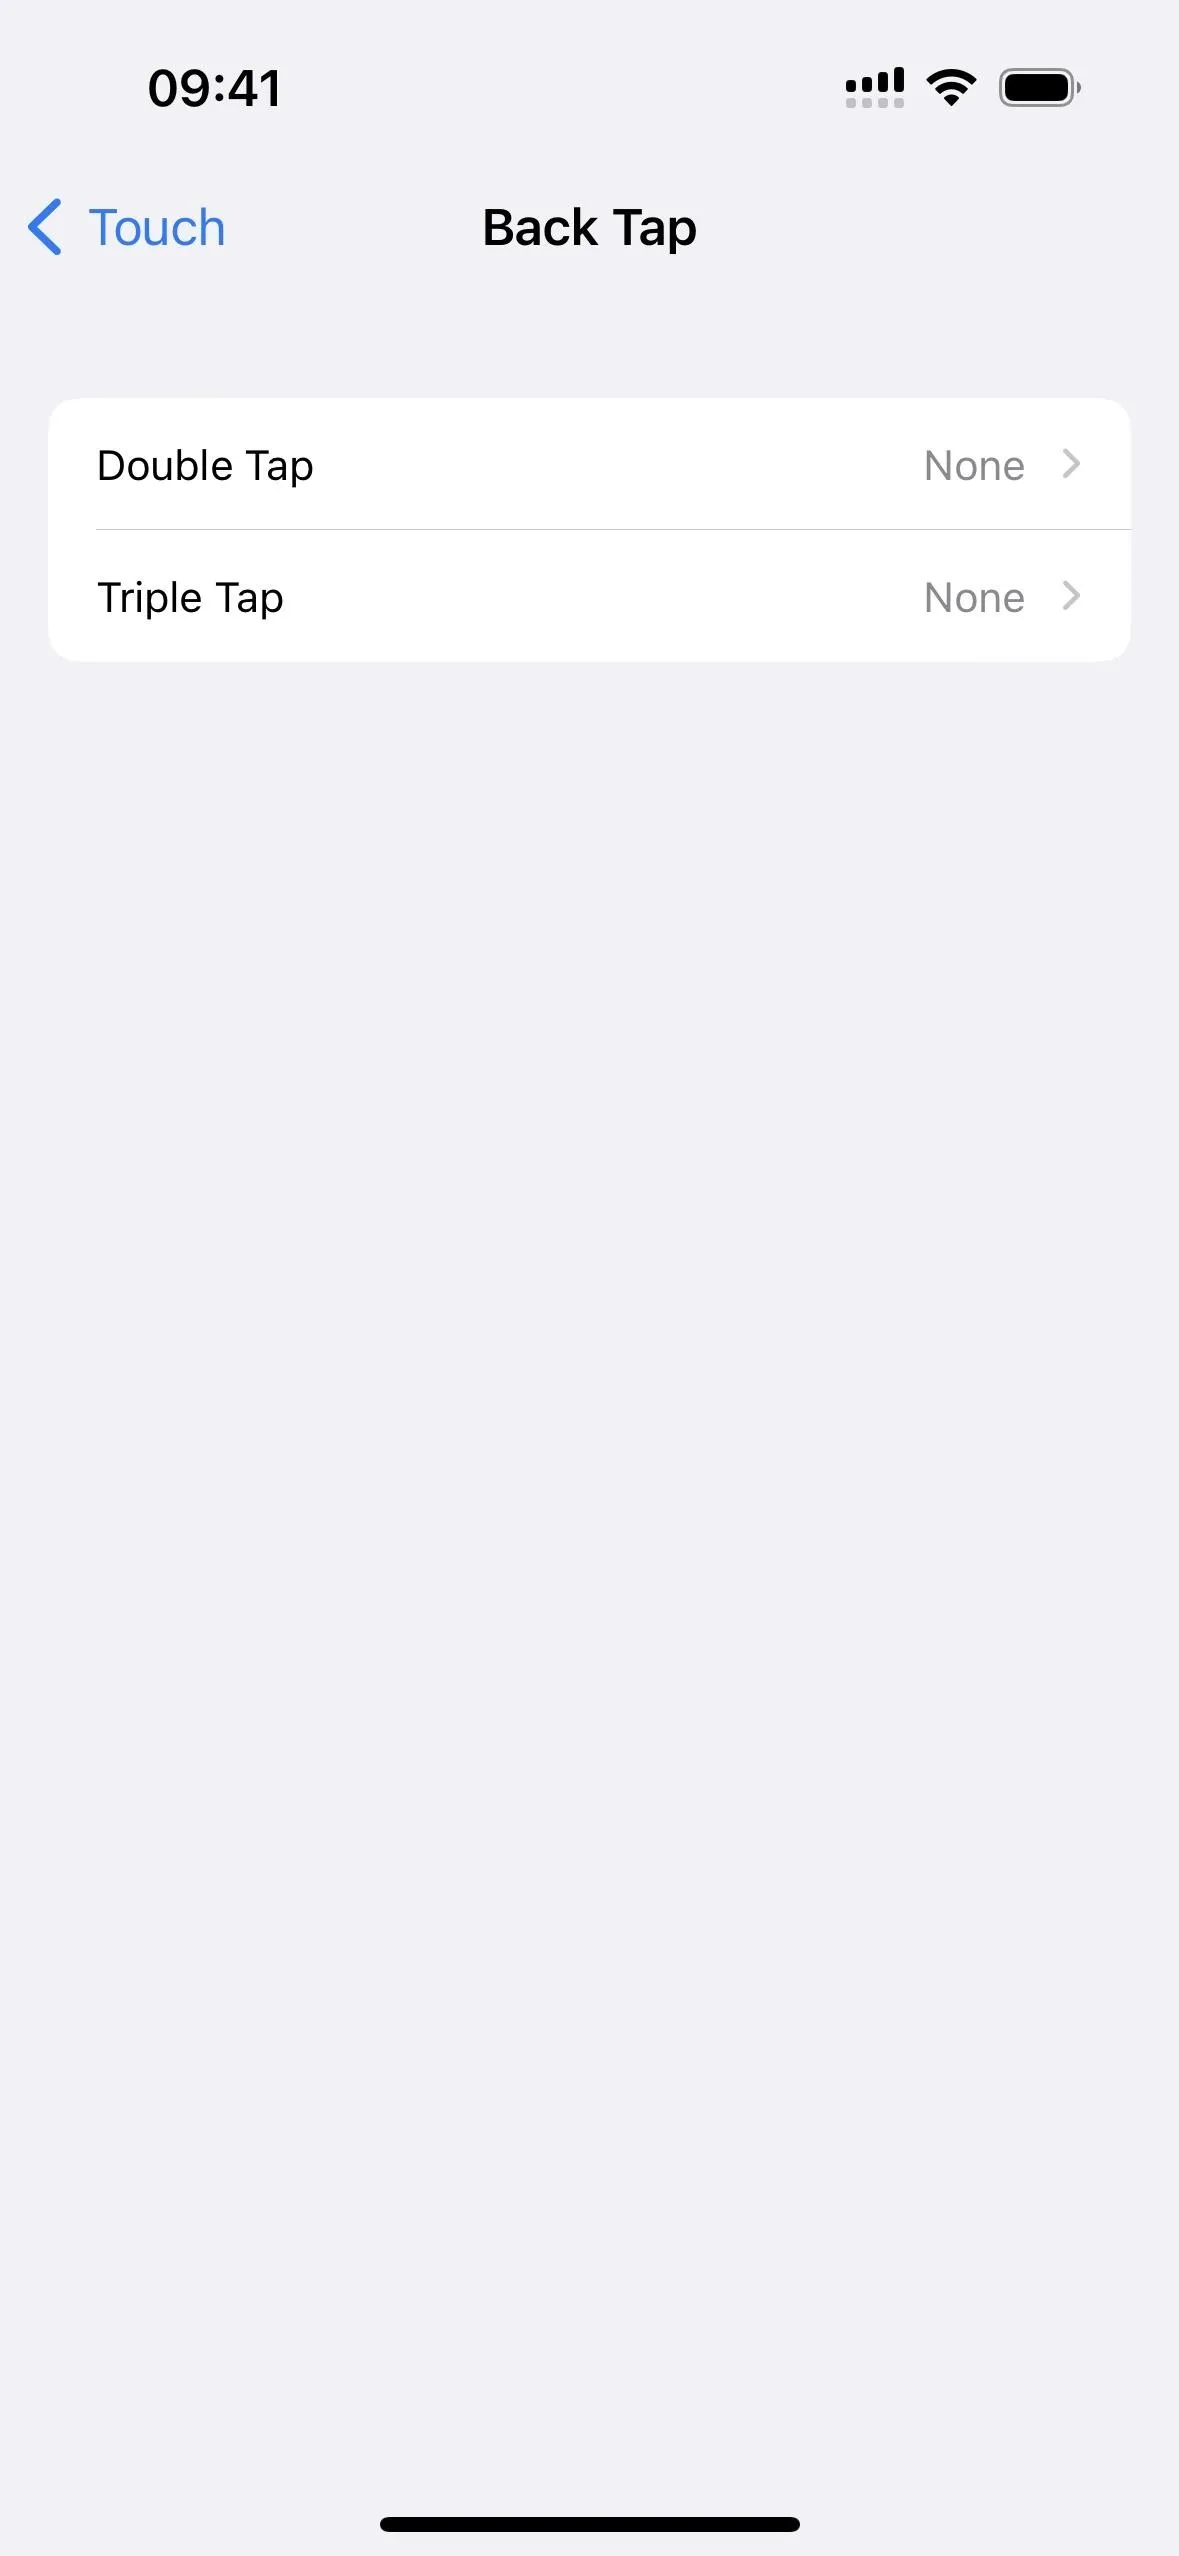
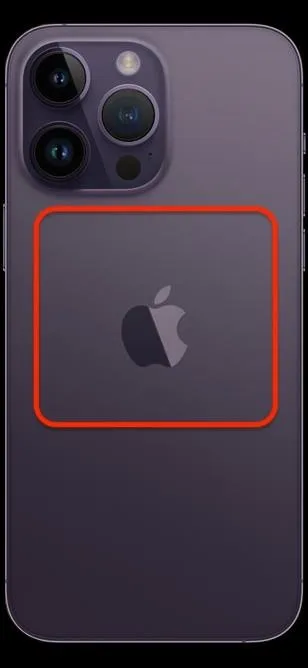
With iOS 14 or later installed on iPhone 8 or a newer model, you can utilize the Back Tap accessibility feature to take screenshots for you. Back Tap essentially turns the Apple logo on the back of your iPhone into an invisible button you can tap to perform several different actions, from regular system tasks to accessibility triggers and even custom shortcuts.
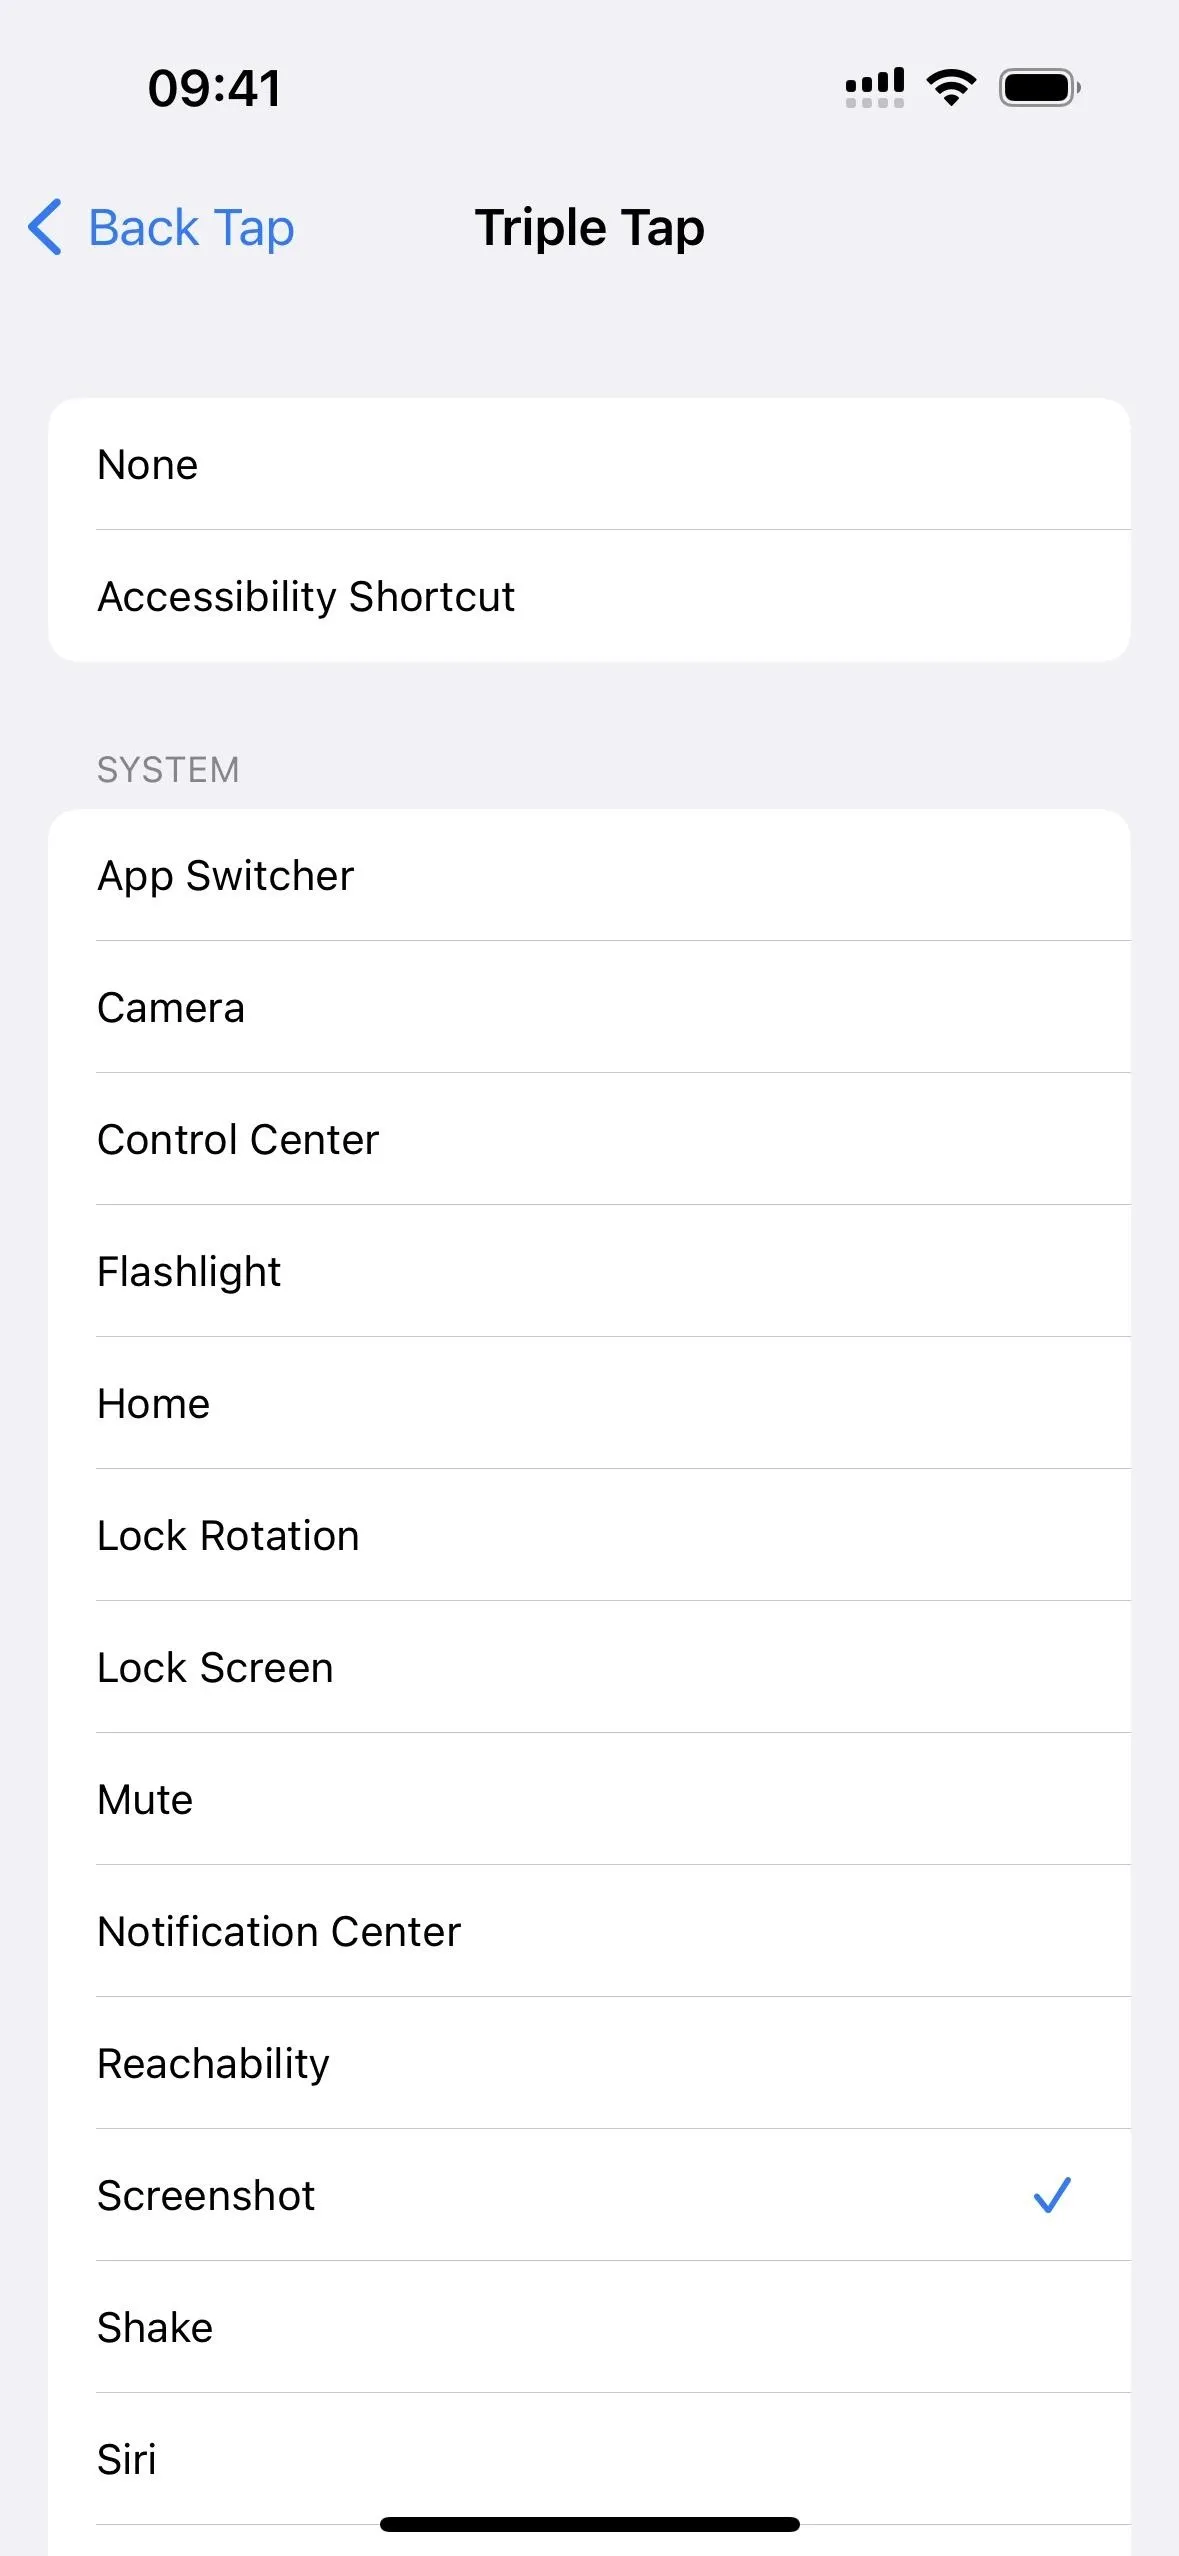
Navigate to Settings –> Accessibility –> Touch –> Back Tap, then pick your tap gesture, either "Double Tap" or "Triple Tap." From the System heading, choose "Screenshot." Now, whenever you need to take a screenshot, simply tap the back of your iPhone two or three times. It's faster than Siri, easier than hardware buttons, and only requires one finger to trigger.
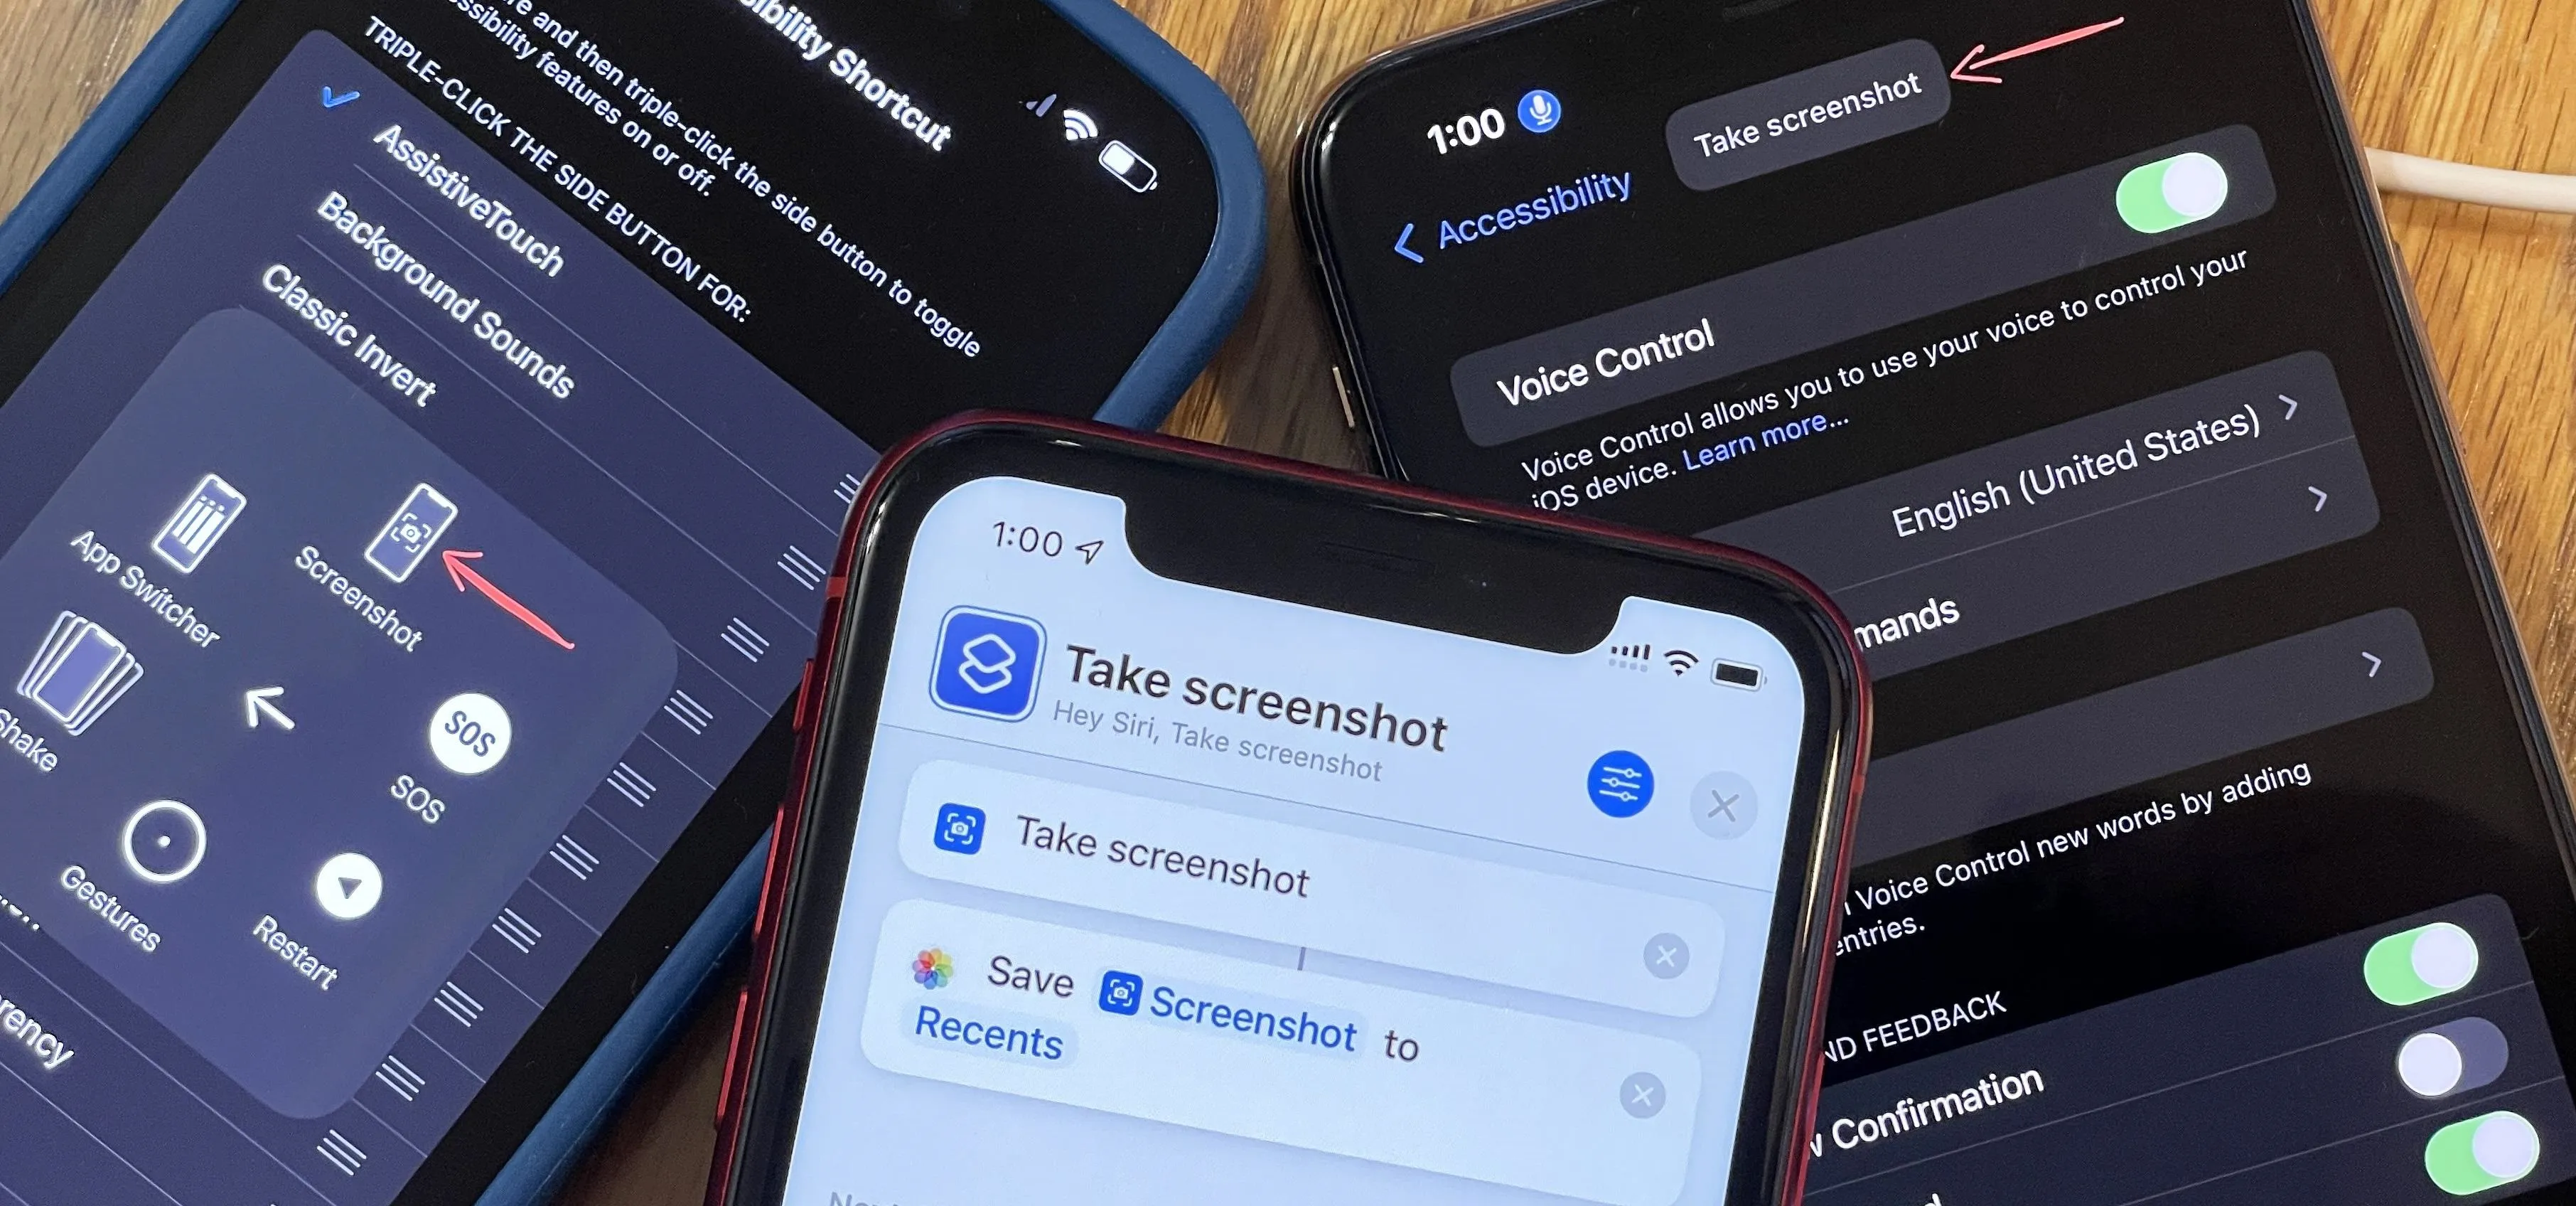
Use a Custom Shortcut
The Shortcuts app on iOS 14.5 or later includes a "Take Screenshot" action you could use in a custom shortcut, and doing so can be more beneficial than the previous screenshot-taking options.
- It produces no thumbnail. If you never edit or share your screenshots right away, this is the only way to eliminate those previews in the bottom left of your iPhone's display.
- You can save screenshots to another album. If you use custom albums in Photos, you can choose one of those to show your screenshots aside from just the Screenshots and Recents albums.
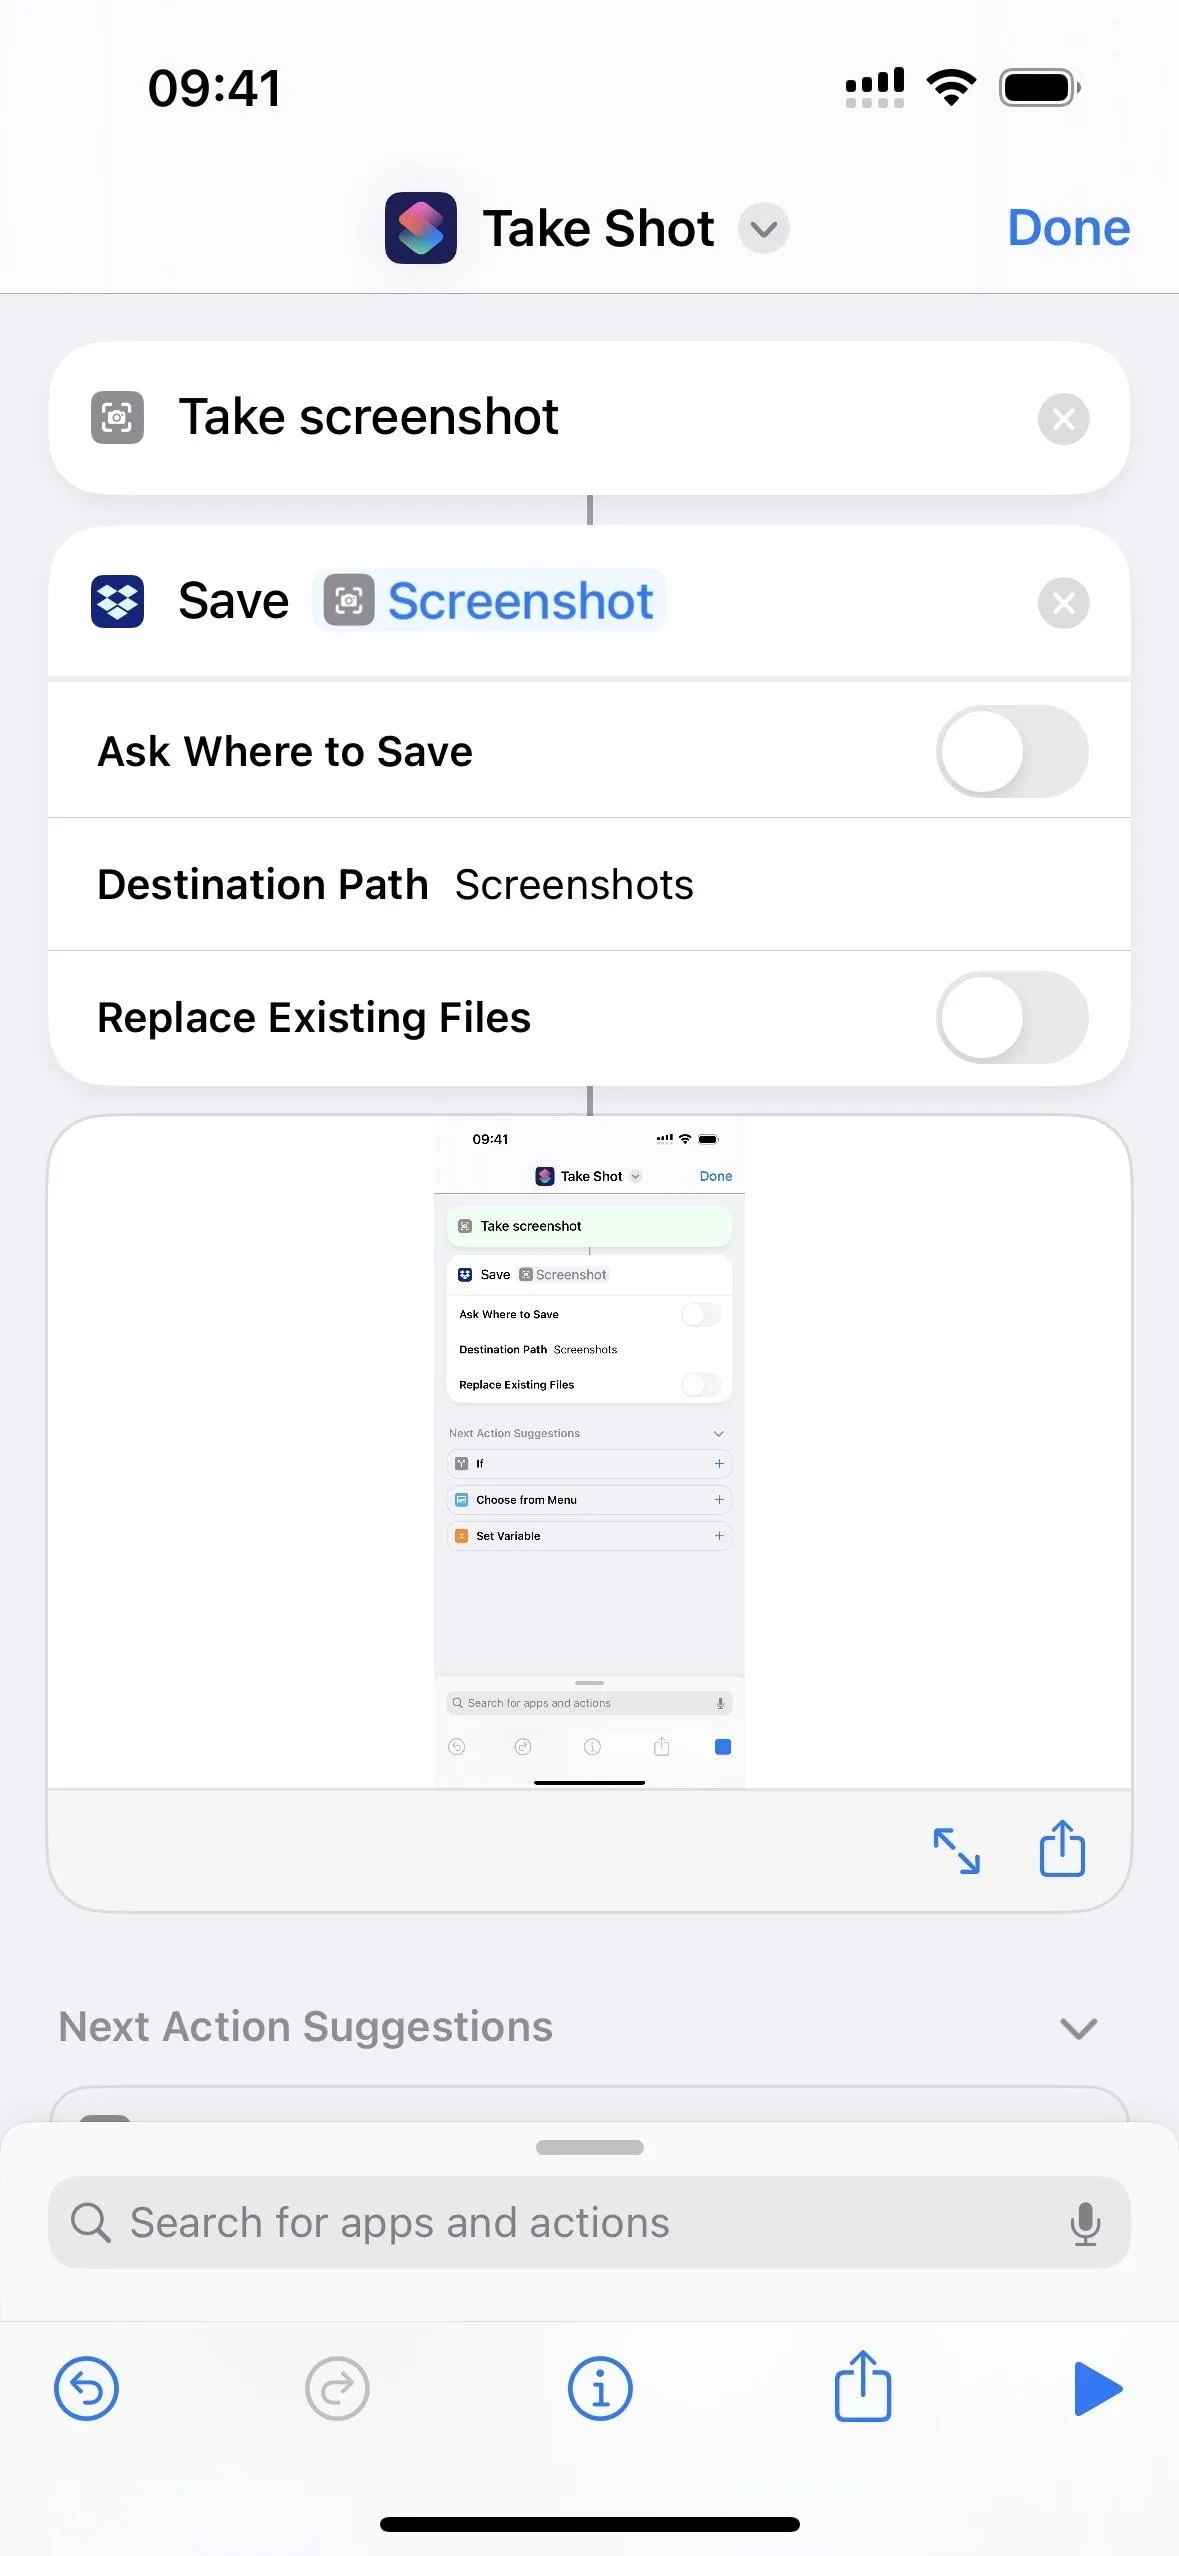
- You can save screenshots to another app. You can store all your screenshots in Files, Dropbox, or another location instead of Photos.
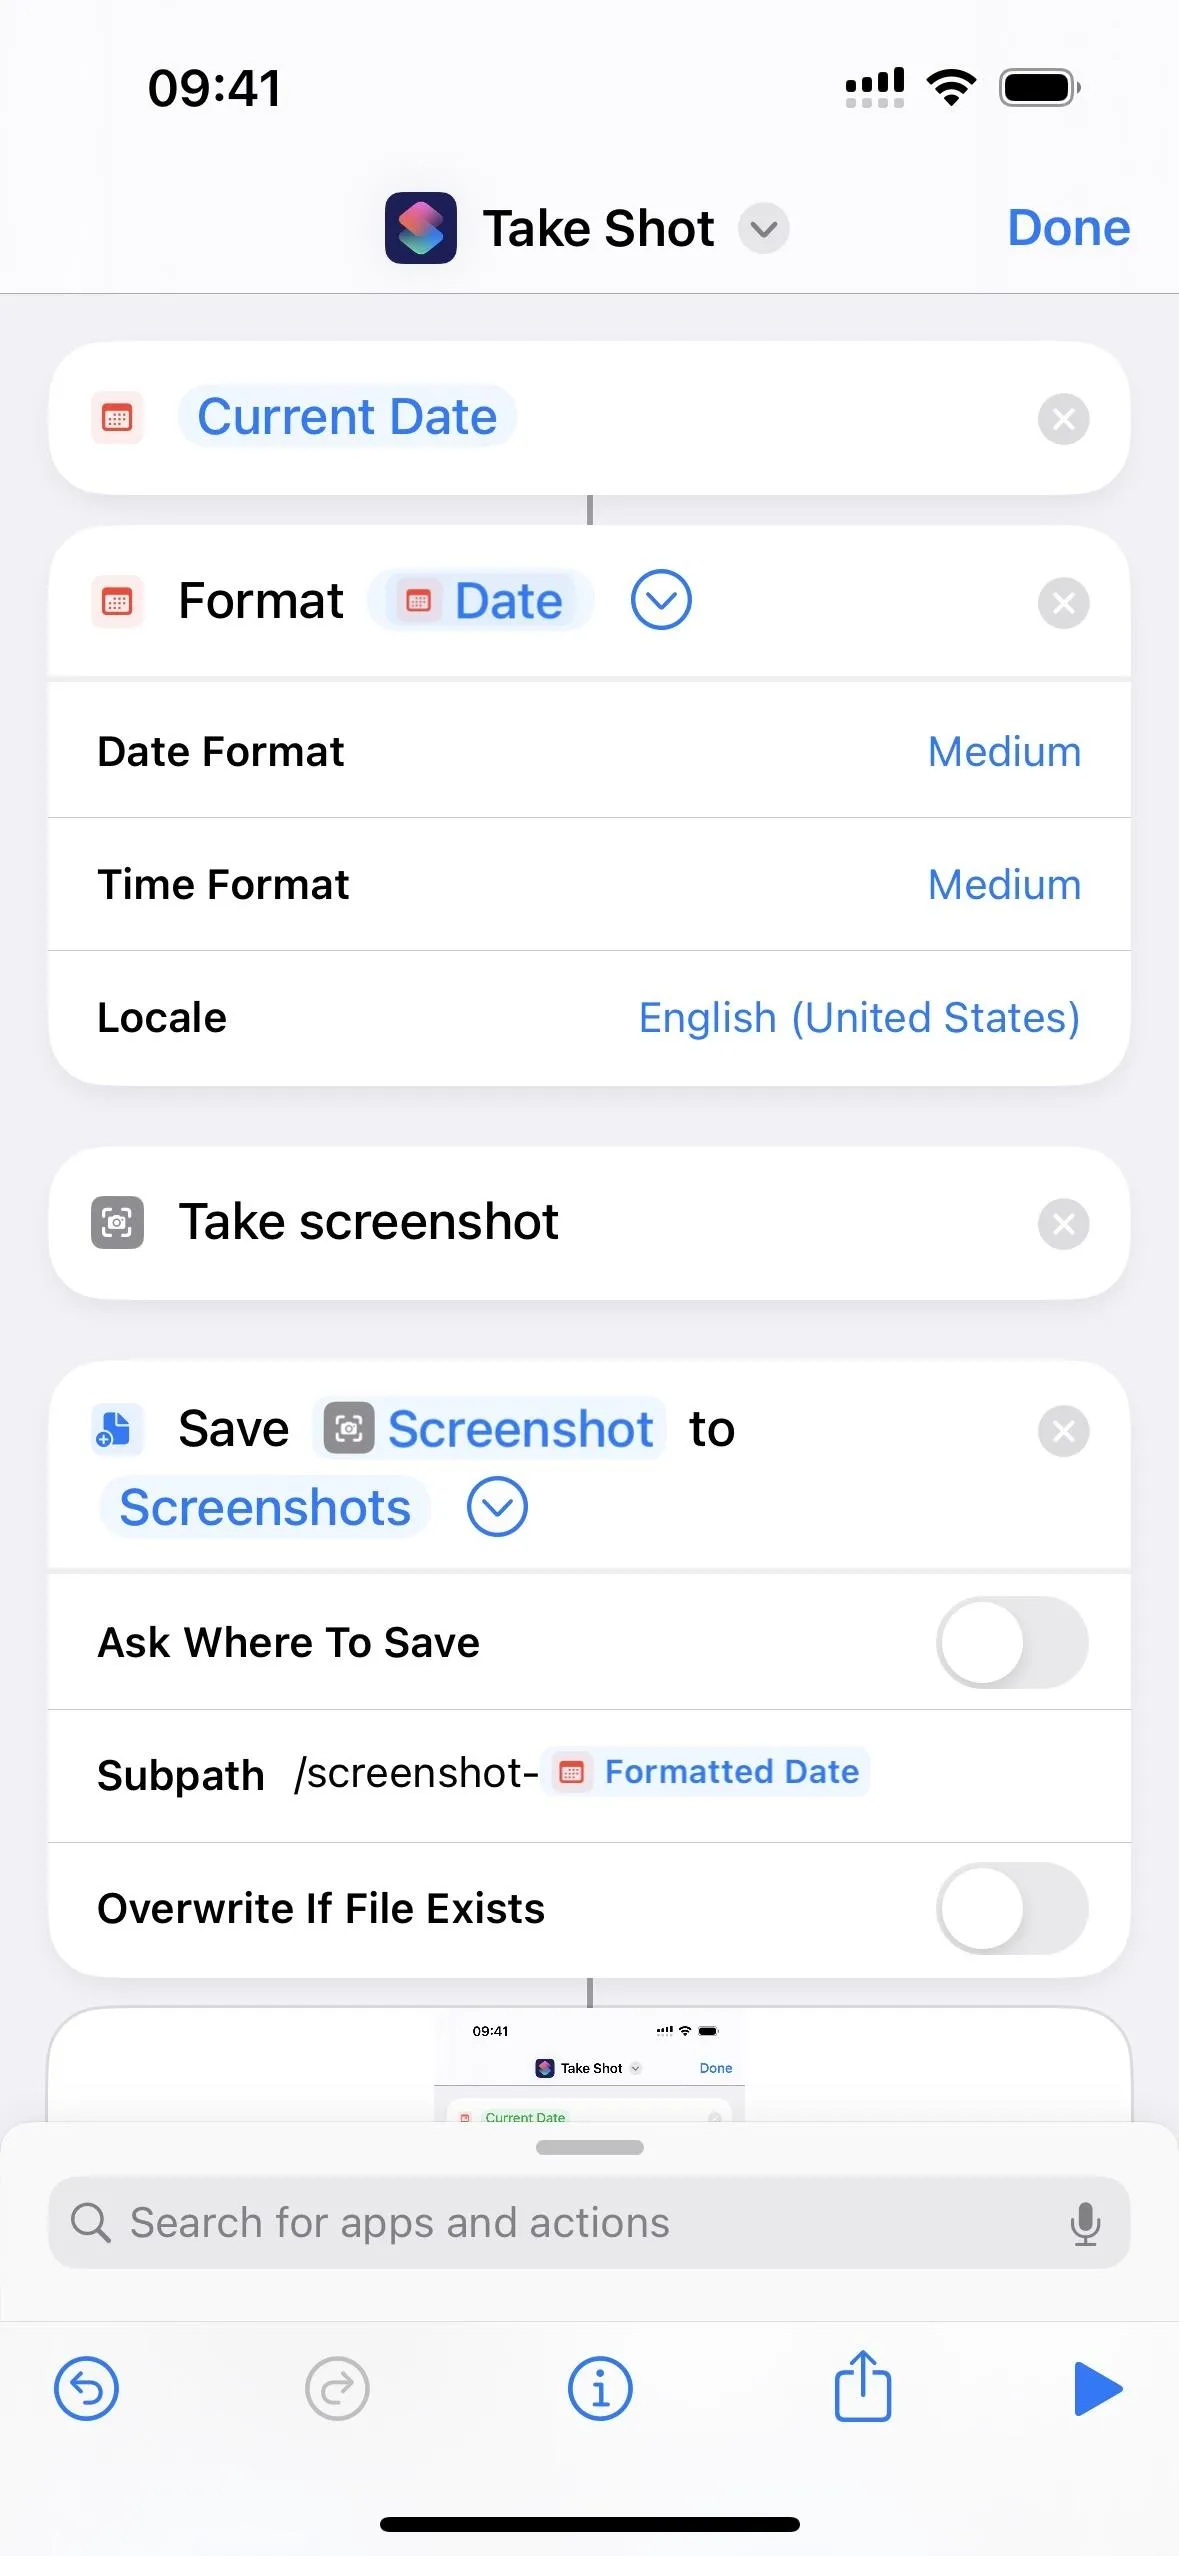
- You can change the file name. Shortcuts lets you specify a file name format when not saving screenshots to Photos. For example, you can add the date and time screenshot names.
- You can add another command for Siri. If you want to say something besides the Siri commands above, rename your shortcut and use that with Siri.
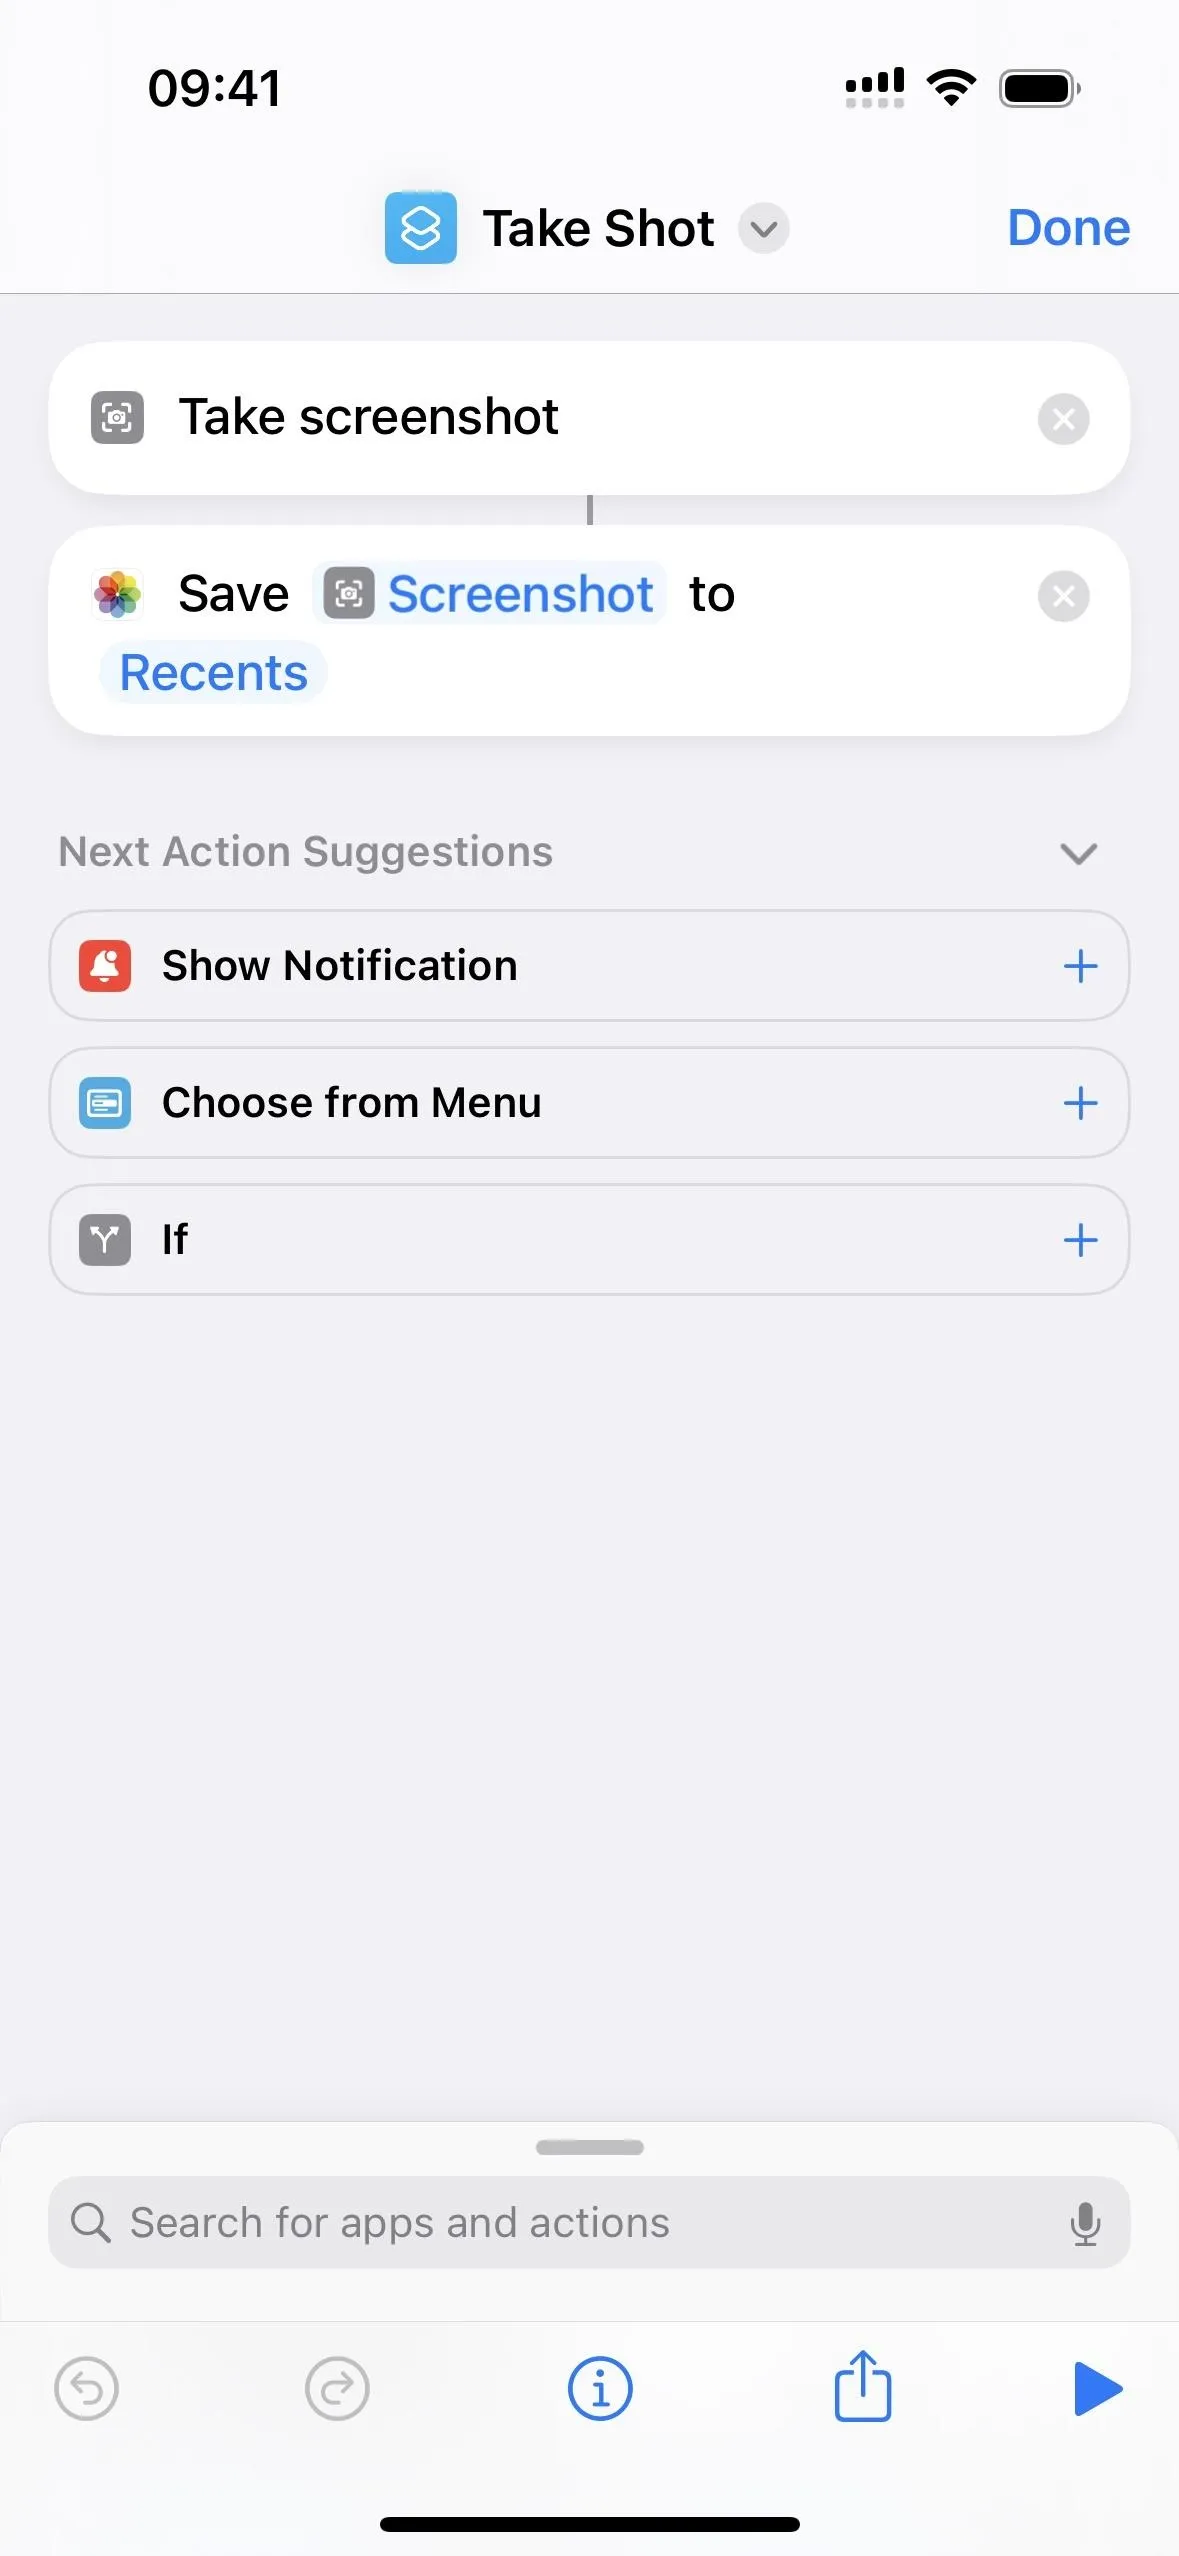
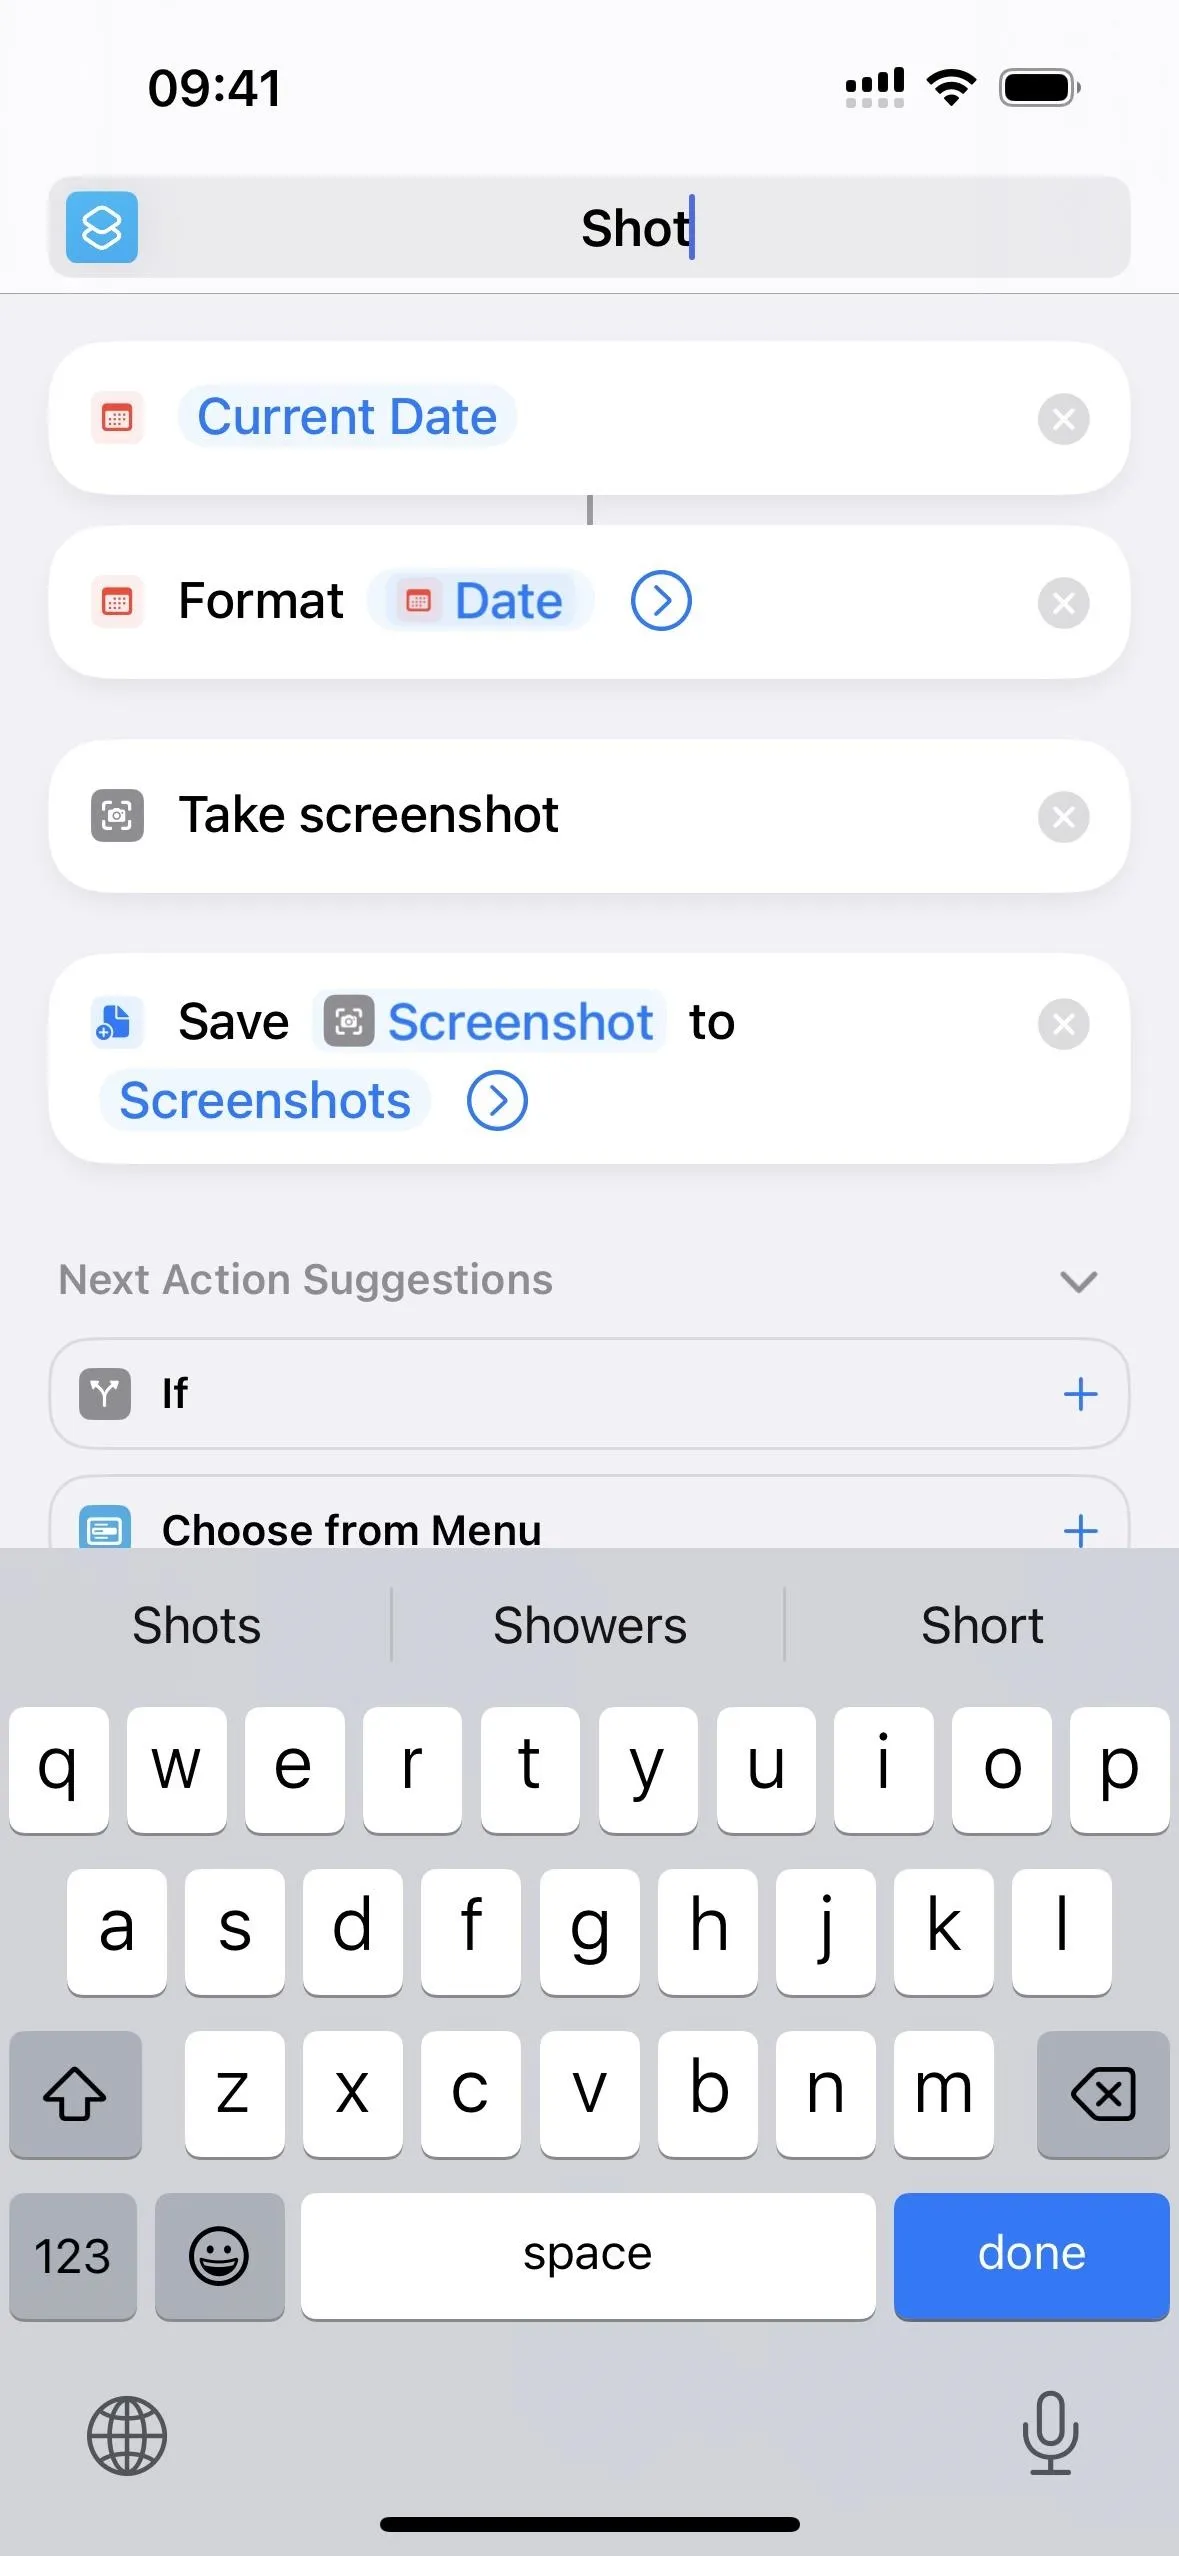
Start a new shortcut in your Shortcuts app and add the "Take Screenshot" action. This alone will take screenshots, but they won't save anywhere unless you specify a location. You can add the "Save to Photo Album" action to save images to your Recents and Screenshots albums. You could also add it to a custom album, but it will still appear in Recents and Screenshots.
To save screenshots to a directory in Files, add the "Save File" action instead. You can choose between iCloud Drive, On My iPhone, any computer or file servers Files is connected to, or even external drives. Some third-party apps enabled in Files may also work, like Working Copy, but many do not support the feature because of a lack of developer documentation on Apple's part.
Some third-party storage services have their own shortcut actions you could use, such as Dropbox, which has the "Save Dropbox File" action.
After creating your screenshot shortcut, you can trigger it in various ways:
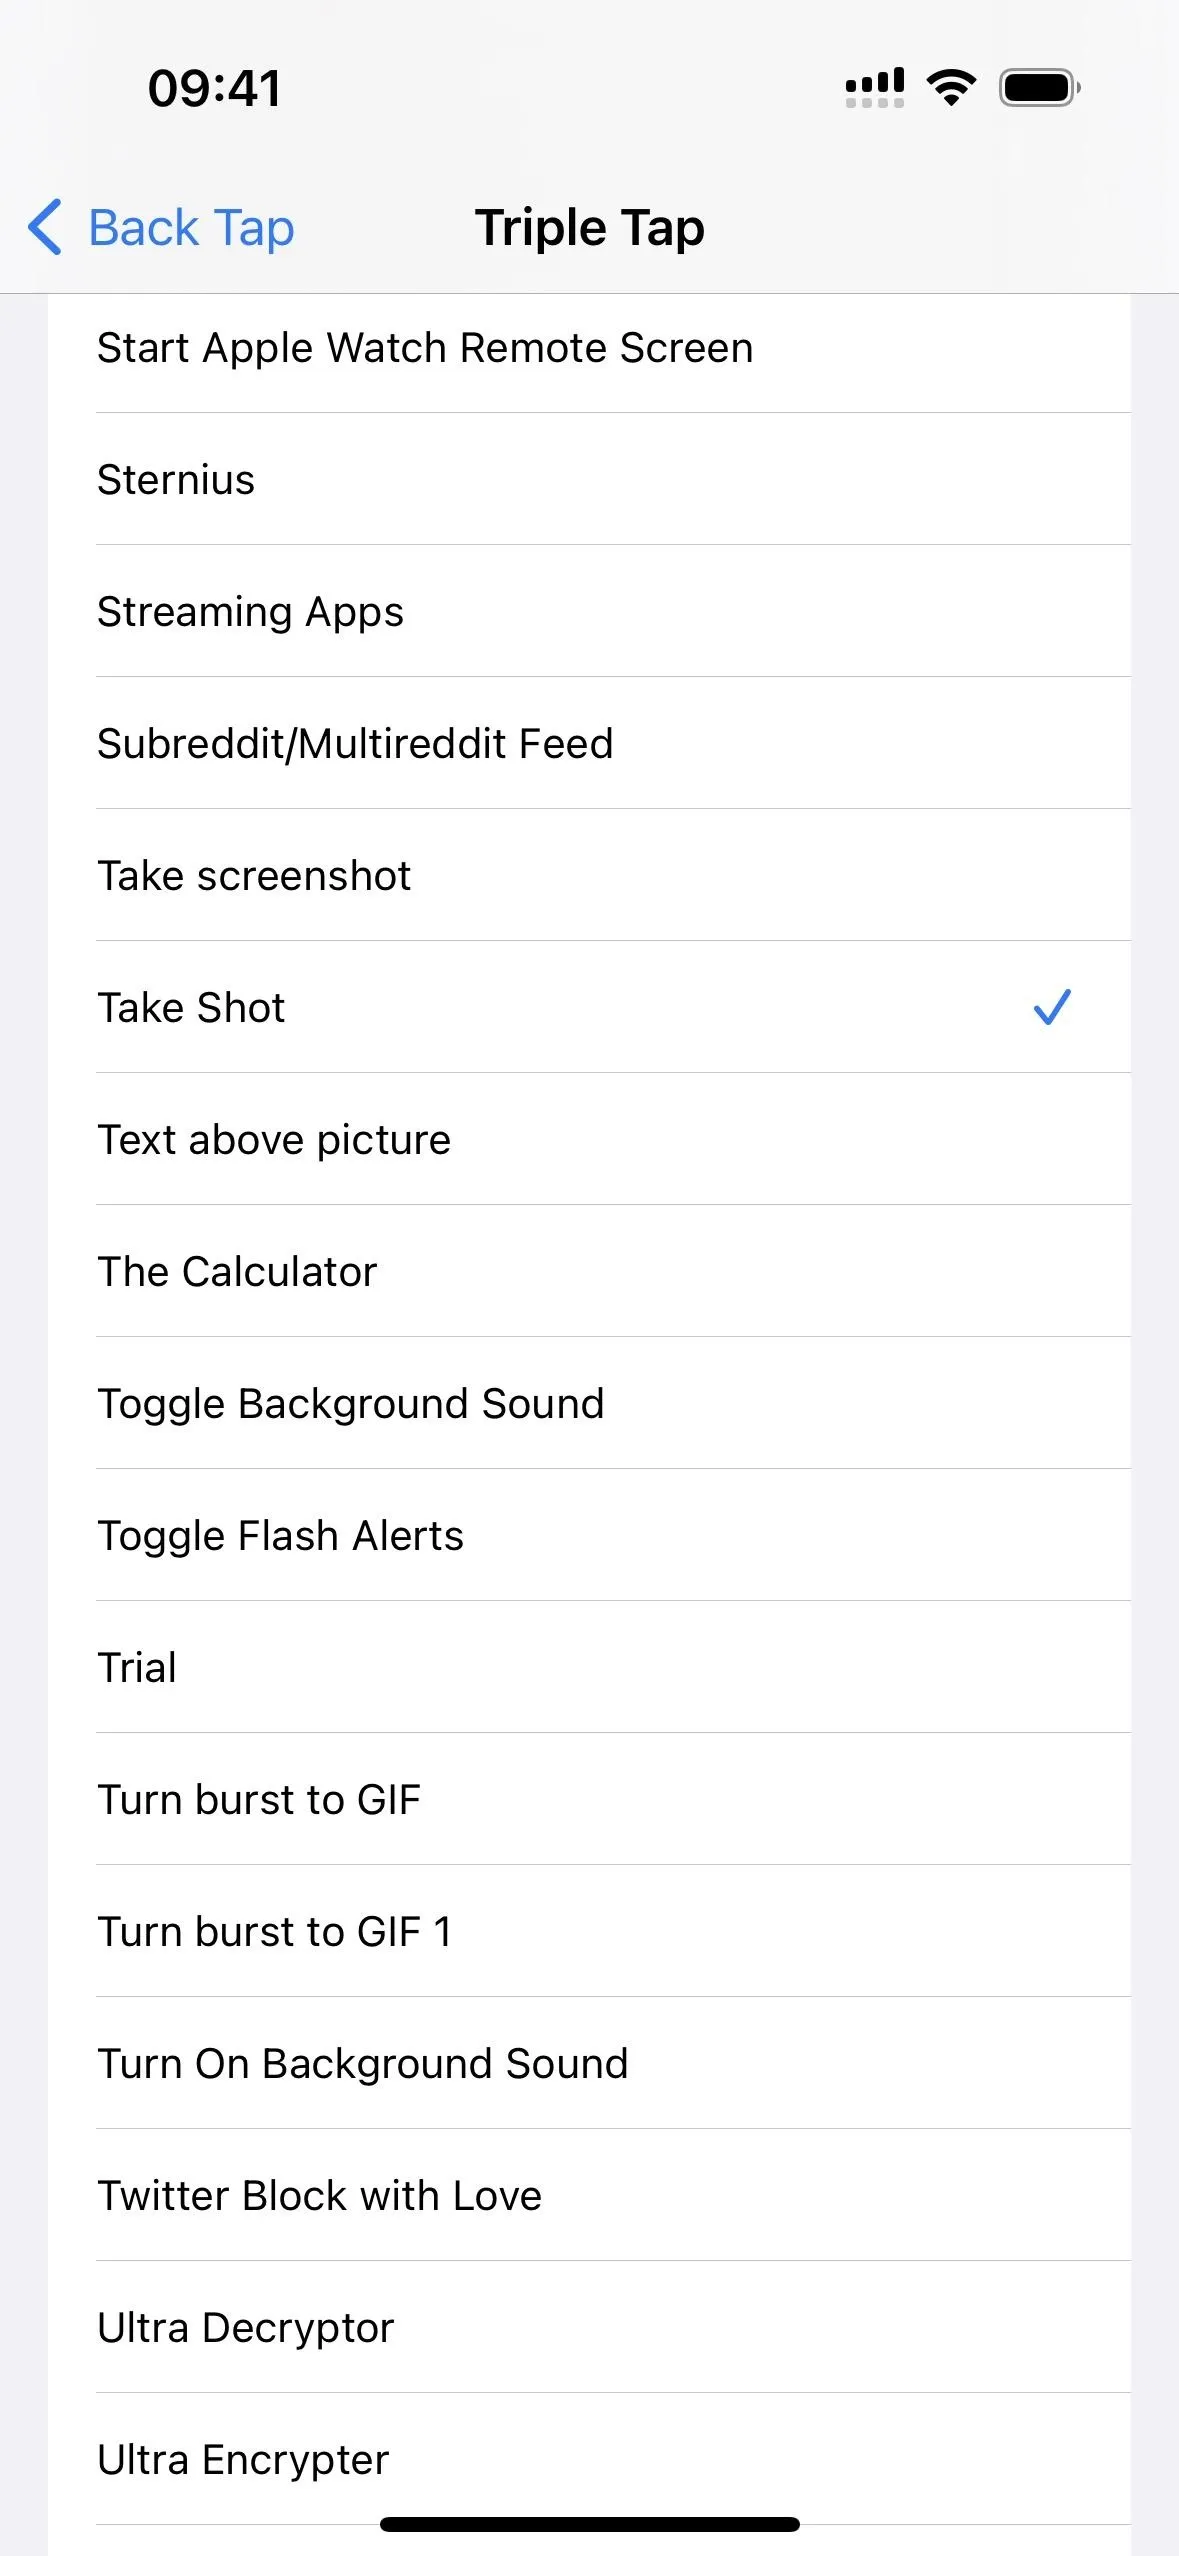
- Use Back Tap: Use the instructions above to add a Back Tap gesture, but choose your shortcut's name instead below the Shortcuts heading.
- Use Siri: Change the shortcut's name to whatever command you want to use with Siri, Hey Siri, or Type to Siri. Don't pick a screenshot command that Siri already uses; it may trigger a regular screenshot.
- Use AssistiveTouch: Use the instructions below to add the screenshot function as a custom AssistiveTouch action.
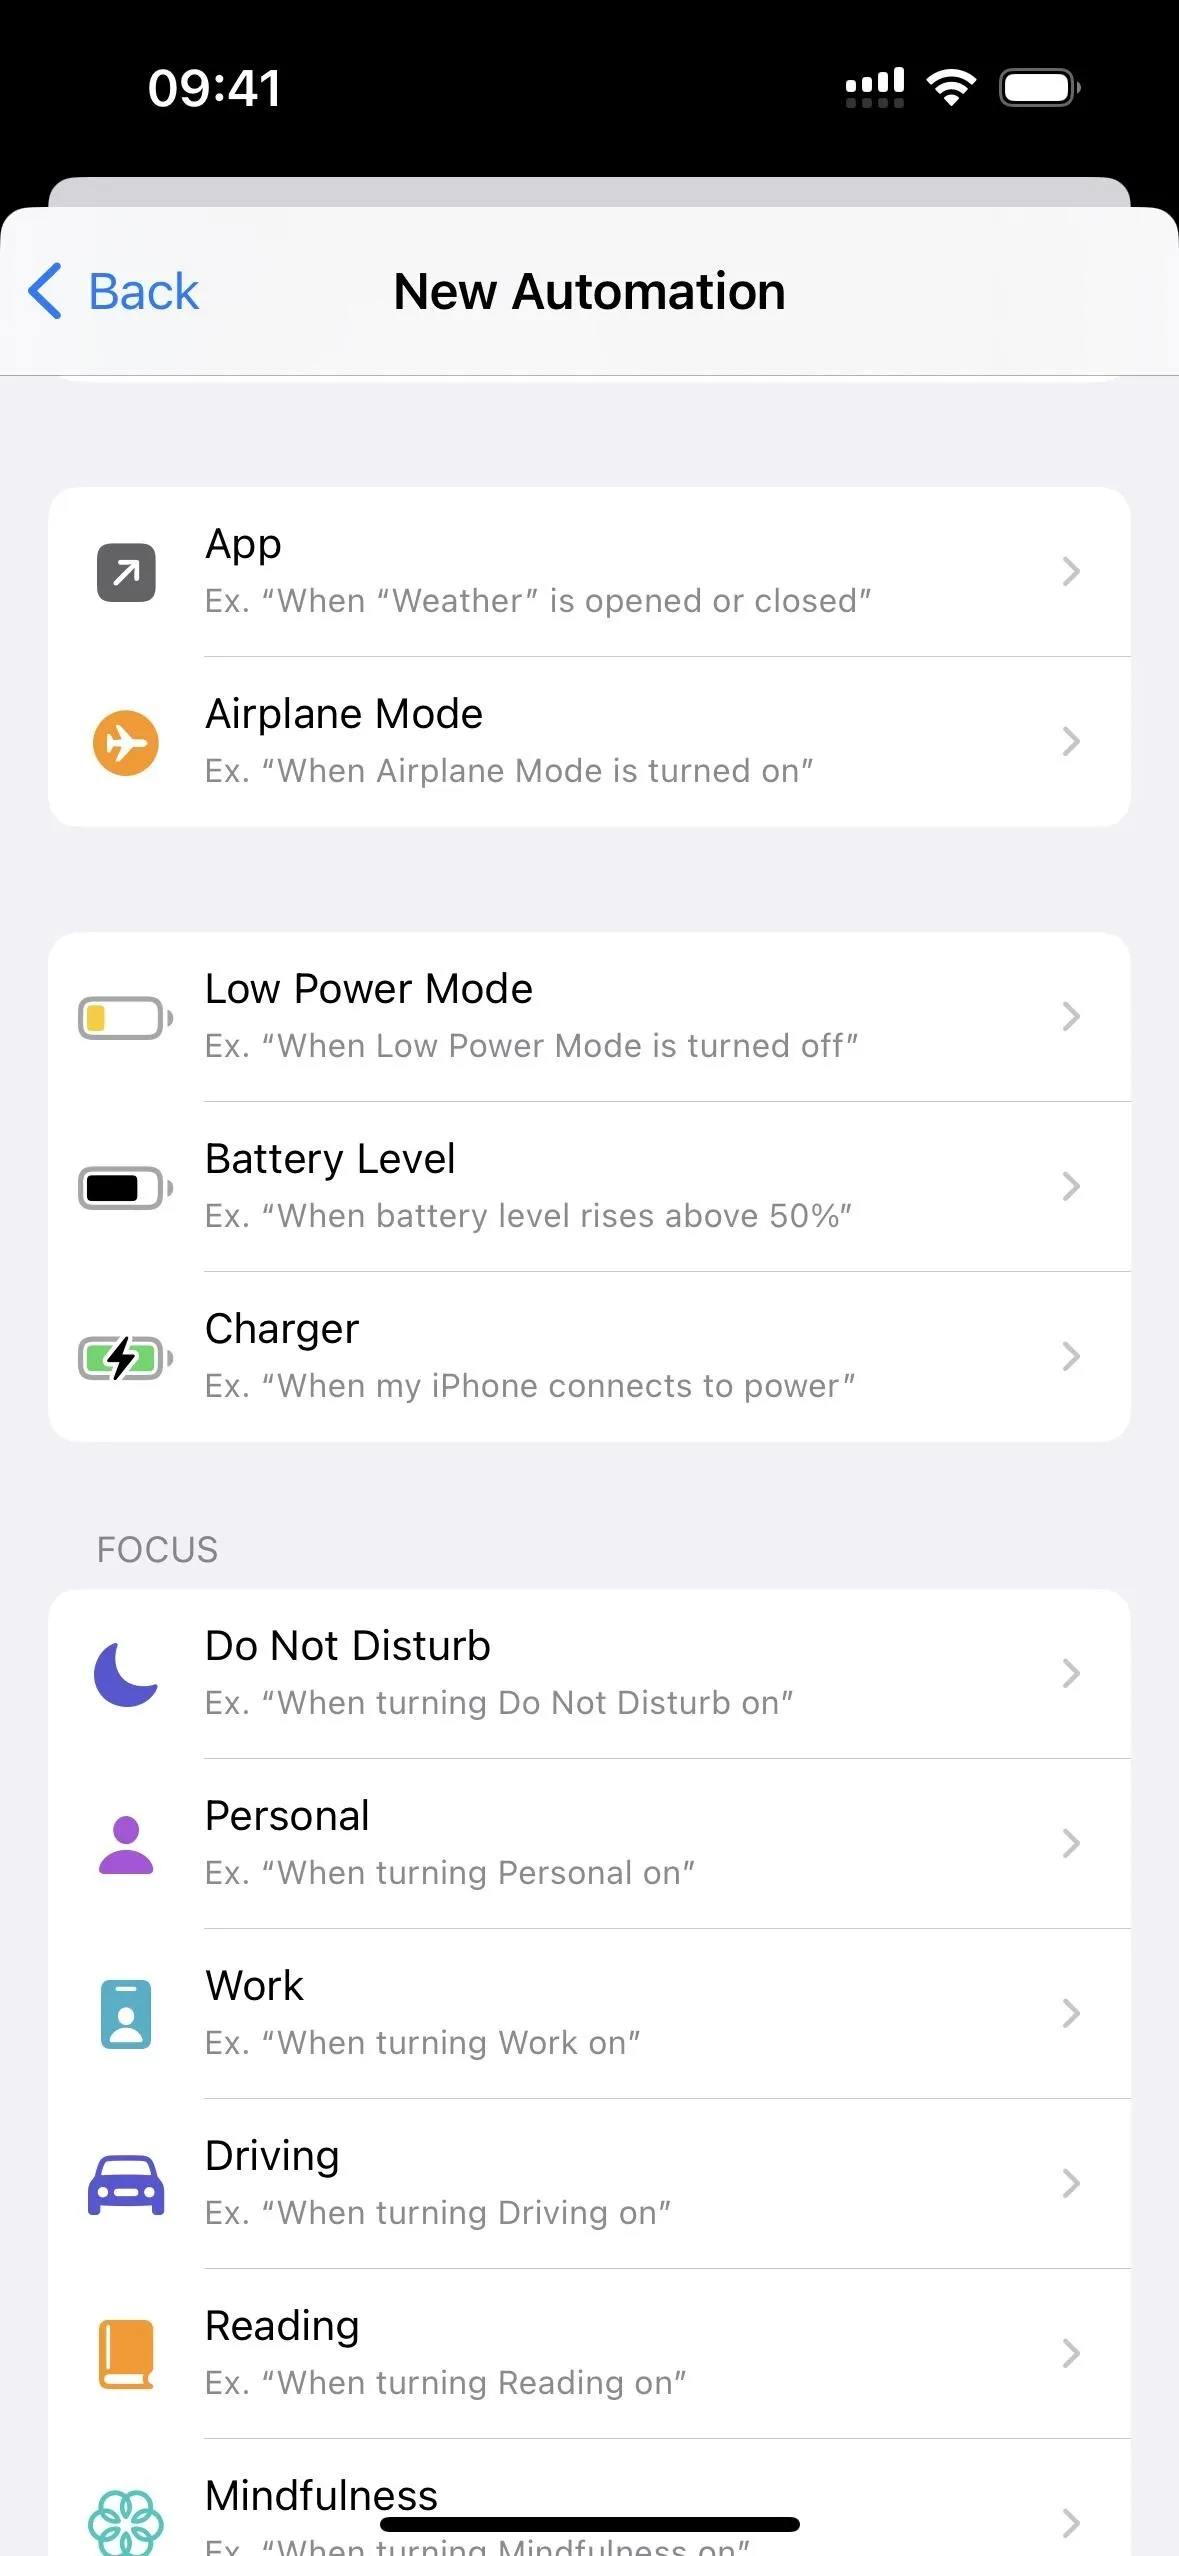
- Automate it: If you want your iPhone to take screenshots each hour, when you charge your iPhone, whenever a Focus starts, or another possible trigger, you can use the "Automation" tab to build an automation, set the trigger, and select or create the screenshot-taking shortcut.
If you are getting banner notifications from Shortcuts in your screenshots that you don't want, you can disable notifications for Shortcuts from your Screen Time settings, as odd as that sounds.
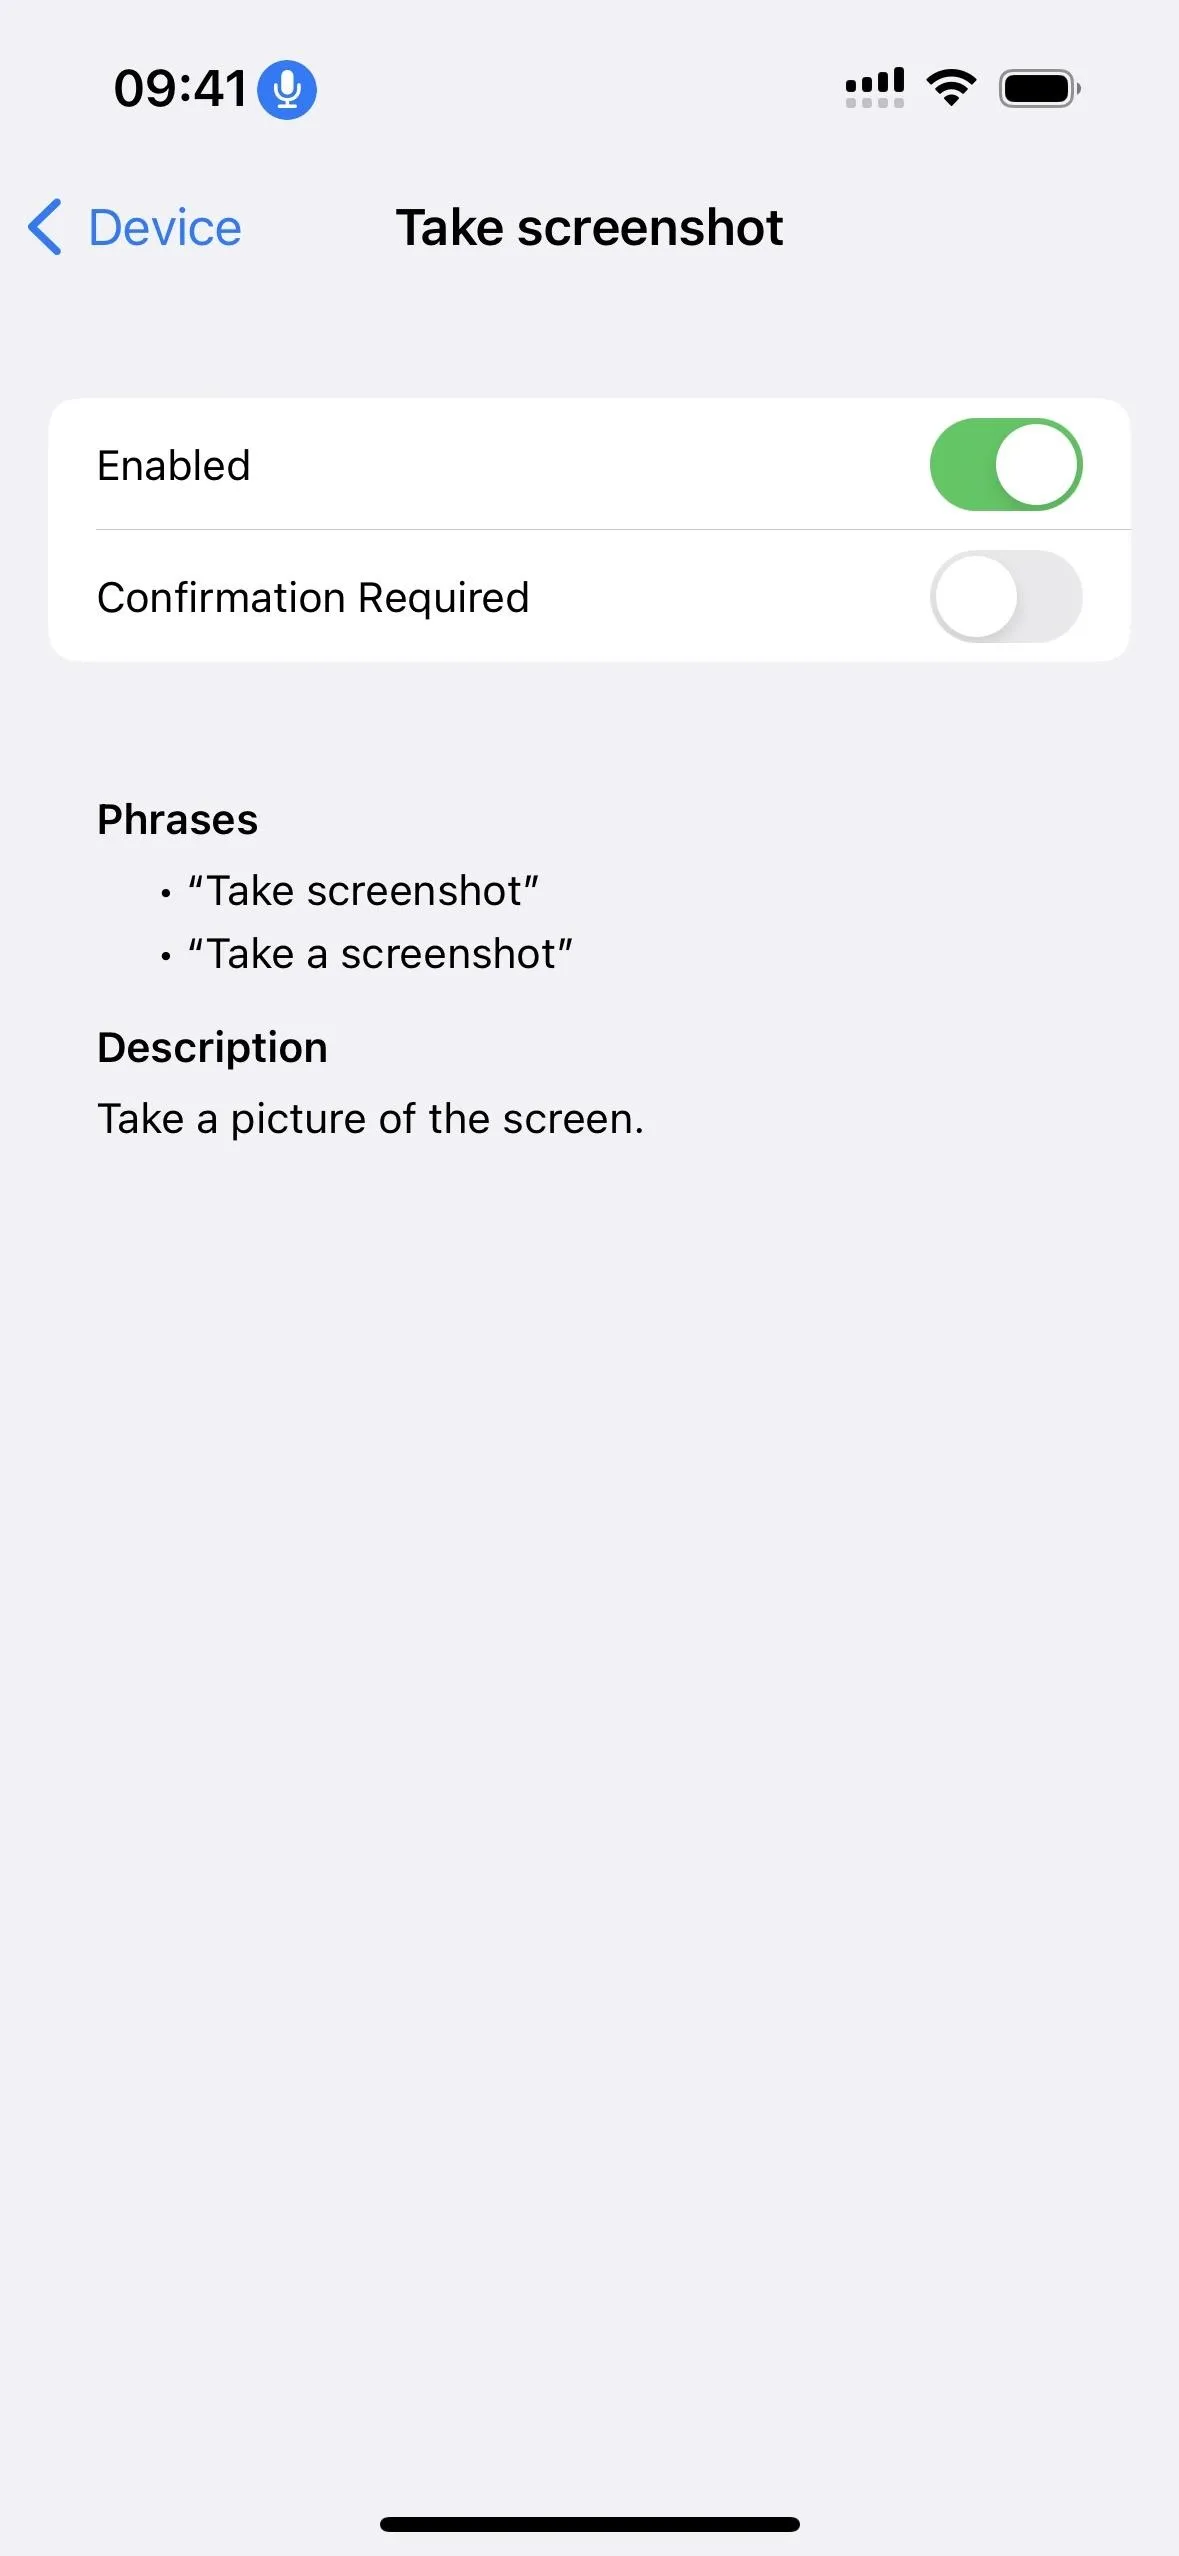
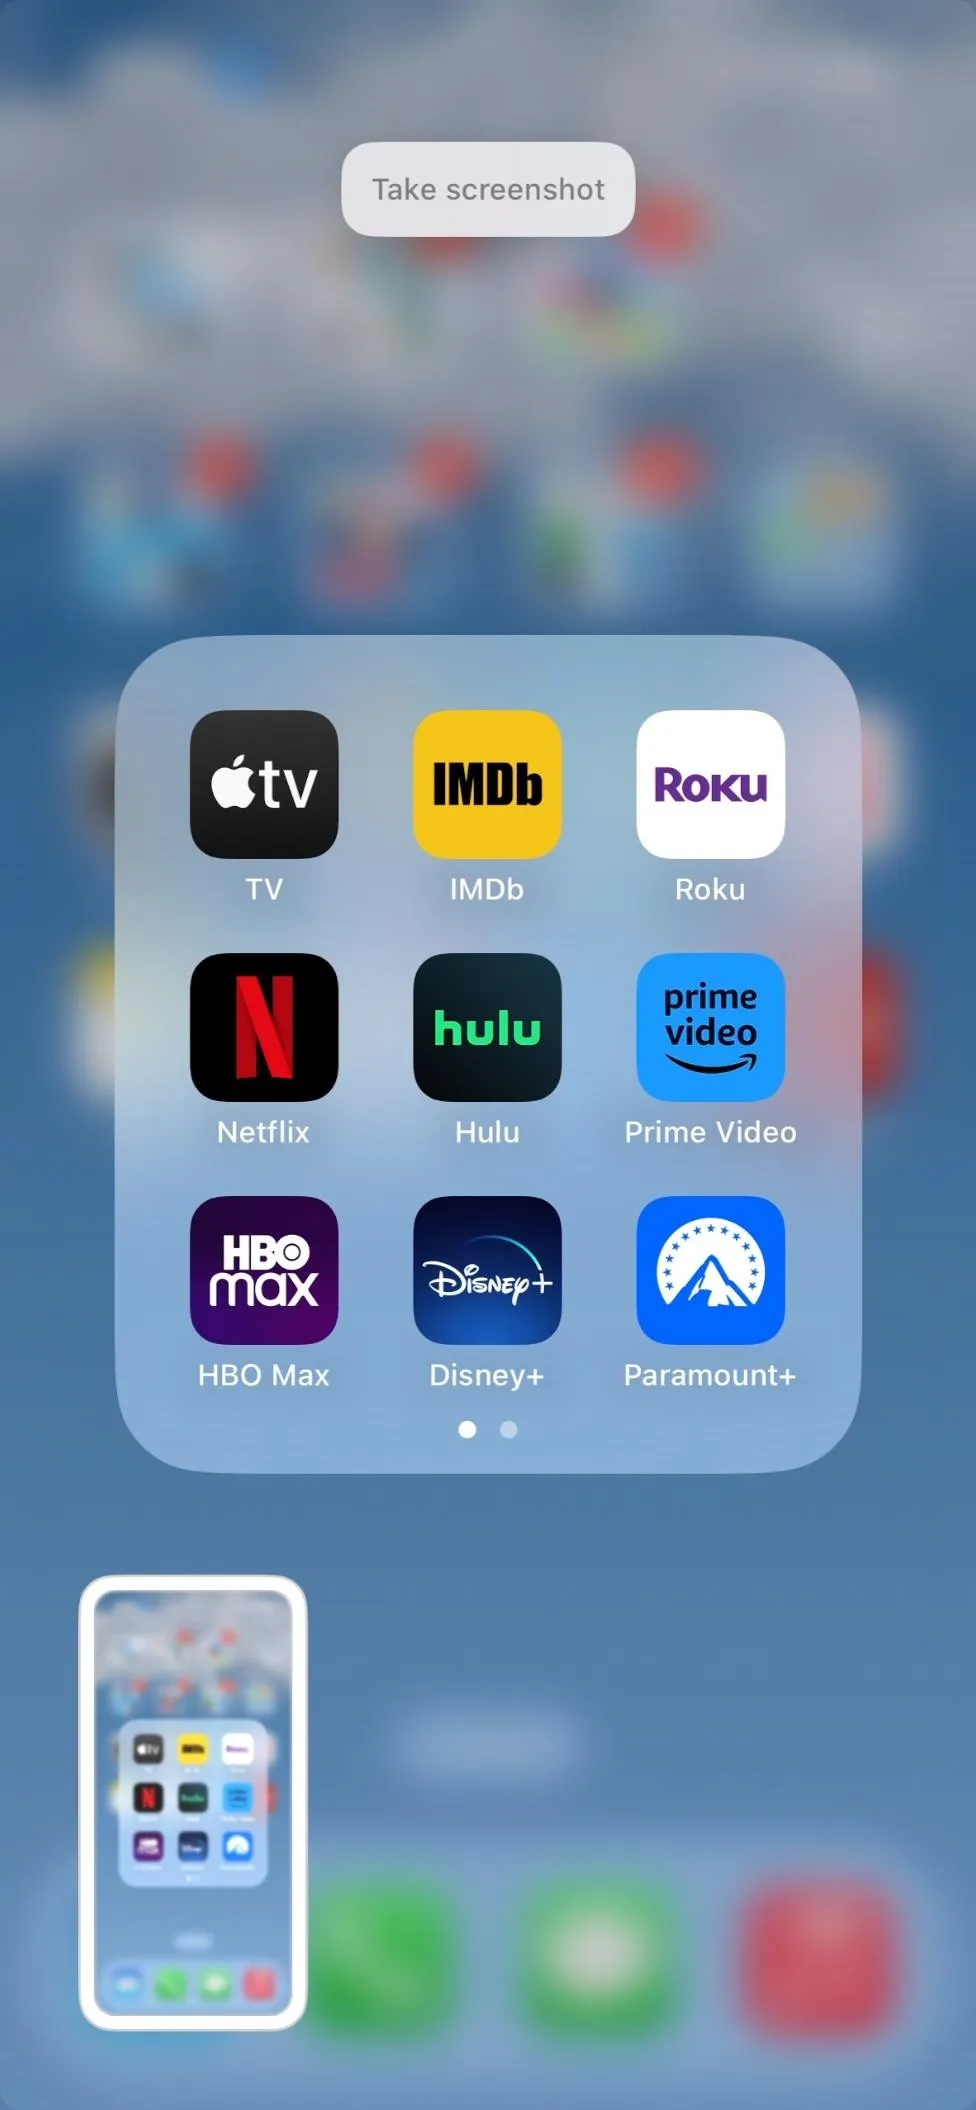
Use Voice Control
Voice Control, available since iOS 13, is another accessibility feature you could use to take screenshots. It lets you control your iPhone completely hands-free, using various Voice Control commands to simulate presses, taps, swipes, scrolls, and other gestures. You can even select items on the screen, write and edit text, turn up your volume, drag and drop content, and use other accessibility features.
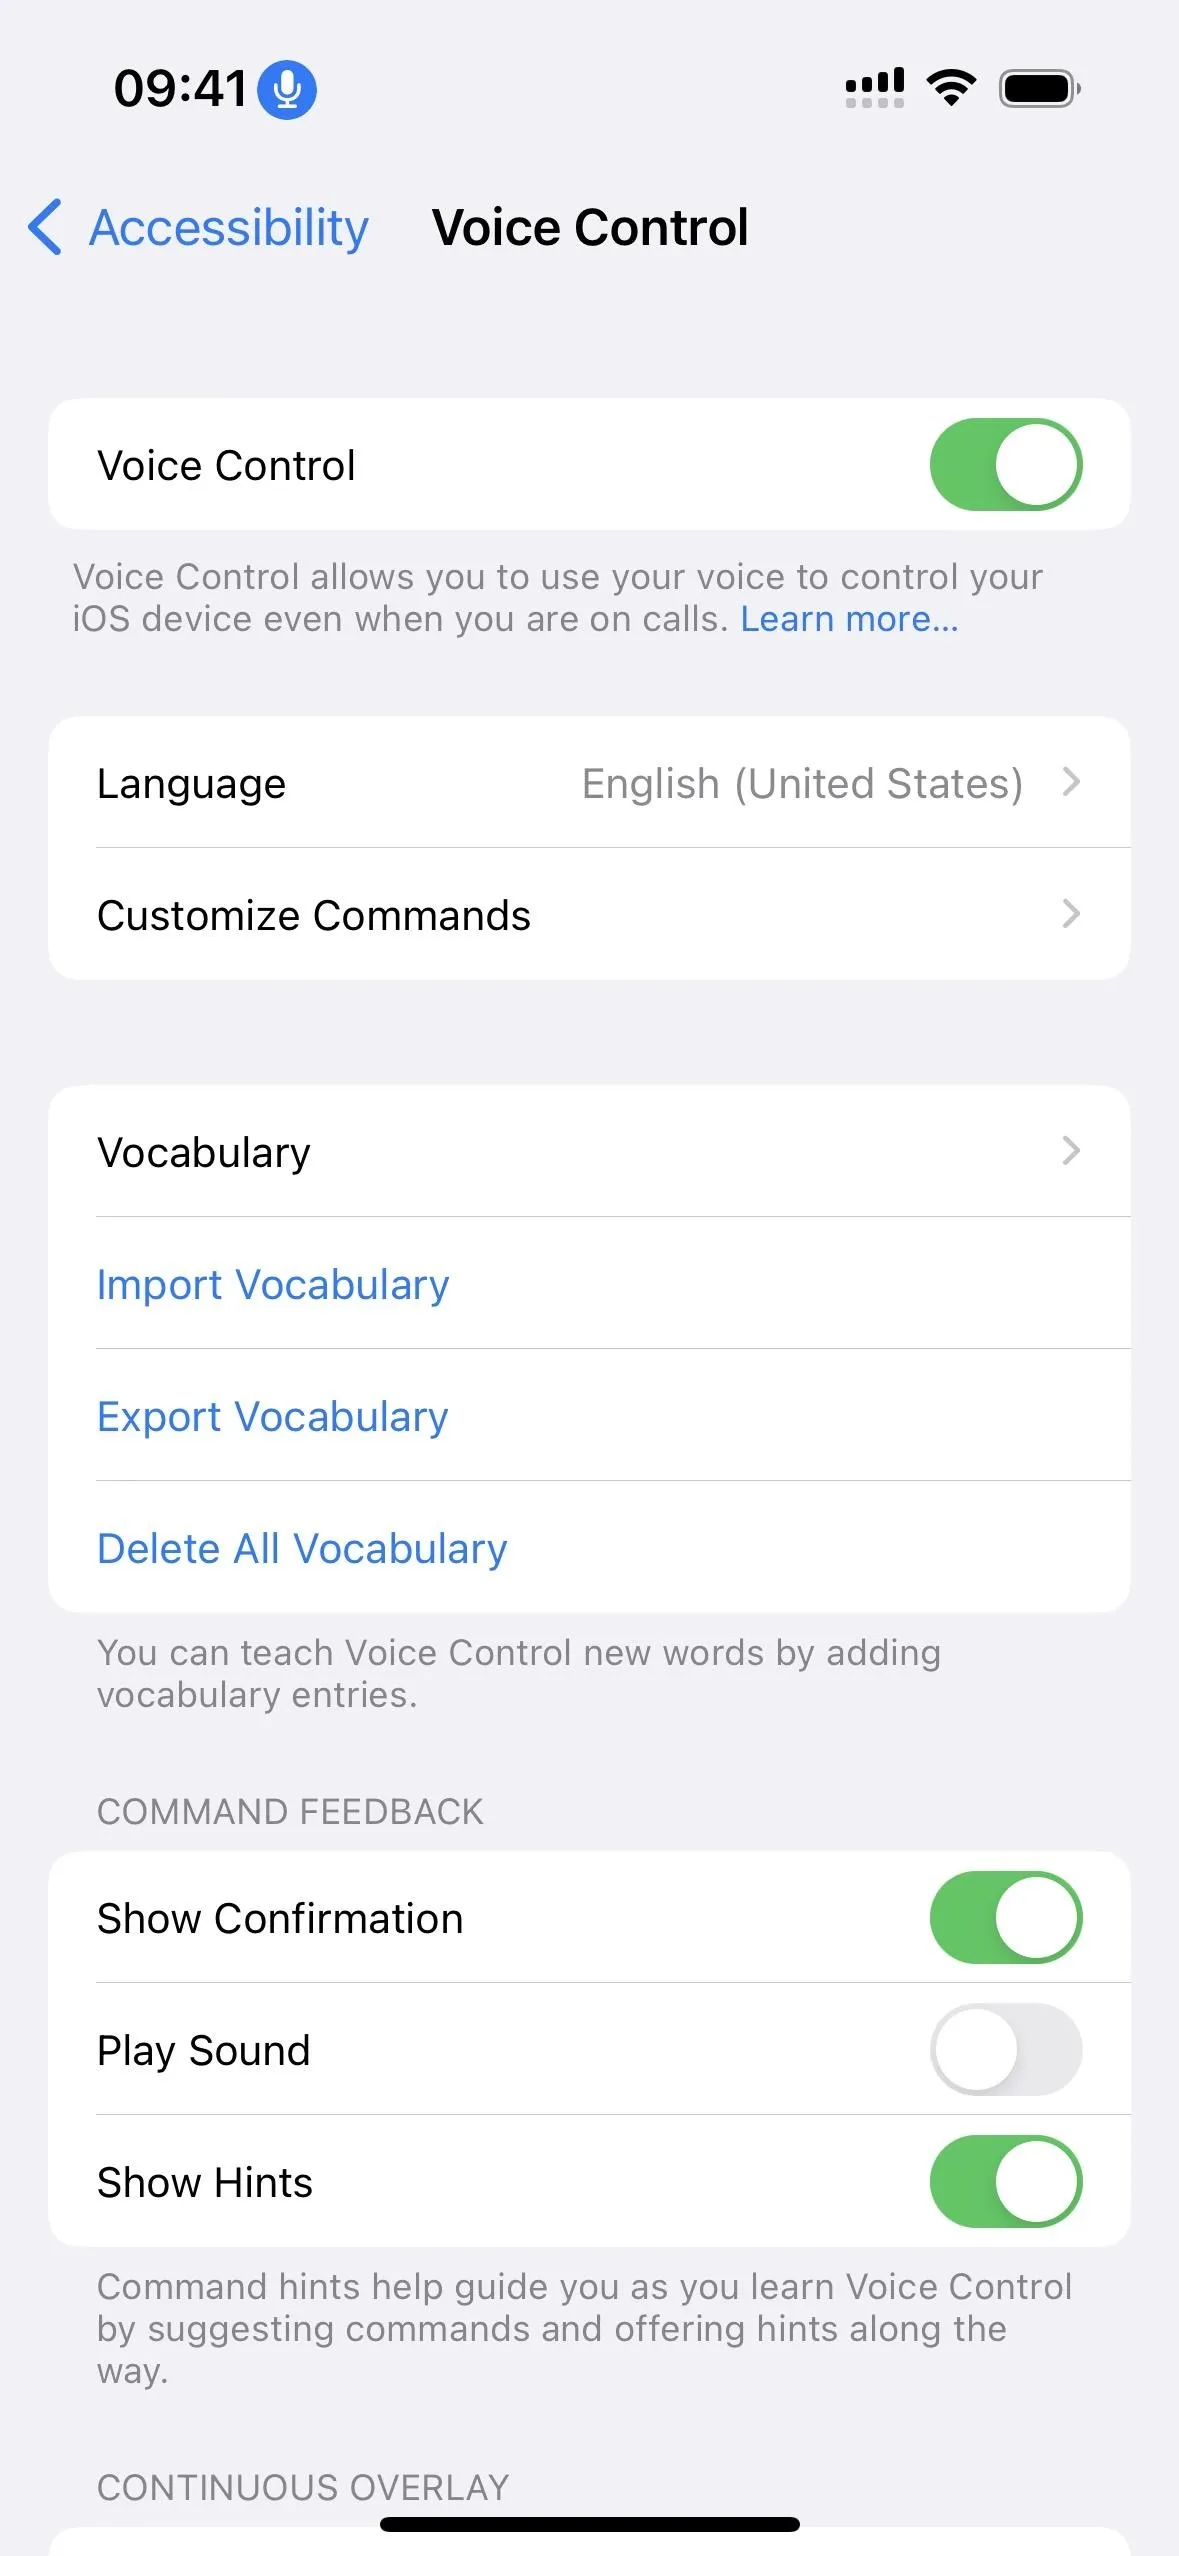
Go to Settings –> Accessibility –> Voice Control, then toggle on or off the Voice Control switch. You could also use Siri commands to enable Voice Control, assign it to a Back Tap gesture, add it to your triple-click Accessibility Shortcut, or toggle it from the Accessibility Shortcuts control in Control Center to avoid going into the Settings app each time. To disable Voice Control using Voice Control, say "Turn off Voice Control" or "Turn Voice Control off."
When enabled, you'll see a blue speakerphone icon appear in your status bar, and Hey Siri will not work since your iPhone can't listen for Hey Siri and Voice Control commands simultaneously. To take a screenshot, say "Take screenshot" or "Take a screenshot."
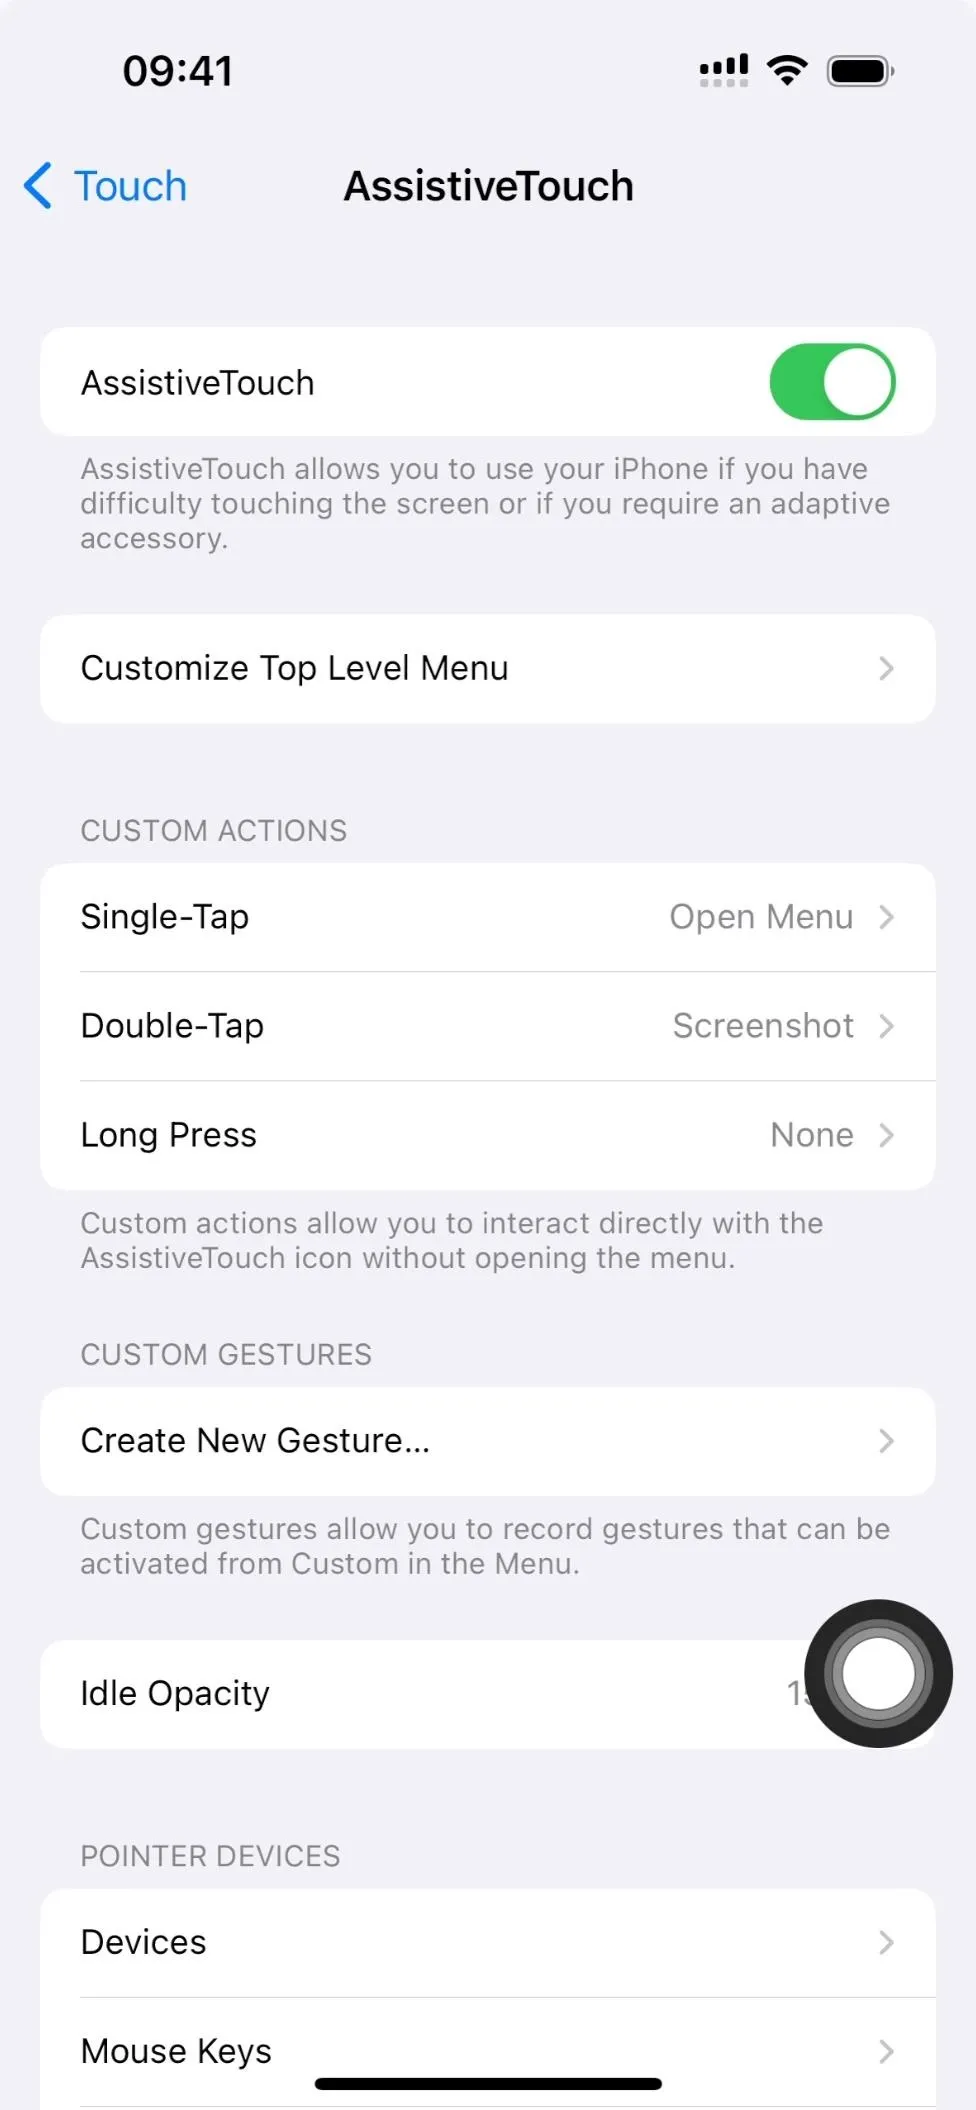
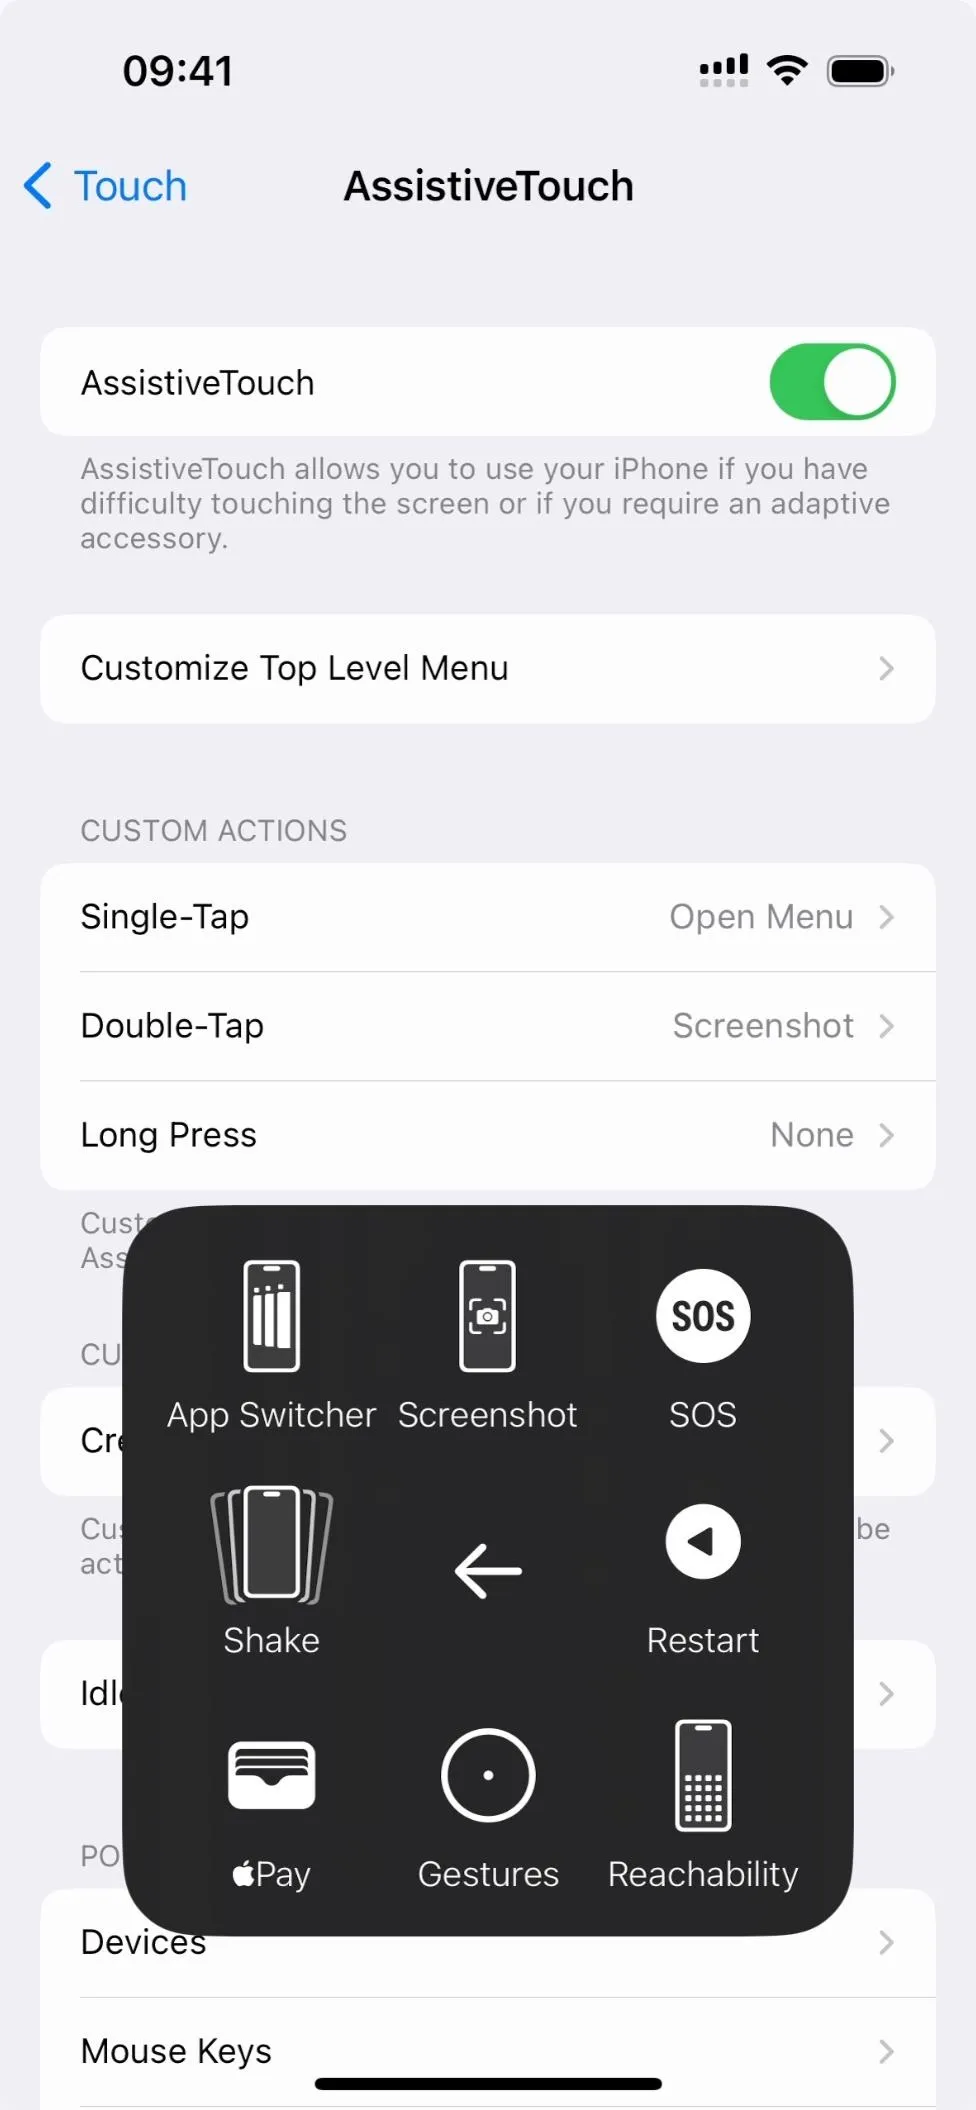
Use AssistiveTouch
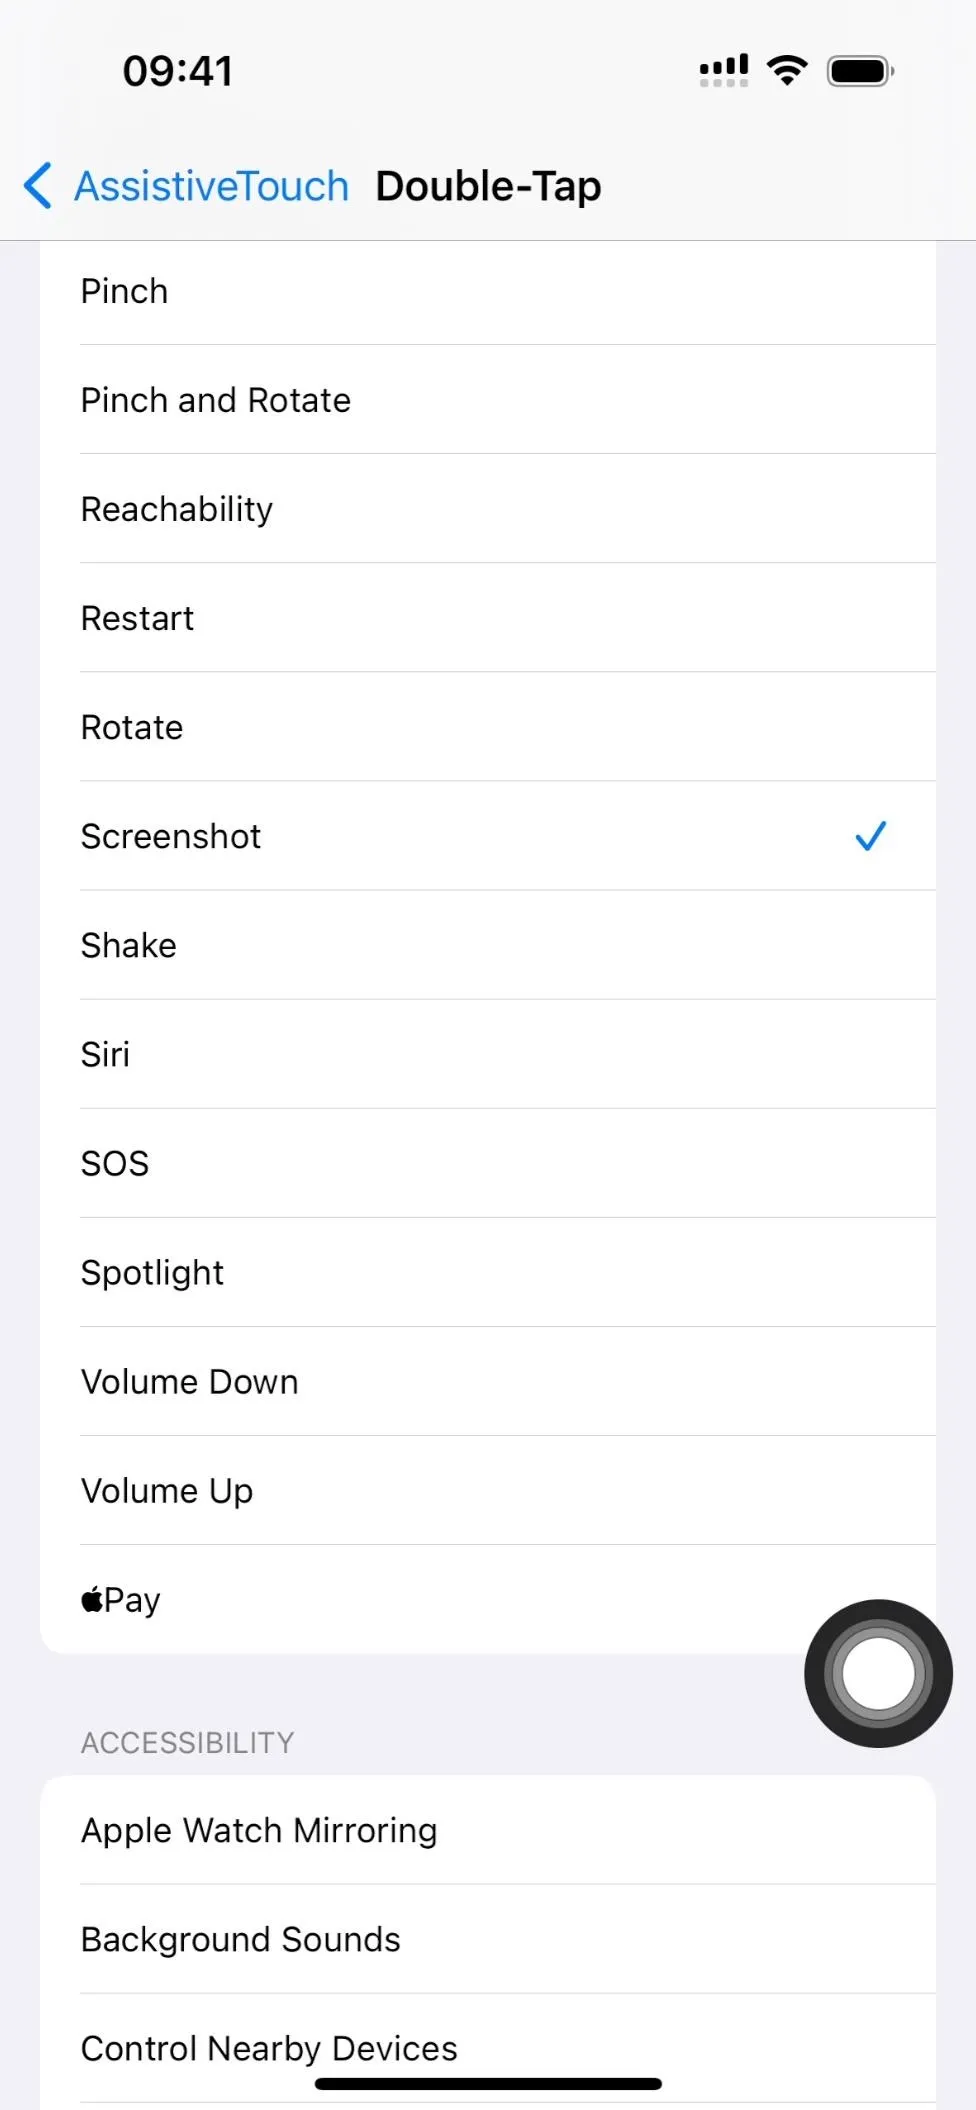
Yet another accessibility feature you can take advantage of for screenshots is AssistiveTouch, and its screenshot abilities have been around since iOS 6.
Go to Settings –> Accessibility –> Touch –> AssistiveTouch, then toggle on or off the AssisitveTouch switch. You could also use Siri commands to enable AssistiveTouch, assign it to a Back Tap gesture, add it to your triple-click Accessibility Shortcut, or toggle it from the Accessibility Shortcuts control in Control Center to avoid going into the Settings app each time.
As with Siri, the AssistiveTouch on-screen button will disappear right before you trigger a screenshot, leaving it out of the saved image. If you want to capture the AssistiveTouch interface, you'll have to use a different screenshot method in this guide but know that some may hide the active or idle AssistiveTouch button.
Use Screen Mirroring
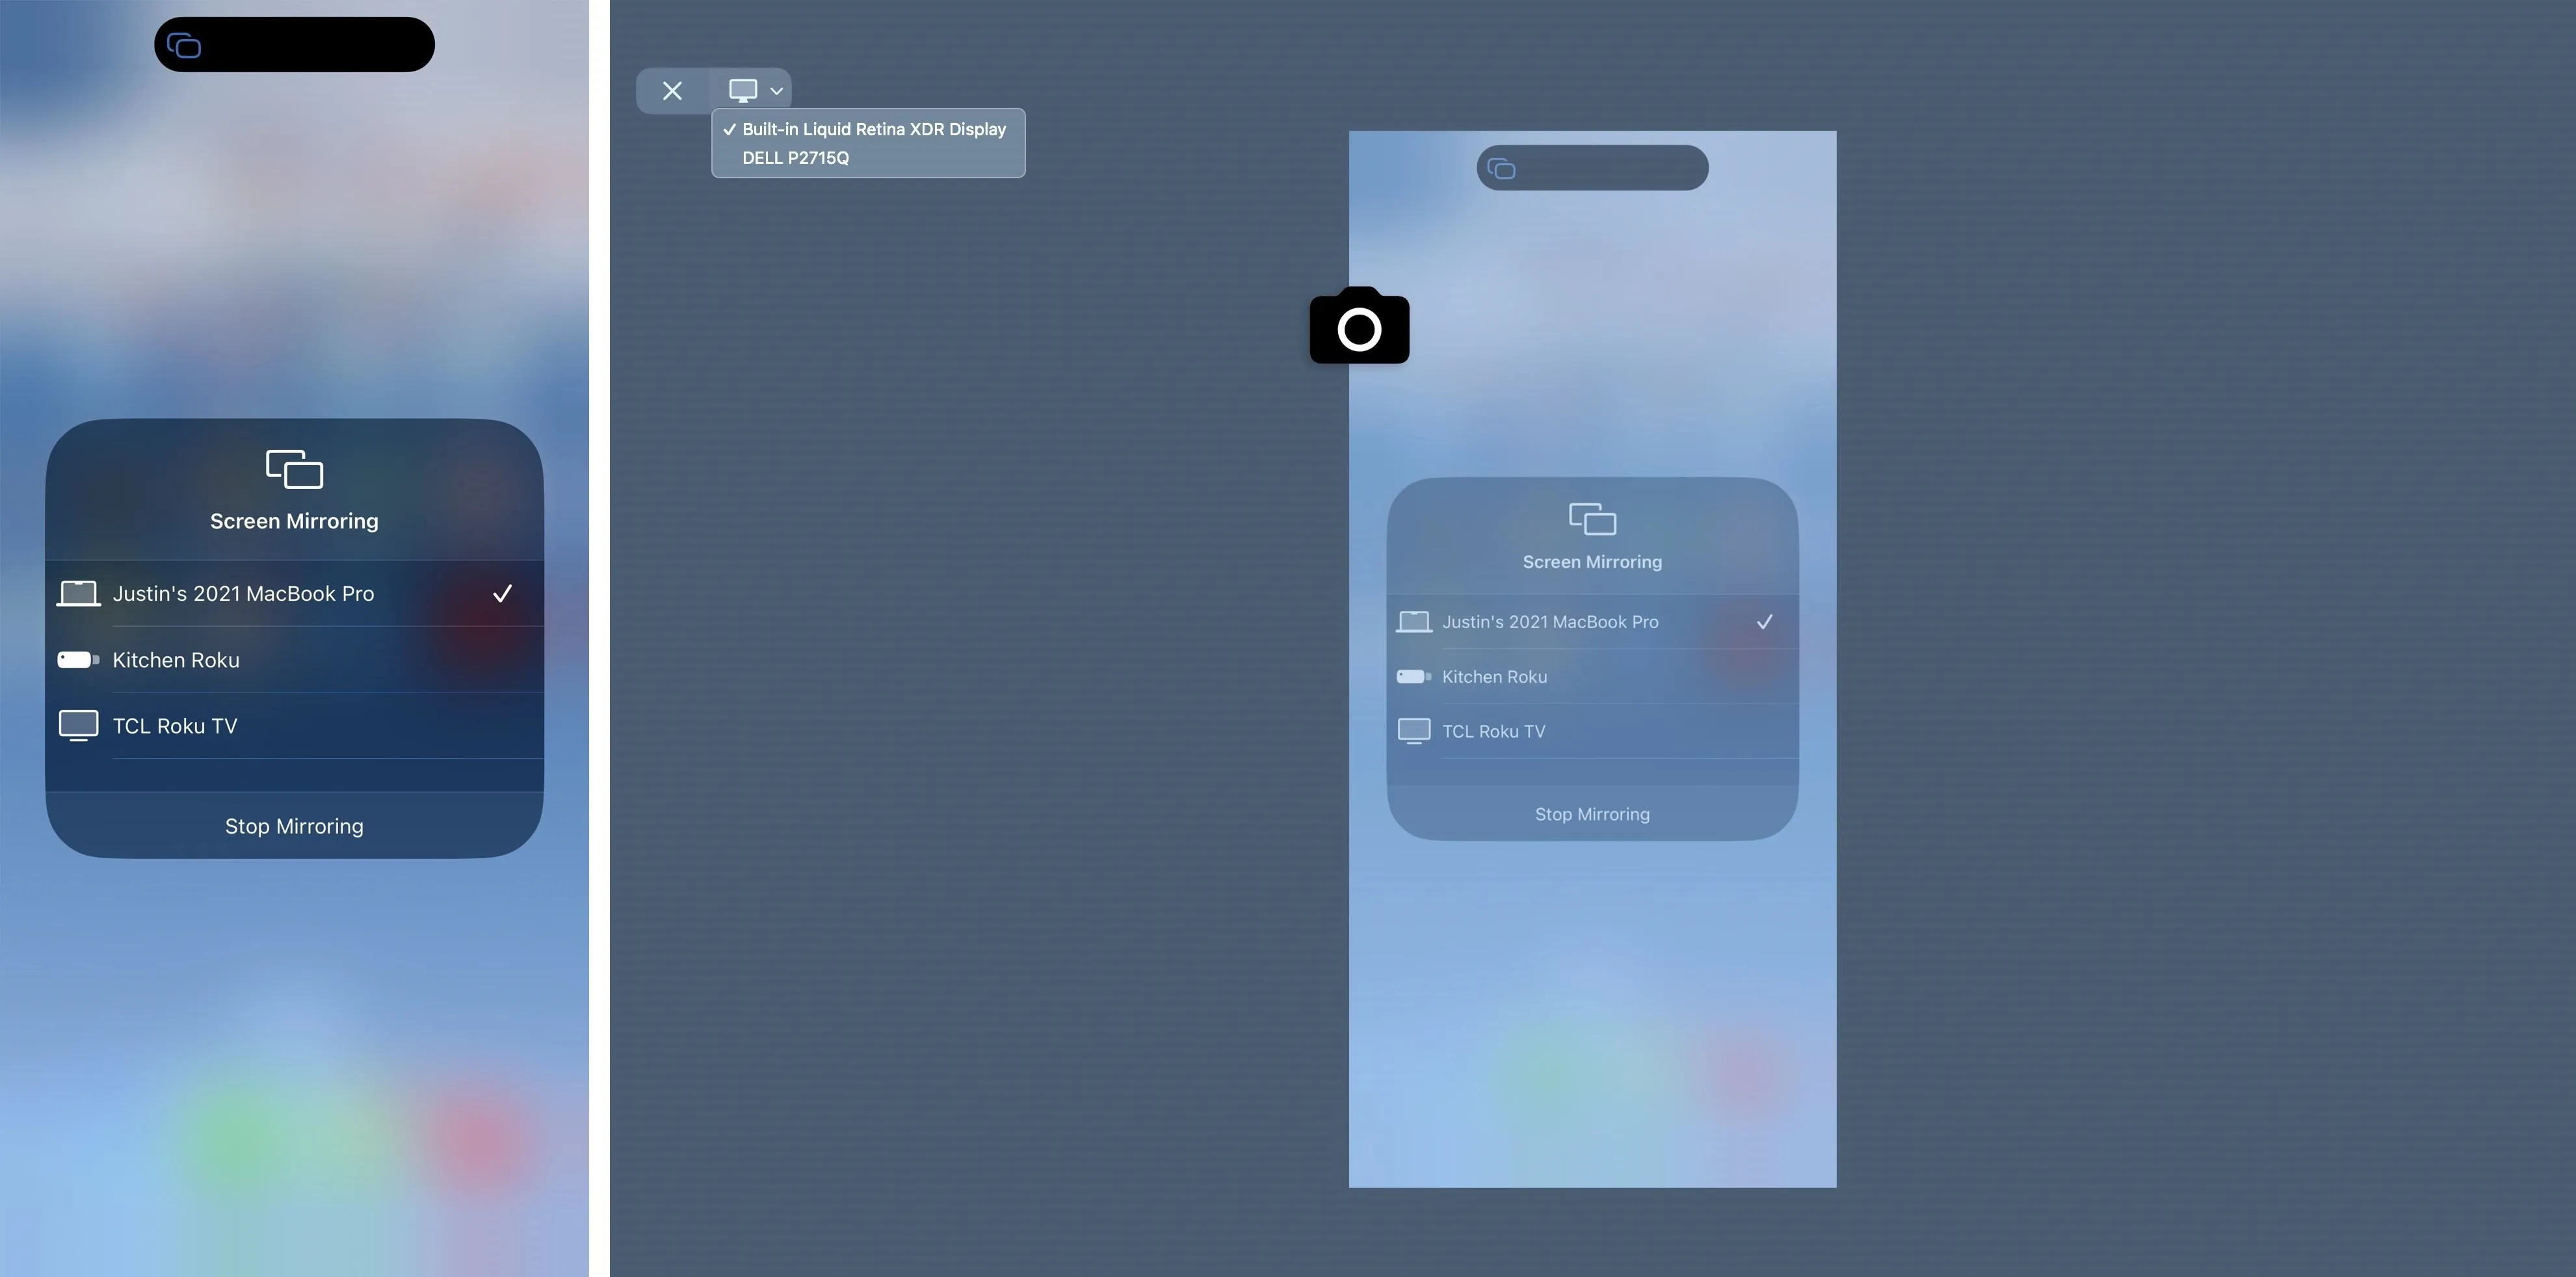
If you're at your Mac computer when you need to take multiple screenshots on your iPhone, you can use Screen Mirroring. Your iPhone and Mac must both be on the same Wi-Fi network.
Open Control Center, tap the Screen Mirroring control, choose your Mac's name from the list, watch your iPhone's screen appear on your Mac, and then use your Mac's screenshotting tools to capture the image.
- Press Shift-Command-3 to take a screenshot of the iPhone's screen, including any blackness surrounding the image on your Mac's display. You can also press Shift-Command-4 followed by the Space bar and click on the iPhone image to take a window capture without drop-shadows, but you'll still see the black borders if visible.
- Press Shift-Command-4 to activate the crosshairs, move them to the edge of the iPhone's image, then left-click, drag the frame around the iPhone's screen, and let go to take a screenshot without any black borders.
Even though you may see black bars around the screenshot that you'll probably want to crop out, screenshotting your iPhone's screen with Screen Mirroring on your Mac makes it possible to capture on-screen elements that otherwise wouldn't be seen, like the screenshot thumbnail preview, Classic Invert, Smart Invert, and Zoom.
- Don't Miss: Customize Colors for All the Apps on Your iPhone to Match How You Use Them Most (Or Just for Fun)
Screenshots save to your Desktop by default, but you can click "Options" on the screenshot menu after hitting Command-Shift-5, then choose another location.
Use QuickTime Player
To record your iPhone's screen without the annoying red bubble or status bar, using QuickTime Player on your Mac is an excellent choice. It's also good for screenshots.
Like Screen Mirroring, QuickTime will let you capture on-screen elements that otherwise wouldn't be seen, like the screenshot thumbnail preview, Classic Invert, Smart Invert, and Zoom. However, you can take screenshots of your iPhone without any borders, saving you time from having to crop them out.
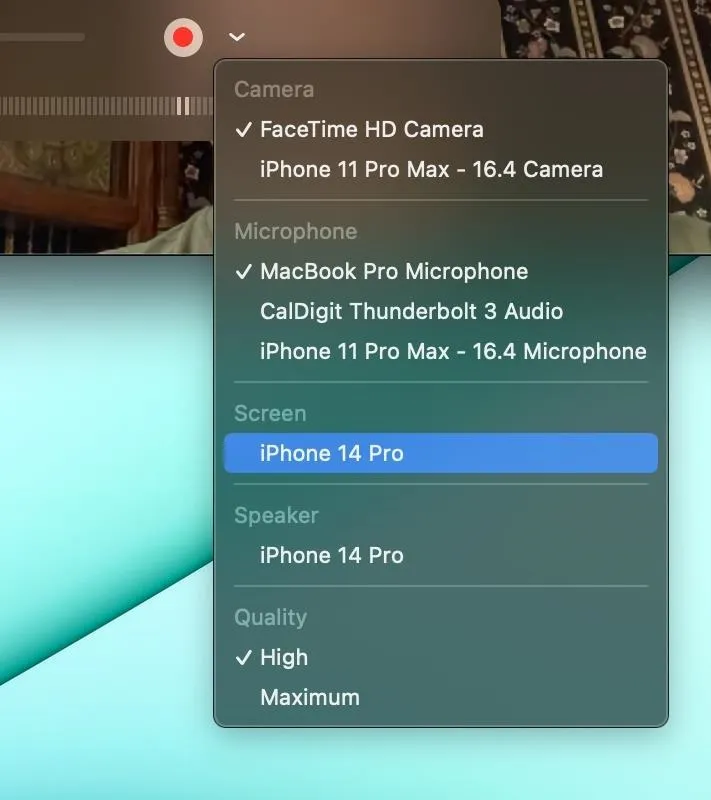
Connect your iPhone to your Mac using a Lightning to USB or Lightning to USB-C cable, depending on the ports available. Open QuickTime Player on macOS, click "File" in the menu bar, then "New Movie Recording." When your Mac's camera feed appears, click the drop-down icon by the record button and choose your iPhone's name under "Screen."
After, you can adjust QuickTime's window size to change the iPhone screenshot's resolution. Then, press Shift-Command-4 followed by the Space bar and click the QuickTime window to take a window capture without a drop-shadow.

Screenshots save to your Desktop by default, but you can click "Options" on the screenshot menu after hitting Command-Shift-5, then choose another location.
Use an External Keyboard
If you have a wired or wireless external keyboard compatible with iPhone and iPad models, you can use it to take a screenshot of your iPhone's screen. This makes the most sense if you're already using an external keyboard with your iPhone to type more efficiently for work, school, or another reason.
Most Bluetooth keyboards will work, such as Apple's own rechargeable Magic Keyboards with Bluetooth, including:
- Magic Keyboard
- Magic Keyboard with Touch ID
- Magic Keyboard with Numeric Keypad
- Magic Keyboard with Numeric Keypad and Touch ID
- Magic Keyboard for iPad
Third-party keyboards from Logitech, Arteck, and other sellers should also work. Wired keyboards should also work as long as they are rechargeable or can be powered on externally since your iPhone will not have enough juice to power it by itself. You may also need a special adapter to connect the keyboard.
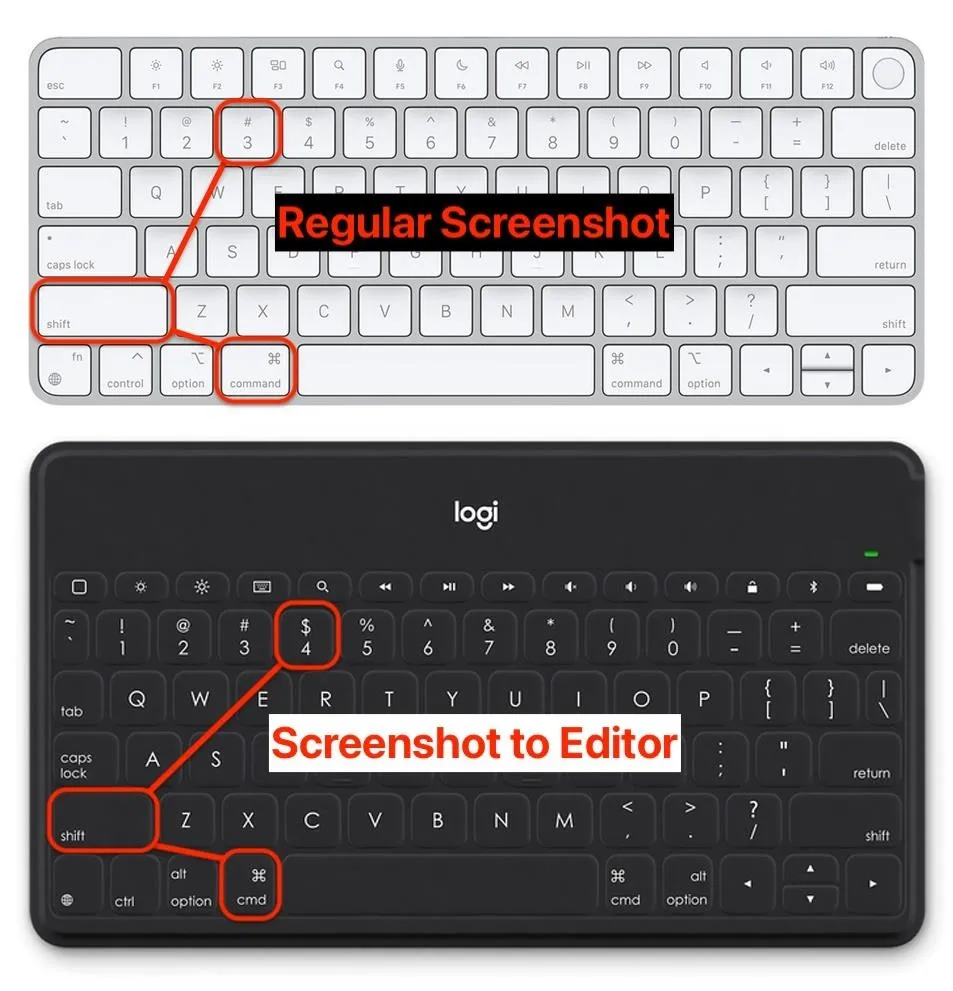
Once you have the keyboard connected, you can use the same keyboard shortcut that you'd use on macOS to take a snapshot of your iPhone's screen.
- Press Shift-Command-3 to take a regular iPhone screenshot, which is saved to Photos.
- Press Shift-Command-4 to take a regular iPhone screenshot and immediately open the screenshot editor to markup or crop the image. You can then save it to Photos or Files as an image, save it to a Quick Note, copy and delete it, or share it to an app or contact.
Cover photo and screenshots by Justin Meyers/Gadget Hacks


Comments
Be the first, drop a comment!