Unruly customers. Crazy exes. Horrible bosses. When you need proof of insanity or just want it for your records, recording a phone call is a must. Problem is, it's not the easiest thing to do on an iPhone — but it's completely possible.
Even though there are plenty of legit reasons to record calls such as documenting an over-the-phone interview, cherishing a call from a loved one, logging verbal contracts and agreements, and improving your business overall, there still is no way to record phone conversations with one or more people by default on an iPhone.
Don't believe me. Try it. The built-in screen recording utility will stop when you answer or start a call or it won't record audio when activated during a call. As for Voice Memos, it may look like it's recording your call, but it stops as soon as you picked up or dial and will give you a warning if you try to enable during a call.
- Don't Miss: 200+ Exciting New iOS 13 Features for iPhone
The Legality of Recording Calls in Your State
Apple tries hard to prevent the recording of calls on your iPhone for the privacy and security of all parties involved. And while federal policy, as well as over half of all US states, implement "one-party consent" laws (of which you can be the "one" party), the other states require all parties to give permission to be recorded. And since Apple can't make sure you abide by state laws, it simply bans it altogether.
Once you know whether or not you need to get verbal consent from the other party or parties based on where you live, you're ready to start exploring the call recording workarounds below. Note that while not all of these methods work with FaceTime, some of them actually do, but only in regards to audio (not video).
Use a Local Access Number Service (Phone Calls Only)
The easiest way to record phone calls on your iPhone is to install an app that's designed specifically for that purpose. TapeACall is one such app, and since its introduction, it's had over two dozen updates to ensure it stays ahead of the competition. And with an average rating of 4.5 stars, you can't go wrong.
TapeACall is a subscription service, so you'll need to sign up for either a pay-each-month or pay-each-year plan. Fortunately, the Lite version of the app offers a seven-day free trial so you can see if you like it before you commit.
The service uses a local access number to record calls, so you will always have to merge the call you want to be recorded with the TapeACall local access number. For outgoing calls, you call that number from the app first, then add the person you want to talk to and merge the calls. For incoming calls, you'll have to put the caller on hold while you add and merge the TapeACall local access number.
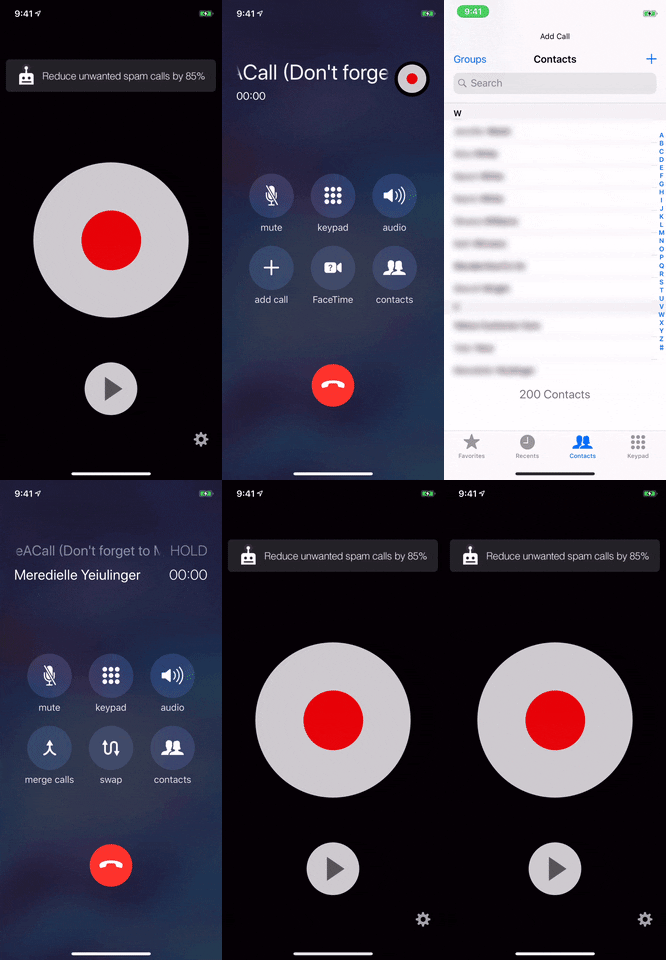
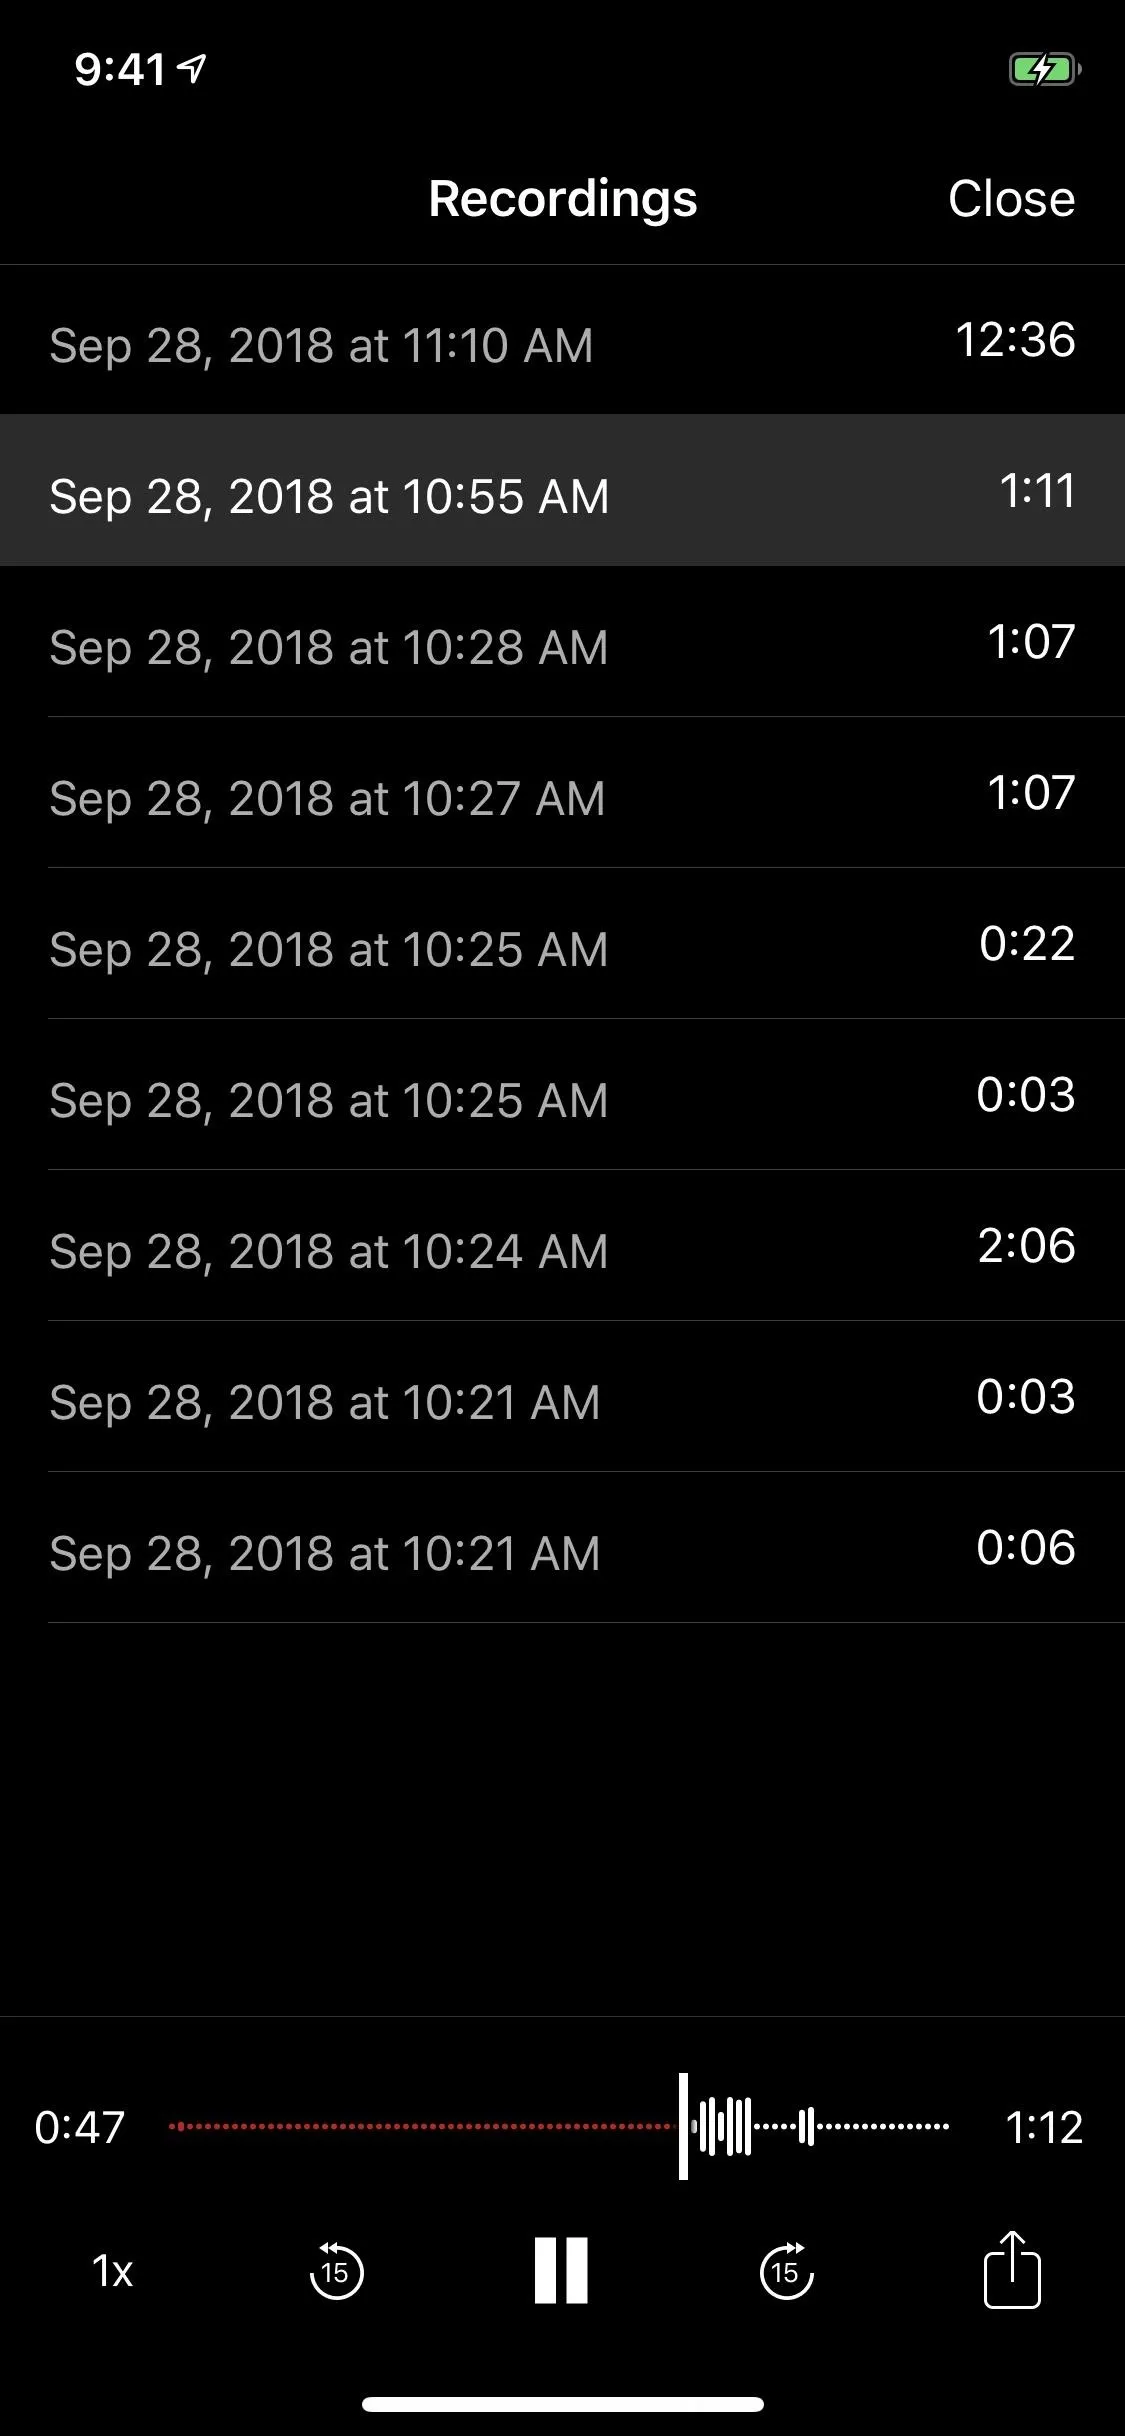


It's a somewhat convoluted method of recording, but all recorders in the App Store work similarly. Recordings are easy to access within the app, and you can share a recorded call via a public URL or an MP3 file to pretty much any app you choose. There's also a 3D Touch quick action shortcut on the home screen and a widget for even easier access to start and view recordings. Learn more.
Use the Google Voice App (Phone Calls Only)
Google Voice is another viable option you can use to record conversations, and unlike TapeACall and its brethren, Google Voice is completely free to use. However, you can only record incoming phone calls, not outgoing. Another downside is that when you initiate a recording, the app will verbally notify the caller when recording has been started and stopped, even if you've muted the call.
Despite its shortcomings, however, Google Voice does have its strengths. For one, recording an incoming call is far easier to do on Google Voice than on TapeACall, only requiring you to tap on "4" in your Phone app's keypad to start or stop recording. In addition, listening to recordings is also just as easy and can be accessed in the Google Voice's "Voicemail" page.
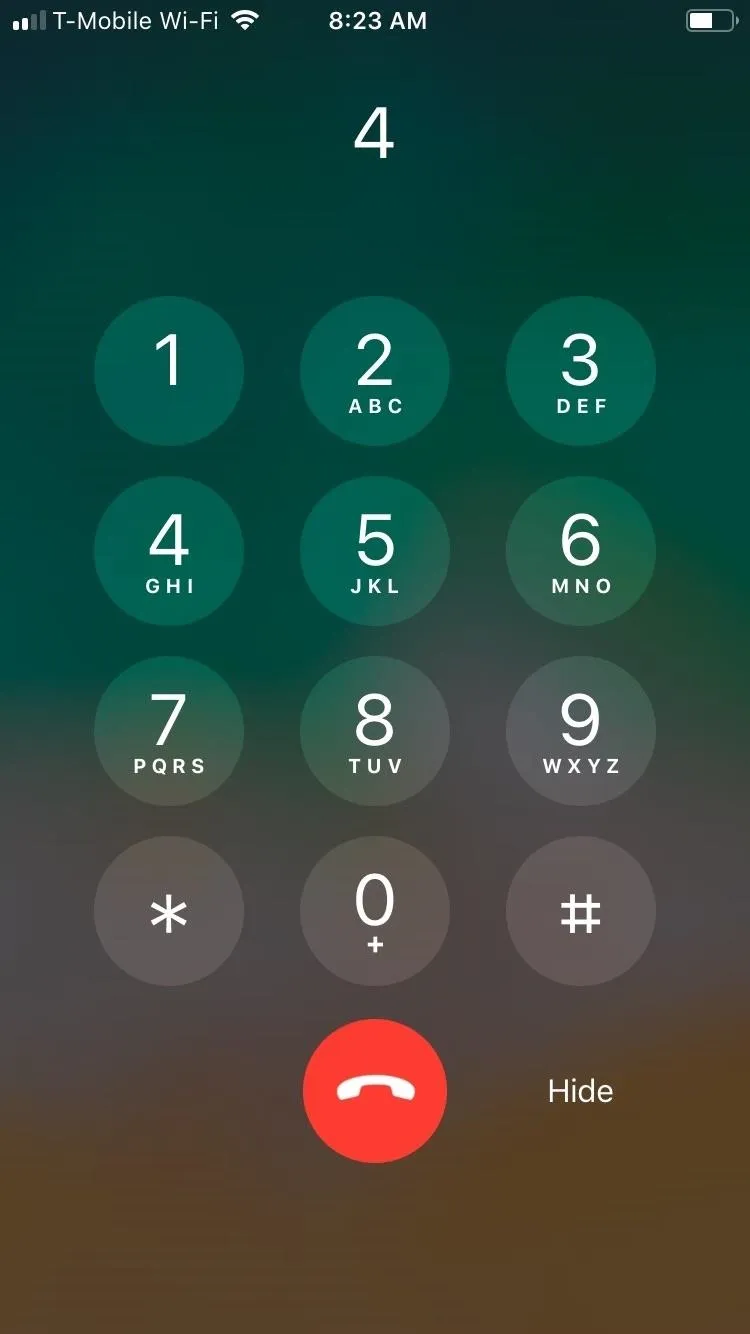
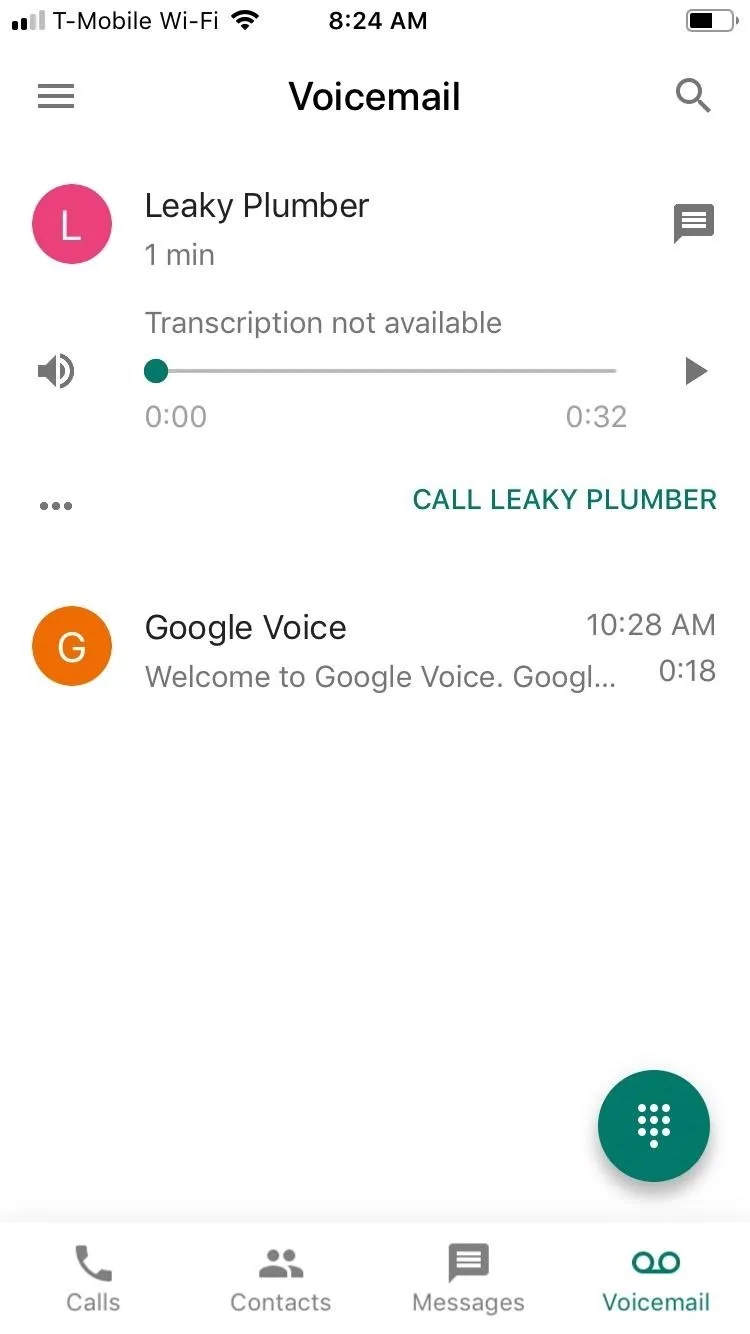


Google Voice is a great option if you regularly record business or work-related phone conversations, be it for verbal contracts, interviews, or important meetings. Best of all, the service is free to use, so we highly recommend giving this app a try before purchasing a call recording app. Learn more.
Use a Jailbreak Tweak (Phone Calls Only)
If you have a jailbroken iPhone, you can buy a tweak from Cydia to record phone calls automatically. The Call Recorder tweak by hAcx costs only $2.99 in total, significantly less than TapeACall, and will work on iPhones running iOS 11 since there is no jailbreak yet for iOS 12.
By default, Call Recorder will record all phone calls, but you can create a whitelist of contacts you only want to record. Using this tweak is the easiest way to record phone calls out of all the methods listed here. It records automatically for whitelisted numbers, and you can manually start a recording for everyone else. You can also manually stop a recording for any call.
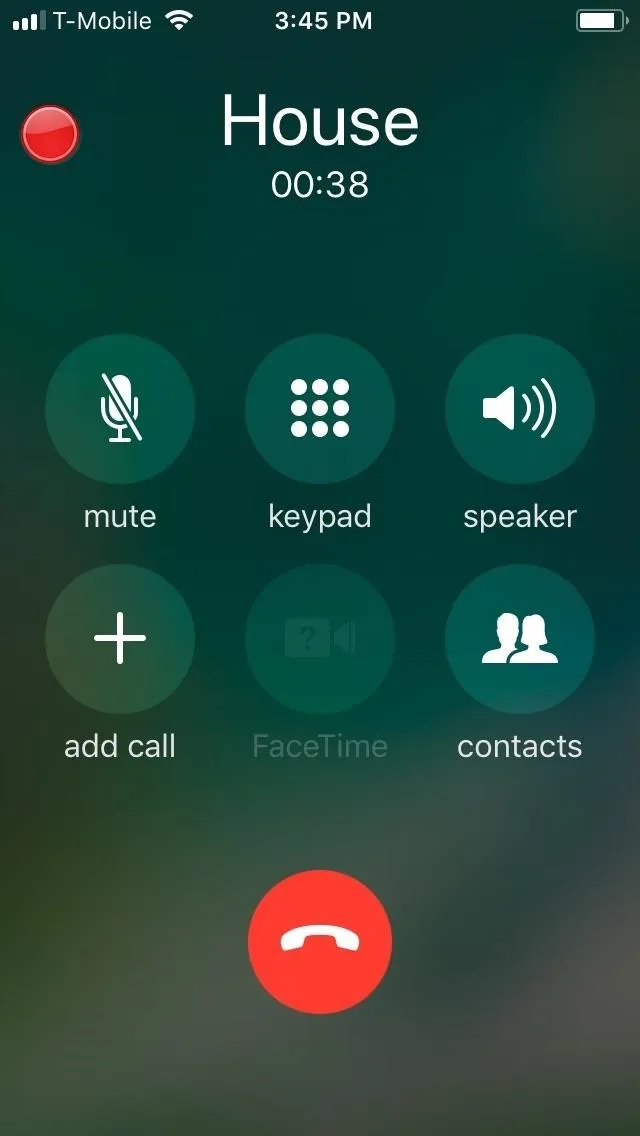
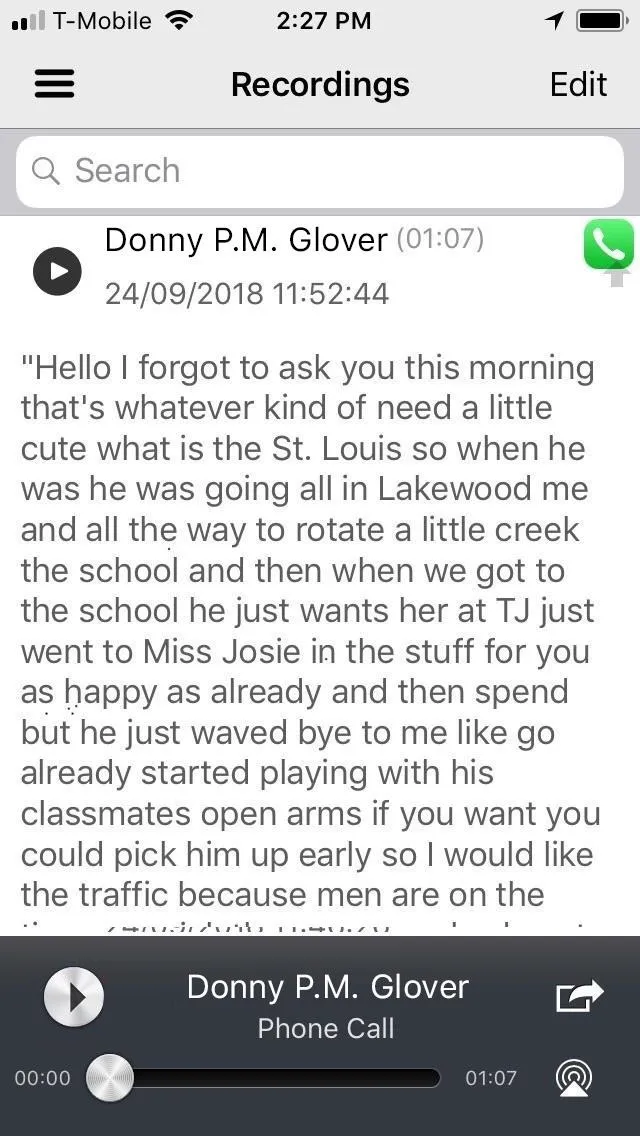


Accessing, sharing, and saving your recordings is also very intuitive. The tweak can even transcribe recordings, though the process can be hit or miss as seen from the screenshot above. In all, the only real downside of Call Recorder is it's limited only to jailbroken devices, which places it firmly out of reach for a majority of iPhone users running on stock iOS. Learn more.
Use QuickTime Player (Phone Calls & FaceTimes)
If you have a Mac, you can actually use QuickTime Player to record phone conversations on your iPhone. It will also work with FaceTime calls. However, it only works if you're talking on your iPhone directly in speaker mode, so you can't use headphones for this. If you answer the iPhone call on your Mac instead, QuickTime Player will not function properly when trying to use it.
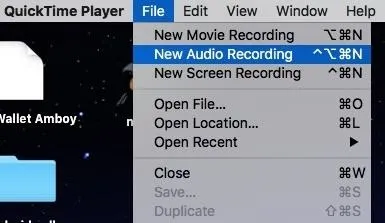
To record, make sure your iPhone is on speaker mode for phone calls or FaceTimes. (It will also work if you select your Mac as the speaker source.) Then, select "New Audio Recording" from QuickTime Player's menu bar "File" option.
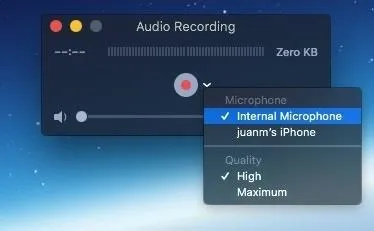
Select the drop-down next to the record button and make sure "Internal Microphone" is checked. Click the record button to start, make sure you're close to your Mac so it can pick up everything, then click the stop button when done.
If you're charging your iPhone with your computer via a Lightning cable, make sure that "Internal Microphone" is still selected and not your iPhone's mic, because it won't record unless it's the internal Mac one. After recording, you can play back right away, then save the file if you want to keep it.
Of course, recording conversations using QuickTime has some drawbacks. Because you're essentially using your Mac as a glorified tape recorder, your conversation won't be captured in the best quality. It will also pick up any outside noise which can potentially make your recording hard to understand. Therefore, we highly recommend going to a quiet place before attempting this method.
Besides that, portability is a major concern, as you won't always have your computer on hand for you to record phone calls or FaceTimes. As this requires your call or FaceTime to be on speaker, privacy can also be an issue, since your otherwise private conversation will be on blast for others to hear.
Use a Tape Recorder (Phone Calls & FaceTimes)
If all else fails, you can use a voice recorder to record conversations on your iPhone similarly to the QuickTime Player method. Granted, it isn't the sexiest or slickest method in this list, but it's still very effective nonetheless, and more portable than dragging your Mac around everywhere. However, you'll still need to place your phone call or FaceTime on speaker mode for the voice recorder to pick up the audio.
Now, you can go old-school with a cassette recorder and player, but since this is the digital age, there are plenty of compact digital recorders you can get. Here's a list of some of the top-rated digital audio/voice recorders online:
- EVIDA 8 GB Recorder (~$20): Amazon
- Olympus 4 GB WS-852 Recorder (~$60): Amazon | Best Buy | Walmart
- Olympus 8 GB WS-853 Recorder (~$70): Amazon | Best Buy | Walmart
- Tokego 8 GB Recorder (~$28): Amazon
- Yemenren 8 GB Recorder (~$32): Amazon
- Sony 4 GB ICDPX370 Recorder (~$48): Amazon | Best Buy | Walmart
- Sony 4 GB ICDUX560BLK Recorder (~$95): Amazon | Best Buy | Walmart
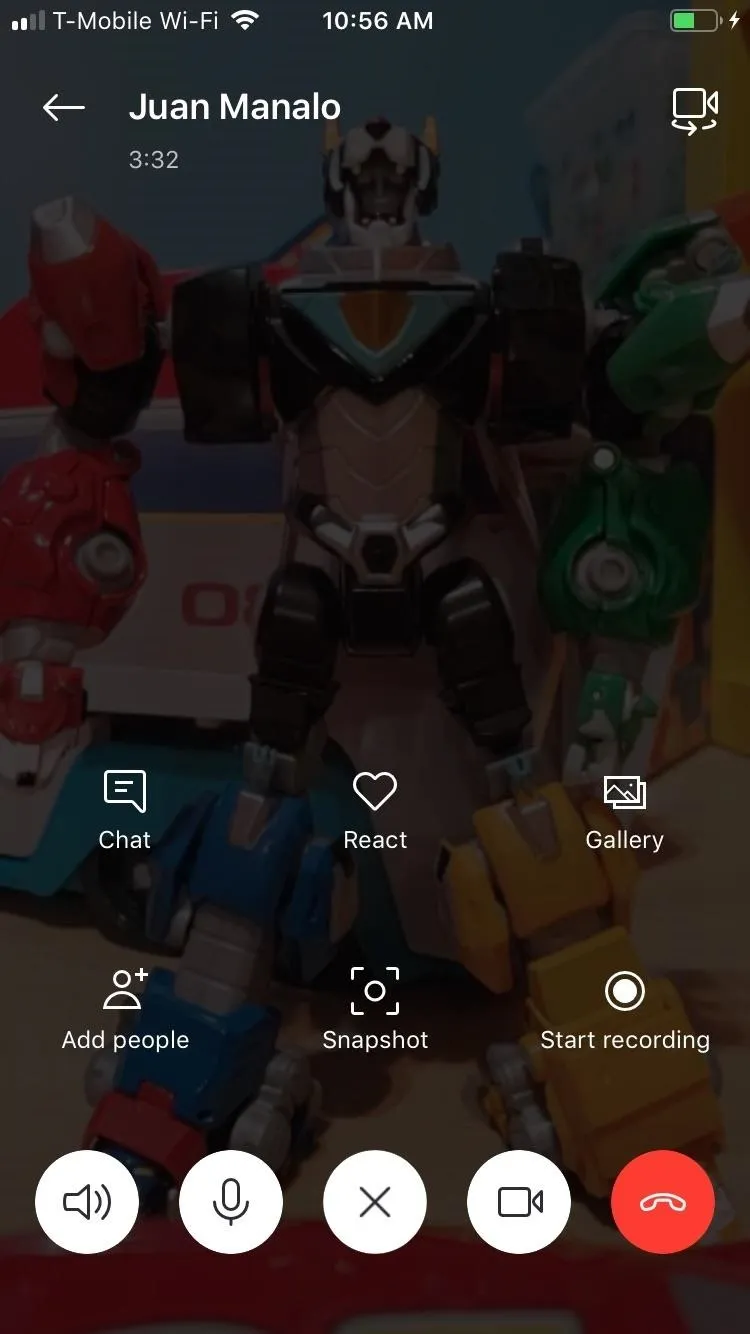
Use Skype (Skype Audio & Video Calls Only)
Breaking away from the traditional phone calls or even Apple's own FaceTime platform, if you're a Skype user, you'll be glad to know that recording both audio and video calls is simple.
The other user will have a persistent alert that the recording is taking place, and all recordings are stored in the Skype's servers in the cloud for 30 days. During that 30 days, all parties can view, save, and share the recording however they want, but only the person who initiated the recording can remove it off the servers.


Found a better way to record phone calls and FaceTime calls on your iPhone? Hit up the comments below or ping us on our social accounts to share your secrets.
- Follow Gadget Hacks on Pinterest, Twitter, YouTube, and Flipboard
- Sign up for Gadget Hacks' daily newsletter or weekly Android and iOS updates
- Follow WonderHowTo on Facebook, Twitter, Pinterest, and Flipboard
Cover image and GIF by Justin Meyers/Gadget Hacks; Screenshots by Amboy Manalo/Gadget Hacks



Comments
Be the first, drop a comment!