


Apple added the option to install custom fonts and use them in different apps on iOS 13. The rollout has been a bit confusing, with Apple announcing partnerships with vendors such as Adobe, but also limiting the feature to work with only certain apps. Nonetheless, you can now download and install custom fonts on your iPhone.
While a system-wide font system would have been ideal, having custom fonts even in just a few specific apps can give artists more control over their creations. In apps like Photoshop or Pages, they'll allow designers to create their own unique tone, mood, and style. So in this guide, we'll show you two ways to custom fonts: through the App Store and using configuration profiles.
Find the Fonts Manager
Before we get into installing new custom fonts, it's important that you know where you can access them. Custom fonts in iOS 13 are only available in select apps at the moment — including Mail, Pages and, Keynote — but that should extend very soon, especially with the imminent release of Photoshop for iOS later this year.
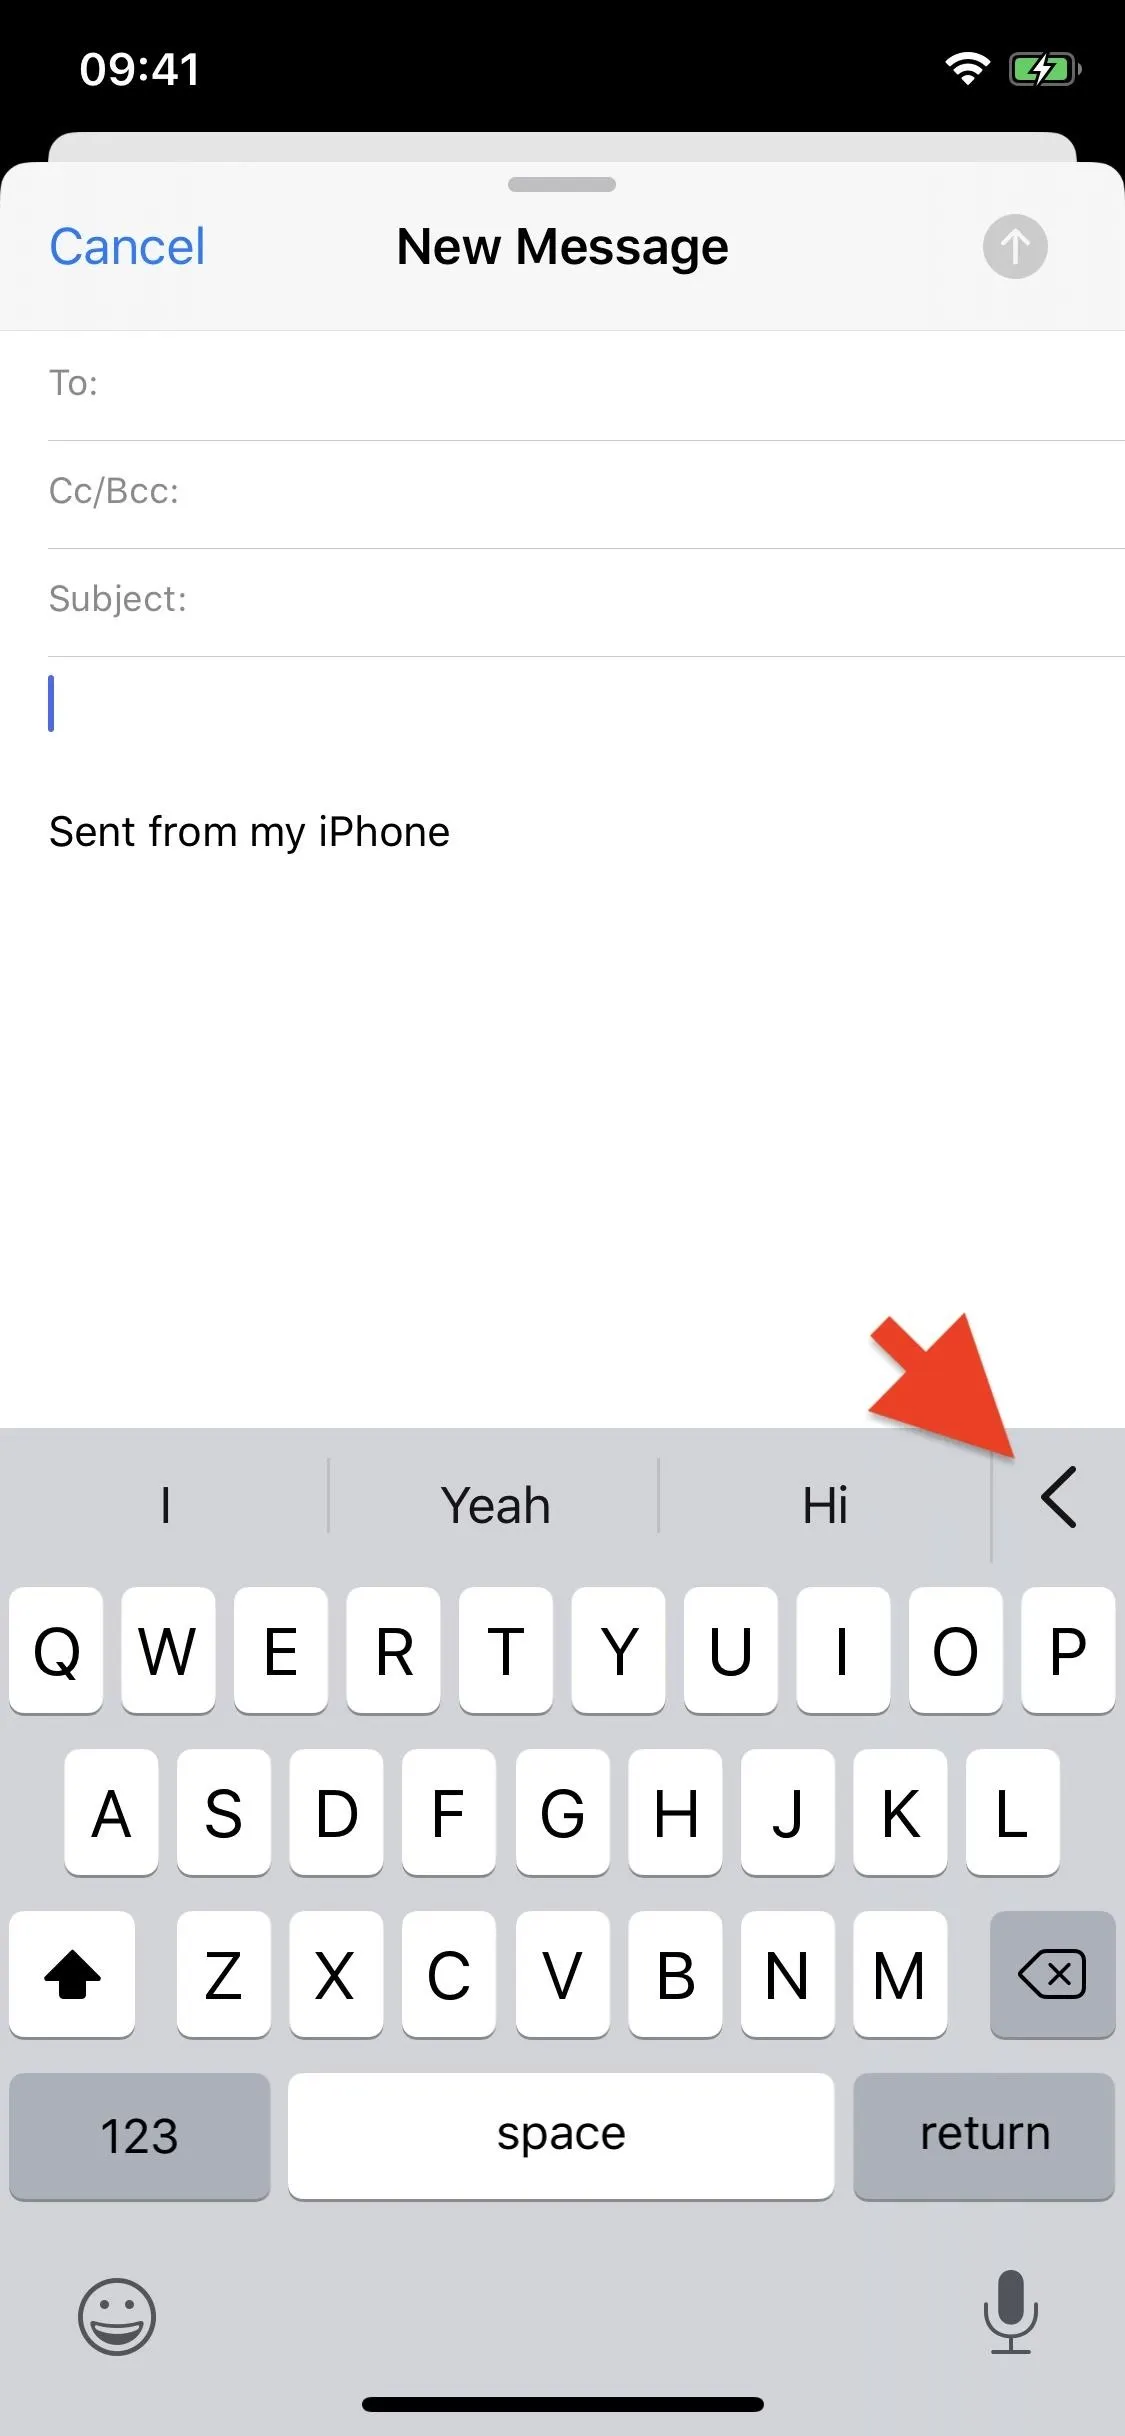
So if you want to access the fonts manager, you must go into an app that is compatible. In this example, we'll be accessing it through Mail. To view the fonts manager, draft a new email and tap anywhere in the body of the message. At the top of the keyboard, you'll see an angle bracket (less than sign) on the far right; tap on it to access the all-new quick toolbar. Tap on the "Aa" icon to view your formatting options.

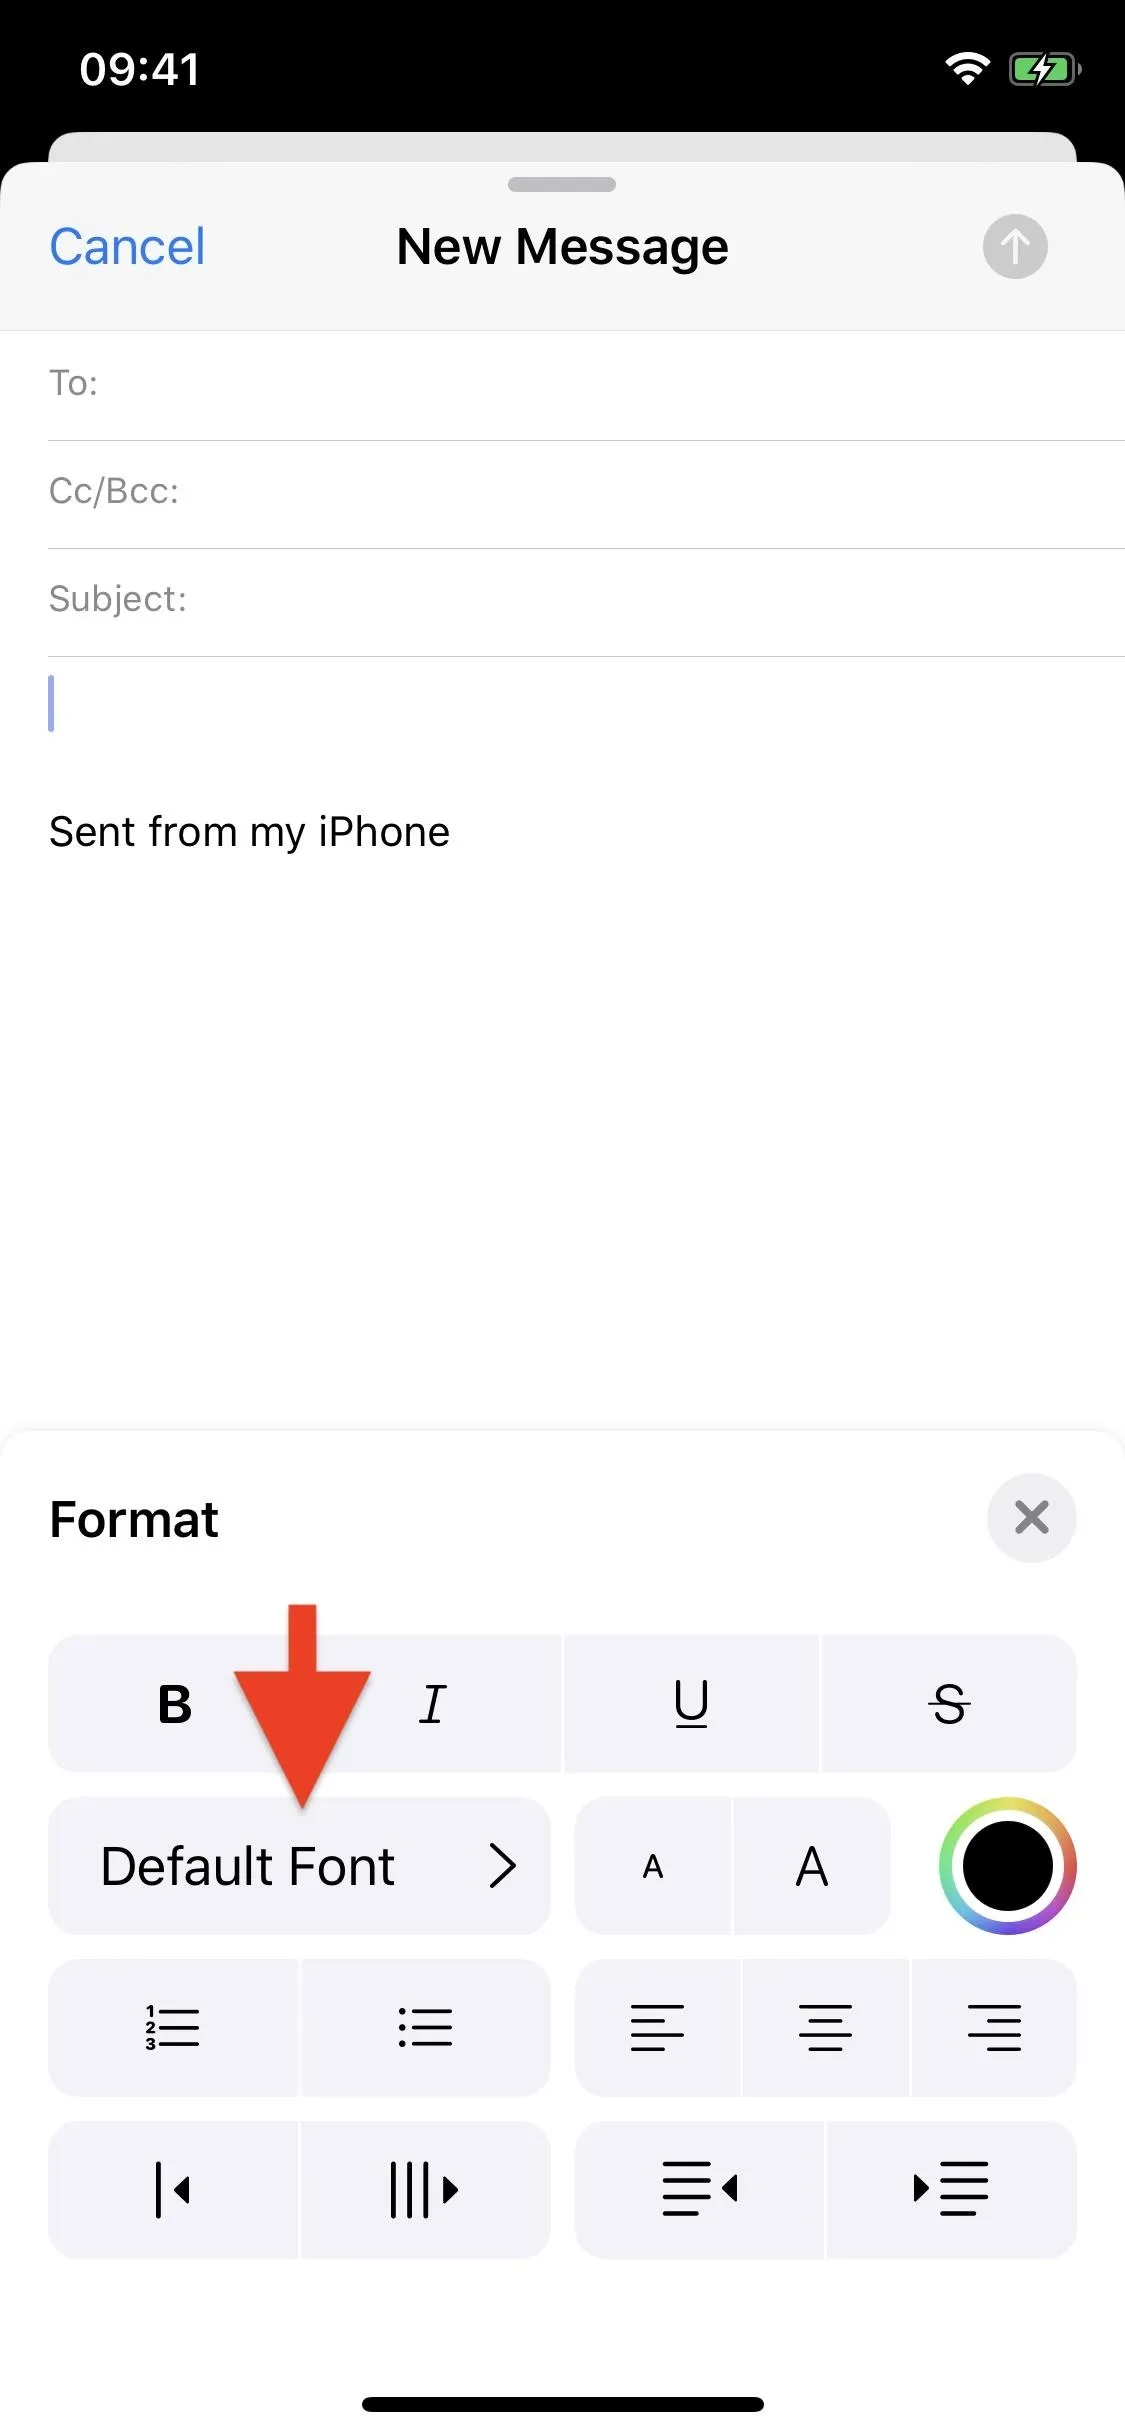
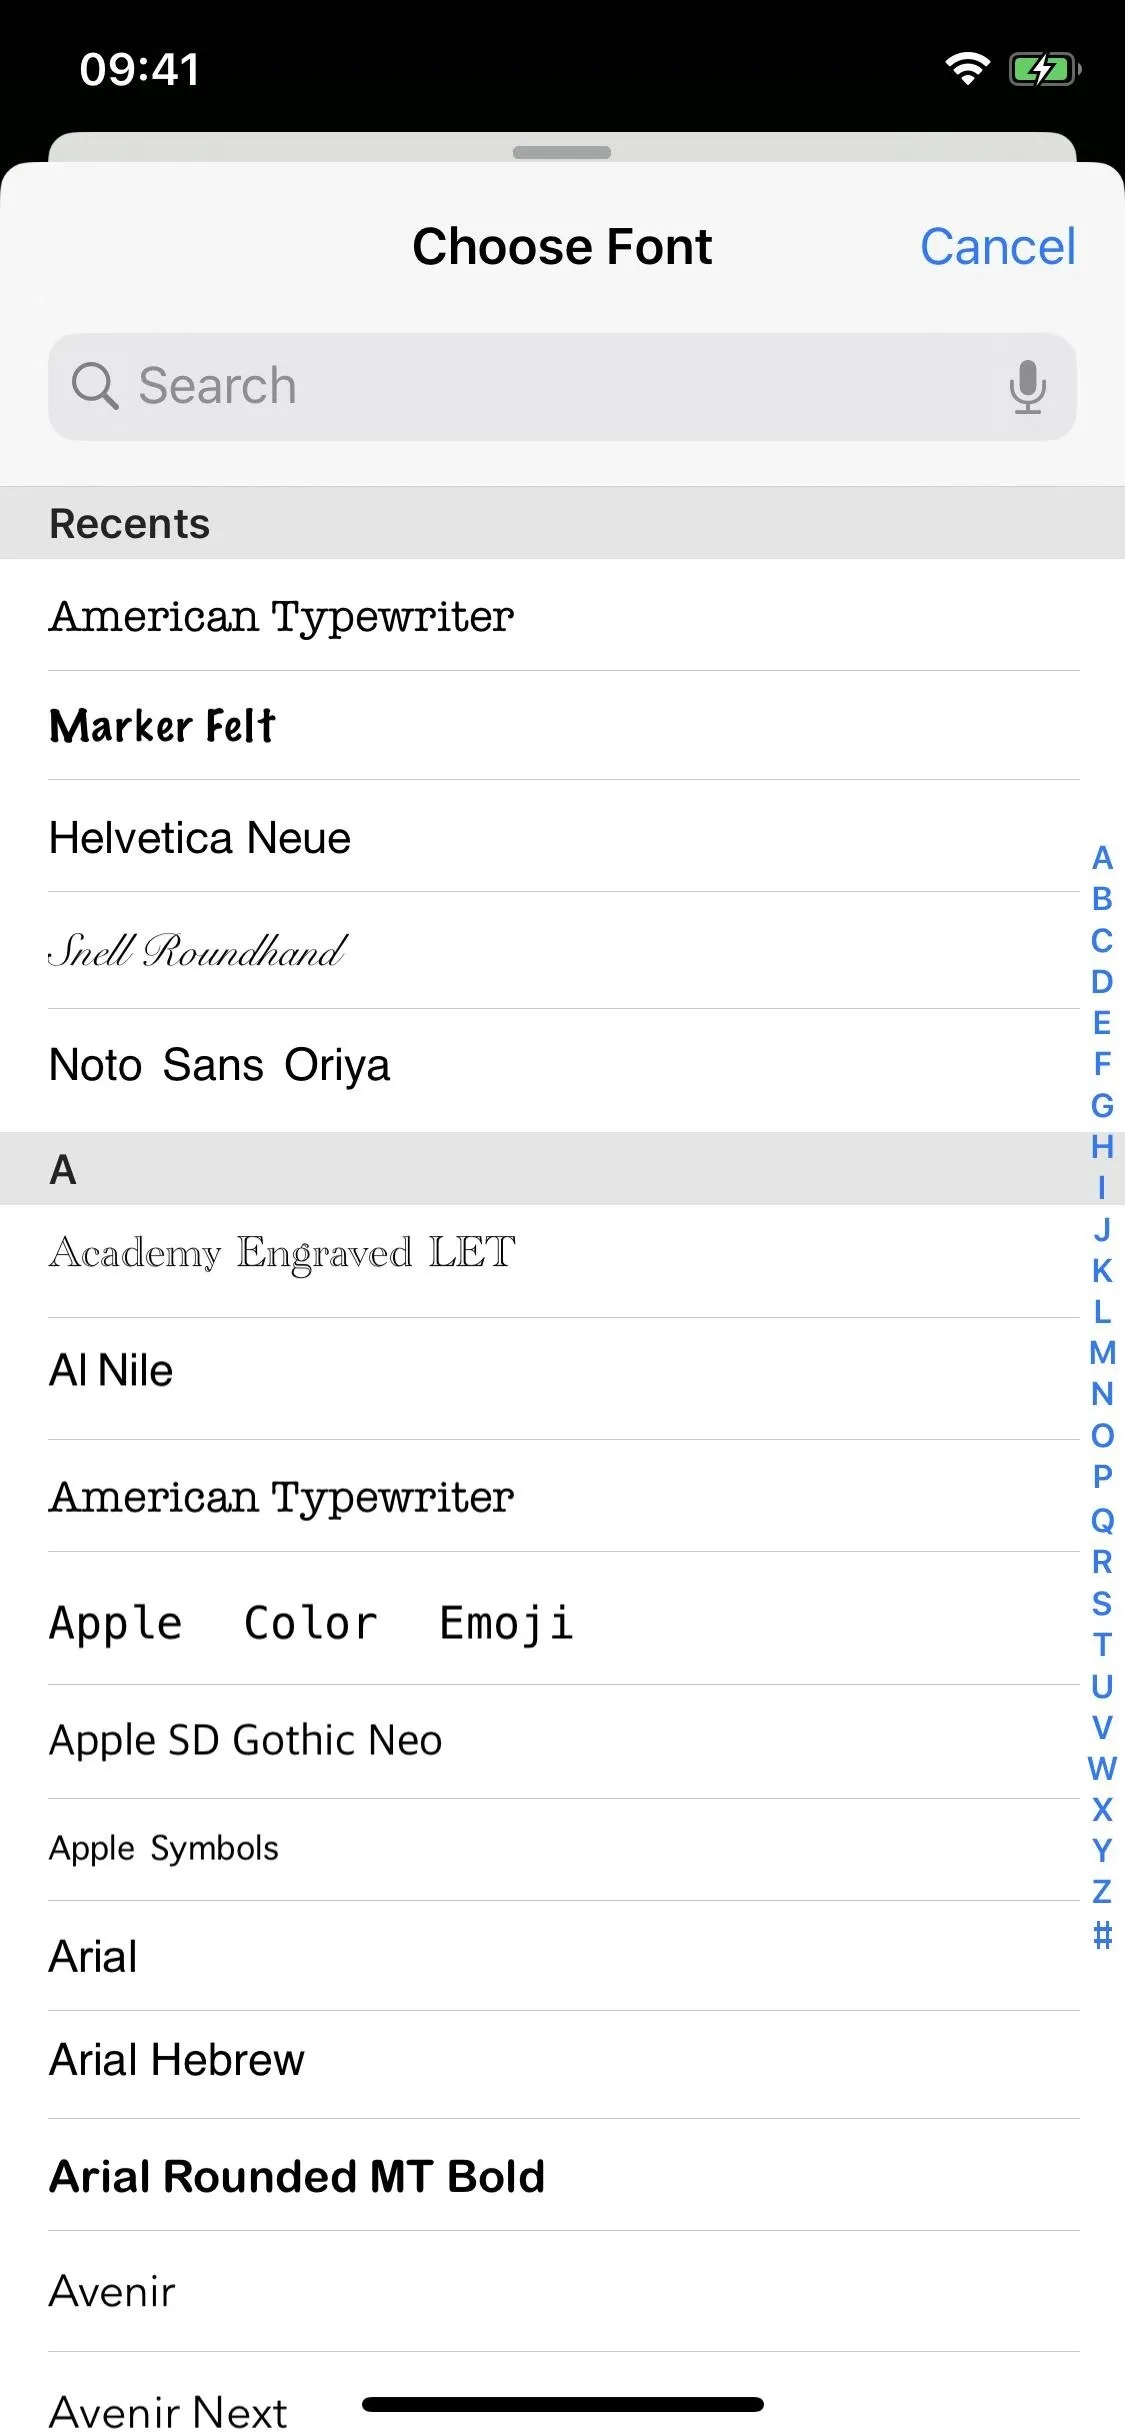
A menu will appear in place of the keyboard; tap on "Default Font" to view the fonts manager. You have nearly a hundred options to choose from, including Times New Roman, Arial, Courier, Georgia, Helvetica Neue, Verdana, and Marker Felt. If you download any custom fonts from the App Store, they'll appear in this list.
Search for Custom Fonts in the App Store
Now that you know where to access your fonts, it's time to download them. You can do this directly from the App Store, as if you were downloading an app, but unfortunately, the options are currently very limited, especially for free fonts. This should change as fonts become more popular.
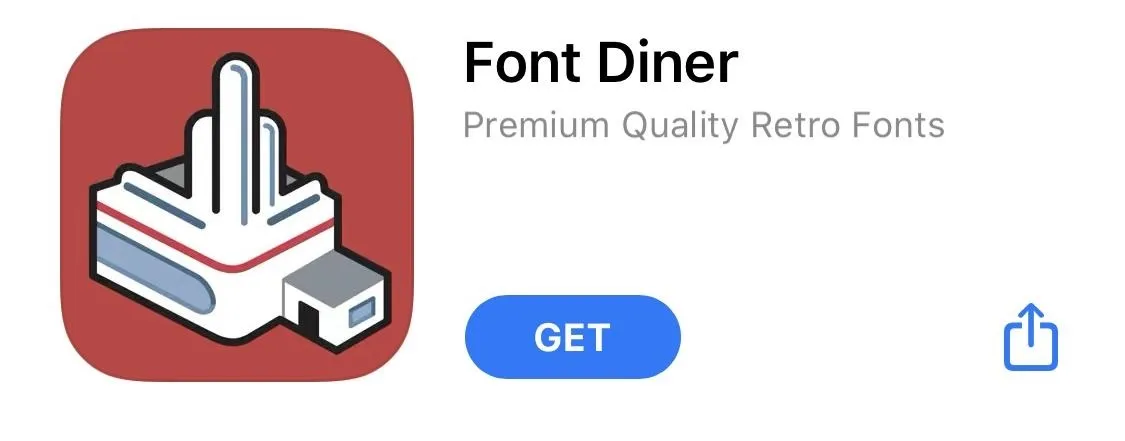
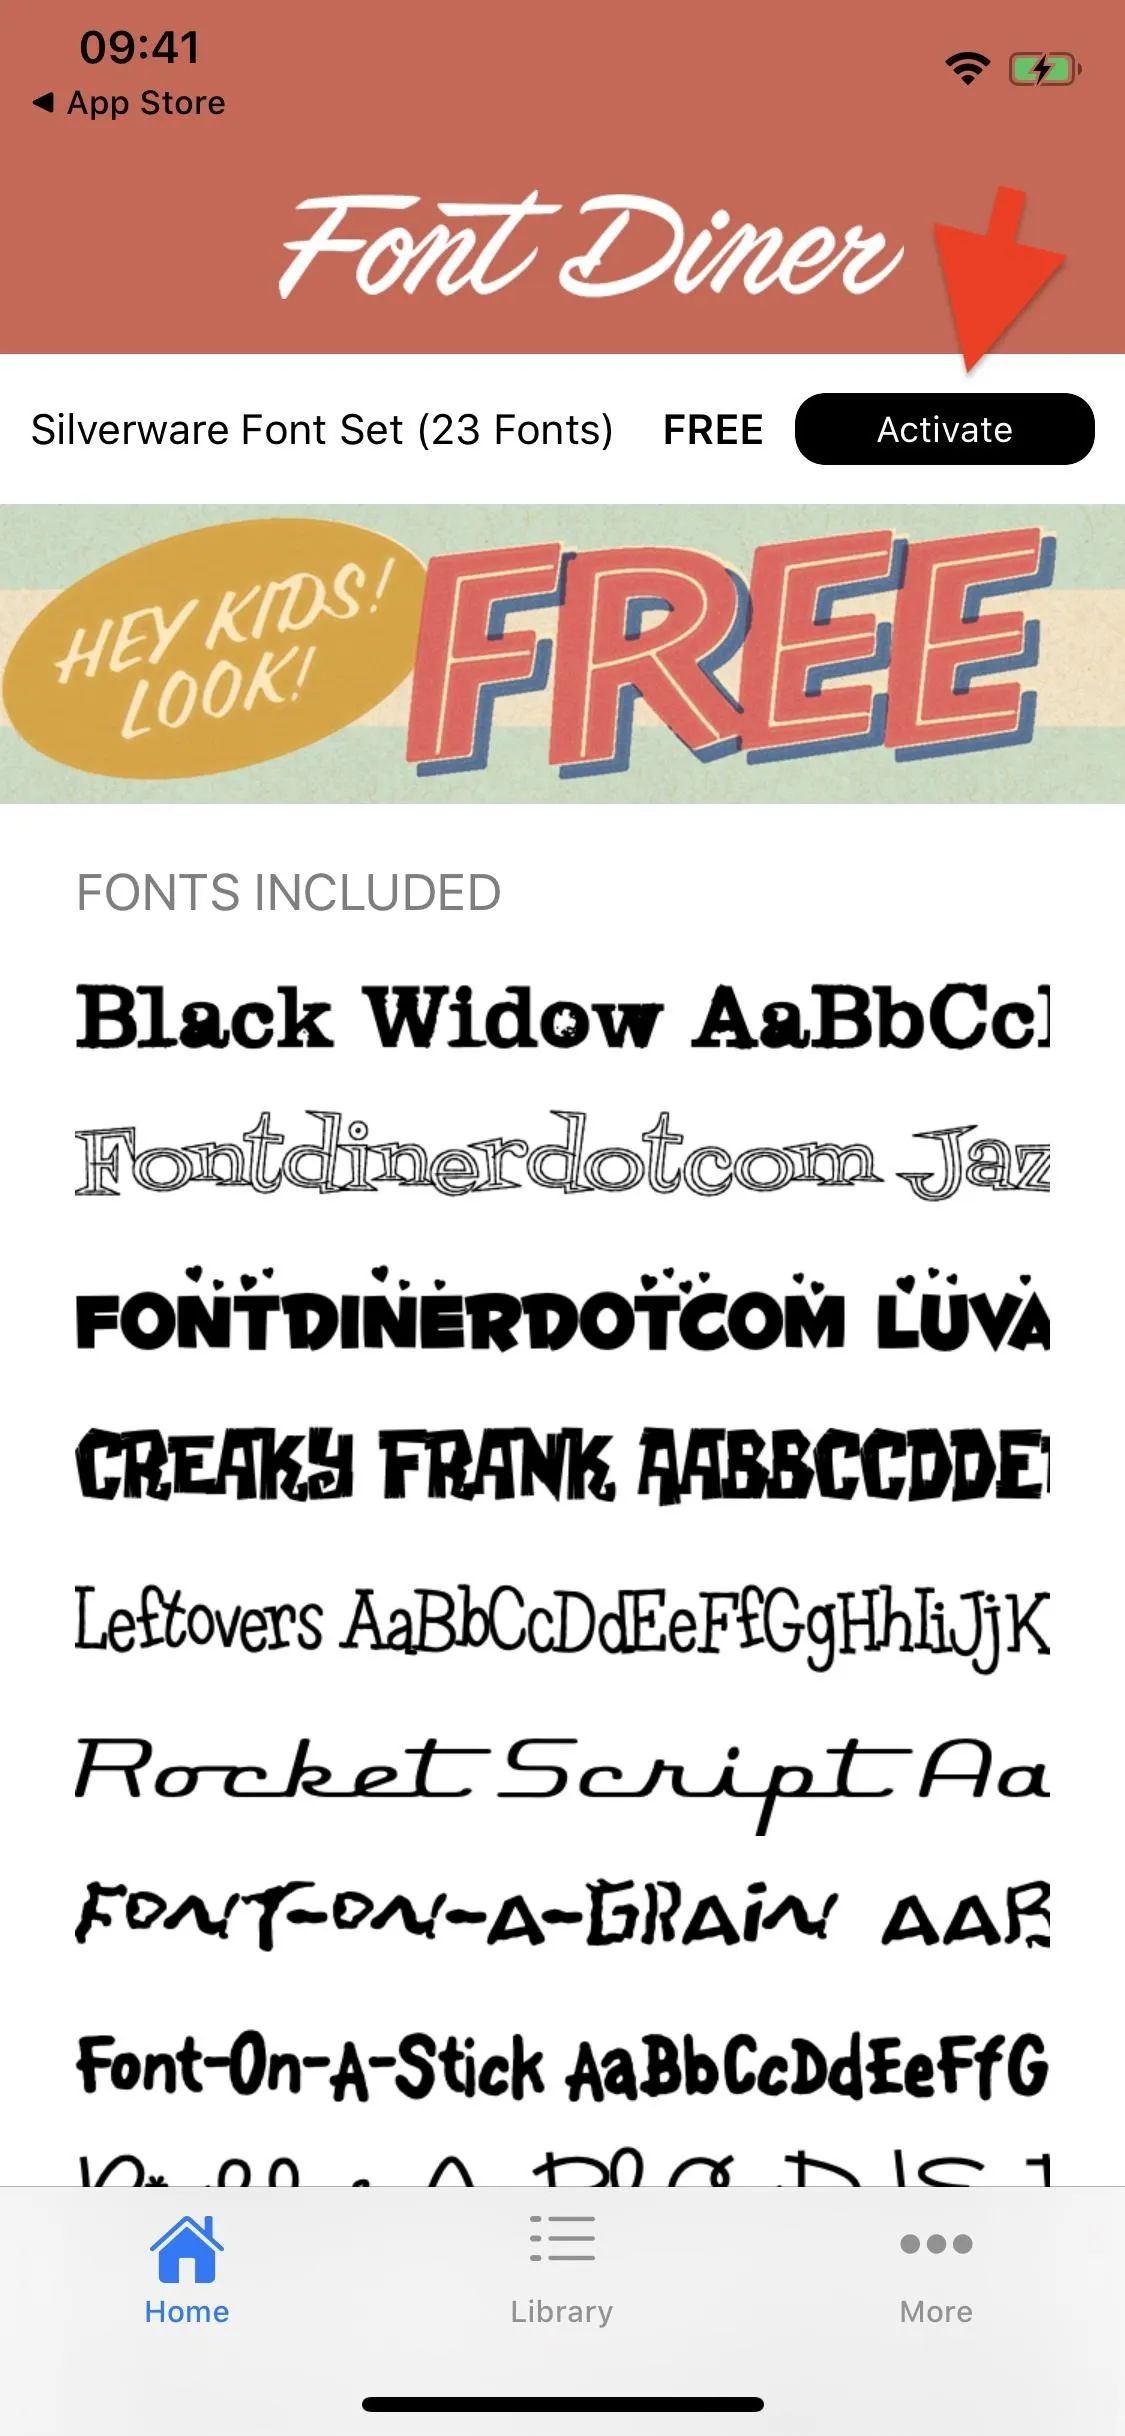
One app that currently works with iOS 13 is Font Diner from developer Mister Retro. You can download it for free from the App Store using the link below.
- App Store Link: Font Diner (free)
According to Apple, custom fonts will be available from Adobe, DynaComware, Monotype, Morisawa, Founder, and more, but there is no set date for when they will be released, so for now, your options are limited.
Install Custom Fonts from App
If you've downloaded Font Diner, you can now go into the app and install the fonts on your device. However, each app will vary slightly in how the fonts are installed, so use this step more as a loose guide and not an exact how-to if you're not using the Font Diner app.
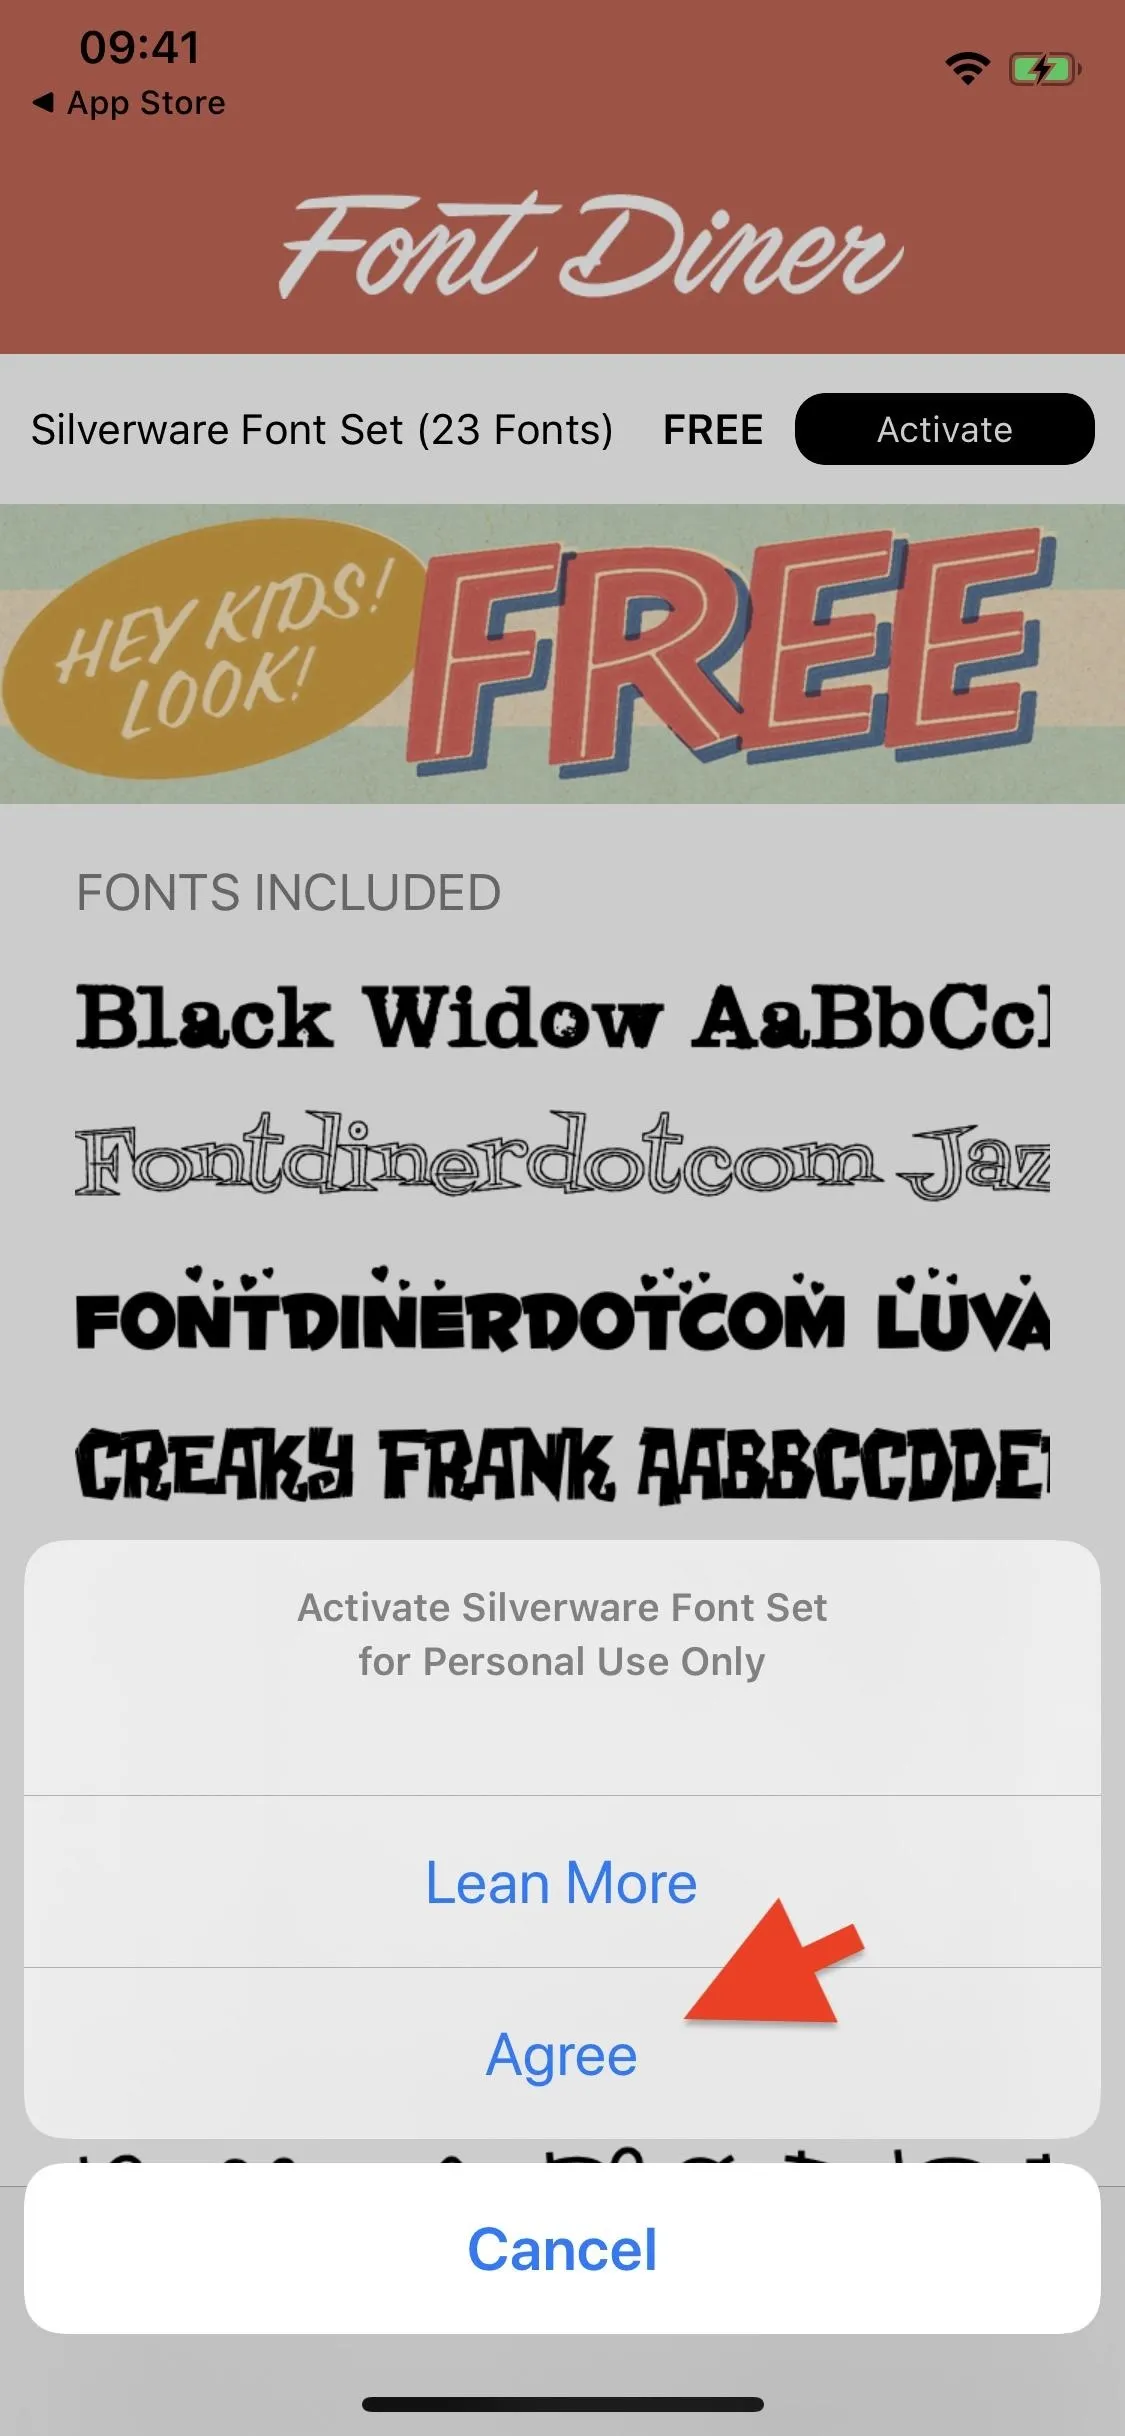
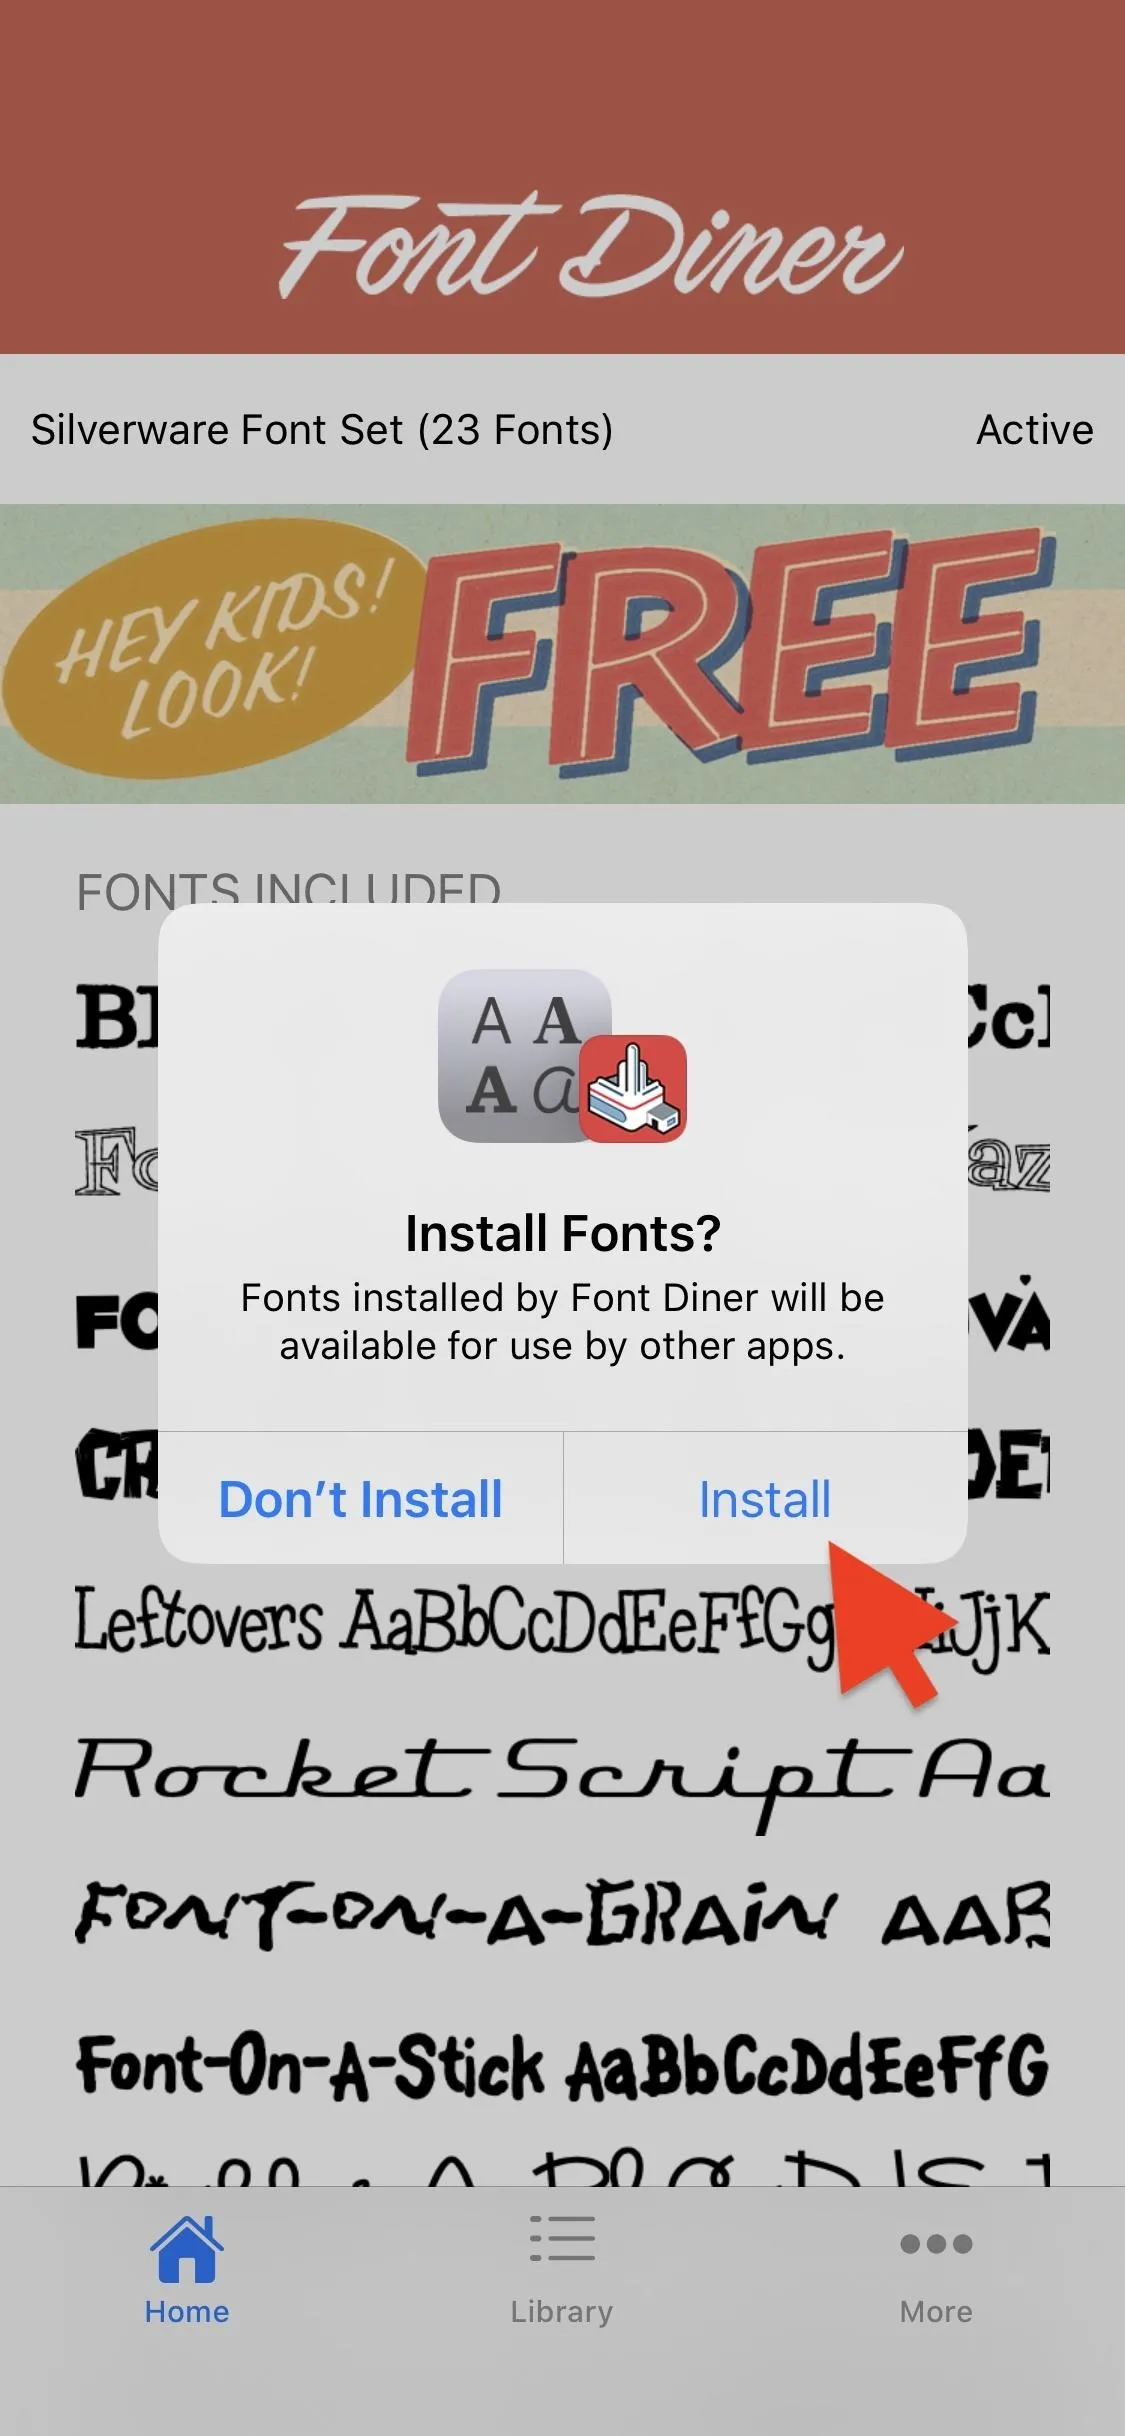
Open Font Diner and you'll see a list of fonts under the Home tab. There are 23 in total, which you must install as a complete set (to remove individual fonts, check out Step 4). To install the font set, tap on "Activate" in the top-right, hit "Agree," and then tap on "Install." The fonts are now ready to be used on your device.
View or Delete Custom Fonts
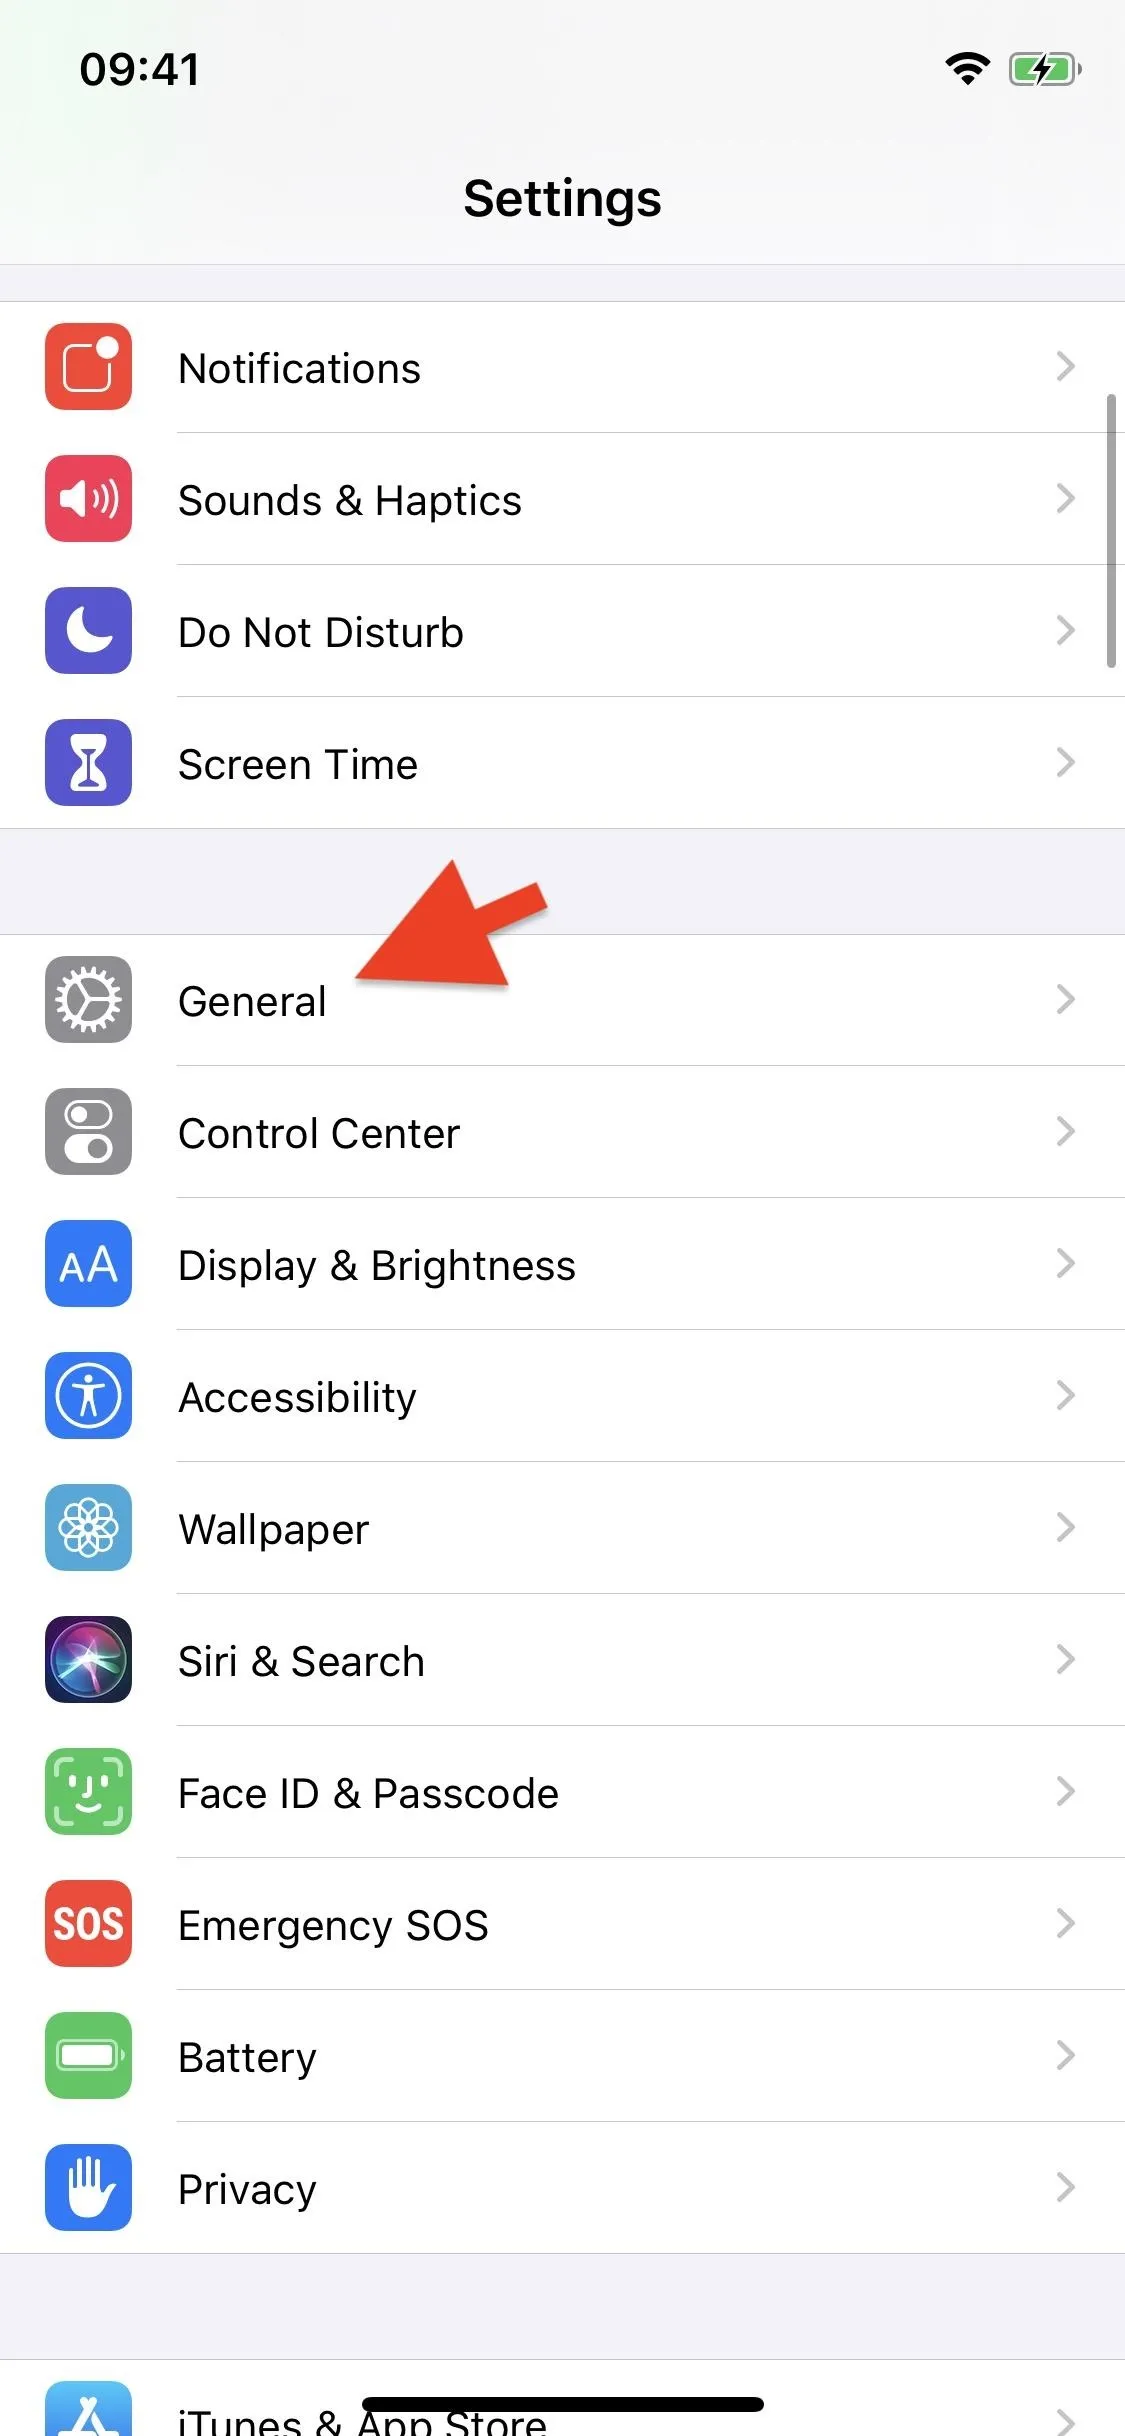
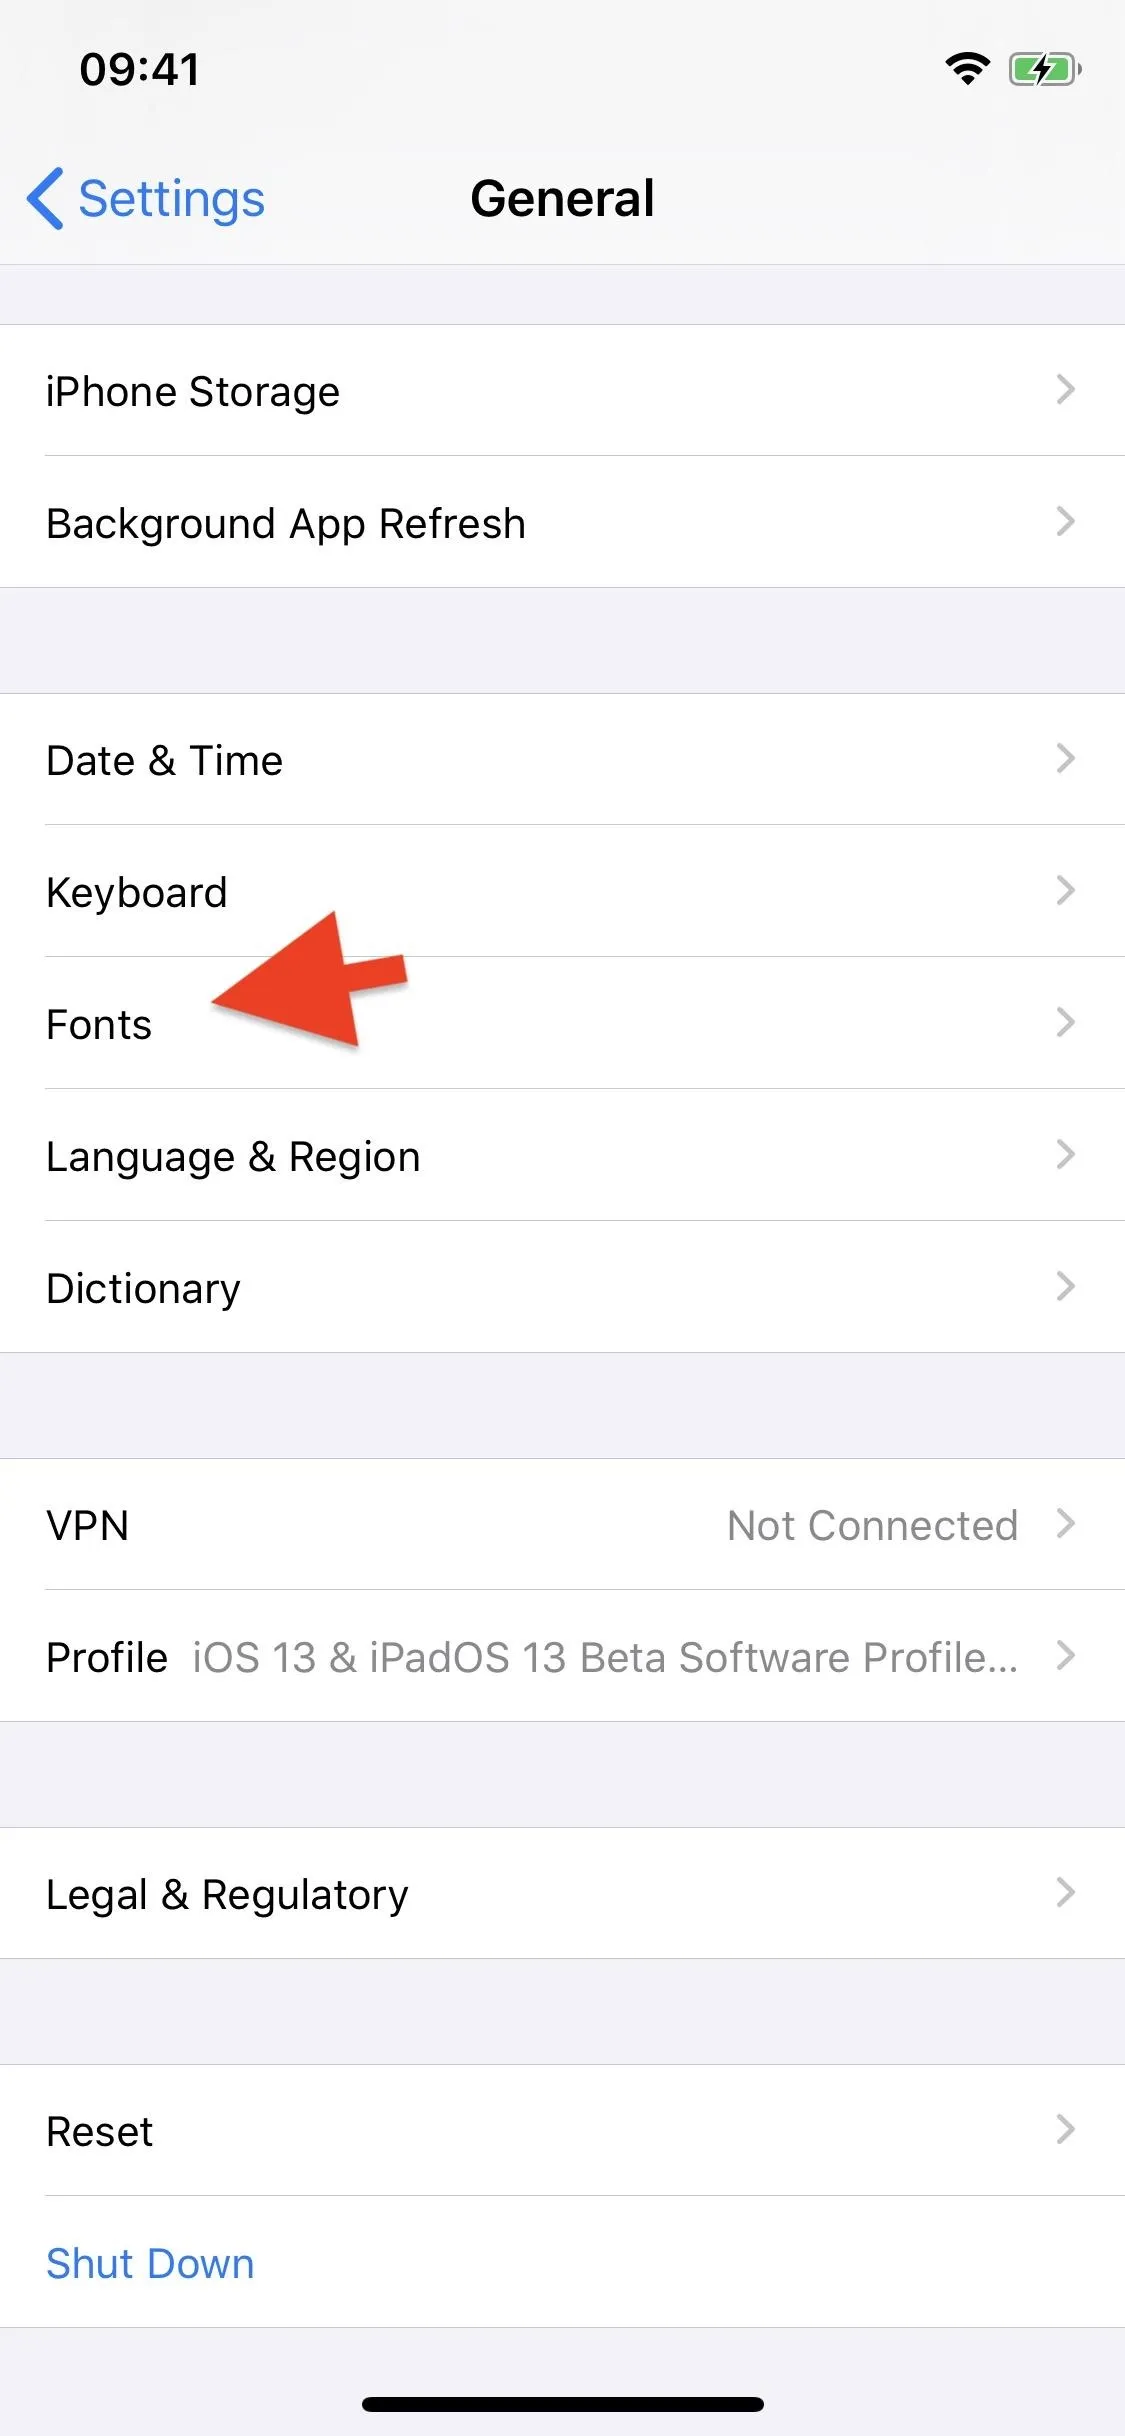
Not sure whether your fonts were successfully installed? iOS 13 brings a new section to your Settings, where you can manage all custom fonts you download and install. Open the Settings app and go into General –> Fonts. Here, you'll see a list of all your installed fonts.
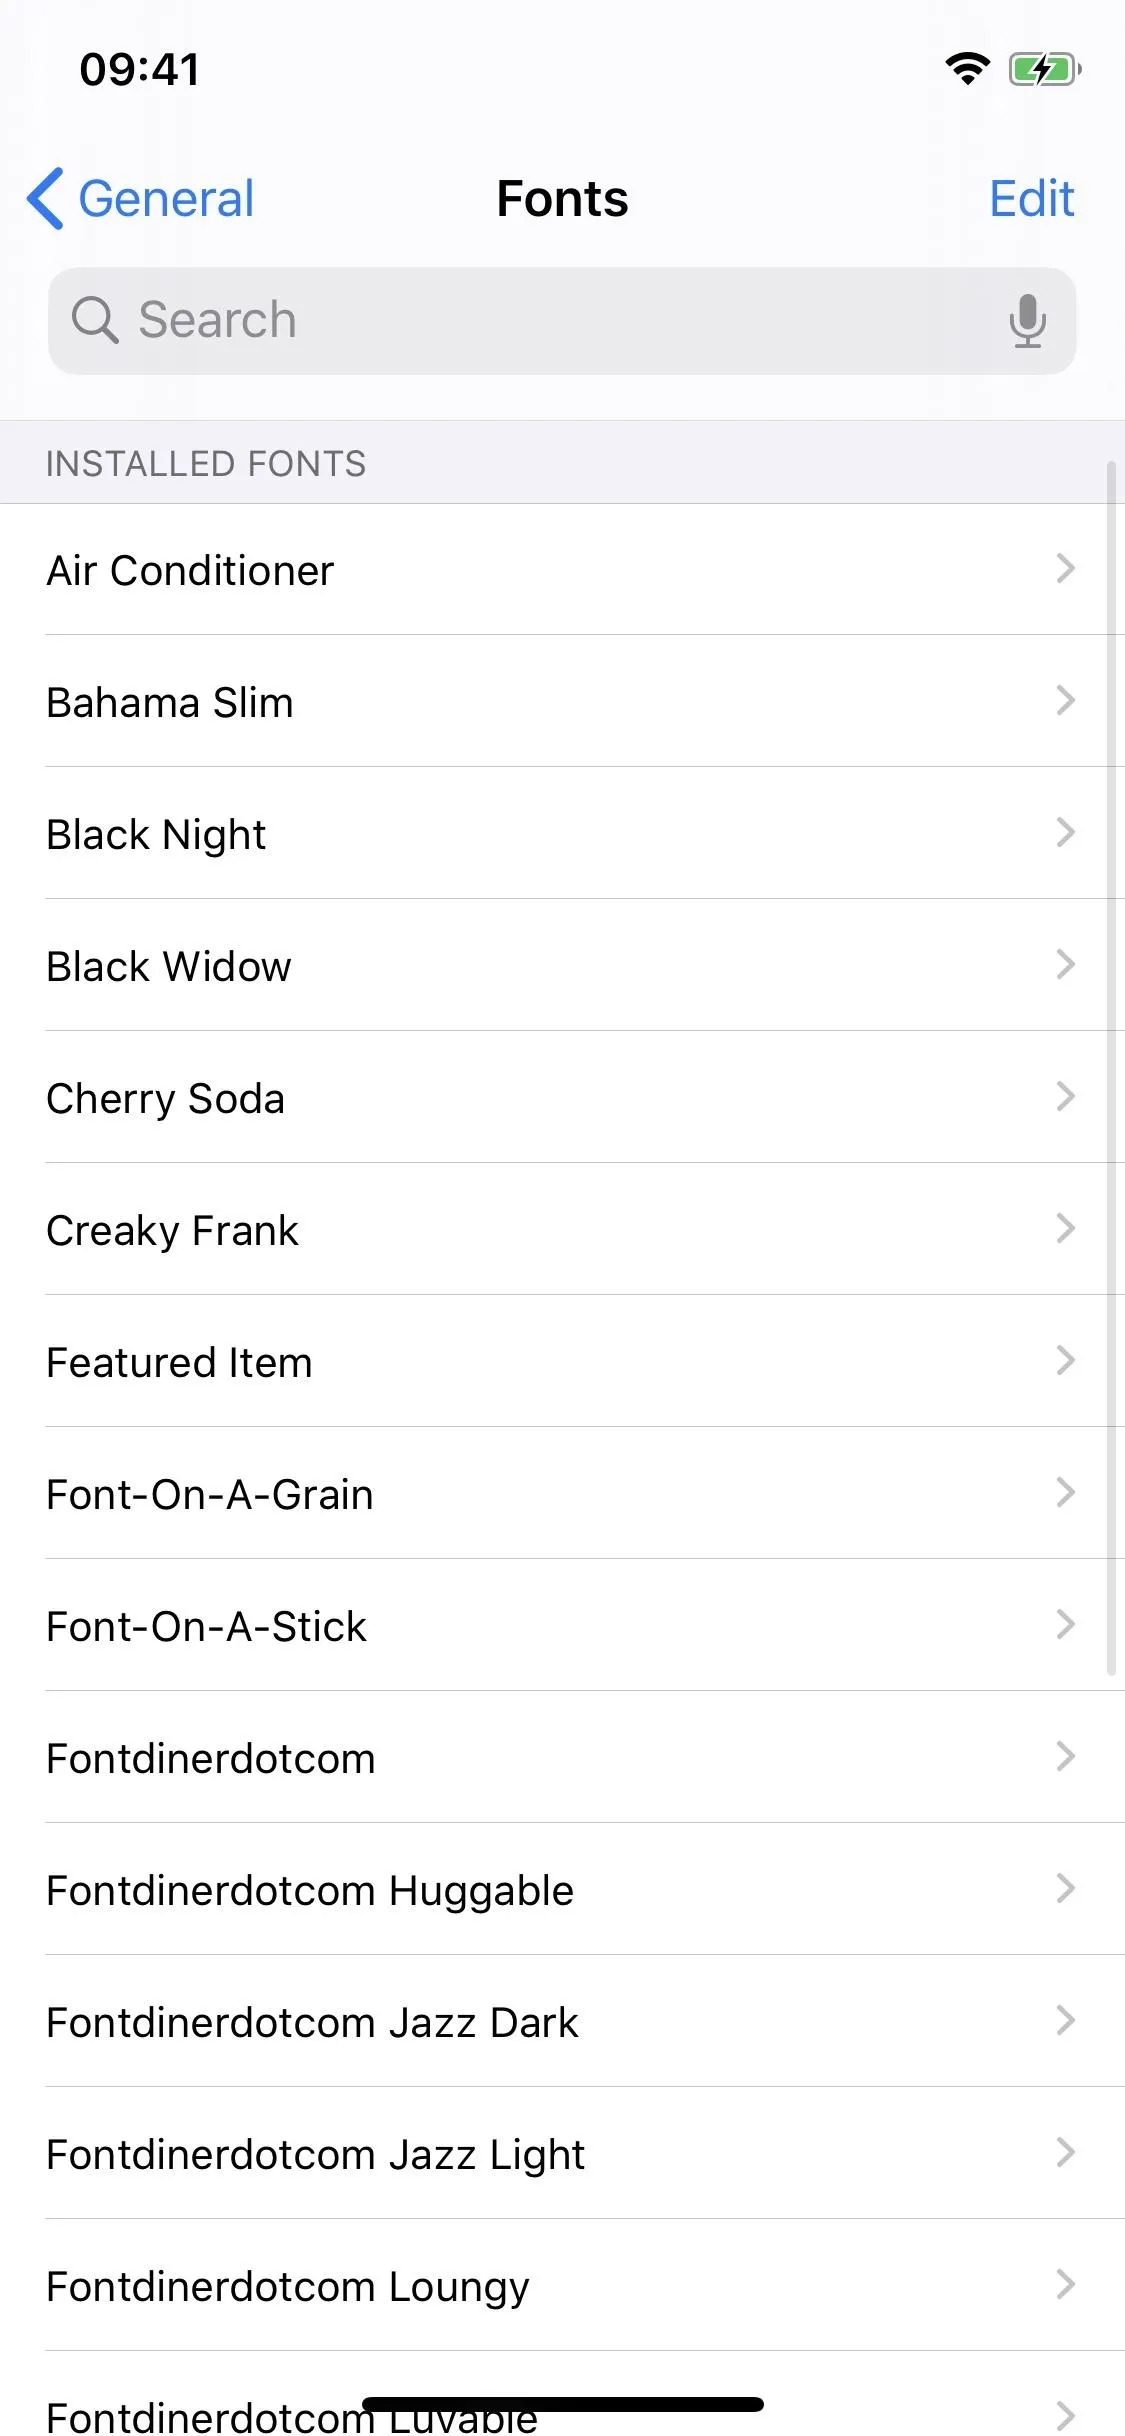
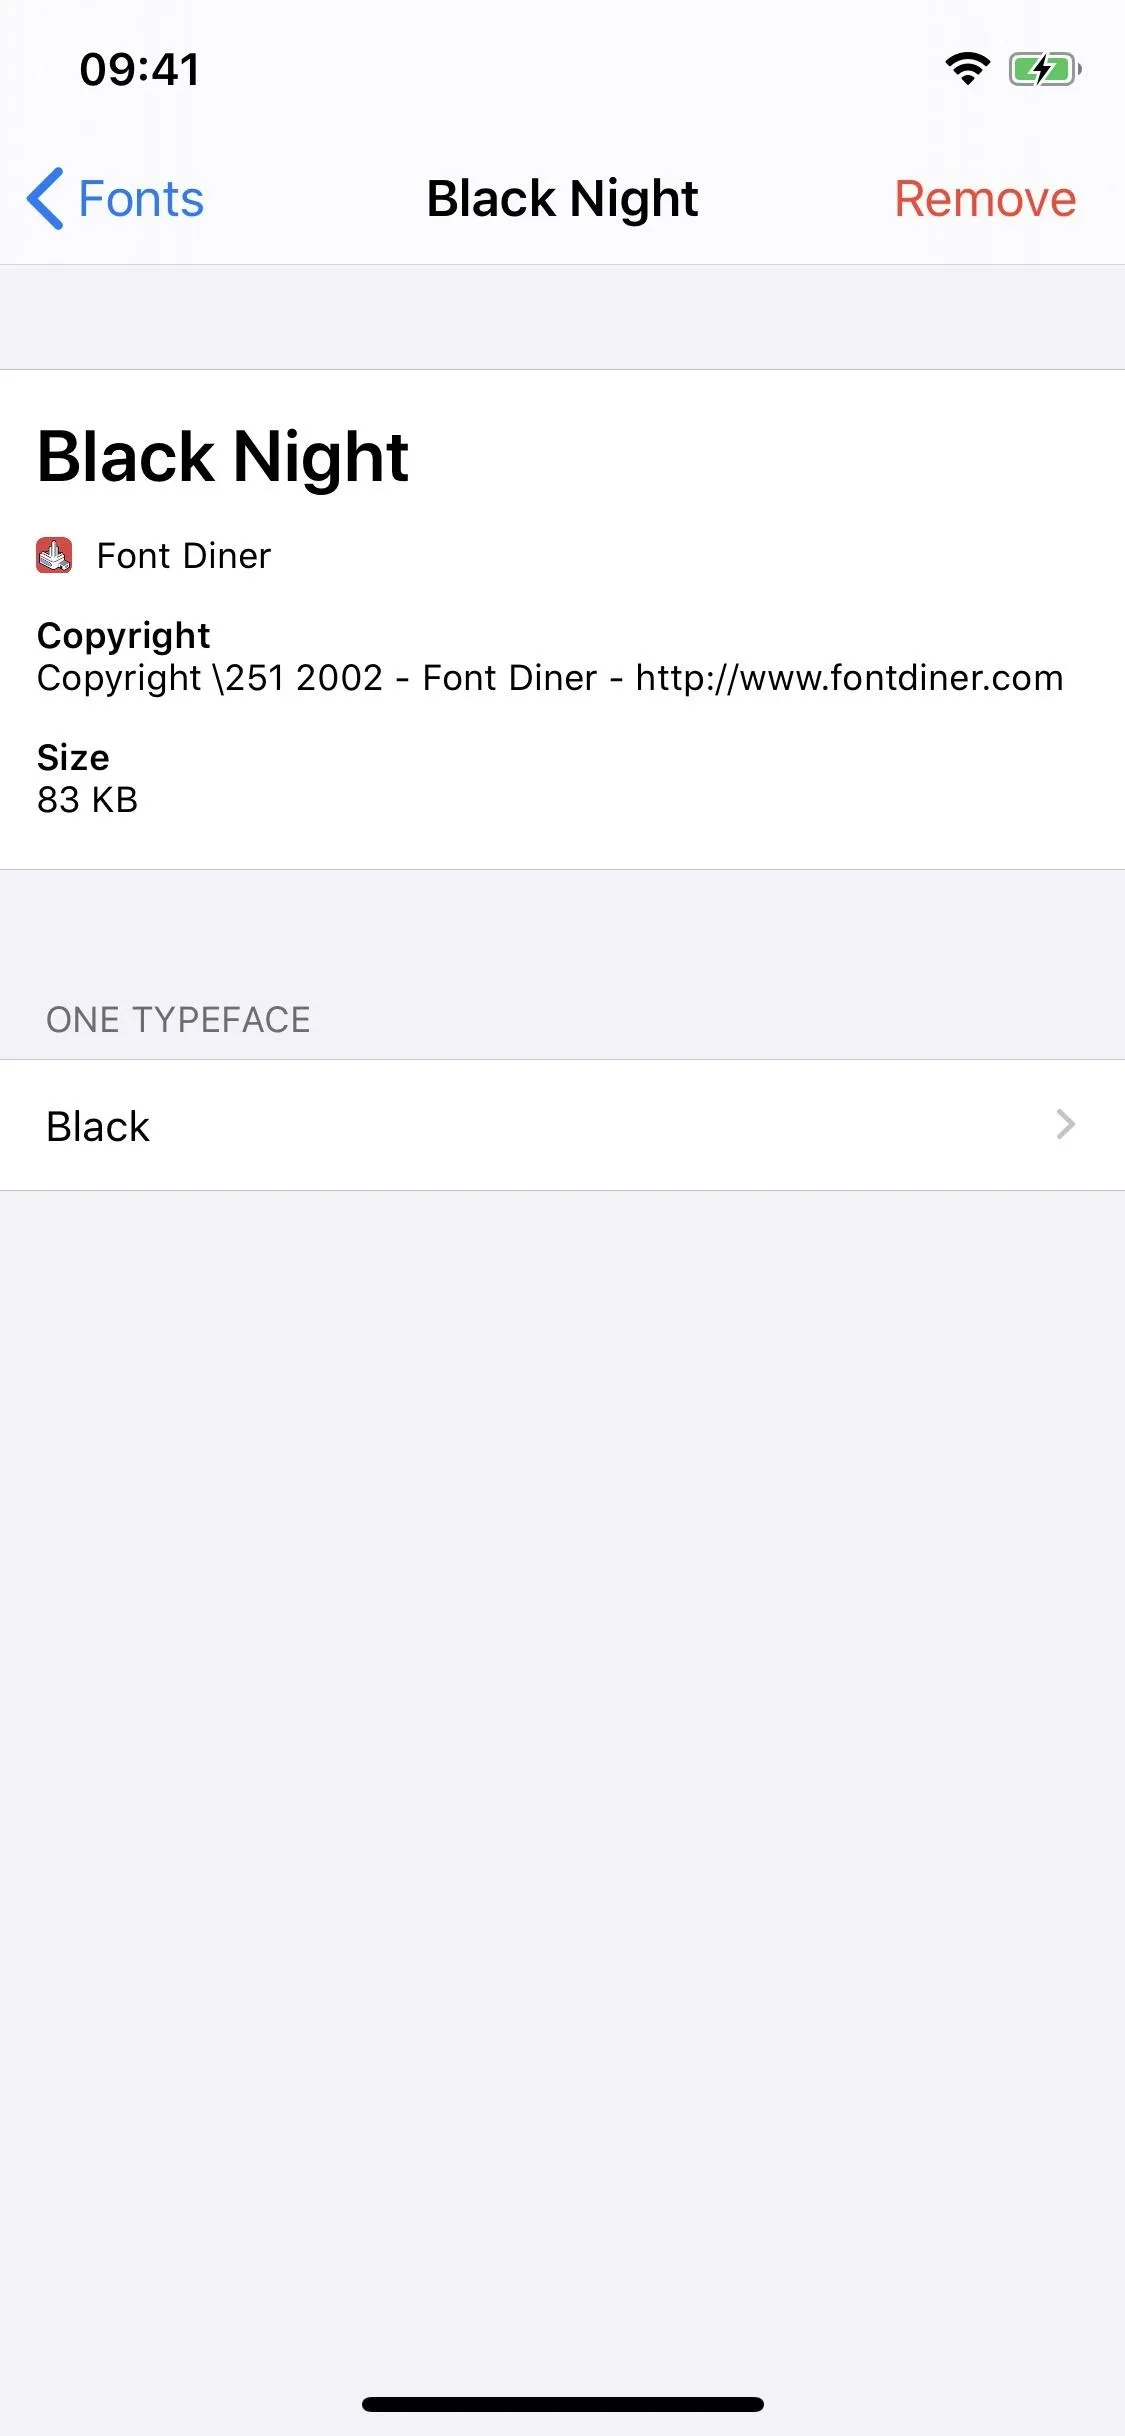
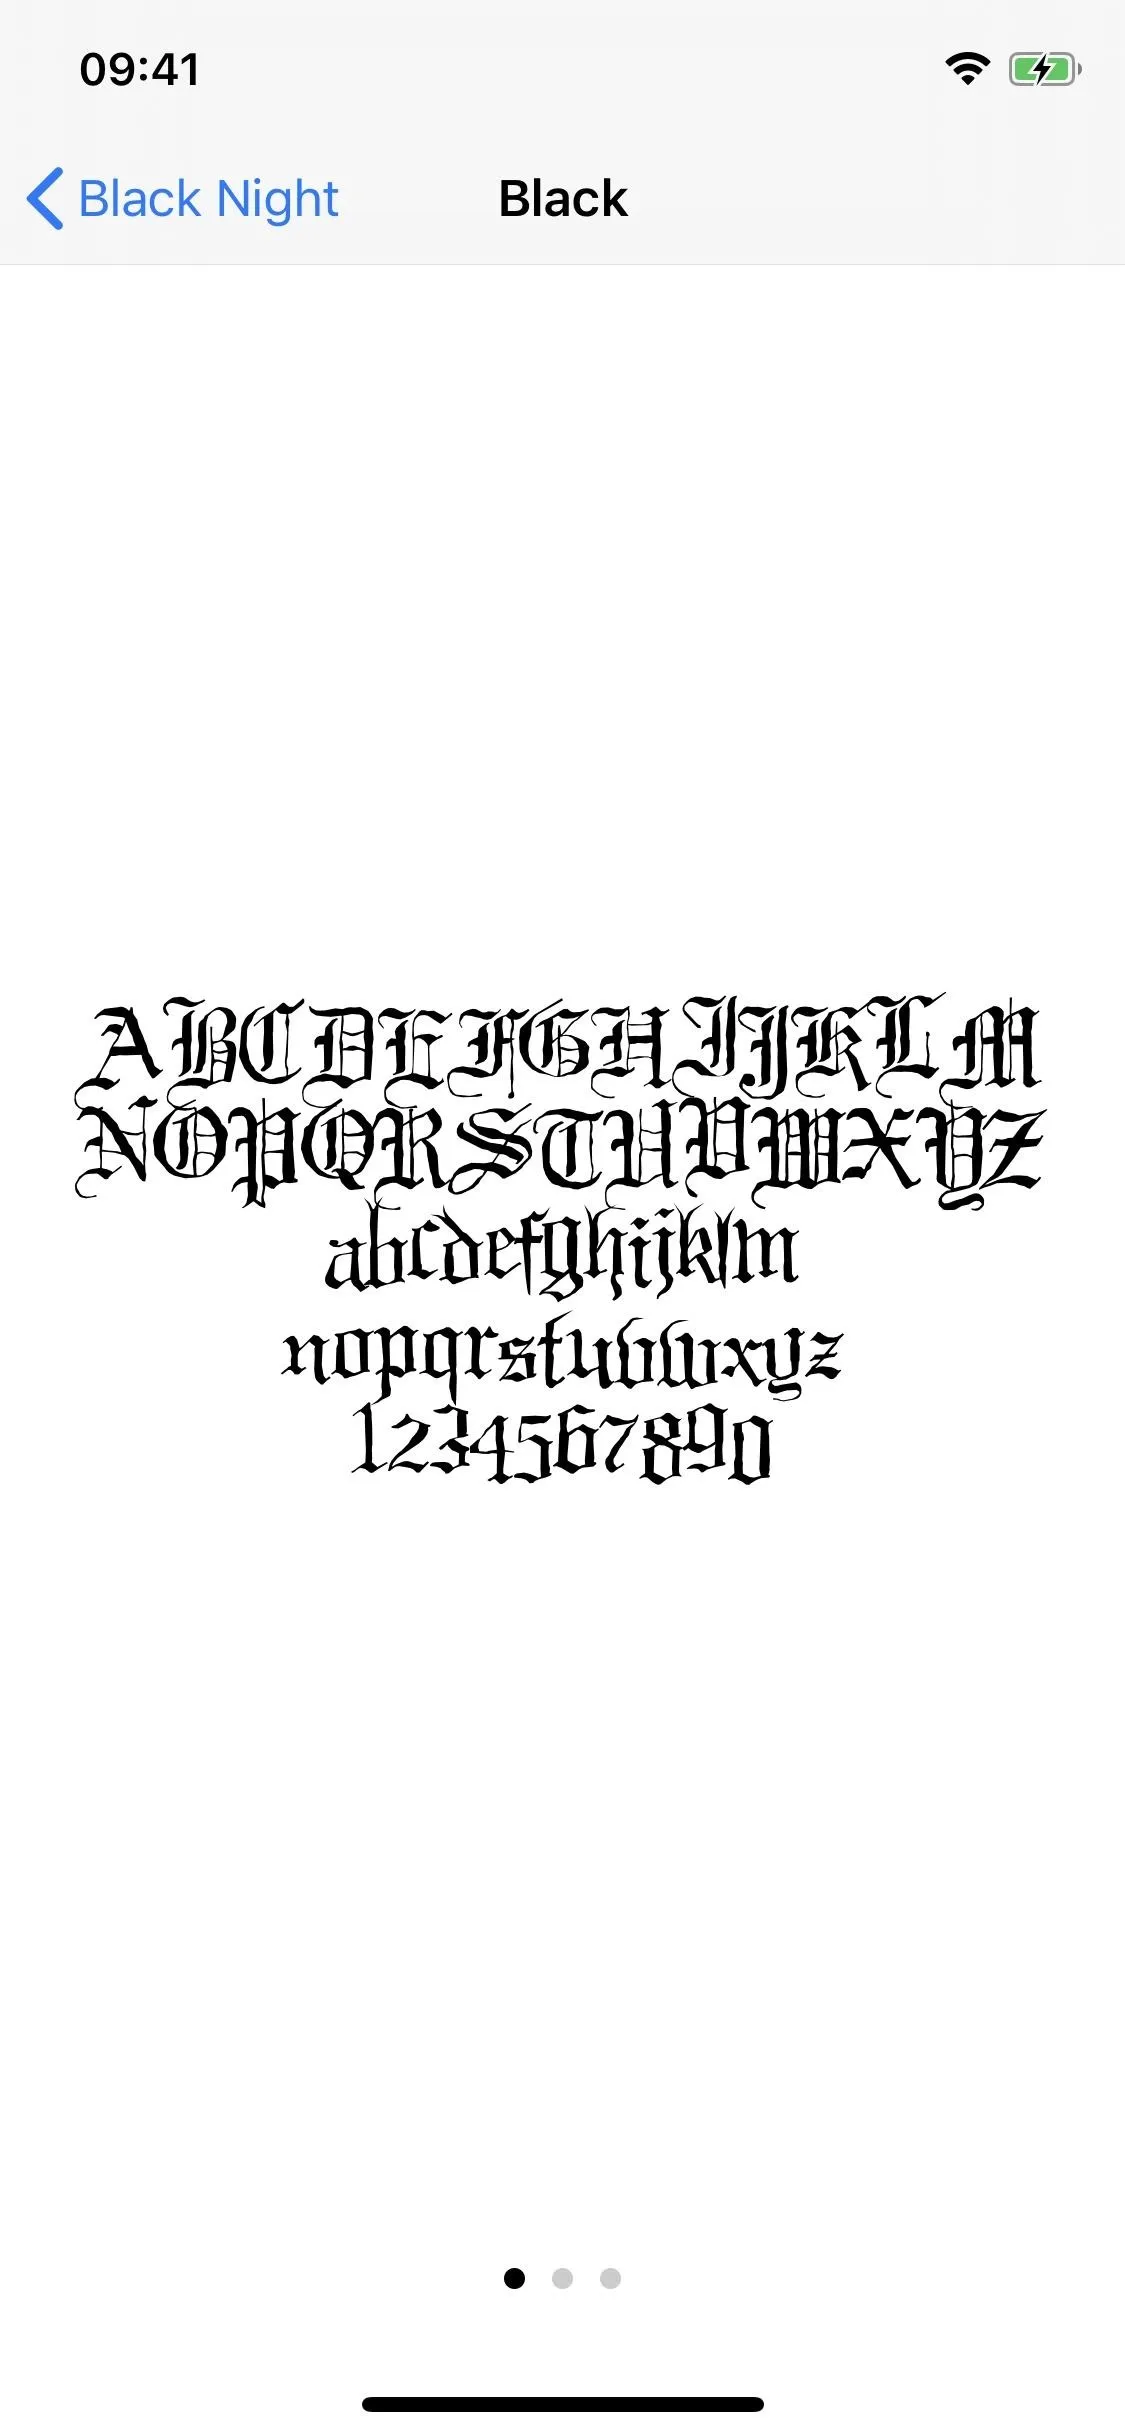
Tap on any font to view which application the font is from, copyright information, font file size, and different typefaces. You can tap on each typeface to view the font in letter/number, paragraph, and character format.
If you want to delete a font from your phone, either swipe left on a font in the list or tap on "Edit" in the top-right, select the fonts you want to delete, then hit "Remove." The second method is preferable if you're looking to delete multiple fonts at once. You can see both options below.
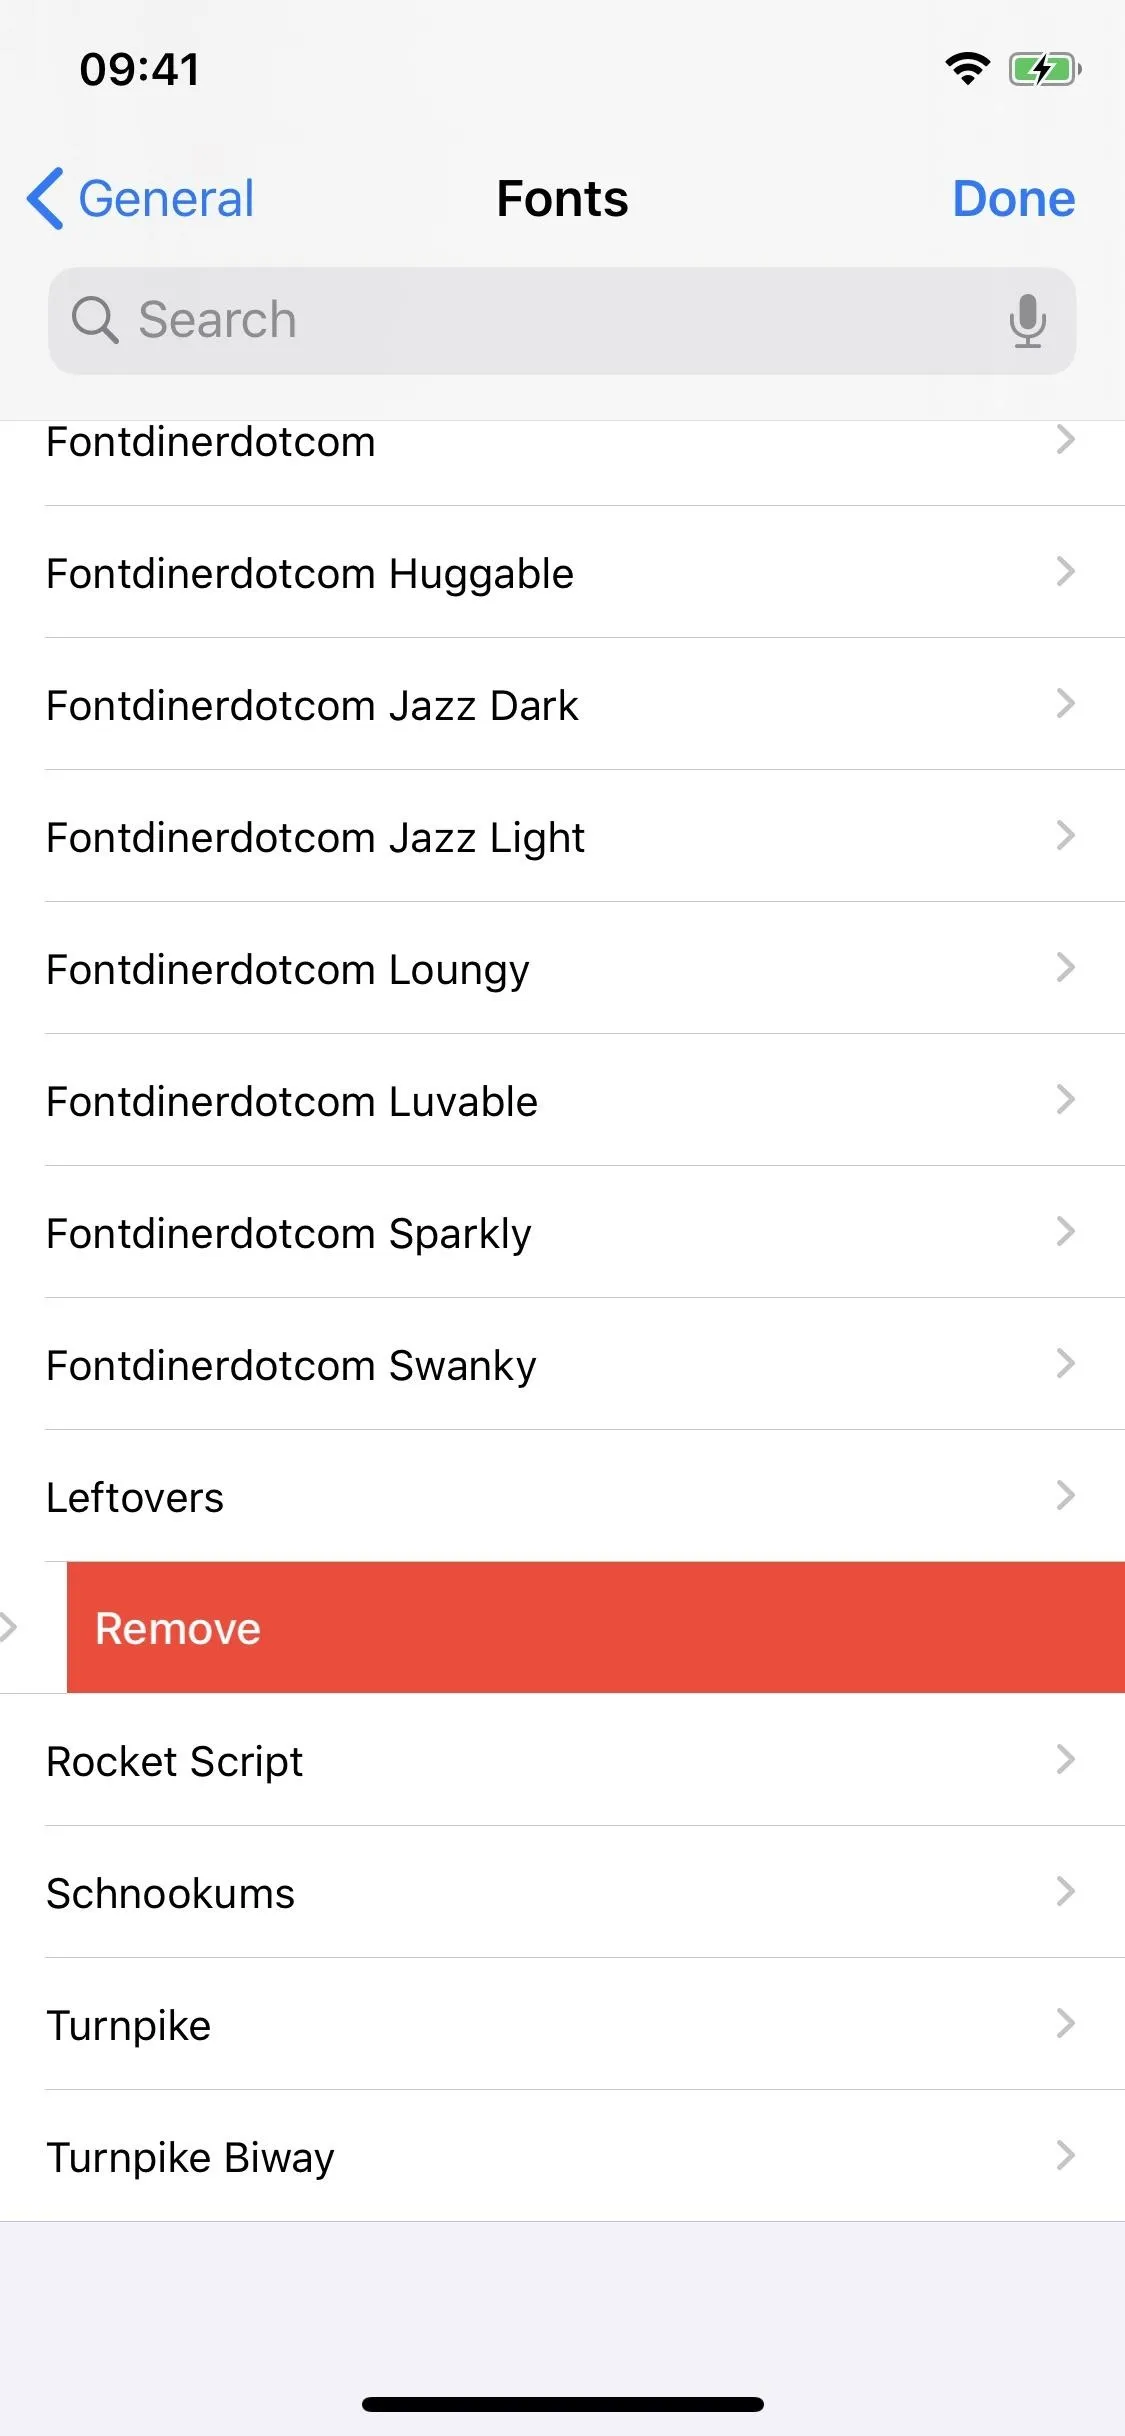
swipe to delete
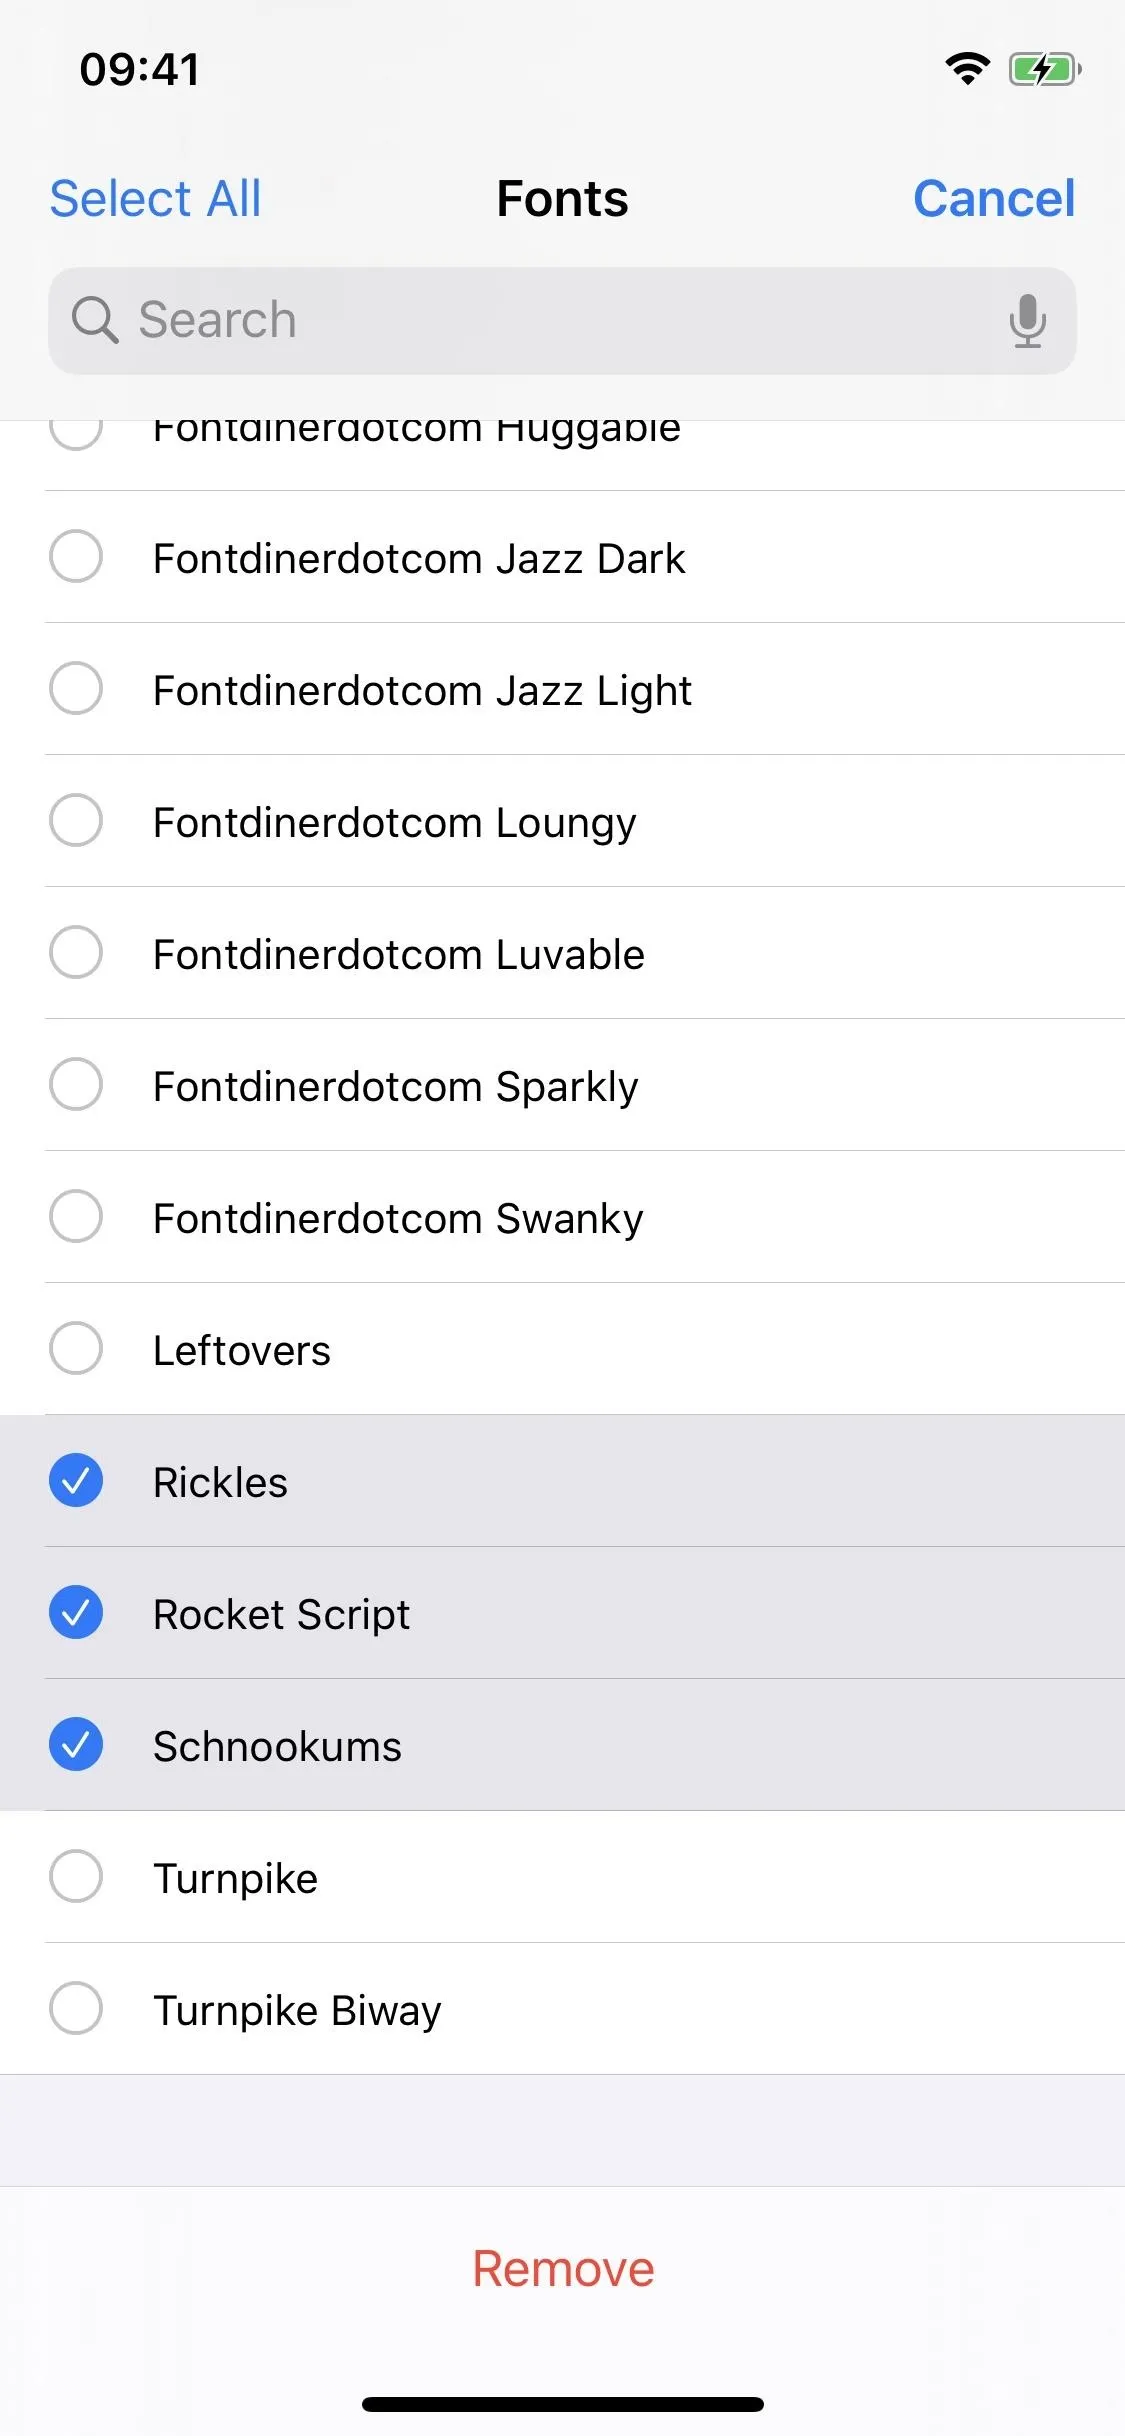
multiple delete
swipe to delete
multiple delete
Use Custom Fonts
As mentioned previously, custom fonts are only available in a few select apps, including Pages, Numbers, and the rest of the iWorks office suite on iOS 13. As soon as other apps support the API, you'll be able to use custom fonts in those apps, but there isn't much information out there as to when third-party apps will support fonts, or if they ever will. Custom fonts don't even currently work in Mail, which they should, but this could be a bug or a huge oversight.
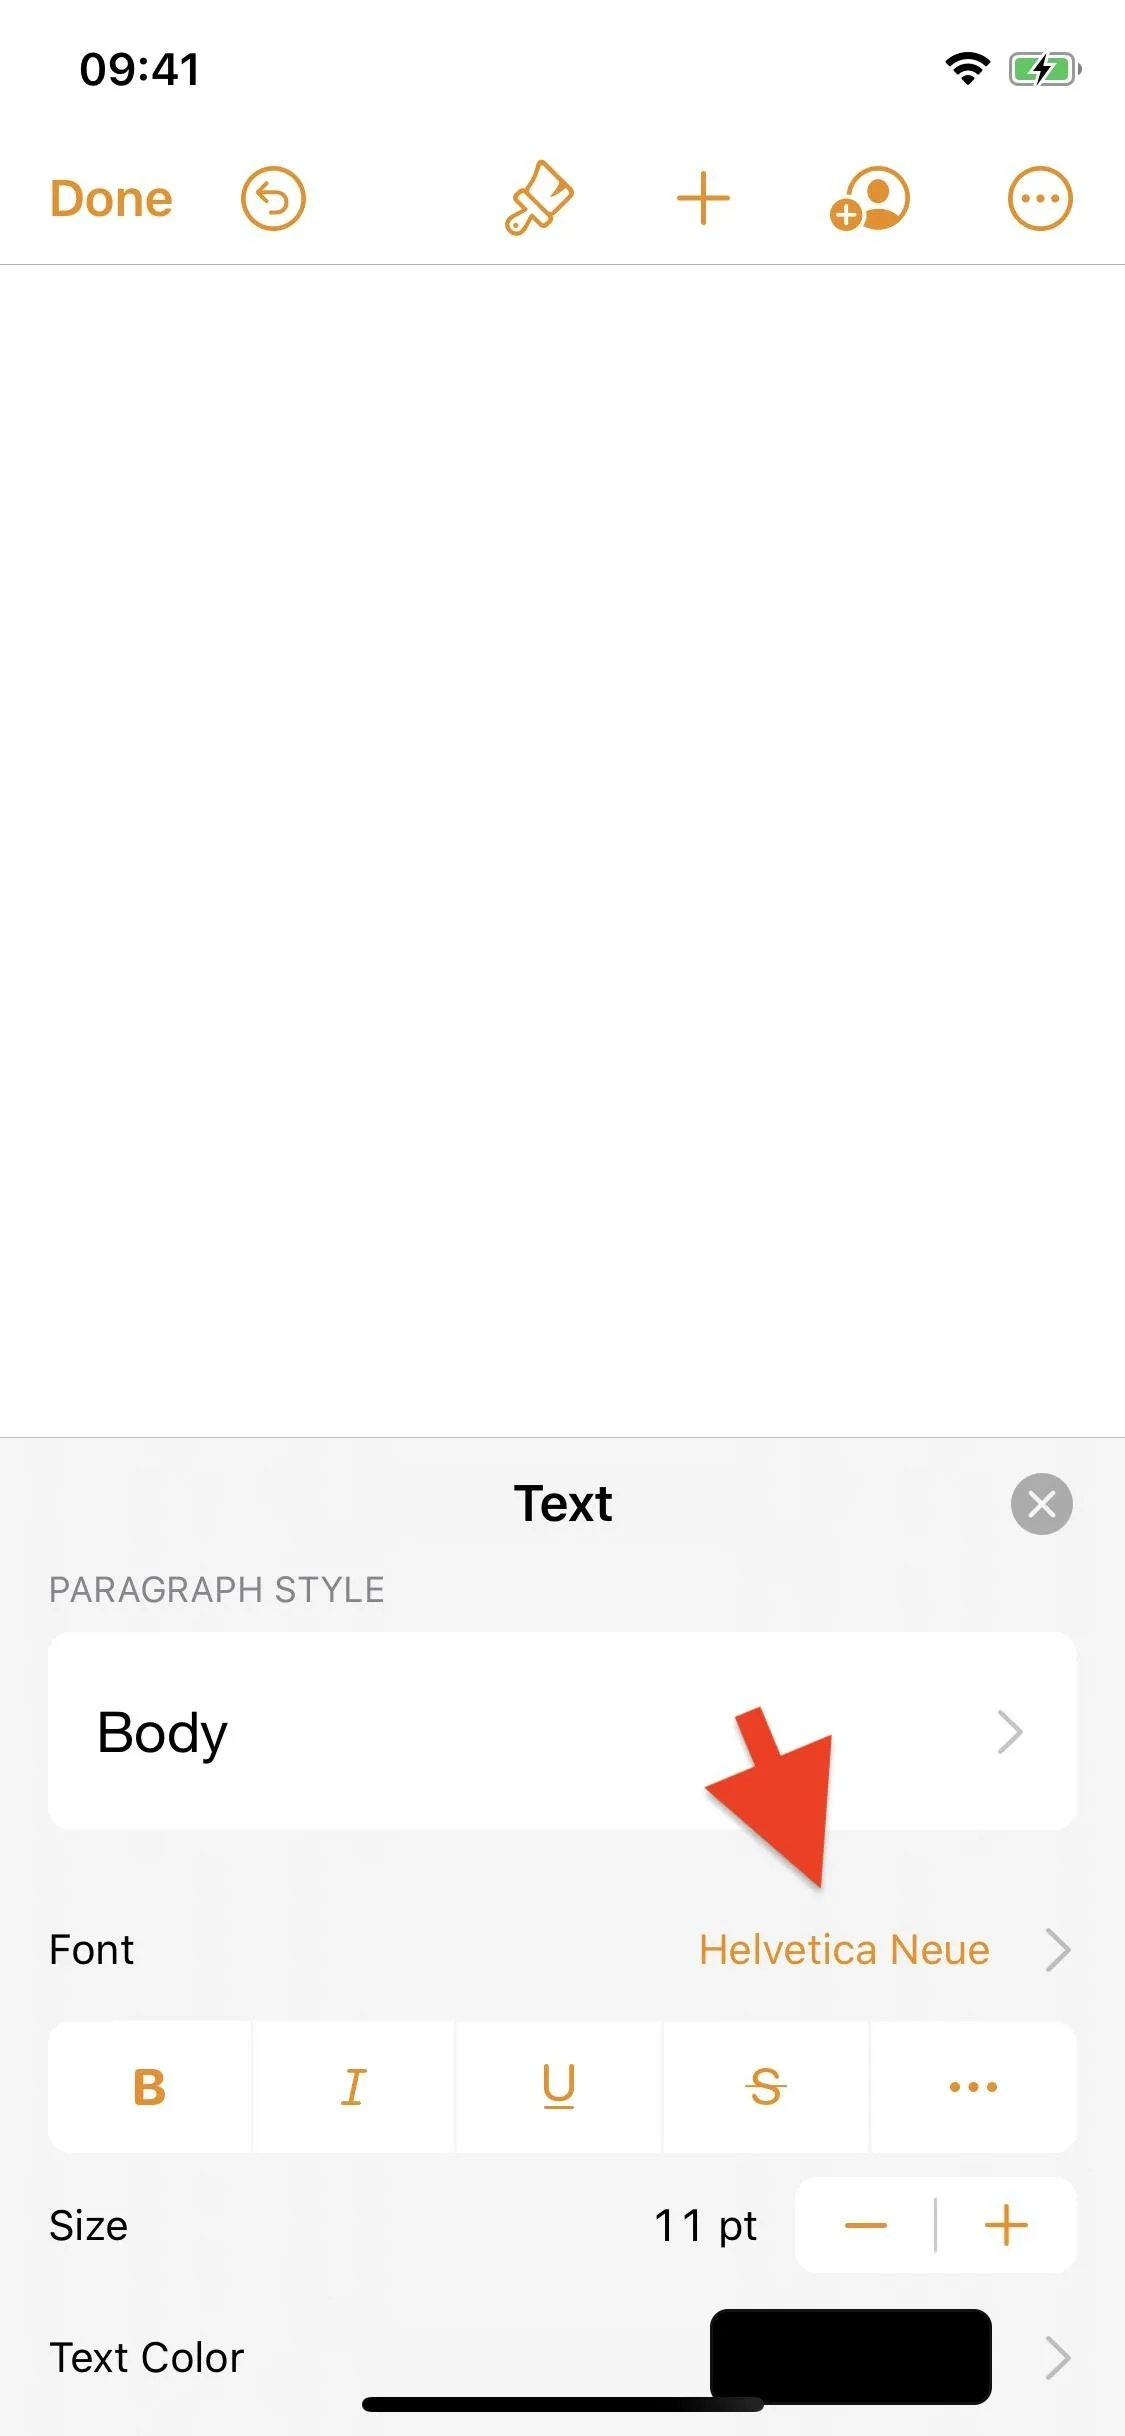
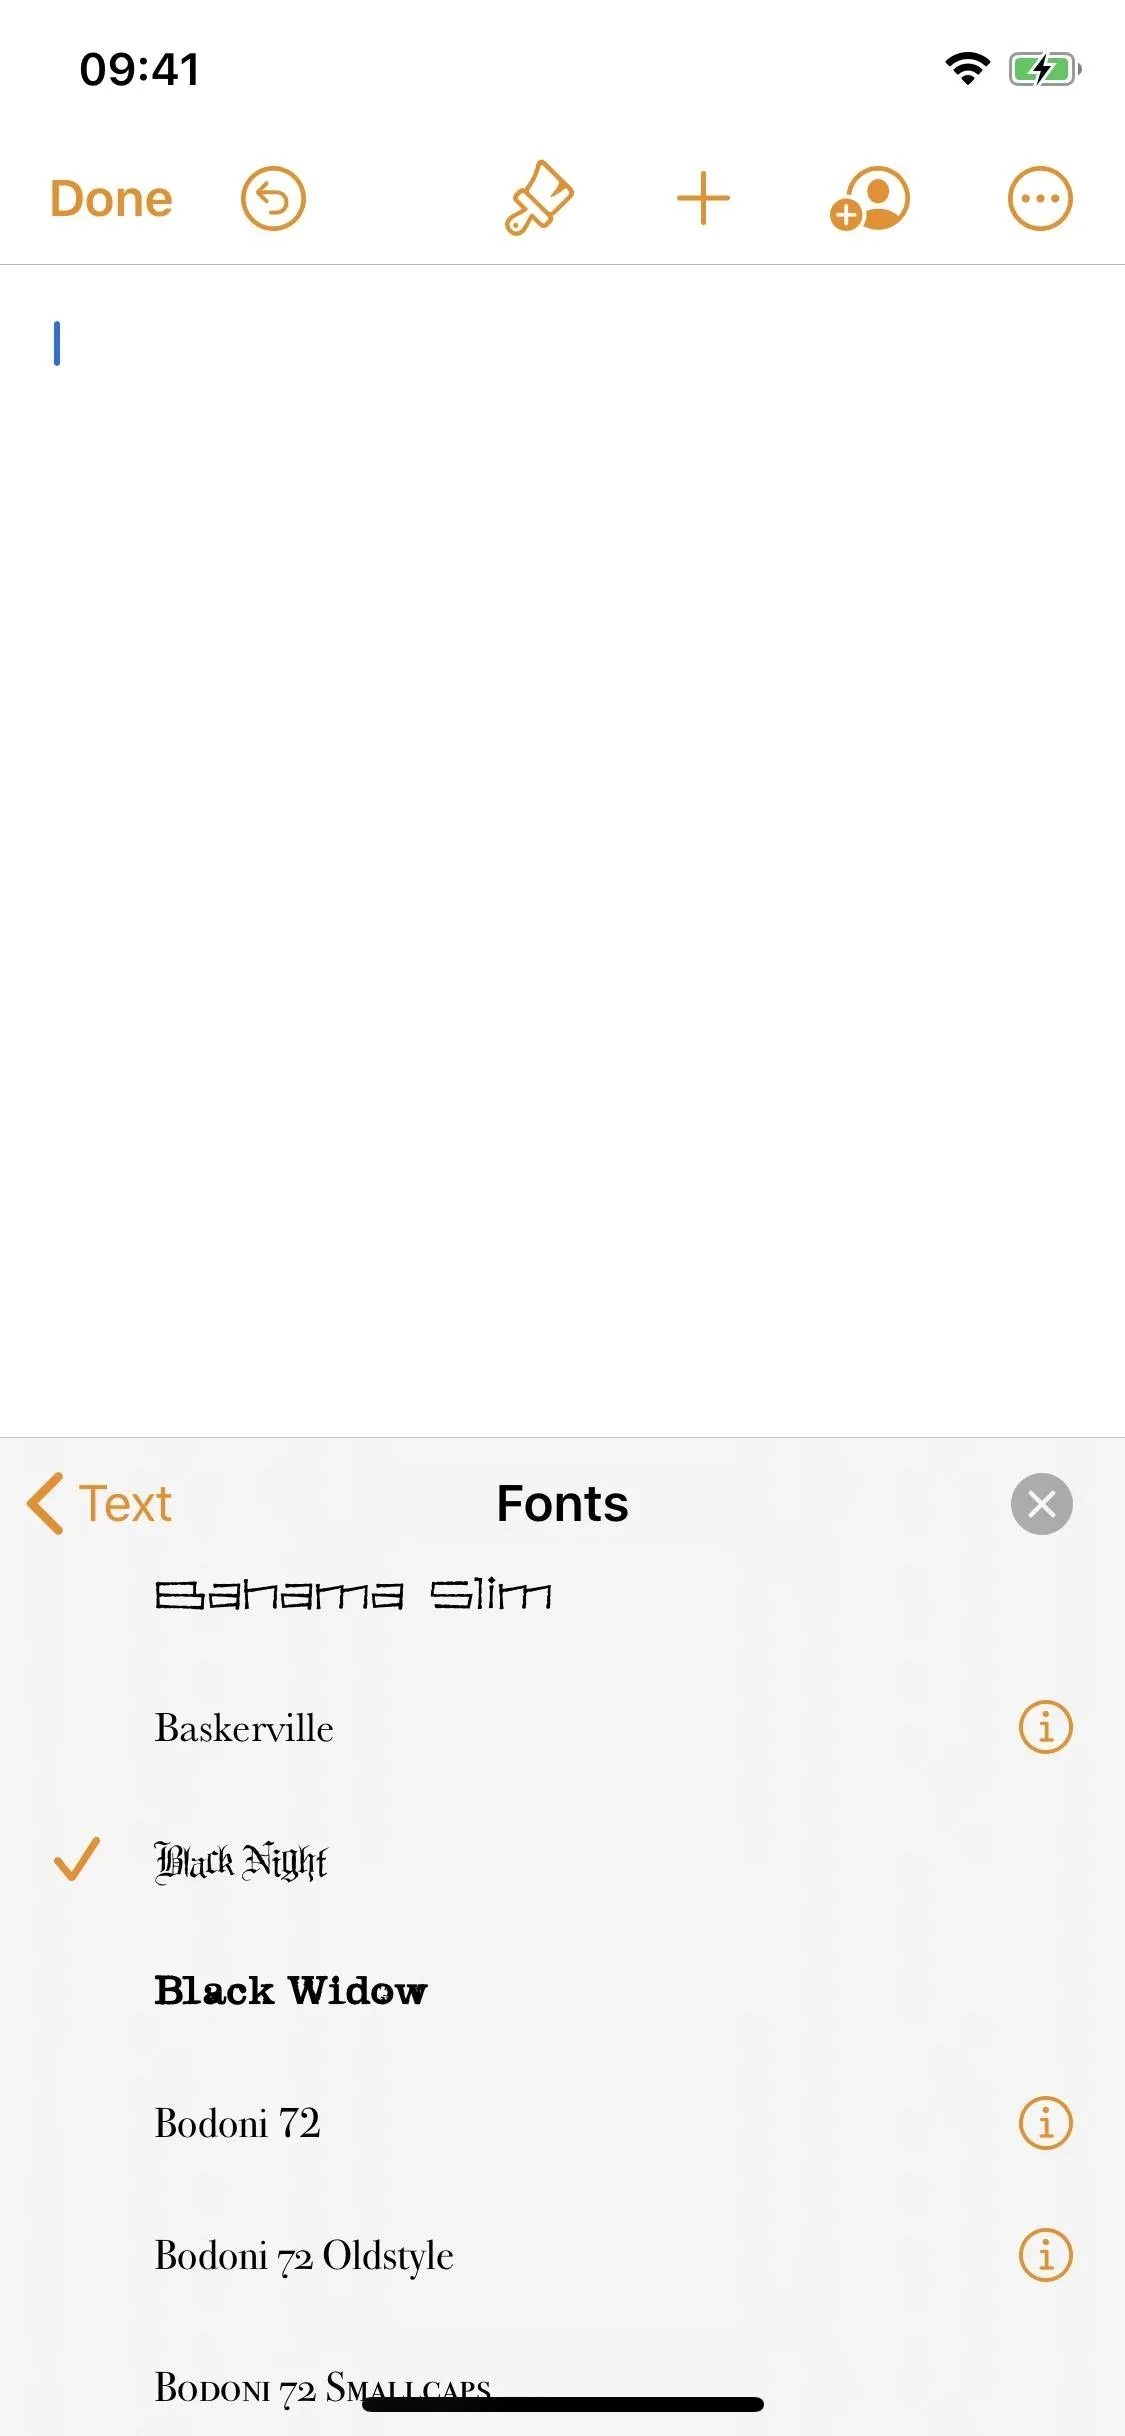
To use custom fonts right now, open any one of the iWorks applications on your iPhone (we'll be using Pages). In Pages, create a new document and tap on the brush icon in navigation bar at the top to bring up formatting options. In the text formatting menu, tap on the current font and scroll through the list. Any fonts you have installed will show up here. Tap on the font to select it and begin typing — your text will appear in a few font.
Install Fonts Using Config Profiles (Alternative Method)
Apple has allowed the installation of third-party system-wide "fonts" for a while now, but the method is a pain in the ass and involves configuration profiles (which, if you're not careful, can result in malicious software running on your device).
However, these fonts weren't really true fonts — they were actually just characters and symbols that appear like true fonts. Thanks to iOS 13, though, this configuration profile method can be used to install true custom fonts, which can then be managed in the fonts manager and used in applications like Pages and Numbers.
#1: Install iFont
First, you'll need a third-party app that can be used to manage your custom fonts before they're installed on your smartphone. There are several out there (FontManager and AnyFont), but our favorite is iFont, which also happens to be free. You can download it using the link below, or simply search for it in the App Store.
- App Store Link: iFont (free)

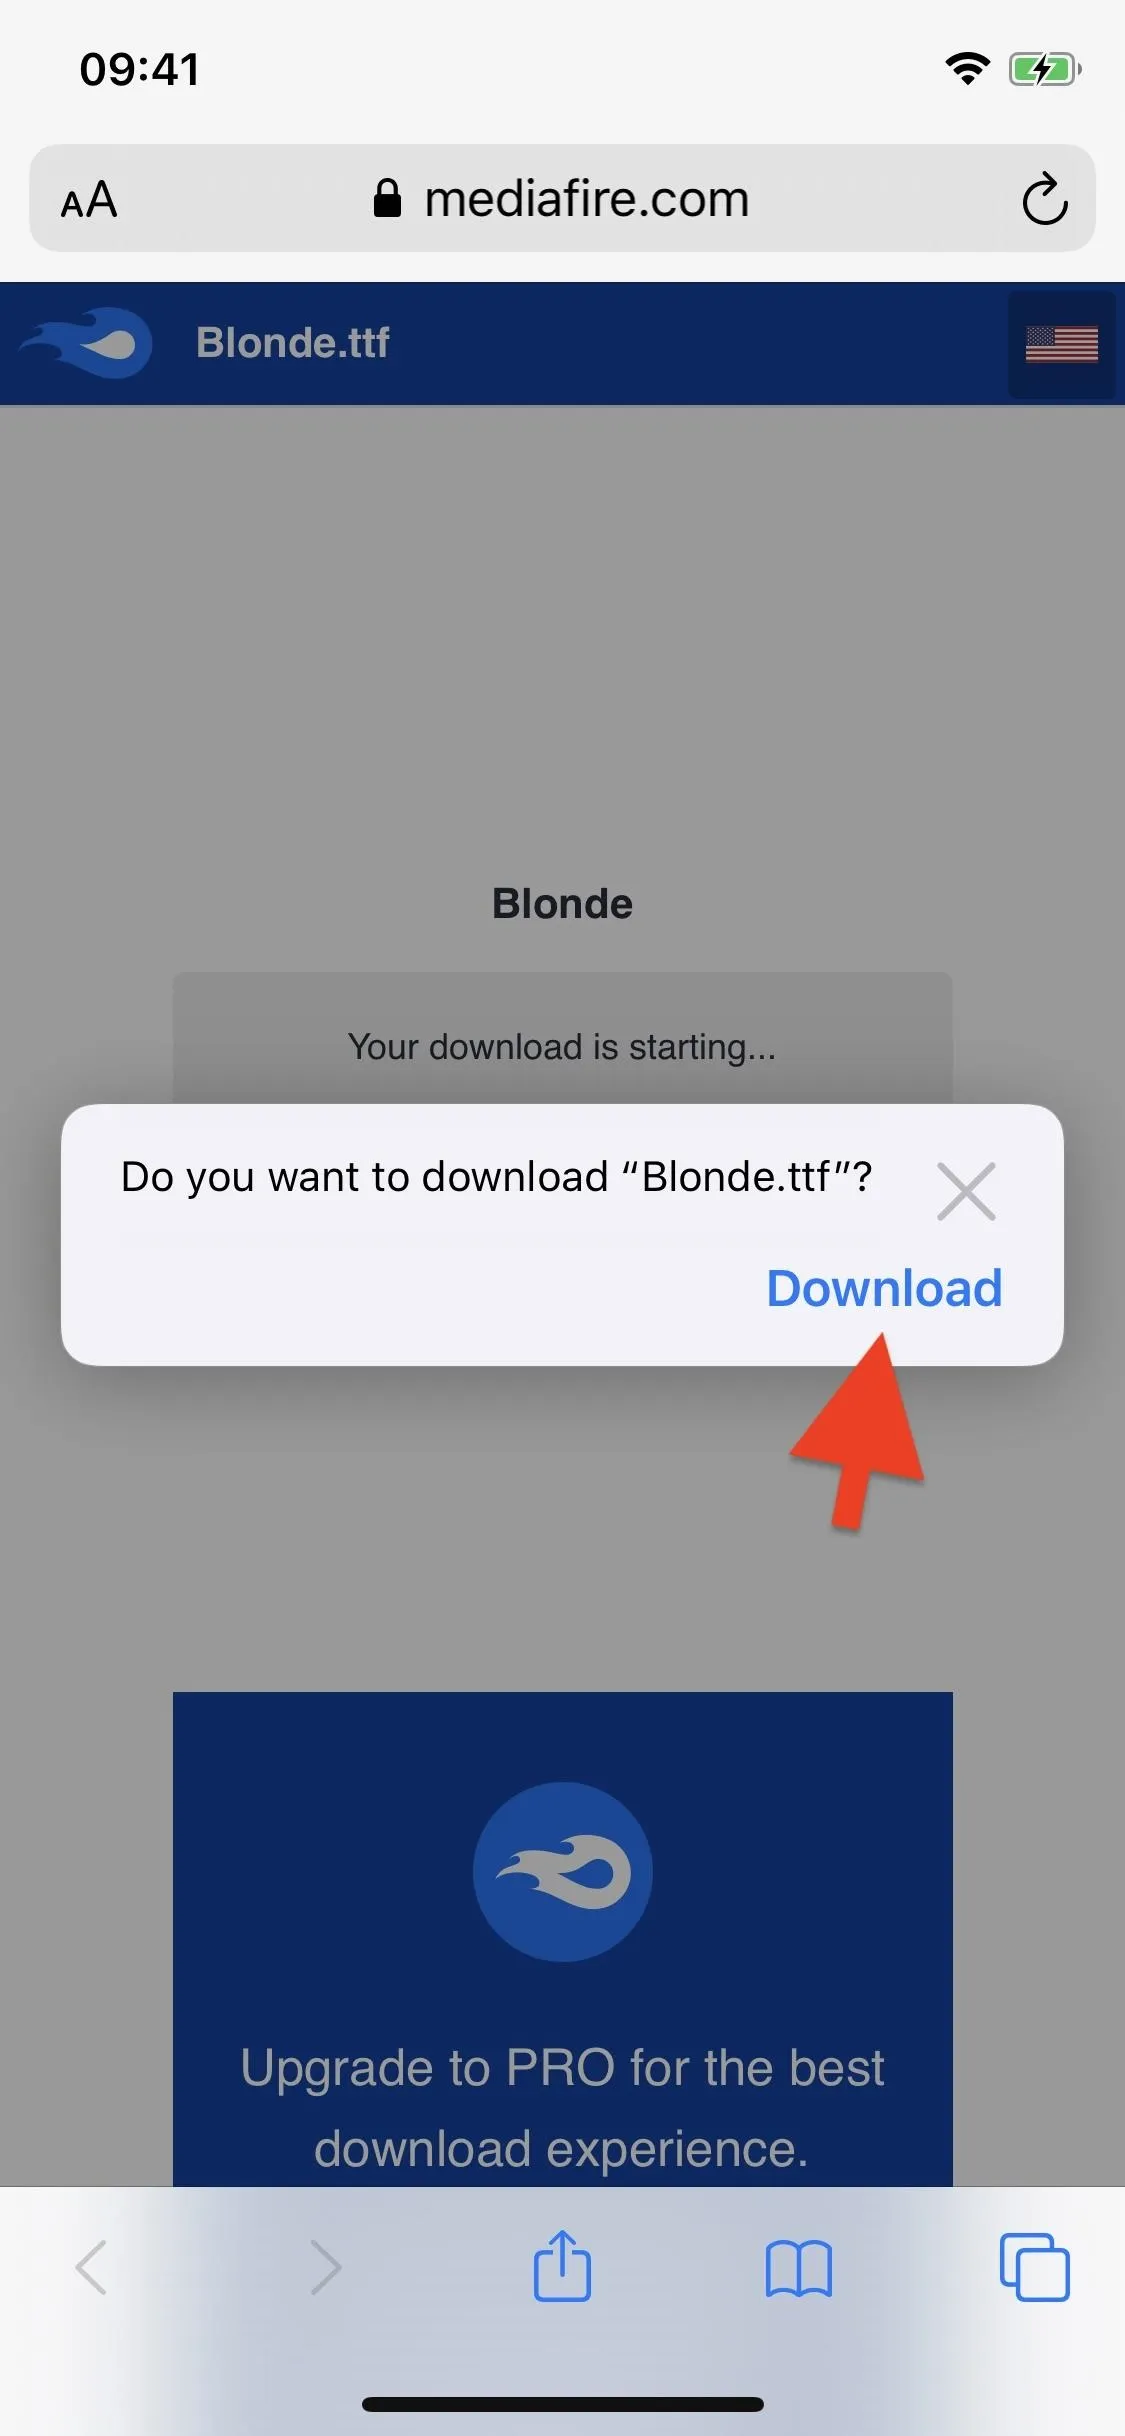
#2: Download Custom Font
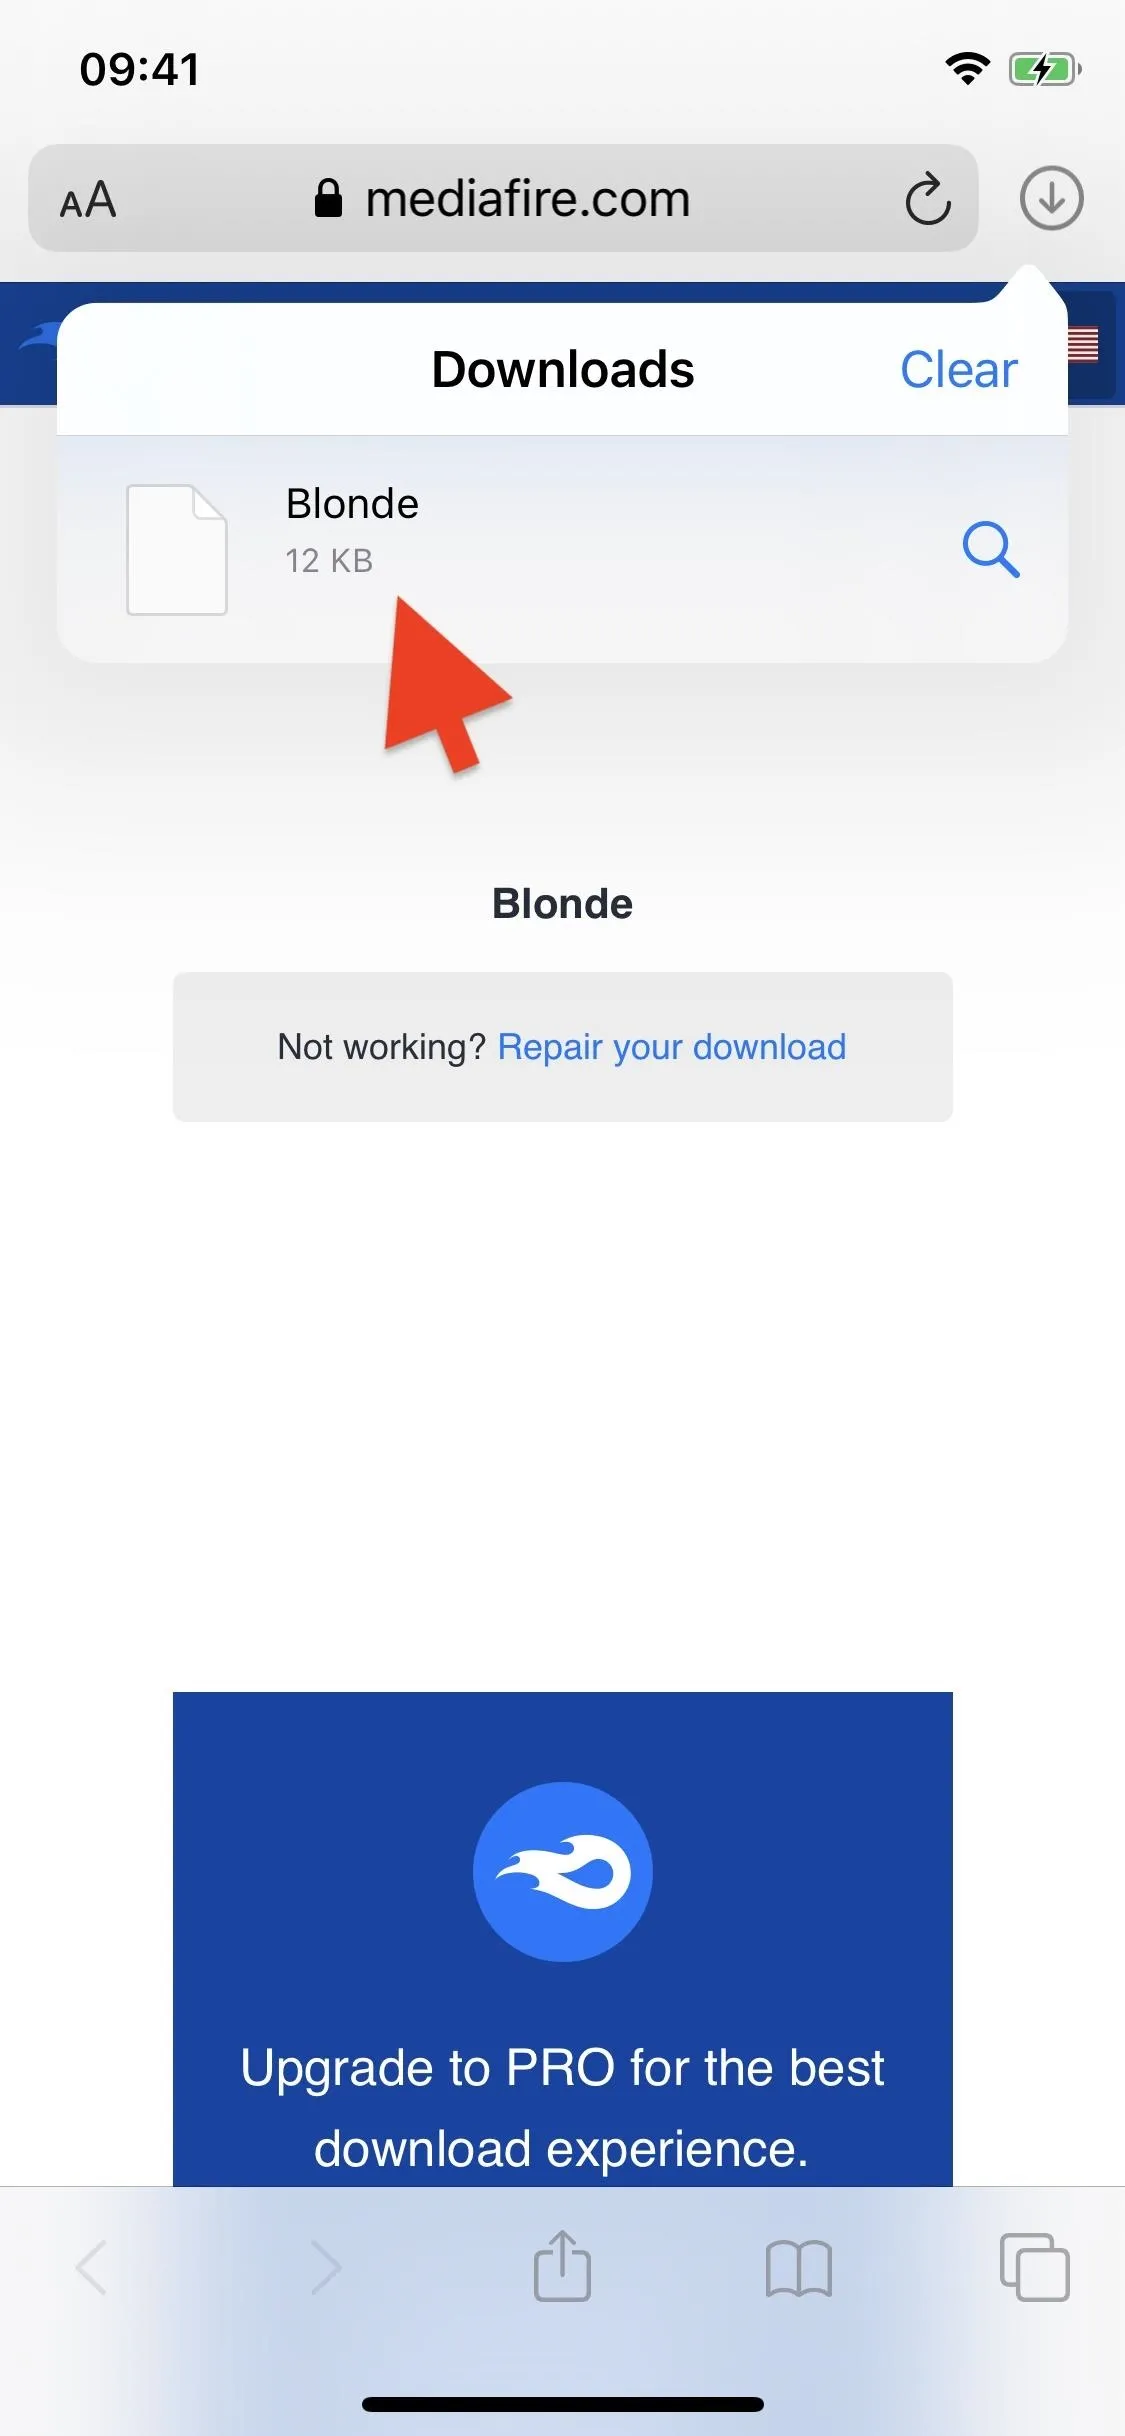
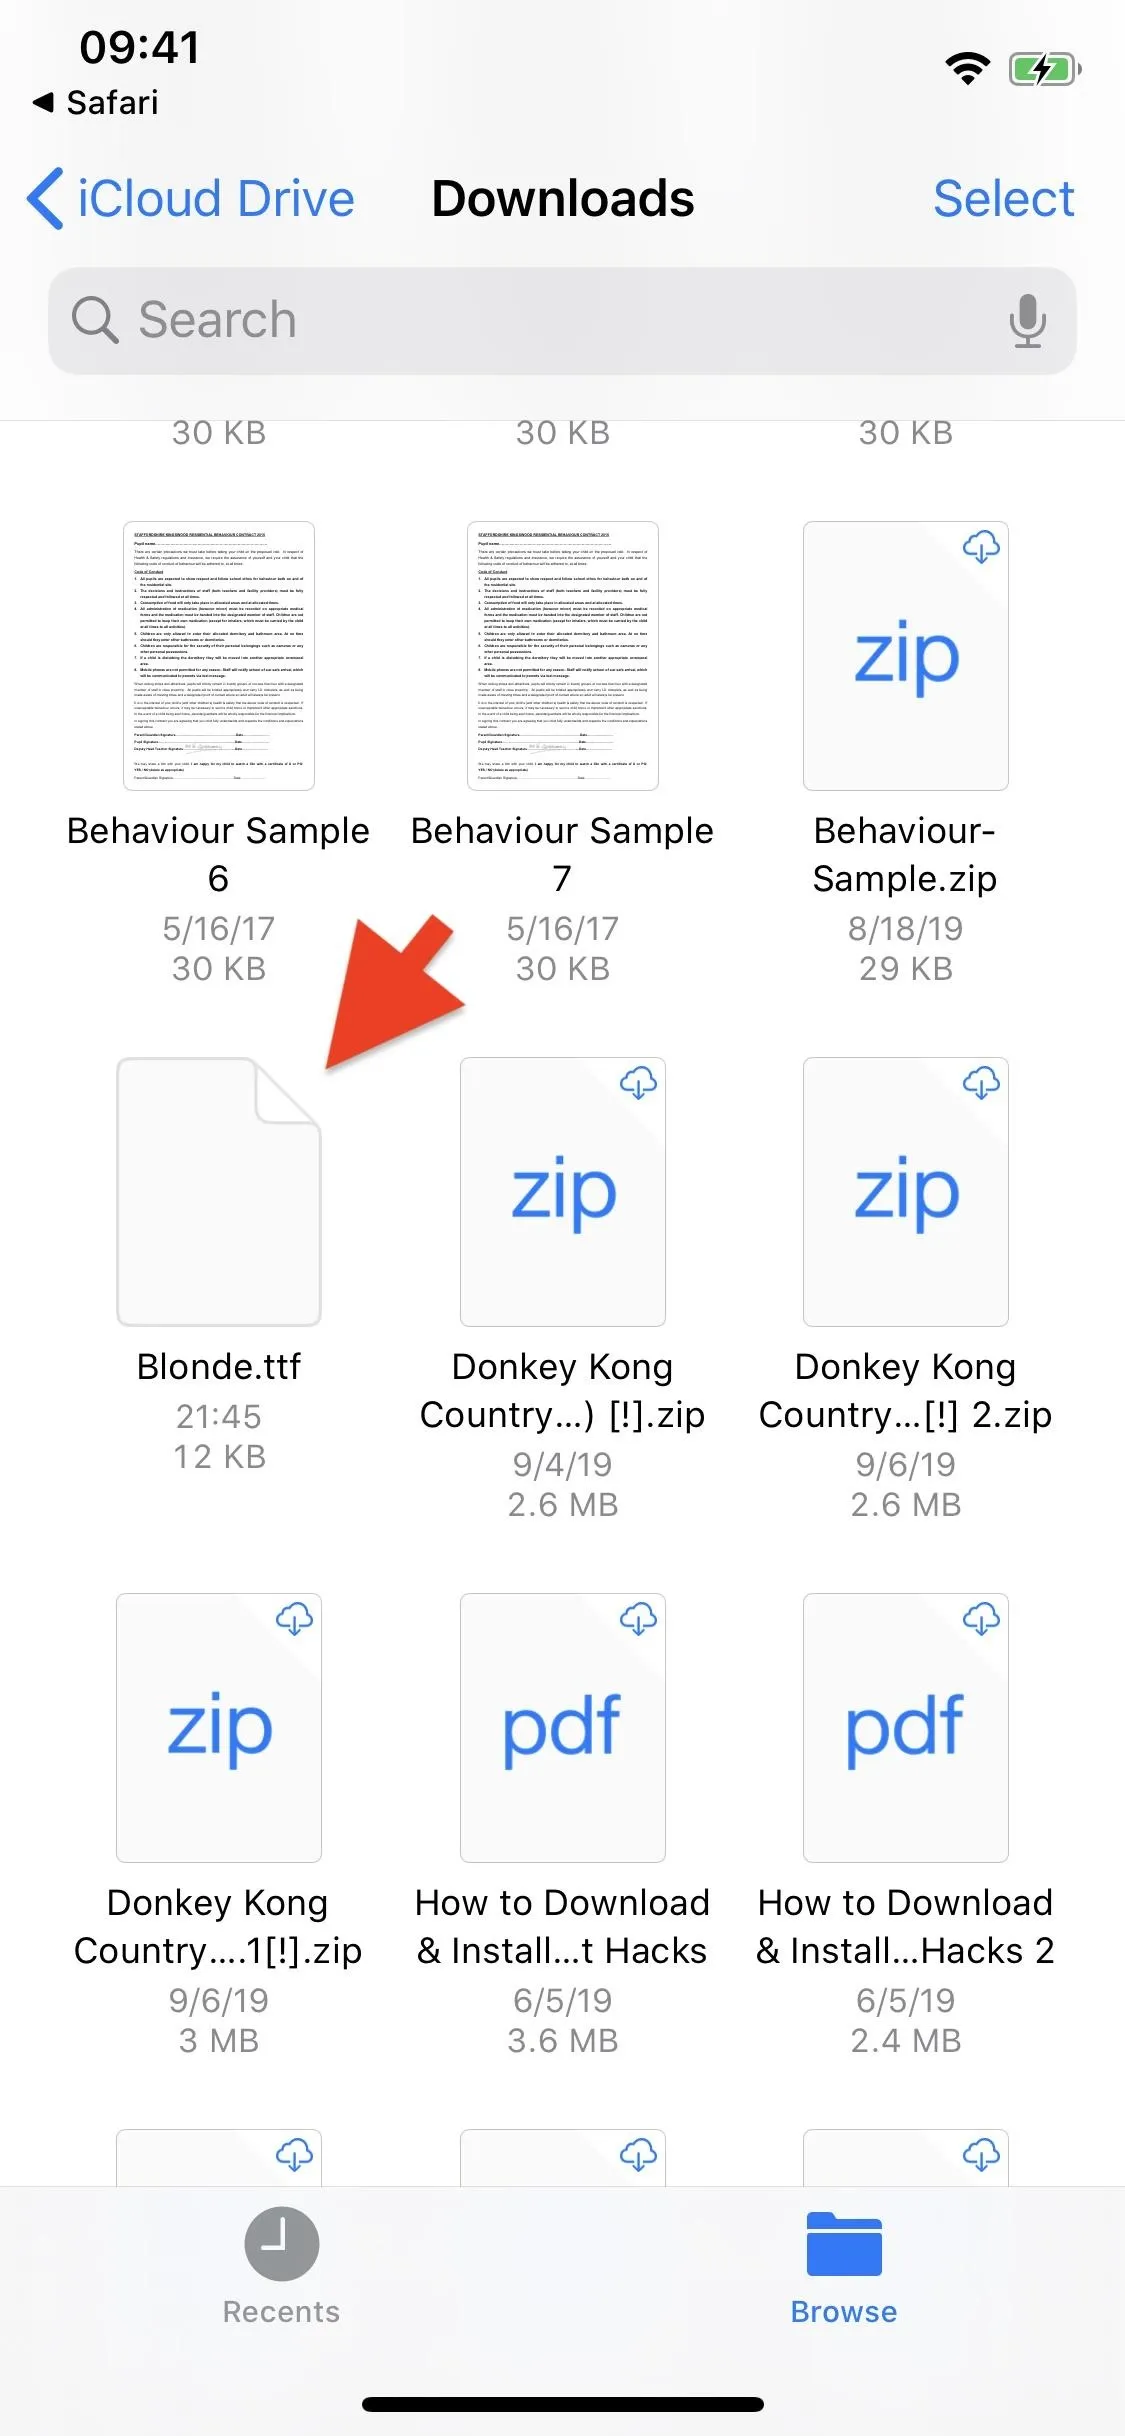
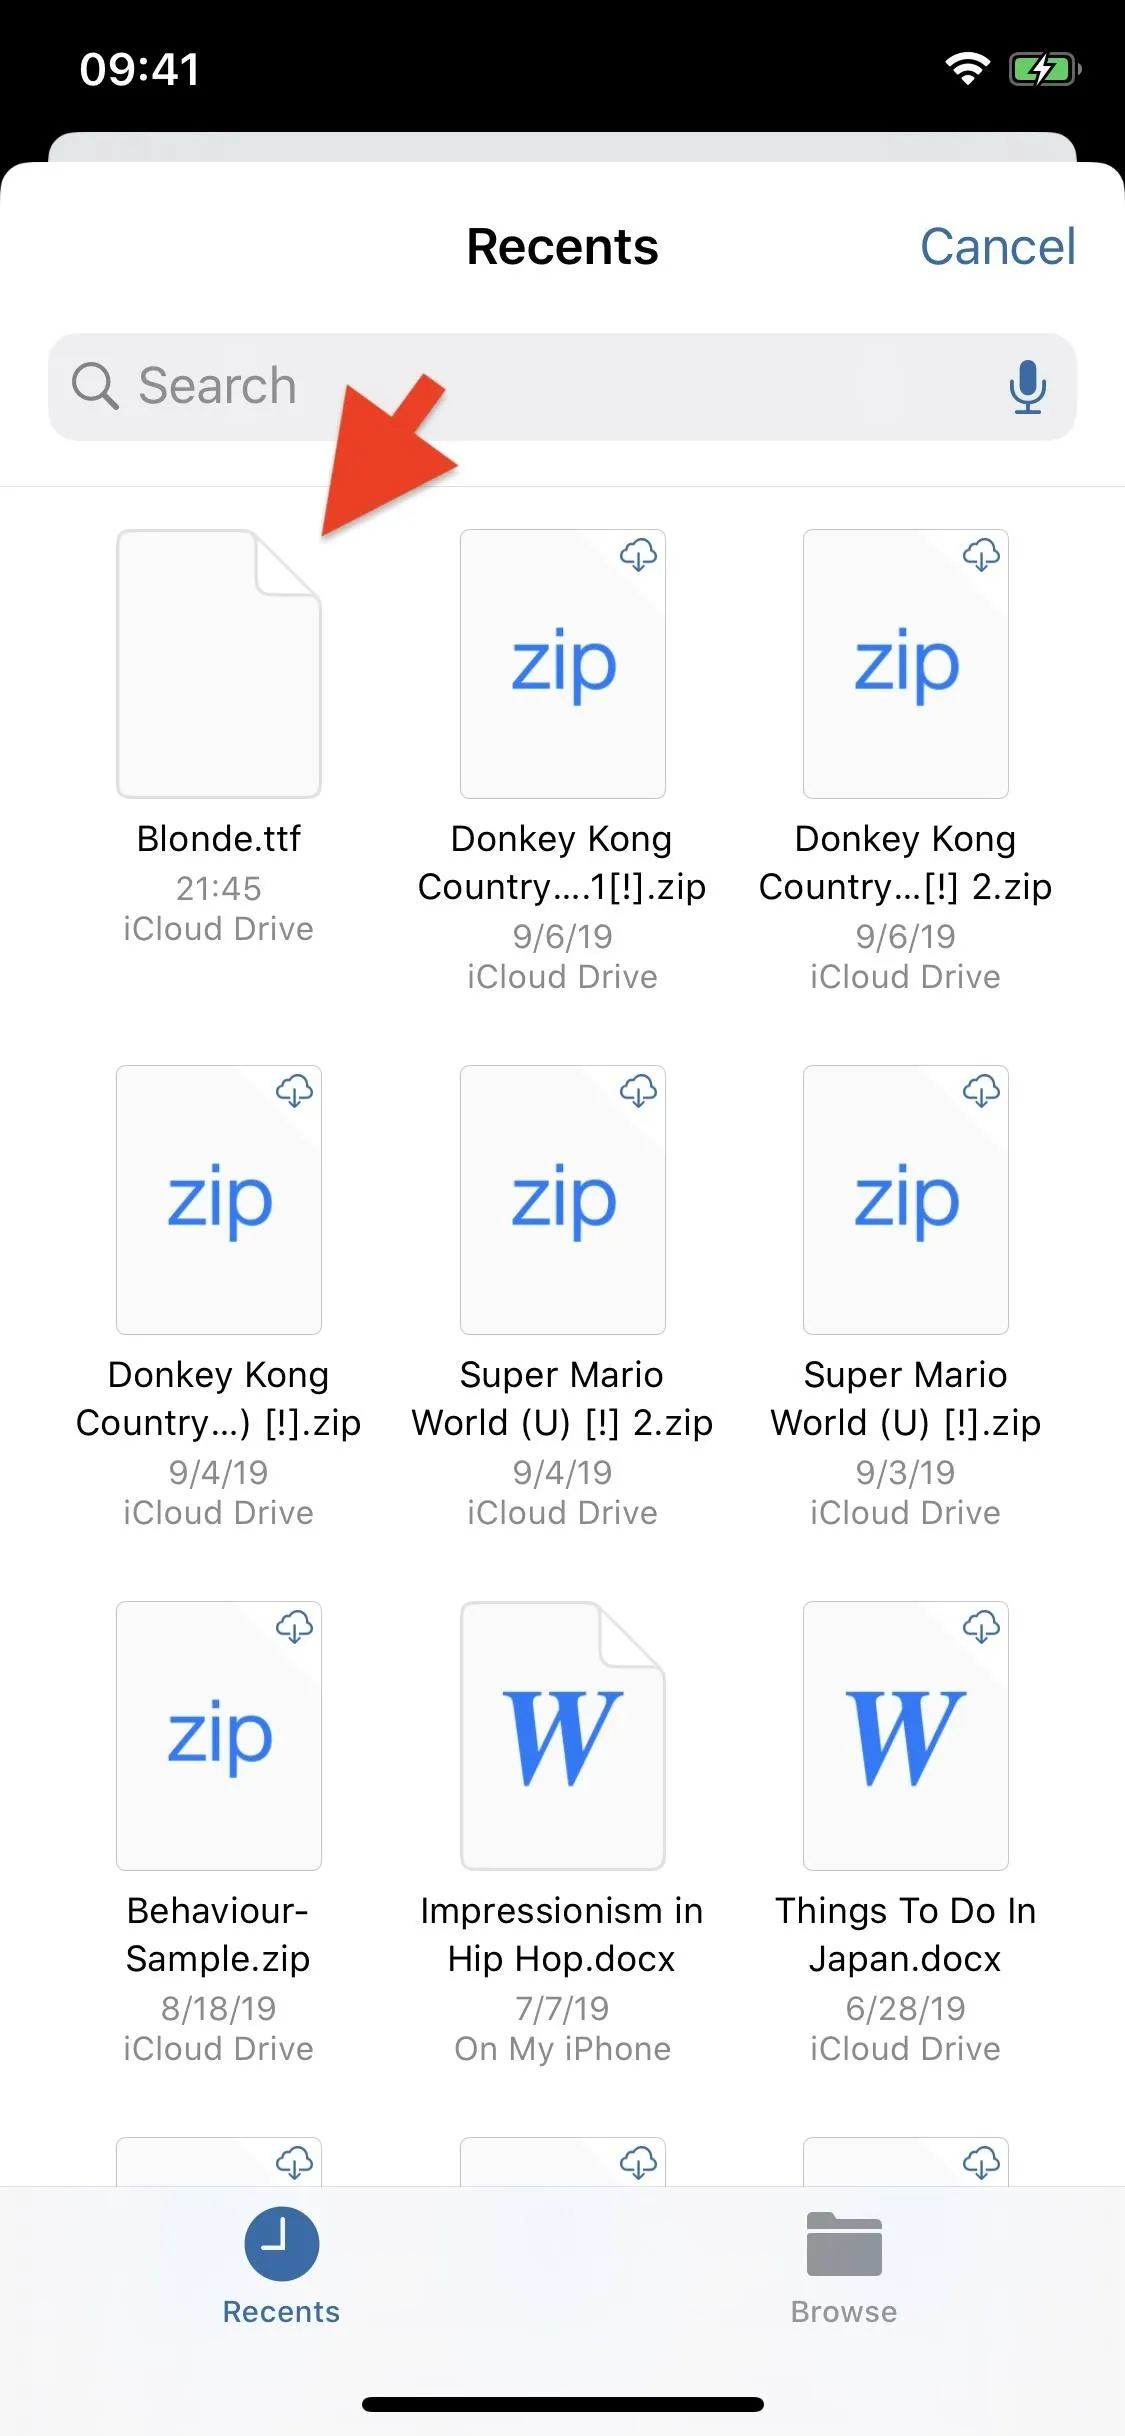
Using Safari, find a custom font (in either .ttf or .otf format) and download it to your device. To make sure the right file was downloaded, tap on the download icon in the top-right and then on the font in the download manager. You'll be redirected to the Files app, where your downloads live.
#3: Install Custom Font
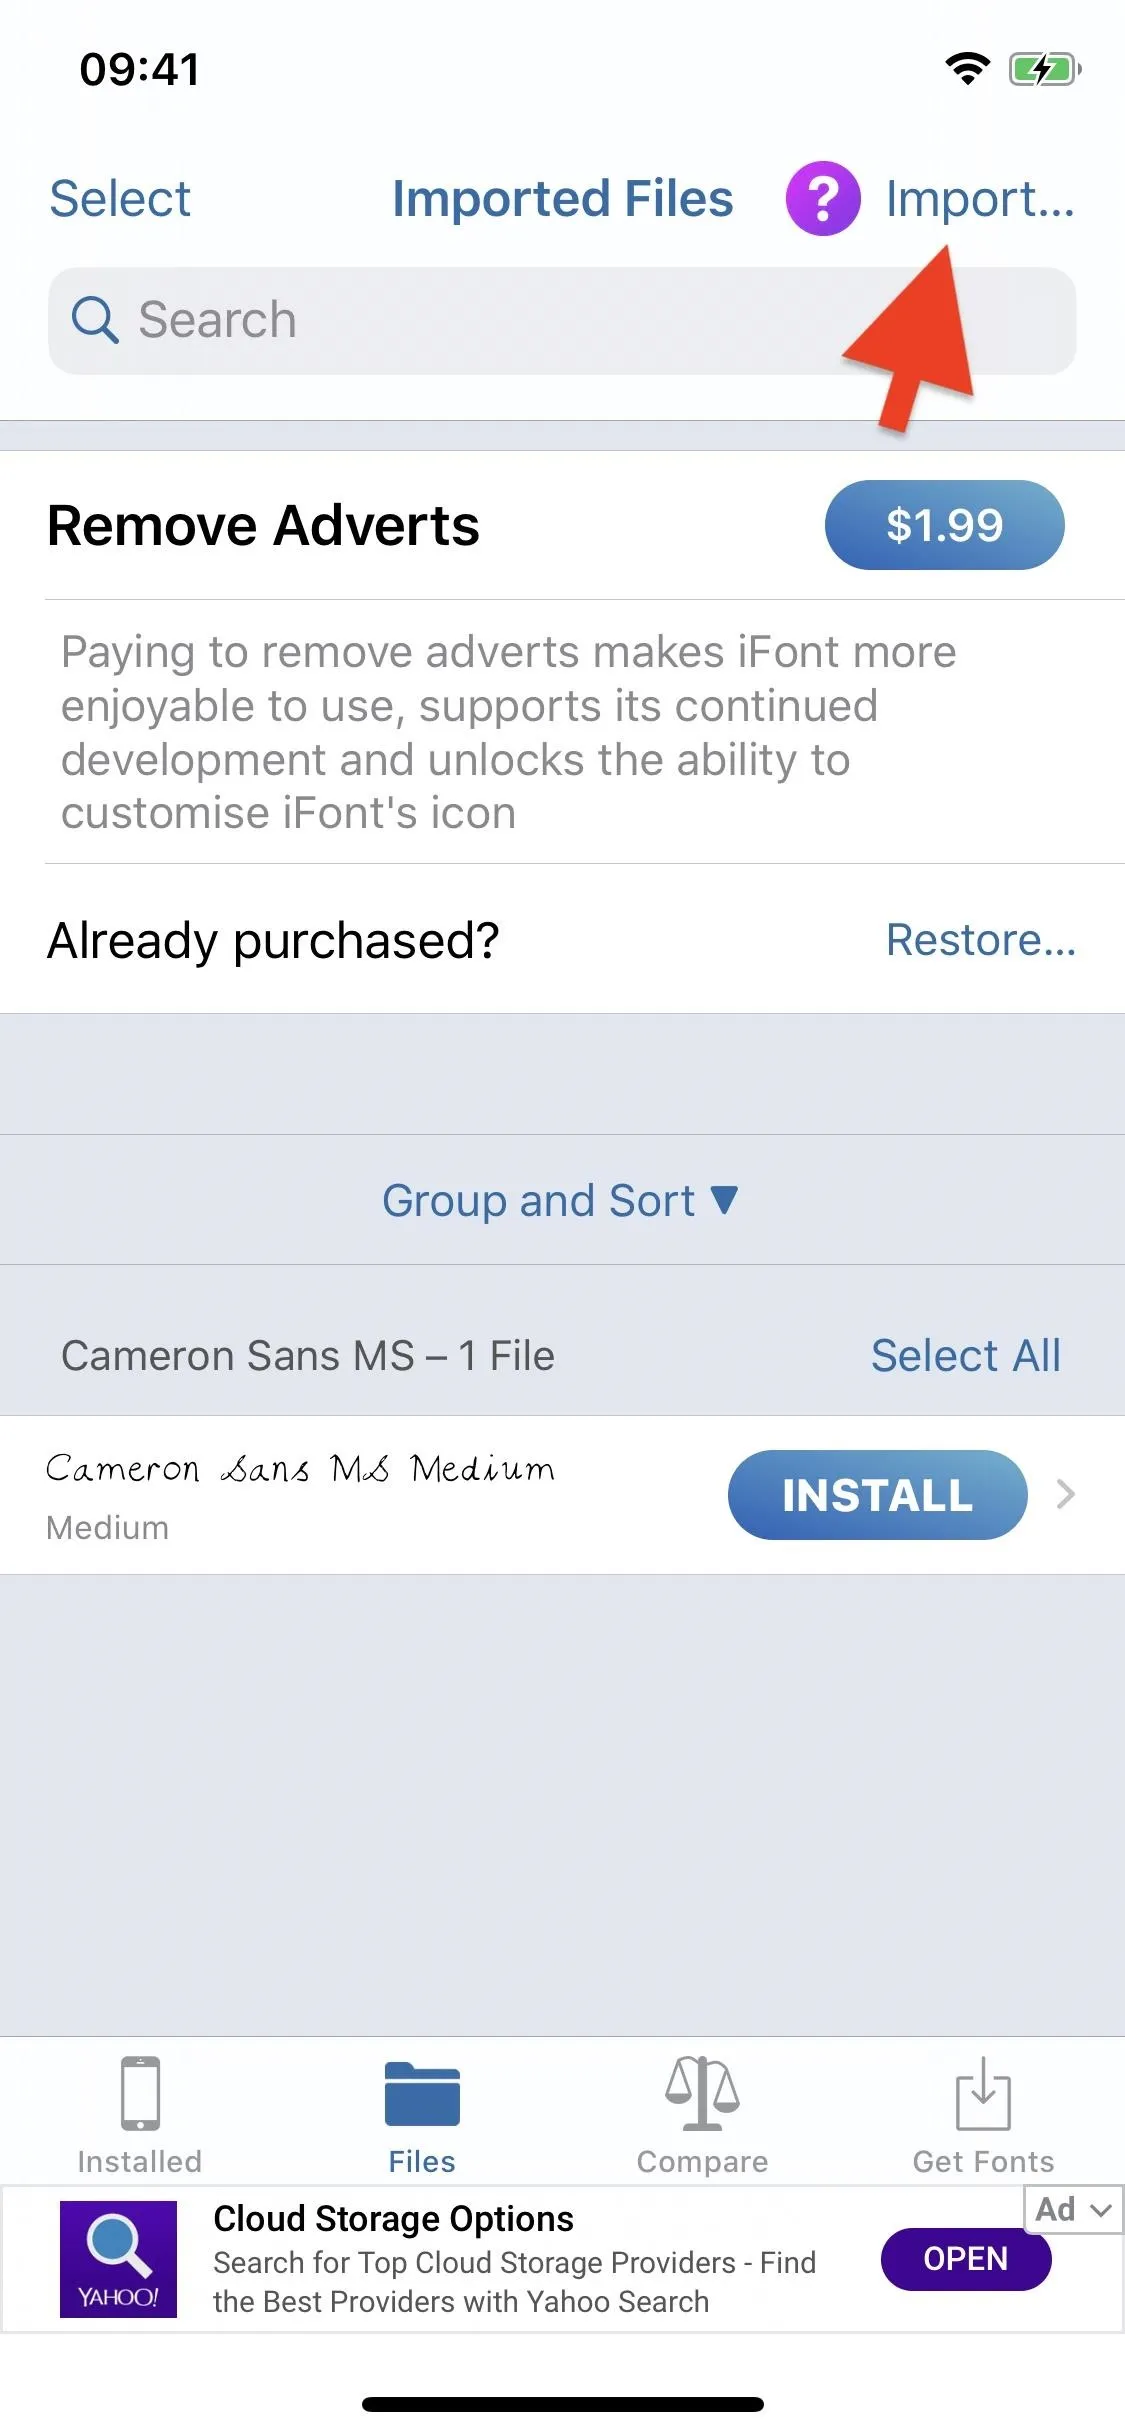
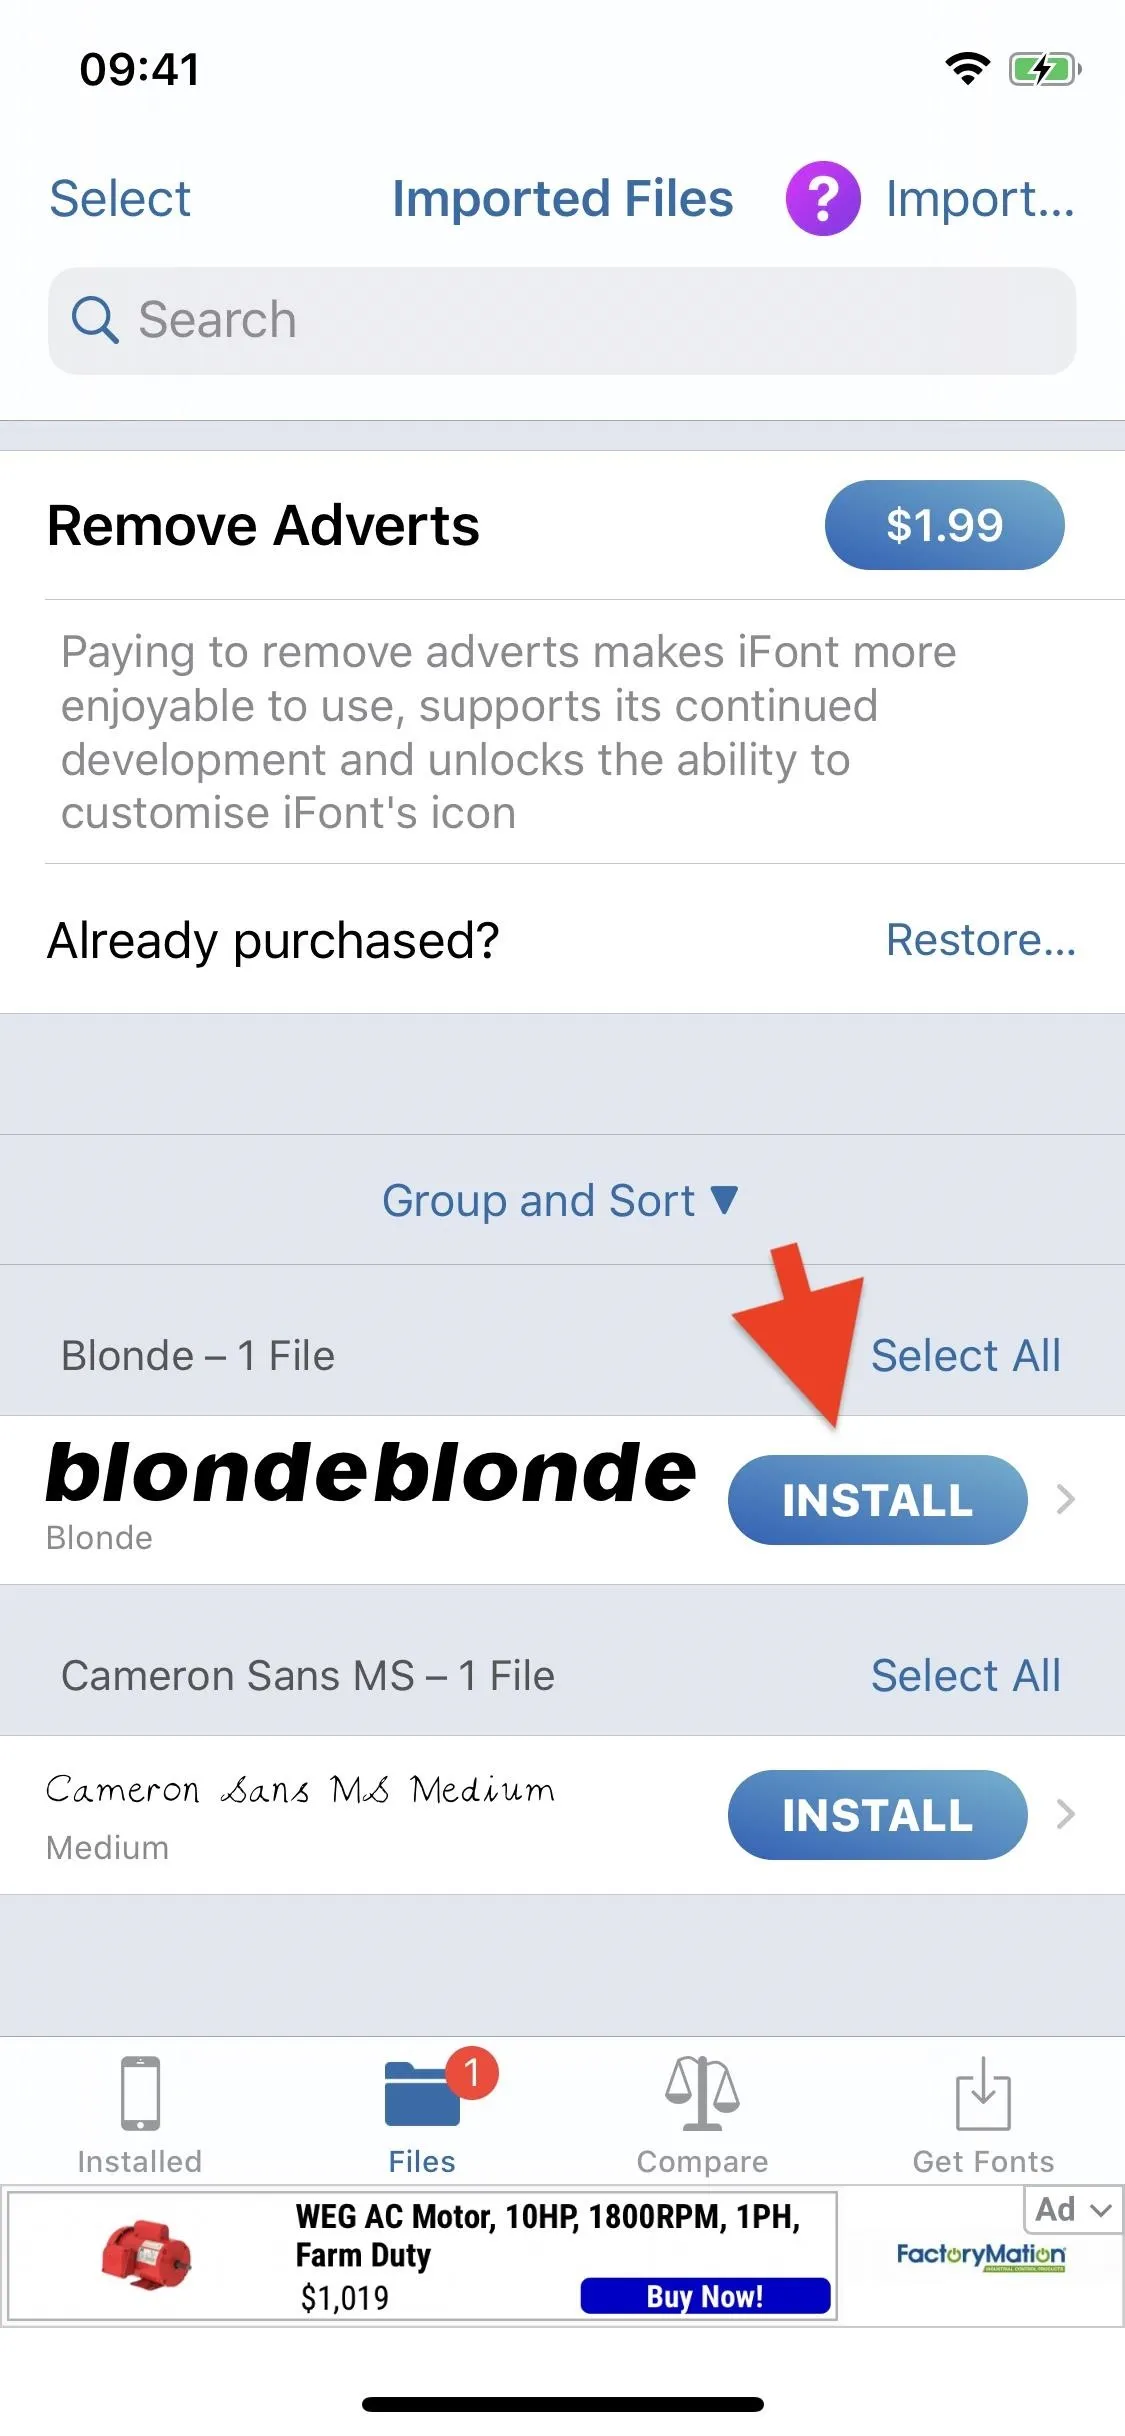
Exit from the Files app, go into iFont, and tap on "Files" in the navigation bar at the bottom. Next, hit "Import..." in the top-right corner and select the font when you're redirected to the Files app. Now, tap on "Install" next to the custom font file. A tutorial will appear; hit "Skip."
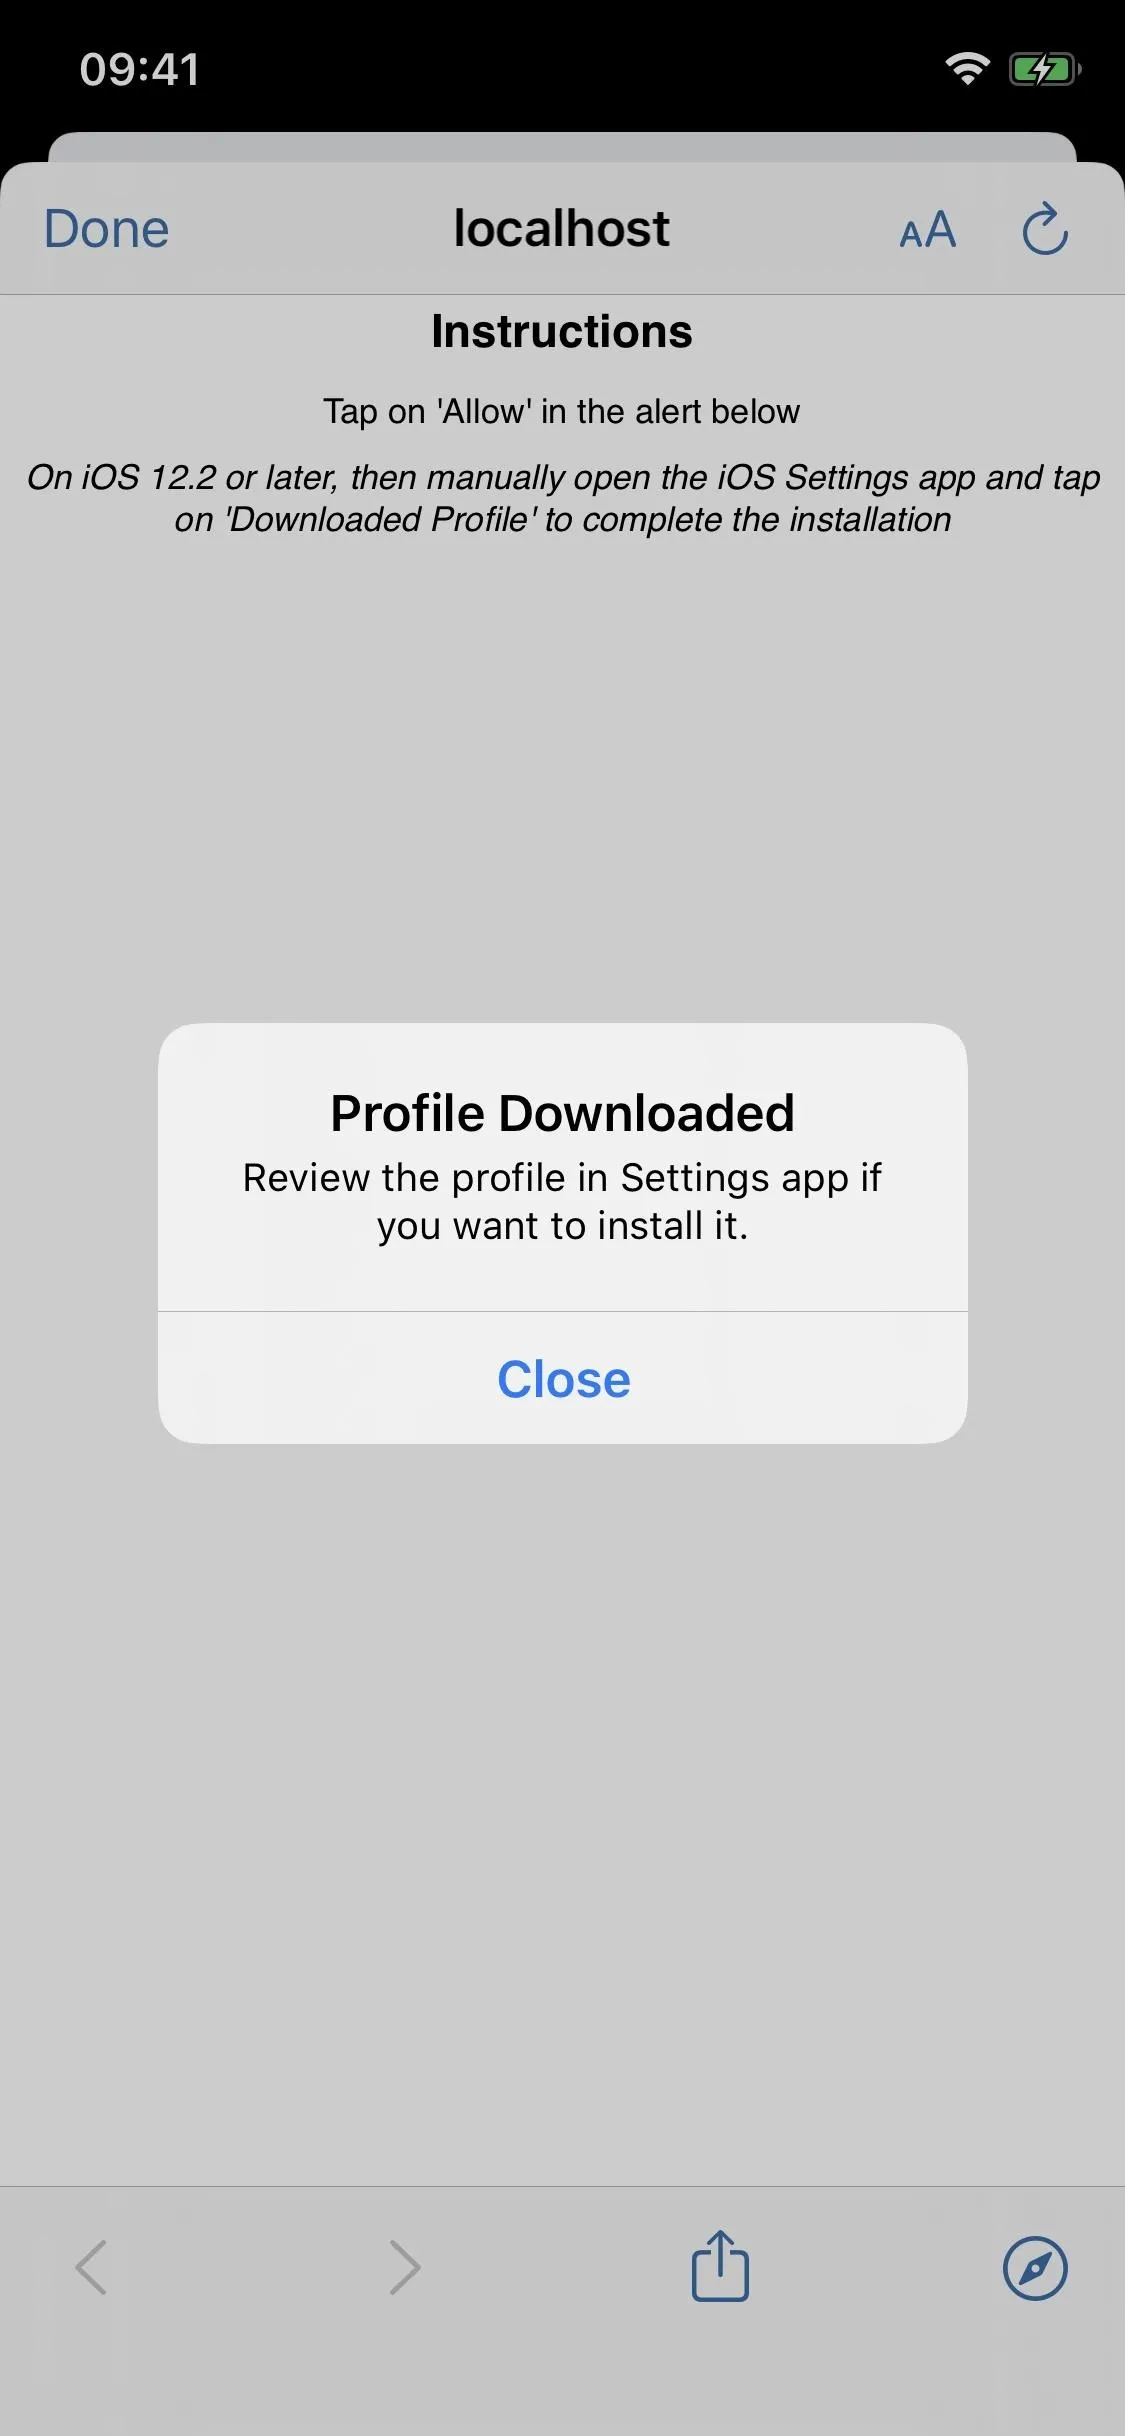
#4: Download Configuration Profile
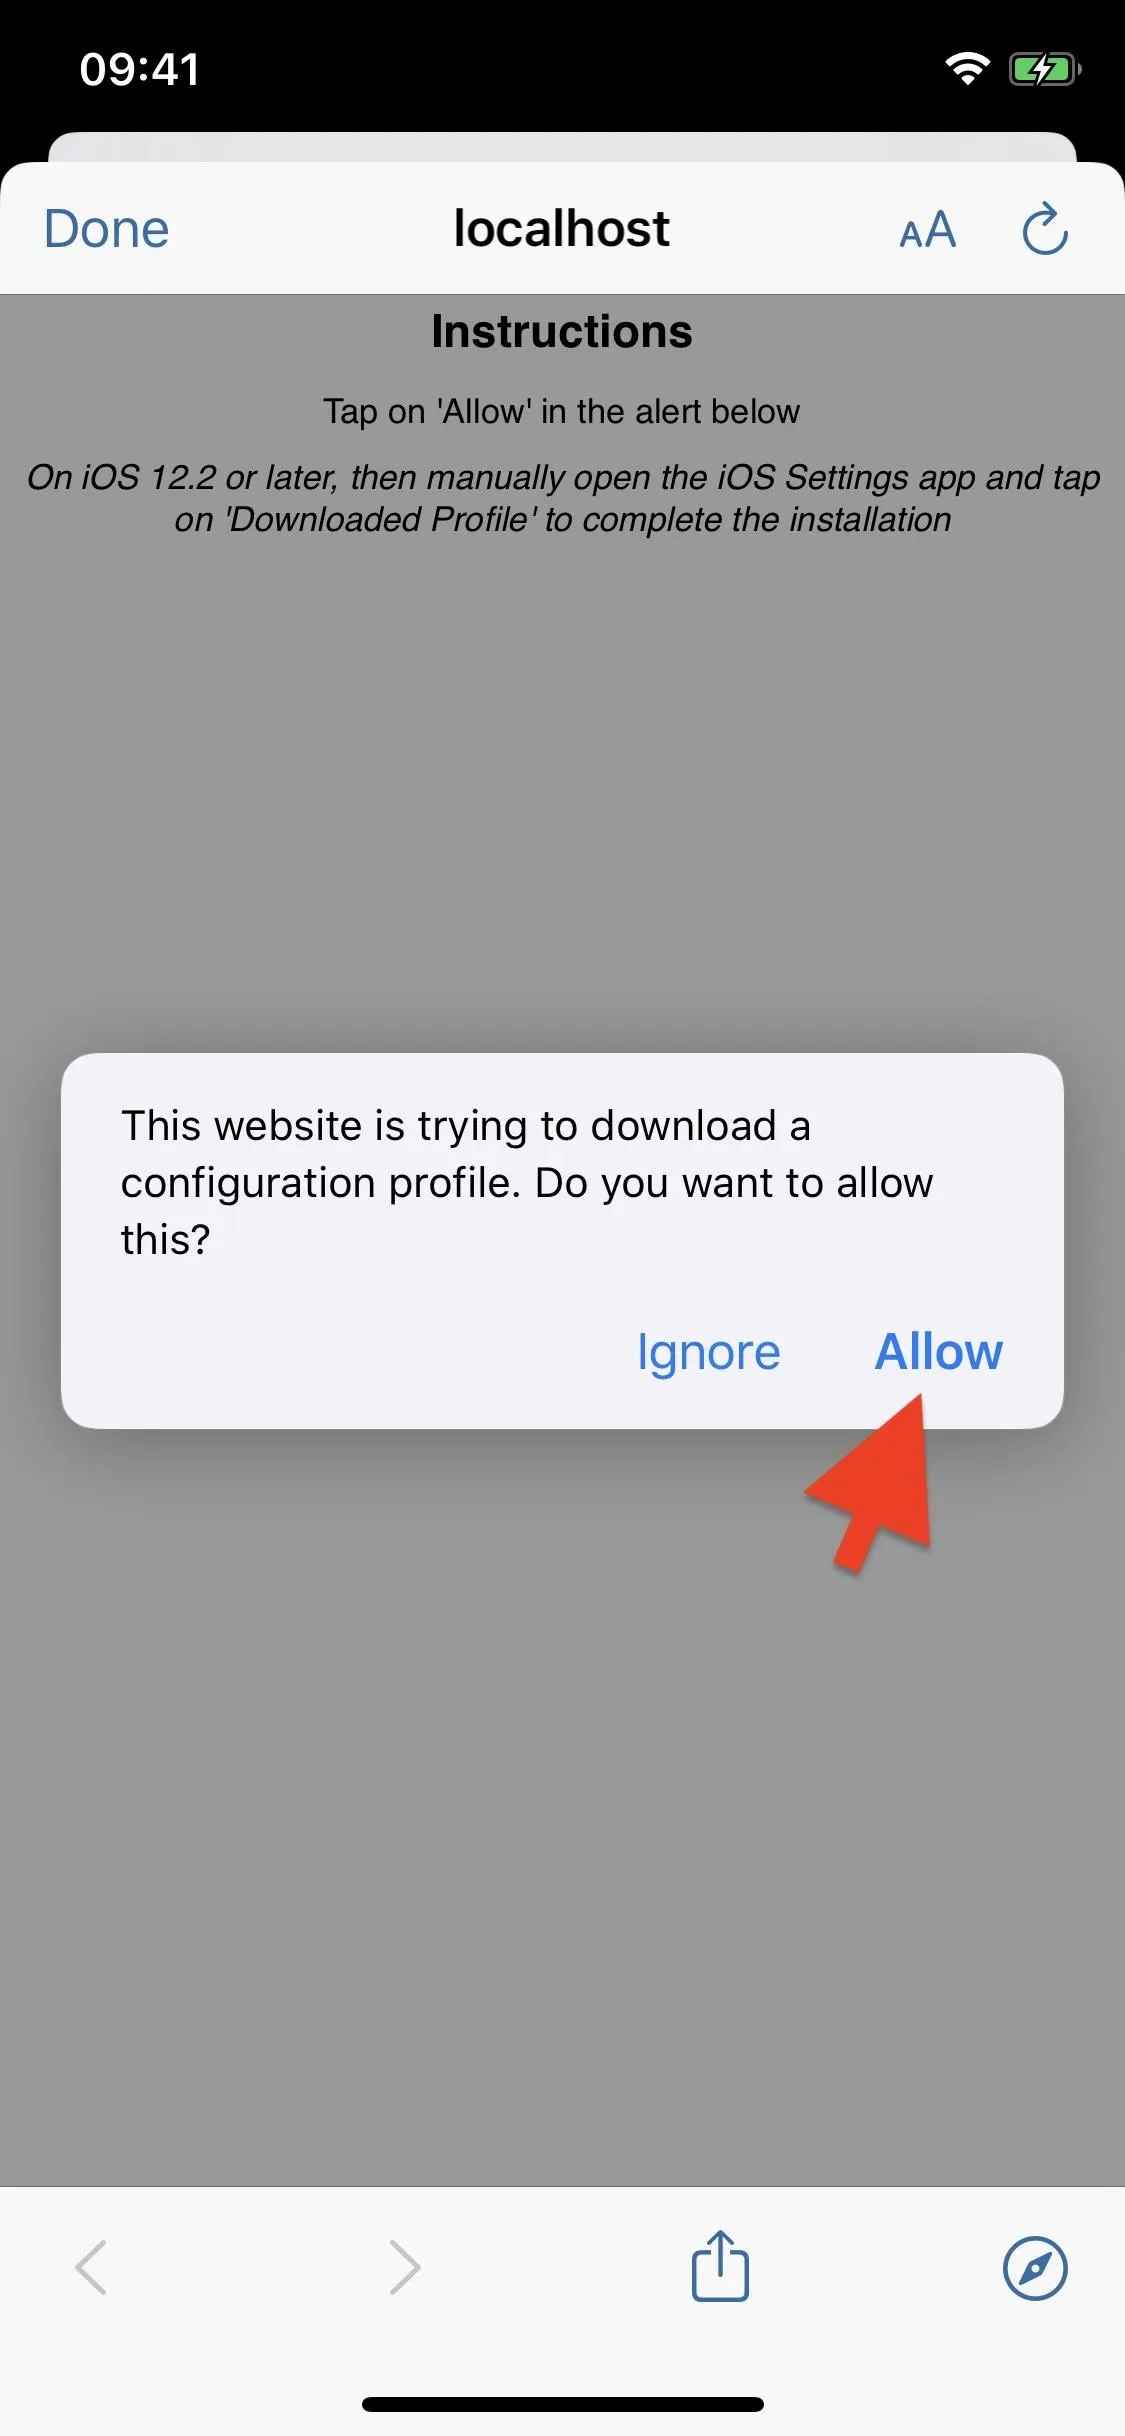
You'll then be asked to download a configuration profile — tap on "Allow." A confirmation will appear if your profile is downloaded successfully. Also, it's important to note that you'll need to go through this process each time you install a custom font, meaning you'll have to download specific configuration profiles for each font.
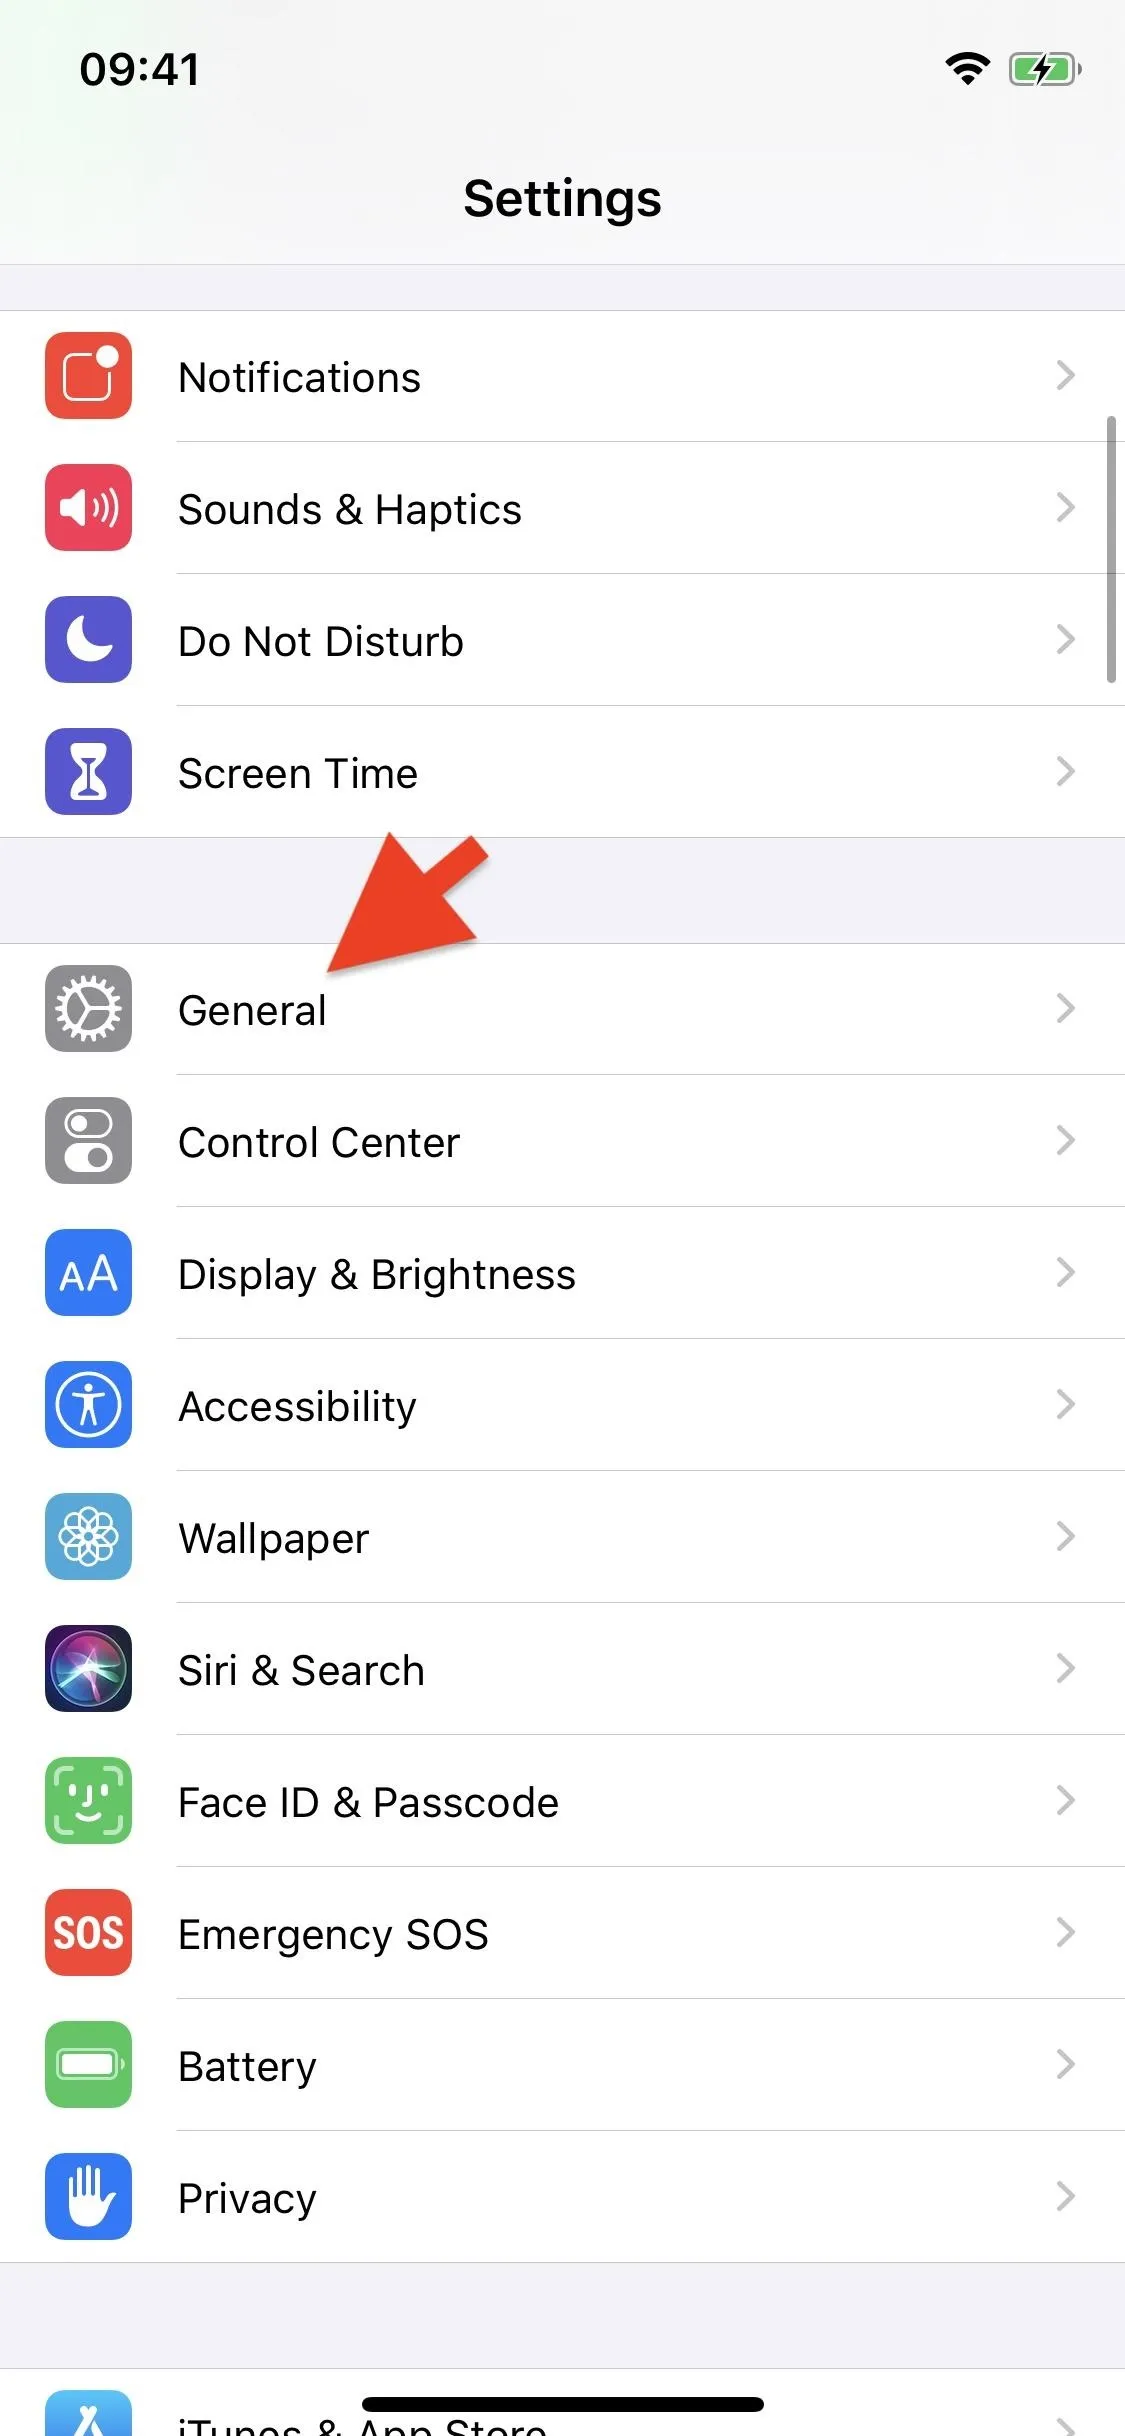
#5: Install Configuration Profile
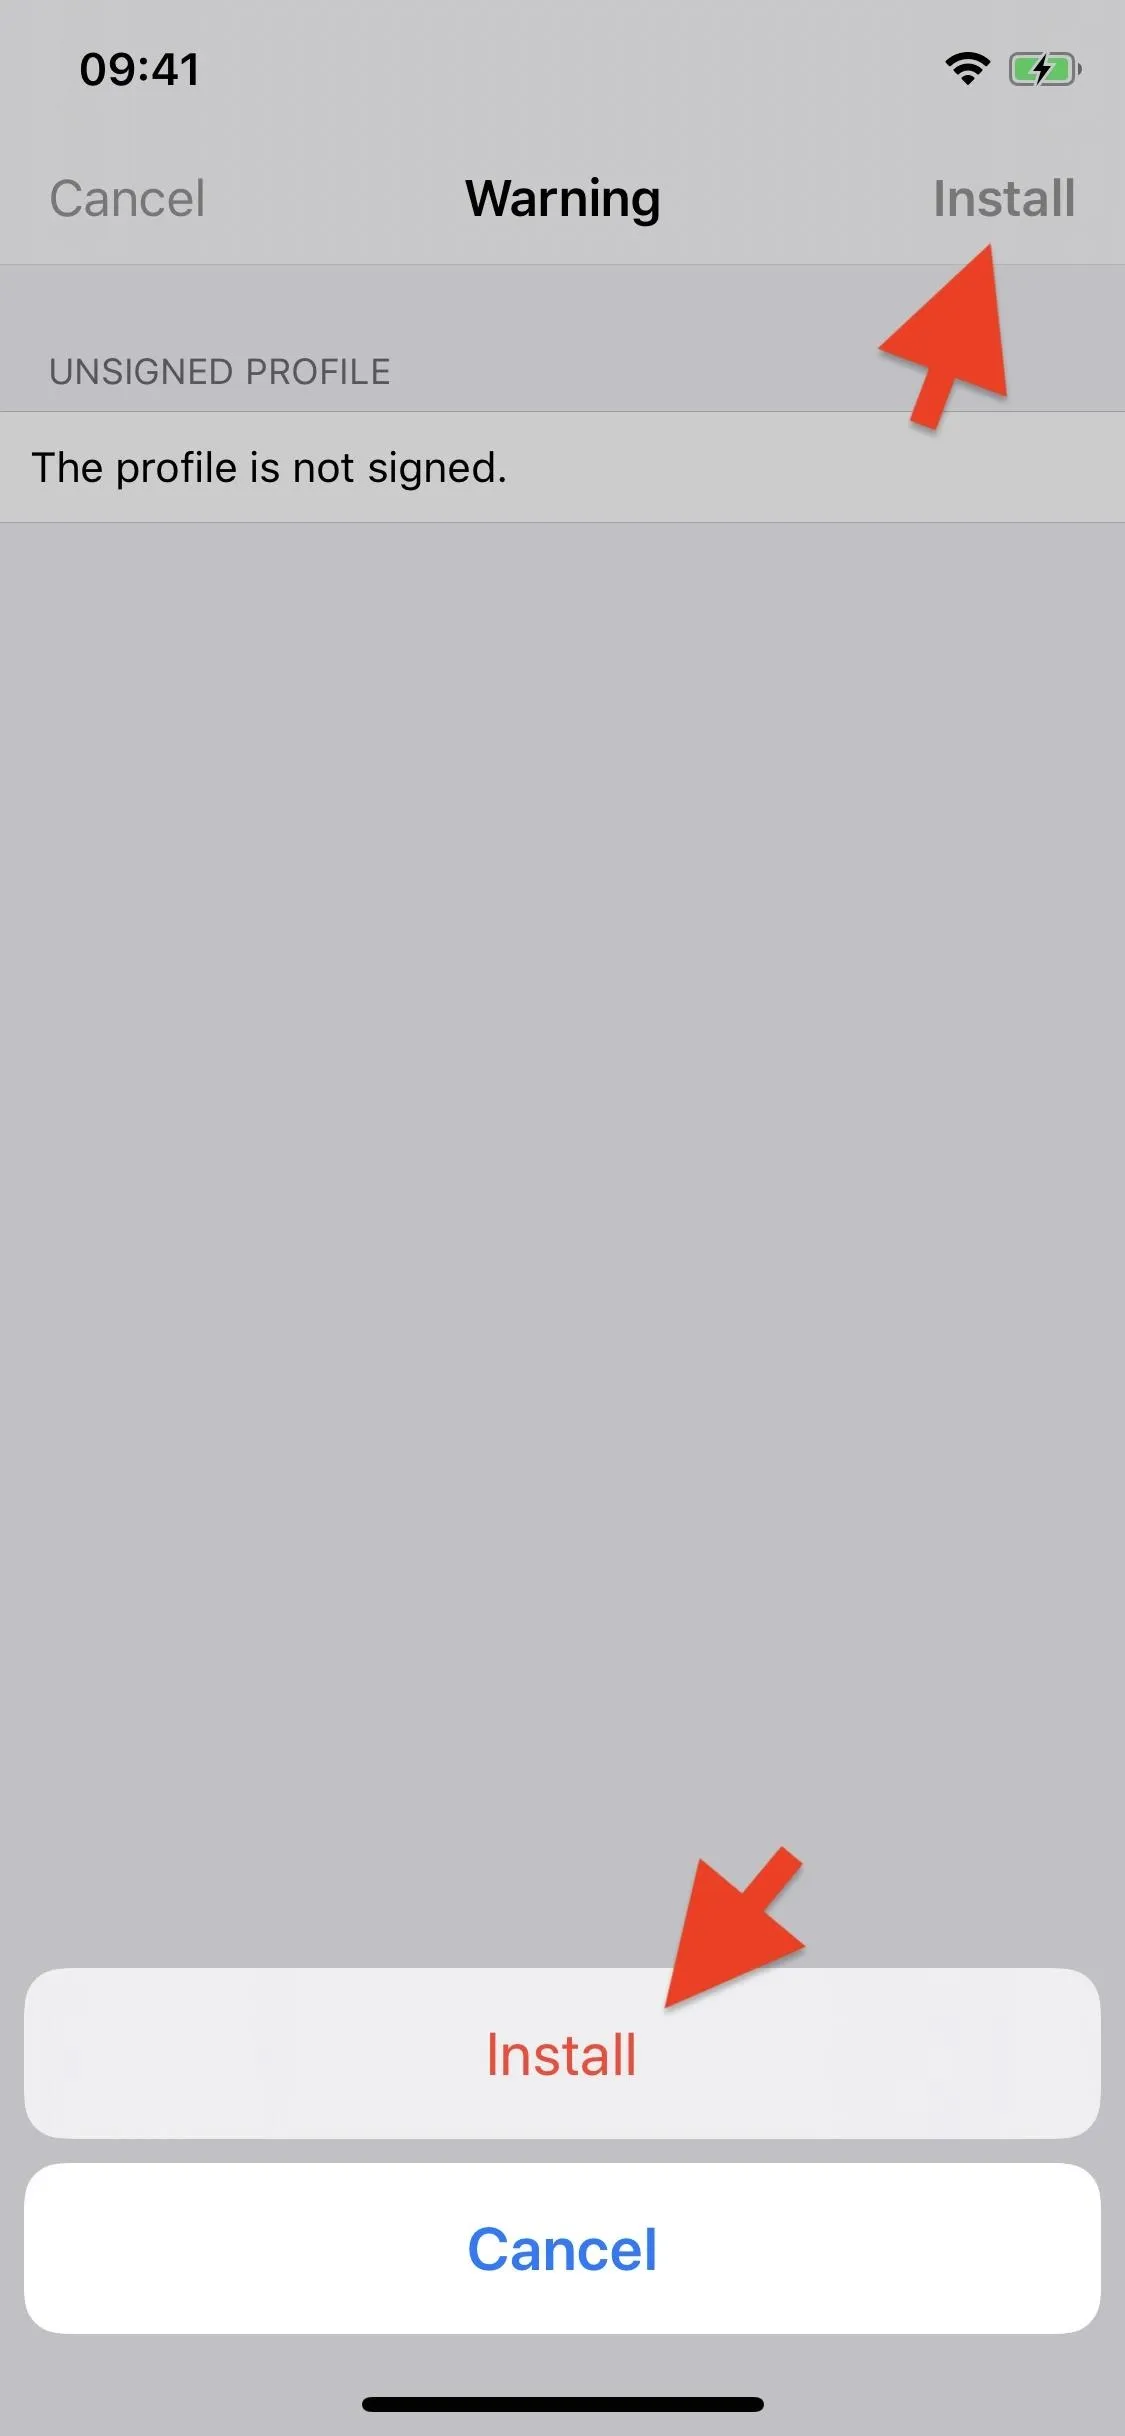
Although your configuration profile is downloaded, it's not yet installed. To install the configuration profile, you must open the Settings app, go to General –> Profiles, and then tap on the specific profile for your custom font.
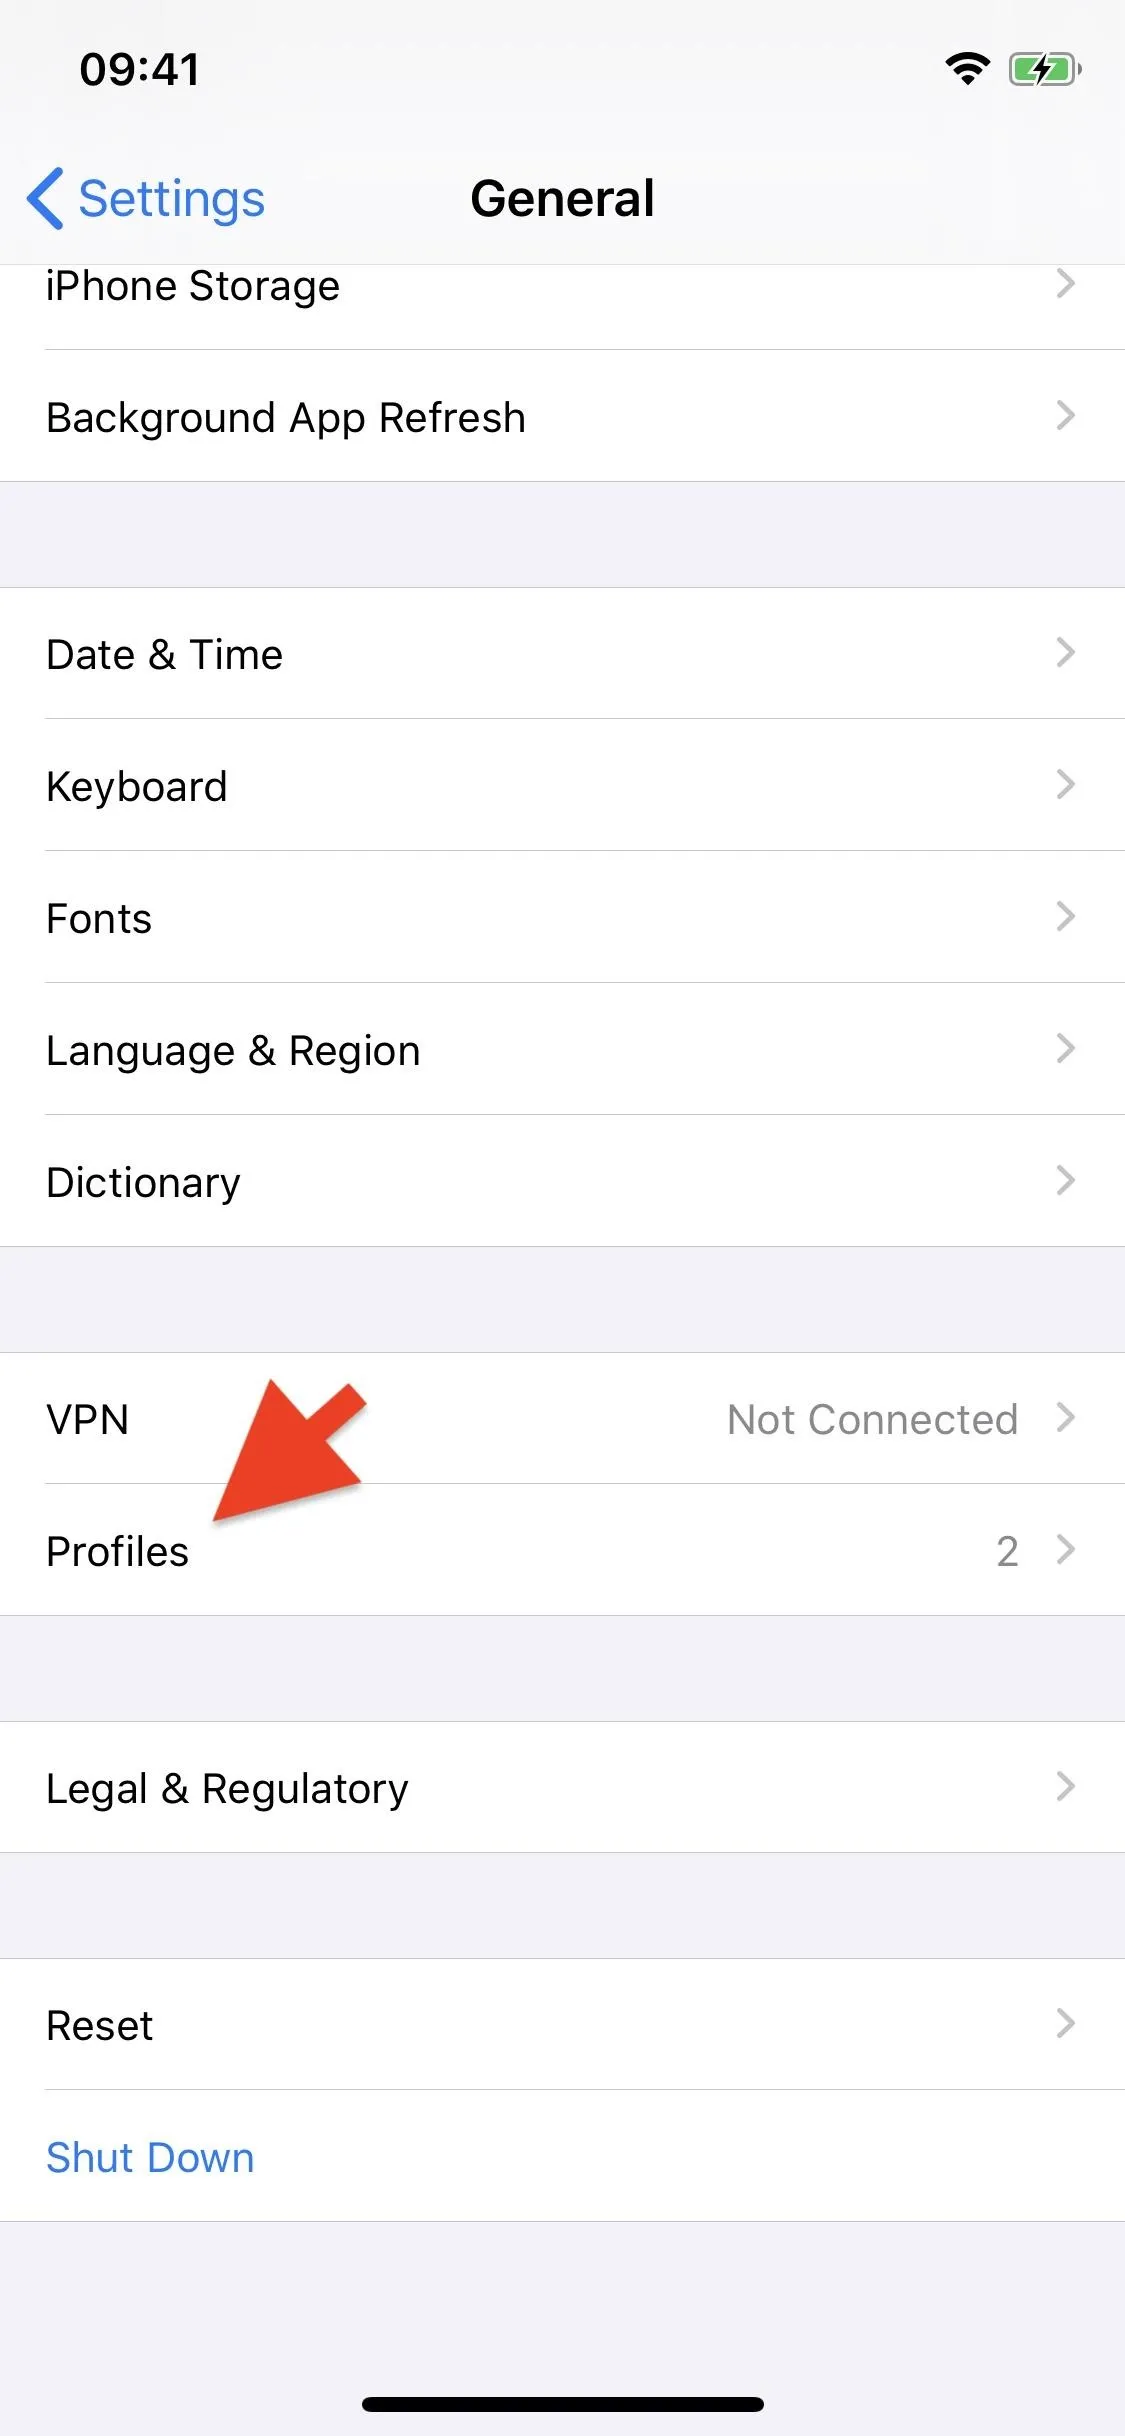
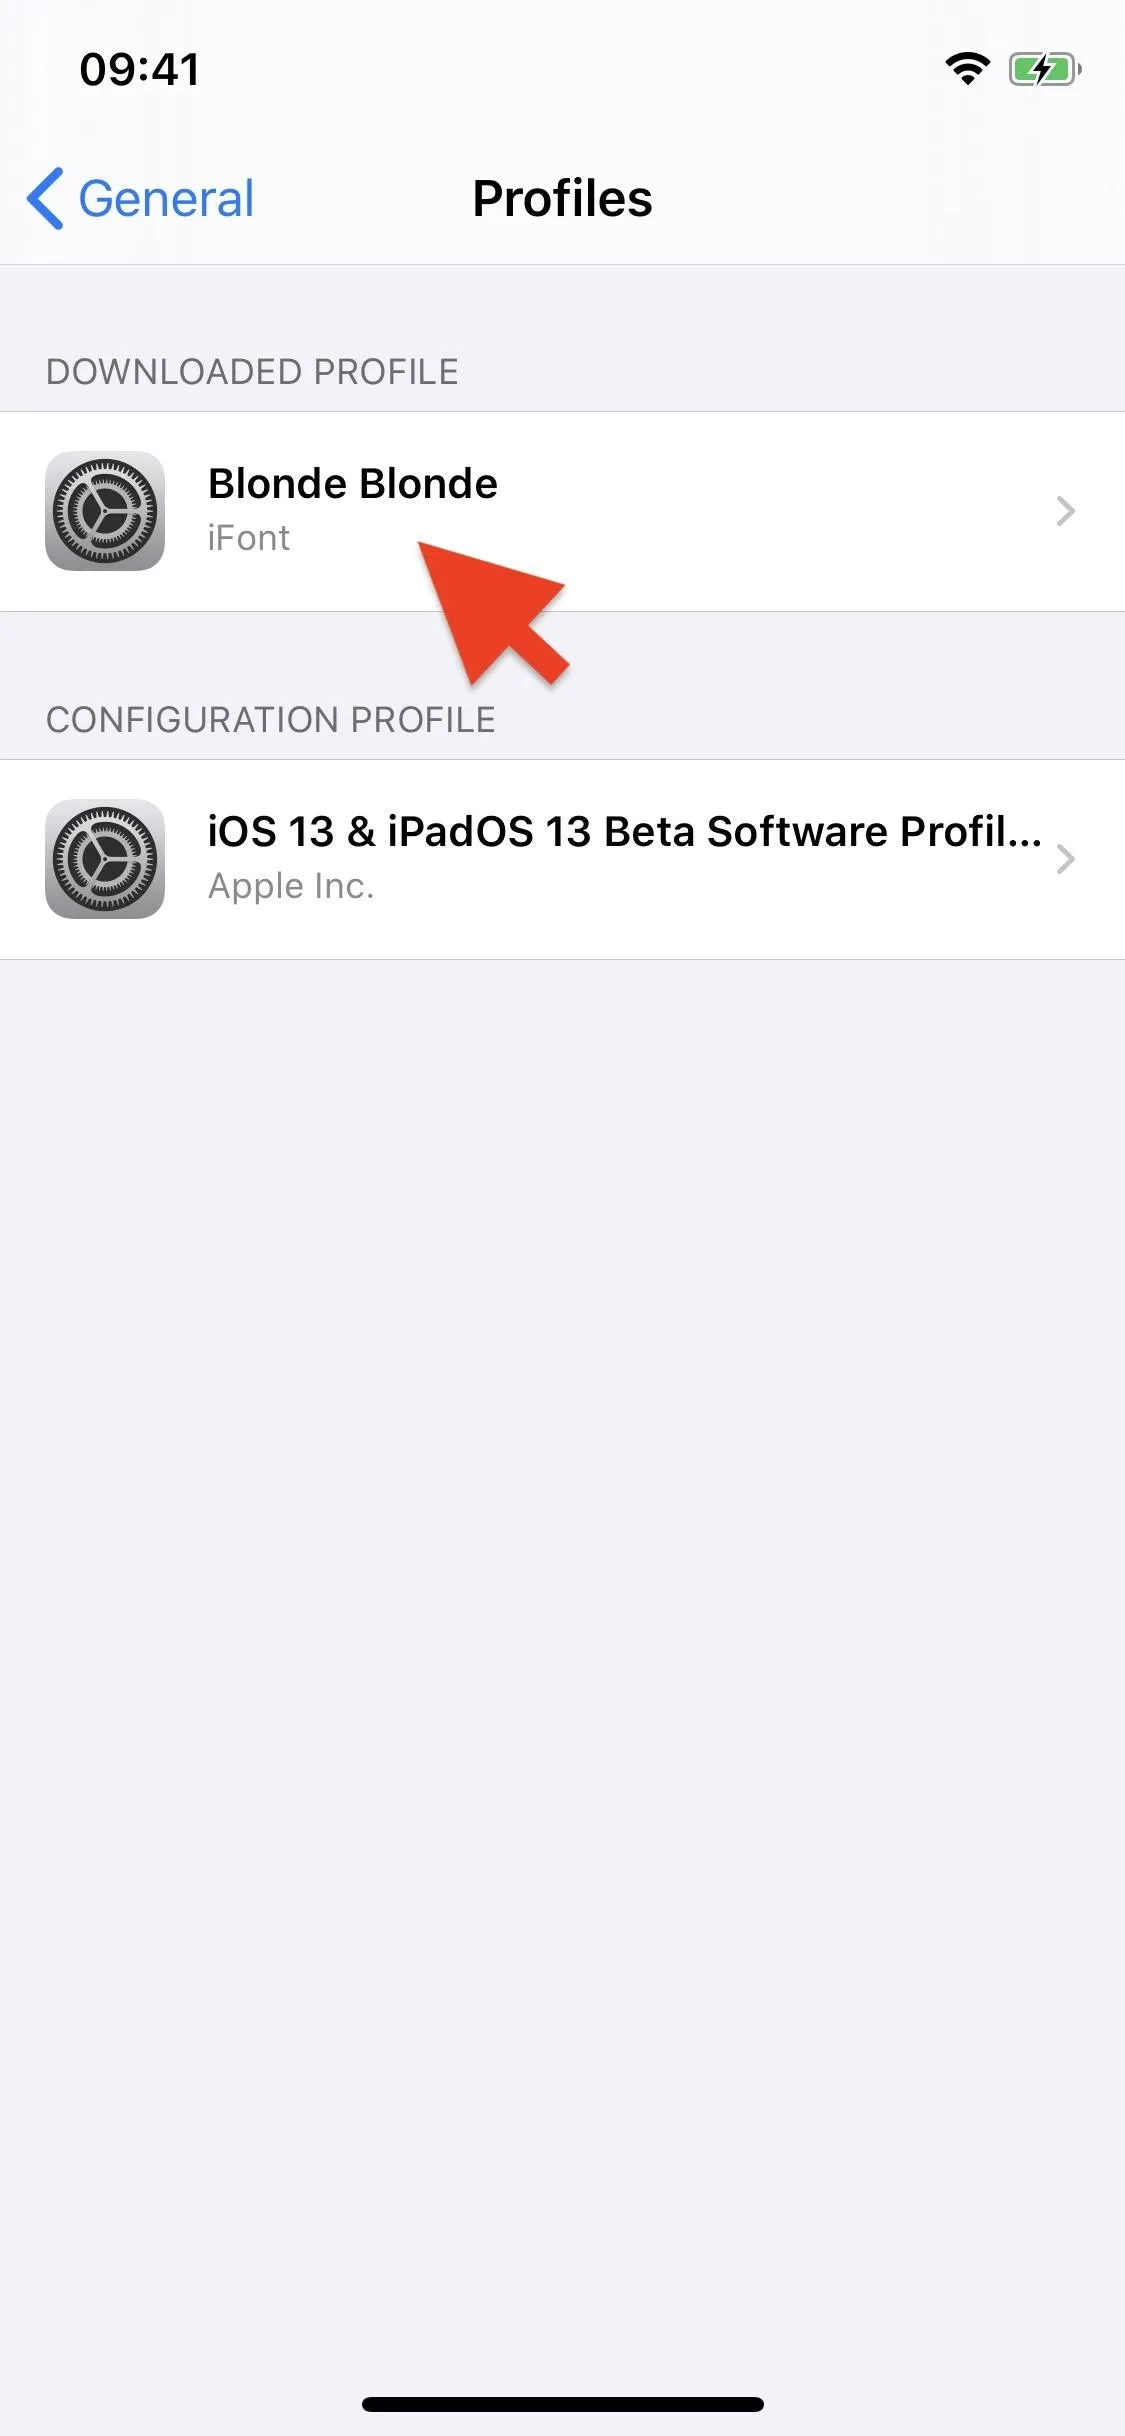
Next, hit "Install" and enter your passcode. You'll then need to tap on "Install" two more times to finally finish the installation process. Hit "Done" and you're good to go.


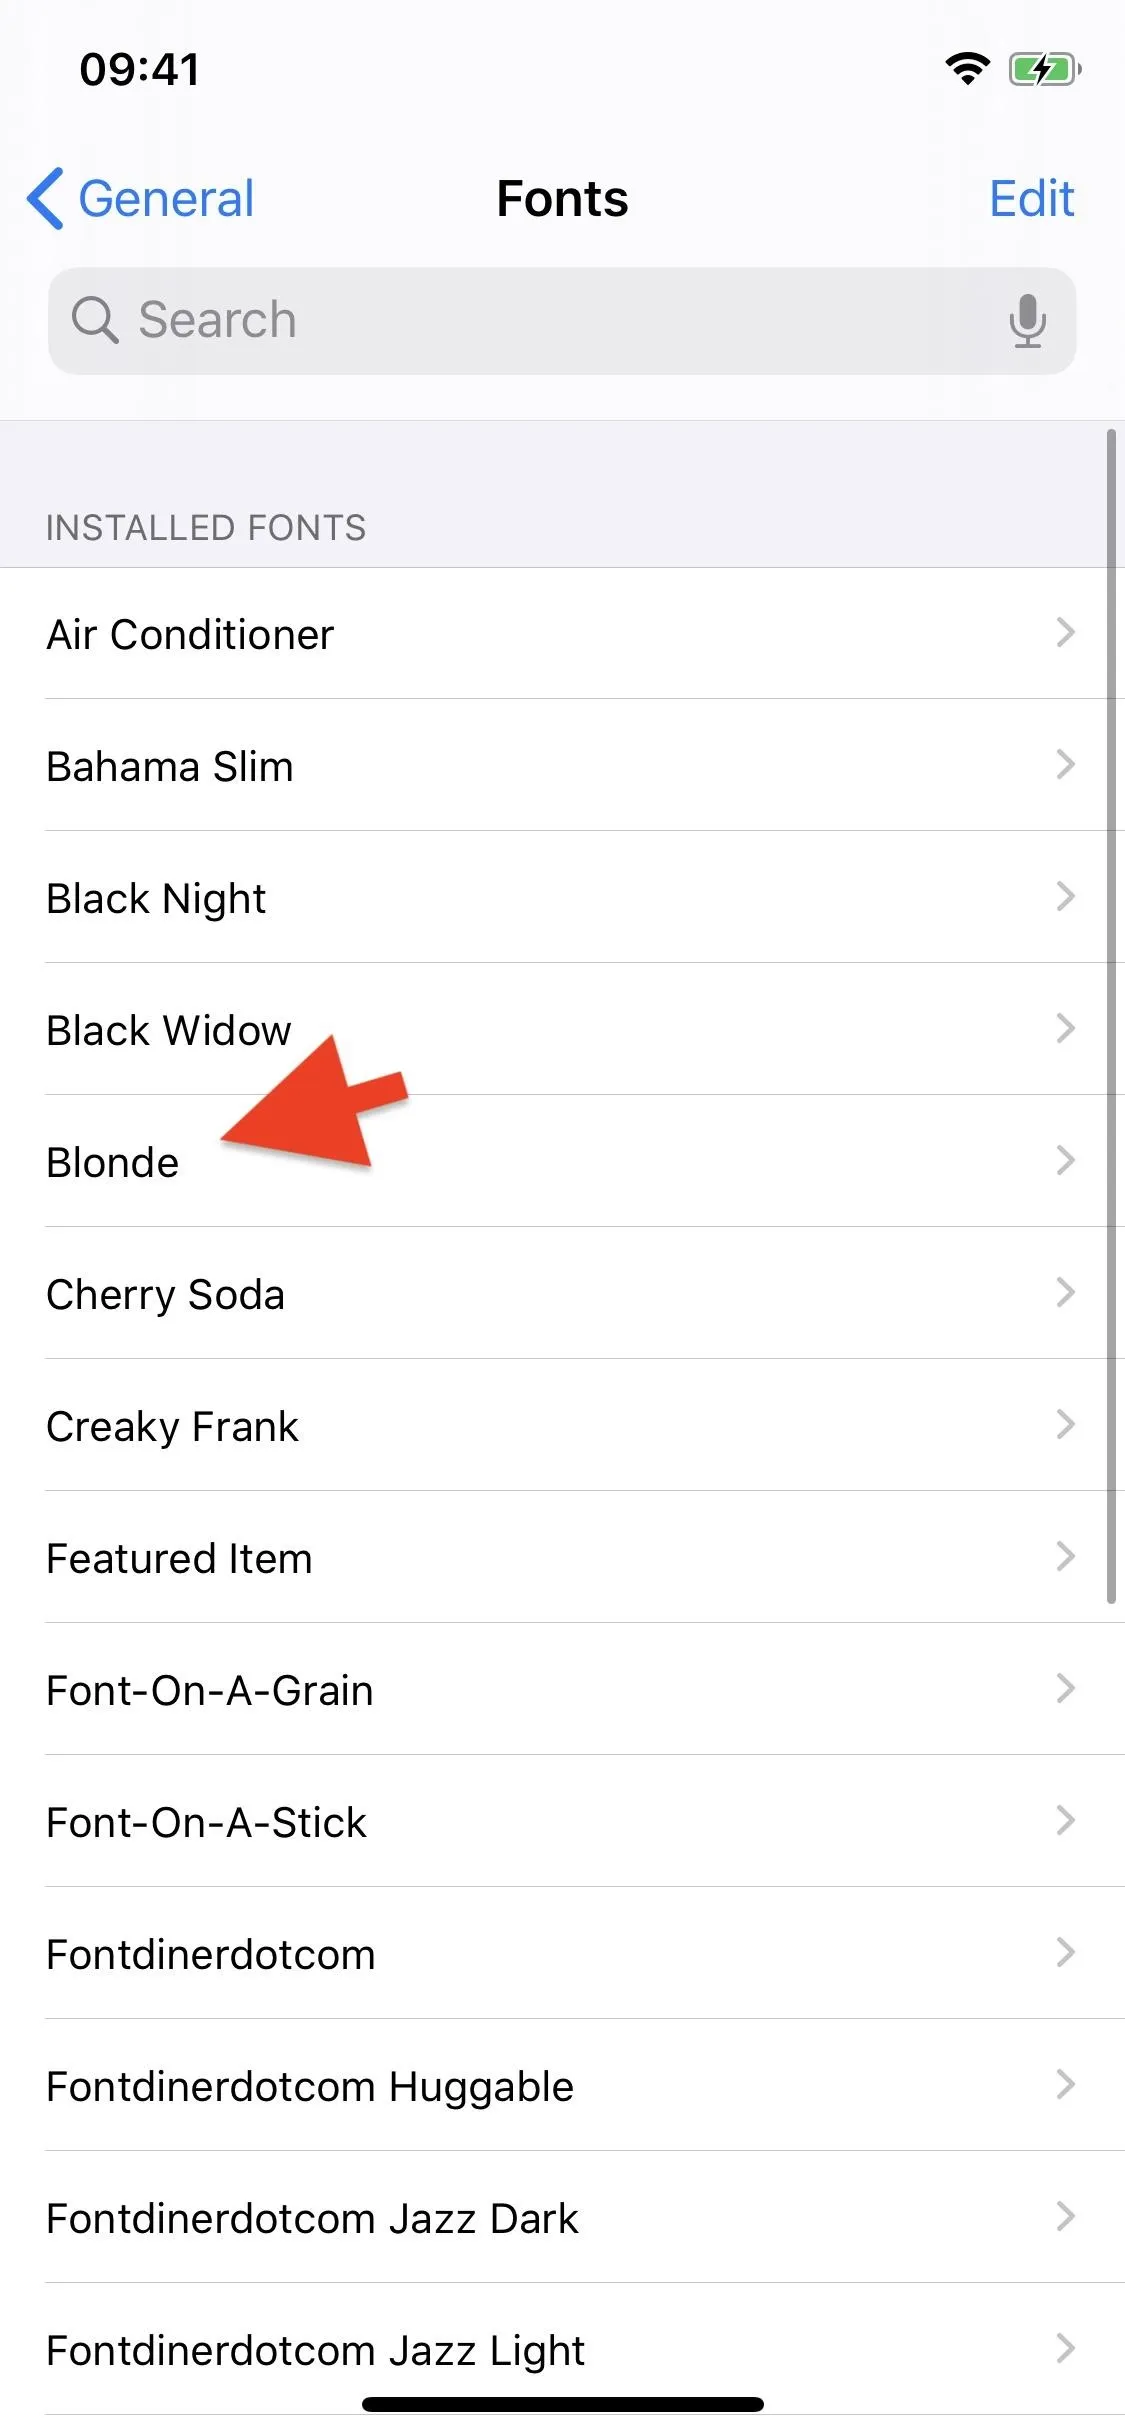
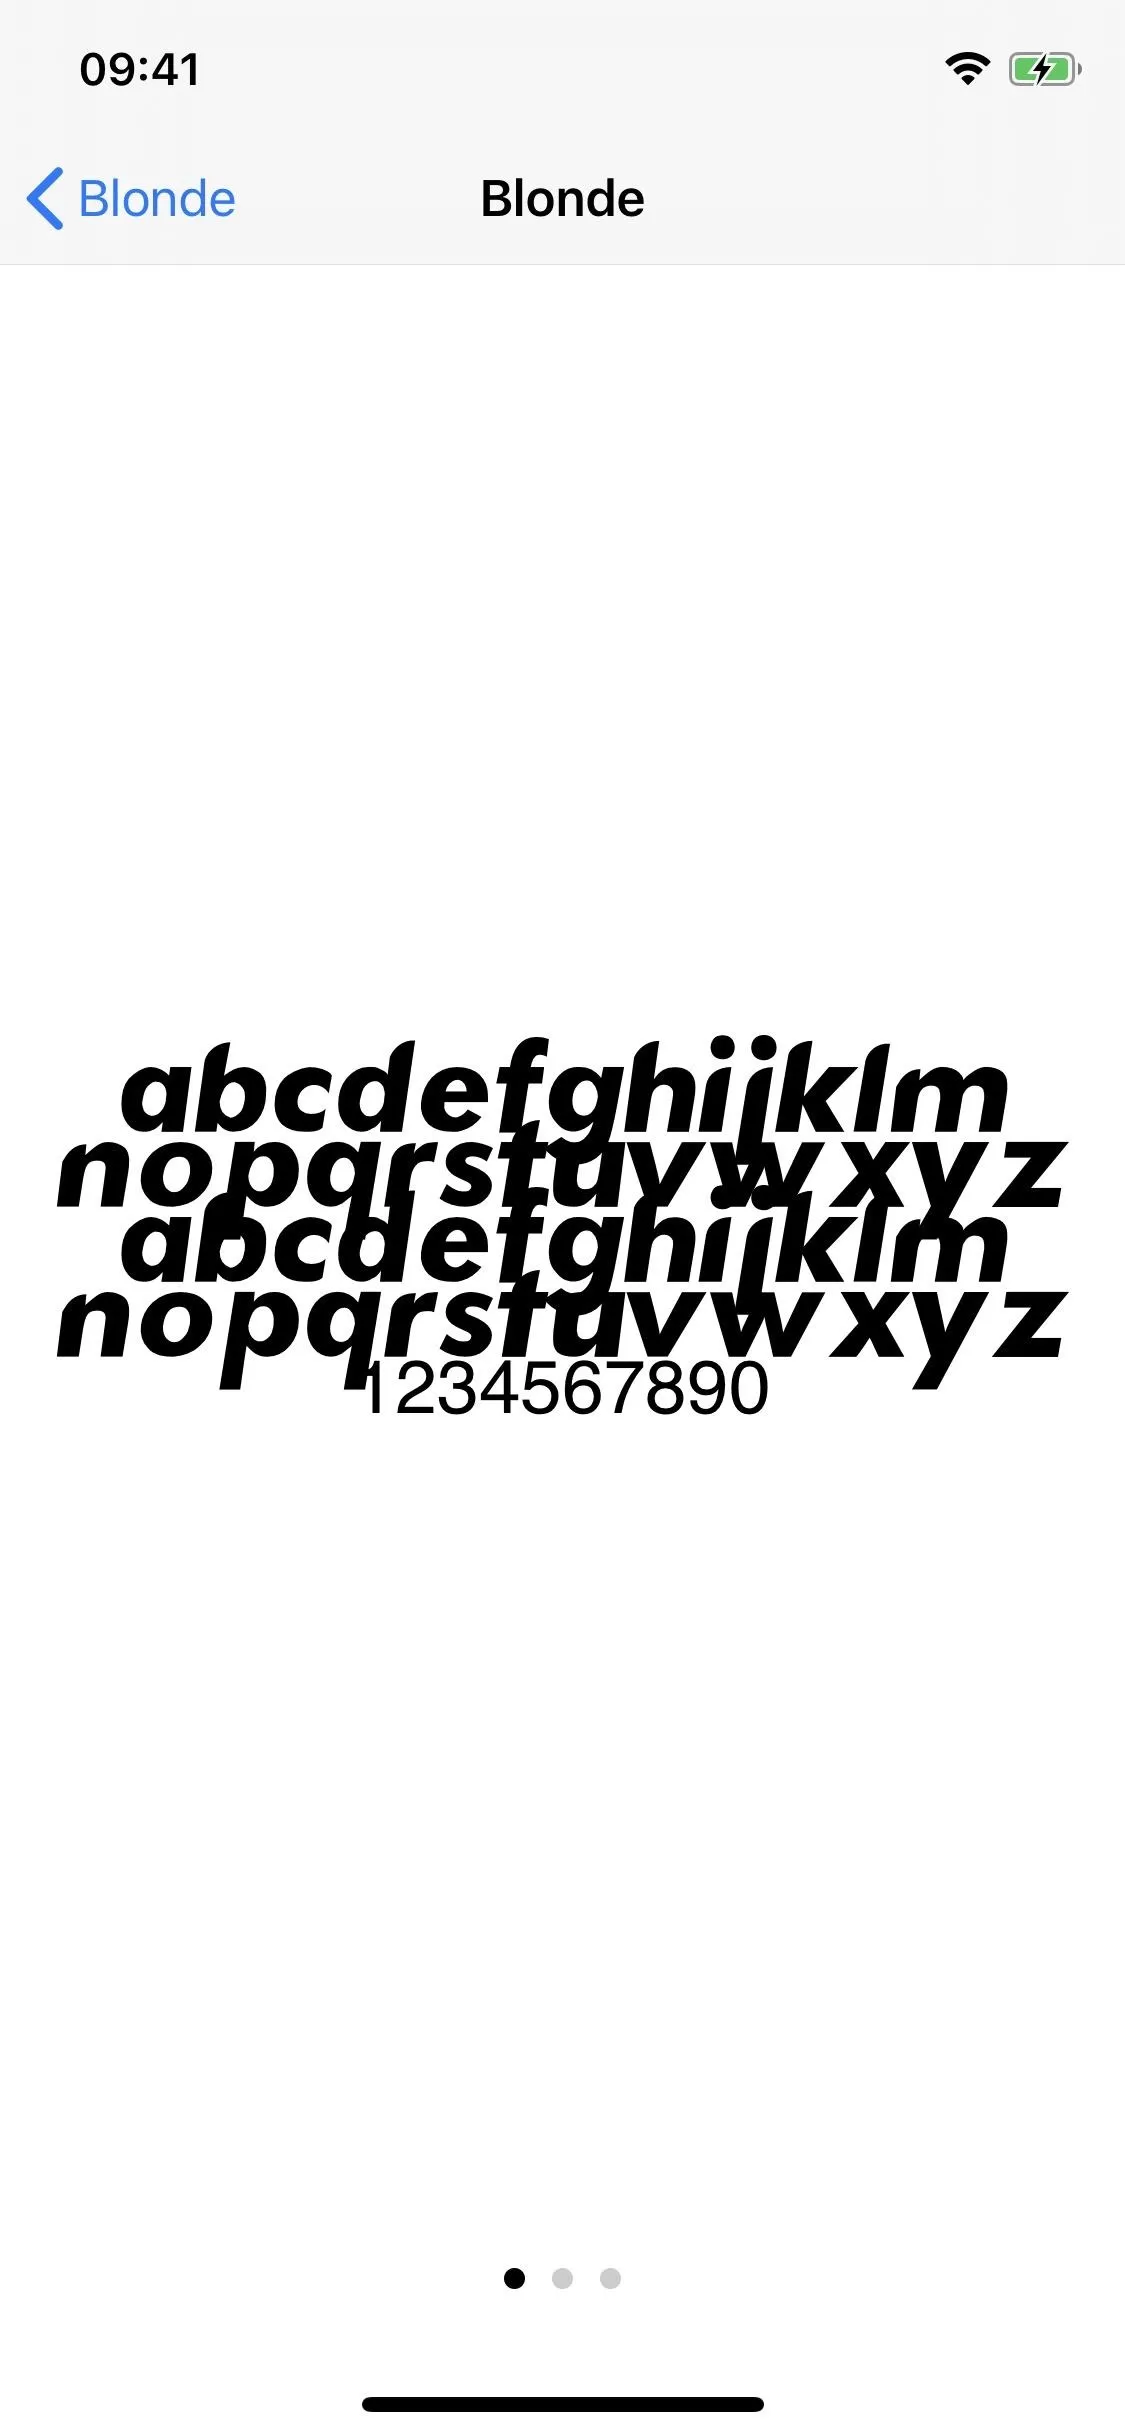
#6: View Custom Font
Open Settings and go to General –> Fonts to view your downloaded custom font. Tap on it to view more information and see the actual font typeface.

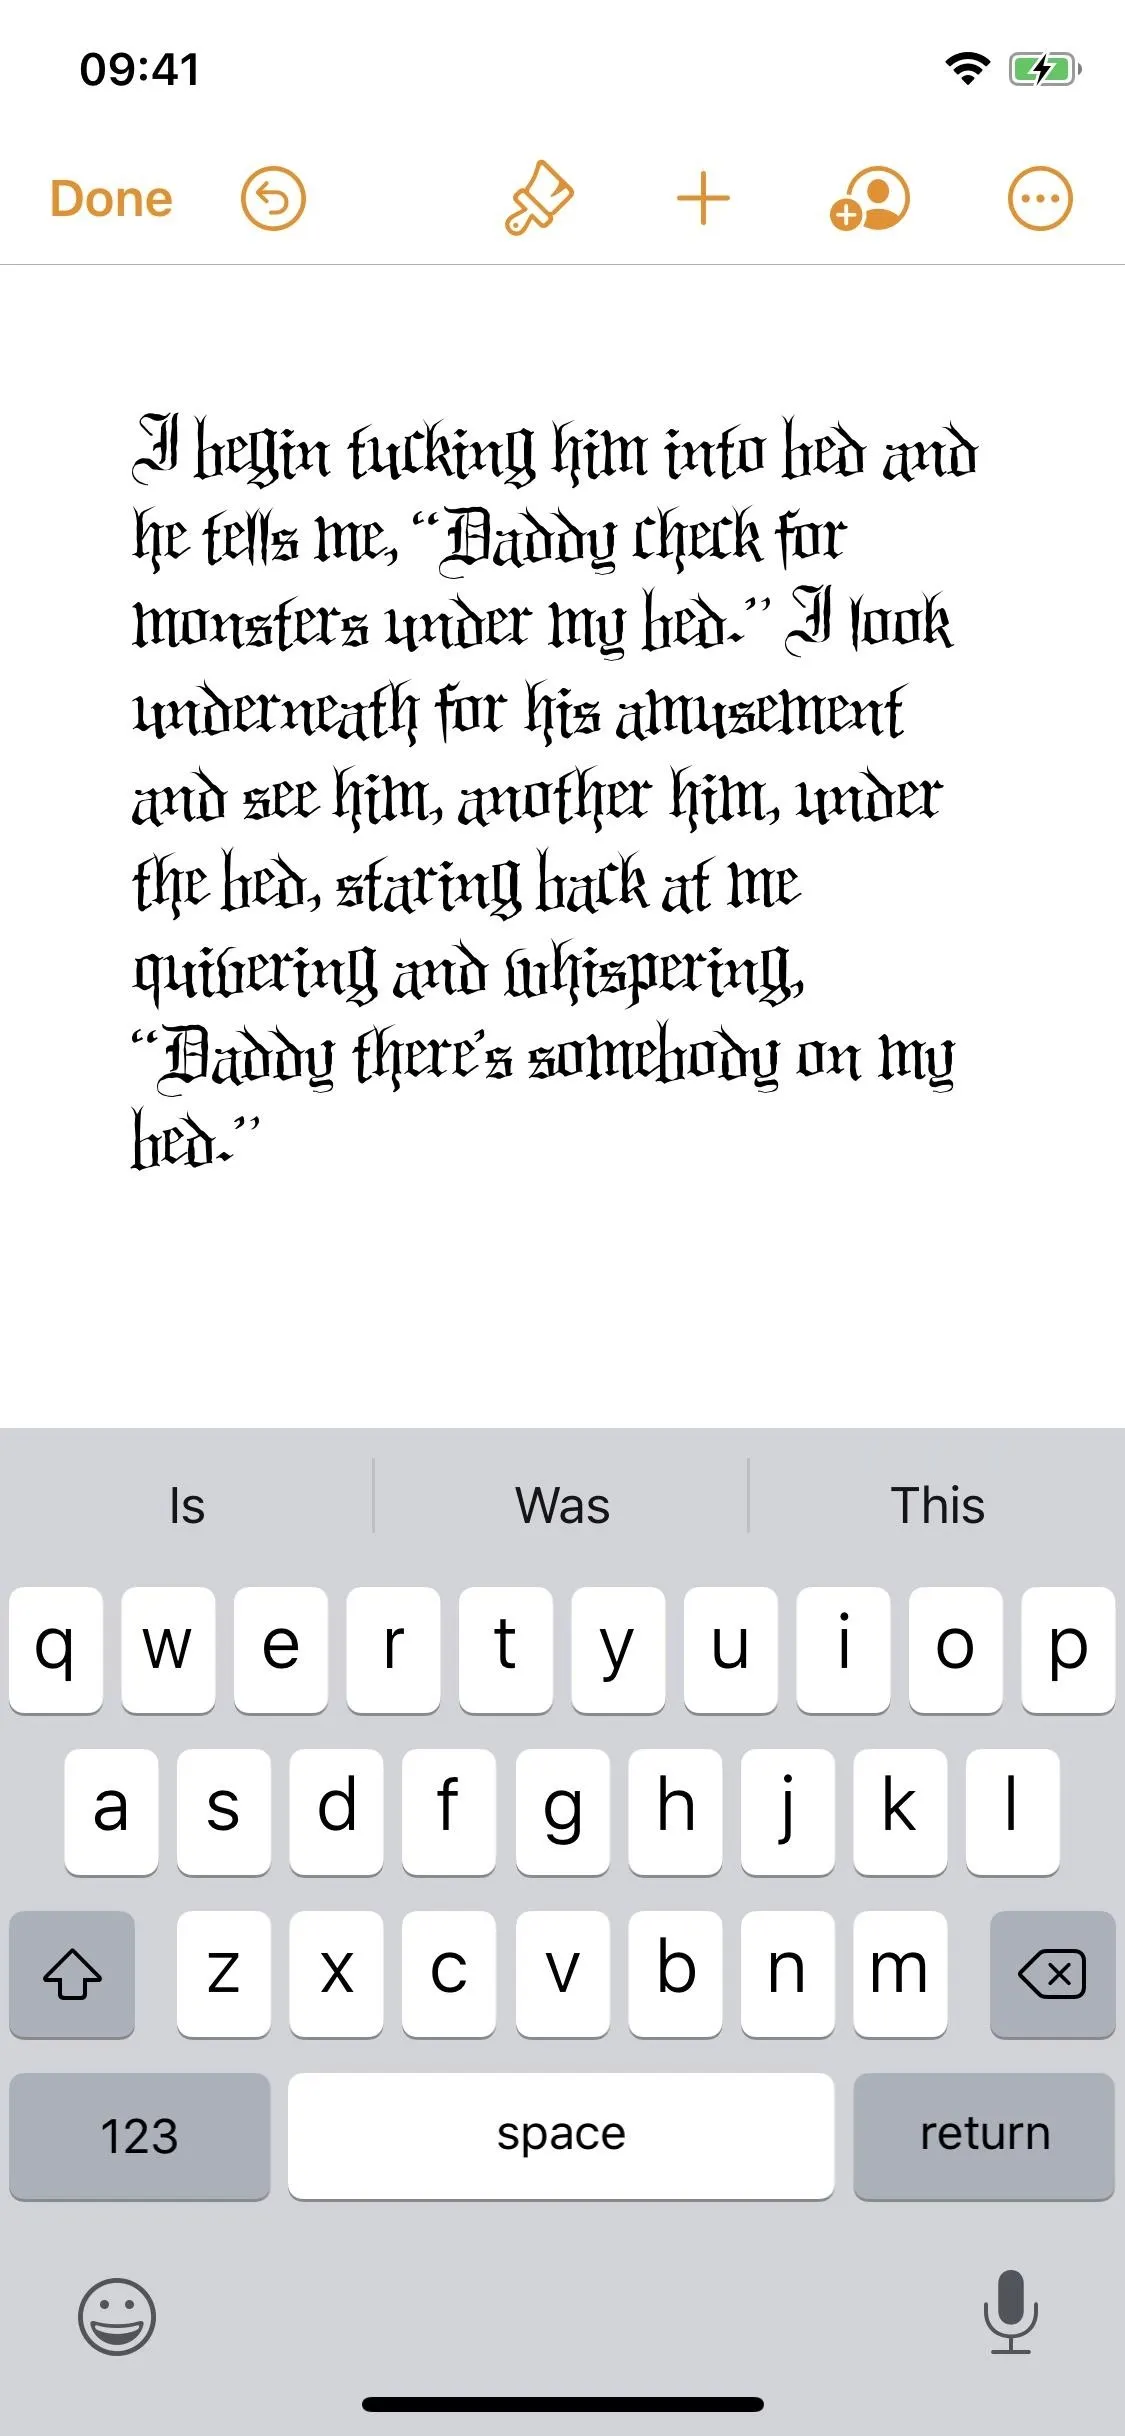
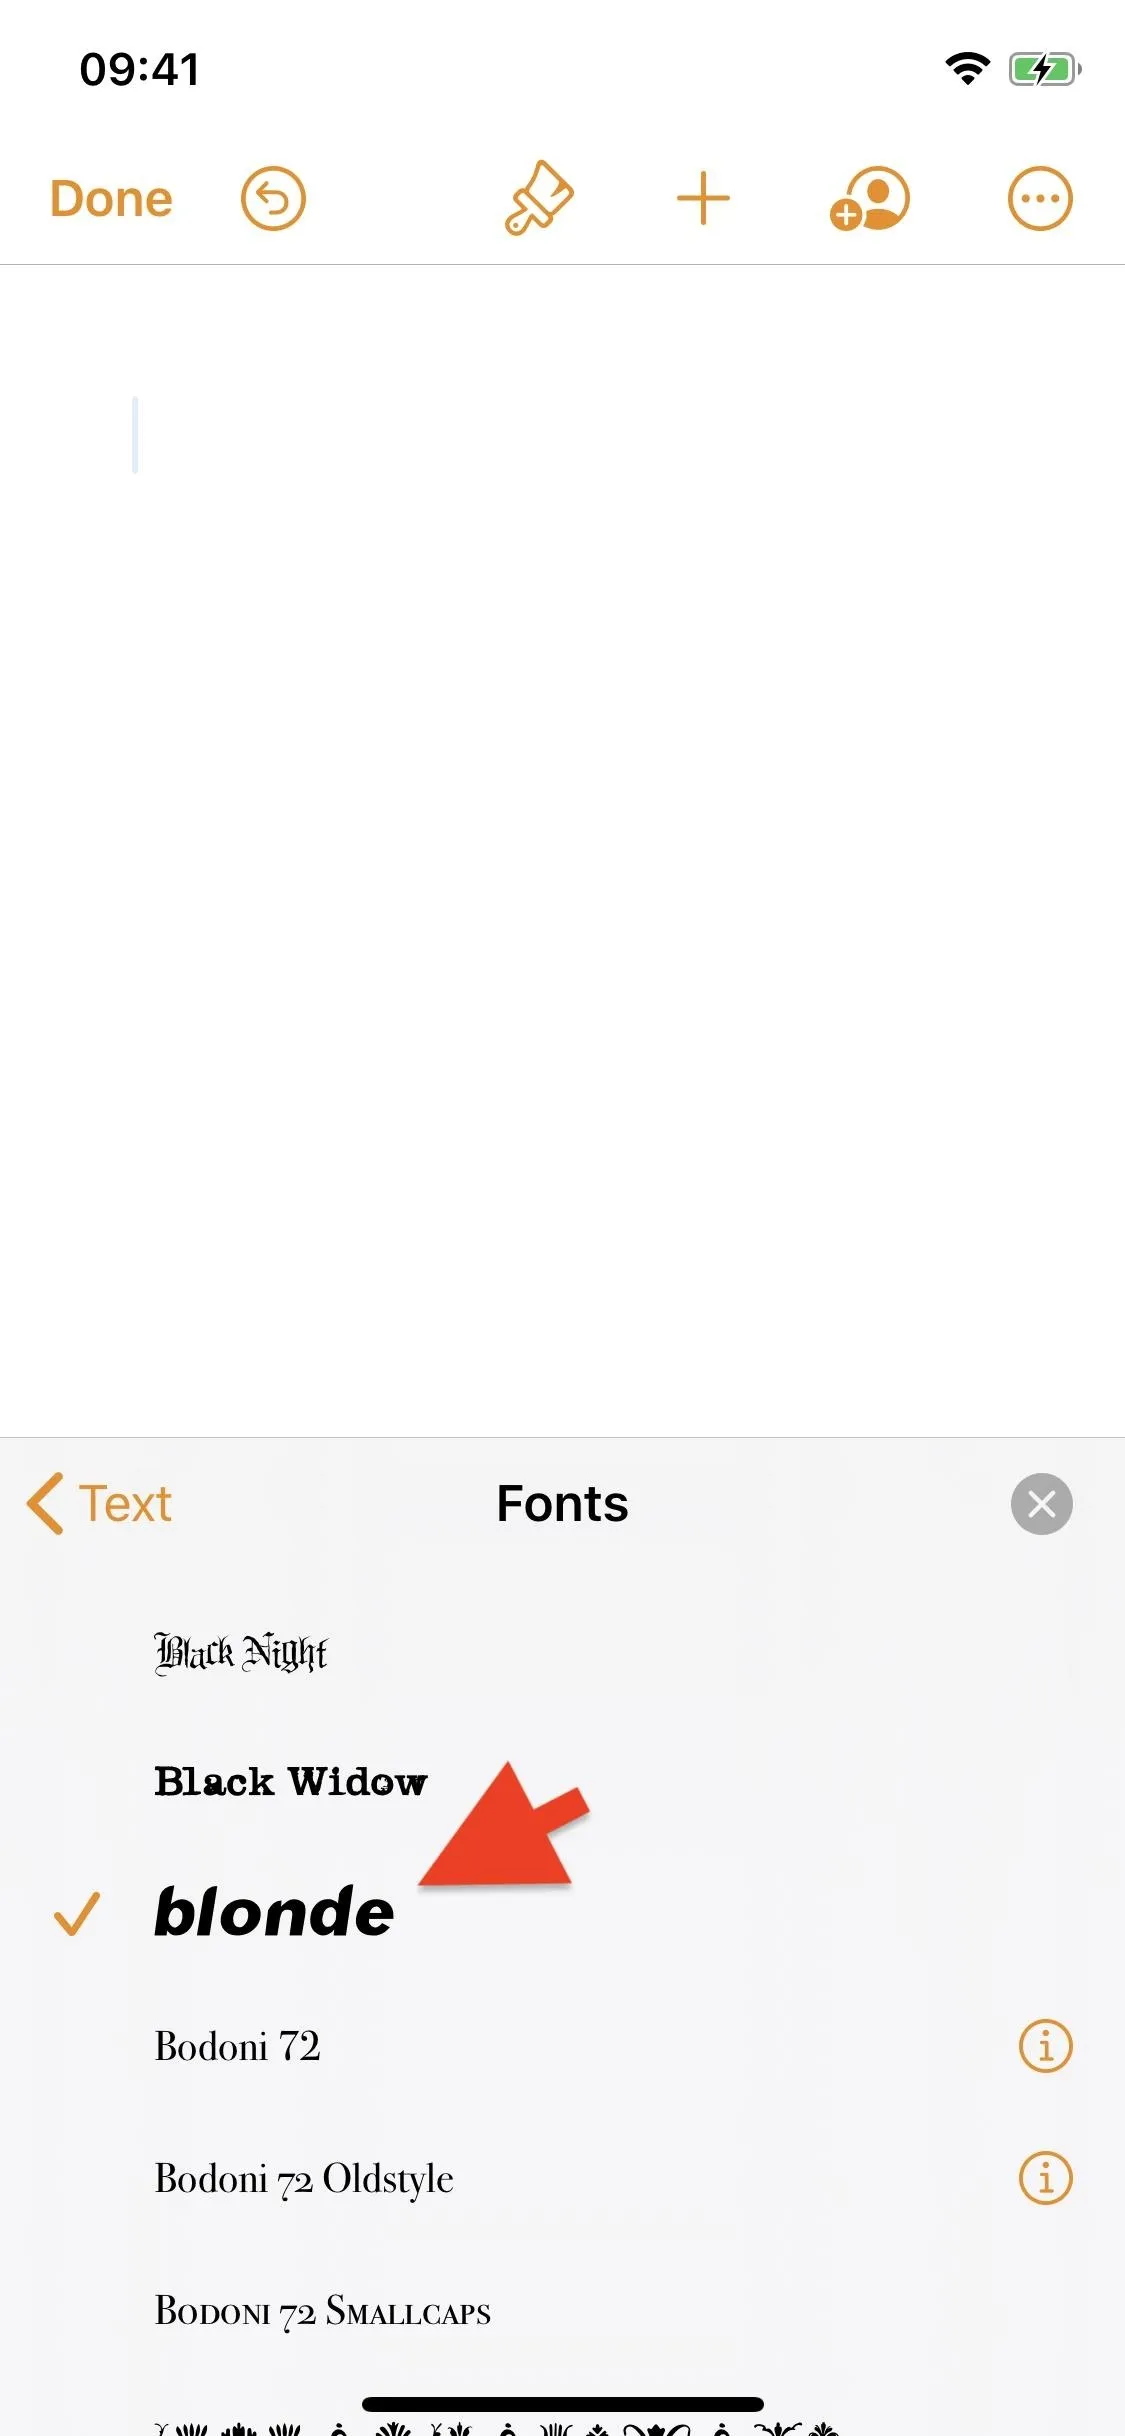
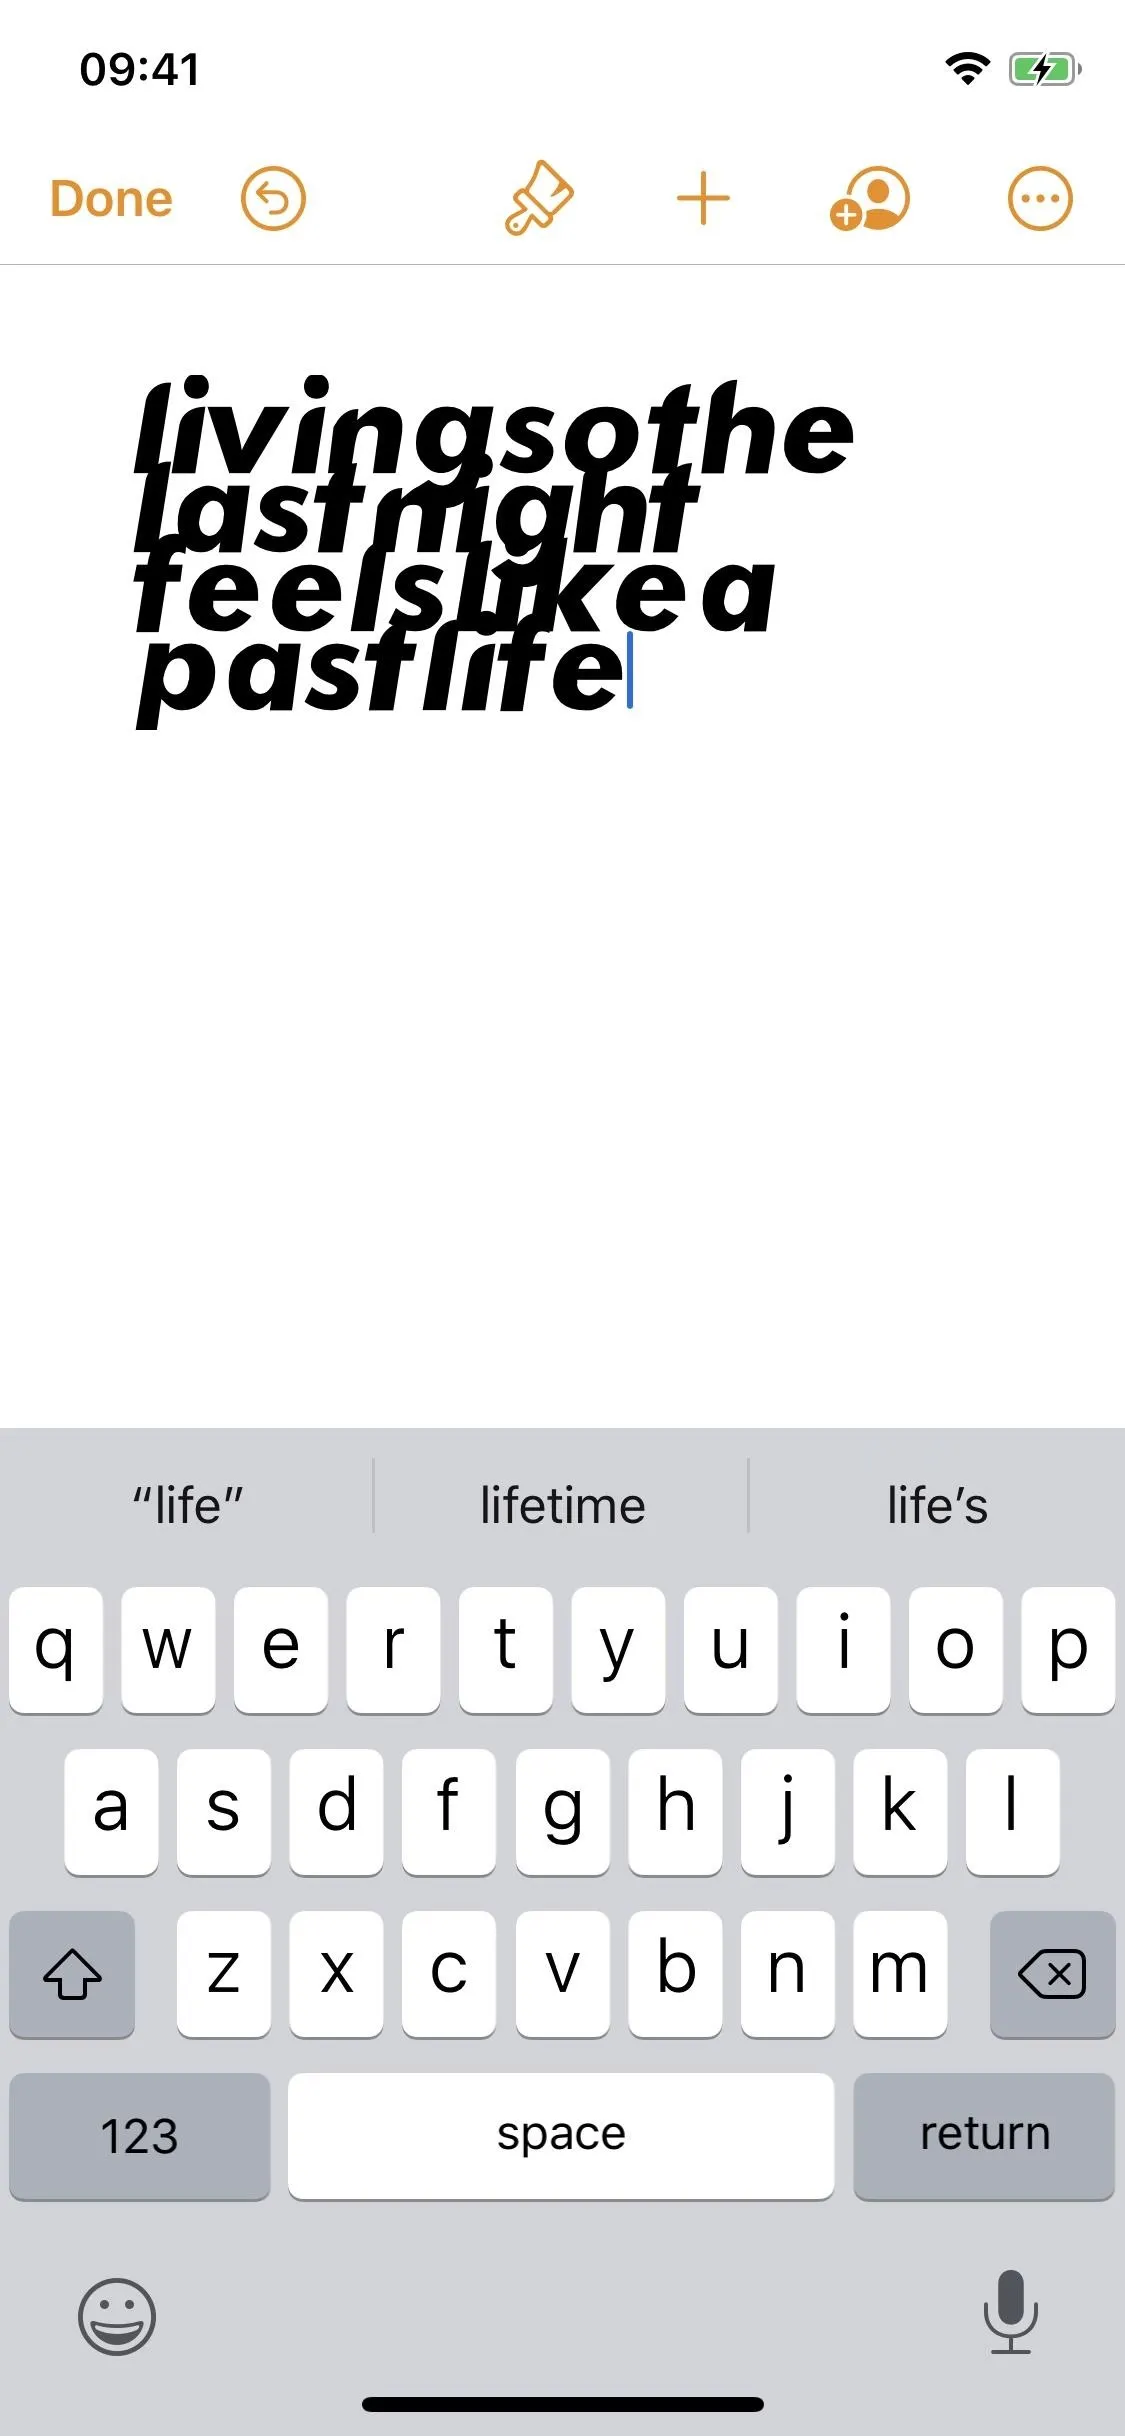
#7: Use Font
Open Pages, and using the same method as in Step 5, choose your new custom font to type with. Below you can see the font I downloaded (called Blonde) being used in Pages.
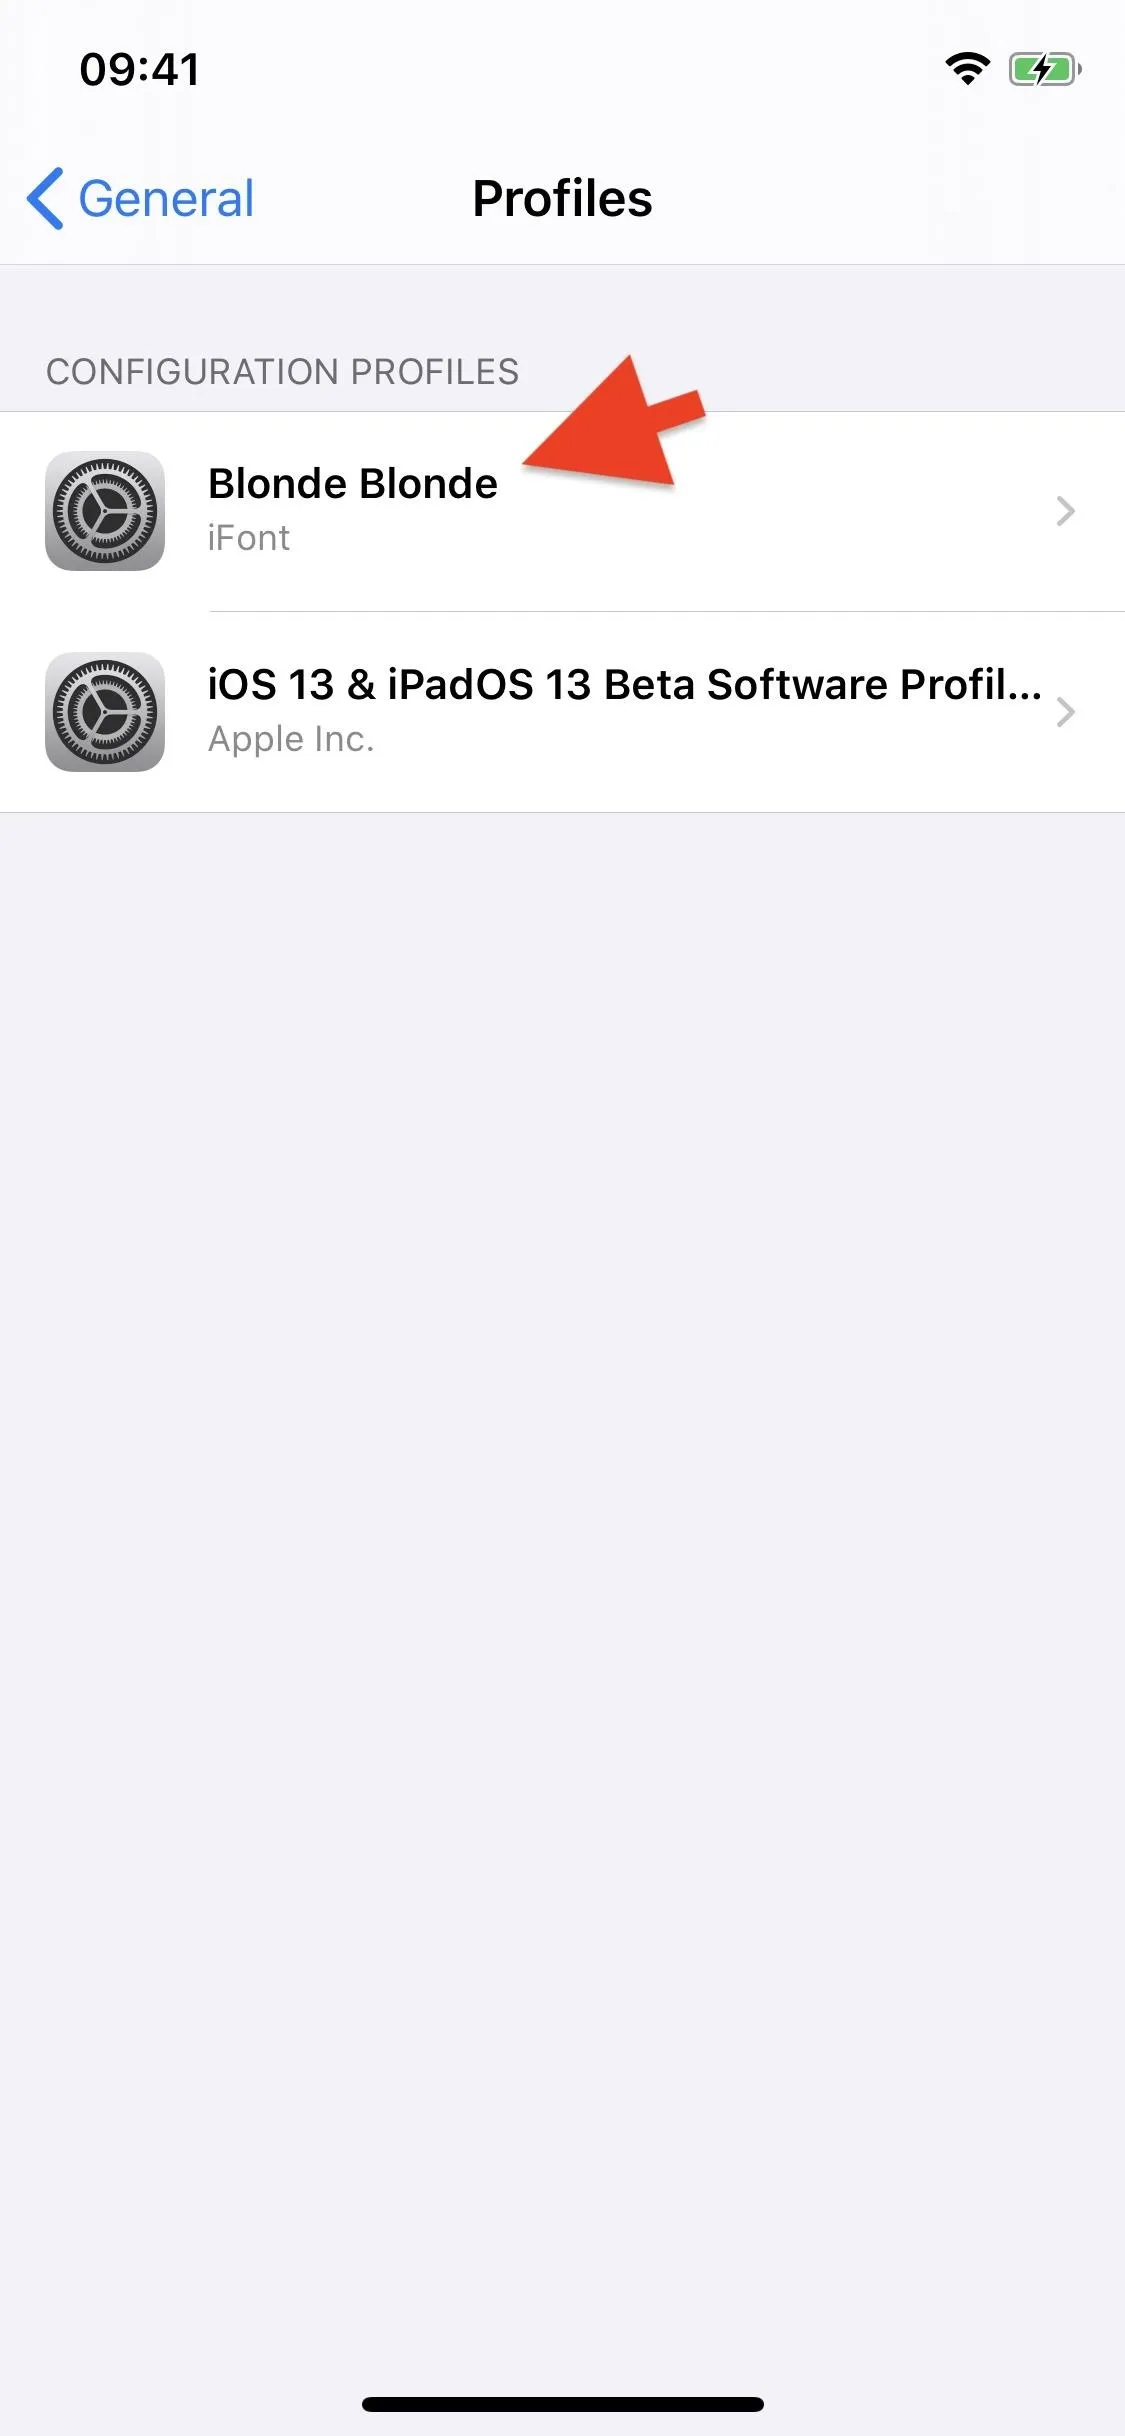
#8: Delete Configuration Profile & Font (Optional)
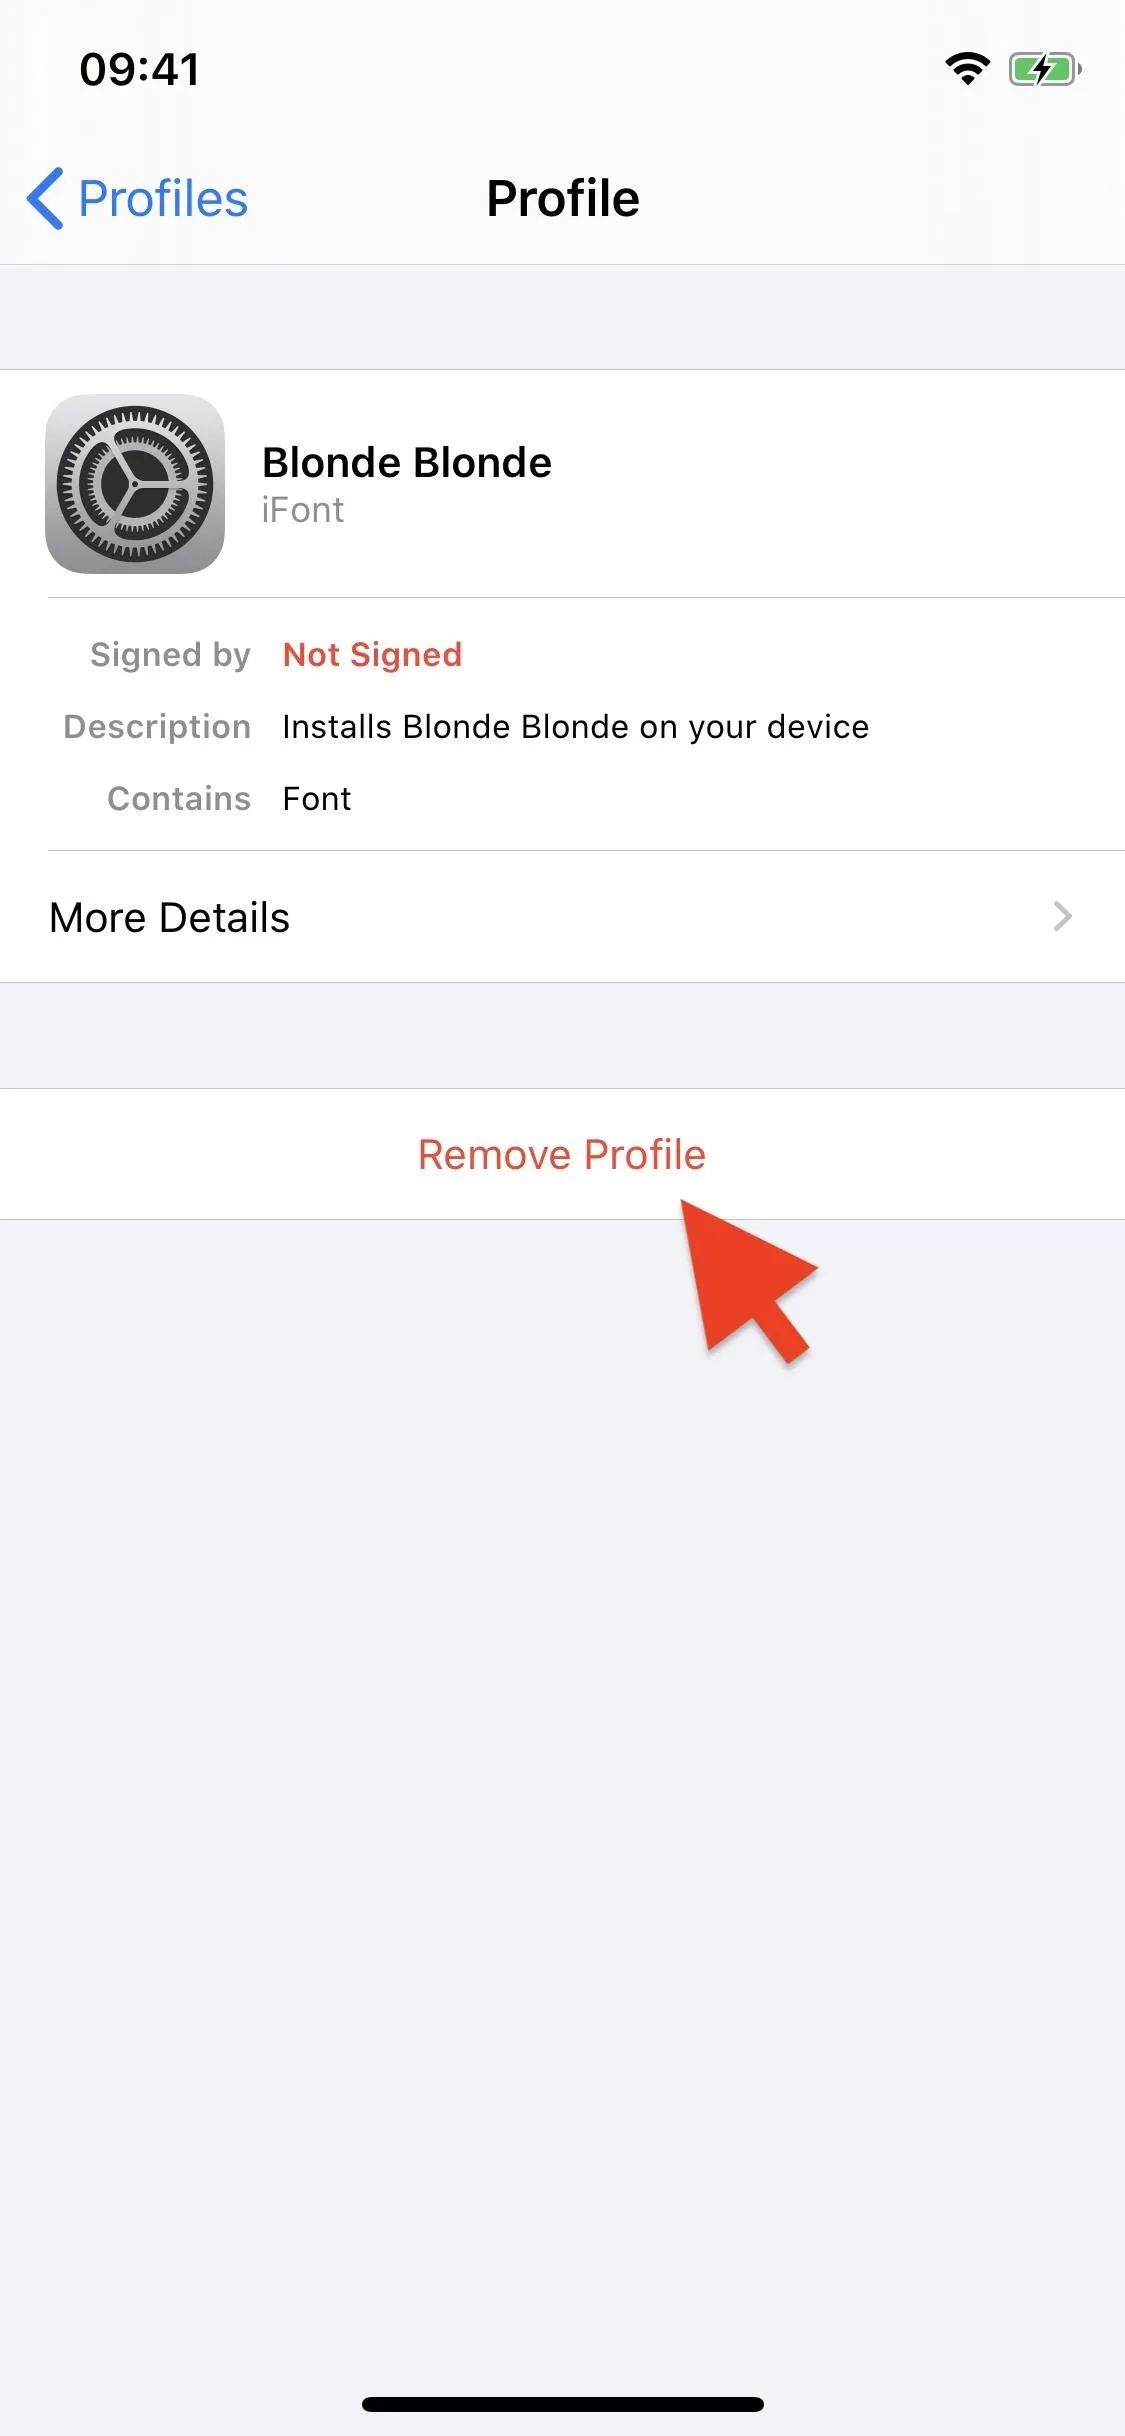
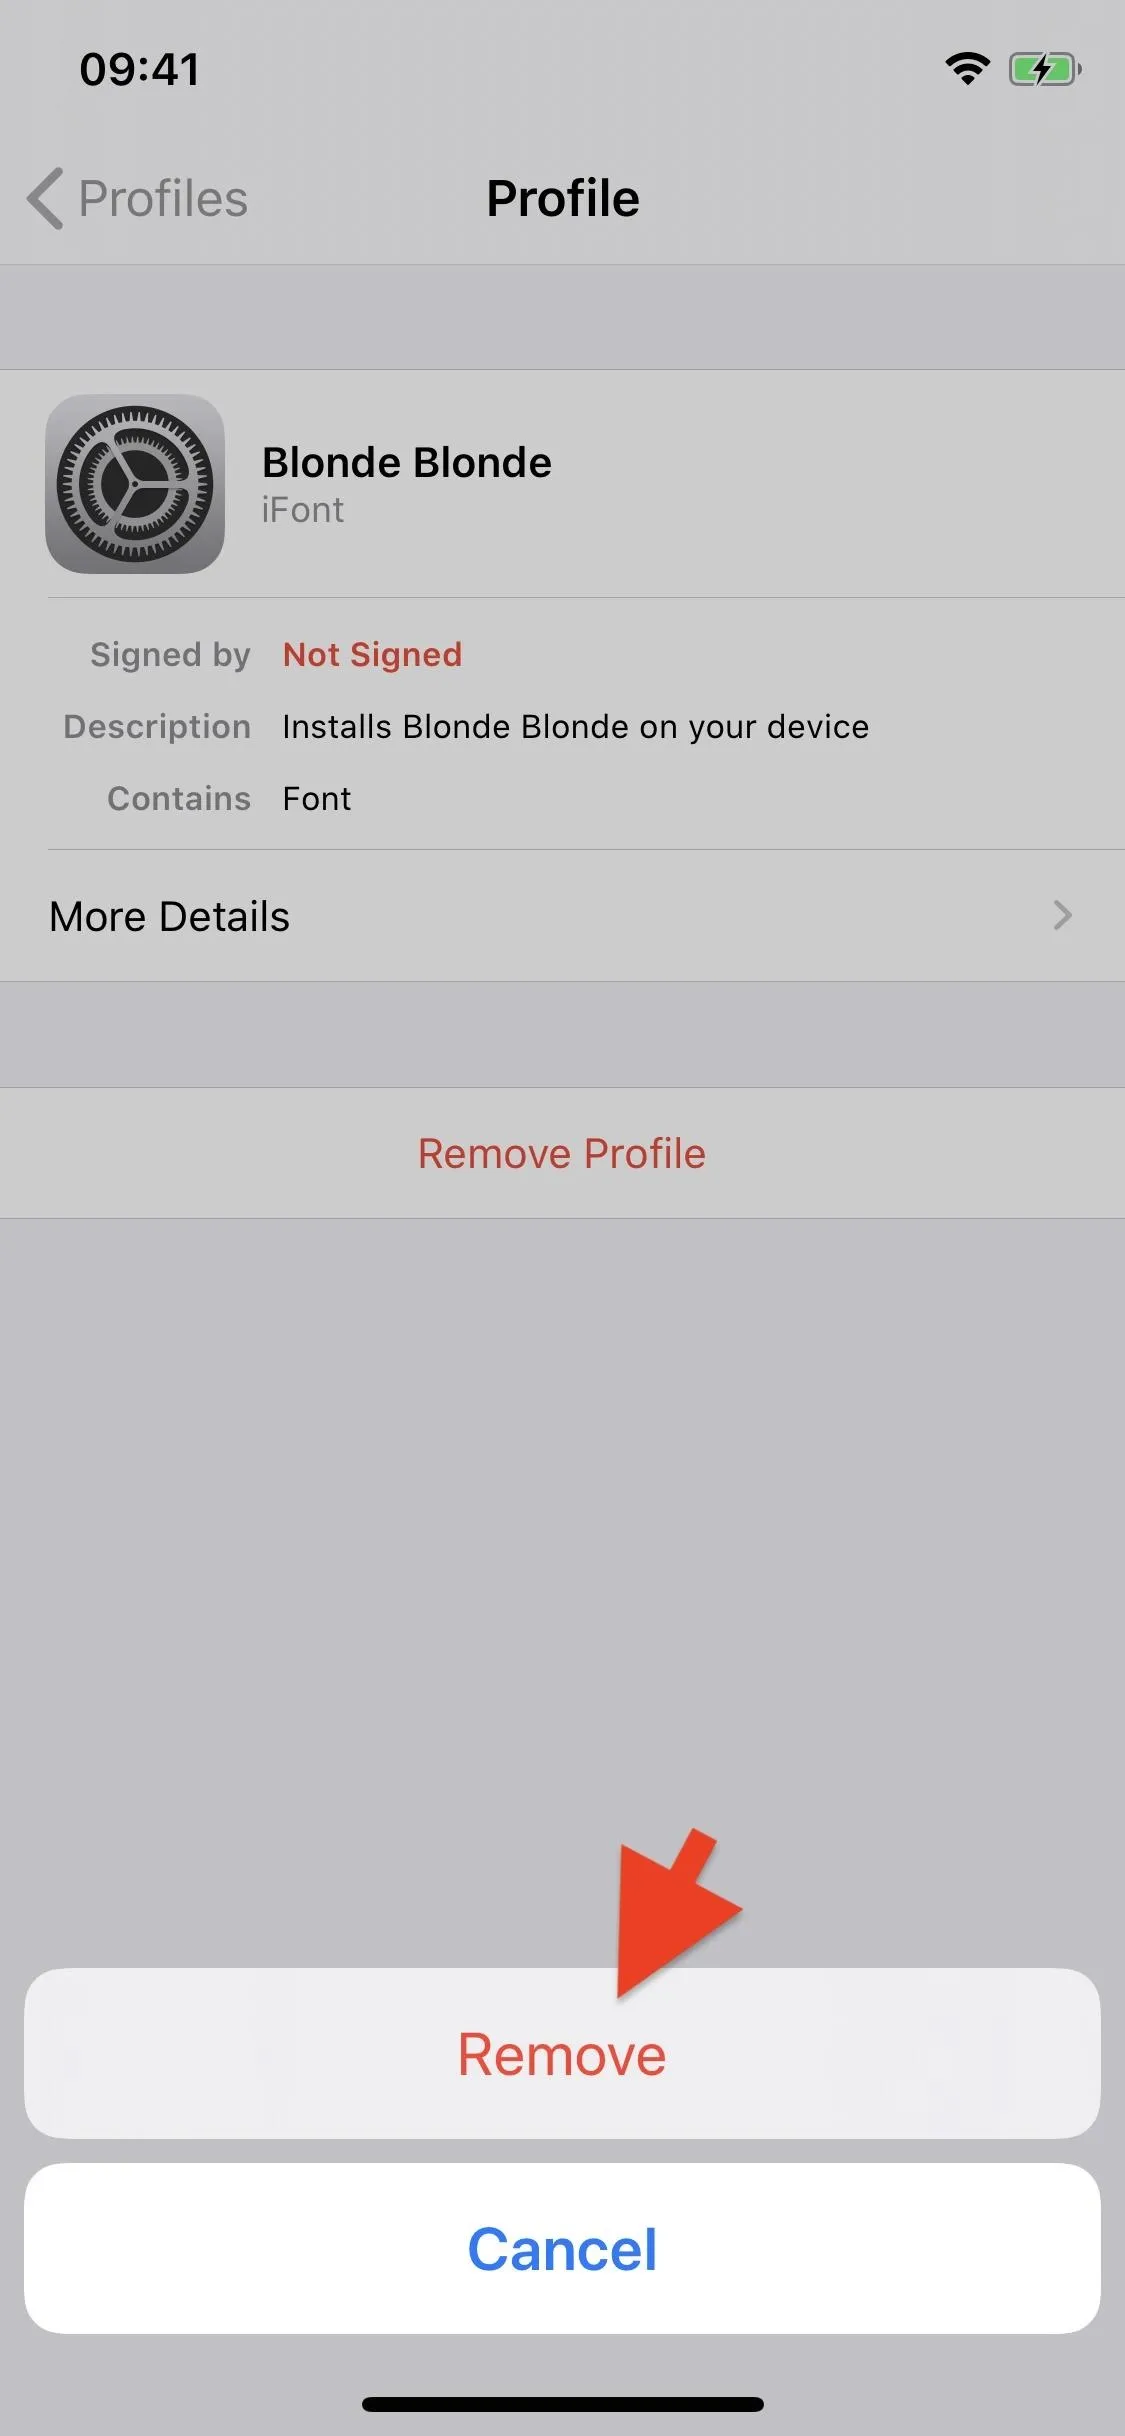
If you decide you want to delete the font, it's best if you remove the configuration profile, which in turn also removes the font. Open Settings and go to "General," then "Fonts." Tap on the config profile of the font you want to delete and then hit "Remove Profile." Enter your passcode and hit "Remove" to completely delete the config profile and font from your device.
Cover image and screenshots by Nelson Aguilar/Gadget Hacks


Comments
Be the first, drop a comment!