


Over the last few years, Apple has significantly improved and scaled up your iPhone's ability to edit photos. Using the Markup feature, which was introduced back in iOS 10, you can add doodles, highlights, important text, your signature, and arrows and other objects onto pictures and screenshots. One of the lesser-known tools in Markup lets you zoom into essential details without cropping.
Using the Magnifier tool in Markup, you can permanently zoom in on any one section of a photo without having to crop the entire image. While the potential uses are many, it's best to either enlarge smaller text or place emphasis on an important item. Either way, the tool can be incredibly useful, and you can use it from within the Photos app or the screenshots editor.
We're using iOS 13 for this guide, but the Magnifier is in previous iOS versions. However, some menus and options for it may be different, so keep that in mind if you're using an older iOS version. Also, while we're showing it off in the Photos app and screenshots editor, you can use Magnifier from within images you share in Messages, from within the Files app, and in images you add to Notes. Also, photos and screenshots aren't the only things you can markup — it'll work on PDFs too.
From Within the Photos App
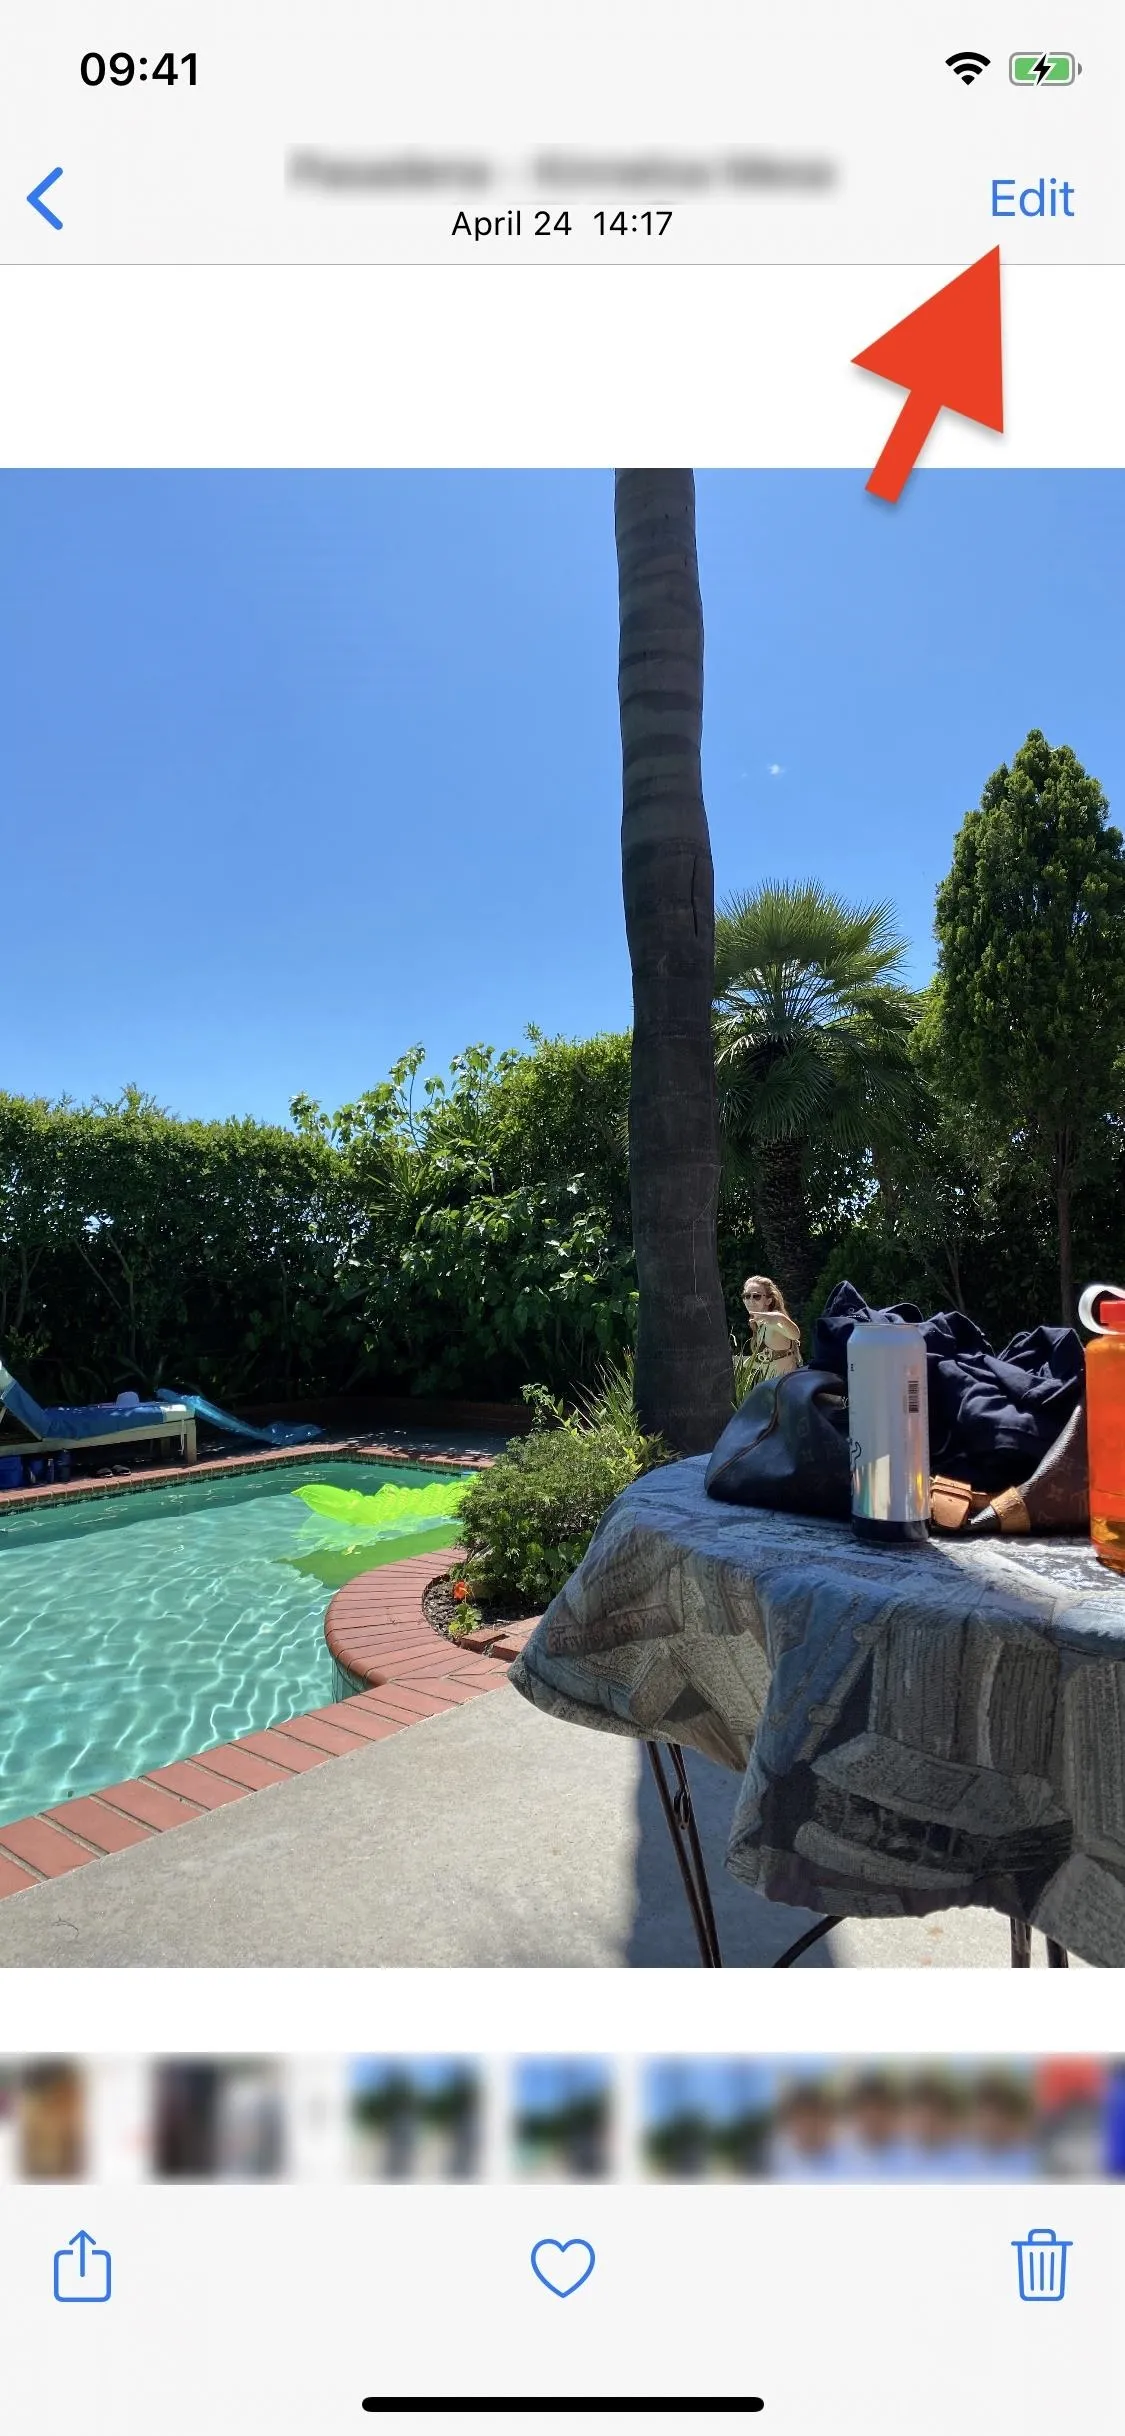
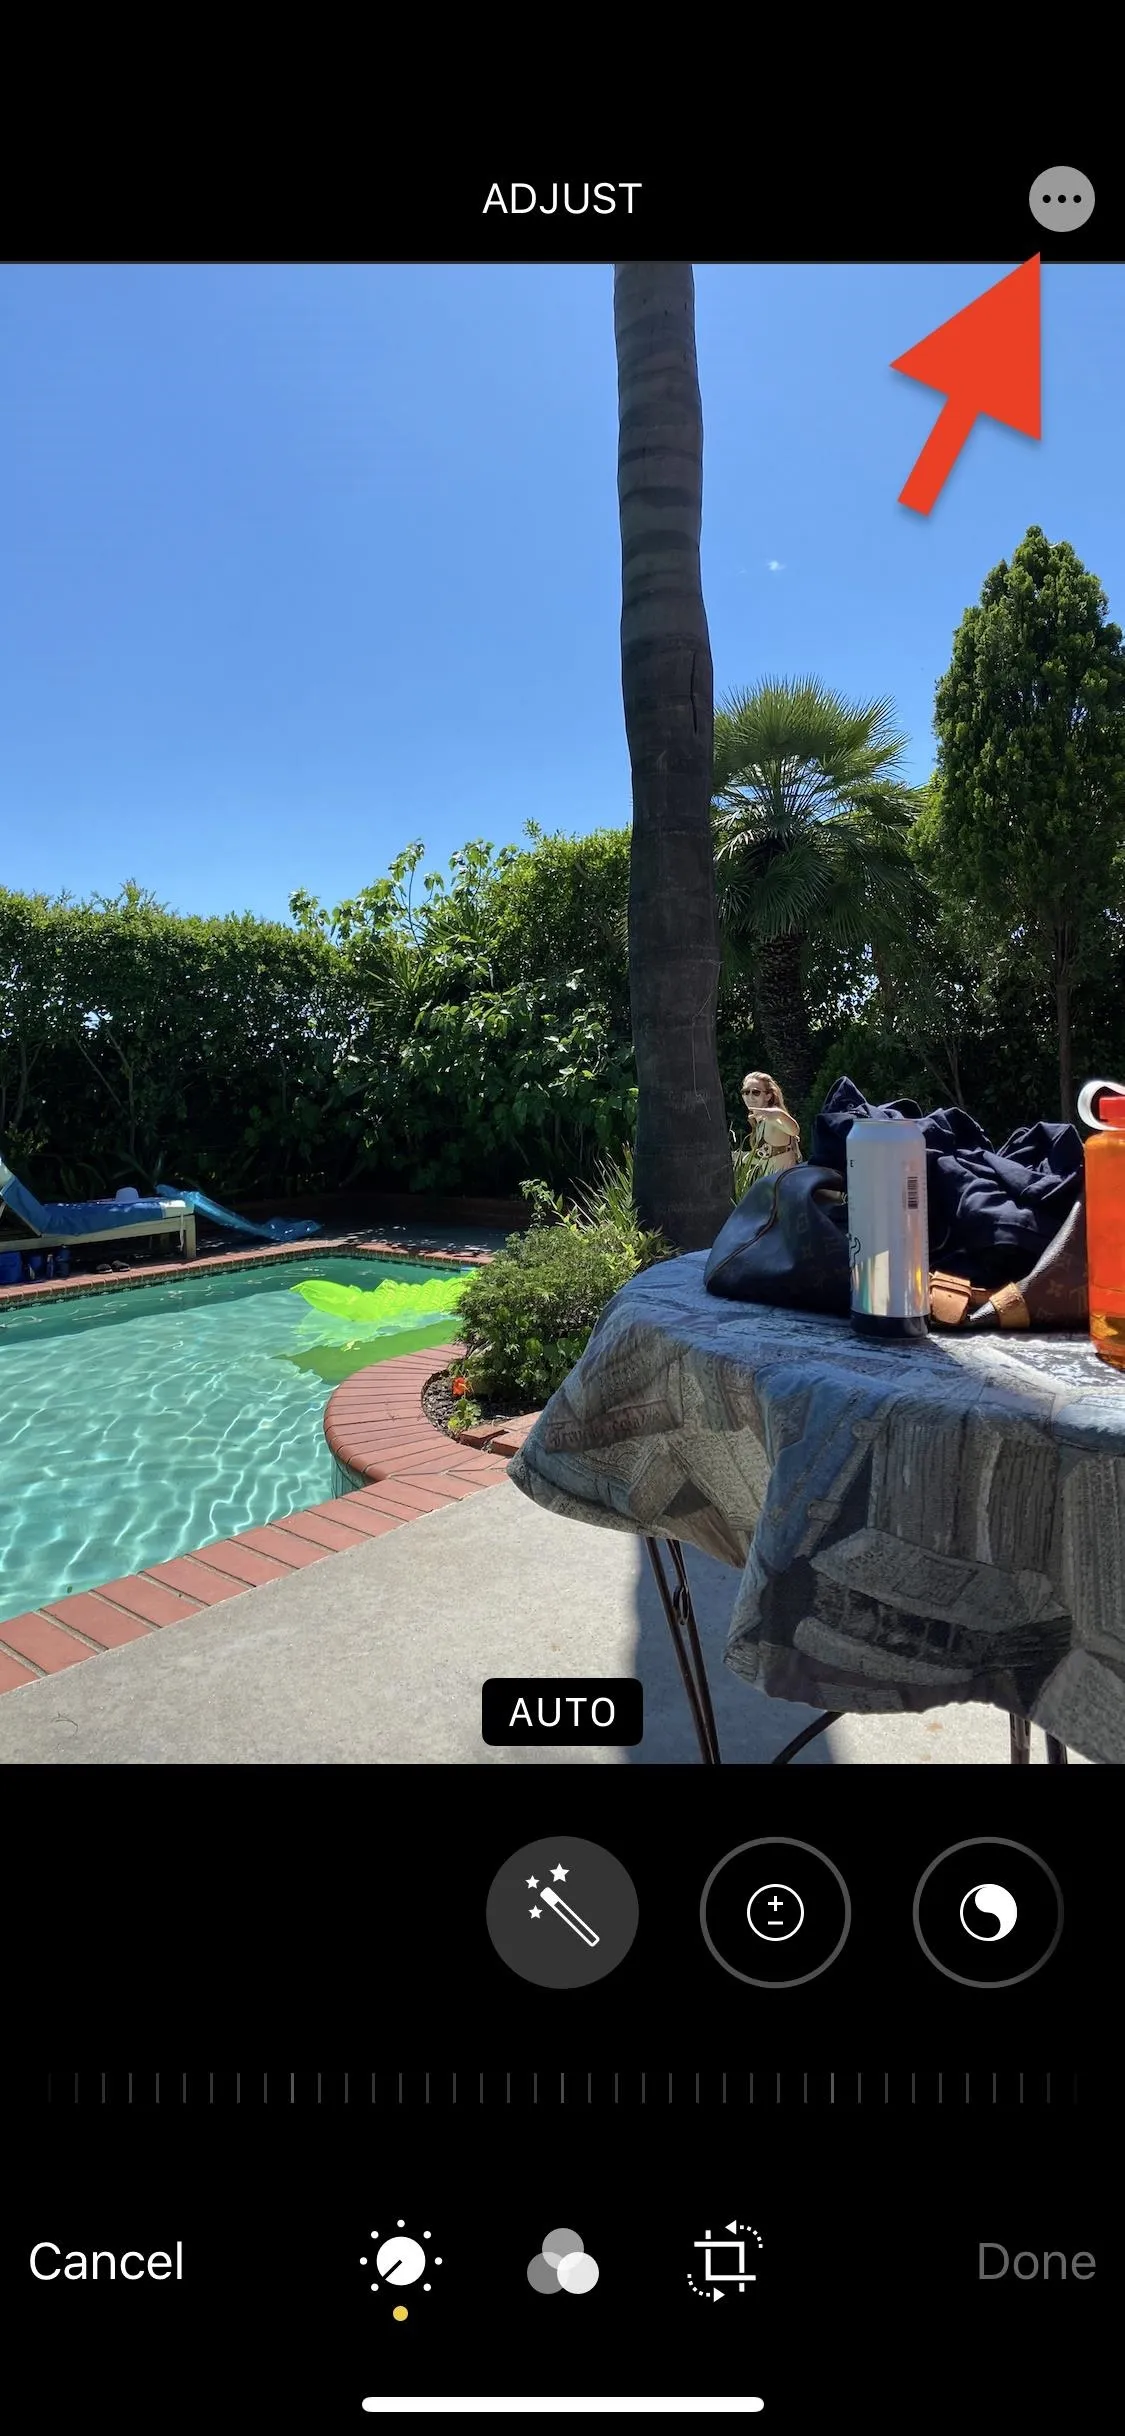
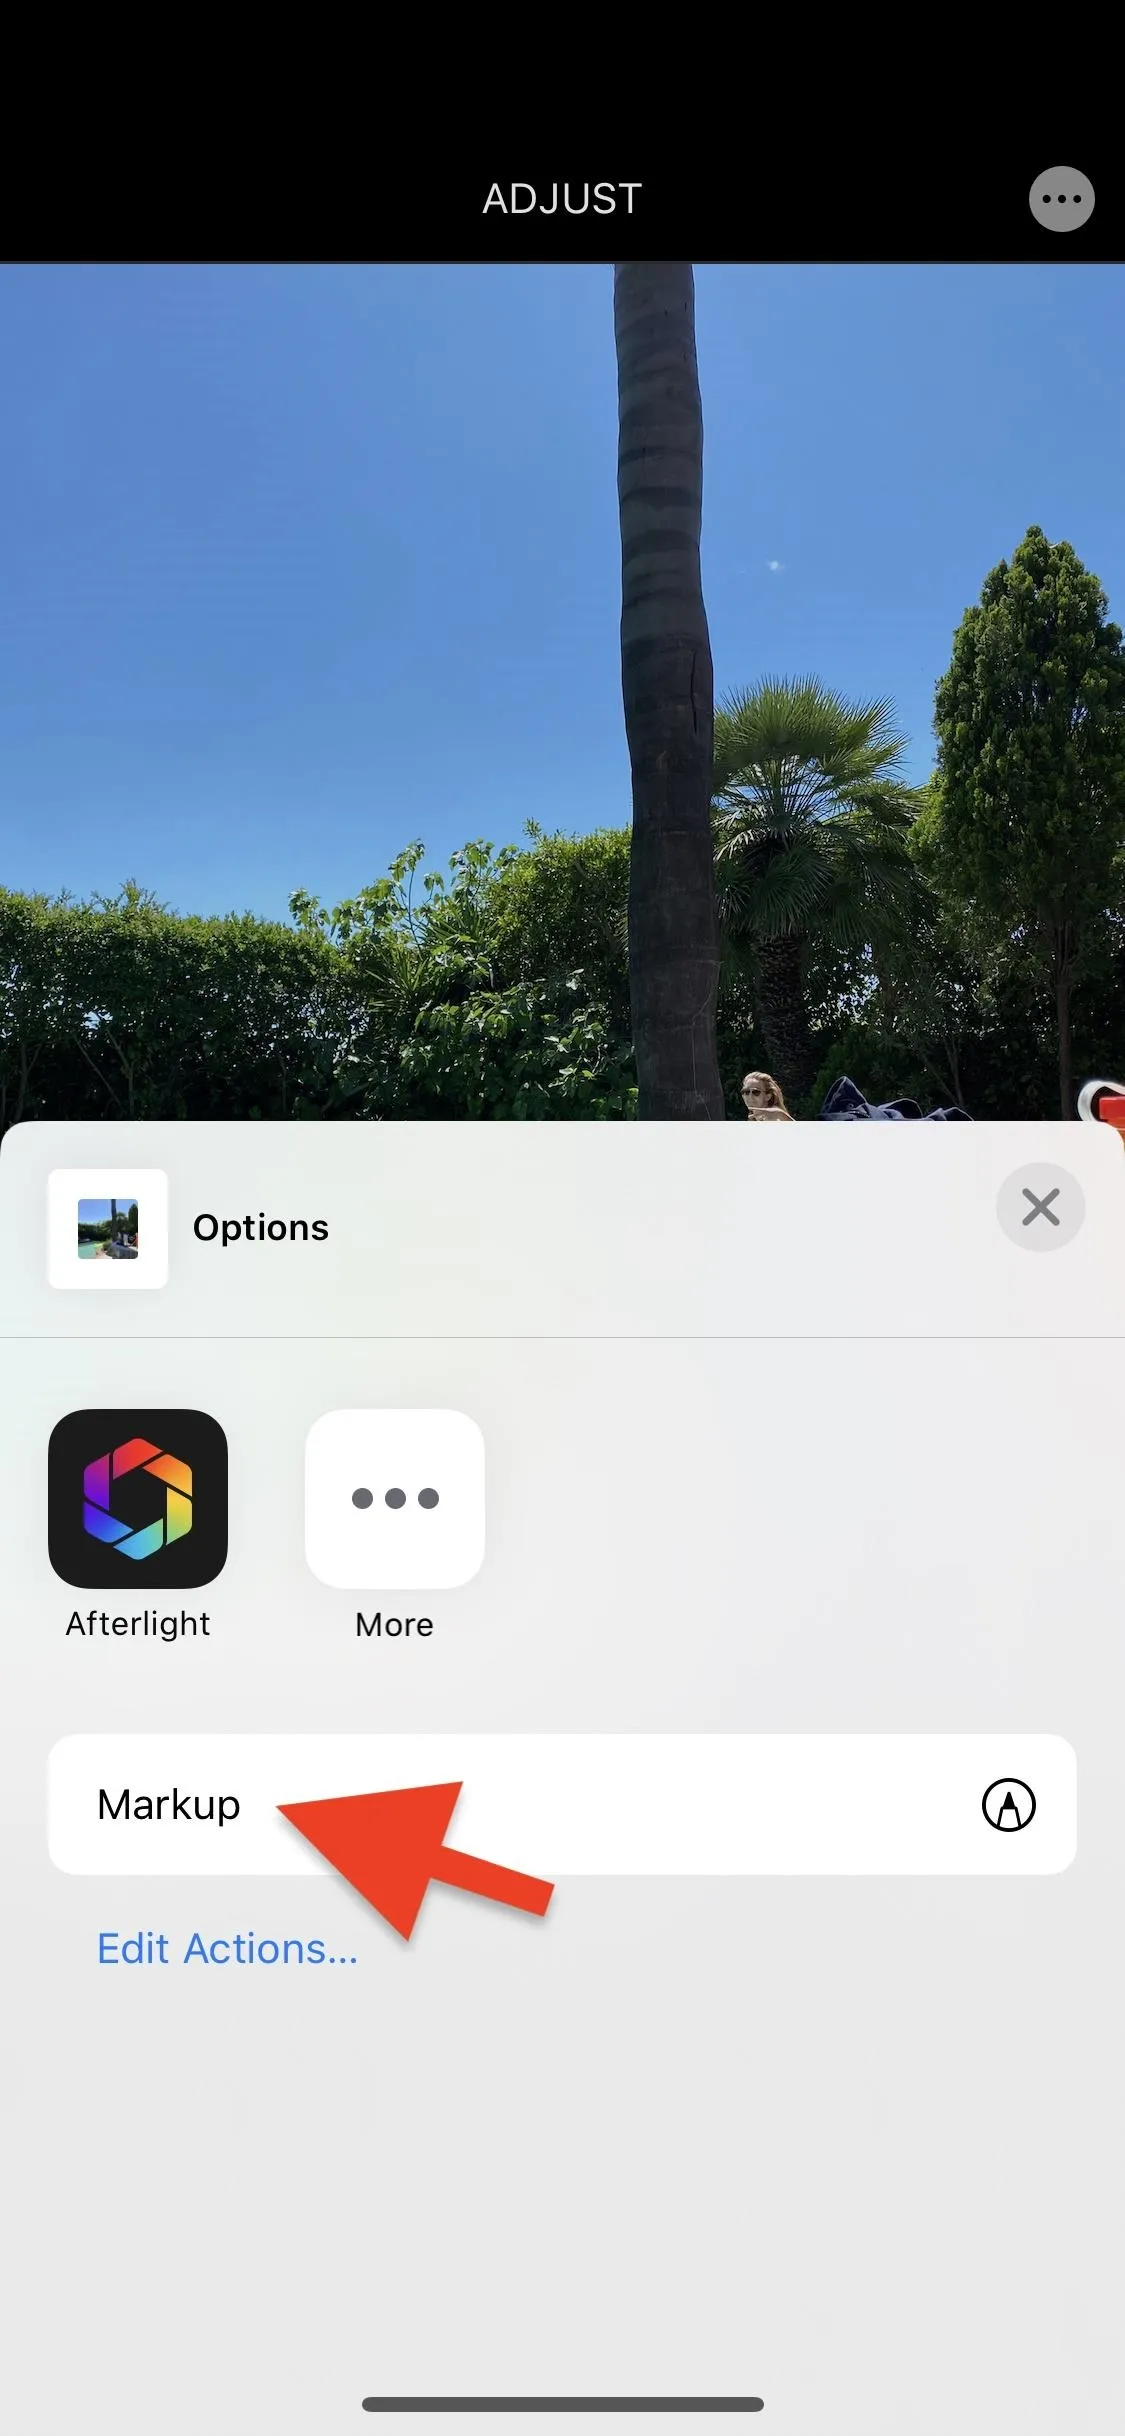
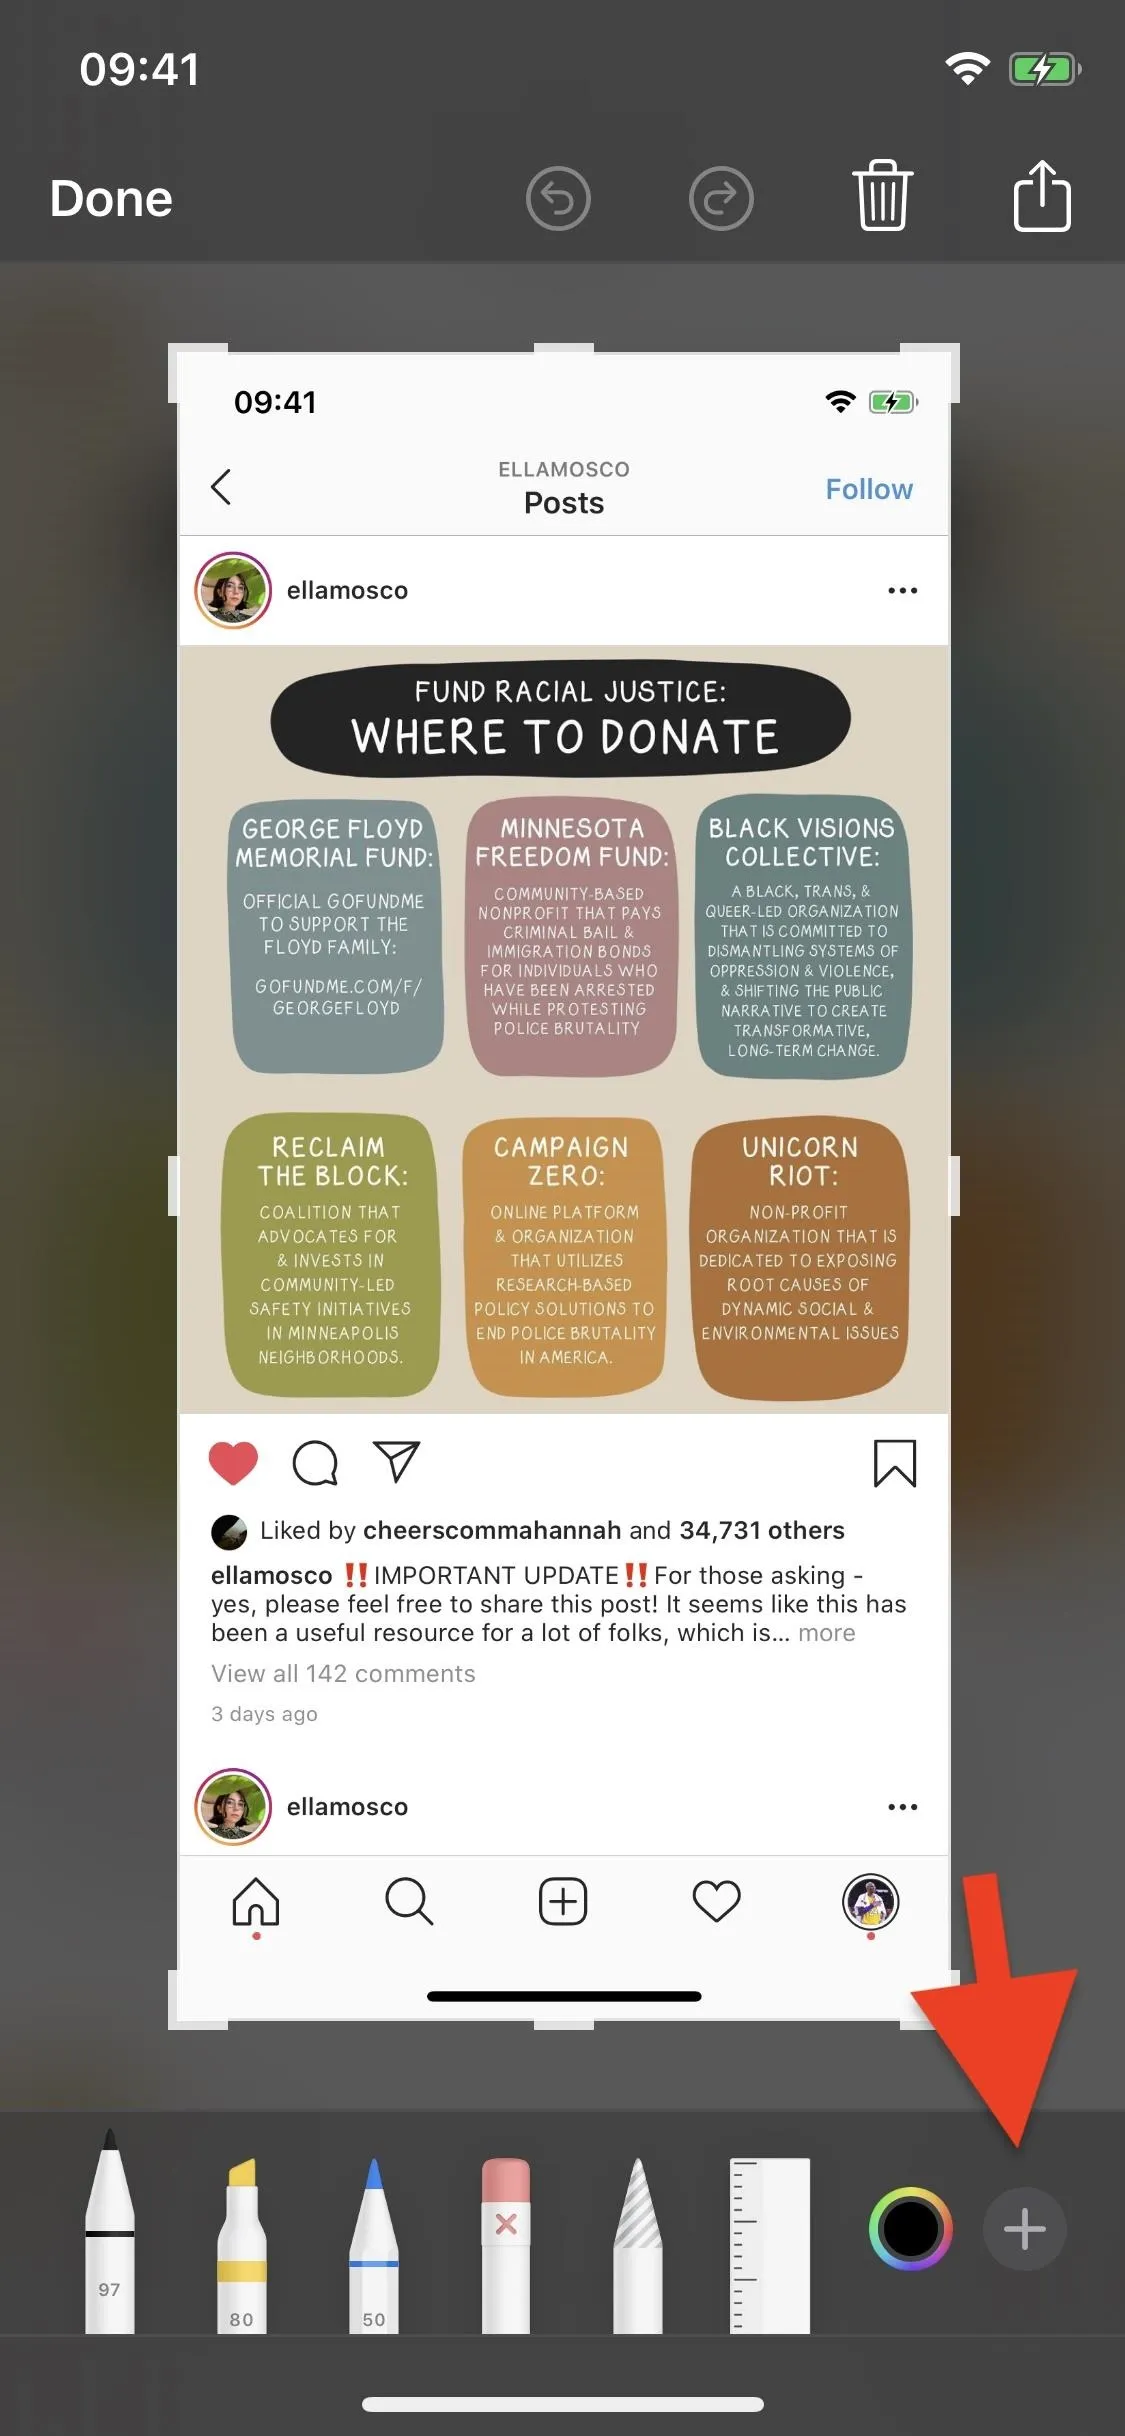
To access the magnifier in Photos, select a photo or screenshot that you want to edit. Tap on the image to show the toolbars if they're not already showing. Then, tap "Edit" in the top right. In the editor, tap the Extensions button in the top right, which is the ellipsis (•••) icon. In the action sheet that pops up, tap "Markup."
If it's a Live Photo that you selected, you will see an alert letting you know that Live Photo will be turned off and that edits will only apply to the still image. Tap "OK."
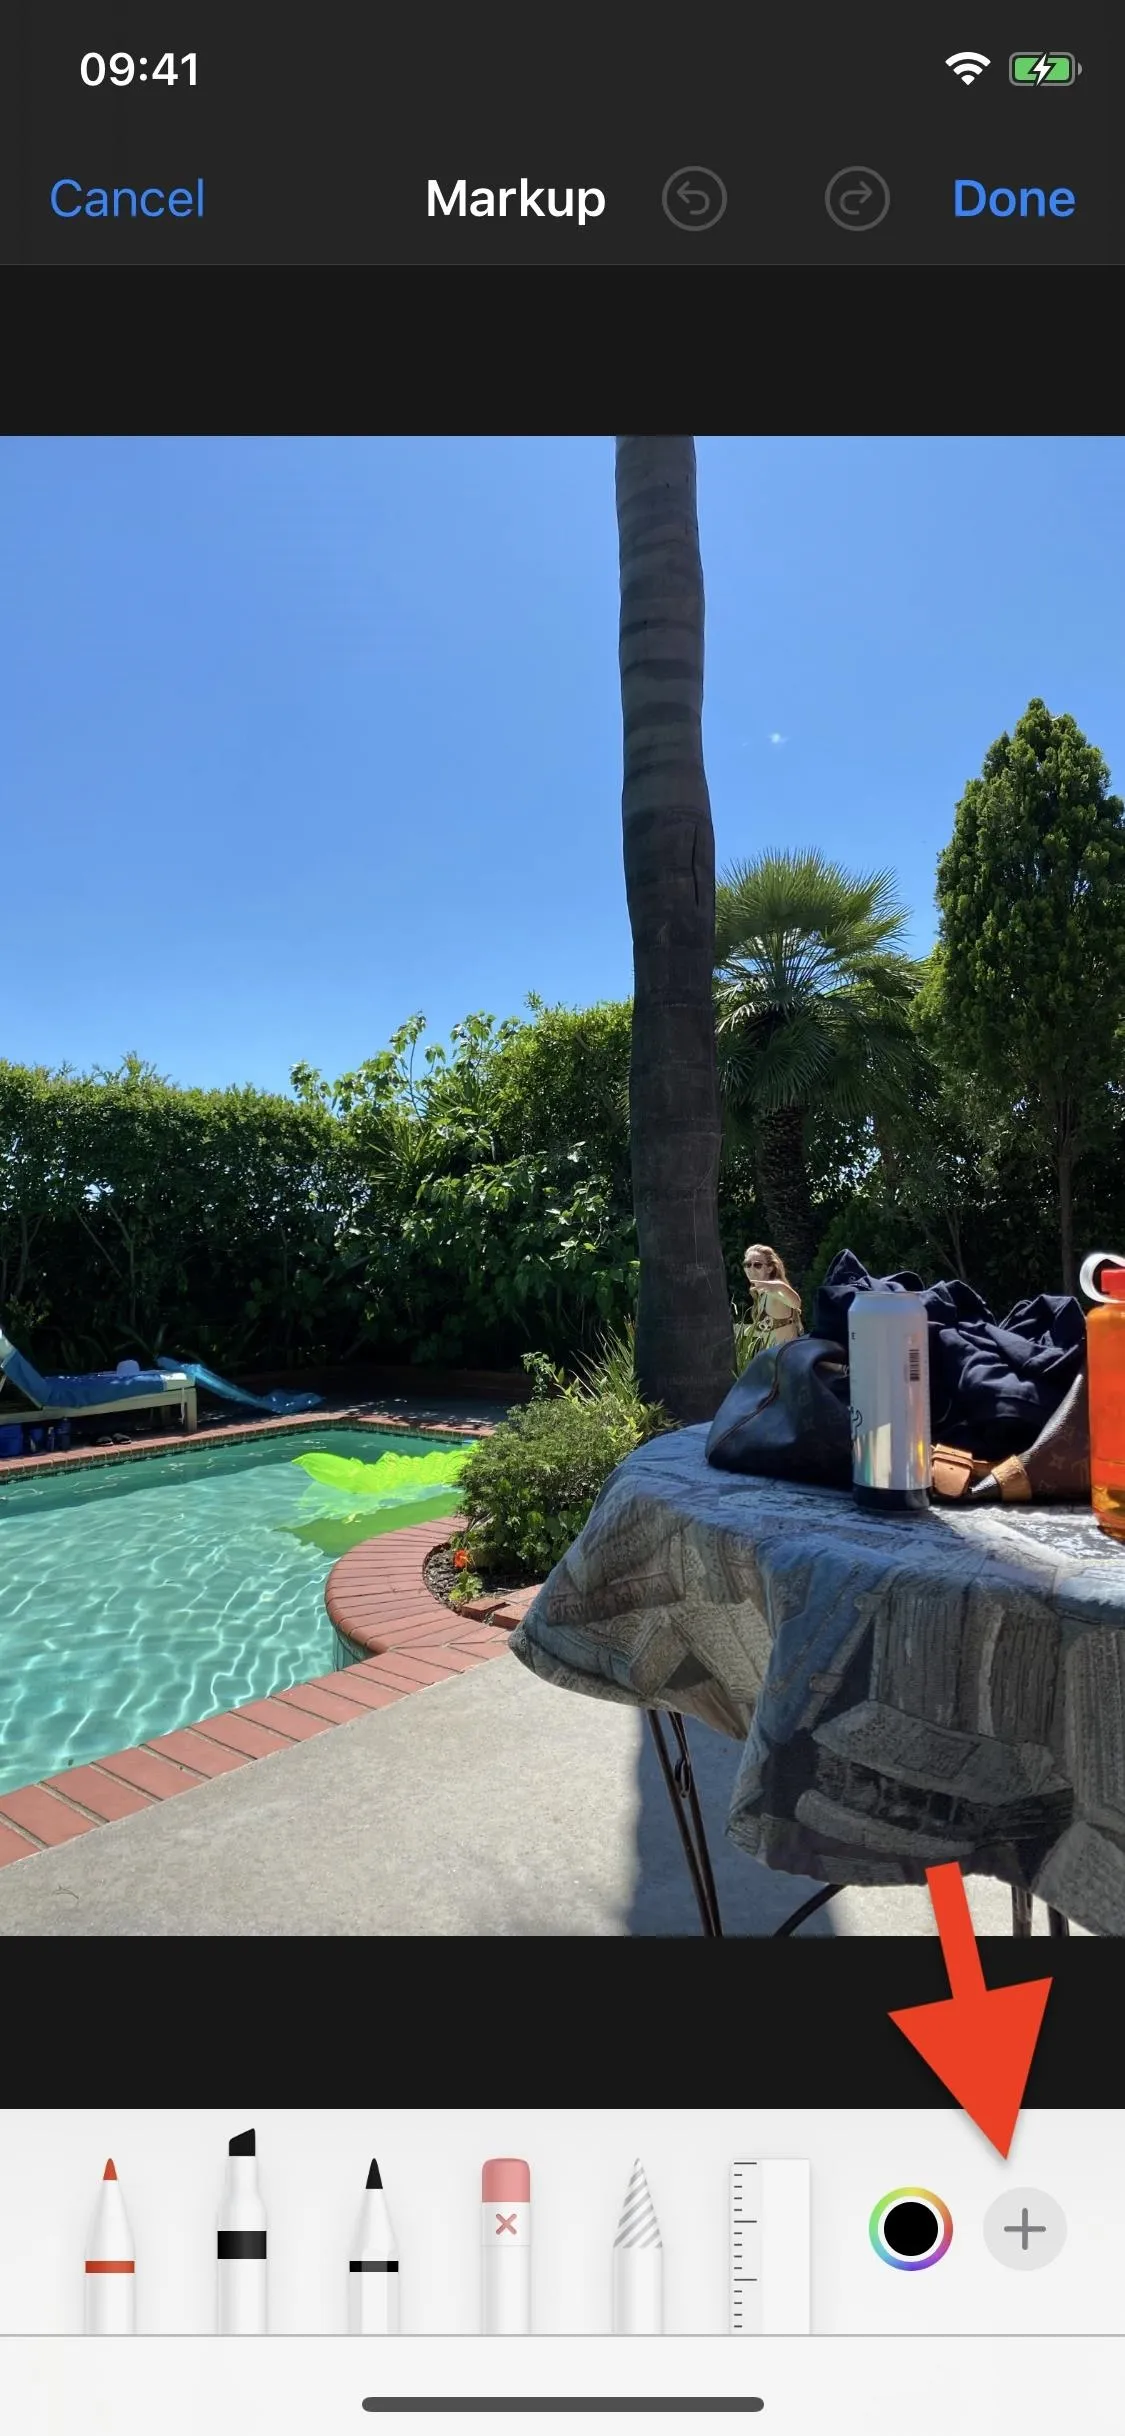
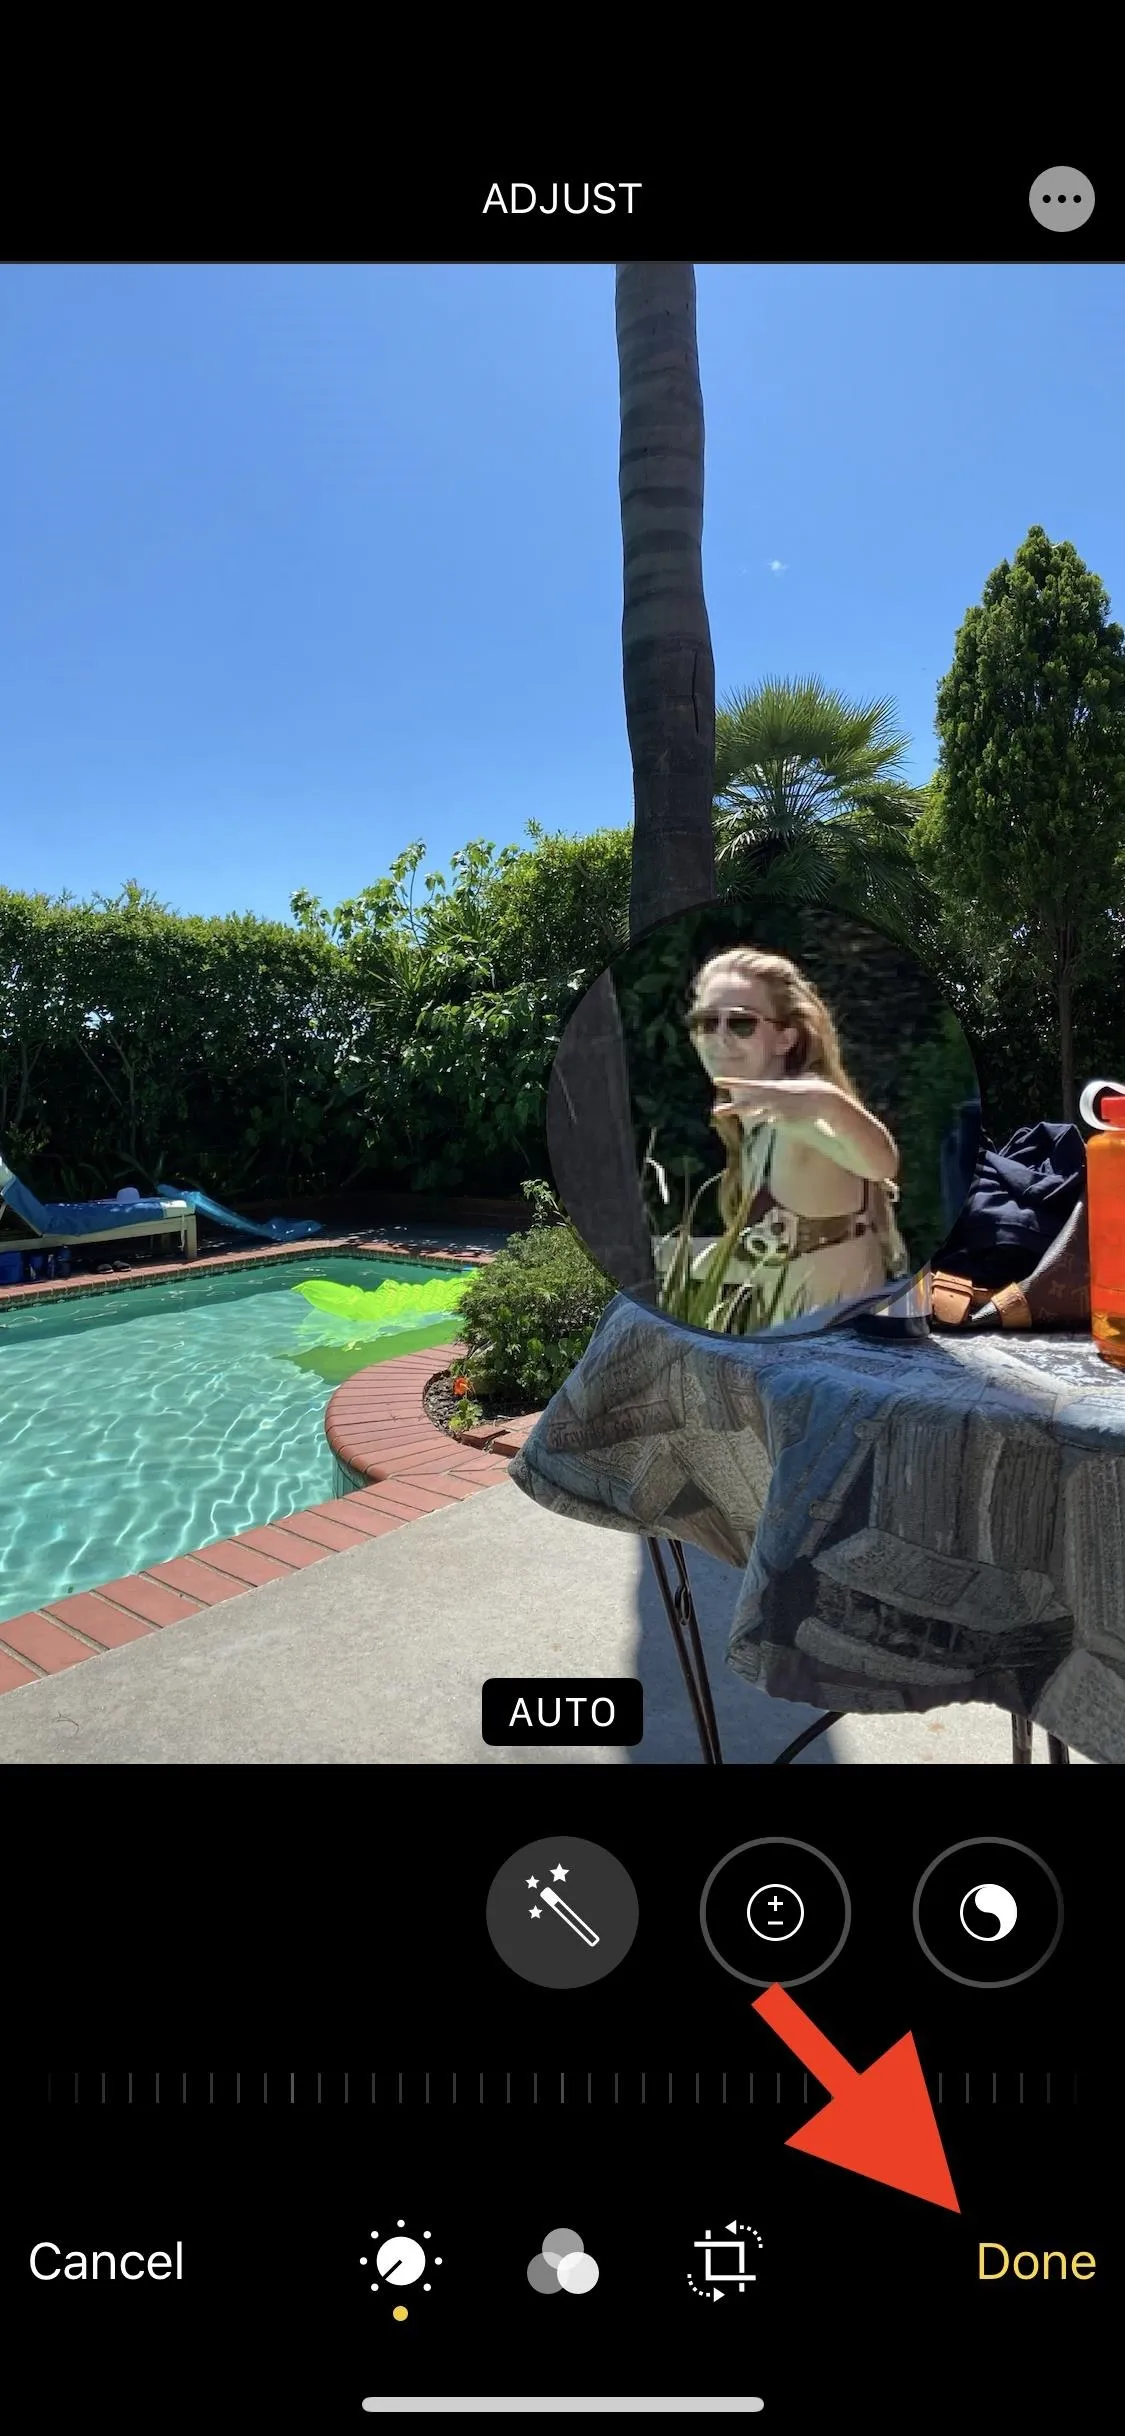
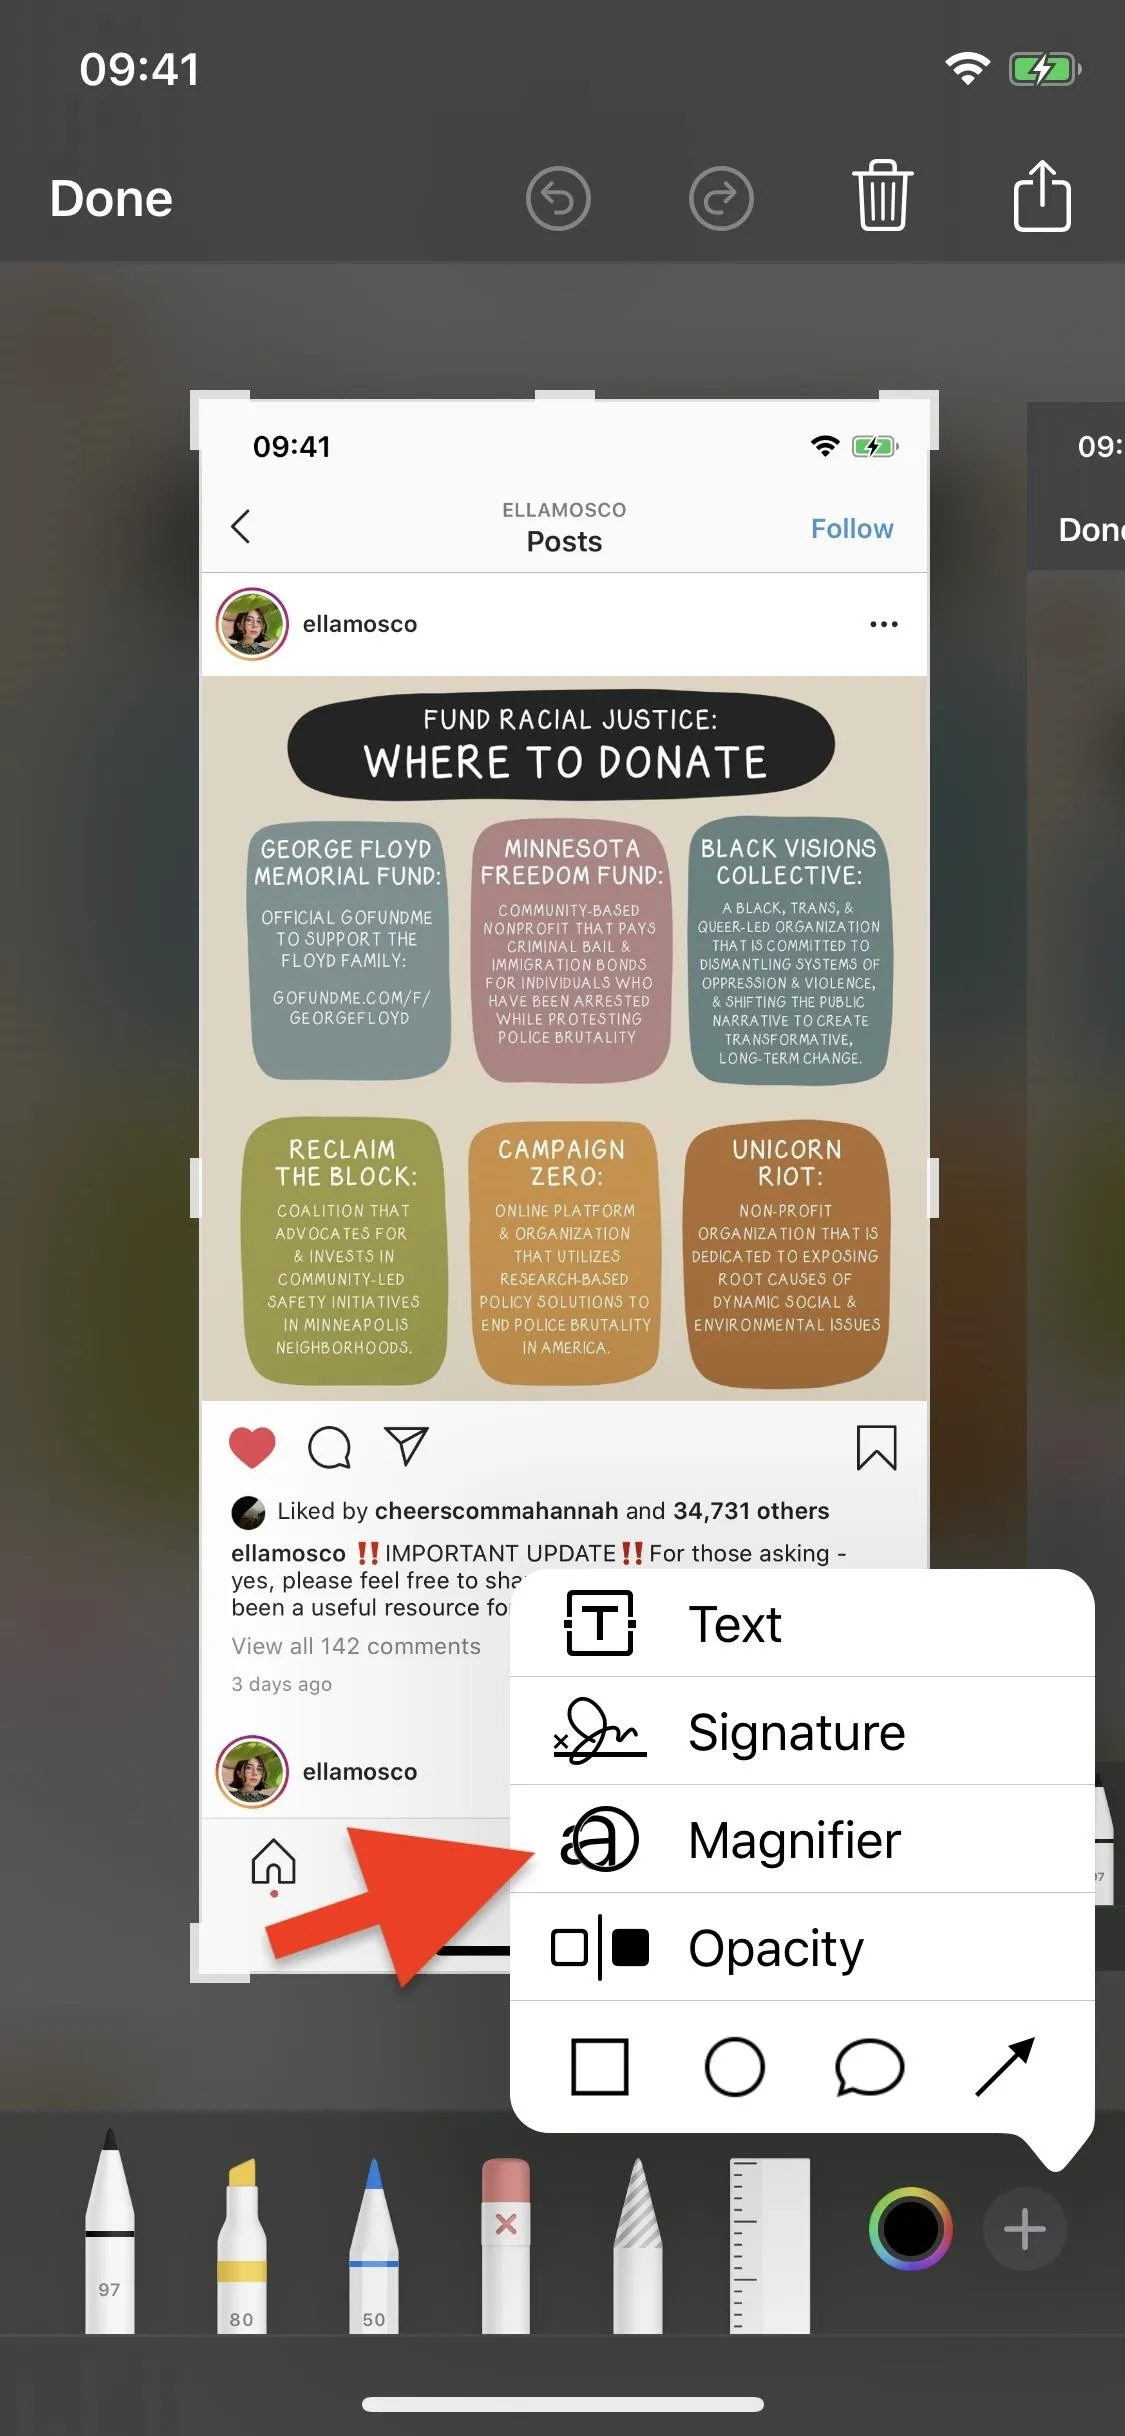
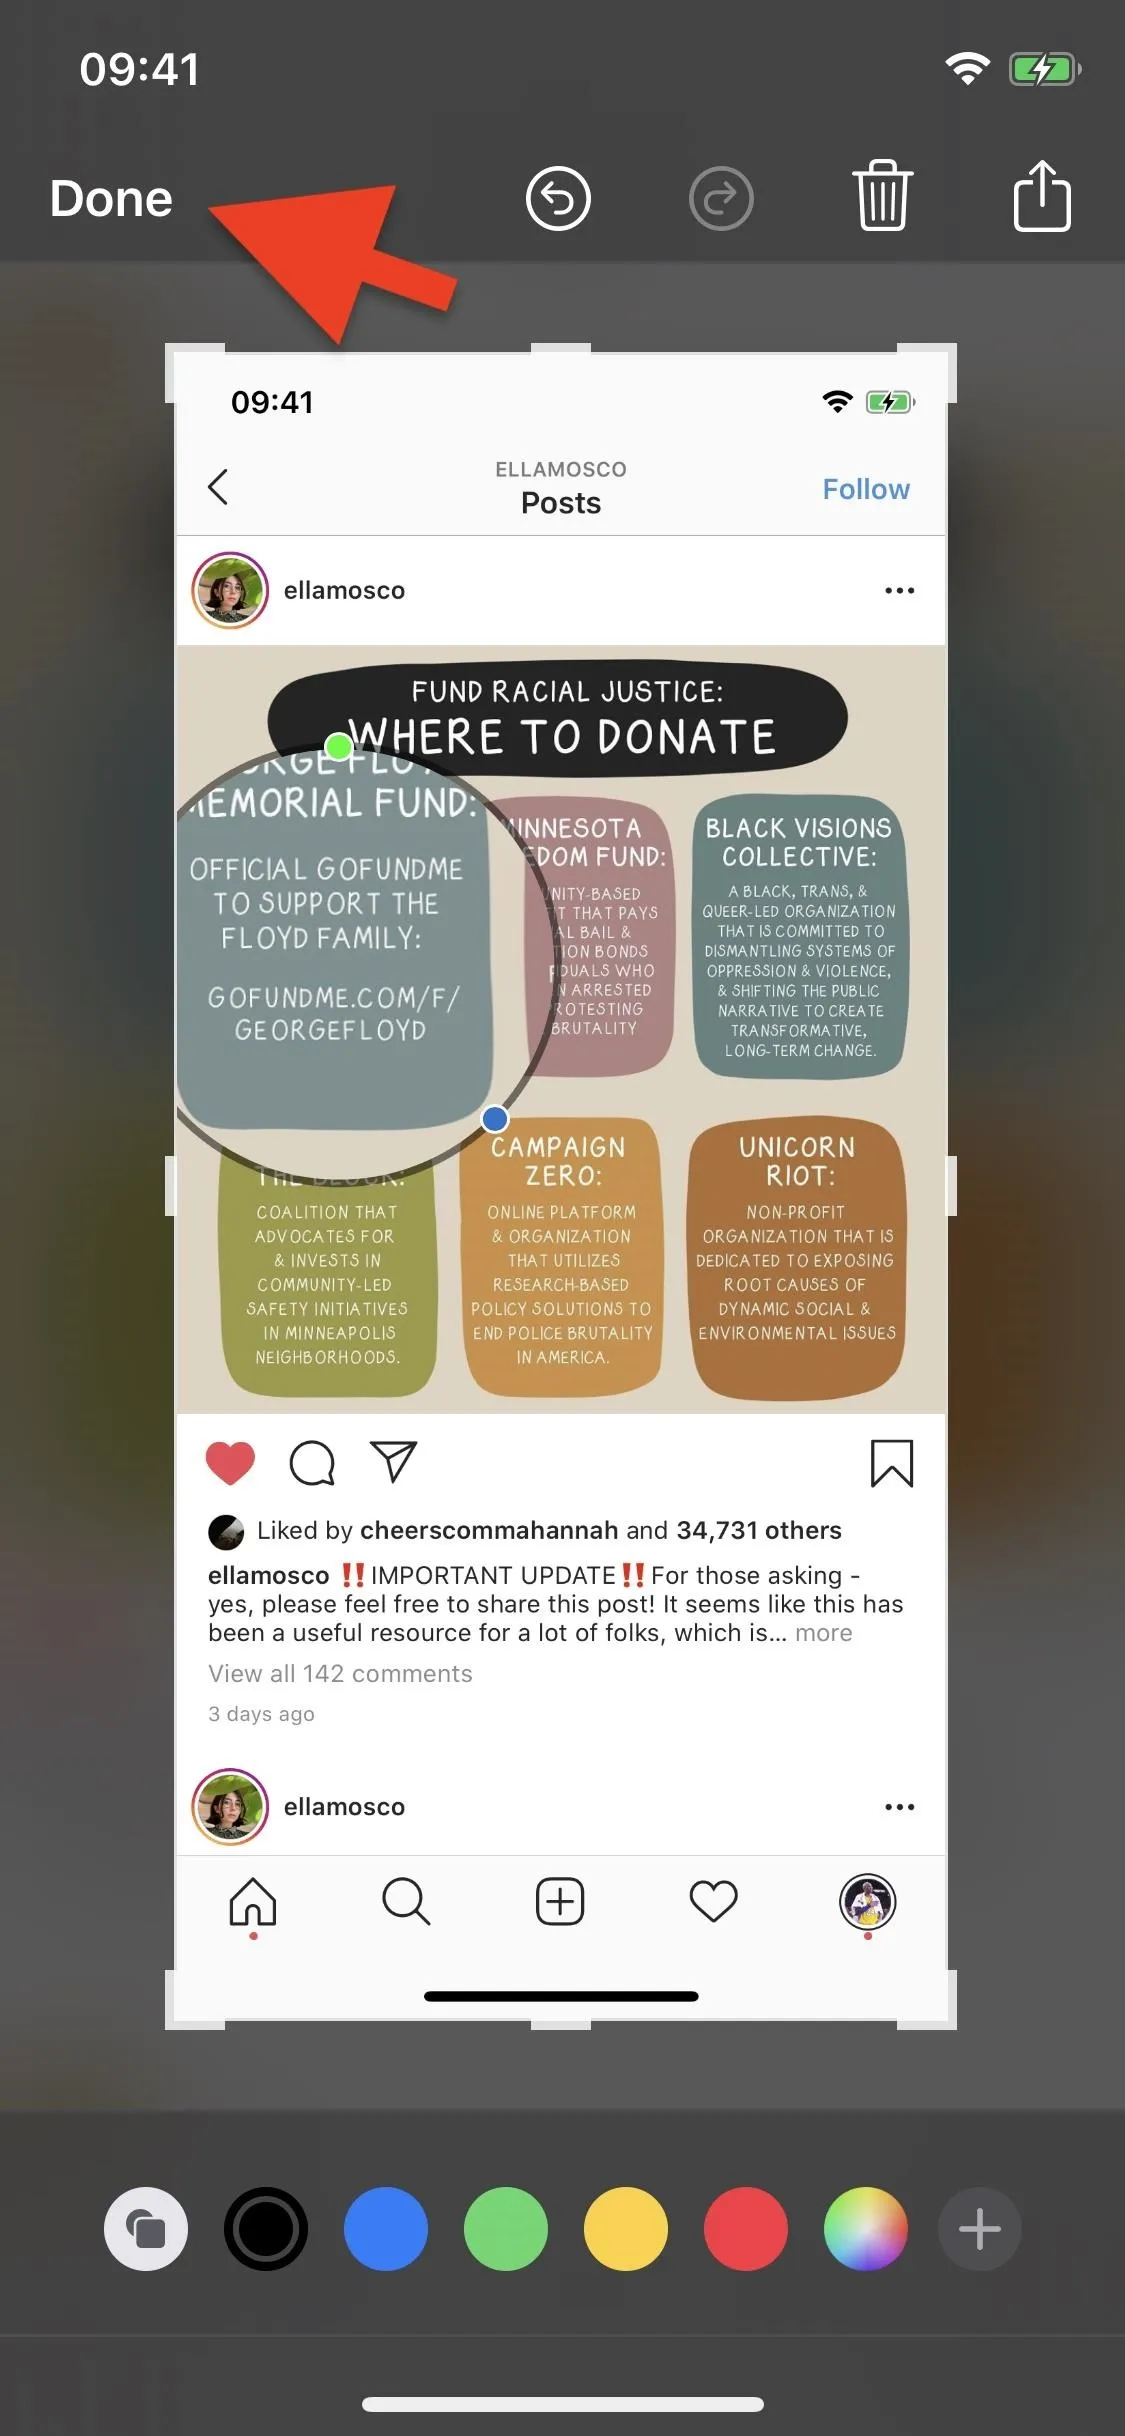
Many options to edit your image will appear. We're not interested in the pen, marker, or eraser — what we want can only be accessed through the plus (+) sign in the bottom right. Tap that, then tap "Magnifier" in the menu that appears.
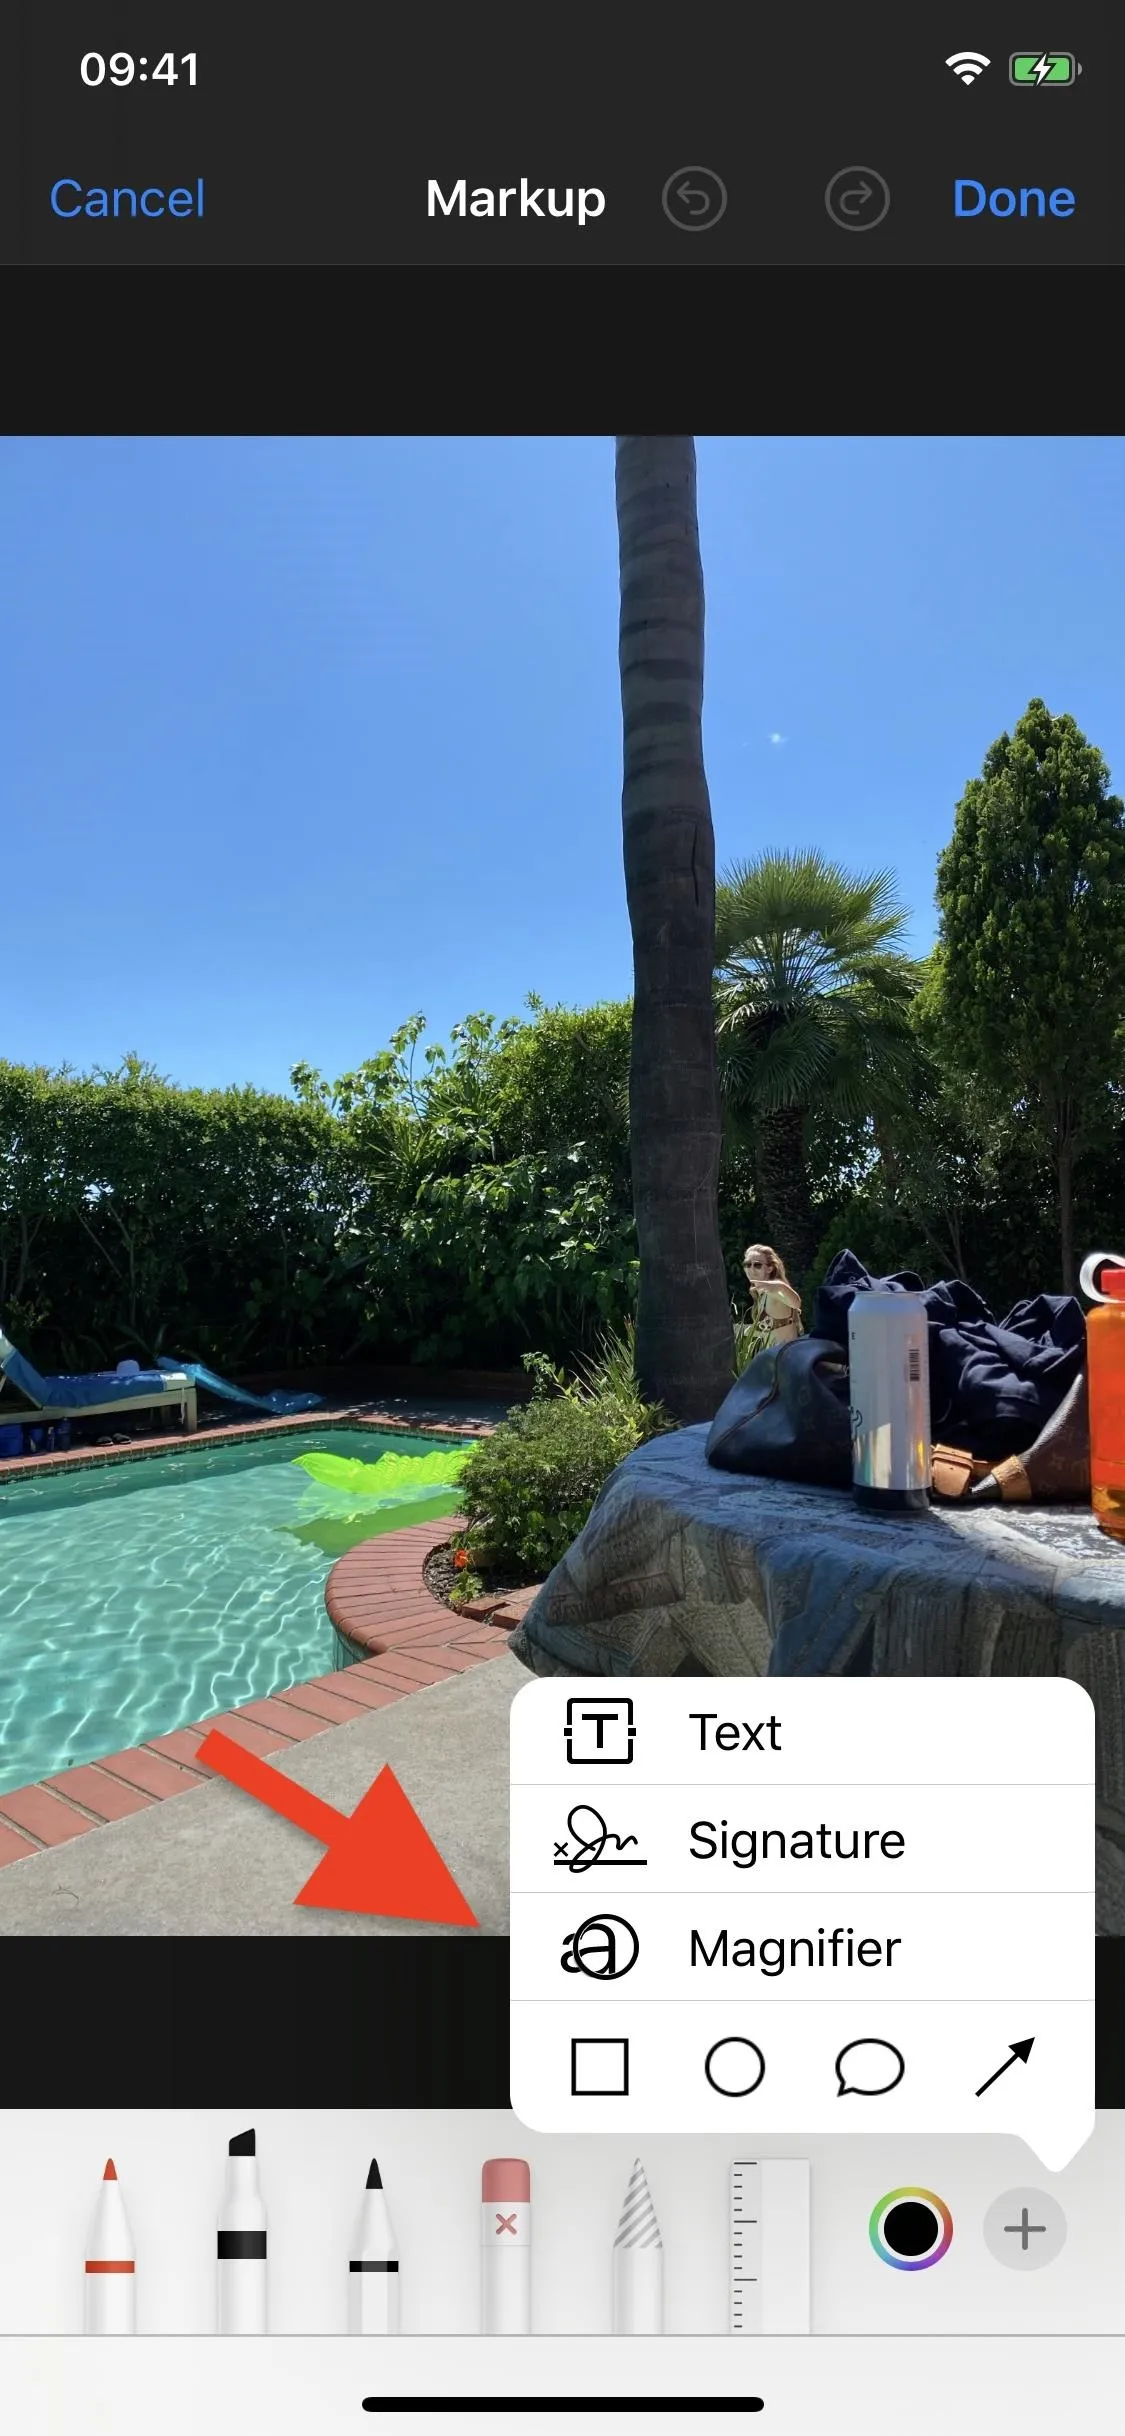
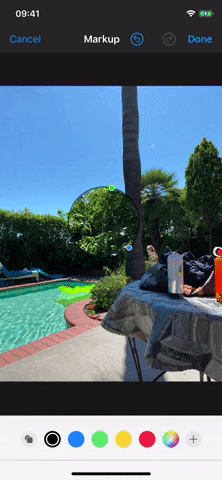
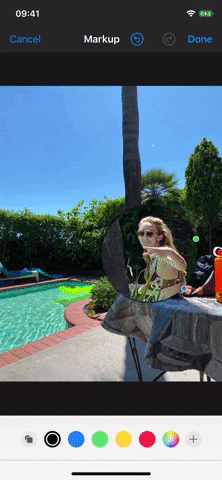
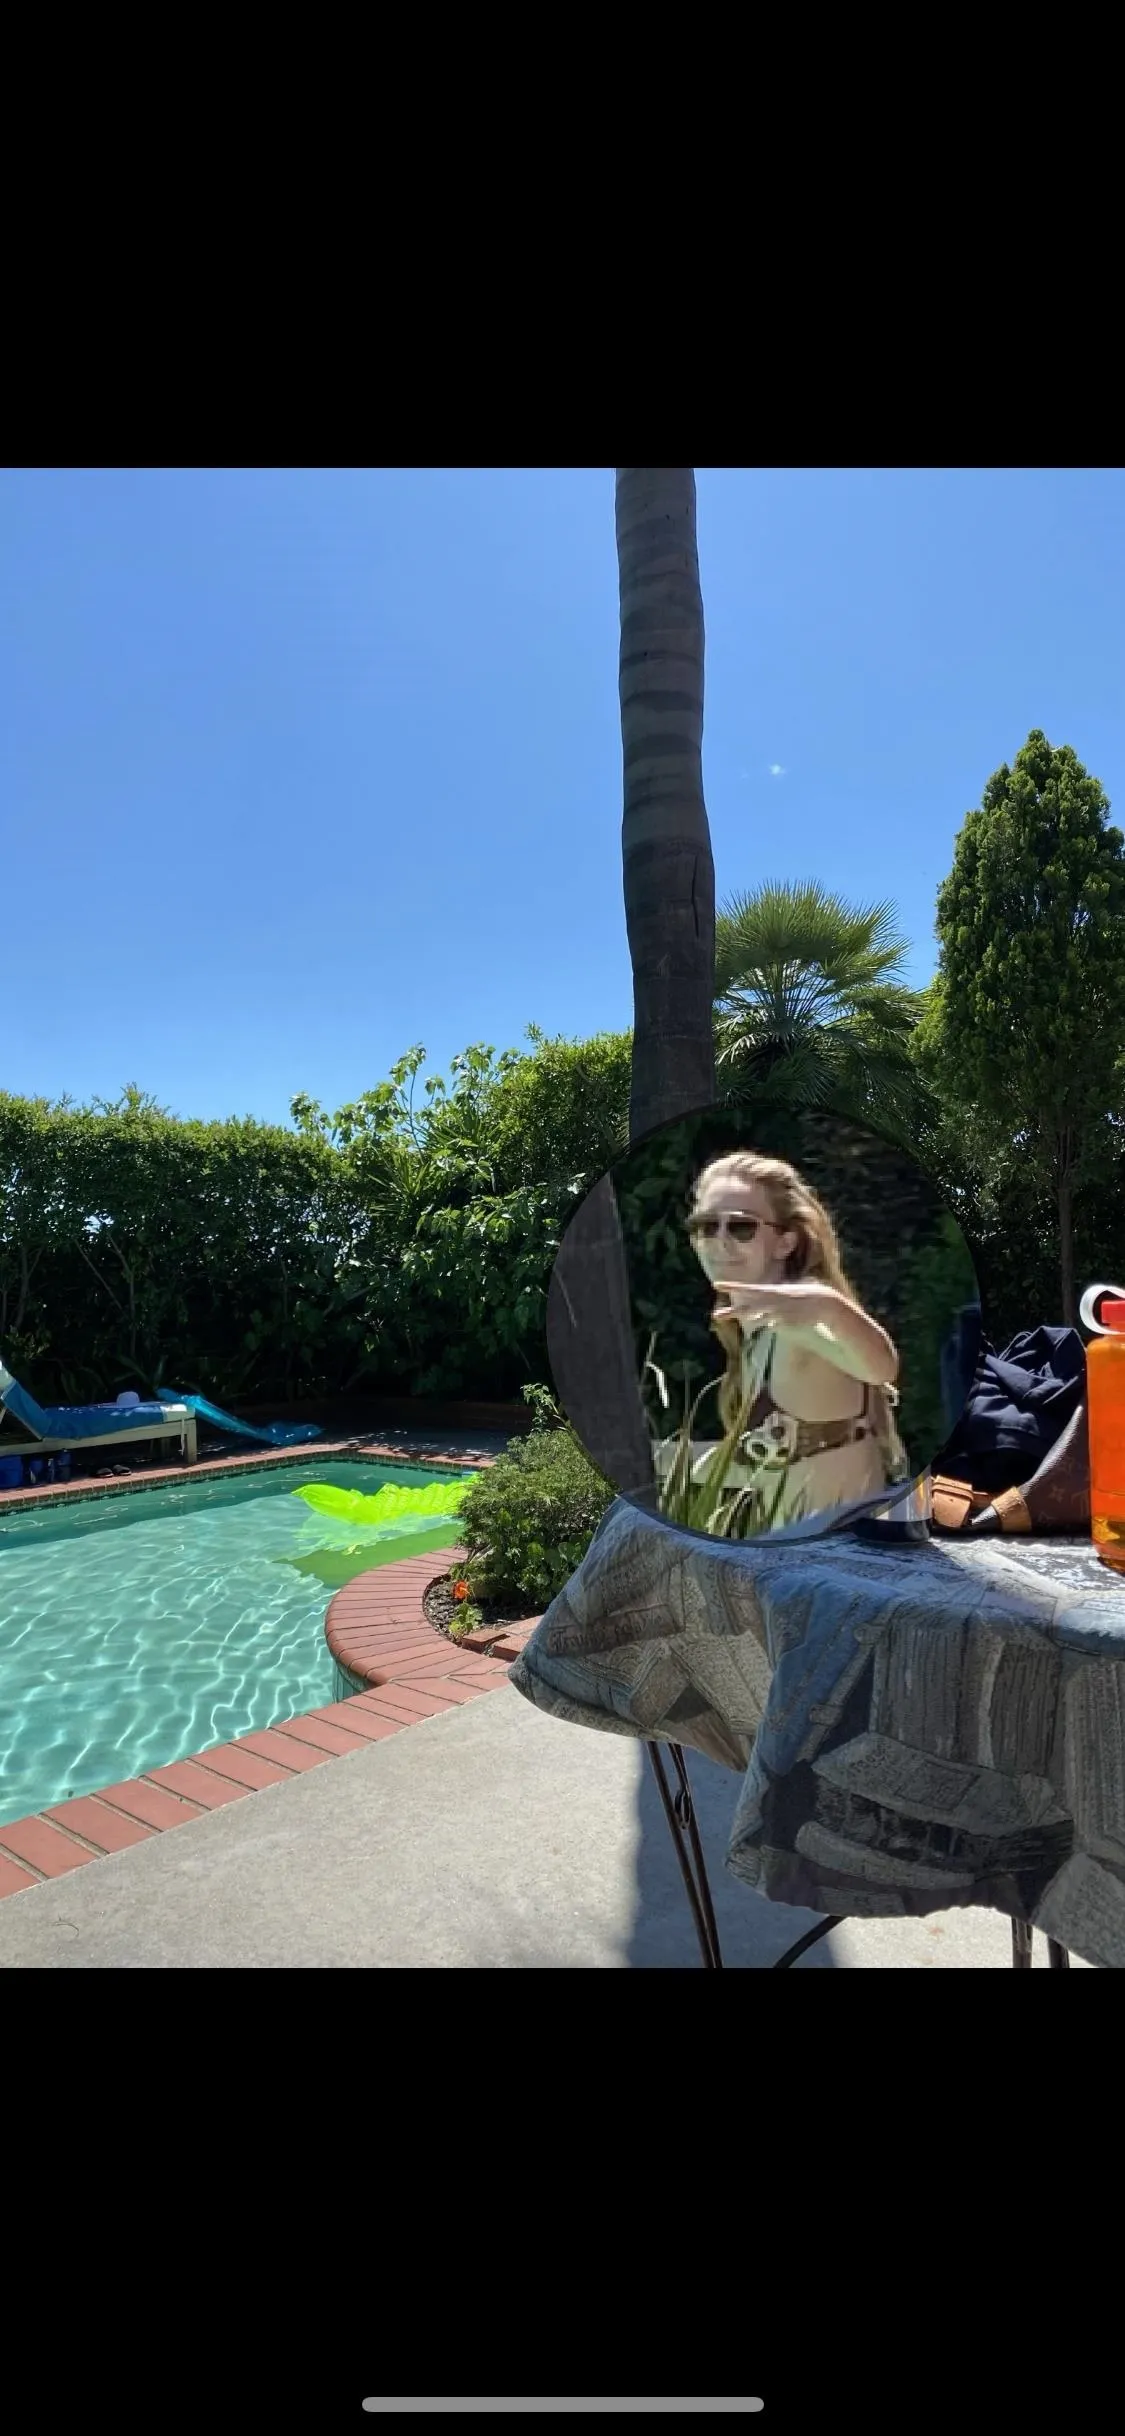
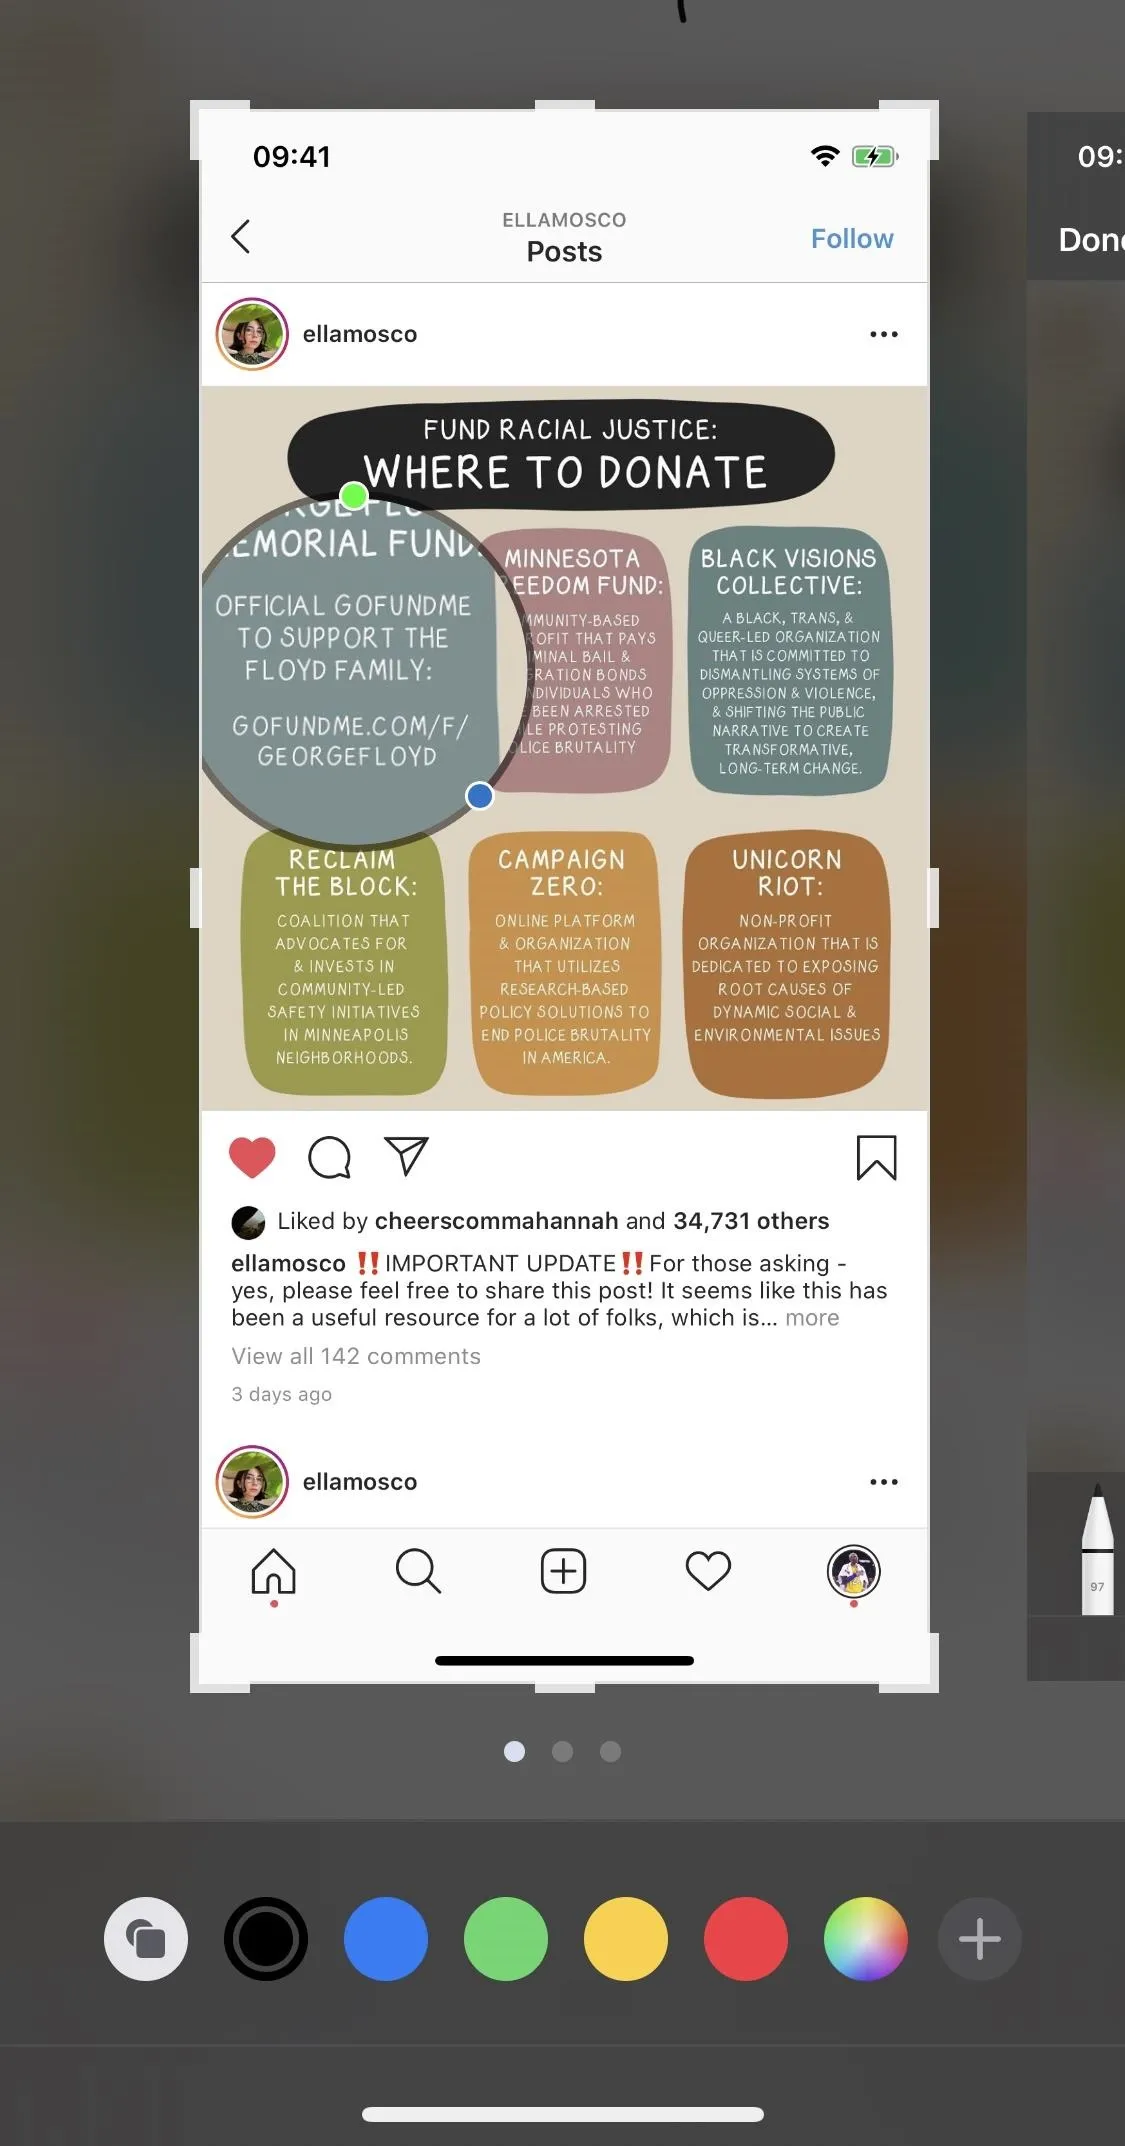
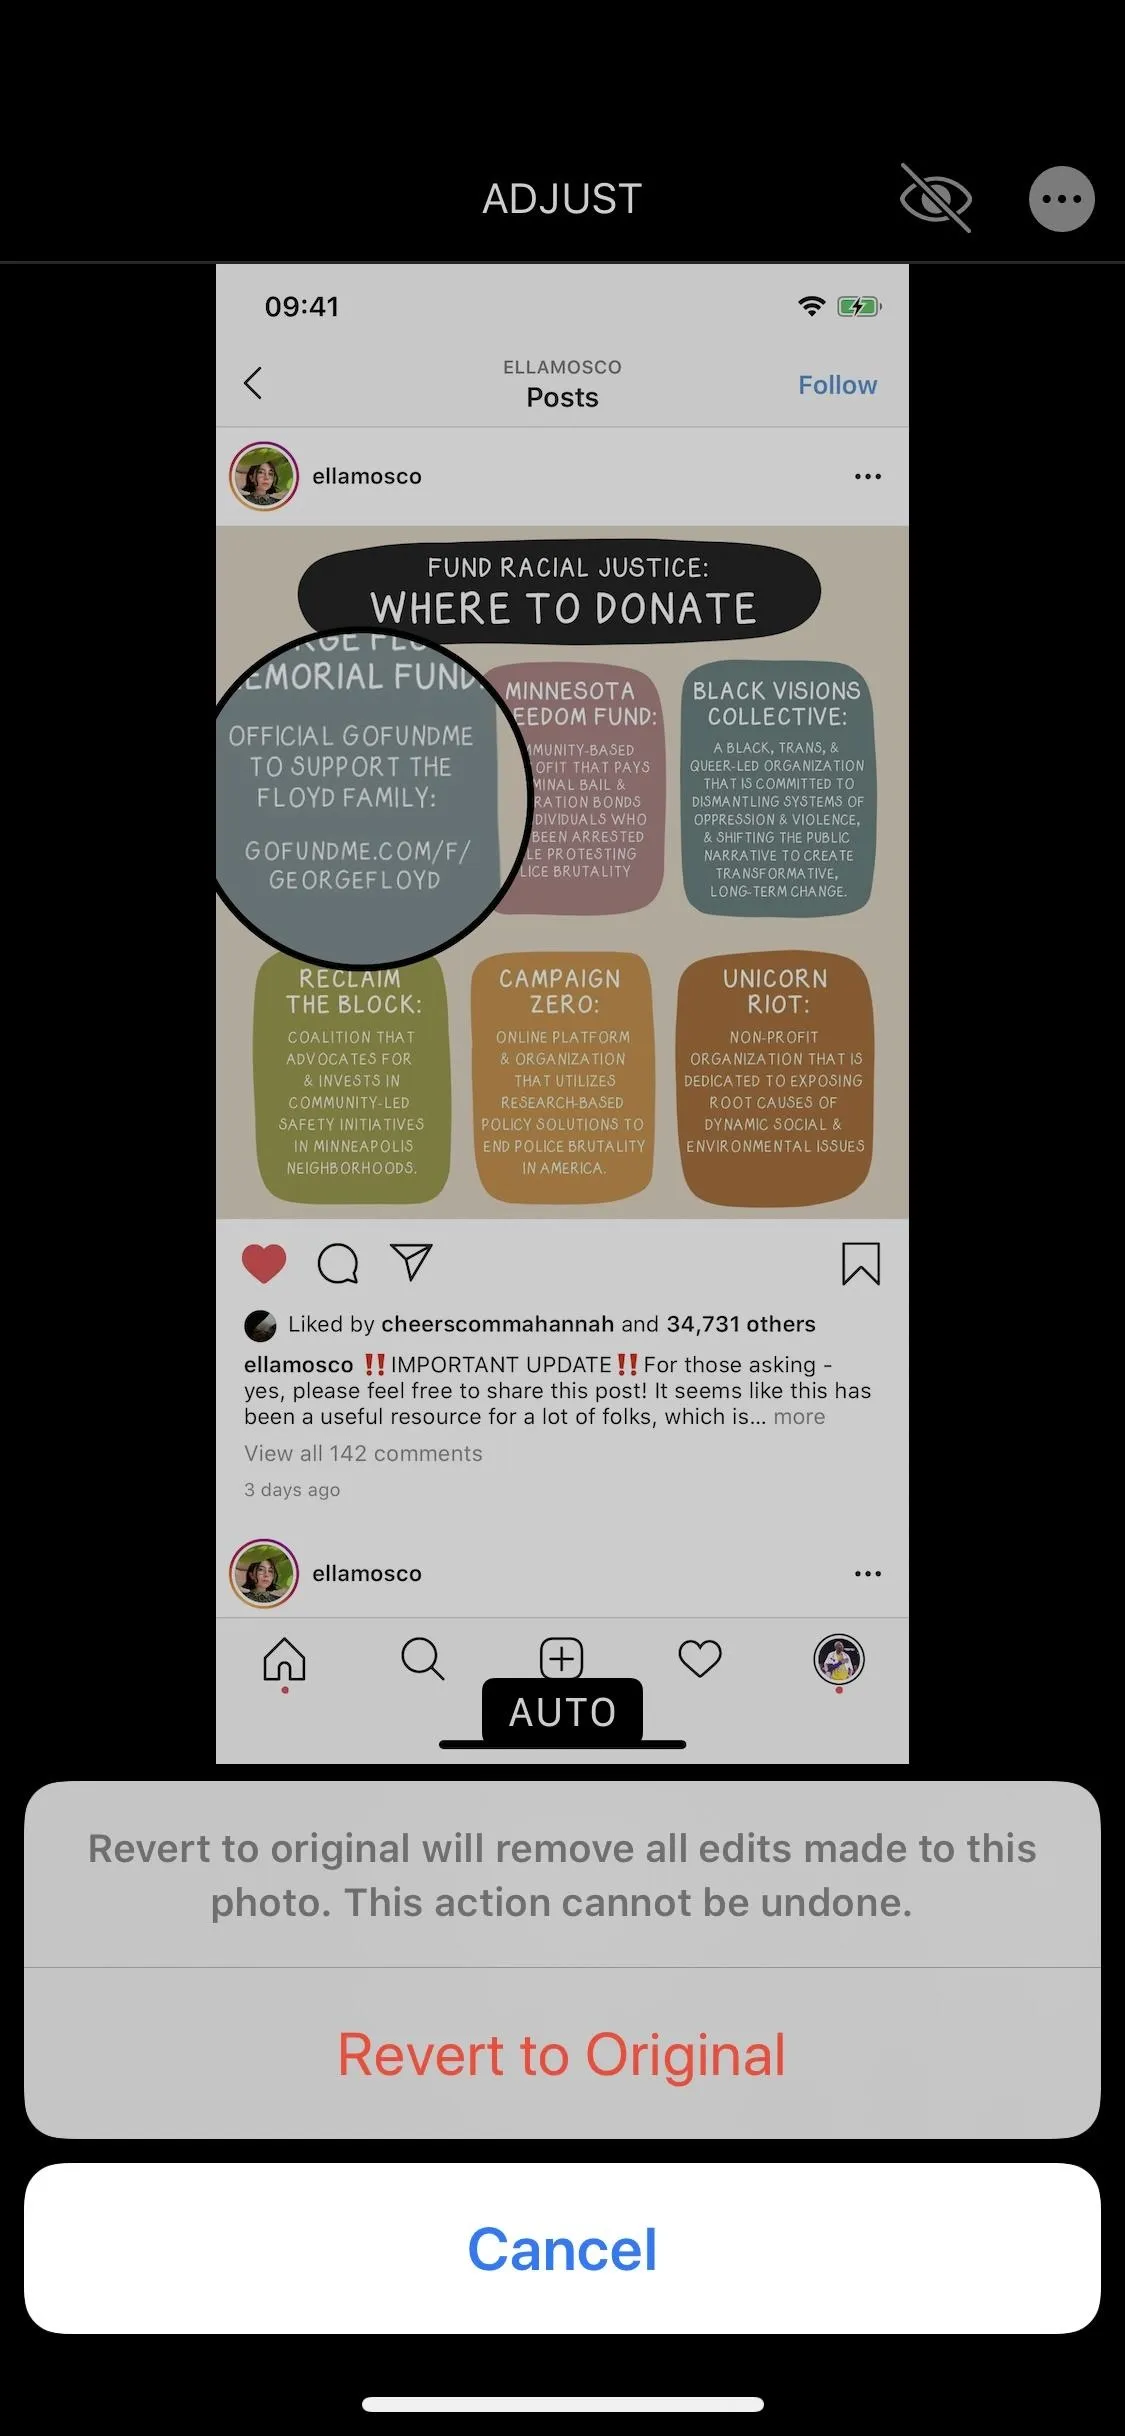
A circle will appear on your image, and whatever is underneath it will be magnified. On the ring, there are two colored dots. Move the green dot around the circle to adjust the magnification level. To make the circle bigger, to see more of what's underneath it, drag the blue dot outward to expand the Magnifier window.
To move the entire circle, tap anywhere within it to select it if it's not already. Then, tap-and-hold the circle, and drag and drop it to wherever it needs to go.
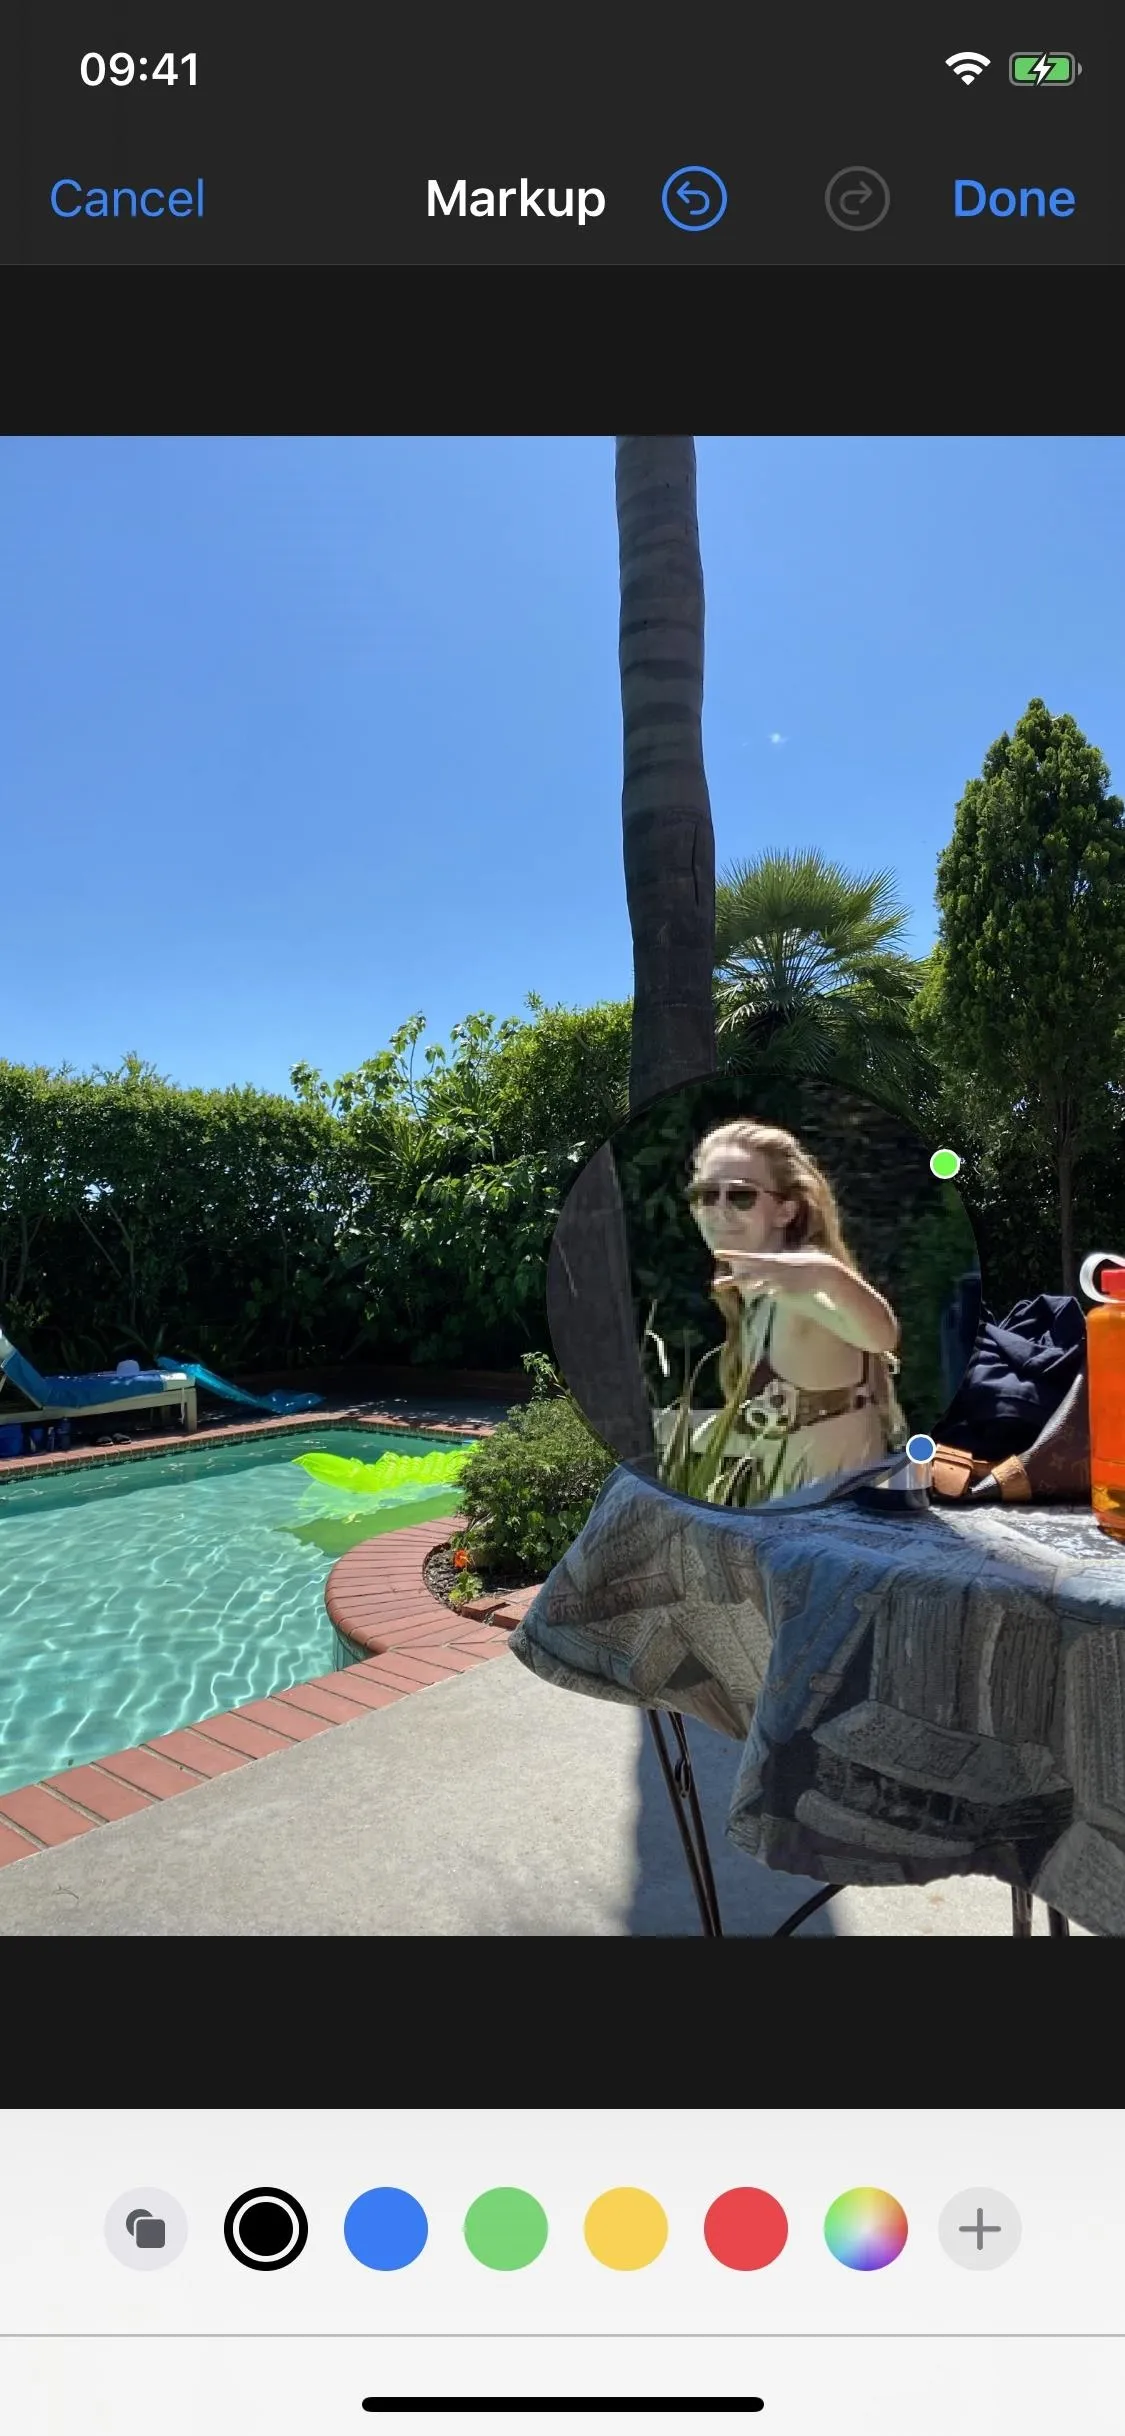
You can also adjust the thickness and the color of the magnifier. To adjust the outline color, tap on any of the colors in the bottom toolbar. If you don't see the color you want, tap on the color picker next to the plus (+) icon, and choose it from there. To adjust the outline's size, tap on the Shapes Attribute button (the circle and square icon in the bottom left) and choose between three sizes.

Once you're happy with the size, placement, and zoom level, tap on "Done" in the top right, then on "Done" in the bottom right. The image will then be saved automatically in the Photos app, replacing the original.
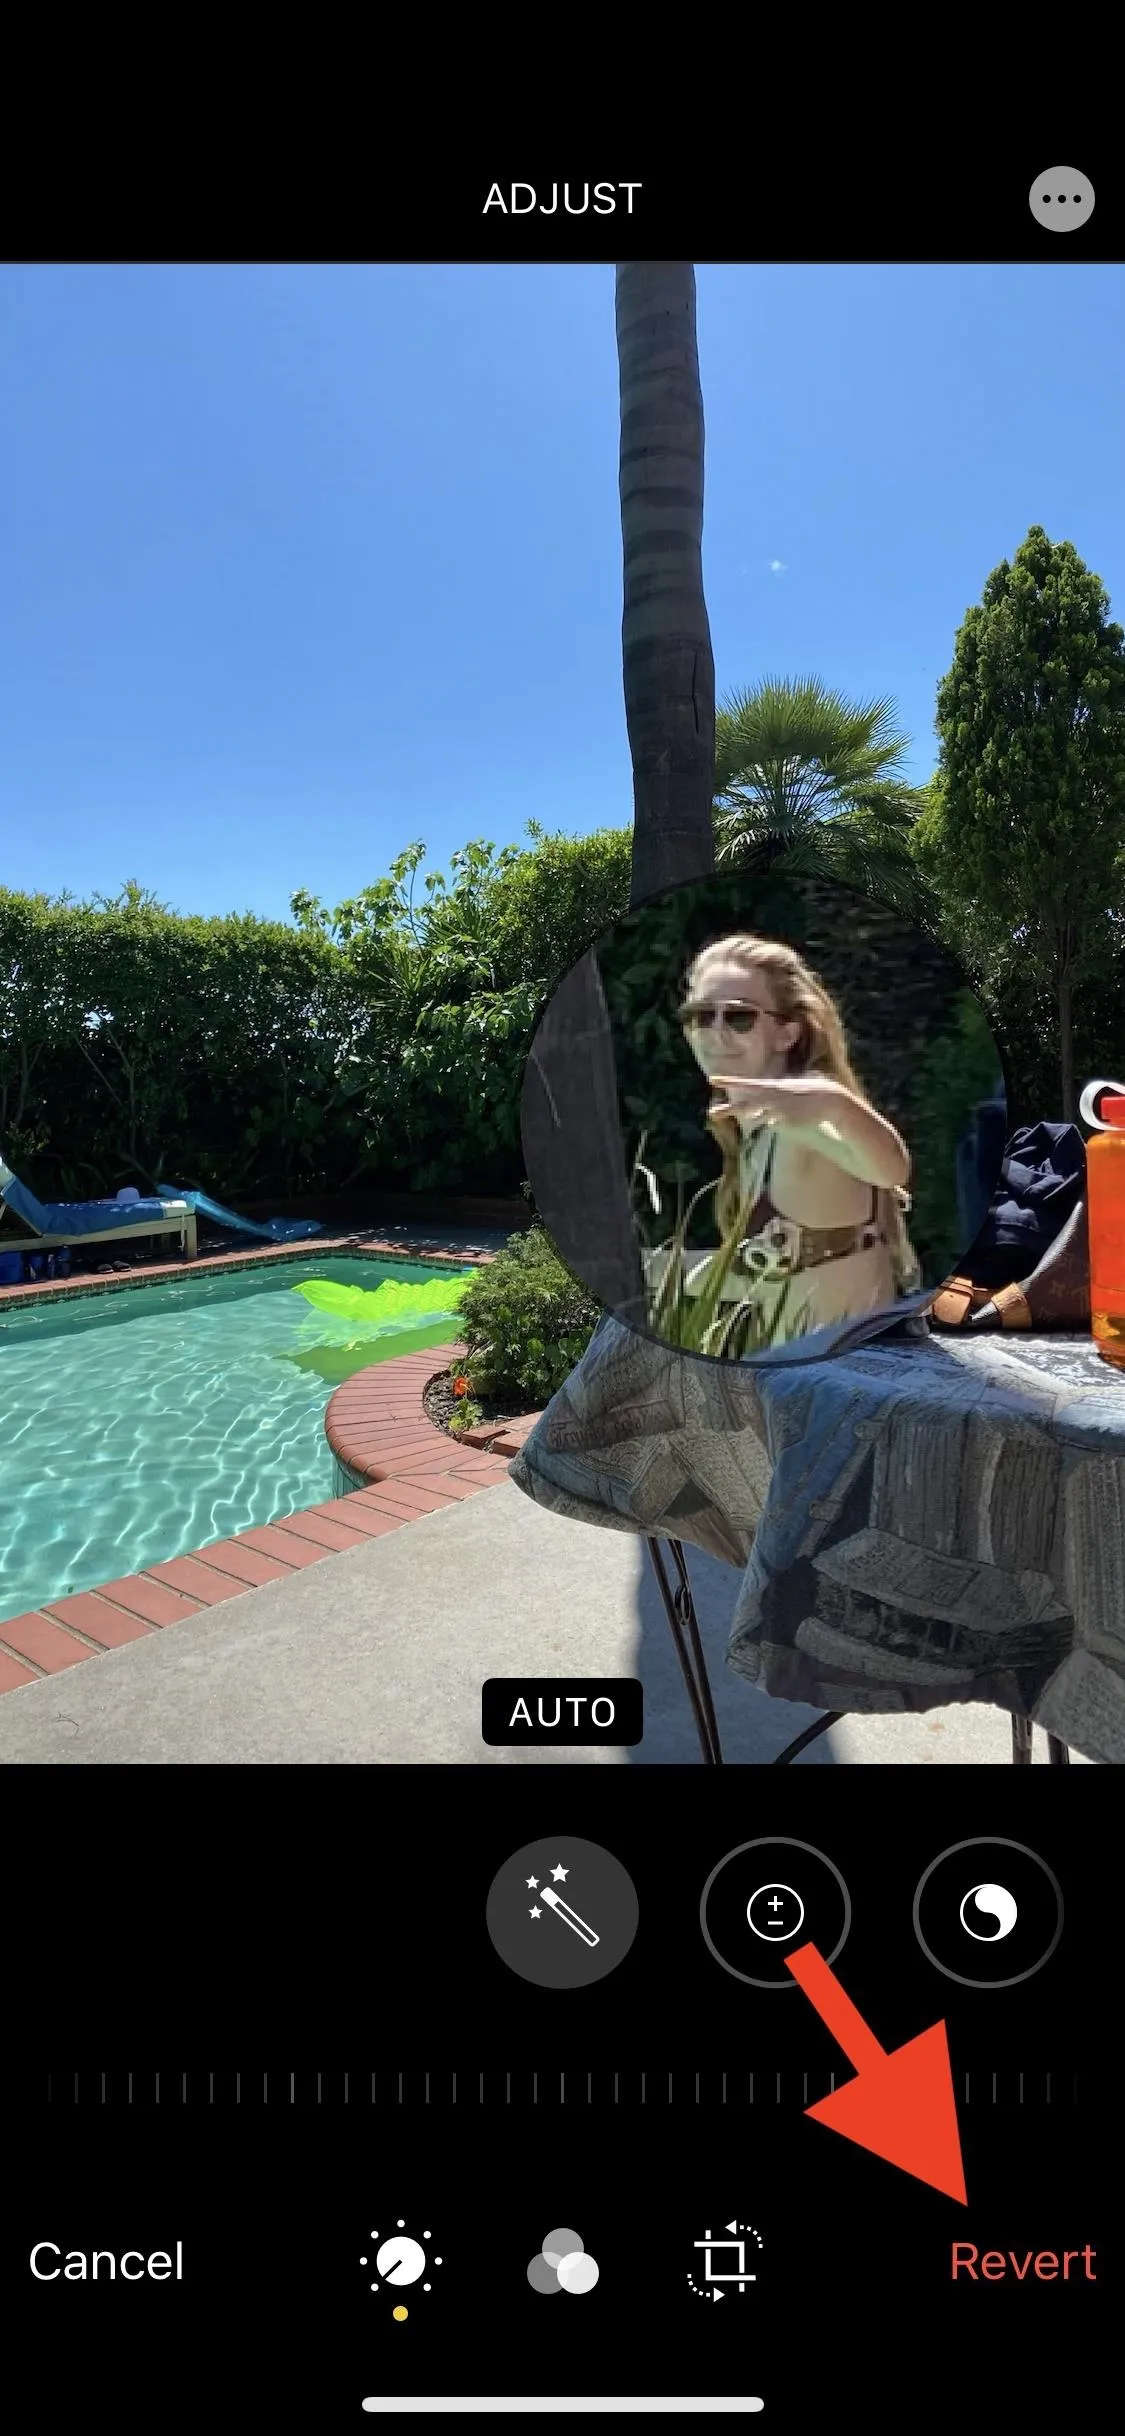
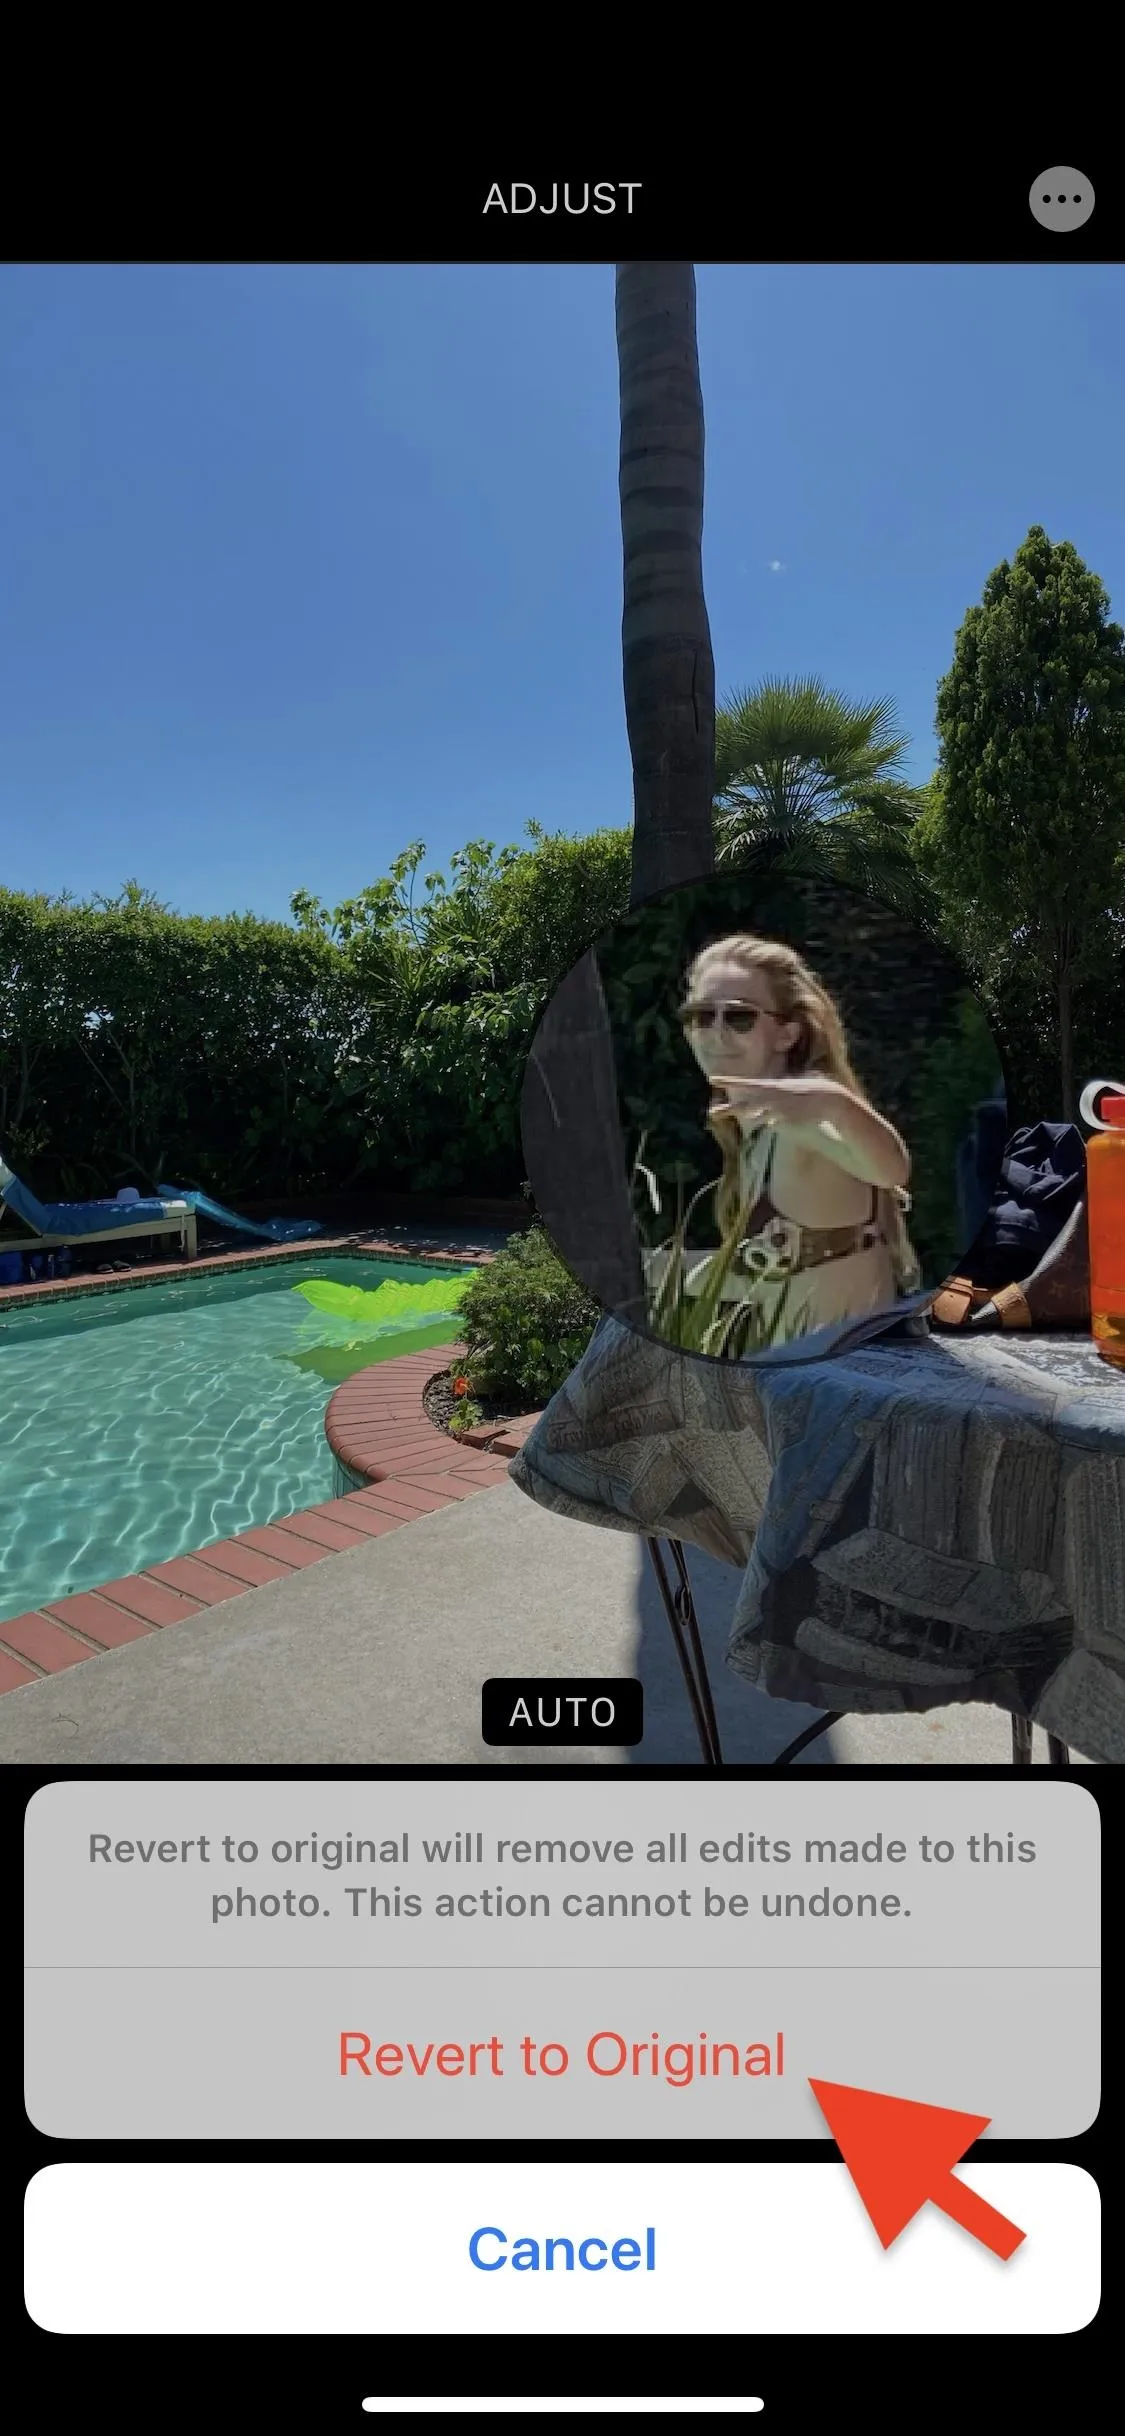
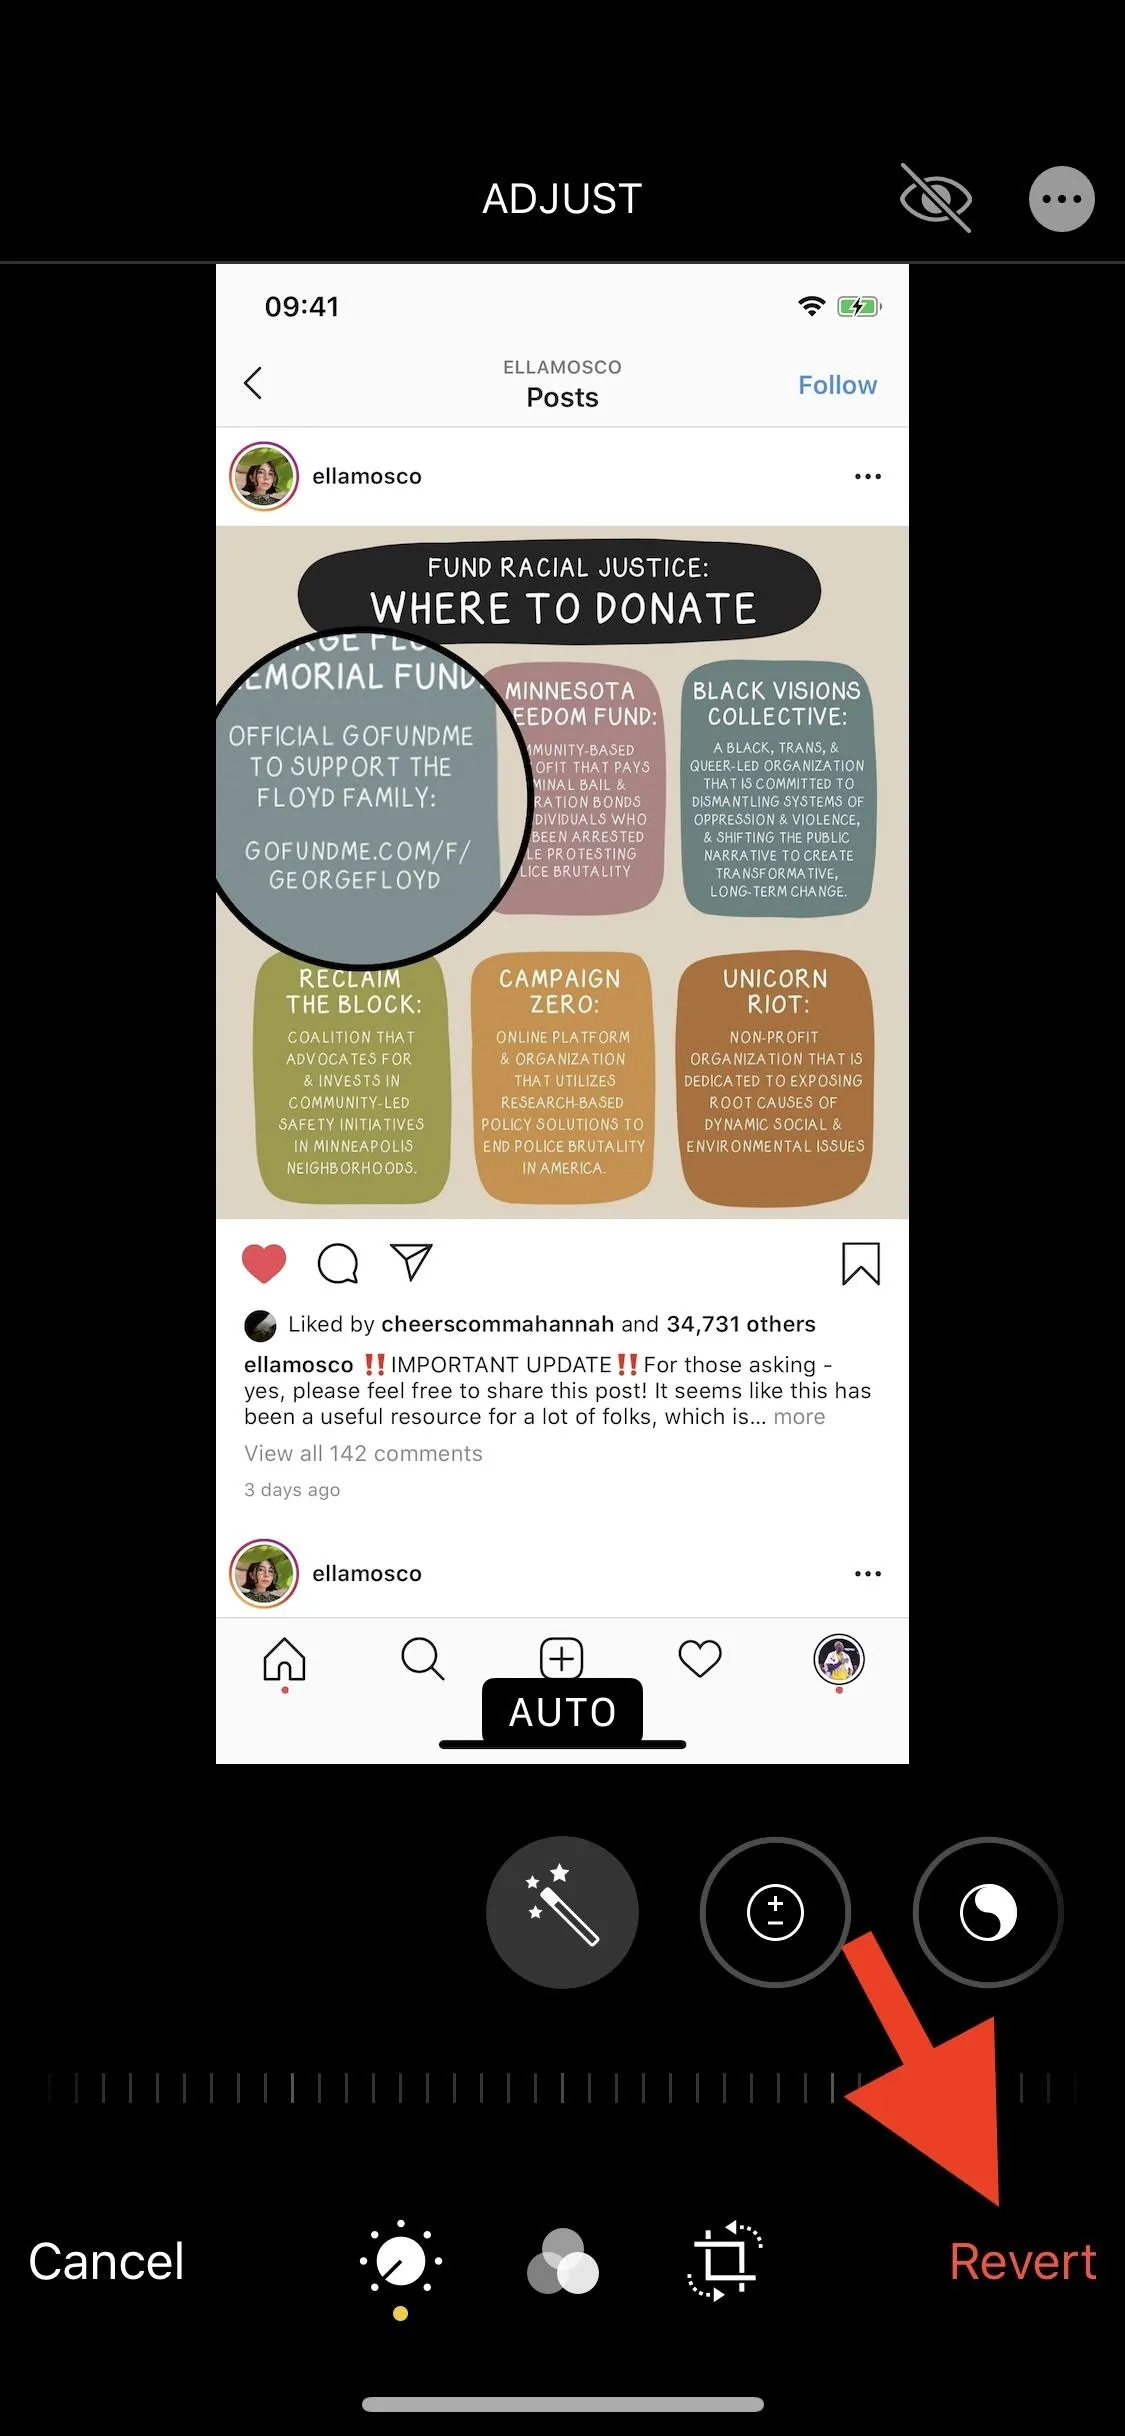
However, if at any time you want to go back to the original image without the Magnifier feature, go back into its editor, then tap on "Revert" in the bottom right. A pop-up will appear, warning you that reverting to the original will remove all edits and that the action cannot be undone. Tap "Revert" to finish or "Cancel" it.
From Within the Screenshots Editor
If you want to mark up a screenshot, you can do so right after you take it. Right after taking a screenshot on your iPhone, tap on its preview in the bottom left. This will open the Markup editor right away. It will look slightly different, but not much. Tap on the plus (+) sign in the bottom right.

Next, tap on "Magnifier." Just like with the Photos app, you can adjust the Magnifier window's magnification level (green dot), size (blue dot), placement, outline size, and color. Check out Option 1 above to see how to use all the tools.
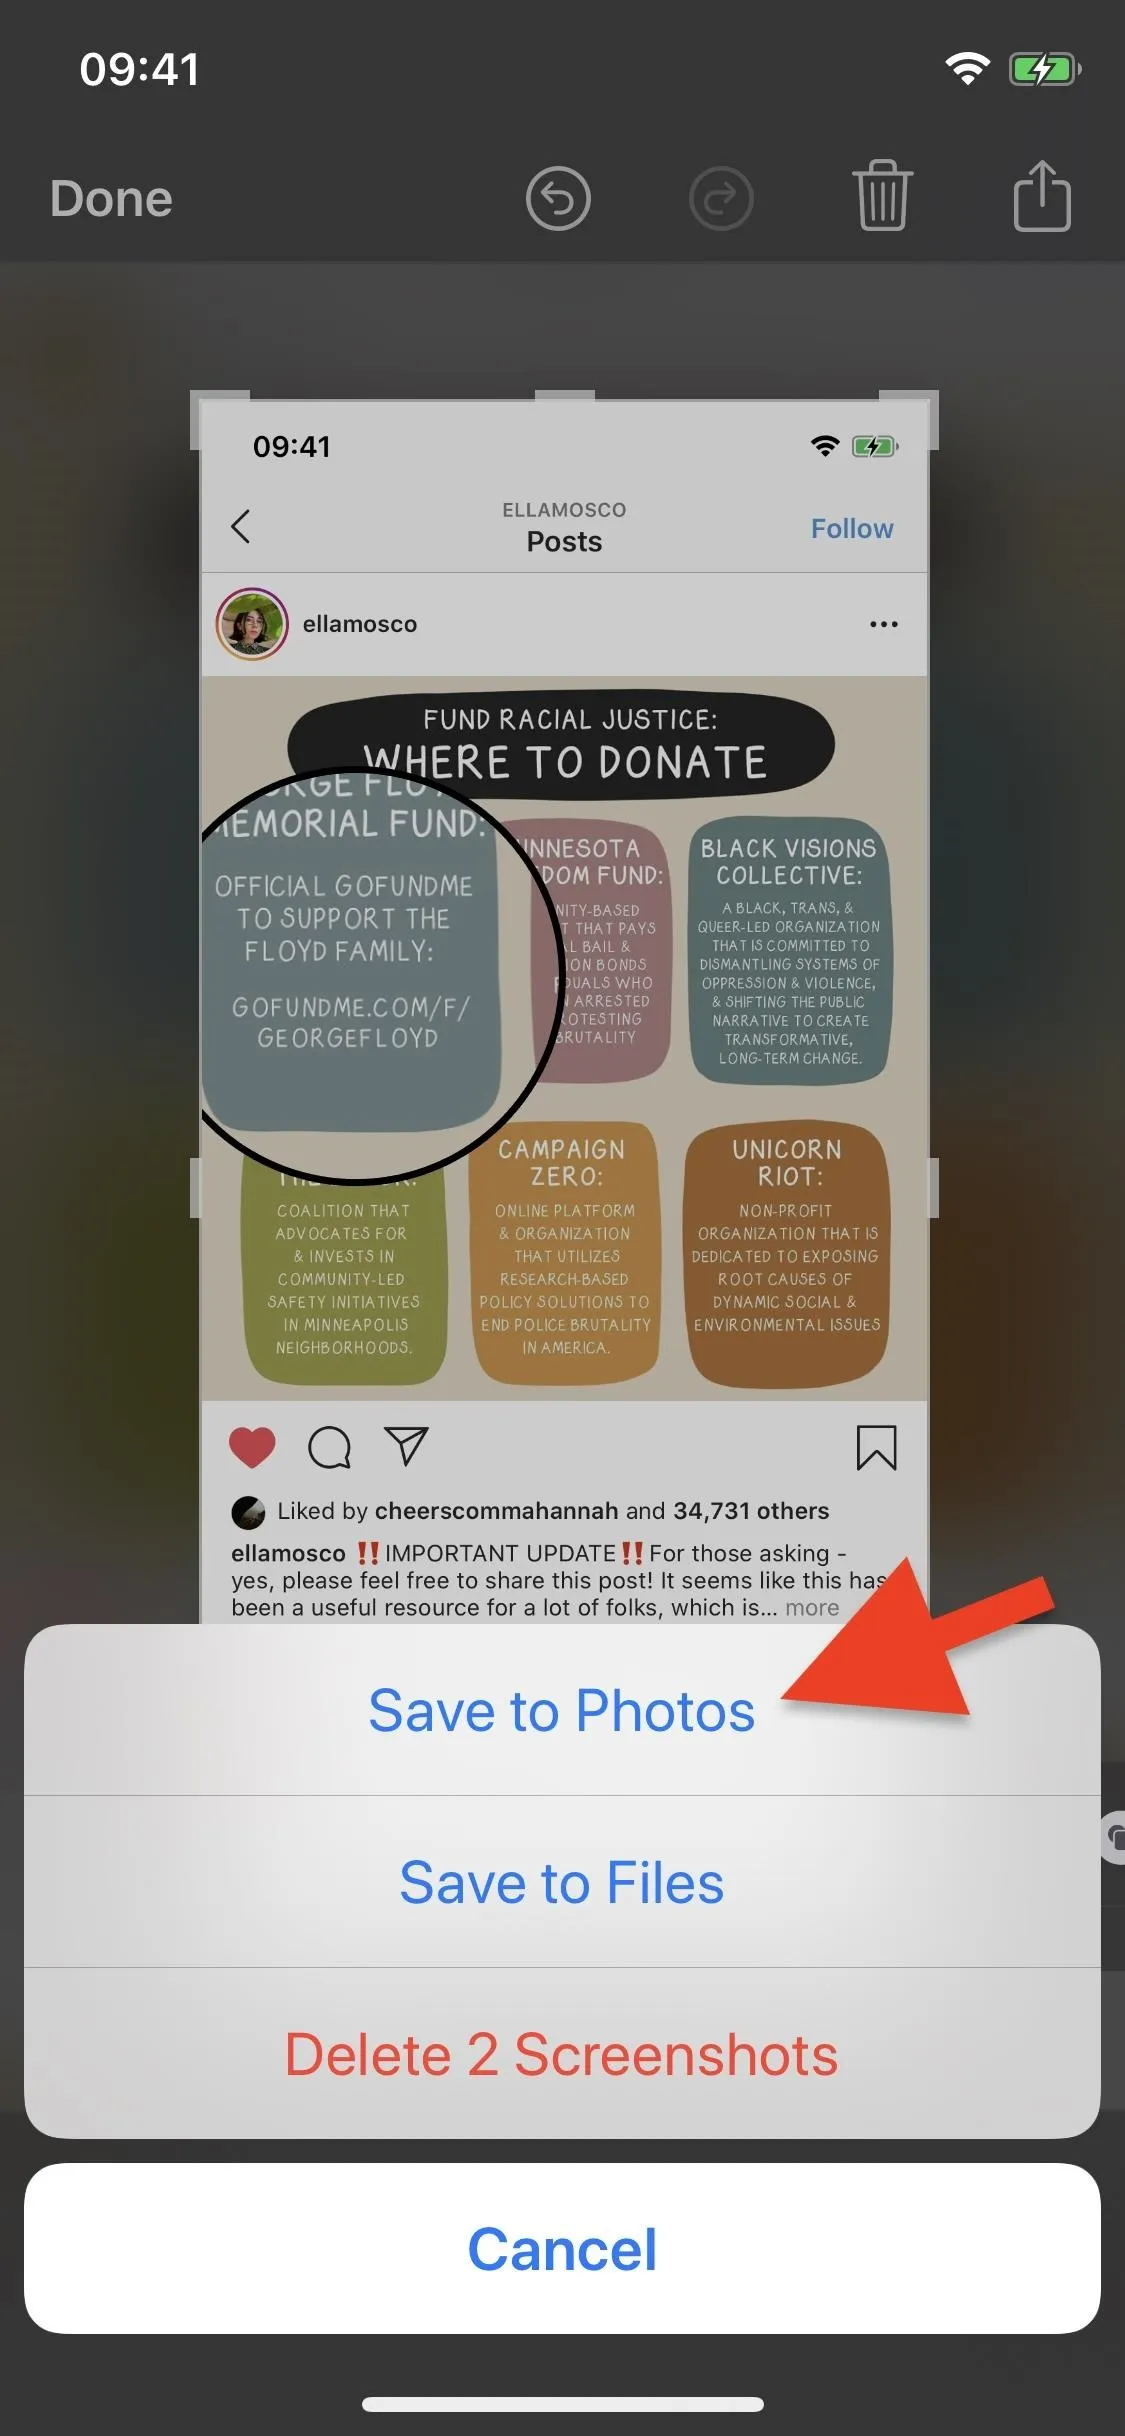
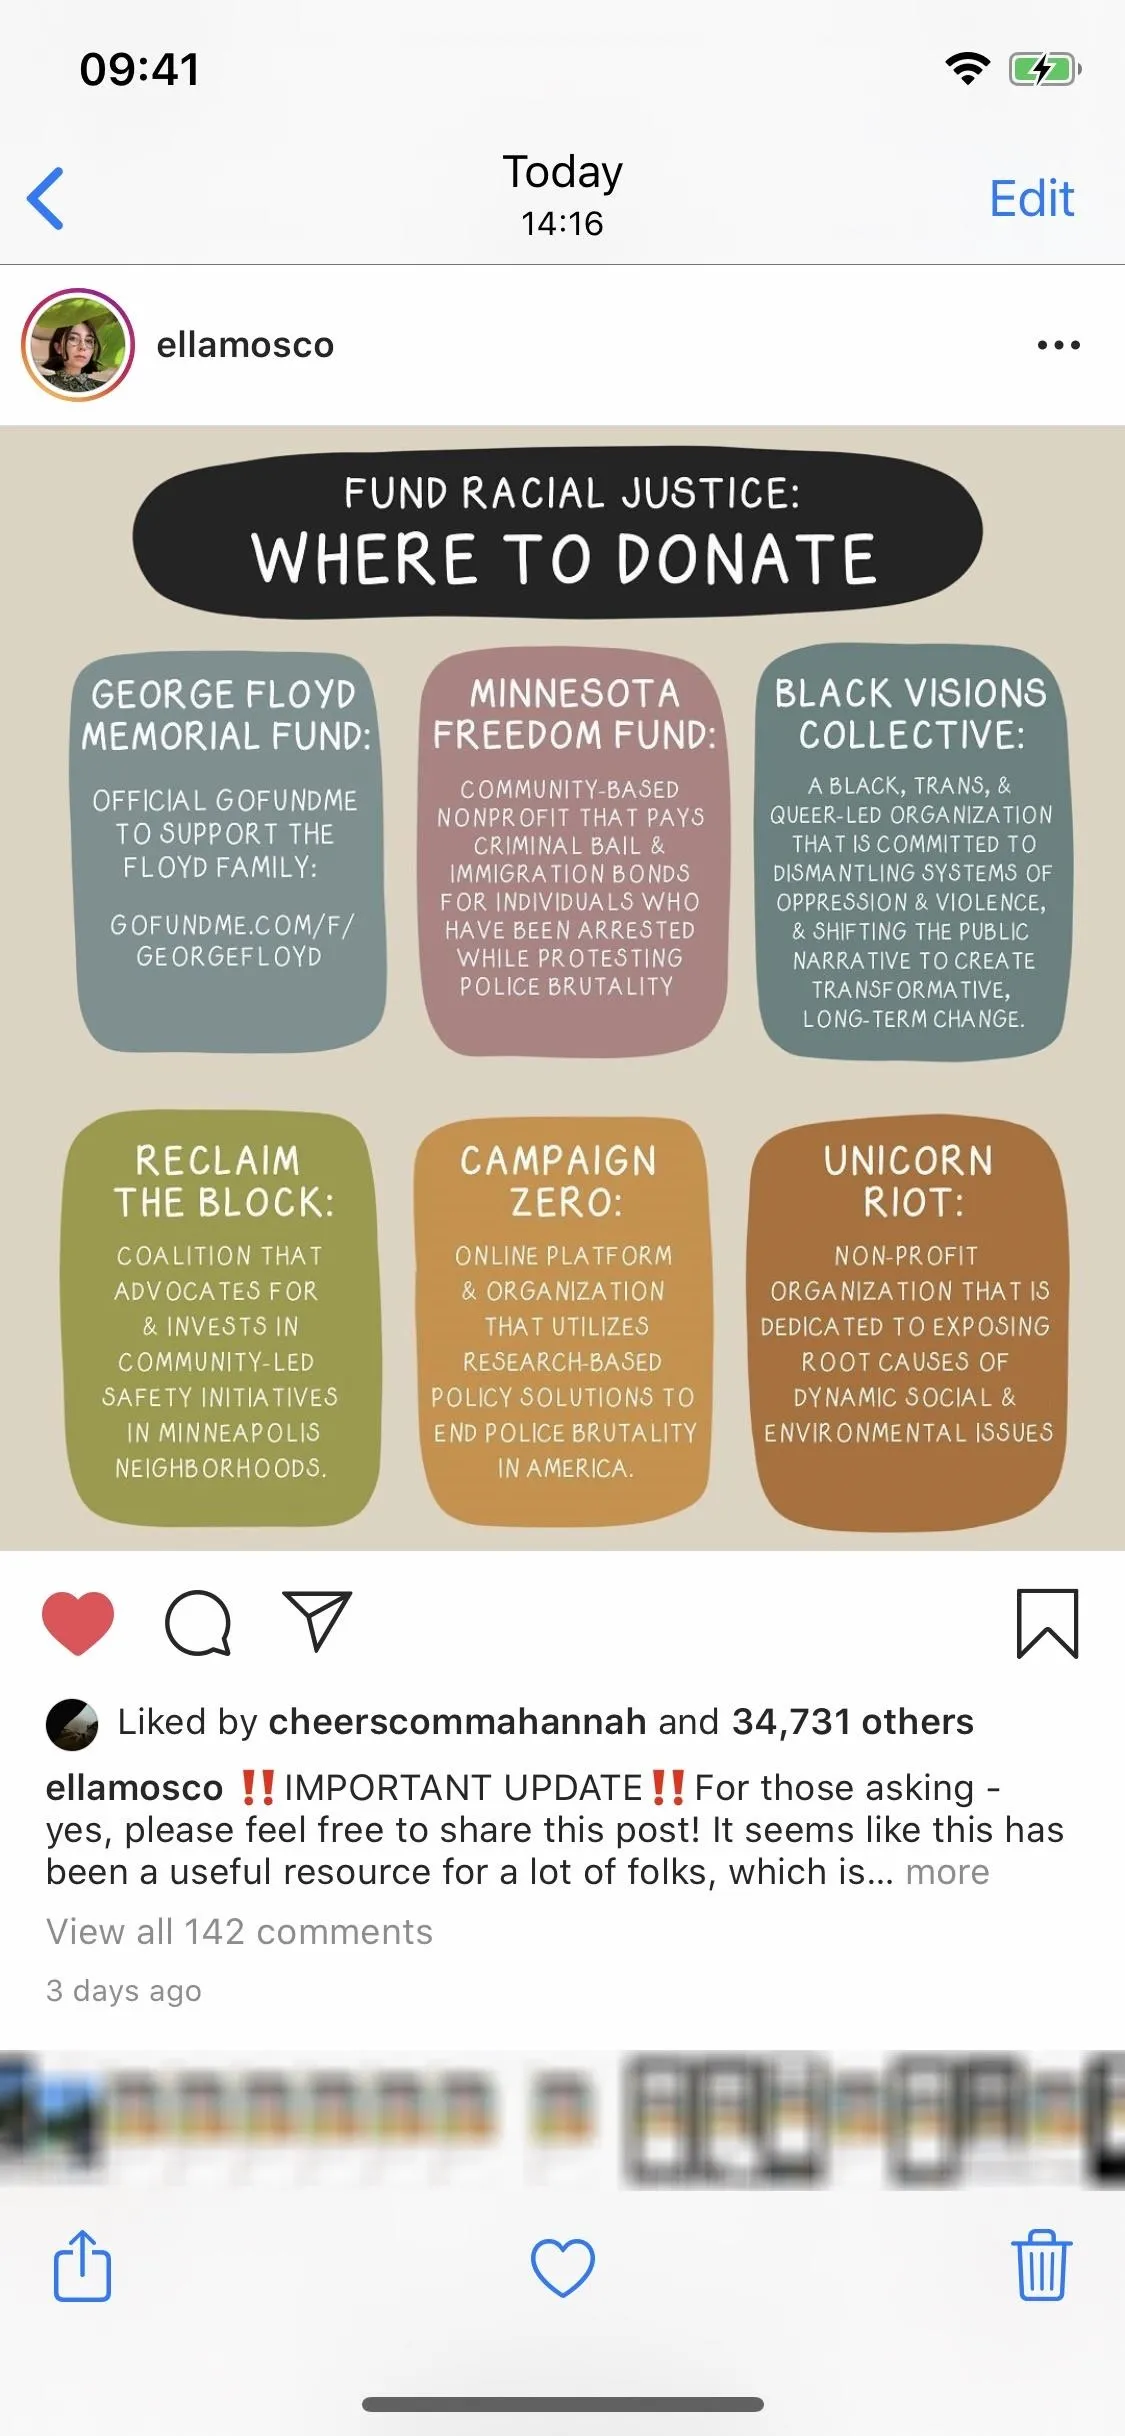
When you're finished, hit "Done" in the top left, then on "Save to Photos" on the action sheet. The screenshot will be saved to the Photos app with the edits you made to it. These edits are reversible if you want to revert to the original screenshot.
You can also "Save to Files" if you'd rather add it to your Files app. If so, you'll need to choose a location, like a folder inside iCloud Drive, on your iPhone, or in a third-party cloud storage service. However, you will not be able to revert your edits, so if you think you're going to want to remove the Magnifier later, save it to Photos instead.

If you want to revert to the original screenshot, without the zoomed-in circle, go to the screen in the Photos app and tap on "Edit" in the top right. Next, tap on "Revert" in the bottom right. Again, if you saved it to Files, you can access the image there, tap the marker icon to reaccess Markup, but you will not have any option to remove the Magnifier.
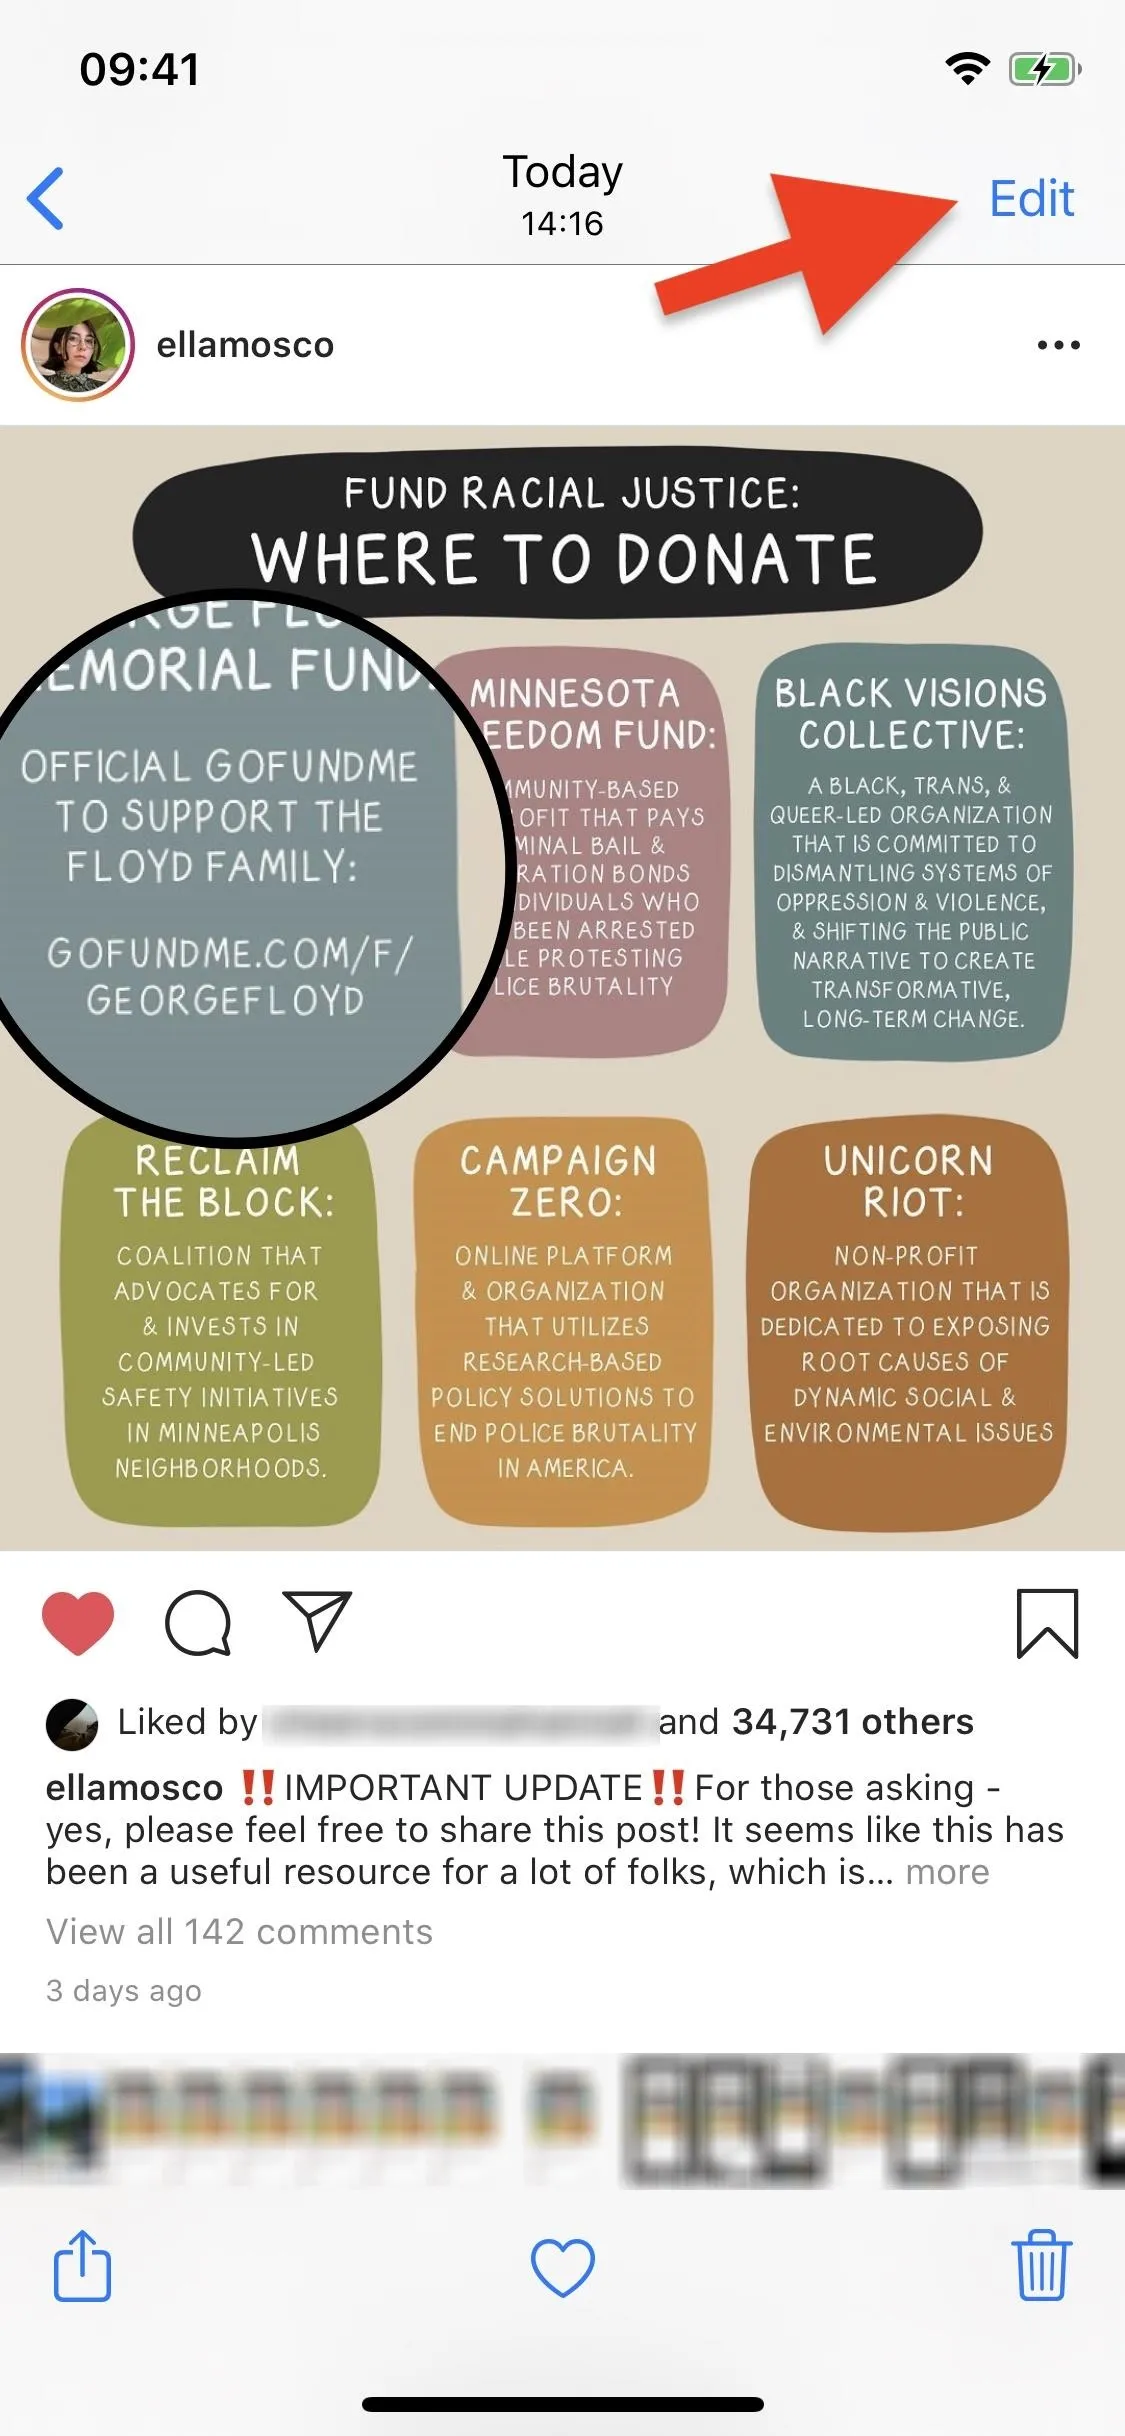
After tapping "Revert" in Photos, tap on "Revert to Original." However, be aware that you cannot reverse this. If you're sure about clearing all edits from the screenshot, revert to the original.
Cover photo, screenshots, and GIFs by Nelson Aguilar/Gadget Hacks


Comments
Be the first, drop a comment!