


Most websites and apps support two-factor authentication (2FA), which adds an extra layer of security to your accounts by requesting another form of identification beyond username and password. The second factor can be a recovery code, physical security key, or one-time password (OTP) that only you can access, even if someone else has your password. This process is easier than ever thanks to iOS 15.
Many people prefer SMS codes as their 2FA method, and that's partly because almost every 2FA-supported account supports it by default. When signing in, you get an SMS code texted to your phone number, and you plug that in where requested to authenticate your login. Your iPhone makes this even more convenient with its "AutoFill" feature, which can automatically load the verification code into the website or app without you having to copy it or type it out.
Why You Should Use an Authenticator App
Push notifications, emailed PINs, and SMS-based confirmation codes aren't foolproof. Hackers can easily intercept, spoof, or phish for the codes, and they can even social engineer the information needed to get the codes from the carrier itself (SIM swap scams are a common attack vector).
While a physical security key is the best way to keep your accounts secure, authenticator apps are the next best thing, providing much better security than push, email, and SMS codes. Authenticator apps generate codes on your phone every 10–15 seconds, and you have to use one to log in before it expires. If a hacker tries to access your account but doesn't have your phone, they can't log in.
Google Authenticator, Microsoft Authenticator, LastPass Authenticator — they can all be used as your authenticator app, but Apple built its own authenticator into iOS 15, and you don't even need to worry about installing another app.
What Makes Apple's Authenticator Stand Out?
Suppose you've enabled 2FA for Facebook via Google Authenticator on your iPhone. If you lose your iPhone, you'll lose Google Authenticator with it. That can make accessing your Facebook account one severe headache, one that you might not be able to treat.
Apple's built-in authenticator can sync to your iCloud so that it's on all of the devices you have connected to your Apple ID. That means you can use your iPad to access your Facebook or Instagram even if you lose your iPhone. The bottom line is if you're knee-deep into Apple's ecosystem, iOS 15's built-in authenticator can be a lifesaver.
You can use the iOS 15 authenticator on any website or app that supports authenticator apps as a 2FA method. I'll show you how to use the new feature by setting up 2FA on Facebook, but you can use authenticator verification codes on Discord, Dropbox, LinkedIn, and Twitter, to name just a few. The exact process of setting up and using authenticator codes for a website or app may differ from Facebook's. Still, it's usually pretty intuitive if you know your way around the settings.
Open Facebook's Settings
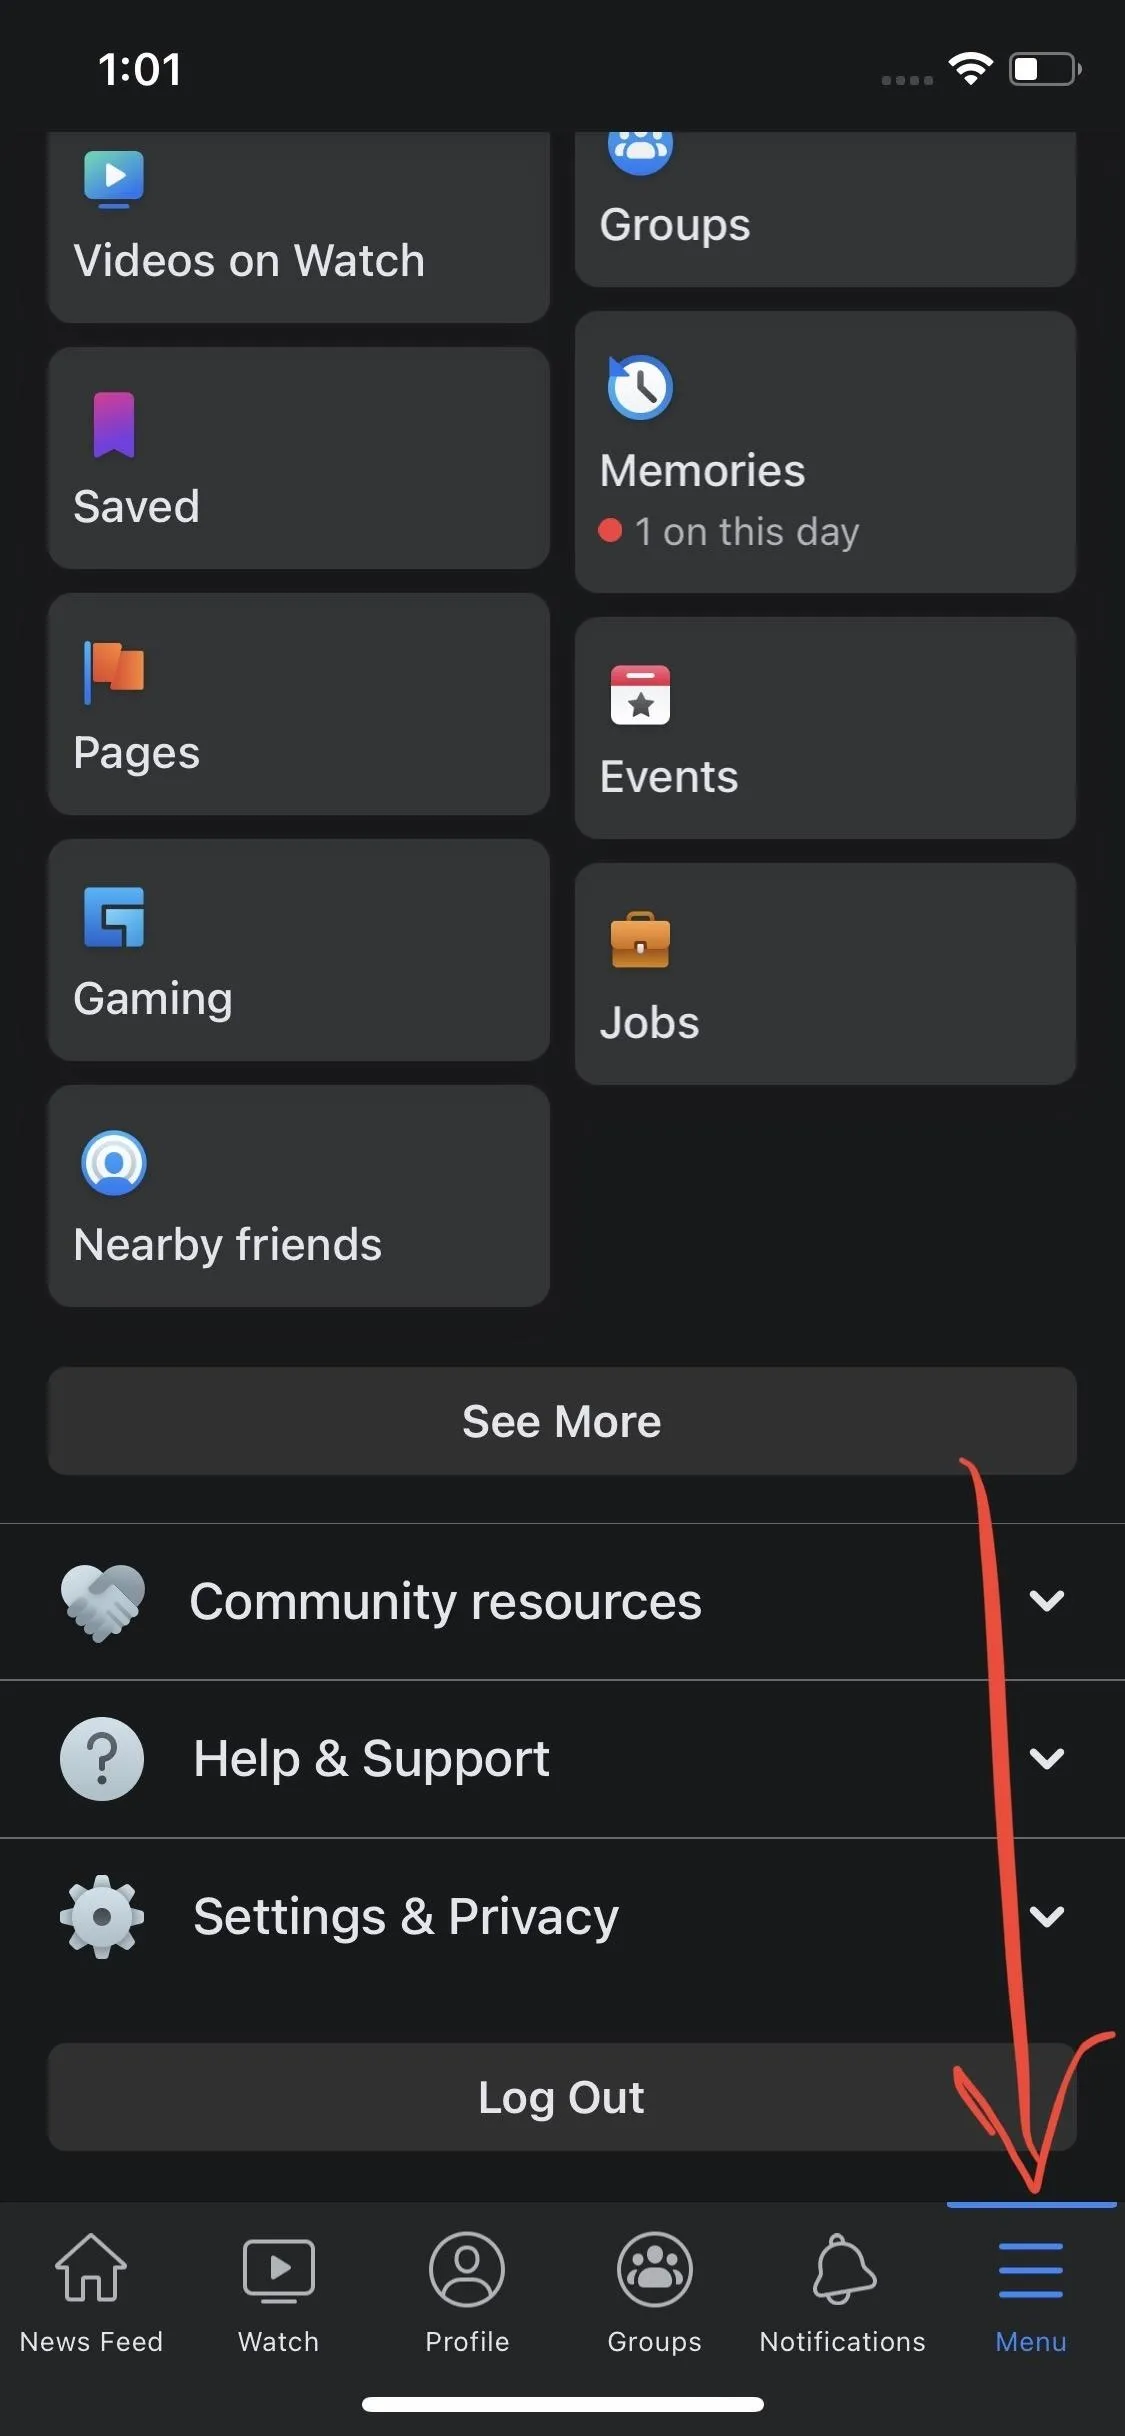
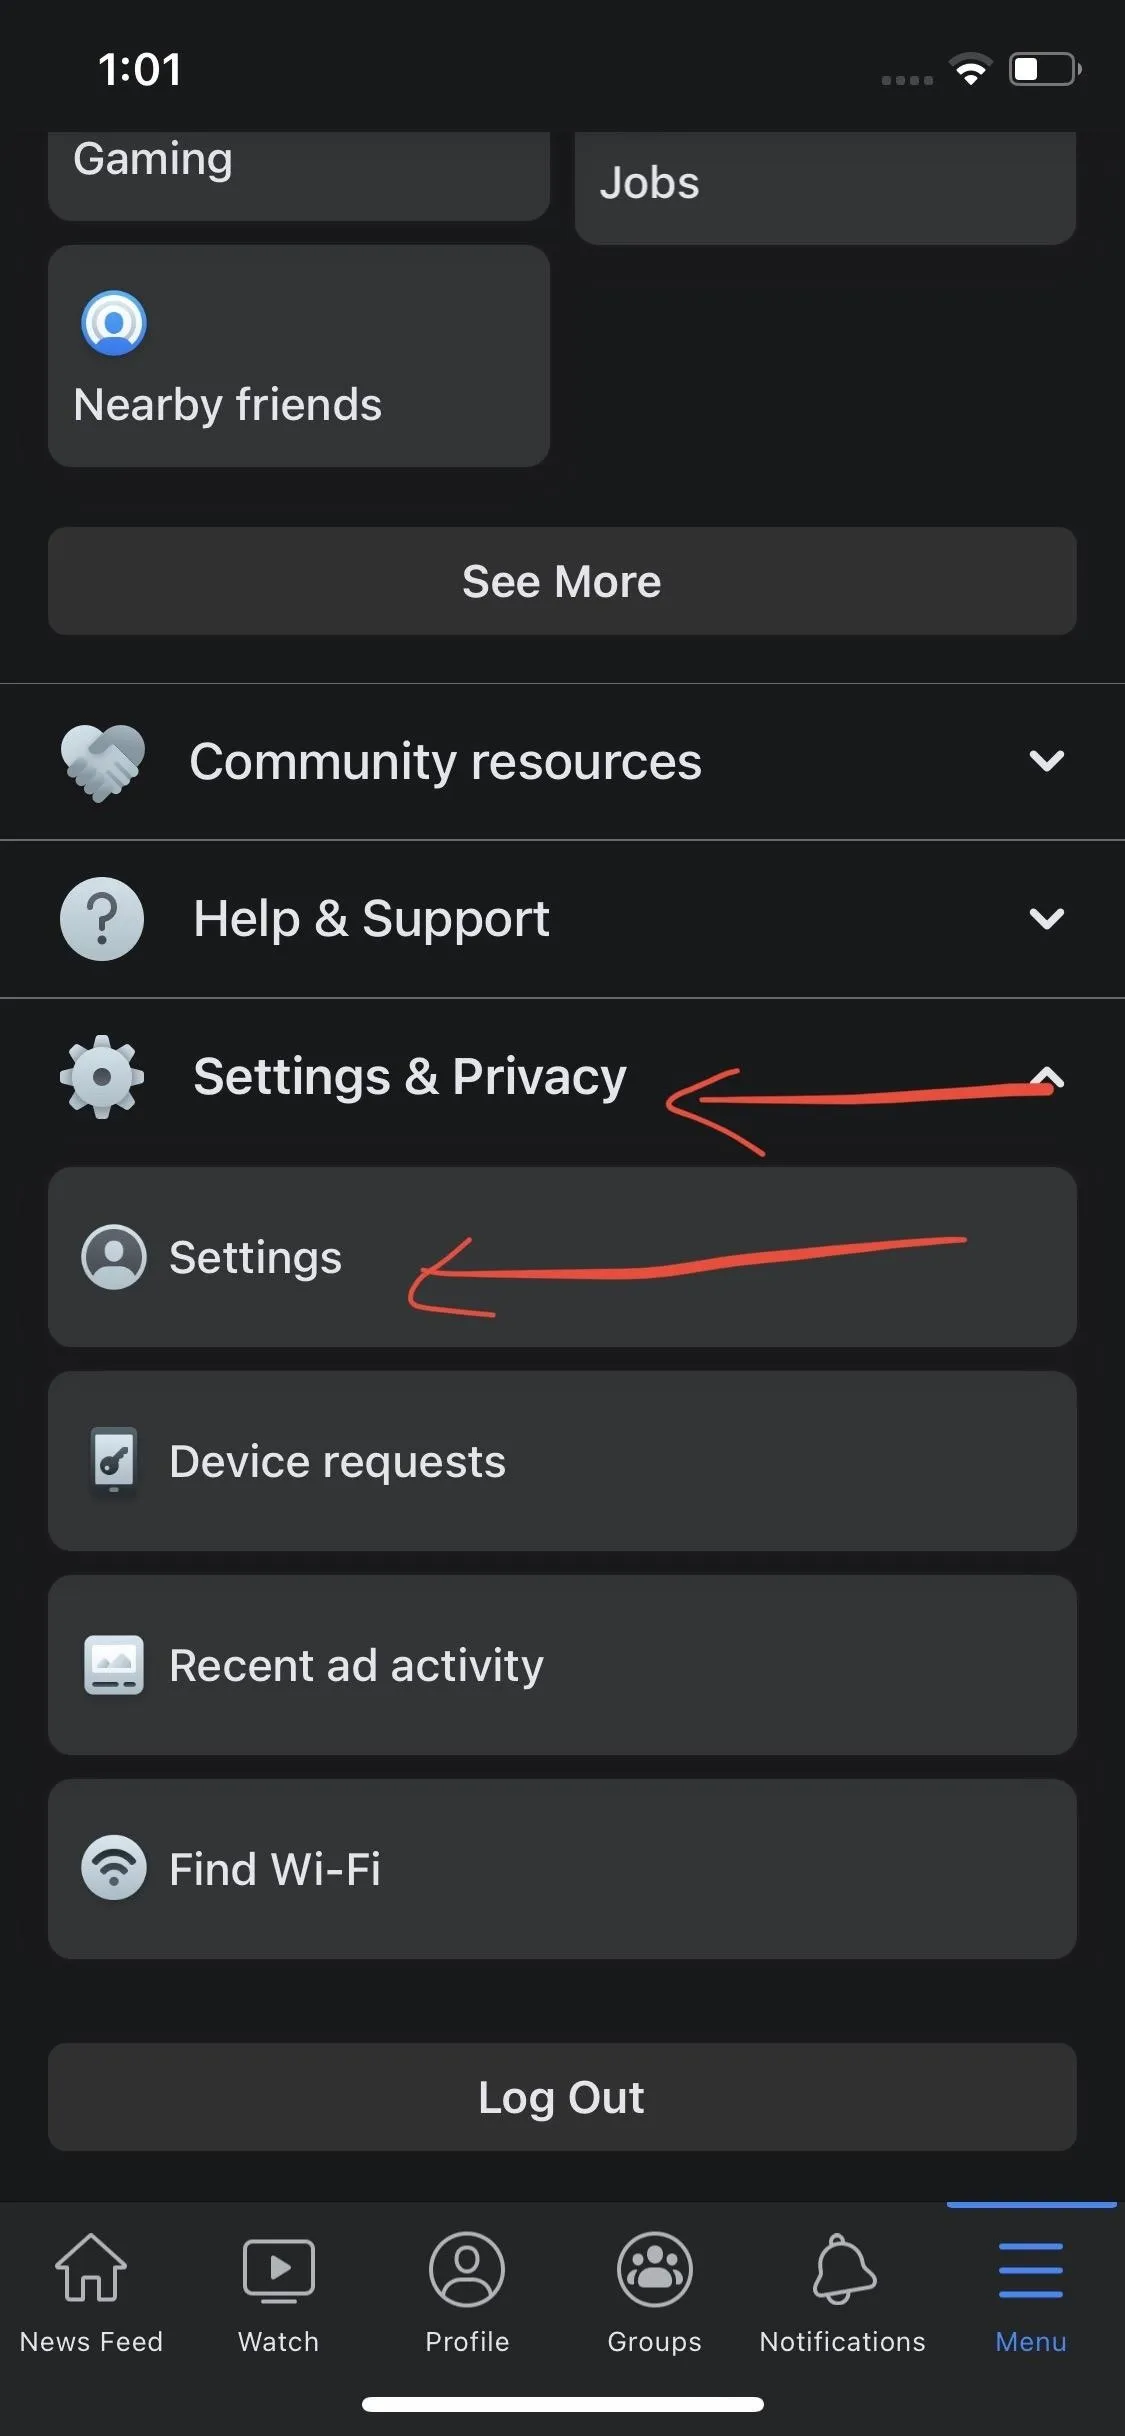
First, open Facebook on your iPhone and sign in if you're not already. Next, tap Menu at the bottom, choose "Settings & Privacy," and open "Settings."
Choose Your Preferred 2FA Method
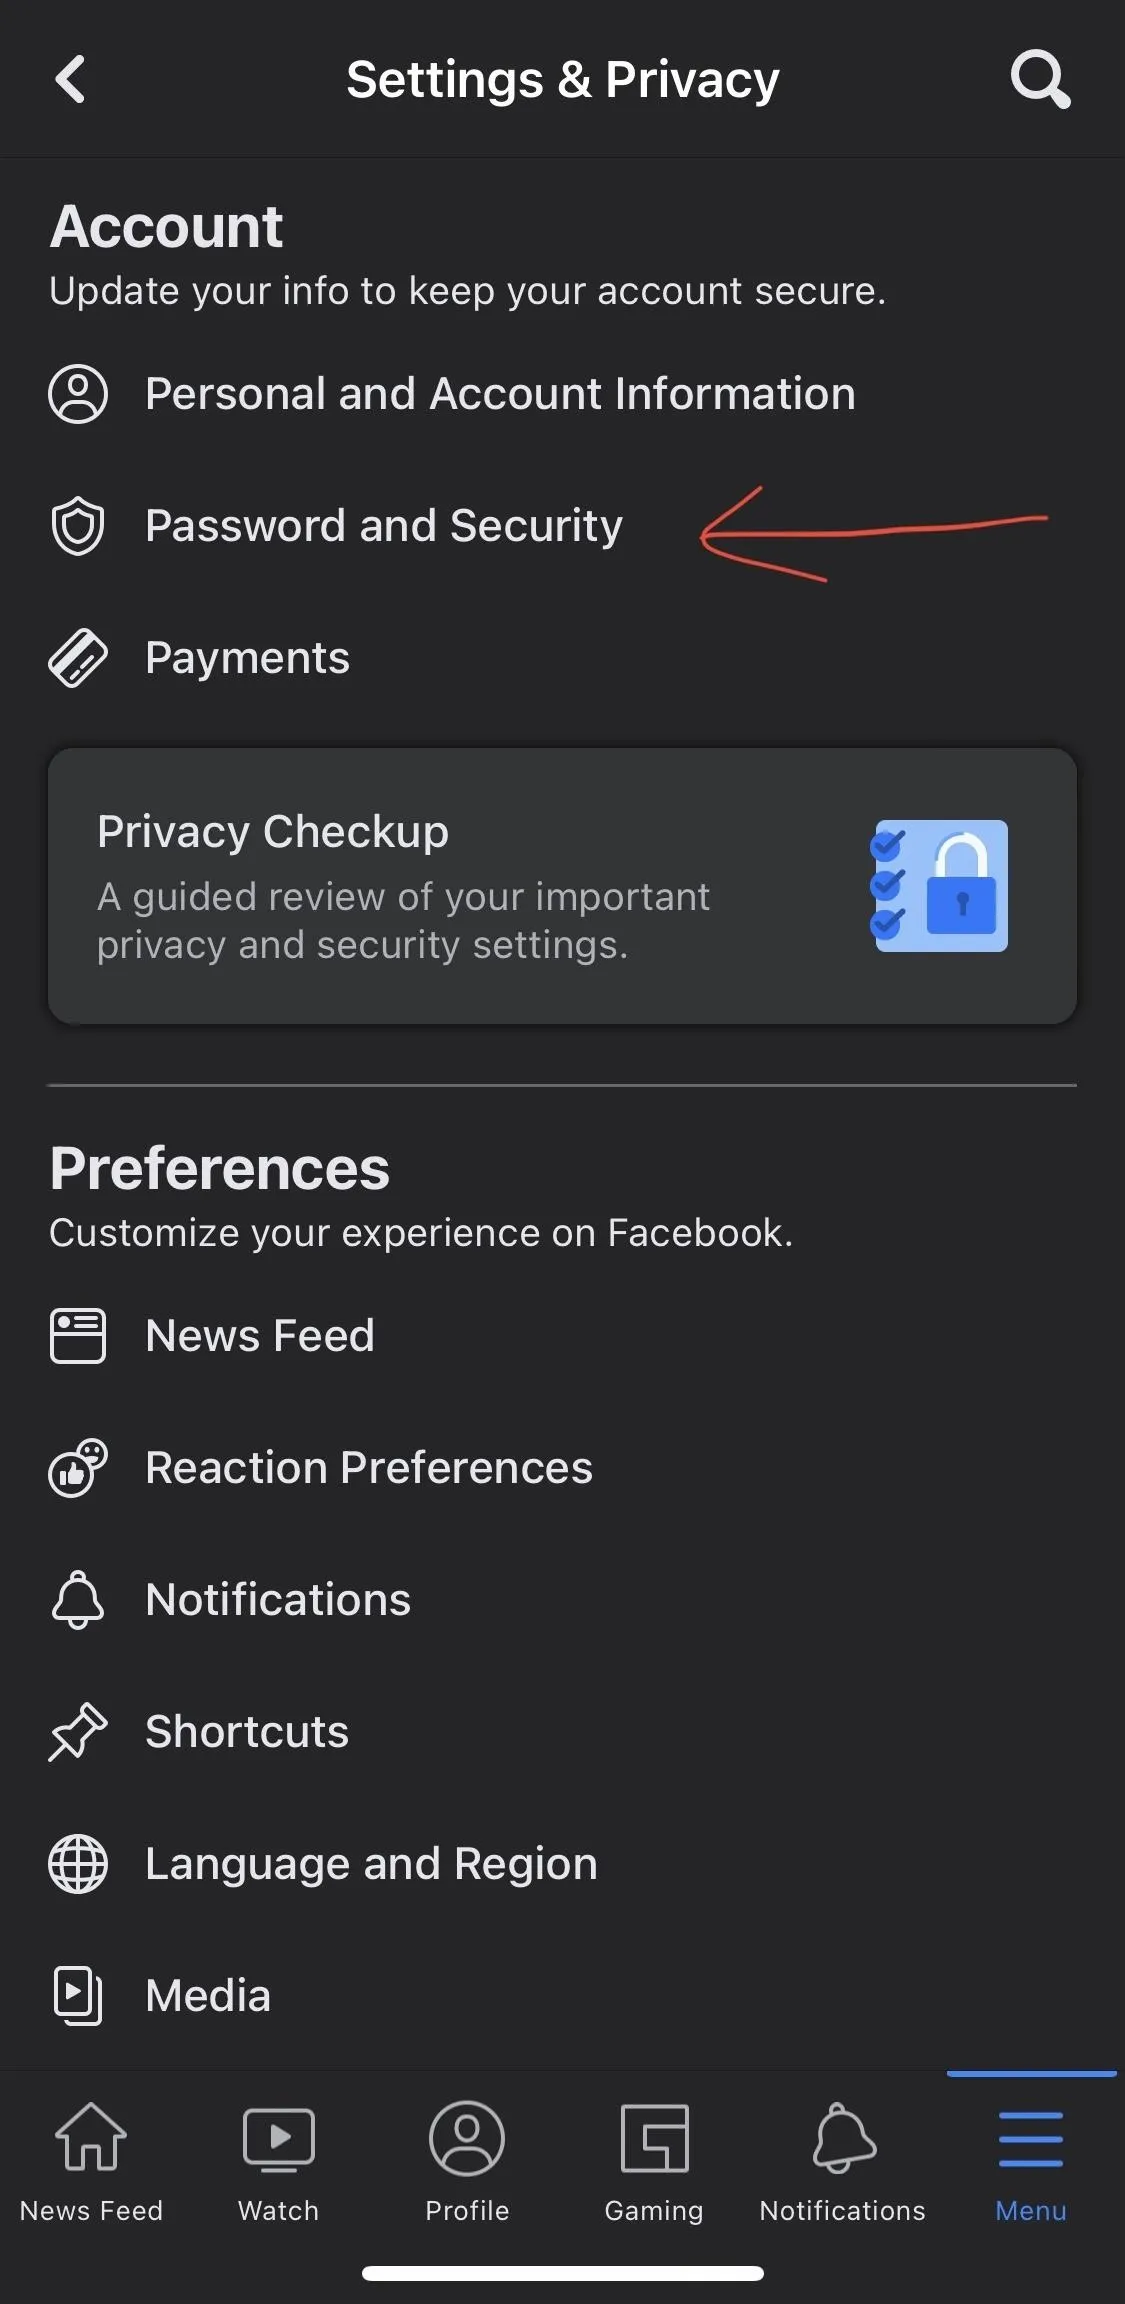
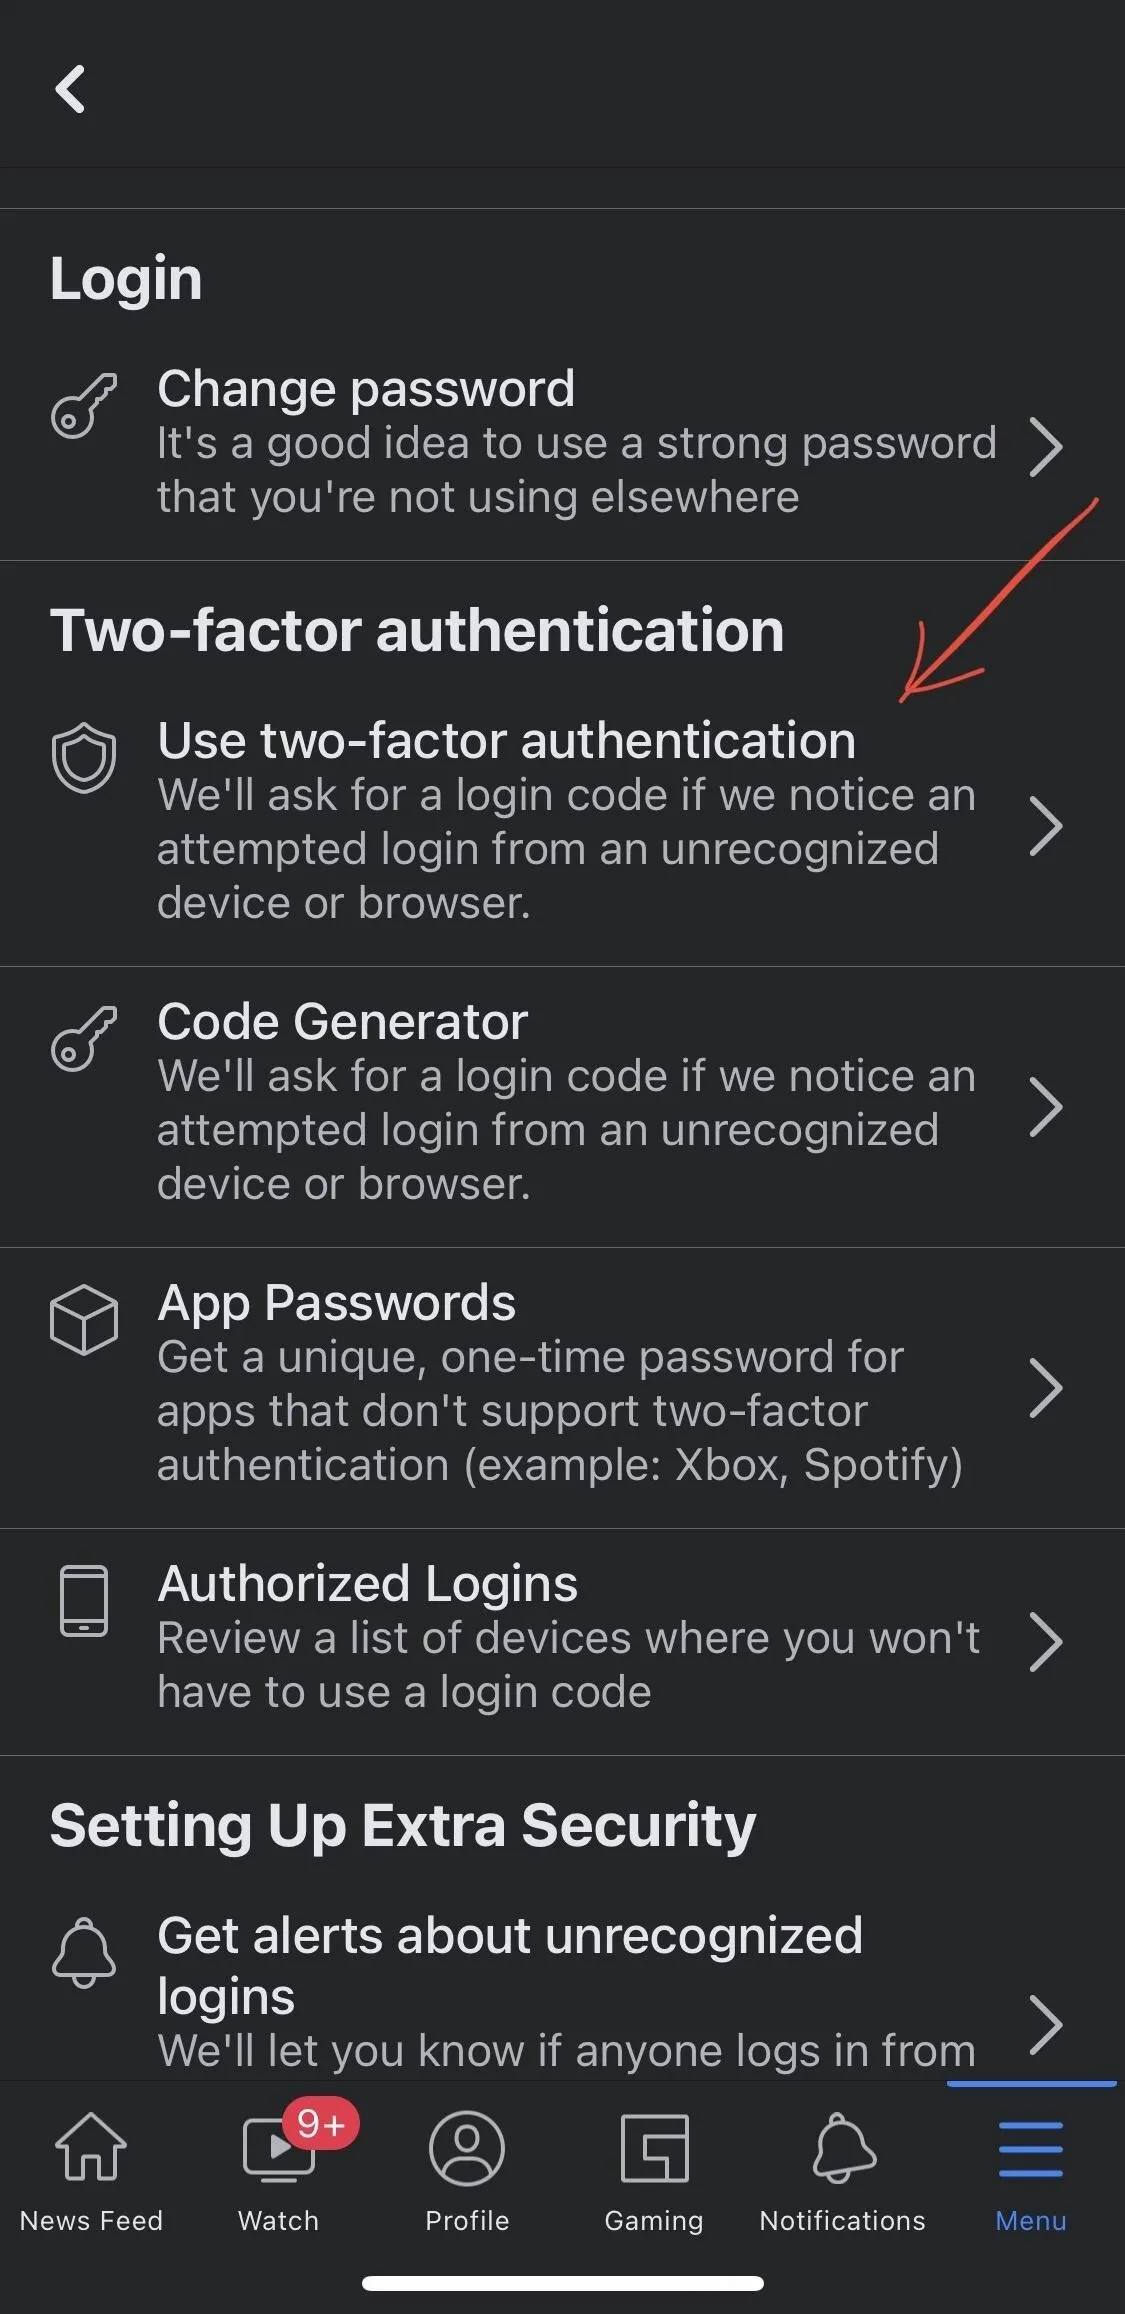
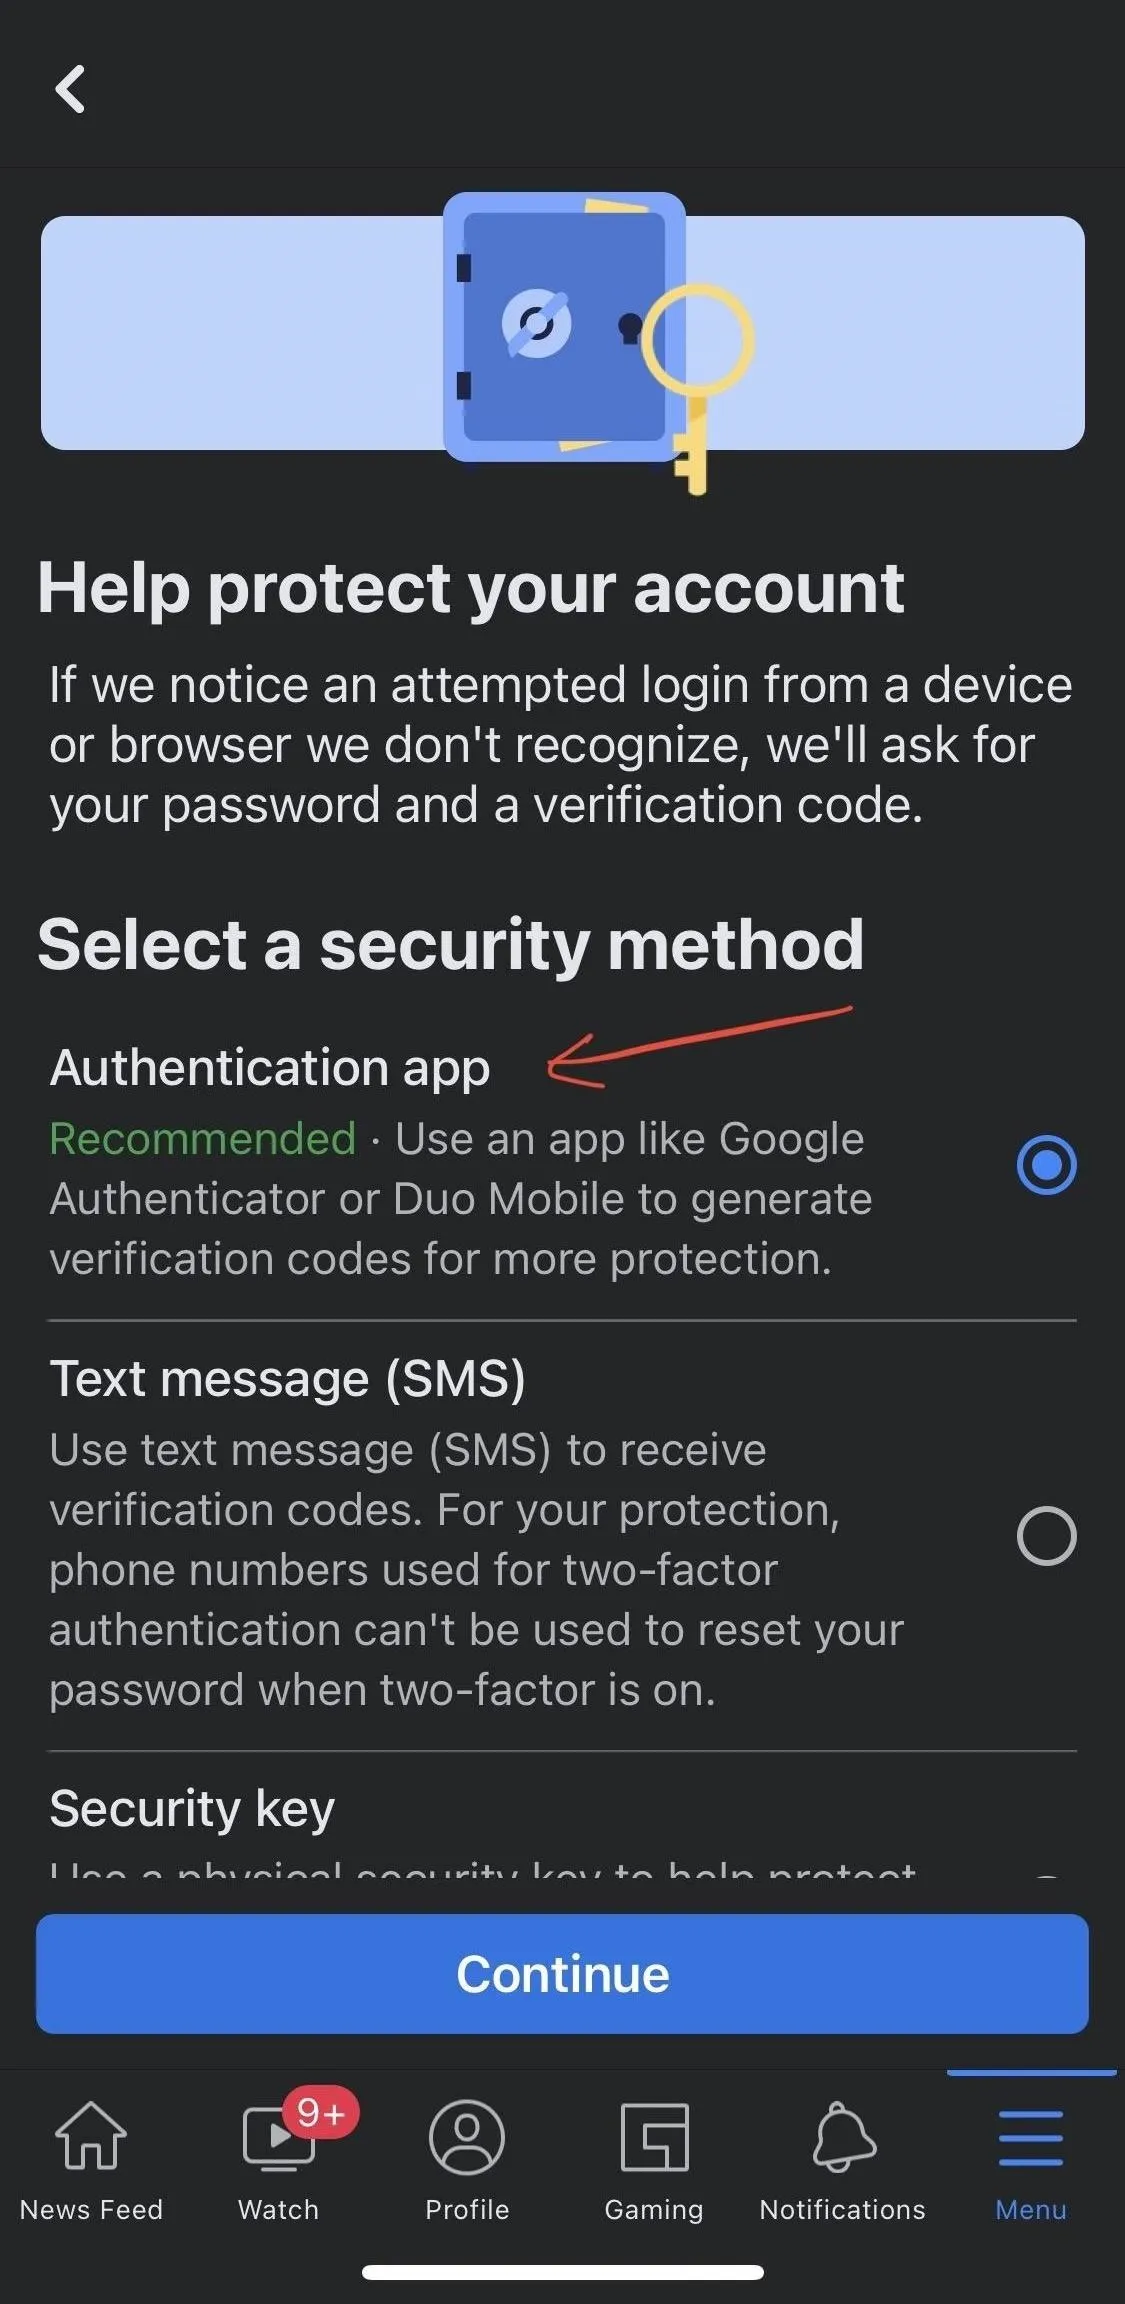
Now, open up "Password and Security." If you see "Set up two-factor authentication" in the top recommendations, tap that. If not, choose "Use two-factor authentication" further down the list. From the 2FA settings, pick "Authentication app" as your preferred security method and hit "Continue."
Choose How You Want to Set It Up
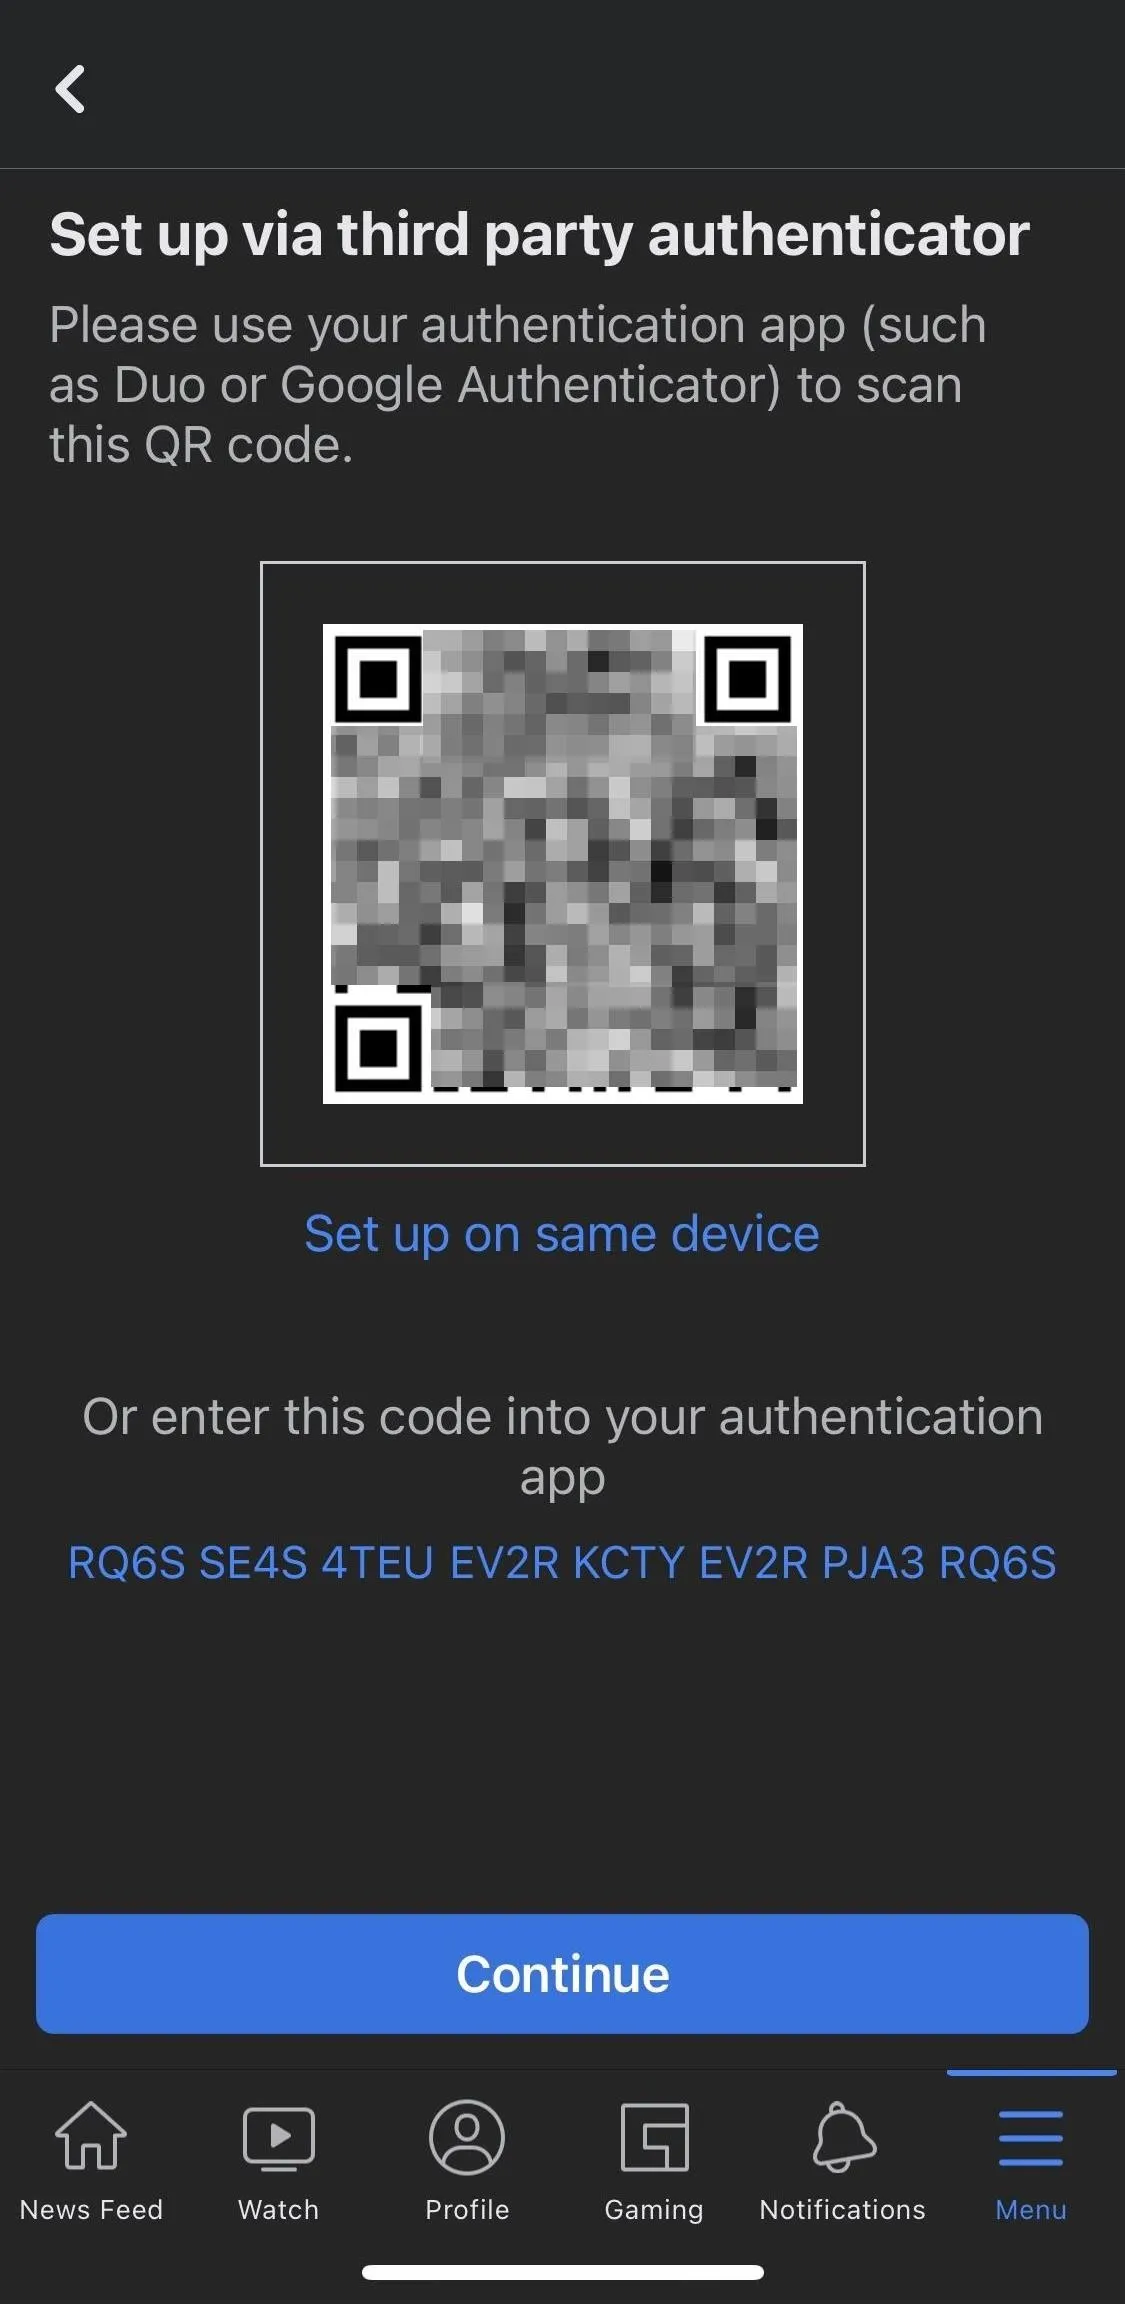
Now, you'll see a page with a QR code and a 32-character code underneath it. From here, you can set up 2FA in three ways:
- If you're using your iPad or computer to set up 2FA, you can scan the QR code from that device using your iPhone. Skip to step 5 for instructions.
- If you want to set up 2FA on the same device, tap "Set up on the same device," and the AutoFill section of your iPhone's "Password" settings will open. If you have your Facebook credentials already saved, select them and skip to step 5. Otherwise, you'll have to set it up first, as outlined in step 4.
- If setting up on the same device, you can also tap on the 32-character code to copy it, then hit "Continue." You'll have to enter a 6-digit confirmation code, but skip to step 5 for more info.
Add Your Credentials to the Settings App
If you already have your Facebook credentials saved in "Passwords" in the Settings app, skip to step 5. Otherwise, head there now. You'll need to use Face ID or Touch ID to access your saved passwords. Once there, tap the plus (+) icon at the top, enter your Facebook login credentials in the provided fields, and hit "Done." After that, you'll see that your facebook.com credentials are now saved in the list.

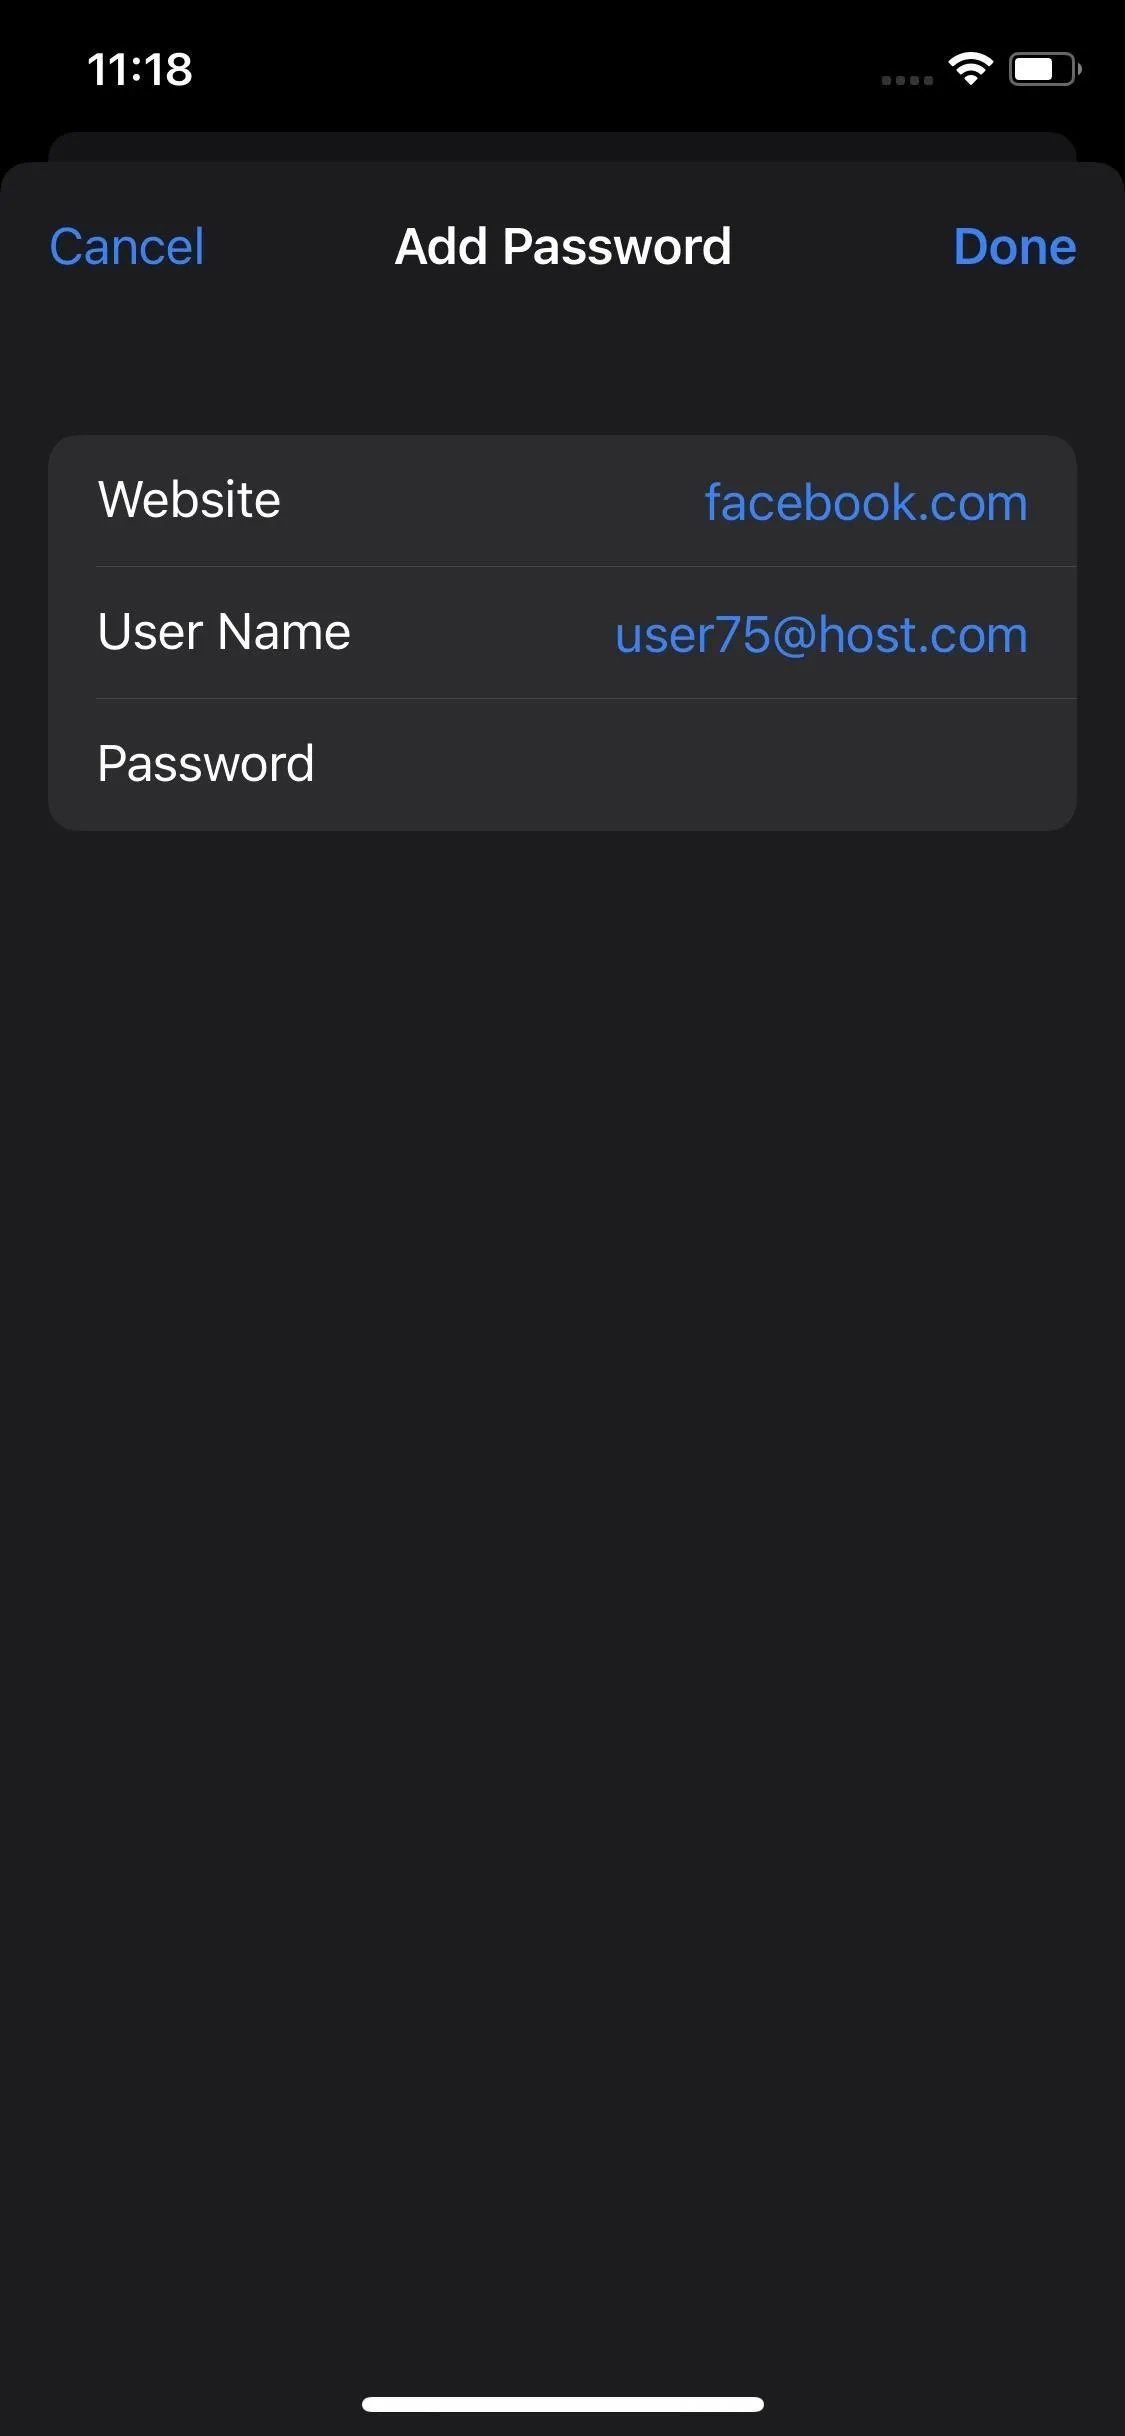
Note: The password in the screenshot above isn't showing because iOS hides all passwords in screenshots. It's one of those little things you don't always notice but can appreciate.
Scan QR Code or Enter the Verification Key
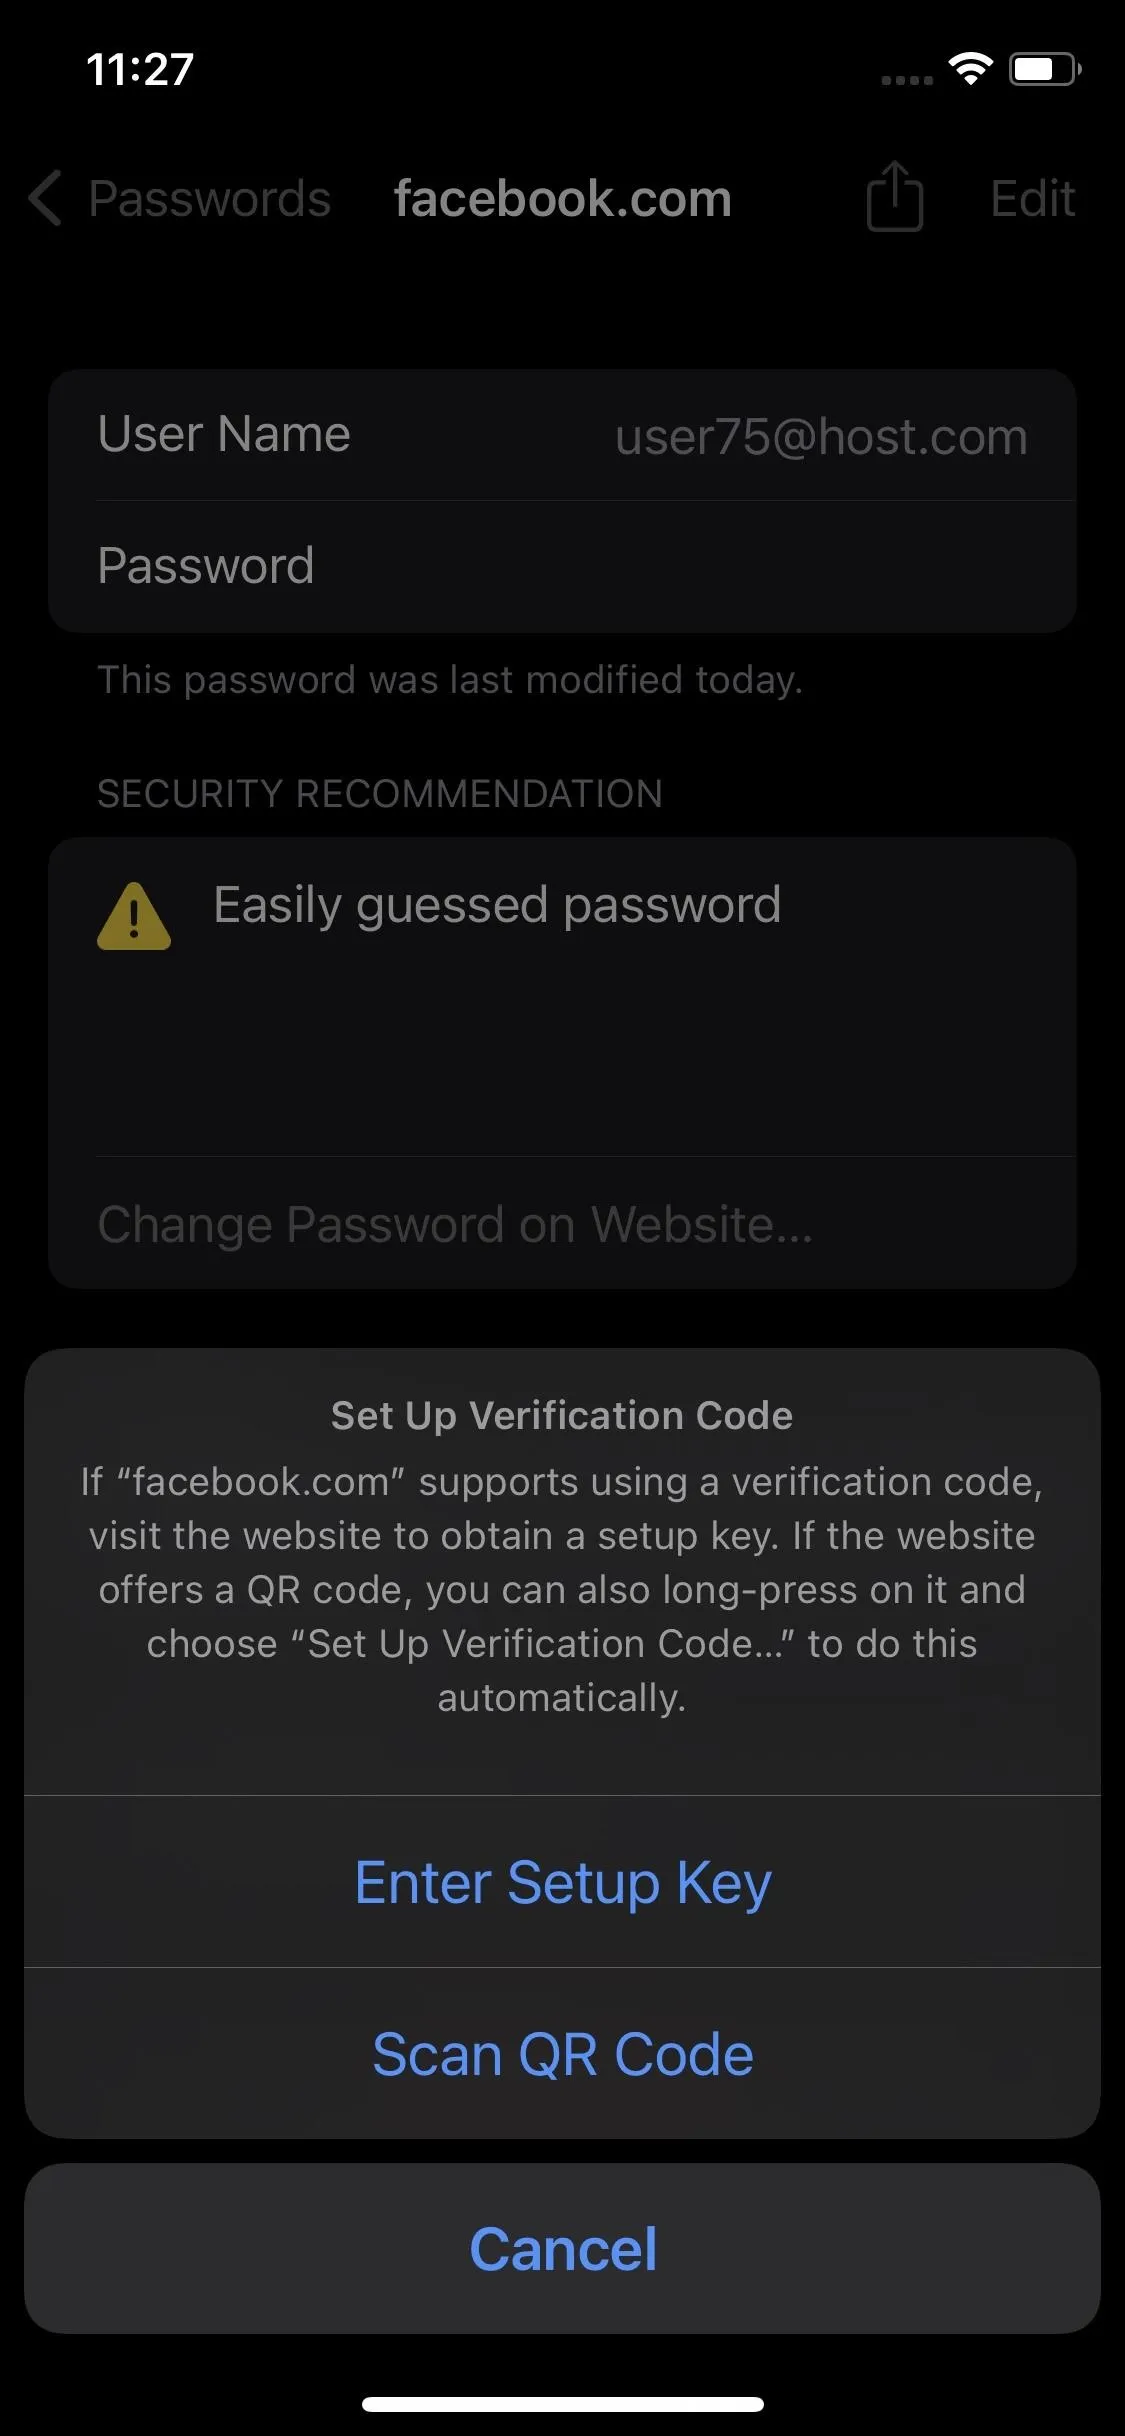
If you copied the 32-character verification code, go to Settings –> Passwords –> facebook.com, then tap "Set Up Verification Code" under the Account Options. On the pop-up, choose "Enter Setup Key," paste it in, and hit "OK."
If you want to use the QR code from Facebook, you can choose "Scan QR Code" from the pop-up. You can't screenshot the QR code and scan that on your iPhone, so you'll need another Apple device to pull up the QR code on. So log in to Facebook on your iPad or Mac and go to the QR code page from step 3. After you tap "Scan QR Code" on your iPhone, point your camera at the QR code on the other device.


Verify Your 2FA Method with Facebook
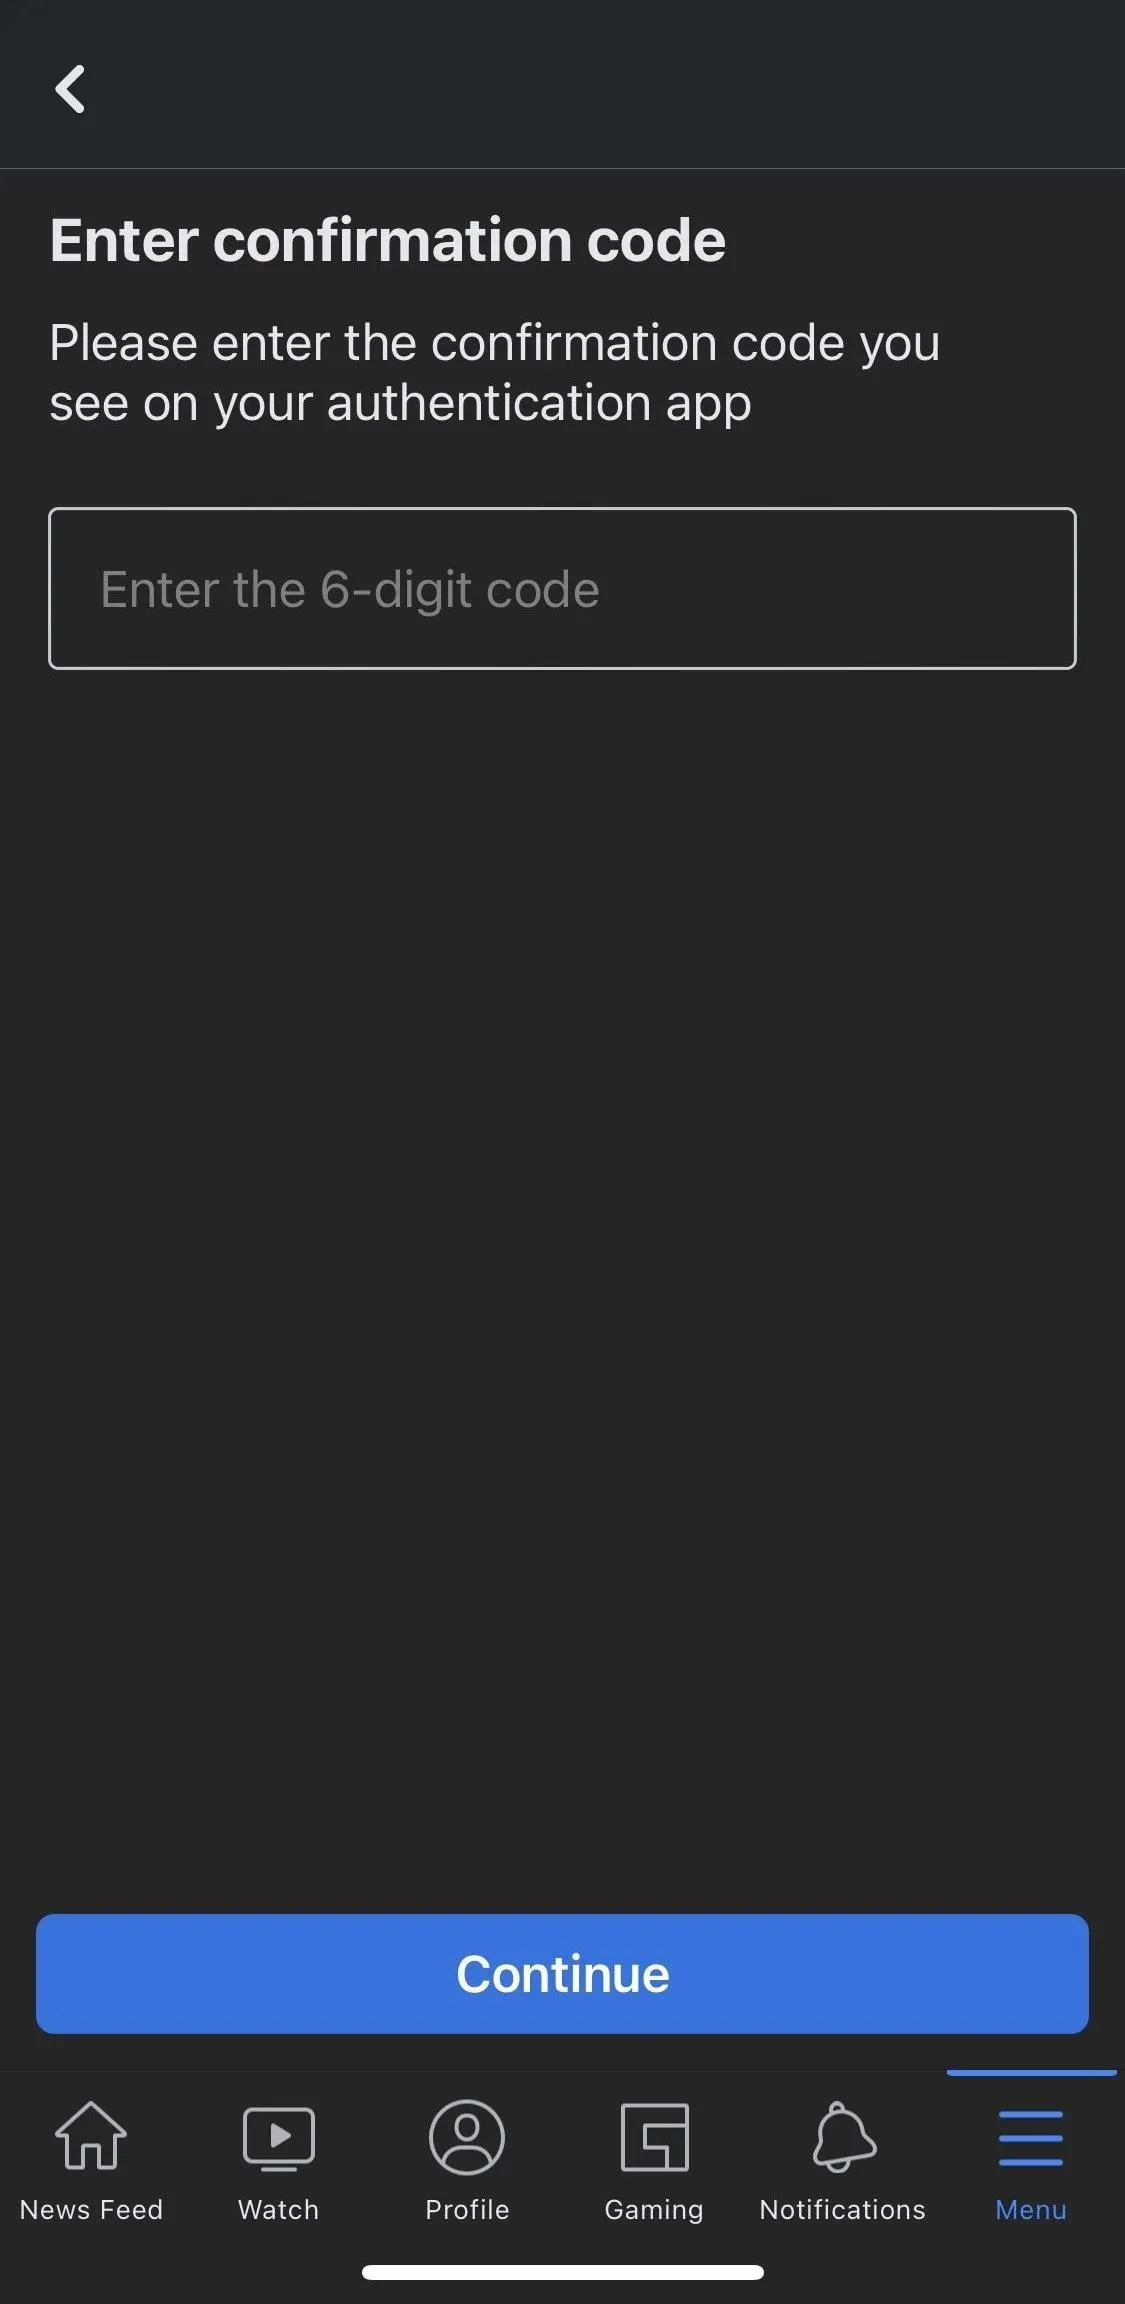
You'll now see a "Verification Code" displayed on the facebook.com passwords page in Settings. This six-digit verification code changes every 30 seconds. Tap on the code, then choose "Copy Verification Code." Next, go to the Facebook app's 2FA section again and paste the code on the "Enter Confirmation Code" page.

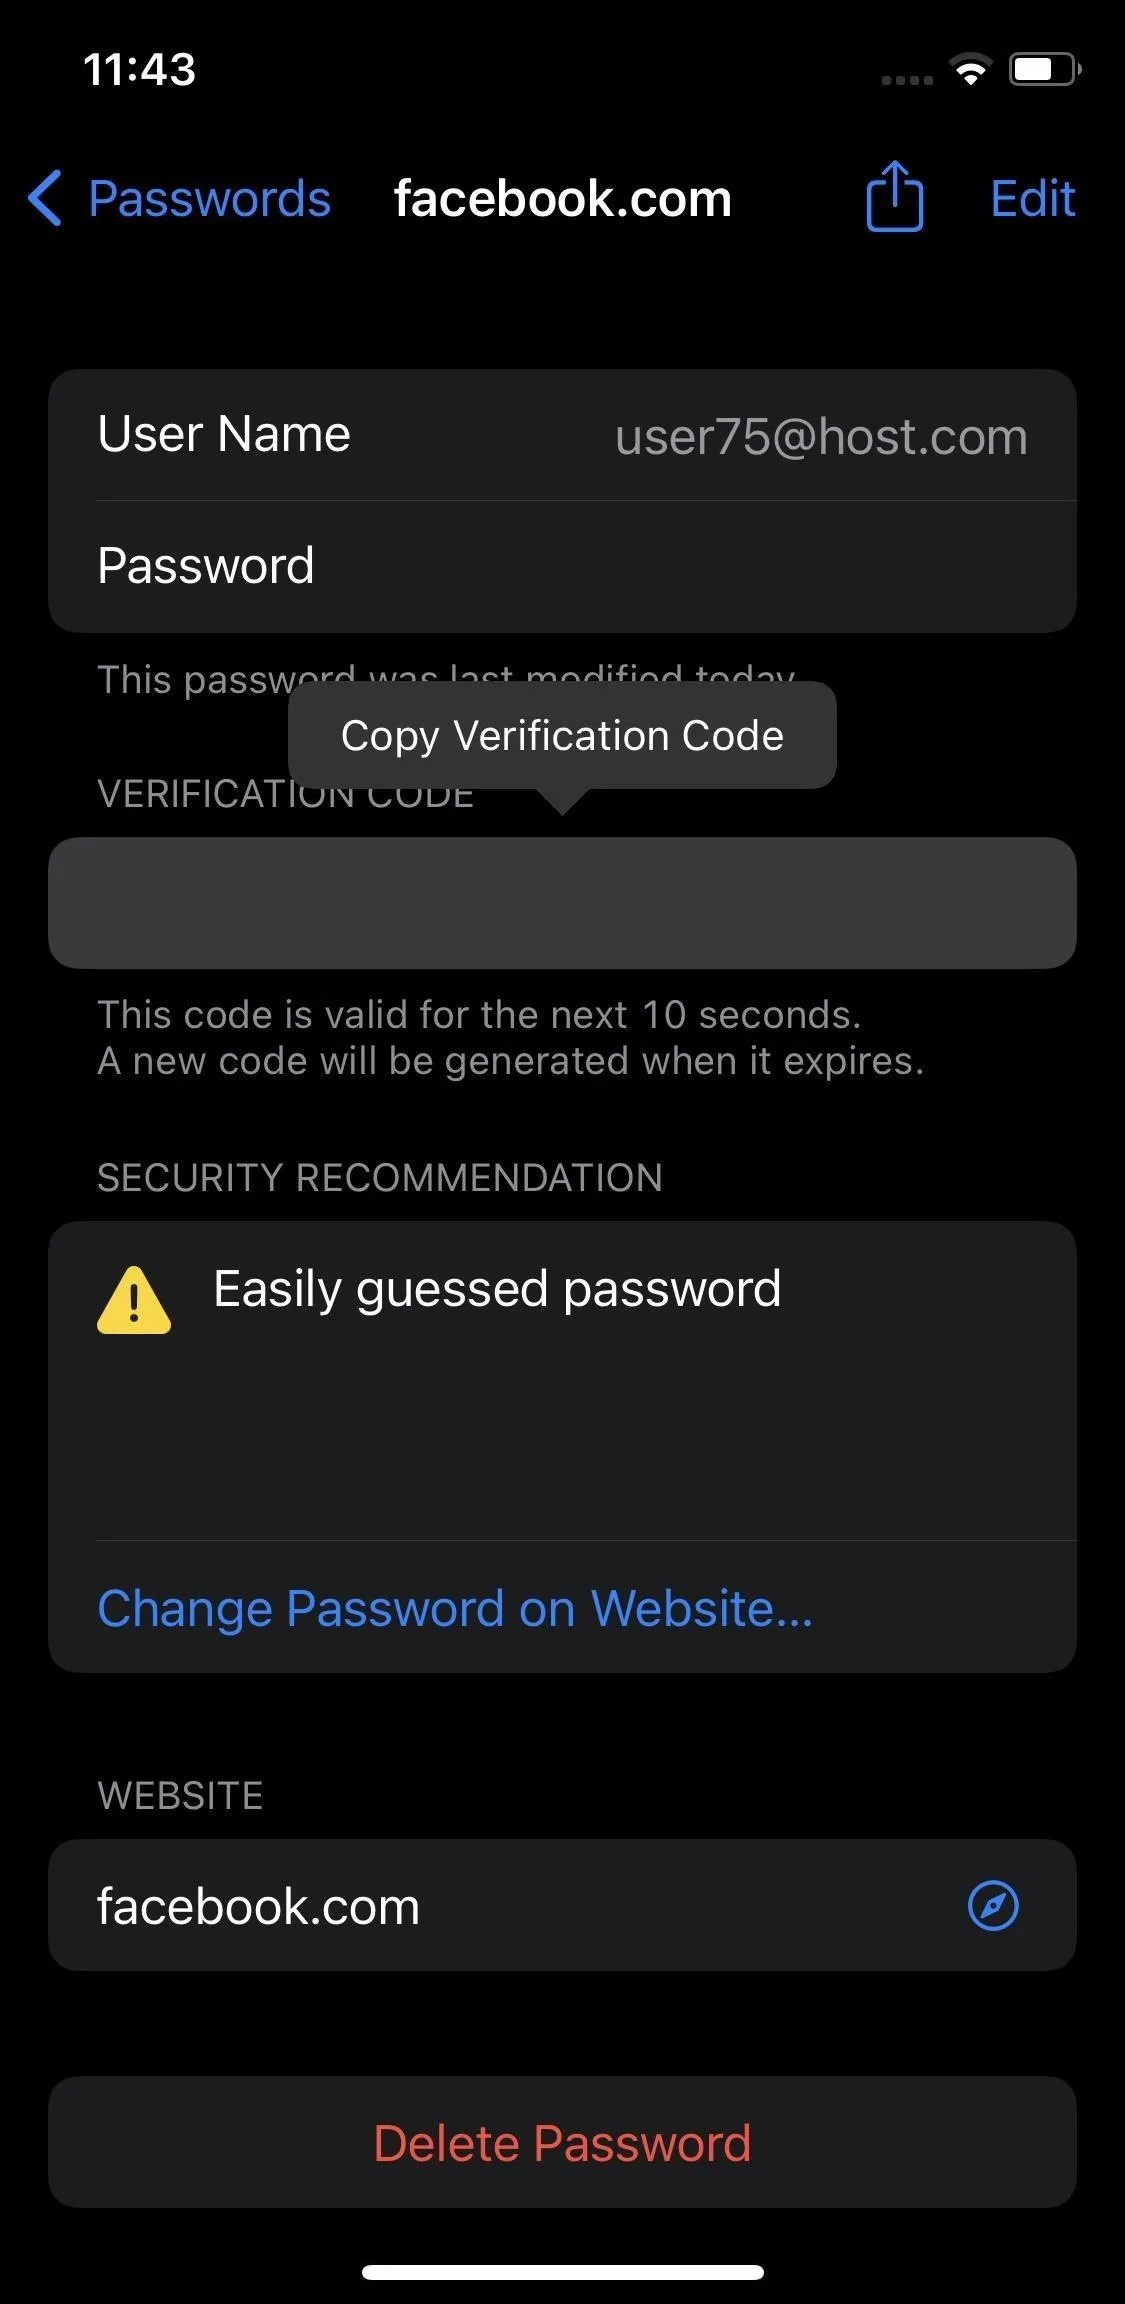
Note: Like passwords, iOS hides verification codes in screenshots here. The changes every 30 seconds, so make sure you copy this code and paste it into Facebook's 2FA section within 30 seconds or the code will expire.
How to Log in with the Authenticator Code
Suppose you log into Facebook using your iPhone and iPad. These are recognized devices, and every time you log in through them, you won't have to deal with 2FA.
The 2FA comes into action when you or someone tries accessing your account using an unrecognized device. When this happens, the website or app will prompt the person trying to access the account to provide the dynamic code from iOS's built-in authenticator. Since only you have access to that, no one can access your account even if they know your password.
If you are trying to log in to your account, iOS may suggest the verification code, much like it does SMS codes, so you don't have to go to Settings –> Passwords –> [website] to find the code.
2FA is very secure but can be equally alarming if you have only one Apple device. If you lose that device, you'll get locked out of your Facebook for good. If you only have one Apple device, you might be better with a different 2FA method. Either that or set up a secondary 2FA method.
How to Turn Off 2FA
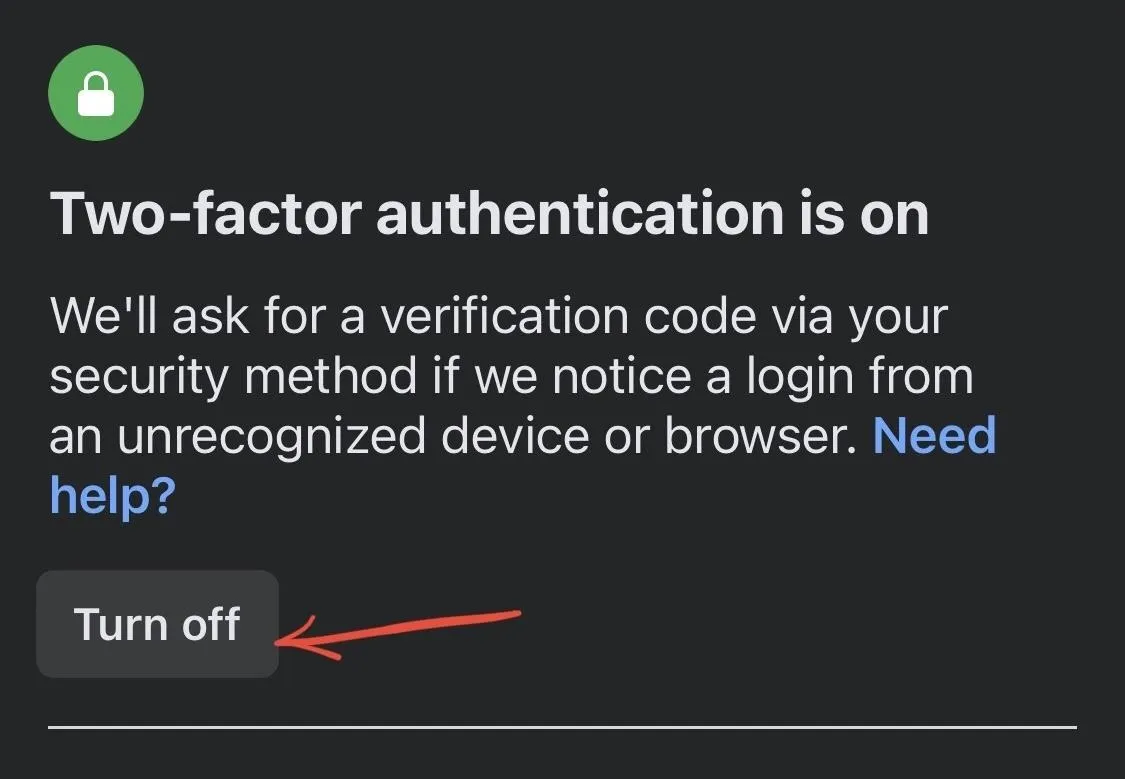
If you ever want to turn off 2FA for your Facebook, you need to do it from the website or app first before deleting it in "Passwords" in the Settings app. If you delete it from iCloud first, you might not be able to access the account unless you have a backup 2FA method activated.
For Facebook, head to Menu –> Settings & Privacy –> Settings –> Password and Security –> Use two-factor authentication. You'll see the option for turning off 2FA here. Simply tap "Turn off," and you'll need to enter your Facebook password to make that happen. Then you can delete the item in your "Passwords" settings.
Cover photo and screenshots by Hasan Tariq/Gadget Hacks


Comments
Be the first, drop a comment!