


Starting in iOS 13, Apple introduced a robust suite of video-editing tools to its Photos app. The majority of editing tools were only available for images in iOS 12 and older, but iOS 13 leveled the playing field to allow even a novice to tweak videos like a pro before sharing.
Before iOS 13, the built-in Photos app for iPhone had provided a broad set of image-editing tools. It not only included essential functions such as auto-enhancement, cropping, straightening, and applying filters, but it also had more powerful tools to adjust lighting and color. Videos, on the other hand, could only be trimmed.
To make things worse, if you use iCloud Photos, you couldn't trim the original video in older iOS versions. Hence, a second copy of the video had to be made, cluttering up your library and taking up precious cloud storage.
- Don't Miss: 200+ Exciting New iOS 13 Features for iPhone
Photos app extensions helped fill the gap, including Apple's iMovie, which enabled trimming the original clip, removing audio, adding filters, and adding text and music to the video. Even with extensions, however, nothing ever came about in Photos that was as powerful and easy to use as what Apple provided for images — until iOS 13.
With iOS 13 and later, videos now have access to almost all of the same powerful editing tools as images, including a new feature just for videos to remove audio. The new tools work across all types of video, up to and including 4K at 60 fps and slo-mo clips in 1080p at 240 fps. Depending on the kind of videos you edit, you may finally be able to ditch third-party video editors that you relied on in the past.
Start Editing a Video
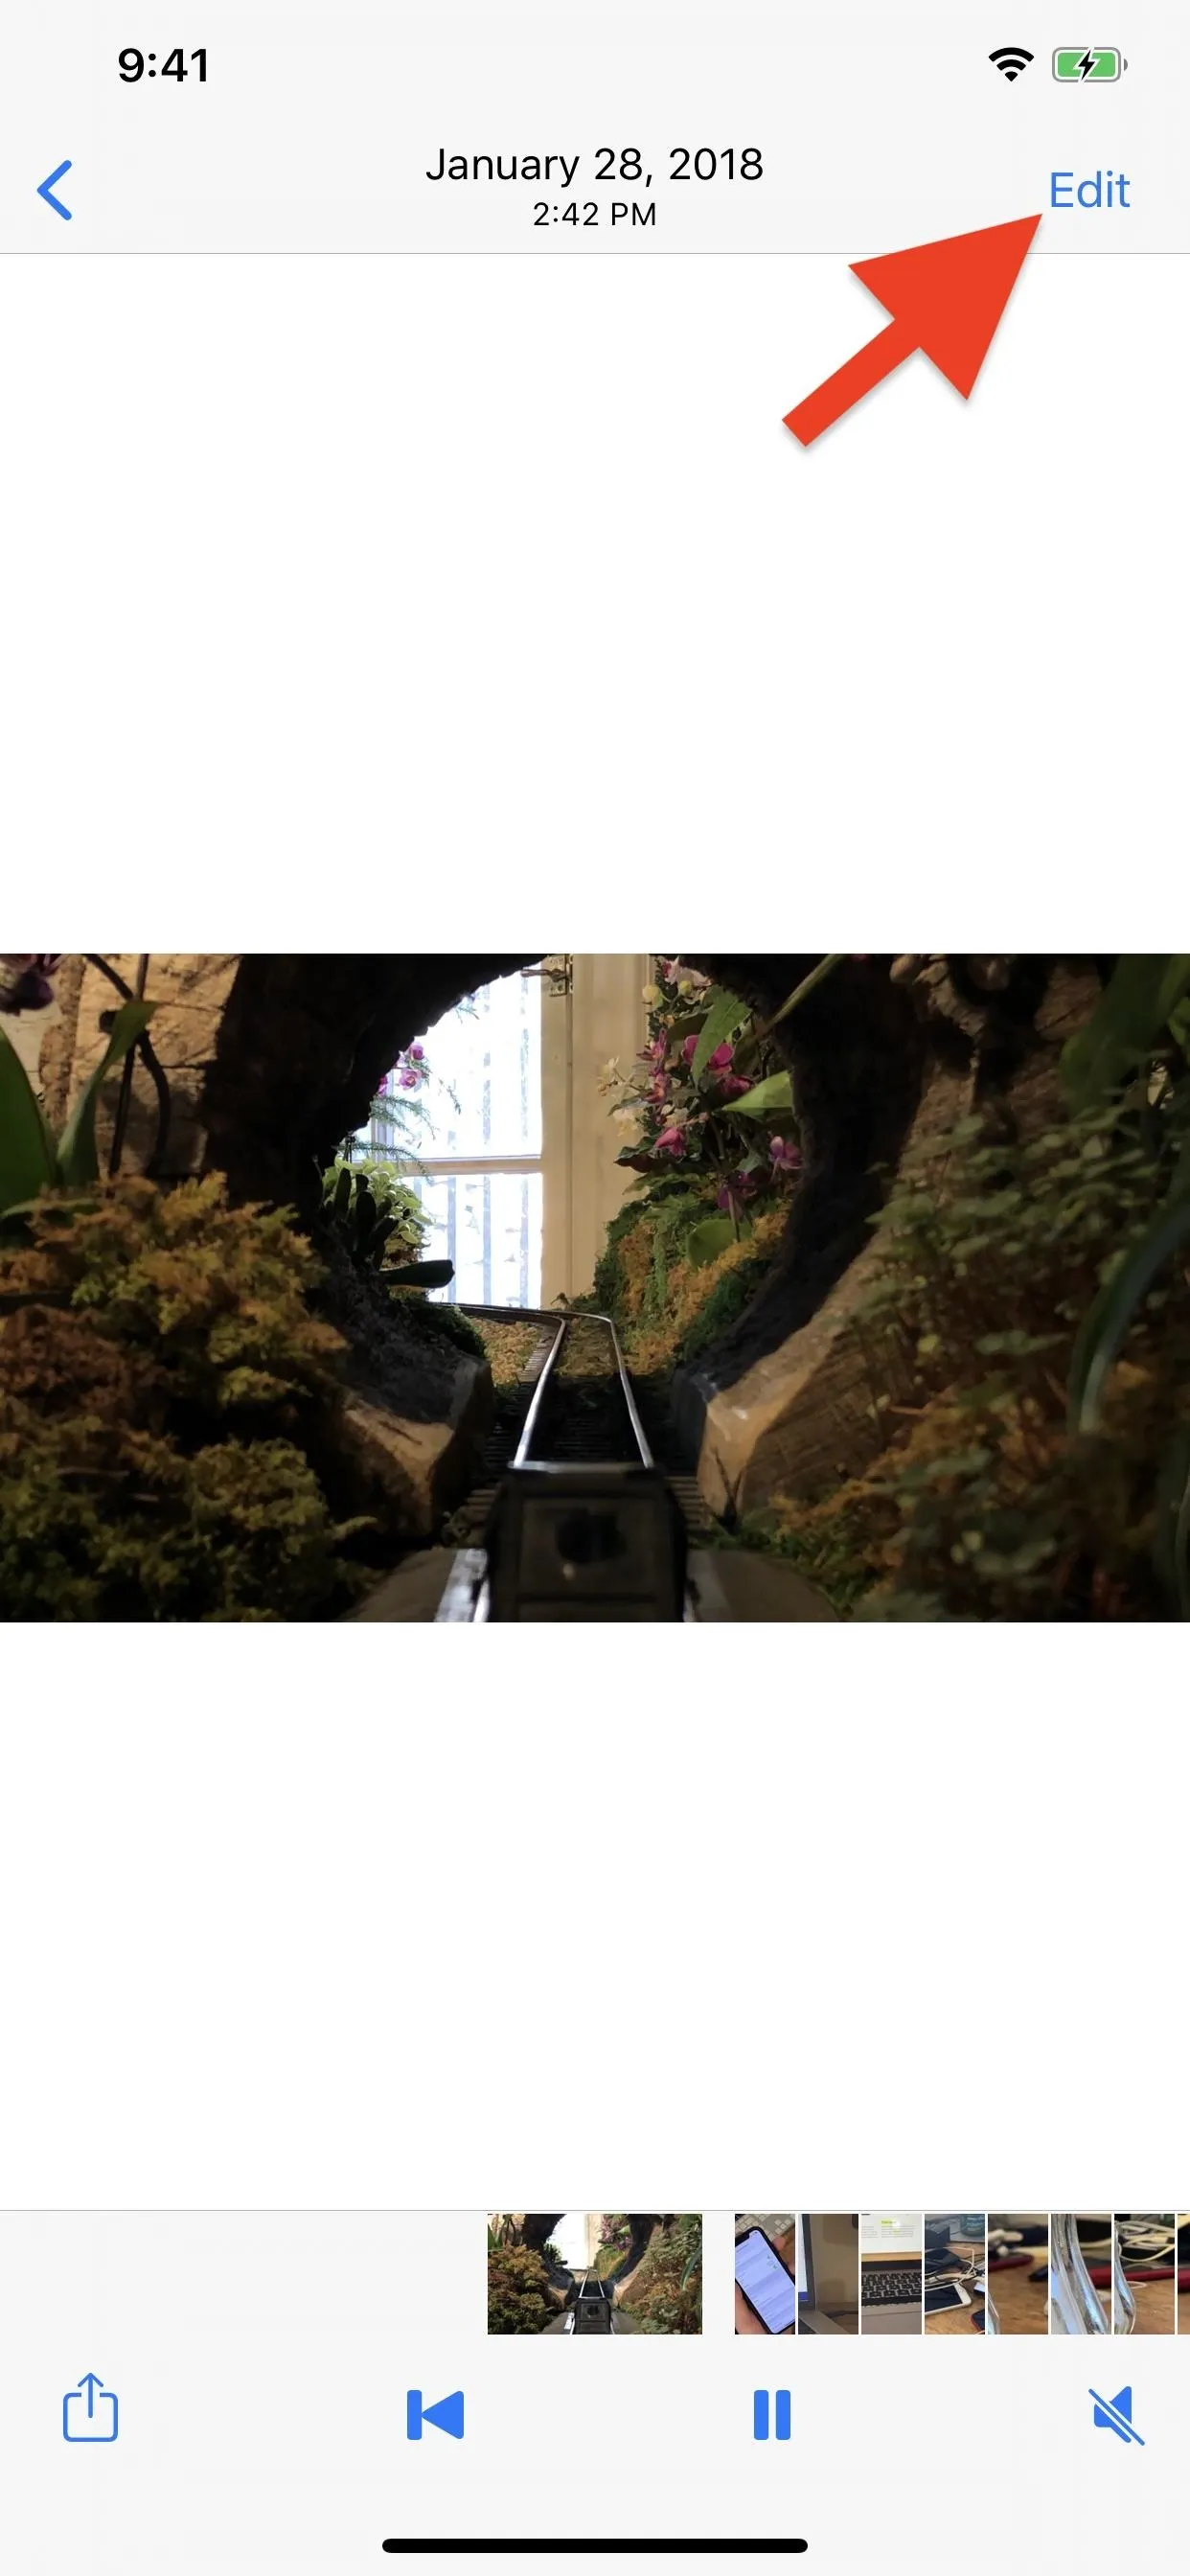
To begin using the video-editing tools in iOS 13 and later, in Photos, select the movie you would like to make changes to, then tap the blue "Edit" button in the upper right. After making edits using any of the tools listed below, tap the yellow "Done" button to save your changes. The white "Cancel" button will remove all unsaved edits.
In iOS 13.3 and later, when you hit "Done," you will have the choice between "Save Video" or "Save Video as New Clip." The former writes over the current file (though, you can revert any changes) while the latter creates a brand new one. For some reason, iOS 13.0 through iOS 13.2.3 removed the new clip option, which was available in previous iOS versions.
Trim Video (iOS 5 & Later)
Just like in iOS 12 and older versions, you can trim videos from both the beginning and end. To shave some footage off of the beginning, drag the left arrow of the timeline to the right. Once you start dragging it, the section of video getting cut is grayed out, and the rest has yellow highlighting. The preview will adjust to the frame below your finger to help you gauge where to stop. Repeat with the right arrow to trim the ending.
Remove Audio (iOS 13 & Later)
If there is background construction noise, ambient chatter from being a public place, or other distracting sounds in your video, iOS 13 lets you avoid it. While there is no way to adjust volume levels or reduce background noise, you can remove the audio altogether. Tap on the yellow loudspeaker icon in the upper left. When it's gray with a line through it, the audio track will disappear after saving the file.
Crop & Rotate (iOS 13 & Later)
Apple's iOS 13 brings several new tools to change the shape of your videos, from basic options like cropping and rotating to more advanced tools like mirroring and skewing. To access these new features, select the crop icon, the last icon in the toolbar.
1. Crop
By default, you will crop in a freeform shape, so grab a corner handle of the video and drag inward, and repeat for the other corners until it's cropped to your liking. You can also pinch and zoom on the image to choose a new crop area.
Tapping the icon next to the ellipsis will allow you to lock the aspect ratio to a variety of options, either in portrait or landscape views. These include the original aspect ratio, square, 9:16 (or 16:9), 8:10 (or 10:8), 5:7 (or 7:5), 3:4 (or 4:3), 3:5 (or 5:3), and 2:3 (or 3:2). When locked, dragging a corner will keep the aspect ratio in place, and you can still pinch to zoom to change the crop area as well.
You can "Reset" the crop if you don't like your changes, something that's especially handy when freeform cropping. And you can tap the aspect ratio icon again to go back to the other editing tools.
2. Rotate
In the upper left, tap the square icon with a curved arrow by its corner to rotate the video. Each time you touch it, the video will turn 90 degrees clockwise.
3. Flip
When you are taking a selfie with your iPhone — a photo or video selfie — the preview makes it seem like you're looking into a mirror, adding a degree of familiarity since it's how you most likely always see yourself. But when you take a photo or video selfie, the results are flipped to show the mirror's point of view. In other words, how someone else would see you in person, which is useful because texts and symbols would appear as they should instead of backward.
However, if you'd rather have the video selfie appear as you shot it, you can flip it back. To do so, tap the icon that looks like a split triangle with a double-sided arrow above it.
Crop, rotate, and flip in action.
4. Straighten
Below the video (in portrait orientation) or to its right (in landscape), you'll see the "Straighten" tool, whose icon is a circle with a horizontal line through it, is already selected. Move the slider left or right to turn the video anywhere from a negative 45-degree angle to a positive 45-degree angle.
To reset the effect, either move the slider back to where the small white dot is, tap the effect icon (which preserves your last angle in case you want to go back), or tap "Reset" up top.
5. Skew
Next to the "Straighten" button are buttons for "Vertical" and "Horizontal" skews. The vertical one is a trapezoid with a vertical line through it, while the horizontal one is a trapezoid with a horizontal line through it. Using the slider for either will skew the perspective of the video either vertically or horizontally.
An example of when this comes in handy would be if you want to mimic the Star Wars opening crawl for on-screen text, albeit, to a lesser degree.
To reset the effect, either move the sliders back to where the small white dots are, tap the effect's icon (which preserves your last angle in case you want to go back), or tap "Reset" up top.
Straighten and skew in action.
Add Filters (iOS 13 & Later)
You can now add some flair to your videos with one of nine filters, which are different options than those provided by the iMovie Photos extension, which has ten additional filters you can use on top of the new ones in iOS 13.
To get to the filters, tap the filters icon (the three overlapping circles) in the toolbar. A series of thumbnail images will appear for each filter, which you can cycle through. Each thumbnail shows a quick preview of what it would look like on the current frame of the video. The filters include:
- Vivid: Brightens the video and accents the highlights There are also Vivid Warm and Vivid Cool options to give the video a yellow or blue tine, respectively.
- Dramatic: Darkens the video and accents the shadows. Also includes Dramatic Warm and Dramatic Cool options.
- Mono, Silvertone, and Noir: Different black and white effects.
Additionally, each filter has a slider underneath to change how intense the filter is, allowing you to adjust them even further.
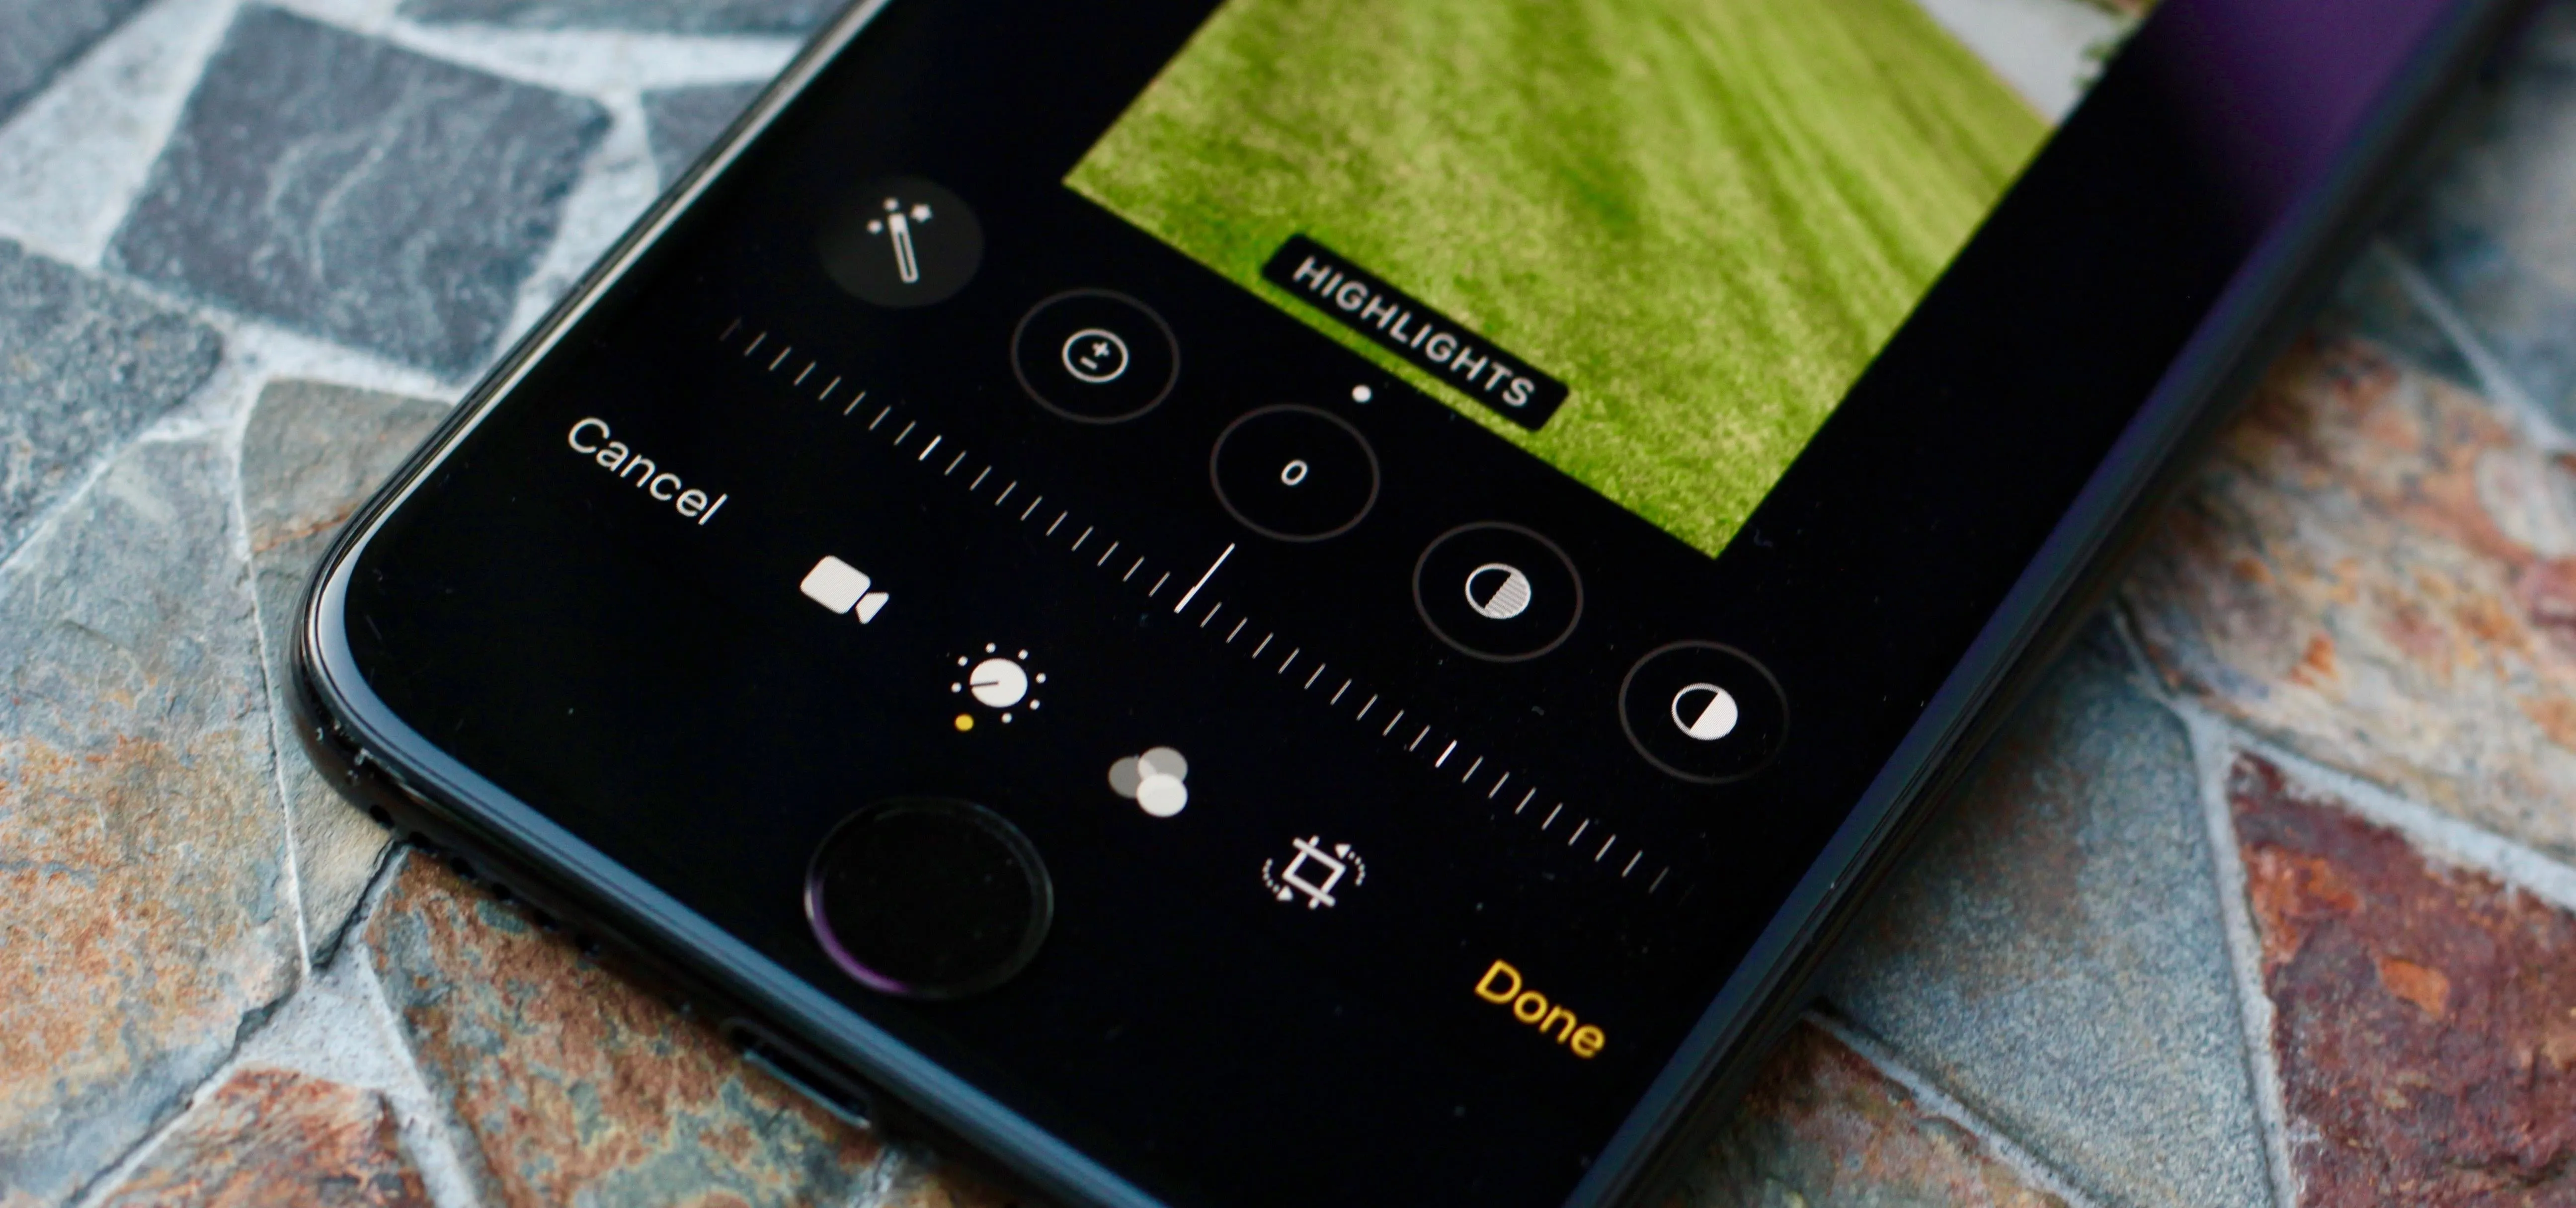
Make Adjustments (iOS 13 & Later)
Apple's iOS 13 brings nearly all of the image adjustment options to video as well. The only one missing is "Brilliance." To get to the adjustments, tap the adjustments icon (a circular dial with dots around it) in the toolbar.
The first option will be "Auto" enhance (the magic wand icon), which tries to figure out what's in the video and adjust the settings to an optimal look, but you still need to move the slider to see anything happen. It generally does an excellent job, but if you want to tweak things a bit more, there are a whole lot more options to the right of the enhance tool. These options include:
- Exposure
- Highlights
- Shadows
- Contrast
- Brightness
- Black Point
- Saturation
- Vibrance
- Warmth
- Tint
- Sharpness
- Definition
- Noise Reduction
- Vignette
Each of these includes a slider underneath to change the intensity of the effect, allowing you to get your video just right. Just like the straighten and skew tools, the impact of each of these adjustments can be undone by either moving the slider back to the small white dot or tapping the adjustment effect's icon. The latter will preserve your last slider position so you can tap the icon again to go back to it.
Use Photos Extensions (iOS 8 & Later)
As could be done since iOS 8, videos can be edited using Photos app extensions. Apple's iMovie is the most notable one for videos, but there are third-party apps that provide extension as well.
- Don't Miss: iMovie Tips & Tricks for Your iPhone
To access these extensions, tap the ellipsis (•••) icon in the upper right. In the activity view, you'll see a list of apps you have installed on your iPhone that support Photos extensions. However, you may need to tap "More" to toggle them on. If there are none, you won't see any apps listed.
Tap any of them to load the extension, and when you finish making changes, tap the "Done" button to return to Photos' chief editor.
Compare with Original (iOS 13 & Later)
No matter what edits you have made with the tools above, you can quickly compare them to your original video by tapping the video itself. Tapping again will show your changes.
Revert to Original (iOS 8 & Later)
One of the most powerful features in the Photos app is that edits are non-destructive. If you want to go back to the beginning, tap the "Edit" button to open the editor, then tap the red "Revert" button, followed by "Revert to Original." All of your changes will disappear, and you'll have your video just as it was when you started.
The updated Photos app is a game-changer for video editing. It gives every iOS user a set of easy-to-use yet powerful video editing tools without having to find third-party apps to do all the work.
Cover photo by Mike Goril/Gadget Hacks; Screenshots and GIFs by Justin Meyers/Gadget Hacks


Comments
Be the first, drop a comment!