


There's always an iPhone in our list of top phones for privacy and security, due in large part to advanced security measures like Face ID, consistent iOS updates, and easy ways to prevent unwanted access and excessive data sharing. However, some of those options actually do the opposite and hinder security. It all depends on how you use your iPhone, but you should at least know everything available.
Like previous iOS versions, iOS 12 has a lot of privacy and security-related features to dig through, and how you use them will vary depending on how secure you want to make your iPhone. We've rounded up some of the most important security settings you should know about, from blocking access to outside users, hackers, and thieves to limiting how much data you share with Apple and third-parties.
While there are a few Safari-related tips below, Safari is its own beast which houses a ton of security features itself. We listed some of the most important ones here, but check out our guide on all the Safari privacy settings you should know about.
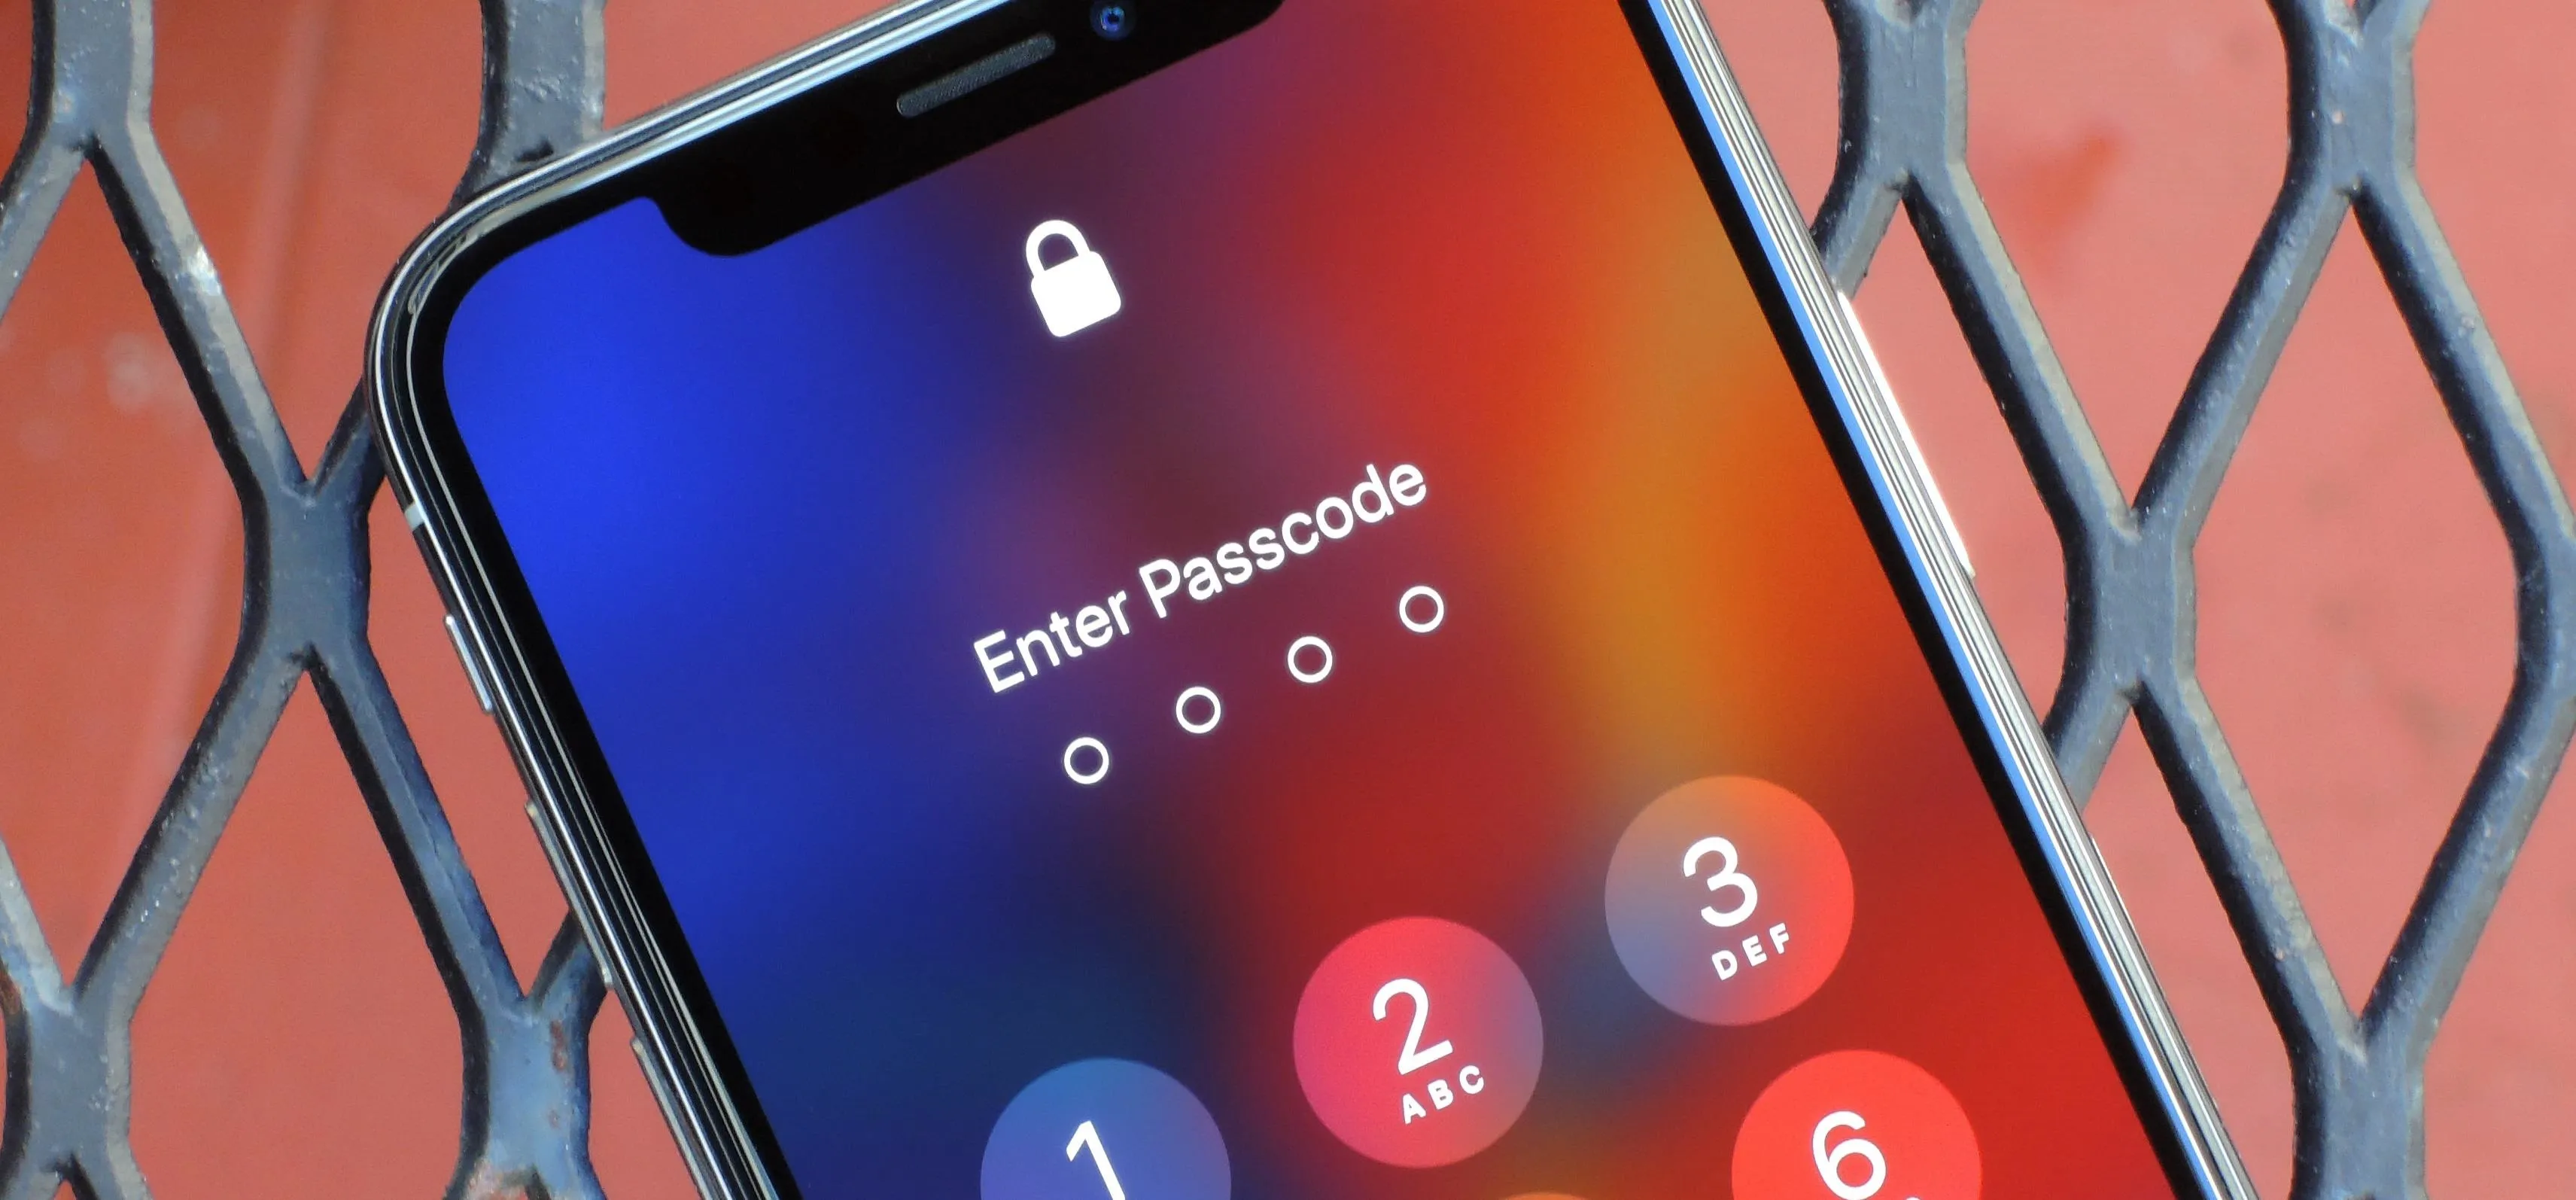
1. Use a Stronger Passcode
Your iPhone's numeric passcode is set to six digits by default, but you can still set it to four digits for faster access. As convenient as the latter option is, it's nowhere near as secure as the former. To put things in perspective, a four-digit passcode has 10,000 possible combinations while a six-digit one has one million —the same odds as Face ID.
If you want to maximize your iPhone's security, however, you may want to switch from a passcode to a password, as using a true password or passphrase with a combination of letters, numbers, and special characters will make your device virtually impossible to crack. You could also choose a bigger numeric-only passcode.
Settings –> Face ID & Passcode –>
Change Passcode –> Passcode Options

-OR-

Settings –> Touch ID & Passcode –>
Change Passcode –> Passcode Options
Obviously, a complicated password is far from ideal if quick accessibility is important to you, but it's currently the most secure way to lock your iPhone. So if you want to strike a great balance between convenience and security, a six-digit or bigger numeric PIN is the way to go, just be sure to steer clear of stay common passcodes like 123456 or all of the same number.
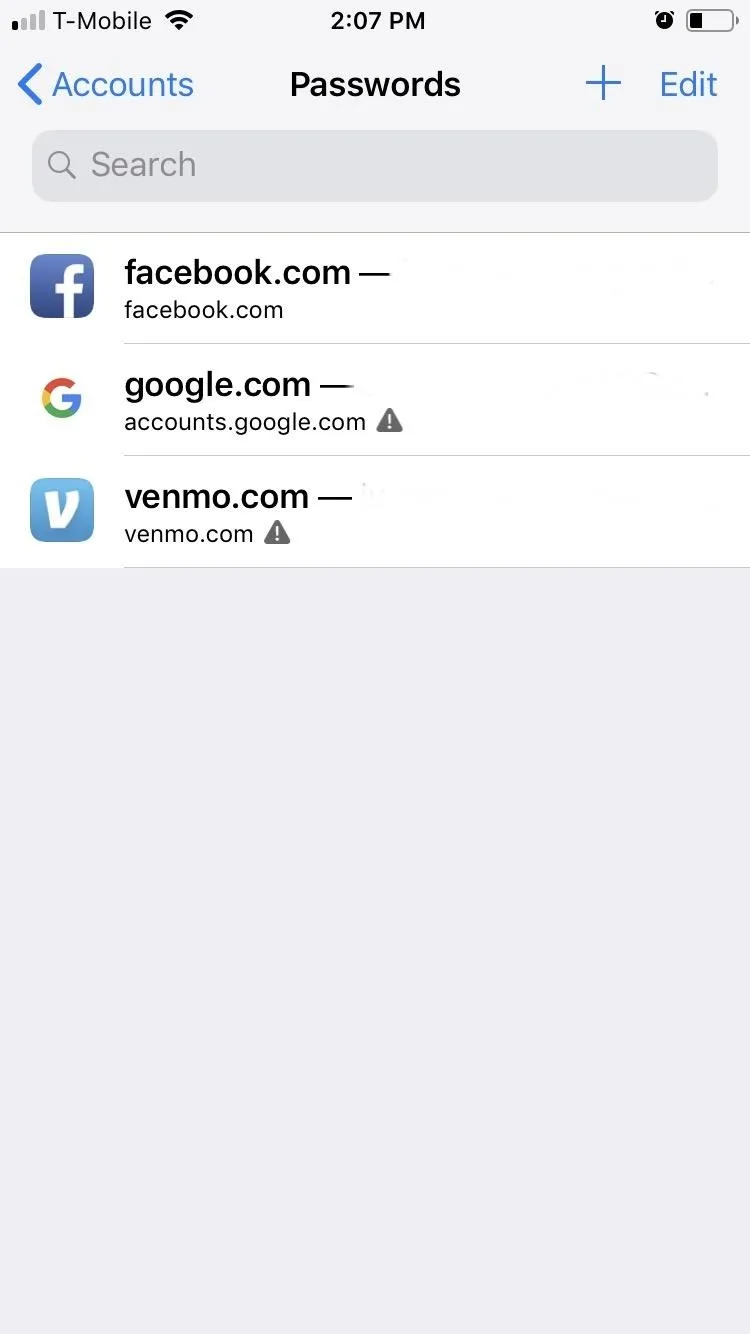
2. Audit Your Passwords
In an effort to enhance website and app security, Apple introduced the Password Reuse Auditing feature for iCloud Keychain in iOS 12 to keep track of saved passwords and check for identical ones for different accounts.
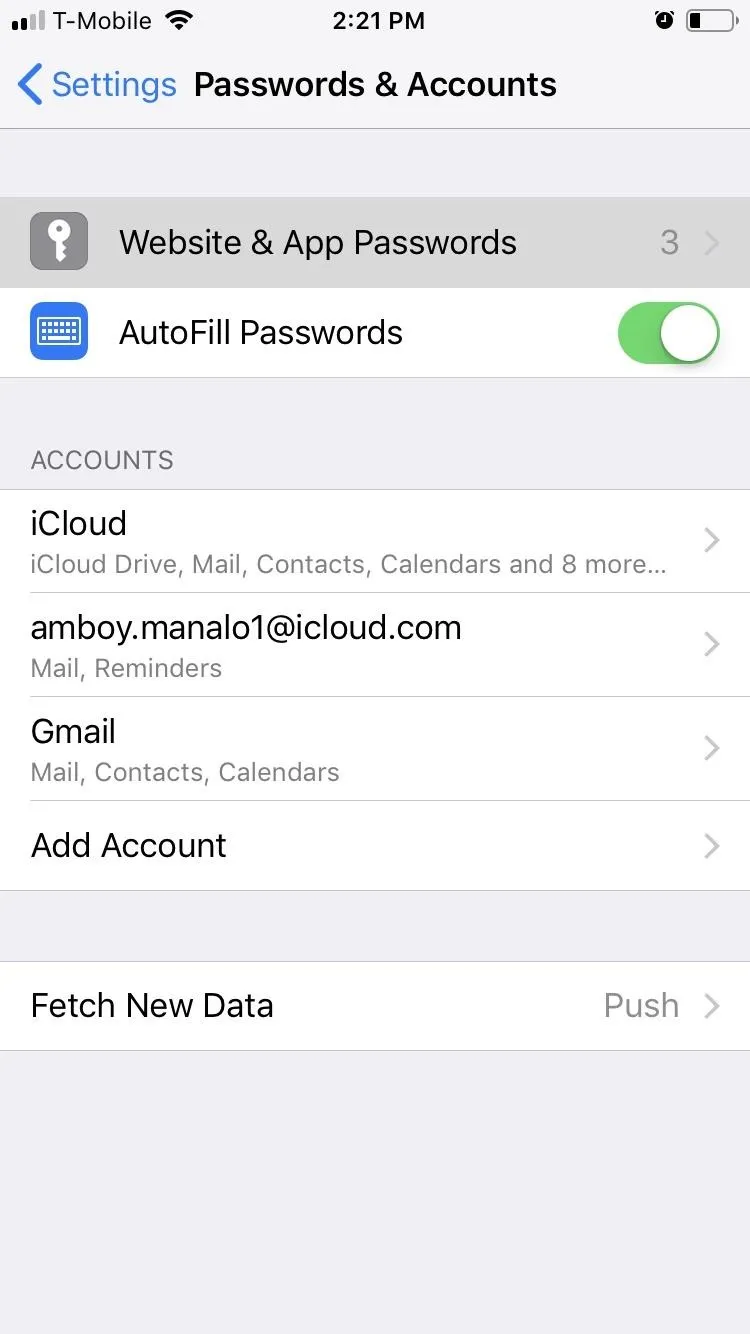
Settings —> Pasword & Accounts —>
Website & App Passwords
Any accounts that share the same password will be flagged with a triangle containing an exclamation point. Hit any of the accounts in question, and tap on "Change Password on Website" on the following page to create a new password for the suspect account.
However, is it even a good idea to keep passwords in iCloud Keychain?
3. Delete Saved Passwords for Apps & Websites
The same iCloud Keychain seen above is Apple's default password manager on your iPhone, and these passwords are protected by your iPhone's passcode, Face ID, or Touch ID. However, if someone ever gains entry into your iPhone and has your passcode, they'll have total access to all of your passwords.
Settings –> Passwords & Accounts –>
Website & App Passwords —>
(Delete Your Passwords)
When in the "Website & App Passwords" menu, to remove them one at a time, swipe left on each password and tap on "Delete." To delete numerous passwords at once, hit "Edit" in the top-right corner, select each one you want to erase, then tap "Delete" to wrap up.
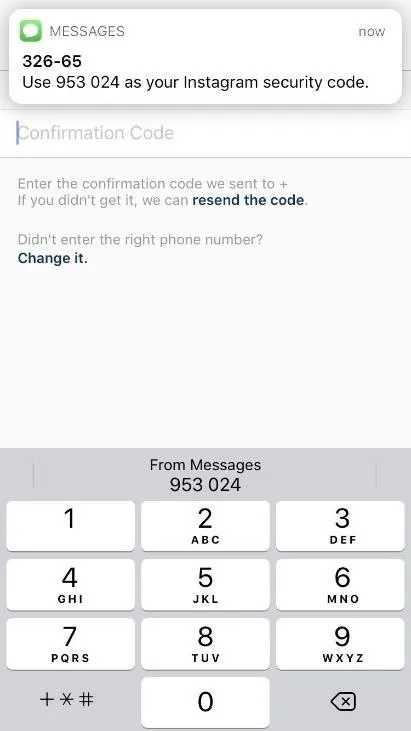
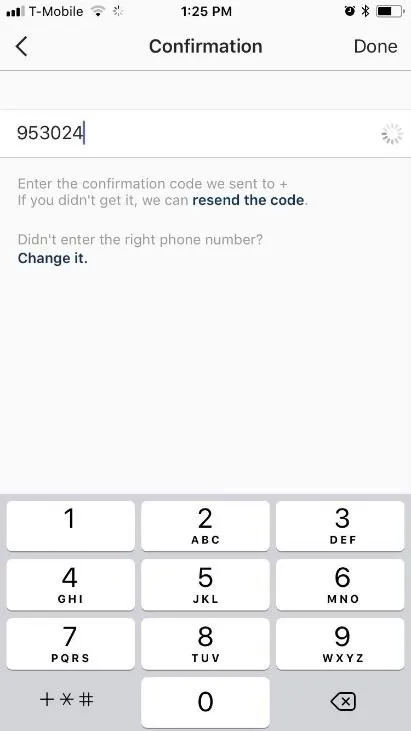
4. Use Automated Two-Factor Authentication
Short for two-factor authentication, 2FA gives you an added layer of security for apps and other services in the form of a numeric security code. Some accounts you may have would rather you use third-party authenticator apps, but for those that are still based on text messages, the process is now easier.
Instead of juggling between apps to retrieve and input a time-sensitive code, you can use AutoFill. Now that it's easier to input these code, you should go back and revisit accounts that contain sensitive data and enable 2FA if it's available.
5. Use Biometrics to Confirm App Store Purchases
Whenever money is involved, it's always a great idea to err on the side of caution to protect your wallet from unwanted use, and this extends to the App Store. That said, we highly recommend beefing up the App Store's security to require your authorization before purchasing any apps. This will prevent an unauthorized user from potentially going on an App Store shopping spree at your expense.
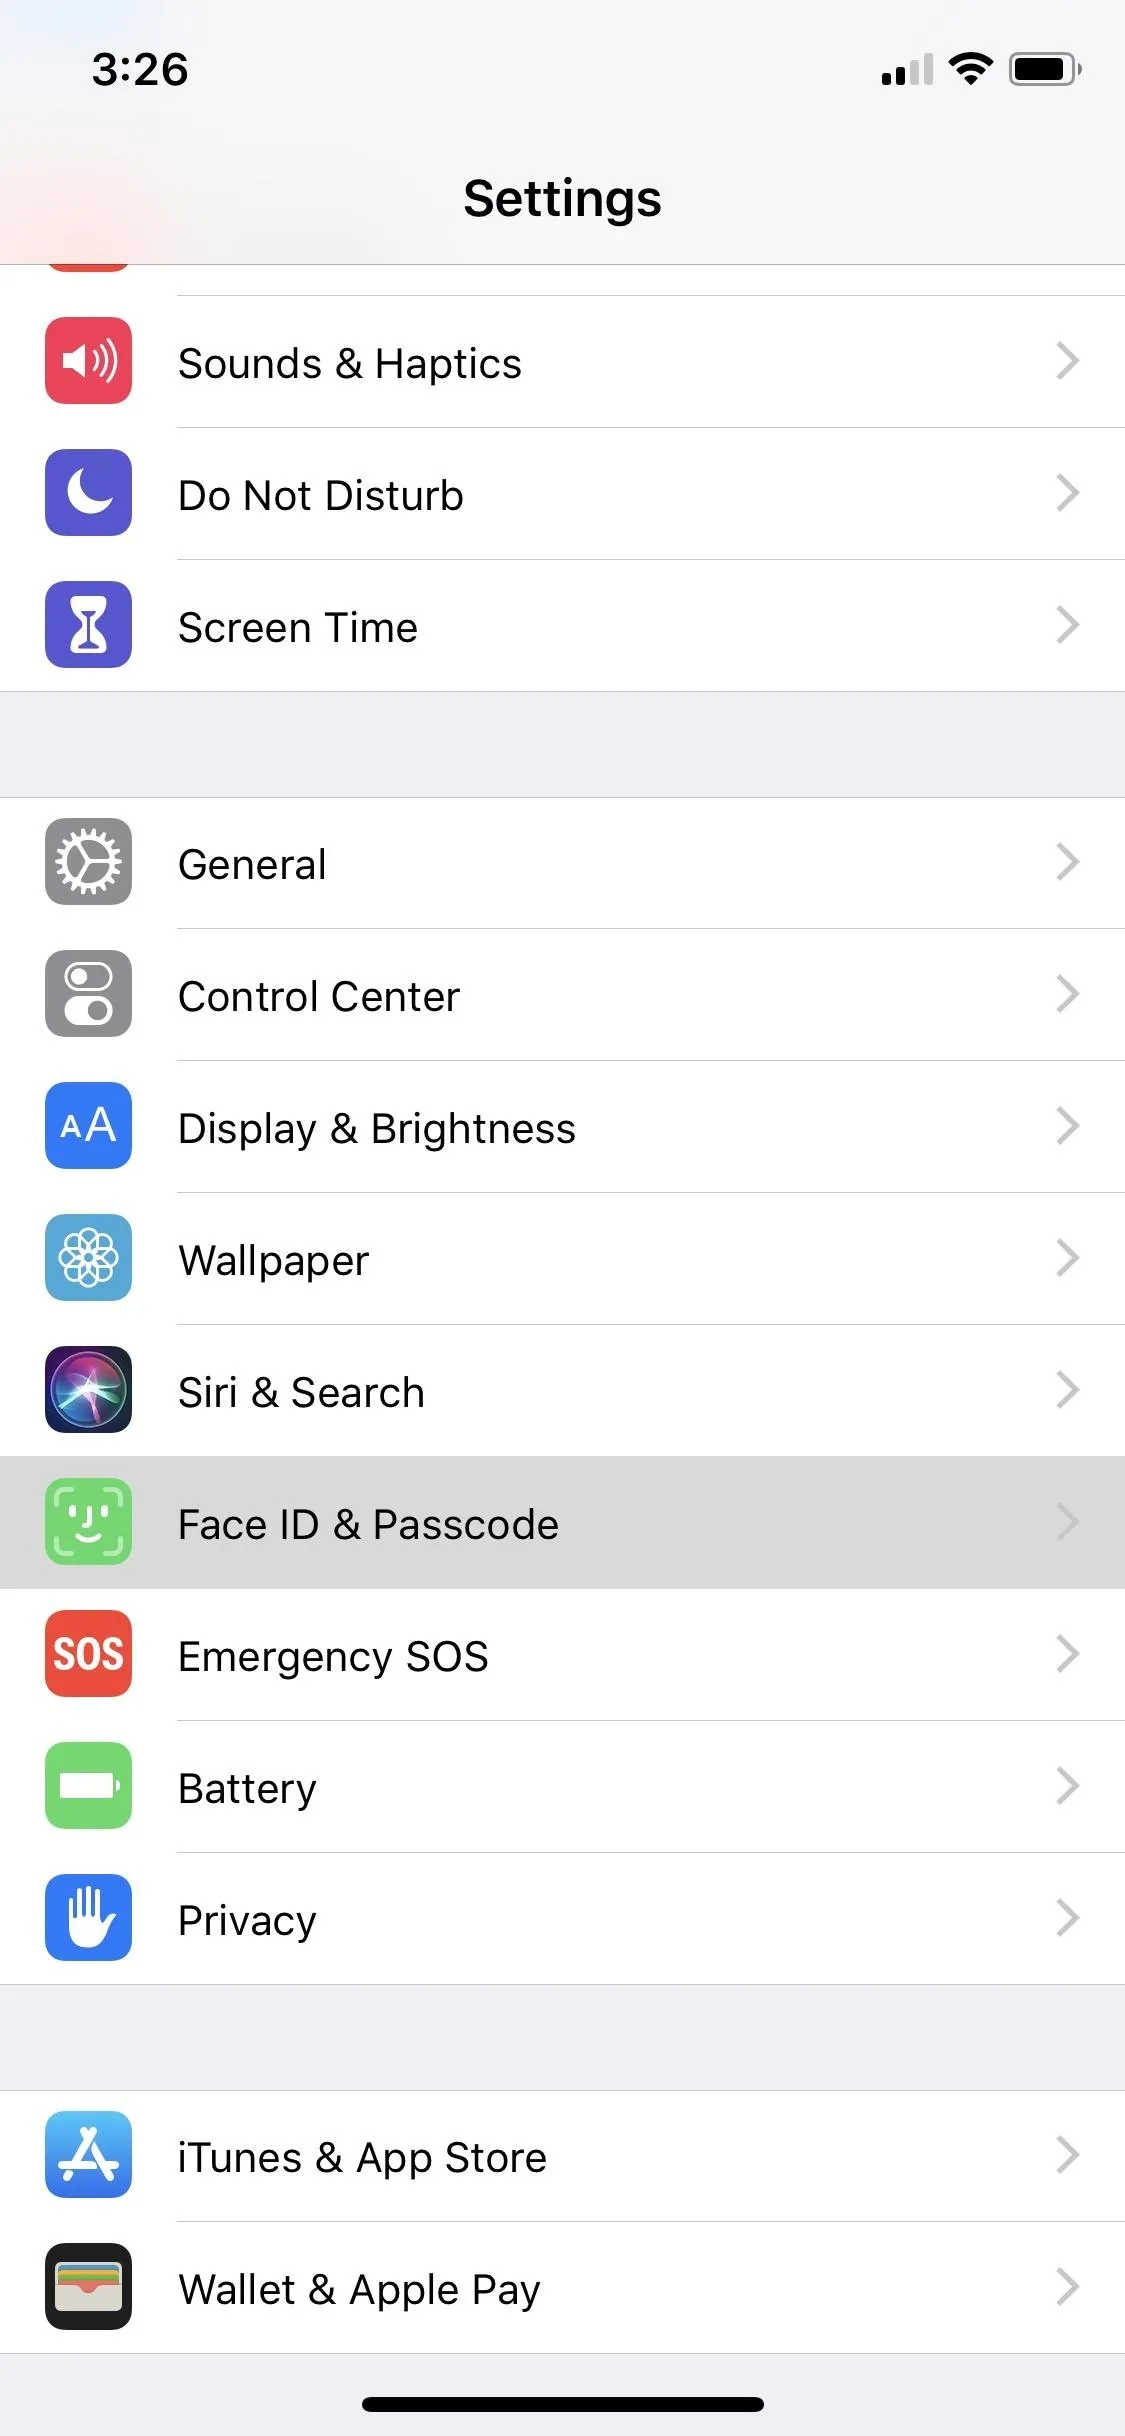
Settings —> Face ID & Passcode —>
iTunes & App Store (On)

-OR-

Settings —> Touch ID & Passcode —>
iTunes & App Store (On)
If you don't use Face ID or Touch ID, you should set App Store purchases to "Always Require" your Apple ID password to maximize security, which is in a different settings menu. In addition to this, you can also enable the same requirement for "Free Downloads."
Settings —> Your Name —>
iTunes & App Stores —>
Password Settings —>
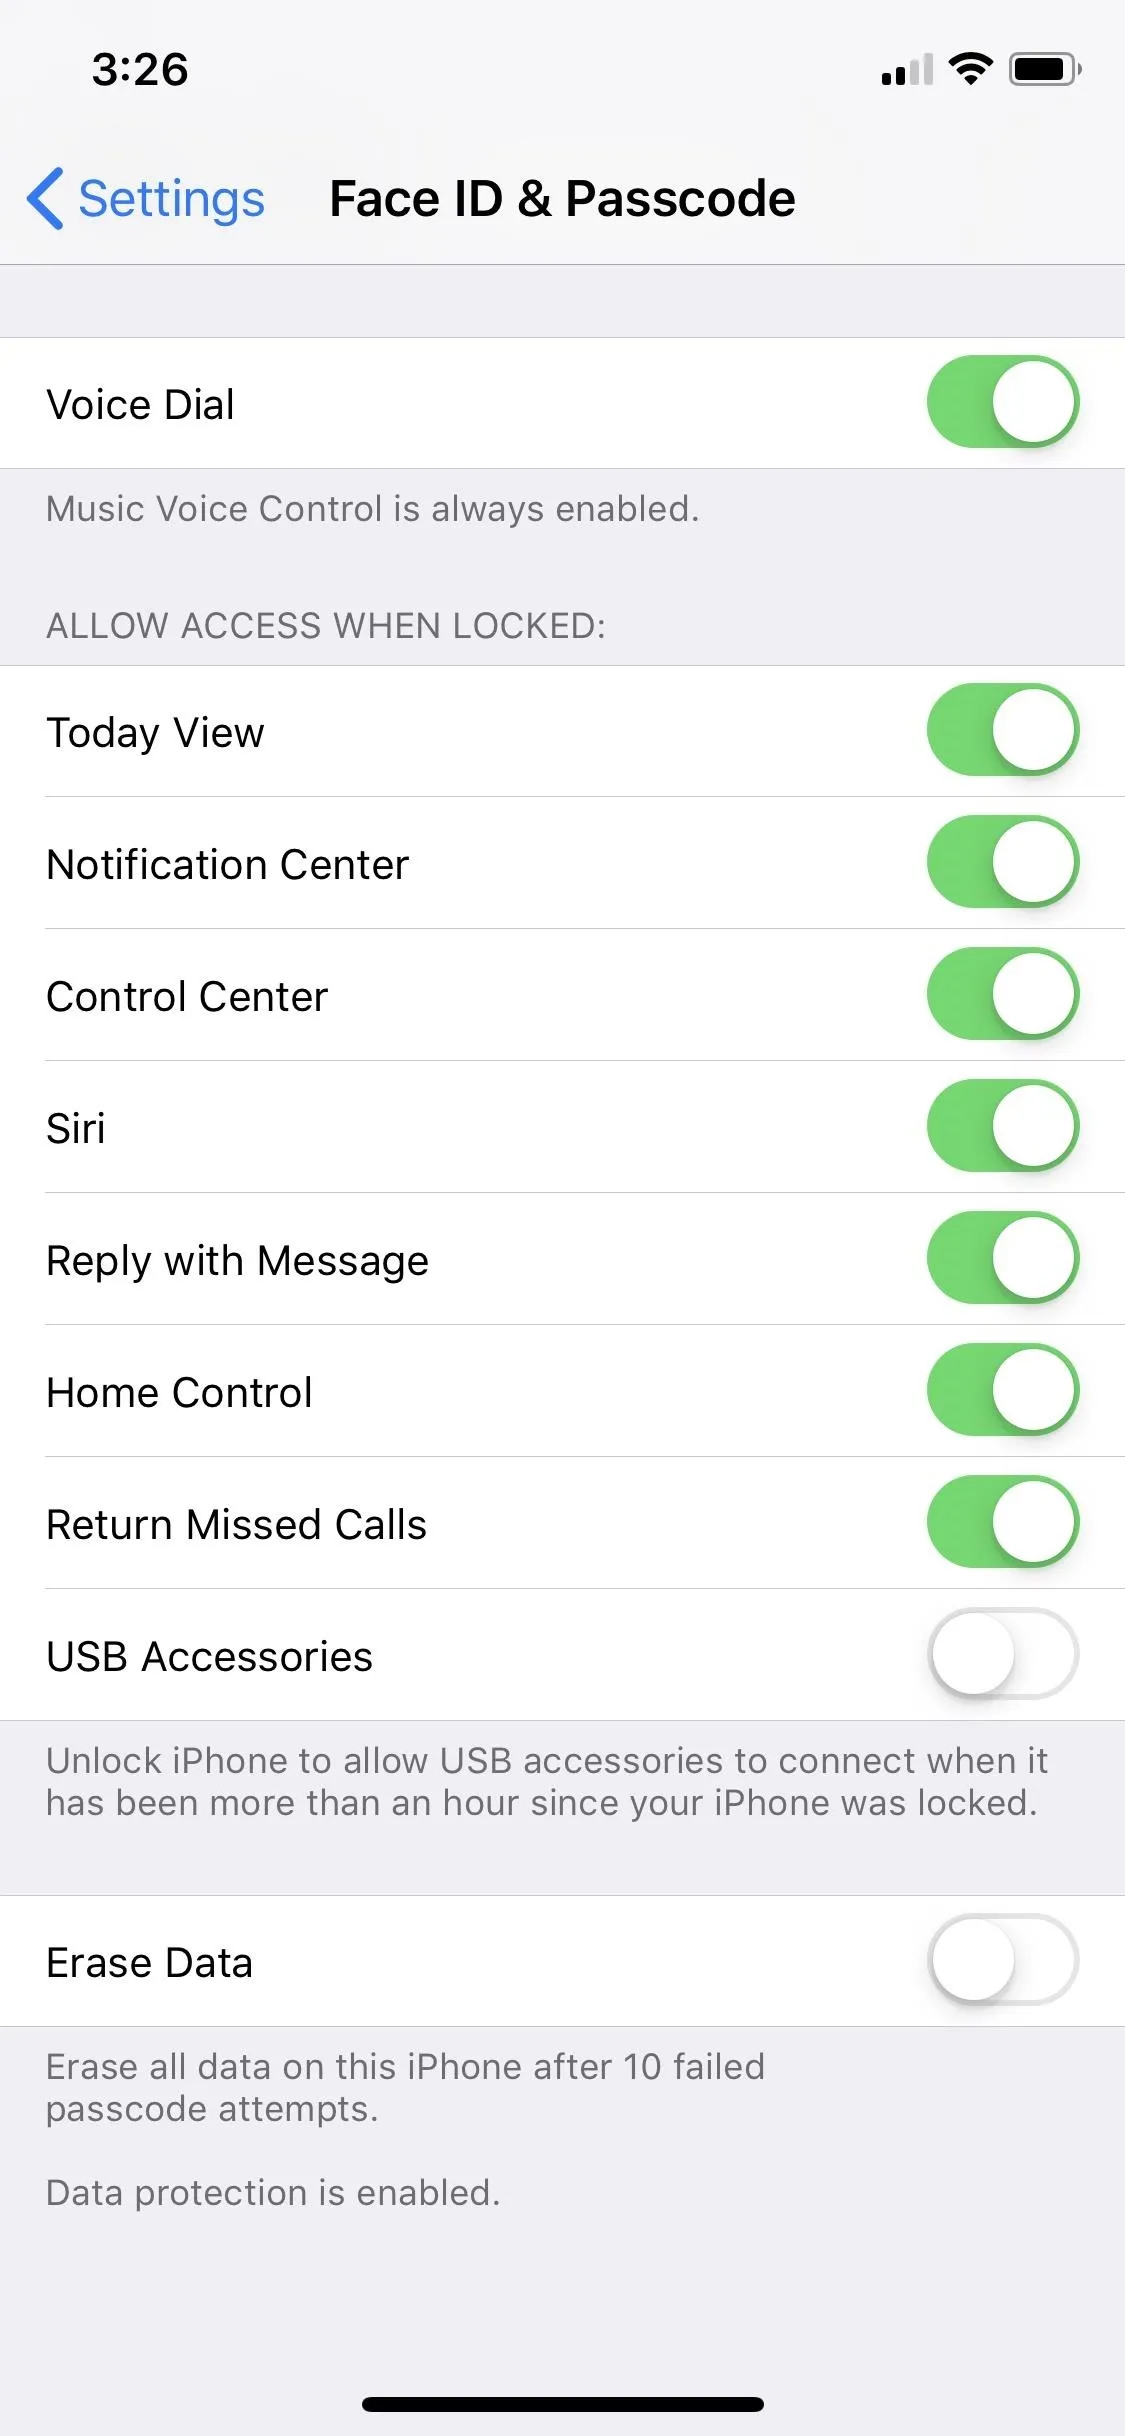
Always Require (Check)6. Block Shady USB Accessories from Your iPhone
Law enforcement agencies across the US have relied upon brute-force unlocking tools like Cellbrite and GrayShift to bypass passcode locks on confiscated devices, due to their ability to circumvent iOS restrictions on the number of incorrect attempts before becoming disabled. With these USB tools, agents are able to enter an unlimited number of passcodes until they finally hit the jackpot.
To combat this, Apple rolled out with USB Restricted Mode, which essentially requires you to unlock your iPhone with Face ID, Touch ID, or your passcode whenever you connect to a USB device. If that weren't enough, Apple also narrowed the authentication requirement for iPhones that haven't been unlocked for one or more hours compared to the seven-day time frame before.
Settings —> Face ID & Passcode —>
USB Accessories (Off)

-OR-

Settings —> Touch ID & Passcode —>
USB Accessories (Off)
This stringent requirement effectively nullifies law enforcement's ability to unlock suspect iPhones with USB unlocking tools, as they will have at most a 60-minute window to gain access to the device before the password requirement kicks in.
7. Disable Face ID on the Lock Screen (iPhone X & Above)
Since its introduction with the iPhone X, Face ID has proved itself a worthy successor to Touch ID in regards to keeping your iPhone secure from unwanted access. Even still, the feature isn't perfect. Apple claims a false acceptance rate of one in a million, which translates to about 7,600 other faces that may be able to spoof your phone, given earth's total population of 7.6 billion.
To make matters worse, there's the ever-present risk being forced to use your face to unlock your device against your will. So your best bet would be to turn off its unlock abilities or disable Face ID altogether and stick with the good old passcode or password method on the lock screen to maximize your iPhone's security.
Settings —> Face ID & Passcode —>
iPhone Unlock (Off)

-OR-

Settings —> Face ID & Passcode —>
Reset Face ID
8. Disable Face ID Temporarily (iPhone X & Above)
If you want to keep on using Face ID on the lock screen due to the sheer convenience it brings, the next best thing to protecting your device before it's ripped out of your hand by thieves or law enforcement is disabling Face ID using button presses. The law can make you use your face to unlock your iPhone but they can't force you to enter a passcode, which is what will happen after disabling Face ID.
- Full Guide: How to Quickly Disable Face ID on Your iPhone X
9. Disable Touch ID on the Lock Screen (iPhone 8 & Below)
Like Face ID, the Touch ID feature found on Home button-equipped iPhones is not without its limitations. For one, the fact that your fingerprint data is stored within your iPhone can be problematic, as someone could potentially pull that sensitive information if your iPhone is accessed without your consent. And similar to Face ID, your fingerprint can also be forcibly used against your will to get into your device.
Settings —> Touch ID & Passcode —>
iPhone Unlock (Off)

-OR-

Settings —> Touch ID & Passcode —>
Fingerprints (Delete All)
You can disable only Touch ID's unlocking abilities or delete all the registered fingerprints to kill Touch ID for good. The first option may be good enough for you.
10. Disable Touch ID Temporarily (iPhone 8 & Below)
As the precursor to Face ID, it's only natural that Touch ID also has the option to be quickly disabled on a temporary basis to prevent it from being used against your will to access your iPhone. By pressing your iPhone's buttons in a certain sequence, you can shut off your iPhone's Touch ID before giving it up, be they nosy loved ones, would-be thieves, or law enforcement.
- Full Guide: How to Quickly Disable Touch ID on Your iPhone
11. Disable & Clear Significant Locations
To enhance some apps that rely on location services, your iPhone has been given the ability to log locations that you frequently visit through the "Significant Locations" setting. Obviously, the convenience the feature brings is at the expense of privacy, which is a huge deal. So if you'd rather not let Apple know about places you visit on a regular basis, disable the feature. You can also clear the history that your iPhone may have accumulated over time.
Settings —> Privacy —>
Location Services —>
System Services —>
Significant Locations —>
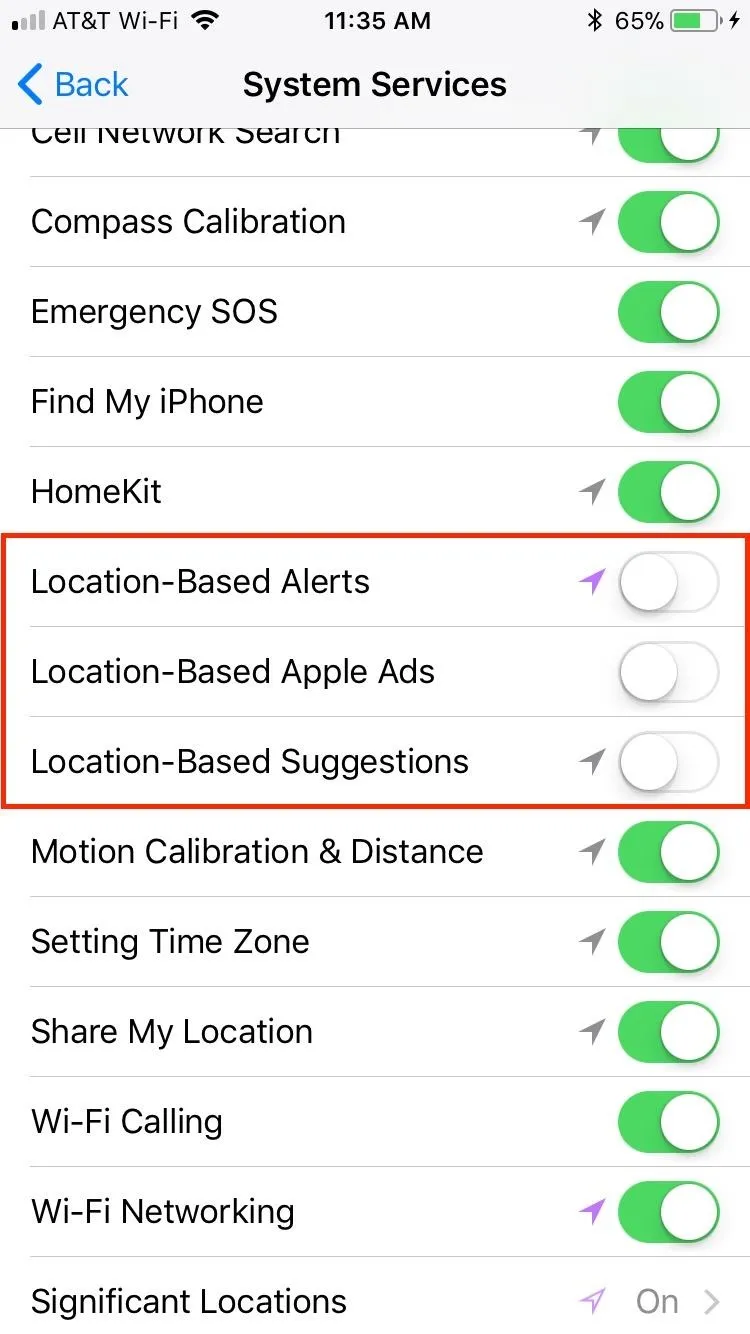
Significant Locations (Off)12. Disable Location-Based Alerts, Apple Ads & Suggestions
Location-based alerts, Apple ads, and suggestions are all able to track your location to give you more targeted ads, notifications, and apps you might like for a more personalized experience overall. Naturally, having these options enabled not only severely compromises your privacy, but in some cases, they are downright creepy.
Settings —> Privacy —>
Location Services —>
System Services —>
Location-Based (Off)
Just make sure all three toggles are turned off (not green) in the settings, and you won't have to worry about getting location-based alerts, ads, or suggestions.
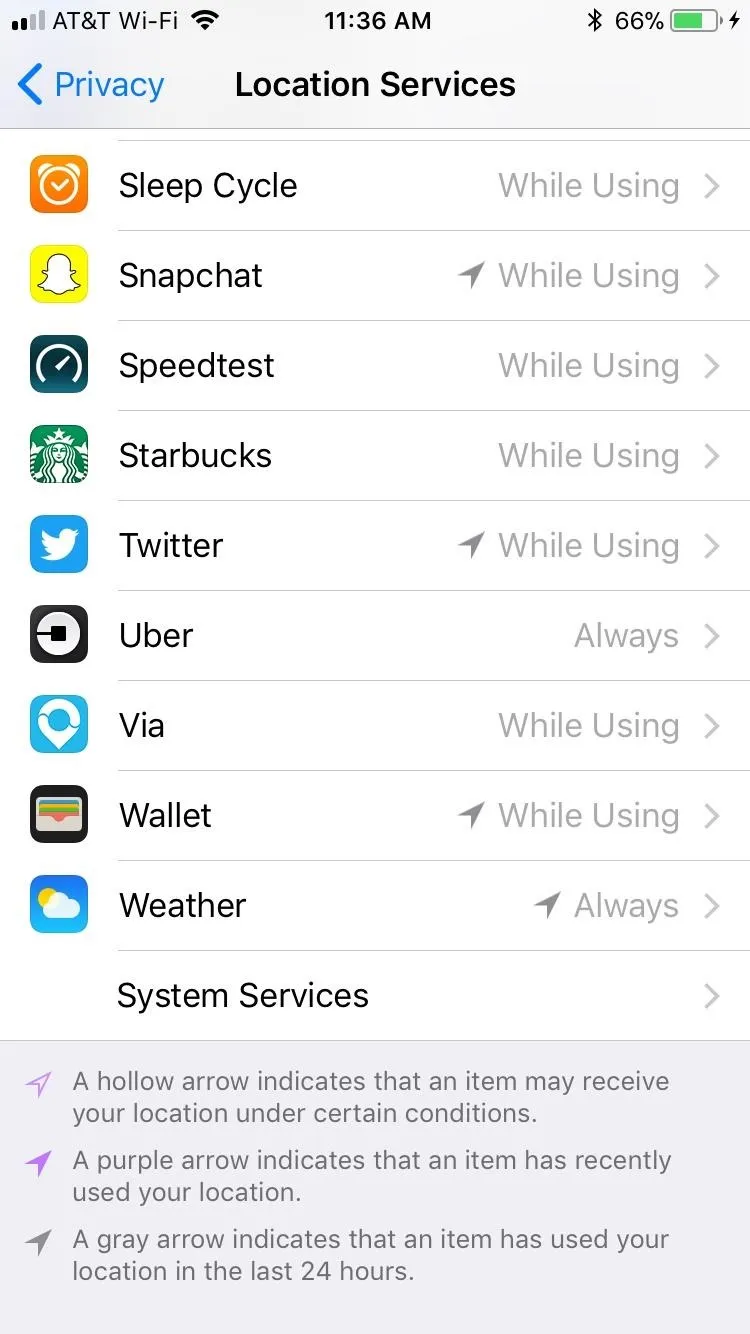
13. Turn Off 'Share My Location'
As the name implies, "Share My Location" lets you share where you currently are with a loved one who requests it. Granted, you and the other person will need to mutually agree to the arrangement using the Find My Friends app, but there are ways of tracking your iPhone without your consent.
Settings —> Privacy —>
Location Services —>
Share My Location —>
Share My Location (Off)
If you'd rather not take any chances, disable it. Beyond that, you can also designate a different device that broadcasts your whereabouts if you have other iOS devices connected to your Apple ID by tapping on "From" within the "Share My Location" page.
14. Prevent Your Parked Location from Being Shown
Unbeknownst to you, your iPhone may be recording your parked location if you've connected it either through Bluetooth or CarPlay. Without a doubt, this information can come in handy if you often have trouble remembering where you parked. But if you're uncomfortable with the inherent breach of privacy that comes with the feature, you should consider disabling it for peace of mind.
Settings —> Maps —>
Show Parked Location (Off)
15. Disable All of Apple's Analytics
Once known as "Diagnostics & Usage," the revamped "Analytics" page buried within your iPhone's Settings contains numerous options that let your device share data with Apple to report bugs in the system and make iOS a better platform overall. While this information helps Apple detect issues to ensure smooth operation, it may come at the cost of your privacy.
Settings —> Privacy —> AnalyticsIf you'd like to cut off the secretive status reports your device sends over to Apple, there are several options you can disable in the "Analytics" menu. Note that you may not see all of these depending on your devices, settings, and app use.
- Share iPhone Analytics: The very top option, which can also have "Apple Watch" included if you own and use one, can be turned off to kill all analytics with Apple.
- Share With App Developers: Turn this off to stop sharing your app data with that app's developer.
- Share iCloud Analytics: Disable this to prevent Apple from using data sourced from your iCloud account to improve on apps and services that rely on such information.
- Improve Health & Activity: Toggle this off to stop transmission of health and activity-related information with Apple to improve these services on your iPhone.
- Improve Health Records: Disable it to stop vital health conditions such as past lab results, medications, along with other conditions from being shared to Apple.
- Improve Wheelchair Mode: This will send Apple your activity data if you use a wheelchair, which may be useful if you actually use a wheelchair. If not, it should be off.
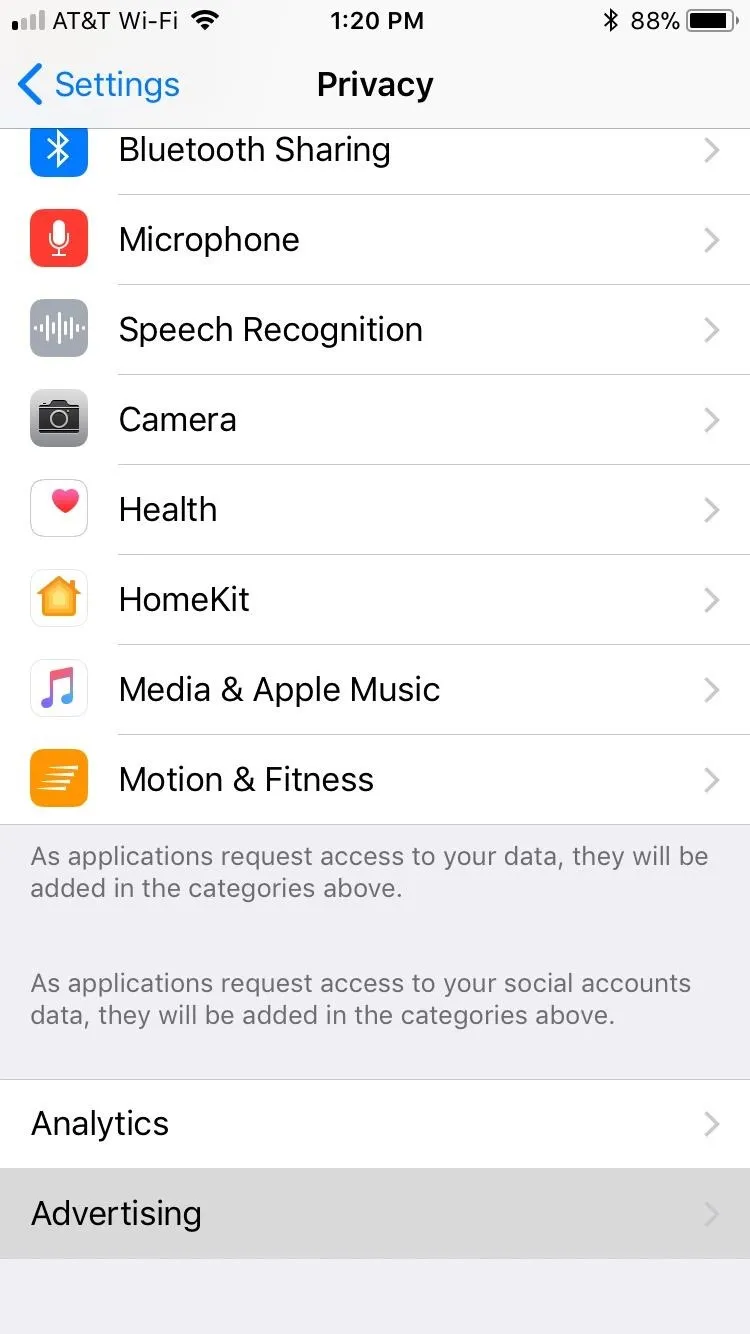
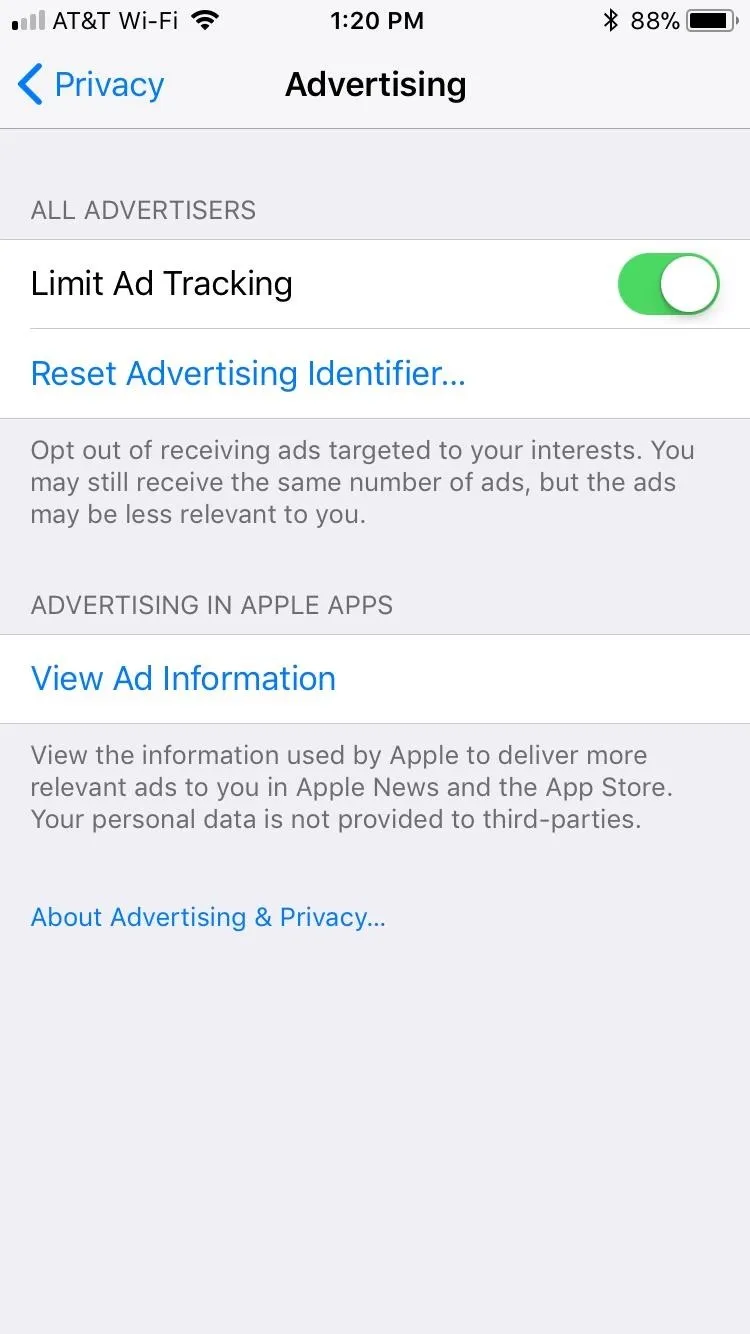
16. Keep Ad Tracking to a Minimum
If you don't want ads that are directly targeted towards you and your interests, you'll want to enable the "Limit Ad Tracking" to lessen Apple's ability to share your data with advertisers. It's worth mentioning that, as the name implies, this option merely limits ad tracking instead of stopping it outright. So even with this setting enabled, Apple claims that your iPhone connectivity, time setting, type, language, location, model, and time setting can still be used against you.
Settings —> Privacy —> Advertising —>
Limit Ad Tracking (On)
If you disabled Location-Based Ads from a previous tip, ad targeting using your location will not apply to you, but everything else will. For more details, be sure to hit "View Ad Information" within the "Advertising" page to learn more.
17. Keep Lock Screen Notifications Private
When you get a notification, whether an email, text, or other type of communication, the whole message or a small snippet of it will appear on your lock screen. These can be read by anyone within eye's view but can be prevented by disabling previews for the apps you don't want anyone to glance at but yourself. You can still view them on the lock screen using Face ID or Touch ID if you want.
18. Prevent Replying in Messages
If you have an iPhone with 3D Touch or Haptic Touch, you can reply to a message straight from its notification on your lock screen — without unlocking your iPhone. However, this only applies if you still have notification previews enabled for the app in question, otherwise, you would need to unlock first.
As convenient as this feature is, it opens the door to unwanted access, as it makes it significantly easier for people to "reply" to messages on your behalf. Needless to say, you should disable this option if you're concerned about giving just about anyone the ability to reply to incoming messages on your iPhone.
19. Auto-Delete Old Messages
As far as old texts and iMessages go, Apple permanently saves them on your iPhone by default and basically leaves it up to you to manually delete. Even with Messages in iCloud enabled, messages will still be kept locally. As such, erasing conversations can be a mind-numbing process, especially if you've made manually cleaning out old messages a part of your monthly routine due to privacy concerns.
Fortunately, your iPhone has an option for automatically deleting old messages once a certain period of time has elapsed. You can select either "30 Days" or "1 Year" to ensure your conversations are erased once they reach the length of time you've set.
Settings —> Messages —> Keep Messages20. Disable 'Raise to Wake'
When enabled, "Raise to Wake" lets you instantly wake your iPhone simply by raising it from a flat position. However, the functionality has some drawbacks with regards to privacy and security. For example, anyone within view of your device's display may see messages and other notifications that are only for your eyes. Luckily, it can be disabled, and for extra privacy on the lock screen, don't forget you can disable previews as mentioned above.
Settings —> Display & Brightness —>
Raise to Wake (Off)
21. Stop Using Lock Screen Widgets
Displaying widgets on your iPhone's lock screen is a convenient method of instantly viewing a wide array of information, including calendar events, battery stats, reminders, news, favorite phone contacts, and packages coming to your door. All this data can be viewed without unlocking the iPhone, a possible privacy concern. Anyone who can pick up your iPhone can view calendar events to track your location, package shipments they can snag from your door, and if you've been talking to people you shouldn't be.
To keep this potential privacy breach from becoming reality, you could hit "Edit" at the bottom of the lock screen, then delete all widgets. Going this this route, however, will result in the loss of all those widgets from your iPhone's Today View, in addition to the lock screen. If you just want to kill widgets for only the lock screen, there are a couple ways to go about it.
22. Disable Control Center on Lock Screen
You can customize the toggles in the Control Center with a number of different features and options. As great as these additions are as far as accessibility, they also have the potential of compromising your privacy and security.
Most content-sensitive apps require a passcode from the lock screen to access these shortcuts, but there are apps that give limited access without having to unlock your iPhone. Having Notes activated, for instance, gives anyone the ability to freely access it straight from the Control Center to write notes, though they cannot view written notes without unlocking your iPhone first.
You can disable apps and tools individually from the Control Center to prevent unwanted access, but this will kill access from the feature outright, even when your iPhone is unlocked. So you may want to disable the Control Center on the lock screen entirely.
Settings —> Face ID & Passcode —>
Control Center (Off)

-OR-

Settings —> Touch ID & Passcode —>
Control Center (Off)
Apple Wallet is the one app that you should definitely remove from your iPhone's Control Center. Granted, your Touch ID, Face ID, or passcode is needed to access any credit cards you saved in your iPhone, but other types of cards such as some gift cards, travel passes, and various other loyalty cards do not. However, disabling Apple Wallet here doesn't make much sense if you still have the Home or Side button shortcut for it set.
23. Ask Websites Not to Track You in Safari
With the removal of the "Ask Websites Not to Track Me" setting in iOS 12.2, Apple has finally acknowledged the option's redundancy, as do not track requests made to sites and advertisers were often left unheard. If you're on a lower version of iOS due to a jailbreak or overall stability, you can still enable the option, but Apple noted that it's possible to be used as a means to fingerprint your device, so either on or off would work depending on your mood.
Settings —> Safari —>
Ask Websites Not to Track Me (On)
24. Easily Spot Less Secure Websites
To bolster your privacy and security while browsing in Safari, Apple has embedded a "Not Secure" alert in Safari's address bar on iOS 12.2, and it shows up for websites that haven't implemented HTTPS yet. The application protocol, which is more secure than HTTP, encrypts data you send and receive from sites.

This feature compliments the automatic warning alerts that Safari would send every time you're on a site with an illegitimate or expired certificate, in addition to notifications for a site's questionable status during a login or checkout process. Needless to say, we recommend staying on the lookout for these warning signs while surfing the web with Safari to keep your data safe from harm.
25. Disable Certain AutoFill Data in Safari
Apart from storing passwords, your iPhone can also save personal information for AutoFill to further streamline filling out forms in apps or online. This feature's benefits are obvious, as it makes entering pertinent data like your name, address, and credit card numbers all the more convenient. If a thief gets into your iPhone, however, access to this treasure trove of data can cause you a lot of grief. In the AutoFill settings, you can disable "Use Contact Info" or "Credit Cards" (or both).
Settings —> Safari —>
AutoFill —>
Use Contact Info (Off) /
Credits Cards (Off)
26. Block All Cookies (For Extreme Privacy)
Cookies are vital to your web browsing experience and allow websites to store bits of your information for faster reloading on subsequent visits. This added convenience comes at the expense of your overall privacy, however, since website and advertisers could know your browsing habits. Apple built in a way to ban all cookies, which you can definitely do, just note that some websites may not work properly or at all without cookies enabled. In those cases, it's better to just block cross-site tracking instead (see next tip).
Settings —> Safari —>
Block All Cookies (On)
27. Block Sites from Tracking You Across Other Sites
Third-party cookies have always been blocked by Safari, so third parties have skirted around Apple's restrictions by taking advantage of first-party cookies associated with legitimate sites. Basically, this sketchy workaround is akin to advertisers piggy-backing off a website's own cookies which are necessary for faster browsing. By preventing cross-site tracking, you're maintaining some privacy without having to block all cookies which can cause issues on websites.
Settings —> Safari —>
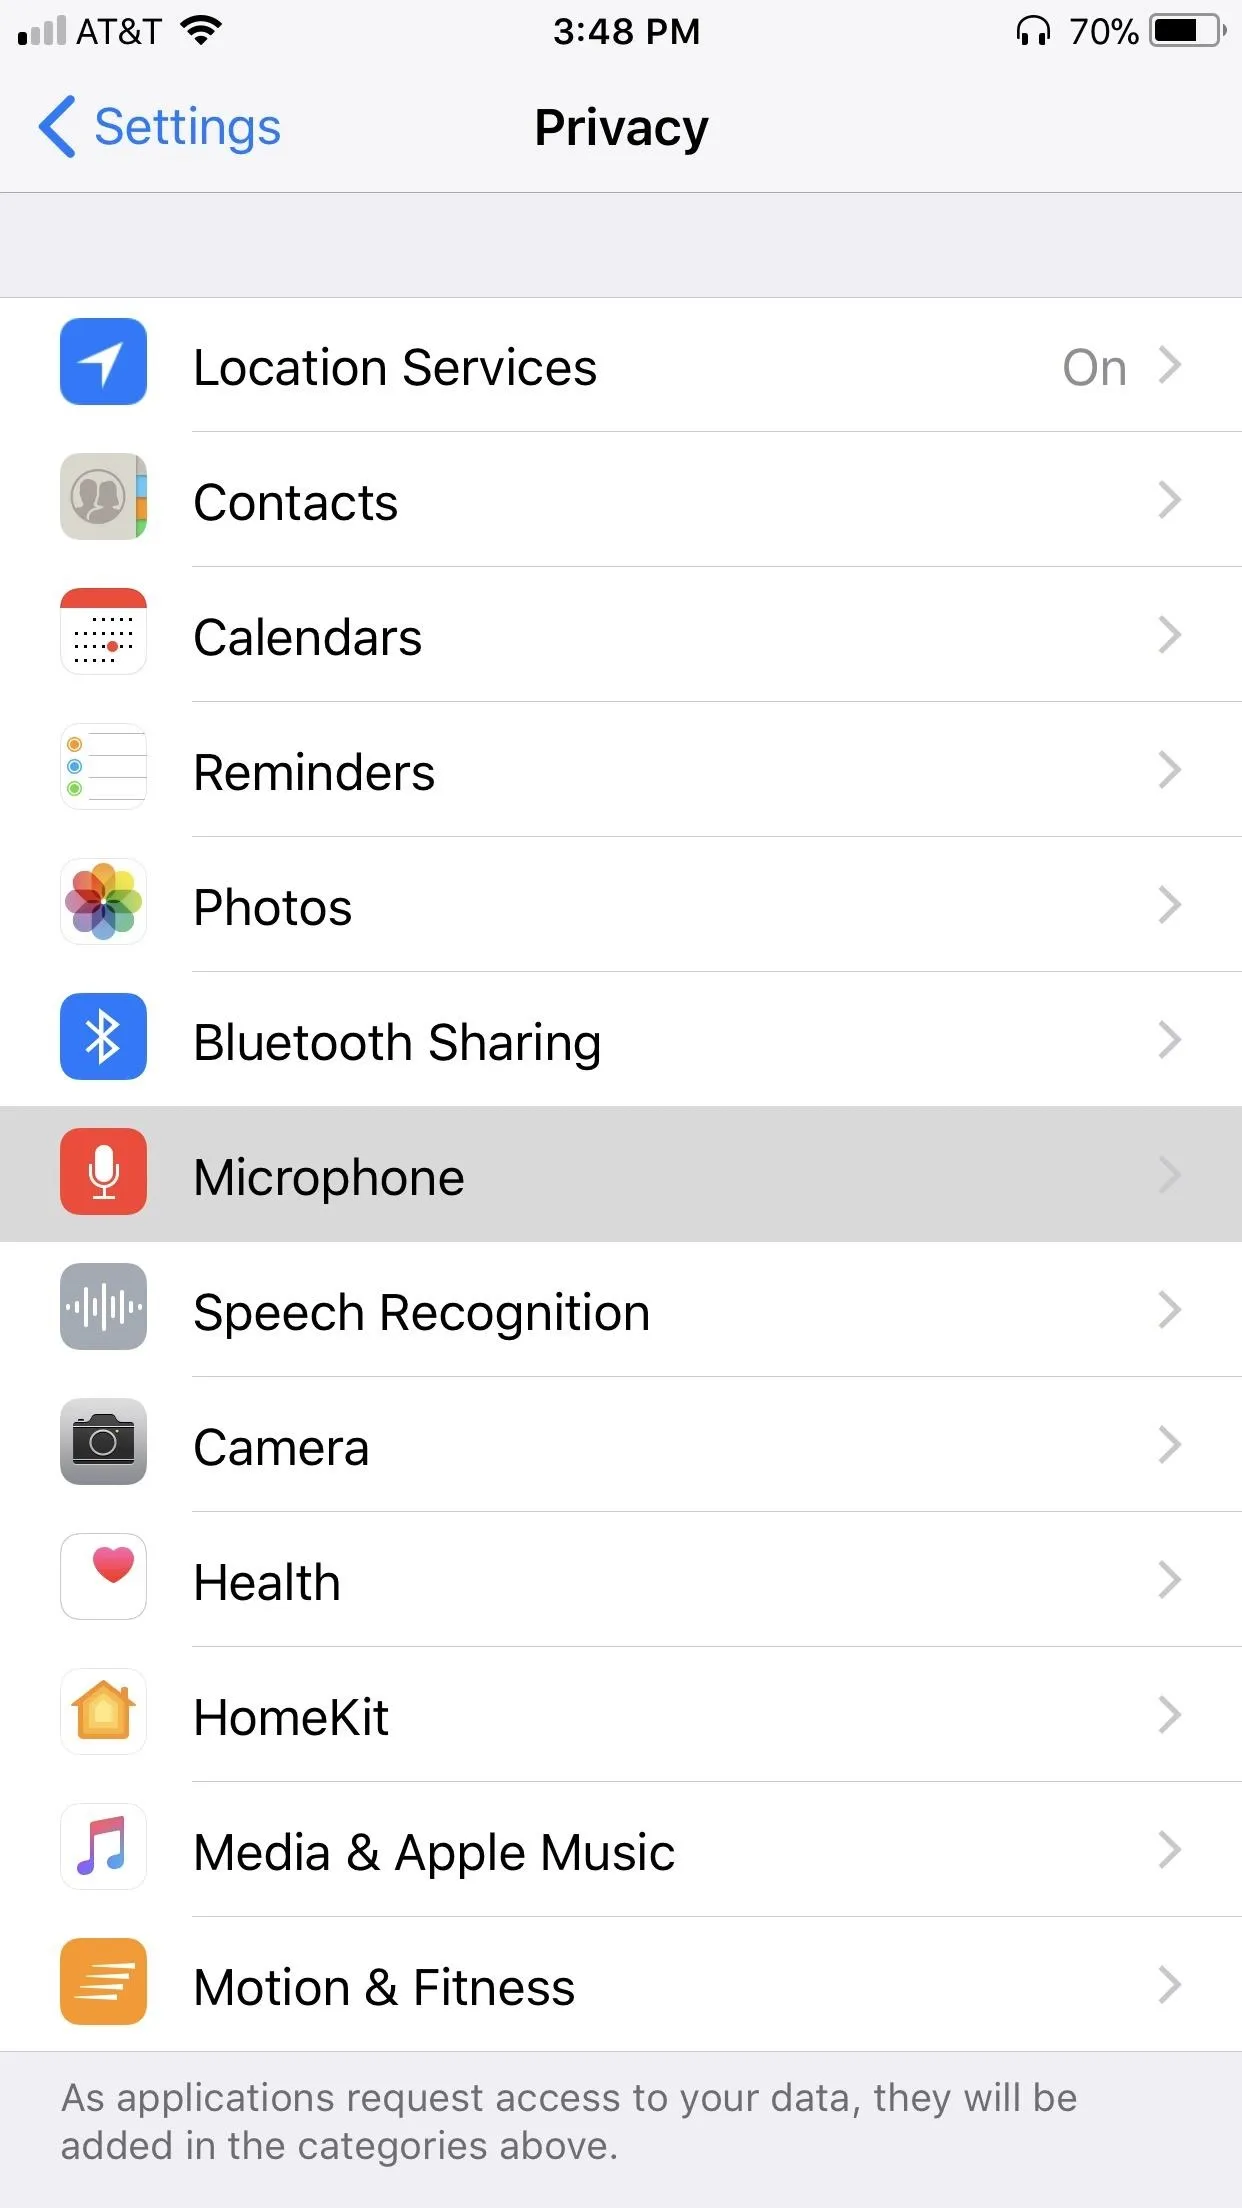
Prevent Cross-Site Tracking (On)28. Turn Off Microphone Access for Apps
Numerous apps rely on having access to your iPhone's microphone to function as they should. Waze, for example, uses your iPhone's mic to listen for voice commands for hands-free navigation. Not all apps need this level of access to run as they should, however, so we recommend checking which apps have this permission granted if you hadn't done so already.
Settings —> Privacy —>
Microphone
Carefully look over the list of apps that can use your mic and disable access by tapping on the toggle next to any of the questionable ones.
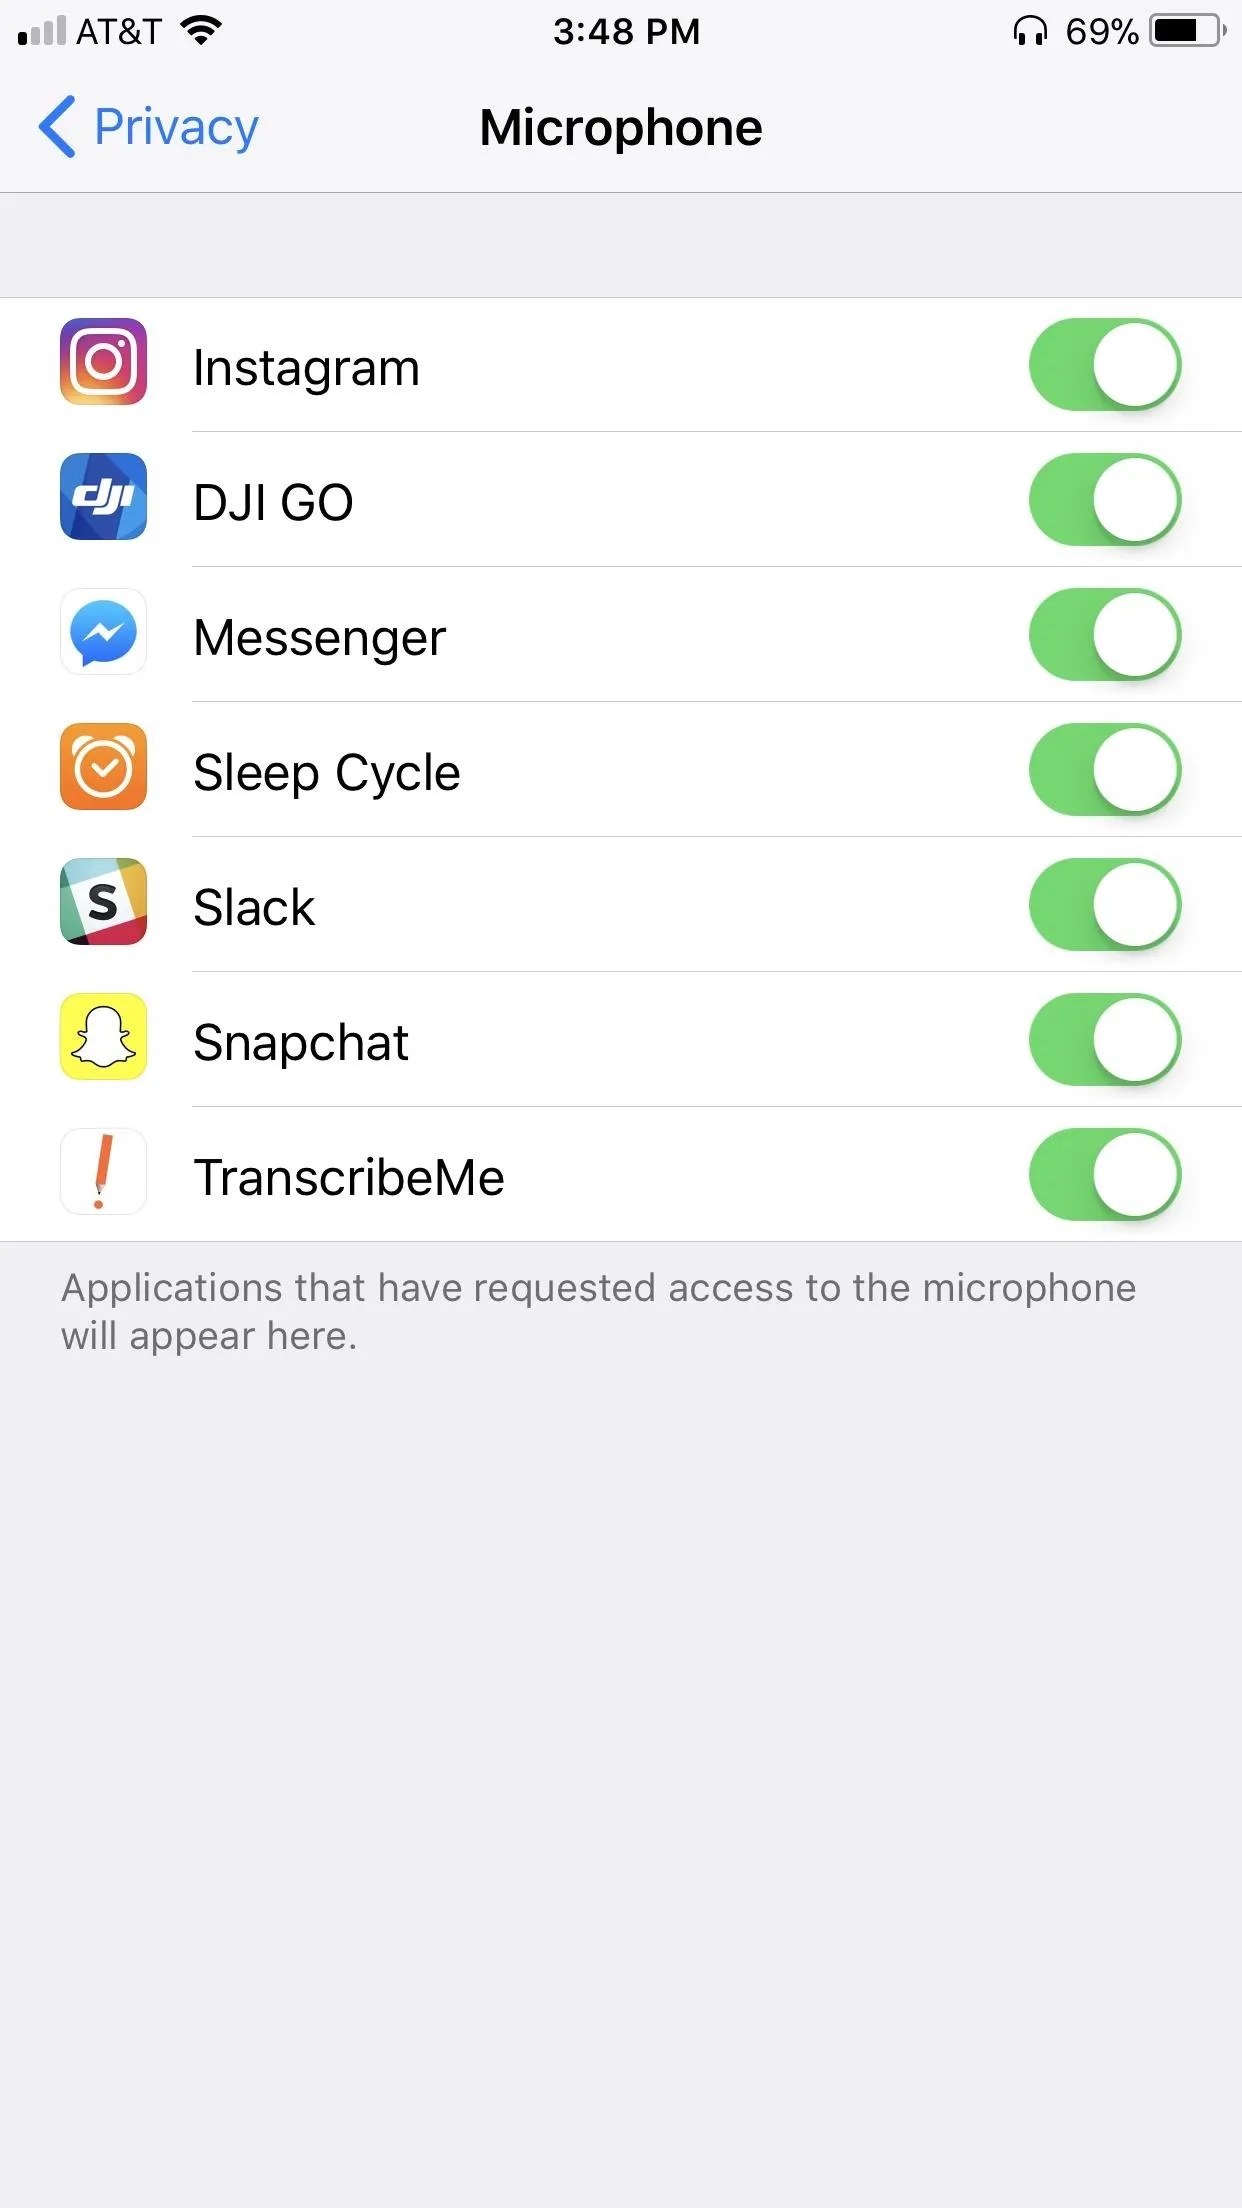
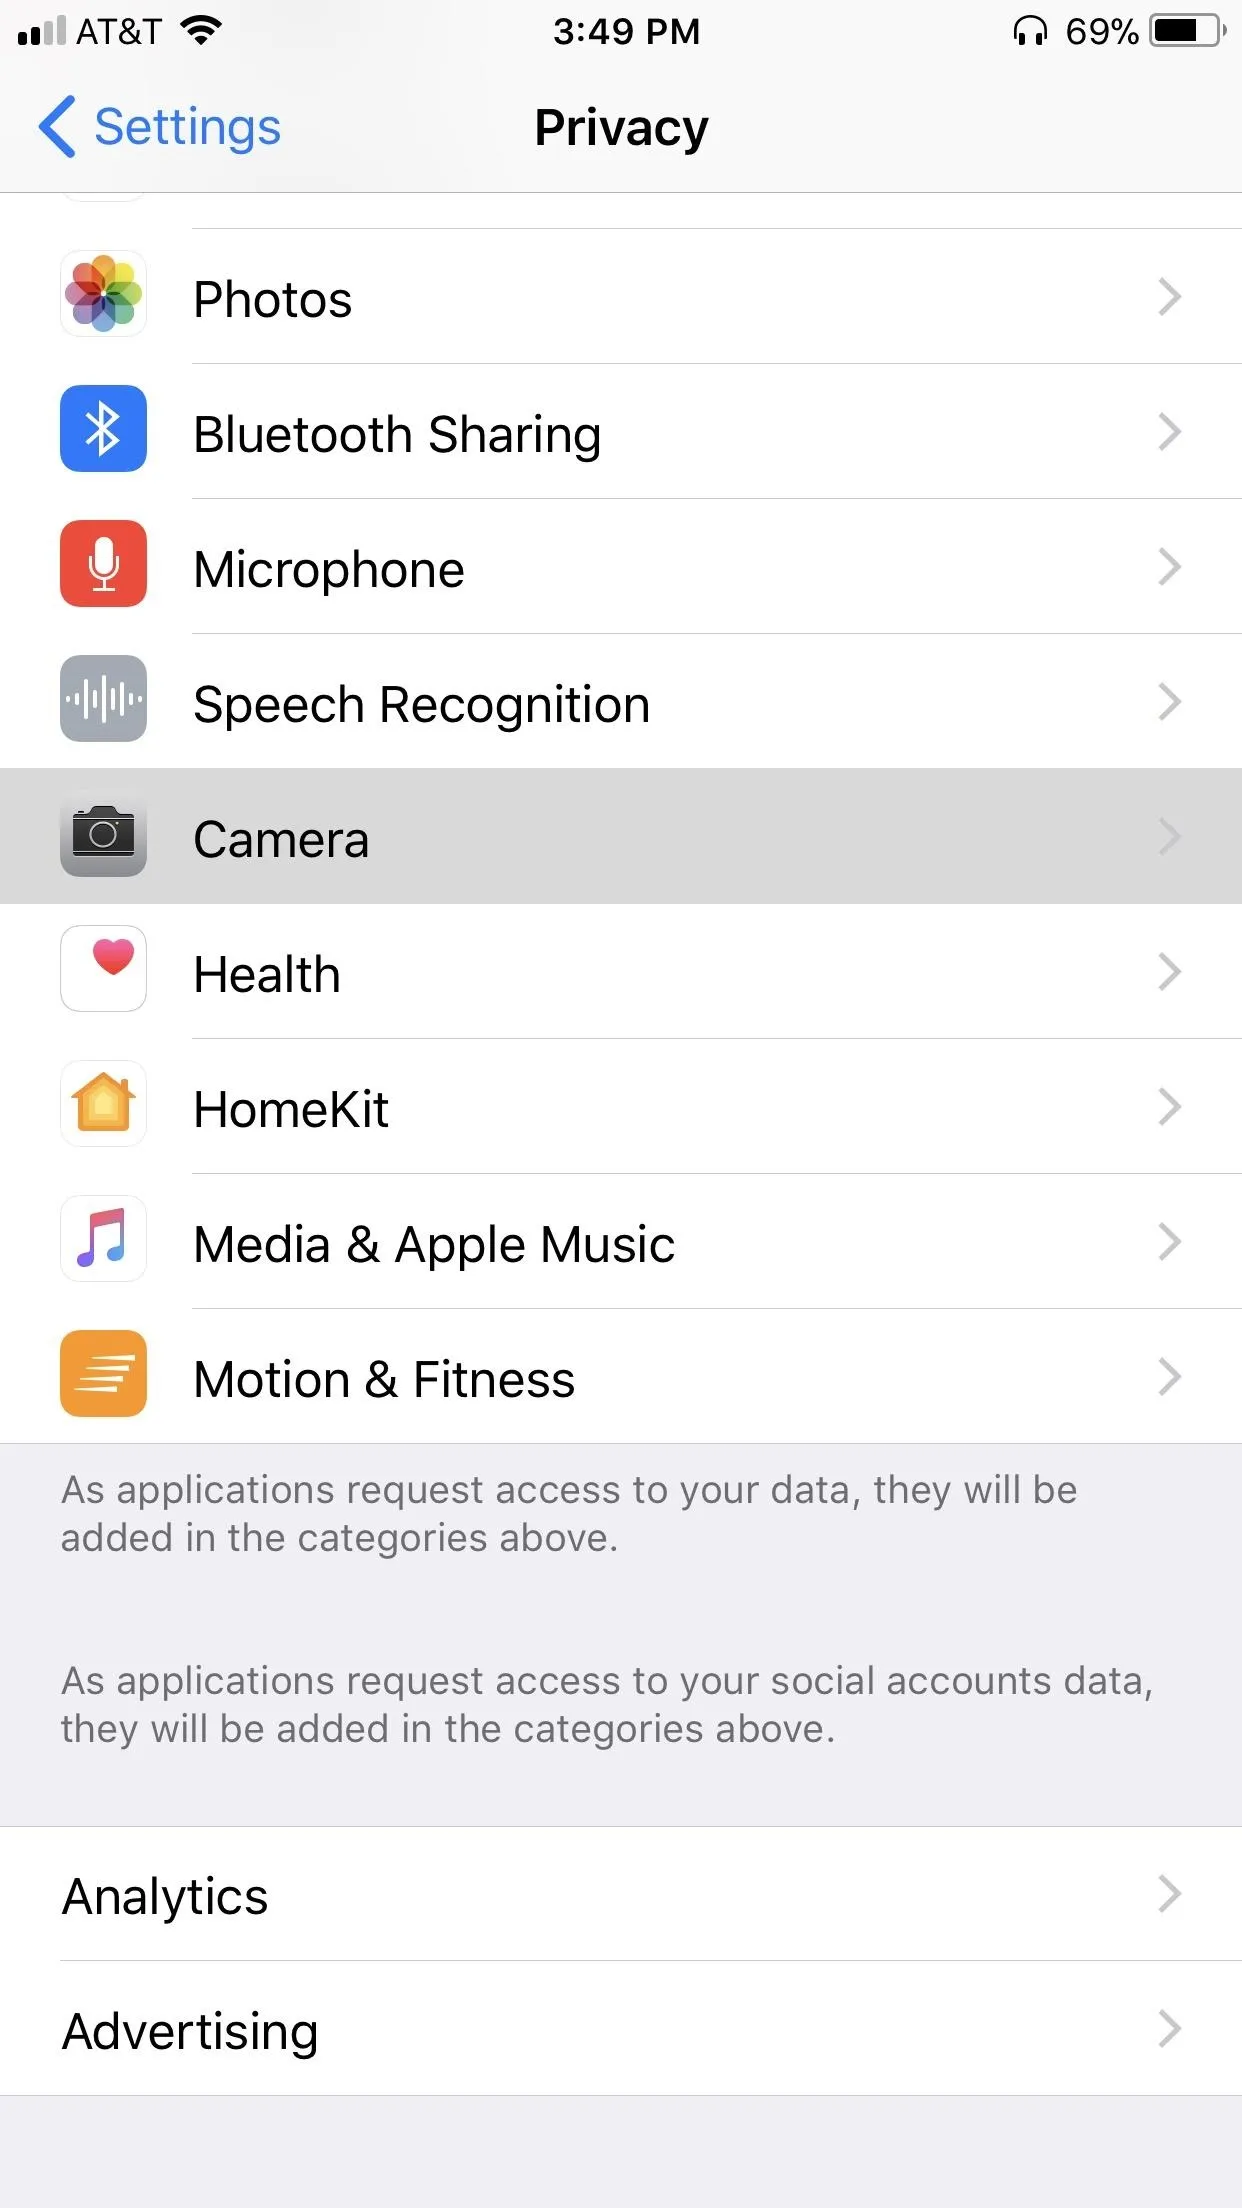
29. Disable Camera Access for Certain Apps
Camera access is essential for numerous photography and social media apps like Instagram and Snapchat to fully work, but just like microphone access, not all apps need this featured enabled.
Settings —> Privacy —>
Camera
We recommend making a habit out this, and frequently check for questionable apps that you might have granted camera access to and disabe them.

30. Turn Off Location Services for Apps
If you want a navigation app like Google Maps or Waze to get you from place to place, you'll need to grant it access to your iPhone's location services. Other examples include Snapchat, which can use your location to apply fun and unique filters that can only be had in specific location, and Camera, which can geotag your photos so you know where they were taken.
But not every app needs location data access, and some that add convenience to your life may not be worth the added privacy invasion. For instance, while the Camera app (or any camera app) can include geolocation coordinates in the EXIF data of an photo you take, texting that image or sharing it on certain websites may give away your location to anyone who knows how to read EXIF data.
Settings —> Privacy —>
Location Services
Once inside "Location Services," comb over each app and set its permission to either "Always," "While Using," or "Never," depending on how much access to GPS data you think the app needs. If you want to totally disable the feature across the board, tap on the toggle next to "Location Services" to turn it off.
31. Disable App Access from the Lock Screen
Your iPhone's lock screen contains a ton of exposed personal data by default. There's recent notifications, your Wallet, the Today View widgets, Siri, and so on. Fortunately, many of these can be specifically disabled from the lock screen, just like we did for the Control Center, Today View, and Reply with Message in previous tips.
Settings —> Face ID & Passcode —>
Allow Access When Locked

-OR-

Settings —> Touch ID & Passcode —>
Allow Access When Locked
Once we haven't discussed yet include Notification Center, Siri, Home Control, and Return Missed Calls.
32. Empty Out Recently Deleted Photos
The "Recently Deleted" folder within the Photos app can be a lifesaver, as it gives you the ability to retrieve accidentally deleted photos for 30 days before they're permanently erased. On the other hand, these deleted photos can also be easily viewed by anyone who gains entry to your iPhone — with or without your permission.
Photos —> Albums —>
Recently Deleted —> Select —>
Delete All (or select pics and Delete)
These are just a few of the settings in iOS 12 that you'll need to be aware of when it comes to privacy and security. Like mentioned before, there are a lot of things to be aware of in Safari alone that we didn't cover here, and a lot of other apps will be the same way.
This article was produced during Gadget Hacks' special coverage on smartphone privacy and security. Check out the whole Privacy and Security series.
- Follow Gadget Hacks on Pinterest, Reddit, Twitter, YouTube, and Flipboard
- Sign up for Gadget Hacks' daily newsletter or weekly Android and iOS updates
- Follow WonderHowTo on Facebook, Twitter, Pinterest, and Flipboard
Cover image by Amboy Manalo/Gadget Hacks; Screenshots by Jake Peterson/Gadget Hacks (unless otherwise noted)


Comments
Be the first, drop a comment!