


If you just got an iPhone 12, 12 Pro, 12 Pro Max, or 12 mini, and you've never owned an iPhone before, some of the most basic tasks can be baffling. Shutting it down, force-restarting it, quitting apps, and even viewing the percentage of battery remaining sound simple but aren't very intuitive for new iPhone owners. Another big question mark is screenshots, and there are several ways to take them.
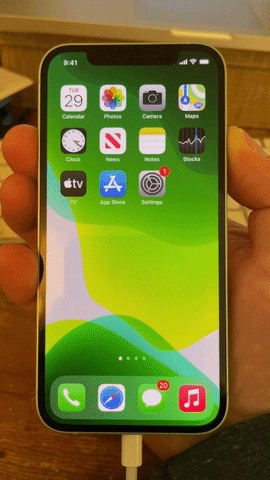
No matter which option you use below to take a screenshot, the result will always be the same: you'll see a flash of light on the screen, and the image captured will shrink down into a thumbnail in the bottom left of the display. That applies whether the screenshot is in portrait or landscape orientation. If you take multiple screenshots in rapid succession, the thumbnails will stack up but will visually max out at three even though it could be any number above that.
Tapping that thumbnail or group of thumbnails will open up the screenshot editor, which houses plenty of tools for sharing images, adding annotations, cropping to different dimensions, magnifying parts of the images, and adding shapes. You can even unlock scrolling screenshots in the editor for webpage captures.
- Don't Miss: Tips for Using Your iPhone's Screenshot Tools
Use Side + Volume Up
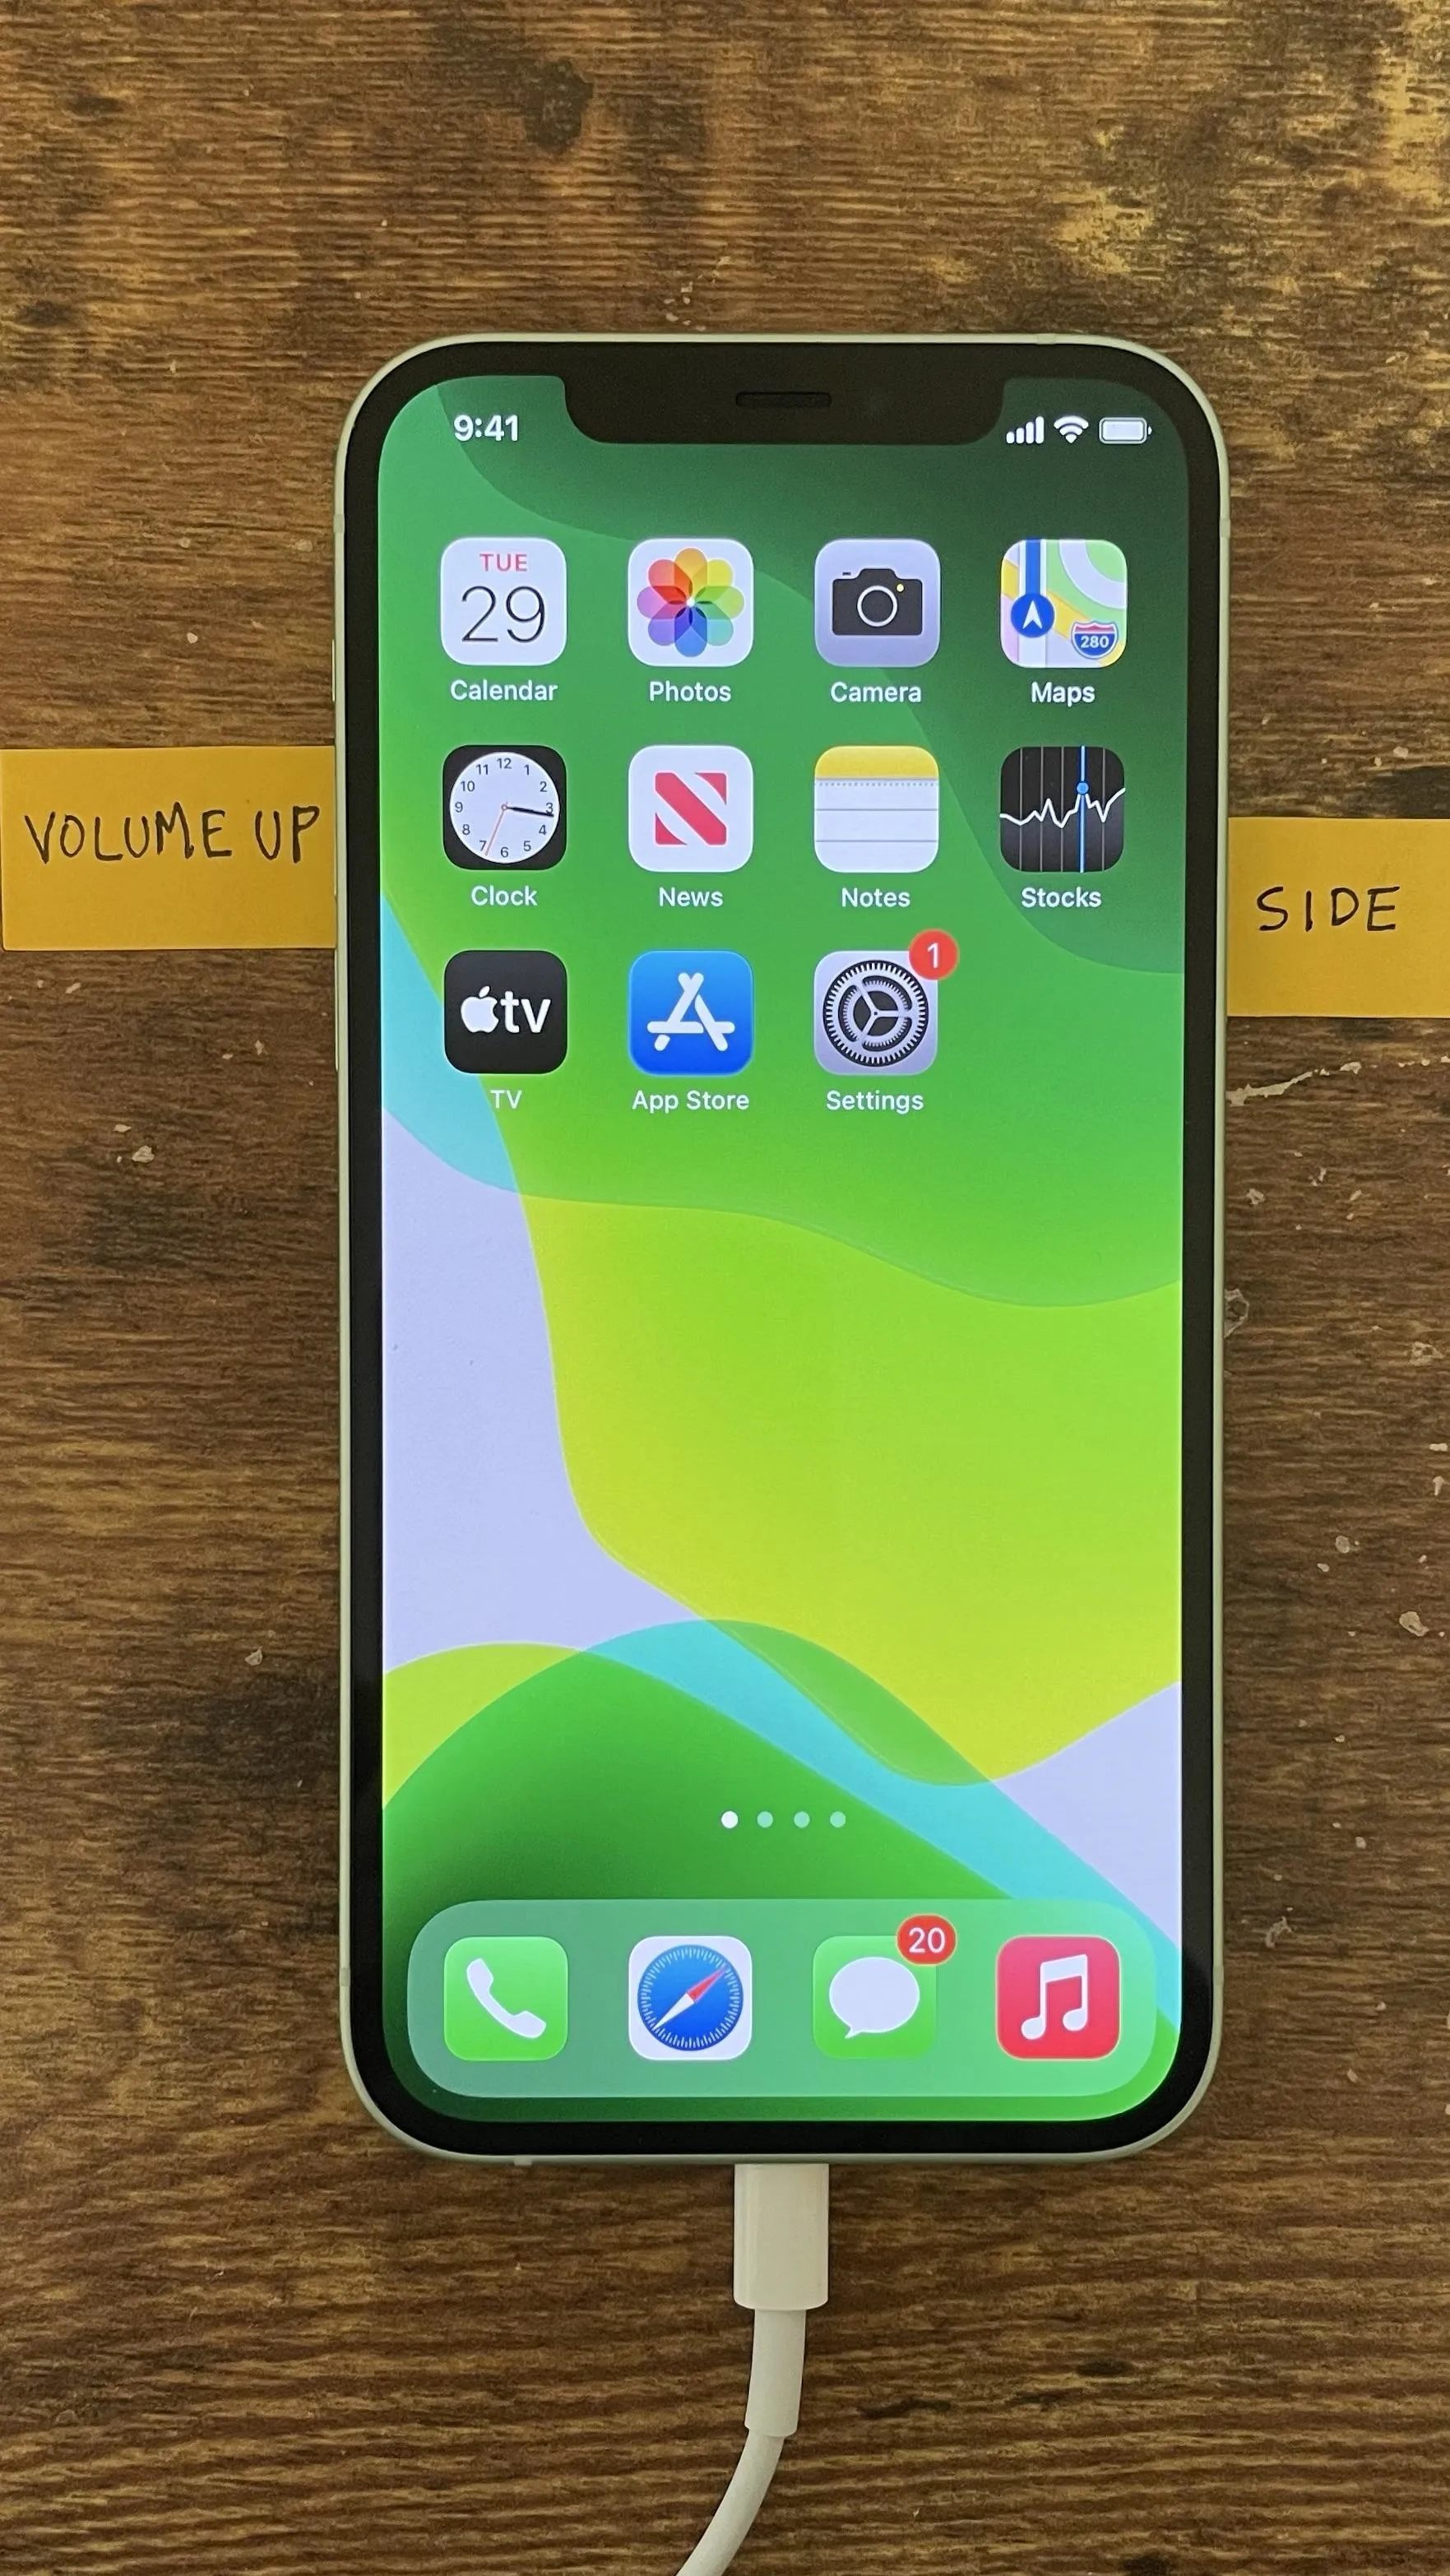
On any of the iPhone 12 variants, the default way to take a screenshot is to quickly push down the Volume Up button on the left side of the device and the Side button on the right side together at the same time. It should be a quick press (or squeeze). Otherwise, you may end up activating the screen that displays the switches for powering down, Medical ID, and Emergency SOS.
Use Siri
If you're looking for more of a hands-off approach, just turn to Siri. Simply say "Hey Siri, screenshot" or "Hey Siri, take a screenshot," and Siri will take one for you. You can also long-press the Side button on your iPhone's right side to activate Siri and verbally give it the command. If you use Type to Siri with the Side button shortcut, just type "screenshot" and hit "done" on the keyboard.

Screenshots using Hey Siri (left), Type to Siri (middle), and Siri (right).


Screenshots using Hey Siri (left), Type to Siri (middle), and Siri (right).
Use Back Tap
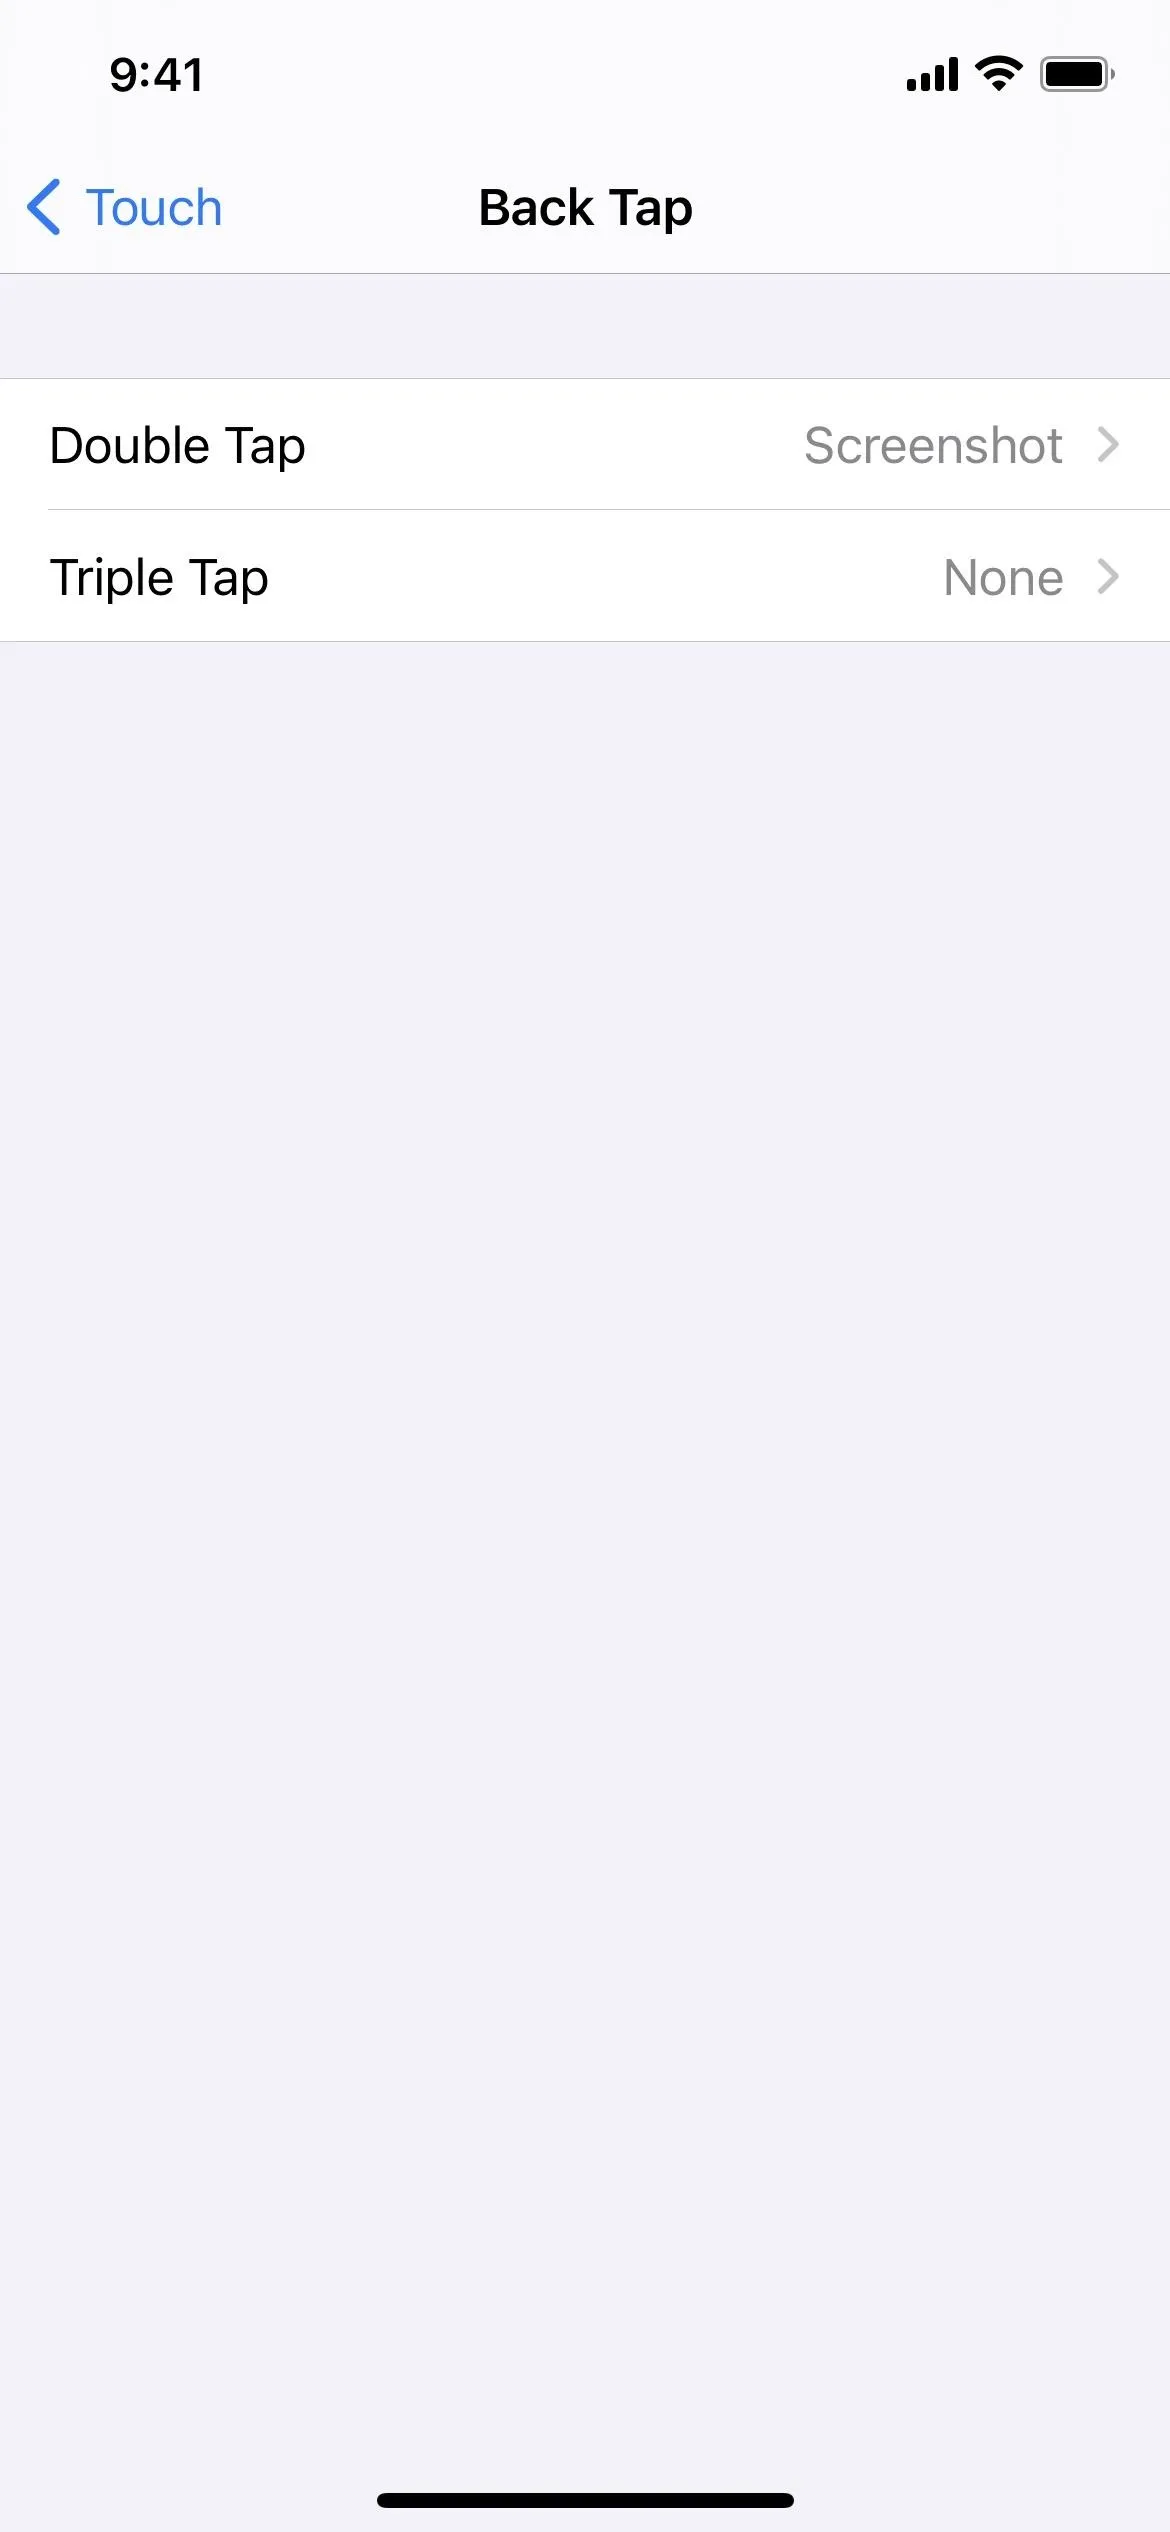
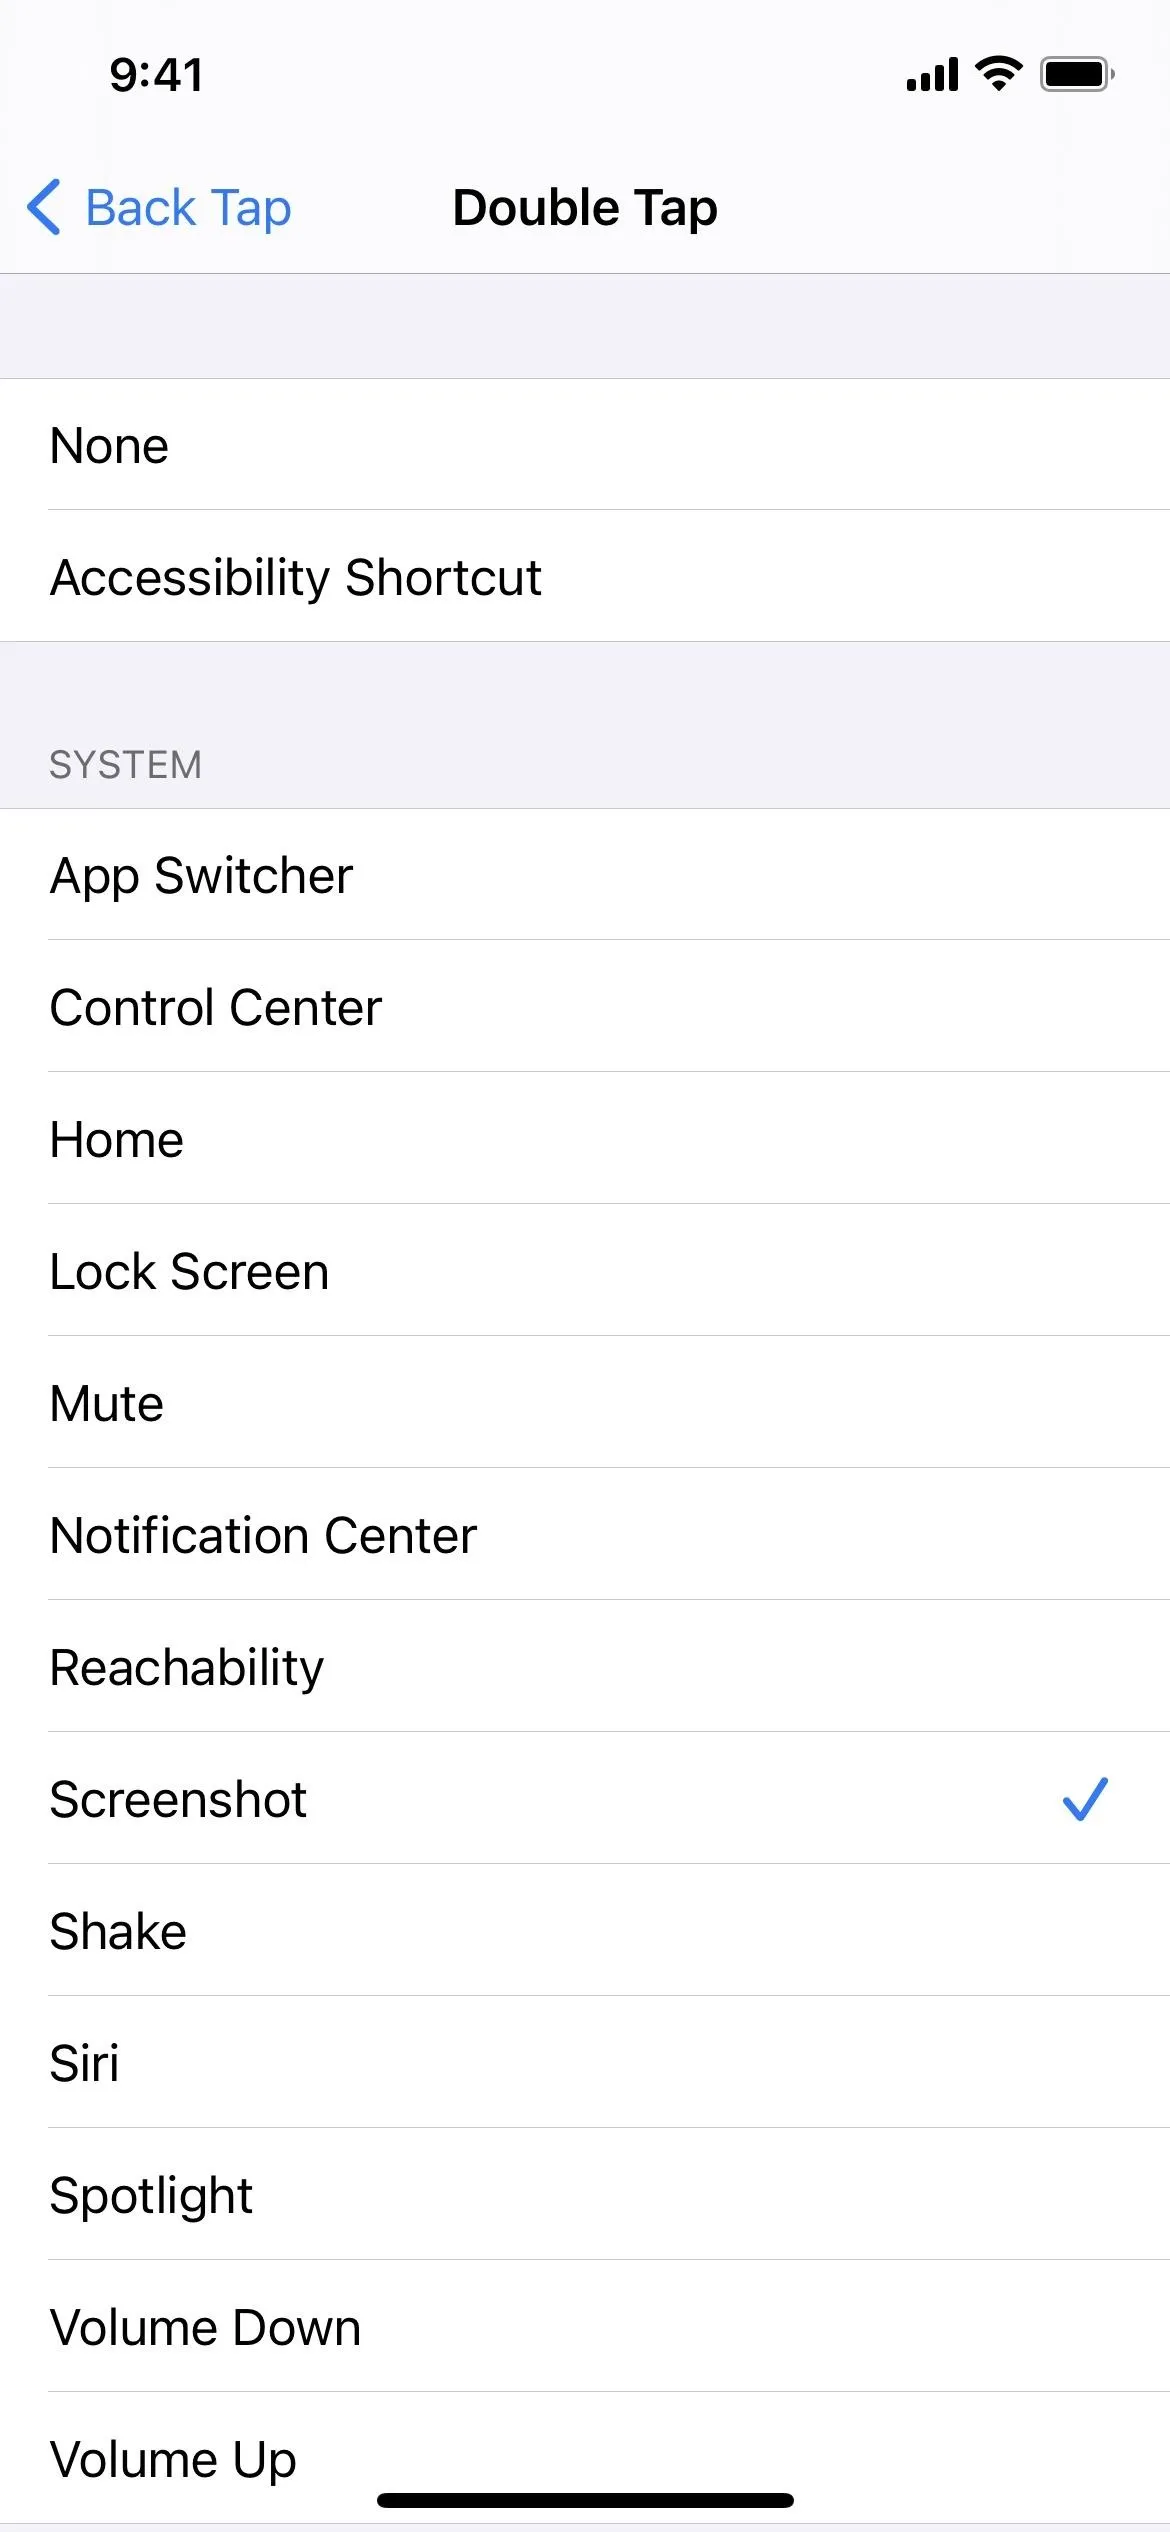
New to iOS 14 is Back Tap, an accessibility feature that lets you perform actions just by double- or triple-tapping the back of your iPhone. To set it up for screenshots, go to Settings –> Accessibility –> Touch –> Back Tap. Choose either "Double Tap" or "Triple Tap," then put a check next to "Screenshot." Then, test it out by either double-tapping or triple-tapping the back of your iPhone with one or two fingers.
Use Voice Control
Apple gave us a new way to interact with the iPhone starting in iOS 13, and it's called Voice Control. There was a Voice Control setting before that, but it hilariously bad in comparison.
With the newer Voice Control, whenever you want to use your iPhone using nothing but your voice, you just activate Voice Control and then tell your iPhone what to do, like navigating around an app. With Voice Control active, you can also just say "Take screenshot," and a screenshot will capture the current screen. There are many ways to turn on Voice Control; see our Voice Control roundup to see them.


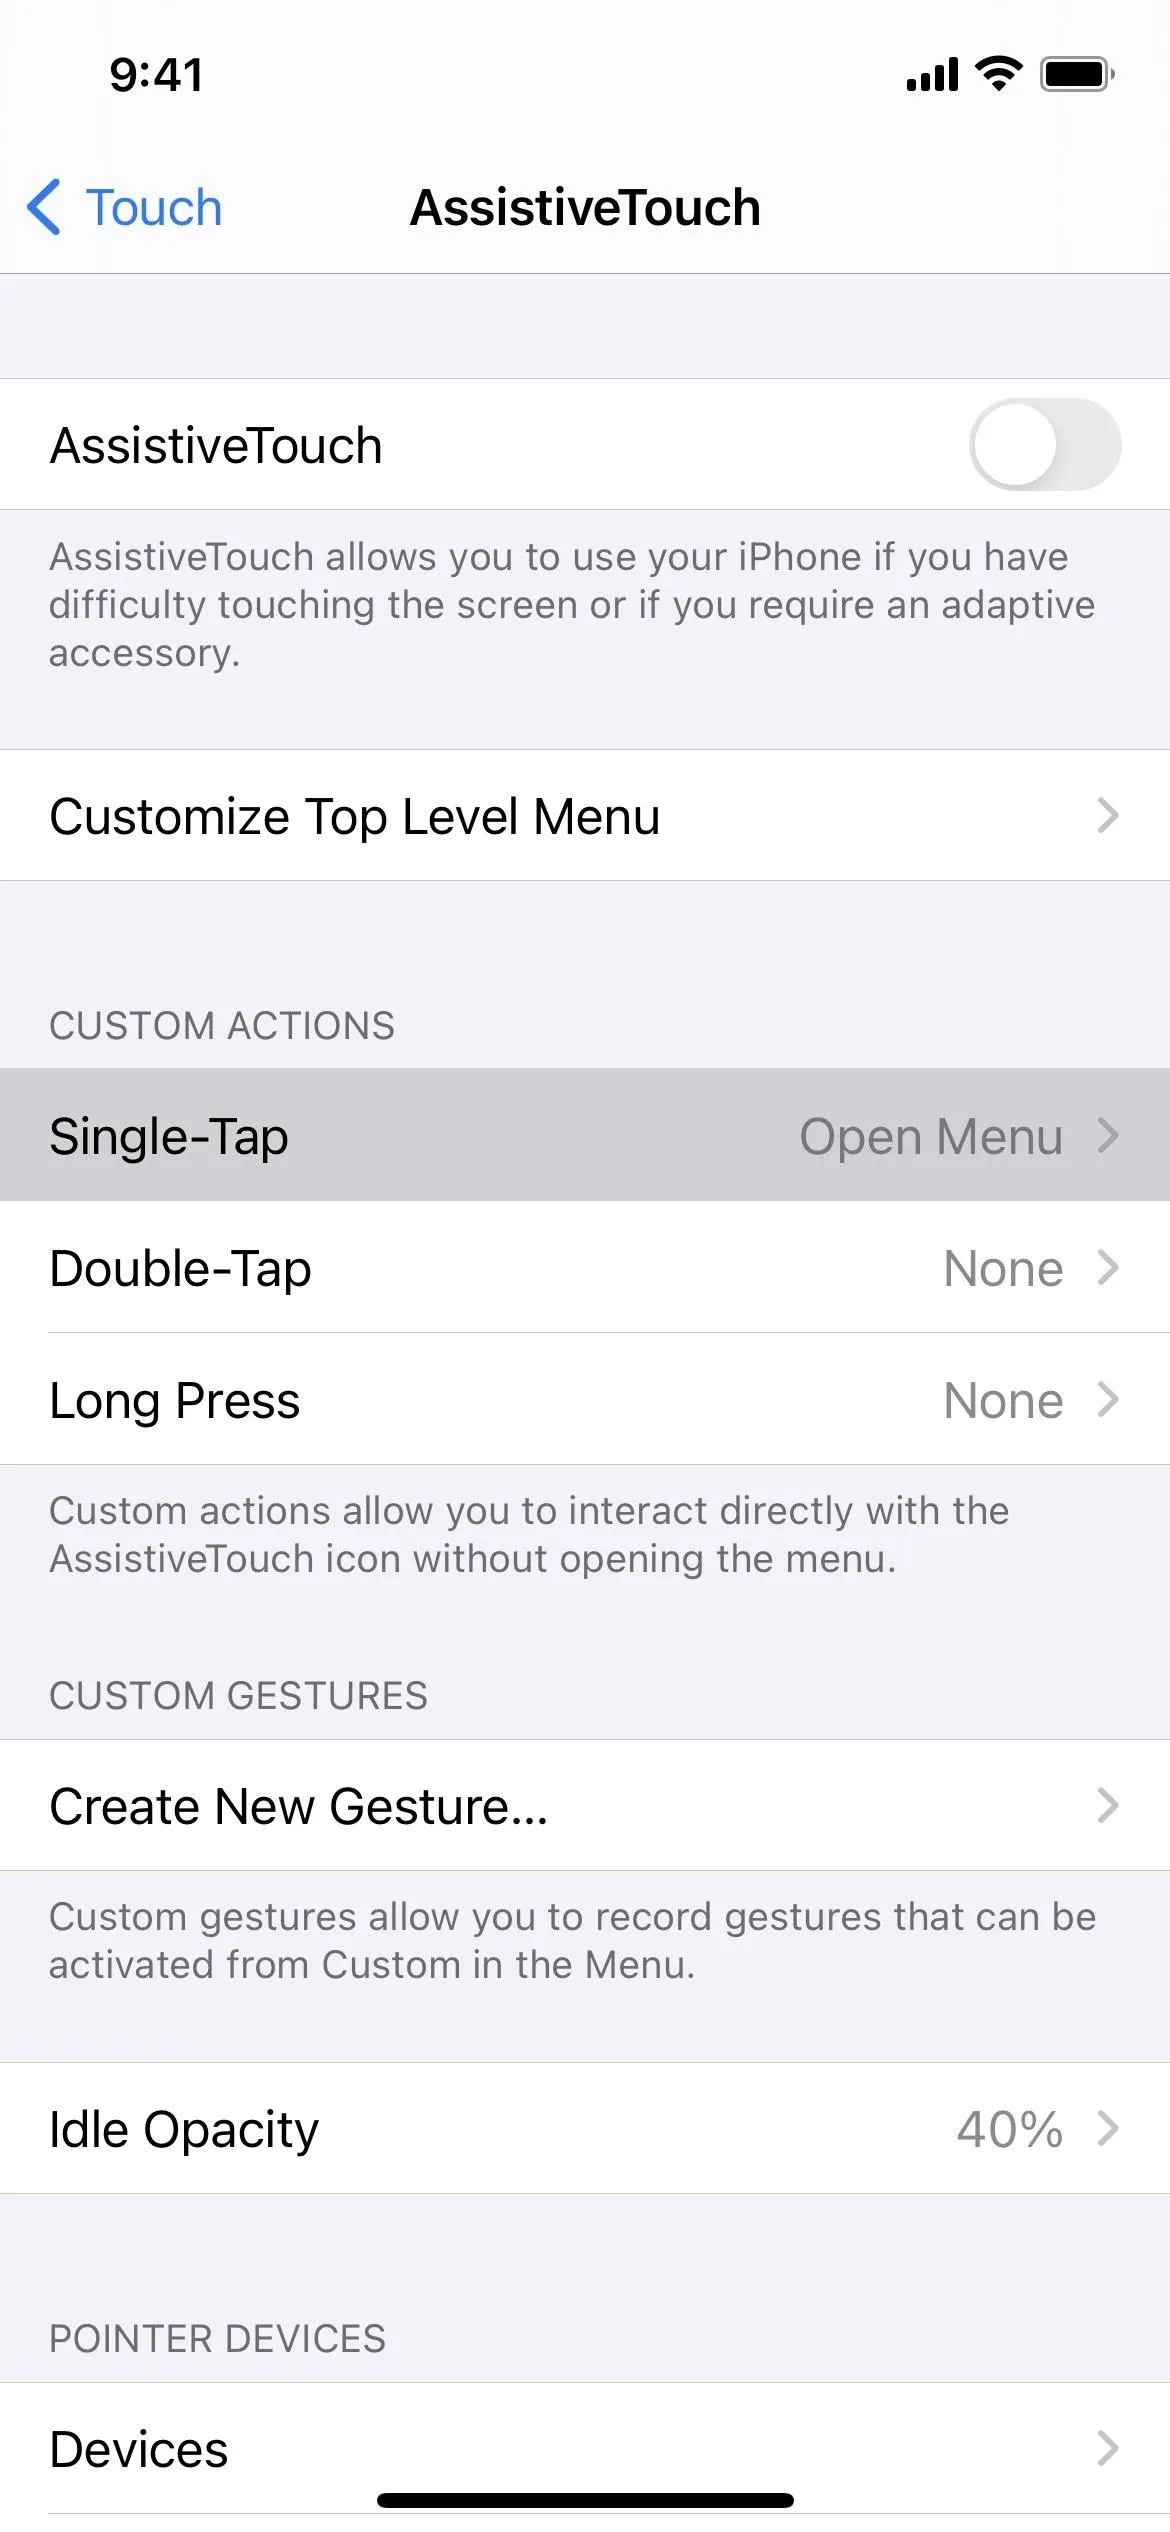
Use AssistiveTouch
If you prefer only dealing with one hardware button instead of two, which would make it easier to take screenshots one-handed, you can utilize AssistiveTouch, an accessibility feature on your iPhone. Alternatively, you could bring up AssistiveTouch from the Control Center and bypass all hardware buttons, but it's a much slower process.
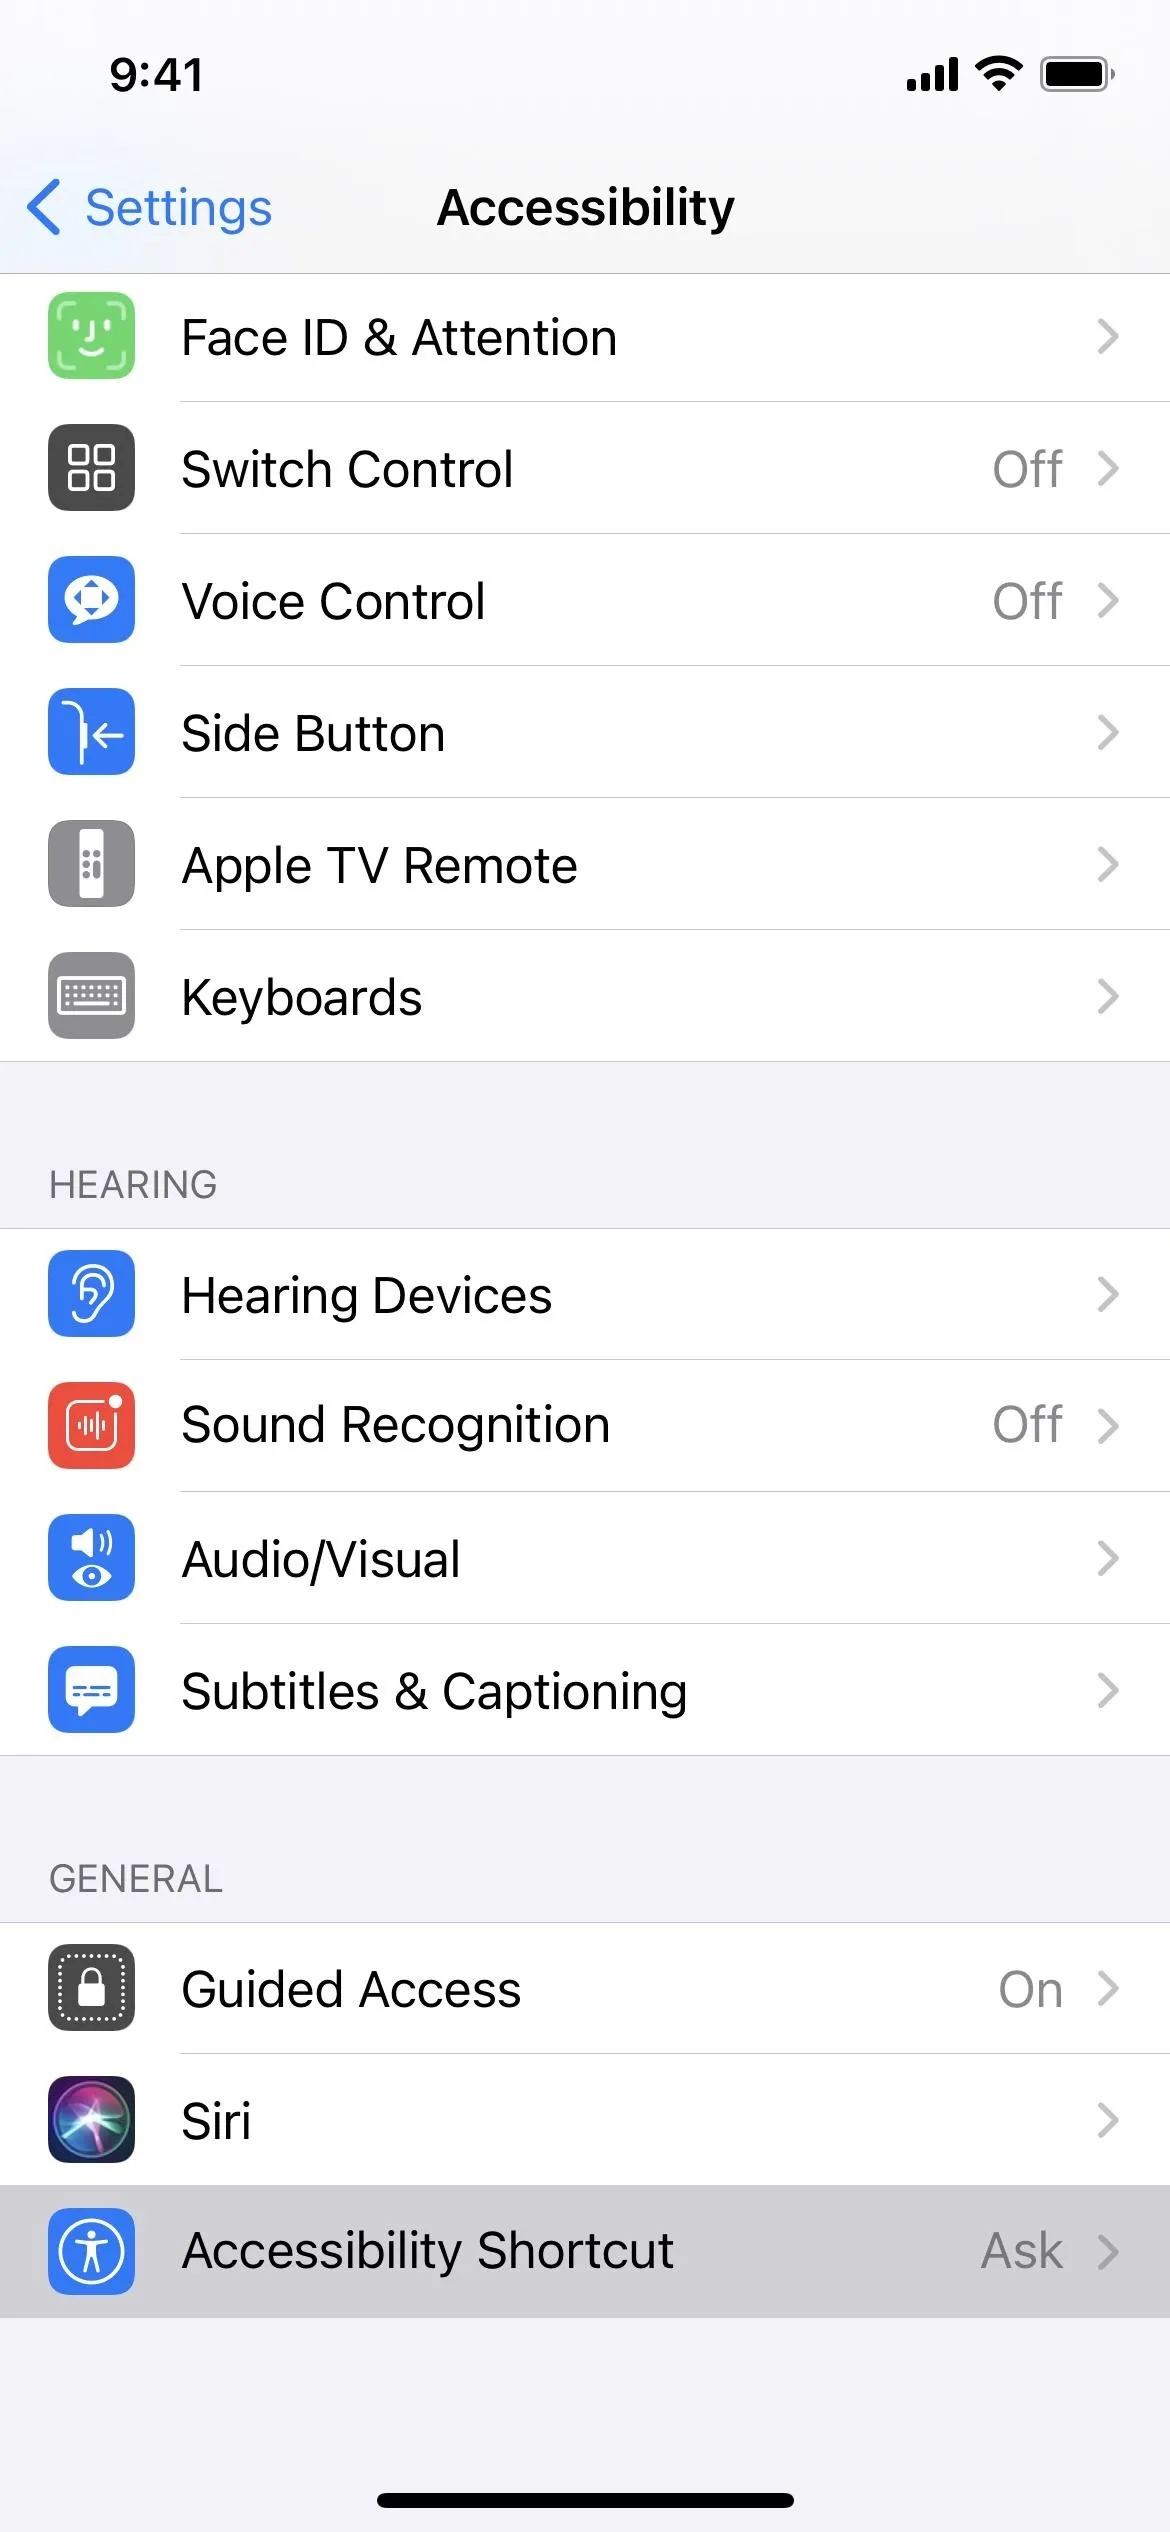
Both methods use the Accessibility Shortcut on your iPhone, so let's set that up first.
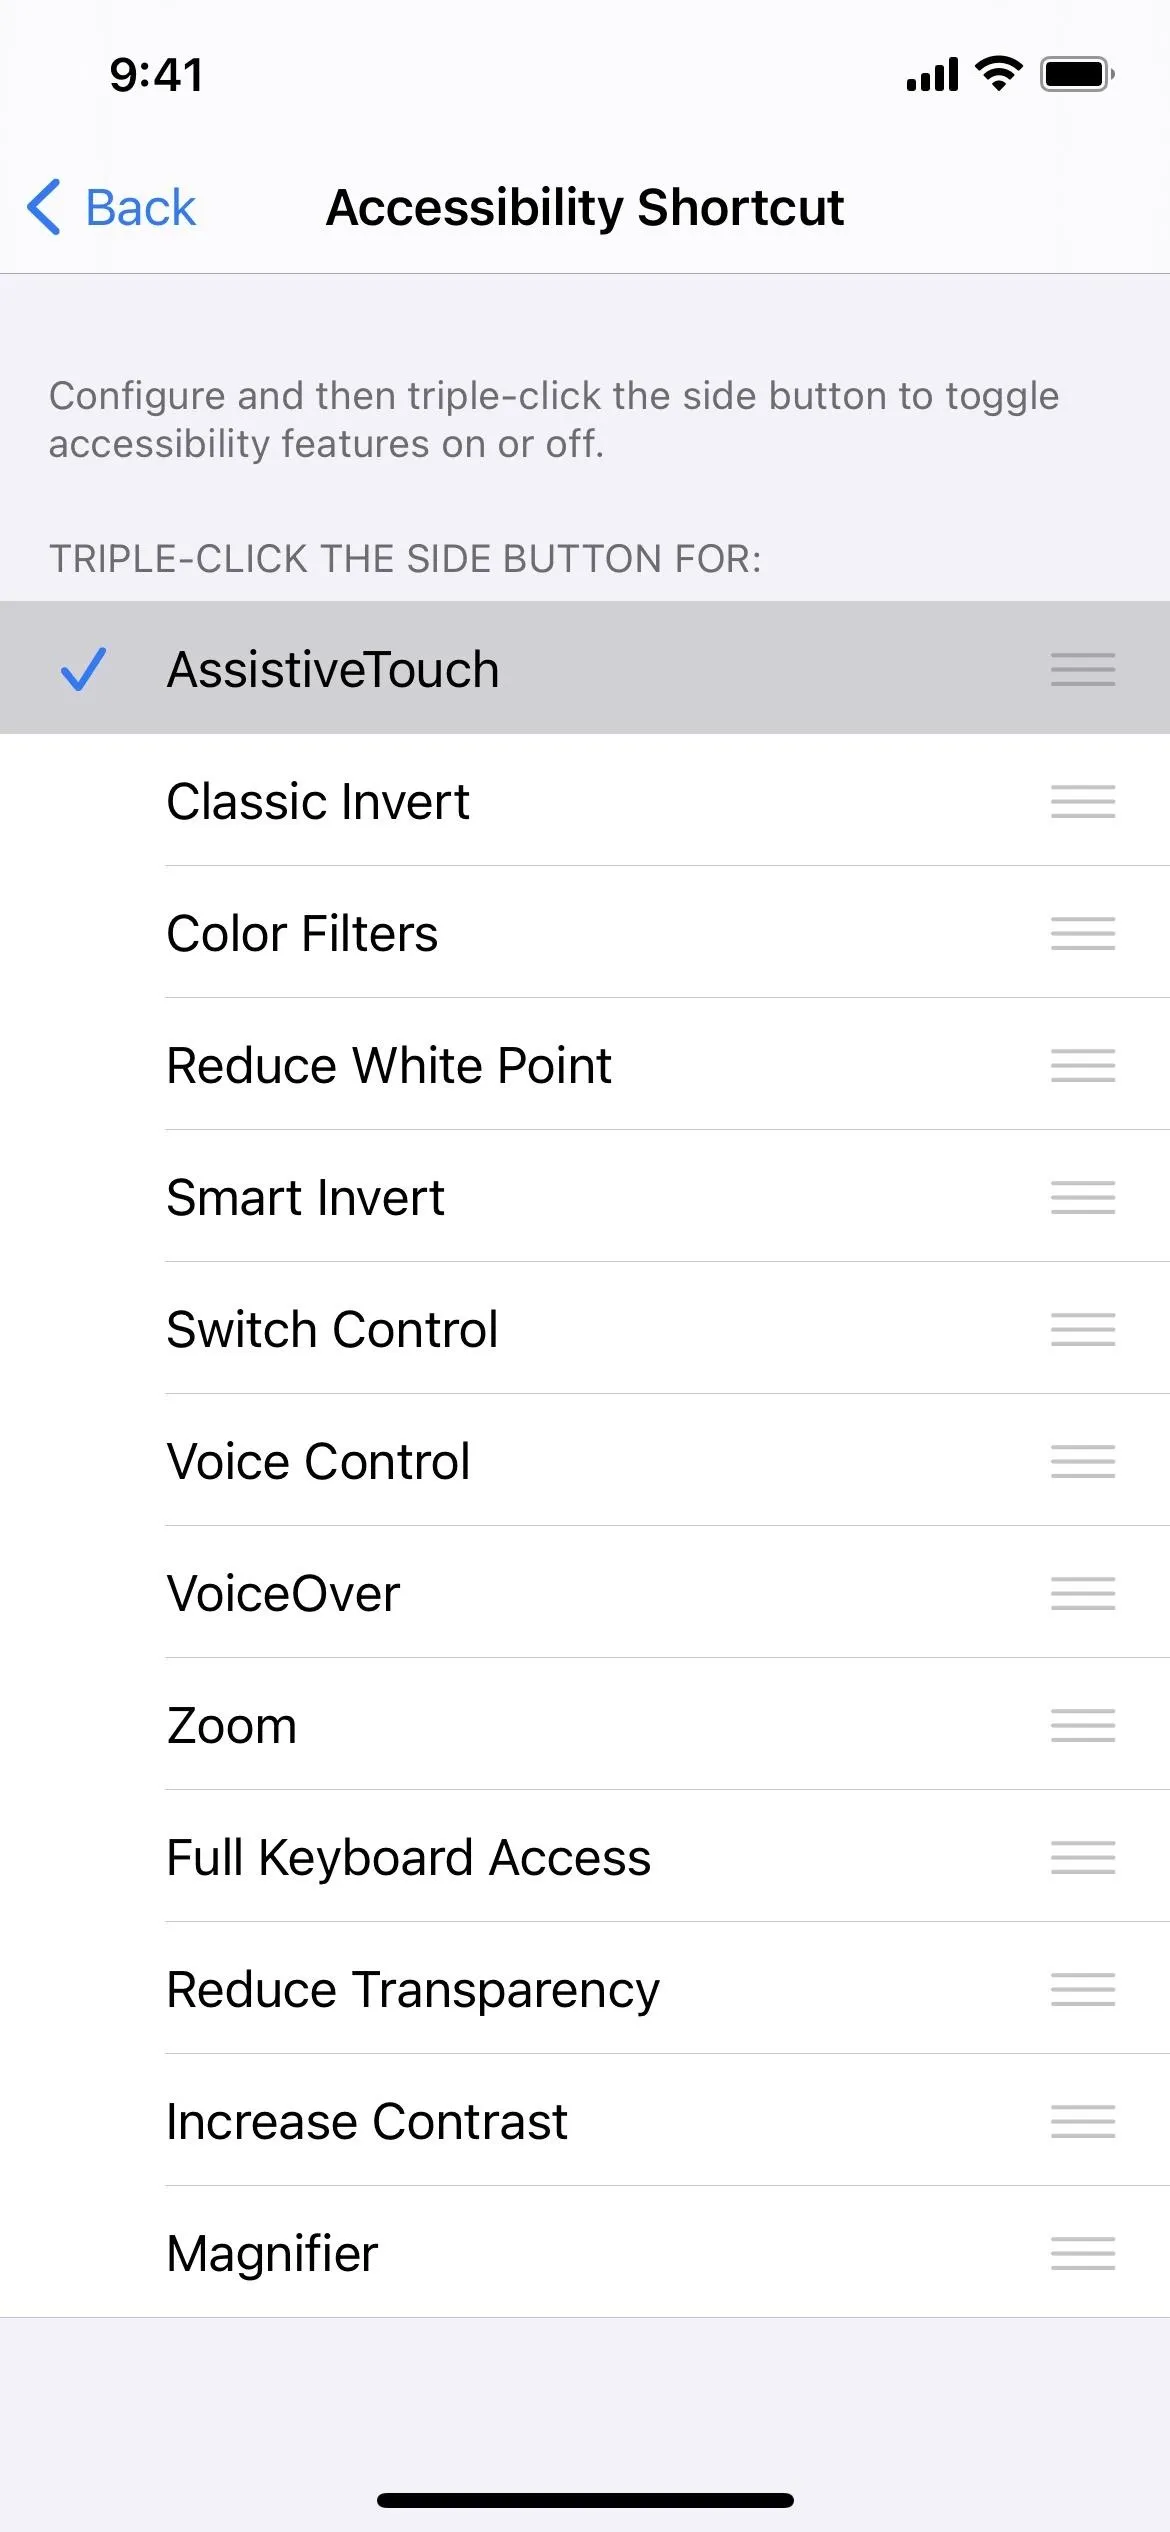
Go to Settings –> Accessibility –> Accessibility Shortcut, then make sure "AssistiveTouch" is checked. It's better if it's the only thing checked. Otherwise, you'll see a selection menu appear when activating the shortcut, where you would then choose which checked item you want to use. If "AssistiveTouch" is the only checked item, that menu won't appear, and you'll save you some time and energy.
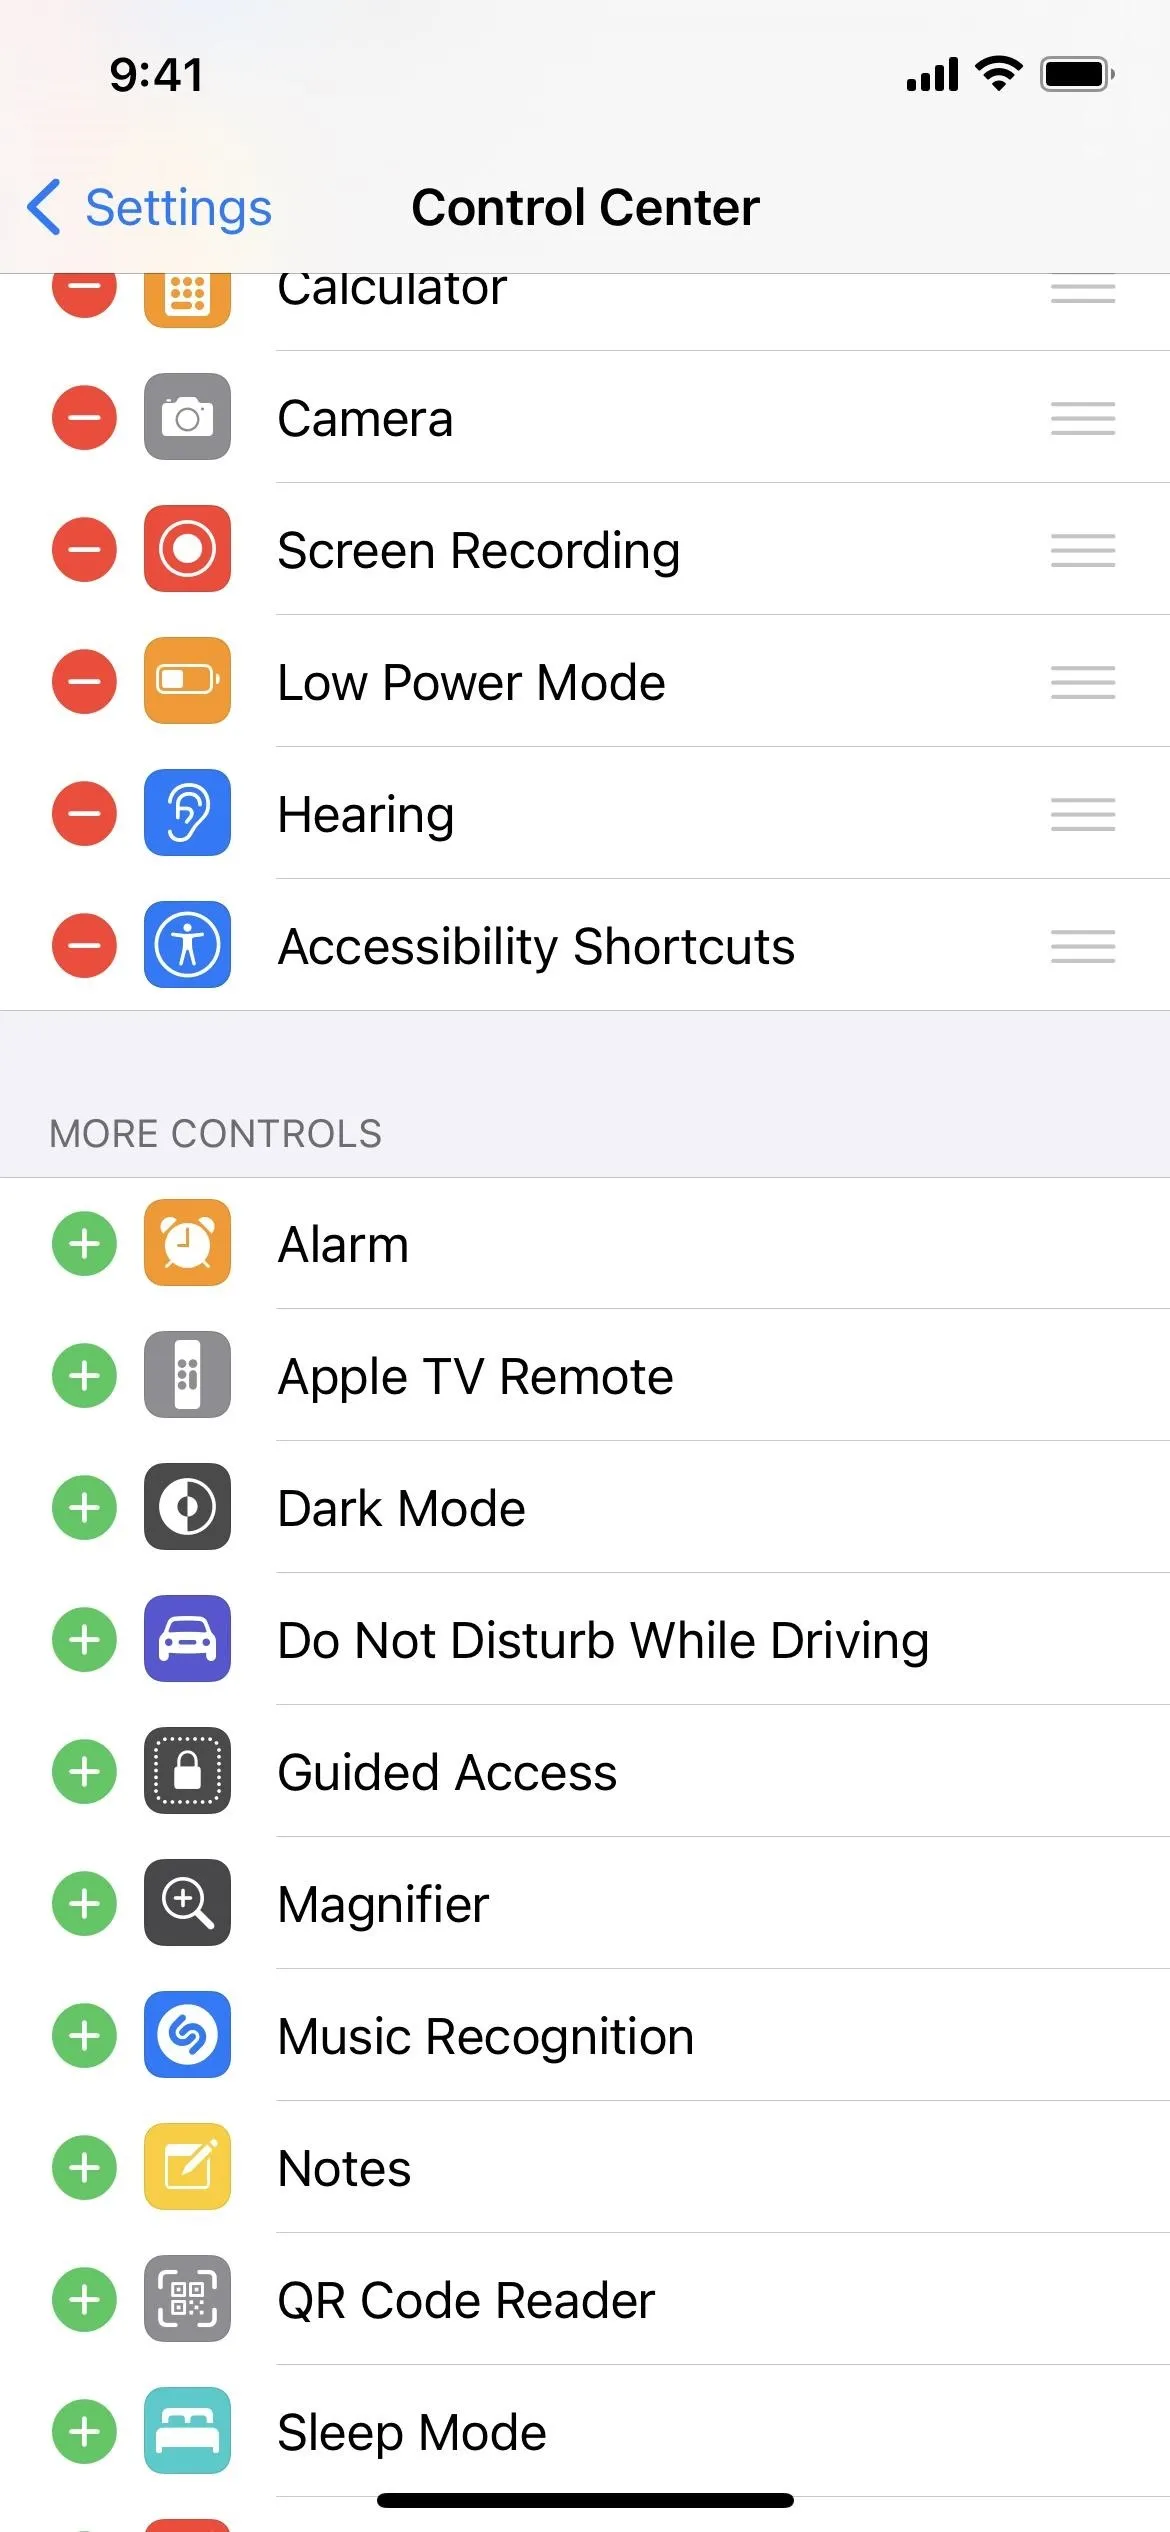
Now, to activate the Accessibility Shortcut, triple-click the Side button on your iPhone. Alternatively, you can go to Settings –> Control Center and add the "Accessibility Shortcuts" control. To use the control, swipe down Control Center from the top right of the screen, tap the control you just added, choose "AssistiveTouch," and exit Control Center.
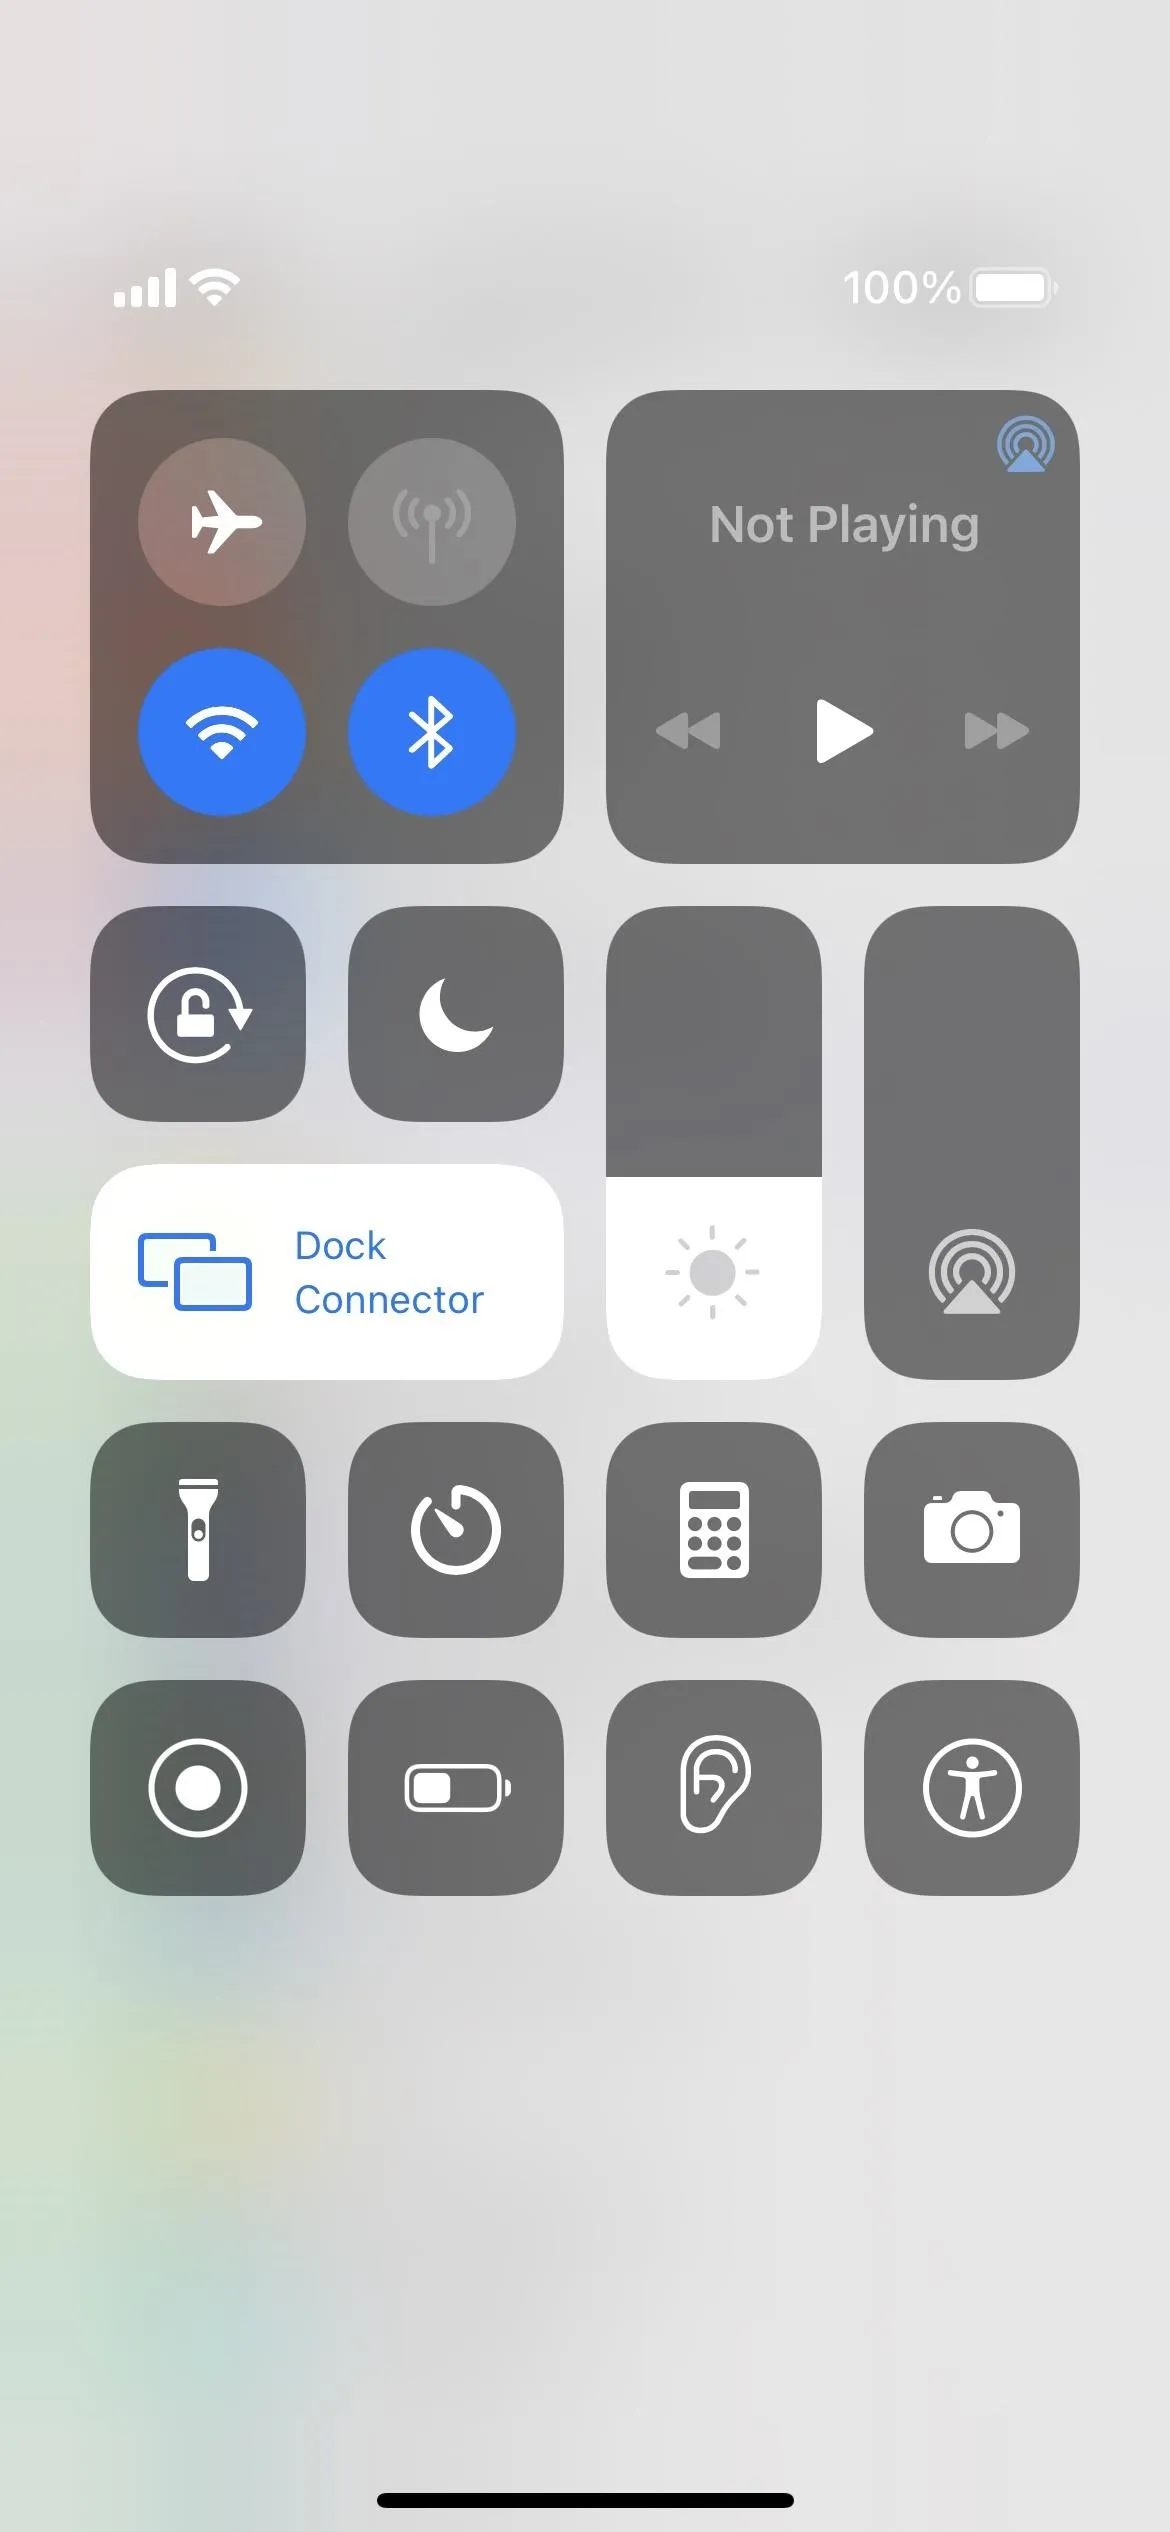
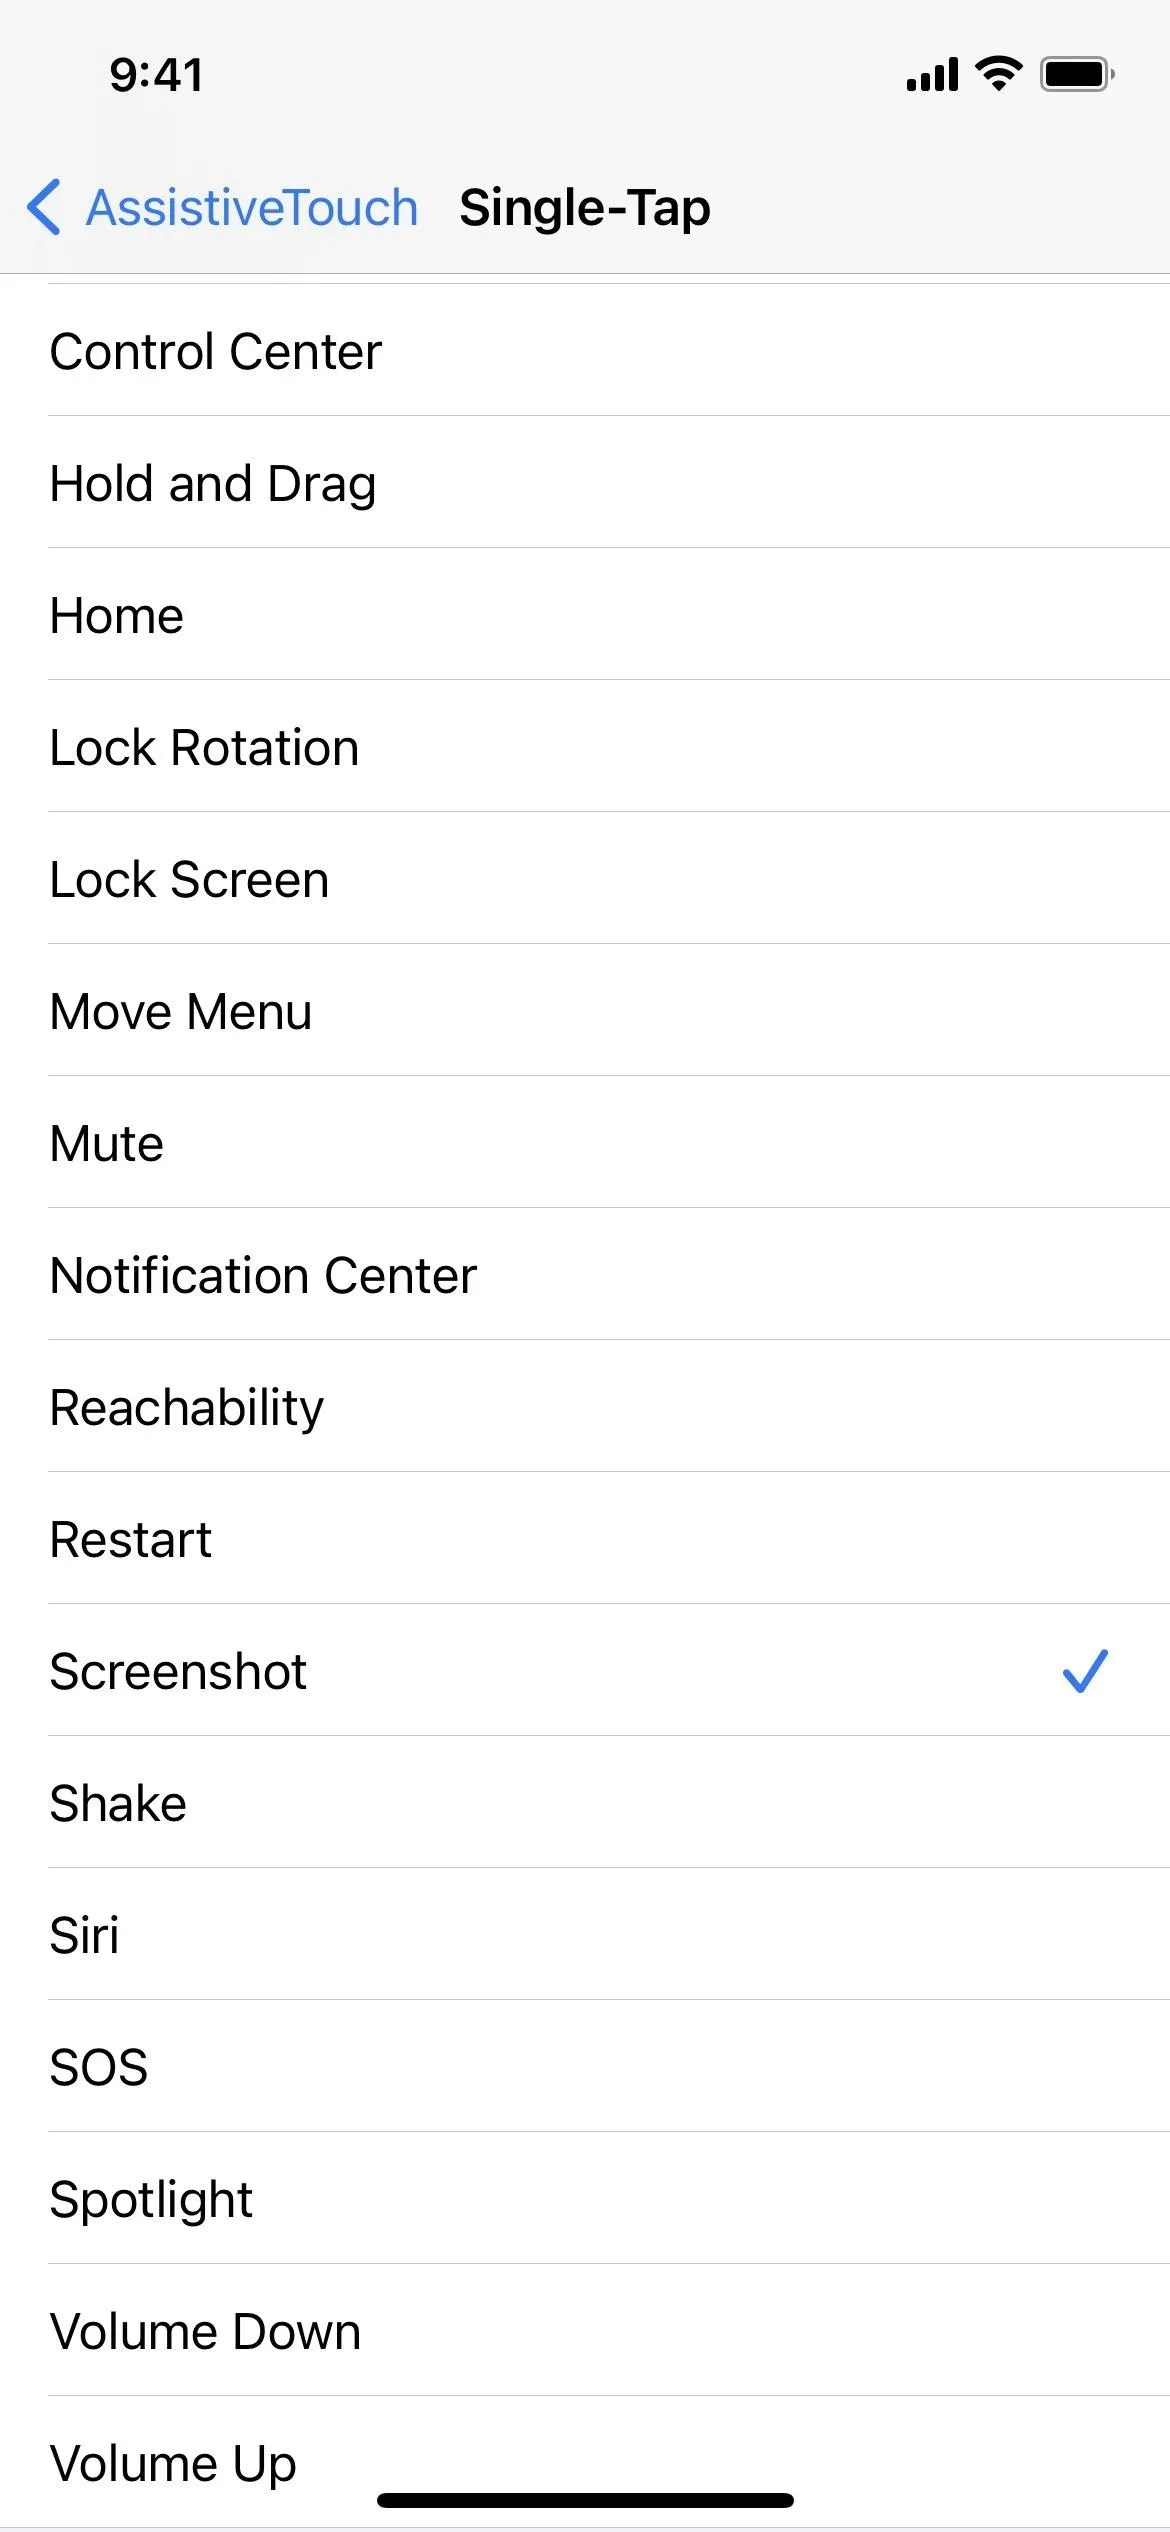
There's one last thing to set up before you can start using it. Well, you could start using it right away by activating the Accessibility Shortcut, tapping the on-screen AssistiveTouch circle, choosing "Device," then "More," then "Screenshot," but that's too much work. Instead, you'll want to assign the screenshot tool to a gesture, such as tapping the AssistiveTouch circle once.
Go to Settings –> Accessibility –> Touch –> AssistiveTouch, then choose "Single-Tap," "Double-Tap," or "Long Press," depending on how you want to take the screenshot after tripping the Accessibility Shortcut. If you want to use "Single-Tap," which is the quickest, tap that and change it from "Open Menu" to "Screenshot," then exit the settings.
Now, triple-click the Side button or touch the Accessibility Shortcuts control in Control Center and choose "AssistiveTouch," and you'll see the AssistiveTouch on-screen circle appear. Tap that once (if you chose the single-tap action), and your iPhone will take a screenshot.
The gray circle for AssistiveTouch will temporarily disappear during each screenshot, so you won't see that in any of your images captured. When you're done taking screenshots, you can exit AssistiveTouch just like you activated it.

Using the triple-click (left) is faster than Control Center (right).
Using the triple-click (left) is faster than Control Center (right).
Use QuickTime on a Mac
Normally, QuickTime Player on macOS is a good option for screen recording your iPhone whenever you don't want the red bubble to appear that the built-in iOS screen recorded shows on many screens. However, it can also be used to take screenshots of your iPhone's screen.
This comes in handy whenever the regular screenshot tool won't capture an element on the screen, such as a screenshot's thumbnail or the AssistiveTouch gray circle.
To do so, connect your iPhone 12, 12 Pro, 12 Pro Max, or 12 mini to your Mac via a Lightning to USB or Lightning to USB-C cable, depending on your Mac model and available ports. If you see the "Unlock iPhone to Use Accessories" message appear on your iPhone, unlock your iPhone with Face ID, Touch ID, or your passcode. Then, you may have to "Trust" the computer before a data connection will work, which involves hitting "Trust" on your iPhone and entering your passcode.
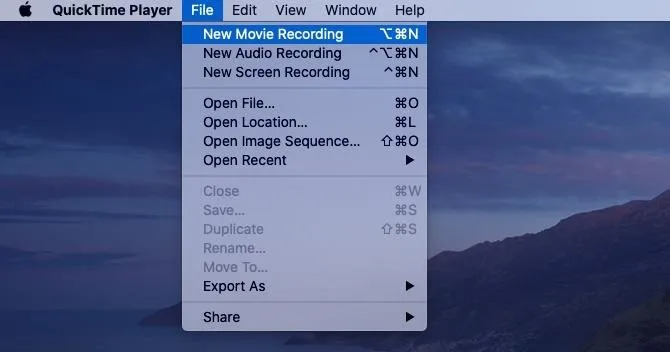
Now that that's all out of the way, open QuickTime Player on macOS. When it opens, click on "File" in the menu bar, then "New Movie Recording."
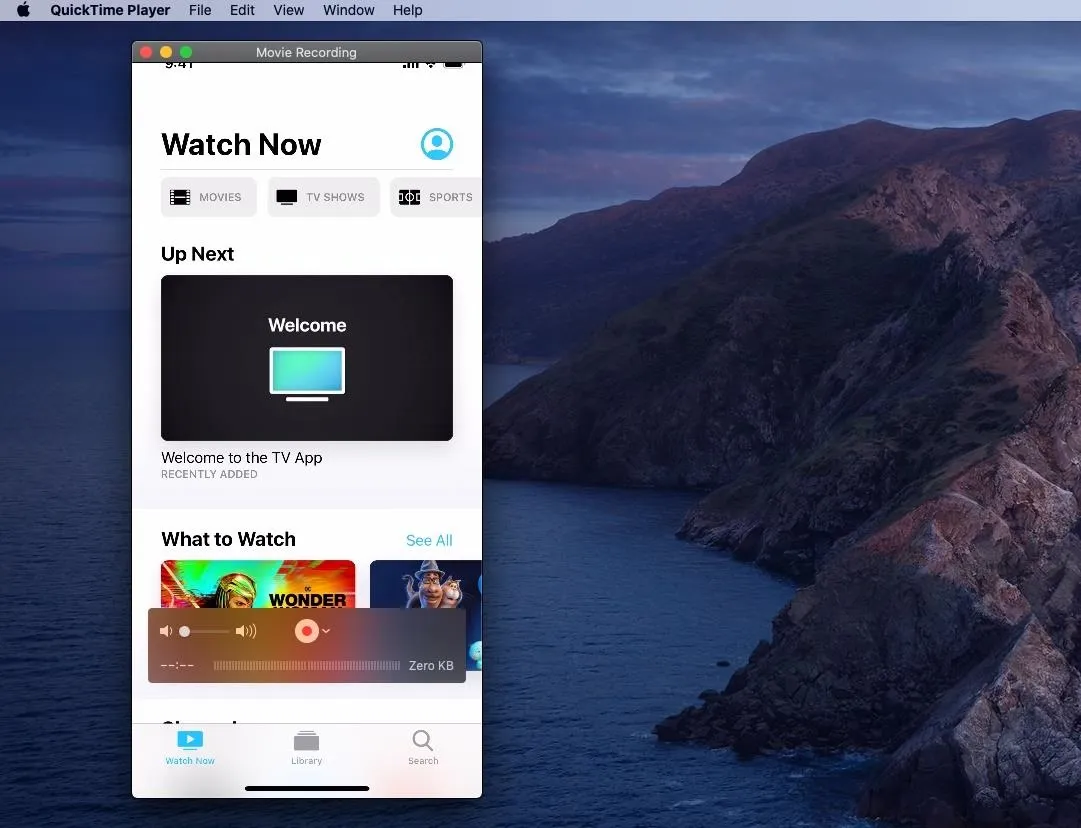
Likely, your Mac's camera will turn on, so you'll need to switch the input to your iPhone. In the video feed that opens, click the drop-down icon next to the record button, then choose your iPhone model as the "camera."

The recording window should change to your iPhone's screen. You can adjust the window's size just like any other window on macOS, and it will adjust the resolution of the screenshot accordingly (it won't be the same resolution as a screenshot taken directly on iOS).
To take a screenshot, make sure your mouse is not on the window (so you don't capture the player controls), then use Command-Shift-5 to open the screenshot tool for macOS right to window capture mode.
Now, hover your mouse, which should now be a camera icon, over the window. Whenever you're ready, left-click to take the image. However, it will take the image with a drop-shadow. To avoid that and get a drop-shadow-less screenshot more like one you would take on the iPhone directly, hold down the Option key while left-clicking the window.
After taking a screenshot, you'll see a floating thumbnail similar to on iOS; click on that to open up a Preview window to edit or share the screenshot right away.
Screenshots are saved to your Desktop by default, but you can change that after using Command-Shift-5. Click on "Options" in the menu that appears, then choose another location to save screenshots. From here, you can also disable the floating thumbnail and enable a timer. Below, you can see the difference between the two types of window screenshots macOS will take.
A drop-shadow screenshot (left) vs. one without a drop-shadow (right).
A drop-shadow screenshot (left) vs. one without a drop-shadow (right).
Cover photo, screenshots, and GIFs by Justin Meyers/Gadget Hacks


Comments
Be the first, drop a comment!