


Whenever something goes wrong with your iPhone, or whenever you want to downgrade from an iOS beta back to the regular iOS release, you can restore your iPhone to your last saved state. Restoring to an iCloud backup is great but won't work in all situations. Plus, if you saved a backup on your computer, that may be the best route to take to get back all of your data.
If you have a Mac running macOS Catalina 10.15 or later, everything happens in Finder. Check out our guide on restoring your iPhone using Finder for help there. But when you're using macOS Mojave 10.14 or lower, or if you use a Windows PC, you'll want to restore using iTunes.
You should've already created a backup using our guide on backing up your iPhone using iTunes. But if you want to save the current state of your iPhone as well, like if you're downgrading from an iOS beta to a stable release but think you might want to jump back on the beta, you can save another backup. Just make sure to archive your last backup first, so the one you make now won't overwrite it.
Disable Find My iPhone on Your iPhone
To restore to a backup or factory reset your device, you'll need to disable Find My iPhone at some point. It will ask you to do so during the restore process, but it's much better to get it out of the way first so that nothing kinks up the restore.
Assuming you're running iOS 13 or later, on your iPhone, open Settings, tap your name up top, select "Find My," then hit "Find My iPhone." Next, toggle off the "Find My iPhone" switch, enter your Apple ID password, and choose "Turn Off" to disable the service.


If your iPhone is in a bootloop, won't turn on, or there is no other way to disable Find My iPhone, skip to Step 2. Otherwise, skip to Step 3 to continue.
If Your iPhone Isn't Working
When the iPhone is stuck in a bootloop, won't turn on, has a frozen display, or any number of other issues, you can still restore your iPhone with iTunes using Recovery mode or DFU mode. Recovery communicates with your iPhone's bootloader, while DFU mode goes straight to the bootrom.
To use Recovery mode, which will try to keep your data intact, connect your iPhone to iTunes (restart iTunes if it was already opened), then use one of the following button combinations to enter the Recovery. Afterward, the "Restore" or "Update" buttons in iTunes should appear automatically. Choose "Update" to keep your data or "Restore" to start fresh. You would need to enter the iCloud password if Find My iPhone was turned on.
- iPhone 8 or later: Quickly press-and-release the Volume Up button, then the Volume Down button. Next, press-and-hold the Side button for about 10 seconds (your display will go black). Don't release the button when you see the Apple logo; release it when you see the recovery mode screen on the iPhone, which looks like a Lightning cable pointing toward a MacBook.
- iPhone 7 or 7 Plus: Press-and-hold the Top button (or the Side button if there isn't a Top one) and Volume Down button at the same time. Don't release the buttons when you see the Apple logo; release them when you see the recovery mode screen on the iPhone, which looks like a Lightning cable pointing toward a MacBook.
- iPhone 6s or earlier: Press-and-hold the Top button (or the Side button if there isn't a Top one) and Home button at the same time. Don't release the buttons when you see the Apple logo; release them when you see the recovery mode screen on the iPhone, which looks like a Lightning cable pointing toward a MacBook.
For DFU mode, jump to one of the articles below to see how it's done.
Locate Your iPhone on Your Mac or Windows PC
Using a good Lightning to USB or Lightning to USB-C cable, connect your iPhone to your MacBook, iMac, Mac Pro, other Mac computer, or Windows PC. If the connection is good, iTunes may open automatically, but not always. So if it doesn't, open iTunes.
If you see an "Unlock iPhone to Use Accessories" notification appear on your iPhone, unlock your iPhone using Face ID, Touch ID, or your passcode to proceed. Then, if prompted, tap "Trust This Computer" on your iPhone, and follow the on-screen steps to trust it. You can always untrust the computer later.
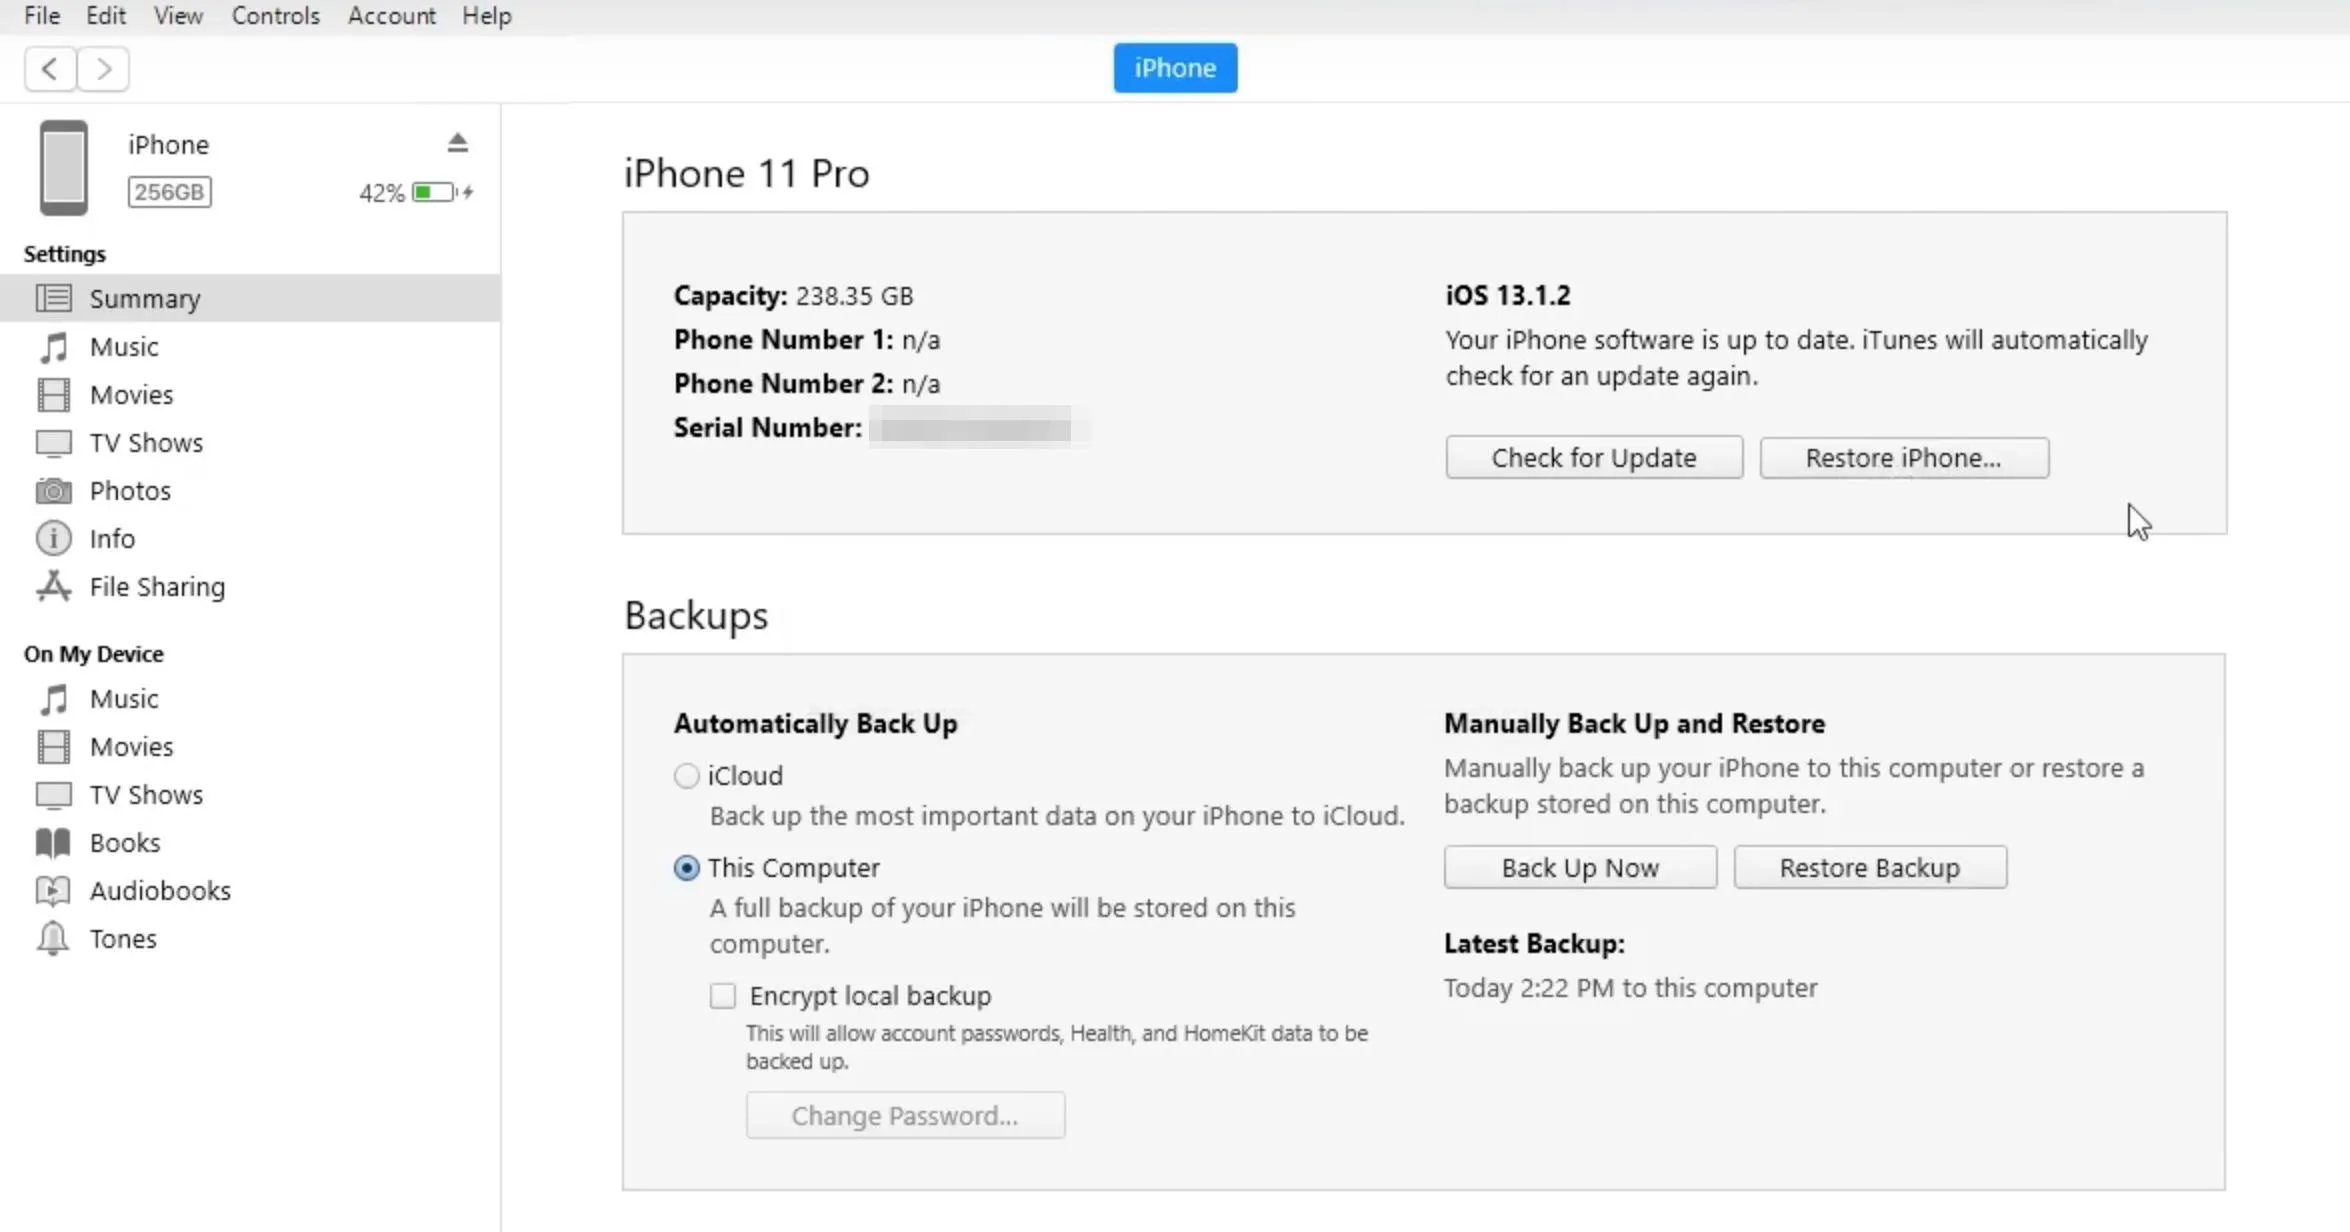
Next, click the iPhone button on the top left of iTunes, under the playback controls. If you don't see it, make sure your cable is connected correctly and not damaged.

After clicking the button, choose "Summary" from the left column if it's not already selected.
Restore Your iPhone
Now that Find My iPhone is disabled and you've found your device in iTunes, you can restore your iPhone from either a previous backup or to the factory default settings. You could even restore it using a restore image in the IPSW file format.
Restore from a Backup
In your iPhone's Summary screen, click on "Restore Backup" under the Manually Back Up and Restore section.
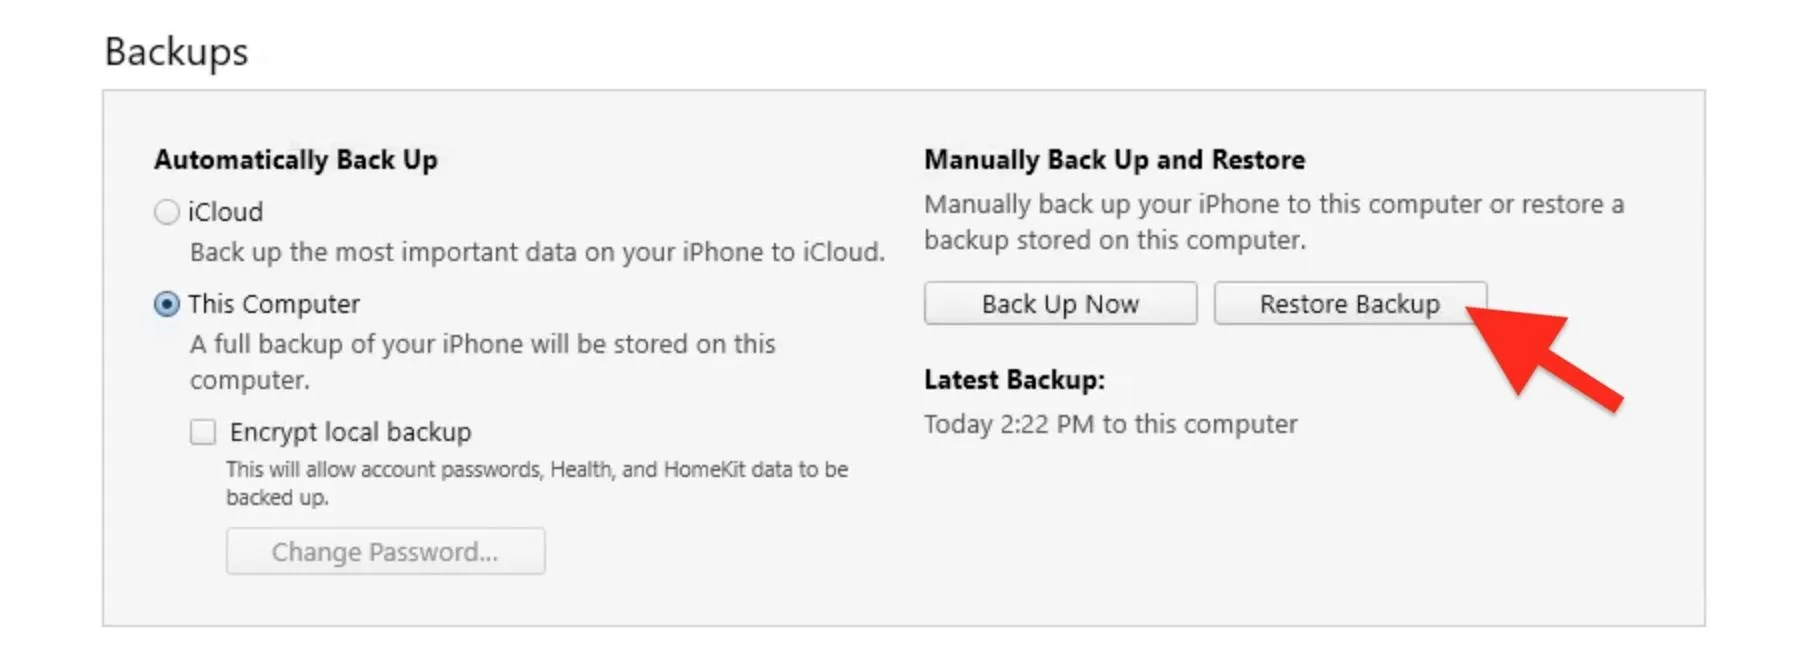
Next, iTunes will show you a window to select the backup. It will choose the last backup created automatically, but if you need a different one, expand the drop-down and choose the right backup file. Look at the time and date of each backup to make sure it's the one you want.
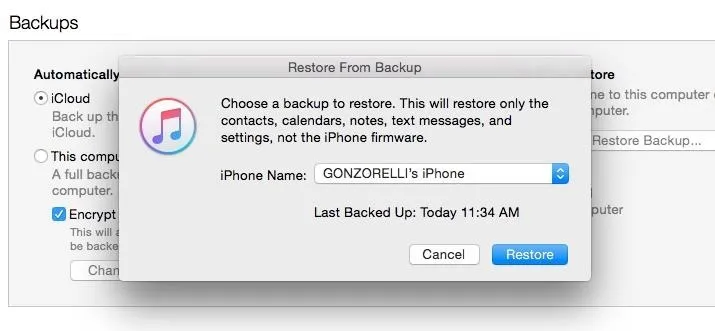
You may see three different types of backups in your options, including:
- iCloud: Your most recent backup saved to your iCloud.
- Local: Your most recent backup saved to your computer.
- Archived: An older backup that can't be overwritten.
If it's an iCloud, local, or archived backup, simply click on "Restore" to begin the process. However, if it's a local encrypted backup — archived or not — you must first enter your encryption password before hitting "Restore."
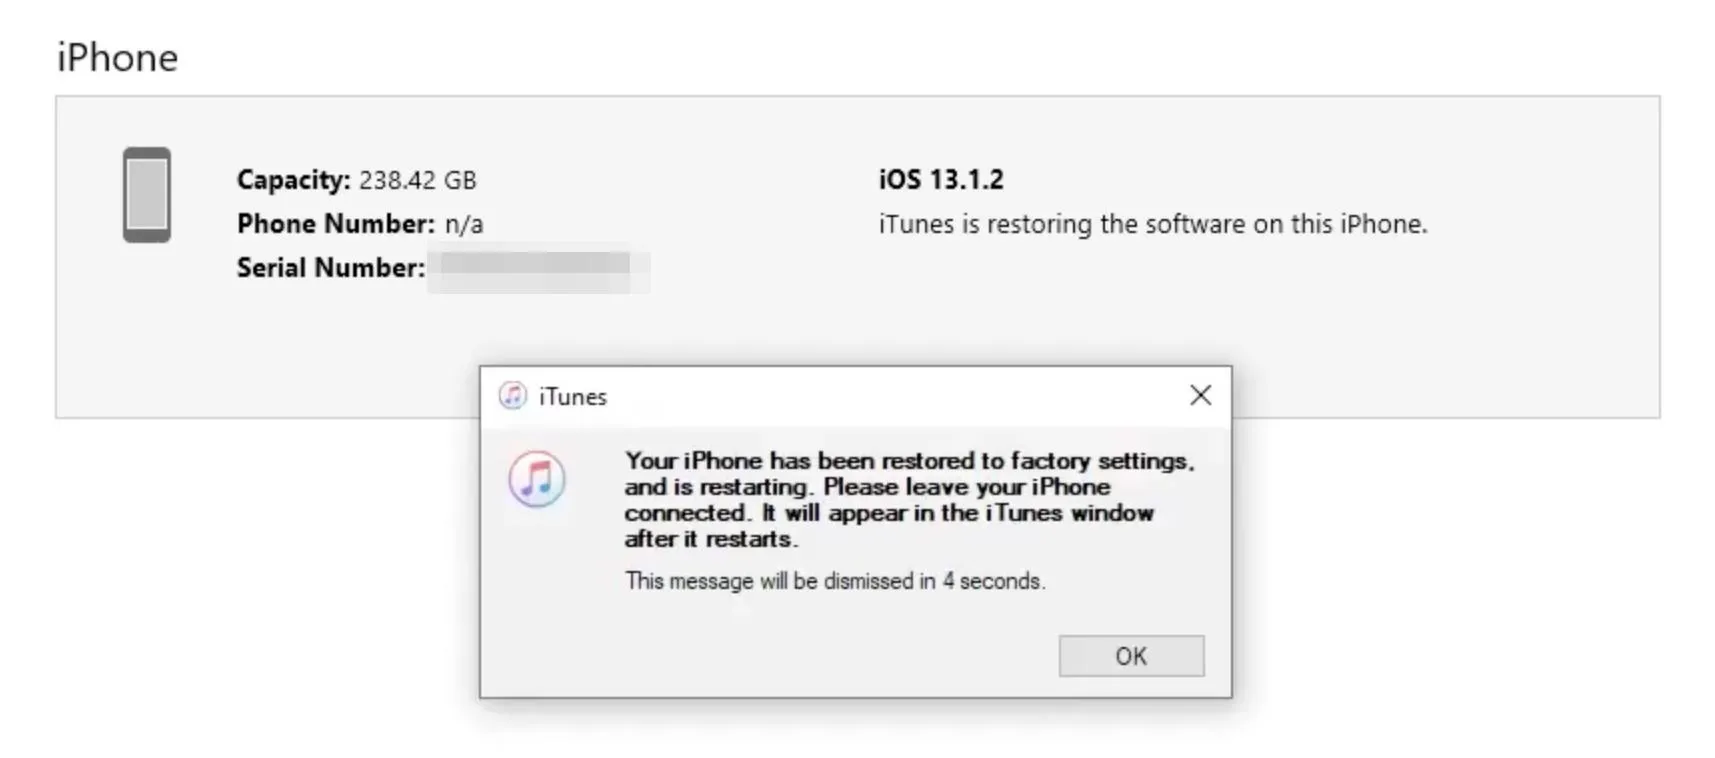
Your iPhone will restart and take a few minutes to restore. Don't disconnect your iPhone during the process. Wait until it's done entirely and syncs with your computer. Then, you can disconnect it from iTunes.
Restore to Default Configuration
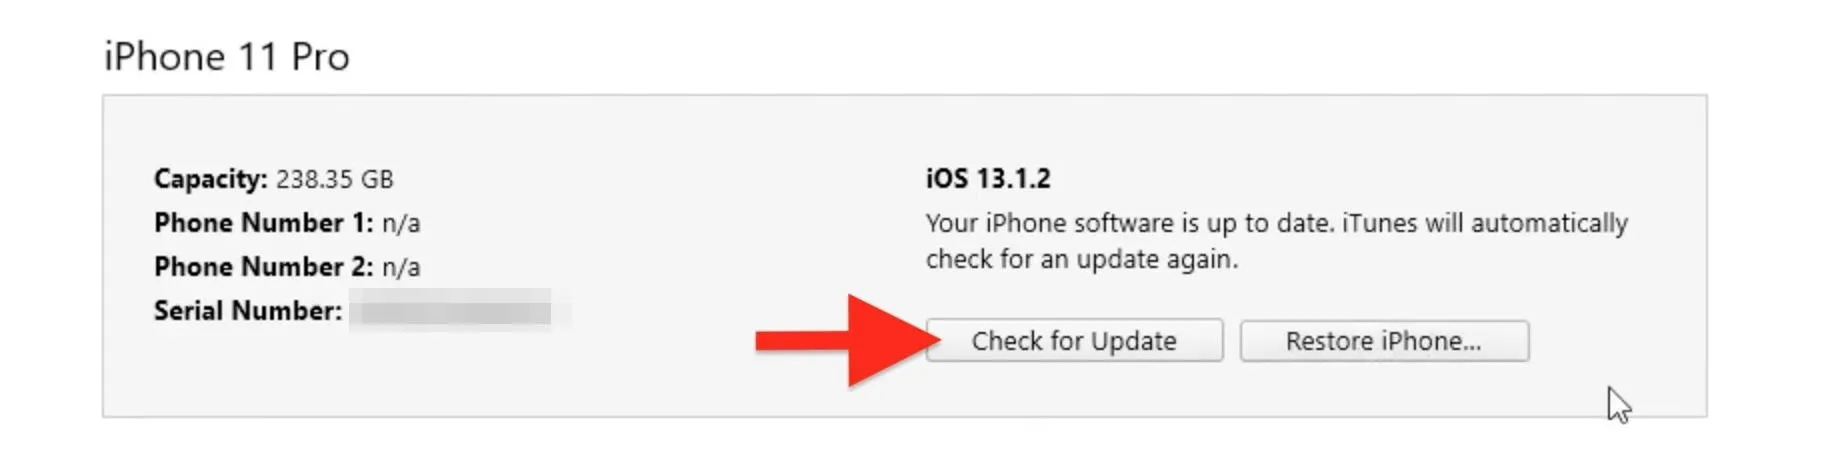
If you don't want to use a backup to restore your iPhone, you can revert to factory settings. In iTunes, select "Restore iPhone" next to the "Check for Update" button near the top.
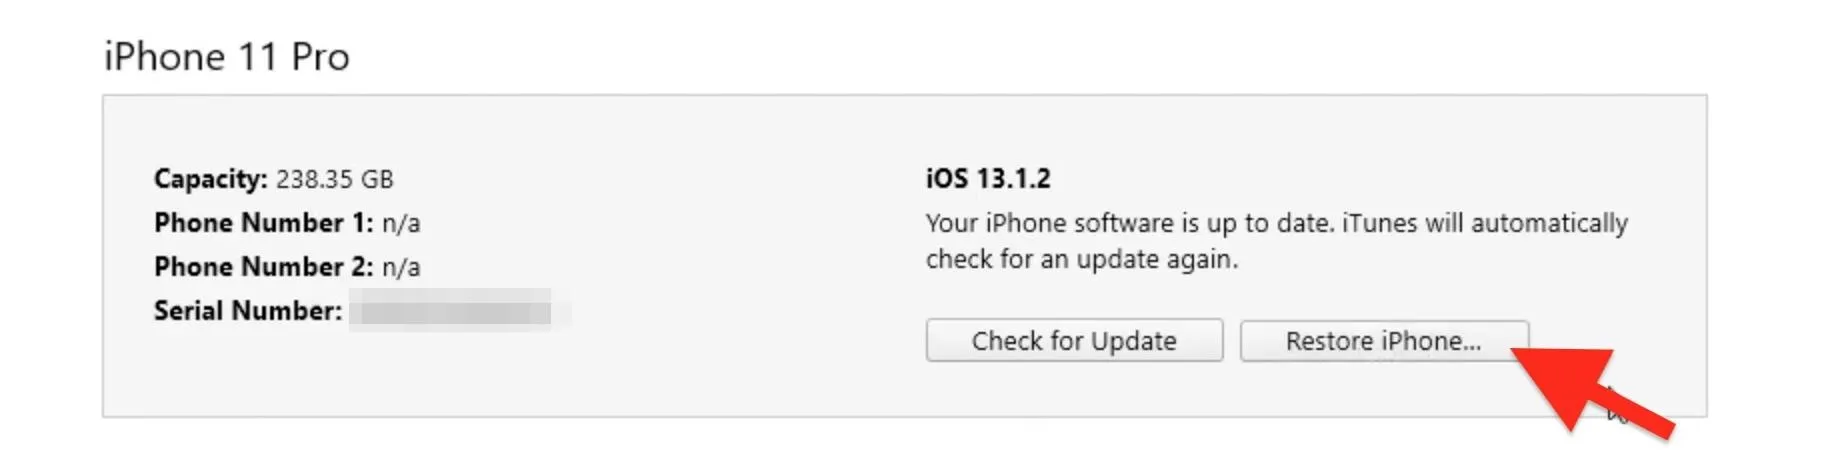
Then, click on "Restore" again when prompted, and your iPhone will restore to the latest stable iOS software version. If you're running public or developer beta software, your iPhone will restore to the latest public software version.

After your iPhone restores to factory settings, it will restart. You can now set up your iPhone as new or restore from a backup, though, you could have just used Method 1 for that.
Restore with a Restore Image
In many cases, restoring with a restore image file is for when you want to install a new beta on your iPhone, but you can also find the restore image for your iPhone as another way to restore to the default settings or choose a backup file.
First, hold down the Option key on your keyboard, then click on "Check for Update" in iTunes to initiate the process. From the selection window in iTunes, choose the IPSW restore image that you downloaded to your computer, then click on "Open." Click on "Update" when prompted. Your computer will contact Apple to verify and install iOS. During the install, you'll have to enter the passcode on your iPhone. Once iTunes finishes installing the image, your iPhone will restart.
Now, all that's left to do is follow the instructions on your iPhone to activate and set up iOS. It may already be ready to go, though, so no additional setup may be necessary.
Cover photo and screenshots by Neil Gonzalez/Gadget Hacks


Comments
Be the first, drop a comment!