


Apple's innovations often involve more taking away than adding on. The company has released seven iPhones that omit the home button, the latest batch including the iPhone 11, 11 Pro, and 11 Pro Max. If you recently picked up one of these devices for the first time, you might be a little confused on how to enter DFU mode when your iPhone acts up.
For the uninitiated, DFU stands for "Device Firmware Upgrade." DFU mode isn't something you use lightly — instead, it's usually the last resort for bringing a bricked or otherwise malfunctioning iPhone back to life. For the occasional iPhone hiccup, a simple restart or reset is often all you need. But DFU can be a powerful tool if your iOS device requires something a bit stronger.
- Don't Miss: 200+ Exciting New iOS 13 Features for iPhone
While your iPhone might be brand new, the hidden DFU code isn't. Apple has used the same button combination to enter DFU mode since the iPhone 8, 8 Plus and X. That said, if you're coming from an iPhone 7 or earlier, you'll find this new button combination to be more complicated than before.
Requirements
- Mac or Windows computer
- Latest version of iTunes installed OR macOS Catalina
- Lightning to USB or Lightning to USB-C cable
Warning — You're About to Lose Everything
You read that right. DFU mode nukes your iPhone's data, completing wiping your hard drive. If you want your photos, texts, documents, or other data saved, you'll need to back it up through iTunes or iCloud first. Obviously, if your iPhone is not currently powering on, this is an impossible step. However, if you entered DFU mode from an iPhone that was up and running, you can quit before going through with the restore and update via your preferred method.
Plug Your iPhone into Your Mac or PC
Connect your iPhone to your Mac or PC with your Lightning to USB or Lightning to USB-C cable.
Unlock Your iPhone (If Necessary)
If you get the "Unlock iPhone to Use Accessories" notification on your device, you'll need to unlock your iPhone first before proceeding.
Trust Your Computer (If Necessary)
In addition, if this is the first time you've connected your iPhone to this computer, you may need to trust the computer on your iPhone. You can untrust the computer after completing these steps if you wish.
Open iTunes (Or Finder on macOS Catalina)
If running anything other than macOS Catalina, iTunes should automatically open. If it doesn't, open it yourself, then check to see your iPhone is connected. You should see your iPhone's icon appear in iTunes next to the media dropdown in addition to the sidebar under "Devices."
If running macOS Catalina, open Finder, then select your iPhone under Locations. If you don't have the Locations menu in your Finder sidebar, click "Finder" in the menu bar at the top of your screen, choose "Preferences," then open the Sidebar tab and tick the box next to "CDs, DVDs, and iOS devices."
Once you click your iPhone in the Locations menu in the sidebar on Catalina, Finder should automatically open the "General" tab. If not, open this tab yourself. If your iPhone doesn't appear, rebooting your Mac should force it to appear.
Boot Your iPhone into DFU Mode
With your iPhone connected to iTunes or Finder, perform the following button-presses:
- Quick-press the volume up button.
- Quick-press the volume down button.
- Press and hold the Side button until the screen goes black.
- Release the Side button once the screen blacks out, then ...
- Quickly press and hold both the Side and volume down buttons together for 5 seconds.
- After 5 seconds, release the Side button without letting go of the volume down button.
- Continue holding down the volume down button for at least 5 seconds.
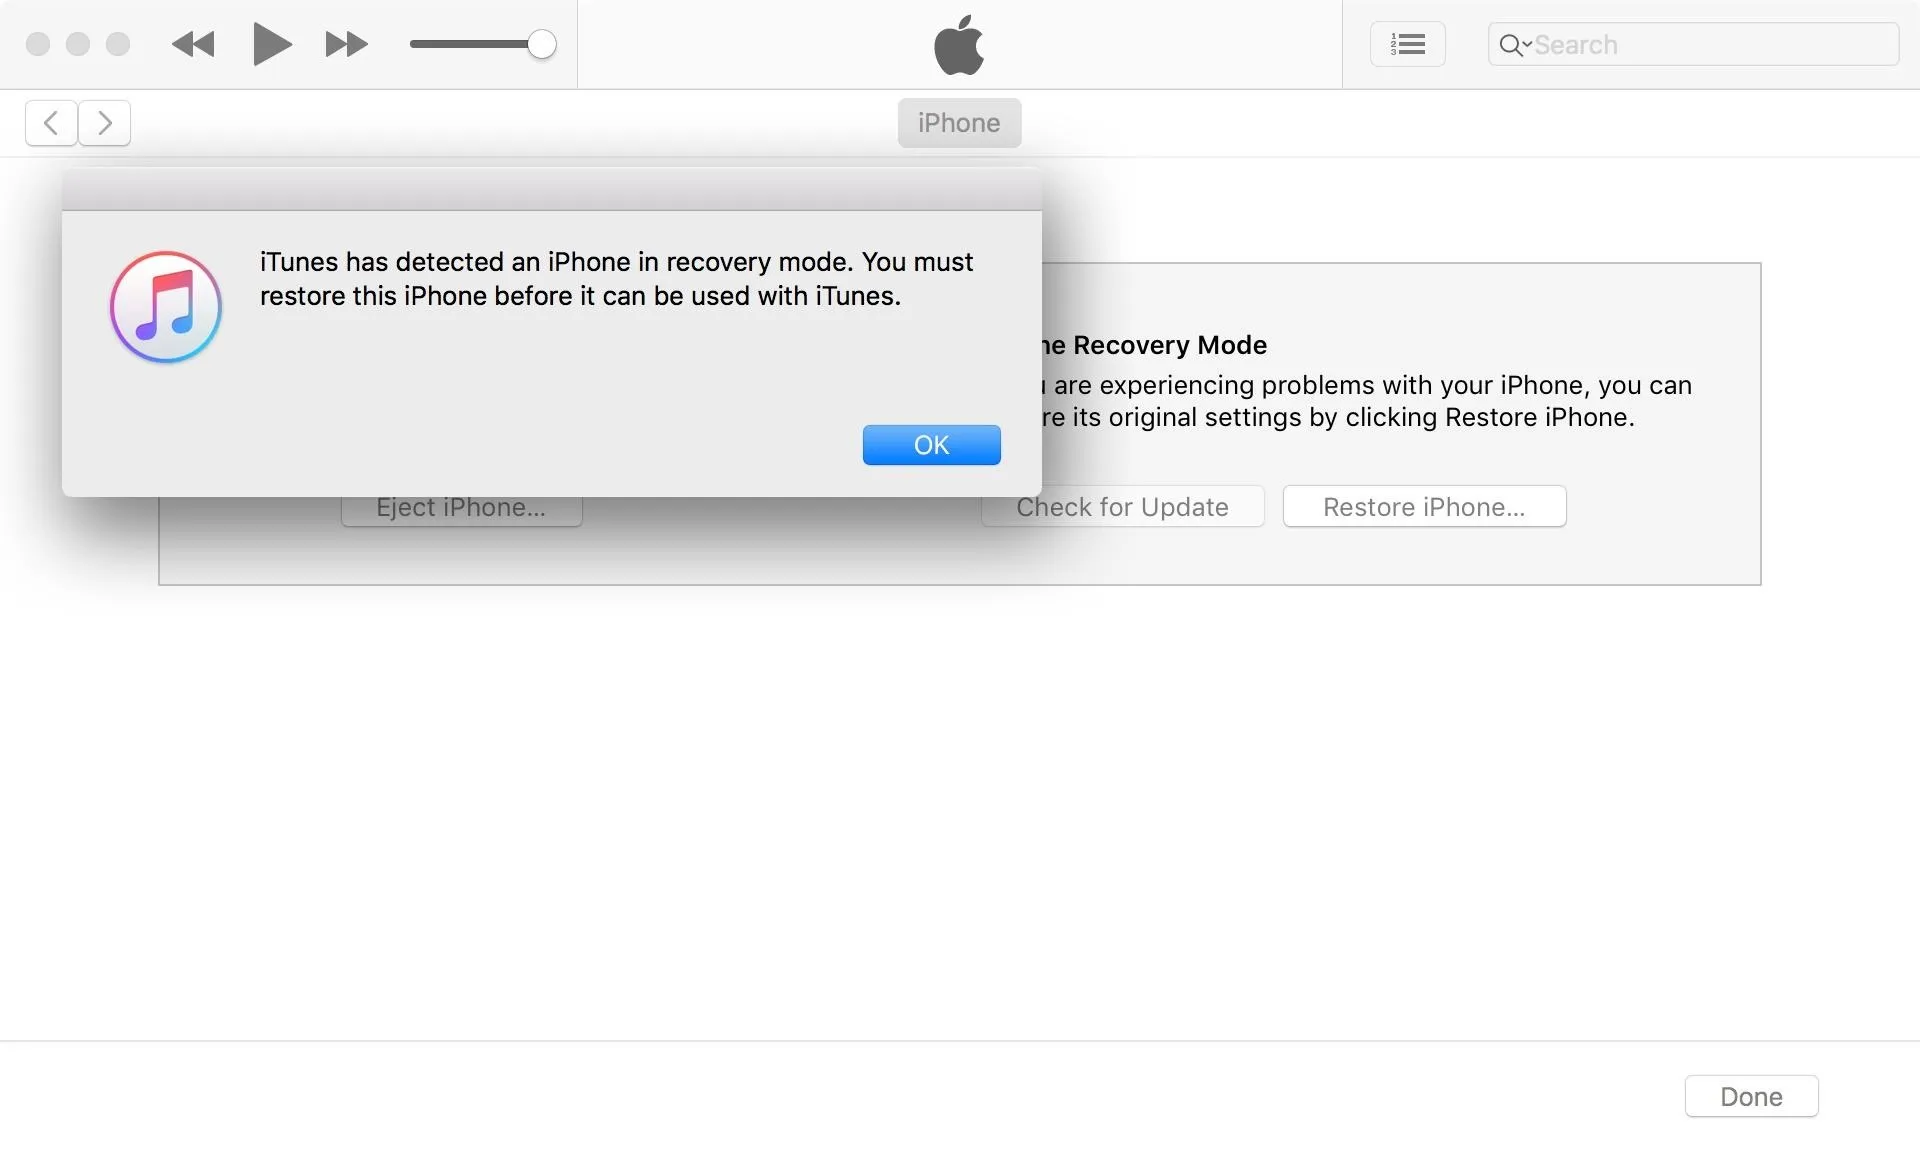
Don't let go until you see a recovery prompt appear in iTunes or Finder. Once it does, let go of the Volume Down button and look at your iPhone's display. If your screen is black, congrats! You're now in DFU mode. If you don't see this prompt appear in macOS Catalina, click out of the iPhone tab, then return. After some time, Finder should show the prompt.
Troubleshooting
If your iPhone restarts, or you see "Connect to iTunes" appear on its screen, head back to Step 1 and try again. Make sure to follow each step to a T — even a slight deviation could prevent your iPhone from successfully entering DFU mode.
Leaving DFU Mode
Whether you want to backup your iPhone before restoring the device, or you just entered DFU mode by mistake, there's an easy way to reverse course and restart the device. Of course, that's assuming your device powered on before entering DFU mode.
To exit DFU mode:
- Quick-press the Volume Up button.
- Quick-press the Volume Down button.
- Press and hold the Side button for at least 10 seconds — until you see the Apple boot screen.
If completed correctly, your iPhone should boot back up to iOS 12 or iOS 13. You'll just need to enter your passcode before proceeding to the home screen.
Erase & Restore Your iPhone
Now that you've successfully booted up your iPhone into DFU mode and don't want to back out, you can hit "OK" to close the iTunes recovery prompt and proceed to restore it back to factory settings. In iTunes or Finder, select "Restore iPhone" under iPhone Recovery Mode. After a successful restore, your iPhone 11, 11 Pro, or 11 Pro Max will automatically leave DFU mode and boot up to that familiar new-iPhone welcome screen.
Cover image and screenshots by Jake Peterson/Gadget Hacks


Comments
Be the first, drop a comment!