


There is no default option on iOS 16 or iOS 17 to lock your apps behind Face ID, Touch ID, or passcode authentication. However, a clever, easy-to-implement workaround will protect your sensitive apps from nosy friends and family temporarily using or looking at something on your iPhone.
For example, you may not want someone with access to your iPhone to open Safari and browse through all your private tabs. Or you might want to prevent them from messing with your device settings. Or keep them from losing your place in that Netflix movie you still have to finish.
- Don't Miss: 14 New iOS 16.6 Features for Your iPhone
Whatever the case, locking the app will keep them out of where you don't want them to go. Before, you might find yourself using Guided Access to restrict people borrowing your iPhone to only one app, but it's not the most straightforward technique to use. But with the Shortcuts app, you can set an automation to automatically lock one or more apps when someone tries to open any of them.
What Apps This Method Works Best On
You should only use this method on apps that don't already have self-locking options. For example, you can already lock a group or photos and videos in your Photos app natively. You can also lock notes in the Notes app.
And most financial apps, whether for banking, investing, crypto, or budgeting, will lock access to your accounts behind a password or biometrics. Other apps may let you safeguard them behind biometrics, such as Facebook Messenger, Microsoft Outlook, Signal, and WhatsApp.
Use the instructions below to protect all other apps from unwanted visitors. The second group of instructions below provides a way to make your house a safe zone, so apps remain unlocked when you're at home for convenience. However, if that's where people tend to borrow your iPhone, you'll want to skip that.
Note: This also works for iPad on iPadOS 16 or iPadOS 17.
Lock Any App on Your iPhone Behind Your Lock Screen
For this to work, your iPhone should be running iOS 16.4 or later since the main action used was only just released on iOS 16.4. If you're running an older iOS version, you can use the timer trick instead.
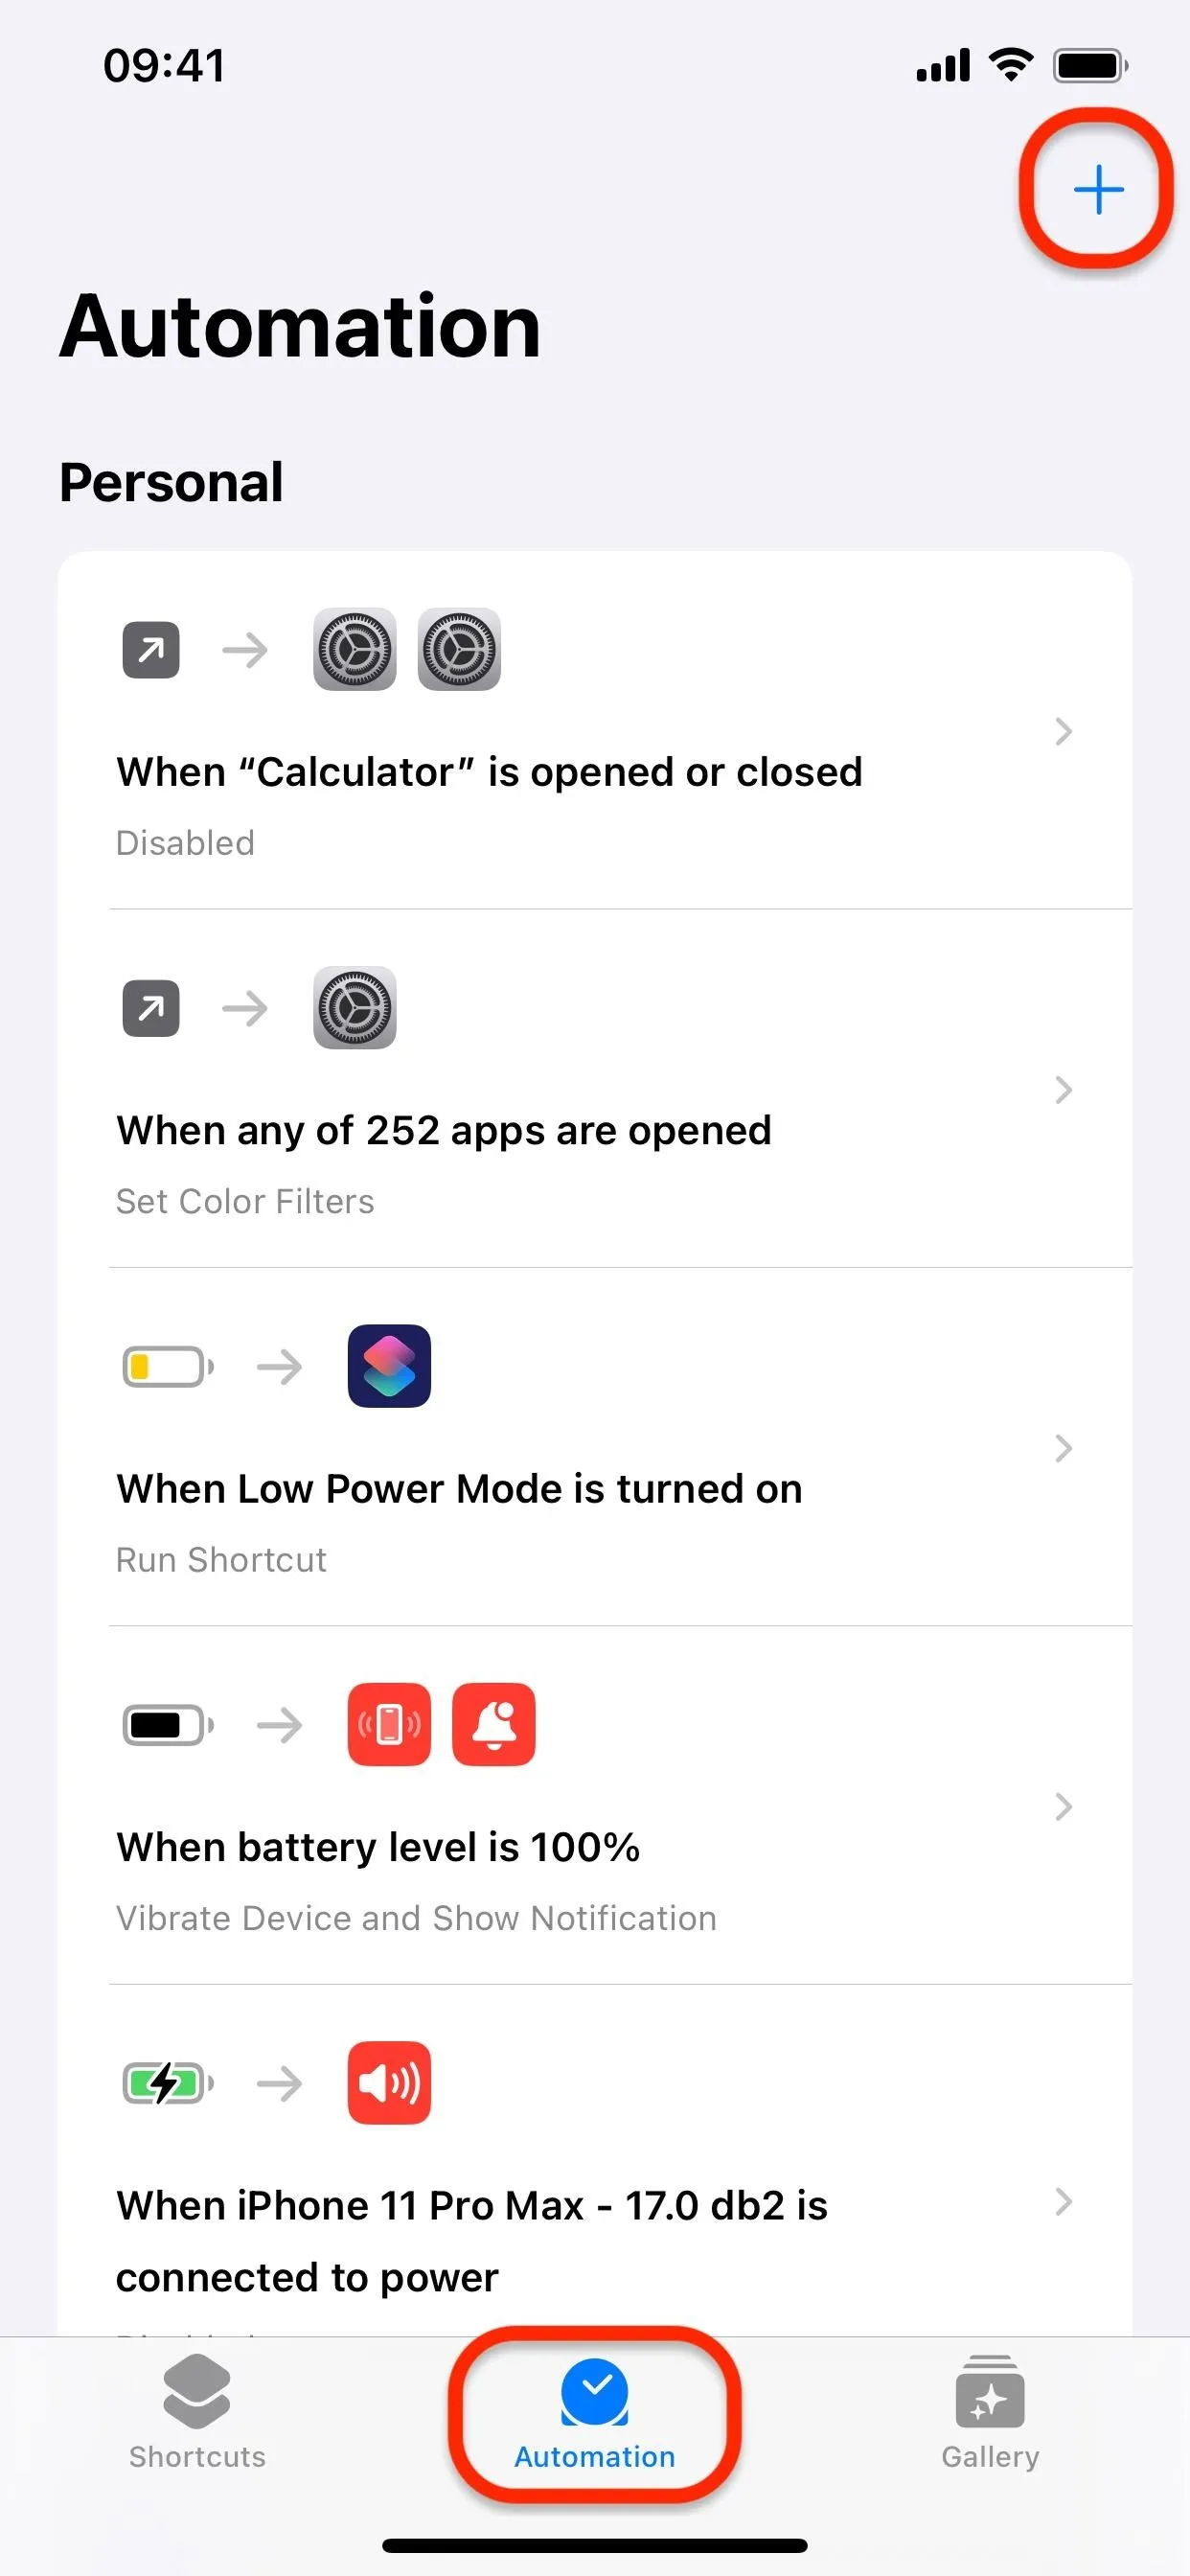
- Open Shortcuts to the Automation tab.
- Tap the plus (+) icon to start a new automation.
- Select "Personal Automation" if on iOS 16. This isn't necessary on iOS 17.
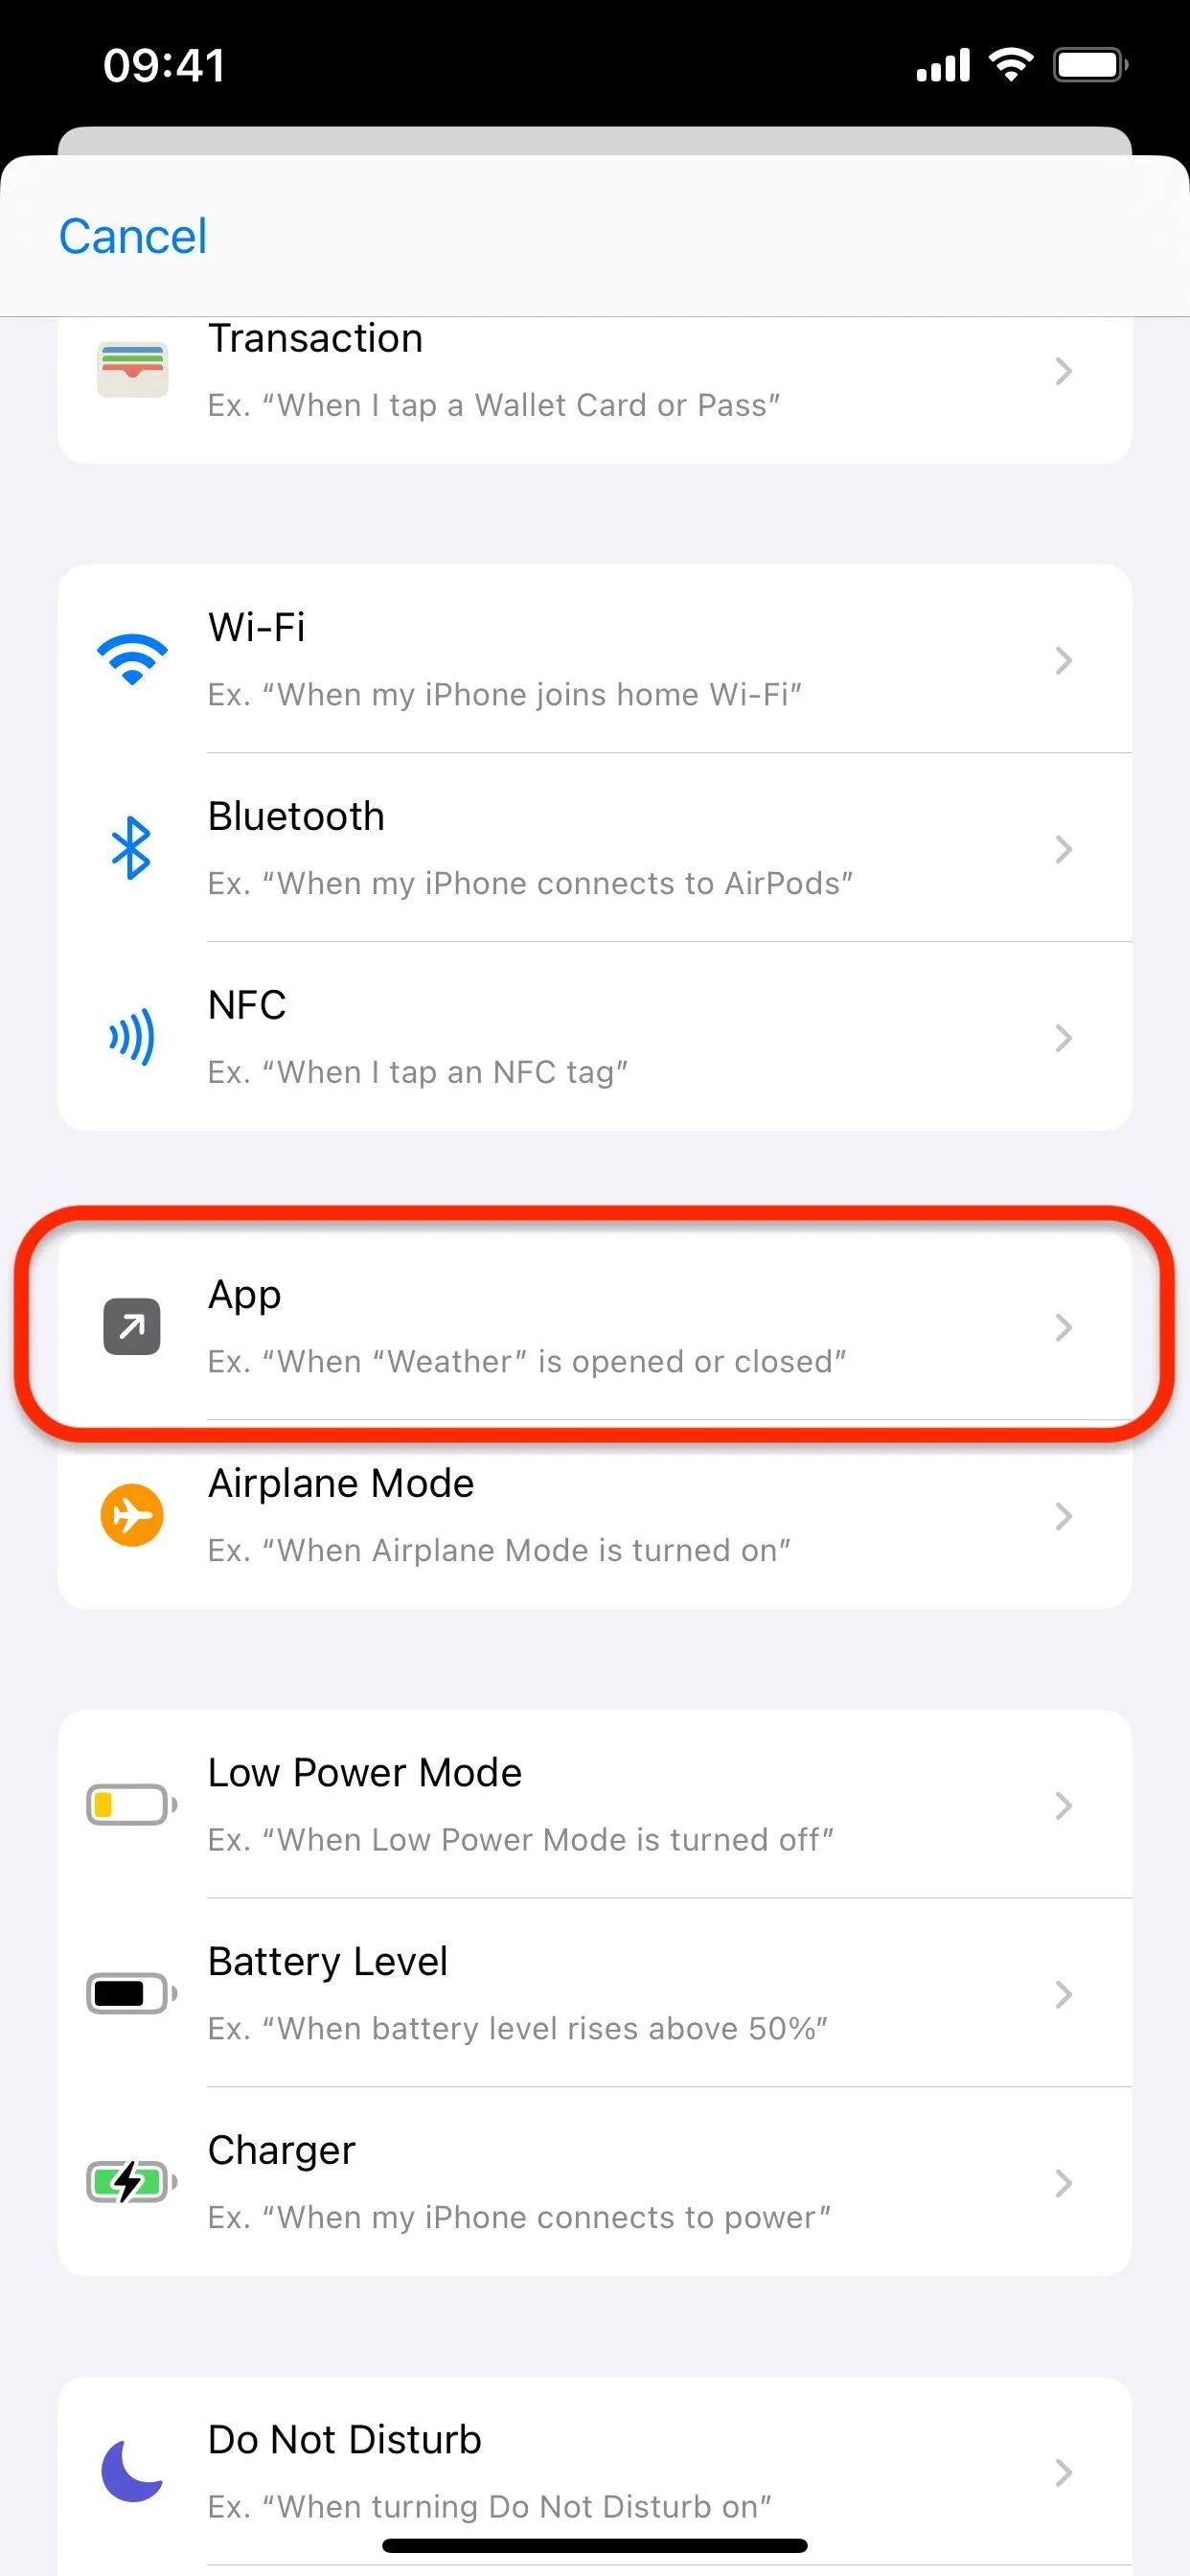
- Choose "App" from the triggers list.
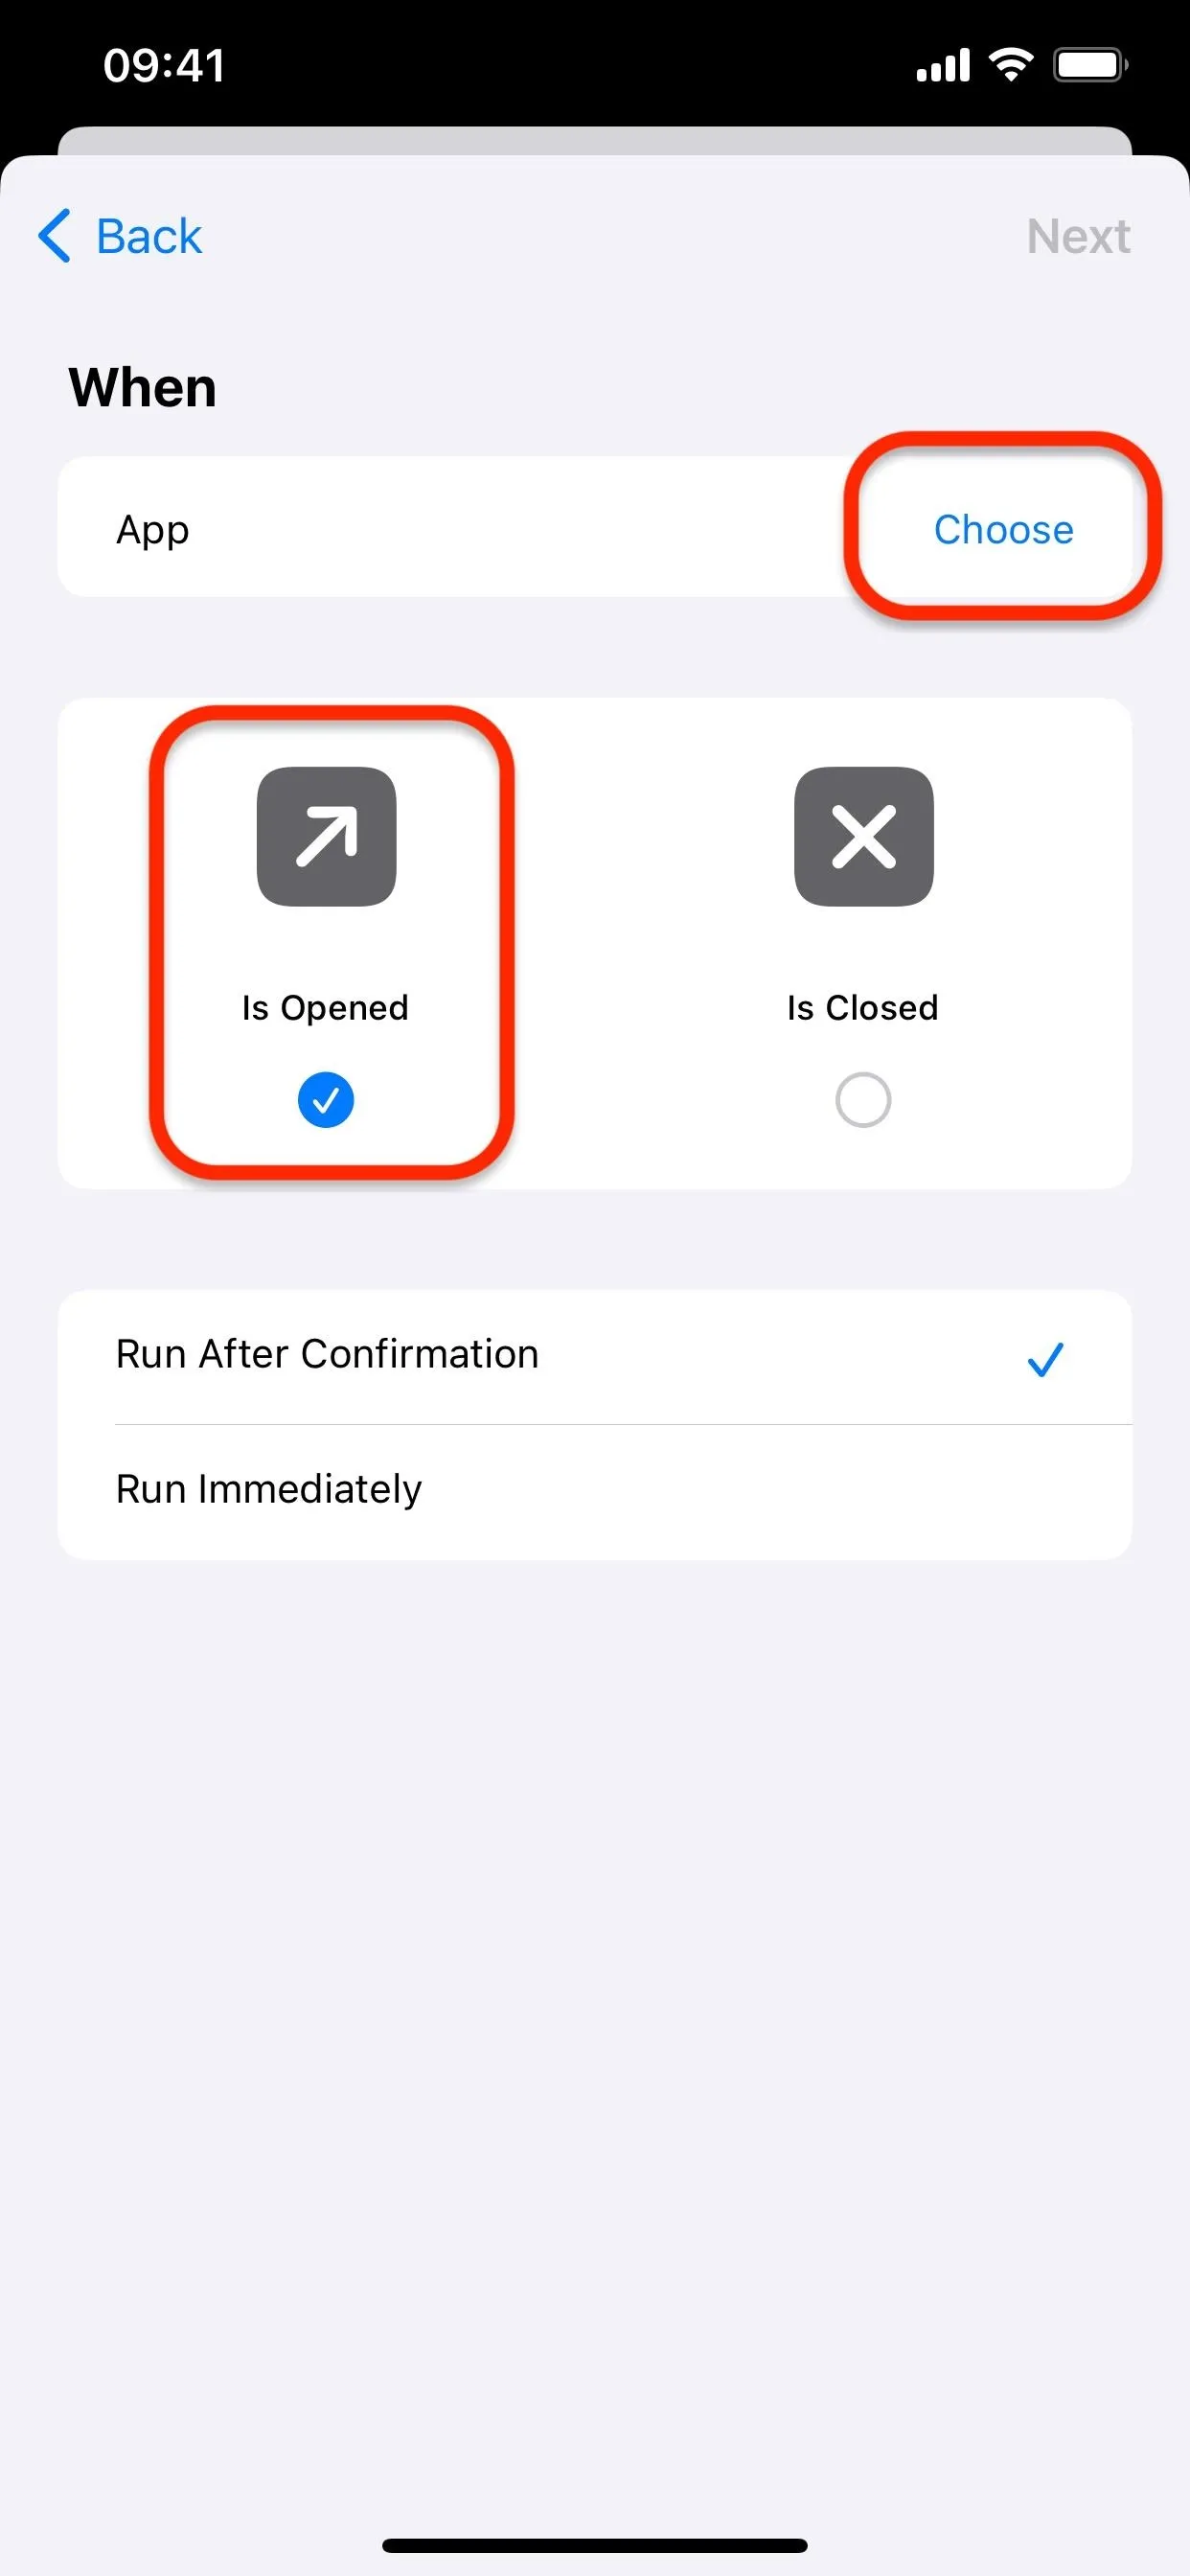
- Ensure "Is Opened" is checked.
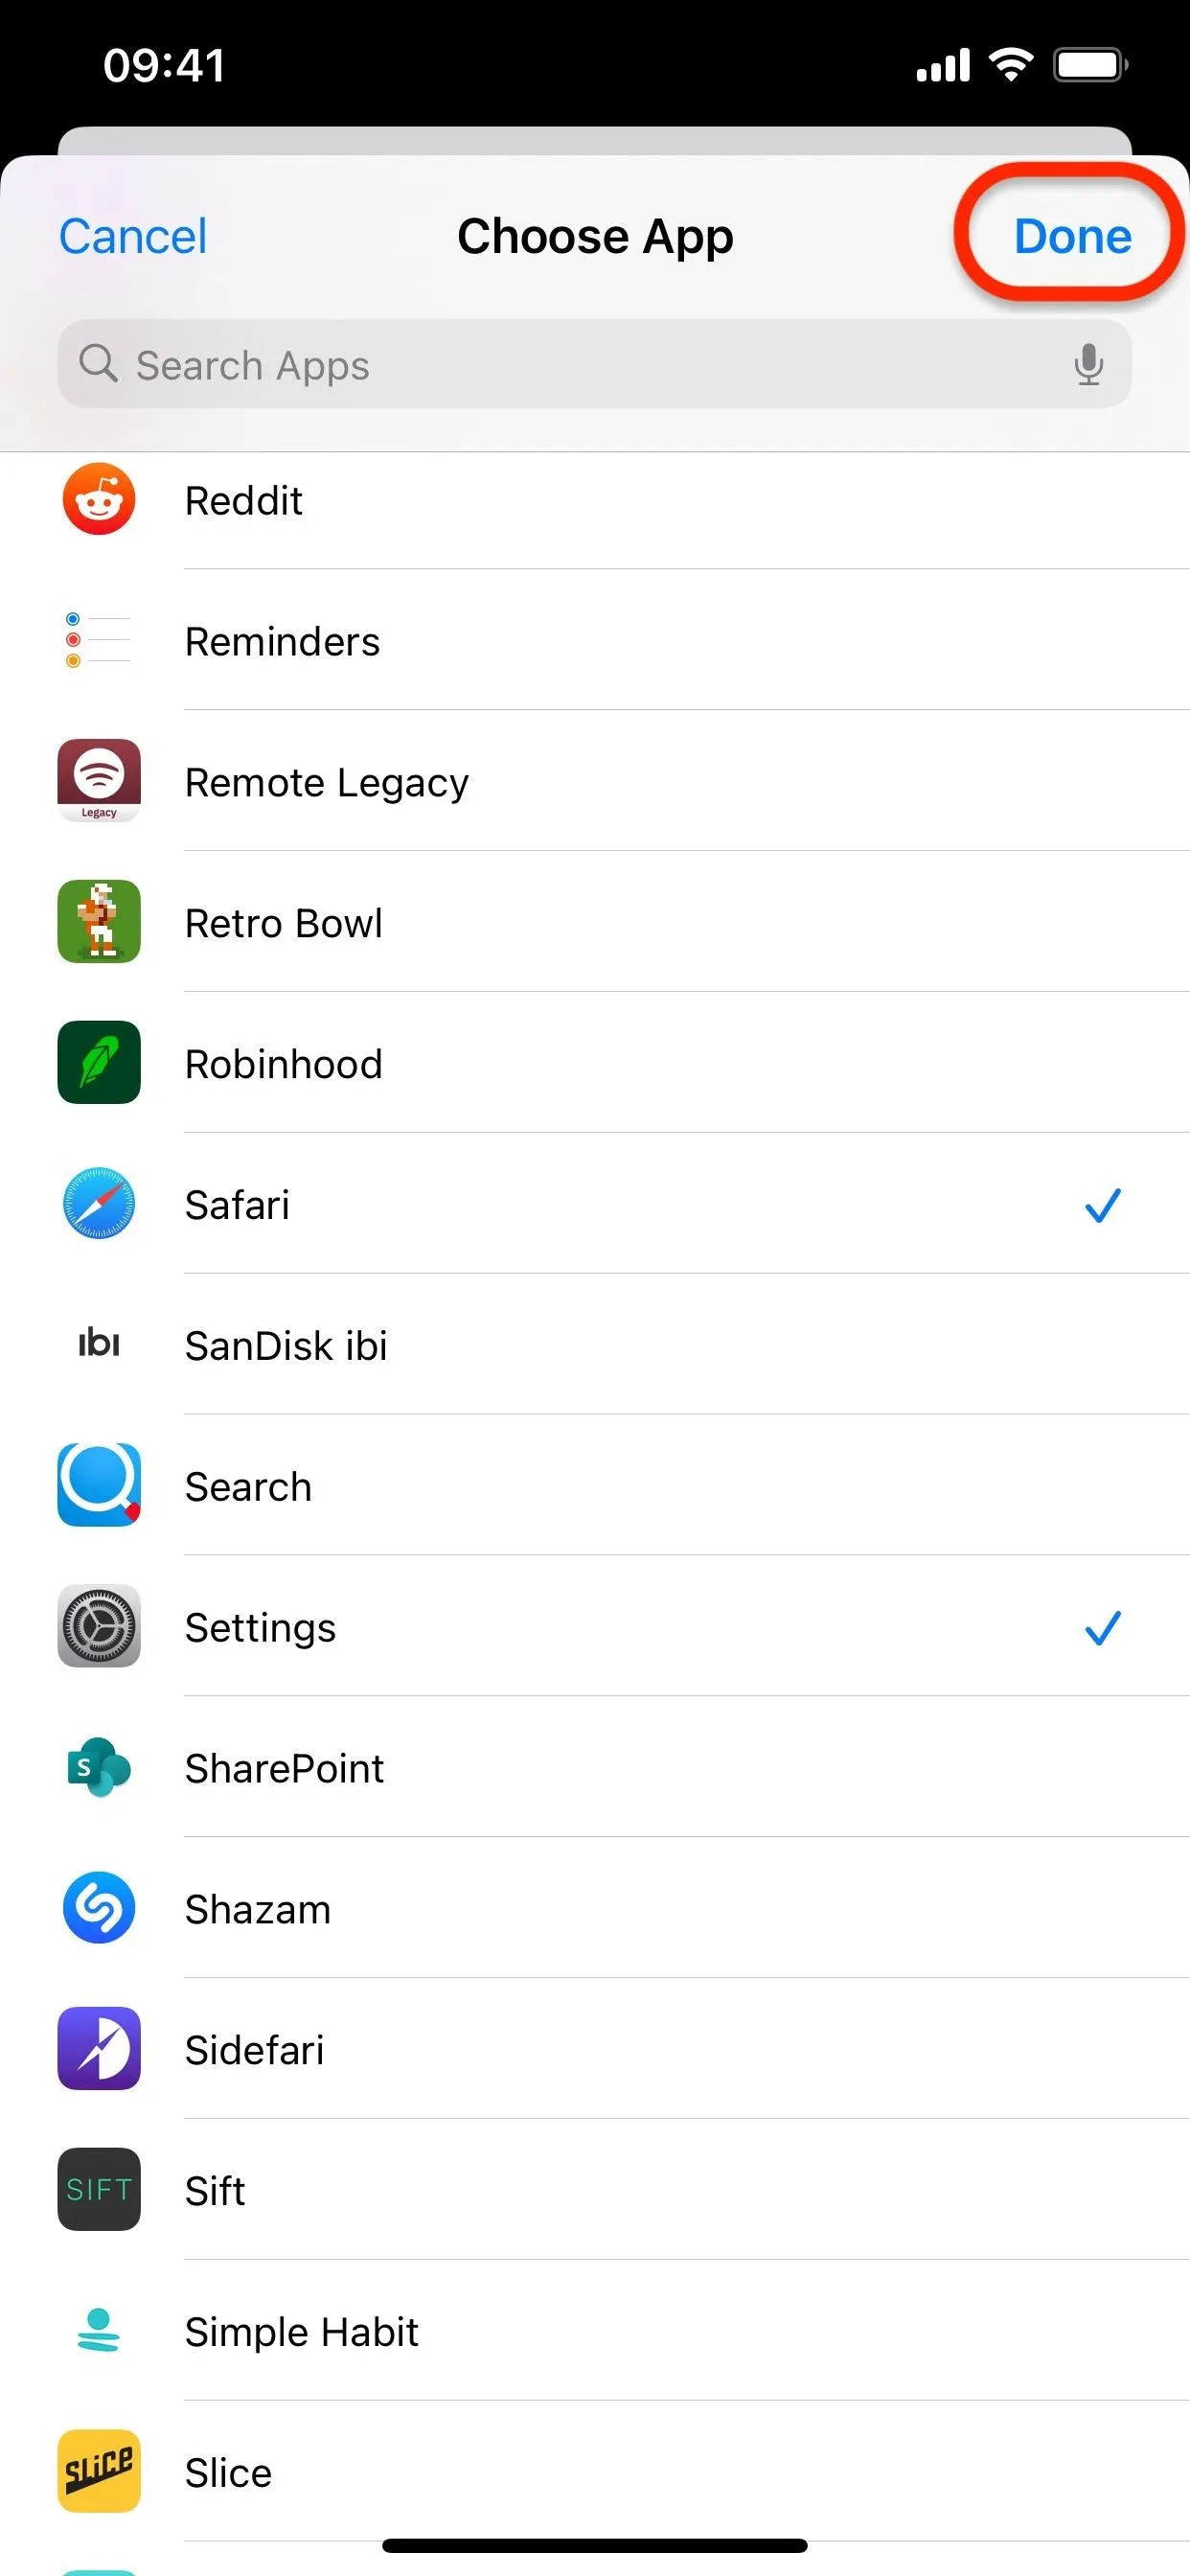
- Tap "Choose" next to "App" to select the apps you want to lock.
- Tap one or more apps to select them.
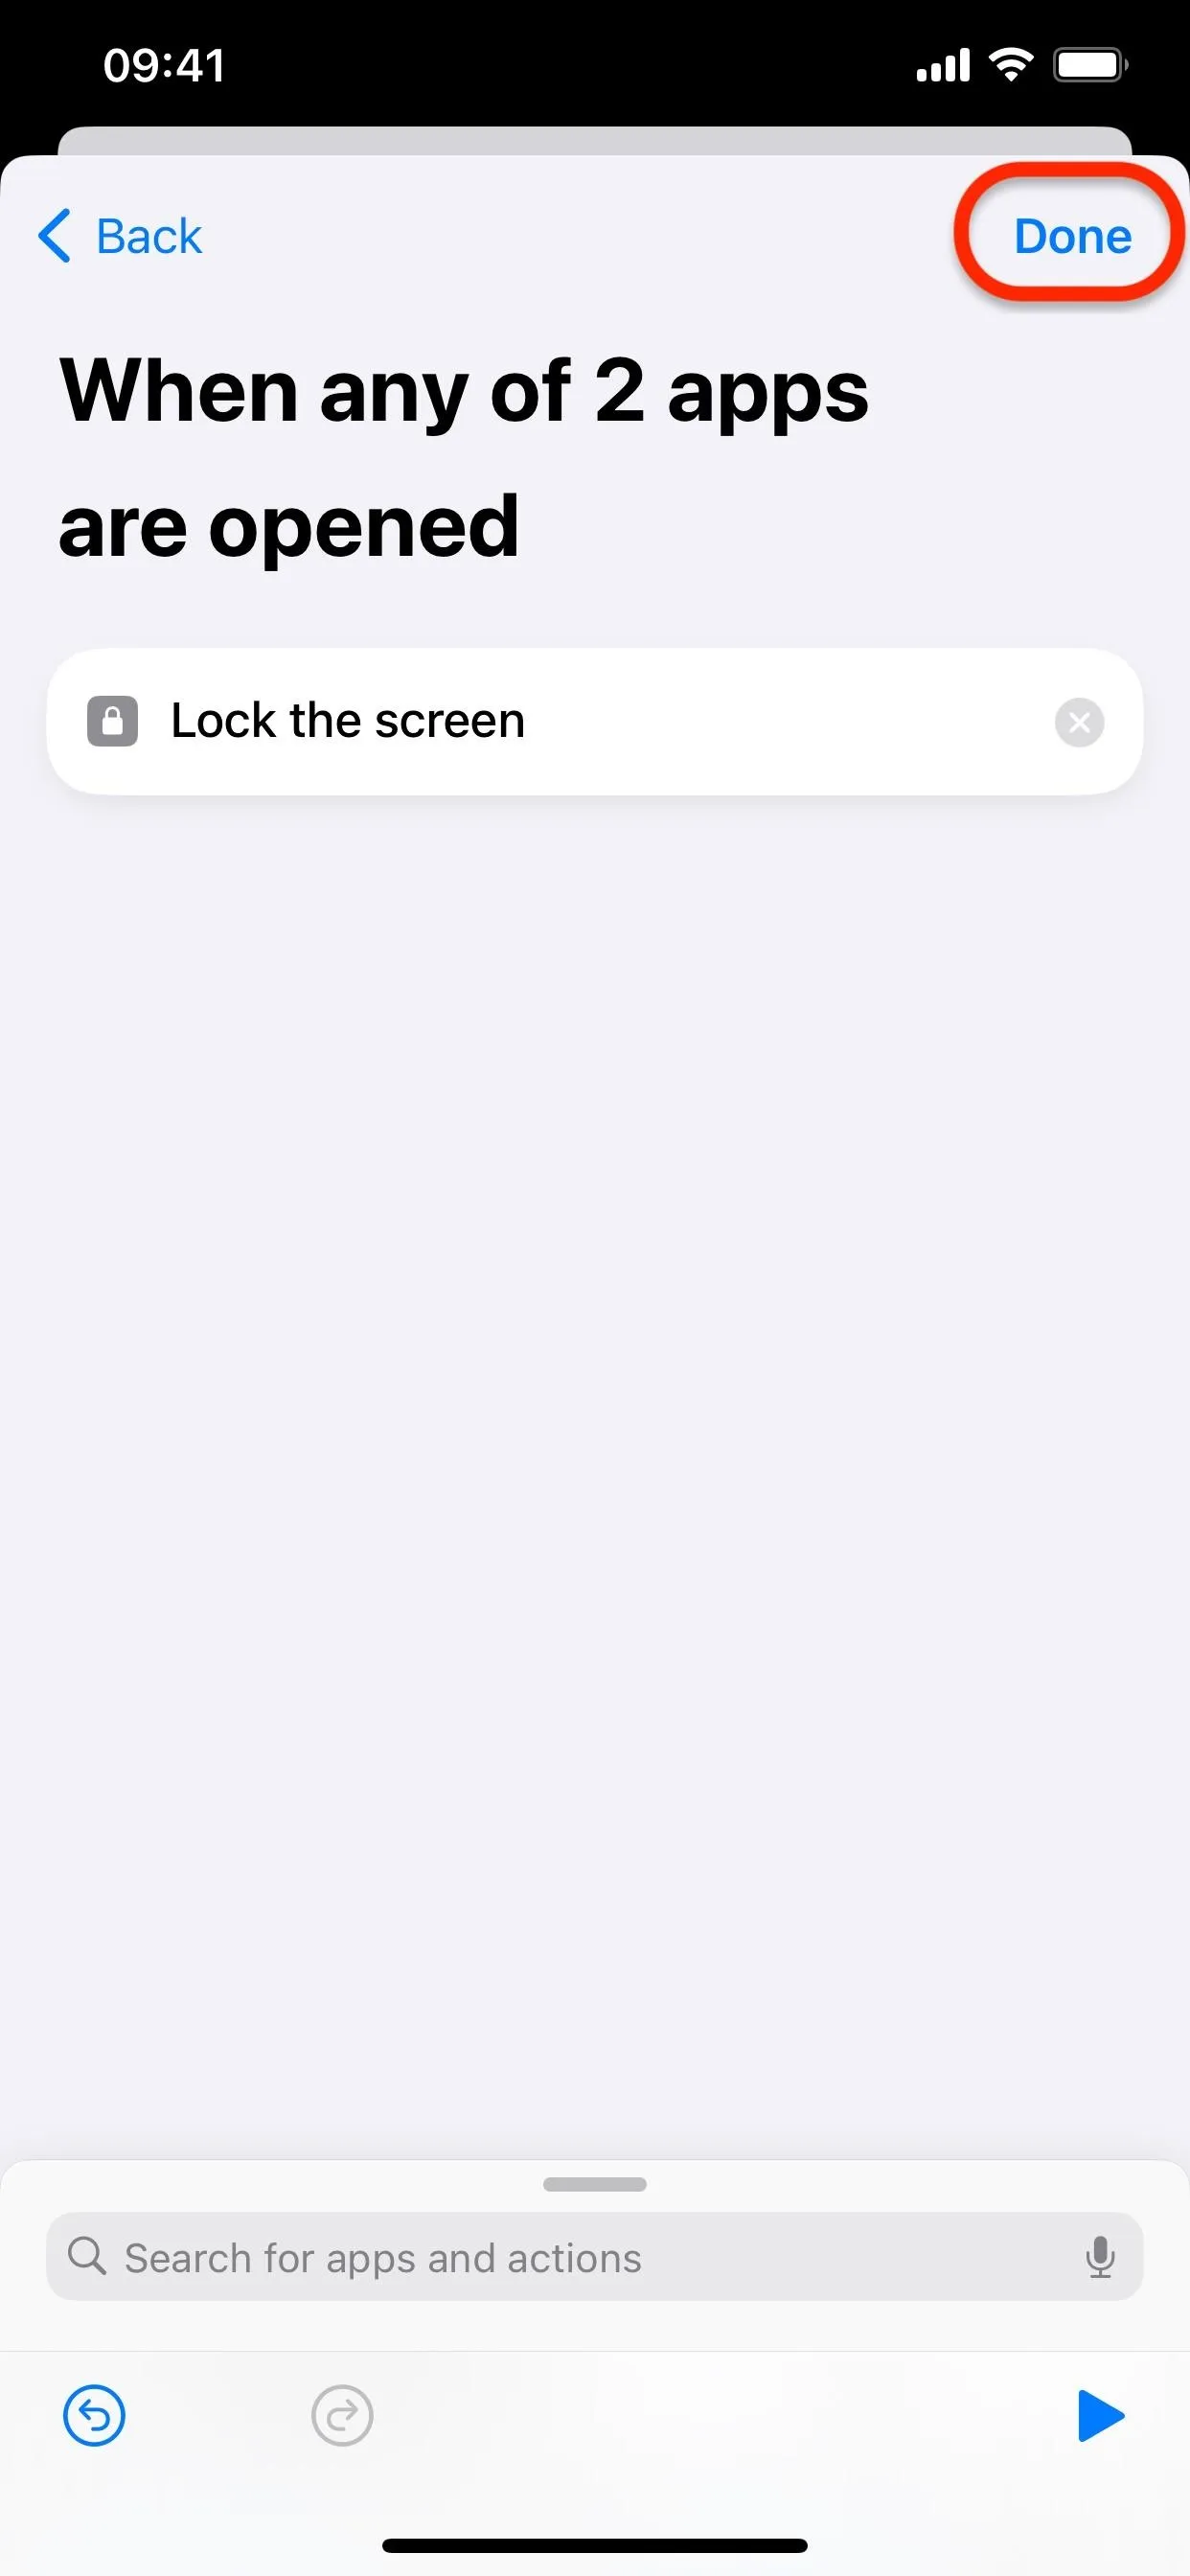
- Hit "Done."
- On iOS 17, change "Run After Confirmation" to "Run Immediately" and ensure "Notify When Run" is disabled. You'll do this step later on iOS 16.
- Hit "Next."
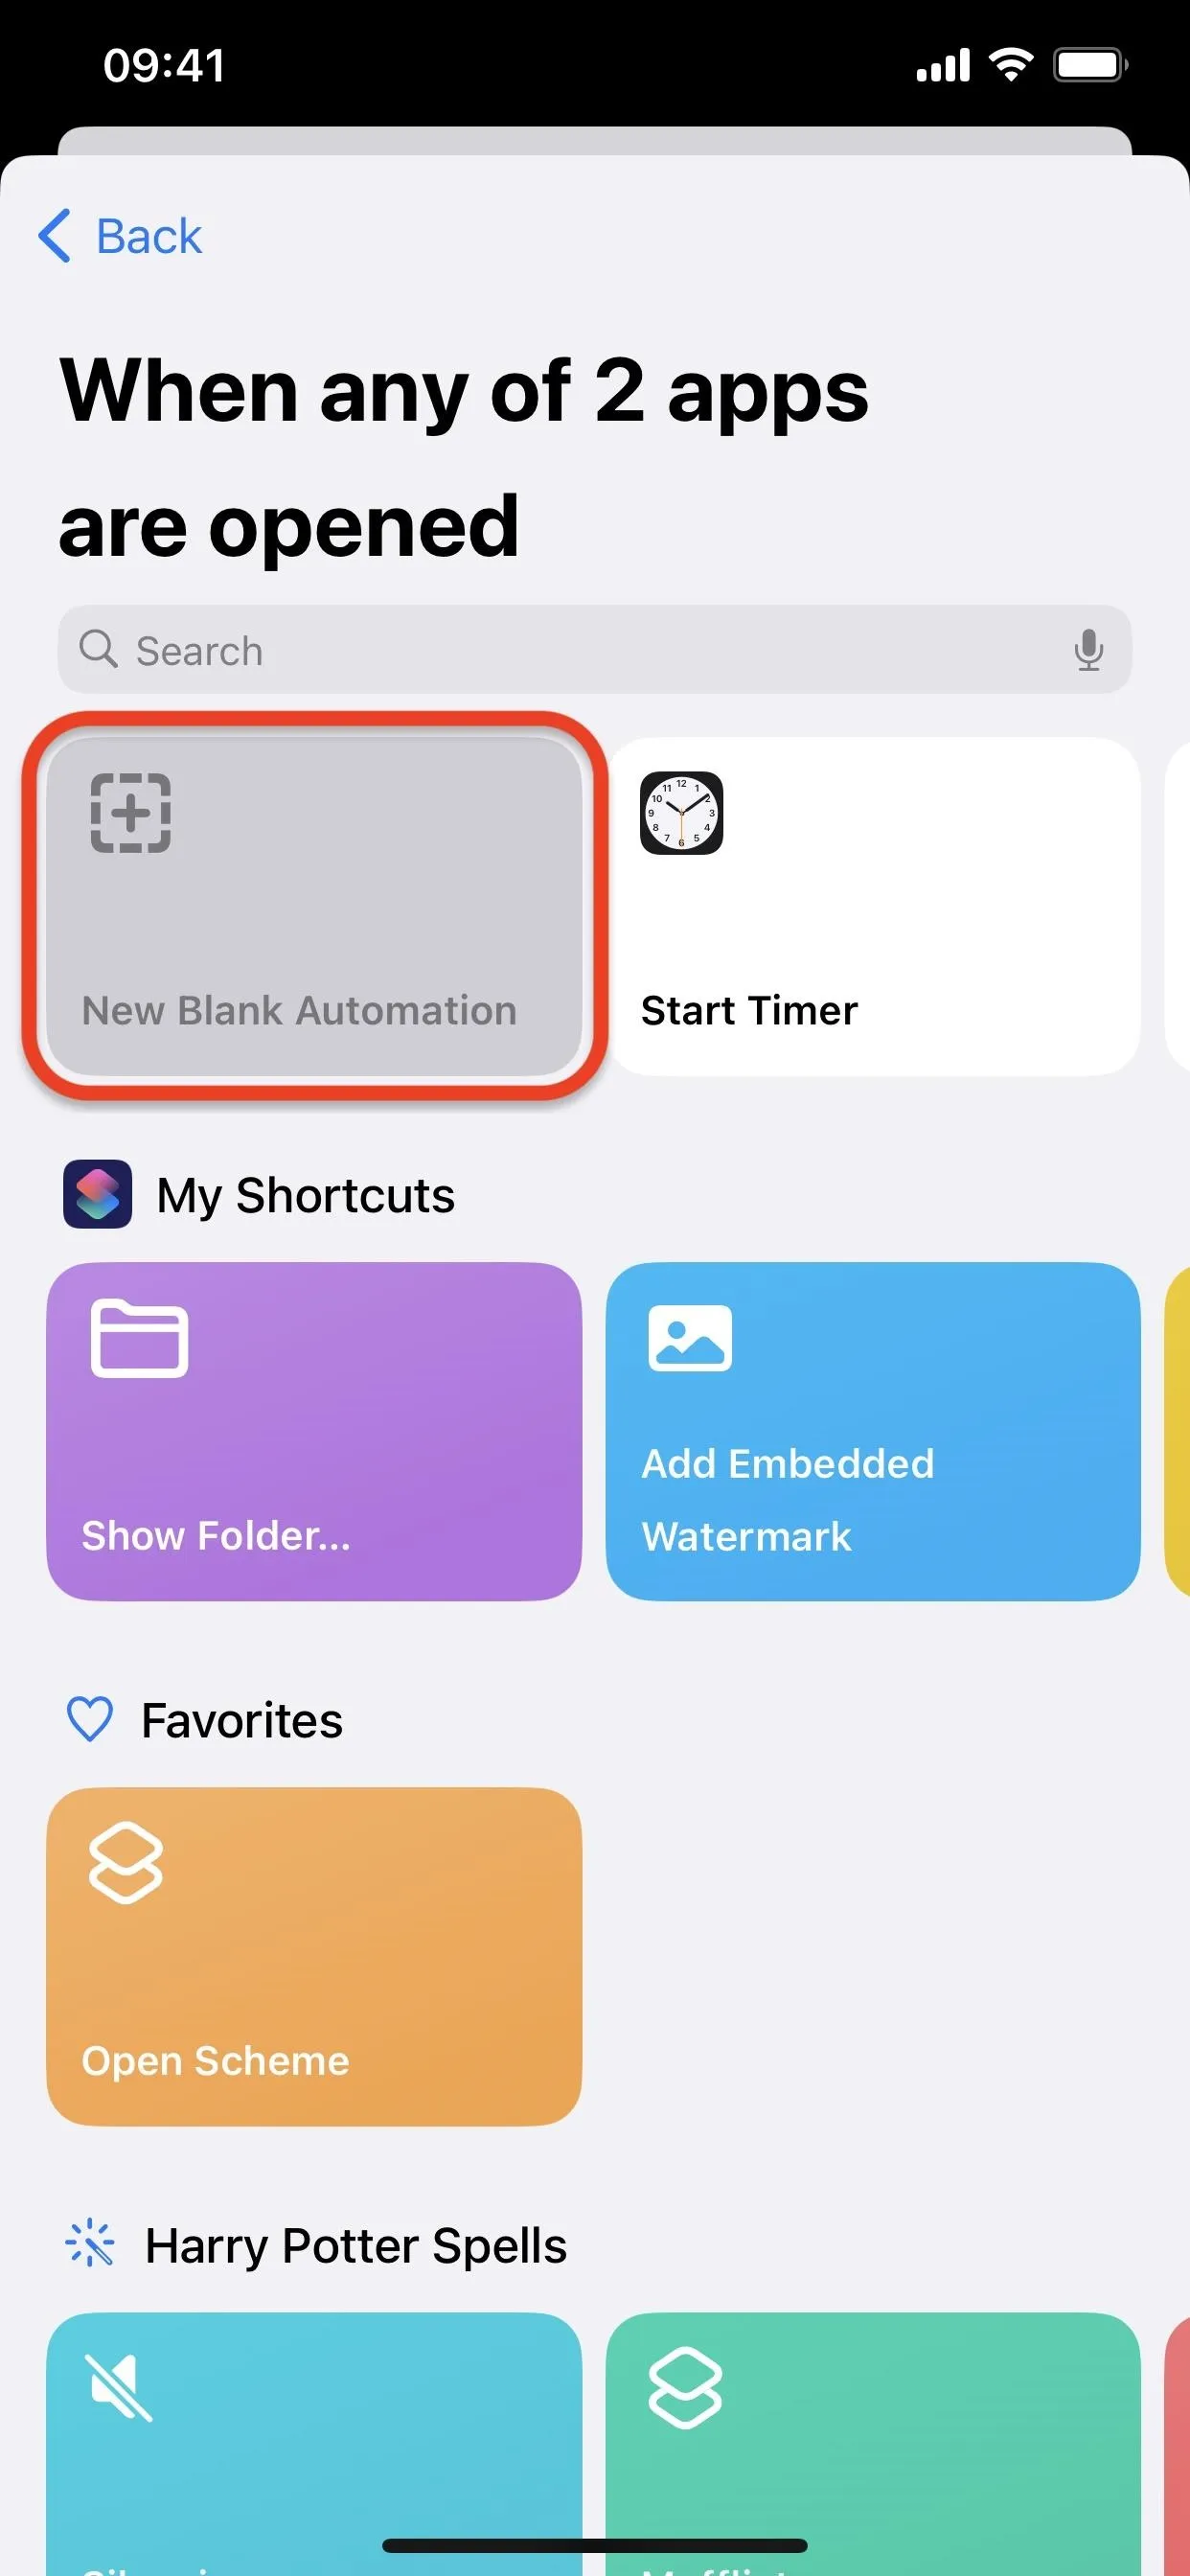
- Tap "New Blank Automation" on iOS 17. This isn't necessary on iOS 16.

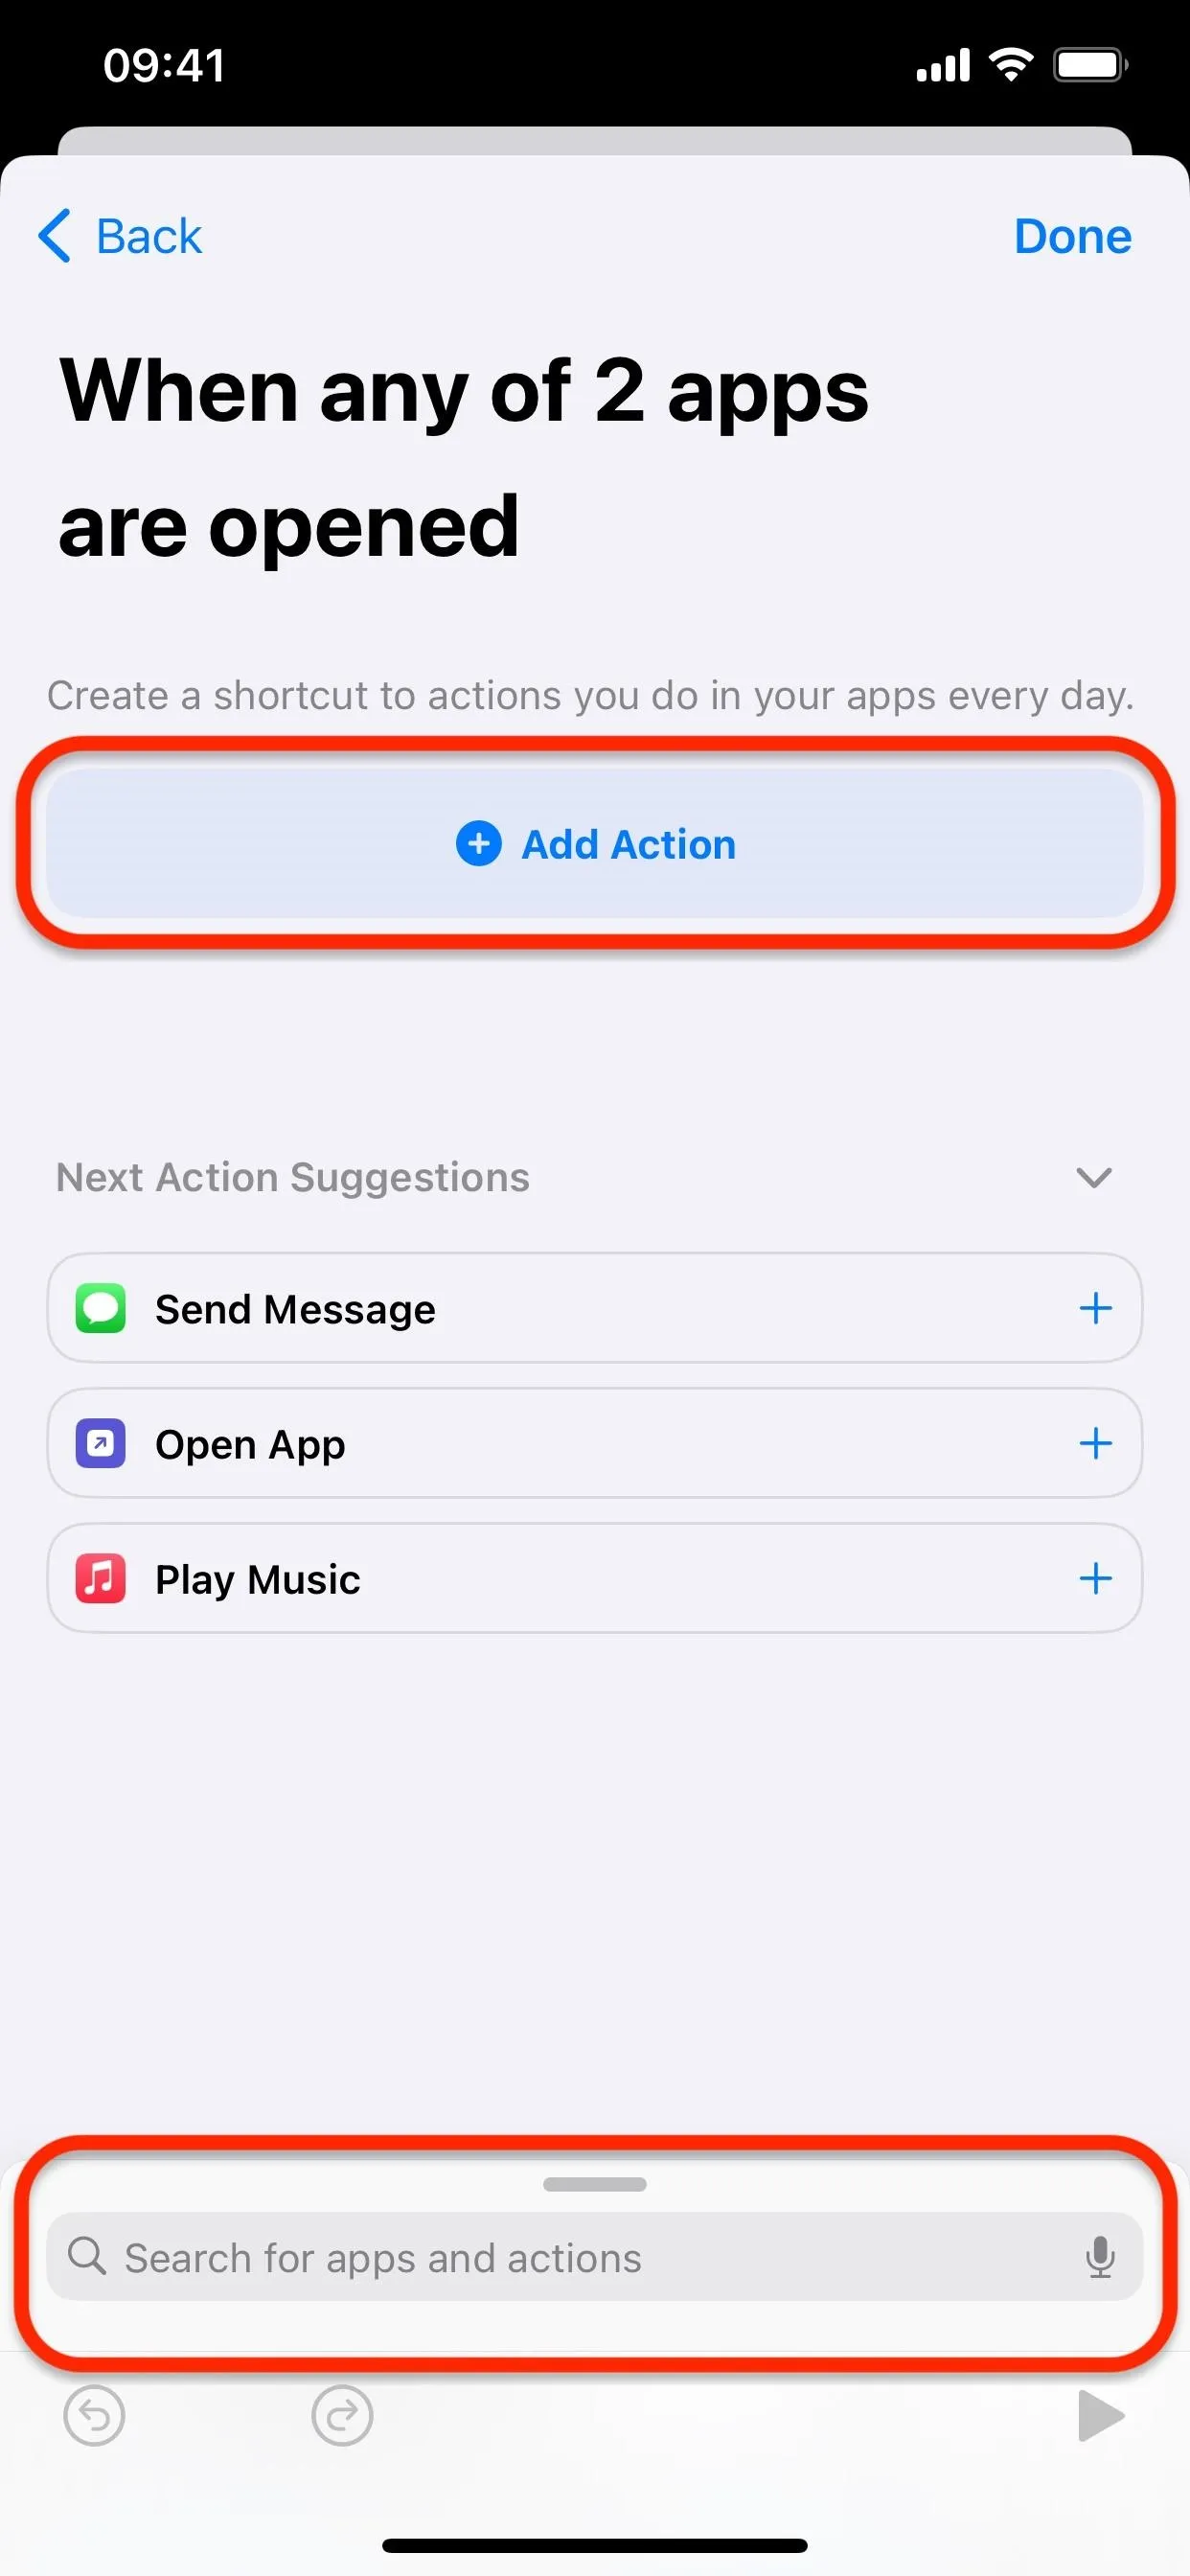
- Tap "Add Action" or the search field at the bottom.
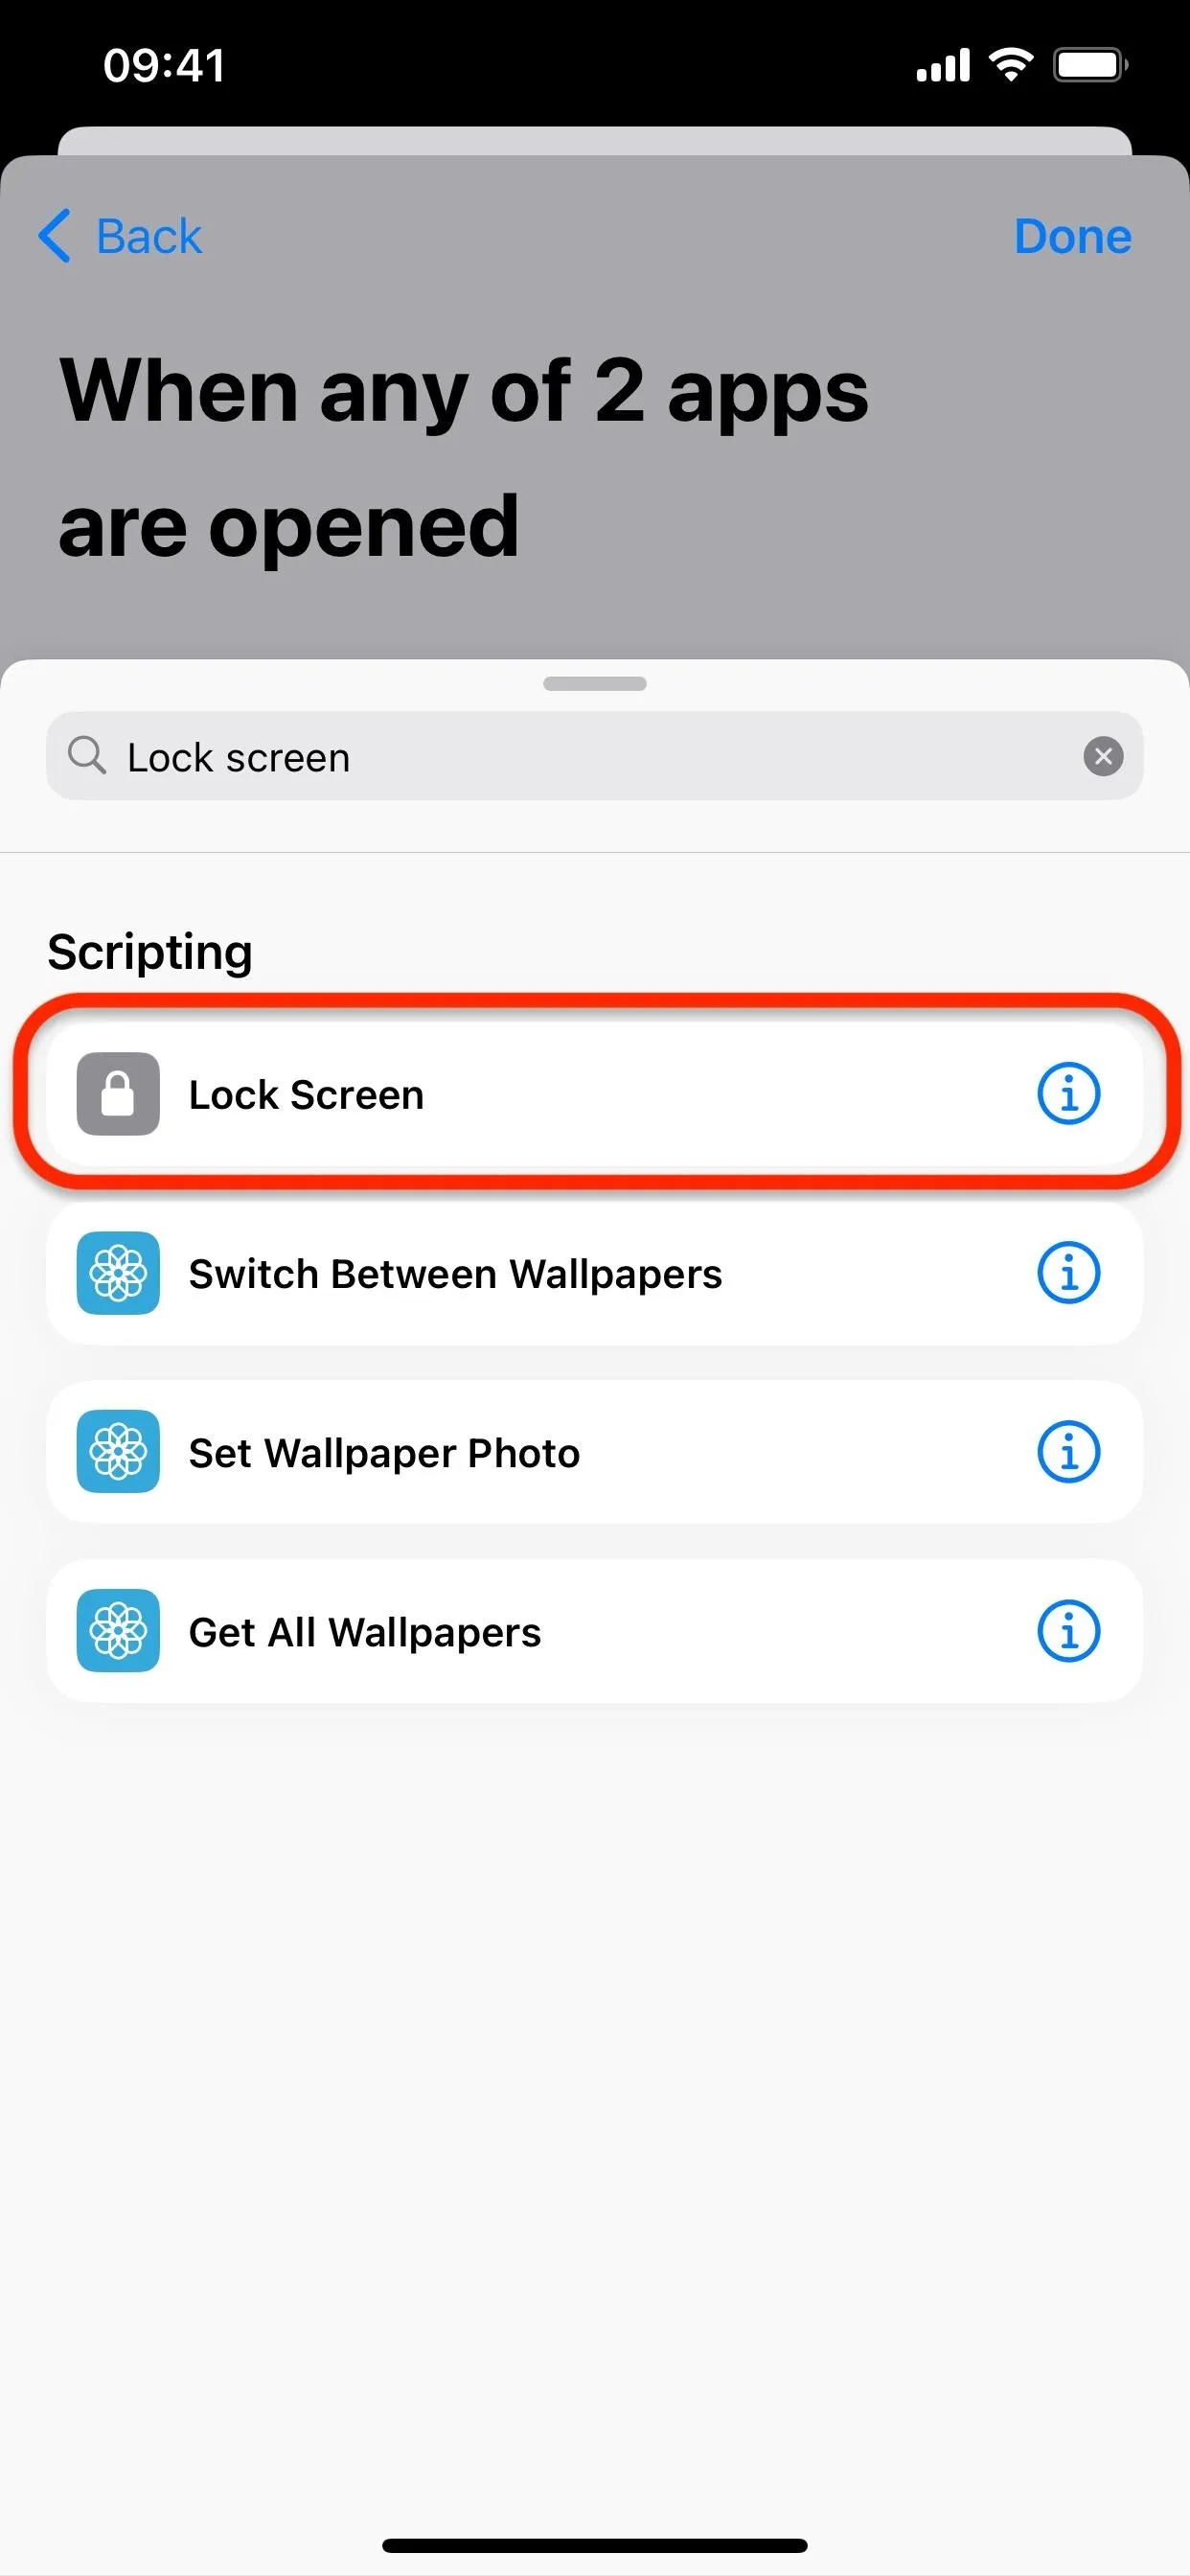
- Search for and select the "Lock Screen" scripting action.
- Hit "Done" on iOS 17 or "Next" on iOS 16.
- On iOS 16, turn off "Ask Before Running," confirm with "Don't Ask," ensure "Notify When Run" is disabled, and hit "Done." This was already completed on iOS 17 in step 9 above.
Now it's time to test it out. Leave Shortcuts and open one of the apps you chose above. You can exit to the Home Screen and select the app, tell Siri to open the app, or switch to the app via the app switcher.
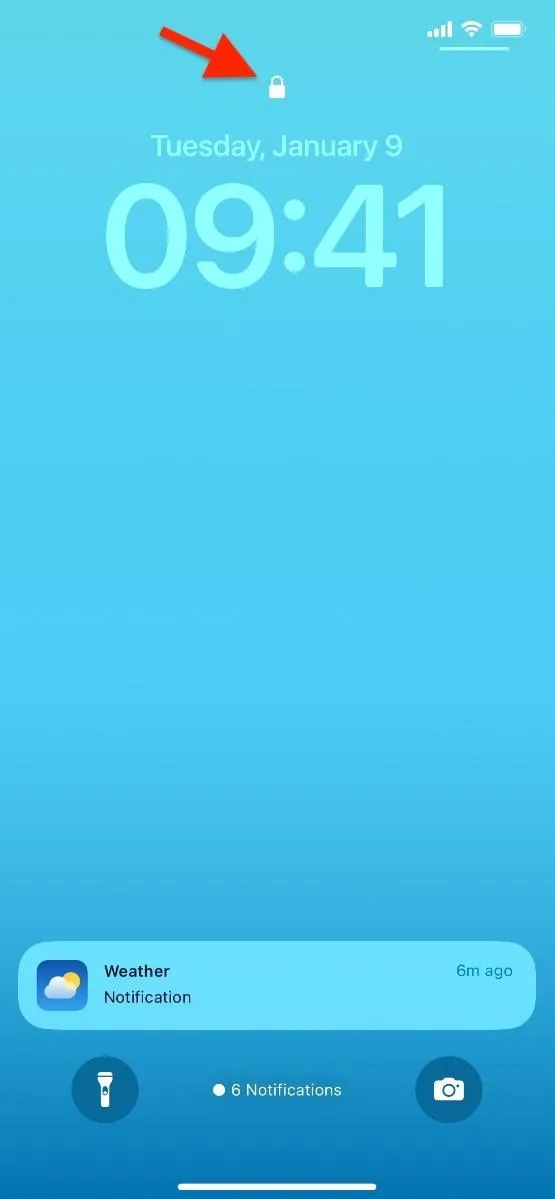
The app in question will open for a fraction of a second, but the Lock Screen will kick in right after, preventing whoever tried to open the app from using it or anything else on the iPhone.
To use the app yourself, simply unlock your iPhone using Face ID, Touch ID, or your passcode. Since the app opened for a moment before the Lock Screen kicked in, it'll still be open when you unlock your iPhone, and you can use it as usual until you leave the app. To use the app again, open it, then unlock your iPhone.
If you're worried about someone going into your automations and disabling this automation, consider locking the Shortcuts app itself behind Face ID, Touch ID, or your passcode. However, this could prevent some automations from running completely, so it's worth testing first.

Pause App from Locking When at Home
If you don't want to deal with apps locking on you all the time at home, you can add a few more actions to the automation to create a no-locking zone. There are various ways to do this, such as by location, but the easiest is just to prevent locking when your iPhone is connected to your home Wi-Fi network.
- Open Shortcuts to the Automation tab.
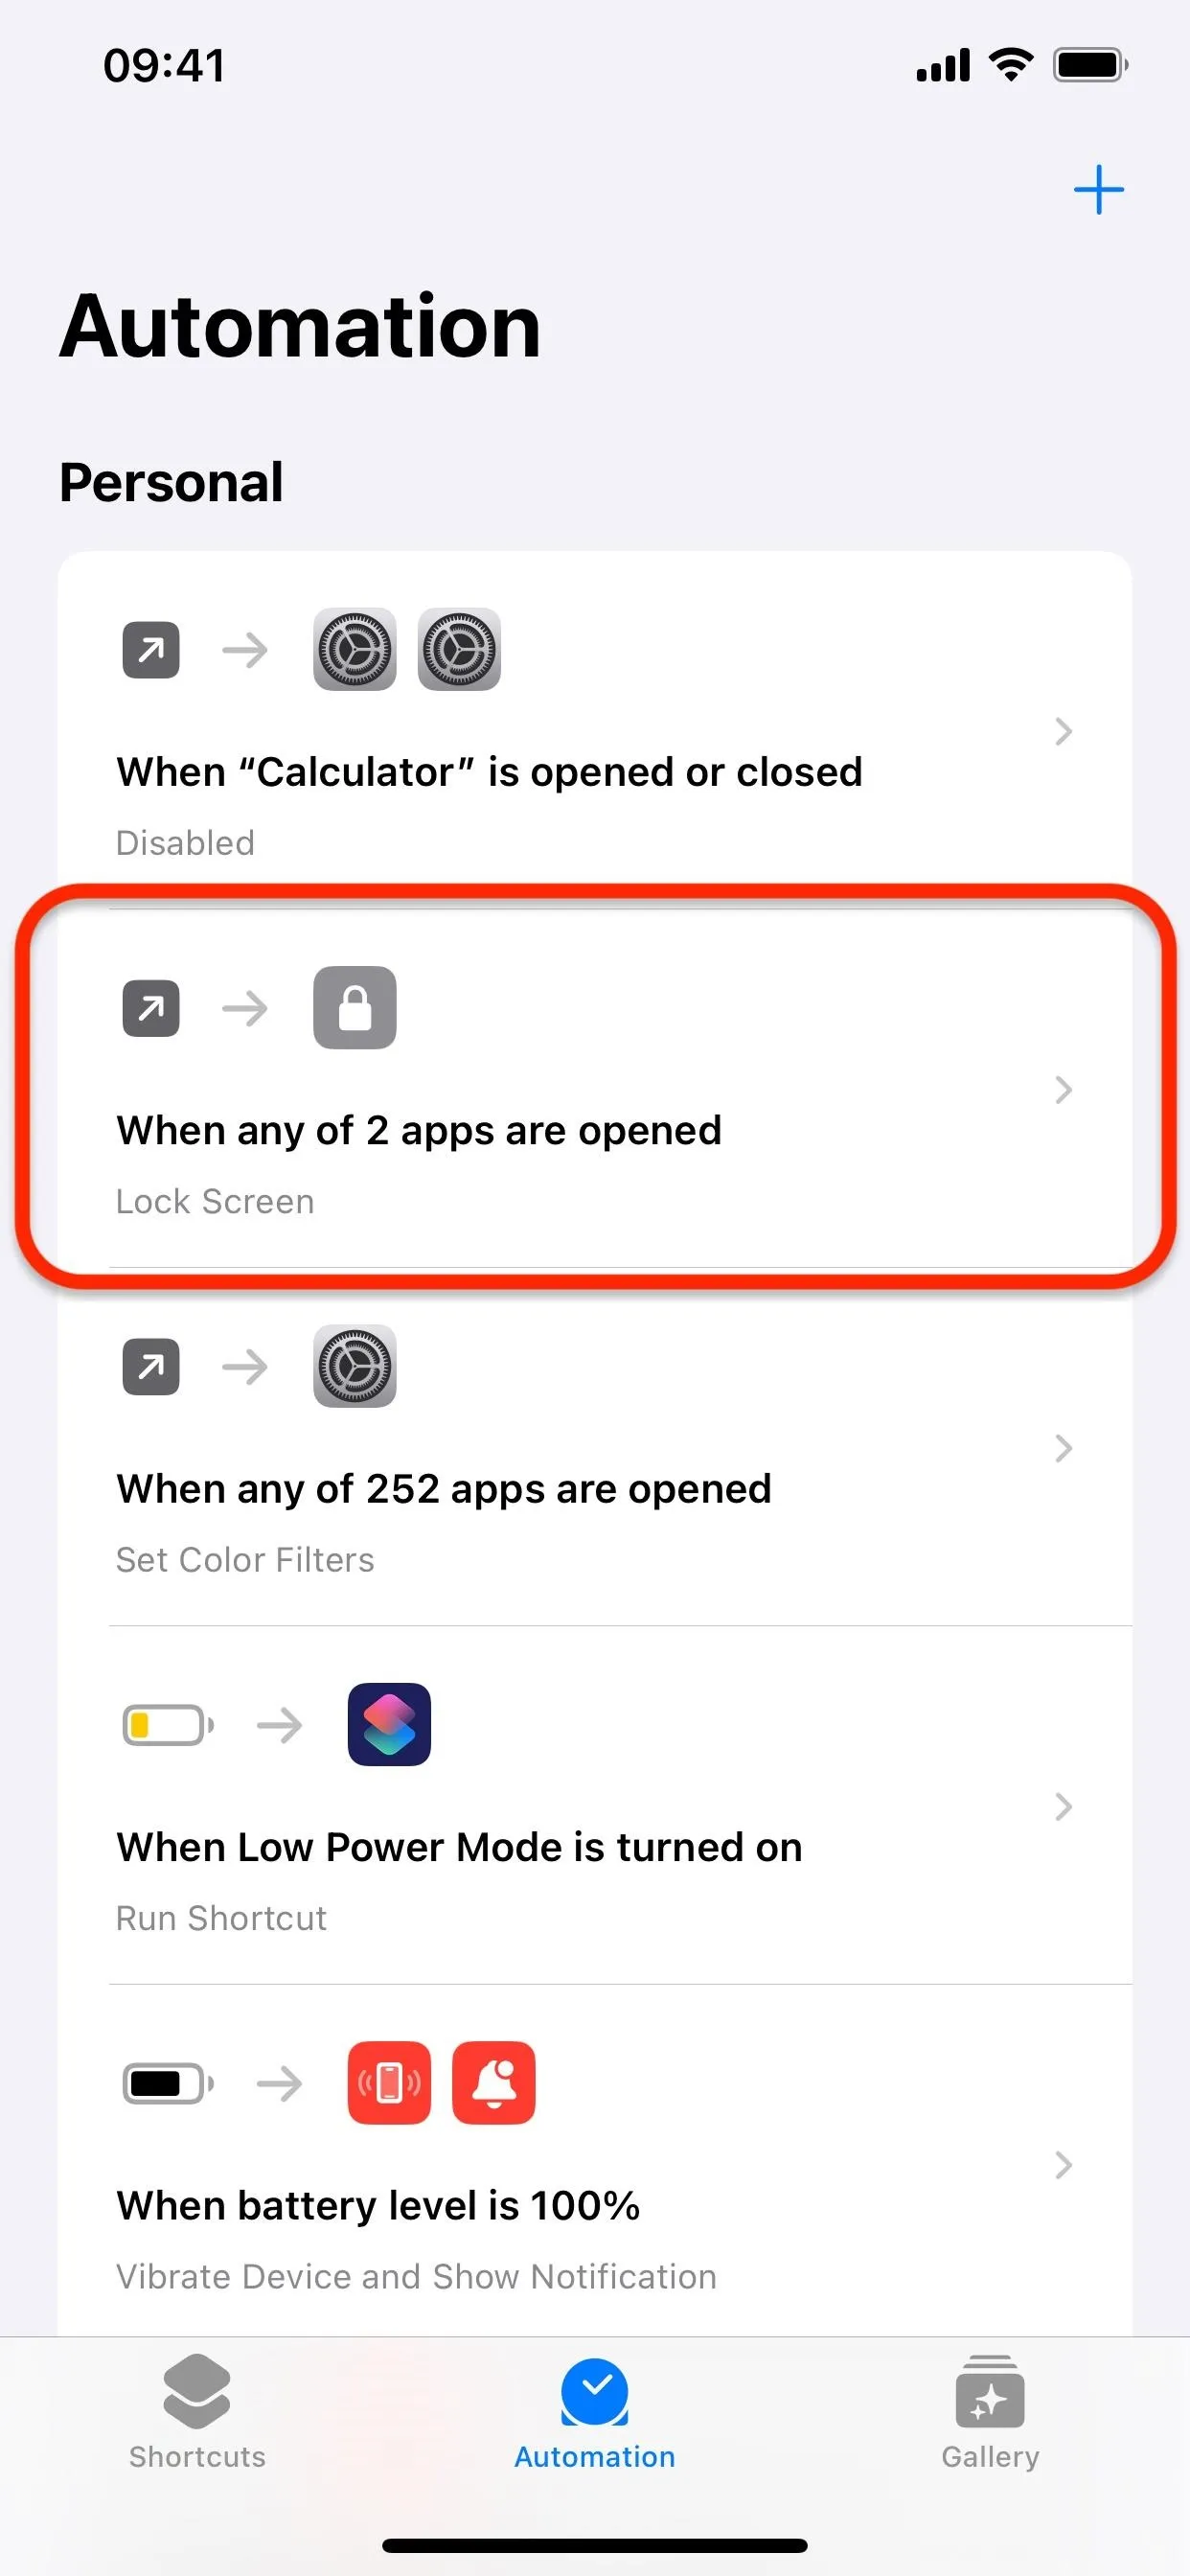
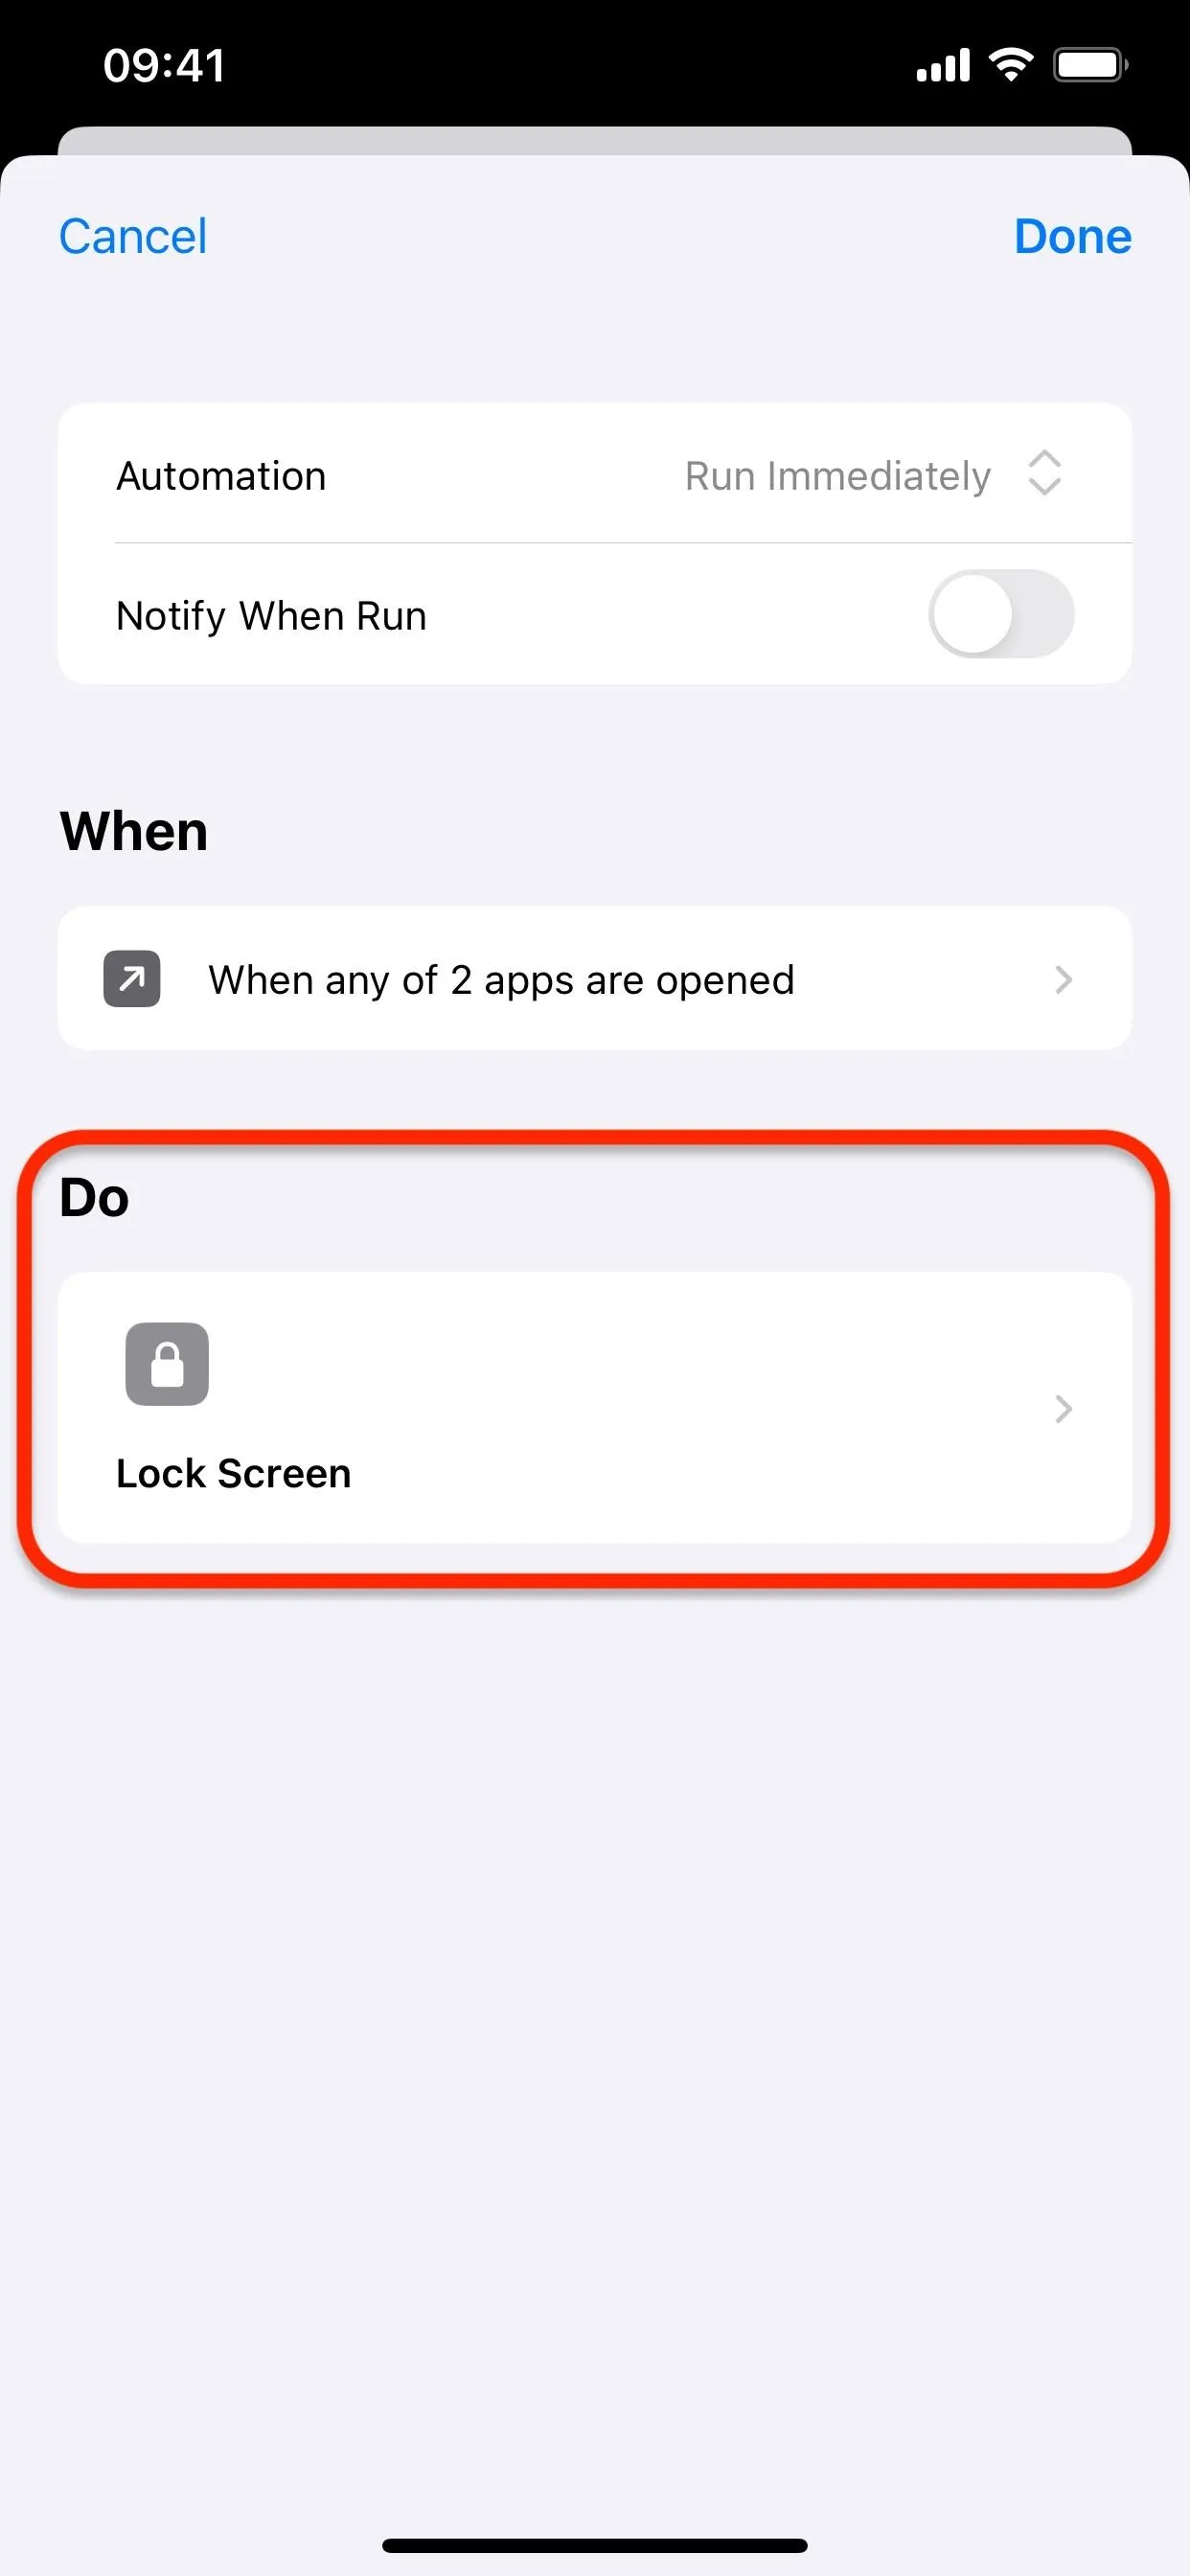
- Select the automation you created earlier.
- Hit the actions box under the "Do" heading.
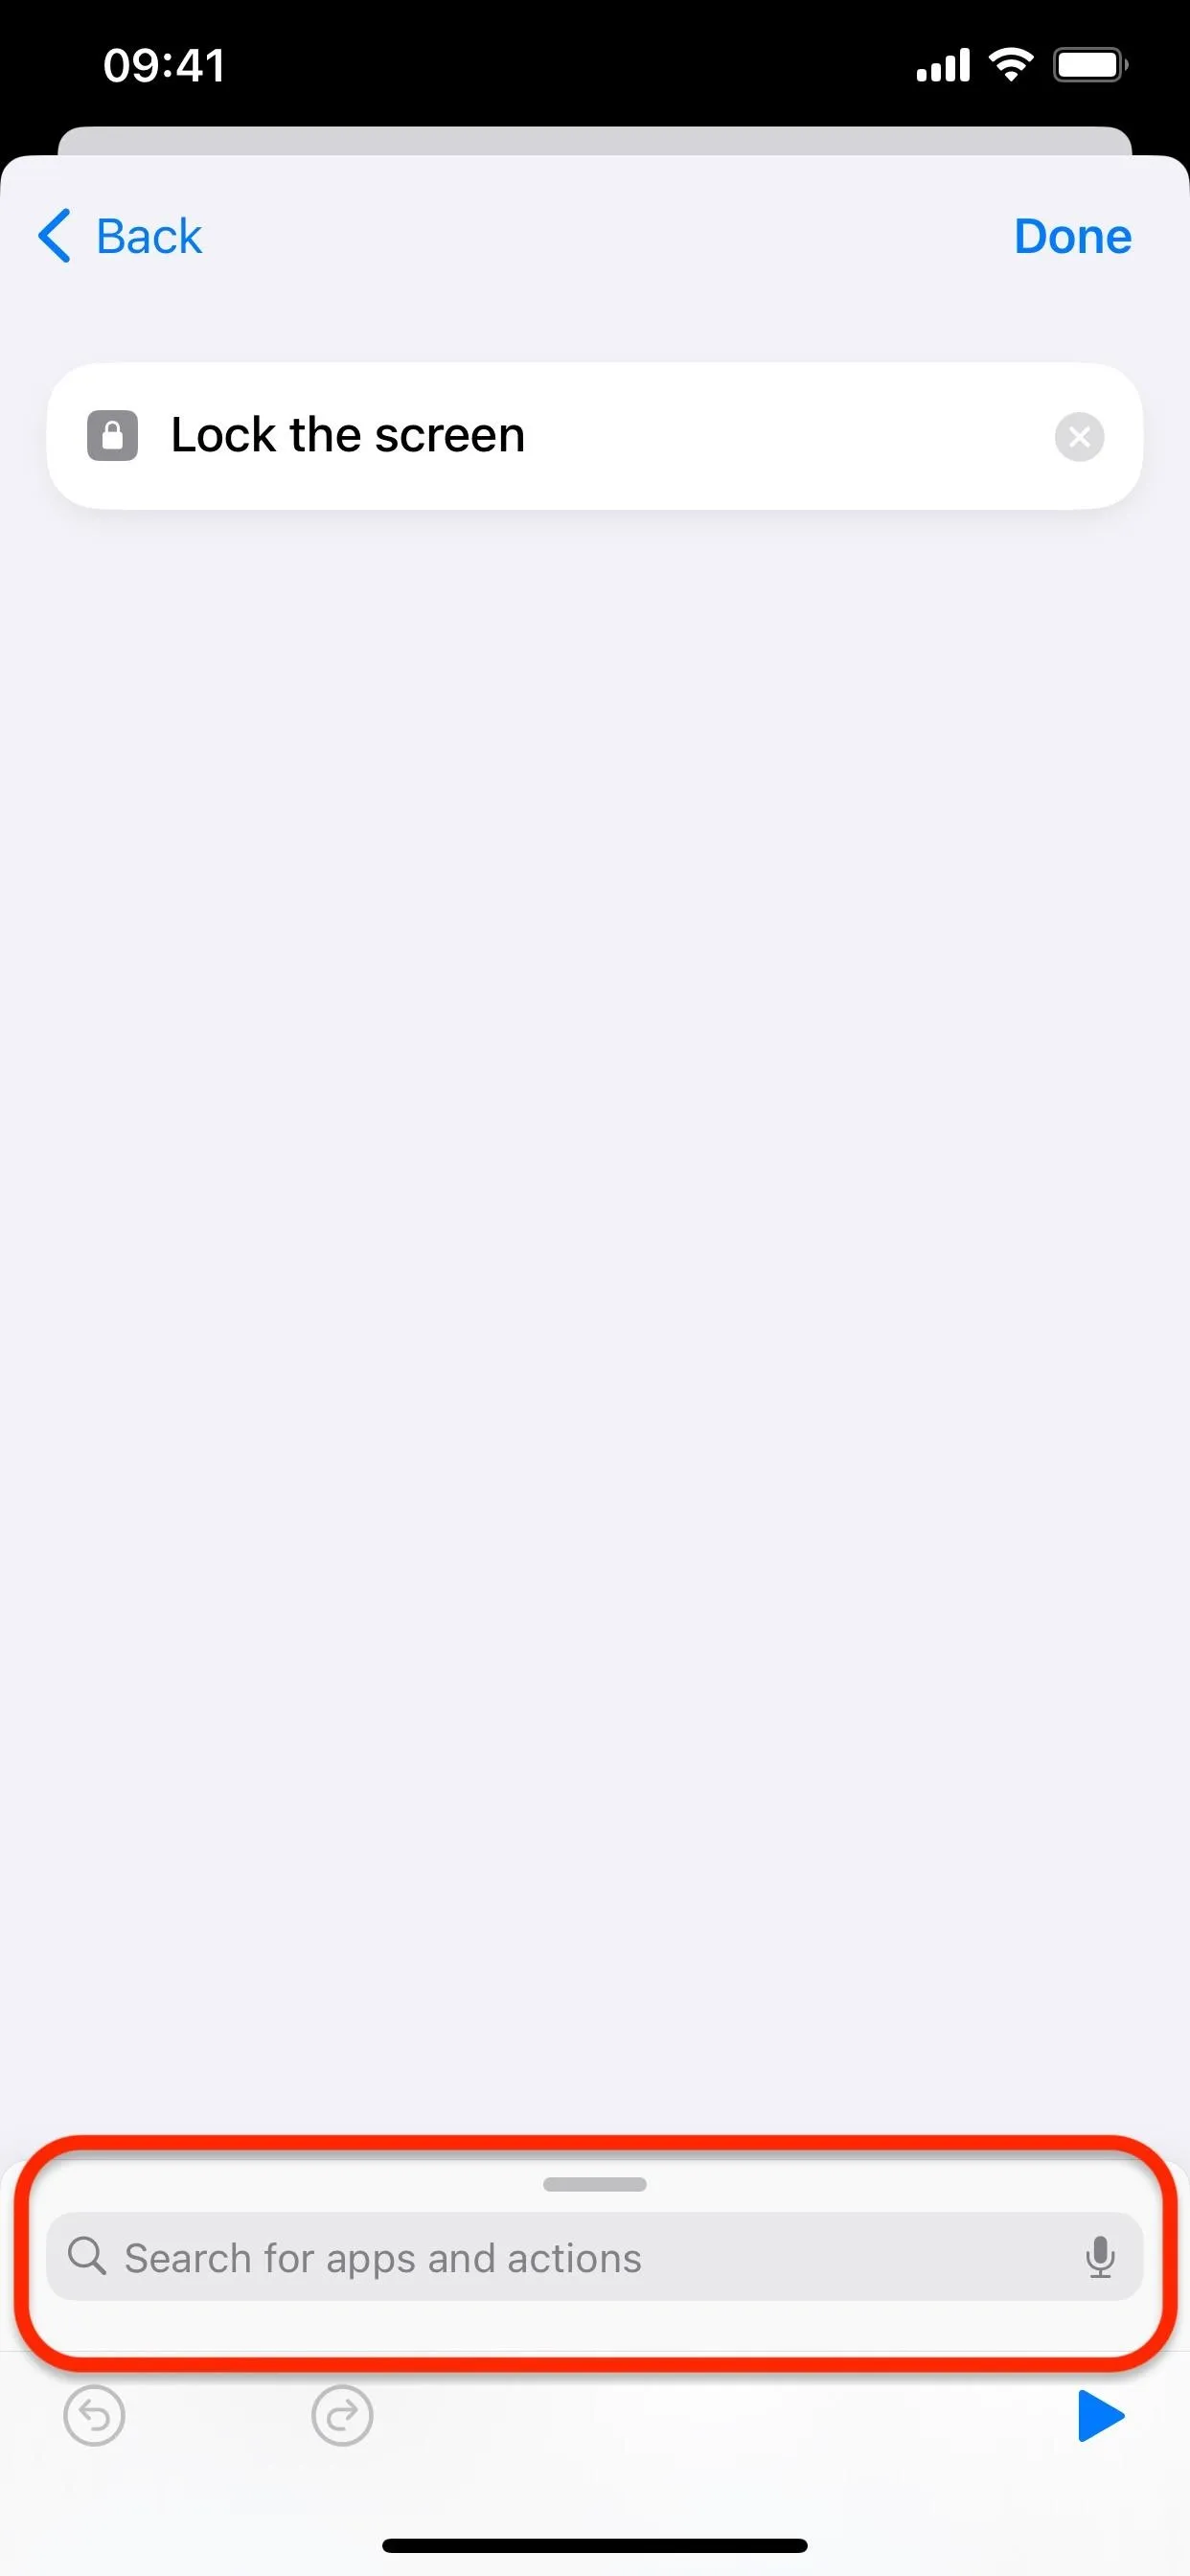
- Tap "Add Action" or the search field at the bottom.
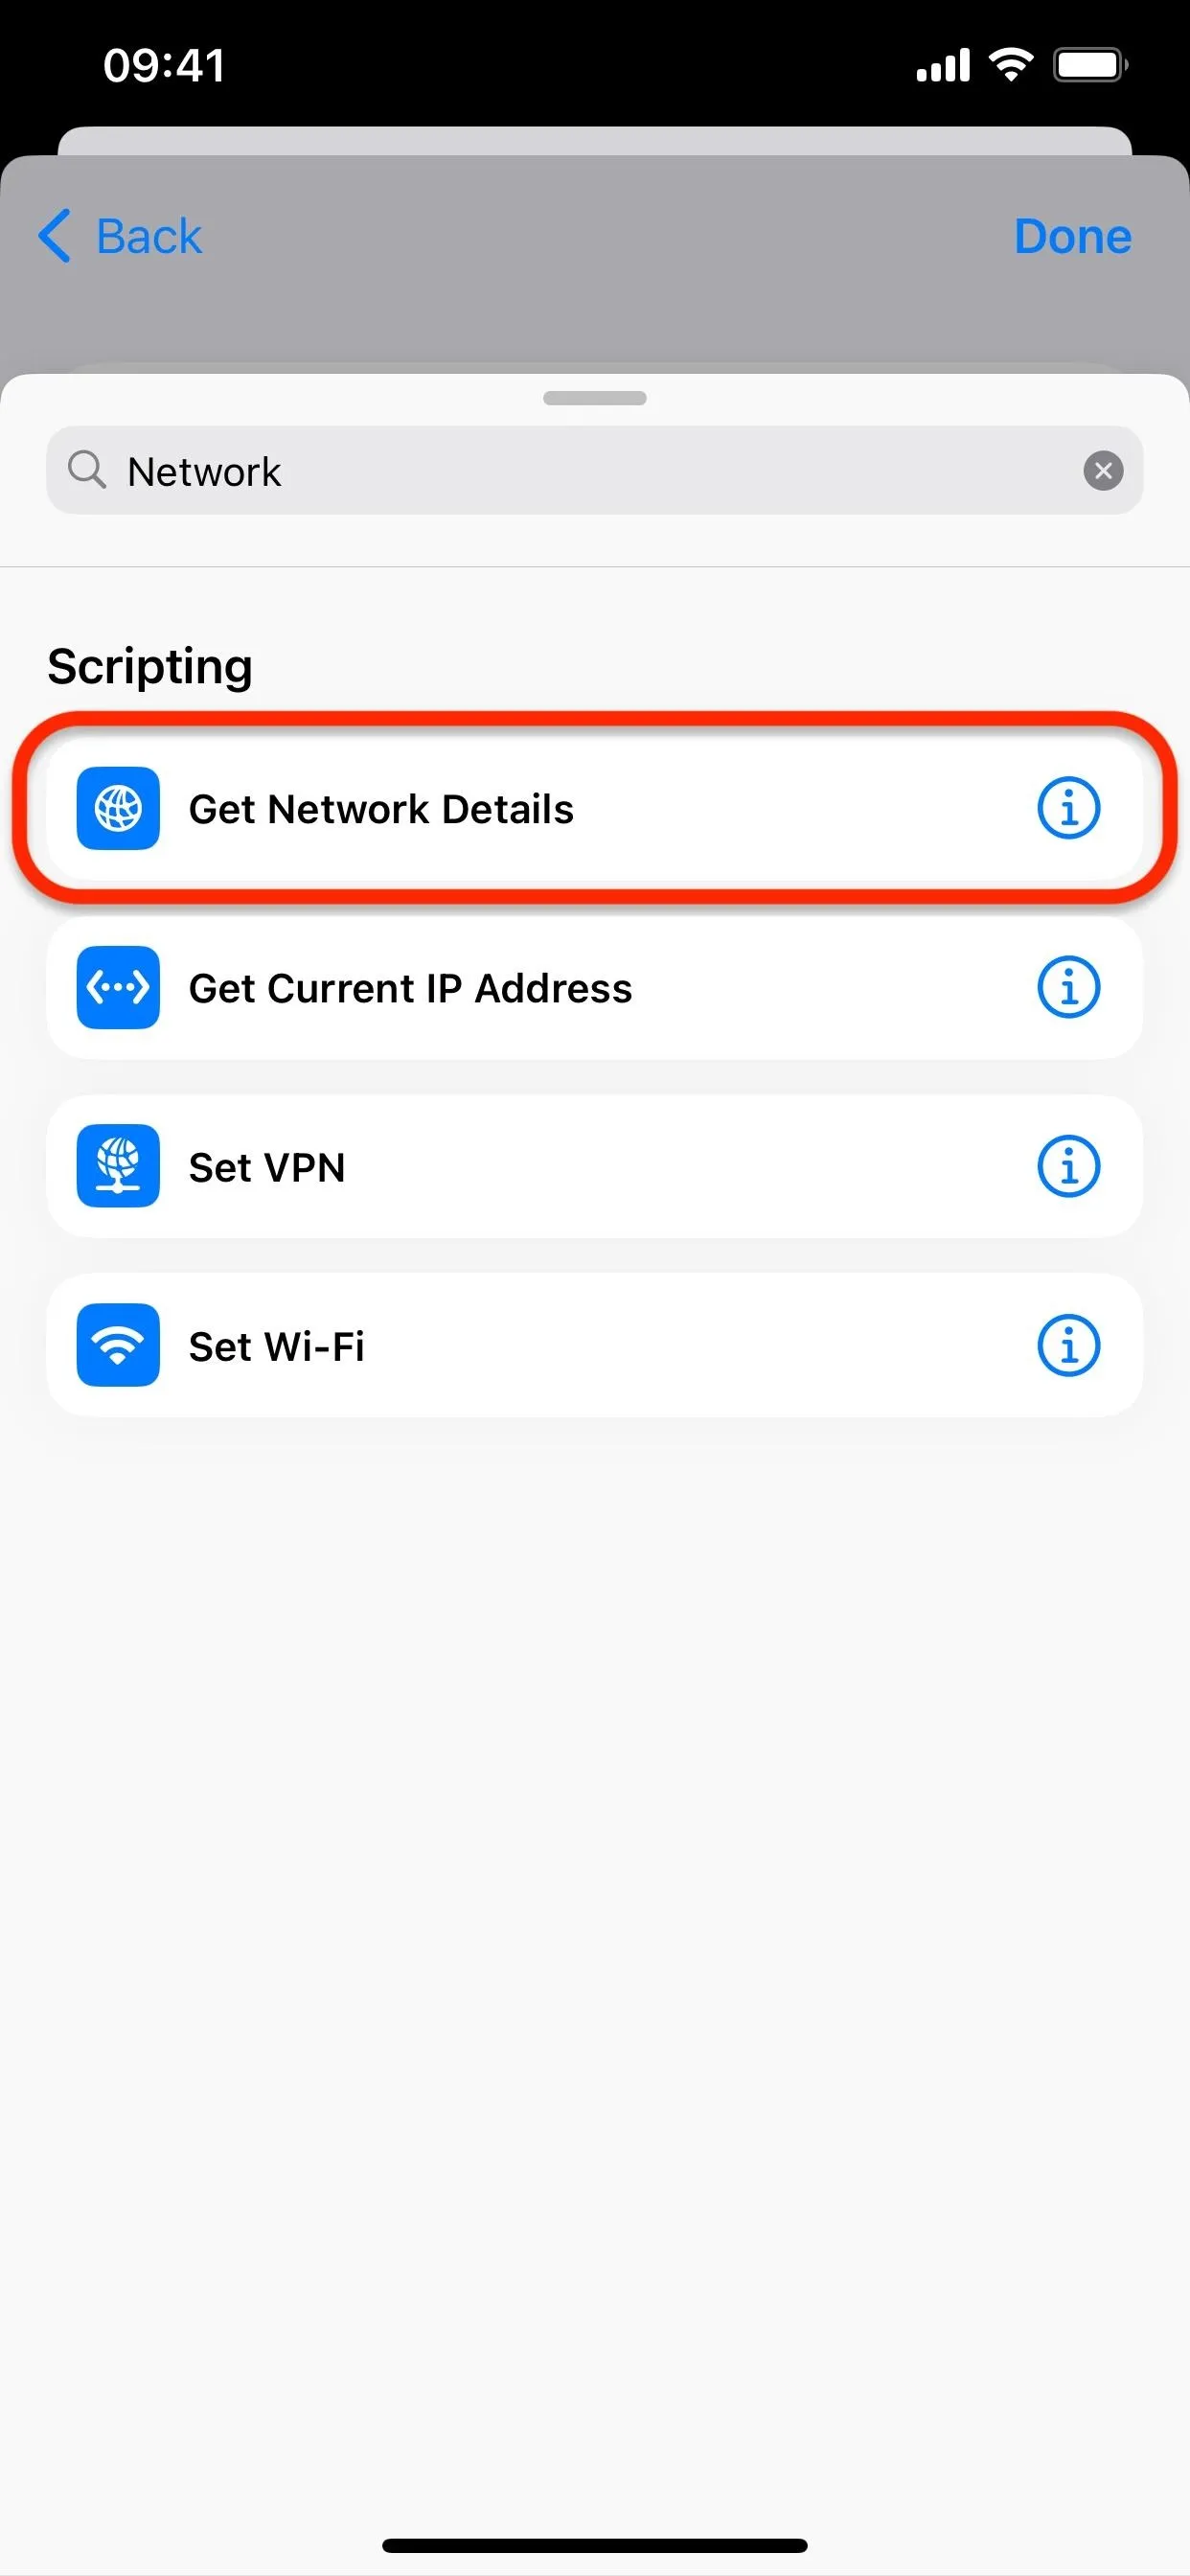
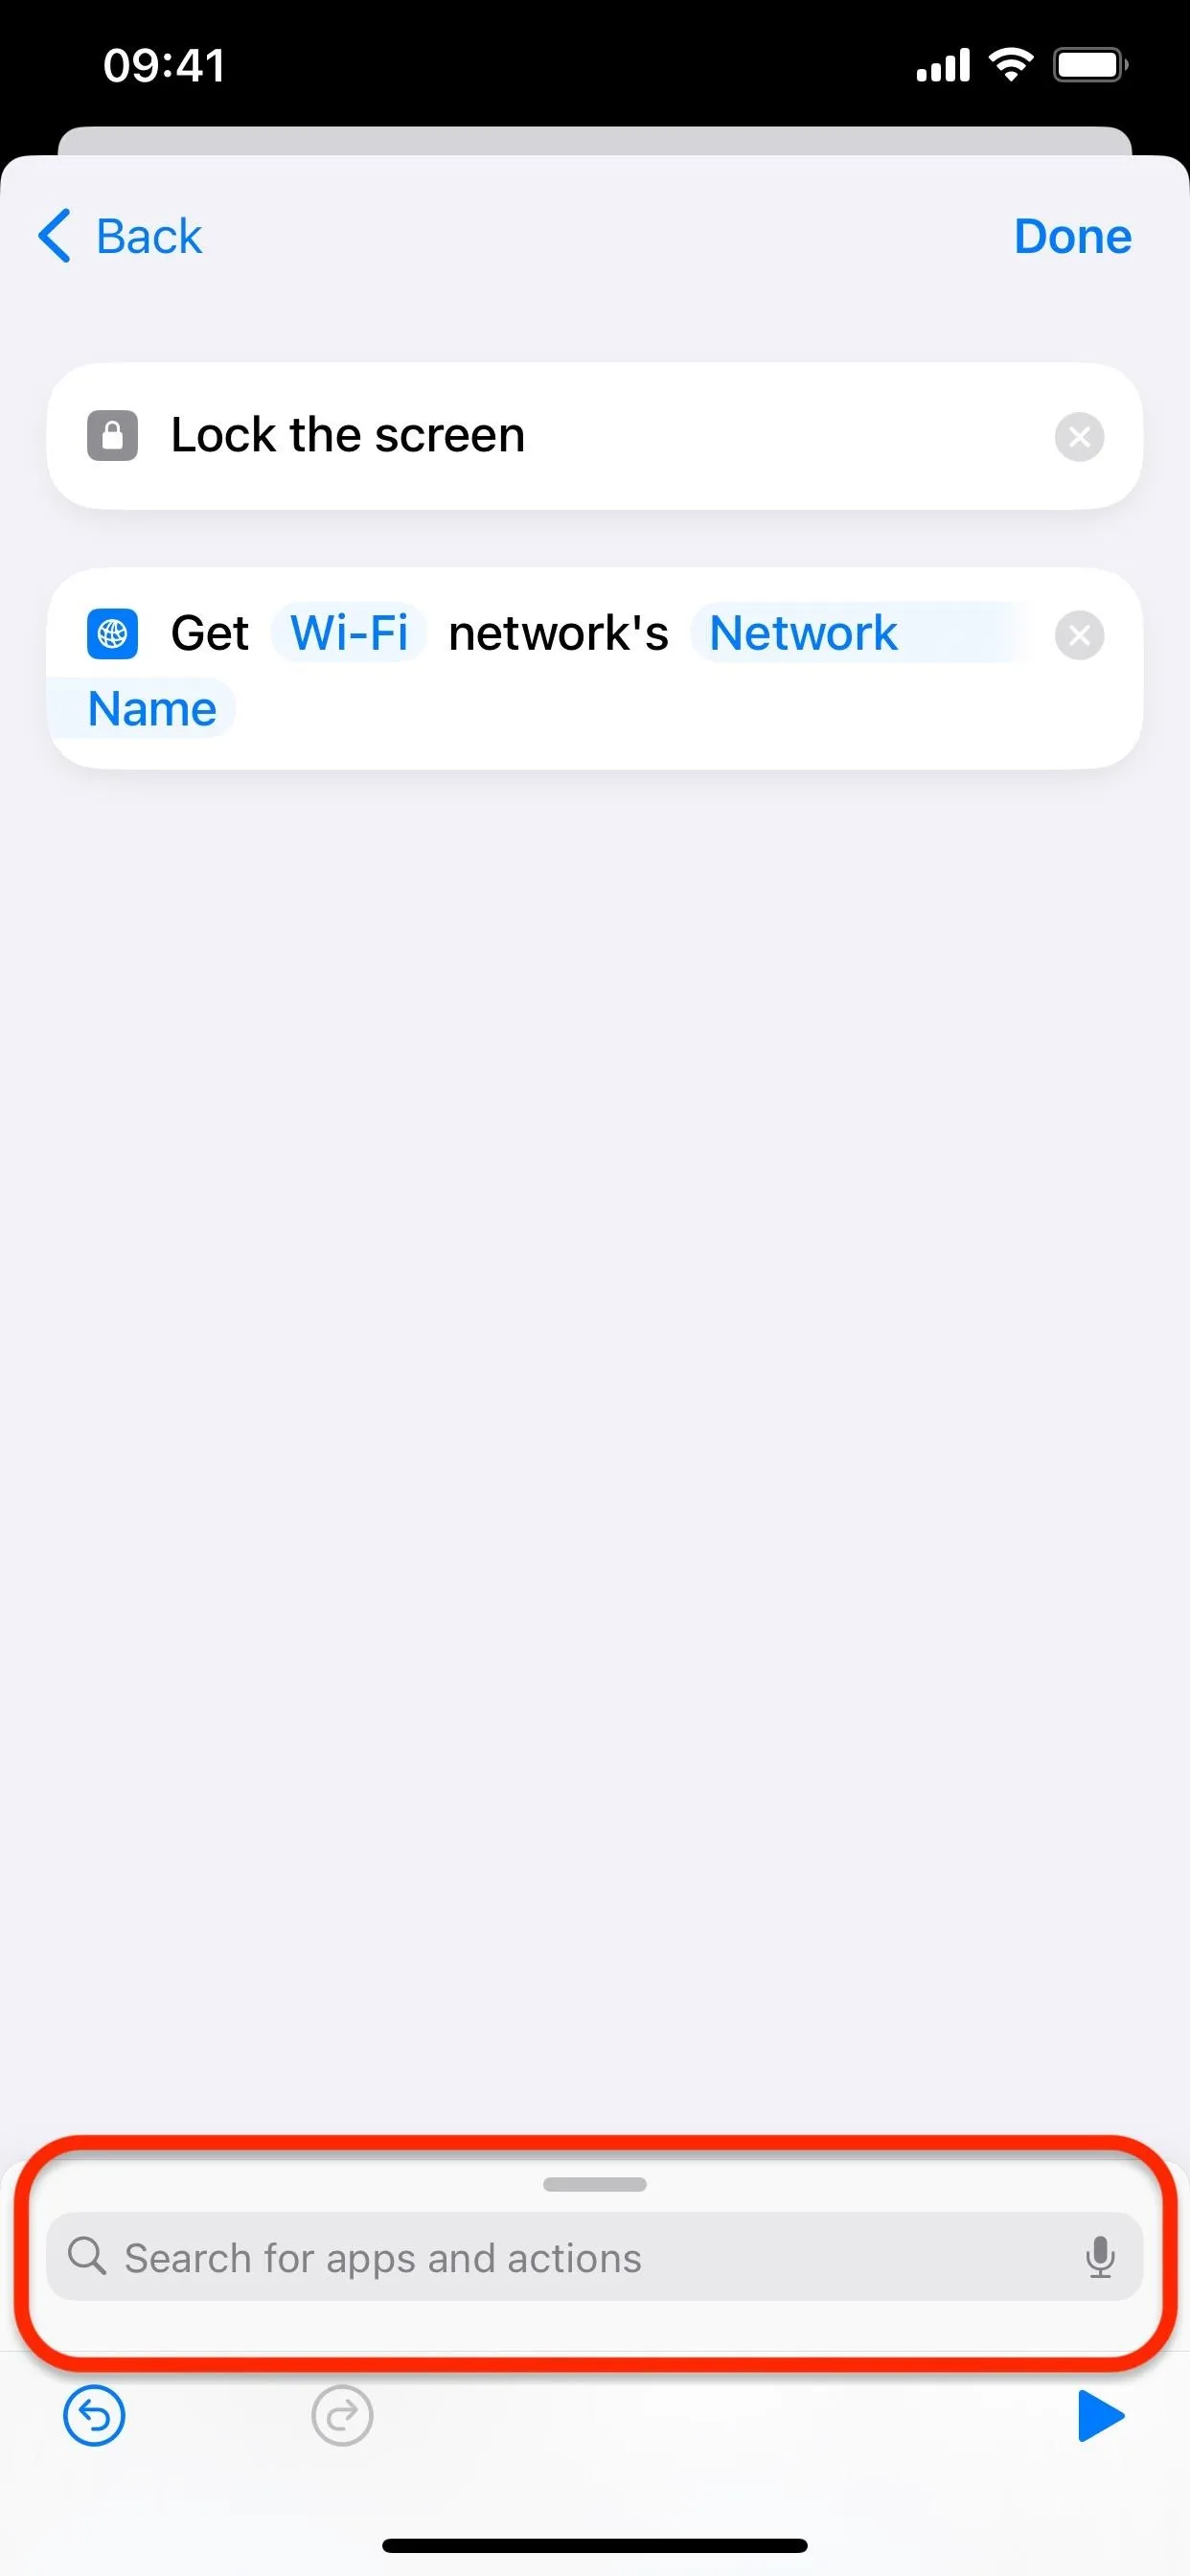
- Search for and select the "Get Network Details" scripting action.
- Tap "Add Action" or the search field at the bottom.
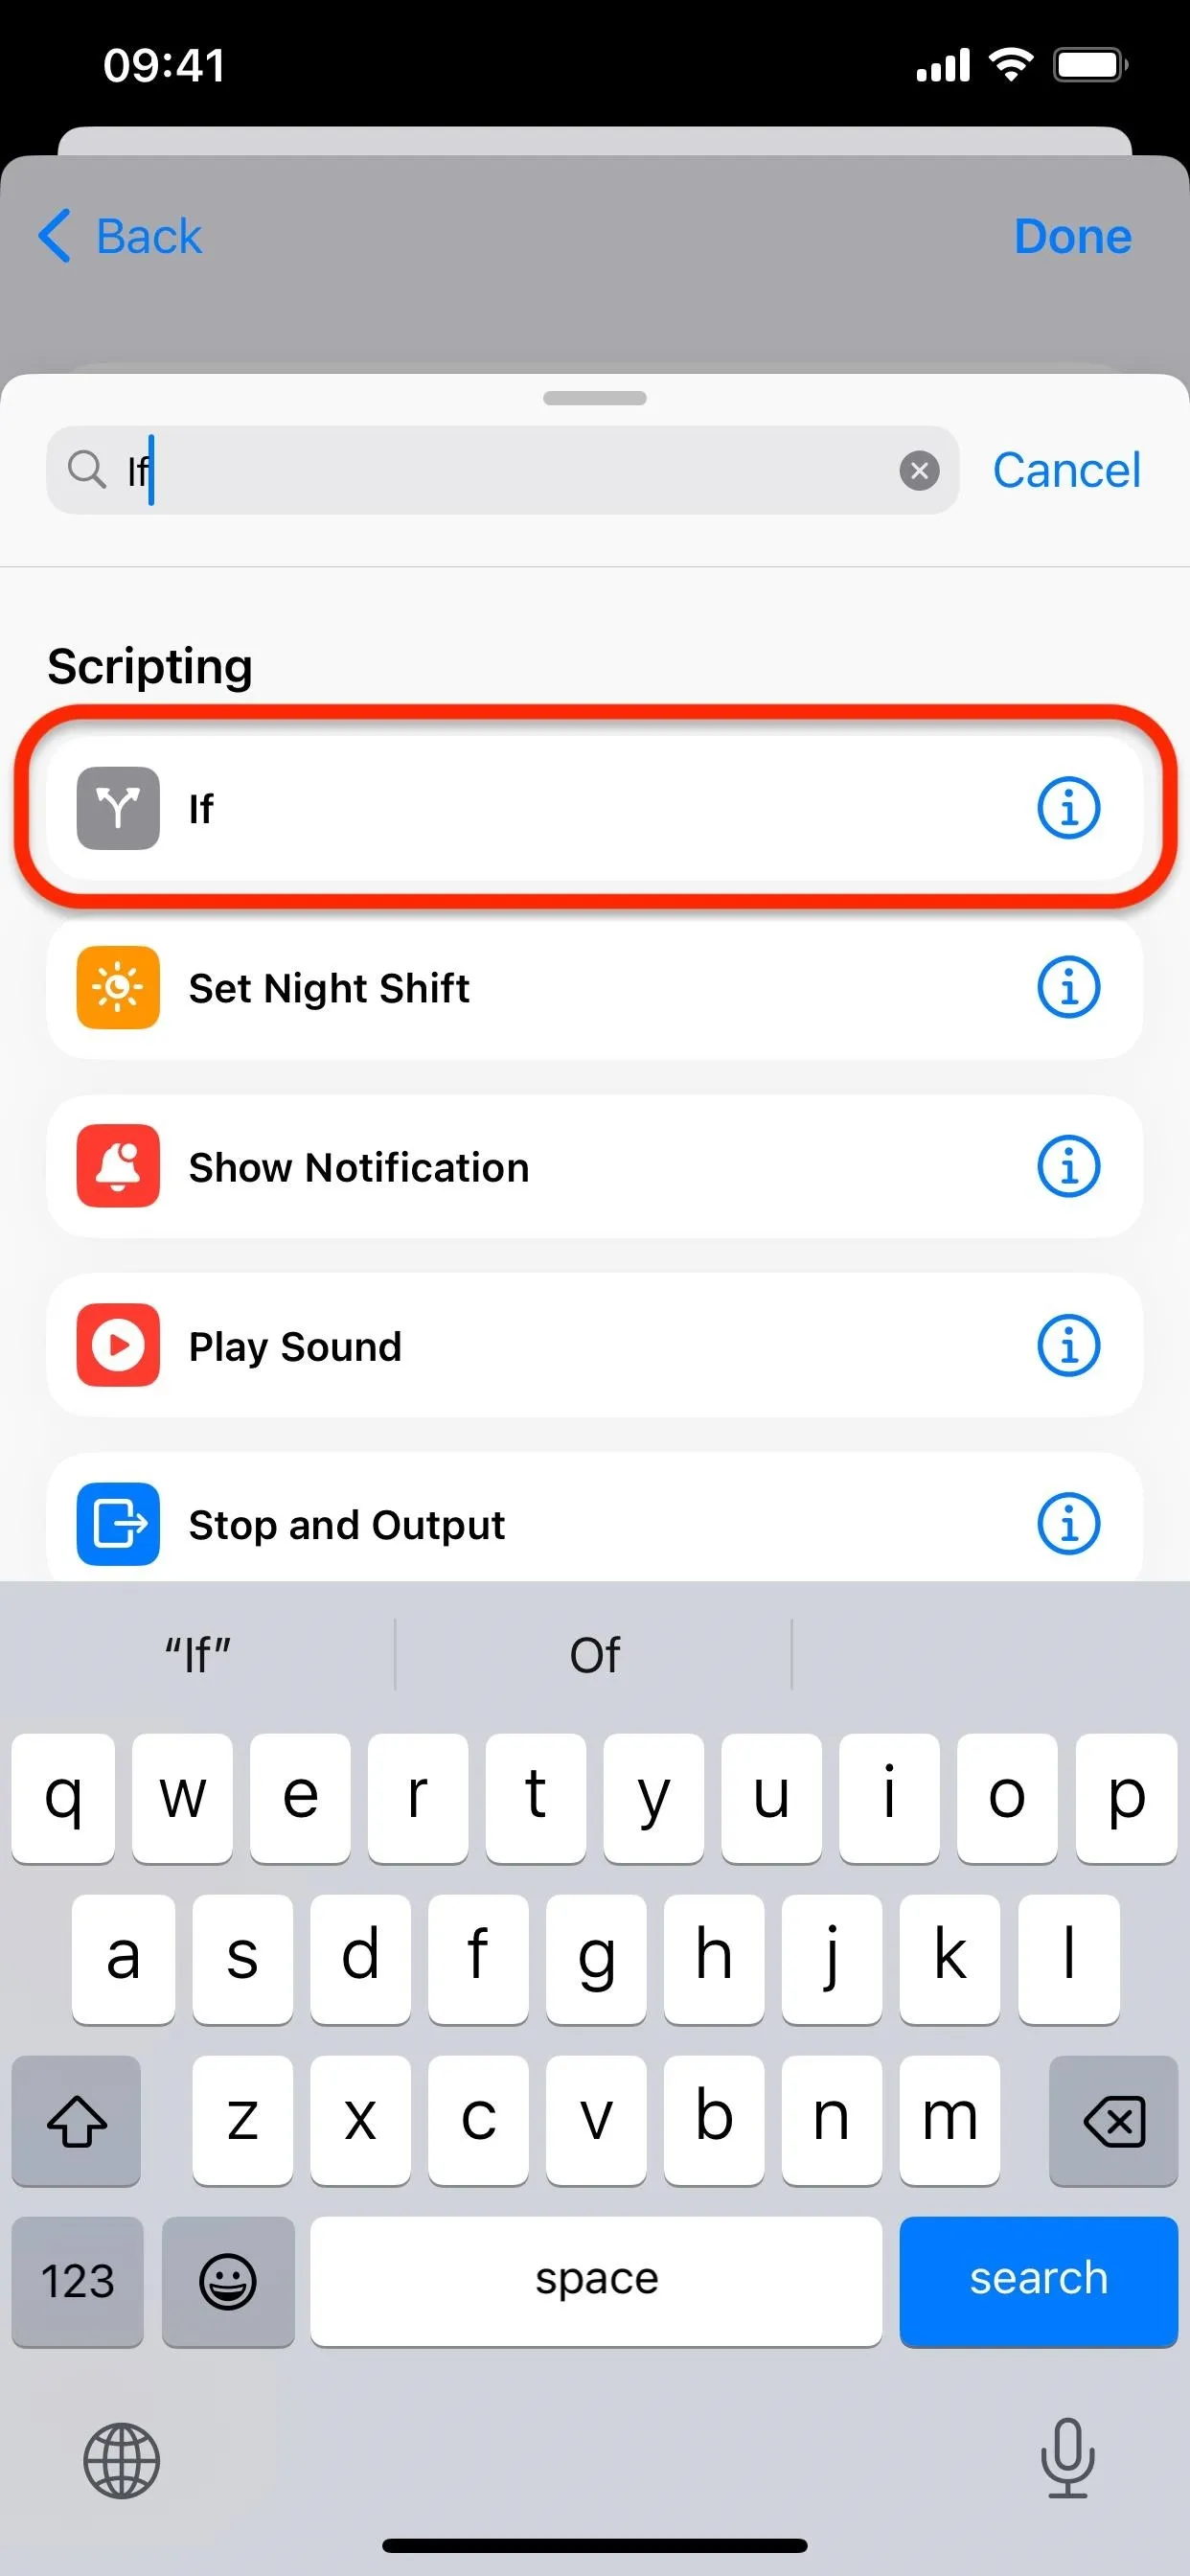
- Search for and select the "If" scripting action.
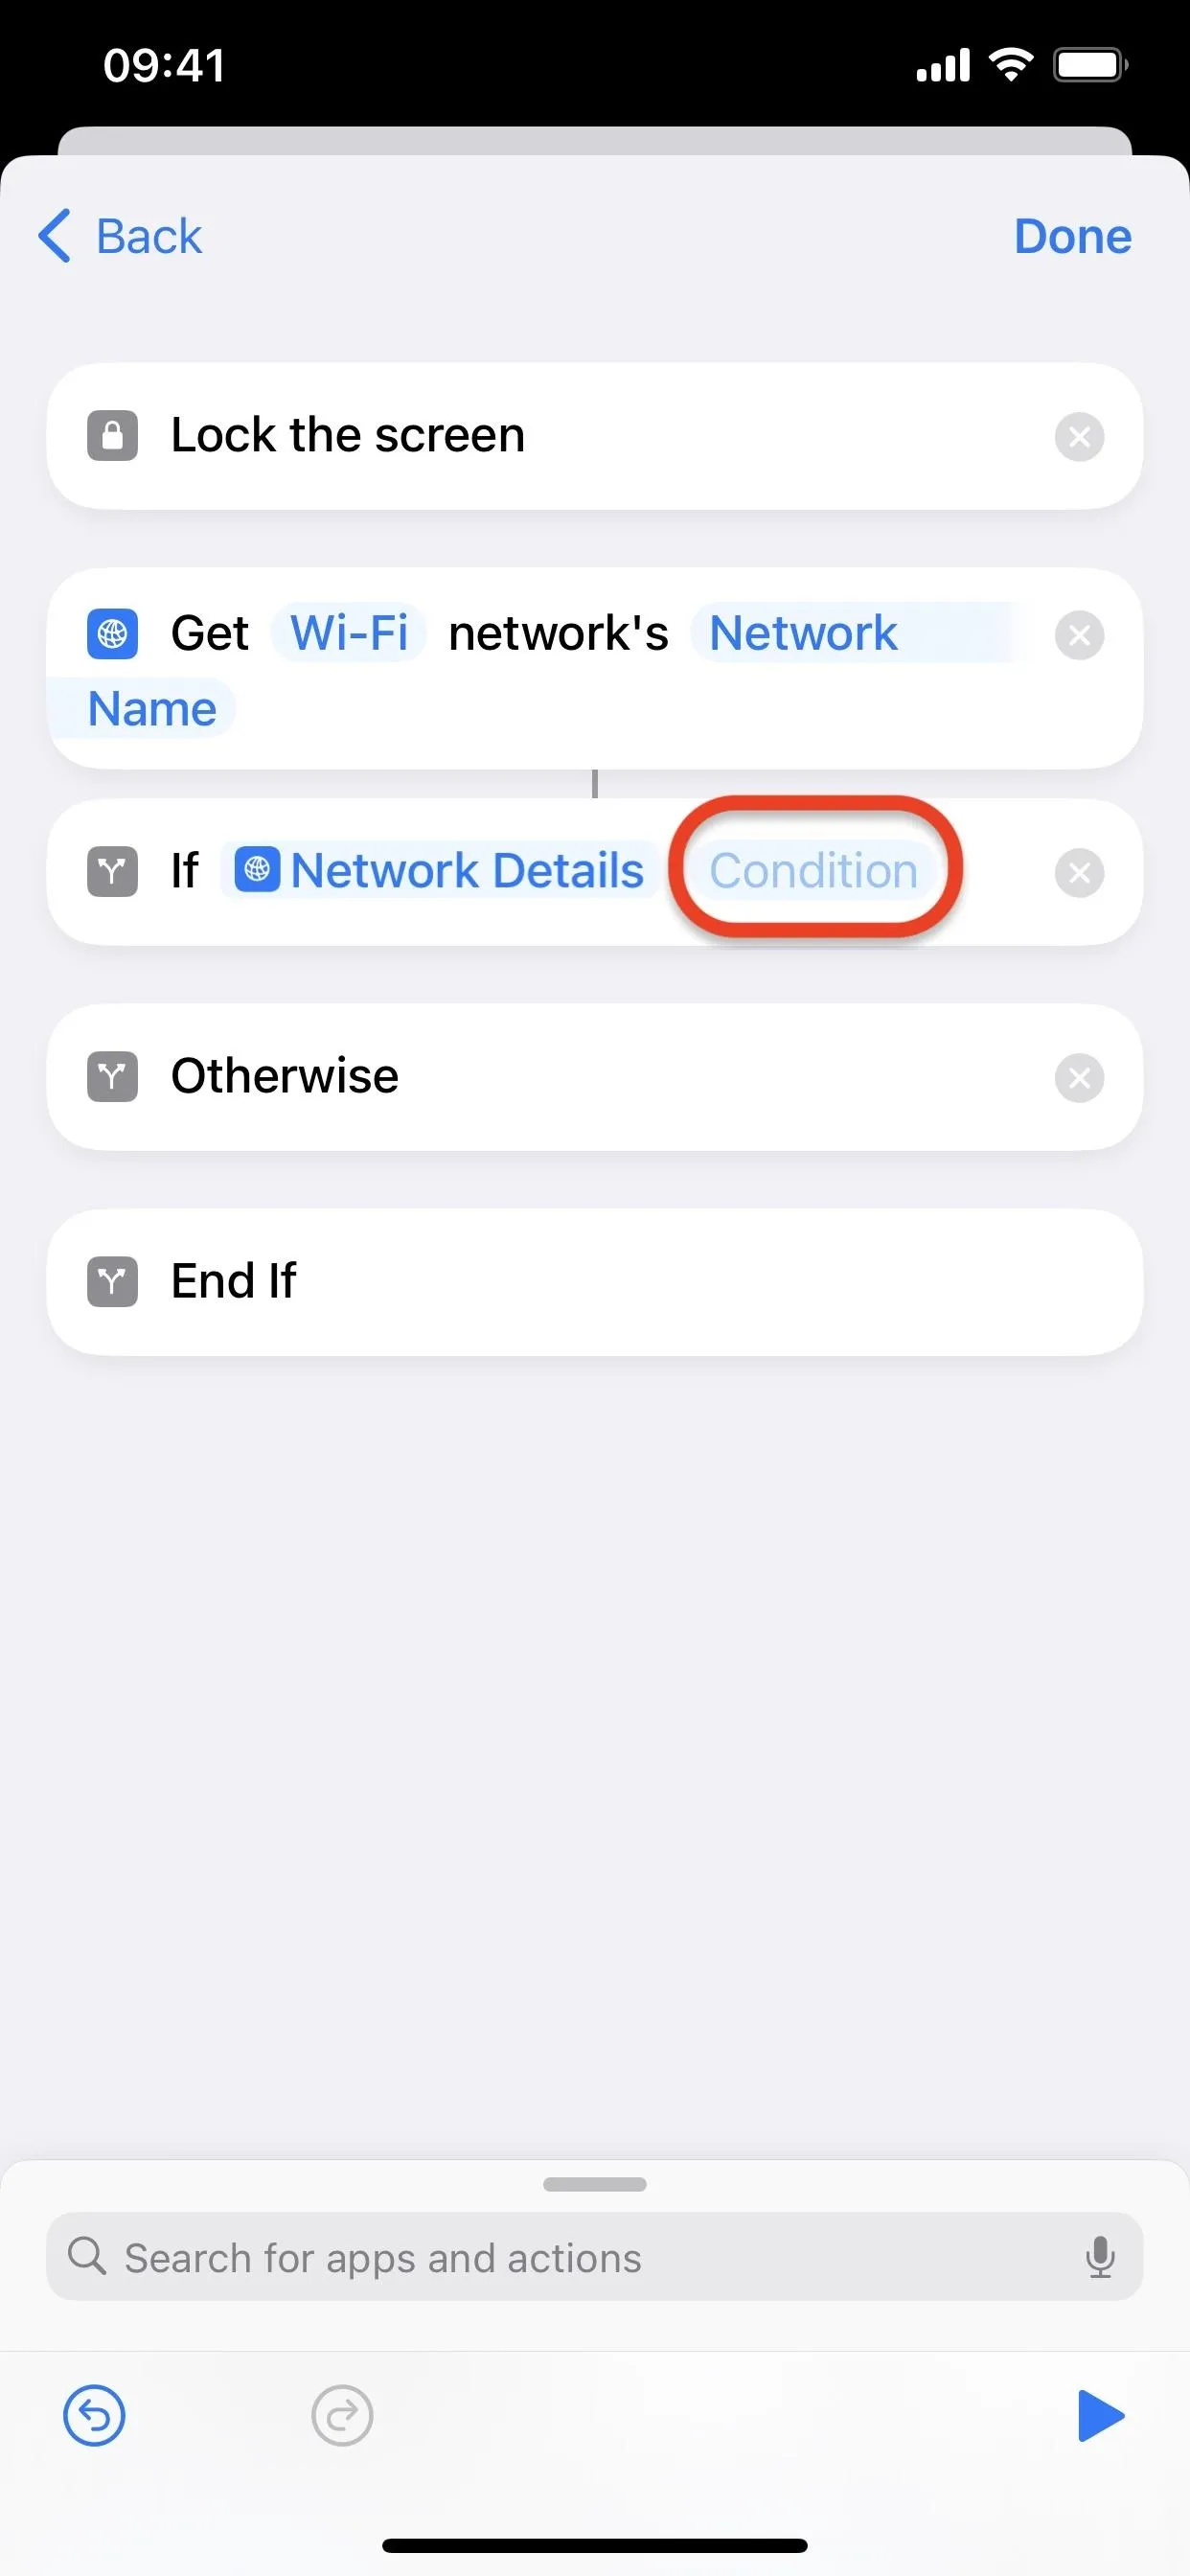
- Tap "Condition" in the If box.
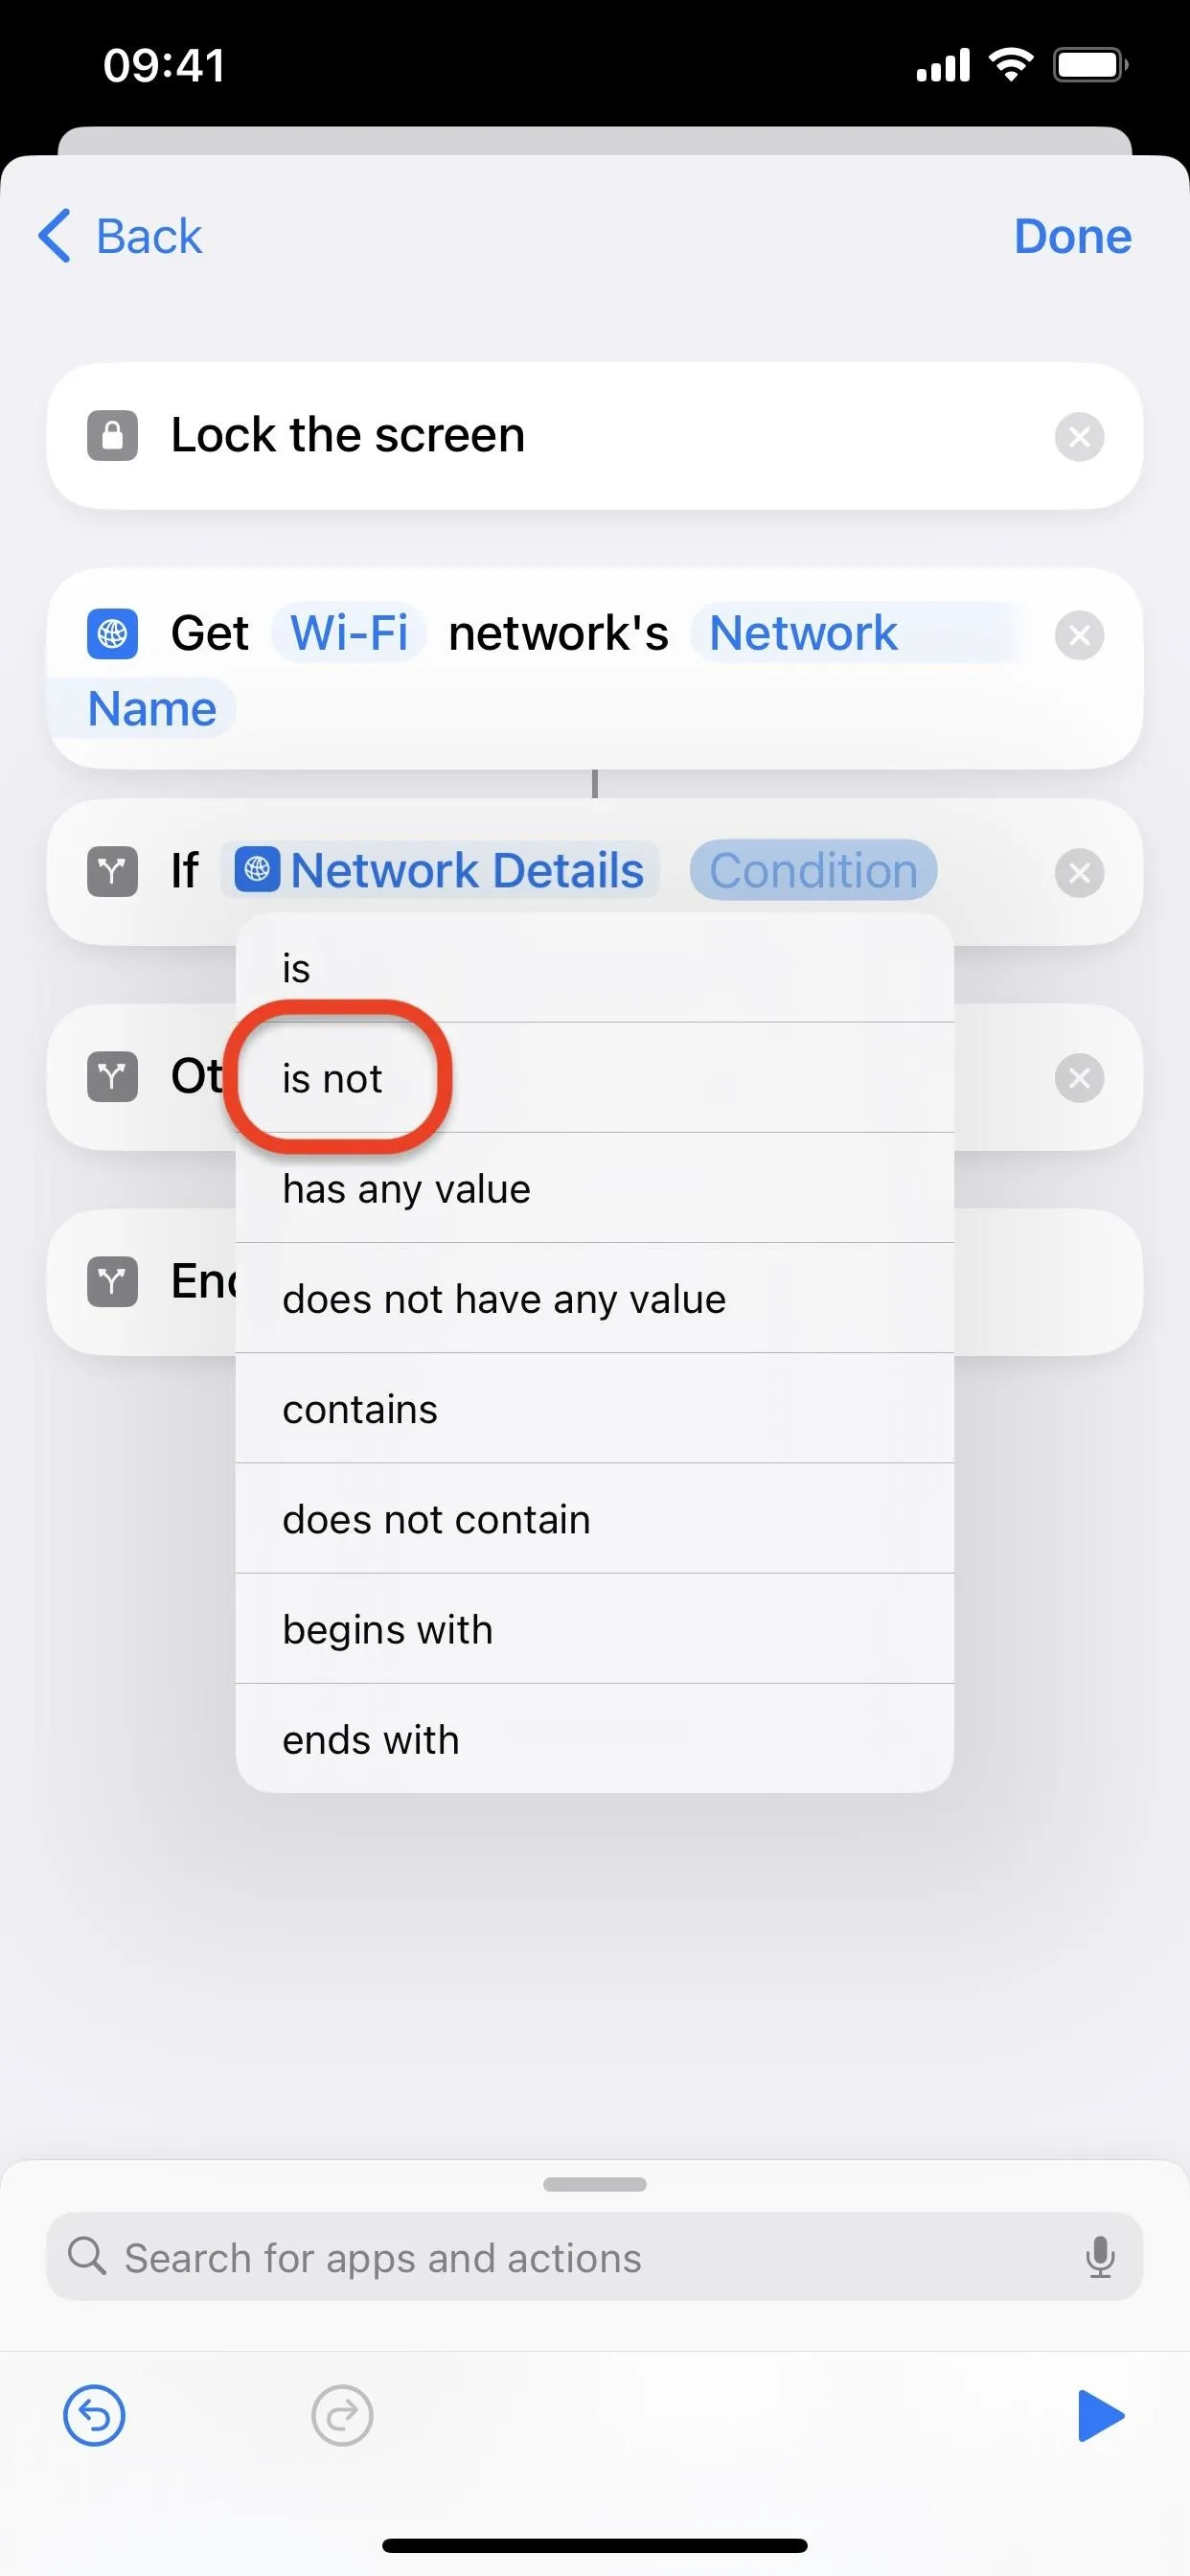
- Select "is not" from the options.
- Tap "Text" after "is not."
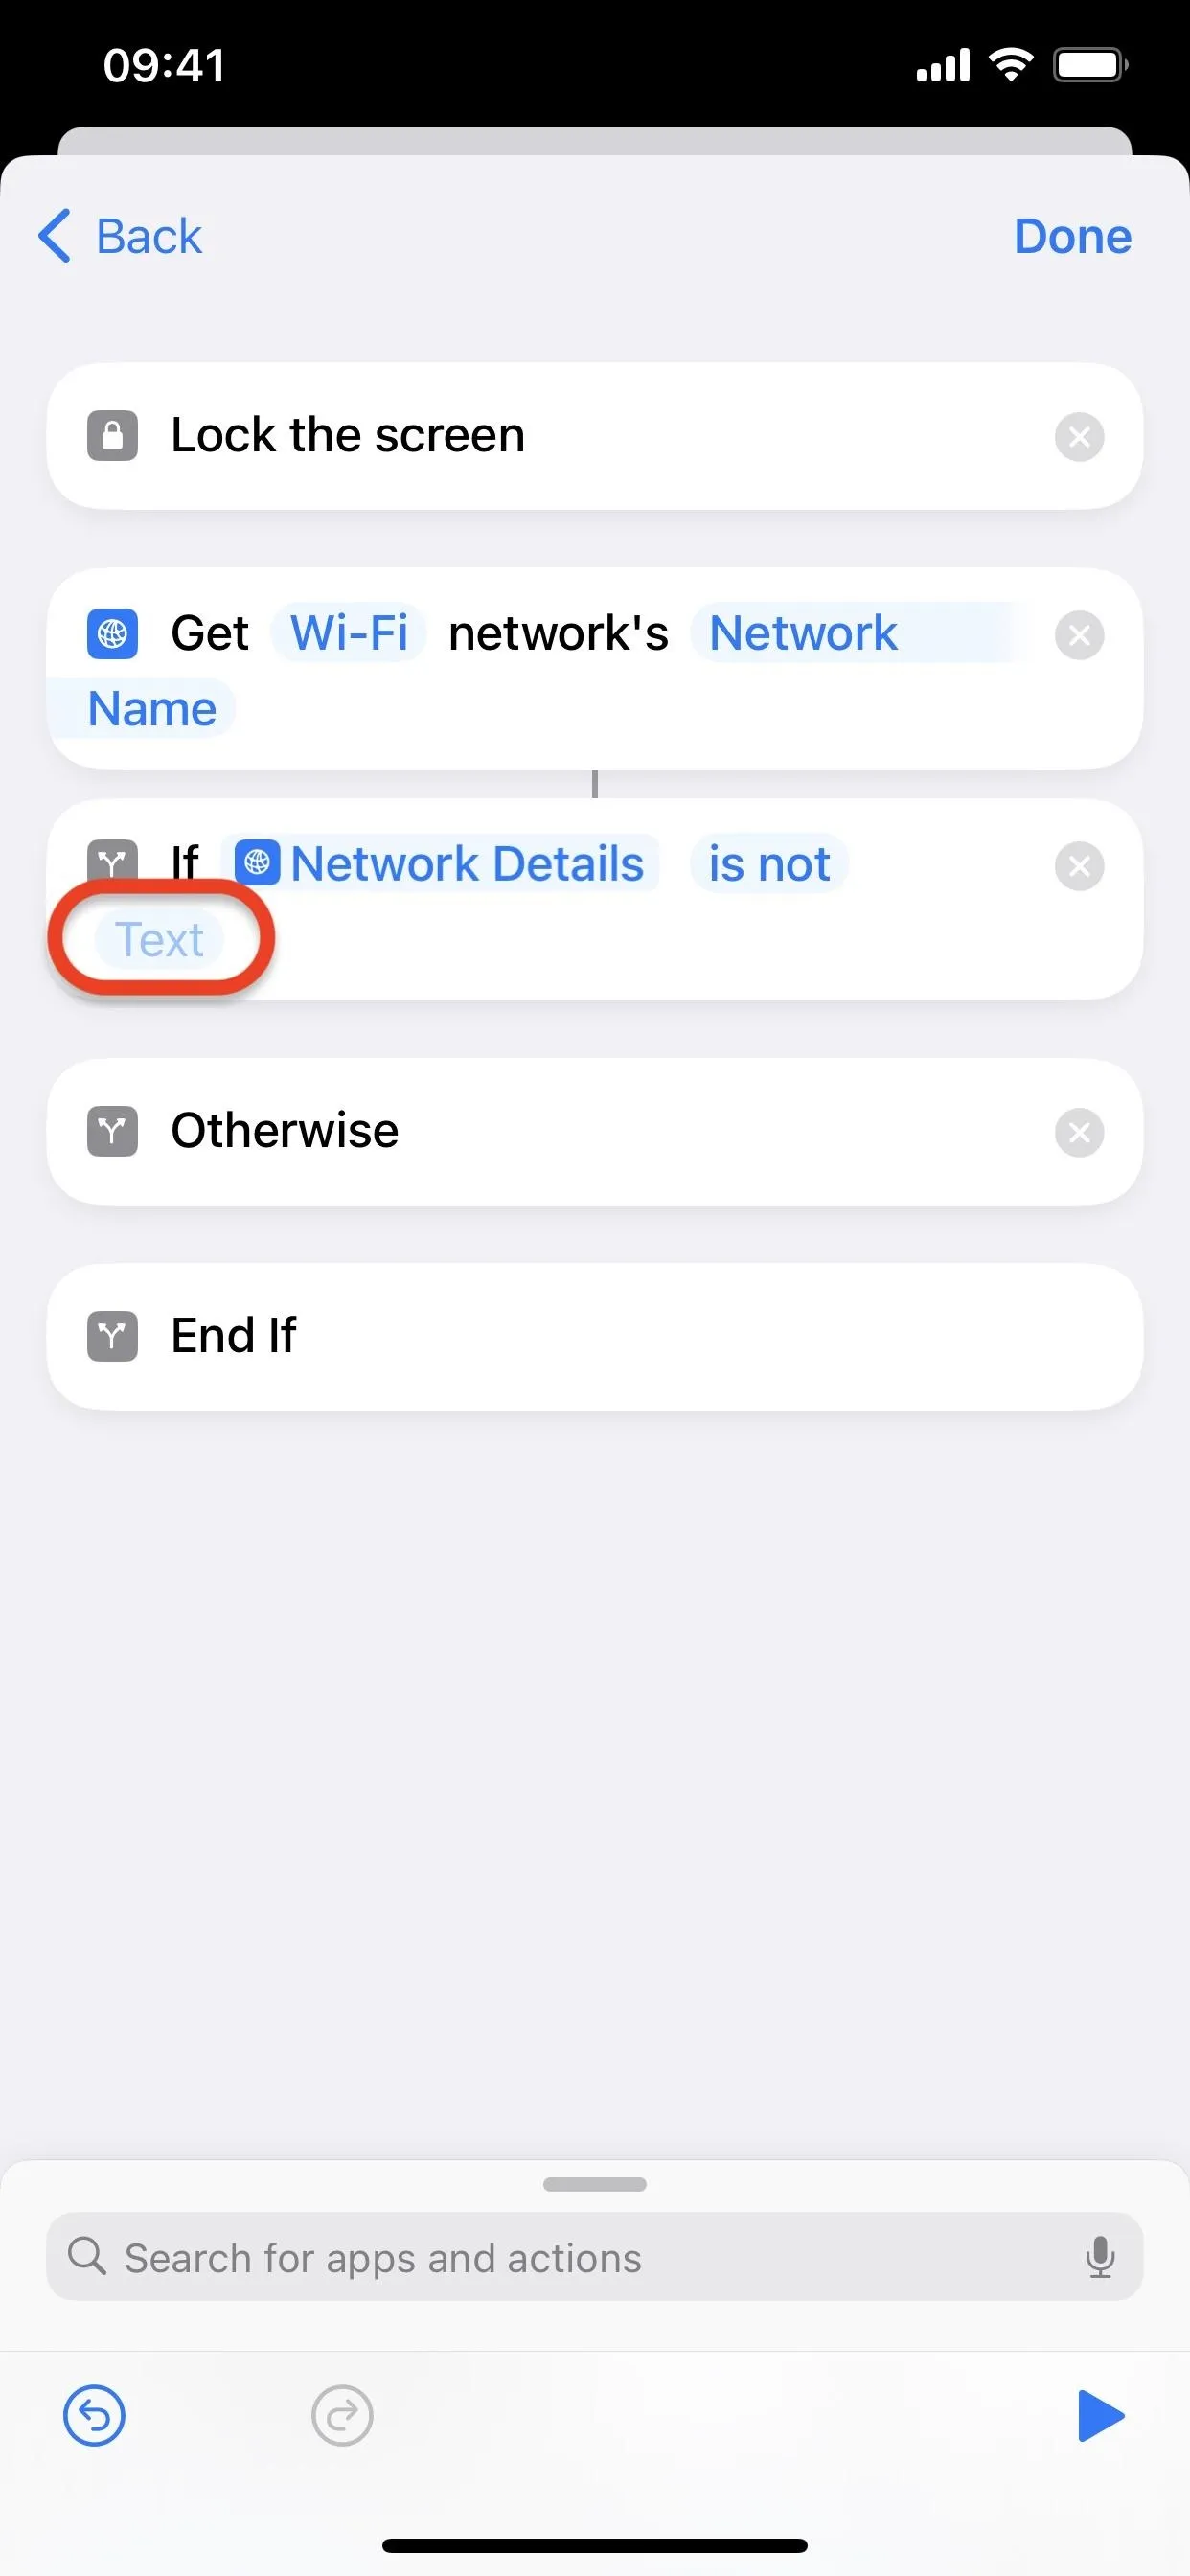
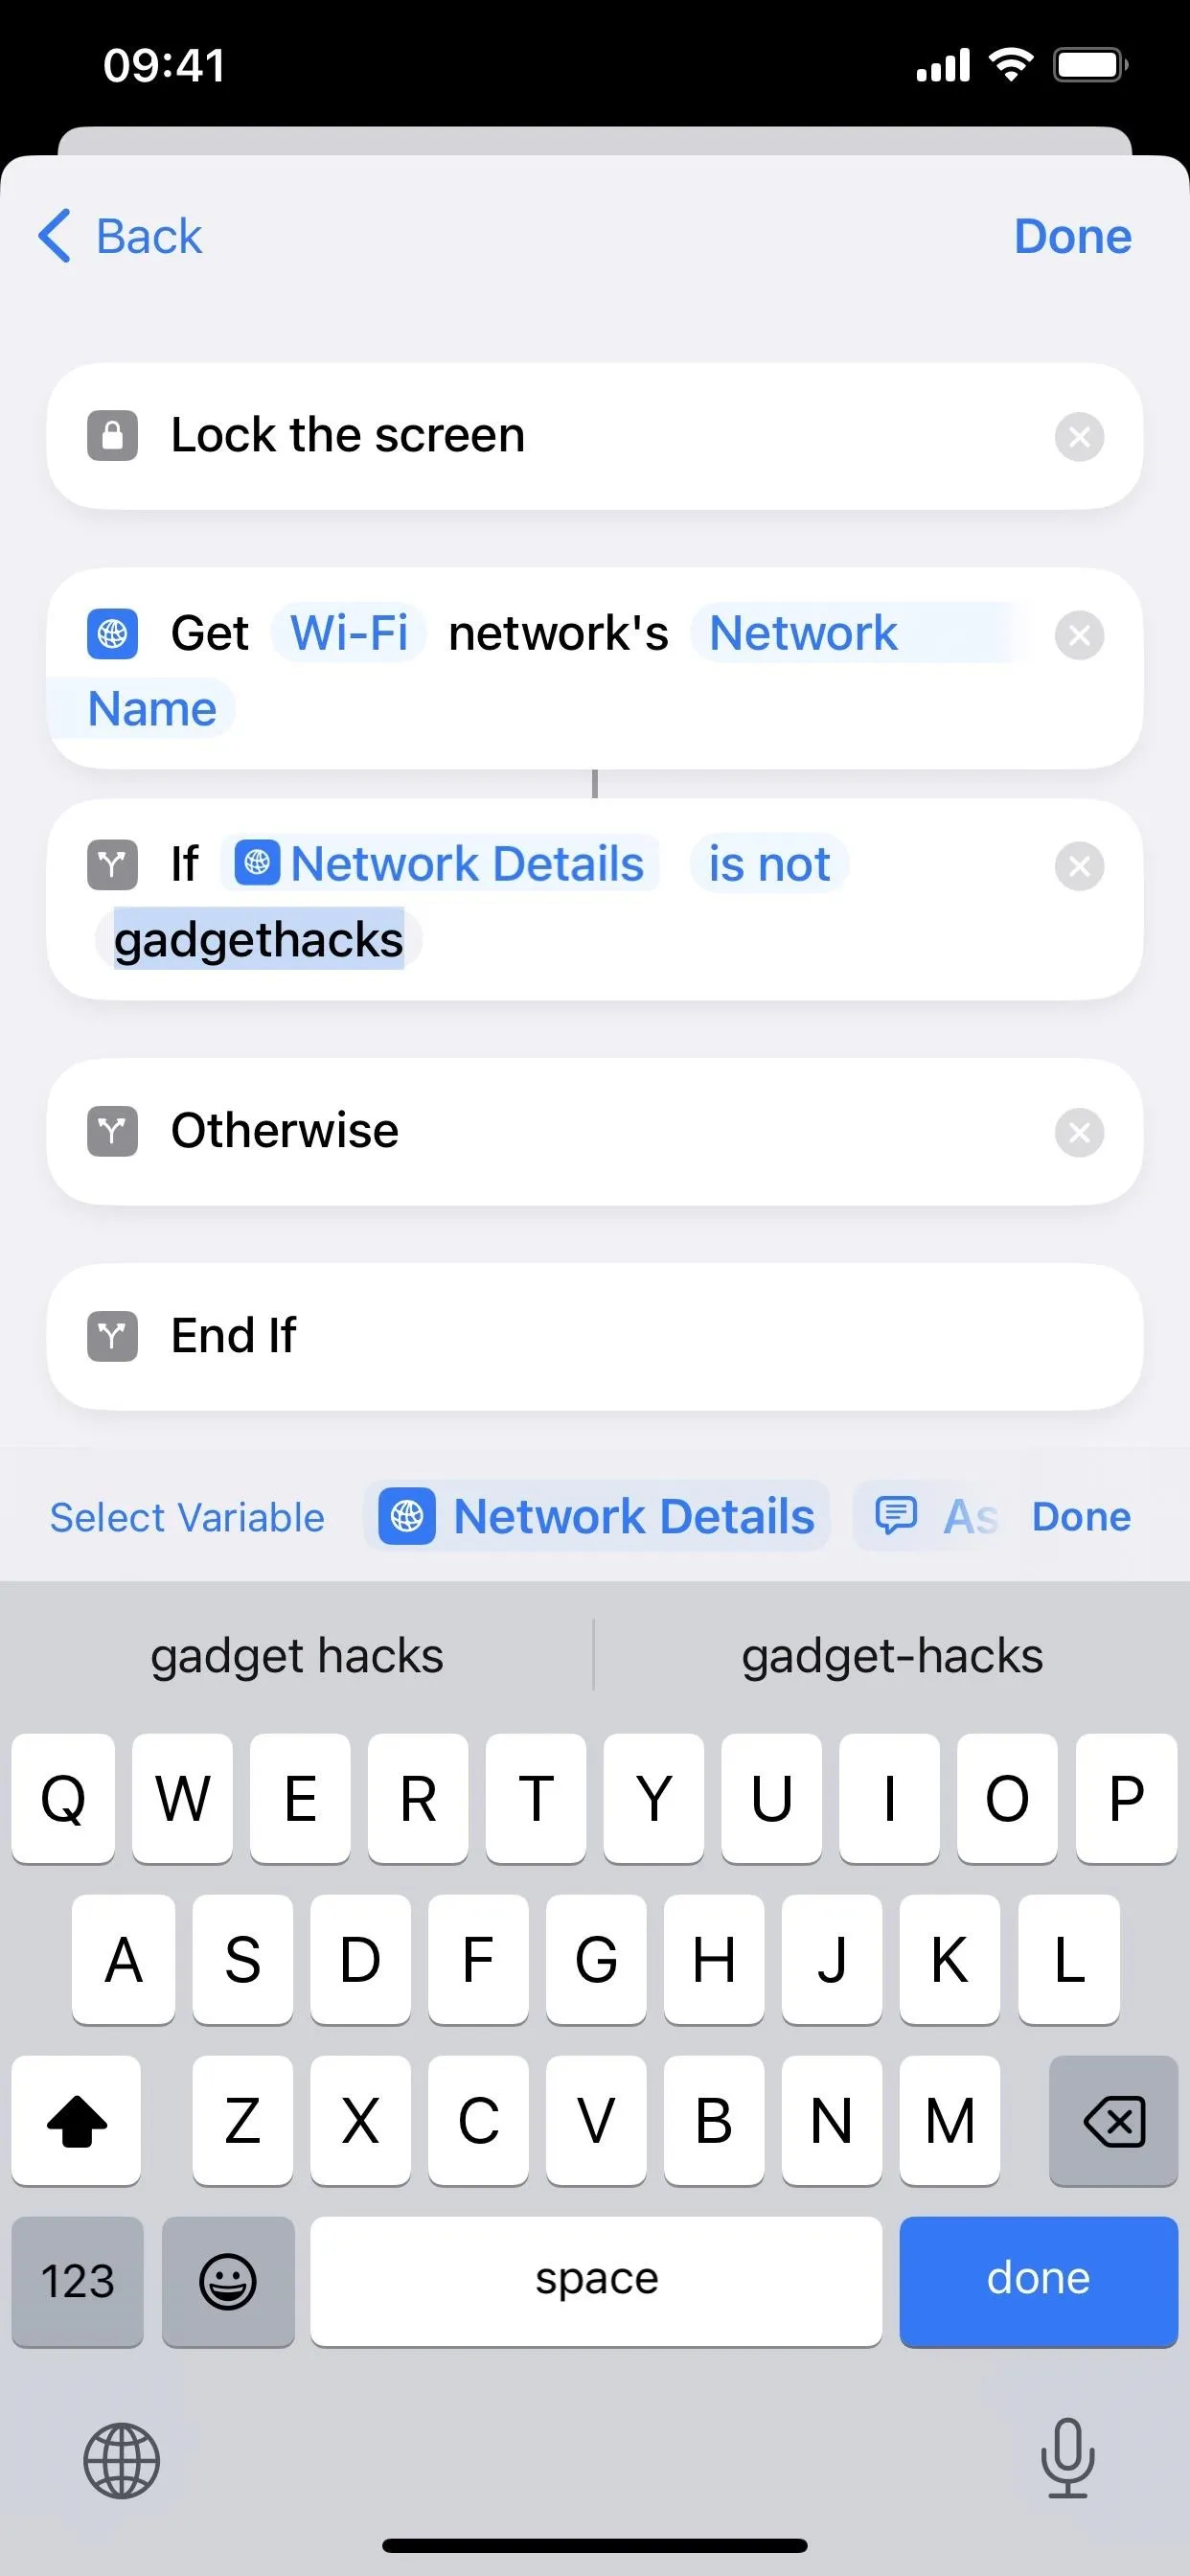
- Enter the name of your home's Wi-Fi network (it's case-sensitive).
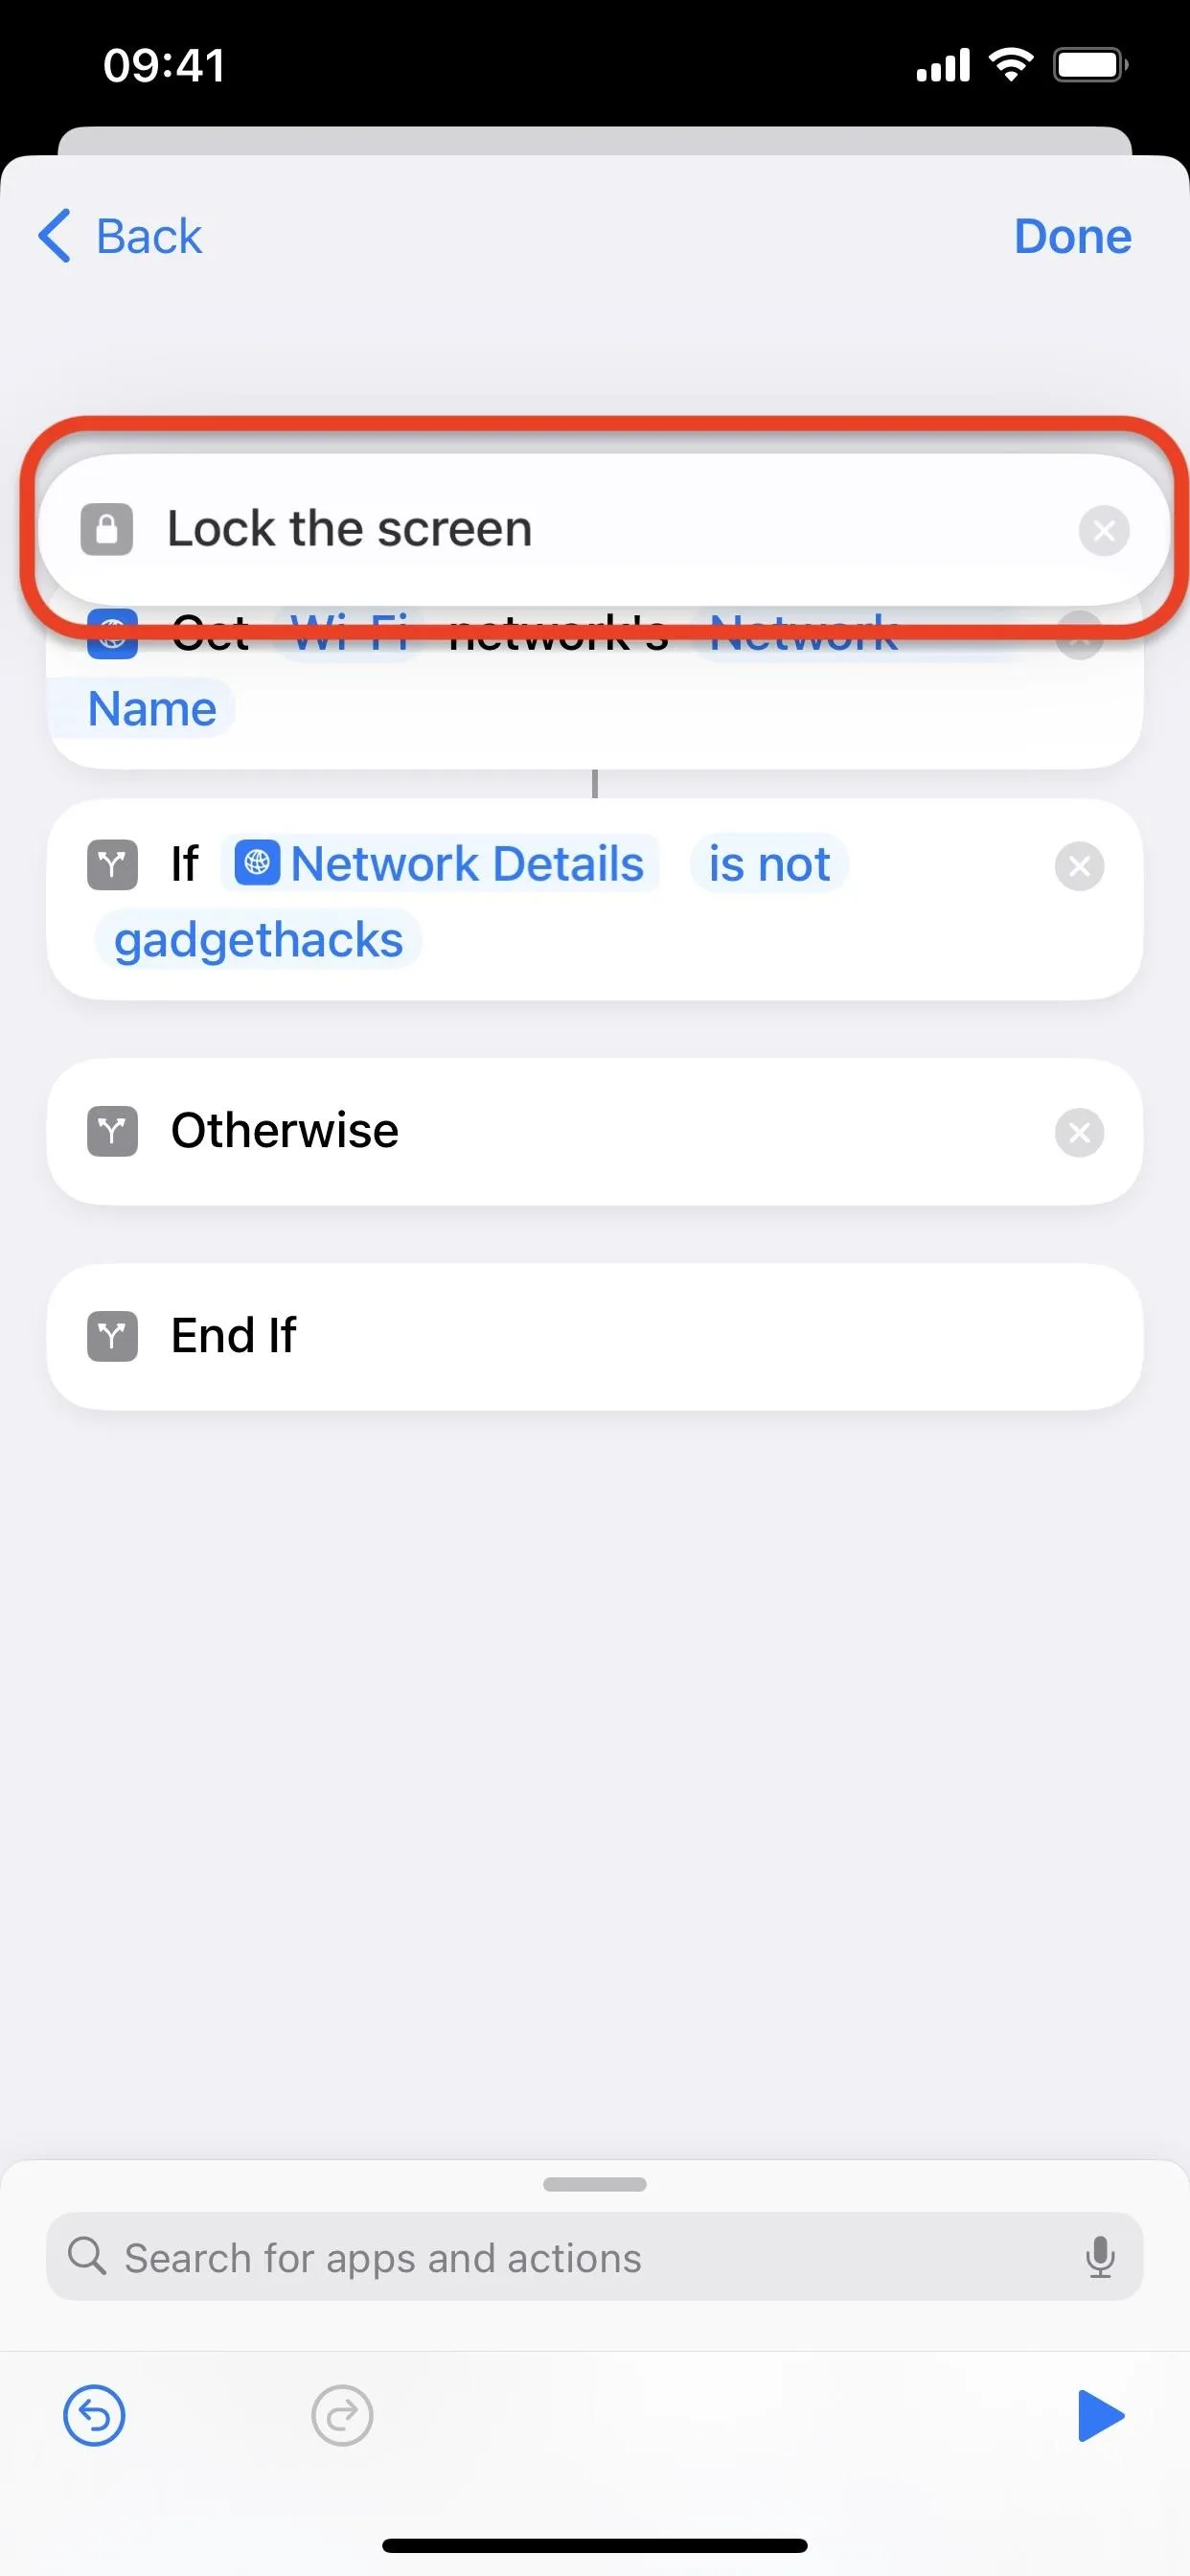
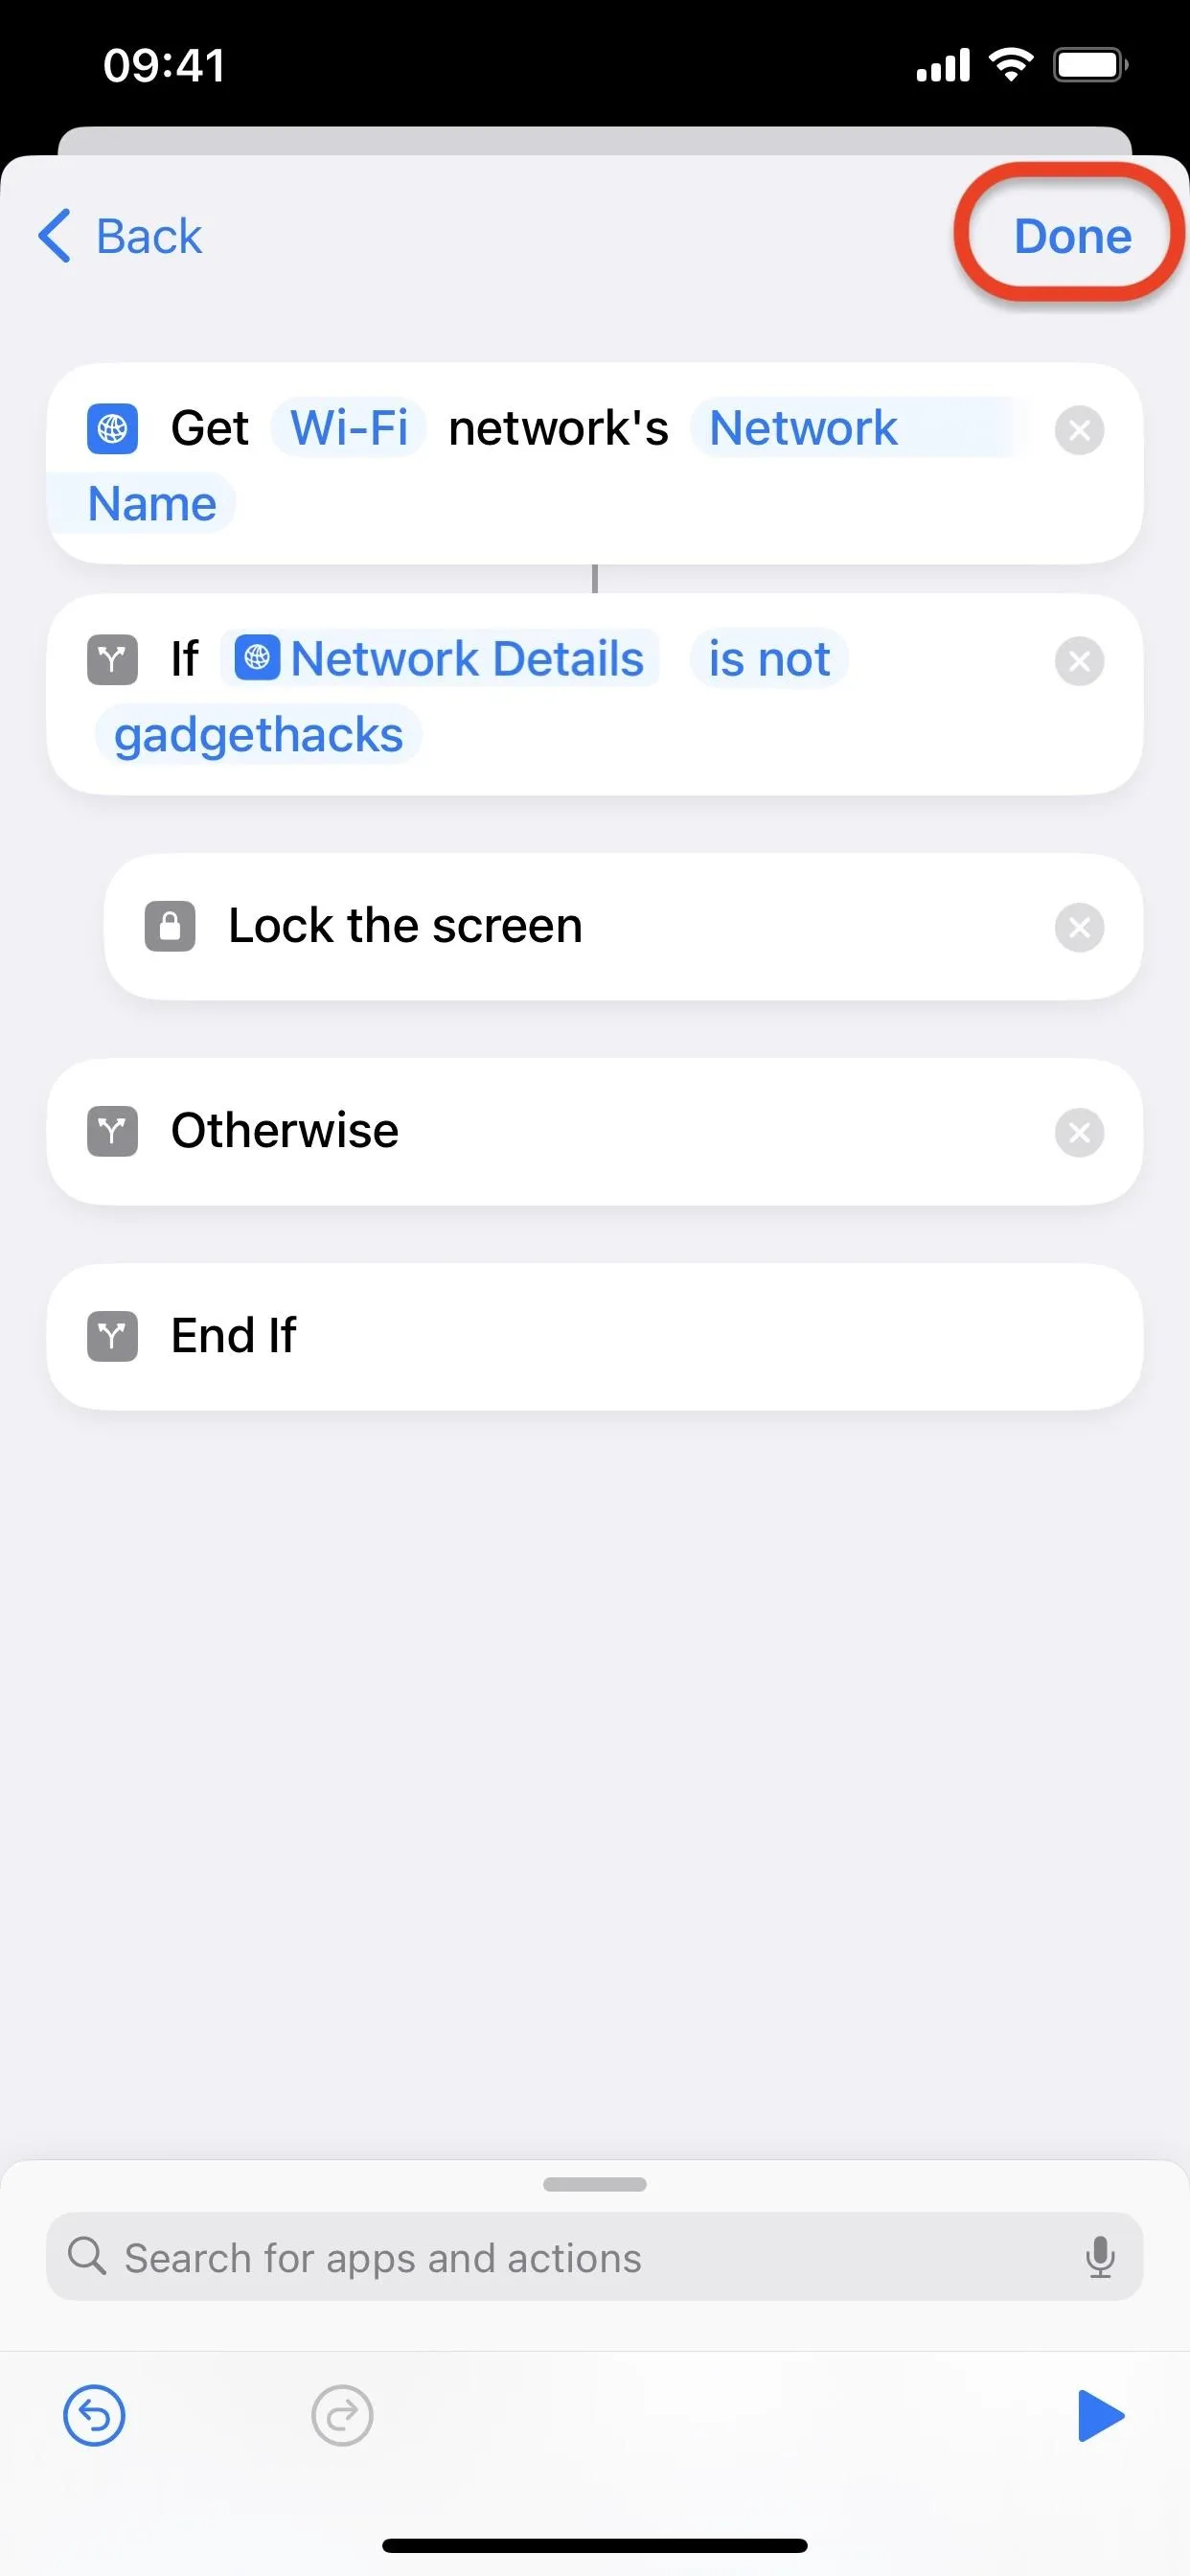
- Tap and hold the Lock Screen action, then drag and drop it between the If and Otherwise boxes.
- Hit "Done" or "Back" and then "Done" on iOS 17 to save your edits. On iOS 16, hit "Edit Automation" to return, then "Done."
You can then test it out. This time, apps should stay open when your iPhone is connected to your home Wi-Fi network. If you disconnect from it manually or get disconnected whenever you leave your home, the automation will work just as described in the previous section, sending anyone who tries to open a chosen app to the Lock Screen.

If you'd rather base your safe zone on location data rather than networks, you could use the "Street Address" action to add your home address, followed by the "Get Distance" action set to determine the distance between "Current Location" and the Street Address input, followed by an "If" action set to "Distance is greater than 0.1." Then move the Lock Screen action to between the If and Otherwise boxes and save your changes
Cover photo, screenshots, and GIFs by Justin Meyers/Gadget Hacks


Comments
Be the first, drop a comment!