Things are a bit more organized in Apple Reminders, so the cluttered mess that it once was is no more in iOS 13. The slapped-together feel in older iOS versions was the main reason I never used it that much, but the updated version for iPhone has finally got me hooked.
Aside from being able to create grouped lists, which are folders that contain several lists within them, you can also nest reminders in a list underneath other reminders. Having main tasks and subtasks does a lot for organization and makes the structure obvious with just a glance.
For example, in a shopping list, you may be at the grocery store looking for ingredients for different recipes or meals. Now, instead of creating separate lists for each dish or having all of the ingredients haphazardly combined, you can make the dish a parent with subtasks (ingredients) underneath it. And there are a few ways to create the parent and subtask reminders, depending on how you're starting.
- Don't Miss: 200+ Exciting New iOS 13 Features for iPhone
Note that you can only make subtasks for lists in your iCloud account, not on third-party services such as Yahoo or Outlook. At least, not yet.
Compatibility
The new Reminders app is only available in iOS 13 and iPadOS 13 for iPhone and iPad and macOS 10.15 Catalina for Macs. If you don't upgrade all of your devices, any using older OS versions can only sync with other devices not upgraded yet. And when you finally do update each device, any reminders you created on those devices after updating your first device to the new Reminders app will be lost when syncing to iCloud since iCloud uses the updated Reminders app as the primary.
Also, if you don't open the updated app on each device before creating reminders on those devices (like via Siri), those won't stick either. Learn more at Apple.
Drag & Drop Subtasks onto a Parent Reminder
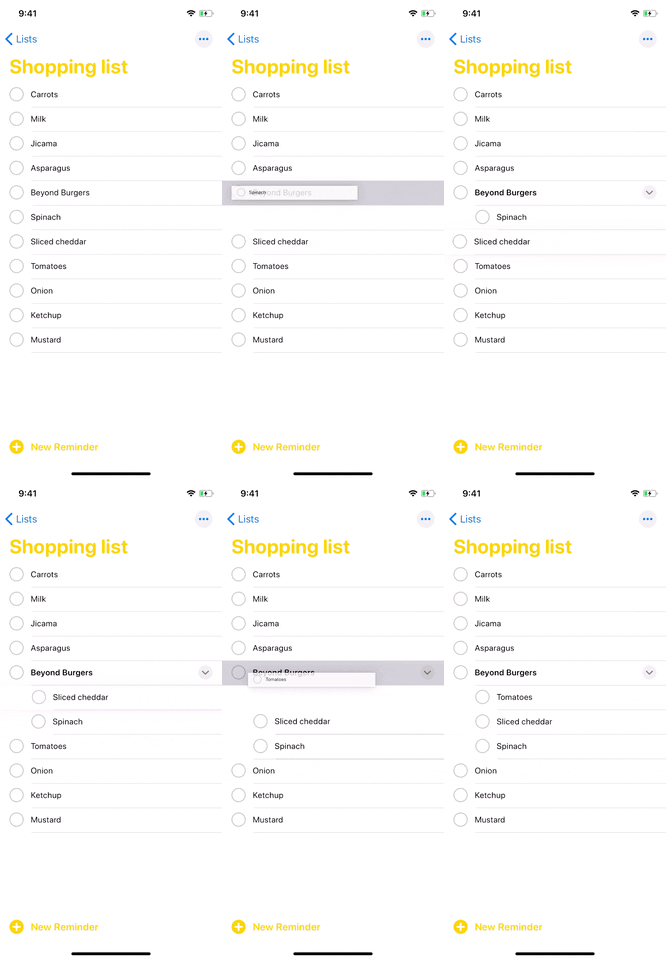
If you already have reminders in the list you want to convert to subtasks for another reminder, press-and-hold on one one of them, then drag and drop it on top of the reminder you want to be the parent. The parent reminder will bold itself, indicating itself as the main task, and the subtask will be indented below it.
Repeat that process for any other tasks you want to move under the parent. It seems like you may be able to bulk move subtasks in the future, similar to how you would bulk-move app icons on the home screen, but it's not entirely working yet.
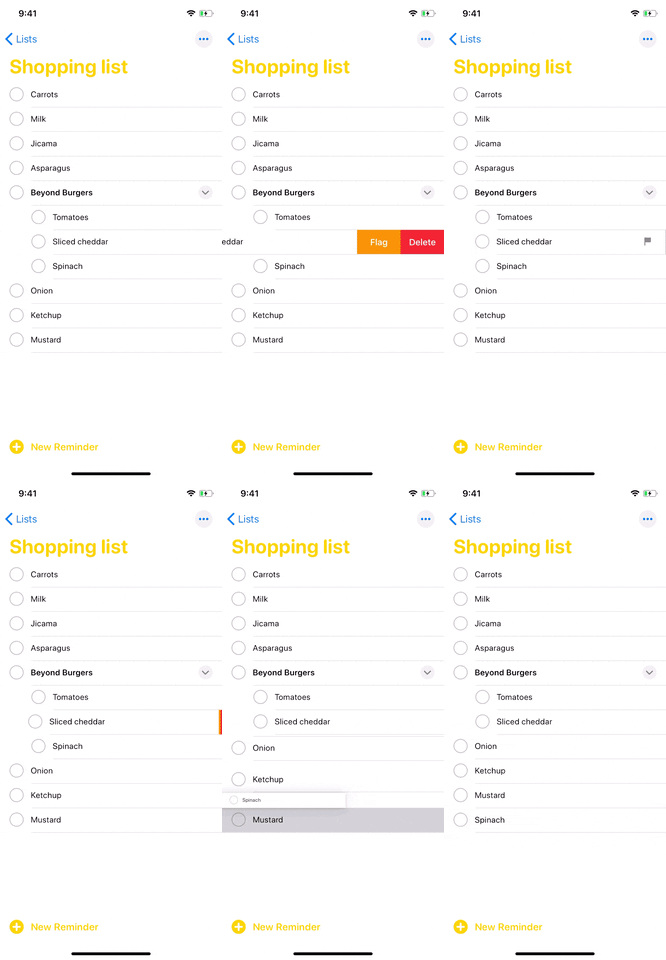
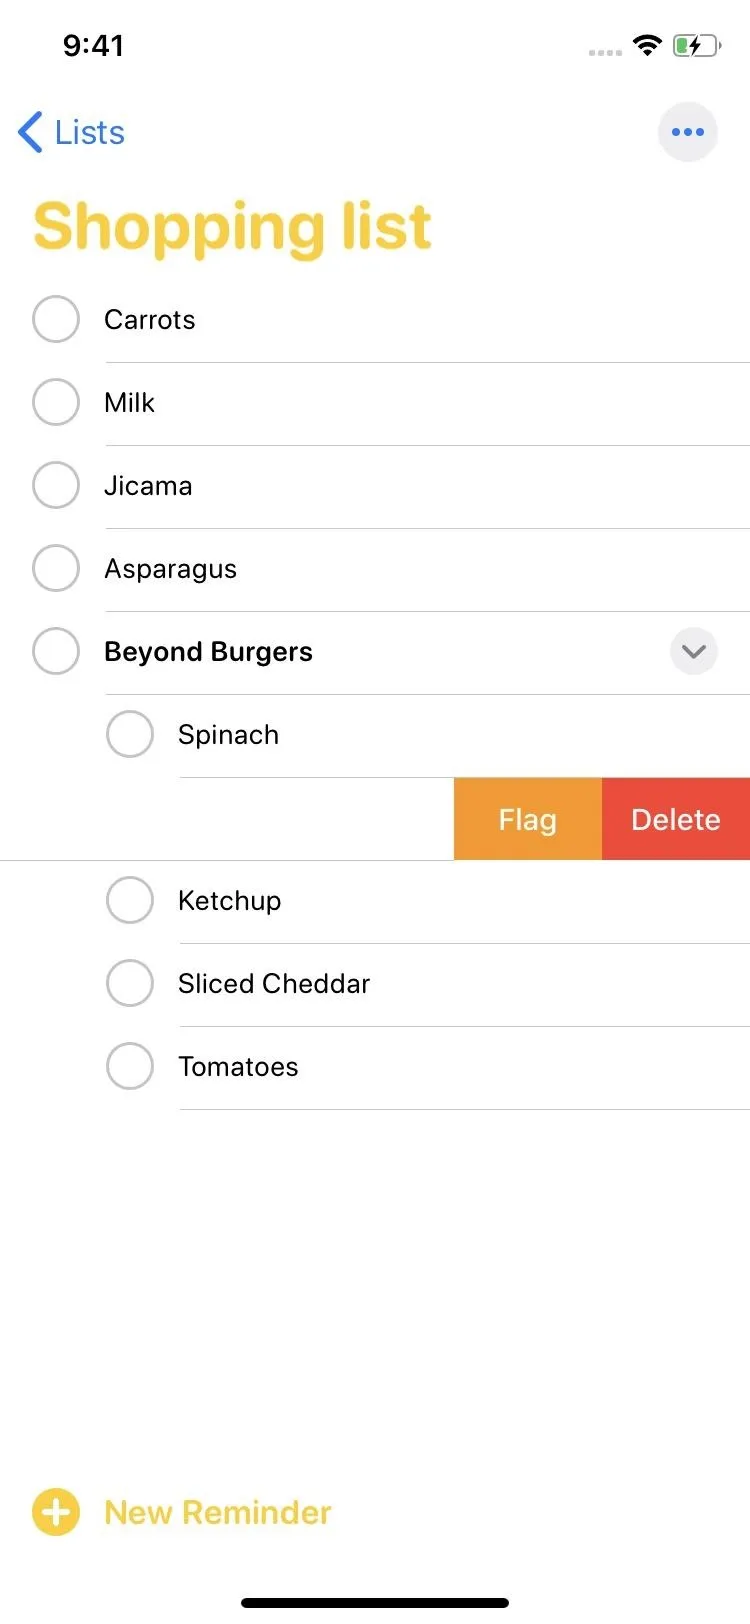
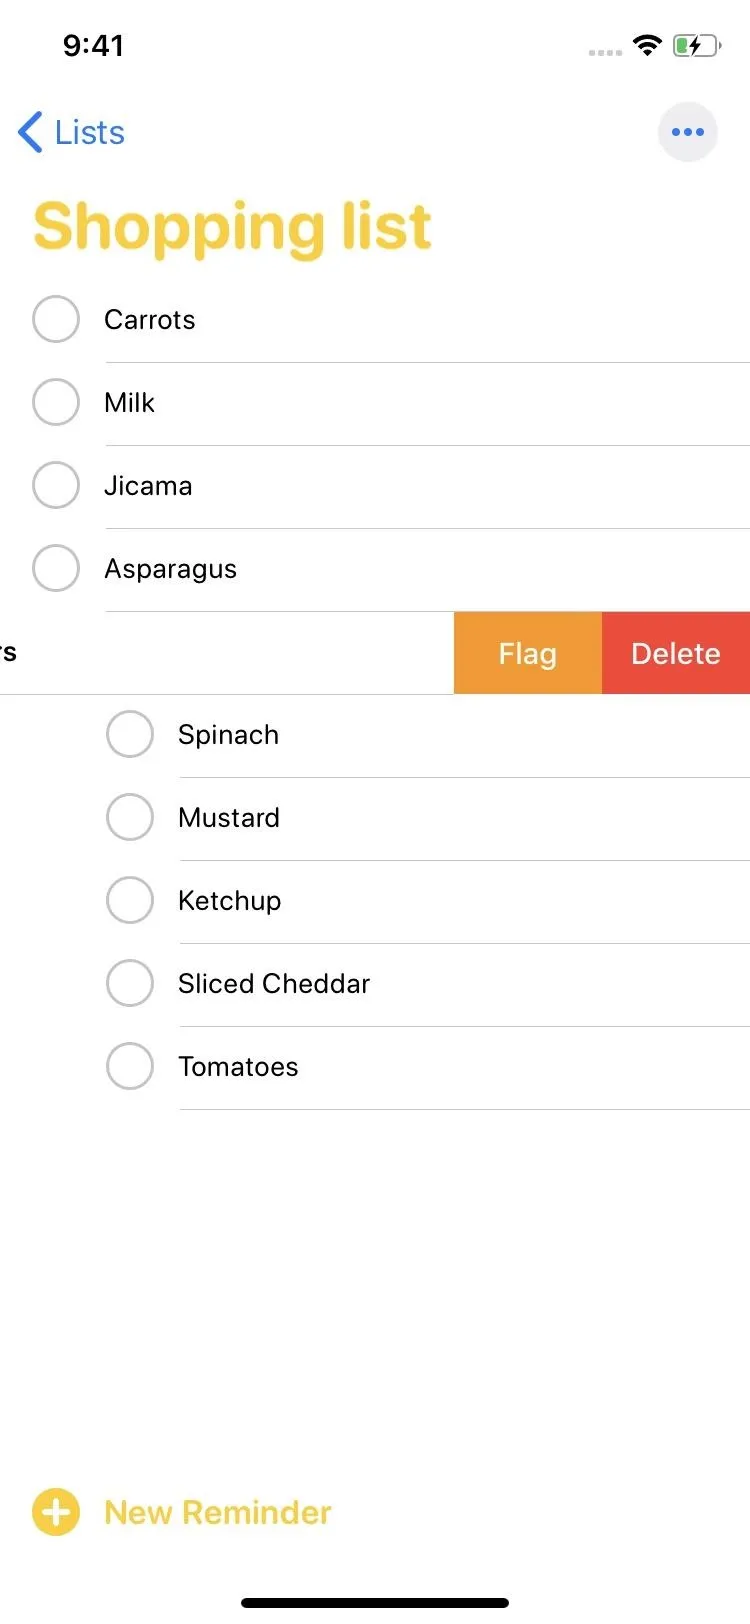
To remove a subtask, you can drag and drop it out of the parent reminder into its own spot in the list or another parent directory. Aside from checking it off as complete, you can also delete it by short-swiping left and hitting "Delete," or long-swiping left to do it automatically.
With a short-swipe left, there's also an option to "Flag" it, which will add a little flag icon next to it and add it to the automated "Flagged" section on the main screen. You can short-swipe left again and hit "Unflag" to remove the flag.


Indent Subtasks into a Parent Reminder
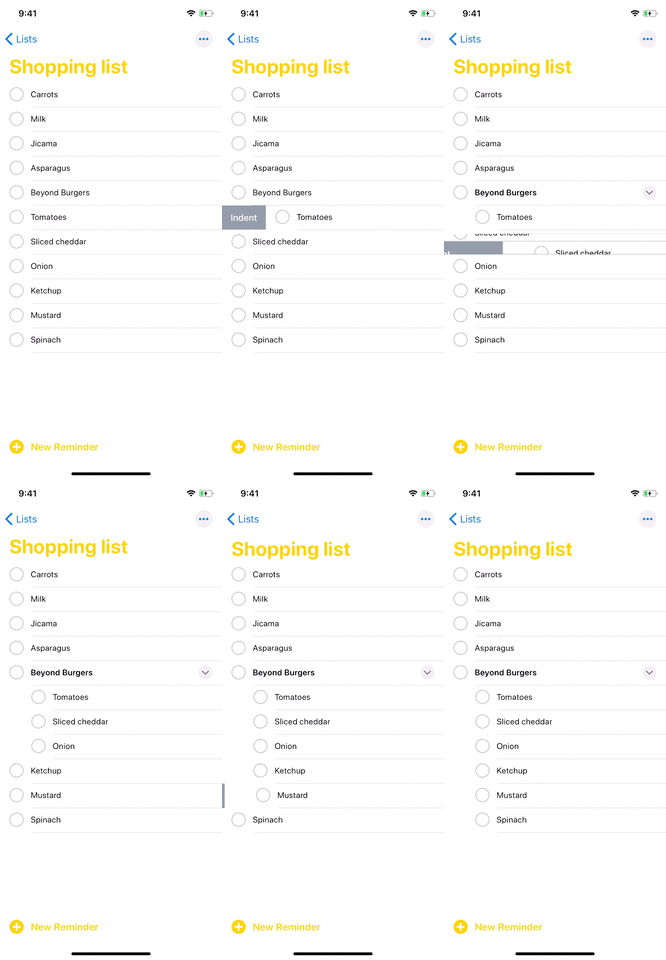
Another way to create subtasks for a parent reminder, if you already have reminders you want to convert in the list, is to indent them. First, drag and drop all of the reminders you want to be subtasks, so they are situated below the one you want to make a parent. Next, for the reminders you want to make subtasks, short-swipe right on them and hit "Indent" or long-swipe right to indent automatically.
It doesn't matter what order you go in when indenting. For instance, if you indent the first subtask under the parent, then the second, and so on, they'll all be subtasks of the parent. If you indent the last subtask first, it will become a subtask for whatever subtask was above it. But indenting that "parent" wannabe will make it and its subtasks as subtasks of the next reminder above, and you can do this until you reach the real parent.
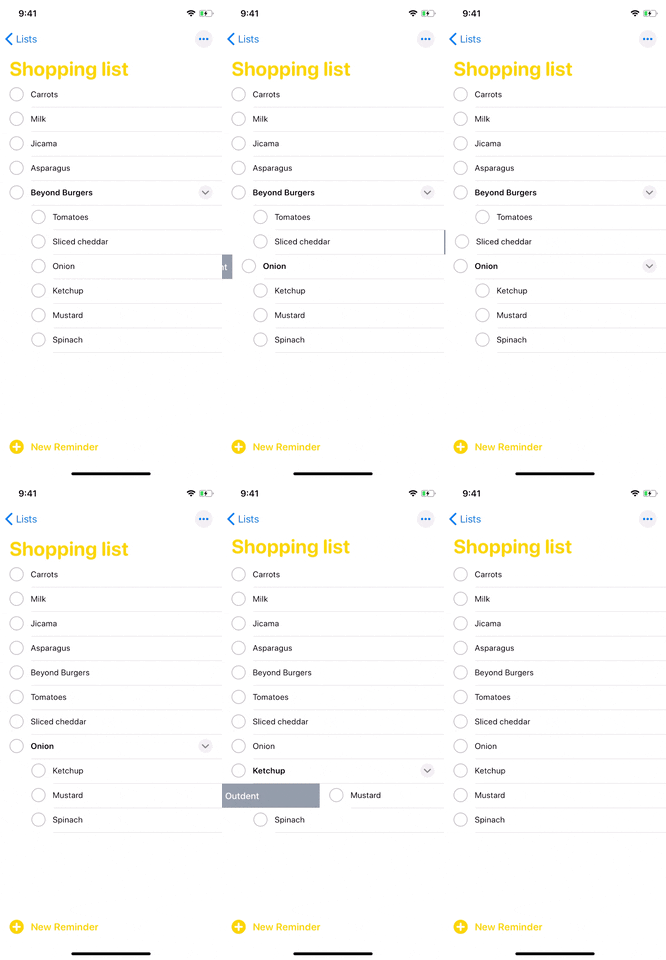
To remove a subtask with the indent method, short-swipe right on it and hit "Outdent," or long-swipe on it to outdent it automatically. If you outdent a subtask somewhere in between other subtasks in the parent directory, that outdented subtask will become its own parent with everything that was underneath now subtasks for it instead of the original parent.
To rearrange, flag, or delete subtasks, you can do so just as described in Option 1.


Add New Subtasks from a Parent Reminder's Details
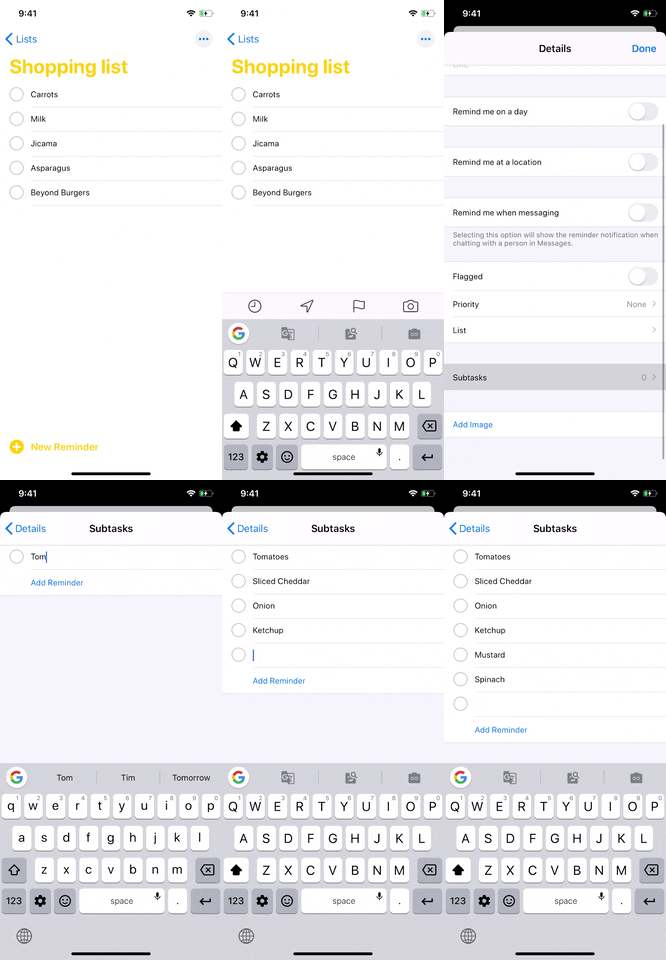
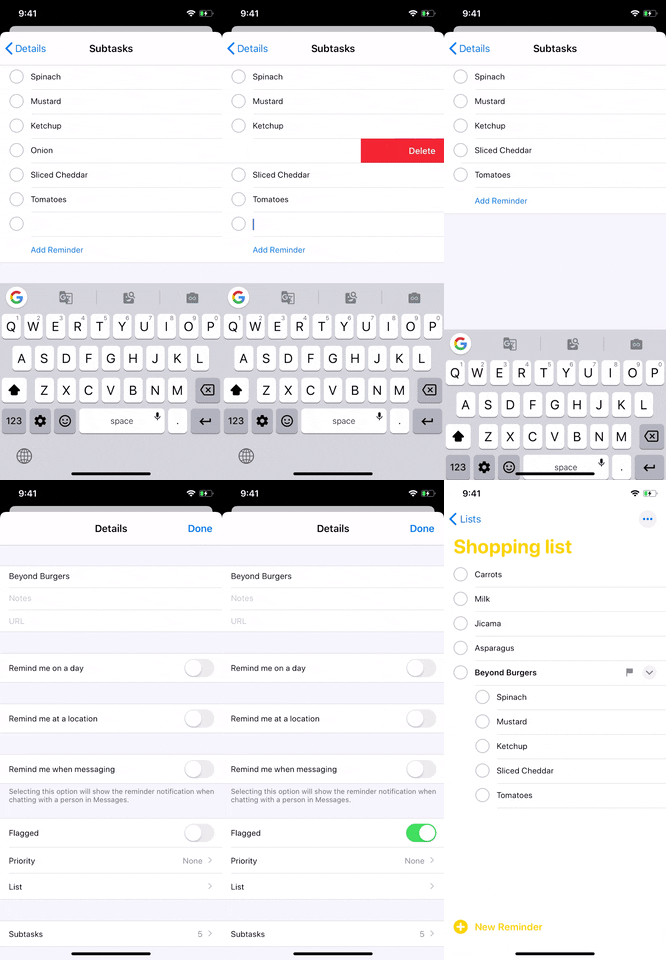
If you don't already have subtasks in the current list, it's easier to create them from inside the parent reminder directly. So either create a "New Reminder" to be the parent or tap on a reminder in the list already that you want to be the parent. Next, tap on its information (i) icon to open its Details modal view. Tap on "Subtasks" near the bottom, then "Add Reminder" for each subtask you want to create.
To make sure newly added subtasks are saved, hit the "return" or "enter" key on the keyboard or hit "Add Reminder" again after typing one out. That will pop you into a new bubble for the next subtask to add.
If you add a subtask you didn't want, edit it to something else or short-swipe left on it and hit "Delete," or long-swipe left to remove it automatically. When no more subtasks are needed, tap "Details" to go back. While you can't flag all of the subtasks from the parent's Details page, you can toggle on "Flagged" to flag the parent. Doing so won't flag all the subtasks underneath, only the parent. Toggle it back off to unflag it. Hit "Done" to finalize things.


View & Hide Nested Reminders
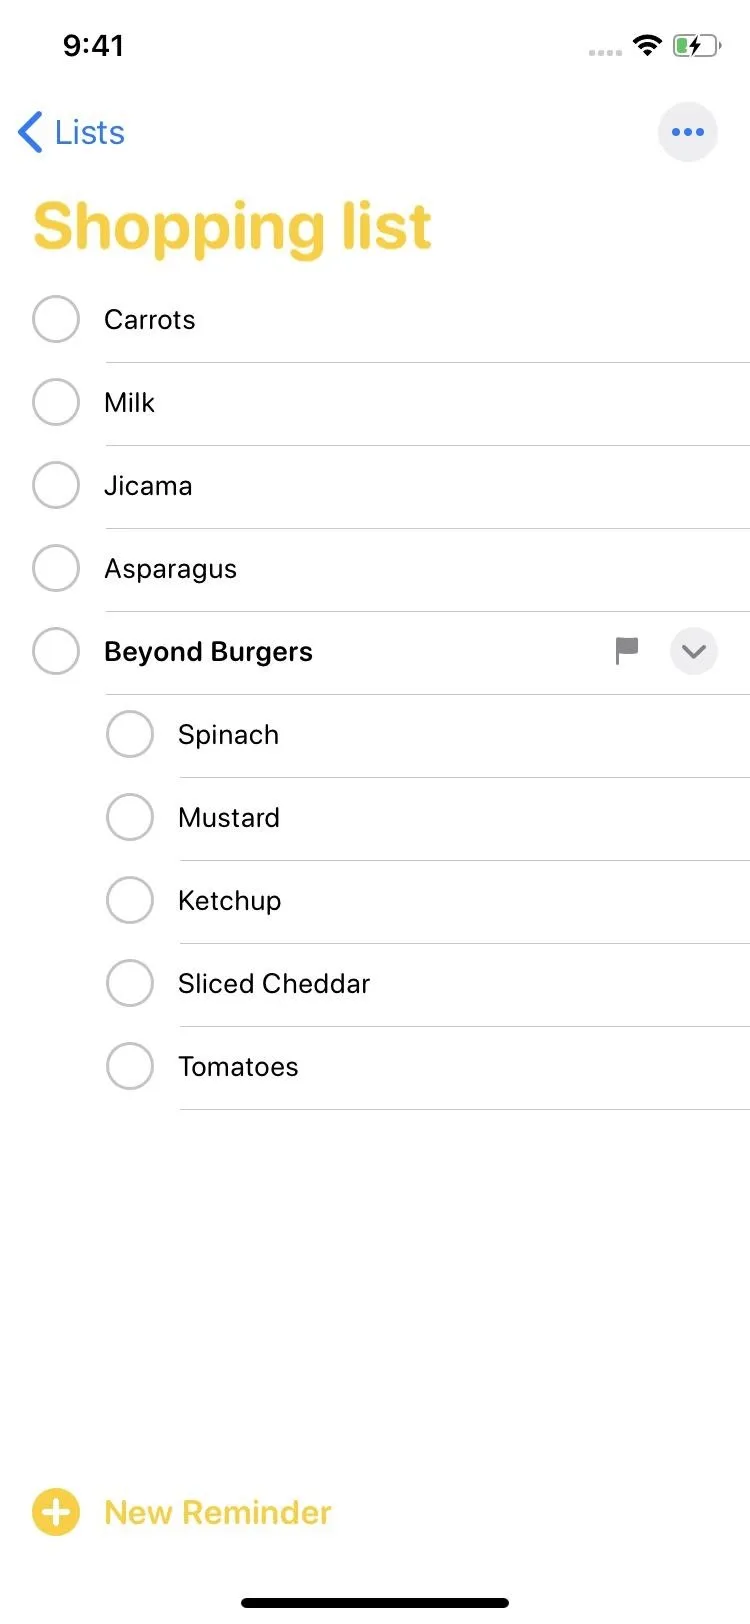
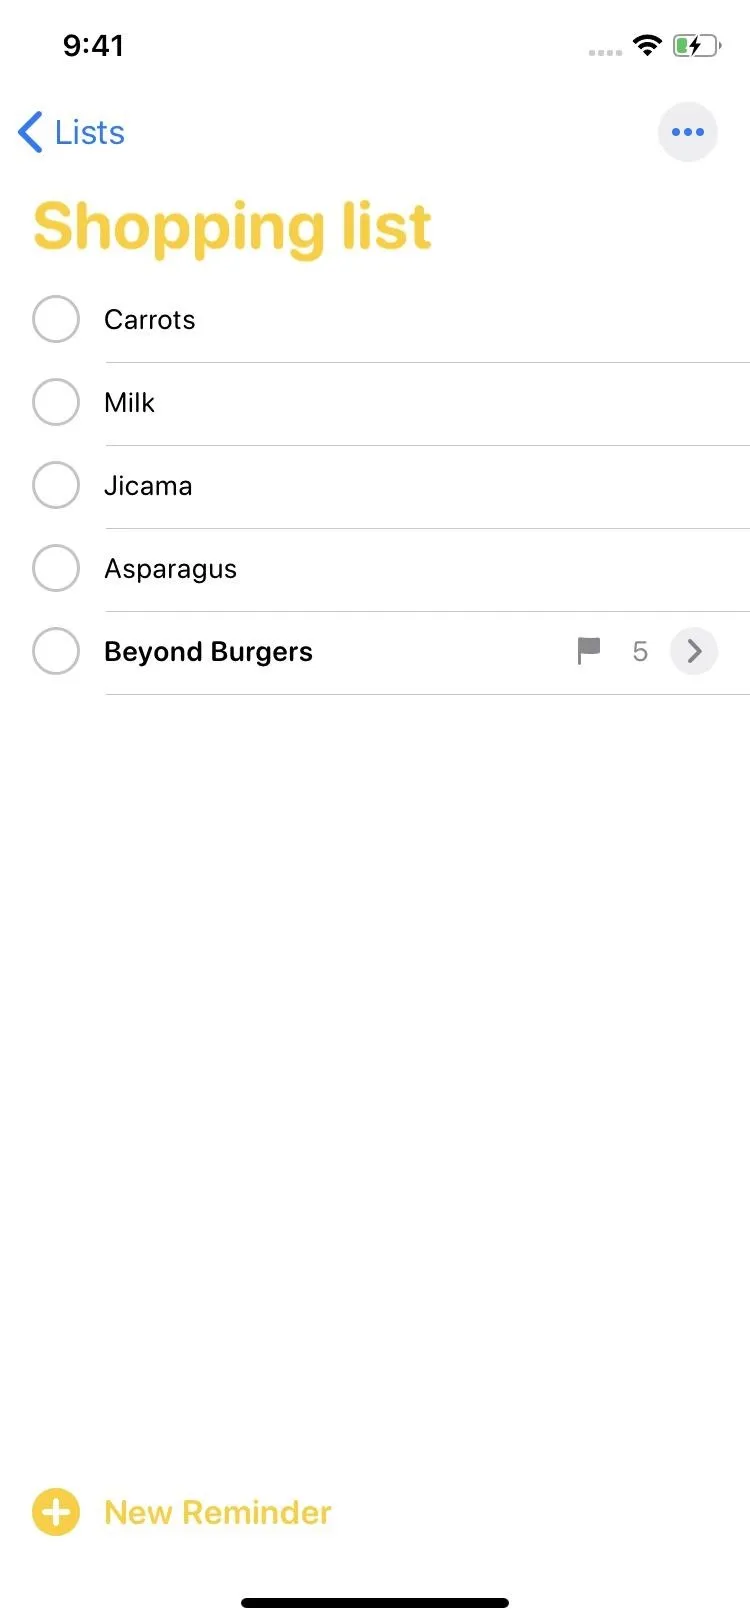
Tap on the chevron to the right of the parent reminder to either view or hide the nested reminders. When hidden, a number in the parent reminder will show you how many subtasks there are. Plus, it helps de-clutter the list, so you only see individual reminders and parent reminders.


Flag & Delete Parent Reminders
To flag or delete a subtask or parent reminder, short-swipe left on it, then hit "Flag" or "Deleted." You can also long-swipe left on one to delete it automatically. If you delete a regular reminder, subtask, or parent directory, it will do it right away — there is not a confirmation prompt. And if you delete a parent, all subtasks within will also go poof.


Cover photo by Nelson Aguilar/Gadget Hacks; Screenshots and GIFs by Justin Meyers/Gadget Hacks







Comments
Be the first, drop a comment!