


Apple has seemingly always made it a priority to show how much it cares about user security and privacy — enough that it has a page dedicated to it, proclaiming that "privacy is a fundamental human right." It's true that there are few issues more important than user privacy when it comes to technology, and Apple only makes things better in iOS 13.
Apple's iOS 13 comes with a handful of new and updated privacy and security features, including better location tracking, anonymous logins, encrypted notes, restricted microphone and camera permissions, and more. If privacy and security are important to you, you'll want to check these new settings.
- Don't Miss: The 4 Best Password Managers for iPhone
1: Improved Location Tracking
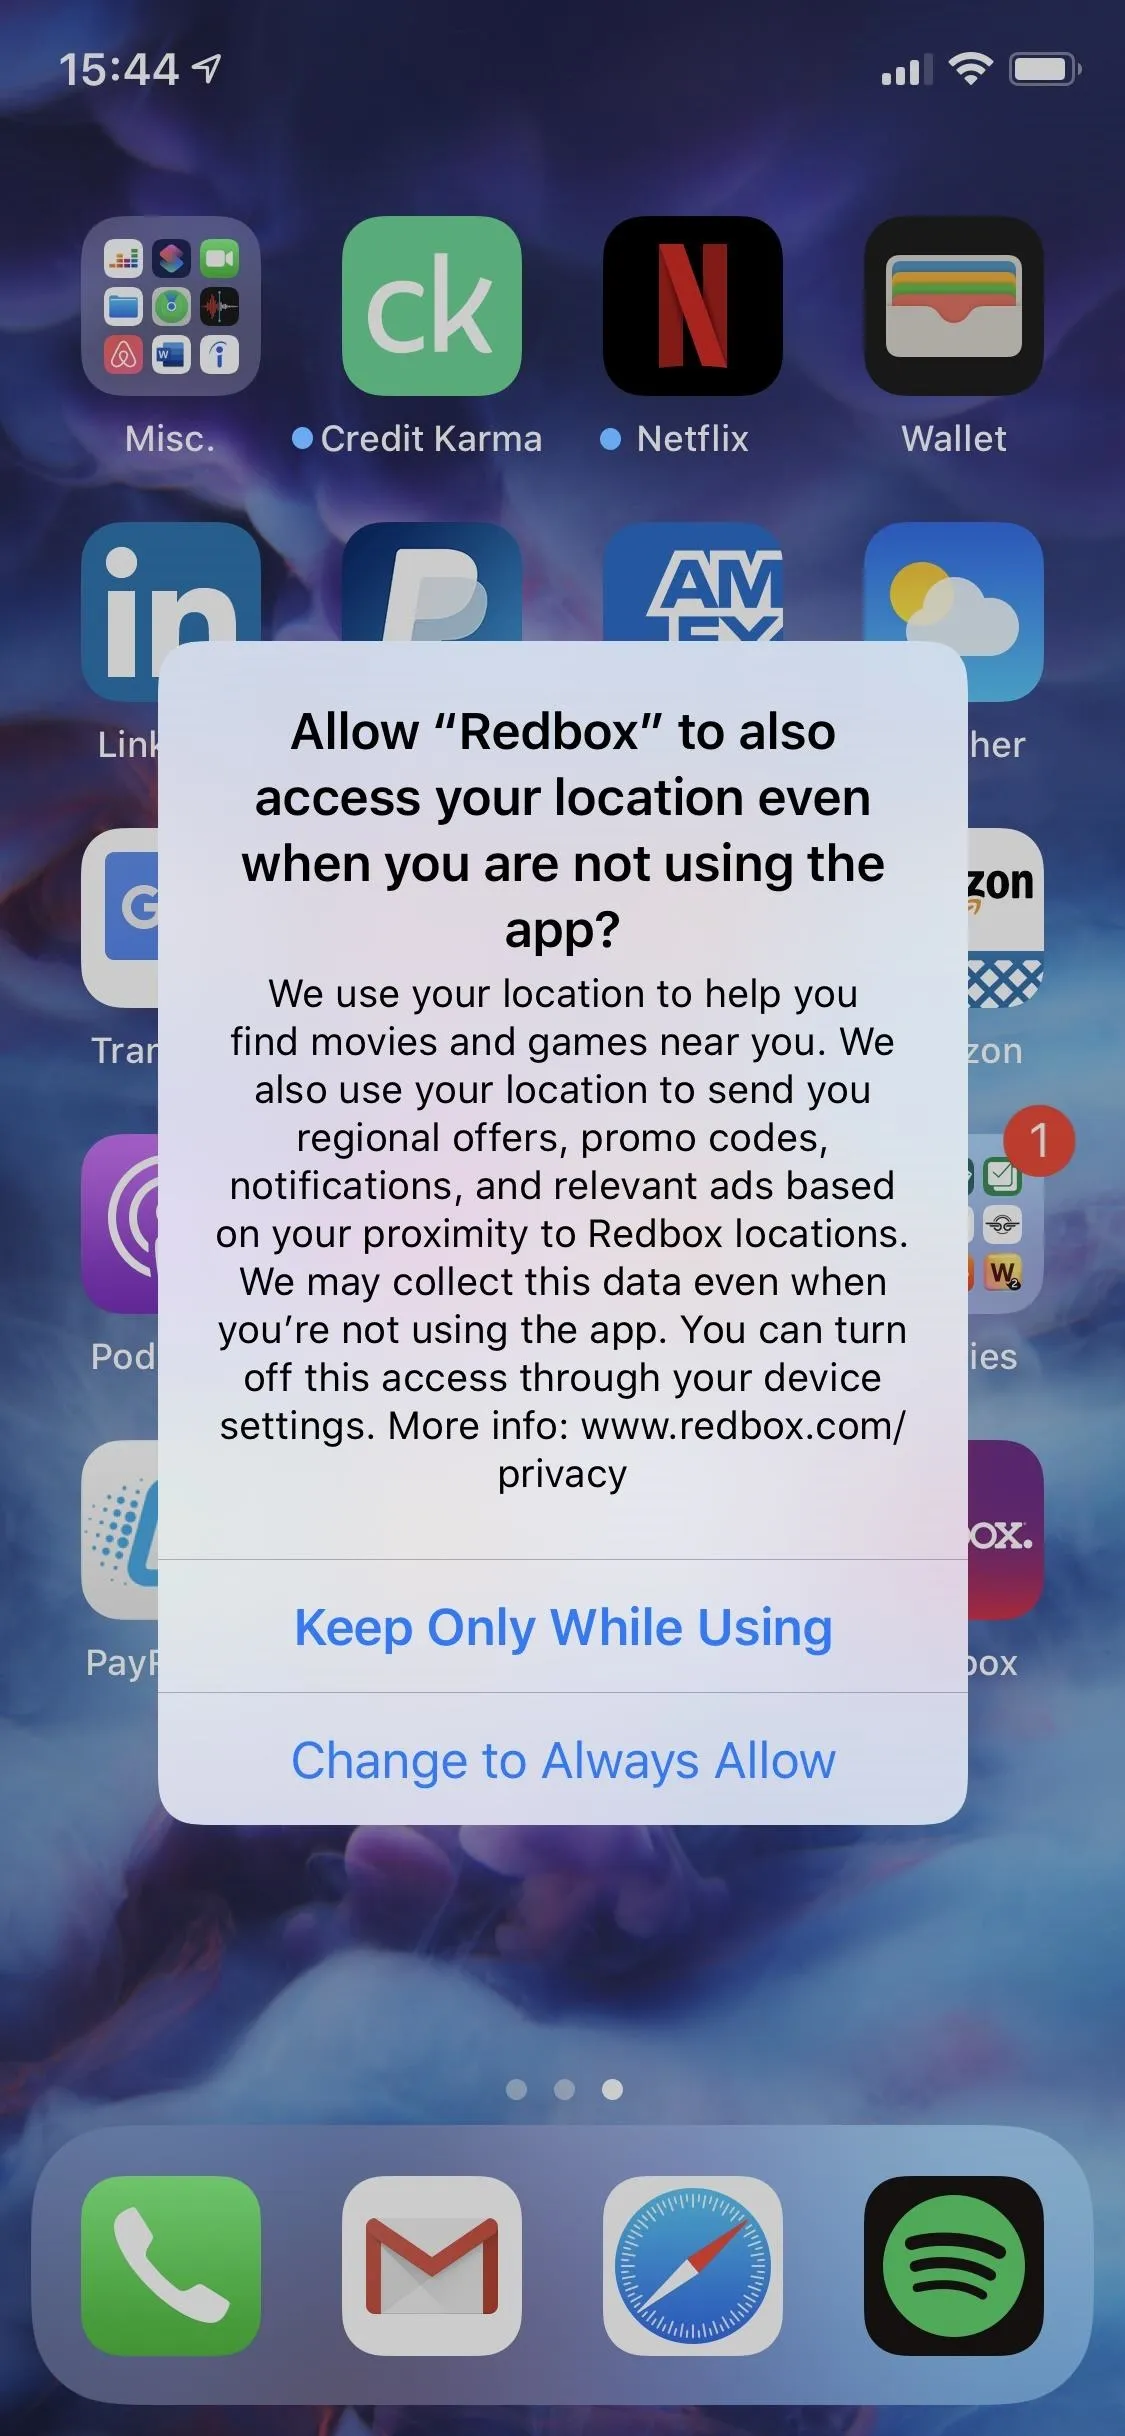
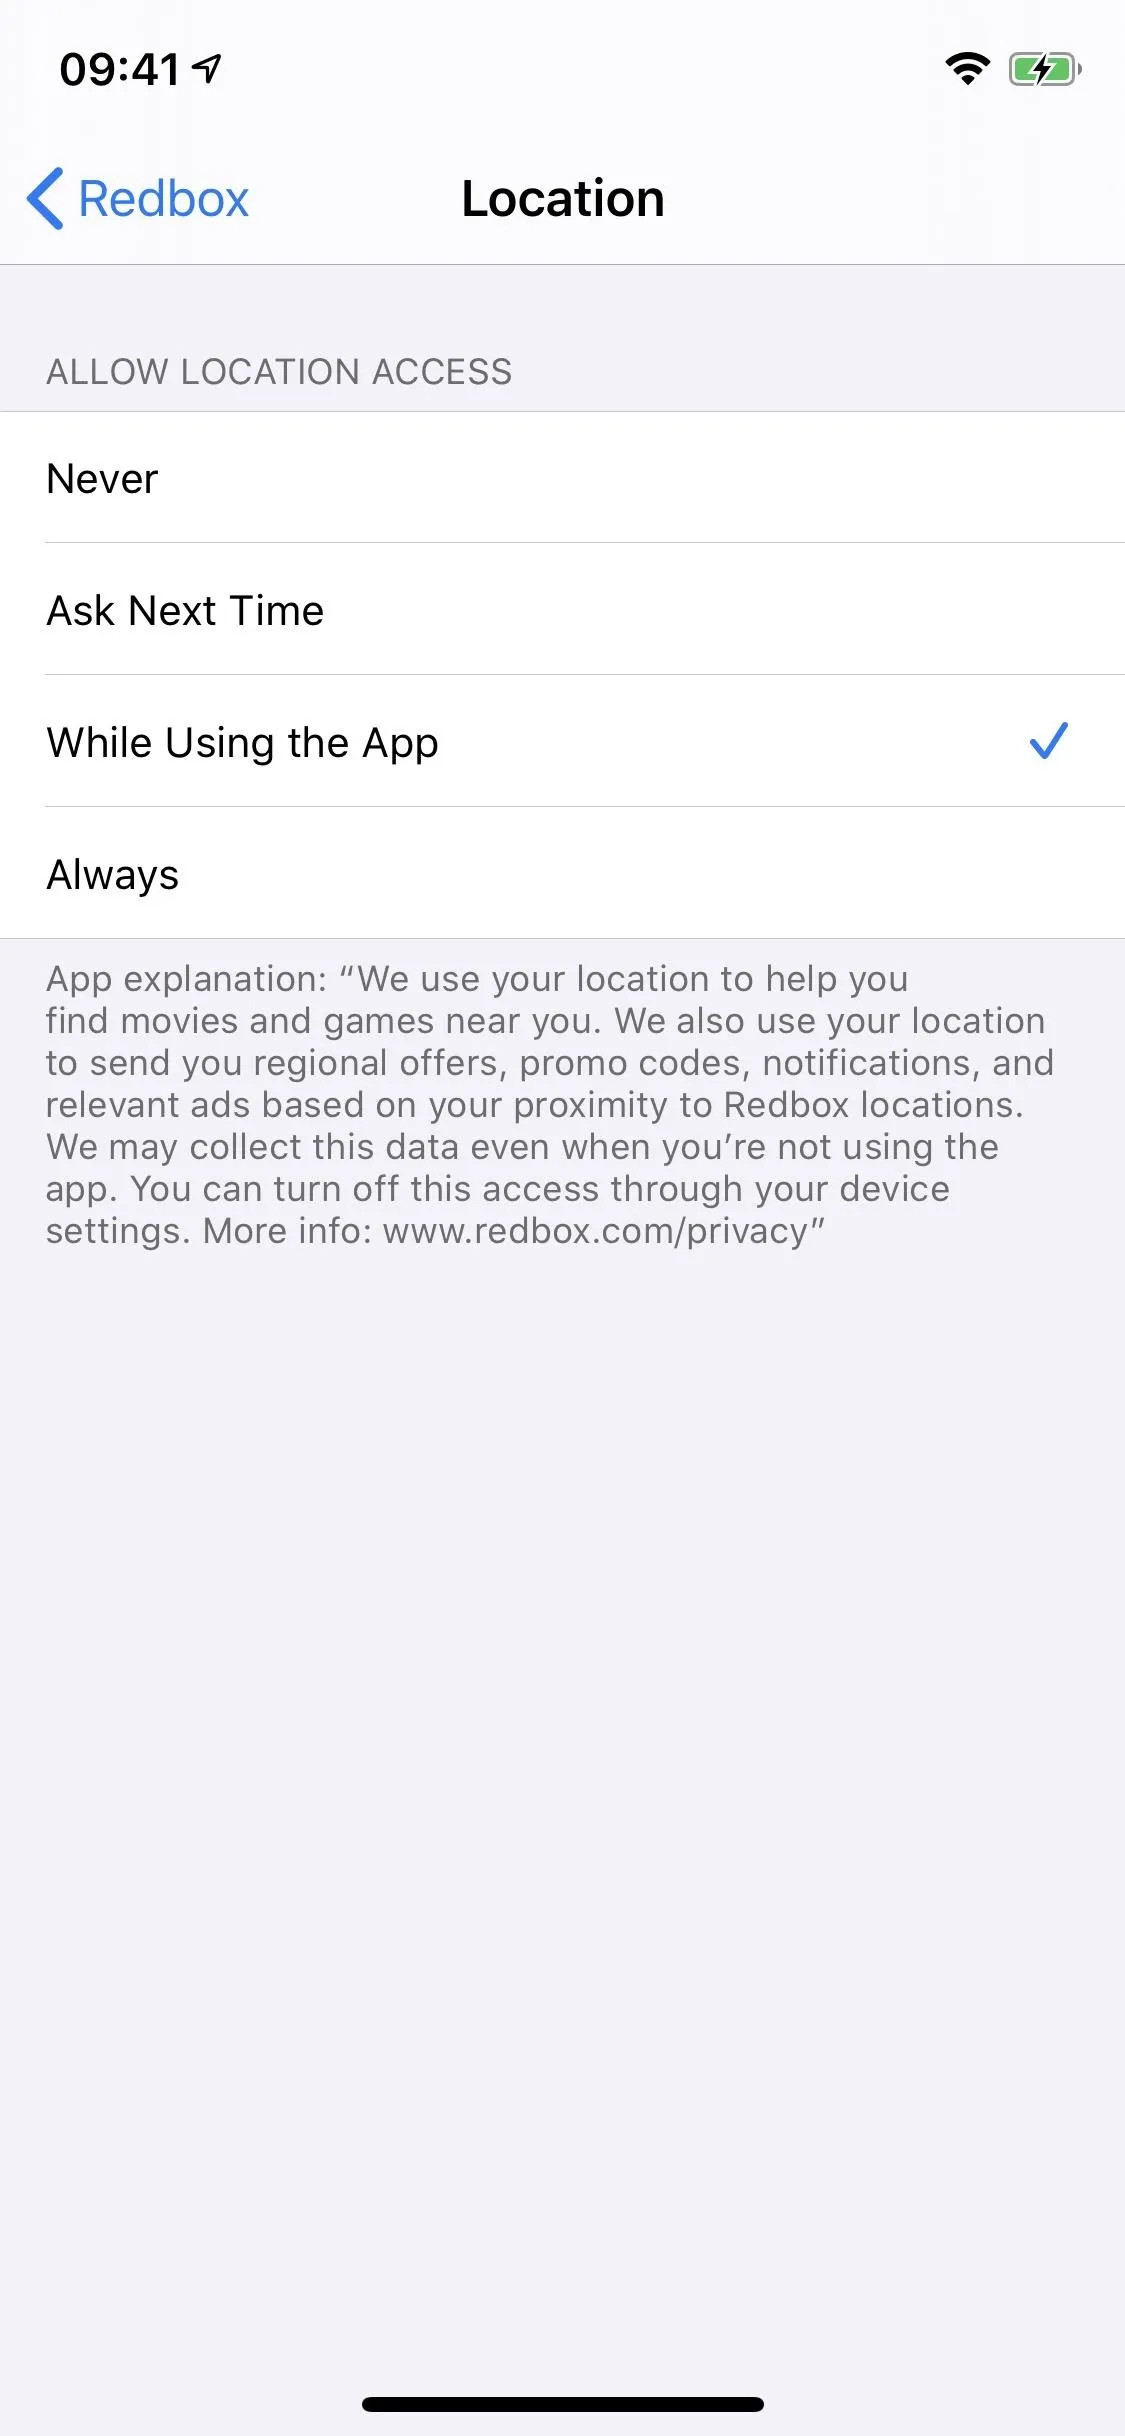
If you forgot that you gave an app access to your location, Apple now reminds you with a pop-up notification that asks you if you want to continue providing the app access to your coordinates. Sometimes, the pop-up includes a map filled with location points. While you'll only see two options in the window that appears, you can go into "Settings," tap on the app you want to restrict access to, and then on "Location."
Another new location tracking feature on iOS 13 includes the ability to grant third-party apps access to your current position only once. It's called "Ask Next Time," seen in the screenshot below. Instead of an app collecting your real-time location, you can grant an app access to it only when you want.
2: Decline Bluetooth Access
Third-party apps ask for access to Bluetooth not only because they want to connect to watches, speakers, and other gadgets, but also because they want to monitor your location. Shopping malls and retail stores use Bluetooth tracking devices, known as beacons, to track you and send you targeted ads on your phone. On iOS 13, much like the location tracking pop-ups mentioned above, you'll also receive sporadic pop-ups to decline Bluetooth access to certain apps.
3: Sign in with Apple ID
Huge companies like Google, Facebook, and Twitter offer one-click logins on third-party apps and websites to let you log in without having to type in an email address and password. However, your information (such as your email) is shared with the third party. In turn, that third party sells the data to other companies for marketing and advertising purposes.
In response to that, Apple has "Sign in with Apple." Although the feature is similar to the logins you're used to, Apple does not let the site track or store your user data, instead offering the website a randomly generated email address. The randomly generated address will instead forward messages to your actual email address.
To use this new Apple service, simply tap on "Sign in with Apple" when you see it. A window will appear, similar to the one that shows up when you download a new app or make a purchase. Decide if you want to use your name, select whether you want to share or hide your email, and then press "Continue." The window will then prompt you to use either Face ID or Touch ID to log in. Once you do, you'll be logged in and finished.
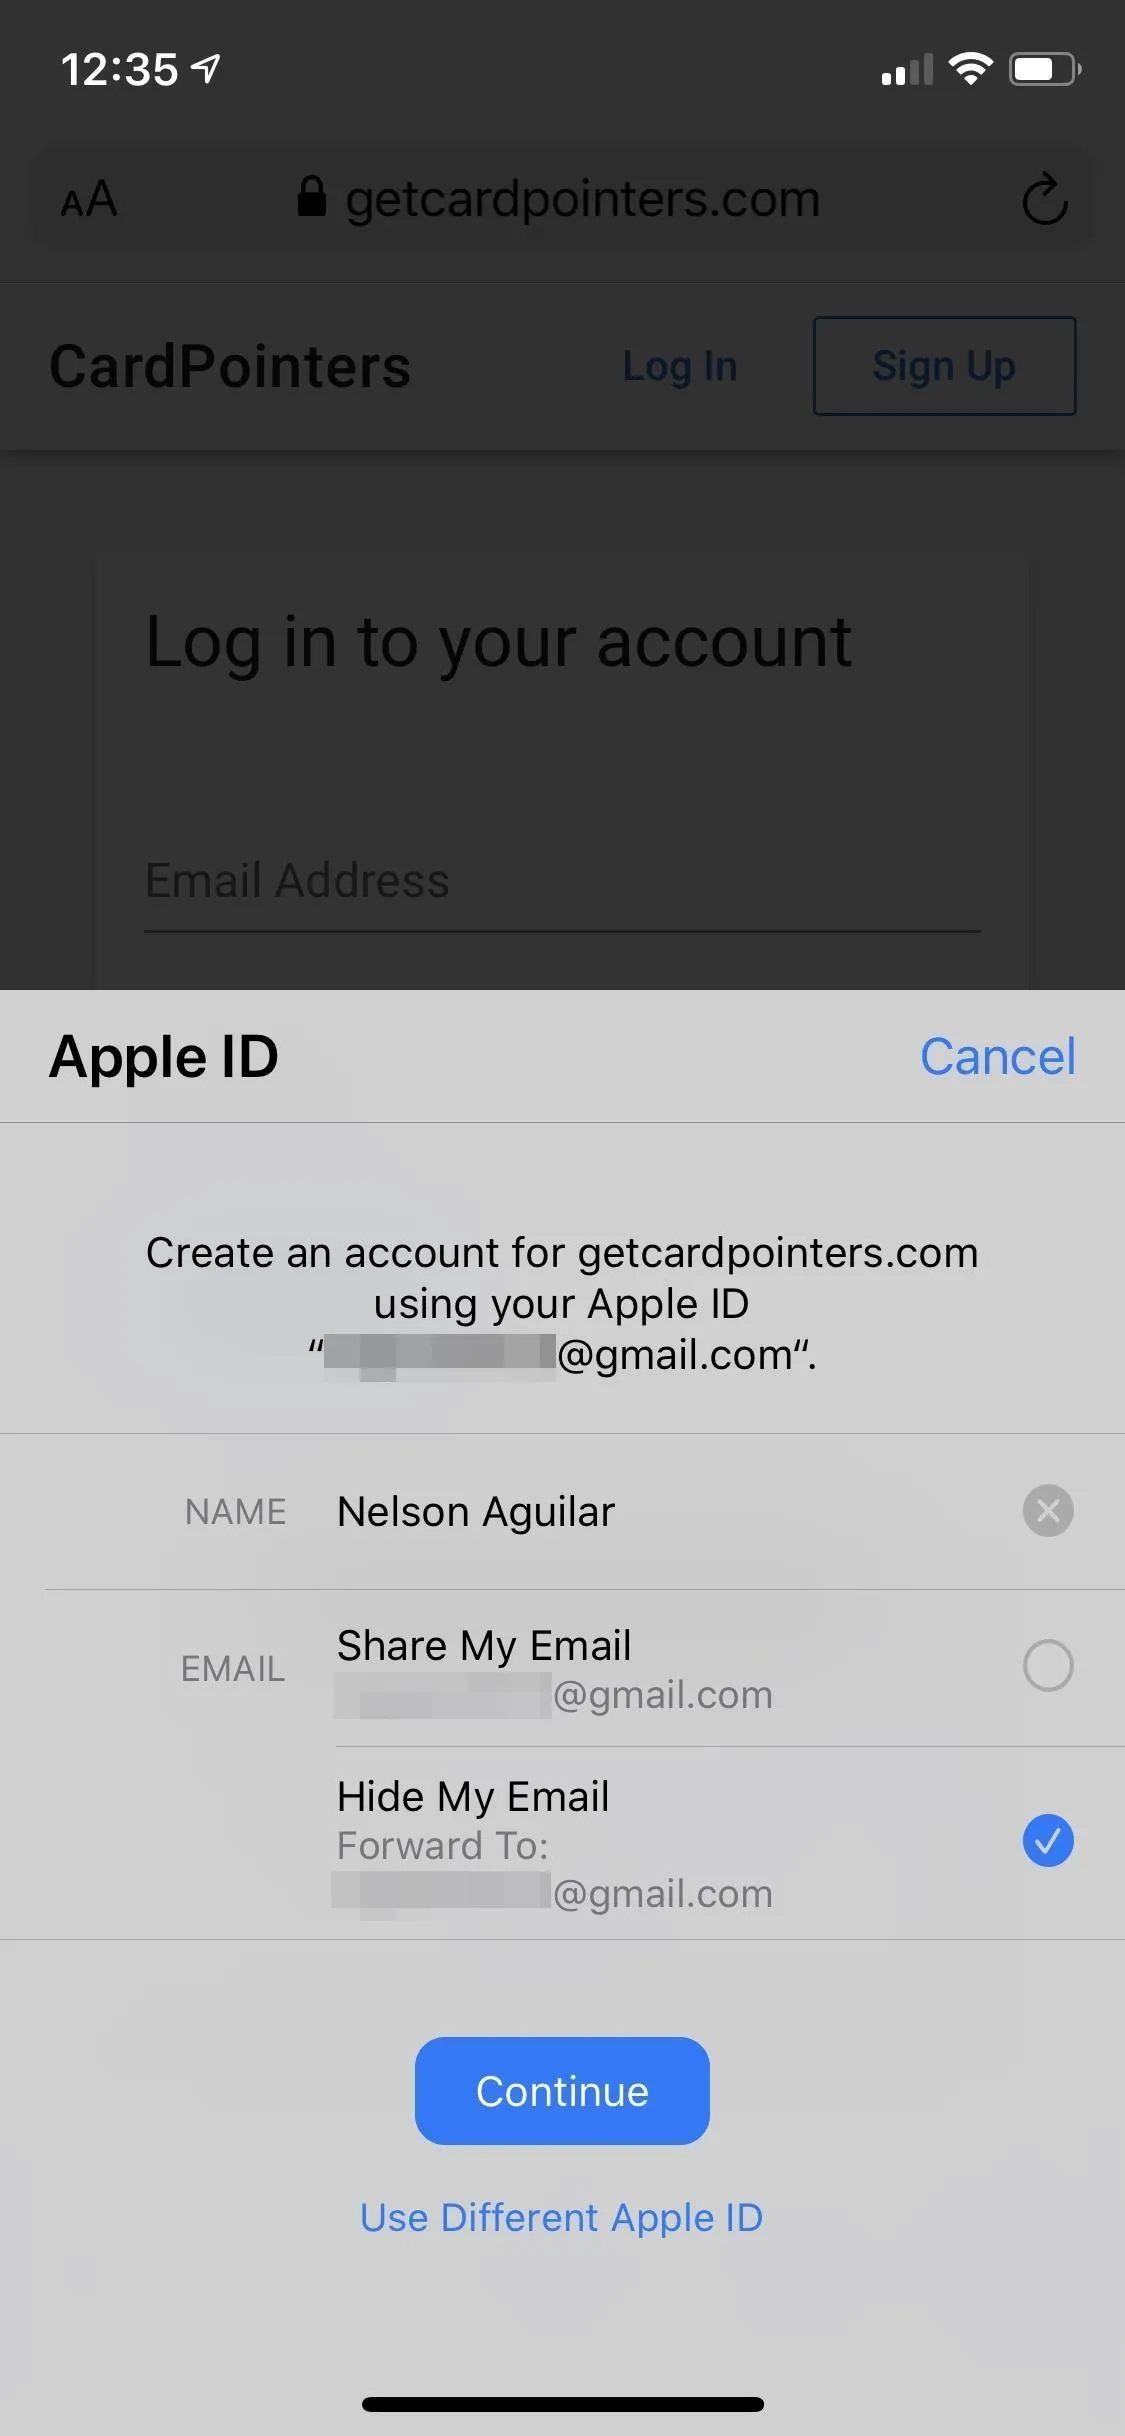
Some apps that have already implemented Sign in with Apple include TikTok, Zillow, Bumble, GroupMe, Adobe (Acrobat, Lightroom, Photoshop, Post, Scan, etc.), WordPress, 10% Happier, Kayak, All Trails, Bikemaps, Bird, GroupMe, Kitchen Stories, LifeSum, Seven, SkyScanner, Slopes, Vivino, Yazio, and Zaro.
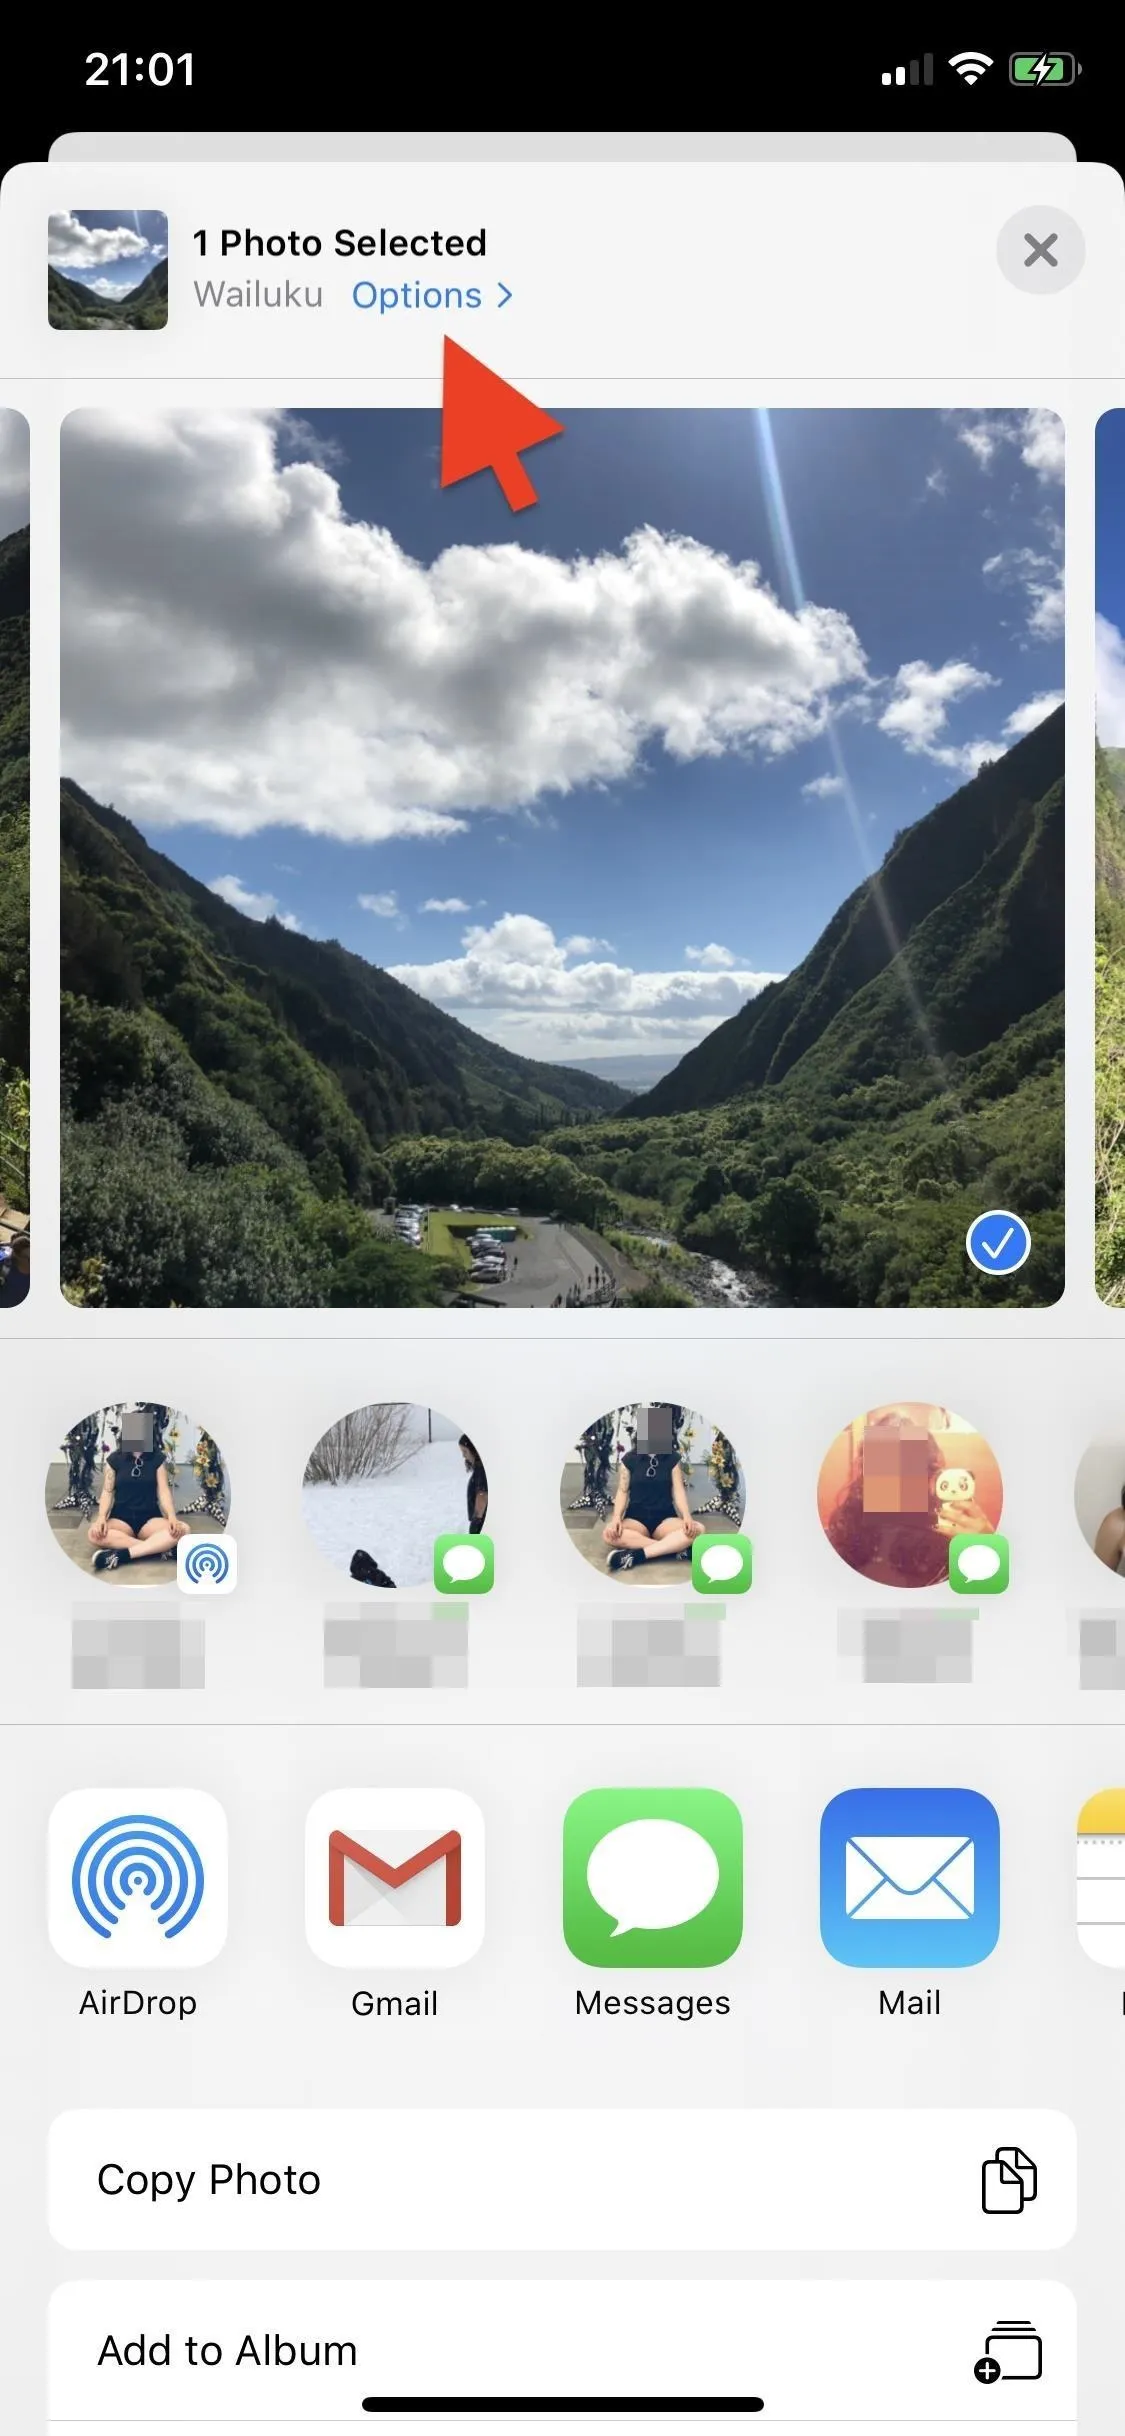
4: Remove Location Data from Photos & Videos
Every photo and video you take with your iPhone contains metadata that includes the date and time, camera settings, thumbnail, and location. Although the information allows you to organize better and find your most important photos, it can also pose a problem. Anyone with access to a picture you take can potentially extract the metadata and view your location. So if you took a selfie at home, someone could get an address.
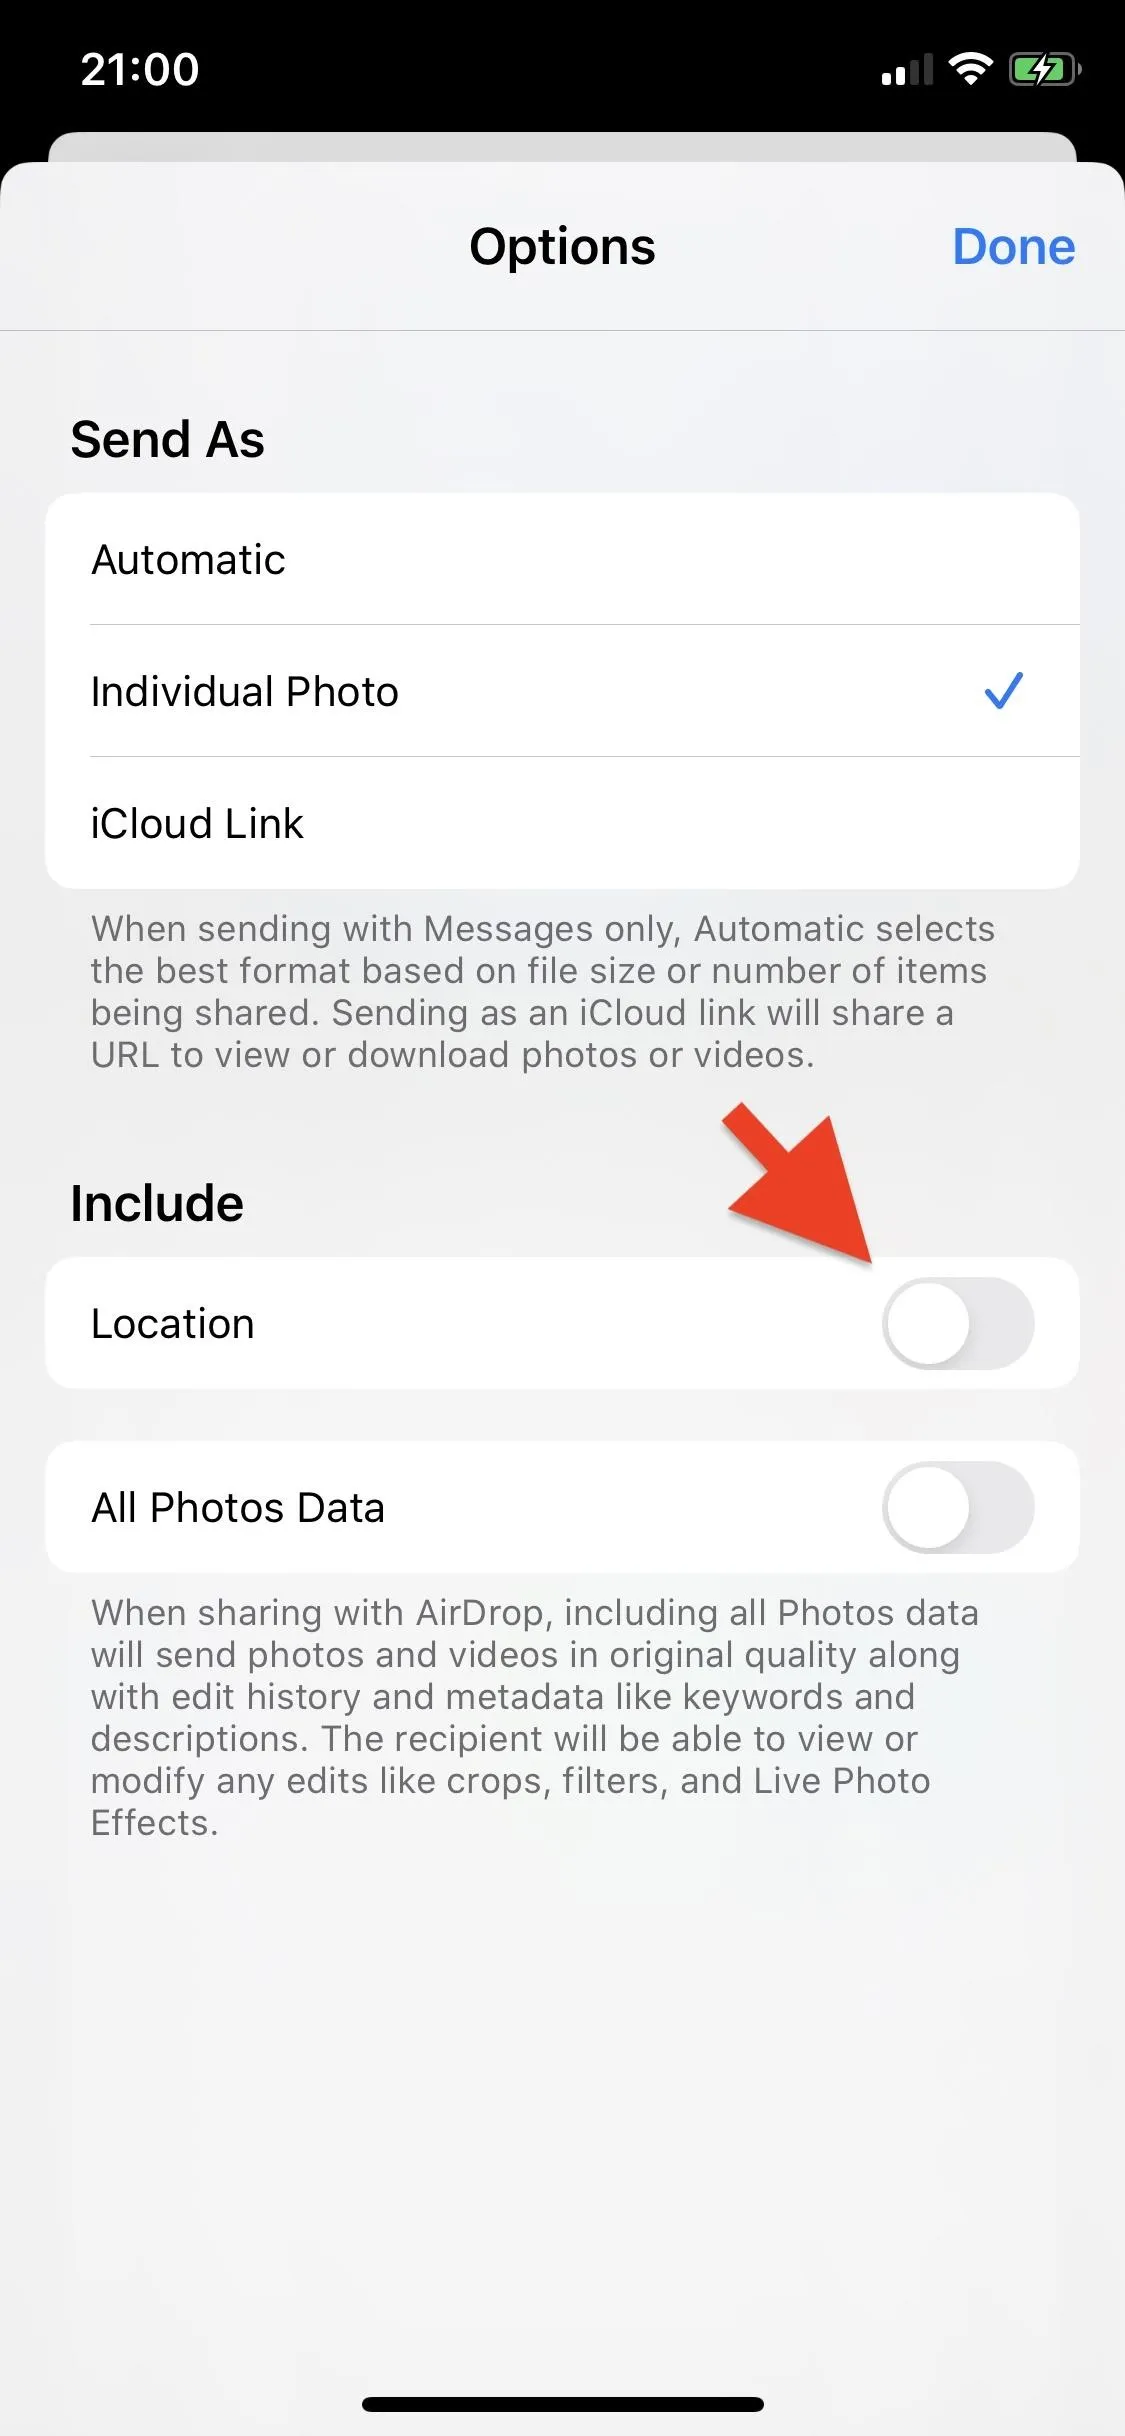
On iOS 13, you can easily remove the location from individual photos and videos you take from your iPhone before sharing them. In the Photos app, open the image or video you want to send out and tap on the share icon. On the top left of the media, you'll see the location along with "Options." Tap on "Options" and toggle off "Location" to remove the geotag from the photo or video. Now when you send it, the recipient won't be able to scrape your location.
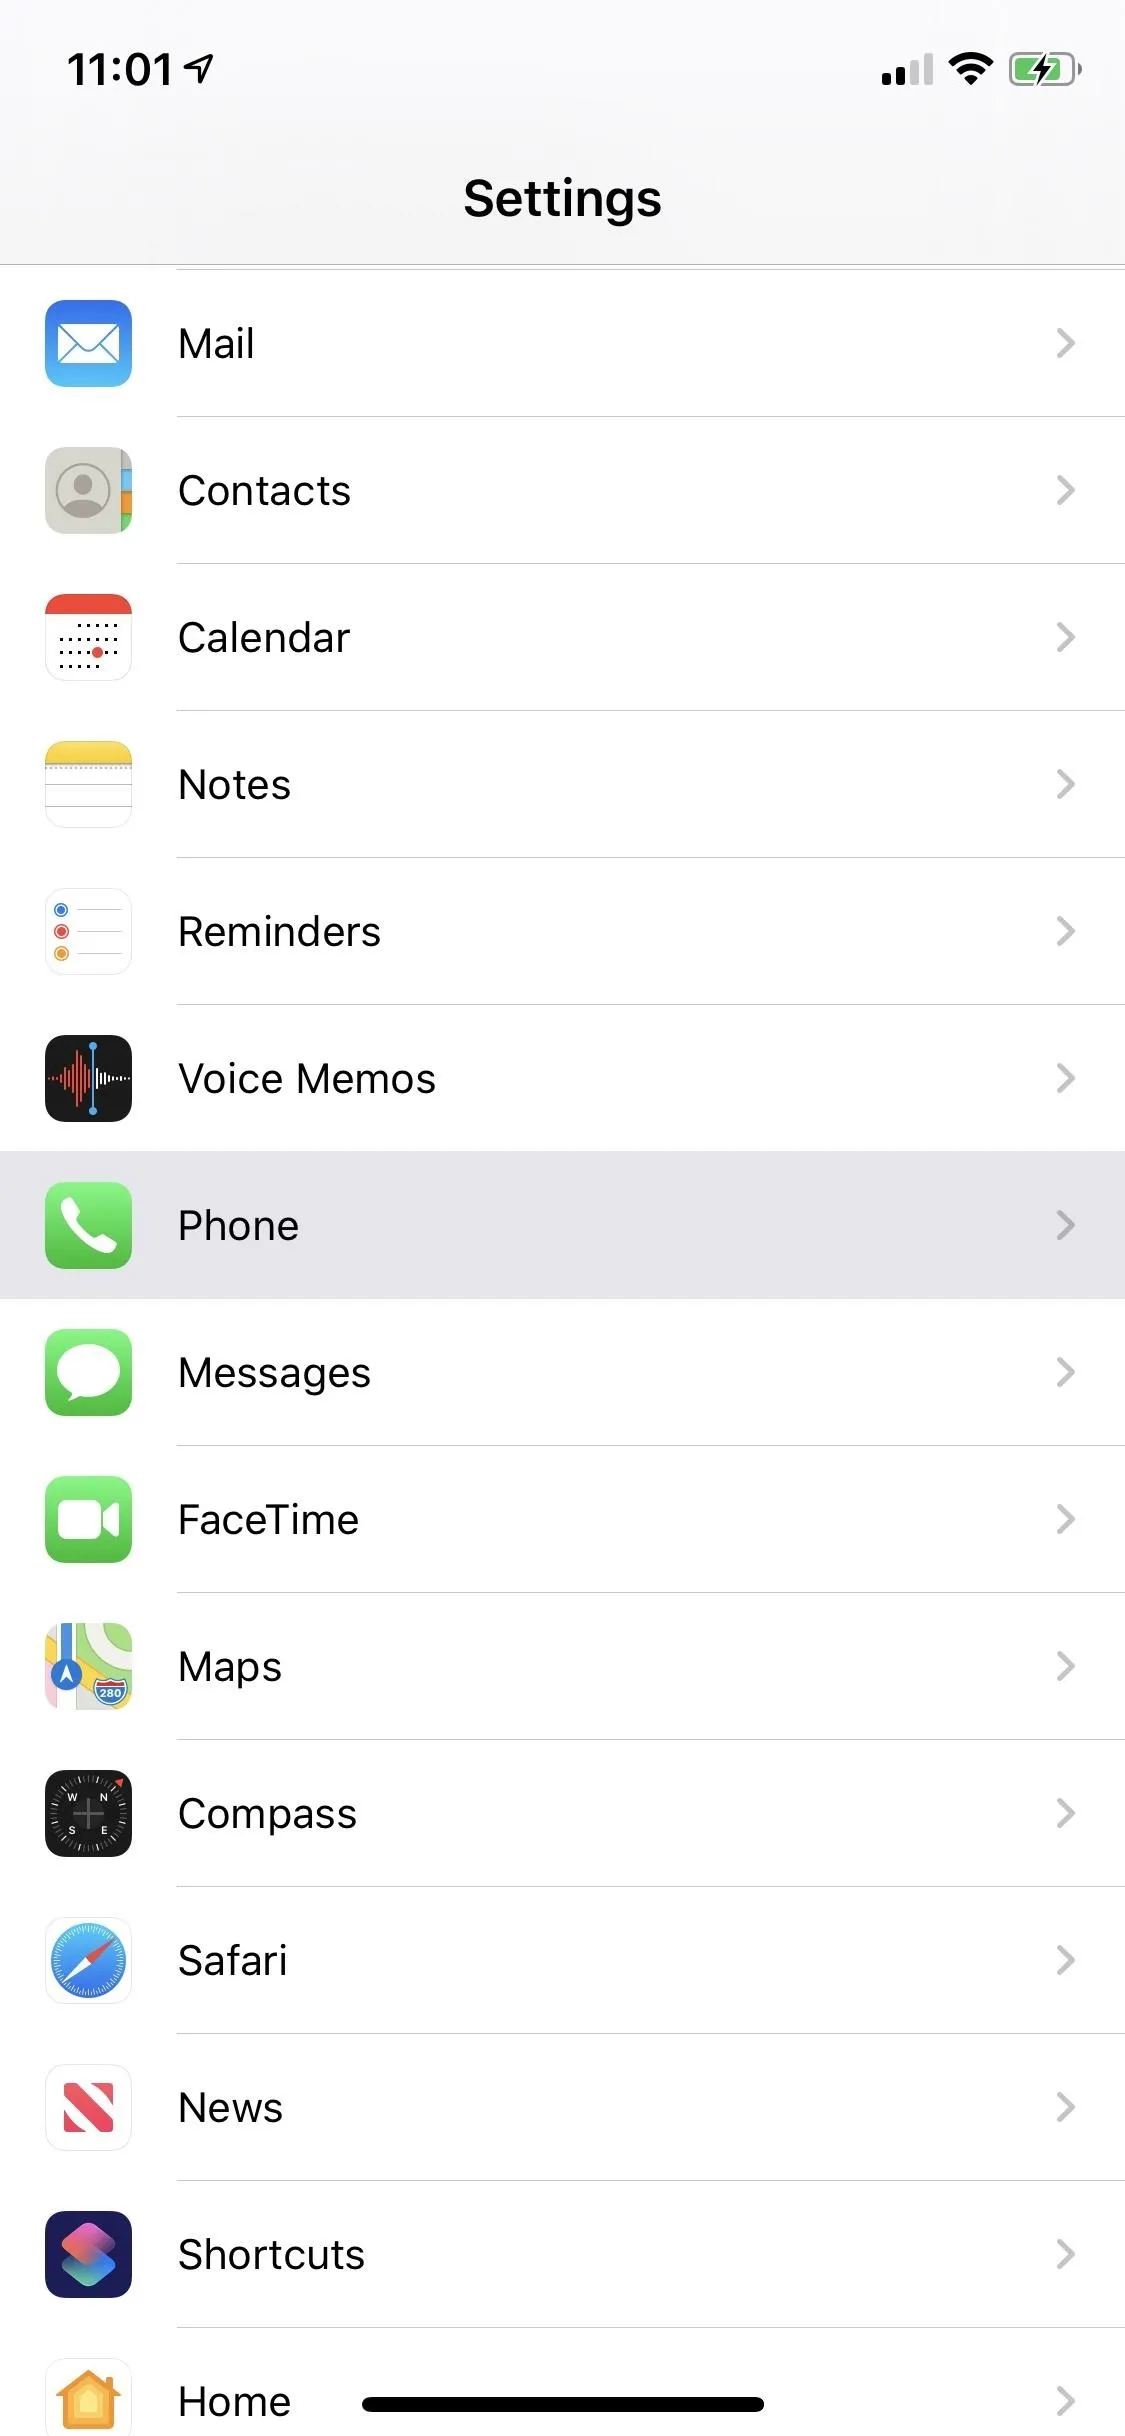
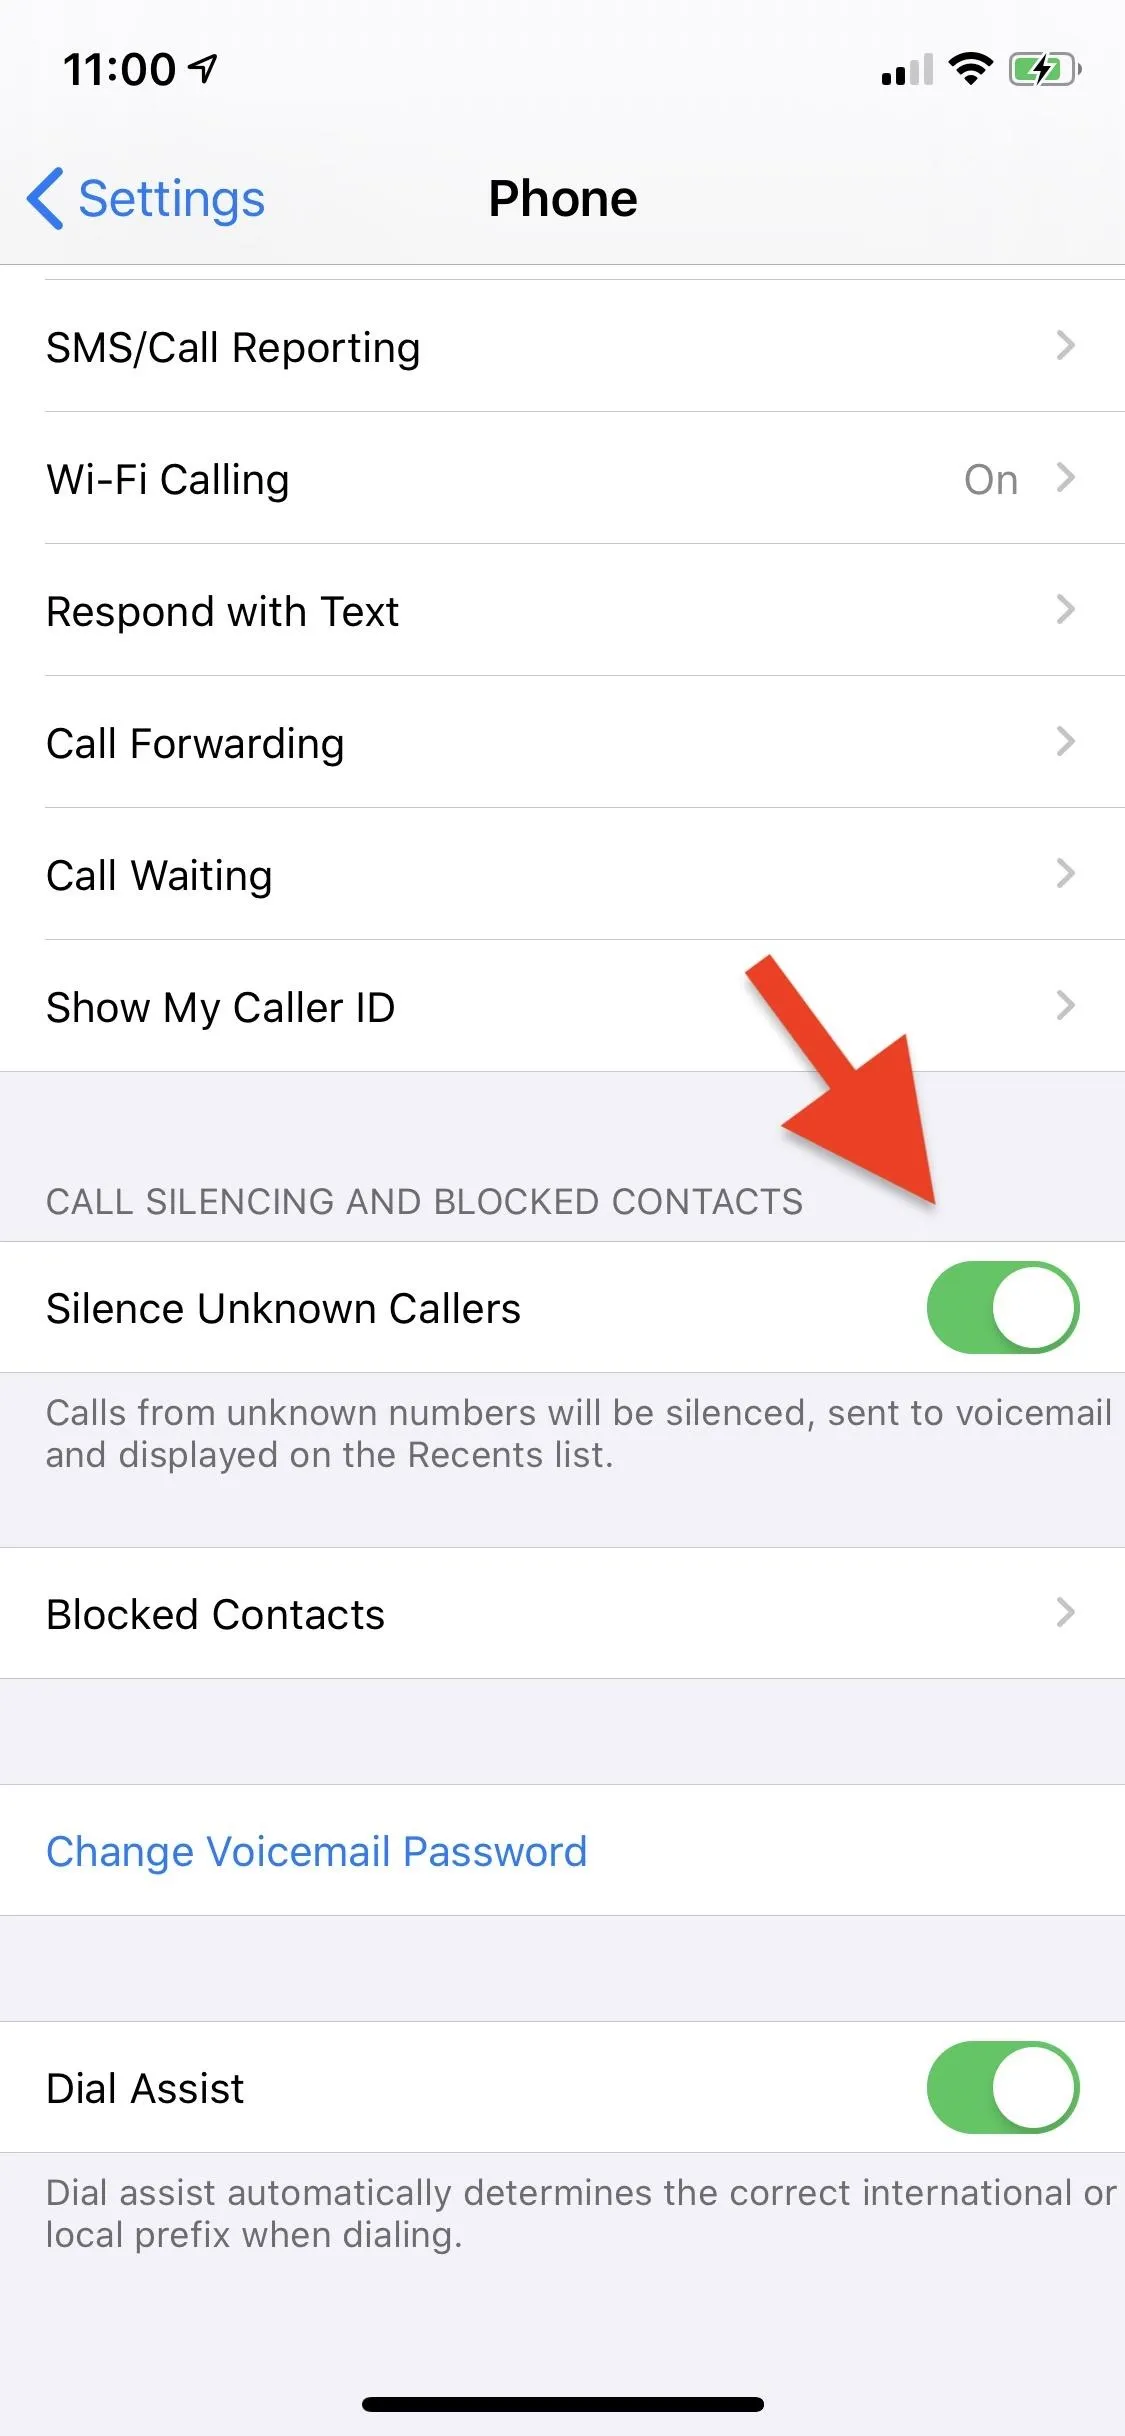
5: Silence Unknown Callers
Apple has had call blocking for some time now, but iOS 13 improves upon it. In the Settings app, under "Phone," you'll see a toggle under Call Silencing and Blocked Contacts titled "Silence Unknown Callers." When enabled, calls from unknown numbers will be silenced and sent to voicemail, but the call will still appear in your Recents list. Only phone numbers saved in your contacts will be able to call your phone.
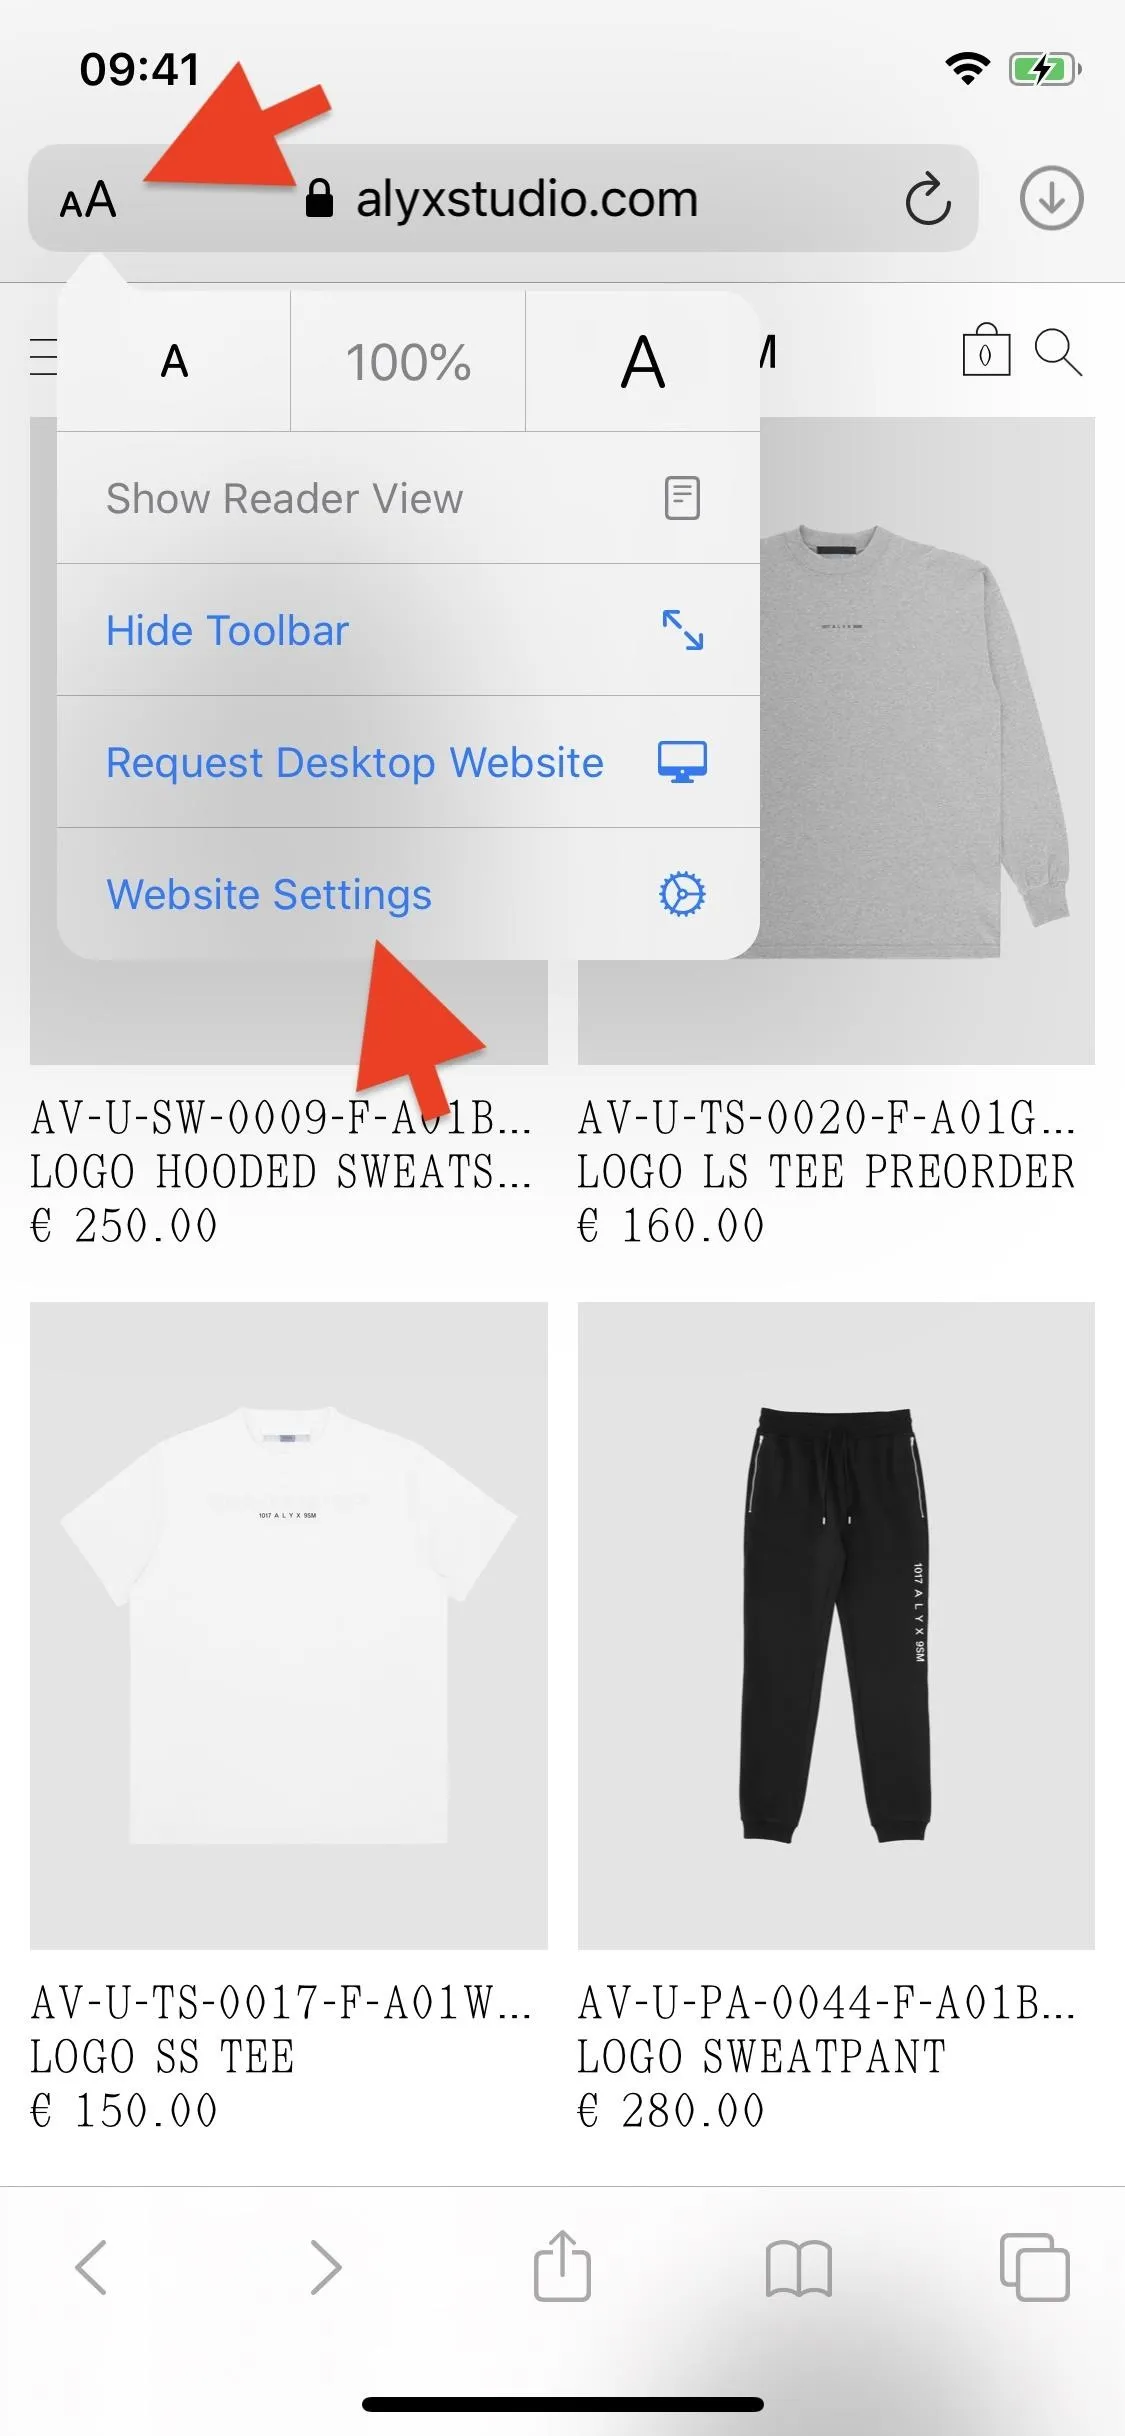
6: Restrict Permissions for Websites in Safari
The latest iOS update brings many changes and new features to Safari, including the ability to edit settings per website. If you want to deny certain websites access to your camera, microphone, or location (or all three), you can easily do so.
First, tap on the "AA" icon on the left side of the address bar in Safari. Next, tap on "Website Settings," and then either "Deny," "Allow," or force the website to "Ask" for access to the device hardware or sensors. You can change these settings anytime, as long as you're on the site.
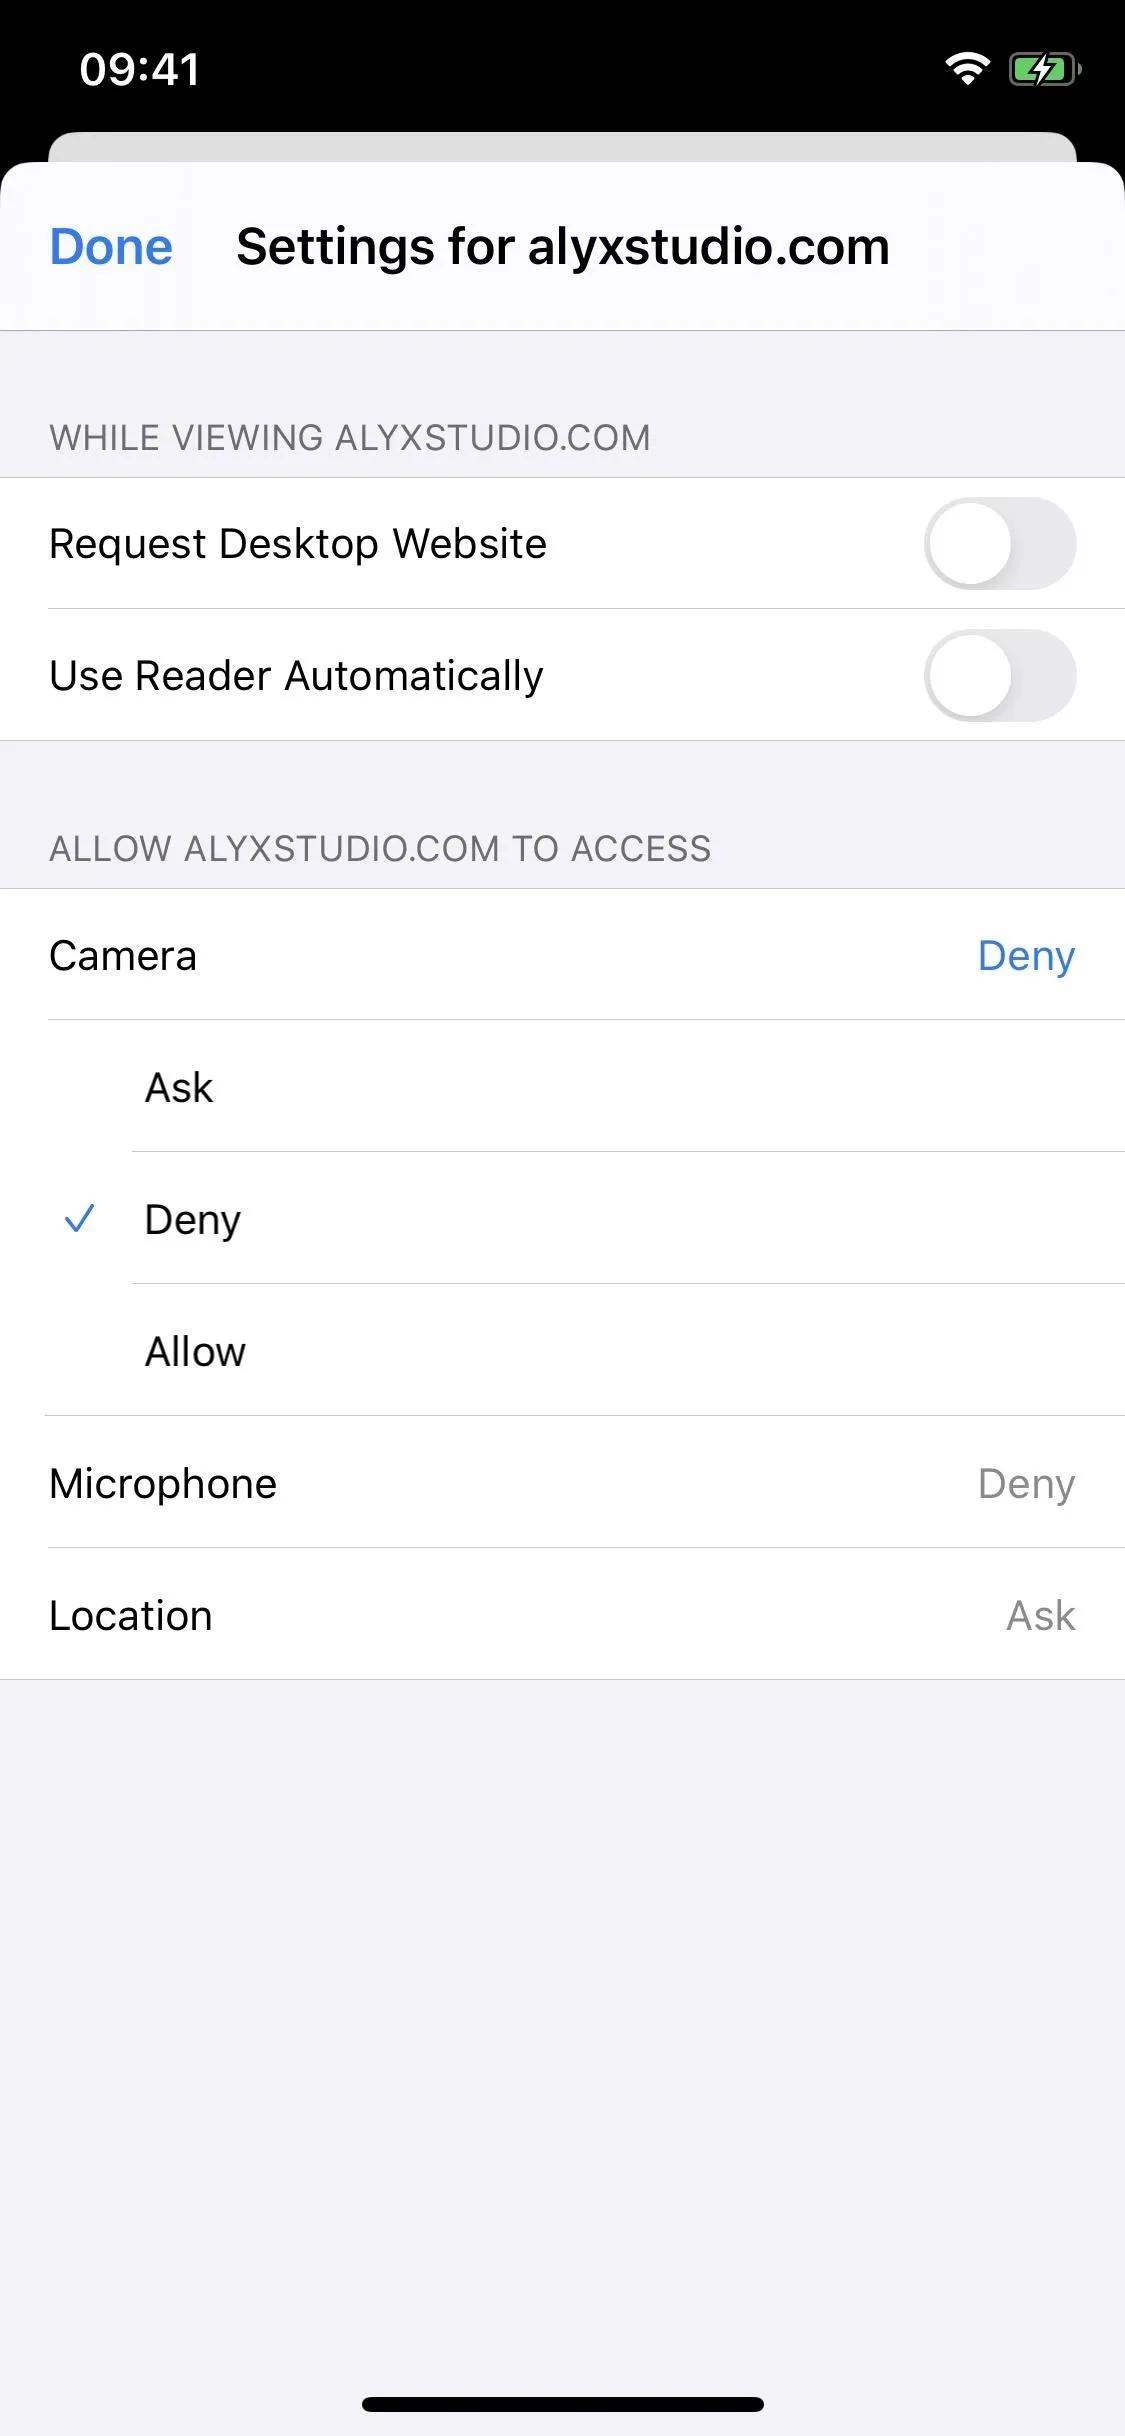
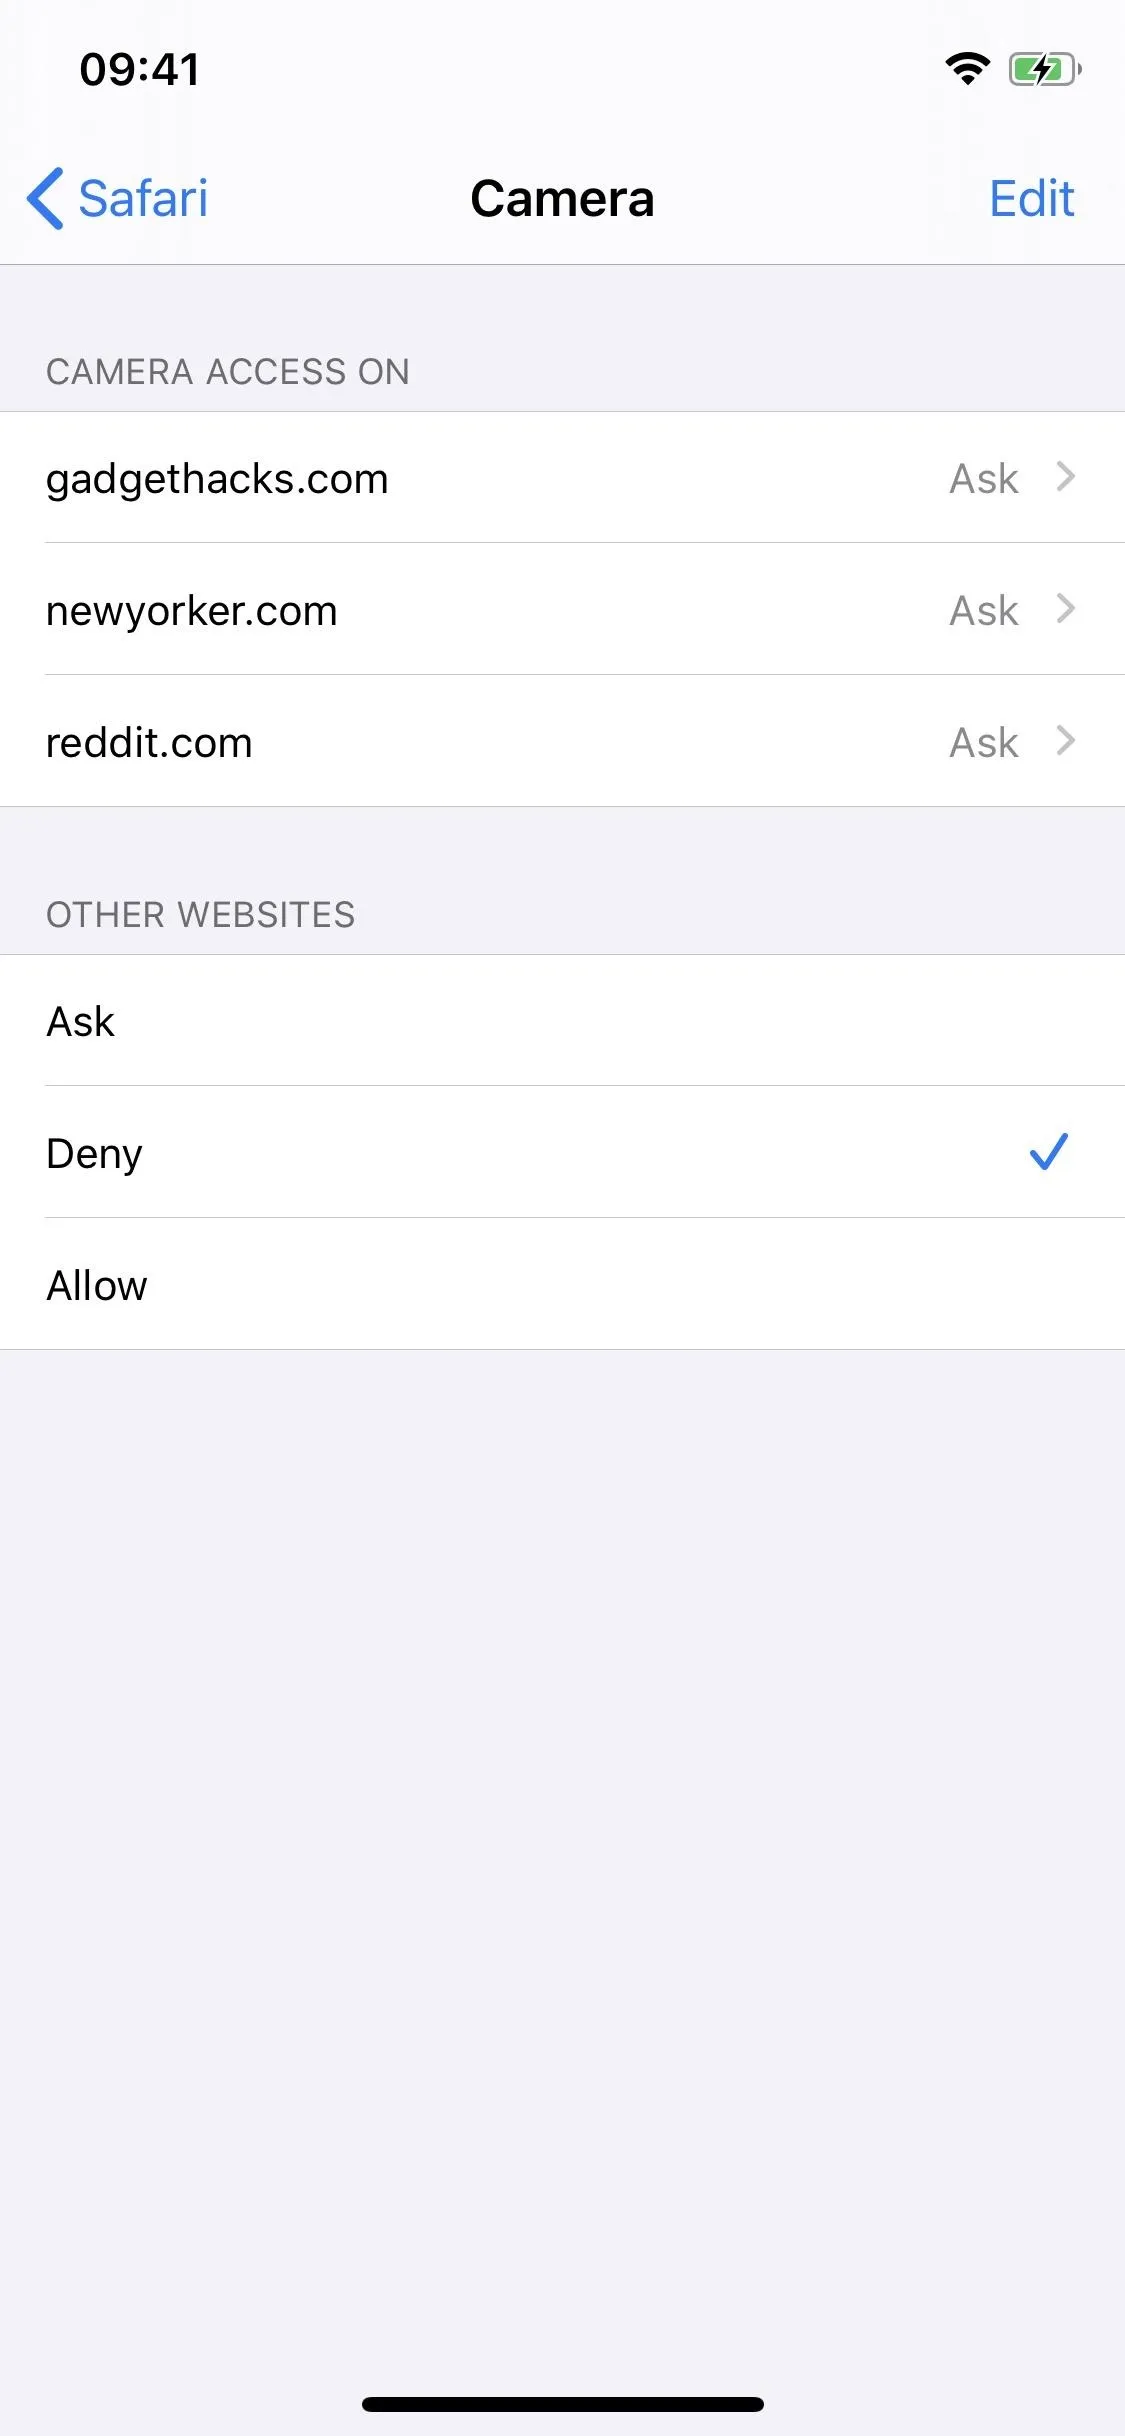
If you don't remember which websites you made changes to, you can view a list in Settings. All you need to do is go into "Safari" and scroll down until you see the options for "Camera," "Microphone," and "Location" under the Settings For Websites header. Go into any of the three settings to view which websites have restricted access. You can change the settings for an individual site or all of them from here.

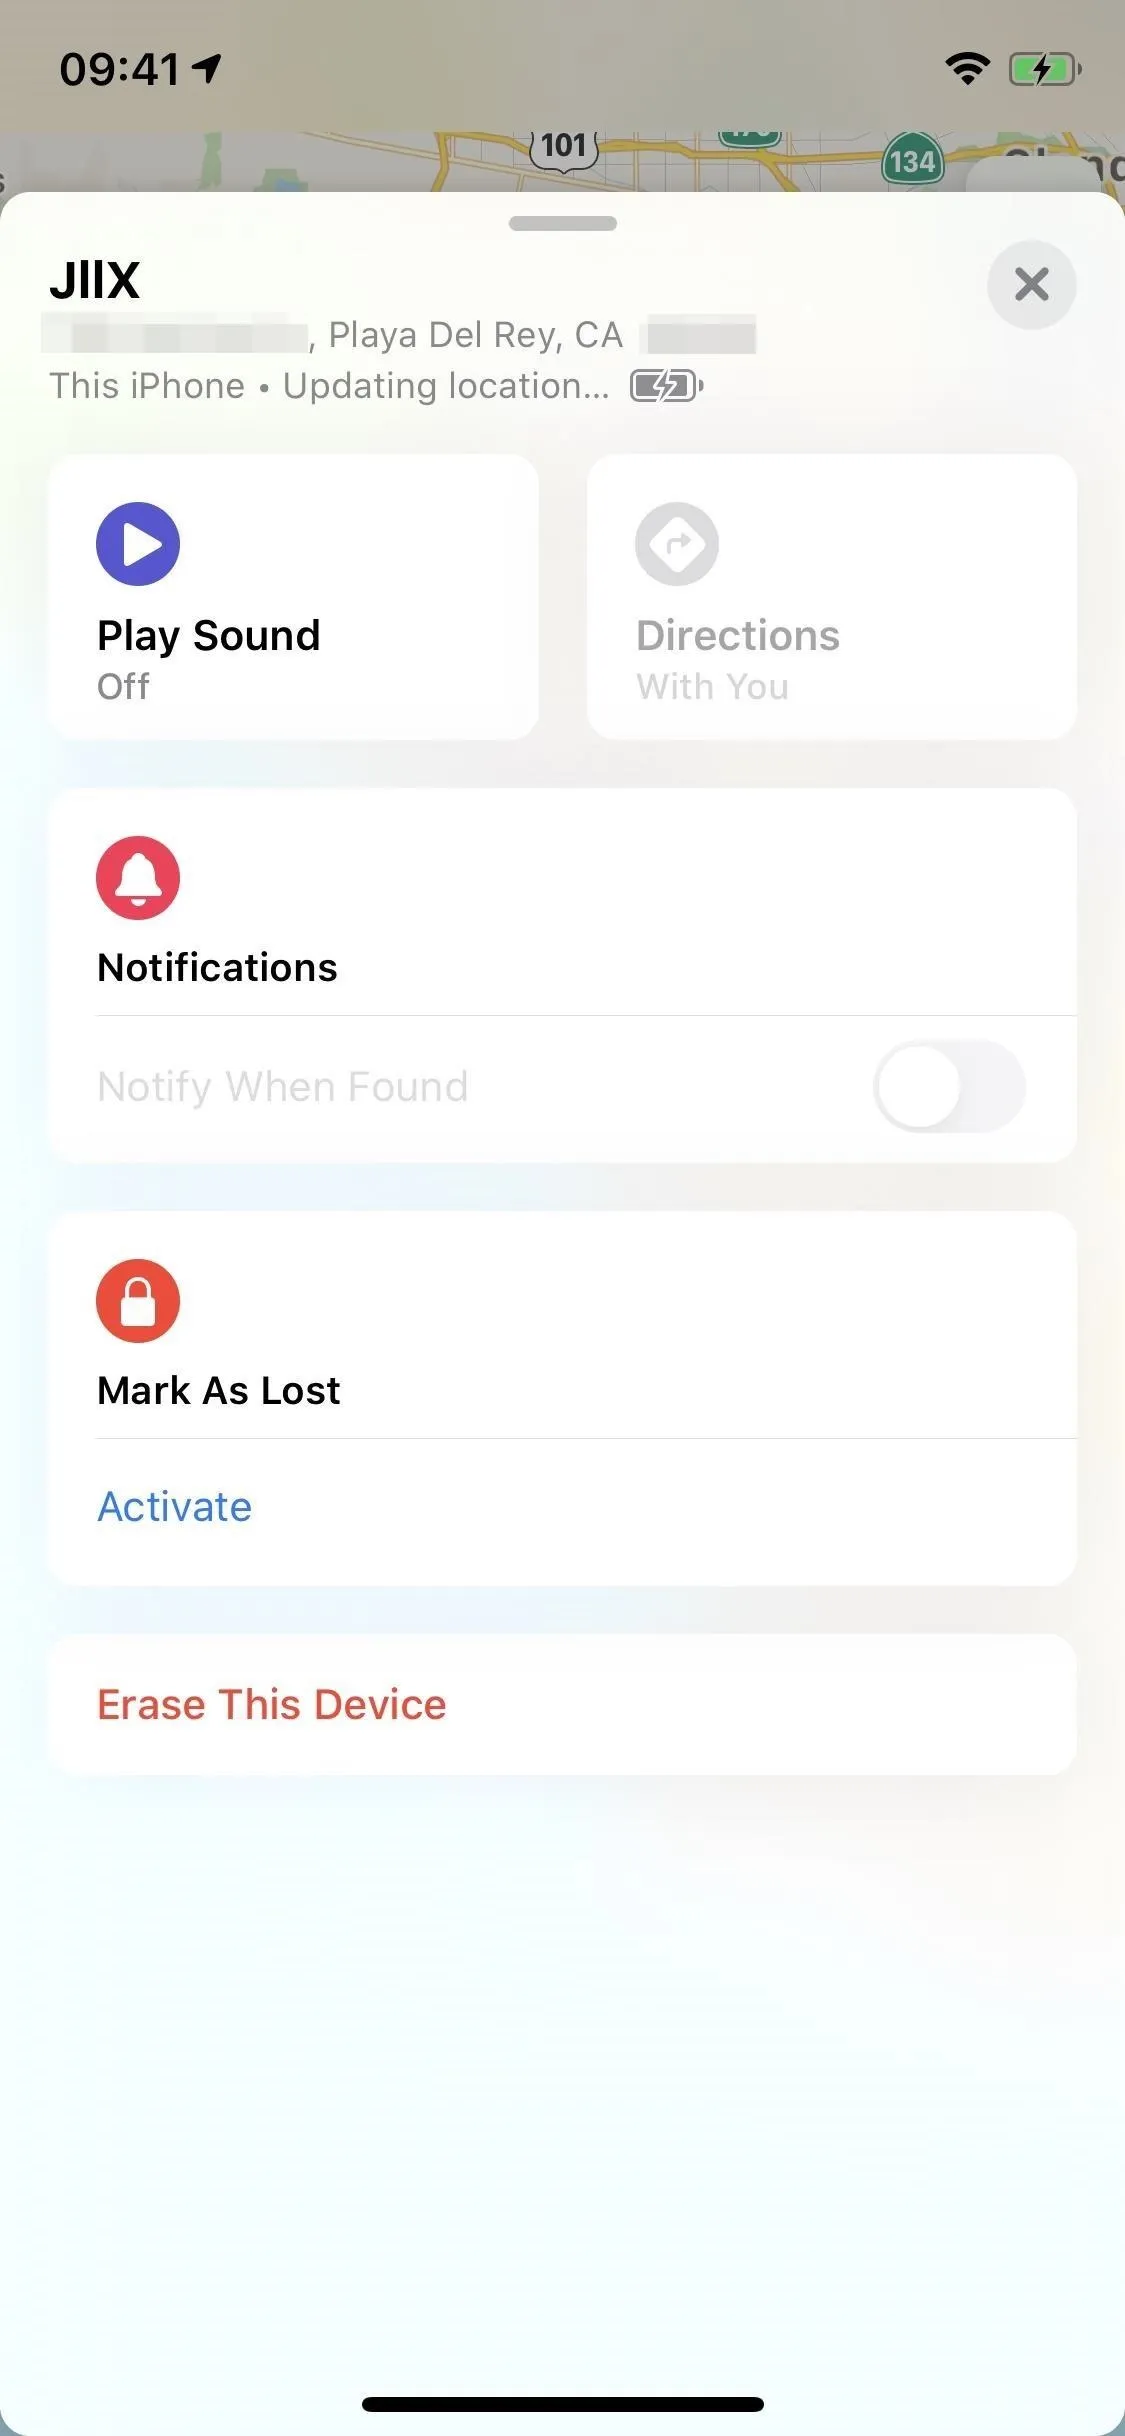
7: Use the New 'Find My' App to Track Your iPhone
Say goodbye to Find My iPhone and Find My Friends. The two apps, used to track iPhone locations, are now combined into one app called Find My. If there are any concerns about your privacy or security, there shouldn't be; using Find My, you'll still be able to keep track of your lost or stolen smartphone.
Open Find My and tap on your device name, and a menu will appear, where you can: (1) play a sound from your device, (2) get directions to your device, (3) enable a notification when the device is found, (4) mark the device as lost (which disables Apple Pay, among other things), and (5) erase all the data from your device.

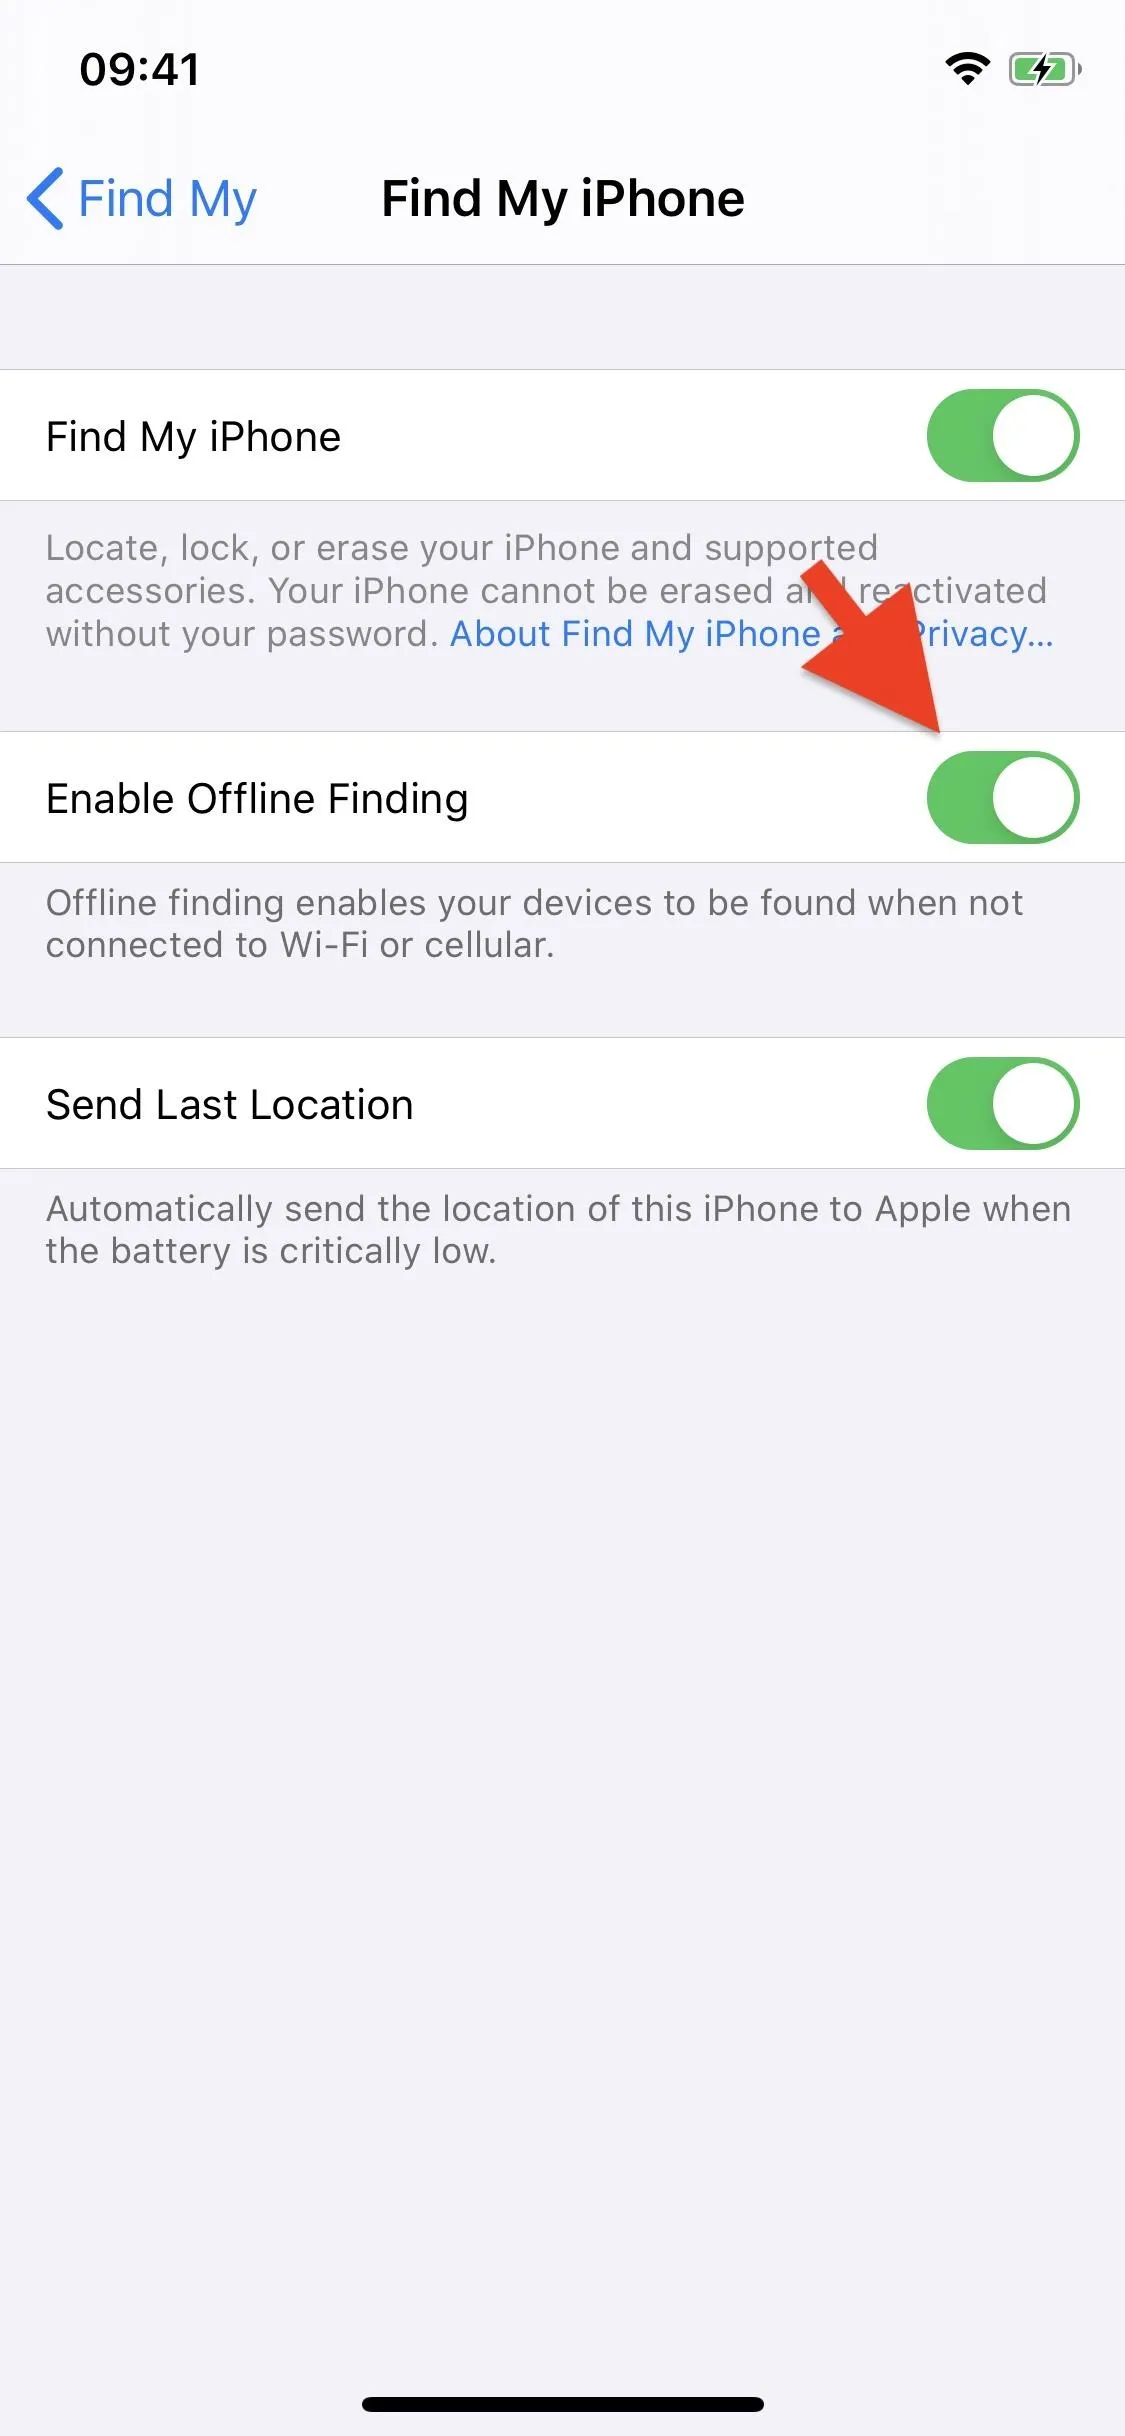
8: Use 'Offline Finding' to Track Your Stolen iPhone
Aside from being reworked, the Find My app also has a few new features on iOS 13, including "Offline Finding," which allows your iPhone to use its Bluetooth signal to report its location using nearby Apple devices.
For example, if someone with the stolen iPhone were to turn off the cellular data and Wi-Fi, your device could still be tracked. If another Apple device (another iPhone, MacBook, Apple Watch, etc.) gets close enough to your stolen iPhone, your device sends your public key to it, which that device then uses to send the encrypted location to Apple's servers. You can then log in to Find My and track your iPhone.
Best of all, the system is completely encrypted, which prevents hackers from intercepting the location being transmitted over Bluetooth. Not even Apple can see your coordinates. However, you must have two Apple devices signed into your iCloud for this to work (and have two-factor authentication), because only these devices carry the private key which you need to access your offline location.
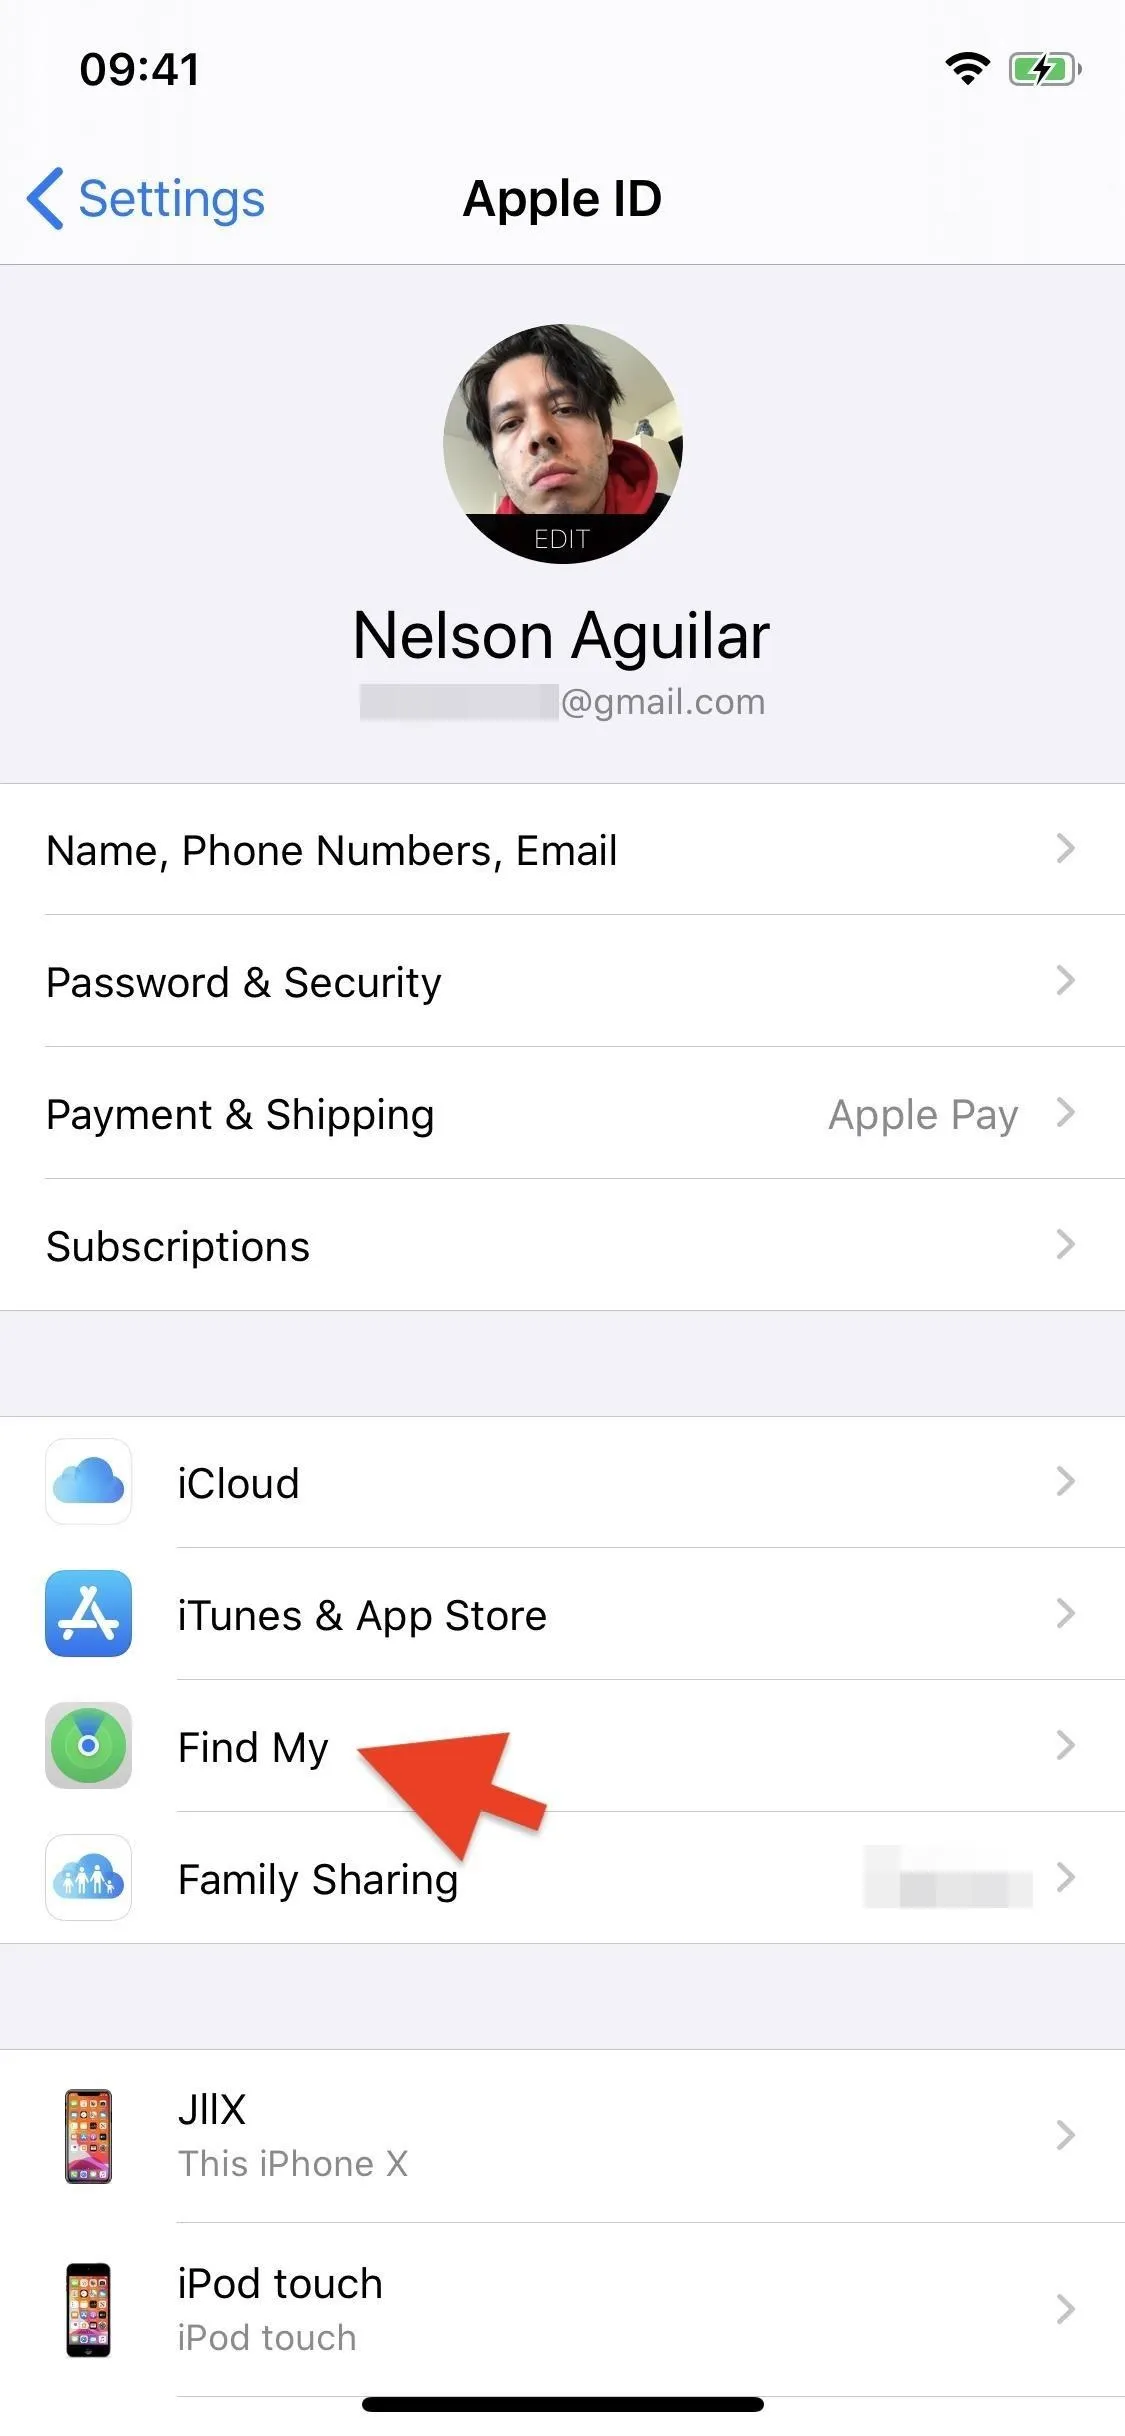
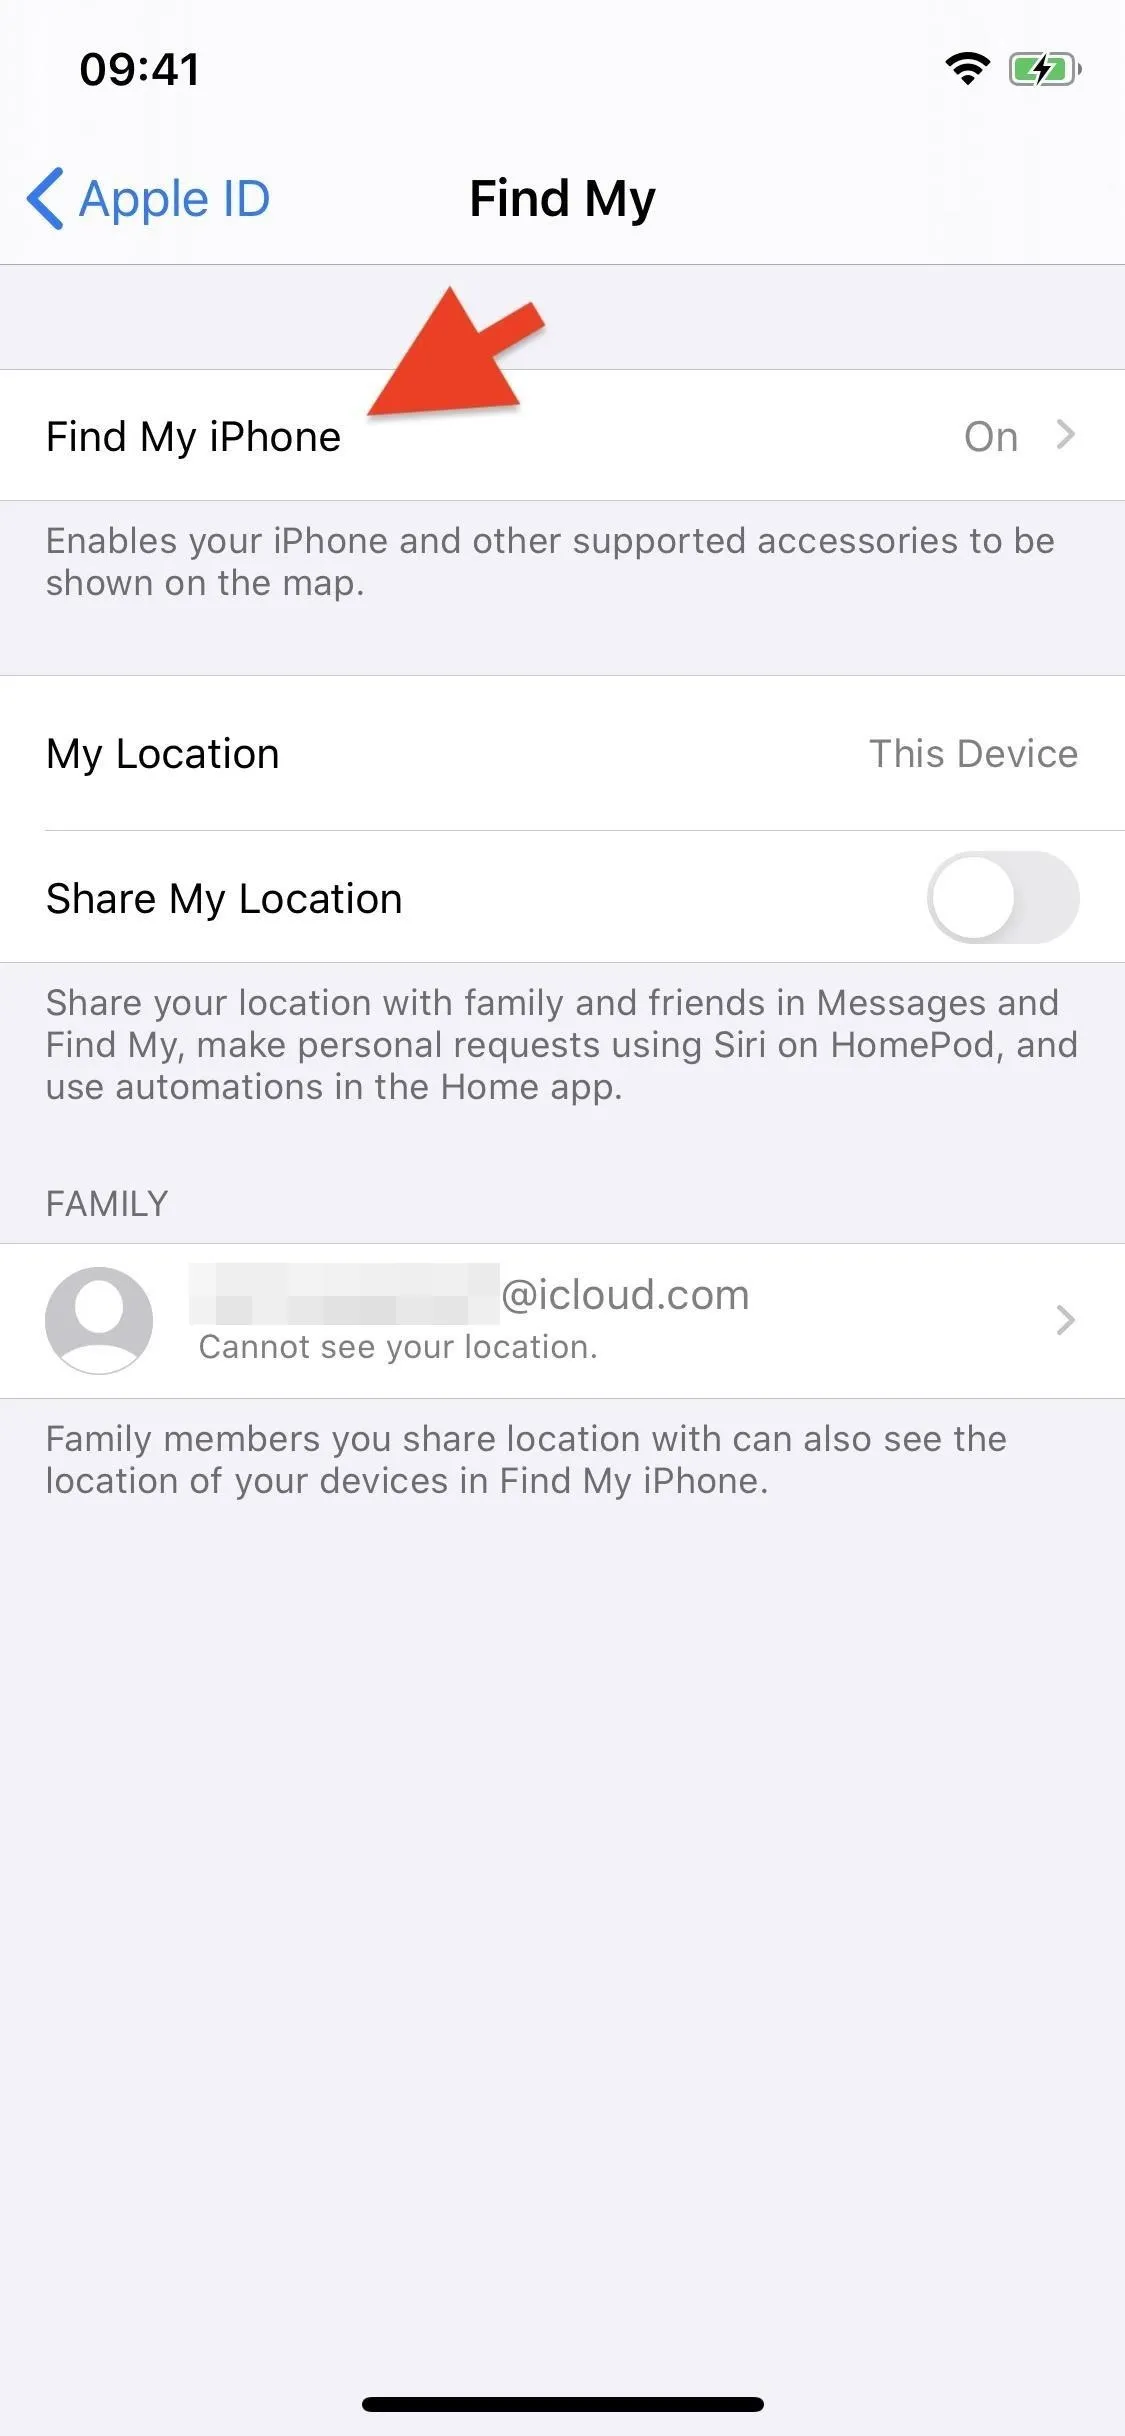
While the feature should be enabled by default, you can check by going into the Settings app and tapping on your name at the top. Next, go into "Find My" and then "Find My iPhone." In the middle, you'll see a setting called "Enable Offline Finding." If disabled, toggle it on.
9: Block Unwanted Emails in the Mail App
Strangely enough, the Mail app never could block contacts — until now. If you get many unwanted or unknown emails, you can now block a specific sender and their emails. You can block a sender in a few different ways, but the easiest method is to open an email in the Mail app, tap on the sender (at the top) email twice, then hit "Block this Contact" twice when it appears.
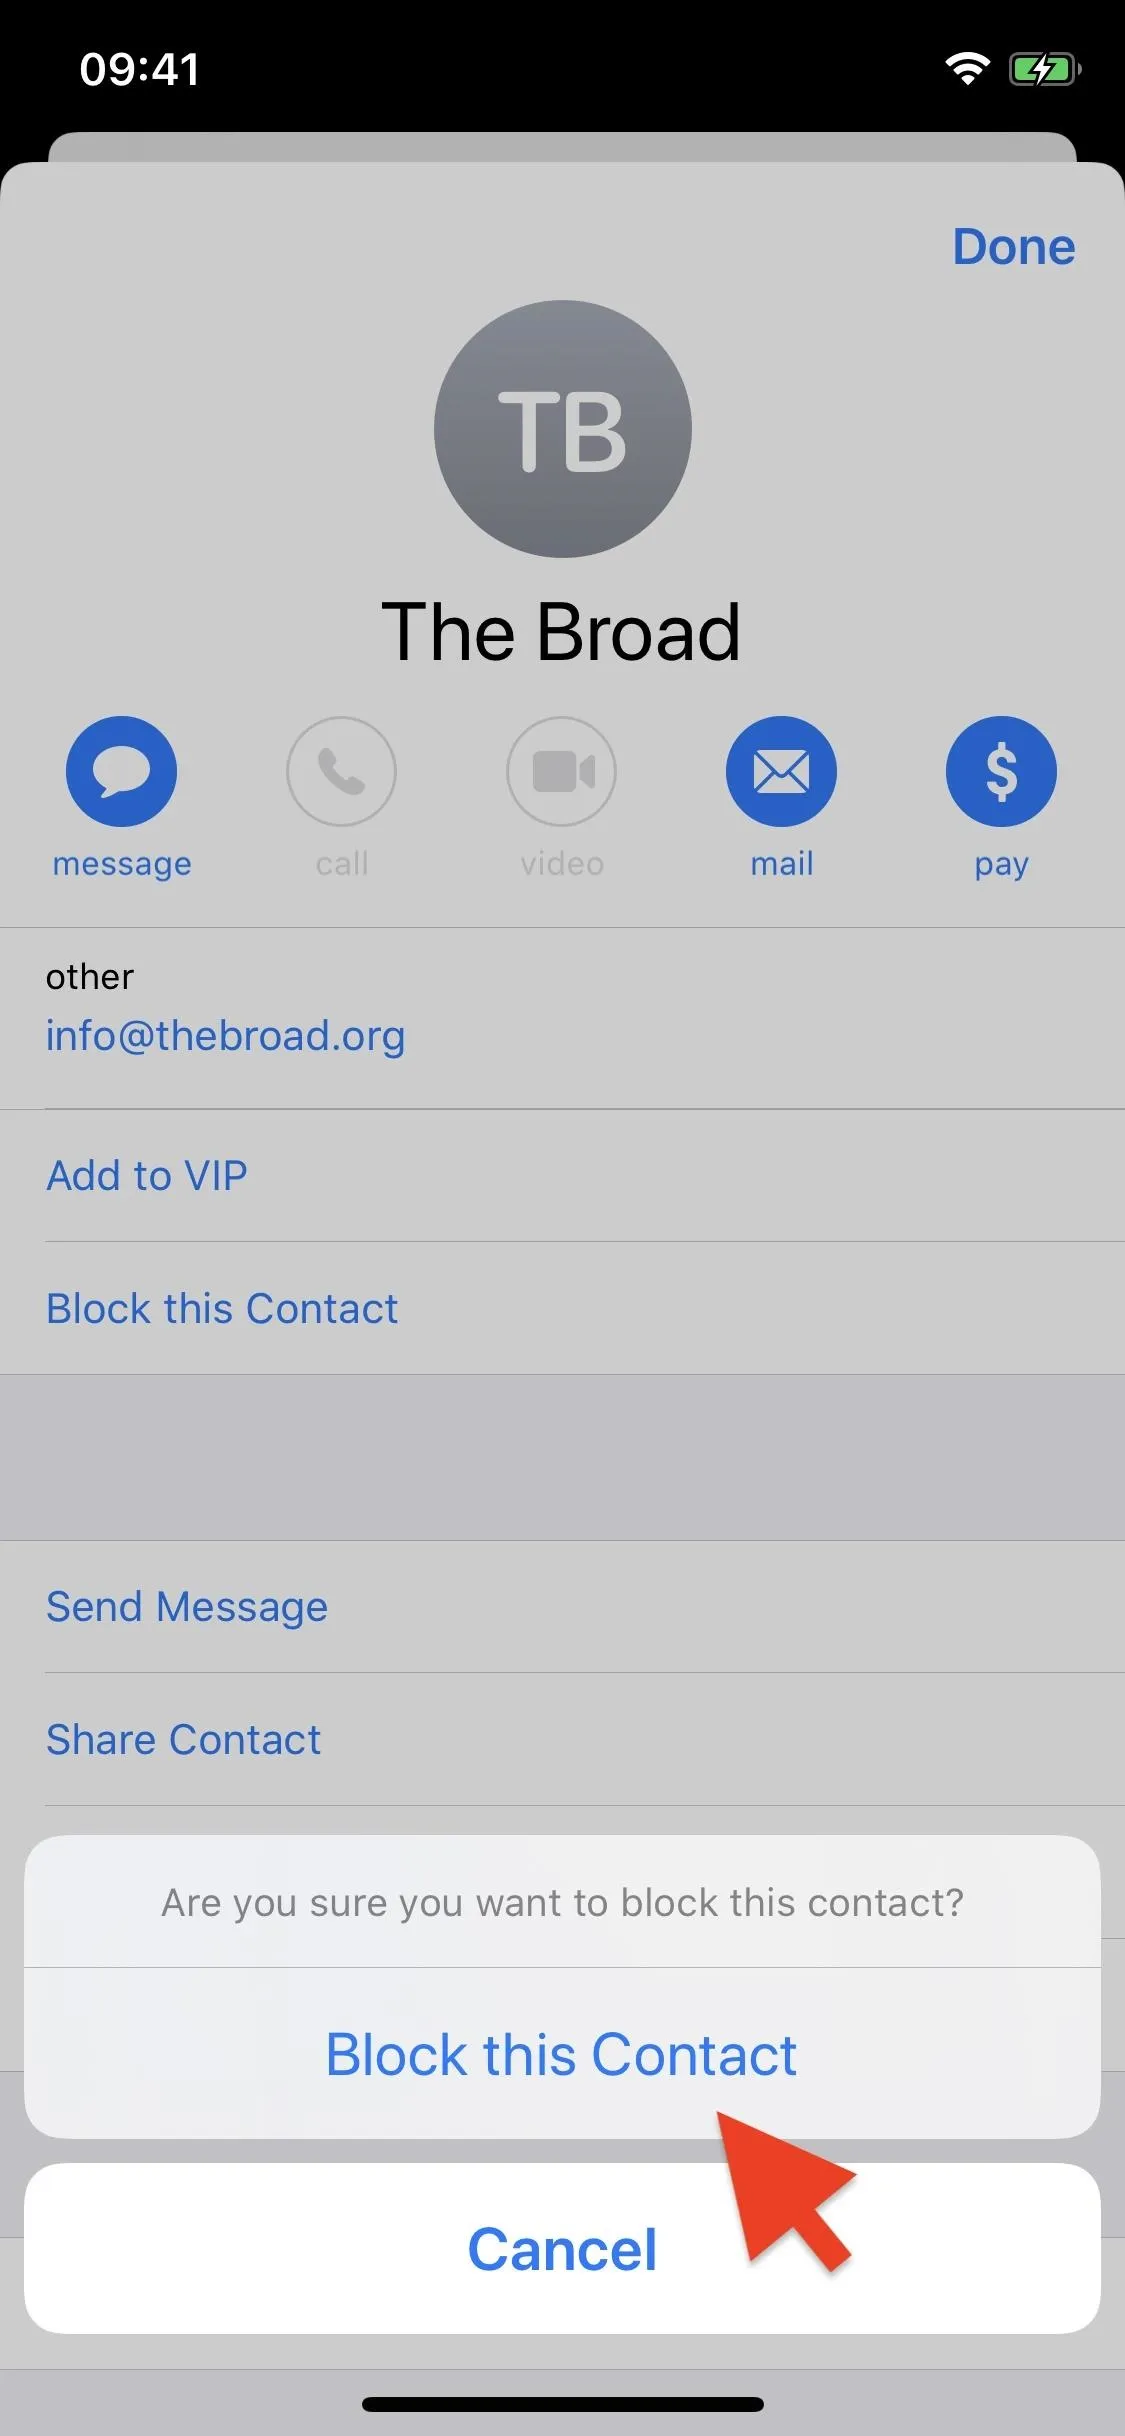
At the top of the blocked email, you'll see a notification that says, "This message is from a sender in your blocked list." If you tap on "Preferences," you'll be taken to Mail's settings where you can configure what happens to blocked emails. Your three options are (1) nothing, (2) mark as blocked but leave in the inbox, and (3) move to trash.
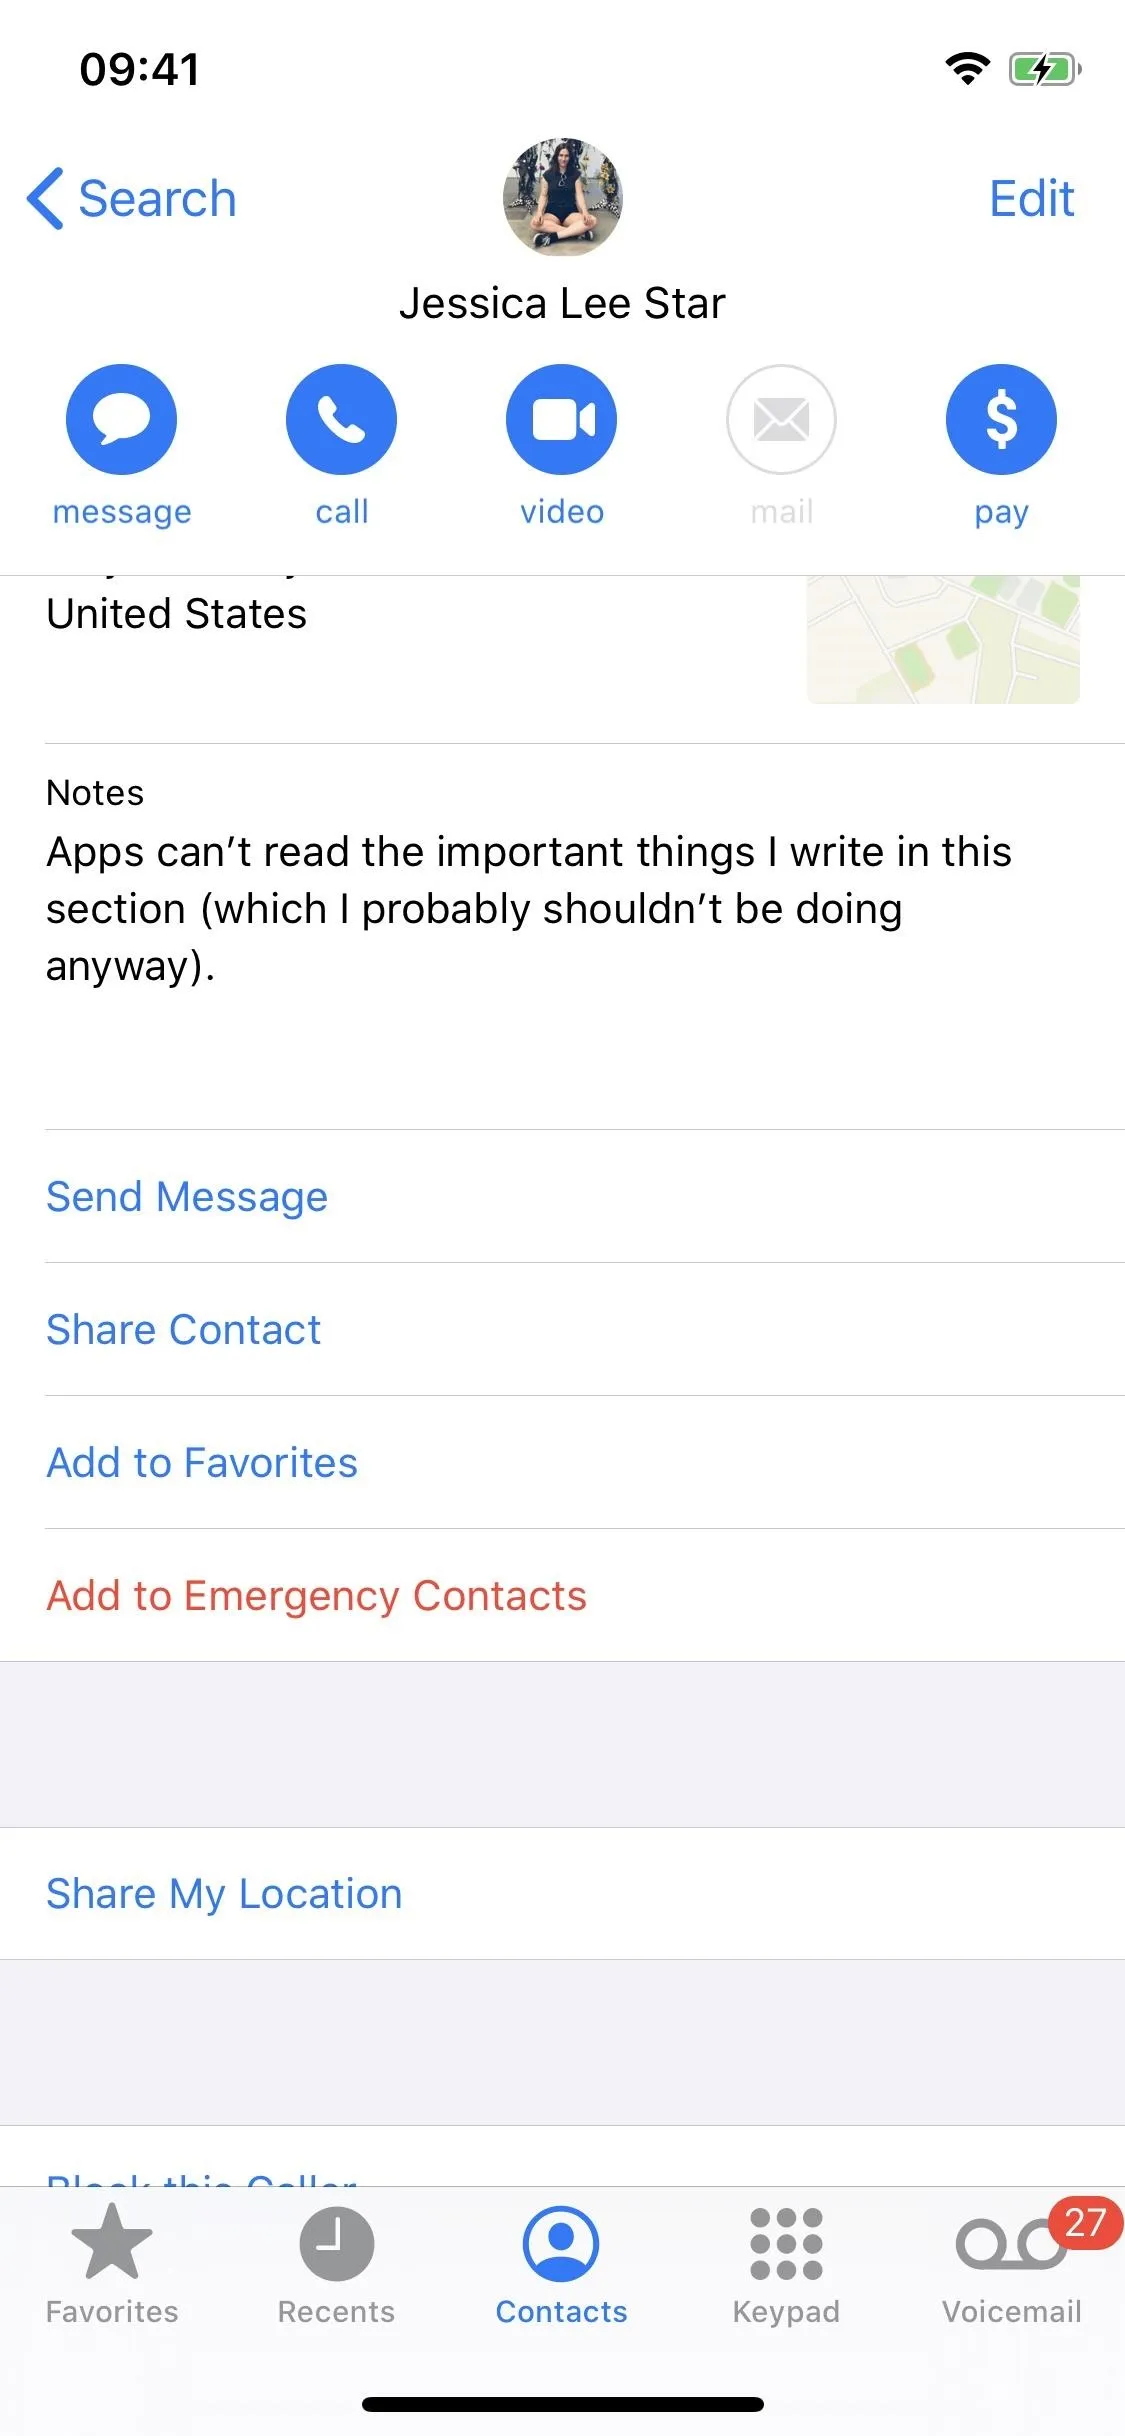
10: Third-Party Apps Can't View Notes in Your Contacts
Although it's not a feature you can turn on or off, it's good to know that third-party apps that have access to your contacts can no longer view what it says in the Notes fields of your saved contacts. Although apps must ask for your permission before they can access your contacts, they can pretty much see everything — but not anymore. On iOS 13, these notes are now encrypted.
This article was produced during Gadget Hacks' special coverage on smartphone privacy and security. Check out the whole Privacy and Security series.
Cover image and screenshots by Nelson Aguilar/Gadget Hacks


Comments
Be the first, drop a comment!