


![Short Cuts (The Criterion Collection) [Blu-ray]](https://m.media-amazon.com/images/I/712N05DgTZL._AC_UY218_.jpg)

Creating GIFs of your own burst images has been possible for a while with third-party iOS apps, some of which cost money or include in-app purchases to utilize the full potential. Fortunately, with Shortcuts, Apple's automation workflow app, there's finally a native way to achieve this without spending any cash.
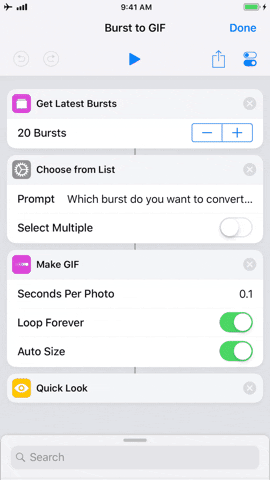
One of the actions available in the Shortcuts app for iPhone is "Make GIF." With this action, you can turn GIFs from another linked to action, such as "Get Latest Bursts," with just a few taps. However, instead of starting a new shortcut from scratch, it's easier to find a workflow that already exists so you can discover how it works and what it's doing, then build upon it or customize it to your liking.
This shortcut will work pretty much the same way if you're not yet on iOS 12 and have the original Workflow app. However, this also means no Siri integration, which is reason enough to update to iOS 12 or higher with Shortcuts.
Add the 'Burst to GIF' Shortcut
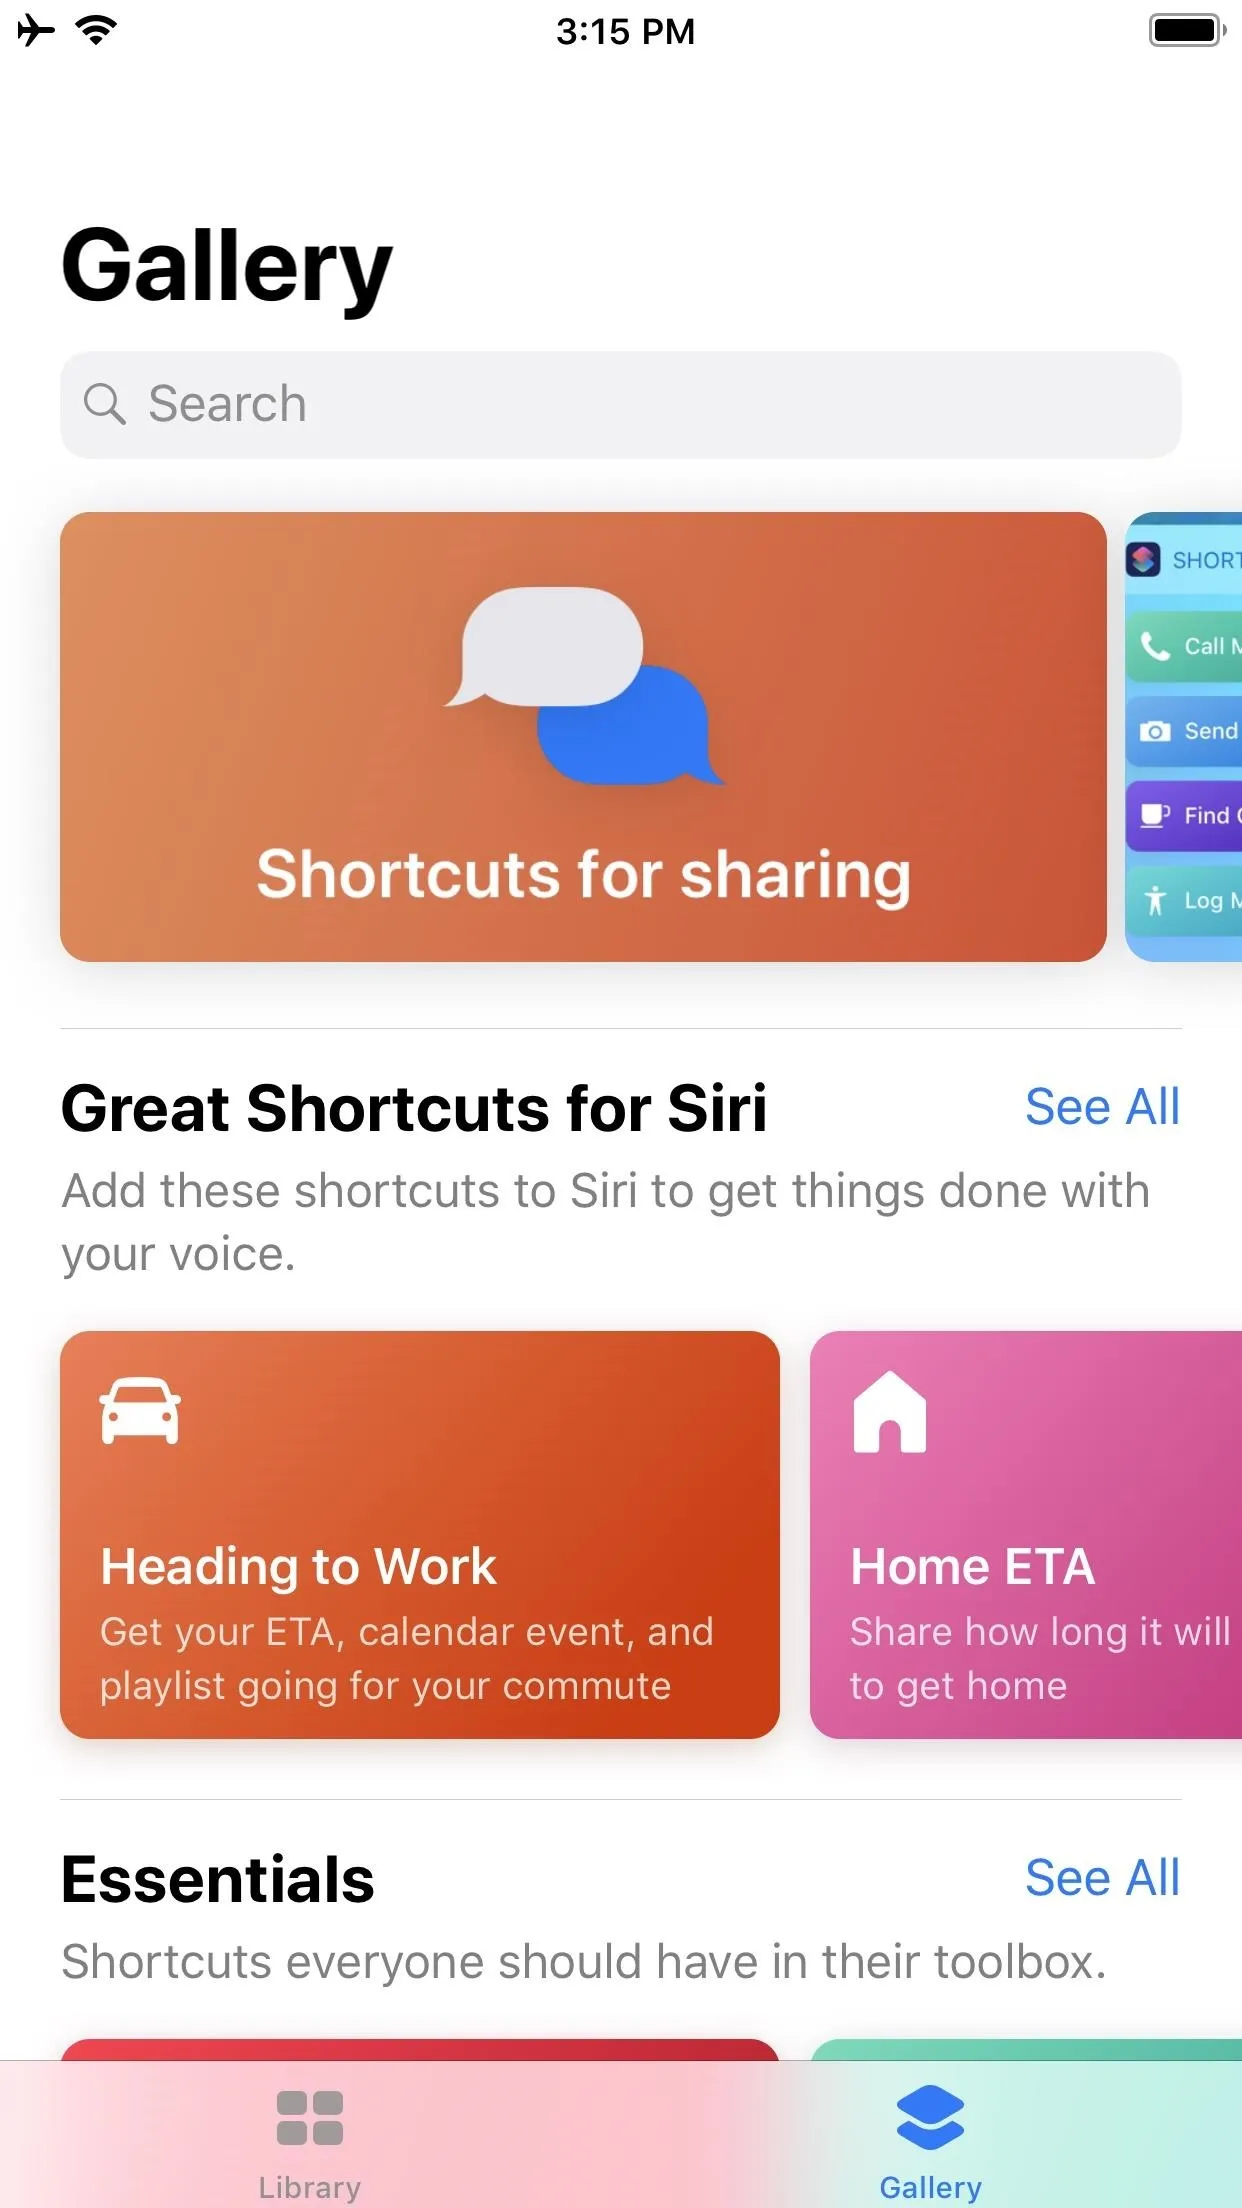
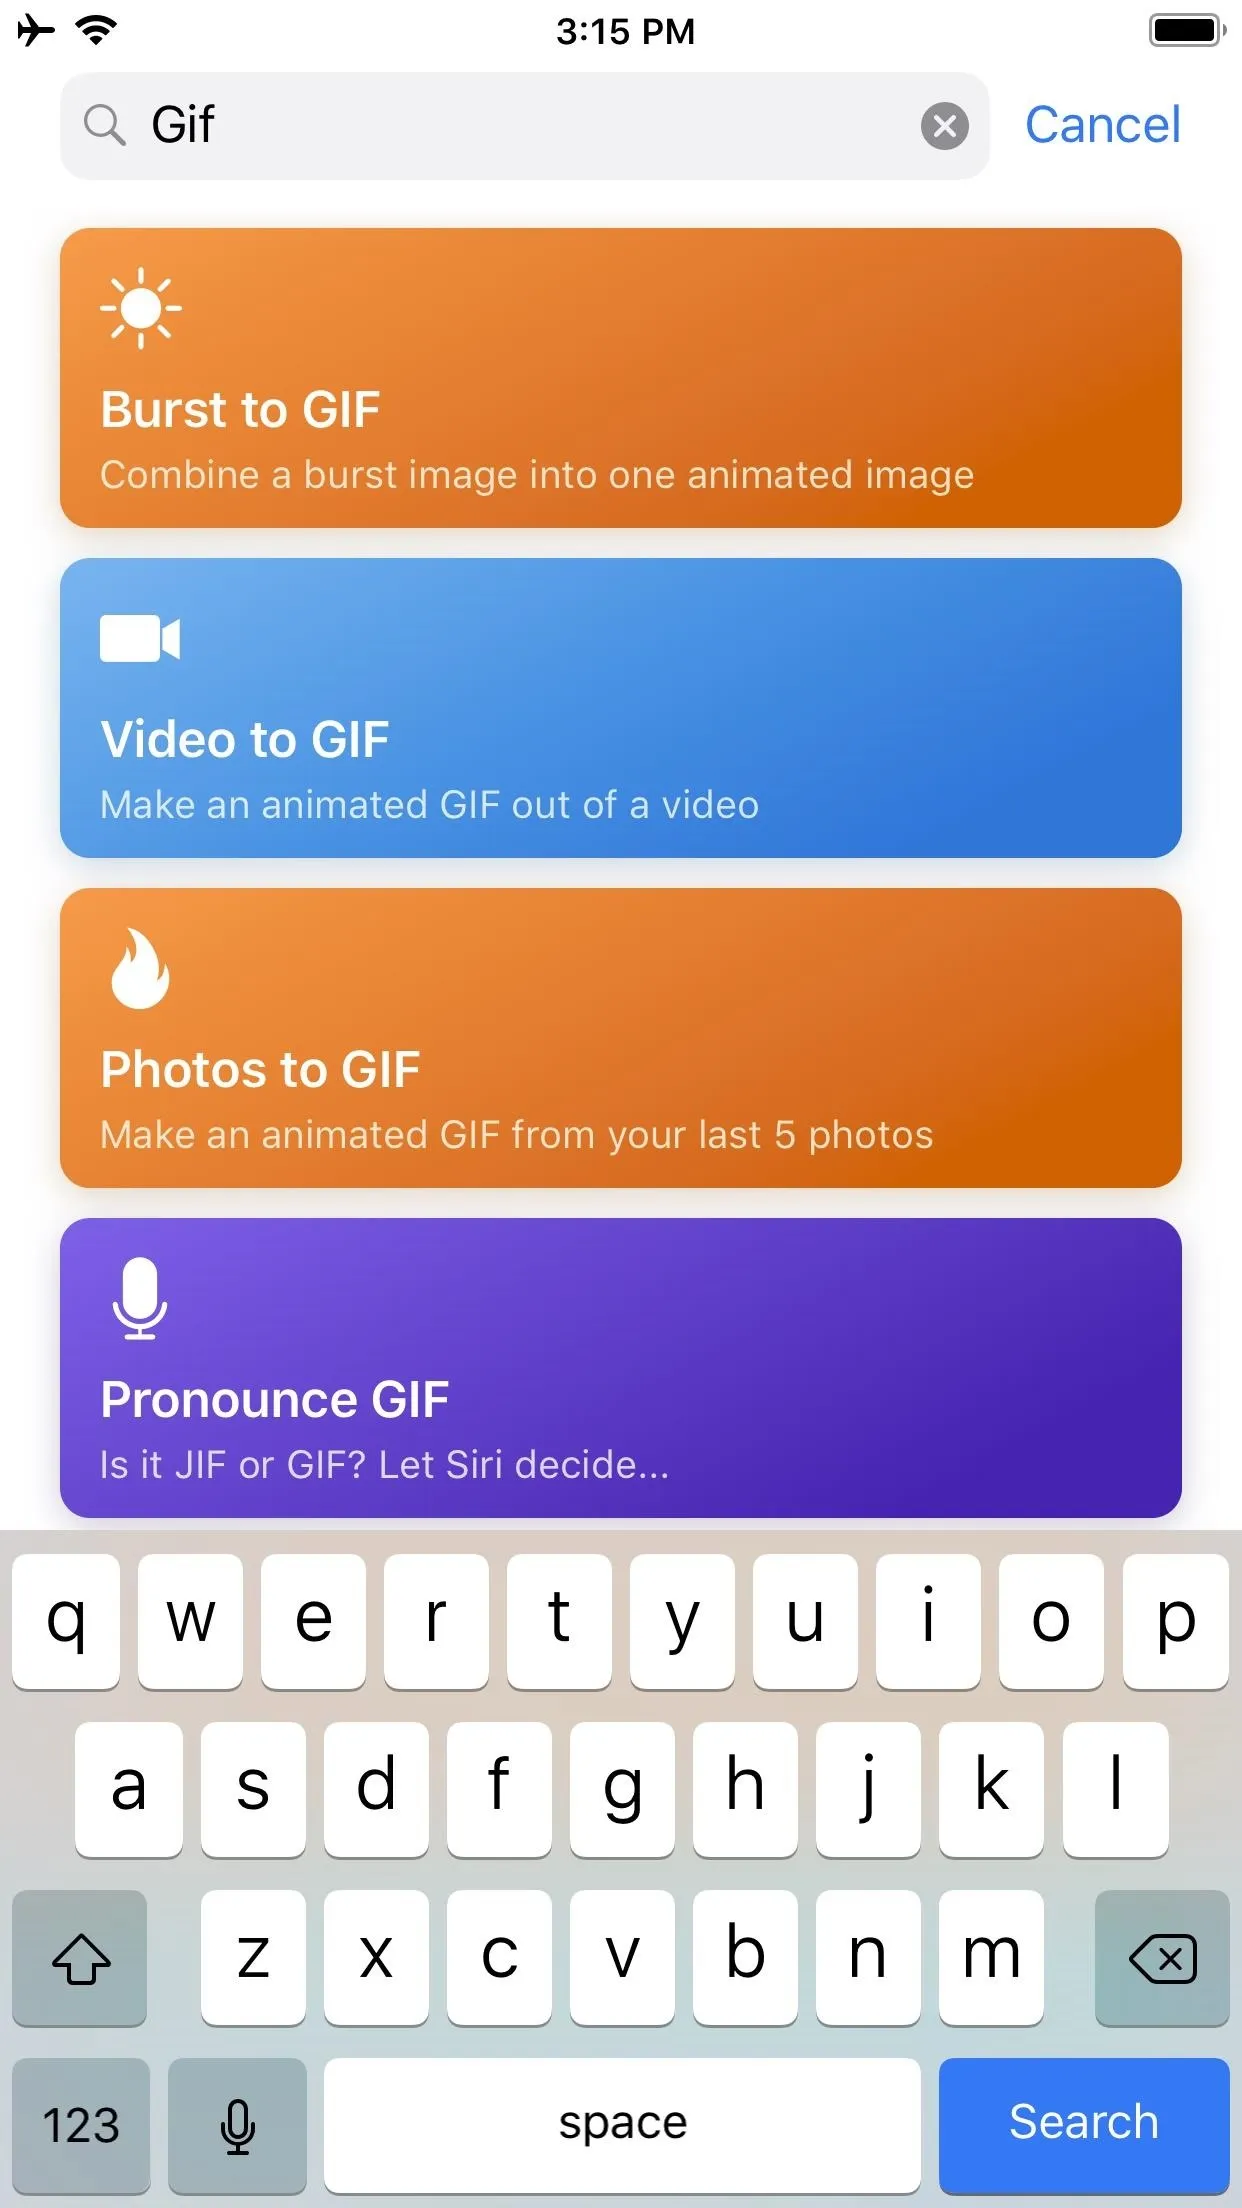
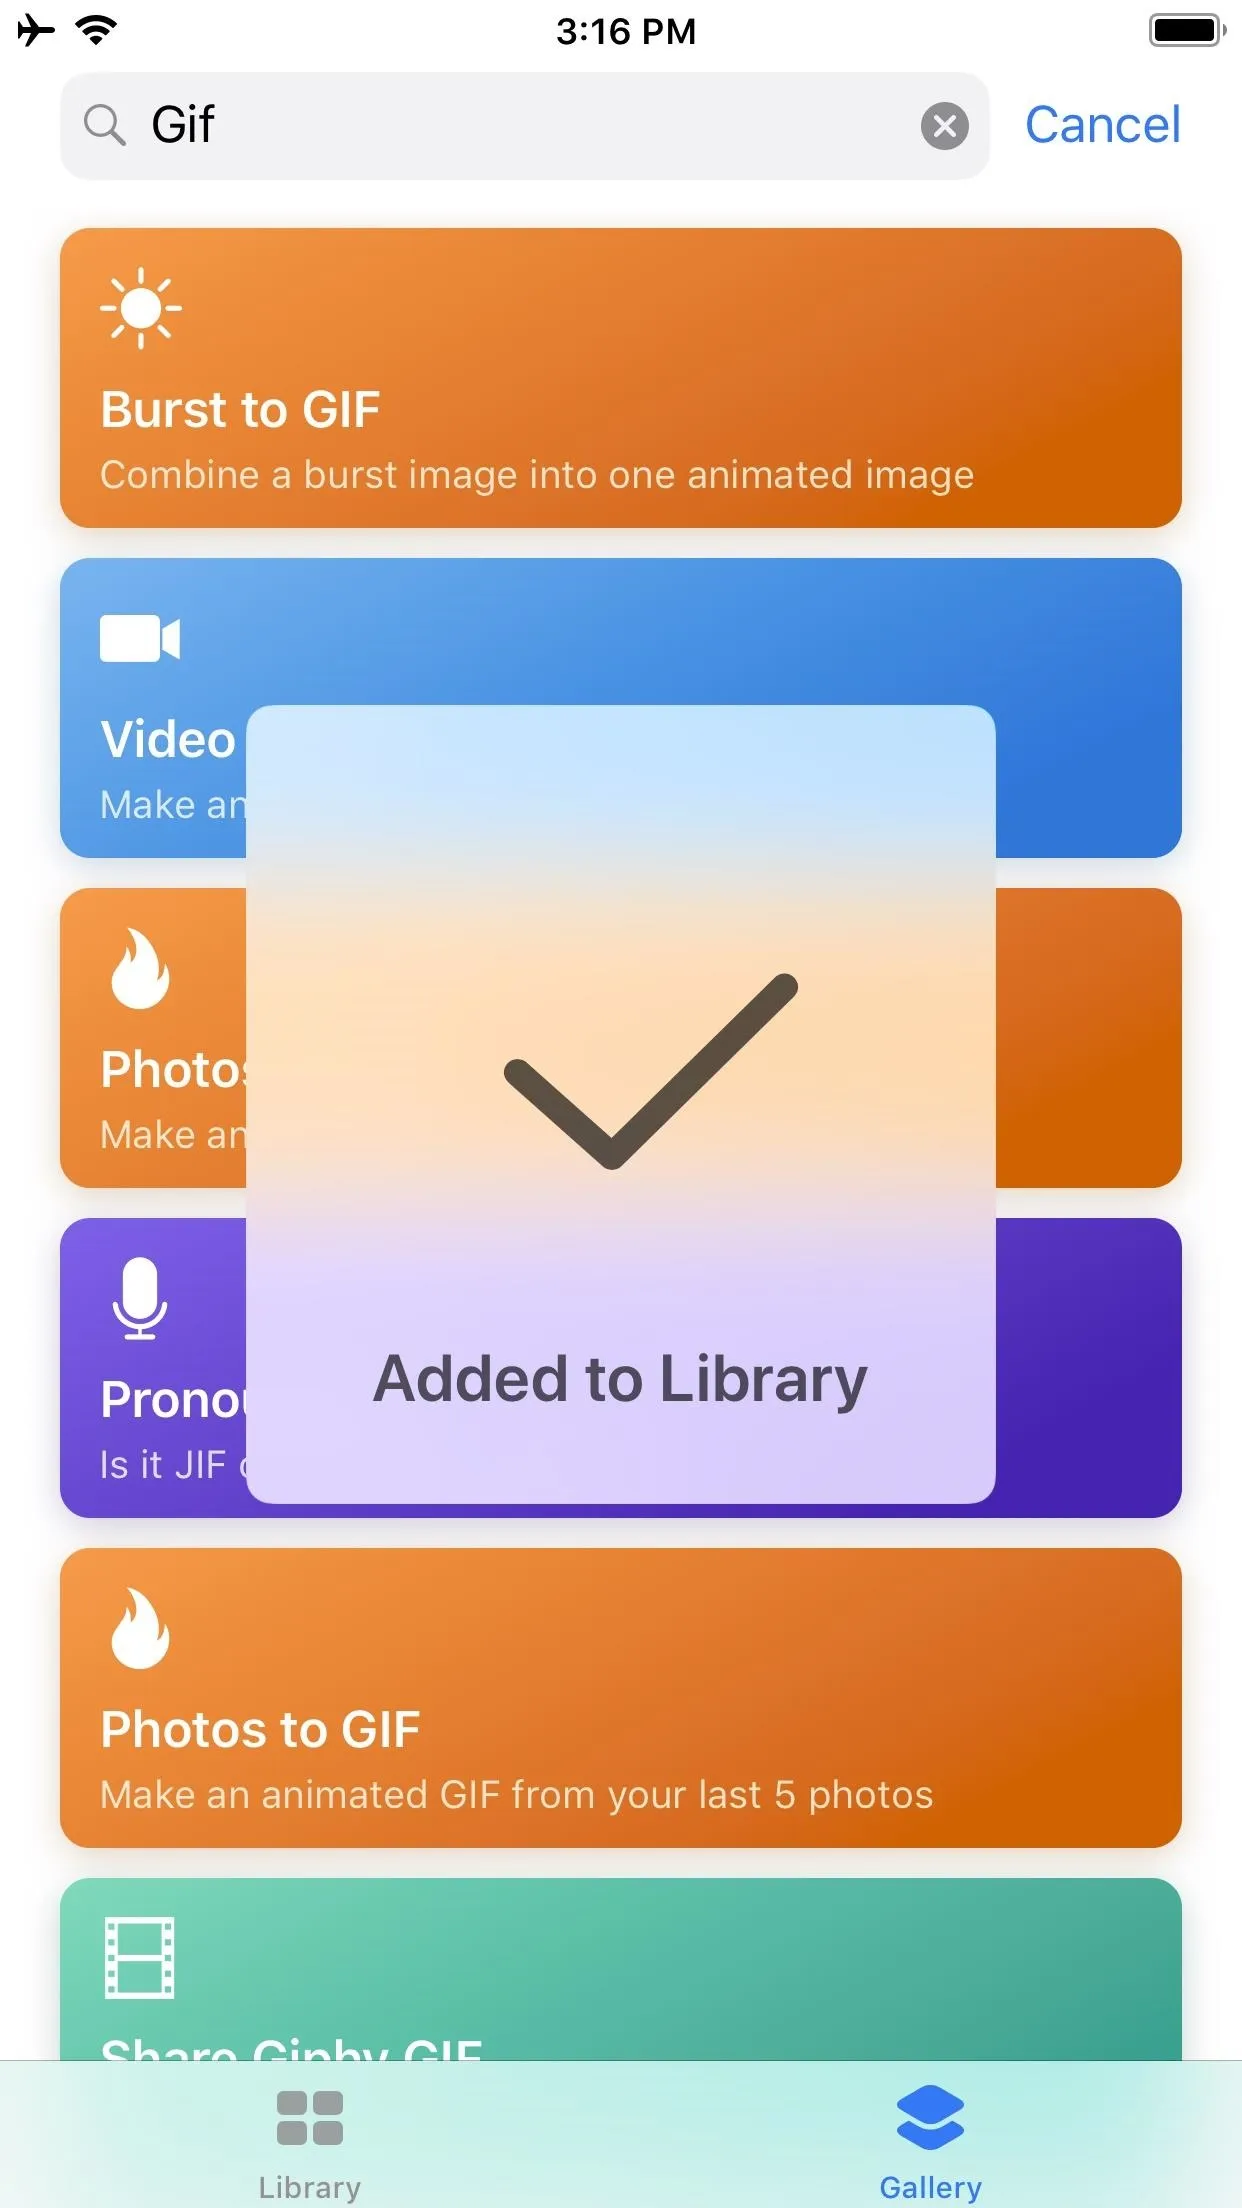
Launch the Shortcuts app on your iPhone, then tap on the "Gallery" tab. Next, tap on the search field, type "GIF," then find and select "Burst to GIF" from the list. Alternatively, you can just jump right to the shortcut with the link below.
- Shortcuts Link: Burst to GIF (free)
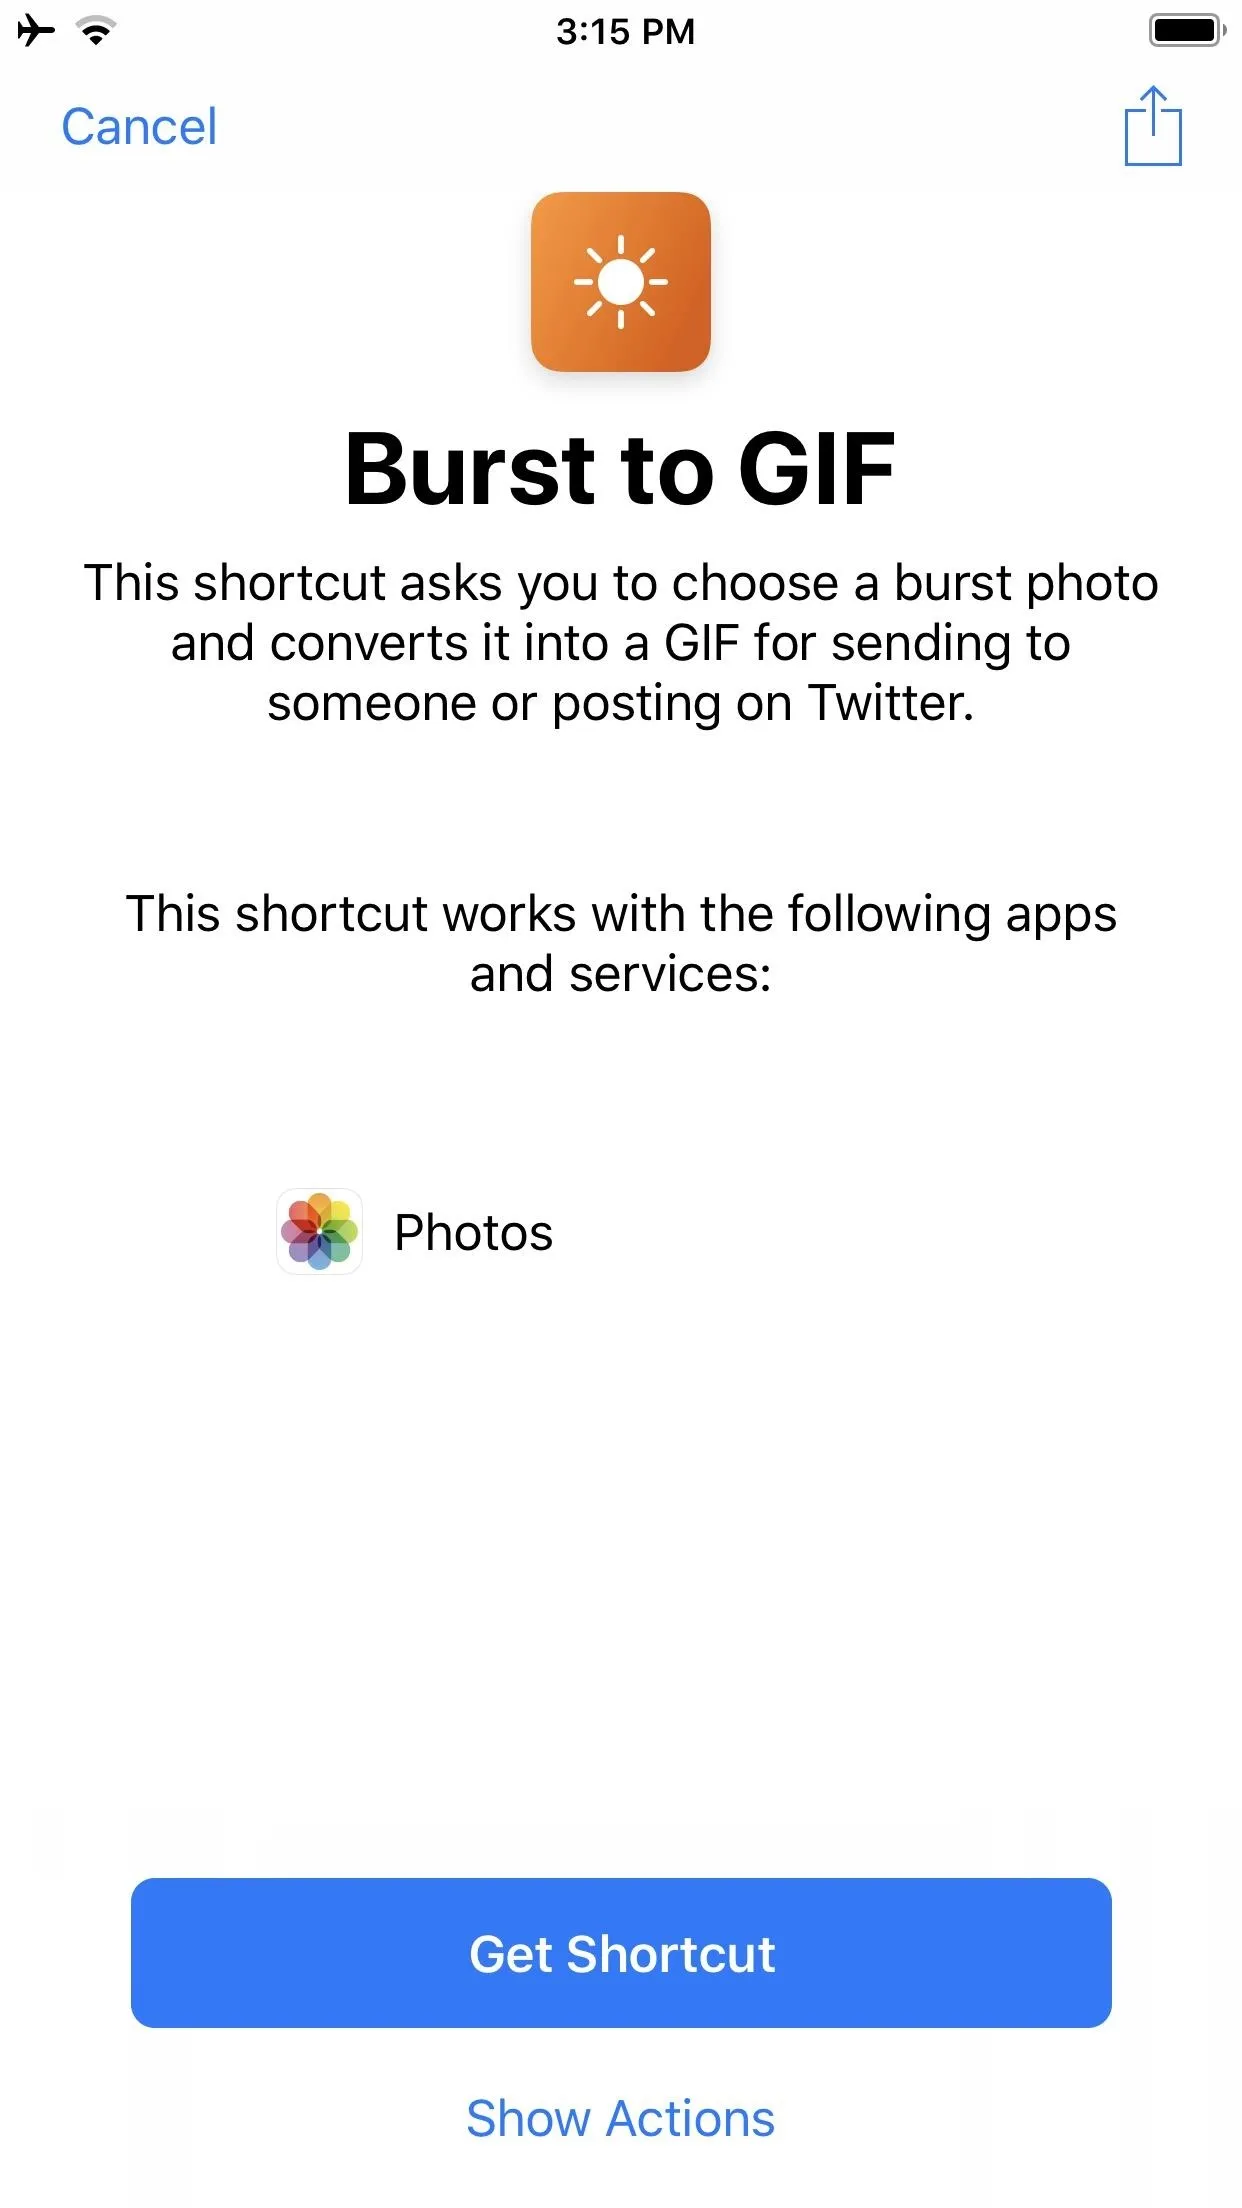
Next, tap on "Get Shortcut" to install it. Once this shortcut has been added, go to the "Library" tab to find it. To view what's involved in the workflow, use 3D Touch to peek then pop into its editing flow. You can also just tap the ellipsis (•••) inside the "Burst to GIF" if you don't have 3D Touch.

Test How Well It Works
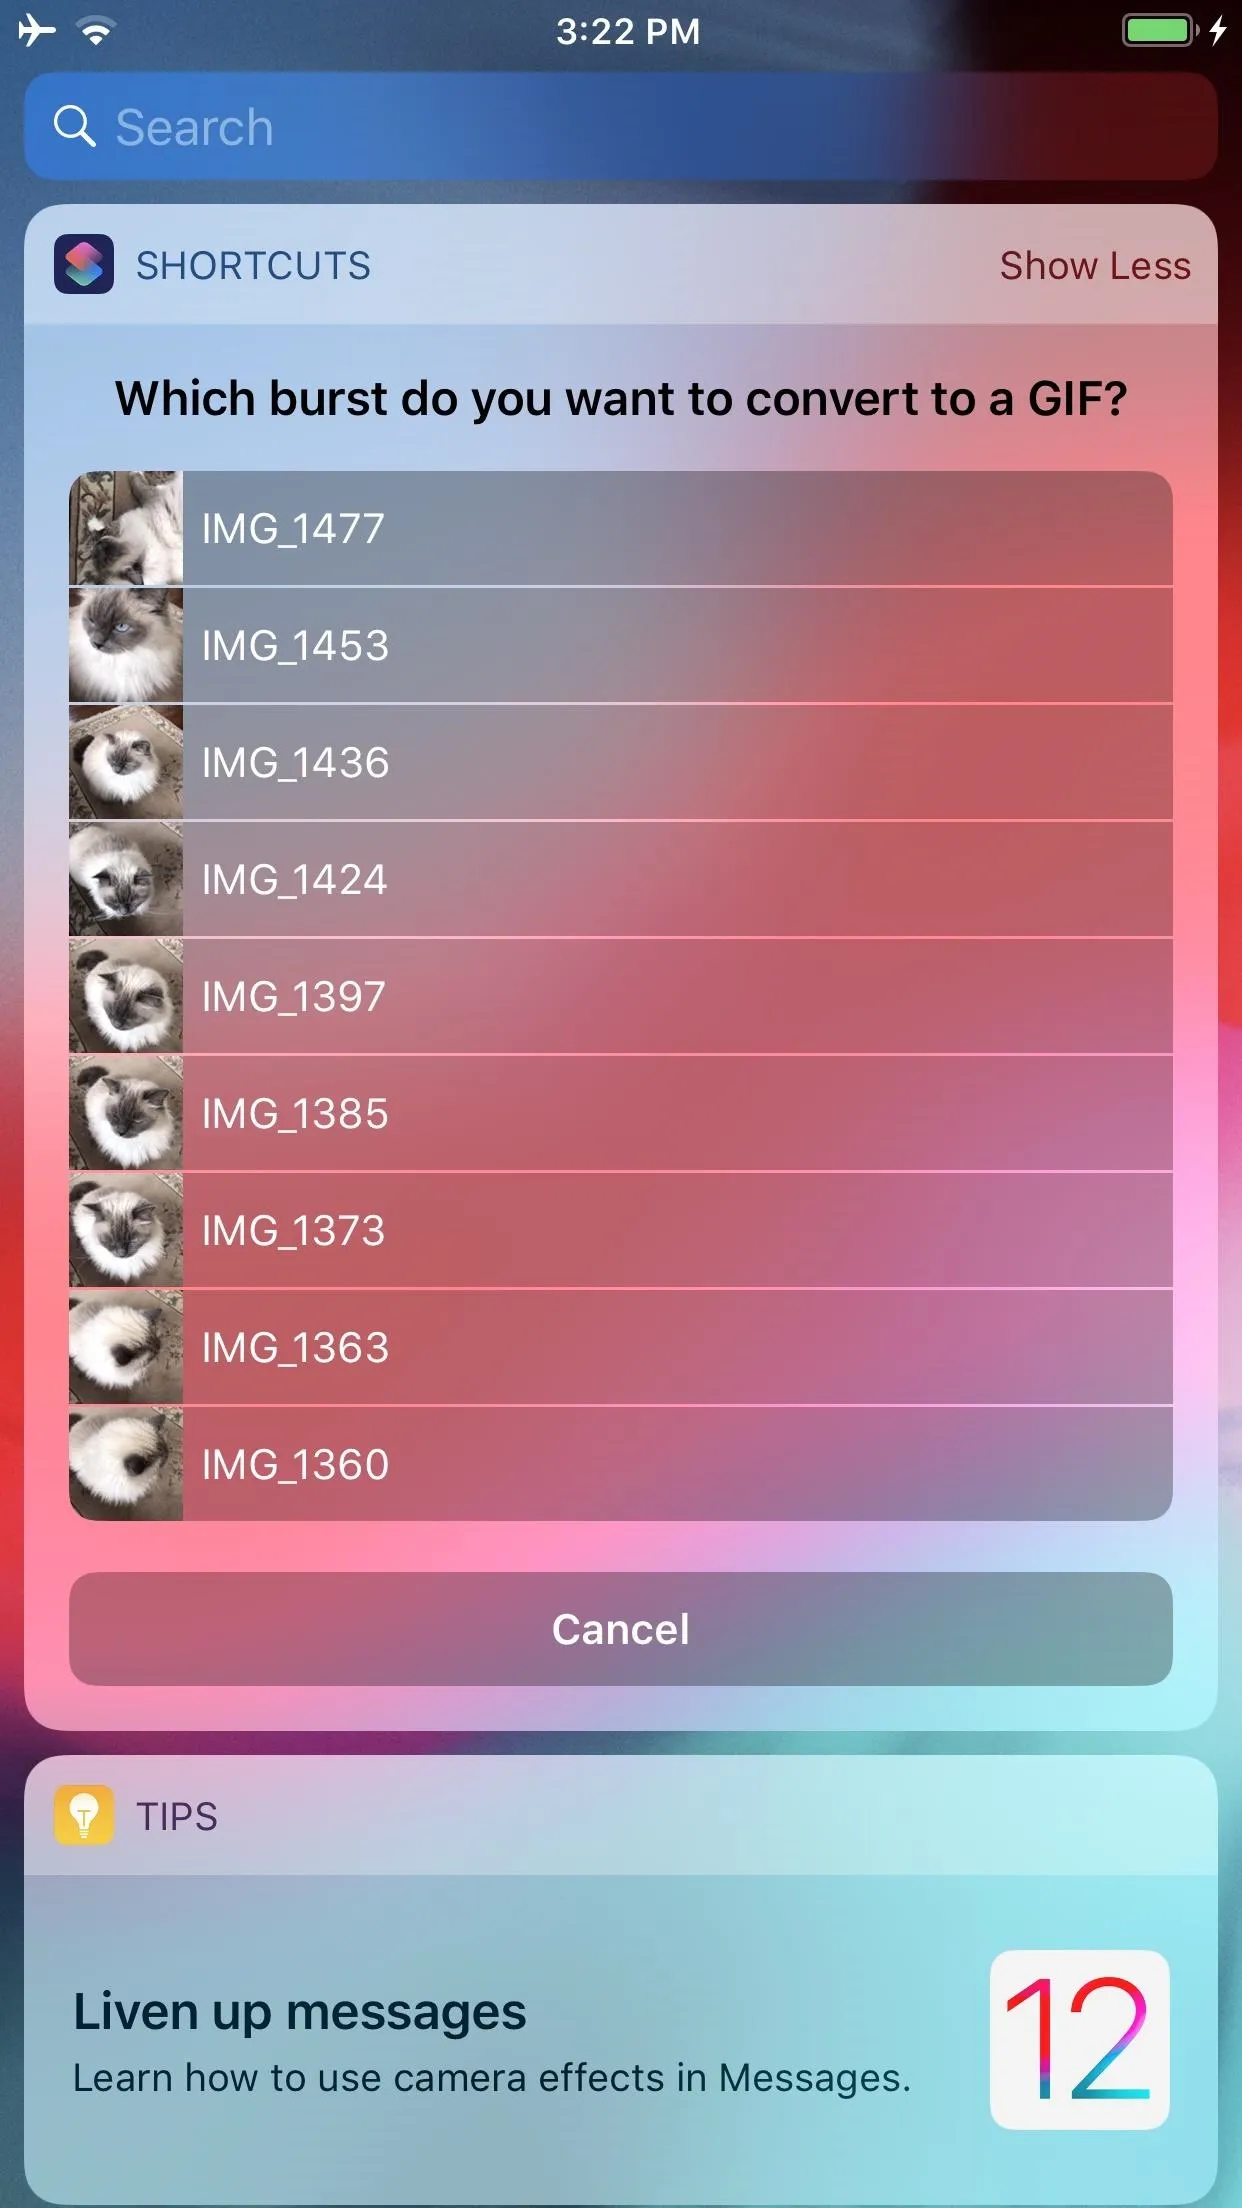
Tap on the play button near the top-center of the screen to test it out. A page will appear, asking you to "Choose Image," where the "image" here is a set of burst photos of which you can only see the representative image for the group. These burst photos are sourced from your Photos app, so if no burst photos exist in Photos, no items will appear on this page.
Quick reminder: A burst group is a result of Burst mode, which is triggered in the Camera app when you keep your finger on the shutter button (or on one of the volume buttons) while taking a photo in either Photo or Square mode with the rear or front-facing camera. The group is a sequence of photos taken at a rate of ten frames per second. I have often taken burst photos unintentionally when I leave my finger on the shutter button for a beat too long.
On the "Choose Image" page, tap the burst you want to convert into a GIF, which will immediately trigger the conversion process. The next quick-look screen will show you the resulting animated image. In the top right corner, you will see the "Share" icon, which lets you share it in the usual ways — via Mail, your preferred social media app, your go-to messenger app, etc. Also, you can save your GIF to Photos or elsewhere, locally or through the cloud (via the Files app).


Tap on the "Done" label up top to finish up. However, if you did not share or download the GIF file, the GIF will be lost, and you'll need to start again since the preview is precisely that.
Add the Shortcuts Widget
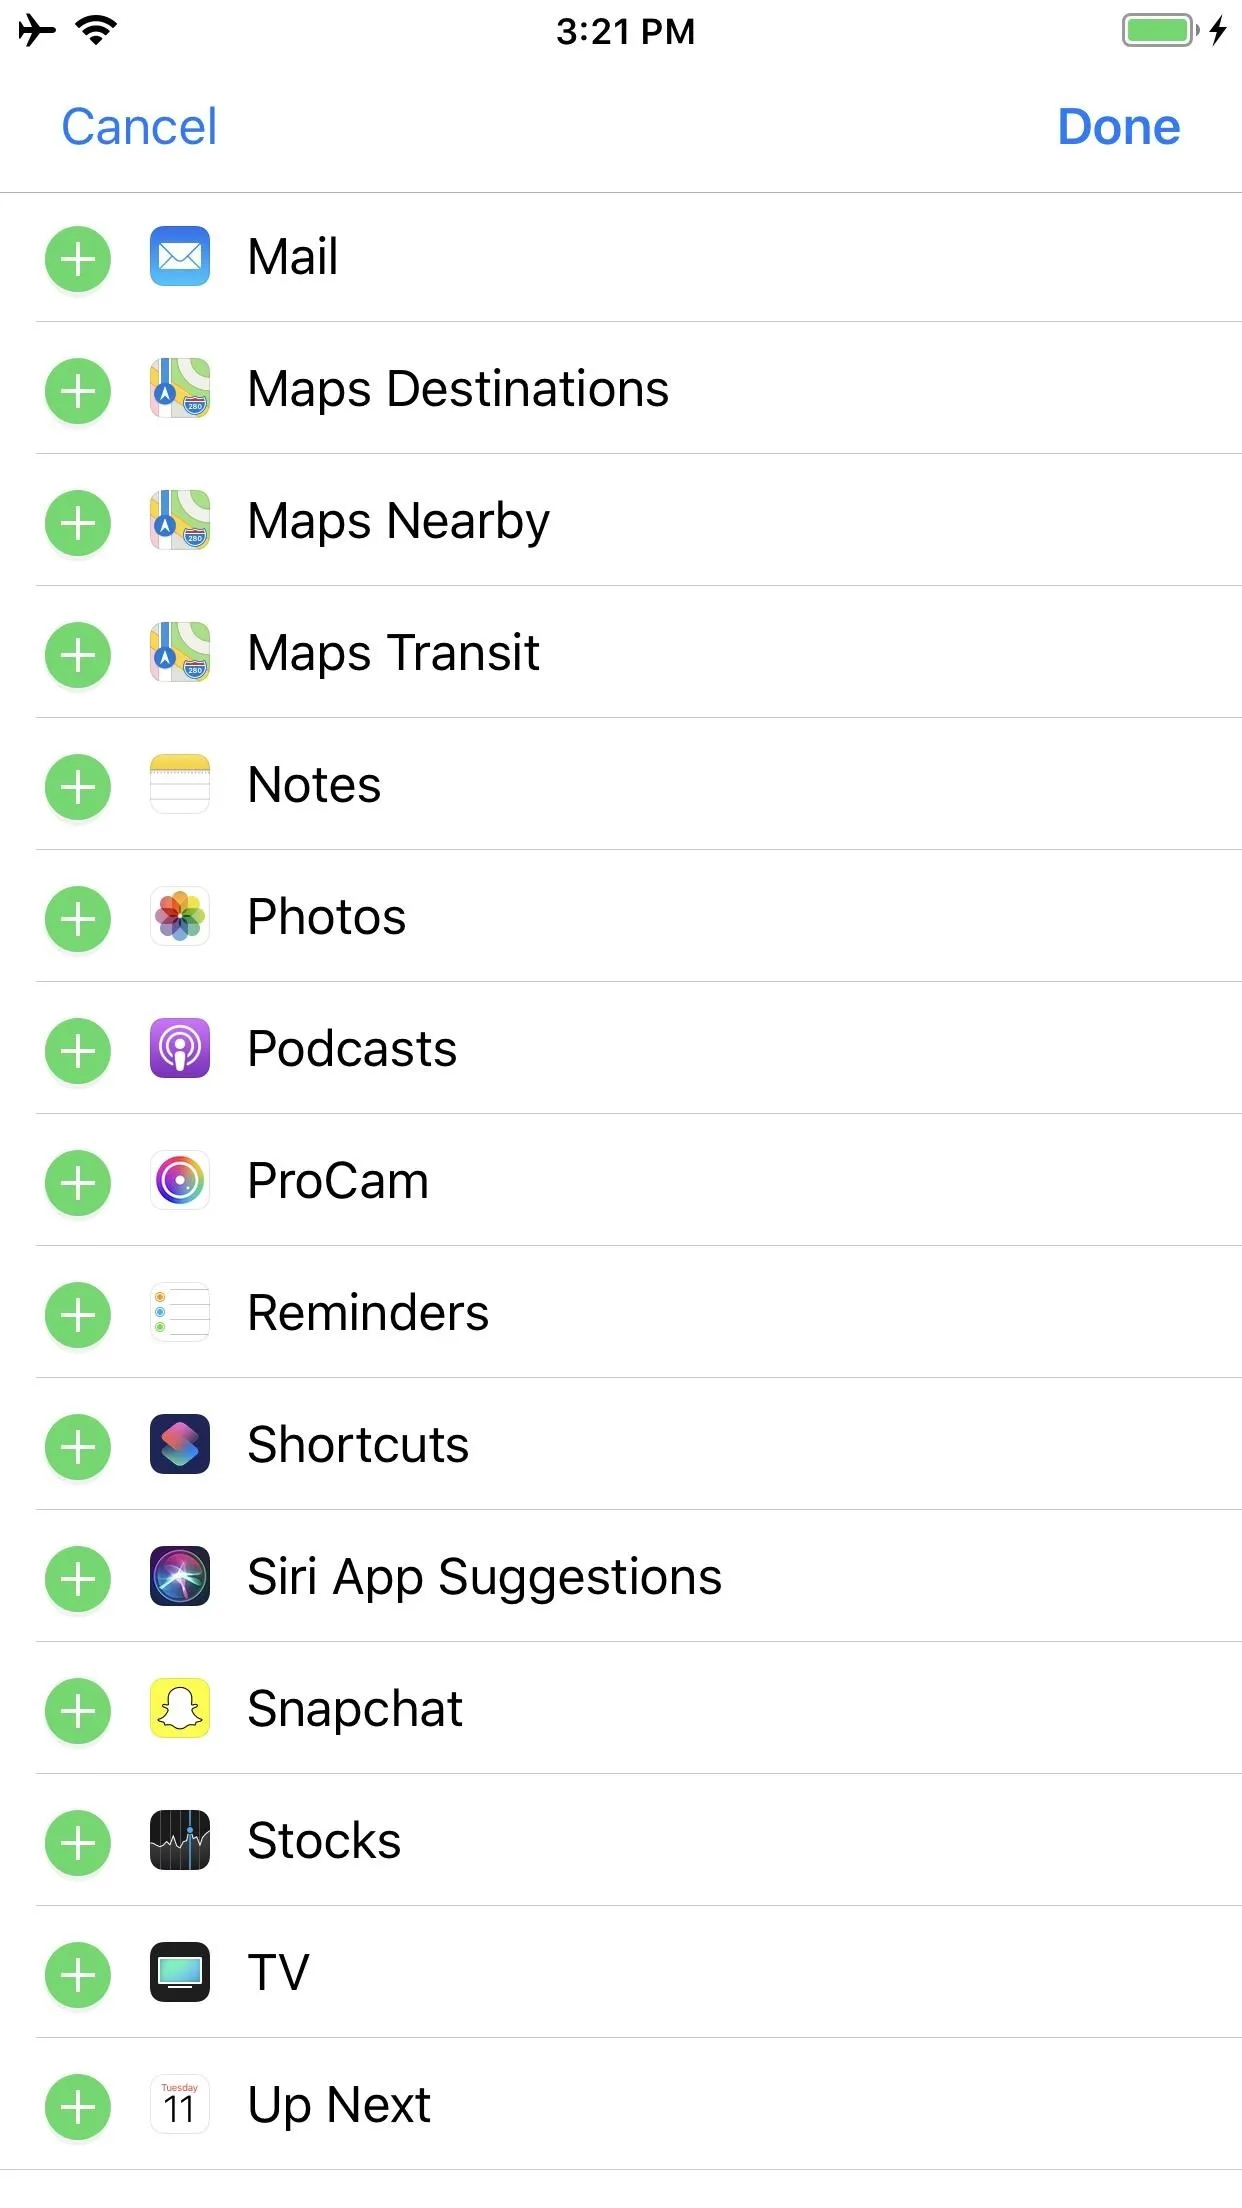
Want easy access to this shortcut? Then add it as a widget to your Today View screen. Swipe right from the first home screen page to access your widgets. (Widgets are also accessible on the lock screen and in the notifications drop-down window.) Scroll to the bottom of Today View, select "Edit," tap the plus (+) icon next to Shortcuts, then choose "Done." And that's it.
Create a GIF with the Shortcuts Widgets
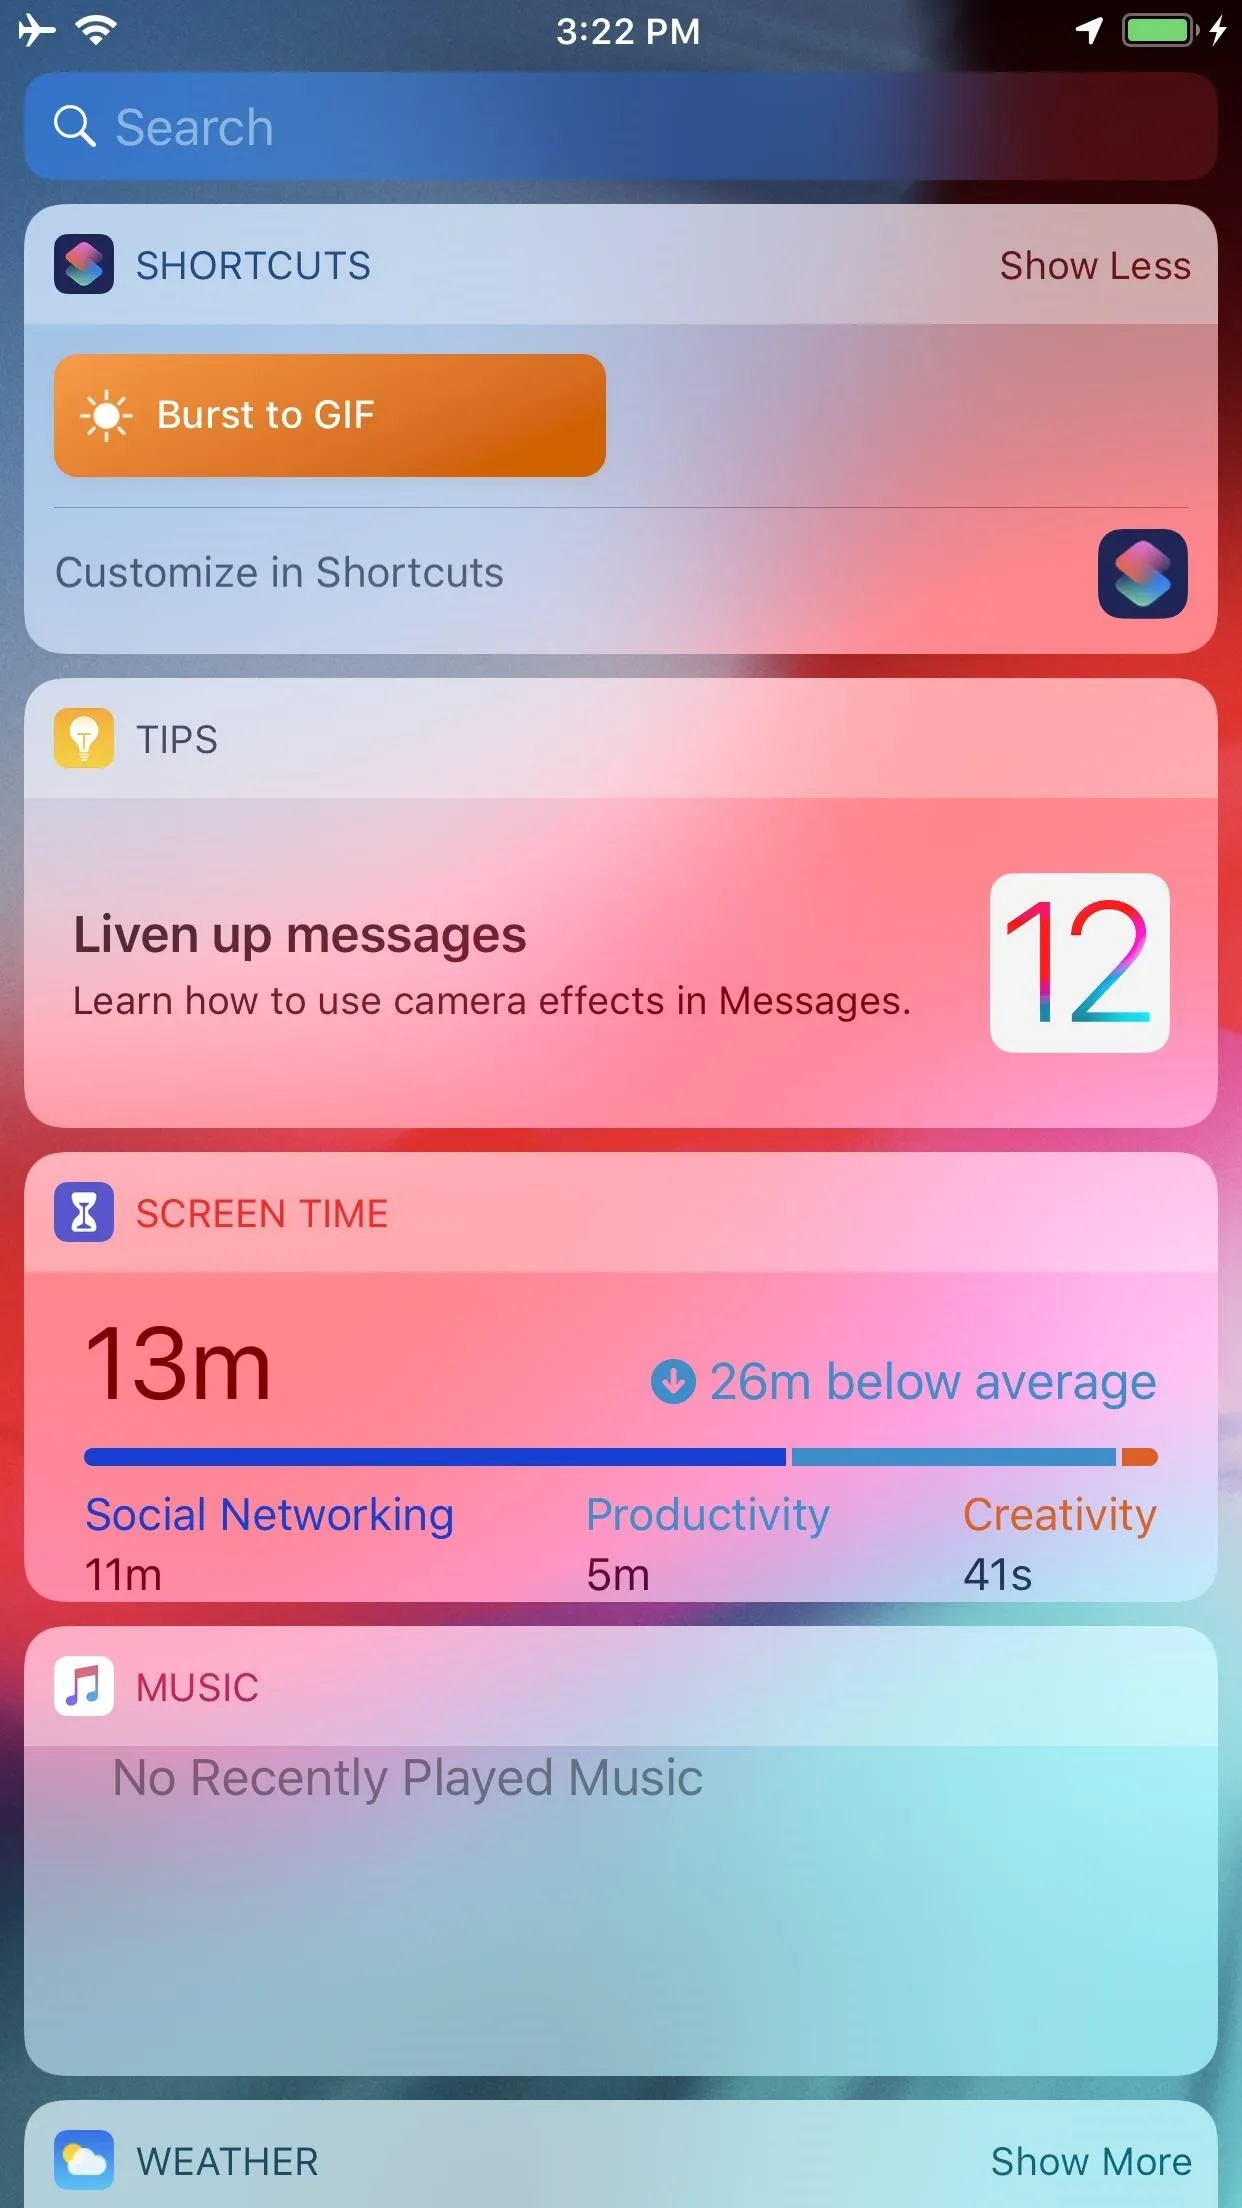
If you set up the Shortcuts widget as explained in Step 3, either swipe right from the lock screen, the pull-down Notification Center, or the first home screen page. Next, tap "Burst to GIF" in the Shortcuts widget. Chose the burst group you want to convert, which will launch the Shortcuts app and generate the GIF in the same preview window you pulled up in Step 2.
You can also access "Burst to GIF" from the 3D Touch menu on the home screen. Just 3D Touch the Shortcuts app icon, then select "Burst to GIF." This will take you directly to the workflow in the app. However, unlike in the widget, you can't see all your shortcuts this way, so you may have to reorganize the shortcuts in your "Library" in Shortcuts to see the ones you want in the 3D Touch widget.
Set Up & Use a Home Screen Shortcut
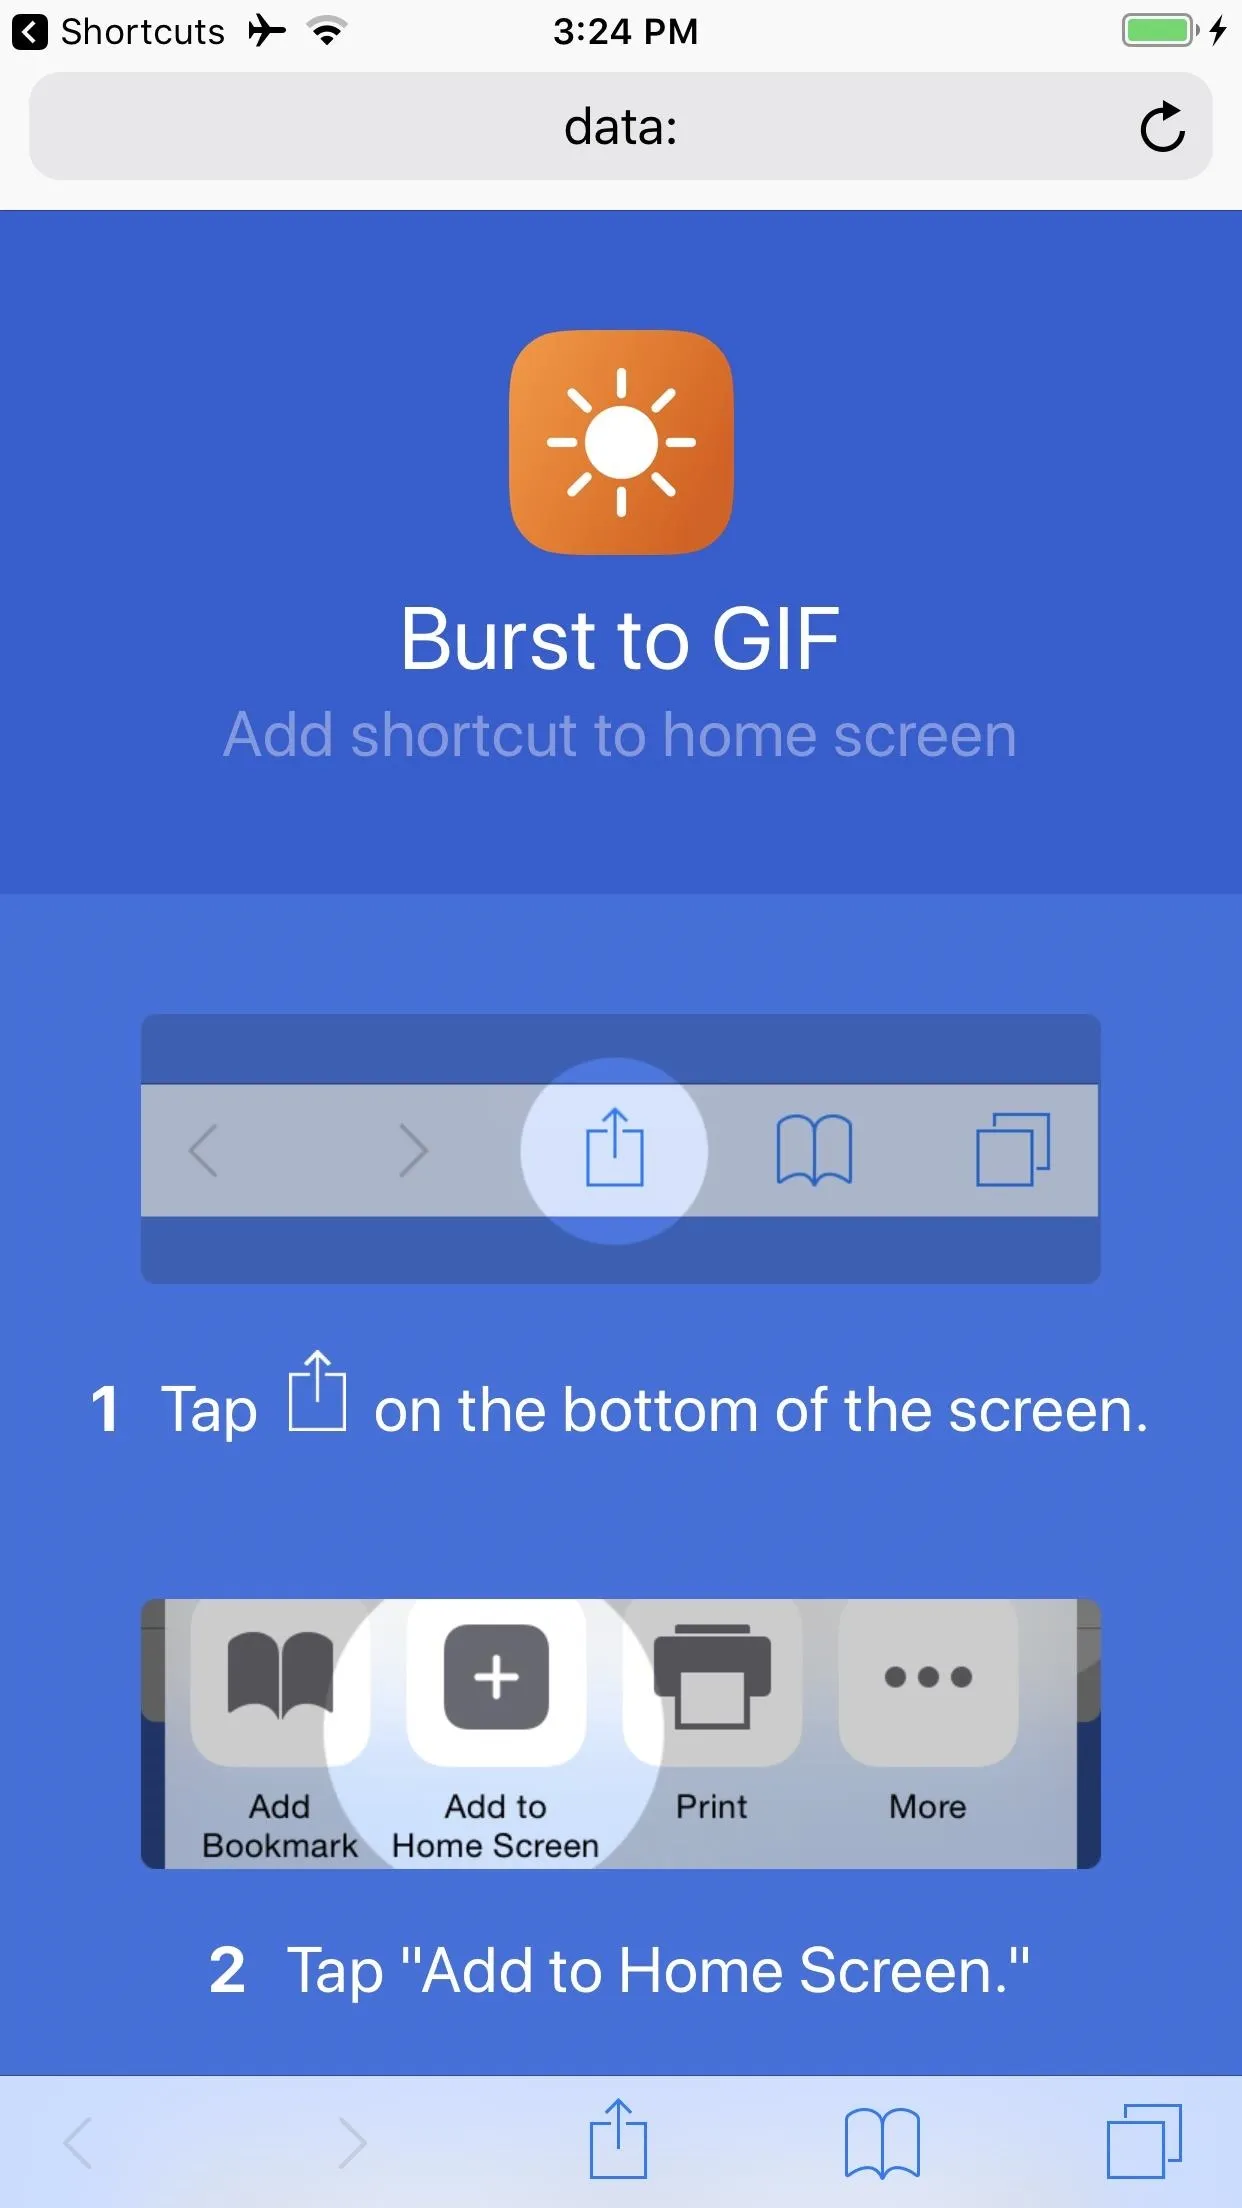
You can also add a home screen shortcut (essentially adding an app icon exclusively for this shortcut). In the "Burst to GIF" workflow in the Shortcuts app, tap on its Settings icon in the top right. Next, tap on "Add to Home Screen," which will open up a link to the shortcut in Safari. Finally, add it to your home screen like any other webpage.

Create a Siri Shortcut for It
You can set up a Siri shortcut from the workflow's Settings page. Tap on "Add to Siri," then either tap the red button to record a shortcut phrase audibly or choose "Type Phrase" and type it in, then tap "Done." By setting this up, summoning Siri by saying "Burst to GIF" (or whatever you called it) will launch "Burst to GIF" right in the Shortcuts app.
Automate Saving Your GIFs
Now that you've seen how the shortcut works and have made it easier to access, you can now tweak the workflow. Let's experiment by adding an action to automate saving.
Currently, the last action in the workflow is "Quick Look," which generates a preview of the GIF. Recall that when Quick Look is triggered, the Share button is in the top-right corner. If you tap on "Done" without choosing any sharing options, the GIF is gone.
But there is an action called "Save to Photo Album," and it does just that. You'll have to add that below "Quick Look," so swipe up the actions menu at the bottom, then search for "Save to Photo Album" under Scripting. You can also just type in "Save" into the search field to find the entry right away.
Tap-and-hold on this action, then drag-and-drop it into place below the "Quick Look" line. By default, the album to which the GIF will be saved is "Camera Roll." Tapping on "Camera Roll" opens up a menu in which you can decide where to put your GIFs. For instance, you can create an album just for GIFs in the Photos app, then choose that album in this script. Personally, I feel that saving to Camera Roll is the most straightforward approach — you can always organize to other albums later.

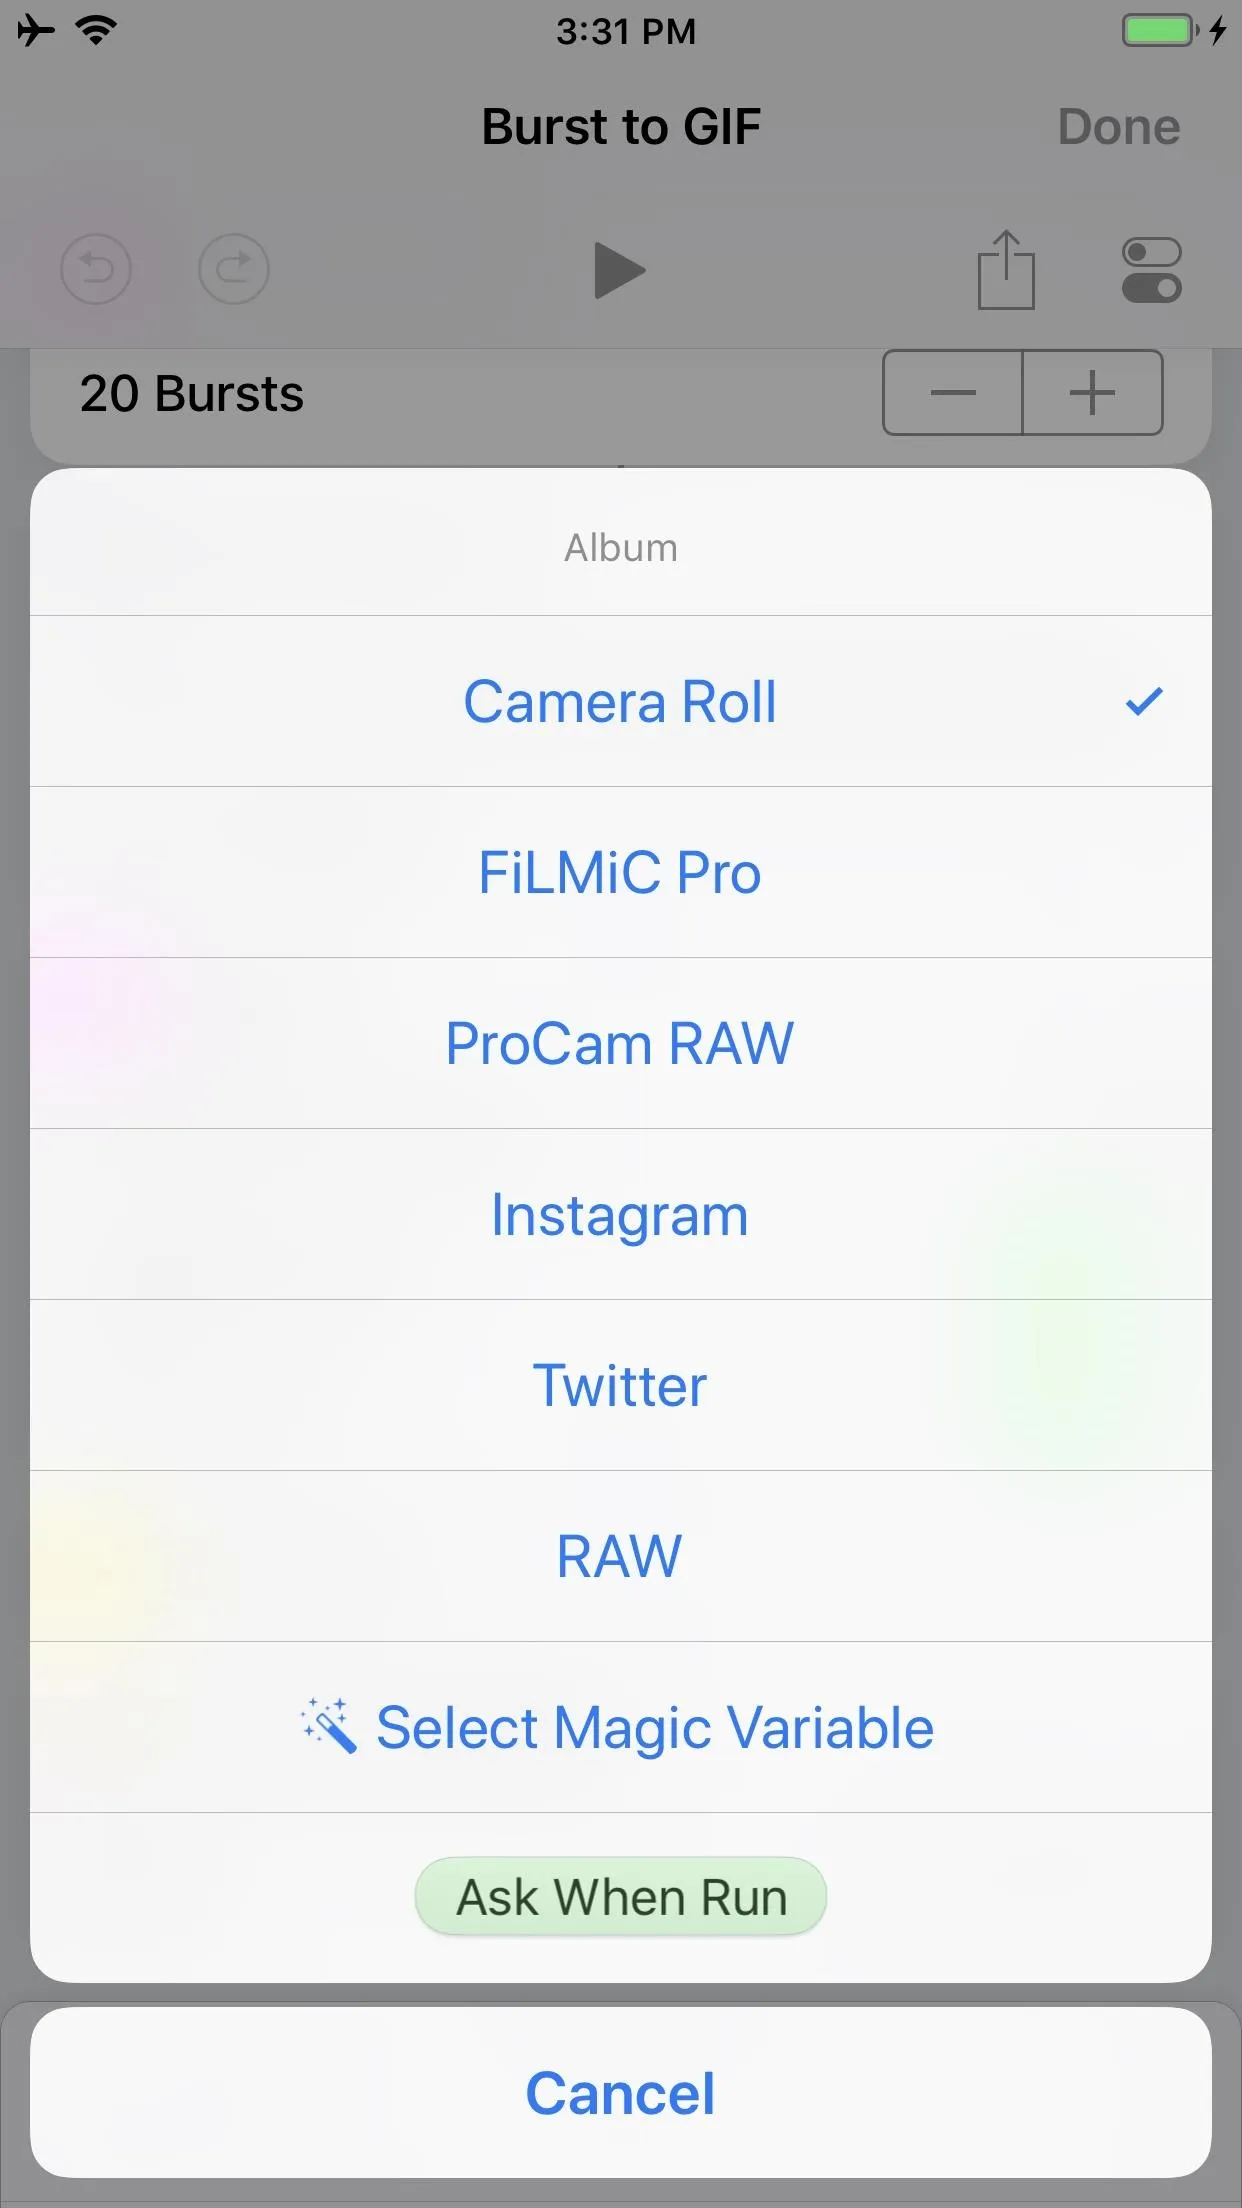
Don't forget that Photos will automatically categorize your media. Thus, if you scroll down to the Media Types section in Photos on the "Album" tab, you should find your saved GIFs in the "Animated" folder. Similarly, if you ever want to see which images of yours are bursts, there is a folder named "Bursts" in which Photos will automatically place such images.
Now, after adding the action, when next you run this Shortcut, everything will be the same — except that after you tap on "Done" on the "Quick Look" screen, the GIF will automatically save to your Camera Roll (or whichever album you designated).
Another variation is to remove the "Quick Look" action. Removing an action is as simple as tapping the "X" on the right end of the action title line.
Thus, "Save to Photo Album" immediately follows the "Make GIF" action. I would say this saves even more time because the "Quick Look" screen is bypassed. The saving of the GIF to Camera Roll is immediate and not dependent on tapping "Done" on the "Quick Look" screen.
Change the Shortcut's Properties
You can also fine-tune other details in the workflow. Let's look at each action and see what we can change.
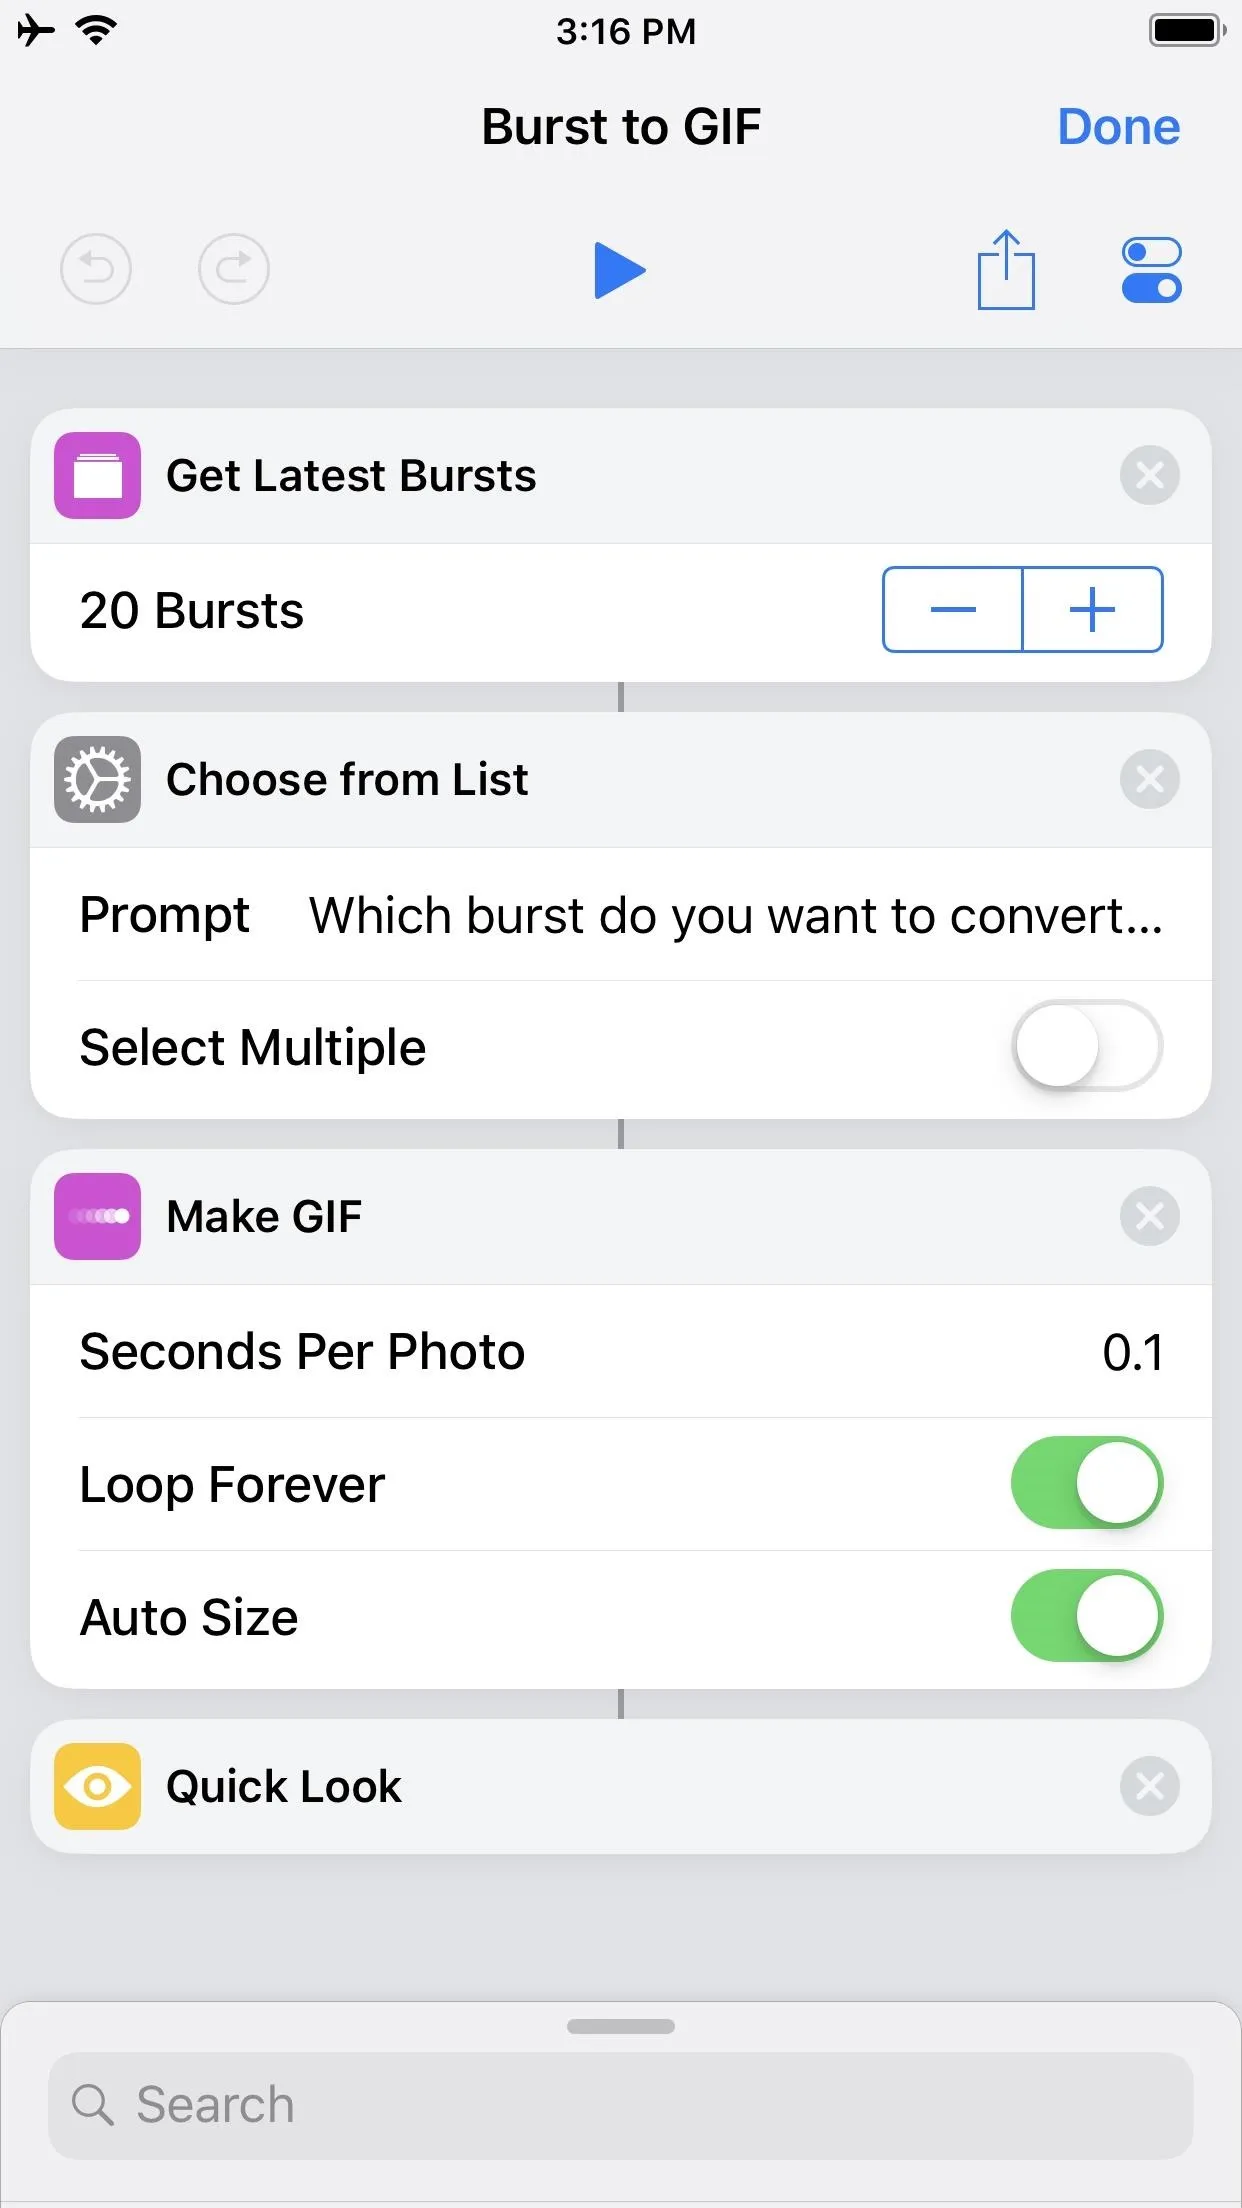
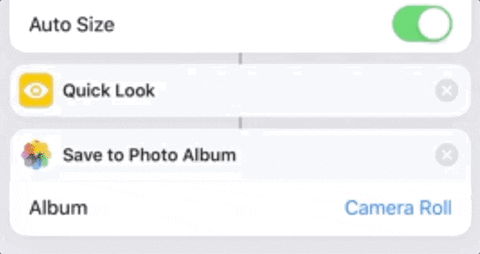
The first action box, "Get Latest Bursts," aggregates your burst photos. The default is set at "20 Bursts," which means you will see the most recent 20 burst groups you took. If you prefer to see more bursts (i.e., older shots you captured), then tap on the plus (+) in the second line of the action to increase the maximum bursts shown when you first trigger the shortcut.
The second action box, "Choose from List," is what allows you to choose from your burst photos. By default, neither "Select Multiple" nor "Select All Initially" are toggled on. I would leave "Select All Initially" toggled off, which does not seem useful as it means that all burst images will be selected by default — resulting in a GIF of all of those burst images stitched together. Deselecting even a dozen images is time-consuming.
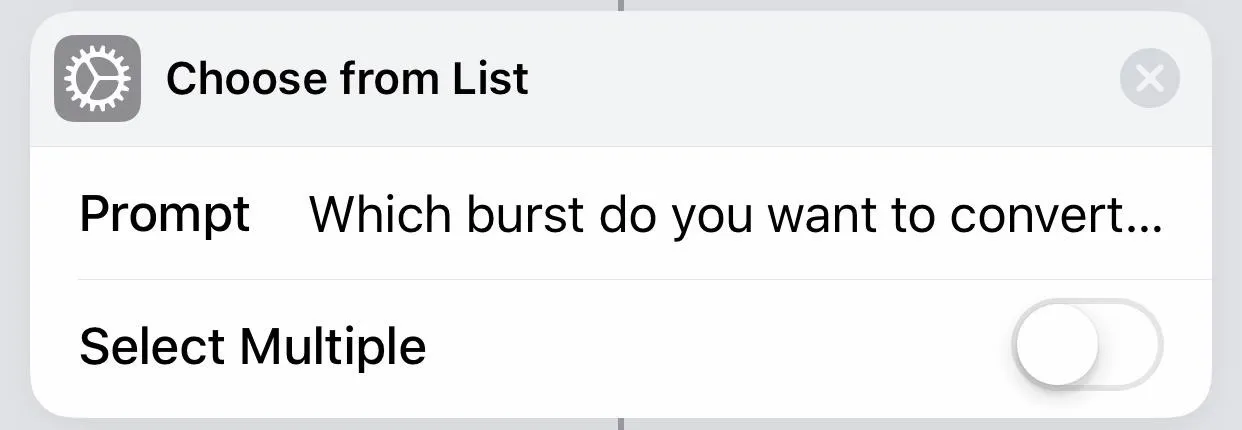
However, toggling on "Select Multiple" can be useful and fun. This means you can choose several burst photos to convert at once. The result, as suggested above, is a stitched GIF of all the selected photos. This is, in a sense, editing potentially two or more different frames for a more cinematic or narrative effect. The only limitation is the order — the stitching will always default to from newest image to oldest.
Finally, the third action box, "Make GIF," allows us to tweak the GIF itself. "Seconds Per Photo" gives us control over the length of each frame. The current default of 0.1 is aligned with the 10-photos-per-minute Burst Mode speed.
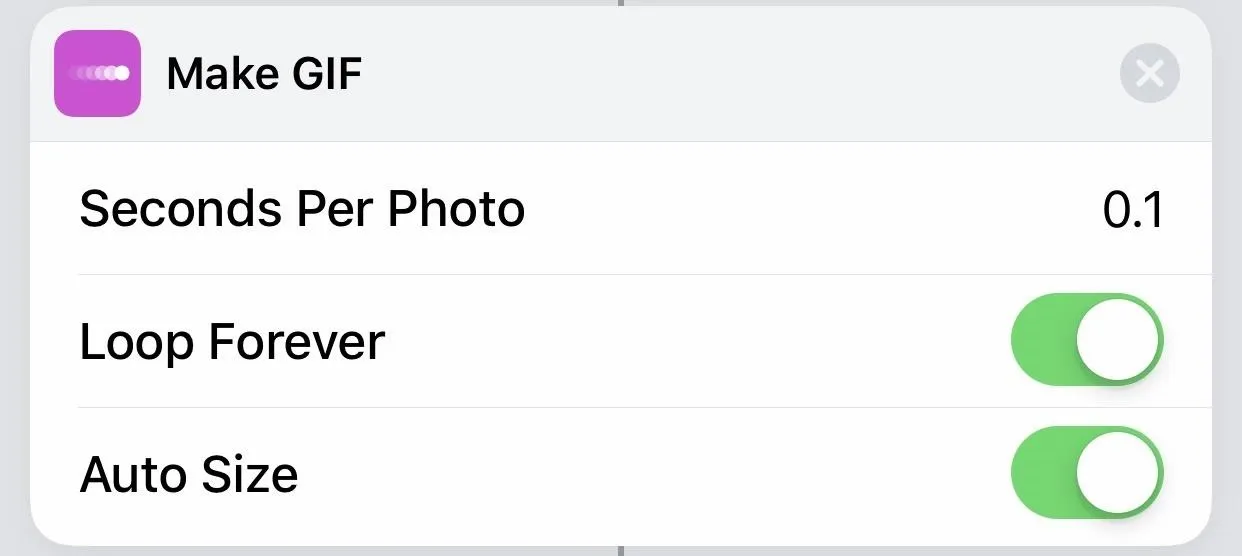
Toggling off "Loop Forever" means the GIF will stop once the frames run out. GIFs are at their most amusing when on loop, so I usually leave this on (which is the default anyway). Toggling off "Loop Forever" reveals a new option, "Loop 1 Time." Tapping on the plus (+) allows you to set a specific number of loops, something which may come in handy if the GIF you create depends on unique repetition for effect (e.g., looping three times for a "three time's the charm" meaning).
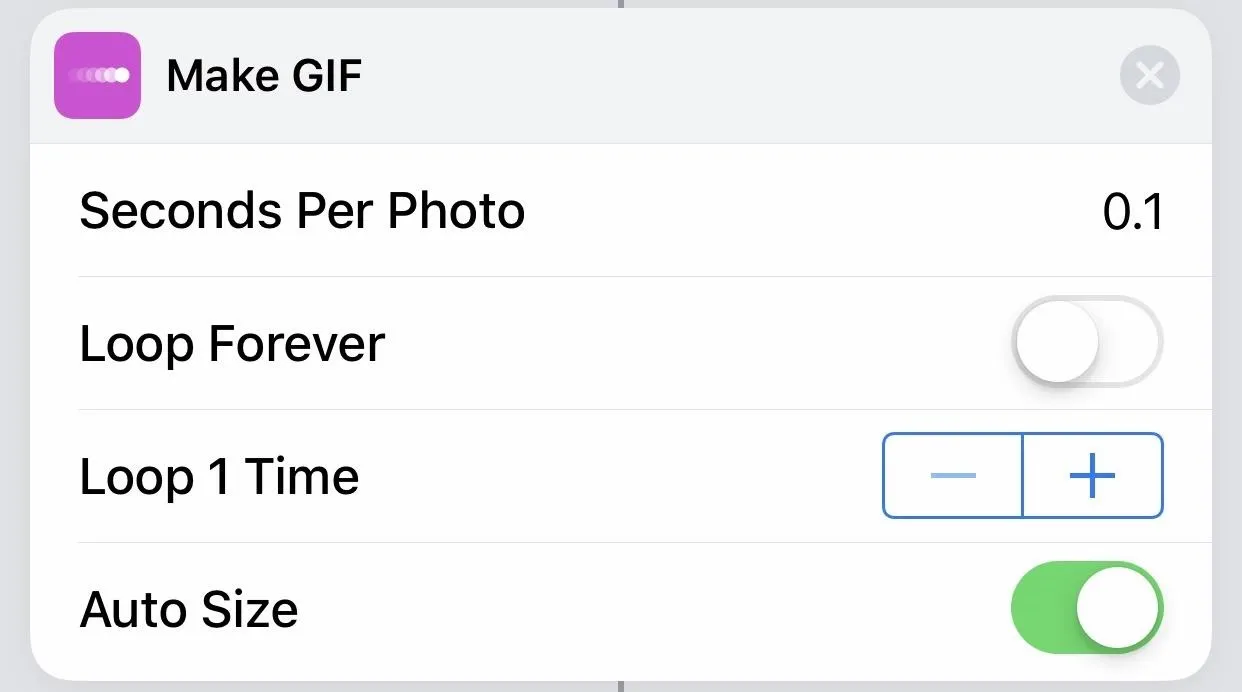
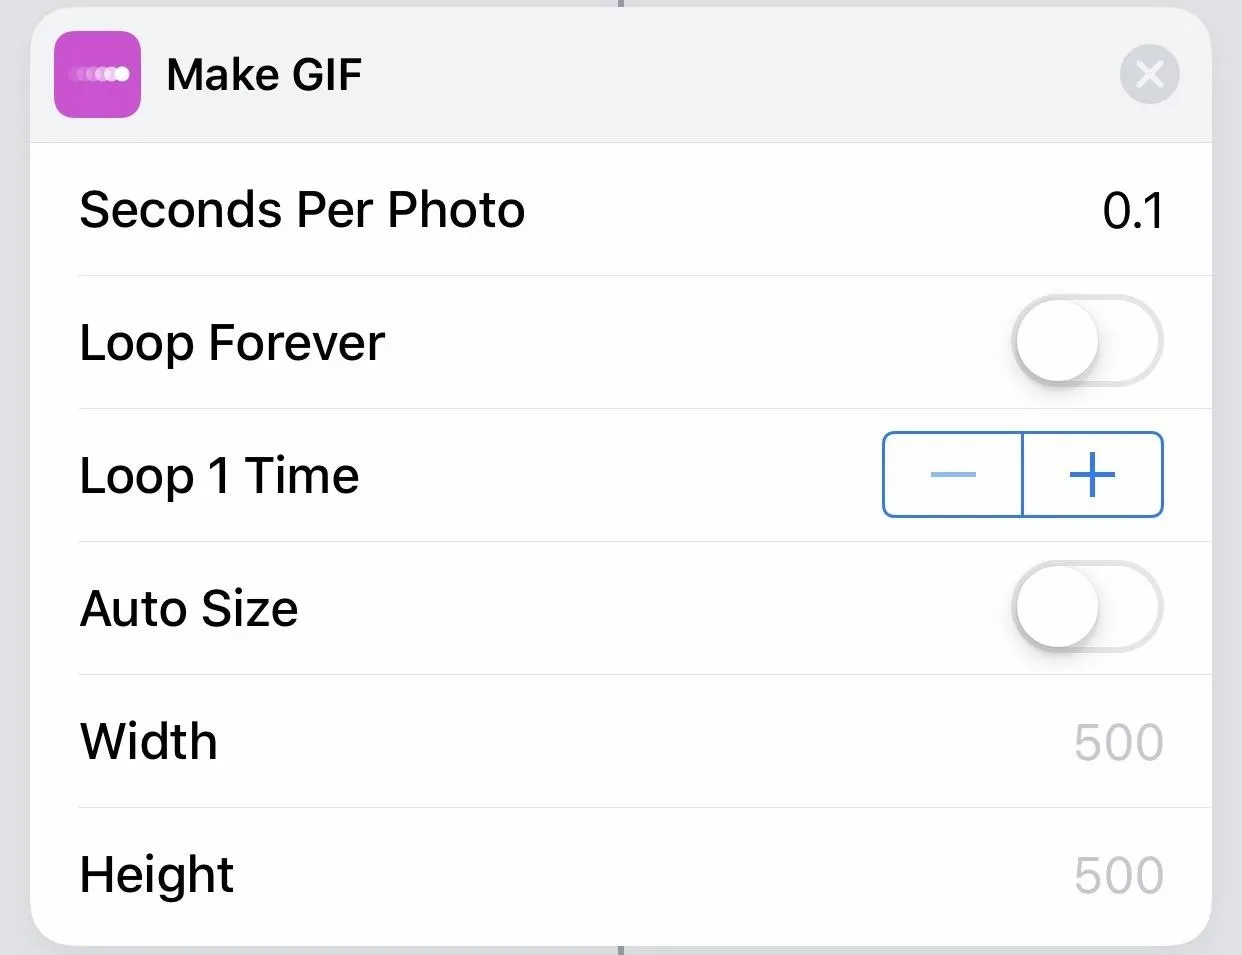
"Auto Size" is toggled on by default, and this is what I prefer. Toggling it off means you can choose the exact number of pixels for the width and height. You may prefer this control if the burst photos you take and stitch are different aspect ratios.
For example, one square burst stitched with two rectangular bursts will result in the square image looking stretched out. Vice versa, if the rectangular burst is in the minority, it will look compressed. For ease of use, I'd recommend keeping "Auto Size" toggled on and trust, that in most use-cases, the resulting GIF is adequate (500 x 500 for square bursts, 376 x 500 for normal bursts).
- Follow Gadget Hacks on Pinterest, Reddit, Twitter, YouTube, and Flipboard
- Sign up for Gadget Hacks' daily newsletter or weekly Android and iOS updates
- Follow WonderHowTo on Facebook, Twitter, Pinterest, and Flipboard
Cover photo and screenshots by David Chien/Gadget Hacks


Comments
Be the first, drop a comment!