


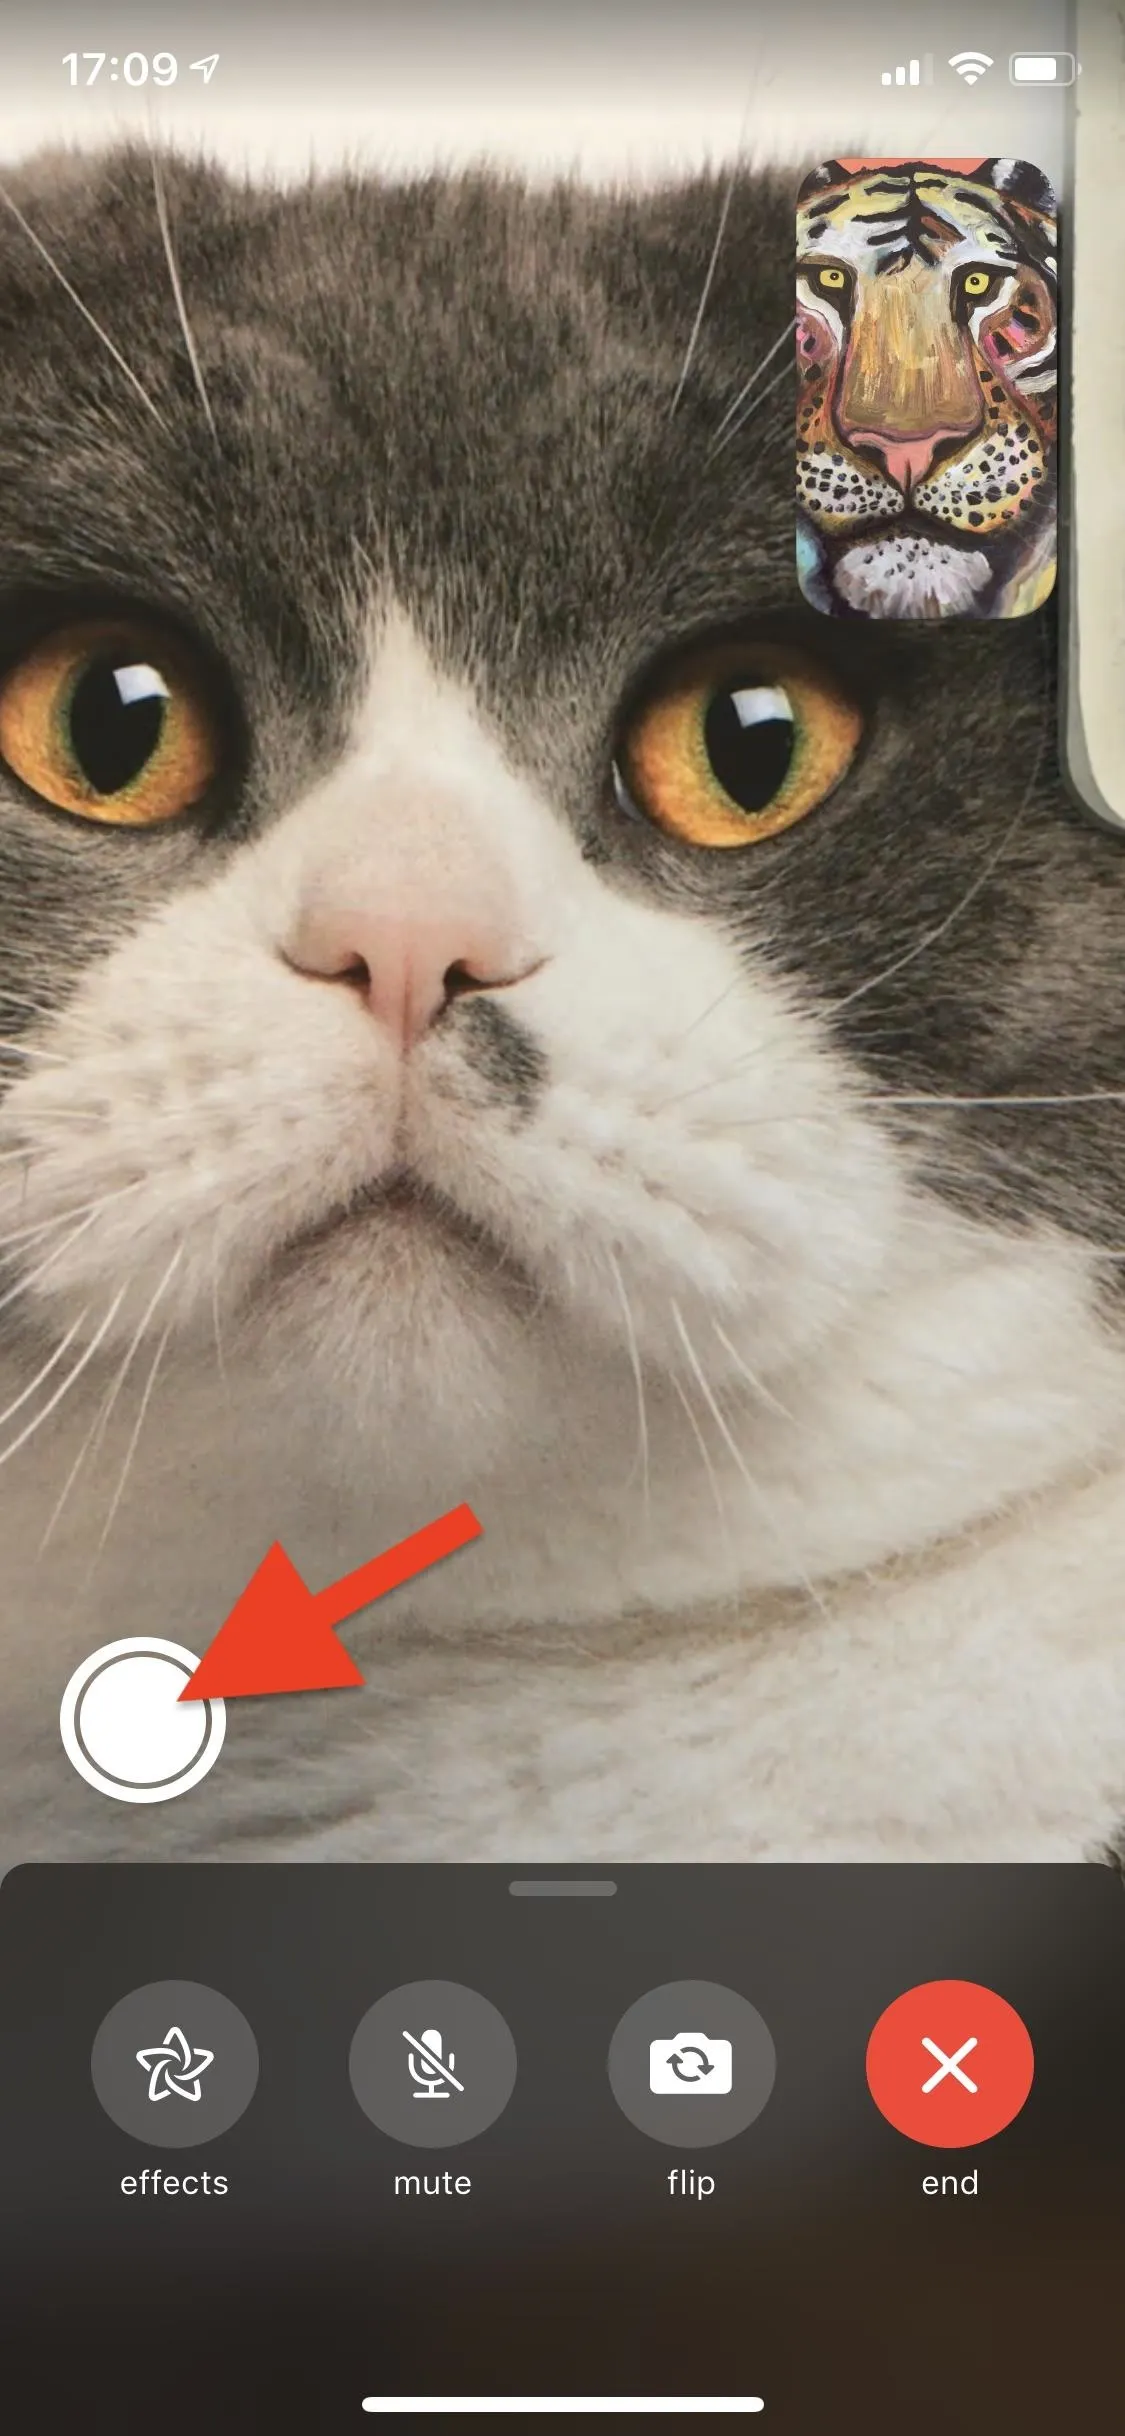
When you're taking a video in the Camera app on your iPhone, there's a little white shutter button in the corner that lets you take a still image while you're filming. Apple brought that same concept over to the FaceTime app in iOS 11, iOS 12, and higher, so you can take Live Photos of your friends during video chats.
FaceTime, which was first released back in 2010, was an instant hit and very much still is. While being able to see and talk to your friends and relatives seamlessly is fantastic, it's always been difficult to capture and share moments with those not in the video call itself.
Sure, you could take a typical screenshot, but there's a delay between the time the screenshot buttons are pressed together and when the screenshot is taken. That means whoever you're FaceTiming could have stopped doing the memorable or embarrassing deed worth capturing. Plus, it's pretty easy to mess up a simple screenshot and close out of the app or lock your iPhone instead.
Apple fixed this issue with an on-screen button you can tap that instantly captures a Live Photo of your friend or family member's camera. Let's check out how to use it below on iOS 11.0 through 11.4.1, as well as iOS 12.1.1 and higher. (Apple, for an undisclosed reason (or accident), removed this feature in iOS 12 through 12.1.)
Make Sure Everyone Is on a Compatible iOS Version
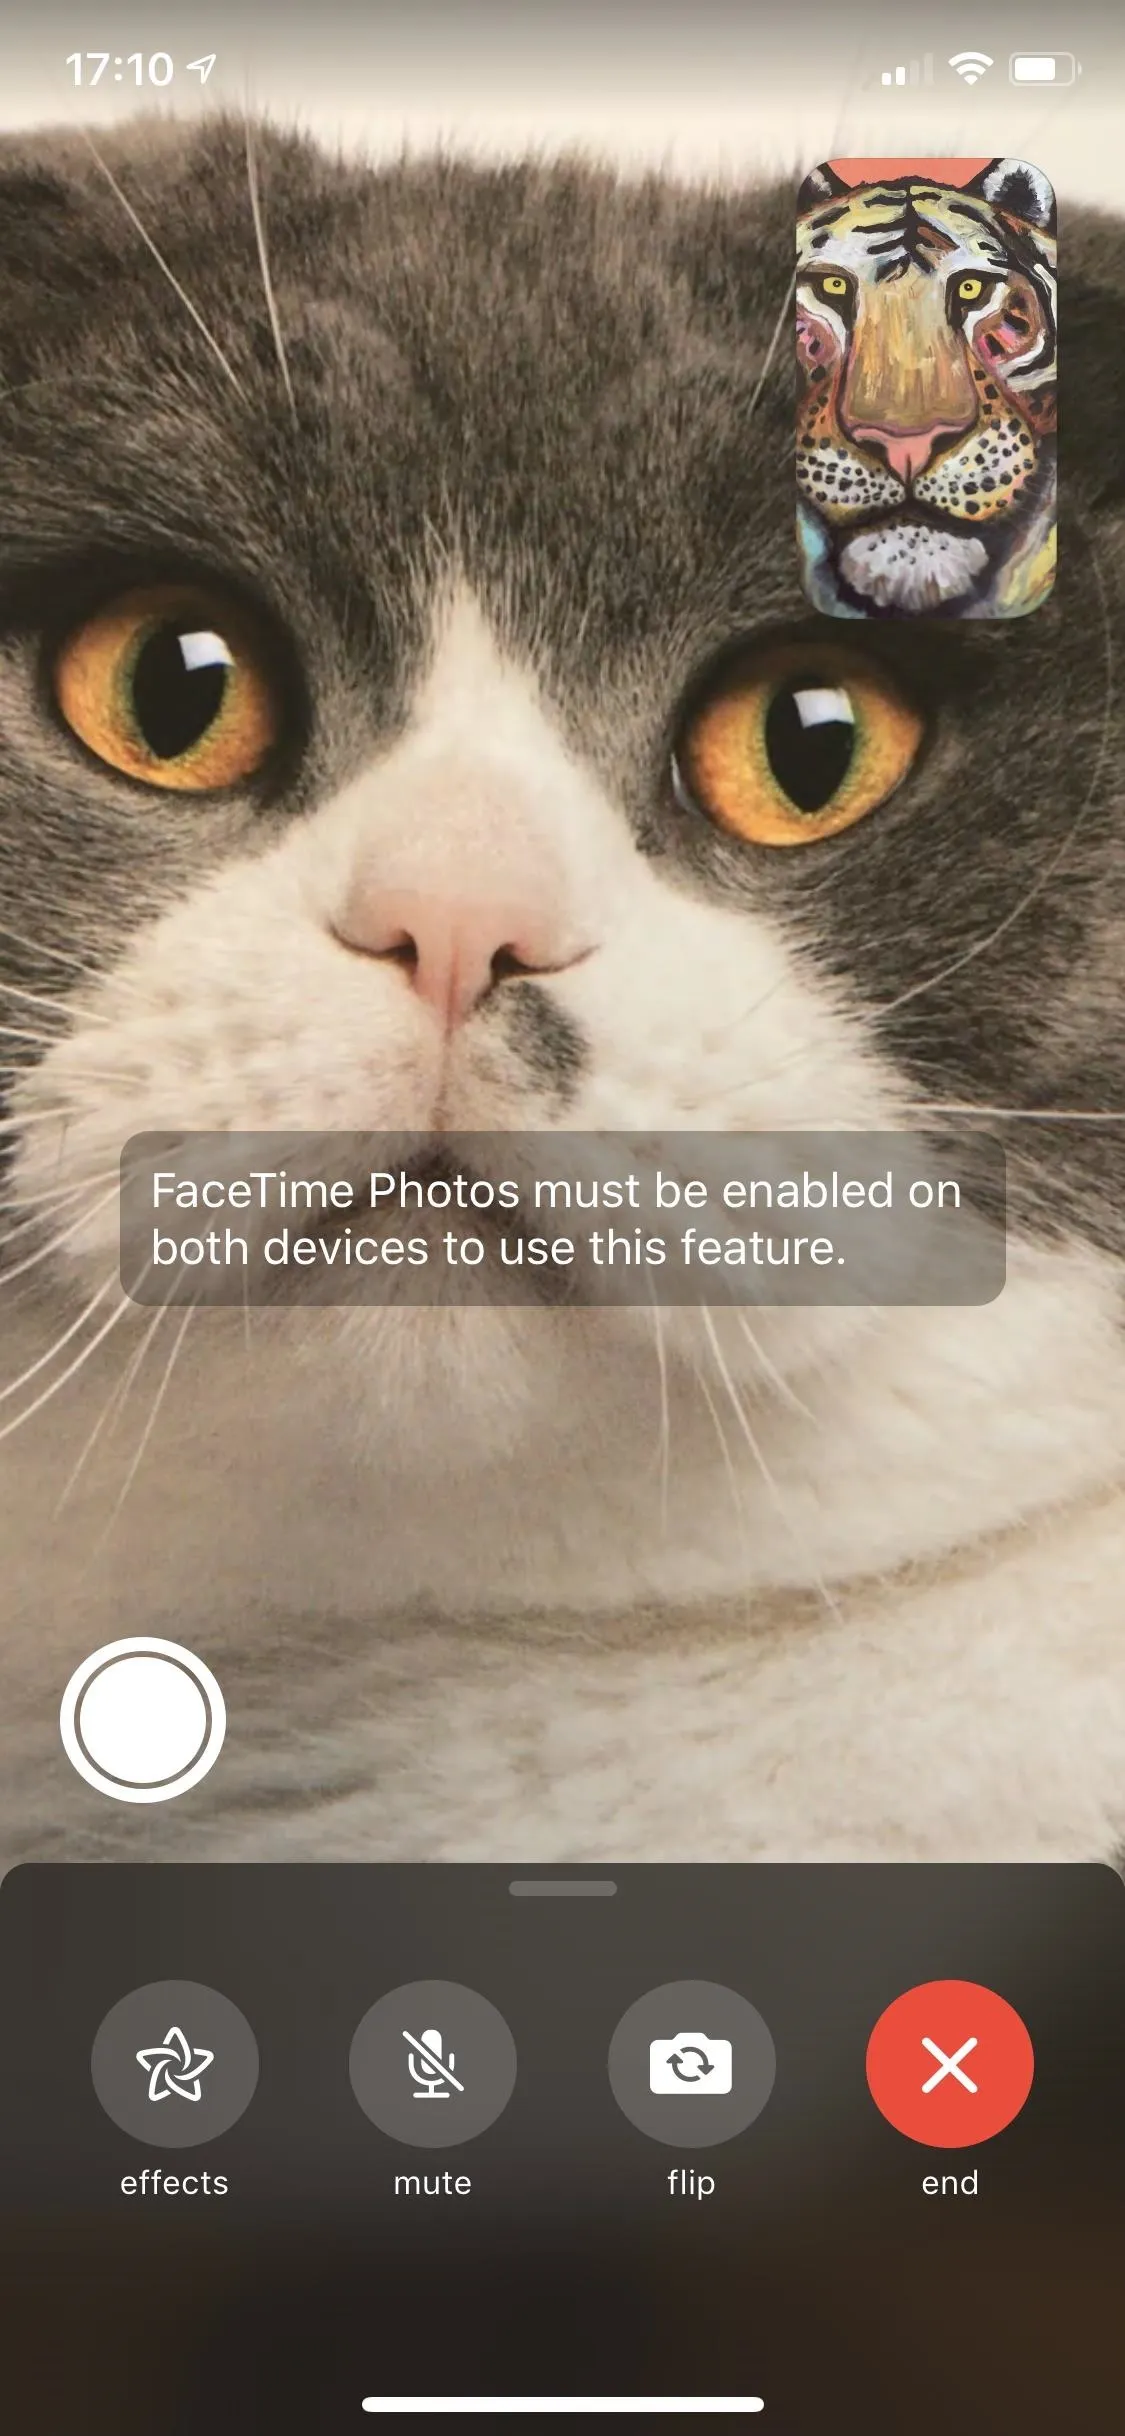
For this to work, both you and the person you are FaceTiming with will need to have either iOS 11.0–11.4.1 or iOS 12.1.1 and higher installed. If you FaceTime with someone running iOS 12.0–12.1 or iOS 10.3.3 or below, the capture button will be grayed out and unusable, and tapping on it will say the other user needs the option enabled.
However, it's also important to note that iOS 11 users can take Live Photos of other iOS 11 users, and iOS 12 users can take Live Photos of other iOS 12 users, but an iOS 12 user cannot take a Live Photo of an iOS 11 user and vice versa. We have not tested all versions against each other, but it's best to always be on the latest update to ensure compatibility.
It's also possible that iOS 11 users can only FaceTime with iOS 11 users and macOS High Sierra 10.13 while iOS 12 can do so with iOS 12 users and macOS Mojave 10.14 and higher. We have not tested version compatibility from iOS to macOS, so just keep this in mind.
Pick Your Victim & Give Them a Call
Start off by picking a friend that does silly or goofy things on FaceTime, then give them a call. Once in the video call, you'll see the white-and-bright capture button on the lower left-hand side. Group FaceTime calls don't count, as the feature is only available in one-on-one conversations.
If you're running an iOS 11 version and it's grayed out, the other user is not using a compatible iOS version or has disabled the feature, so you won't be able to take a Live Photo of them.
On iOS 12.1.1 and higher, the button will only be grayed out when you disable the feature on your end. So it may appear as if you can take a Live Photo of the other user, but doing so will still give a "FaceTime Photos must be enabled on both devices to use this feature" warning.
- Don't Miss: How to Use FaceTime's Group Chat on Your iPhone
Catch Them in the Act
Once your FaceTime video call is in motion, wait for whoever you're calling to do something worth sharing and hit the white dot-in-a-circle button on the bottom left. Both you and they will see a brief toast message stating that a FaceTime Live Photo was taken, while only you will find a saved Live Photo within your Photos app.
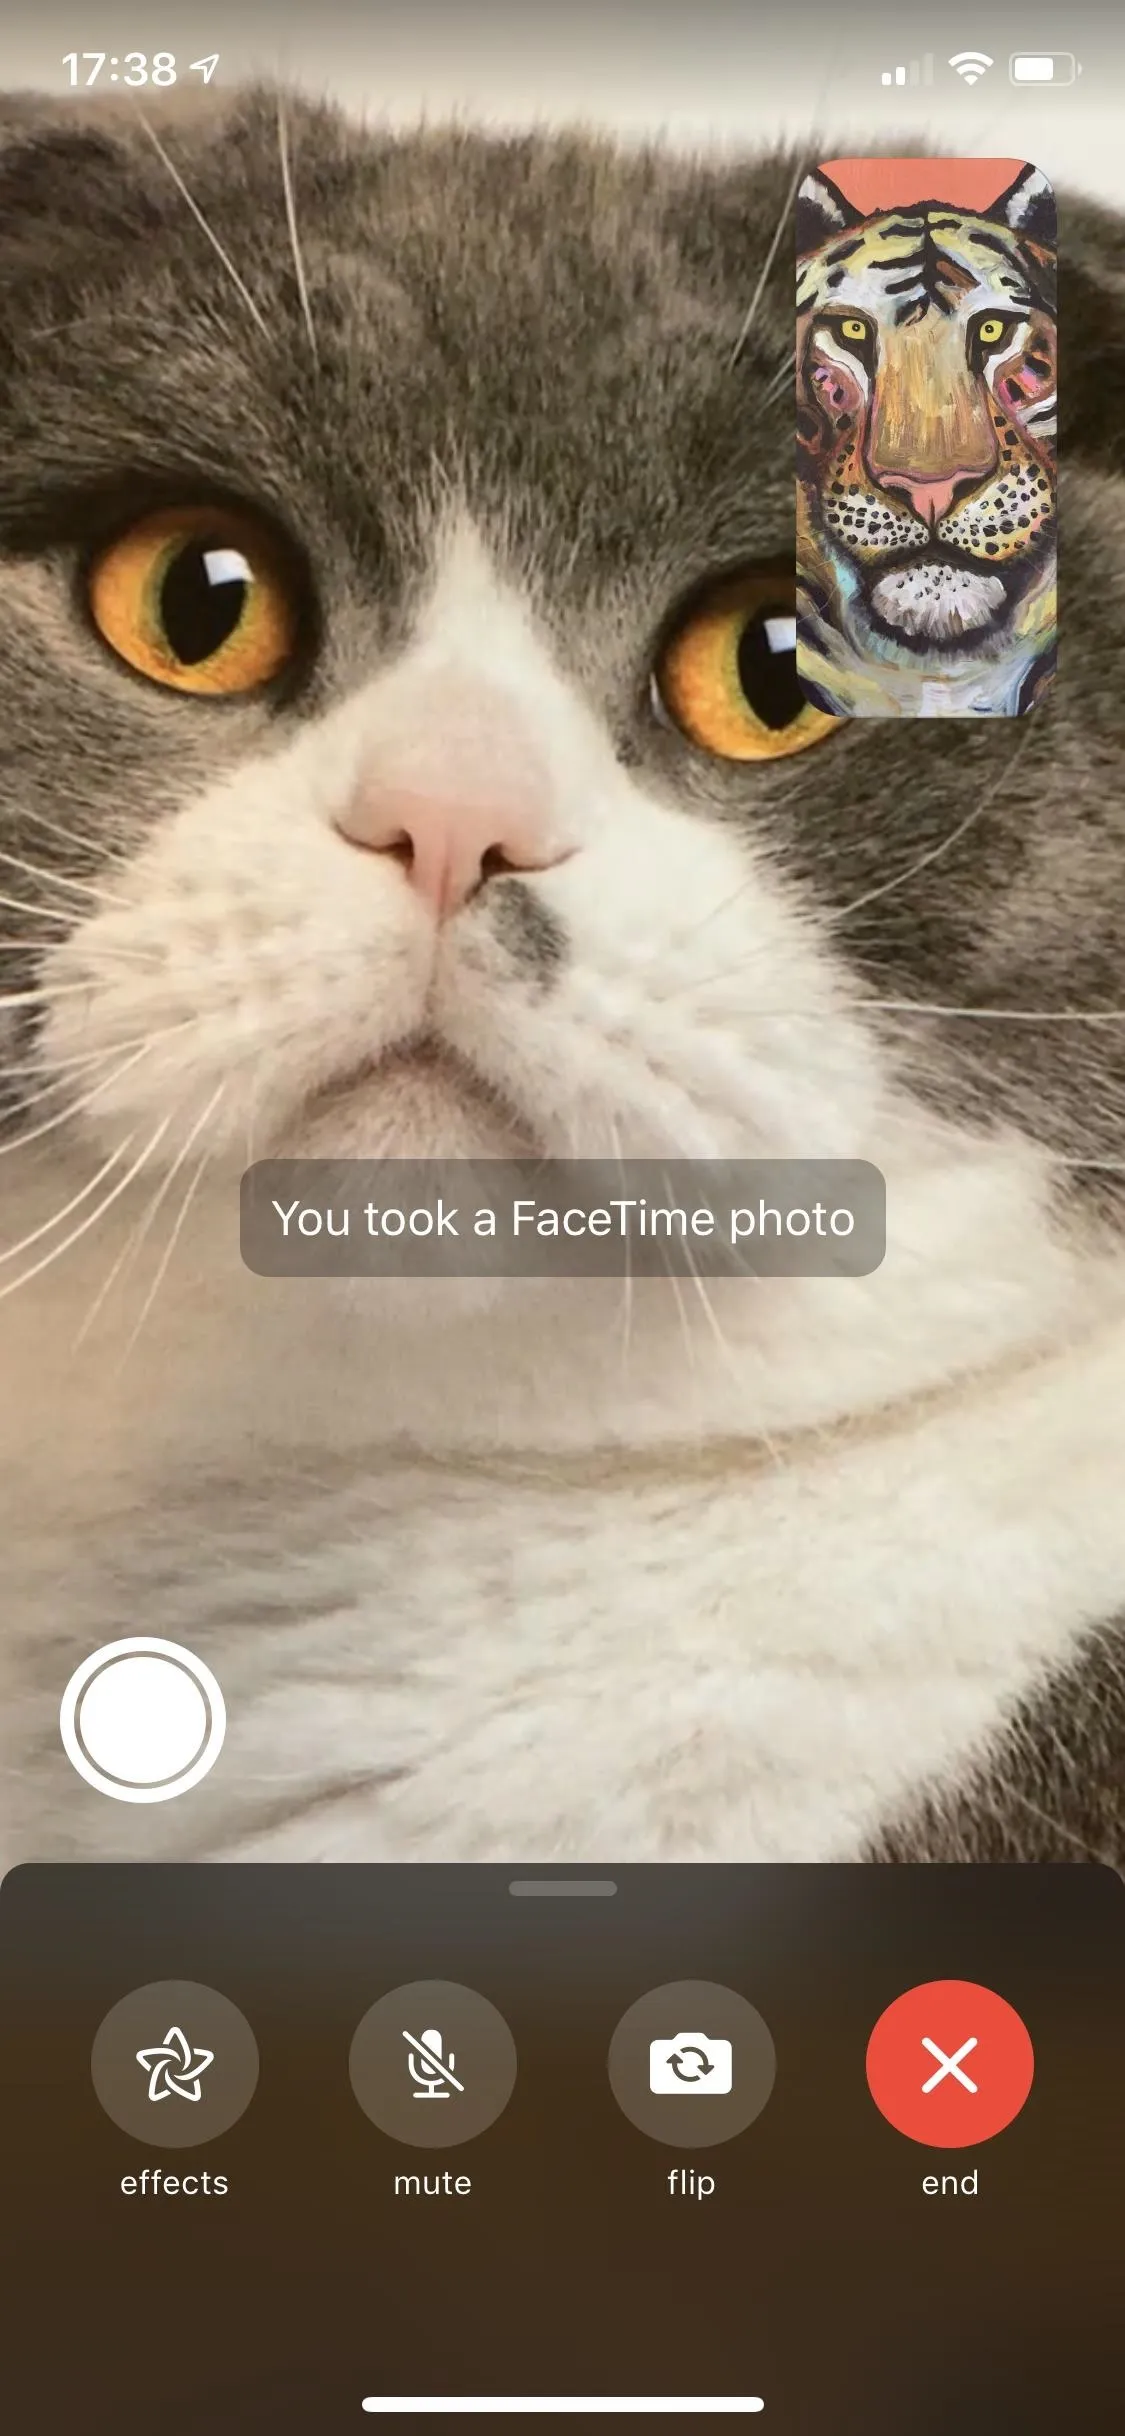
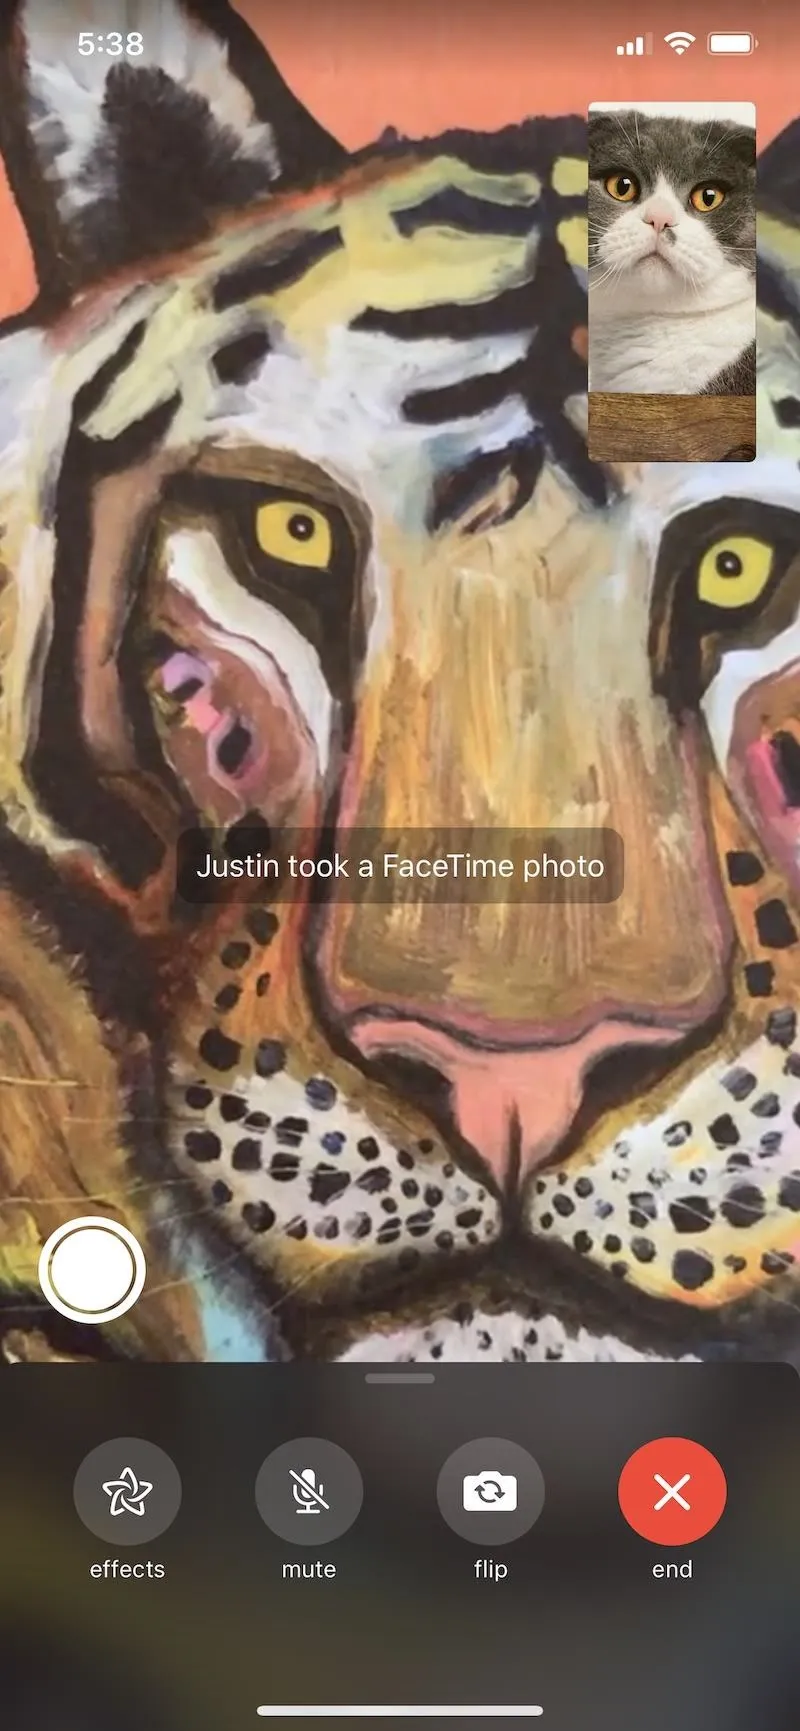
The cool part about this is that it's almost as though you took the photo using the other person's front-facing camera. There's no call button in the Live Photo, no mute option, and best of all, your picture won't be in the top right-hand corner. Plus, the Live Photo you save will also have the audio attached, so you can get any funny spoken moments with the visuals. The examples below are between two iOS 11 users, each took a Live Photo.


How to Protect Yourself from FaceTime Live Photos
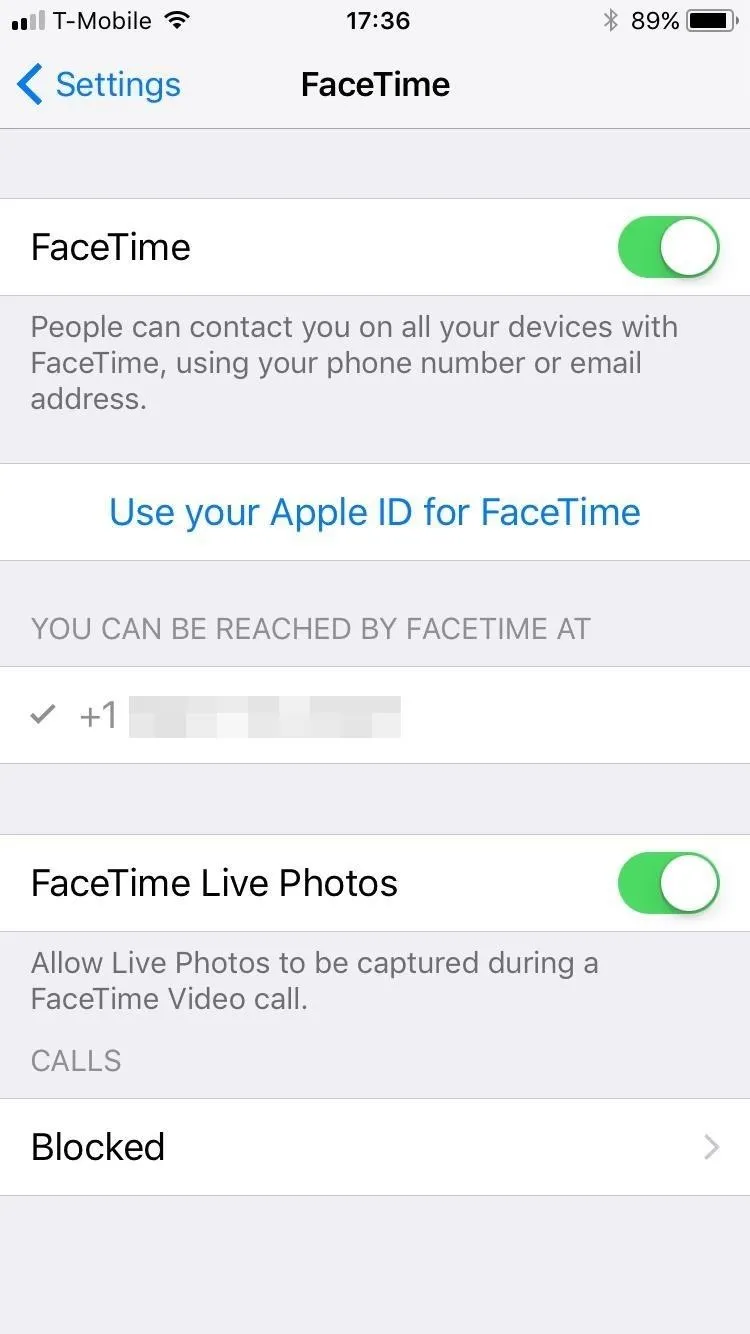
There's a straightforward way to prevent someone from taking a FaceTime Live Photo of you — just turn off the Live Photos option in the Settings app under FaceTime. However, with the setting off, you will also not be able to take a Live Photo of someone else during FaceTime since both participants need it activated.
Turning FaceTime Live Photos off doesn't mean you're completely safe from someone snagging a pic of your call — regular screenshots can still be taken without you being alerted.
What Do You Think of This New Feature?
On iOS 11, the only thing you'll have to get used to is the way you switch from front to rear camera since the Live Photos button took the "switch camera" button's place. It's not gone entirely, it's just hiding under your thumbnail image, and all you have to do is tap on it to switch to the rear camera. If you have iOS 12, there's a "flip" button that's fairly obvious.
Cover photo and screenshots by Justin Meyers/Gadget Hacks


Comments
Be the first, drop a comment!