


Although the Clock app in iOS has undergone some designchanges over the years, you still can't set more than one timer on your iPhone. Oddly enough, Apple's own HomePod speaker added this feature, mimicking the timer on Amazon's popular Echo smart speakers. Fortunately, through Apple's Shortcuts app, there's a clever hack to set multiple timers — without using a third-party timer app.
Authoring your own automated workflows can be a challenge, especially if you're not a programmer or developer. But there are plenty of shortcuts available from the community that you can use with little effort. And if you want to eventually get to a point where you're making your own shortcuts, using, analyzing, and customizing shortcuts from others is a great way to learn and get there.
- Update: Apple's Clock App Finally Lets You Run Multiple Timers on Your iPhone at the Same Time on iOS 17
Note that Shortcuts is only available in iOS 12 or higher. Older systems can use Workflow, but the steps may be different, and some features may not be possible.
Add the 'Set Multiple Timers' Shortcut
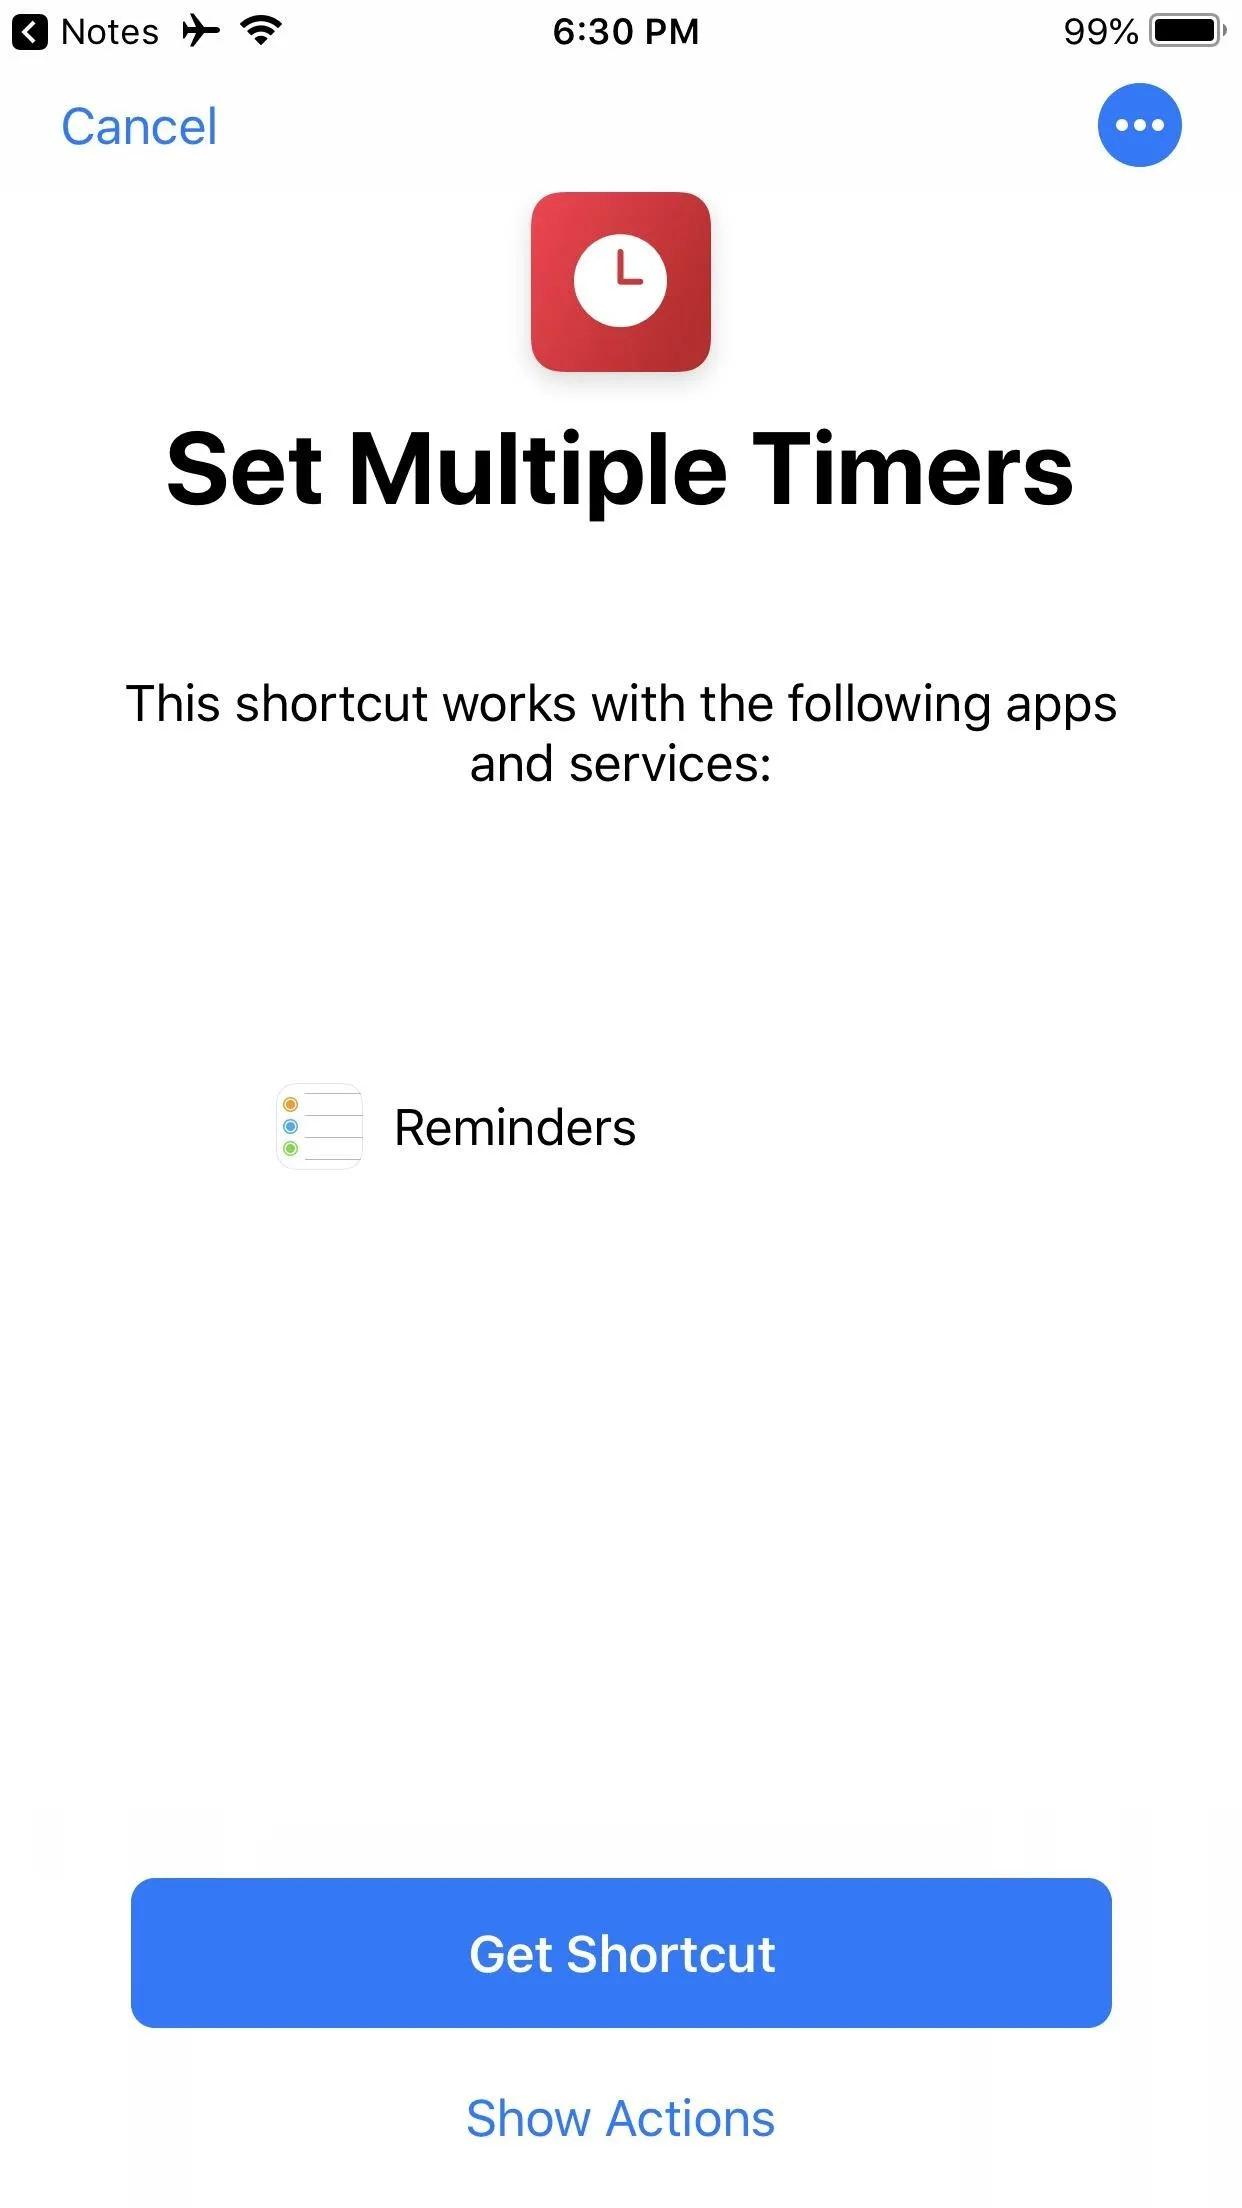
Apple highlights timer-based shortcuts in the "Gallery" section for actions such as steeping tea and doing laundry, but these are meant for one-at-a-time use cases. However, we built a shortcut called "Set Multiple Timers," and while it's not featured in the Shortcuts Gallery, you can use the link below to install the shortcut.
- Shortcuts Link: Set Multiple Timers (free)
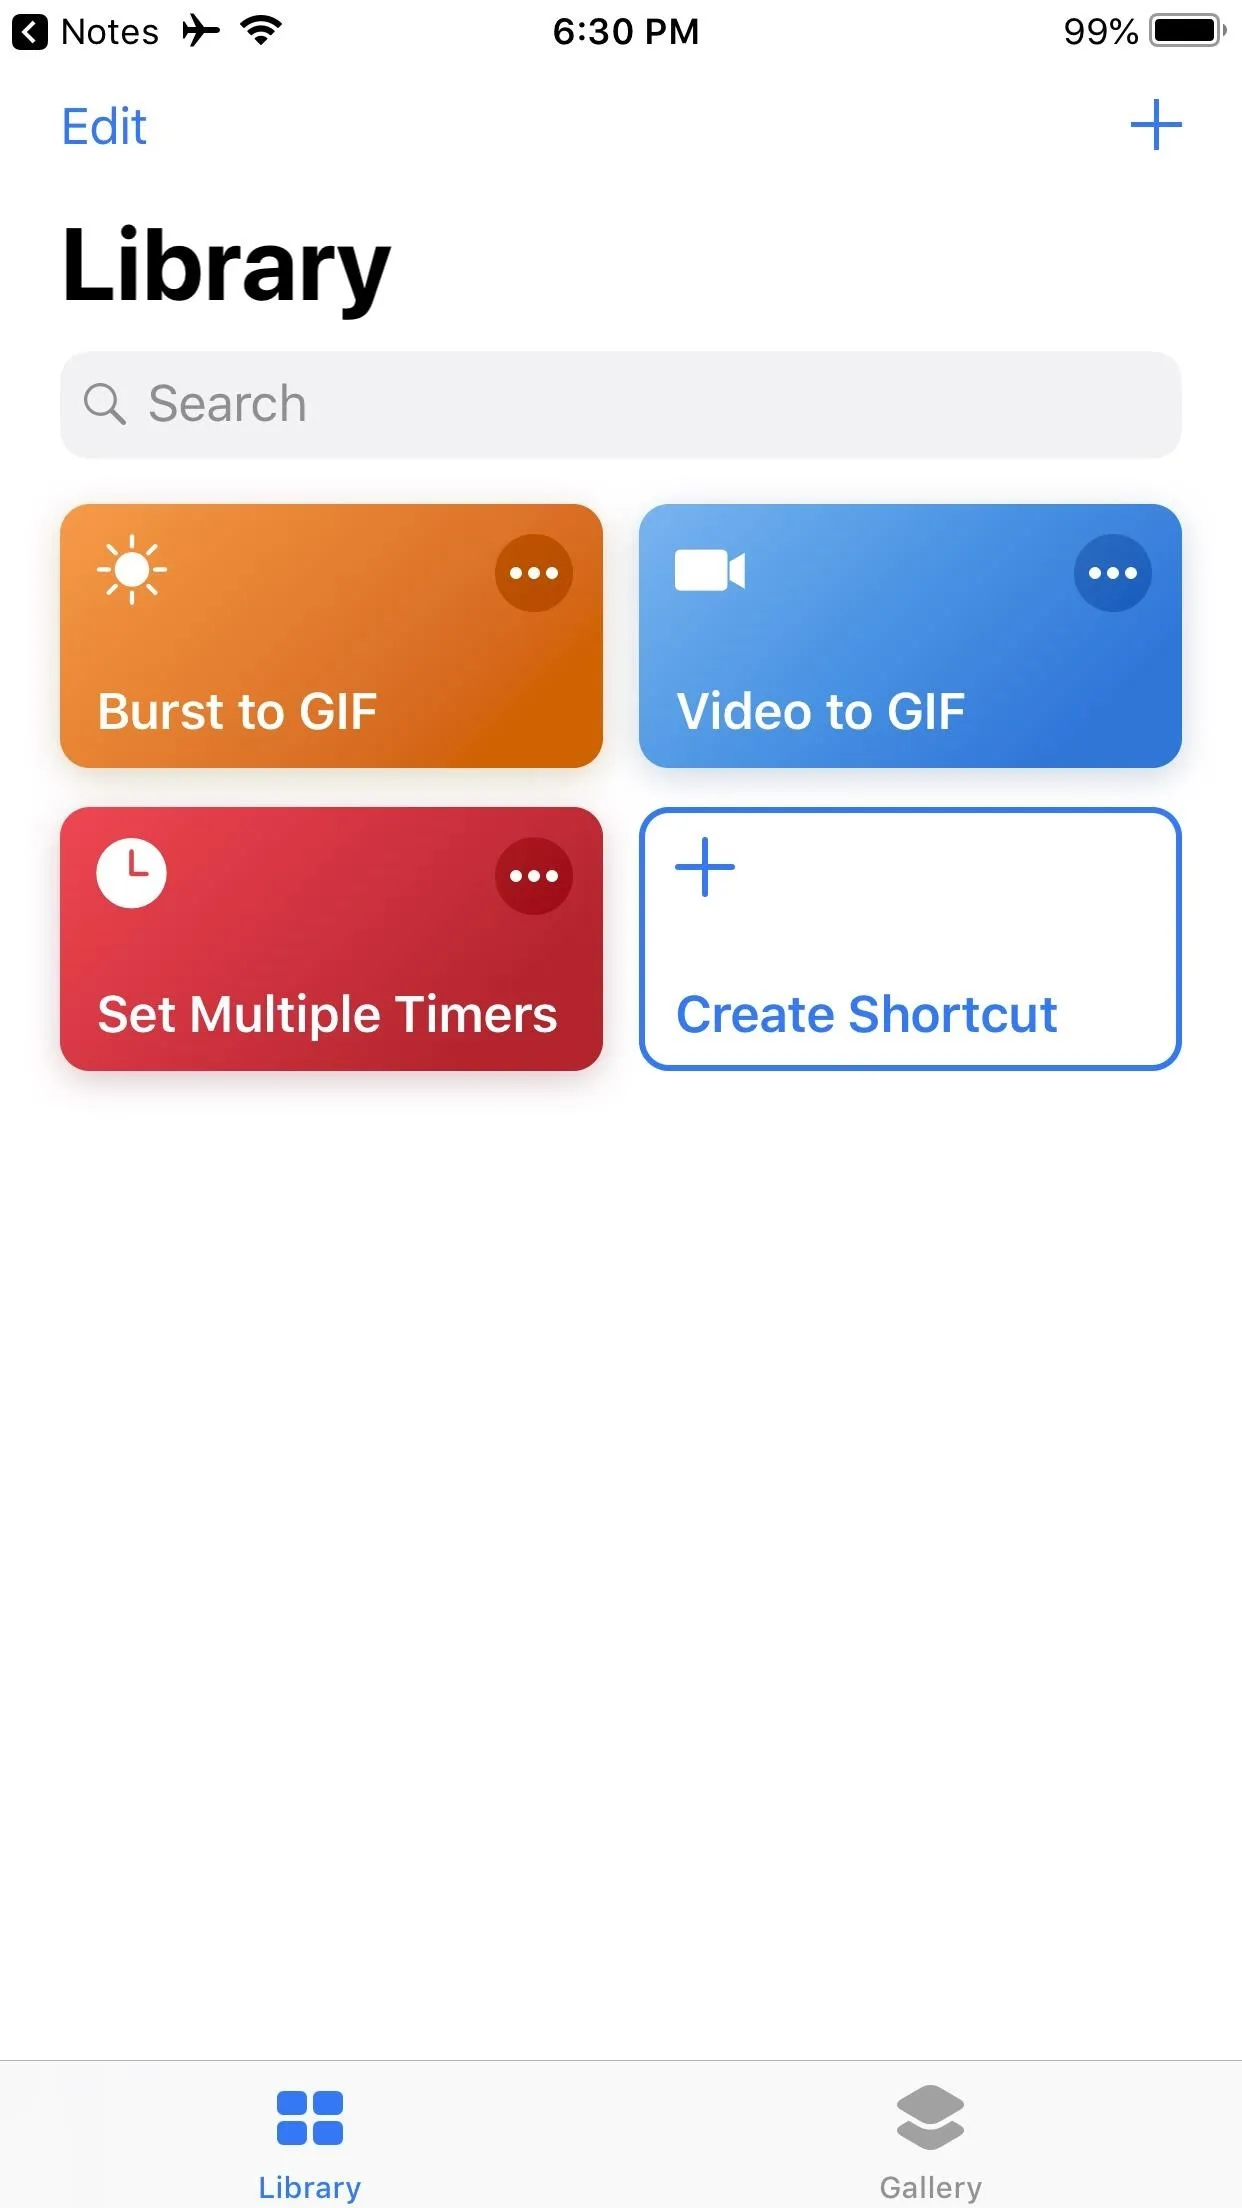
When you open it in Shortcuts, tap "Get Shortcut," then tap the "Library" tab. Find it, then peek-and-pop on its workflow with 3D Touch. Or, if you are using a non-3D Touch iPhone, tap the ellipsis (•••) inside its box to view the actions.
Test How Well It Works
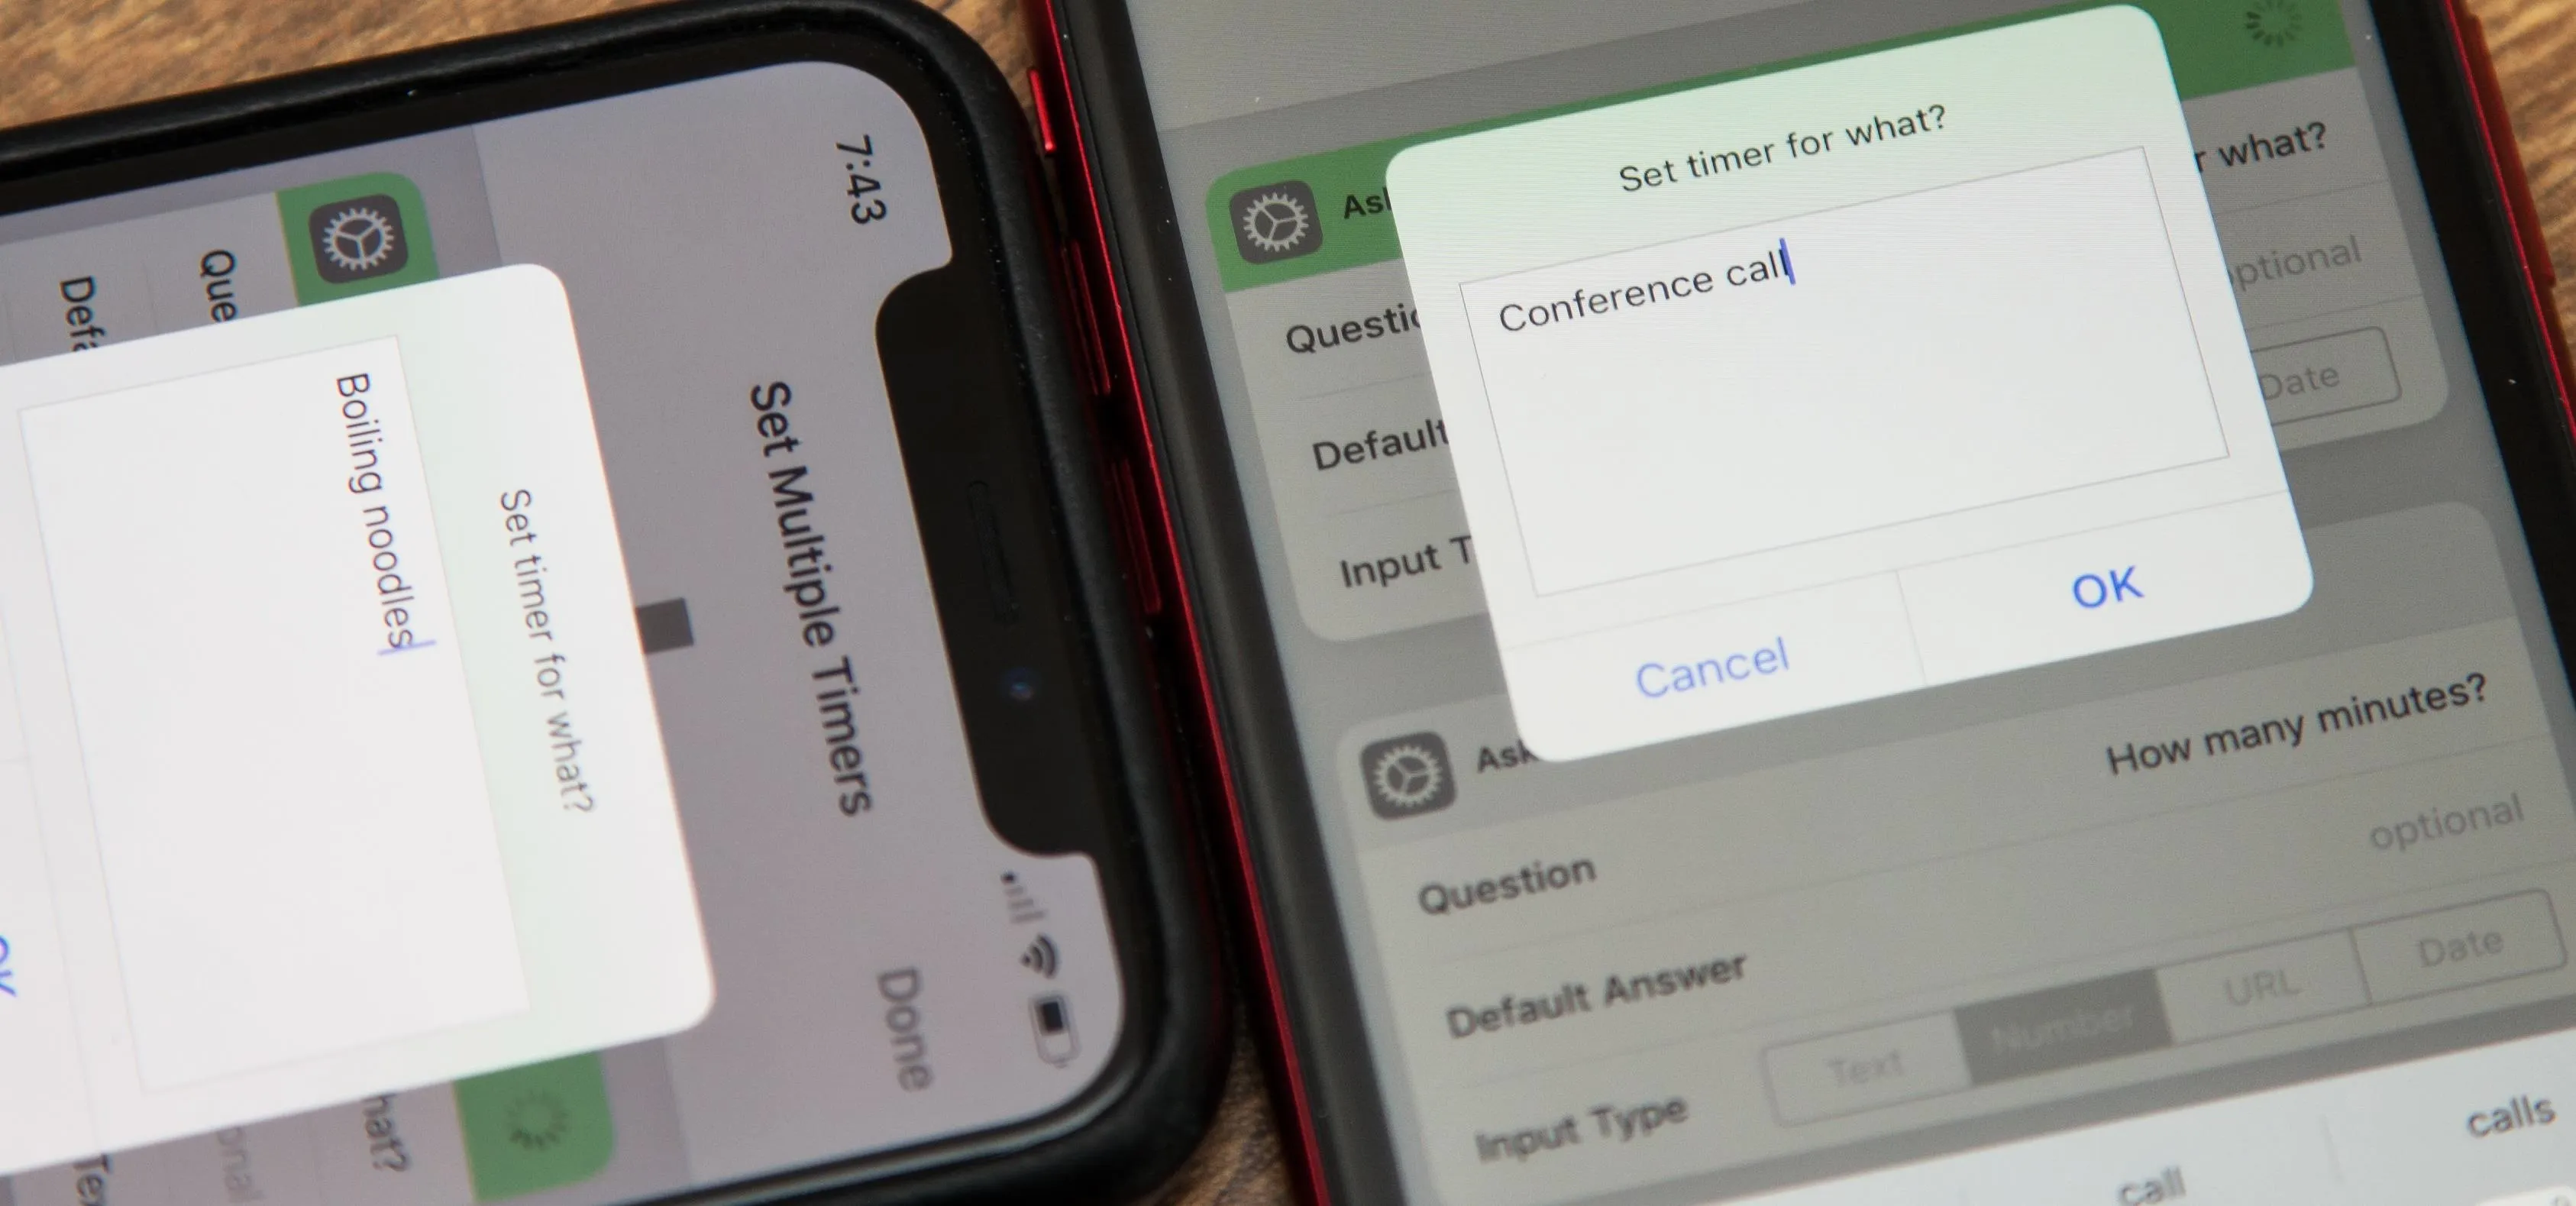
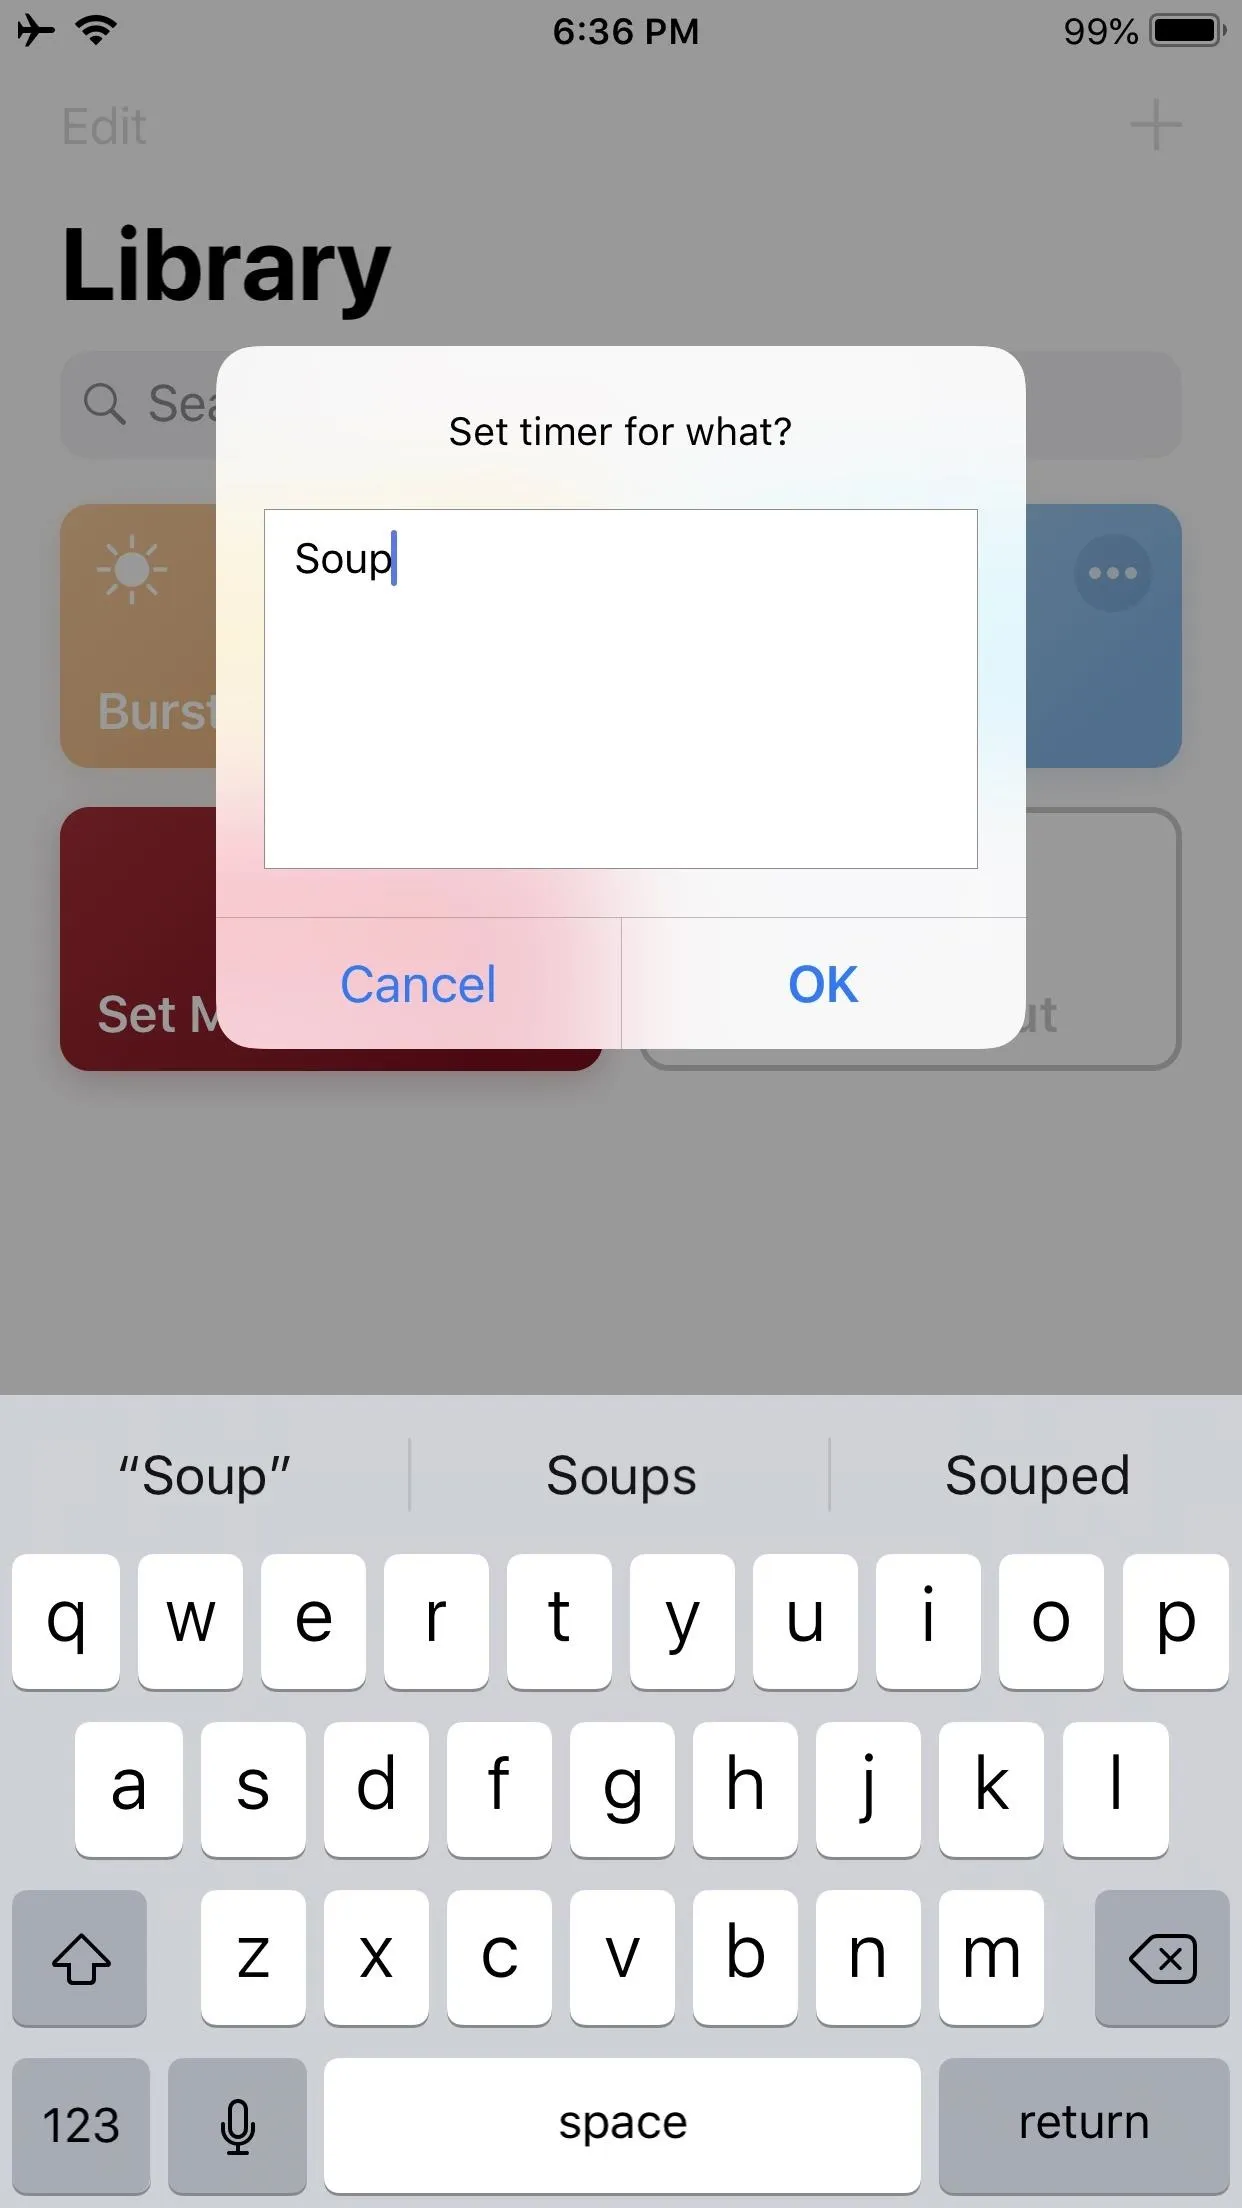
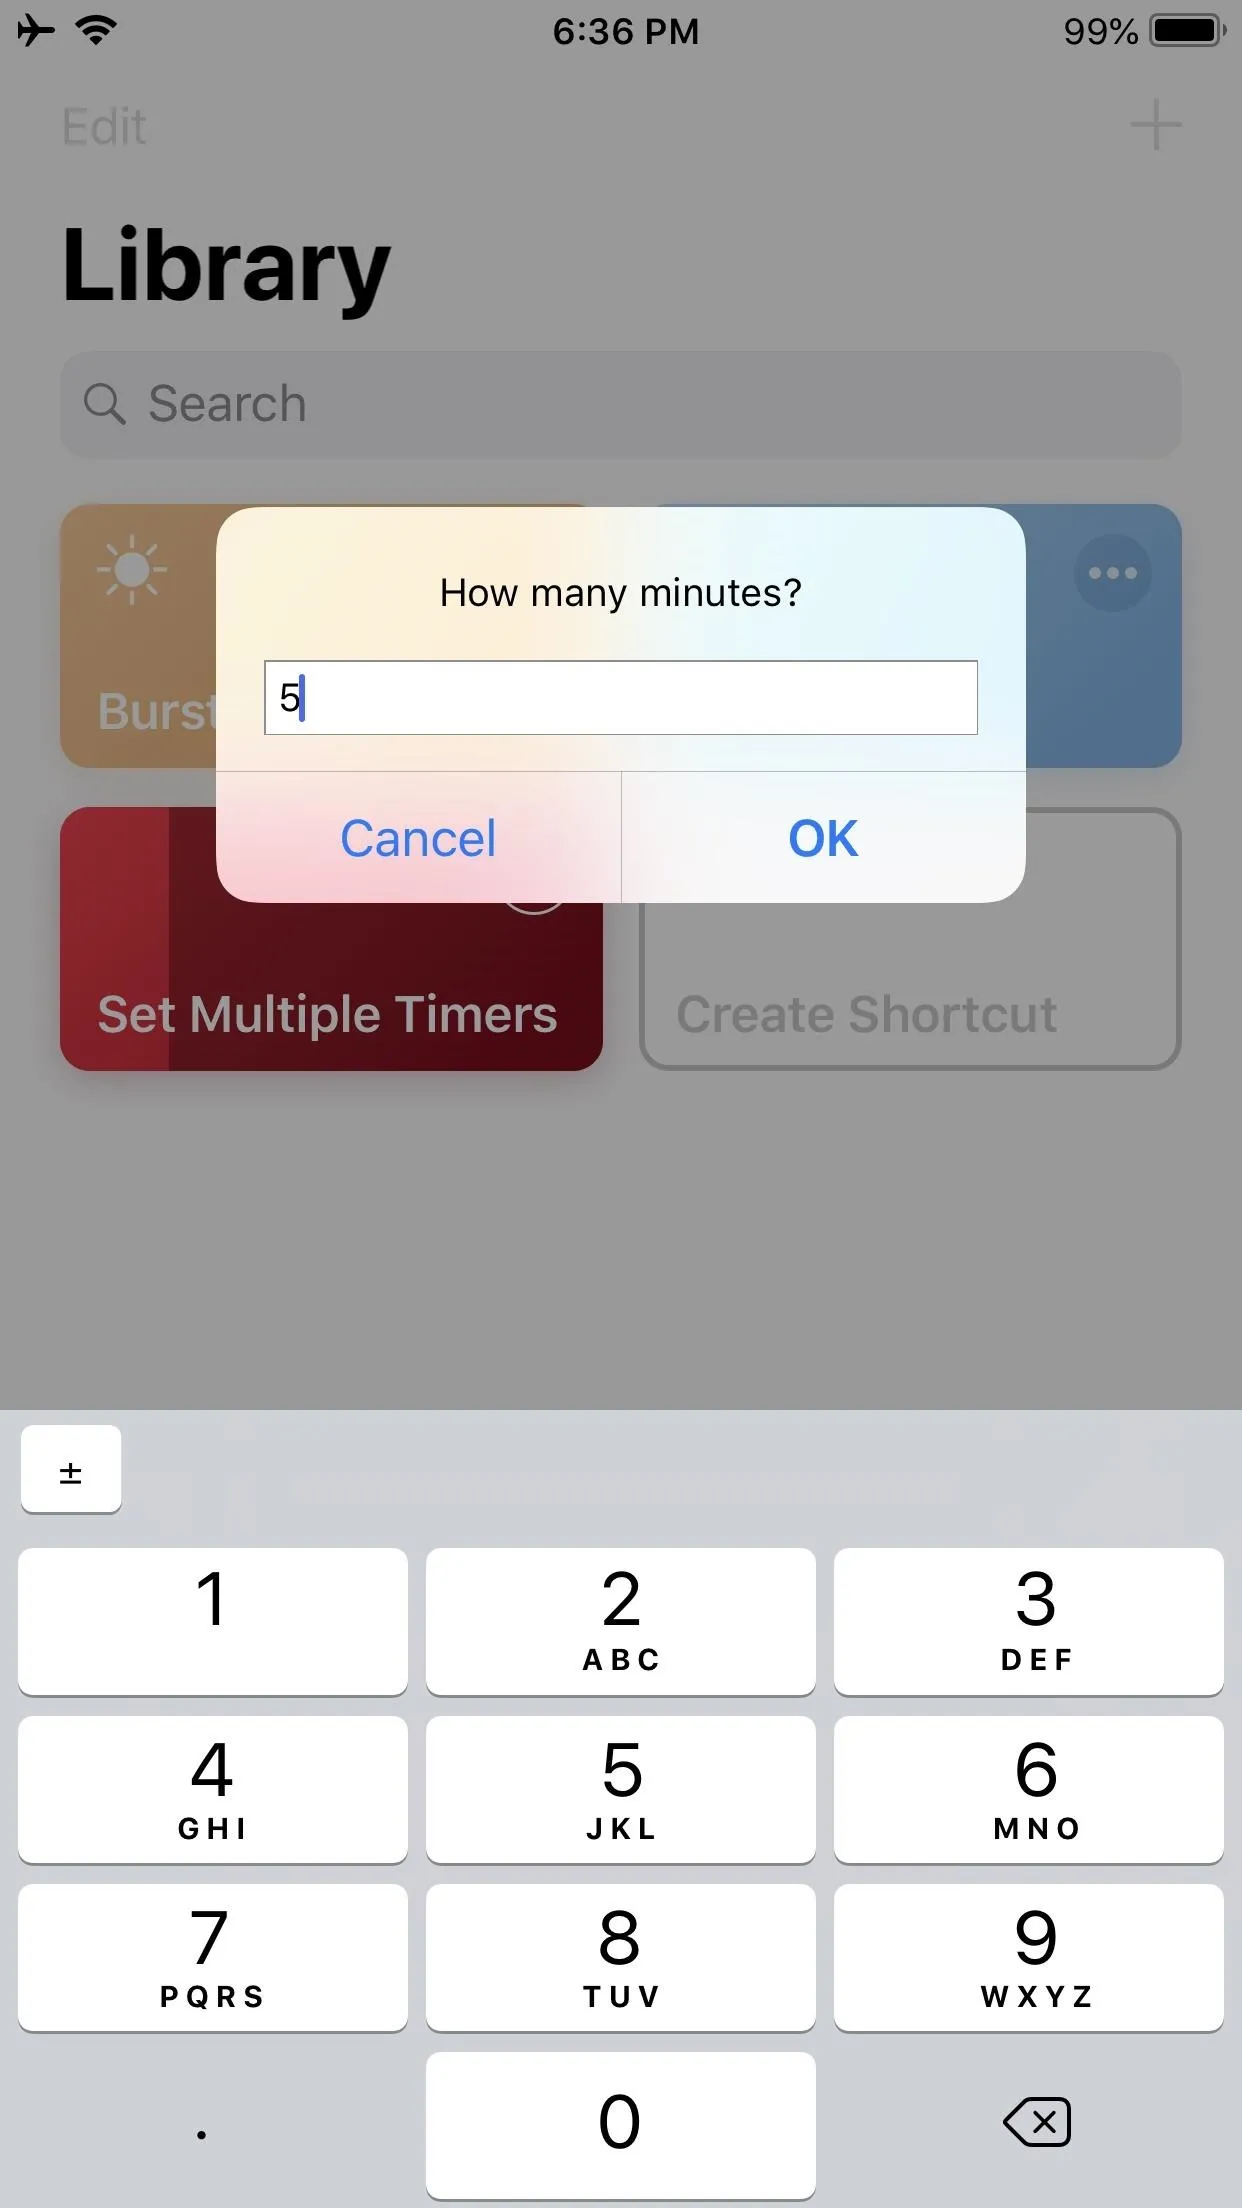
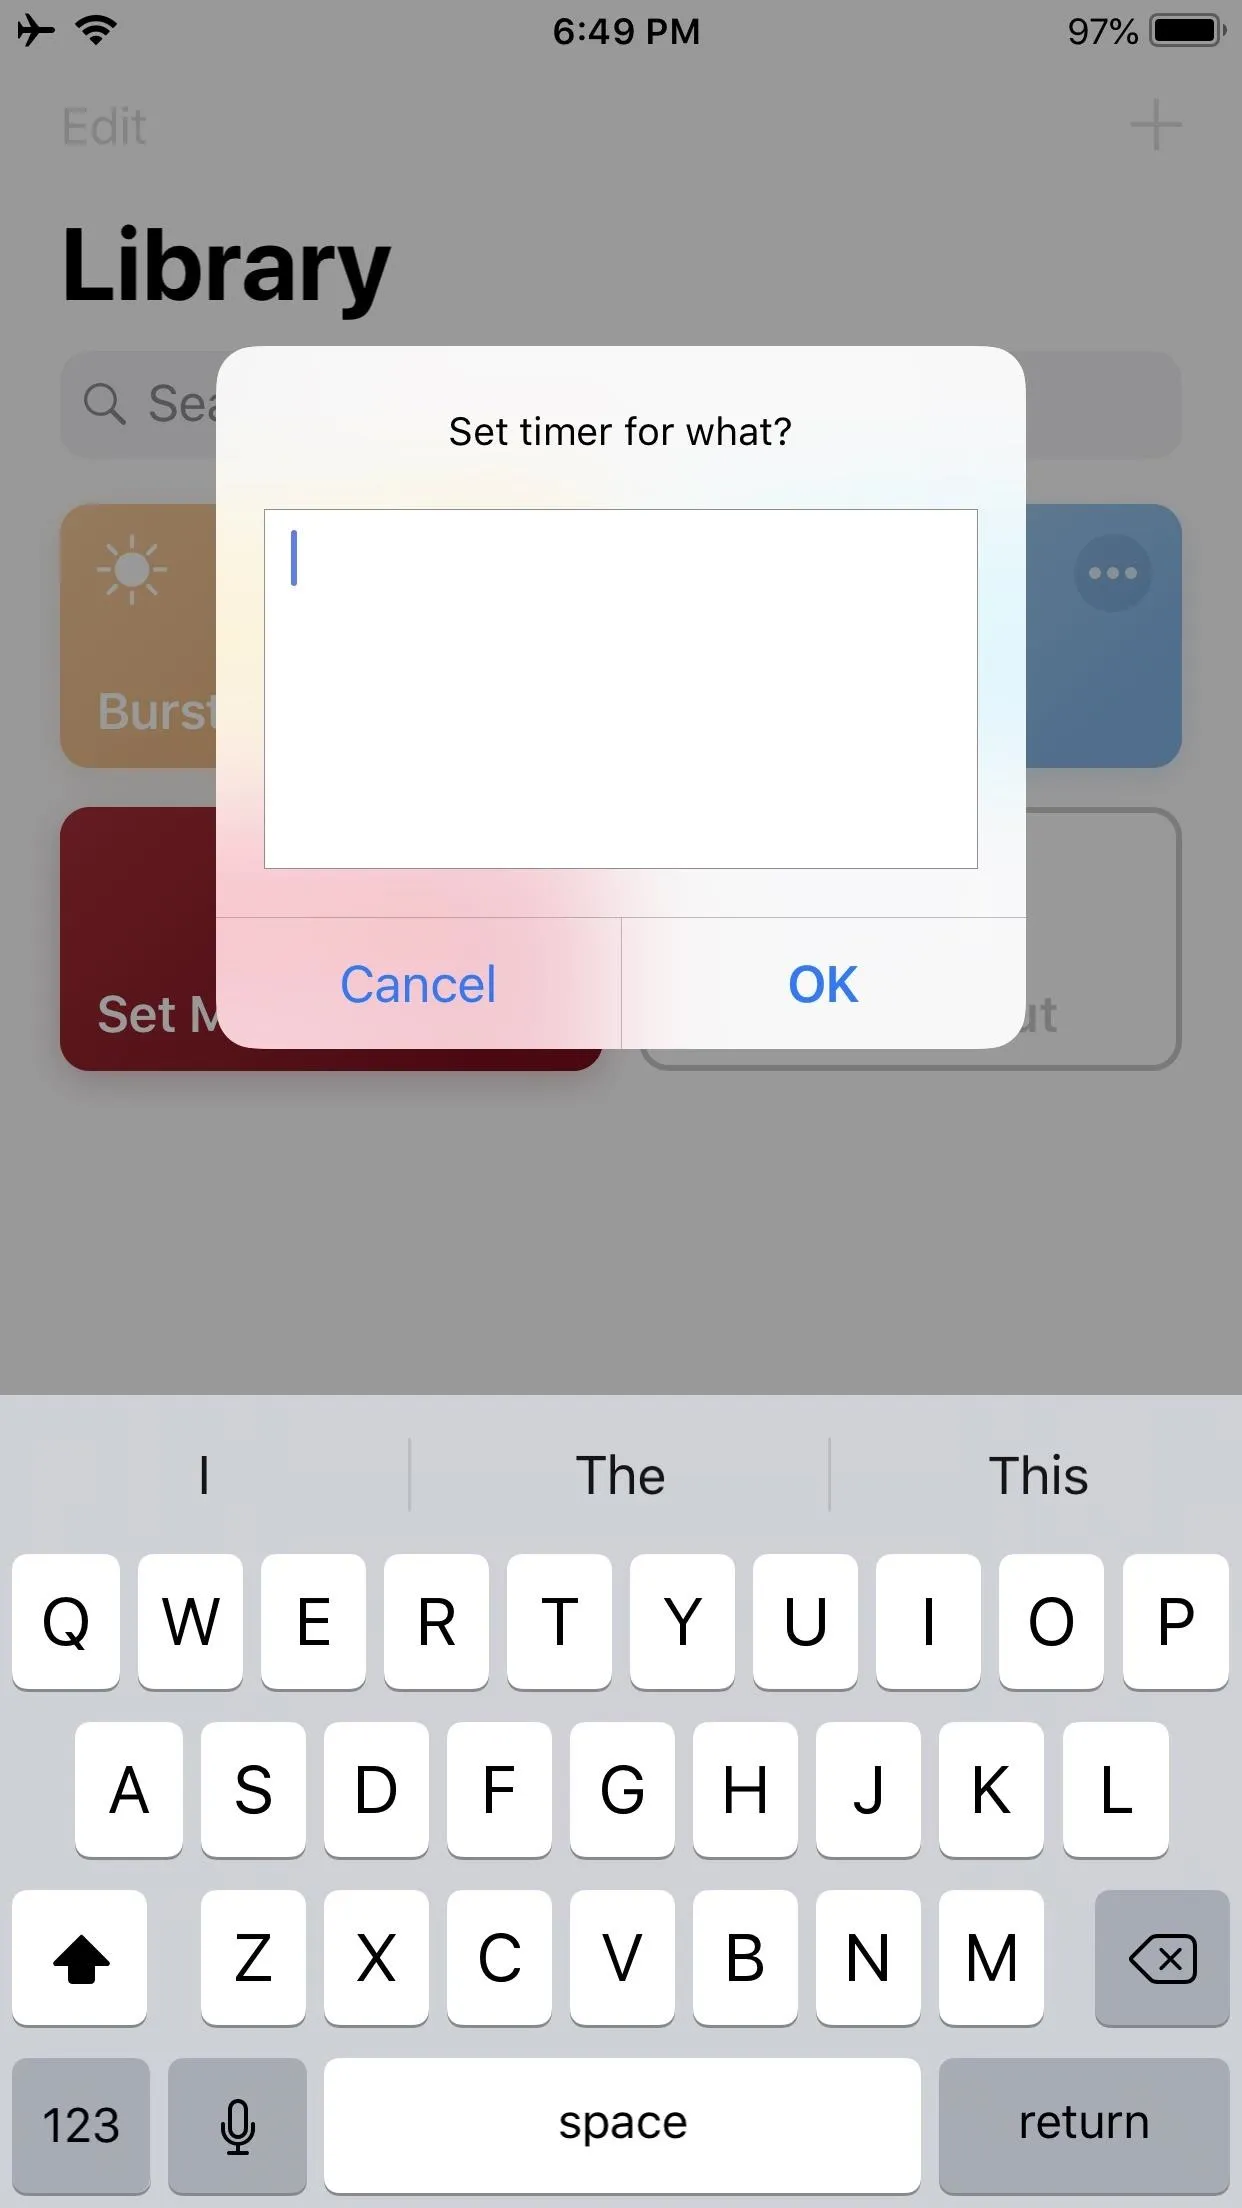
Tap play to test it out. A popup will appear asking you to name what the timer is for, which helps distinguish between other timers. Name it and tap "OK," then tell the next prompt how many minutes the timer should be and tap "OK." The shortcut actually uses your Reminders app to work its magic, so if you haven't already given Shortcuts access to Reminders, you'll be prompted to do so now.
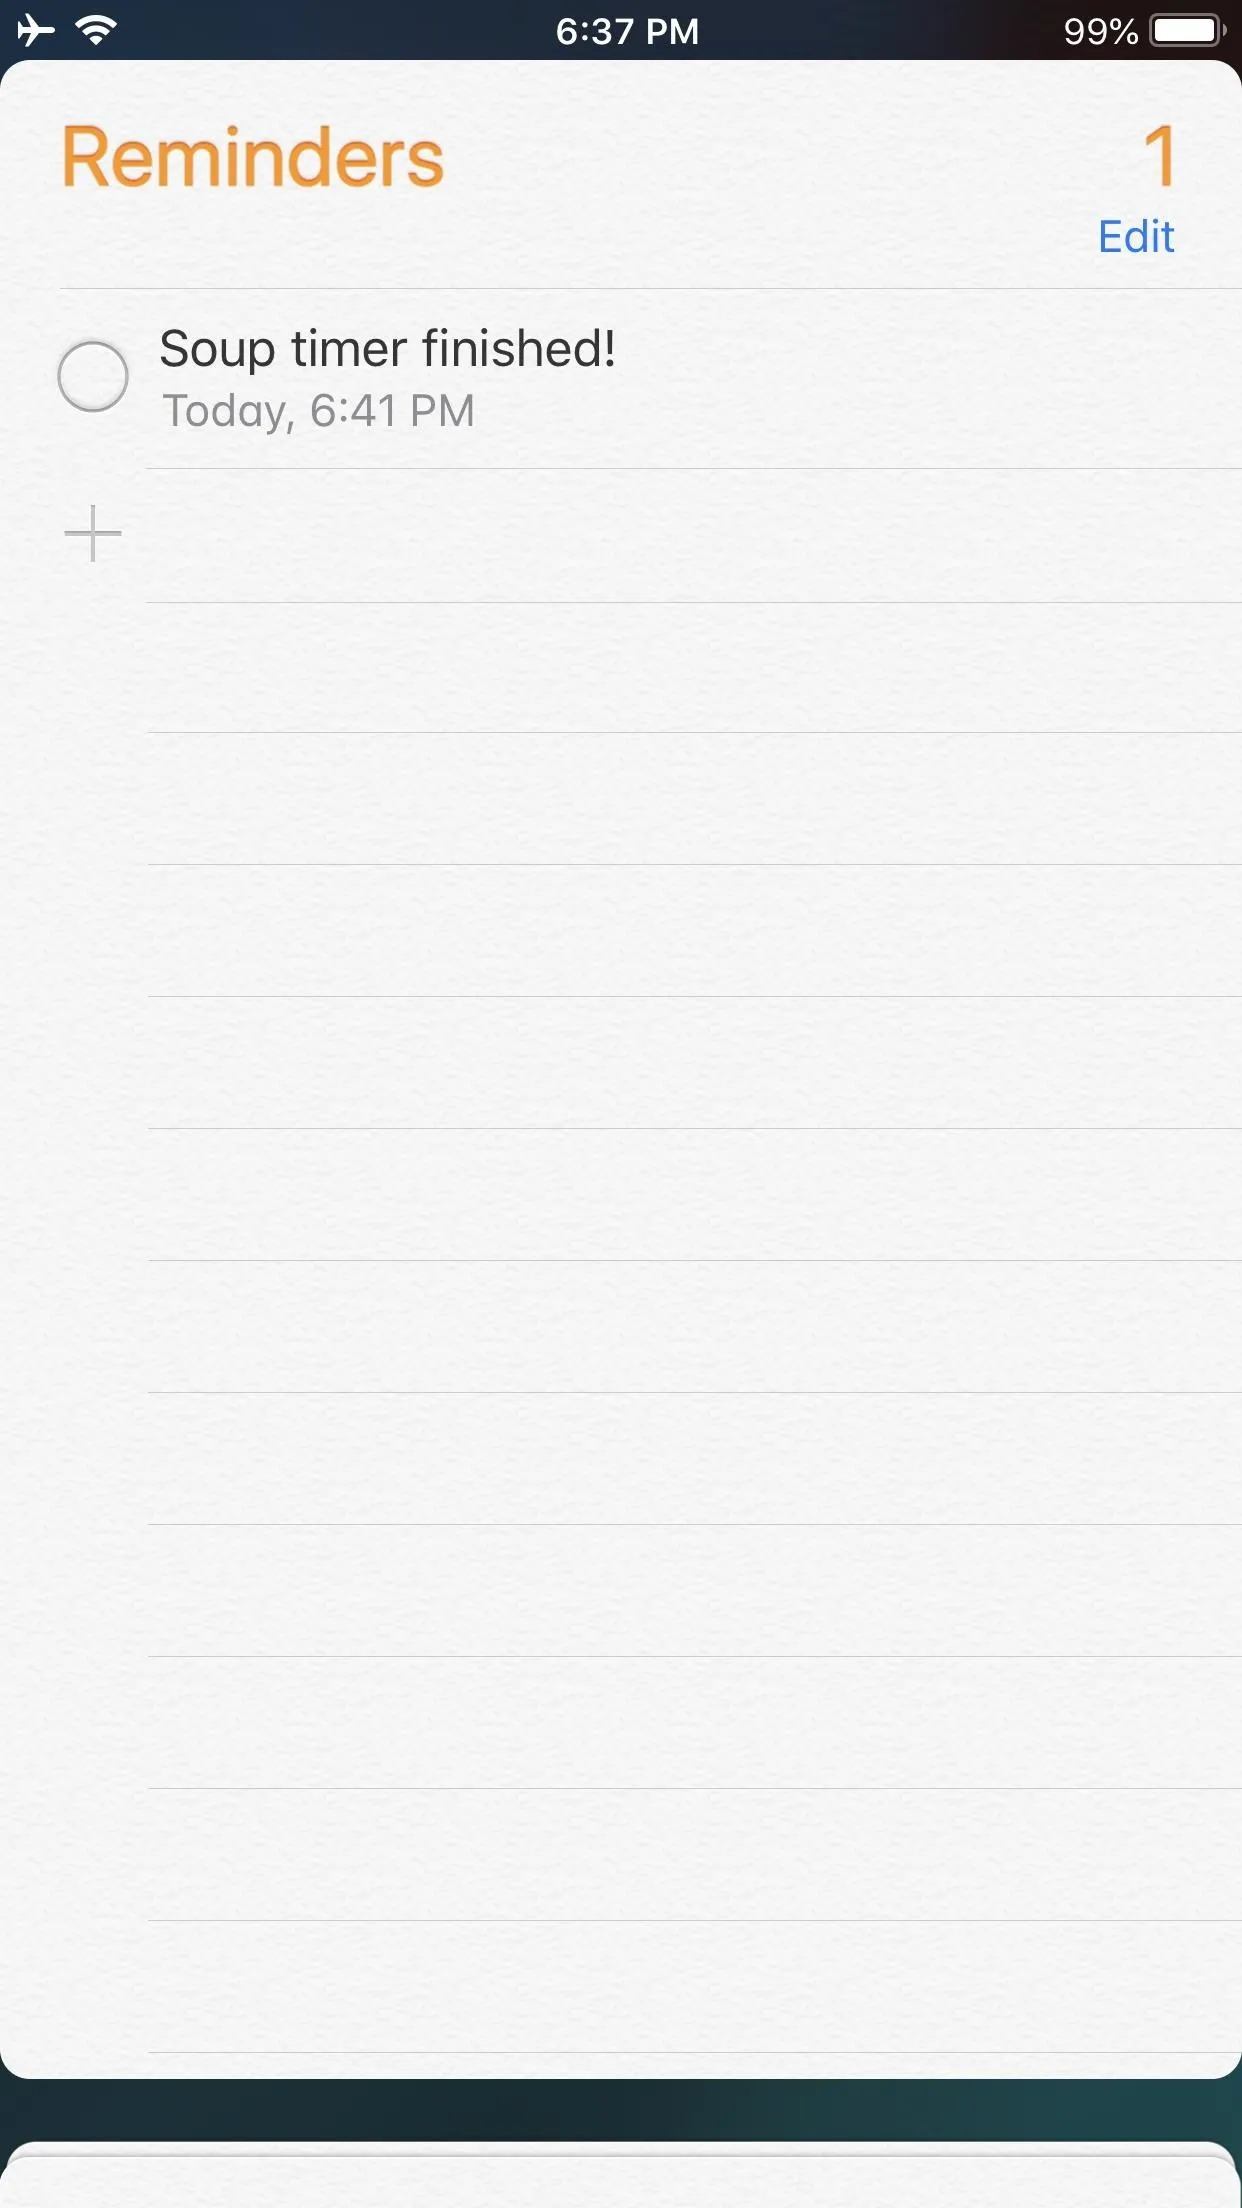
Now, if you typed in 5 minutes, you will get a notification from Reminders in roughly five minutes which reads, "[Task name] timer finished!" Before the timer goes off, you can verify that the reminder has been set by launching Reminders. "[Task name} timer finished!" will be listed in your default Reminders list, whatever that may be (which can be chosen in Reminders' settings).
Since this shortcut doesn't use the Clock app and instead uses Reminders, the countdown to the alert is not entirely accurate, making this more useful for tasks that don't need exactness. For example, when you set a timer for your laundry and started boiling noodles for a quick meal.
The countdown start time is based on whatever second you start it at, but the end time will be as soon as the minute hand reaches the number of minutes requested. Unless you start it at exactly 00 seconds, the timer will sound off anywhere from 1–59 seconds too soon. More details on this later.
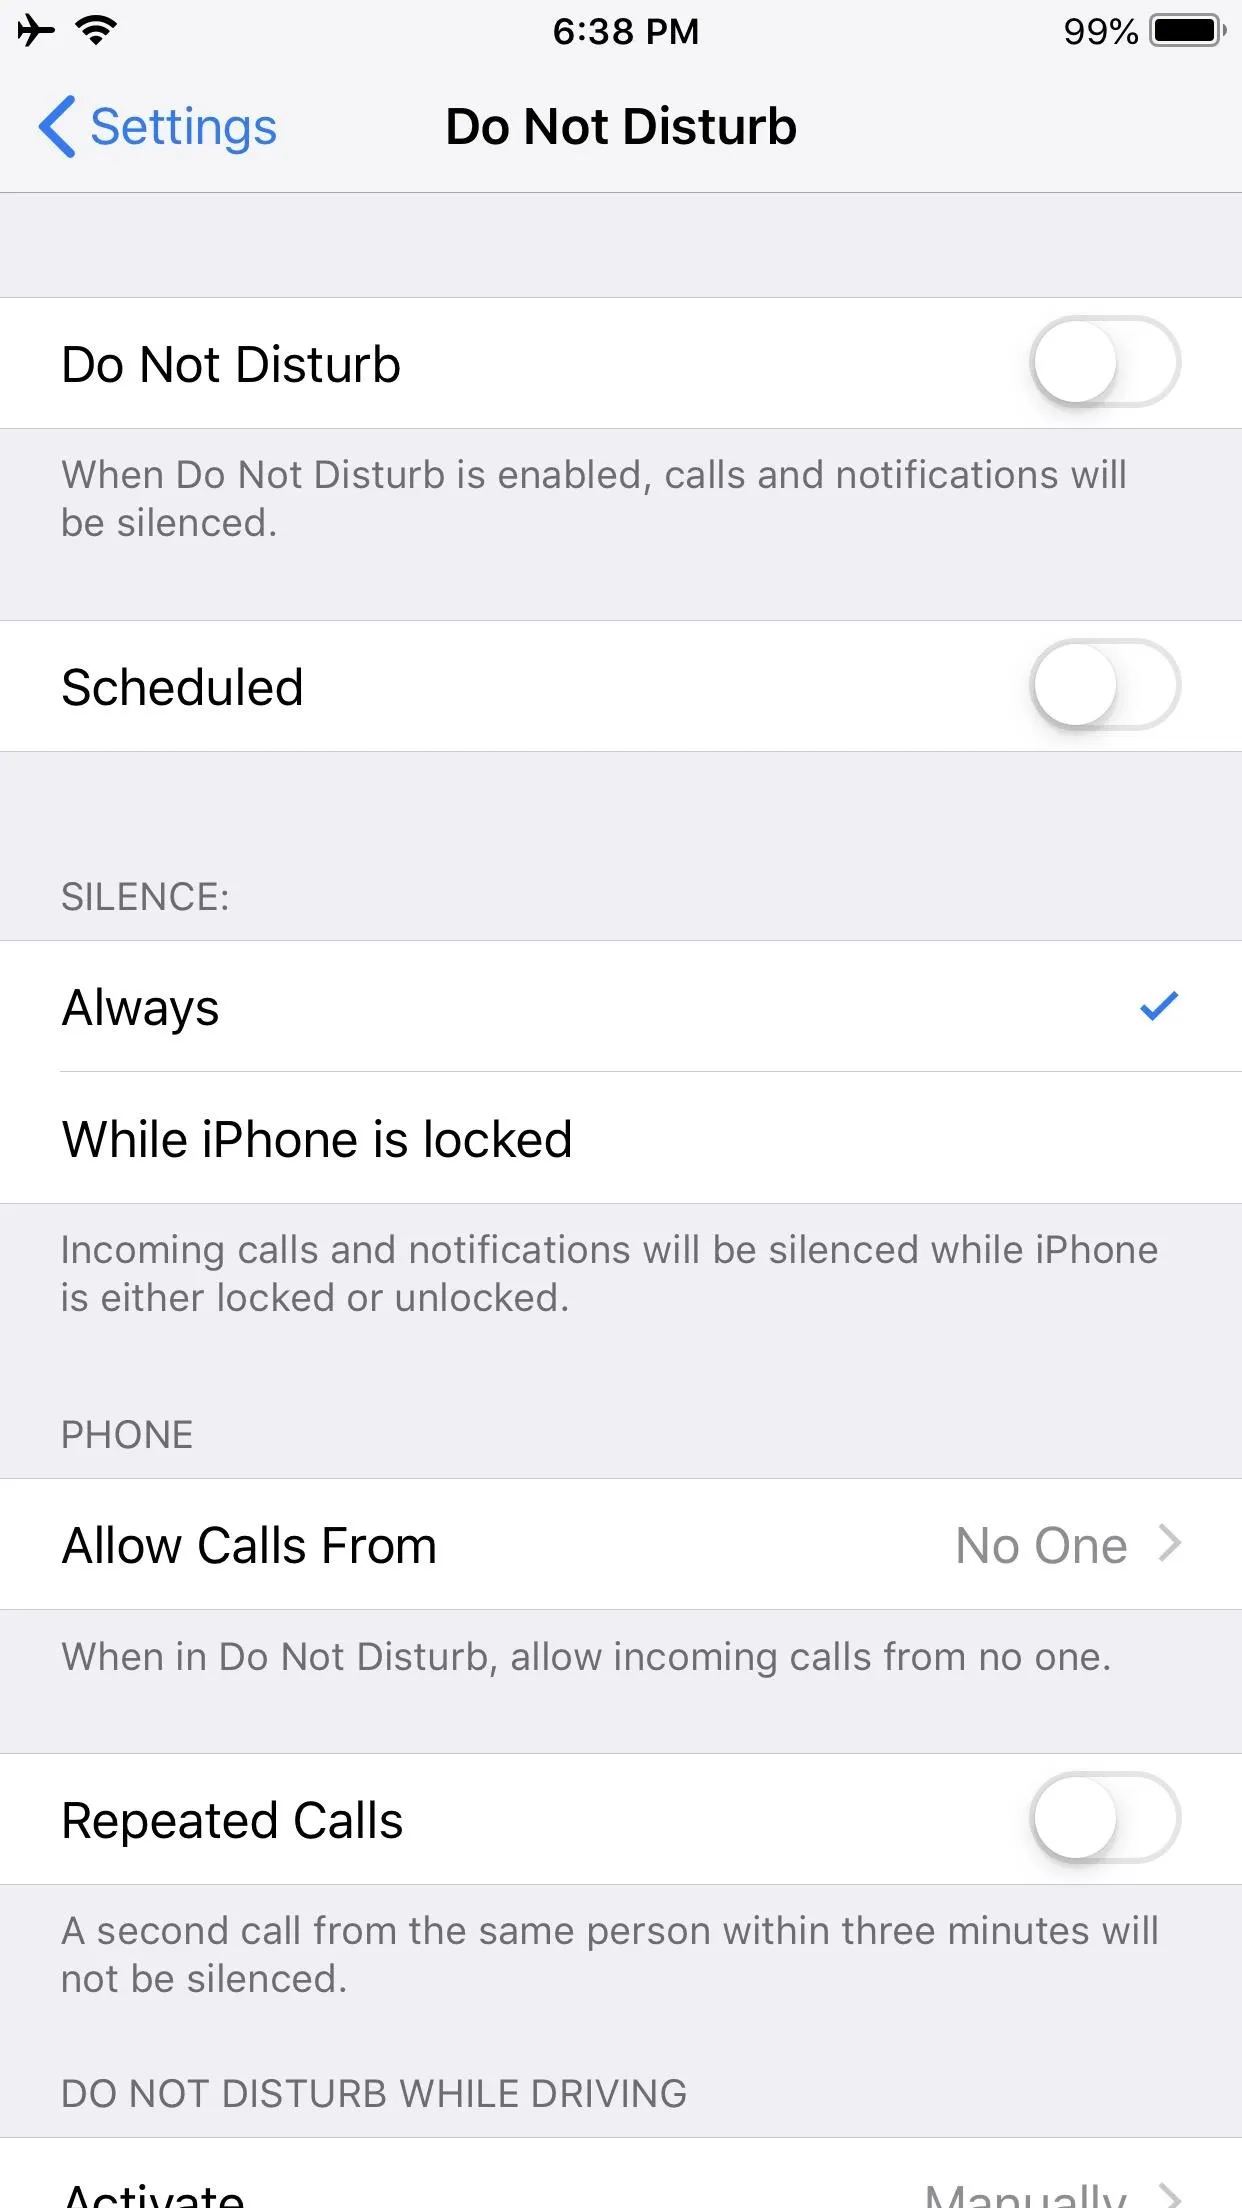
As for the notification you'll receive, you have to make sure that notifications for Reminders is toggled on in Settings and that Do Not Disturb is toggled off. Unlike a normal alarm or timer in Clock, a Reminders notification will not be able to bypass those restrictions if they are toggled on.
Also, if your iPhone is set to silent (when the hardware "Mute" switch is toggled on along the side), you will not hear the notification chime. Even if it's not on mute, you may want to change the notification sound in Settings to something more noticeable, like a long ringtone, in case your pocket muffles the tone.

Add the Shortcuts Widget
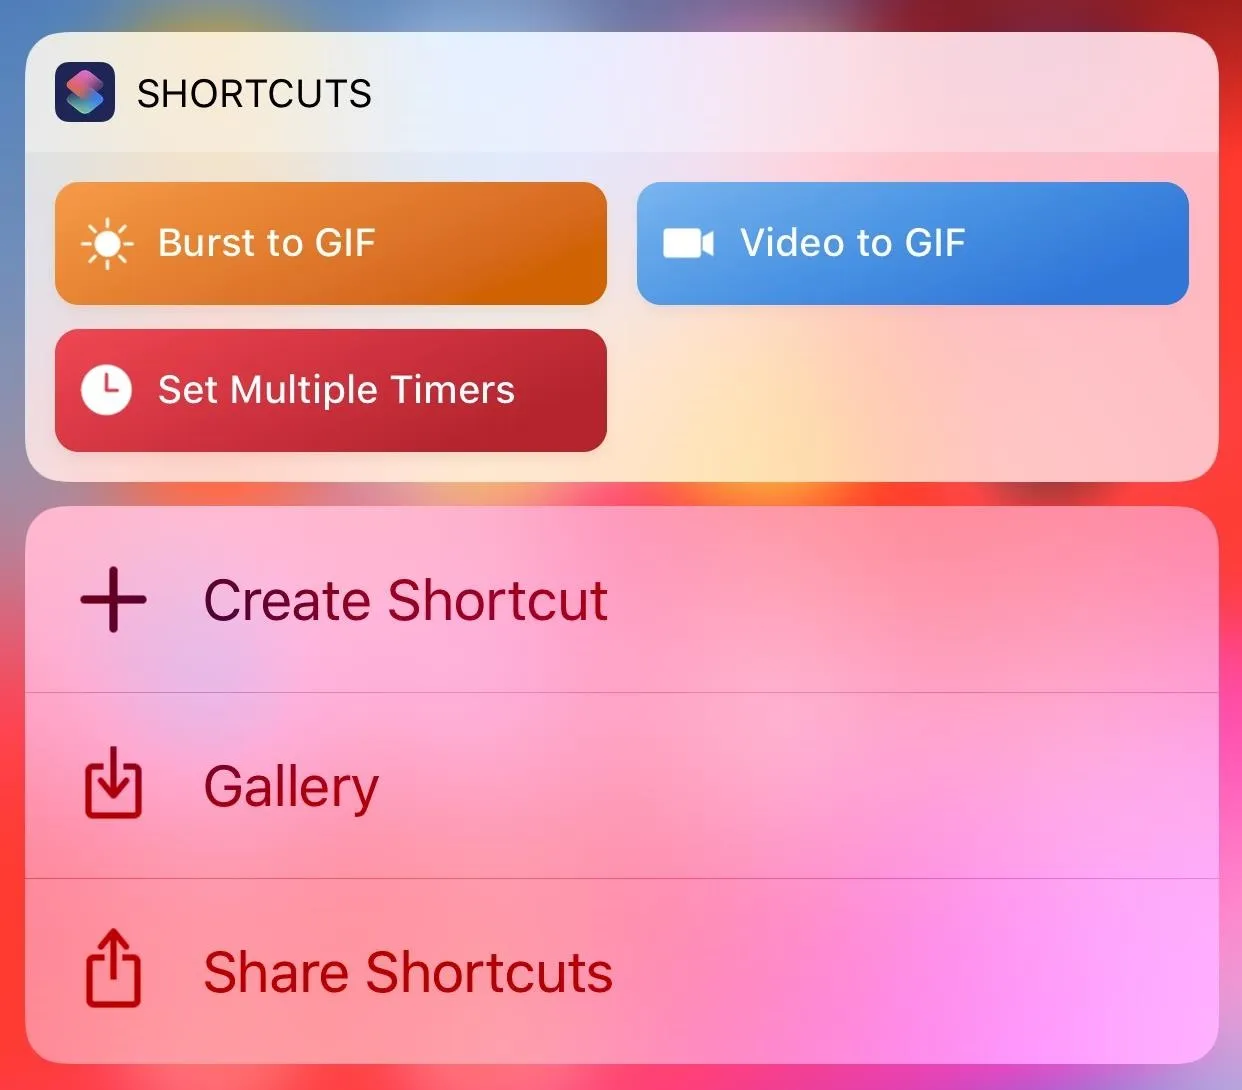
Now, you're likely not going to want to open up Shortcuts directly every time you want to set a timer. That's where the Shortcuts widget comes in. Widgets can be accessed on the Today View from the lock screen, home screen, or from the drop-down Notifications Center.
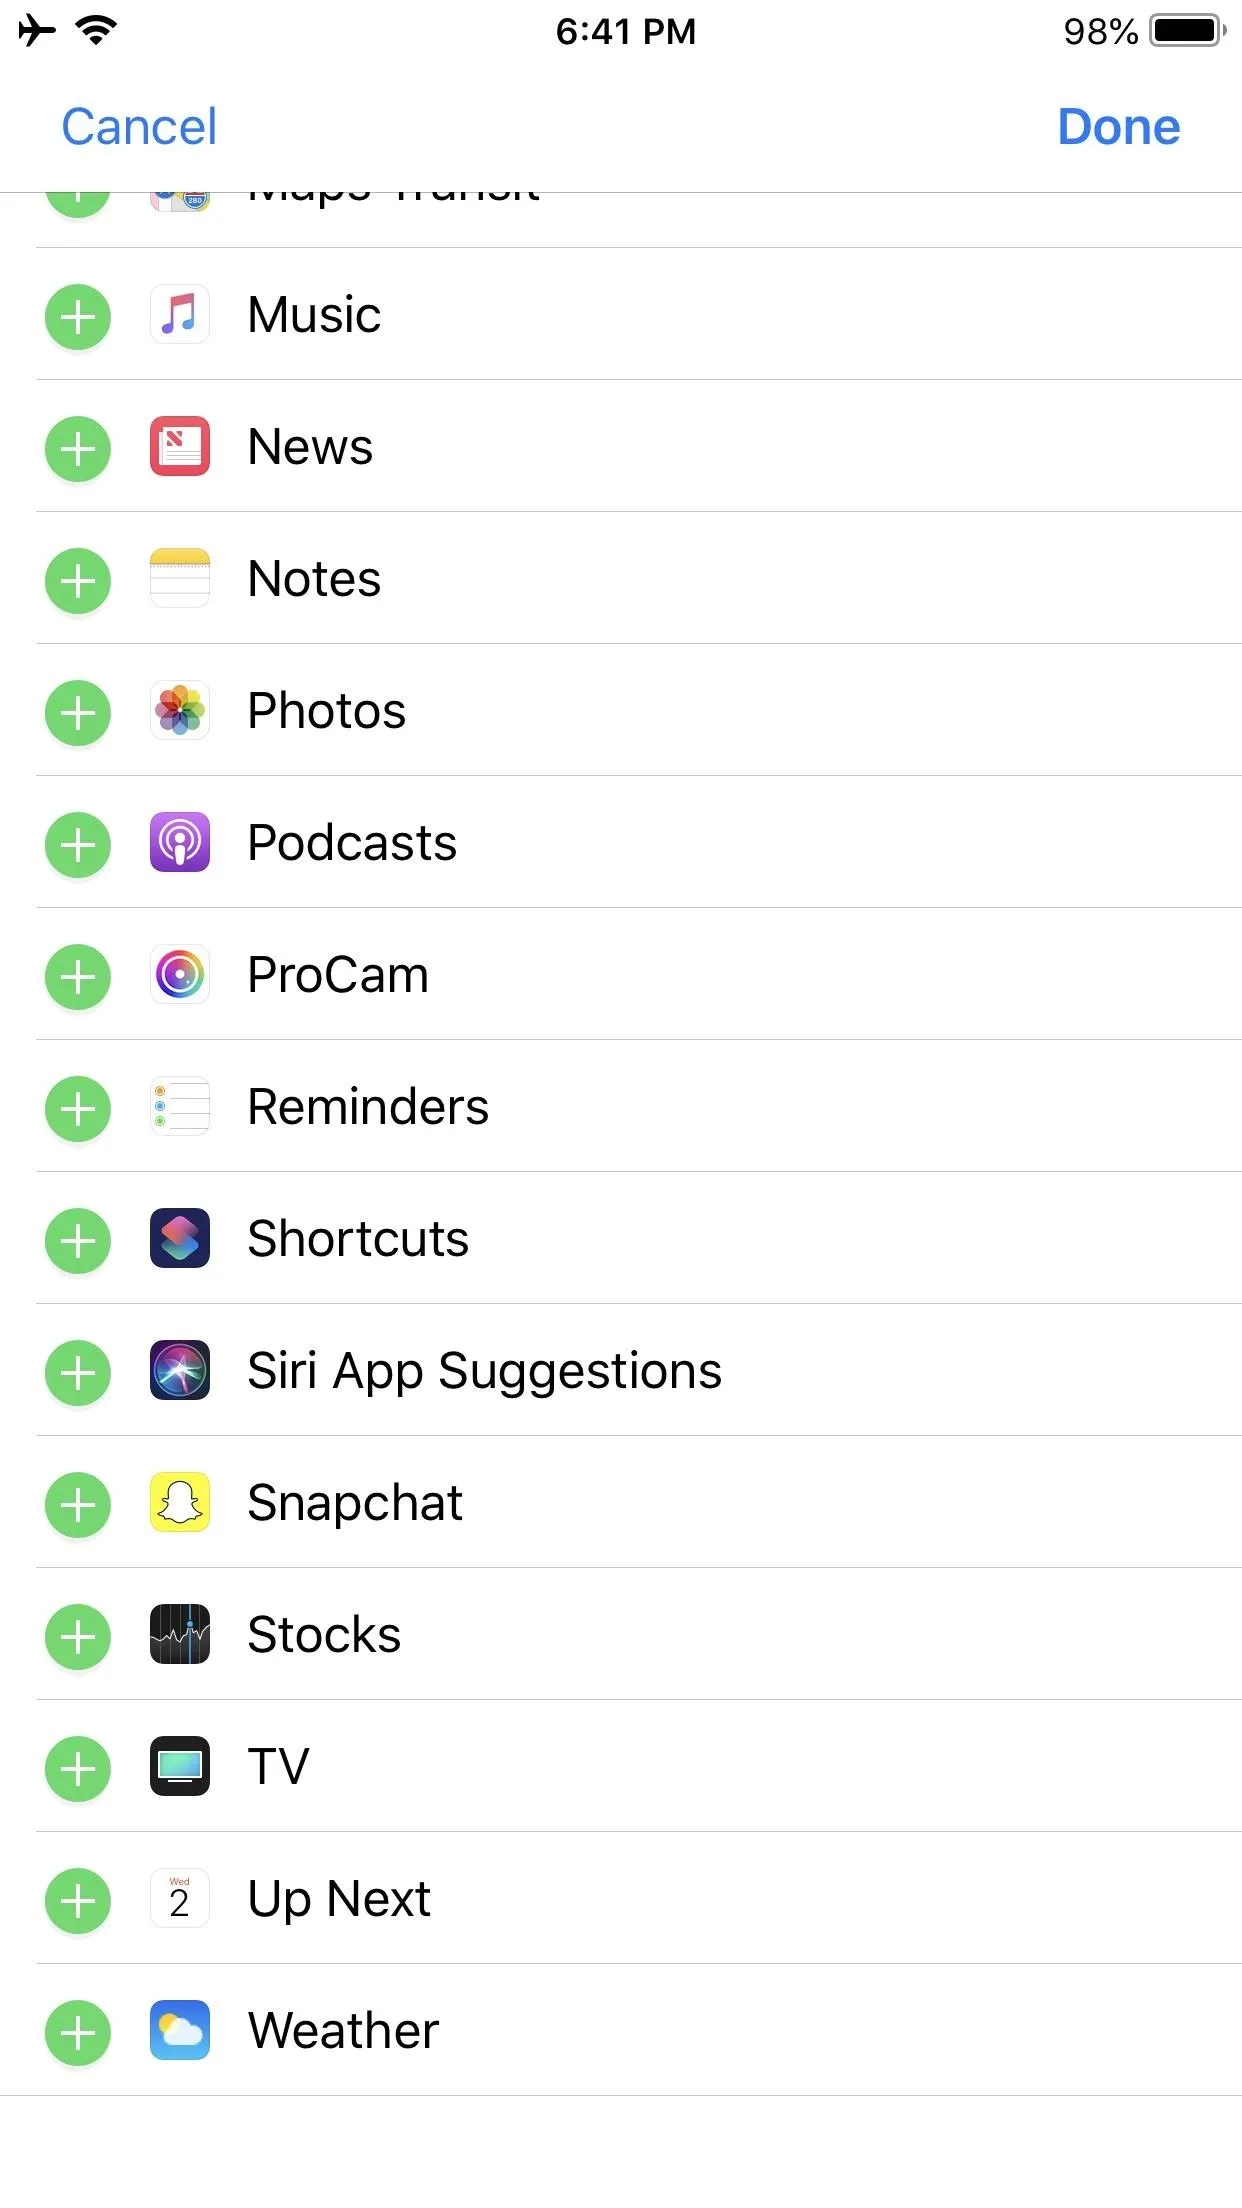
The quickest way to add the widget is to just 3D Touch on the Shortcuts home screen icon, then tap "Add Widget" in the widget area of the quick actions. If you don't have 3D Touch or don't like quick actions, you can swipe right from the first home screen page, lock screen, or Notification Center, tap "Edit" at the bottom of the Today View, tap plus (+) next to Shortcuts in the list, and tap "Done."

Set Multiple Timers from the Lock Screen
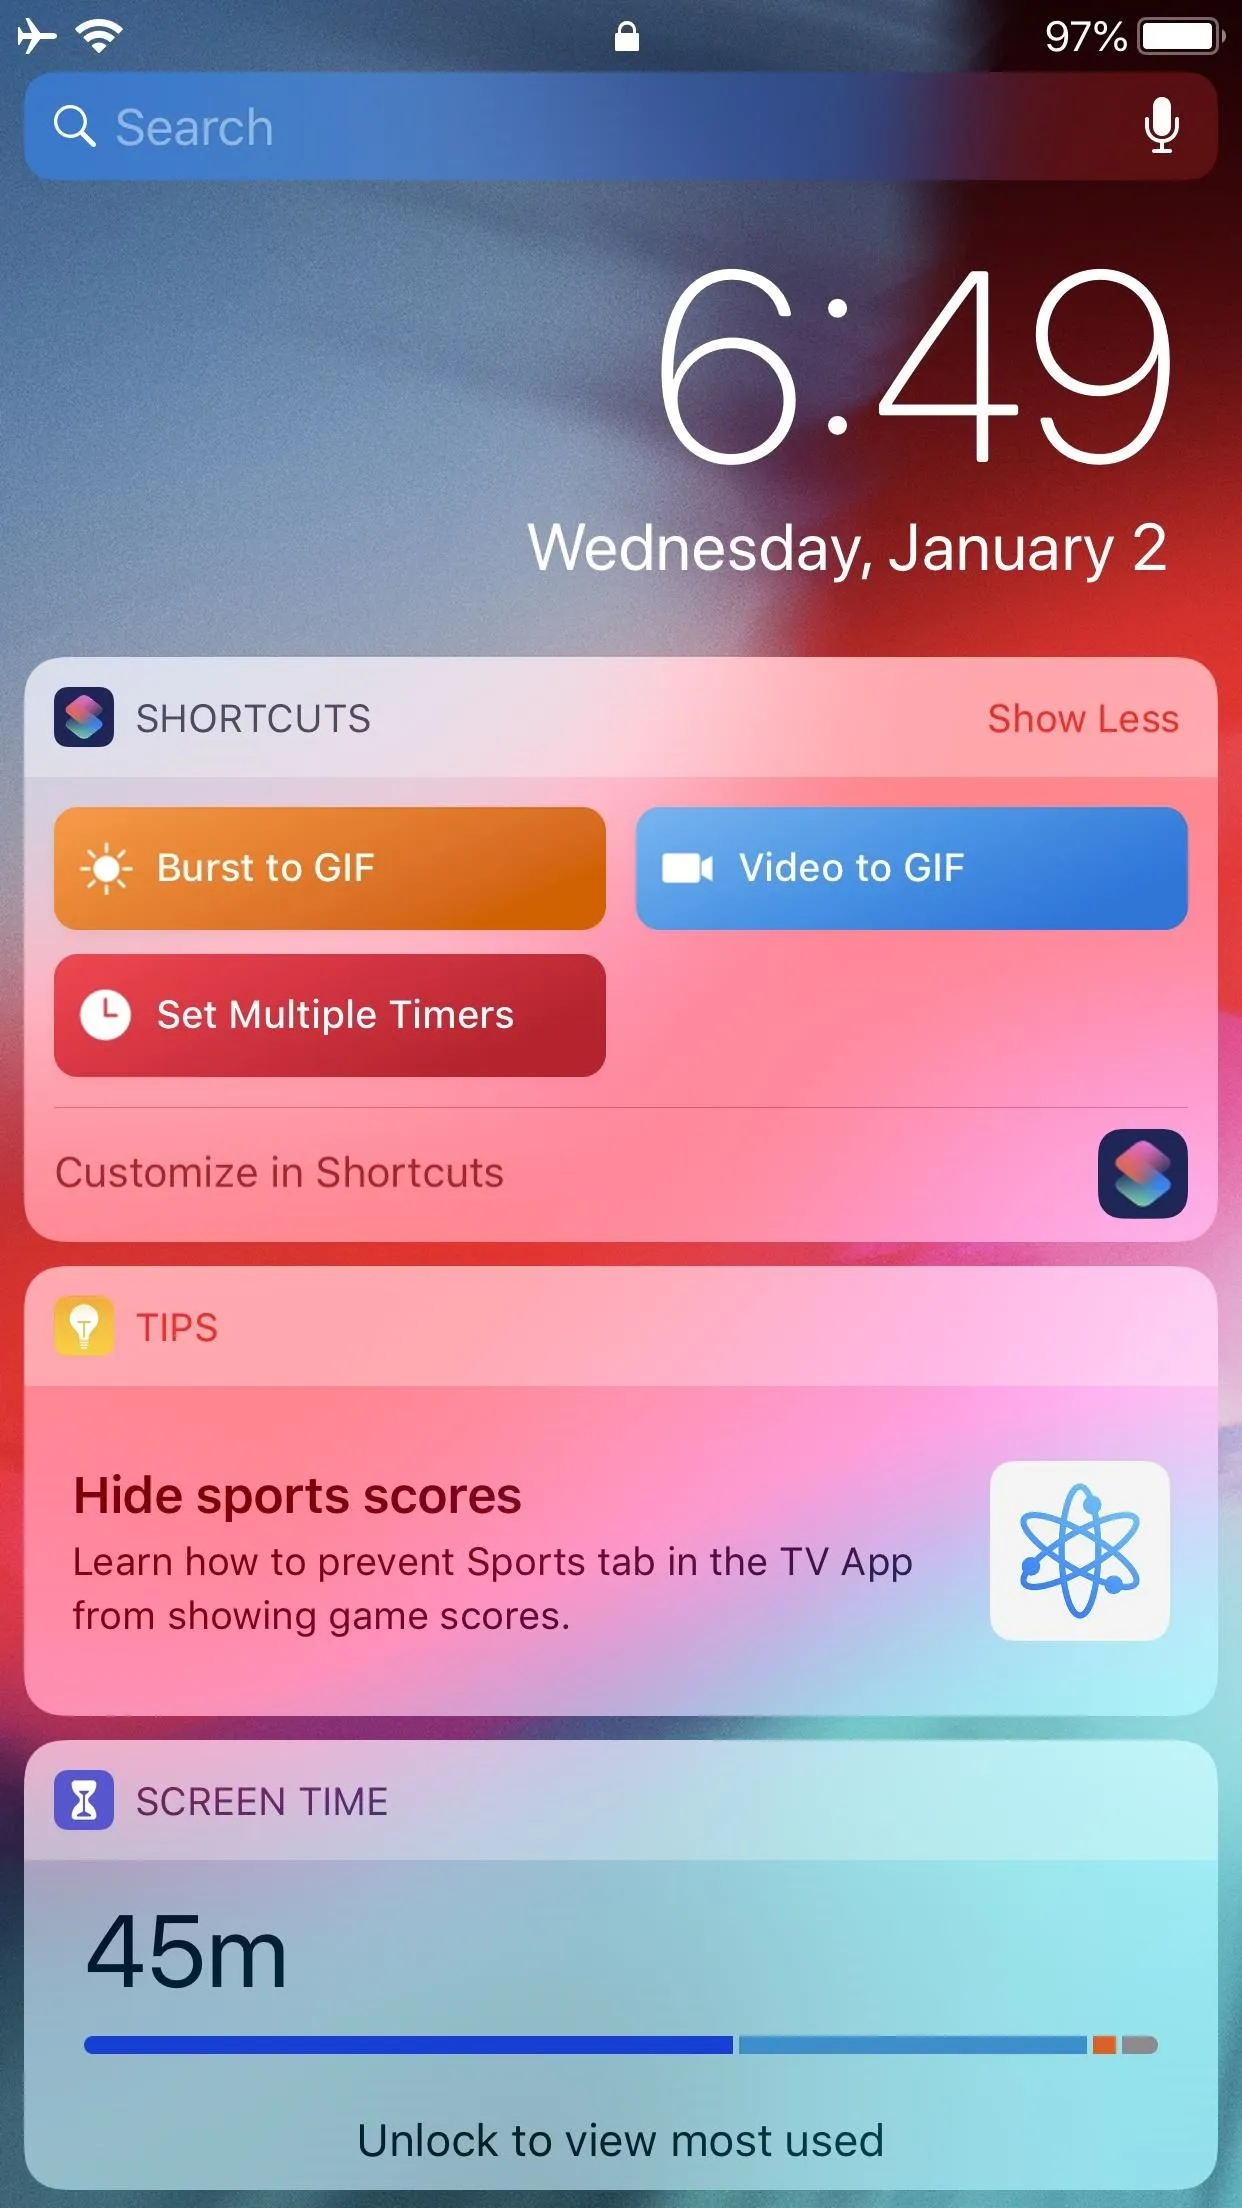
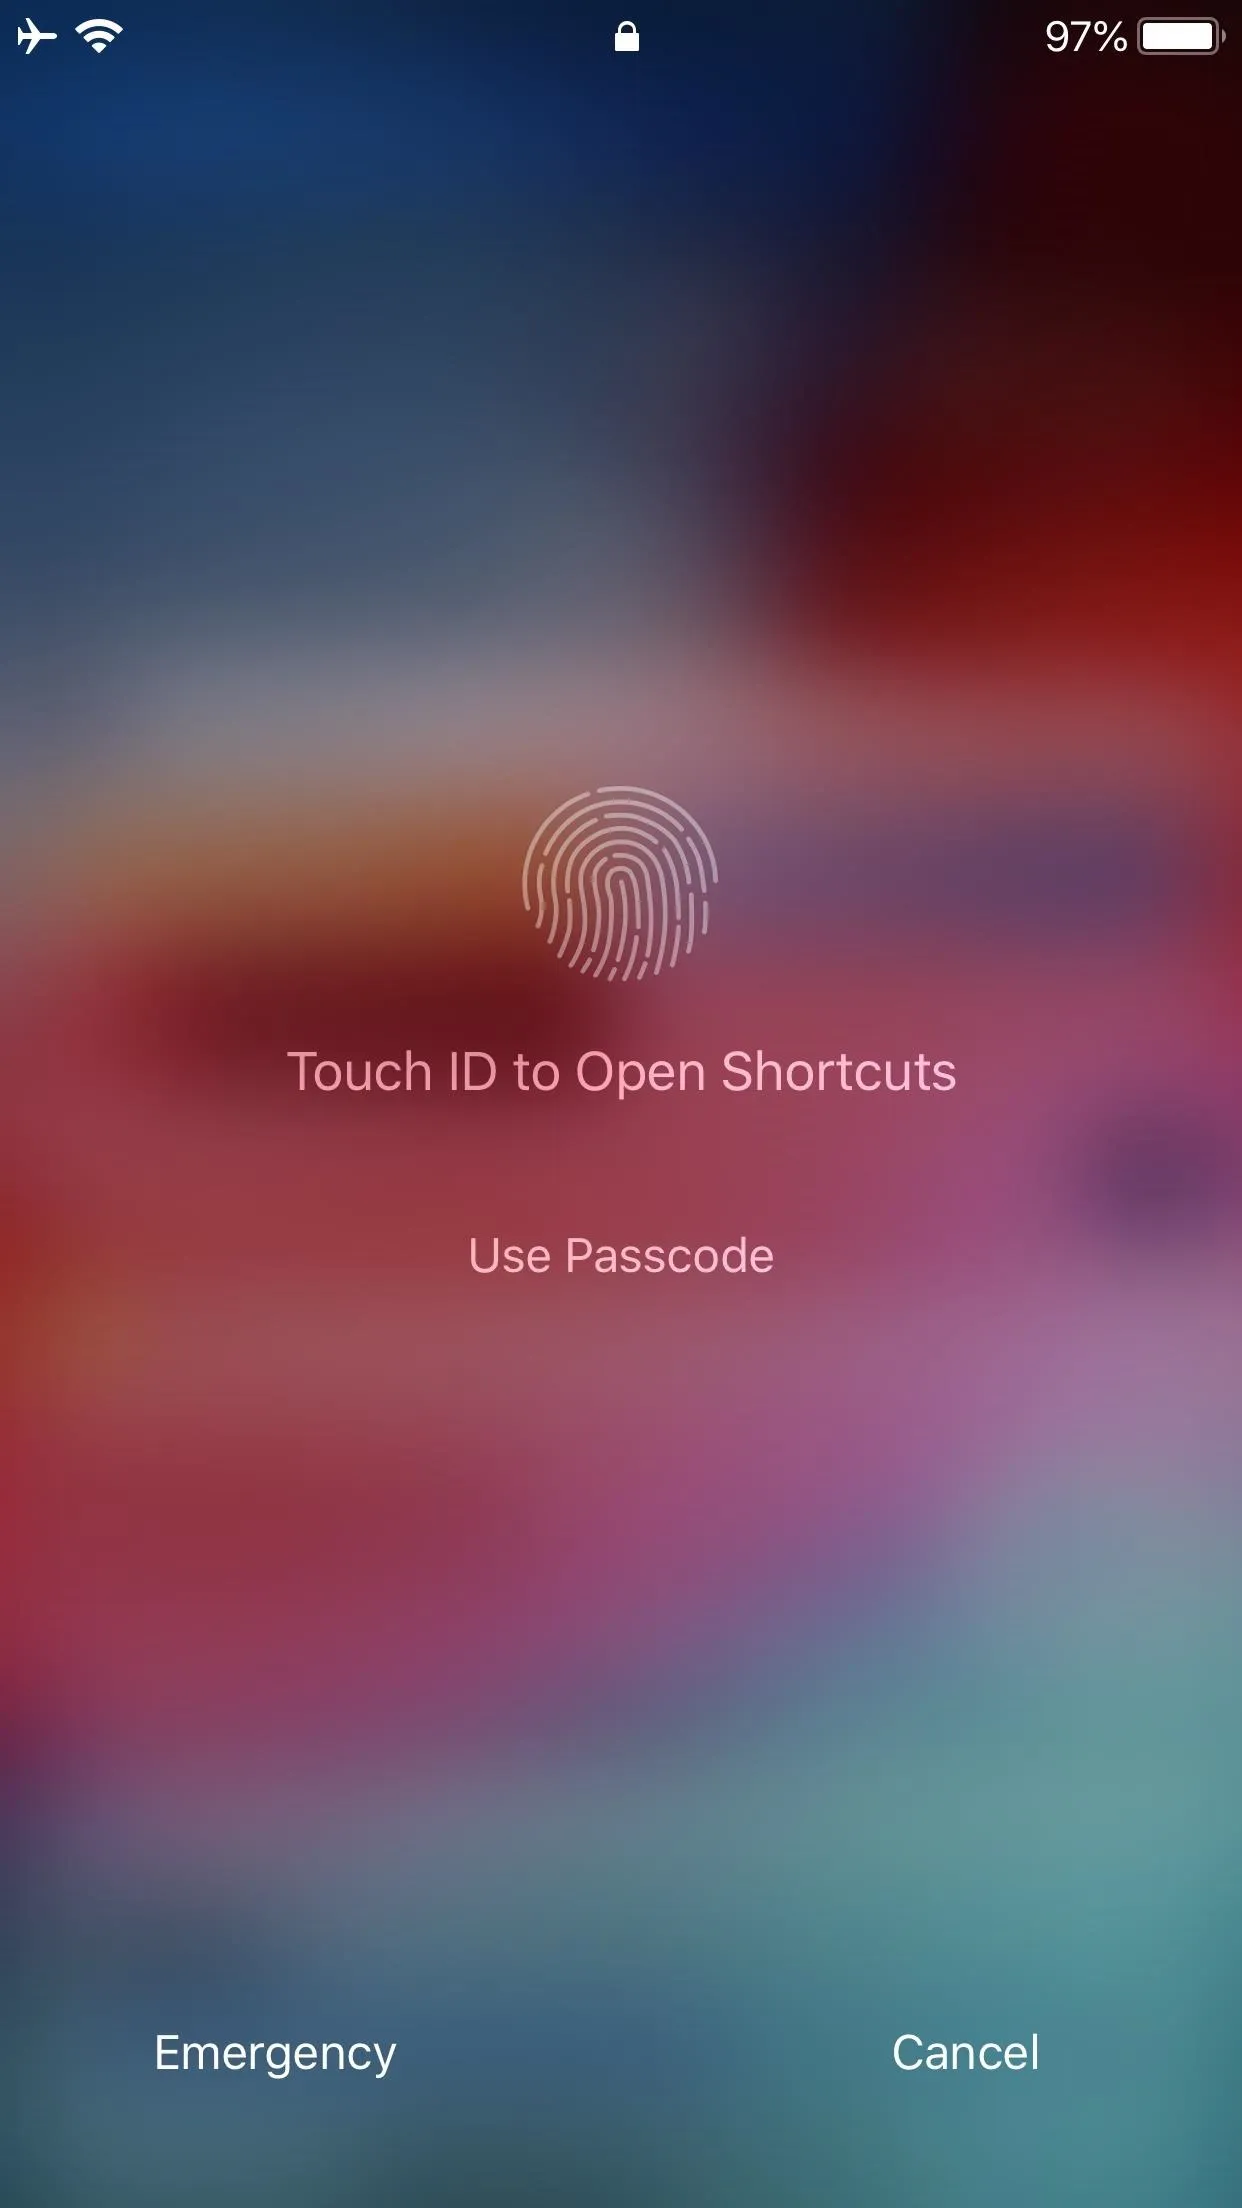
As mentioned above, you can use the widget on the lock screen. To do so, swipe right on the lock screen, then tap "Set Multiple Timers" in the Shortcuts widget (you may have to tap "Show More" to see it, depending on how many shortcuts you have). This will start the first prompt of naming the timer in the Shortcuts app, and you can proceed as in Step 2 above. If you use a passcode, Touch ID, or Face ID, you'll have to unlock before being taken to the Shortcuts app.
Set Multiple Timers from the Home Screen
Just like with the lock screen, you can start the "Set Multiple Timers" shortcut on the home screen from the Shortcuts widget. Just swipe right on the first home screen page and tap the shortcut's name to start it. If you're in an app like Instagram or Facebook, you can easily swipe down the Notifications Center, swipe right on it, then tap "Set Multiple Timers" from the Shortcuts widget.
Alternatively, you can use 3D Touch on the Shortcuts' app icon on the home screen to launch the workflow. When the quick actions appear, tap "Set Multiple Timers" from the widget box to start it. If you don't see it, that's because you can only view the first four shortcuts in your "Library," so if you want to use it here, rearrange the "Library" tab in Shortcuts accordingly.
The 3D Touch quick actions on the home screen icon.
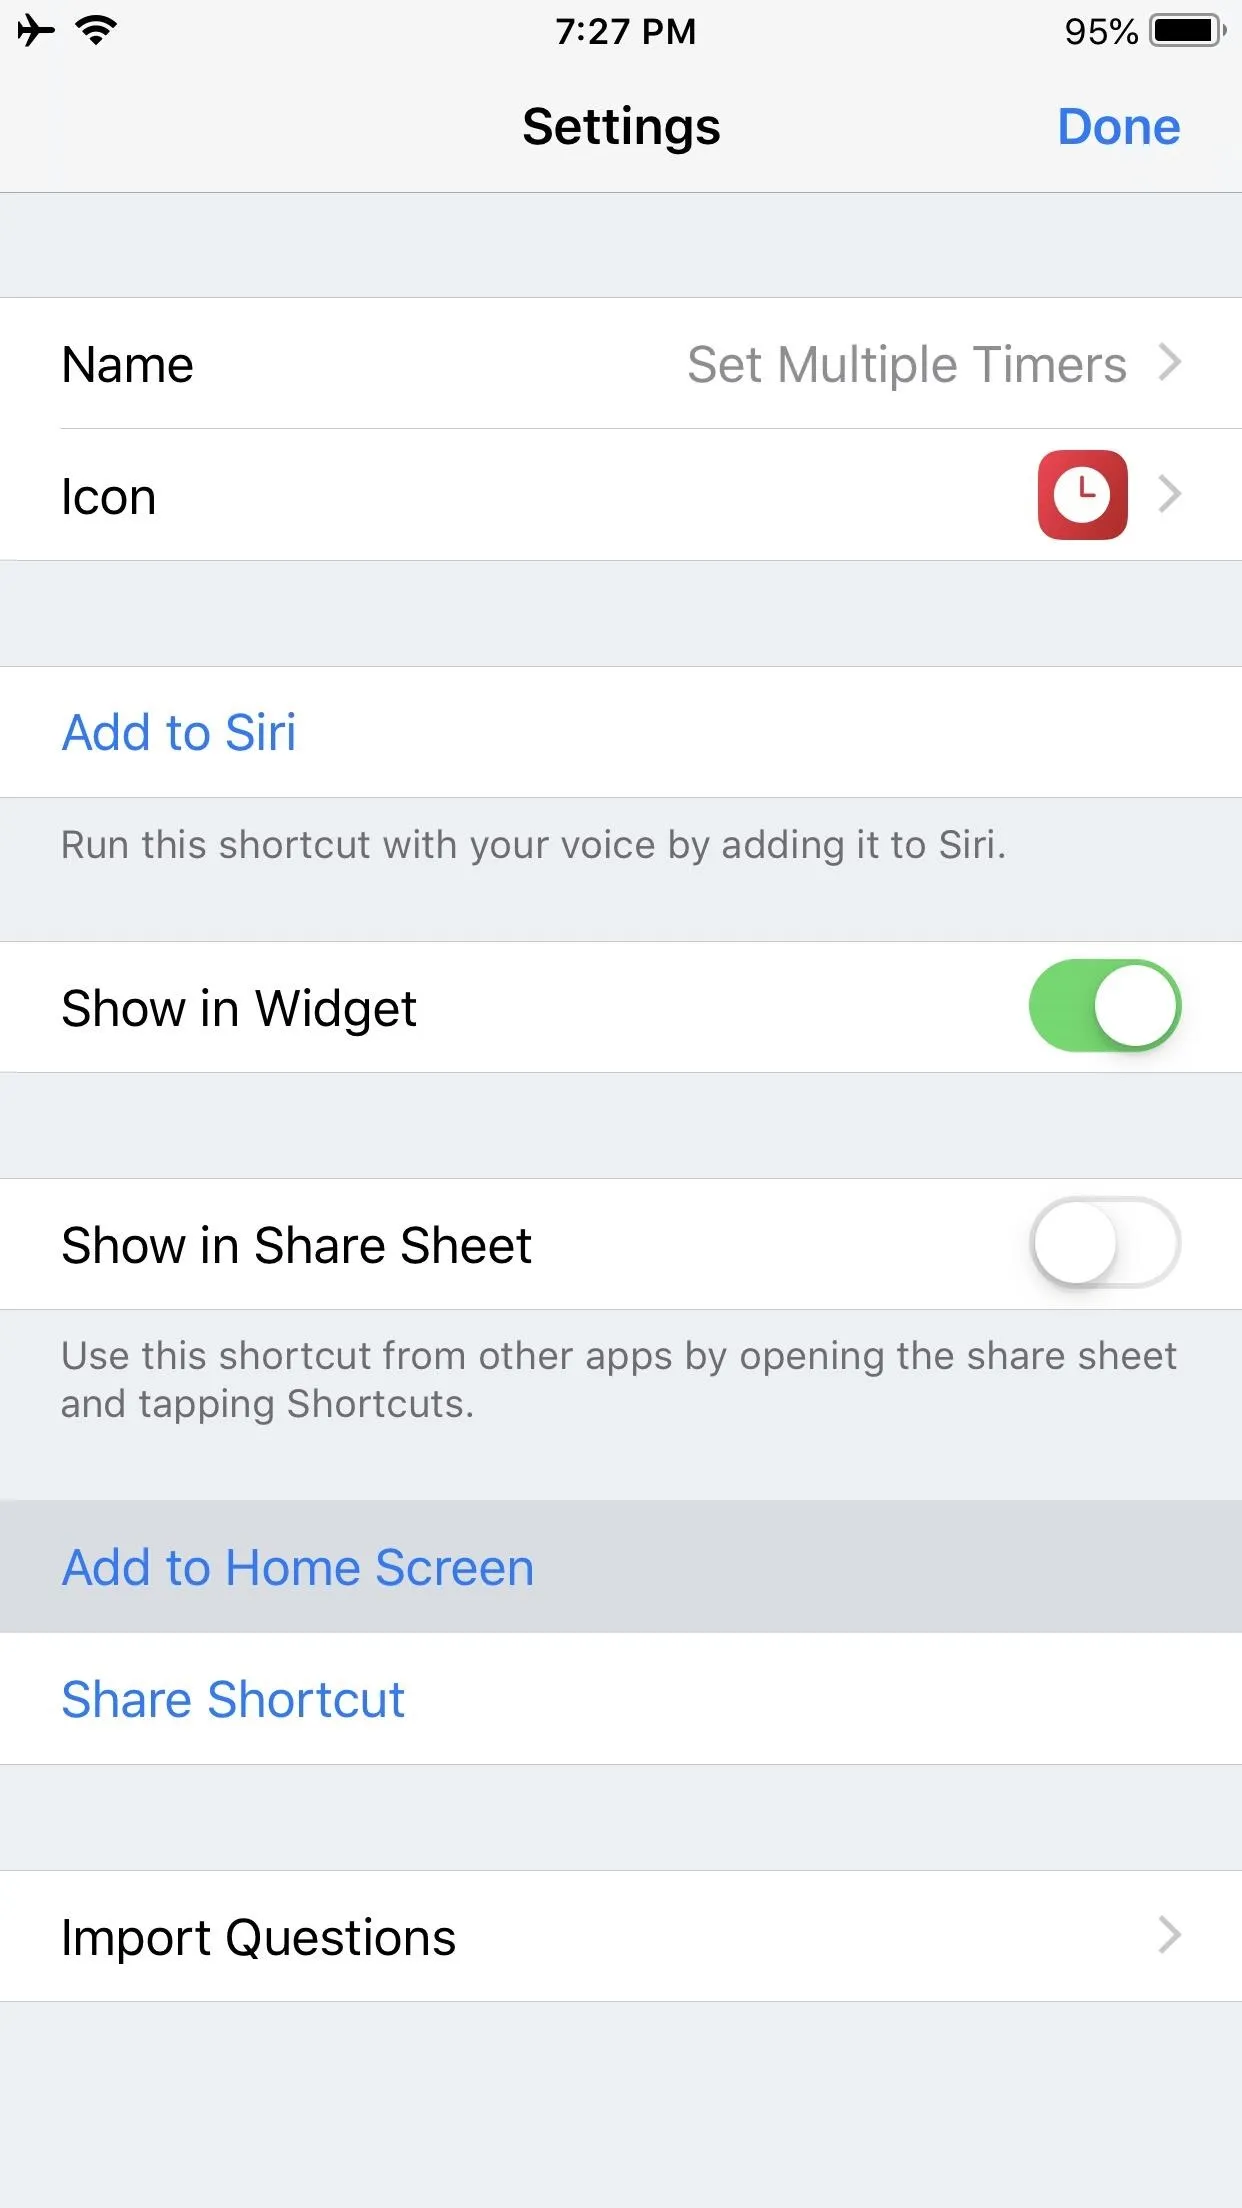
Wait, I'm not done yet! There's one more thing you can do. Open up the workflow for the "Set Multiple Timers" shortcut in the Shortcuts app, then tap the settings icon up top. Next, tap "Add to Home Screen." This will open up a link to the shortcut in Safari, then you just add it to your home screen like any other webpage. This way, it gets its own home screen icon.

Create a Siri Shortcut for It
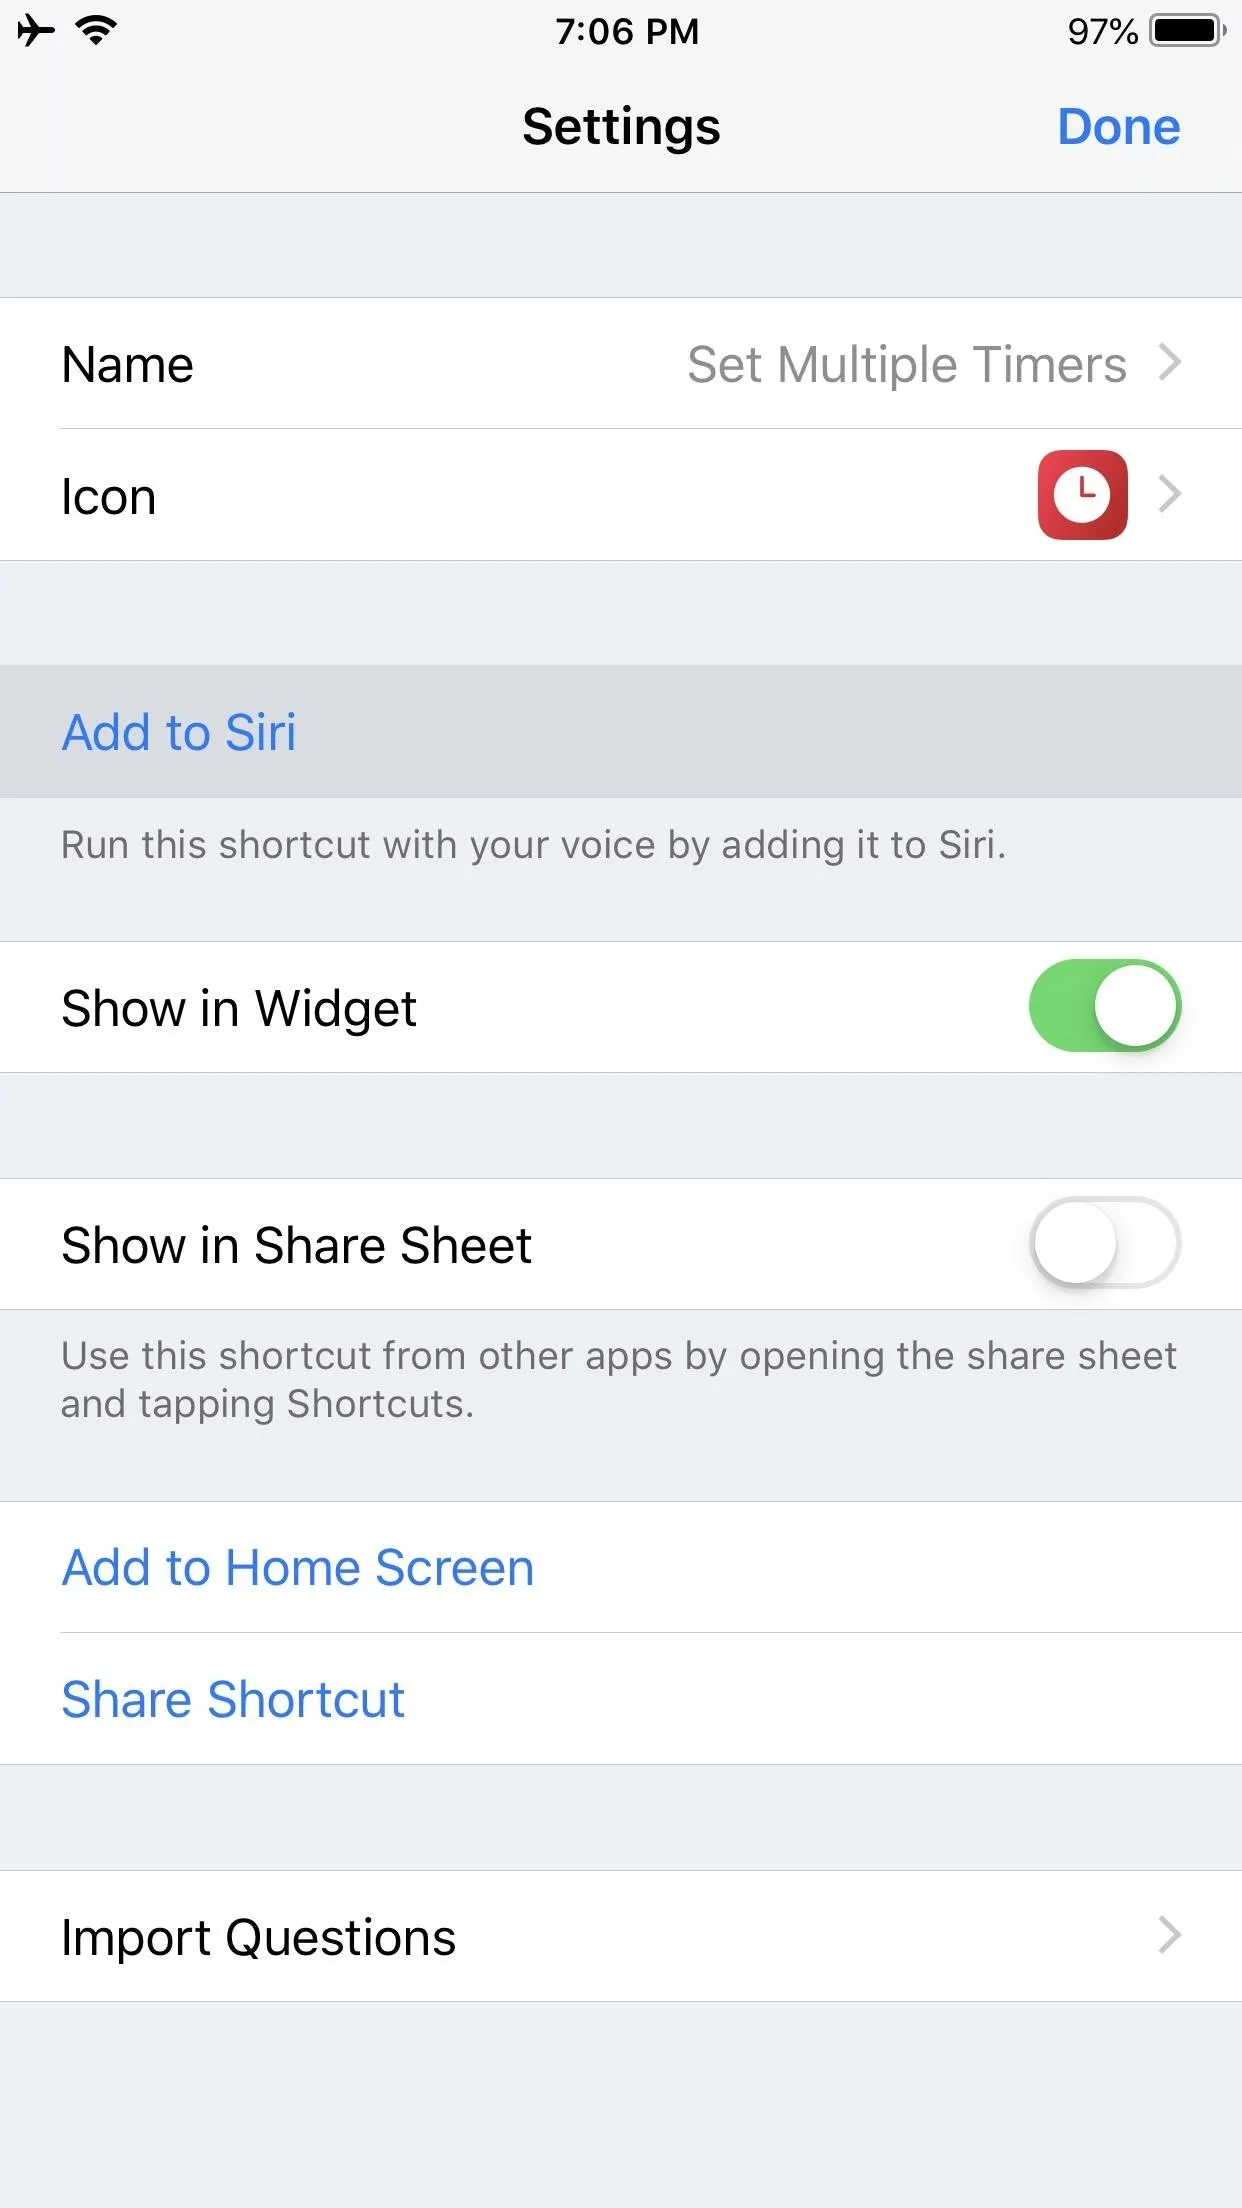
Unlike the Workflow app in the pre-iOS 12 days, Shortcuts allows for you to use Siri. In the shortcut's workflow, tap the settings icon. You'll see an option to "Add to Siri." Once you tap on it, you'll be taken to a screen where you can type or speak the phrase you desire to trigger "Set Multiple Timers."
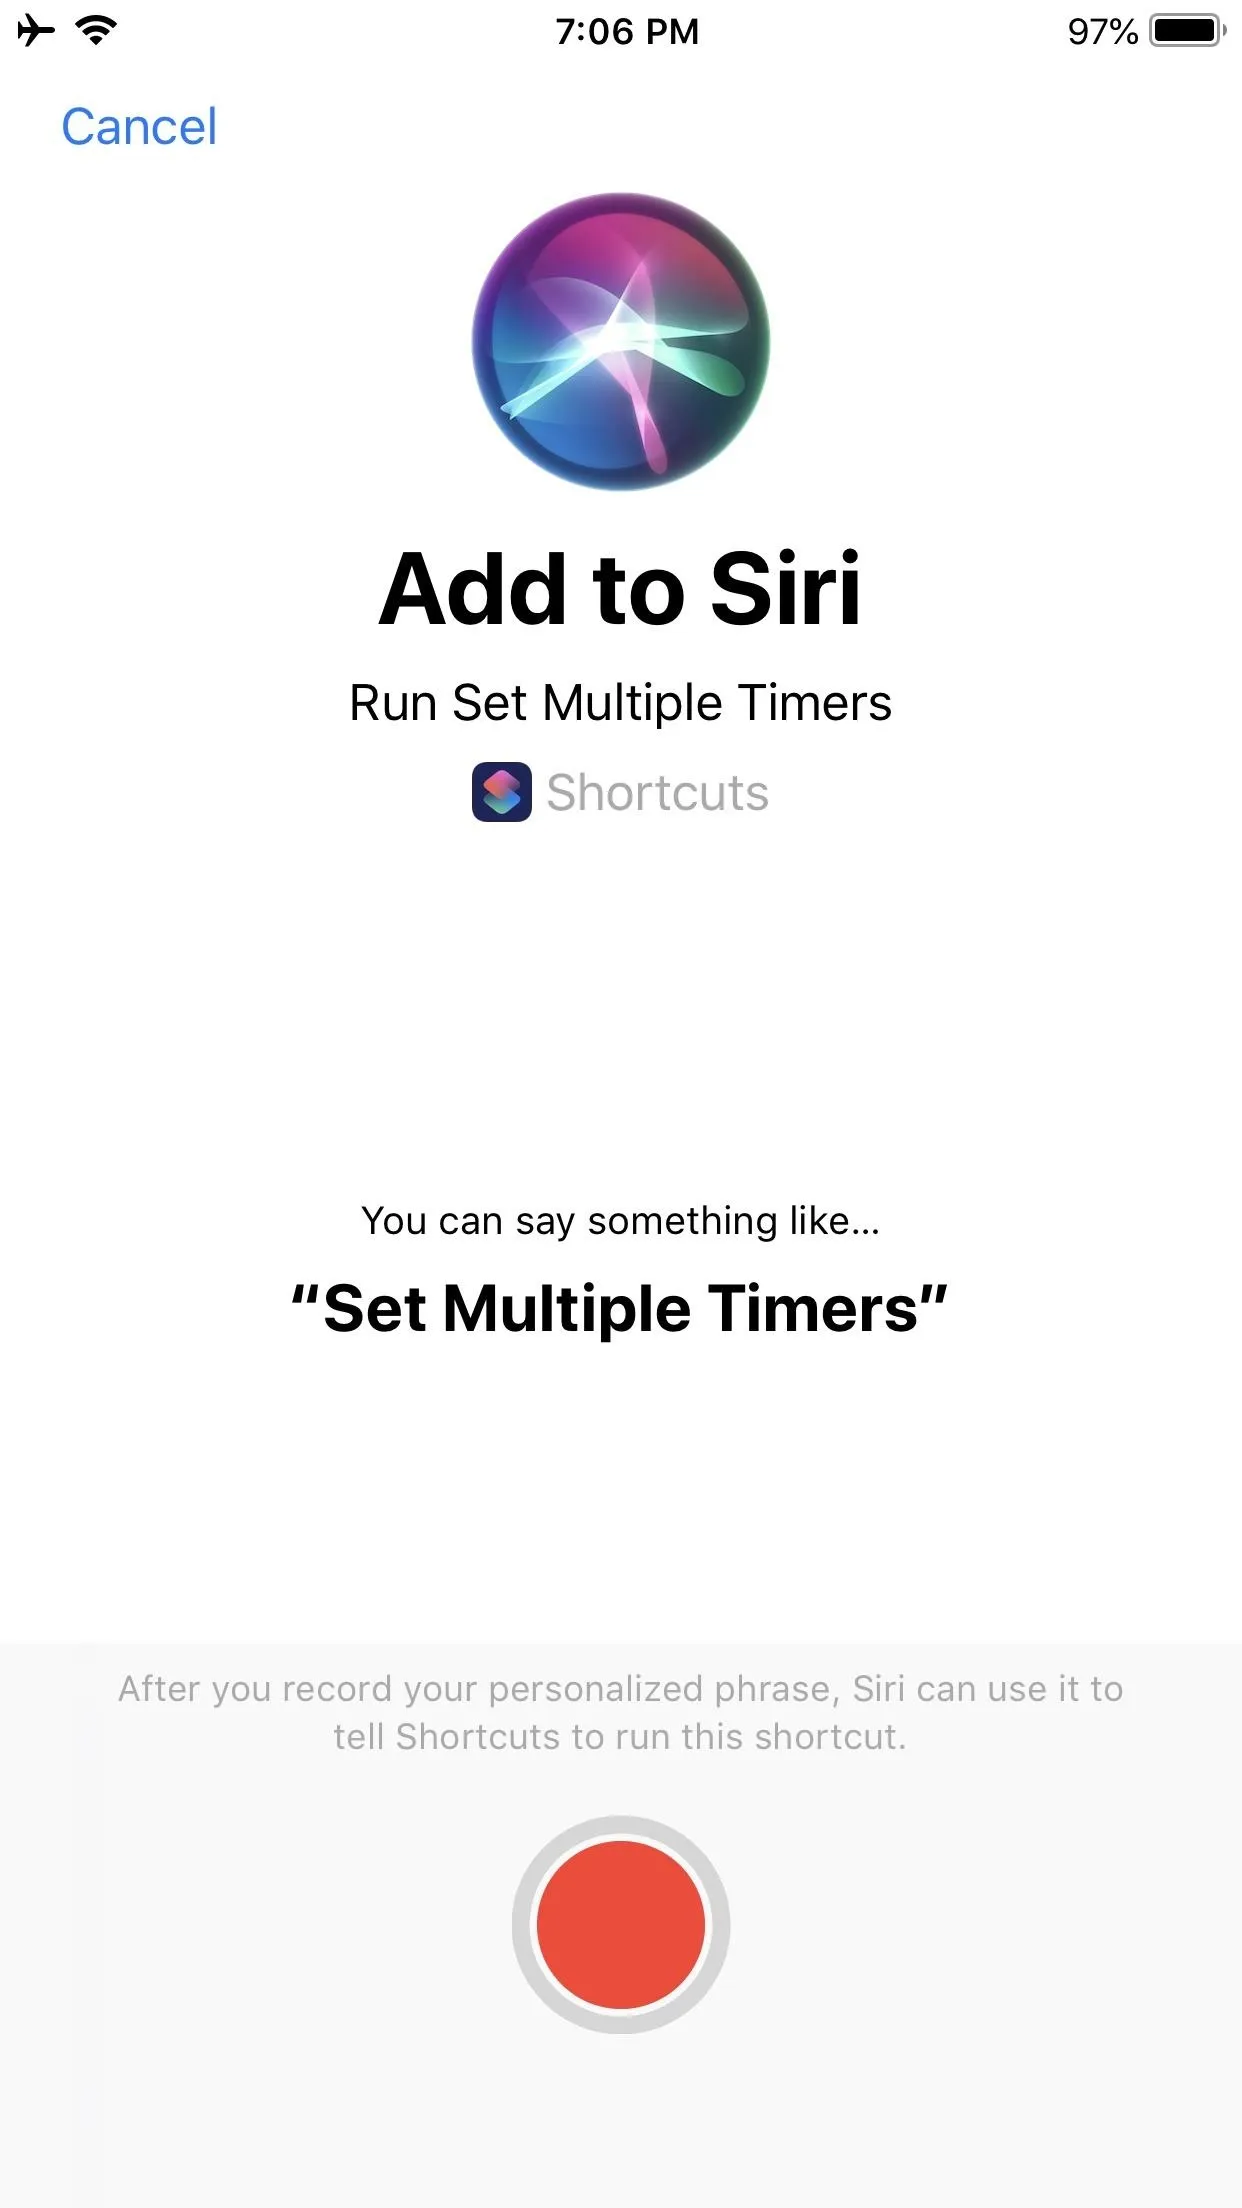
Once this is complete, you can test it out. Activate Siri however you normally would, then say "Set Multiple Timers" (or whatever phrase you set). Siri will launch that shortcut in the Shortcuts app, starting the first prompt to name the timer.
It's worth mentioning that since this shortcut relies on Reminders, you can also generate these "timers" by summoning Siri — without setting a Siri Shortcut by way of the above steps — and stating something like, "Remind me to get laundry at 2 p.m." The resulting reminder notification at 2 p.m. will read "Get Laundry."
Understand & Customize the Shortcut's Workflow
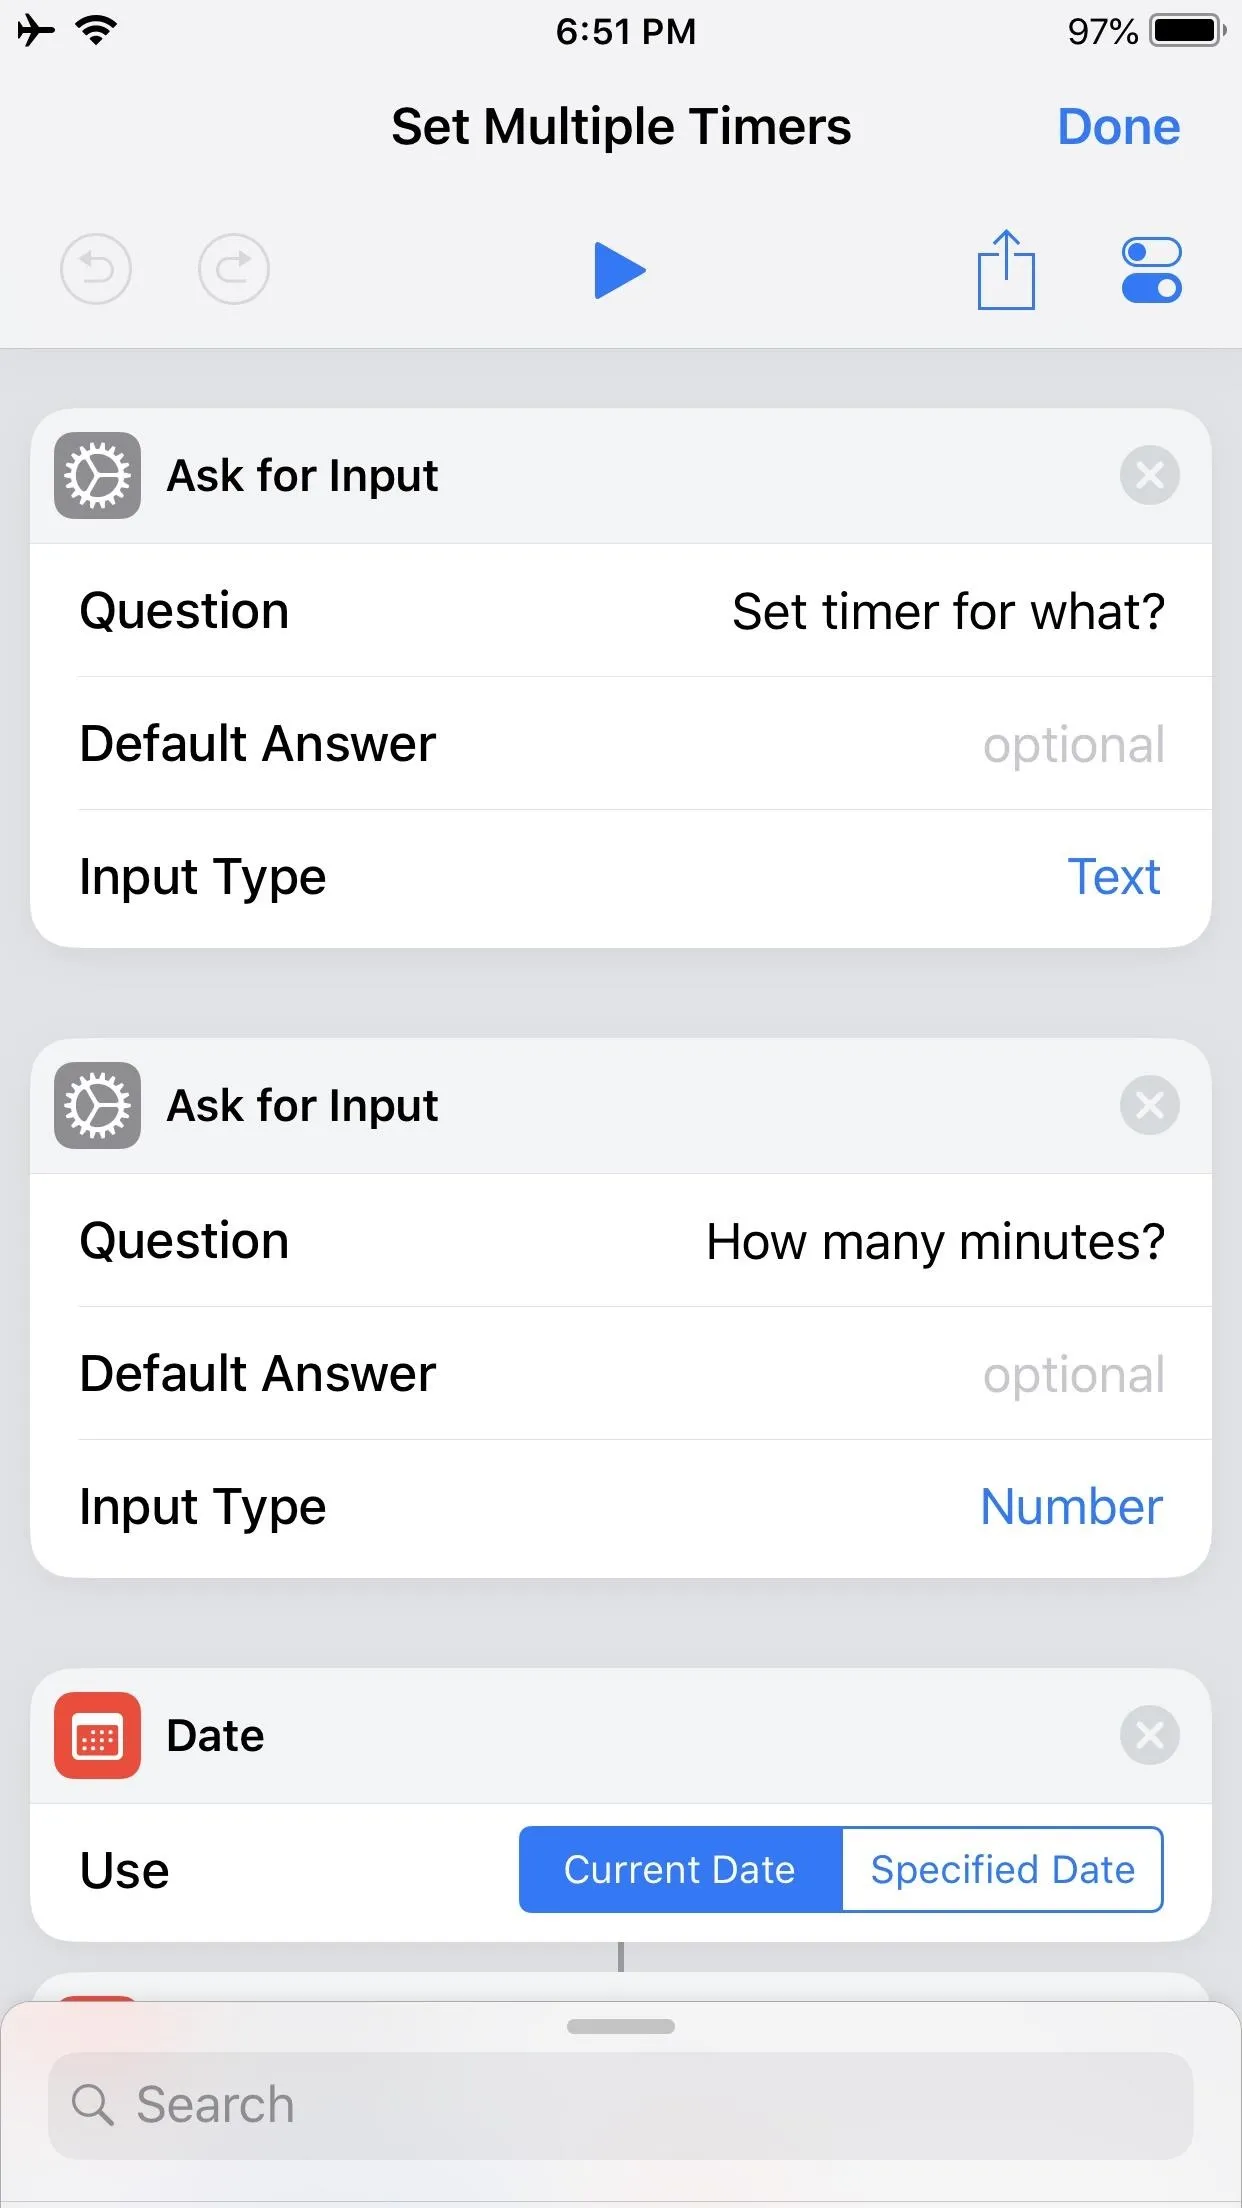
Let's look at each of the five actions that make up this shortcut.
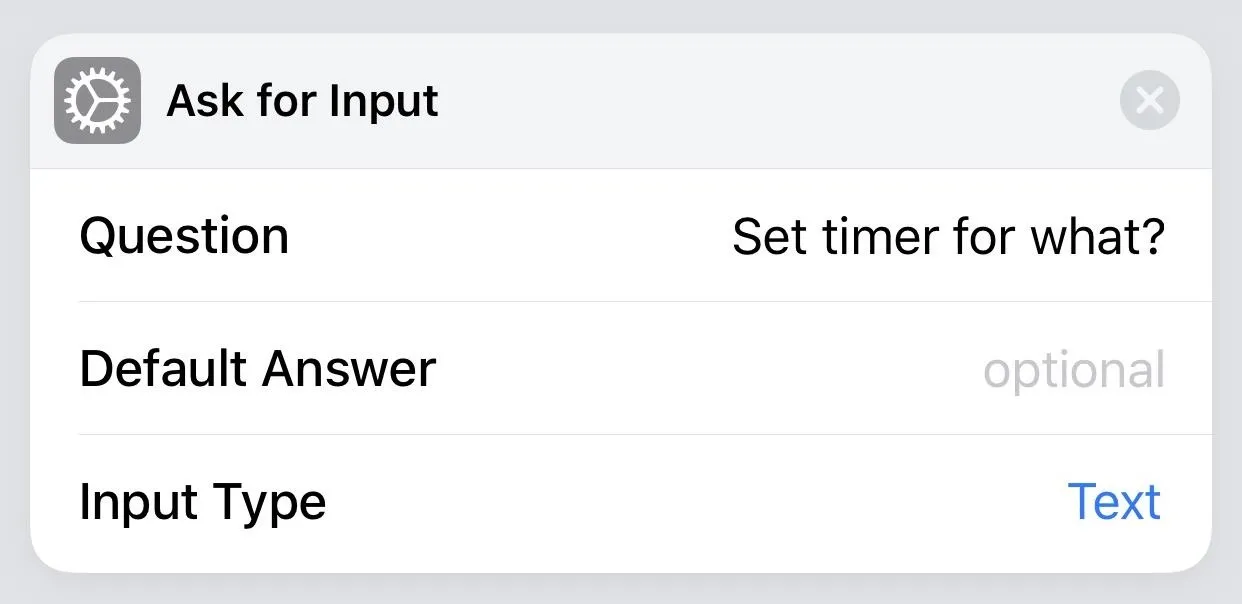
The first action box, "Ask for Input," gets us started with the question, "Set timer for what?" The Default Answer is blank since this is what we will fill in when prompted (e.g., laundry, pot roast, writing time, etc.). Input Type is set as "Text" because we plan to fill this field with a word or letter, not a number, URL, or date — all of which are options here.
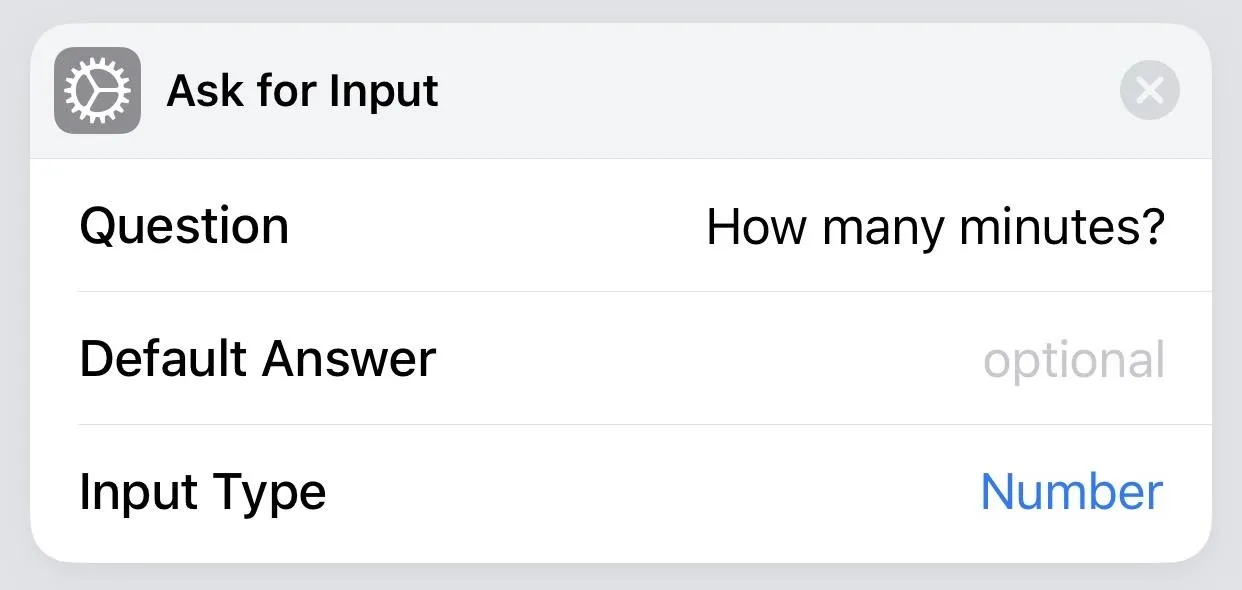
The second action box, another "Ask for Input," allows us to set the time, hence the question, "How many minutes?" Default Answer is left blank again since we fill this in on the prompt when using the shortcut. Because this action pertains to the desired minutes, the Input Type will be "Number."
These first two action boxes are not sequence-dependent in relation to one another. In other words, you can tap and hold the second "Ask for Input" action box and drag it to the top if you want the "How many minutes?" prompt to precede "Set timer for what?" when using the shortcut. It won't affect the result.
The third action box is for "Date." The key thing here is to ensure that "Current Date" is selected. Selecting "Specified Date" would defeat the purpose of this shortcut since setting the reminder is based on "now," not any other date.

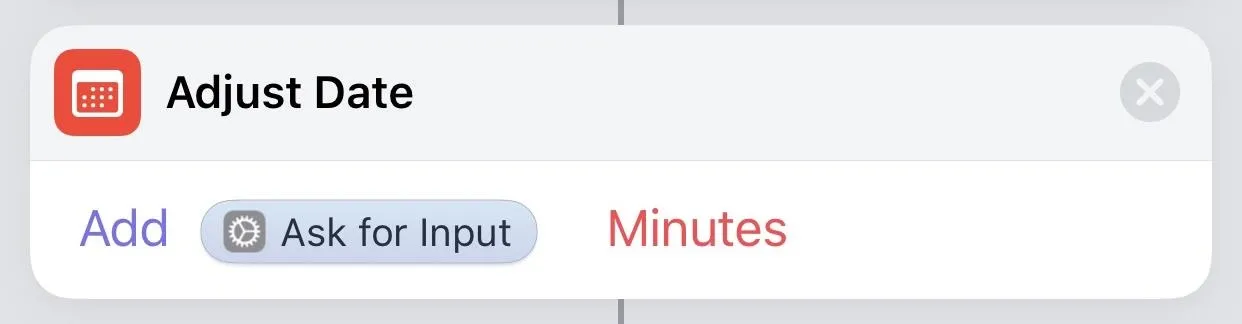
The fourth action box, "Adjust Date," incorporates the numerical field from the "How many minutes?" action box to the "Date" action box — thus, adding our desired number of minutes to the time at which we set this "timer."
Note that with two action boxes for "Ask for Input," this means the "Ask for Input" entry in "Adjust Date" defaults to whichever is second during authoring. Meaning, if you later move "How many minutes" above "Set timer for what?" the "Adjust Date" action will still refer to the numerical entry for "How many minutes?"
Be careful, however, if you delete and re-enter "Ask for Input," because if "Set timer for what?" is the second action box, then "Adjust Date" will refer to that "Text" field — thus breaking the shortcut's intended function.
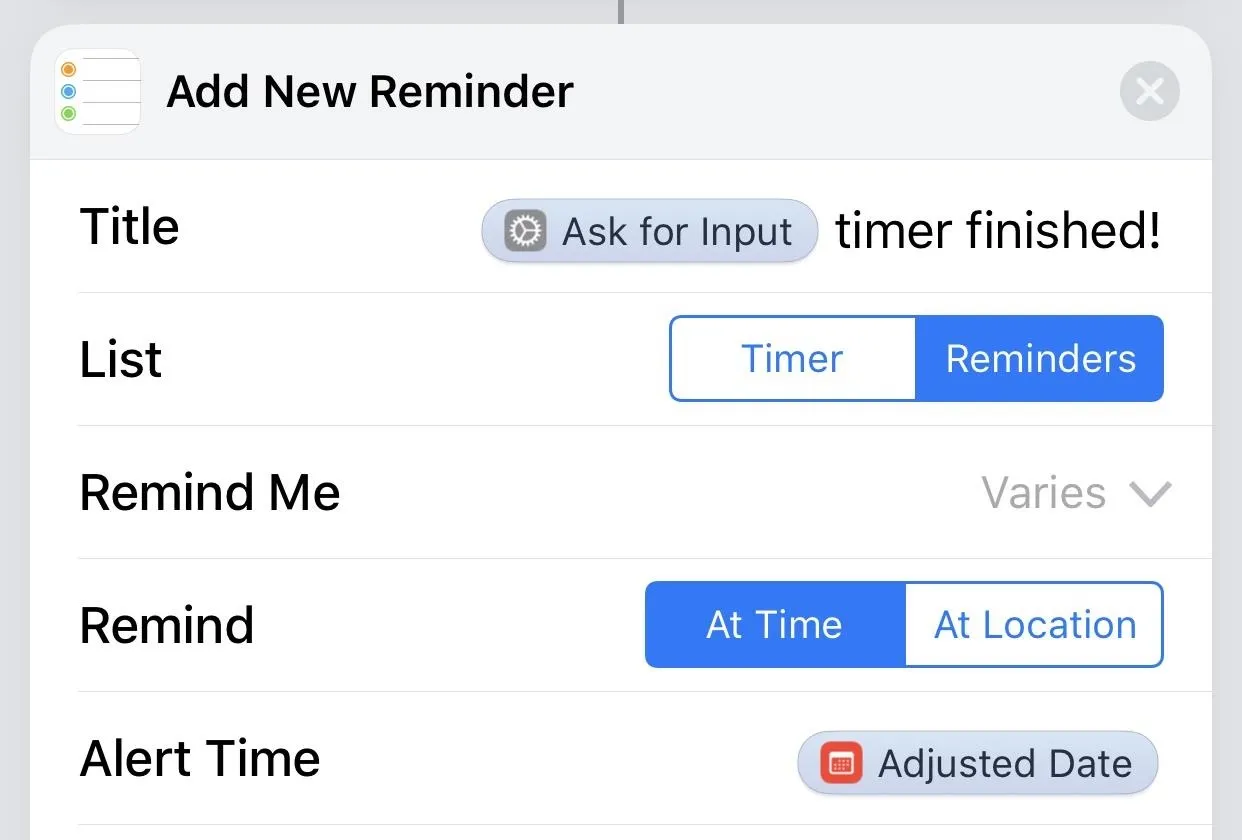
The fifth and final action box, "Add New Reminder," brings it all together. Title refers to the text in the Reminders notification — what we see when the "timer" is complete. List defaults to whatever your default list is in the Reminders app. If you only have a couple of lists, tap the one that you want to use. If you have more than one list, tap on the list name, then select from the options available. It might be wise to create a "Timer" list in Reminders just for this purpose.
Remind Me can be toggled up or down. When toggled down, you can see the last two relevant fields — Remind and Alert Time. For the former, "At Time" is what we need since our notification should rely on the actual time and not where we are physically. The latter field should include "Adjusted Date" since this is the time ("Date" plus "Adjust Date") we have designated as the end of the timer.
To reiterate, this shortcut allows us to create a reminder differently — with custom prompts — while relying on the Reminders app to send a notification to us as though it were the end of a normal timer.
Margin of Error
Keep in mind that there is a margin of error baked into this shortcut. Because the shortcut essentially creates a reminder for a specific task, that notification may appear up to 59 seconds sooner than desired. For example, if you set a timer with this shortcut at 2 p.m. for a reminder that will come up in 60 minutes, it will actually be a little less than 60 minutes. Why?
The reminder notification will be set for 3:00 pm. But when you set the reminder at 2:00 PM, it's likely that you weren't setting it at 2:00 p.m. sharp. Maybe it was a few seconds before 2:01 p.m., in which case the "60" you typed for the second prompt ("How many minutes?") would, in execution, be more like 59 minutes.
This is not a huge margin of error, but it's worth understanding this because for some tasks — something short like brewing tea or something involved like baking a soufflé — precision is important. In those cases, it is best to use the regular timer in Clock. You can then pair that with using this shortcut for other things which allows for this 59-second window of imprecision.
Finally, don't forget the Reminders notification will only be heard if Do Not Disturb is toggled off, Reminders notifications are toggled on, and the hardware Mute button is switched off. And whether or not you picked a good enough sound for the notification in the Settings app.
Until Apple decides to implement multiple timers in the Clock app going forward in iOS 13 or beyond, this is a solution we can experiment with as a workaround. And if you need more precision, third-party apps can help.
- Follow Gadget Hacks on Pinterest, Reddit, Twitter, YouTube, and Flipboard
- Sign up for Gadget Hacks' daily newsletter or weekly Android and iOS updates
- Follow WonderHowTo on Facebook, Twitter, Pinterest, and Flipboard
Cover photo by Justin Meyers/Gadget Hacks; Screenshots by David Chien/Gadget Hacks


Comments
Be the first, drop a comment!