


Have you ever been locked out of your iPhone? Maybe you forgot your passcode. Or perhaps someone with access changed the passcode as a prank. Your iPhone's display could have even been damaged and unresponsive. Whatever the reason, there's an easy way to get back access to your iPhone the next time it happens.
When you can't remember or don't know the passcode to your iPhone, Apple recommends you use recovery mode on a computer to restore the device. But what if you don't have a computer? Or don't have easy access to one when you need to get back into your iPhone? What if you don't live near an Apple Store?
There's a built-in iOS feature that lets you erase your iPhone and create a new passcode no matter where you are — without any computers. And if that doesn't work, you can still easily wipe your iPhone using pretty much any other device.
Use the Wrong Passcode
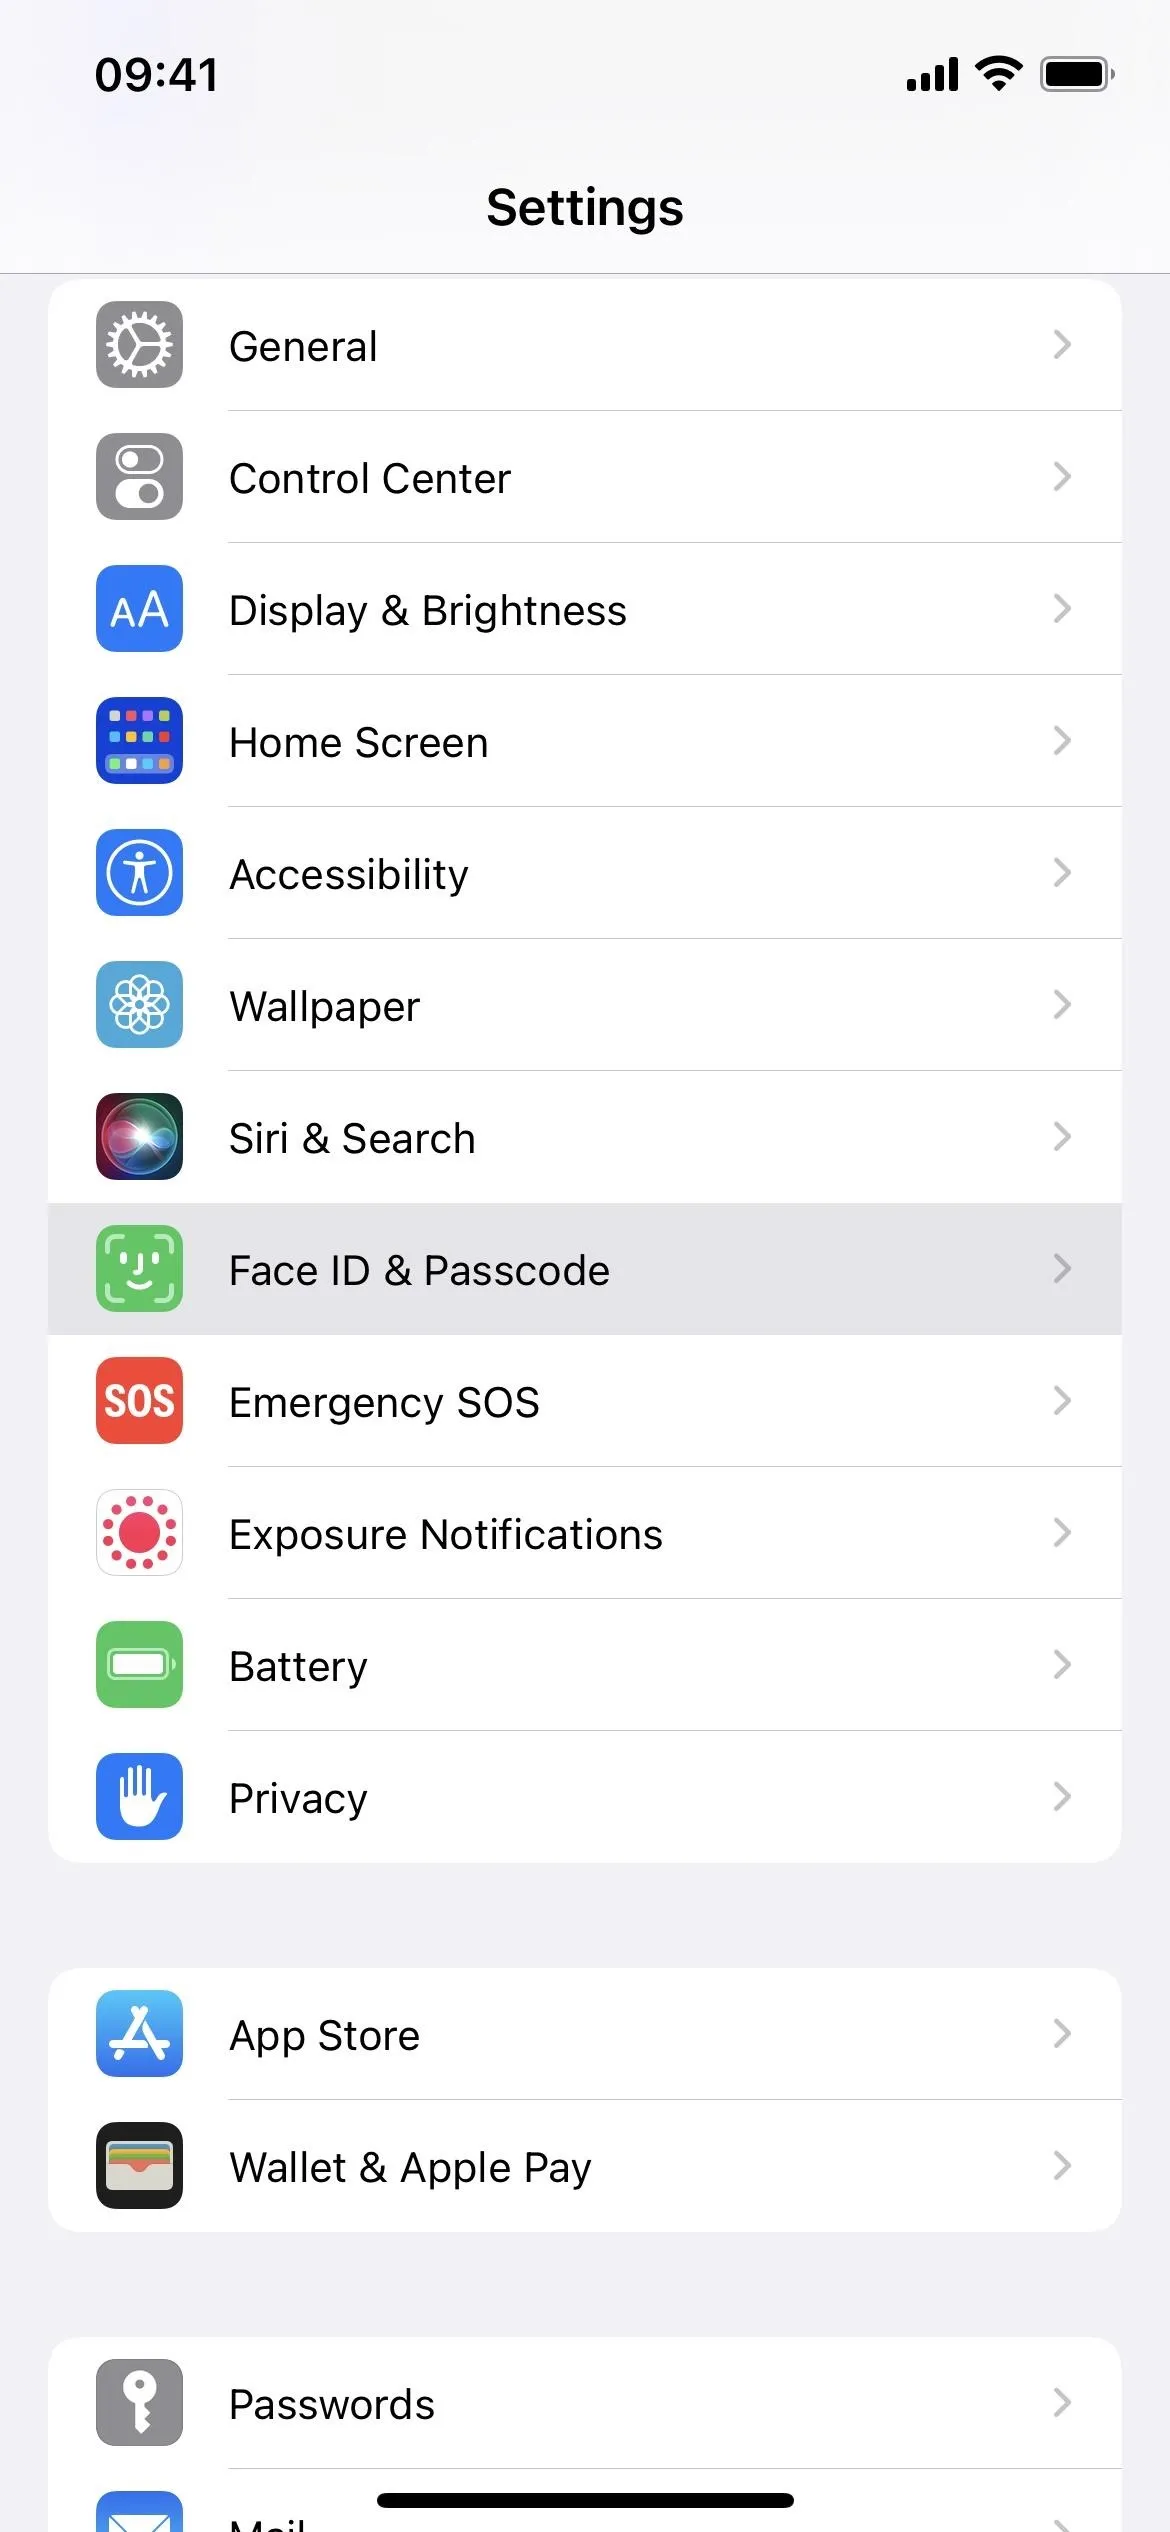
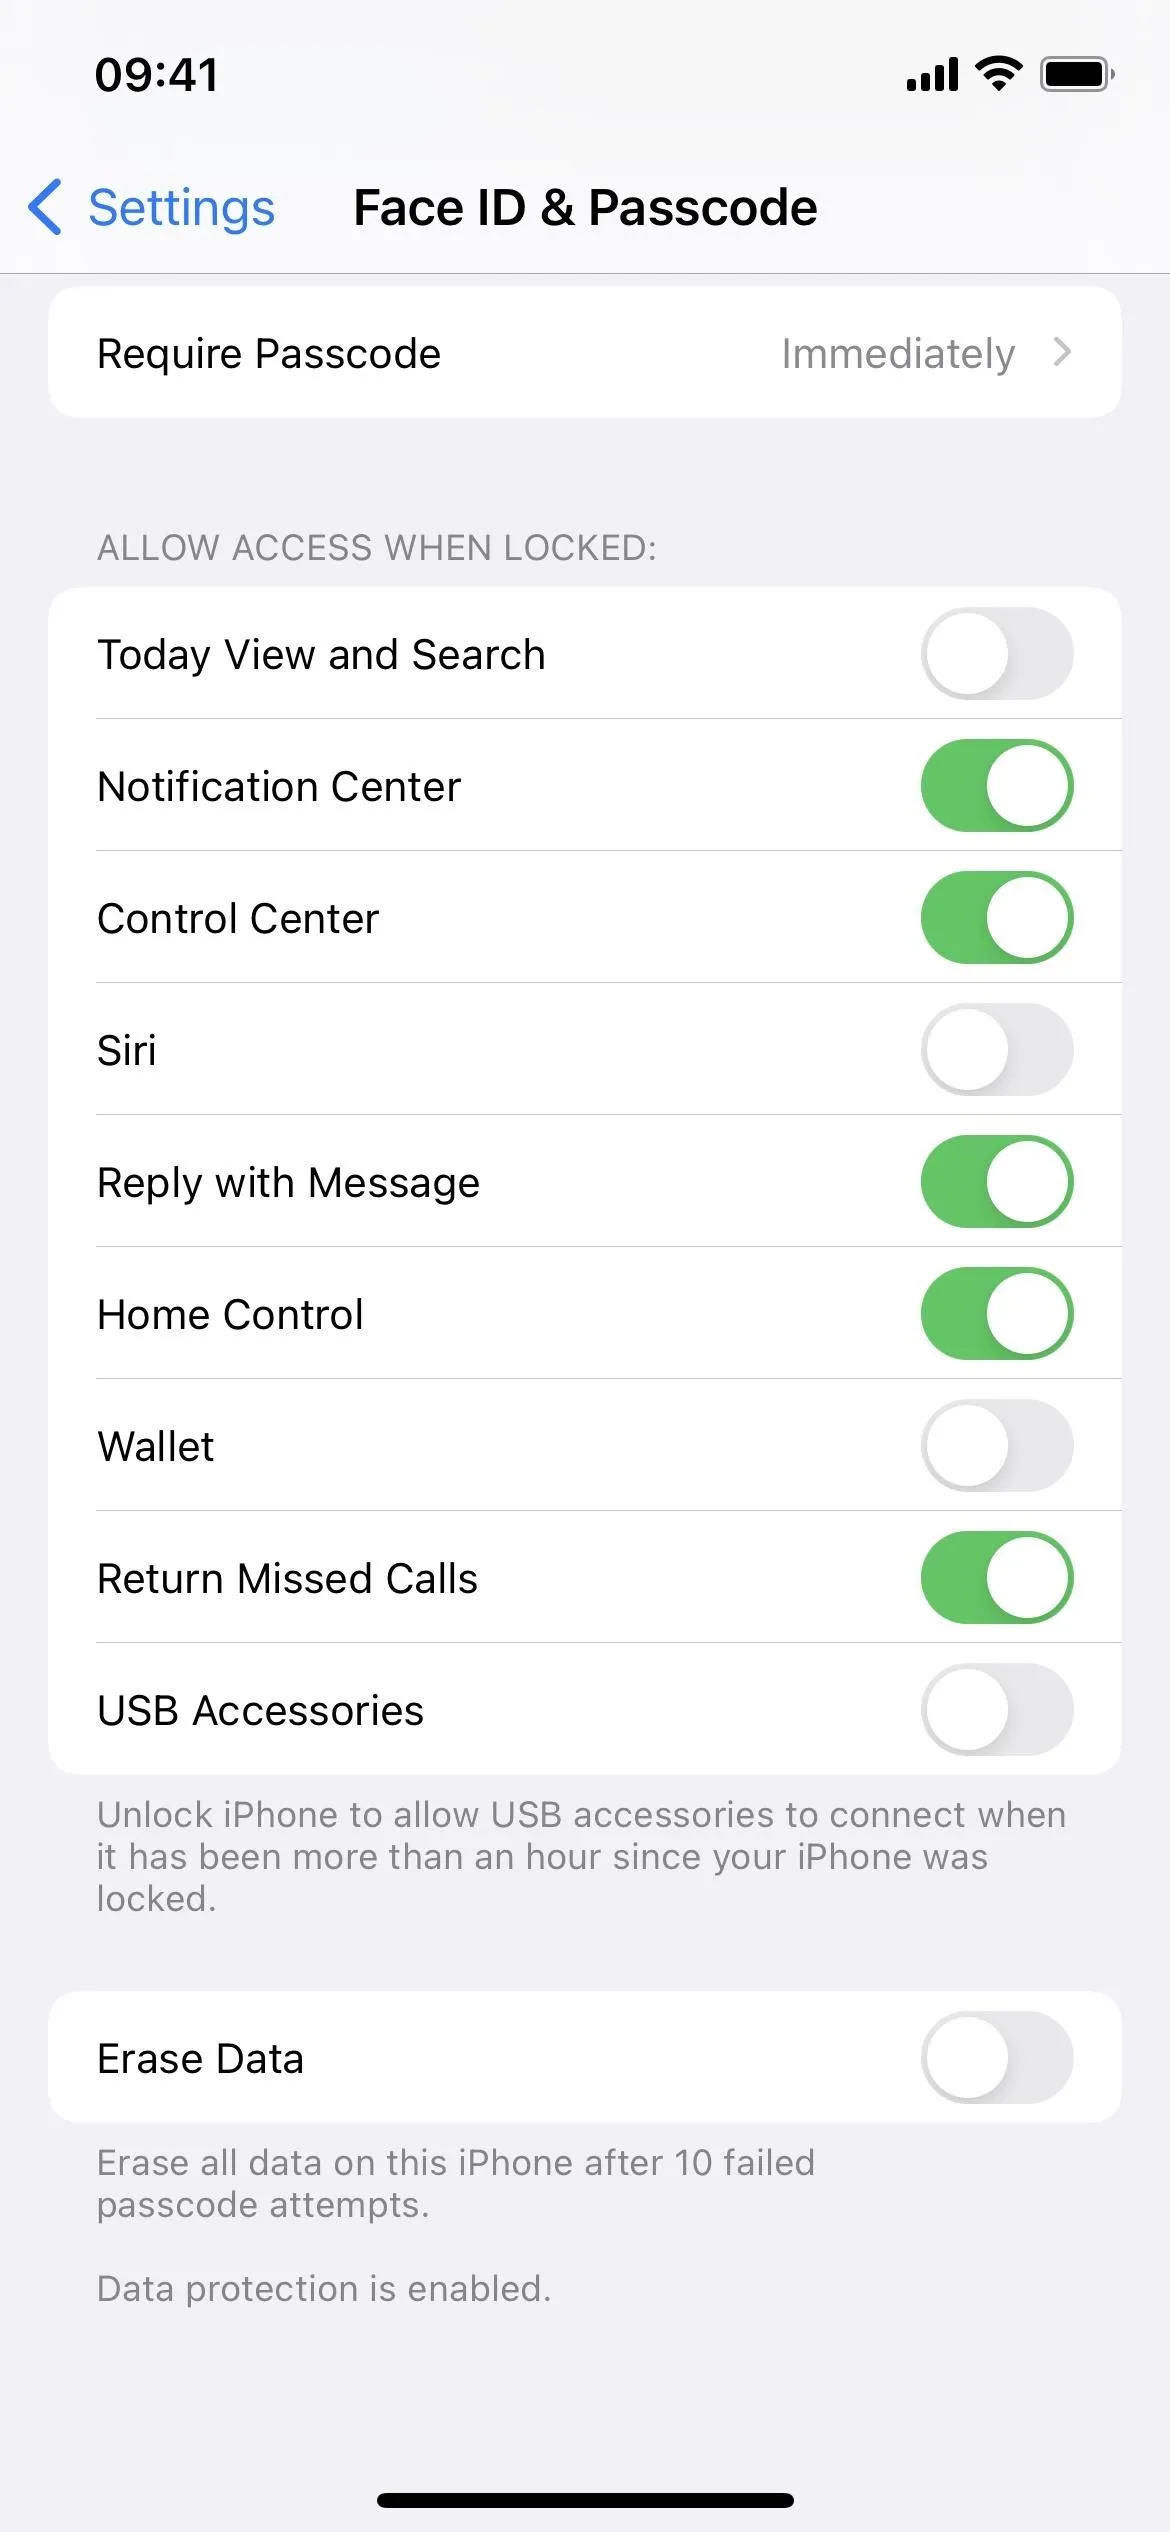
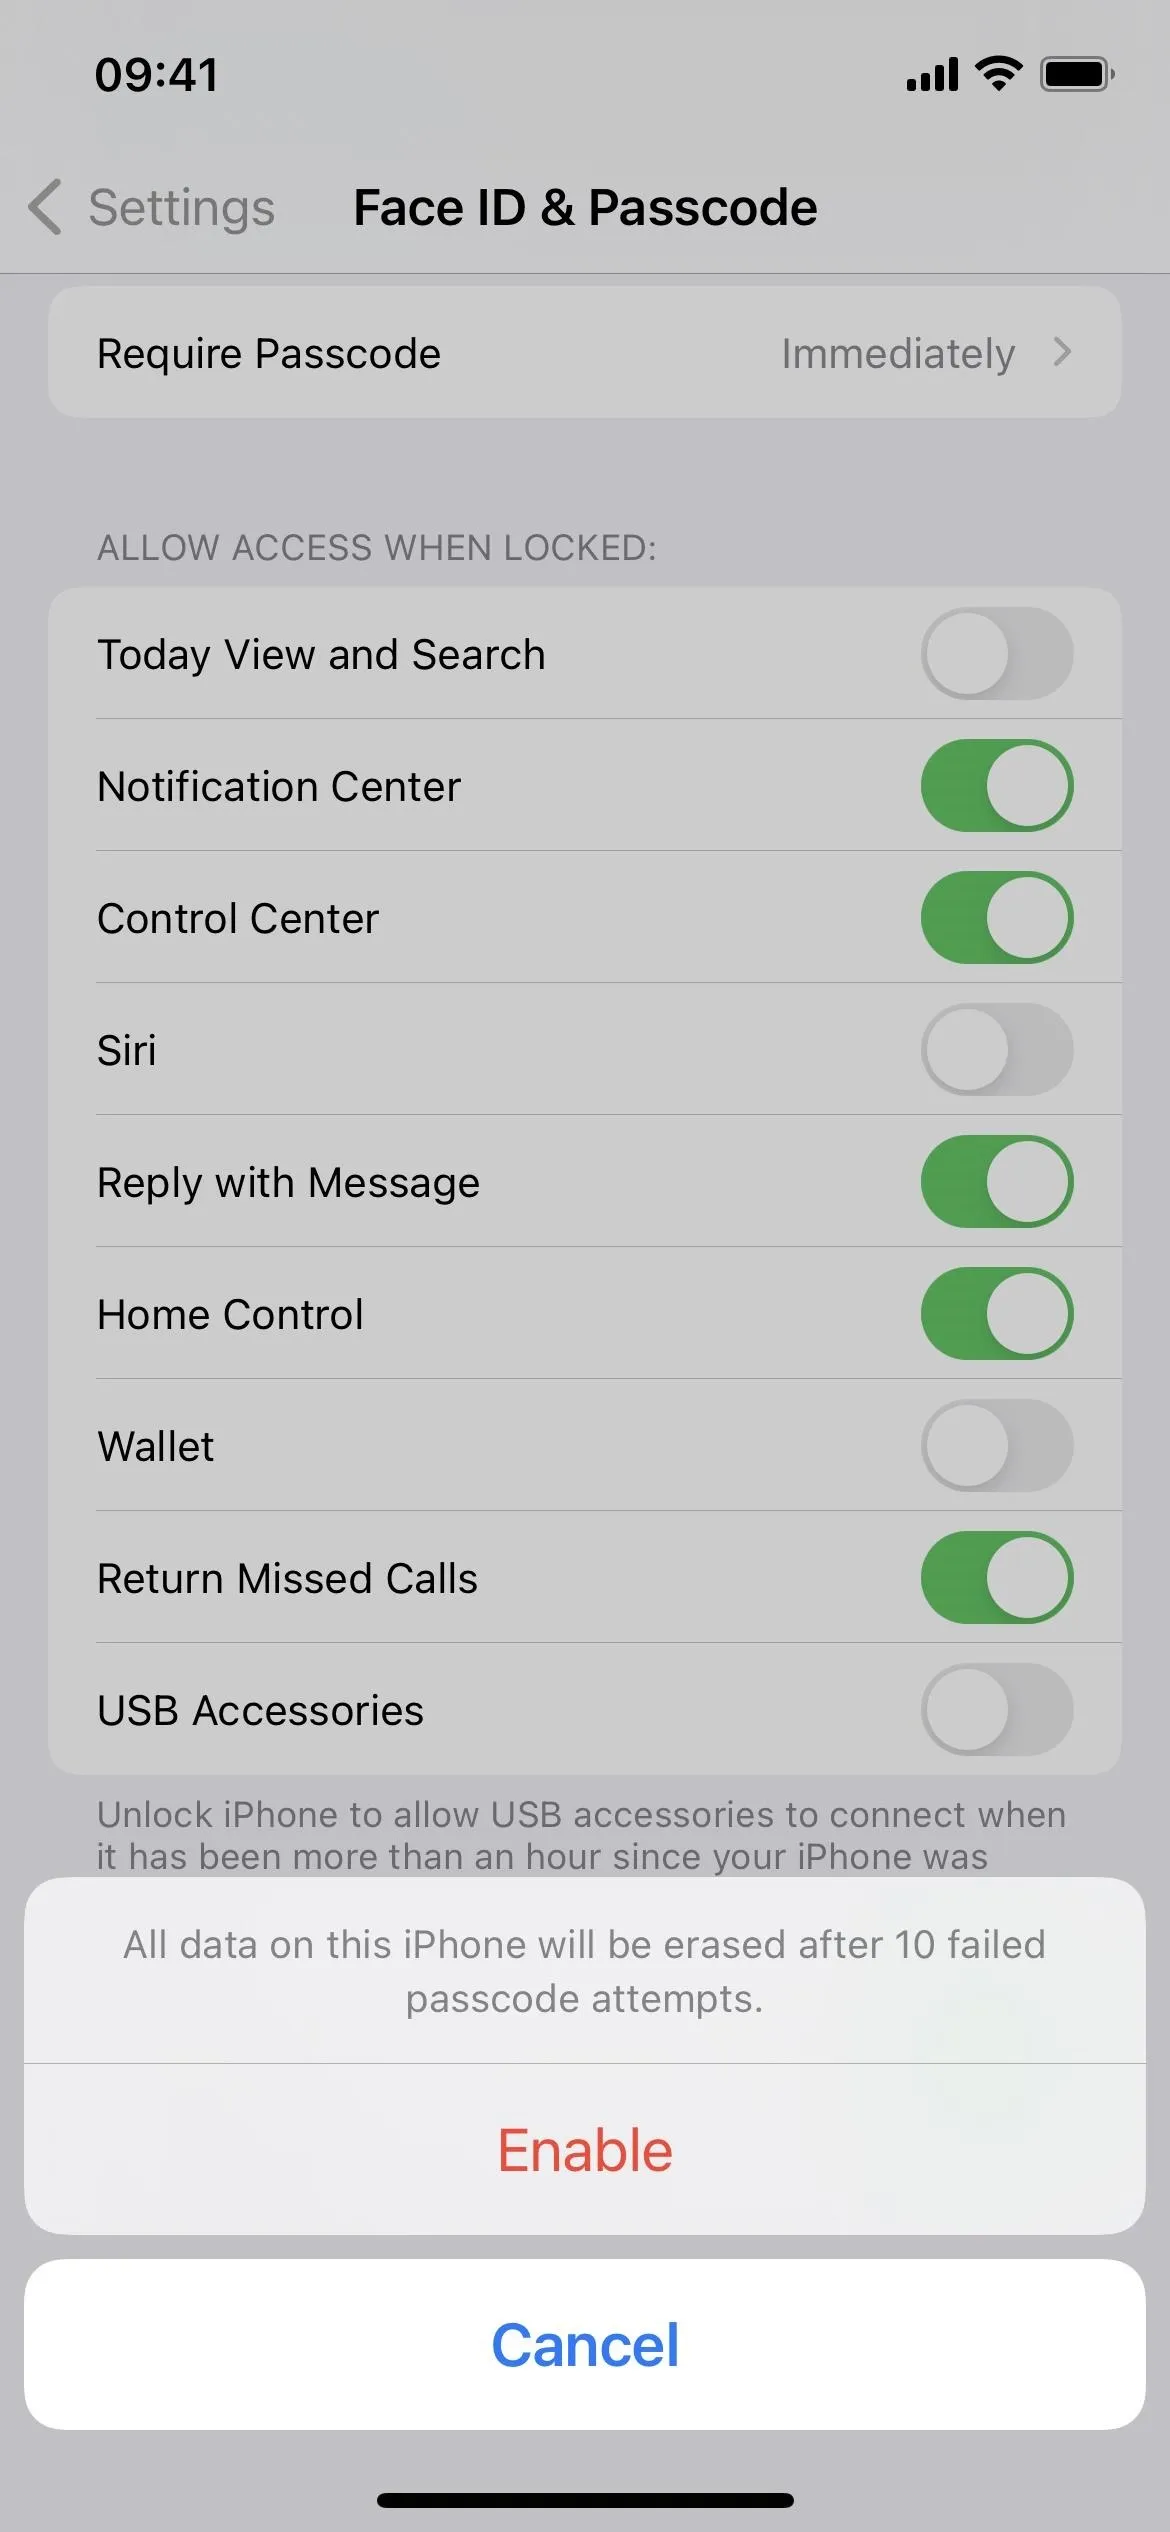
While disabled by default, if you go to "Face ID & Passcode" or "Touch ID & Passcode" in your iPhone's Settings app, there's an option to "Erase Data" after 10 failed passcode attempts.
With the switch turned on, iOS will erase the device automatically after the 10th failed passcode attempt. However, consecutive attempts of the same incorrect passcode will not count. When it auto-wipes the data, it does not remove the association with your Apple ID, so only you can restore the device and not any thieves.
You can use this method to either start fresh or restore your iPhone with a backup. It's not very convenient, but it's a good option if you back up to iCloud. That way, you can wipe and restore your iPhone from anywhere, then set a new passcode.
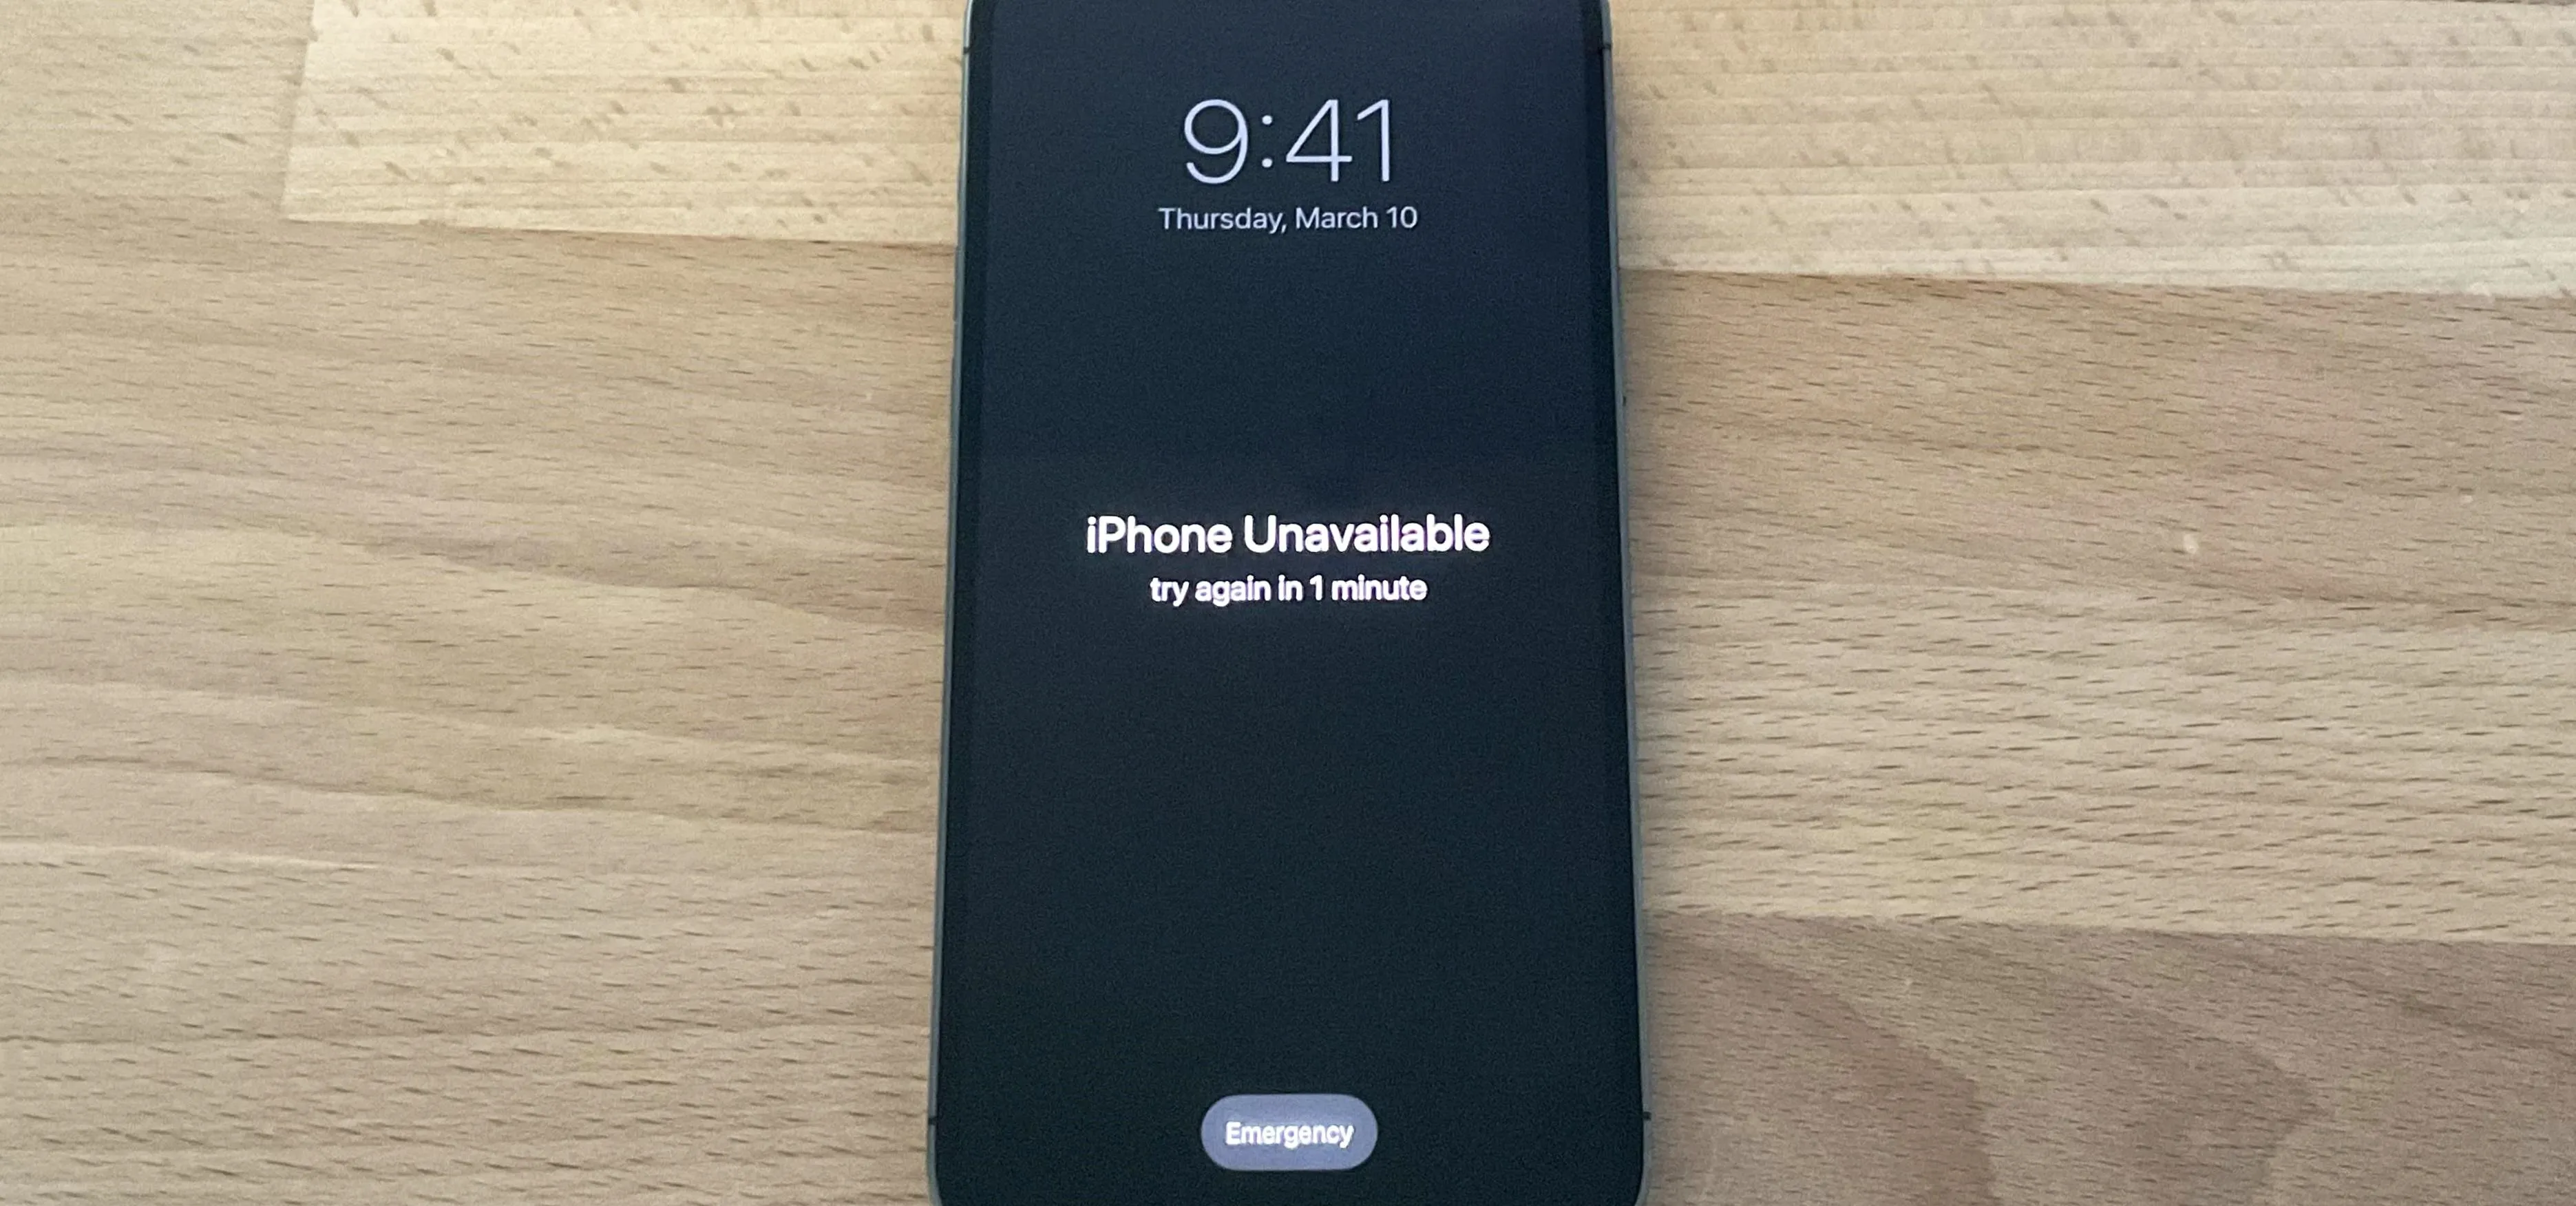
While 10 tries may sound like a few seconds of work, it's a little more involved than that. Before it wipes anything, it will lock you out for one minute after the fifth failed attempt. If you enter the same wrong passcode more than once, subsequent tries do not count toward the limit. Then, it gets drawn out even more:
- After 5 failed attempts: 1-minute wait
- After 6 failed attempts: 5-minute wait
- After 7 failed attempts: 15-minute wait
- After 8 failed attempts: 15-minute wait
- After 9 failed attempts: 1-hour wait
- After 10 failed attempts: erases device automatically
However, if you're running iOS 15.2 or later, you don't have to wait for all 10 failed attempts to erase your iPhone and restore it.
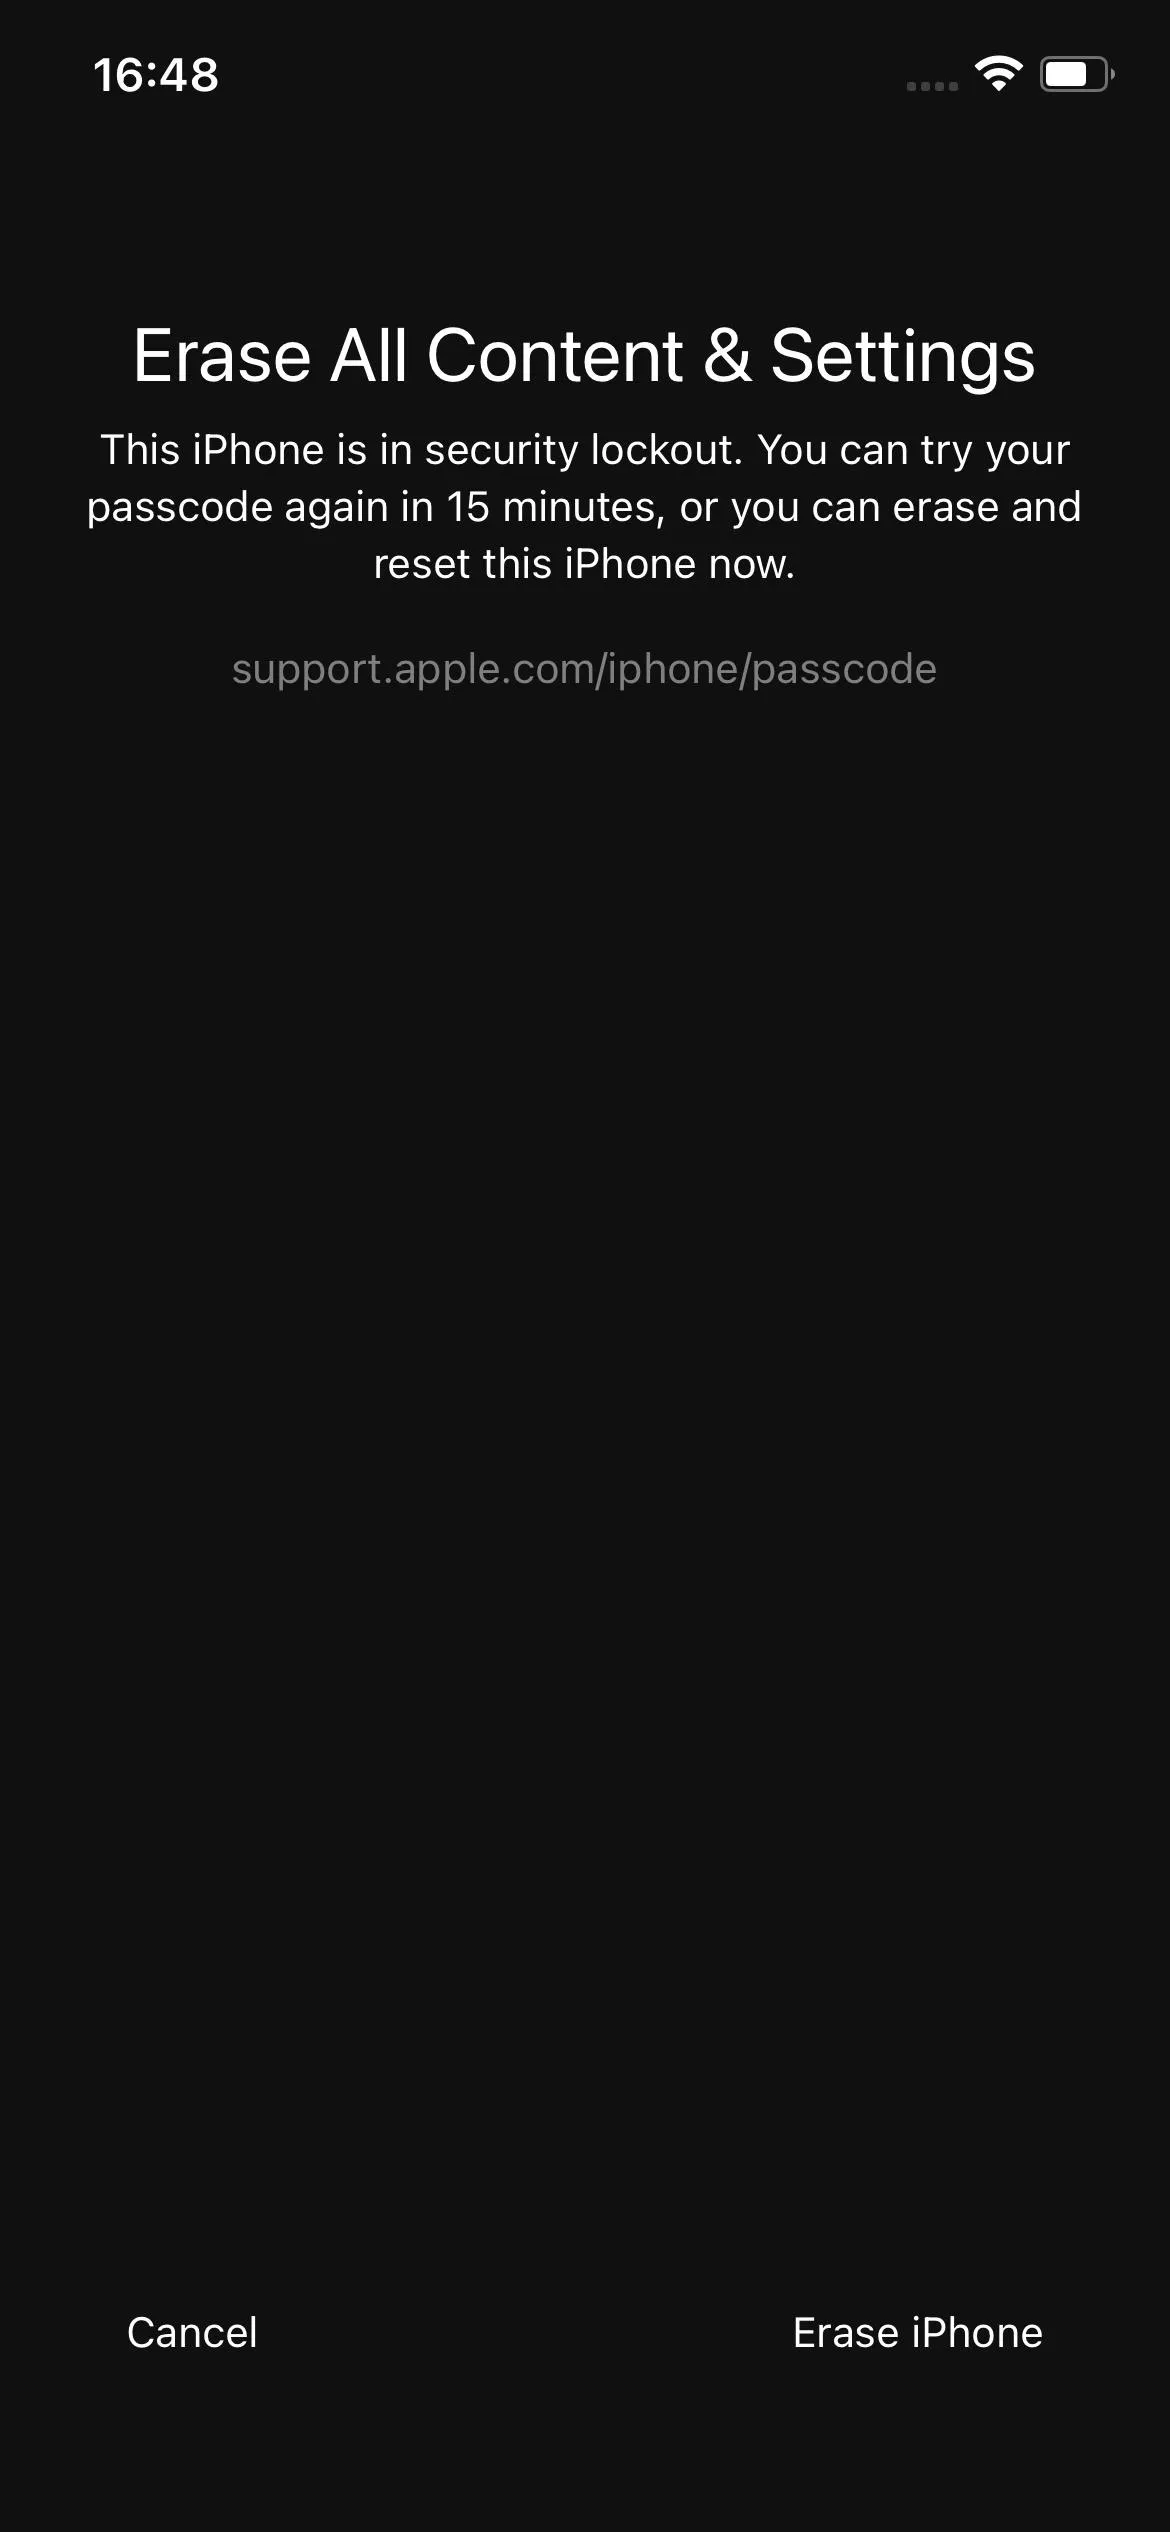
When the first 15-minute lockout occurs, there will be a button on the screen to "Erase iPhone." Tap that, and tap it again to confirm. Then, enter your Apple ID password, which signs you out of your Apple ID. While the auto-wipe keeps the device associated with you, this method does not. The iPhone should begin wiping itself, then follow the instructions to restore it and set a new passcode.
If you restart your device when you see "Security Lockout" on the Lock Screen, you won't be able to reconnect to a Wi-Fi network [and therefore won't be able to "Erase Phone"] until your device is unlocked. Cellular devices will reconnect to a cellular network if you have active service.


If you don't have the "Erase Data" switch enabled in your Settings app, you will still get these lockouts, but you'll get an "iPhone is Disabled" error that will force you to connect your iPhone to your Mac or PC to use recovery mode. The "Erase iPhone" button will still show on-screen after the seventh failed attempt in iOS 15.2 and later.
Note: If your cellular plan uses an eSIM, Apple recommends contacting your carrier first to get a QR code to set up the eSIM again when you're back up and running. Otherwise, it may be a chore to get the eSIM working.
Use Another Device
If the above method doesn't work for you, you can use another device to wipe your iPhone. The device can be any device with access to an internet browser. For example, an old Android phone, an old iPhone, any computer (PC, Mac, or Linux), an iPad, an Android tablet, and even some smart TVs will work.
Find Your Apple ID Password
If you don't have it already, you will need to figure out your Apple ID password. If you do not know your password, you can reset your password.
Check to See if Data Is Backed Up (Optional)
Keep in mind that erasing your iPhone will delete all the data on your iPhone. Any data that is not backed up will be permanently erased. That's why we recommend checking to see if backups are enabled before you go through the process. However, you can skip to Step 4 if you're like me and don't use a backup.
From a computer or tablet:
- Go to appleid.apple.com.
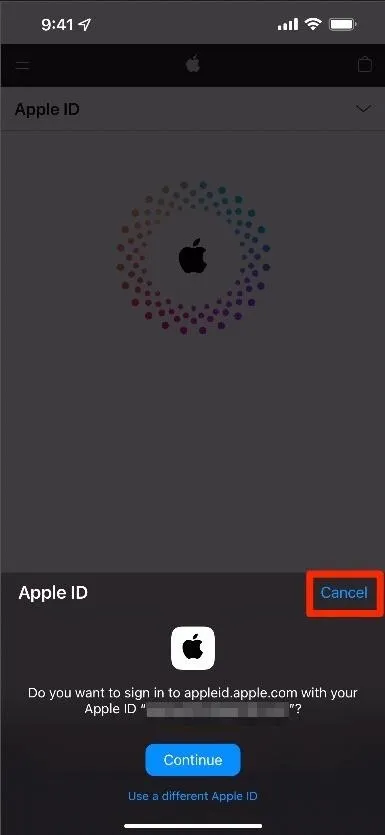
- If you are using someone else's device, you may see a pop-up asking if you would like to sign in using their Apple ID. You won't want to, so hit "Cancel."
- Sign in with your Apple ID.
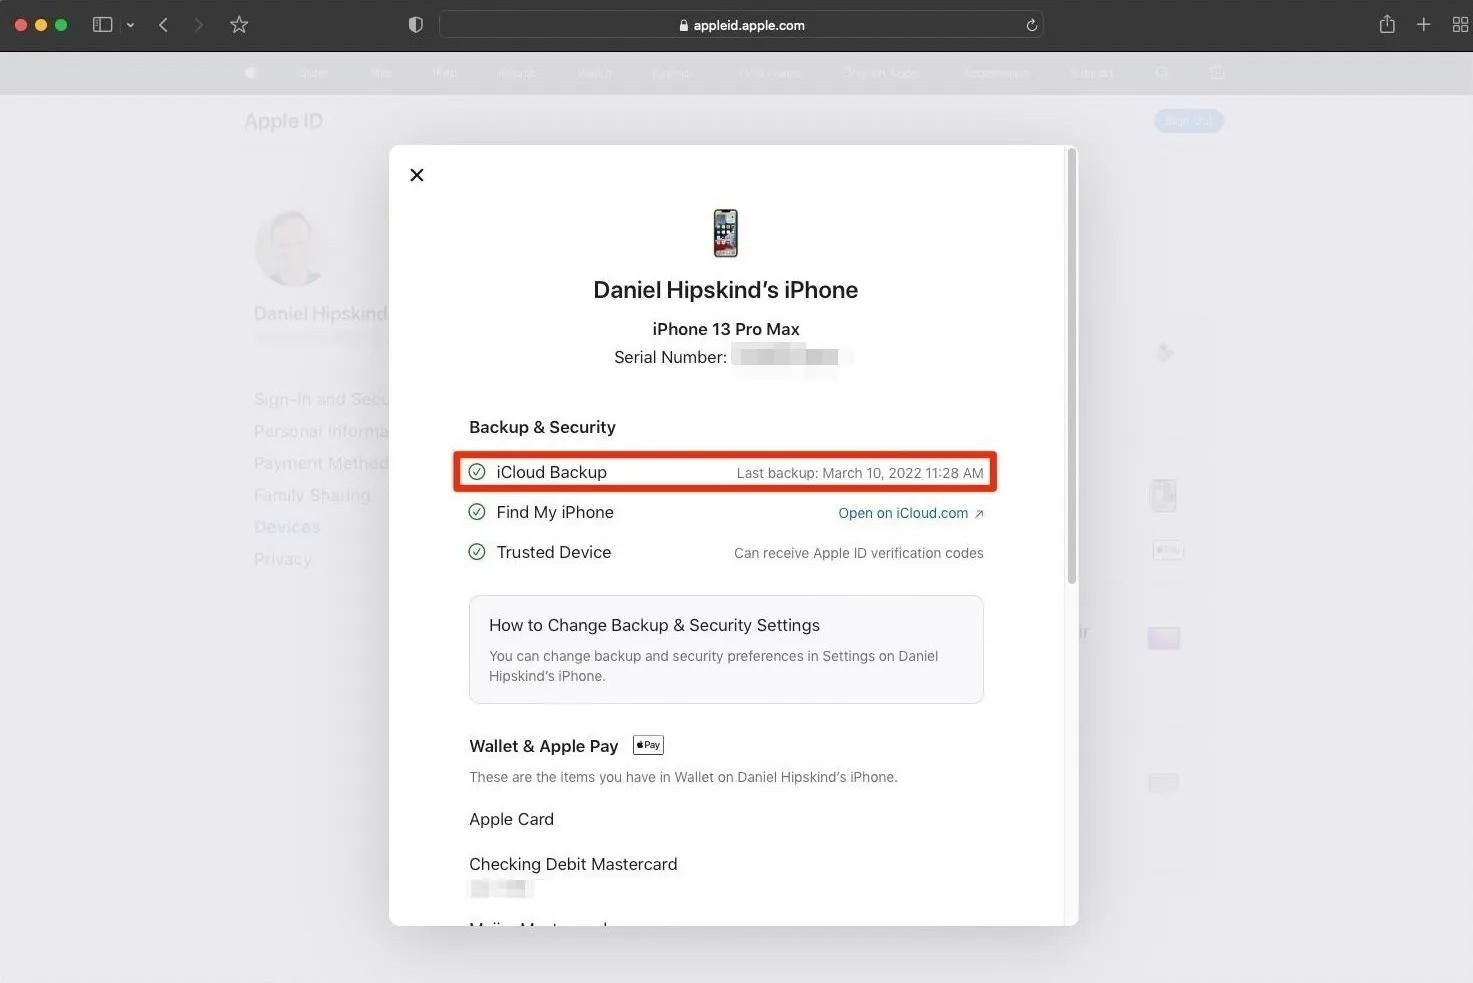
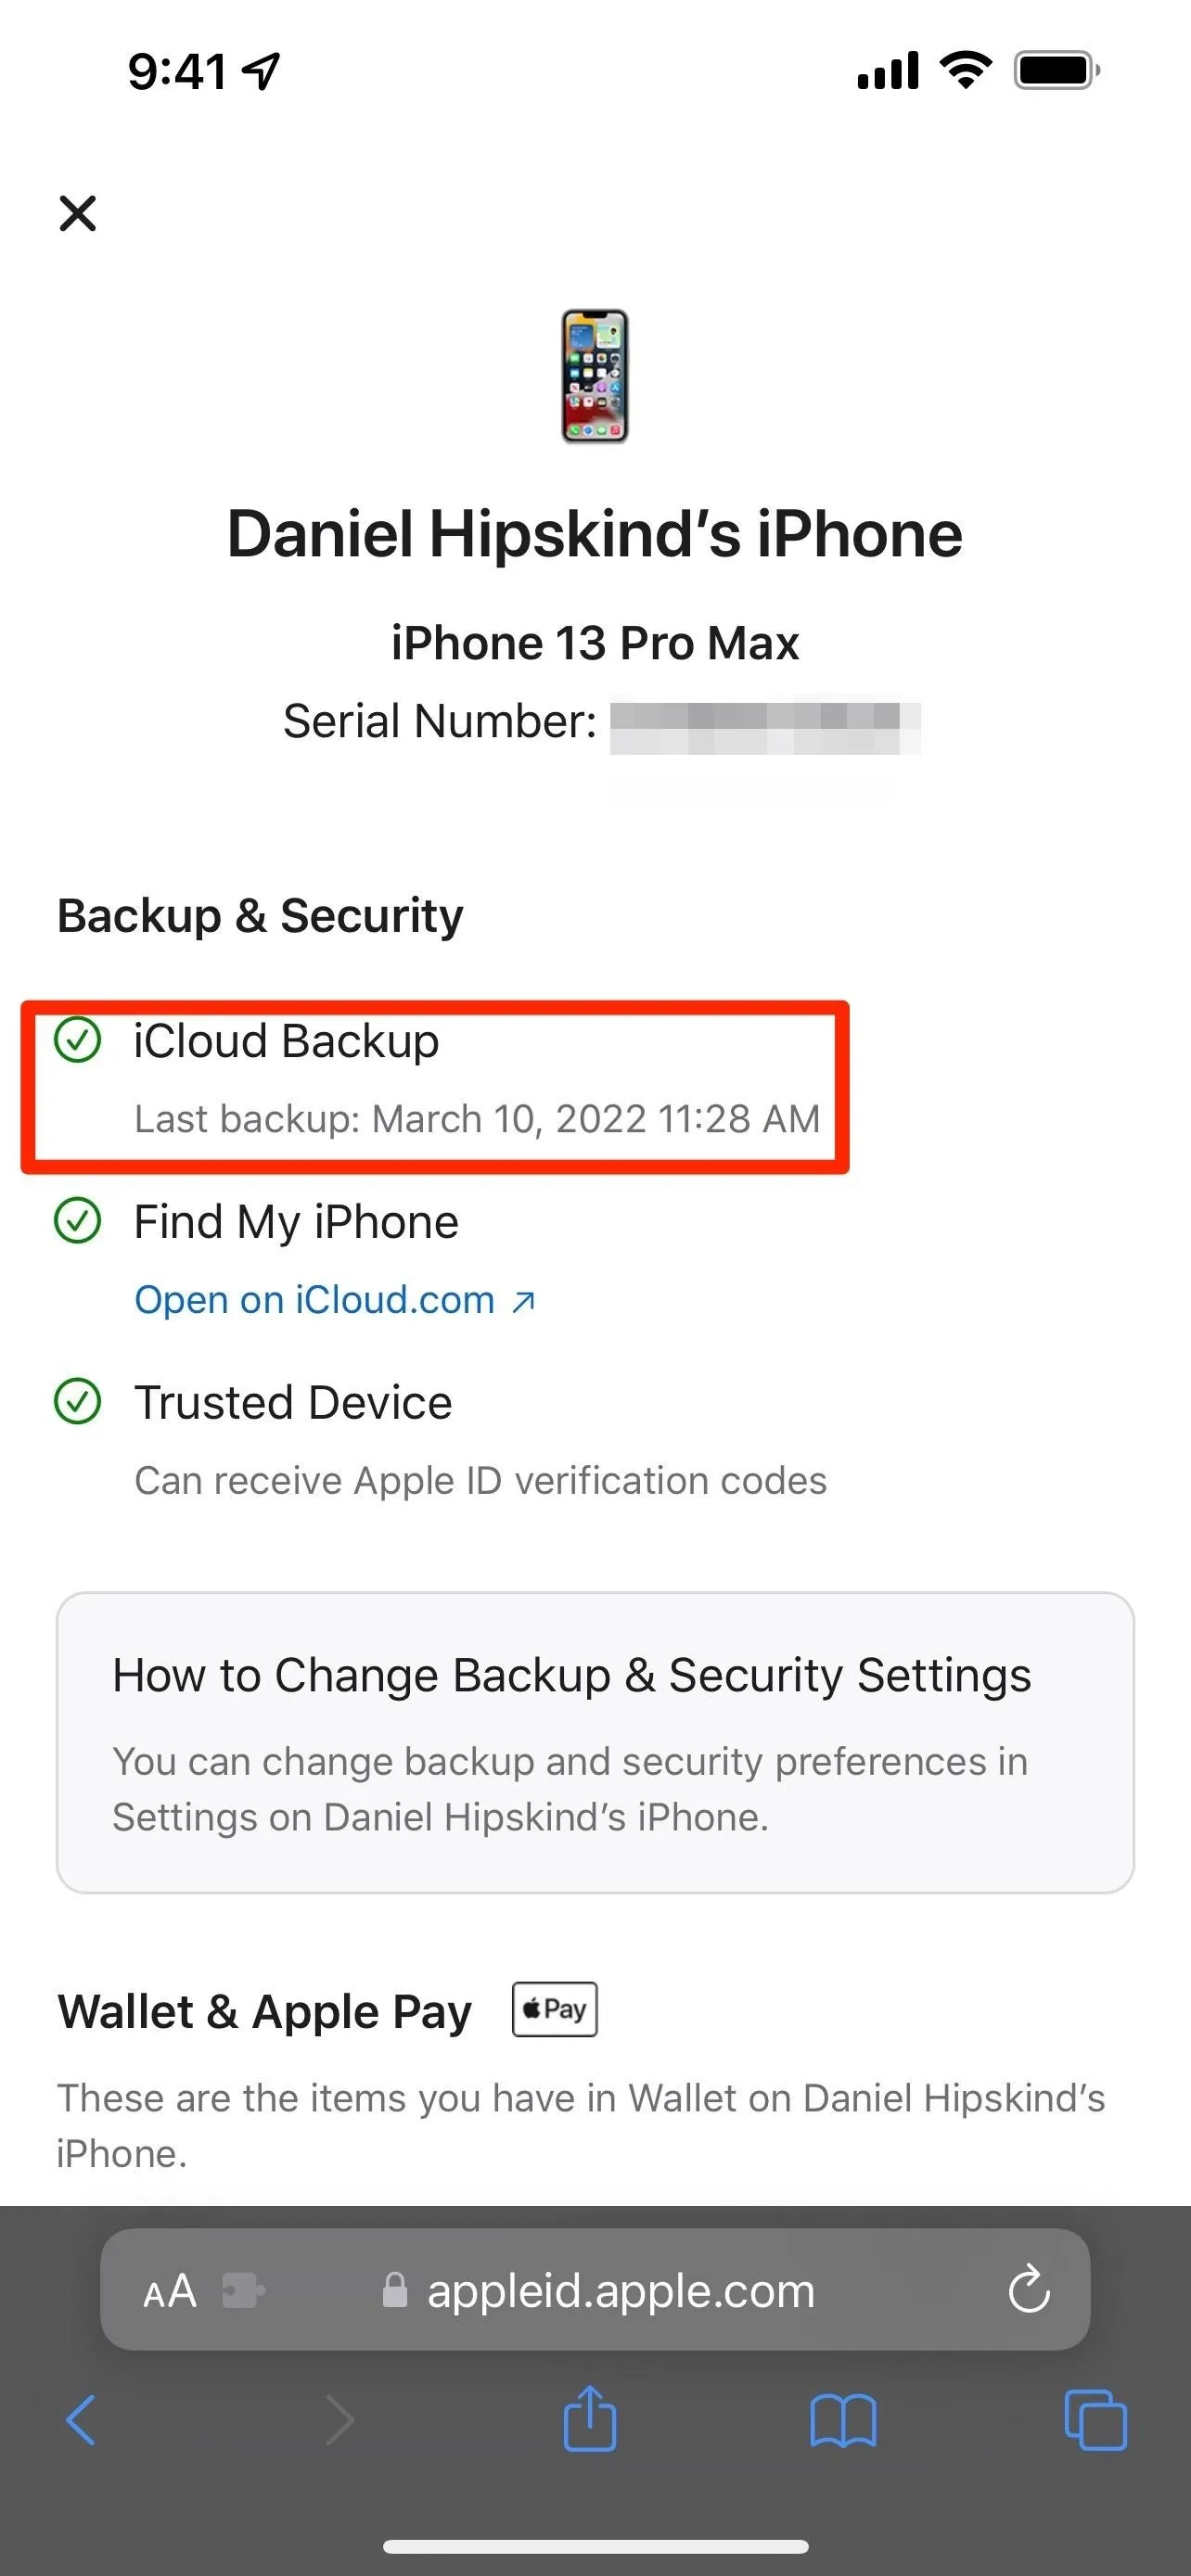
- Click on "Devices" in the left-hand column.
- Click on the device you want to wipe.
- The last time you backed up your iPhone will be next to "iCloud Backup."
From an iPhone or Android:
- Go to appleid.apple.com.
- If you are using someone else's device, you may see a pop-up asking if you would like to sign in using their Apple ID. You won't want to, so hit "Cancel."
- Sign in with your Apple ID.
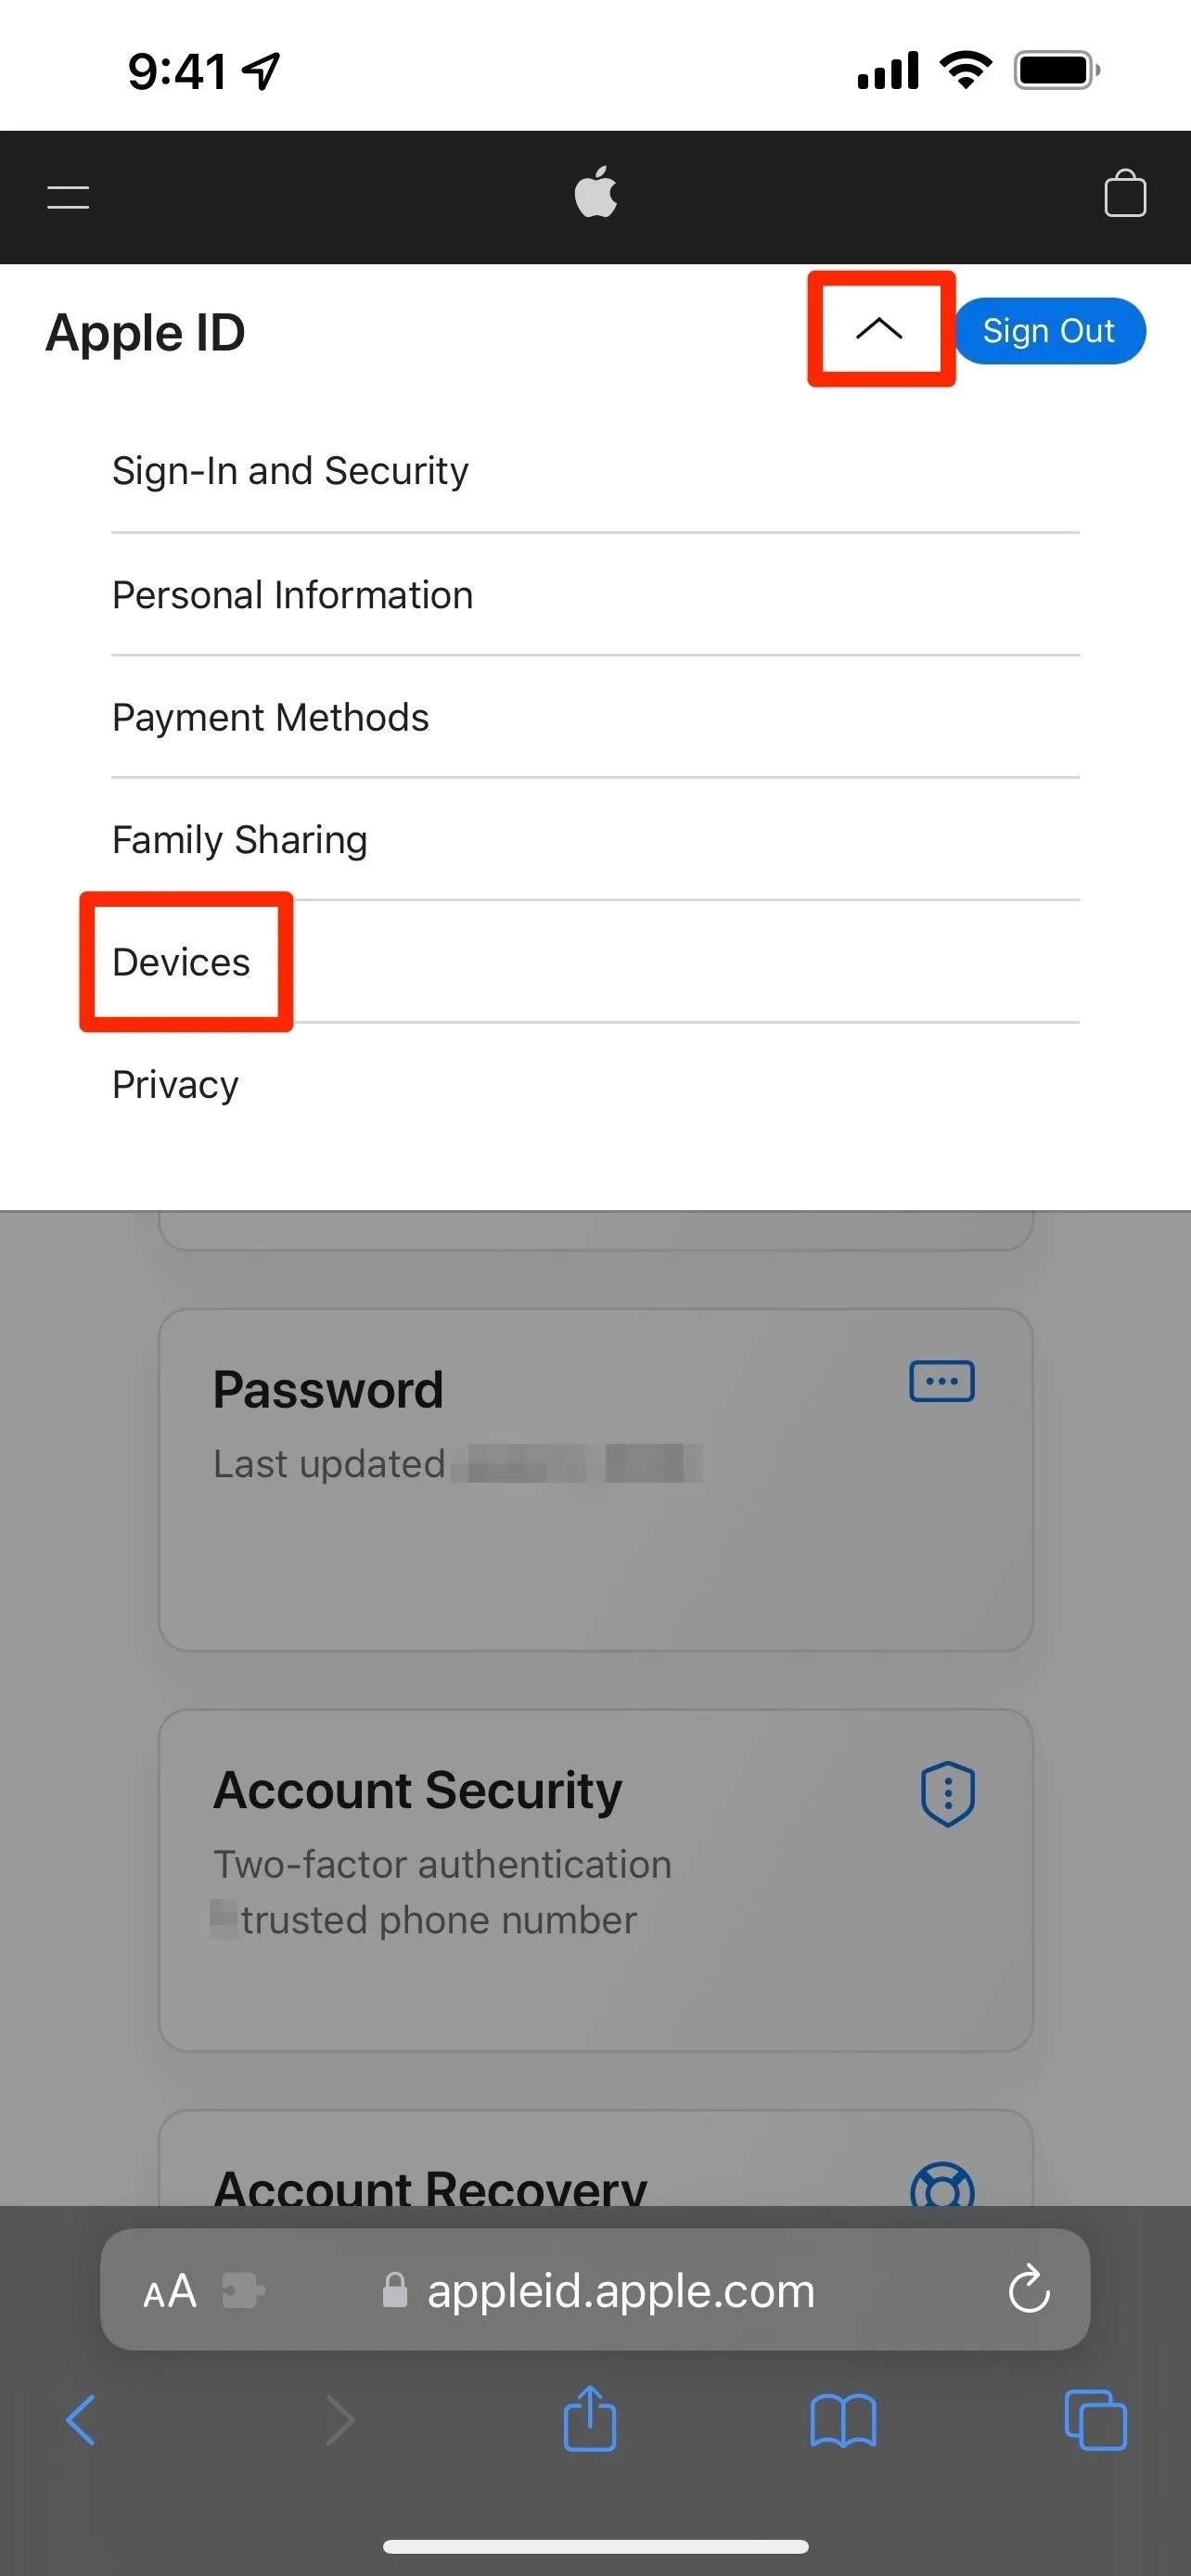
- Tap the arrow at the top next to the "Sign Out" button.
- Tap on "Devices."
- Choose the device you want to wipe.
- The last time you backed up your iPhone will be under "iCloud Backup."
If your data was backed up recently, you should be fine to wipe your iPhone. If your data isn't backed up and you have important information stored on your iPhone, you may want to wait until you can unlock your iPhone or schedule an appointment with Apple to get the data back.
Log in to the Find My Web App
To start the remote wipe process, visit icloud.com/find/ to open Find My on iCloud or open the Find My app on another device and tap "Help a Friend" from the profile tab. It may instantly want you to log in using the Apple ID associated with the device you're on; If you're using someone else's device, click or tap "Cancel."
Erase Your Device
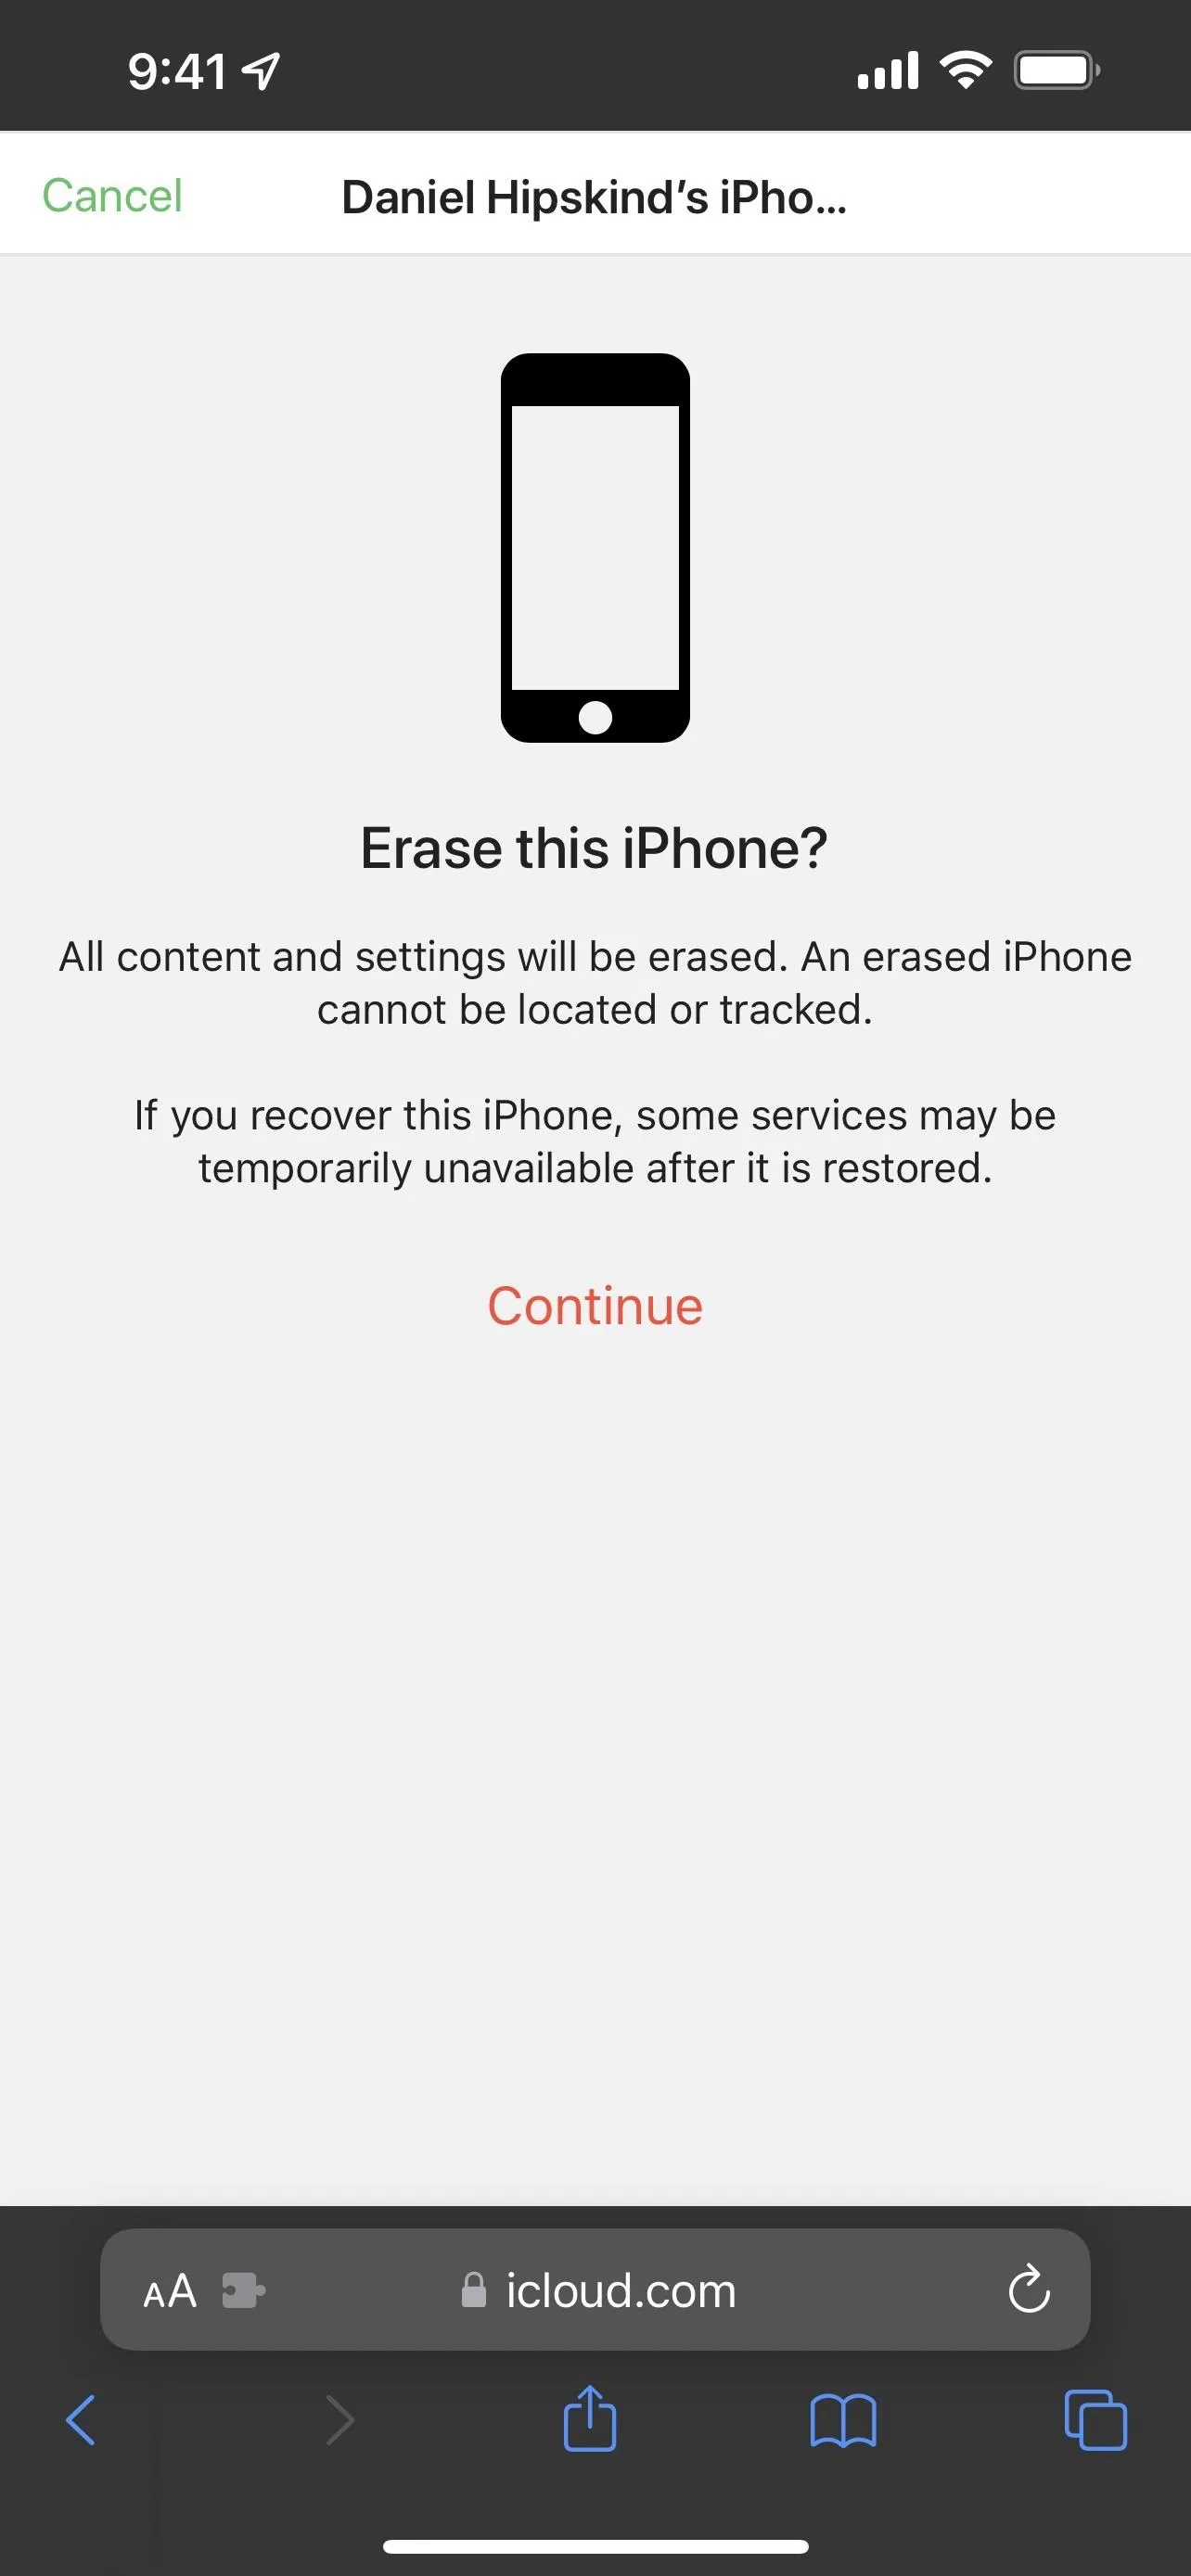
Once again, remember that your iPhone will be entirely wiped, and any data that isn't backed up will be lost.
All content and settings will be erased. An erased iPhone cannot be located or tracked. If you recover this iPhone, some services may be temporarily unavailable after it is restored.
From a computer or tablet:
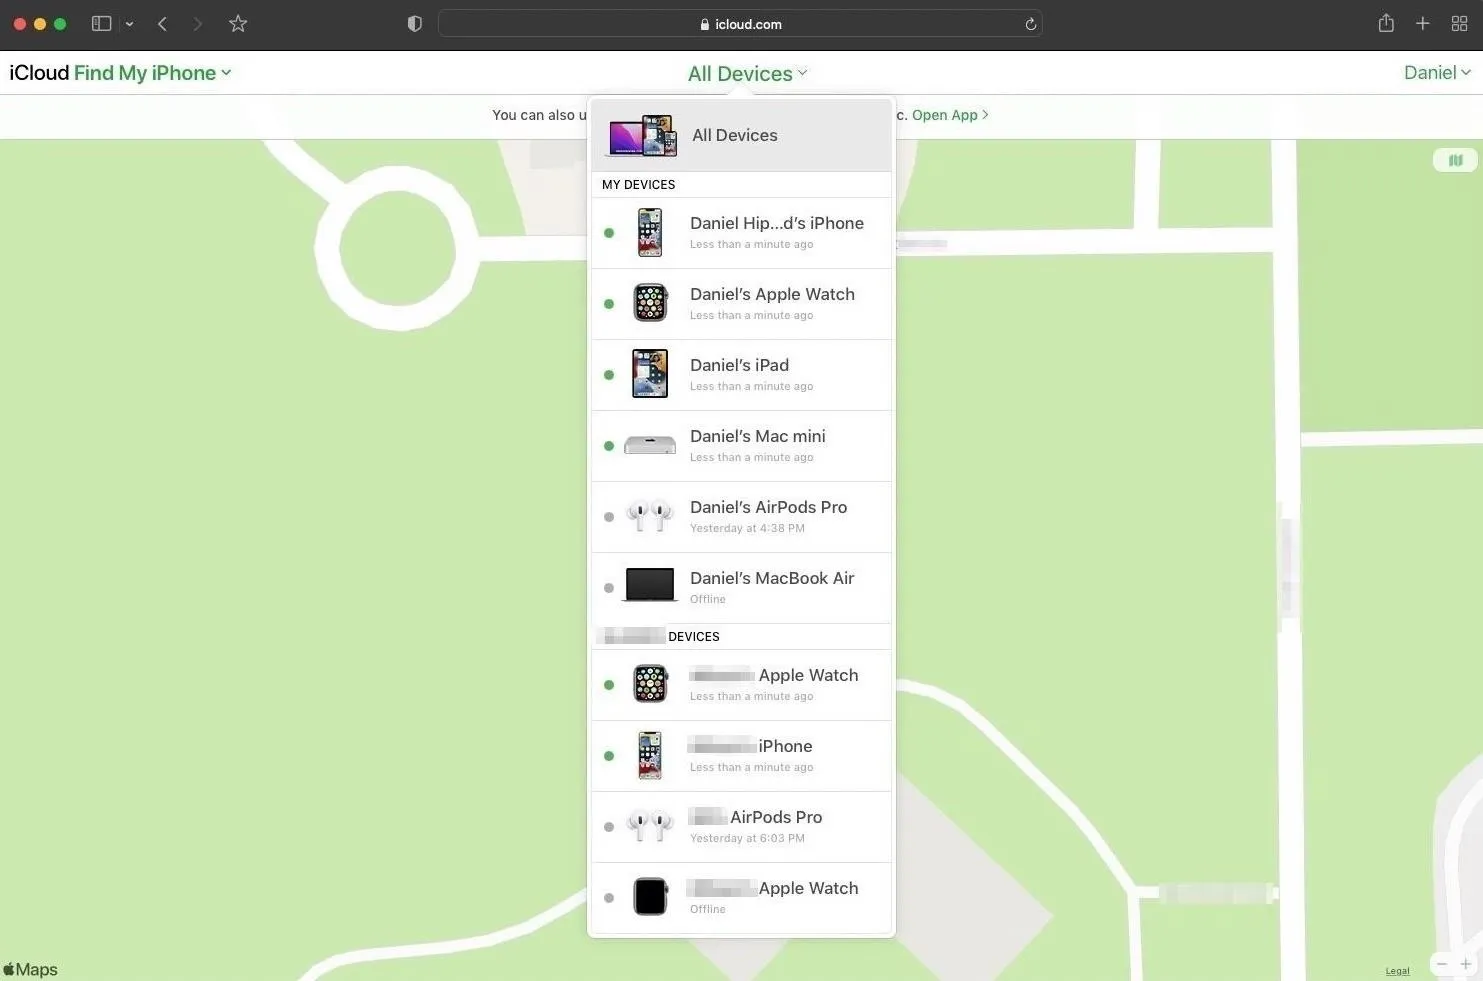
- Click on "All Devices" from the top menu bar.
- Select the device you're looking to wipe.
- Click "Erase iPhone" and "Erase iPhone" again to confirm.
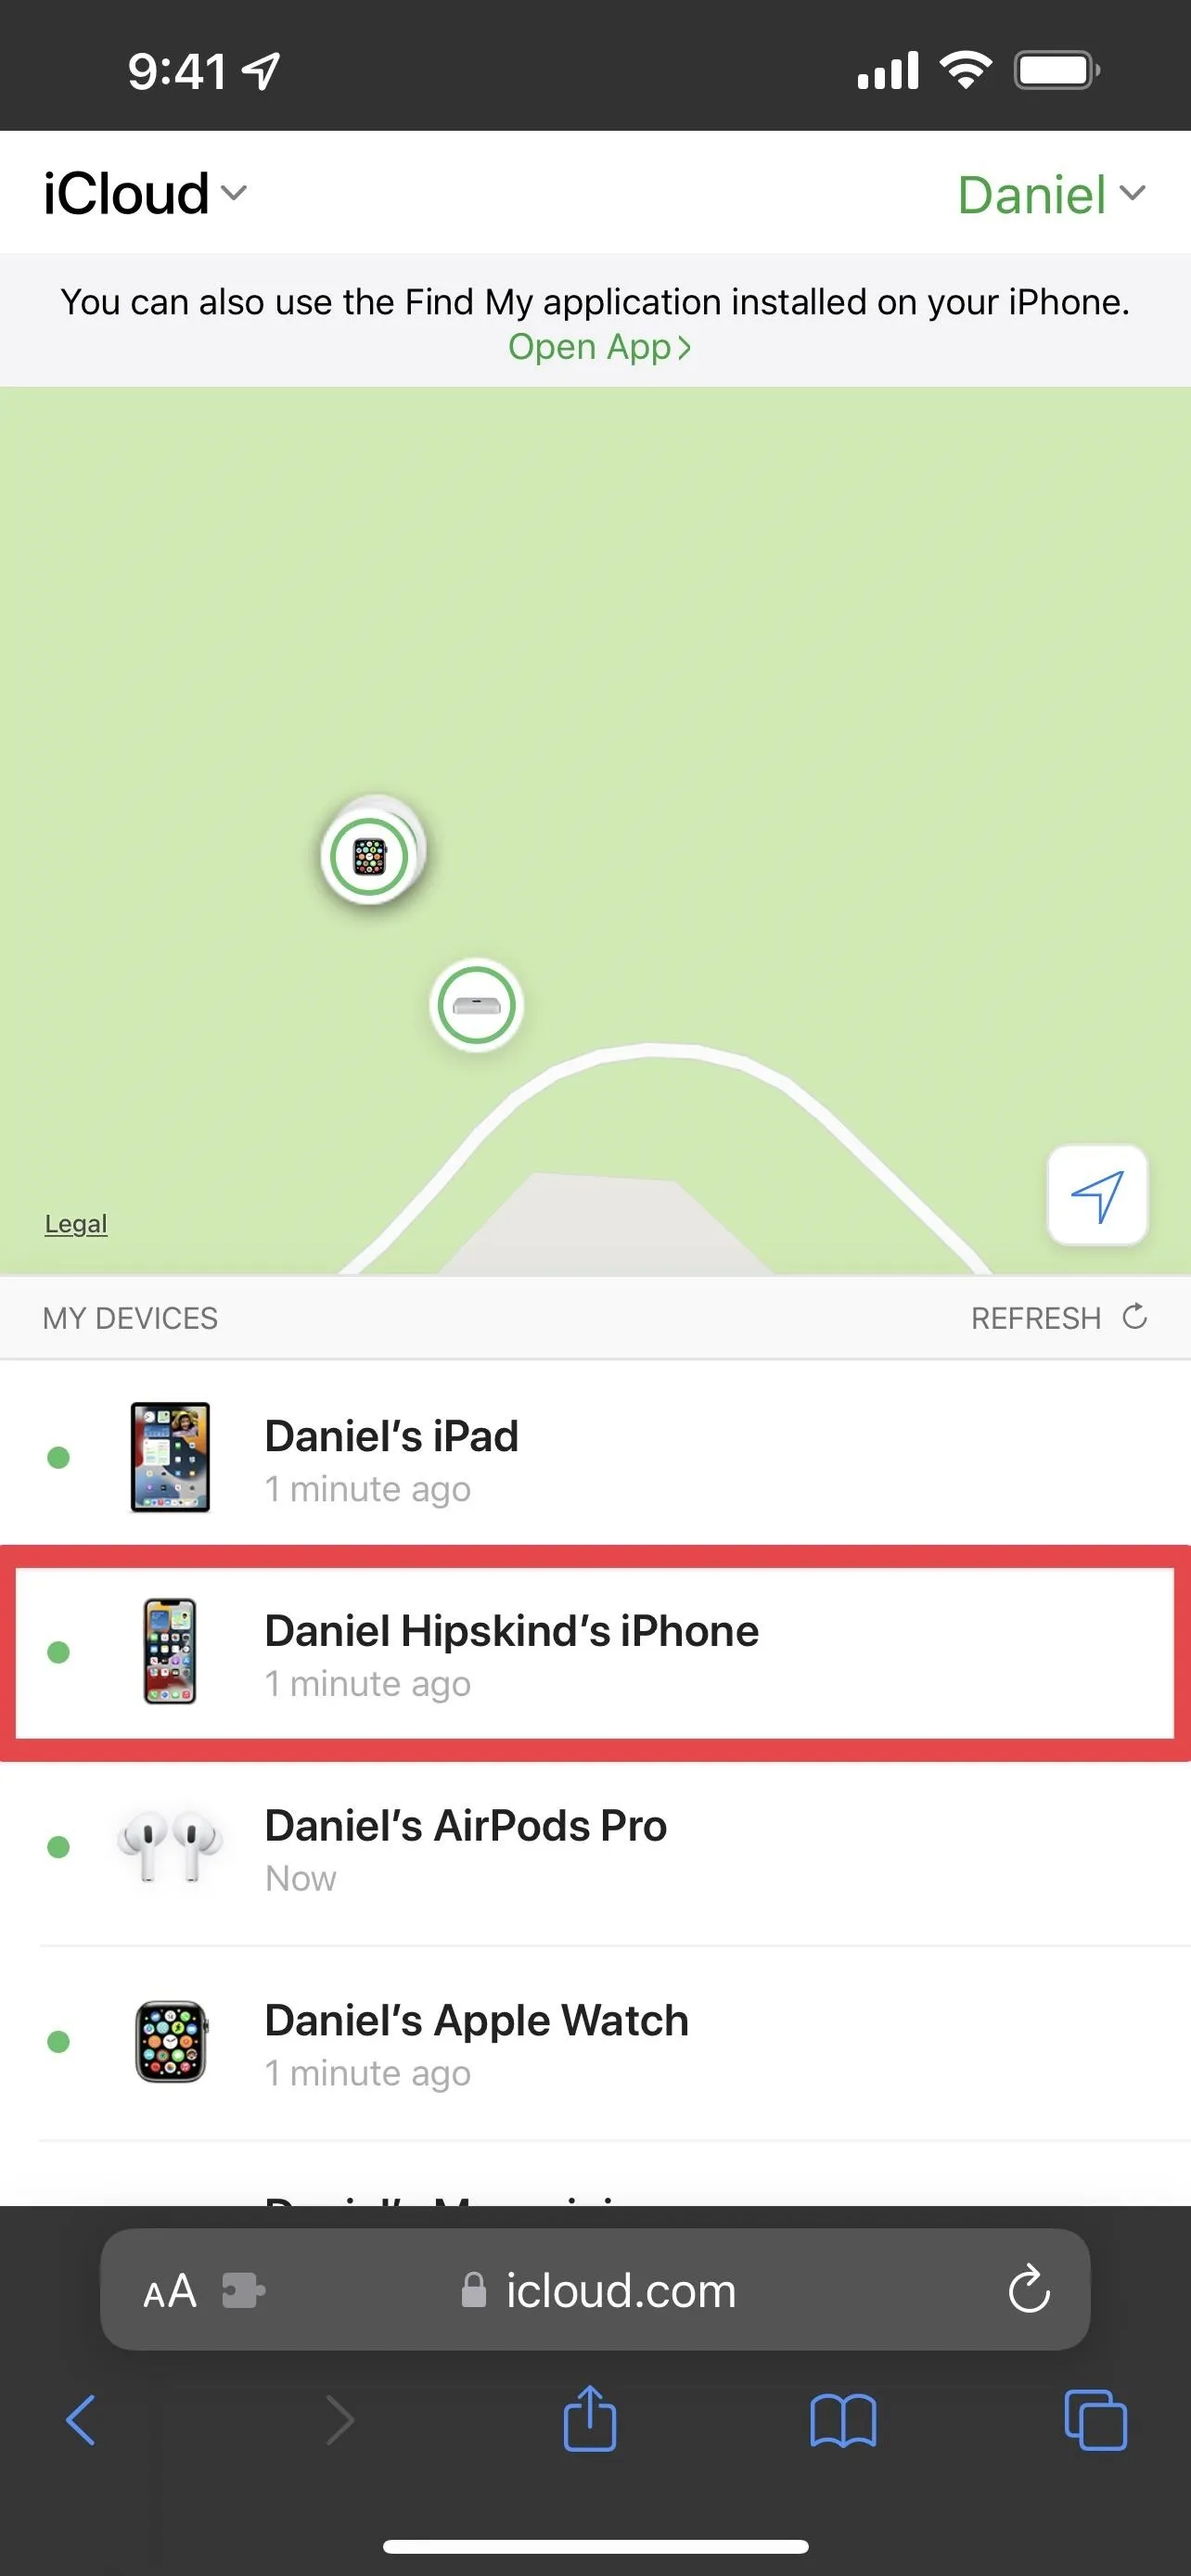
From a phone:
- Tap on the device you want to erase.
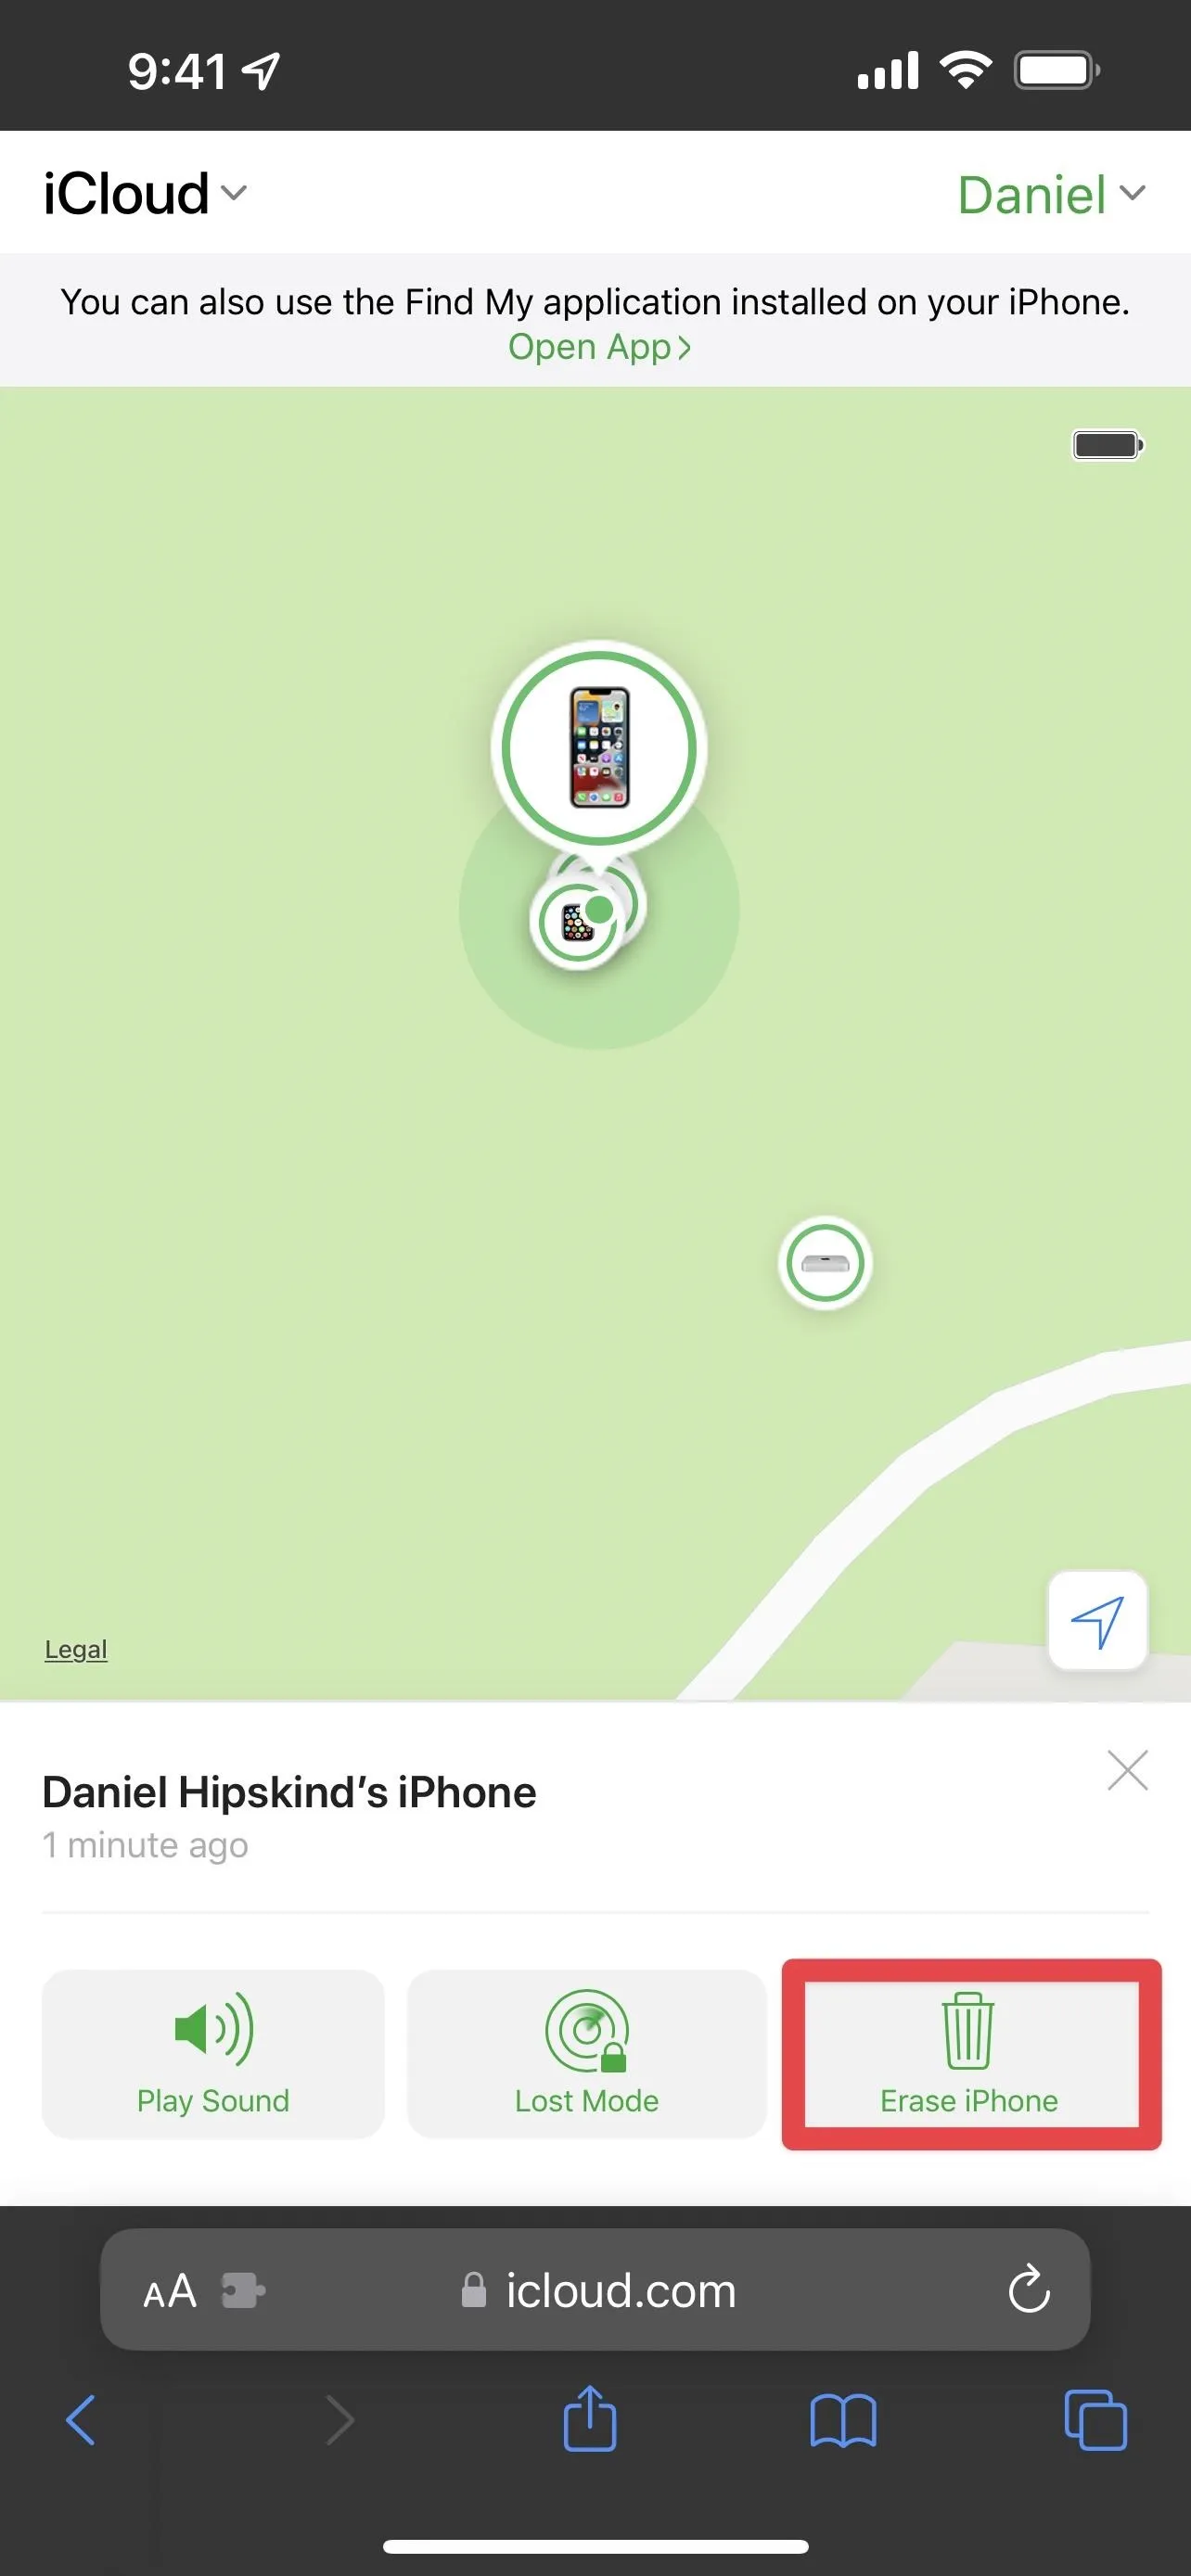
- Tap "Erase iPhone."
- Tap "Continue" to confirm.
Set Up Your iPhone with a New Passcode
After the device has been erased, you'll need to set up your iPhone again. You'll be able to restore from a backup if one is available, but you can start fresh either way. Your device will also be iCloud locked, so you will need to unlock it using your Apple ID password.
Cover photo and screenshots by Daniel Hipskind/Gadget Hacks


Comments
Be the first, drop a comment!