


![Short Cuts (The Criterion Collection) [Blu-ray]](https://m.media-amazon.com/images/I/712N05DgTZL._AC_UY218_.jpg)
If you're like me, you take more than just a few screenshots throughout the day, and they add up fast on your iPhone. When you snap that many images of the screen, your Photos app's "Screenshots" folder can swell beyond triple digits if you don't manage it, and your "Recents" folder will become a cluttered mess. But there is a trick to keeping screenshots in check, and you can have total control over it.
There is no setting for the Photos app to delete screenshots automatically. This trick uses a custom-built automation in the Shortcuts app to delete unwanted screenshots using any parameters you want. You just need to know your way around Shortcuts a bit to set it up to your liking.
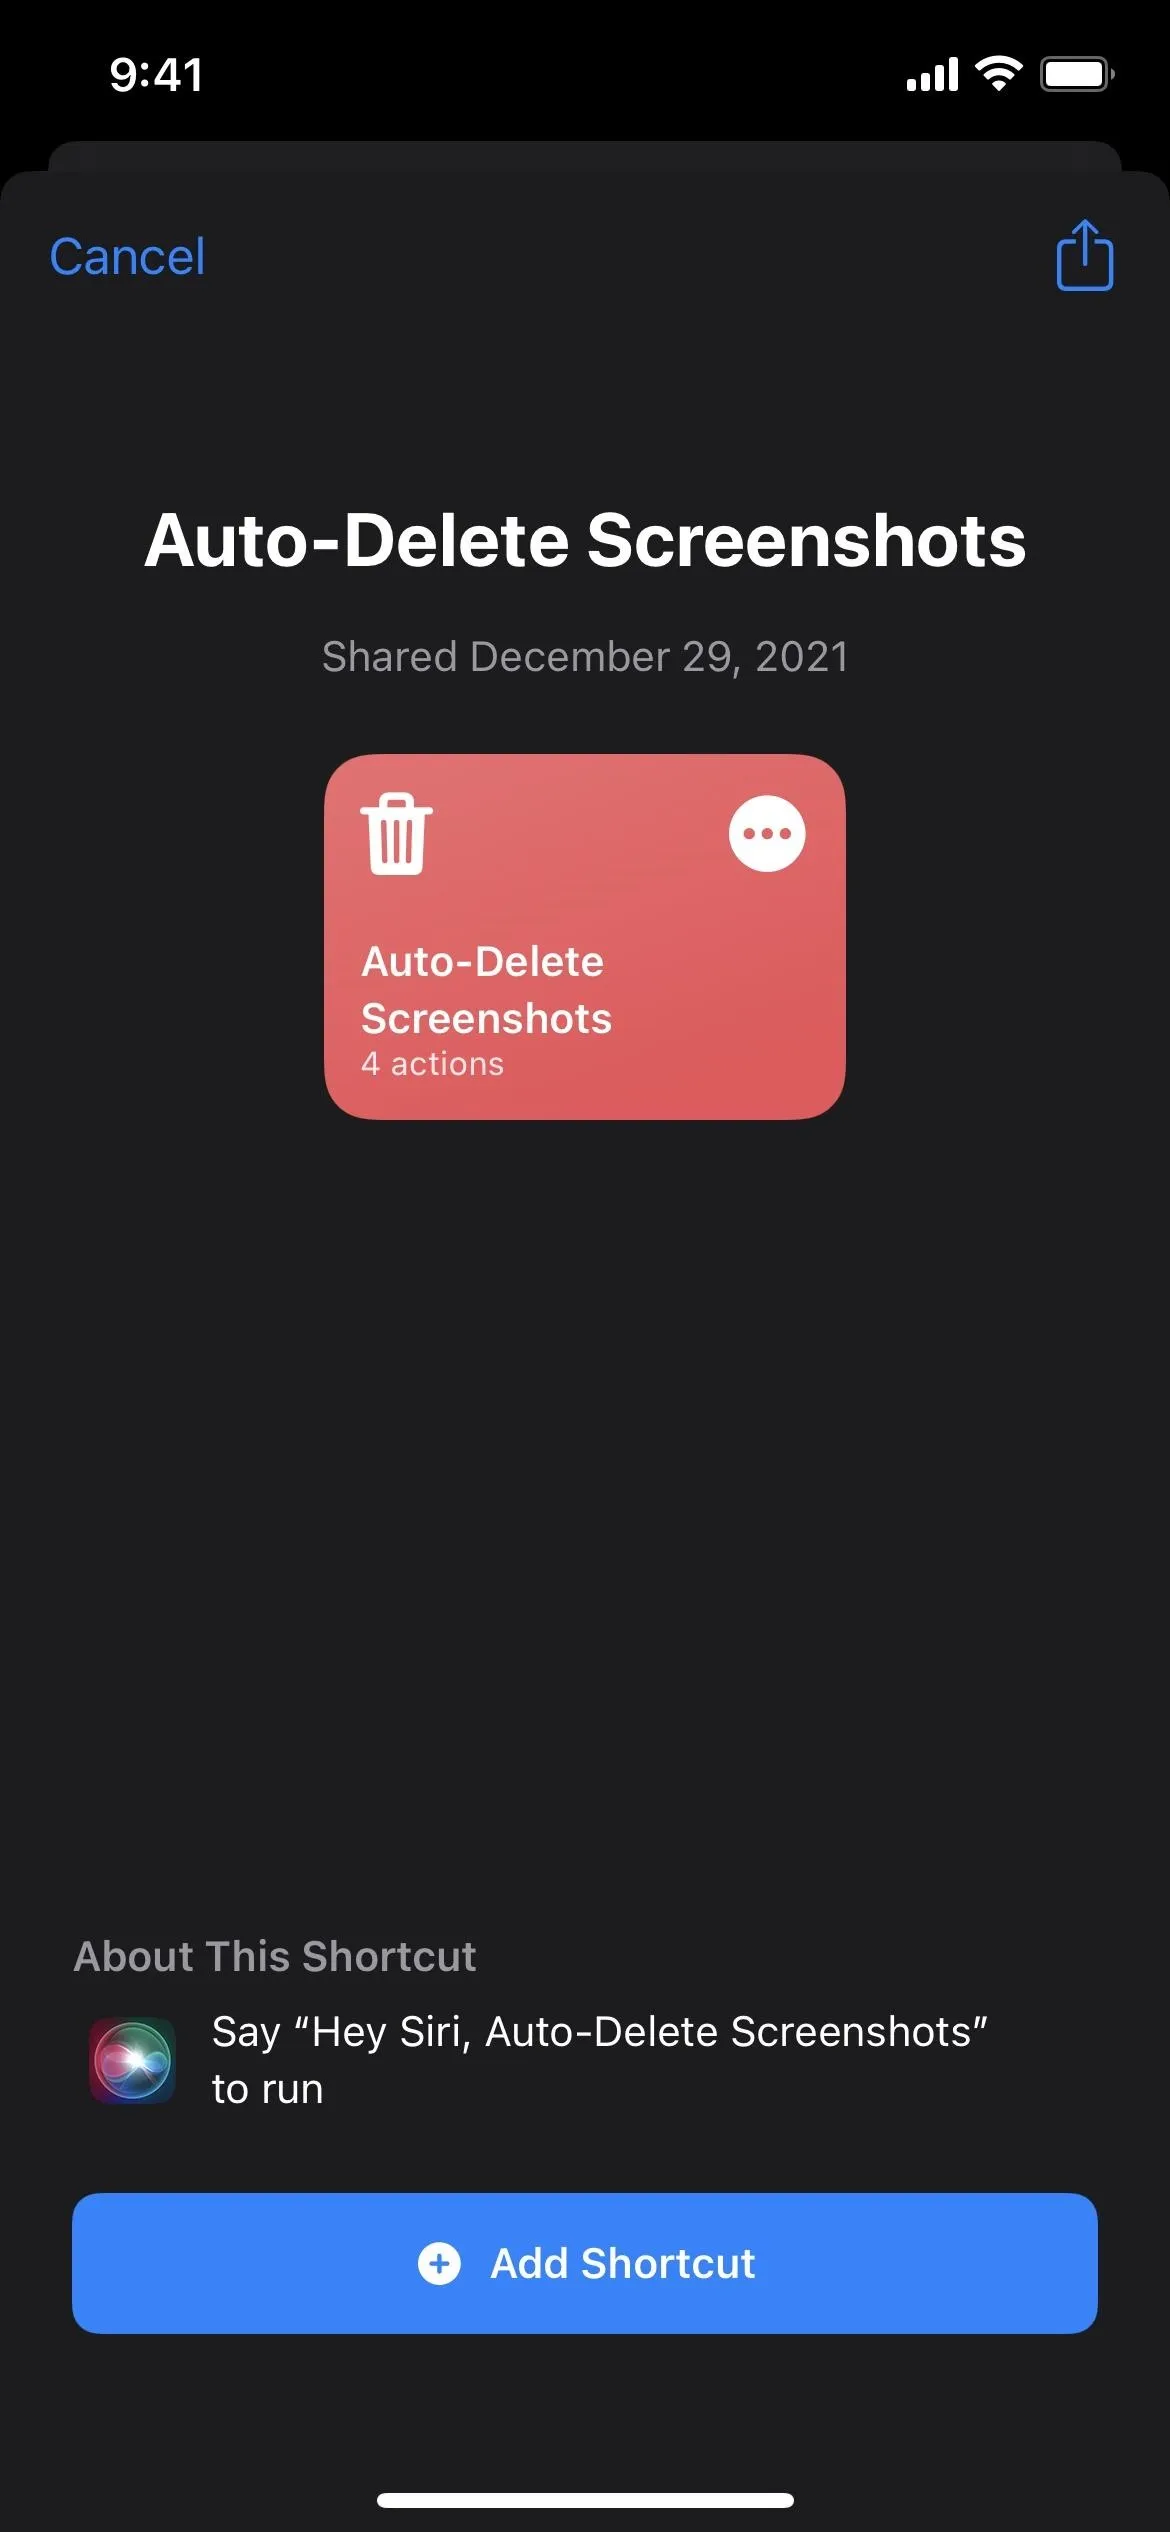
Now, you can build the entire workflow directly in an automation or create a shortcut first, then have the automation run that shortcut. If you're new to Shortcuts, you may want the latter, and you can download the basic shortcut template below. This guide assumes you're running iOS 15 or iOS 16, but the actions in the shortcut will also work in iOS 14.
- Install shortcut: Auto-Delete Screenshots
Whether you want to build the shortcut from scratch or use the one linked above, you'll want to go through all the steps below to customize everything to your needs. It's worth noting that there are other shortcuts out there for deleing screenshots, but none of them did what I wanted.
Save Screenshots from the Last 7 Days
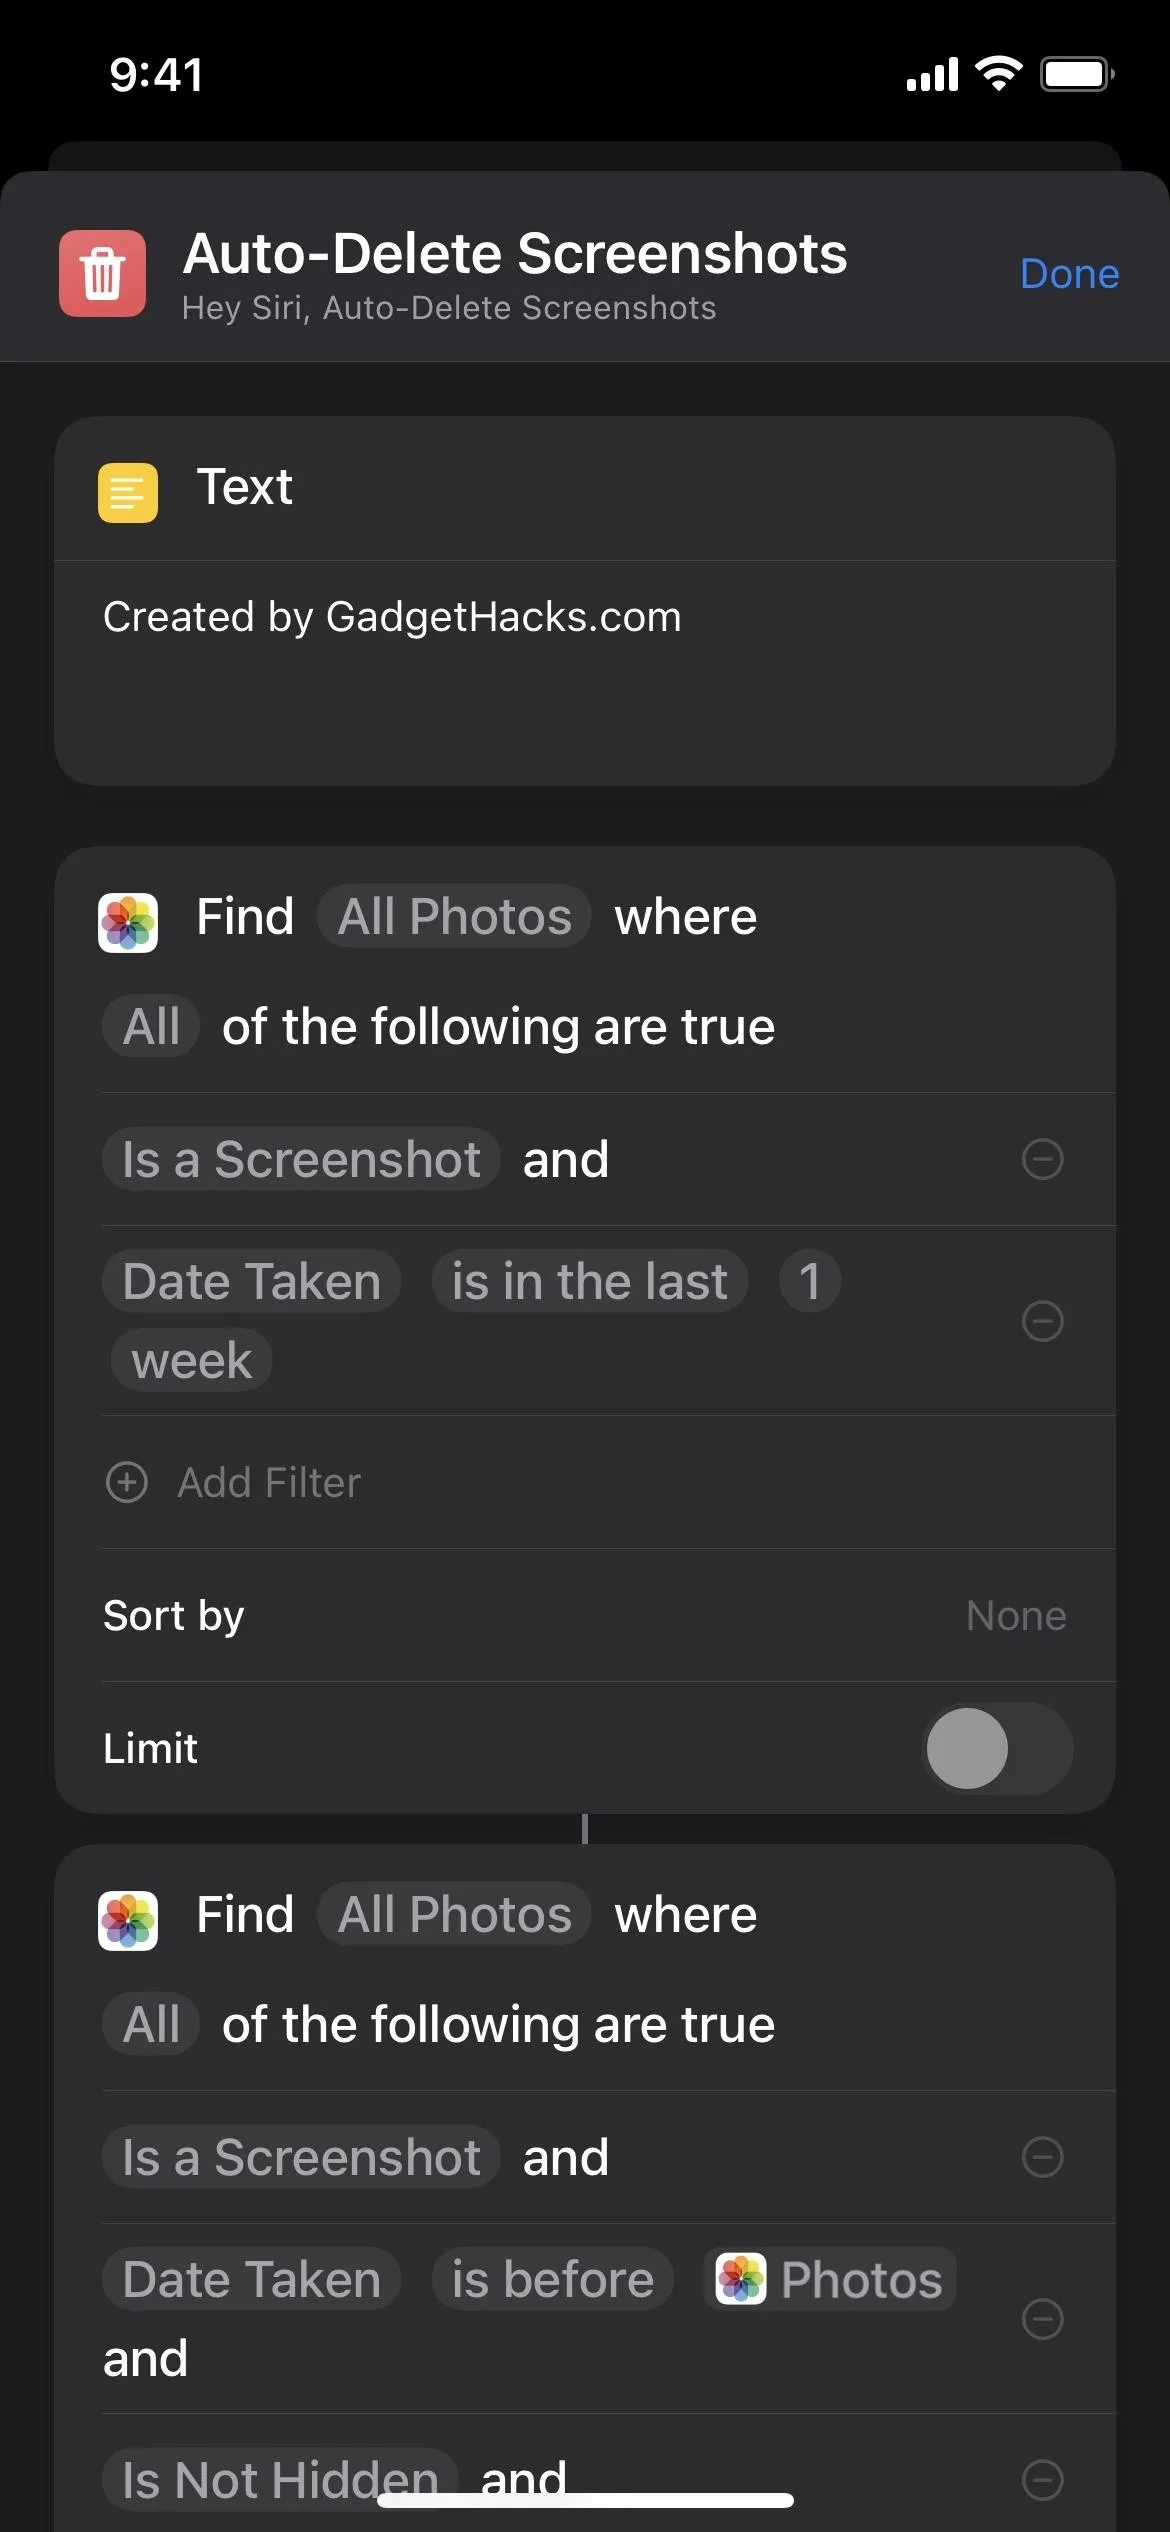
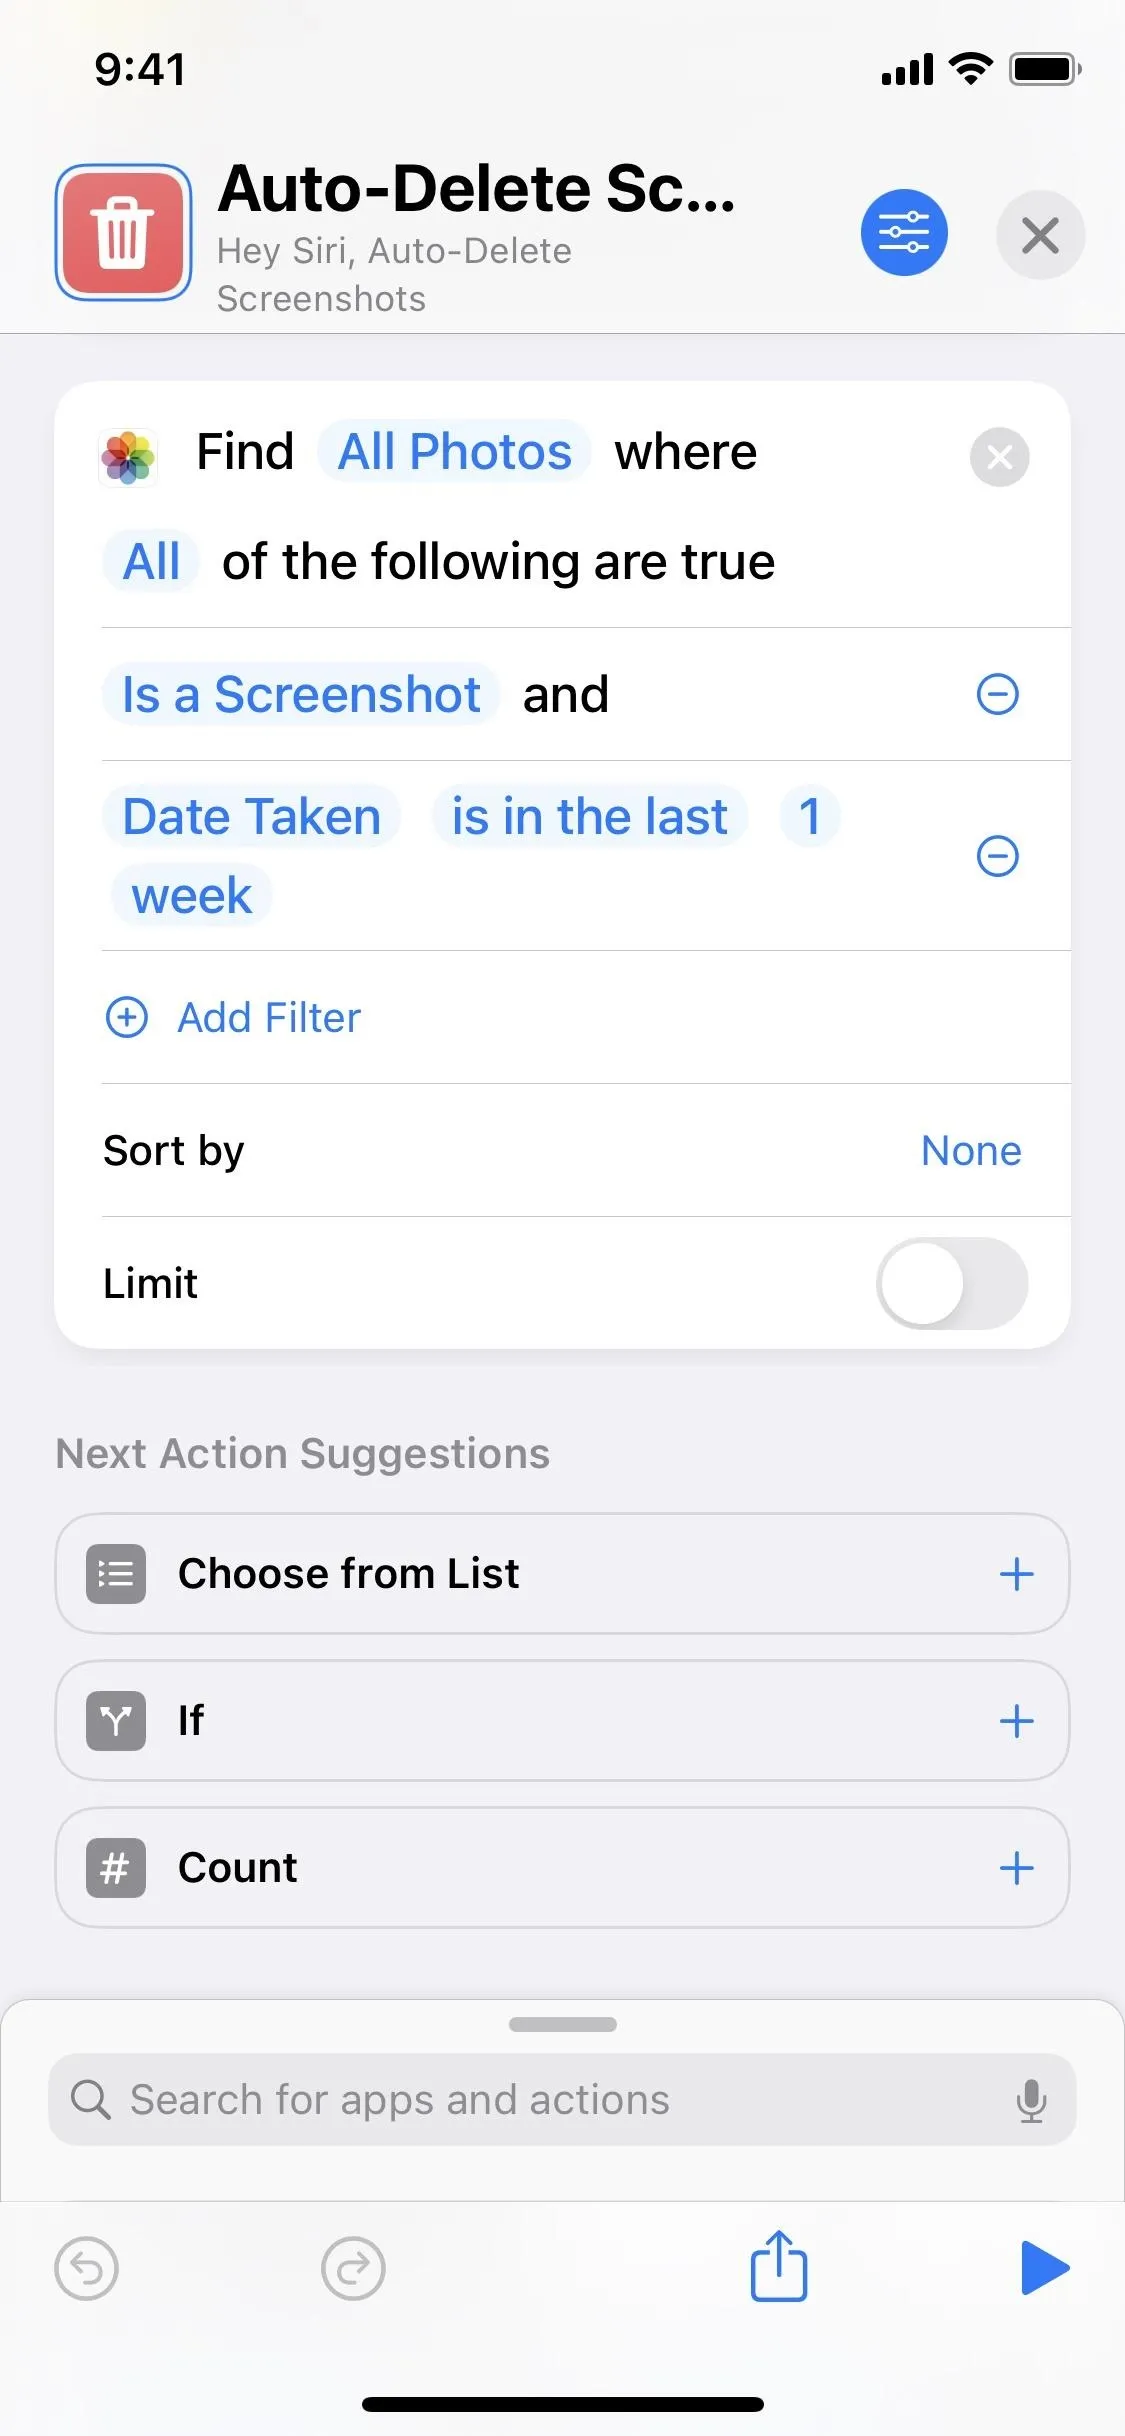
First, it uses the "Find Photos" action to locate "All Photos" on your iPhone. Then, it's configured to filter out anything that's not a screenshot. There's another filter that includes only screenshots taken over the last week. That way, anything you snapped over the previous seven days will remain untouched. That gives you a week for each screenshot to decide whether you want to save it or not.
- Don't Miss: 18 Tips for Using Your iPhone's Screenshot Tools
Easy Step-by-Step Build Guide:
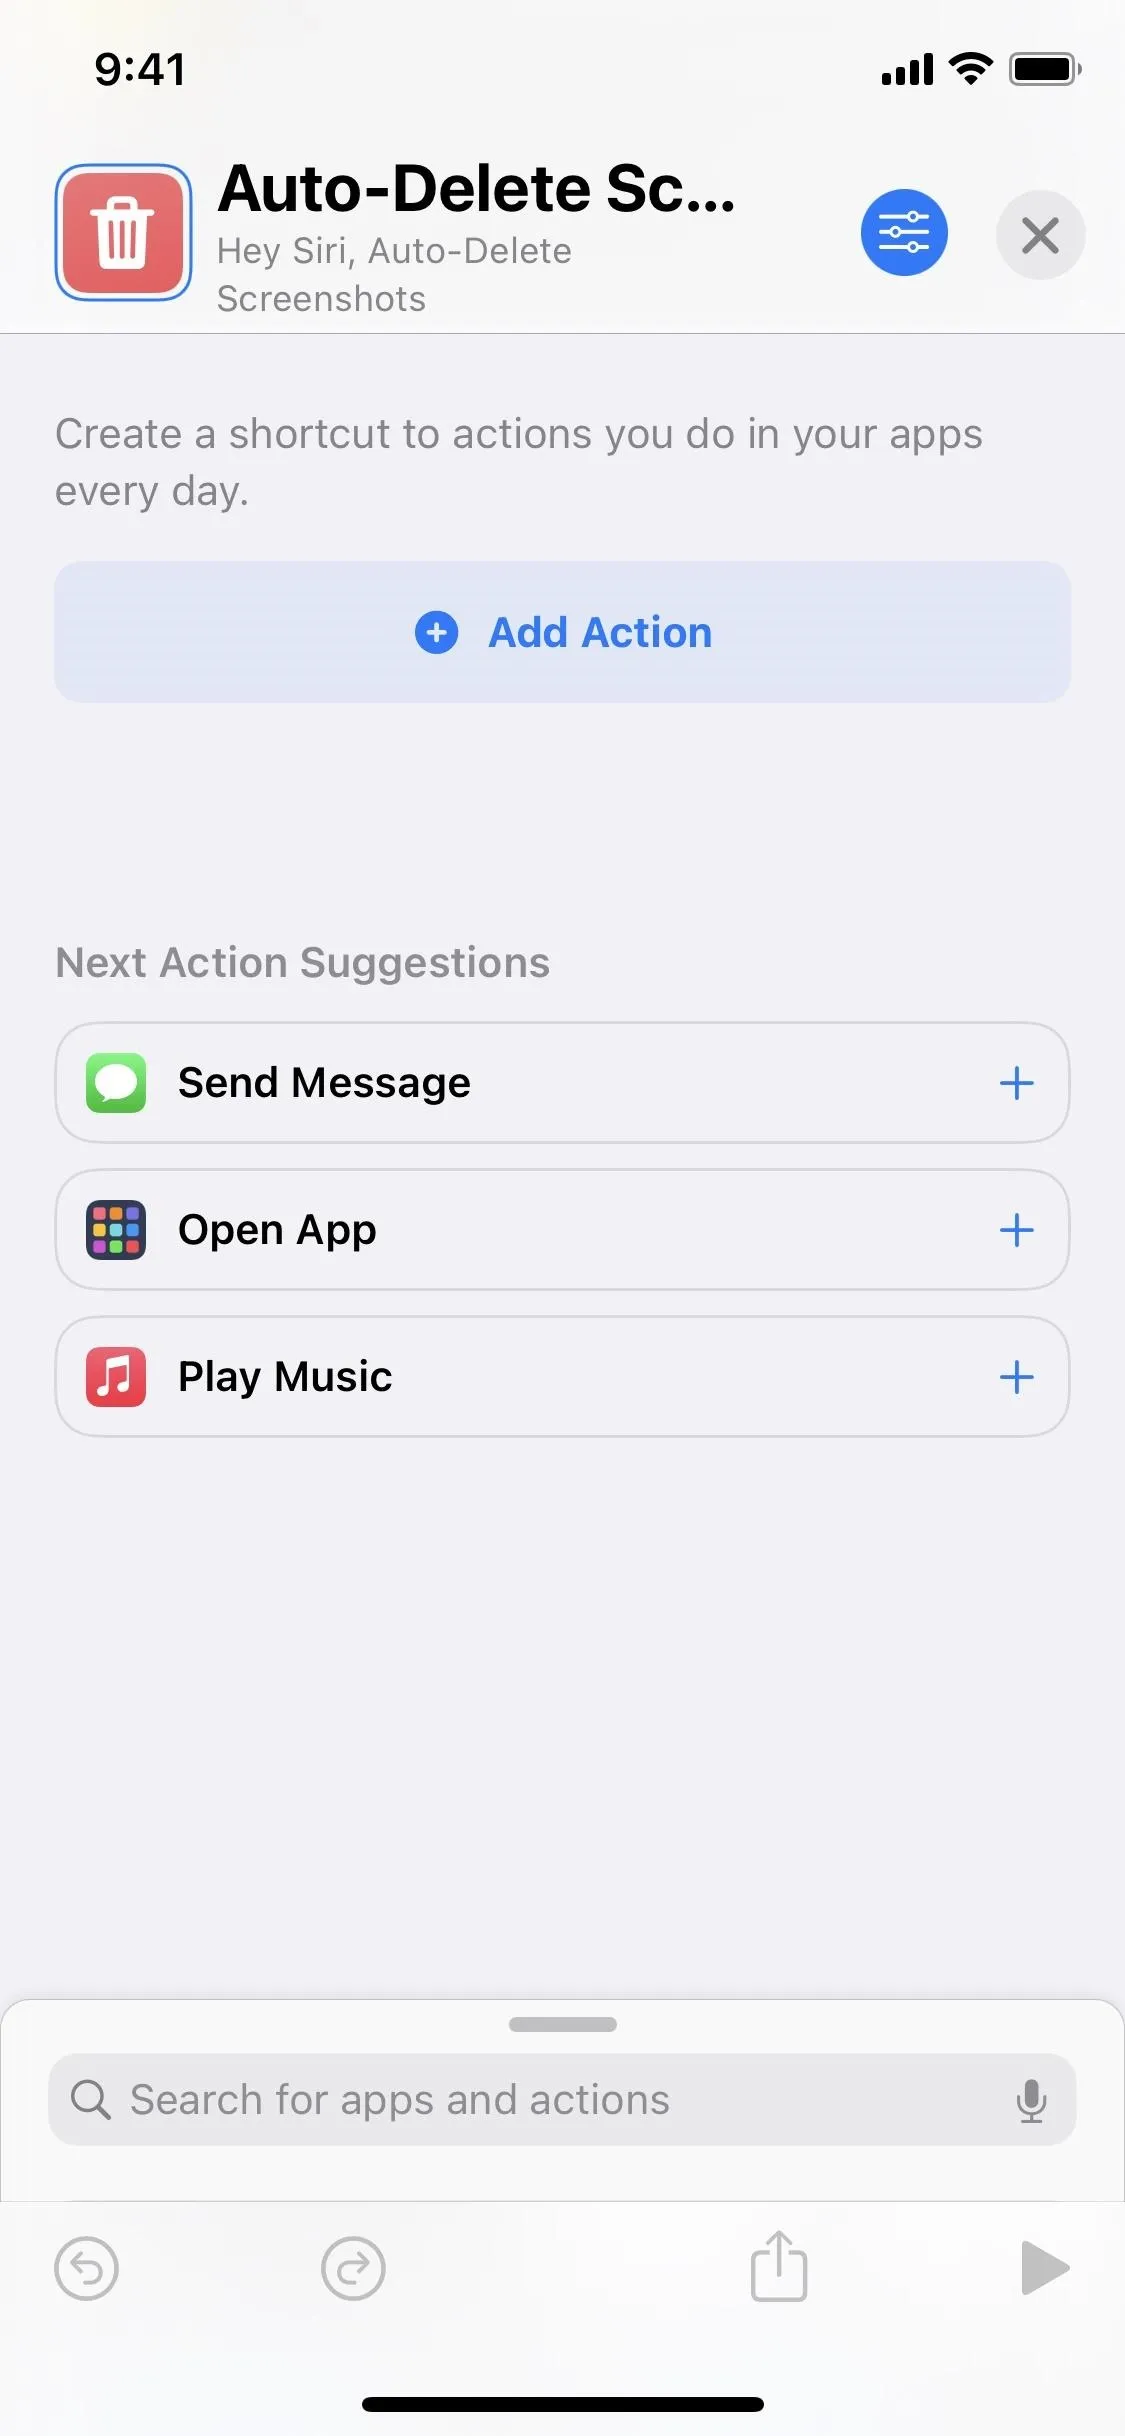
- Start a new shortcut.
- Add the "Find Photos" action.
- Tap "Add Filter" in the action box.
- Tap "Album" and change to "Is a Screenshot."
- Tap "Add Filter" again.
- Tap "Album" and change to "Date Taken."
- Tap "is on" for that and change to "is in the last."
- Tap "years" for that and change to "weeks" (or another time span).
- Tap the blank space between "is in the last" and "weeks" and add a "1" (or another number).
- Hit "Done" on the keyboard.
Filter Out Important Screenshots
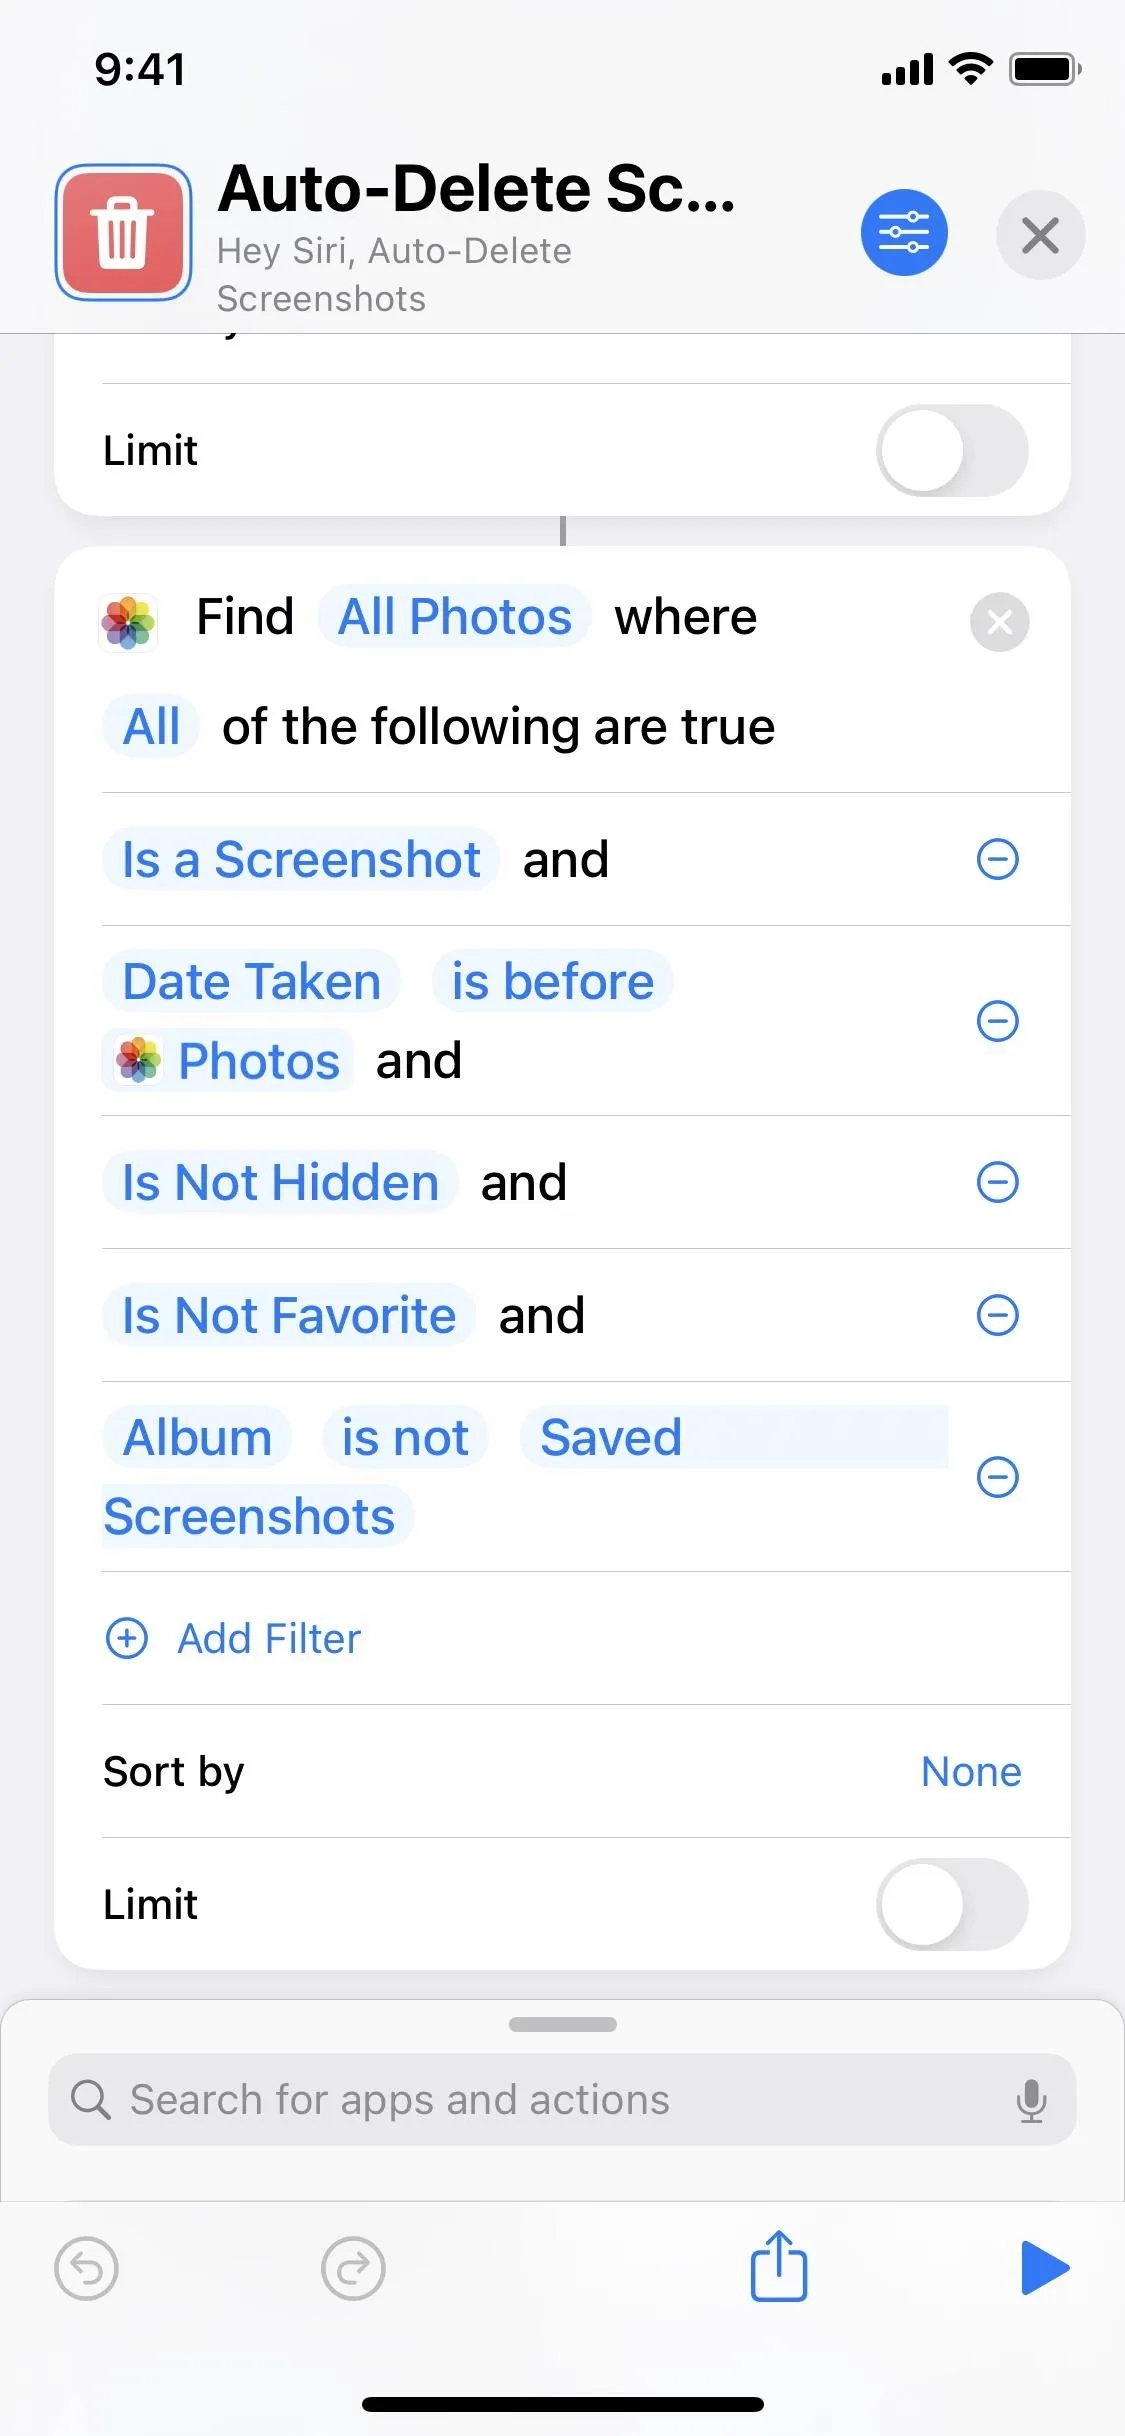
The second action is also "Find Photos." Like before, it's set to locate "All Photos." If you're building this yourself and place it after the first action above, tap "Photos" in the action box and change it to "All Photos." Otherwise, it'll only look at the last seven day's screenshots, not everything before it.
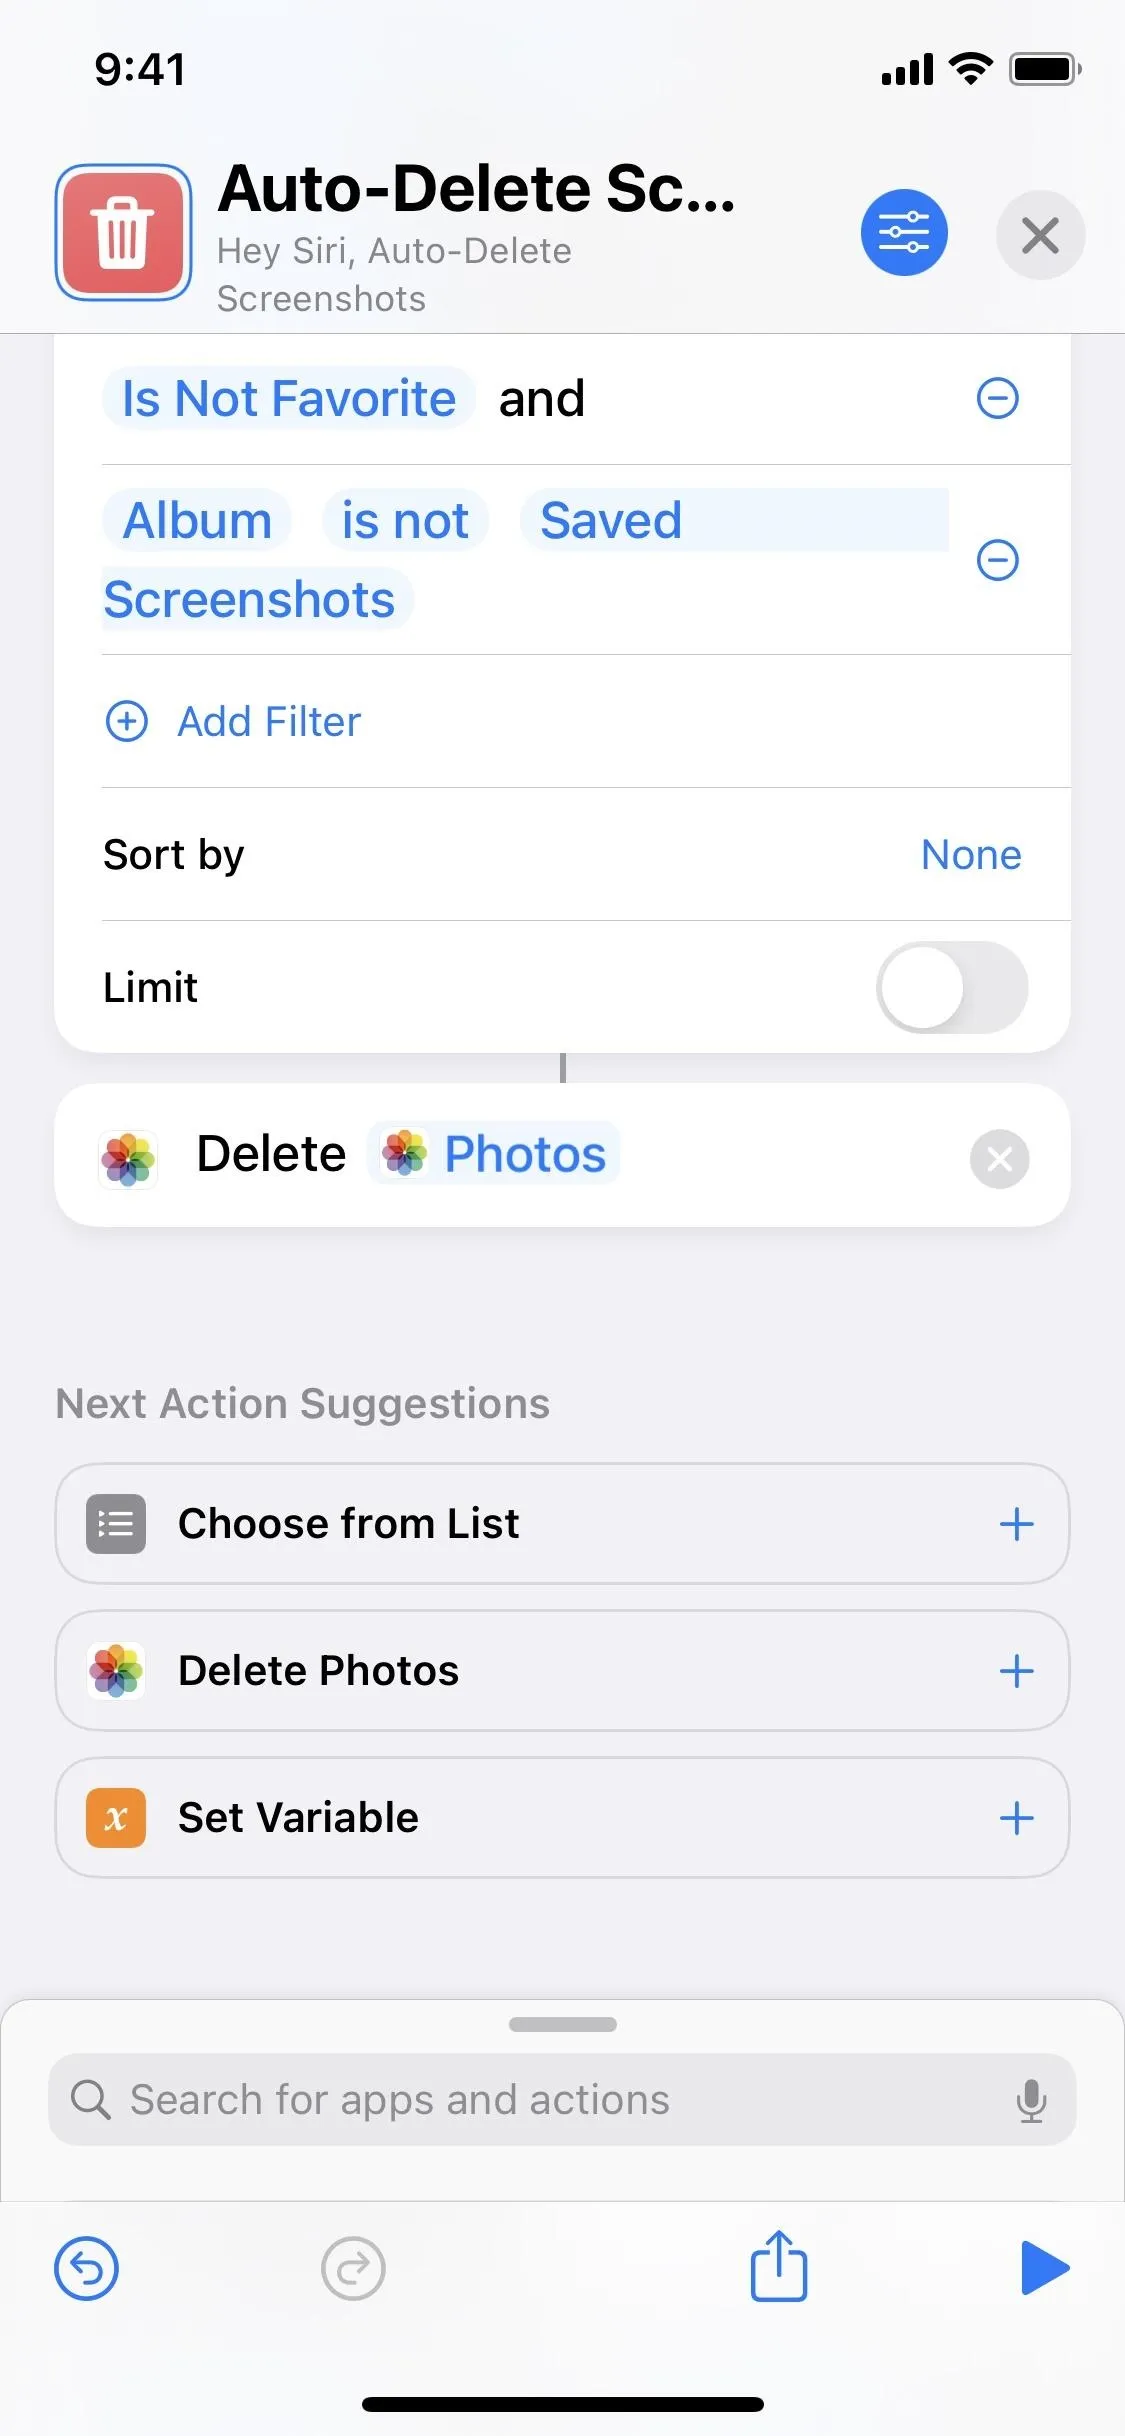
The second action's first filter singles out screenshots from your library, while the second filter excludes anything the first "Find Photos" action box found.
I also have filters for "Is Not Hidden," in case you hide important screenshots in your Hidden album, and "IS Not Favorite," since you'll likely want to keep those. One more filter excludes anything that I put in my custom "Saved Screenshots" album, but you can choose any album to be a safe zone. You can also add as many albums as you like, but you'll have to do them one by one.
Easy Step-by-Step Build Guide:
- Add another "Find Photos" action after the first one.
- Tap "Photos" in the action and hit "Clear Variable."
- Tap "Add Filter" in the action box.
- Tap "Album" and change to "Is a Screenshot."
- Tap "Add Filter" again.
- Tap "Album" and change to "Date Taken."
- Tap "is on" for that and change to "is before."
- Long-press the current date and change to "Select Magic Variable."
- Tap the "Photos" variable below the first "Find Photos" action box.
- Tap "Add Filter" again.
- Tap "Album" and change to "Is Not Hidden."
- Tap "Add Filter" again.
- Tap "Album" and change to "Is Not Favorite."
- Tap "Add Filter" again.
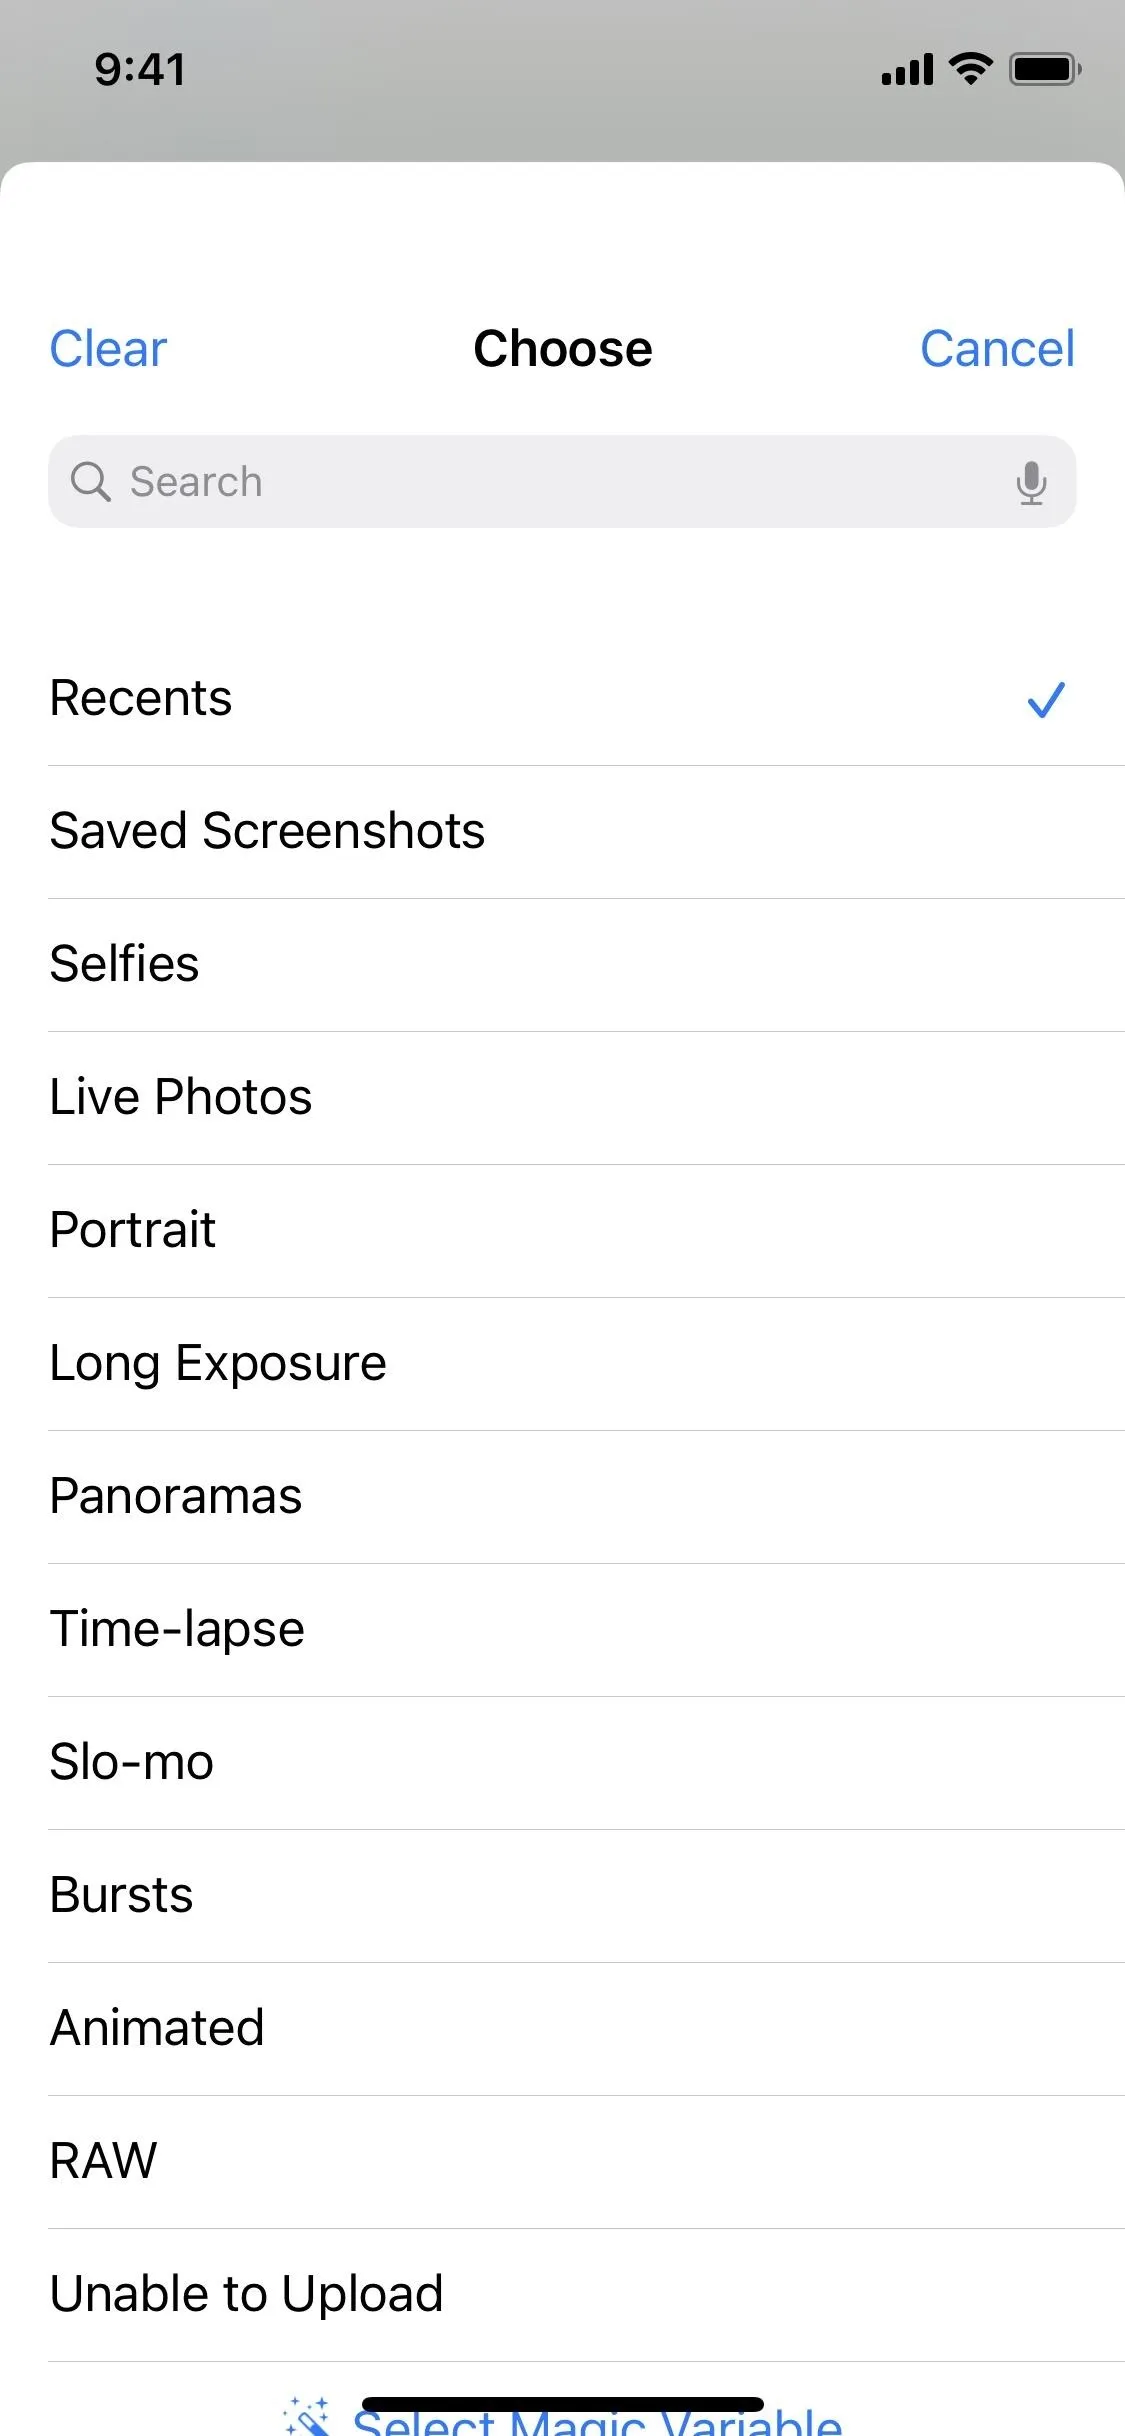
- Keep "Album" there and tap "is" beside it, then change to "is not."
- Tap "Recents" for that and choose an album to avoid.
- Optional: Repeat 14–16 to add more albums if necessary.
- Optional: Tap "Sort by," choose what you want, and adjust the "Order."
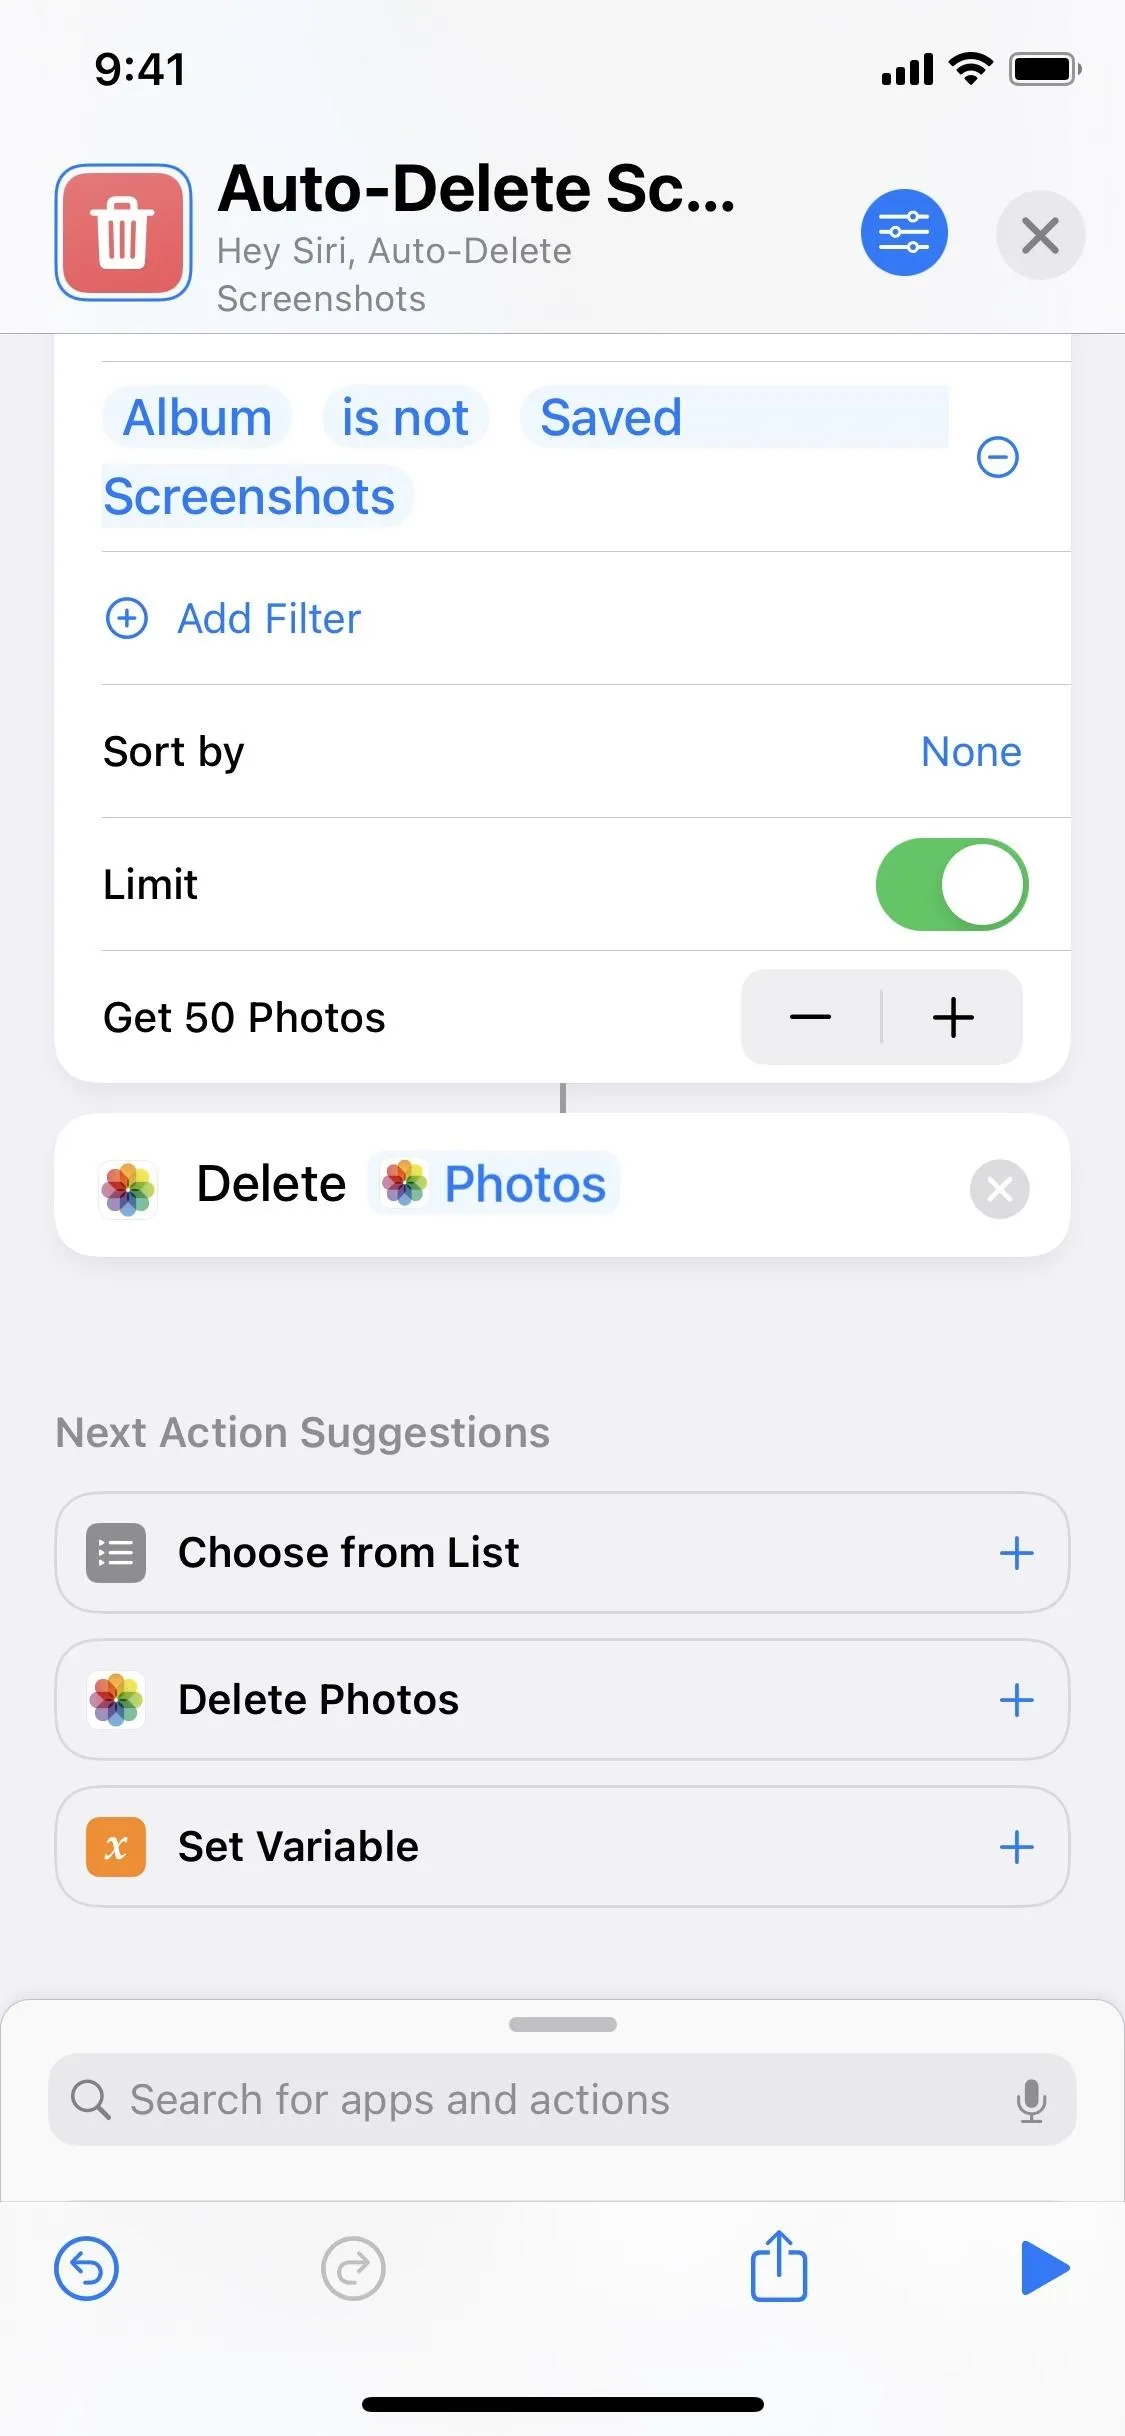
- Optional: Toggle on "Limit" and choose the max amount of screenshots you want the shortcut to delete when triggered.
Set Remaining Screenshots to Delete
Now all that's left is to make the shortcut delete everything it pulled away from the filters. "Delete Photos" is the action you need, and it should be at the end of the workflow. To make sure everything works, tap the Play button at the bottom.
If you get an error saying there's a problem running the shortcut, go back to the second "Find Photos" action and add a limit to how many screenshots it can work with at a time. I've found that 50 is the highest you can go before getting the error.
Easy Step-by-Step Build Guide:
- Add the "Delete Photos" action to the end of the workflow.
- Hit the Play button at the bottom to ensure it works.
- If you get an error: Add a limit to the second "Find Photos" action box.
Interact with the Privacy Prompt
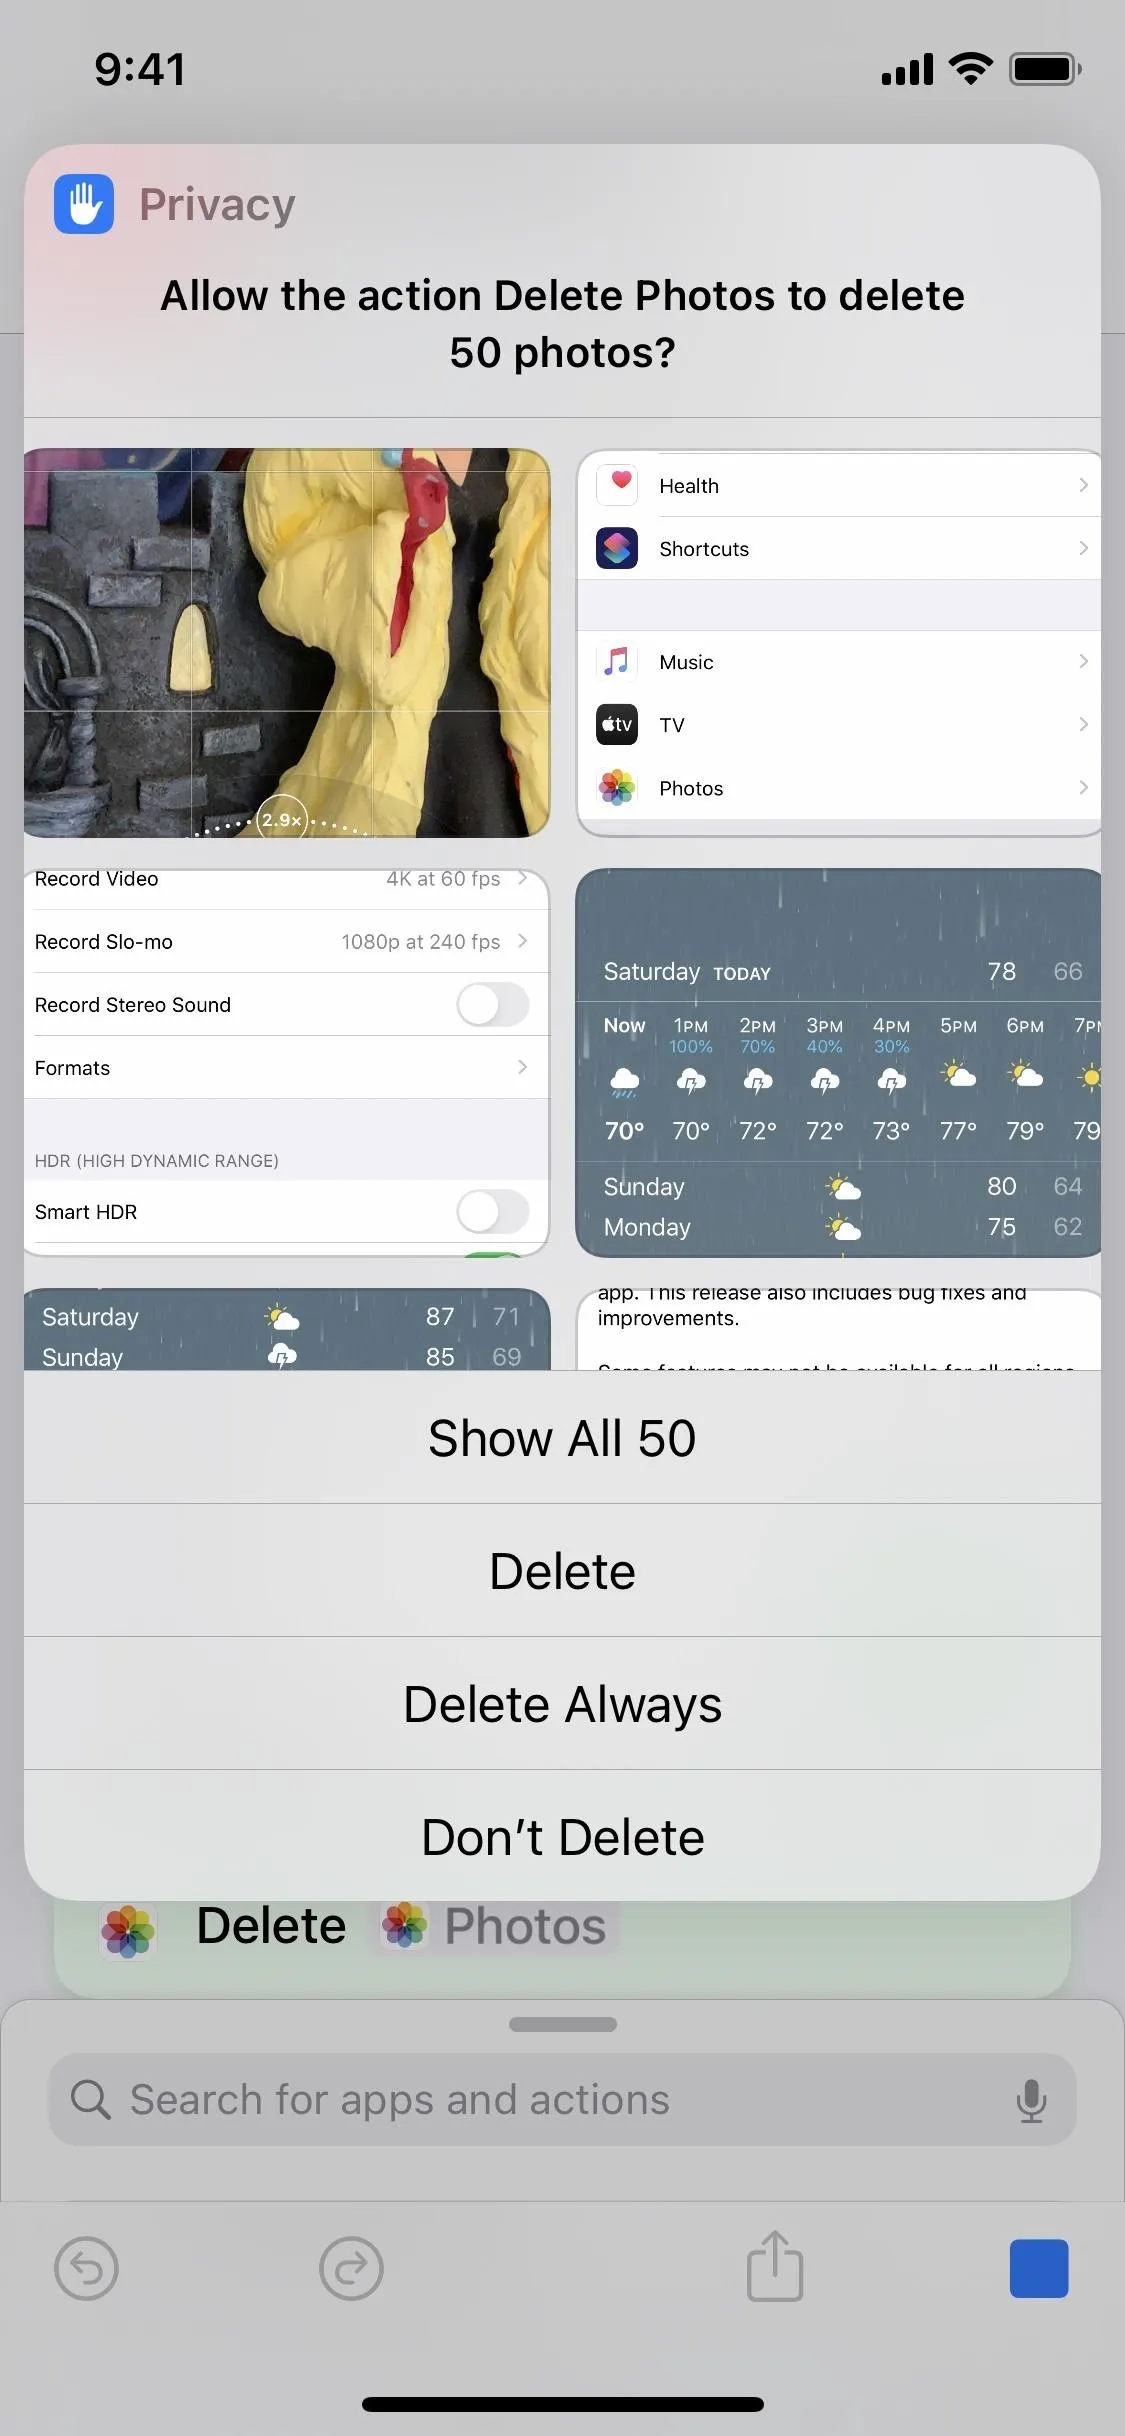
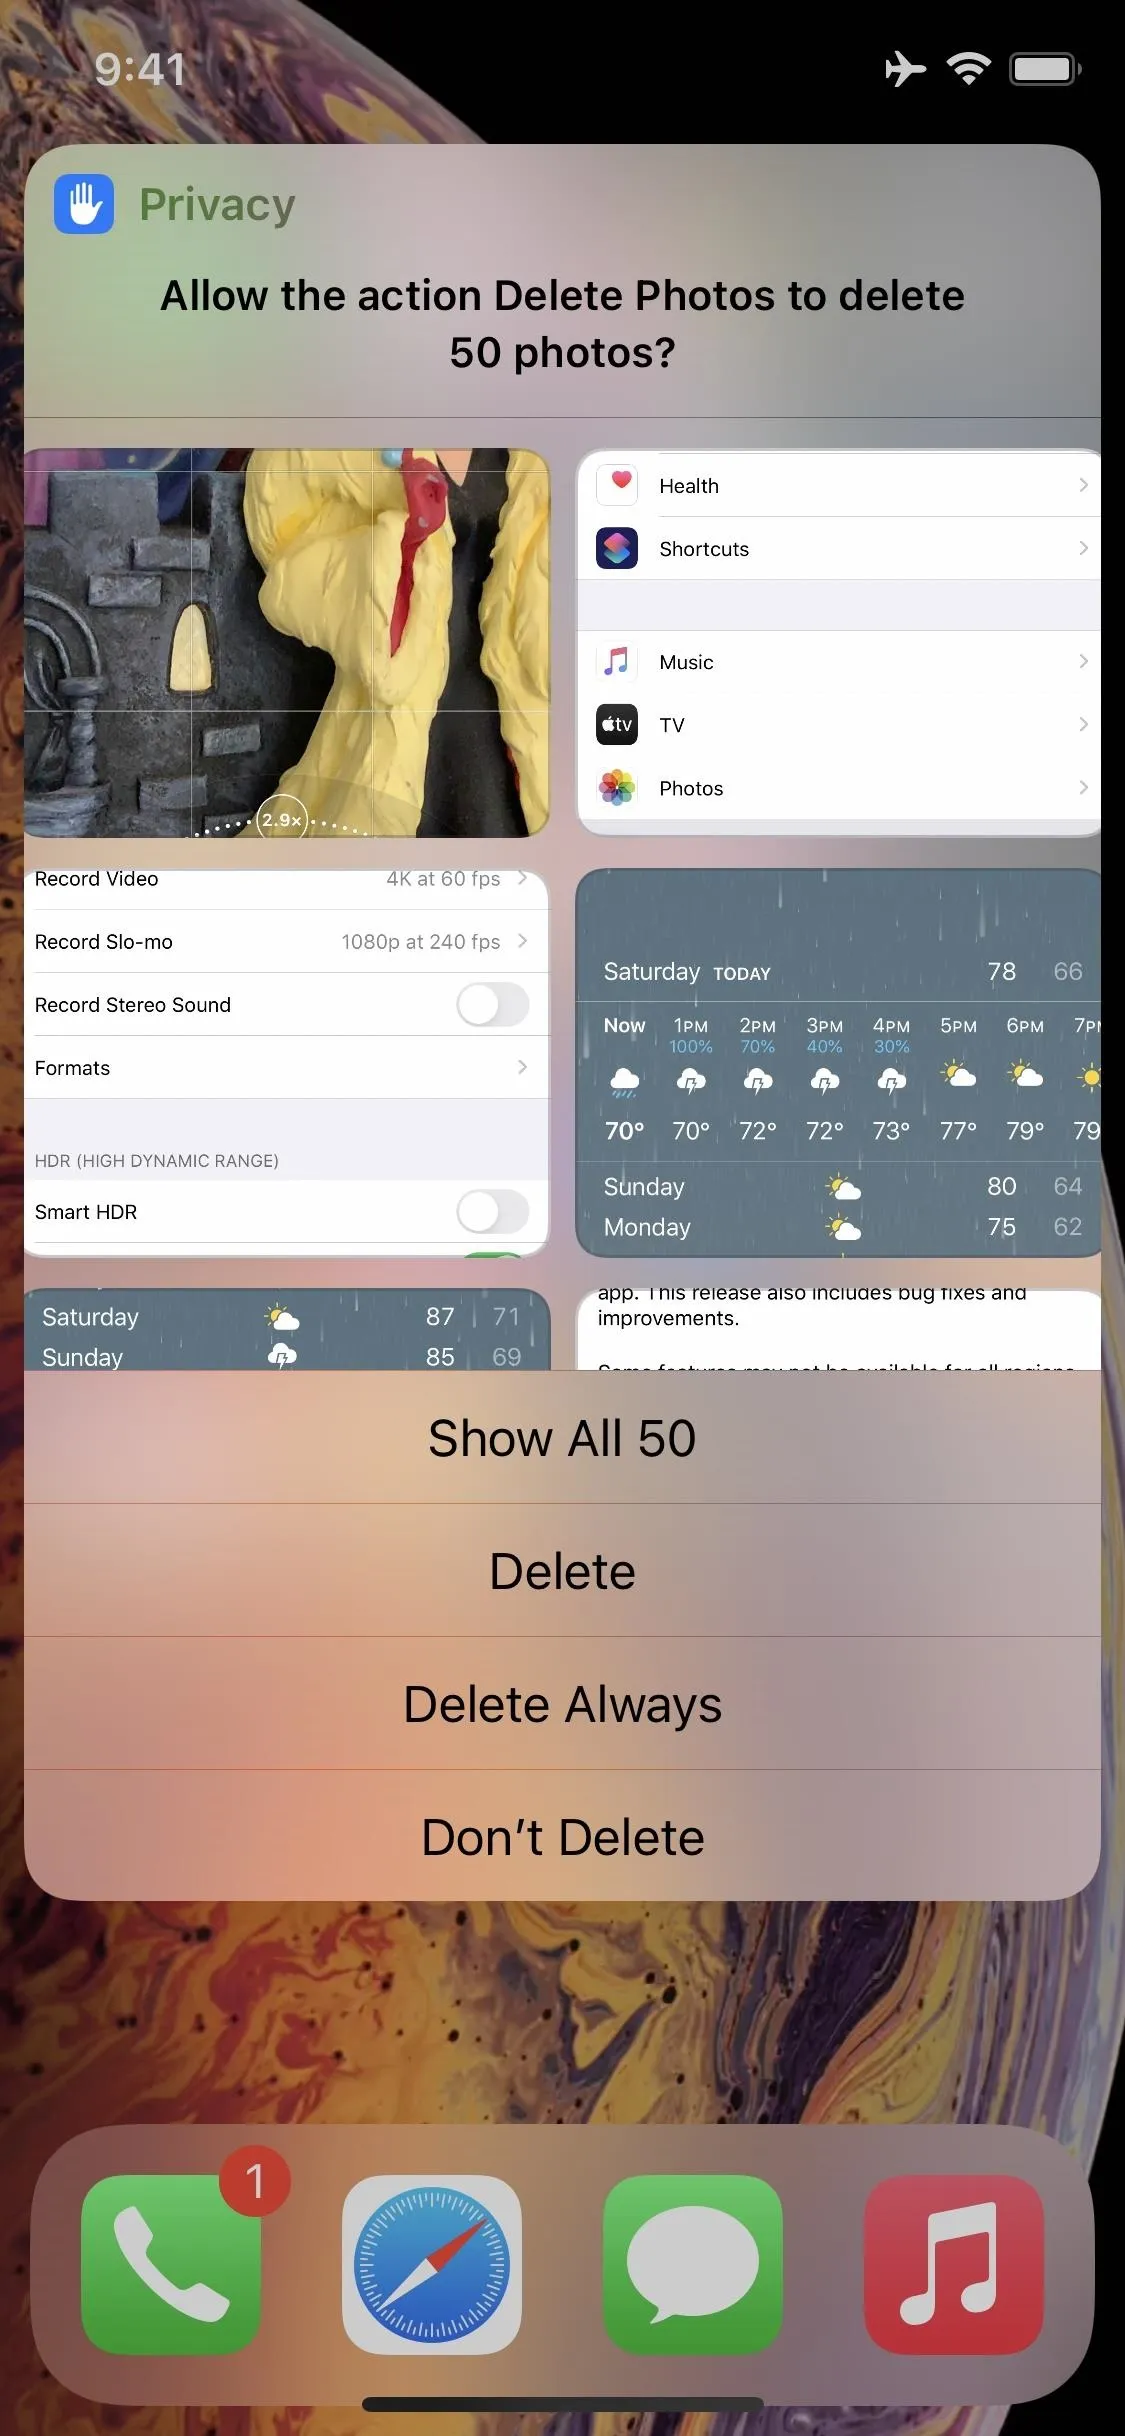
In iOS 15 and iOS 16, there's a "Privacy" setting for individual shortcuts, and it's on by default. So when you play the shortcut, you'll get a Privacy prompt, which can be very useful or very annoying, depending on your point of view.
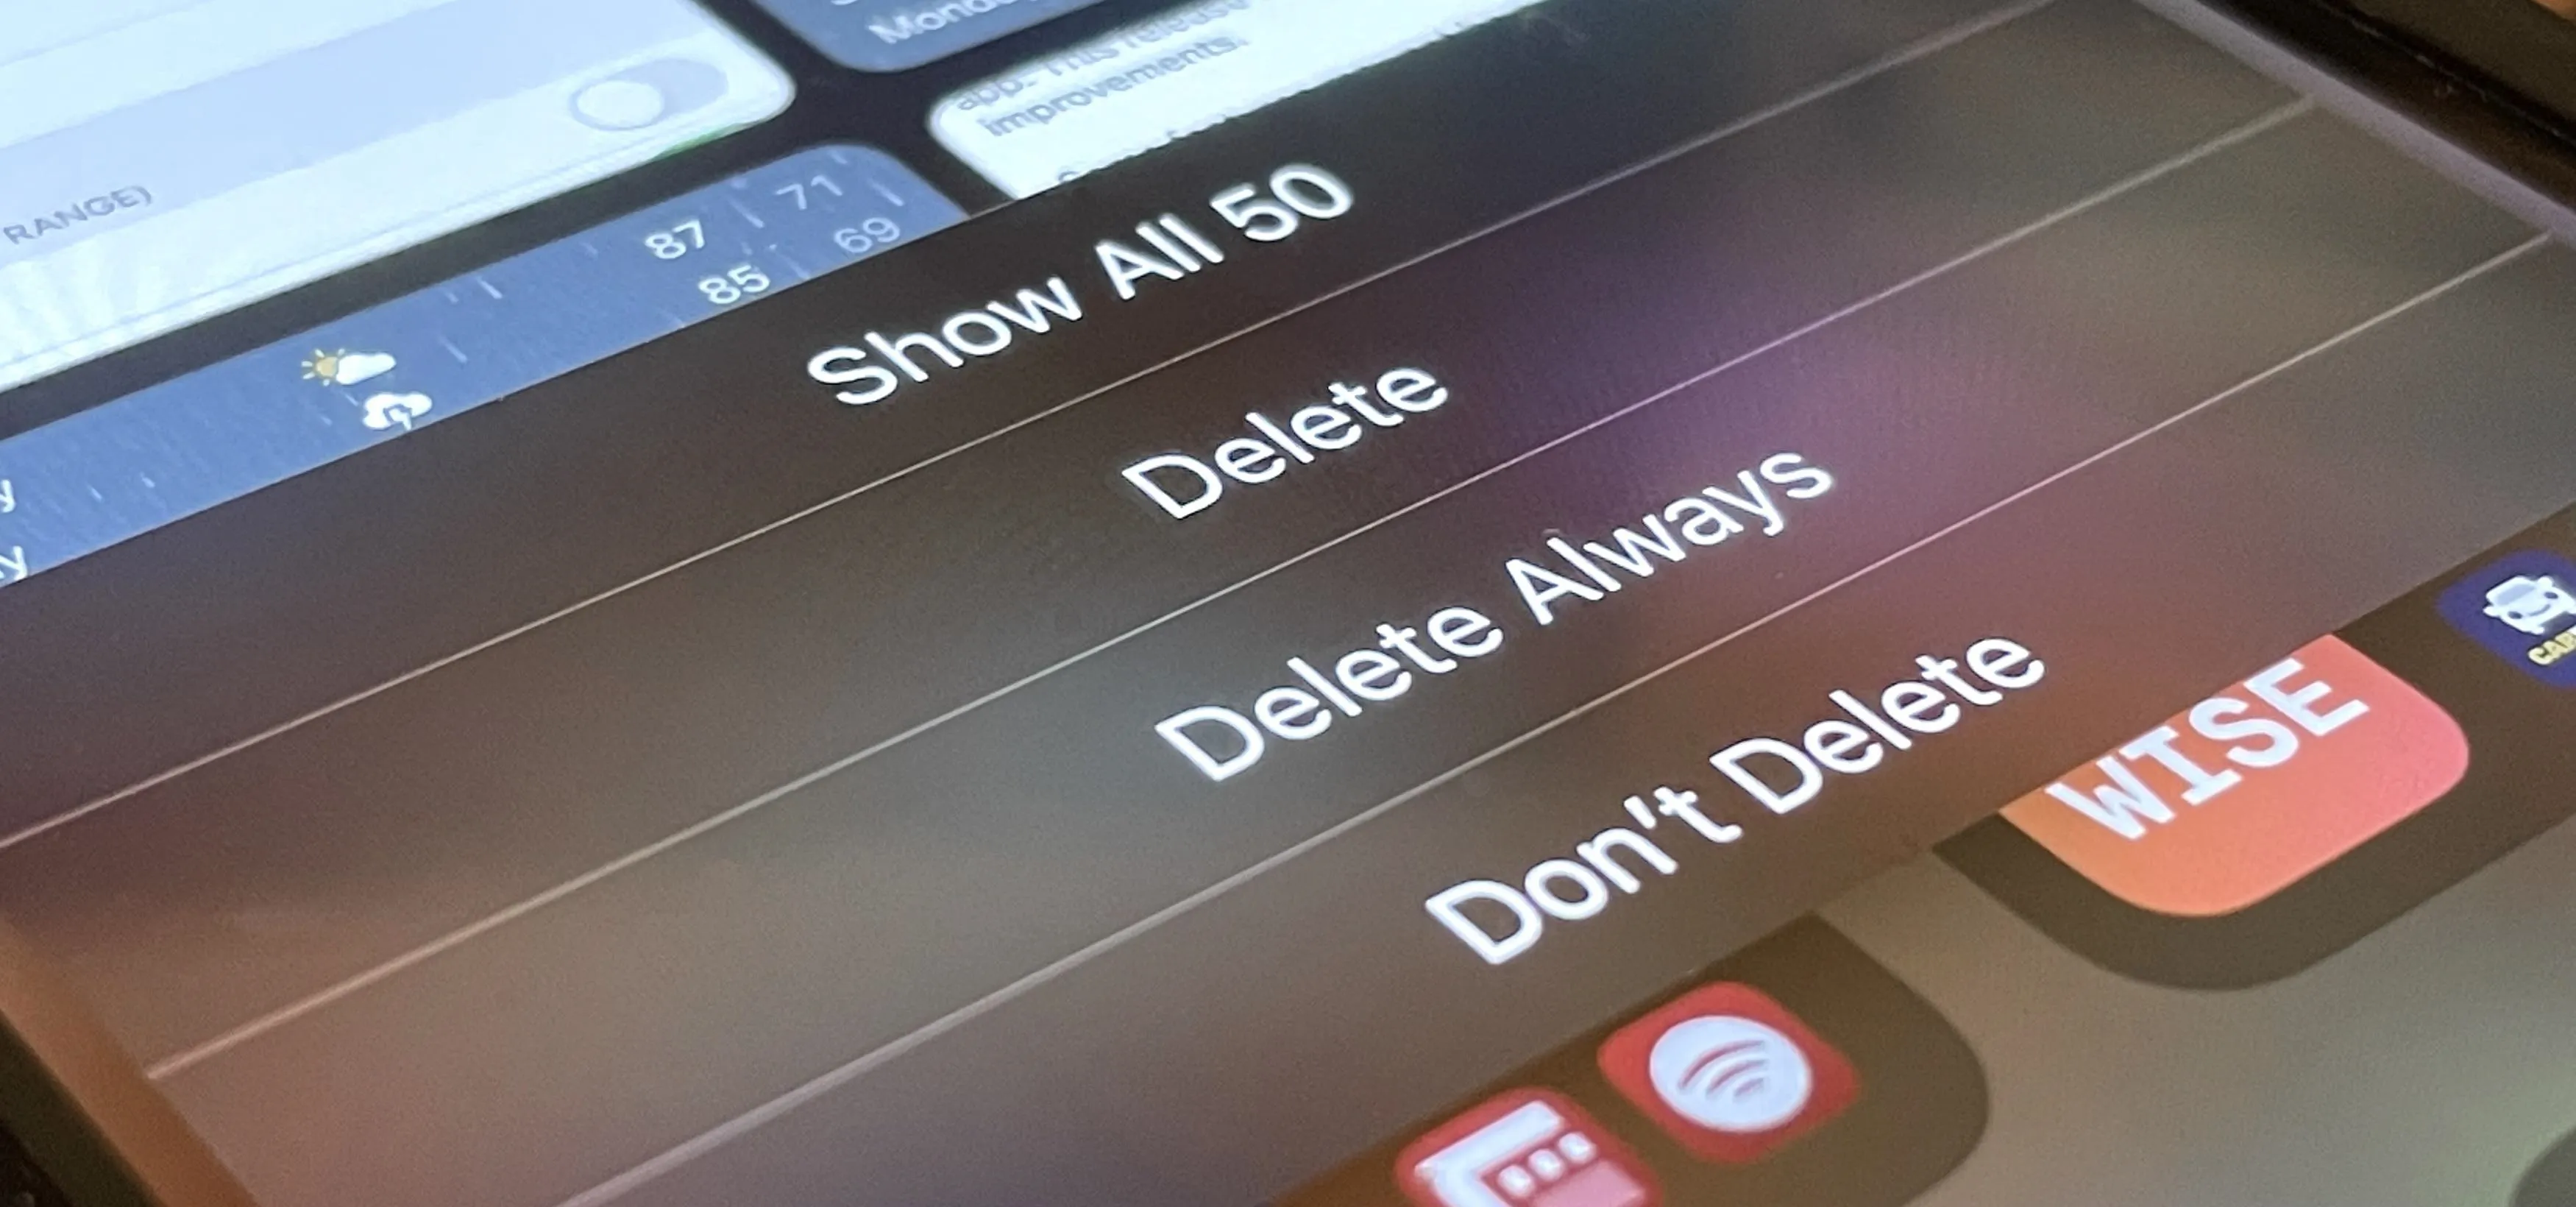
In the Privacy prompt, it will give you options for "Show," "Delete," and "Don't Delete." If you have "Allow Deleting Without Confirmation" enabled in Shortcut's advanced settings, you'll also see "Delete Always."
- "Delete Always" will stop the Privacy prompt from showing up in the future, and the shortcut will be able to delete things without any confirmation from you.
- "Delete" will just delete all of the shown images.
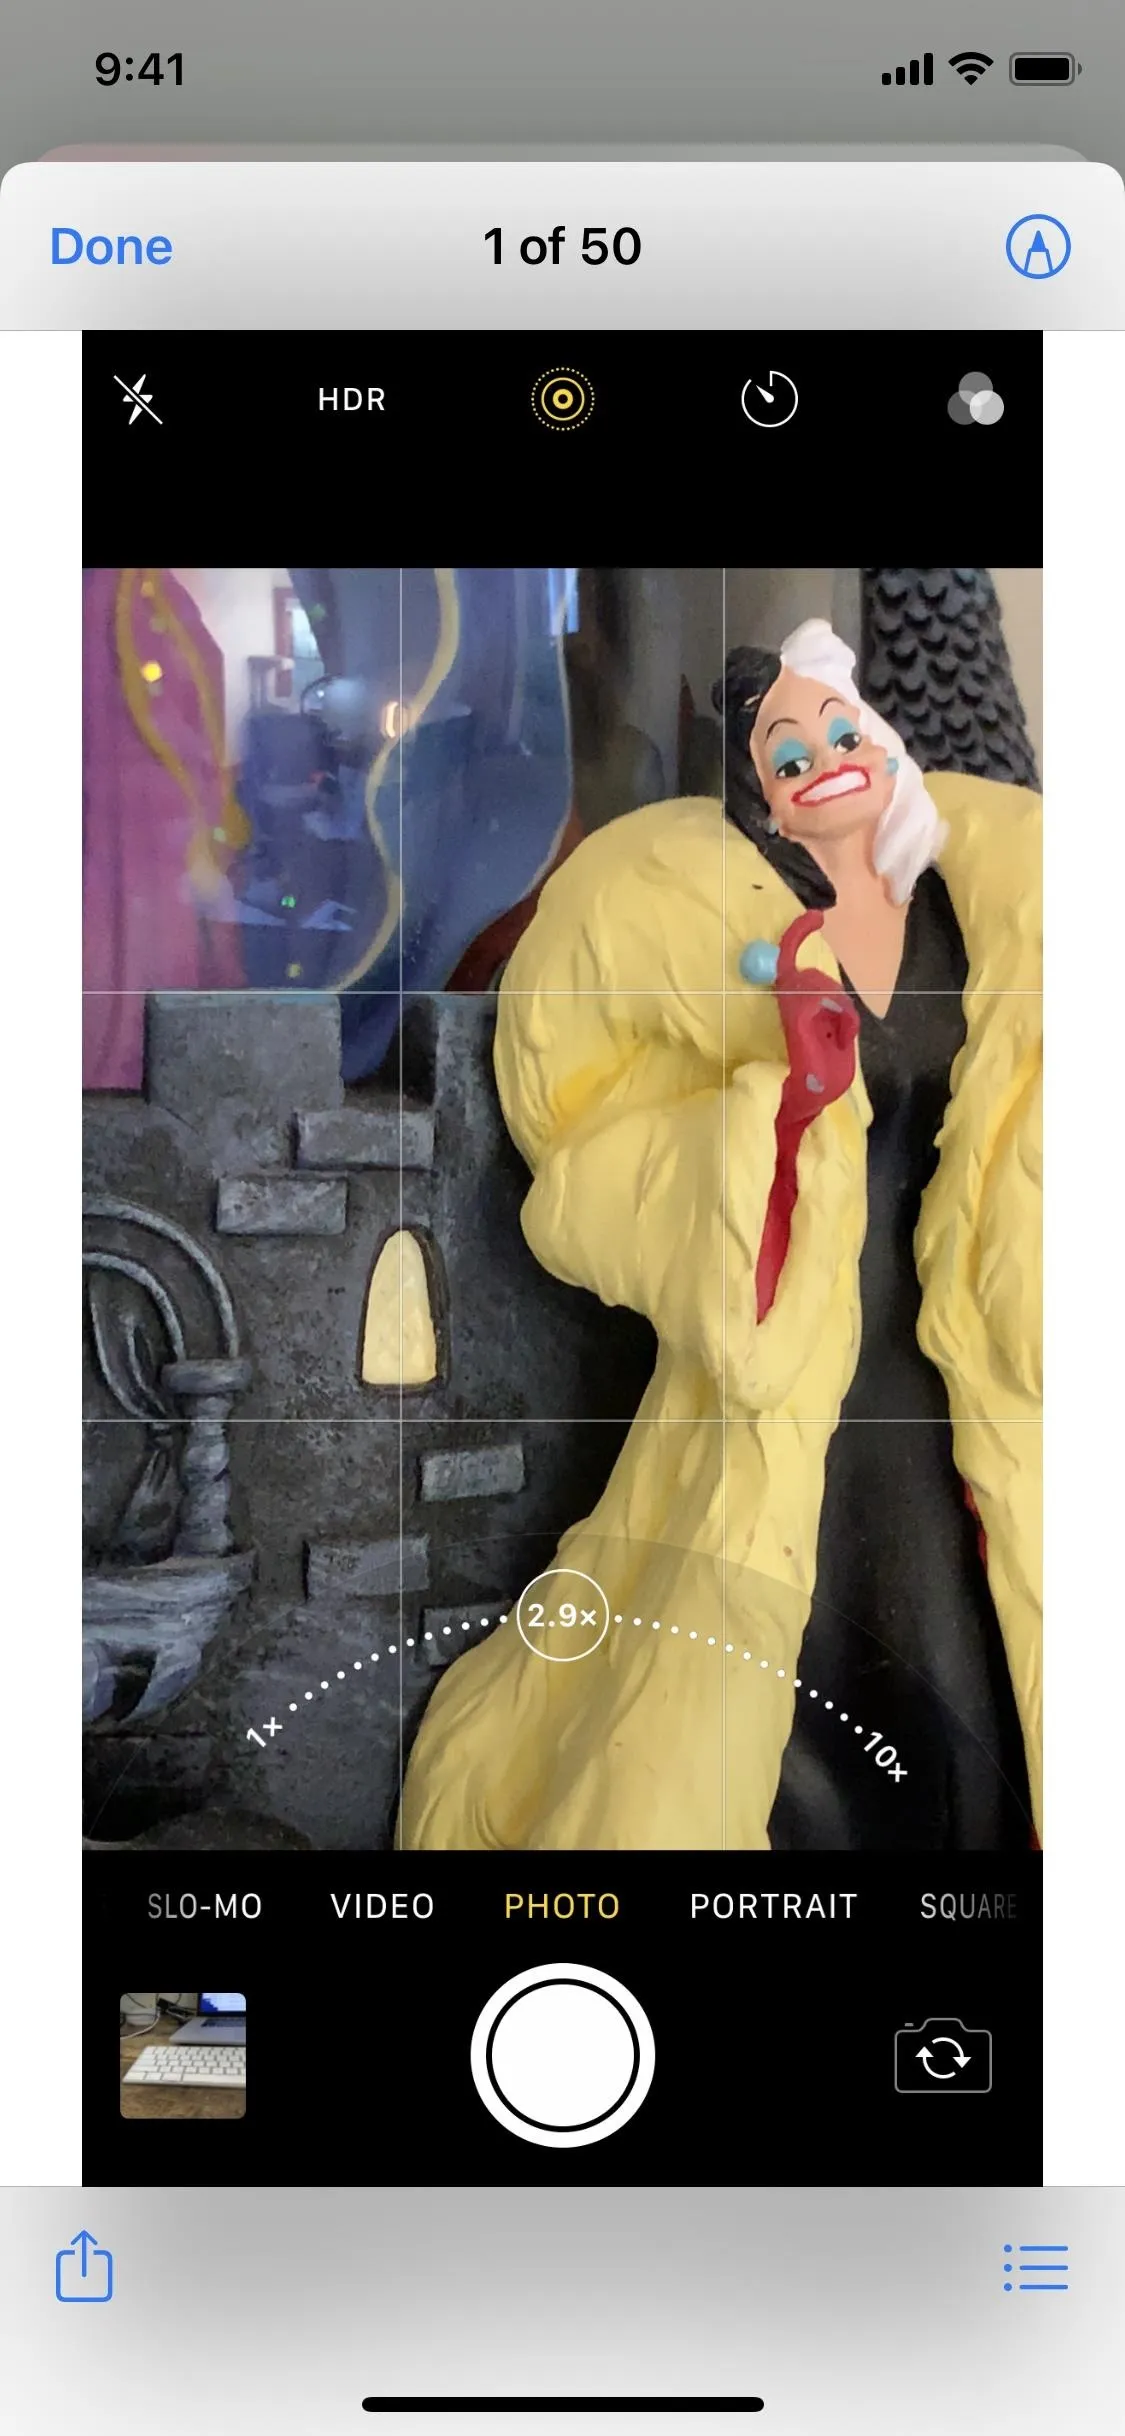
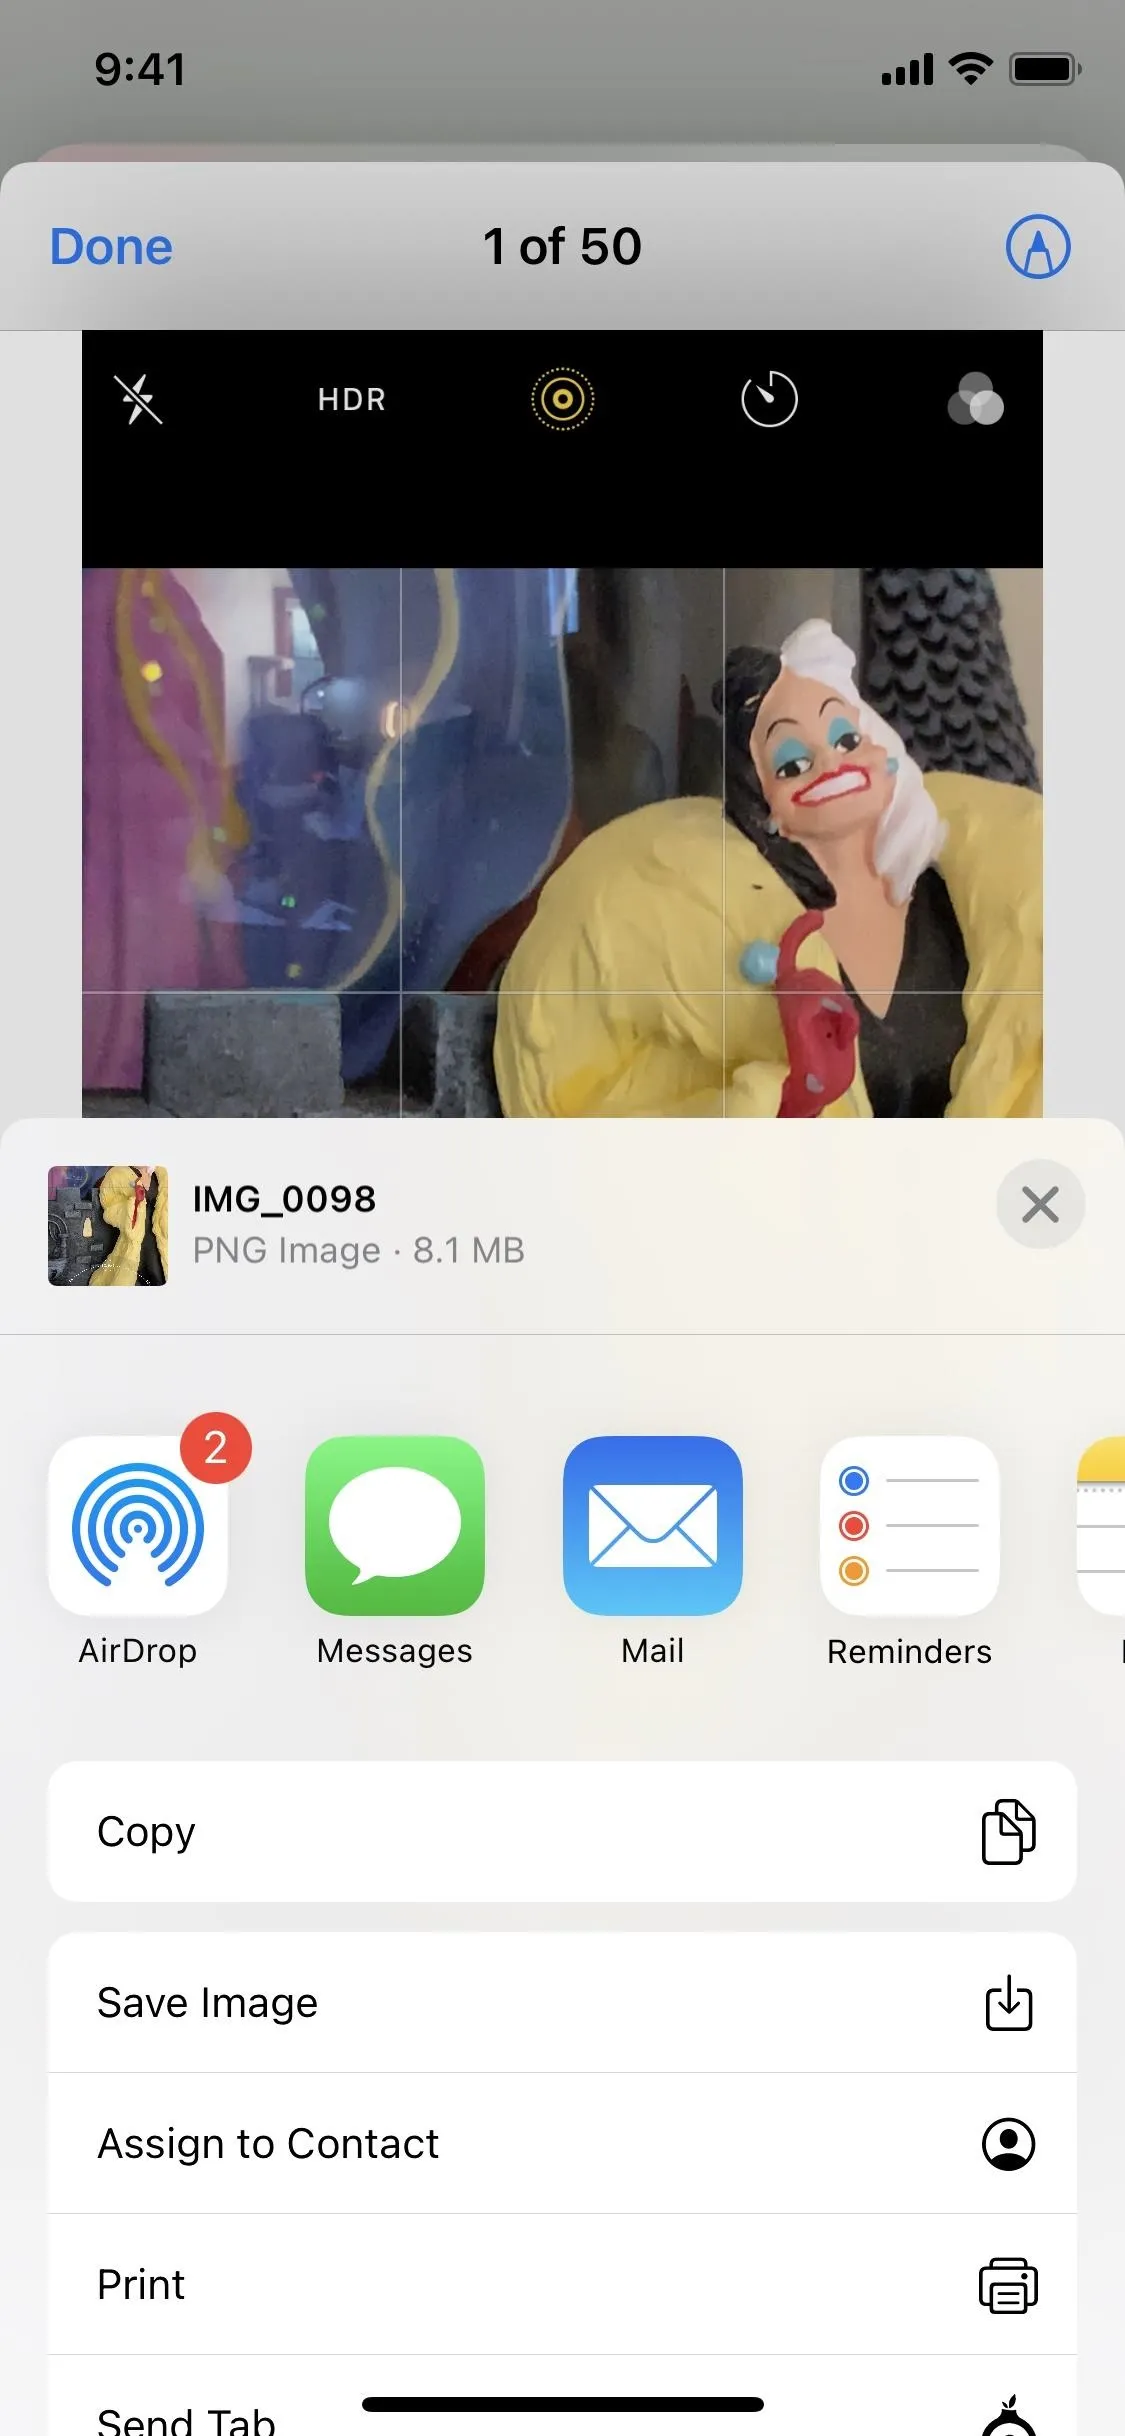
- "Show" lets you get a better look at each screenshot you're about to erase. If there are one or two images you want to keep out of the many that appear, you can use the share sheet for each one to "Save Image," which will put a new date stamp on so that the first action in the shortcut will exclude it for seven days.
- "Don't Delete" is problematic. If you want to keep all of the images shown, you'd want to tap this option, but this also disables the shortcut from deleting any pictures in the future. At least, until you change its privacy settings back to "Ask to Delete" or "Delete Without Asking." There is no option to delete everything shown while also keeping the primary setting to ask or don't ask.
If you don't want to delete anything and don't want to disable the shortcut from running, just tap outside the menu to close it, and nothing will change.
In iOS 14, you'll just see a prompt asking you to allow Shortcuts to delete the number of images it found that match the criteria. You can "Delete" or "Don't Allow," and unlike iOS 15 and iOS 16, choosing not to delete the images will not prevent the prompt from appearing in the future.
Build the Automation
You can stop right here if you just want to run the shortcut manually to clean out old screenshots. You can play the shortcut from the Shortcuts app, ask Siri to run it, or you can "Add to Home Screen" so there's an icon you can quickly tap from your Home screen.
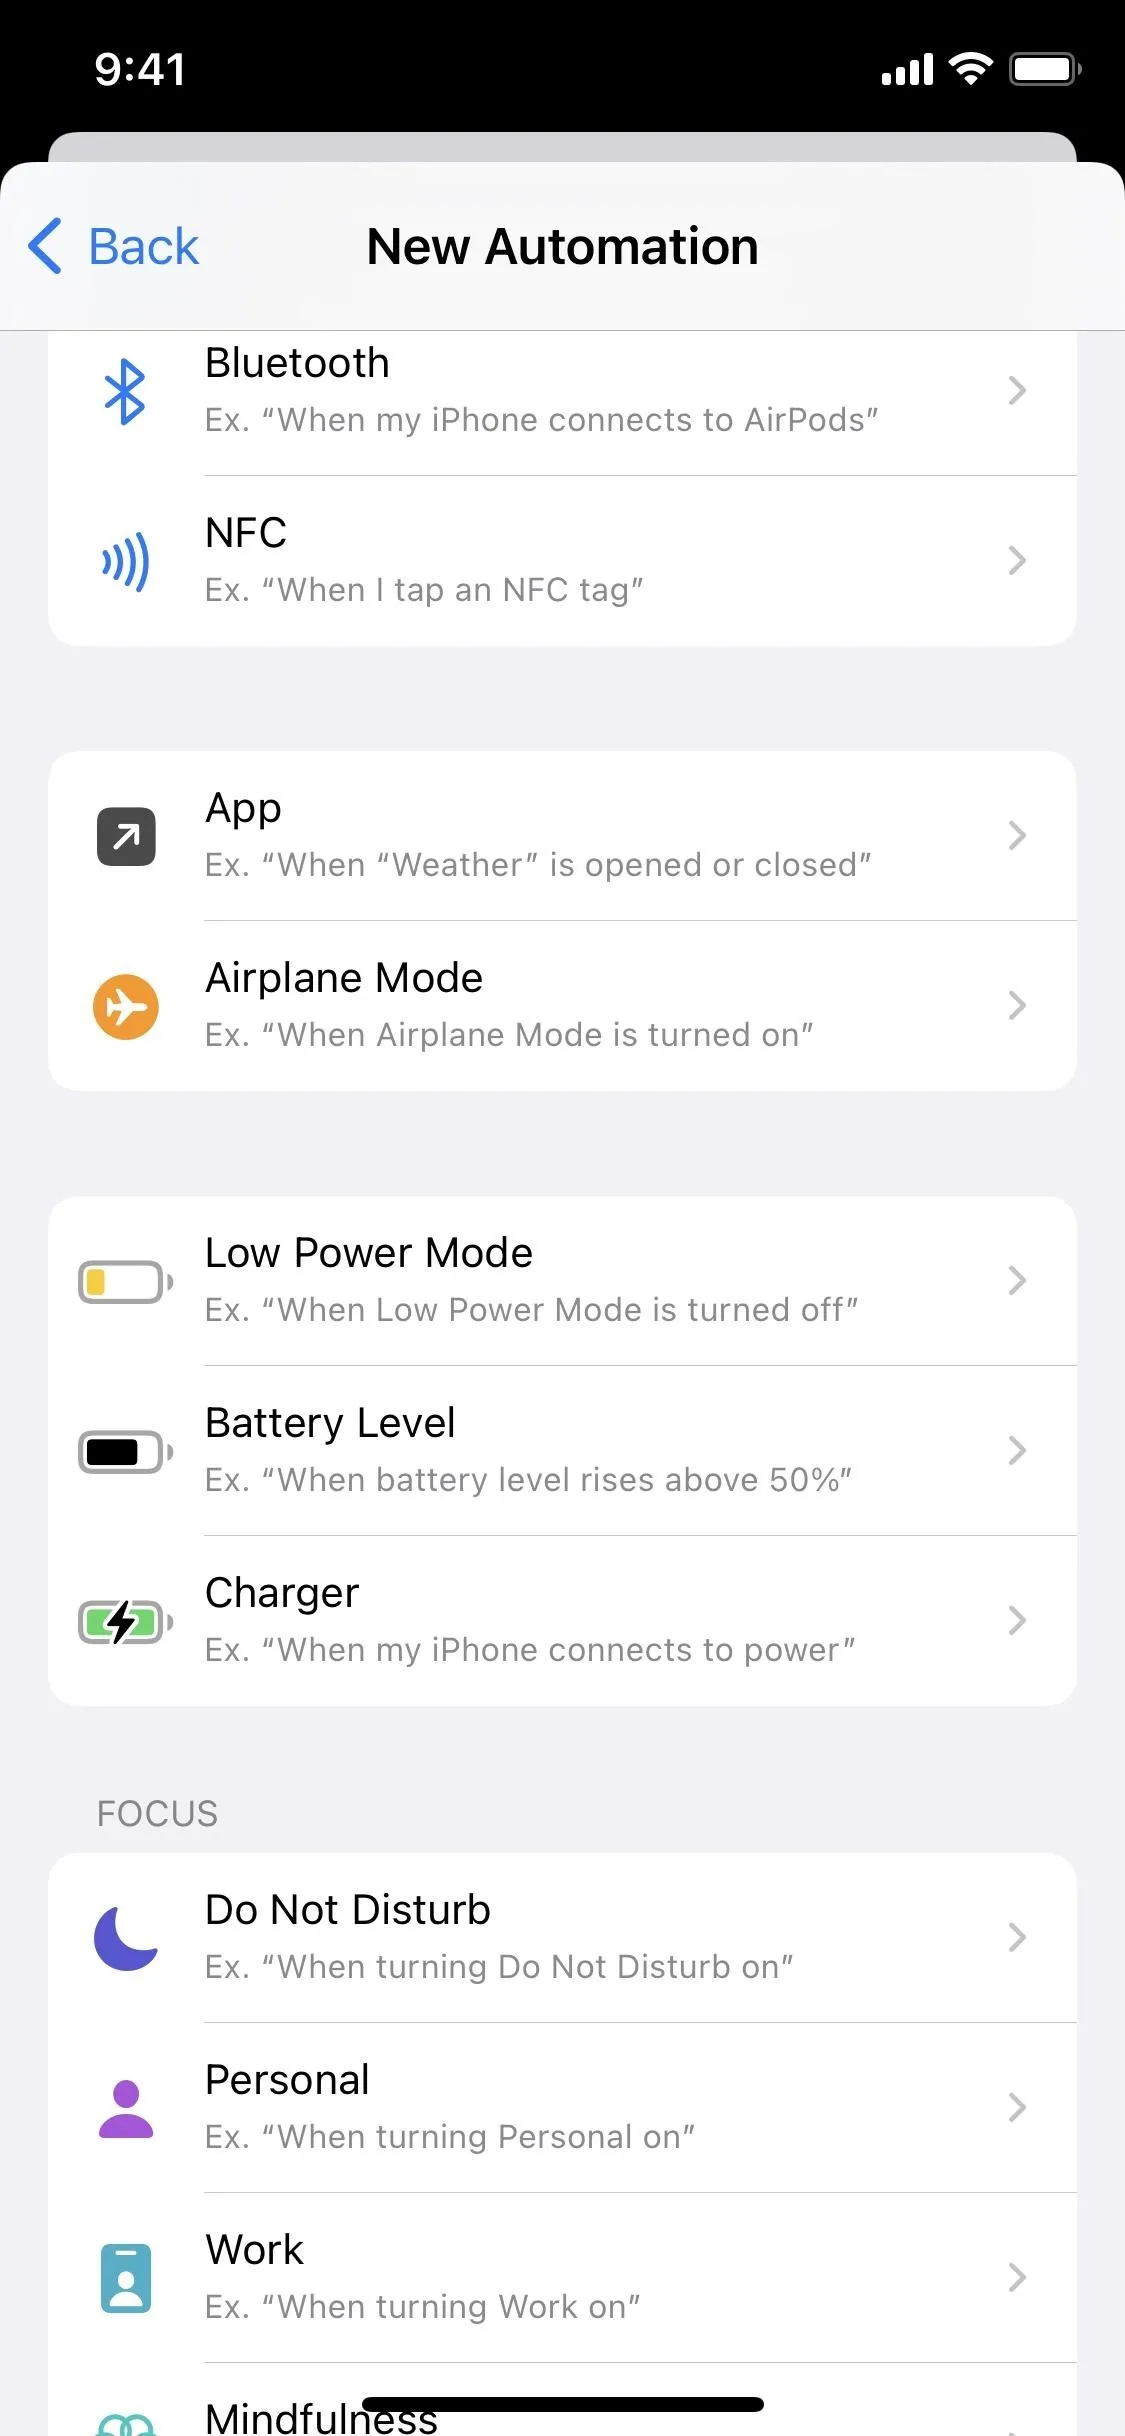
If you want to automate things, start a new personal automation in the "Automation" tab. Here, you'll set your trigger. You can have it auto-delete screenshots at a specific time, daily, weekly, or monthly. Or you can set it to go off every time you open the Photos app. You can even set NFC tags, focuses, emails, messages, and power to trigger the shortcut. It's all up to you because any of them will work.
I just set mine to trigger every time I turn on Airplane Mode.

Easy Step-by-Step Build Guide:
- Create a new personal automation from the "Automation" tab.
- Choose the trigger of your choice and configure it.
- Hit "Next" to proceed.
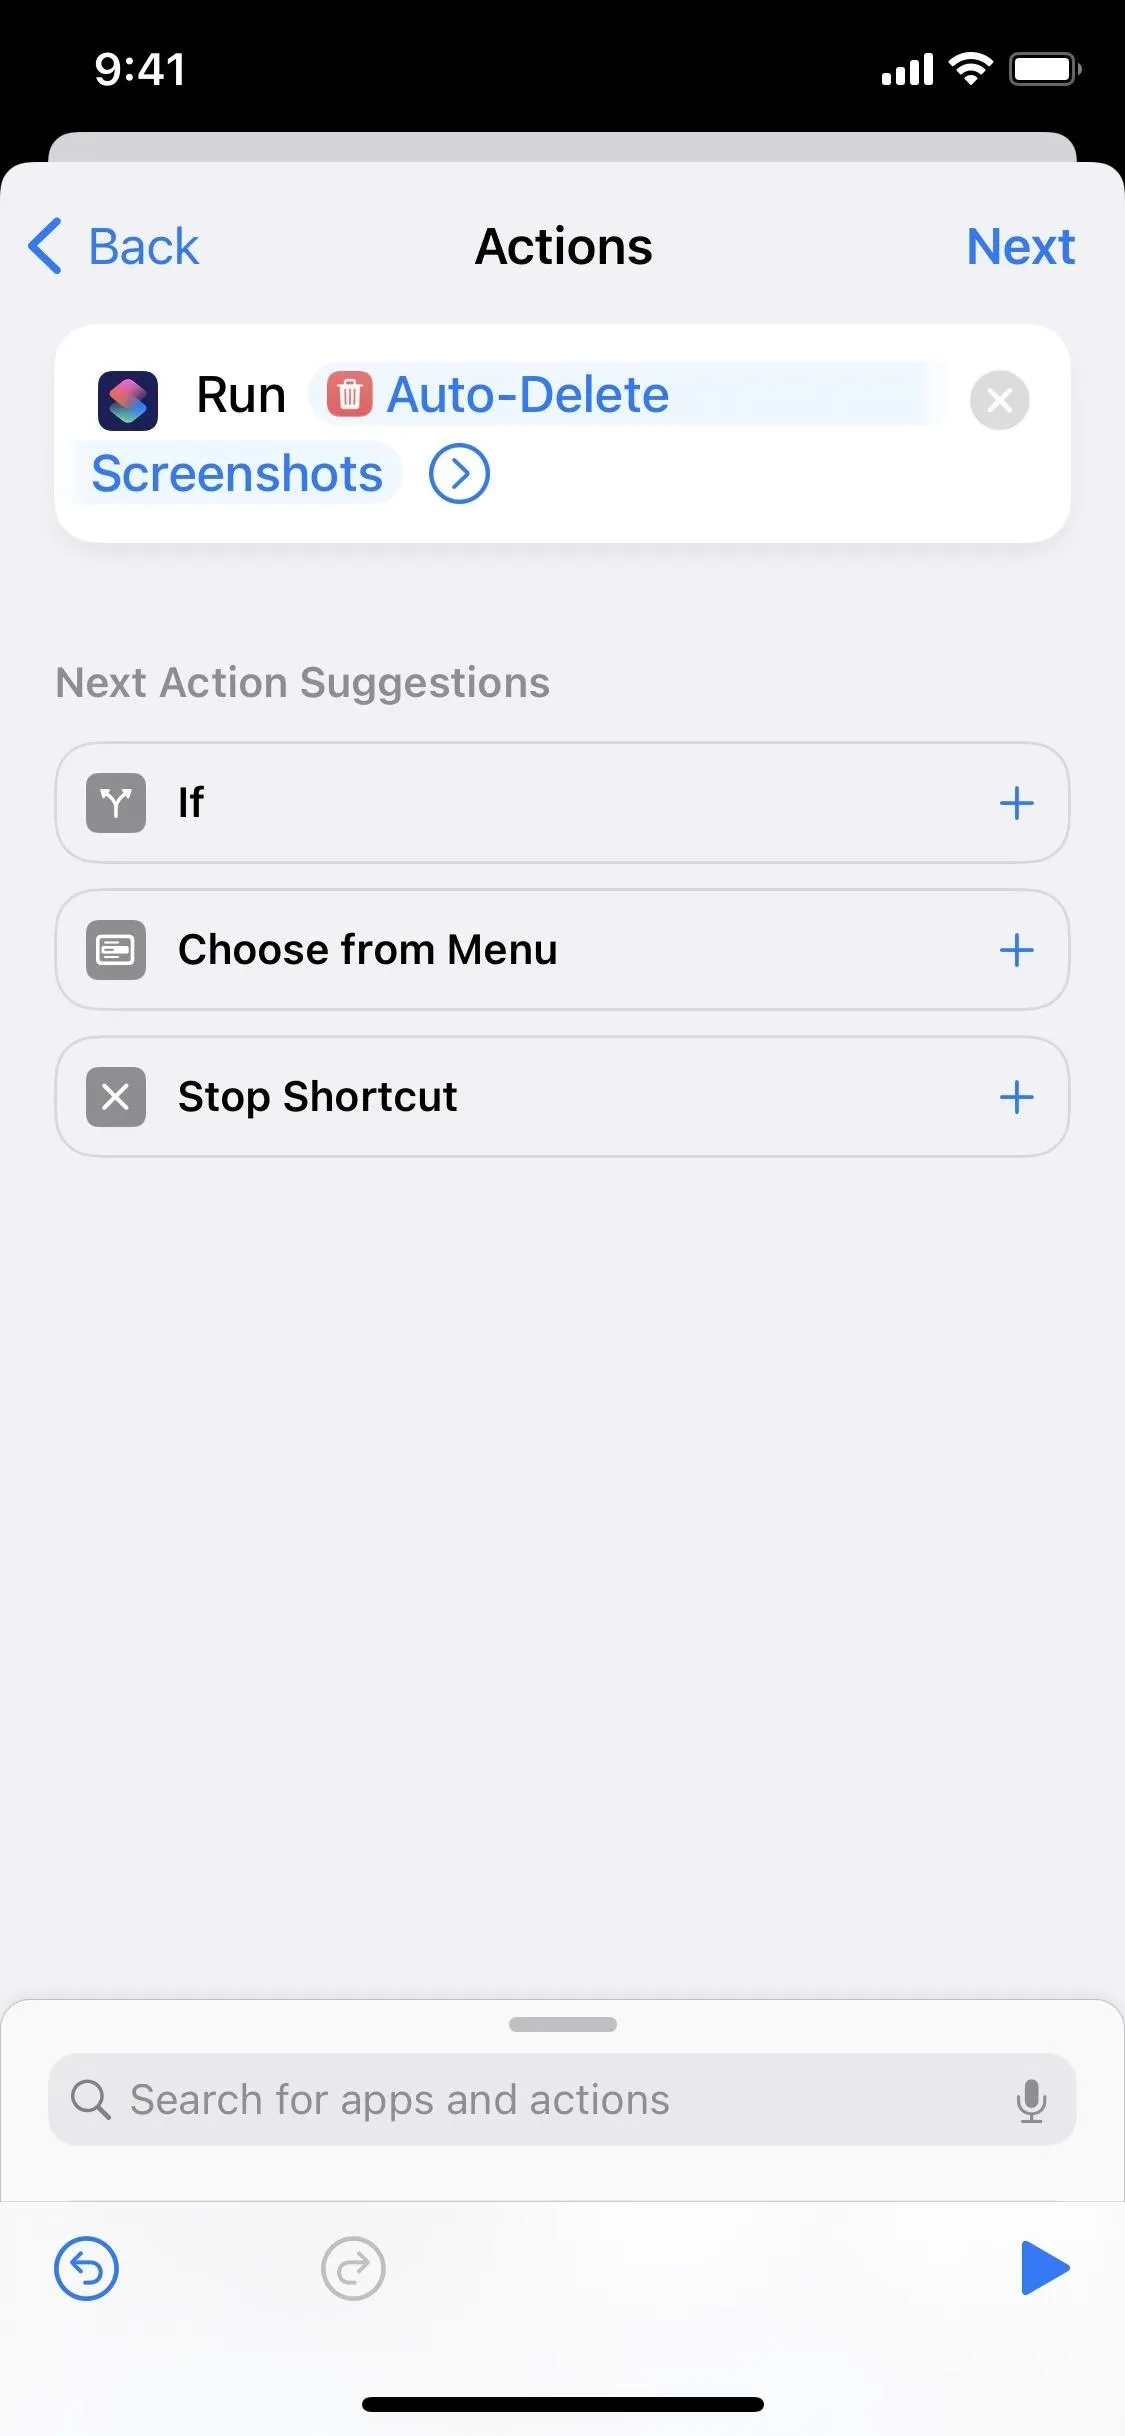
- Either build the whole shortcut from scratch on the "Actions" screen or add the "Run Shortcut" action.
- Tap "Shortcut" in the action box.
- Pick the shortcut you downloaded or built to delete screenshots.
- Hit "Next" to continue.
- Toggle off "Ask Before Running" and confirm your choice.
- Hit "Done," and that's it.
Enjoy Your New Screenshot Deleting Automation
This shortcut and automation are relatively simple, and there's a lot you can do to customize it beyond what's already been discussed. For instance, you can make it show you all the screenshots it found before it deletes them, so you can uncheck the ones you want to keep and send the rest to the Privacy prompt where you make the final decision.

Cover photo and screenshots by Justin Meyers/Gadget Hacks


Comments
Be the first, drop a comment!