


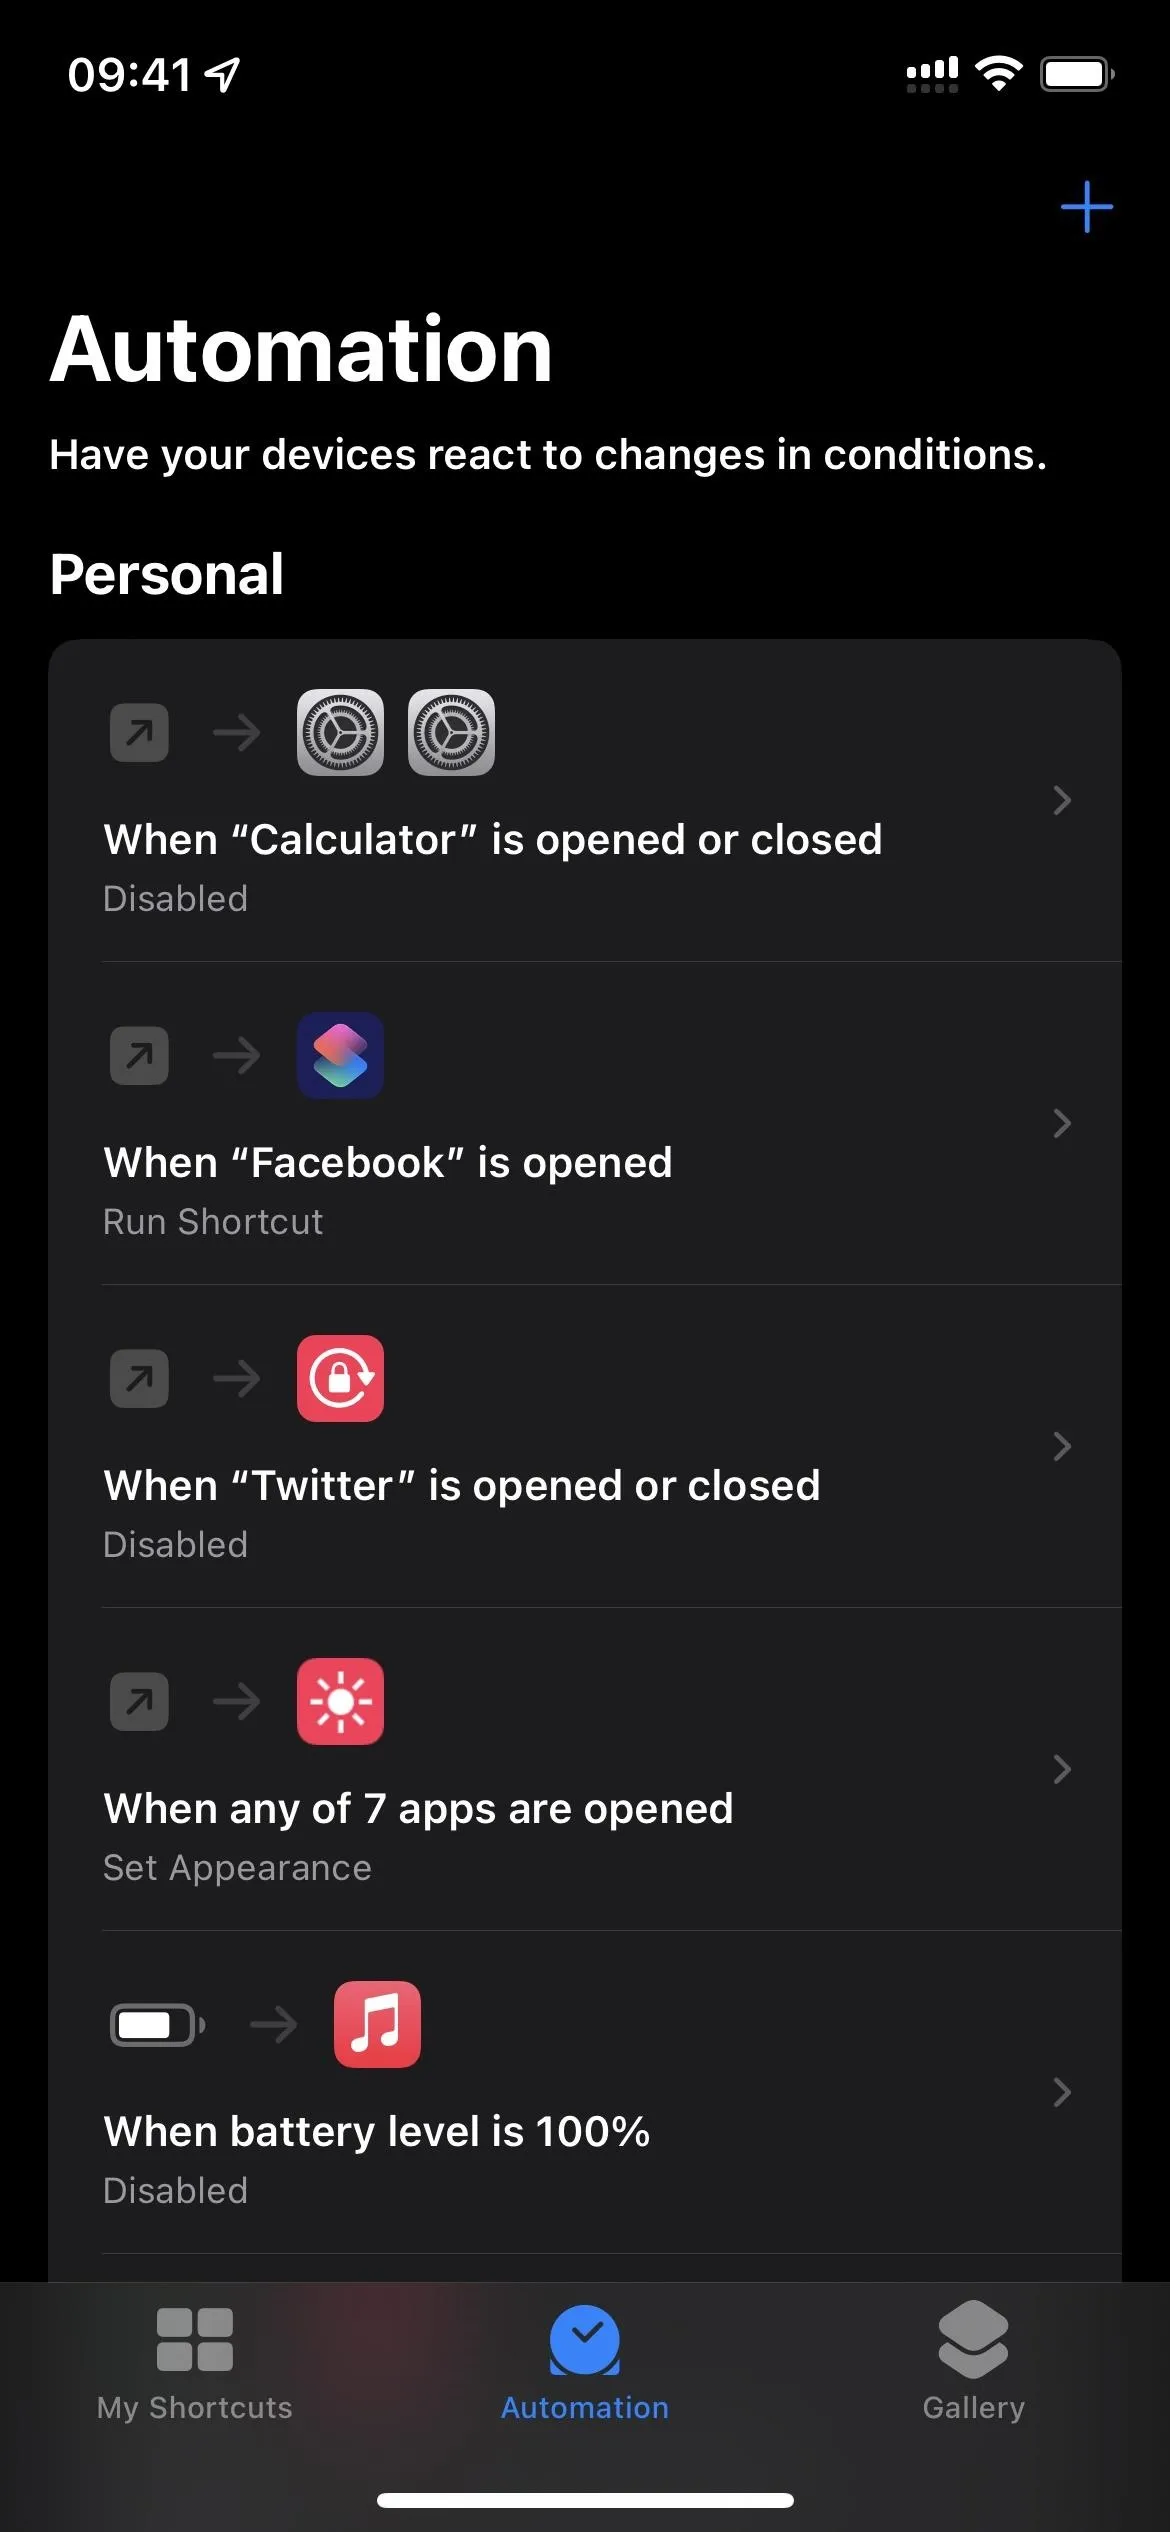
Some apps look great with Dark Mode, and some do not. So when you have system-wide Dark Mode enabled on your iPhone and are using an app that only looks good in Light Mode, you'd normally have to turn the dark appearance off manually, then switch it back on when you leave. But there's a workaround that can automate the process for you.
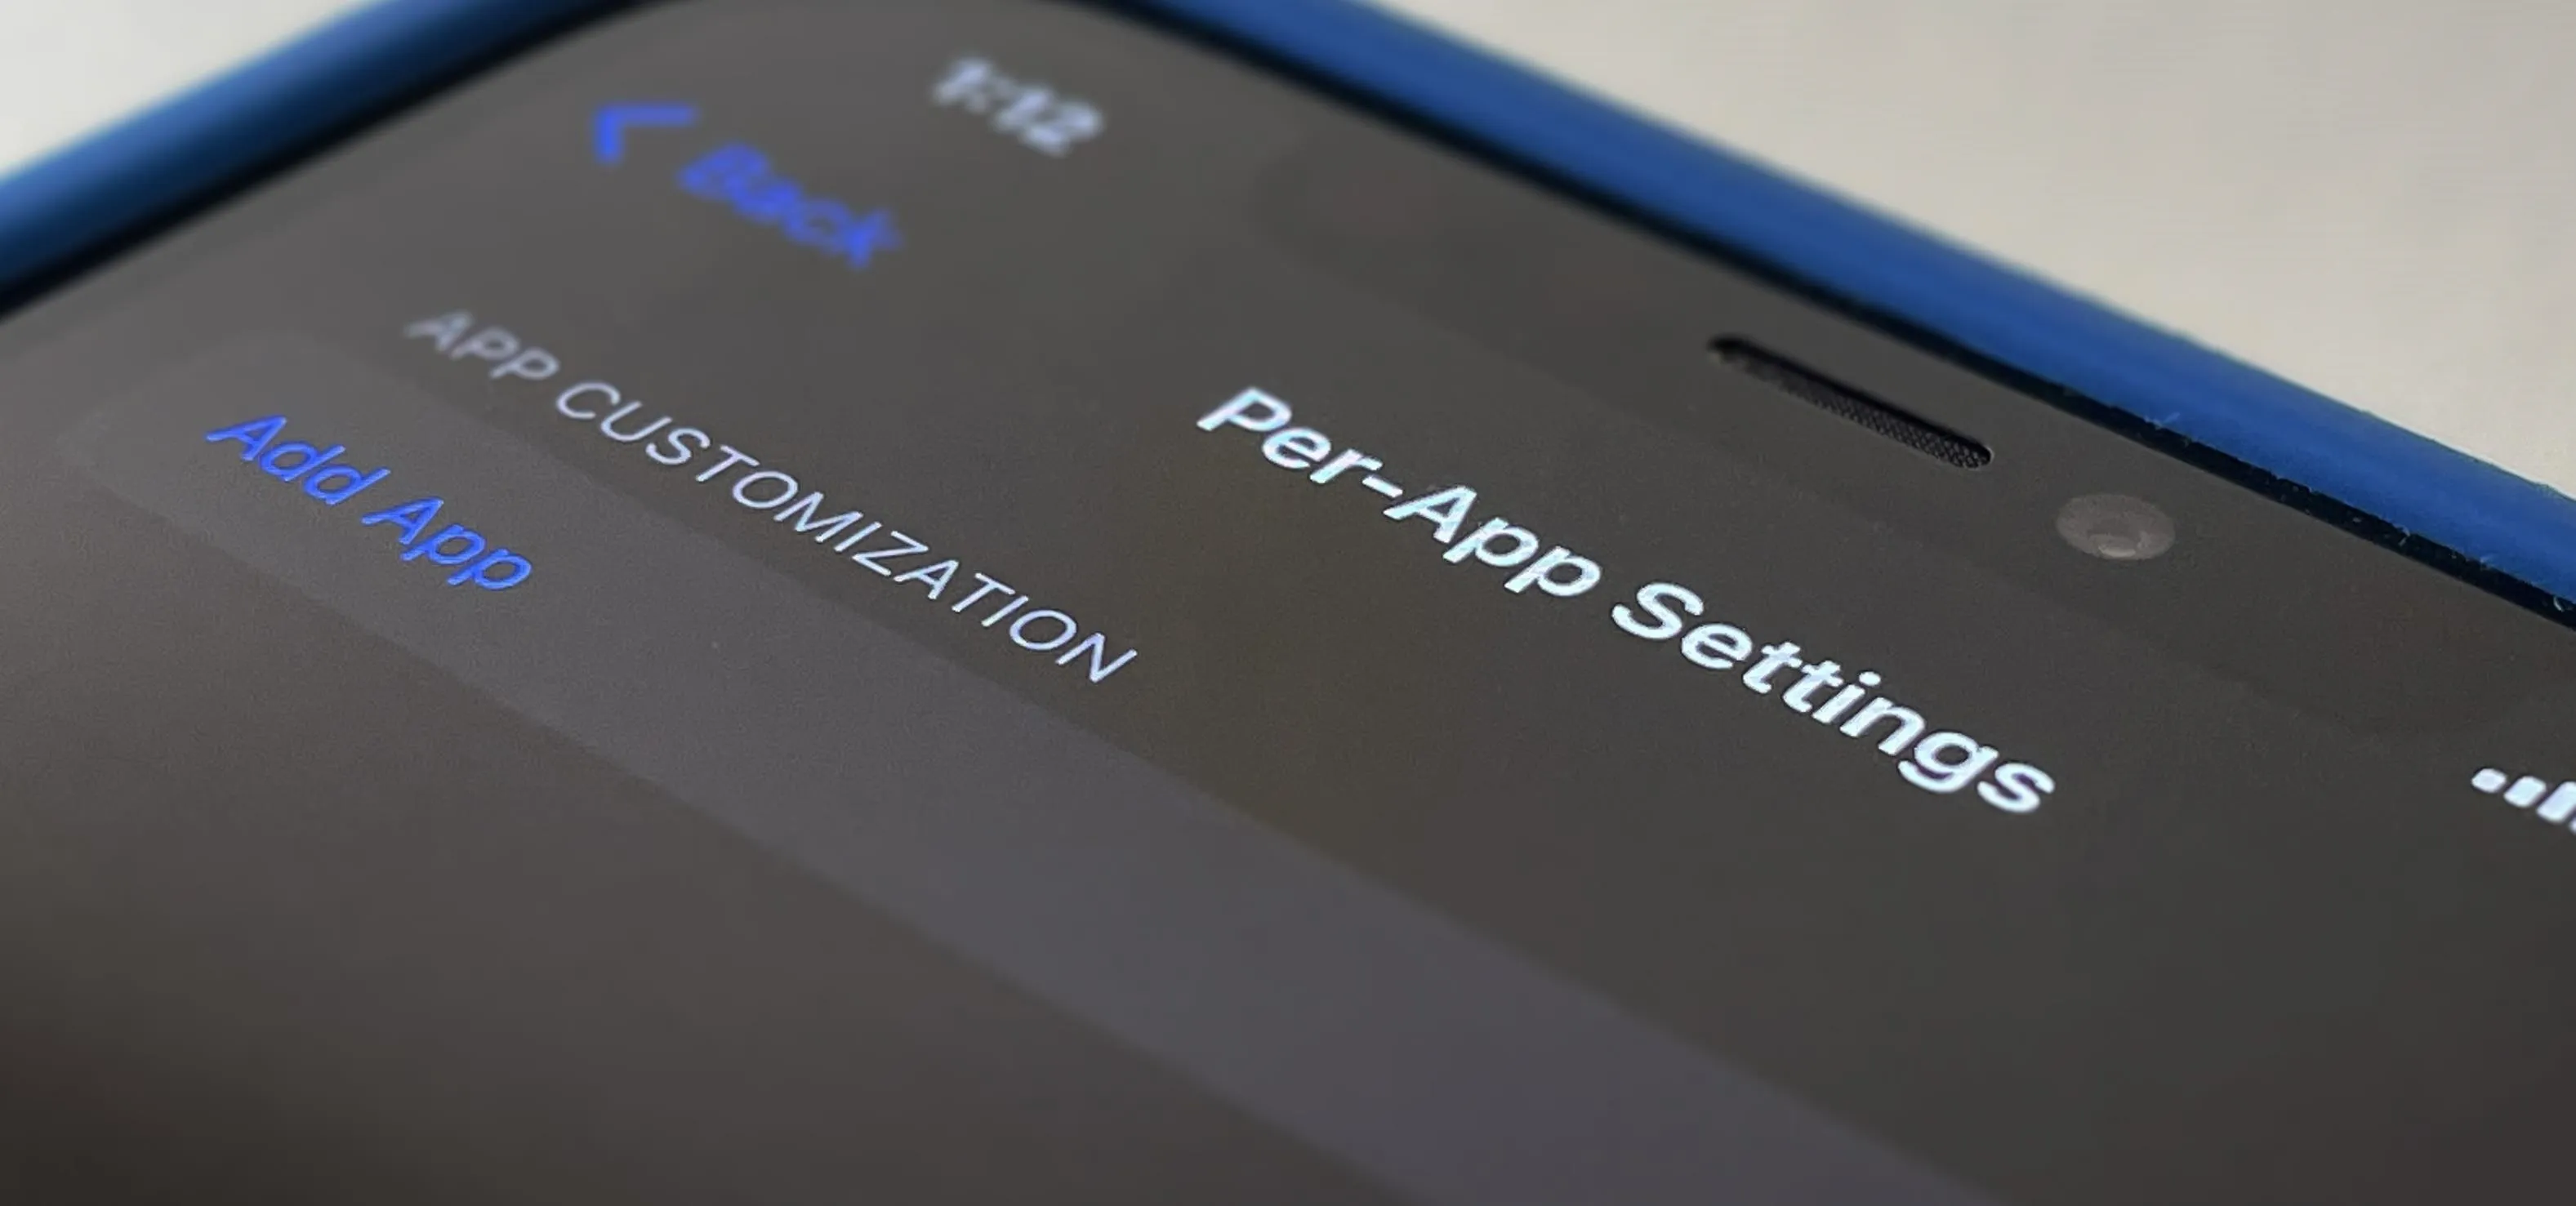
Perhaps the best improvement to the Dark Mode that appeared in iOS 13 is per-app dark and light appearances. Only it's not as simple as flipping a switch. While iOS 15 and iOS 16 have a "Per-App Settings" section in the Accessibility preferences that lets you set app-specific text size, button shapes, color style, and other customizations, there are no "Use Dark Mode" or "Use Light Mode" switches.
Instead, you'll have to see if the app in question has an override in its settings, and if not, you'll have to set up two or more automations in Shortcuts to achieve per-app Dark Mode settings. You can build super simple automations that turn on Dark or Light Mode when you open an app, but there are downsides to doing so, namely, that your system-wide appearance will be affected overall.
If you want to maintain your iPhone's system-wide Dark or Light Mode setting after leaving an app you assigned to Dark or Light Mode automation, the workflows are a little bit more involved but not difficult. This is the closest thing to assigning each app a preferred dark or light appearance that we'll see until Apple gives us a real per-app option or until all apps include overrides.
Use Override Switches for Individual Apps
Some third-party apps build in override settings for Dark Mode that let you choose to keep the app on Dark Mode, Light Mode, or synced with the system-wide appearance. If you decide to make an app use a specific appearance, it will always use that look, and it won't affect the current system-wide setting.
So if you set an app to Light Mode only and Dark Mode is currently on system-wide, the app will use the light appearance, and you'll see the system-wide night look for everything else when you exit the app.
Not all apps have an override, but some big-name ones include:
- Facebook: Go to Menu –> Settings & Privacy –> Settings –> Dark Mode.
- Google Maps: From the Explore or Go tab, tap your profile icon, then go to Settings –> Dark Mode.
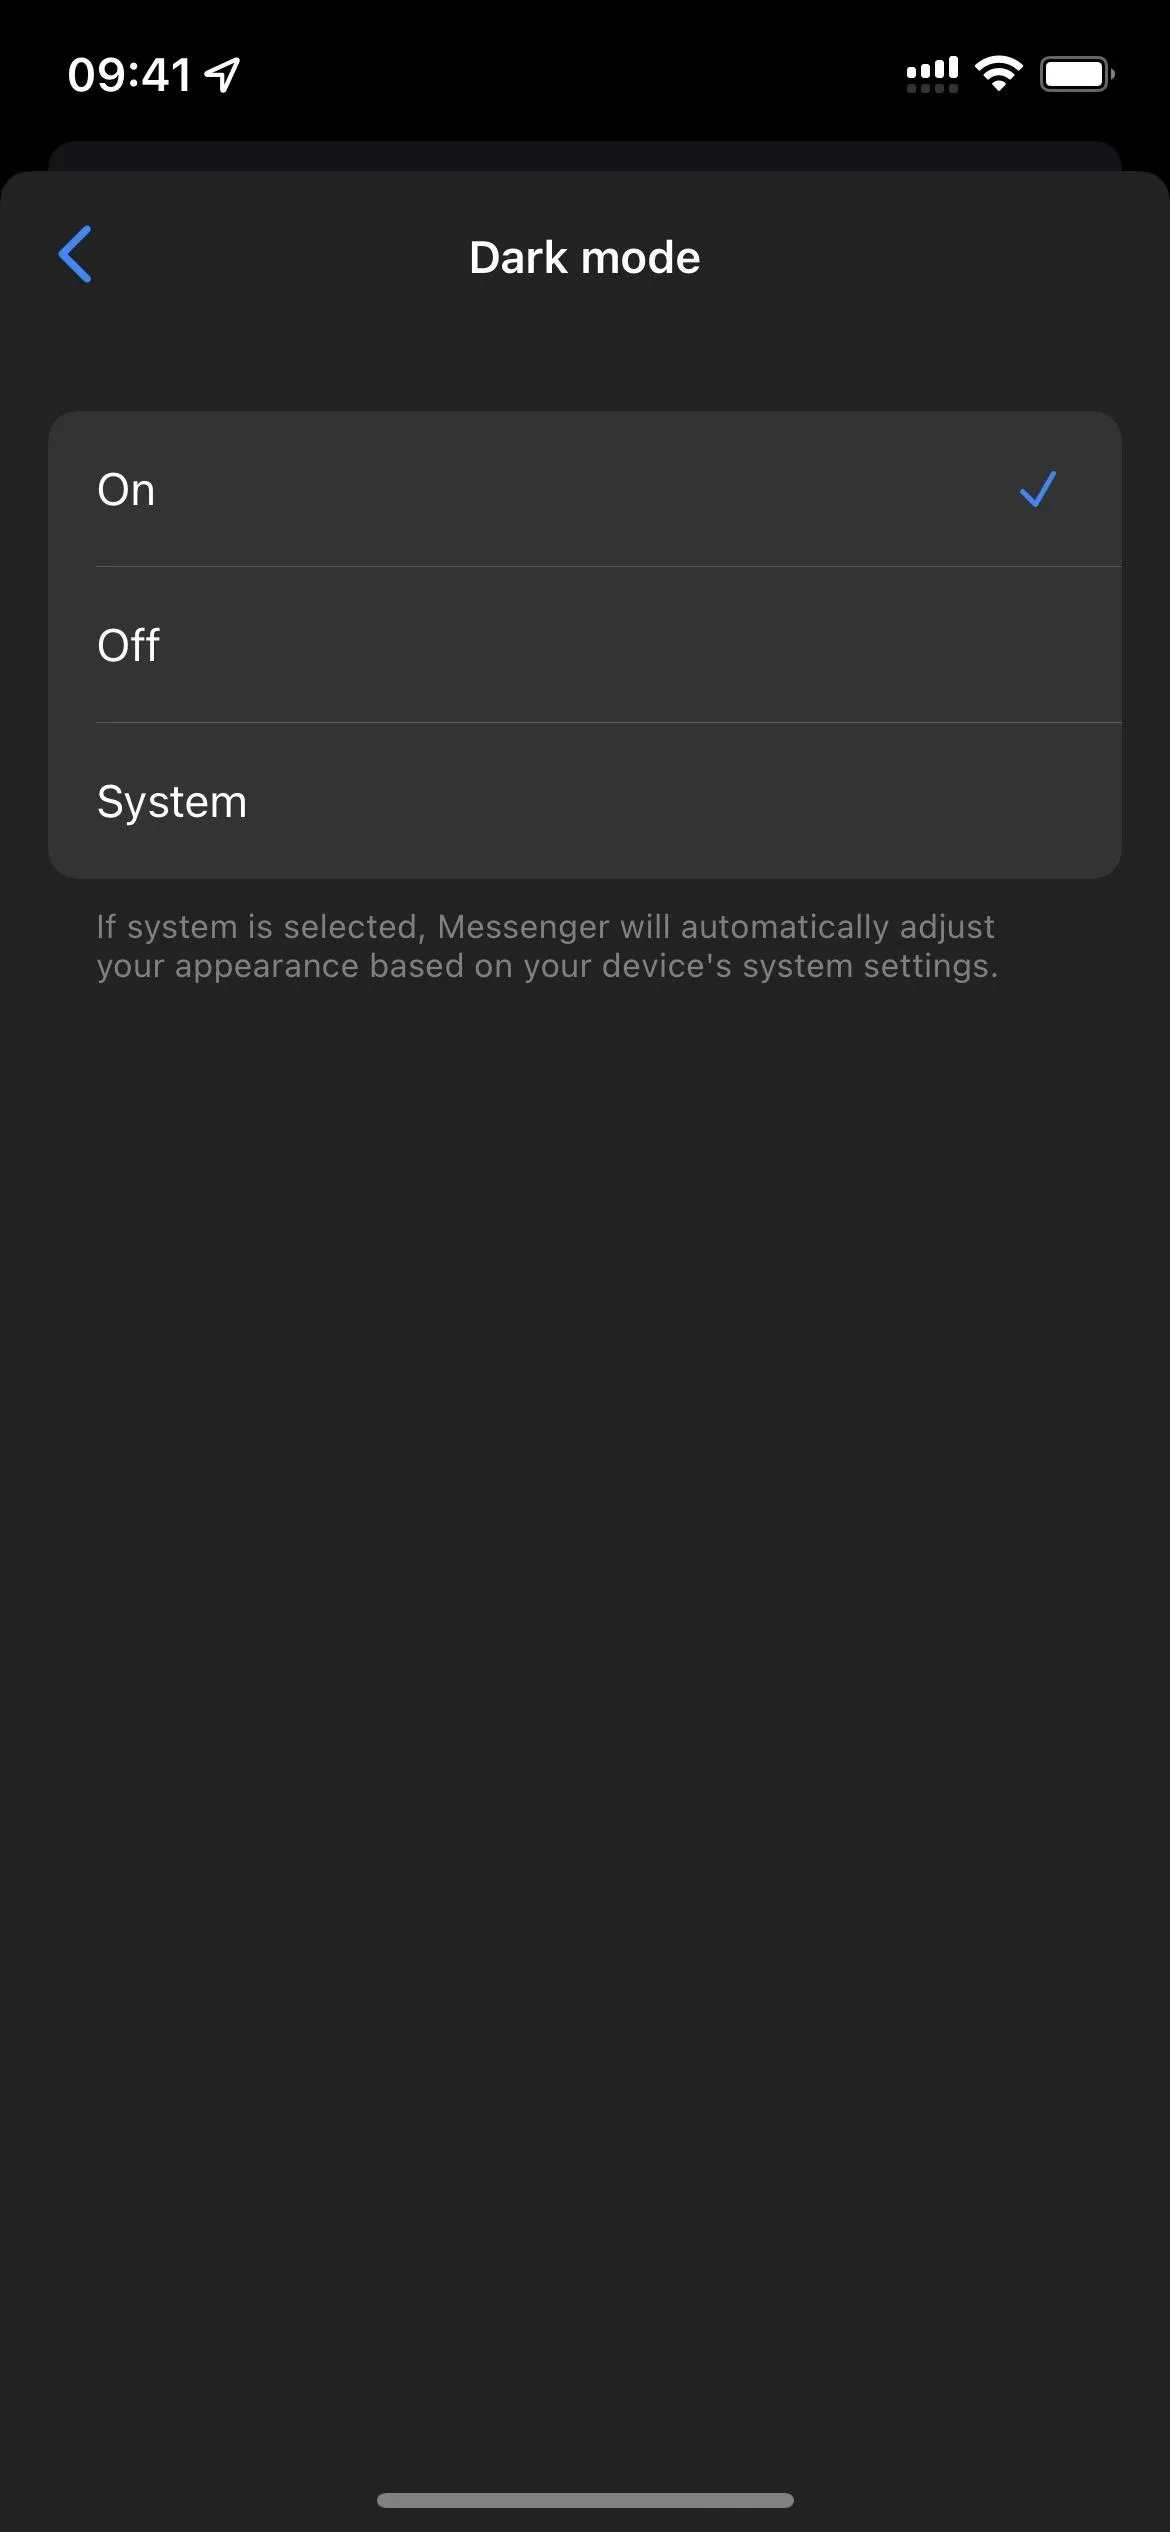
- Messenger: Tap your profile icon from any tab, then choose "Dark mode."
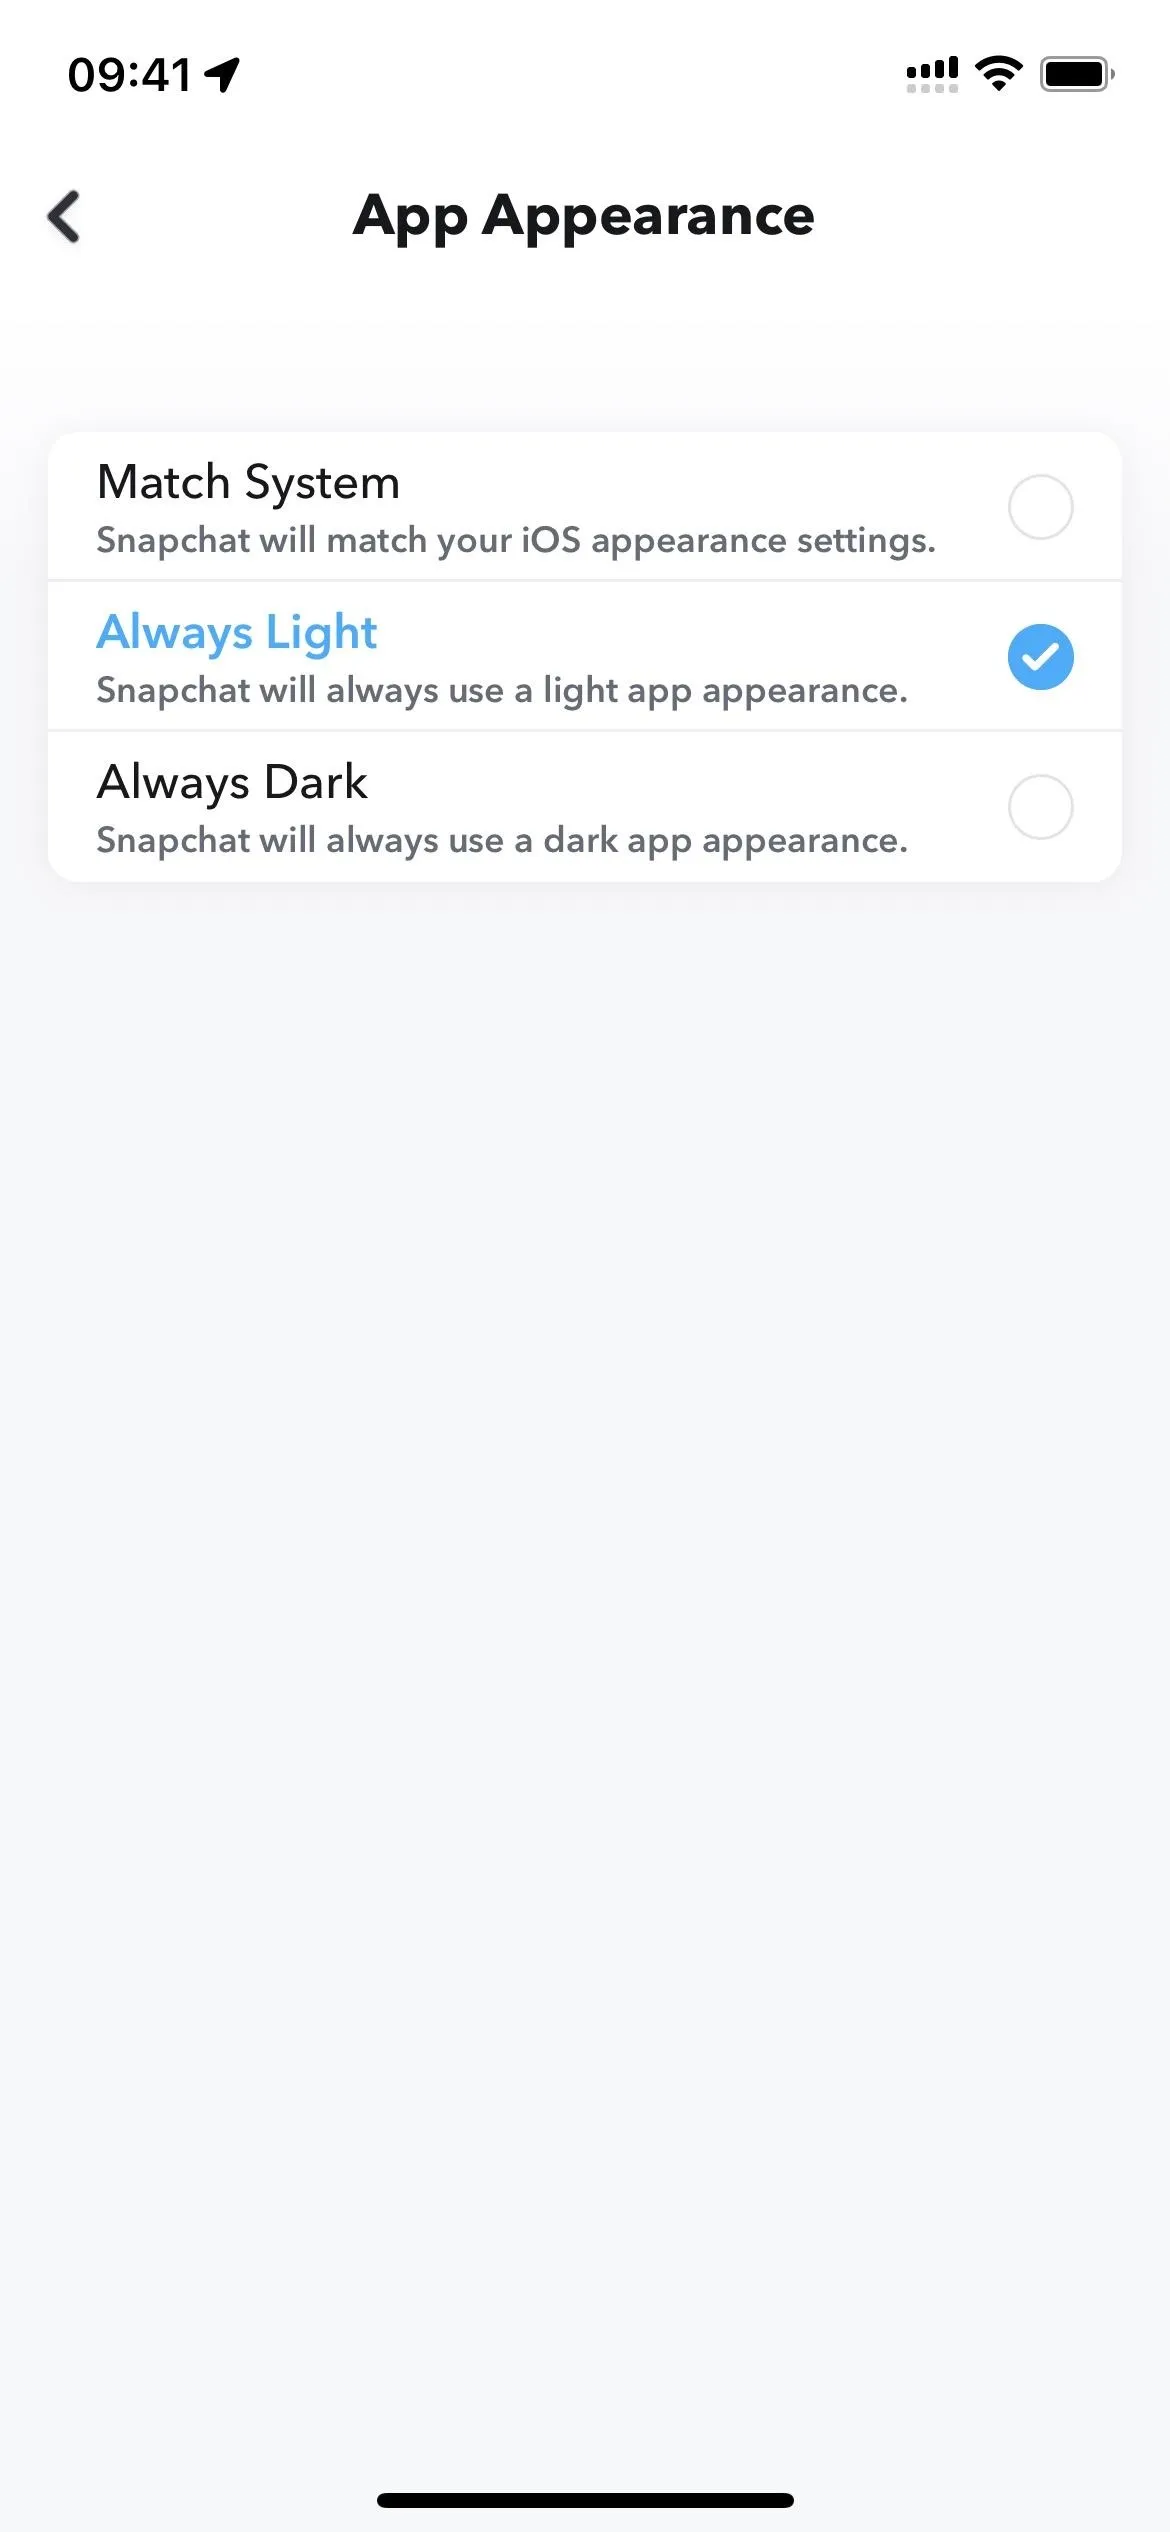
- Snapchat: Tap your profile icon from any tab, then select the settings cog, followed by "App Appearance."
- TikTok: From the Profile tab, tap the three-lined menu icon, then "Dark mode."
- YouTube: Tap your profile icon from any tab except for Shorts, then go to Settings –> General –> Dark theme. (Note that YouTube does not give an option to keep it the same as the system-wide setting, so it's always light or dark depending on your preference.)
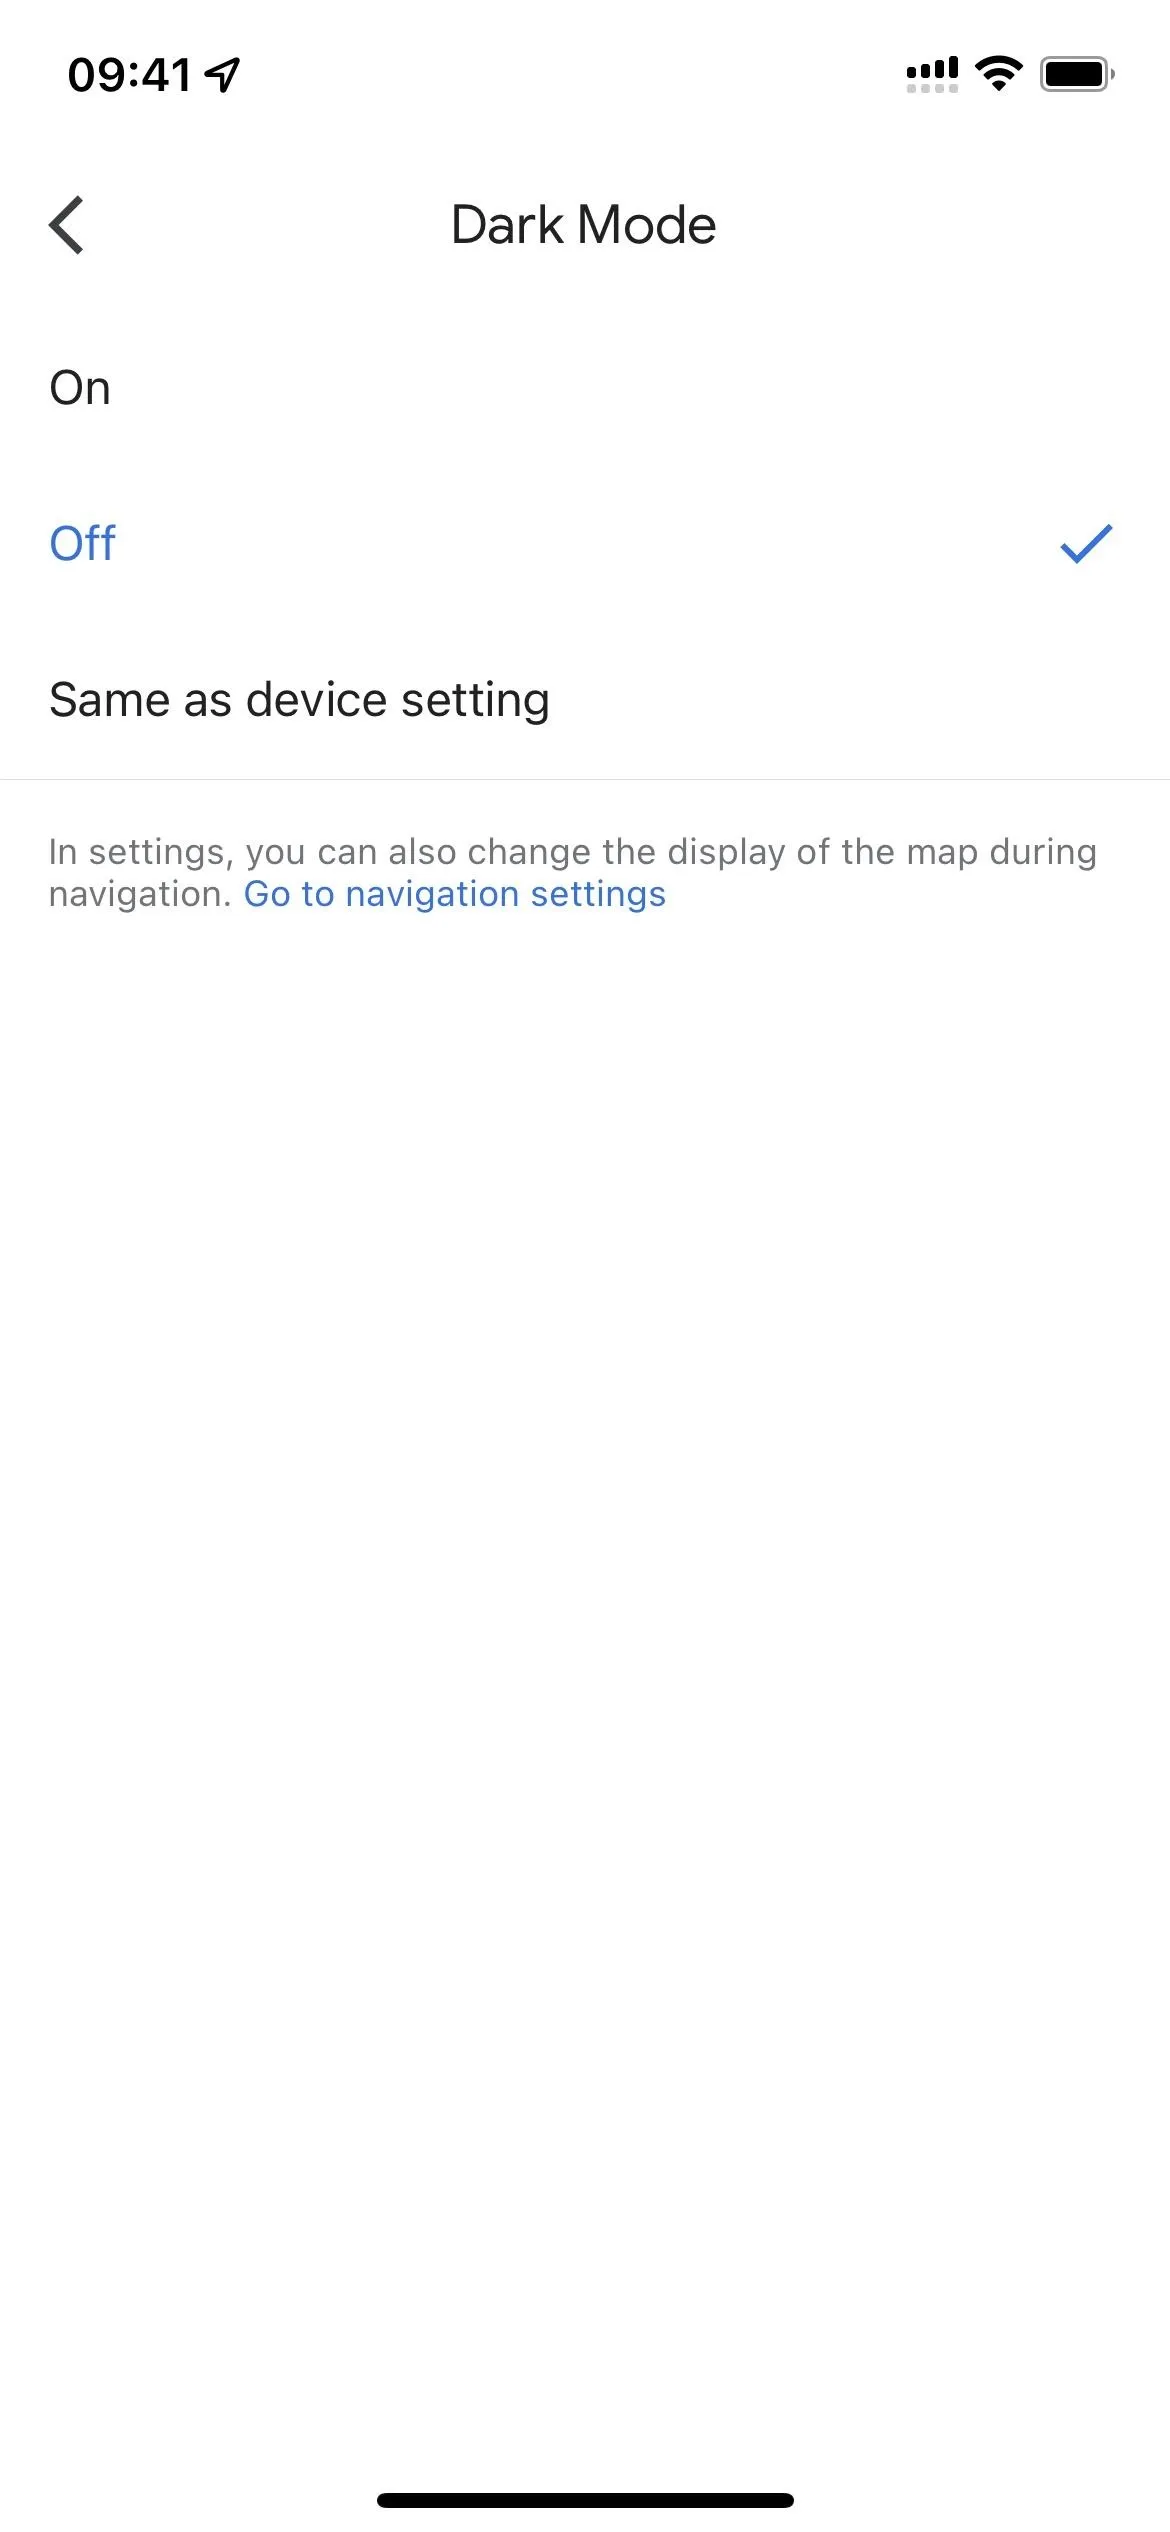
From left to right: Google Maps, Messenger, and Snapchat override switches.
From left to right: Google Maps, Messenger, and Snapchat override switches.
Create Your Own Override Switches for Apps
When the app itself doesn't have an override for the device-wide Dark Mode setting, you'll need to build an automation that turns on Dark or Light Mode for all the apps you select. Then, you'll need another for when you close those apps, which will switch the appearance back to whatever it was before opening the apps. That way, assigning apps to a specific look won't affect your system-wide setting.
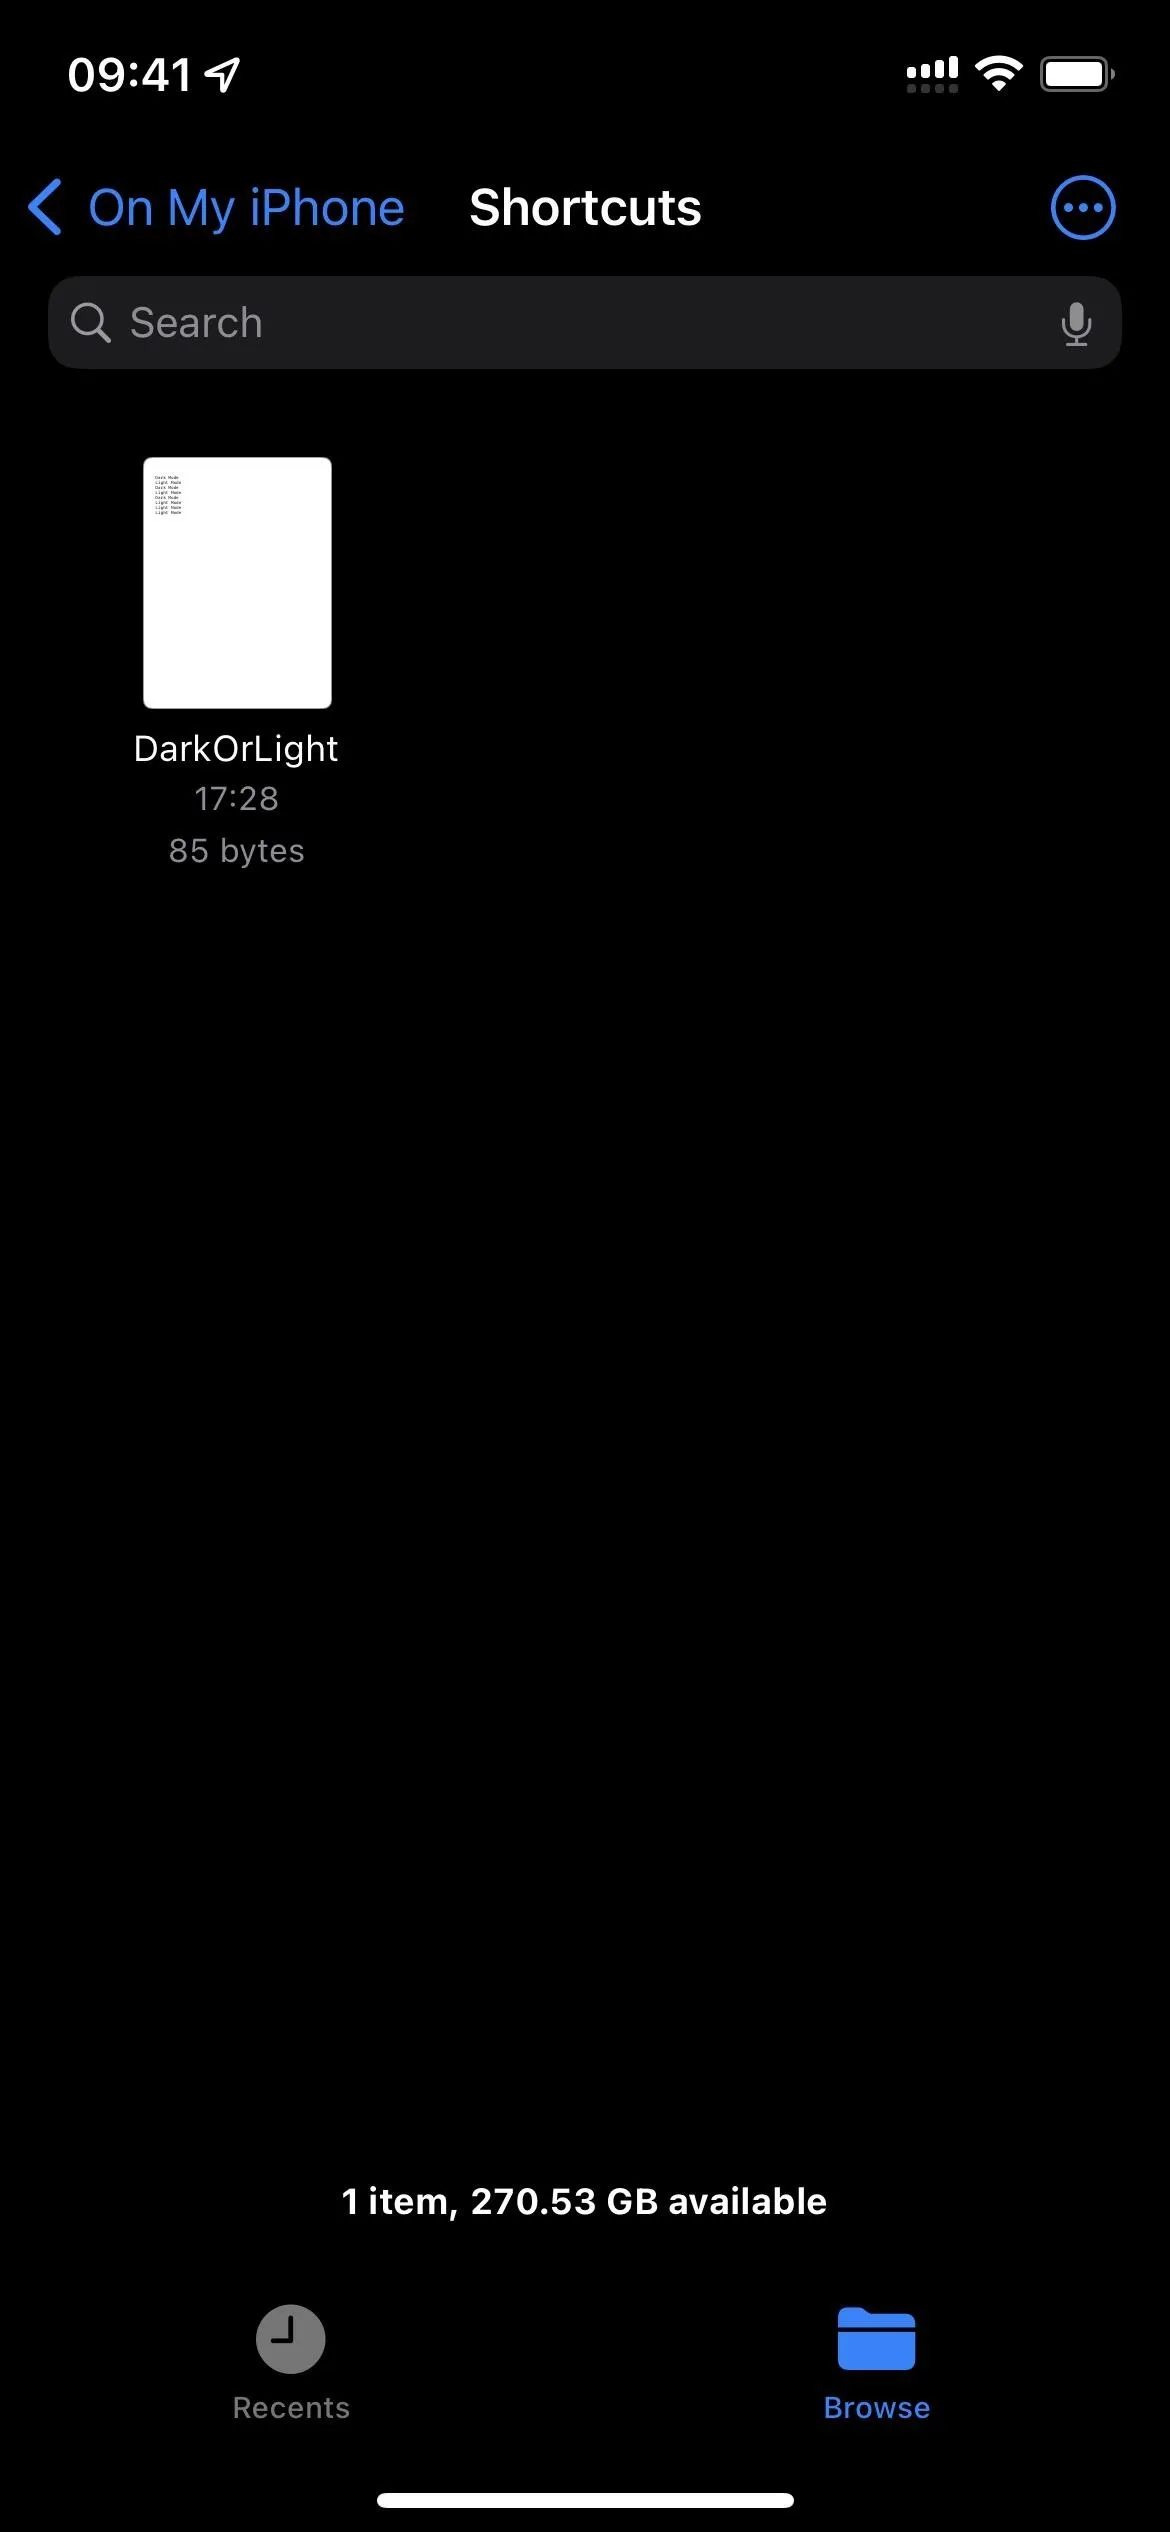
Create a Blank TXT or RTF Document in Files
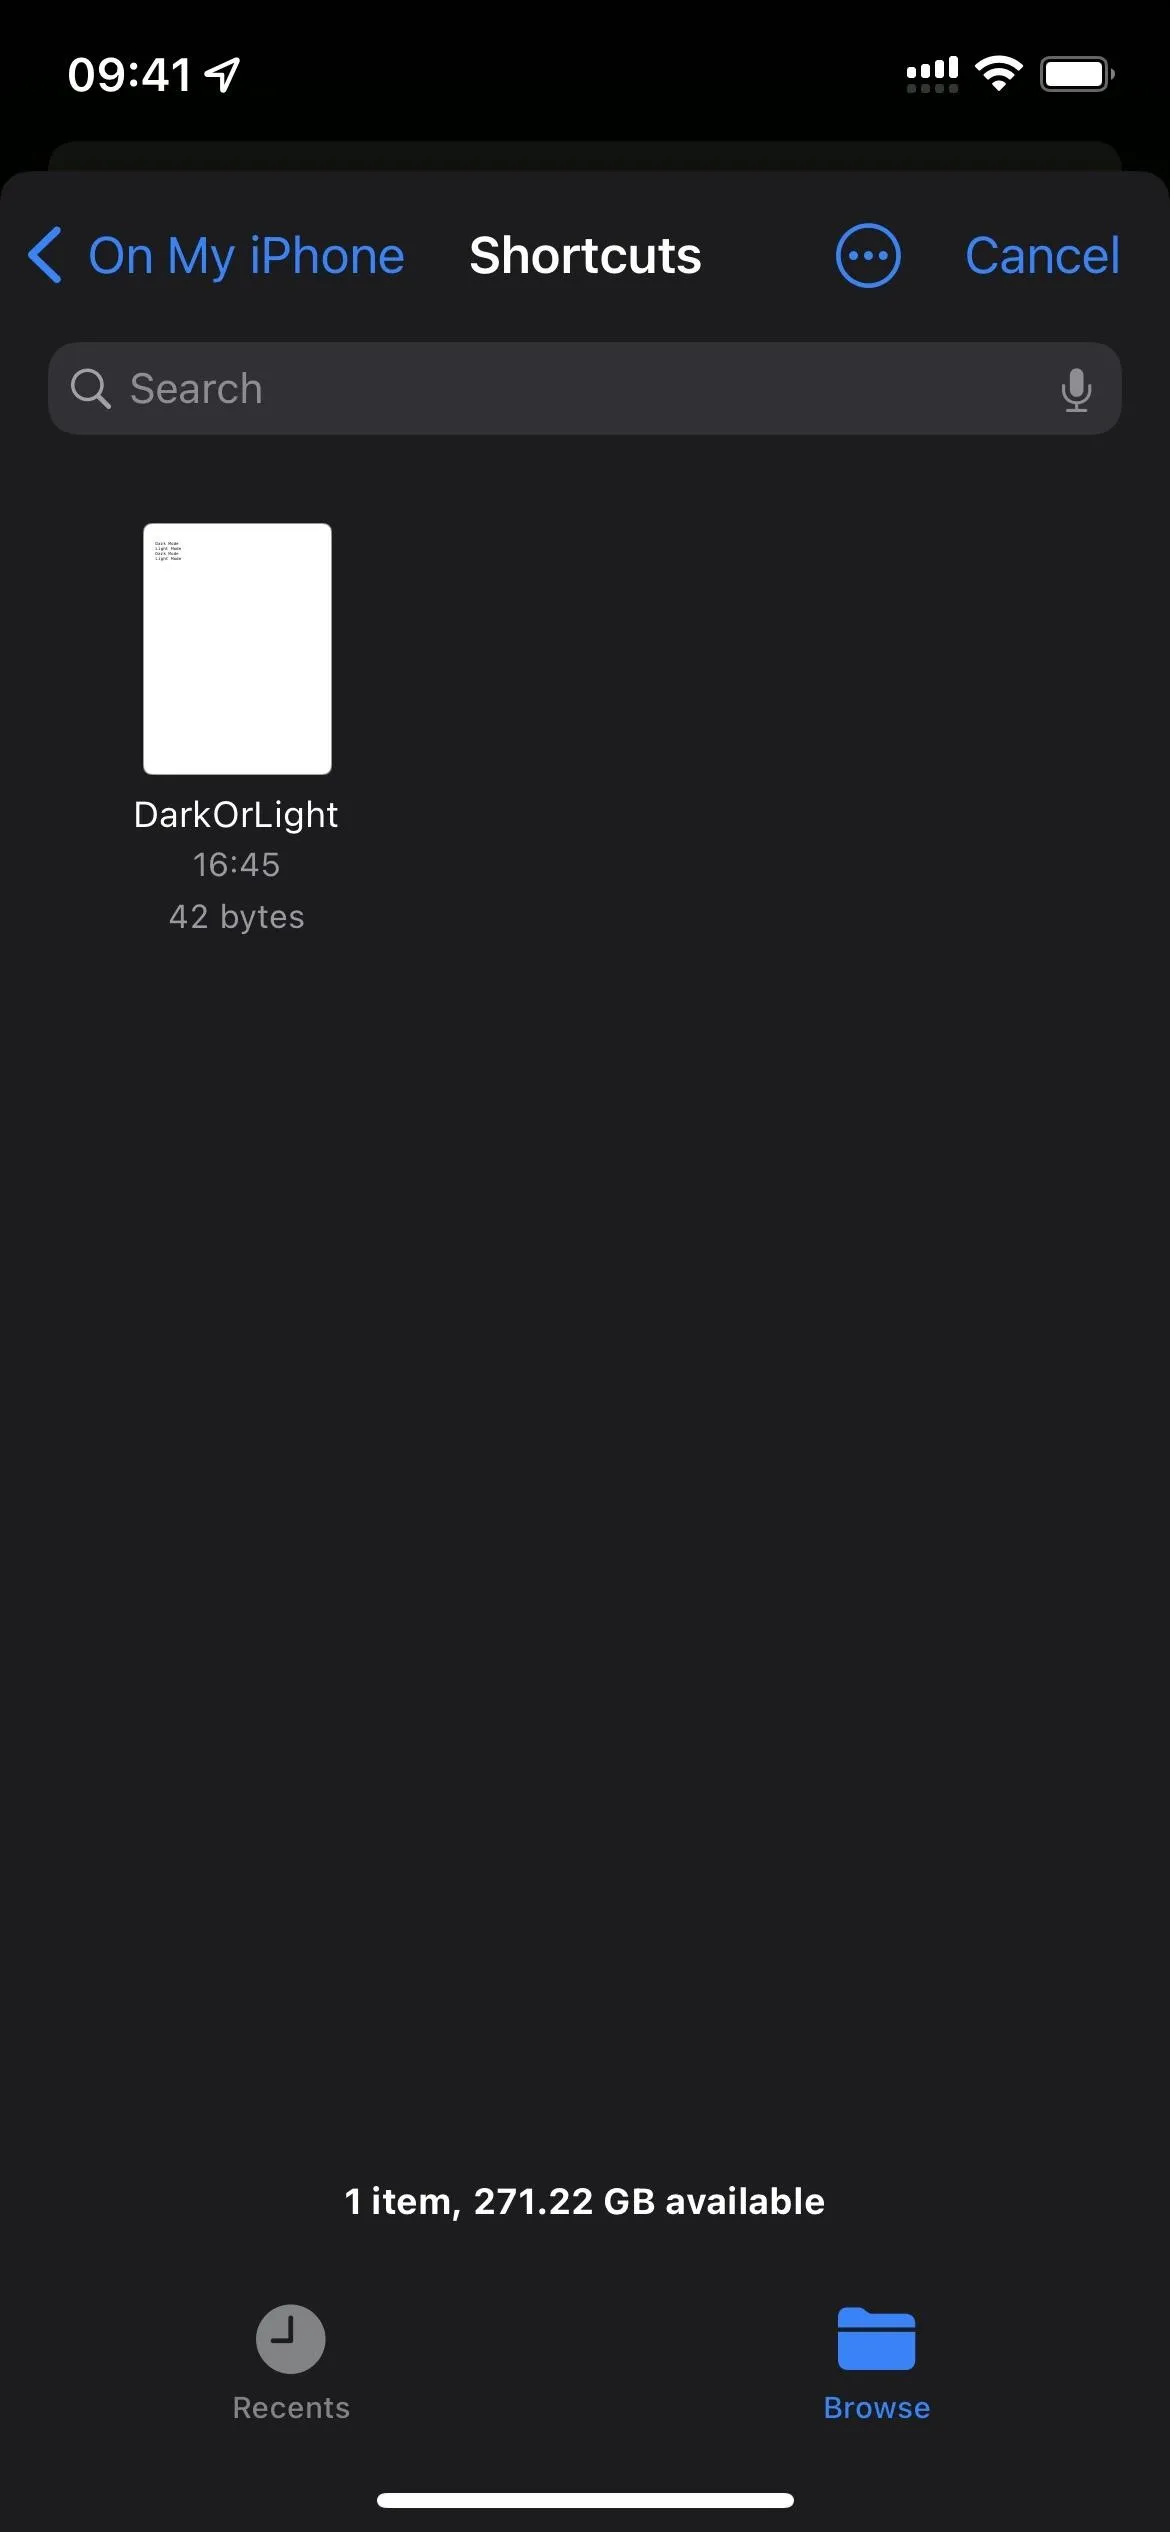
Before making the automations, create a new .txt or .rtf file called something like "DarkOrLight," then move it to a specific location in the Files apps. Since you'll want the automations to work whether you have internet access or not, I'd suggest putting it in a "Shortcuts" folder in the "On My iPhone" directory instead of on iCloud somewhere.
You can create a blank .txt or .rtf file on your computer, then share it with your iPhone. Or you could use an app like Pages or Documents by Readdle on your iPhone and save it directly to your chosen directory in Files.
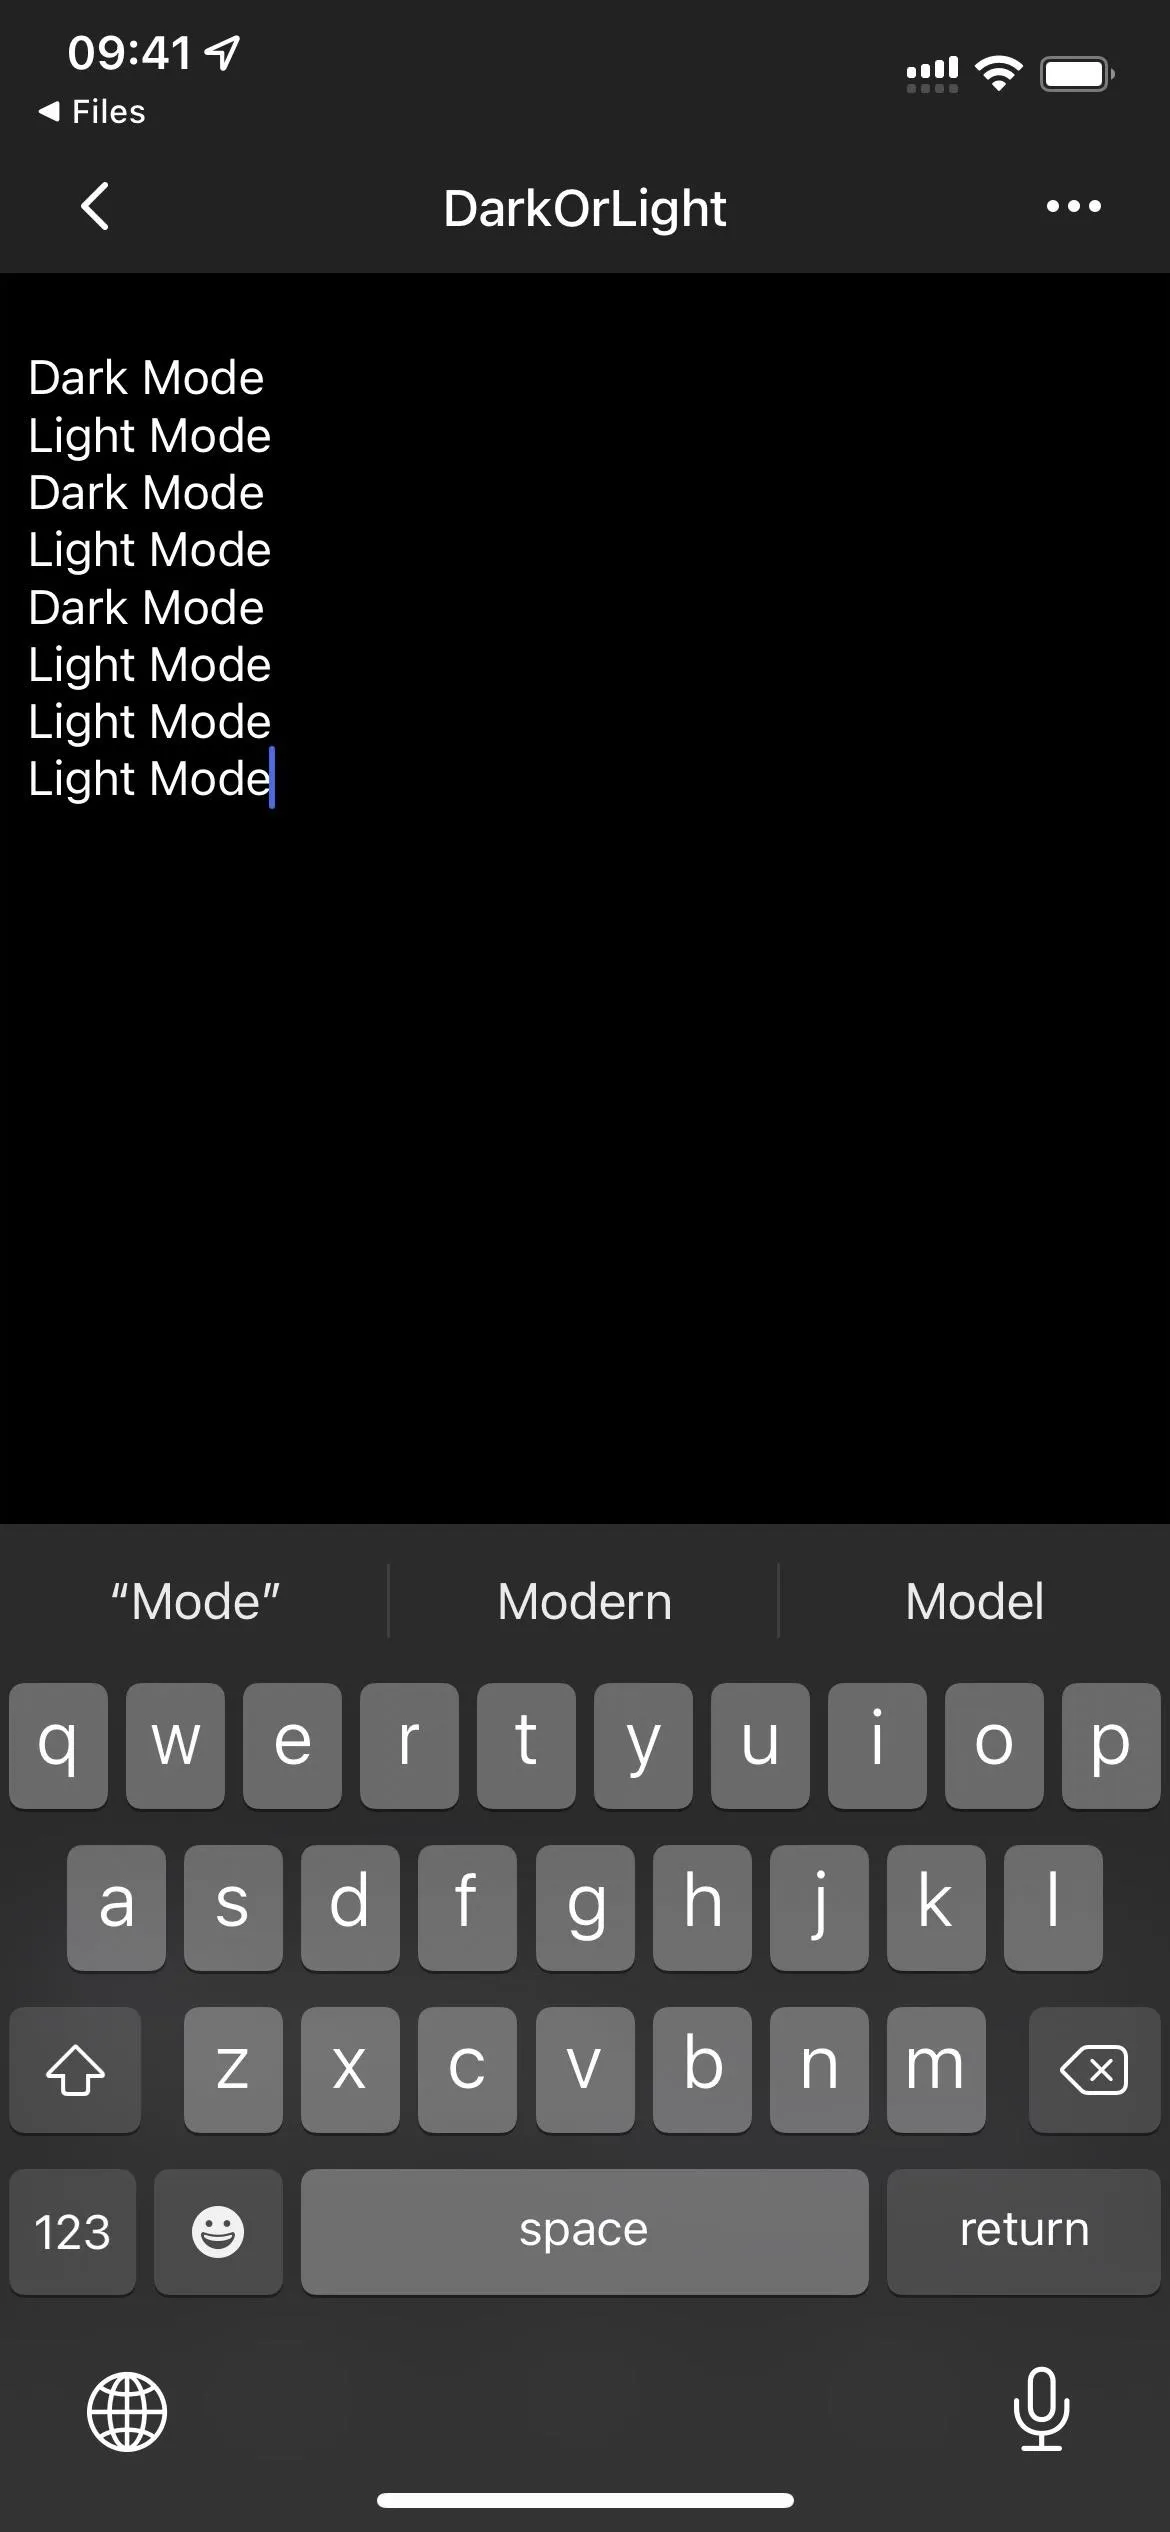
The first automation will use the file to write the name of the current appearance as either "Dark Mode" or "Light Mode" before the app that opens switches to its assigned Dark or Light Mode. Then, the second automation will review that file whenever the app closes, and it will switch to whatever appearance it reads.
Set Apps to Always Use Dark or Light Mode
Now it's time for the first automation. This is where you choose either Dark Mode or Light Mode and assign all of the apps you want to your desired appearance. If you want some apps to stay dark while some always look light, you'll want to build separate automations for each. The automation will also detect the previously used appearance and record the state in the document that the second automation will reference.
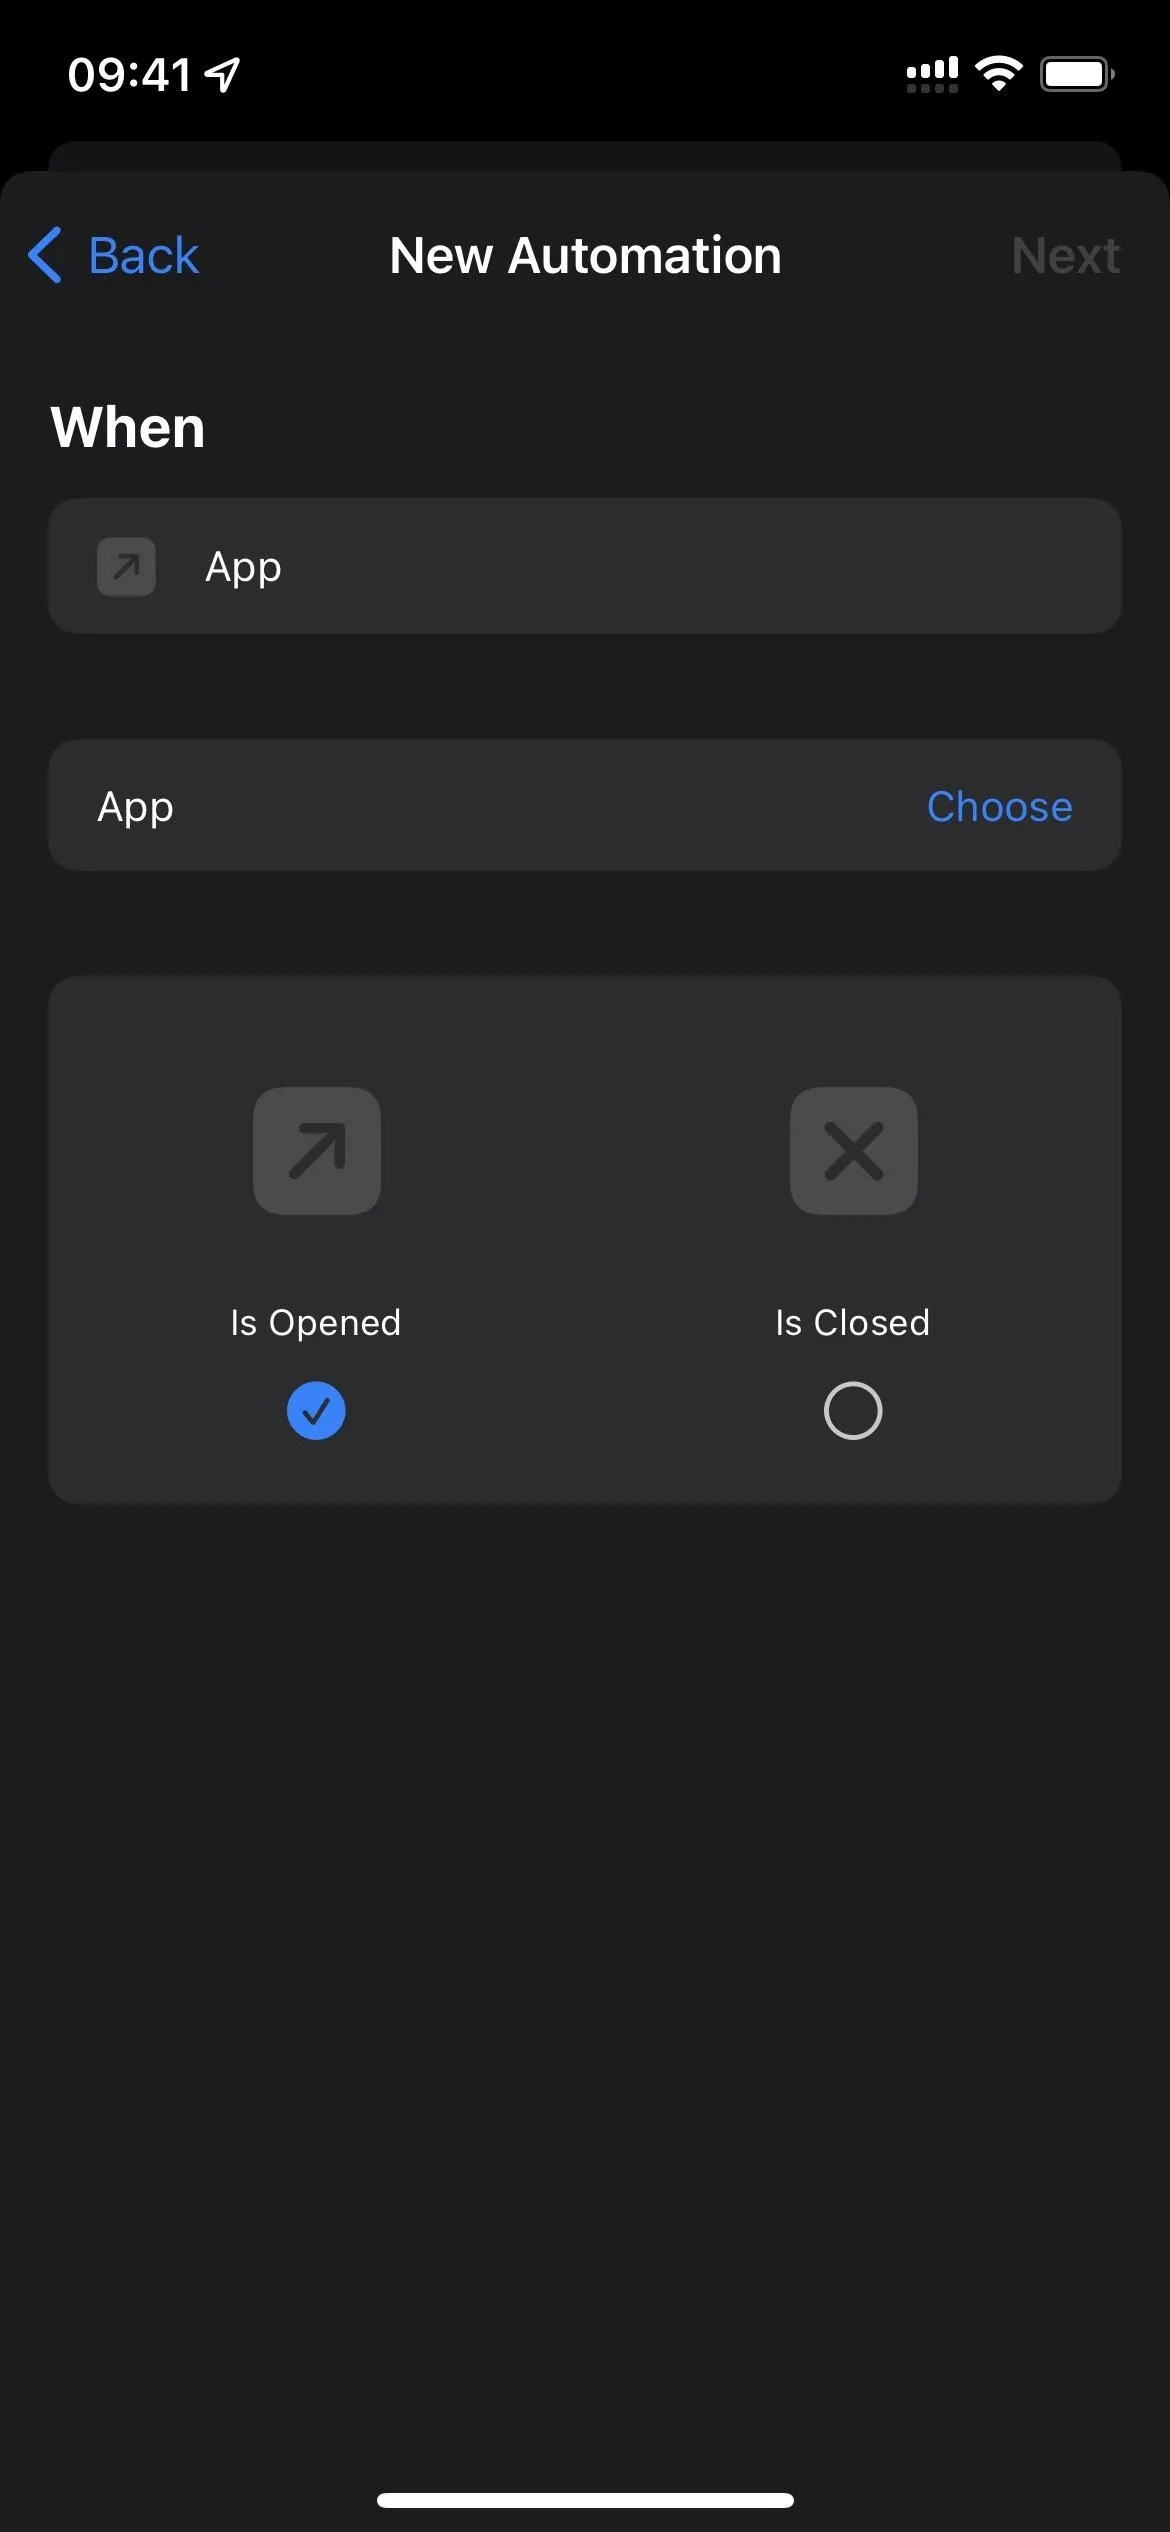
- Open the Shortcuts app.
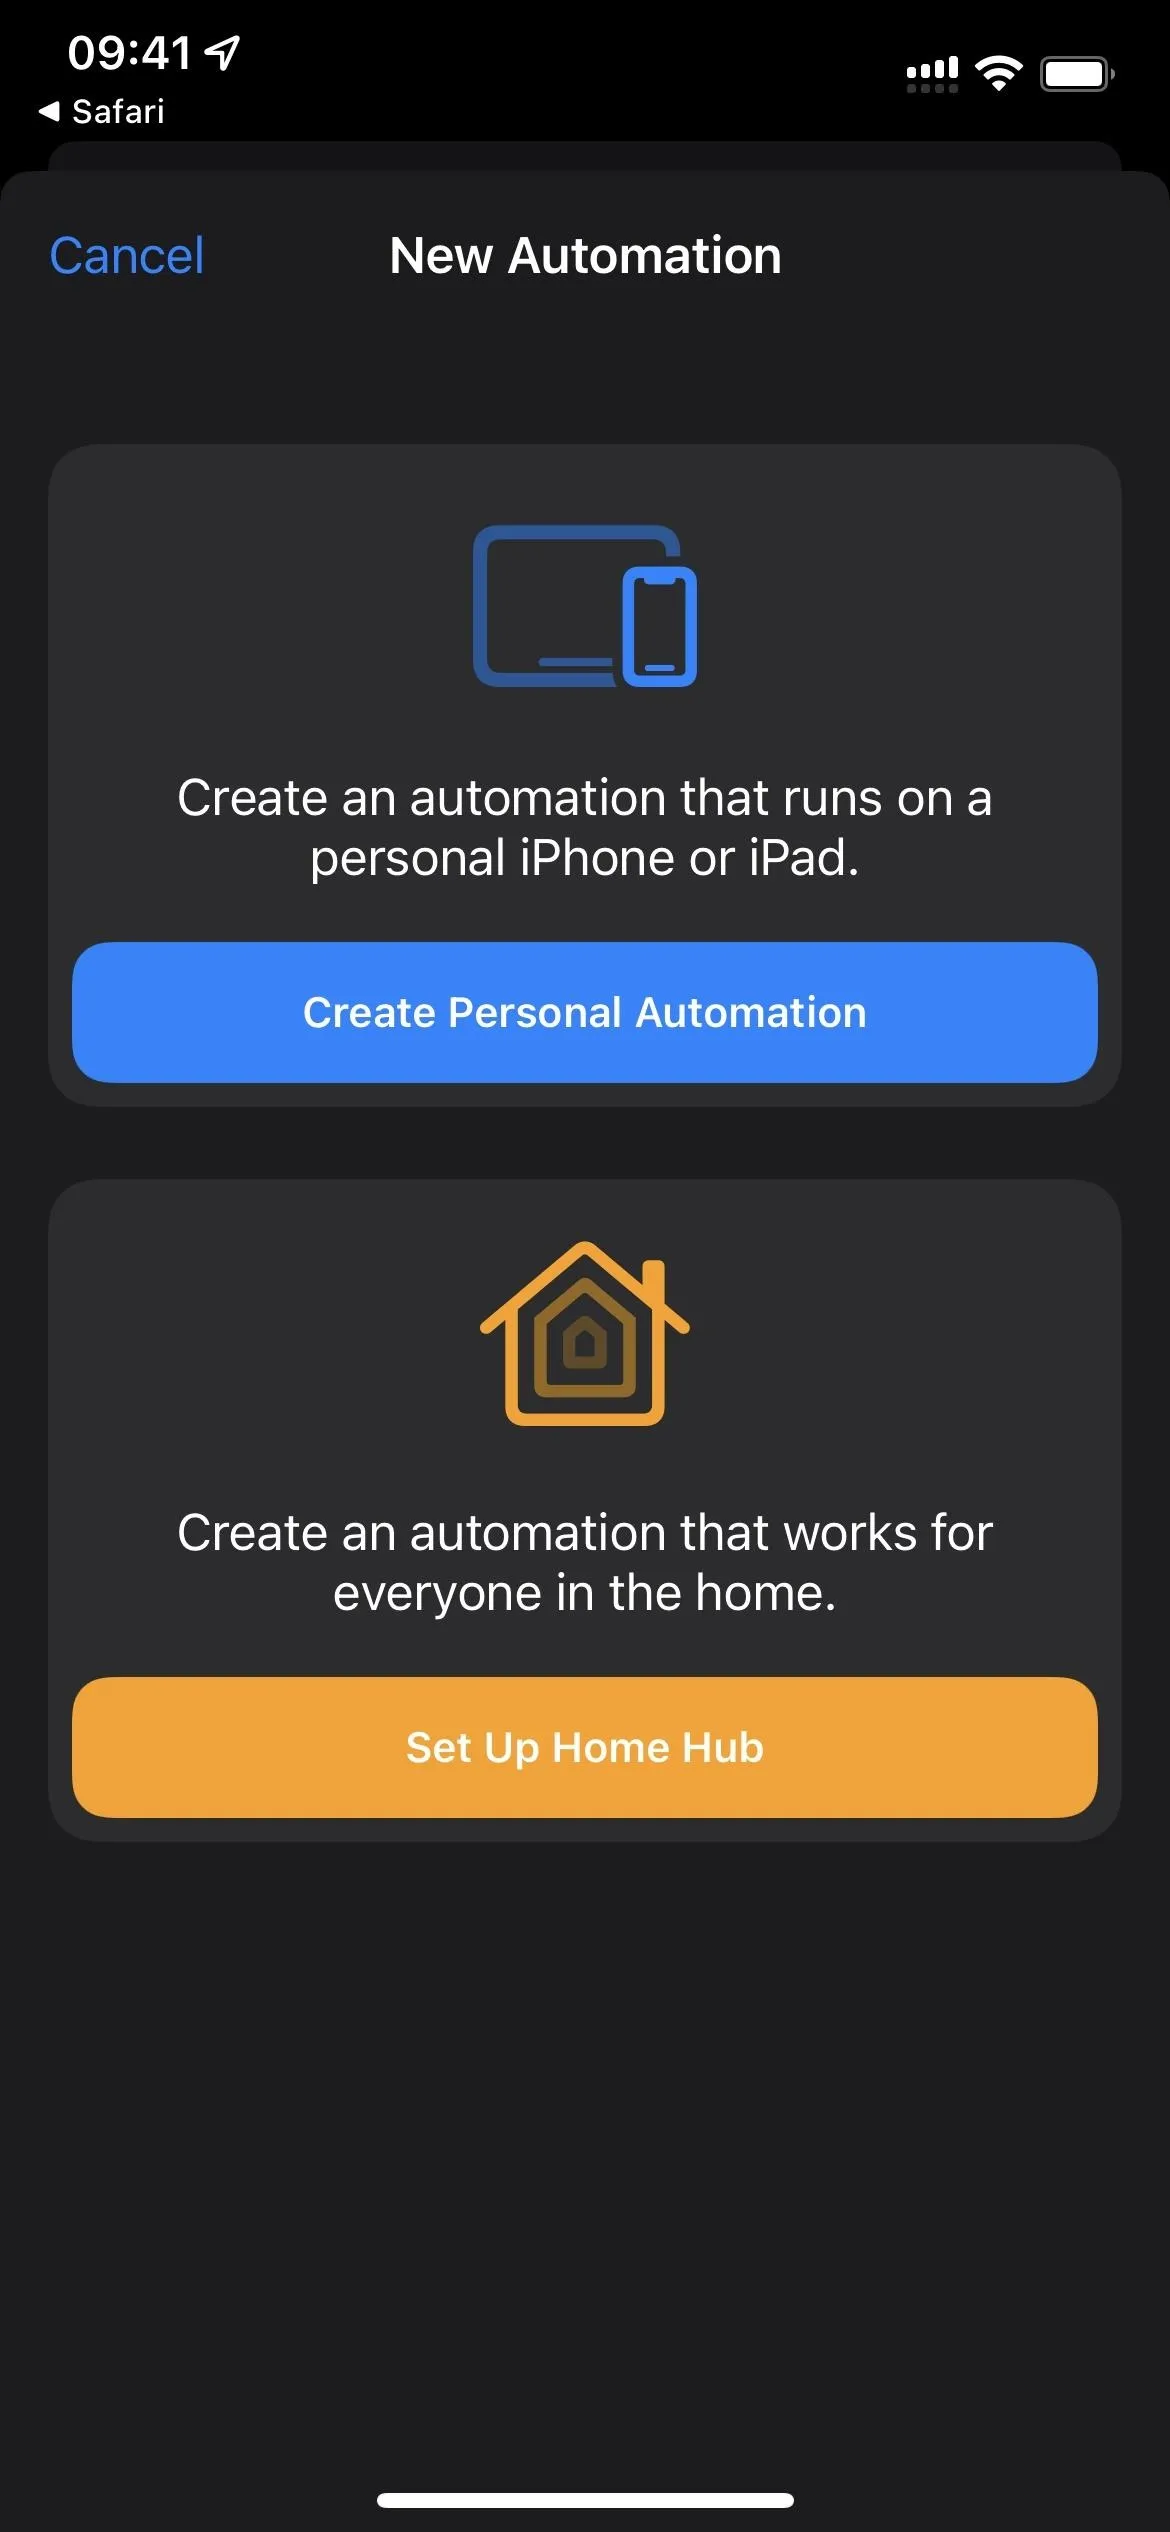
- Start a new personal automation from the "Automation" tab.
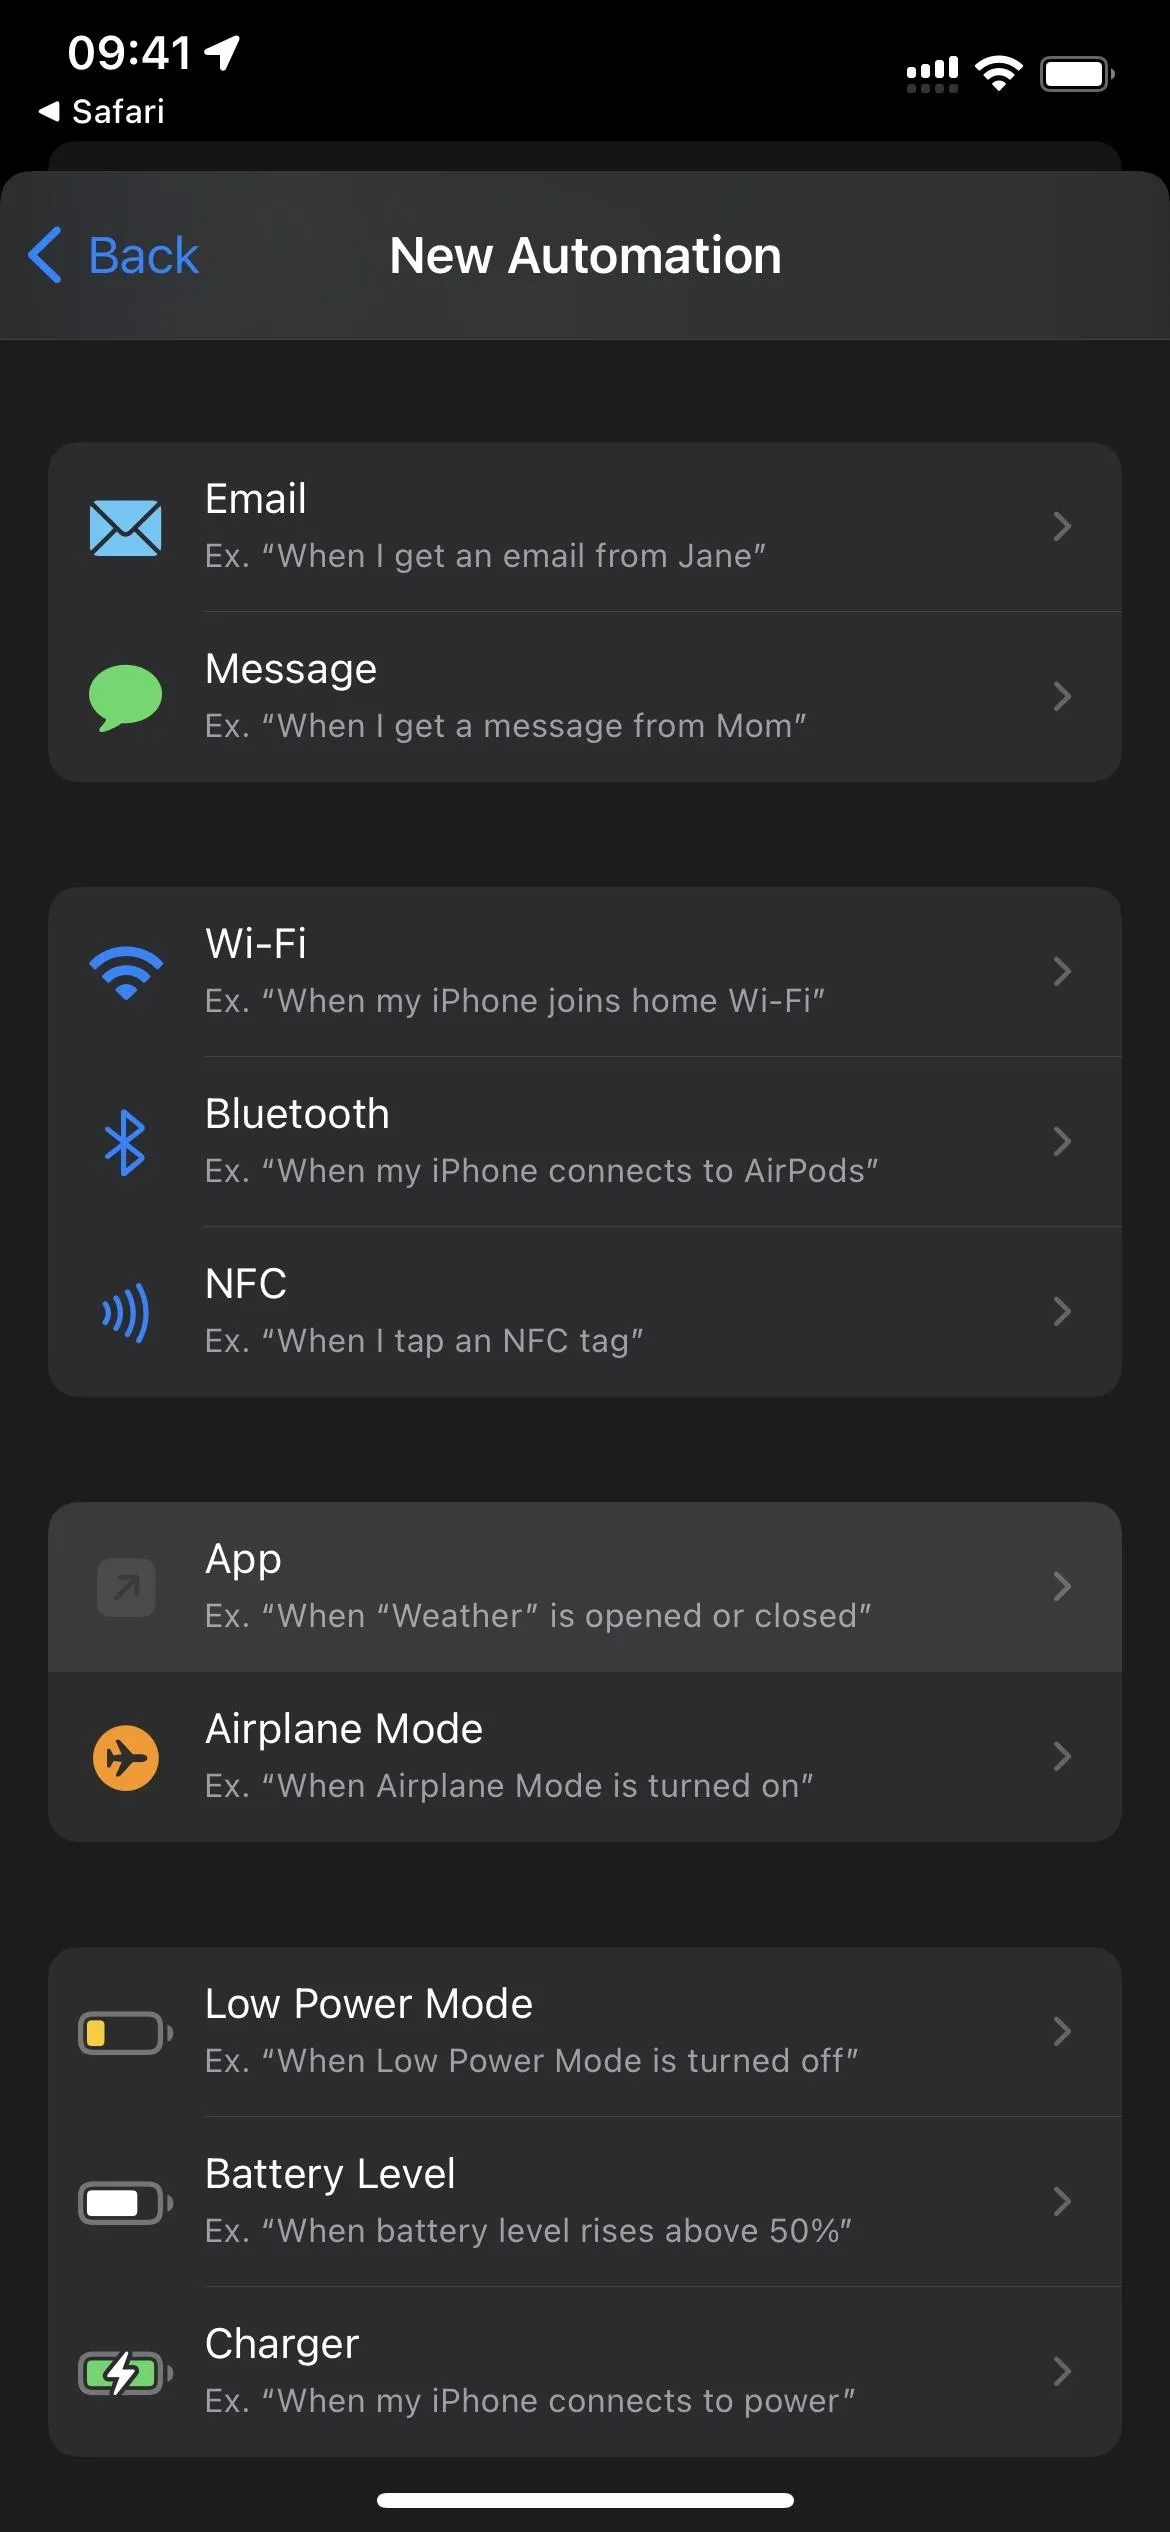
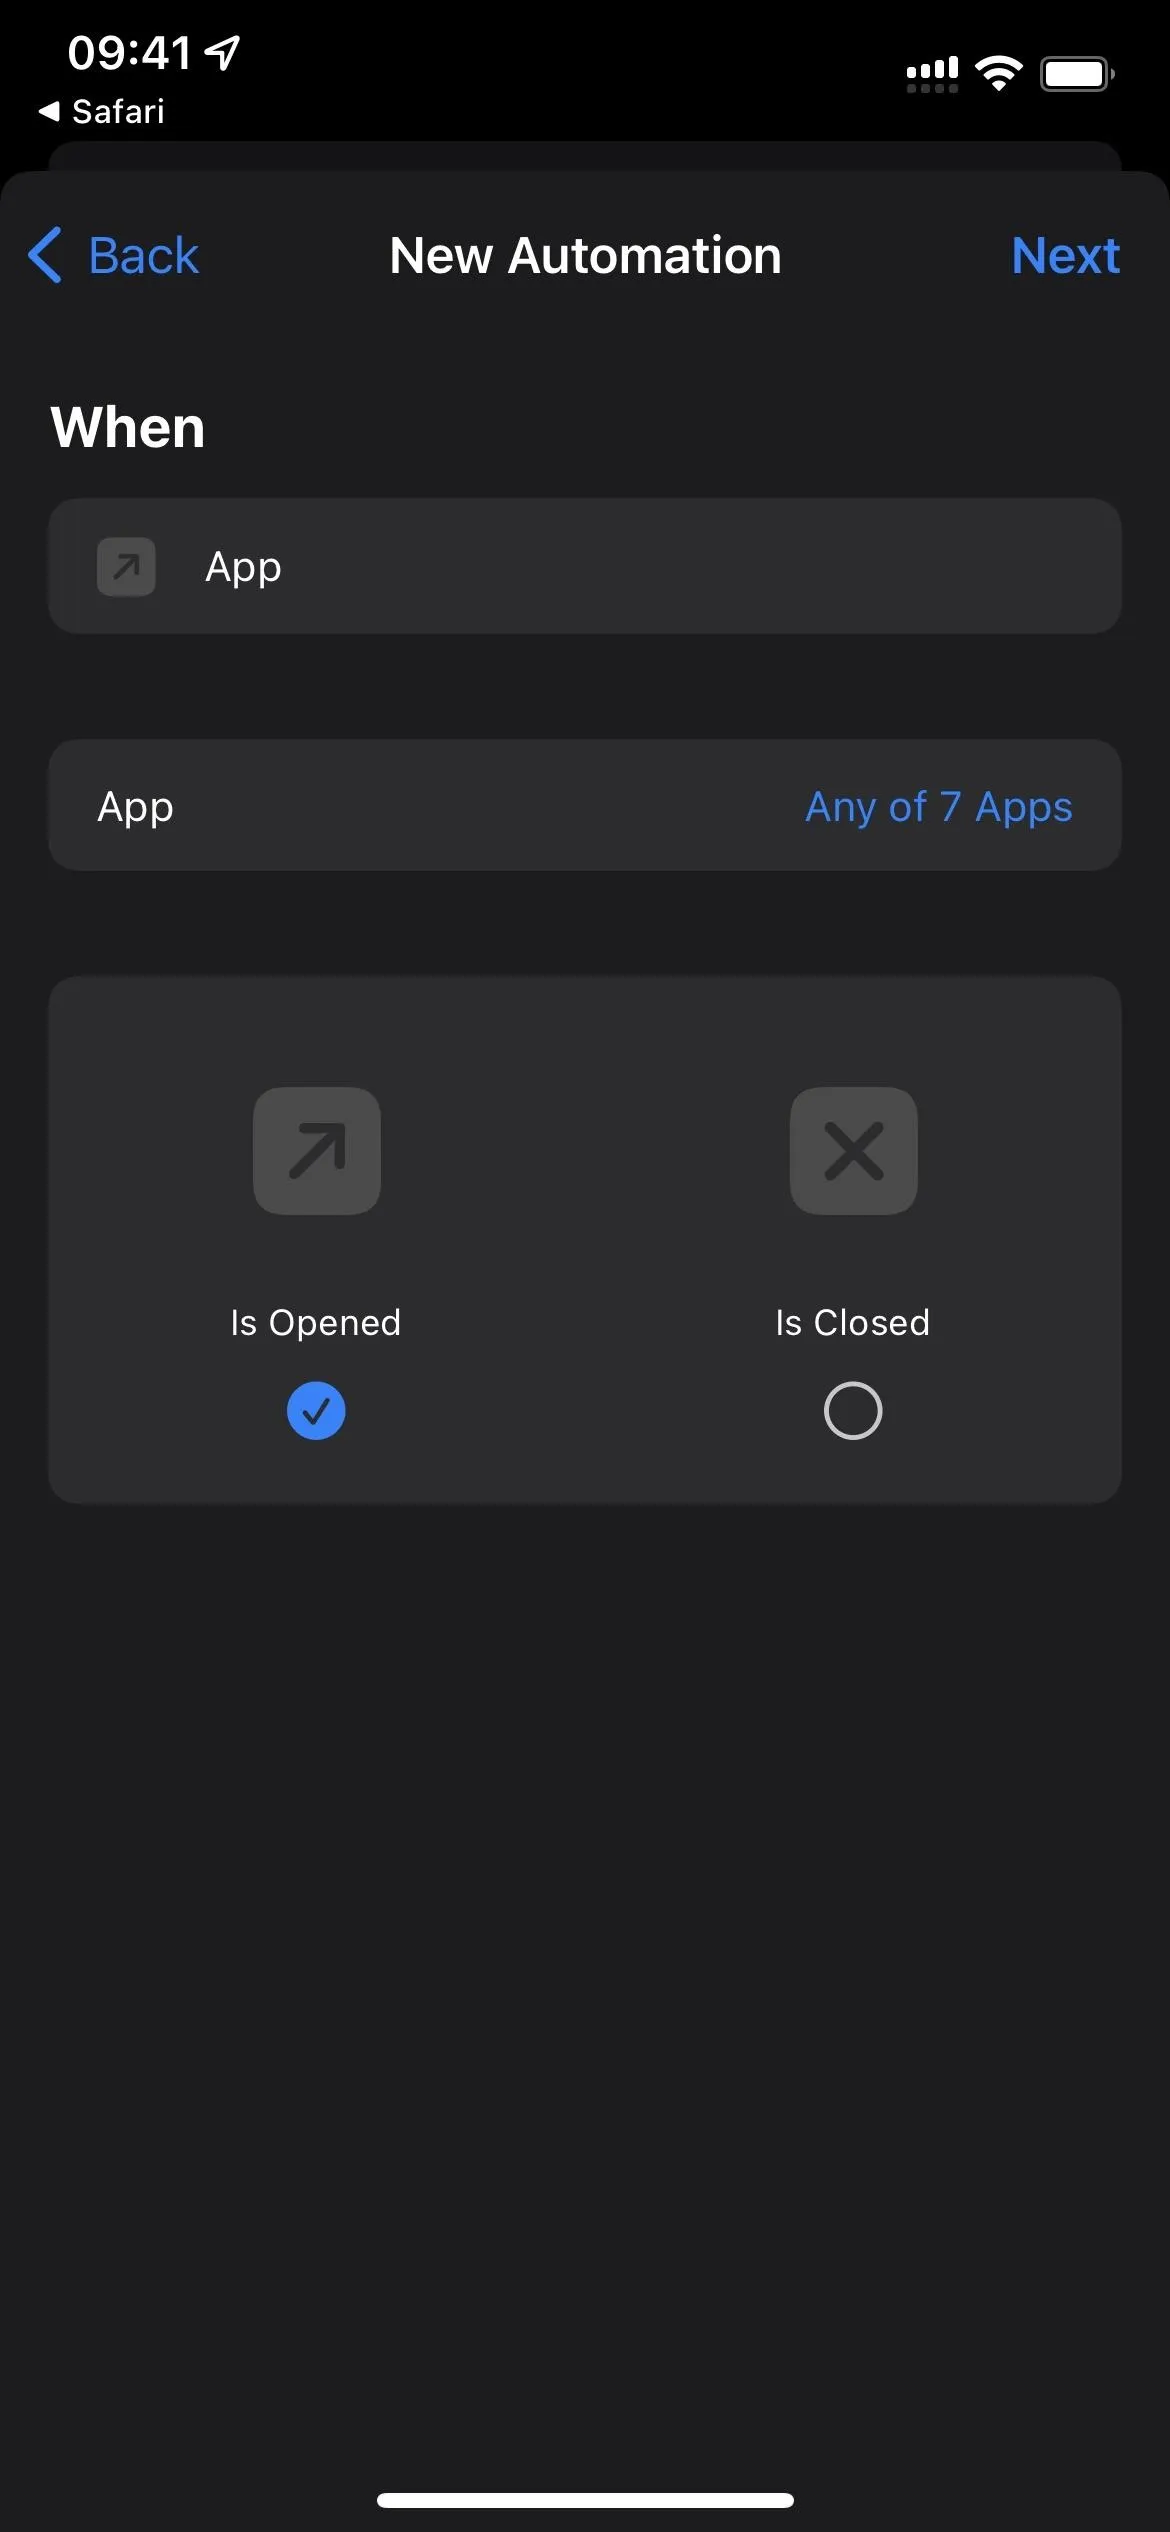
- Choose "App" as the trigger.

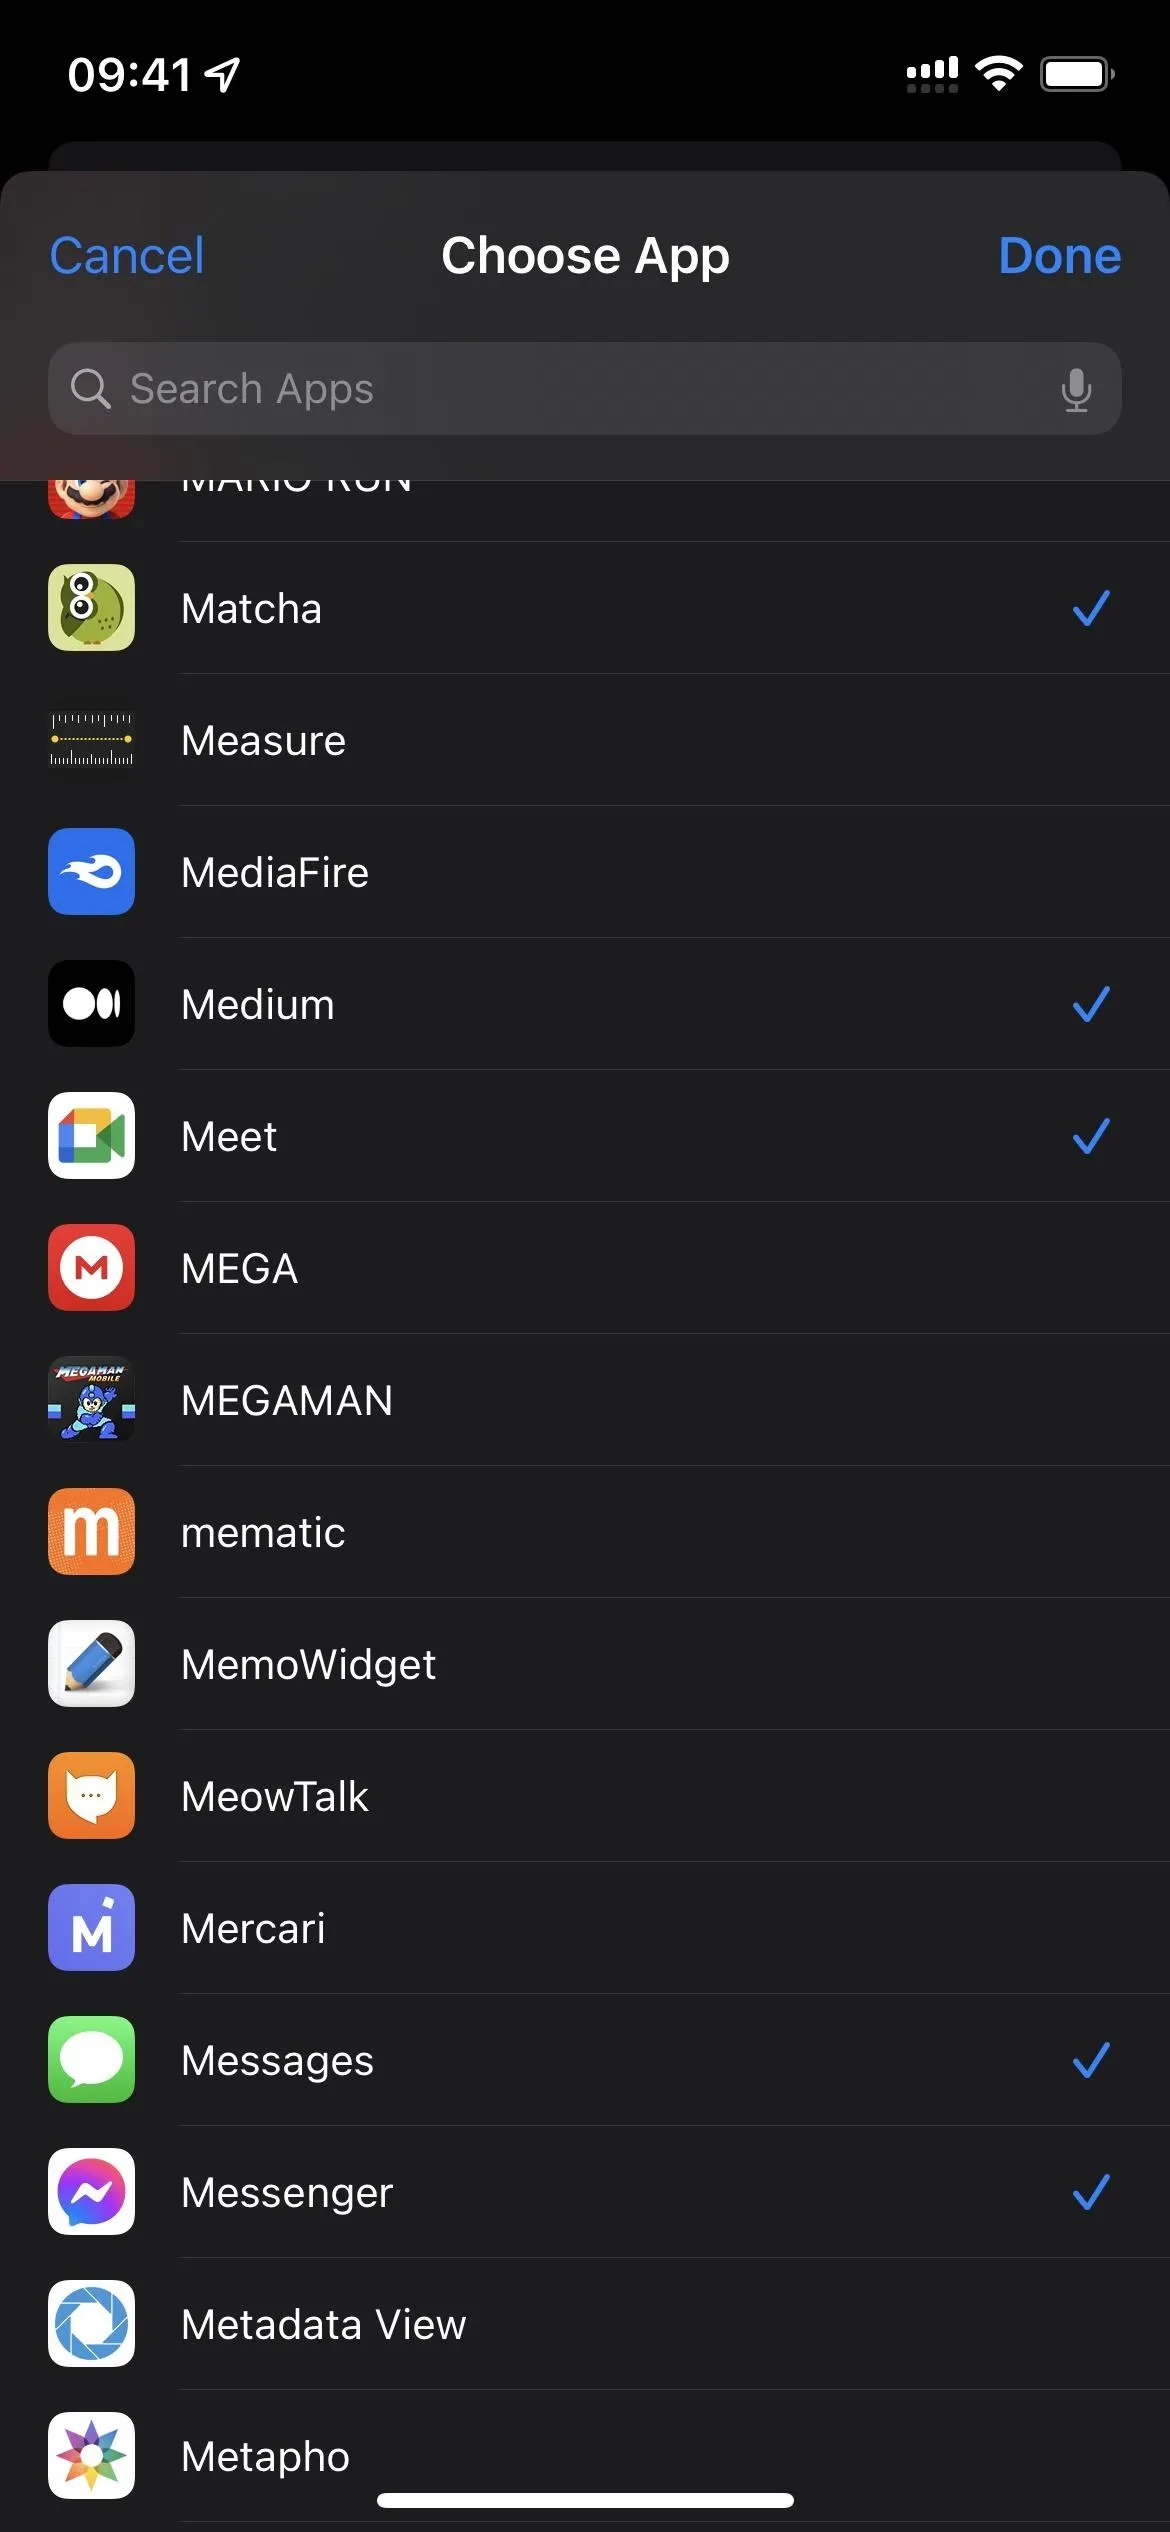
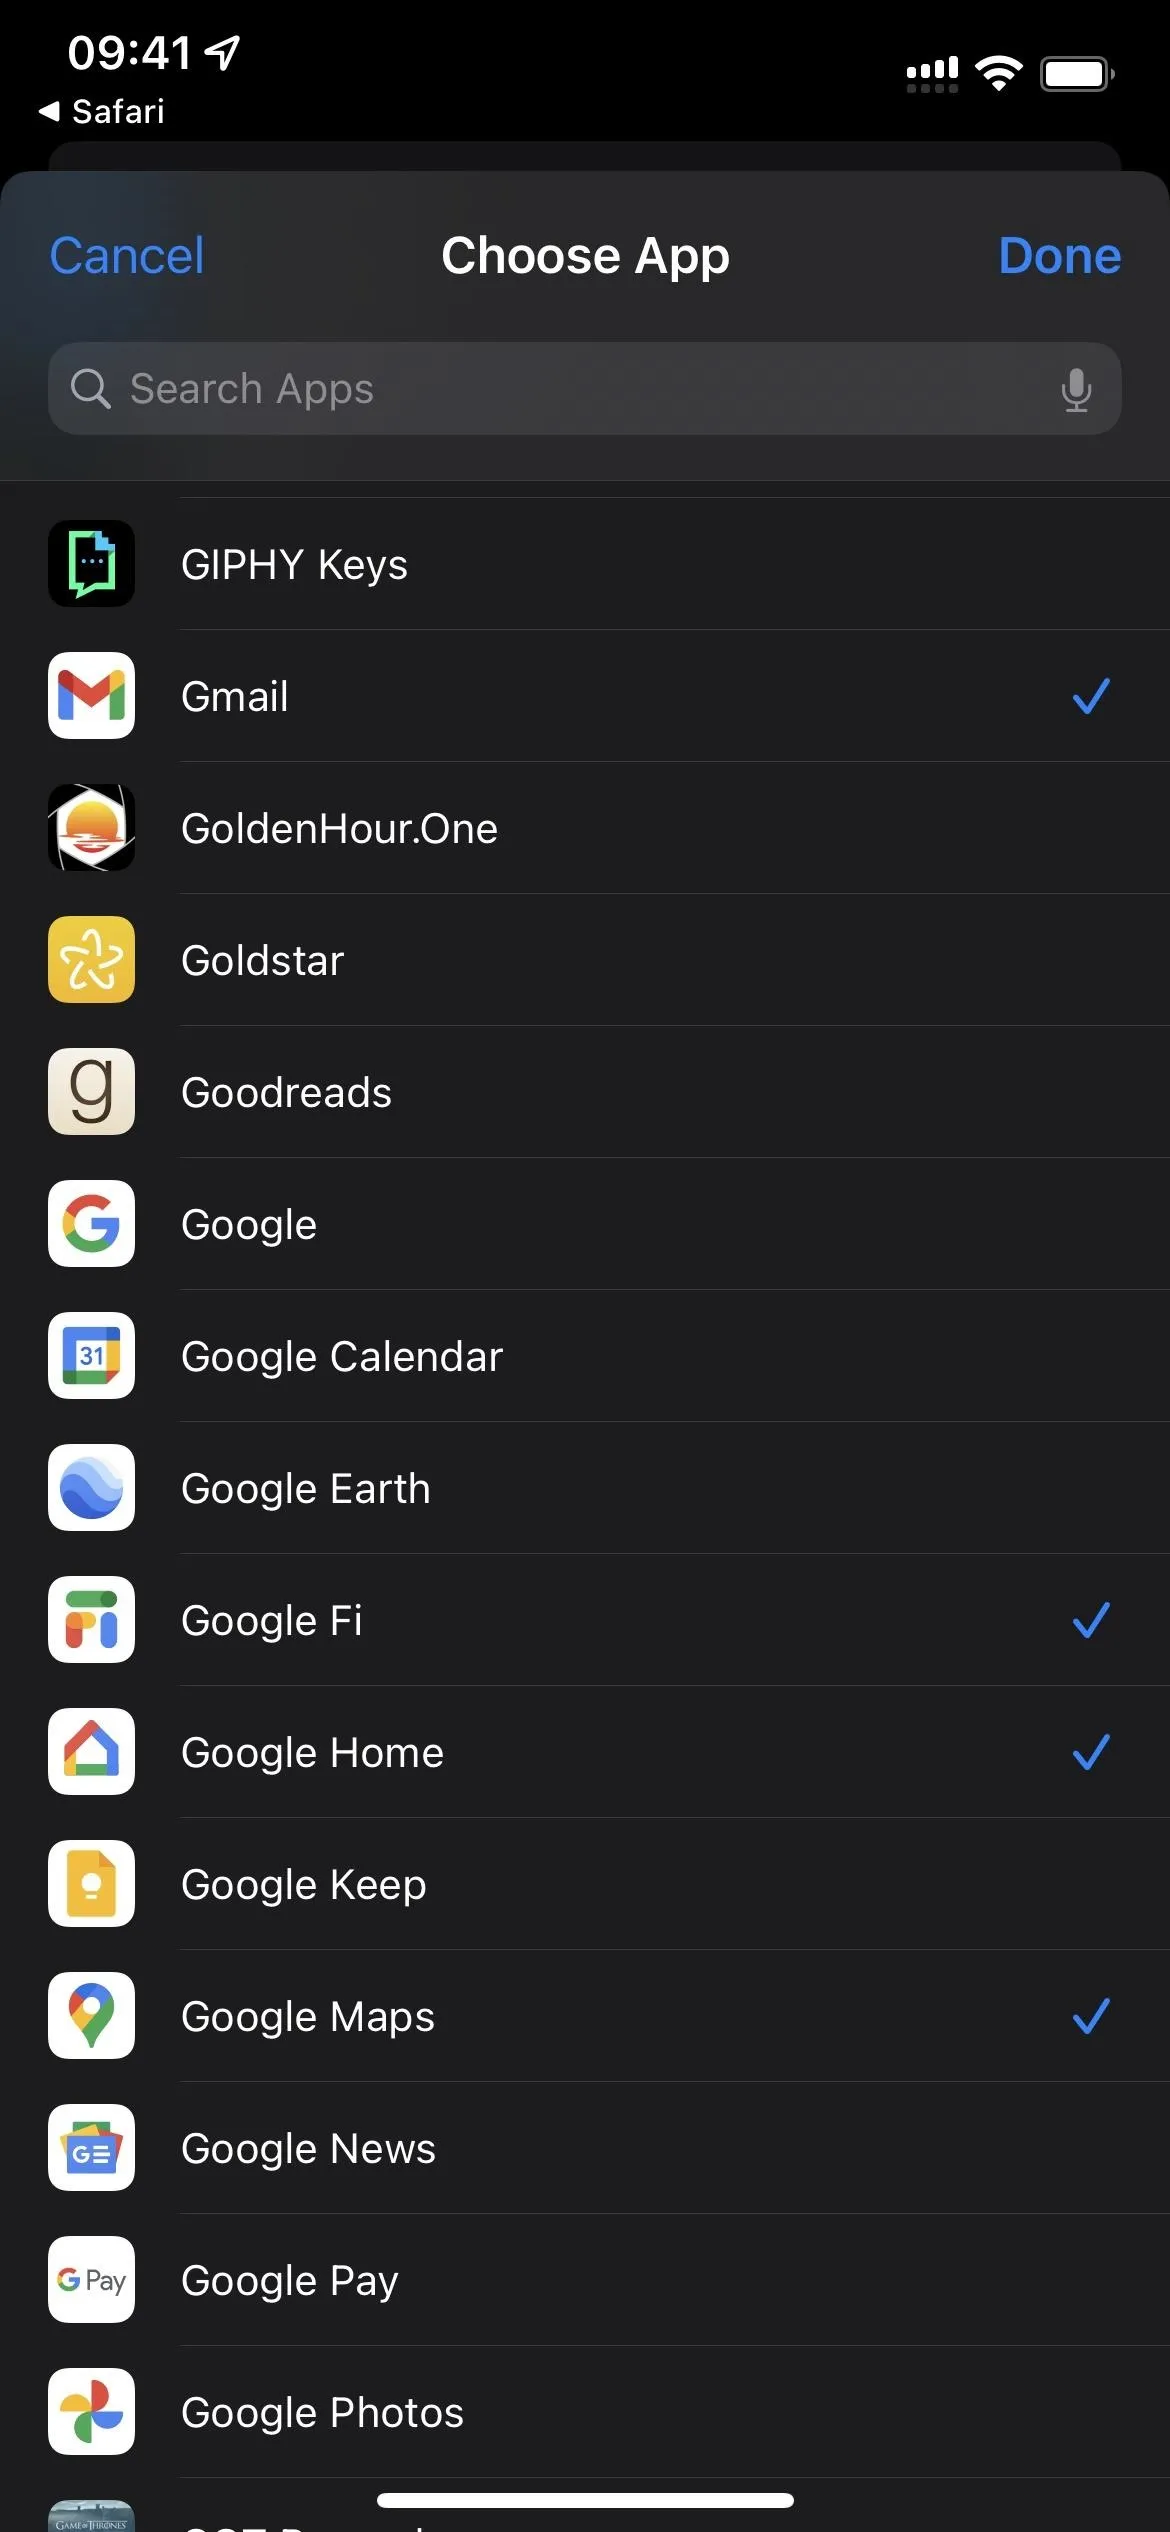
- Tap "Choose" next to "App."
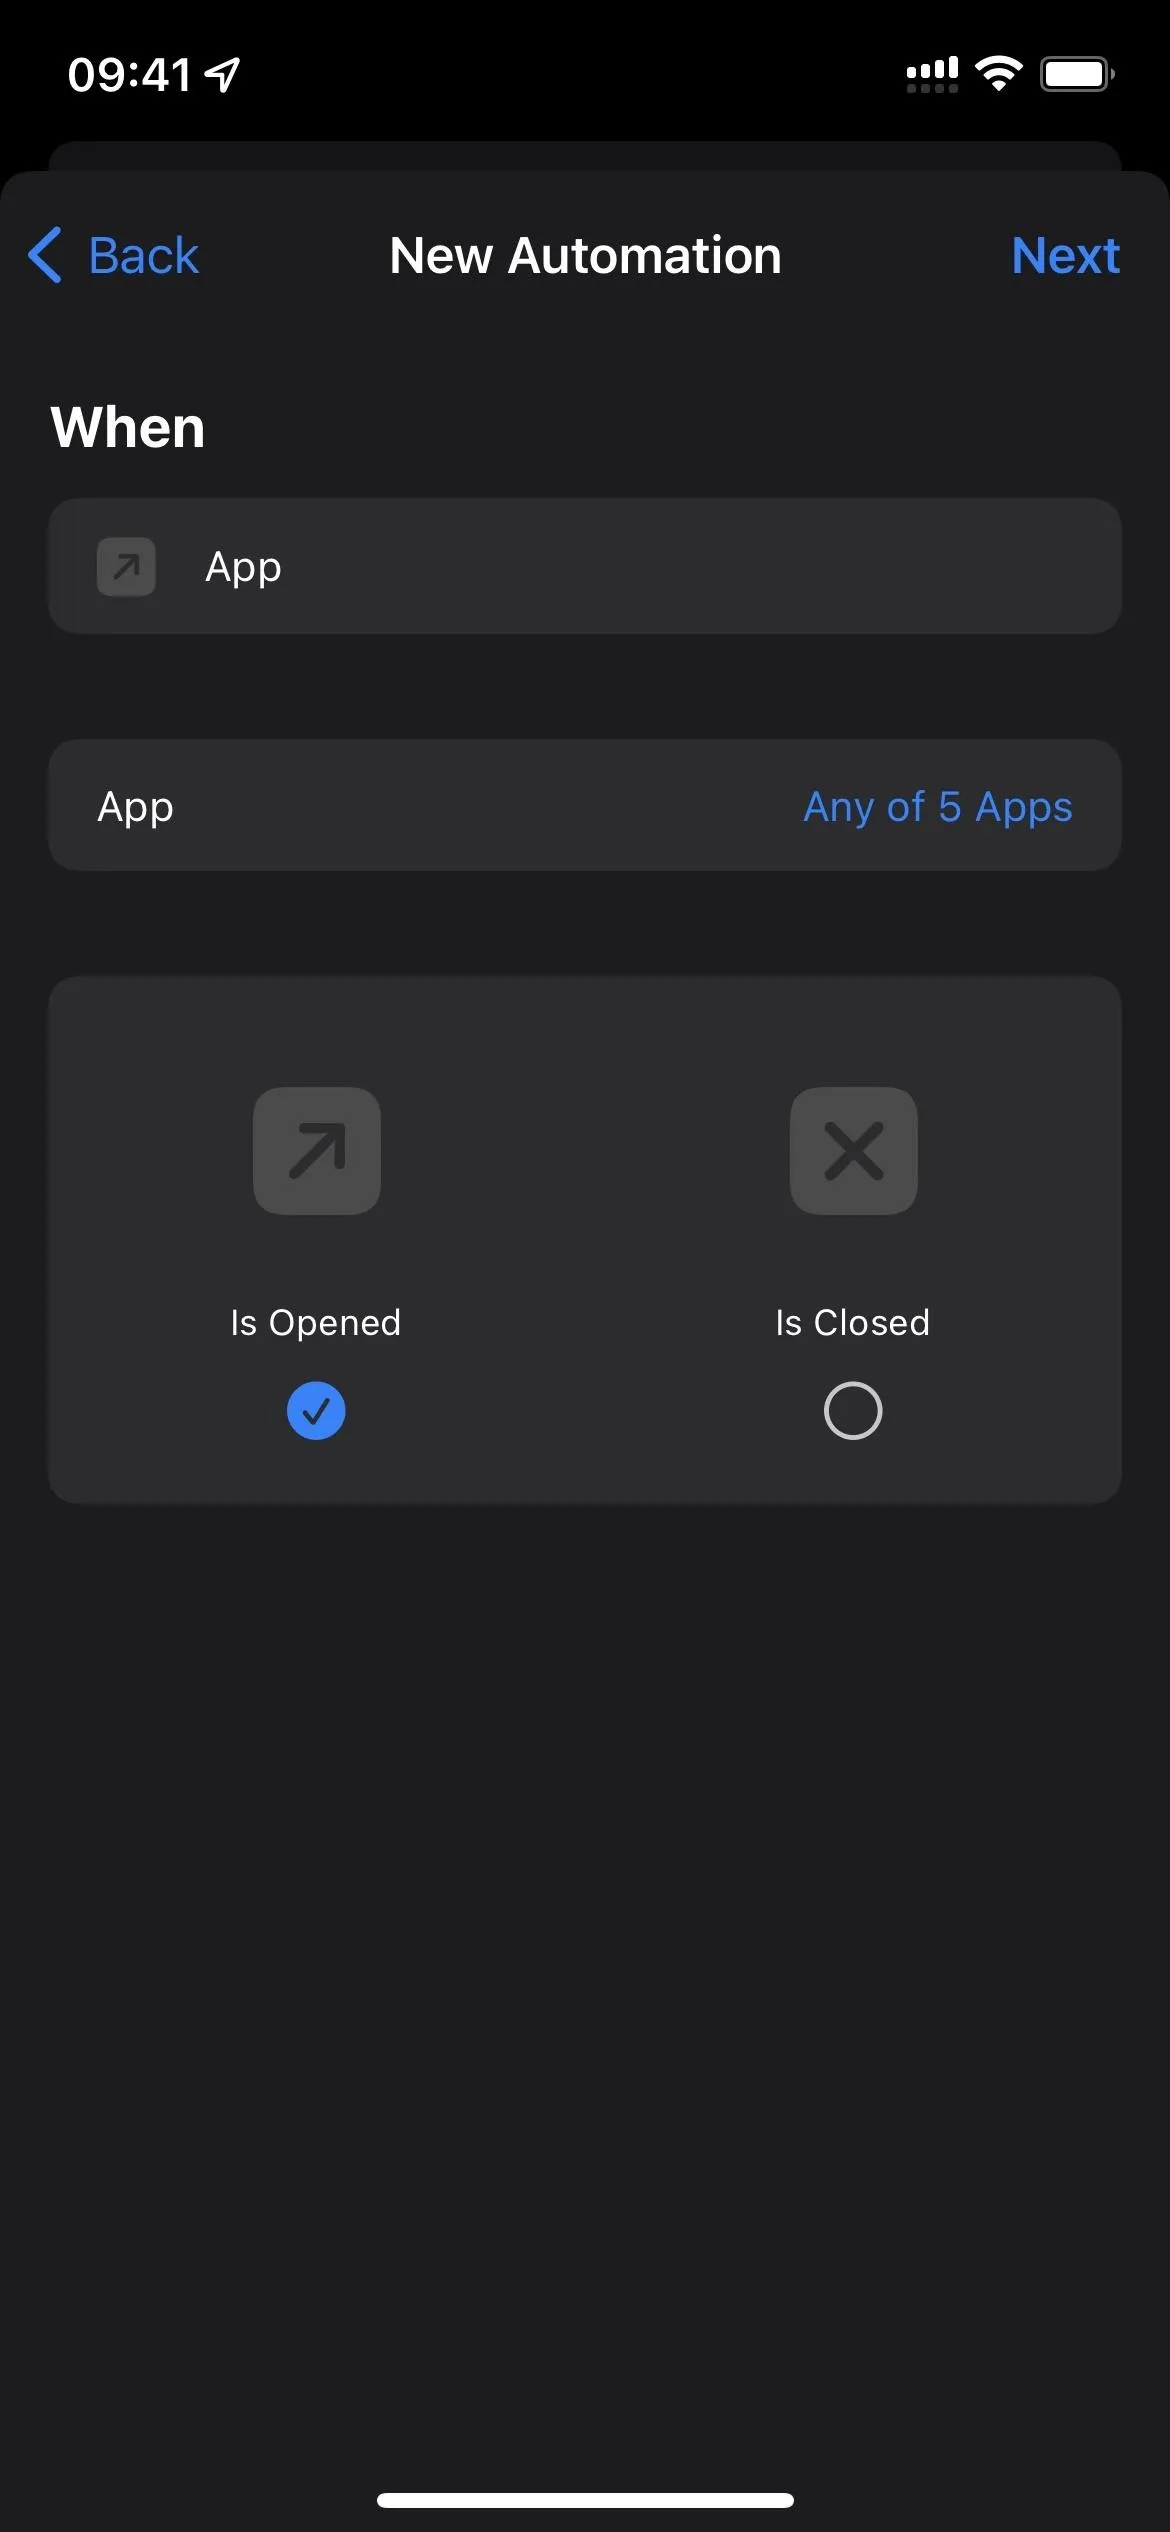
- Check all of the apps you want and hit "Done."
- Make sure "Is Opened" is checked, not "Is Closed."
- Hit "Next" to continue.
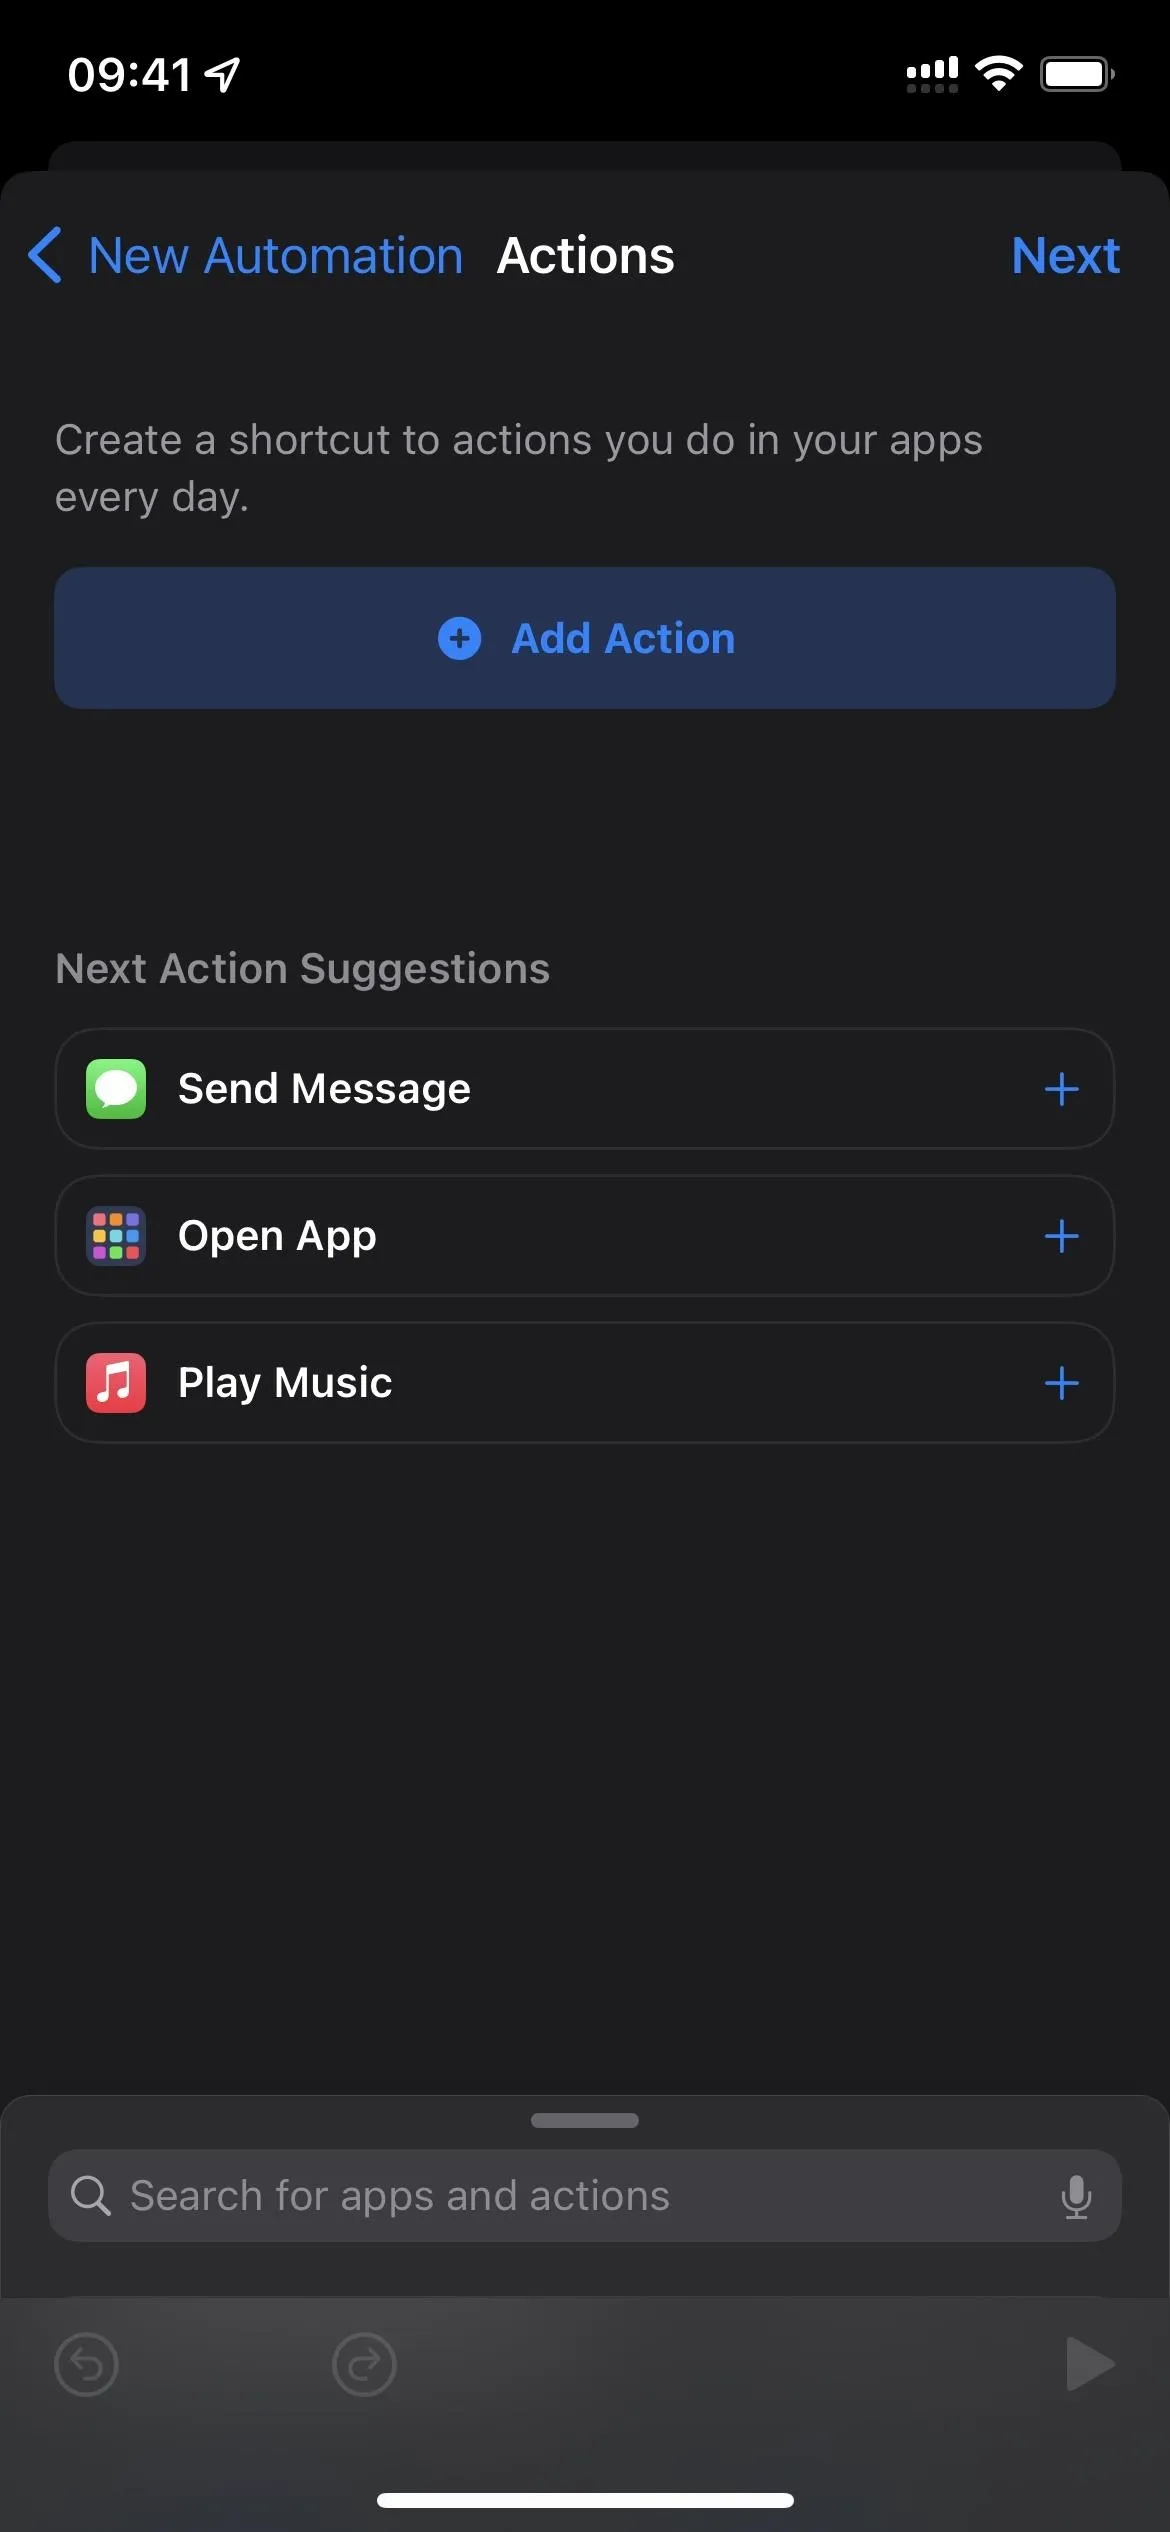
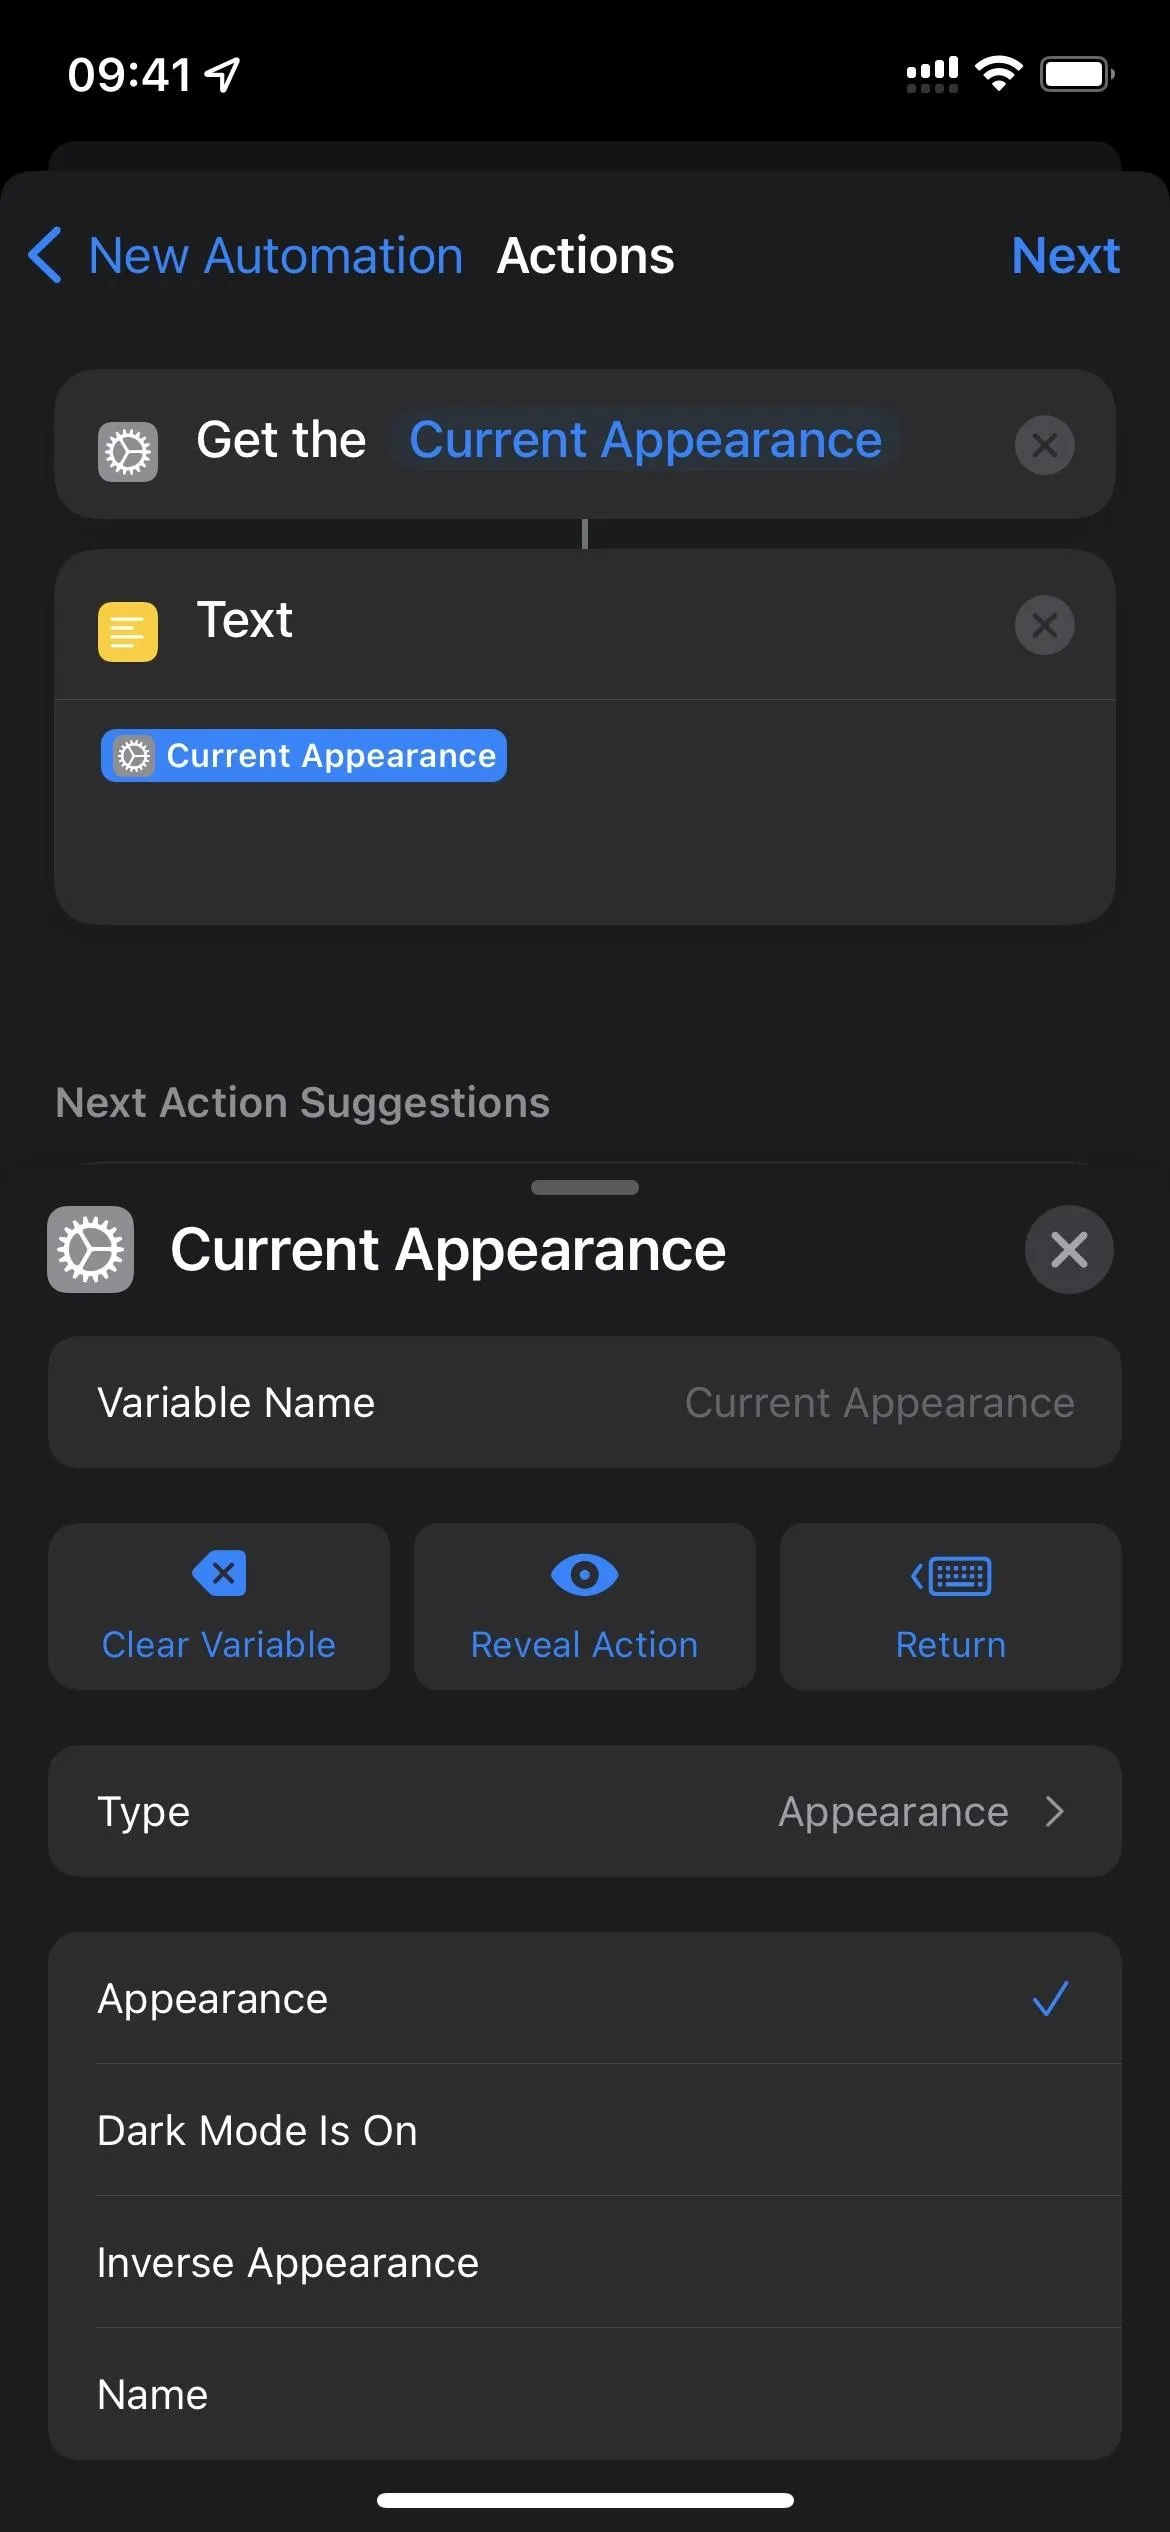
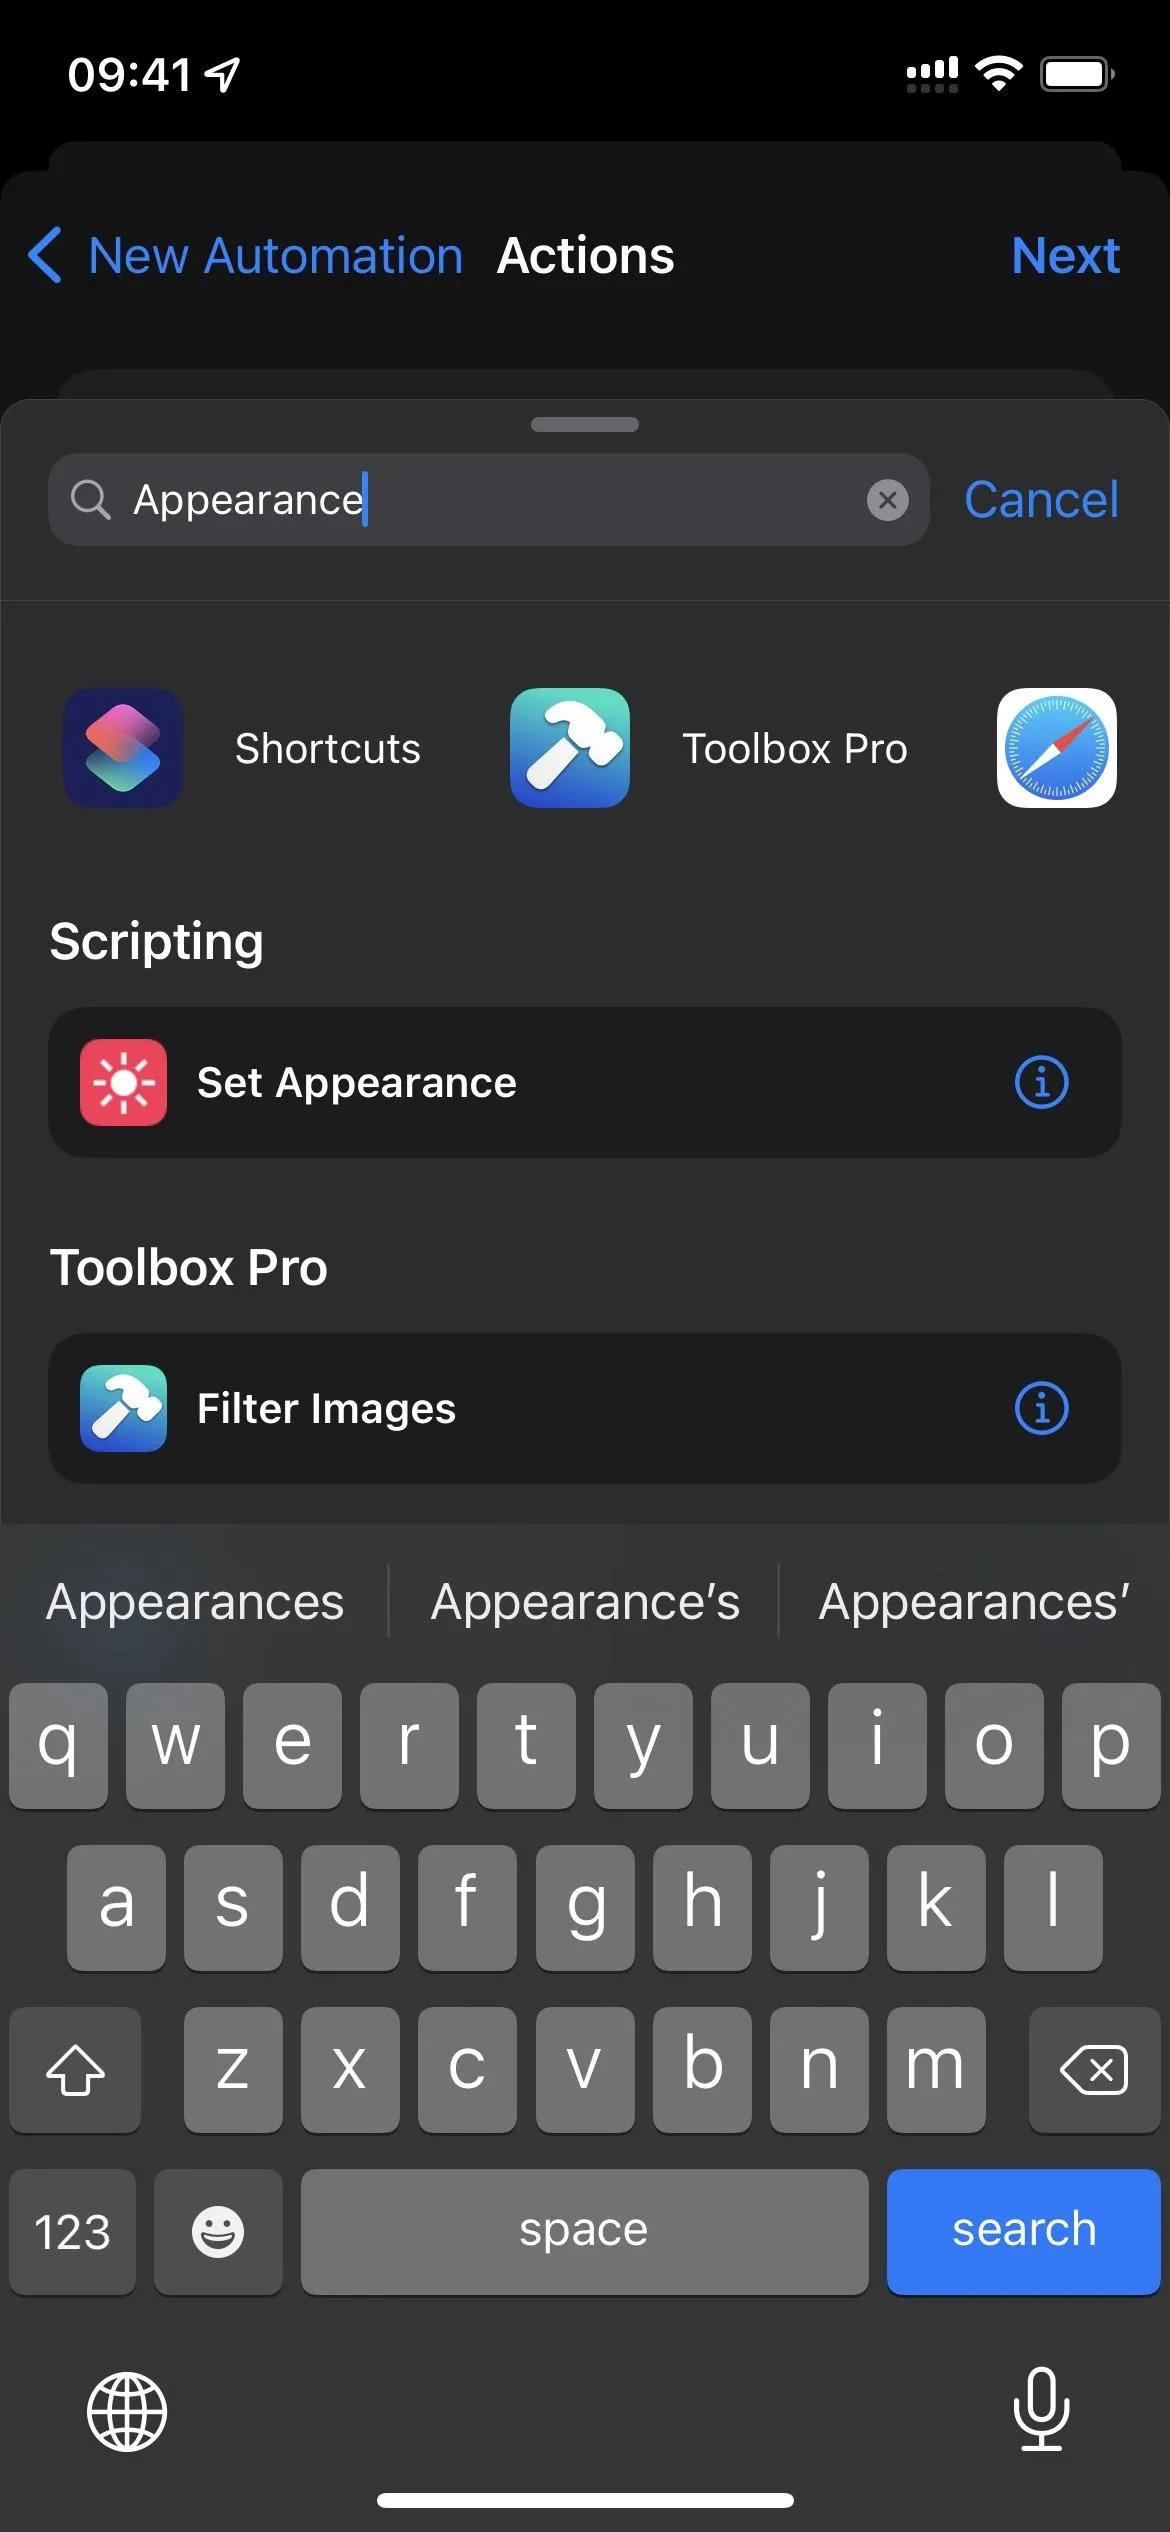
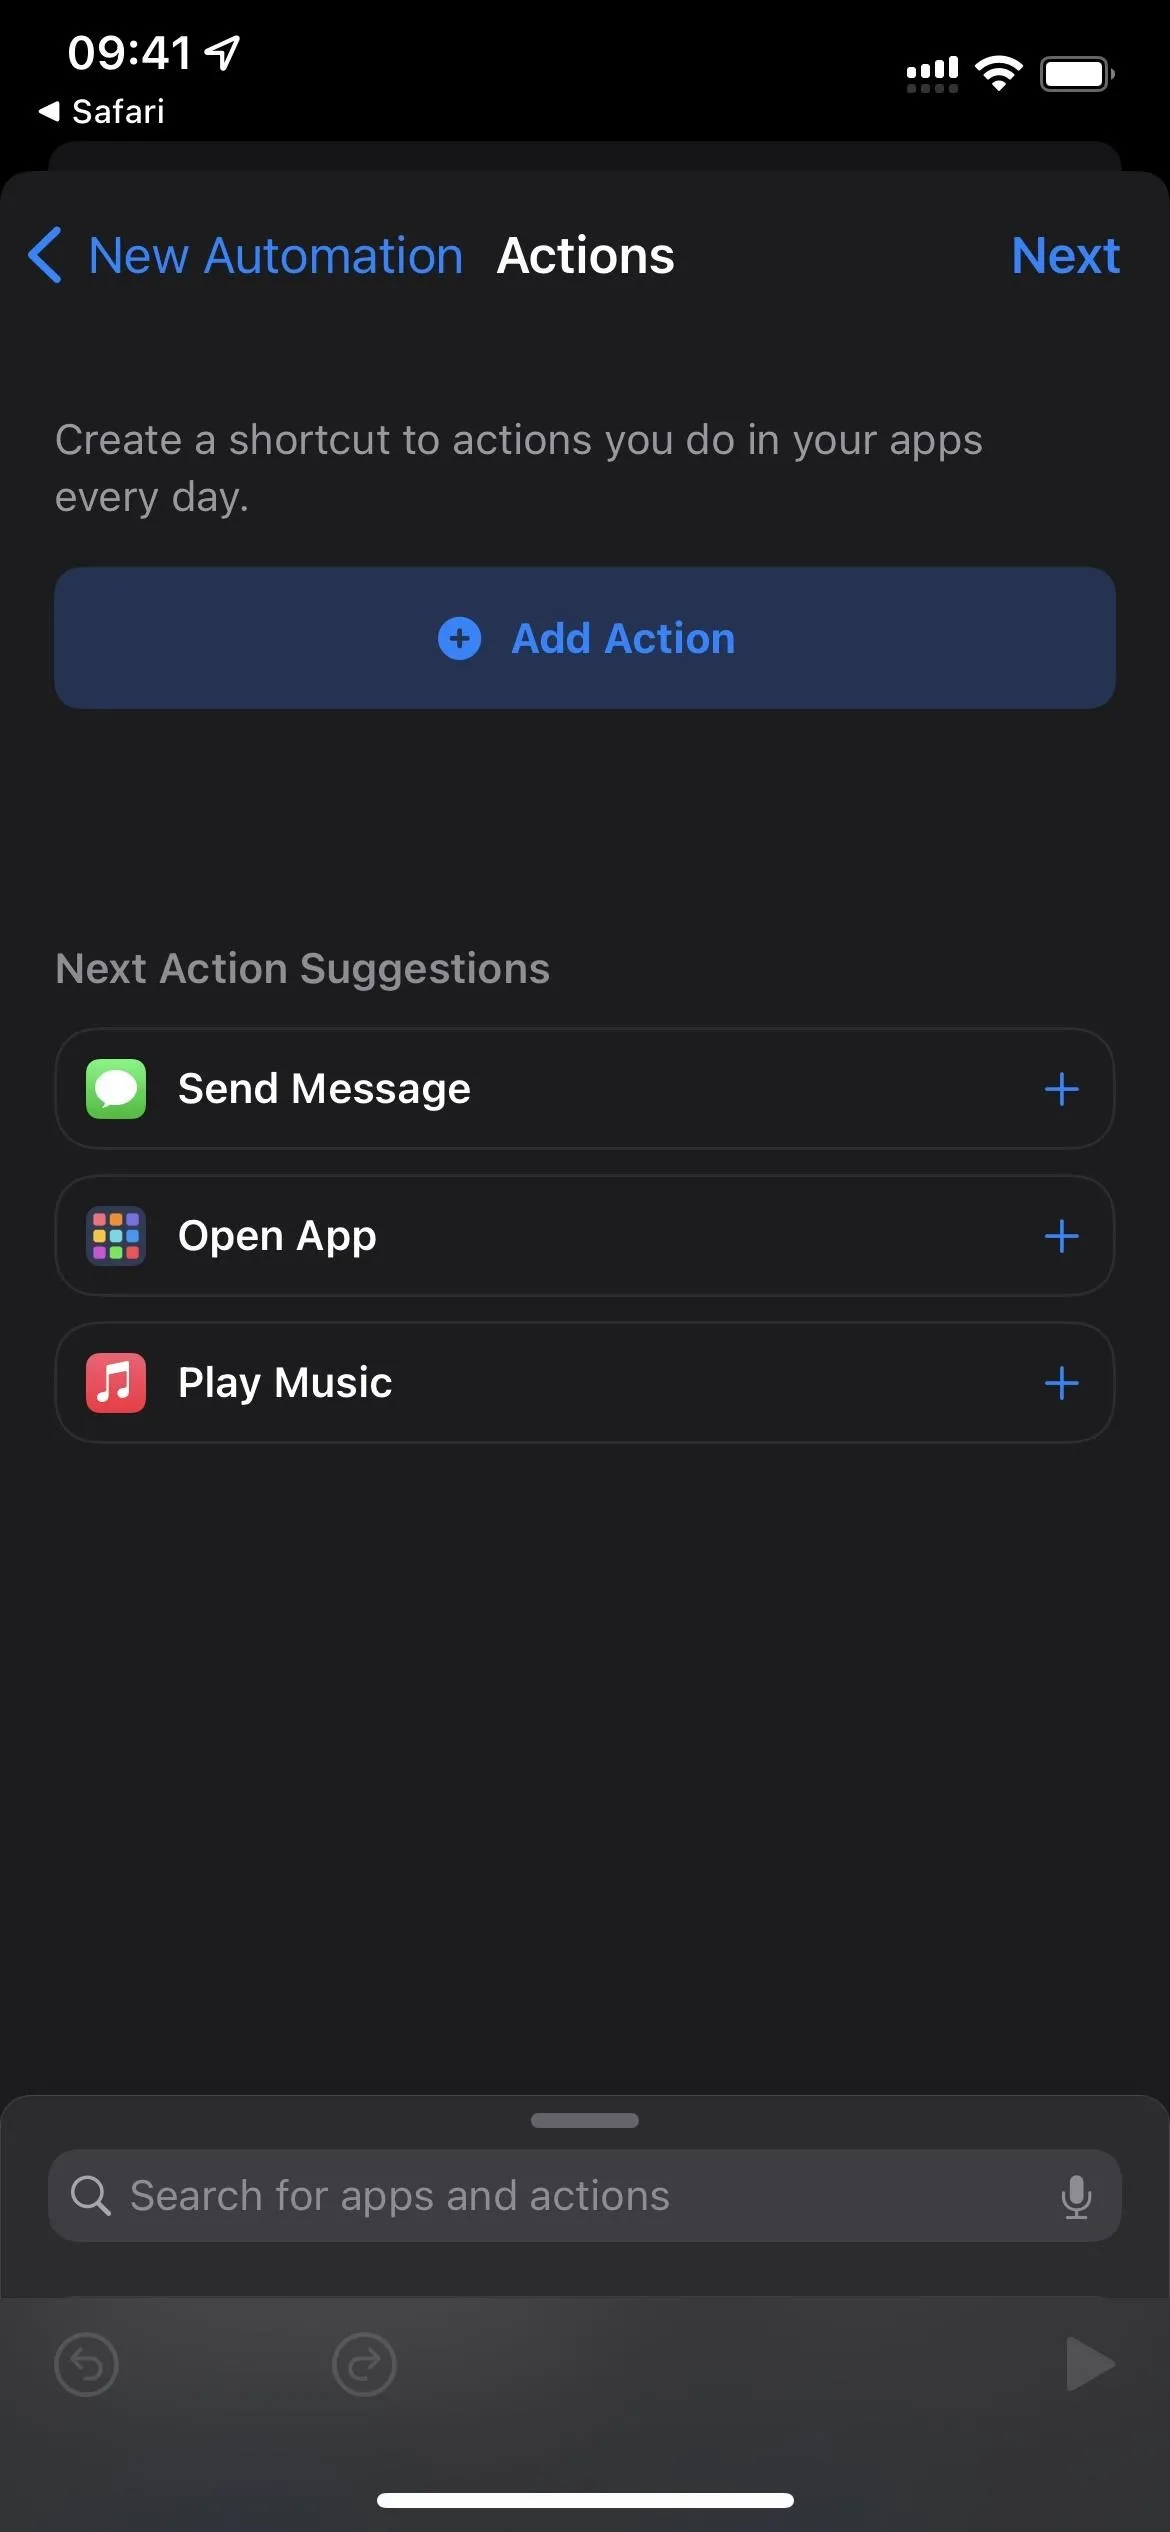
- Add the "Get Device Details" action.
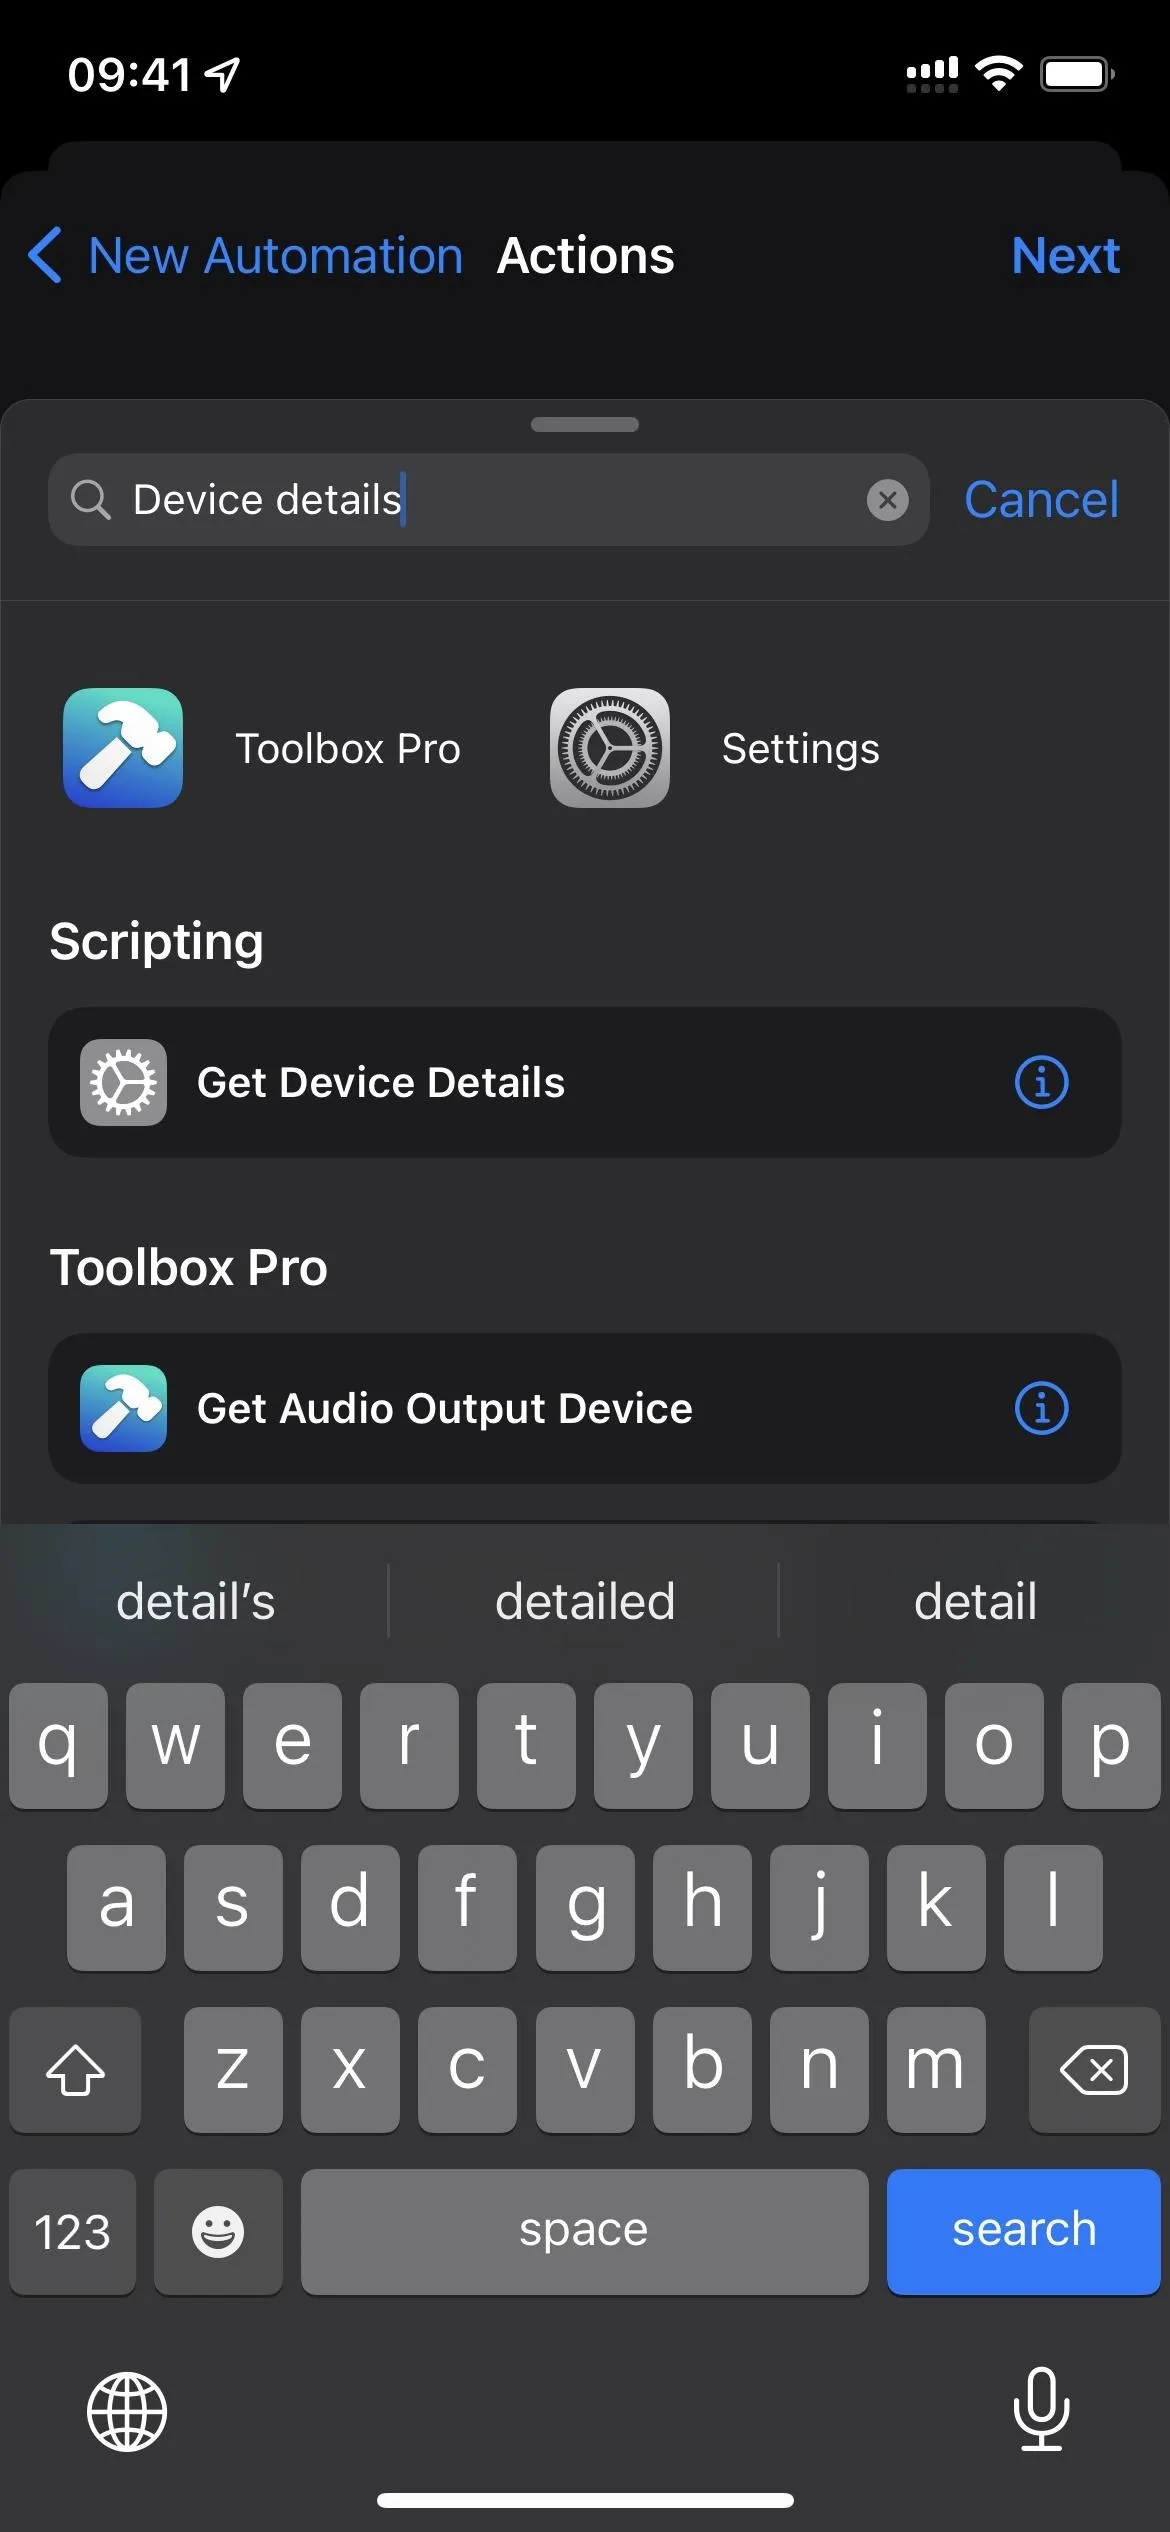
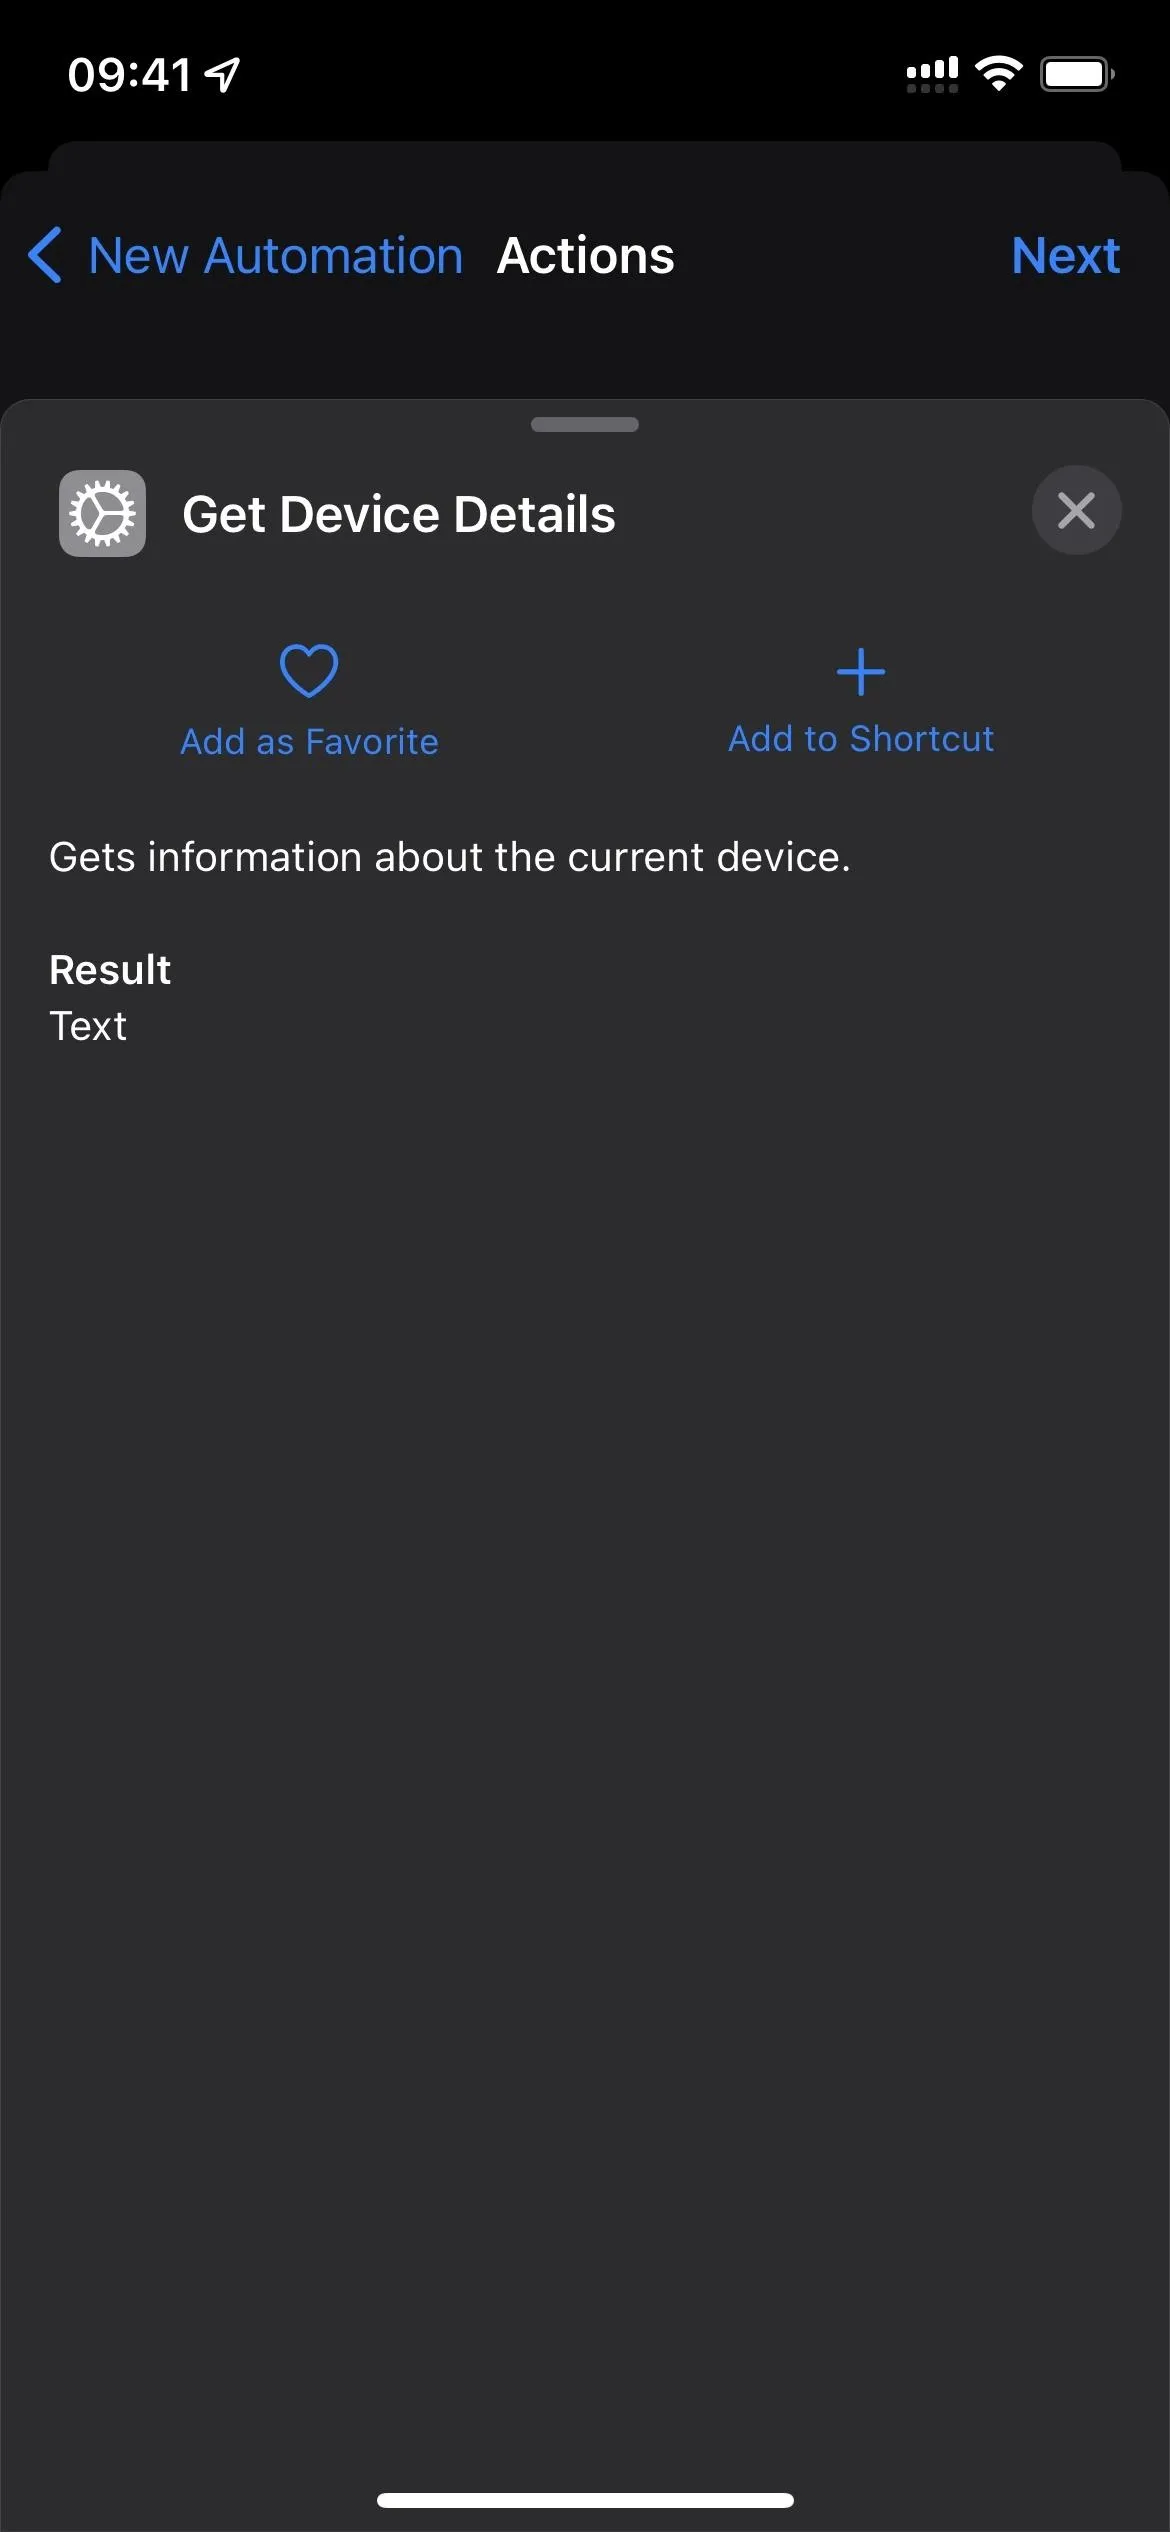
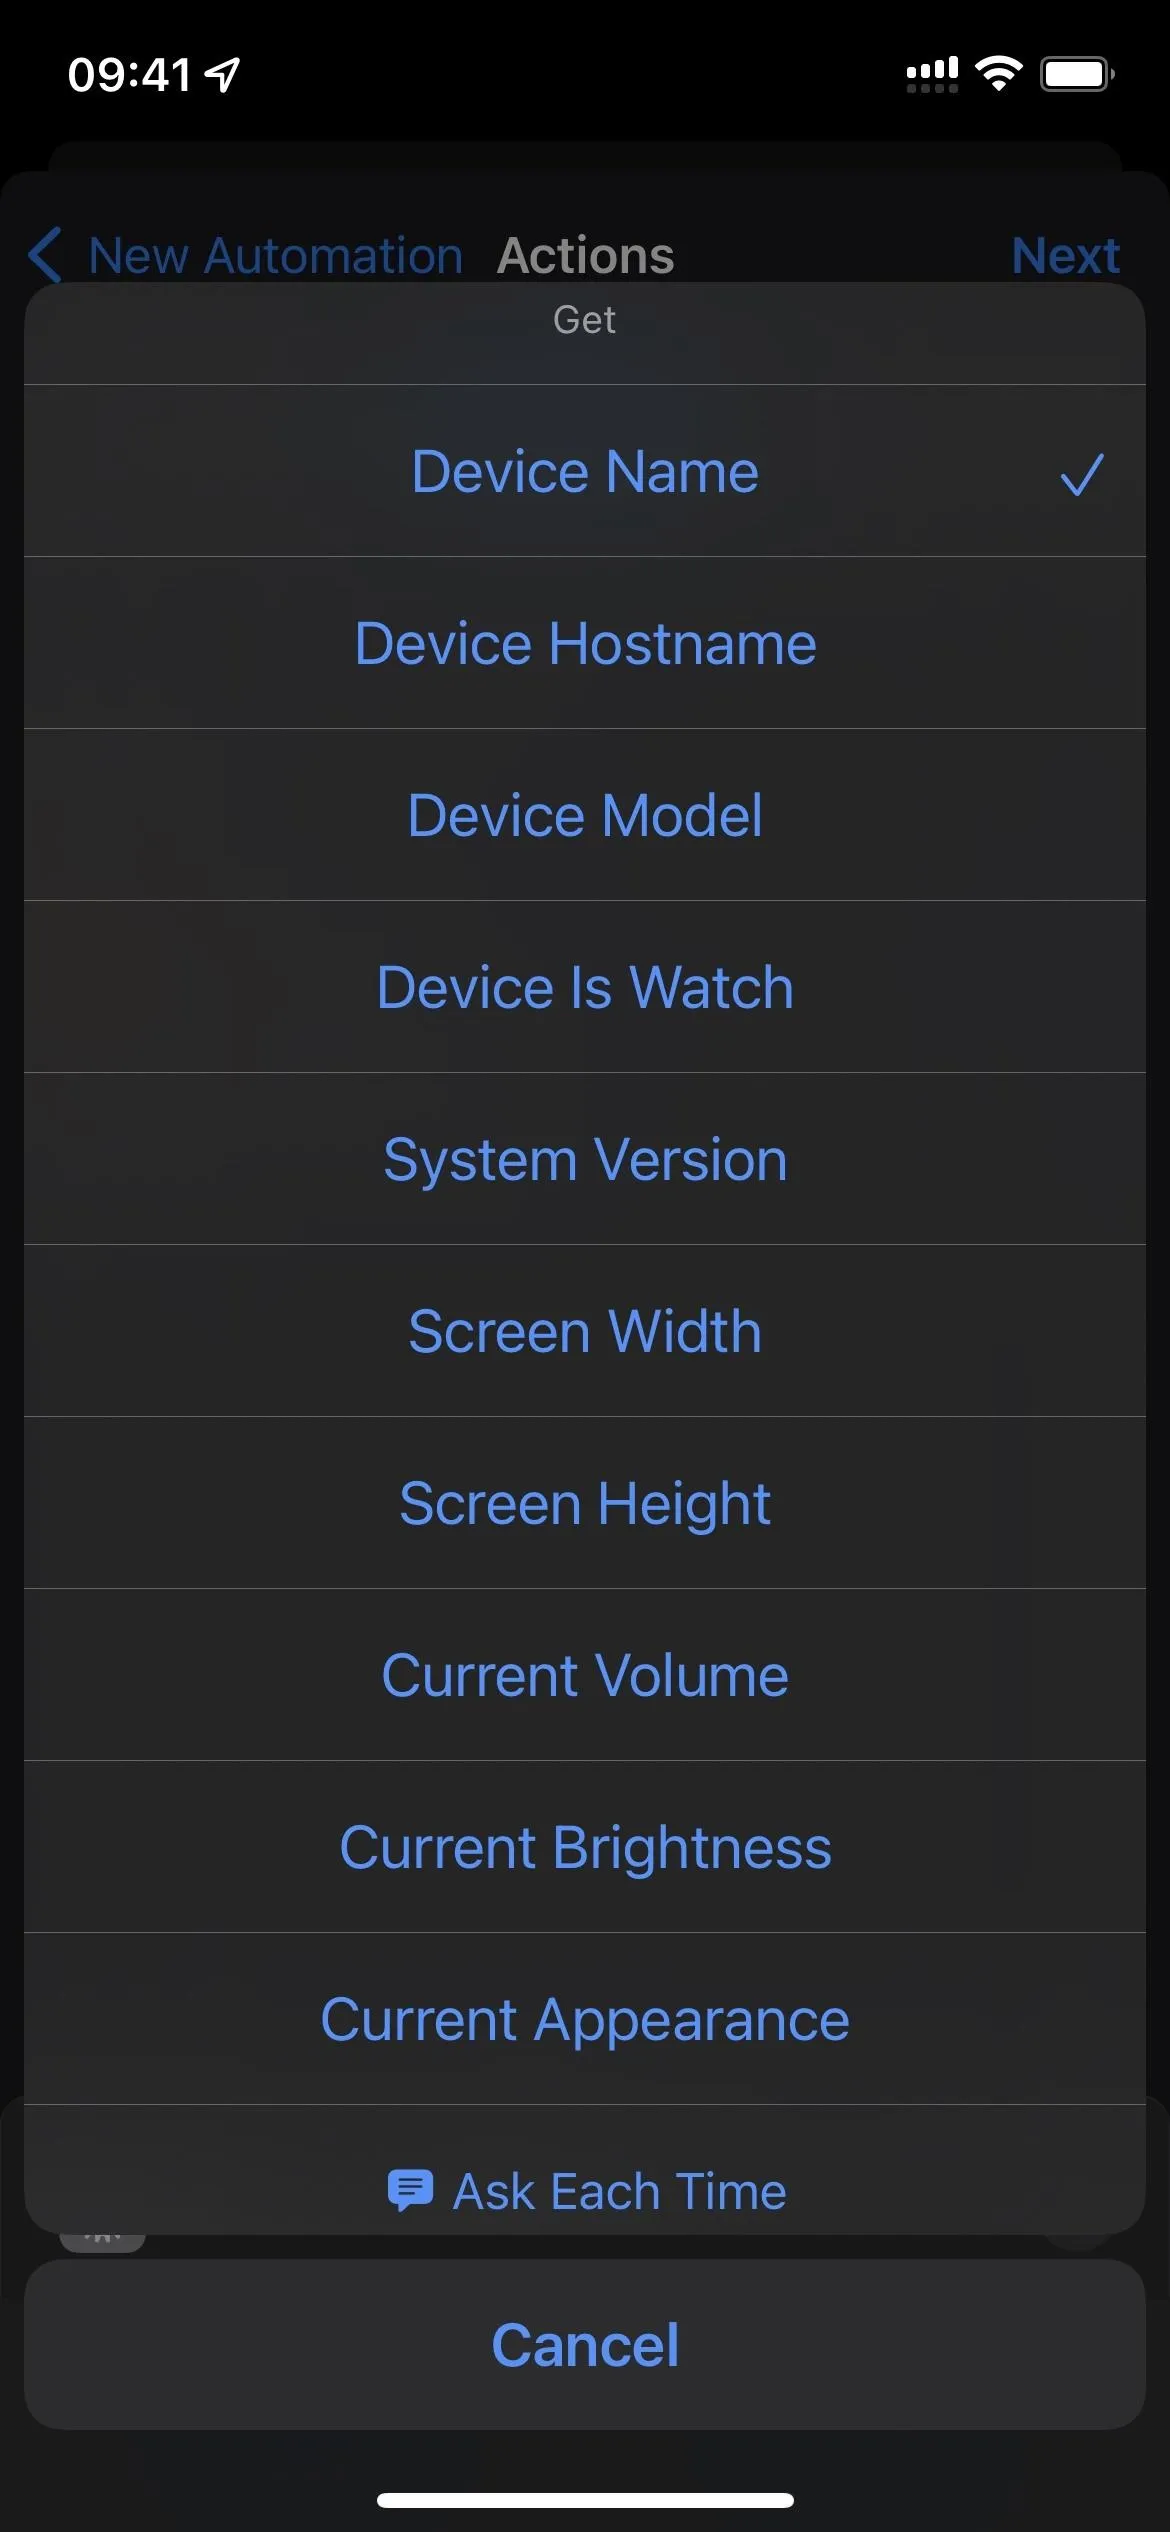
- Tap "Device Name" in the Get Device Details action box.
- Choose "Current Appearance."

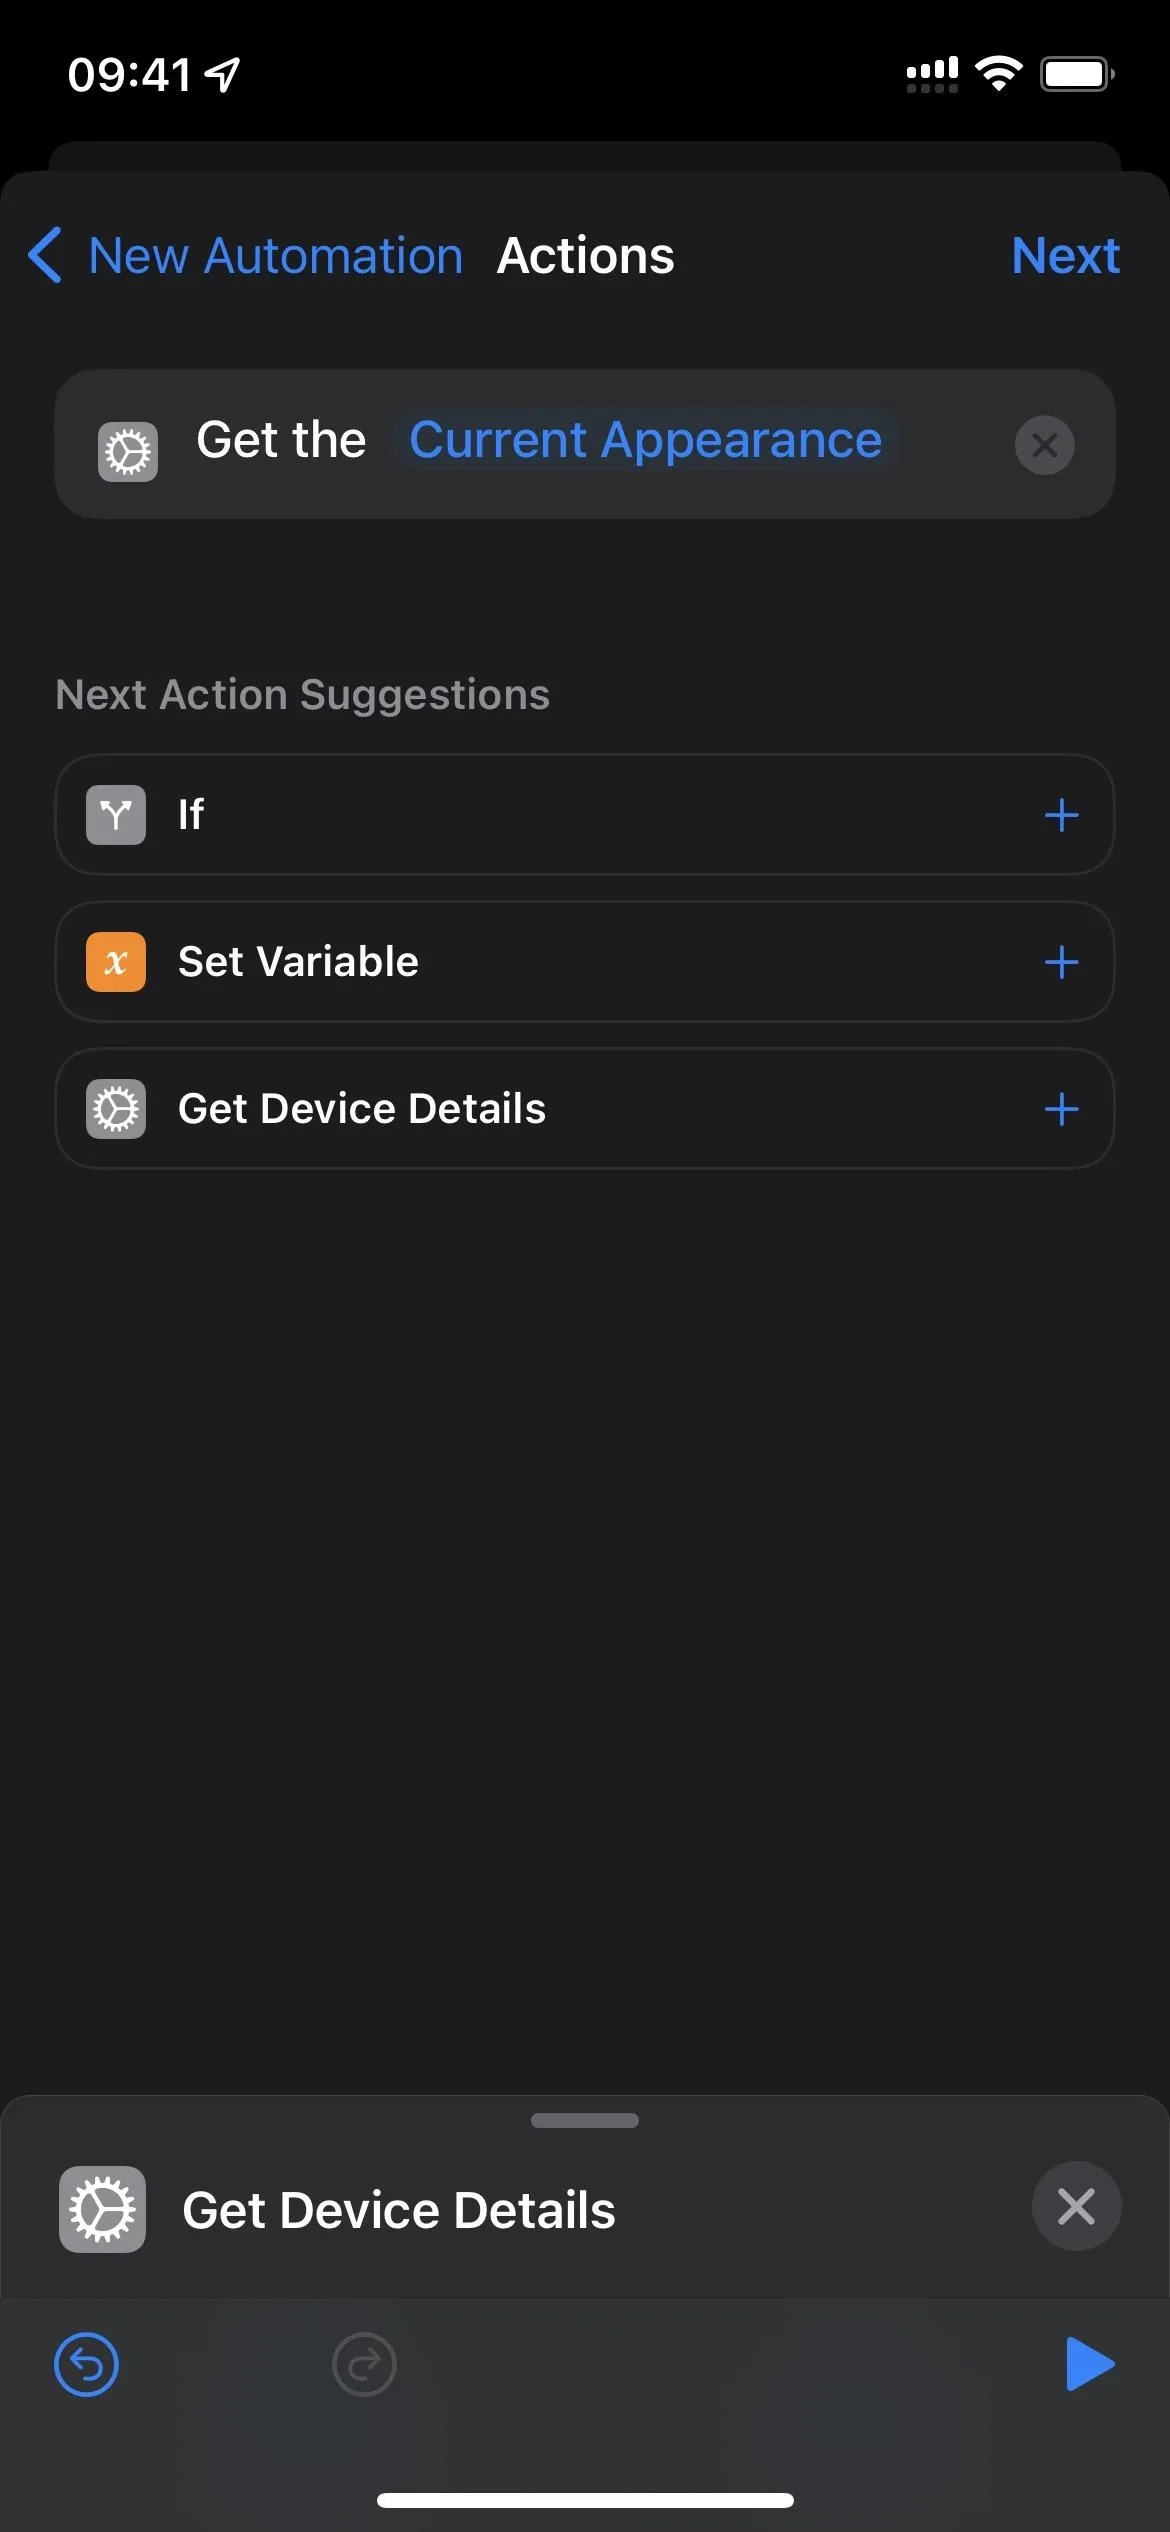
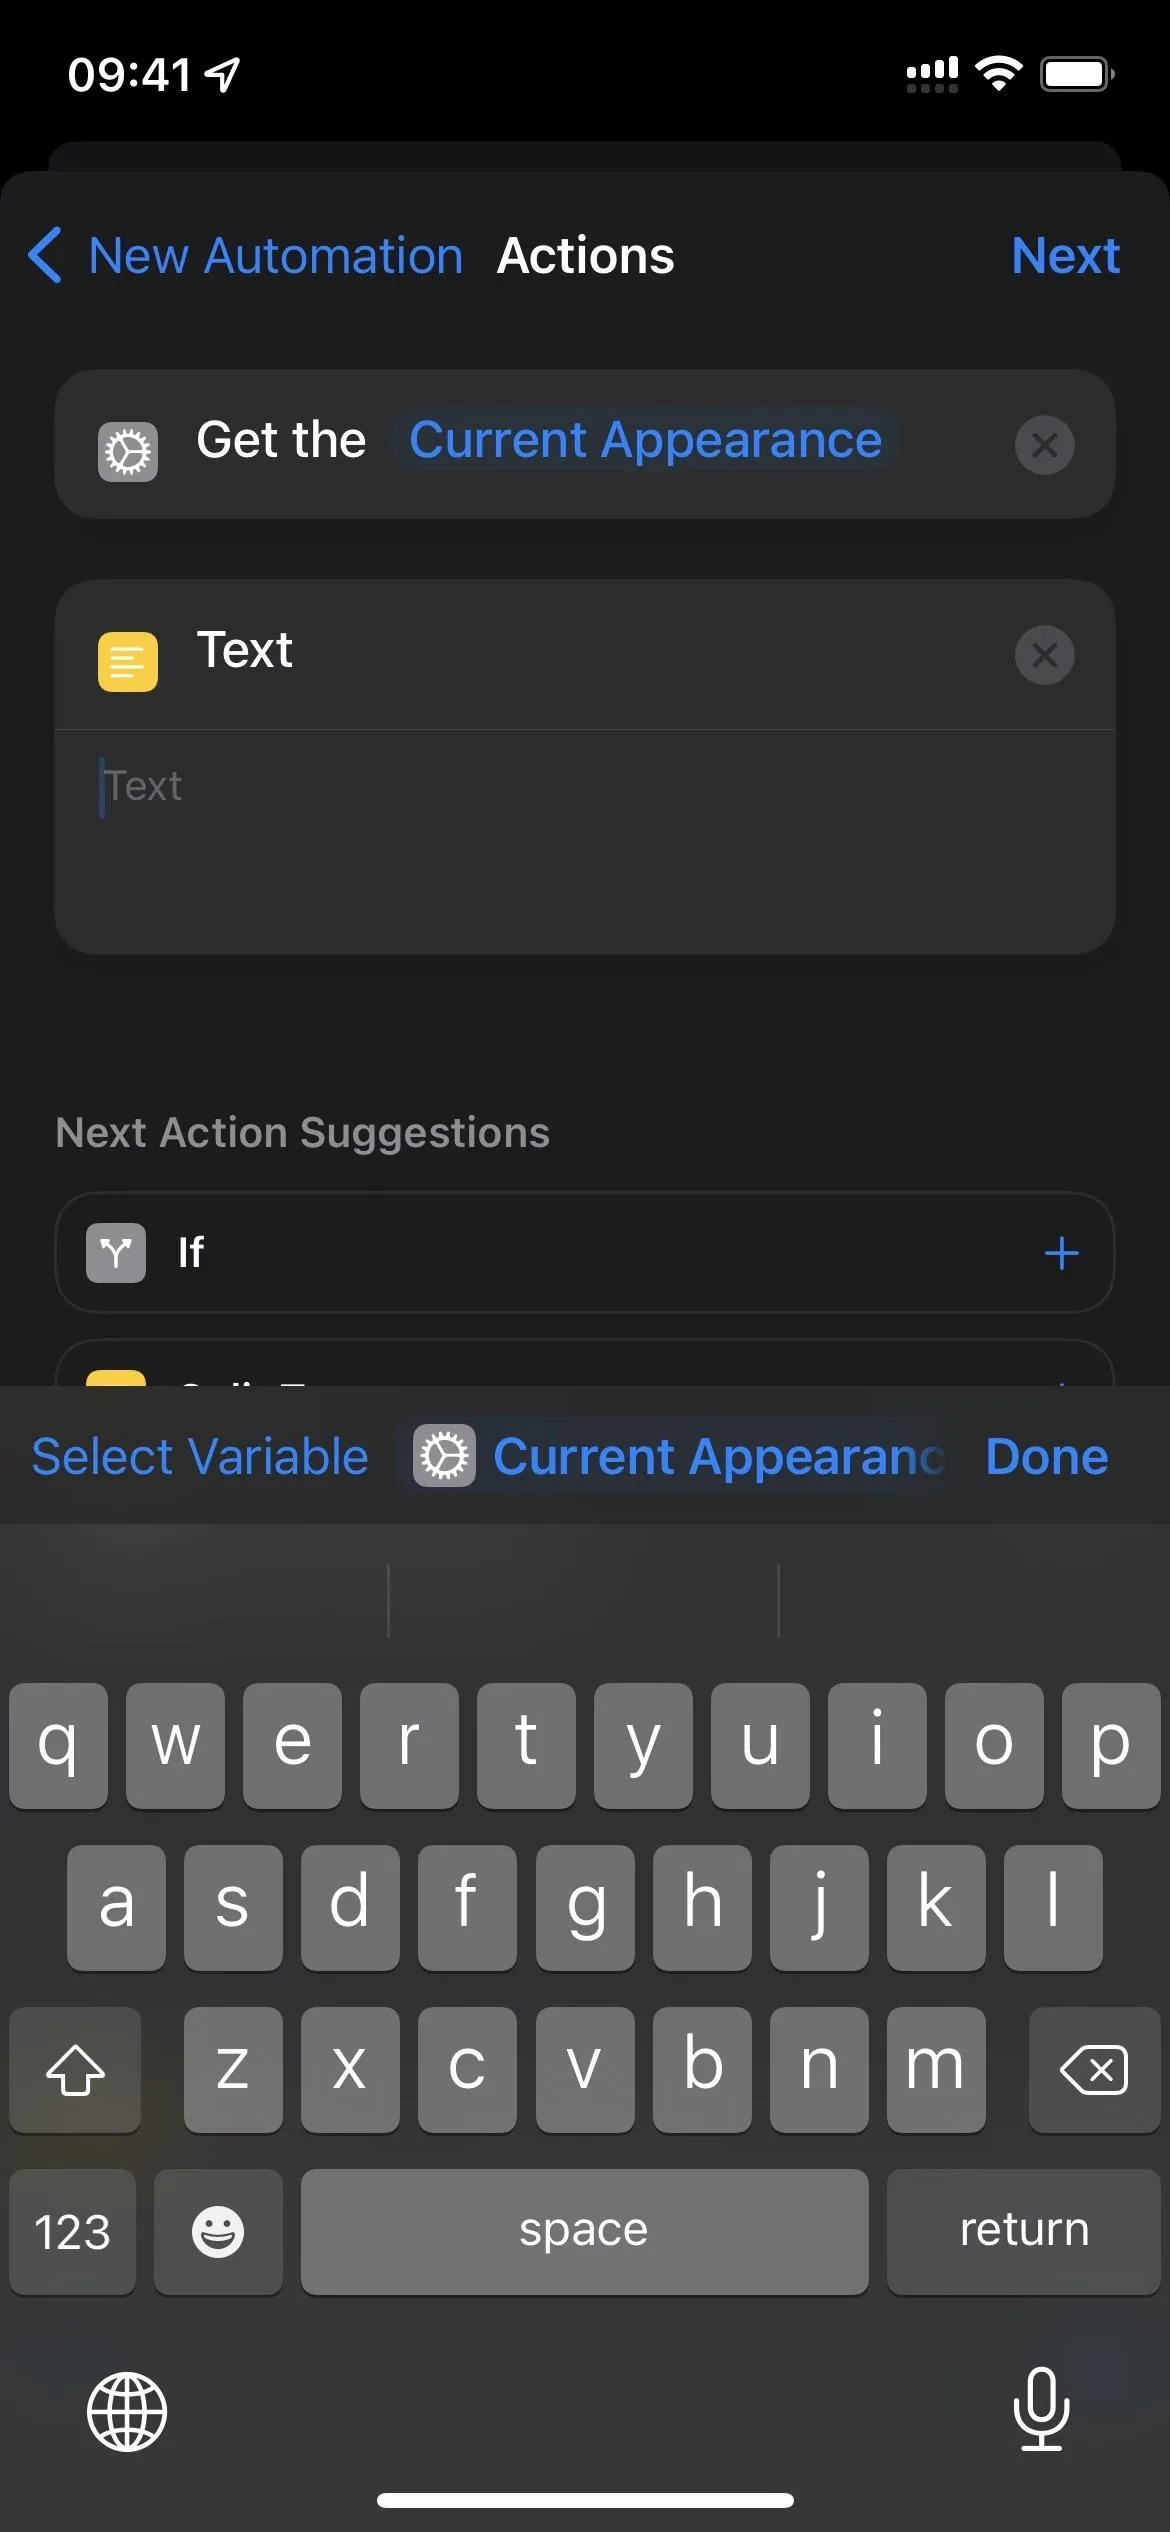
- Add the "Text" action below the Get Device Details action box.
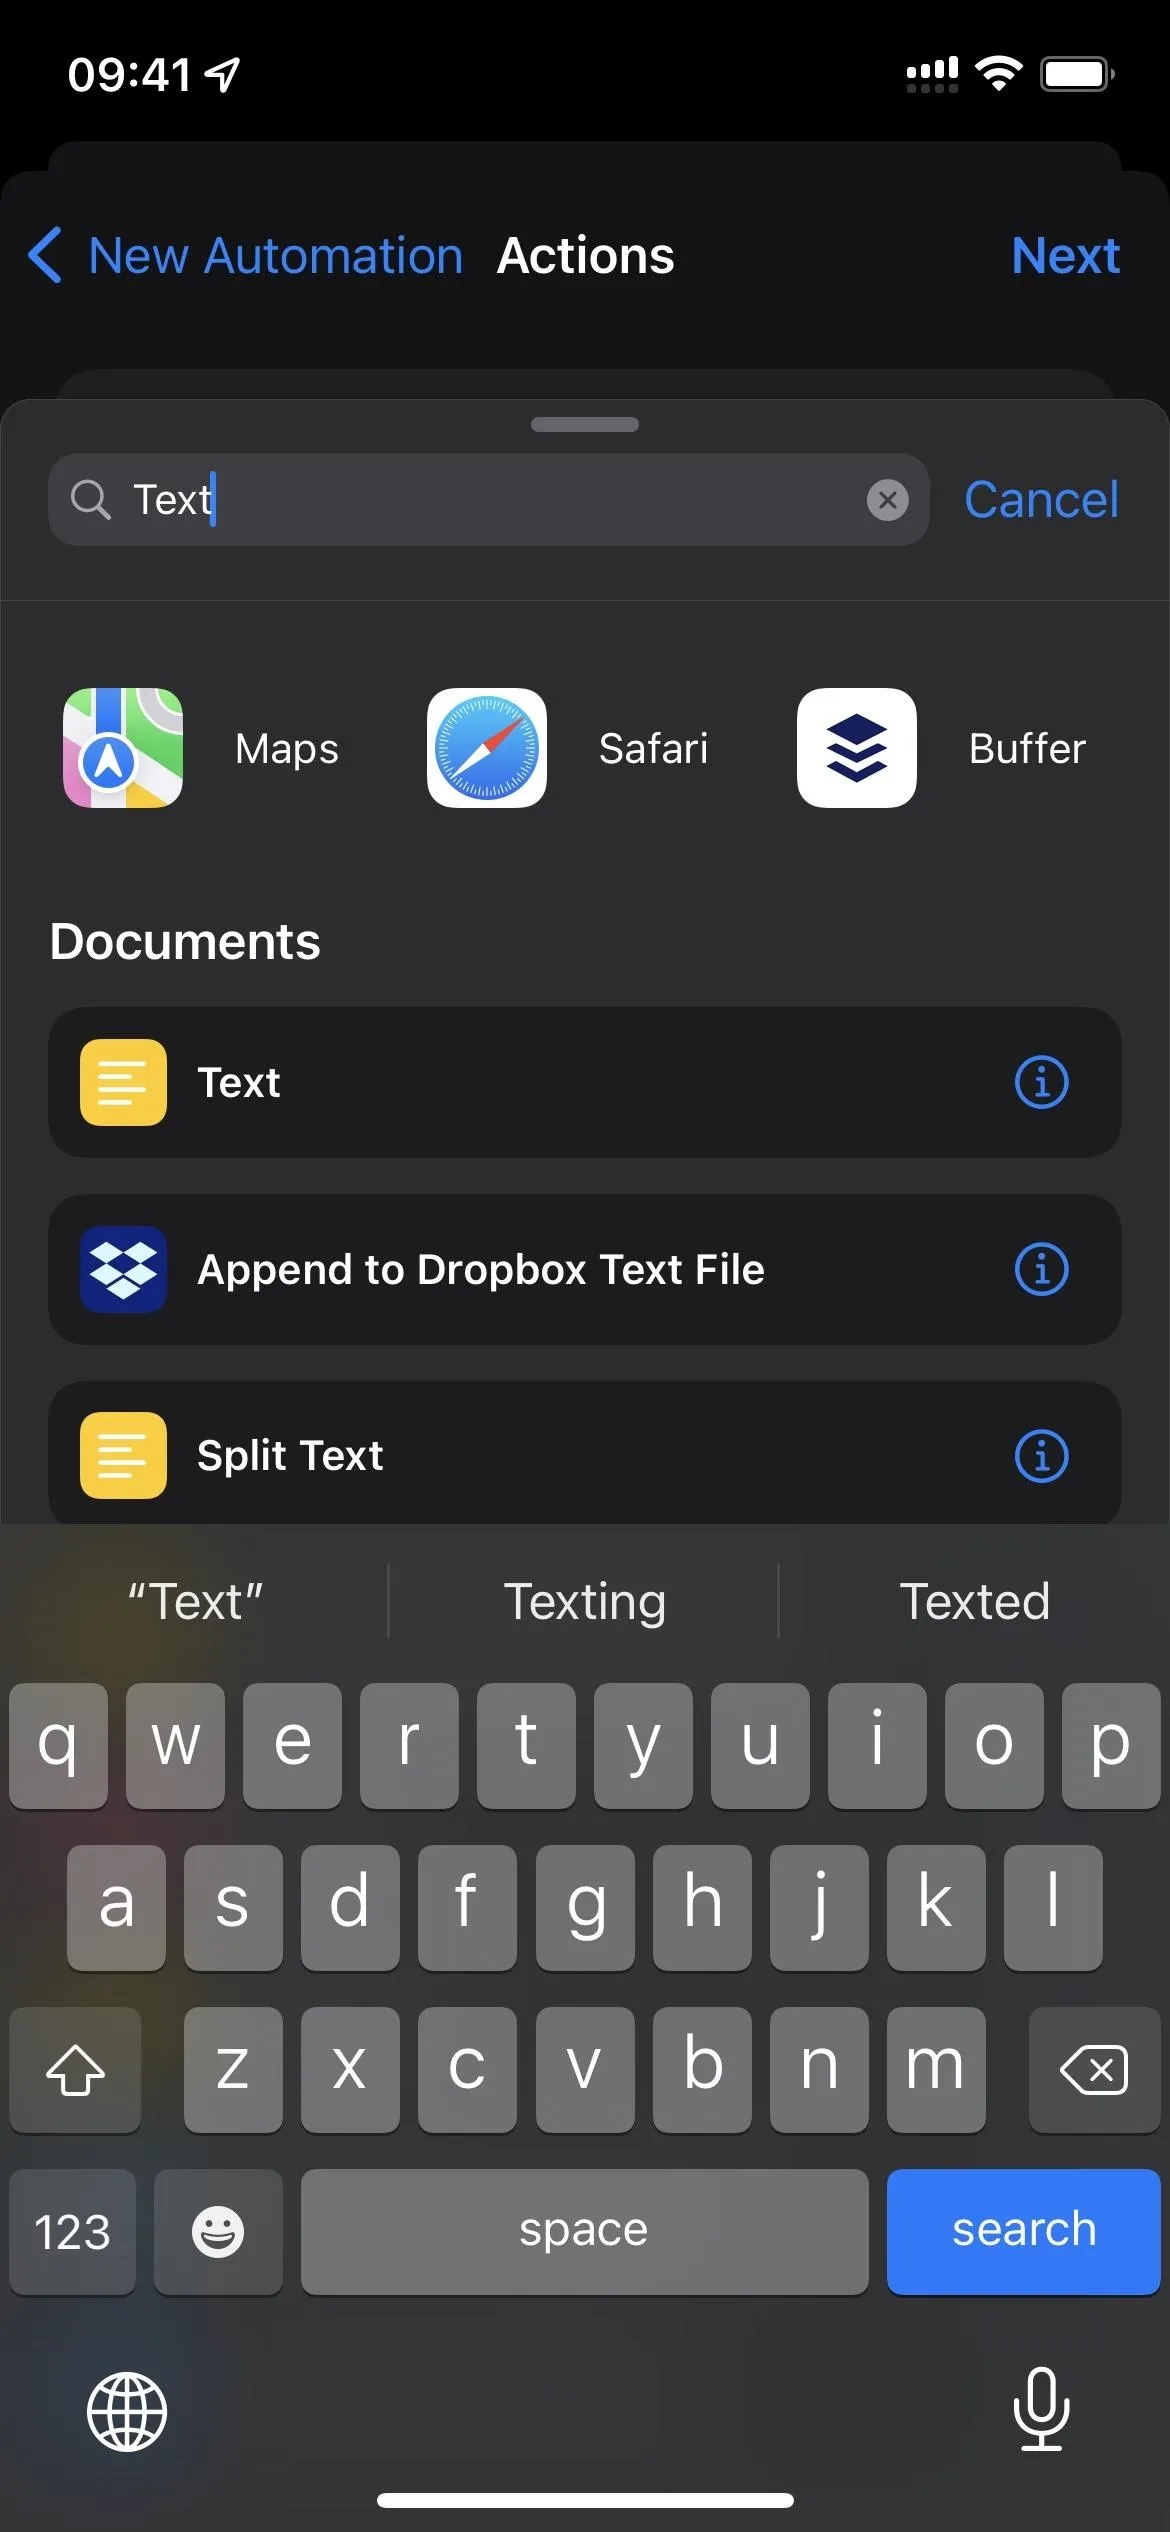
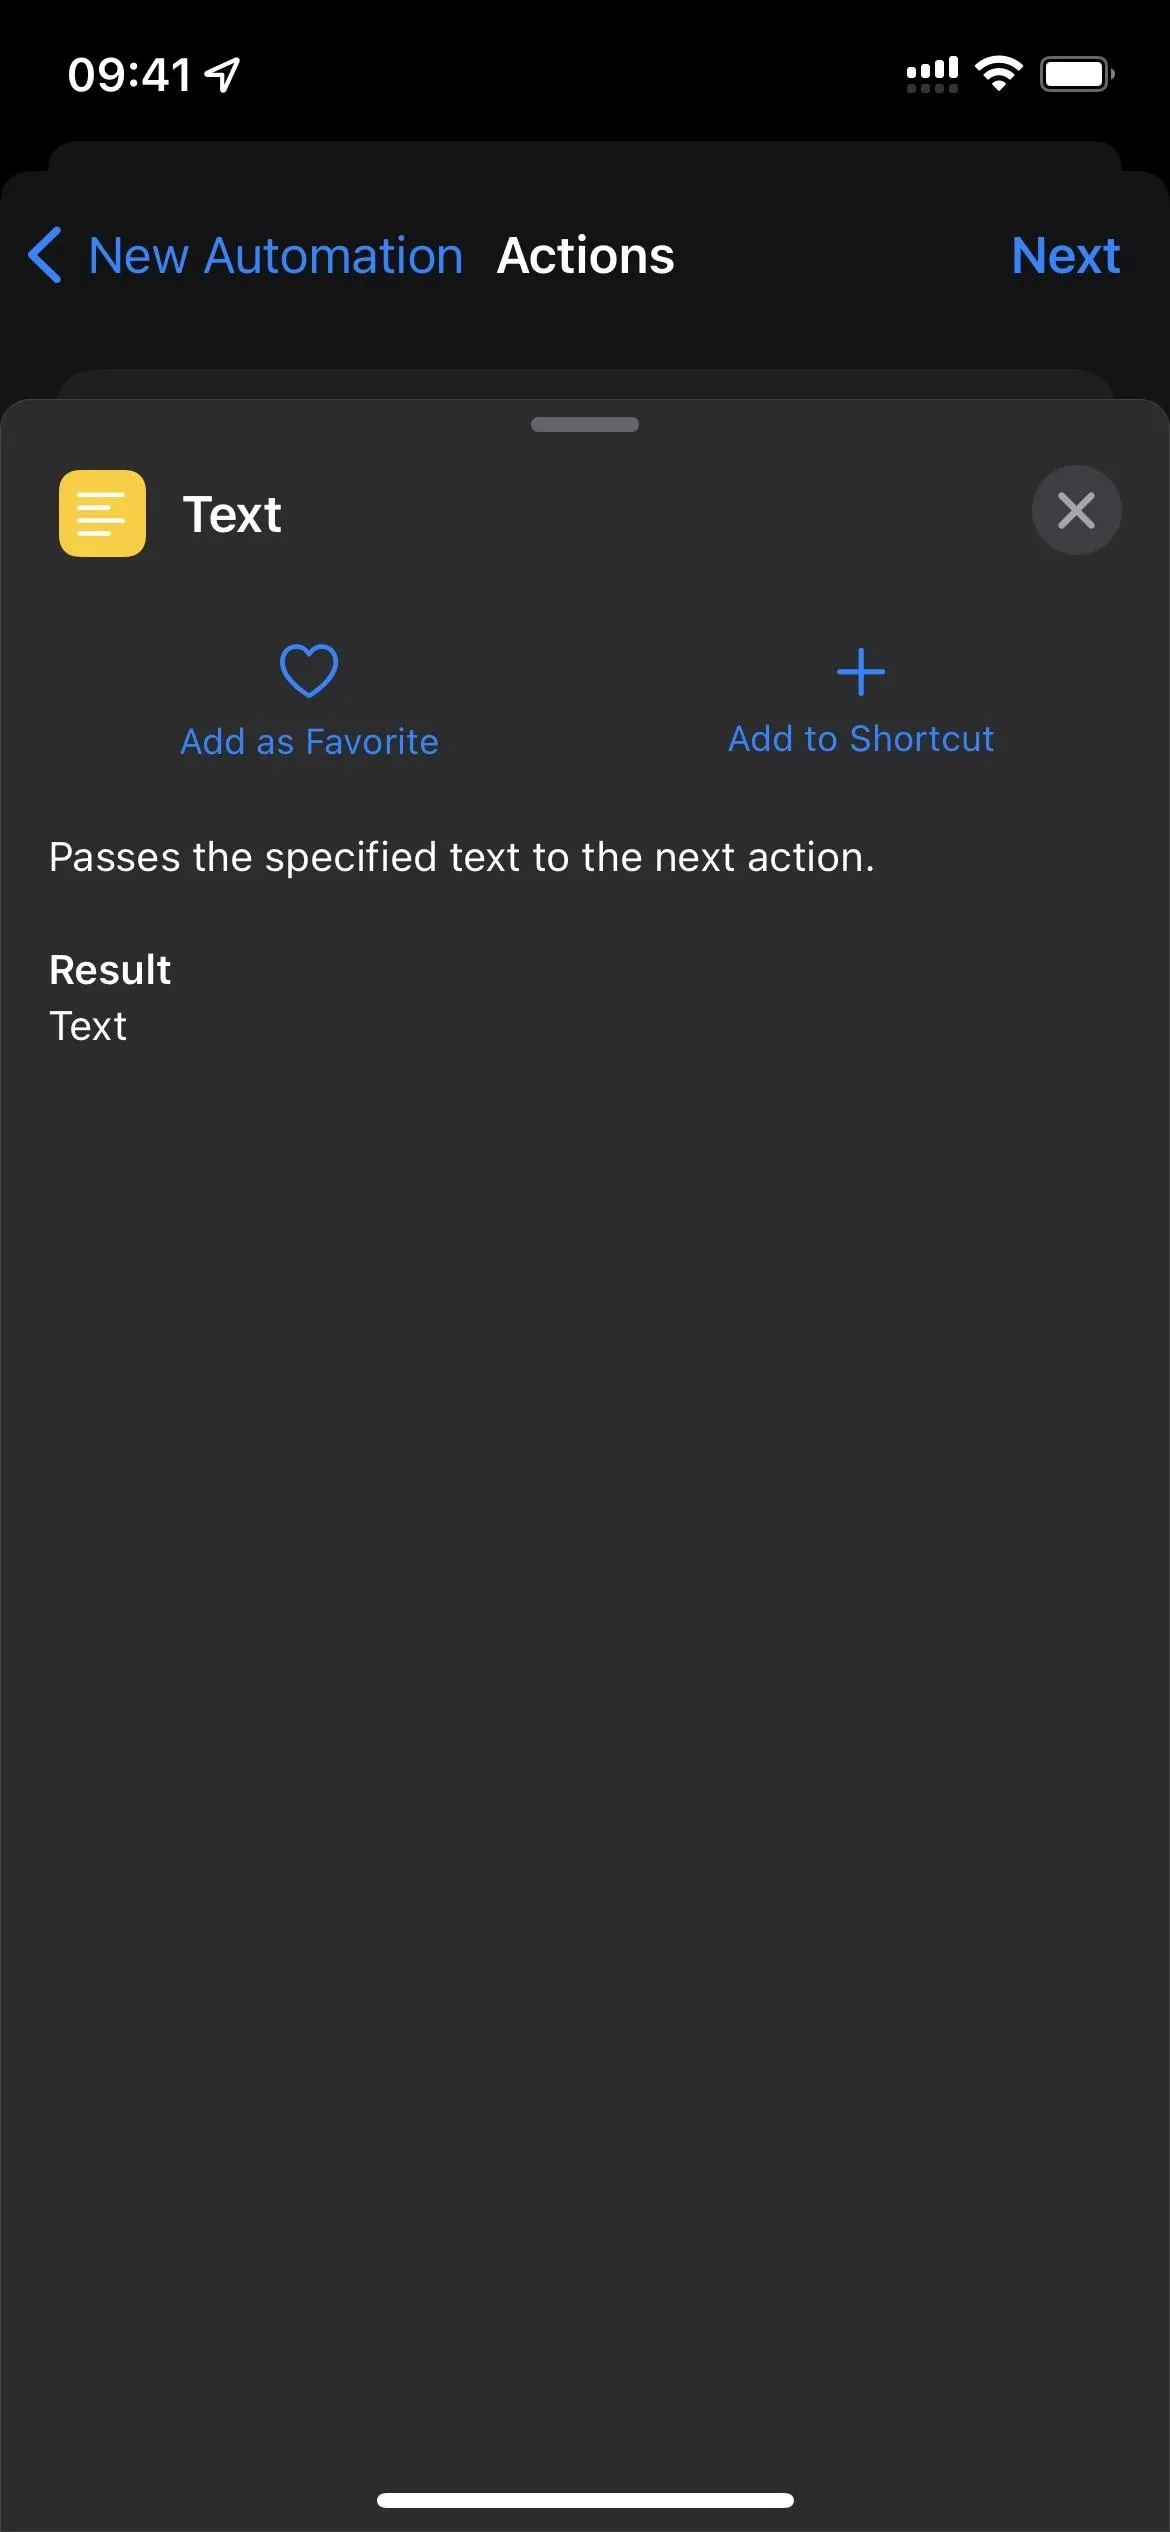
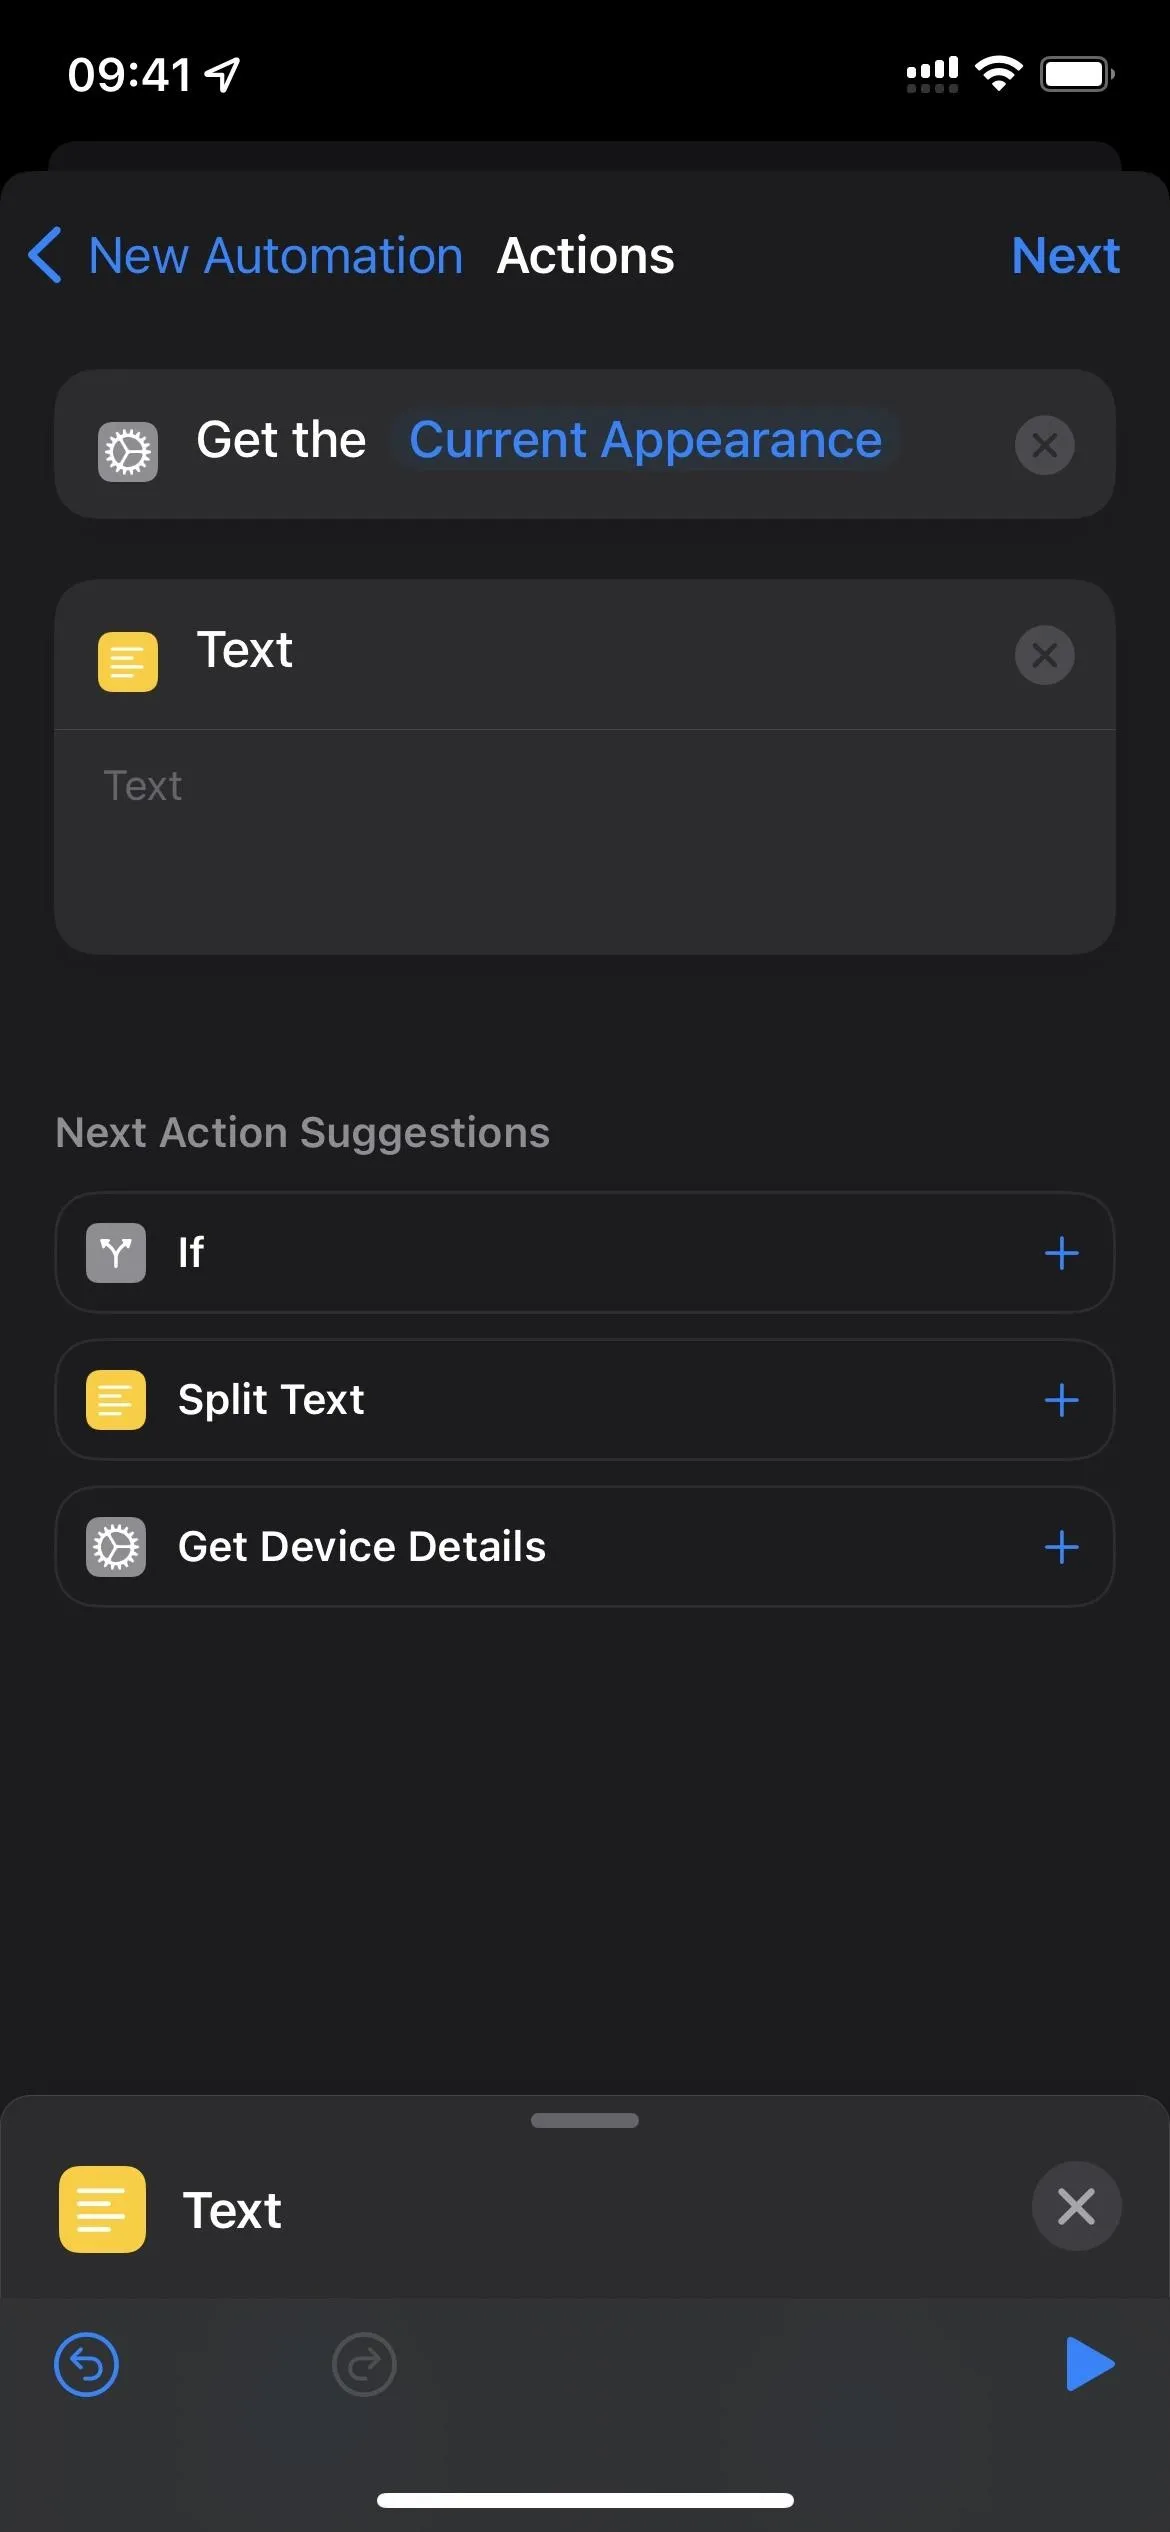
- Tap in the Text action box.
- Choose "Current Appearance" as the variable.
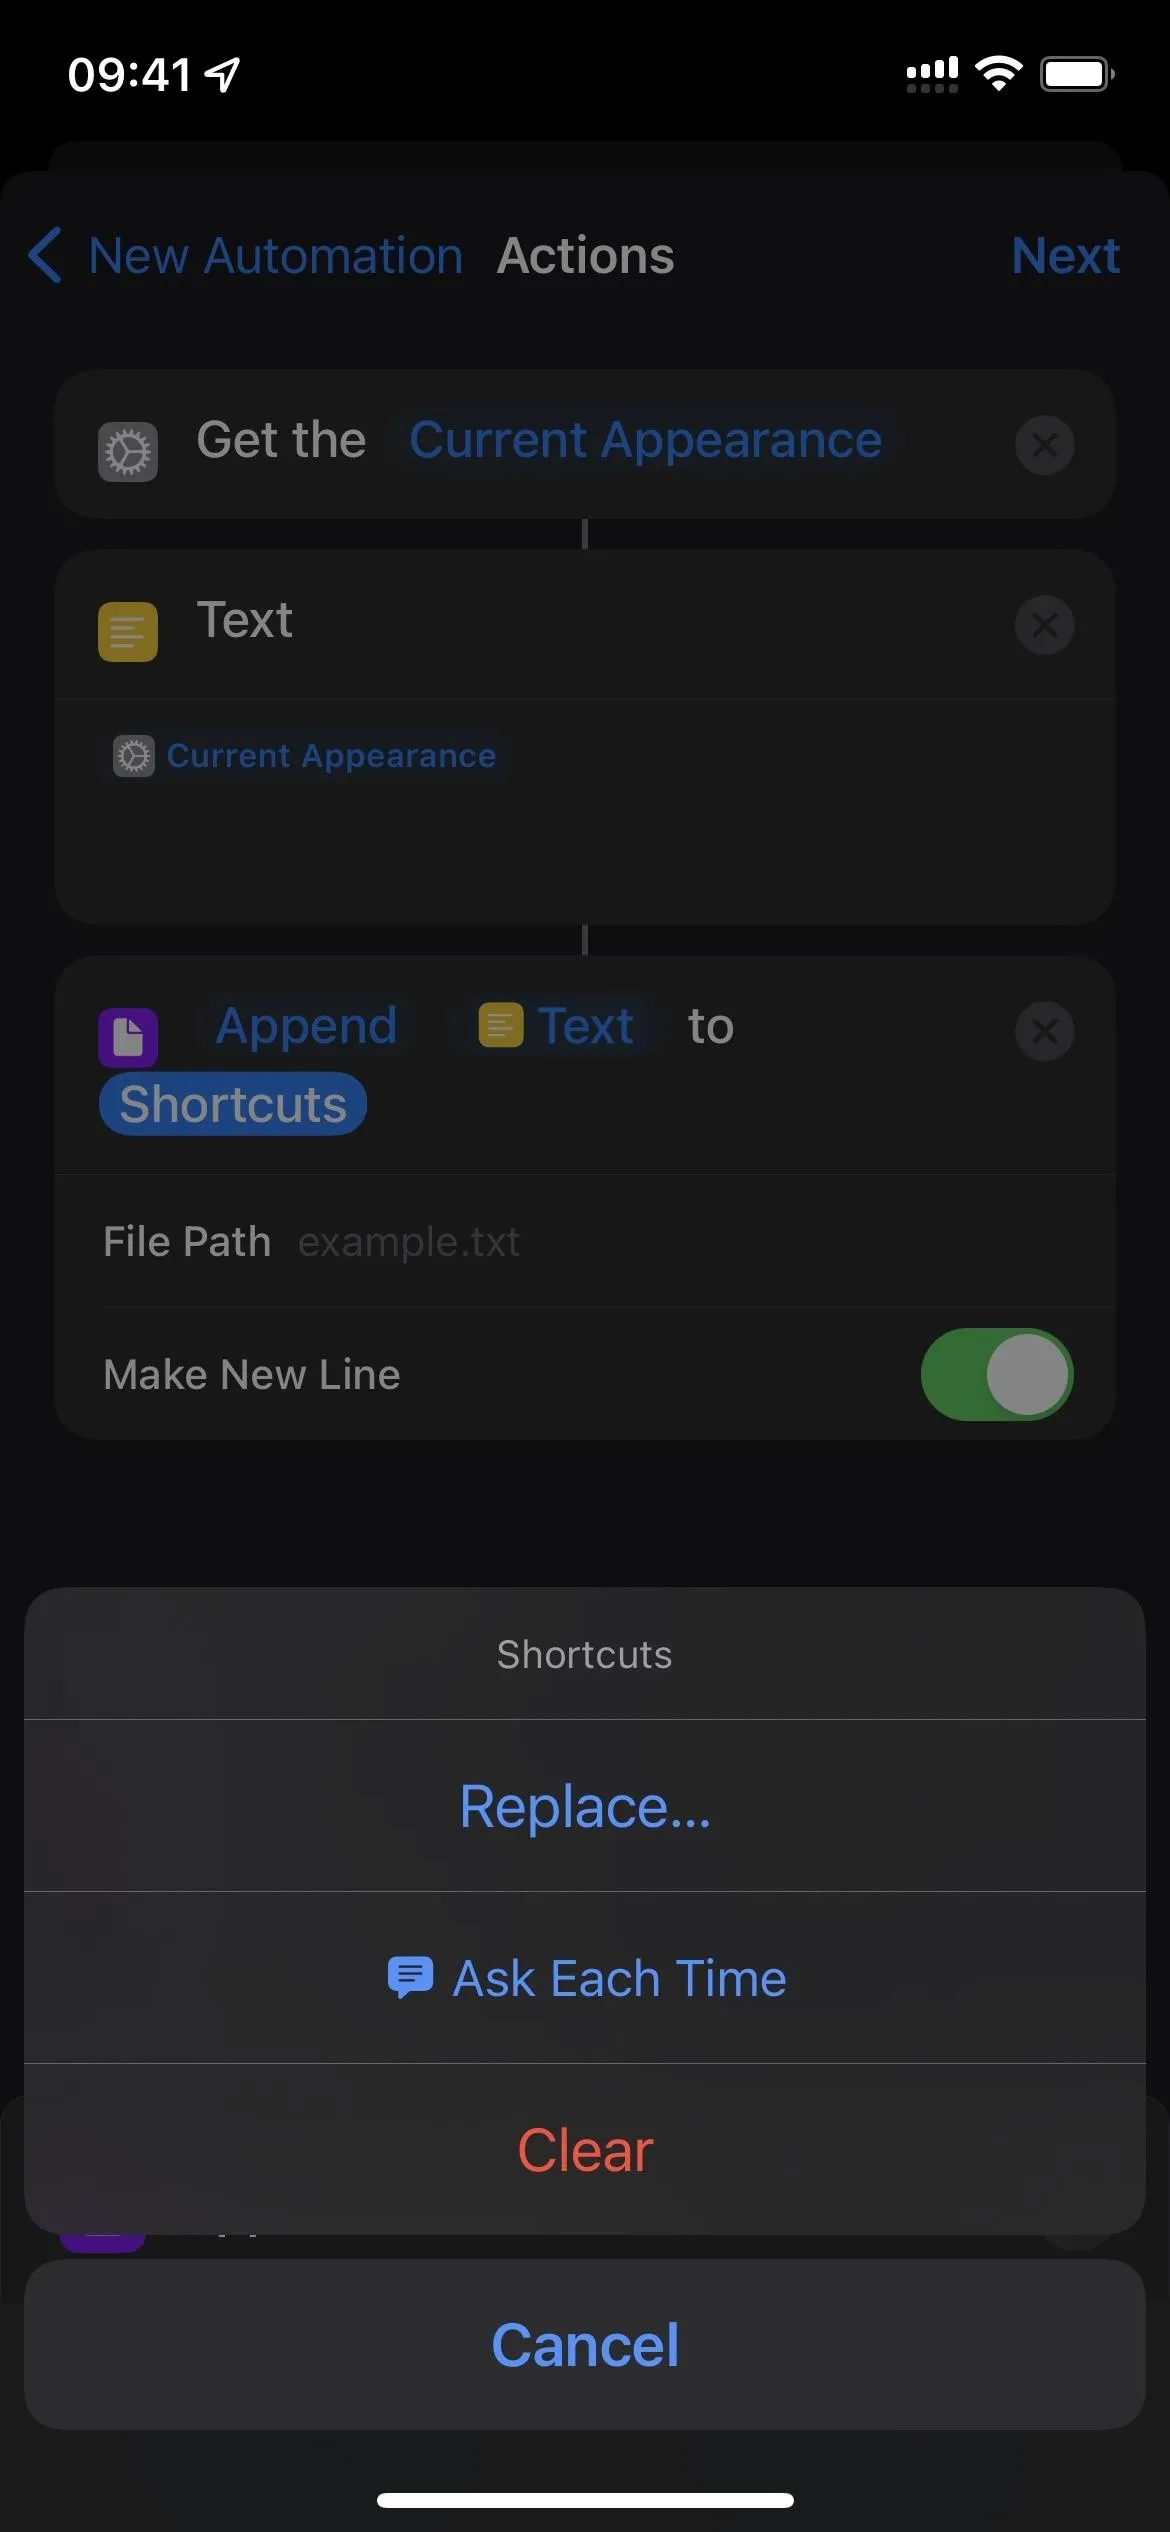
- Add the "Append to Text File" action below the Text action box.
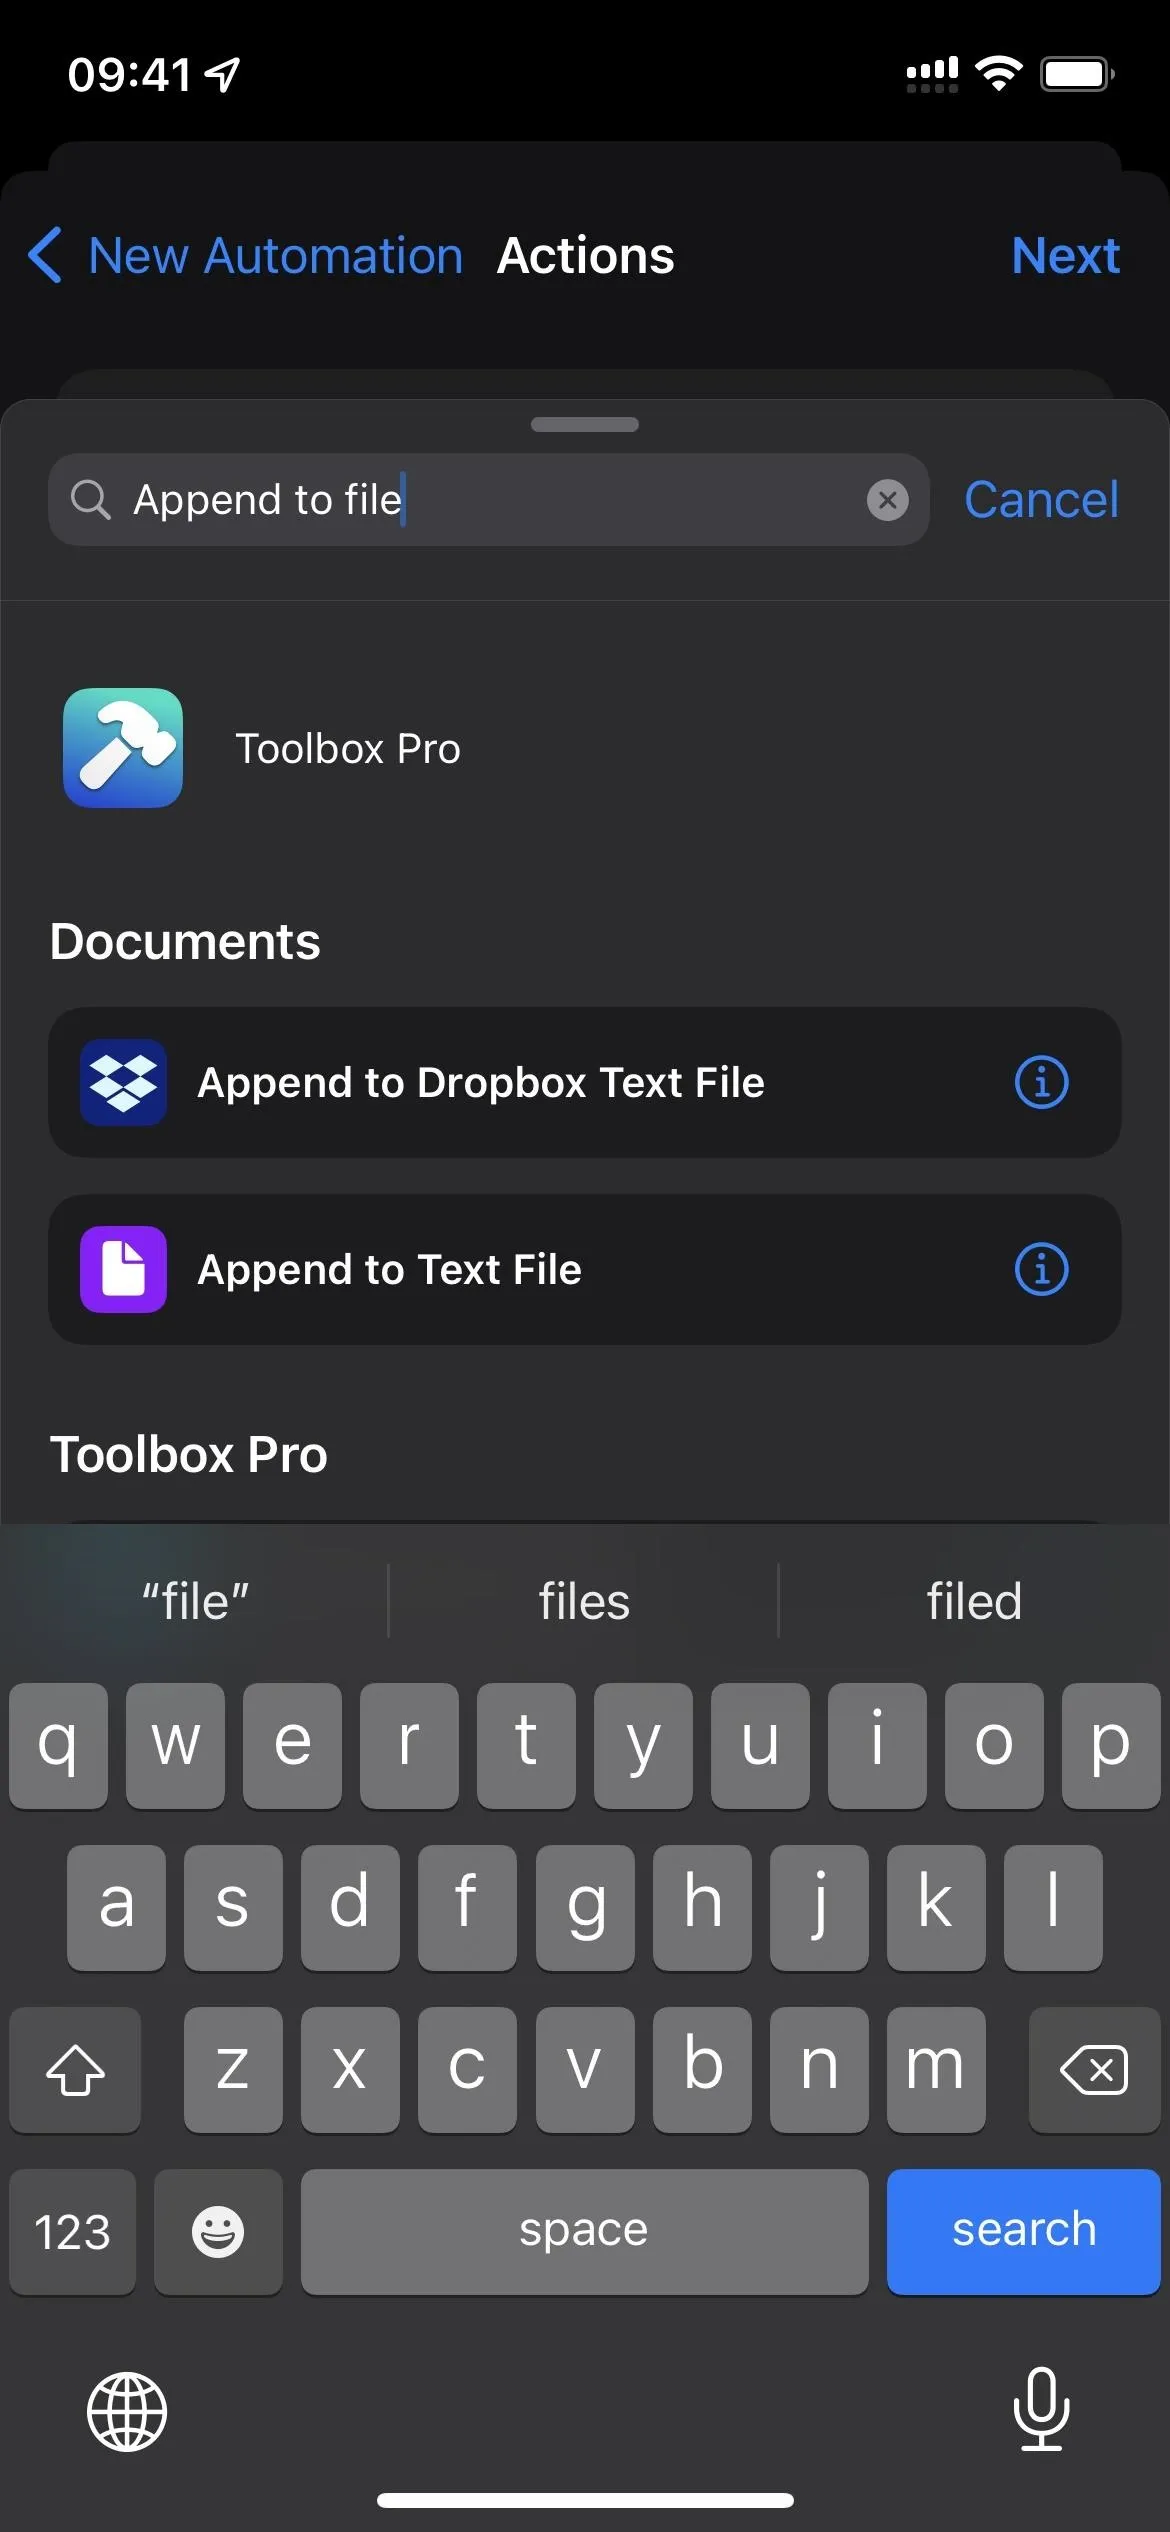
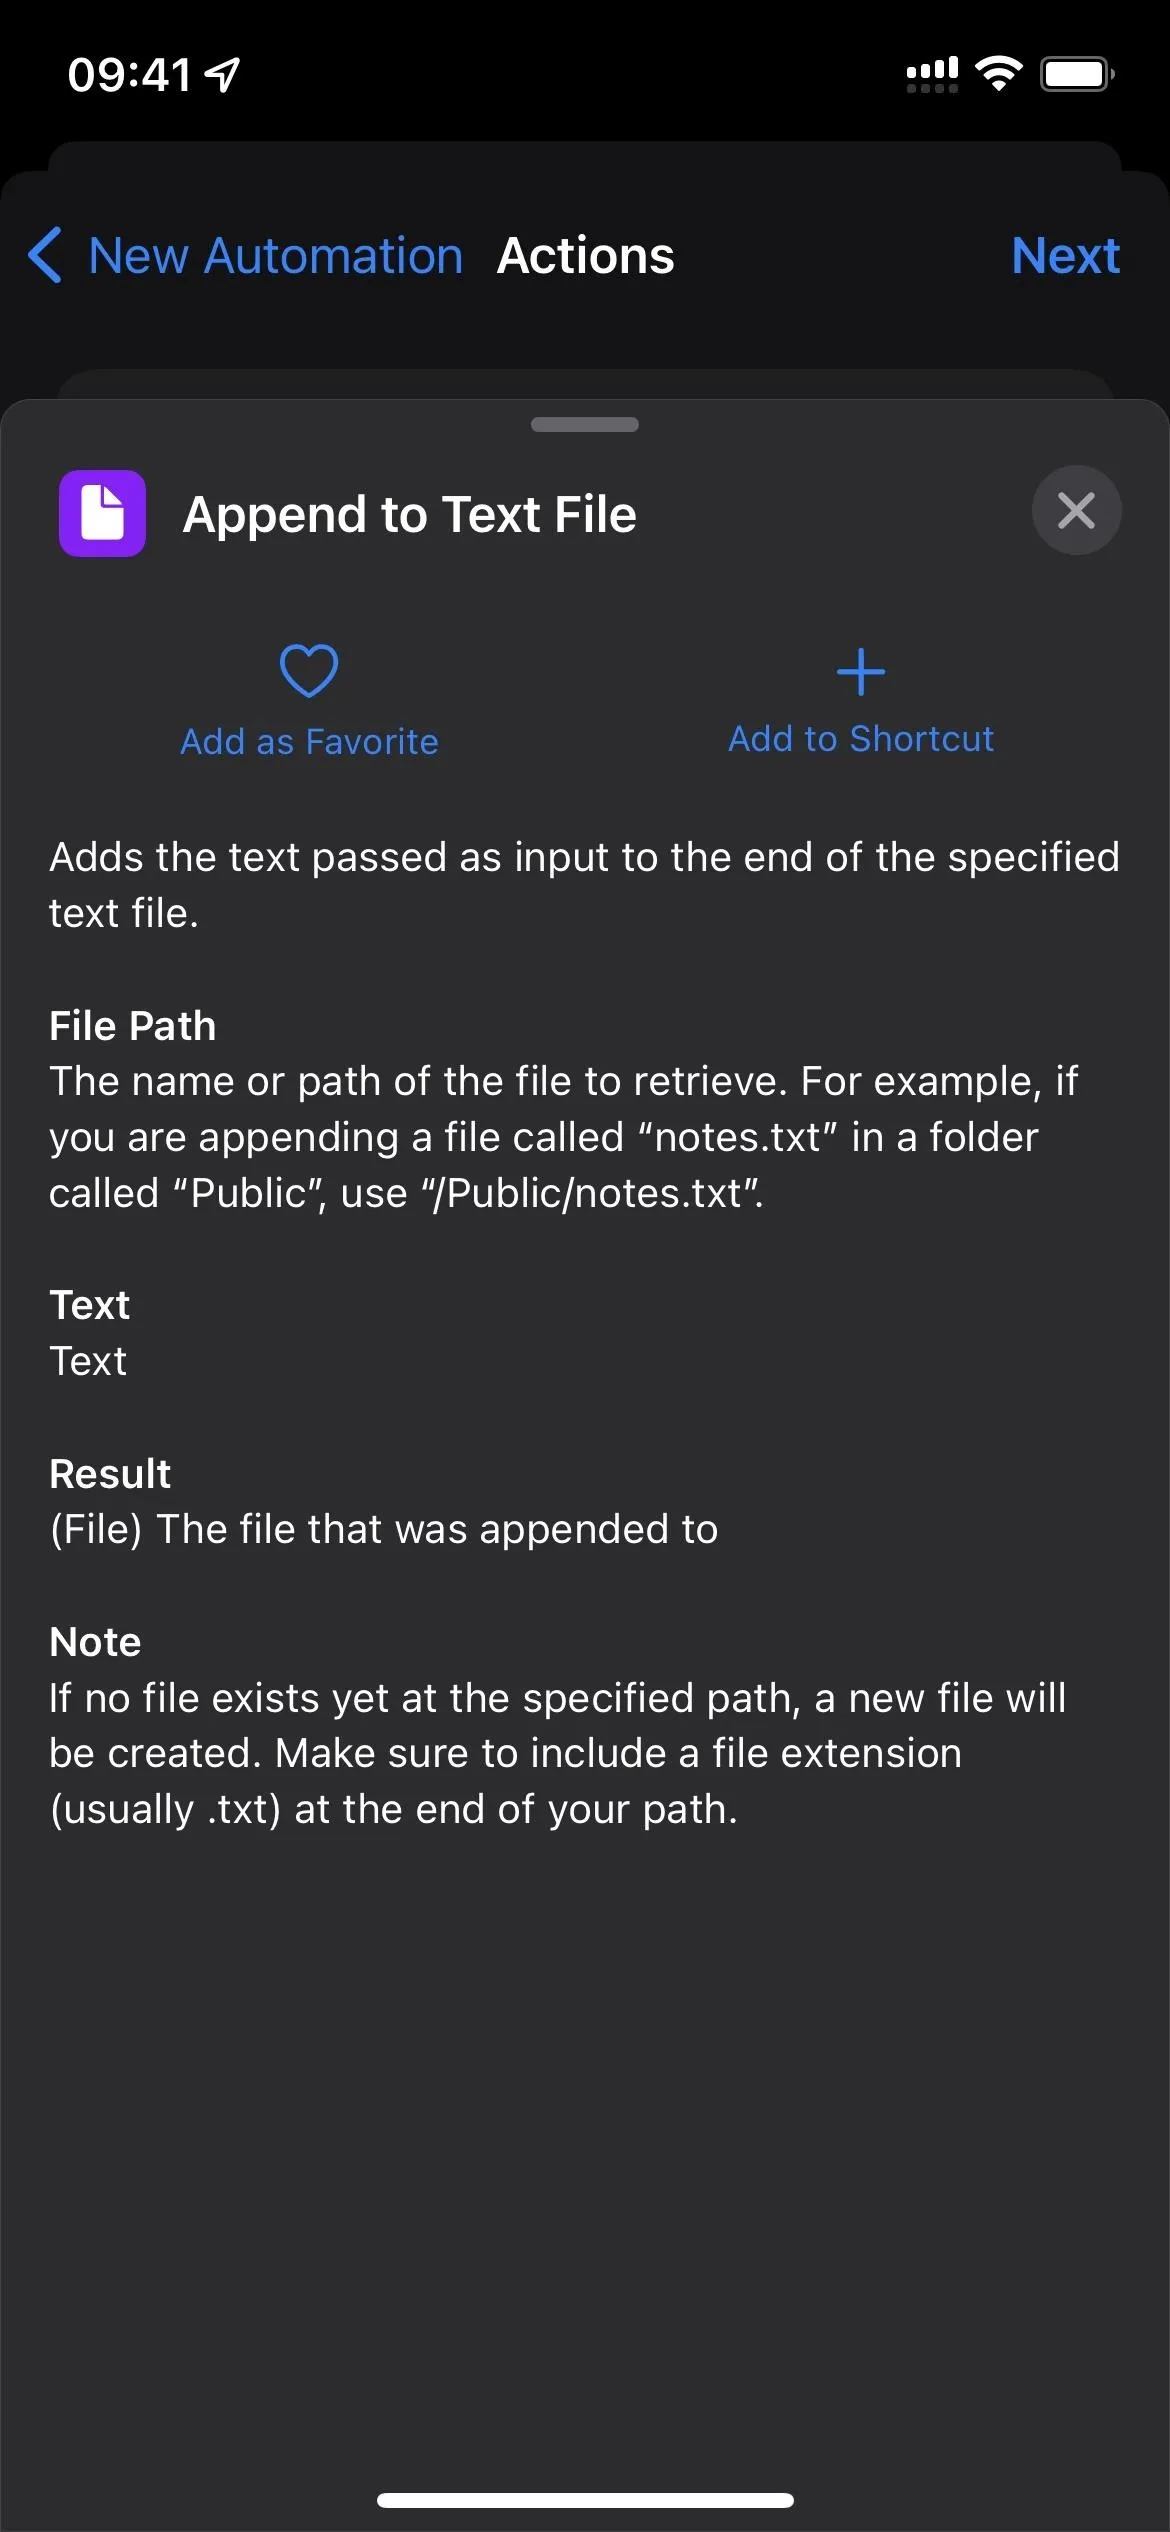
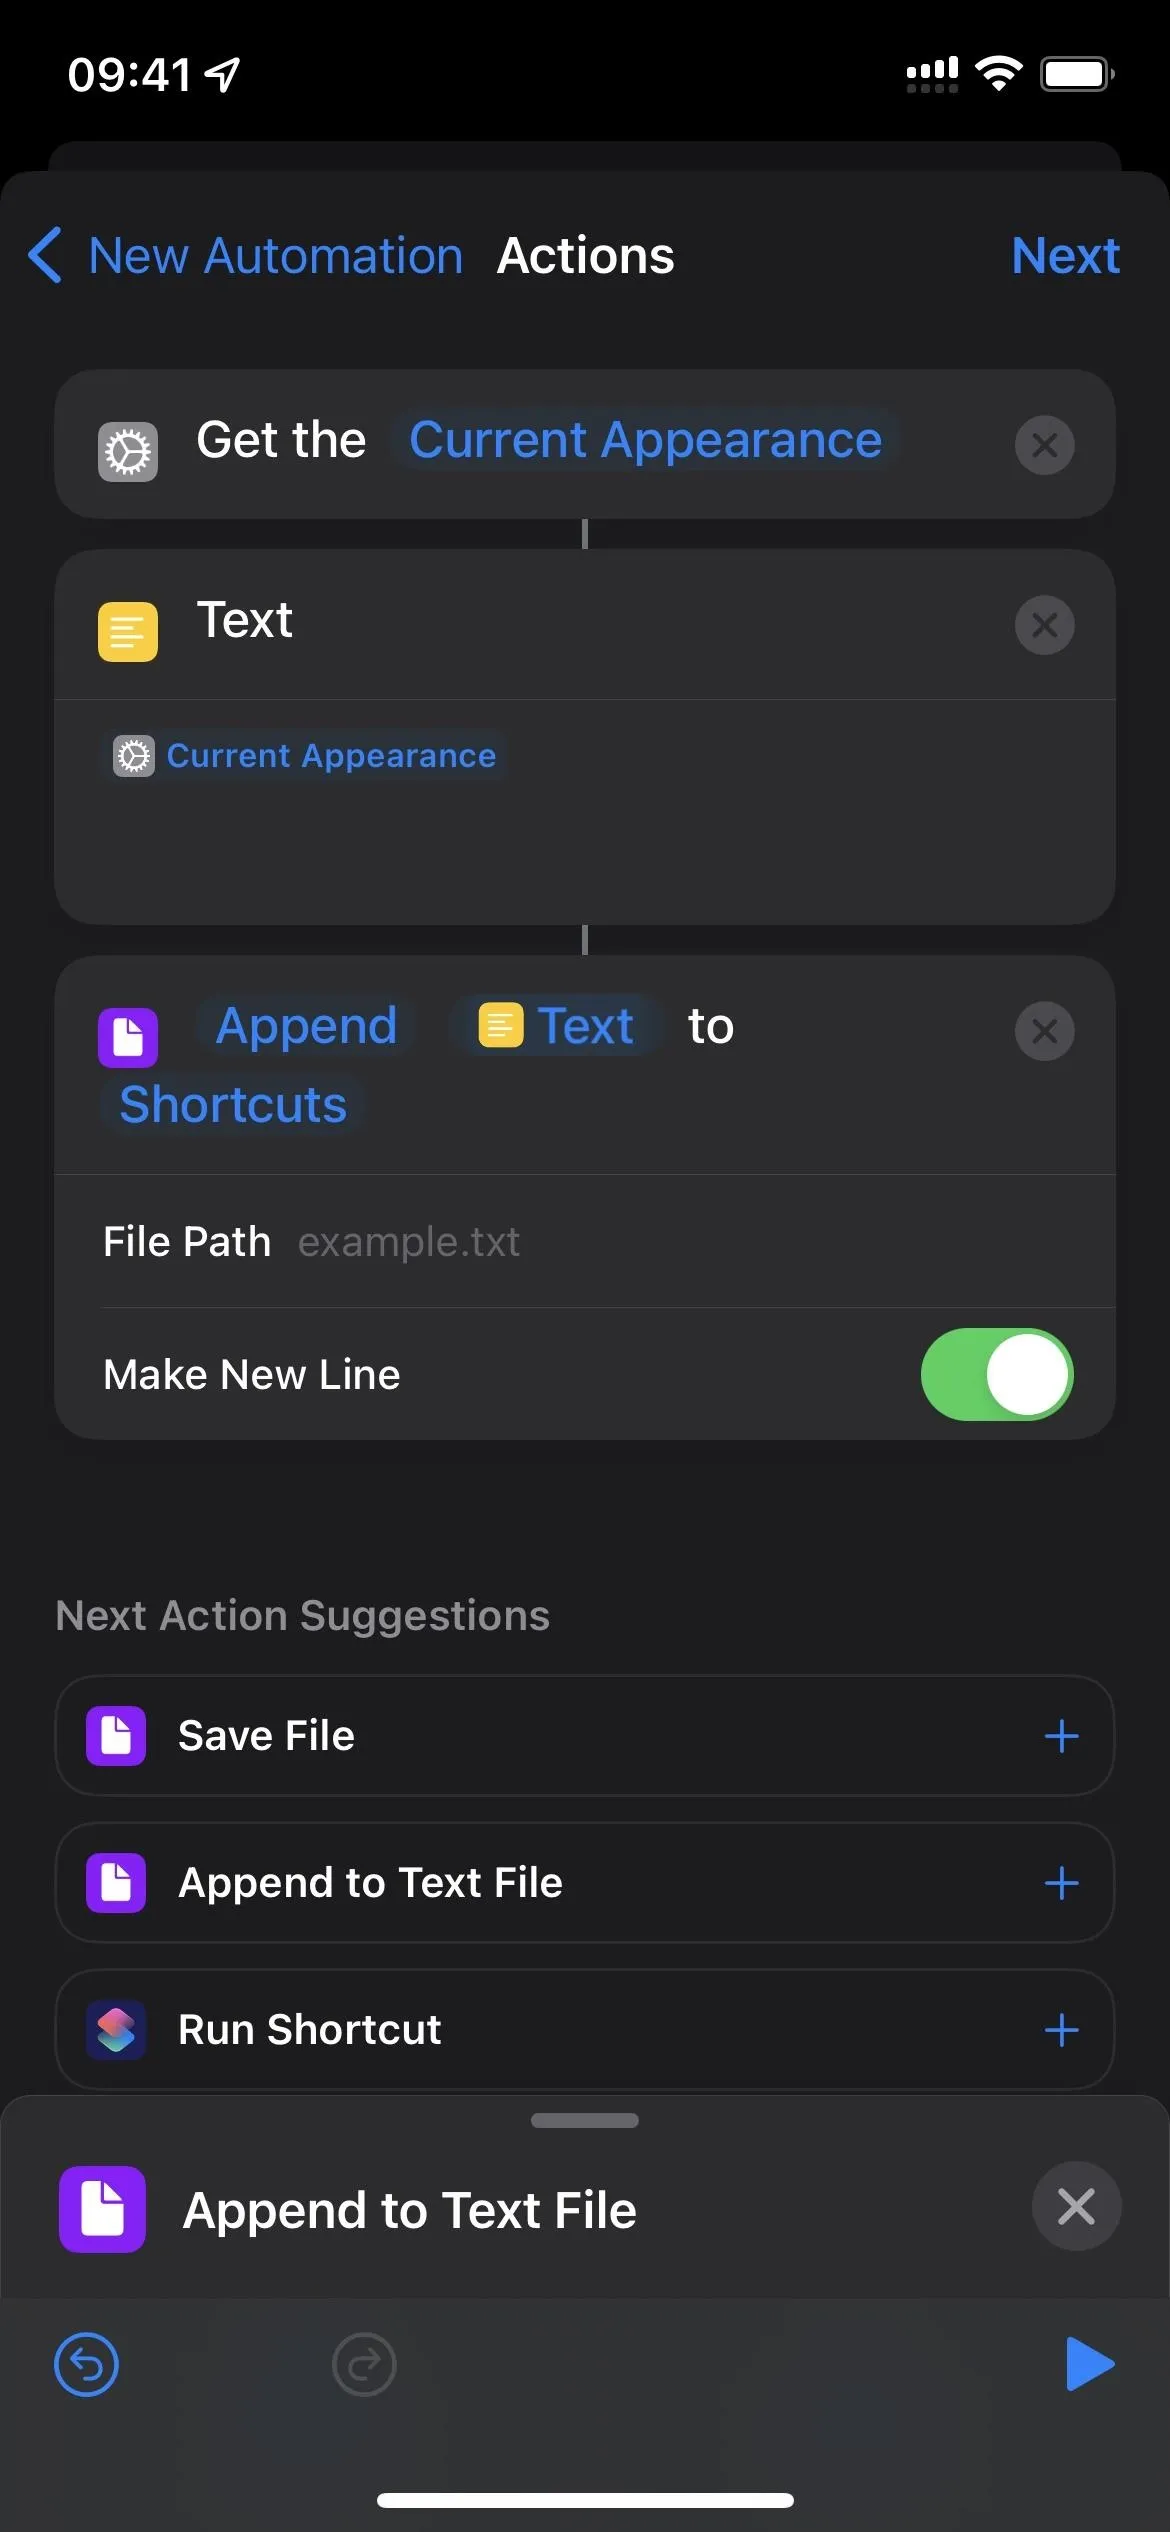
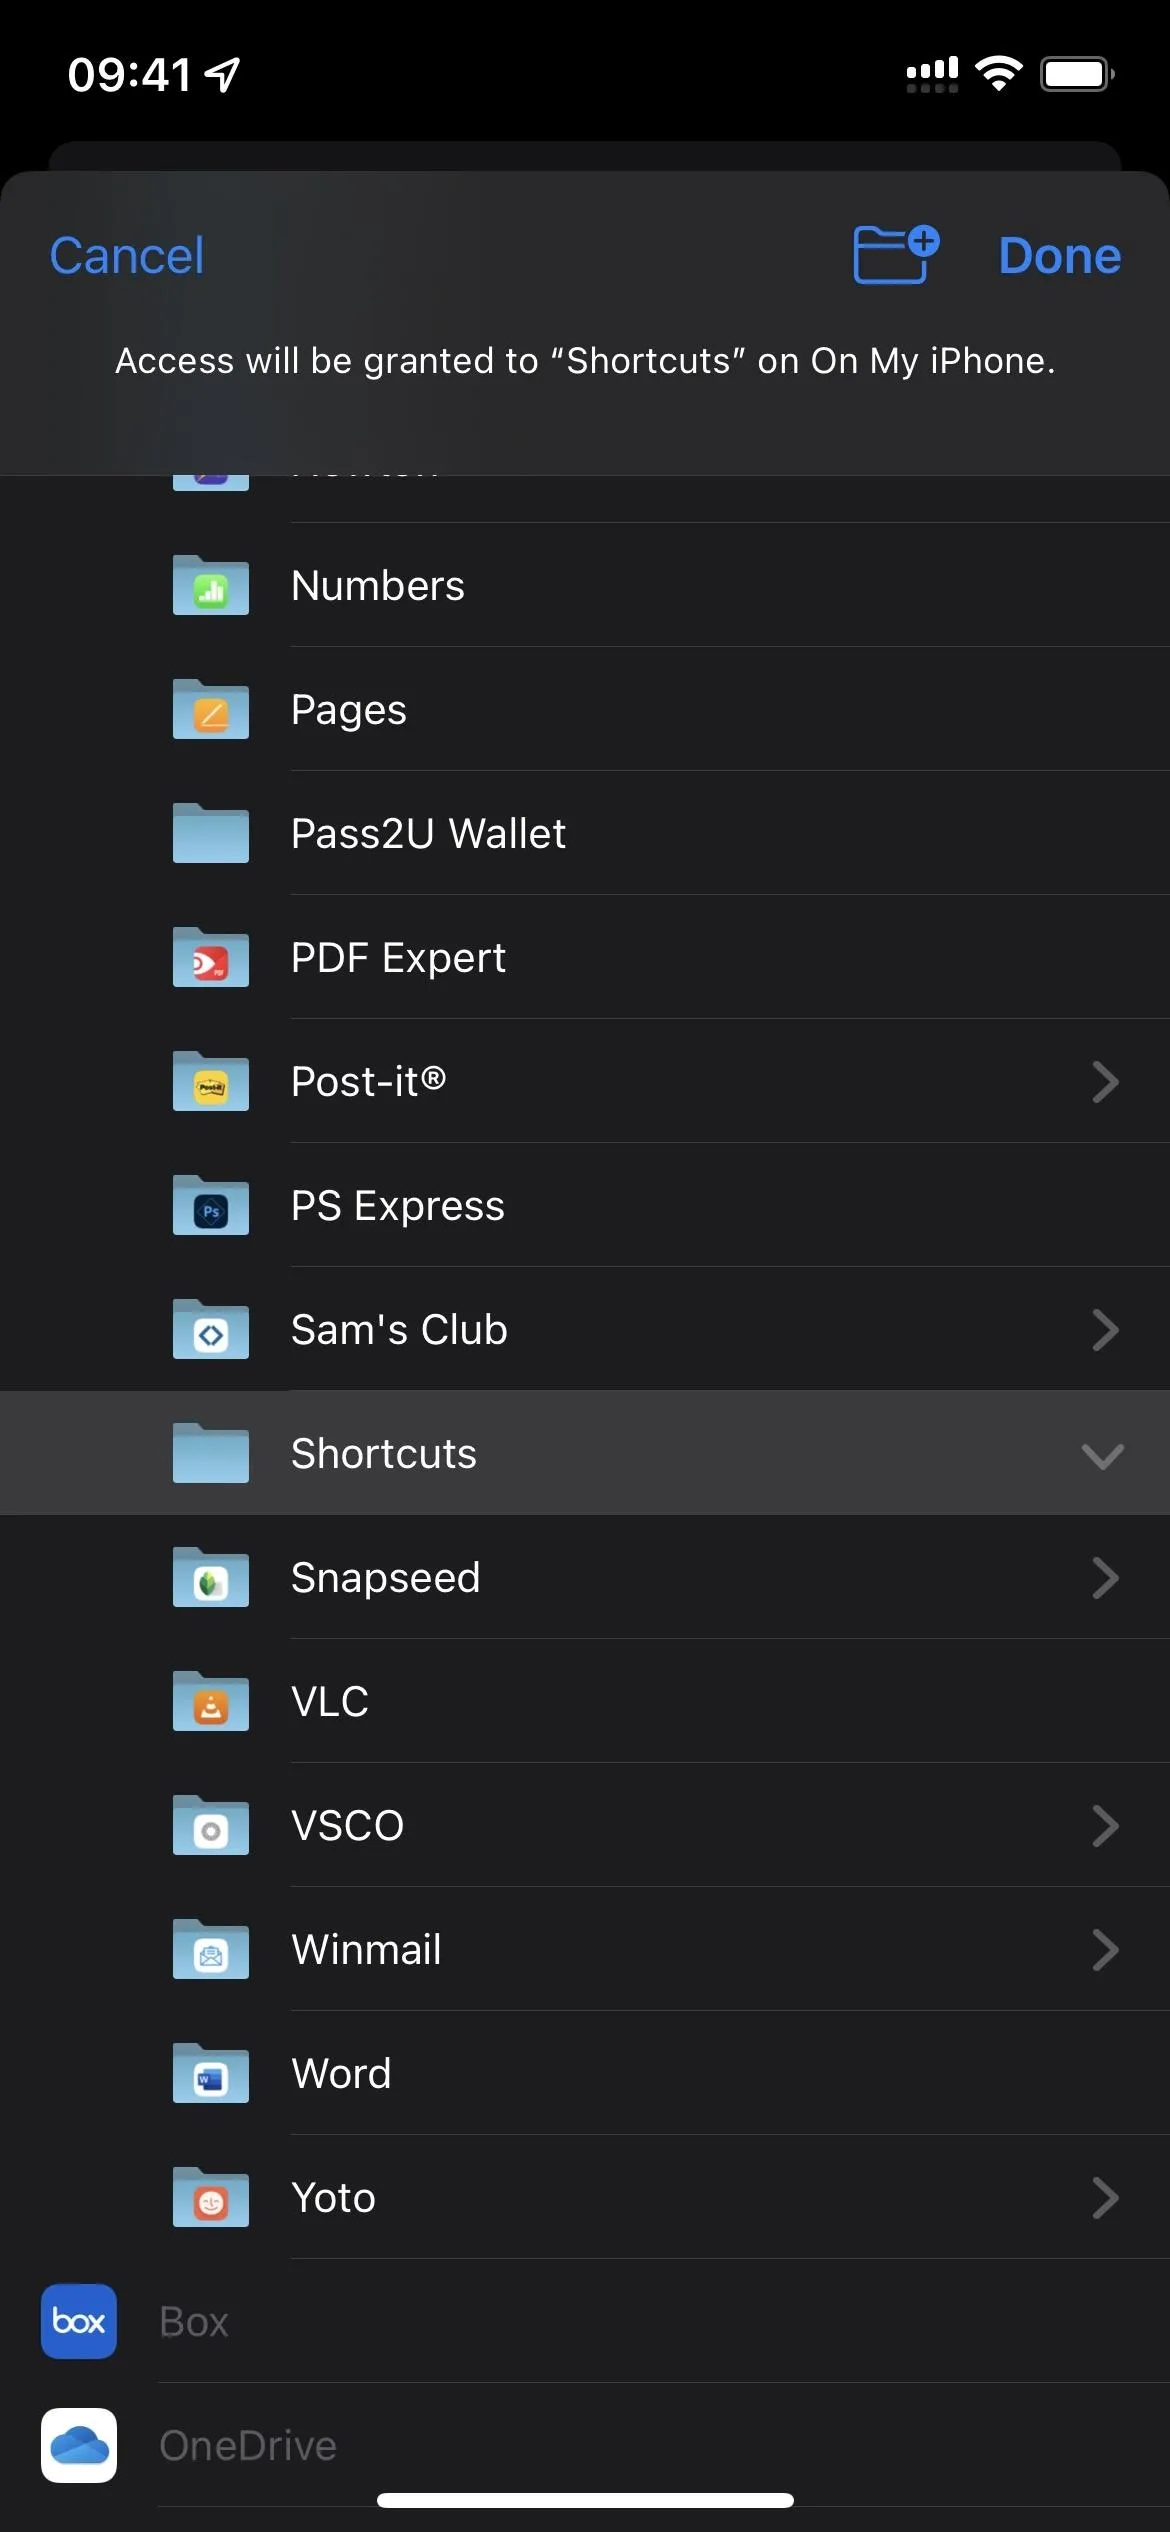
- Tap the directory in the Append action box. (Mine is "Shortcuts.")
- Choose "Replace..." from the menu.
- Choose the location where your file is.
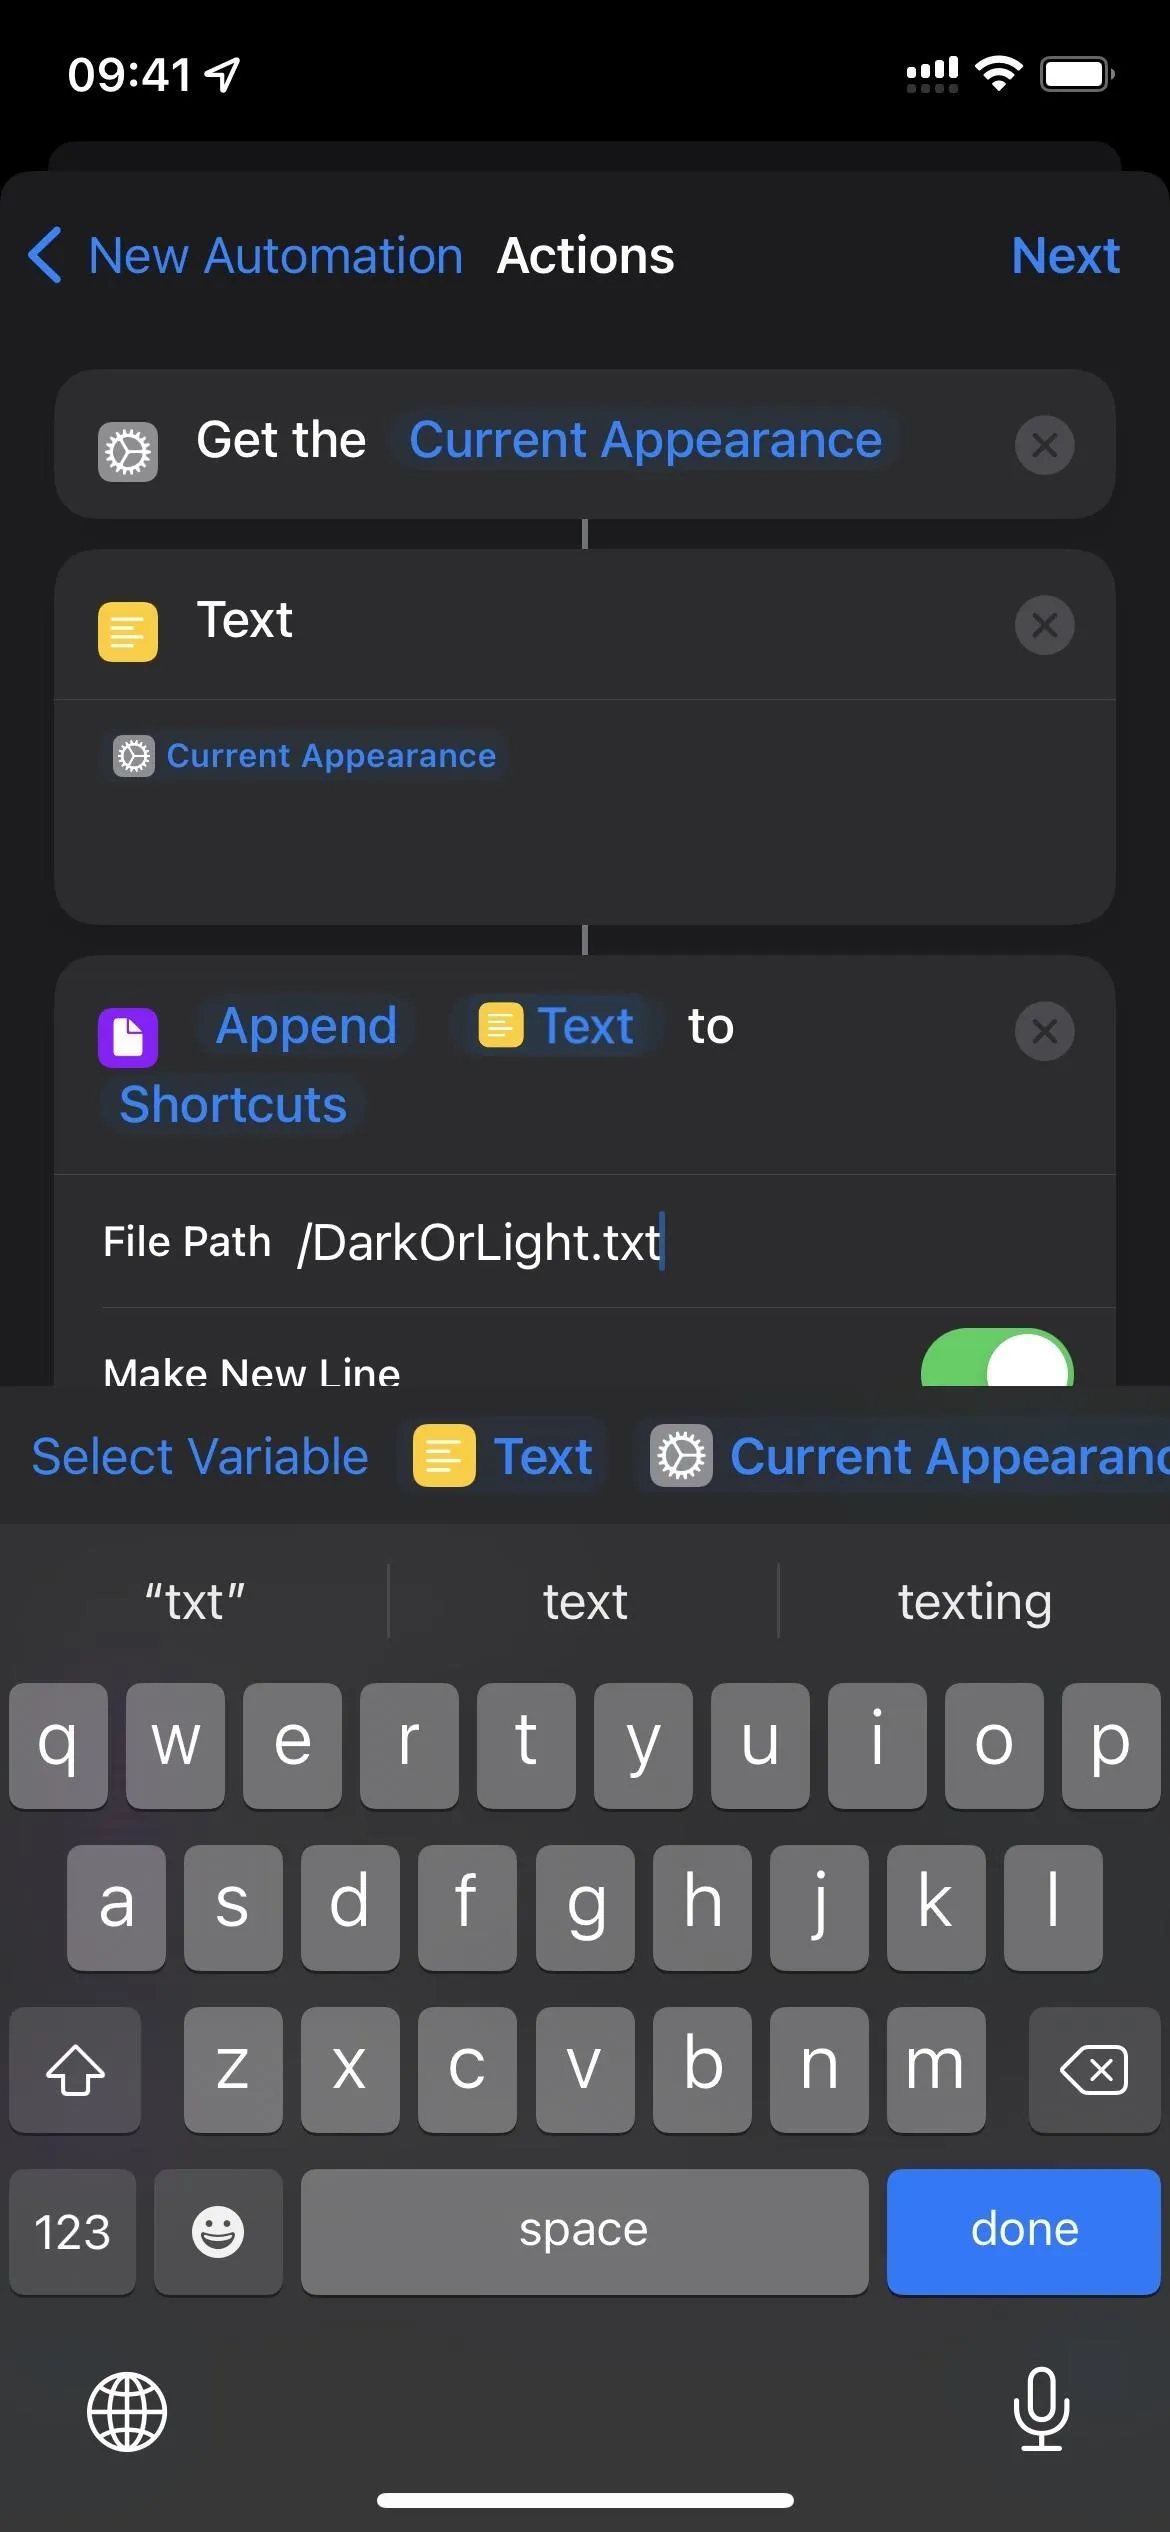
- Type the file name, starting with a / (slash), as the File Path. (Mine is /DarkOrLight.txt.)
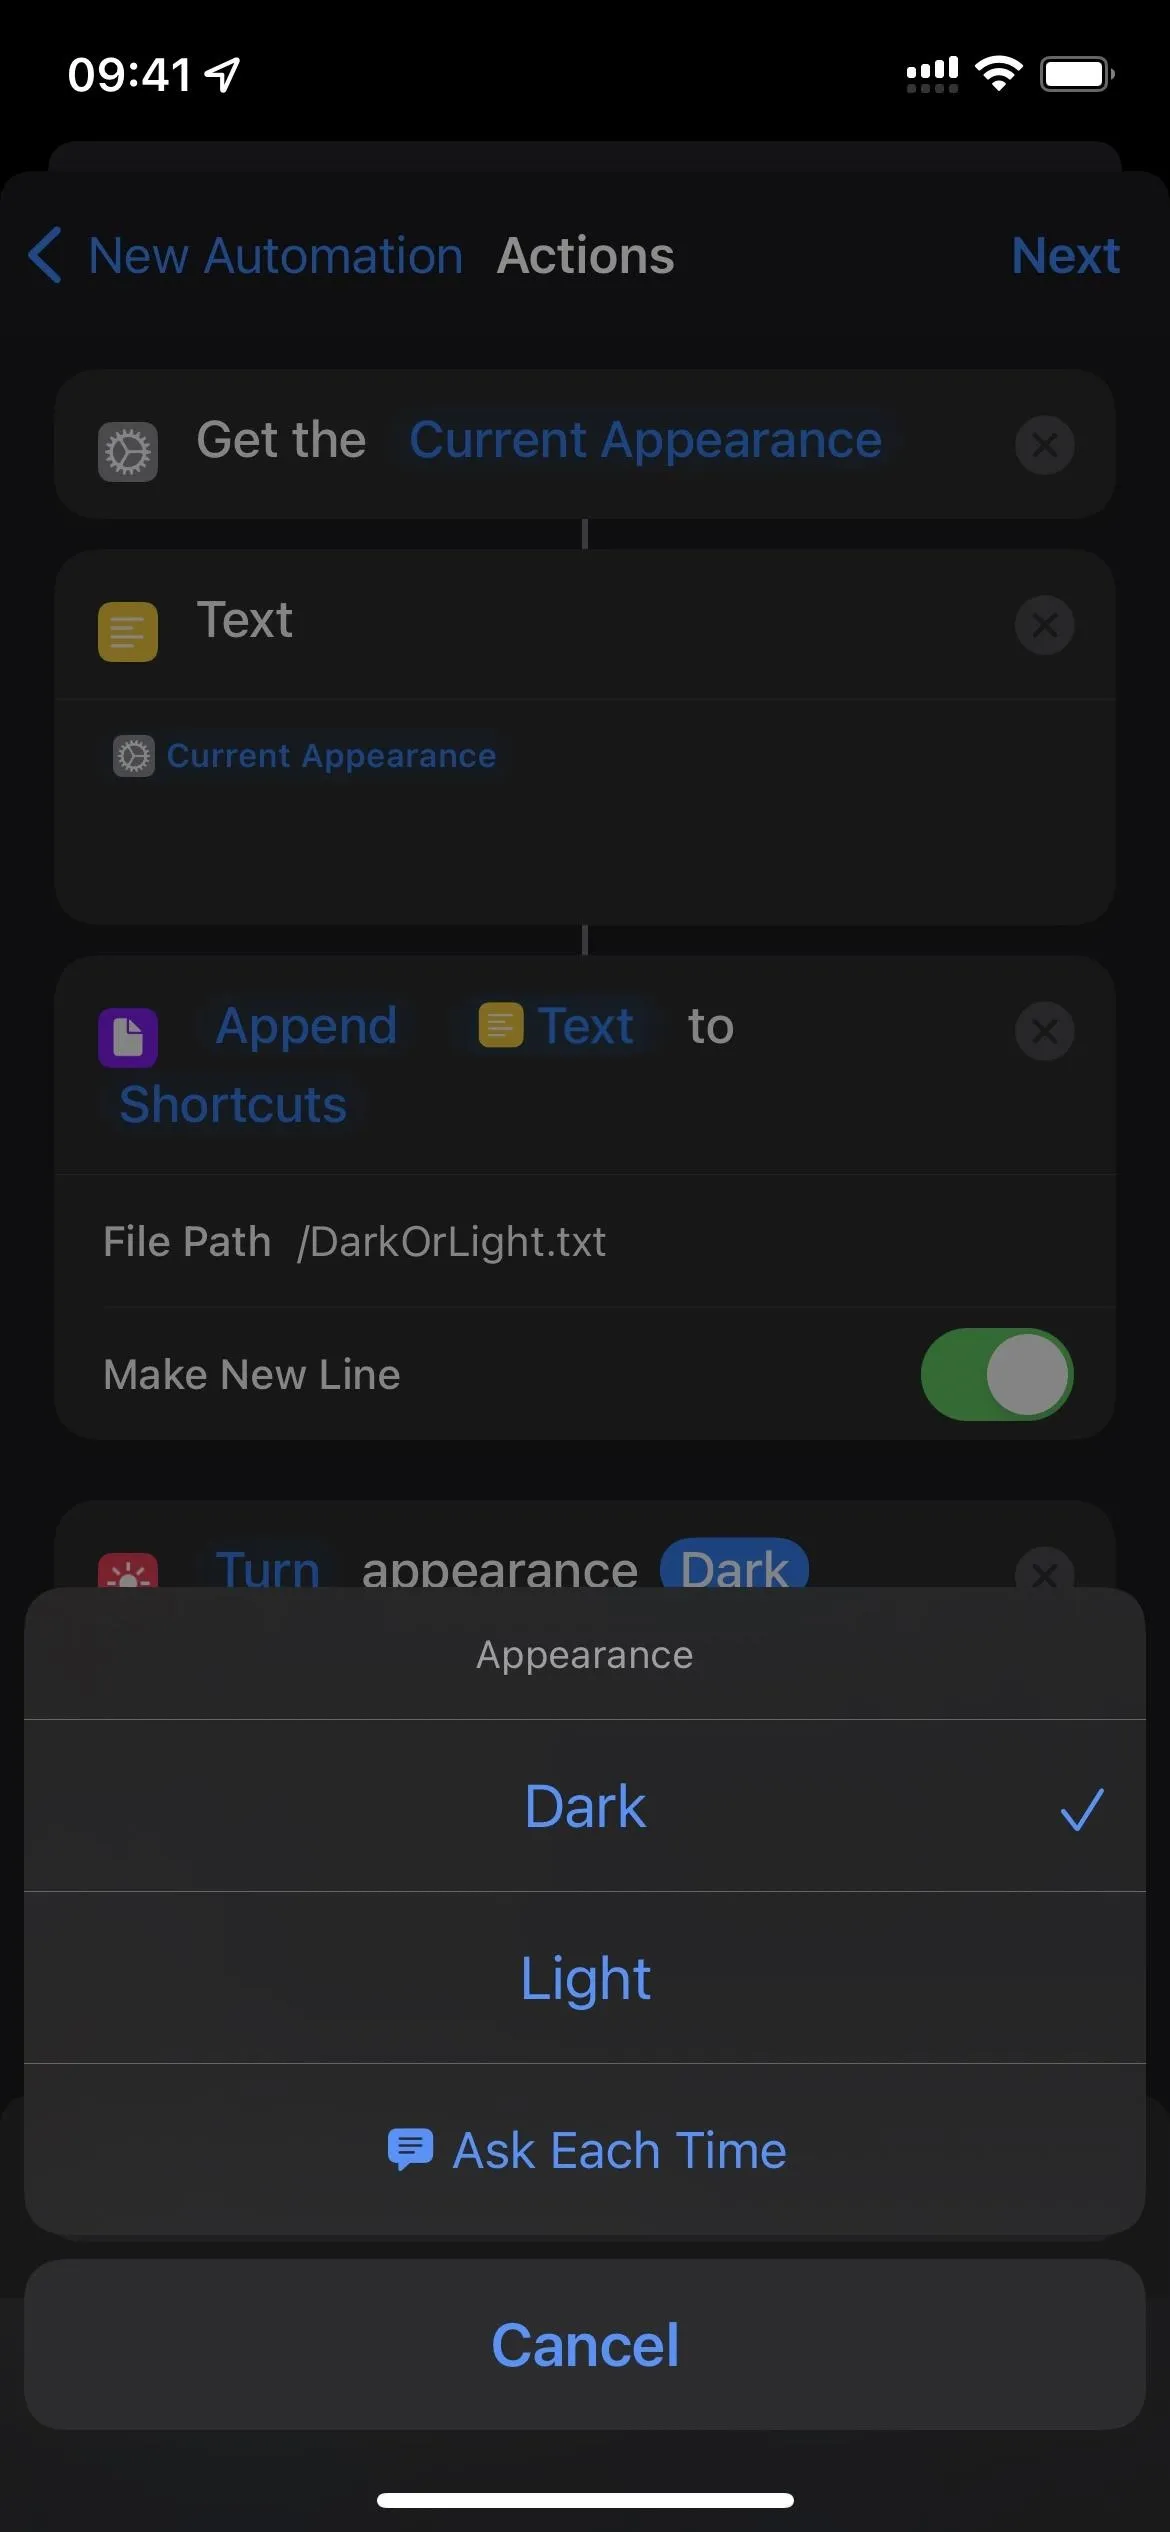
- Add the "Set Appearance" action below the Append to Text File action box.

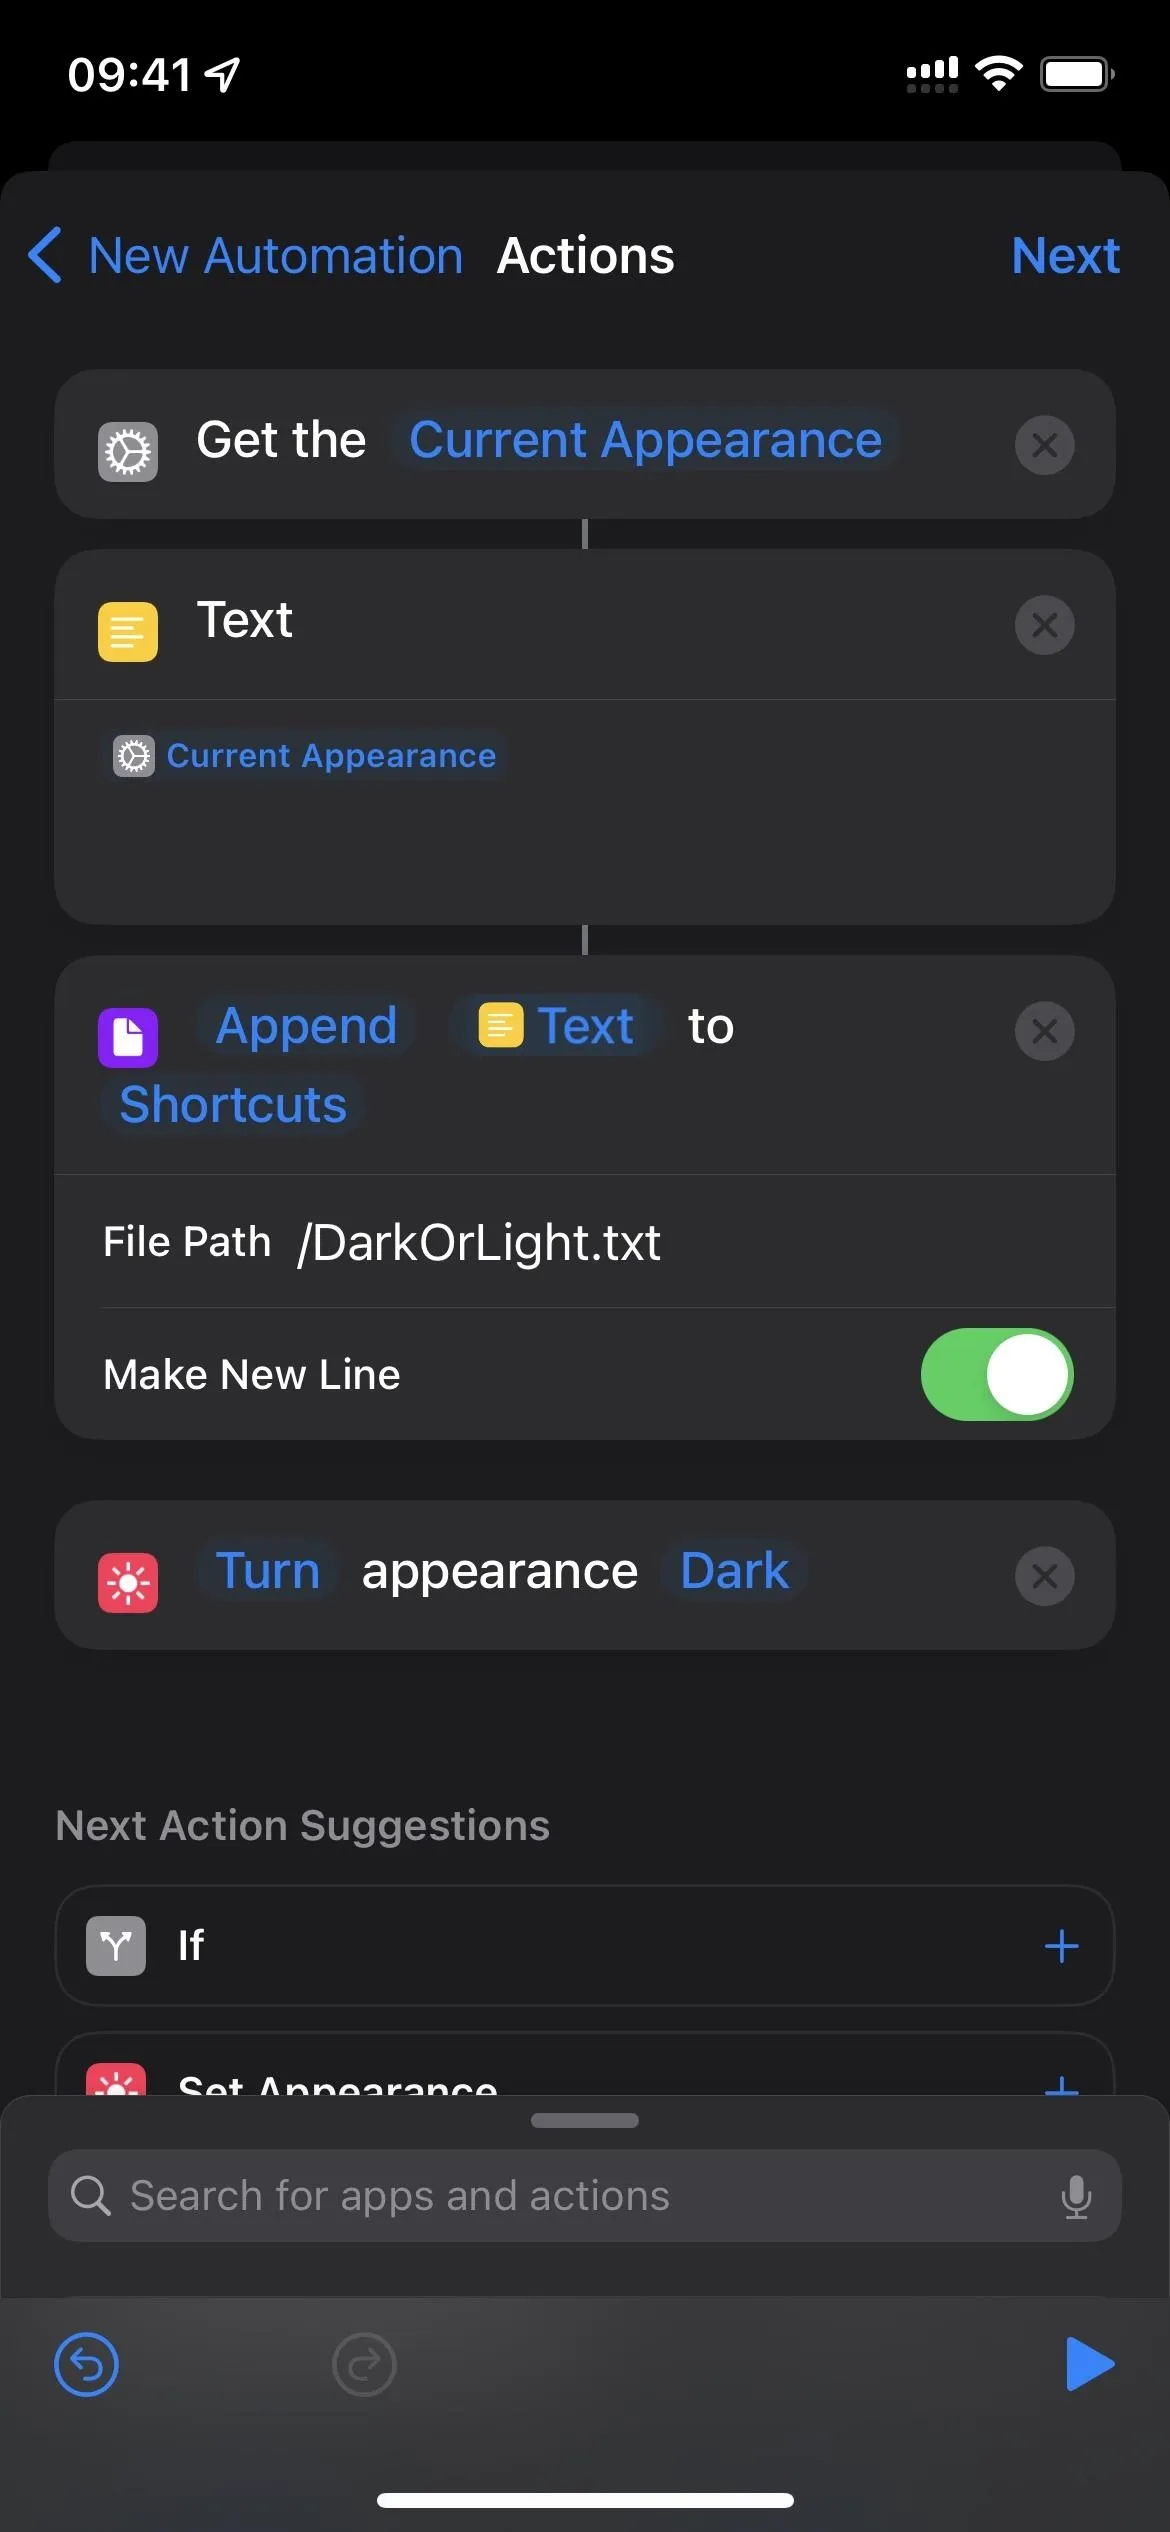
- Skip this part if you want the apps to use Dark Mode. Otherwise, tap "Dark" in the action box and select "Light."
- Hit "Next" to continue.
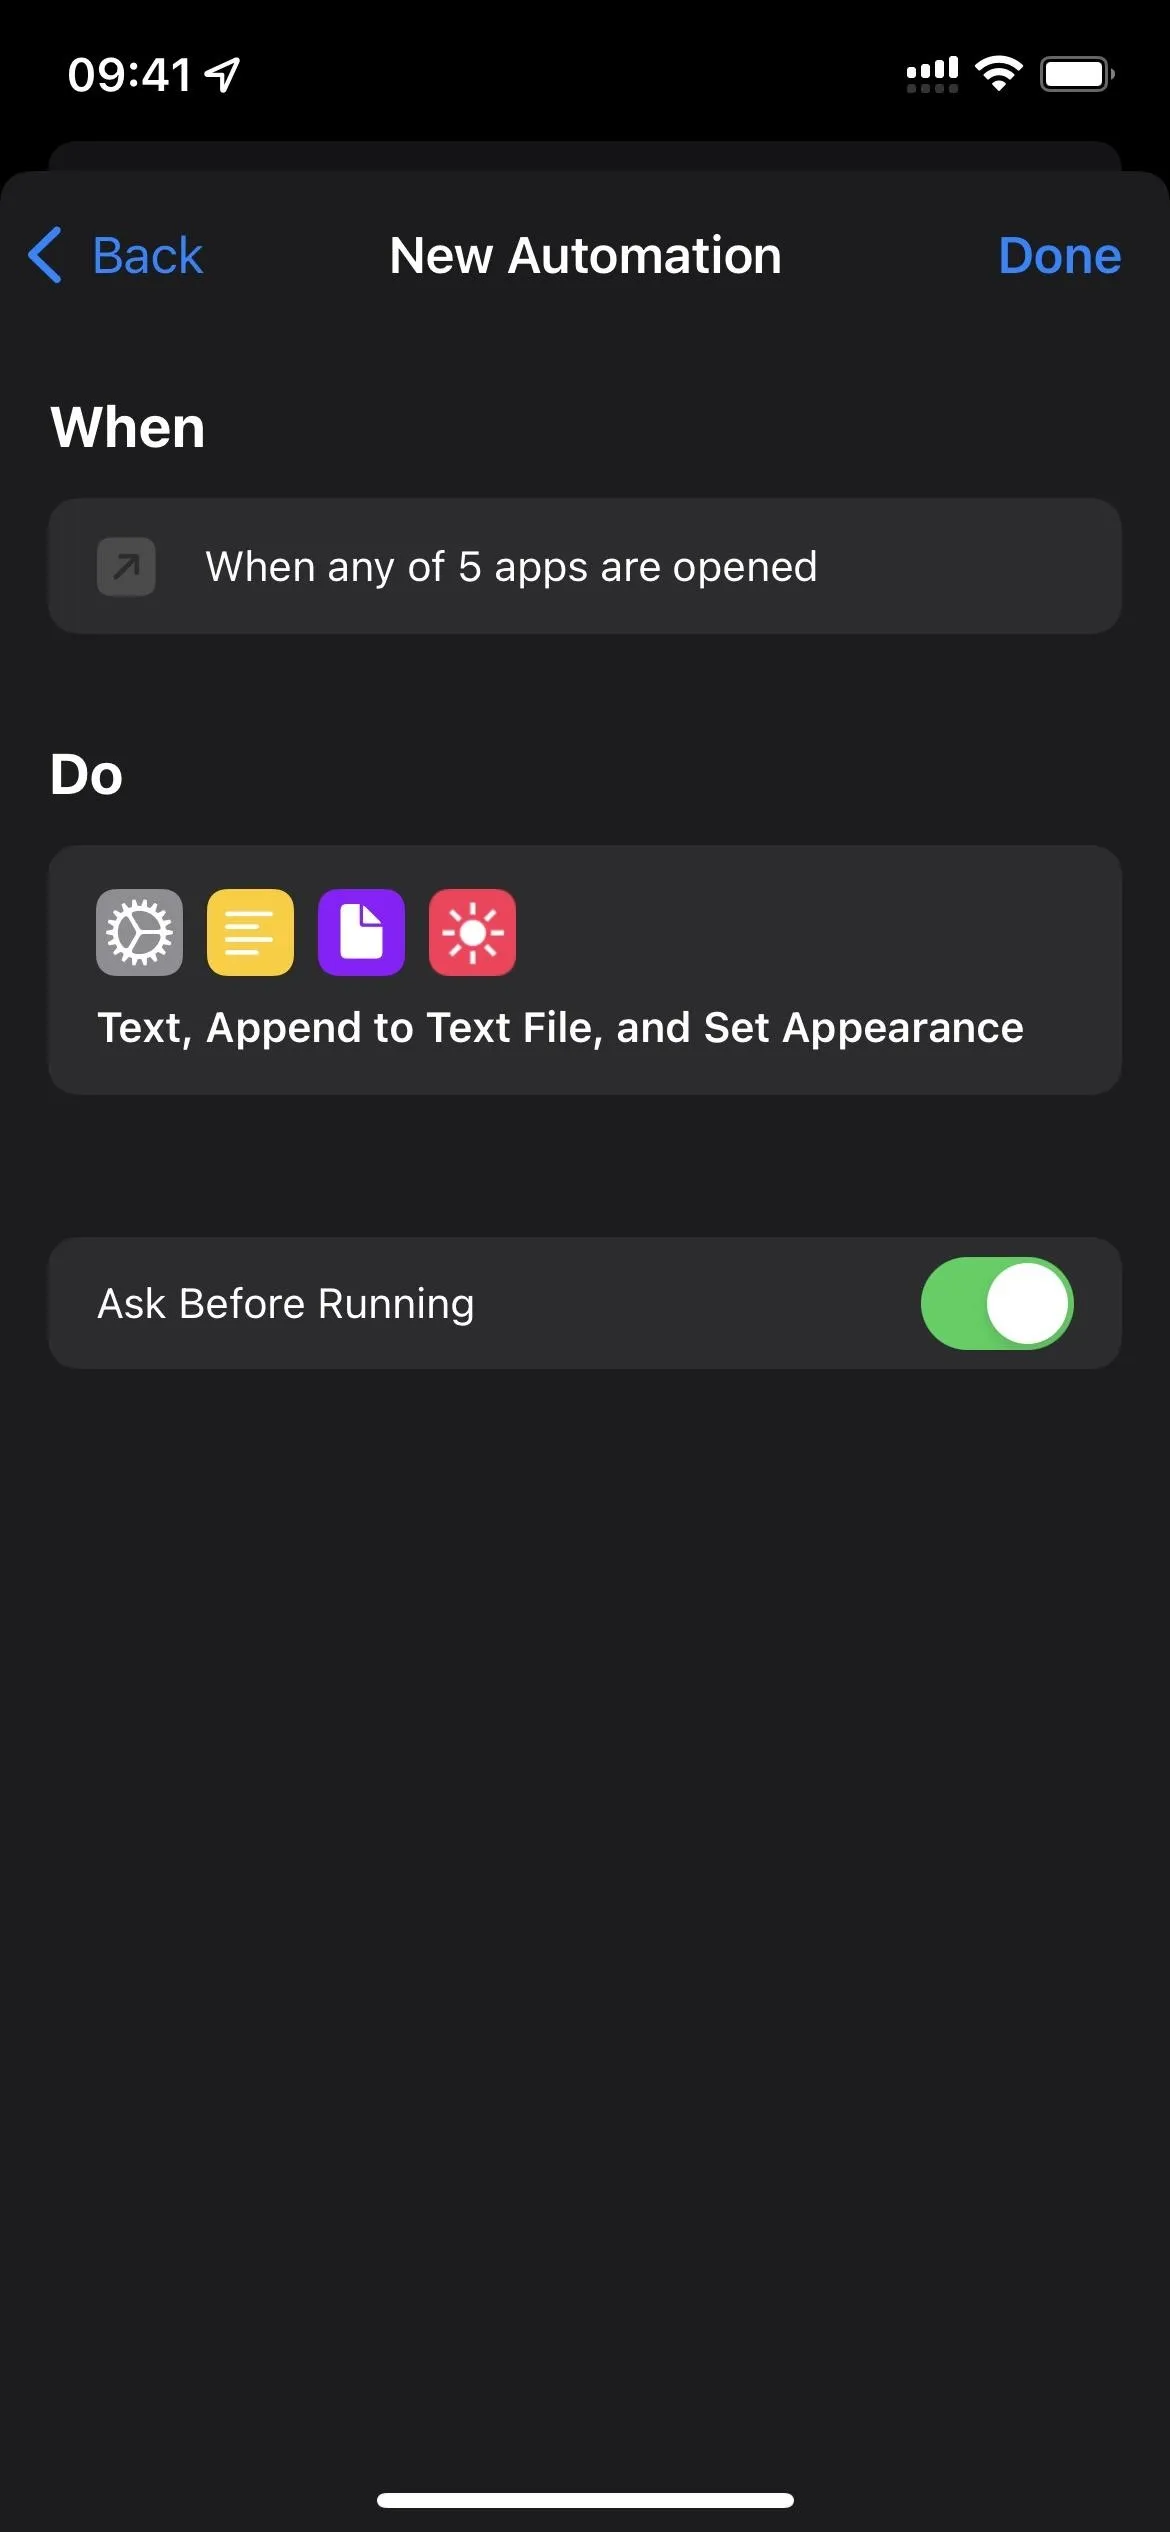
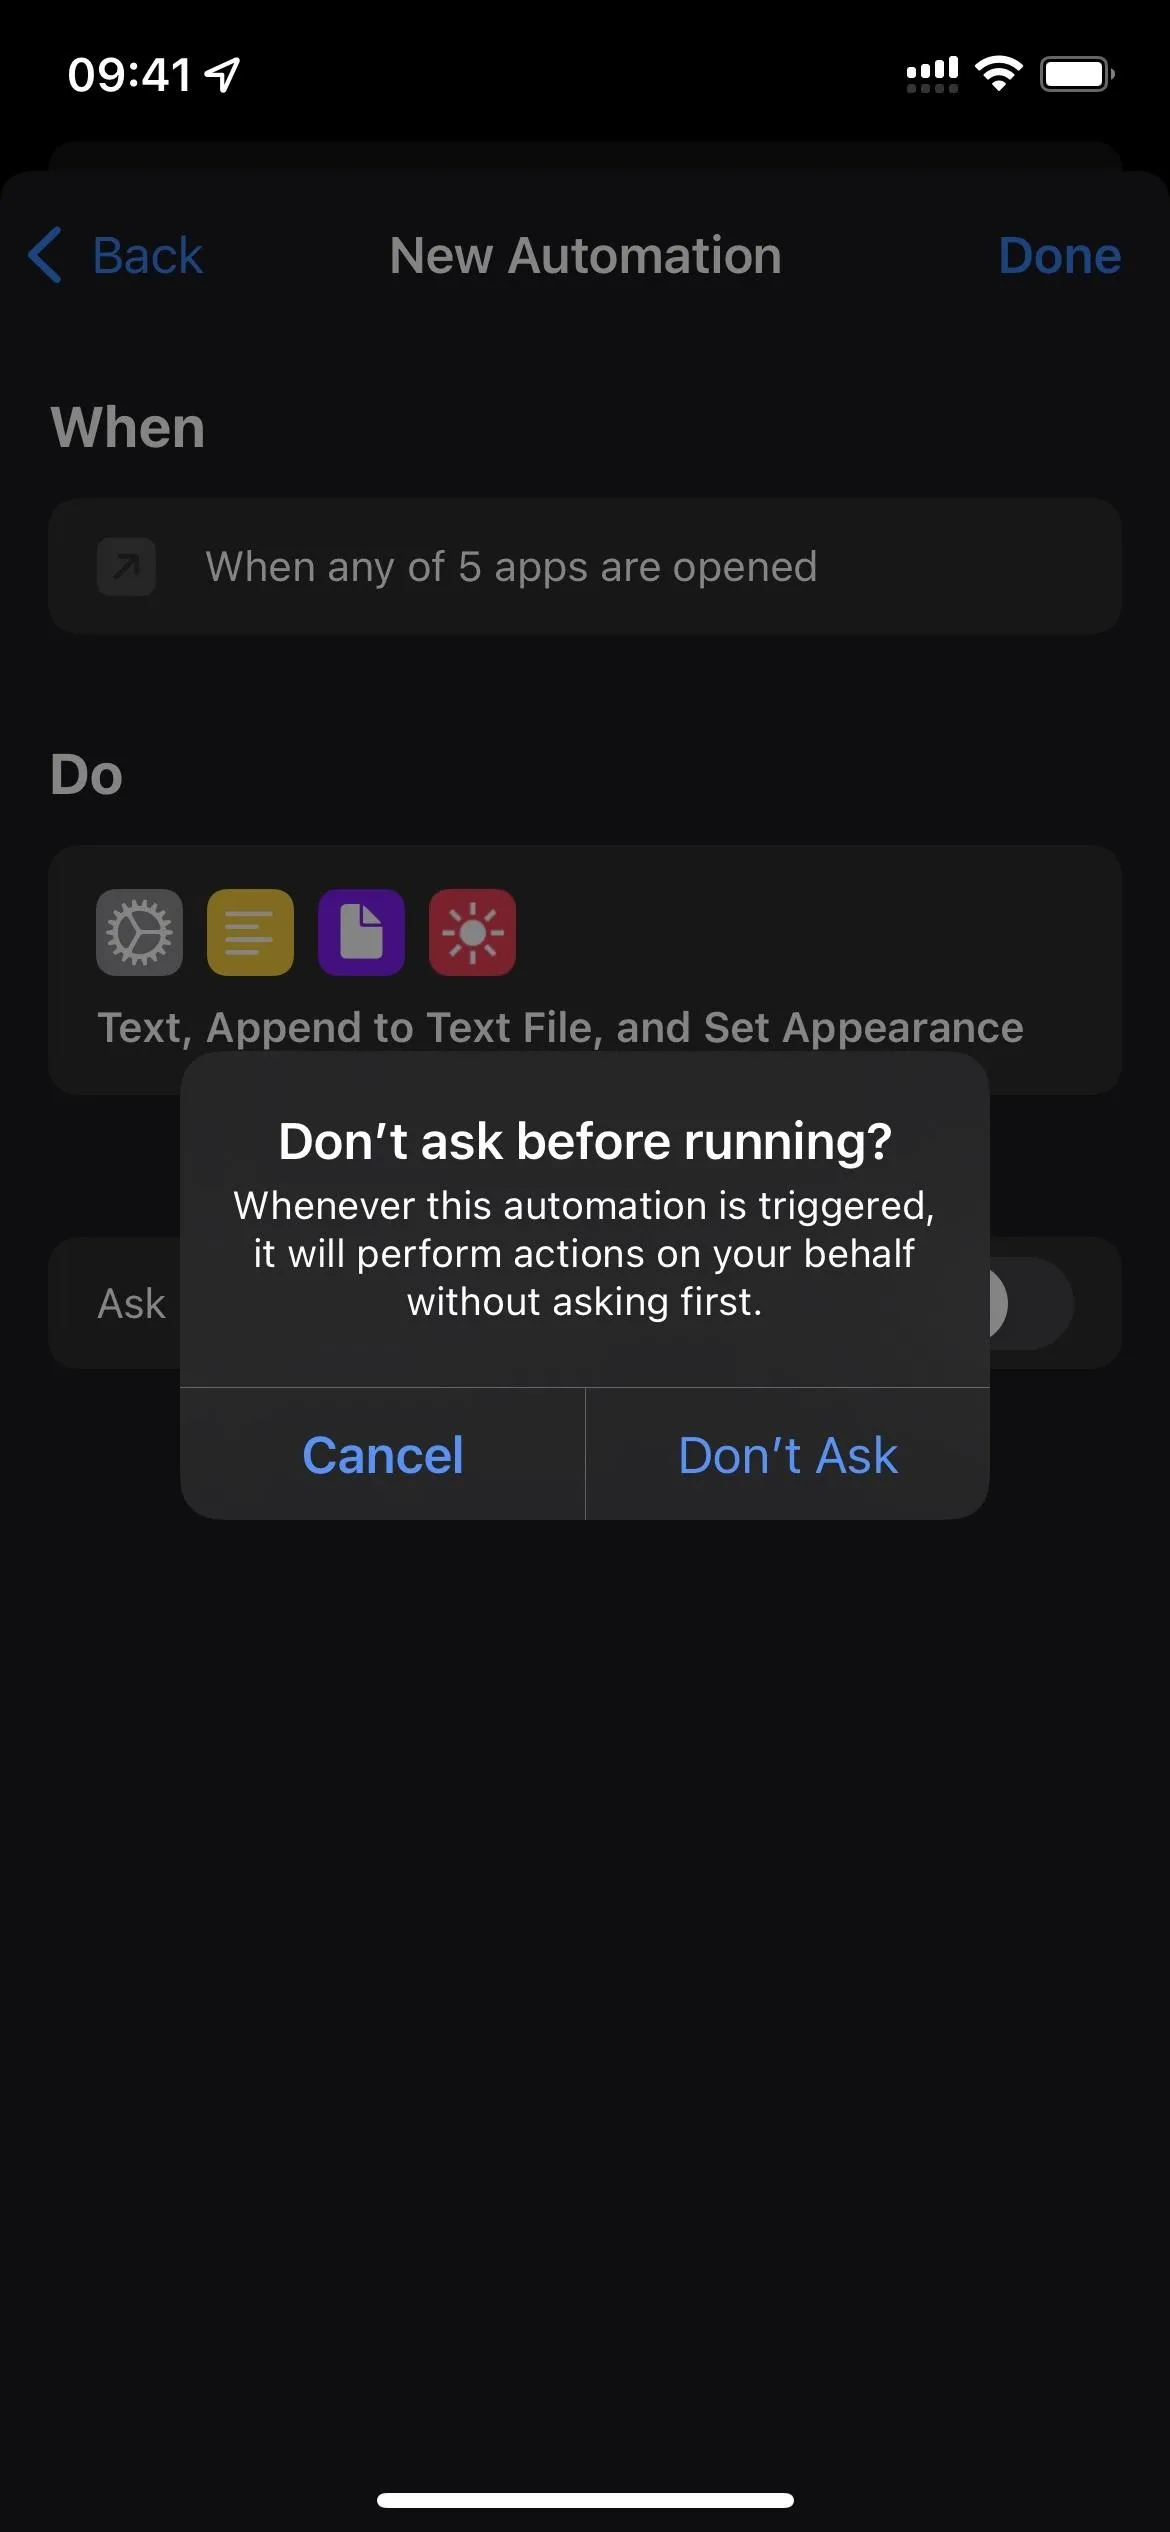
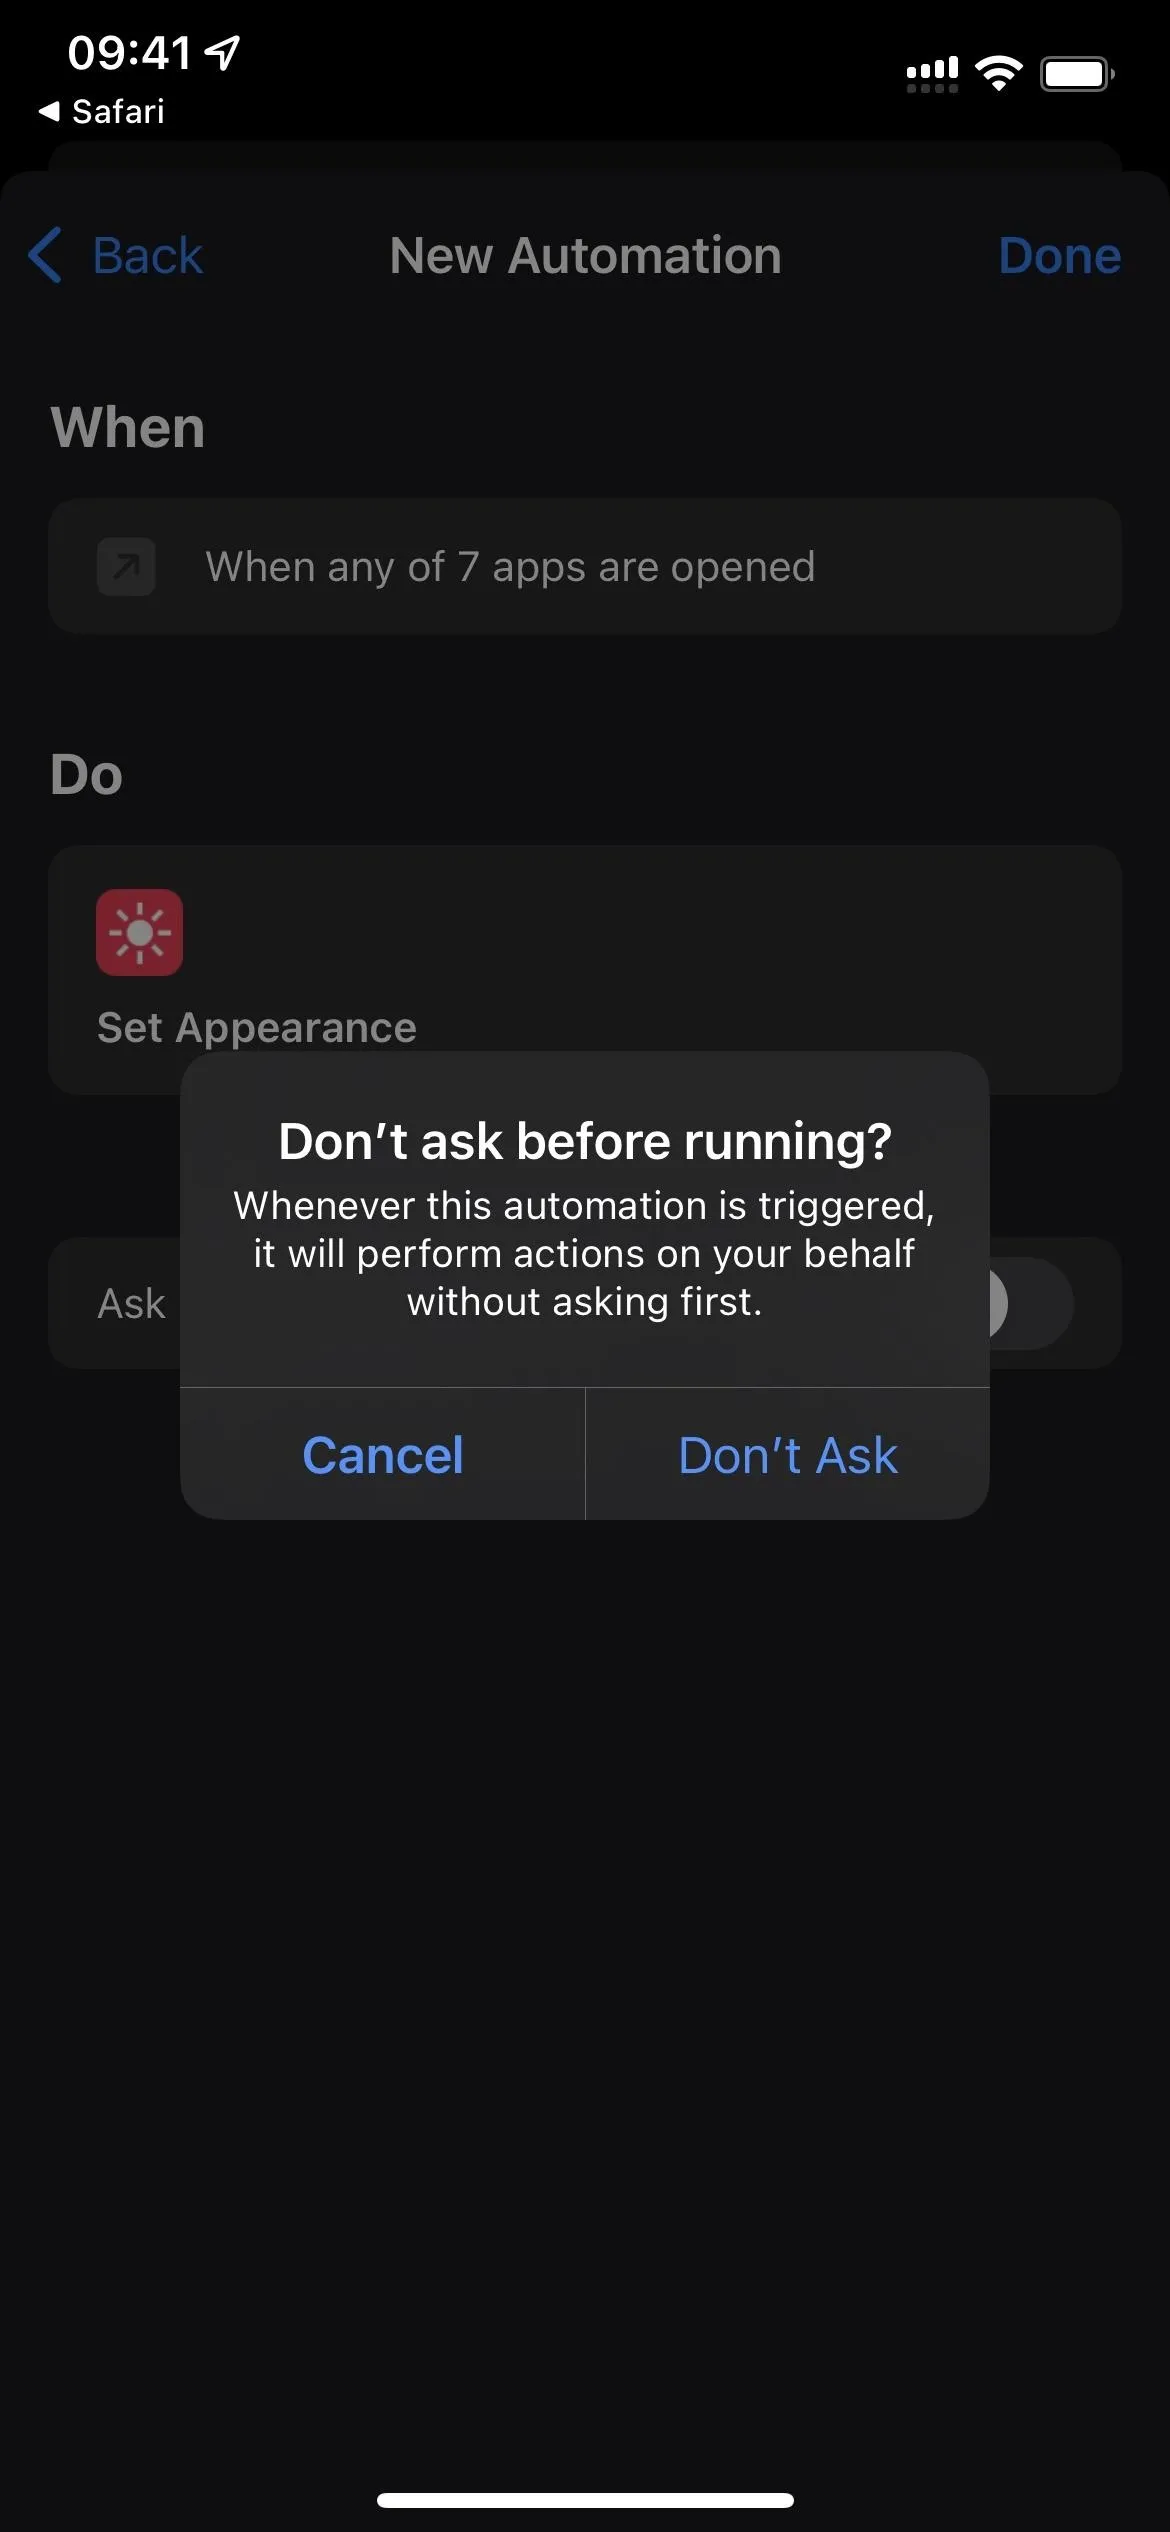
- Toggle off "Ask Before Running" and confirm with "Don't Ask."
- Hit "Done" to finish.
- Optional: Repeat the whole process to create another automation for different apps to use the opposite appearance.
Set Apps to Return to the Previous Appearance When Closed
Now it's time for the second automation. You'll choose all of the same apps you did for the first automation; only this one will work when those apps close. This automation will also need to read the appearance that the first automation recorded in the document, then set it as the device-wide appearance. That way, when the app closes, your system returns to that dark or light state that iOS was using before you opened the app.
- Open the Shortcuts app.
- Start a new personal automation from the "Automation" tab.
- Choose "App" as the trigger.
- Tap "Choose" next to "App."
- Check all of the apps you selected in the previous automation and hit "Done."
- Make sure "Is Closed" is checked, not "Is Opened."
- Hit "Next" to continue.
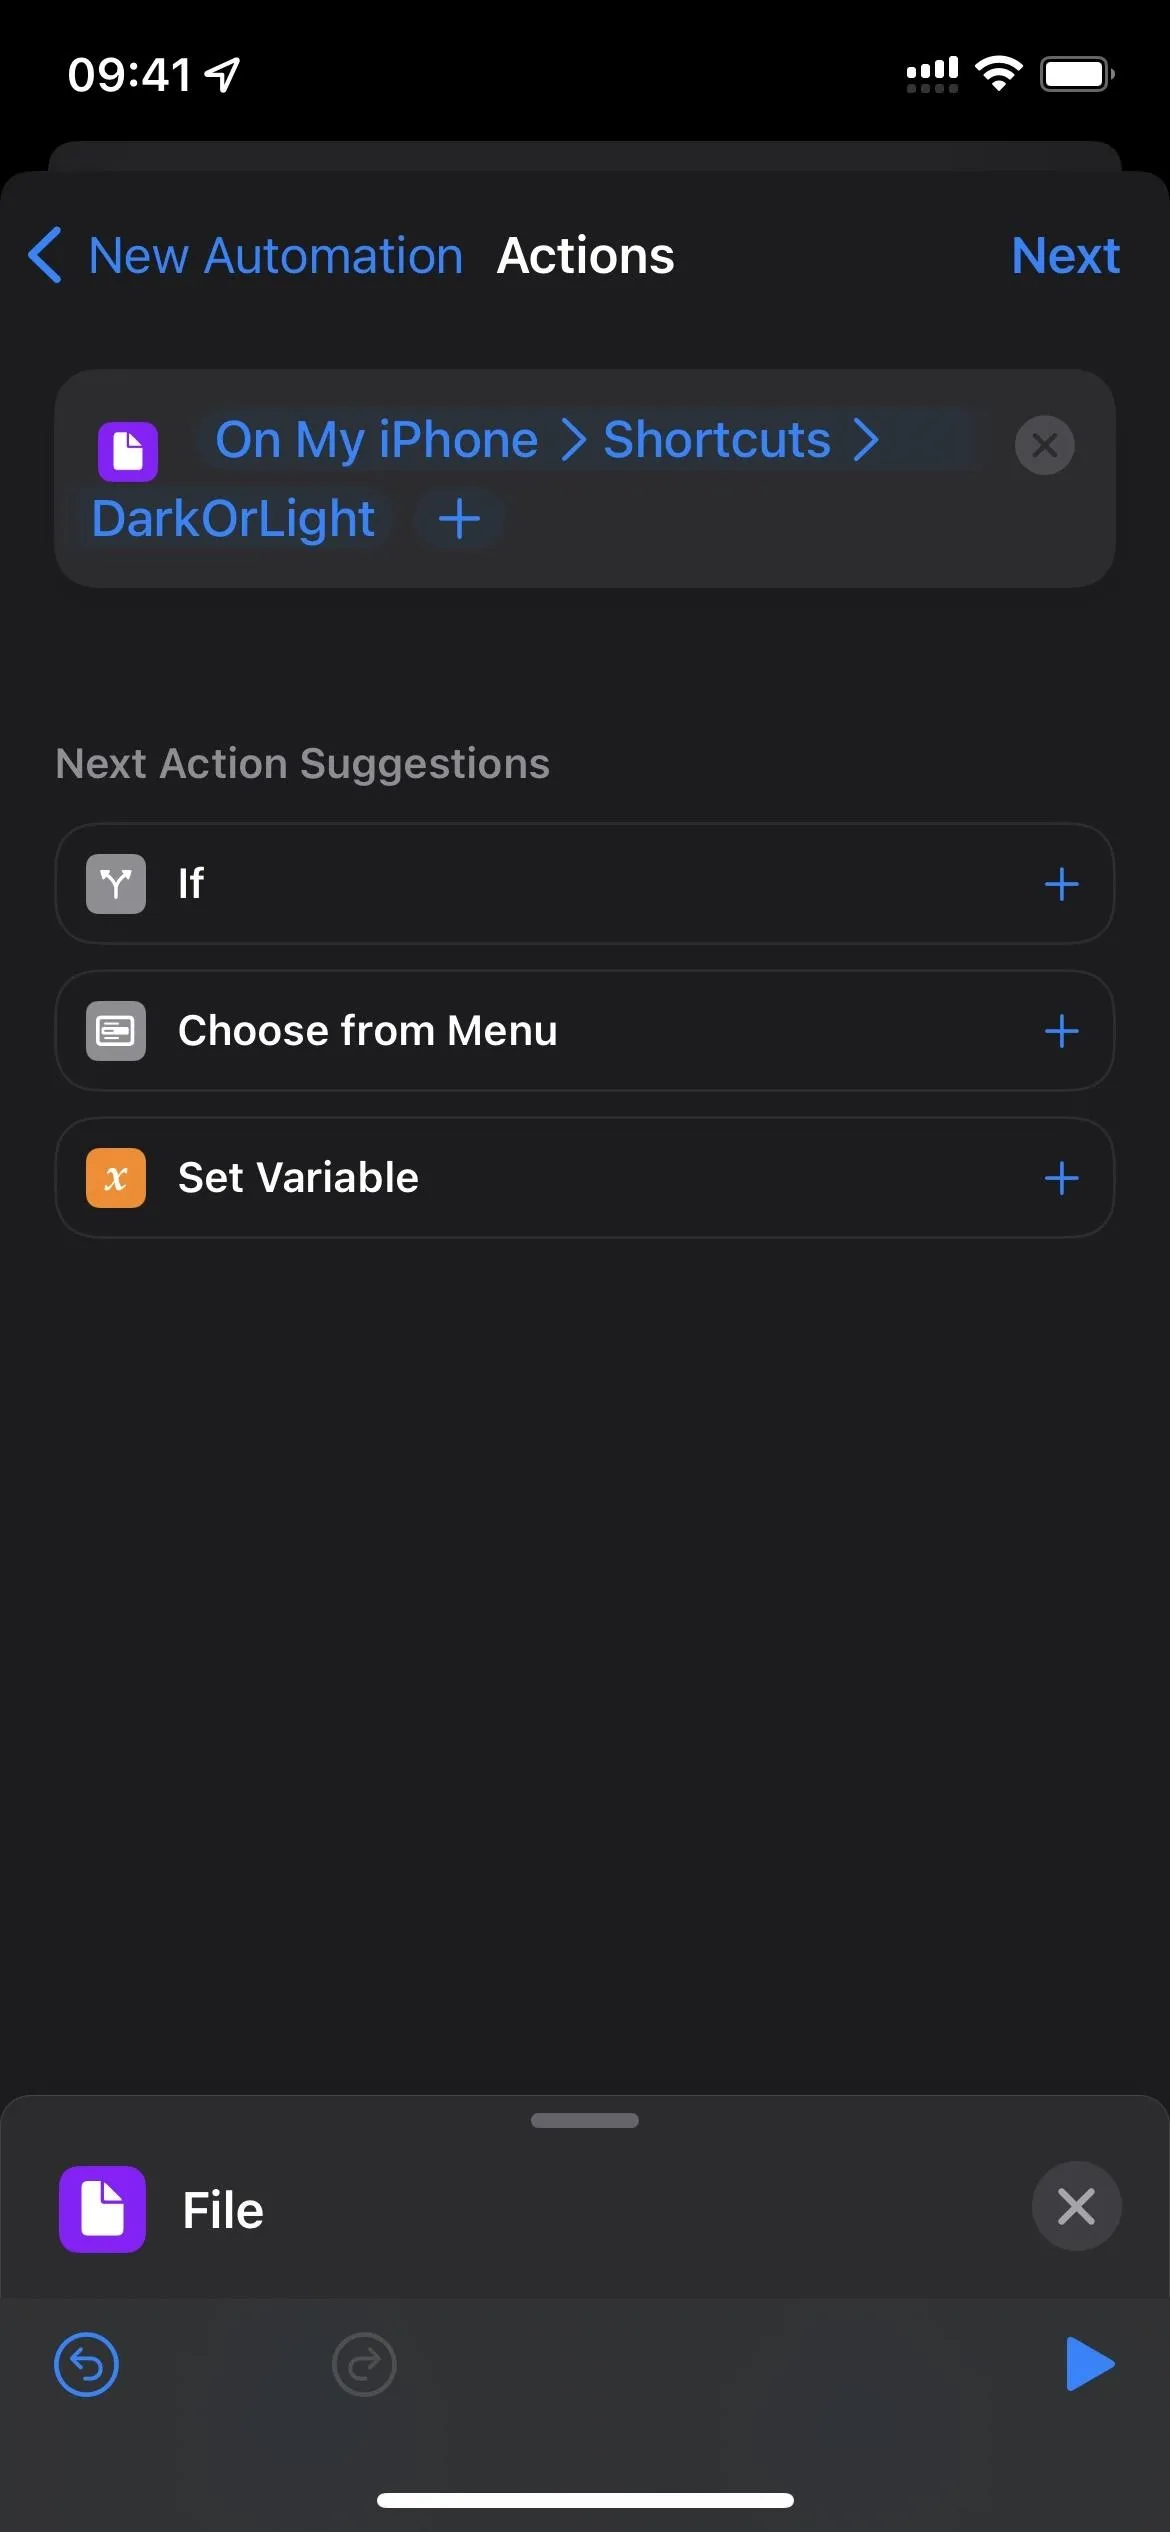
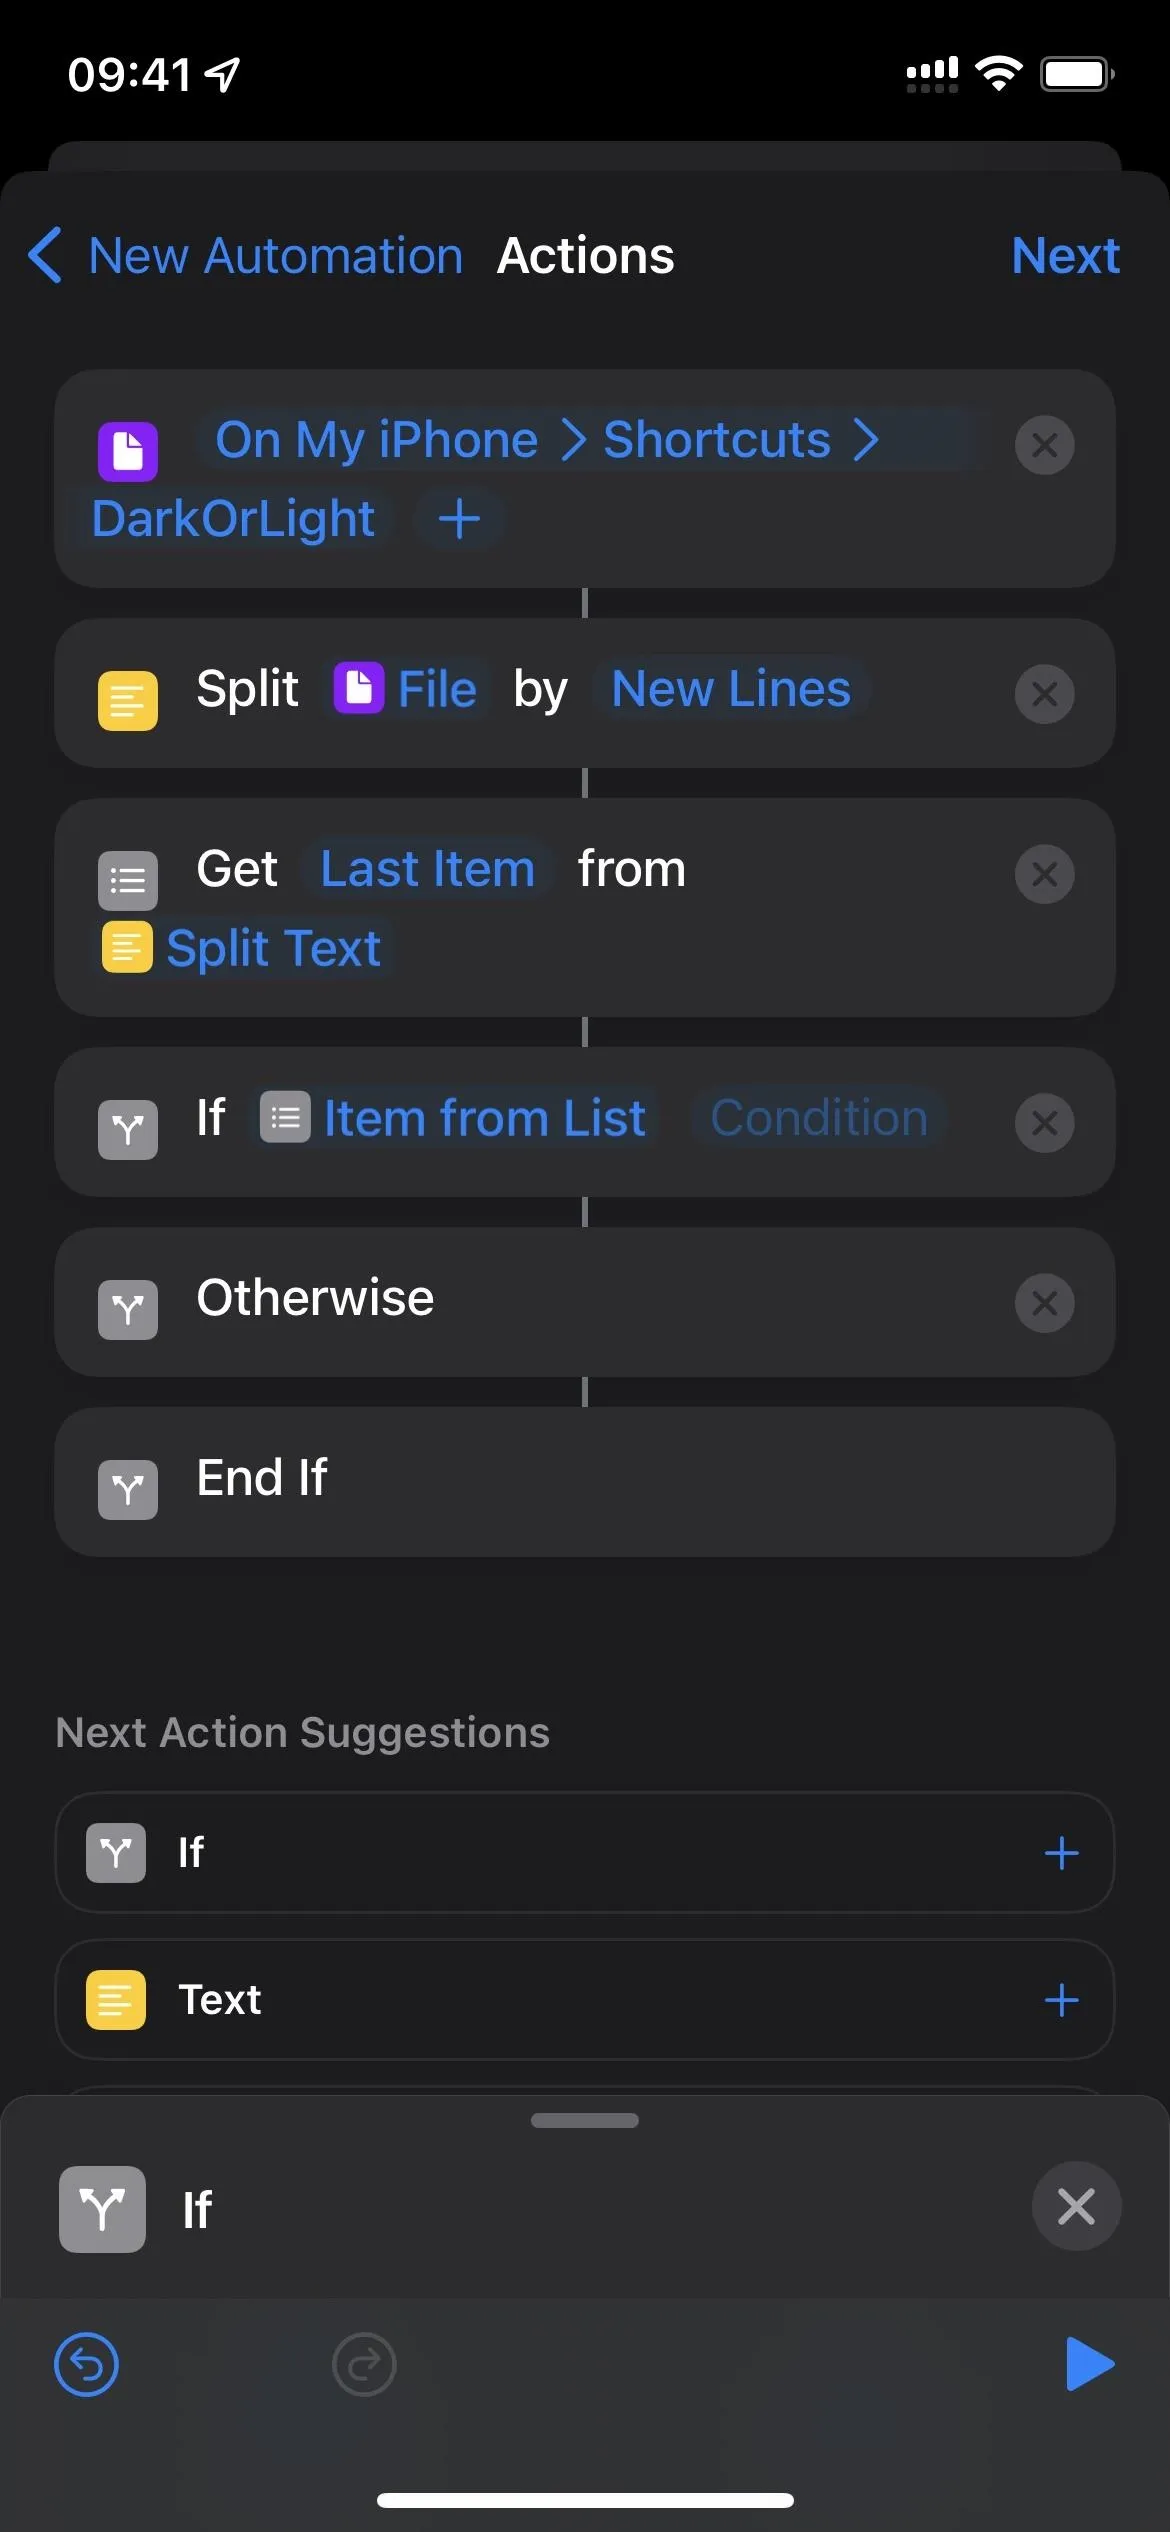
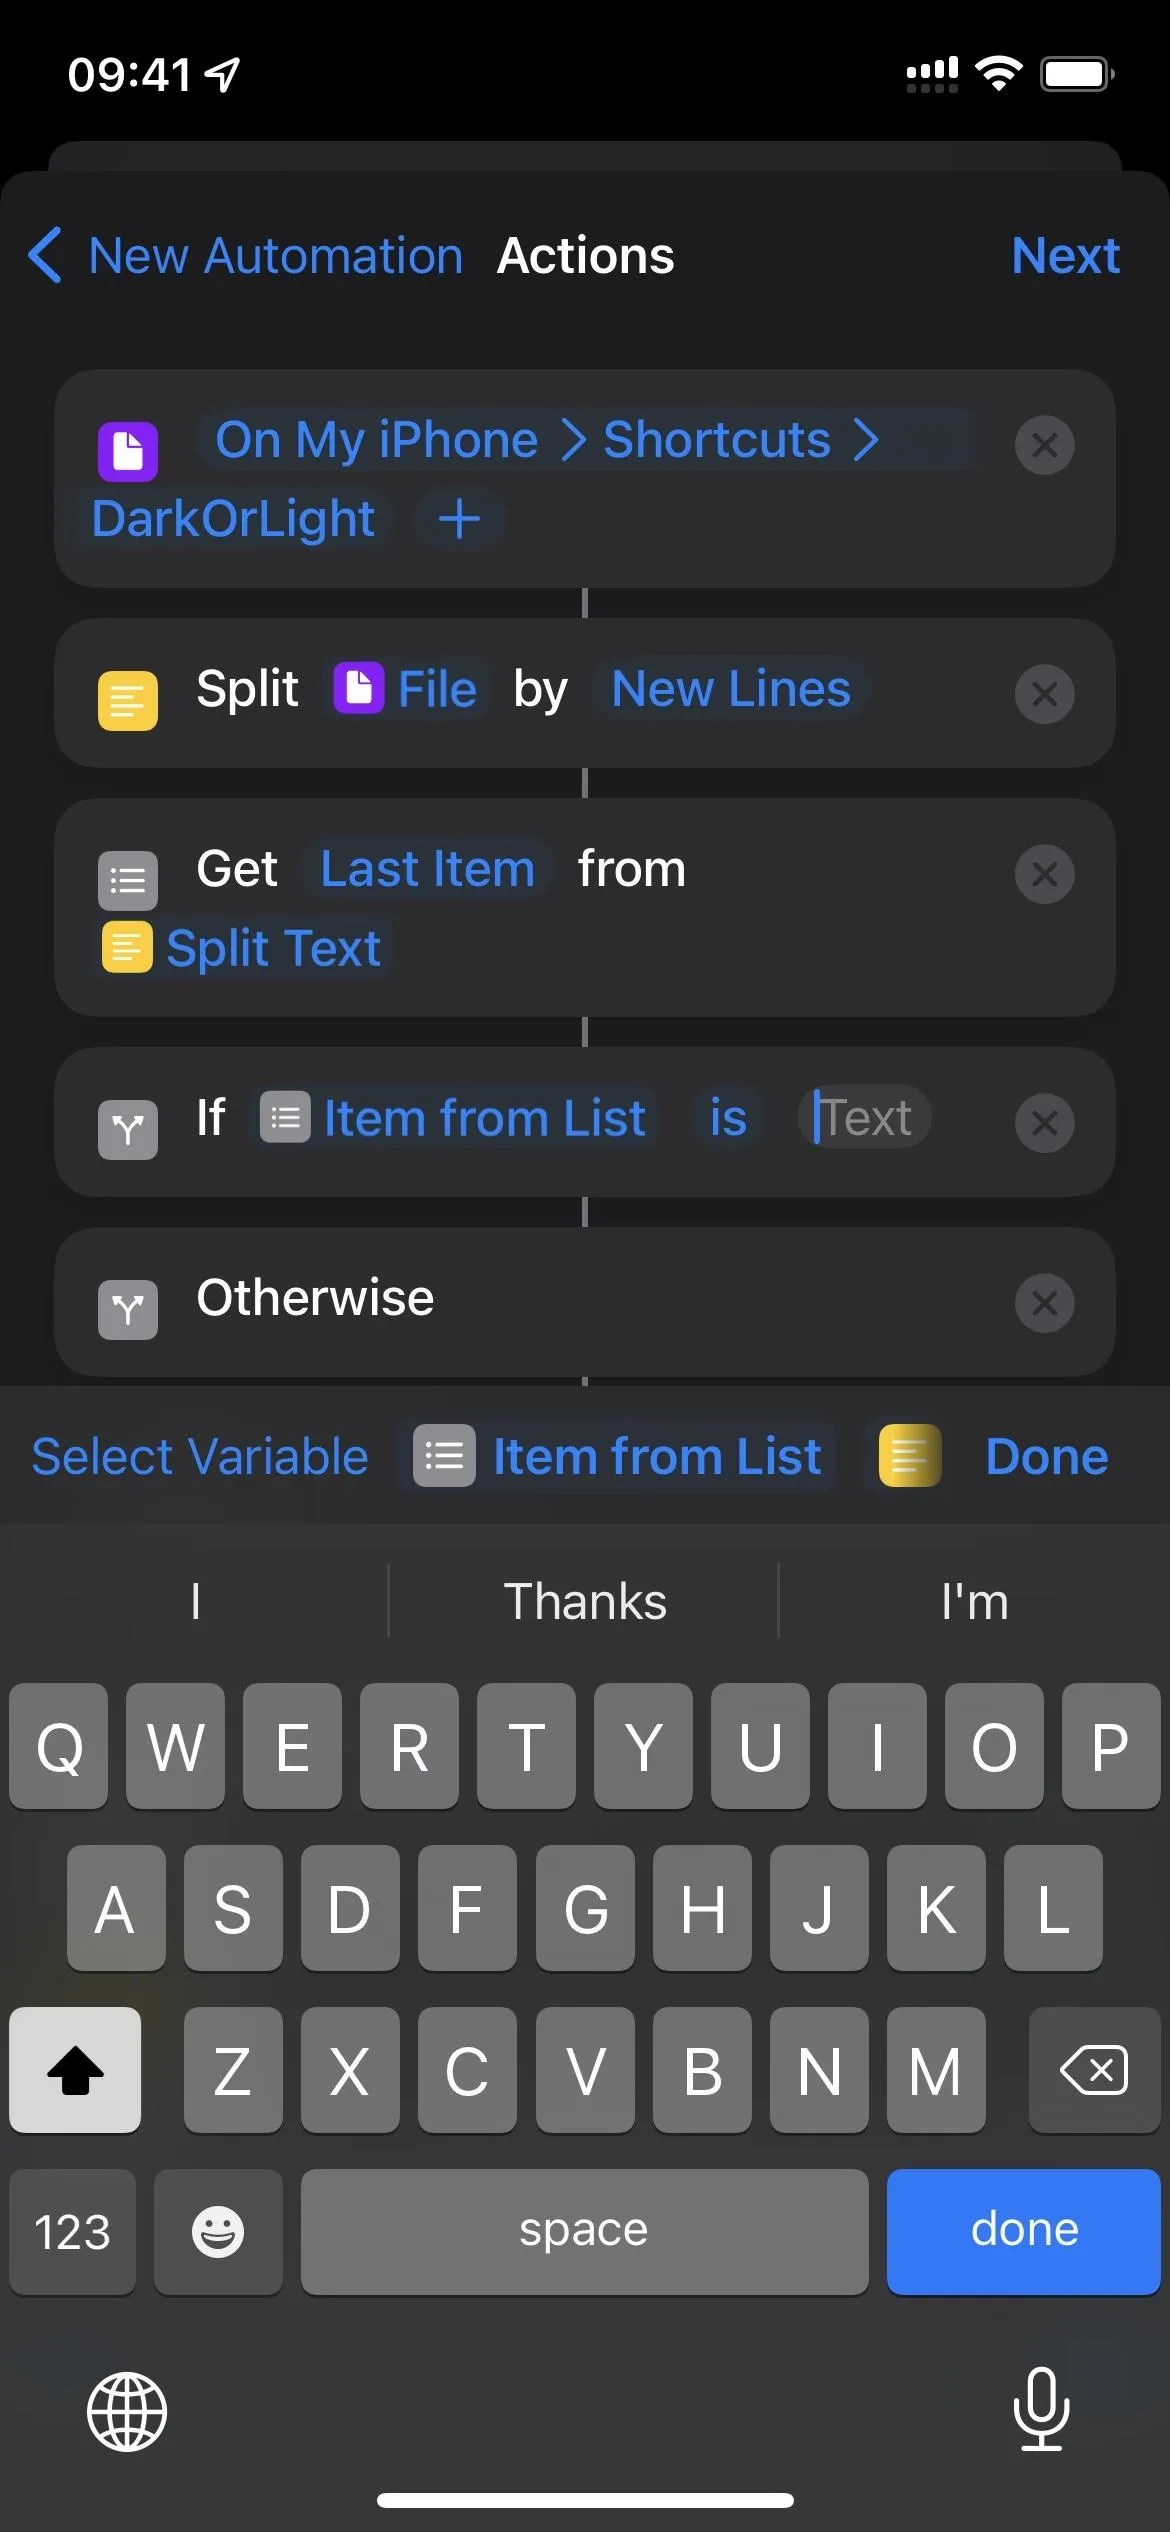
- Add the "File" action.
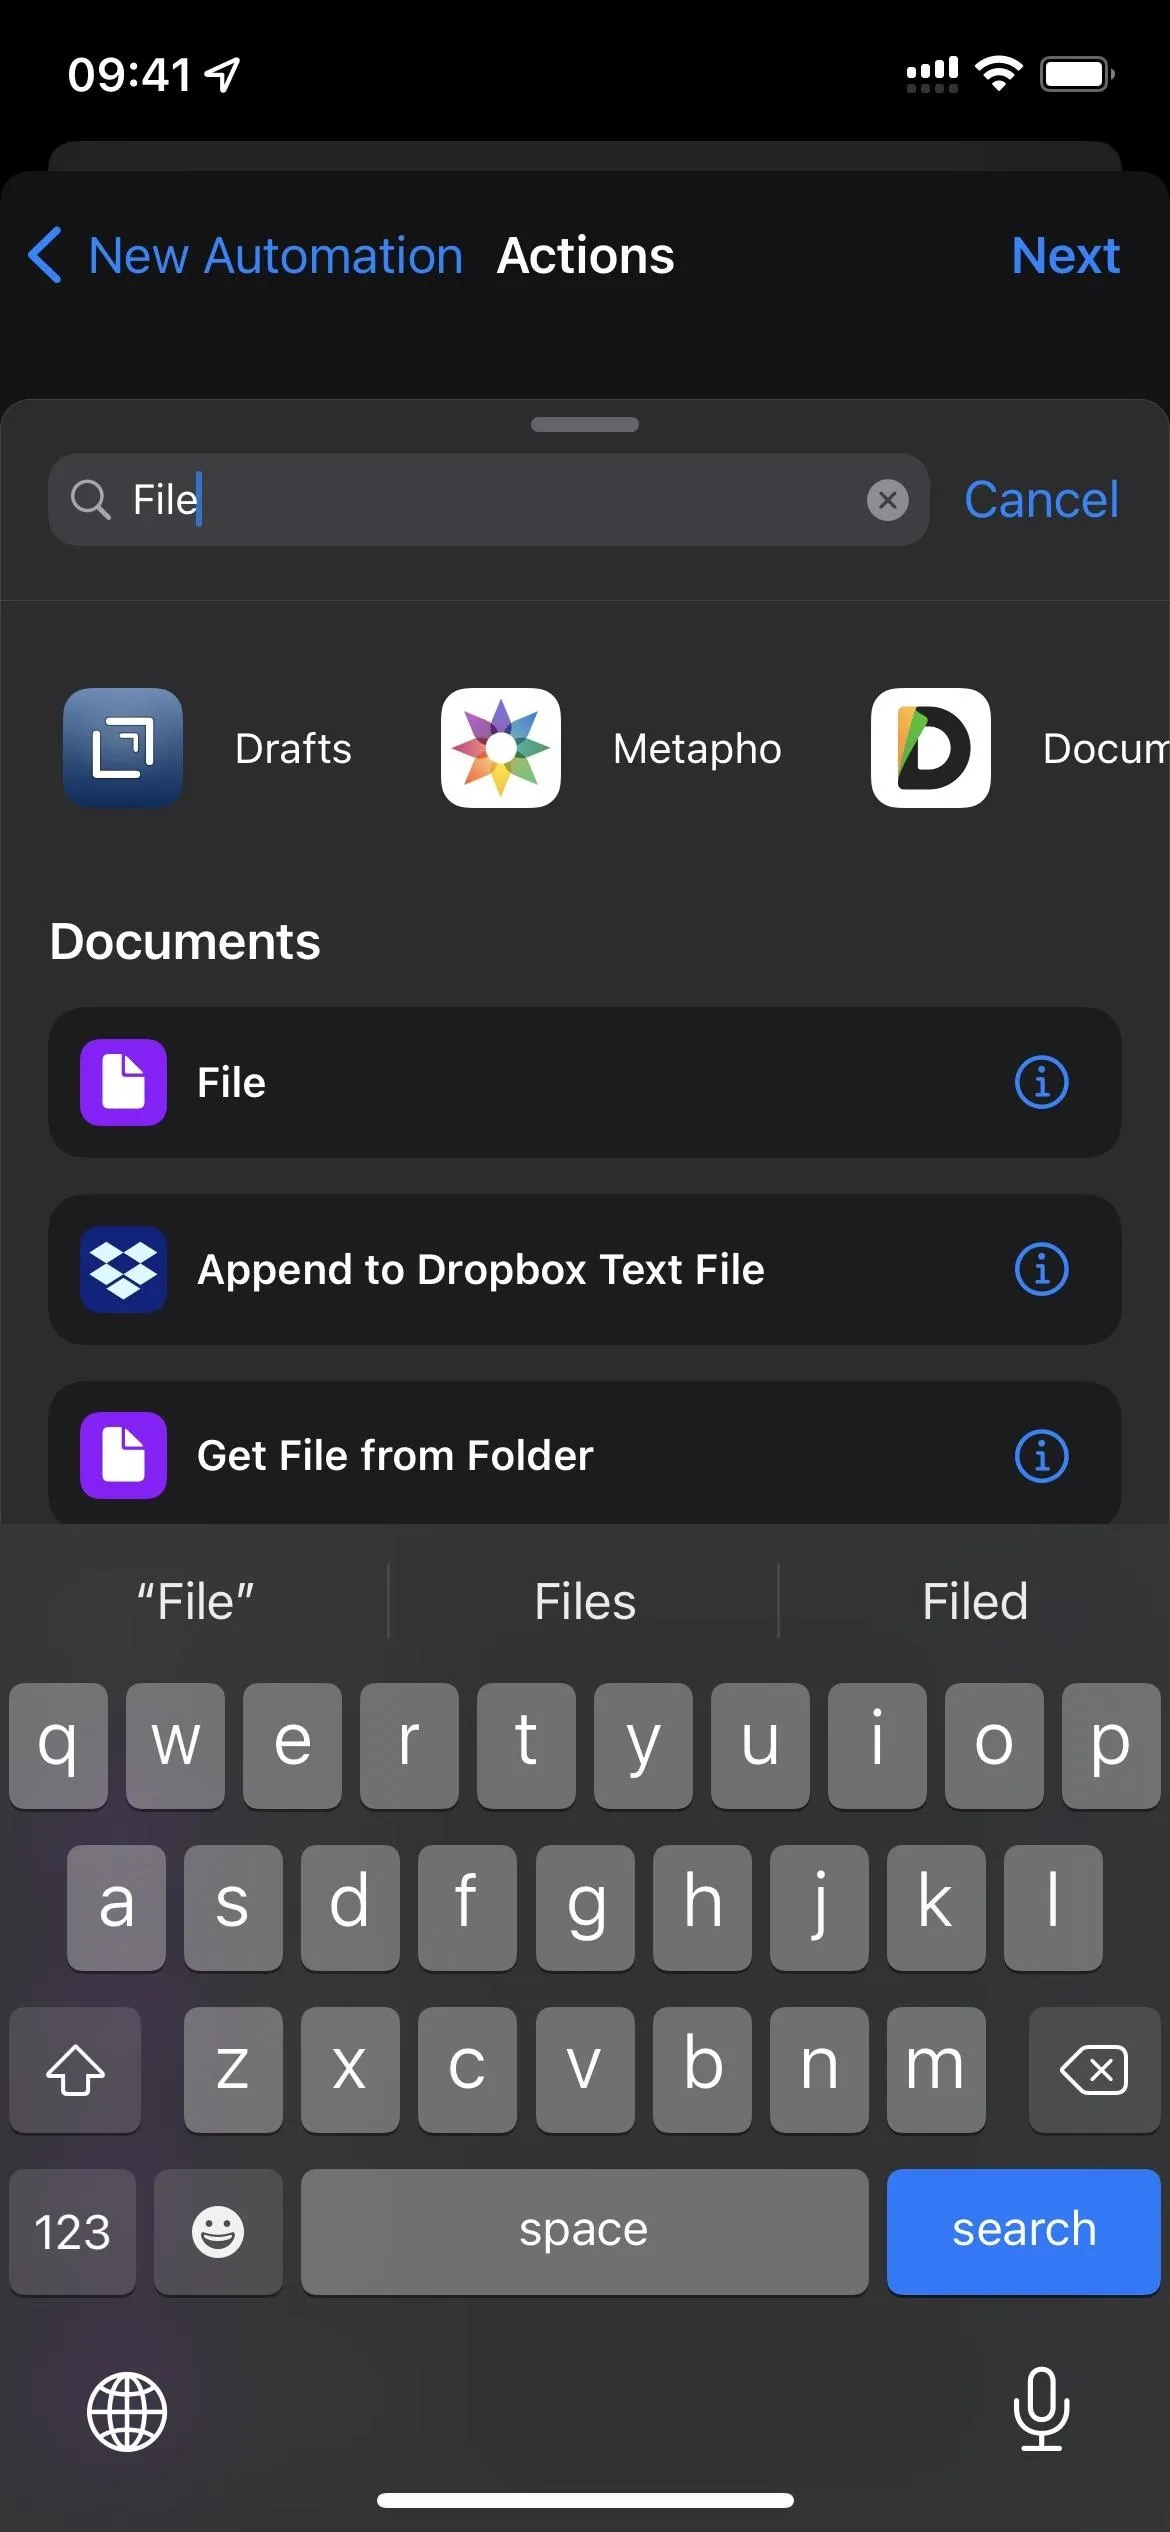
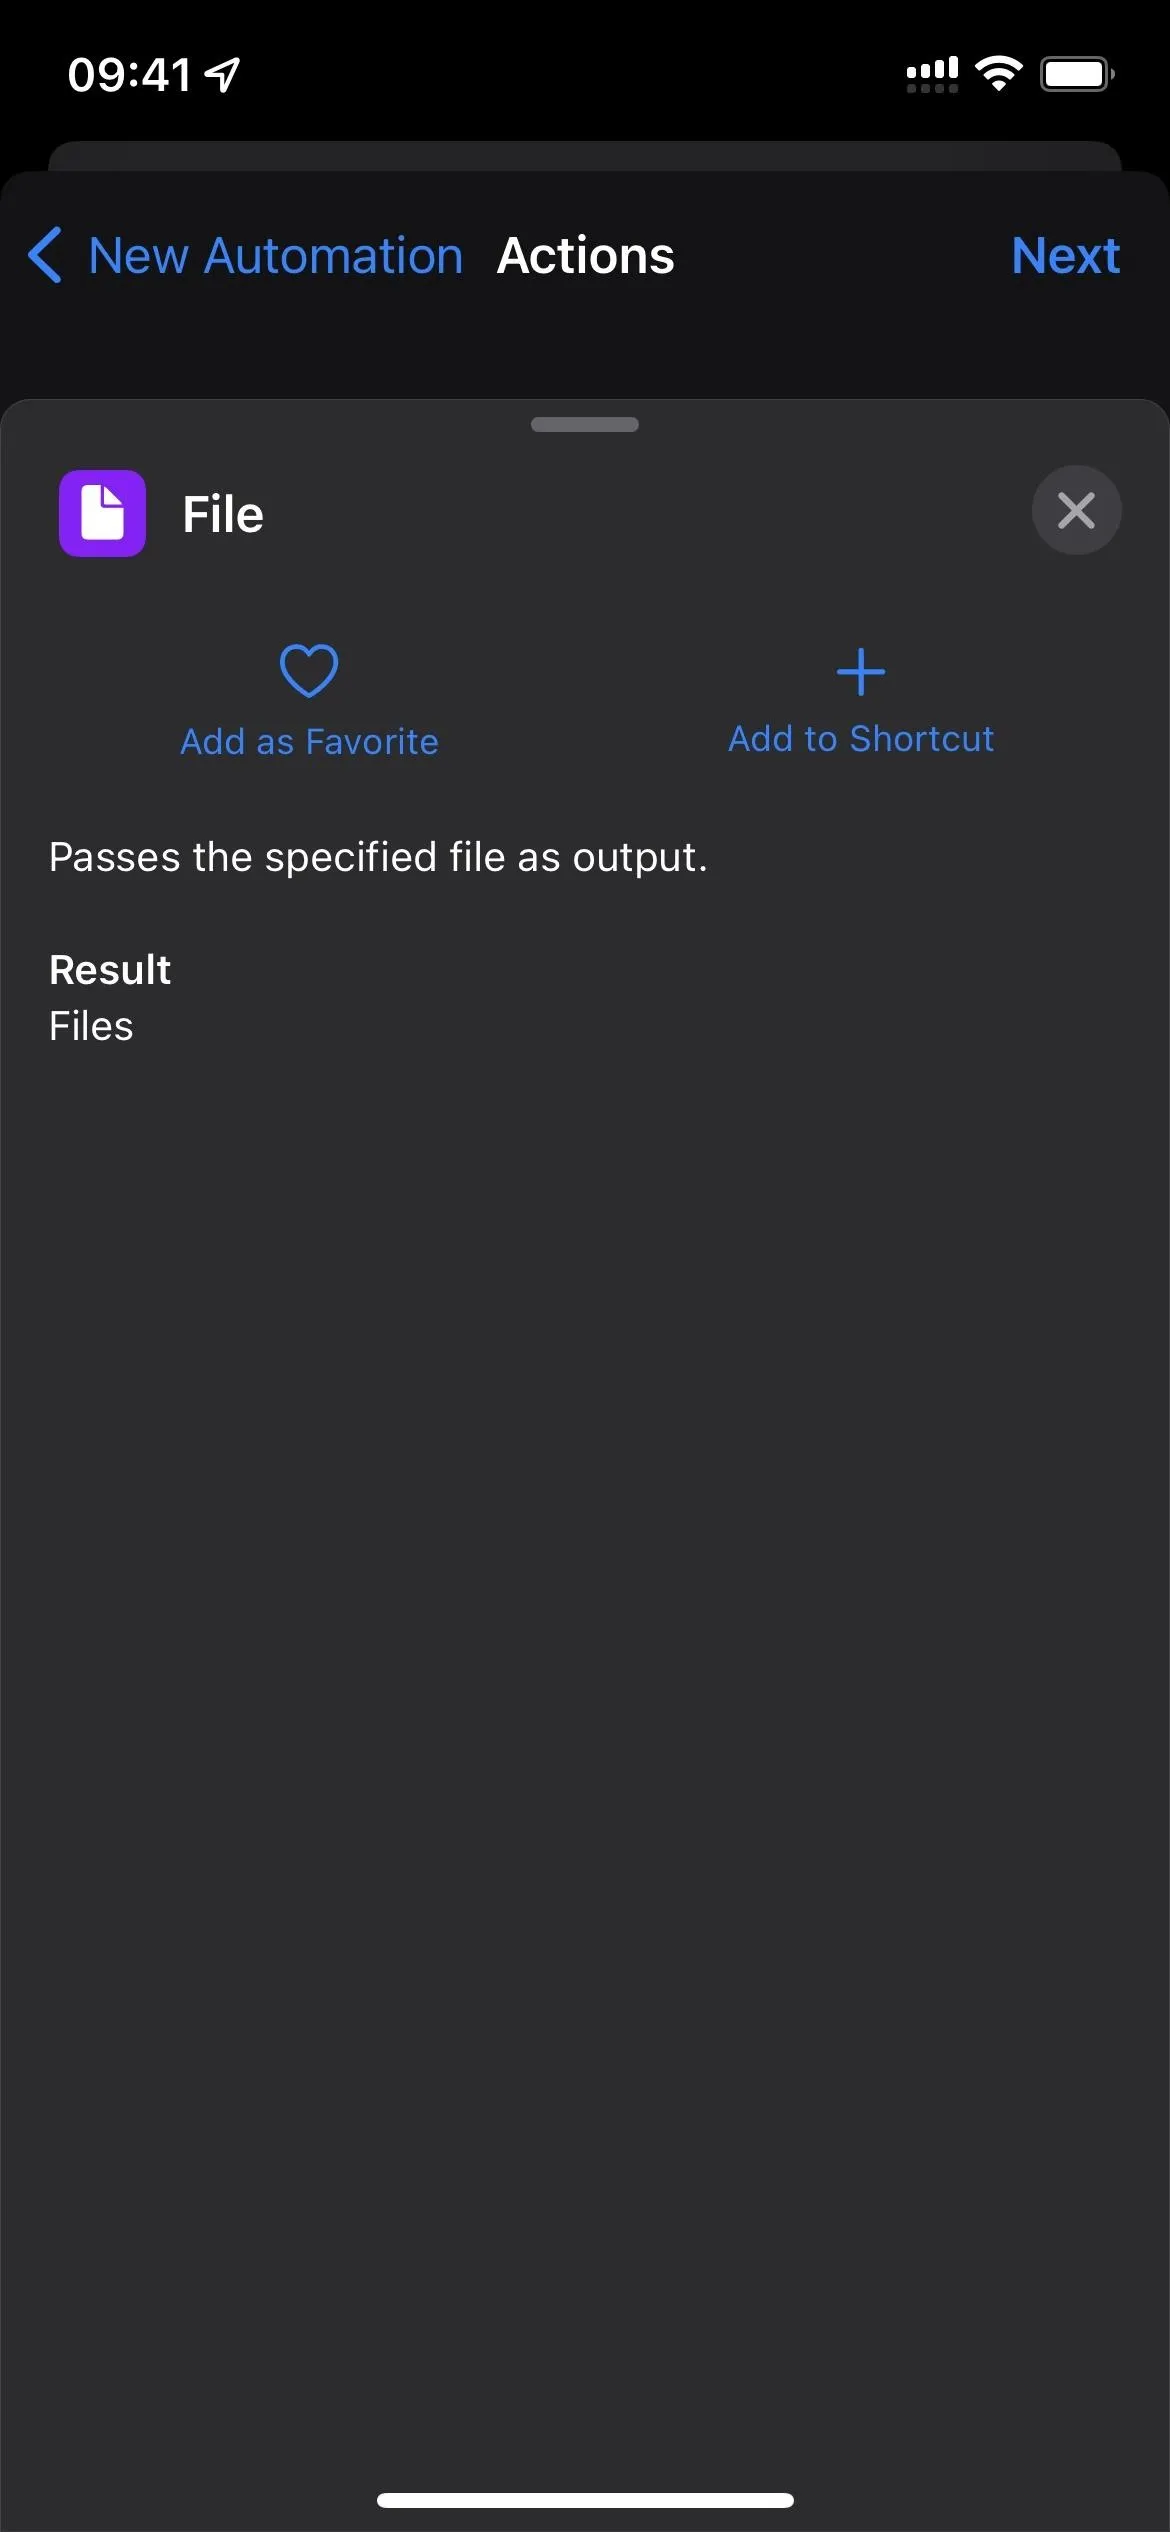
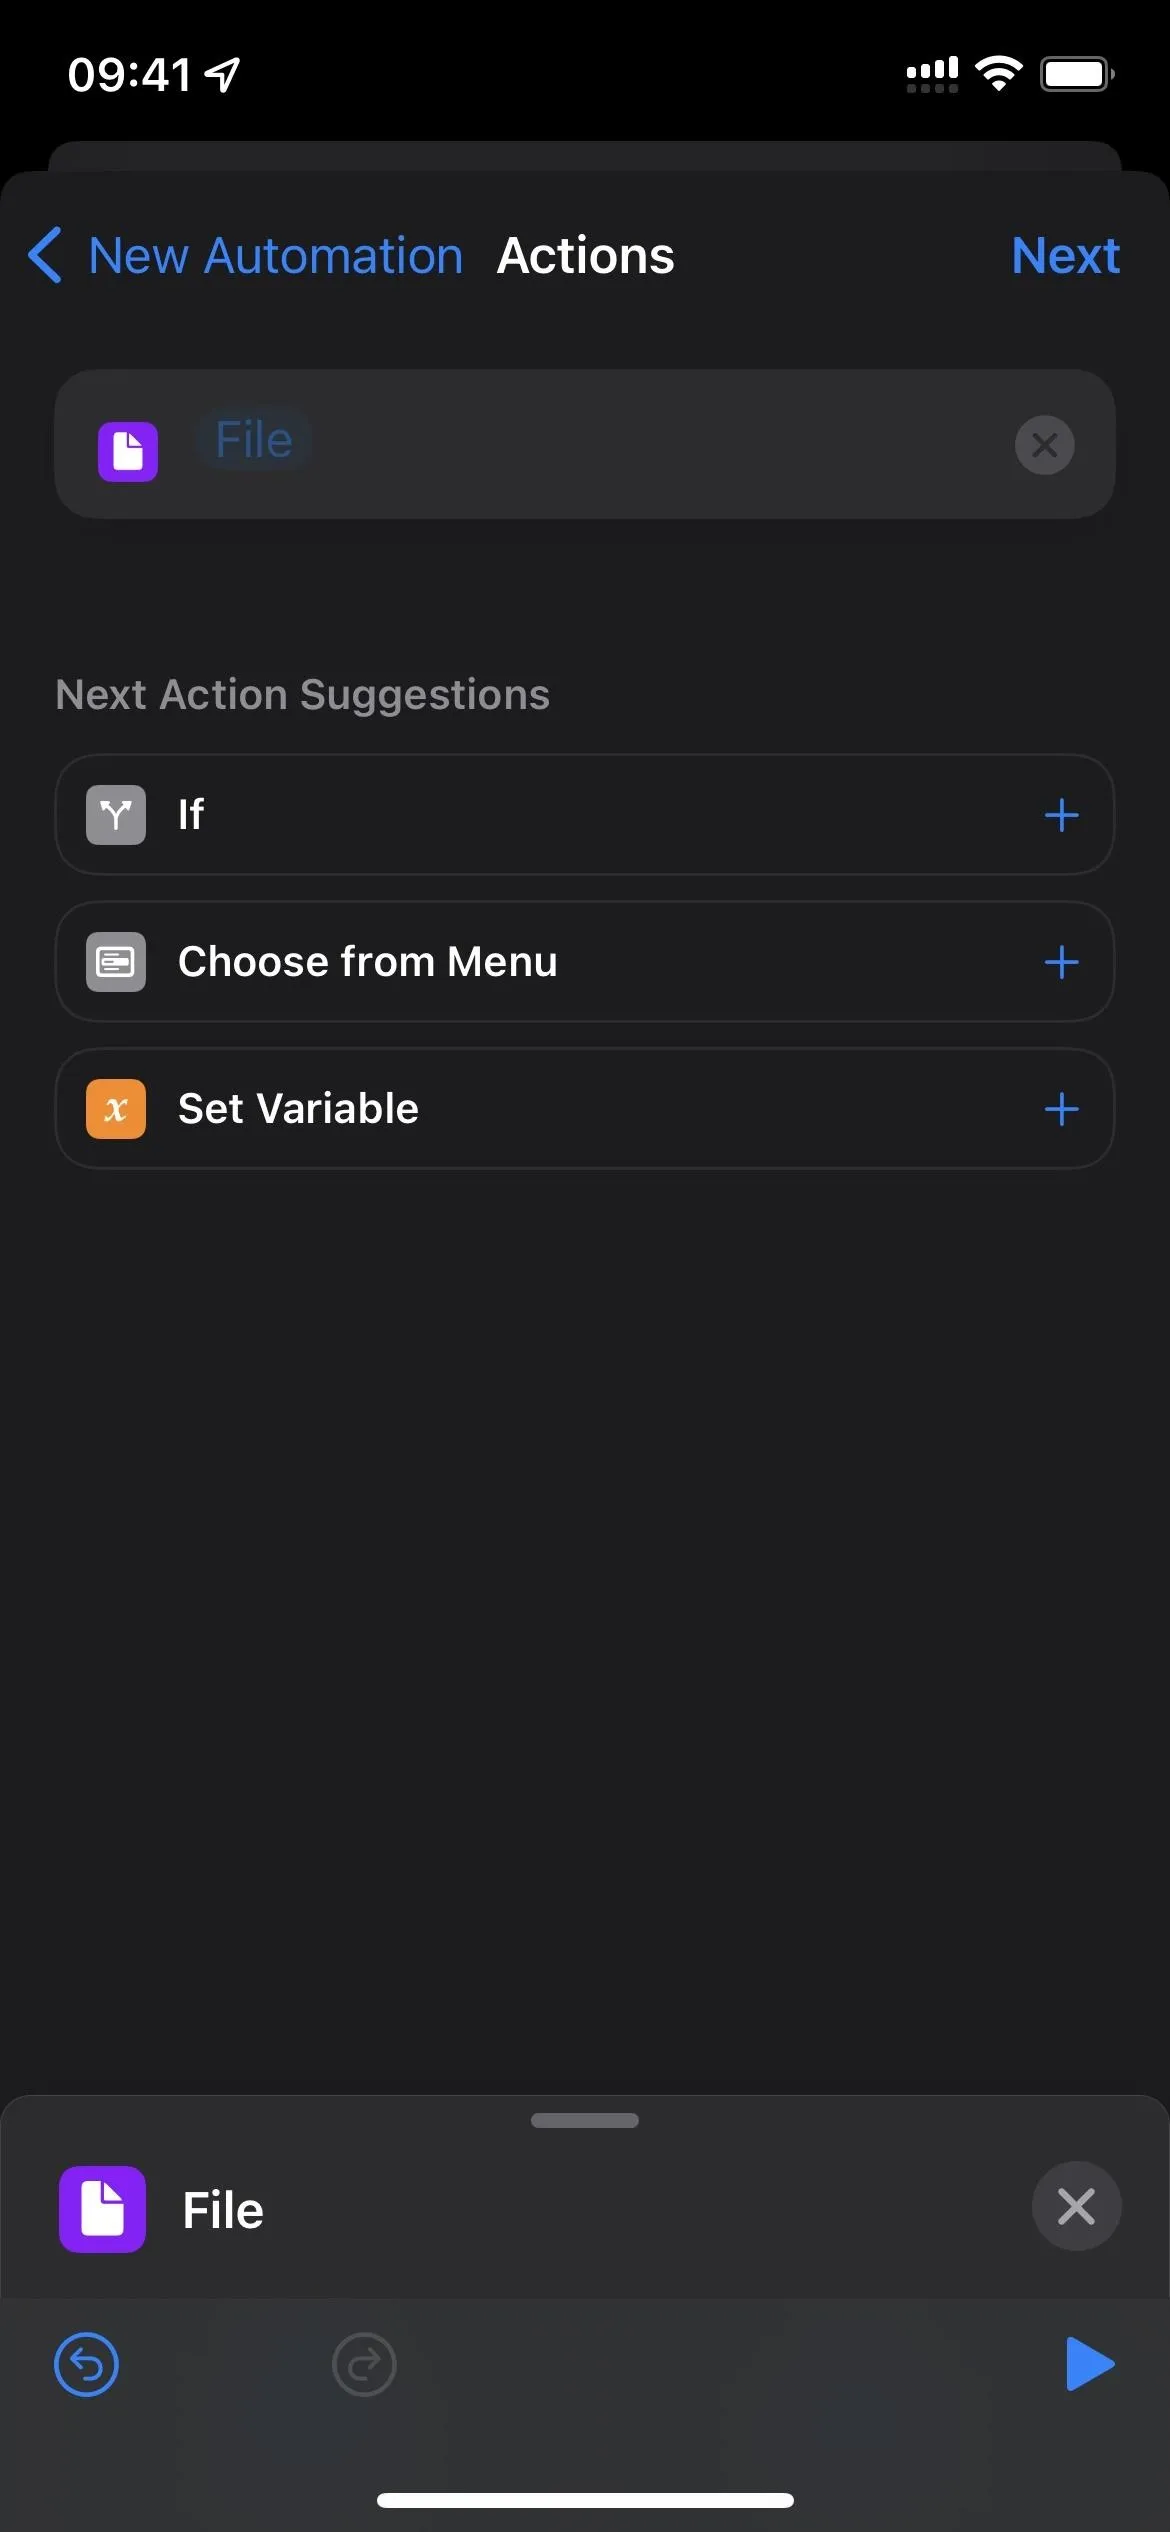
- Tap "File" in the File action box.
- Choose your file.
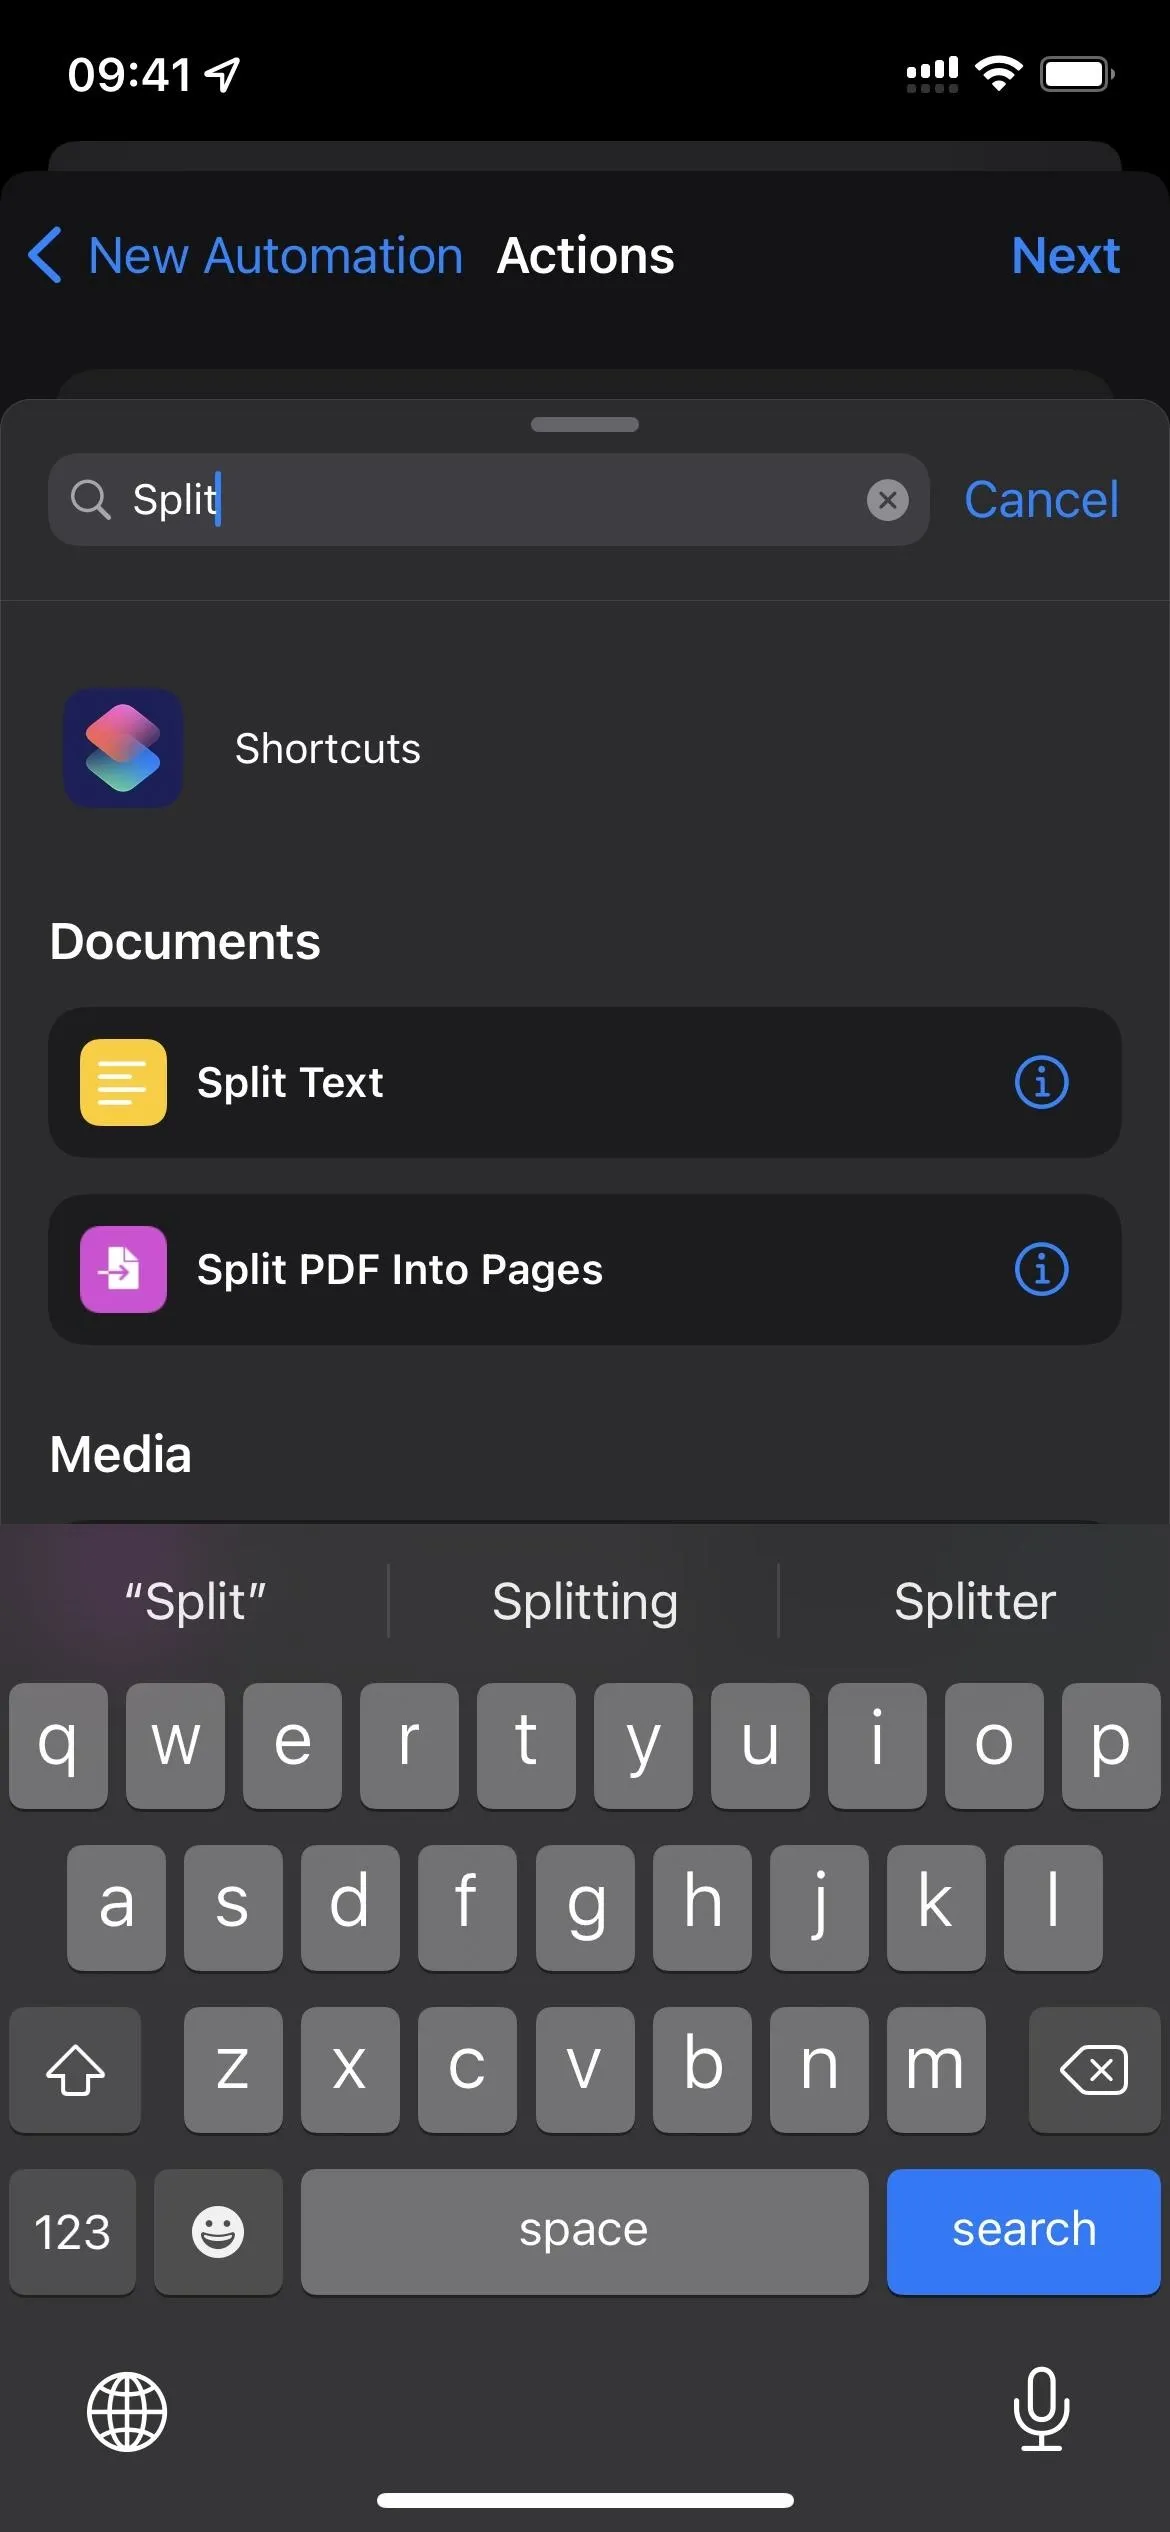
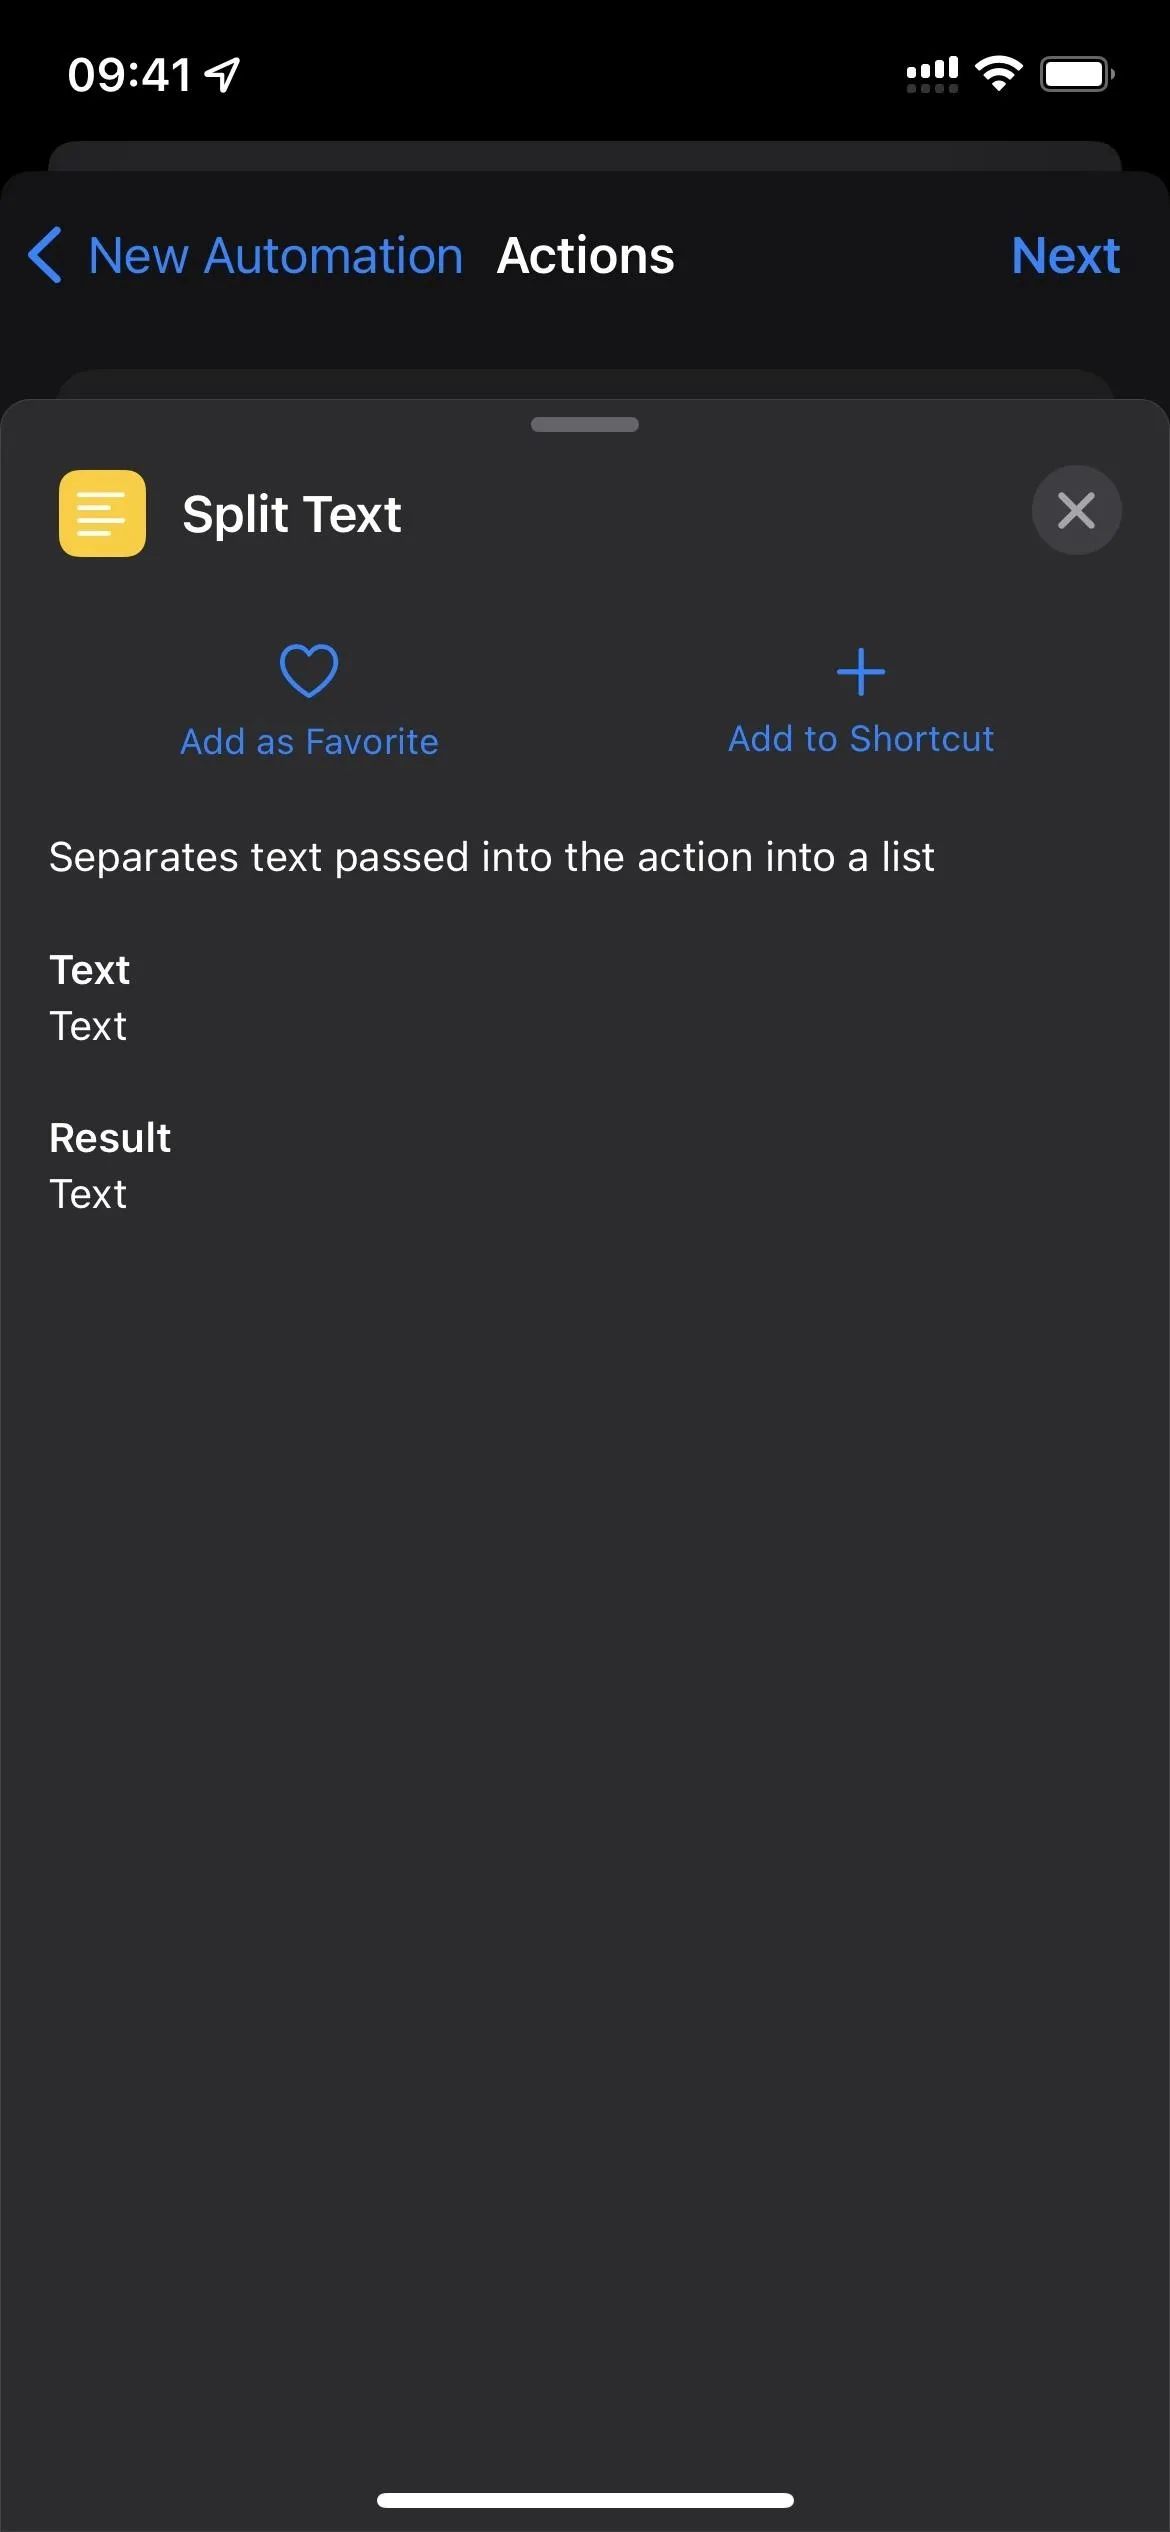
- Add the "Split Text" action below the File action box.
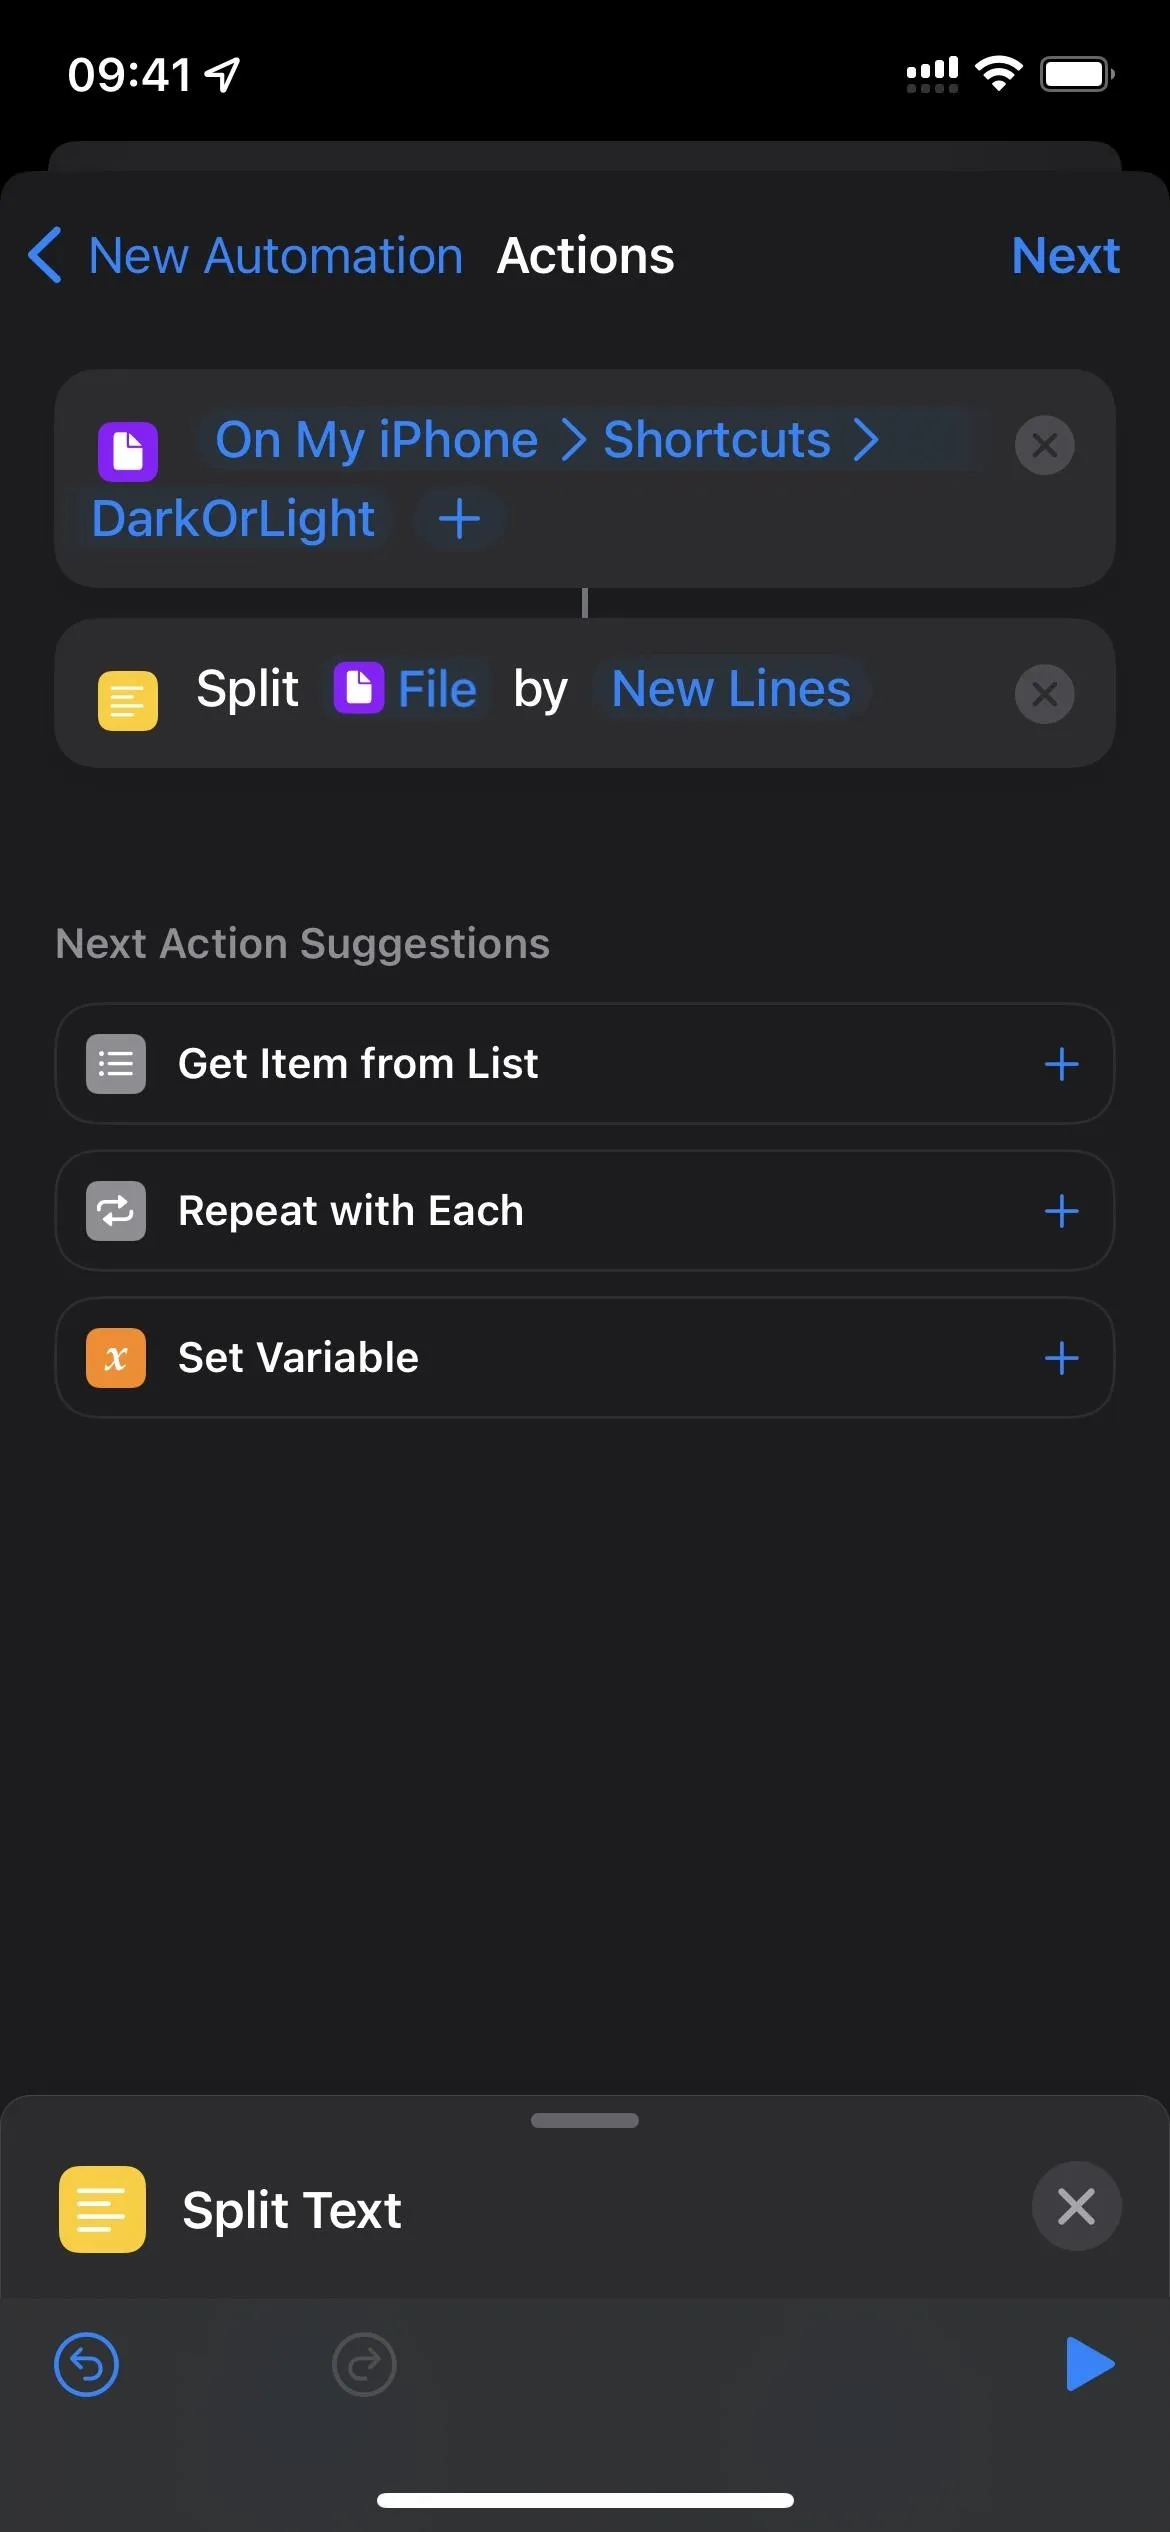
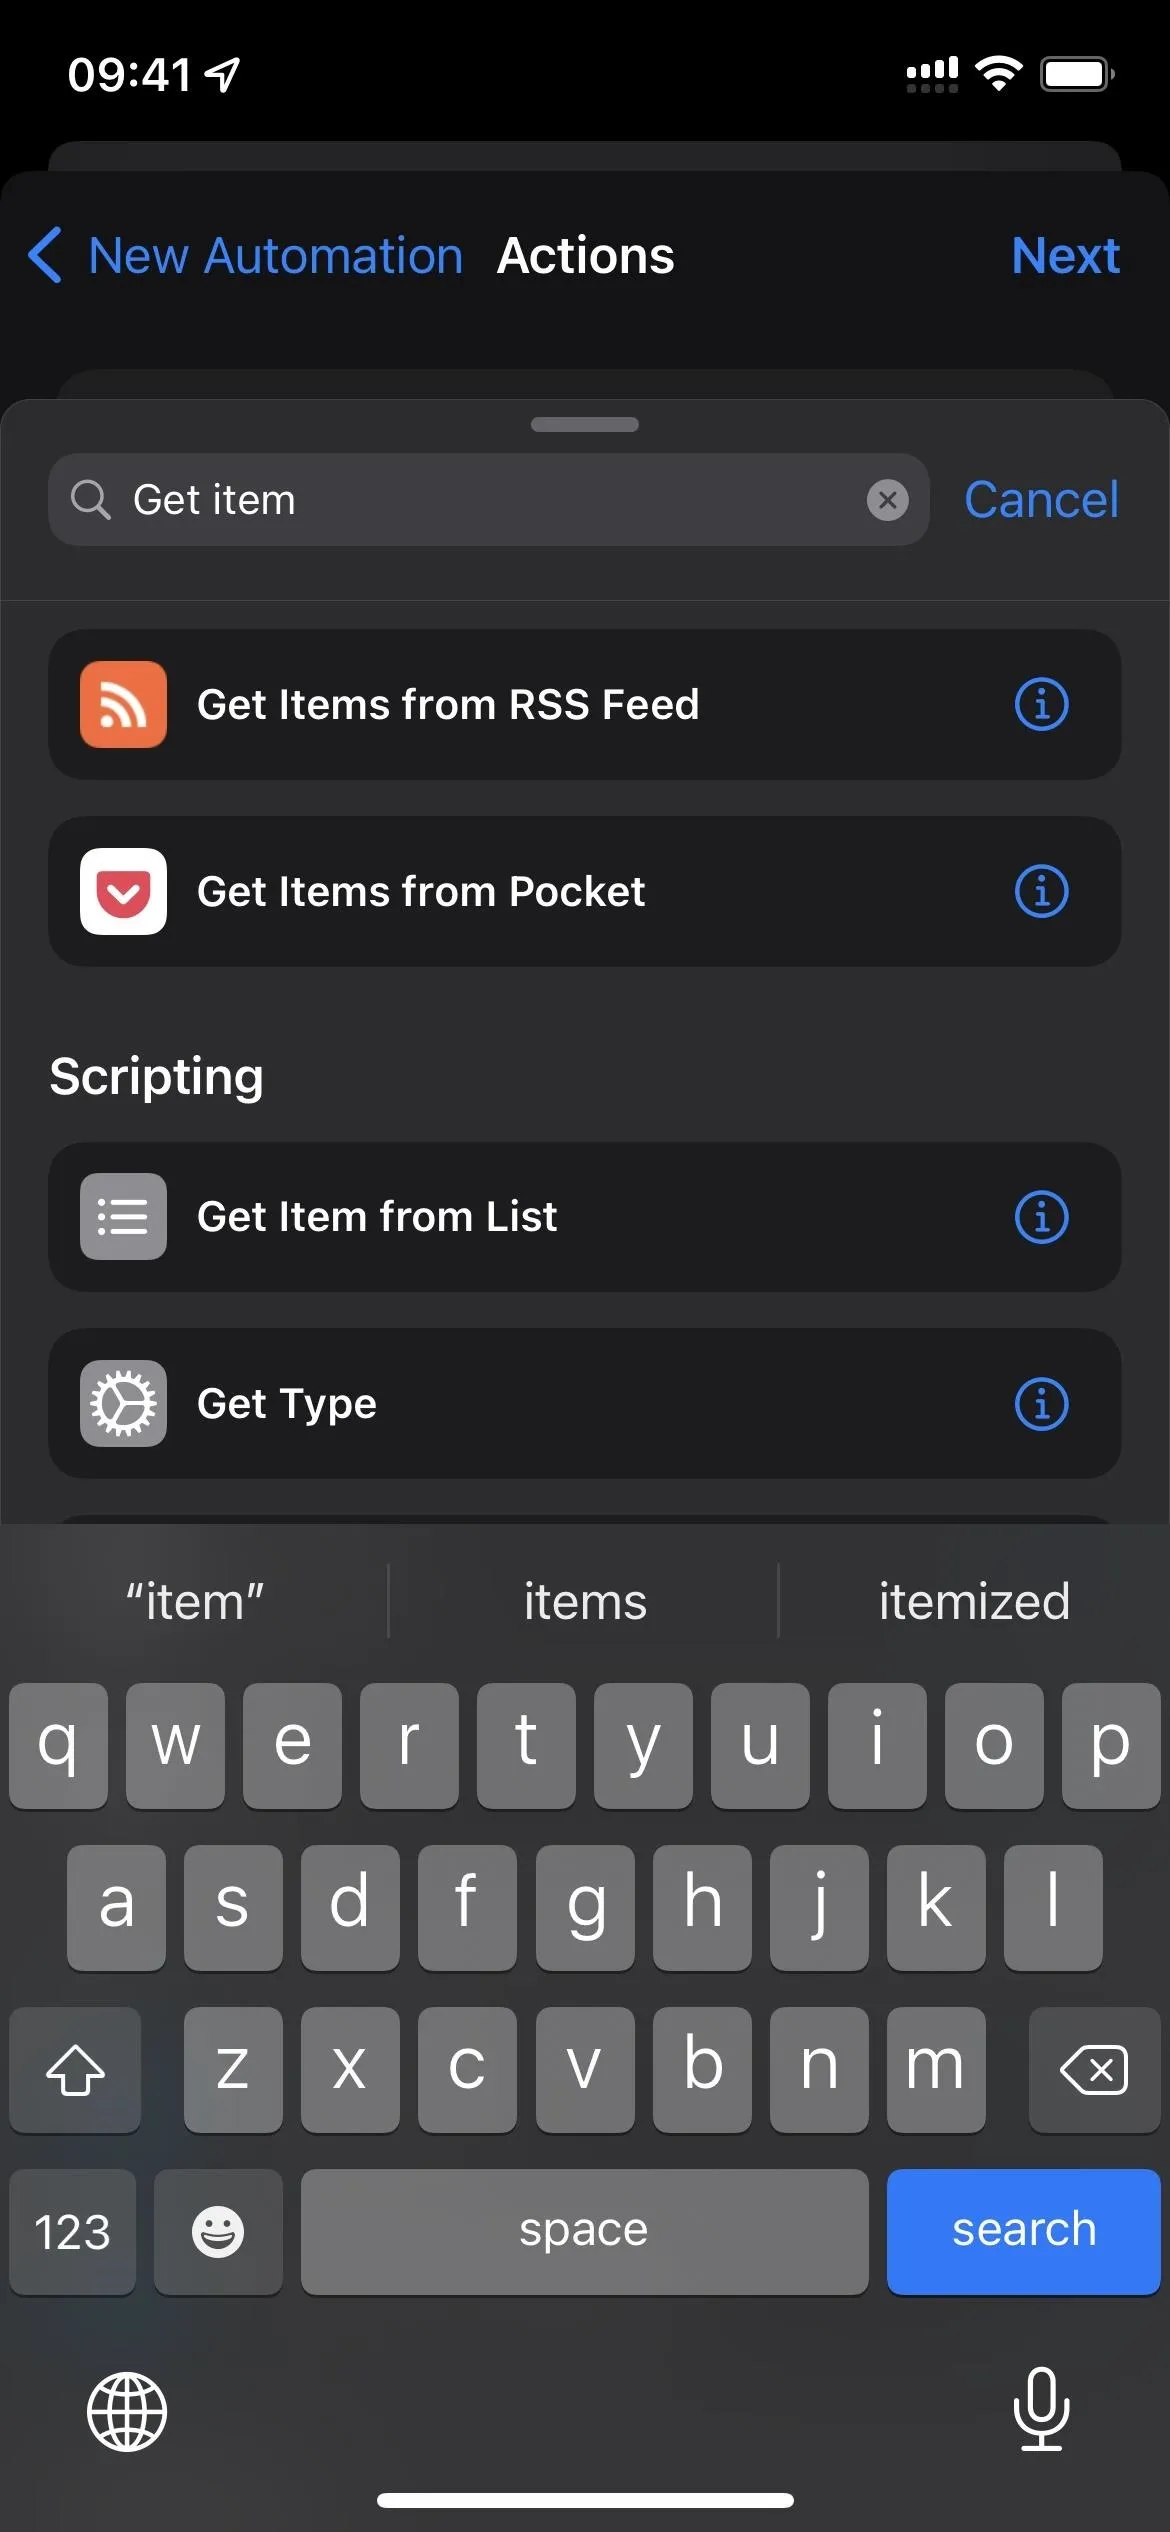
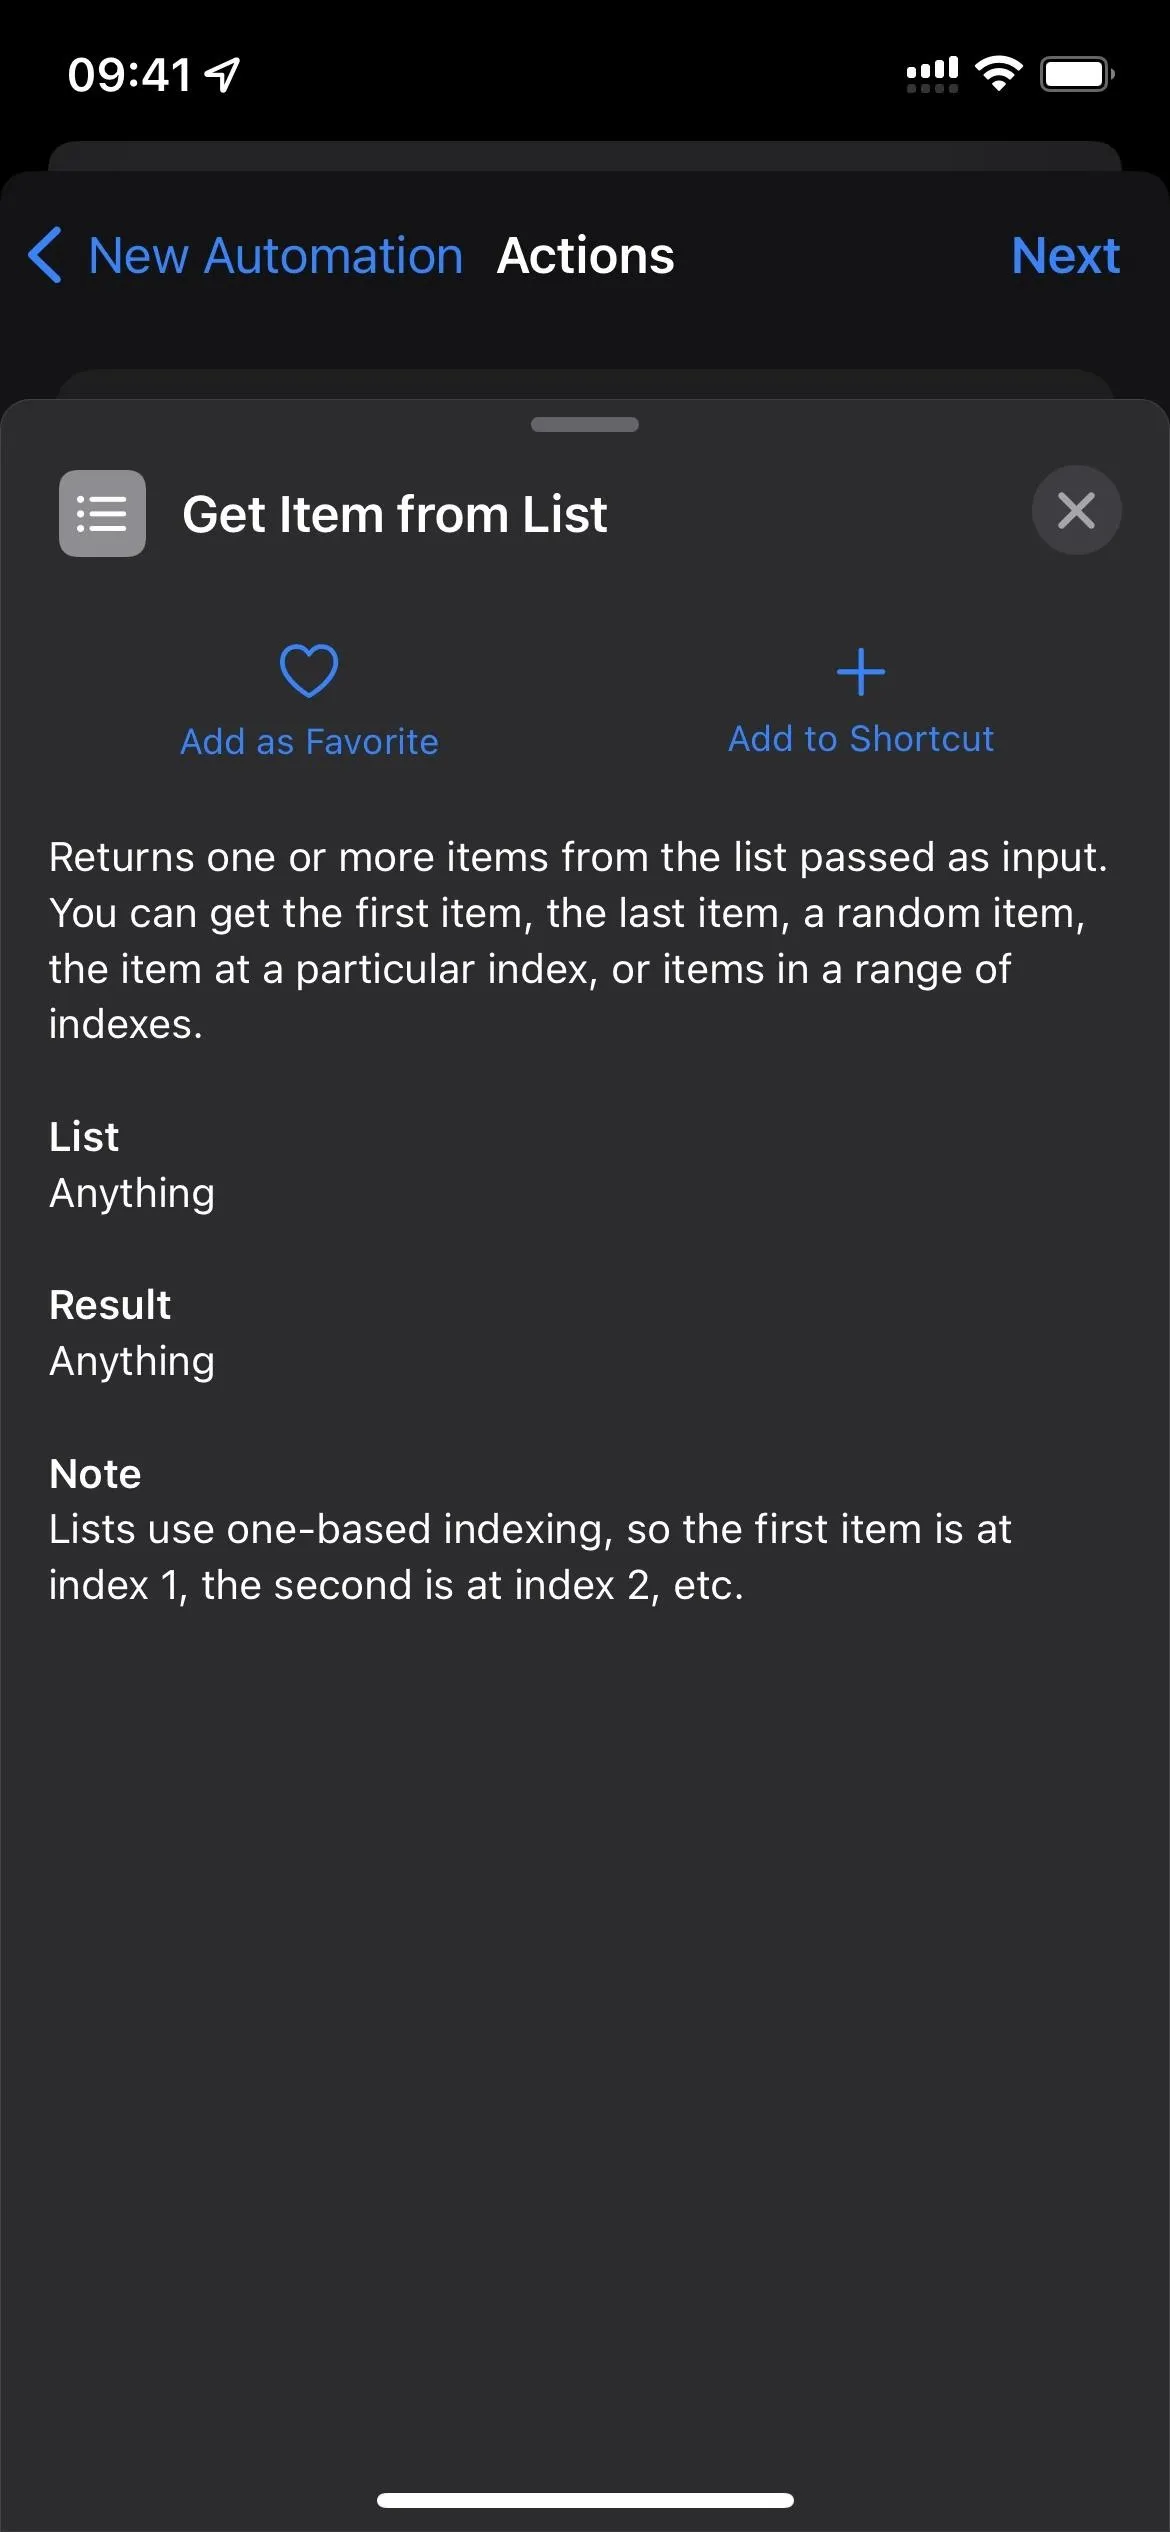
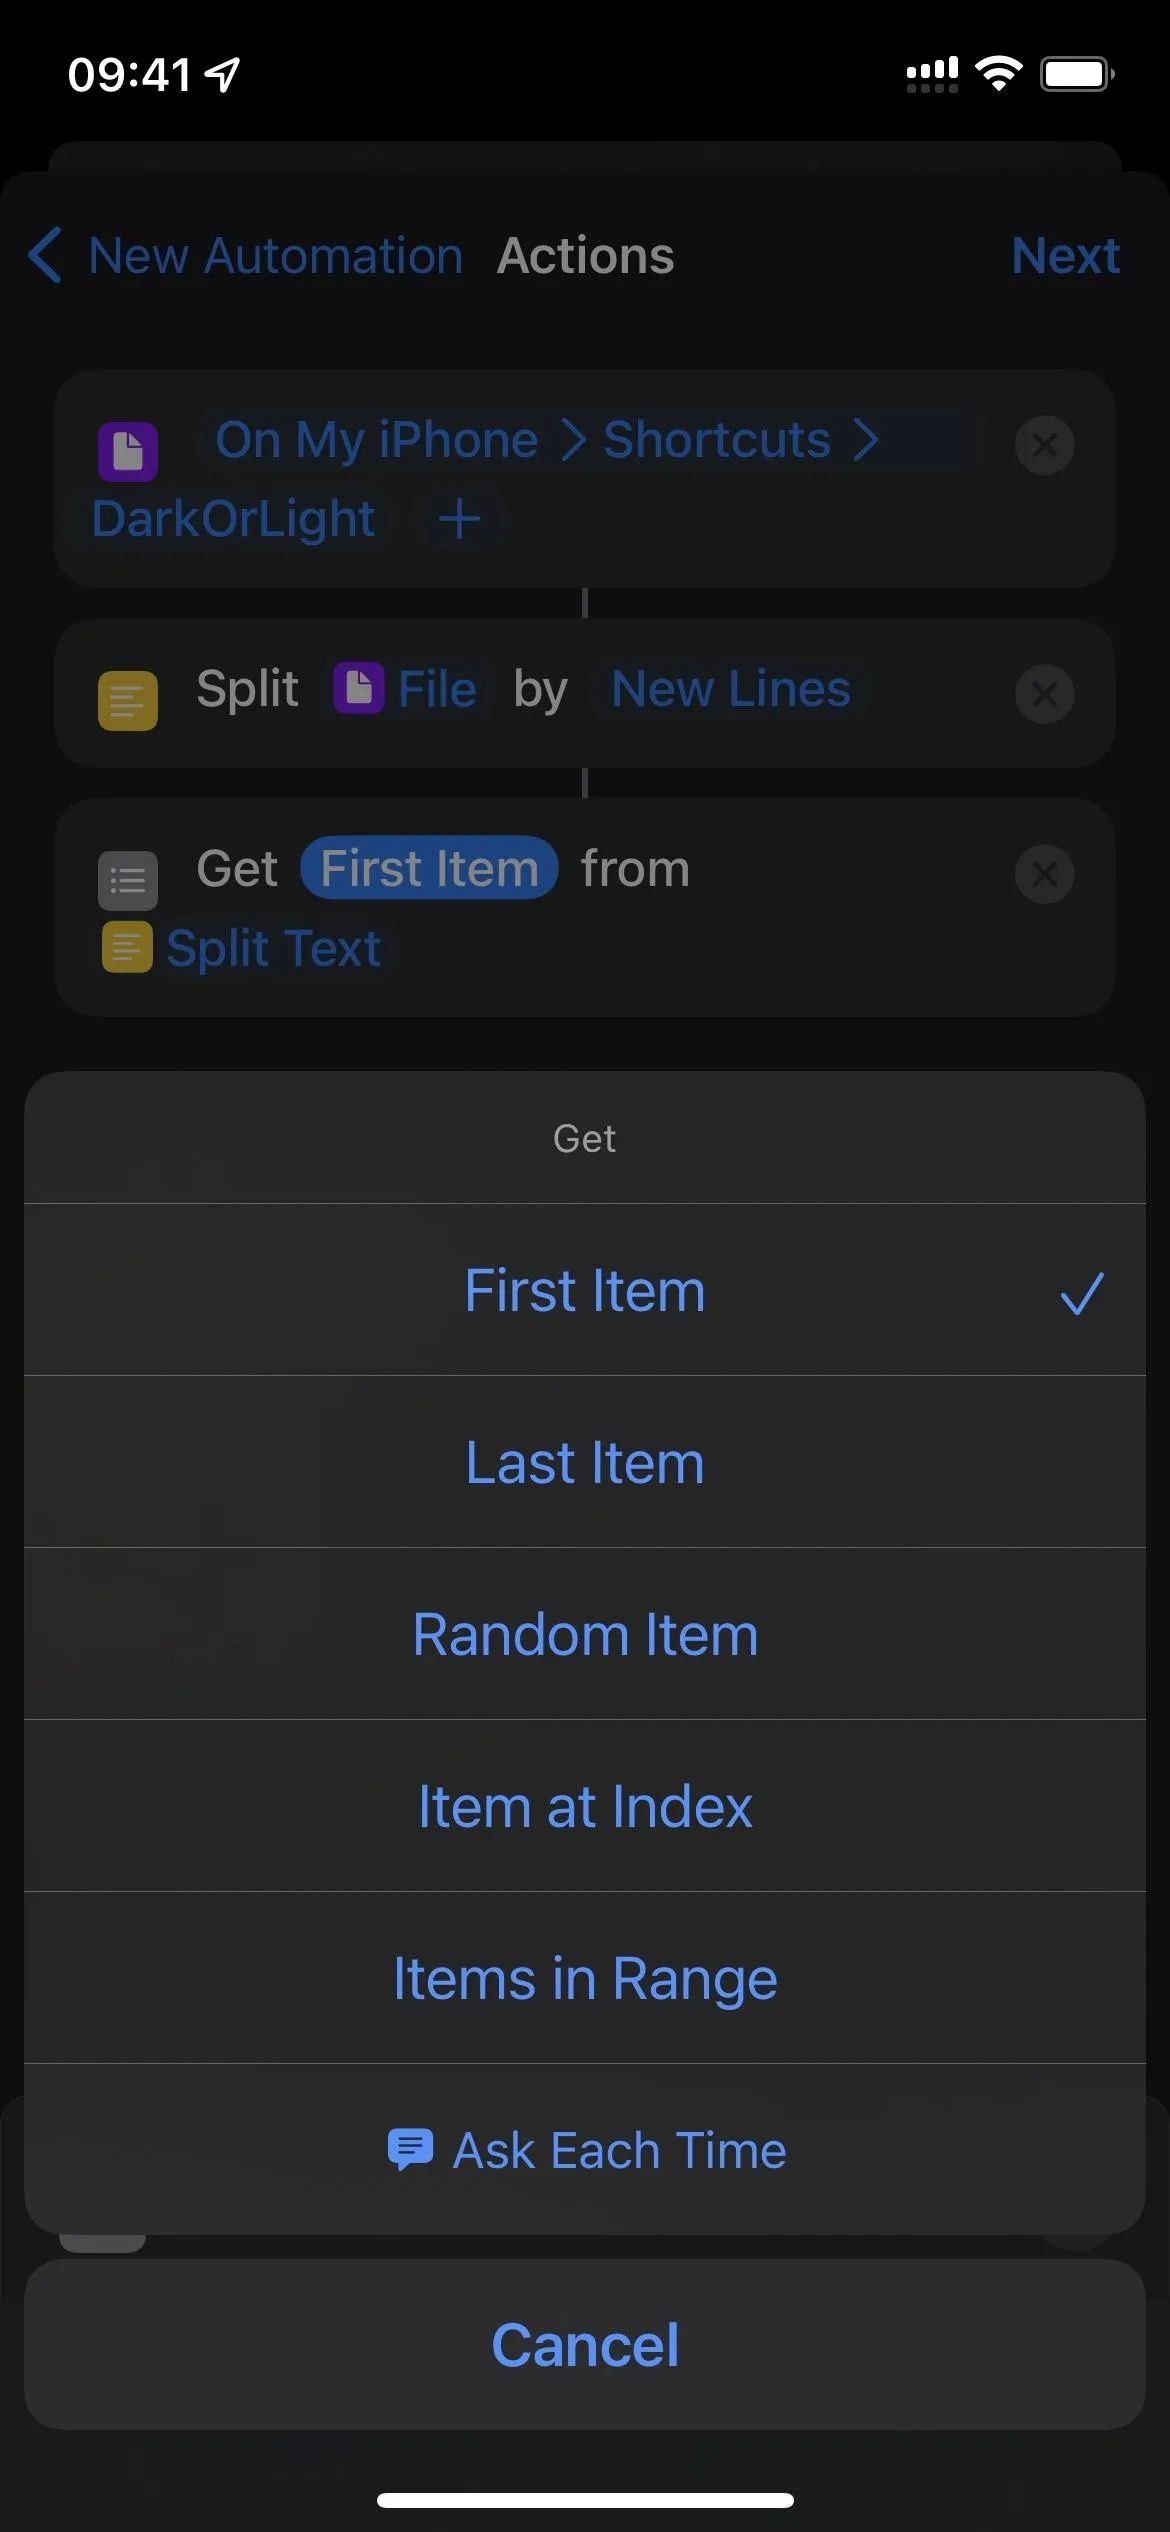
- Add the "Get Item from List" action below the Split Text action box.
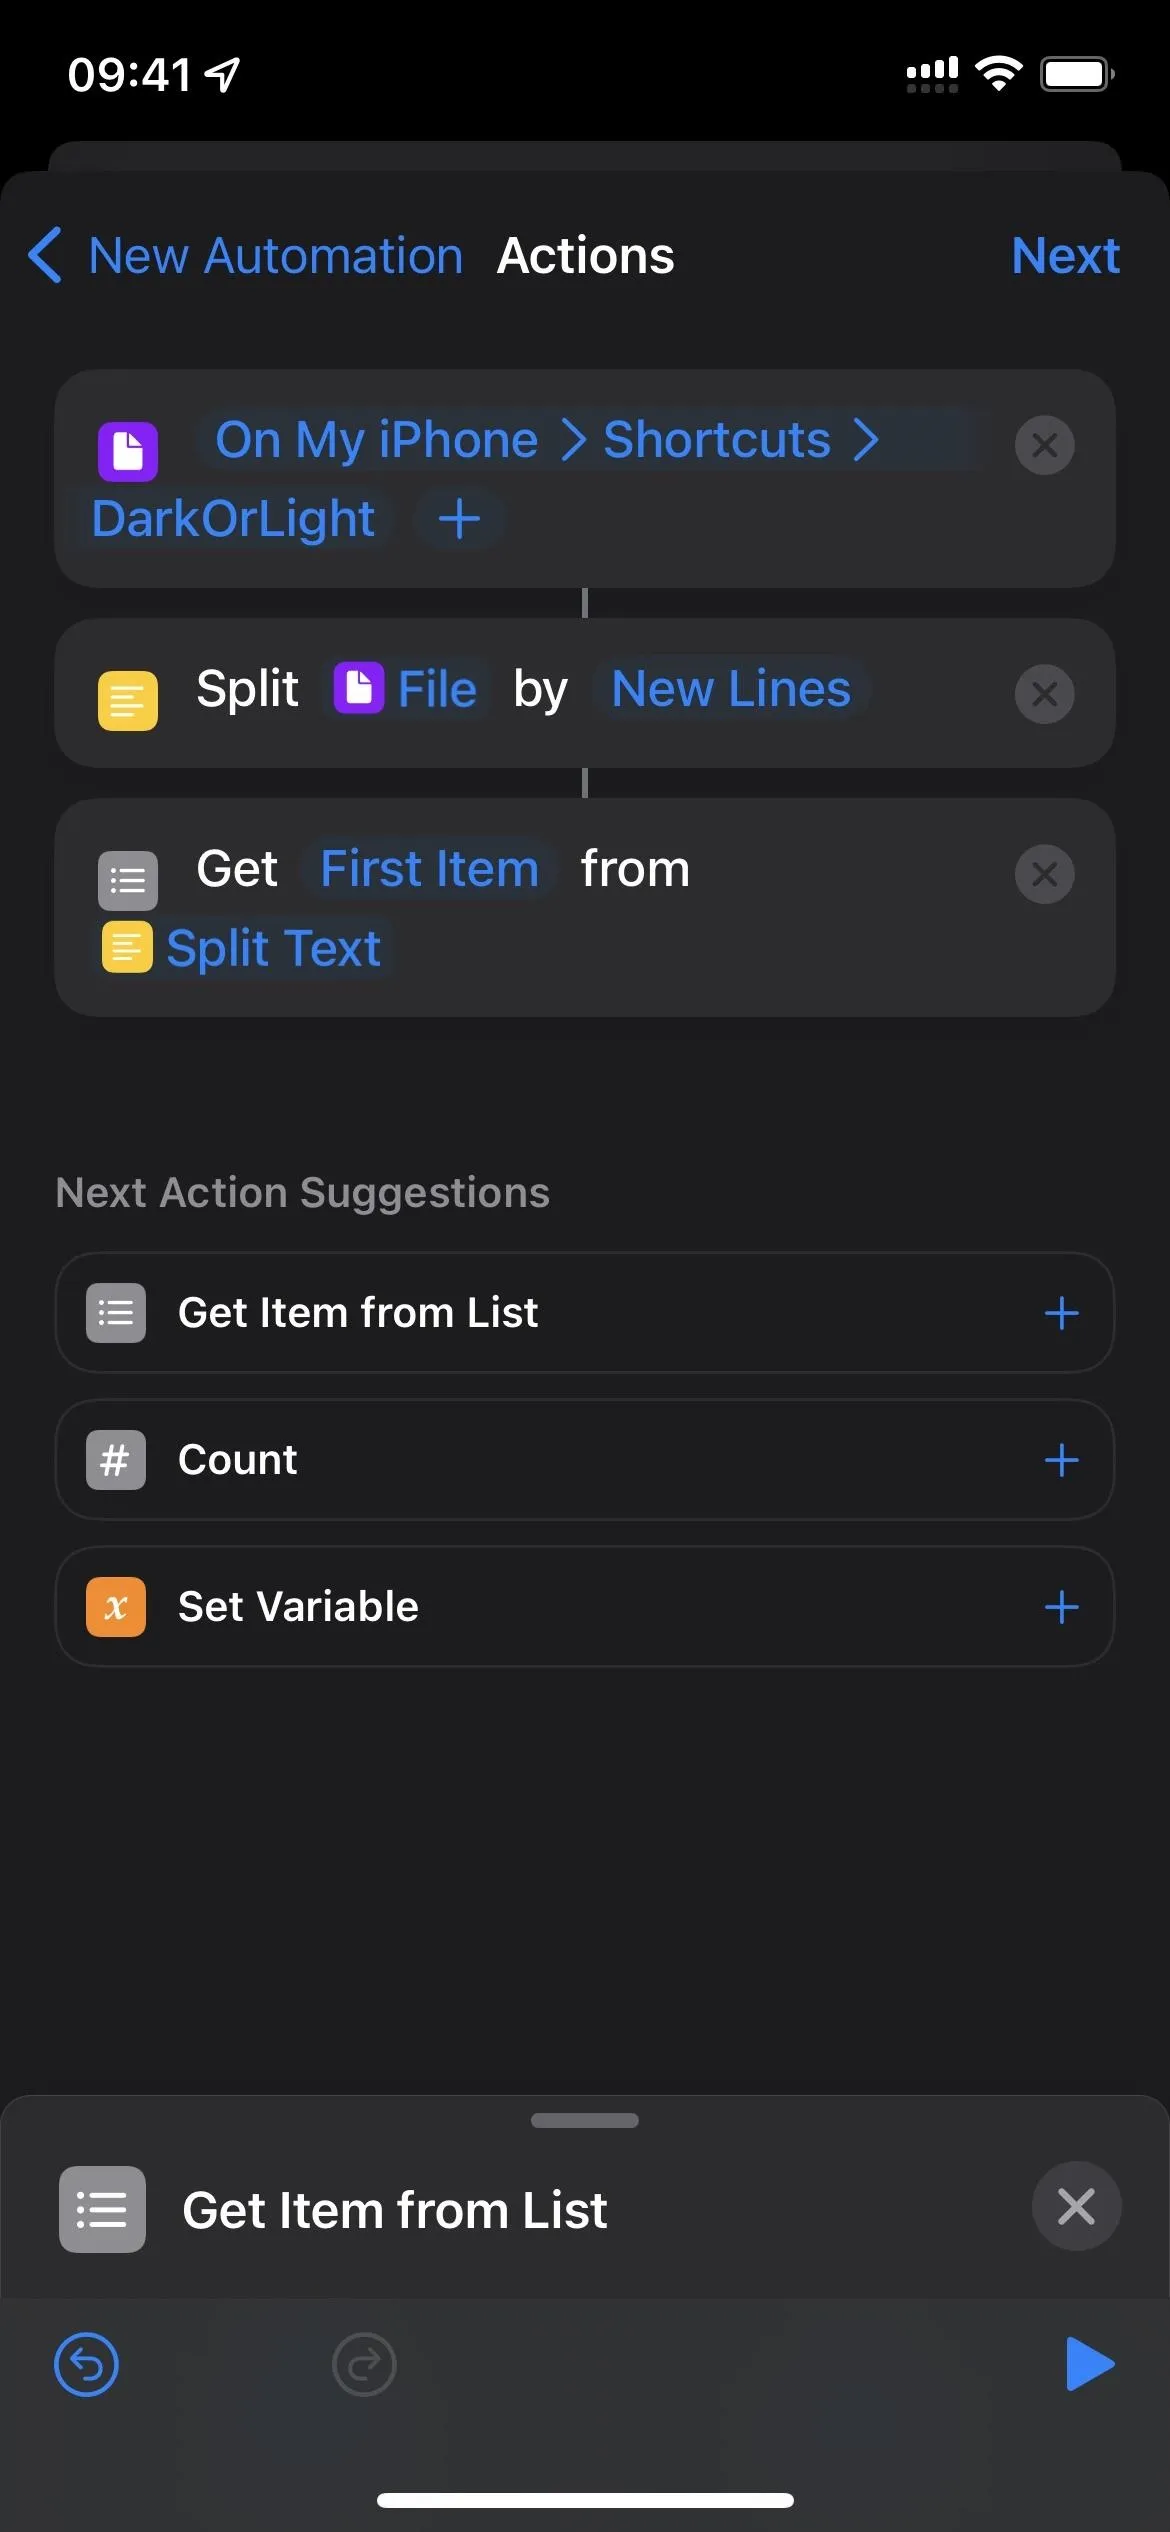
- Tap "First Item" from in the Split Text action box.
- Choose "Last Item" from the menu.

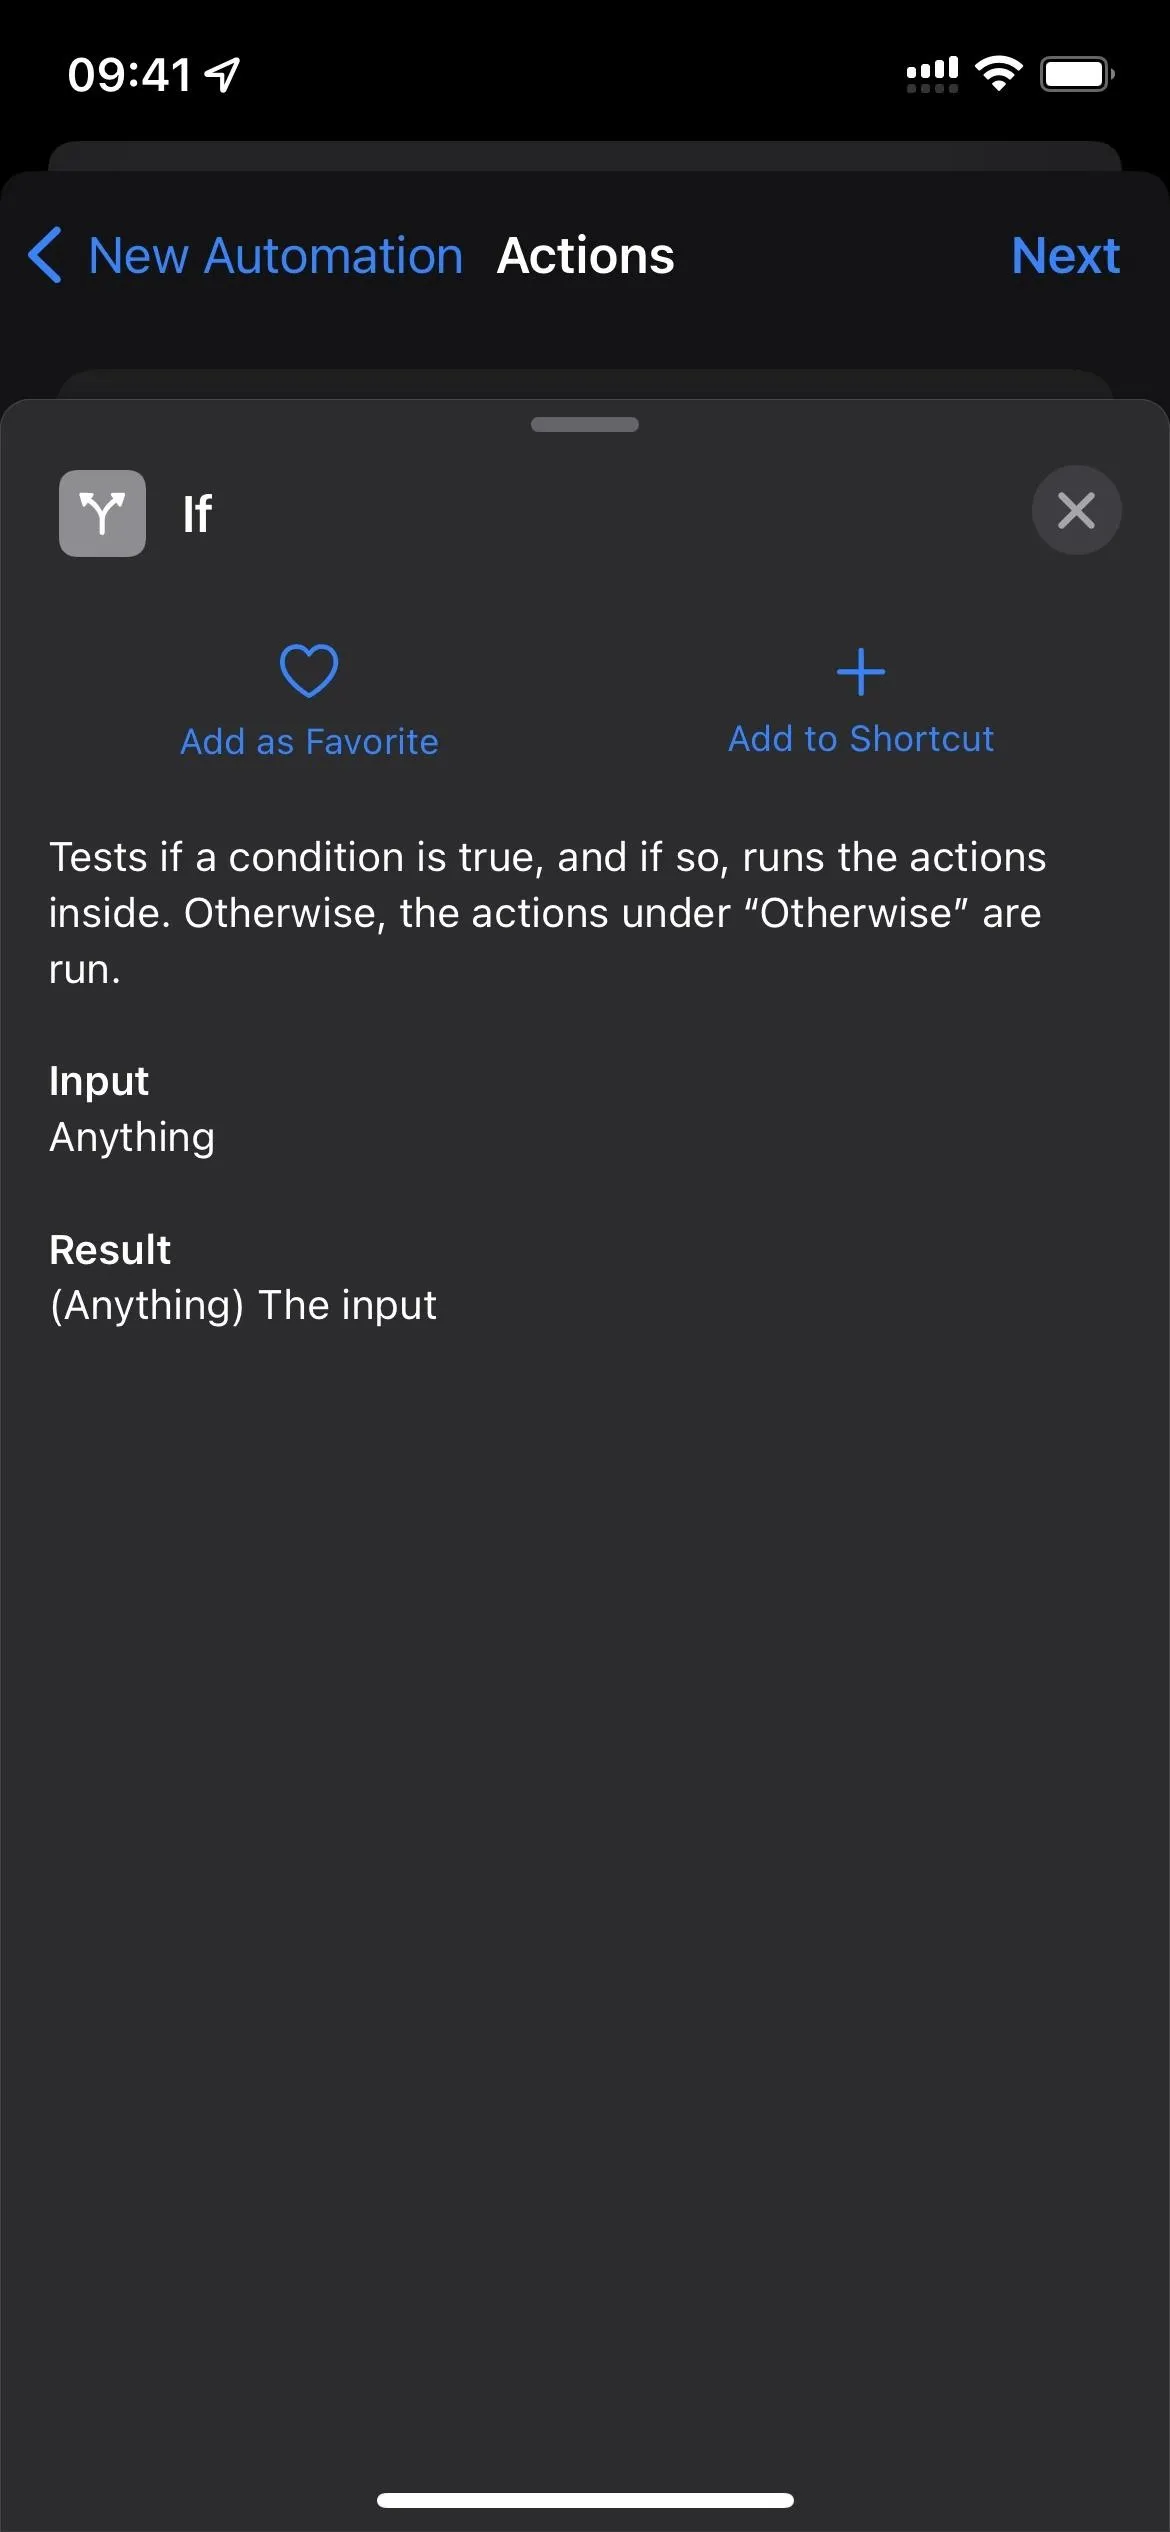
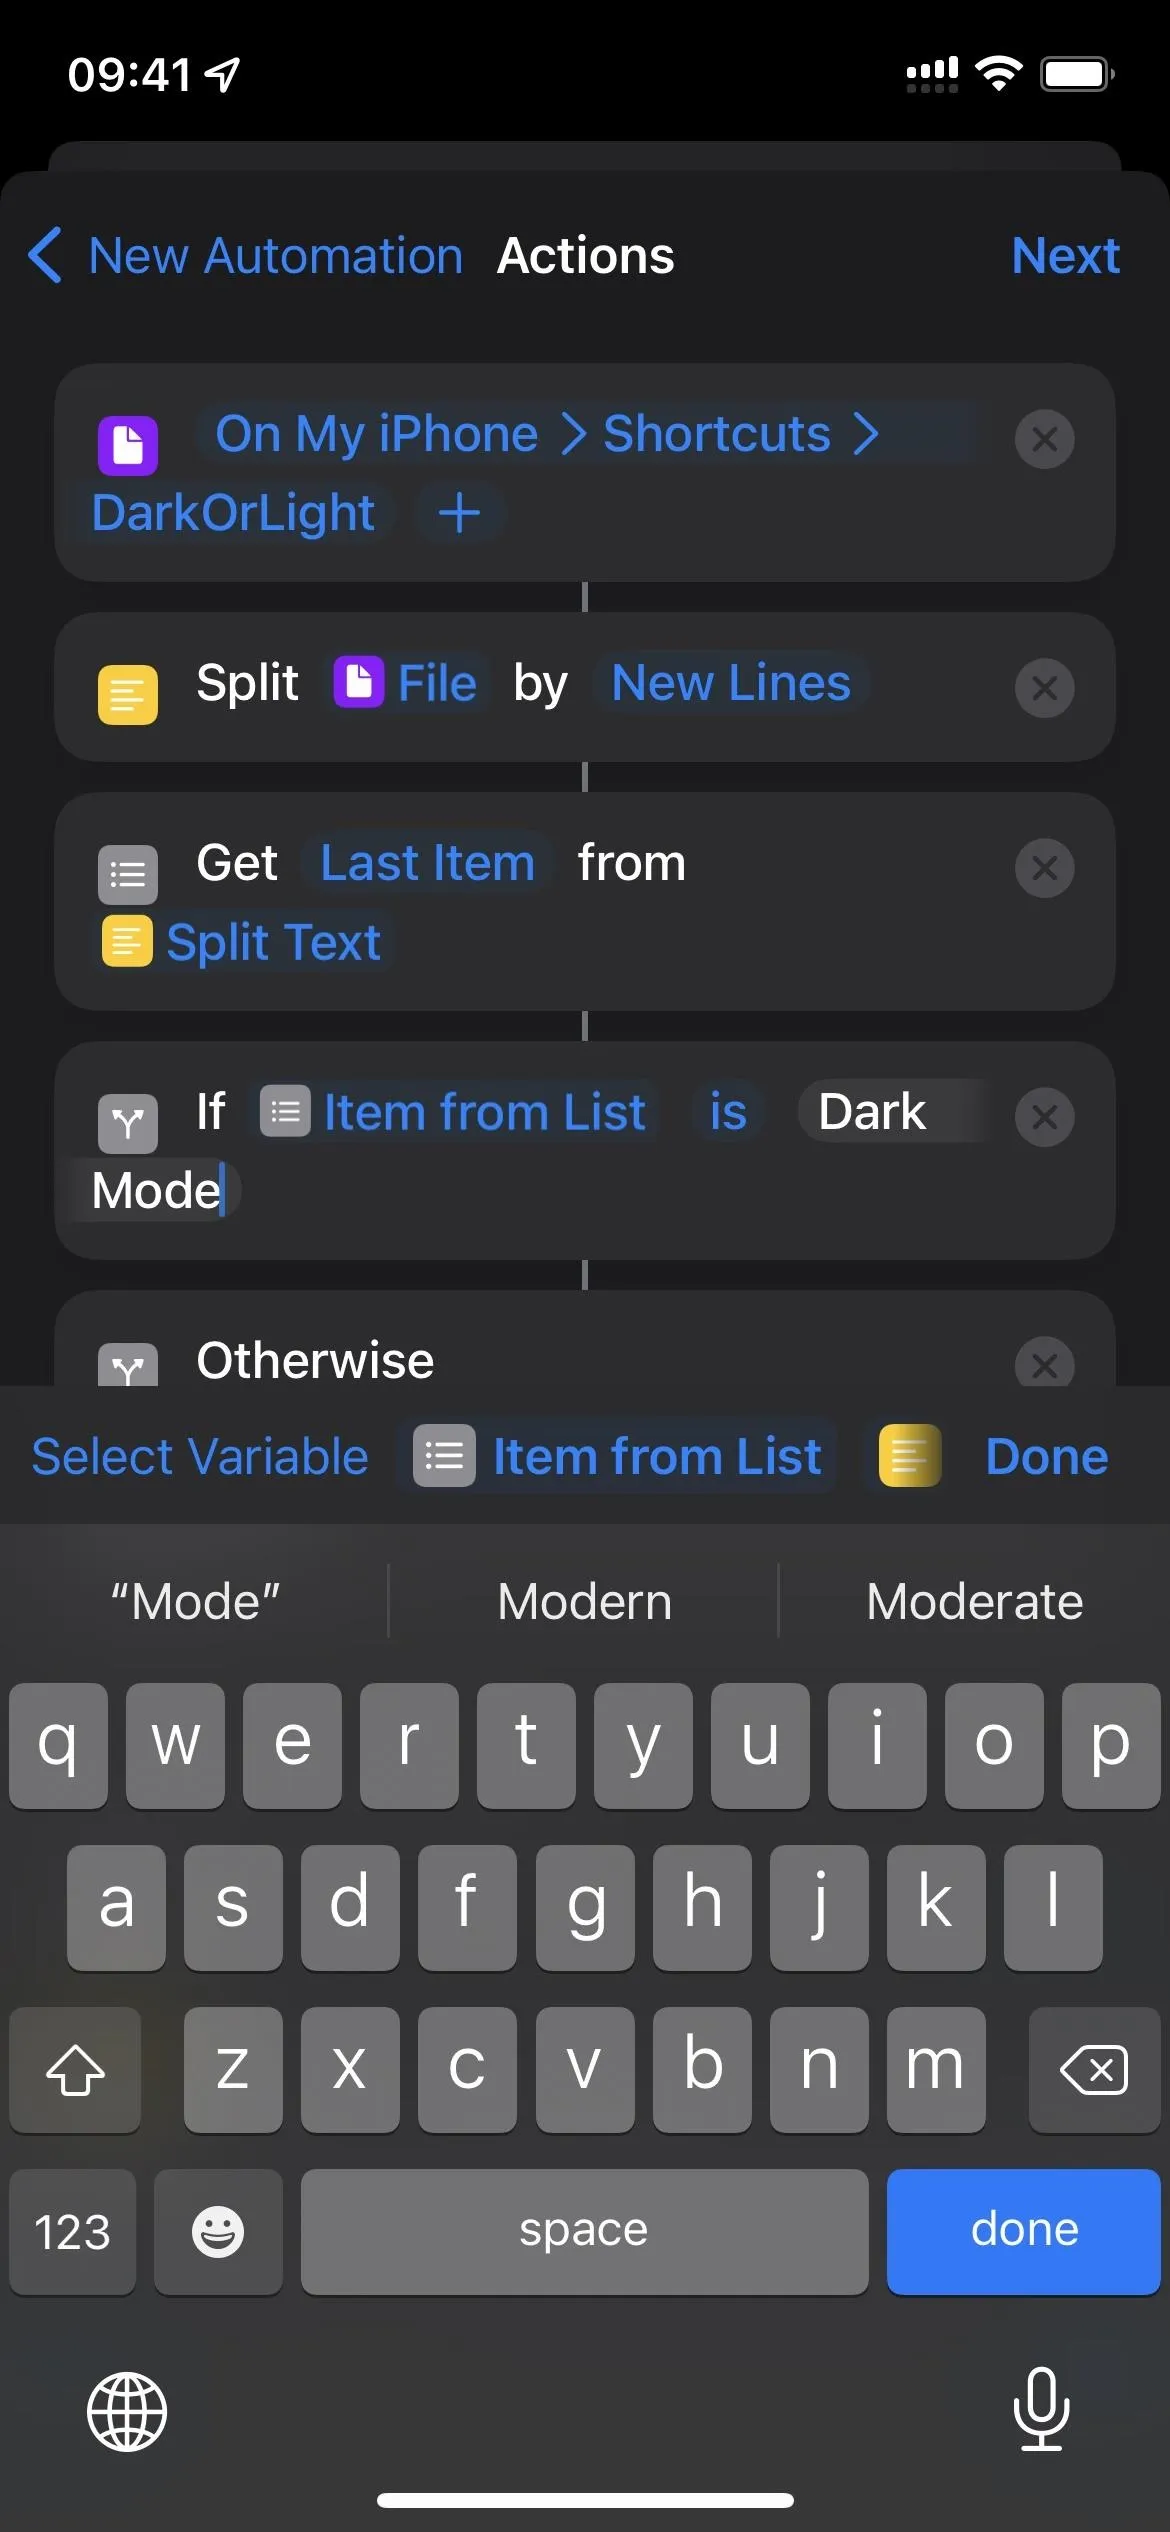
- Add an "If" statement below the Get Item from List action box.
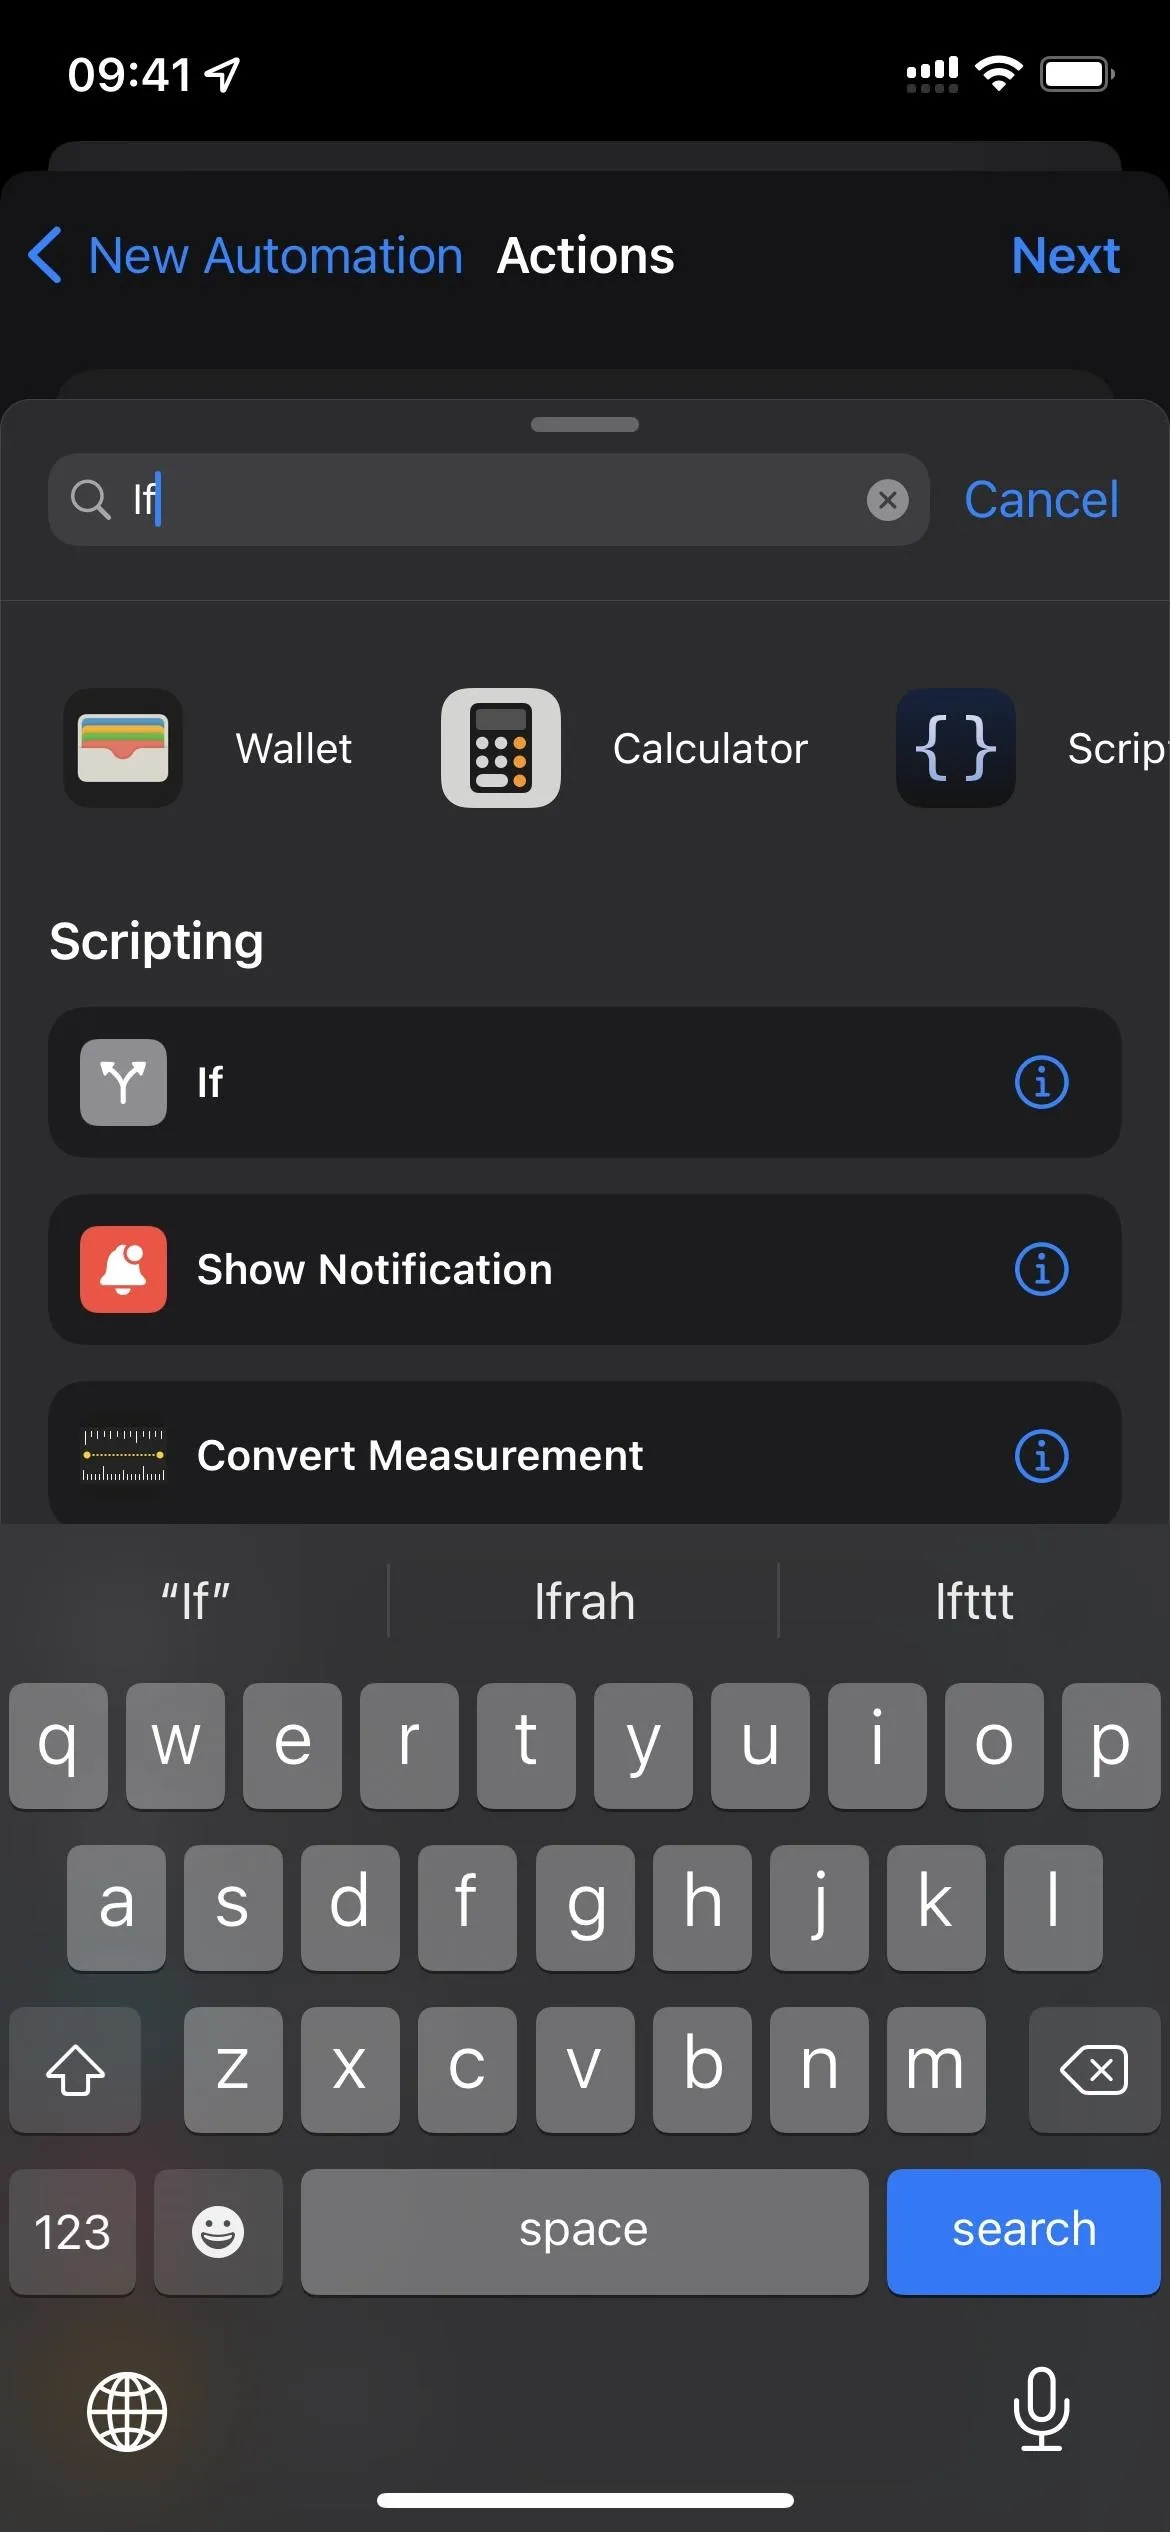
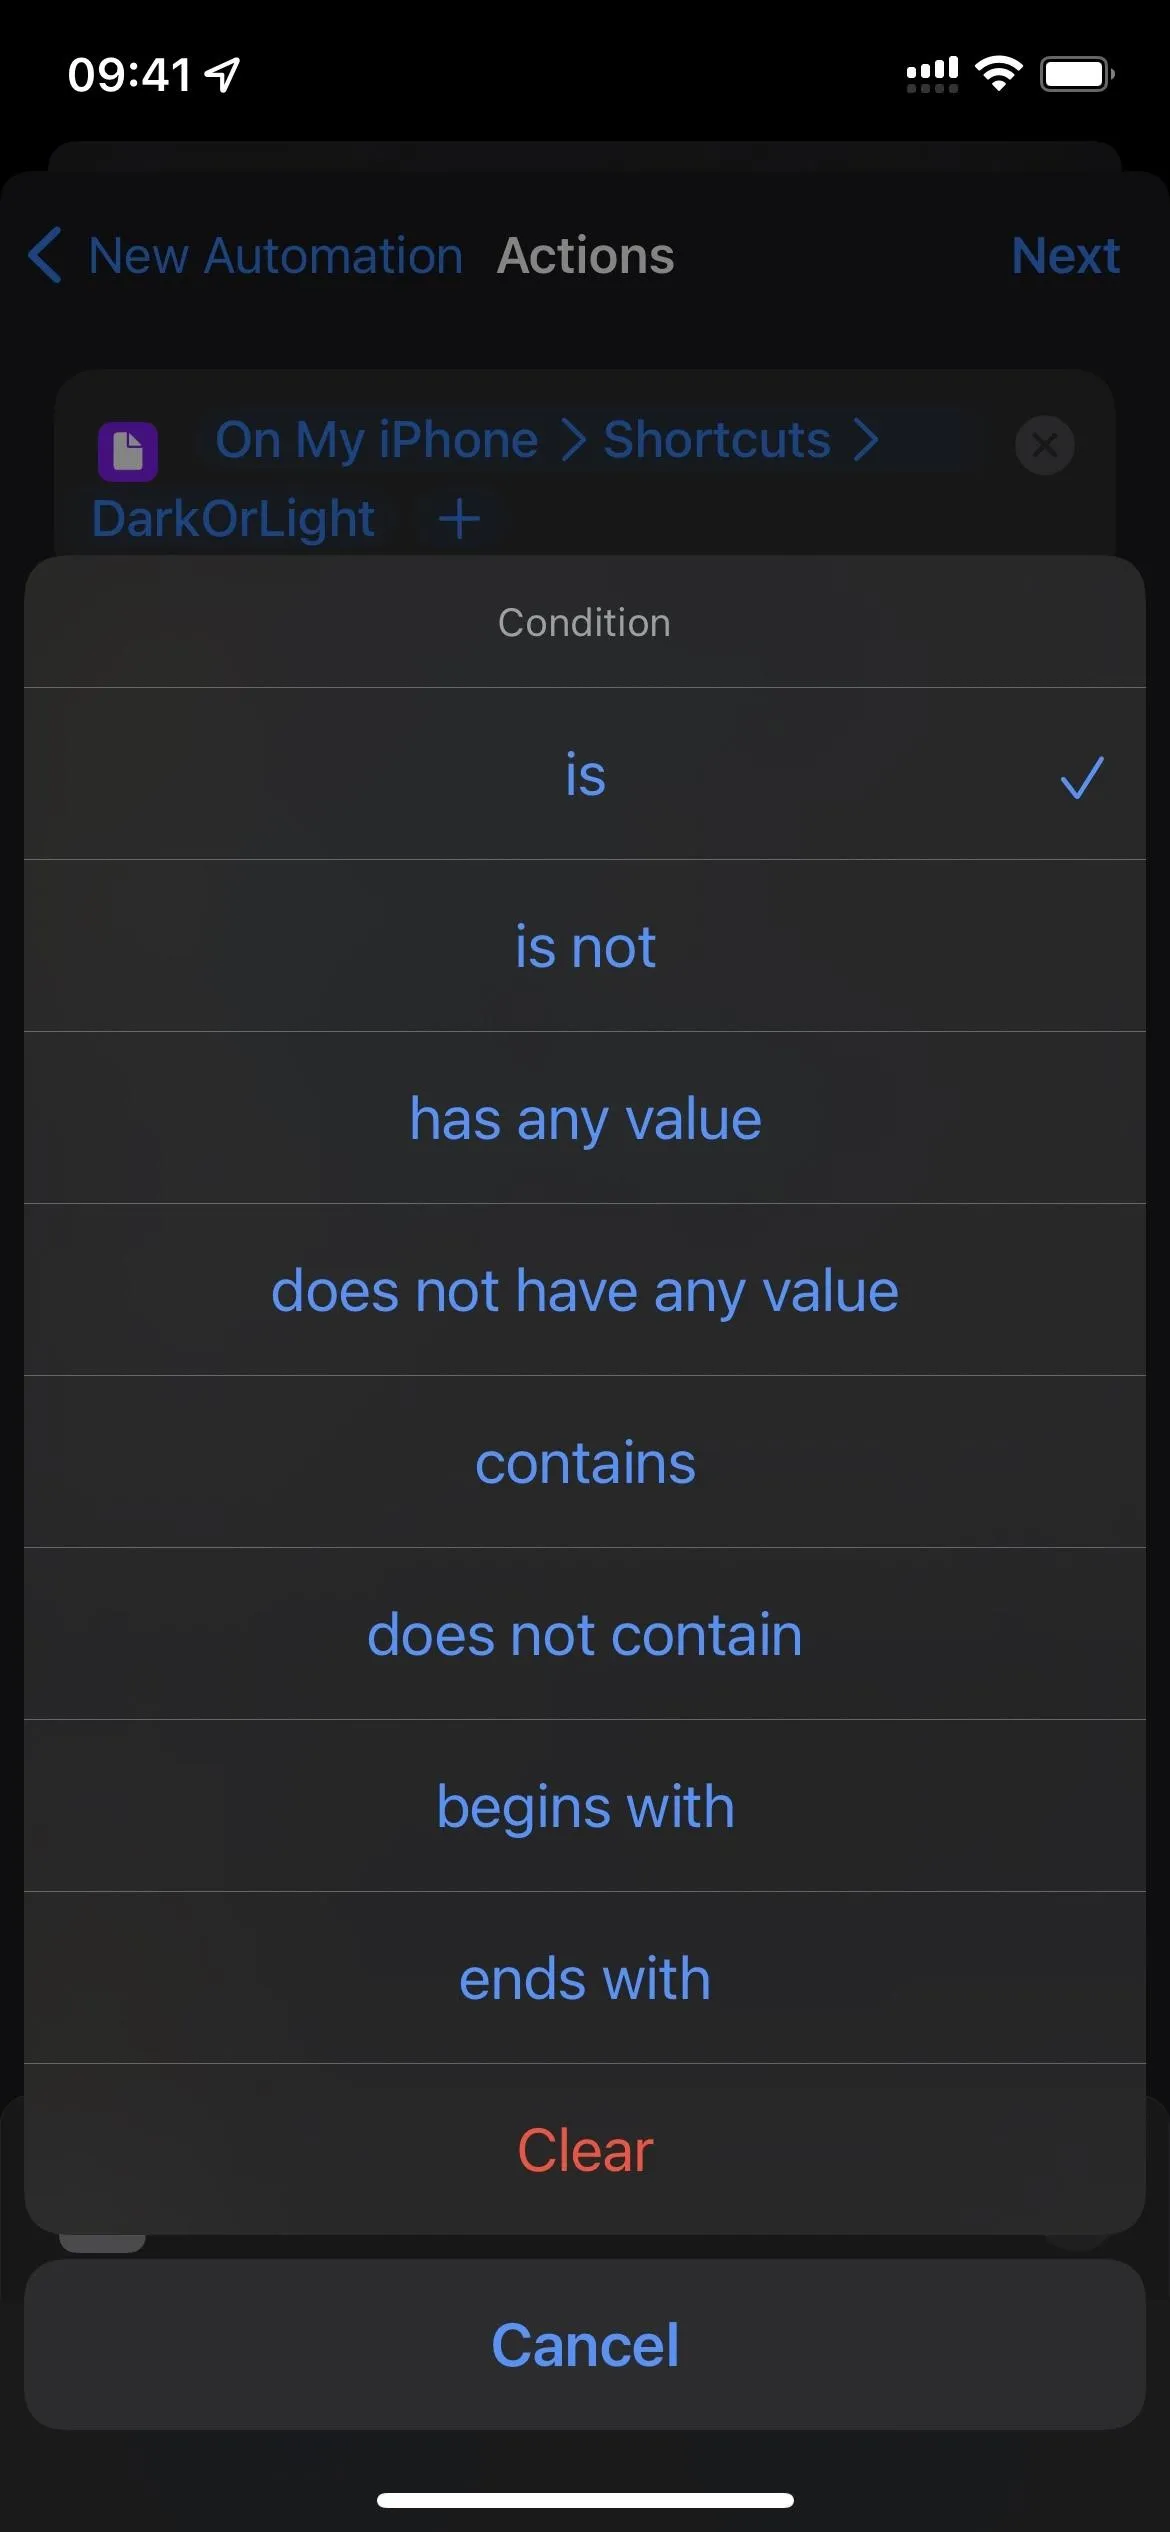
- Tap "Condition" in the If action box.
- Choose "is" from the menu.
- Tap "Text" in the same action box.
- Type "Dark Mode" and hit "Done" on the keyboard.
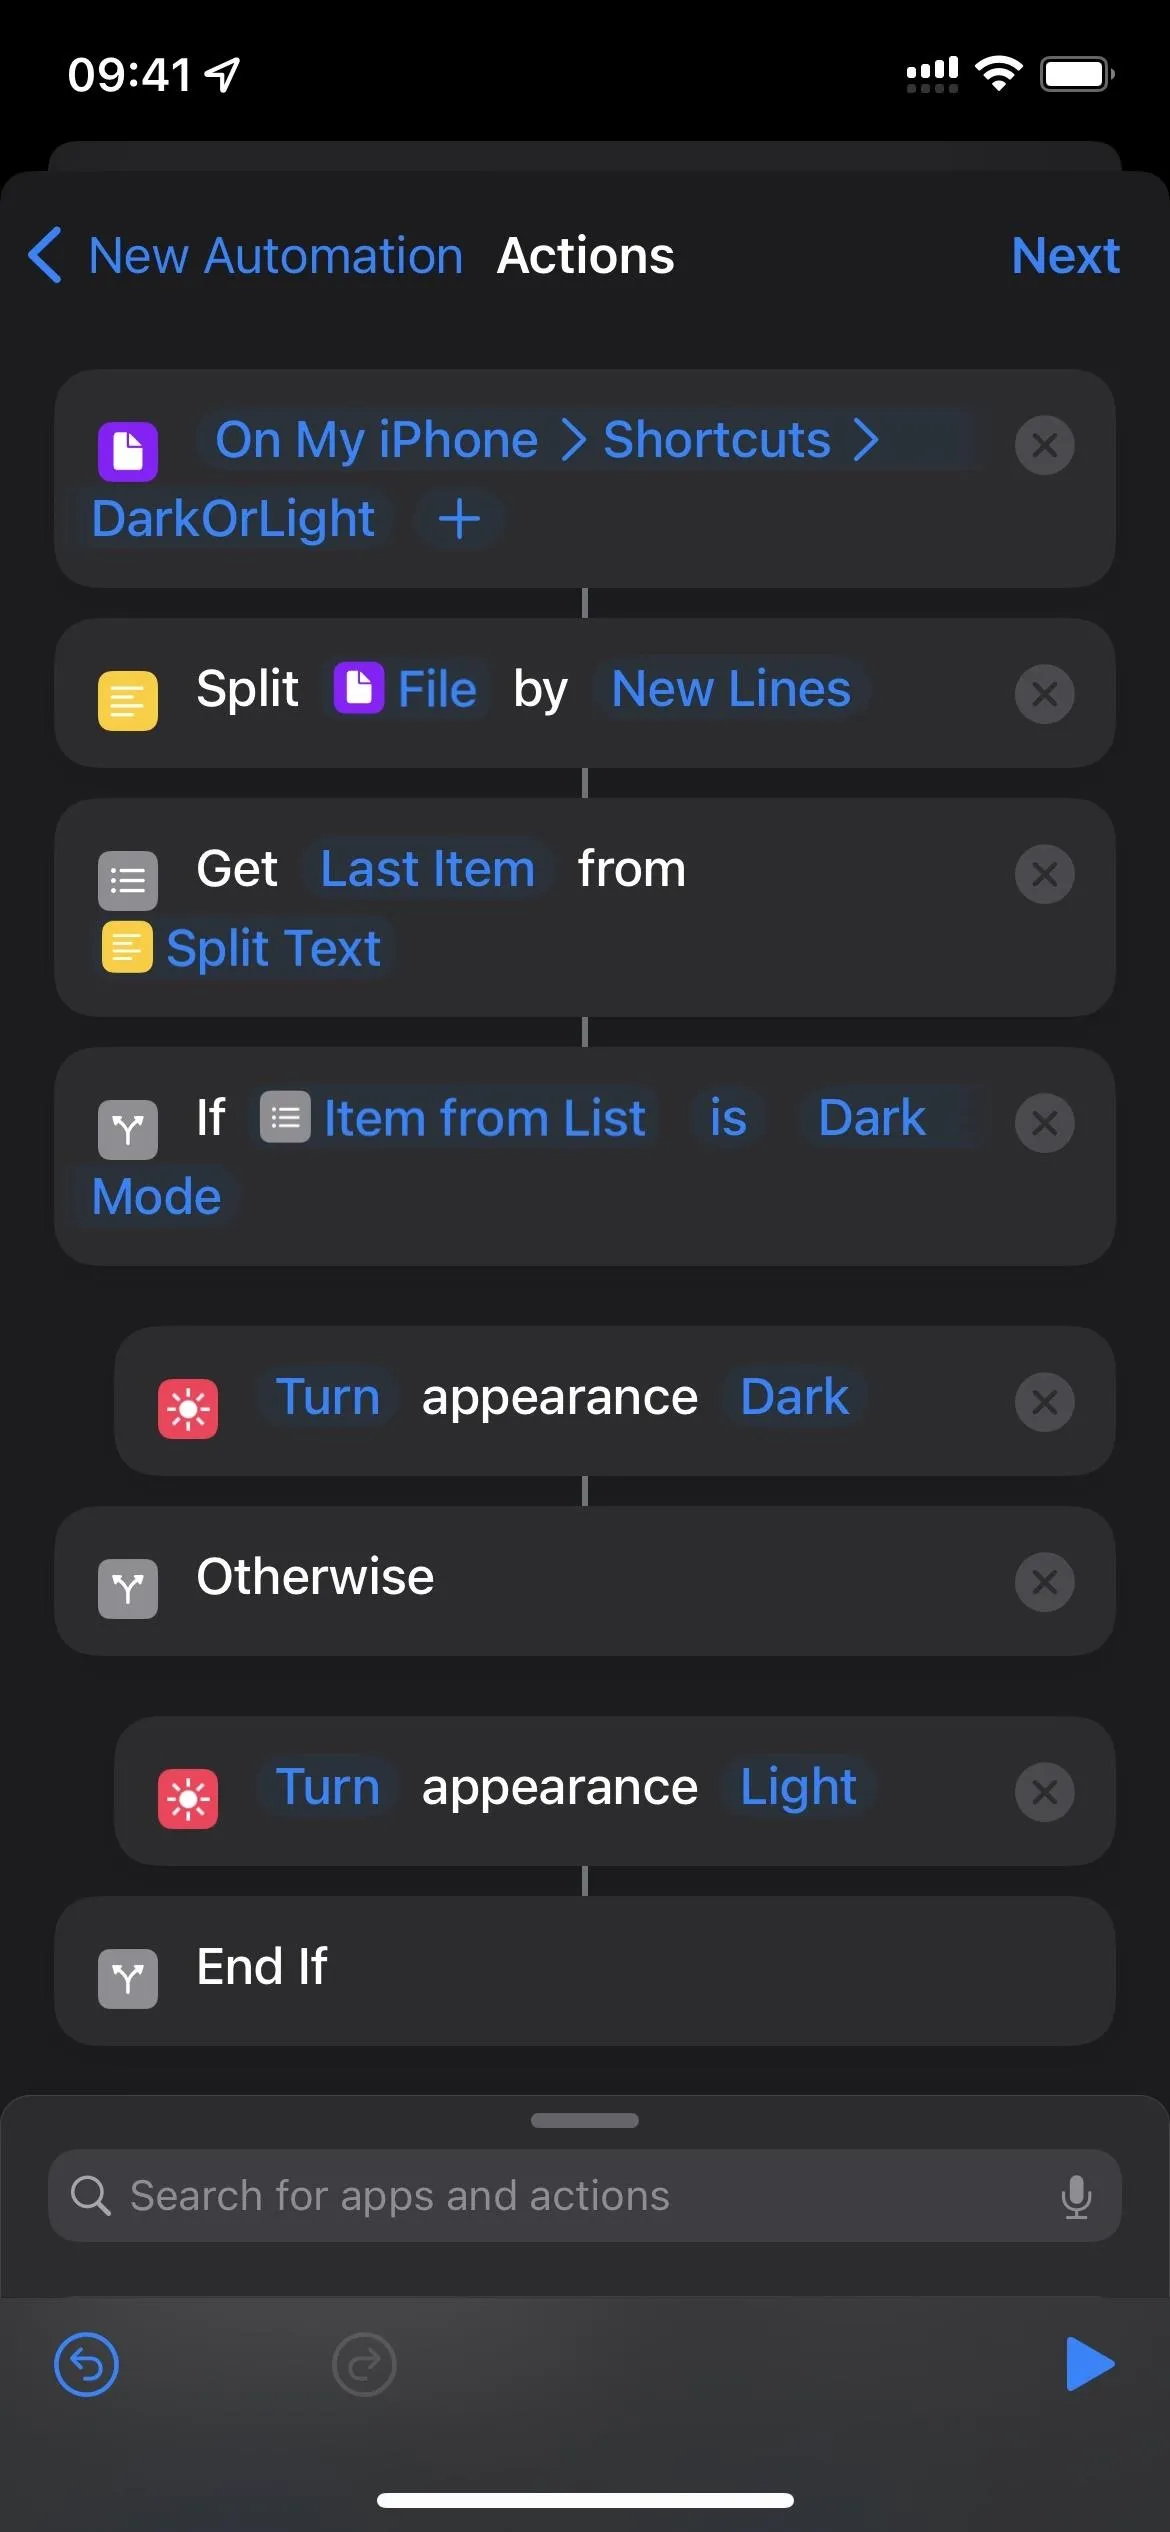
- Drag and drop the "Set Appearance" action to just after the If action box.
- Drag and drop another "Set Appearance" action to just after the Otherwise action box.
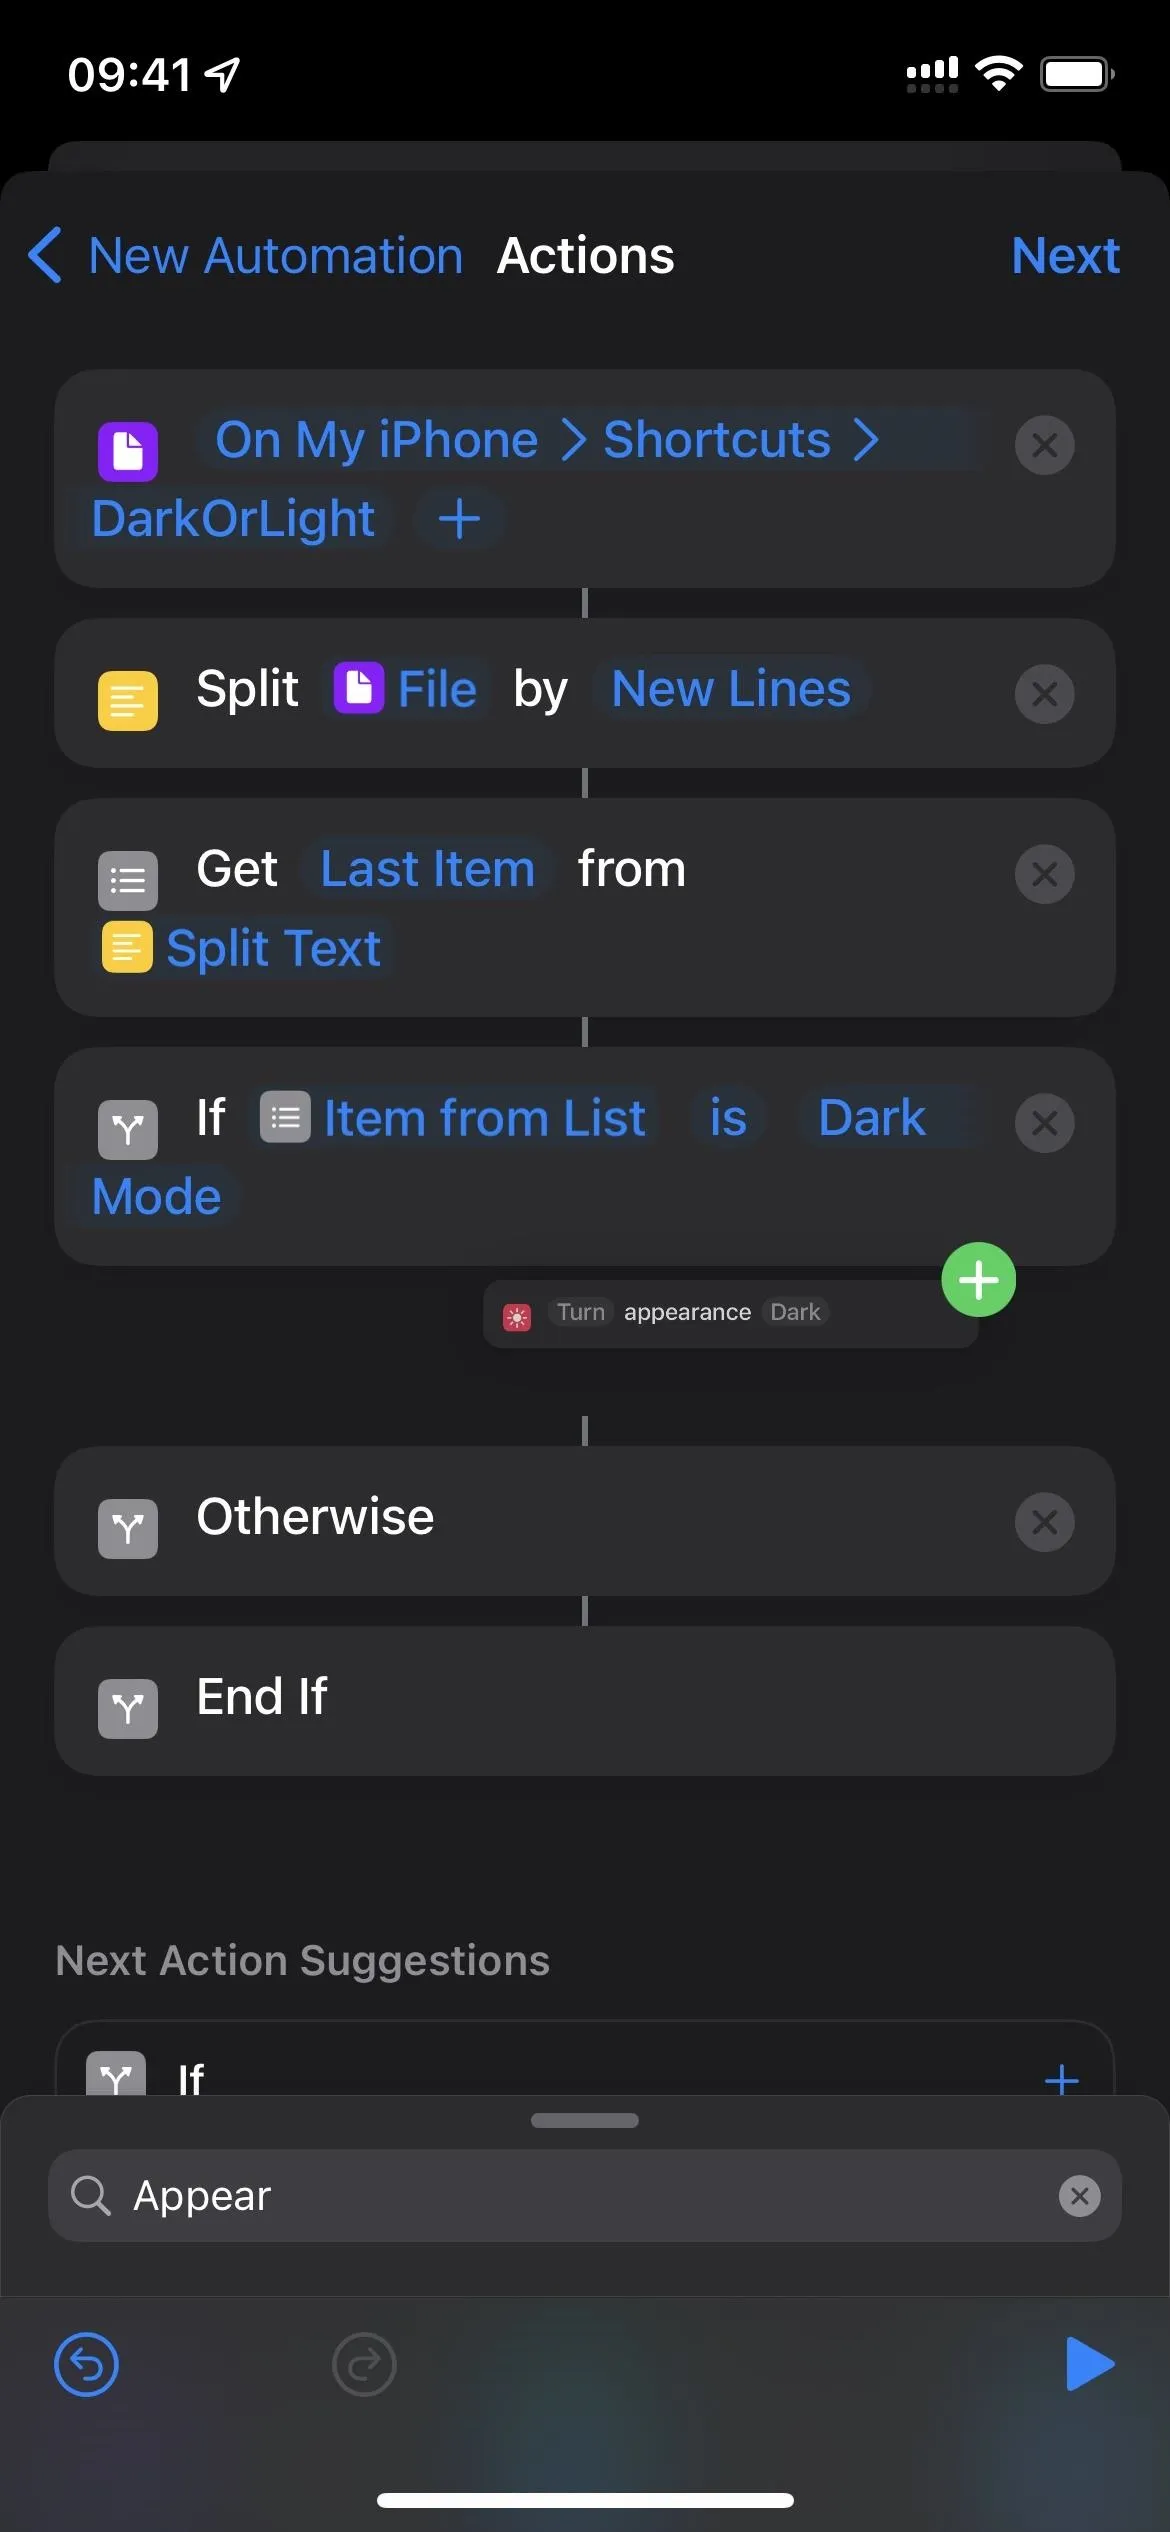
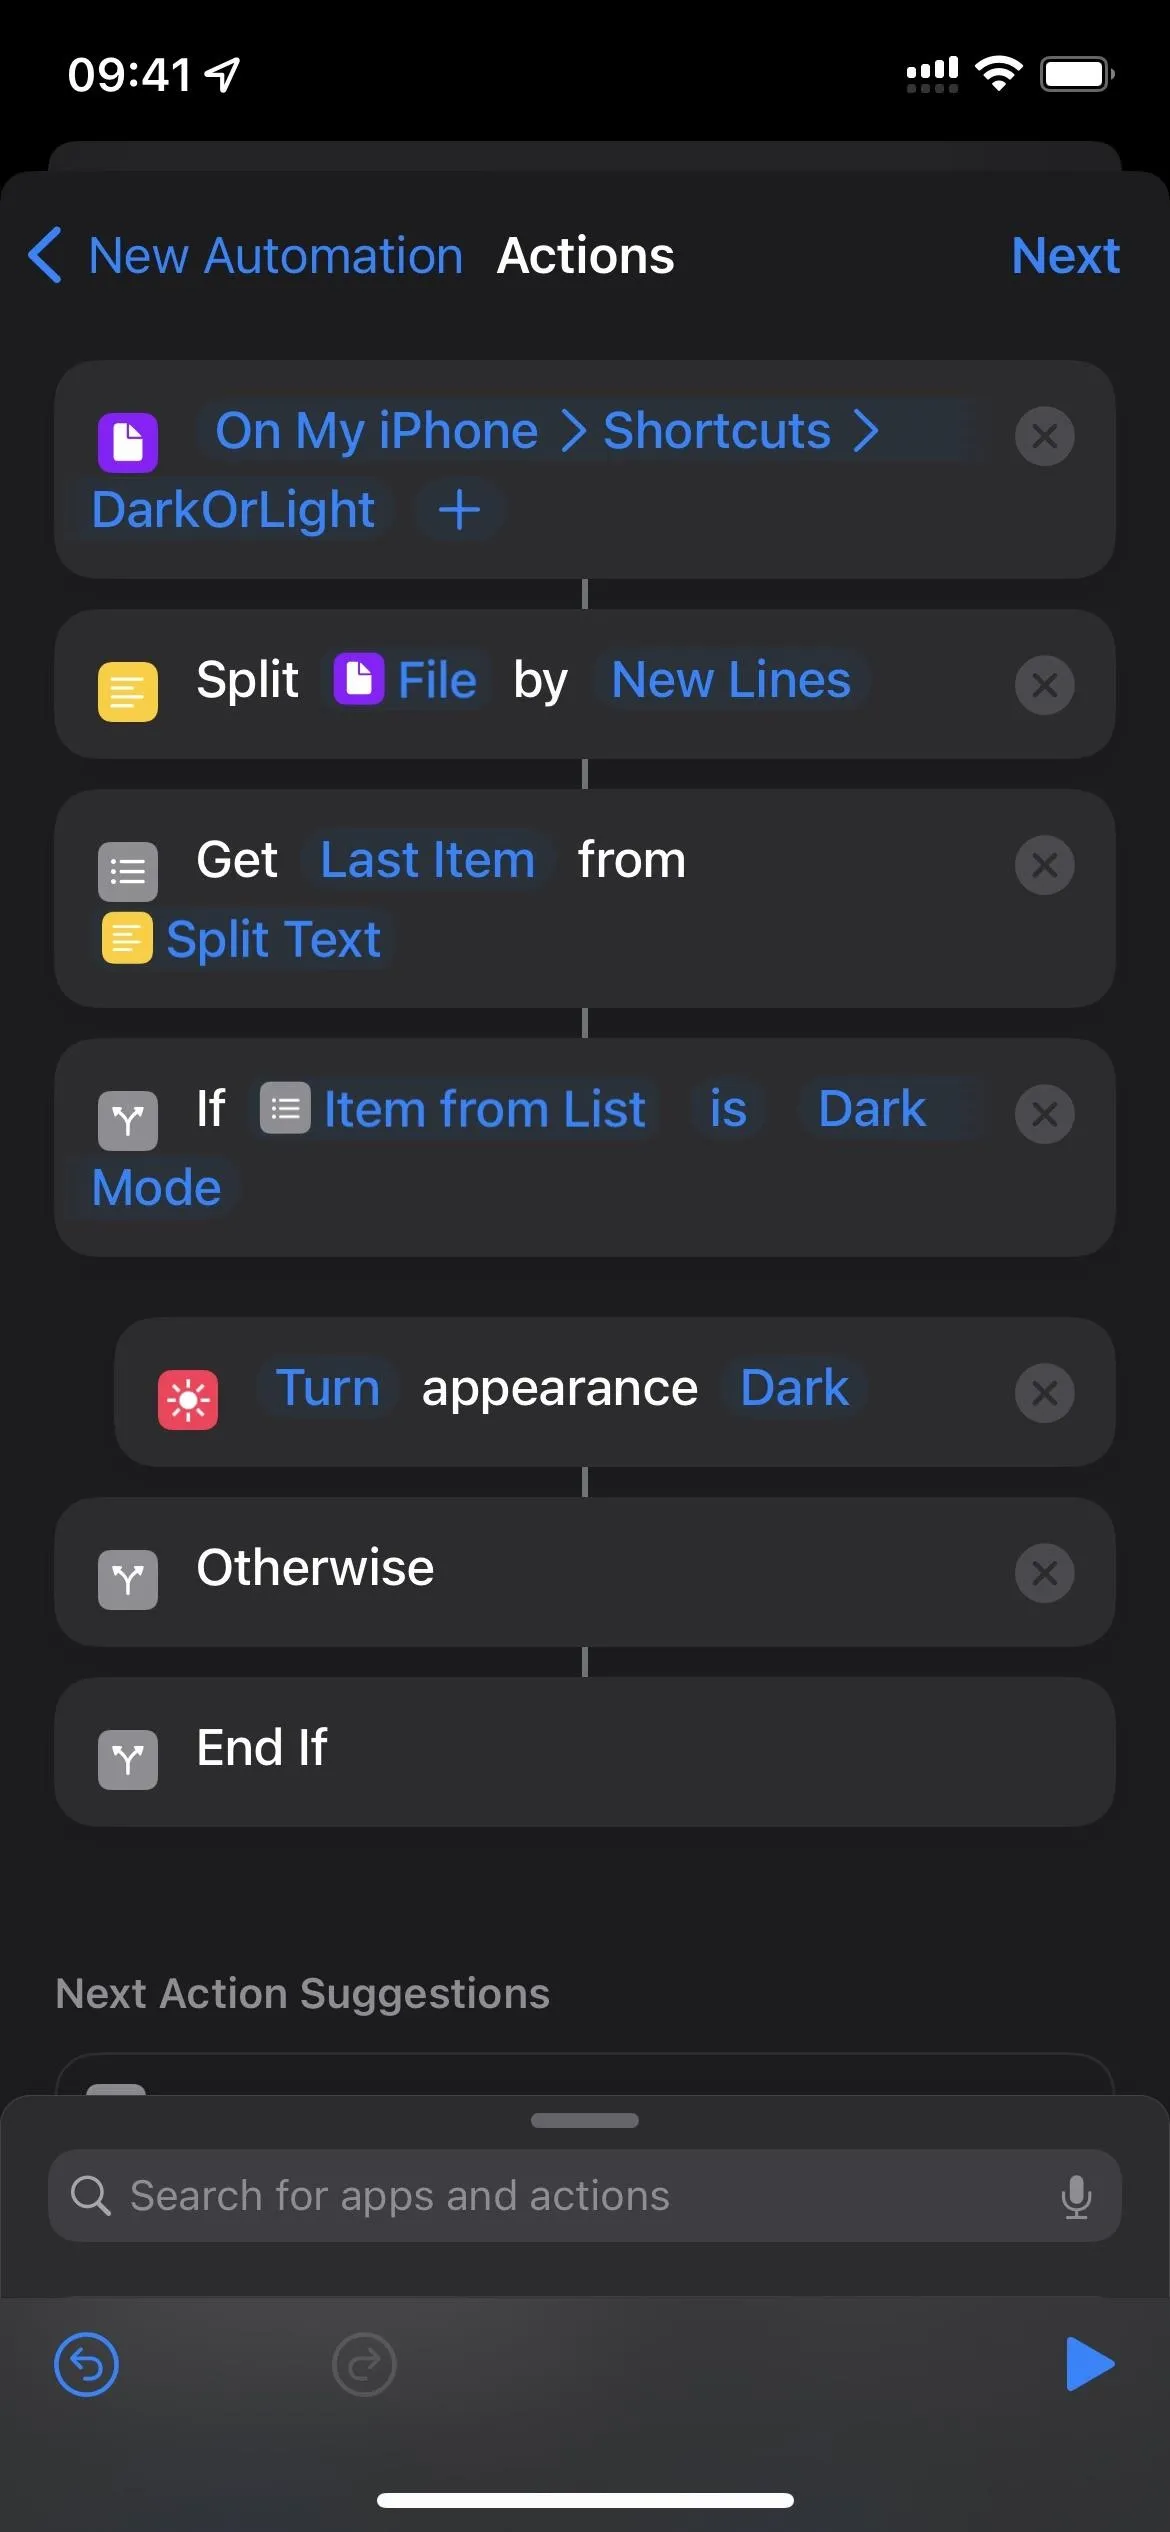
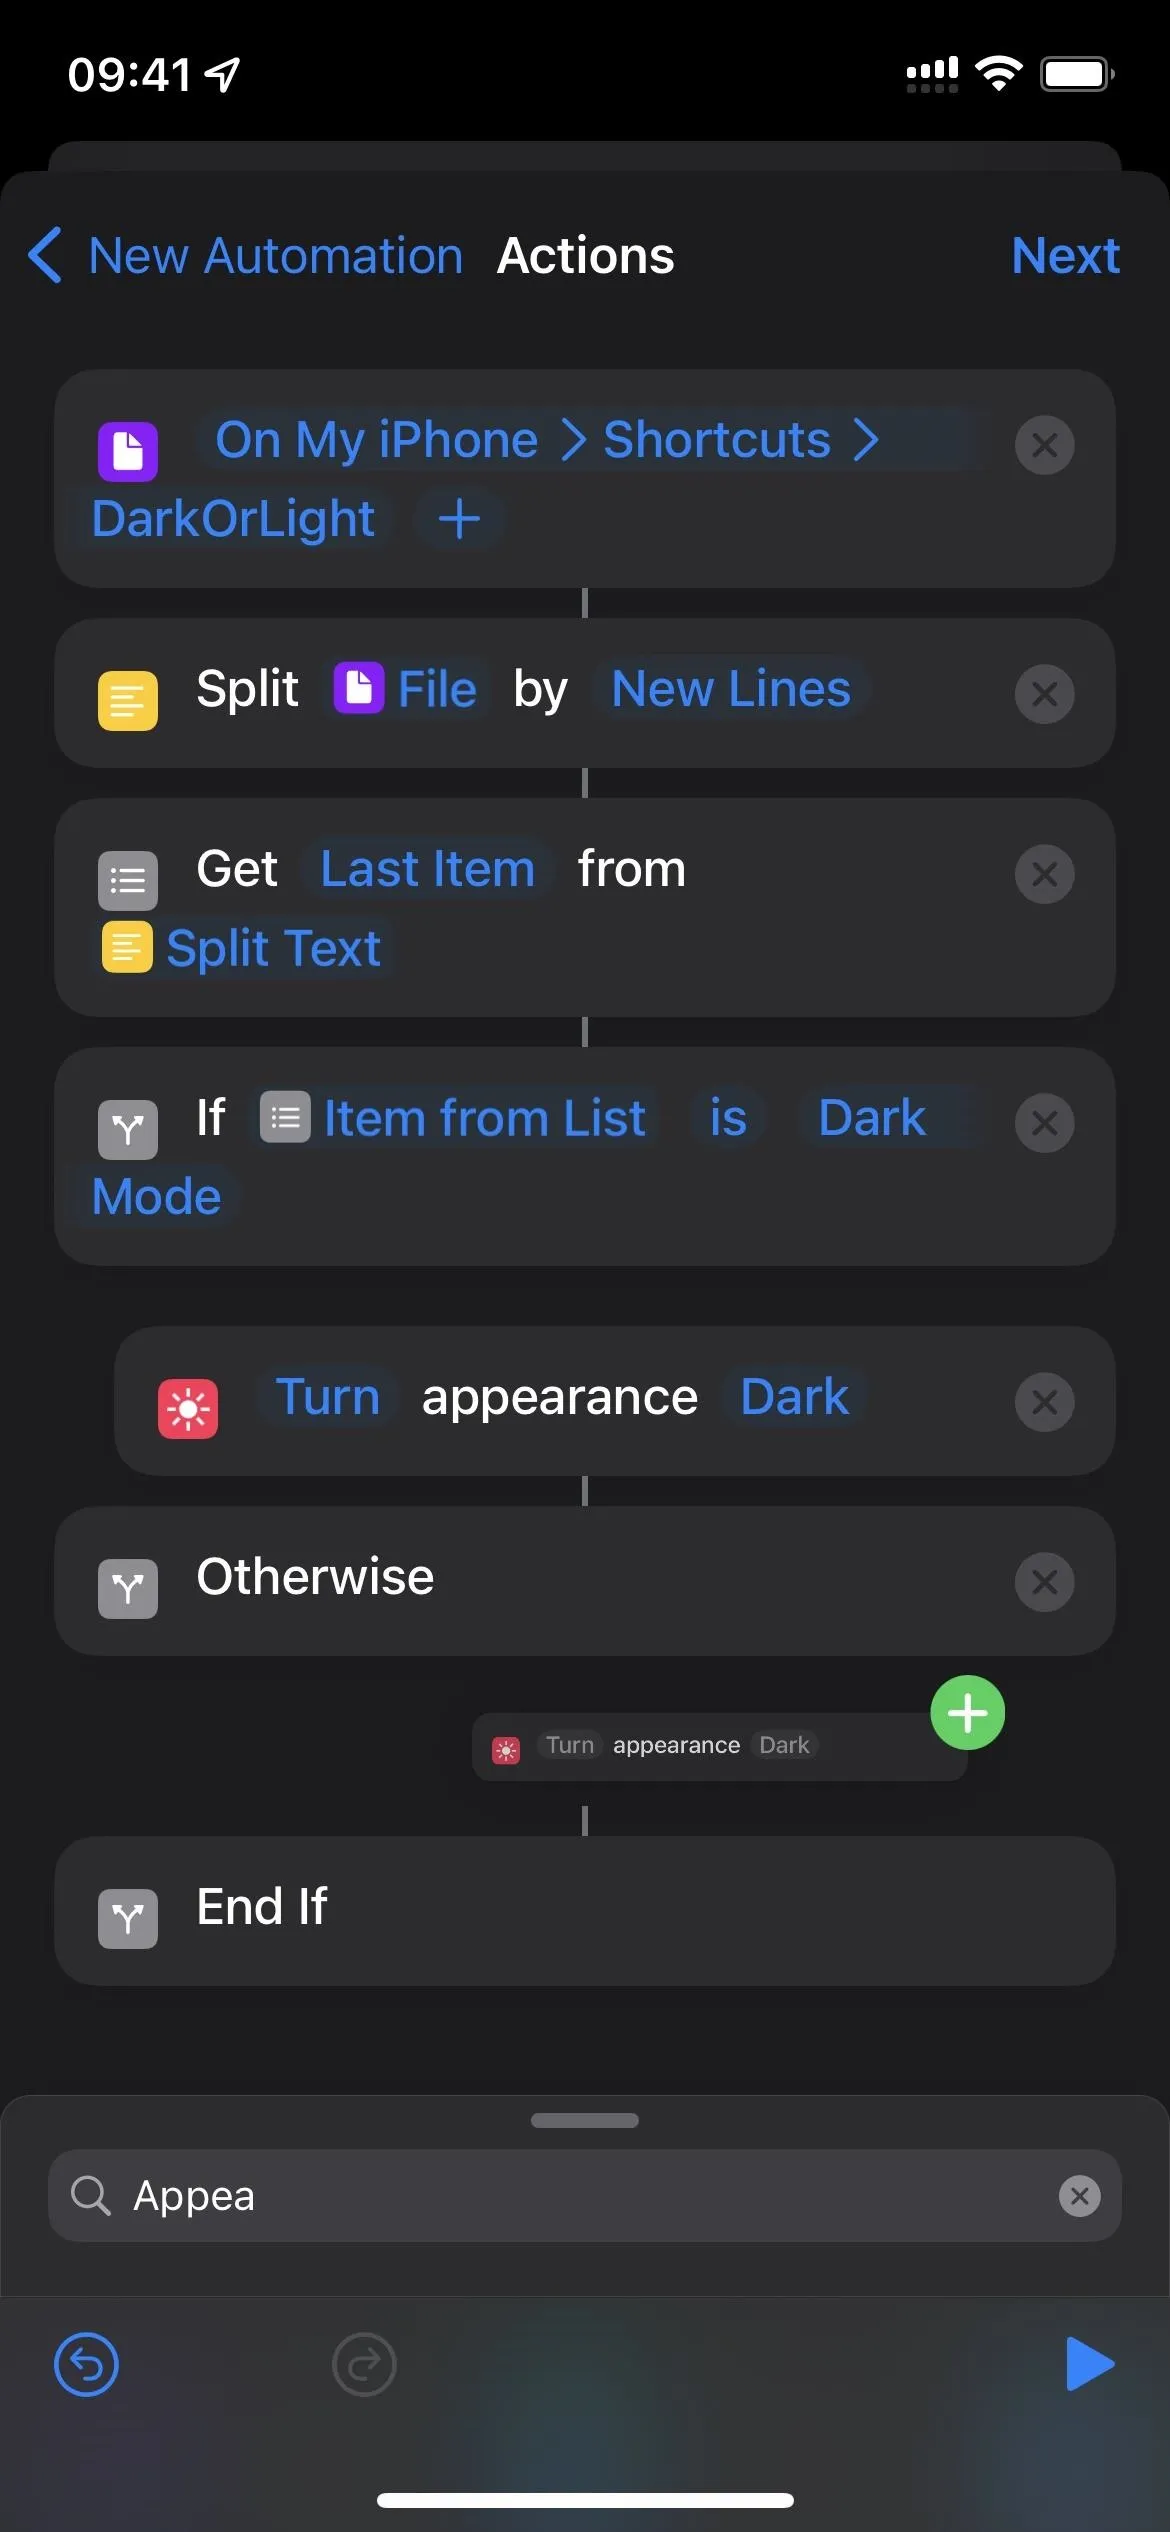
- Tap "Dark" in the second Set Appearance action box and select "Light."
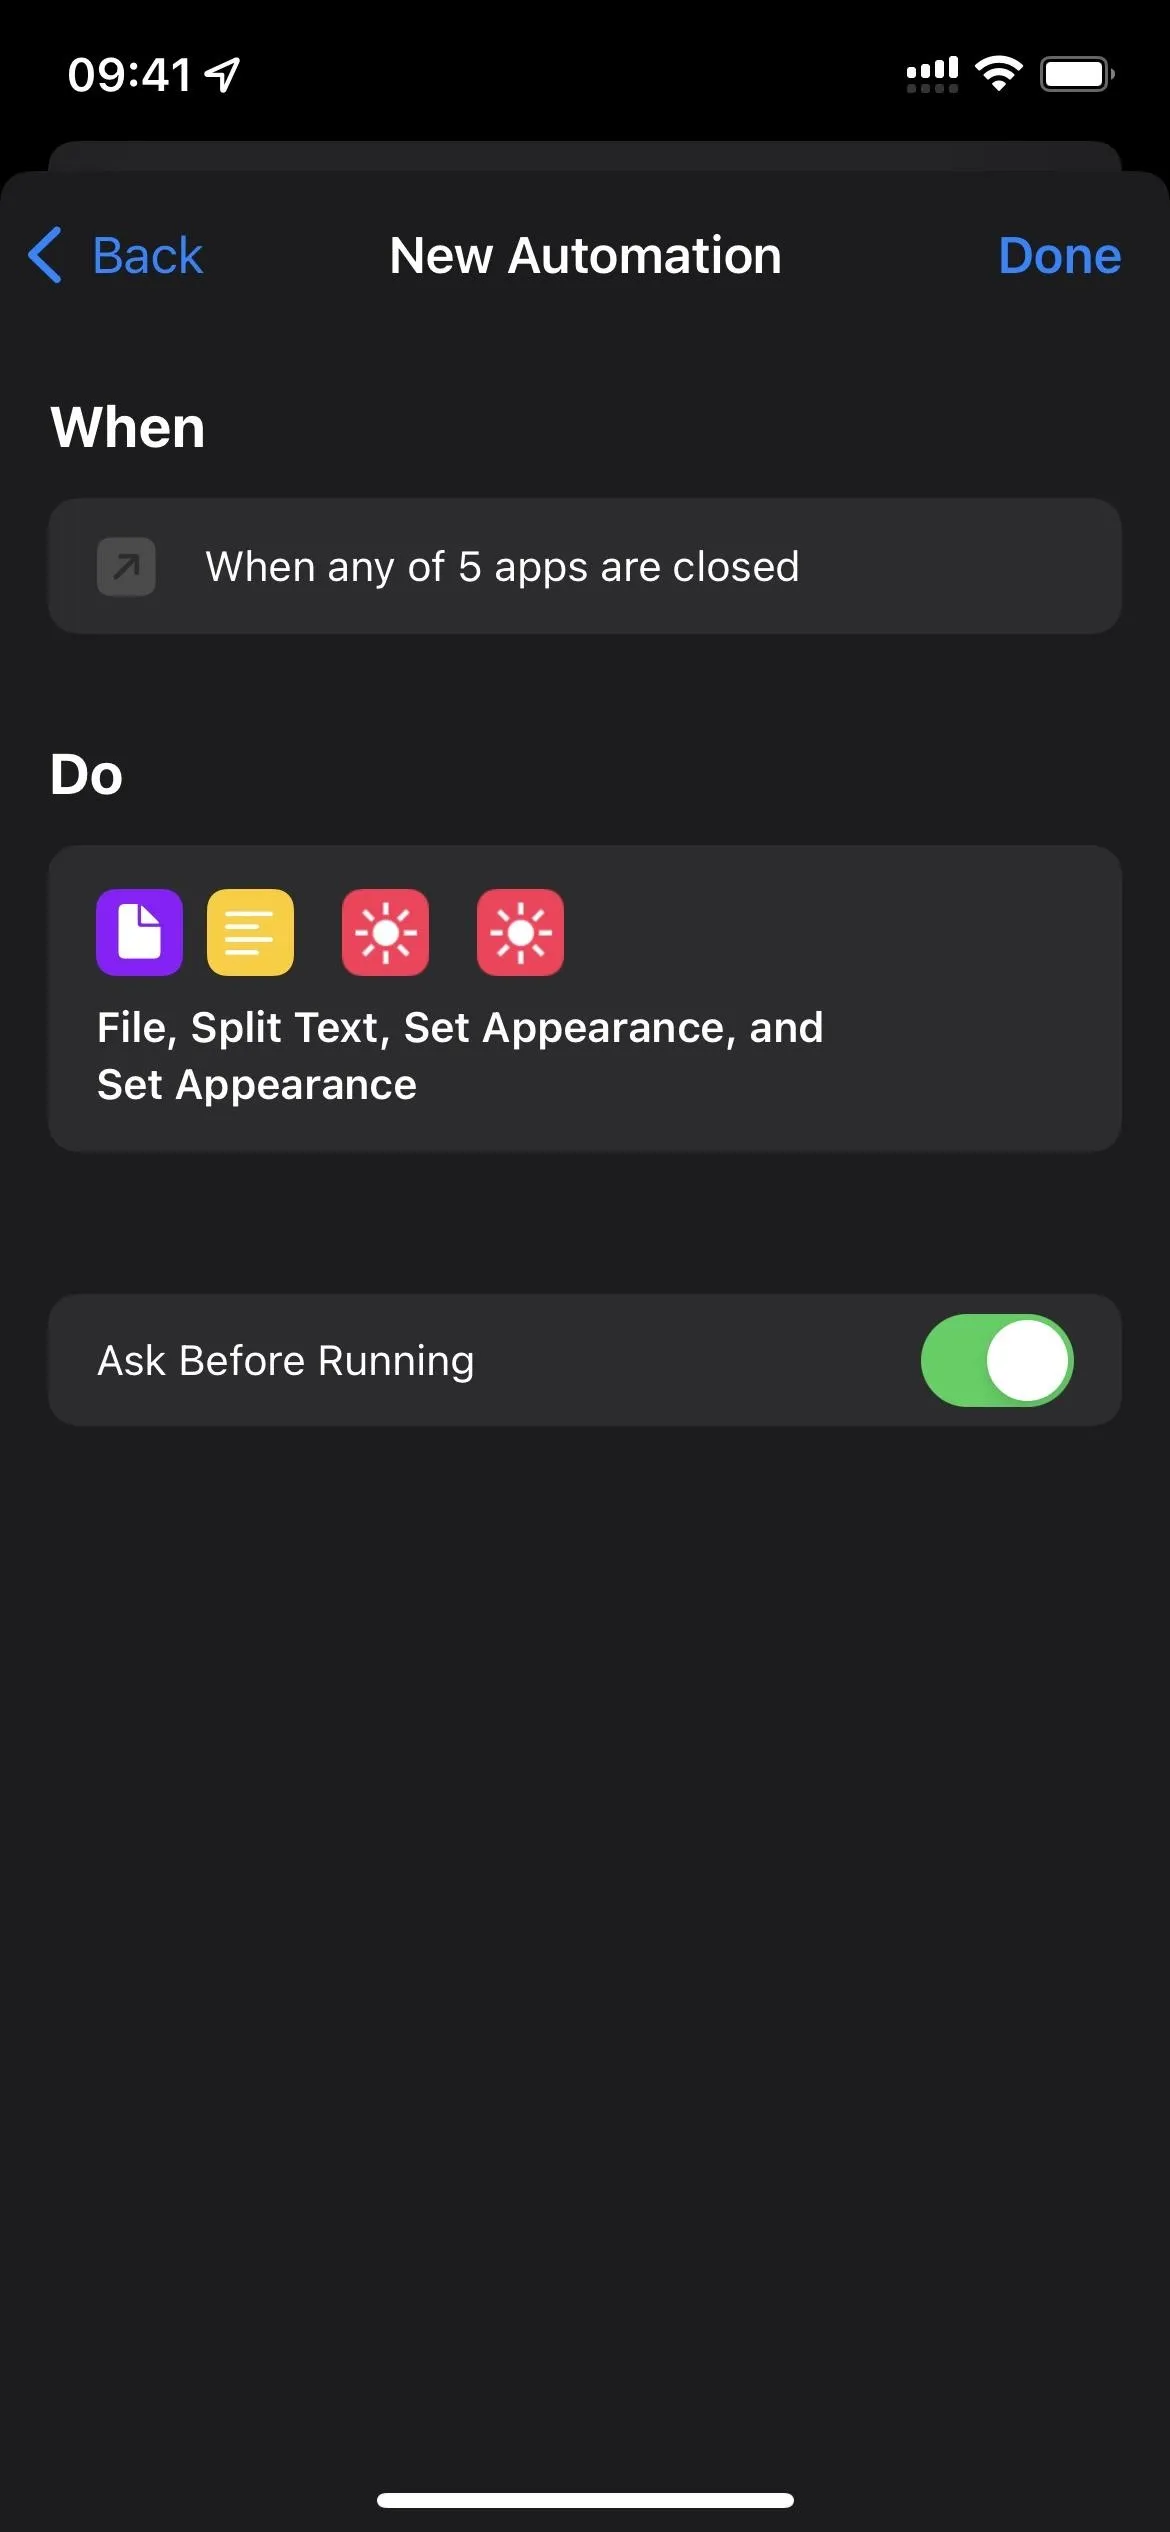
- Hit "Next" to continue.
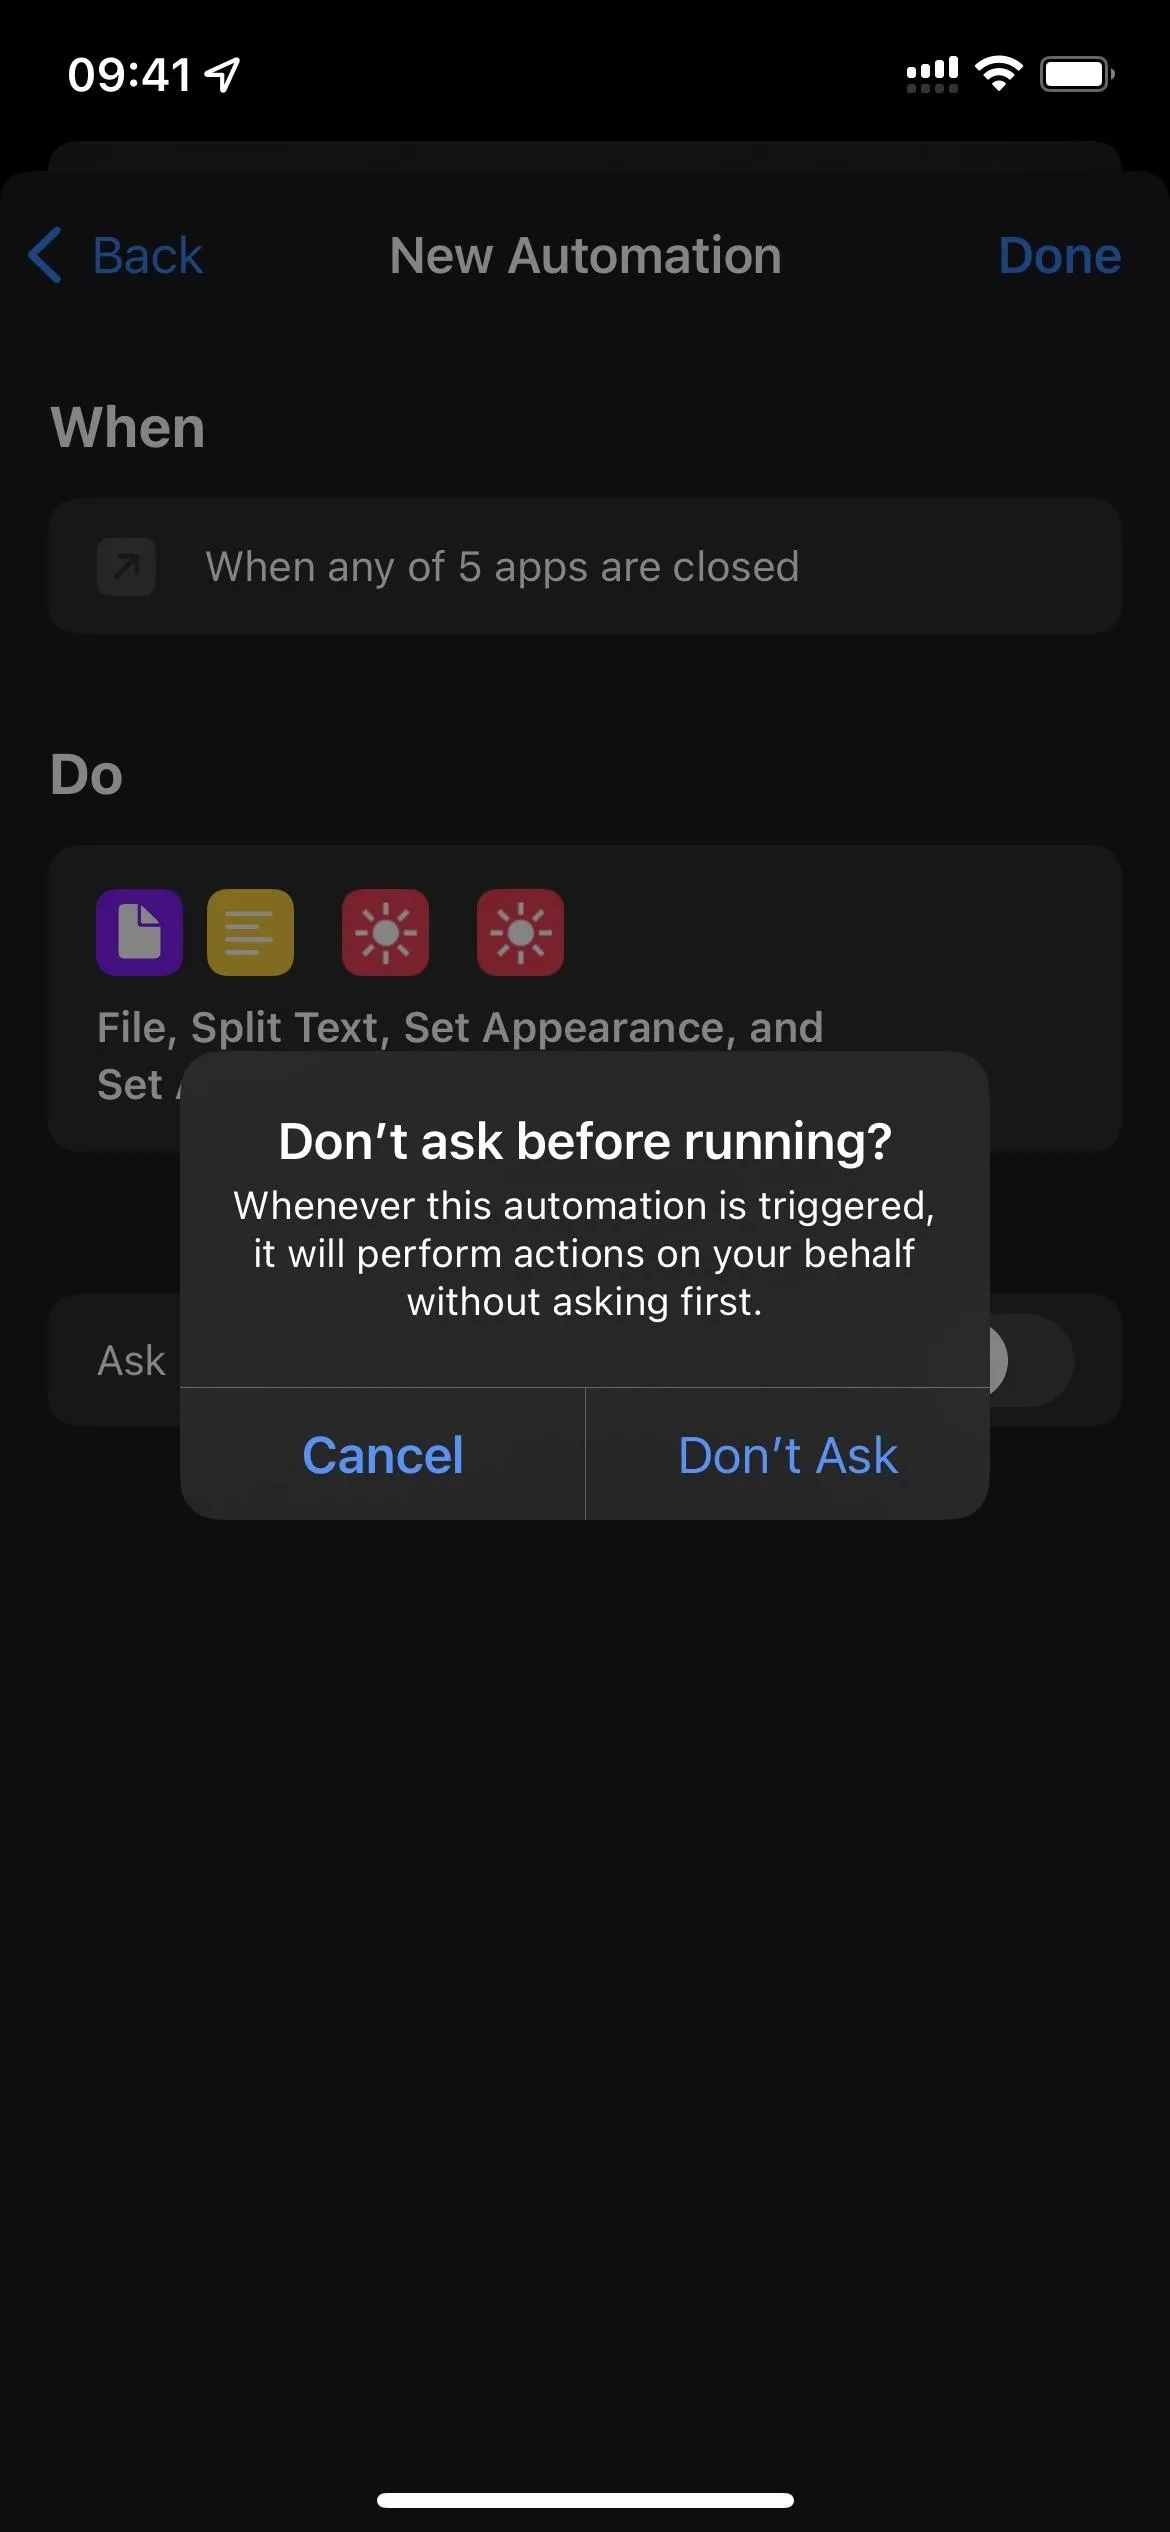
- Toggle off "Ask Before Running" and confirm with "Don't Ask."
- Hit "Done" to finish.
- Optional: If you create separate automations to enable Dark Mode and Light Mode for different apps when they open, you'll want to repeat the whole process to work with the other appearance.
And that's all there is to it. Now, any time you open one of the apps you chose, they'll turn Dark Mode or Light Mode on, whichever you set up in the first automation. Whenever you close one of the set apps, iOS will return to the previously recorded appearance.
Create a Simple Automation to Assign Apps an Appearance
If Option 2 above is too complicated, there's an easier way to assign apps certain appearances, but there are downsides, namely:
- Exiting the app won't revert to the appearance used before opening the app. If an app has an internal override, it's wise to use that instead.
- System-wide Dark or Light Mode won't matter much if you set all of your apps to an appearance, and it may even make things confusing.
If that's OK, you can build a more straightforward automation that turns on Dark Mode or Light Mode for all the apps you select. That way, whenever an assigned app opens, Dark Mode or Light Mode will activate no matter what the current system-wide appearance is — even if the system-wide one is on a schedule.
If you want more control, you can set up another automation for the opposite appearance you set first. So if you just set up a Dark Mode list of apps, also set up a Light Mode list of apps. Then, make sure you set all of the apps on your iPhone to one or the other. Whenever you close or switch to another app, except the Home Screen, the next app should switch or keep the current appearance based on how it's set up. There are also downsides to this:
- You can't select Home Screen from the list of apps, so it will always be the appearance of the last app you were in.
- If you assign all of your apps to start in Dark or Light mode, scheduling system-wide Dark Mode in the evening (or whenever) will be pointless.
- If you want a different appearance for an app at any particular moment, you'll have to switch Dark Mode on or off manually.
If it still sounds OK, here are the instructions:
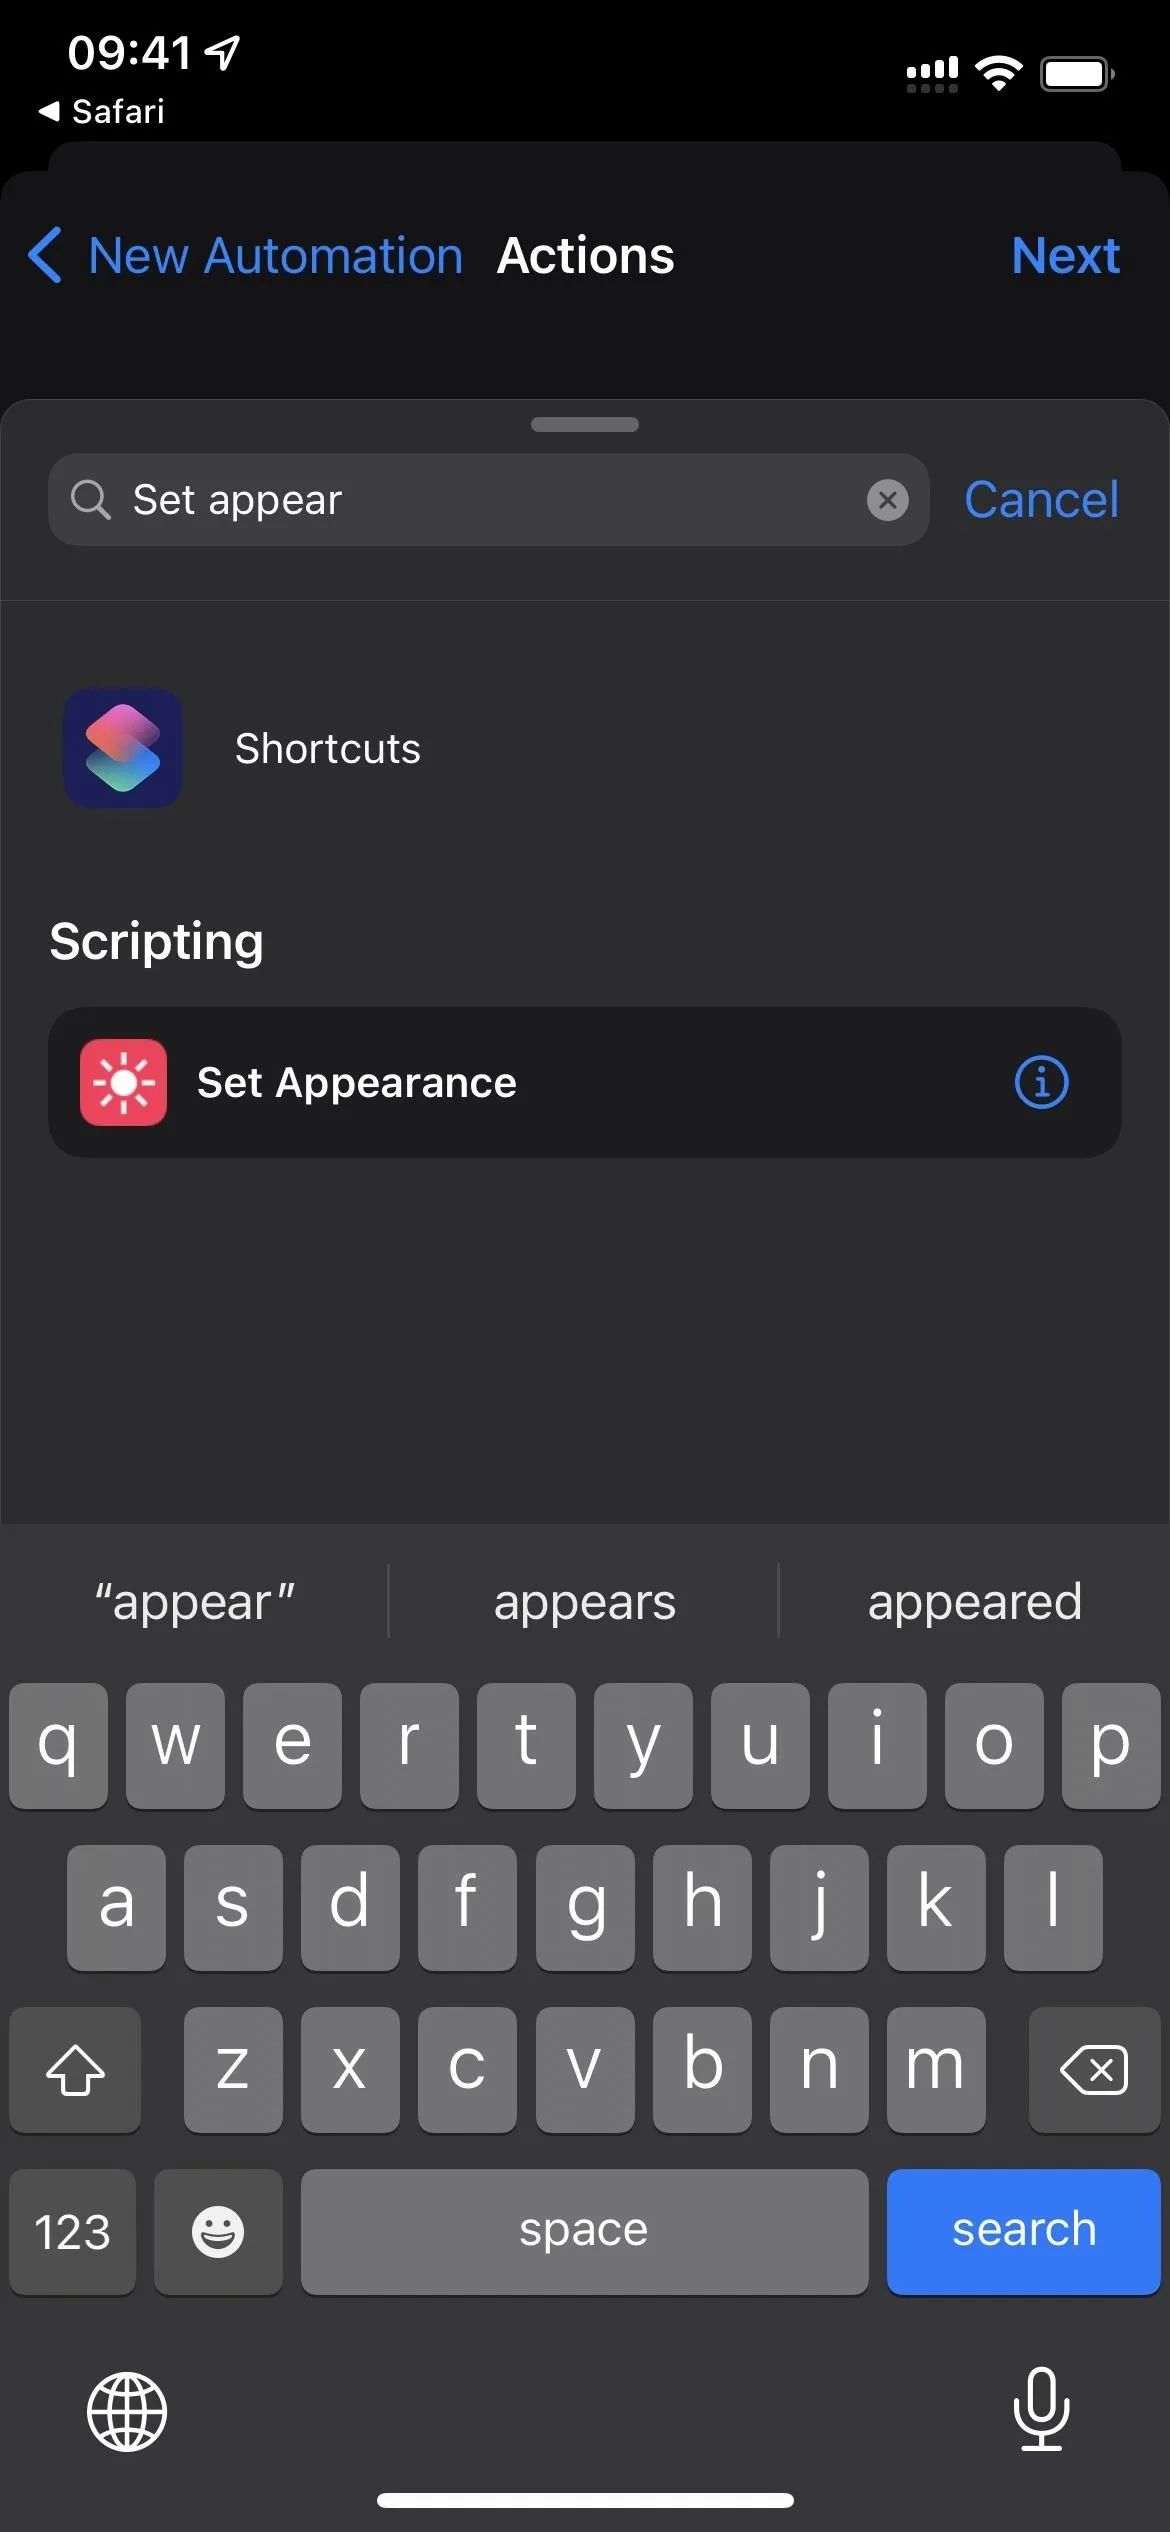
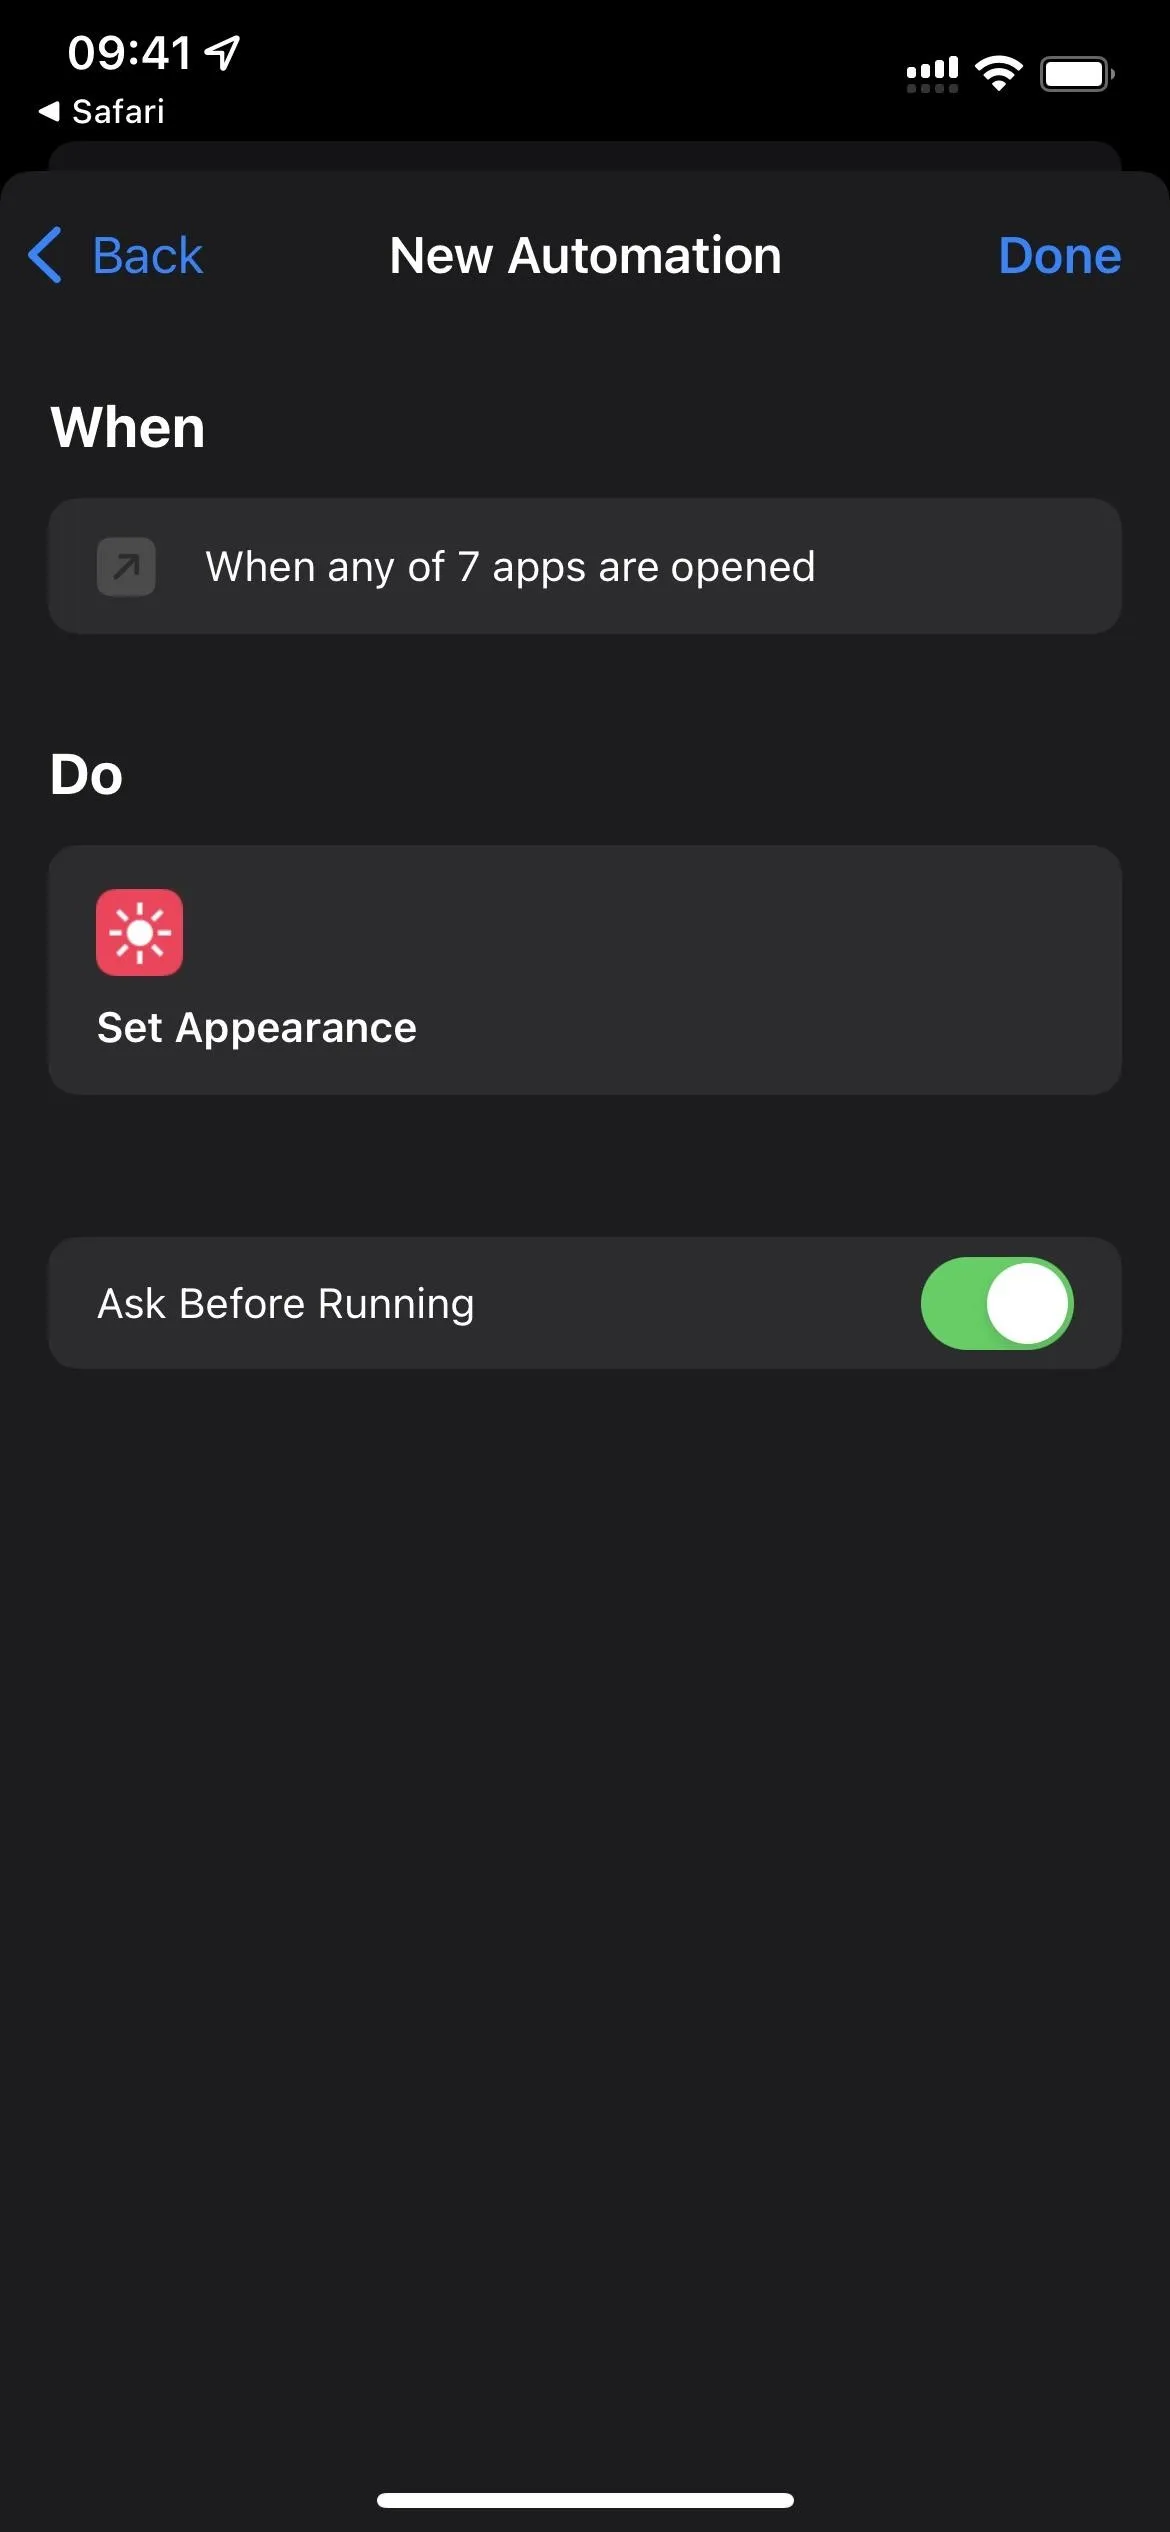
- Open the Shortcuts app.
- Start a new personal automation from the "Automation" tab.
- Choose "App" as the trigger.


- Tap "Choose" next to "App."
- Check all of the apps you want and hit "Done."
- Make sure "Is Opened" is checked, not "Is Closed."
- Hit "Next" to continue.

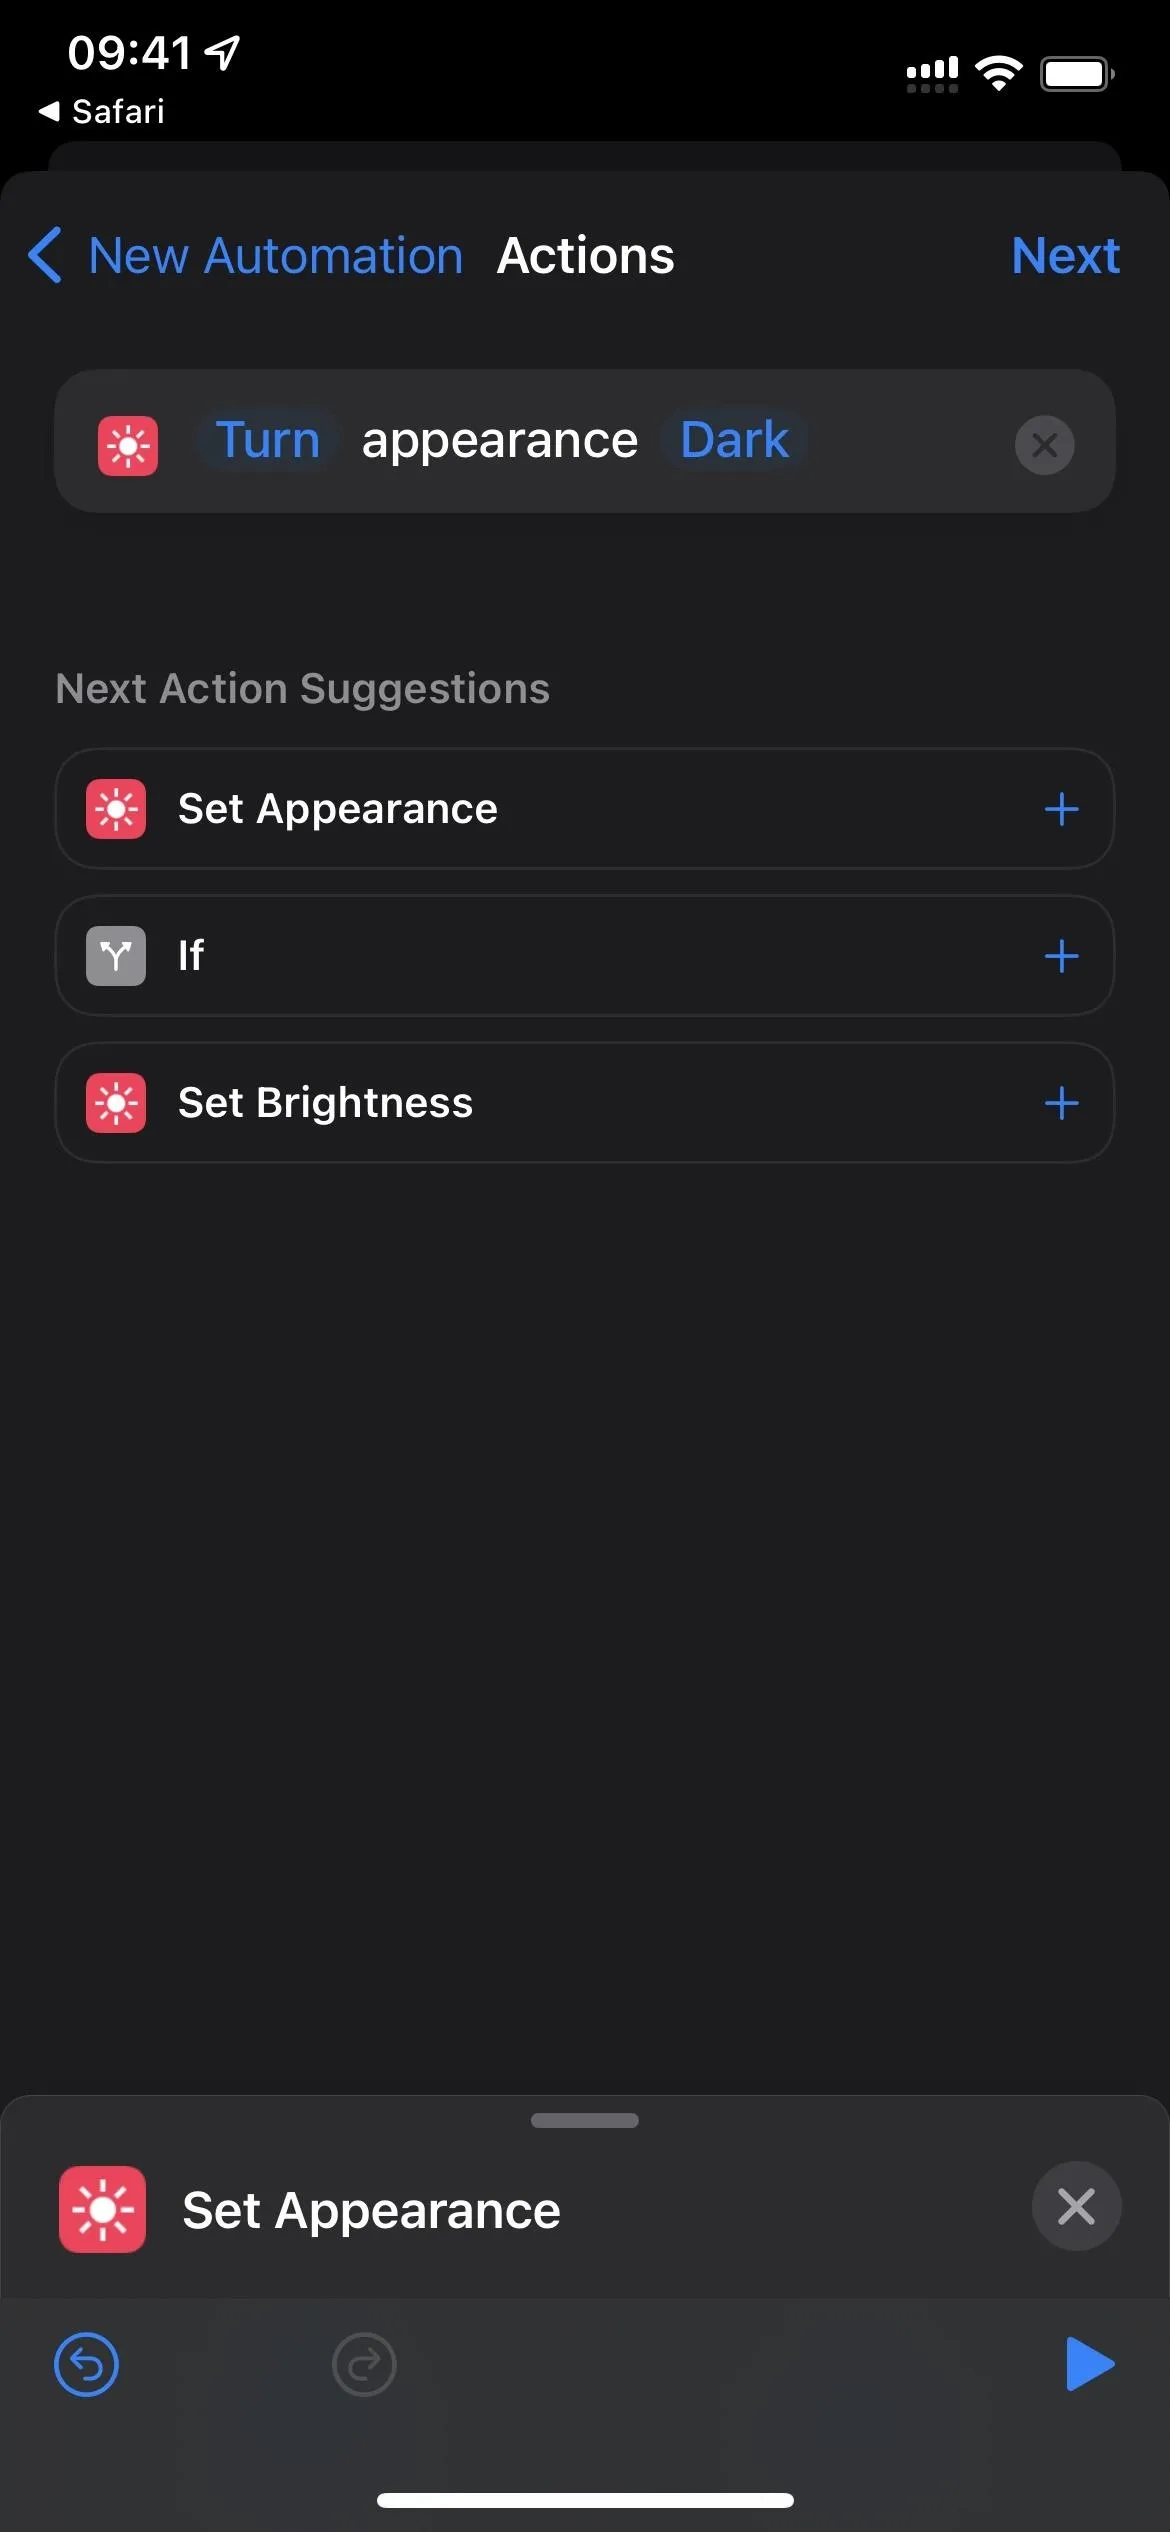
- Add the "Set Appearance" action.
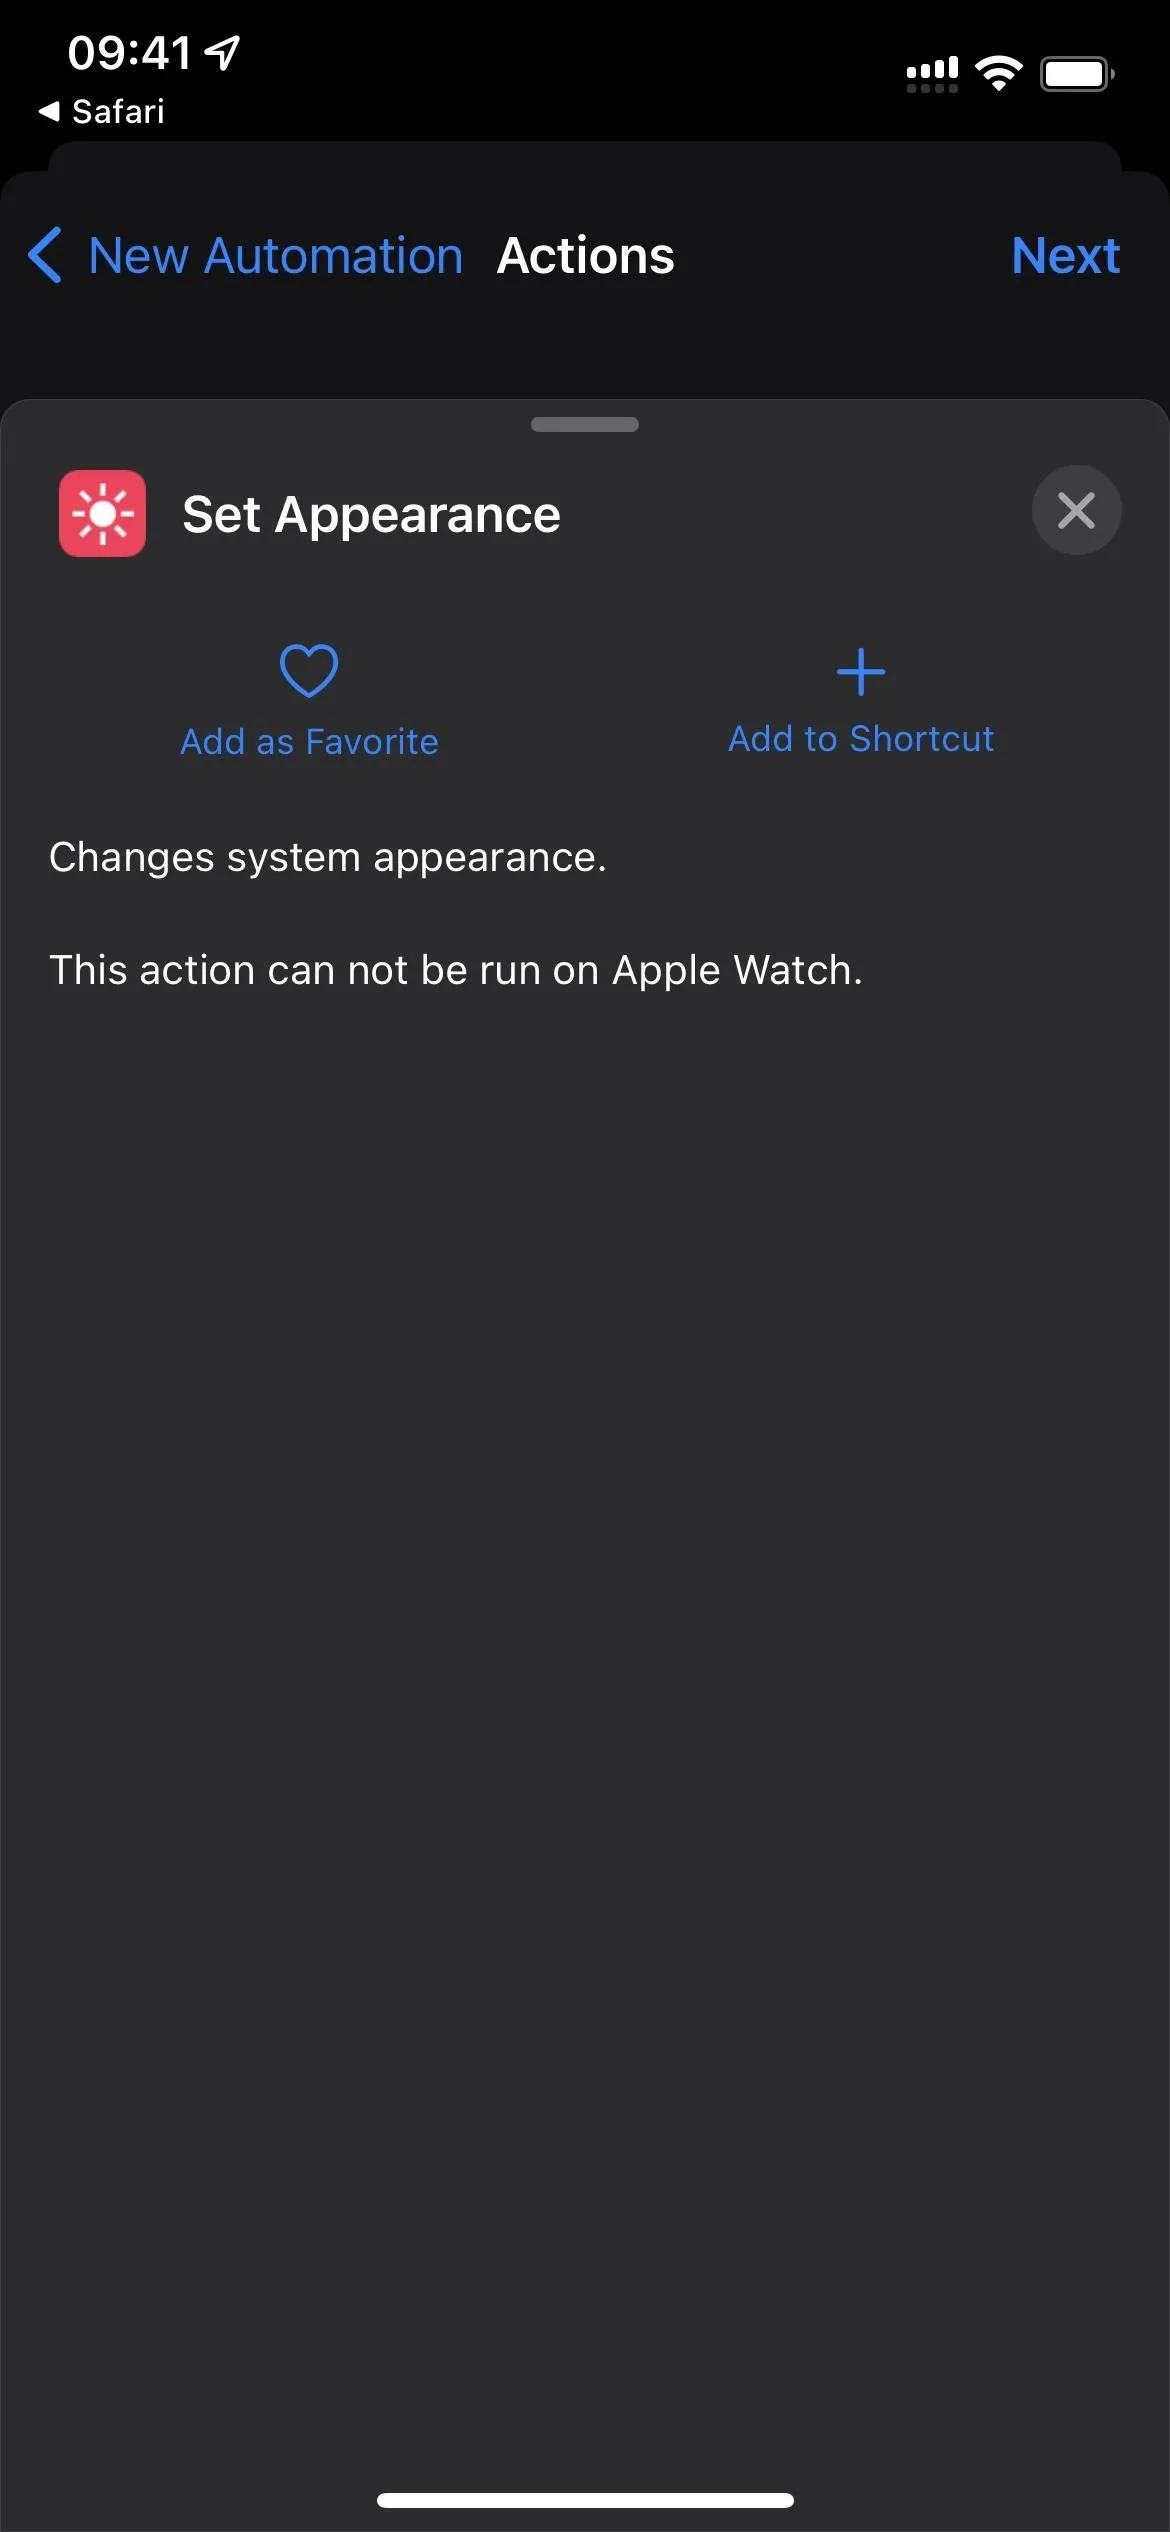
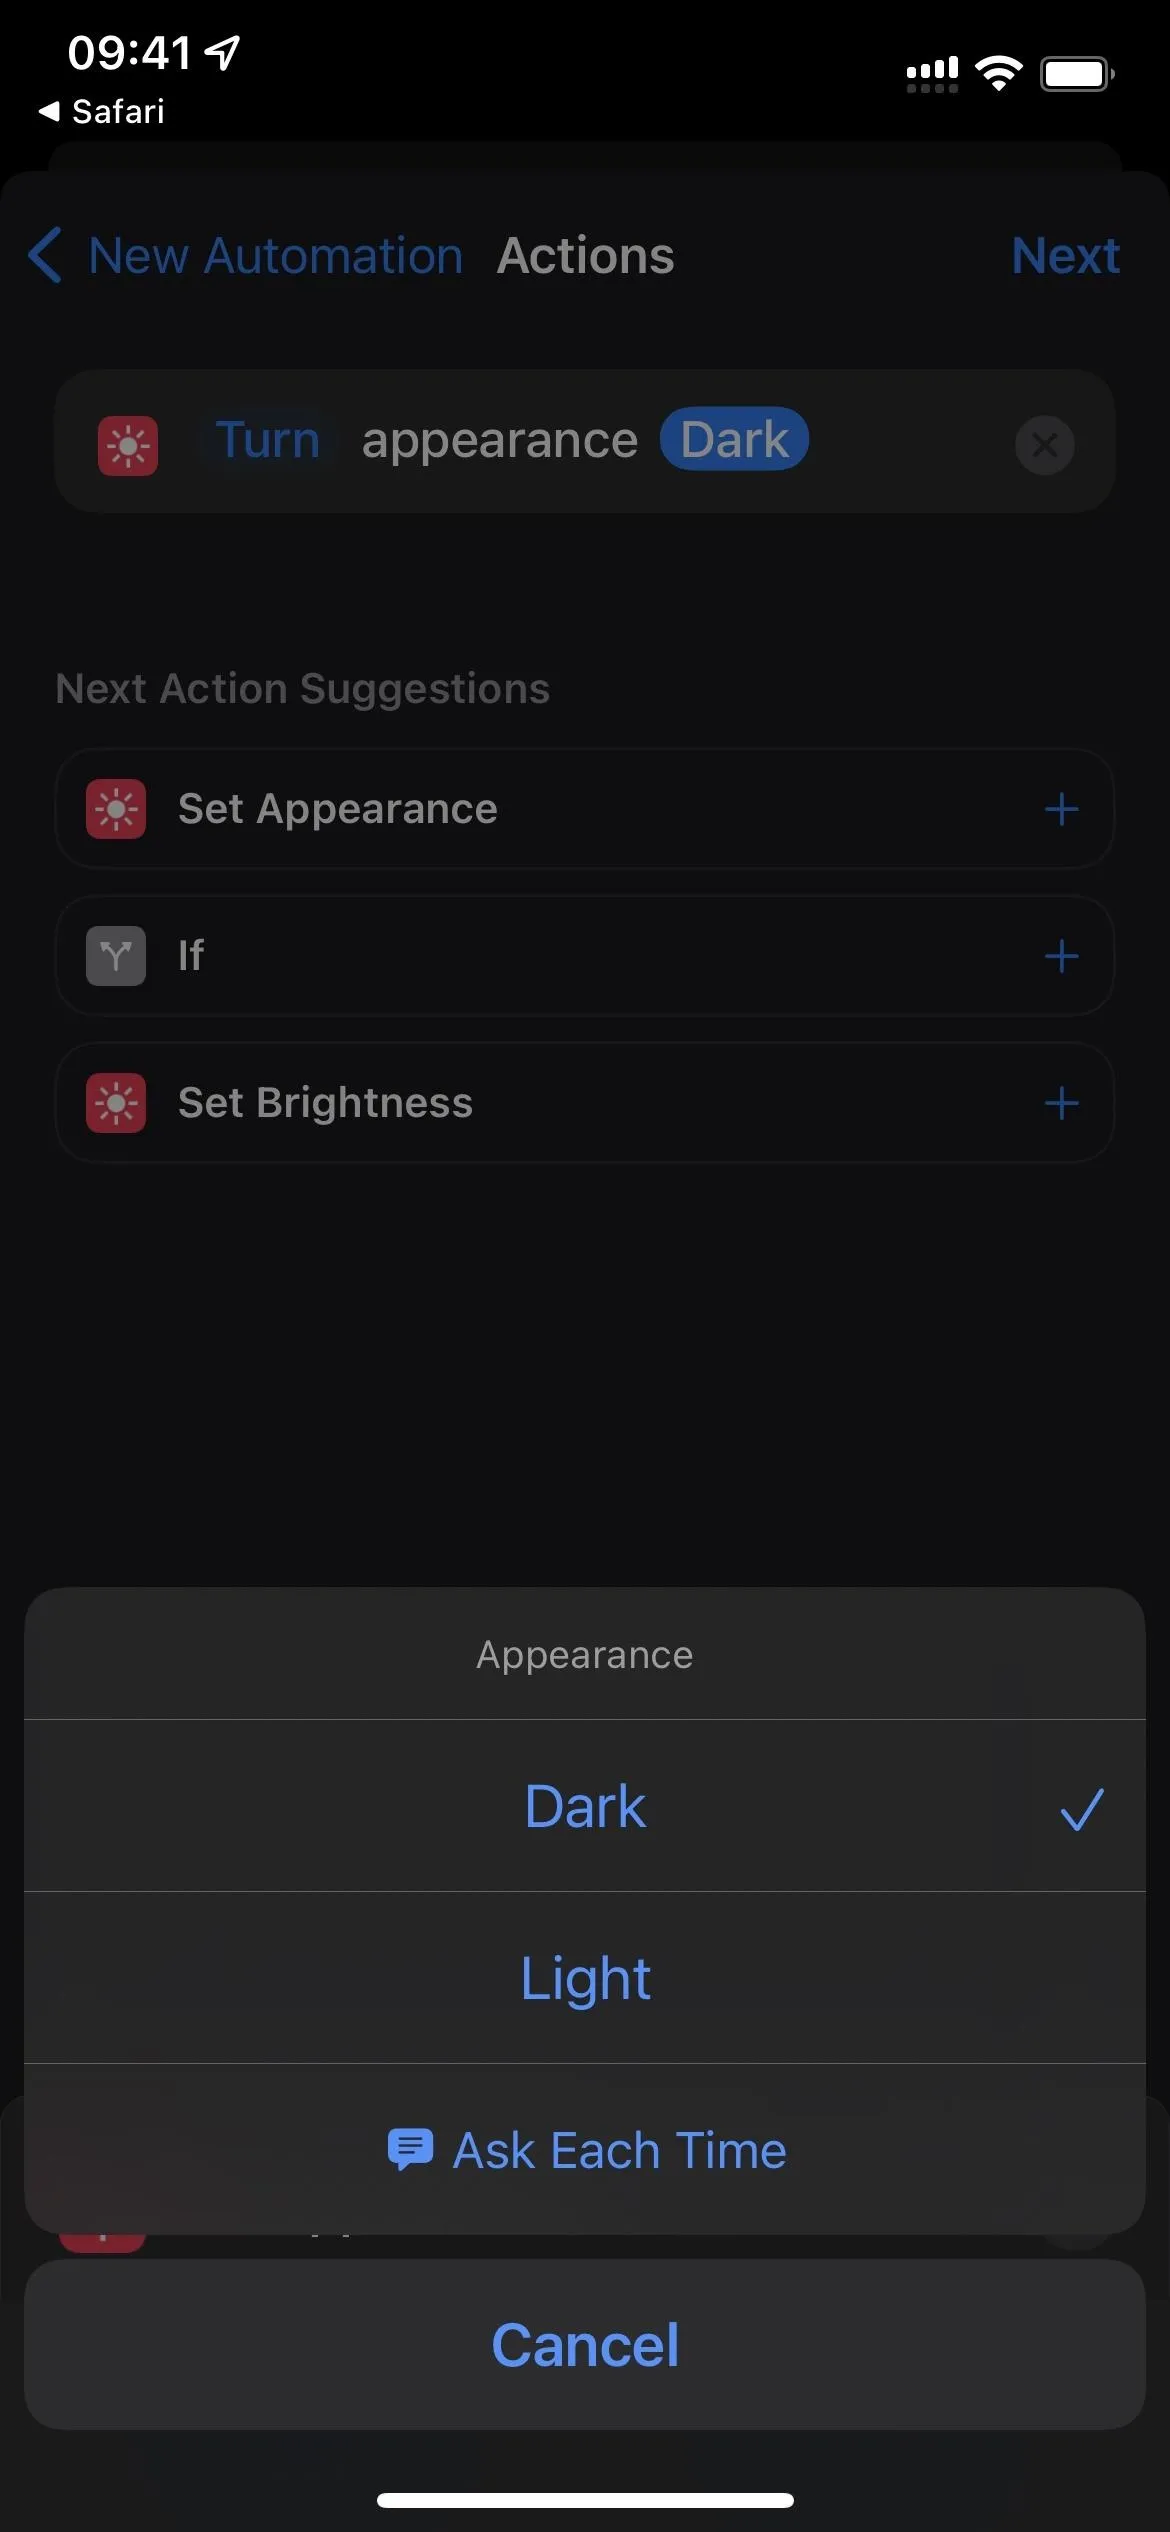
- Skip this part if you want the apps to use Dark Mode. Otherwise, tap "Dark" in the action box and select "Light."
- Hit "Next" to continue.
- Toggle off "Ask Before Running" and confirm with "Don't Ask."
- Hit "Done" to finish.

- Optional: Build the same automation again except with the opposite appearance you just set up, and assign the apps you want to that one. Alternatively, you could build another automation that prompts you with an option to choose either "Dark Mode" or "Light Mode" whenever you close an assigned app, making sure it's always what you want. But if you're going through all of this work, it might be better to just use Option 2 above instead, so it's fully automated to remember your system-wide choice.
Cover photo and screenshots by Justin Meyers/Gadget Hacks


Comments
Be the first, drop a comment!