


On your iPhone, your phone number and Apple ID email address are the default ways in which somebody can contact you on FaceTime. While you can't remove your phone number as an option, you can withdraw your Apple ID email account. More importantly, you can add any other email addresses you'd like to the list, so you never have to worry about a friend, family member, or coworker not being able to audio or video chat with you.
I'll assume you already have FaceTime turned on and that your Apple ID email address is being used for FaceTime audio and video calls. Also, in iOS 10, there are multiple ways to associate email addresses with your Apple ID for FaceTime use, while in iOS 11 and higher, there is only one way. I'll show you how in iOS 11 and higher first, then how in iOS 10 or lower even though most people have iOS updated.
Add Emails for FaceTime
If you're still running iOS 10.2.1 or lower, it's easier to add emails to FaceTime where you can be reached, but in iOS 10.3 and higher, it's a little trickier.
iOS 10.3 & Higher
If you're running iOS 10.3.x, iOS 11, iOS 12, or iOS 13 on your iPhone, you won't be able to add new email addresses in the same way as in older iOS versions. It's actually less intuitive but still pretty easy.
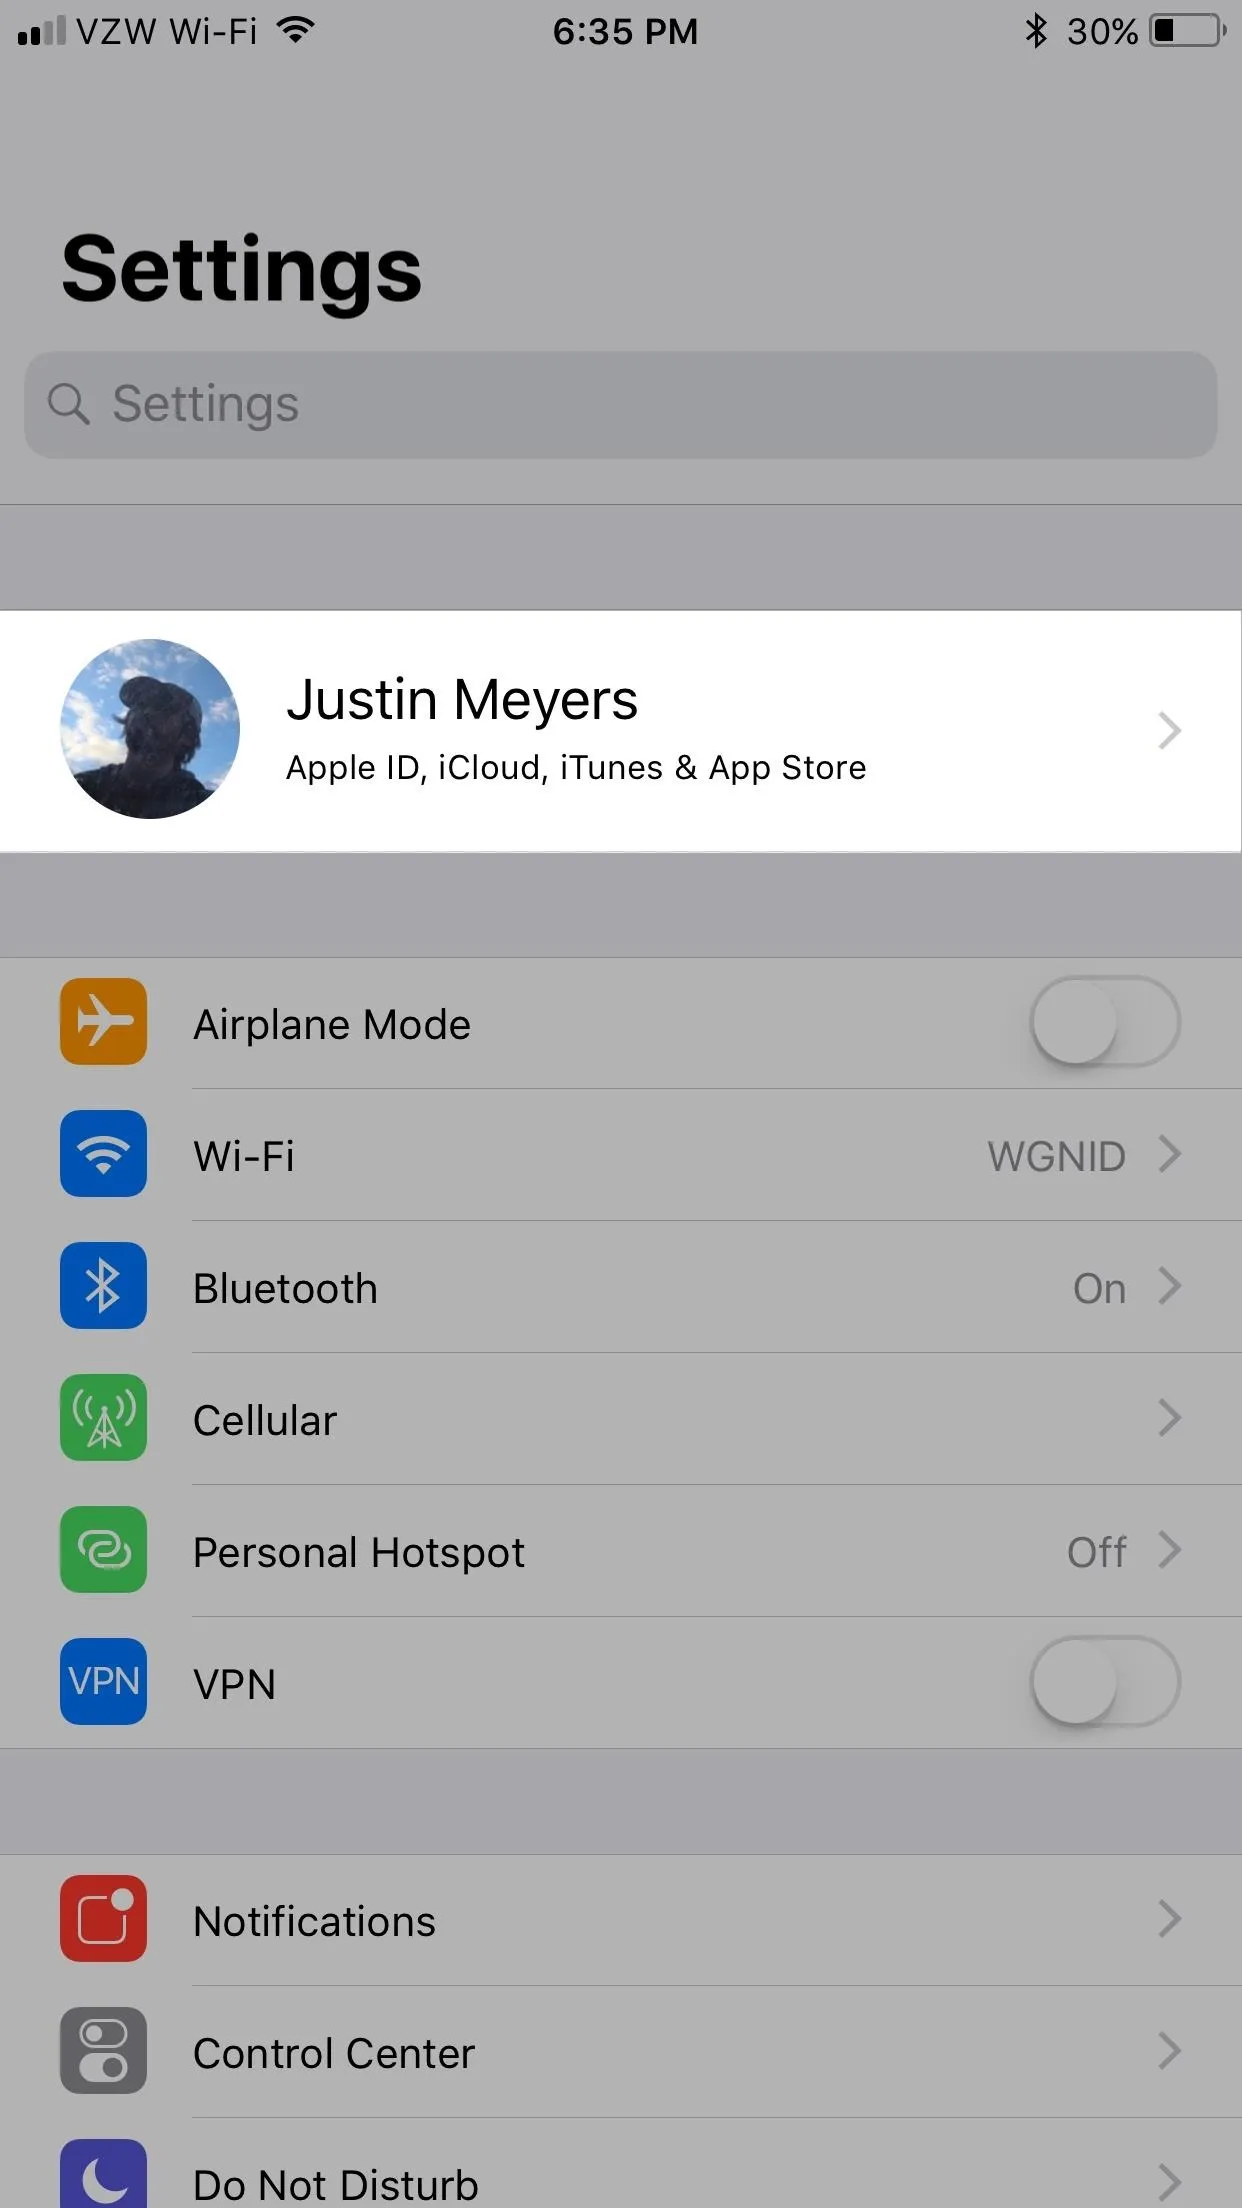
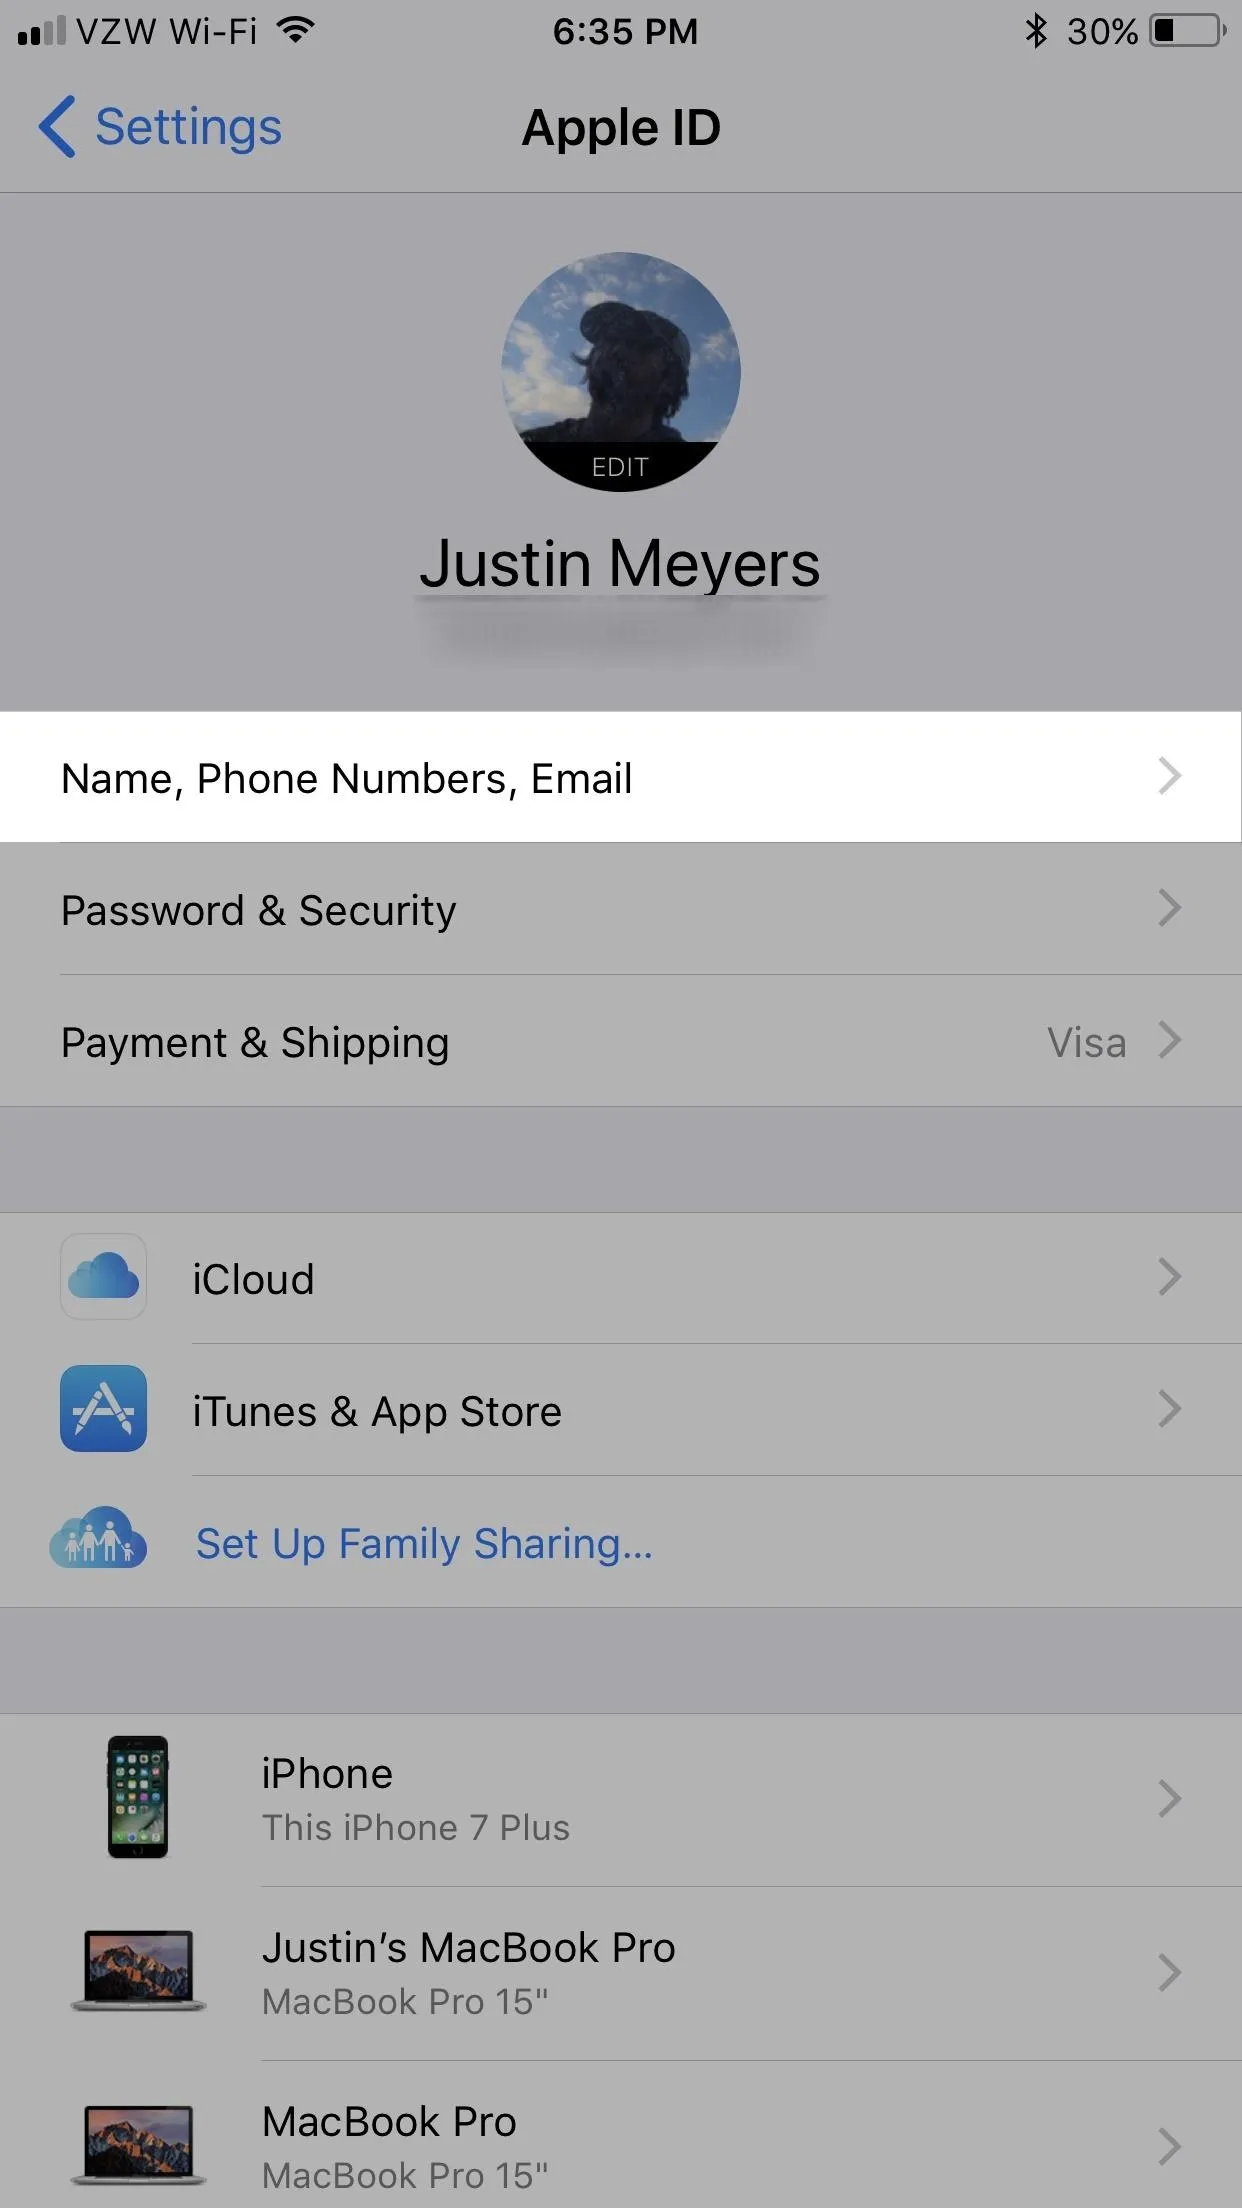
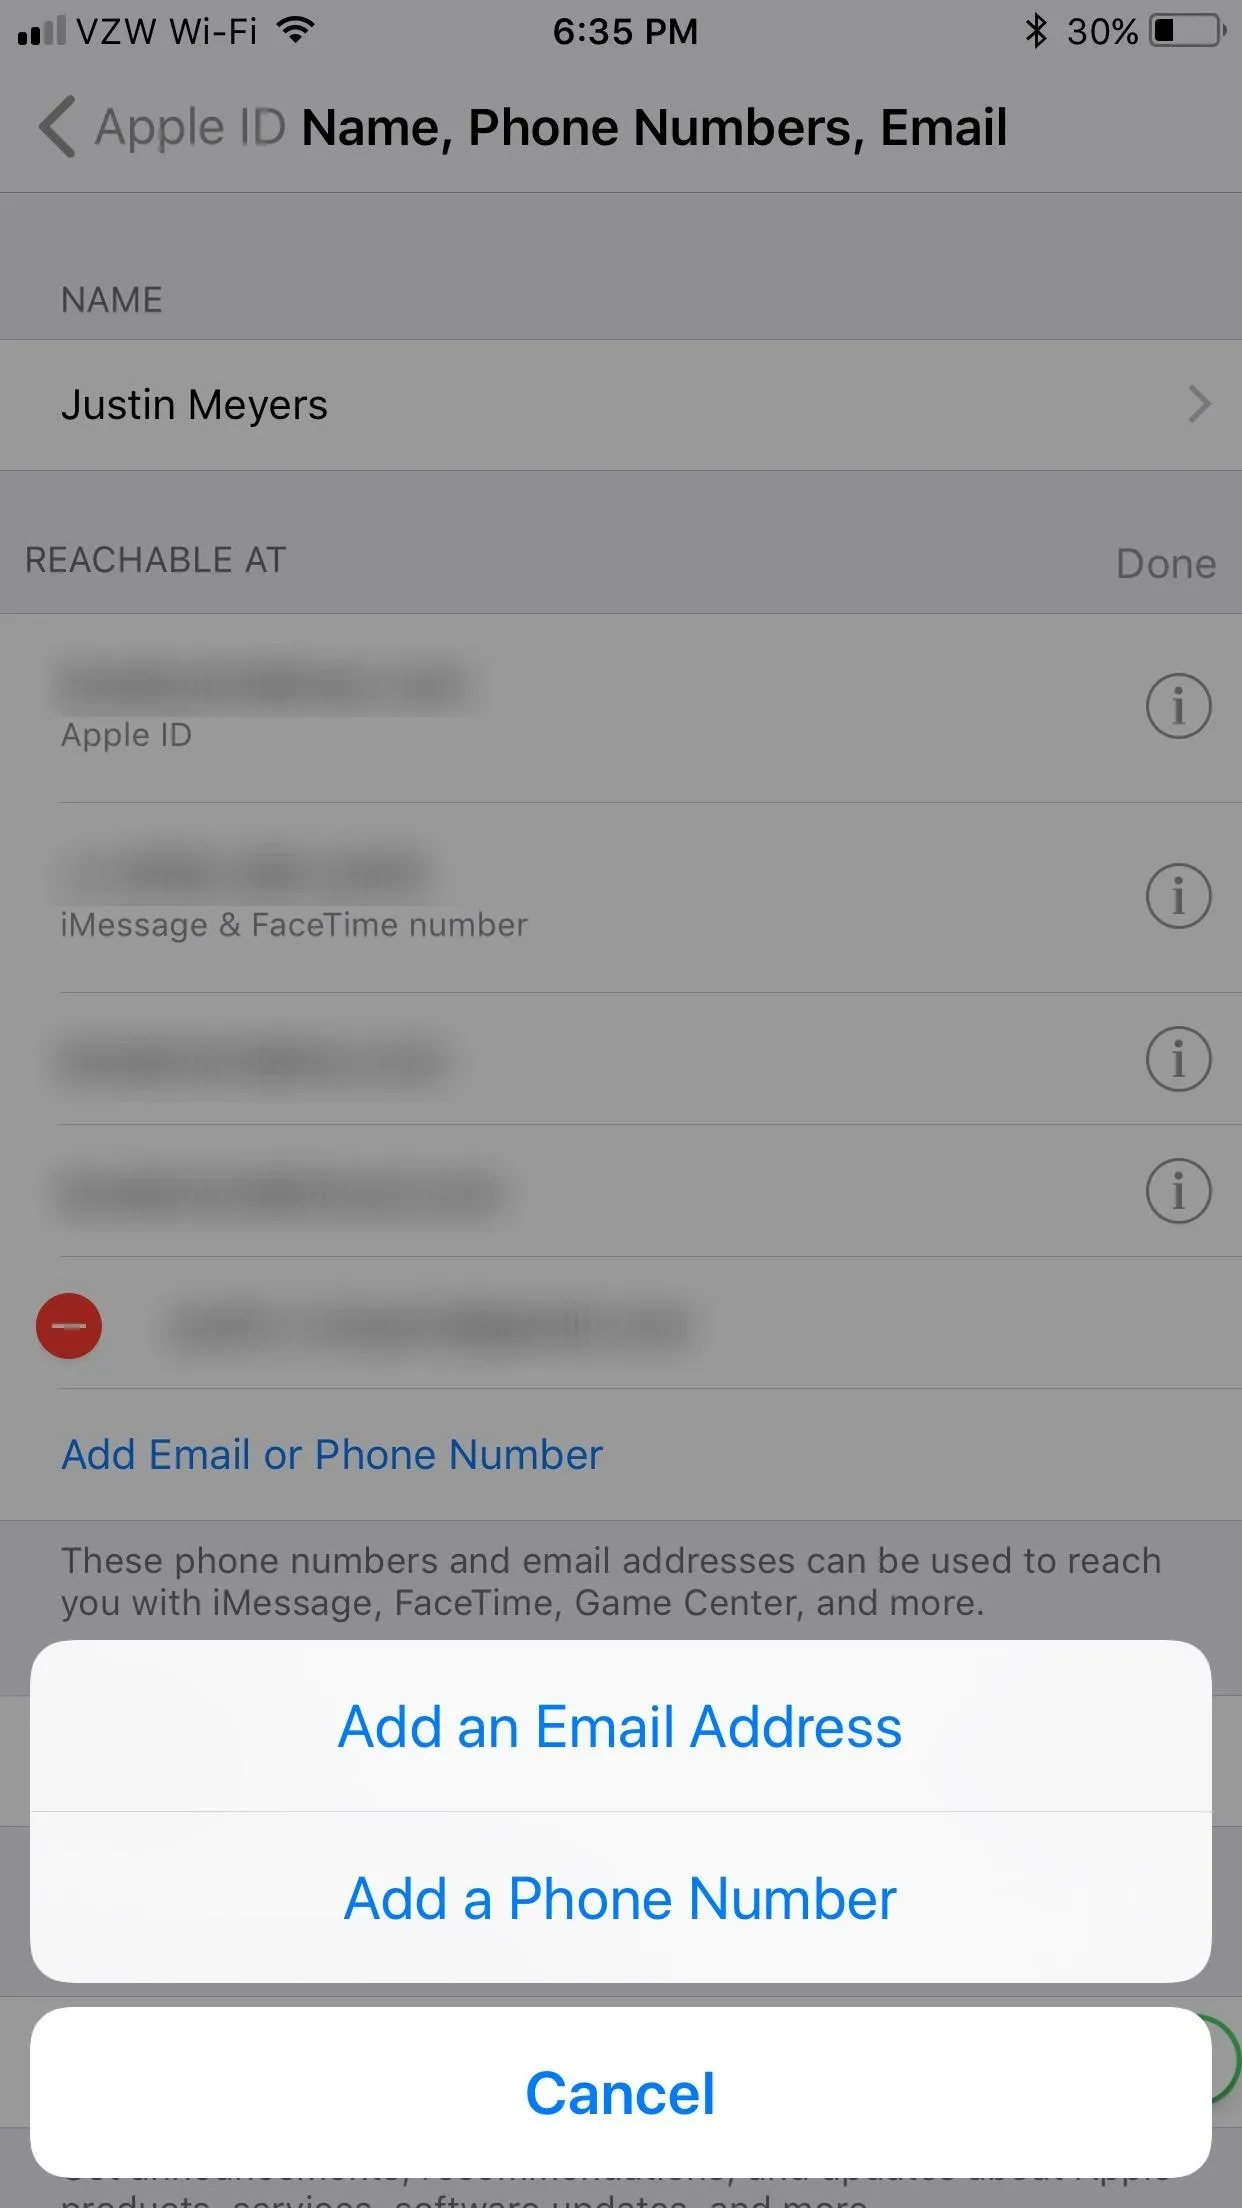
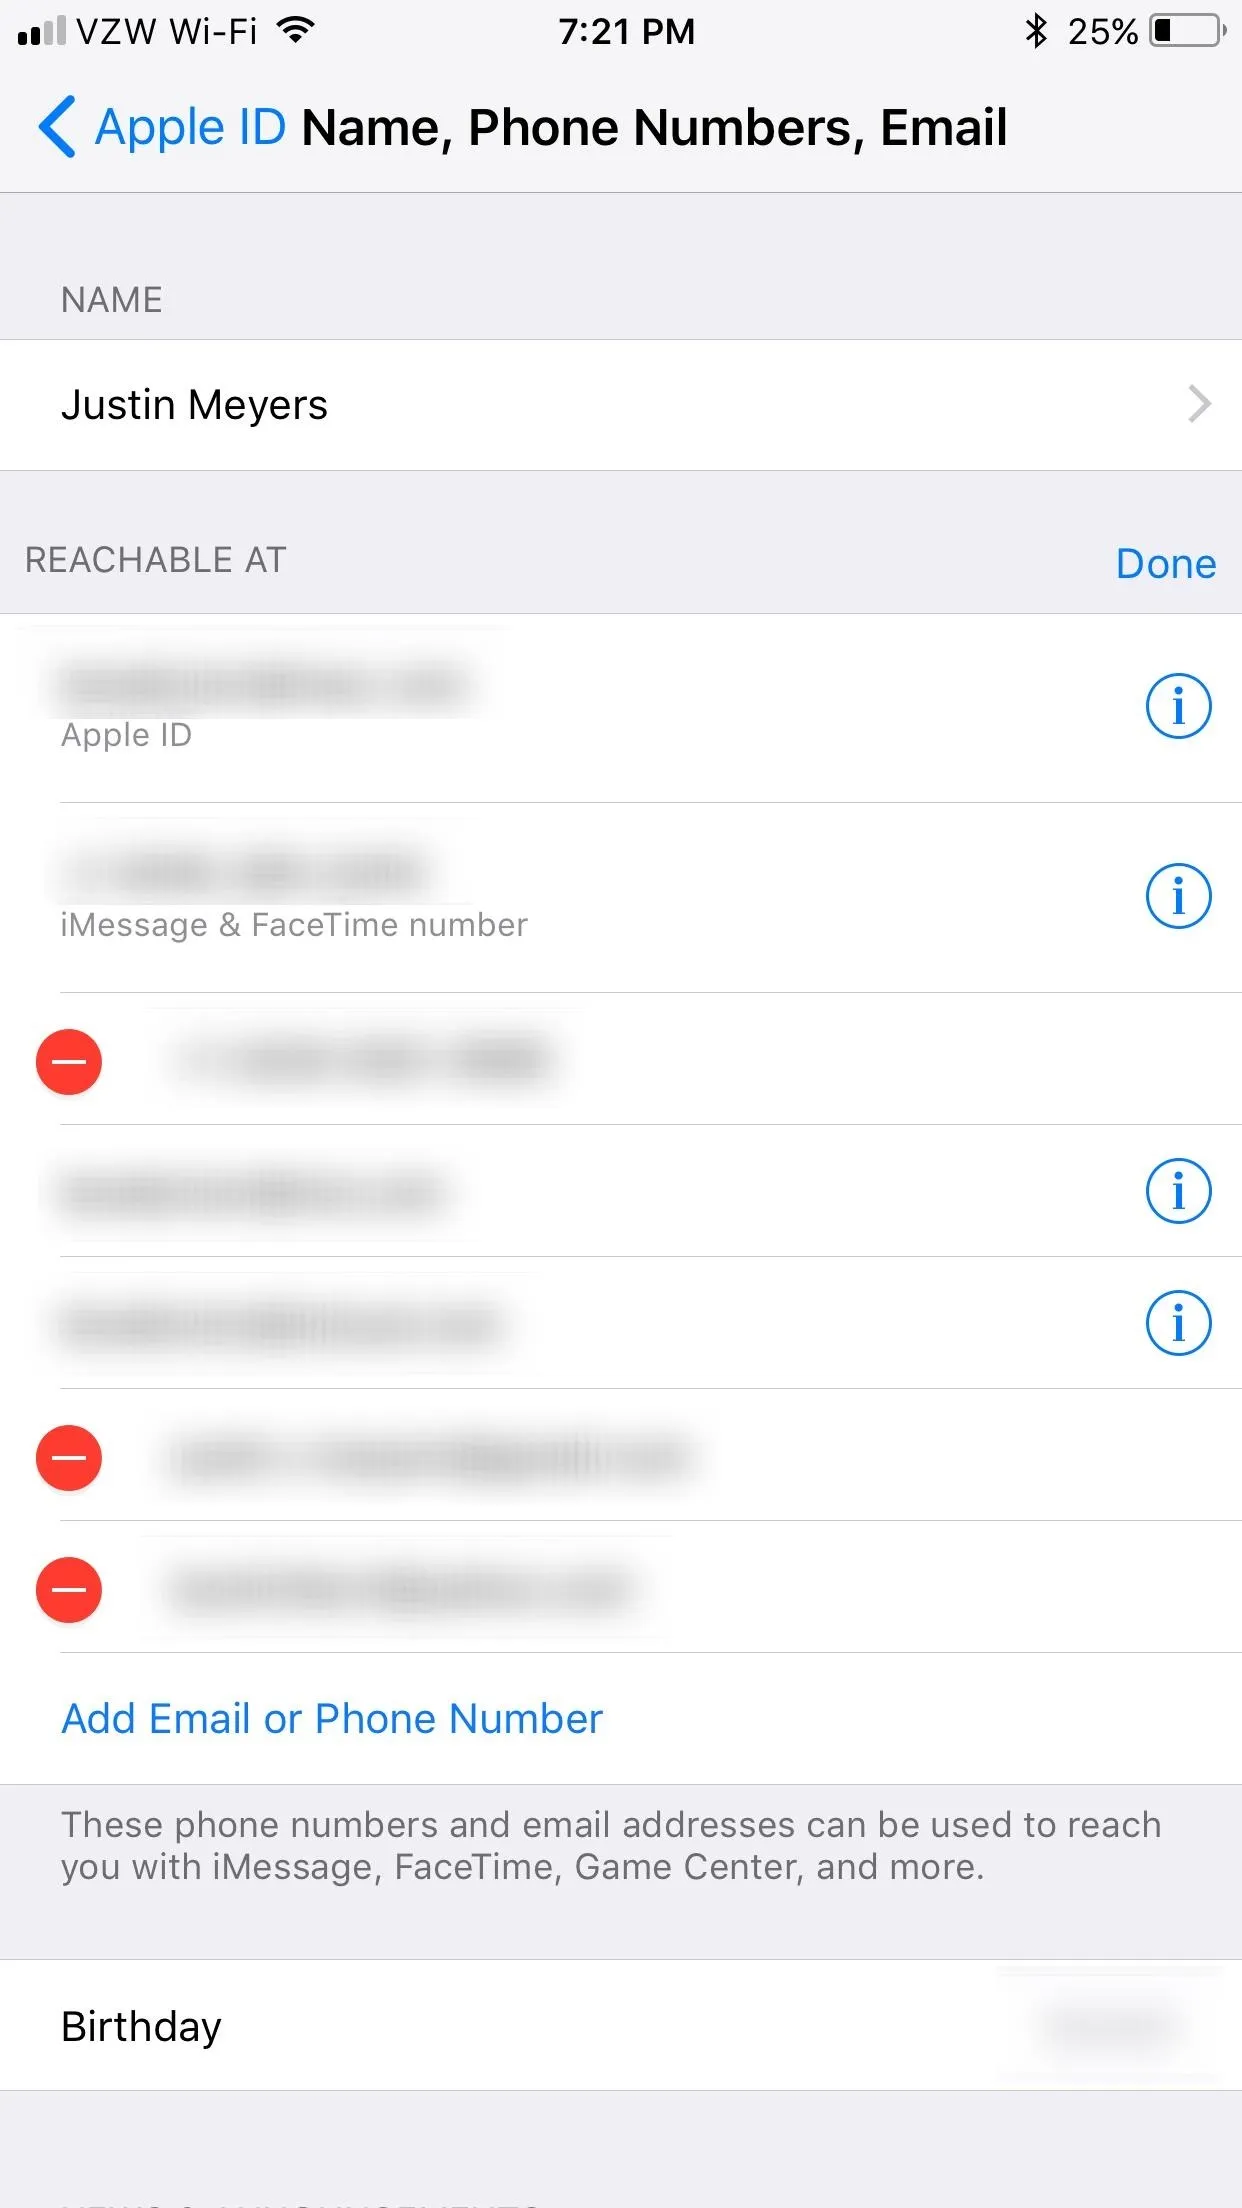
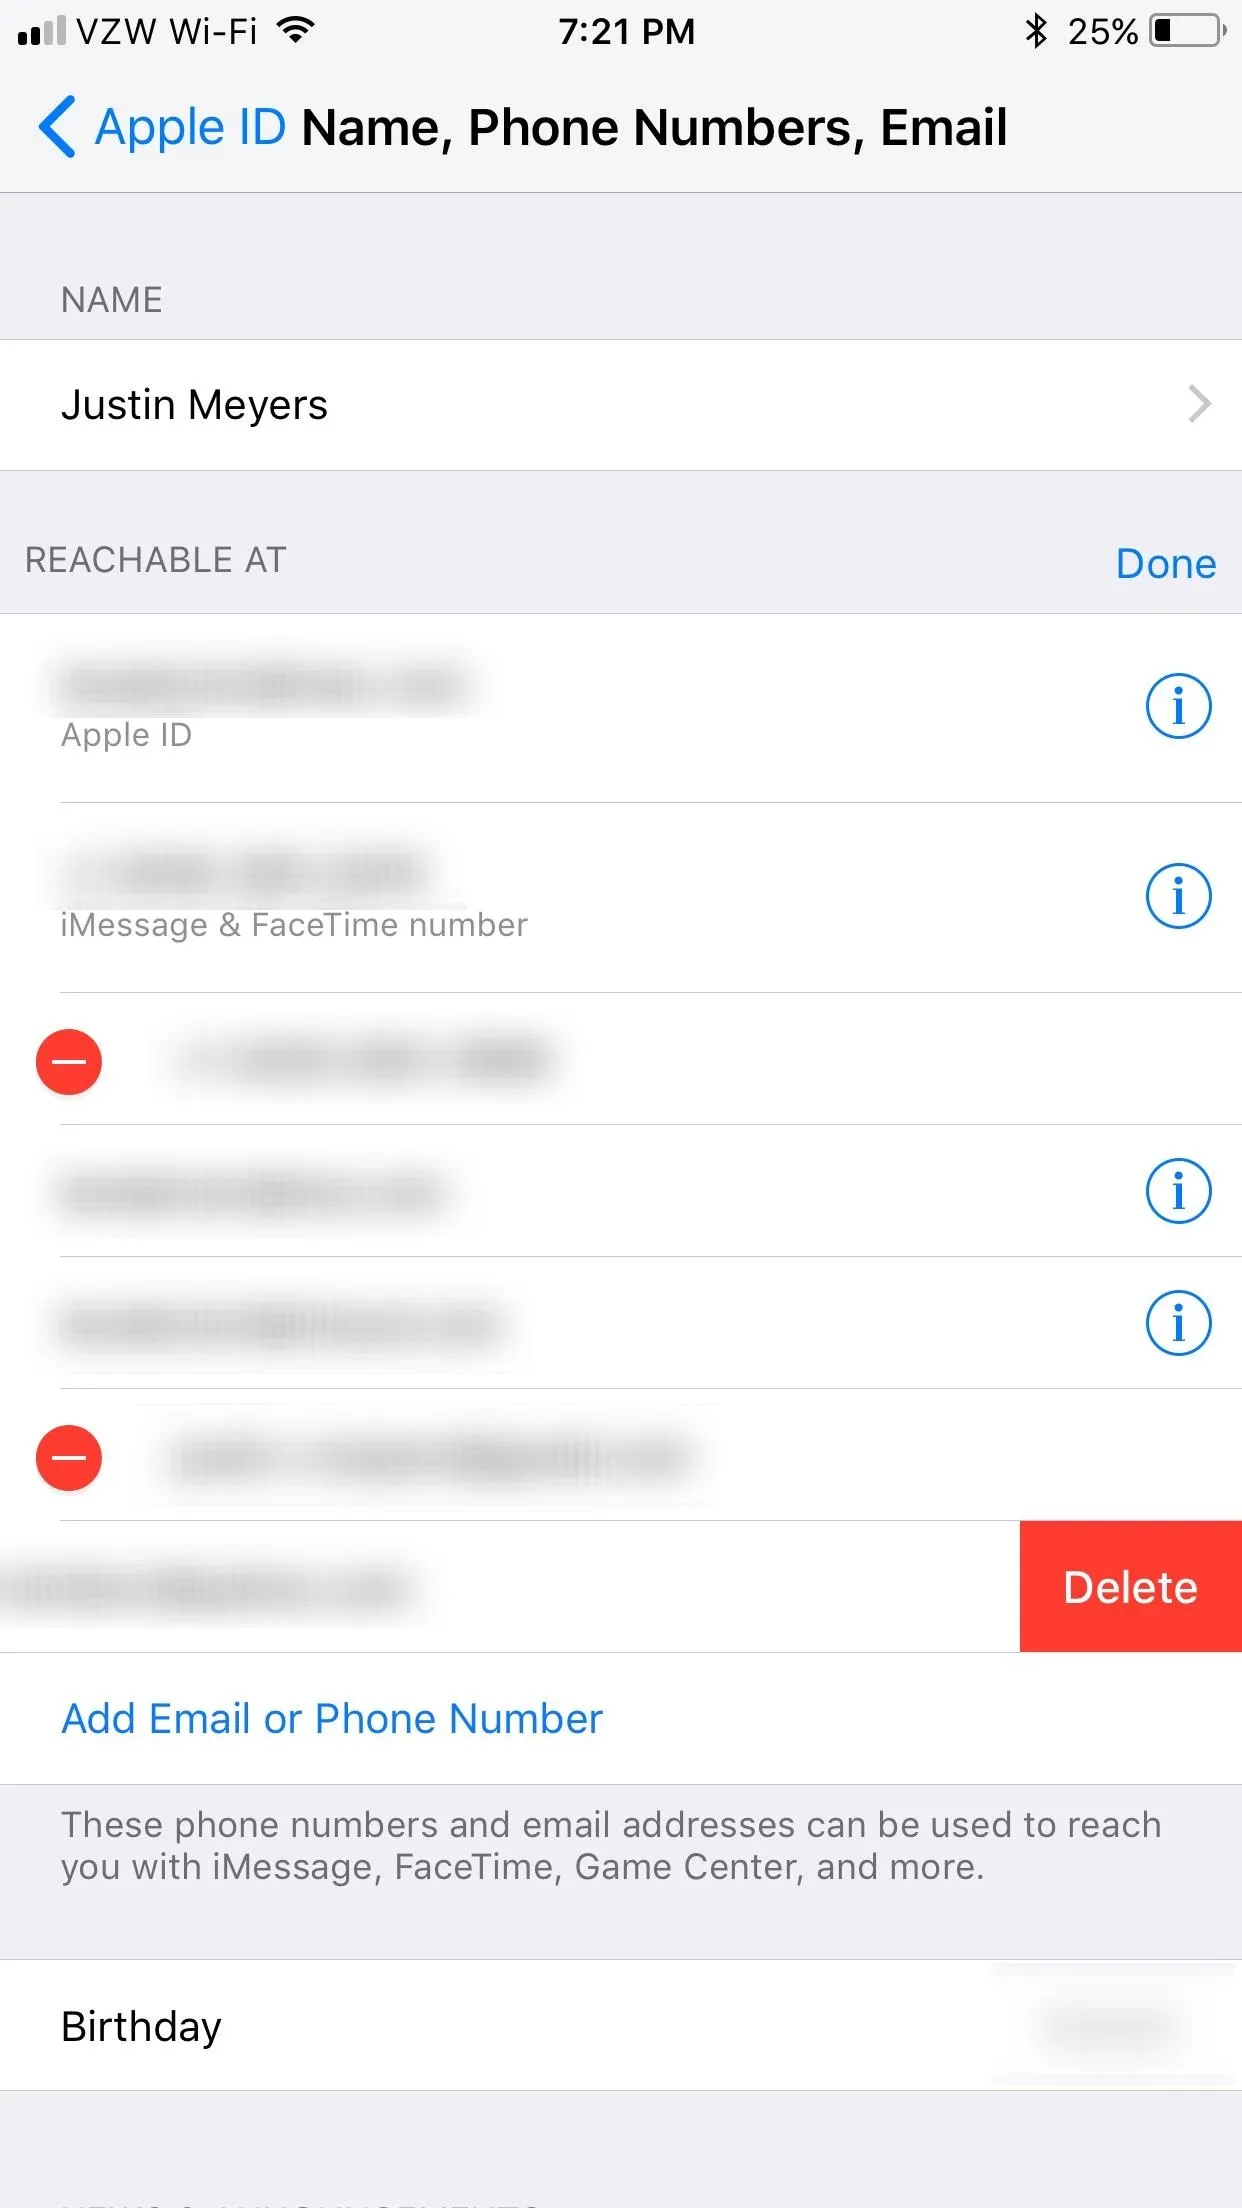
Open up your Settings app, tap on your name at the top, then hit "Name, Phone Numbers, Email," followed by "Edit" next to Reachable At.
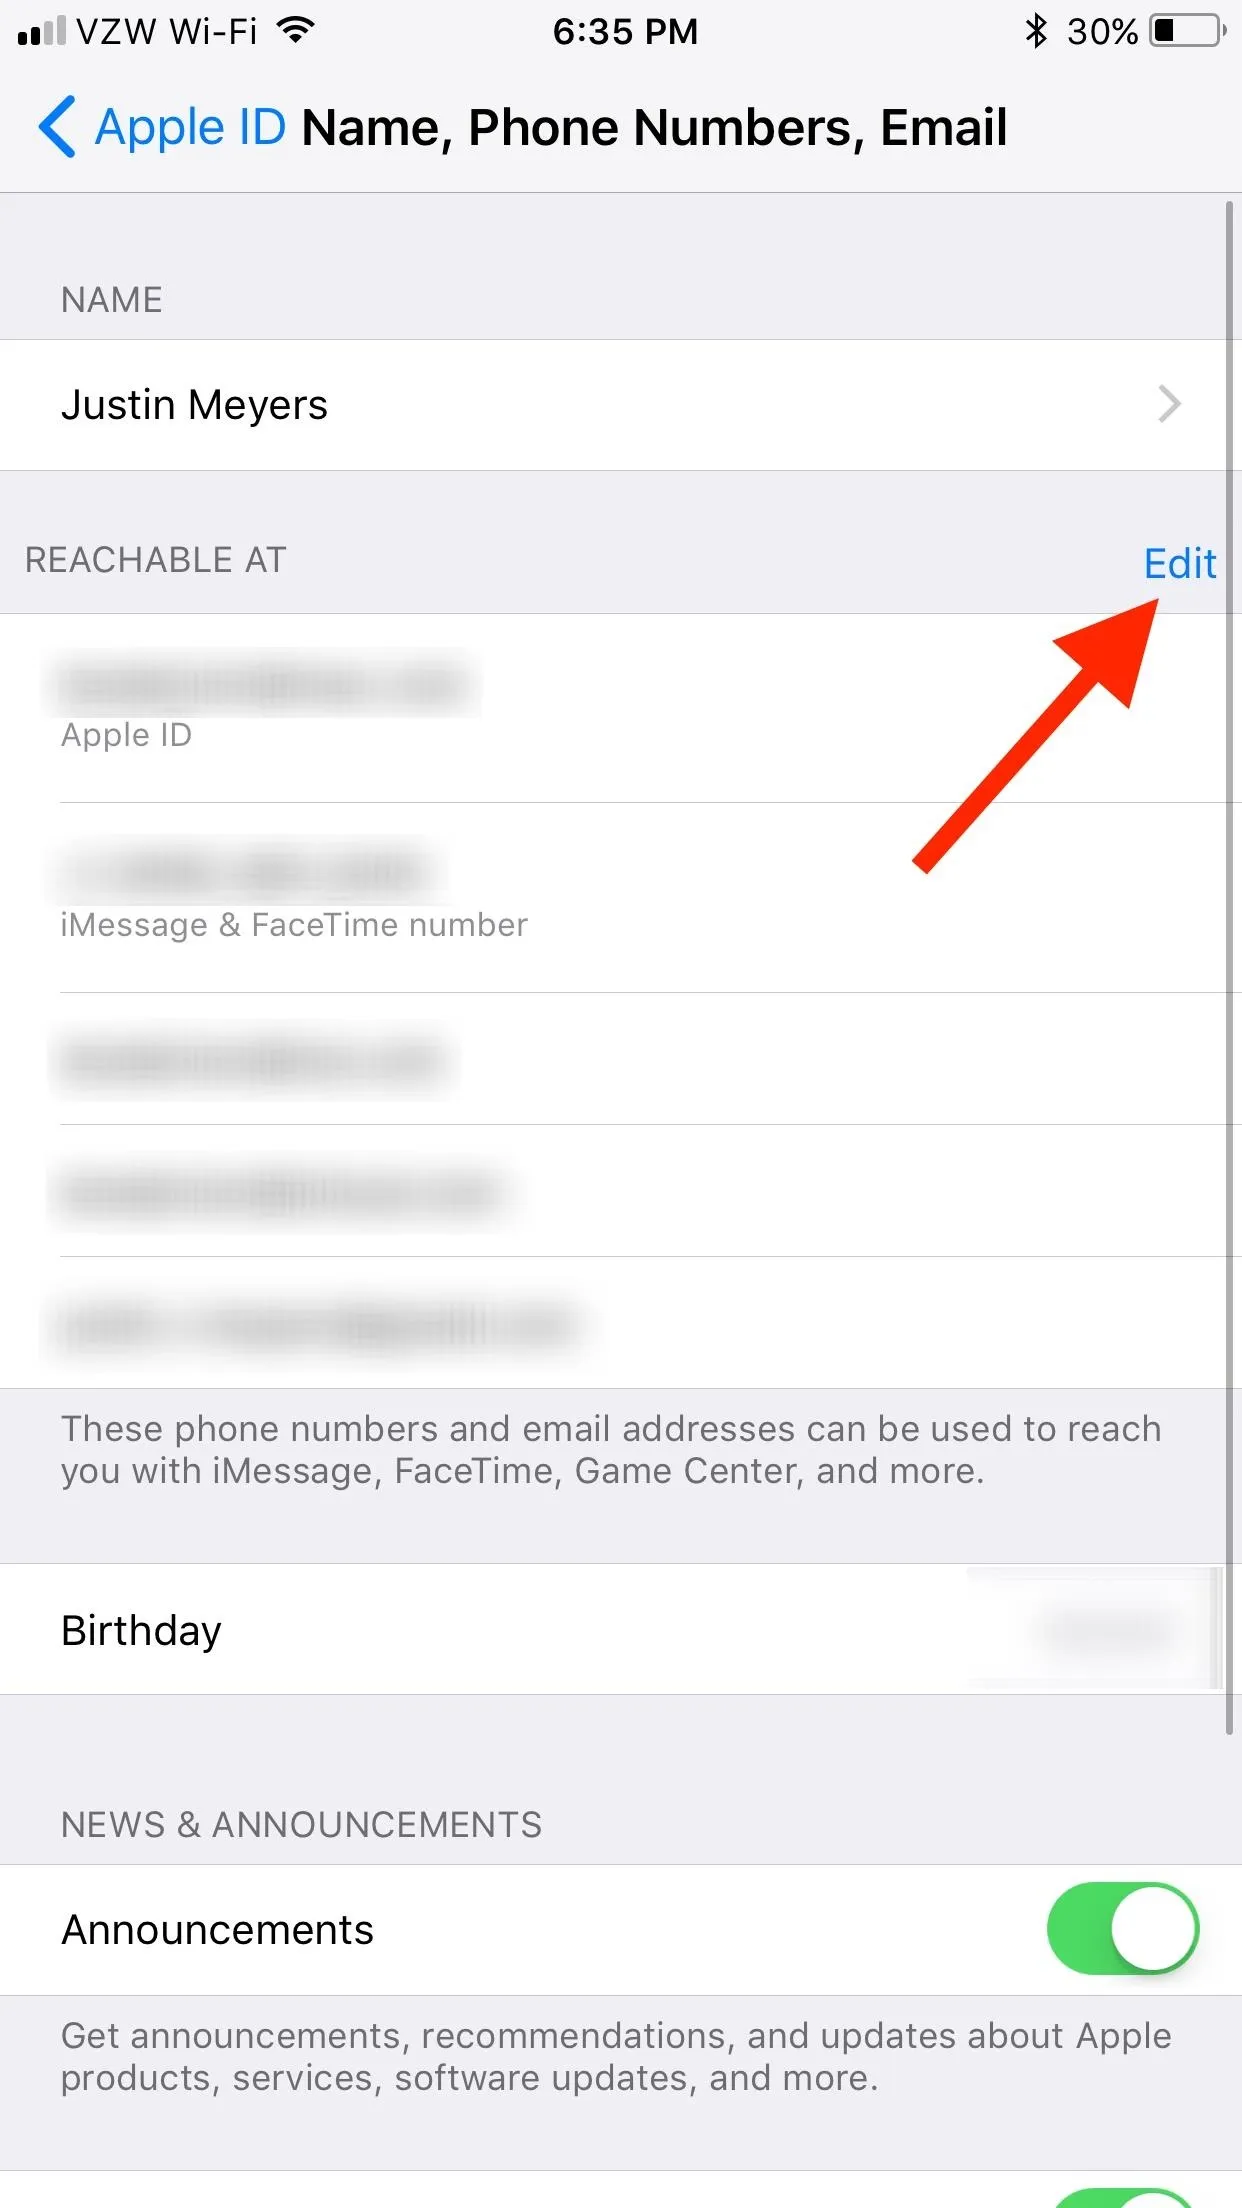
Next, choose "Add Email or Phone Number" at the bottom of the Reachable At list, then select "Add an Email Address" from the prompt. Note that you can enter in phone numbers here, but they don't seem to work for either FaceTime or iMessage unless it's your iPhone's actual phone number, so we're not quite sure what adding a different phone number will actually do.
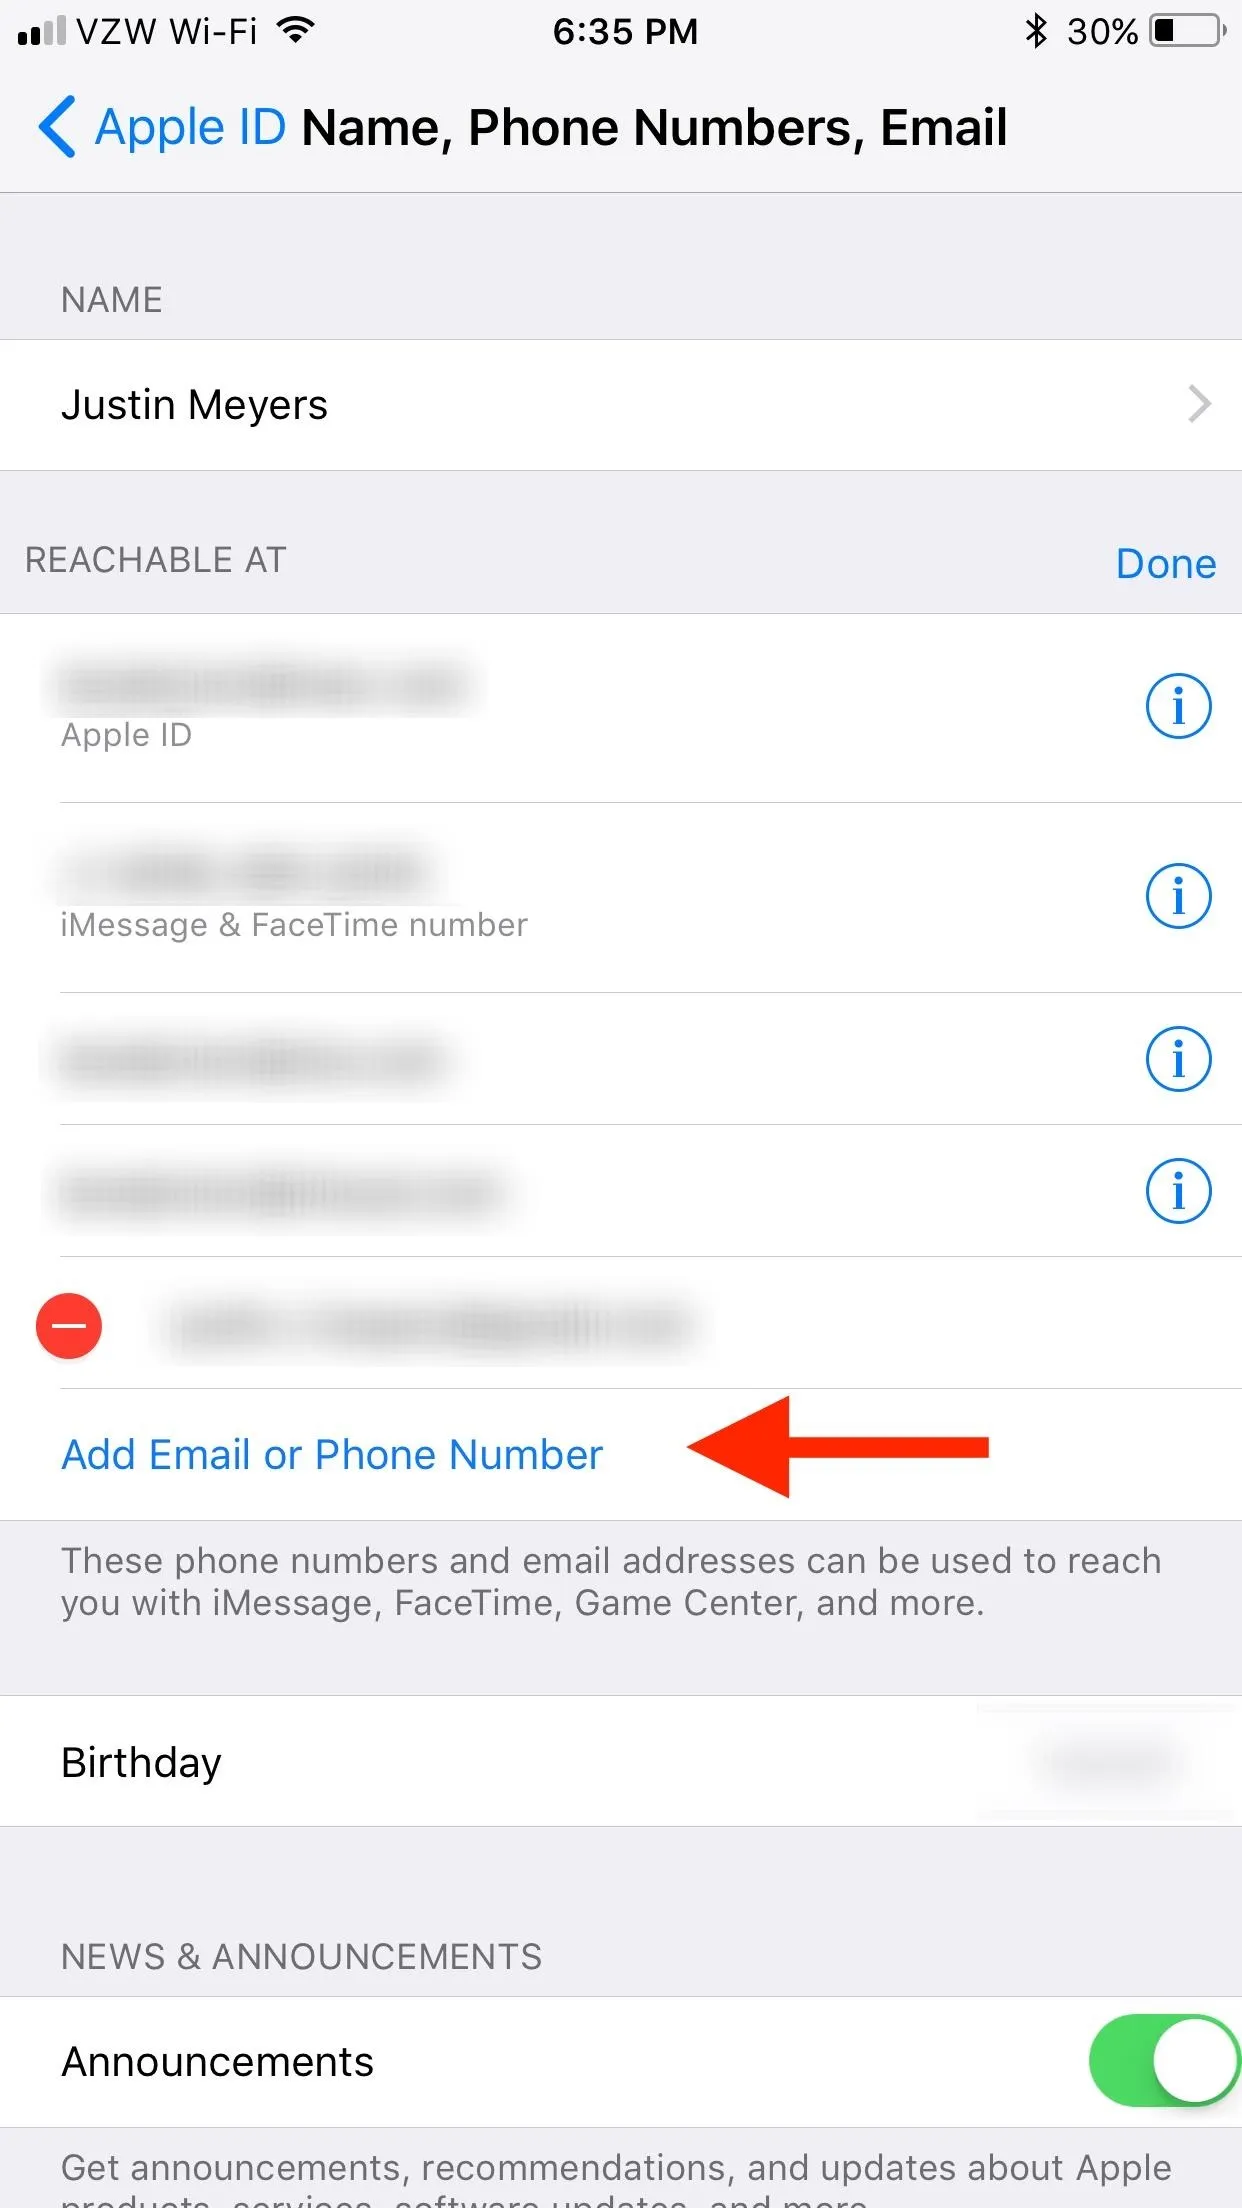
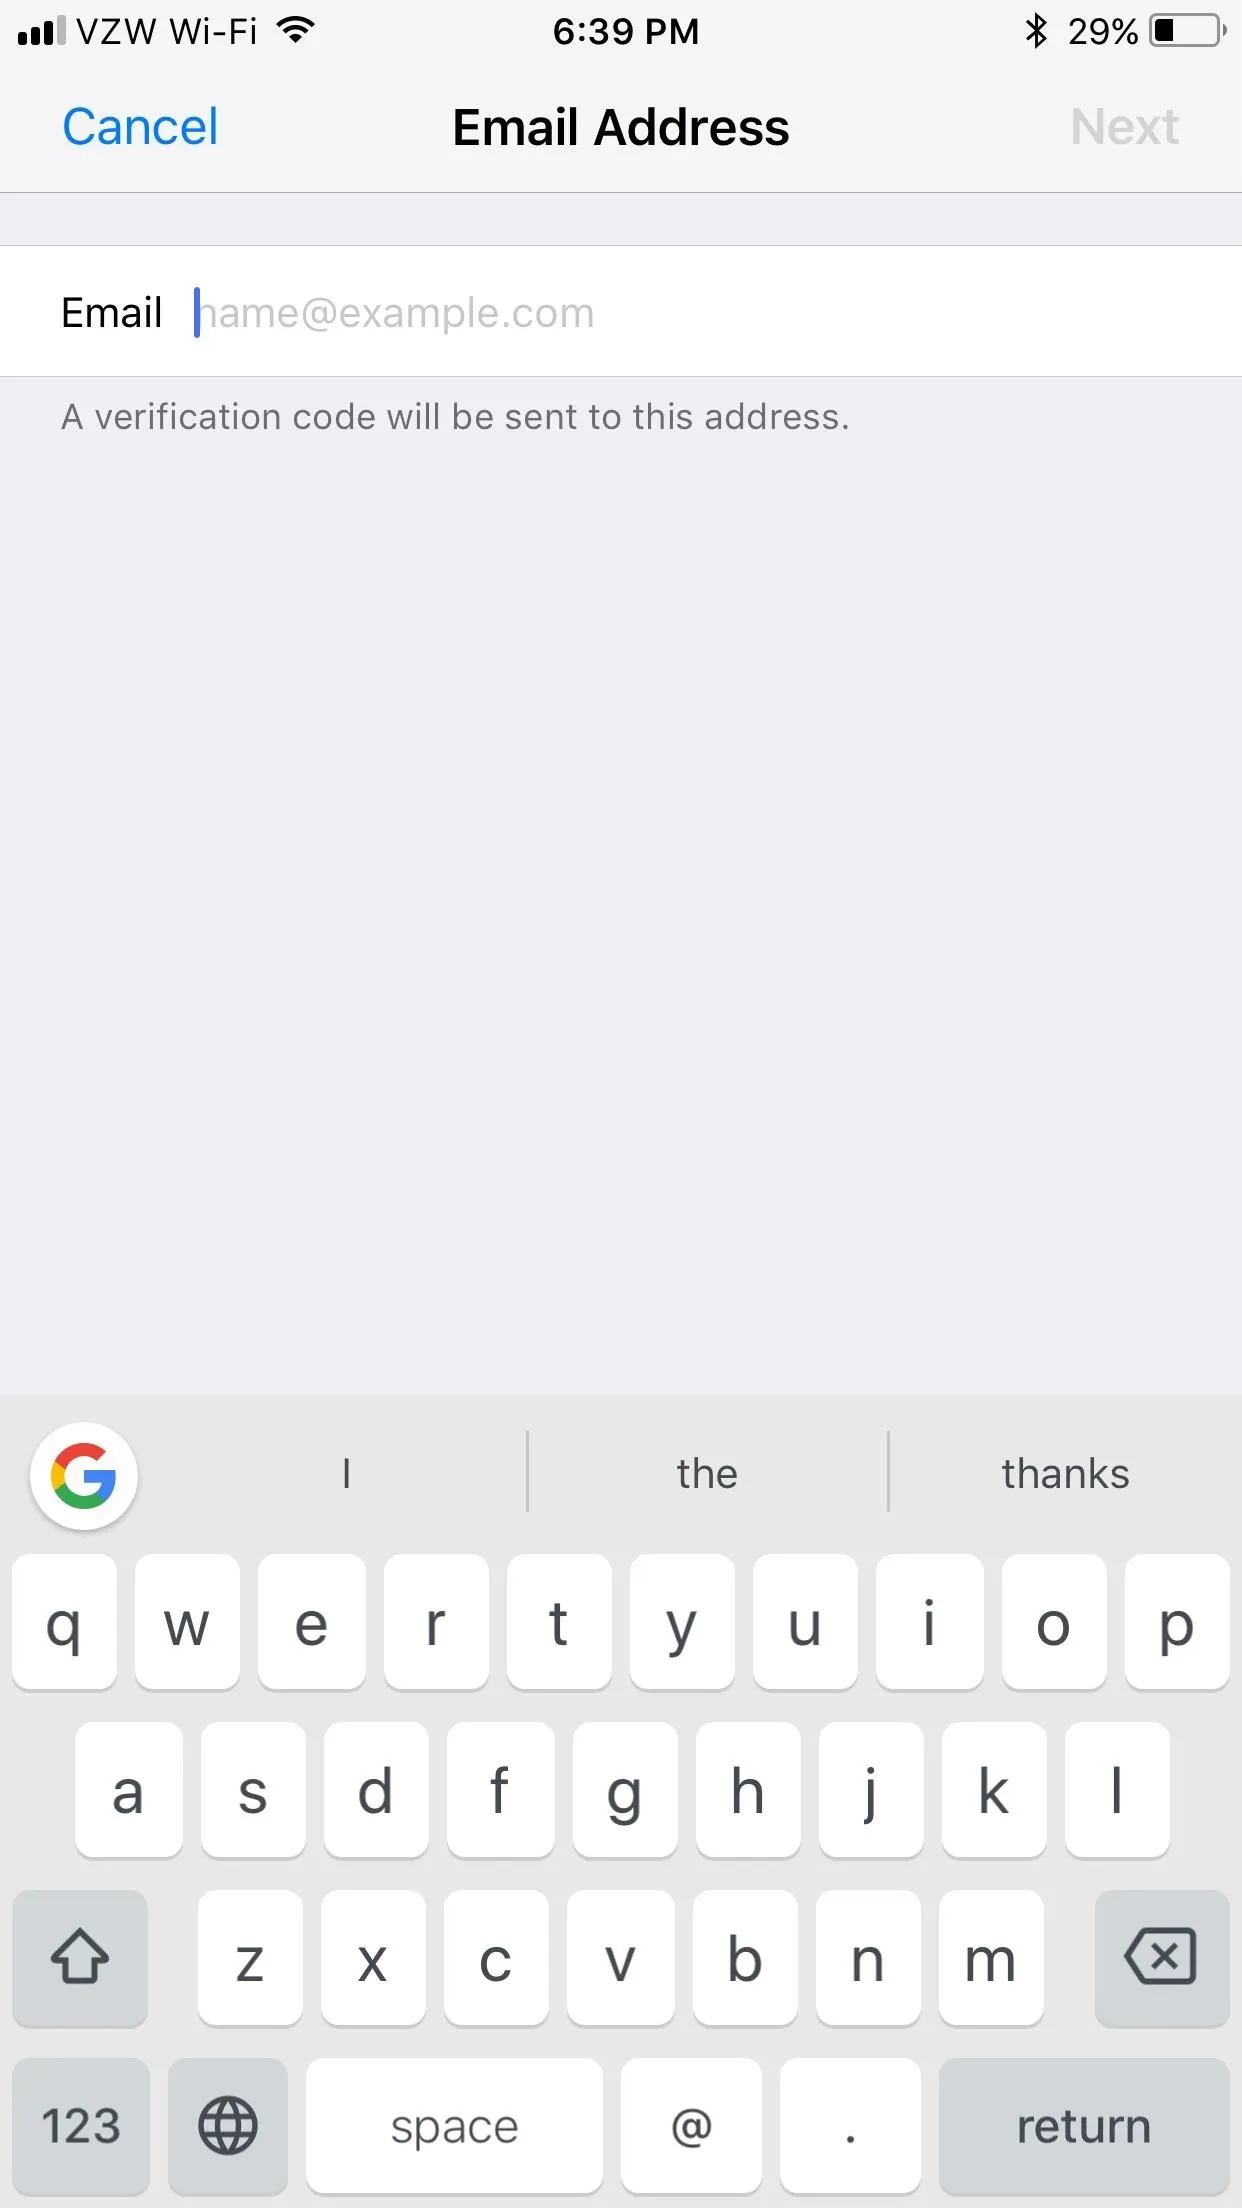
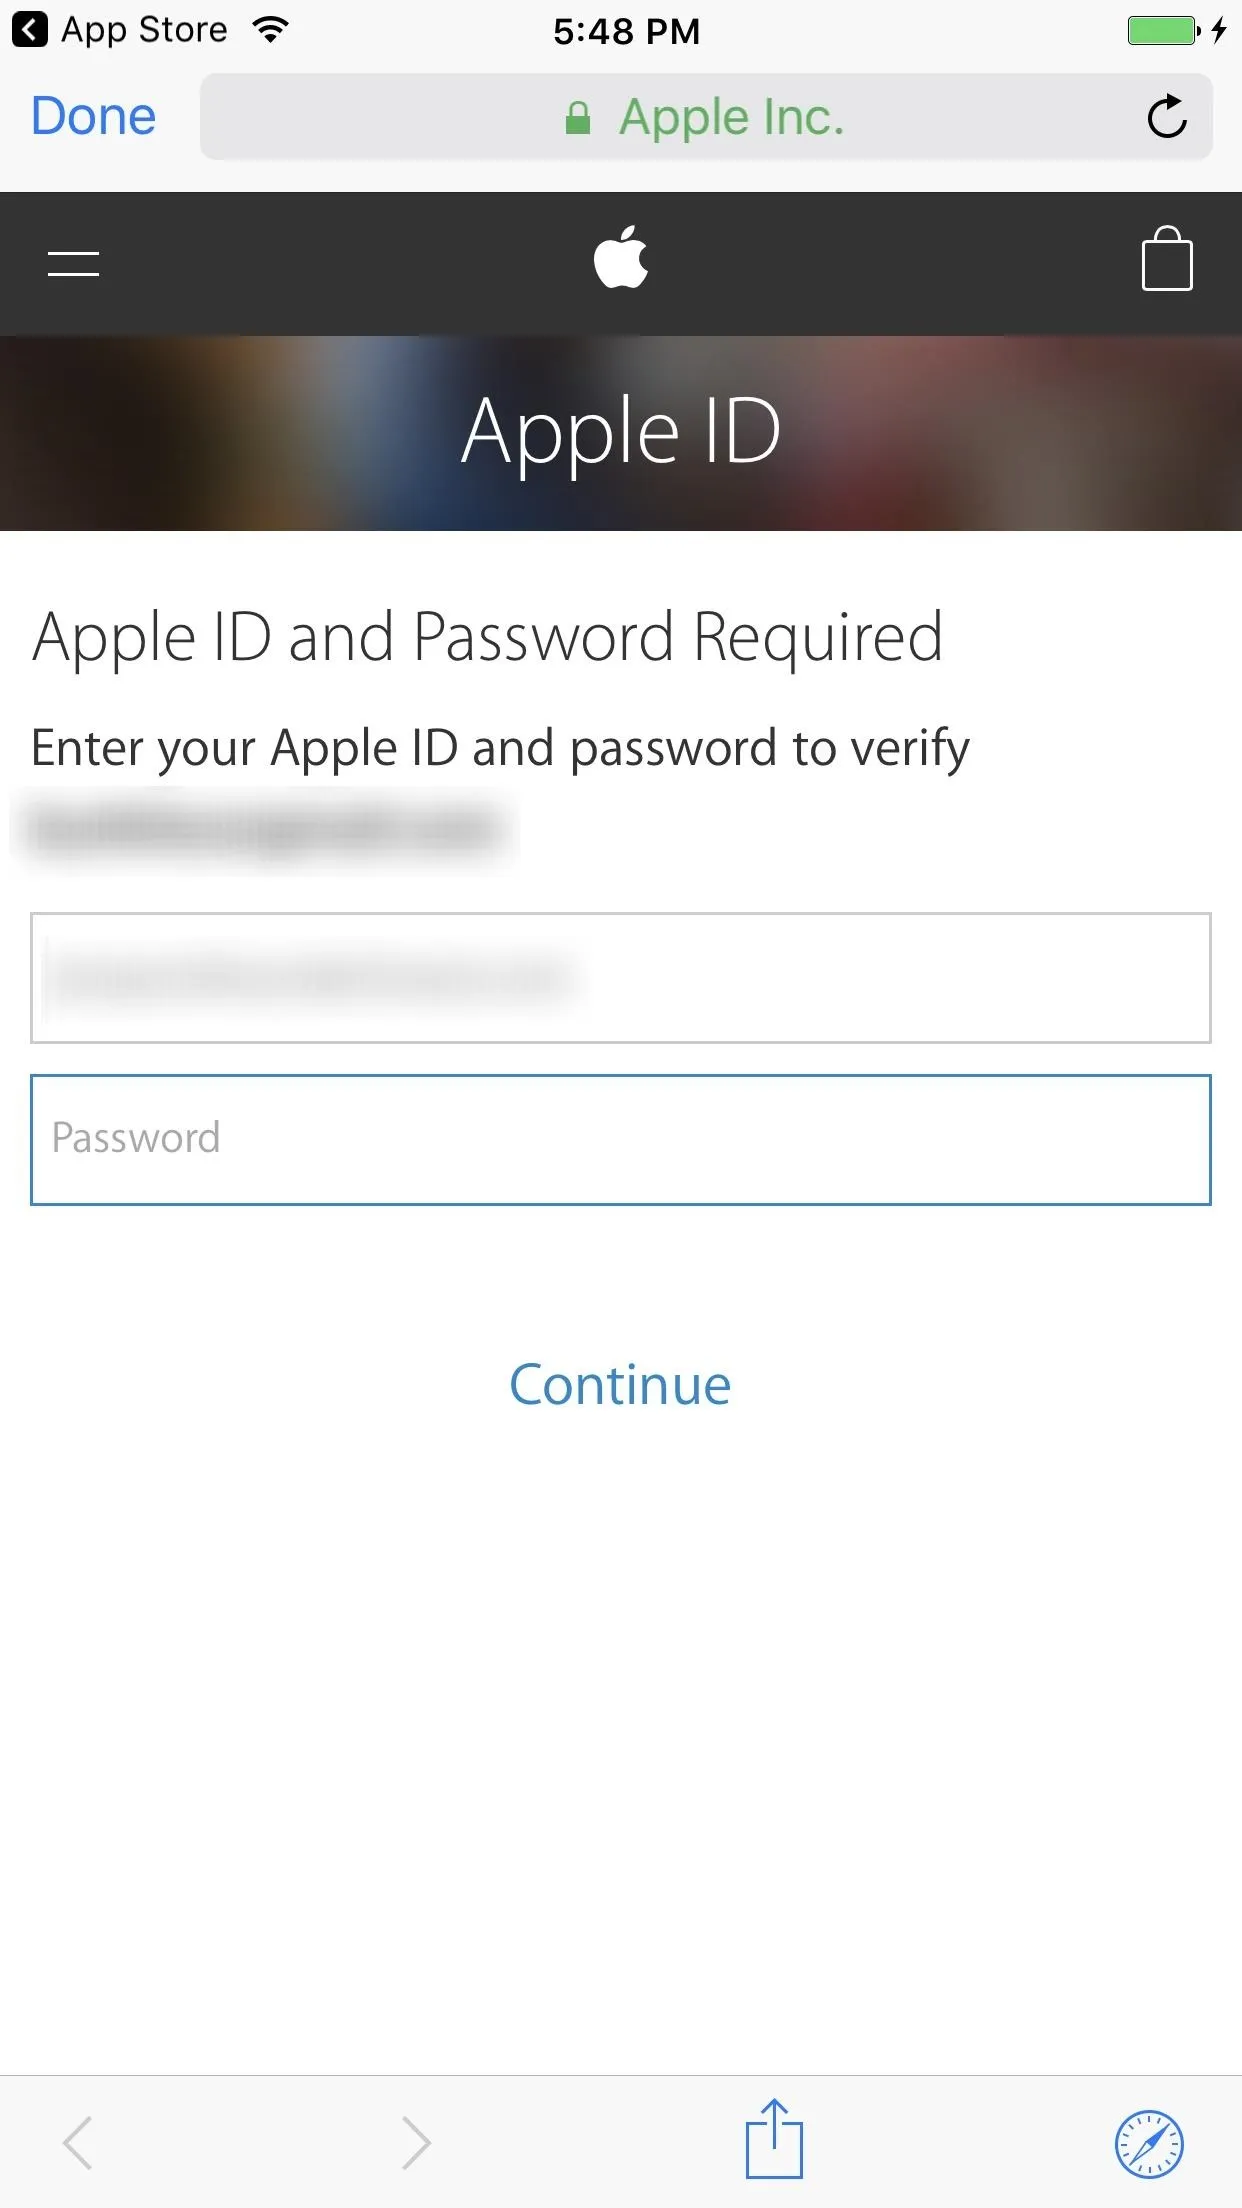
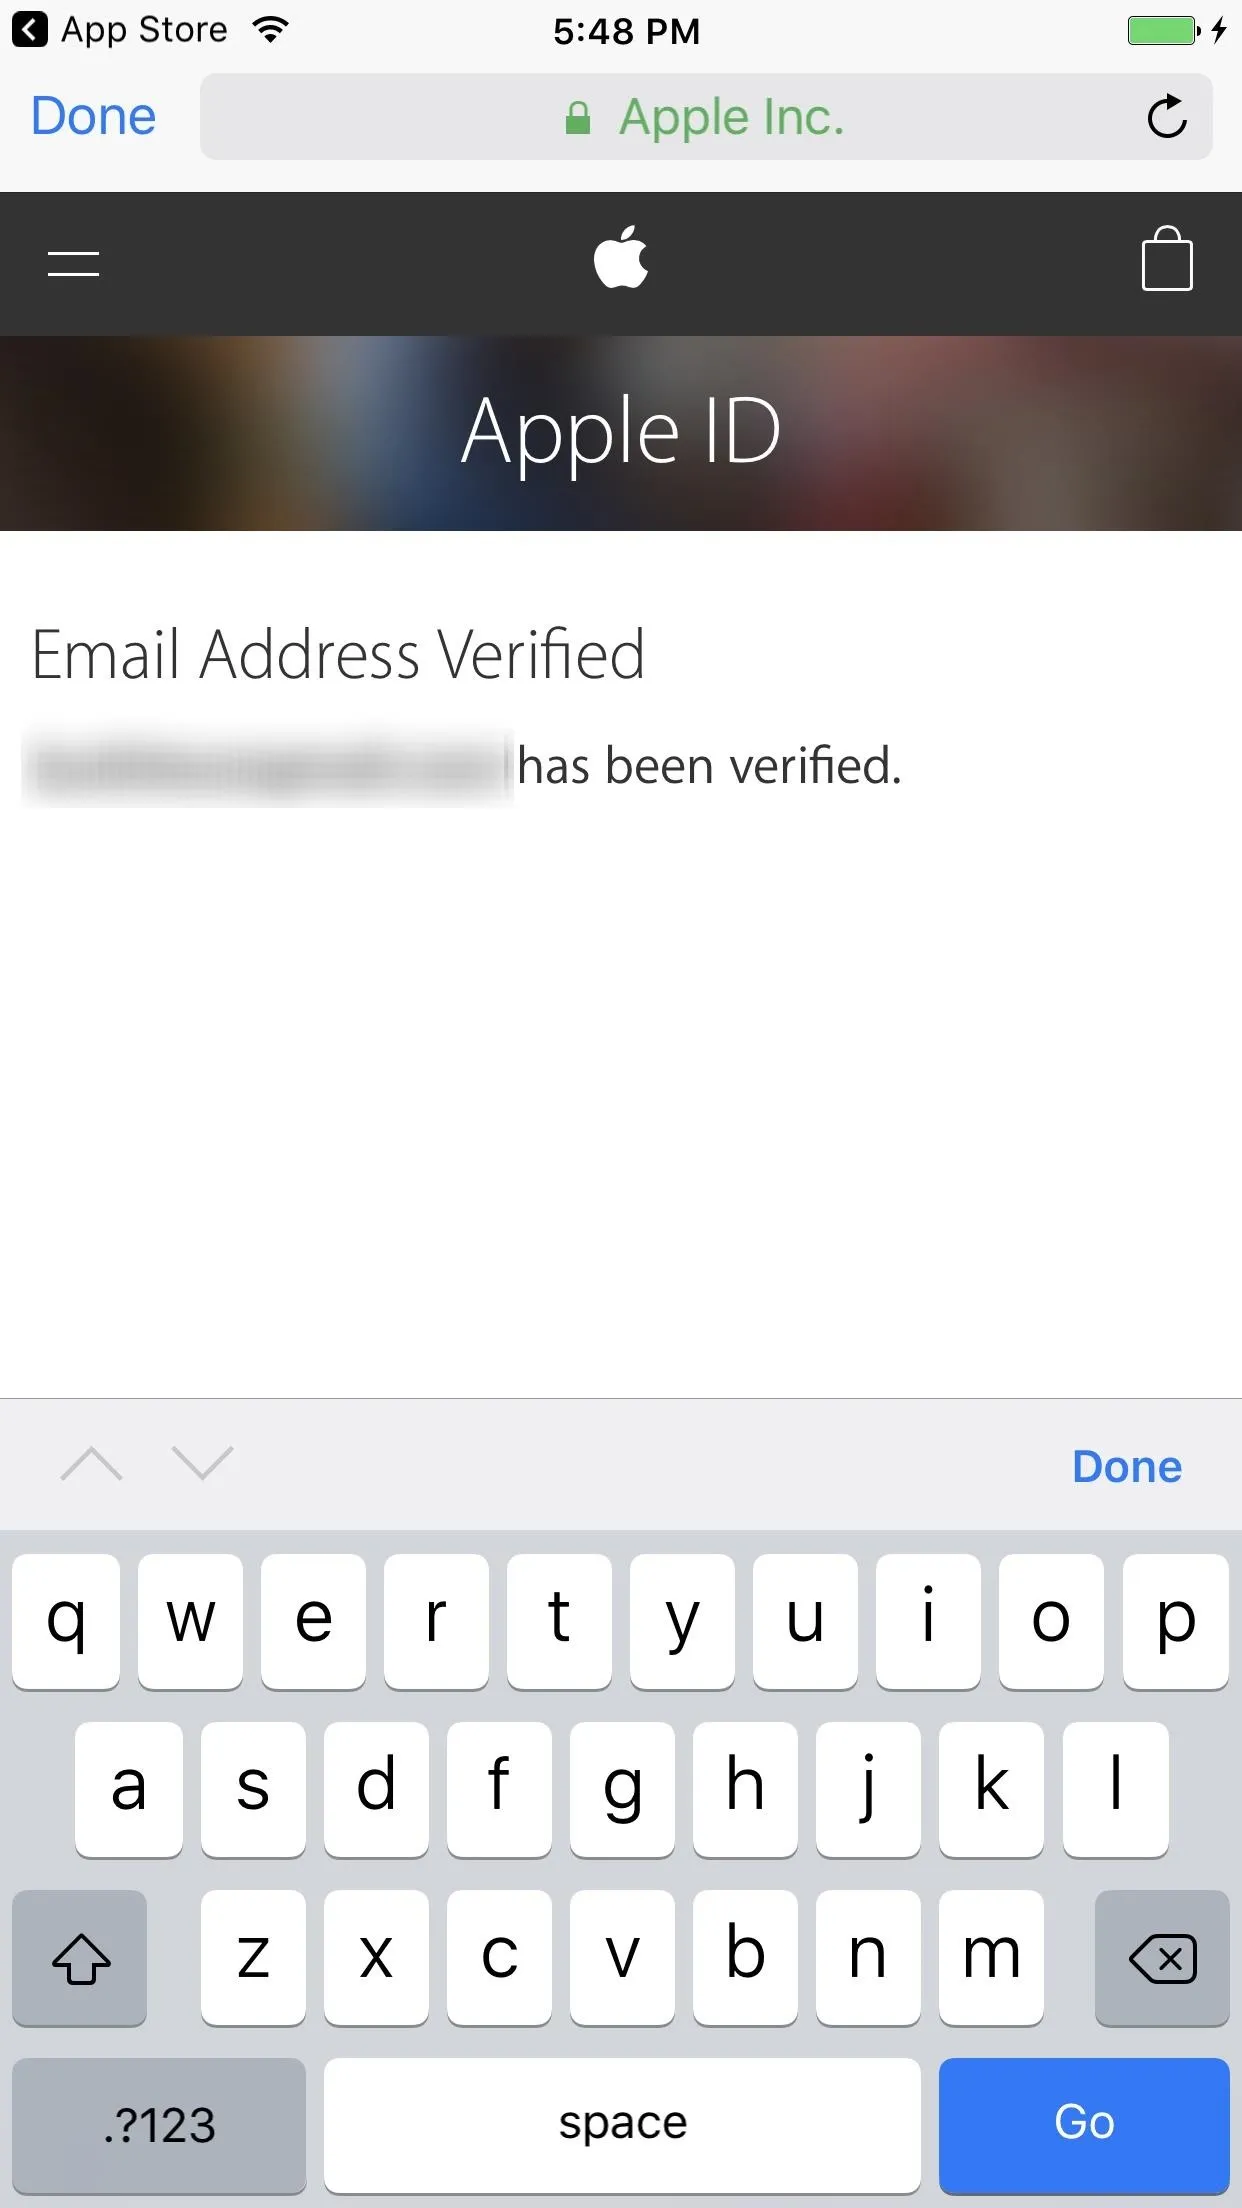
Then, wait for Apple to send you a verification email to that email address. Once you get it, input the 6-digit code onto your iPhone's screen, and you'll be set.
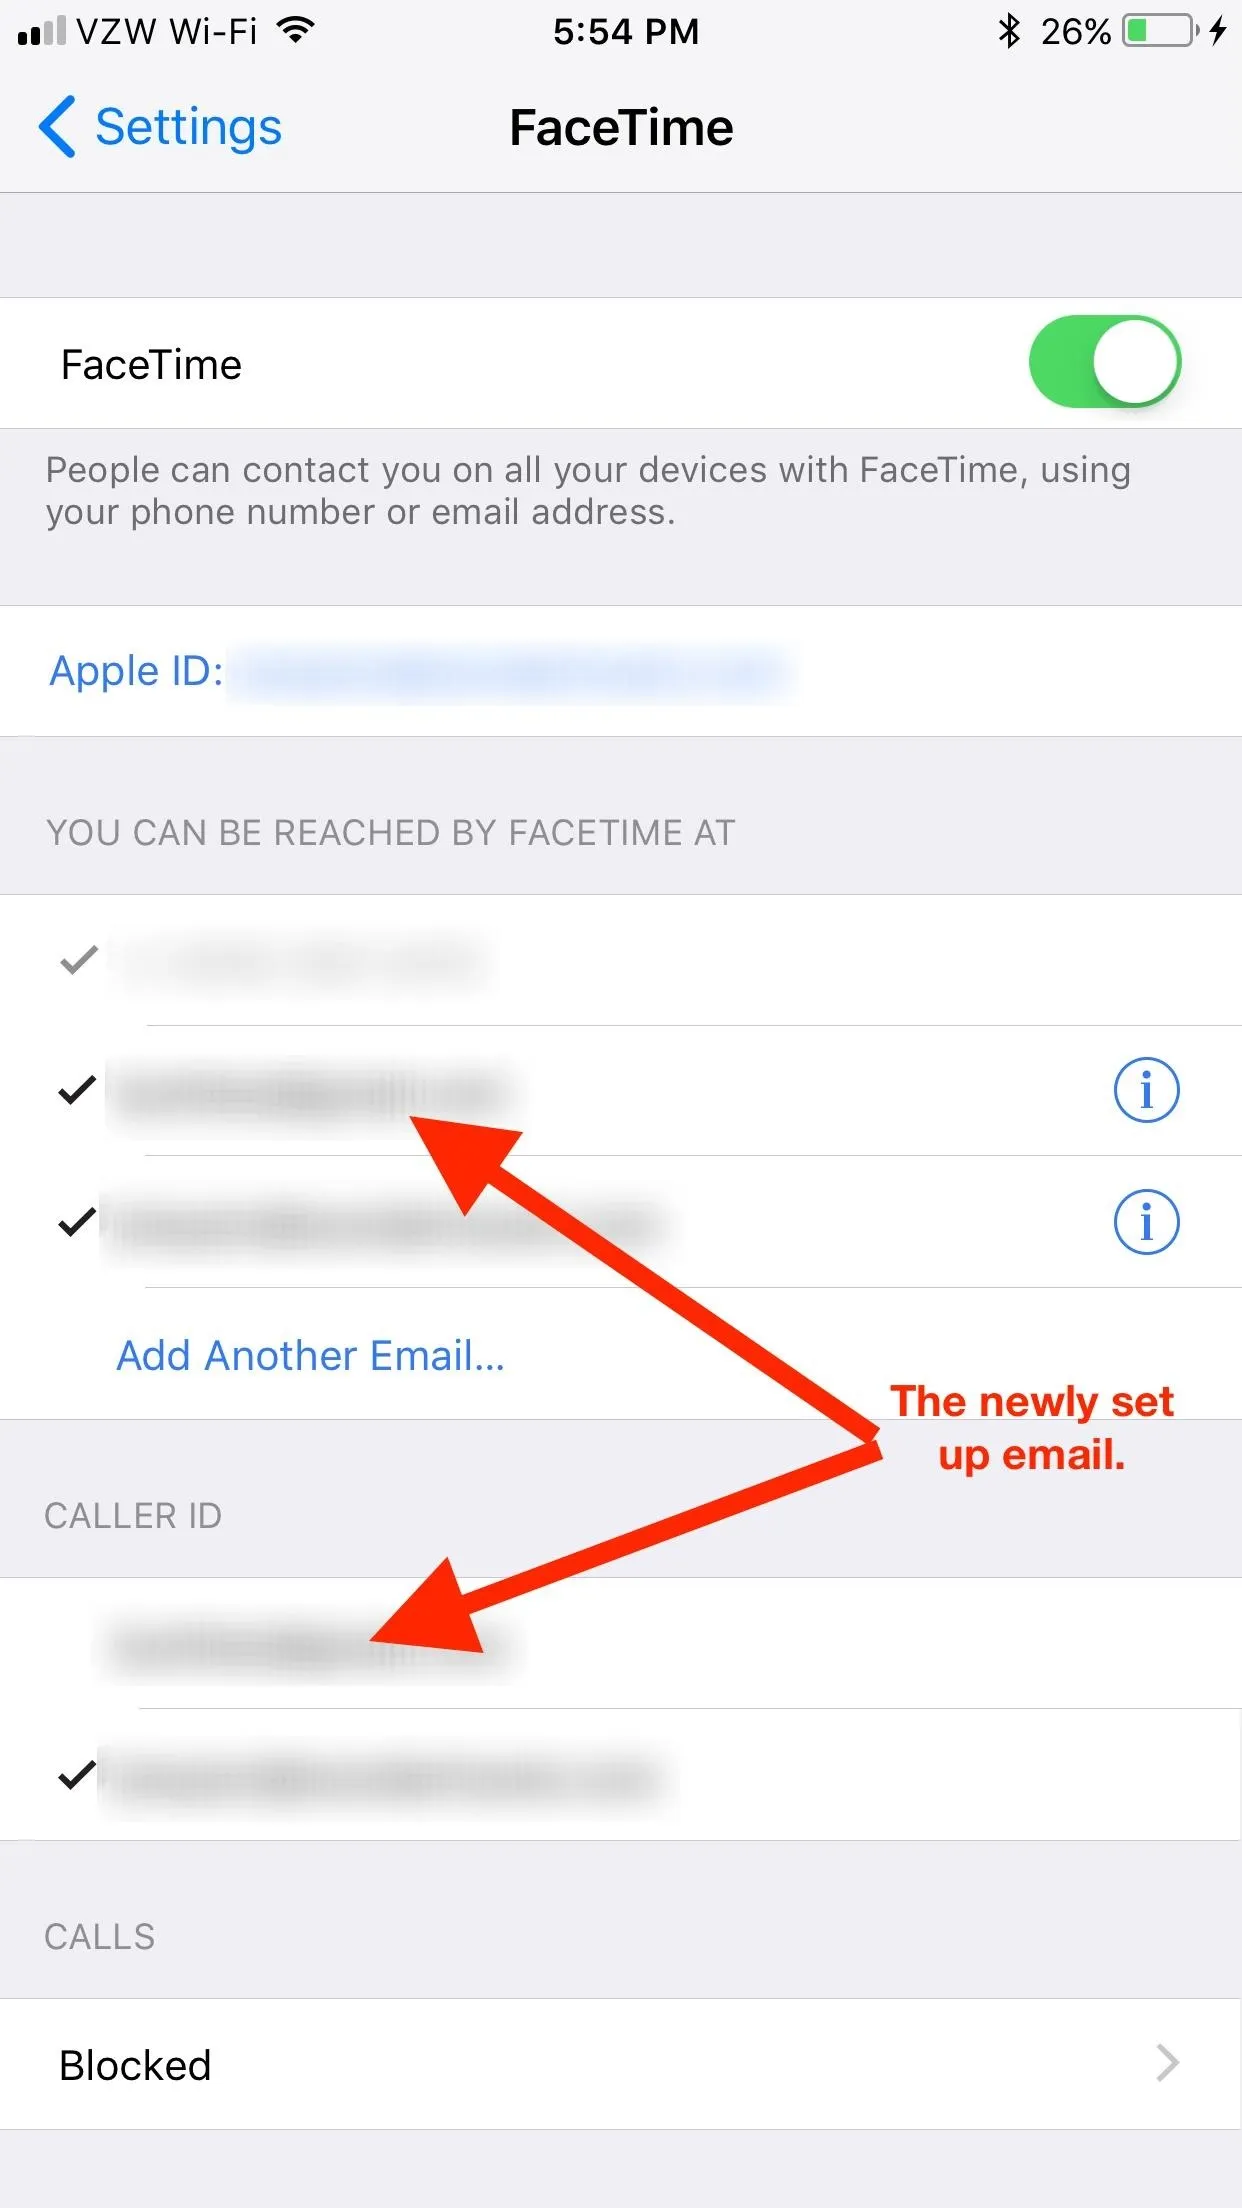
Shortly afterward, you'll see a pop-up asking to "Add '[email address]' for iMessage and FaceTime." If you select "Yes," you won't have to do anything else. If you choose "No" because you don't want to use it with iMessage, then you'll have to go to FaceTime in Settings and check the new email you just added, like below in the iOS 10 section.
iOS 10.2.1 & Under
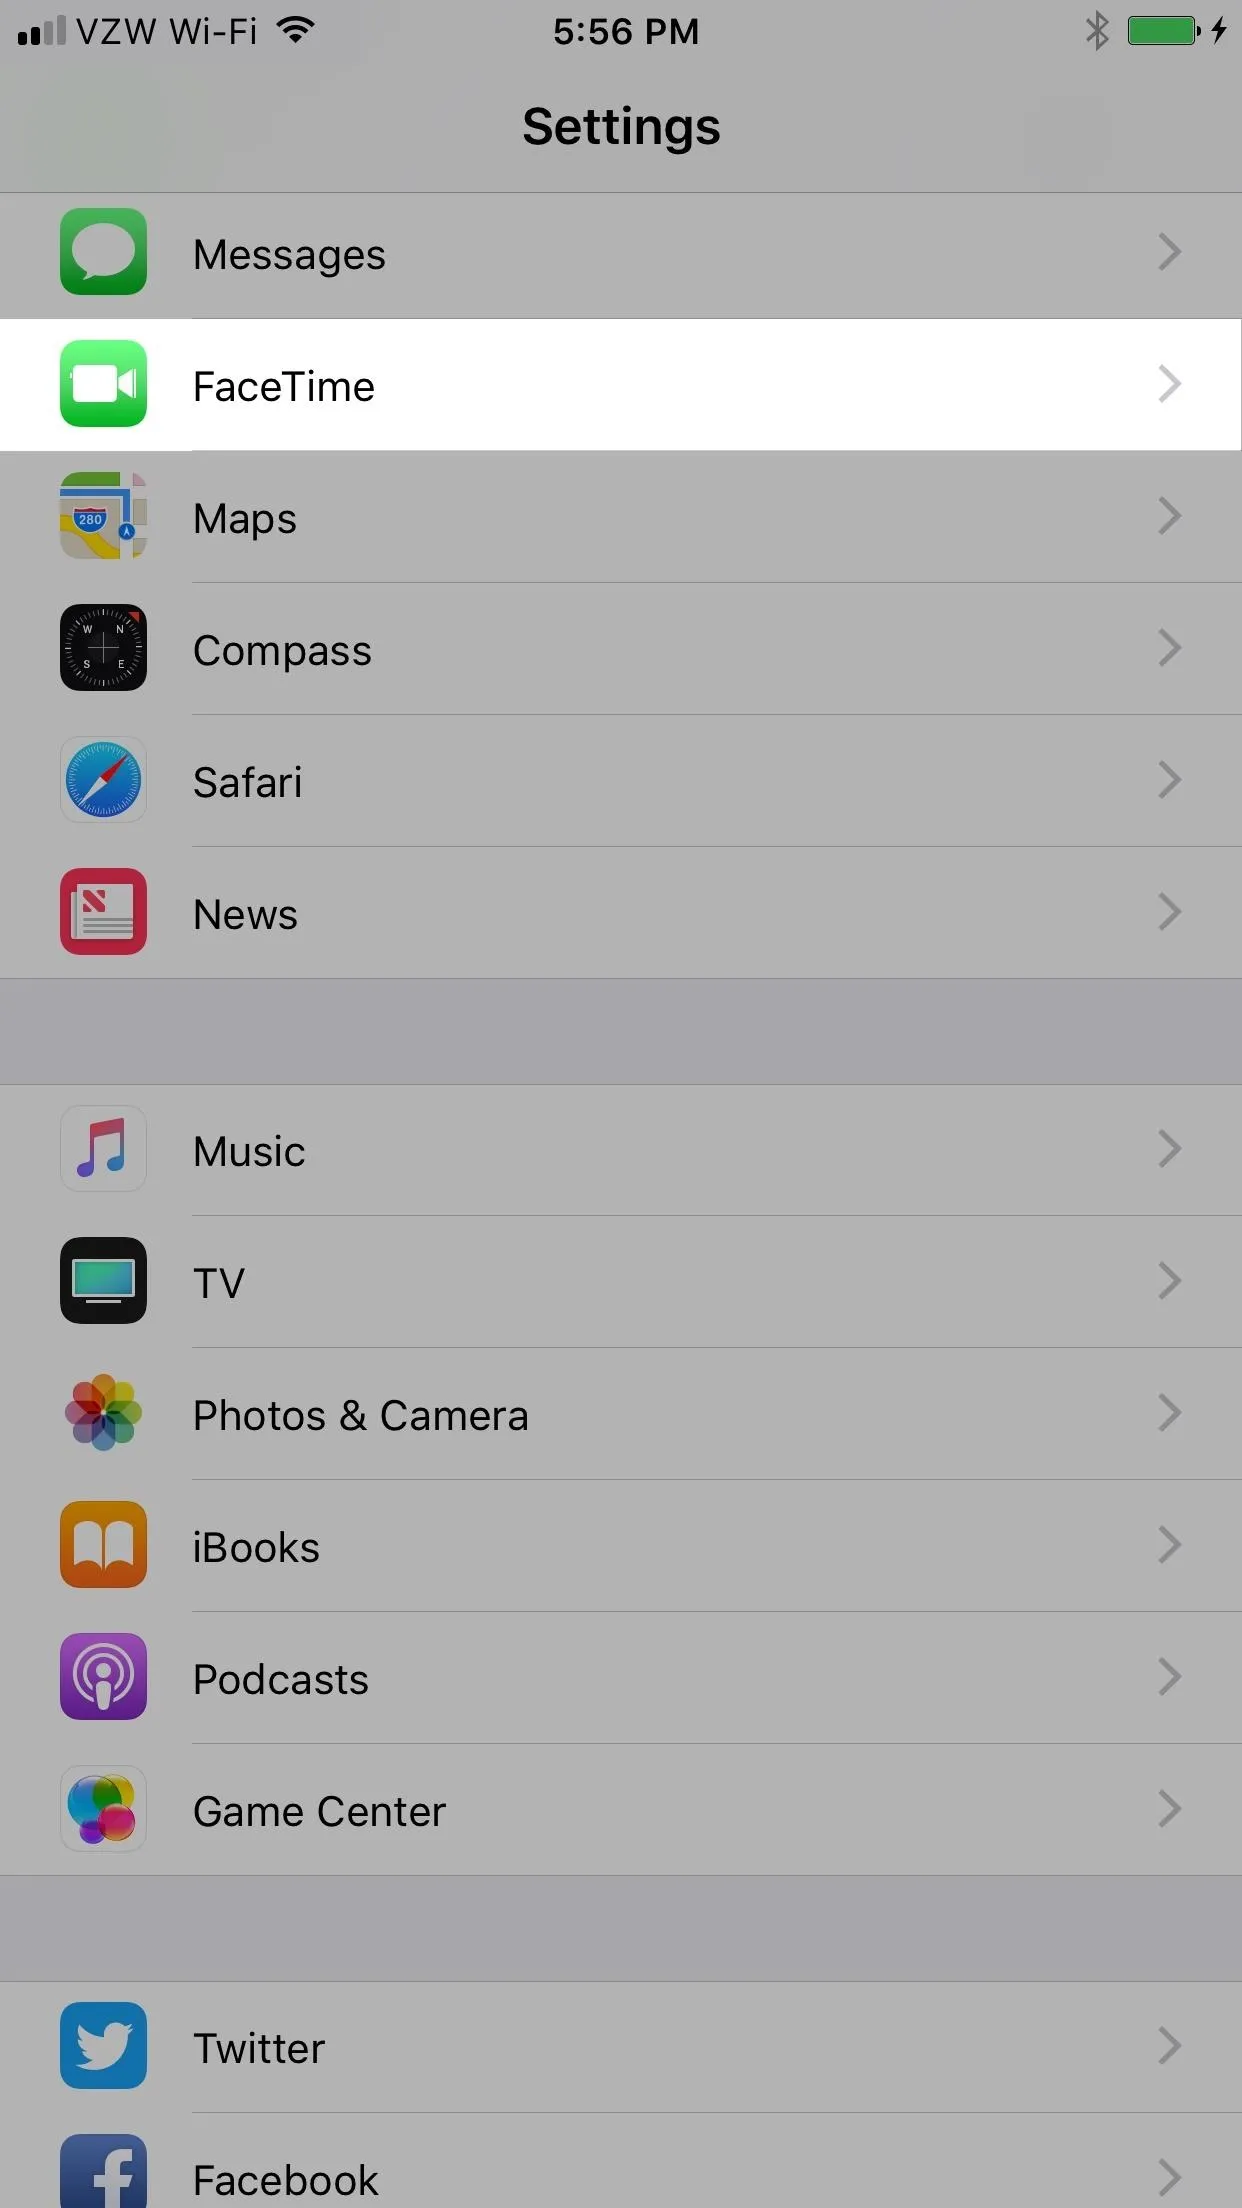
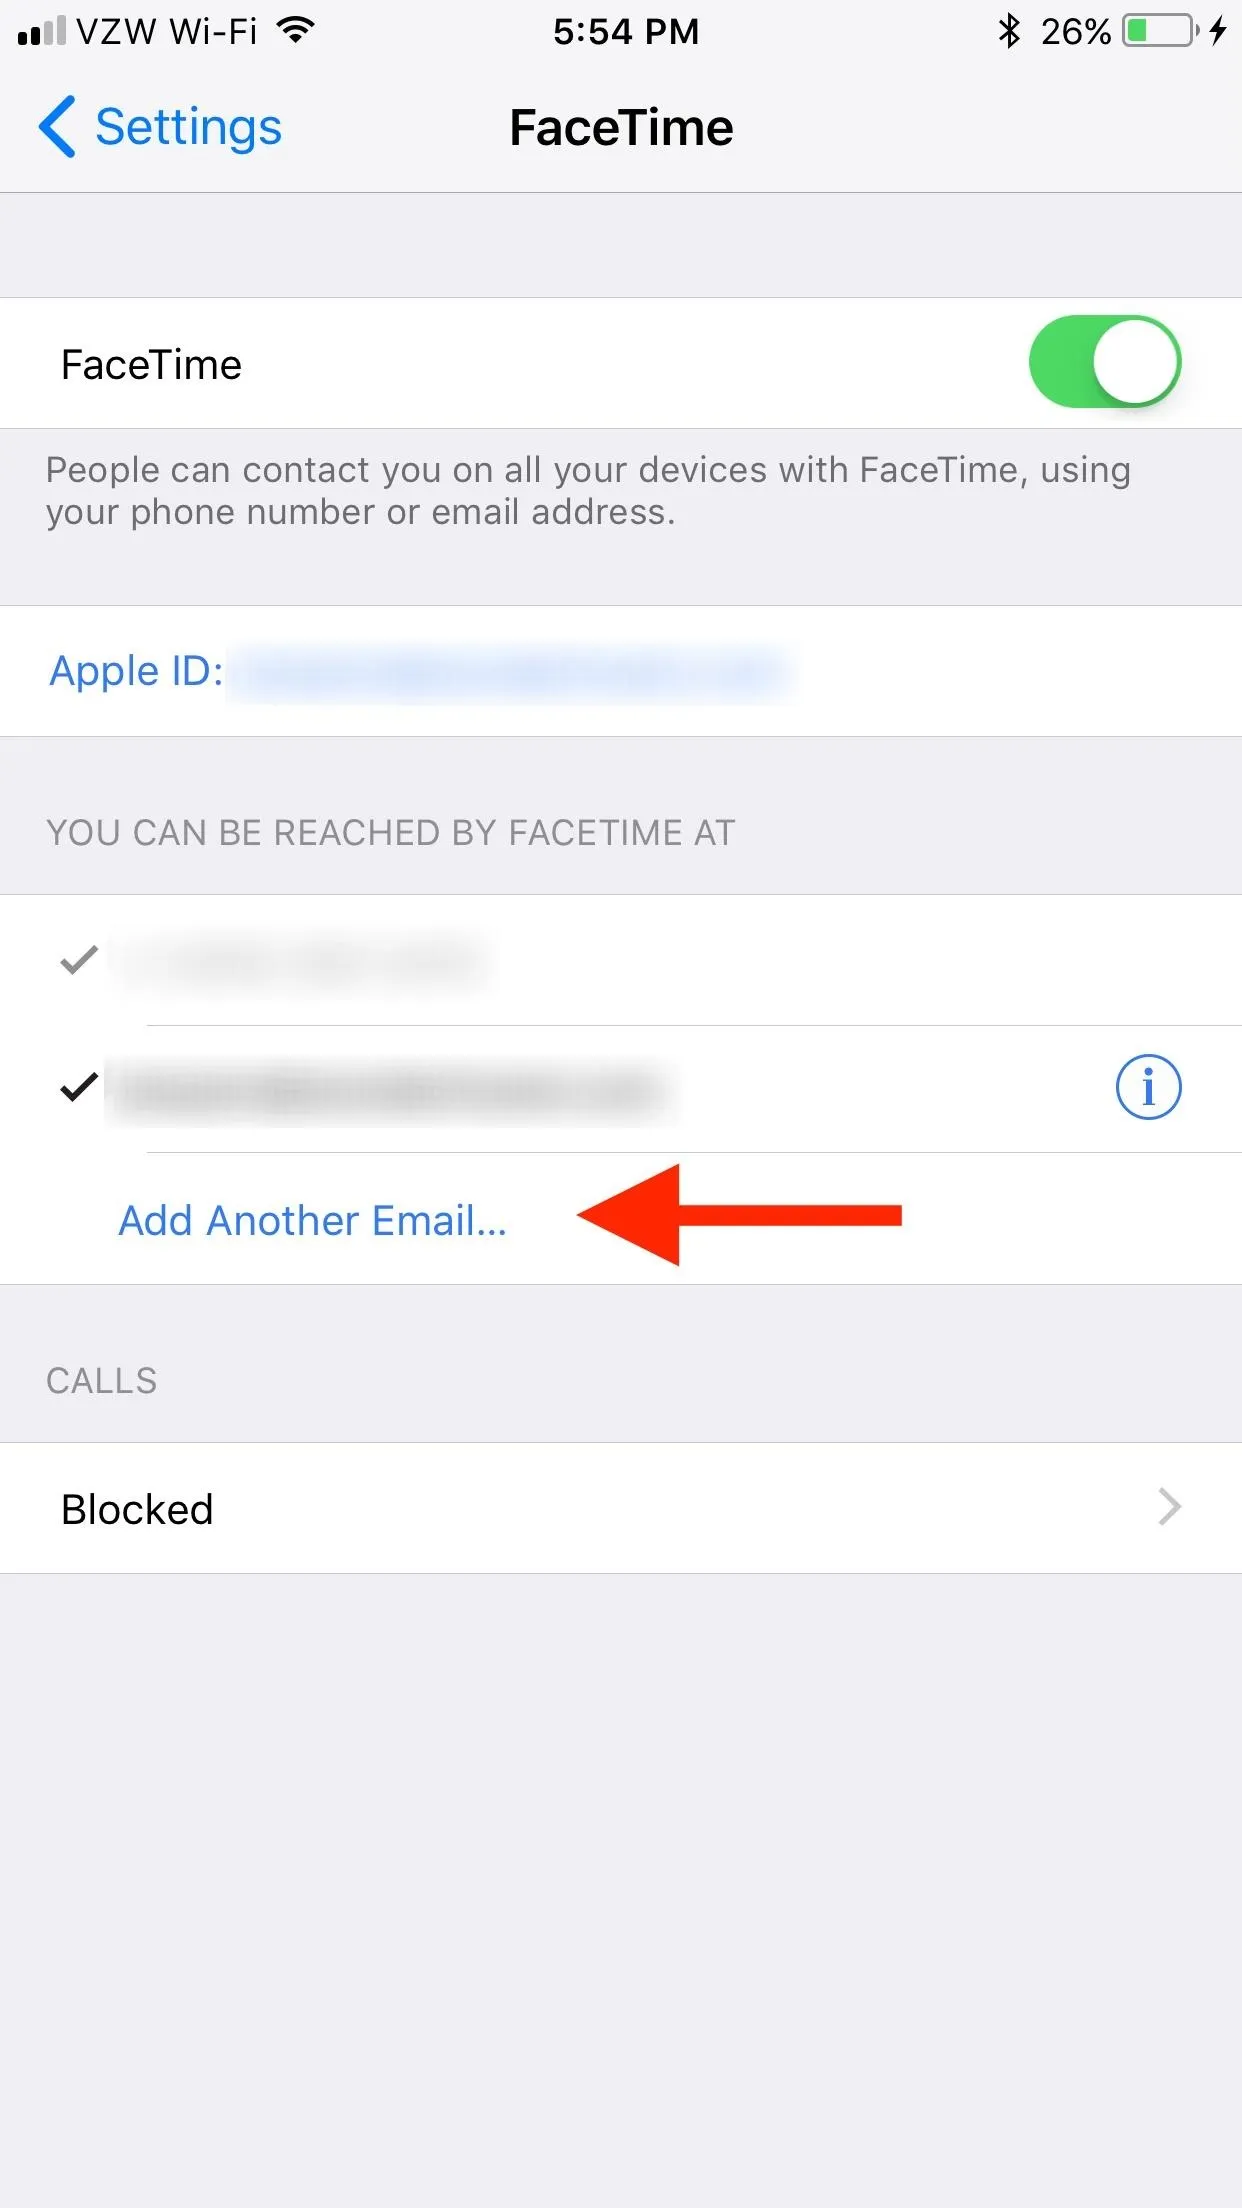
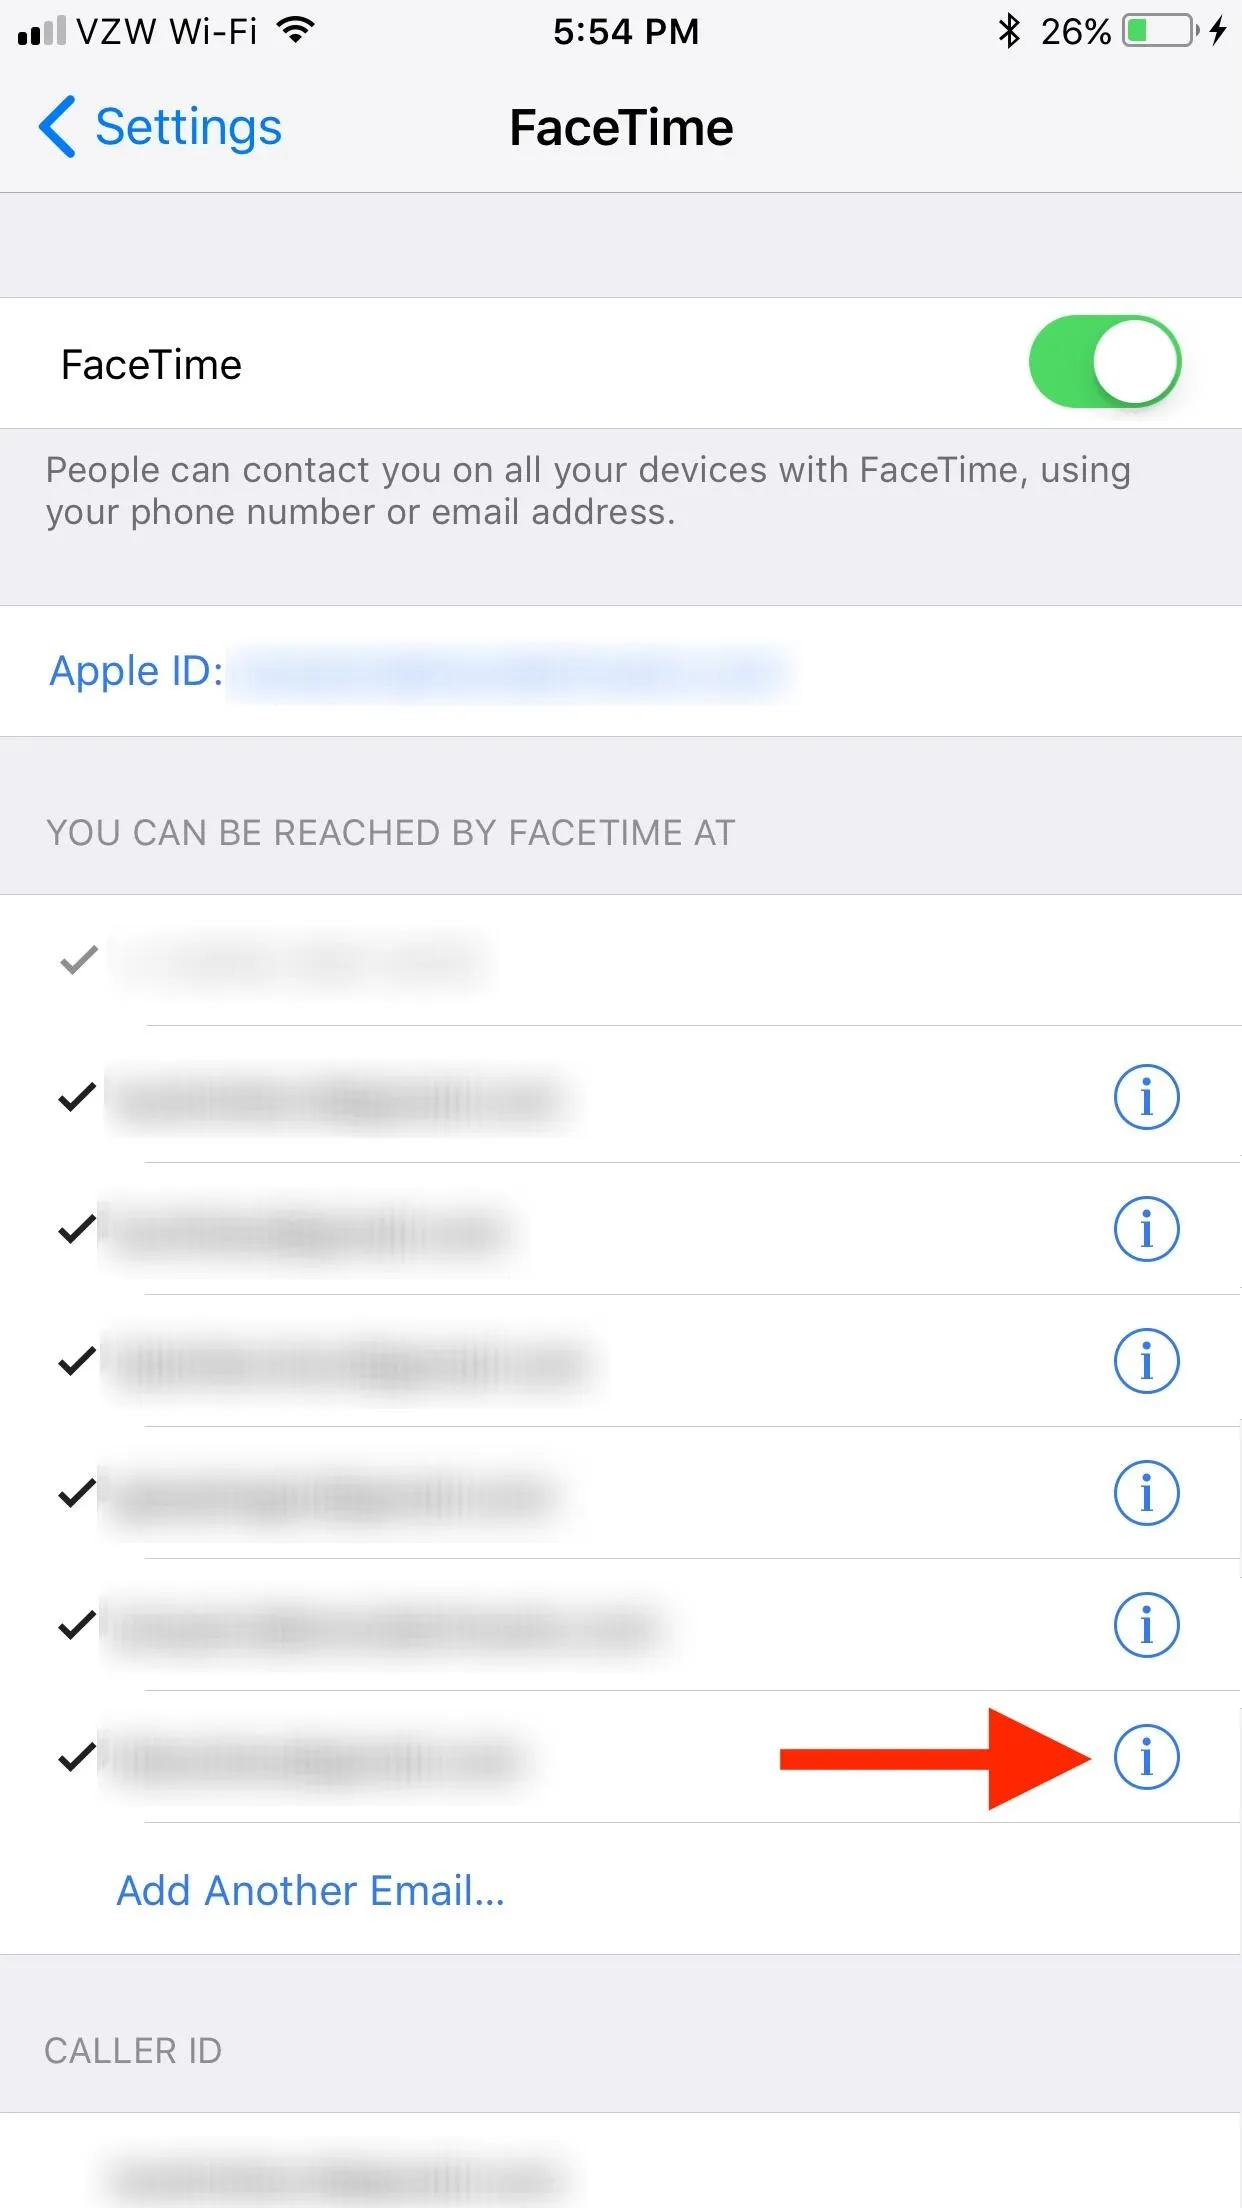
Open up your iPhone's Settings app, then select "FaceTime" from the list. In the FaceTime settings, tap on "Add Another Email" under the You Can Be Reached by FaceTime At section. Input your new email address, then press "Return" on your keyboard. Since this email address has to be associated with your Apple ID account, Apple will send an email to the address for security purposes.

- Don't Miss: How to Take Live Photos of FaceTime Video Calls
When you get the email, tap on "Verify" to open up the verification page in your web browser, then just submit your Apple ID password. Once submitted, the "Verifying" indicator next to the email address in the FaceTime settings will disappear, and the email will be check-marked and will also appear as an option for your FaceTime caller ID.
Important note: If you try to add multiple emails at the same time without verifying each one before adding the next, once you verify one email address, all of the others you entered will disappear on the screen. However, if you verify them with Apple via the emails, they will show up back in the list afterward.
Remove Emails for FaceTime
If you're still running iOS 10.2.1 or lower, it's easier to remove emails from FaceTime where you can be reached, but in iOS 10.3 and higher, it's less convenient.
iOS 10.3 & Higher
If you want to stop using an email address for FaceTime in iOS 10.3.x, iOS 11, iOS 12, and iOS 13, you can un-check it in the FaceTime settings. However, you cannot remove the email address from the list here as you could on older iOS versions. You only have the option to remove the email from FaceTime, iMessage, and your Apple ID altogether.
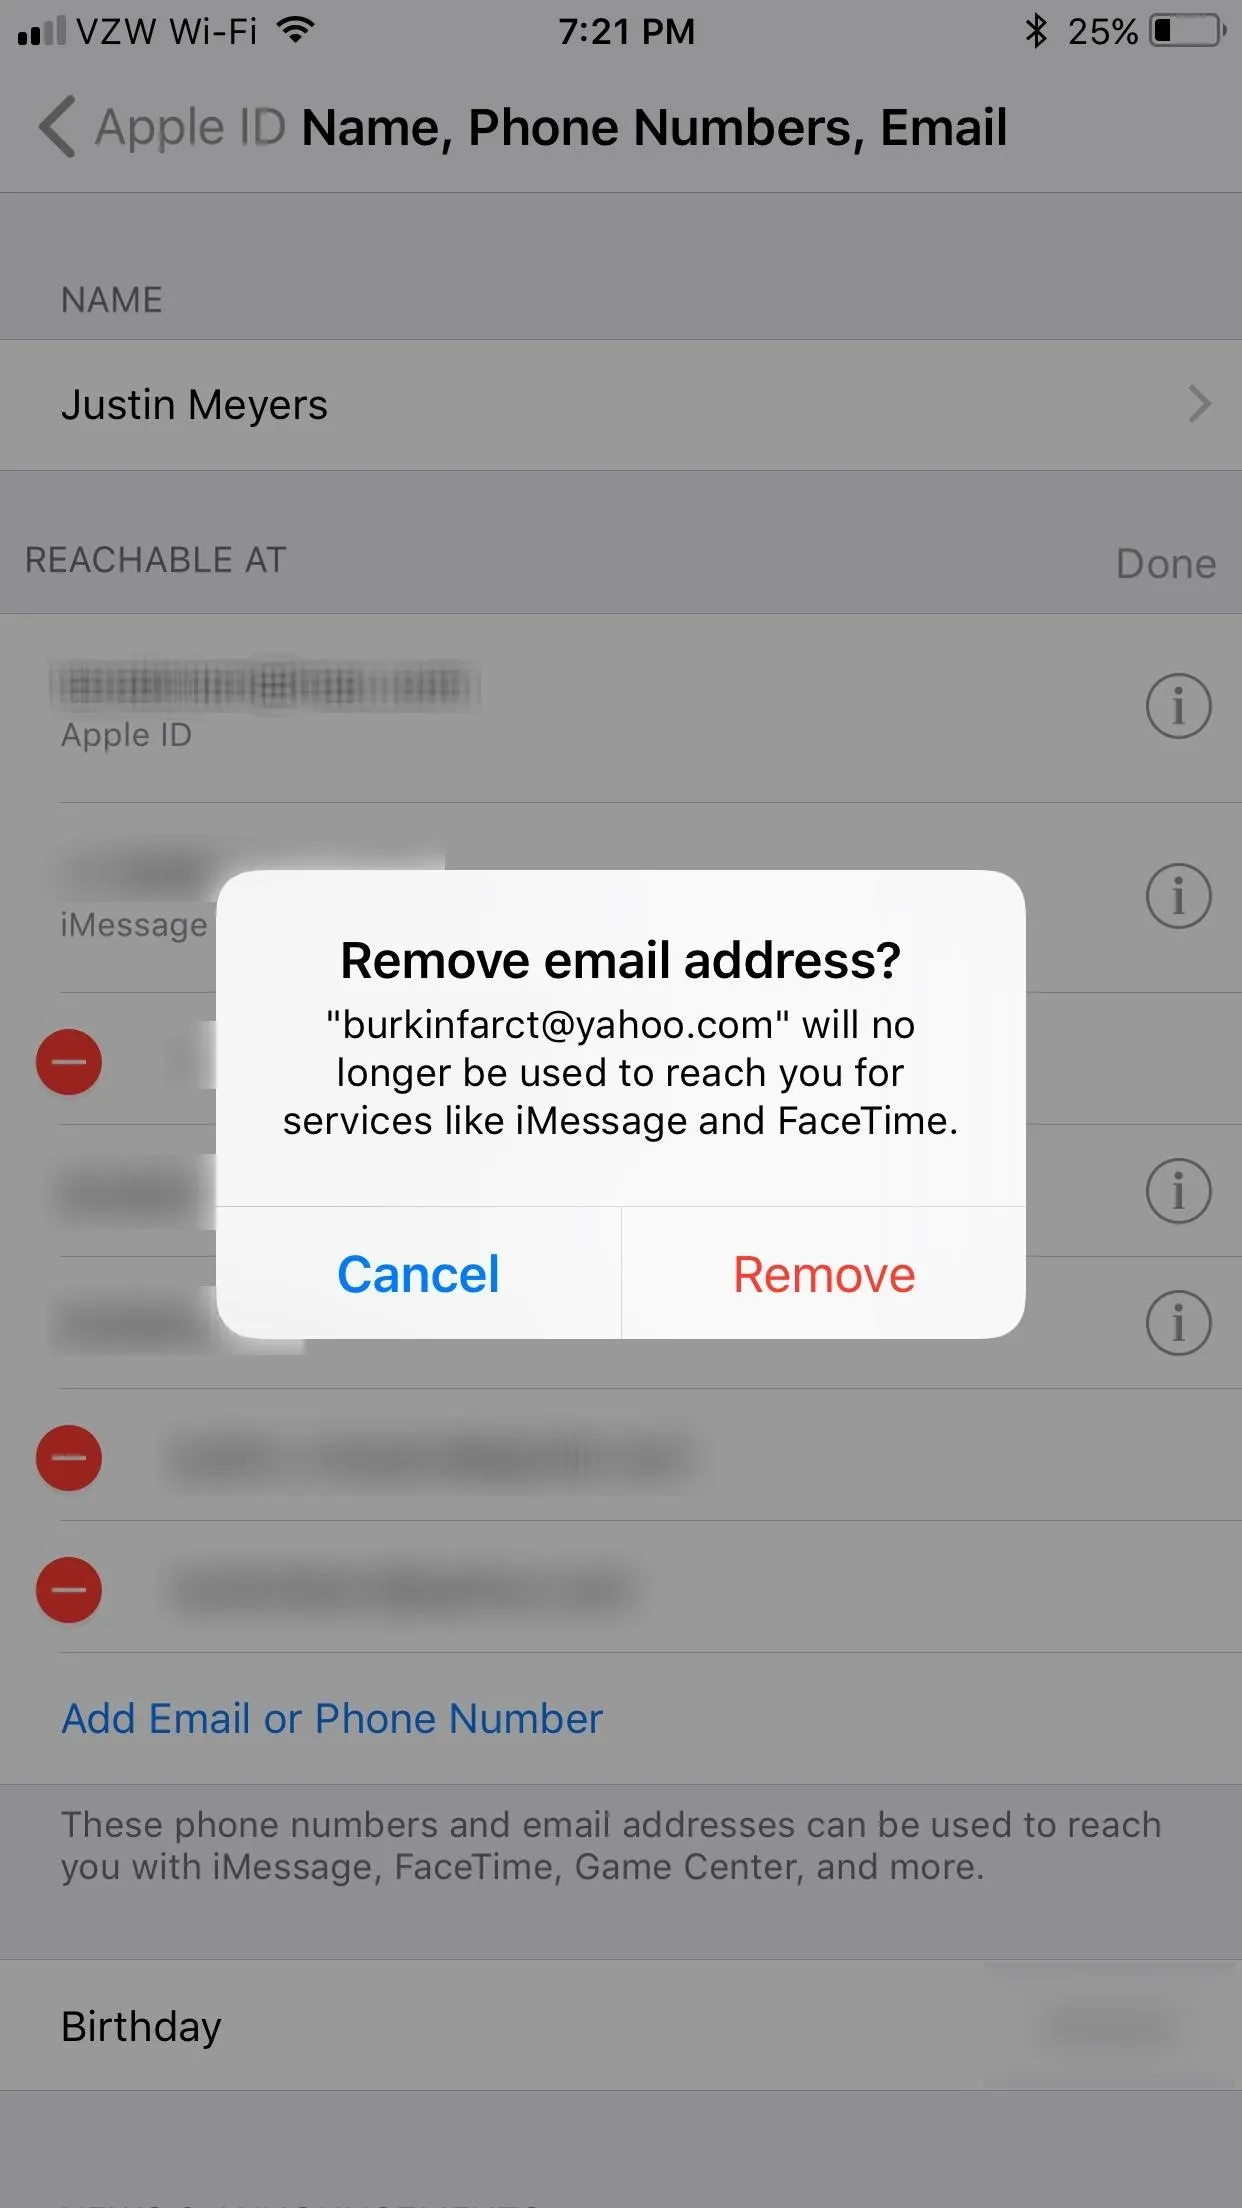
To do so, in the main "Name, Phone Numbers, Email" page highlighted in the above section, tap on "Edit," then tap the minus sign in the red circle to the left of the email you want to remove. Next, select "Delete" on the right and "Remove" on the pop-up to confirm you wish to disassociate it with services like iMessage and FaceTime.
You can't remove specific email addresses entirely from your Apple ID, such as iCloud aliases for @mac.com, @icloud.com, and @me.com. However, you can still un-check them in FaceTime's settings.
While it's all relatively easy to do, it does seem a little more complicated than it needs to be. Hopefully, Apple will streamline the process, which it seems to want to do by removing the ability to delete emails from either FaceTime or iMessage independently when you can just un-check them in those situations where you don't want to remove the email entirely.
iOS 10.2.1 & Under
If you want to get rid of an associated email address so that you can't be contacted with it on FaceTime, you can simply tap on the email address under You Can Be Reached by FaceTime At section to uncheck it. It won't remove it entirely, but will just keep people from contacting you.
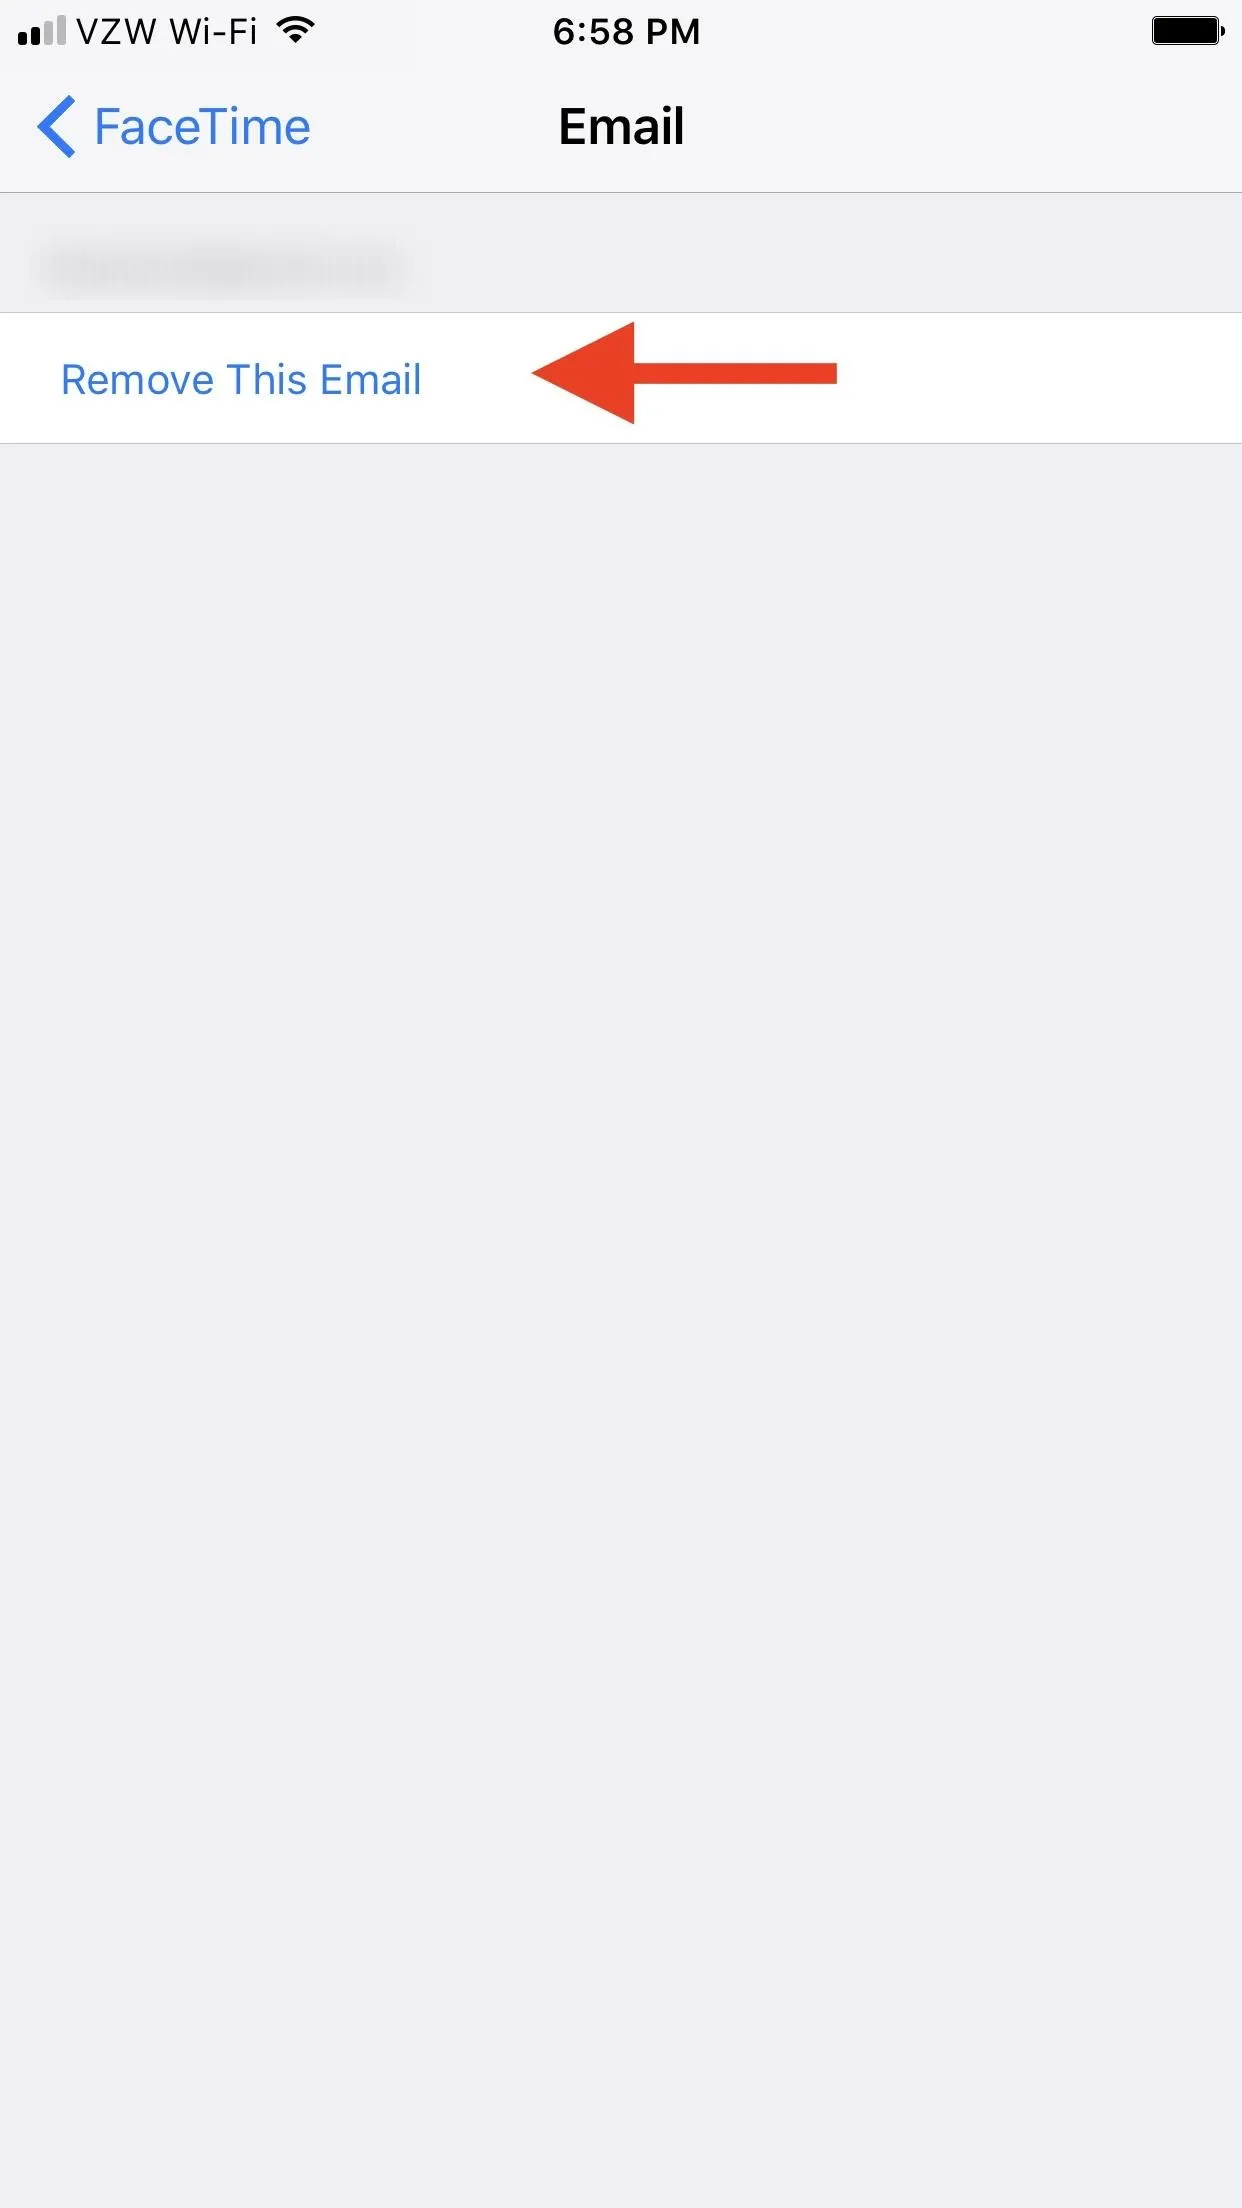
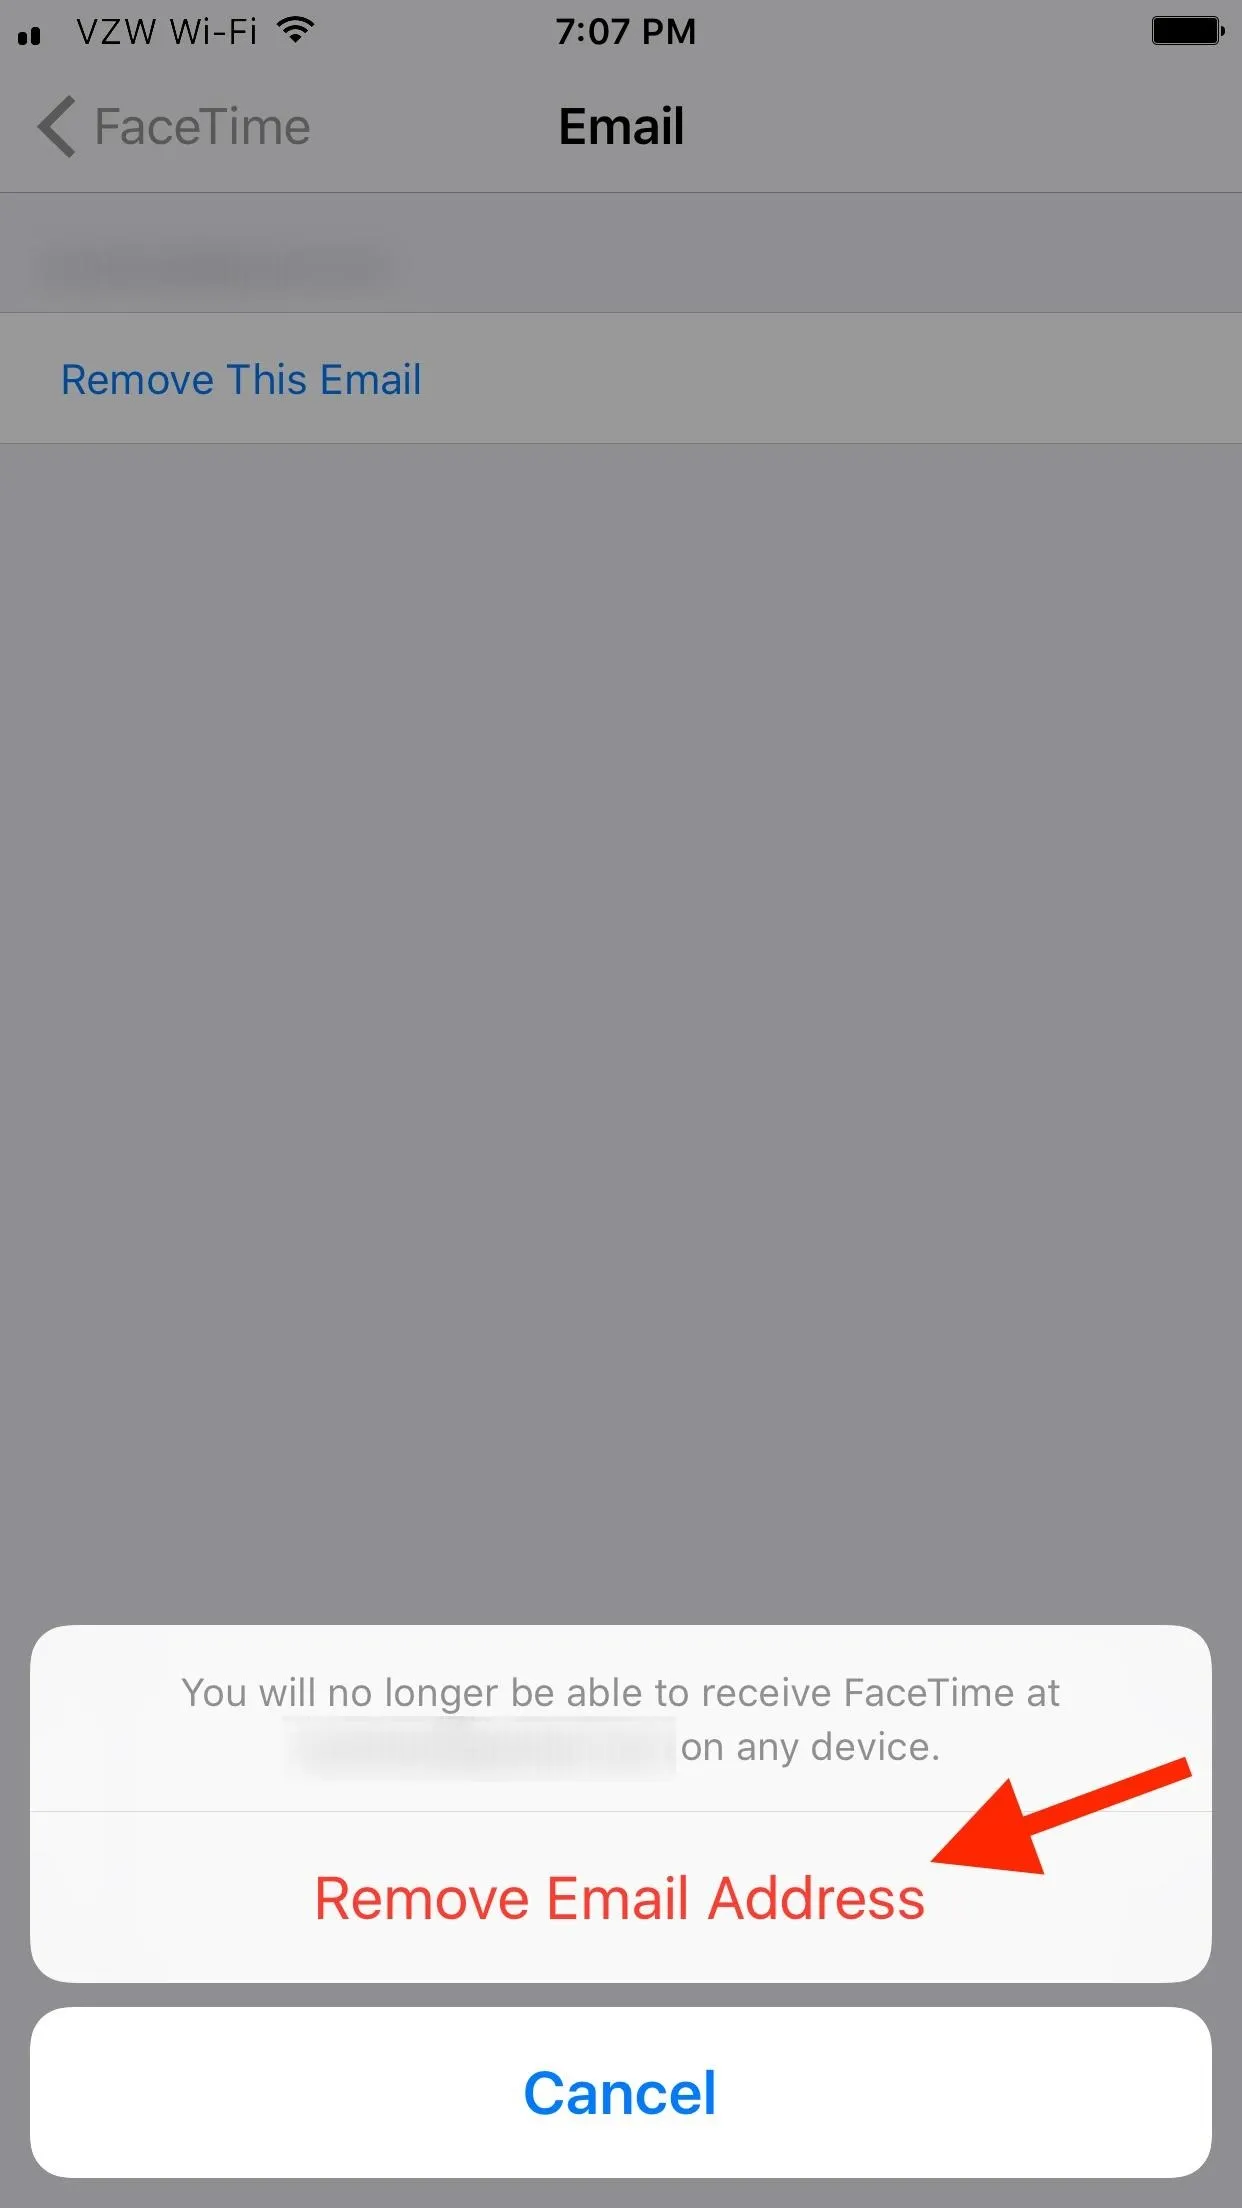
To remove it altogether, tap on the "i" (info) button next to it, then select "Remove This Email." After that, confirm by selecting "Remove Email Address." Just note that this only removes the email address from FaceTime, and it will still be listed as an option for iMessage and will still be associated with your Apple ID. To remove it entirely from your Apple ID, see the last section below.
Again, some email addresses you can't remove this way, such as alternative iCloud accounts for @mac.com, @icloud.com, and @me.com. However, you can still un-check them so FaceTime doesn't use them.
Cover photo and screenshots by Justin Meyers/Gadget Hacks


Comments
Be the first, drop a comment!