


Using either iMessages or FaceTime on the iPhone is a great alternative for coworkers to stay in touch in the event that messaging services like Slack go down. They're also a handy means of communicating between buyers and sellers, as it provides a more intimate way of either checking out or showcasing a product. But you're not always going to want to give out your real number to everyone.
As great as using iMessage and FaceTime for business purposes are, many will no doubt raise concerns about privacy. Sharing your phone number or primary iCloud email with colleagues, buyers, or sellers is less than ideal, as it's private in nature and is only usually shared among friends and family.
Fortunately, iOS 11 has a simple solution to this problem; It lets you add additional email accounts such as a work-related addresses or ones linked to either eBay or Craigslist, to mask your primary iCloud account. Though similar to iOS 10, the new method varies slightly in where to access the setting for adding accounts.
Add Additional Emails for FaceTime & Messages
Before we get the ball rolling, it's important to note that you can't add additional iCloud accounts, as doing so will yield an "Invalid" result upon entering, so only email accounts not linked to Apple and iCloud can be added on.
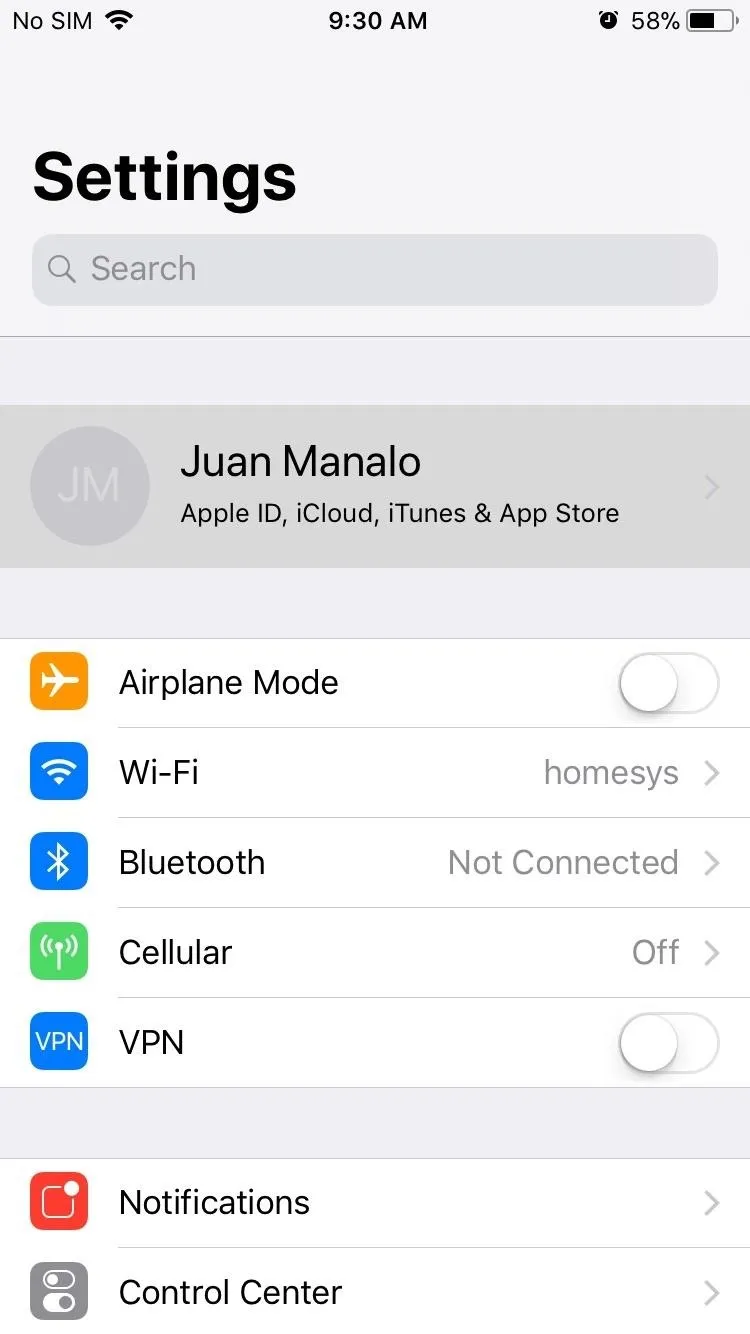
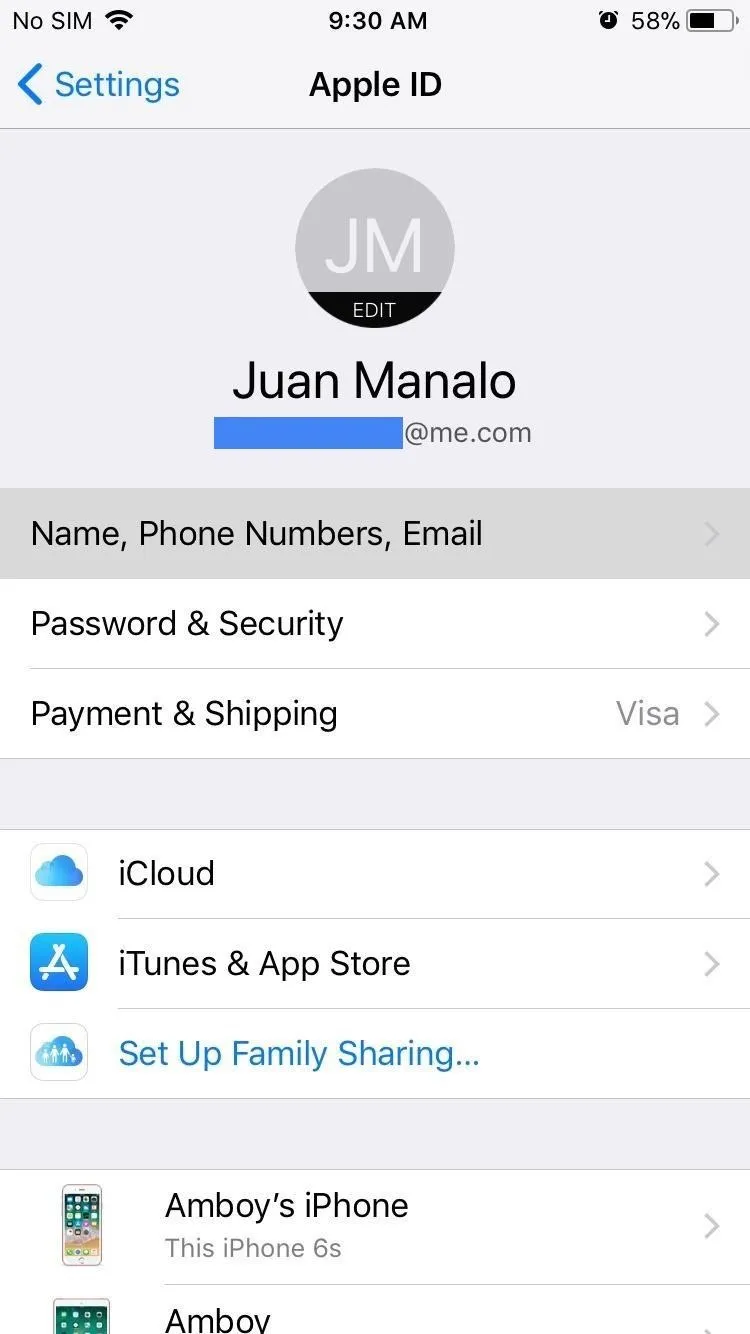
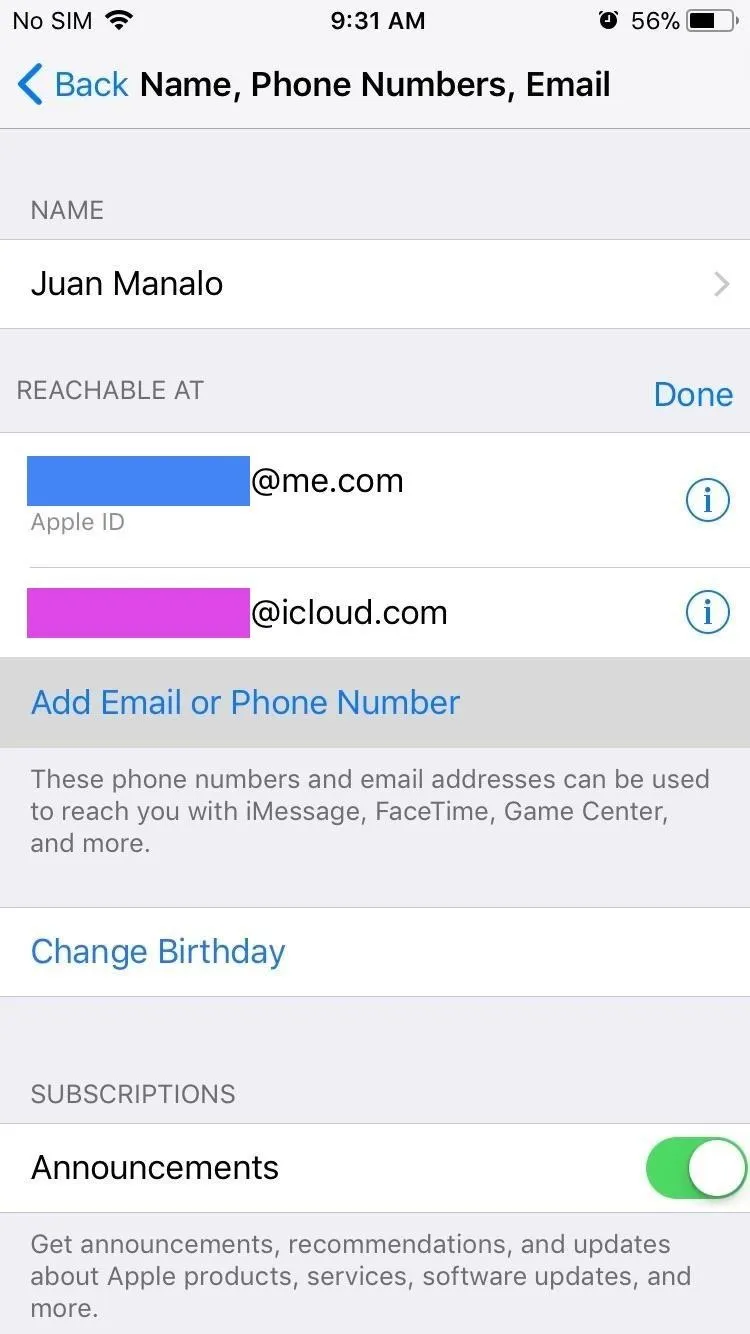
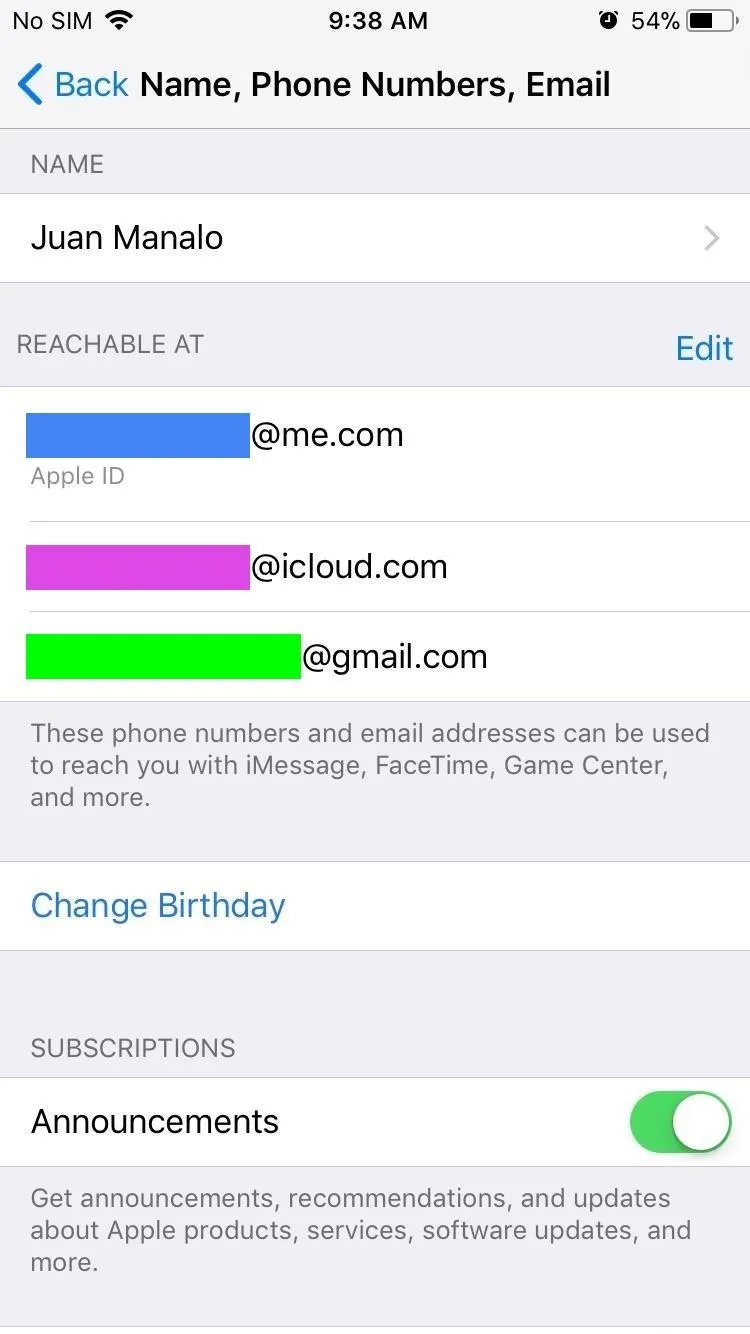
That said, open the Settings app to get started. Tap on your name at the top, then select "Name, Phone Numbers, Email" once inside your Apple ID page. You may need to input your Apple ID password to continue. From there, tap on "Edit" next to Reachable At.
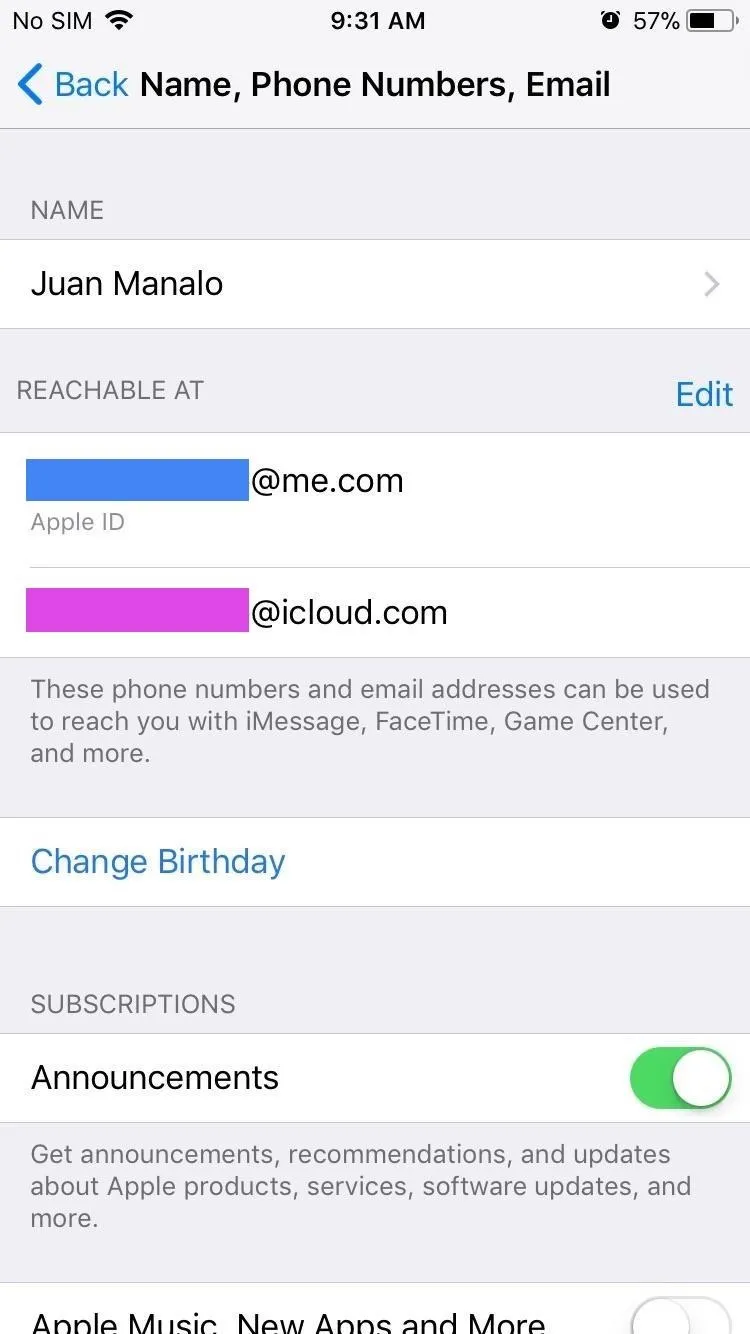
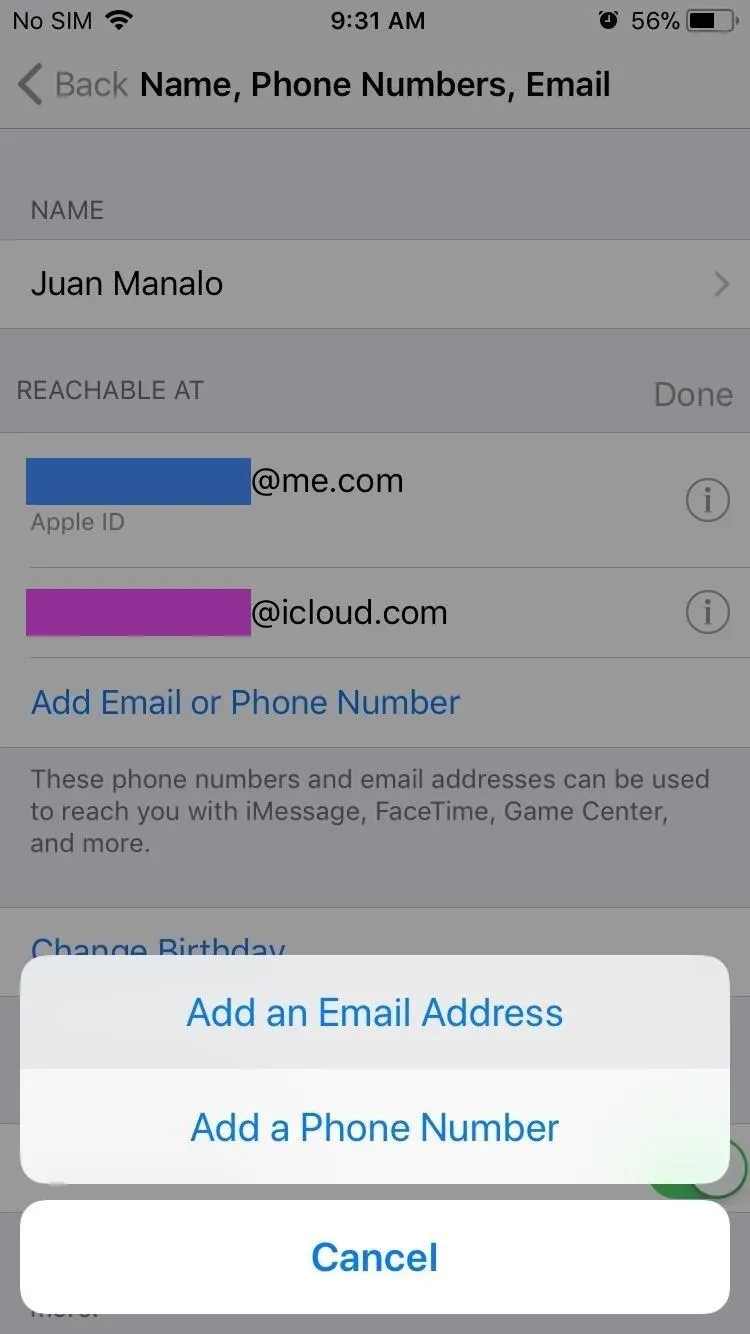
Once you've tapped on "Edit," an option to "Add Email or Phone Number" will now appear right under your primary iCloud accounts, so go ahead and select it and tap on "Add an Email Address" once the confirmation prompt pops up from the bottom.
Verify Email Accounts
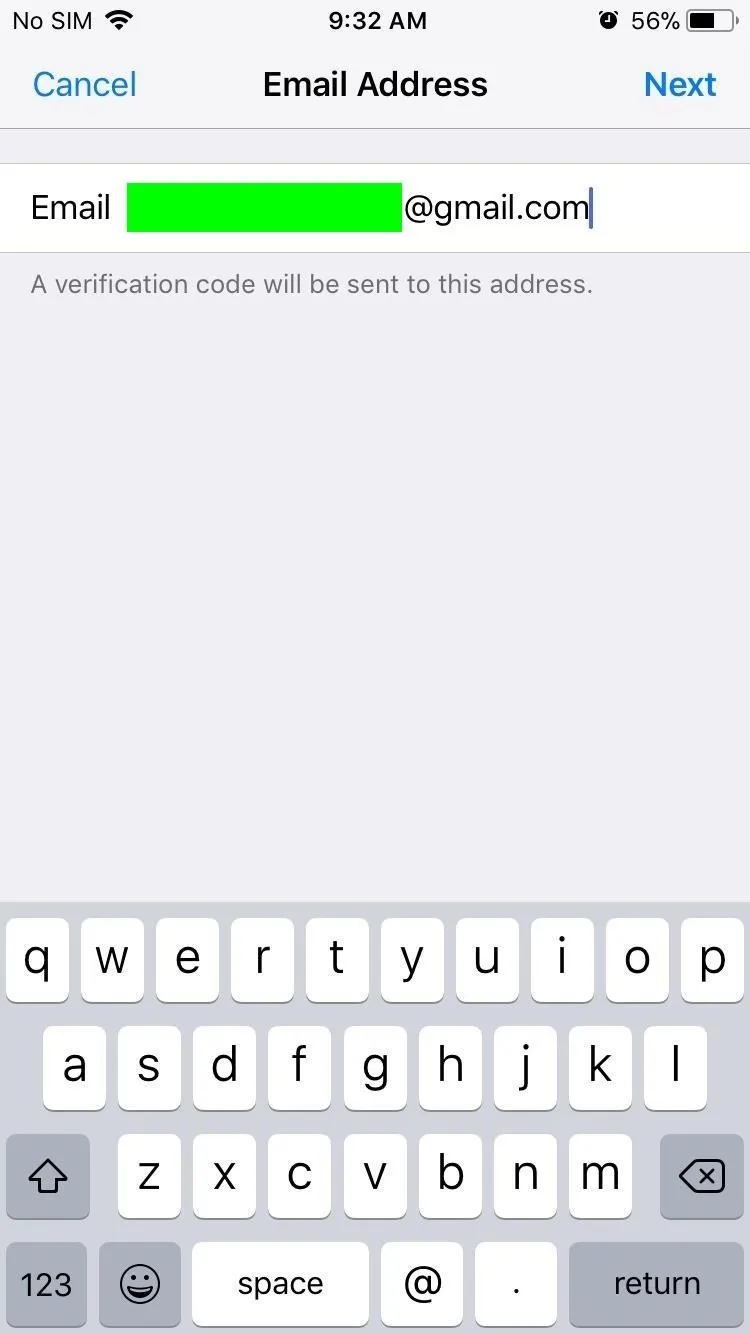
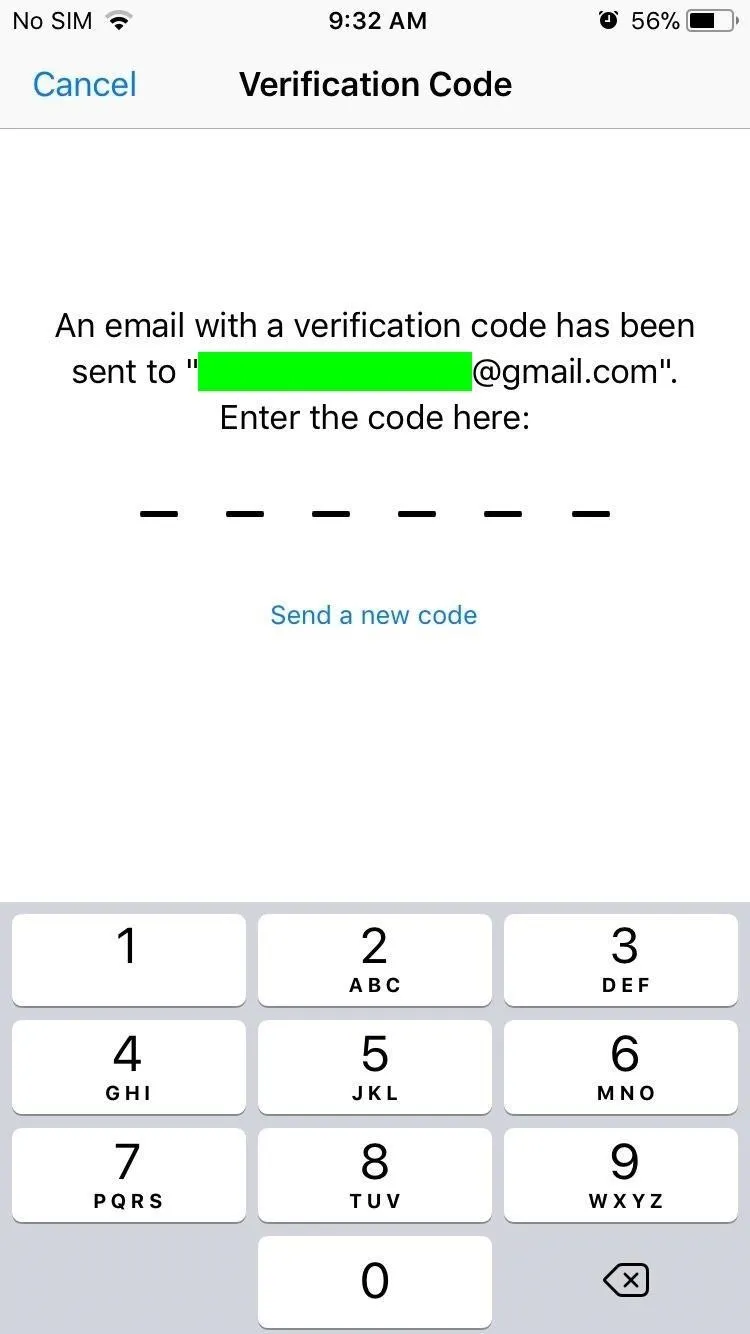
Now, add the email address you wish to use with both Facetime and Messages and tap on "Next" to proceed. For security purposes, Apple will send a verification code to the address you provided, so check your email and input the six-digit code once you've retrieved it. After your email's been verified, tap on "Yes" to confirm its addition from the prompt that appears.
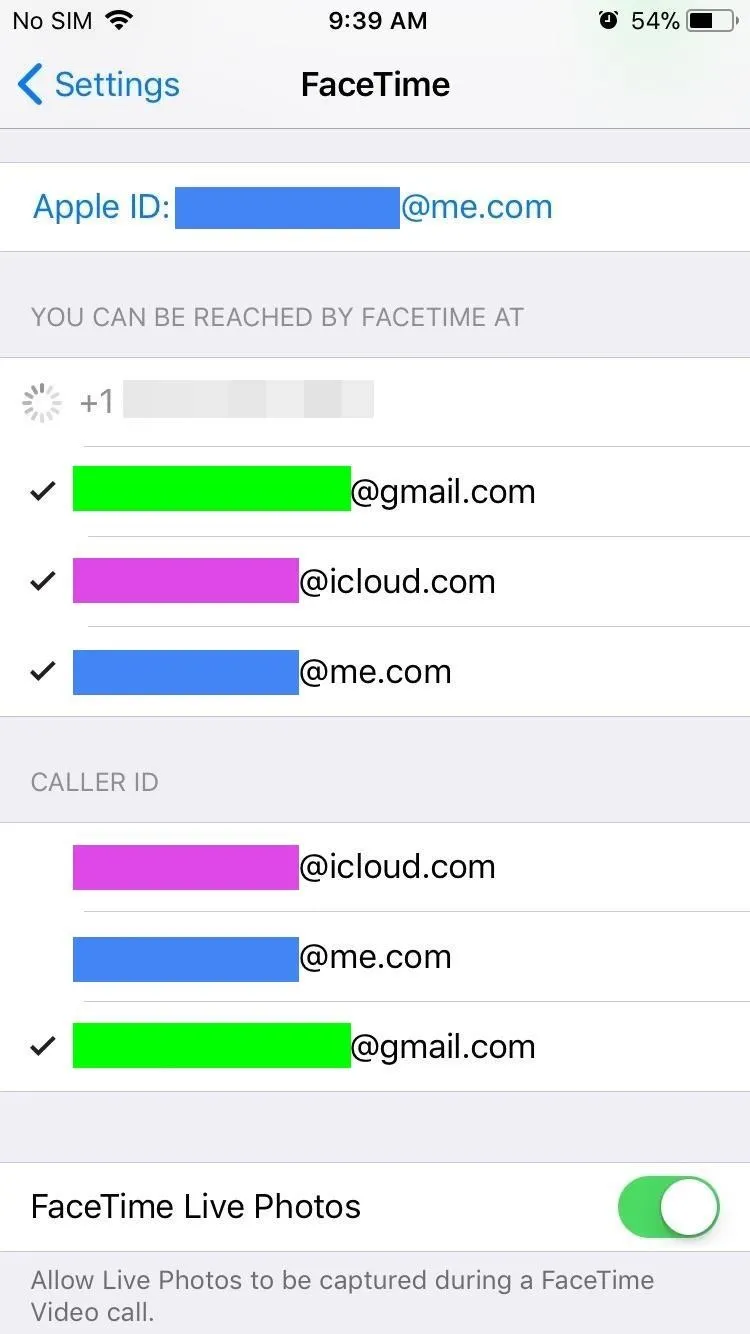
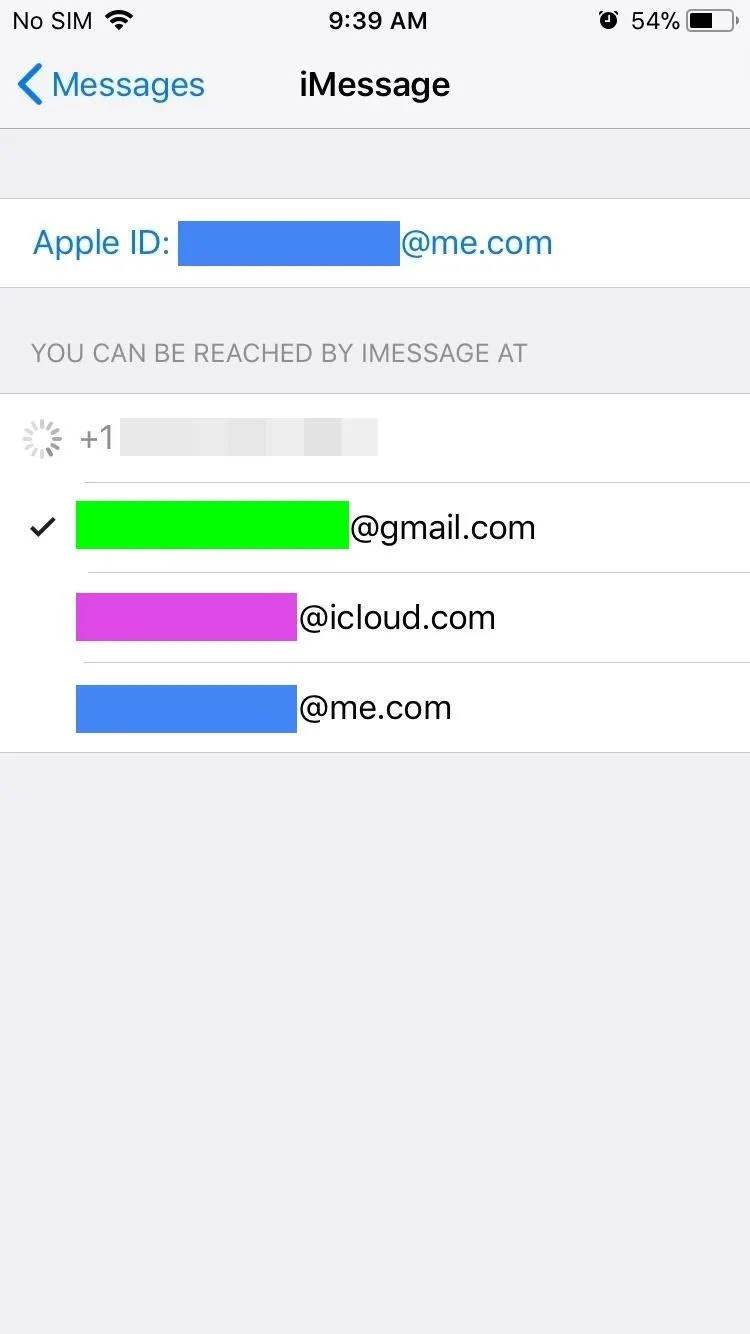
If you only wish to use the email address for FaceTime, select "No" from the prompt, then go to "FaceTime" inside Settings and tap on the email address you just added to use it. If you only want it for iMessage, select "No" from the prompt, then go to "Messages" inside Settings, tap on "Send & Receive," then tap on the email address you just added.

Once you've added your new email address, people will now be able to contact you via FaceTime and iMessage using the new address provided. You can also have your new account show up as a Caller ID in FaceTime simply by tapping on it from within the FaceTime settings.
Please note that while there's also an option to enter phone numbers as seen in Step 1, they can only be the phone number associated with your SIM card. We'll be sure to update this guide if this ever changes.
- Follow Gadget Hacks on Facebook, Twitter, Google+, YouTube, and Instagram
- Follow WonderHowTo on Facebook, Twitter, Pinterest, and Google+
Cover photo and screenshots by Amboy Manalo/Gadget Hacks


Comments
Be the first, drop a comment!