


The Home button on an iPhone does a lot. That's not necessarily news for anyone who's ever owned an iPhone with a Home button, but what you might not know is that it's capable of so much beyond the standard everyday functions. So if you have an iPhone 7, 8, or the new SE model running iOS 13 or later, keep reading to learn about 17 secret Home button tricks you're missing out on.
Common tasks the Home button helps with include waking the device, opening the app switcher, returning to the home screen, using Reachability, and activating Siri. To perform those functions, you click the Home button once, click it twice, click it once, tap it lightly twice, and long-press it, respectively. But everyone knows those.
What you're about to see below are tips beyond the basics, like how your Home button can help you control your iPhone with just your keyboard, lower screen brightness beyond the minimum, and even clear your device's random-access memory for a performance boost. Again, the tips below assume you're running iOS 13 or later, but many will also work on older iOS versions.
1. Clear Your iPhone's RAM
It might be surprising to learn that you can actually clear the RAM on an iOS device. Apple doesn't advertise the feature, not even to developers, which makes it relatively unknown. Still, it's real and can be done using, among other functions, the Home button on your iPhone.
When would you want to clear your iPhone's RAM? Well, you likely wouldn't want to do it often. Apple ensures that iOS ships with excellent RAM management, so most of the time, the system can manage just fine on its own. However, if you run into an app that starts eating up too much RAM, iOS might not be able to function correctly. It's at a time like that when you'd want to try clearing the RAM to see if it was poor RAM management throwing your iPhone for a loop.
- See How It's Done: Clear the RAM on Your iPhone with This Trick
2. Type to Siri Instead of Talk
When you press-and-hold the Home button, you summon Siri. While there are other ways to ask Siri, the long-press gesture has been around since Siri was a thing. However, did you know that you don't actually need to speak to Siri to use the virtual assistant? Instead, you can use the Home button to prompt "Type to Siri," which allows you to ask Siri whatever you want silently.
If you didn't know your Home button — or iPhone, for that matter — had the feature, that's not your fault. Type to Siri is a bit hidden, and even though it's a great option, Apple really only promotes the default "Hey Siri" and Home button long-press as the primary Siri activators.
- How to Set It Up: Use Type to Siri on Your iPhone So You Don't Have to Talk


Tip: You Can Also Just Disconnect Siri from the Home Button
With the iPhone 7, and the advent of the capacitive Home button, triggering Siri accidentally became much harder to do. Still, that doesn't mean it's not possible, and if you have an older iPhone with a mechanical Home button, the problem still exists.
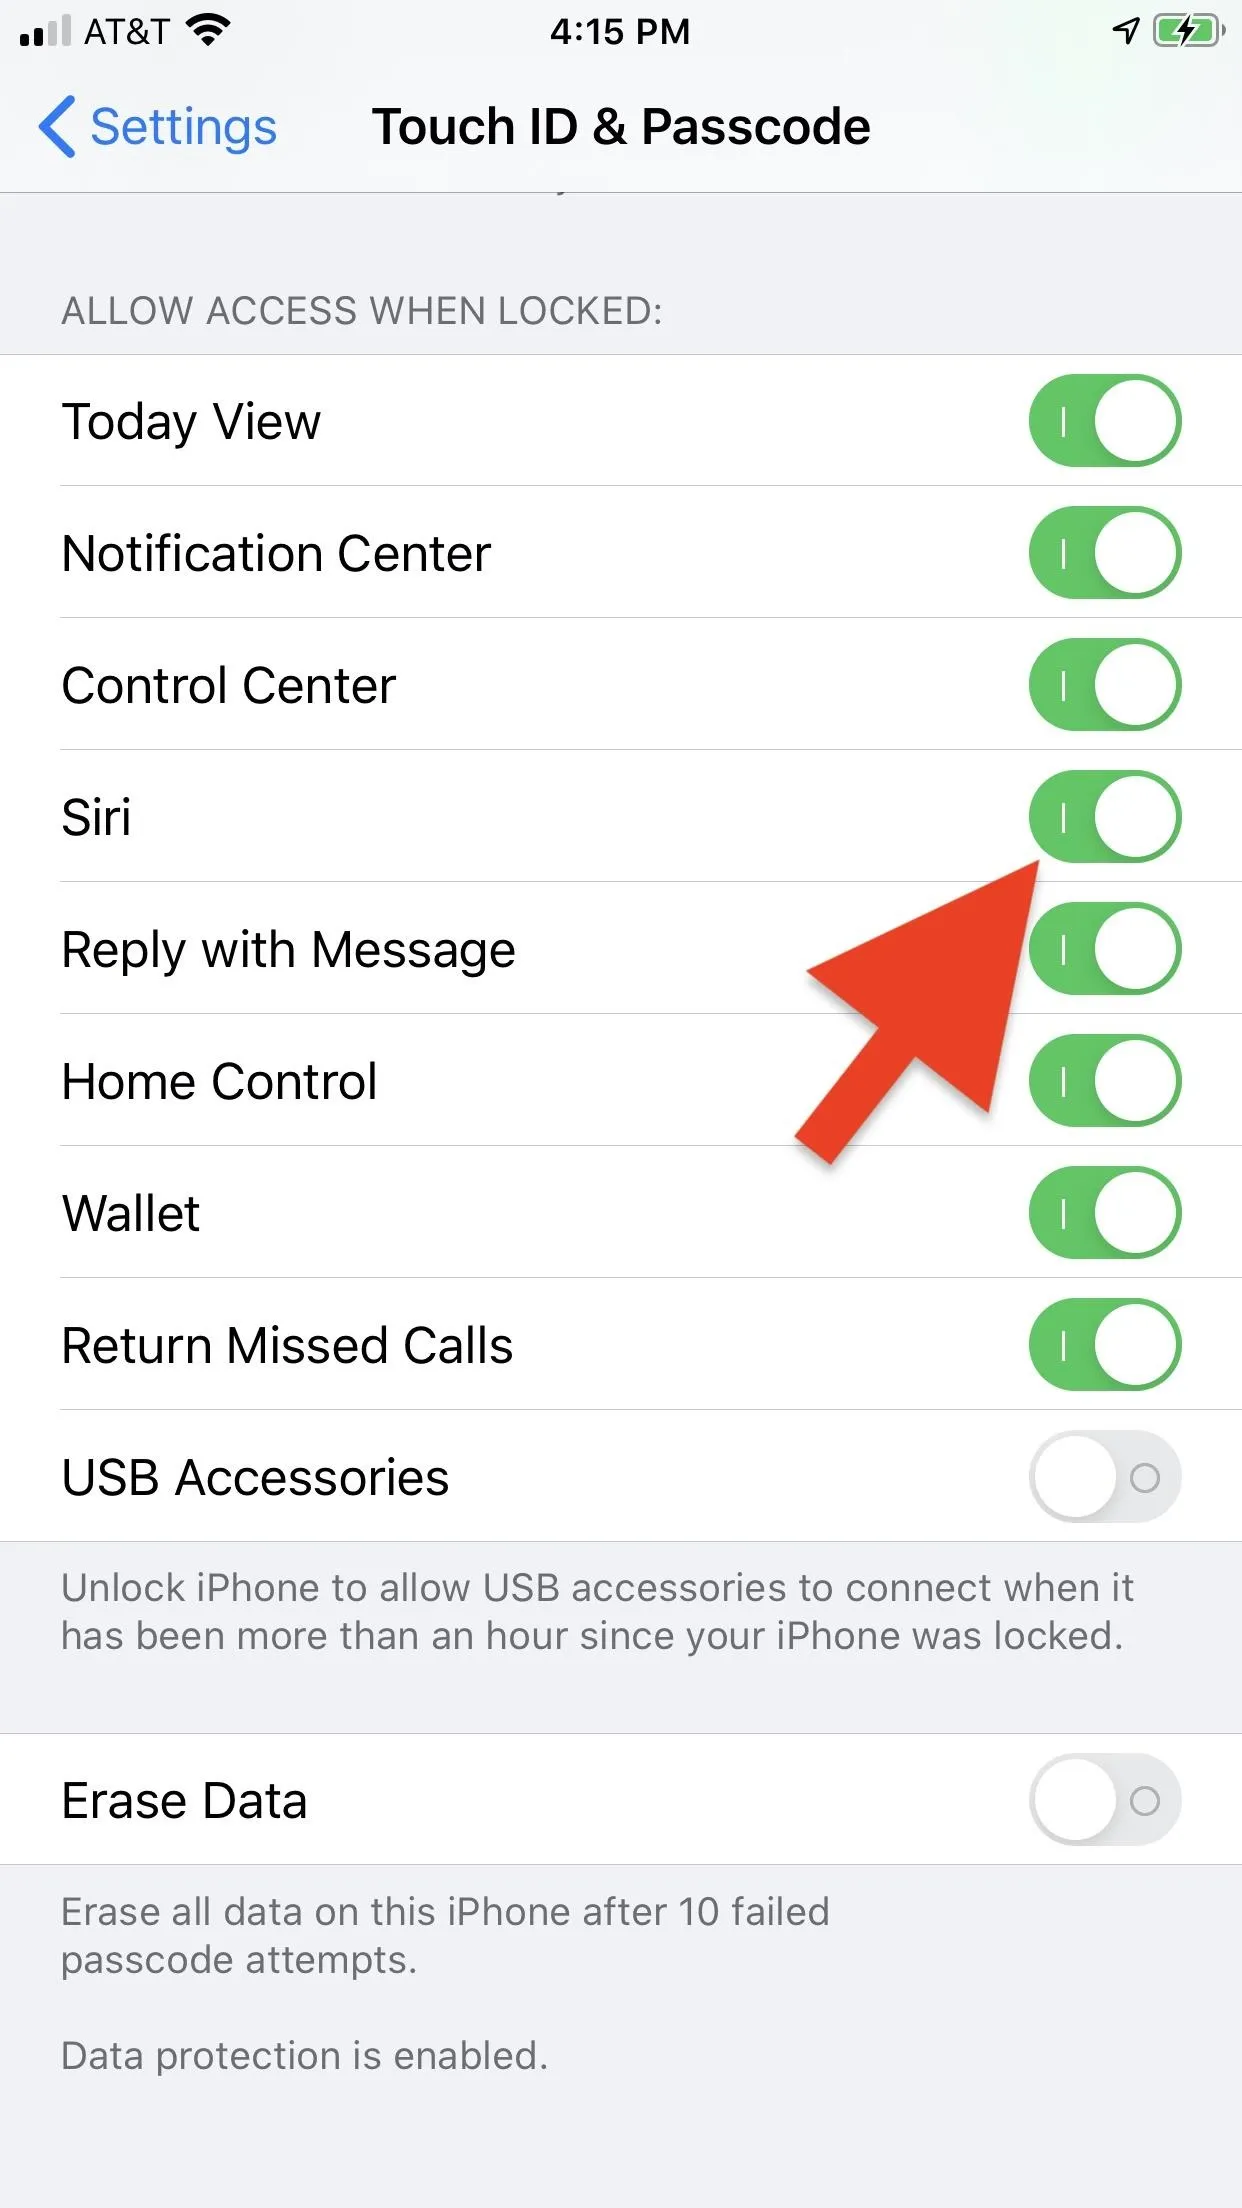
To prevent accidental Siri activation on the lock screen, go to Touch ID & Passcode (or just Passcode) in your Settings menu, then input your passcode to continue. Once in, scroll down and toggle off "Siri" under Allow Access When Locked. You can also accomplish the same feat by going to Settings –> Siri & Search, then disabling the "Allow Siri When Locked" option.
- More Info Here: How to Disable Siri on Your iPhone's Lock Screen
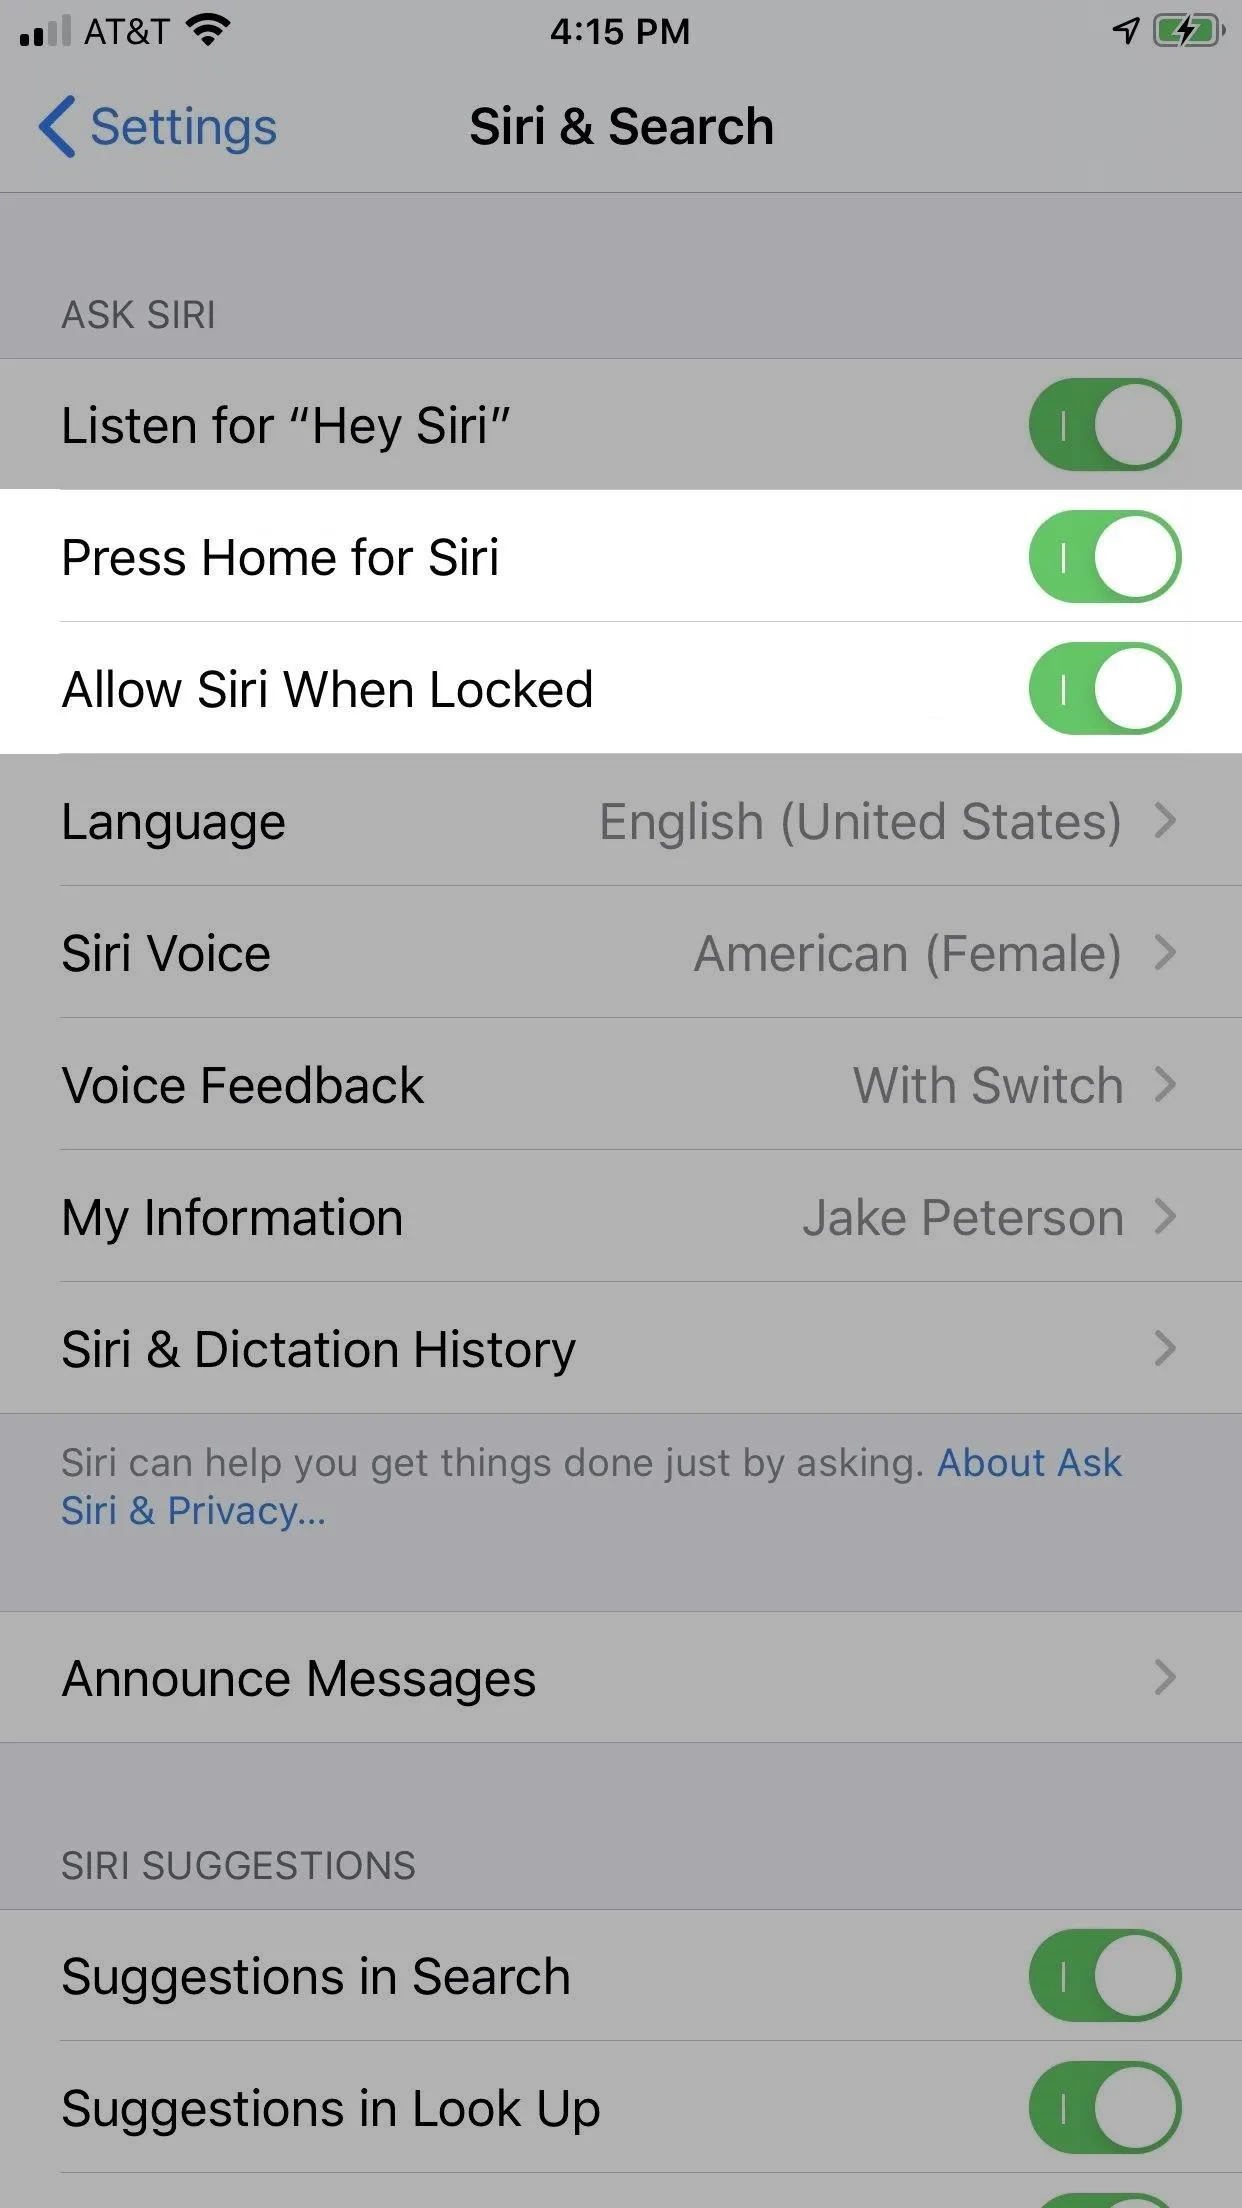
If you want to remove Siri from the Home button altogether, head to Settings –> Siri & Search, then toggle off "Press Home for Siri." If you really want Siri gone, also toggling off "Listen for 'Hey Siri'" will do the trick.
- Take the Plunge: How to Turn Off Siri on Your iPhone Completely
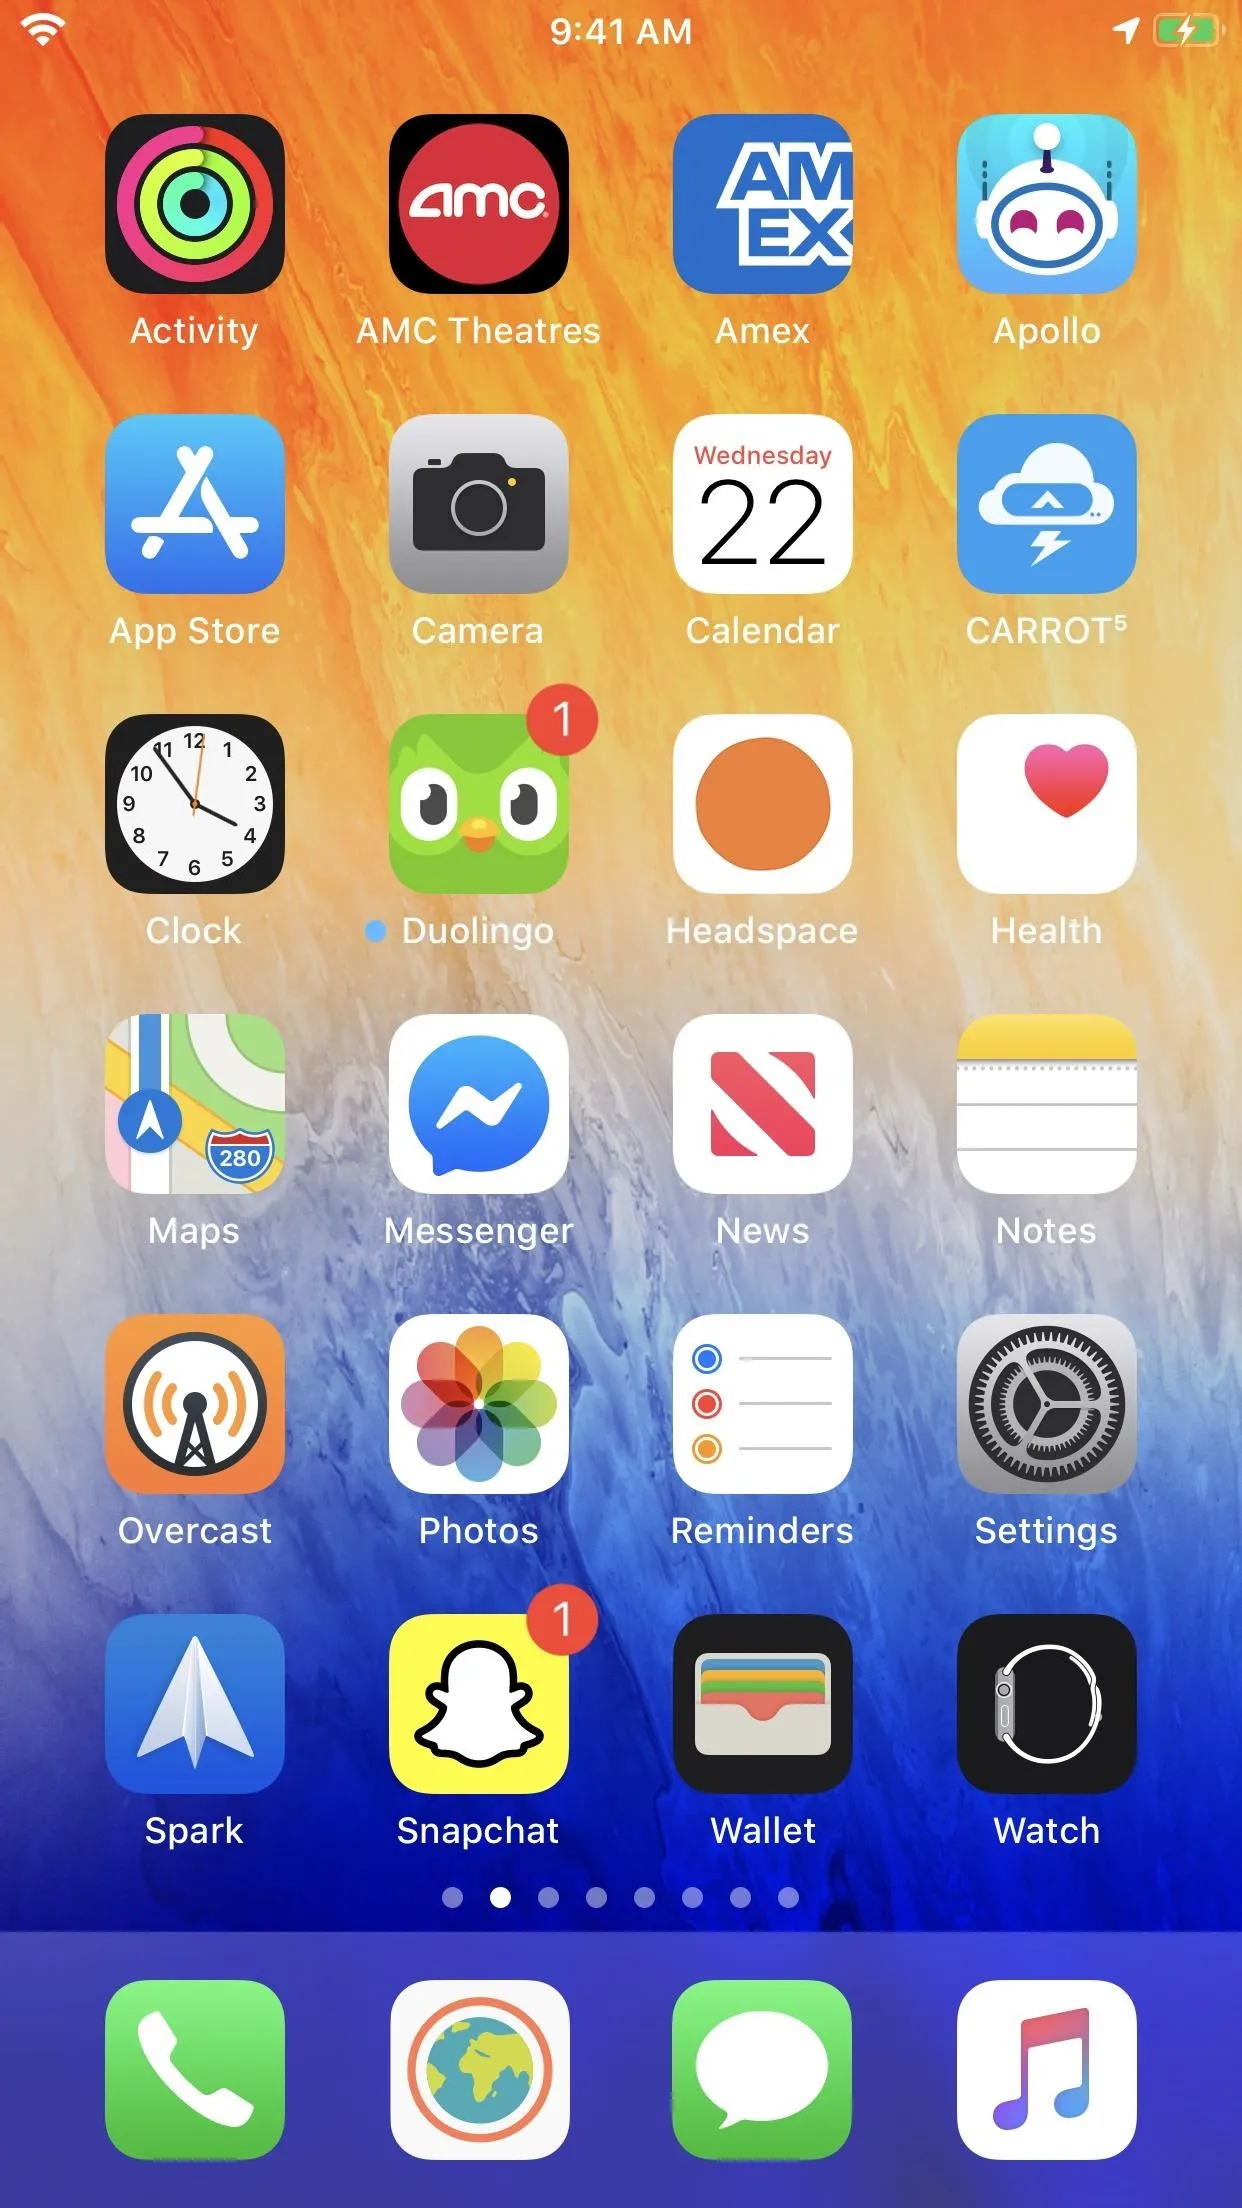
3. Jump Back to the First Home Screen Page
If your home screen has multiple pages of apps, it might seem like a chore swiping through them all of them just to get back to the first page. That's not necessary, however, as your iPhone's Home button actually lets you jump right back to the first page, no swiping required. And it's the same thing you would do any time you'd want to go back to your home screen from pretty much anywhere.
- See the Trick: How to Jump Back to the First Page of the Home Screen
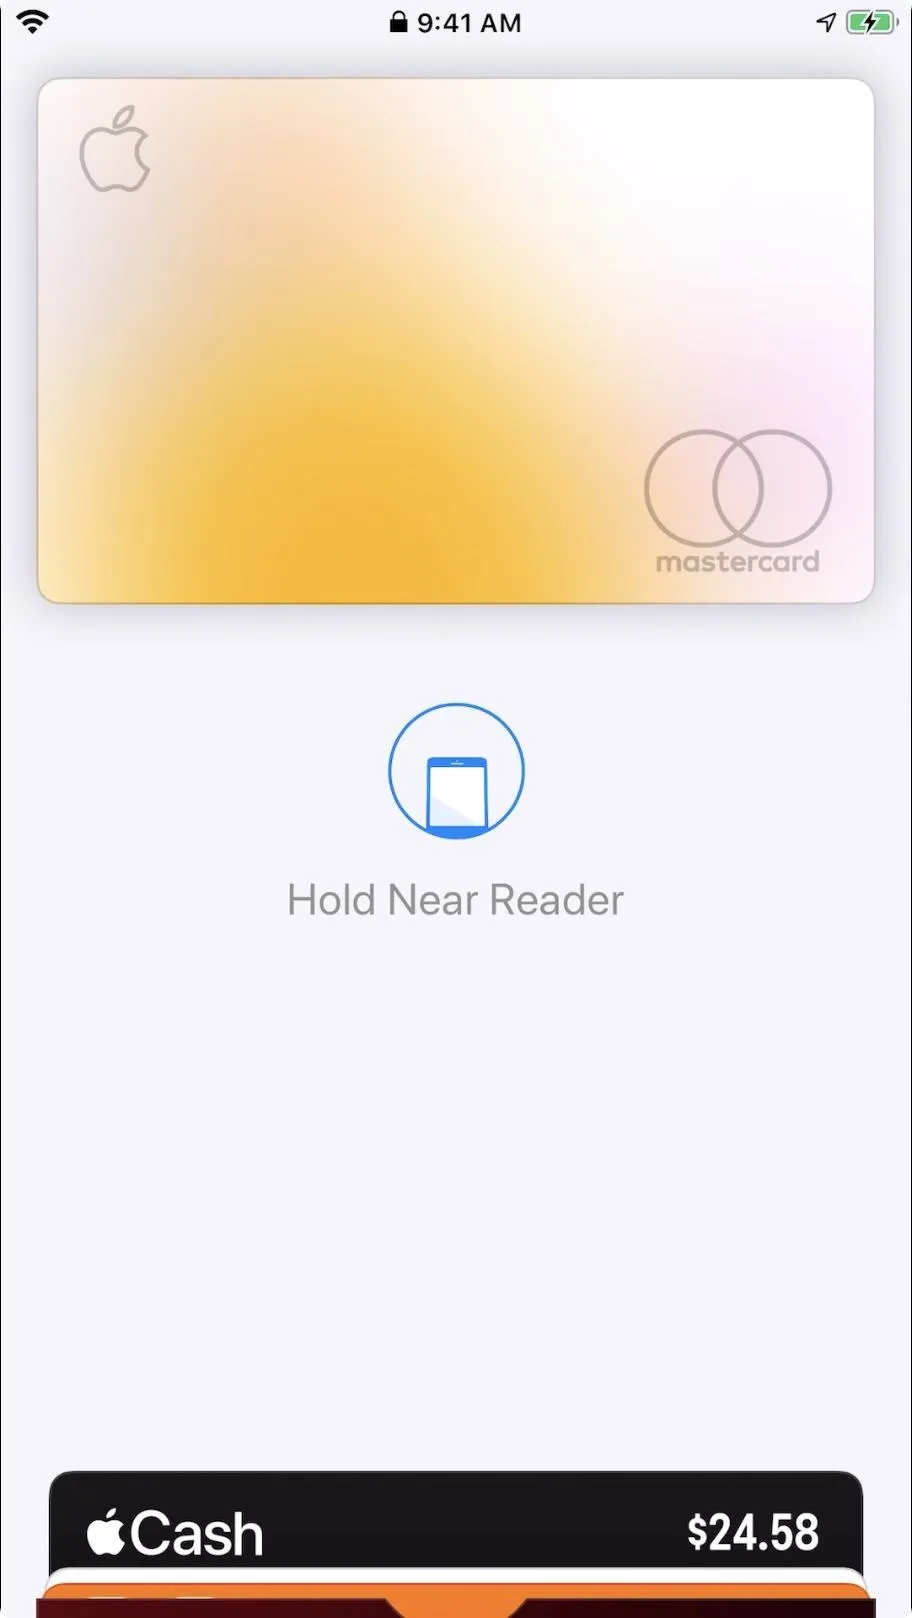
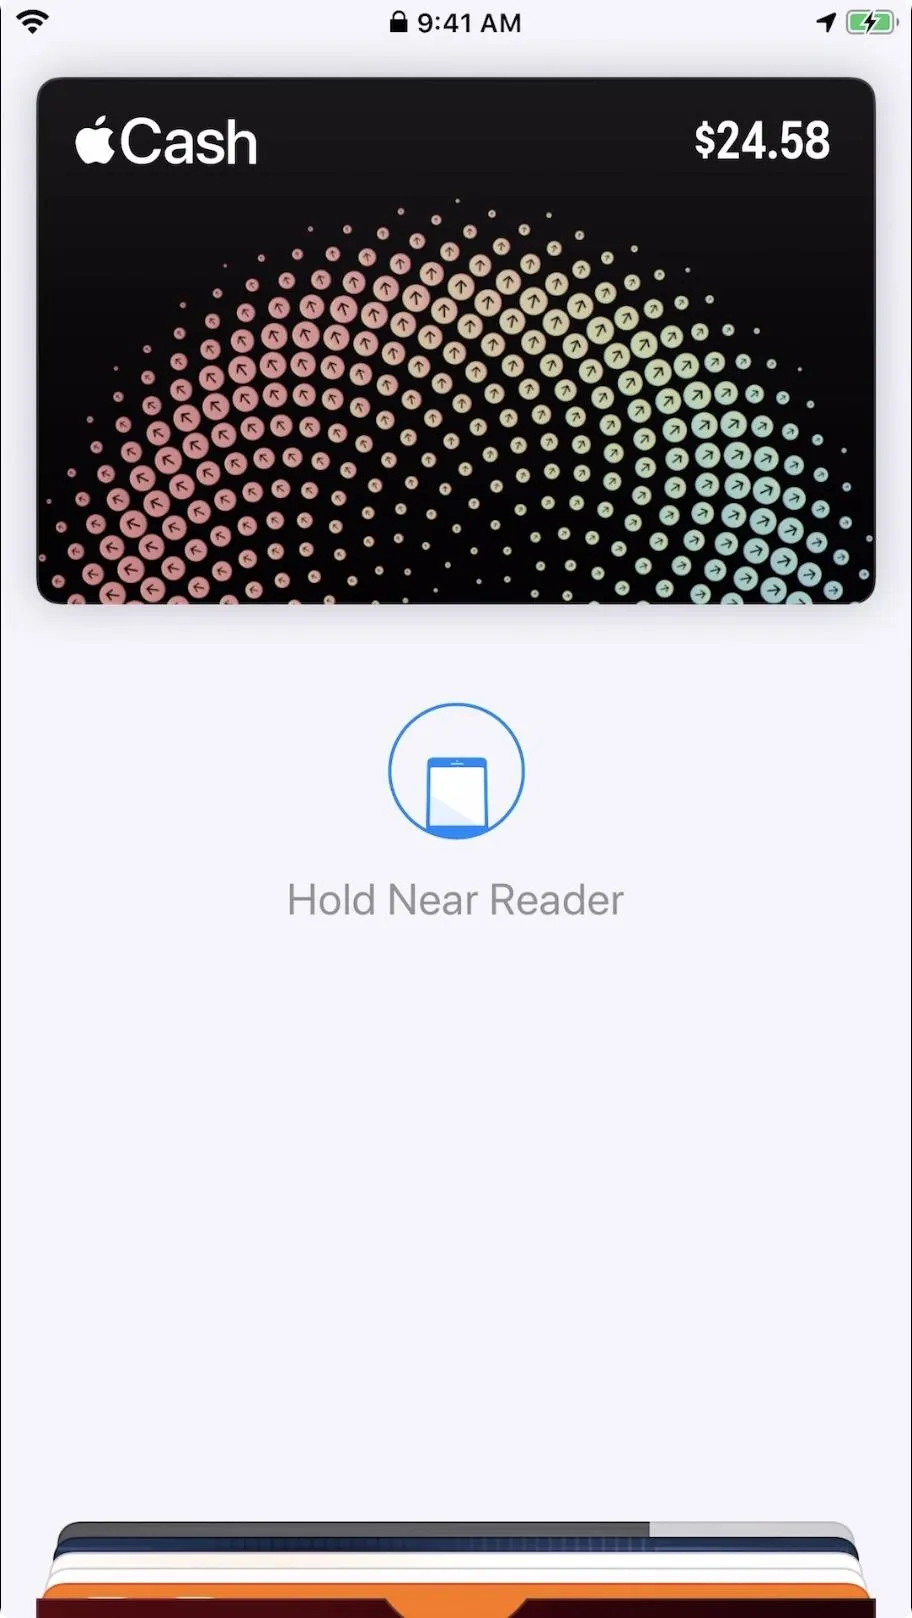
4. Access Apple Pay & Passes
These days, you'll find more and more vendors accepting payments from just your iPhone. Groceries? Yup. Coffee? Yes. That hip sandwich shop that charges $15 for a sub? You bet. But if you're unlocking your iPhone, heading to Wallet, then using Apple Pay or a pass to purchase your goods, you're wasting time.
There's actually a shortcut that will allow you to access Apple Pay and saved passes without needing to dig through your Wallet first. The problem is, the feature only works if you have some type of card (debit or credit), saved in Wallet. If you're working with just passes, you'll still need to open Wallet to pay for your stuff, so a card is still required.
5. Decrease the Home Button's Click Speed
For double- and triple-click functions, there's a certain speed that these gestures need to be performed with. Otherwise, the multitasking interface, Apple Pay, or your accessibility shortcut won't launch. For some people, the default speed between clicks might be too fast. If that's you, you can change that click-speed quite easily.
Just know that there aren't a whole lot of options to choose from. You won't find a series of speeds like you do when selecting mouse cursor sensitivity. Instead, iOS presents you with "Default," "Slow," or "Slowest." If you pick one of the latter two options, you can take a little more time between Home button presses when launching double- and triple-click gestures.
- Slow Things Down: How to Change the Click Speed on Your Home Button
6. Activate the Hidden Magnifier Camera Tool
Having trouble reading something in front of you? Want a closer look at something in the distance? Sure, you could use the zoom on your iPhone's camera, but that's only going to get you so far. Instead, your Home button can activate the hidden Magnifier tool in iOS, an accessibility function that allows you to zoom much further than your camera allows typically.
While you can use this Magnifier as a simple visual aid, you can also use it to take photos of your macro subjects. The function comes packed with tools like flash, filters, and auto-exposure lock, so while it's not as feature-filled as the typical Camera app, it can get the job done for subjects that are very, very far away.
- See Things More Clearly: Use Your Home Button to Trigger the Magnifier


7. Reduce the White Point of the Display
We're all hopelessly addicted to our smartphones, I'm sure. And for better or worse, that addiction likely carries well into the night. That said, you might find the lowest brightness setting on your iPhone to still be too bright during those late-night benders, making Instagram, YouTube, or TikTok a bit uncomfortable to use.
Enter "Reduce White Point." The feature reduces the intensity of the white areas of your display, bringing down the overall brightness on your iPhone significantly. Seriously. If you push the setting to the max, you might find your iPhone is too dim, even in complete darkness. Of course, you can configure your Home button to trigger the feature with just a triple-click.
8. Lower Brightness Even More with 'Zoom'
If you find that Reduce White Point still isn't dim enough for your taste, you should know it's not the only setting that can help reduce your iPhone's brightness. Your Home button can also trigger a "Zoom" filter, which can further dim your display should you need it.
So what do zooming and dimming have to do with each other? It's all about accessibility. The primary Zoom function is, obviously, to zoom in on your display if you're having trouble reading it. In addition, Apple includes different filter options as visual aids, one of which being "Low Light."
The thing is, you don't actually need to zoom in on your display to take advantage of the Low Light filter. Your Home button can simply activate the overlay, so you can browse your iPhone a little more comfortably. You just need to set it up. Combined with the Reduce White Point trick, we've found the display to be too dim, but it all depends on what you're using them on.
- The Instructions: Use 'Zoom' to Lower Display Brightness to Almost Black
9. Apply a Color Filter to Your Display
Speaking of filters, did you know that you can apply a color filter to your iPhone's display? Your Home button can be used to trigger these filters, which, aside from adding a unique look to your device, can help you see your screen better in certain situations.
The most likely use case? Using a red filter in low-light environments. Red light is harder for our eyes to pick out than other light frequencies, which makes it easier to look at up close in dark places. From far away, that red screen will help keep other people from noticing you at night. If you want something a bit different than merely lowering the overall brightness of your display, you might want to try giving color filters a try.


10. Activate Voice Control
No matter your experience with iOS and iPhone, you probably know a lot about Siri. But Siri isn't the only way to control your iPhone using your voice. Voice Control is your other option, and it differs from Siri in many ways. The biggest? Rather than answering questions or running functions, Voice Control lets you replace taps and touches with voice commands.
Your Home button can be used to enable or disable Voice Control at any time, allowing you to switch over to voice commands whenever you want. Using grids, numbers, and more, your voice can do virtually anything on your iPhone you could do yourself with screen gestures. It might take some practice to get the hang of it, though.
- Master Voice Control: 24 Voice Control Features to Use Your iPhone Hands-Free

11. Enable Smart or Classic Invert
With iOS 13, Apple finally introduced system-wide dark mode for the first time. Before that addition, however, there was a way to get a pseudo dark mode on almost any app you could think of, courtesy of Smart Invert and Classic Invert.
These two functions flip the color scheme of your iPhone, most notably so that white colors become black colors. Classic Invert flips all colors, while Smart Invert tries only to change colors that make sense. The latter isn't always perfect but can be an excellent solution for any apps that haven't switched over yet.
- The Home Button Trick: Enable Smart & Classic Invert with Just a Triple-Click
Smart Invert (left) vs. Classic Invert (right).
Smart Invert (left) vs. Classic Invert (right).
While more and more apps adopt iOS 13's dark mode, many still do not, meaning there's still plenty of reason to use these invert settings if you want instant night mode. Your Home button can flip the switch at any time, so if you're going to browse a bright app like Facebook in the dark, you can do so.
12. Get On-Screen Controls with AssistiveTouch
If you're still not happy with your iPhone's Home button, or if it's currently broken or buggy, you may want to try an entirely new way to interact with your device. Instead of using a button to do everything, a feature called AssistiveTouch lets you control your iPhone with on-screen, tappable buttons.
AssistiveTouch isn't just used to replace Home button functionality. While you can do anything with AssistiveTouch you can do with the Home button, it can also take over plenty of other gestures or functions you'd typically perform yourself, such as activating Control Center, opening Notification Center, putting your iPhone to sleep, taking a screenshot, etc.
- The Lowdown: How to Activate & Use AssistiveTouch on Your iPhone
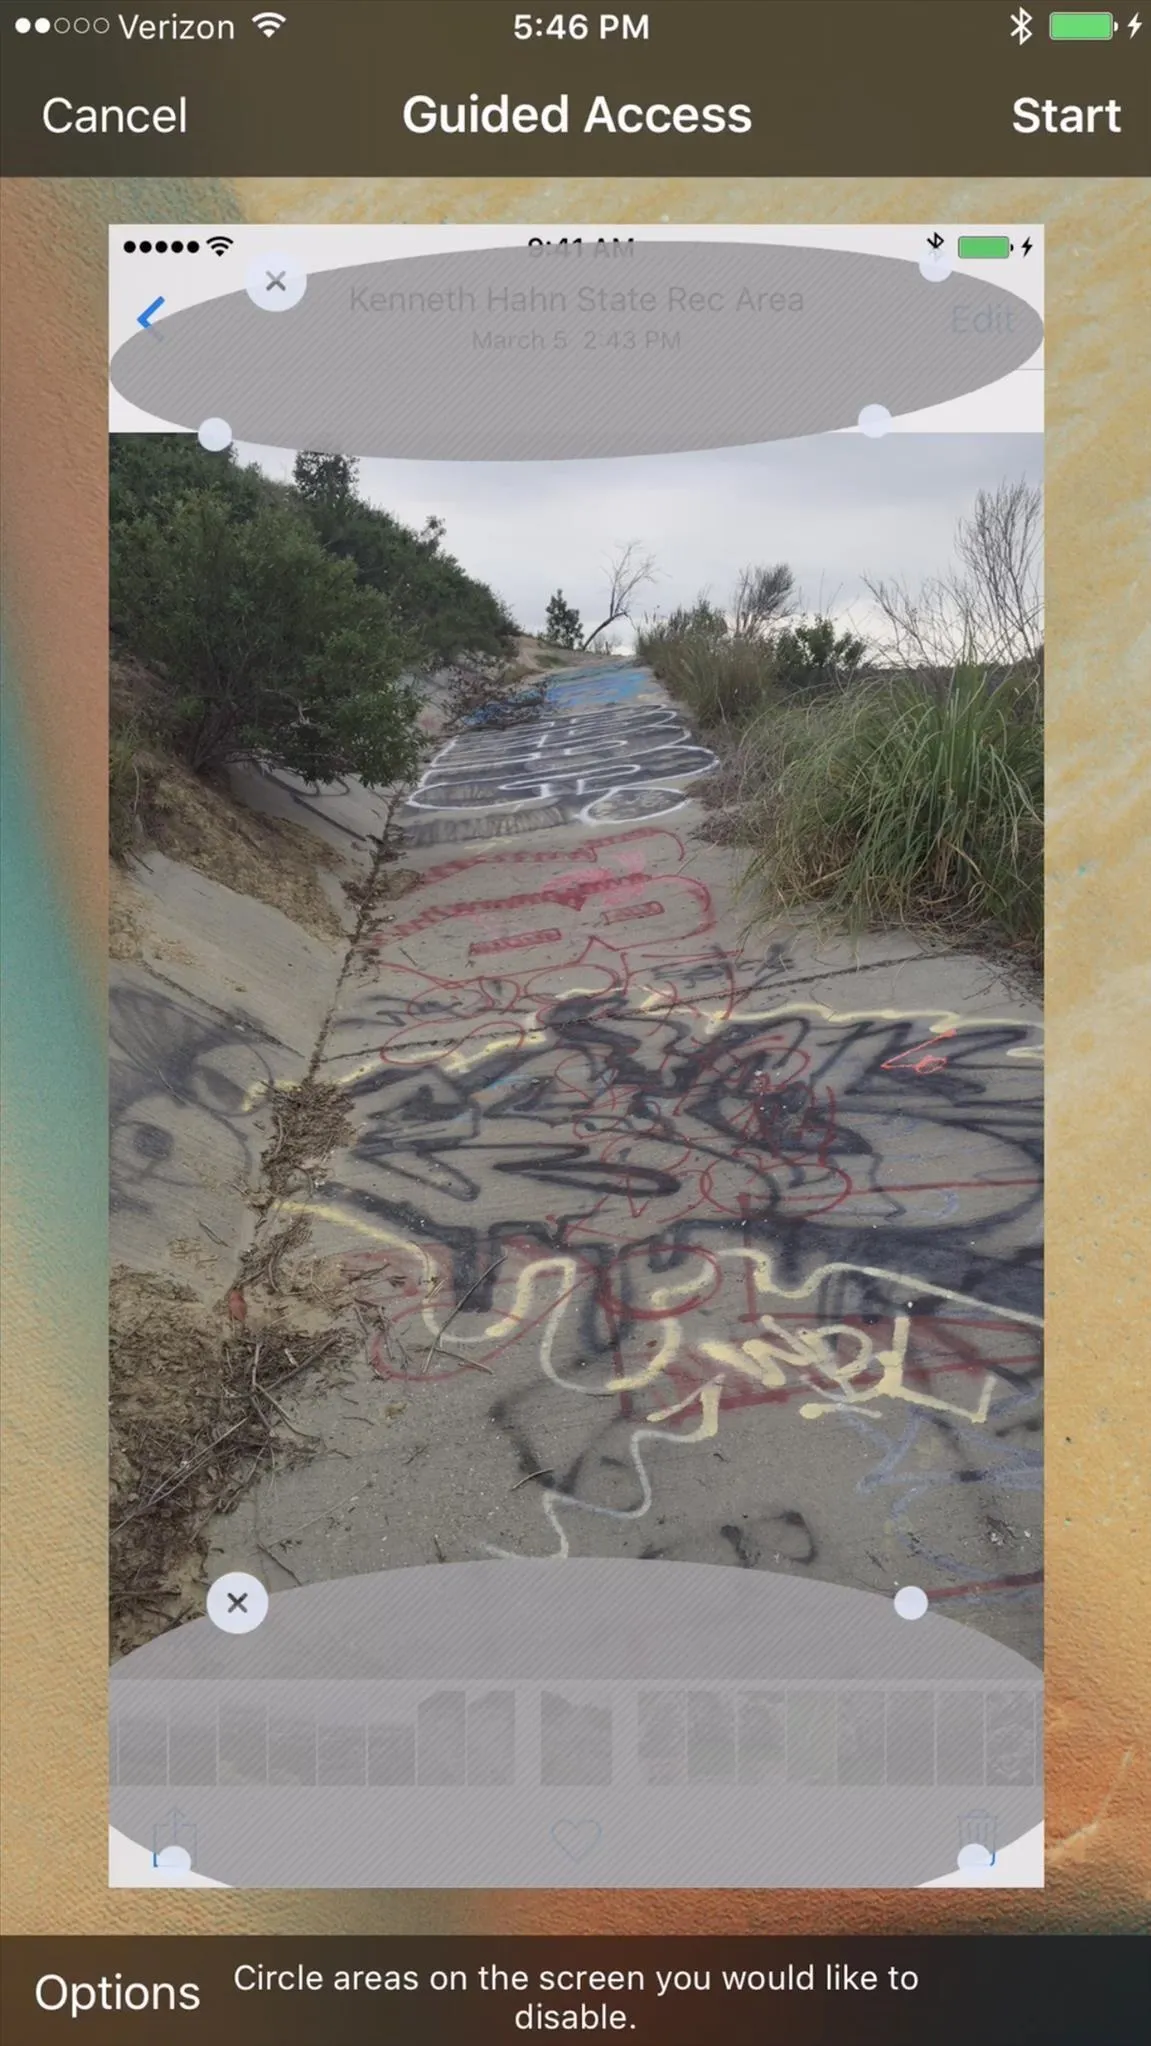
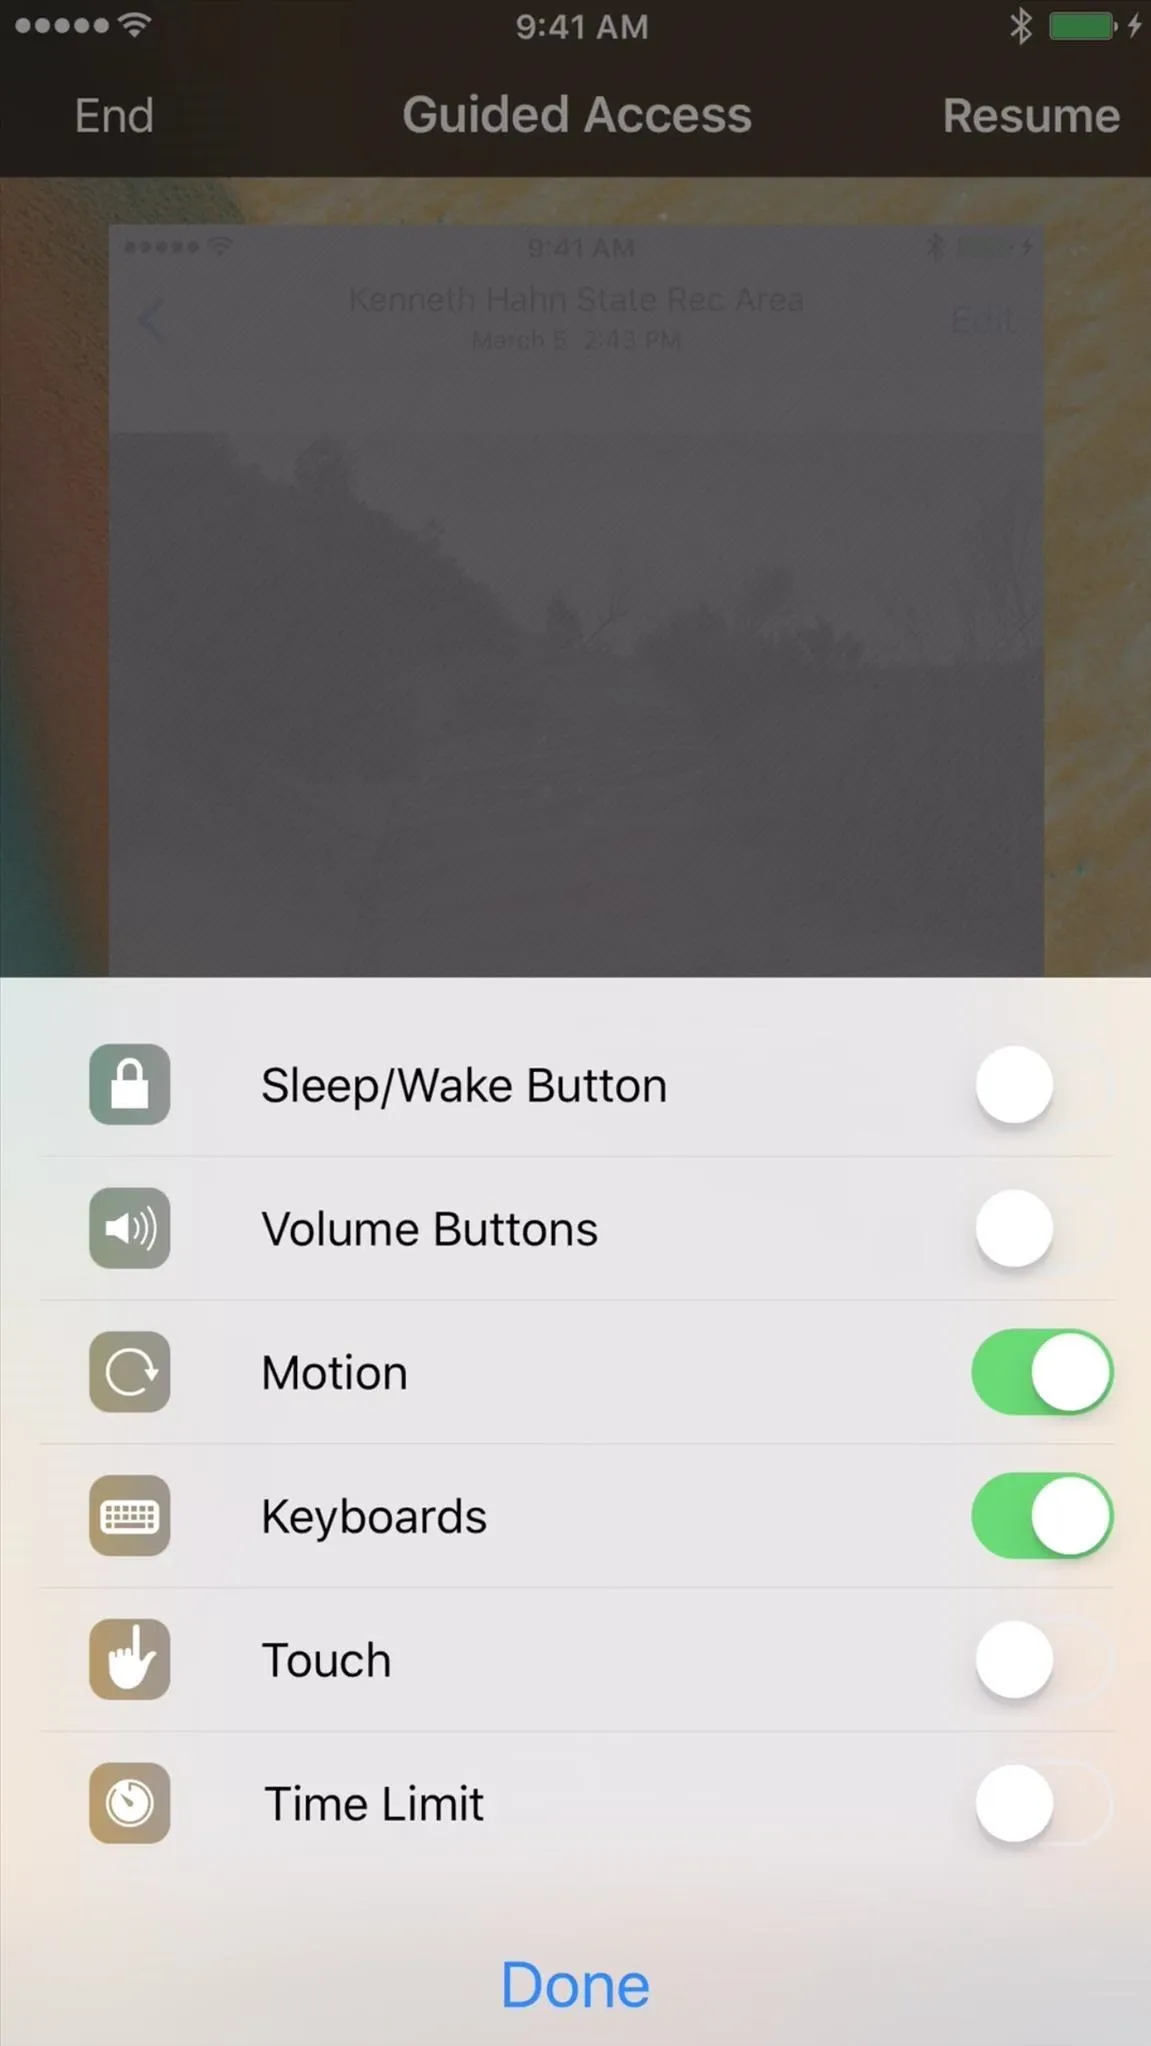
13. Enable Guided Access
Don't you just hate it when you show someone a photo on your iPhone, but they insist upon swiping through more than they should? It can be enough to discourage you from ever letting your device go in the first place. It doesn't have to be this way, however, thanks to a little feature called "Guided Access."
Guided Access allows you to lock your iPhone to the window currently displayed. You can even specify which areas of that window are even interactable, leaving the rest of the screen effectively "dead" if touched. The setting all but ensures whoever takes your iPhone can only interact or see exactly what you want them to. With Guided Access, you can hand your iPhone off to a perfect stranger without worry.
- The Use-Case: How to Show Someone a Photo Without Them Snooping Around
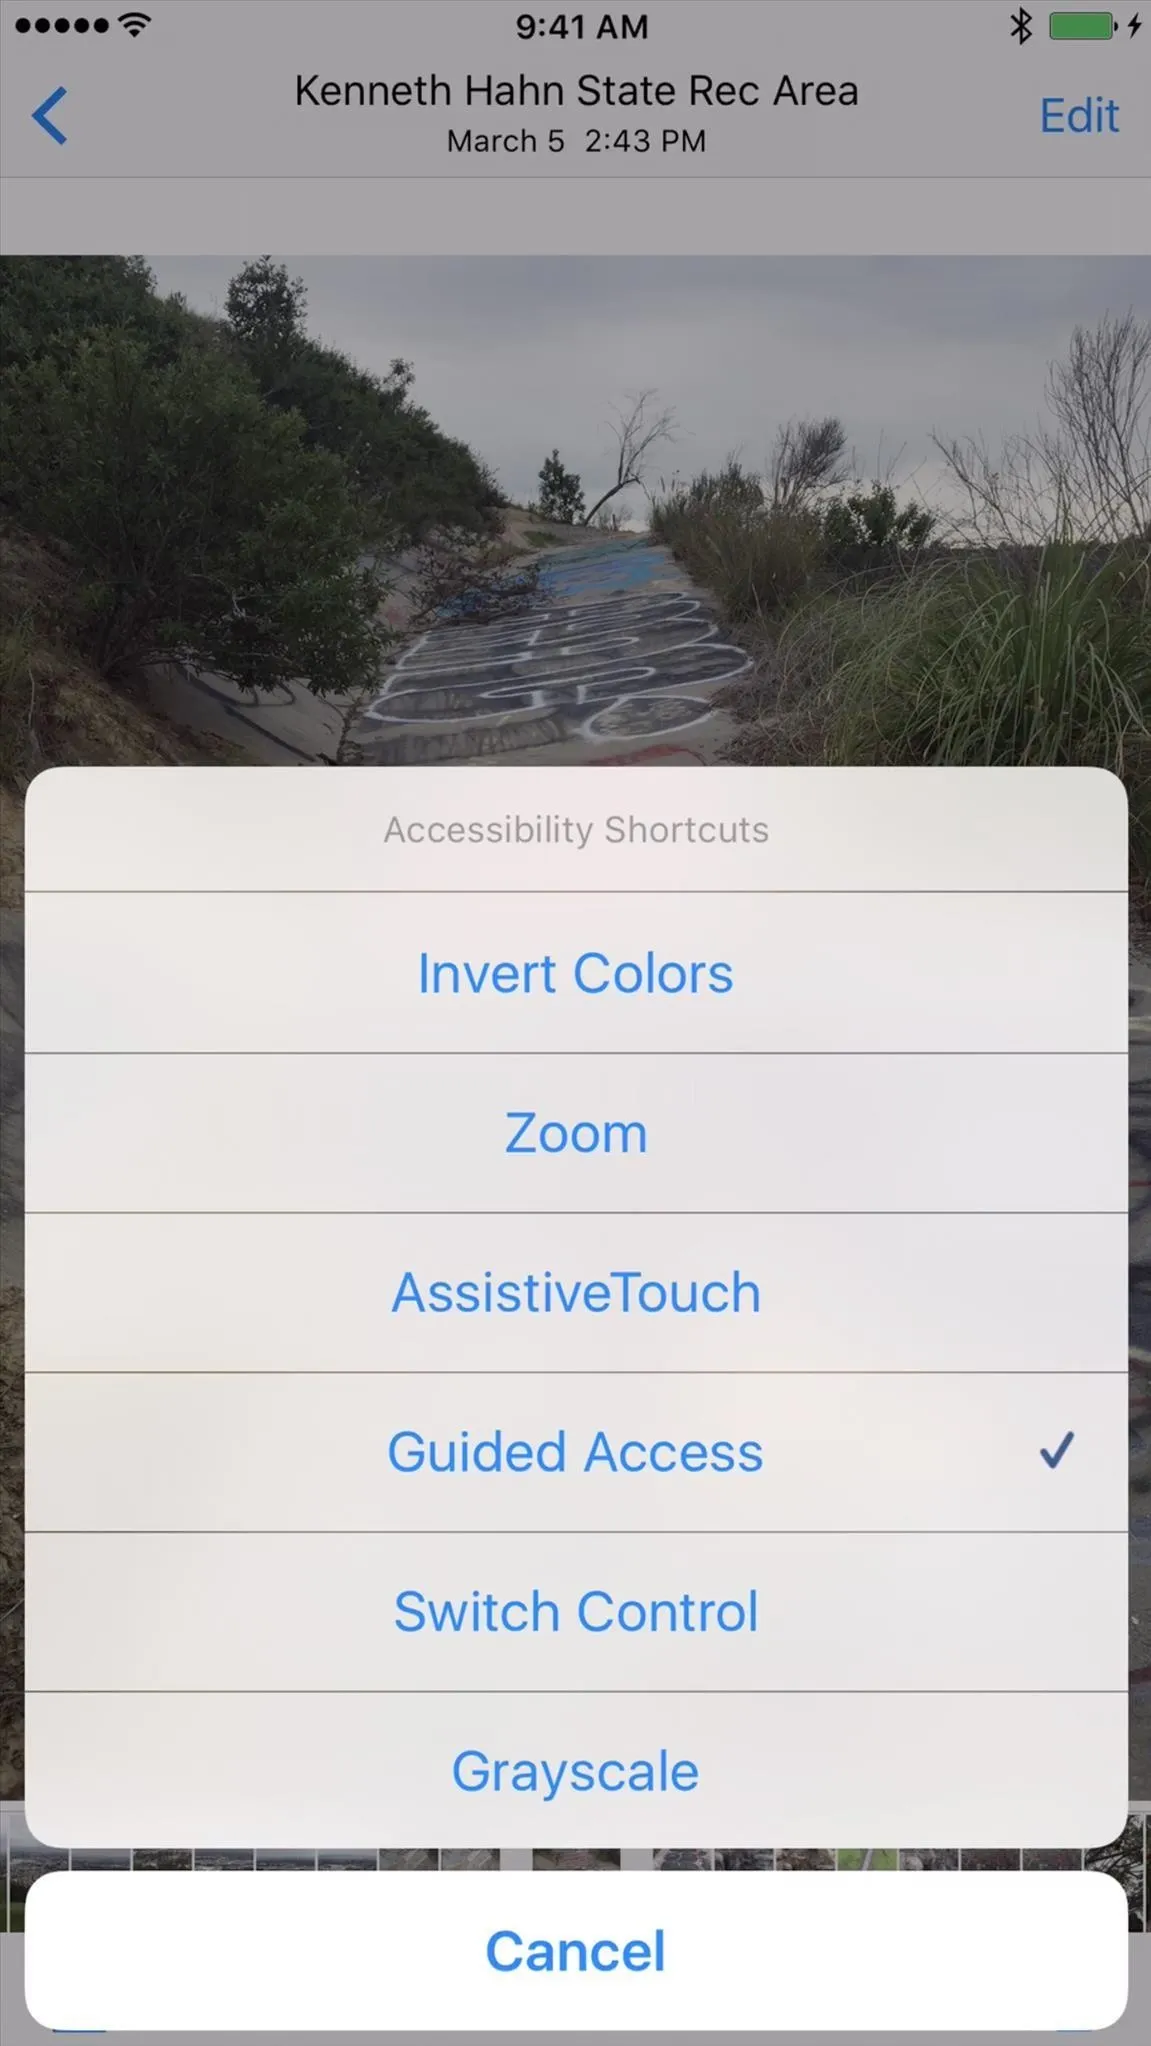
Guided Access is, of course, only temporary, requiring your passcode to disable. But all it takes is a shortcut from your Home button to activate, meaning you can quickly enable the setting when needed.
Justin Meyers/Gadget Hacks
Justin Meyers/Gadget Hacks
Justin Meyers/Gadget Hacks
Justin Meyers/Gadget Hacks
Justin Meyers/Gadget Hacks
Justin Meyers/Gadget Hacks
14. Control Your iPhone with an External Keyboard
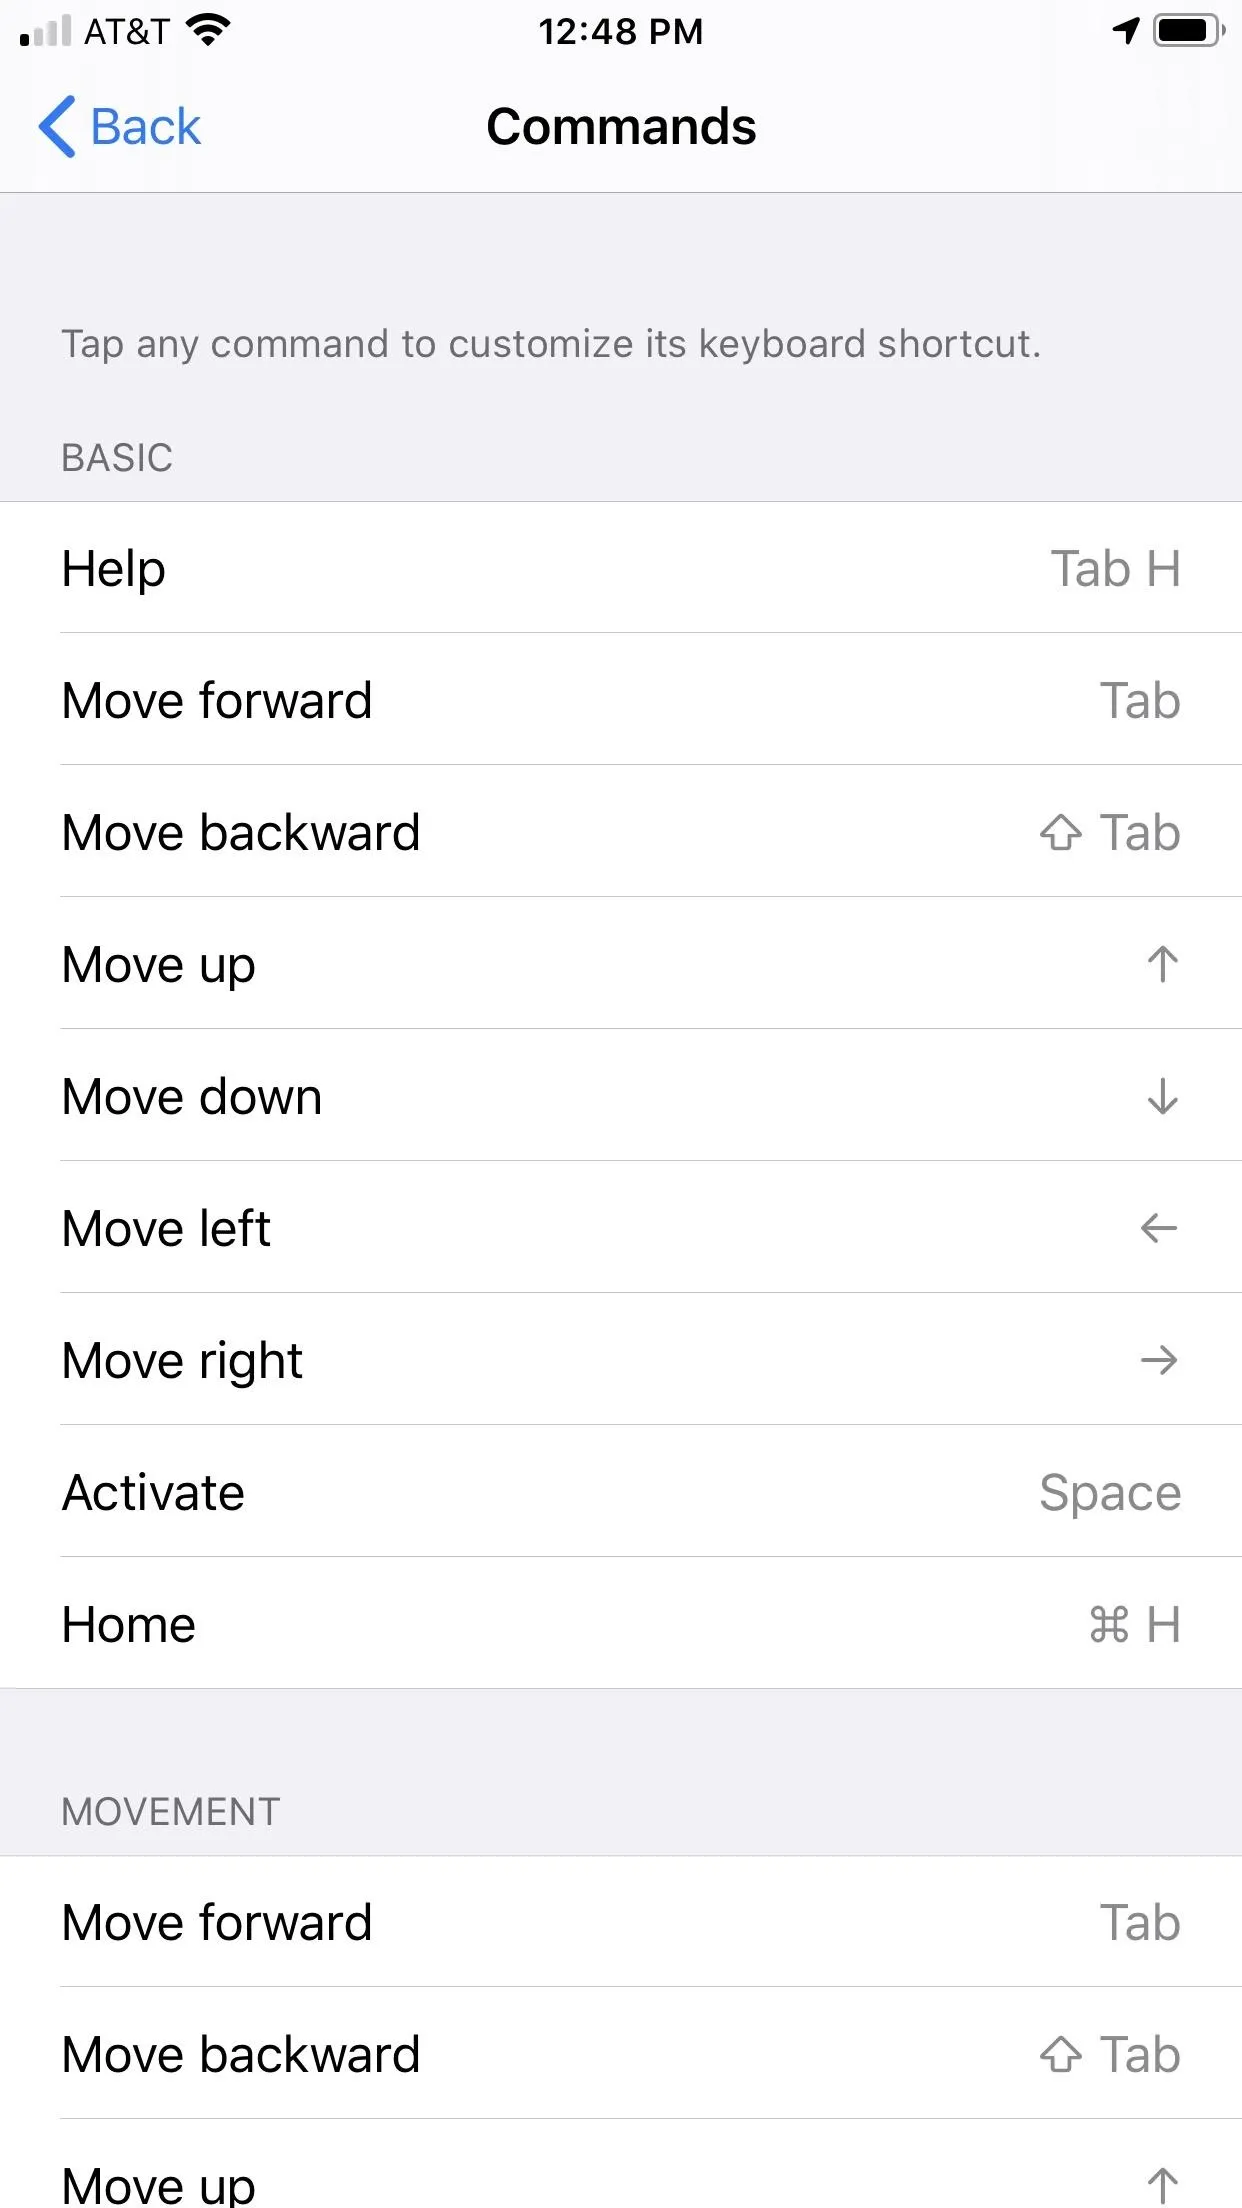
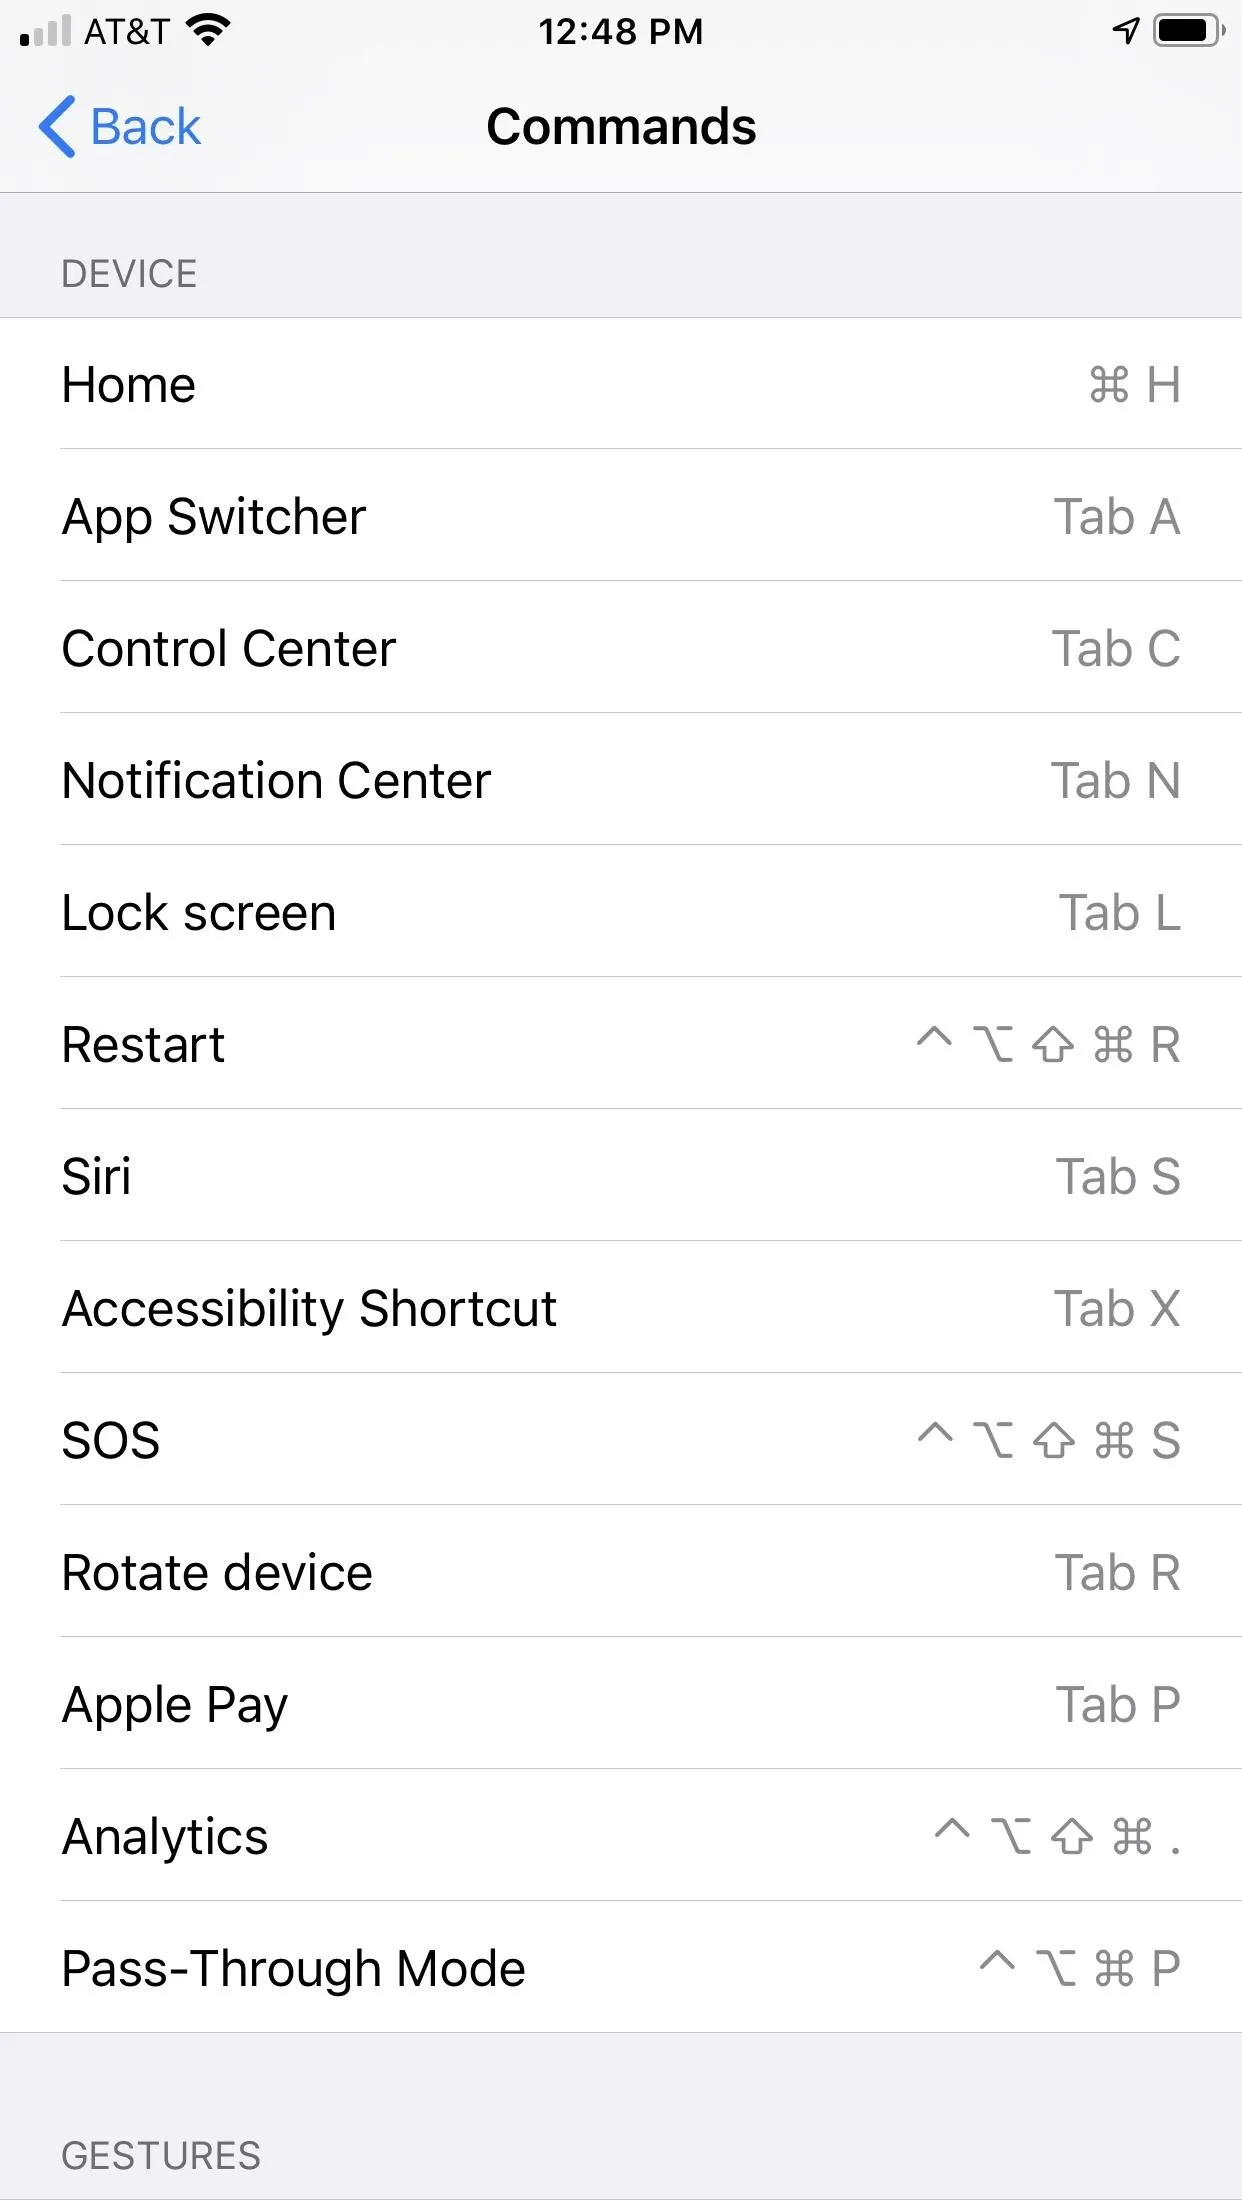
New to iOS 13.4 is "Full Keyboard Access," an impressive feature that lets you control your iPhone with just an external keyboard. No, seriously. While it initially looked like Full Keyboard Access was an iPadOS exclusive, you'll find the accessibility shortcut on iOS as well.
How does it work? Virtually any command or function you'd normally use a tap or gesture for on your iPhone is assigned a keyboard shortcut. You can find a full list of these shortcuts under Accessibility –> Keyboards –> Full Keyboard Access –> Commands, so you know exactly how to execute each one. If you don't like a command, just customize a new one.
- Recommended on Amazon: Arteck Stainless Steel Bluetooth Keyboard for $31
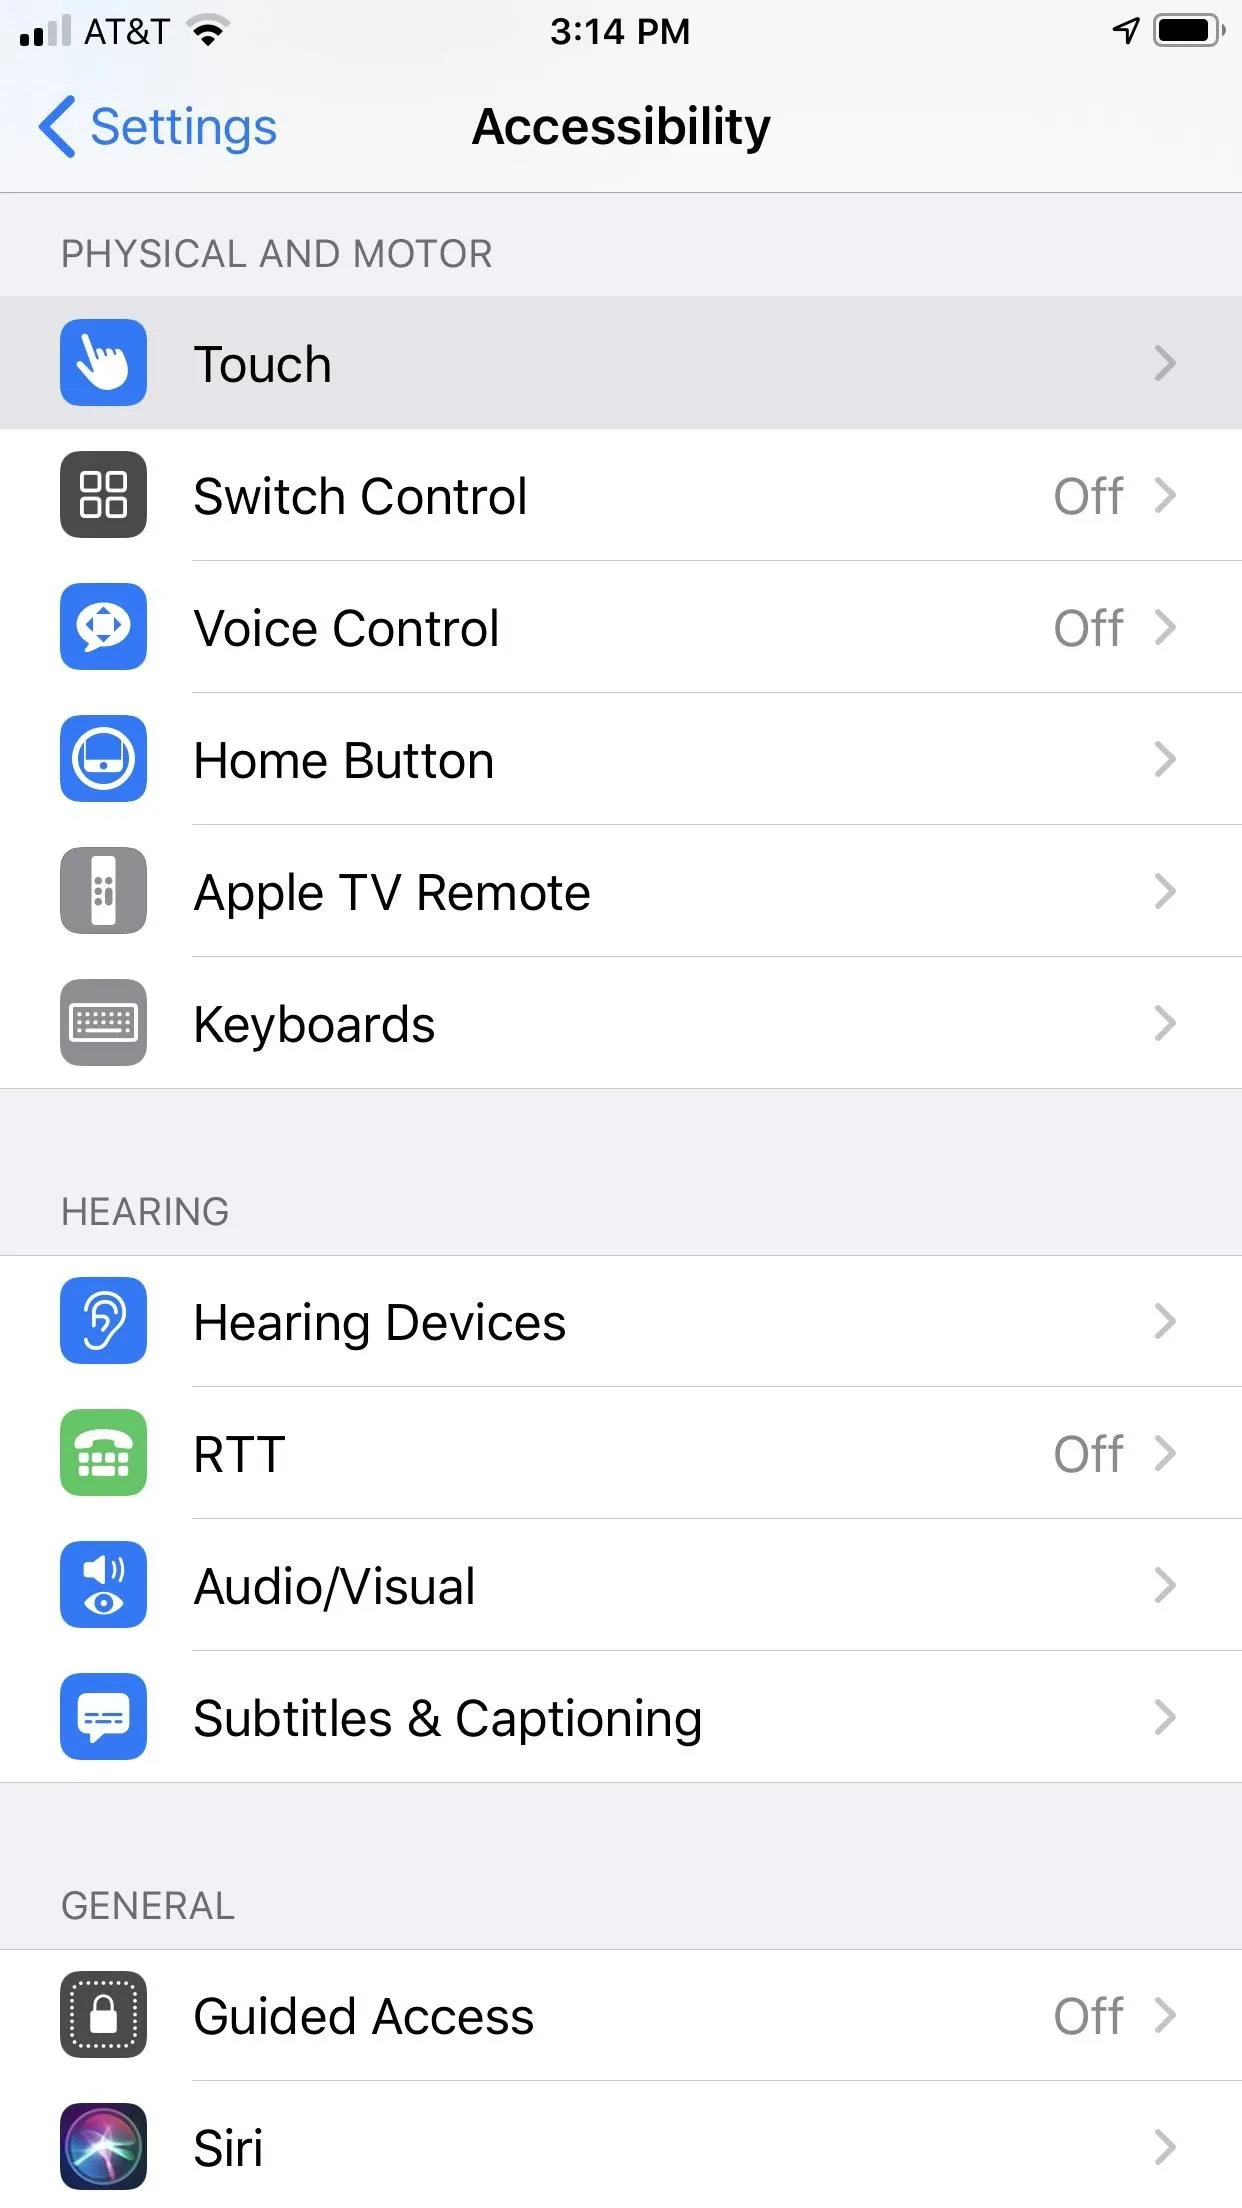
Because it's an accessibility shortcut, a simple triple-click of the Home button is all you need to enable it. To set it up, just head to Settings –> Accessibility –> Accessibility Shortcuts, then tap "Full Keyboard Access."
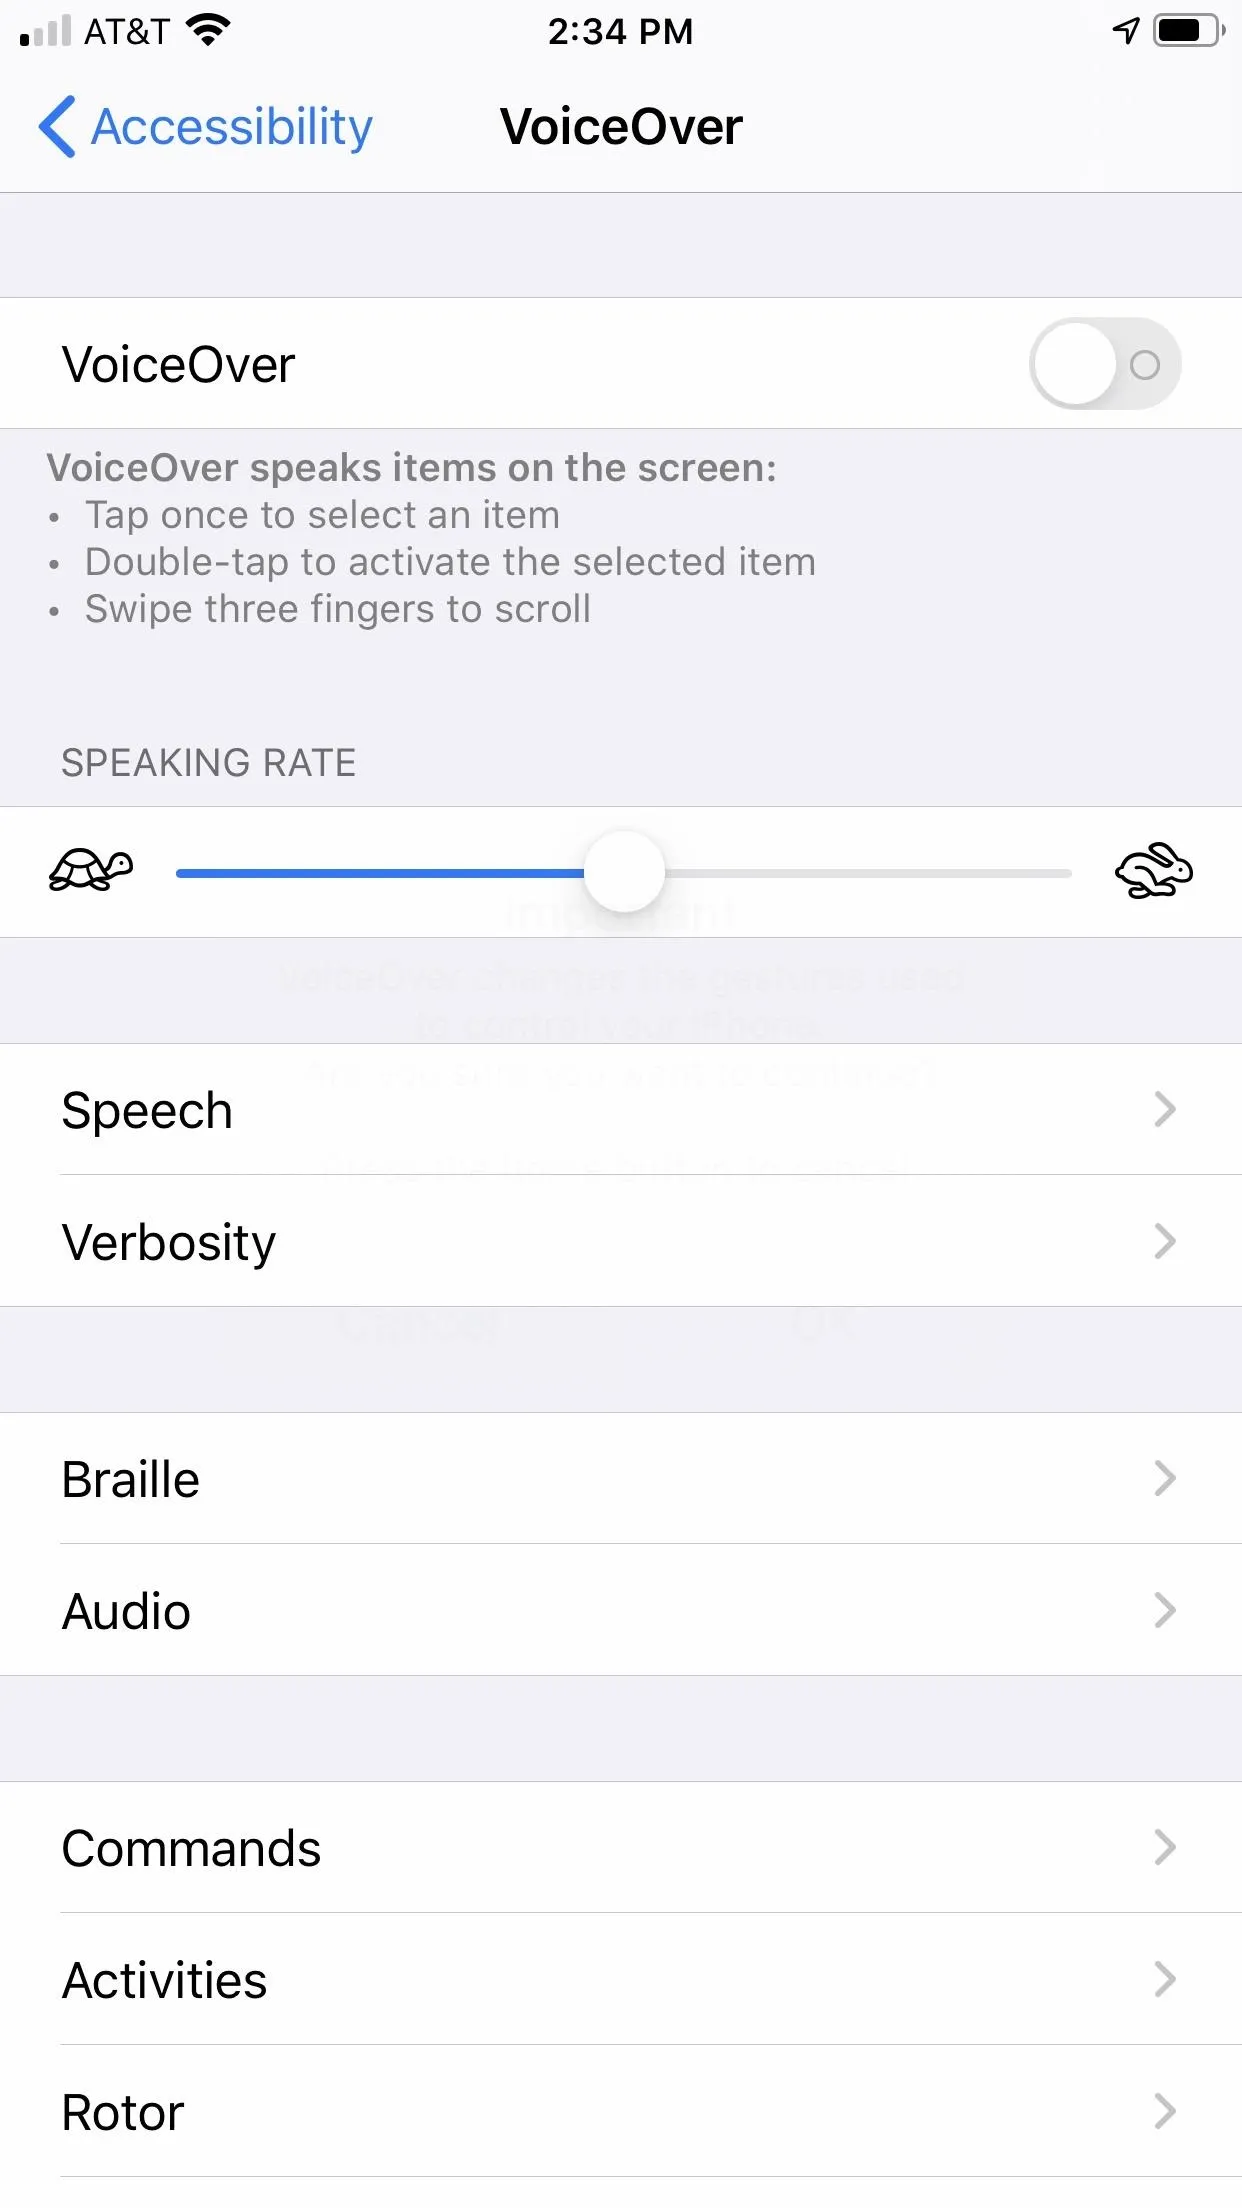
15. Activate VoiceOver
VoiceOver might sound like Voice Control, but it's a very different feature. Rather than controlling your iPhone with your voice, VoiceOver lets you control your device with taps and gestures. How is that different than usual? Because iOS reads out what's on your display, in case you can't see the screen. Those taps and gestures can then be performed based on what you hear, not necessarily where you're tapping on the display.
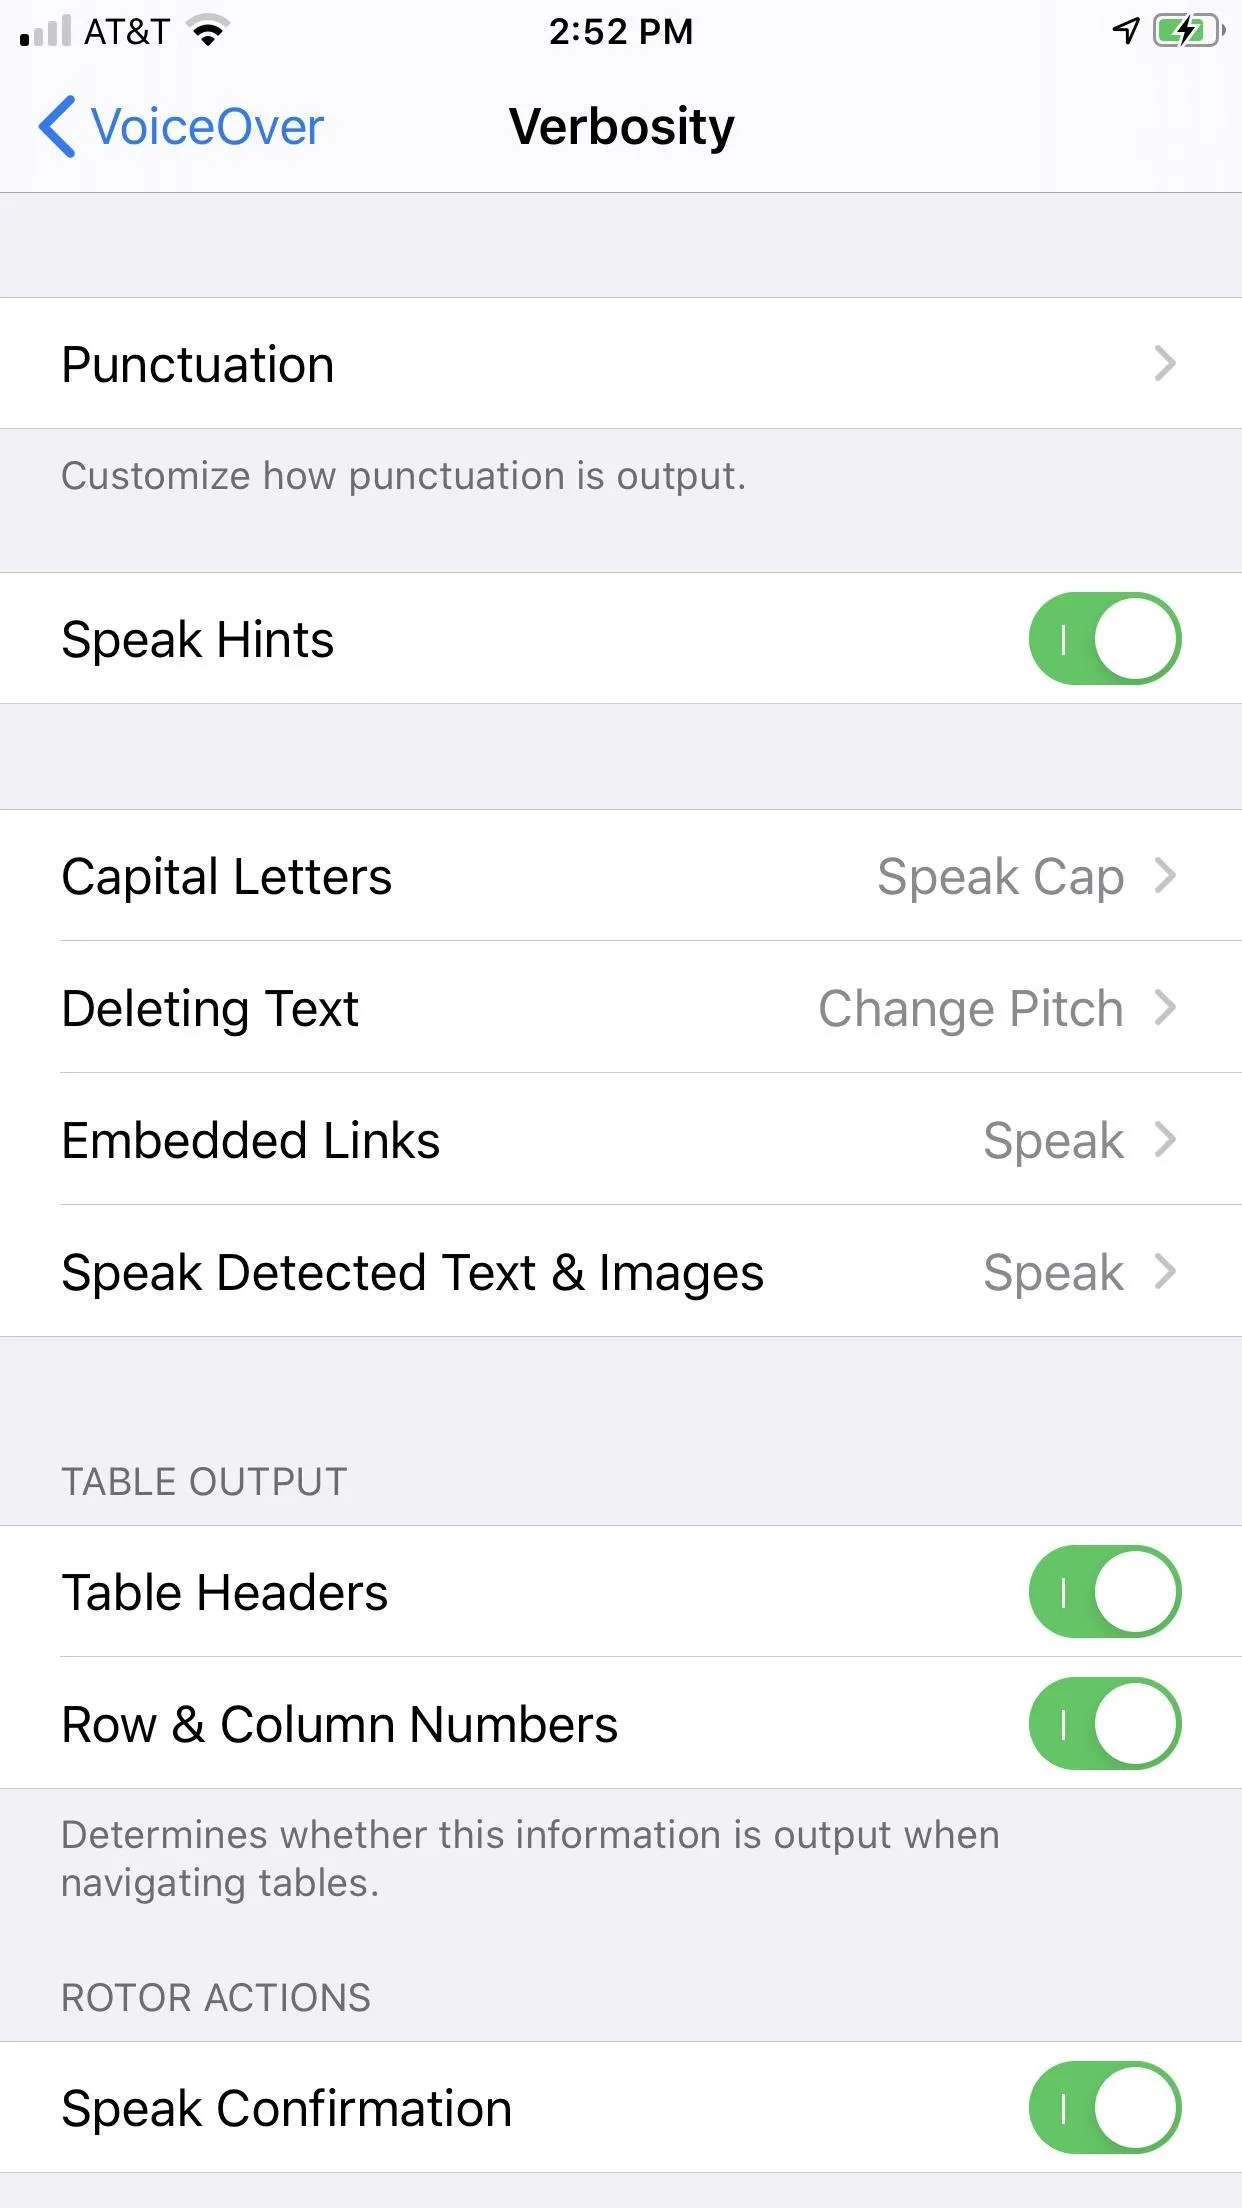
VoiceOver highlights a chunk of text or an option at a time, then reads it out loud. It's up to you whether to select the item, move on to the next item, or even have VoiceOver break down the text letter by letter. And don't be afraid to change how VoiceOver works. You can control how fast or slow iOS speaks, customize pronunciations, control how haptics work, customize commands, and much more. There might not be an area of iOS that's more customizable.
- Related Feature: This Gesture Makes Your iPhone Read Books & Articles Aloud
Be warned: once enabled, VoiceOver can be a difficult feature to maneuver. We're so used to the standard ways of controlling an iPhone, that new taps and gestures — plus iOS speaking everything VoiceOver highlights — can be jarring. Luckily, it's easy to disable when you set VoiceOver as an accessibility shortcut, as it just takes three clicks of the Home button to turn on or off.
16. Activate Switch Control
Your Home button can also be used to activate Switch Control. This feature allows you to interact with your iPhone using an adaptive accessory, usually for highlighting items on your display. If that sounds similar to VoiceOver, it is but differs in some significant ways. In fact, it's more of VoiceOver's inverse.
Switch Control doesn't speak what's on your display. While it highlights items in a familiar way, that "cursor" actually moves throughout the screen on its own, at least, by default. The idea here is to wait for the cursor to reach an area of the display you'd like to interact with, then, using a gesture or accessory, you can select that area without issue.
- Interesting Switch: AbleNet Hook+ Switch Interface on Amazon
Like VoiceOver, Switch Control is highly customizable, allowing you to change highlighting speed, how highlighting works, cursor appearance, gestures, and more. As an accessibility shortcut, all it takes is a triple-click of the Home button to get Switch Control up and running.

17. Disable Reachability to Prevent Accidental Triggering
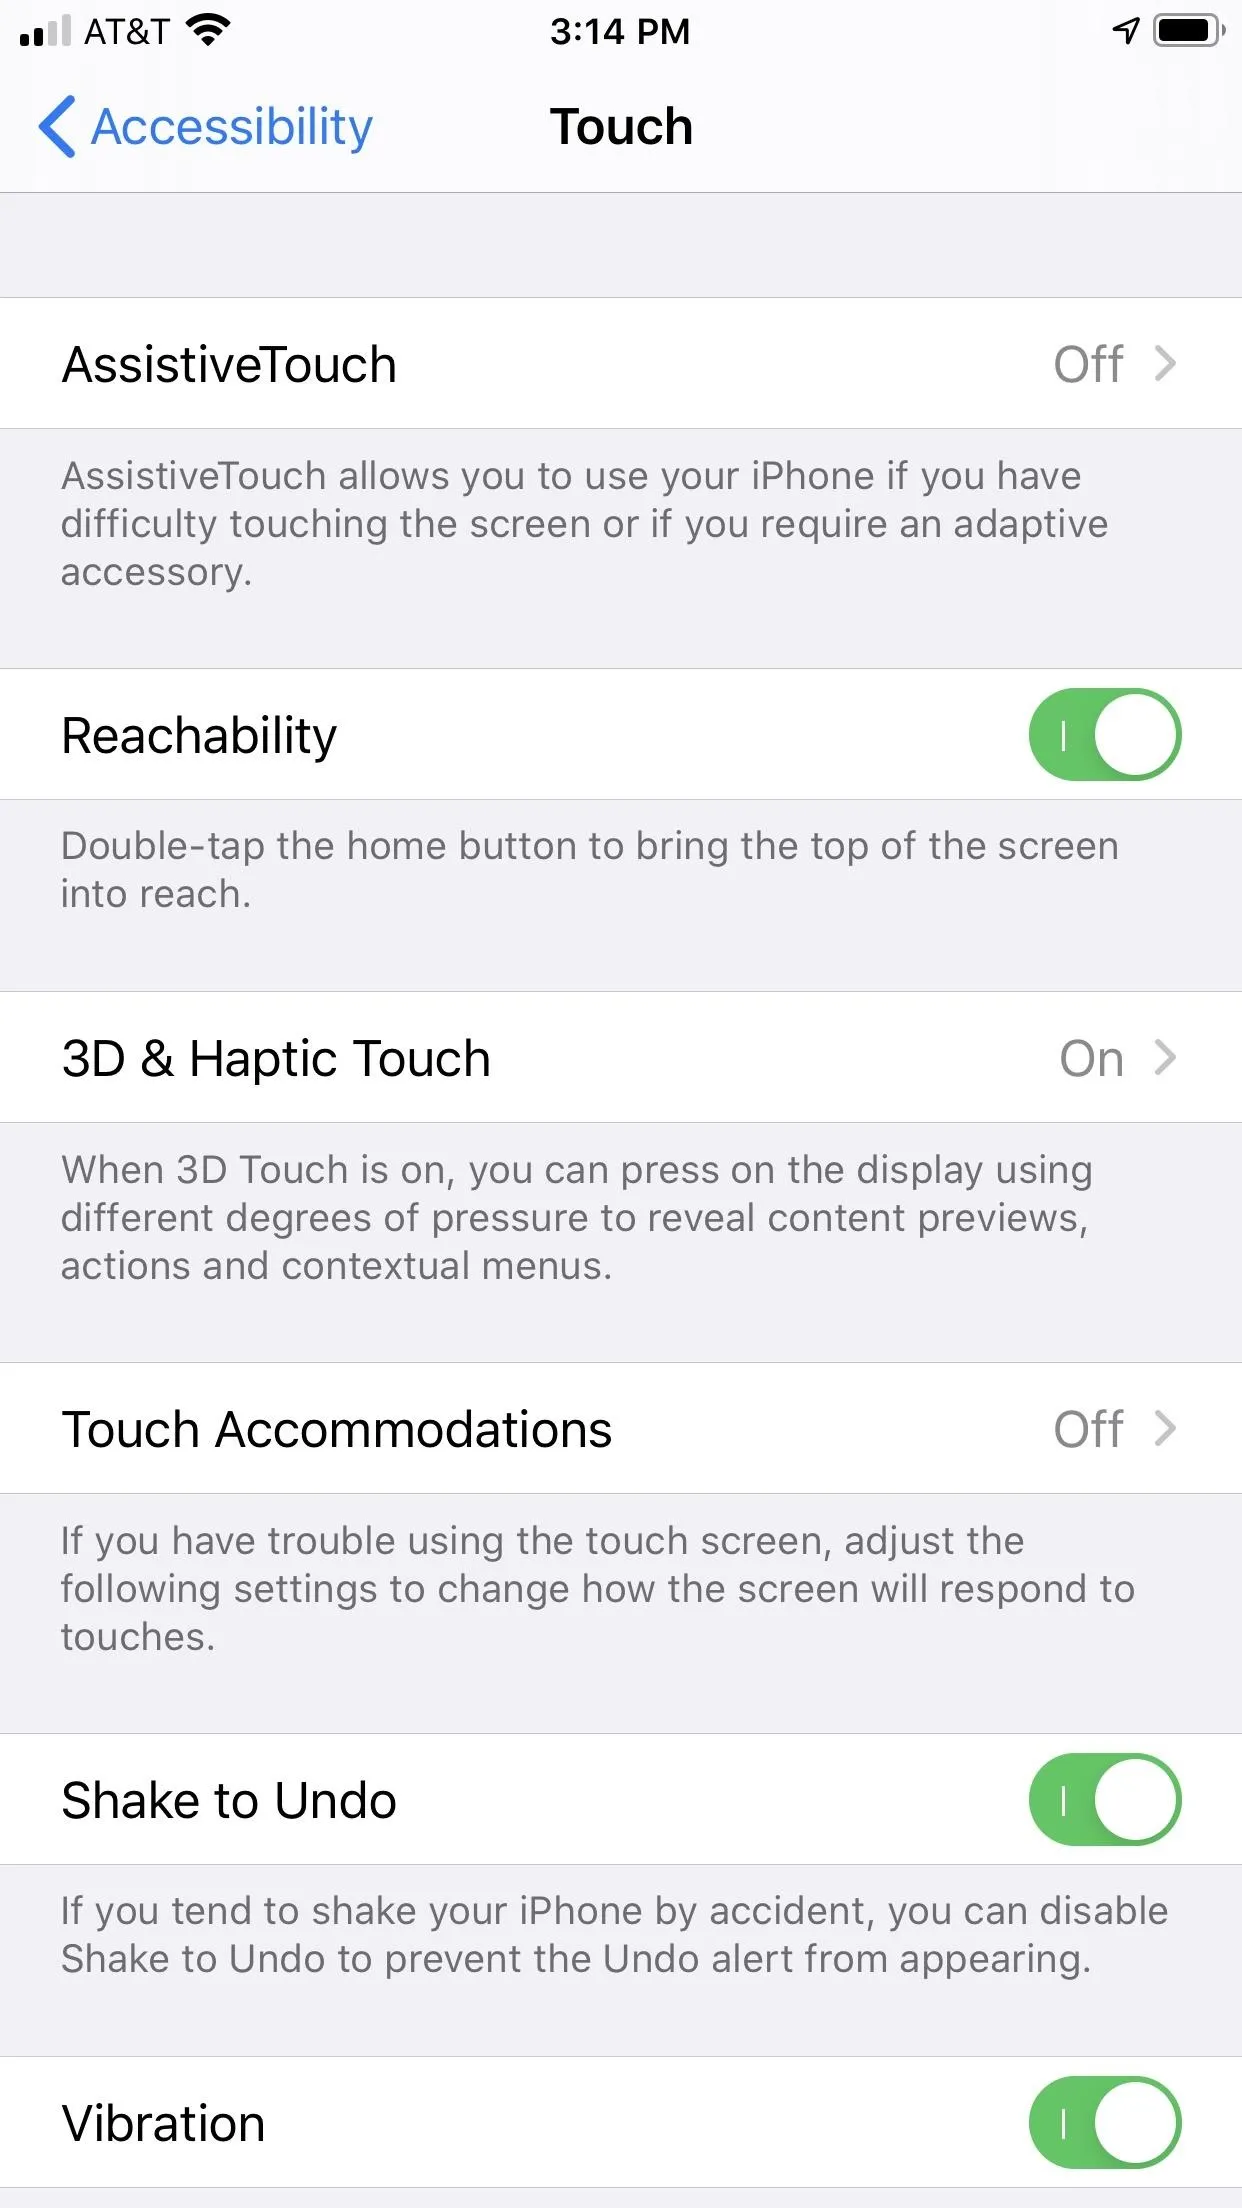
Reachability was first introduced on the iPhone 6 and 6 Plus, to make the larger screens more comfortable to use with only one hand. Many of you may find the feature useful, but then again, some of you might not since all it takes is two inadvertent touches to frustratingly set off the feature by accident.
If you'd like to disable this feature, head to Settings –> Accessibility –> Touch, then toggle the switch next to "Reachability." From now on, double-tapping your Home button won't cause anything to happen. Sure, it's kind of the opposite of something your Home button can do, but hey, you might not have known the button could also not activate Reachability.
Cover photo by Dallas Thomas/Gadget Hacks; Screenshots and GIFs by Jake Peterson/Gadget Hacks (unless otherwise noted)


Comments
Be the first, drop a comment!