Your iPhone keeps track of every single place you go, especially those you frequent most often, and syncs those locations across all your iCloud-connected devices. People who gain access or already have access to your iPhone, iPad, iPod touch, or Mac may be able to view all of these locations to see where you've been and where you might be. If this worries you, there are things you can do.
Why Does Your iPhone Collect This Data?
The feature behind all of this is "Significant Locations," and it's been a part of iOS since iOS 7, when it was first called "Frequent Locations."
Whenever your iPhone thinks a location might be important, it logs its coordinates and the times you were there. It will also do this for recently visited locations. Apple uses this information for personalized services such as predictive traffic routing, better Memories in Photos, location-based suggestions using Siri, and so on.
The Problem with Significant Locations
The geodata collected by Apple Maps is end-to-end encrypted, so Apple can't read it. But like I said, it syncs across all of your iCloud-connected devices. If you look at the list of Significant Locations on your iPhone and your Mac, you'll see that they're the same, no matter which device recorded the geocoordinates.
If someone shares one of your devices, such as an iMac, Mac Pro, or MacBook that the whole family uses at home, they may be able to access the Significant Locations that all of your other iCloud-connected devices have rounded up and stored. They could have fingerprints registered on the Mac or a more portable device like an iPad, which gives them access. They could also simply know the passcode, or there may be no passcode used on the device, which is common with shared devices.
There's also the possibility that someone may gain unlawful or unwanted access to your Apple devices, whether it be hackers, law enforcement, private detectives, clever family members, suspicious spouses, and other third parties.
- Don't Miss: Stop Apps from Asking to Track Your iPhone Activity in iOS 14.5 for More Control Over Your Privacy
With access to Significant Locations, someone will know where you go, how often you visit, what times you regularly travel there, and so on. Needless to say, this takes the work out of following you around and logging events on a notebook.
What You Can Do to Secure Your Location History
To safeguard your geolocation data, you can review your Significant Locations, delete locations individually, remove visits for individual locations, clear your entire history, or disable the feature altogether. We'll cover each below.
Note that while we are using an iPhone, the instructions below also apply to iPod touch and iPadOS for iPad. The settings menu and preference will be the same.
1. Viewing the Significant Locations Your iPhone Saved
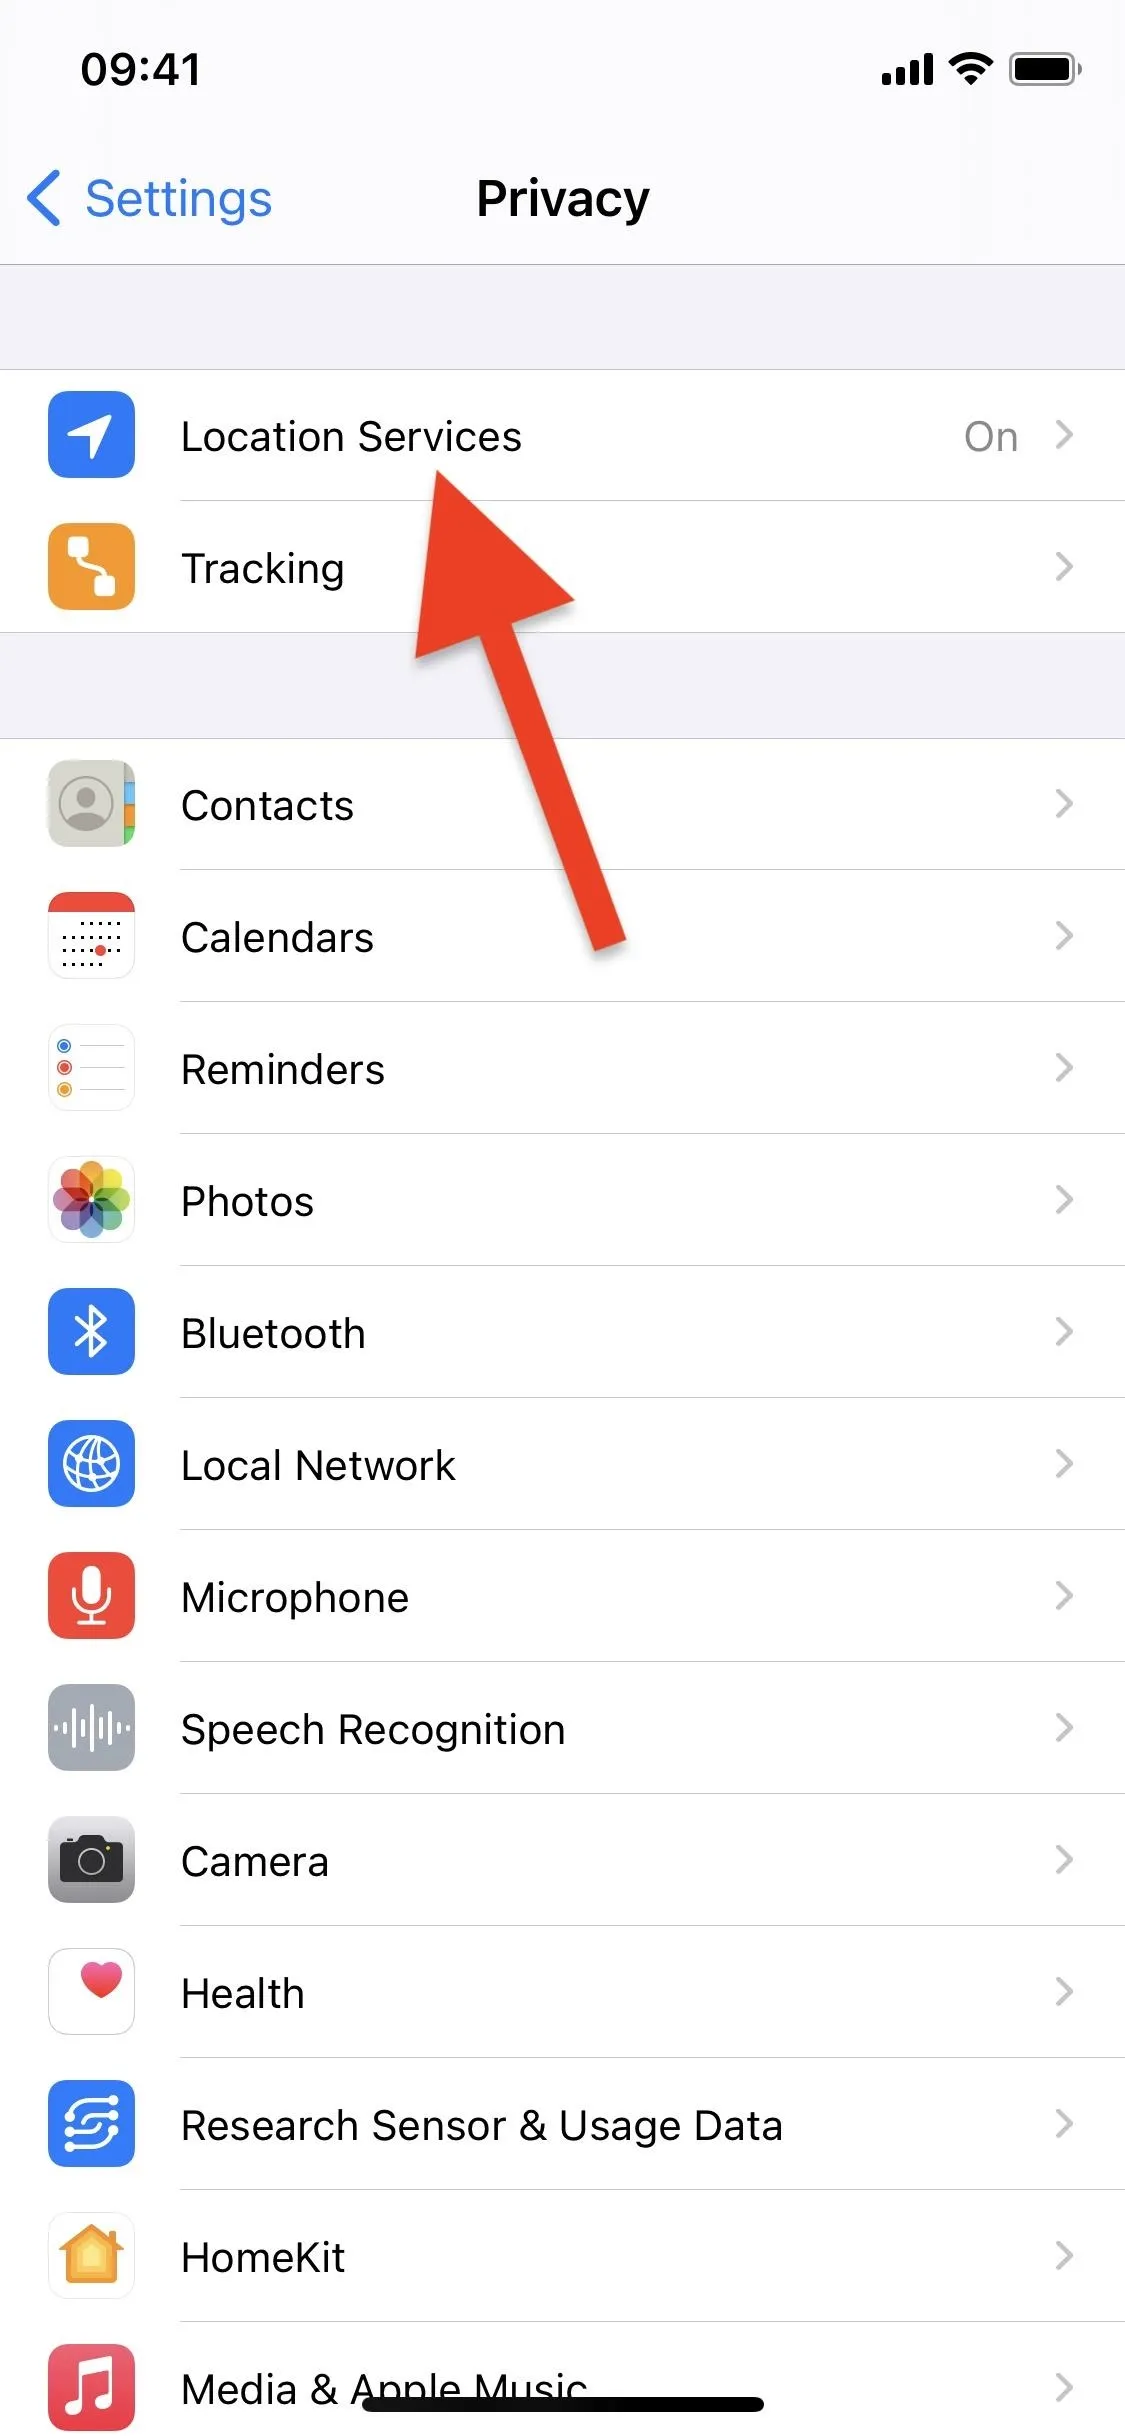
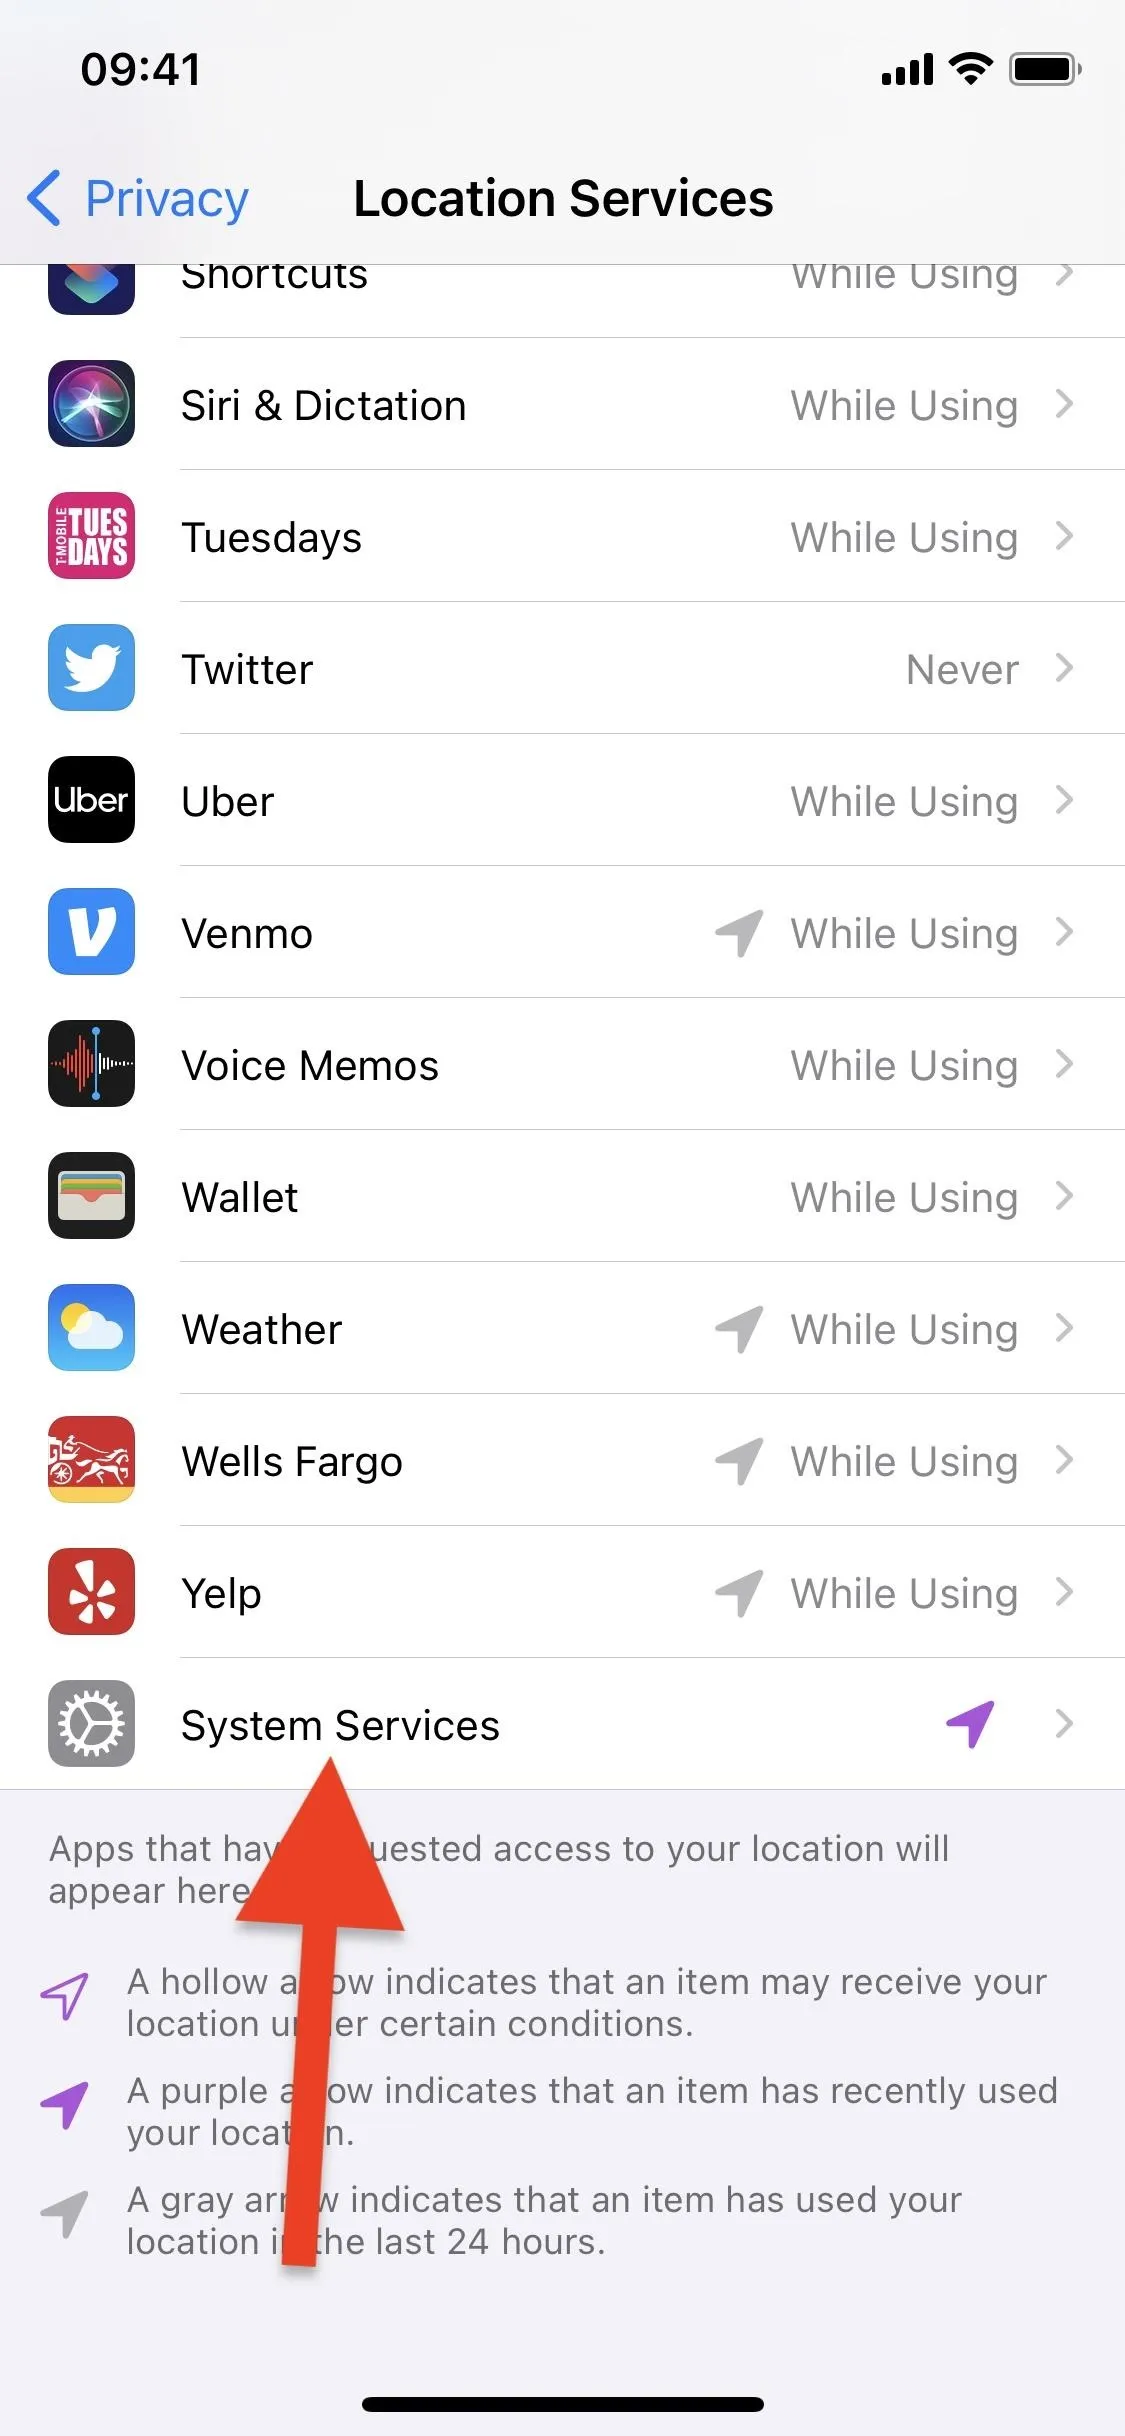
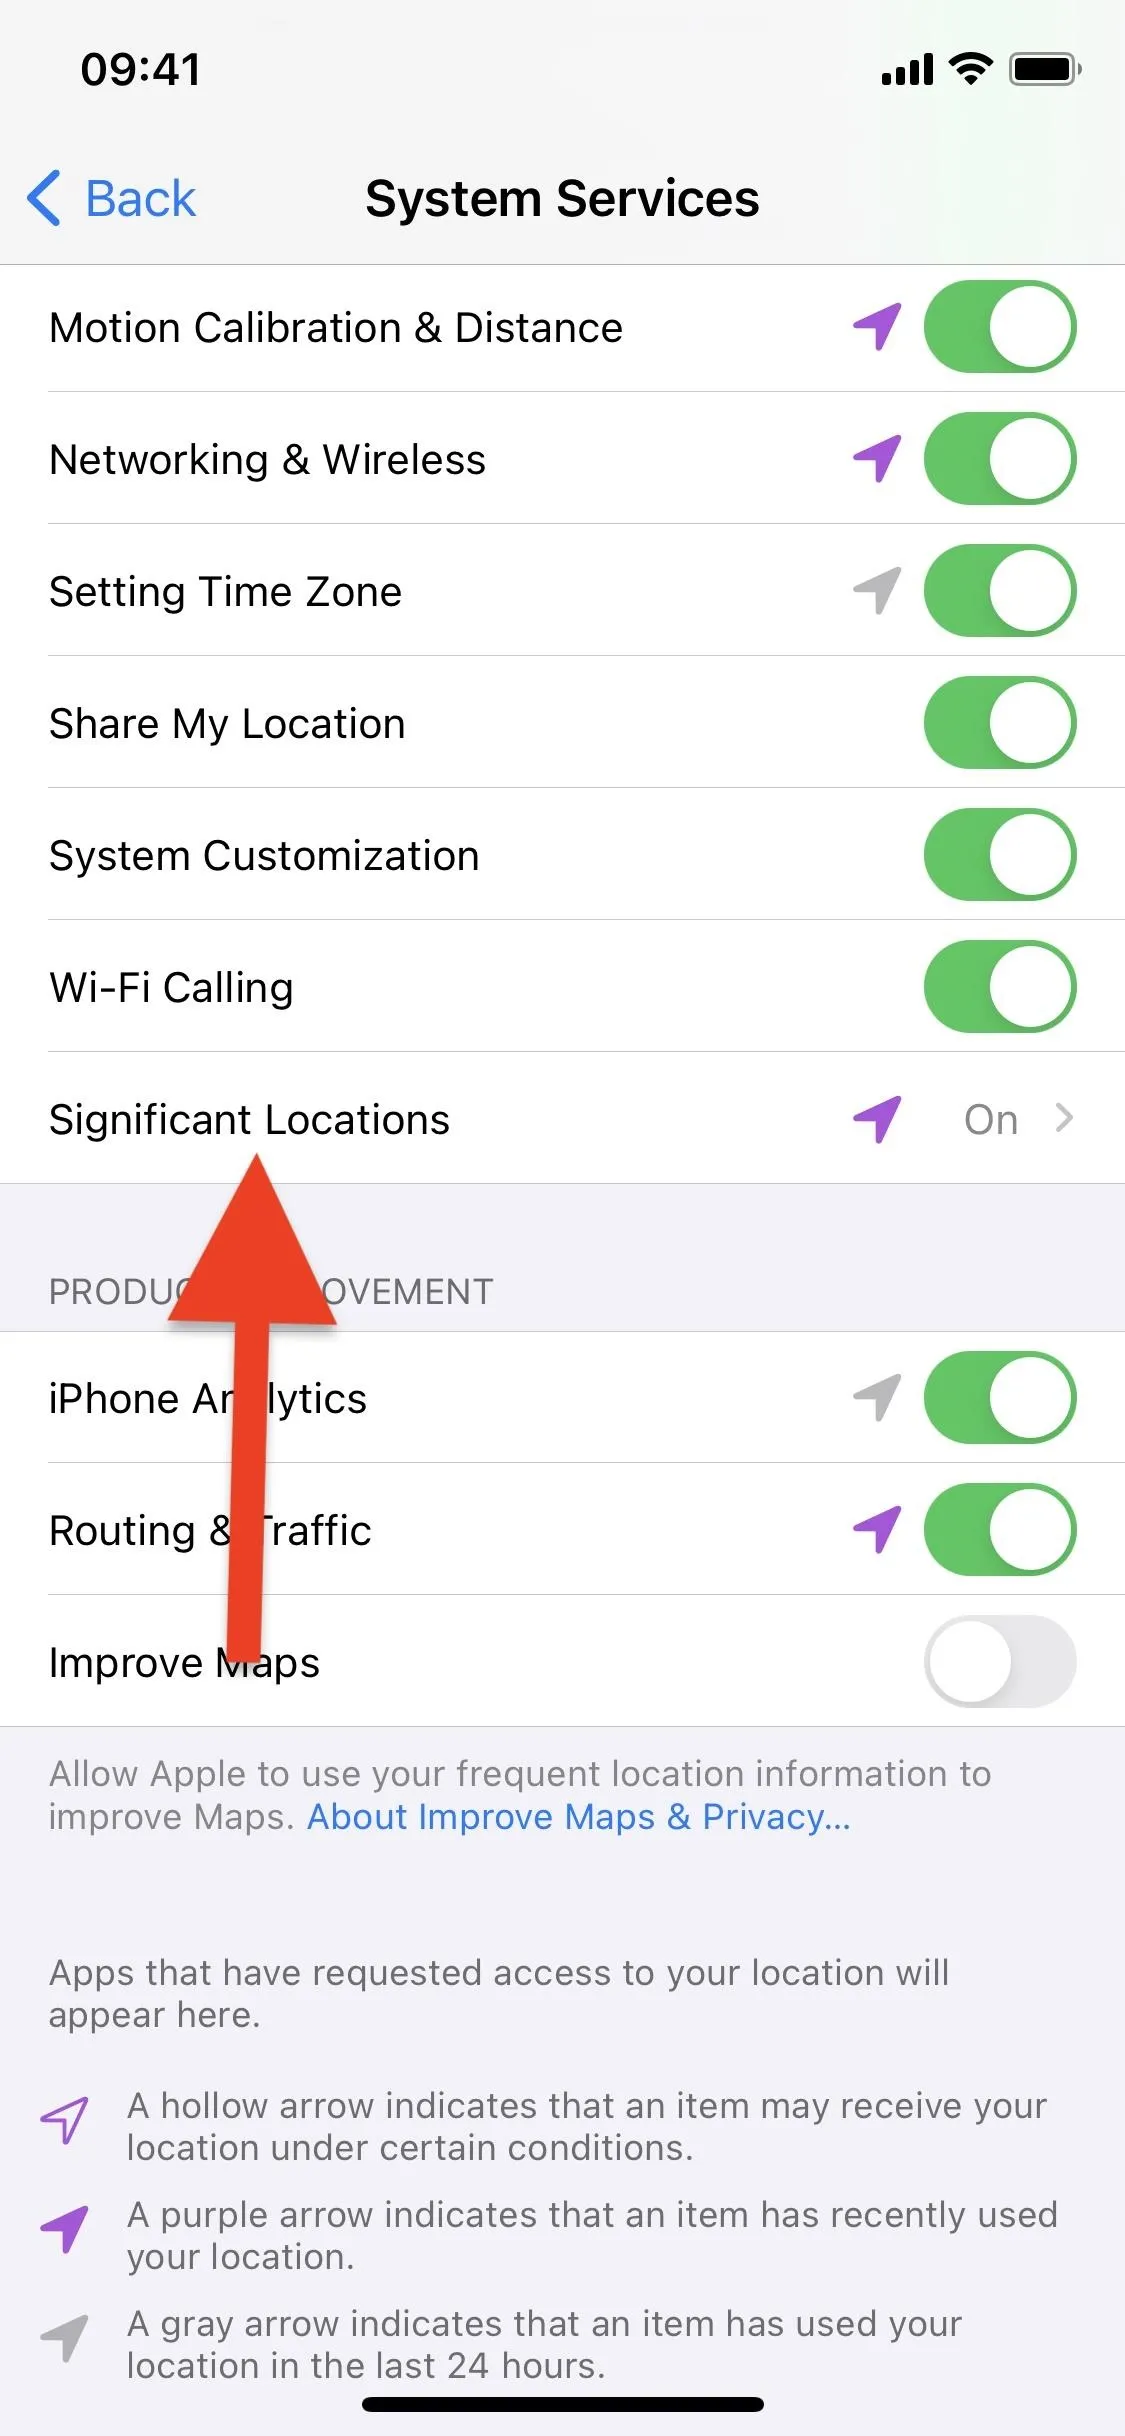
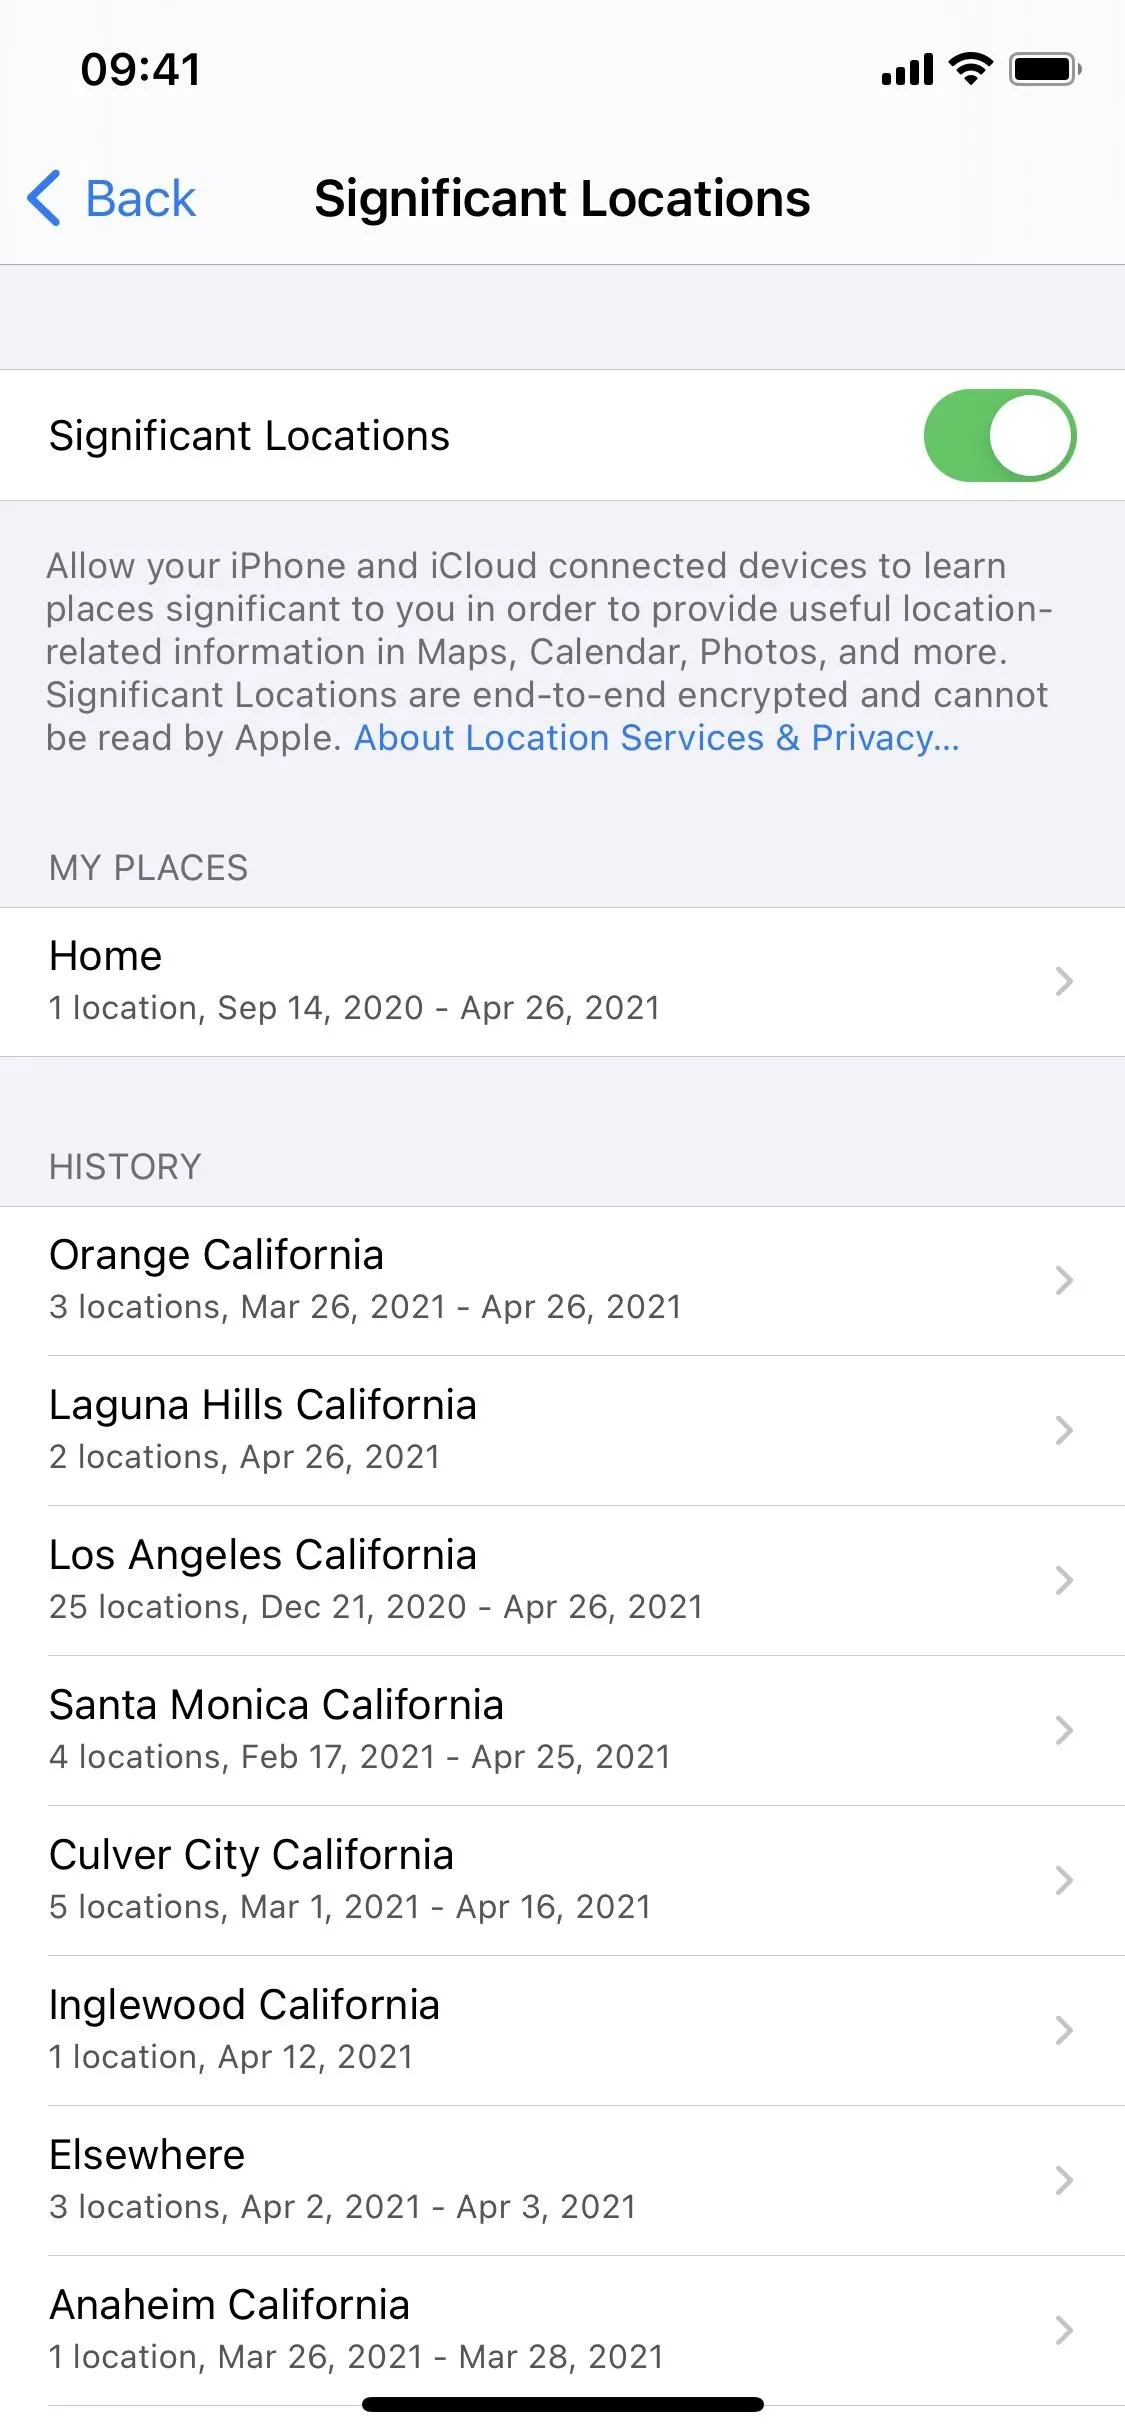
To view your Significant Locations, launch the Settings app and go to Privacy –> Location Services –> System Services –> Significant Locations.
Before you can see your most-visited locations, you'll need to use either Face ID, Touch ID, or your passcode to proceed. If you don't have a passcode set up, you don't have to worry about any of those, but why don't you have a passcode set up?!


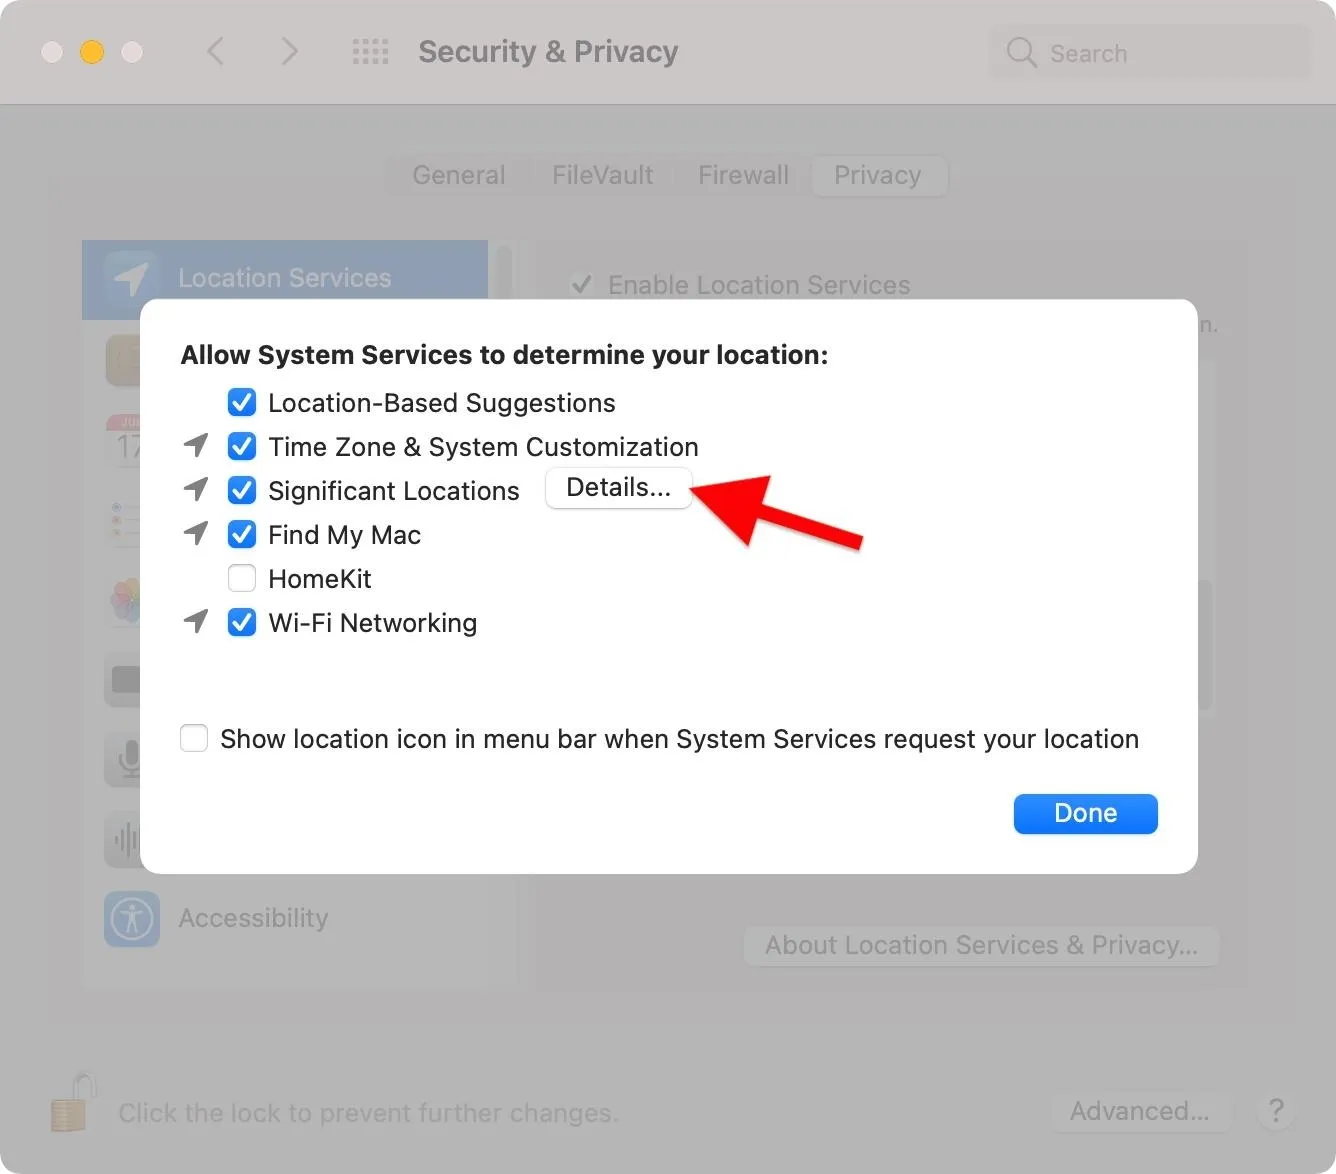
On macOS, you can review Significant Locations at System Preferences –> Security & Privacy –> Privacy –> Location Services. If locked, click the lock and enter your password. Then, choose "Details" next to System Services in the list of options. Finally, choose "Details" next to Significant Locations.
Your 'My Places'
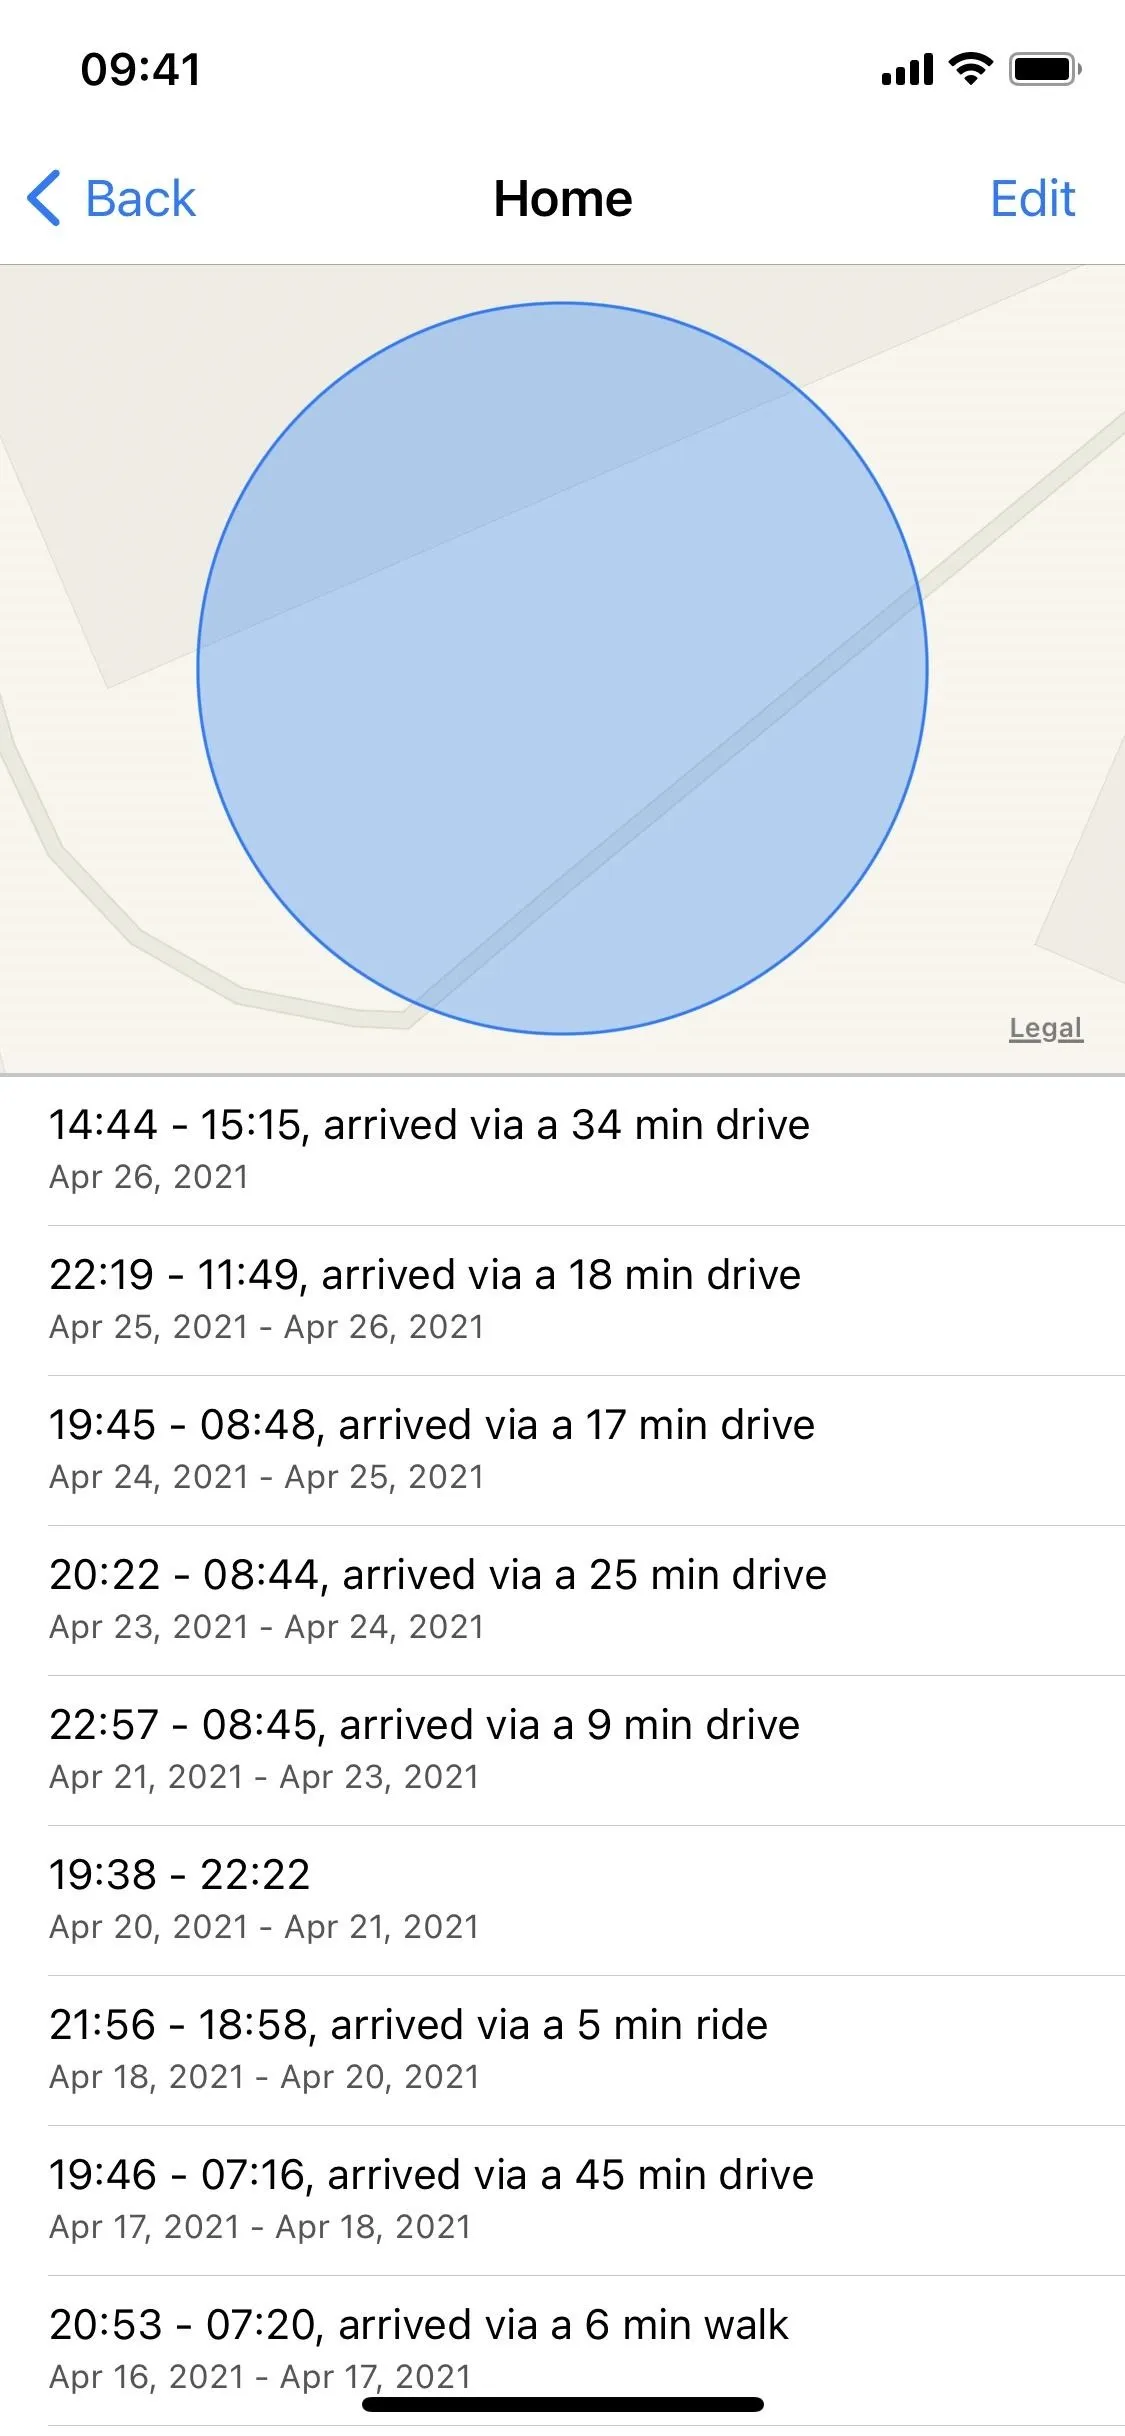
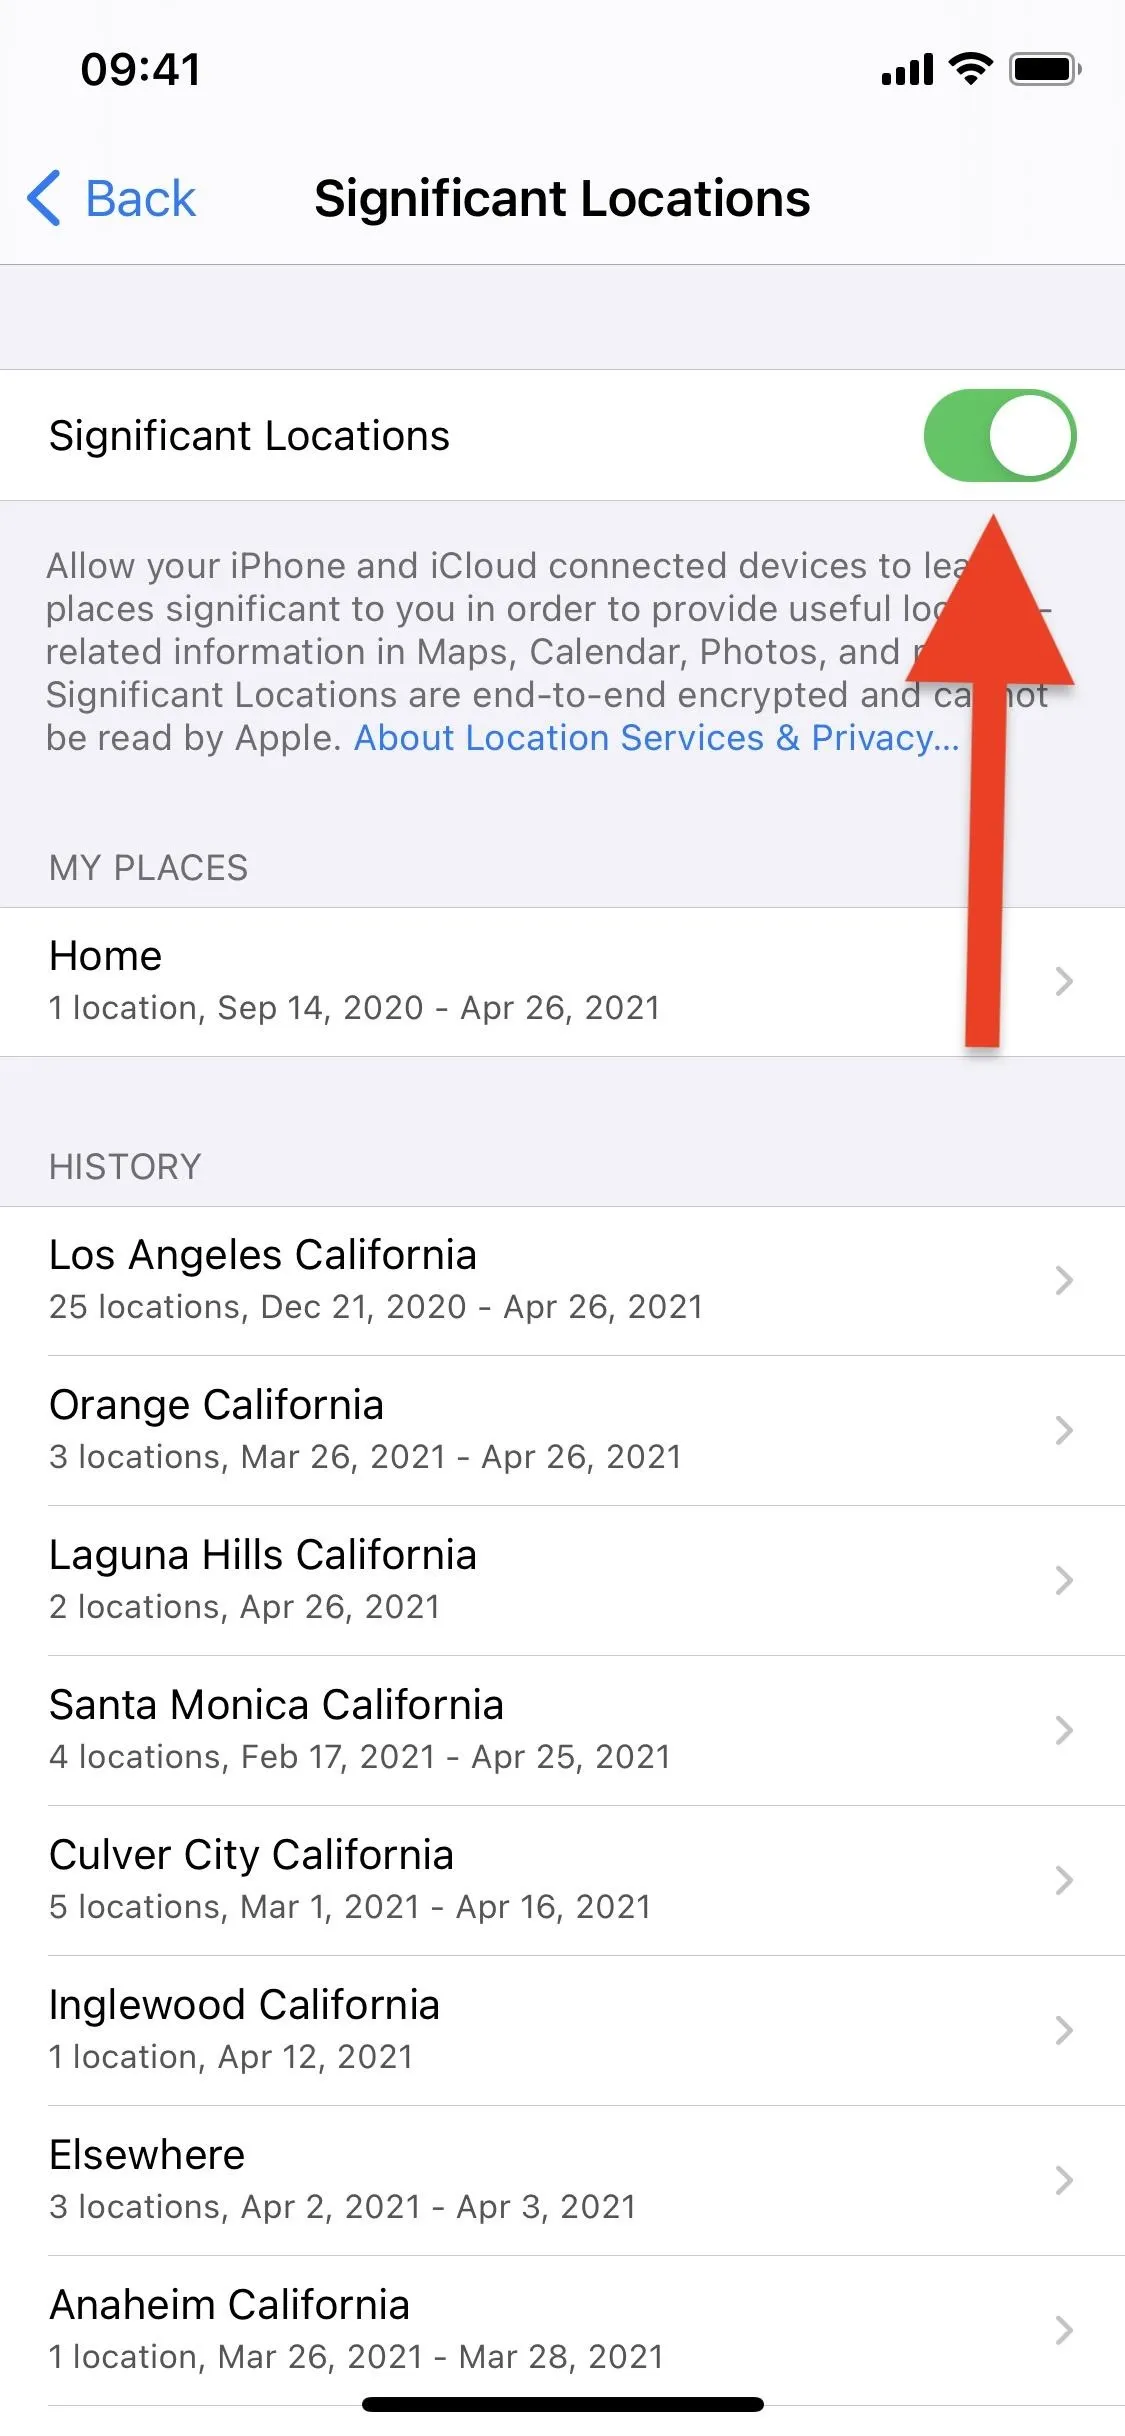
Once you're in Significant Locations, you may see a list of My Places, which are the spots that Apple recognizes as your home or work. These locations can be manually inputted into Apple Maps if you don't see them here.
After opening up this menu item, you can see all of the time you spent at those locations, as well as the time it took for you to arrive there from elsewhere (driving or walking) — even if you didn't use Google Maps, Apple Maps, or any other navigation service.


Your 'History'
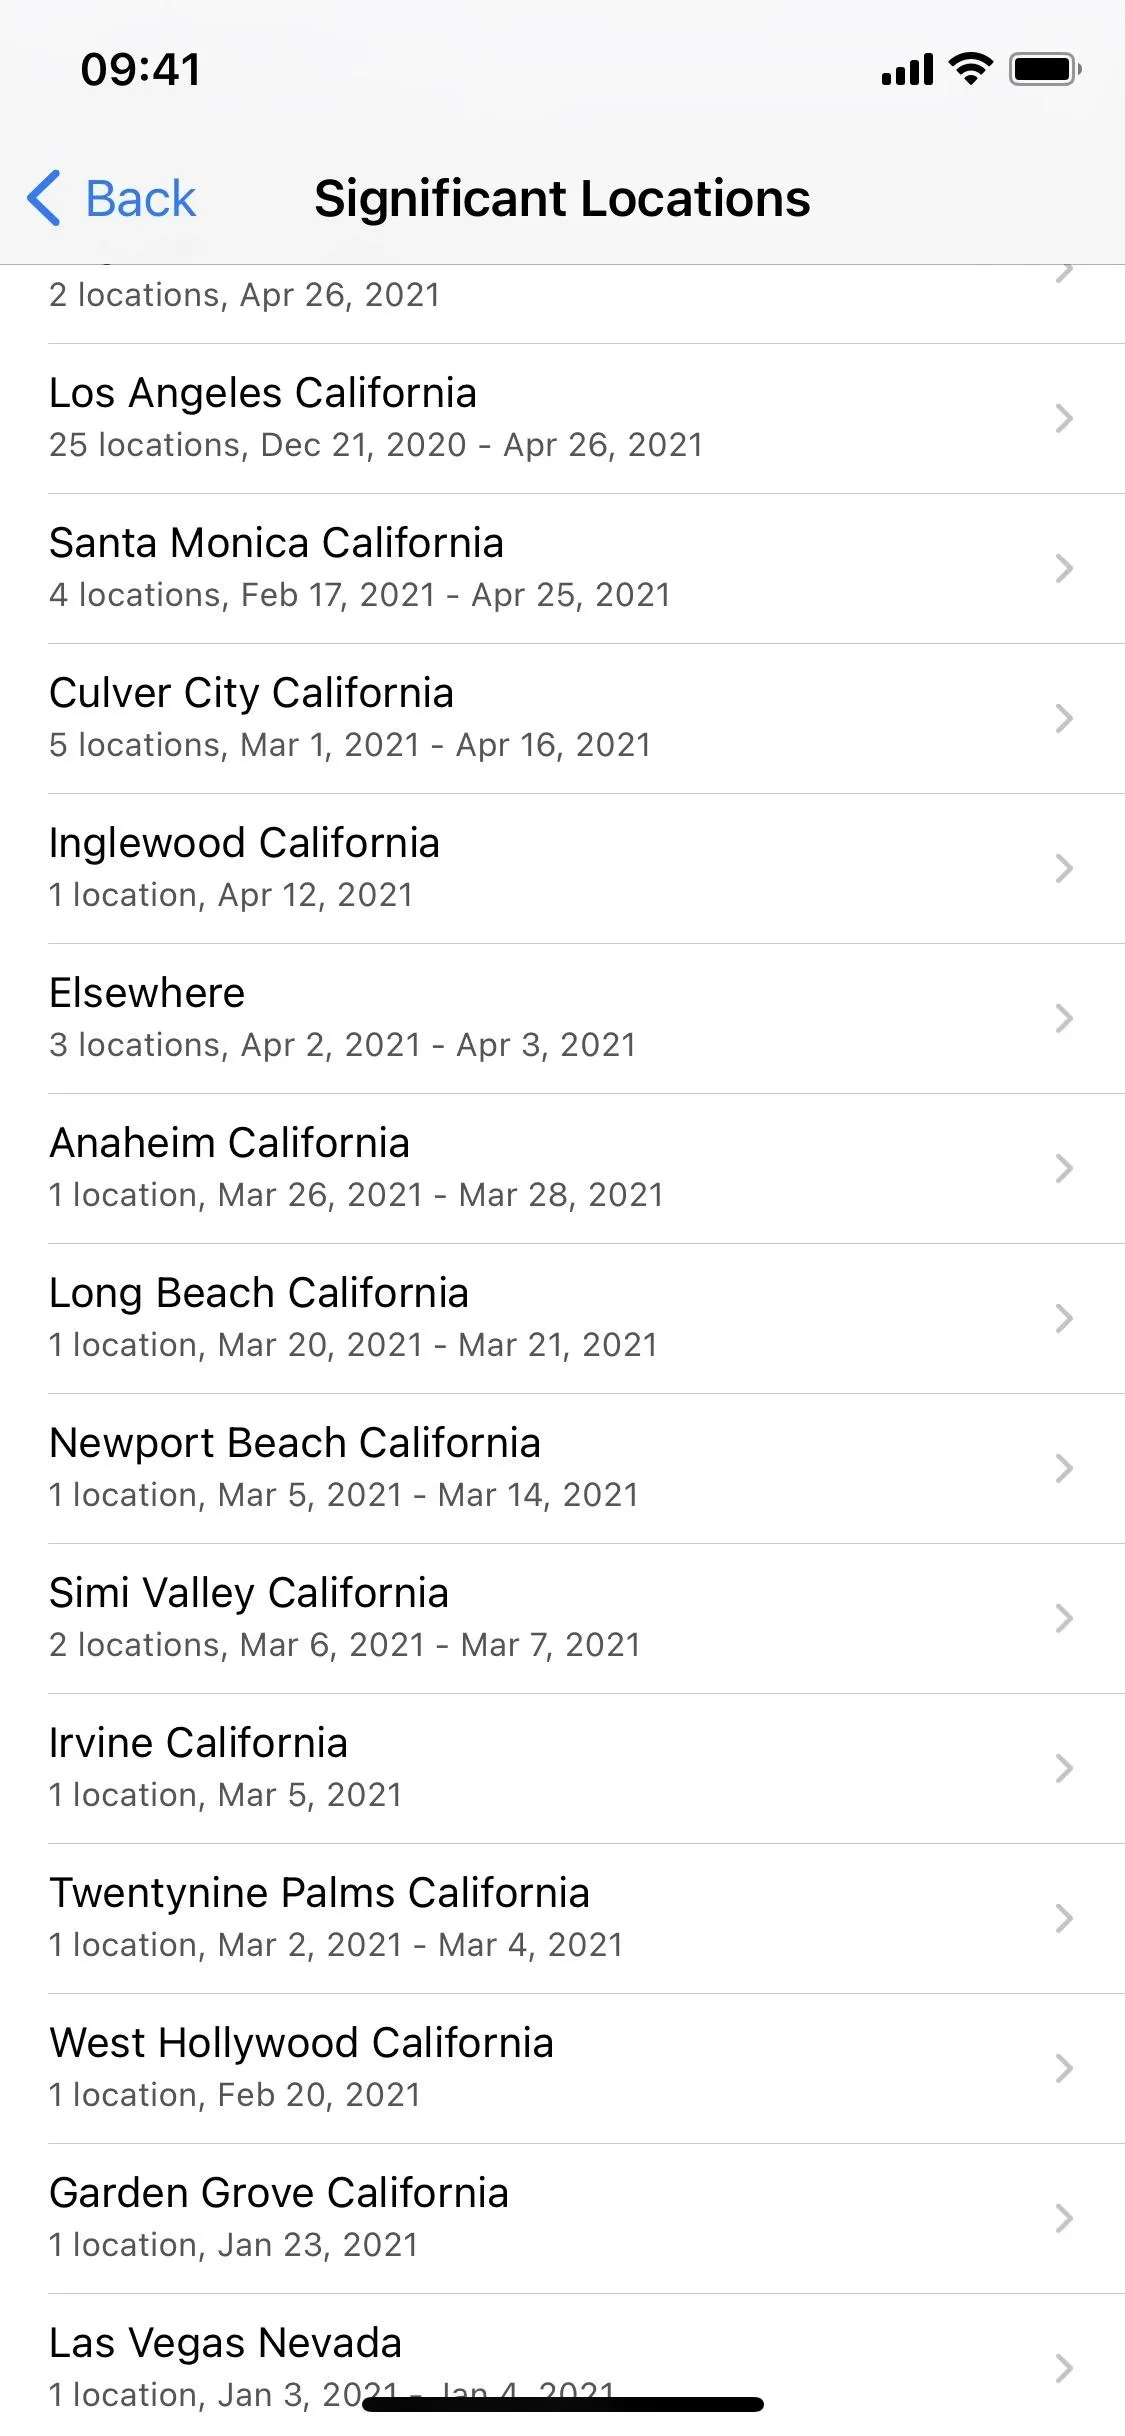
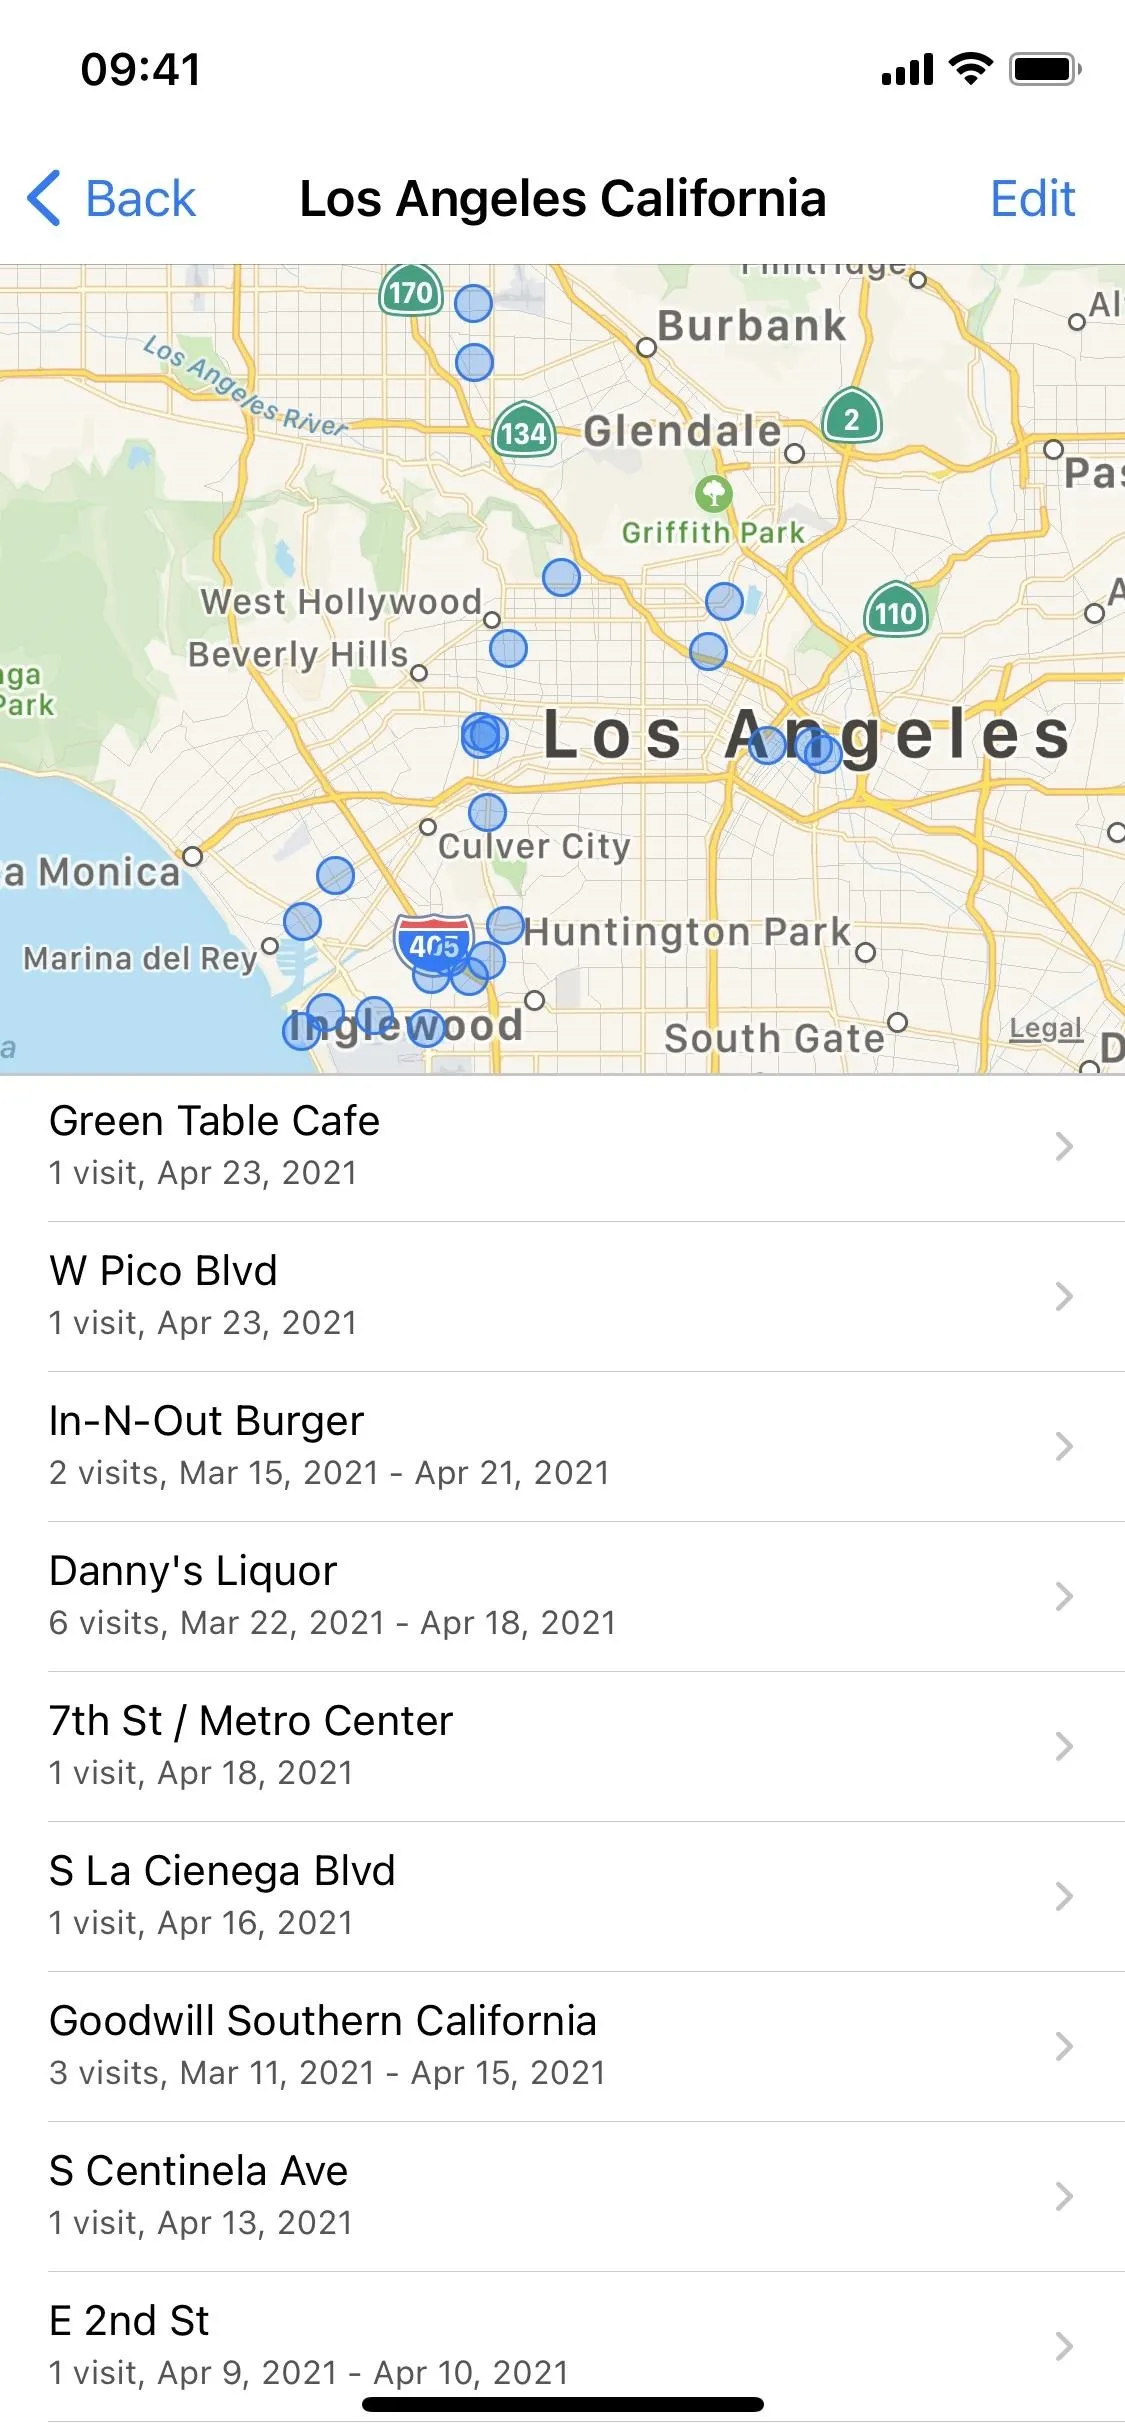
Under My Places, you'll see History, which includes locations you've visited with your iPhone that Apple deems "important," meaning that you've spent some quality time there. Each location will include the city and state, the number of locations visited within that location, and a date range for when you were there.
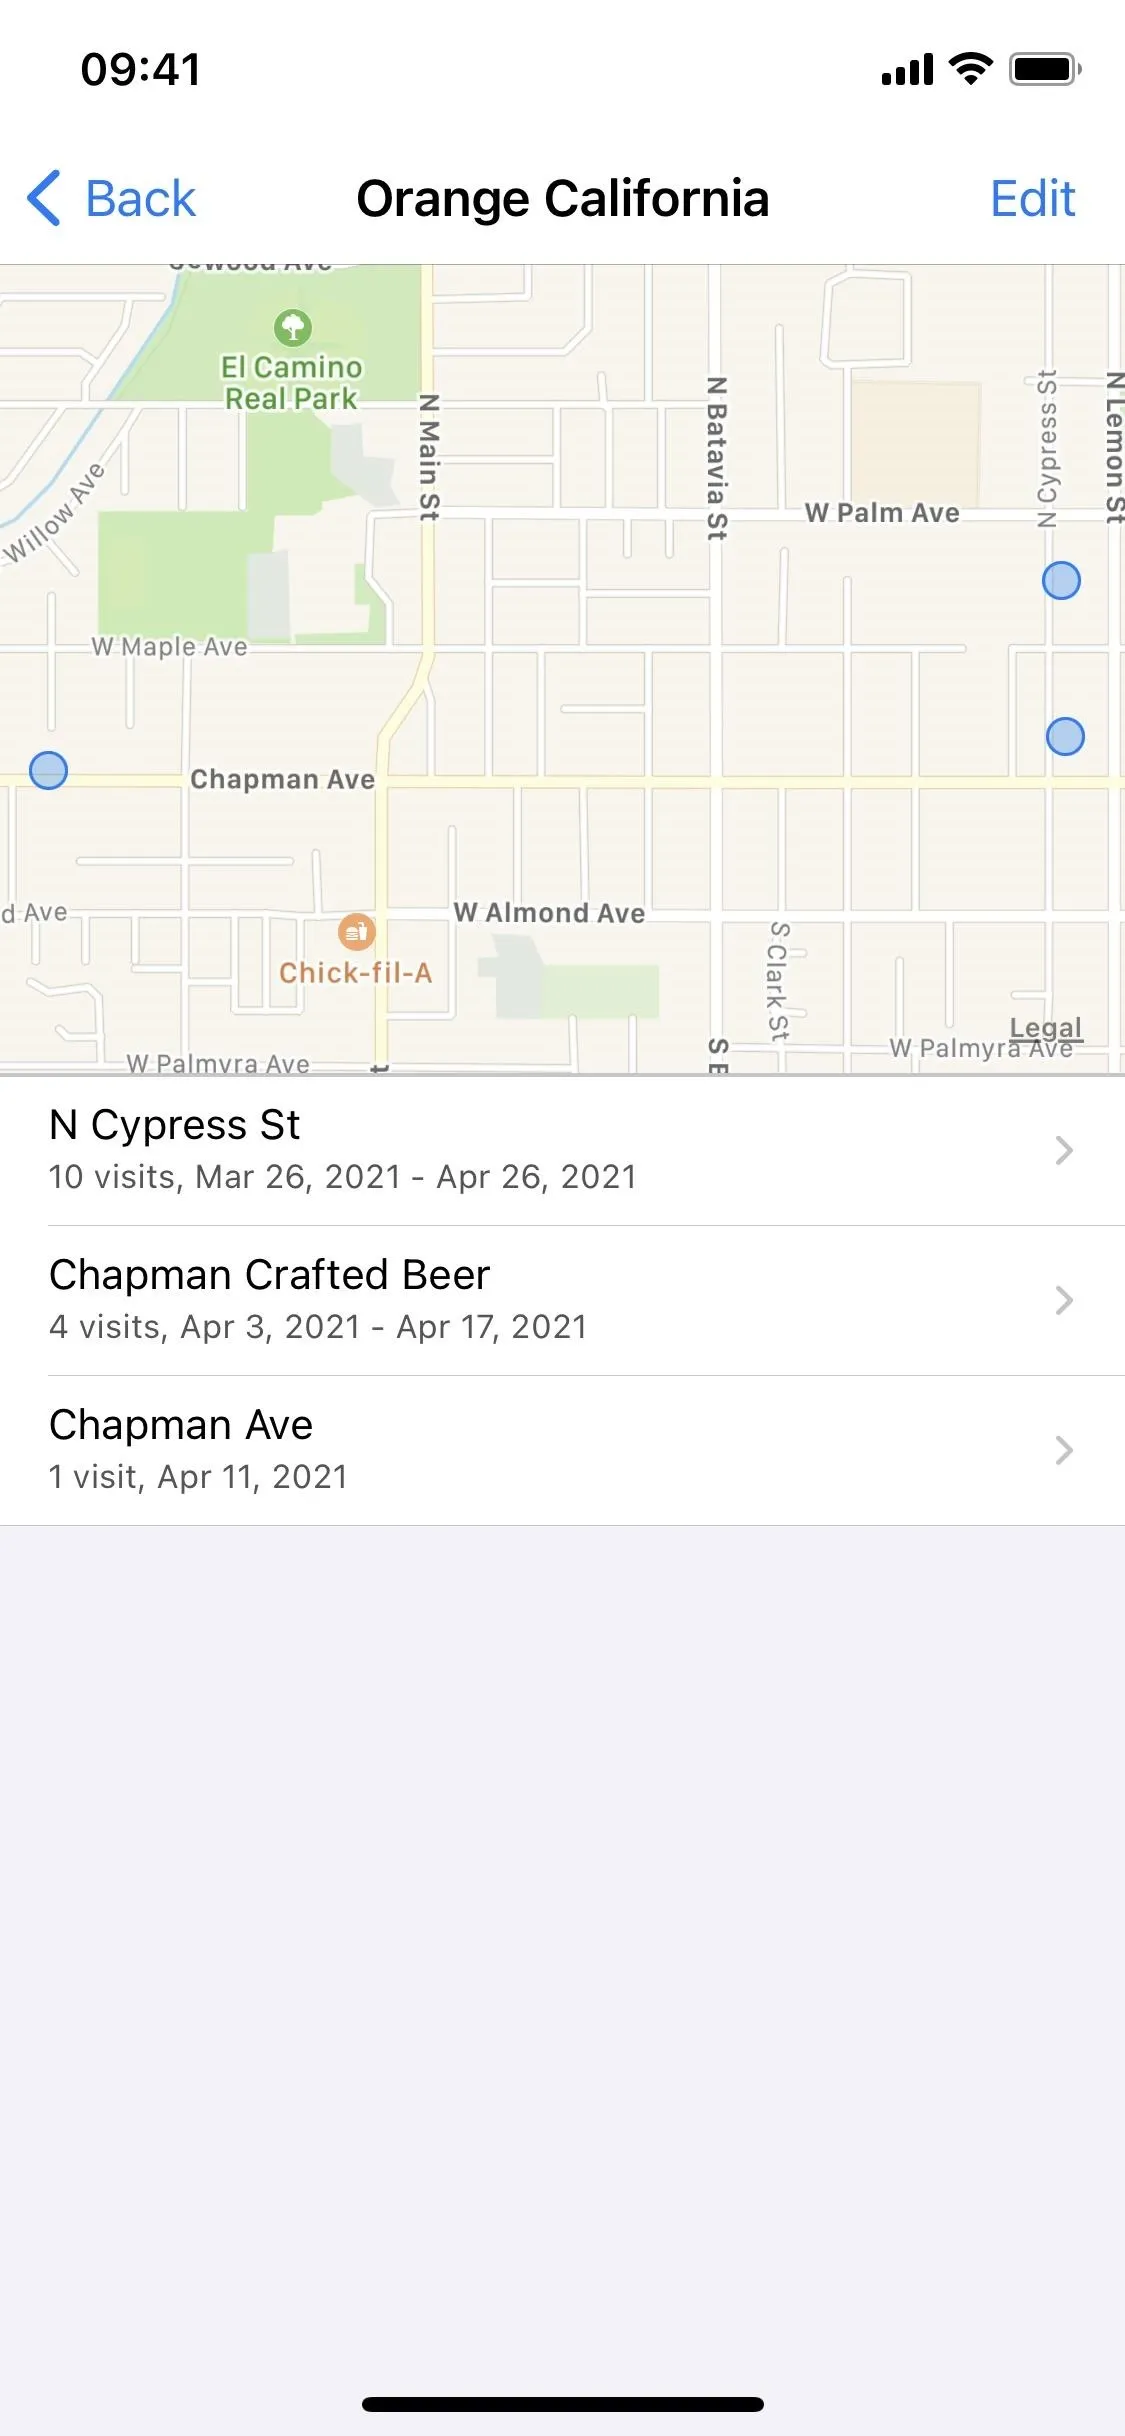
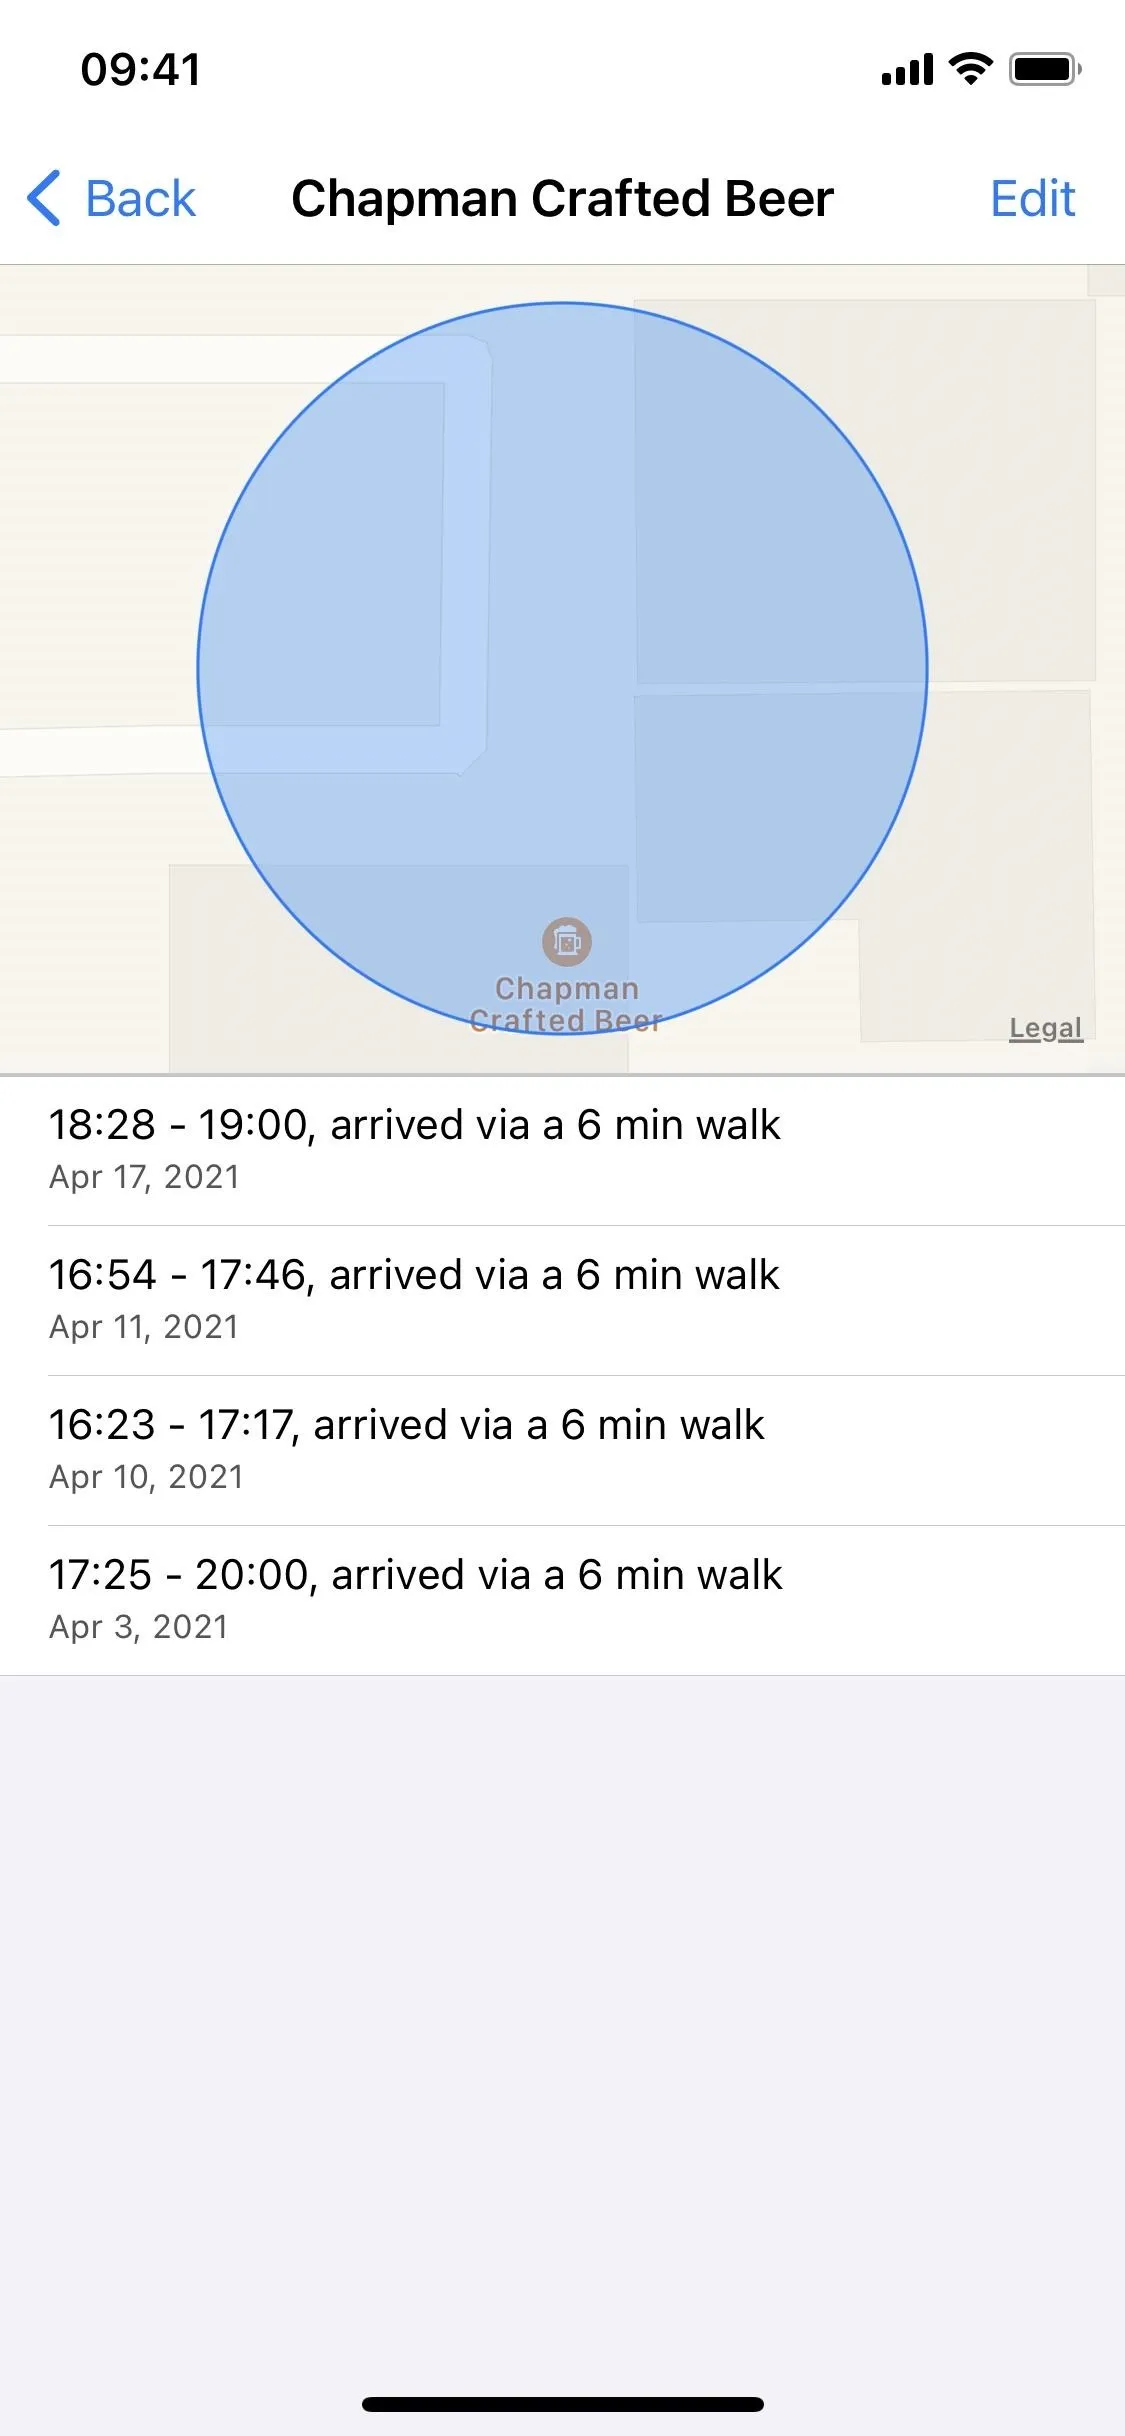
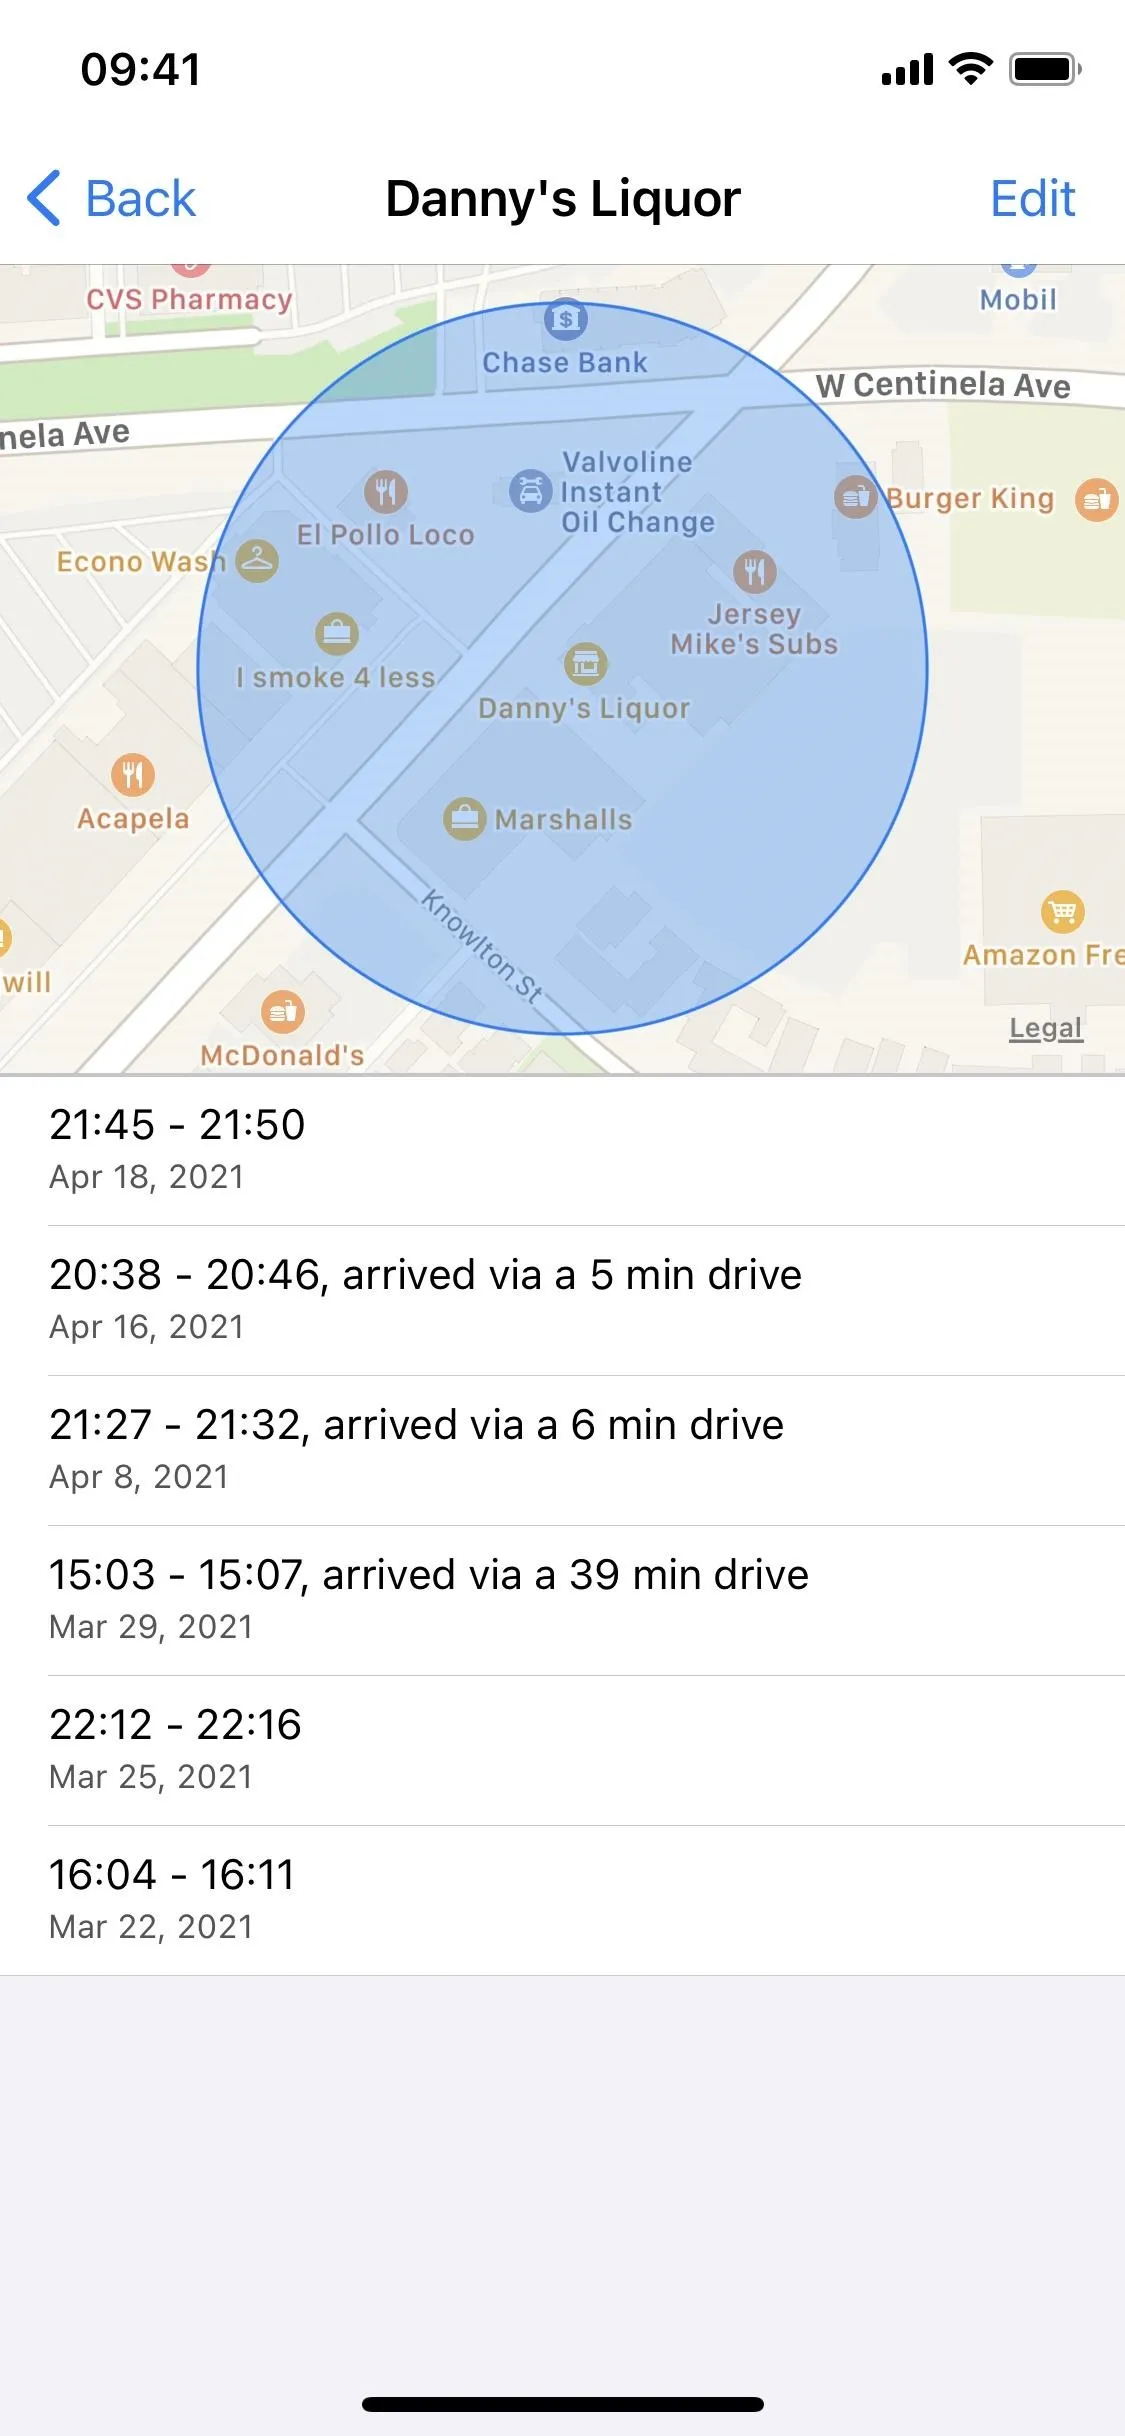
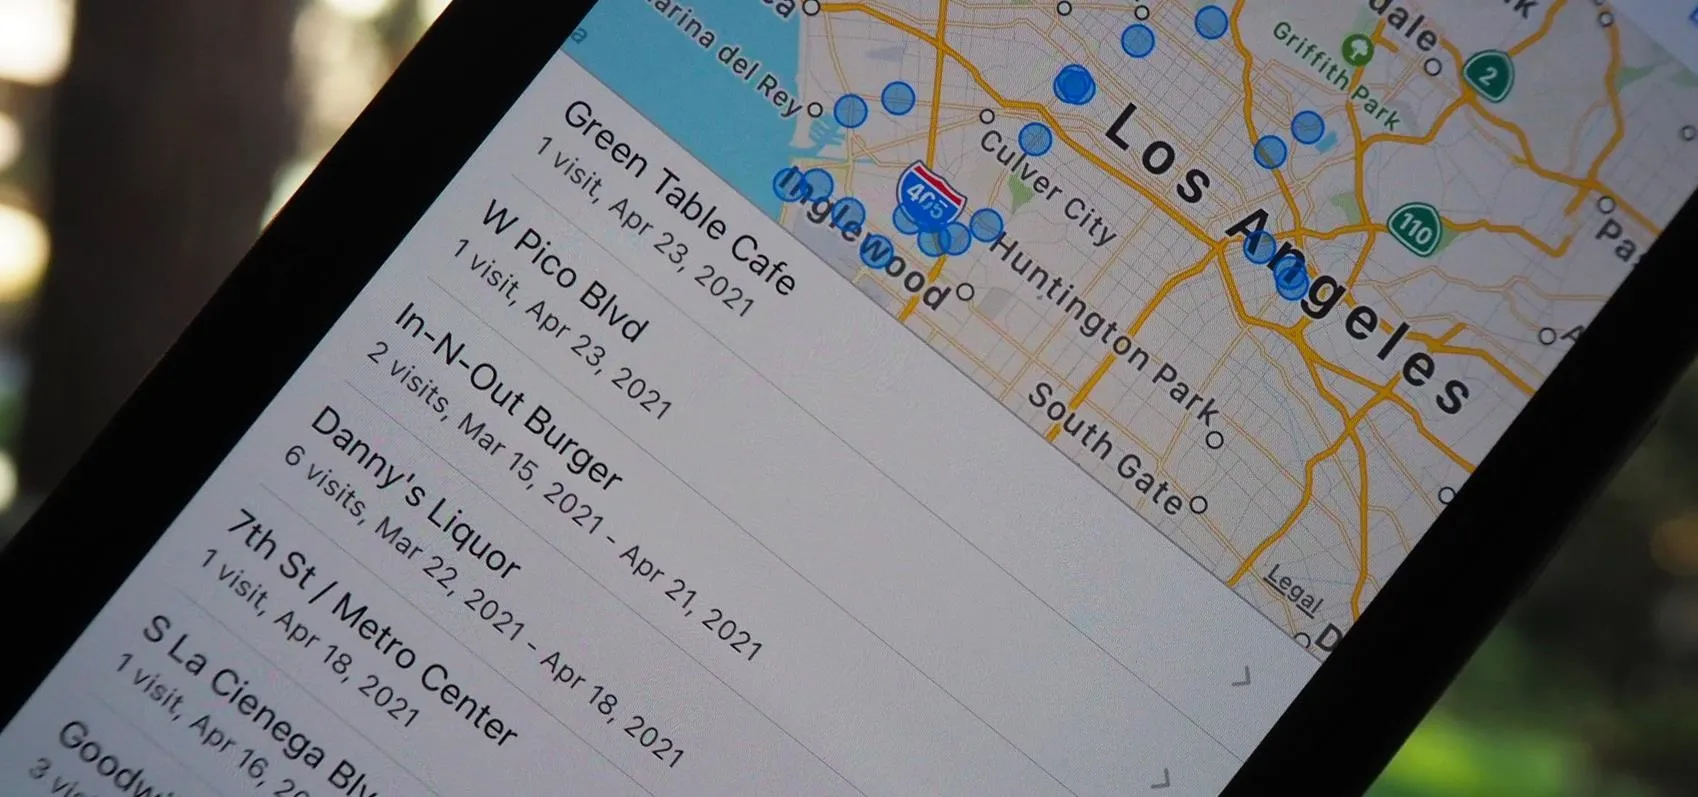
Tap a city location, and you can view more specific locations you visited there, narrowed down to the street address or location (businesses, parks, etc.). If you tap on one of these specific locations, you can view the times you were there and how long it took you to get there.


2. Deleting Specific Significant Locations from the List
Let's say someone does have access to your iPhone and your Significant Locations or that someone may gain access in the future, whether allowed by you or not.
They could be spying on your frequented places and history, but you can throw them off your scent by deleting a few important entries that hide some of your most valuable travels. That way, they can still see all the crap your iPhone has collected, so nothing hurts you in the long run, and they won't even notice you're doing it.
While that may seem far-fetched, anything is possible, and your iPhone's security isn't foolproof. Zero-days are being found and exploited by hackers every day, and some of those are bound to target iPhones.
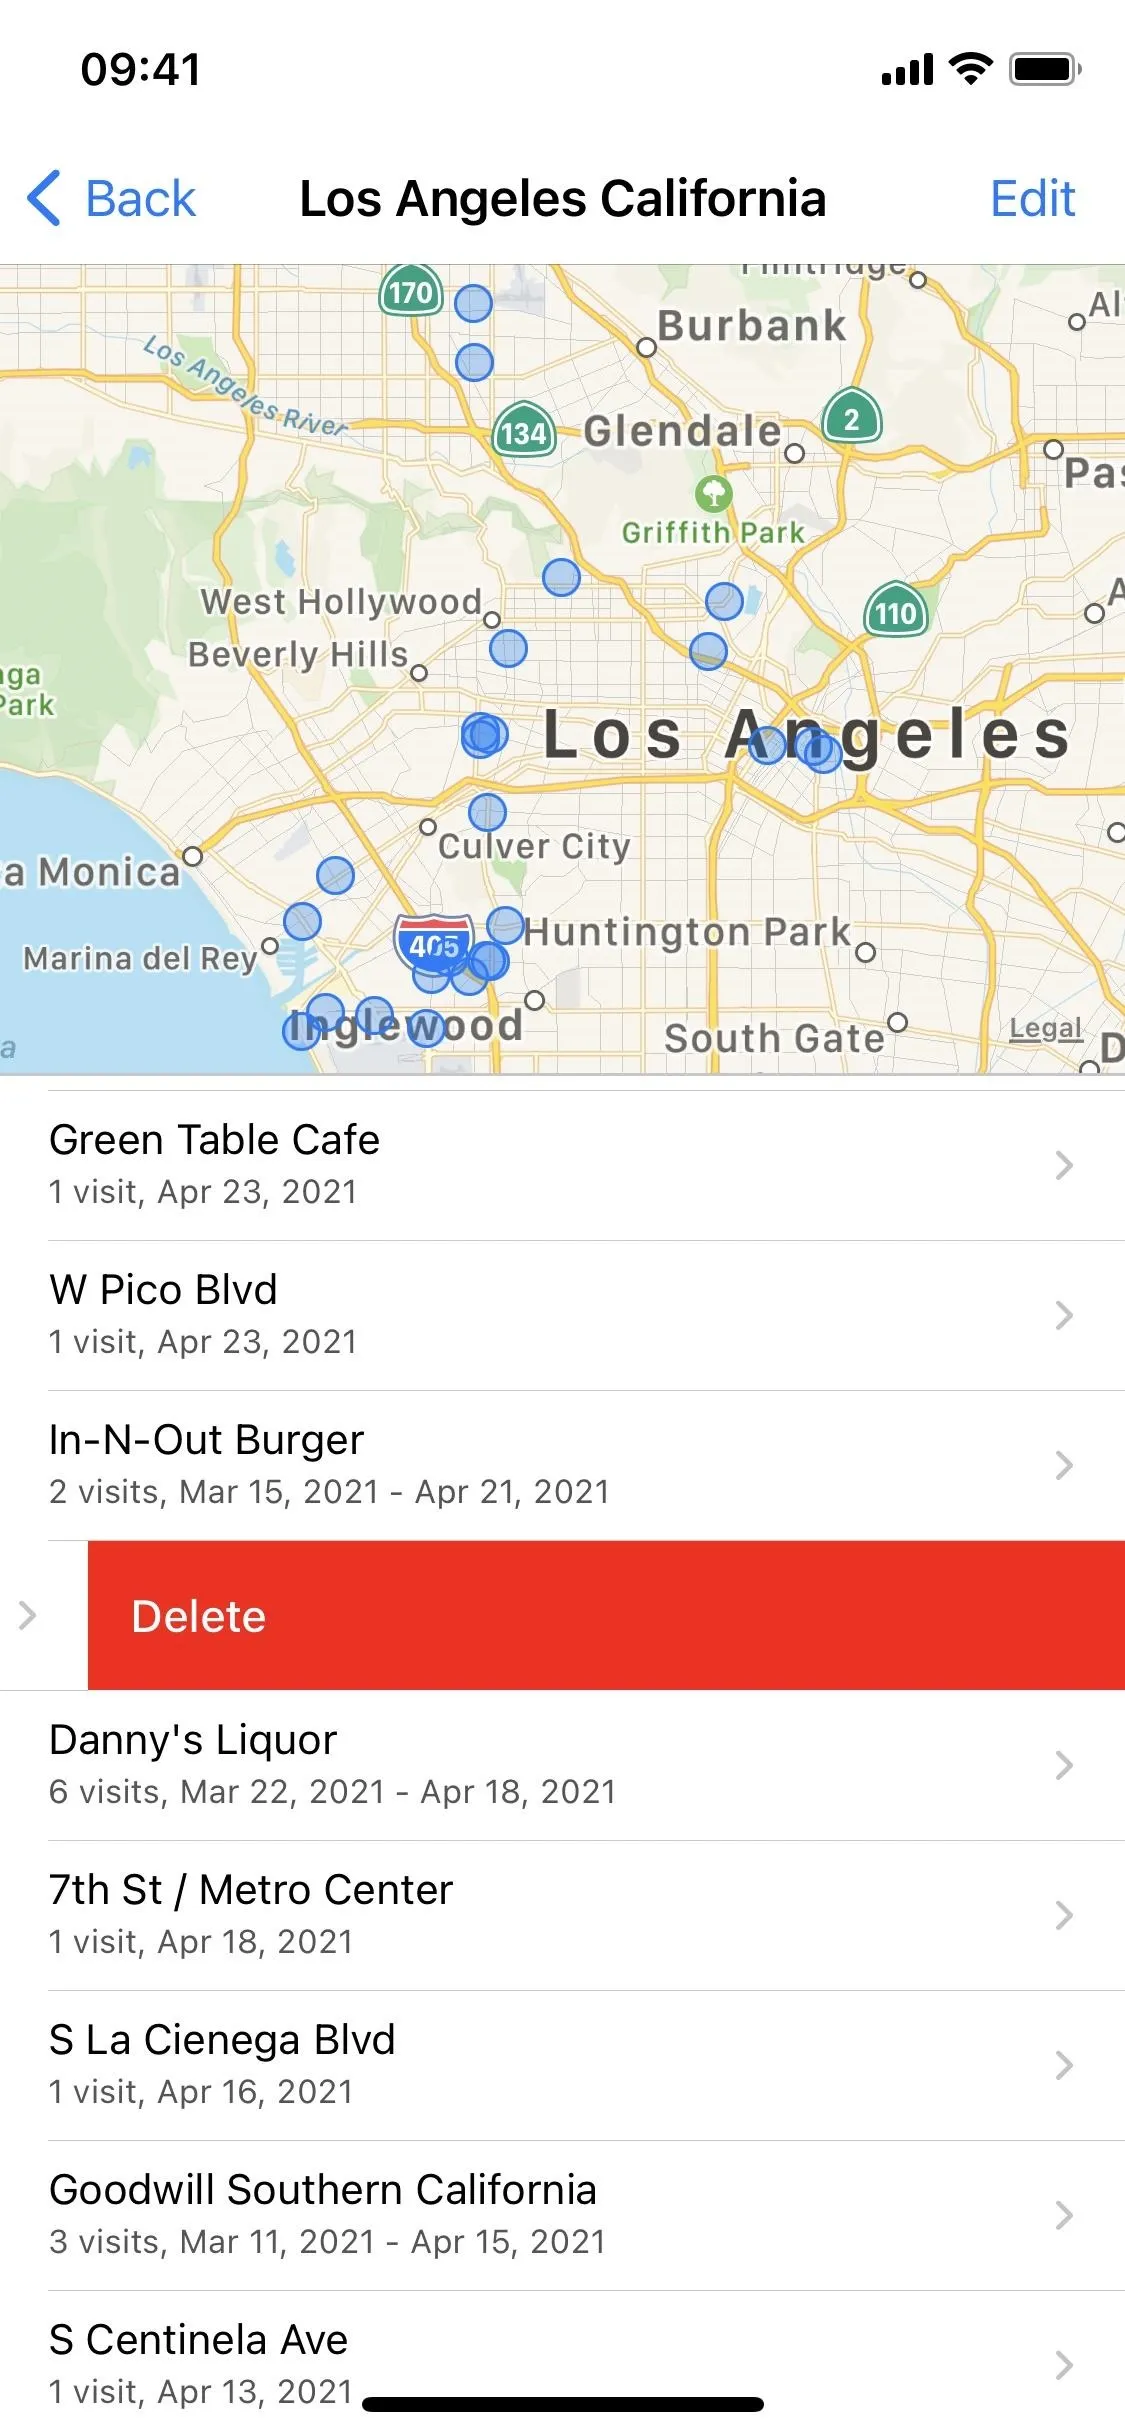
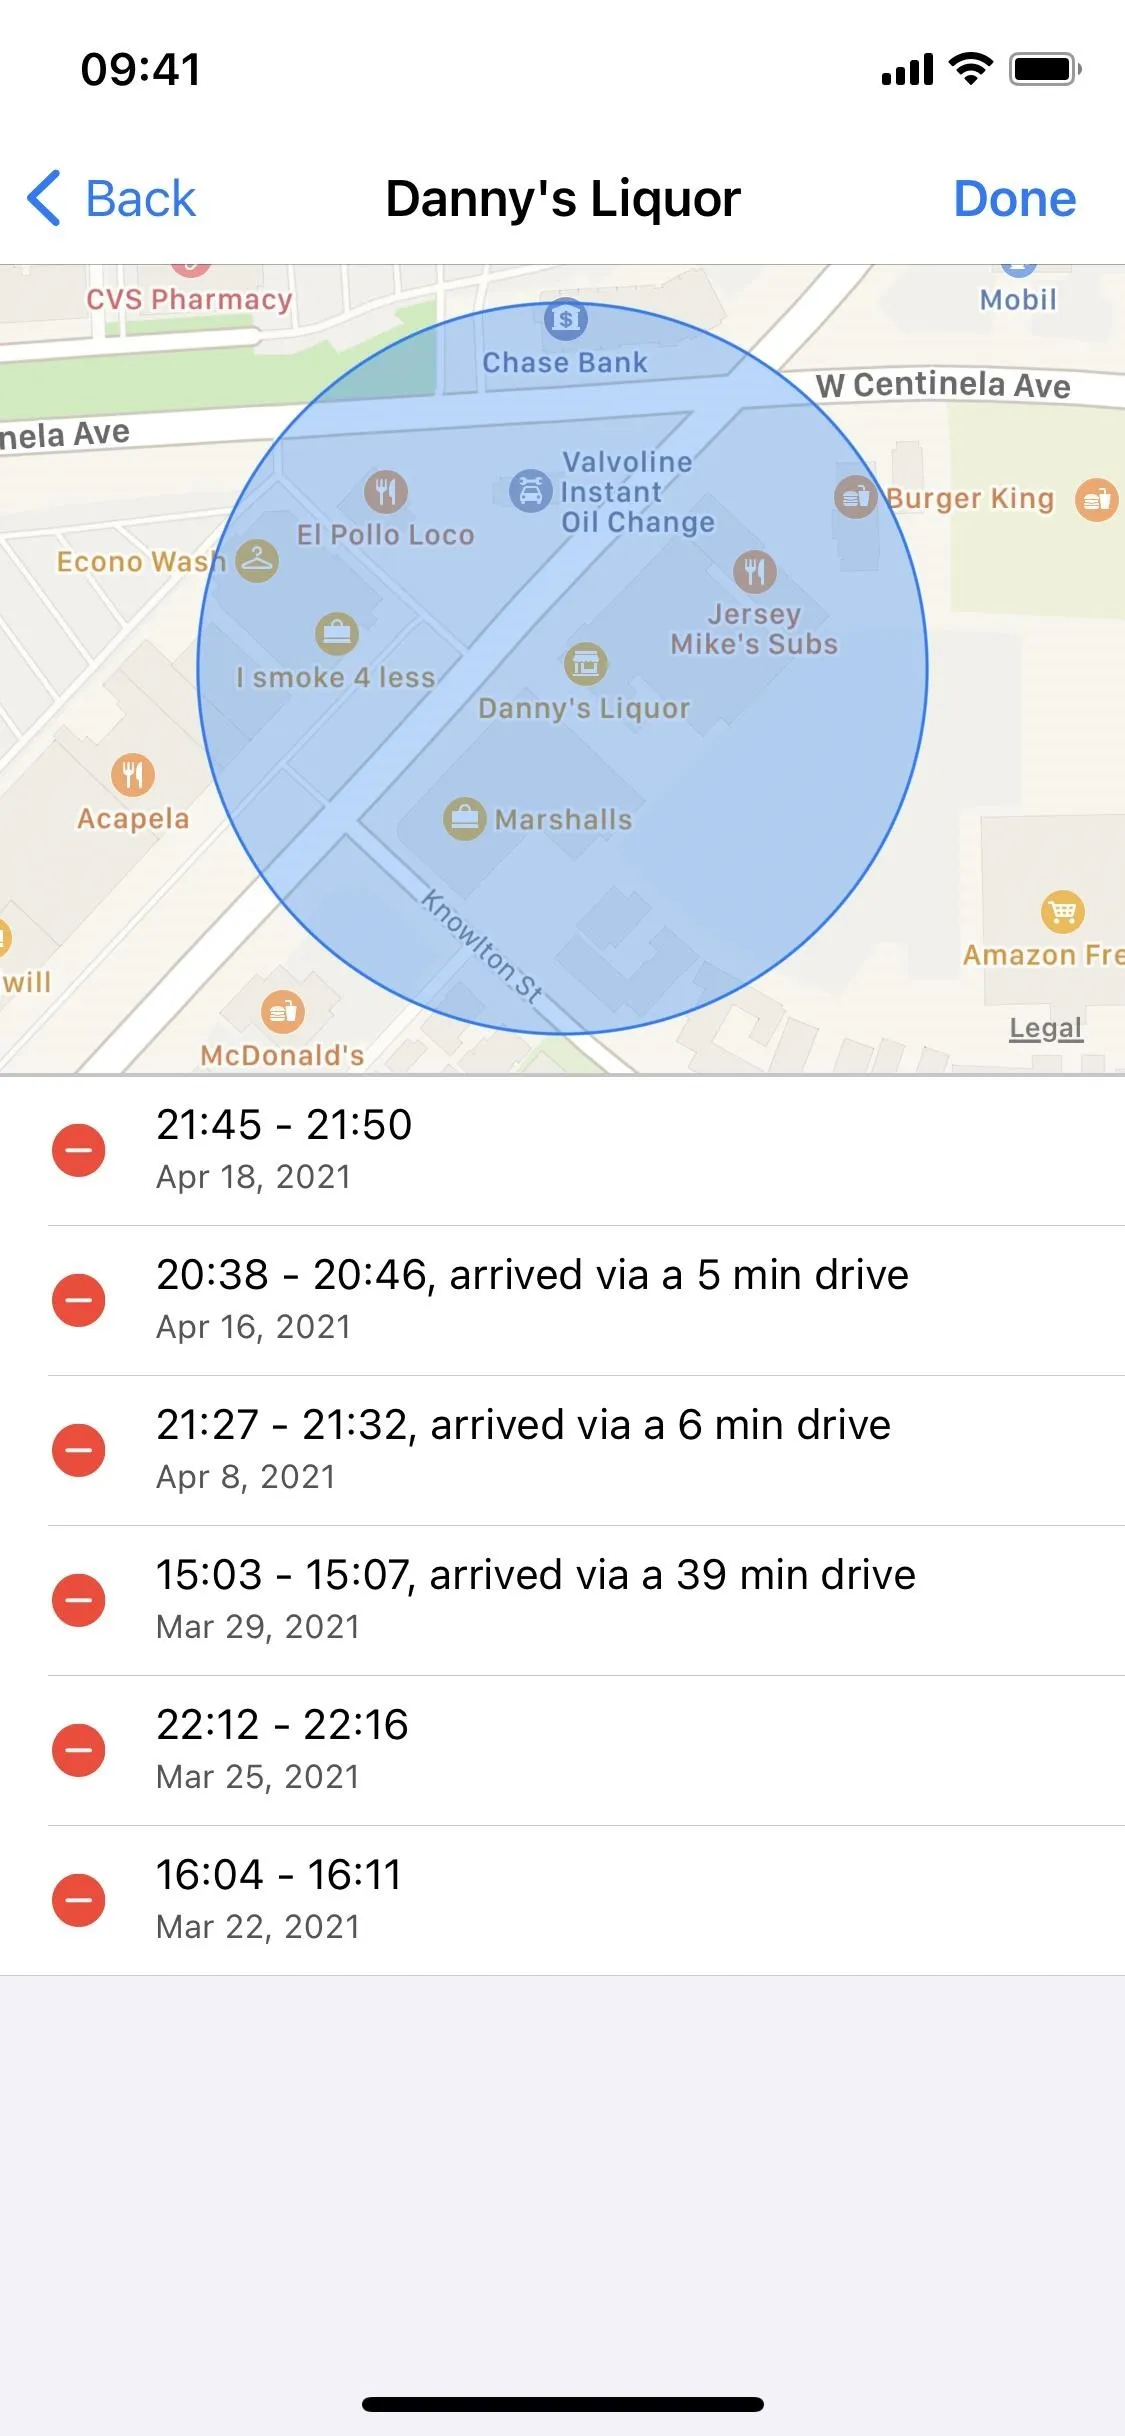
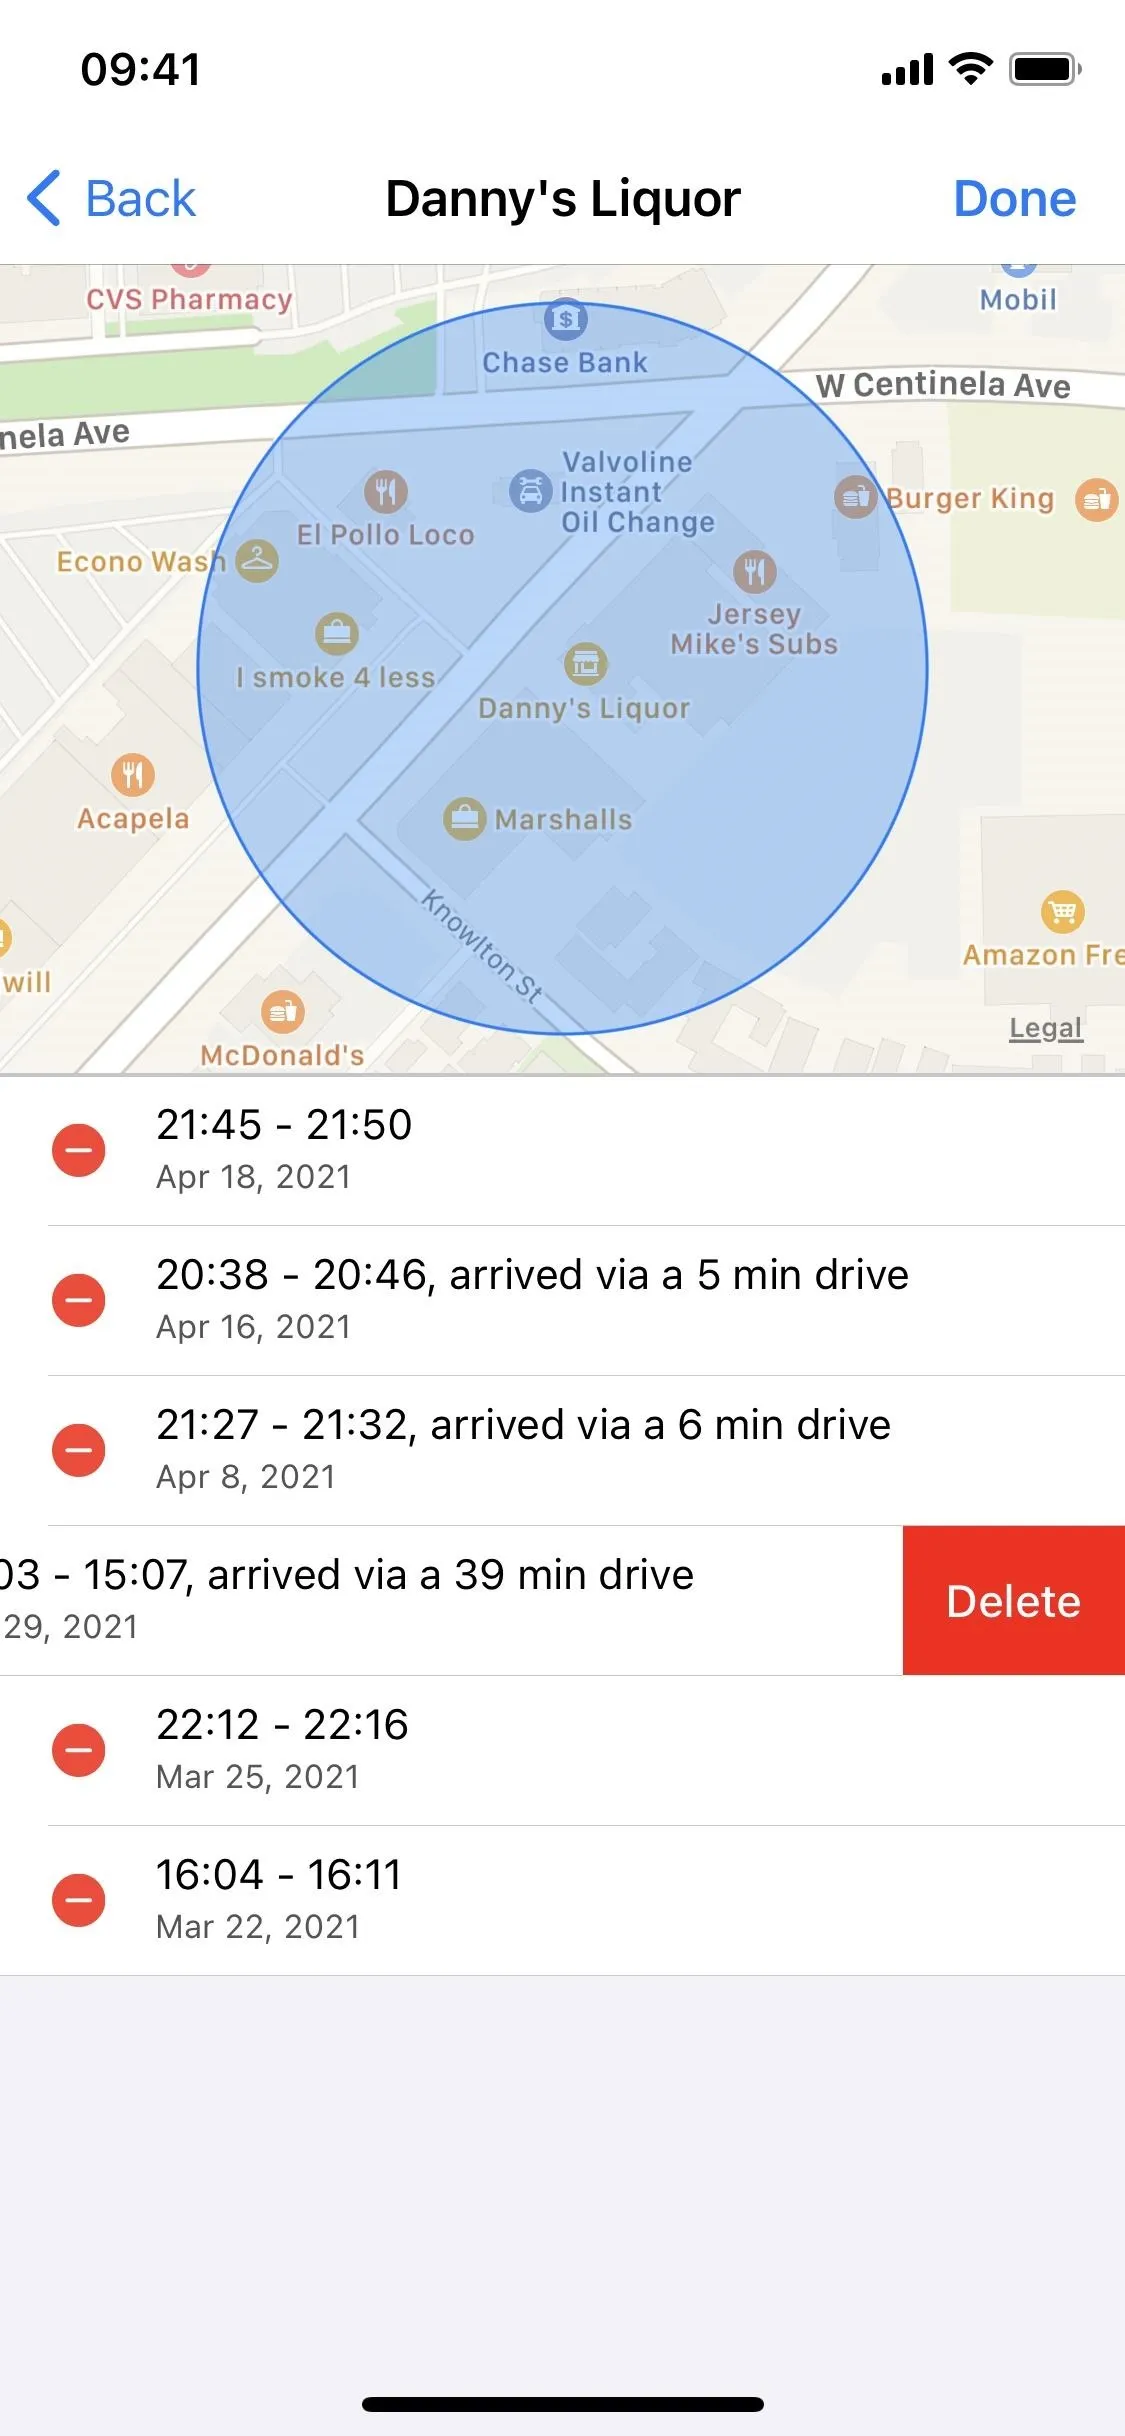
To remove an individual location, tap on any listing that appears under My Places or History. On the list of more specific locations, do any of the following, which will delete the entry on your current device and all of your iCloud-connected devices.
- Short-swipe left on a location and hit "Delete."
- Long-swipe left on a location to auto-delete it.
- Tap "Edit," hit the red minus (–) icon next to the location, and tap "Delete" to remove it. Hit "Done" to return.


You can also erase specific times that you were at each location. So if you open any location that has "visit" in the description, you can use the same three options above for wiping out locations to erase certain time slots.
This comes in handy if you want people to know that you're definitely not trying to hide anything but that you also don't want to incriminate yourself if something happened at a specific date and time.
Note: if a location only has one visit, you'll delete the location itself.


3. Clearing Your Entire Specific Locations History
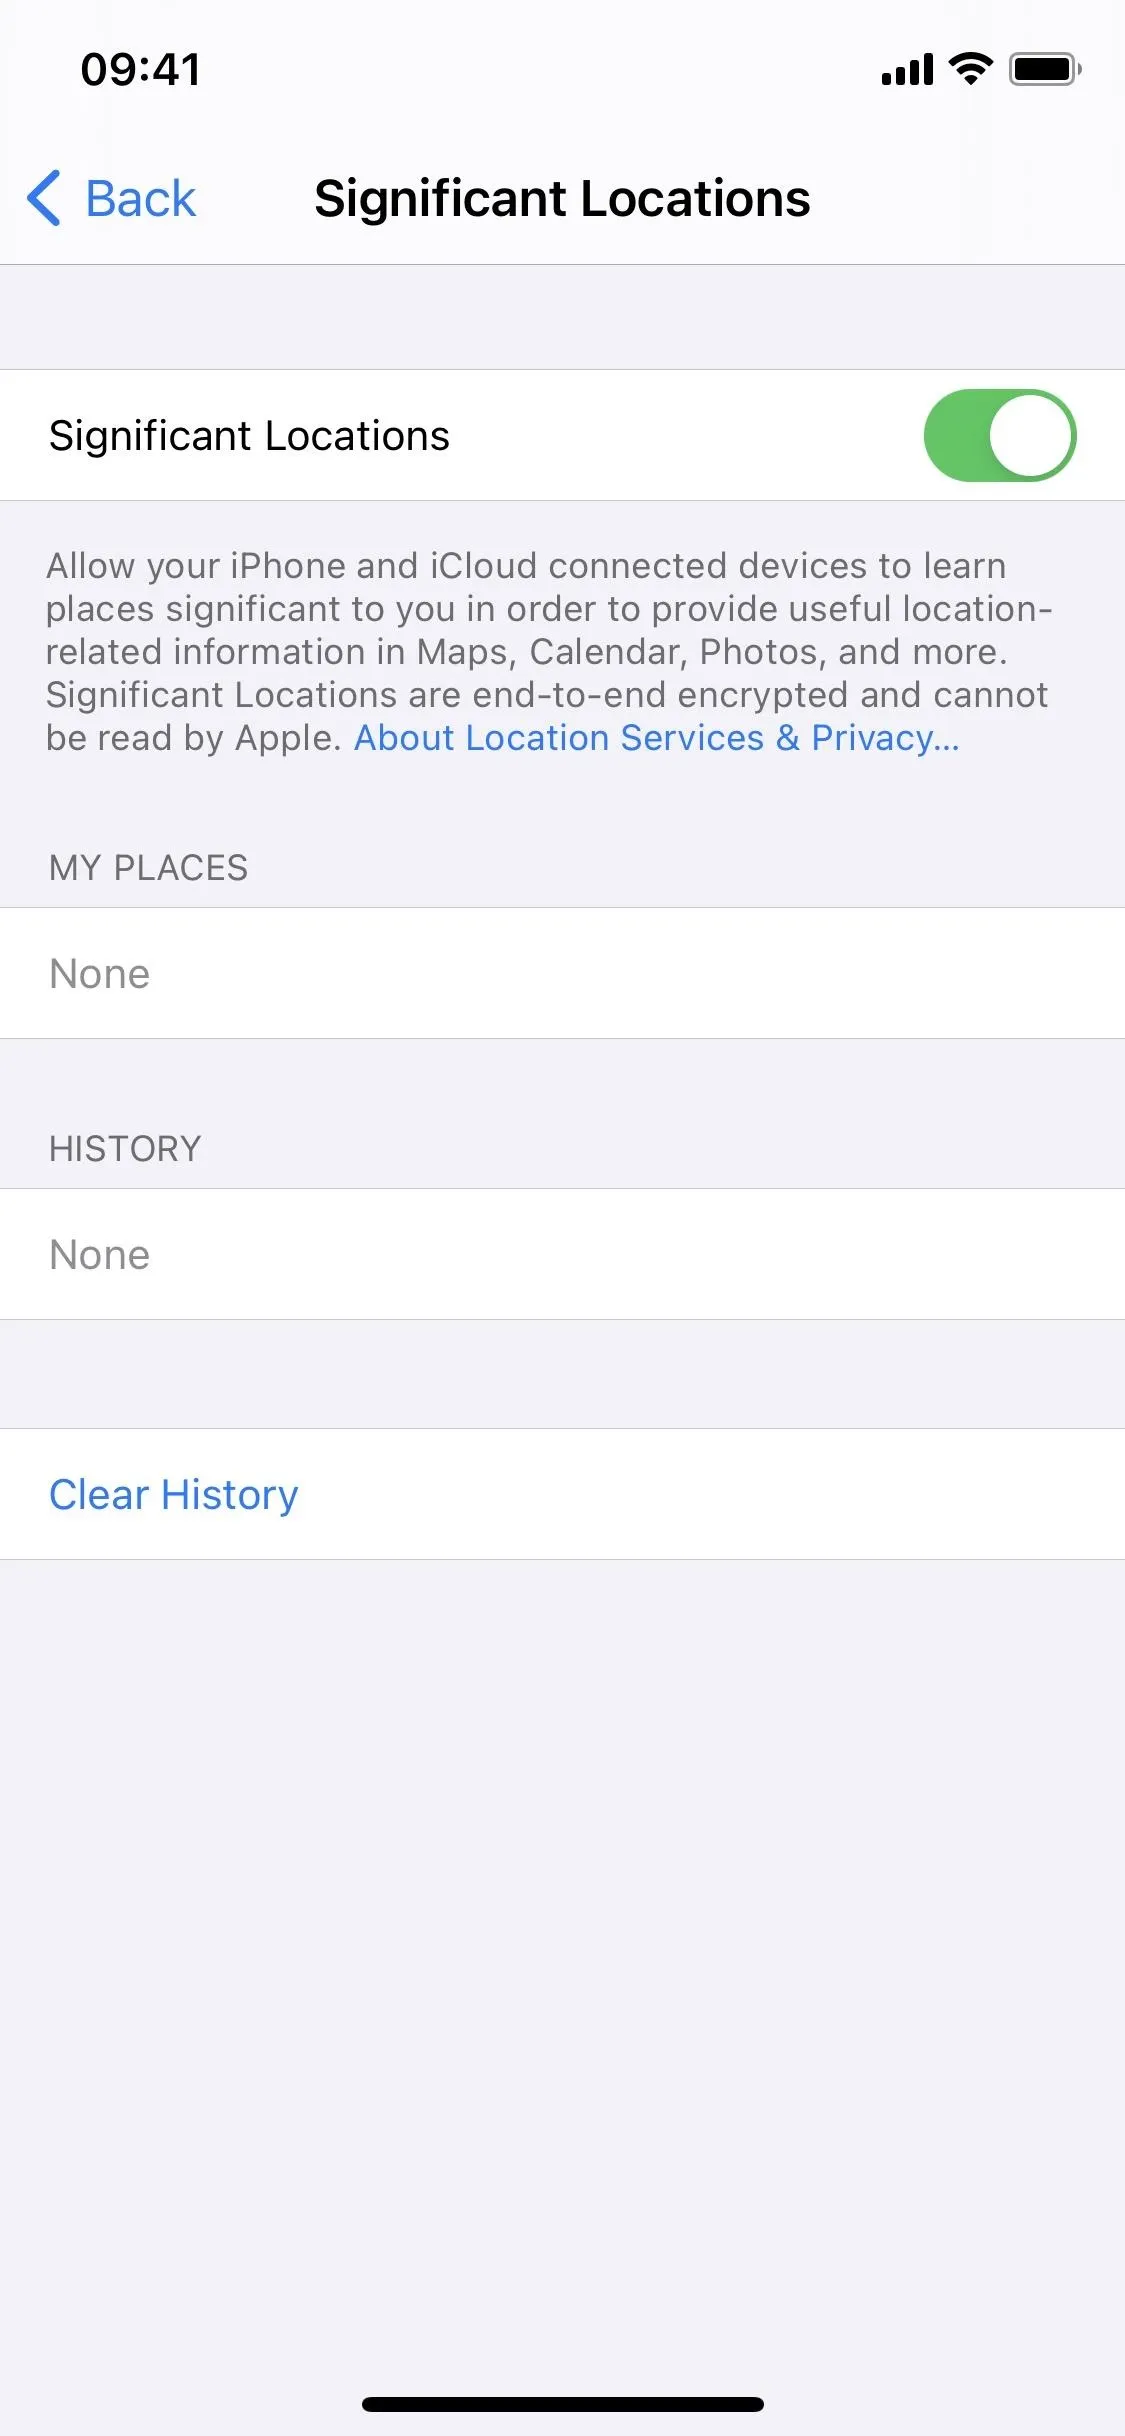
Deleting locations one by one is time-consuming, so it's better to wipe the whole record if you don't care about fooling anyone that may get eyes on the list. Doing so will clear everything on every one of your iCloud-connected devices.
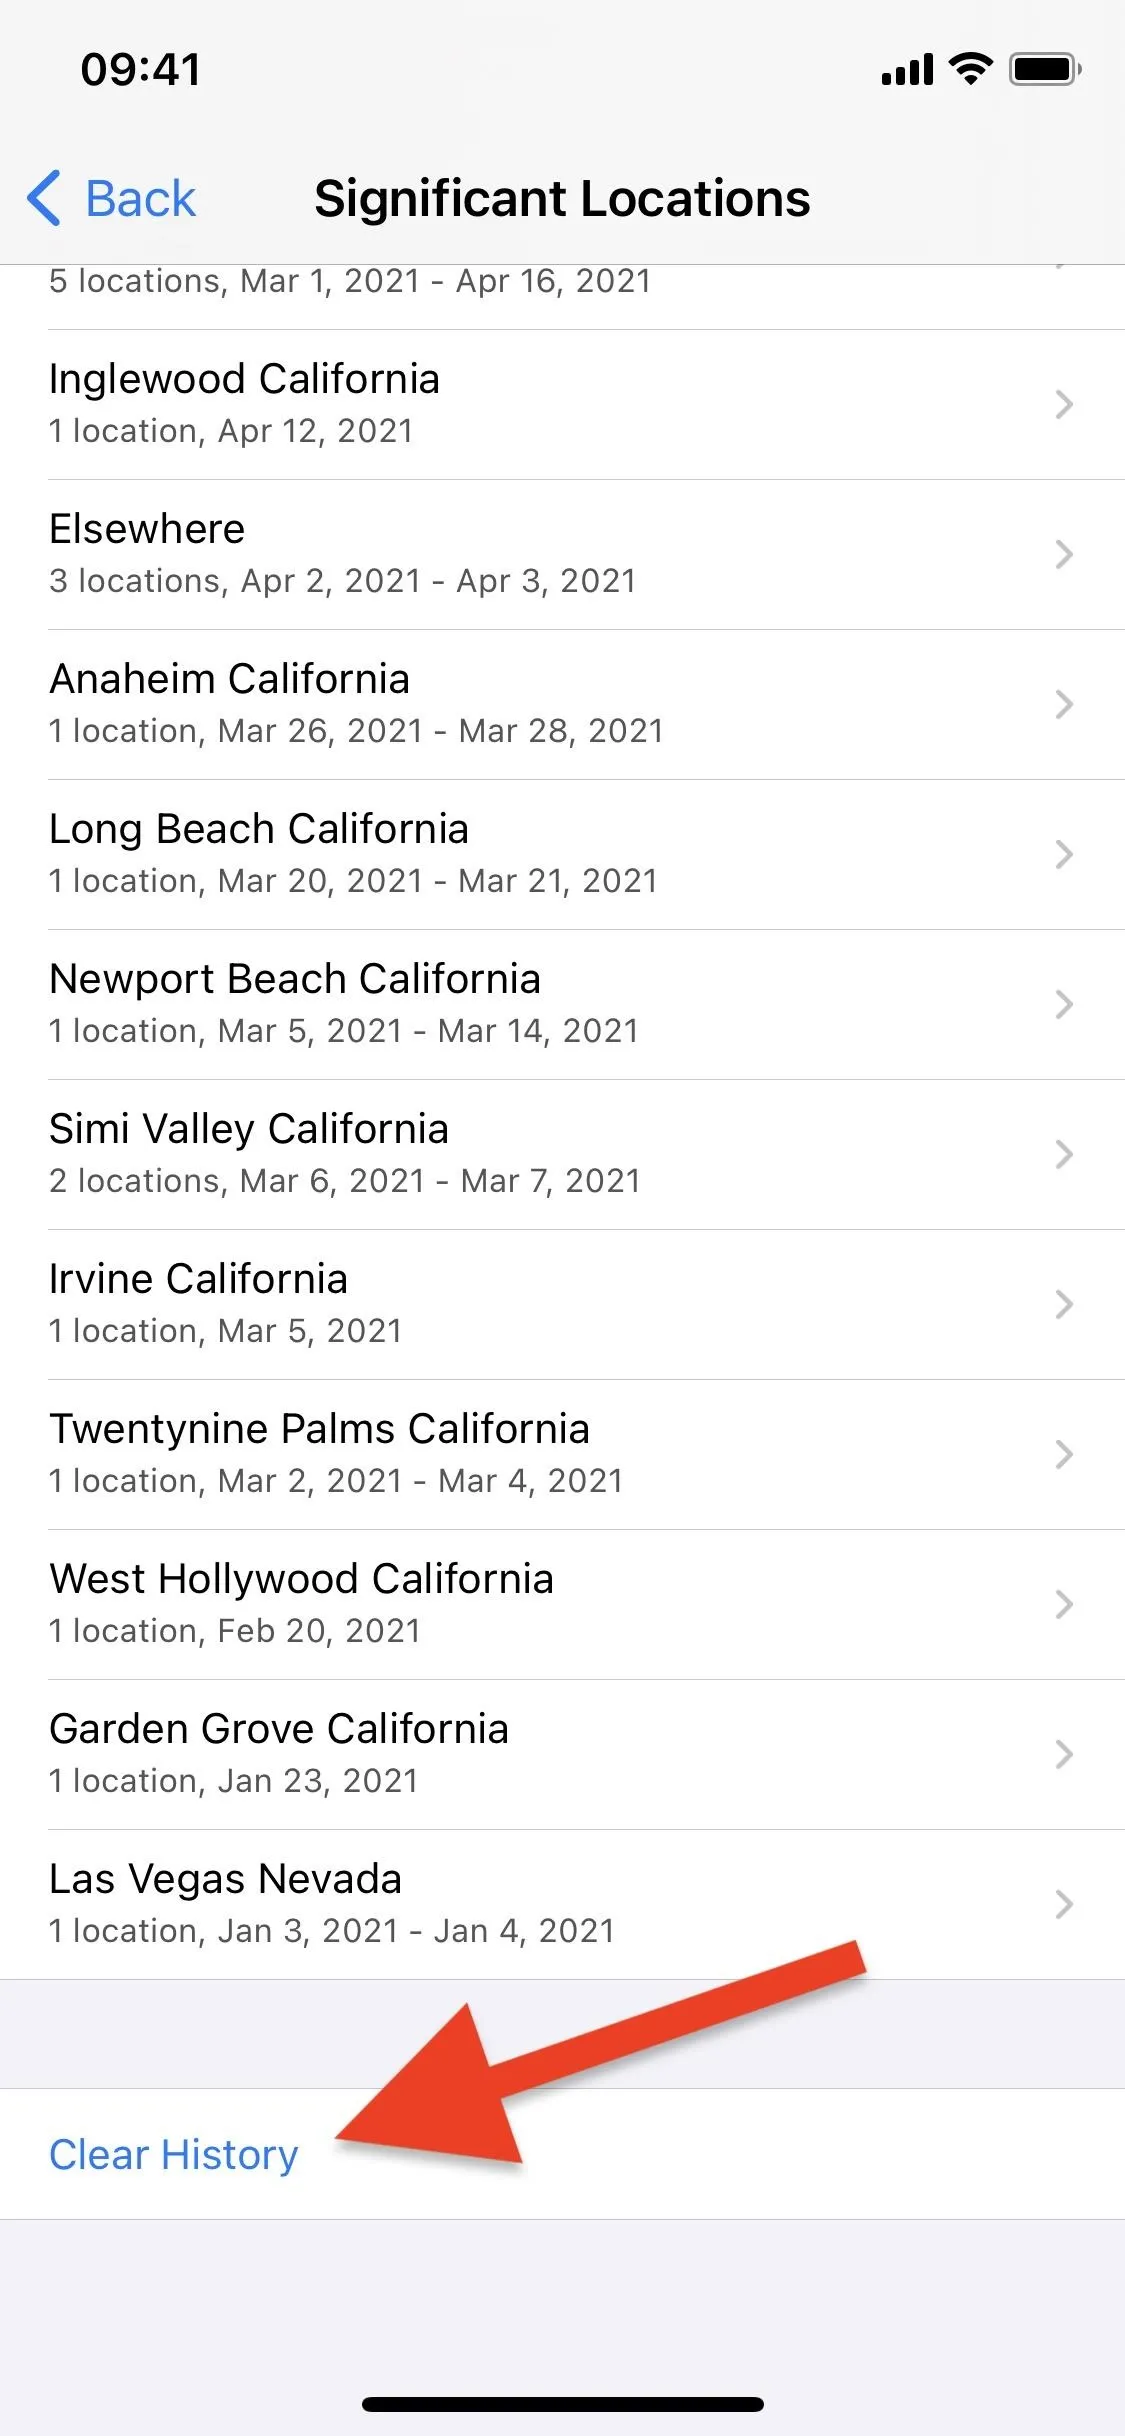
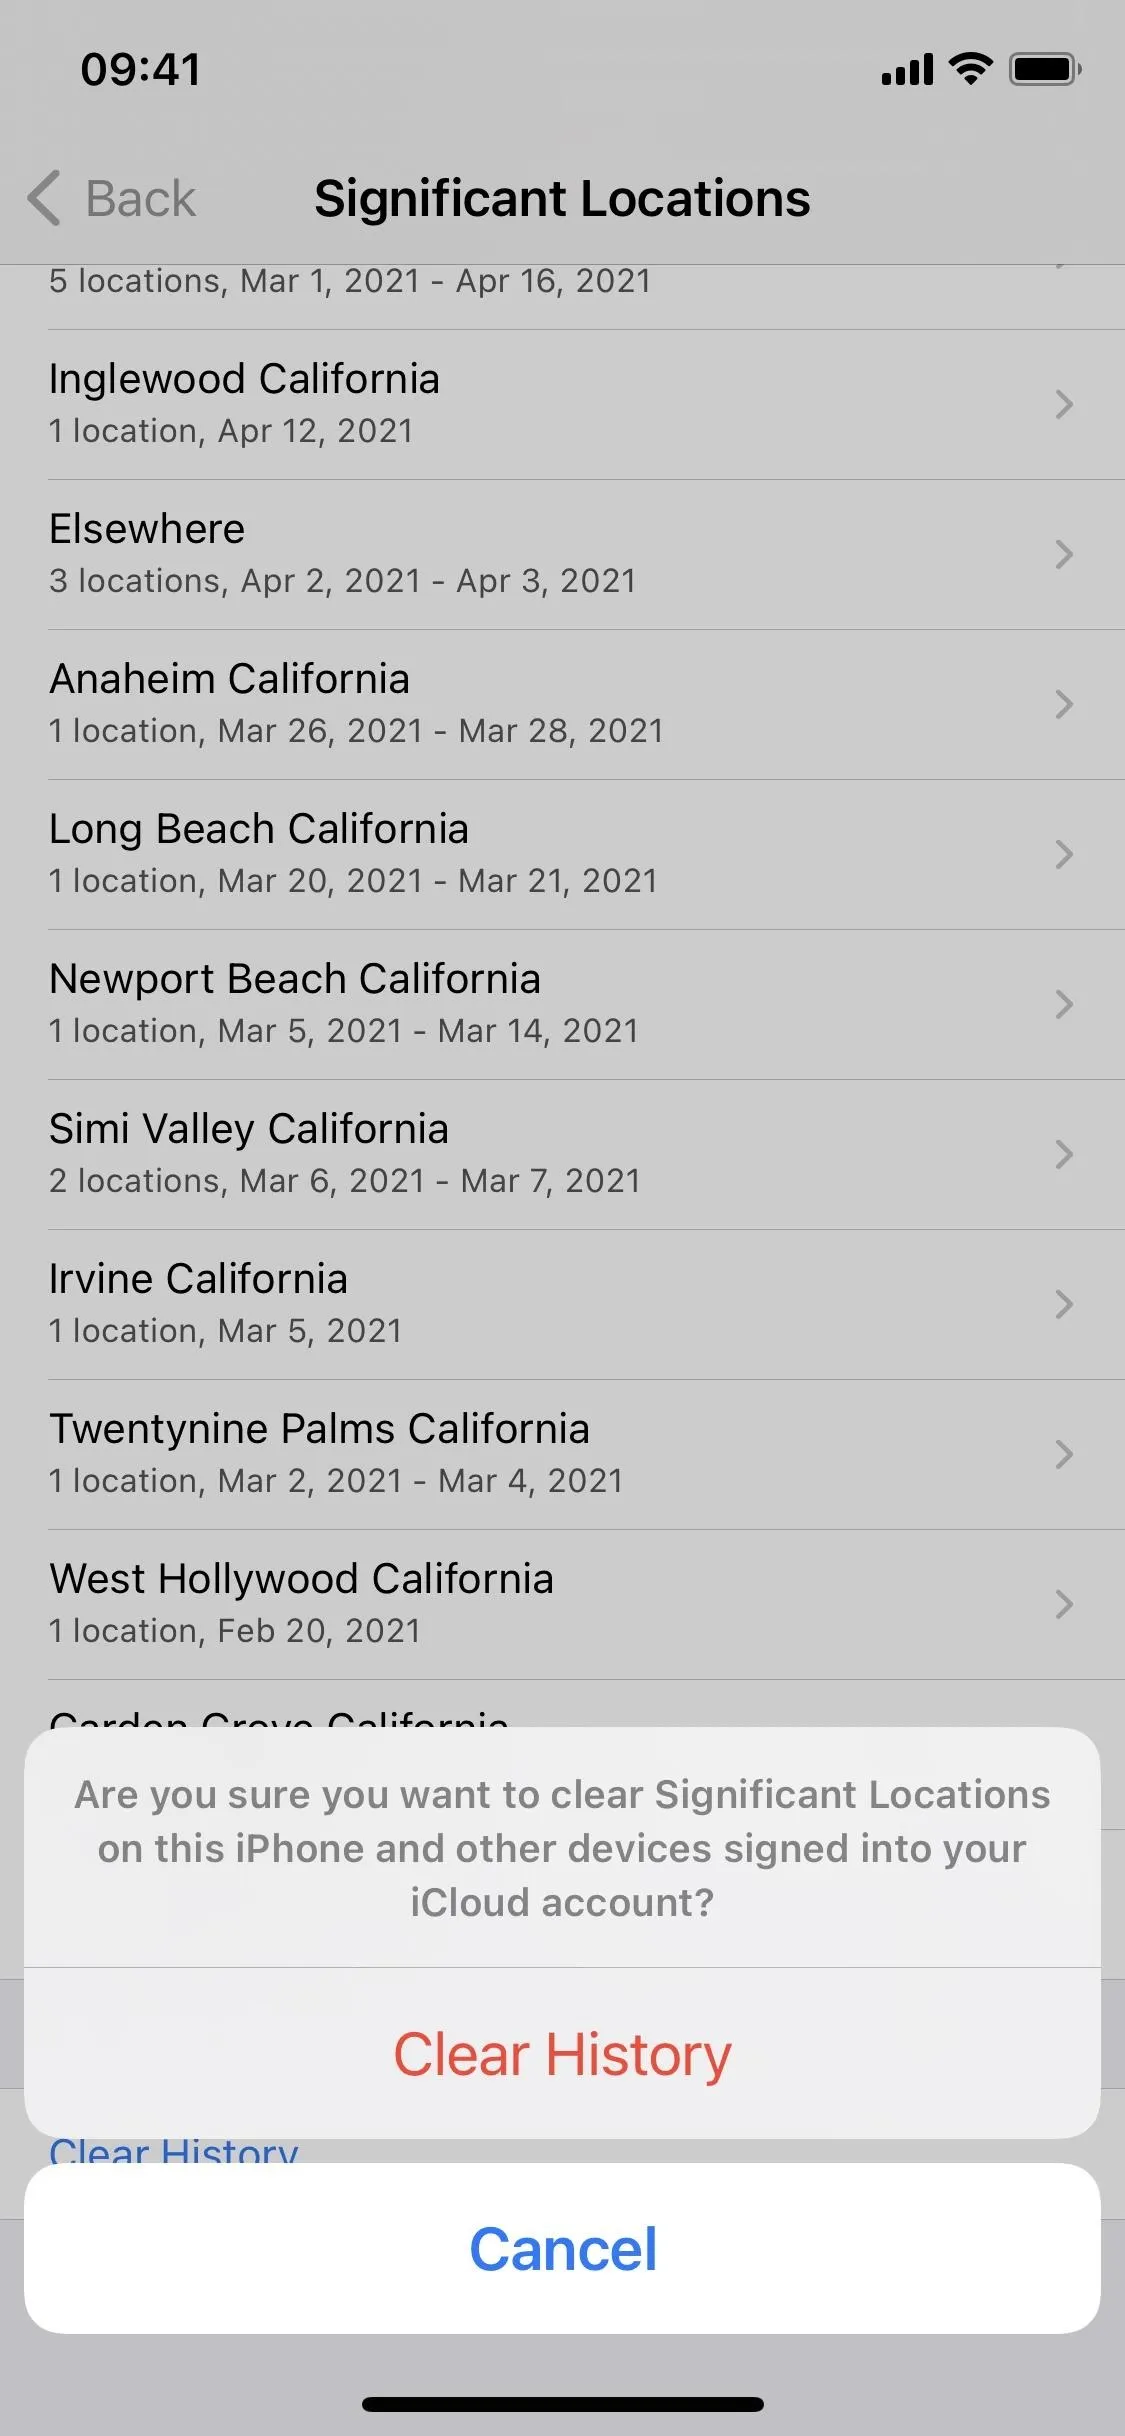
On the Specific Locations preferences, scroll to the bottom and tap "Clear History." Your iPhone will ask you if you're sure you want to clear your significant locations. Touch "Clear History" to confirm and completely erase your places and history. However, iOS will continue to track your locations, so Significant Locations will populate with more places as soon as you start traveling again.


4. Disabling Significant Locations on Your iPhone Permanently
If you never want your iPhone to keep track of the locations you visit and when, you can completely disable Significant Locations. However, you will have to disable it on all of your iCloud-connected devices separately since the switch itself does not sync.
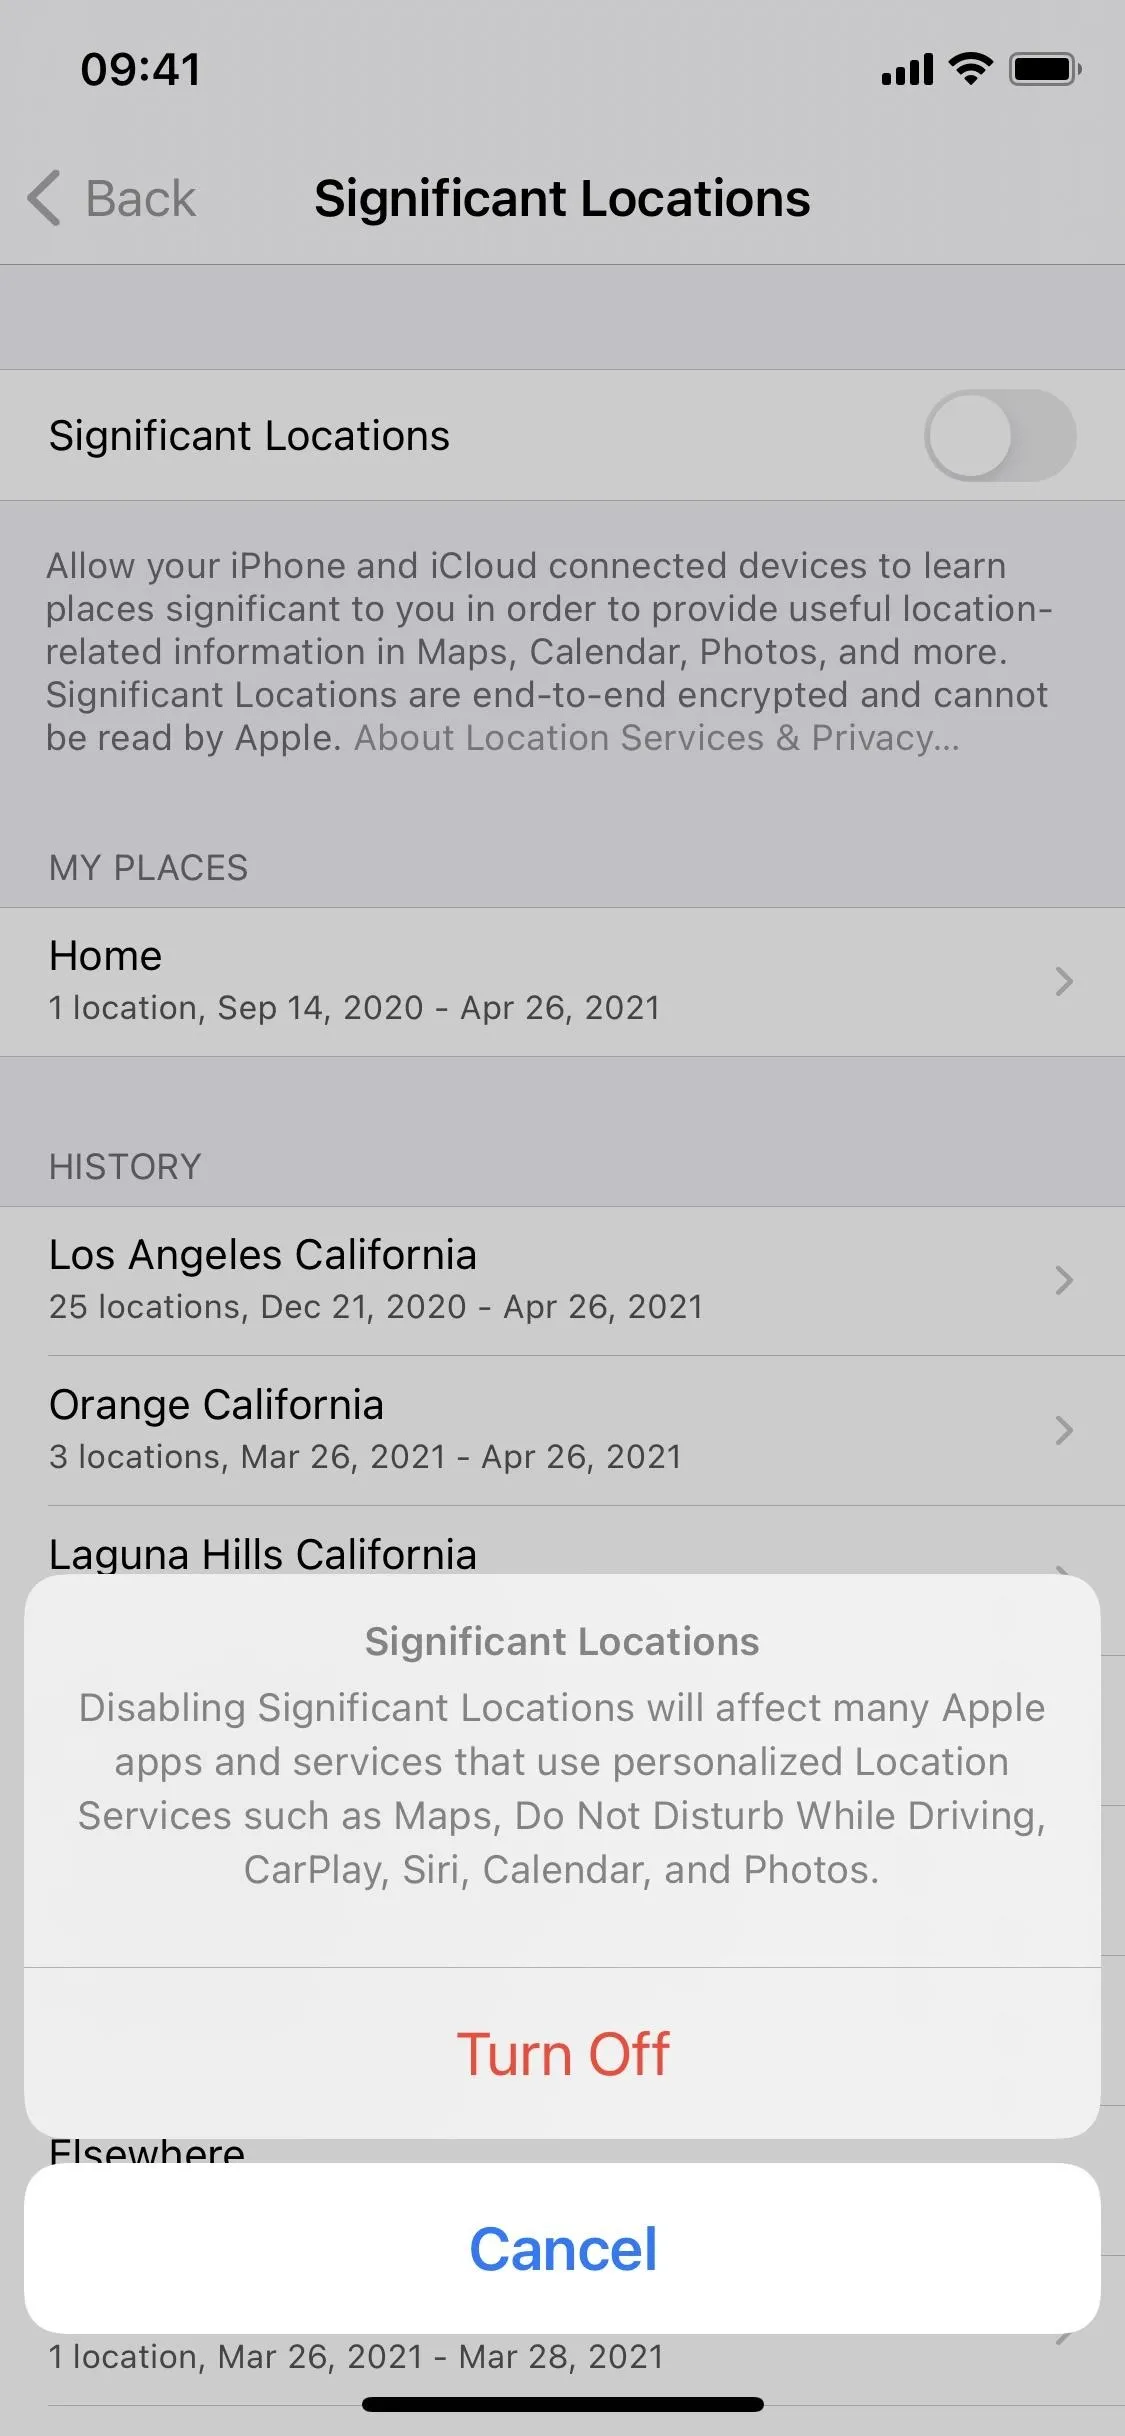
On the Significant Locations preferences, simply toggle off "Significant Locations." Before you can do it, iOS will prompt you with the following message.
Disabling Significant Locations will affect many Apple apps and services that use personalized Location Services such as Maps, Do Not Disturb While Driving, CarPlay, Siri, Calendar, and Photos.
If you're fine with that, tap on "Turn Off" to disable Significant Locations fully. If you want to iOS to track your locations again, you can always toggle it back on.


On macOS, go back to the menu in System Preferences that lists "Significant Locations" (see the Viewing section above), then uncheck it and hit "Done."
It's important to note that toggling off Significant Locations will not remove the locations already saved on your iPhone — it will only prevent more locations from being added. To remove the tracked locations, you either have to delete them one by one or use the "Clear History" setting to remove them all at the same time.
Cover photo and screenshots by Nelson Aguilar/Gadget Hacks








Comments
Be the first, drop a comment!