


We've all seen the login pages that allow you to log in to third-party accounts using your credentials from Facebook, Google, or Twitter. It saves you the trouble of creating another account and remembering more passwords — but it can also become a privacy and security issue, which is why Apple created the "Sign in with Apple" feature for iOS 13.
Signing in to Facebook or Google to log into other accounts isn't inherently bad. Most big tech companies use open standards such as OAuth 2.0 or OpenID Connect, which allow third-party websites to only access some of your personal information to authenticate you. But even these bits of data can be used against you in ways you wouldn't like.
The biggest issue with single sign-on (SSO) is that your information (such as your birthday, employment, college, and friends list) can be shared to the third party, who in turn can sell what they've gathered to other companies for advertising purposes. In addition, they can continue gathering information as they track you while you use other apps and websites. If you search for local concert tickets on Google, the third-party service will probably know.
These companies build an increasingly robust profile on you with all this information, which is already bad enough, but can be downright worrisome if hackers were to get into one of your least-secure accounts. Because your profiles are linked via SSO, hackers could potentially get their hands on much more information than usual because they get access to more than one of your accounts ... which brings us back to Sign in with Apple.
What You Need to Know About 'Sign in with Apple'
Although the Sign in with Apple is similar to other SSOs, Apple does a few things to secure your privacy. First, it still uses technology similar to OAuth 2.0 and OpenID Connect, so you know it's at least as good as other SSOs. Secondly, it adds a double-layer of protection by making you use Touch ID or Face ID to log in, and two-factor authentication, which requires you to enter an additional code sent to you to log in.
Thirdly, Apple doesn't allow third-party services to track you while you browse the web. Services like Google and Twitter do track you, which is how they gather more information about you for marketing and advertising purposes, but Apple prevents this. Also, Apple doesn't allow third-party services to store your user data.
And last, but certainly not least, instead of giving them your personal email, Apple randomly generates an email address for you to use to log in to third-party apps and services, if wanted. This anonymous email can be used to forward messages to your personal email, the way Craigslist does, which means you can instantly stop contact from the third-party by simply deleting the temporary email address. Also, marketers won't have your actual email to harass you, which is always a good thing.
As you can tell, Sign in With Apple protects what matters most to you, but also gives you a fast and easy way to sign into apps and websites without having to remember old credentials or type in new ones.
What You'll Need
To sign into an application or website with Sign in with Apple, you'll only need a couple of things:
- An Apple device running iOS 13
- An Apple ID with two-factor authentication enabled
Additionally, you can use Sign in with Apple in Safari and other web browsers, and on platforms like Android and Windows, but you'll still need an Apple device with that your Apple ID information logged in.
Also, you might be wondering which services/websites/apps are already using Sign in with Apple. There is no official list, but a few of the big names include Kayak, Bird, WordPress, Fretello, Parcel, Lifecake, and many more. If you don't see the Sign in with Apple button on your favorite app, don't fret — Apple requires all apps that support one-tap sign-in to eventually also support Sign in with Apple.
Use Sign in with Apple on Your Apple Device
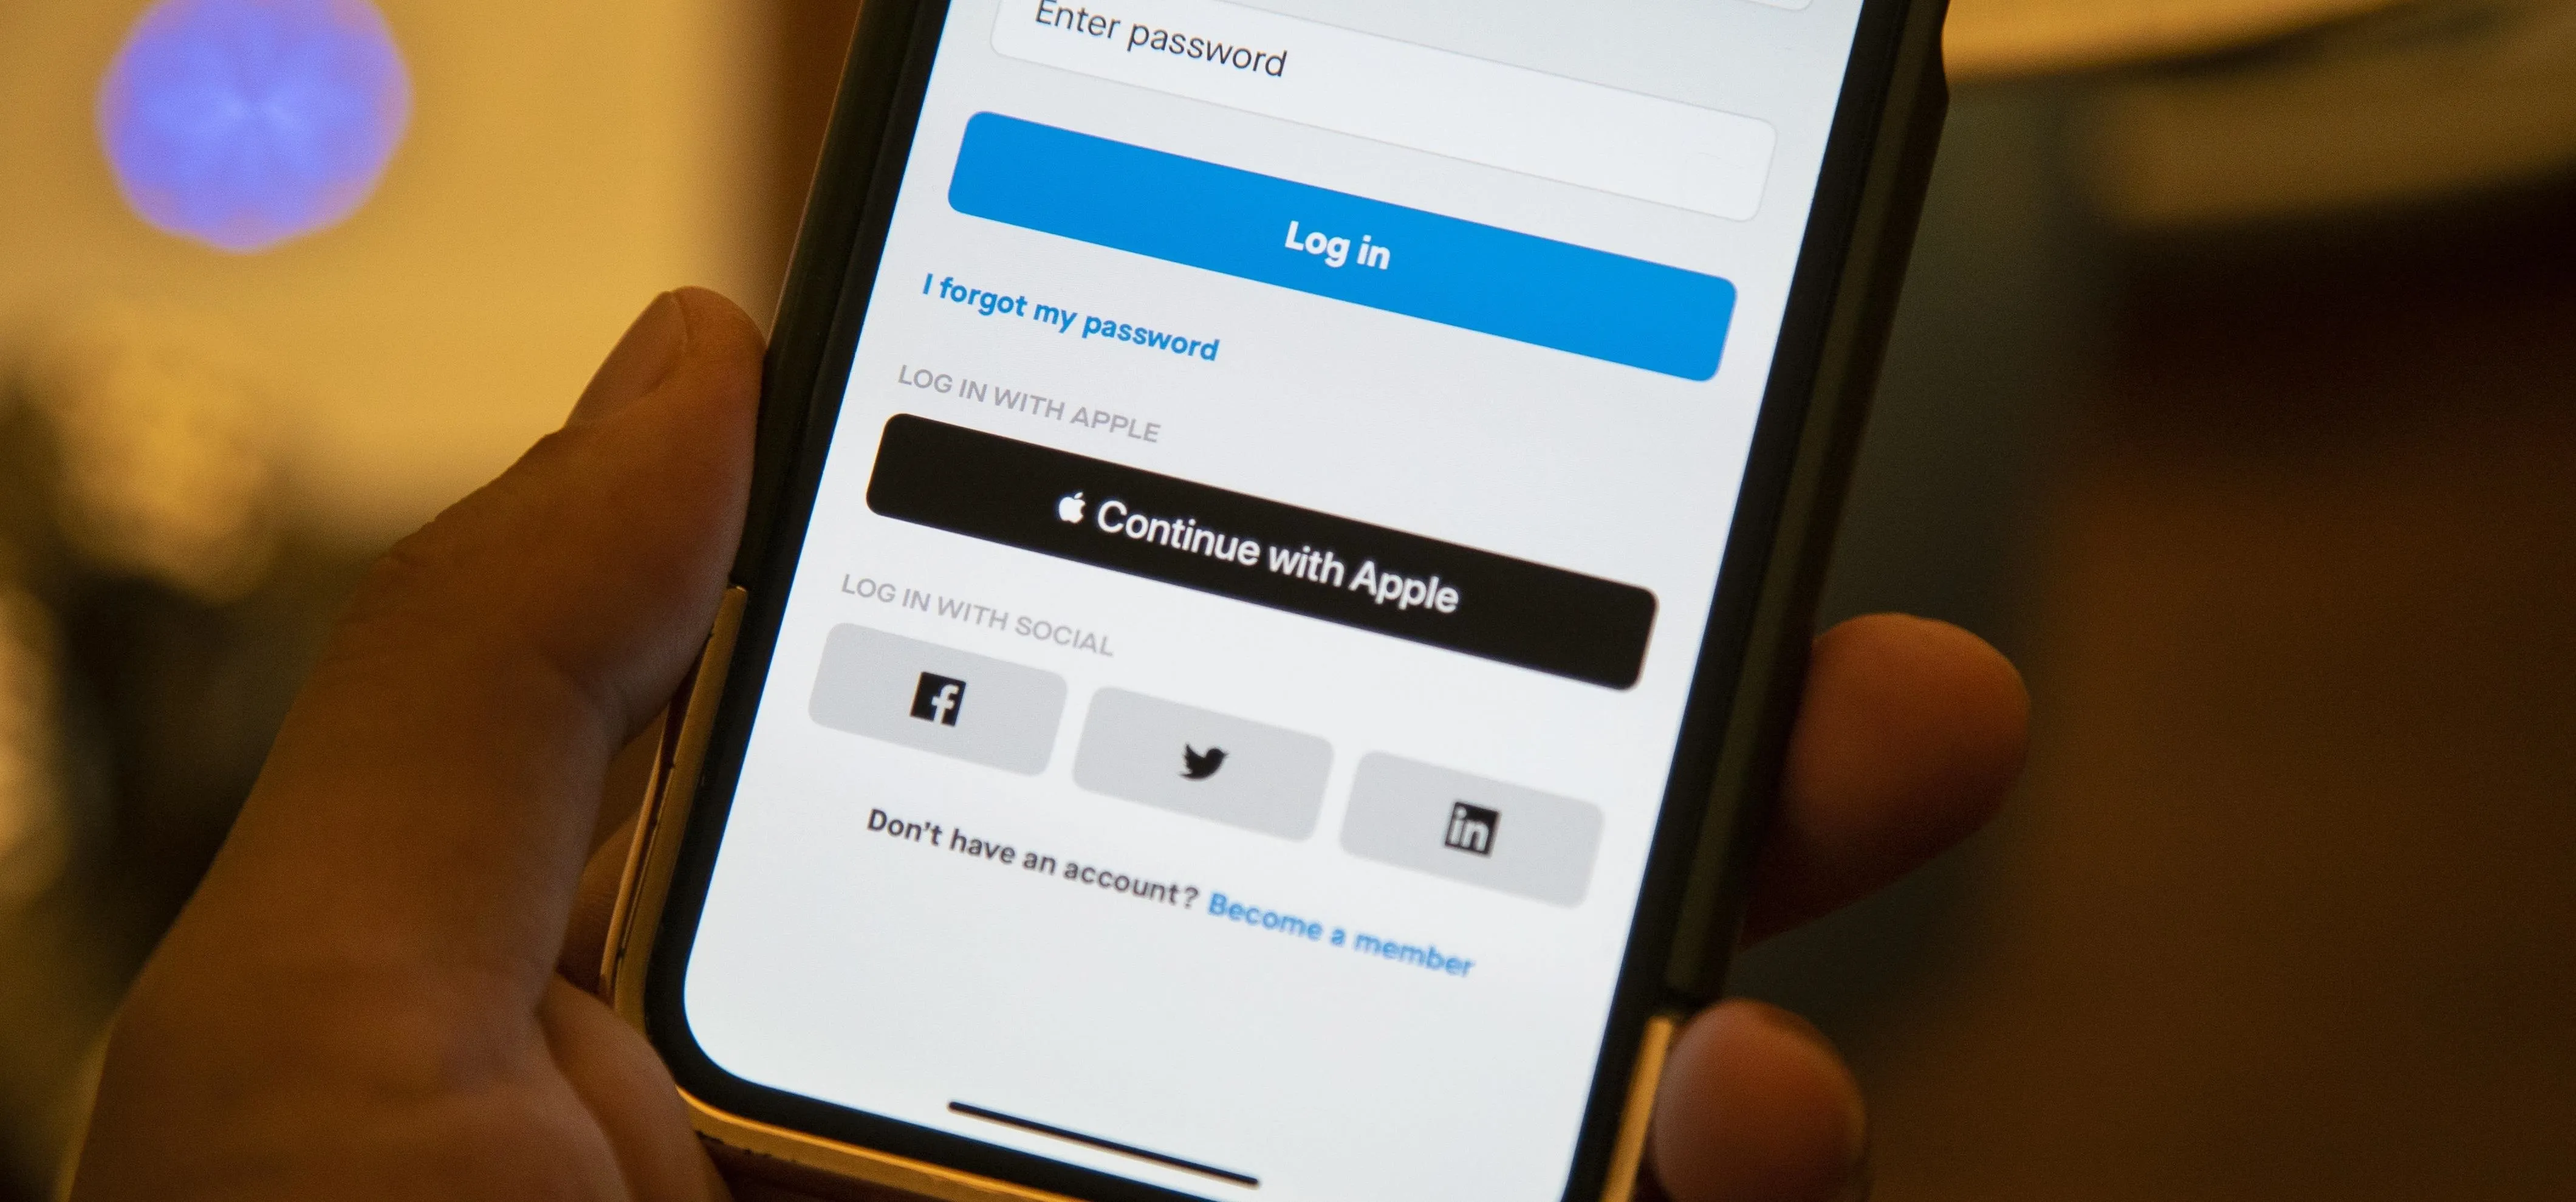
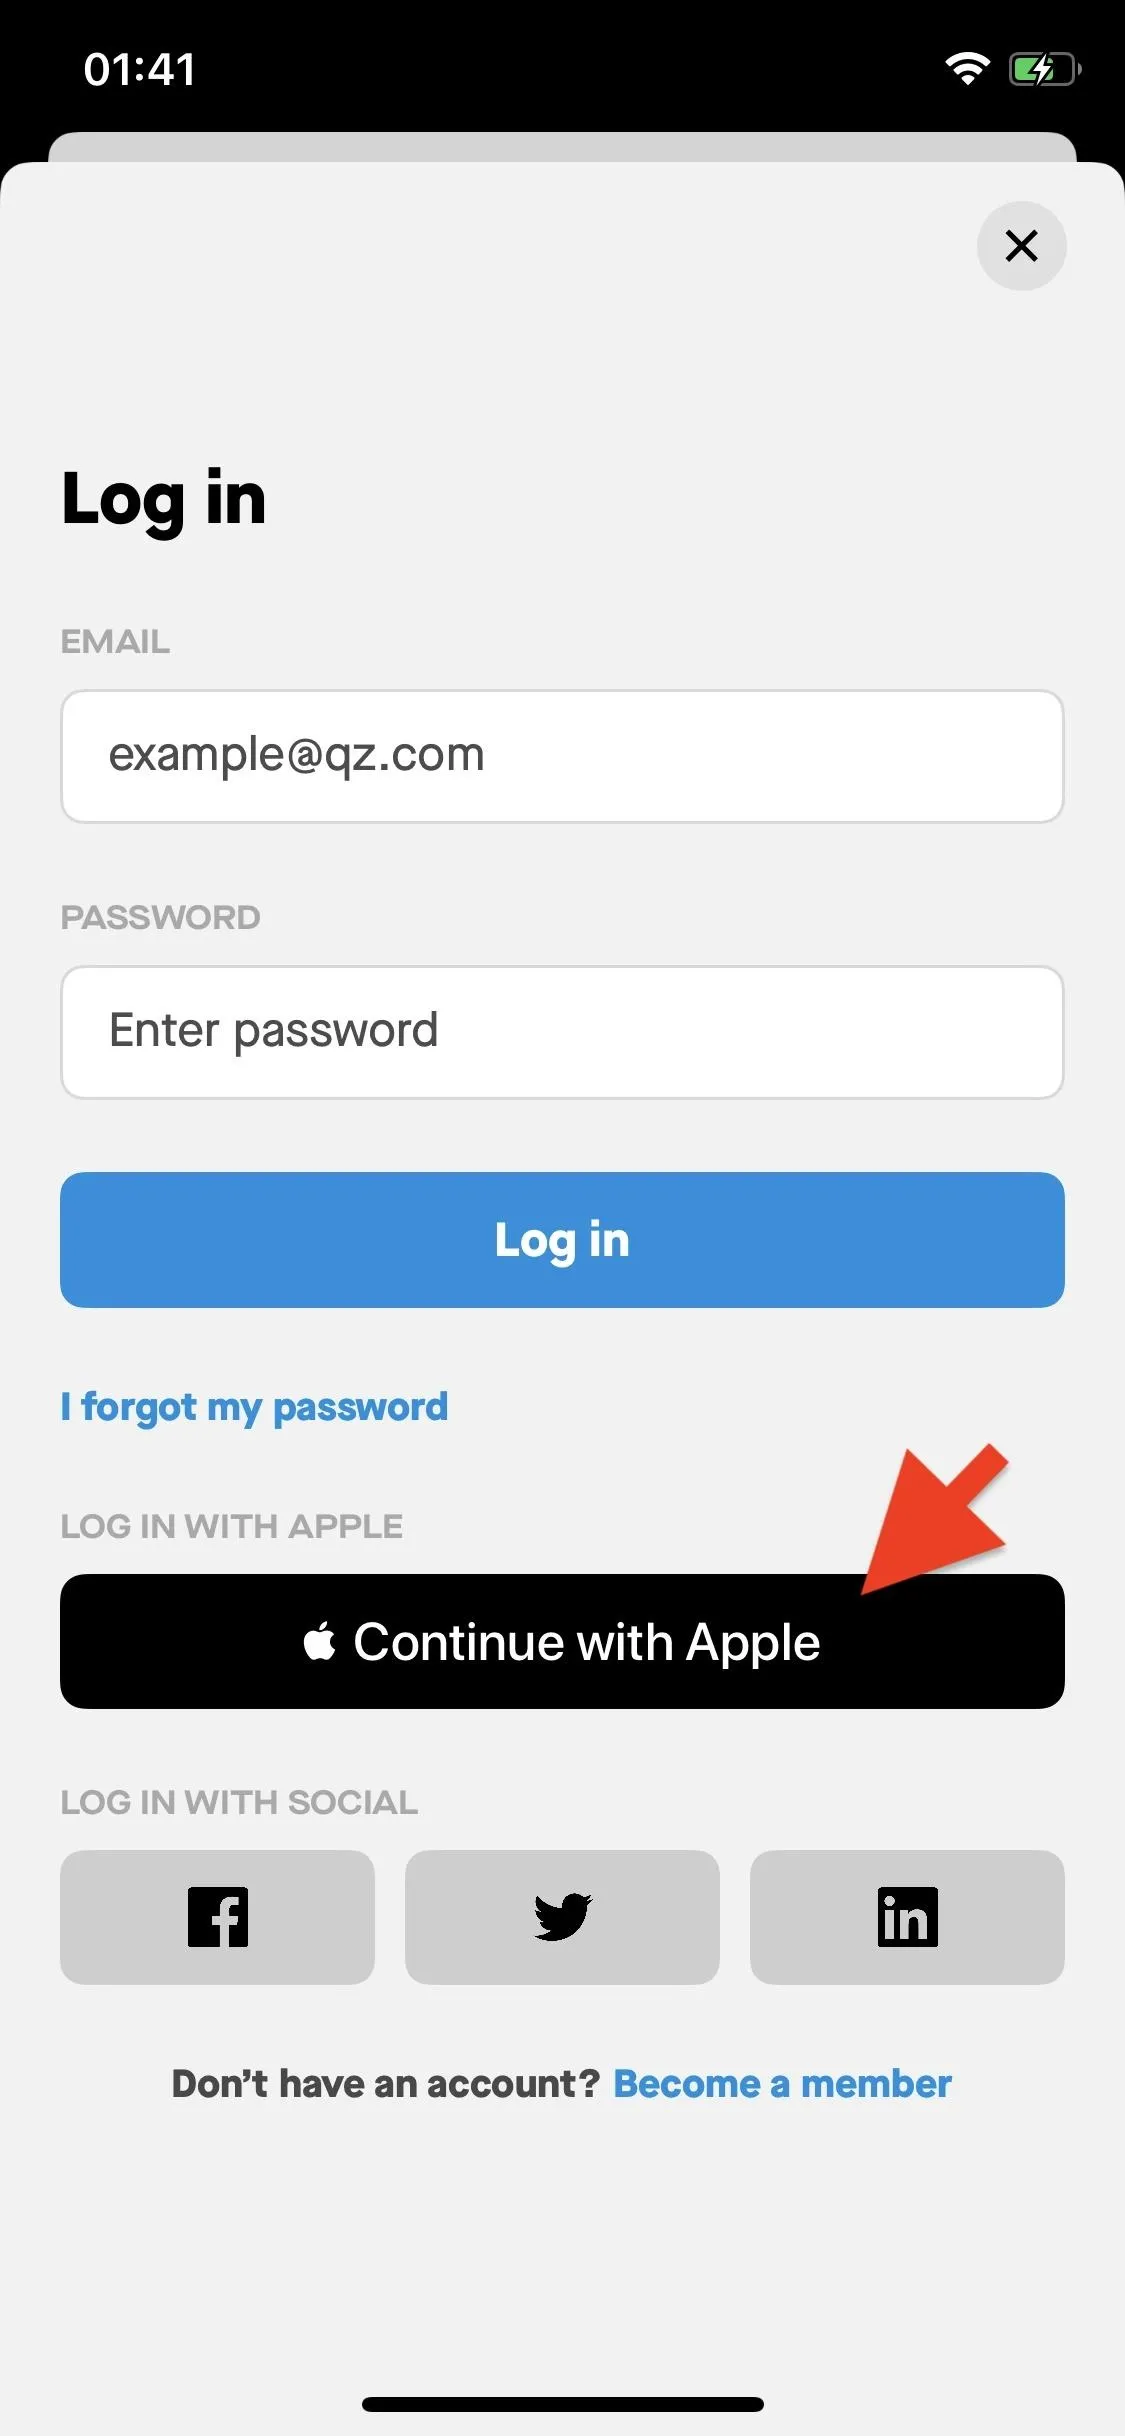
To use this new Apple service, you must first find a participating third-party app or website. In this example we'll be using Quartz, the popular and award-winning news mobile app. As you can see from the screenshots below, Quartz has added the Sign in with Apple feature to their login page: Continue with Apple.
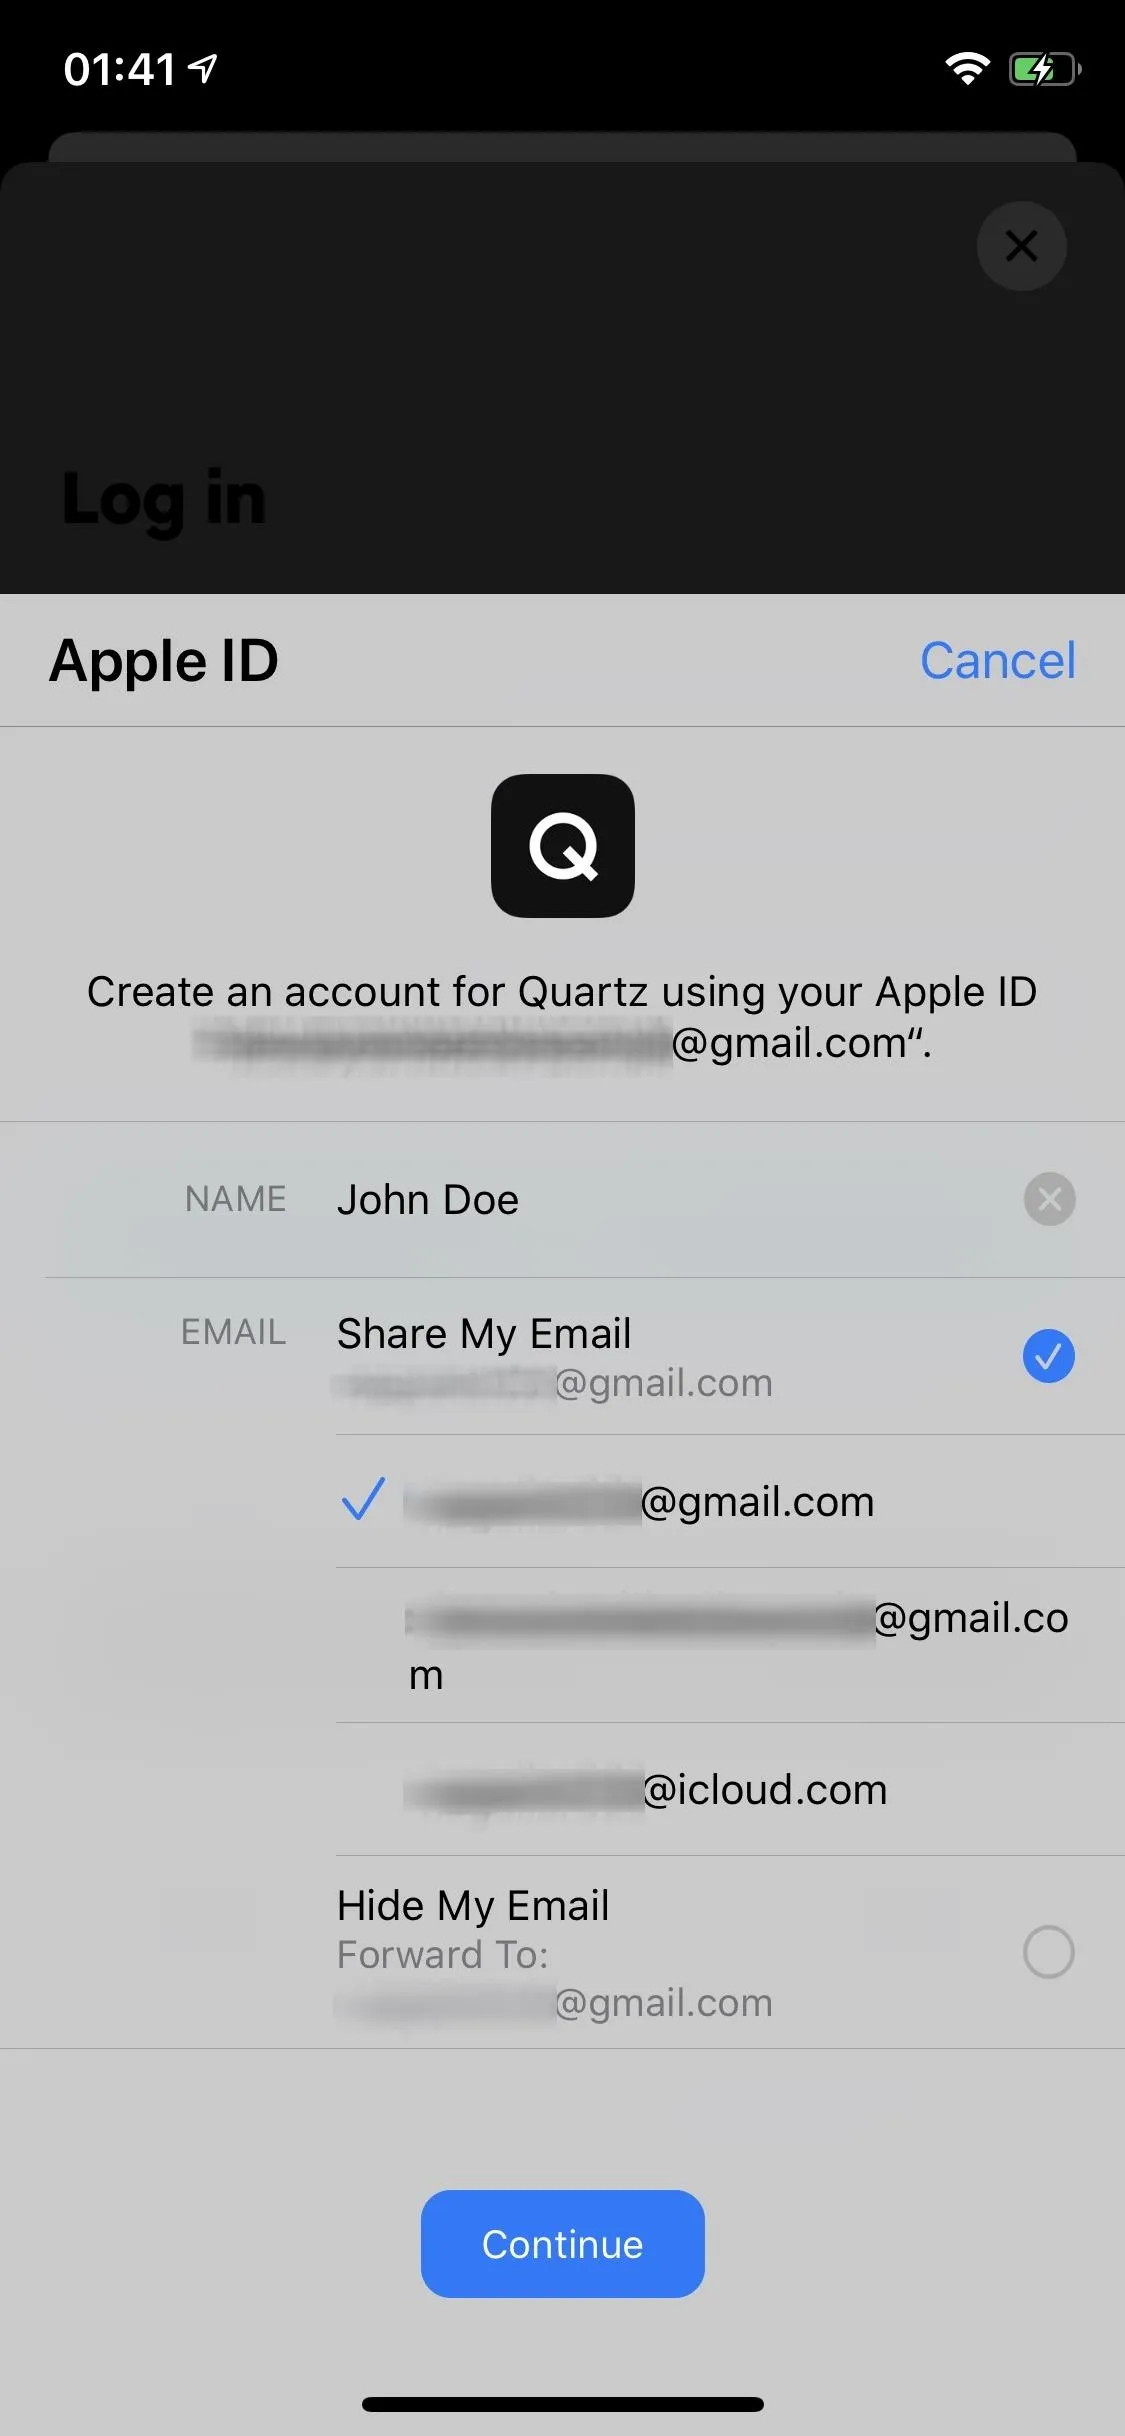
Tap on this button to bring up an Apple ID log in, similar to the one that appears when you download a new app or use Apple Pay. At the top, you'll see that it says you're attempting to create an account for this third-party app/website using your Apple ID. Below that, you'll see your name and email(s).
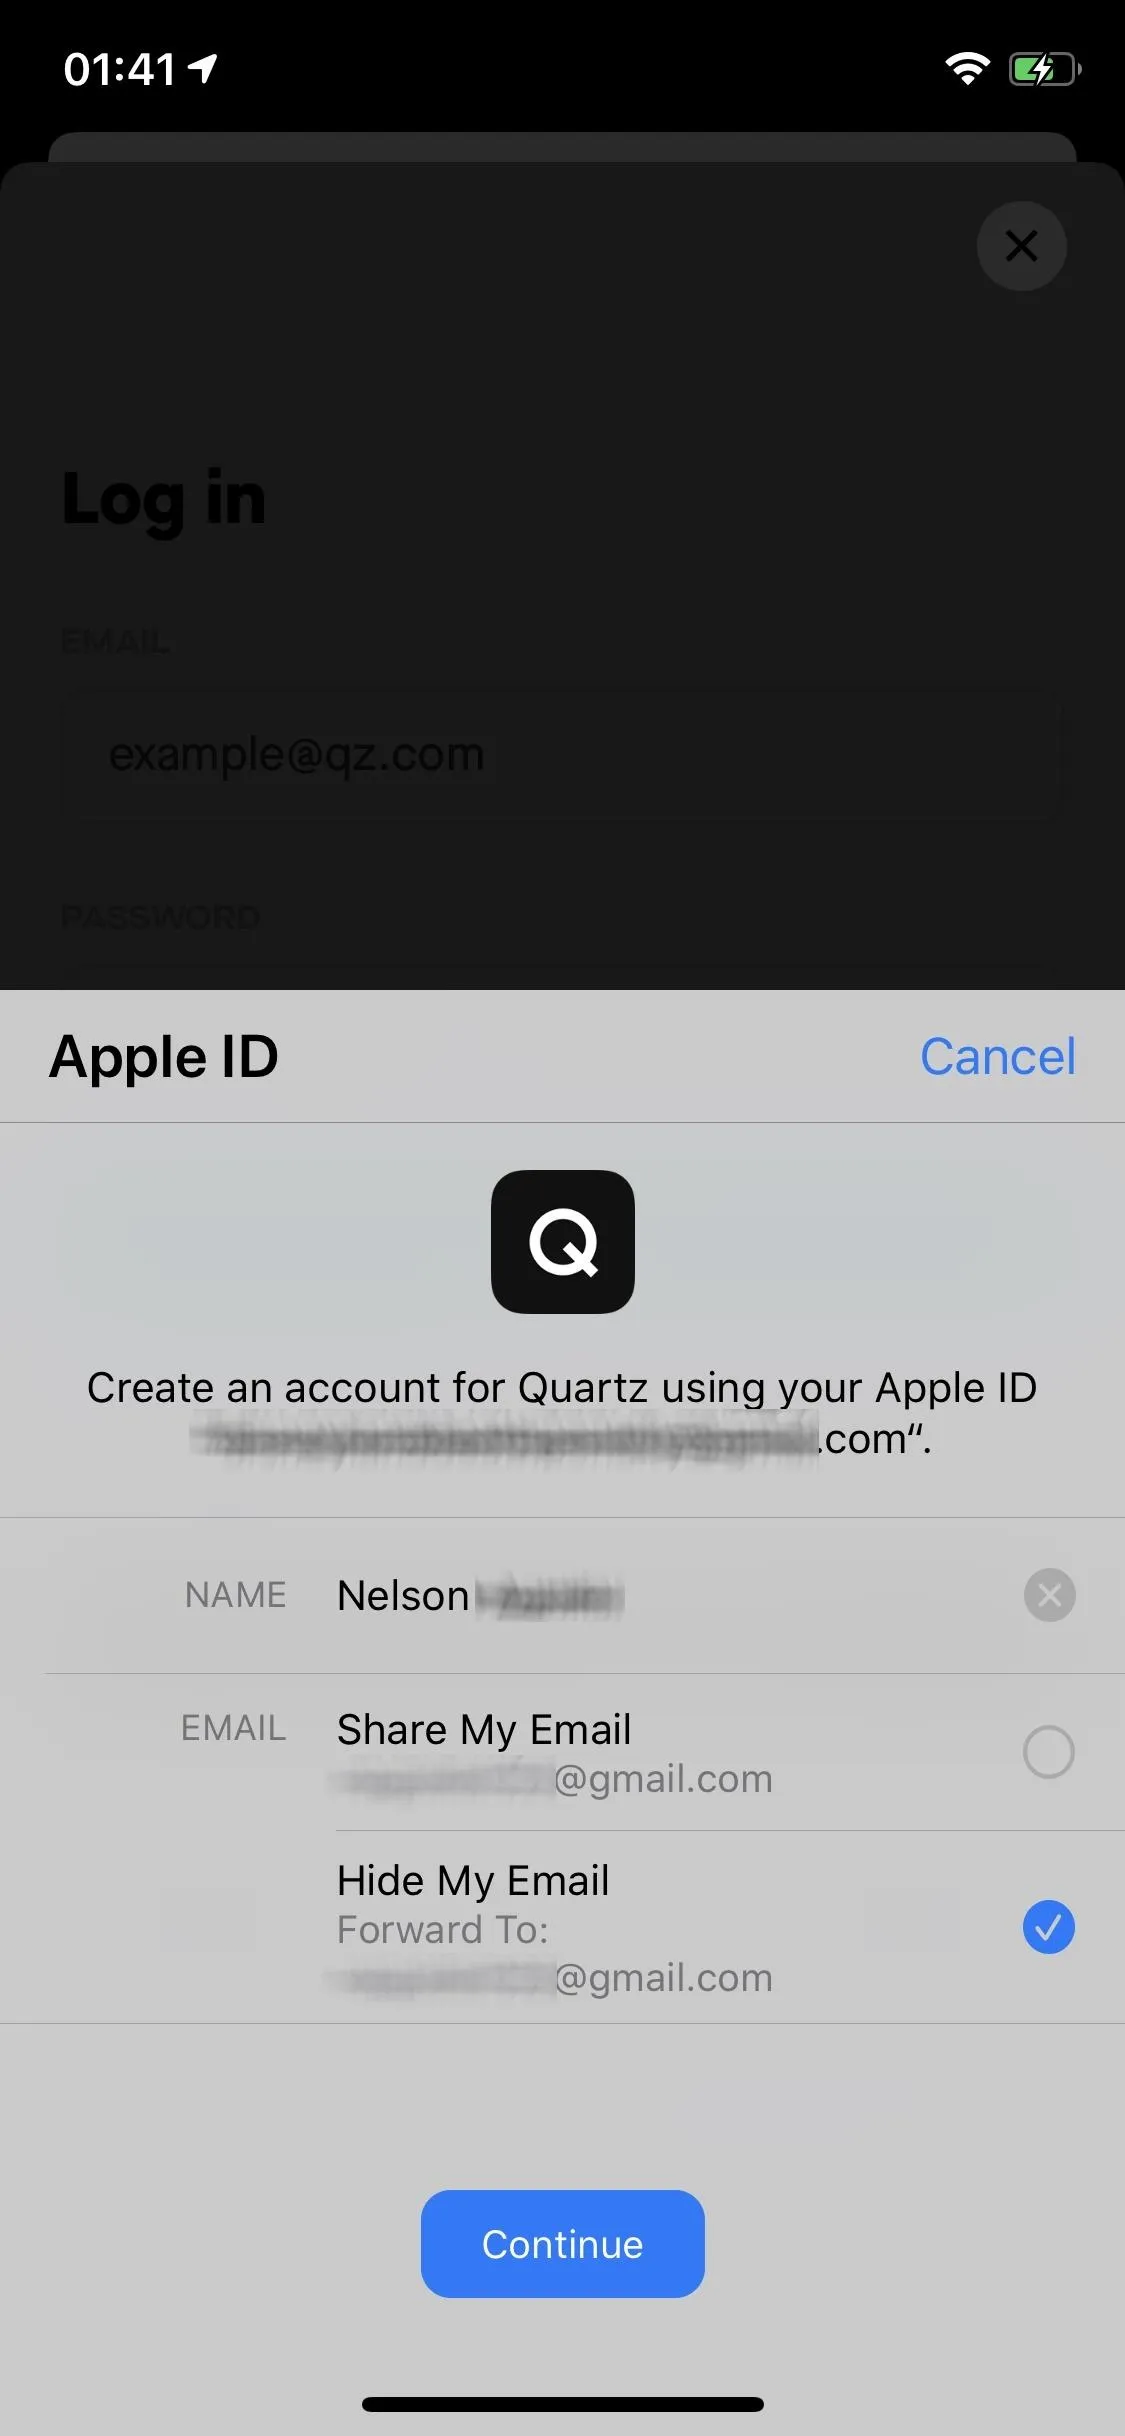
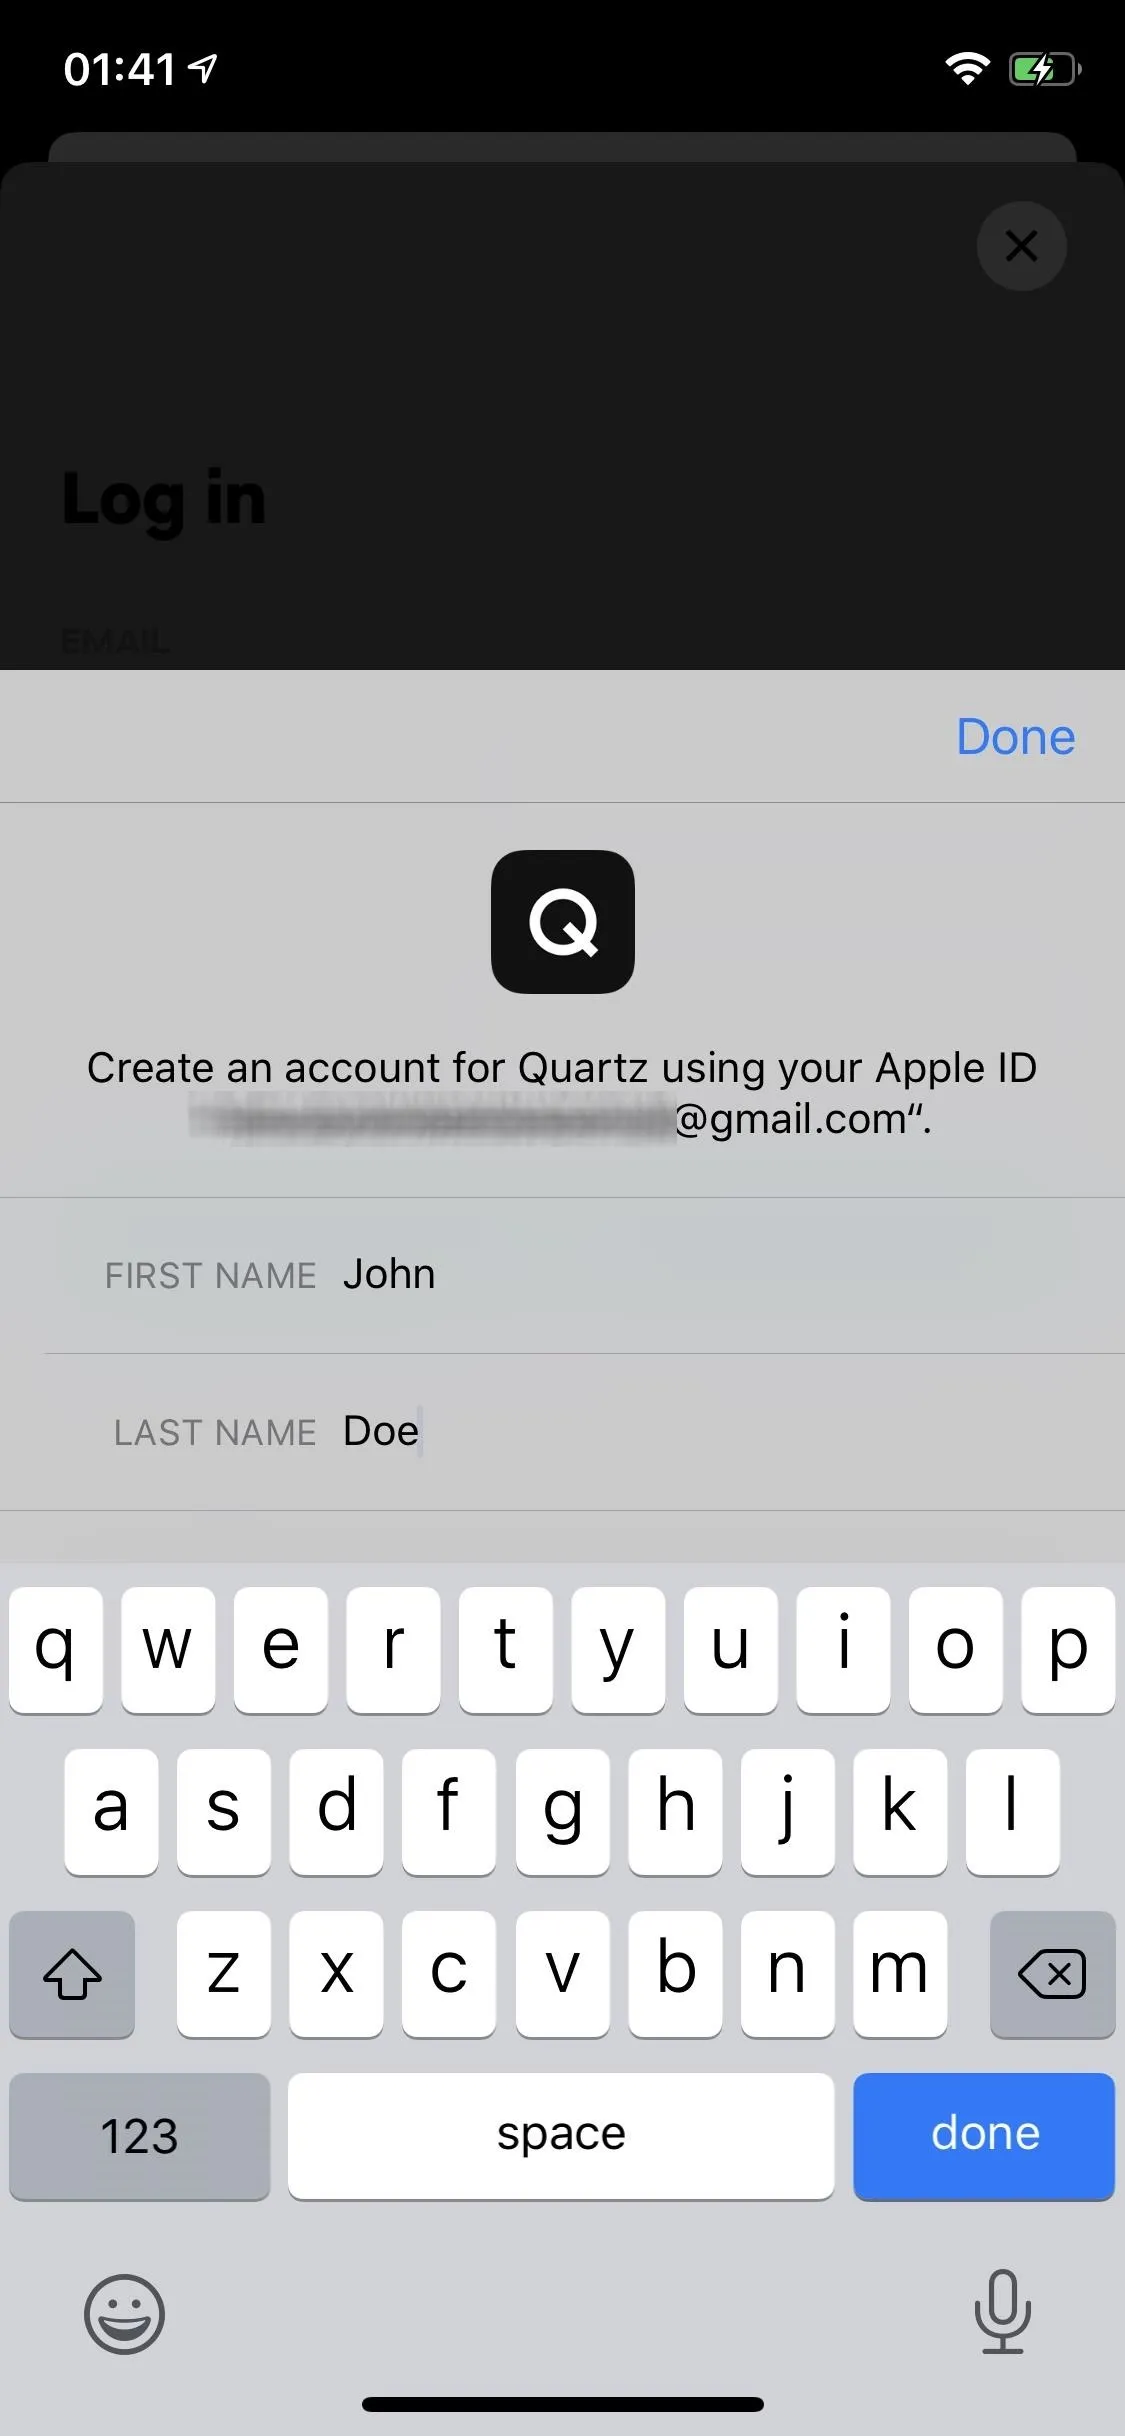
Now you can (1) tap on your name to change it and (2) share your email, choose another email that's linked to your Apple ID, or hide your email completely. To change your name, simply tap on your name and enter a new name. You cannot leave this blank, so you'll need to enter something.
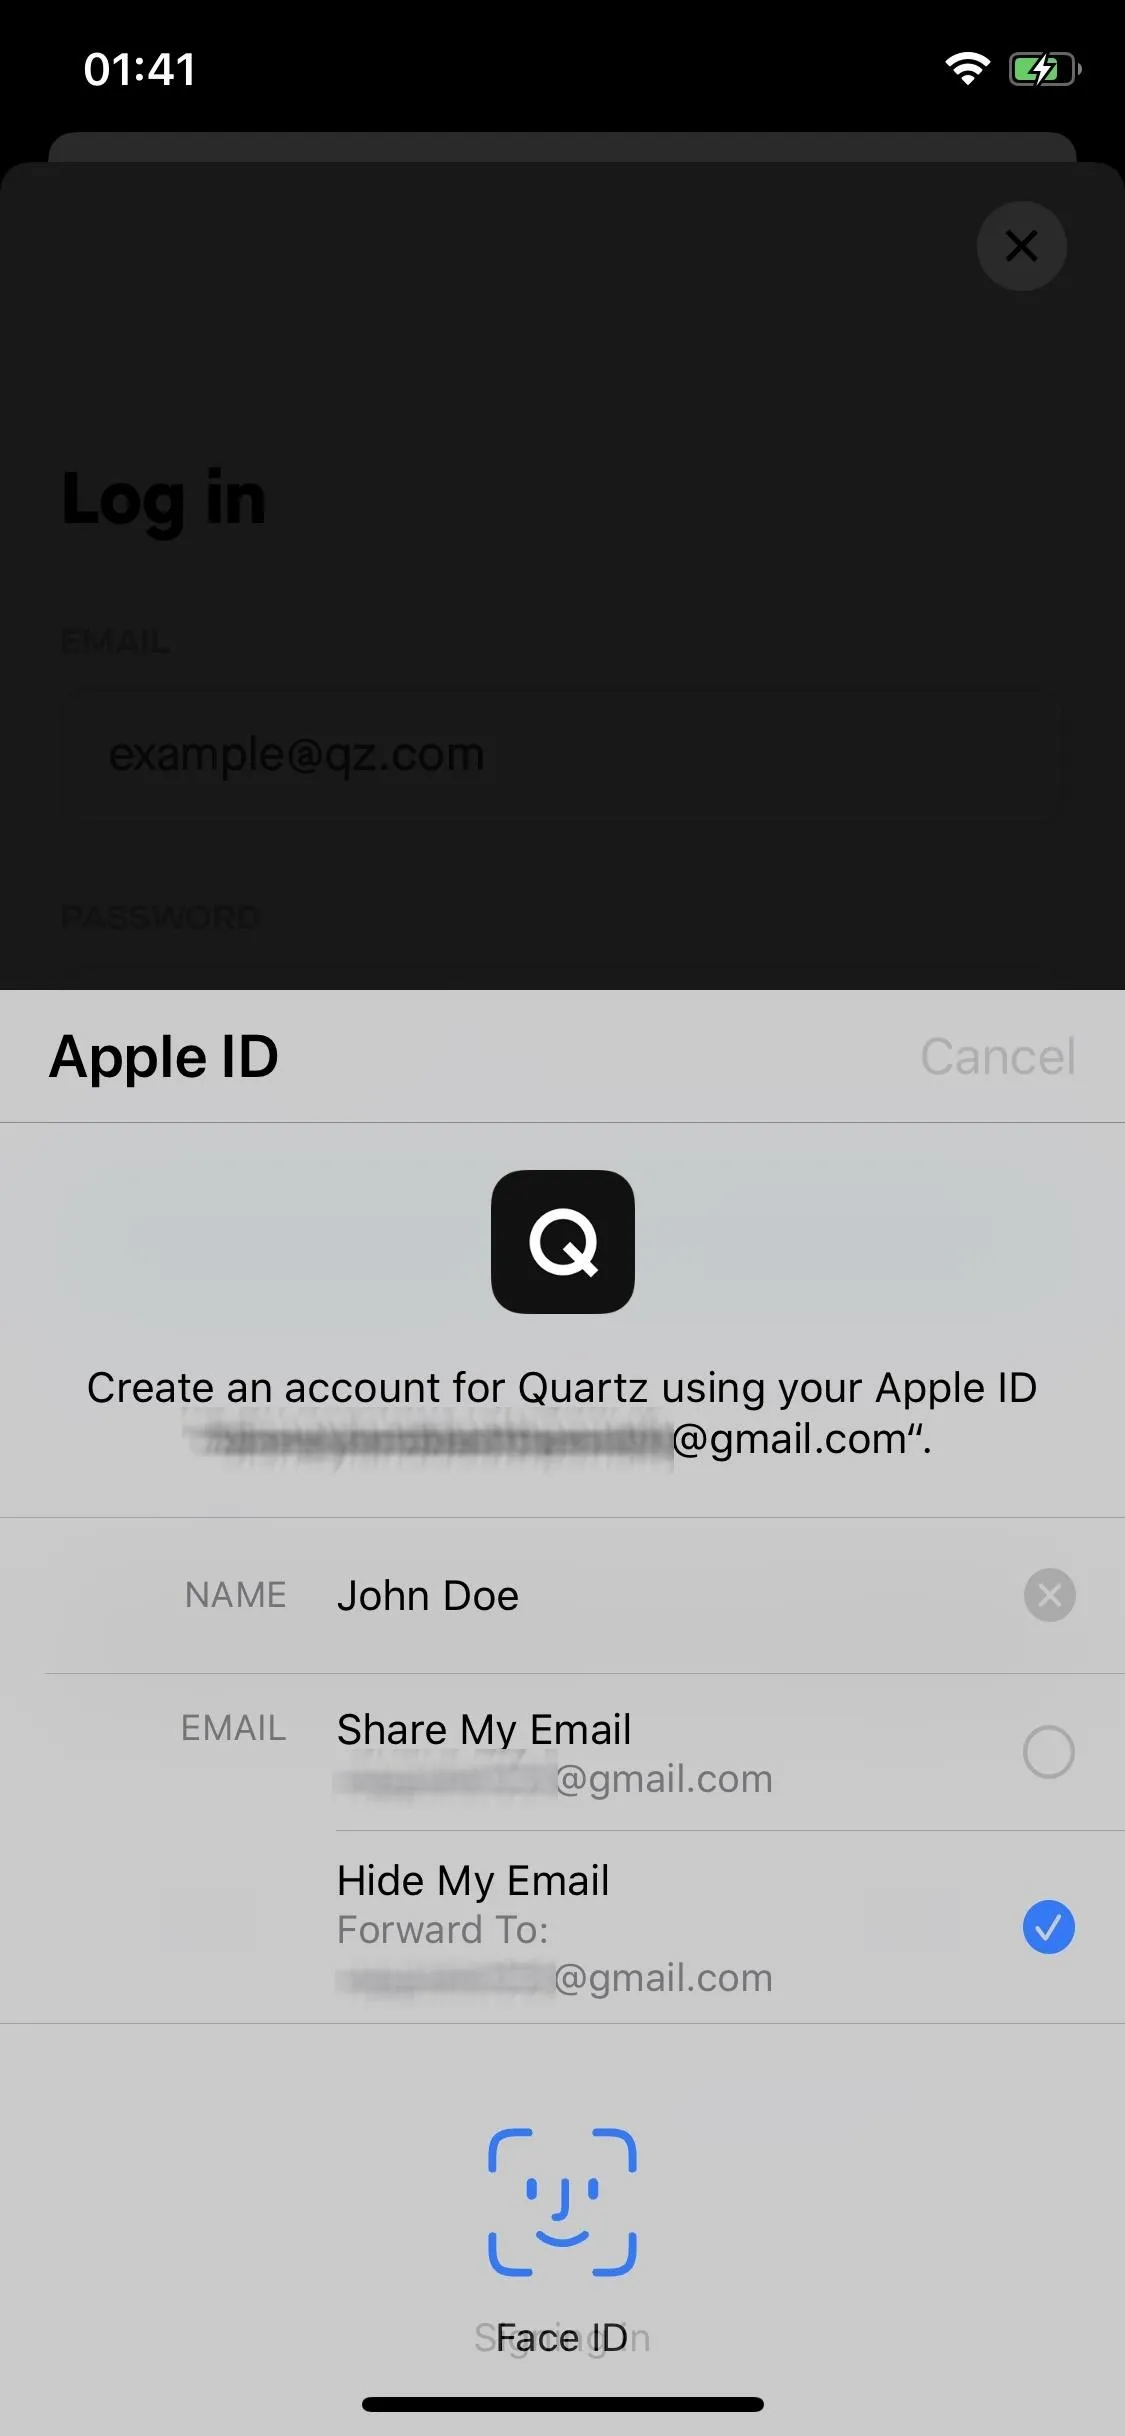
If you want to hide your email from the third-party app/site, tap on "Hide My Email." You'll see where your emails are forwarded to (your primary Apple ID email), if that service decides to contact you. If you don't want to hide your email, you can tap on "Share My Email" and you choose from several emails (if applicable).
Once you're finished tap on the "Continue" button at the bottom of the screen, and then either use Touch ID, Face ID, or a passcode to confirm you want to log in with your Apple ID. Your account will automatically be created and you can then began using the service.

If you sign out and need to sign back in, just tap the Sign in with Apple button again and use Face ID, Touch ID, or passcode to confirm.
Use Sign in with Apple on Your Android Device
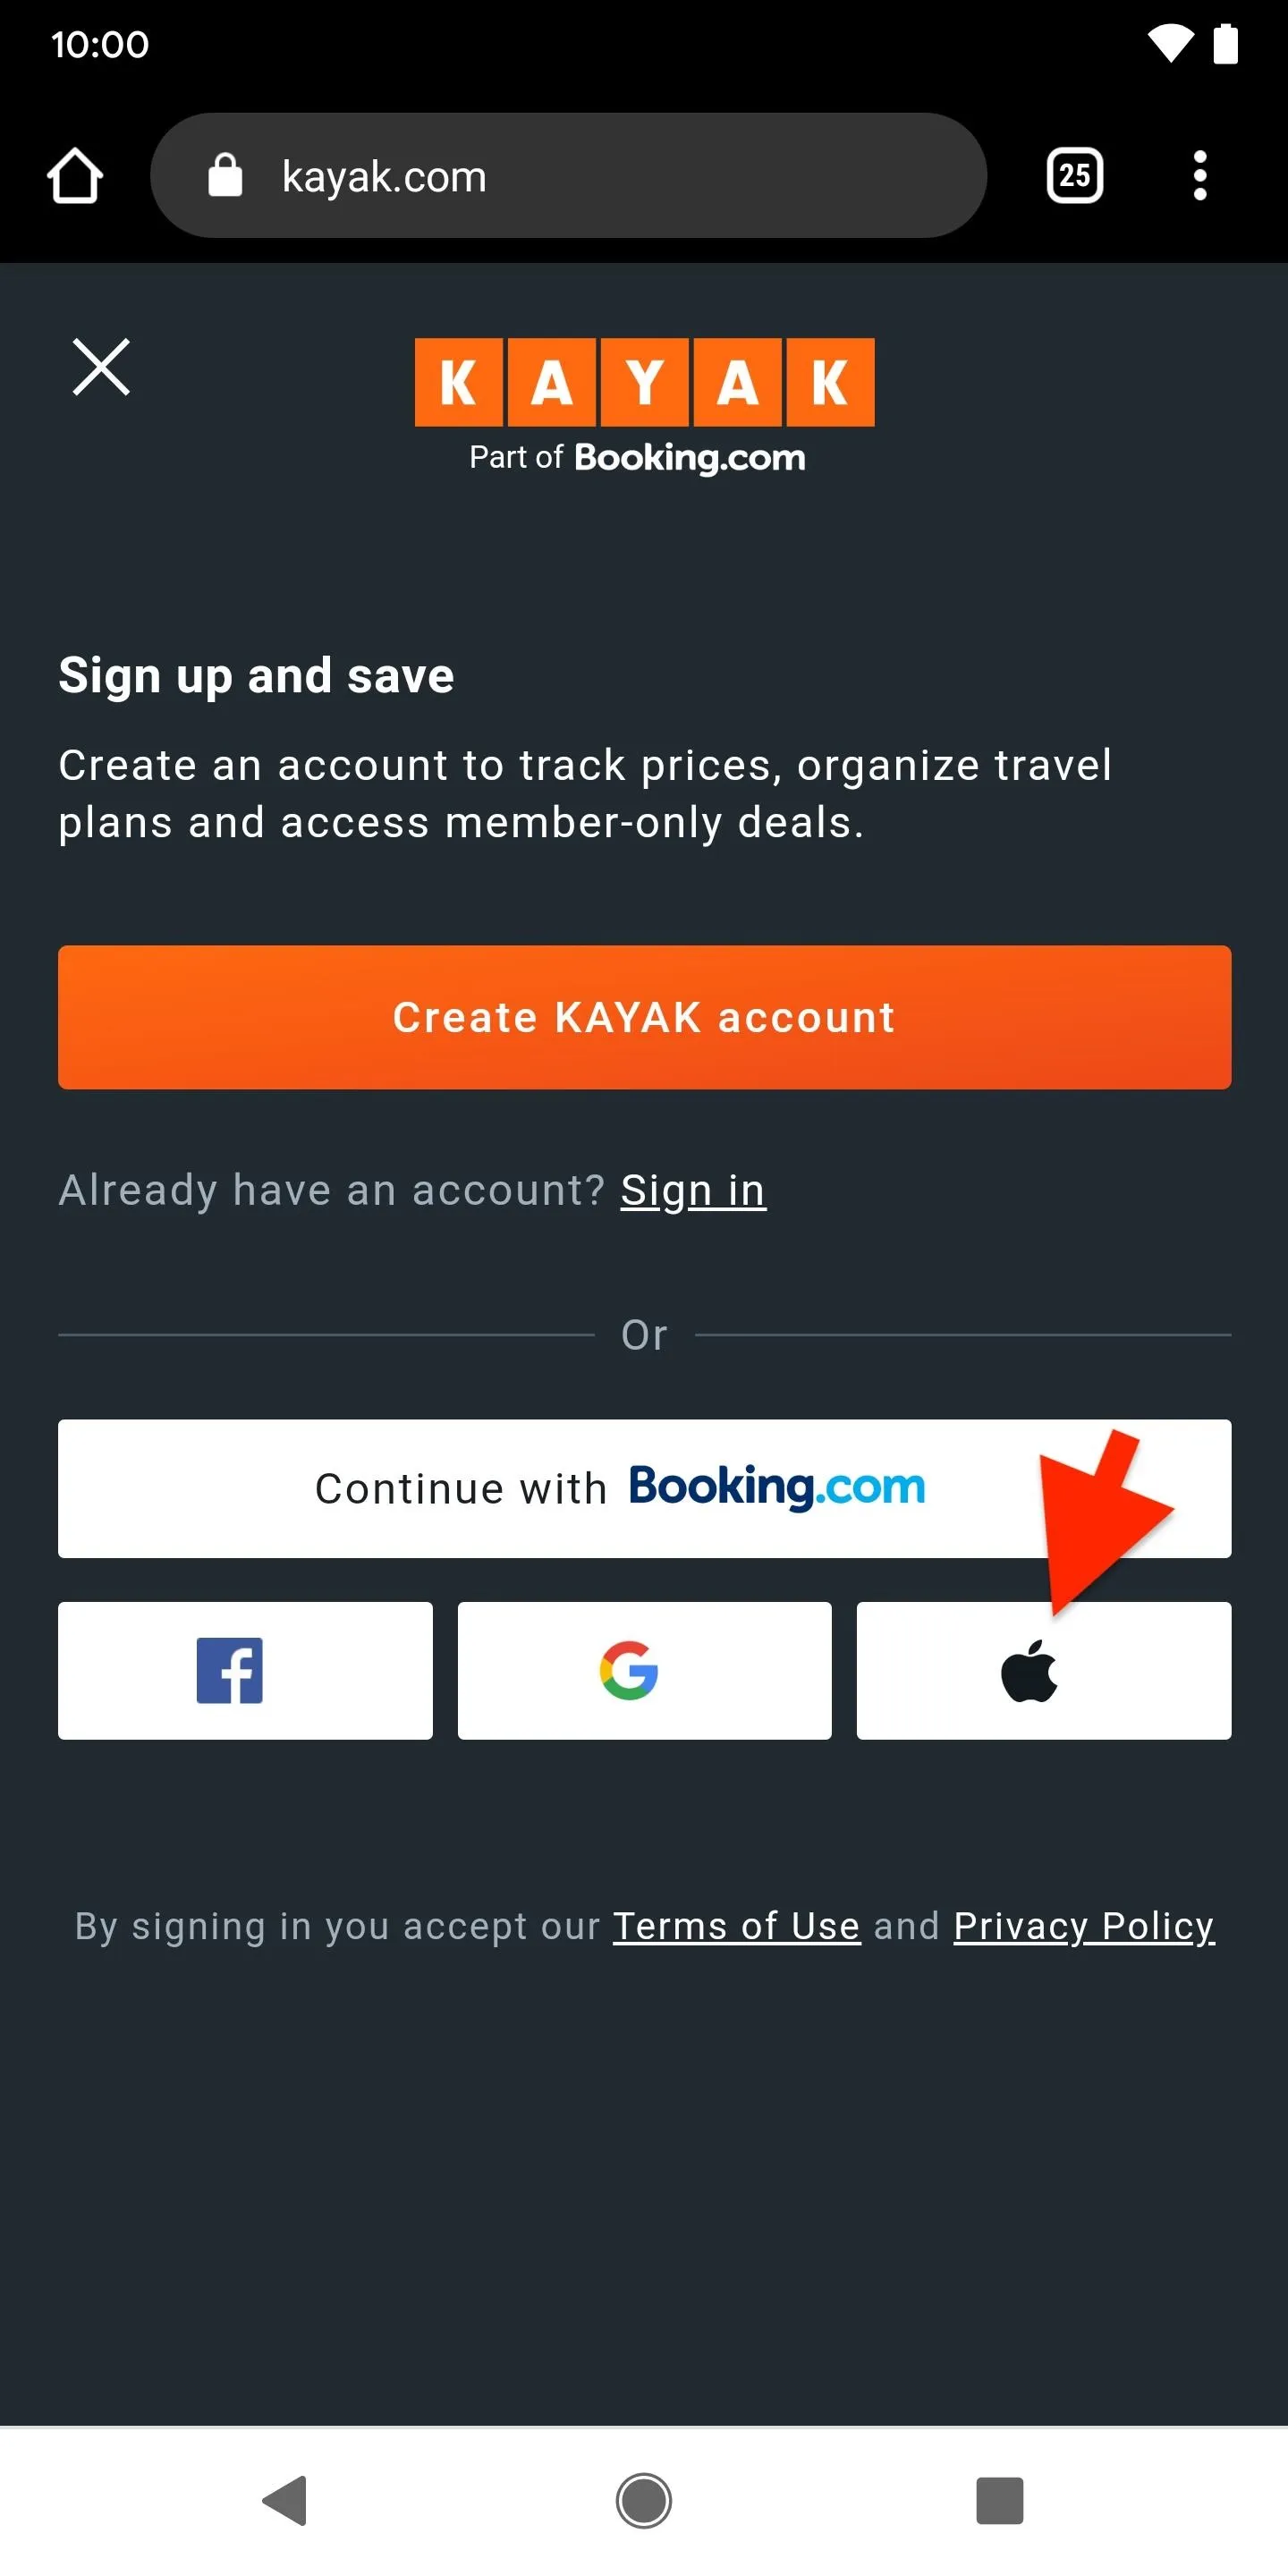
If you also have an Android (or Windows) device (in addition to an Apple one), you can log in to third-party websites using Sign in with Apple. Unfortunately this won't work for apps downloaded from the Play Store, but you can do it from your web browser of choice.
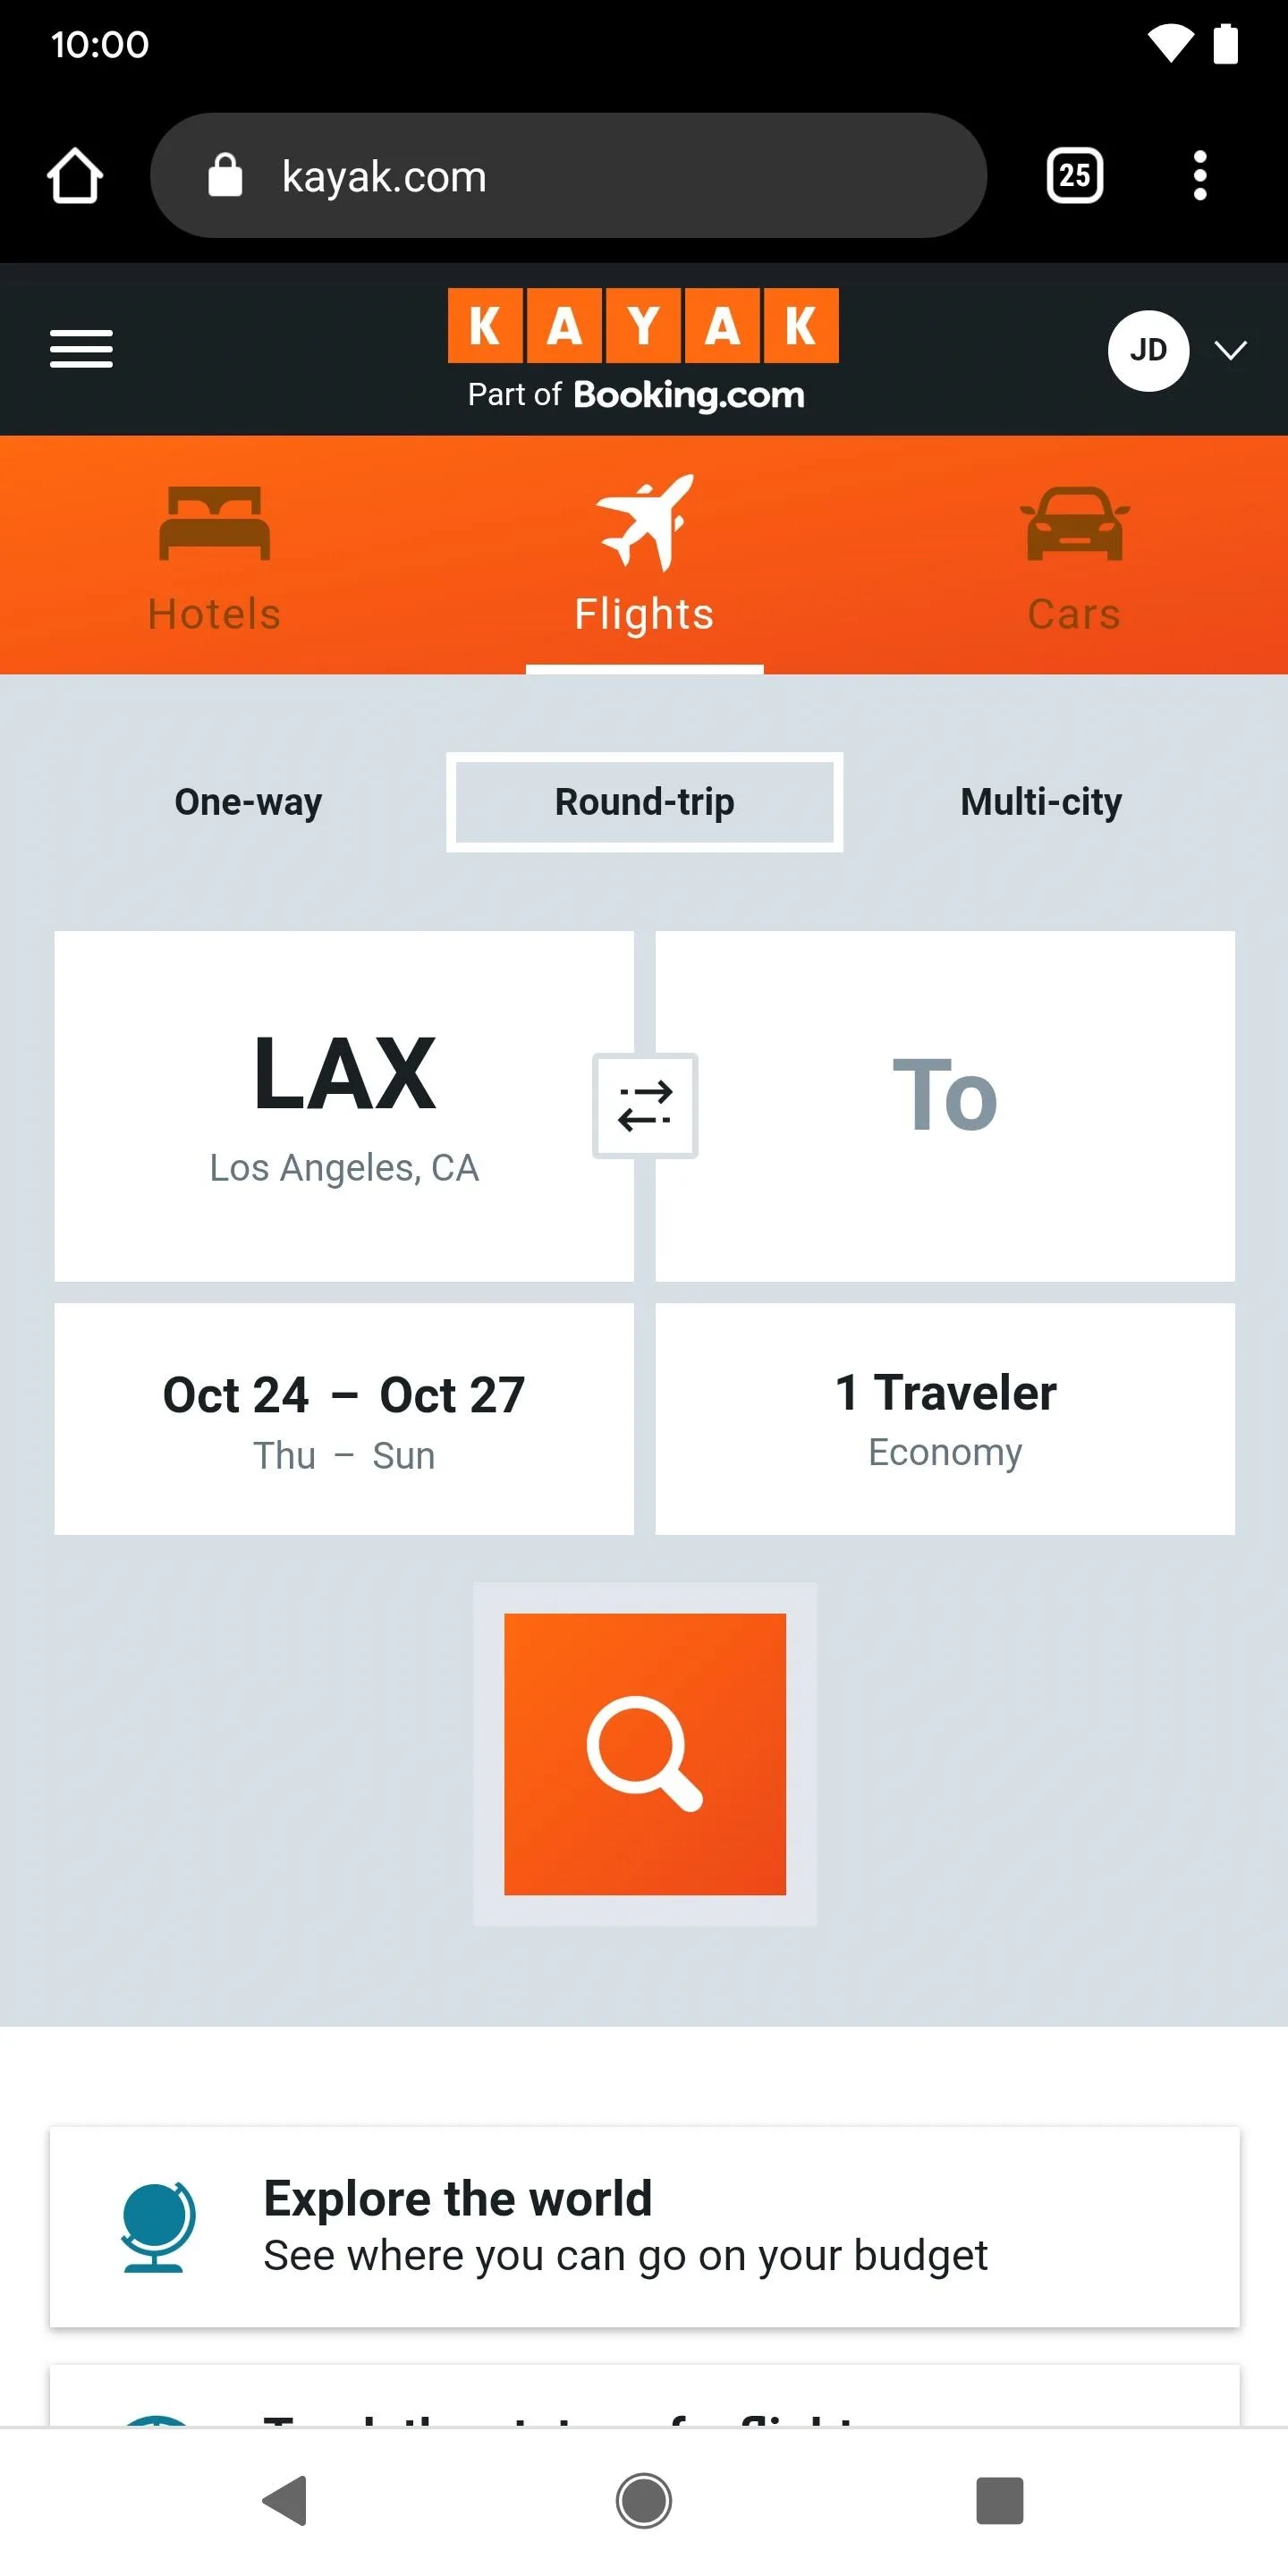
Go to a participating third-party service (we're using Kayak) and find the Sign in with Apple button, which always contains the Apple logo (text and color may differ). Tap on it and then enter your Apple ID email and password.
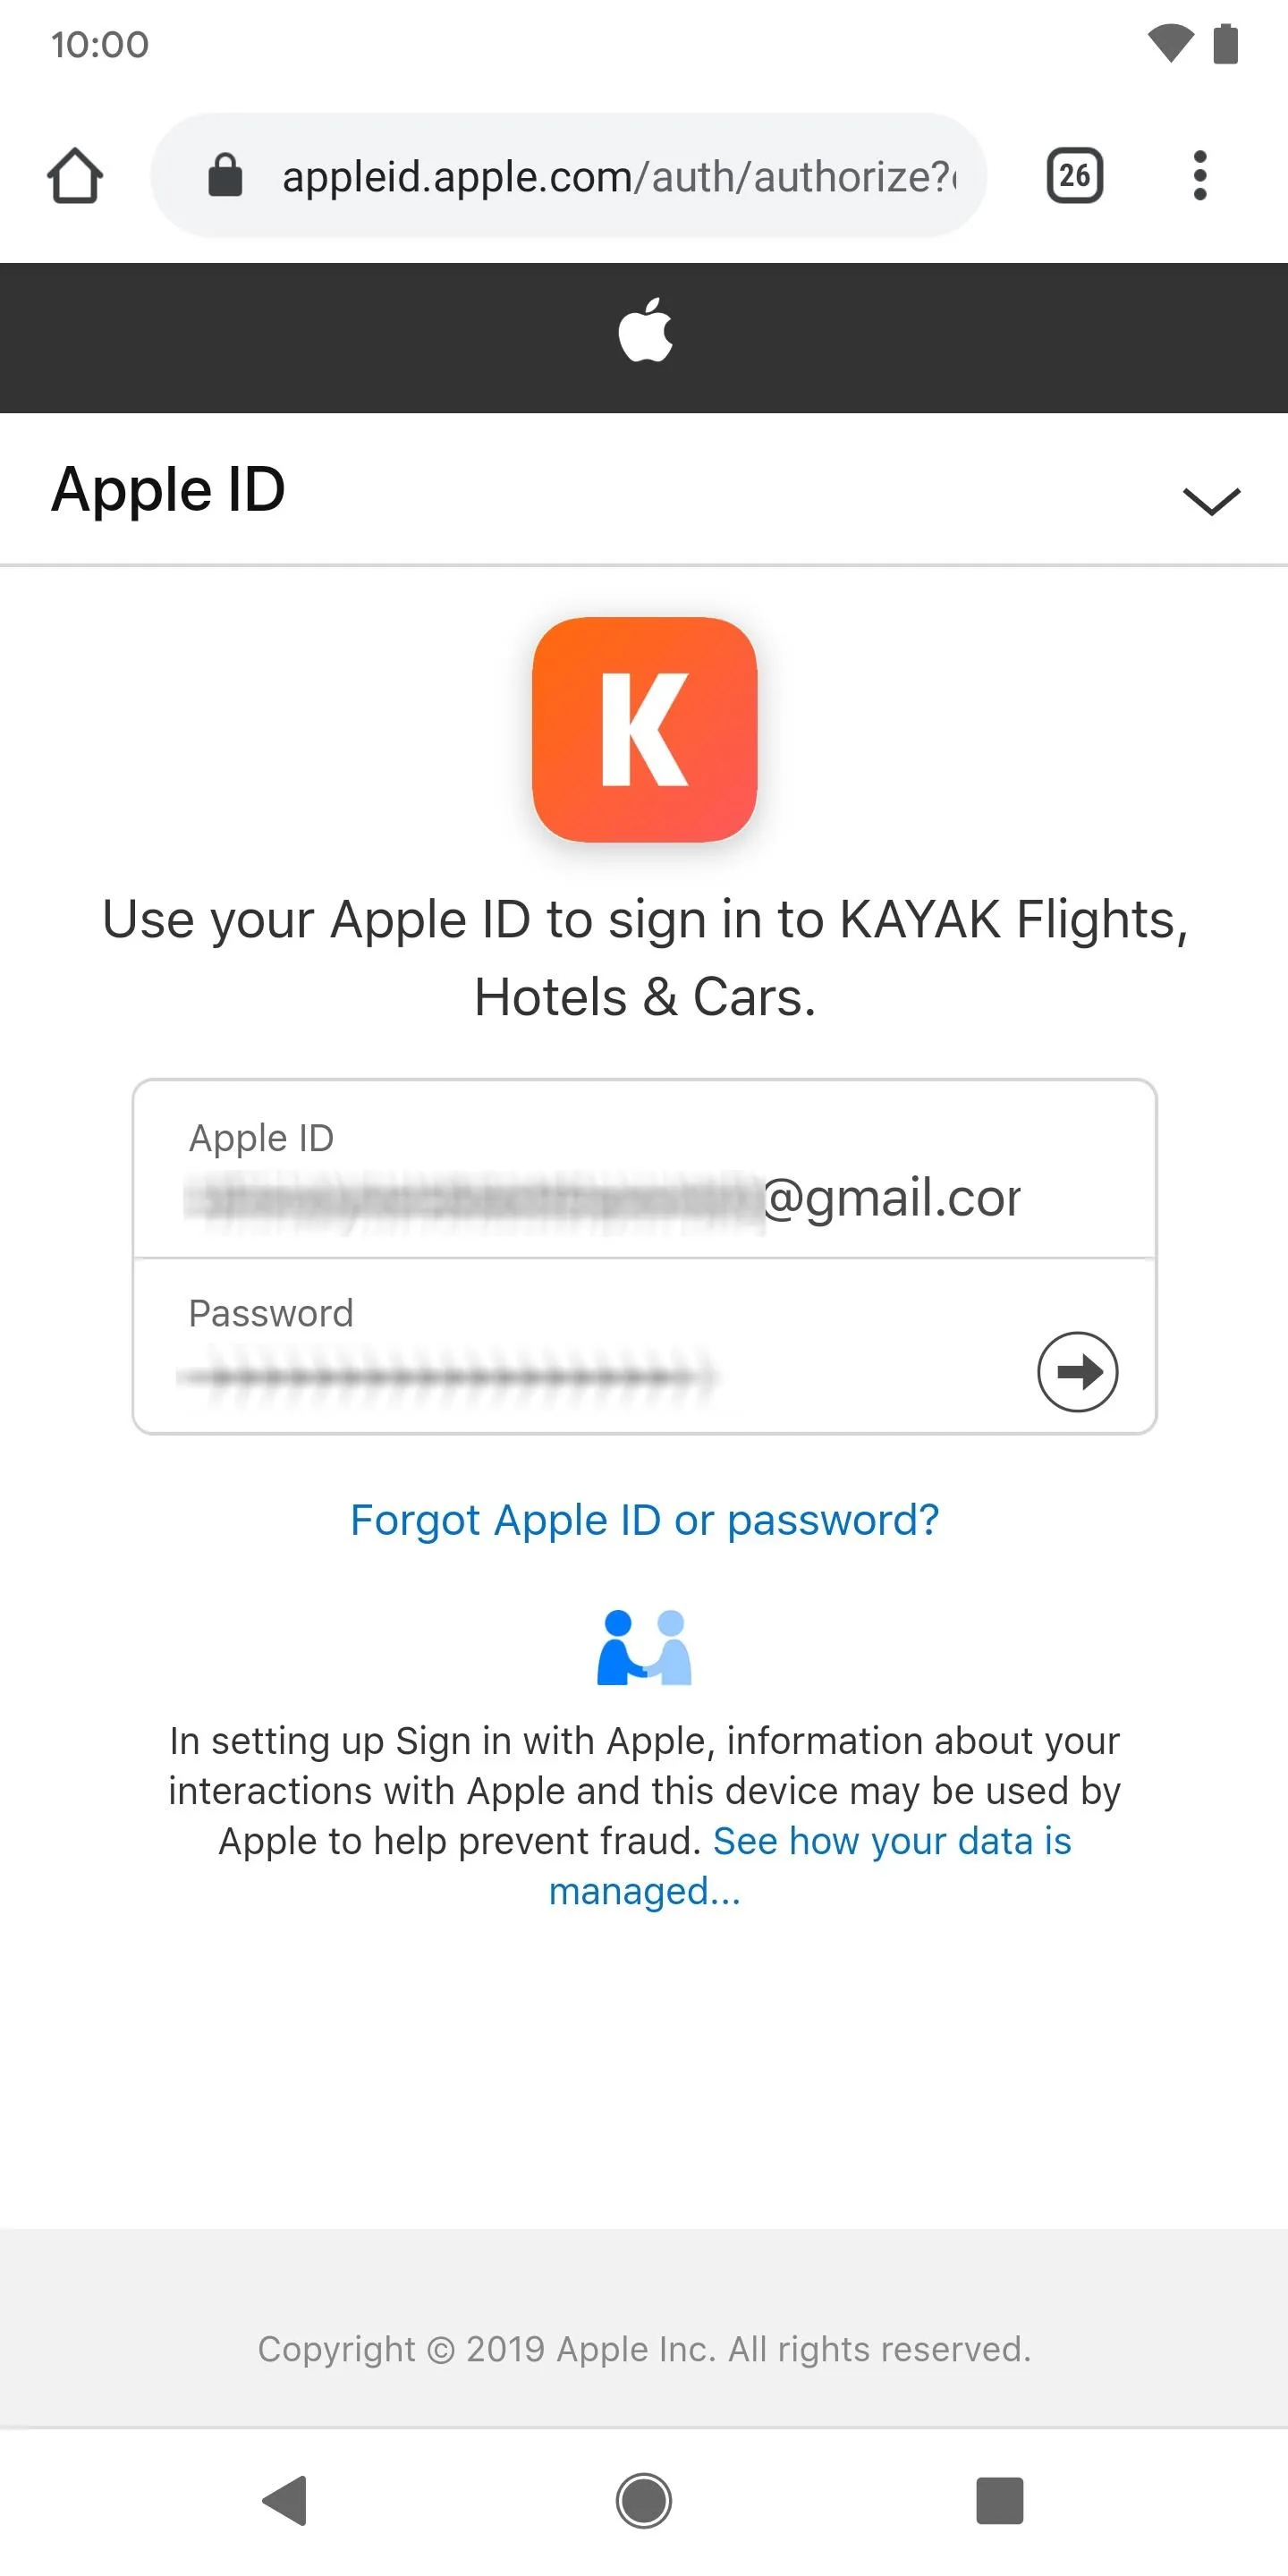
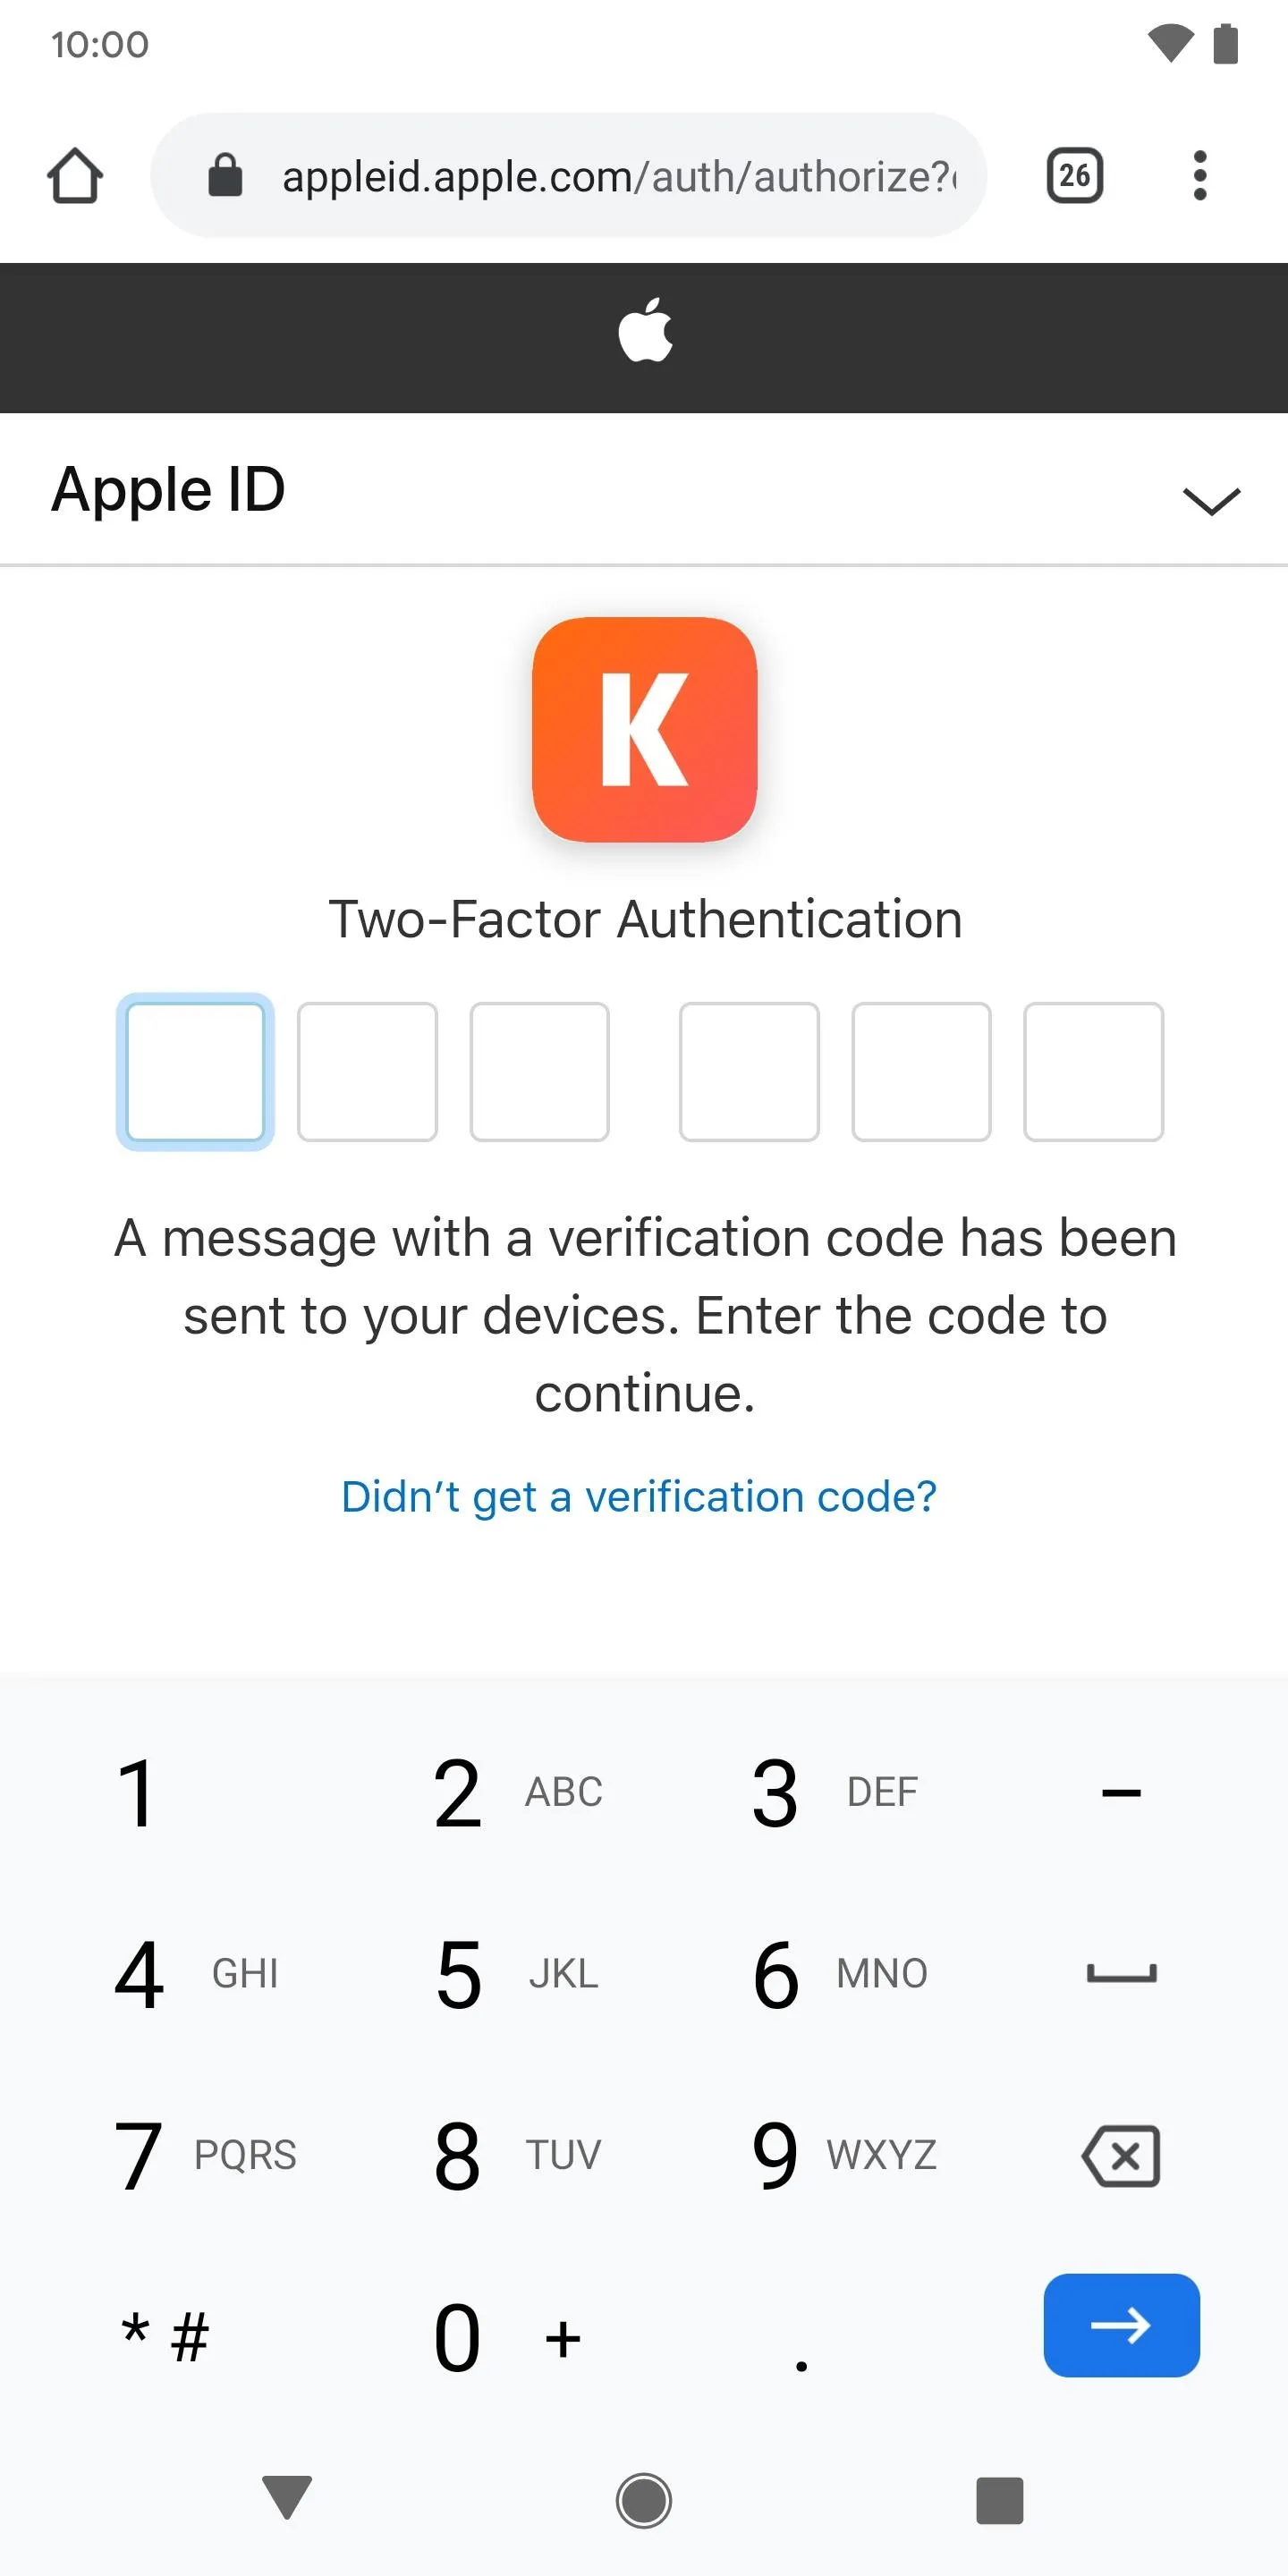
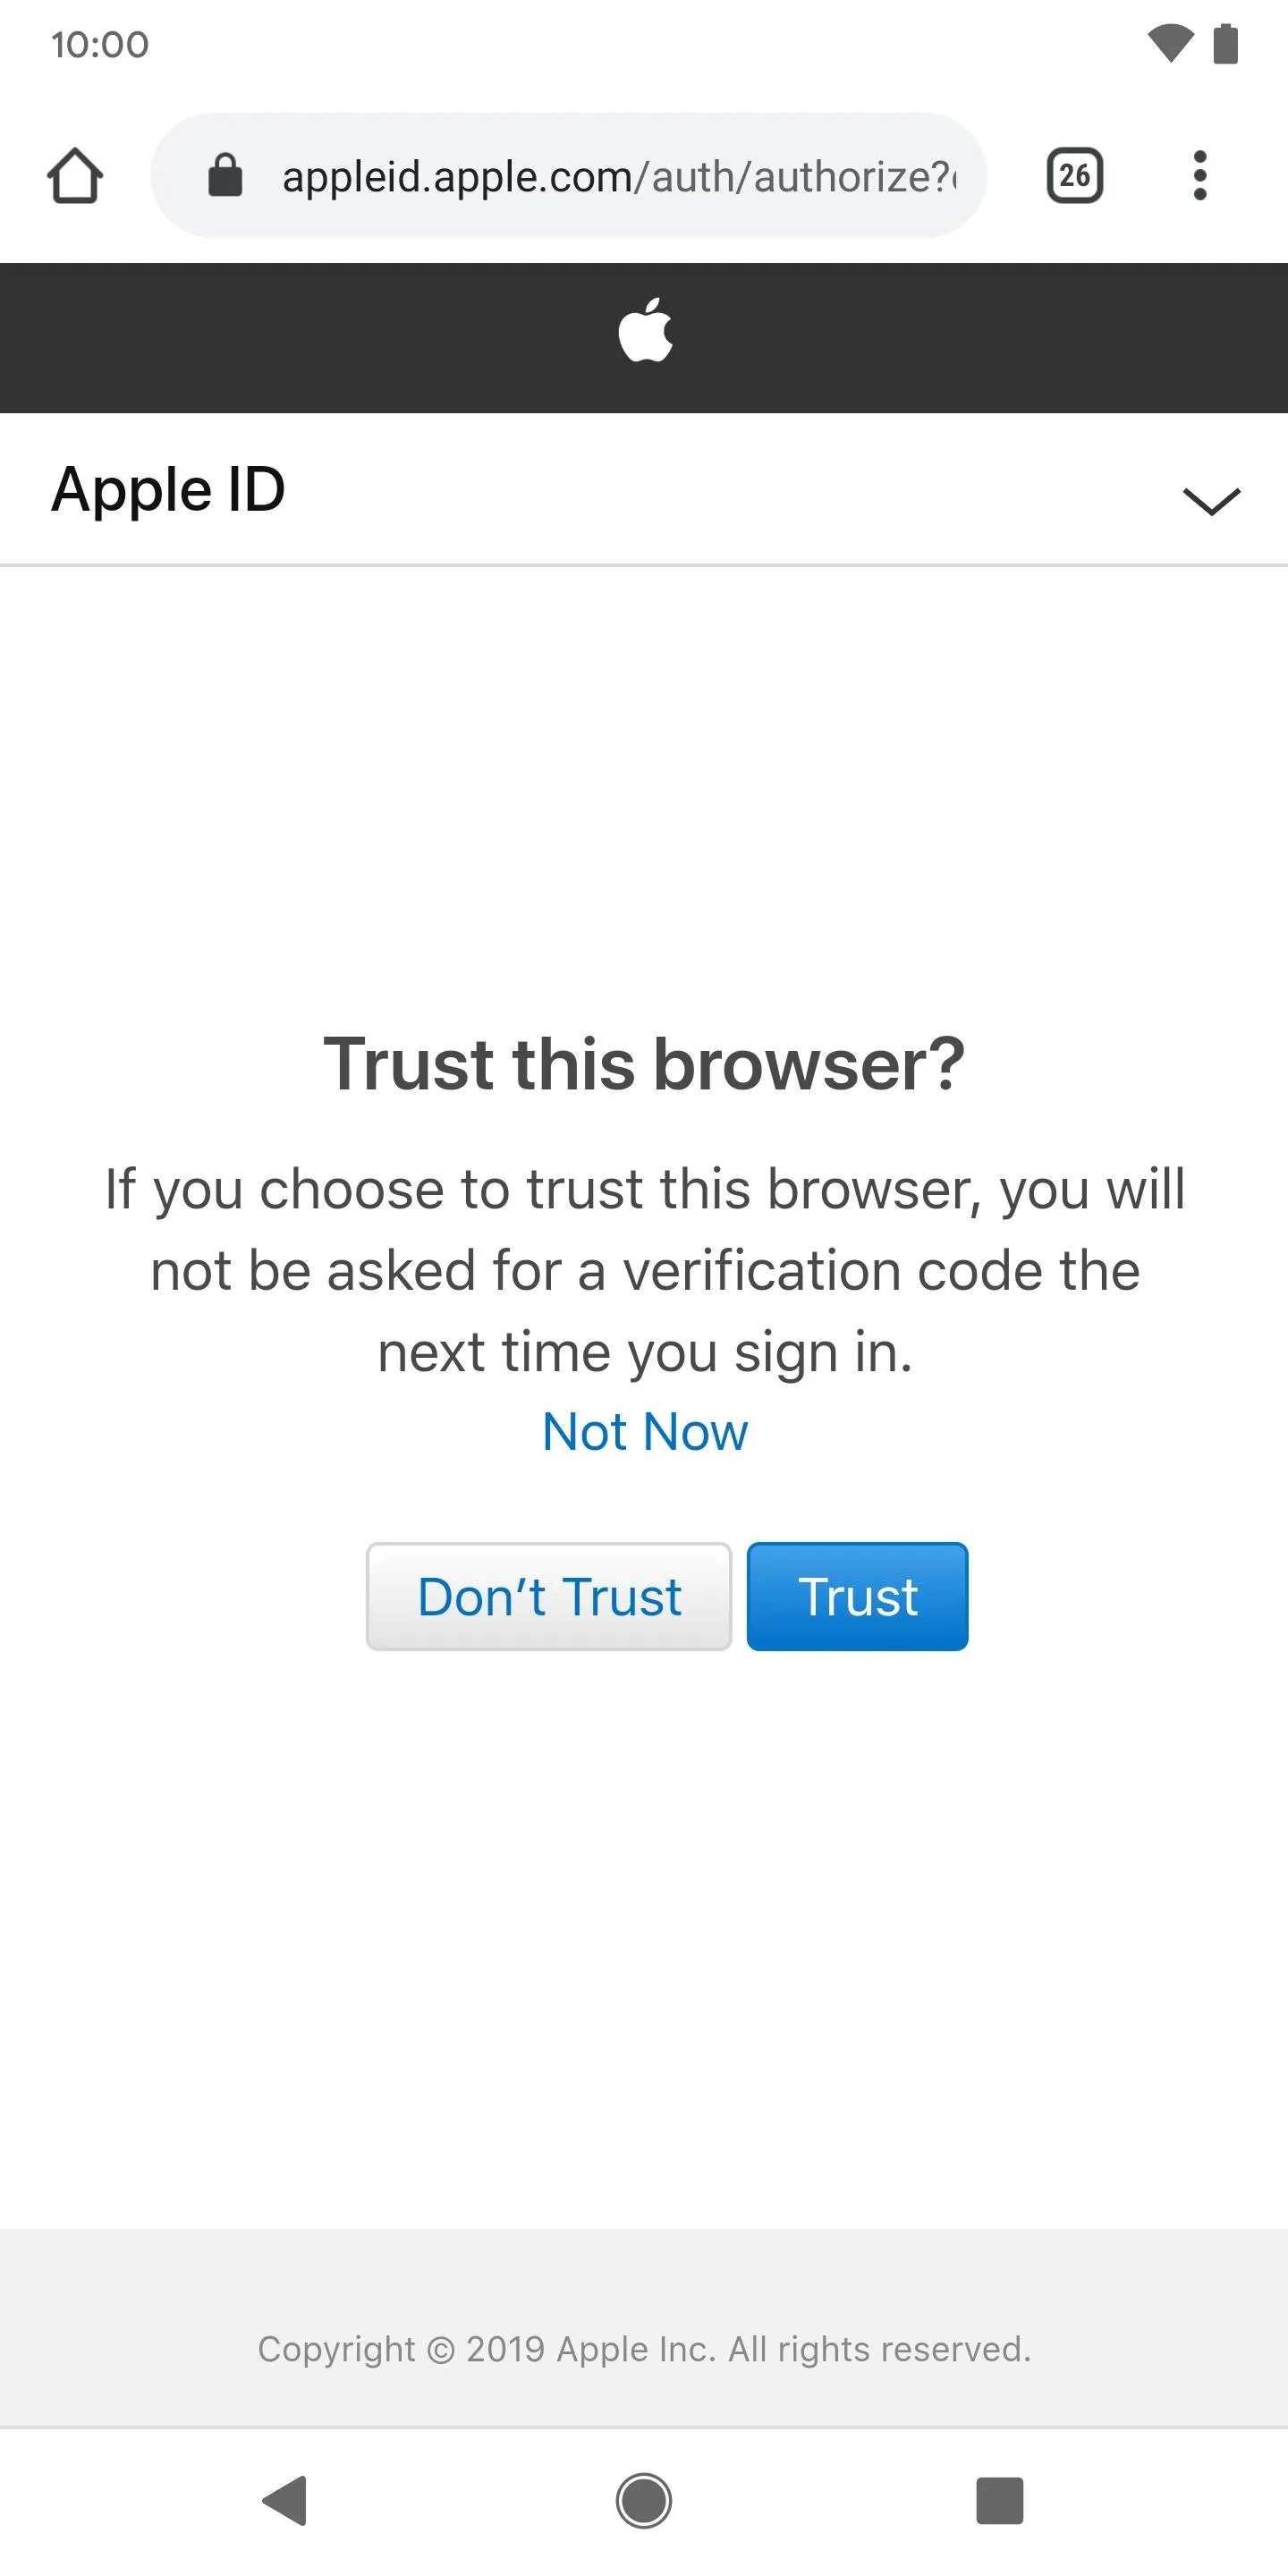
Once you attempt to log in, you'll be asked to enter a verification code for two-factor authentication, which will be sent to one of your Apple devices. Enter the code and then either hit "Don't Trust" or "Trust." If you trust the browser, you'll no longer need to enter a verification code in the future.
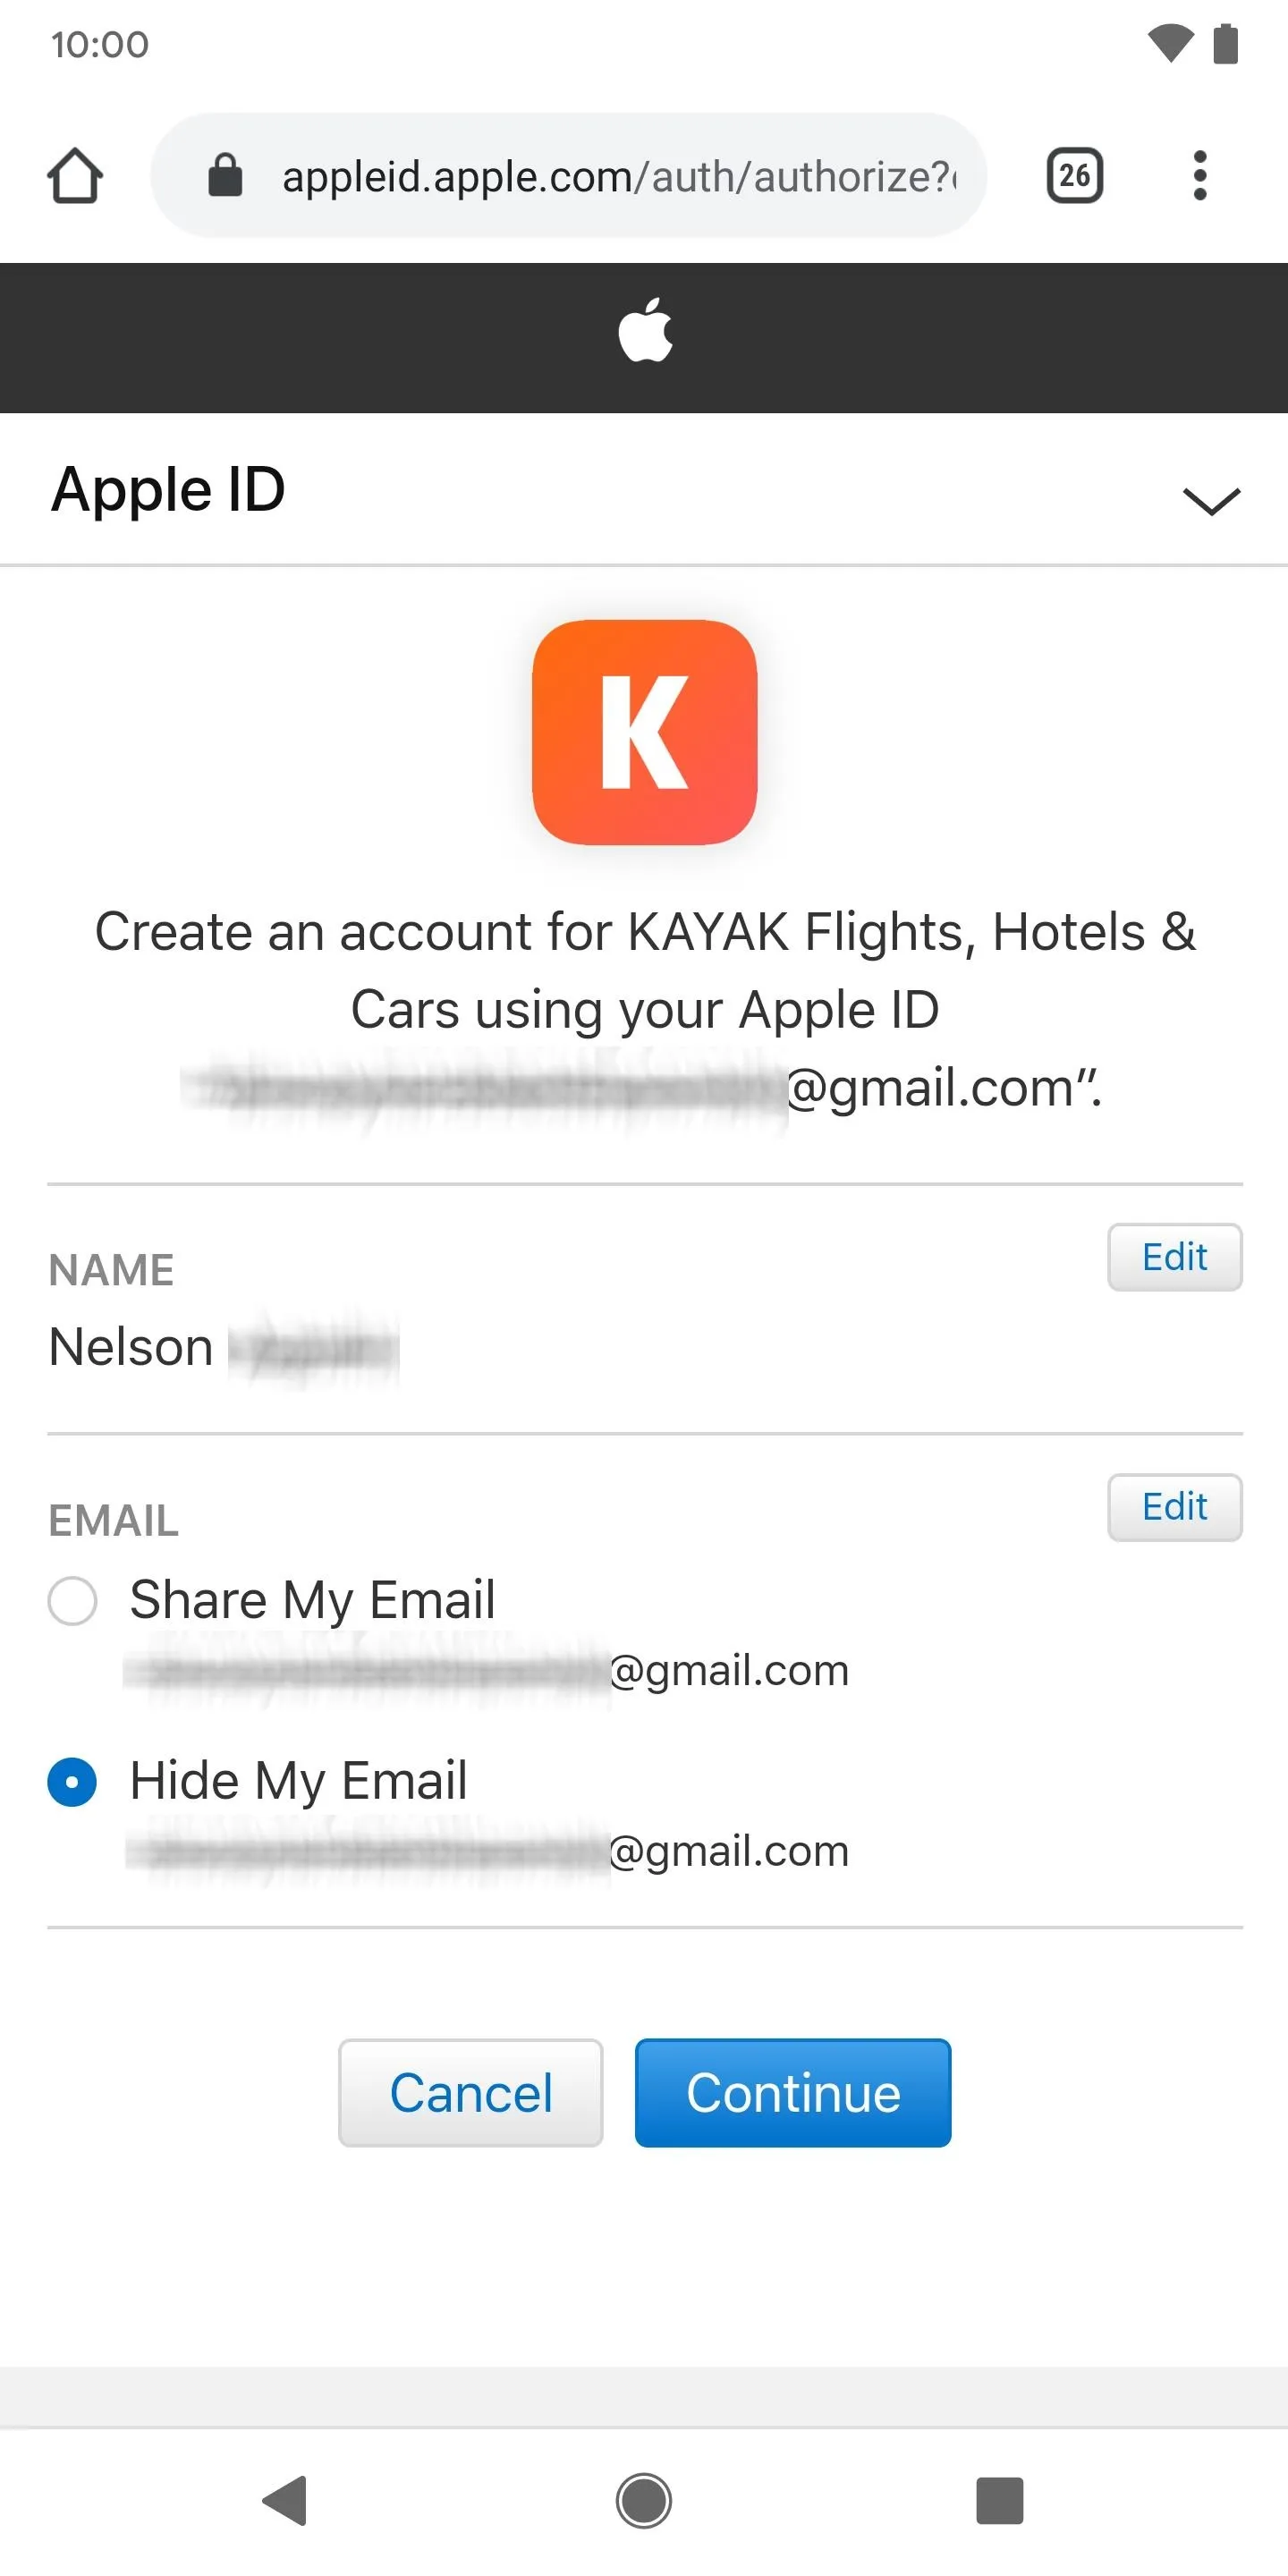
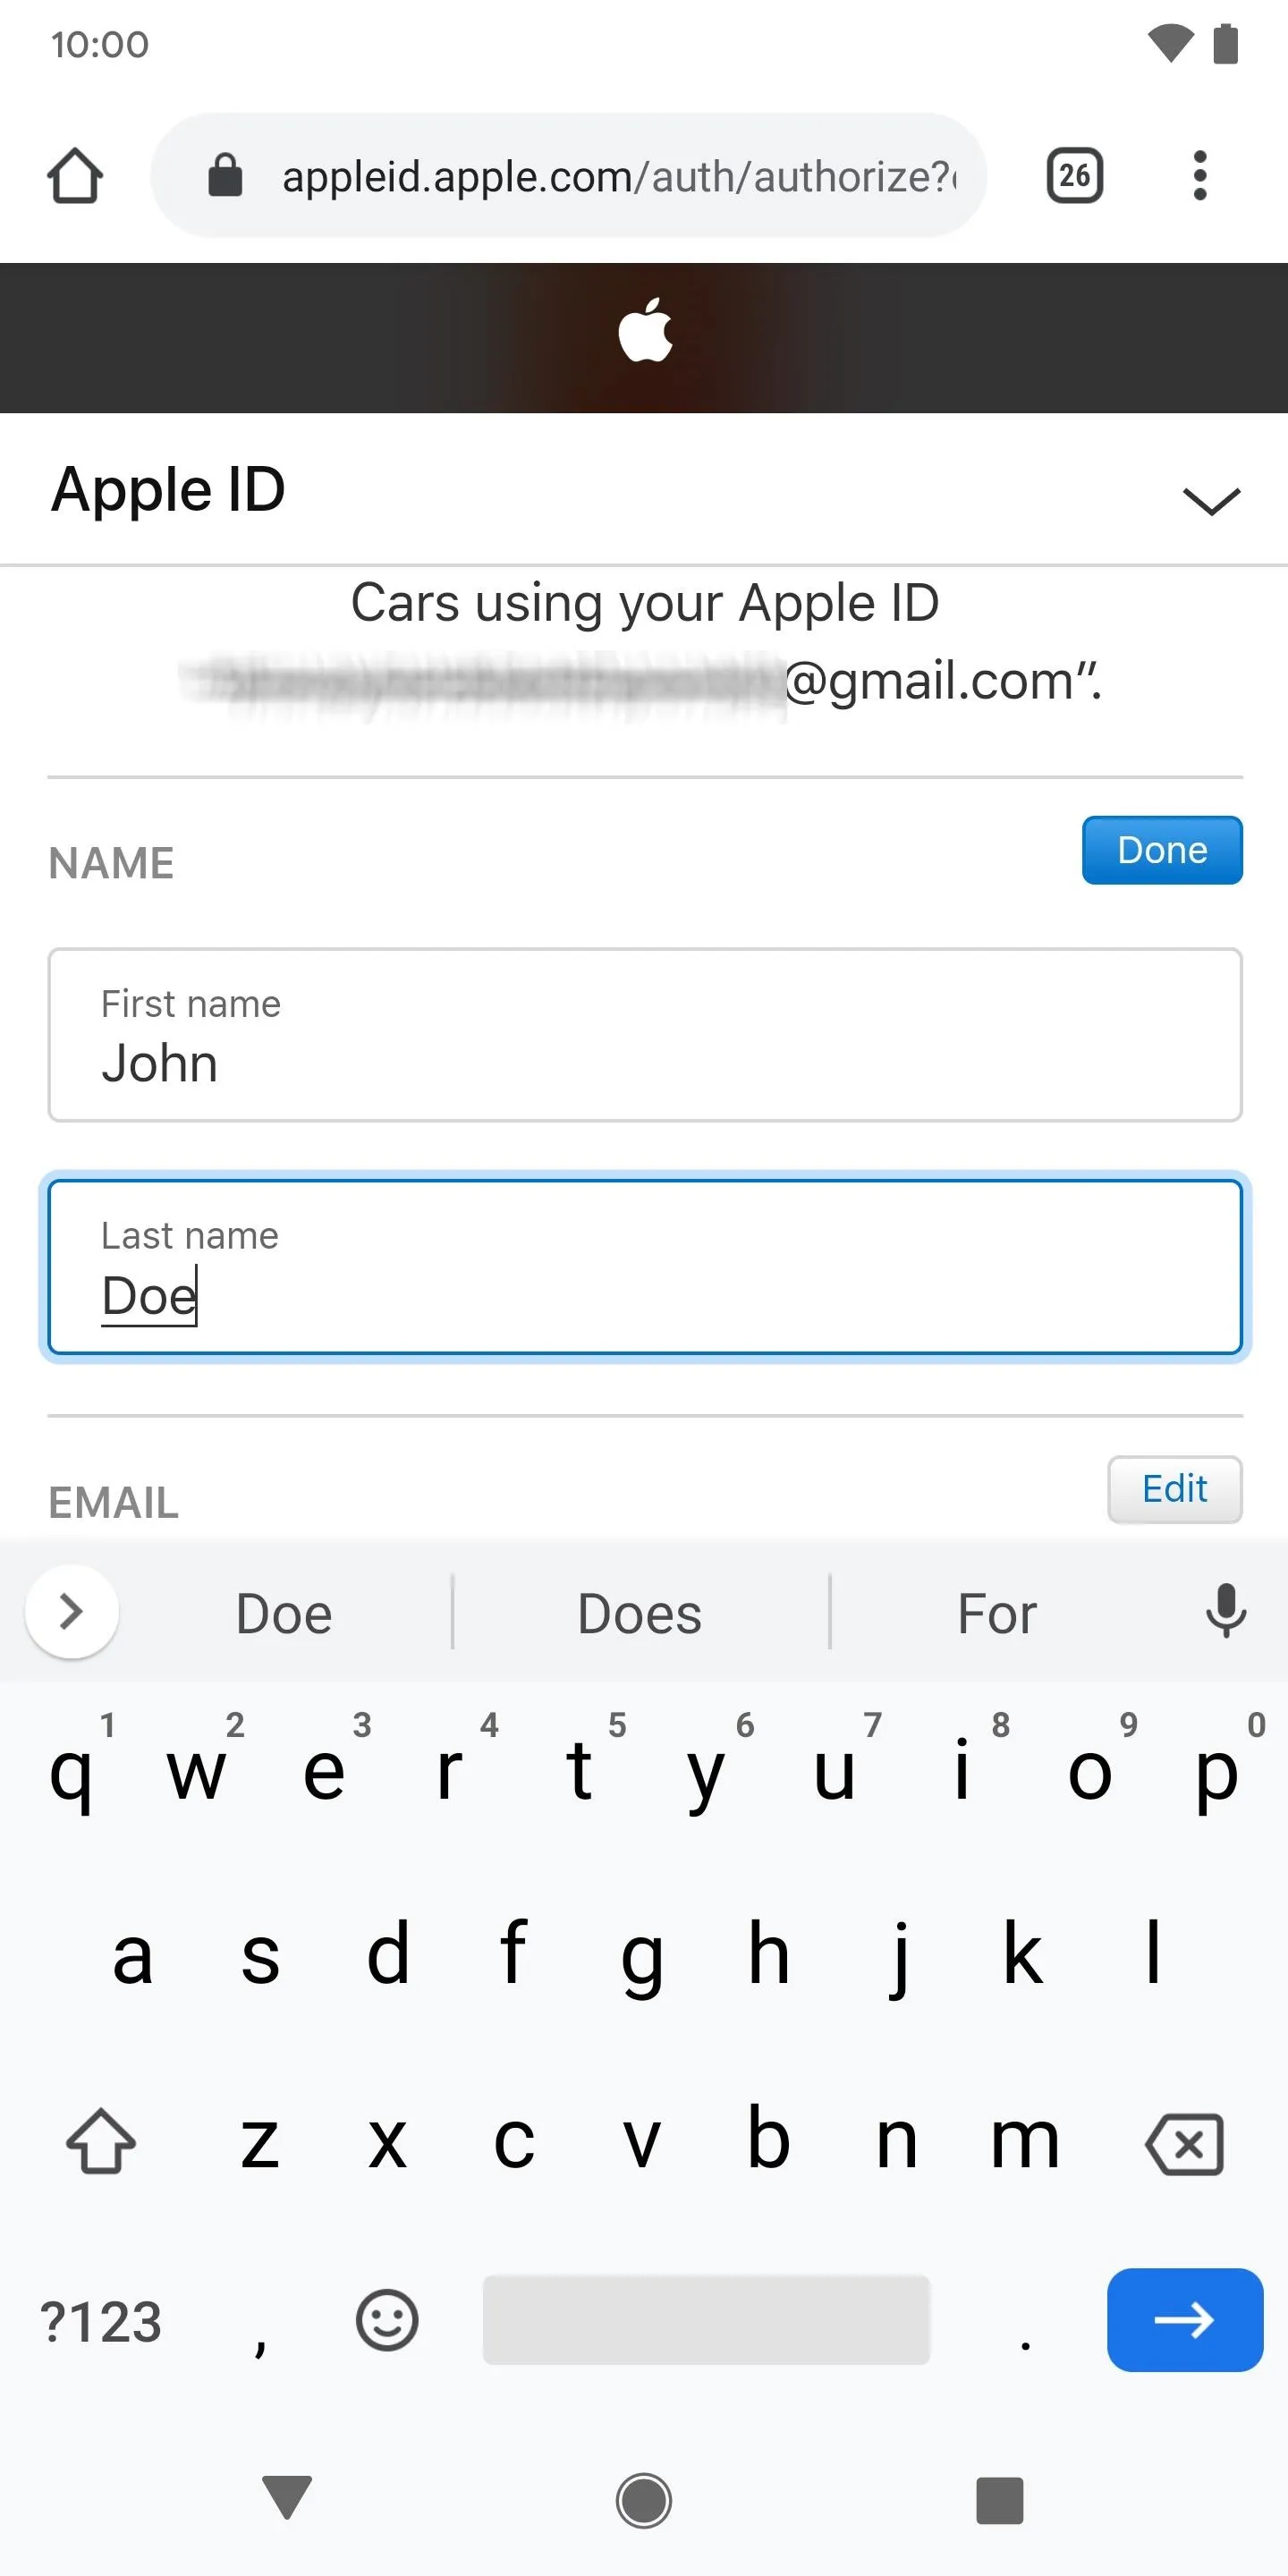
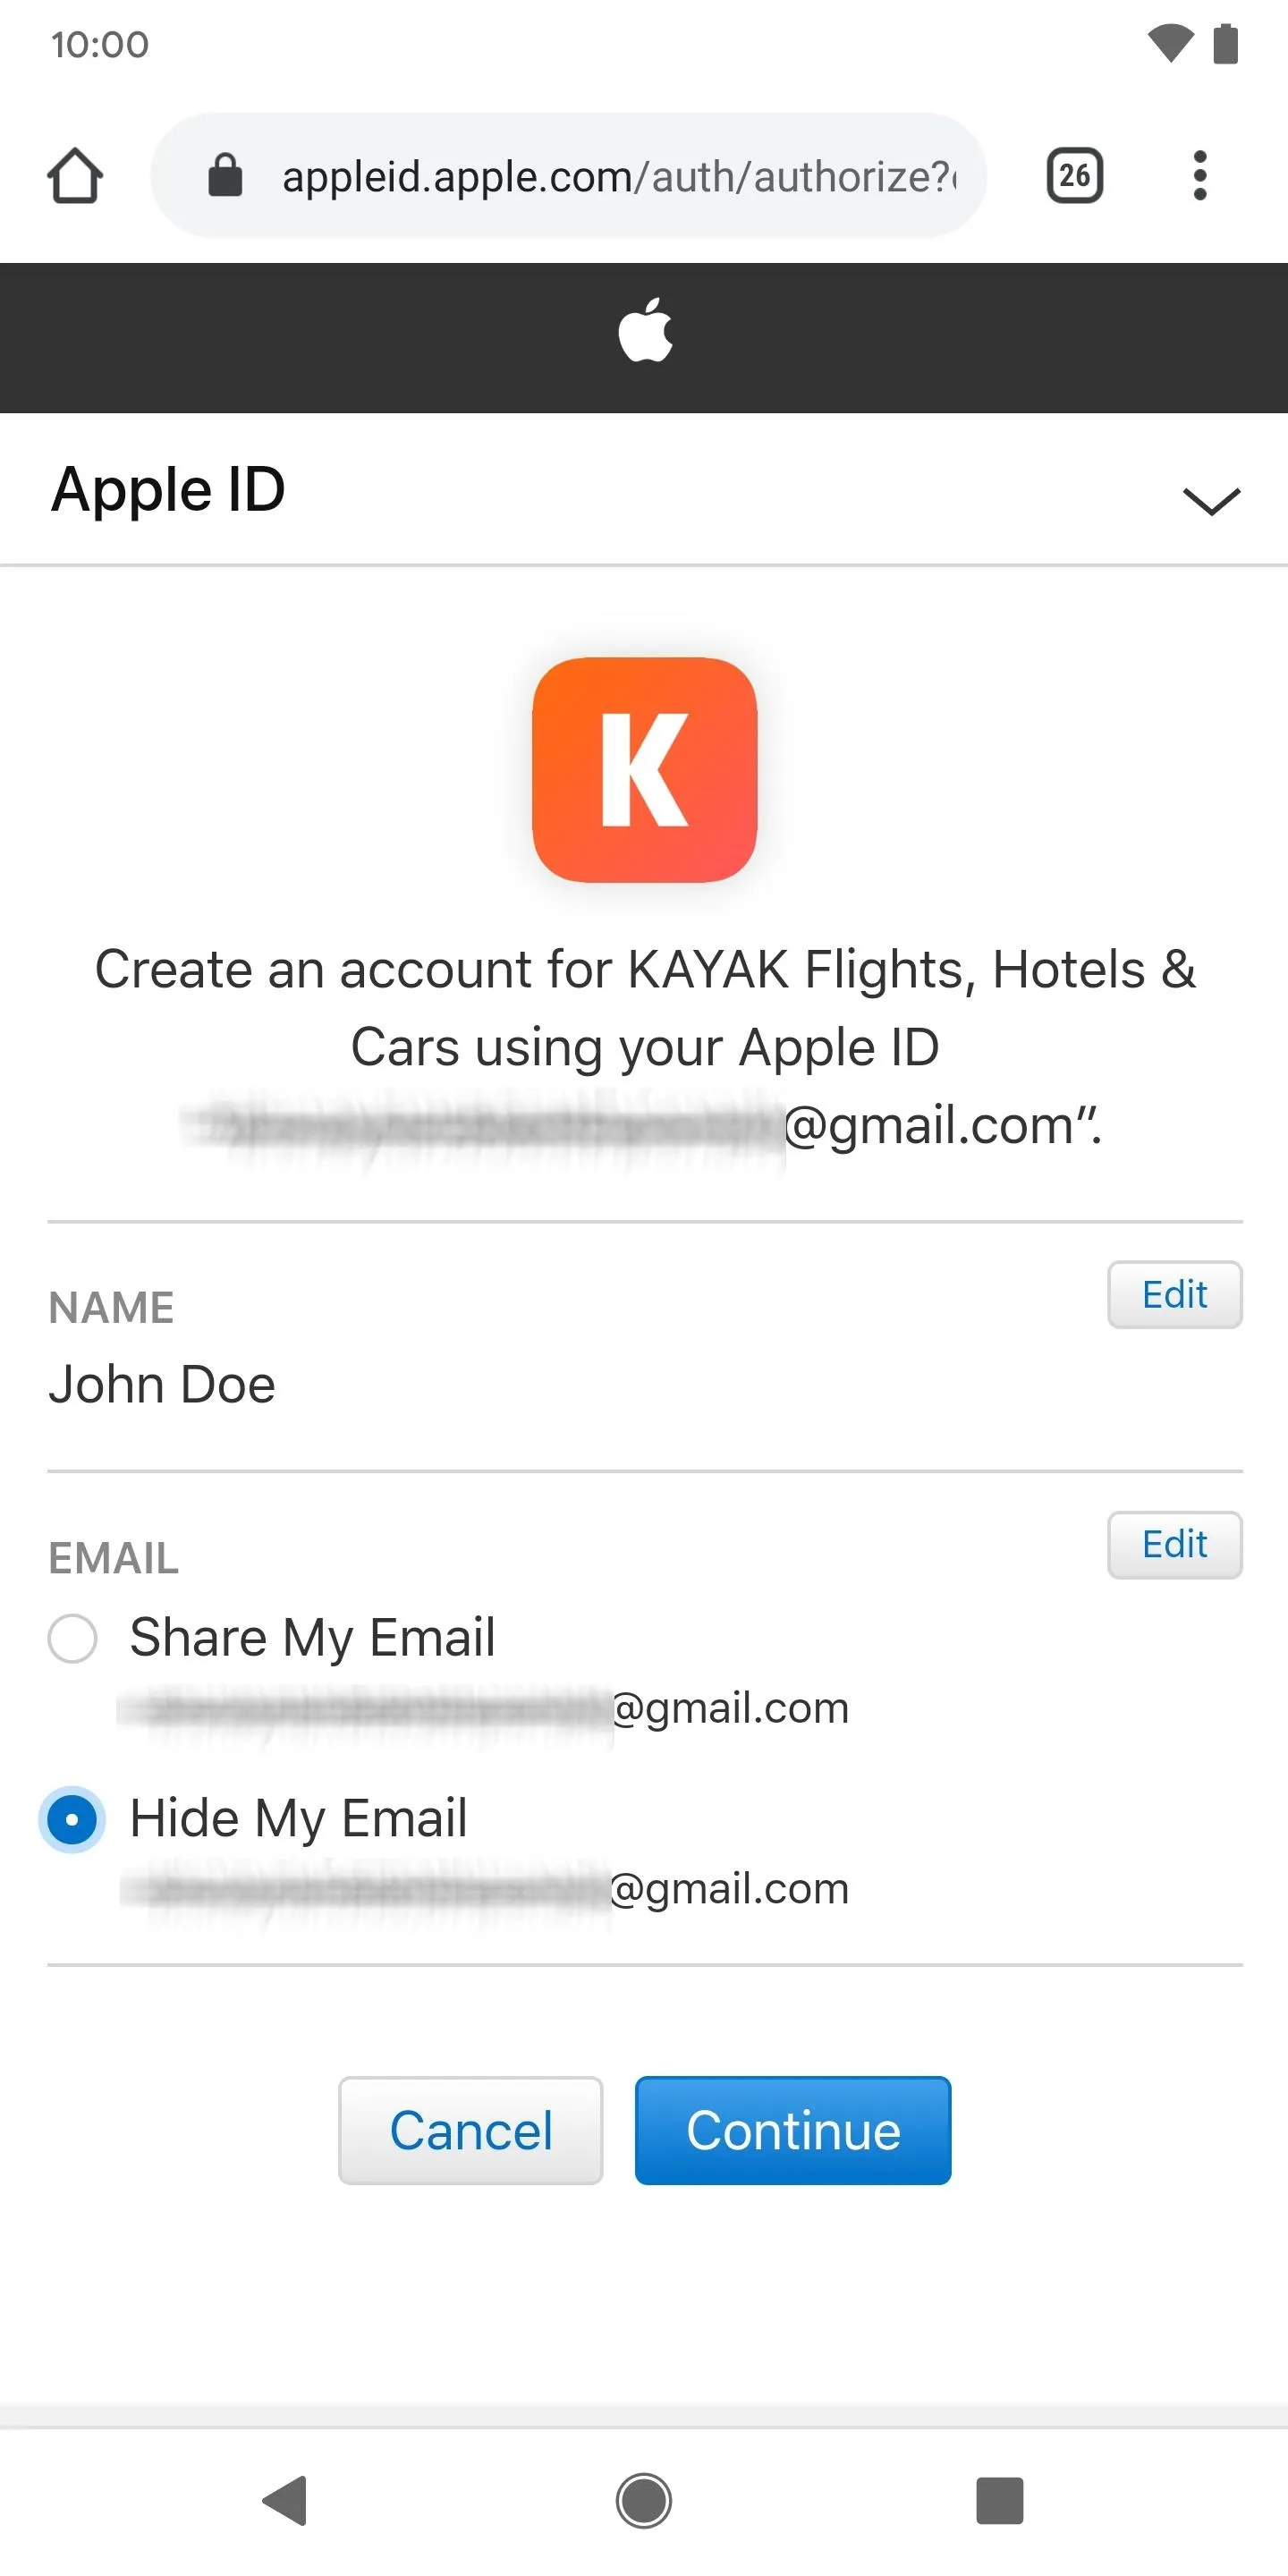
You'll then be able to create an account using your Apple ID, but first you can edit your name and choose whether you want to share or hide your email. If you want to change your name, tap on "Edit" next to your name. Hit "Done" when you're finished. If for some reason you want to share your email, tap on that option. If there are multiple emails attached to your Apple ID, you can choose another. If not, tap on "Hide My Email" to use an anonymous email.
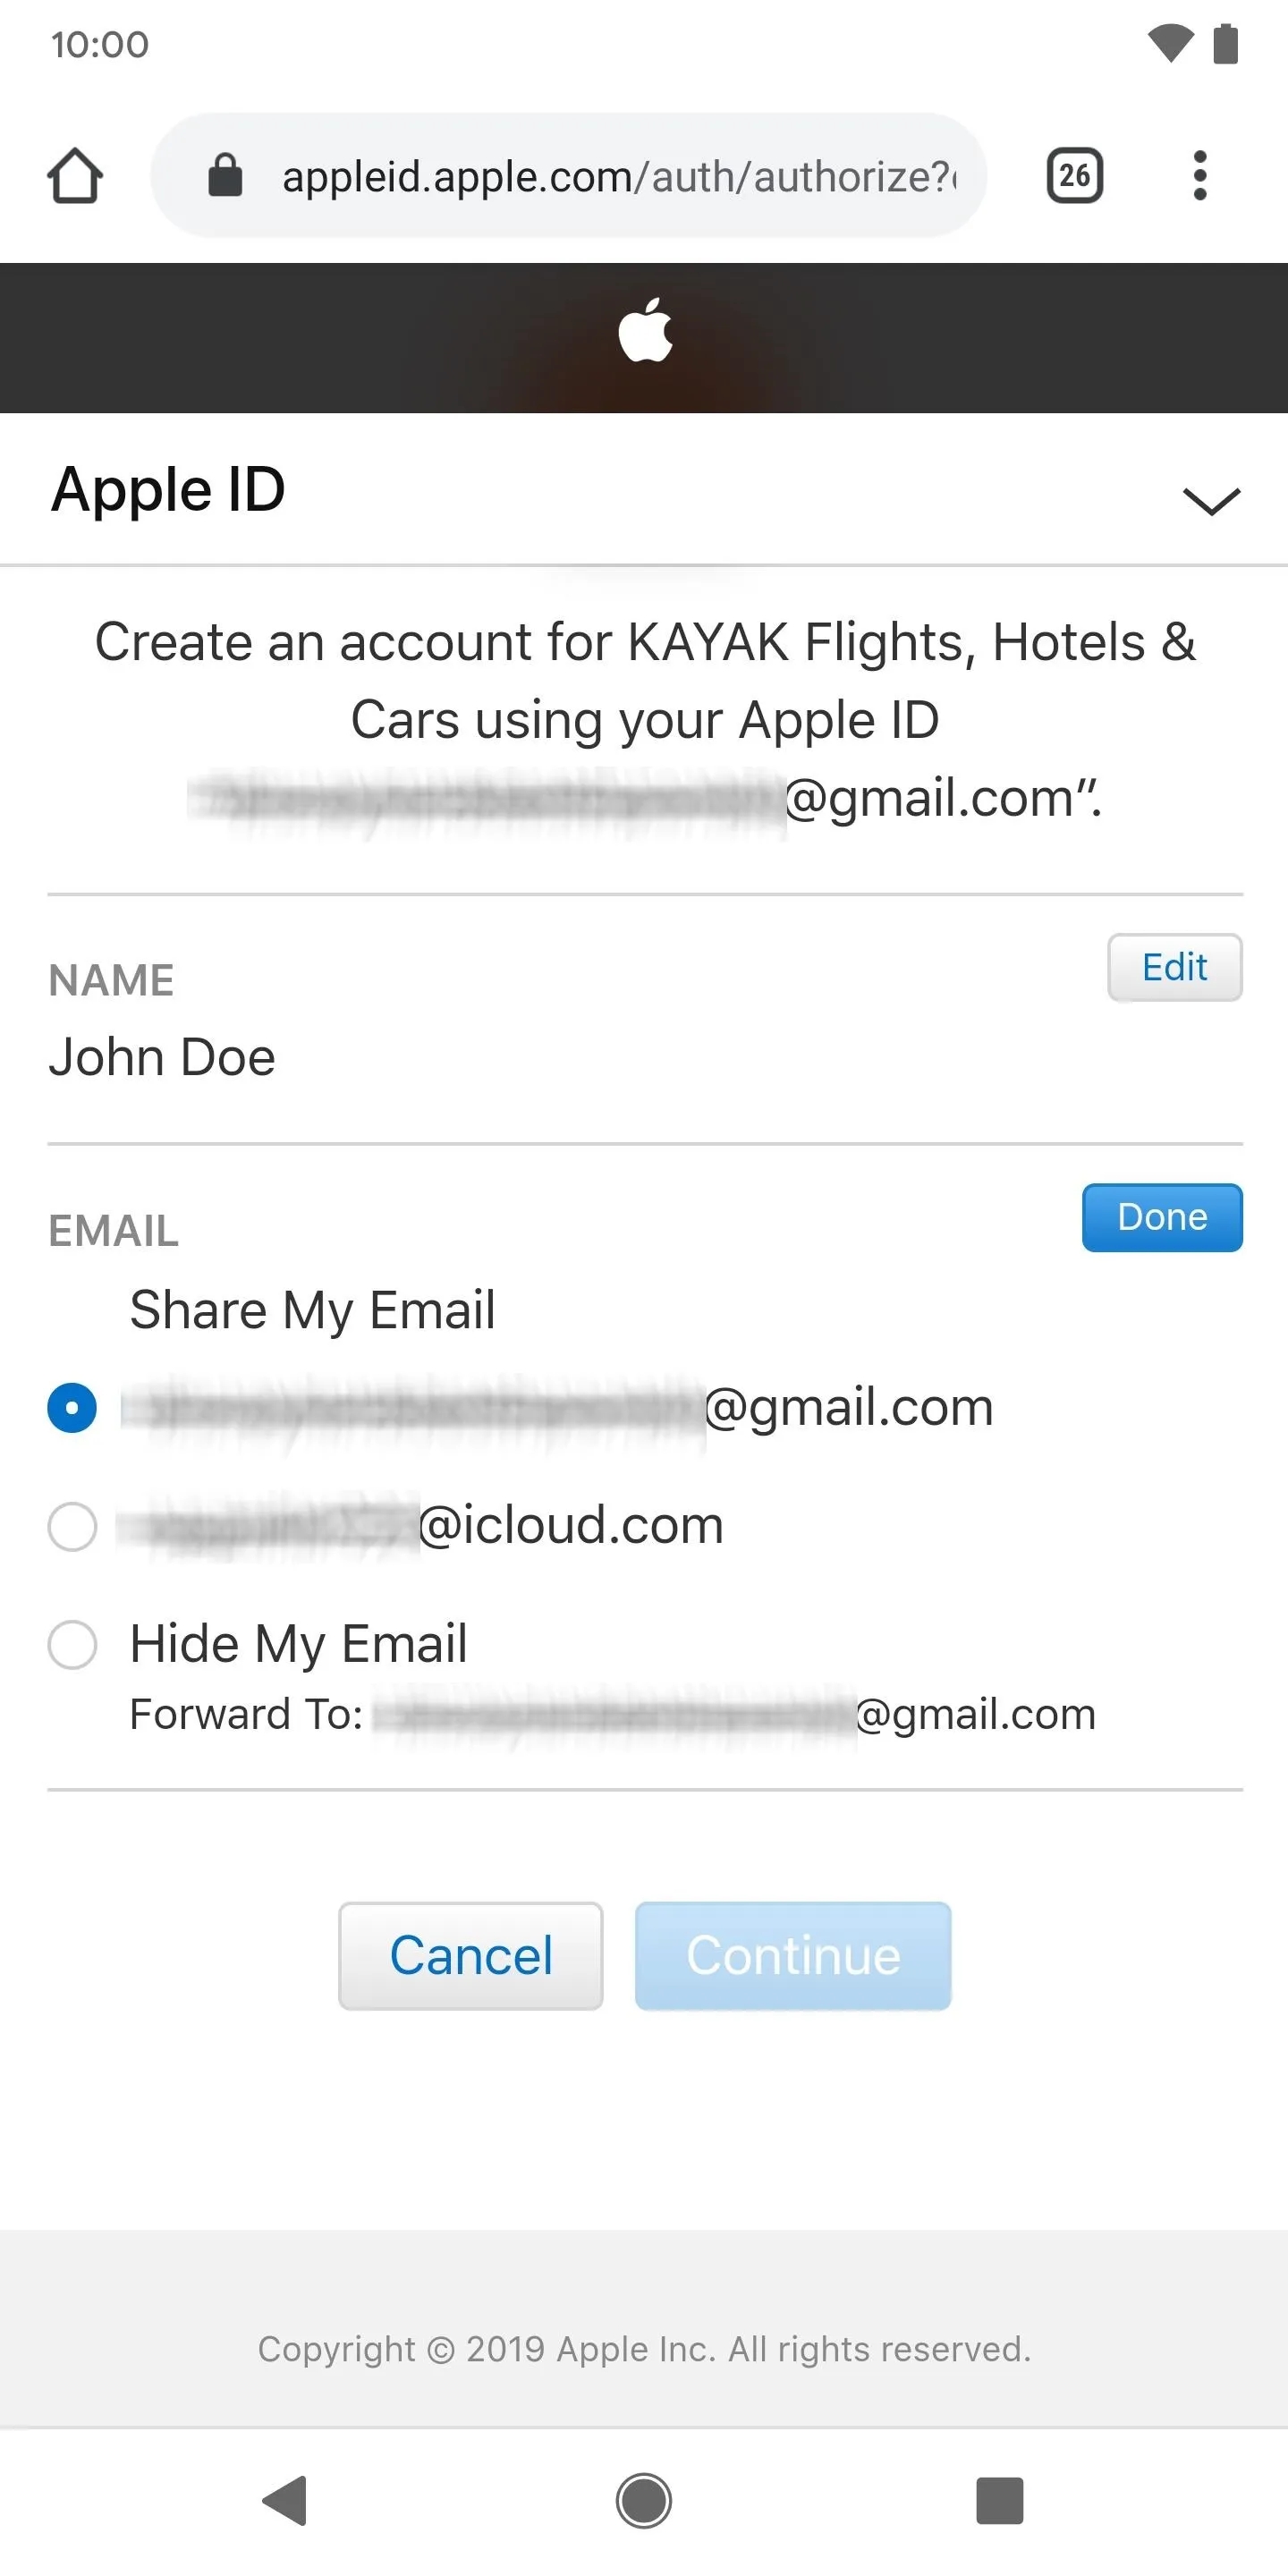
When you're finished, hit "Continue" at the bottom and your account will be created using your Apple ID. You're now free to use the service with your new account.
Use the same process to log back in, in case you're ever logged out from the third-party service.
Convert Existing Accounts to Sign in with Apple
Sign in with Apple isn't only for new users. Even if you've already created an account for a third-party app using Google or another SSO option, some apps allow you to convert your existing accounts to Sign in with Apple, which allows you to reap the benefits of the increased privacy and security.
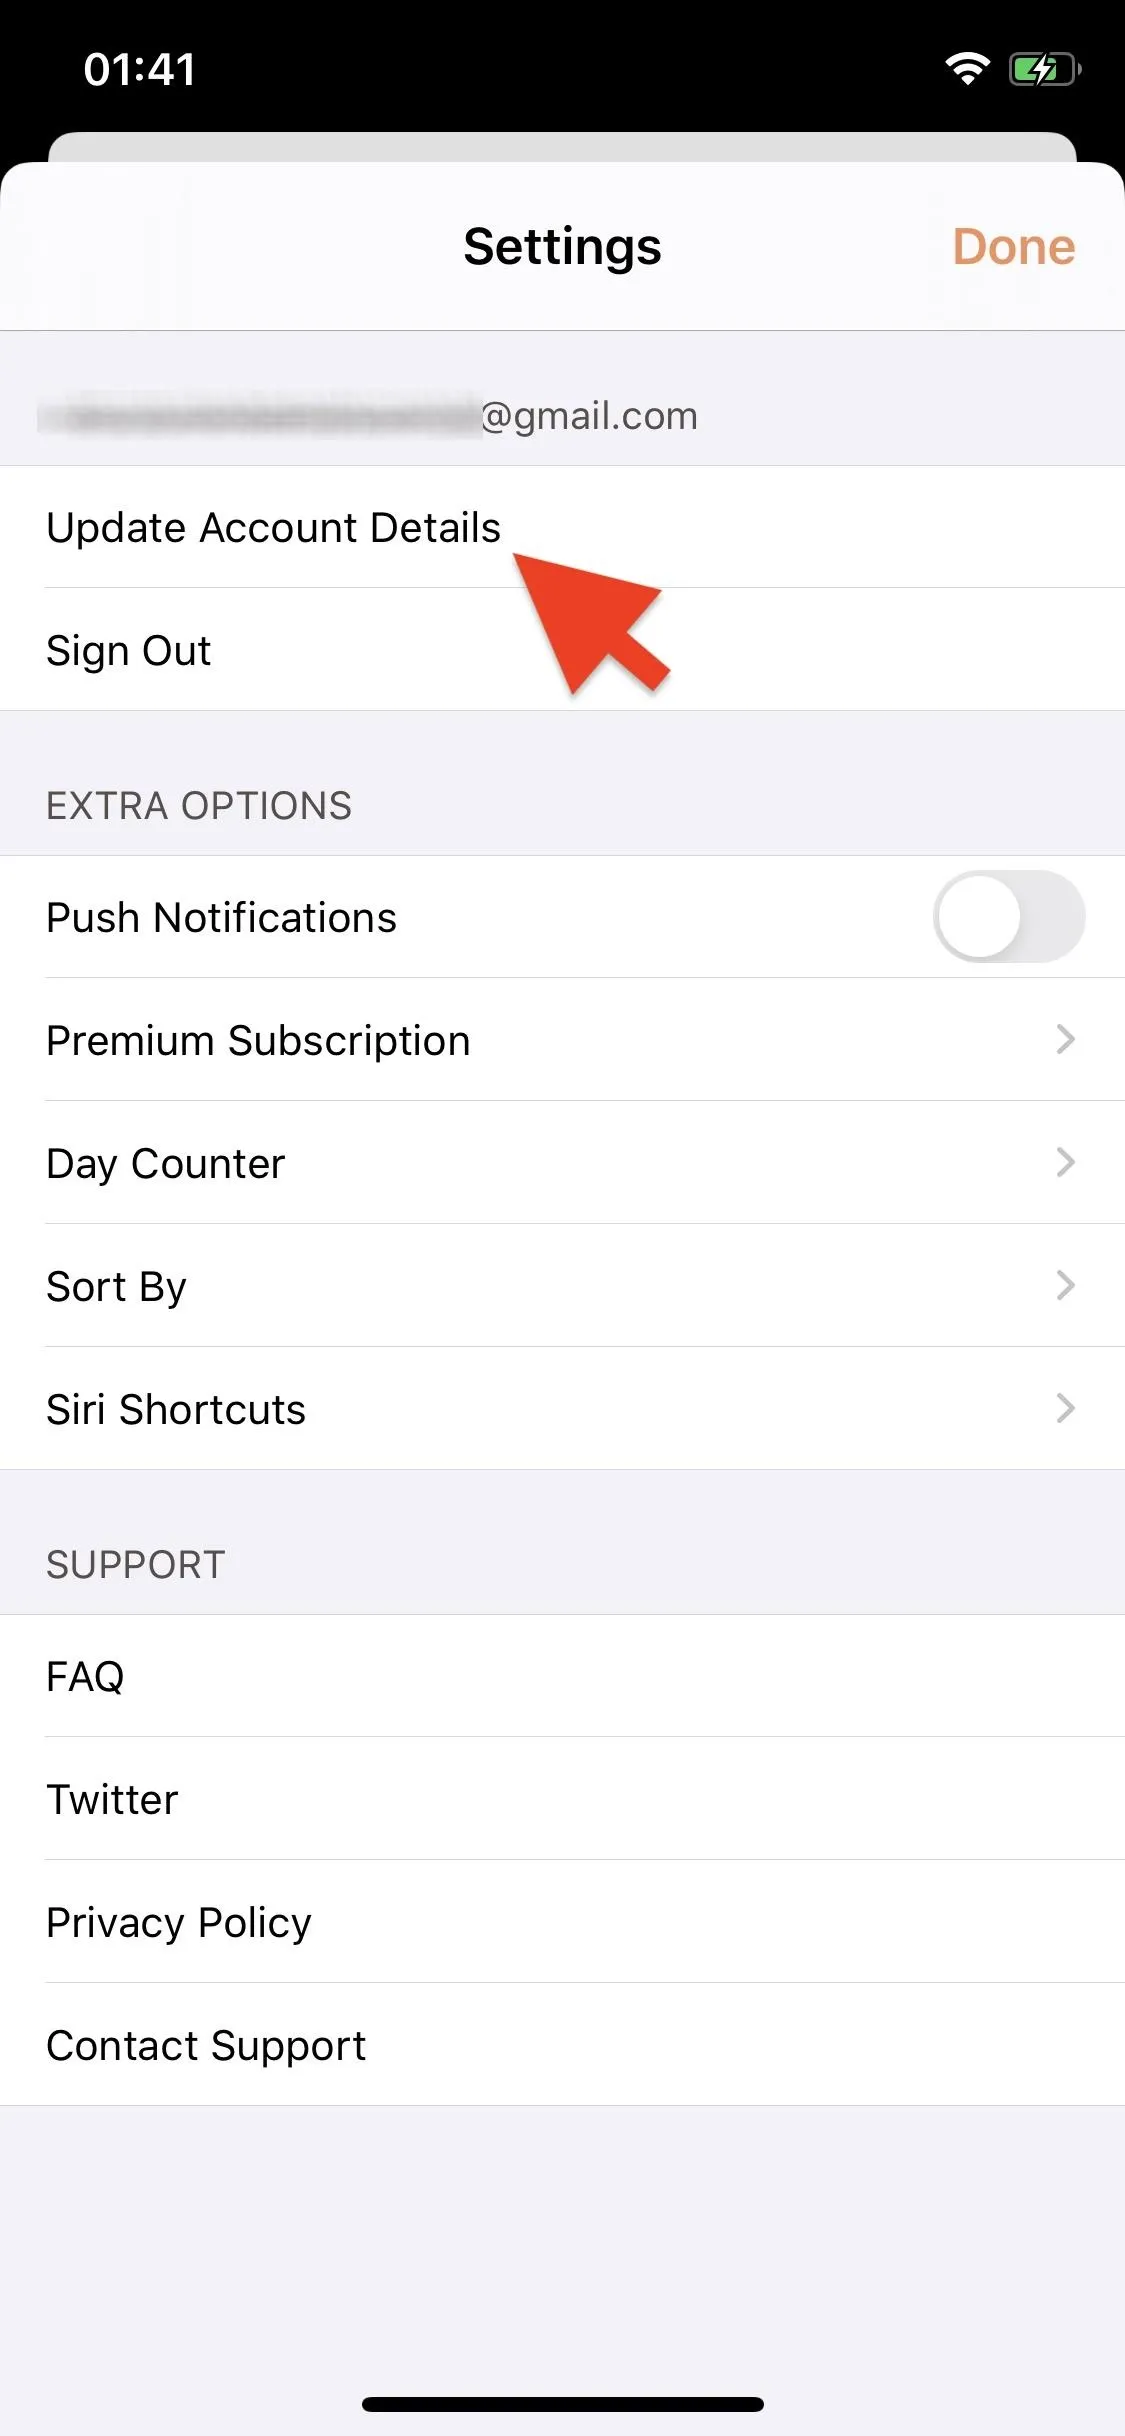
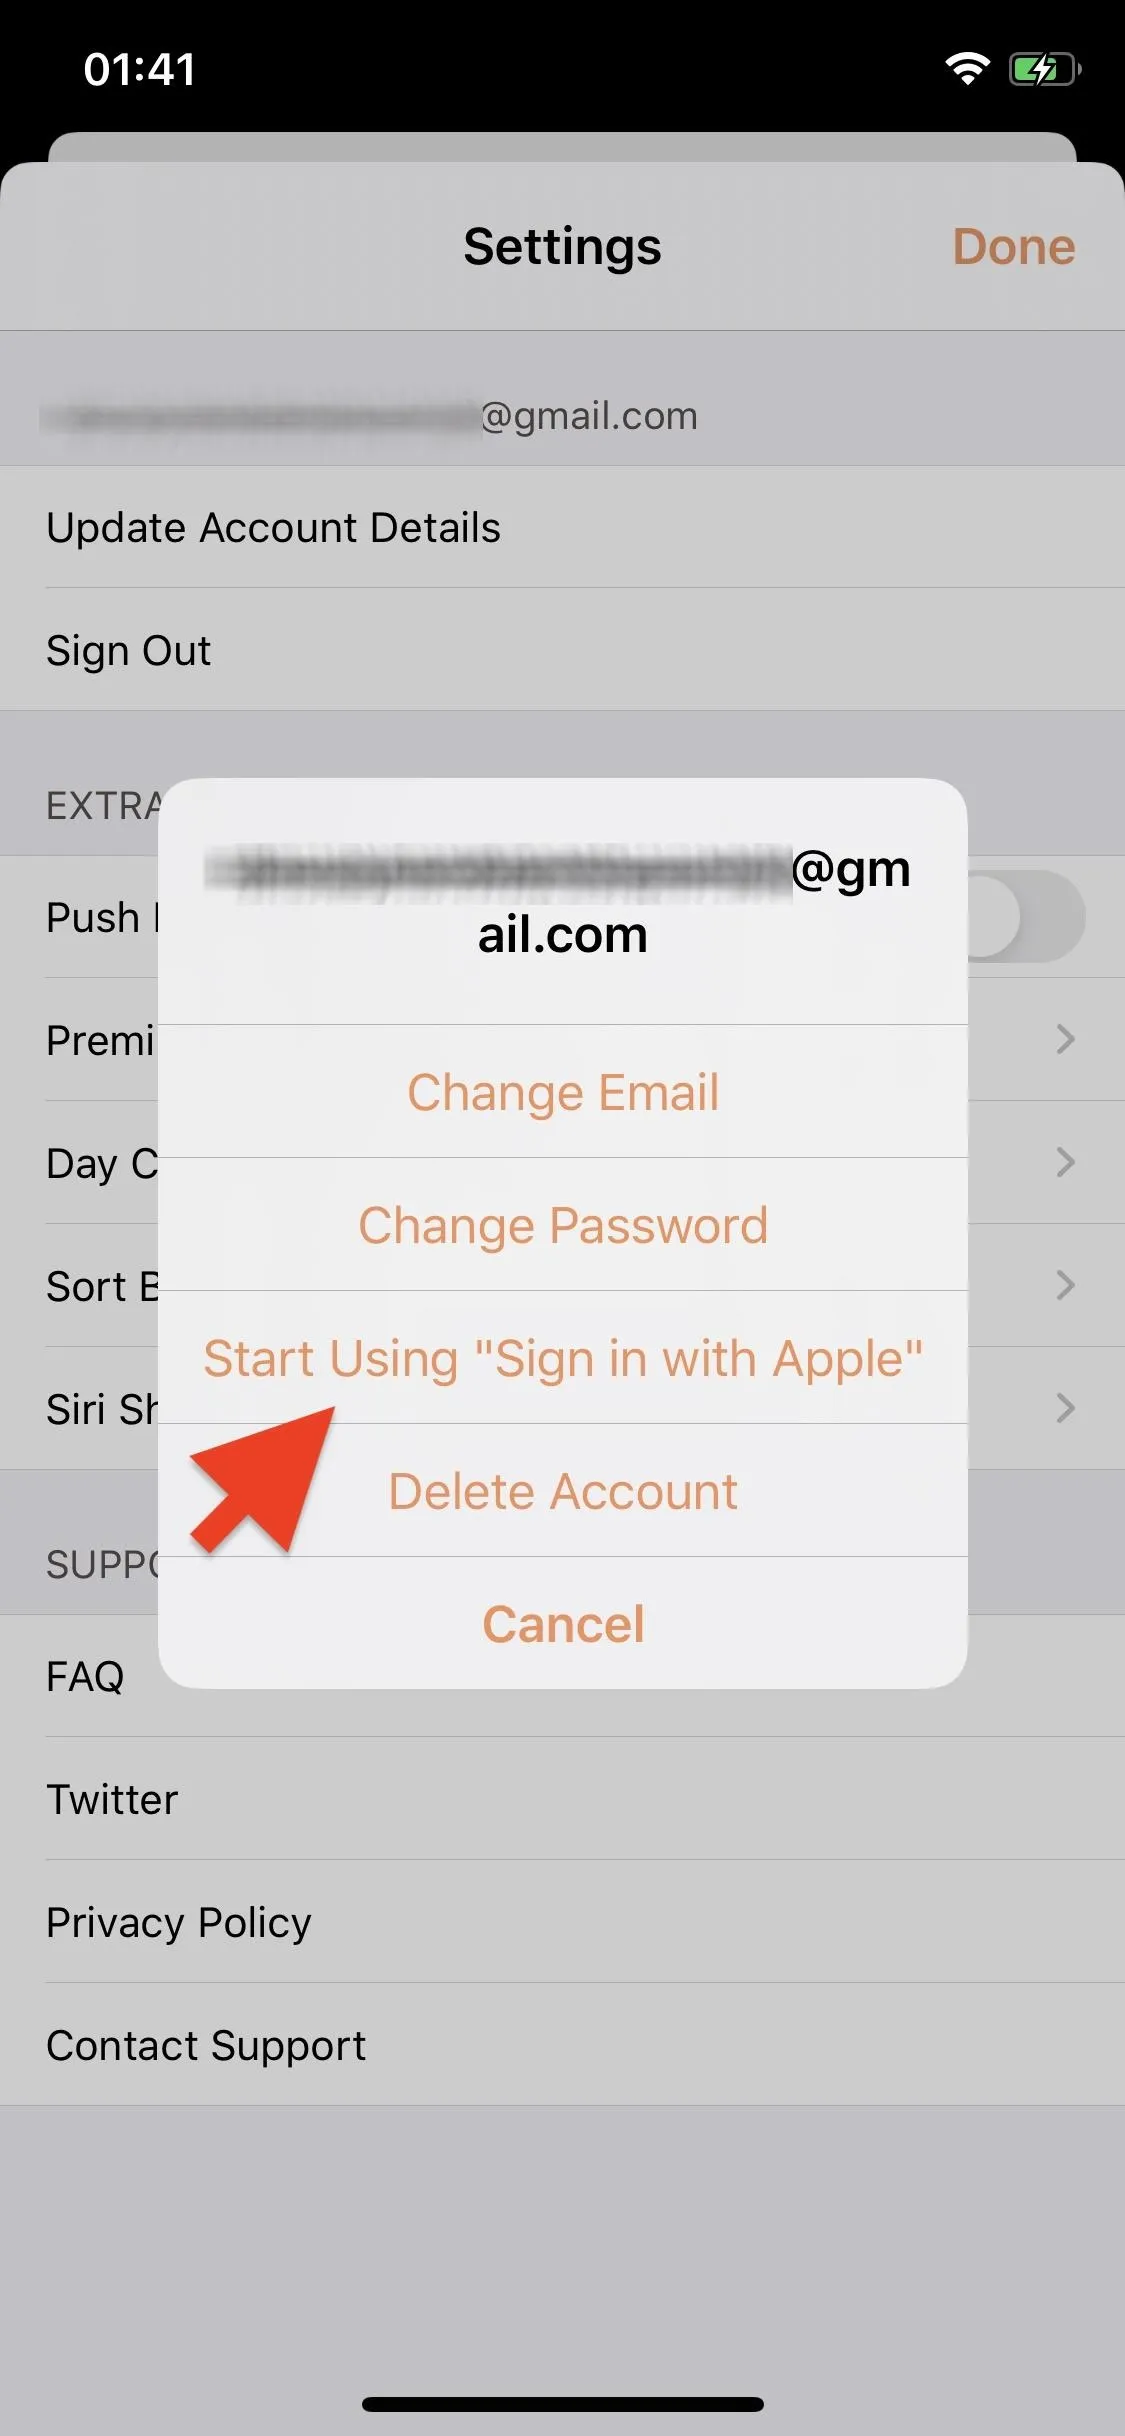
One app that allows this is Parcel, a delivery tracking app. If you already have an account and are logged in to Parcel, go into the settings and tap on "Update Account Details," and then on "Start Using 'Sign in with Apple'." Obviously, this will be different on every third-party app, and many may not have the feature available yet, but just be on the lookout for something that mentions changing to Sign in with Apple in the settings.
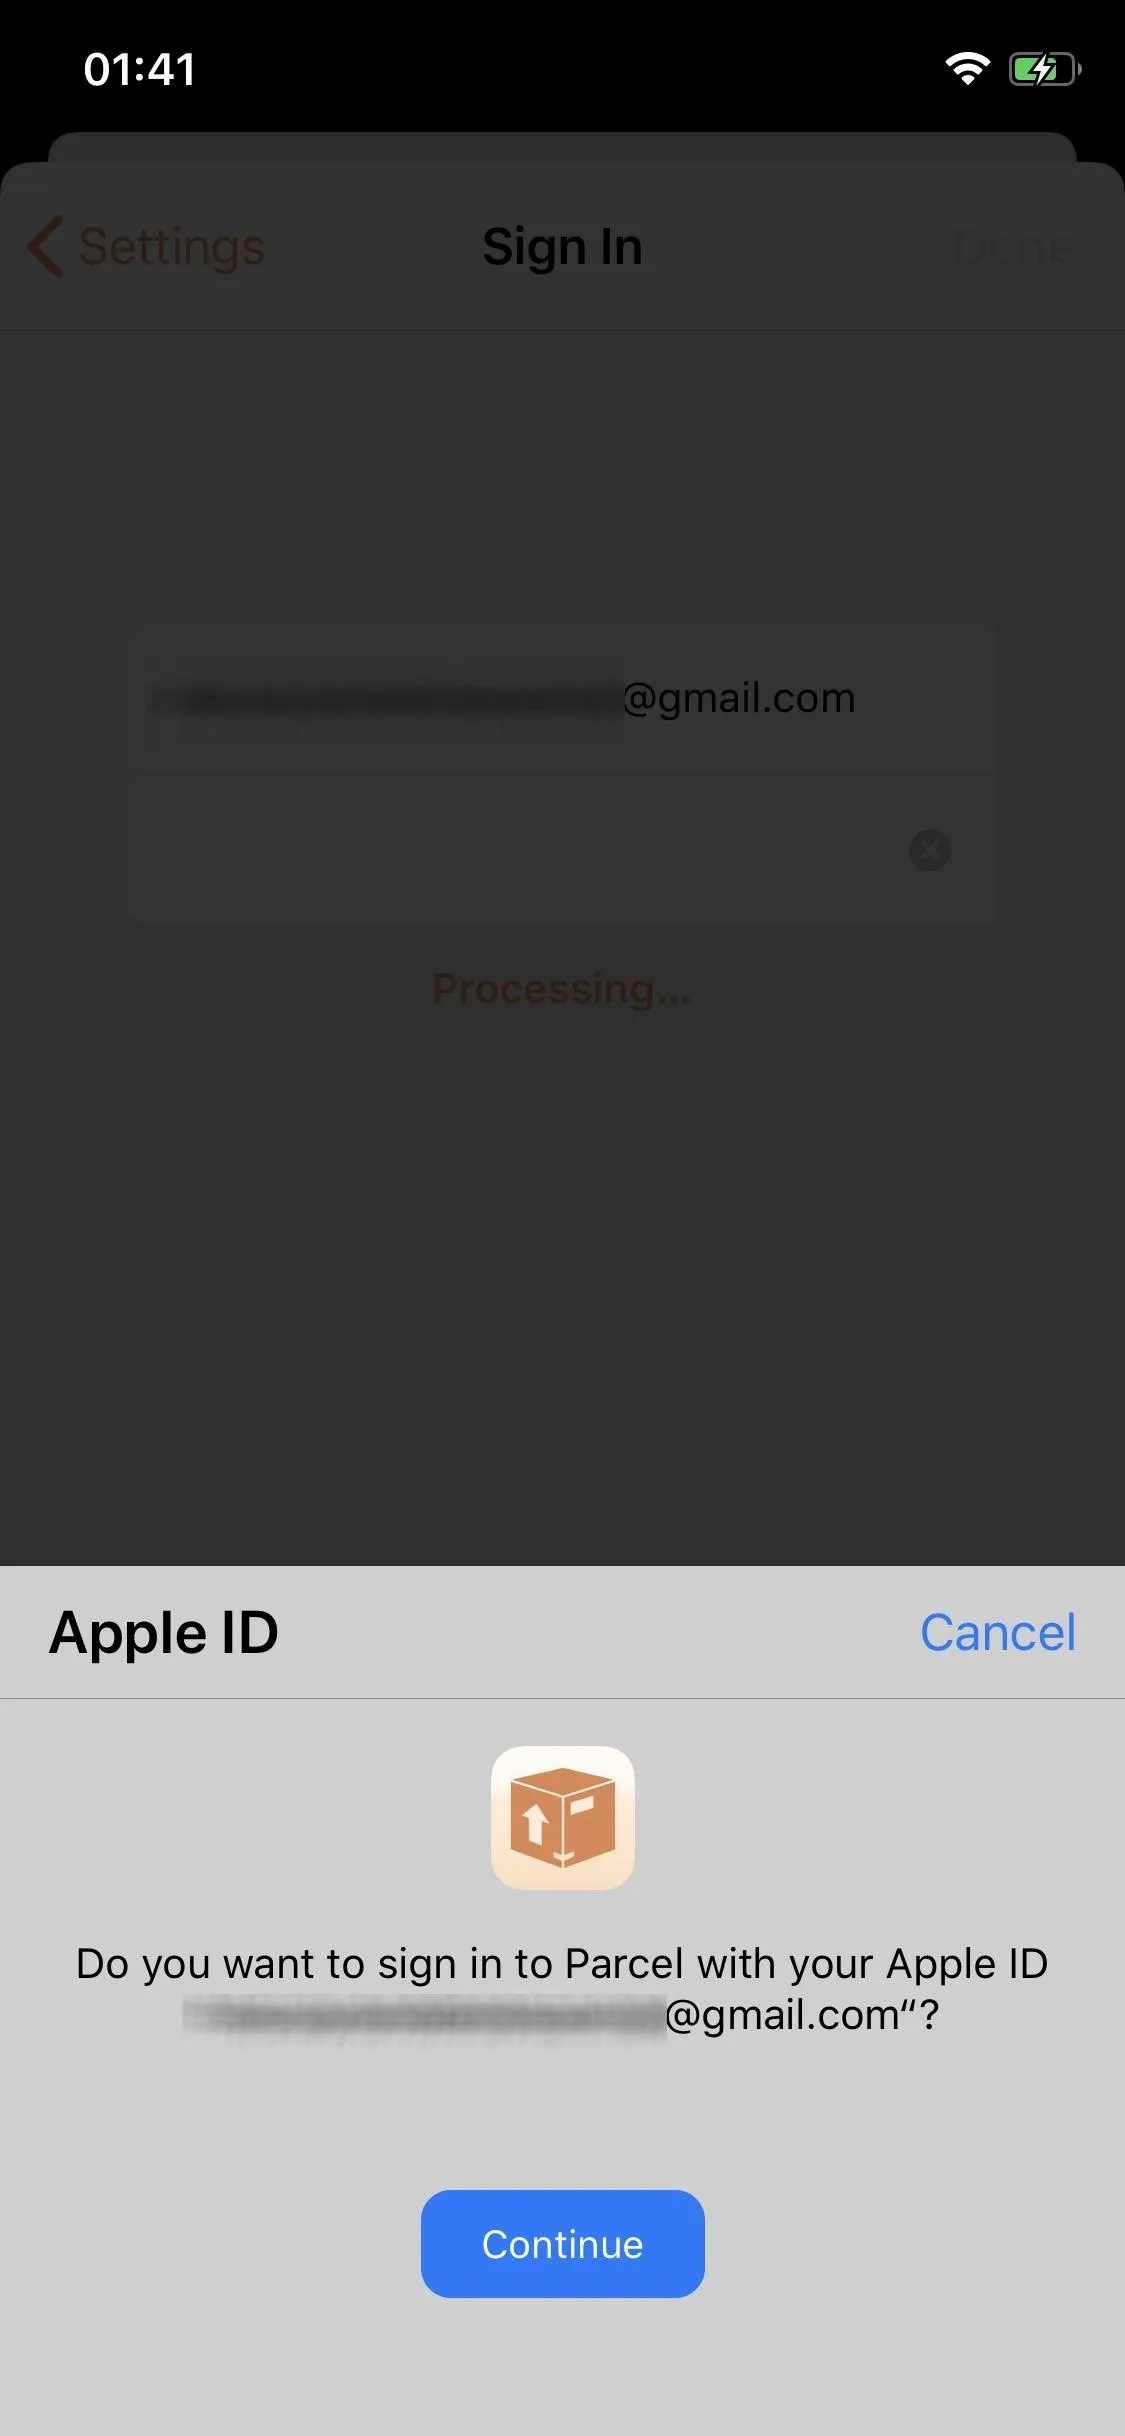
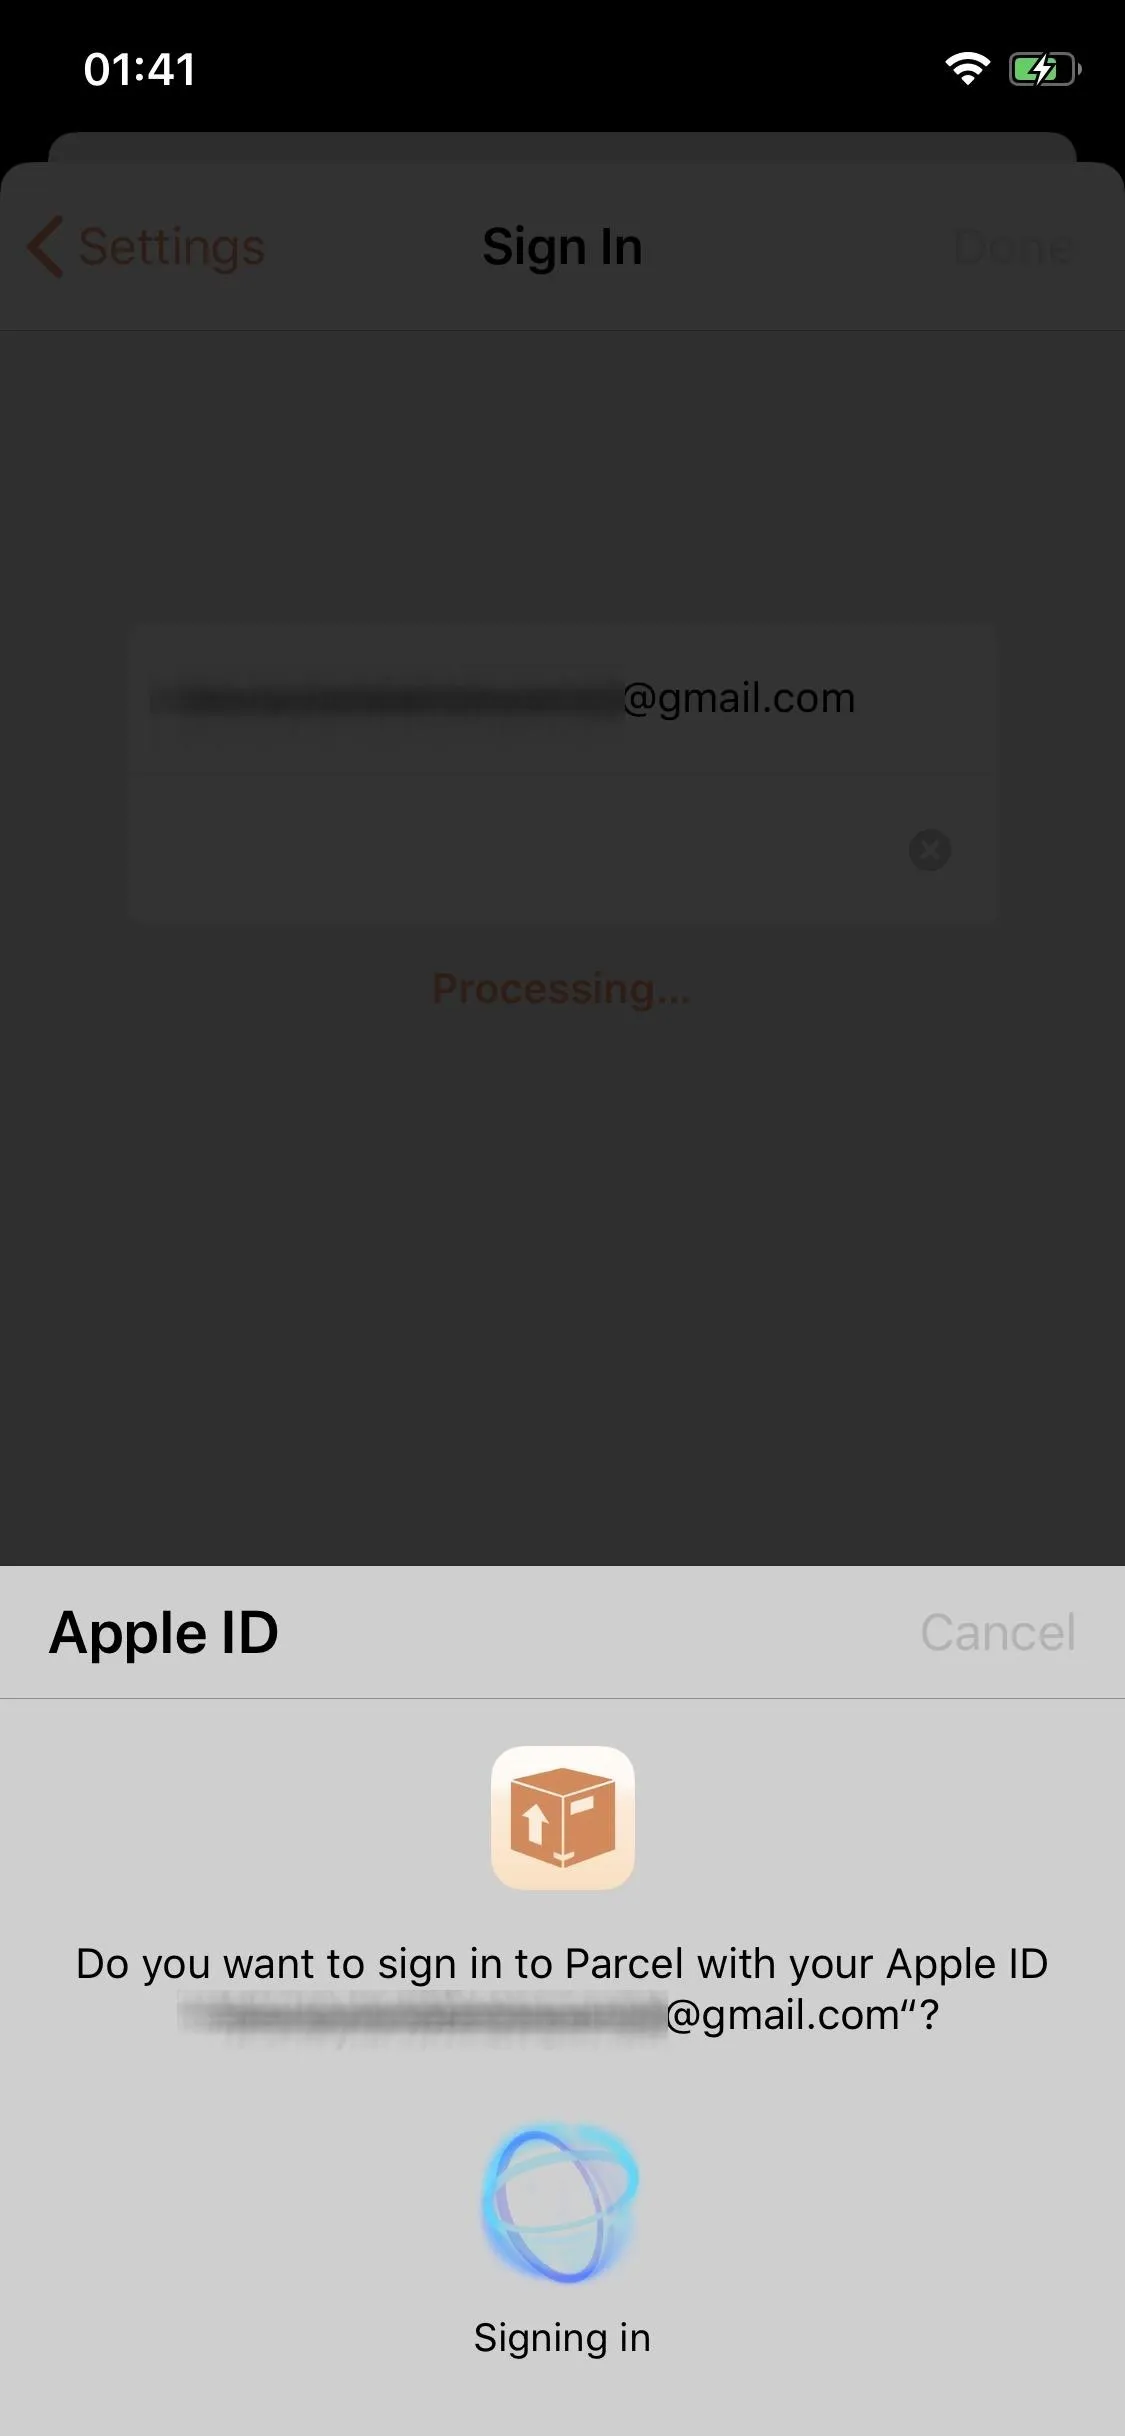
Once you attempt to change to Sign in with Apple, you may be asked to log in to your account again like normal. Your account email and Apple ID email don't need to match for this to work. An Apple ID window will then appear, where you can sign into the third-party app with your Apple ID. Hit "Continue," edit any settings that may appear, and then use Face ID, Touch ID, or a passcode to verify your identity. Your account will be converted to Sign in with Apple and you'll be able to use it just like before.
Your previous login credentials will no longer be valid once you convert, so just be aware of that in case you use the third-party application on other devices or on a desktop.
Cover photo and screenshots by Nelson Aguilar/Gadget Hacks


Comments
Be the first, drop a comment!