


There seems to be no end to all the viral TikTok sound bites and trending TikTok songs, and there's a good reason why they are ingrained in the fabric of our pop culture. TikTok's short audio clips can evoke laughter, tears, and a wide range of other emotions, and many of them just happen to be the perfect length to add to your iPhone's or iPad's arsenal of ringtones.
Unfortunately, you won't find any "Set as Ringtone" option on your favorite TikTok videos. Still, you can take advantage of TikTok's video-saving option and automatically convert the video into an audio file that'd be perfect as your system-wide ringtone or a contact-specific one. You can even turn these TikTok sound effects into text tones if you want. To make this magic happen, all you need are two Apple apps, one of which you probably already have.
Prerequisites
- Before starting this project, ensure your iPhone or iPad has Shortcuts enabled. If you previously deleted the app, you can add it back from the App Store.
- You'll also need GarageBand, which can also be installed from the App Store. This app is required to create the ringtone and install it on your device after using Shortcuts to download the audio track.
How It Works
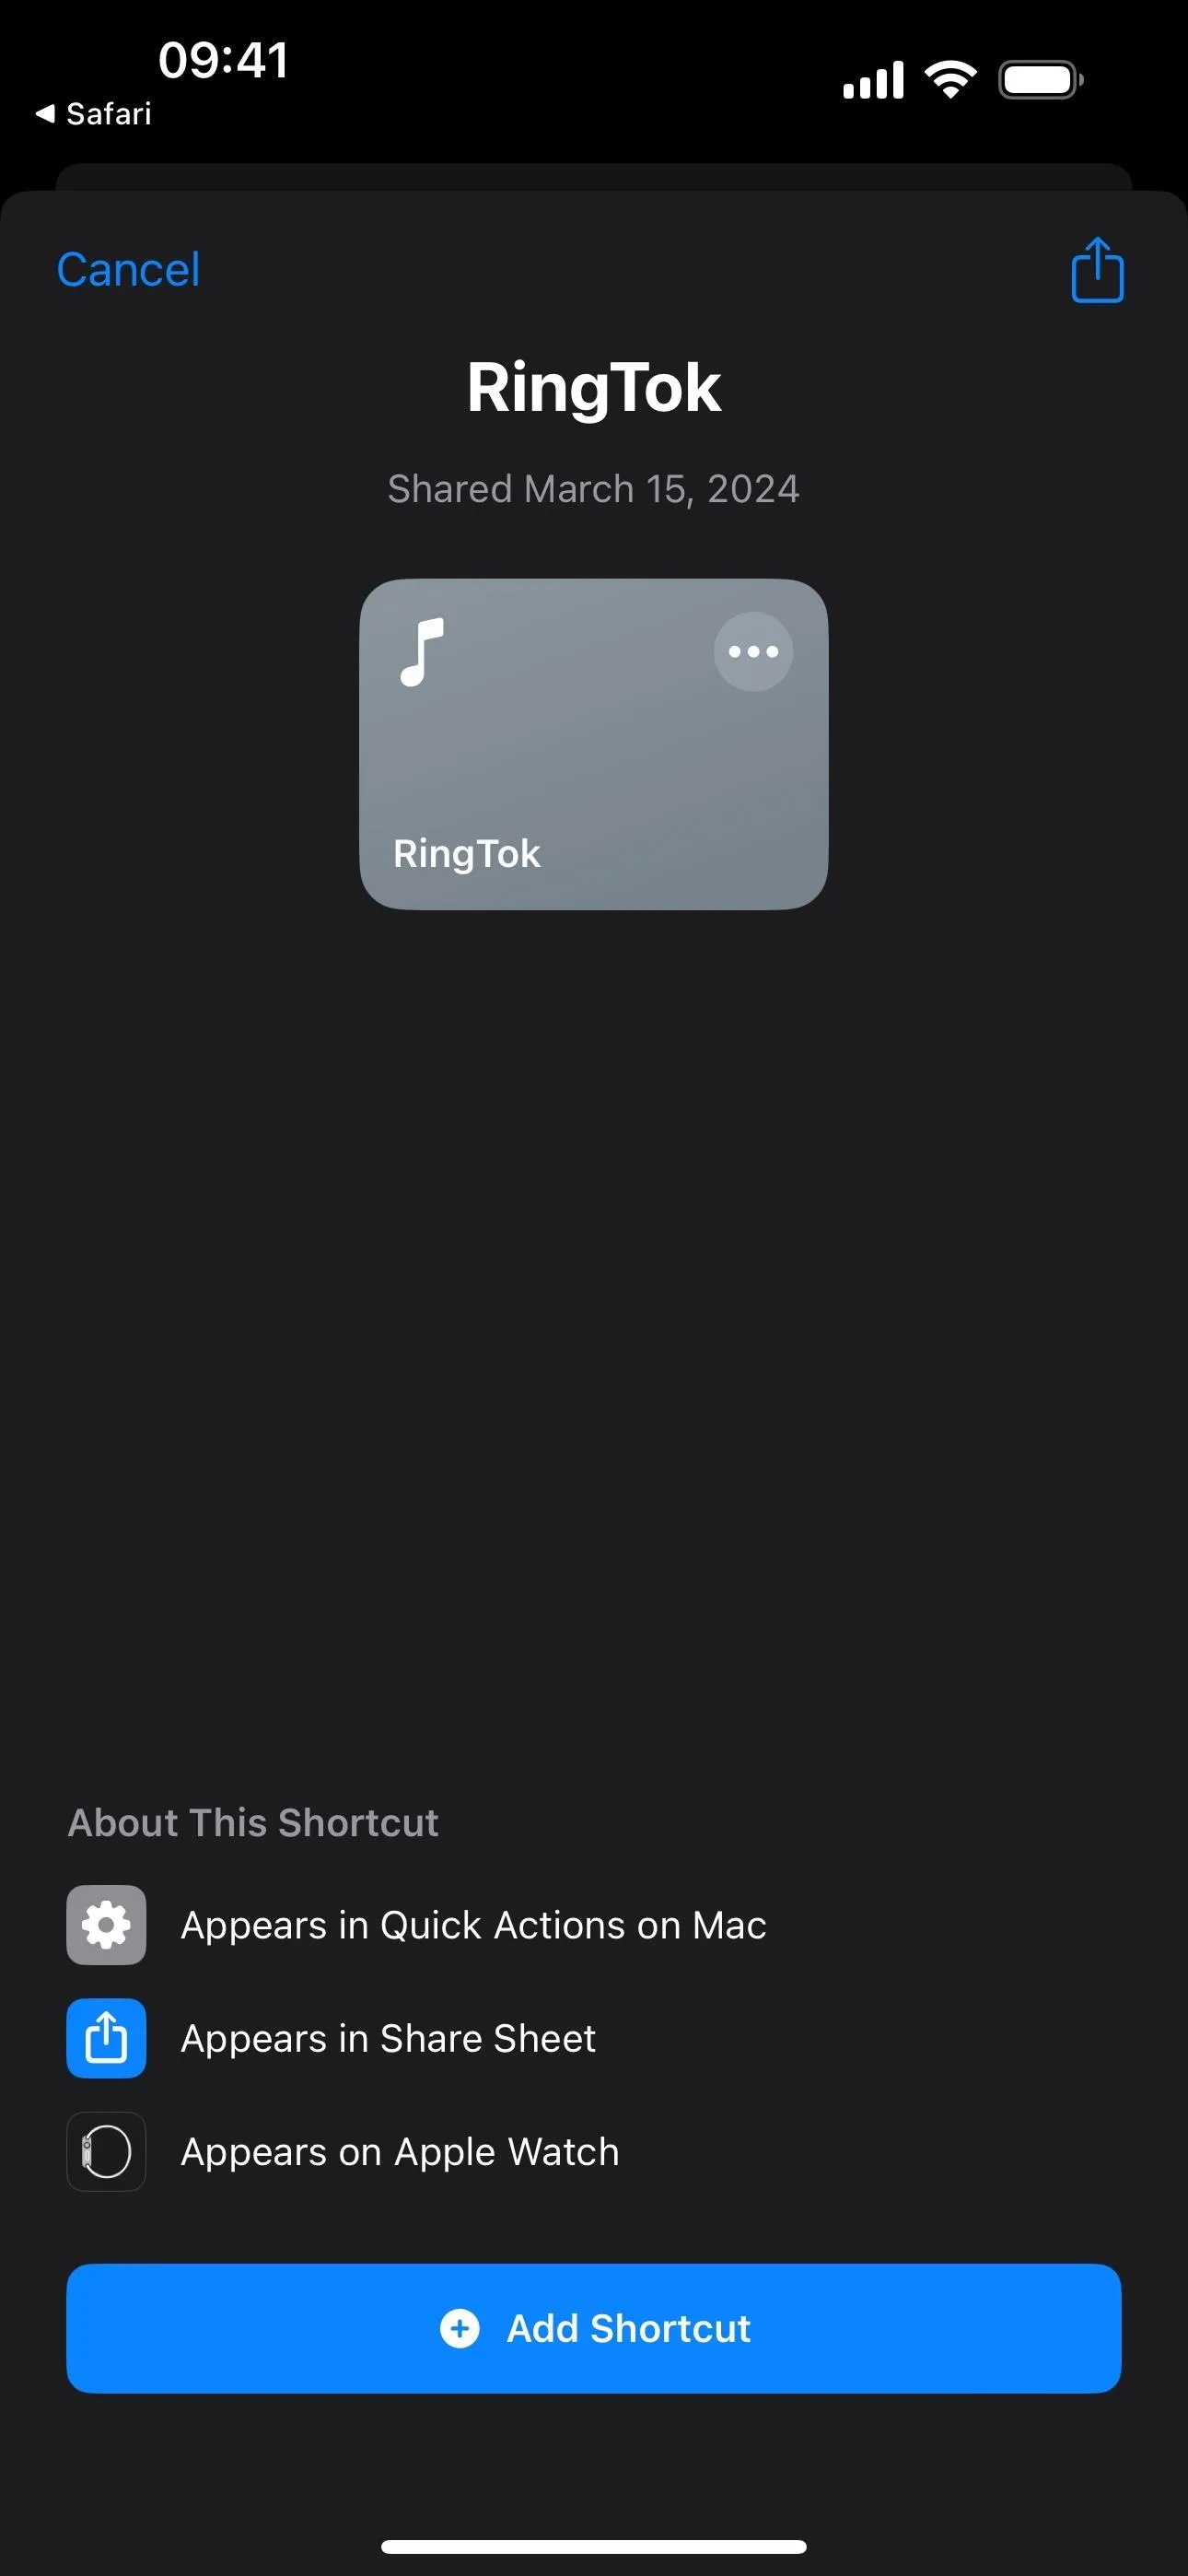
We'll use a custom-built shortcut, RingTok, to alleviate the manual manipulation required to get the TikTok video in a format that can easily be converted to a ringtone in GarageBand.
Here's how the shortcut works: After finding a TikTok sound bite, share it with RingTok. Then, RingTok will let you trim the video before it converts to a custom-named audio-only file. Finally, RingTok lets you save it to Files, and it will open GarageBand for you so you can turn the file into a ringtone.
I'll show you how to build this shortcut in Step 1 below, and you can follow along. However, you can also download RingTok and skip to Step 2 if you want to get a TikTok ringtone ASAP.
- Add to Shortcuts: RingTok (iCloud link)

Create the RingTok Shortcut
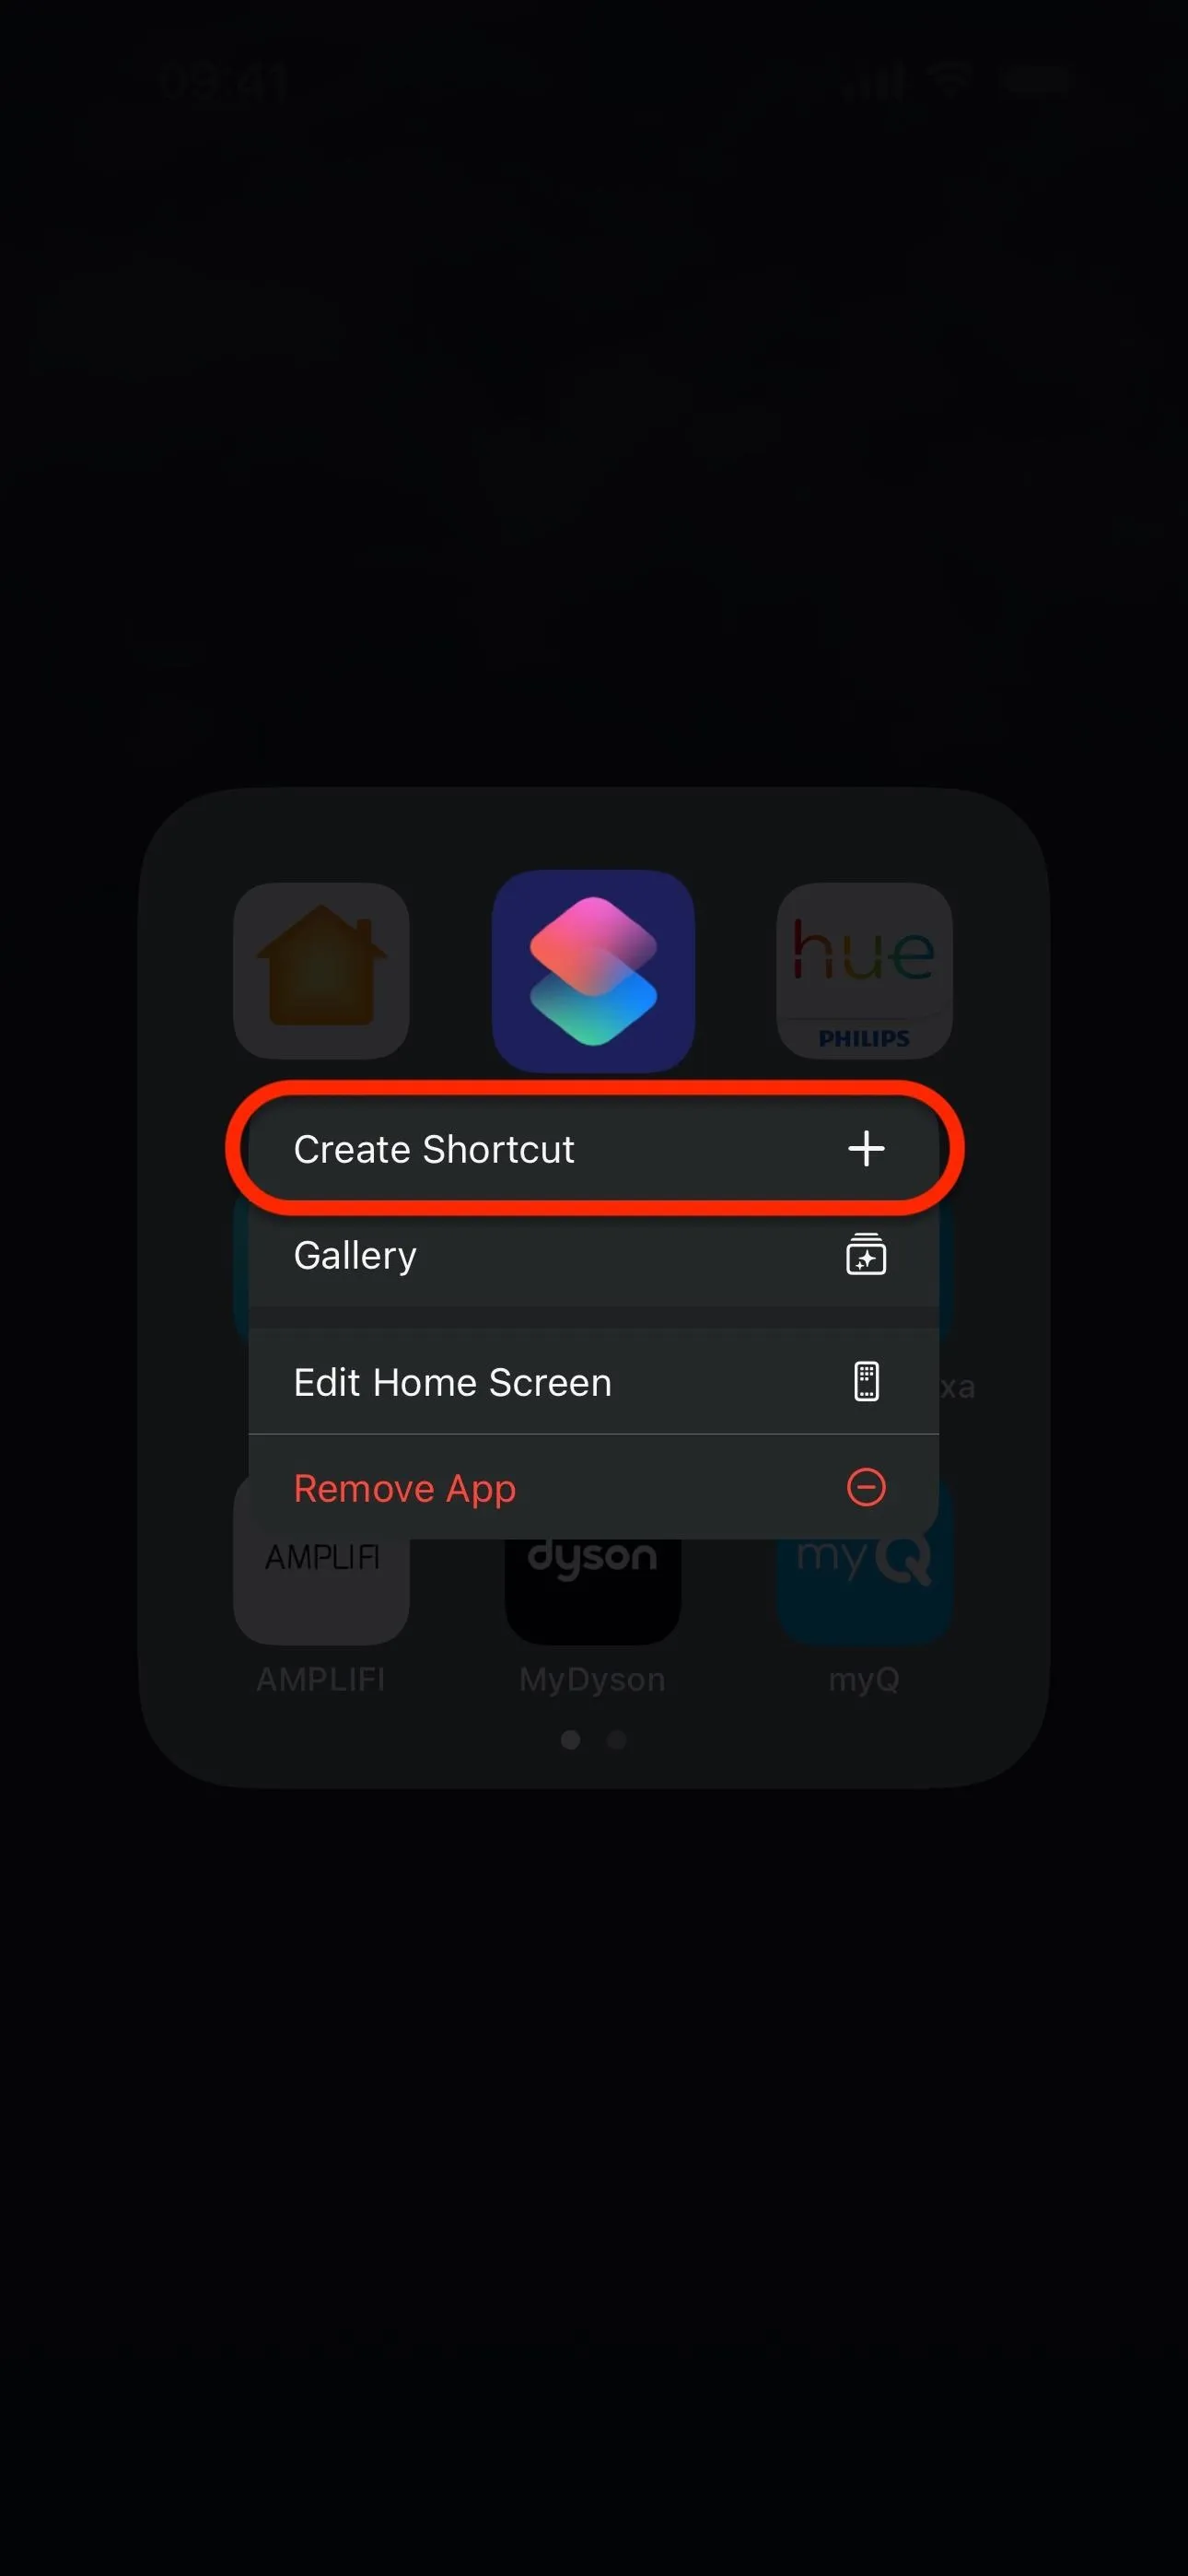
Start by creating a new shortcut. You can press the Shortcuts app icon on your Home Screen, in your App Library, or from a search, then select "Create Shortcut," or you can open Shortcuts to the Shortcuts tab and hit the plus (+) sign at the top. Next, tap the Info (i) button in the toolbar in your empty workflow.

From the Details tab, toggle on the "Show in Share Sheet" switch, then tap "Done." You could also enable "Use as Quick Action" on macOS to get easy access to the shortcut in Finder.
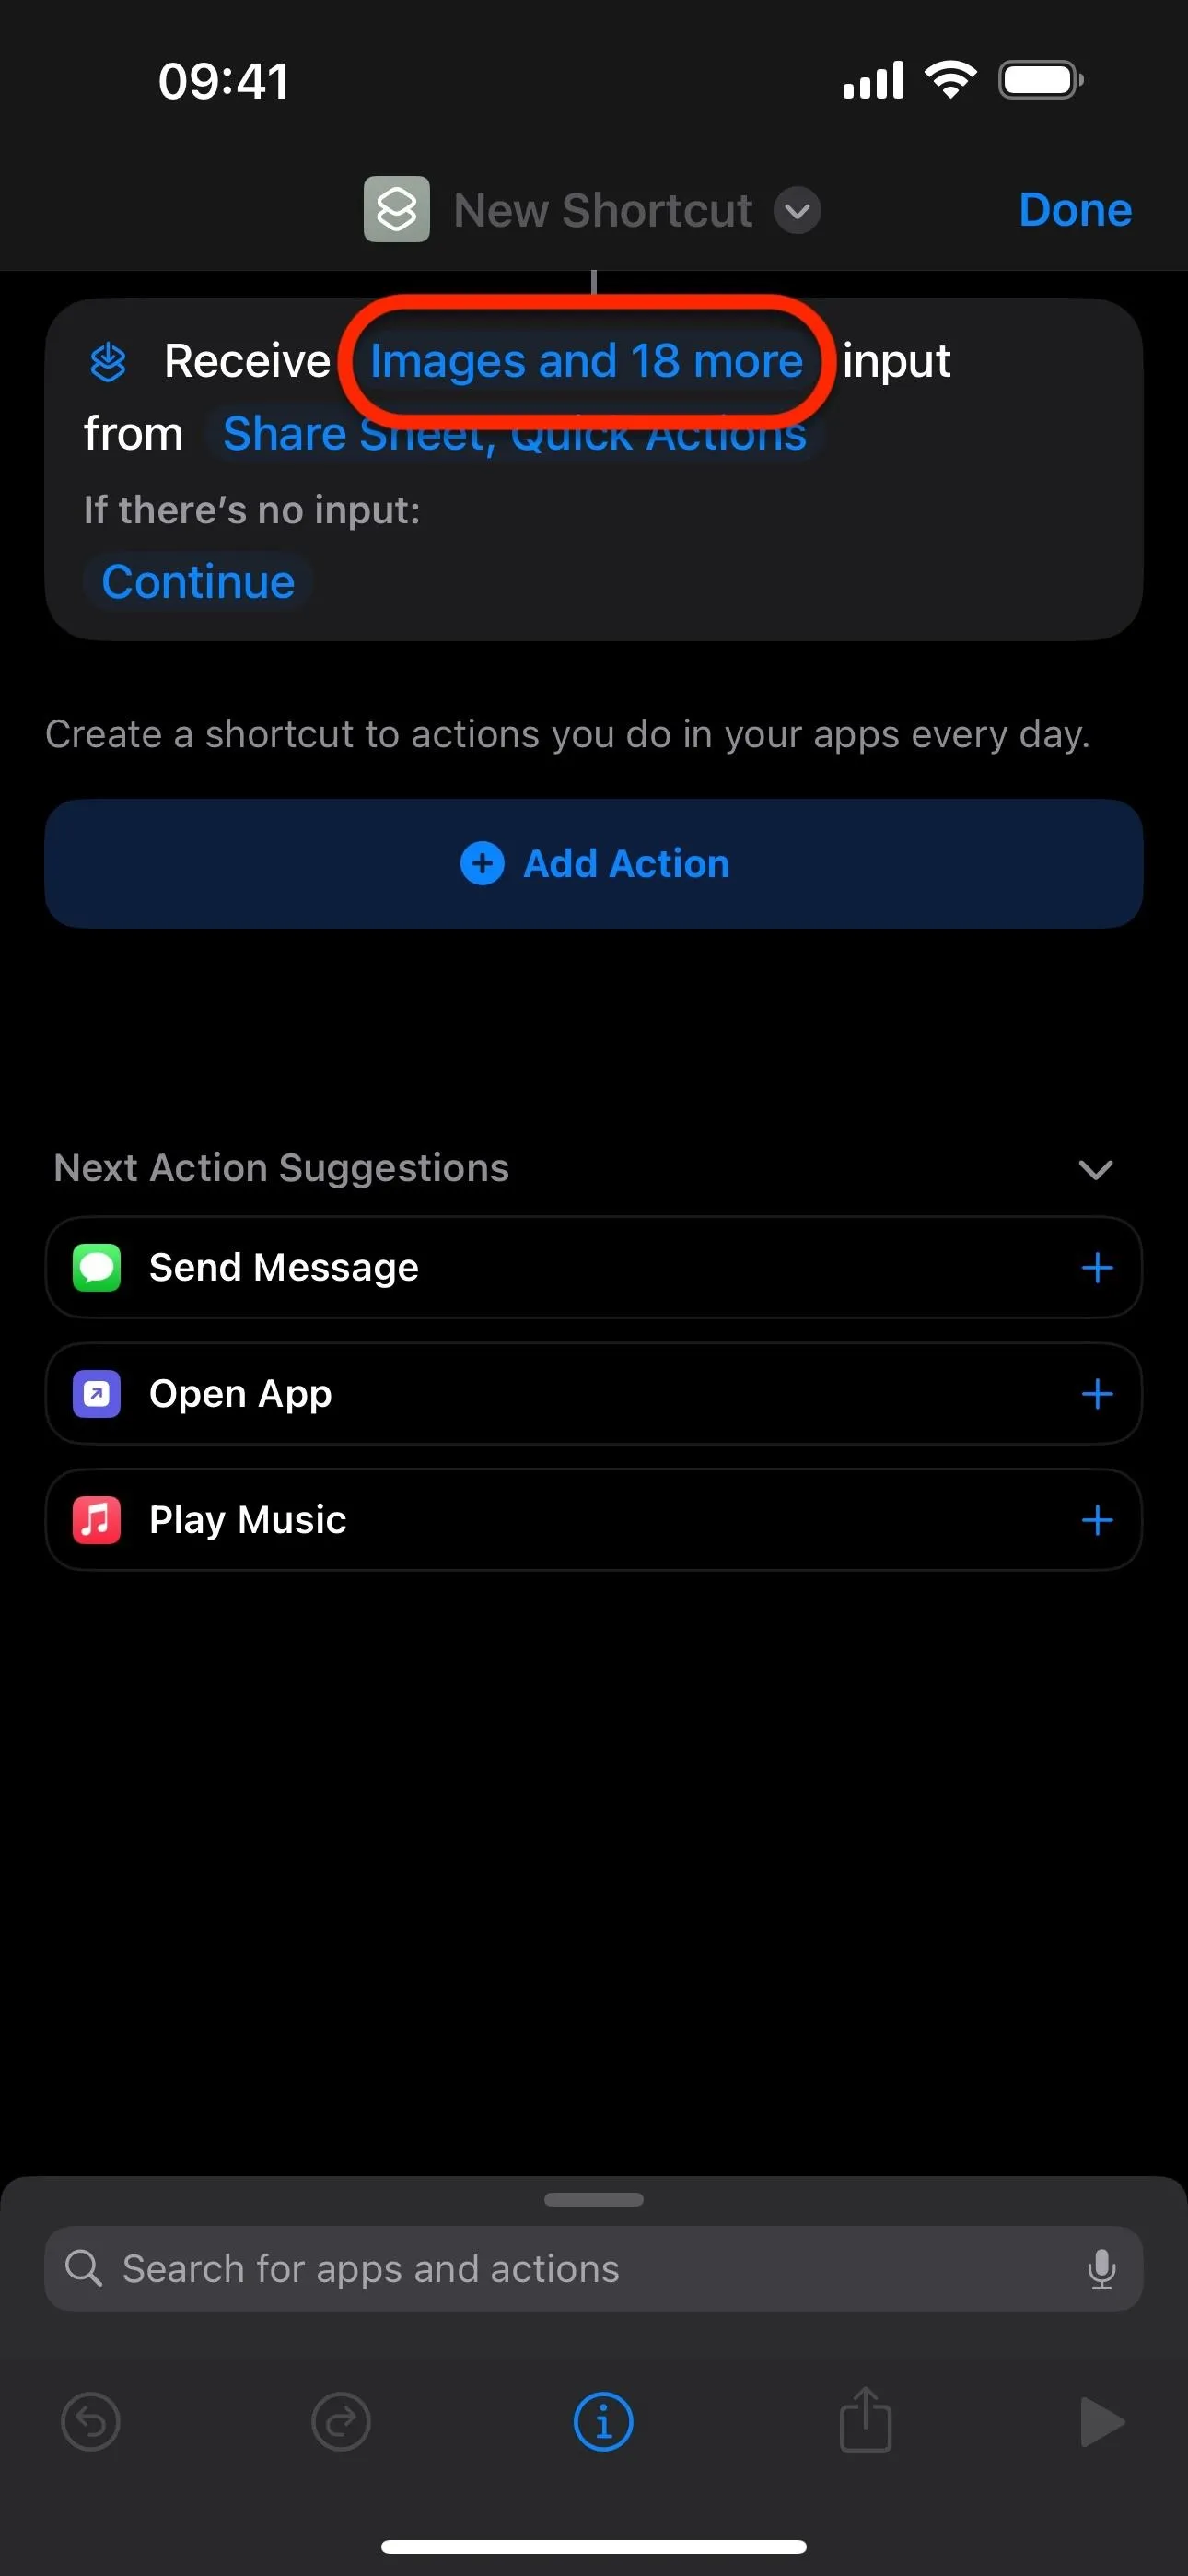
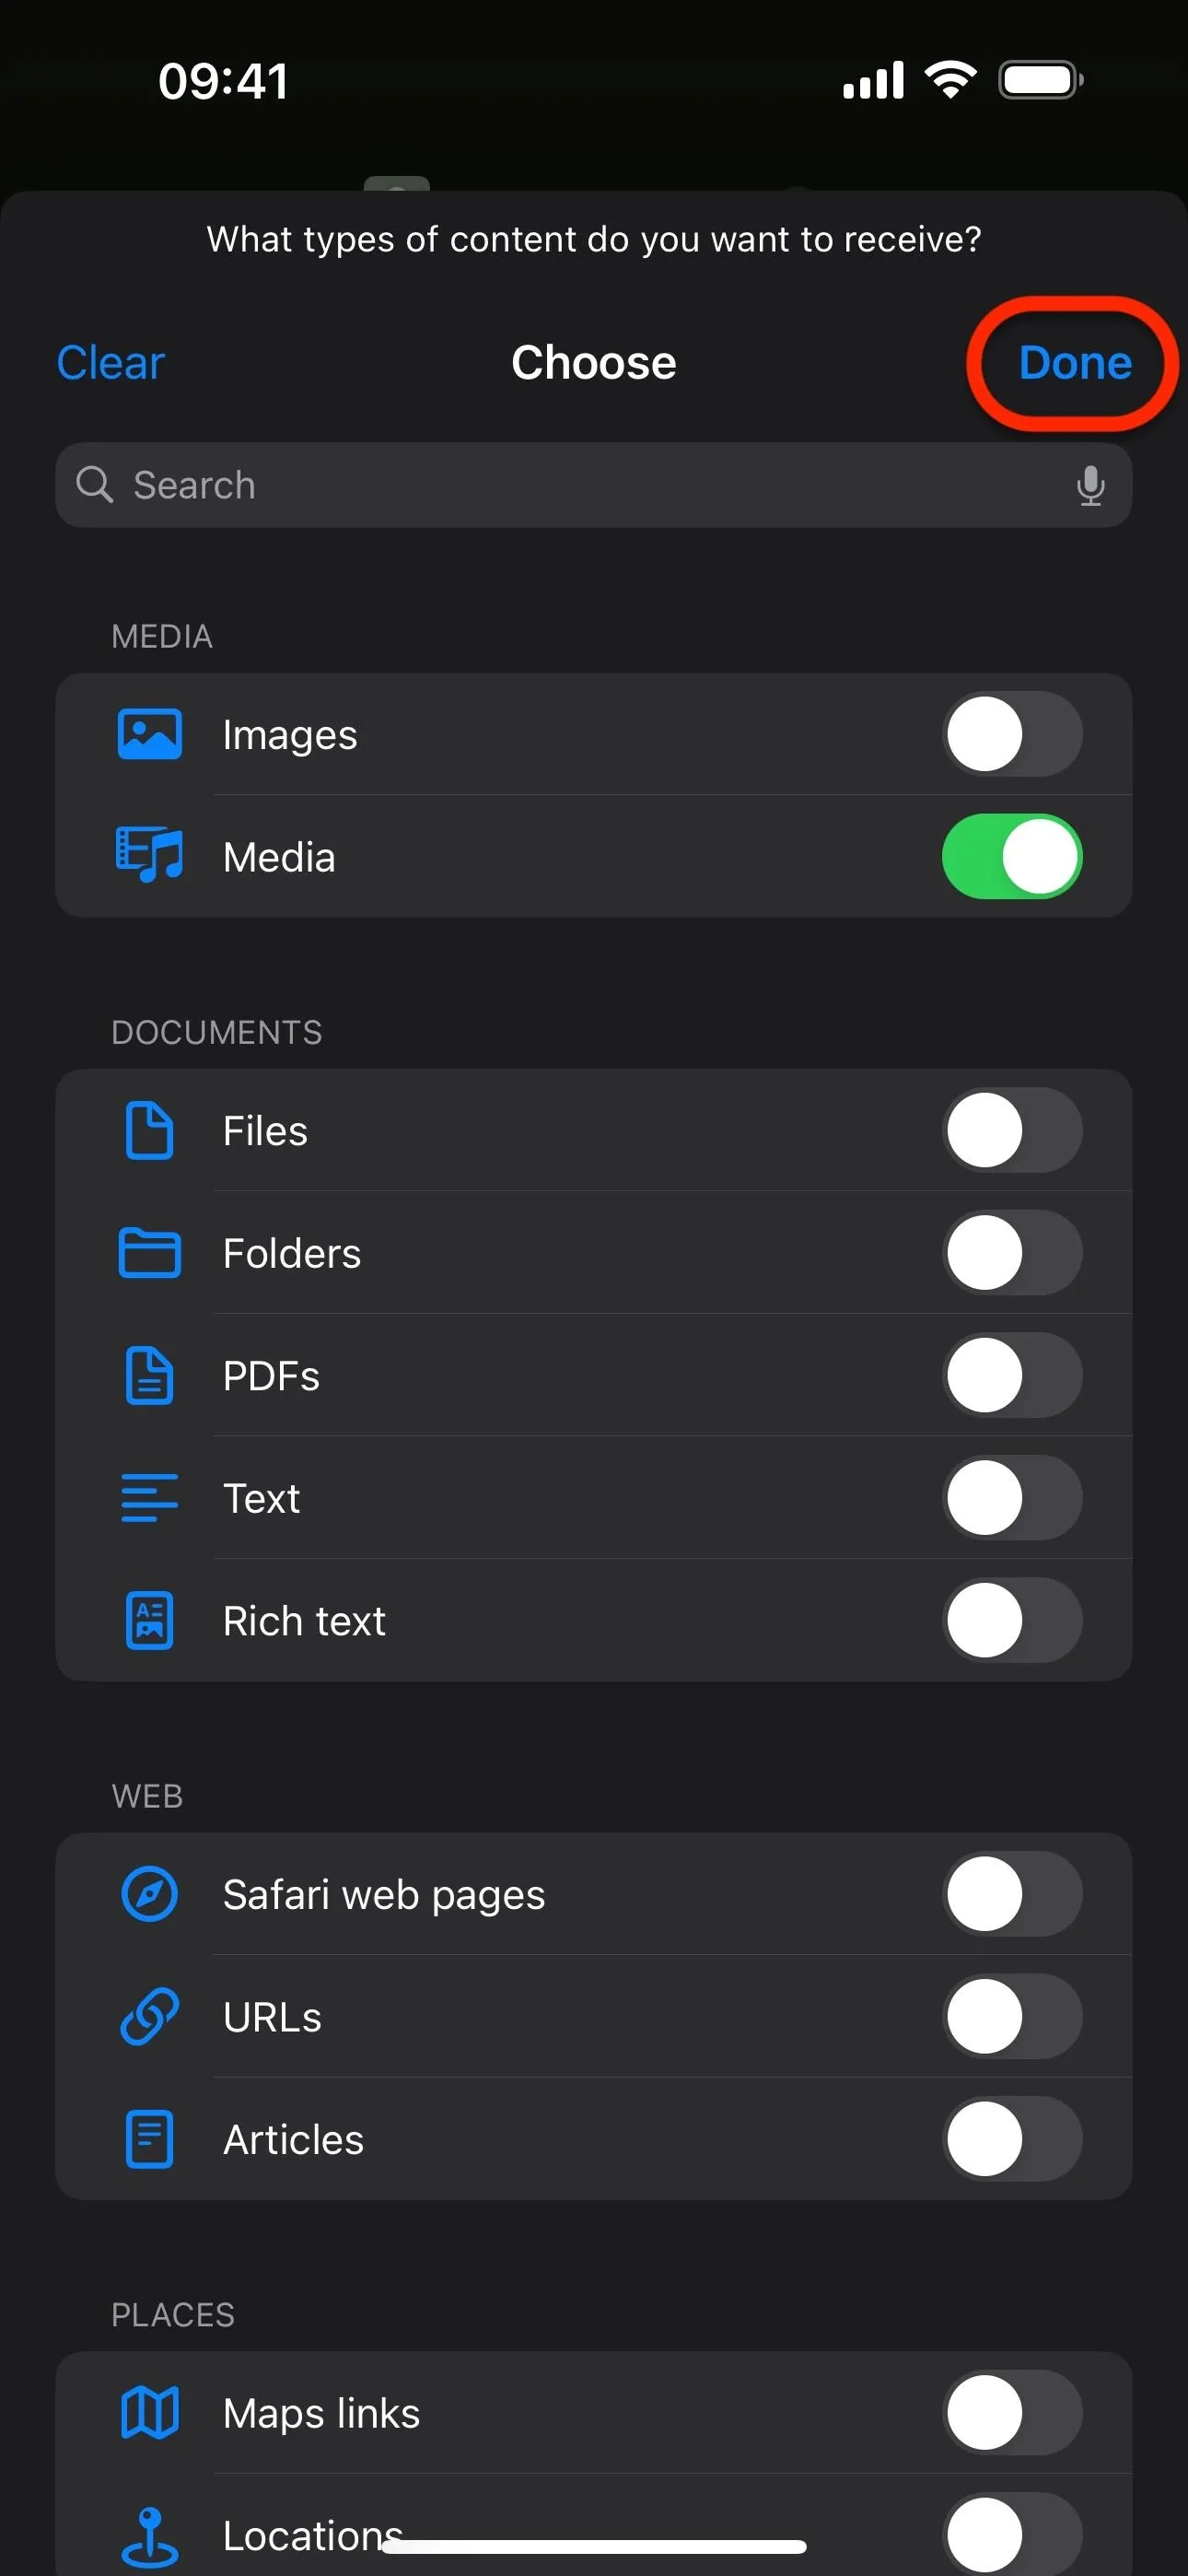
Next, tap "Any" or the current input options from the first blue token on the newly added input action. Since you're dealing with TikTok videos, you only need to enable "Media," so RingTok doesn't show up anywhere it's not required. Tap "Done" to continue.

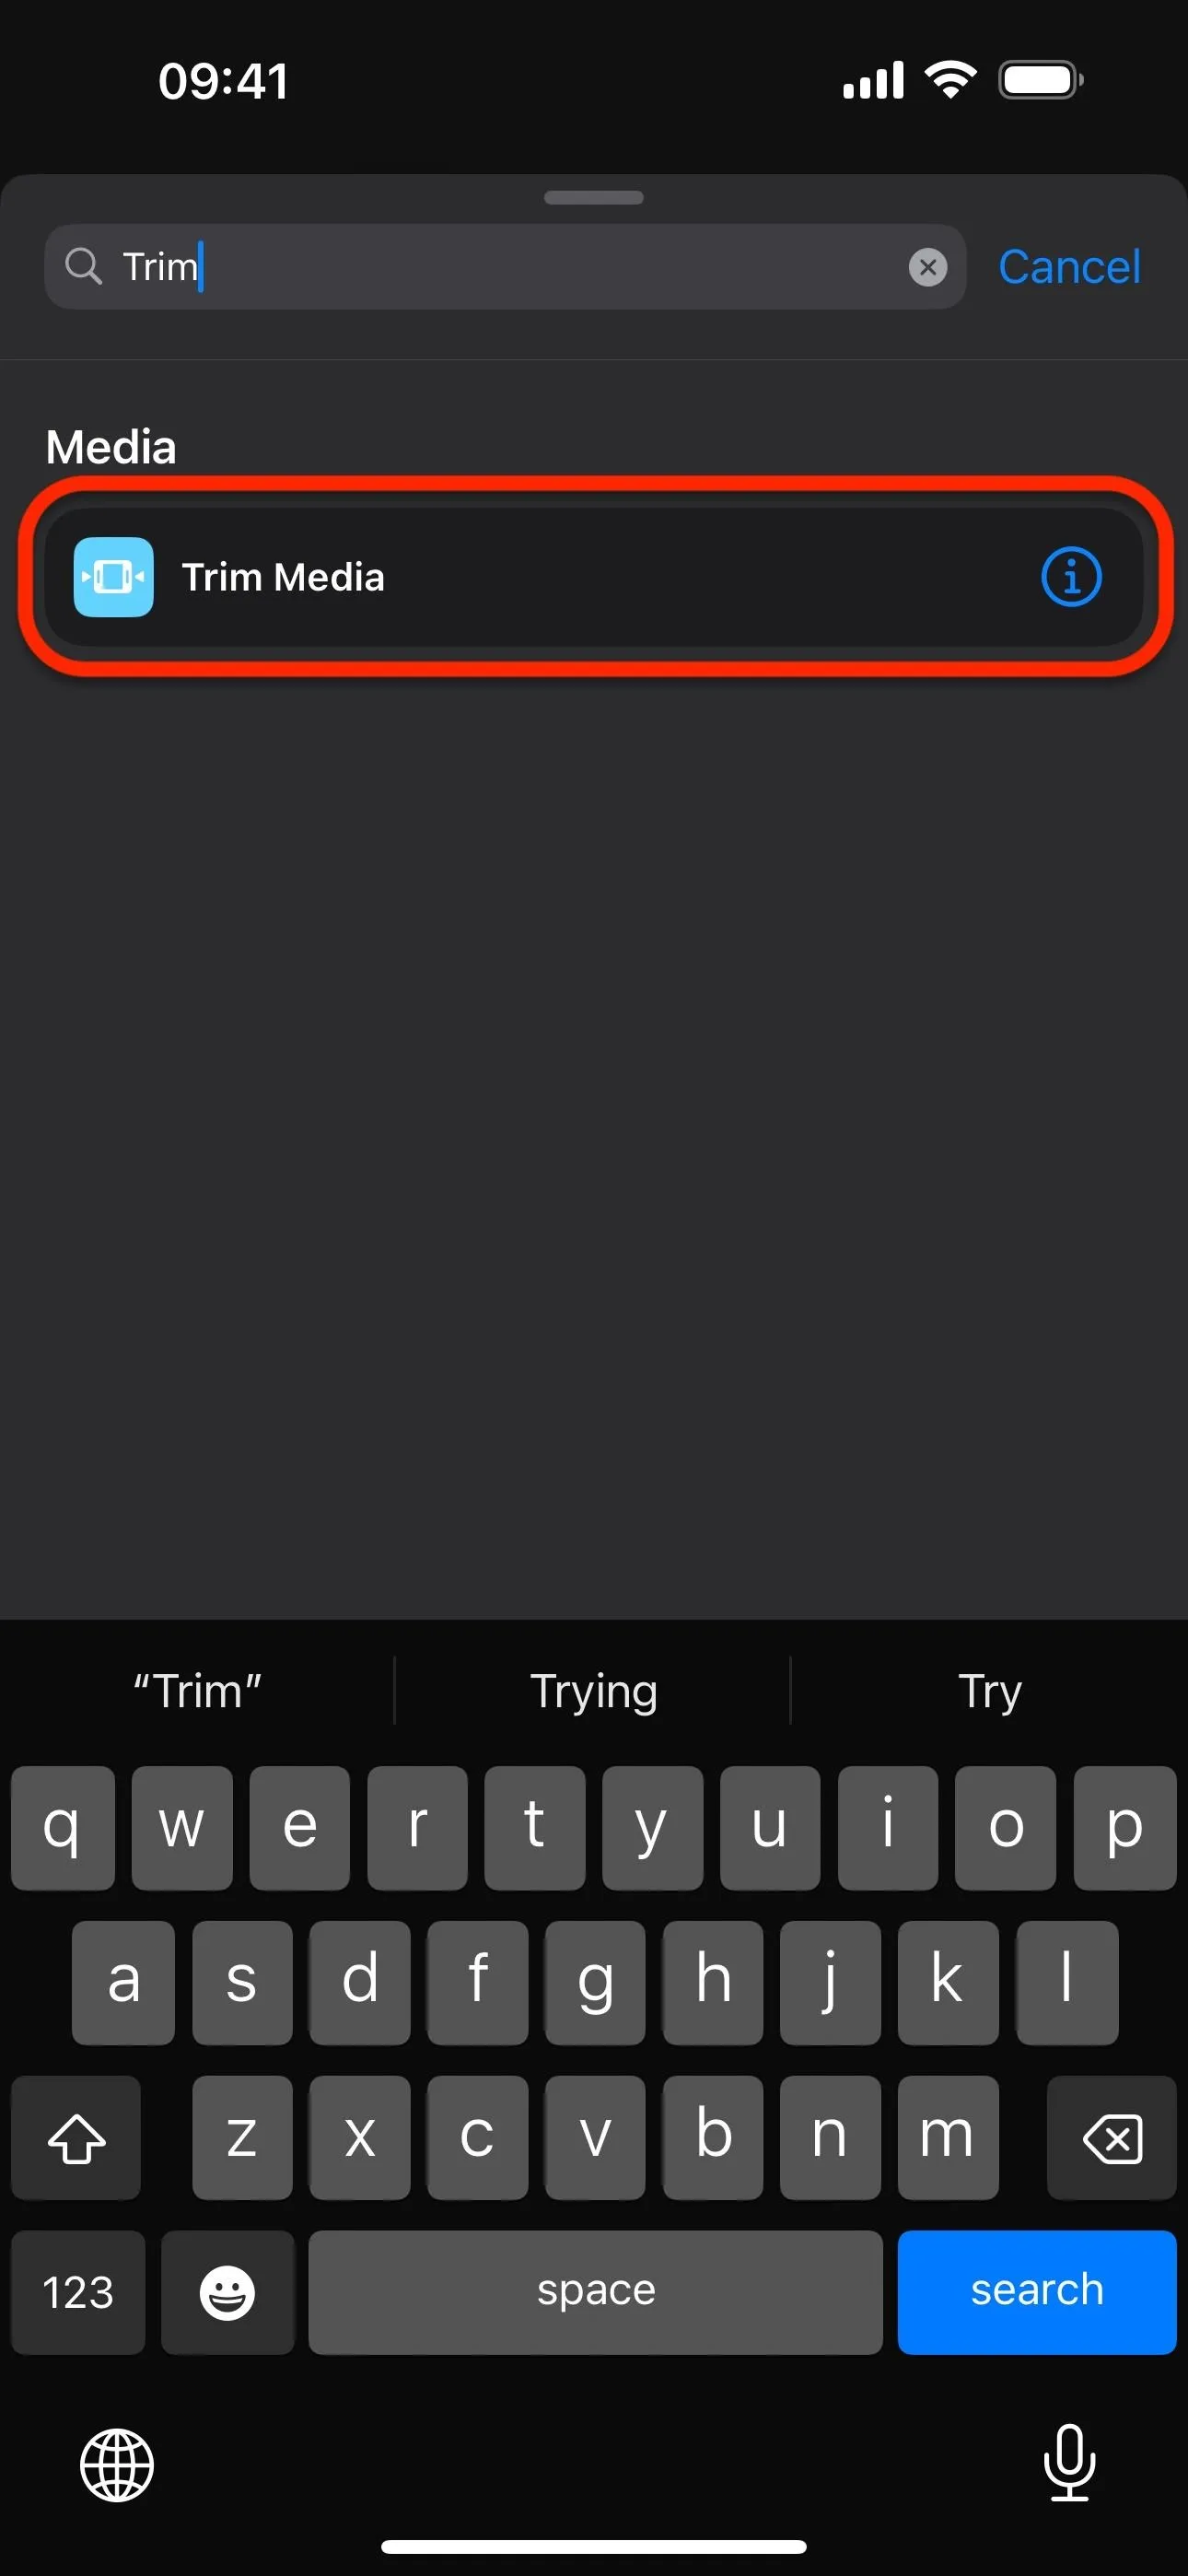
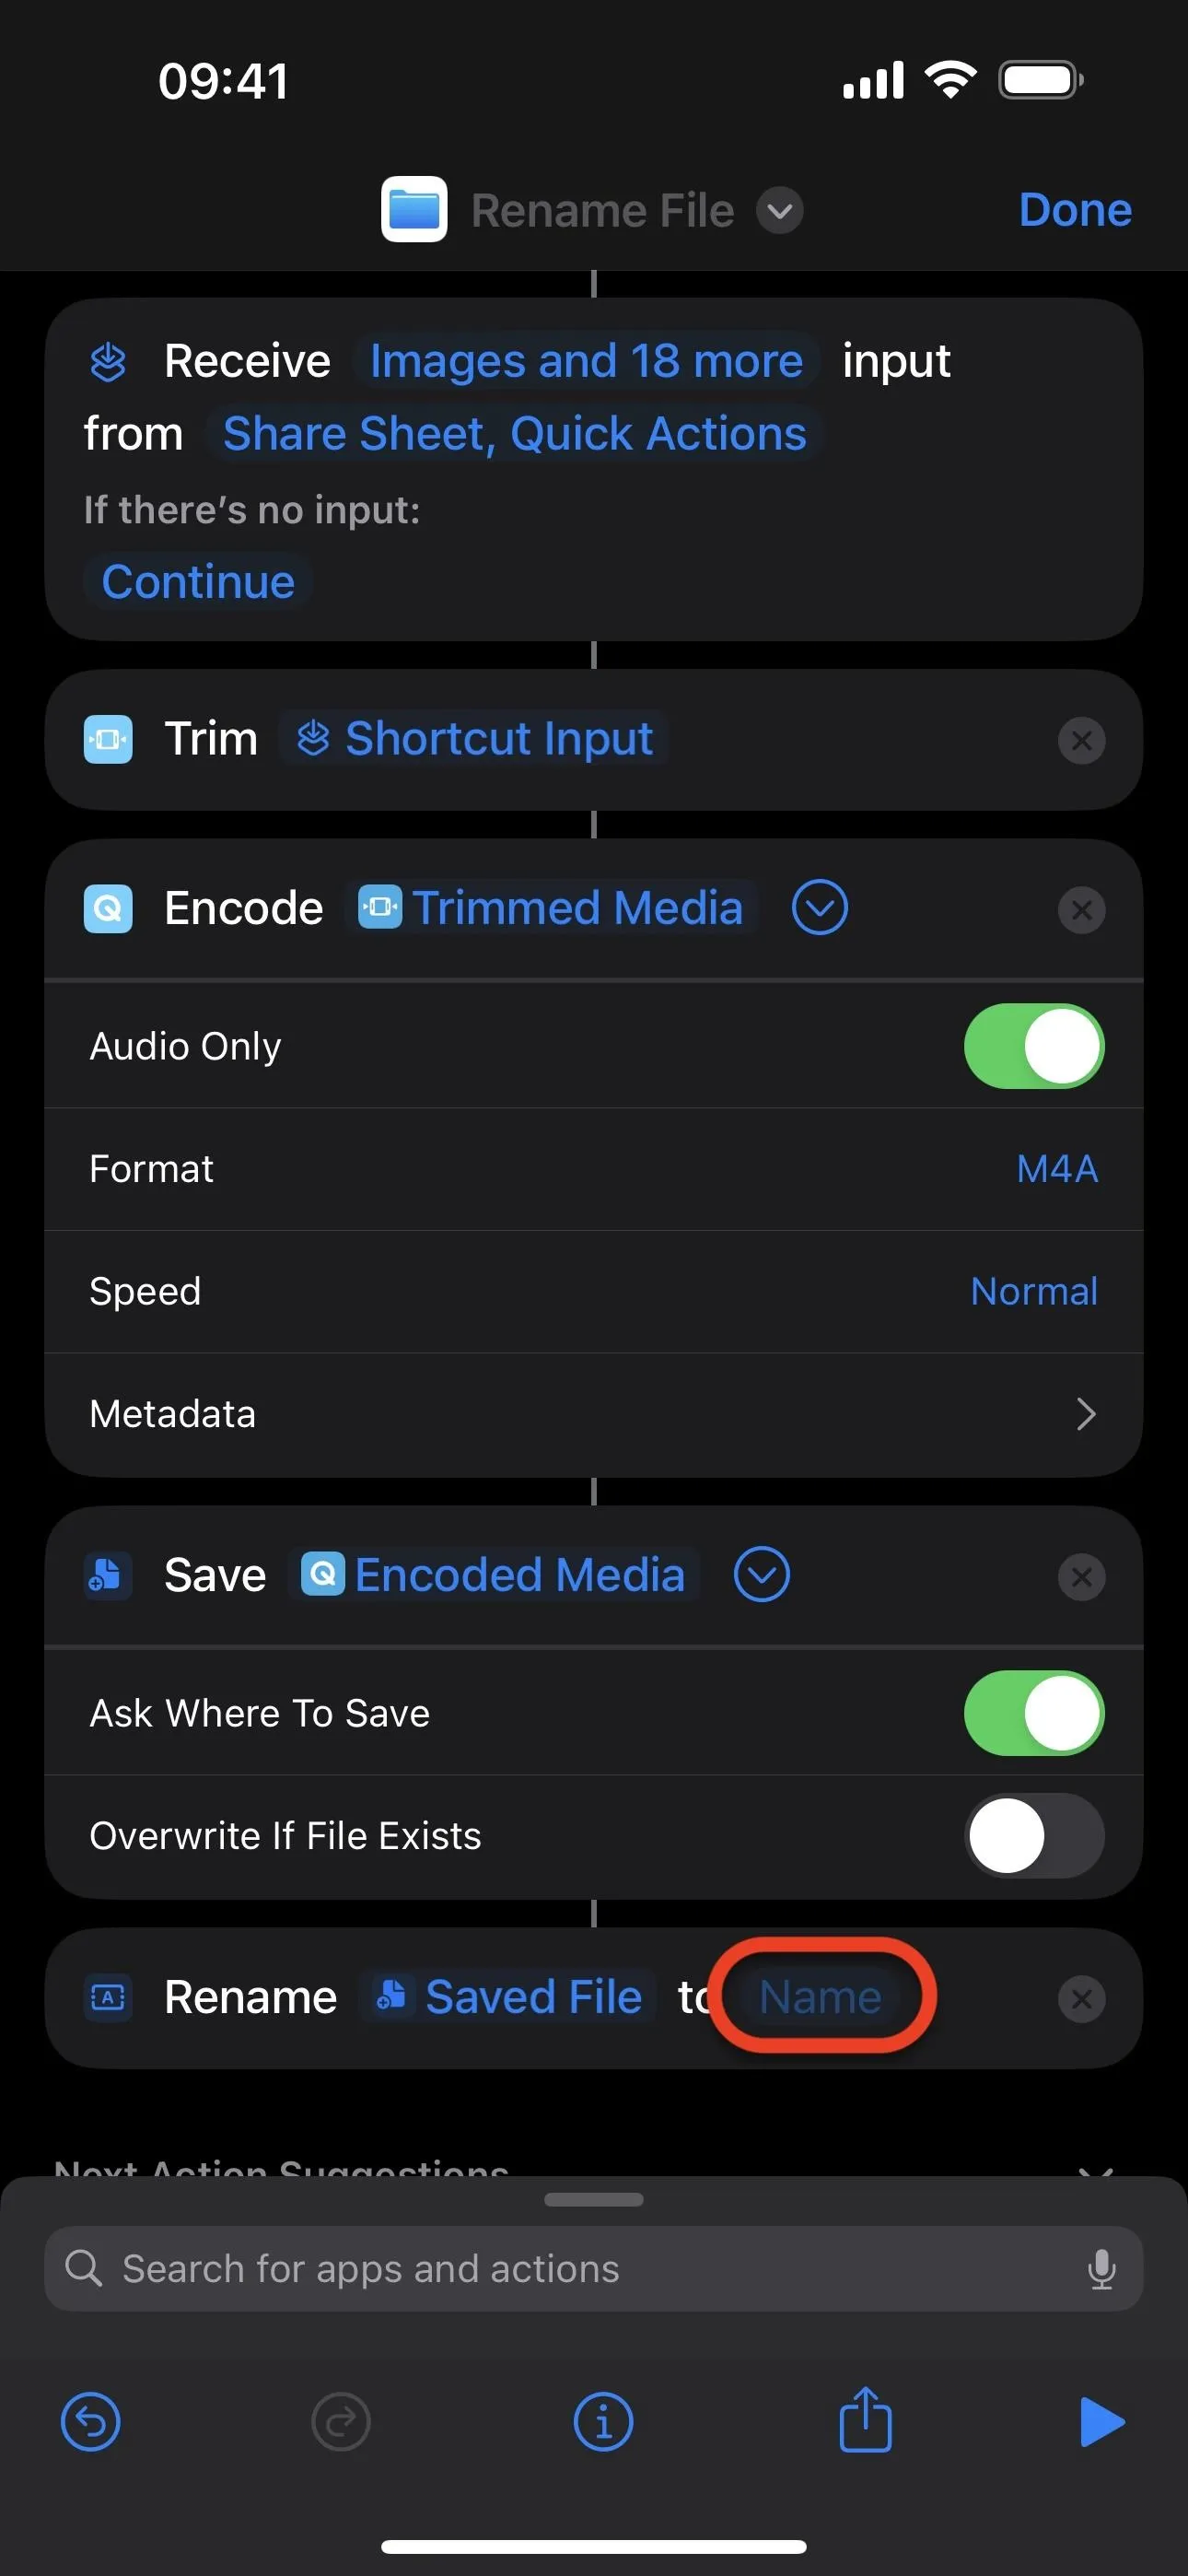
Now, tap the search bar and find and select the "Trim Media" action. Shortcuts should automatically link "Shortcut Input" to feed the trim action. If not, select "Media" next to Trim and choose "Shortcut Input" from the list.
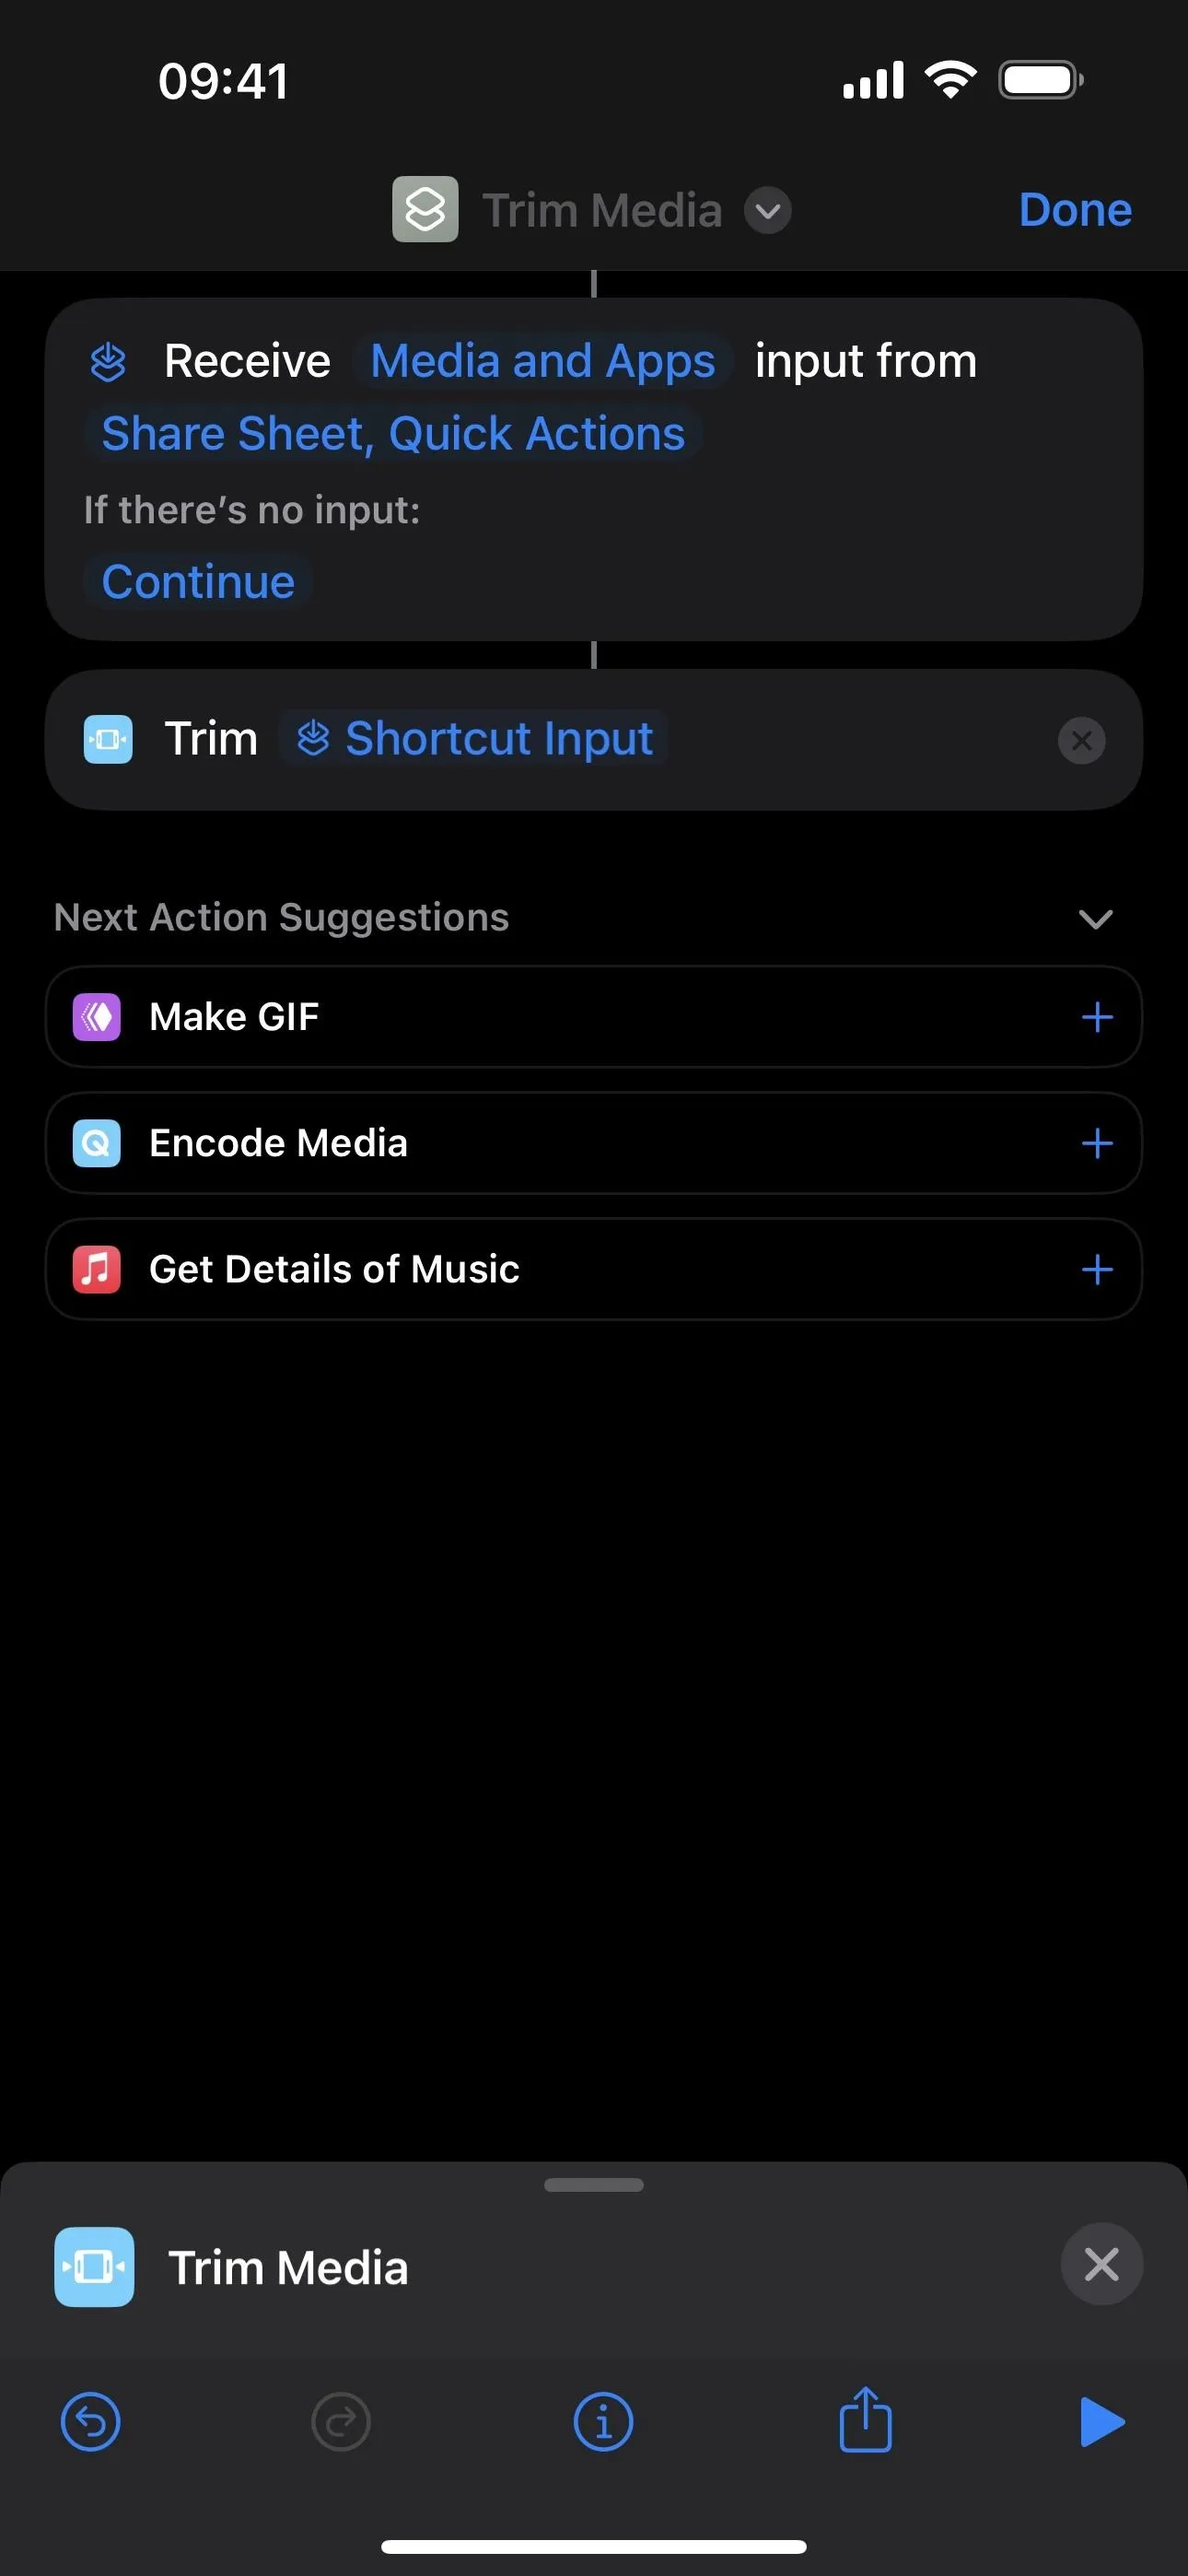
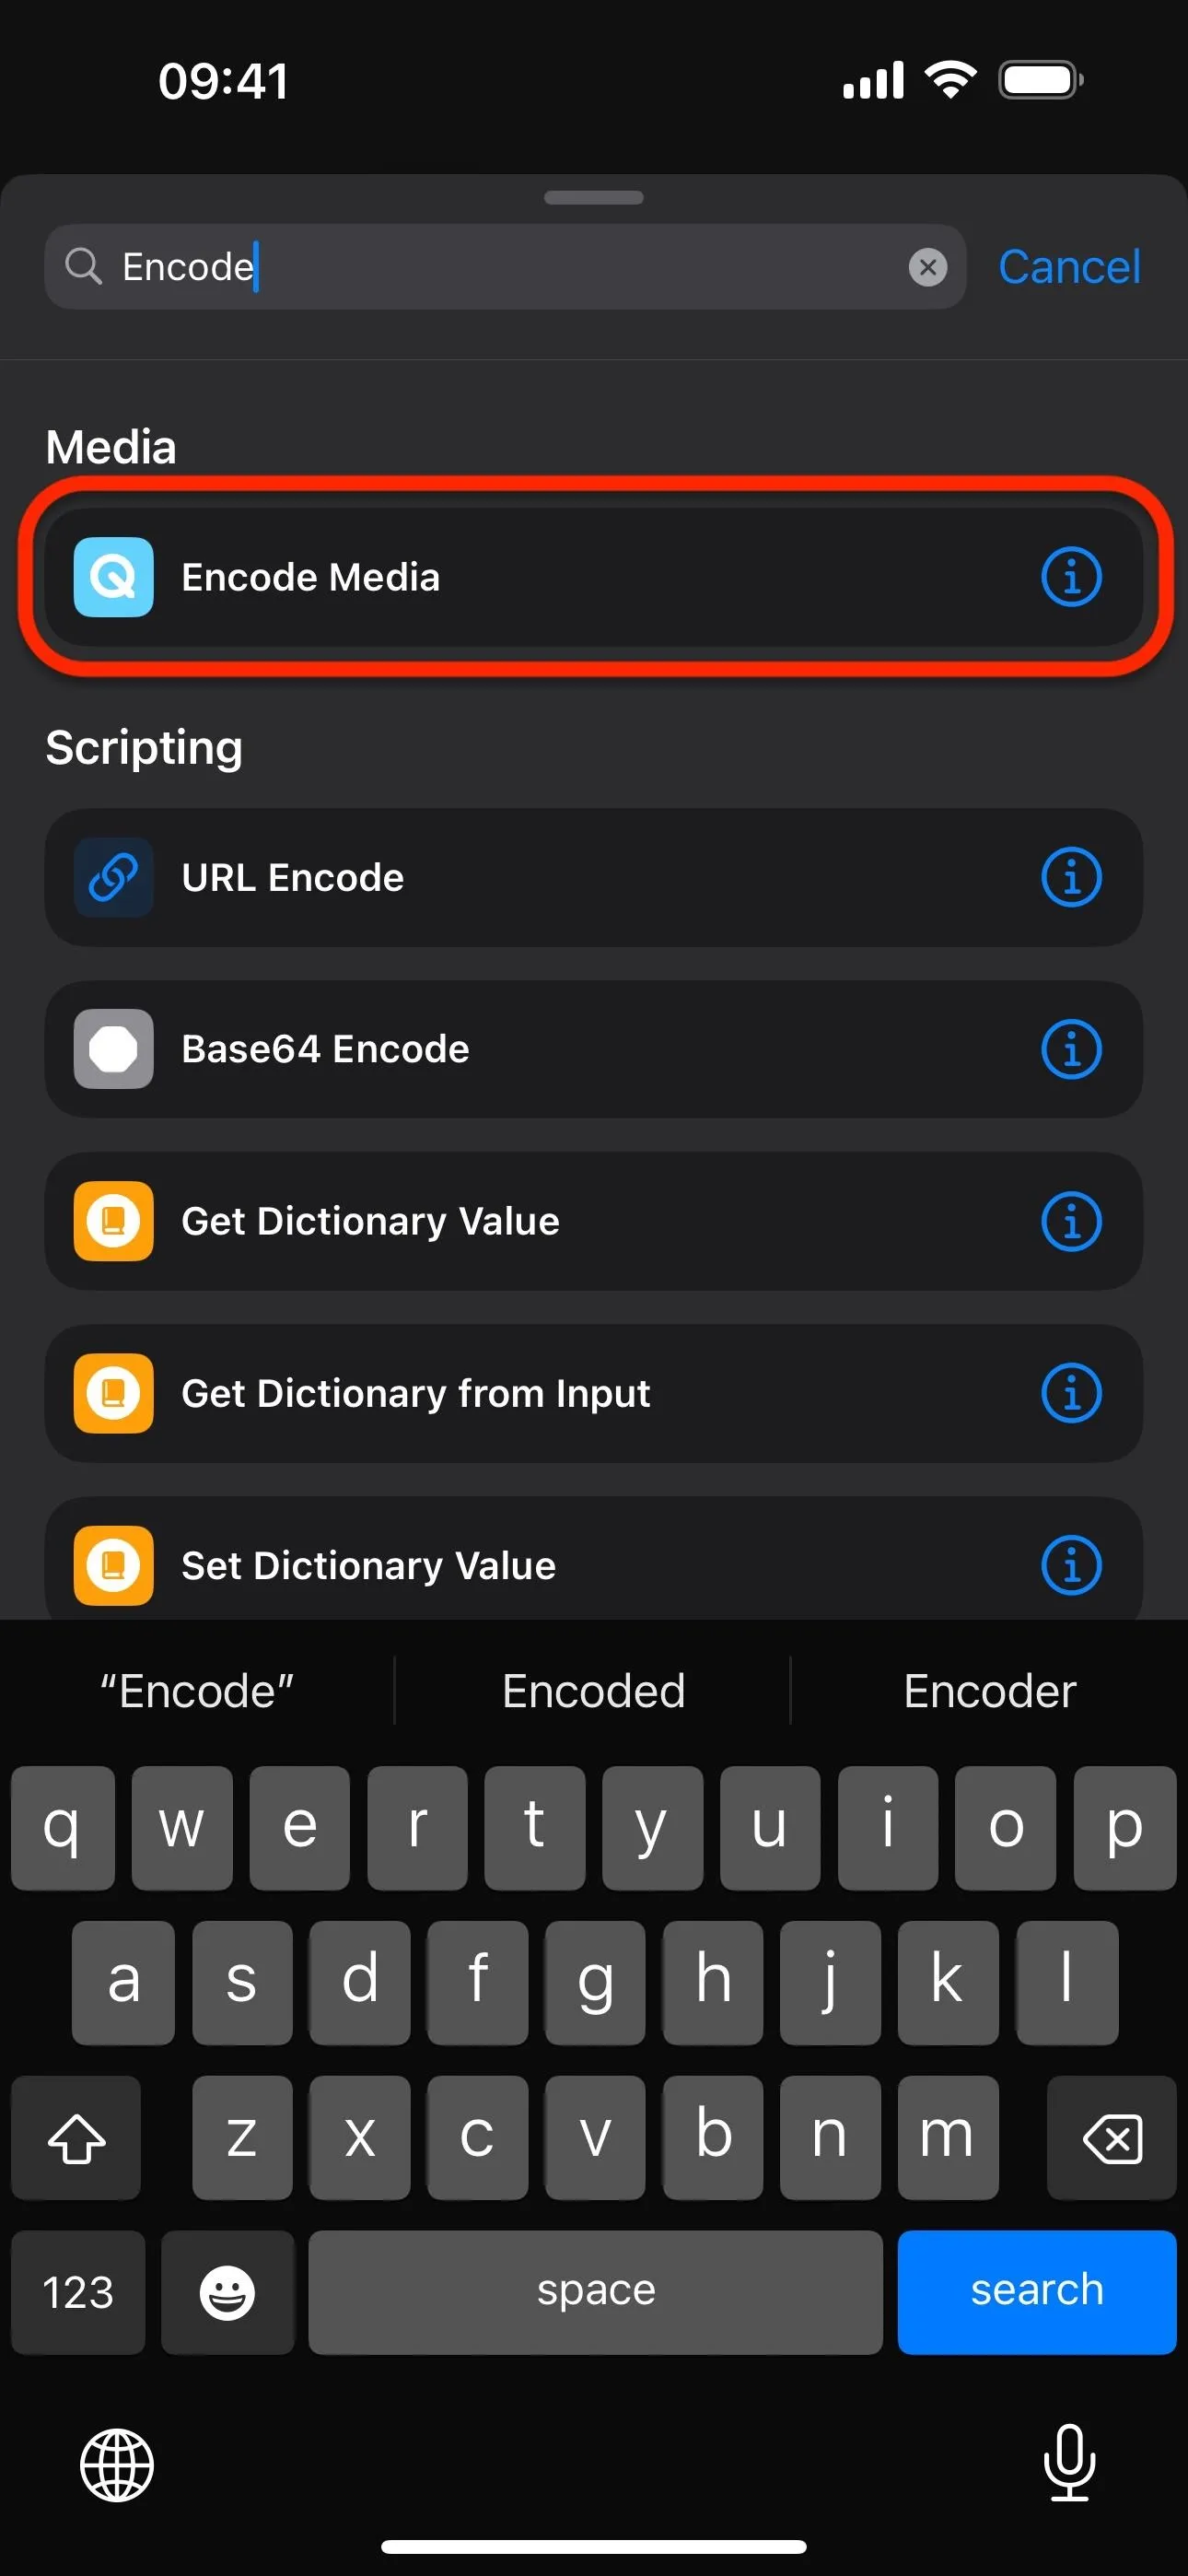
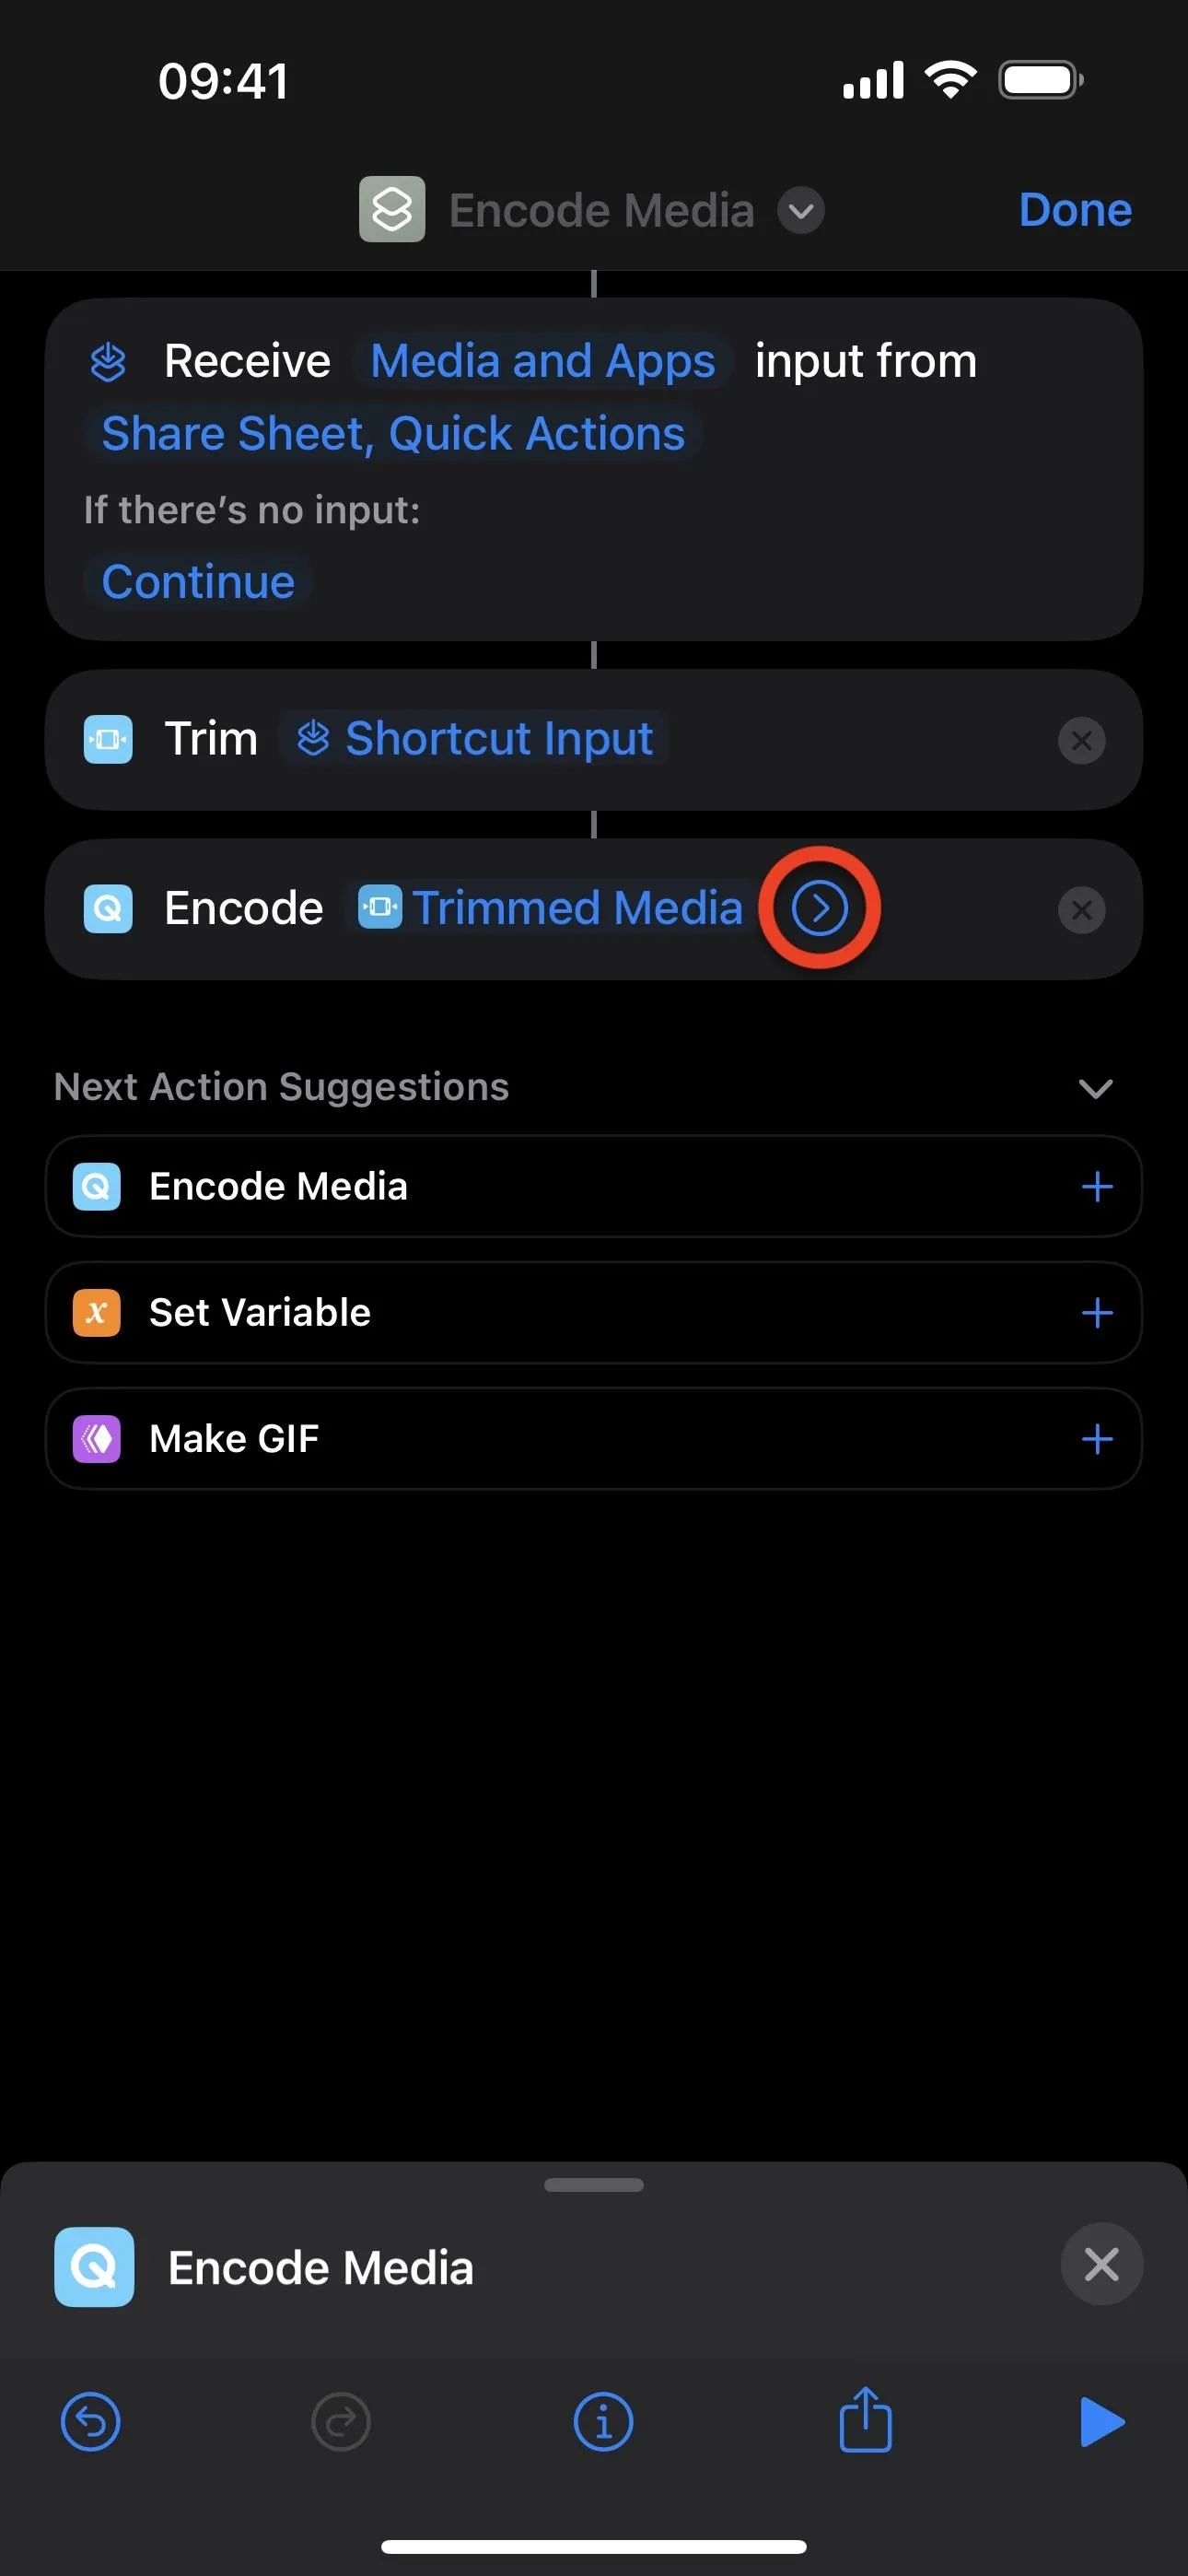
Tap the search bar again and find and select the "Encode Media" action. Shortcuts should automatically link "Trimmed Media" to feed the encode action. If not, select "Media" next to Encode and choose "Trimmed Media" from the list.
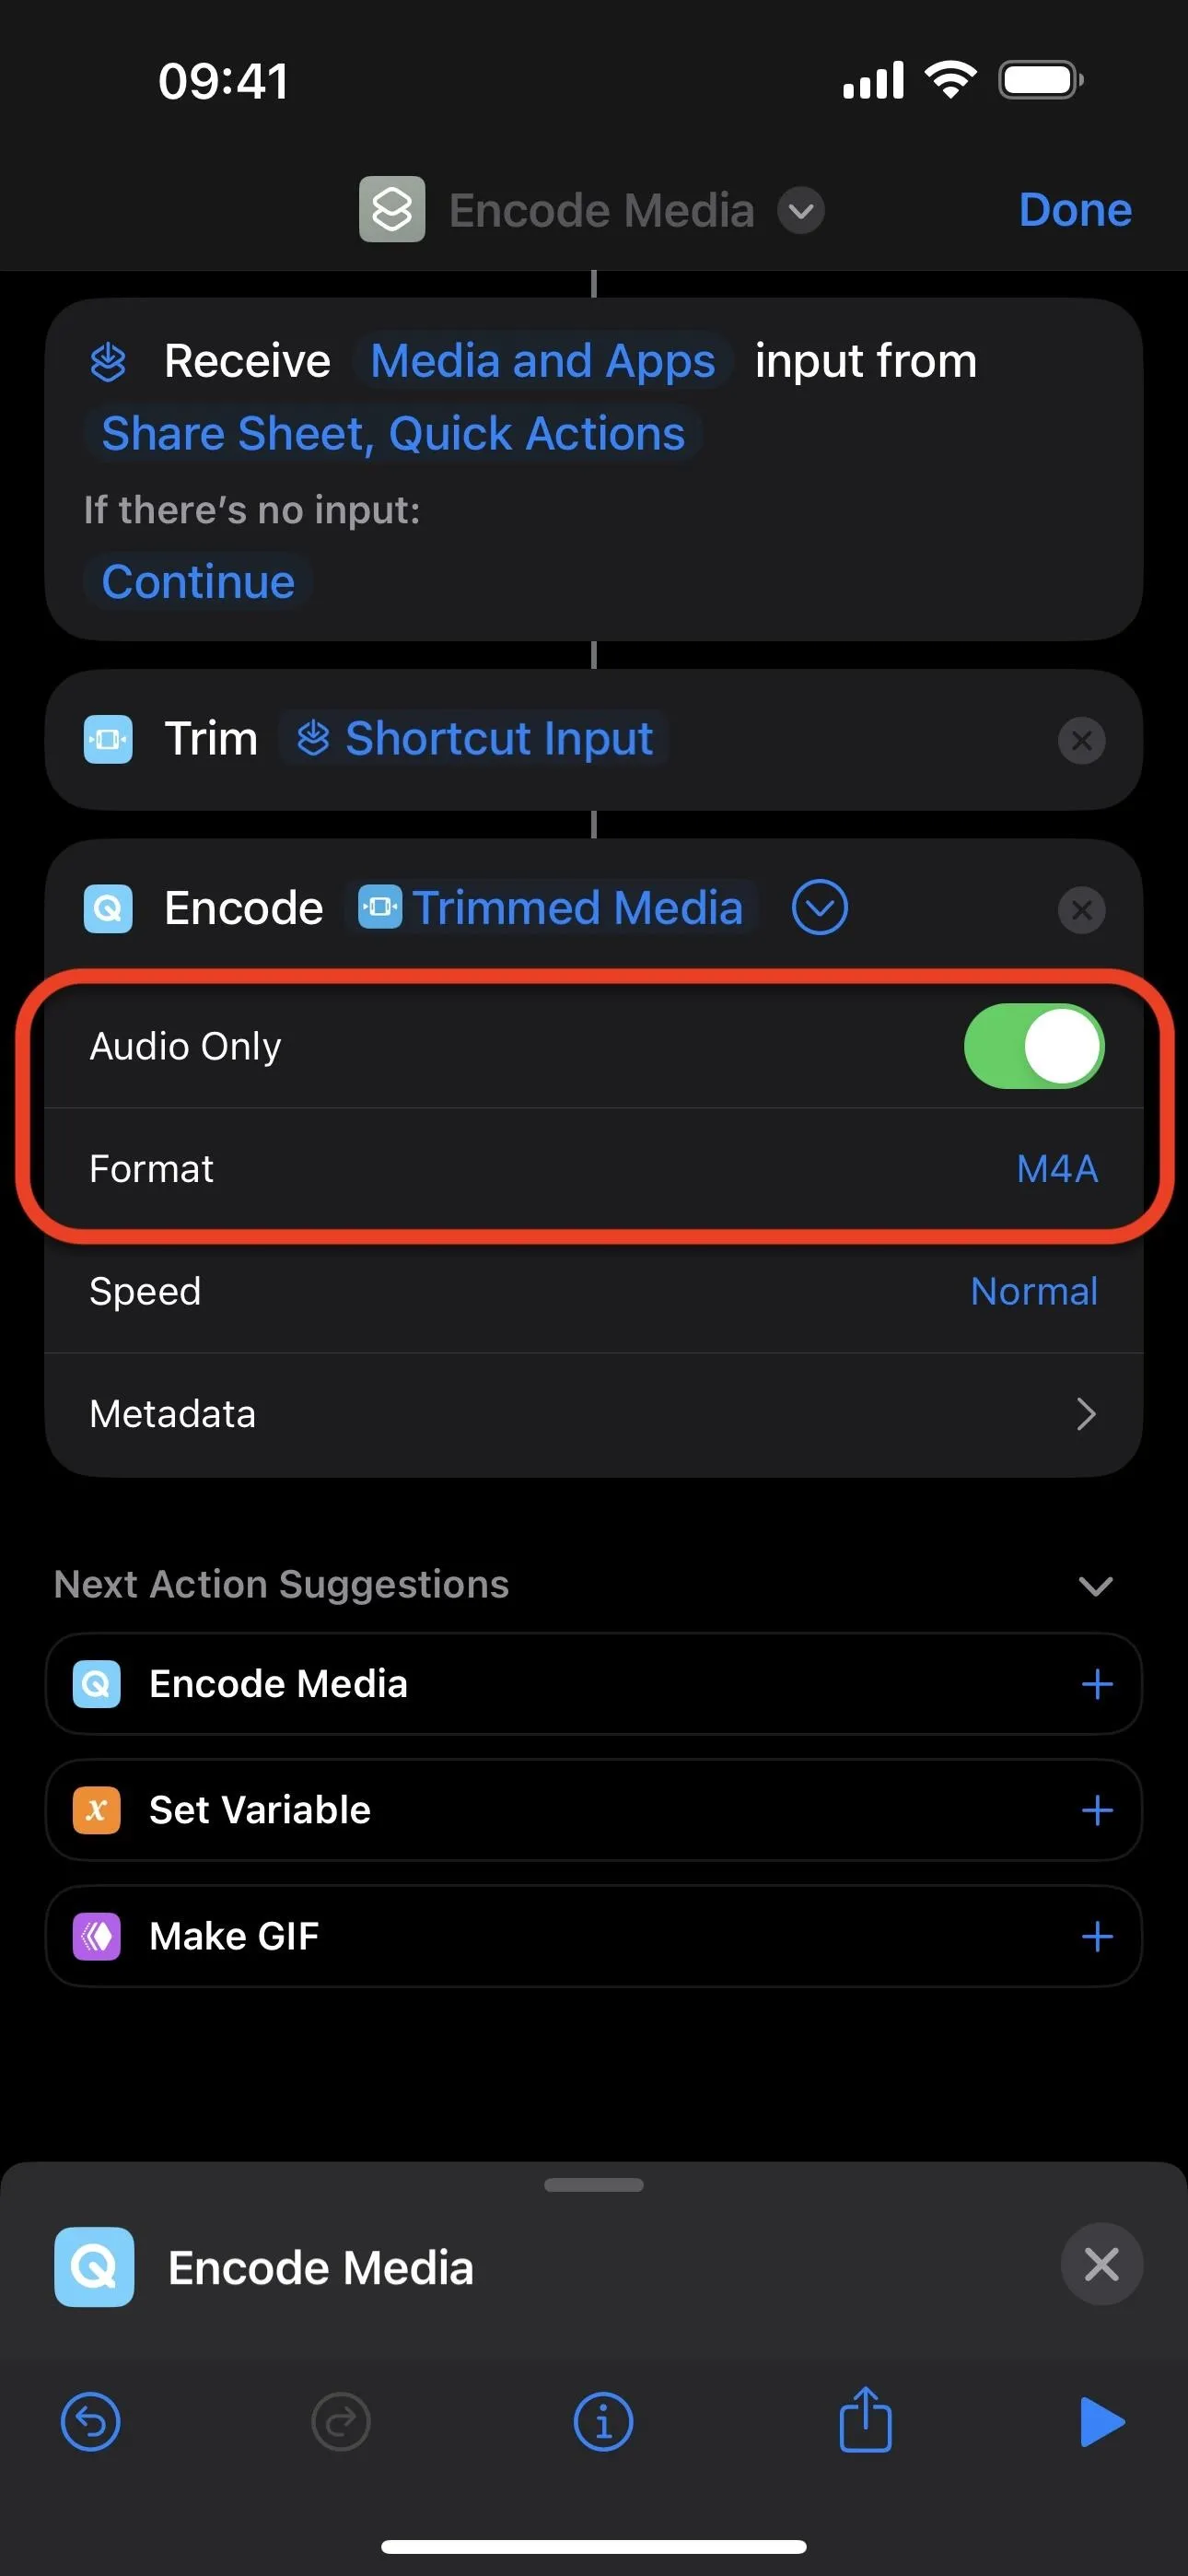
Then, hit the arrow next to Trimmed Media to expand the action's options. Toggle on "Audio Only" and ensure the "Format" is set to "M4A."
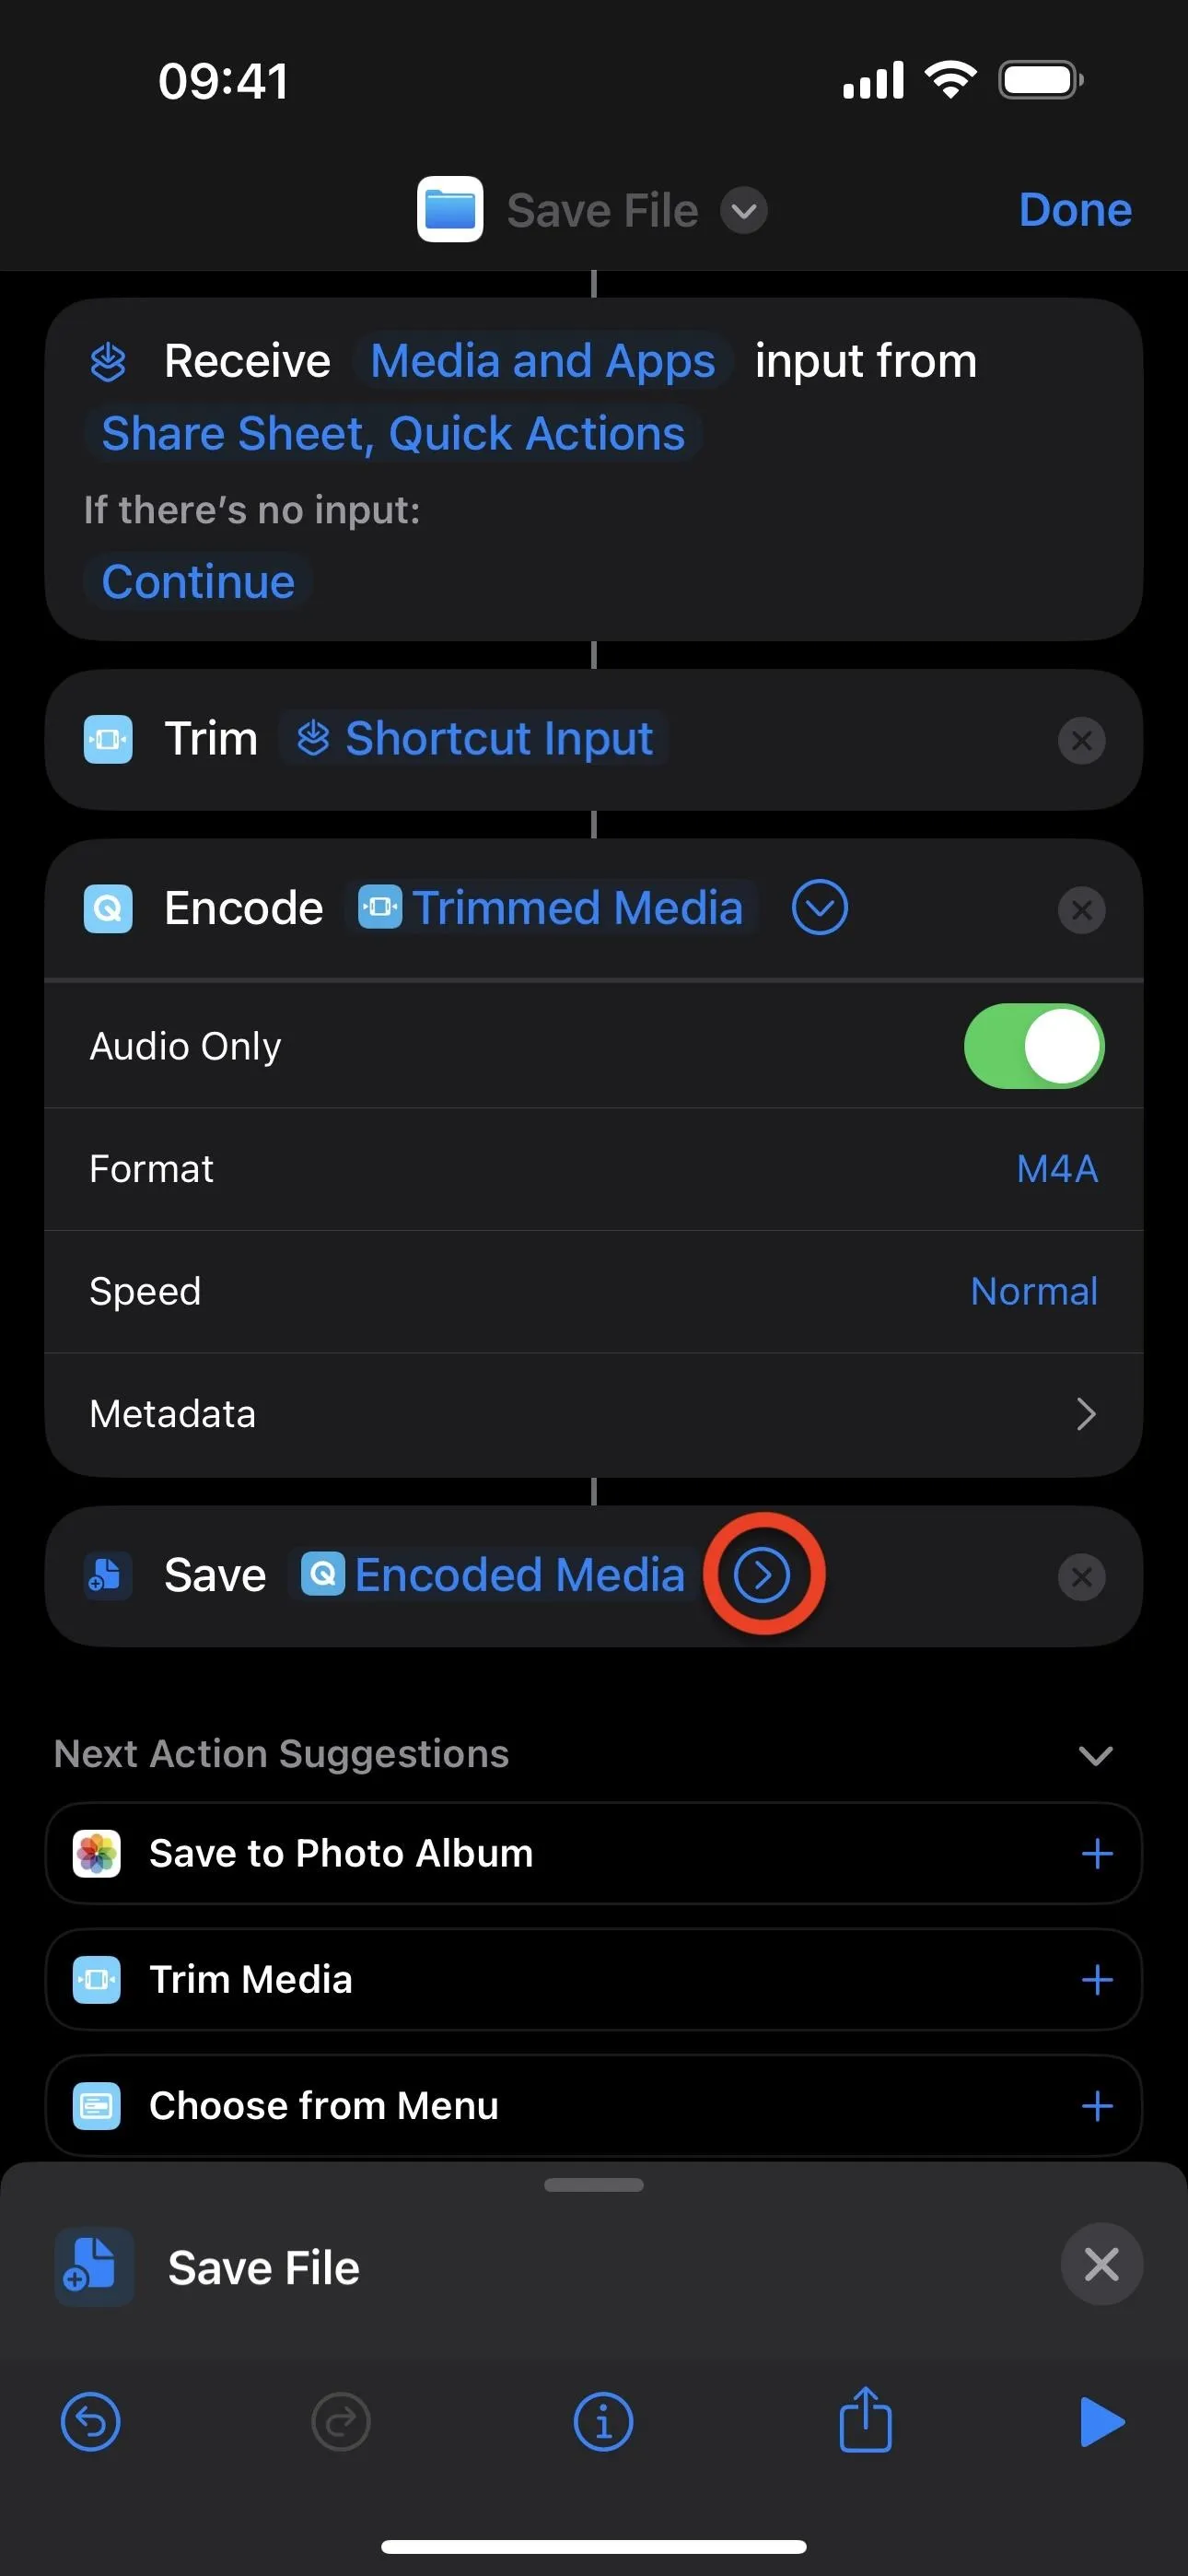
Tap the search bar again and find and select the "Save File" action. Shortcuts should automatically link "Encoded Media" to feed the save action. If not, long-press or tap and hold "File" next to Save and choose "Encoded Media" from the list.
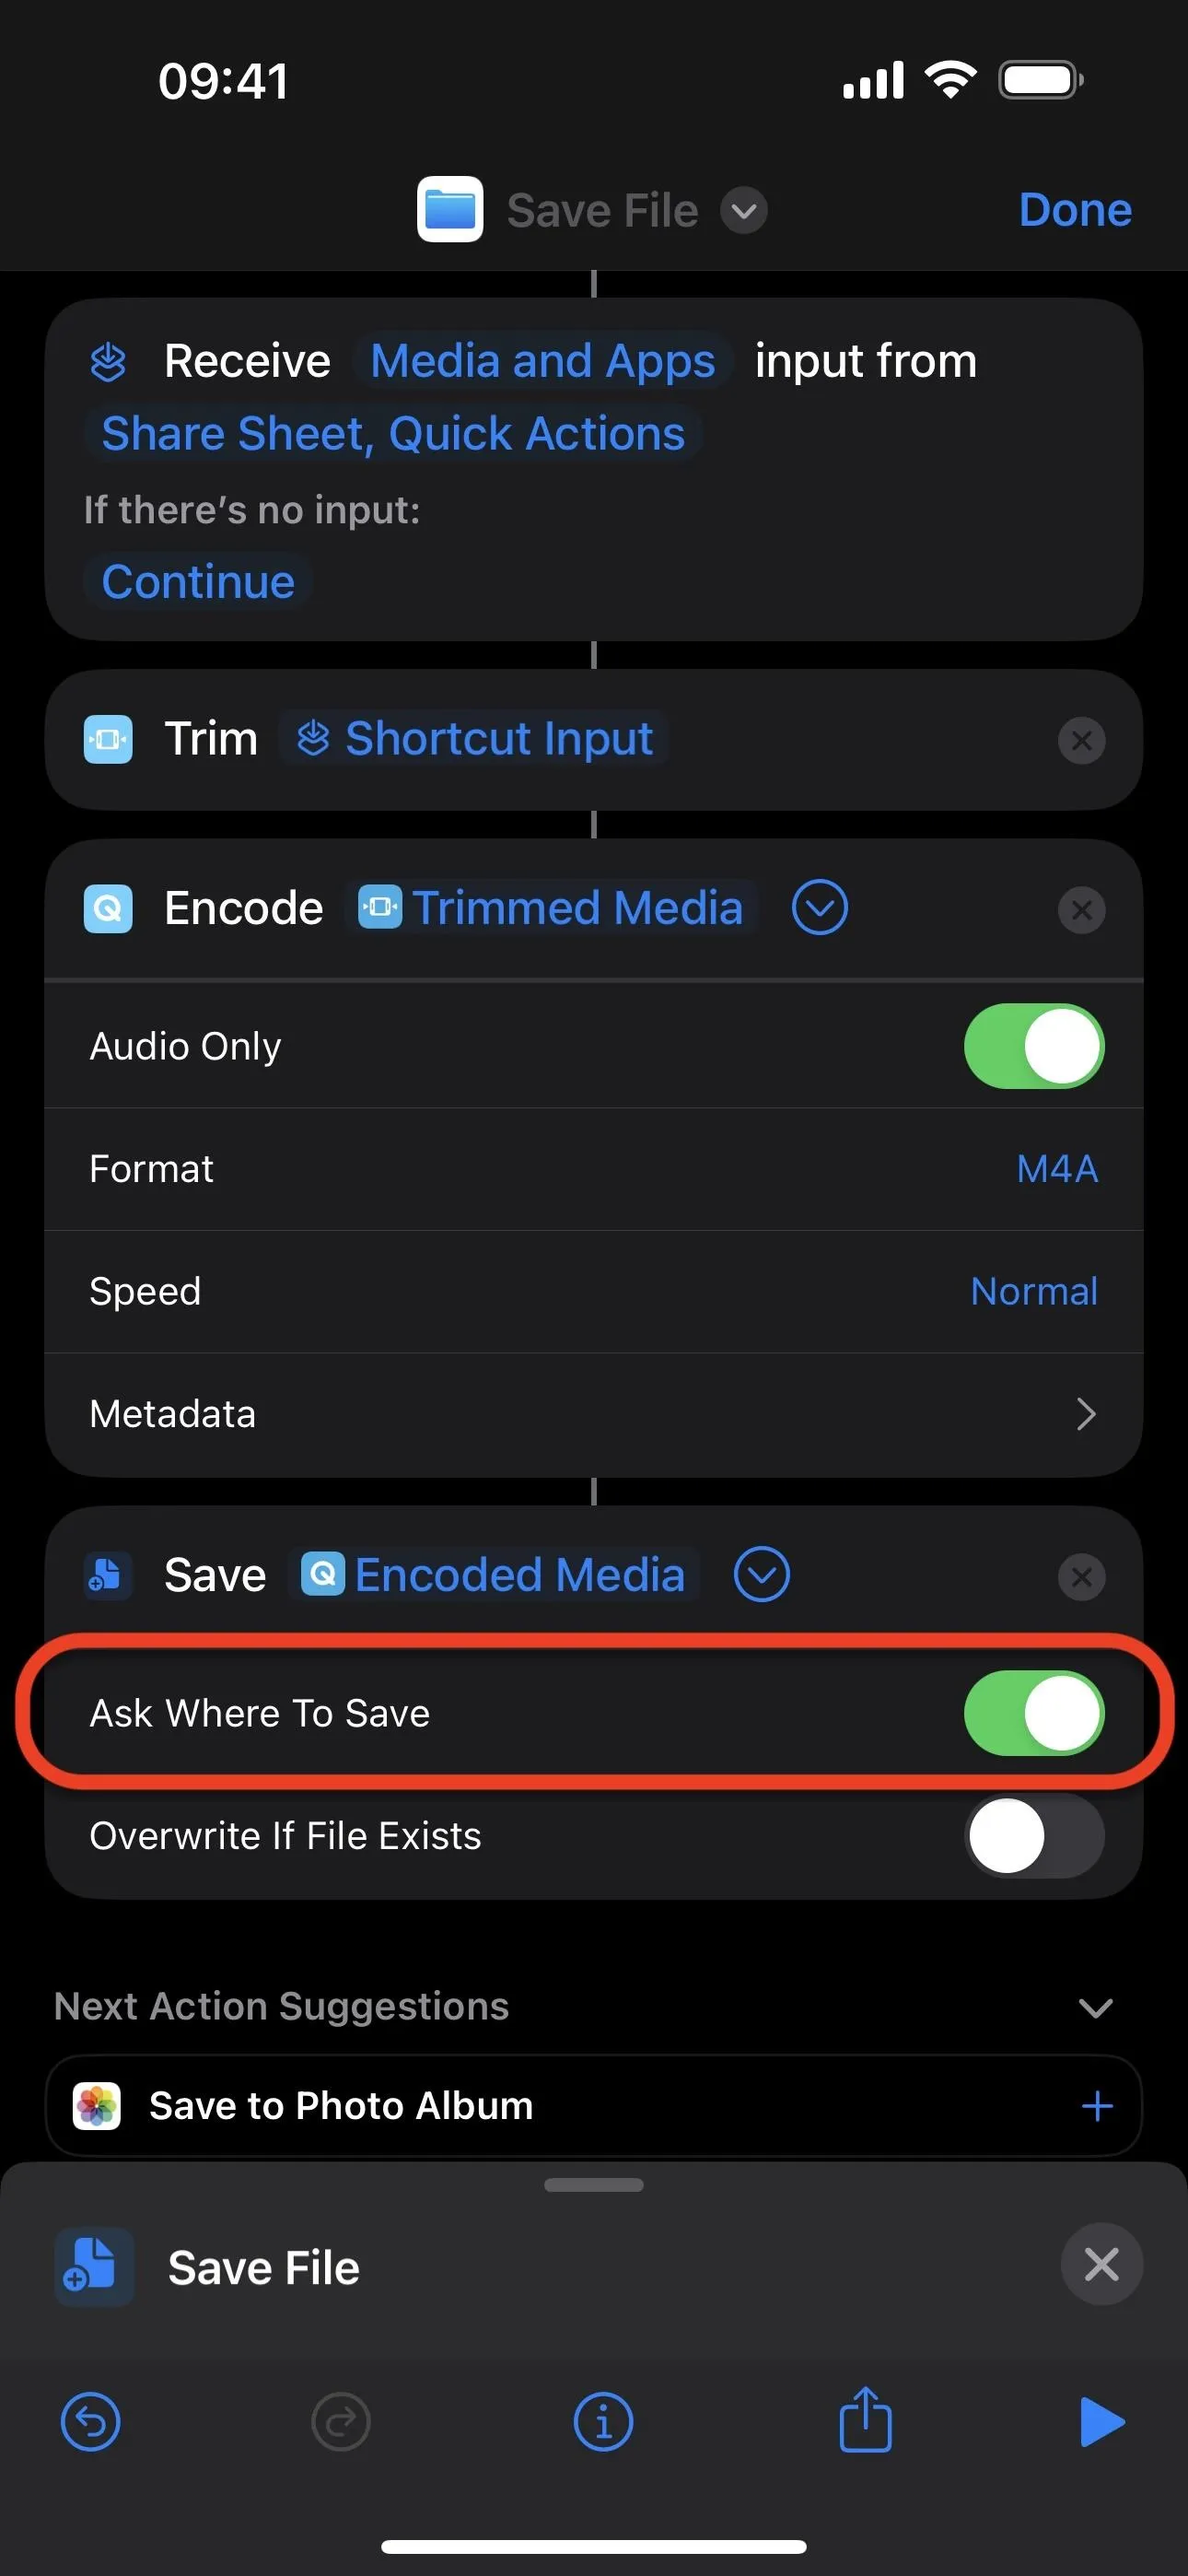
Then, hit the arrow next to Encoded Media to expand the action's options to ensure "Ask Where To Save" is toggled on.

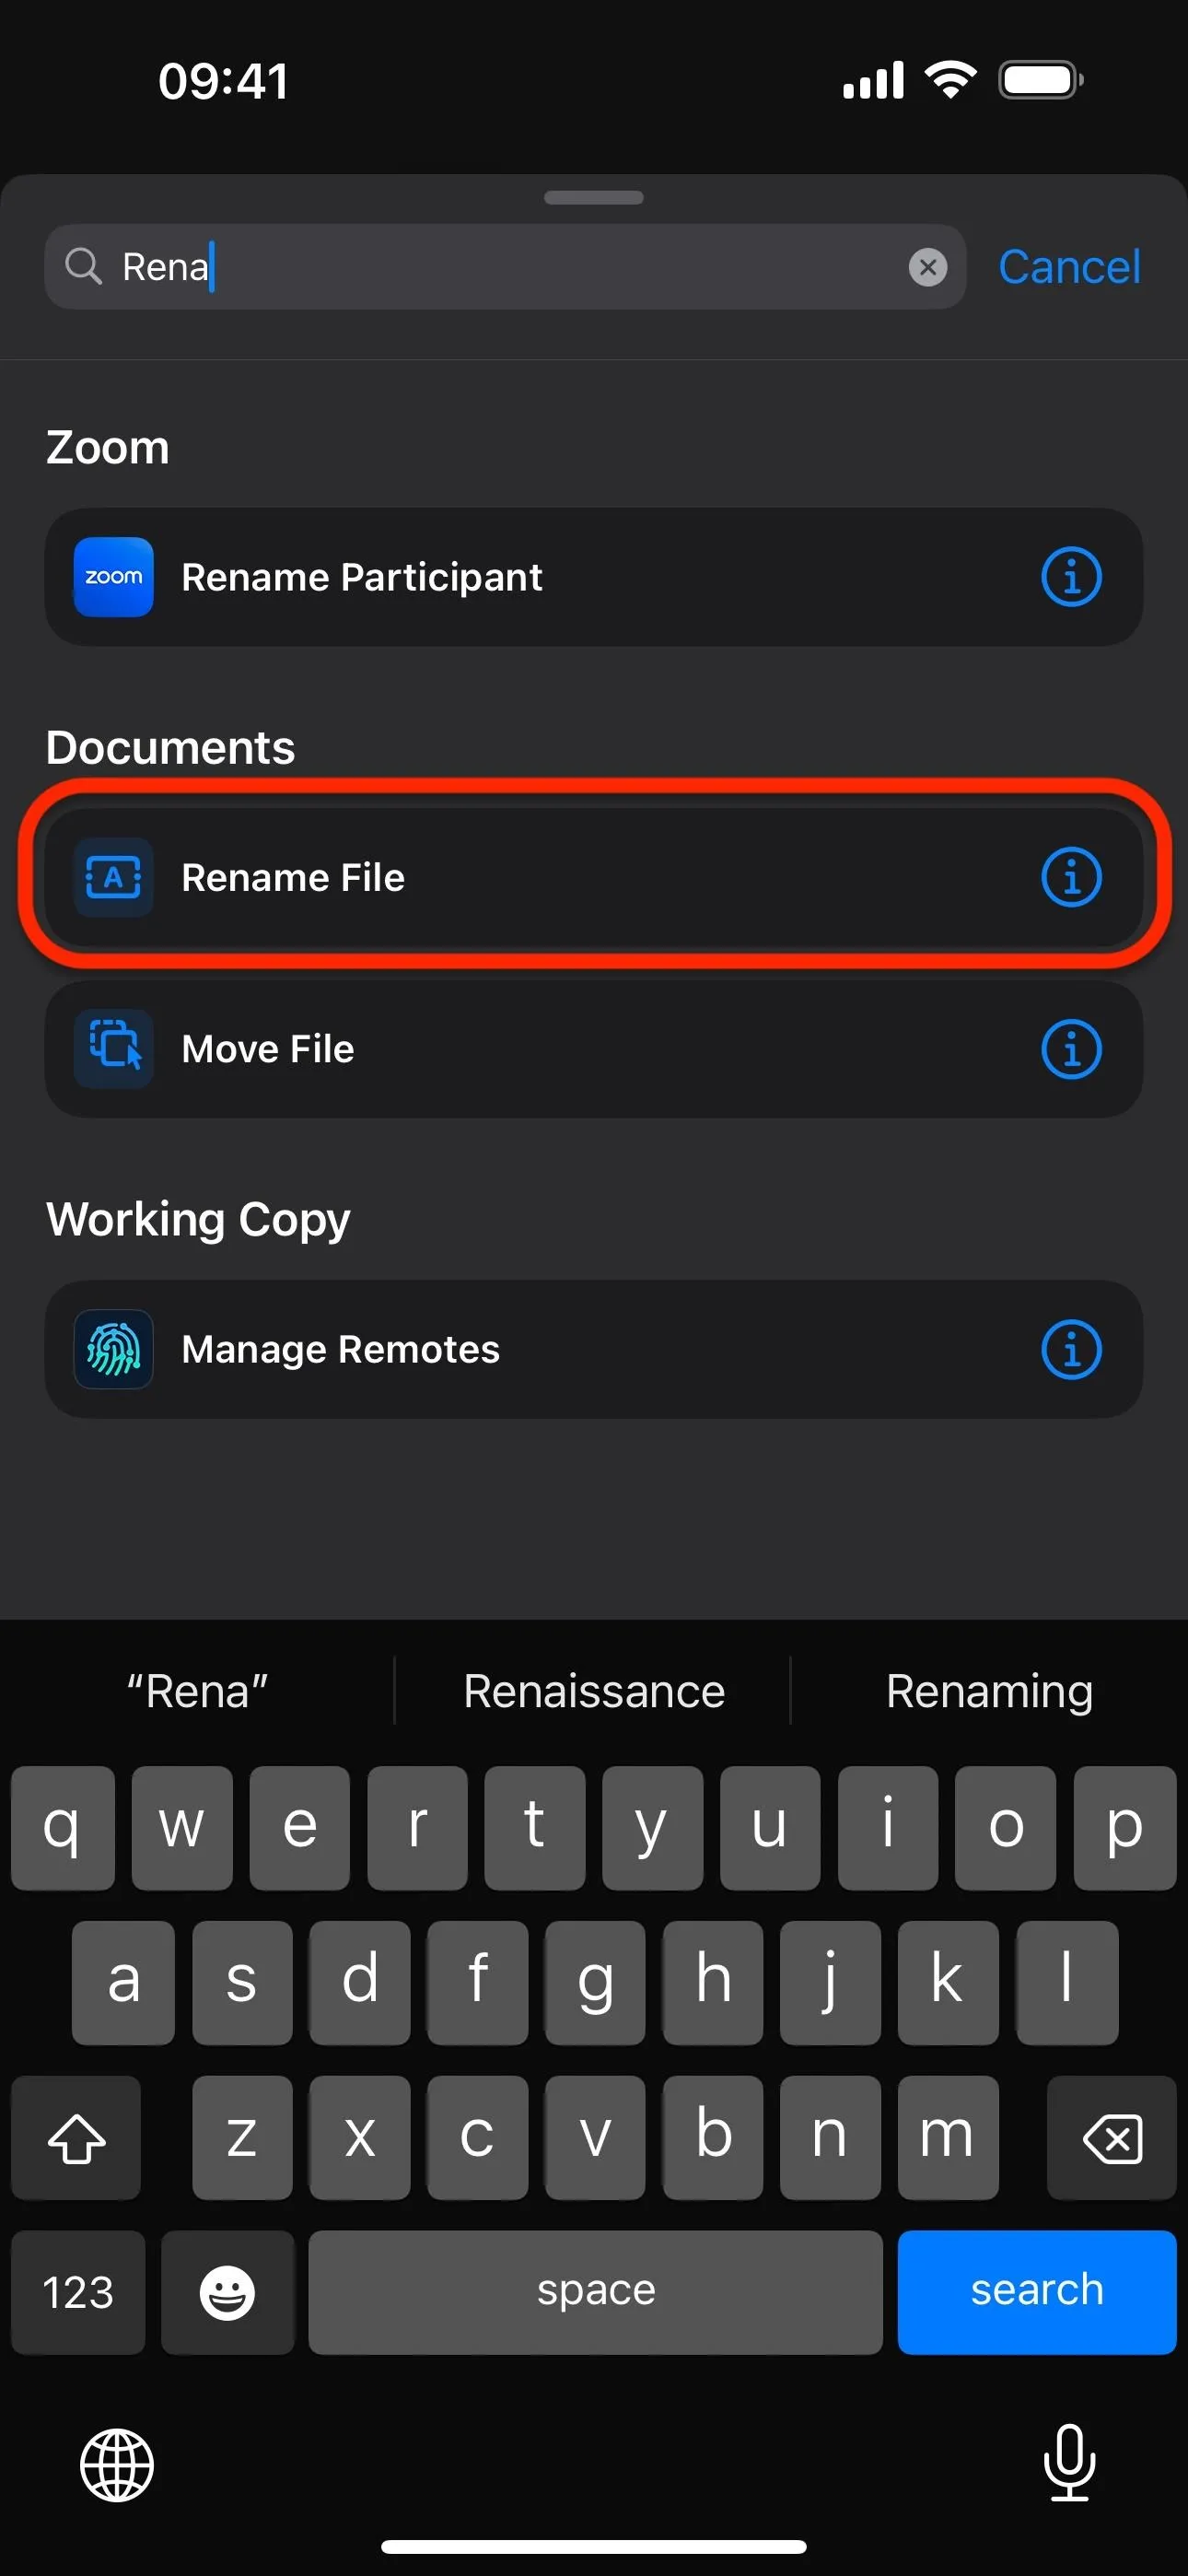
Tap the search bar again and find and select the "Rename File" action. Shortcuts should automatically link "Saved File" to feed the rename action. If not, long-press or tap and hold "File" next to Rename and choose "Saved File" from the list.
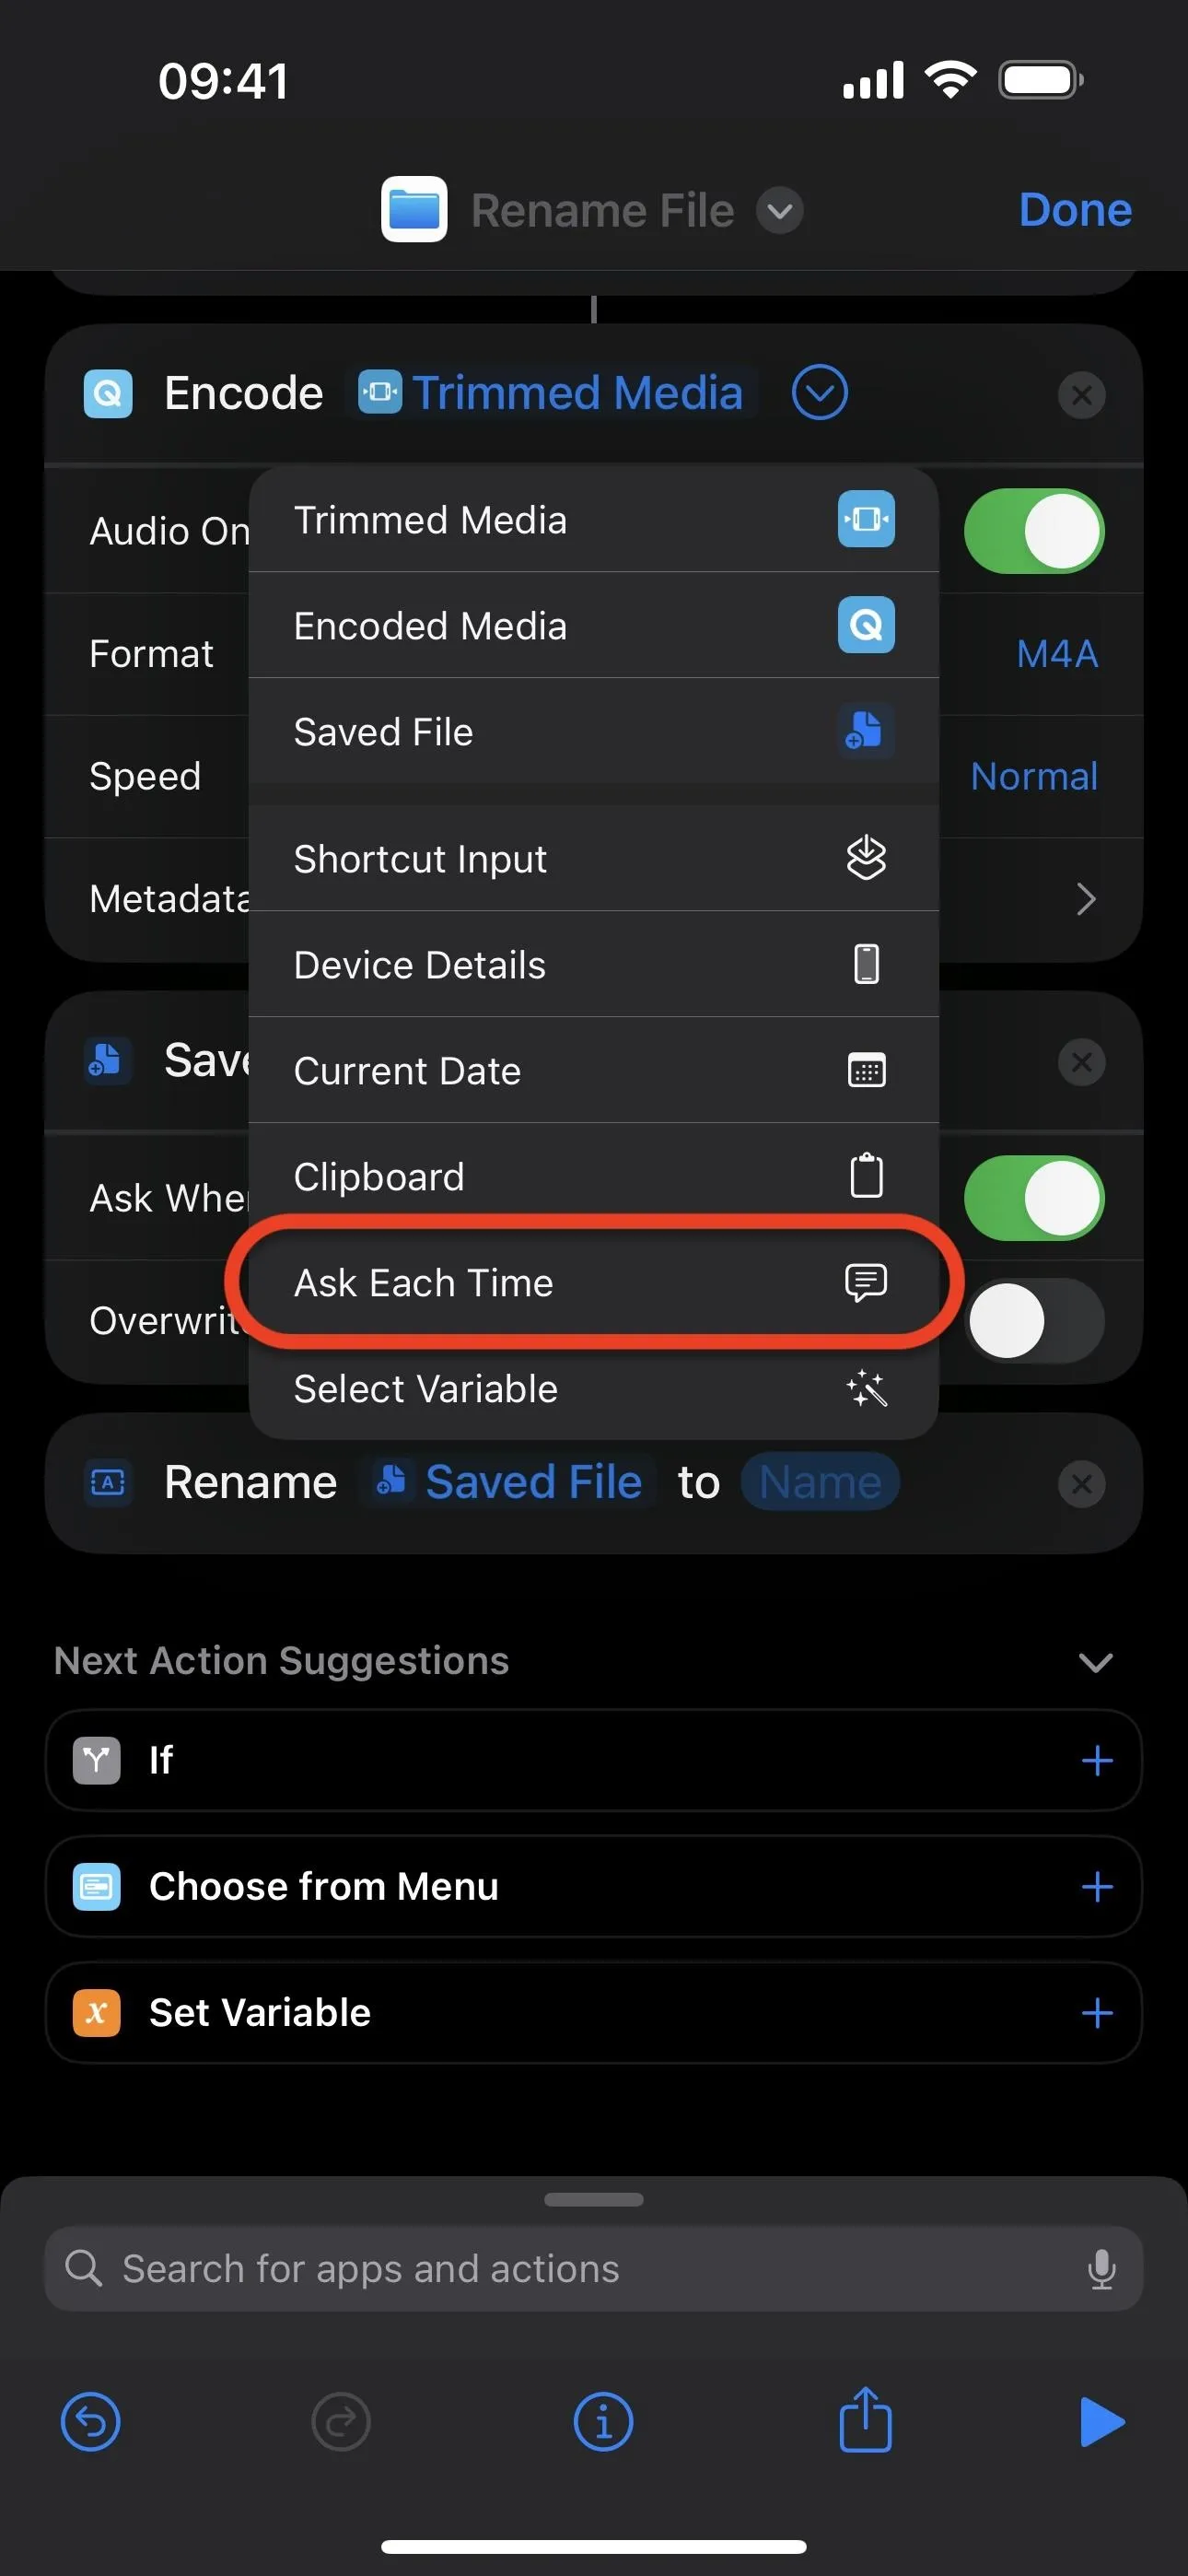
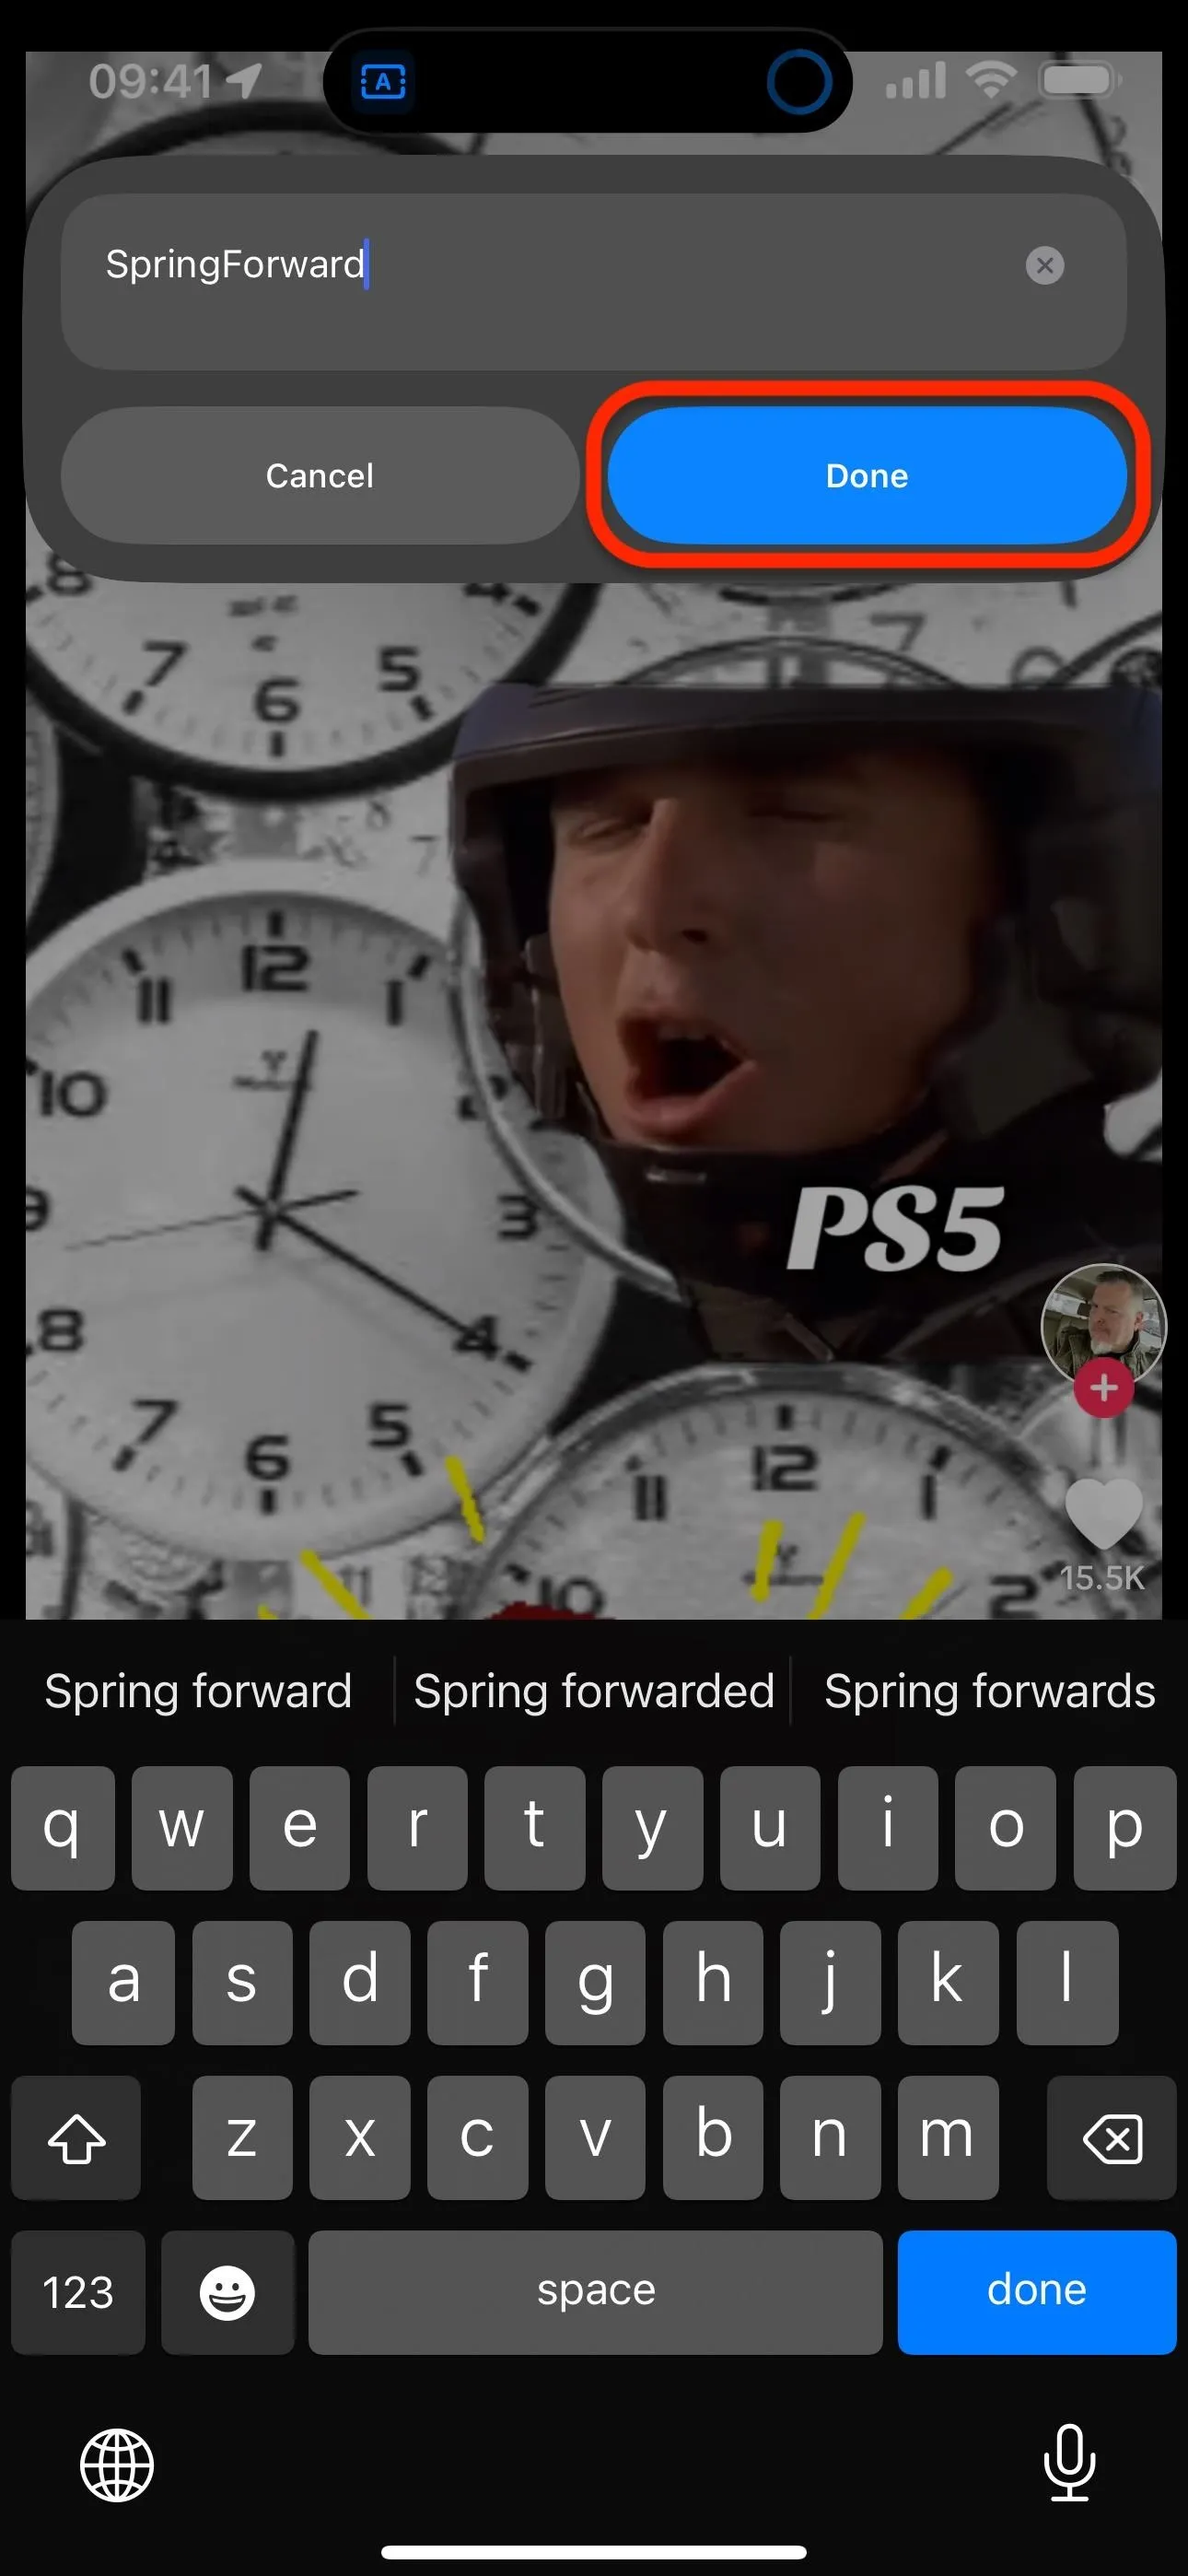
Next, long-press or tap and hold "Save" in the rename action box, then choose "Ask Each Time." This will allow you to name the audio file so that you can easily tell all your TikTok audio files apart.
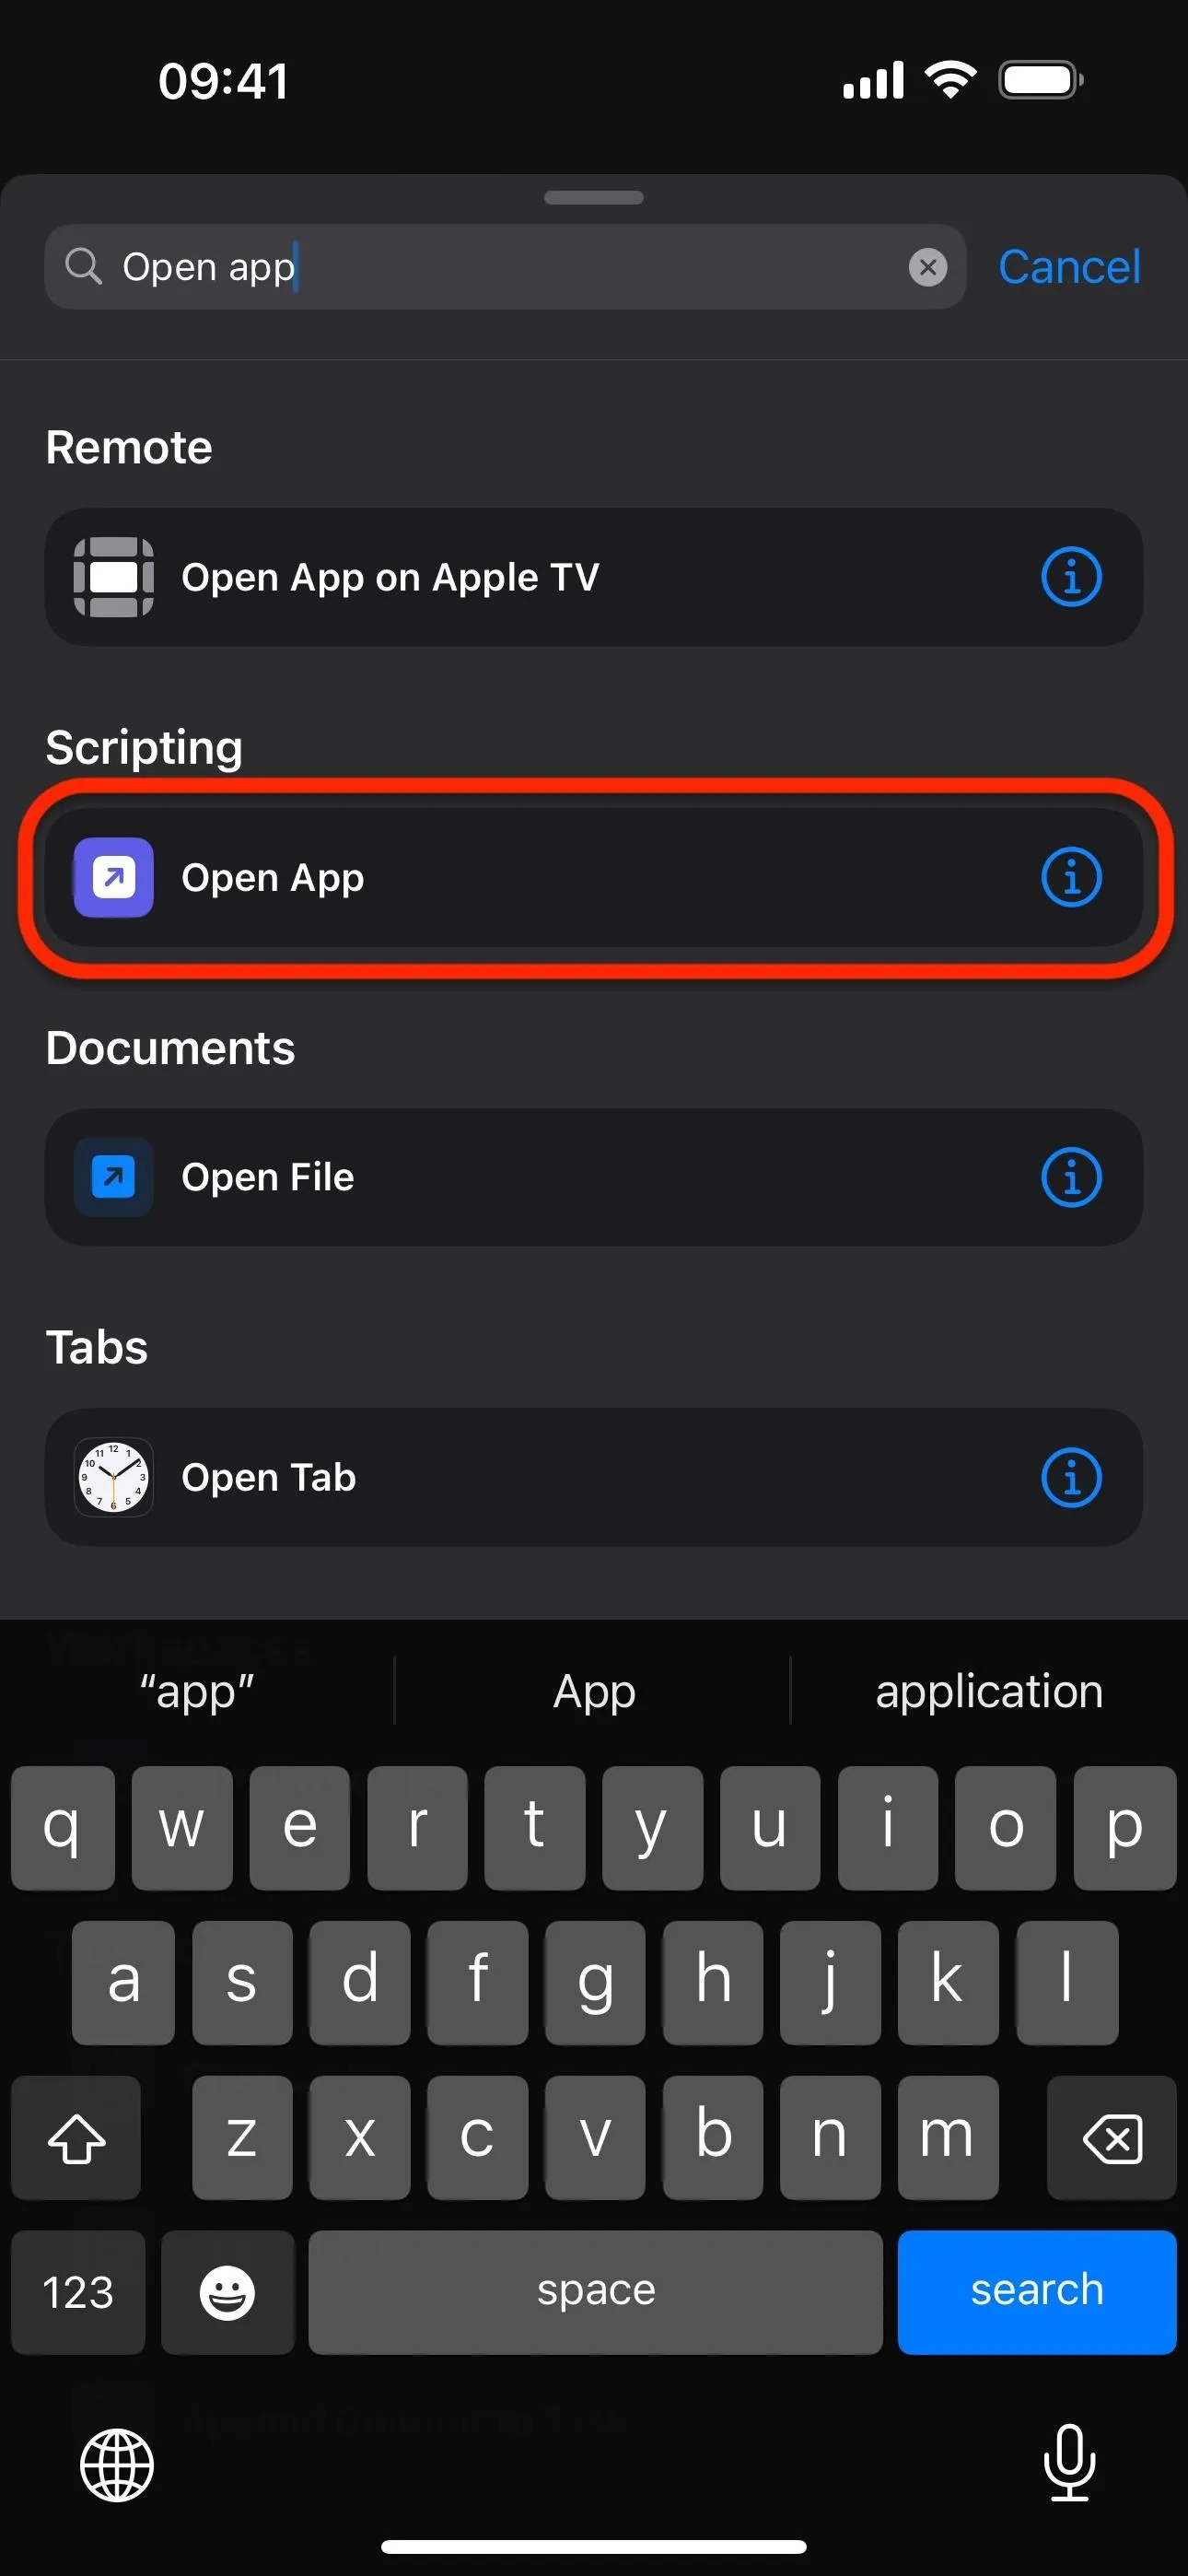
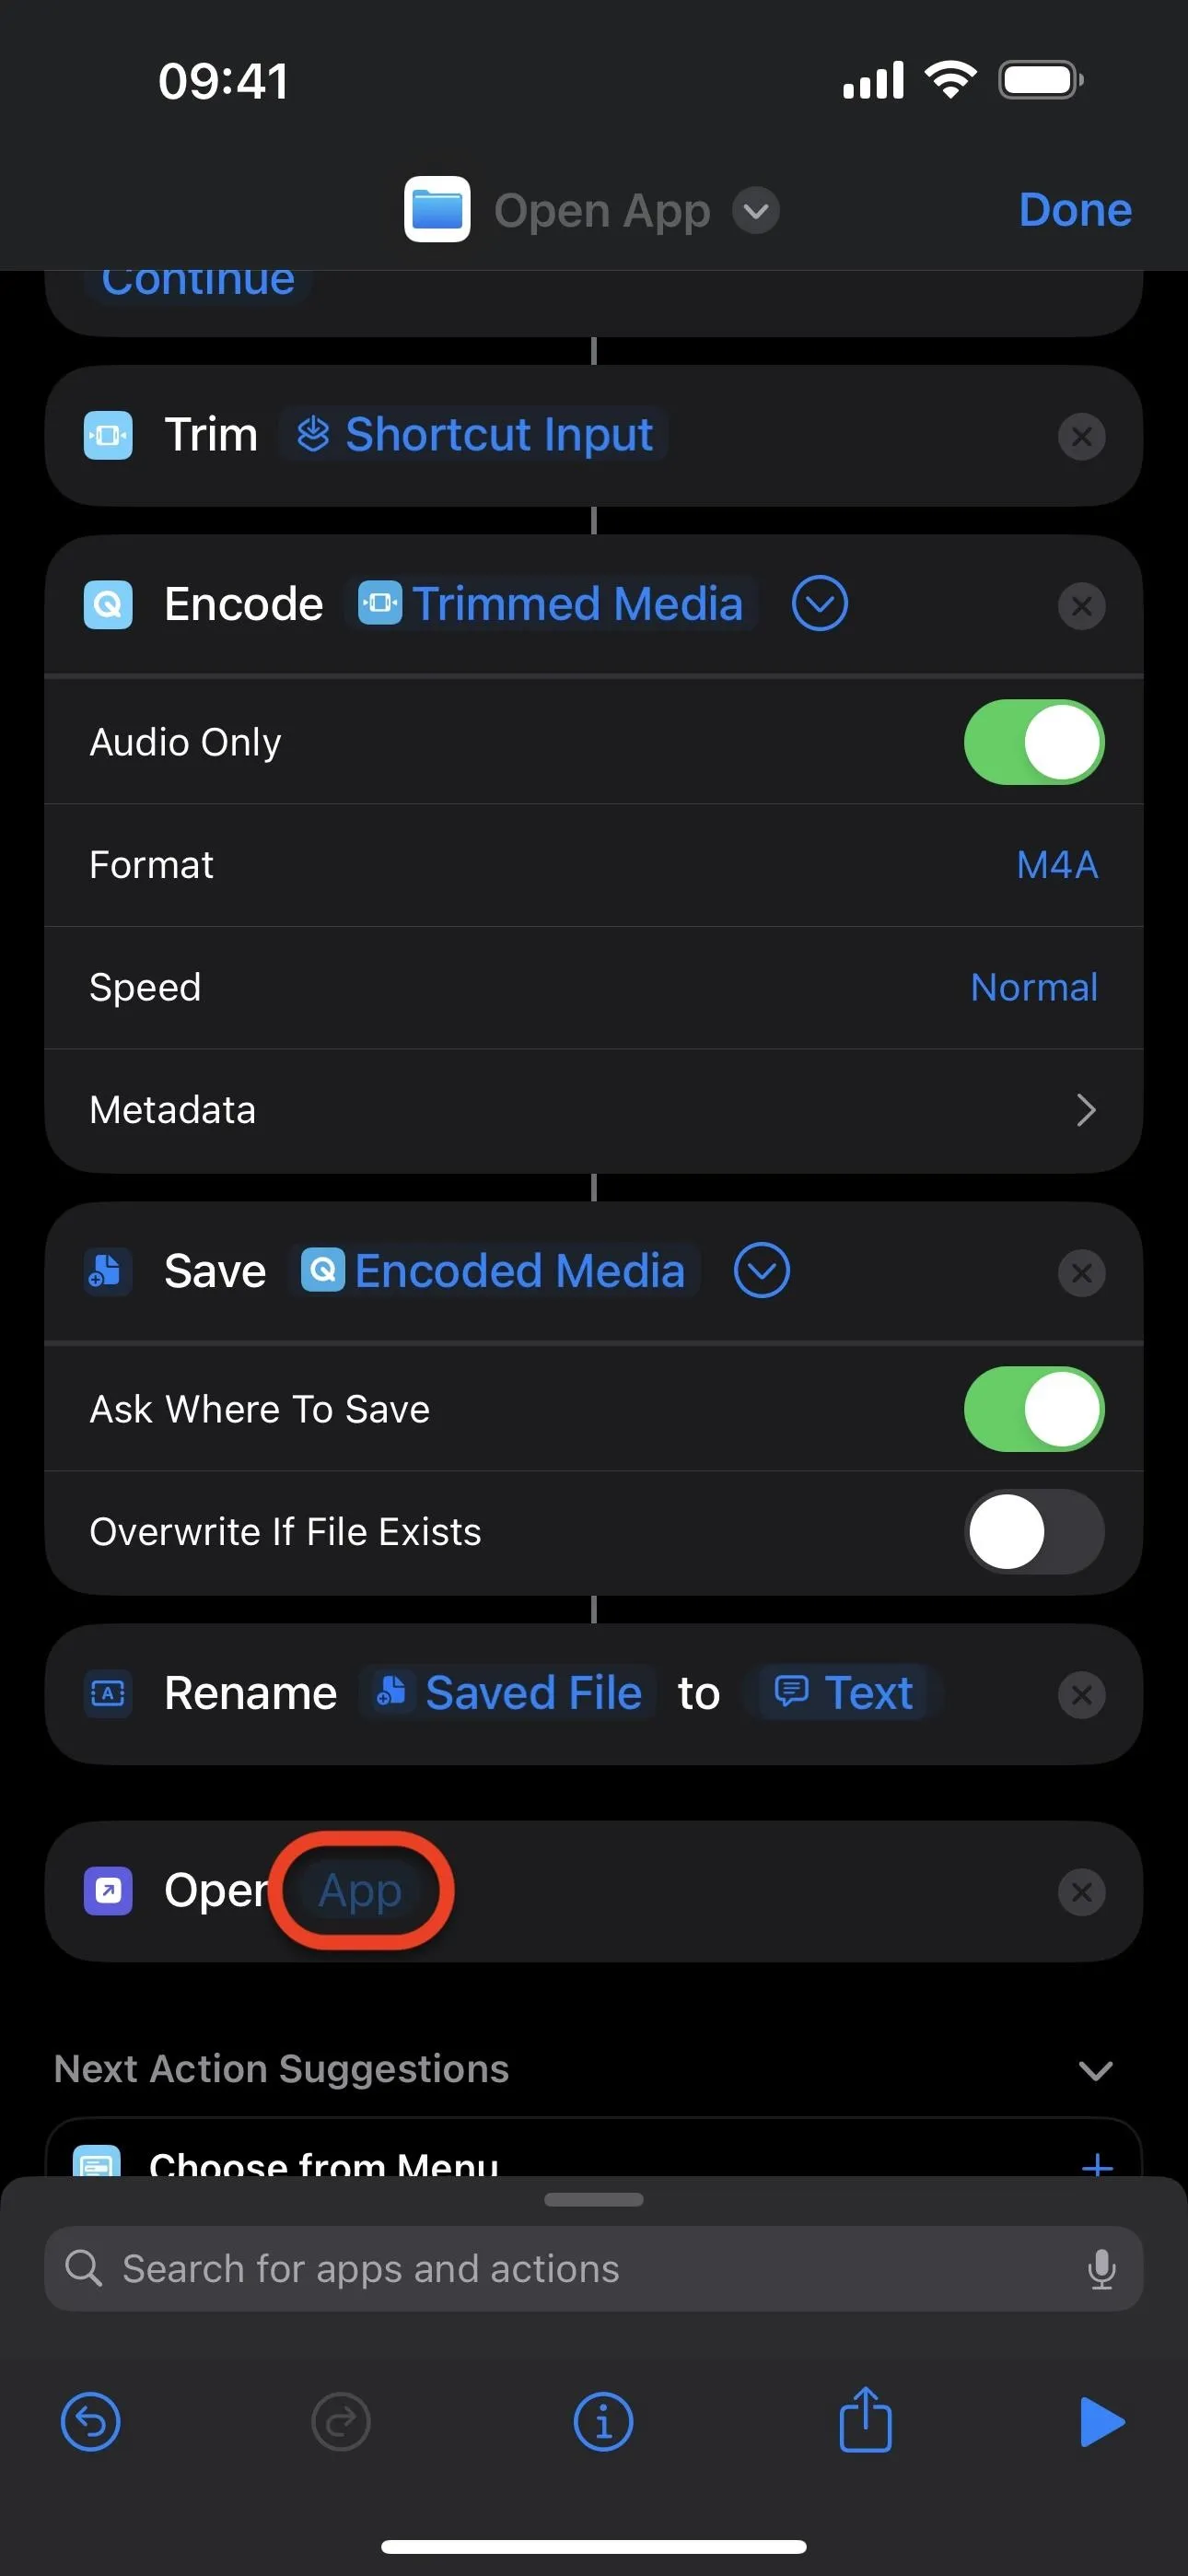
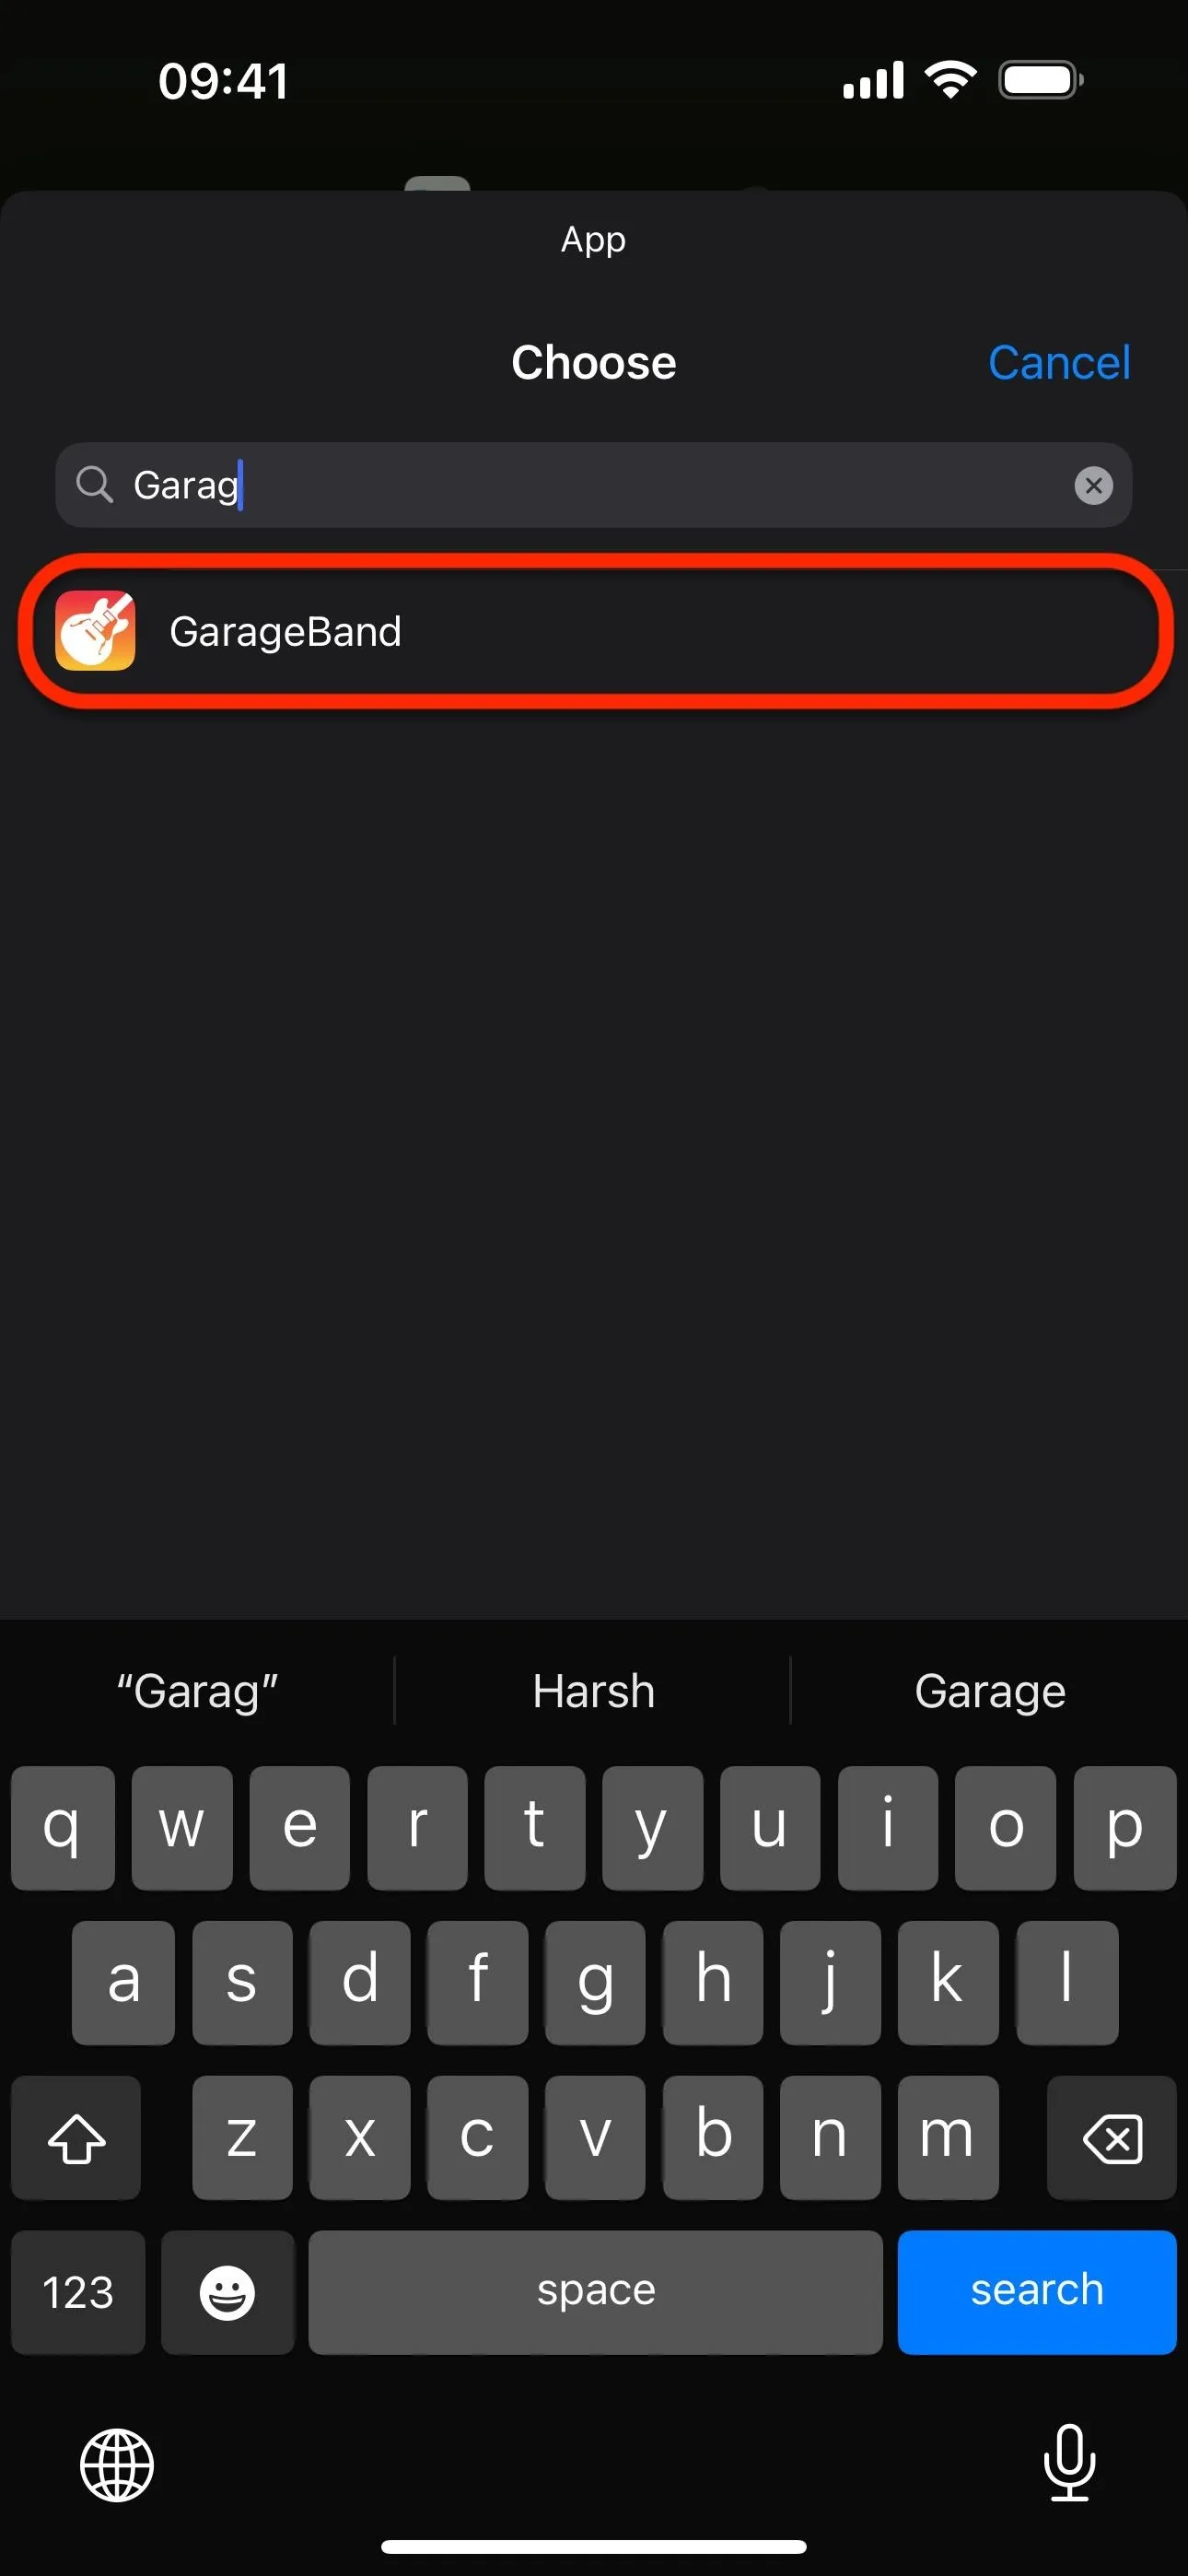
Tap the search bar one last time and find and select the "Open App" action. Tap "App" next to open in the action box, then find and select "GarageBand."
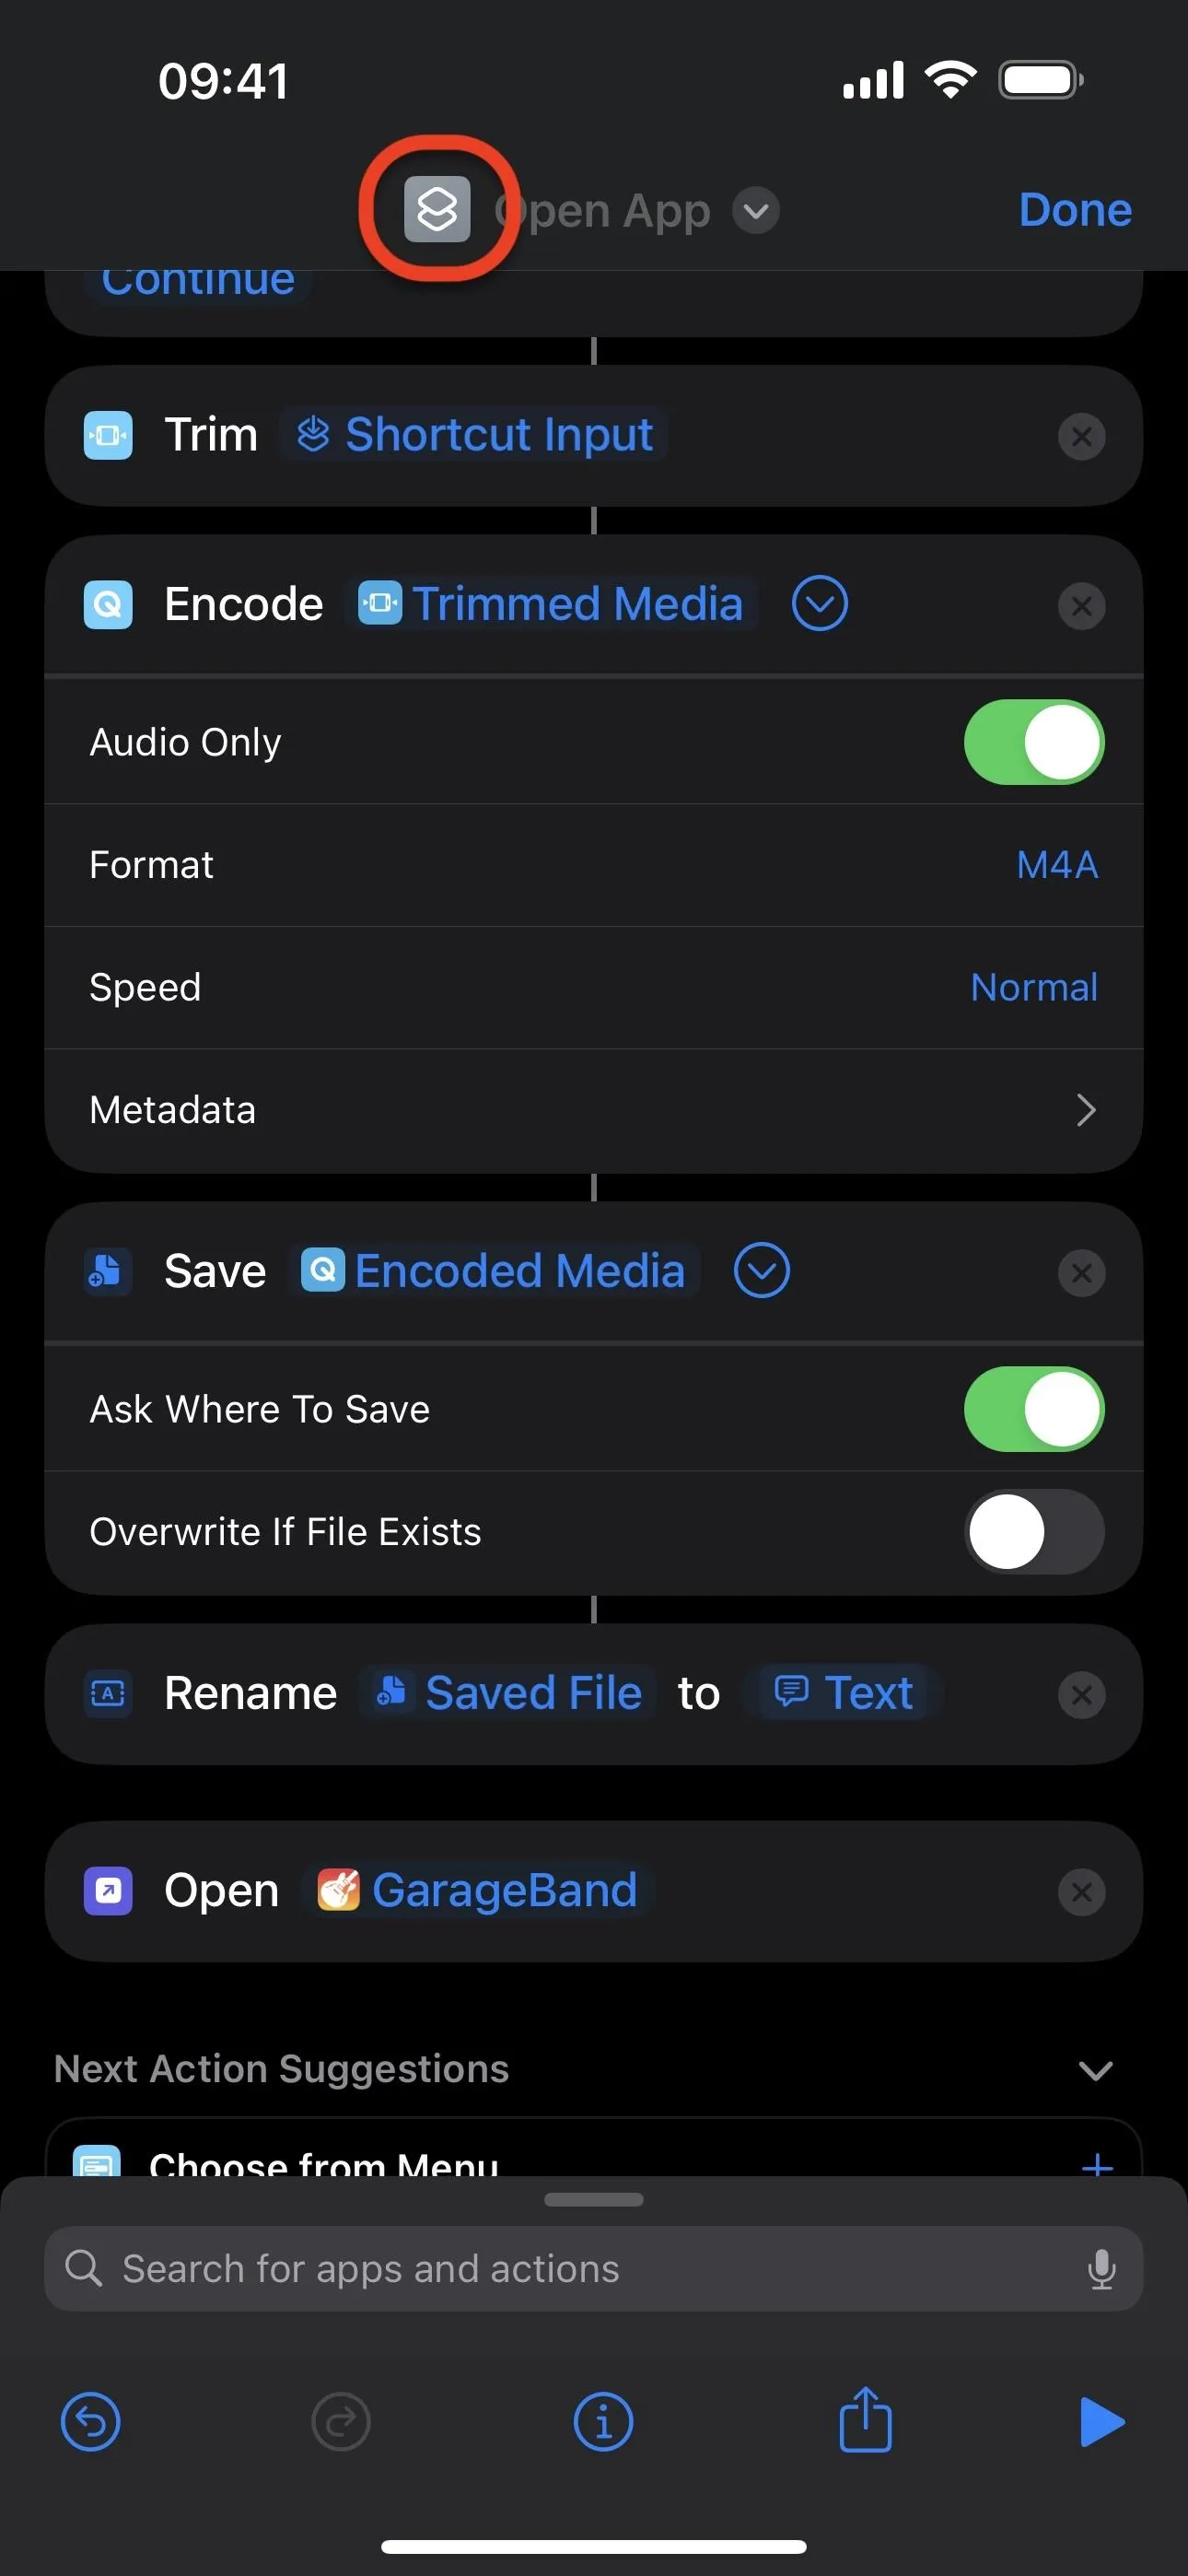
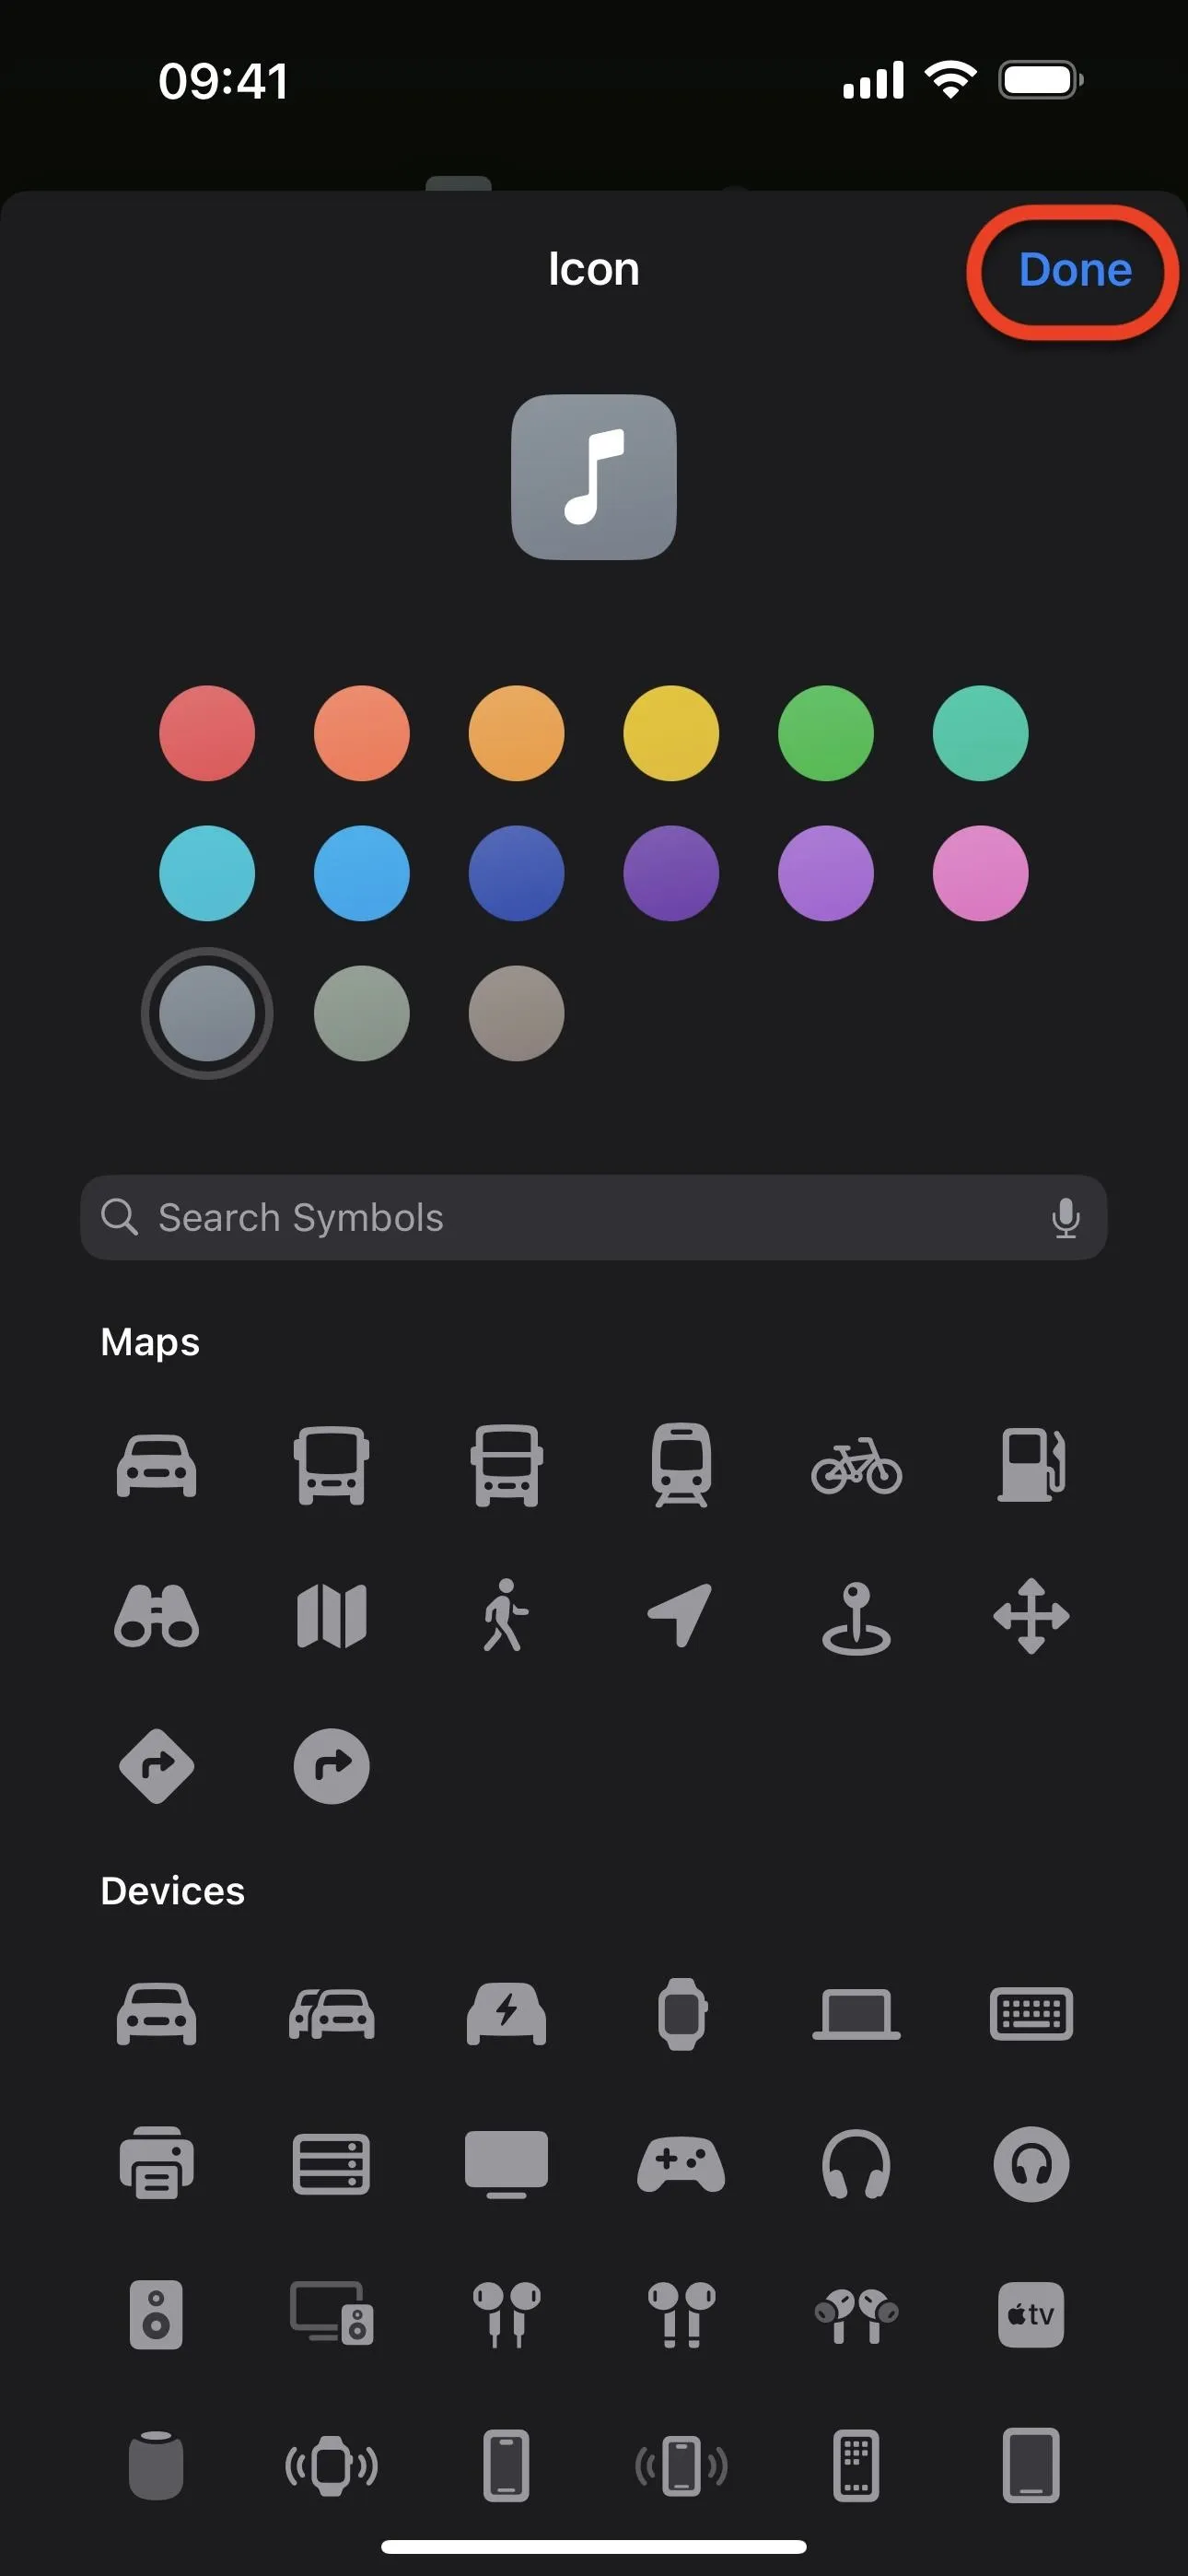
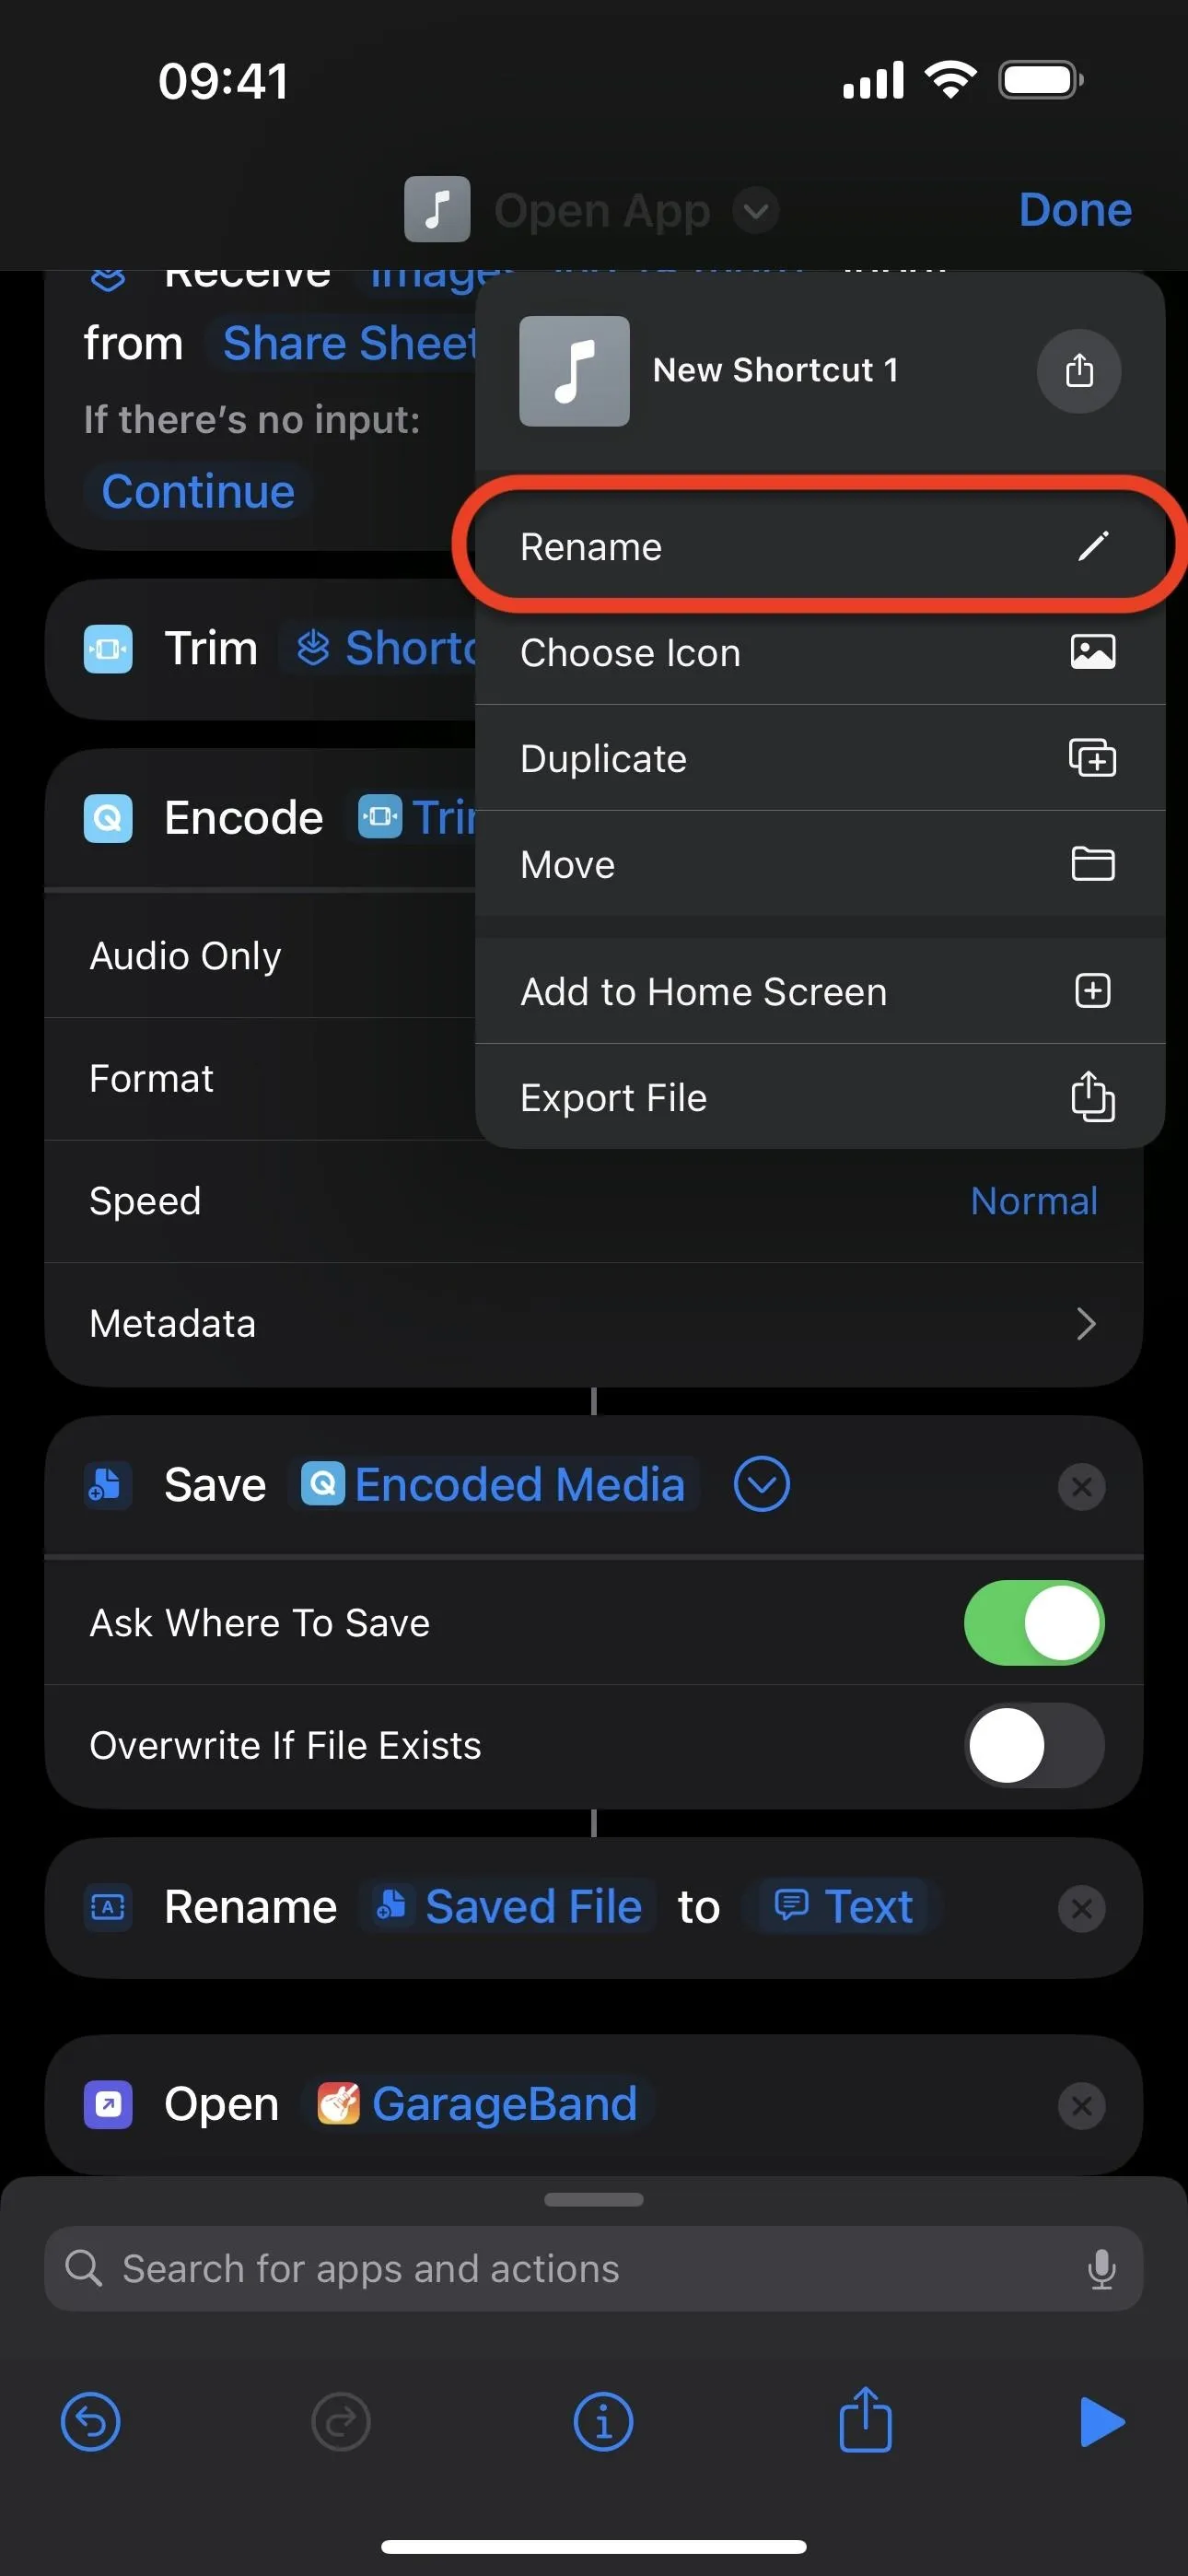
For the finishing touches, tap your shortcut's icon at the top to bring up the icon picker, then select your desired symbol and color. Tap "Done" to save it.
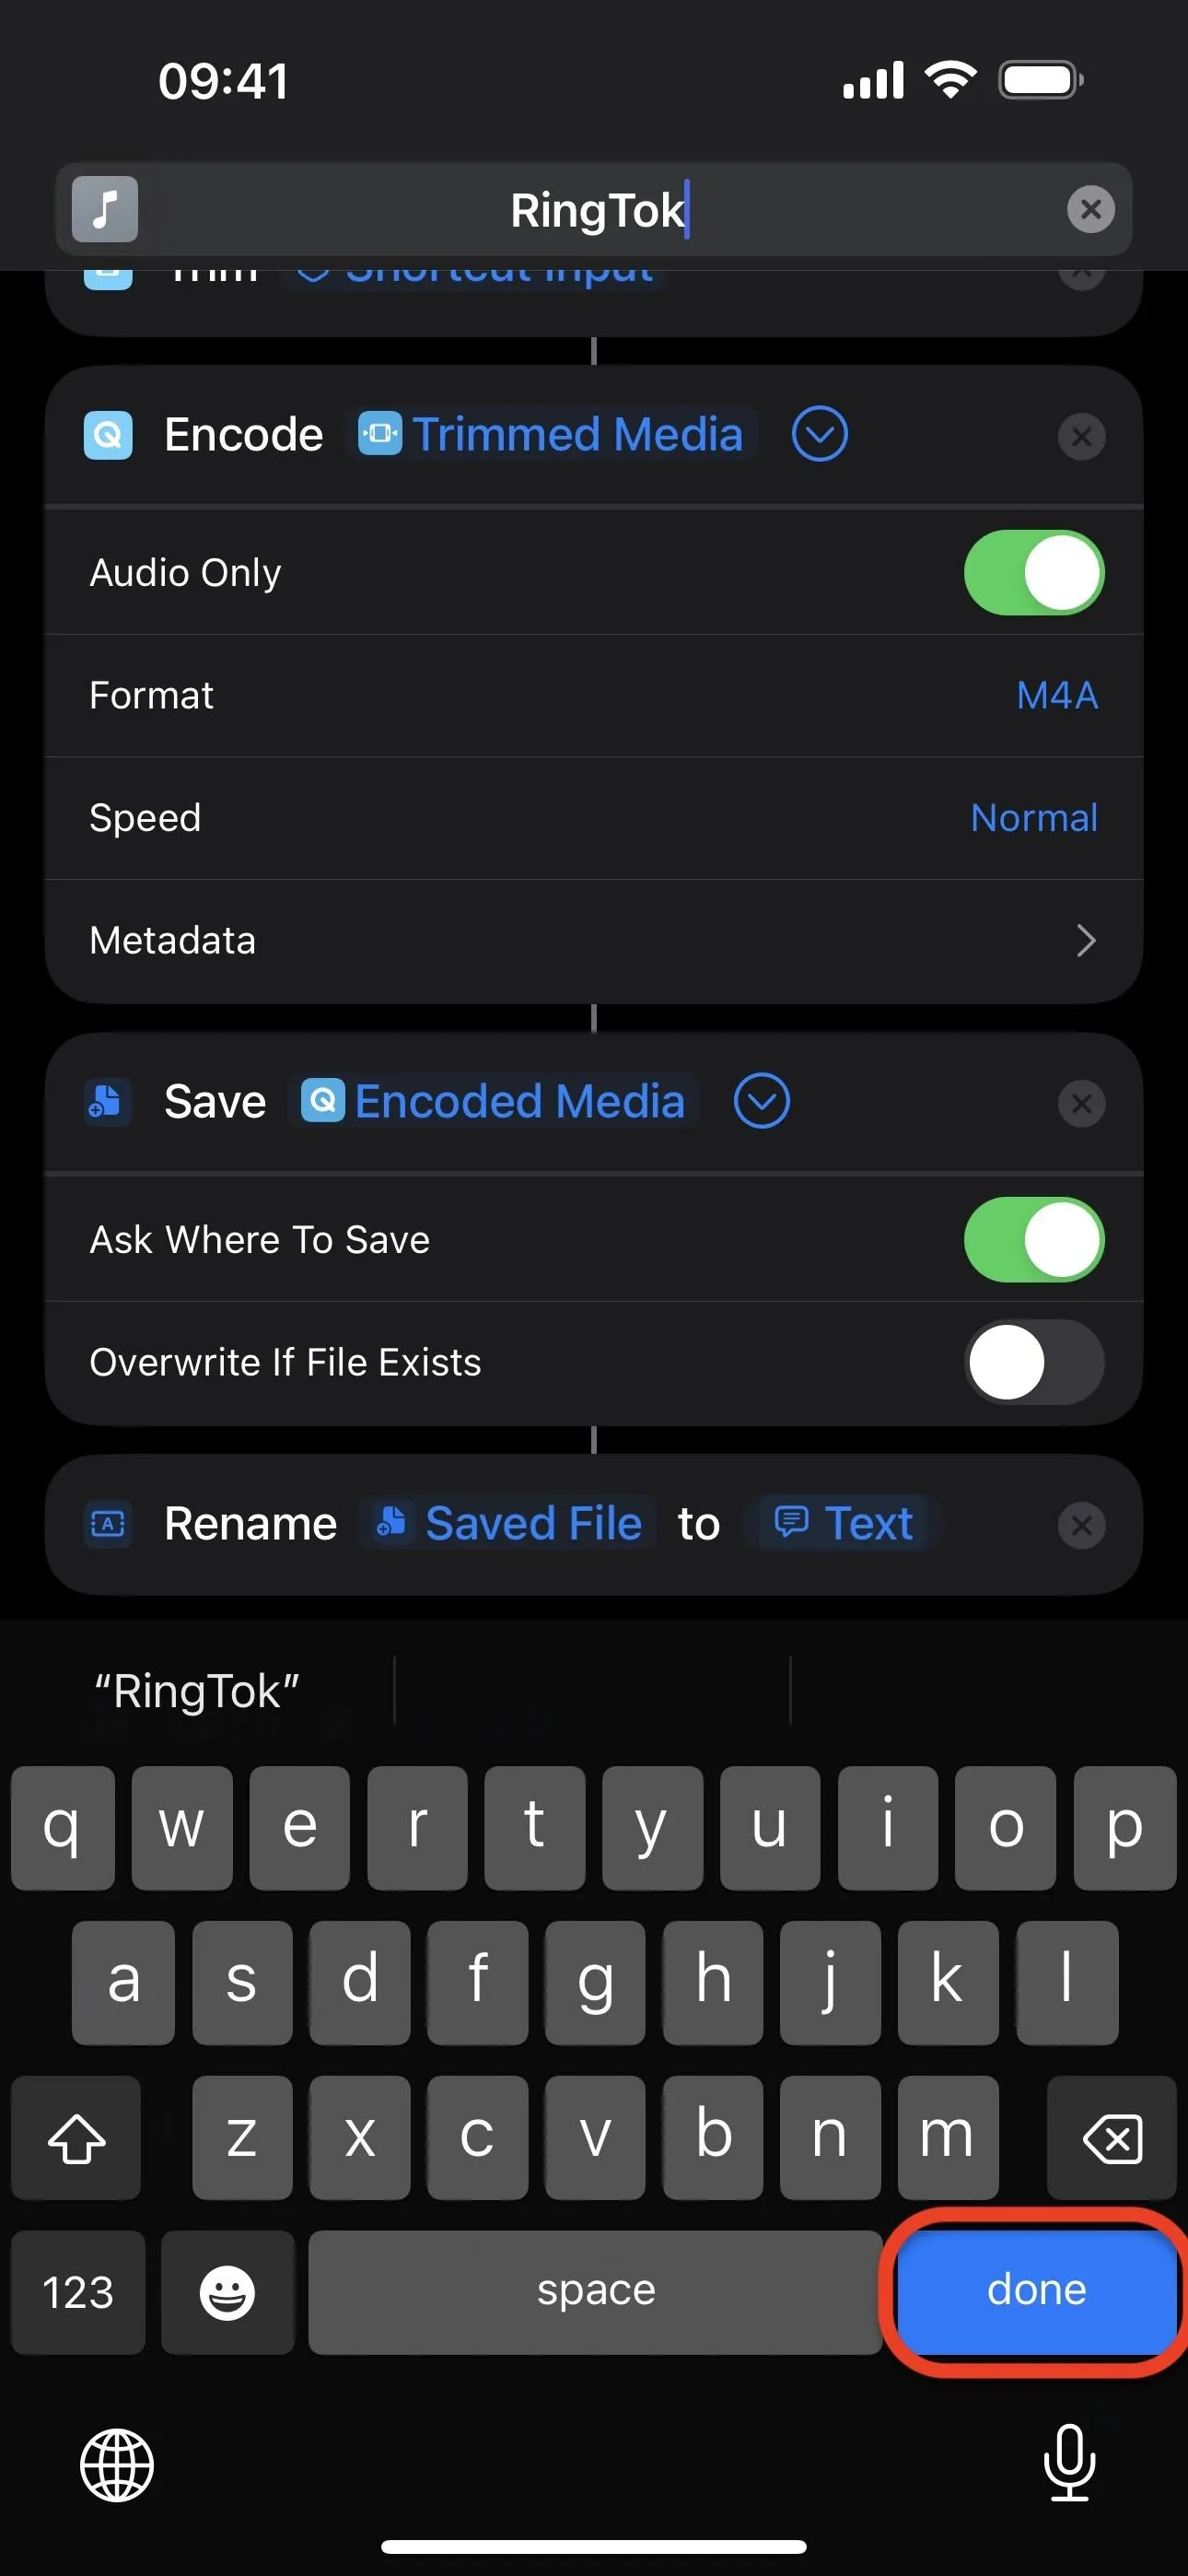
Next, tap the name next to the icon, choose "Rename," and change it to something like "RingTok" so it's easily identifiable in the Shortcuts list and Share Sheet. Tap "Done" on the keyboard to save it, then hit "Done" again to save your entire workflow.
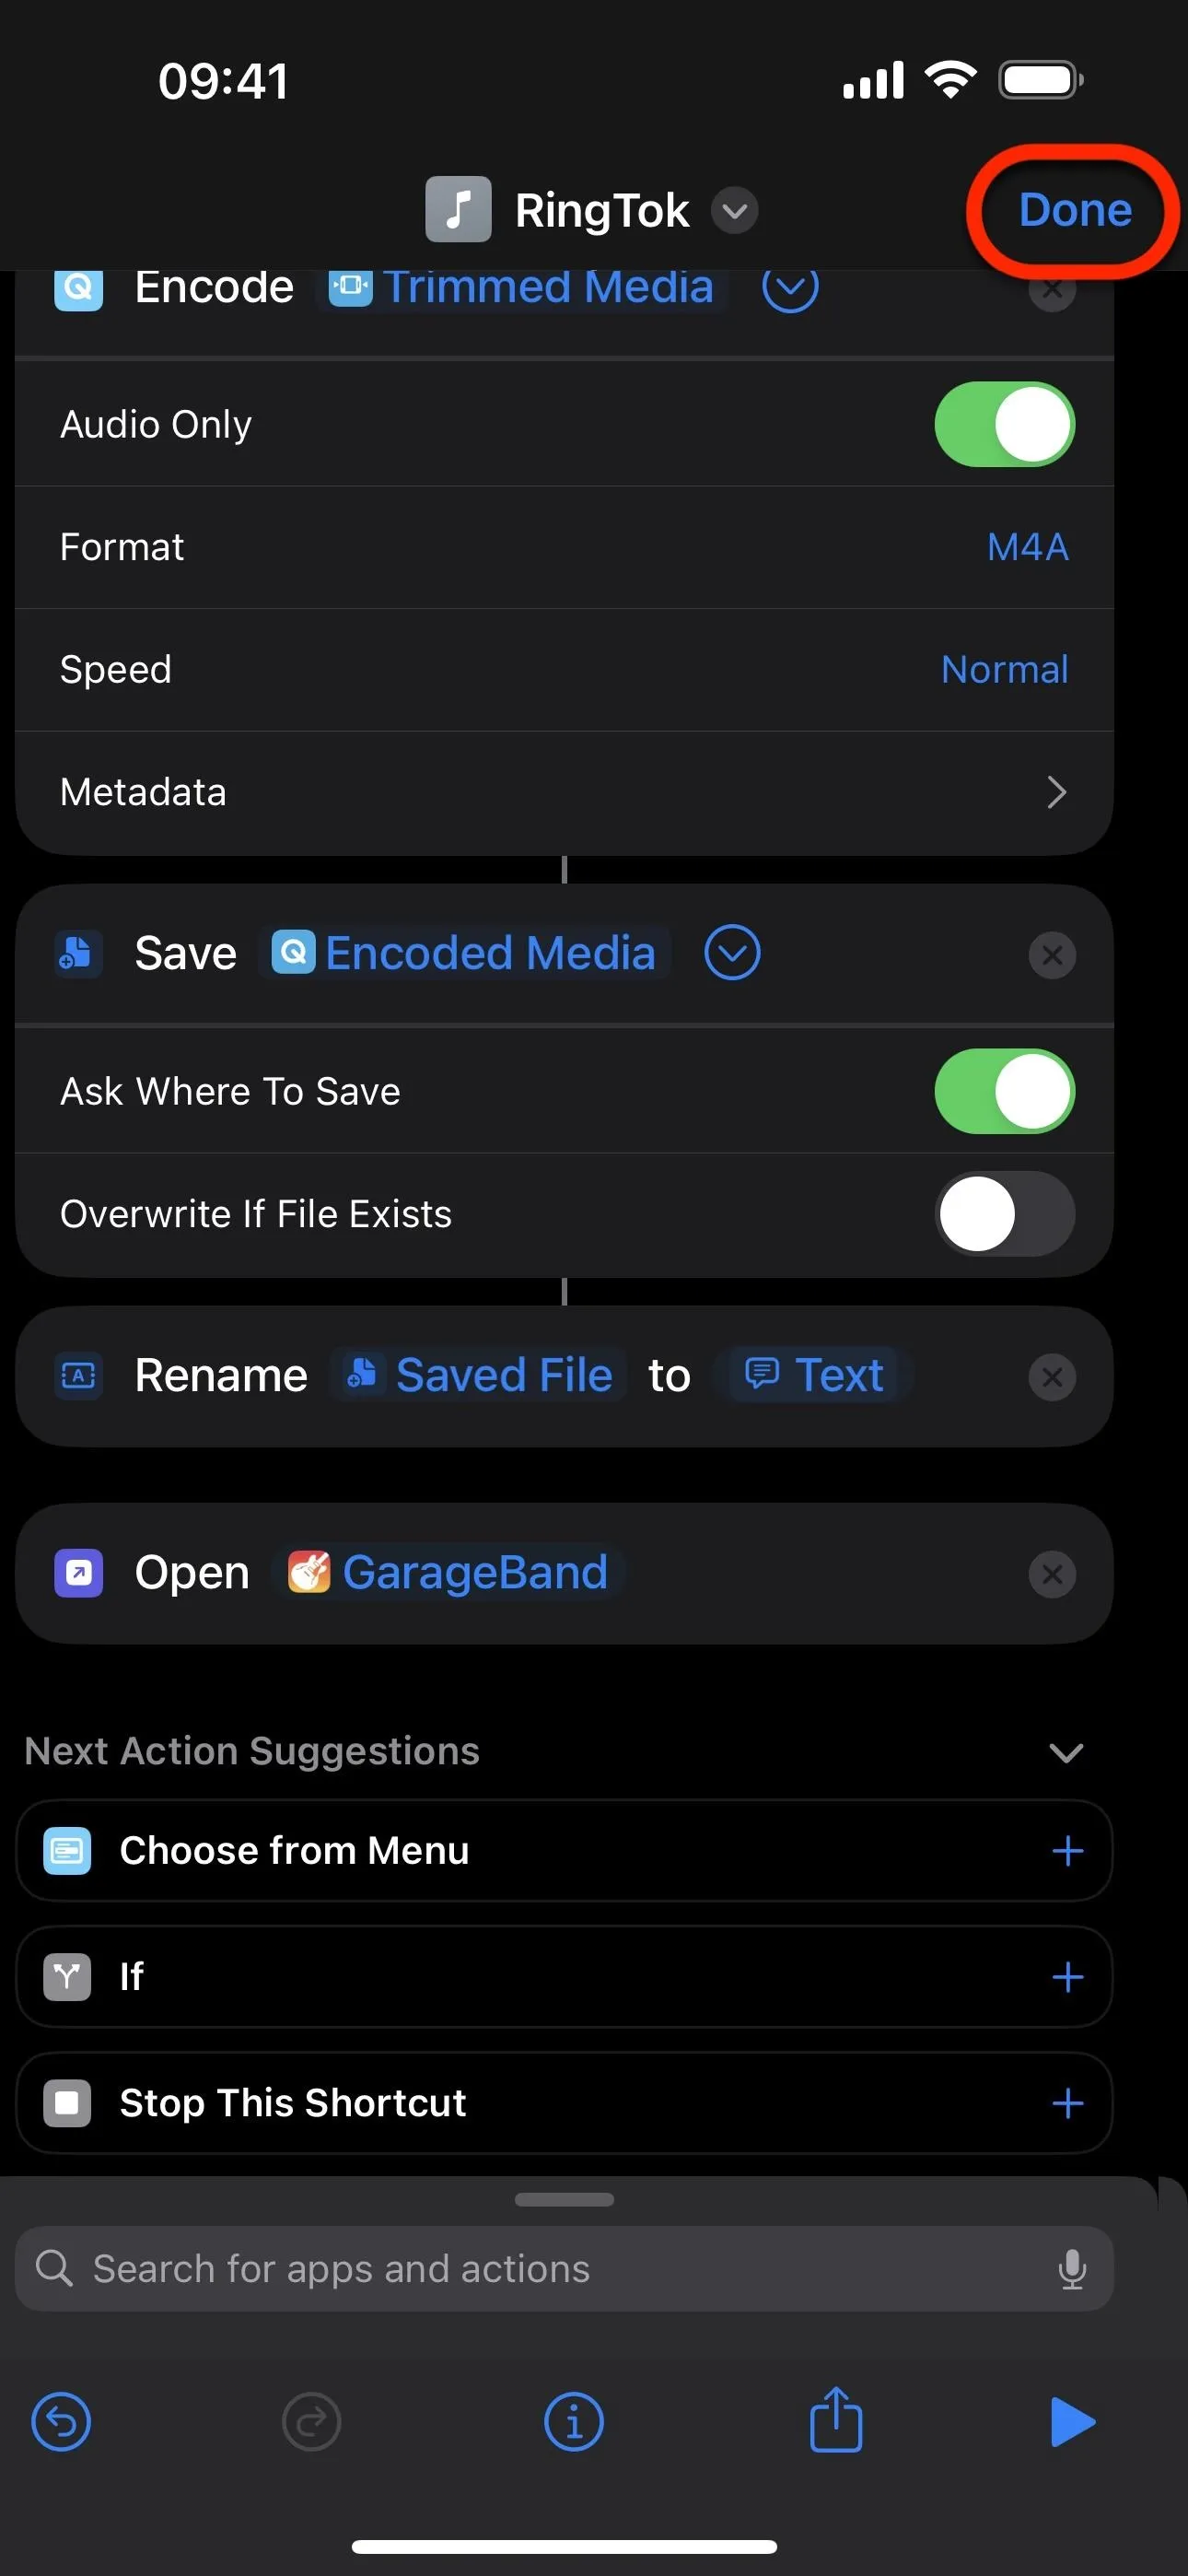
That's it! That's all the steps needed so the shortcut can process a TikTok video into an audio file that can easily be put into GarageBand and converted to a ringtone.
Share a TikTok Video to RingTok
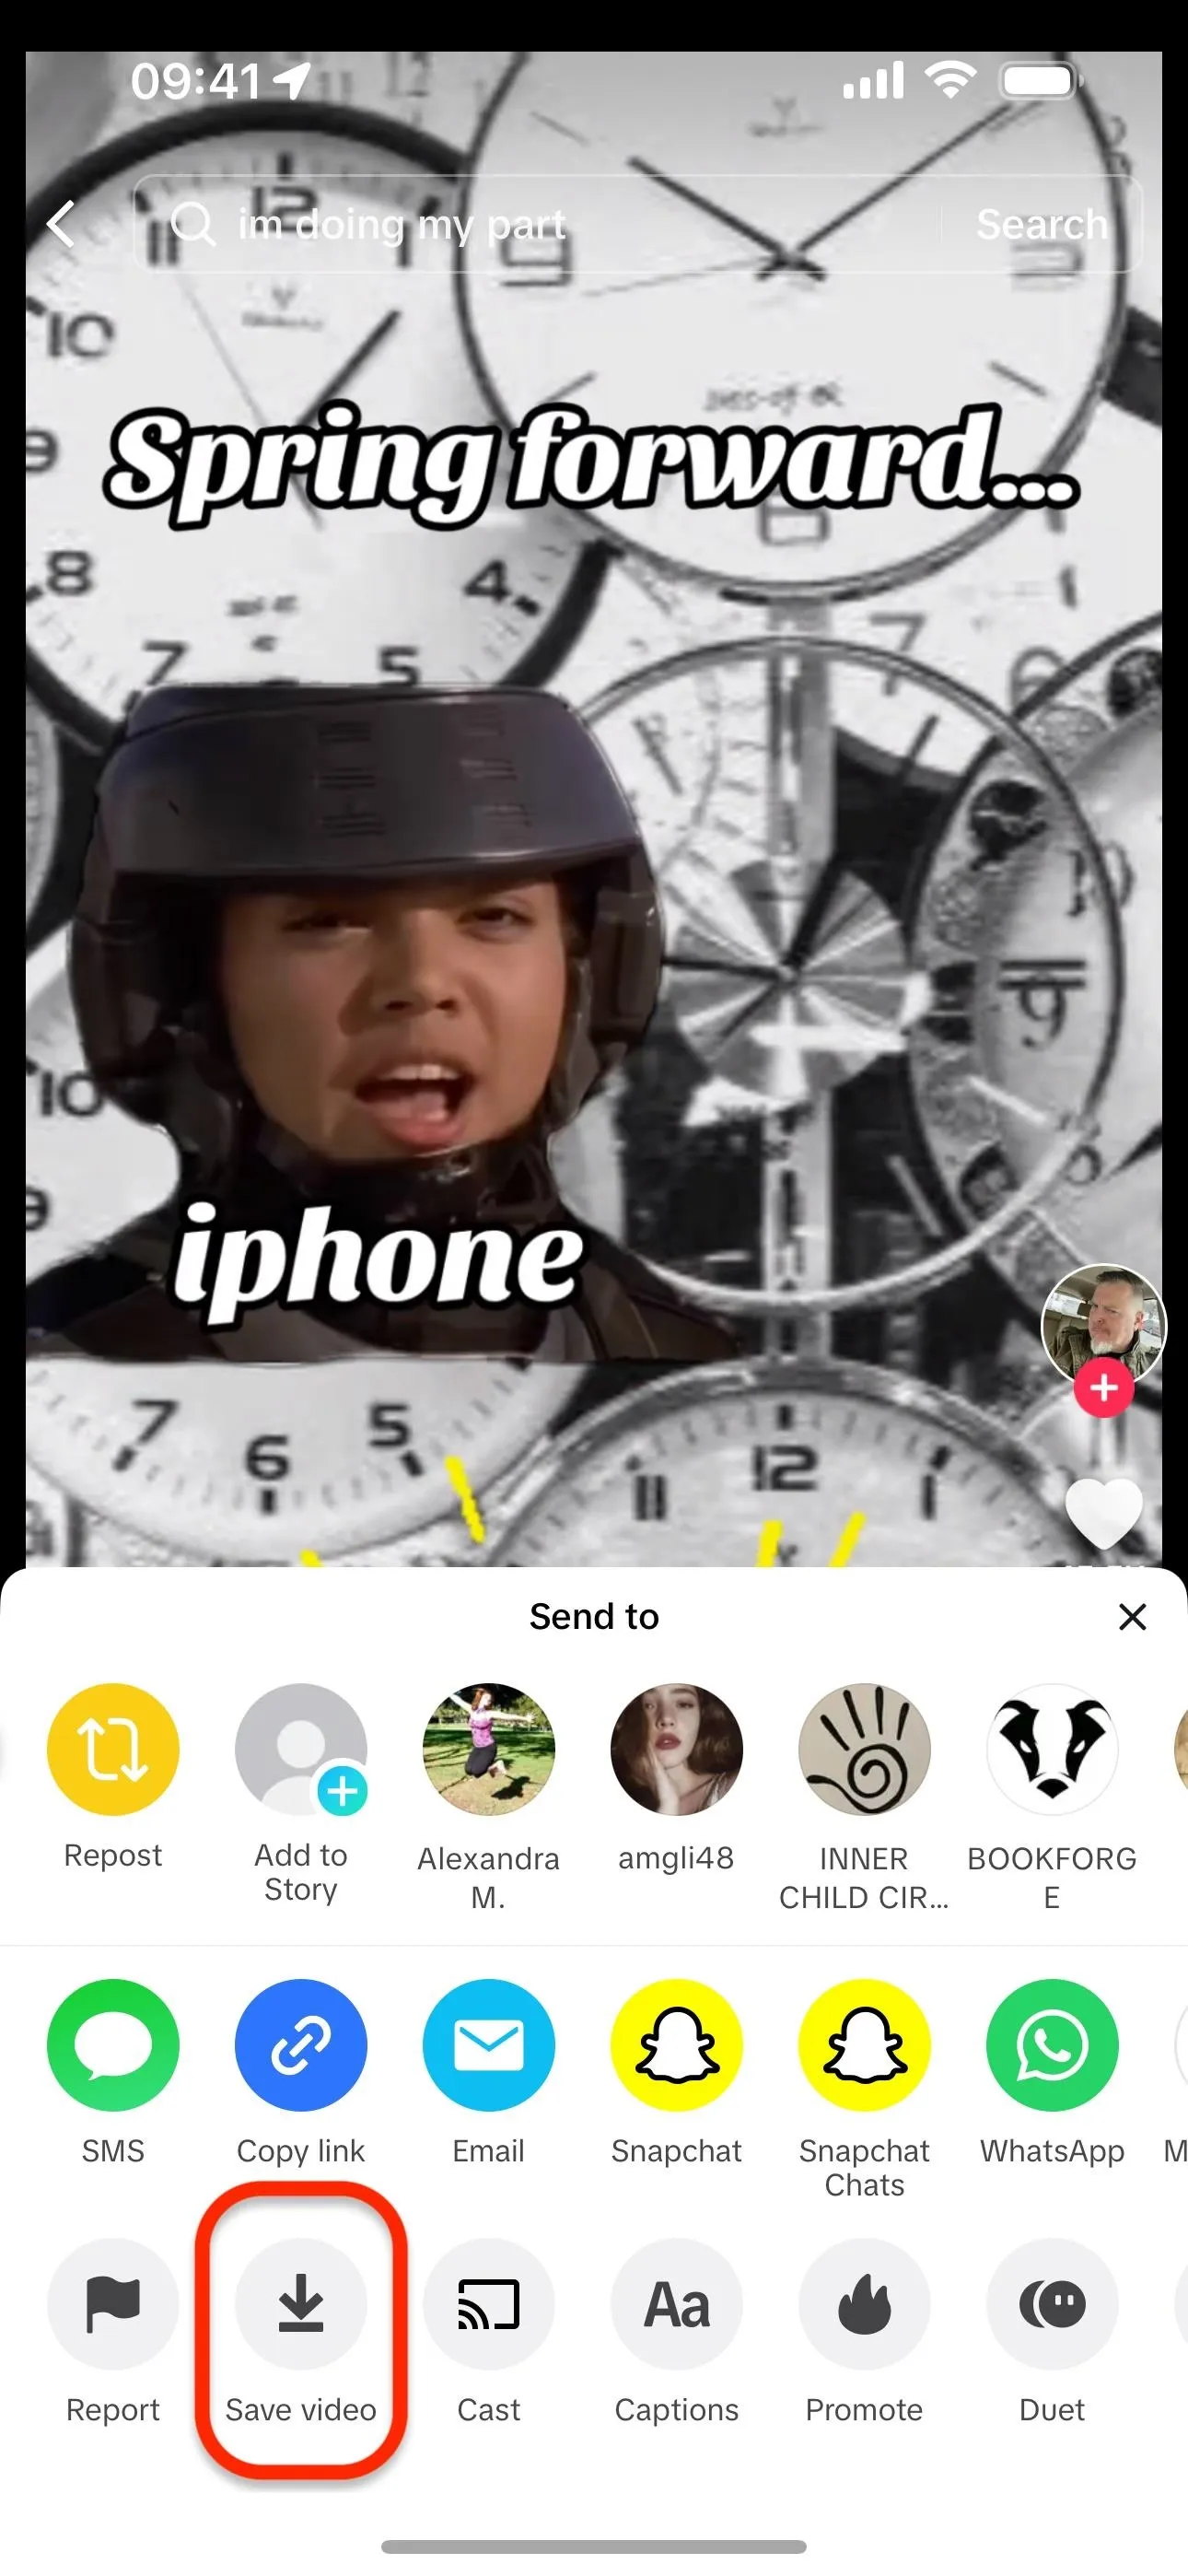
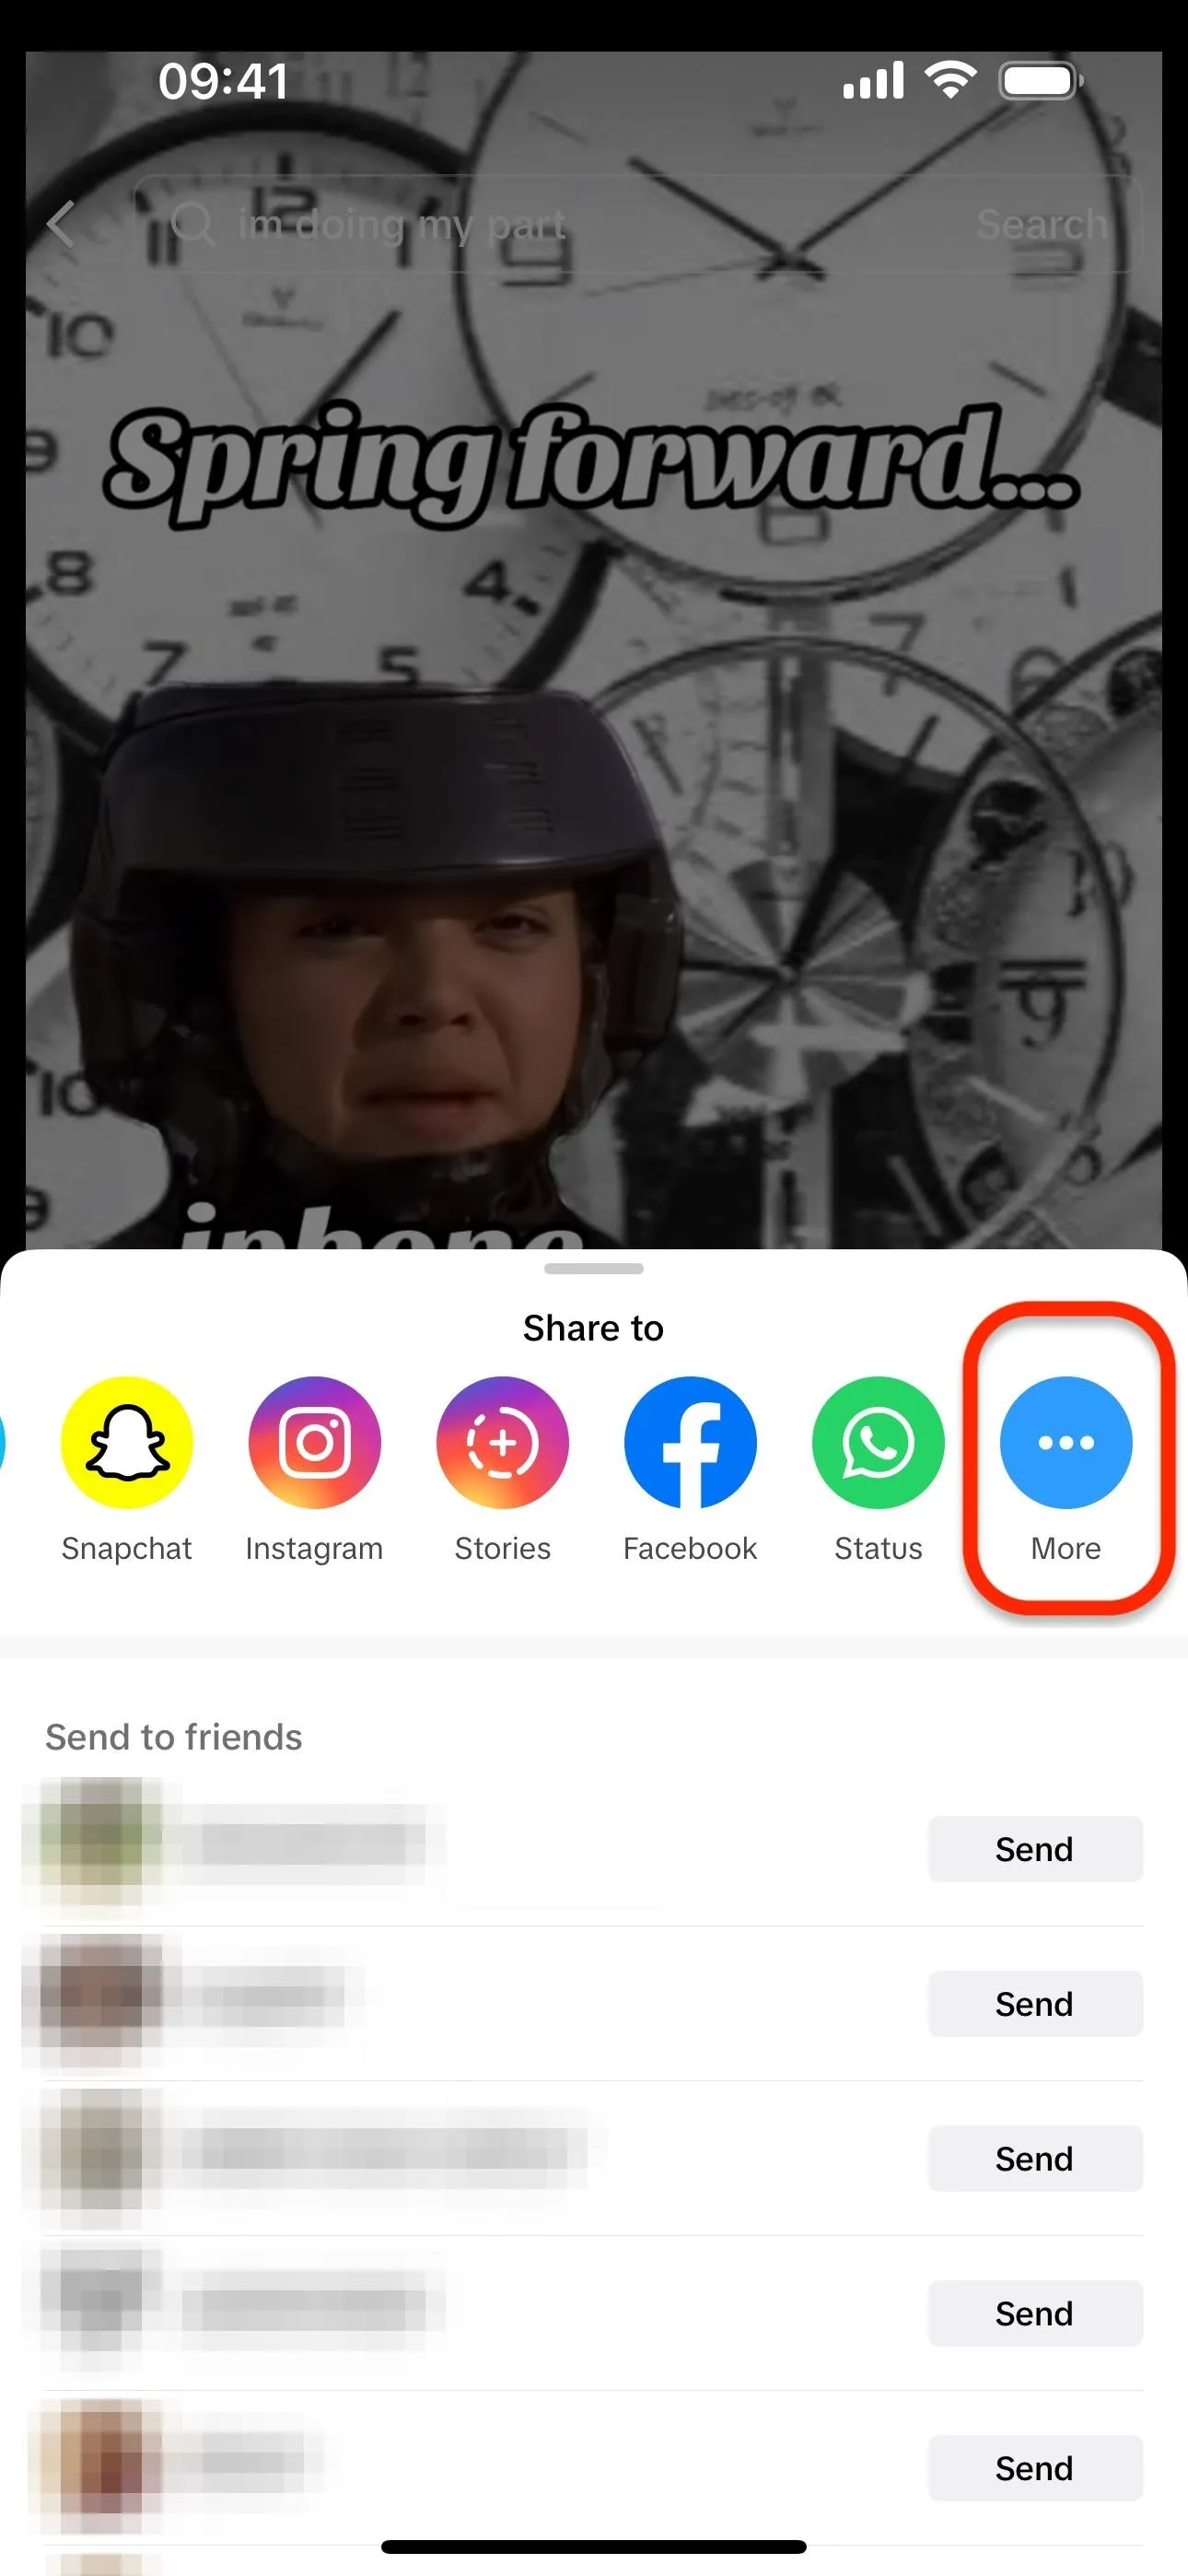
Now, open TikTok and find the video you want to turn into a ringtone. Once you've located a video with a must-use sound bite, hit the share button and select "Save video." Not all videos will have a save option, so if you don't see it, try another video.
Swipe through the apps on the sharing menu to get to "More," and tap it. On the share sheet, find and select "RingTok" (or whatever you named it).
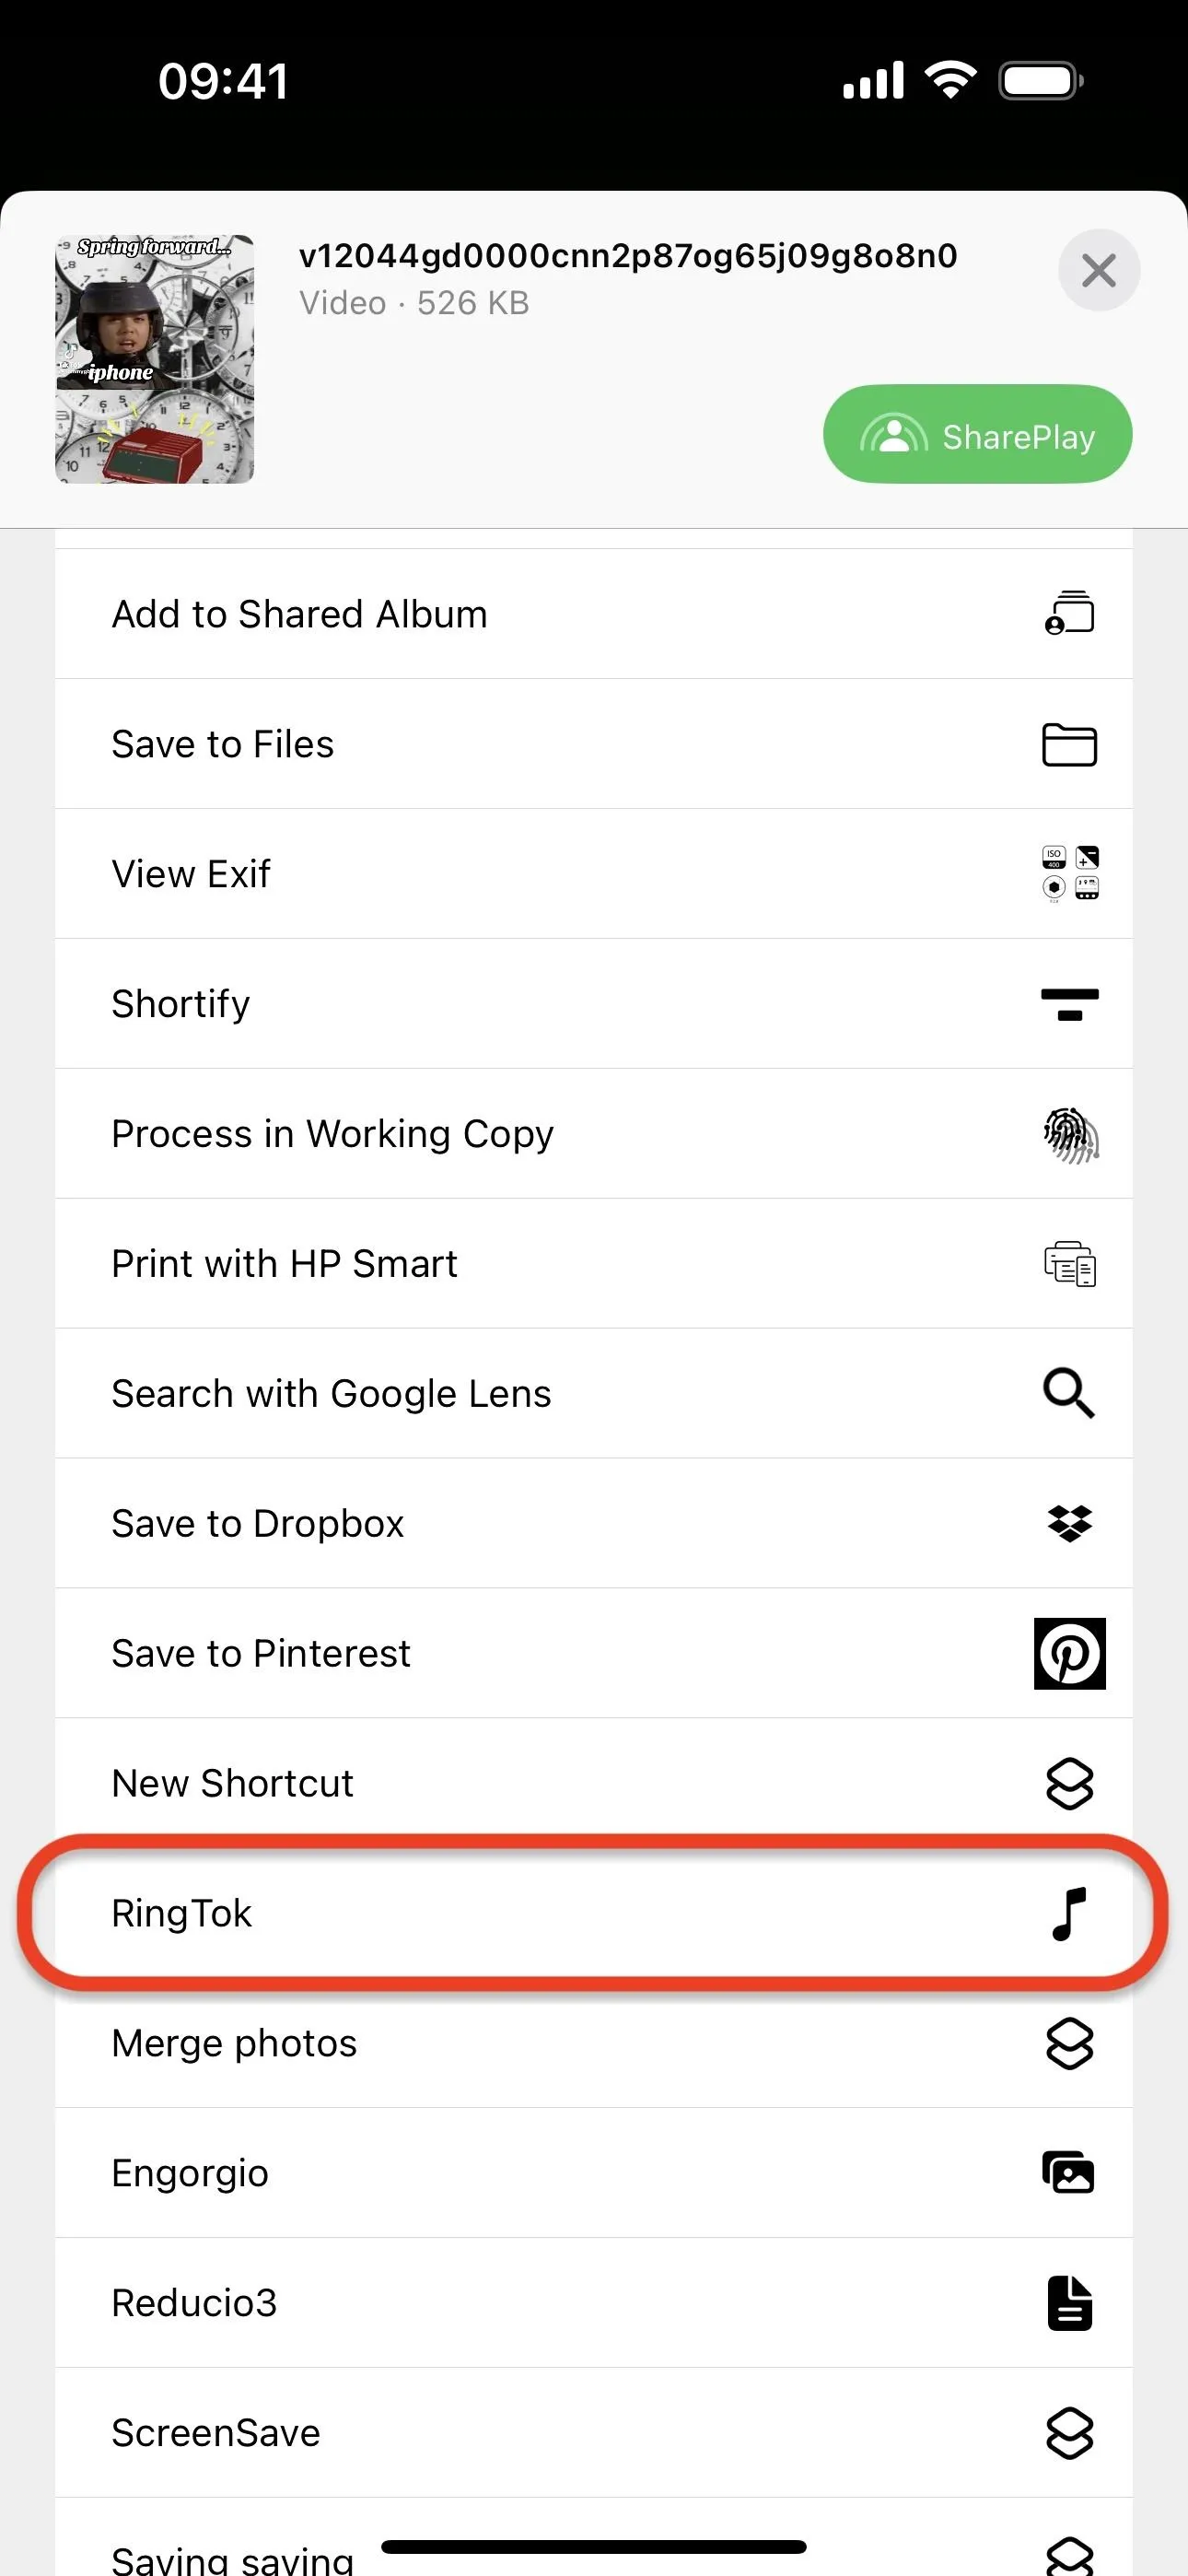
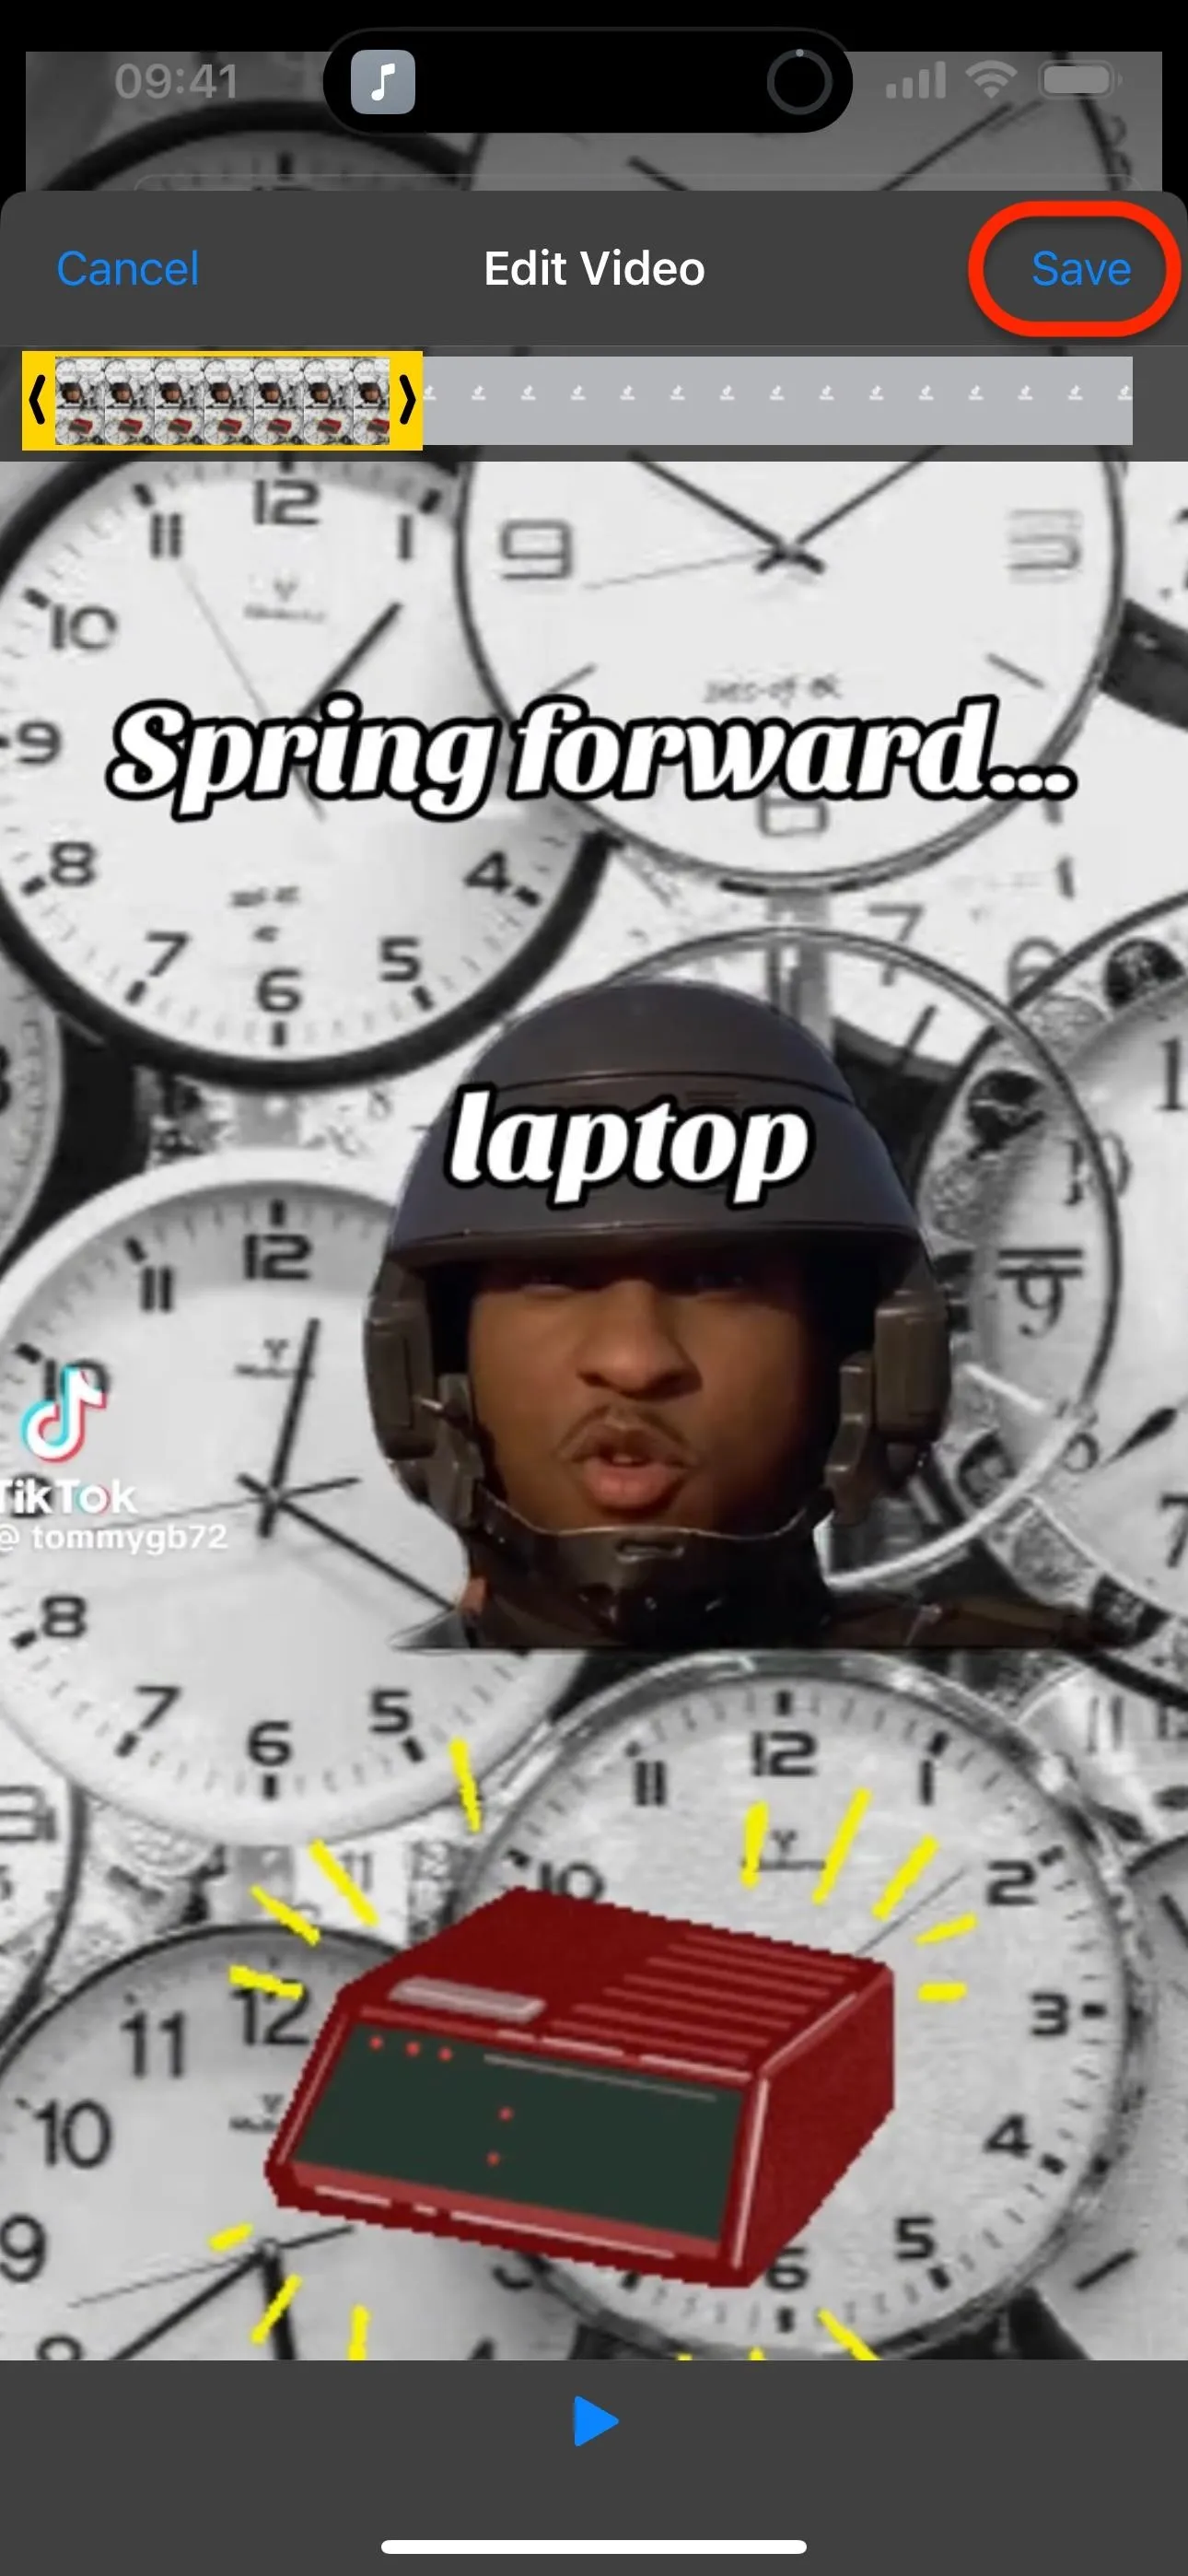
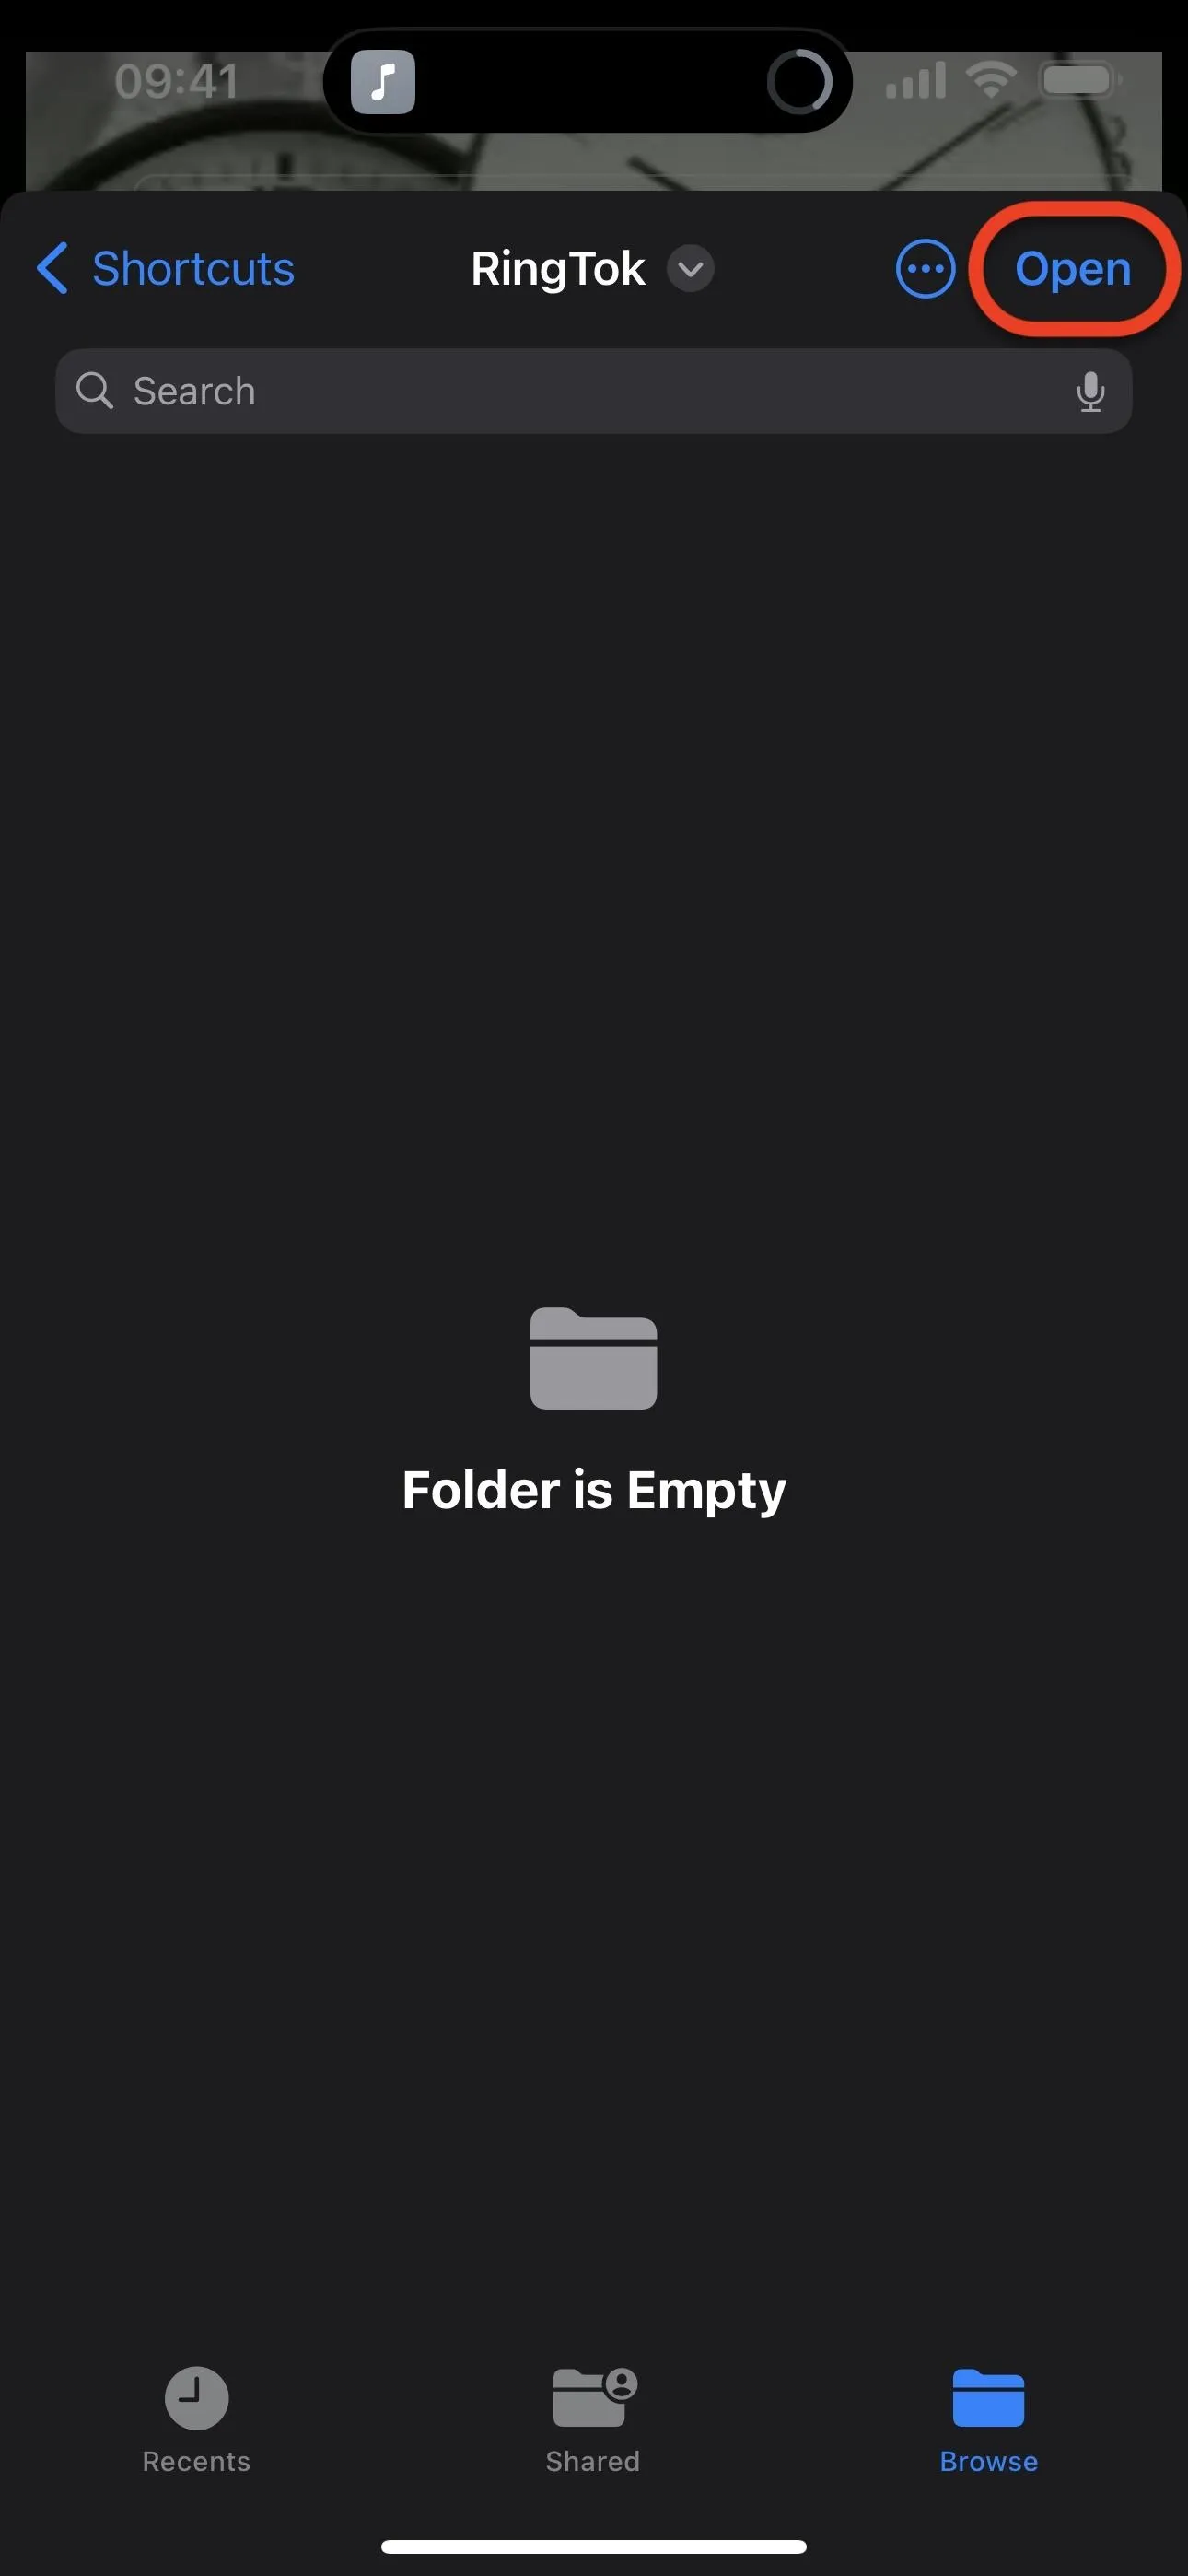
Once you do so, the workflow will run. You'll first be prompted to trim the video, so cut it as necessary and hit "Save." Next, you'll be asked to select a place to save the audio in the Files app (I created a "RingTok" folder in Shortcuts on iCloud Drive).
Tap "Open" after selecting the save location, then type in a name for the audio file to easily find it later. If it asks to allow RingTok to rename a file, choose "Always Allow." Lastly, tap "Done," and GarageBand will open.
Note that you will also have a saved copy of the complete TikTok video in your Photos app. If you want to auto-delete it after saving the audio file, return to Step 1 and add the "Get Latest Videos" action to the end of your shortcut, ensuring it's set to "1 video." Then, add the "Delete Photos" action and save the workflow.
Use GarageBand to Make the Ringtone
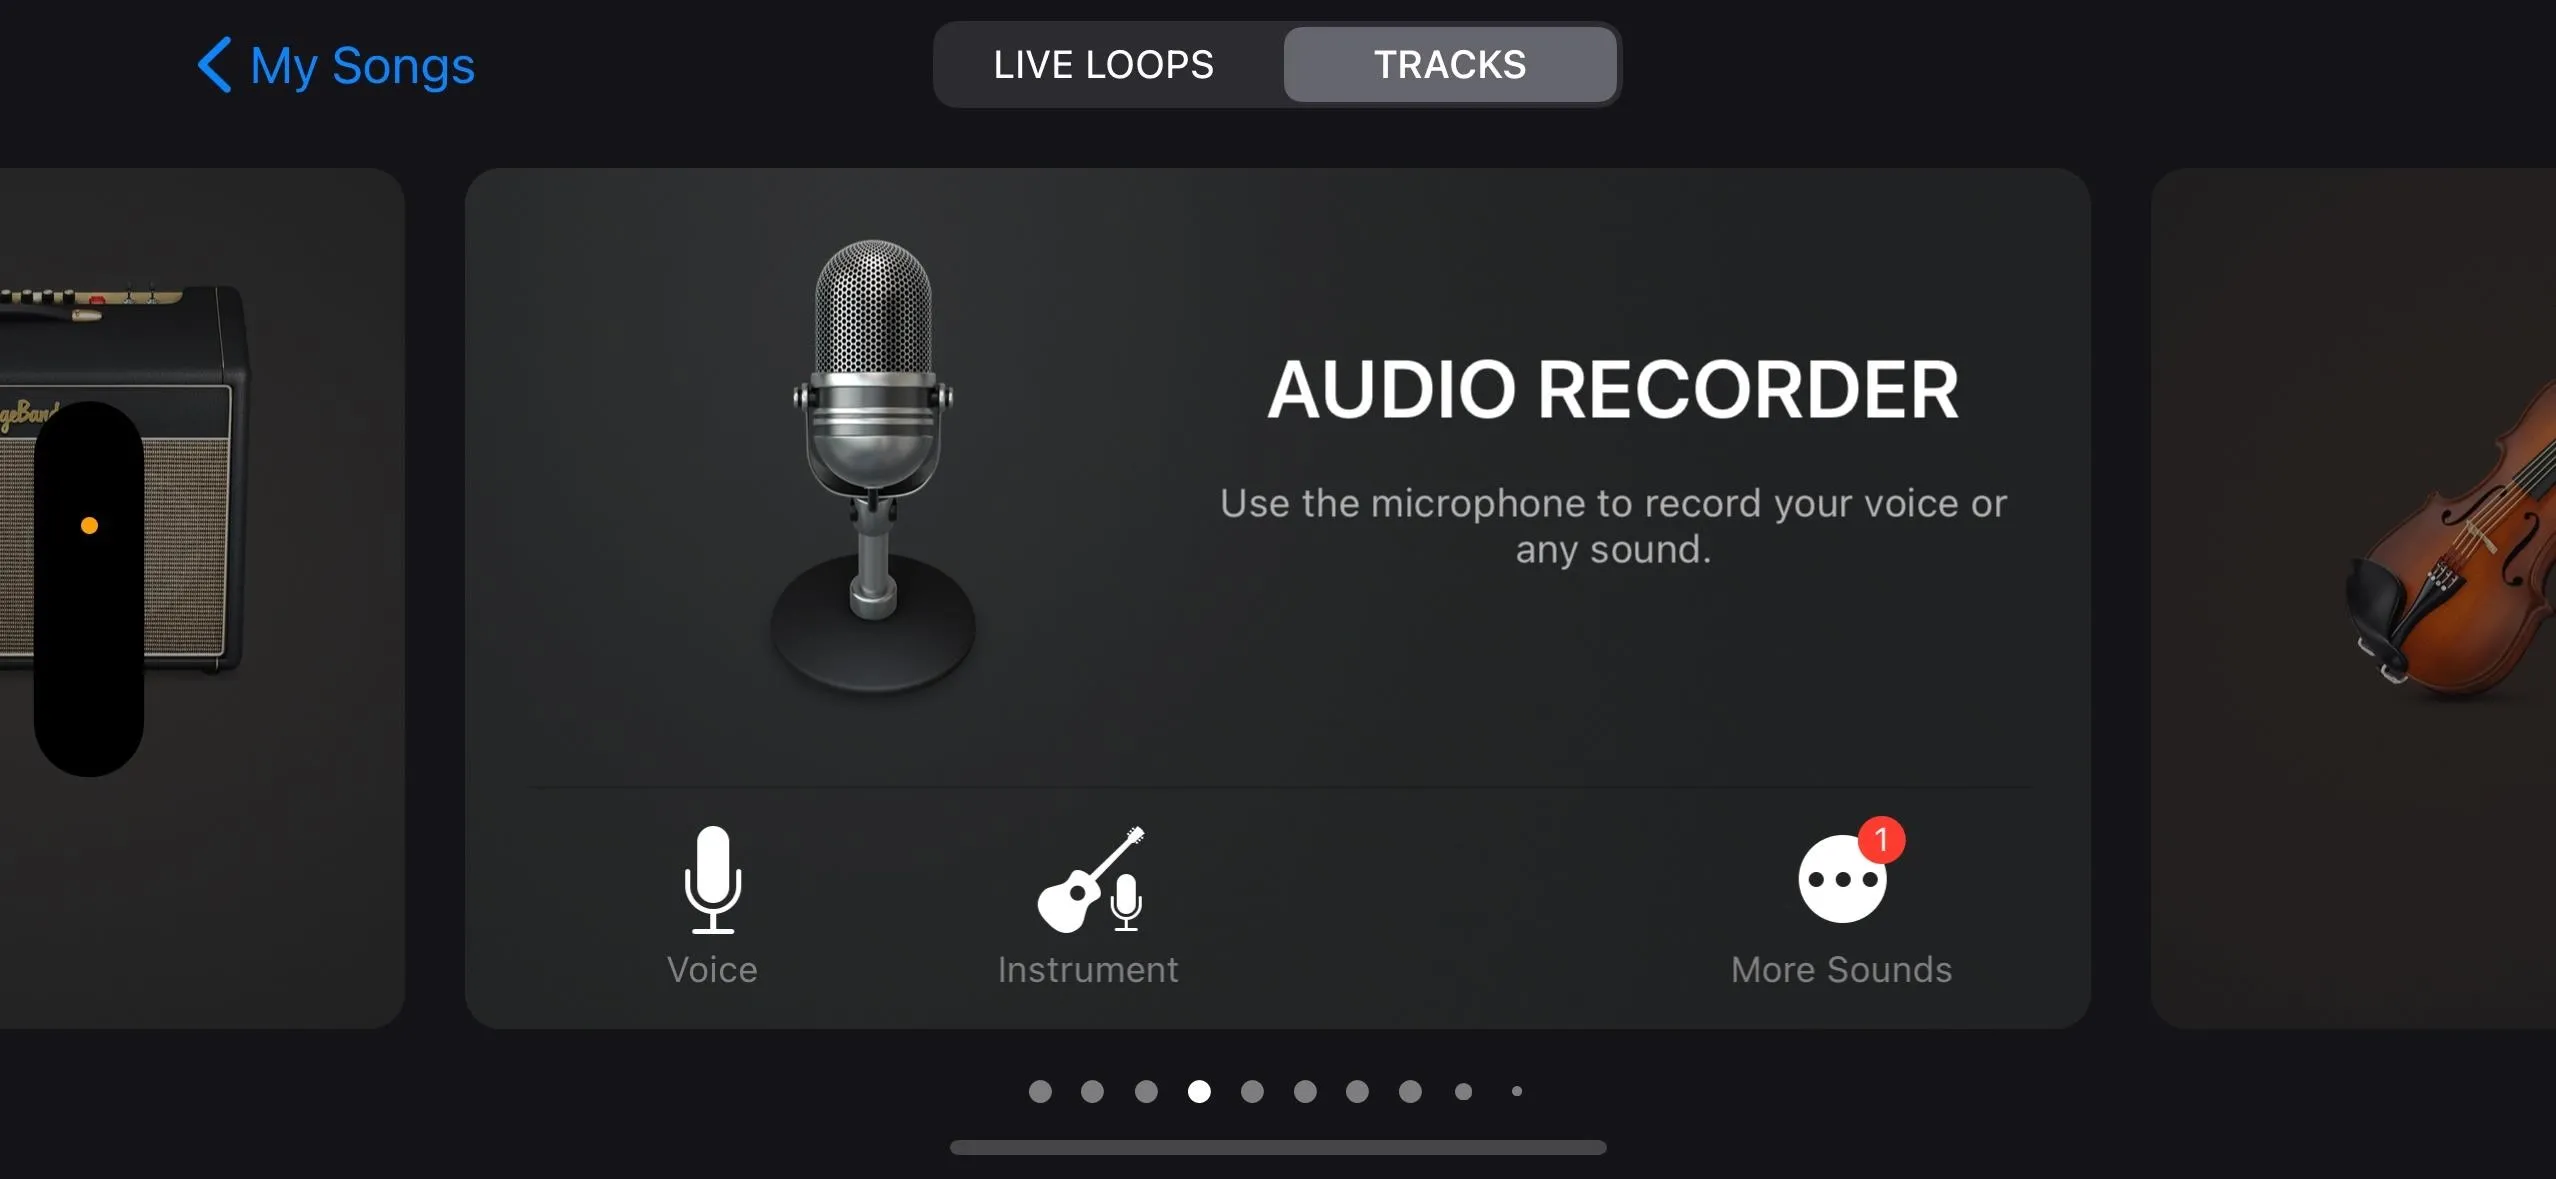
GarageBand will automatically launch at the end of the process. This is when you know it's done saving the audio file. Now, you have some minor manual work to do to create the ringtone. To get started, tap the plus (+) sign from the "Recents" tab, select "Tracks," and choose the "Audio Recorder" option.
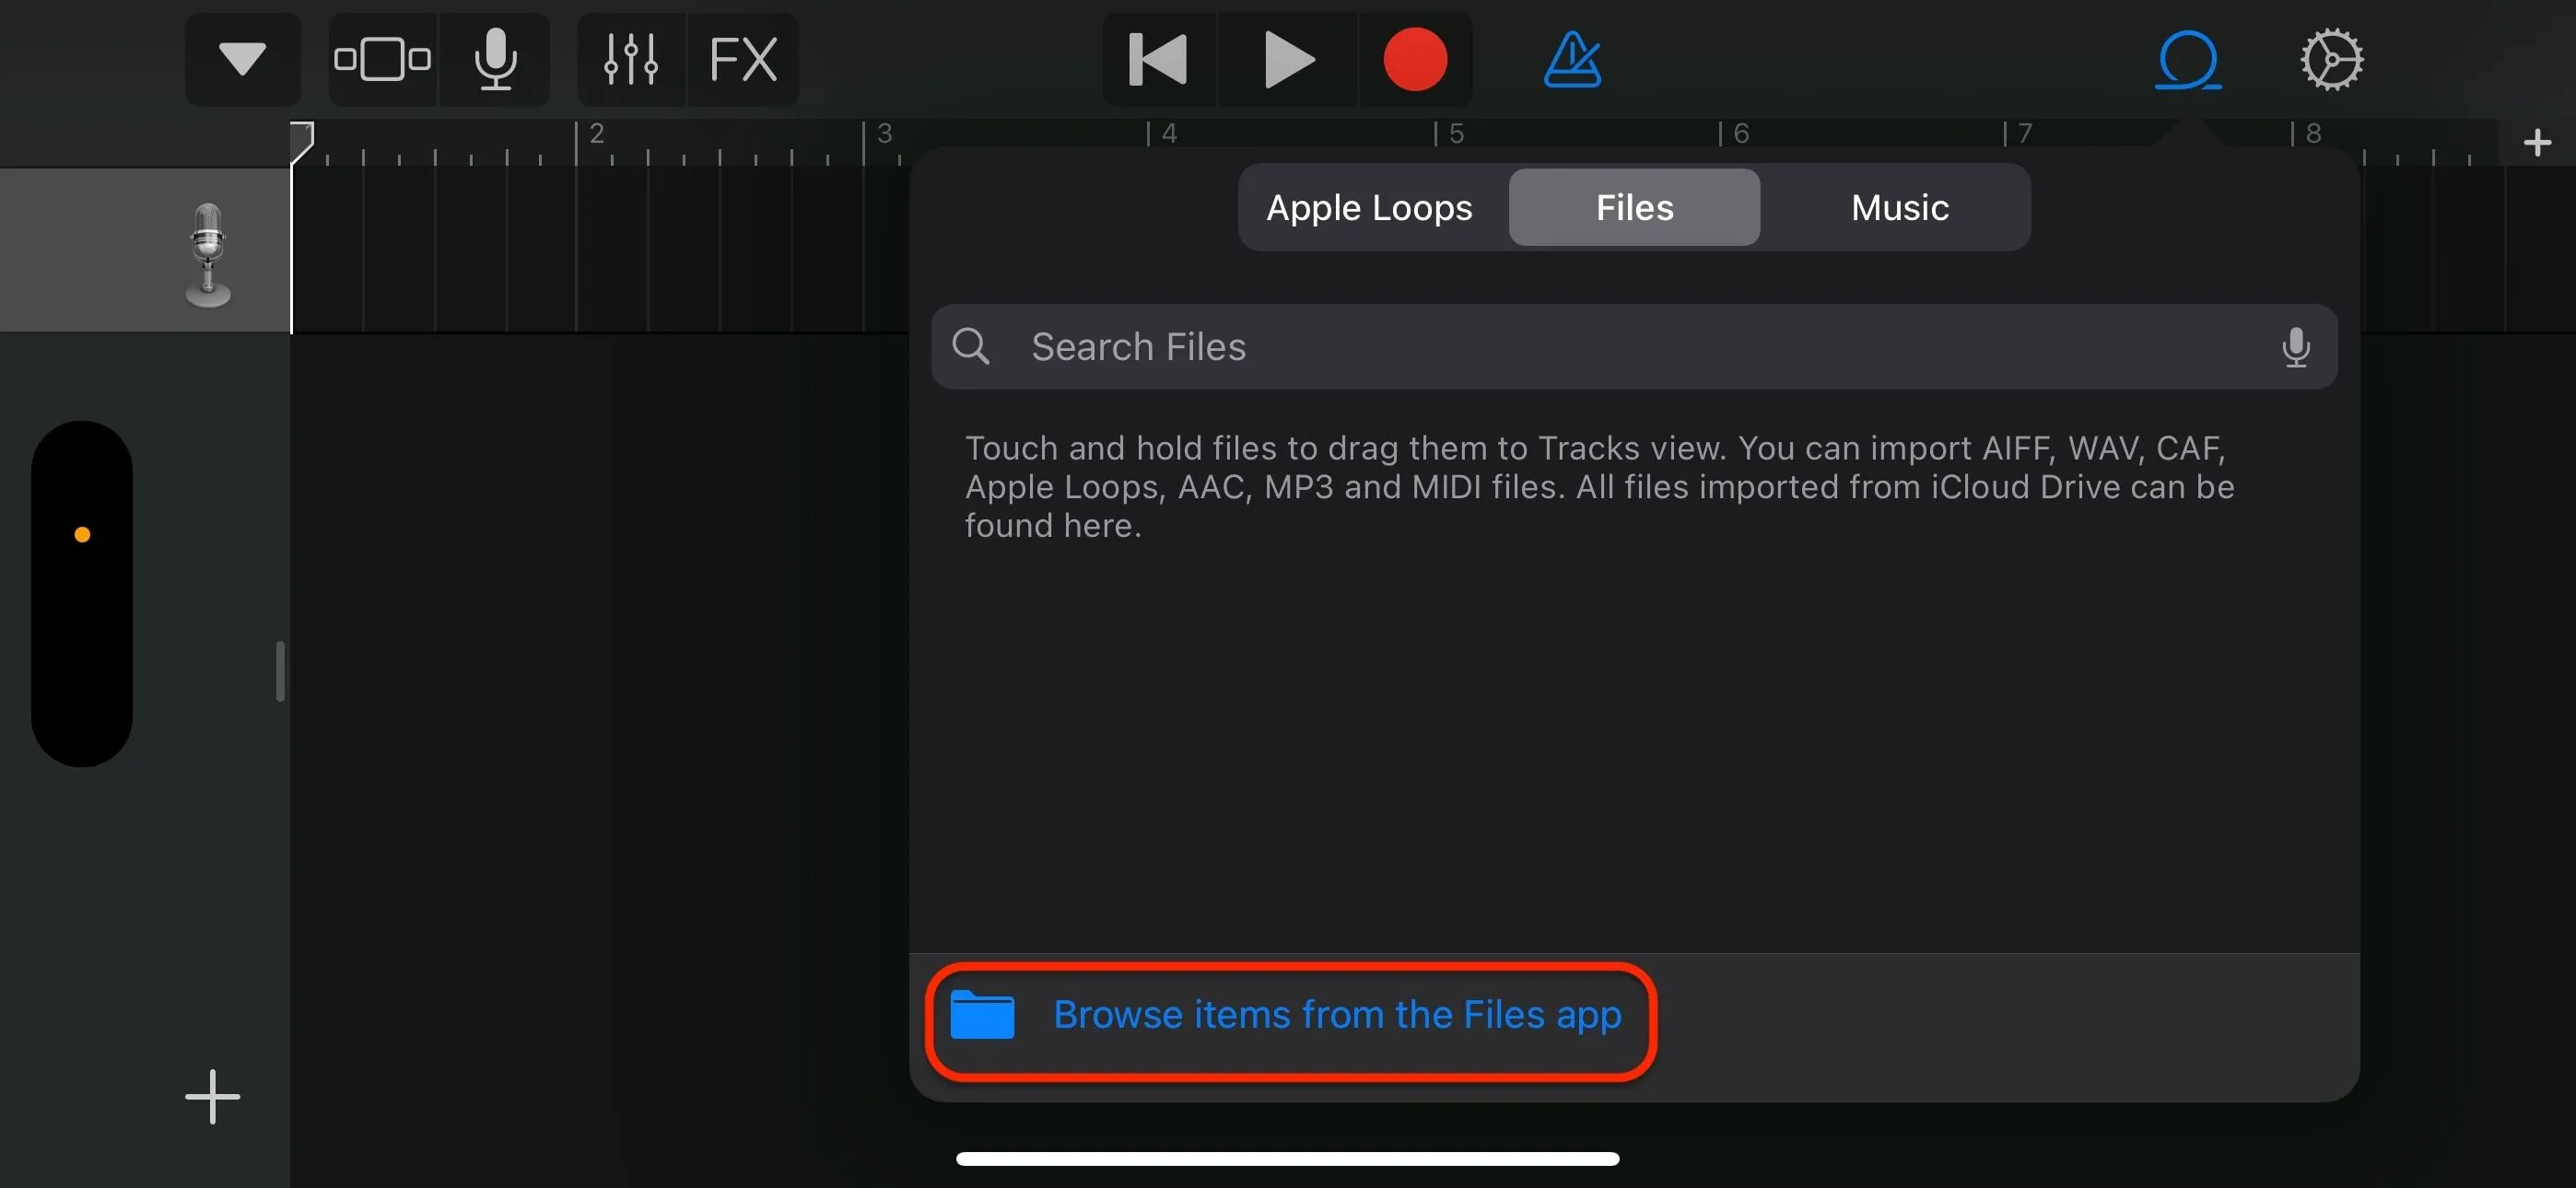
In the new project, tap the "Tracks" button in the toolbar, then the "Loops" button.
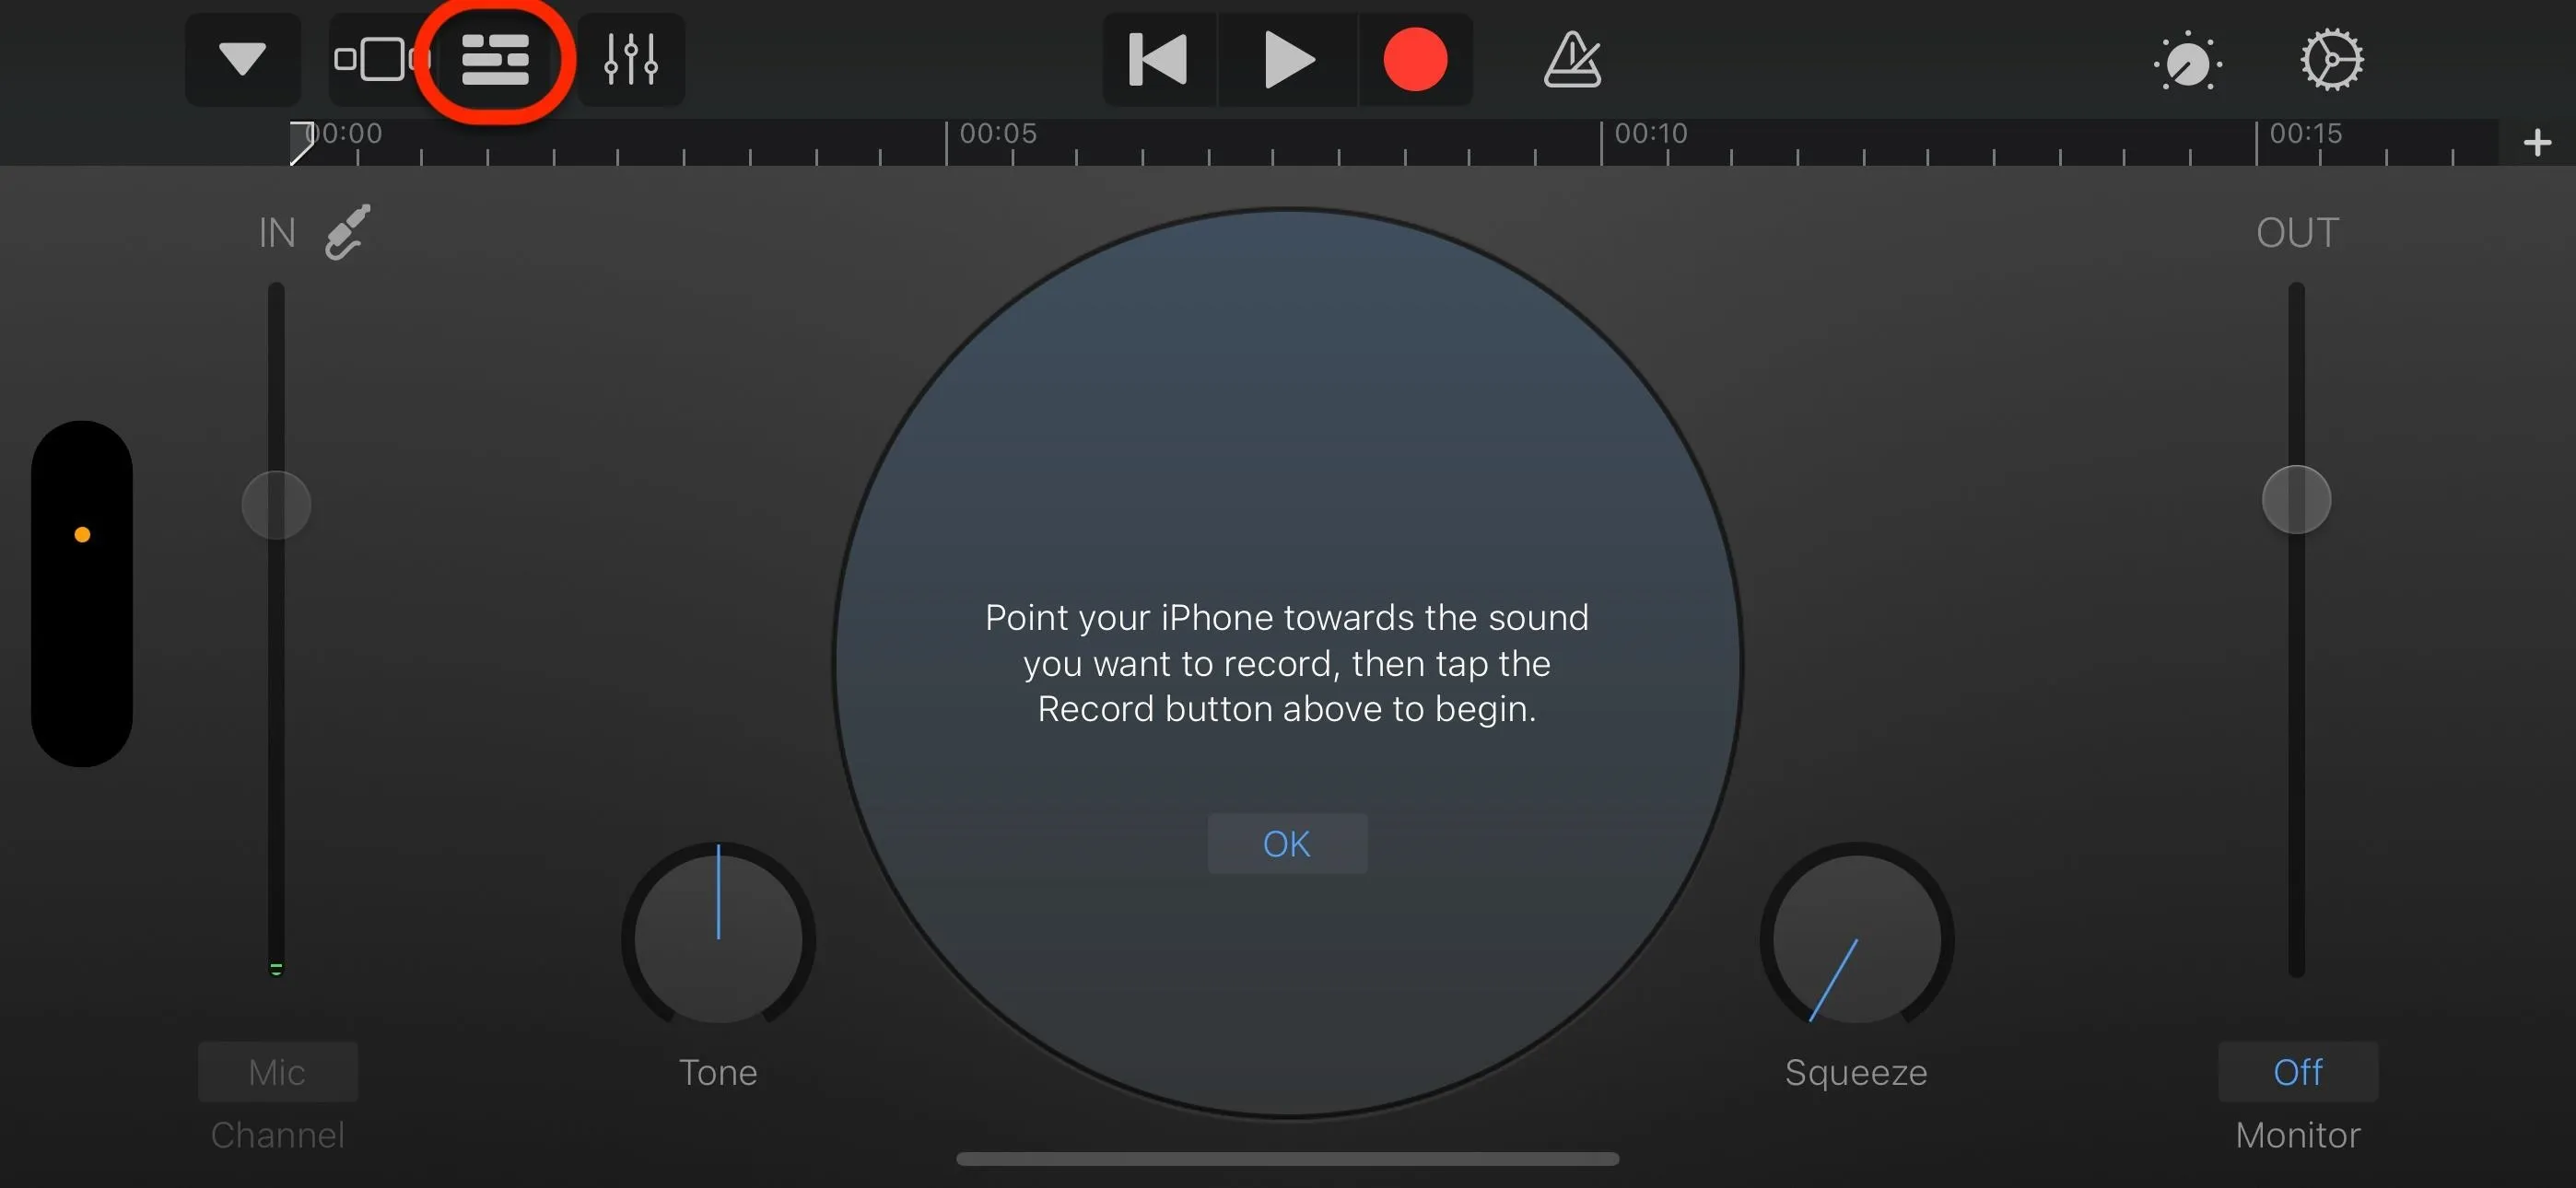
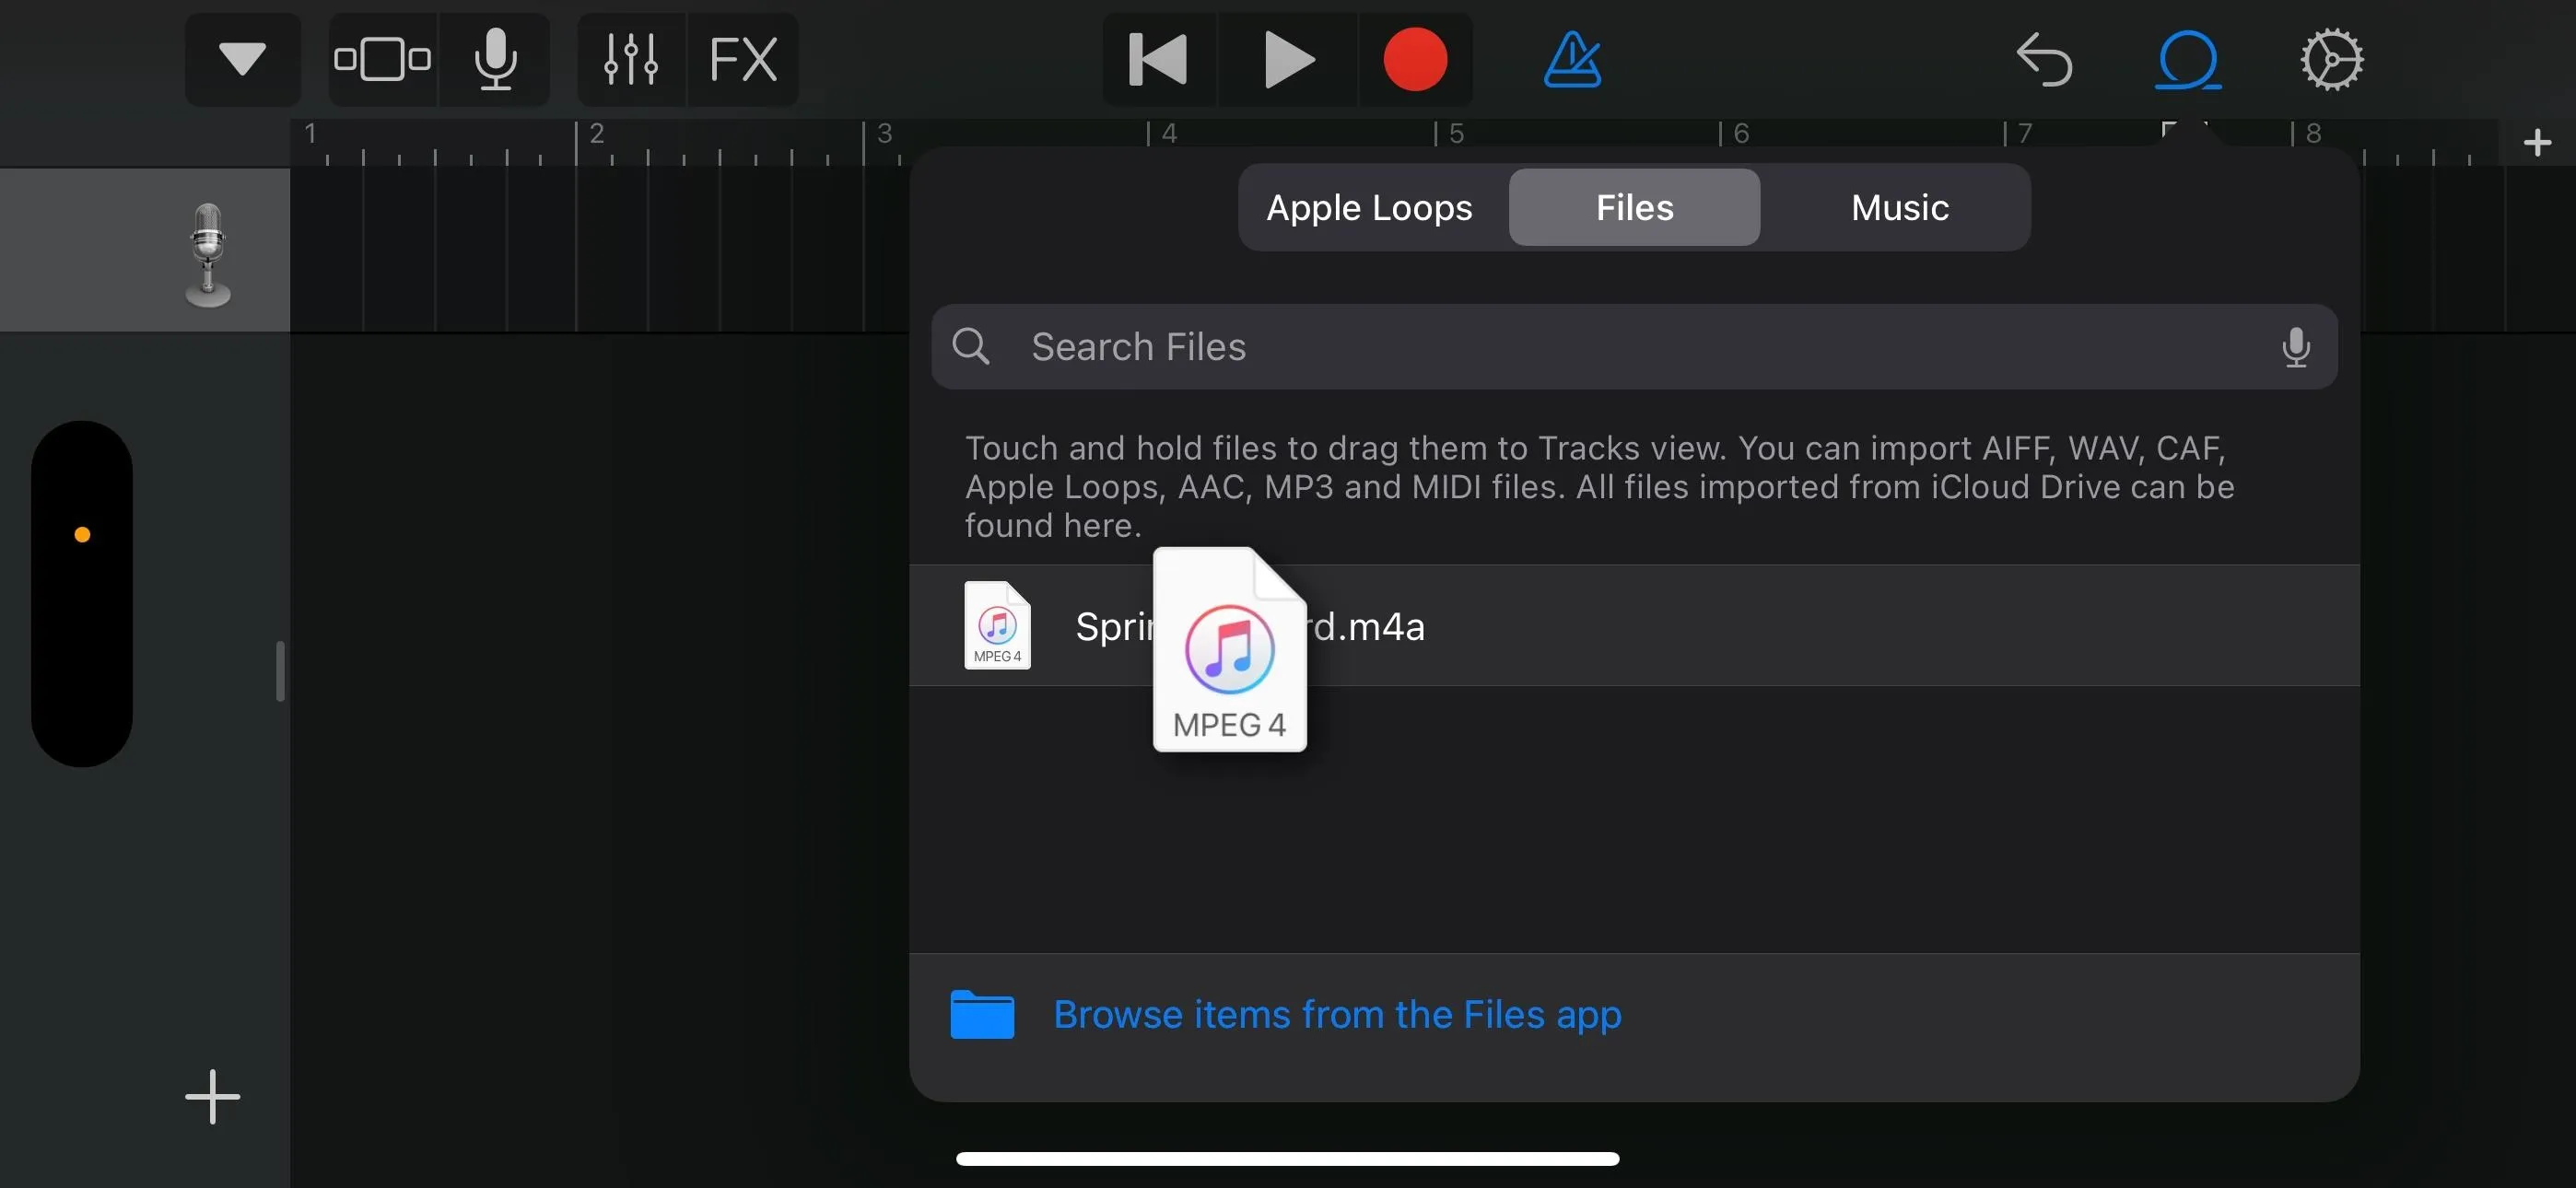
Tap "Browse items from the Files app" from the "Files" tab, then select the file you exported through the shortcut. Your loop will then be imported into GarageBand.

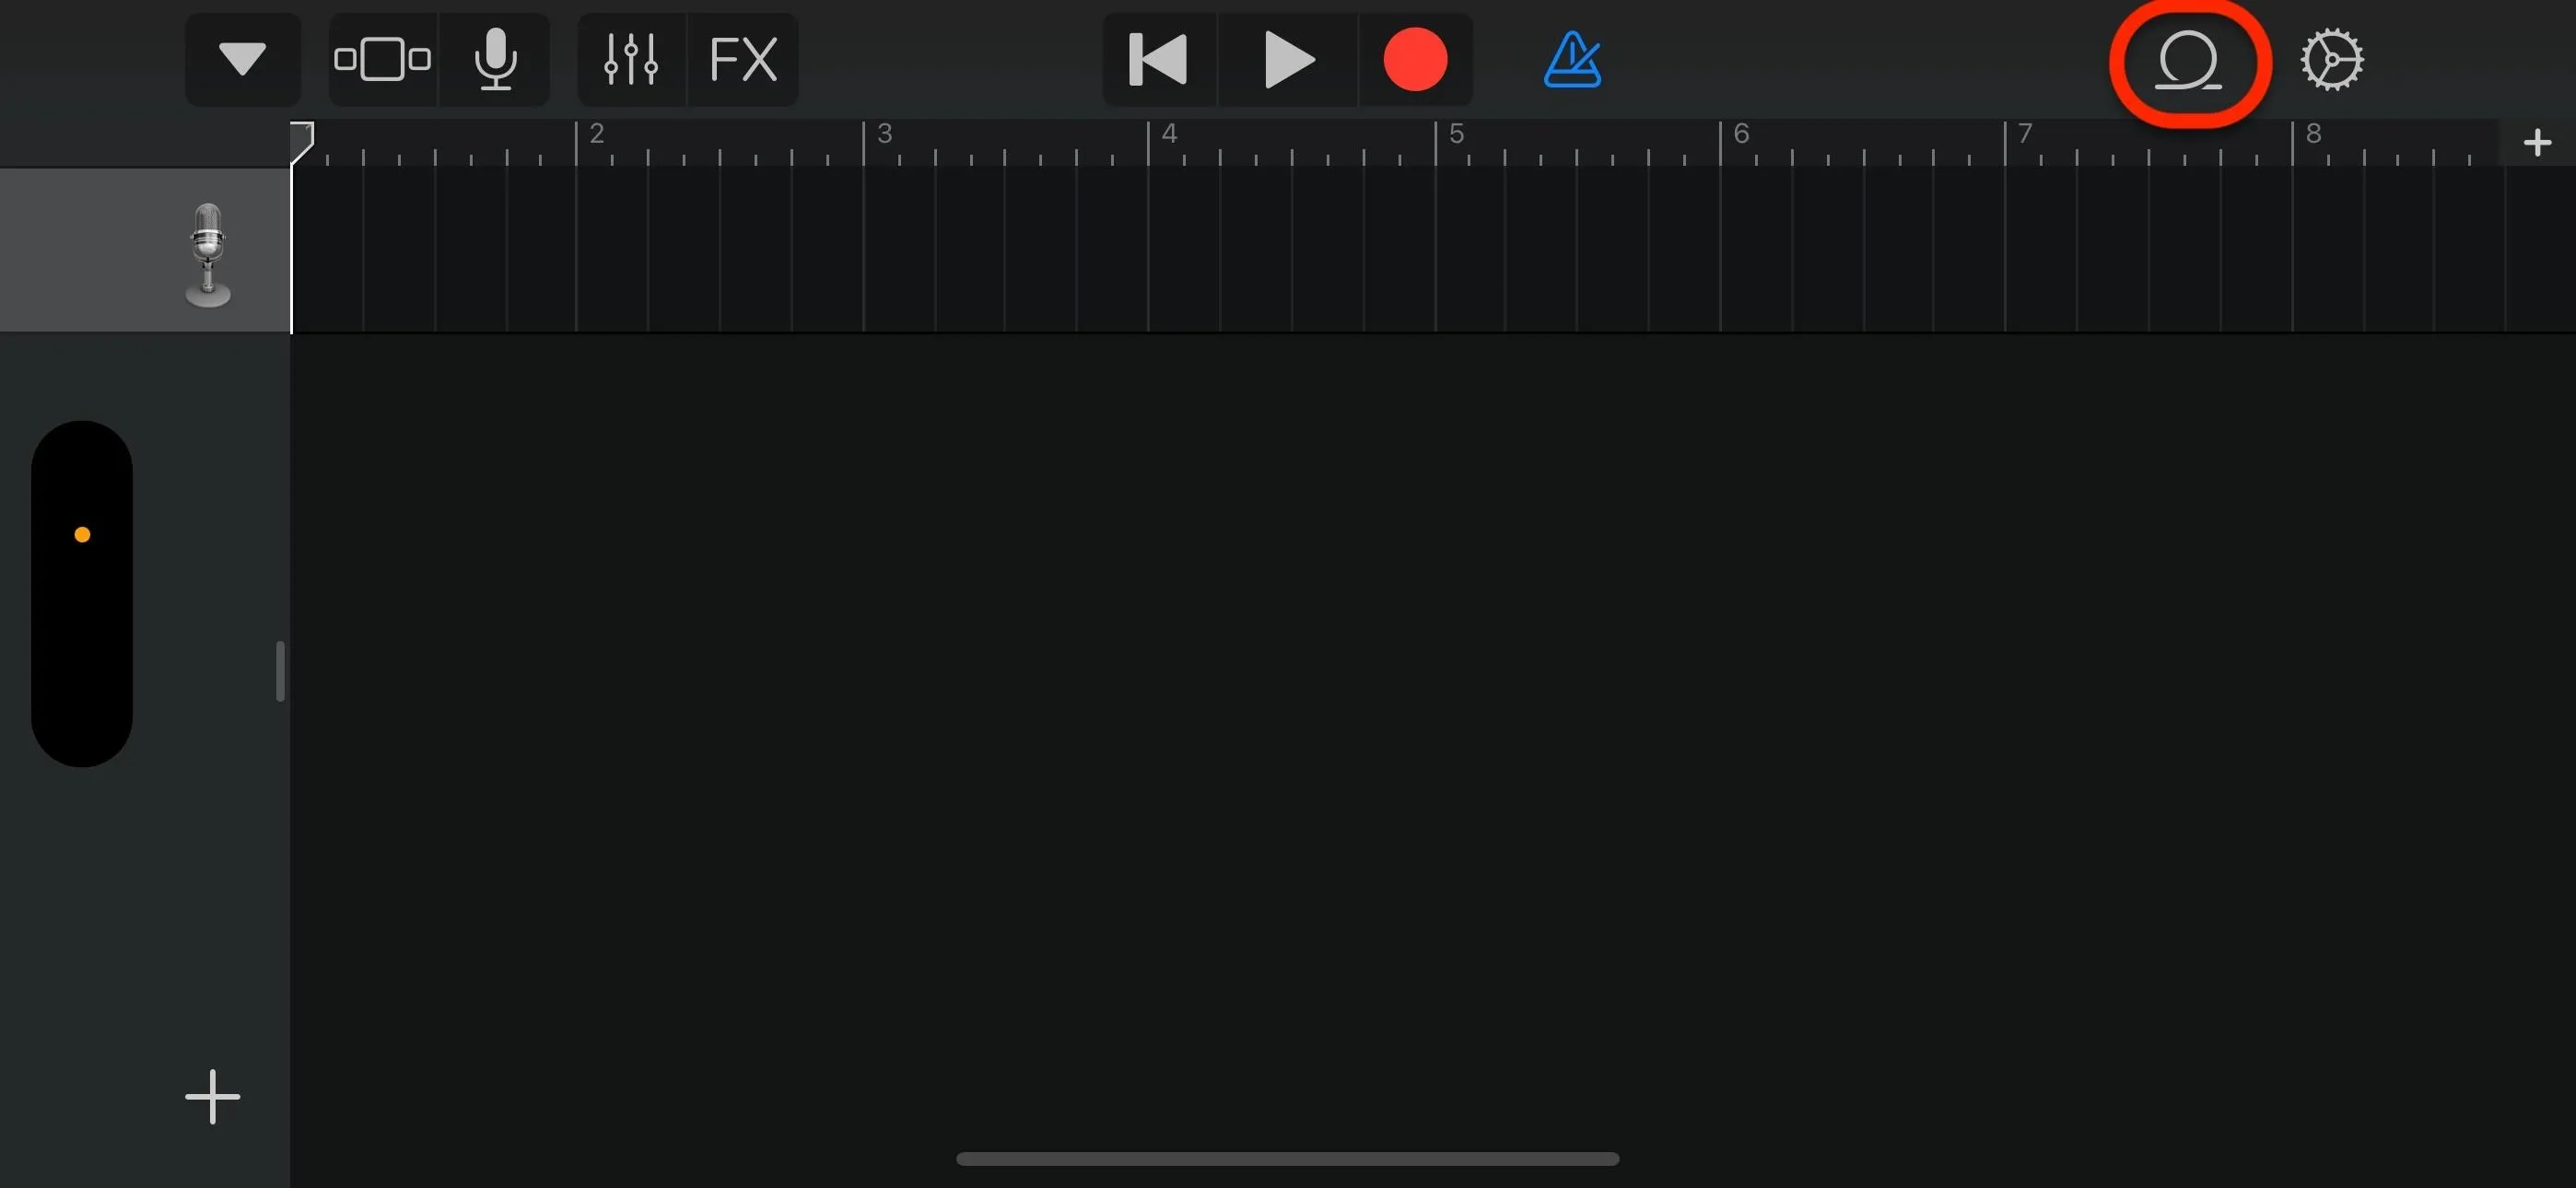
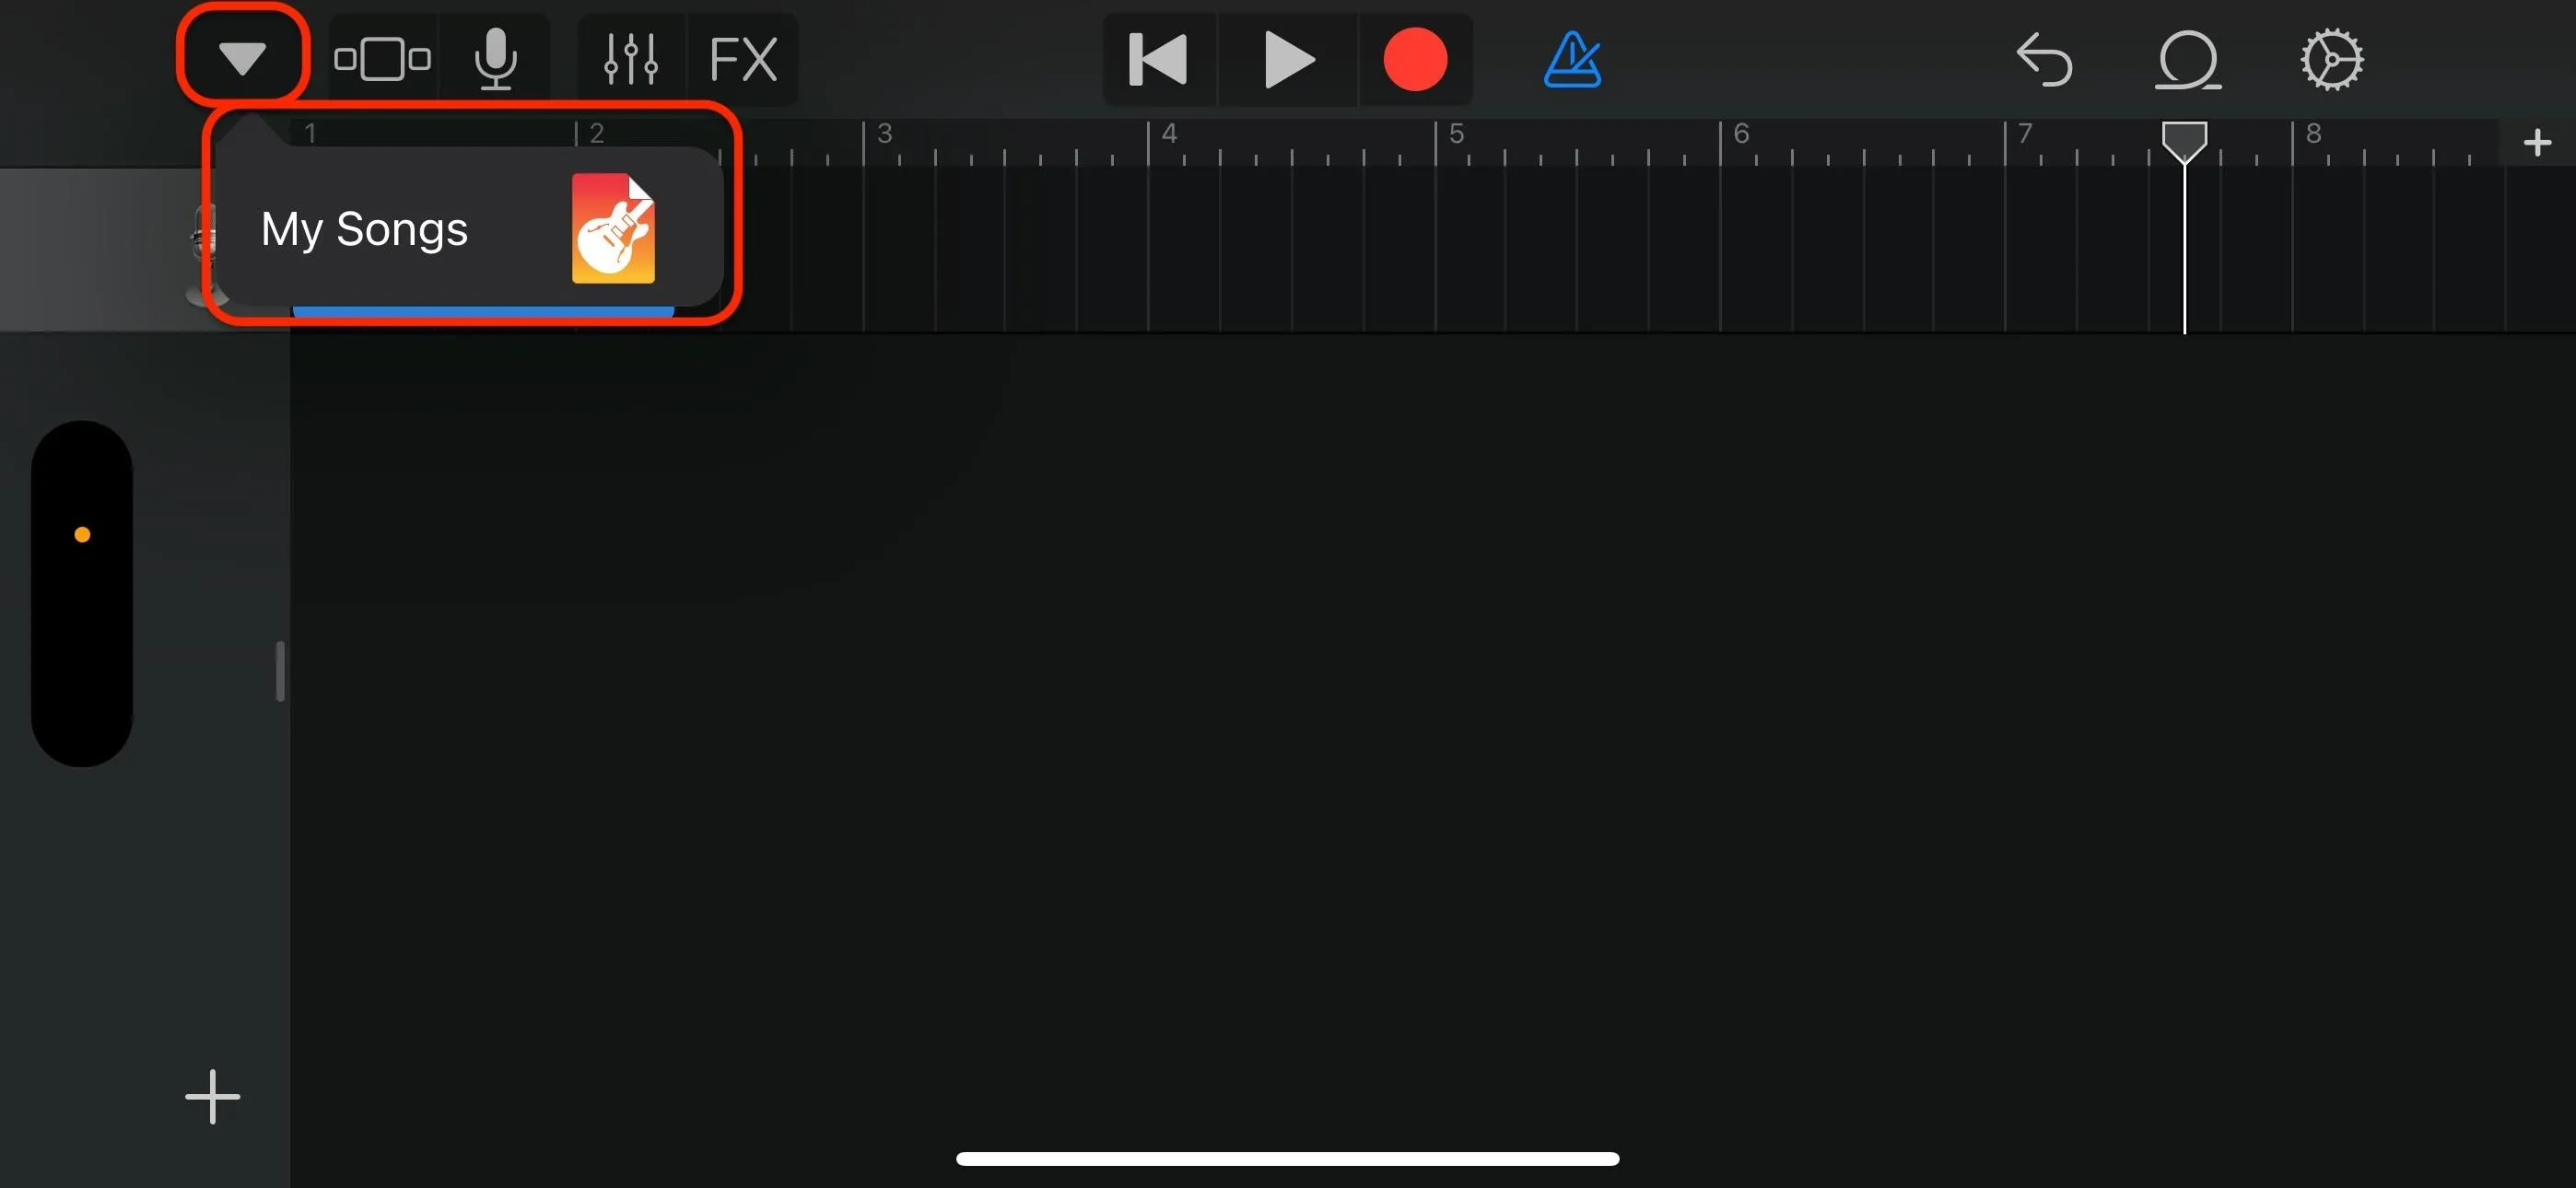
Now, press and drag the TikTok audio file from the list of imported files to the beginning of the first track in the editor, then drop it in place. Then, tap the down arrow at the top and choose "My Songs" to exit the editor.
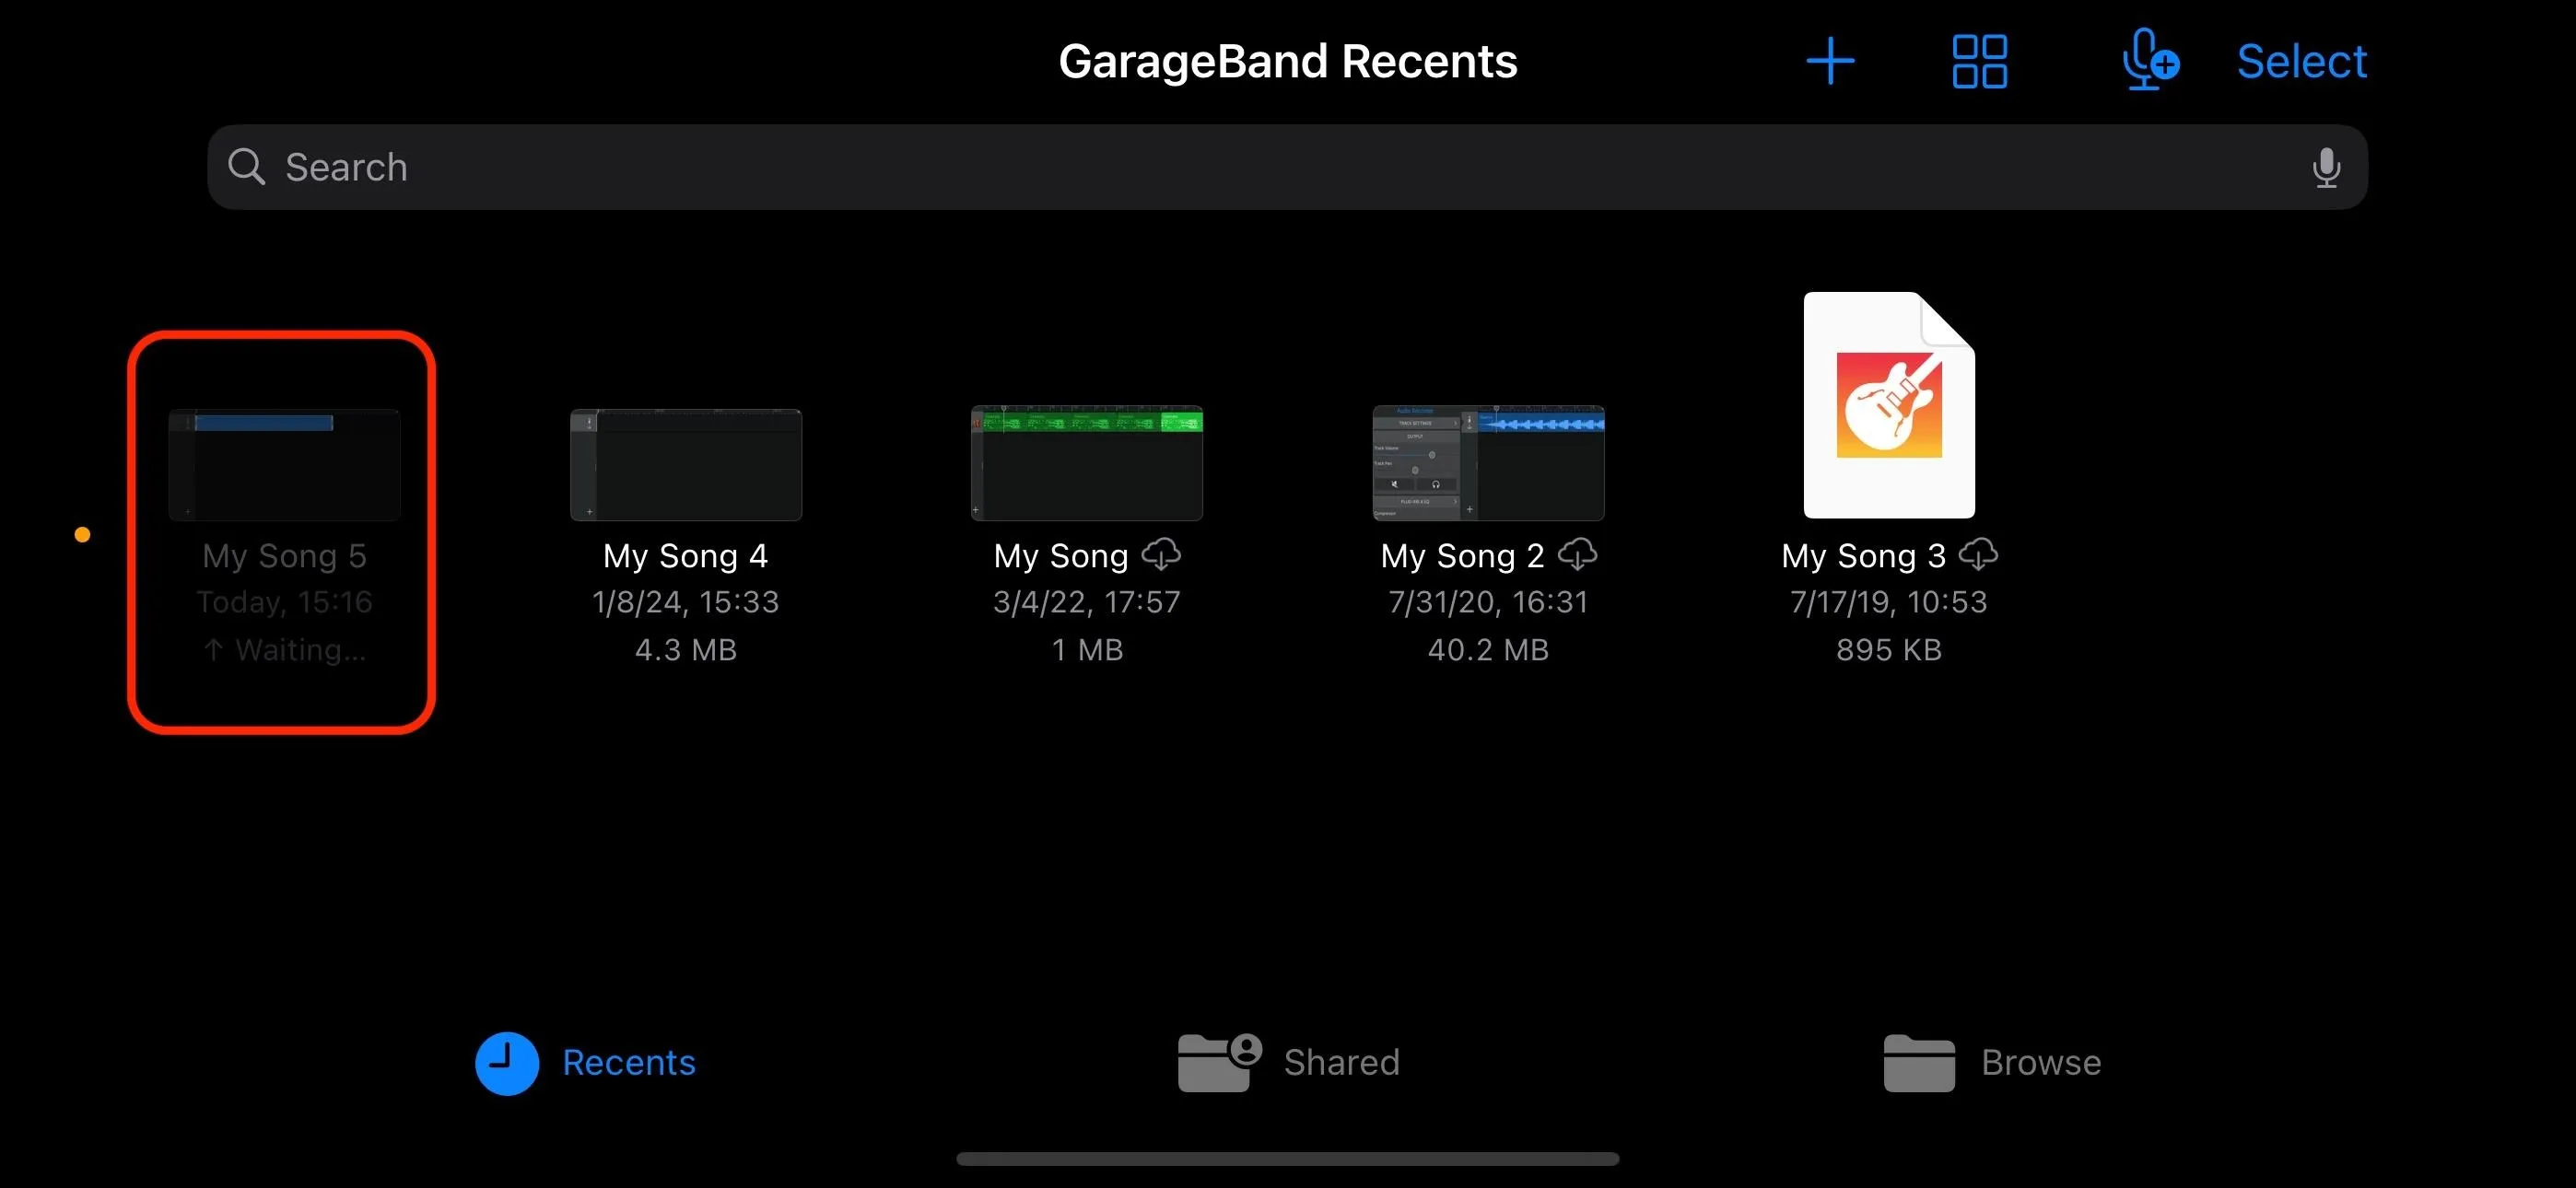
On the recent projects screen, press or tap and hold your new iMovie song project, then choose "Share" from the menu that appears.
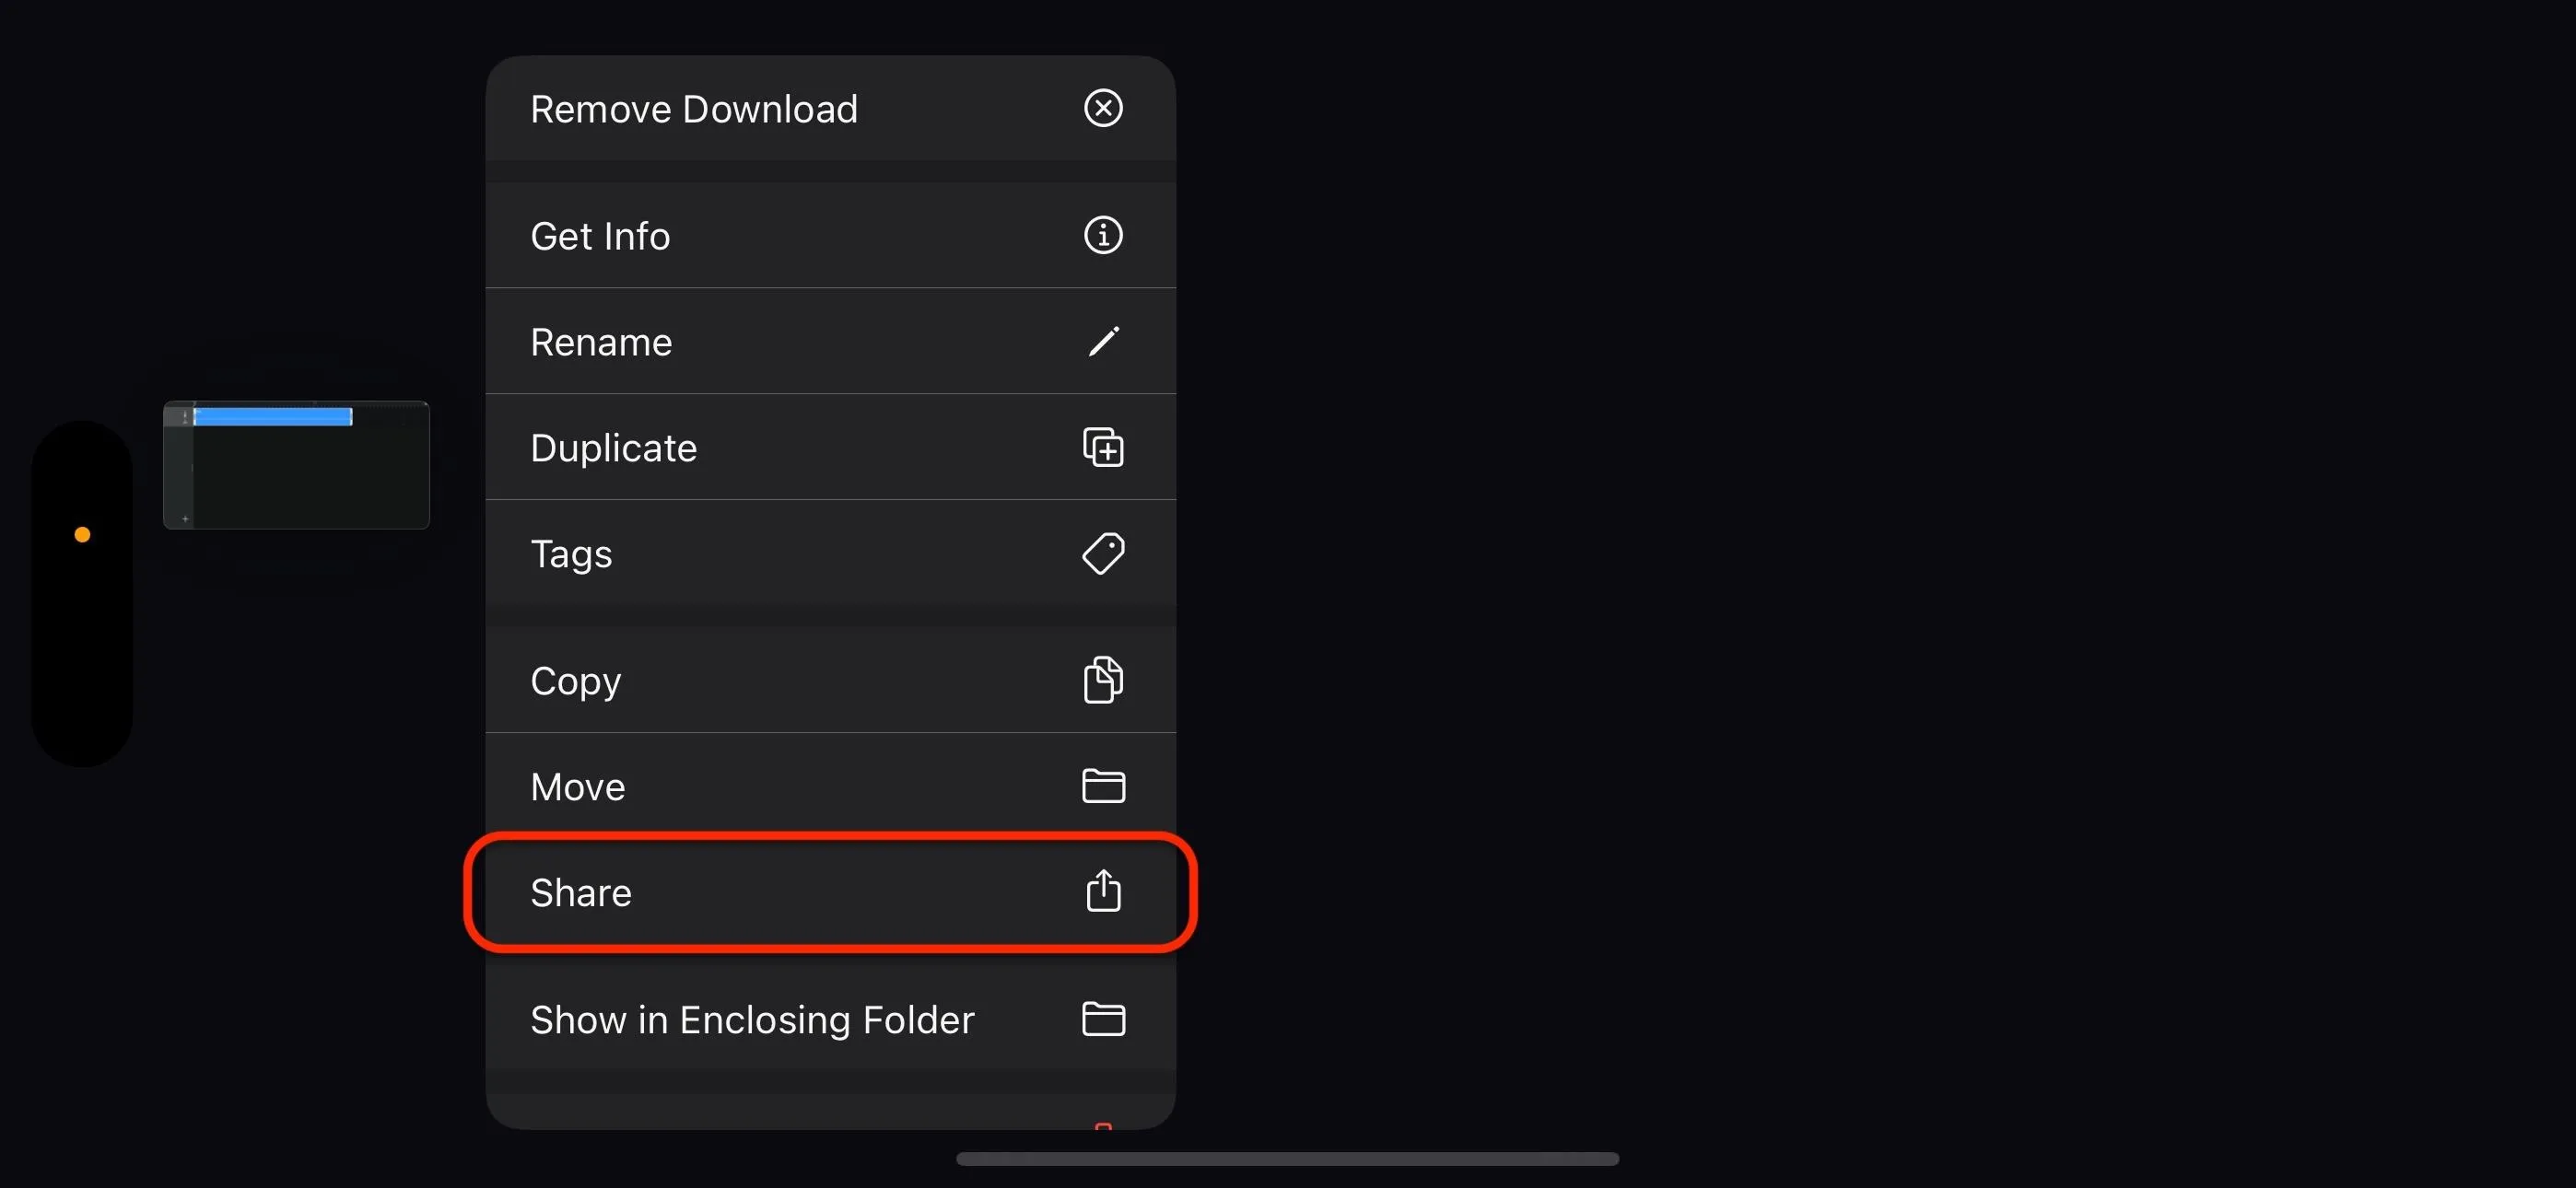
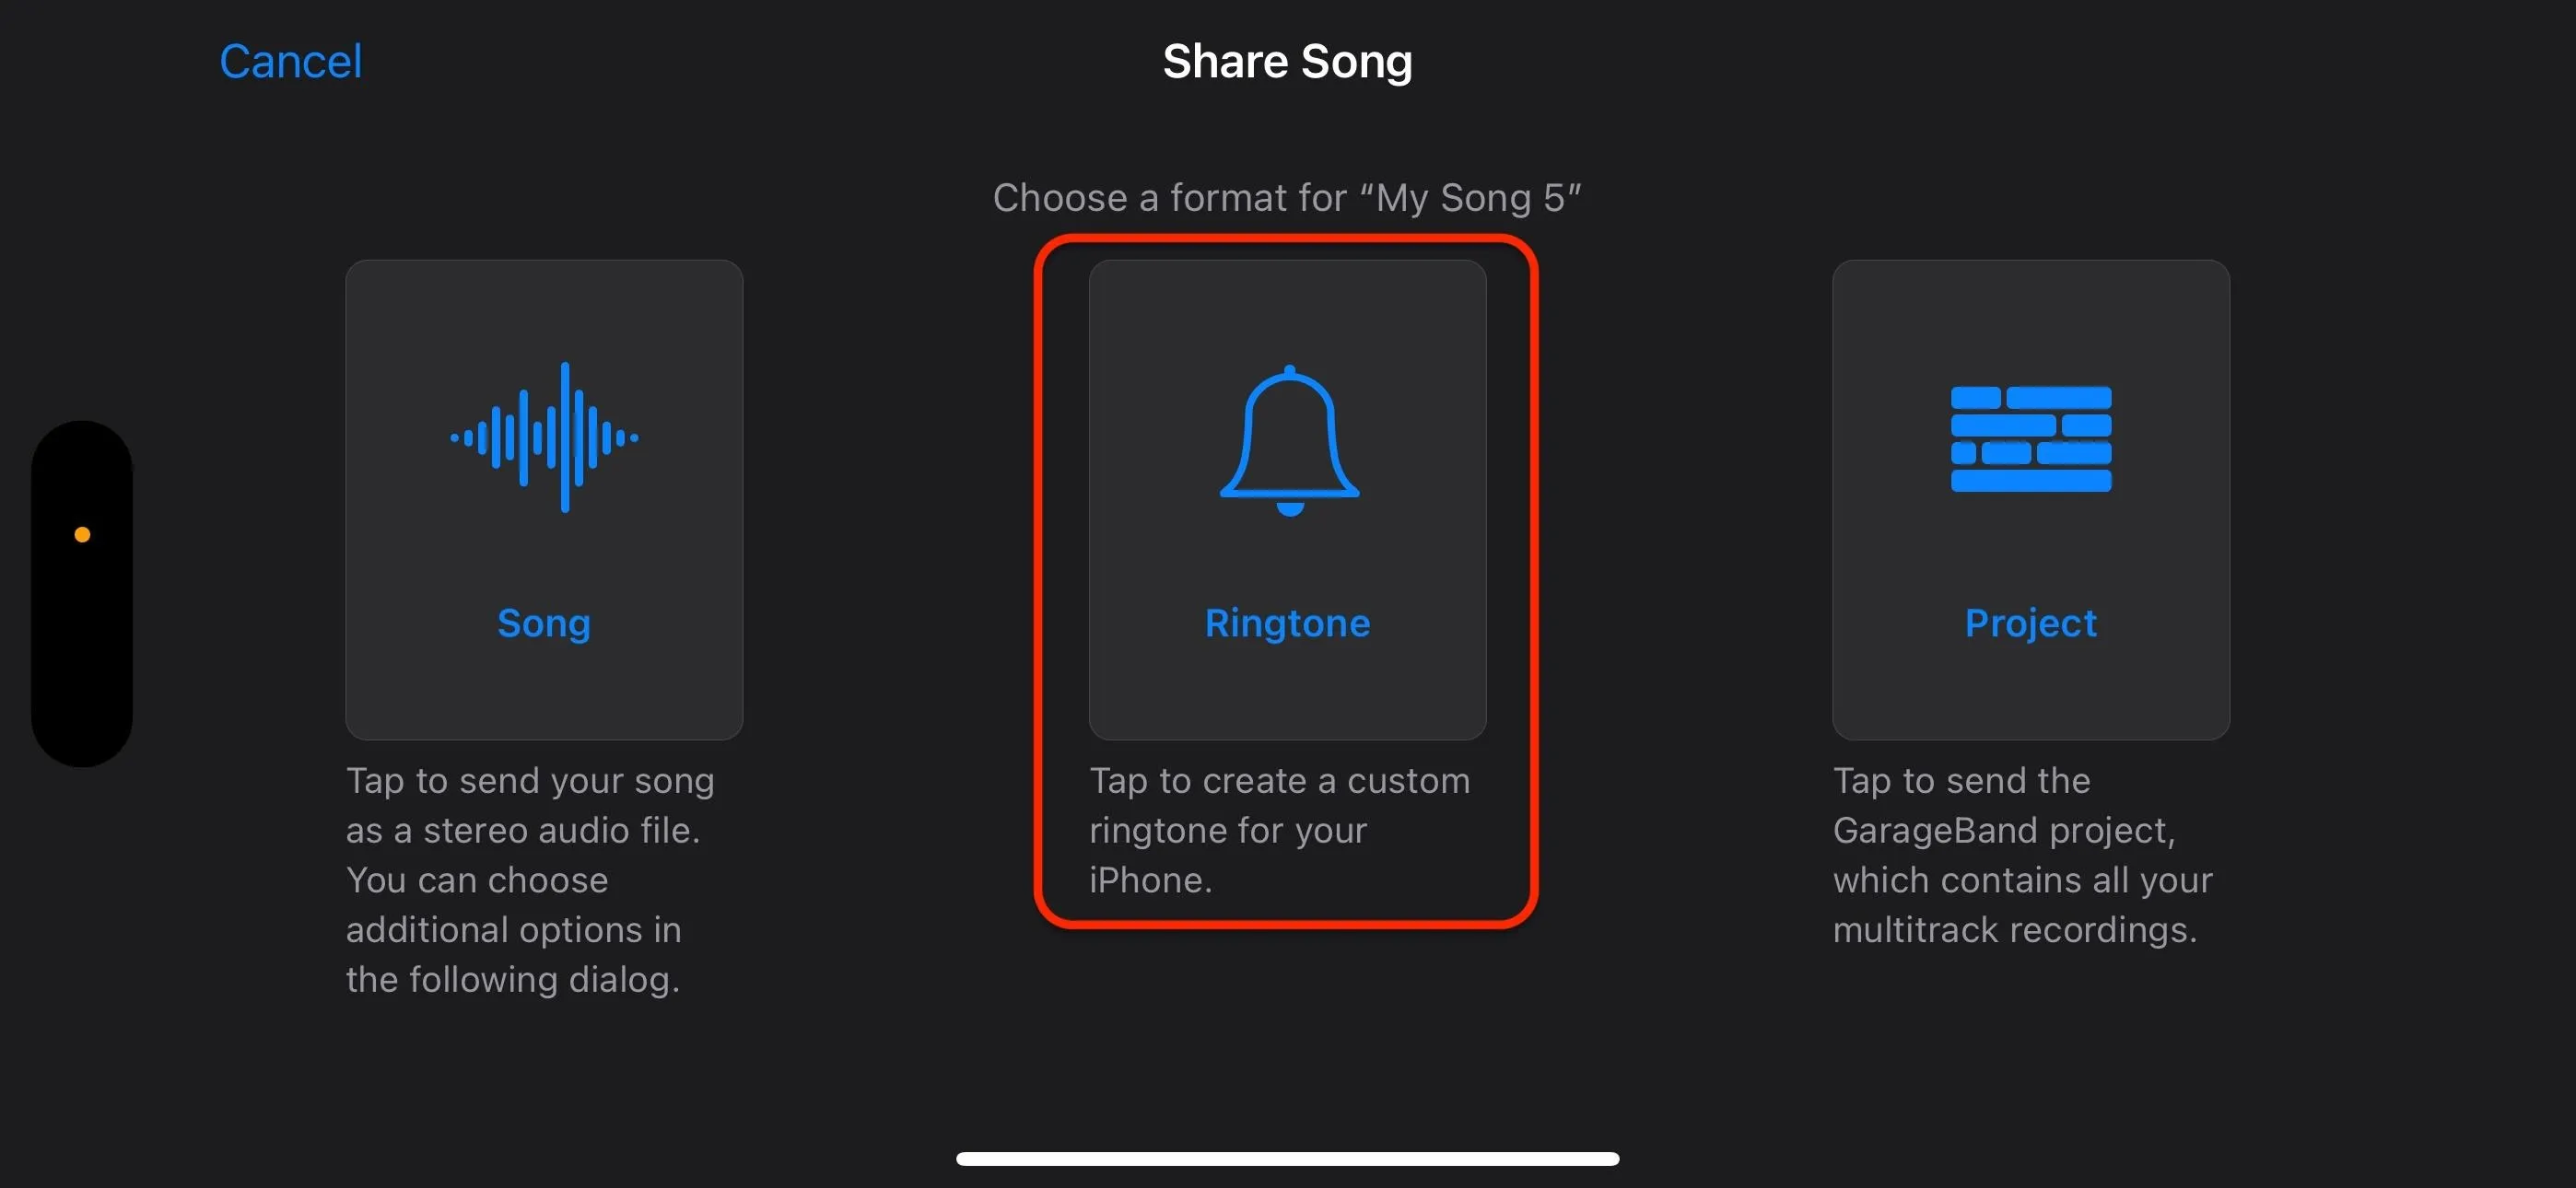
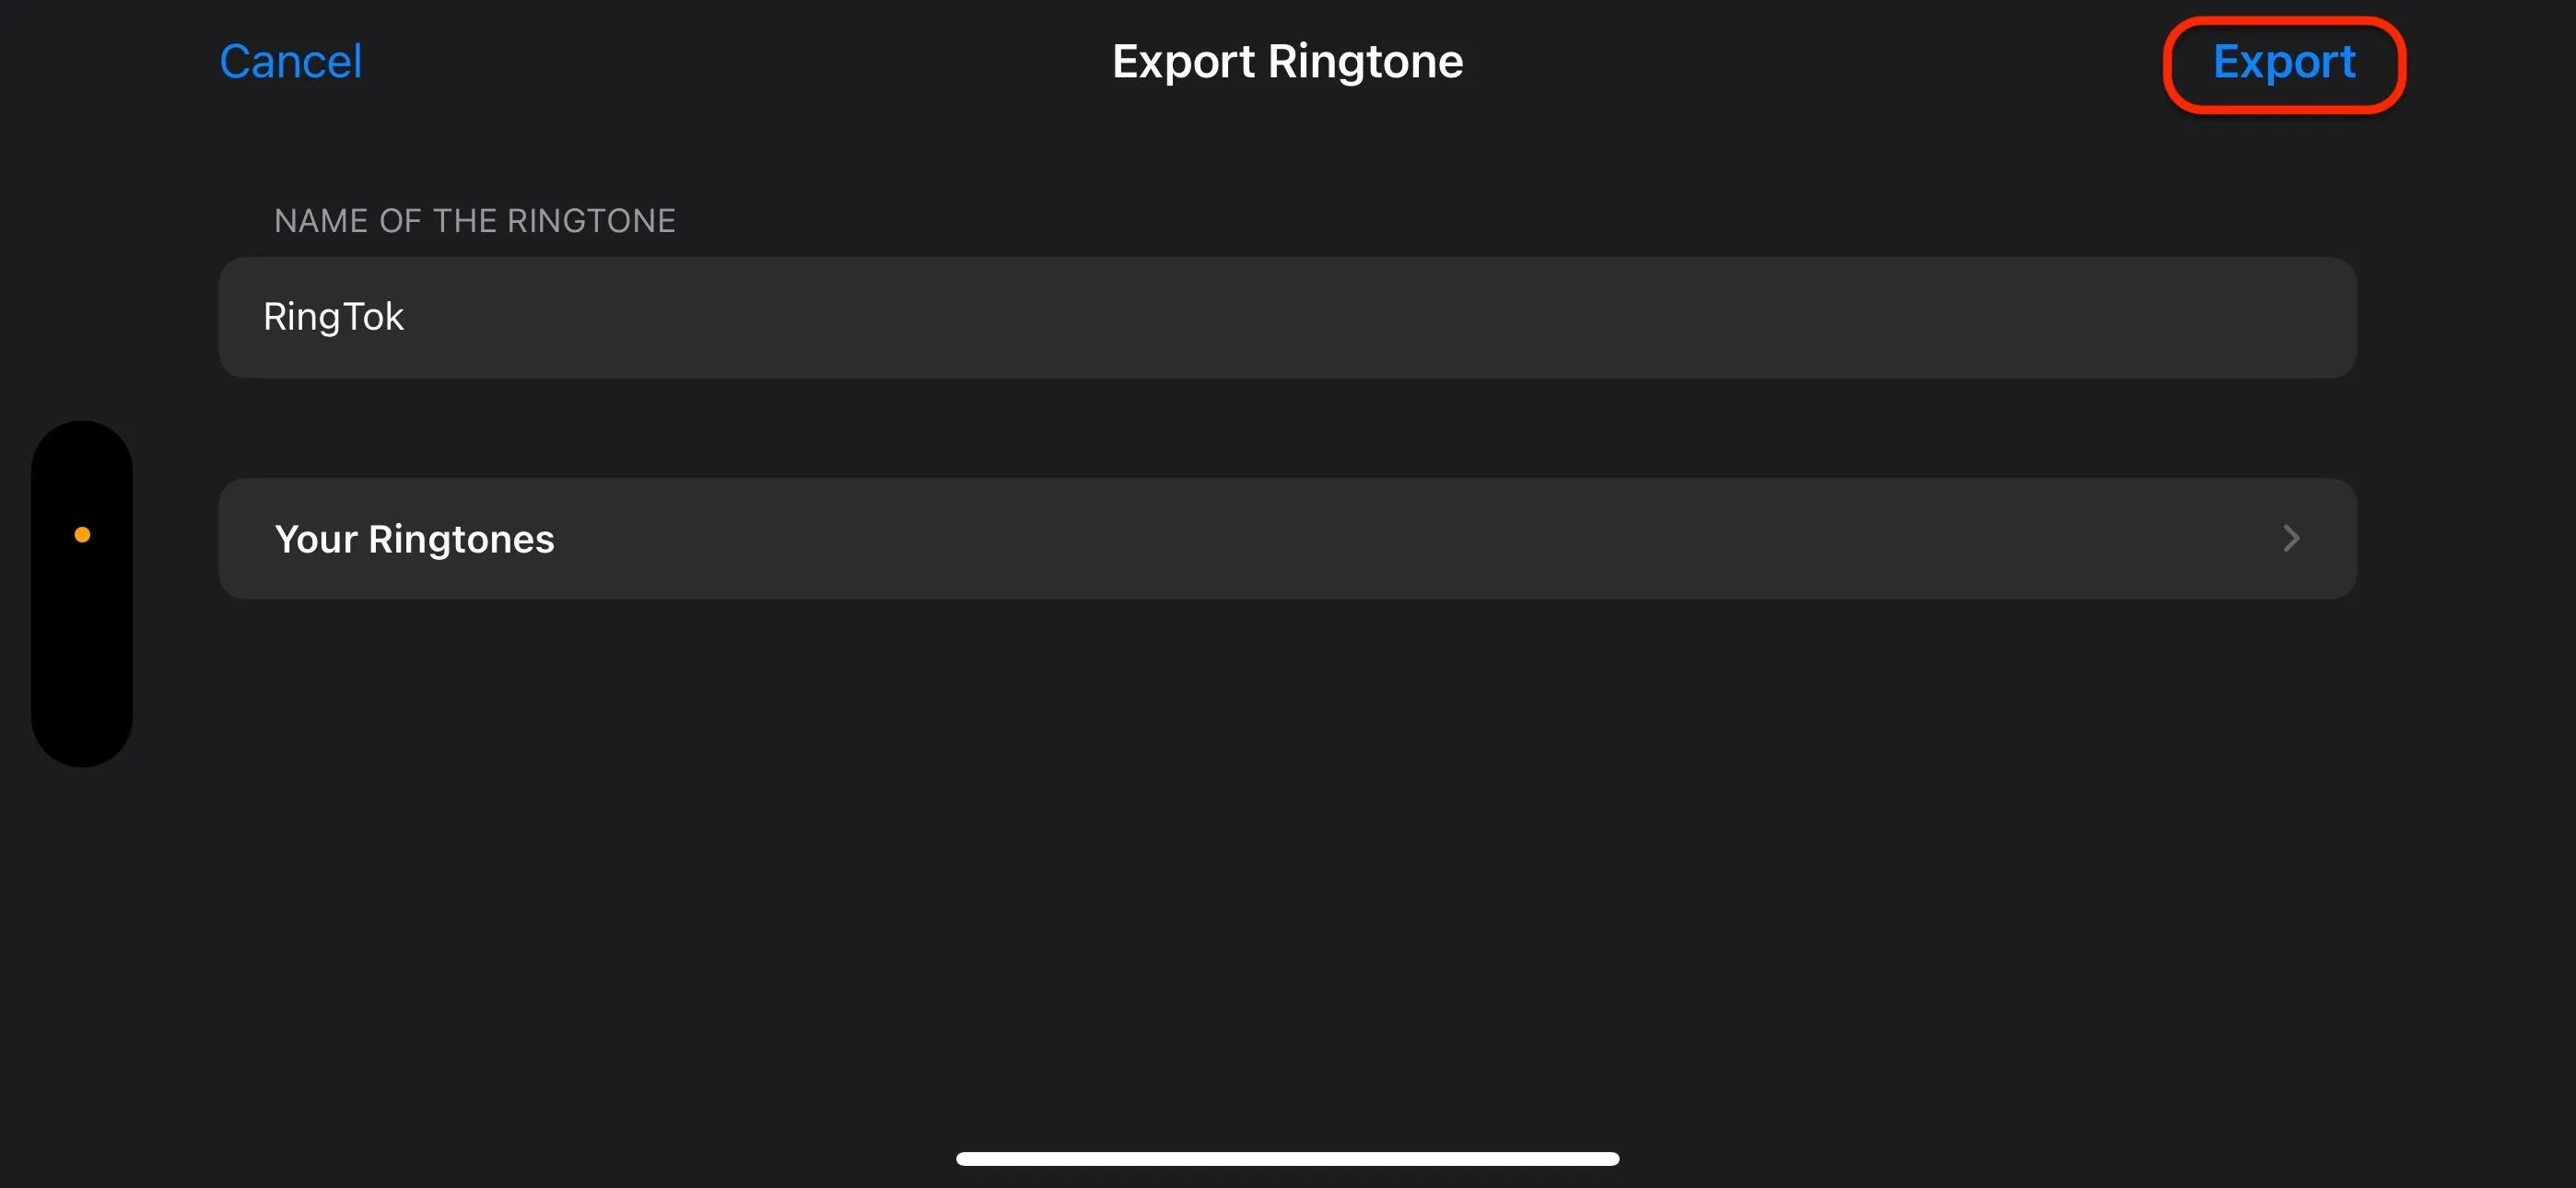
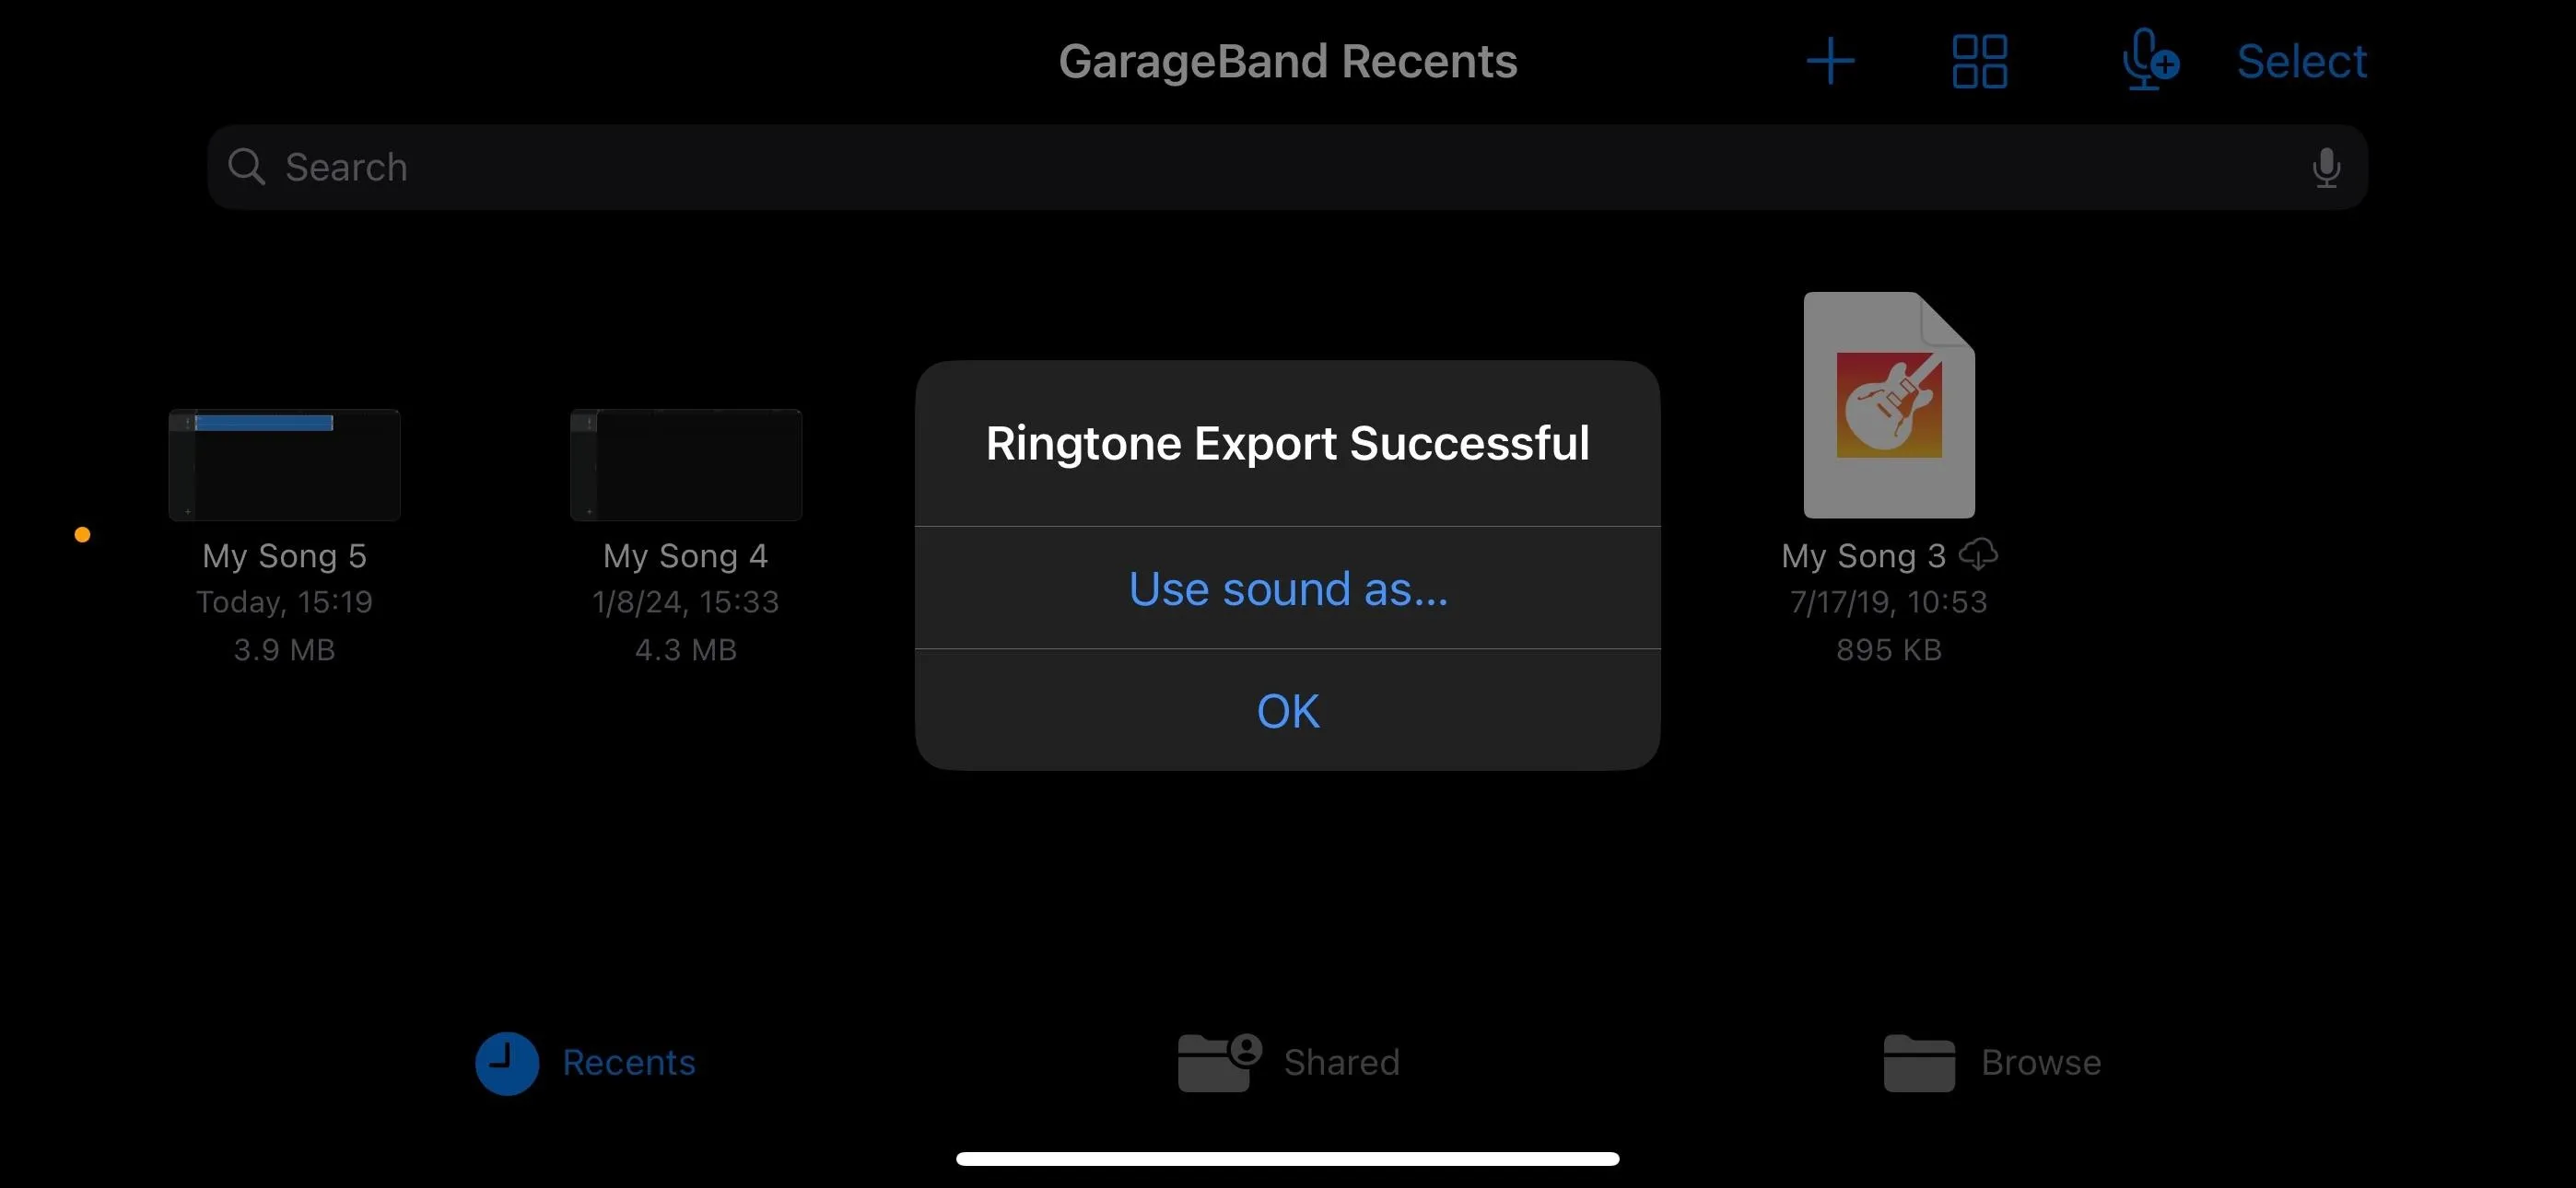
Select "Ringtone" as the sharing option, rename the file so you know what it is amongst all your other system ringtones, and hit "Export."
Once this is done, your ringtone will be usable inside of iOS or iPadOS. Continue to the next step to learn how to assign the ringtone either globally or just for a single contact.
Assign the RingTok Ringtone
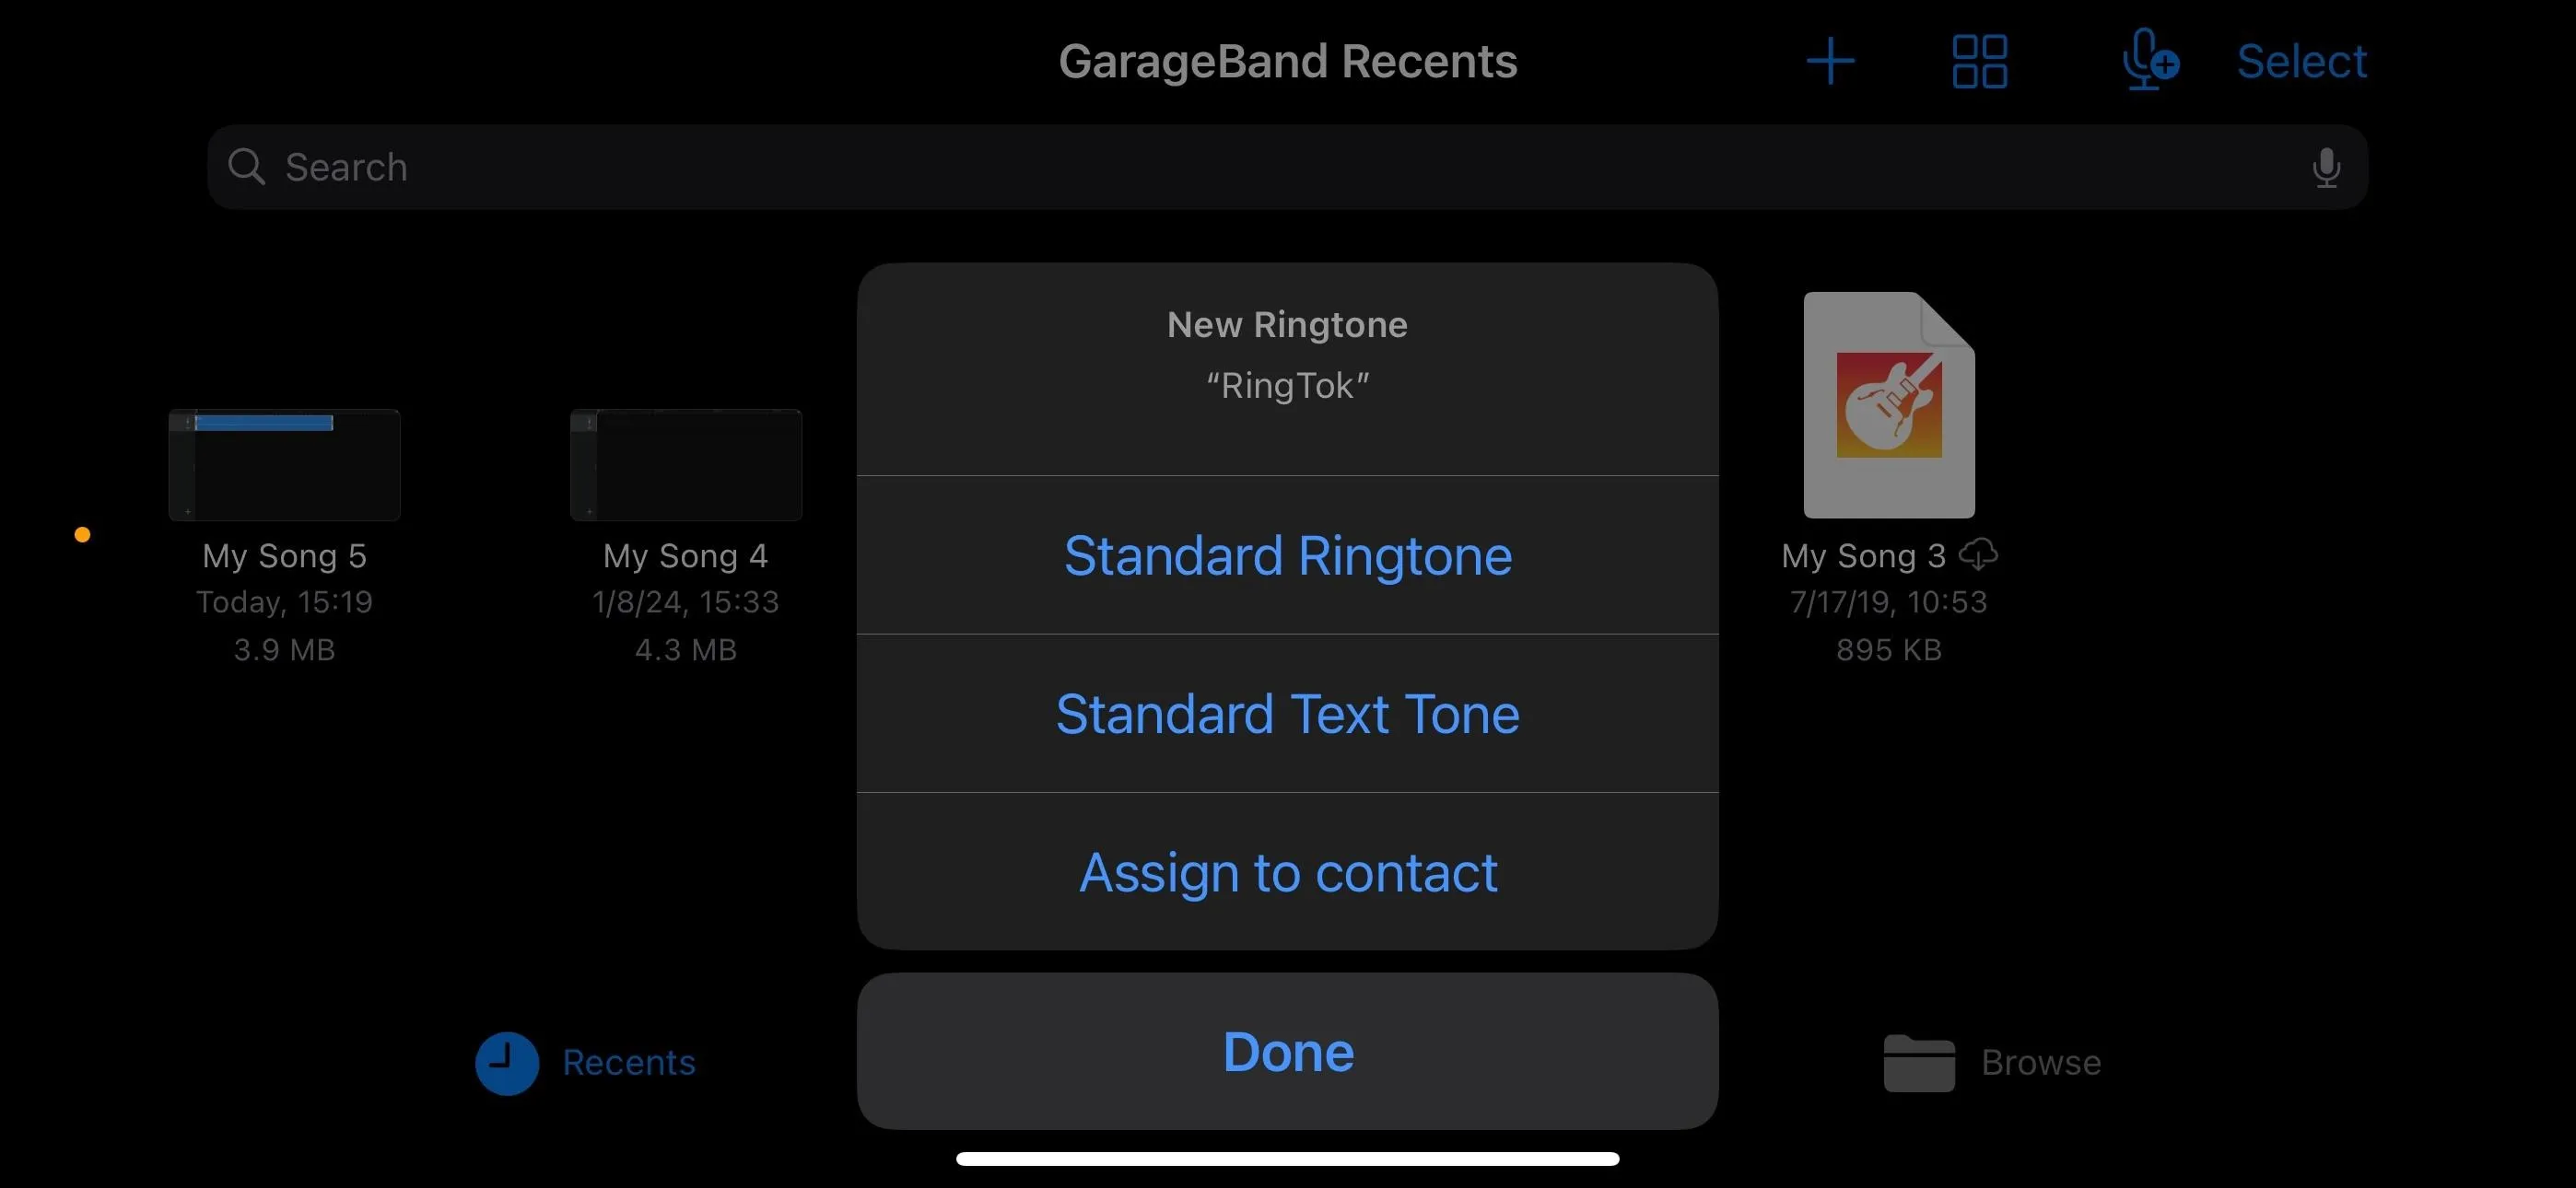
After exporting the ringtone in Step 3, GarageBand should ask if you want to use the sound now. You can tap "OK" to dismiss it or choose "Use sound as" to set the ringtone immediately. If you do it now, you can choose between setting it as a "Standard Ringtone" or "Standard Text Tone," or you can "Assign to contact" to attach the ringtone to just one of your contacts.
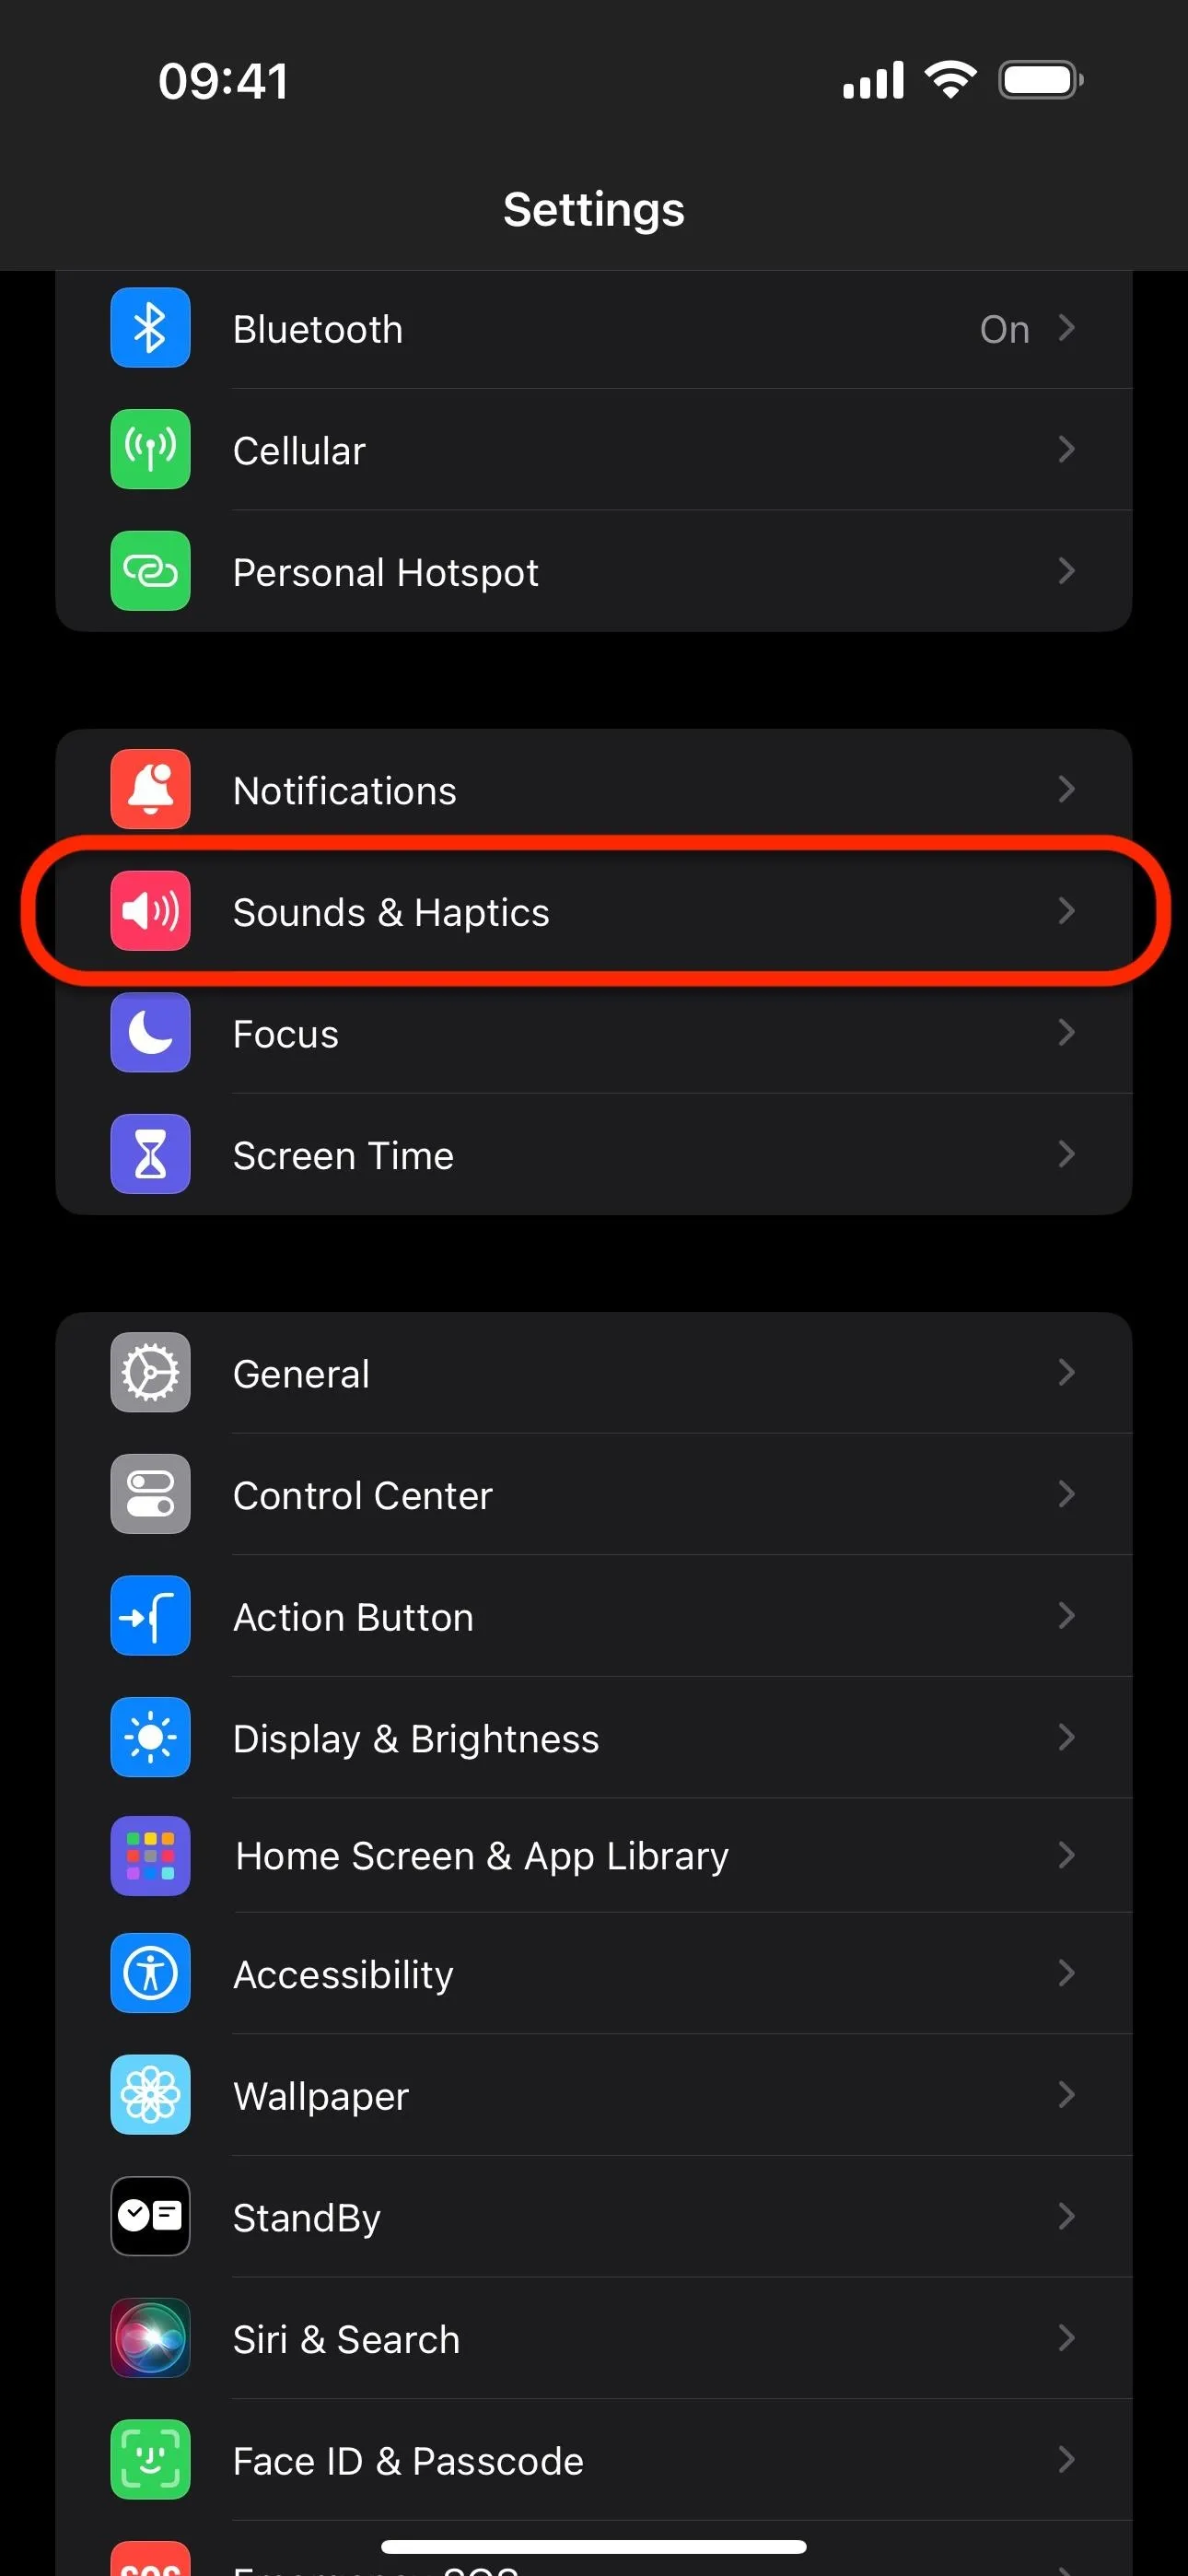
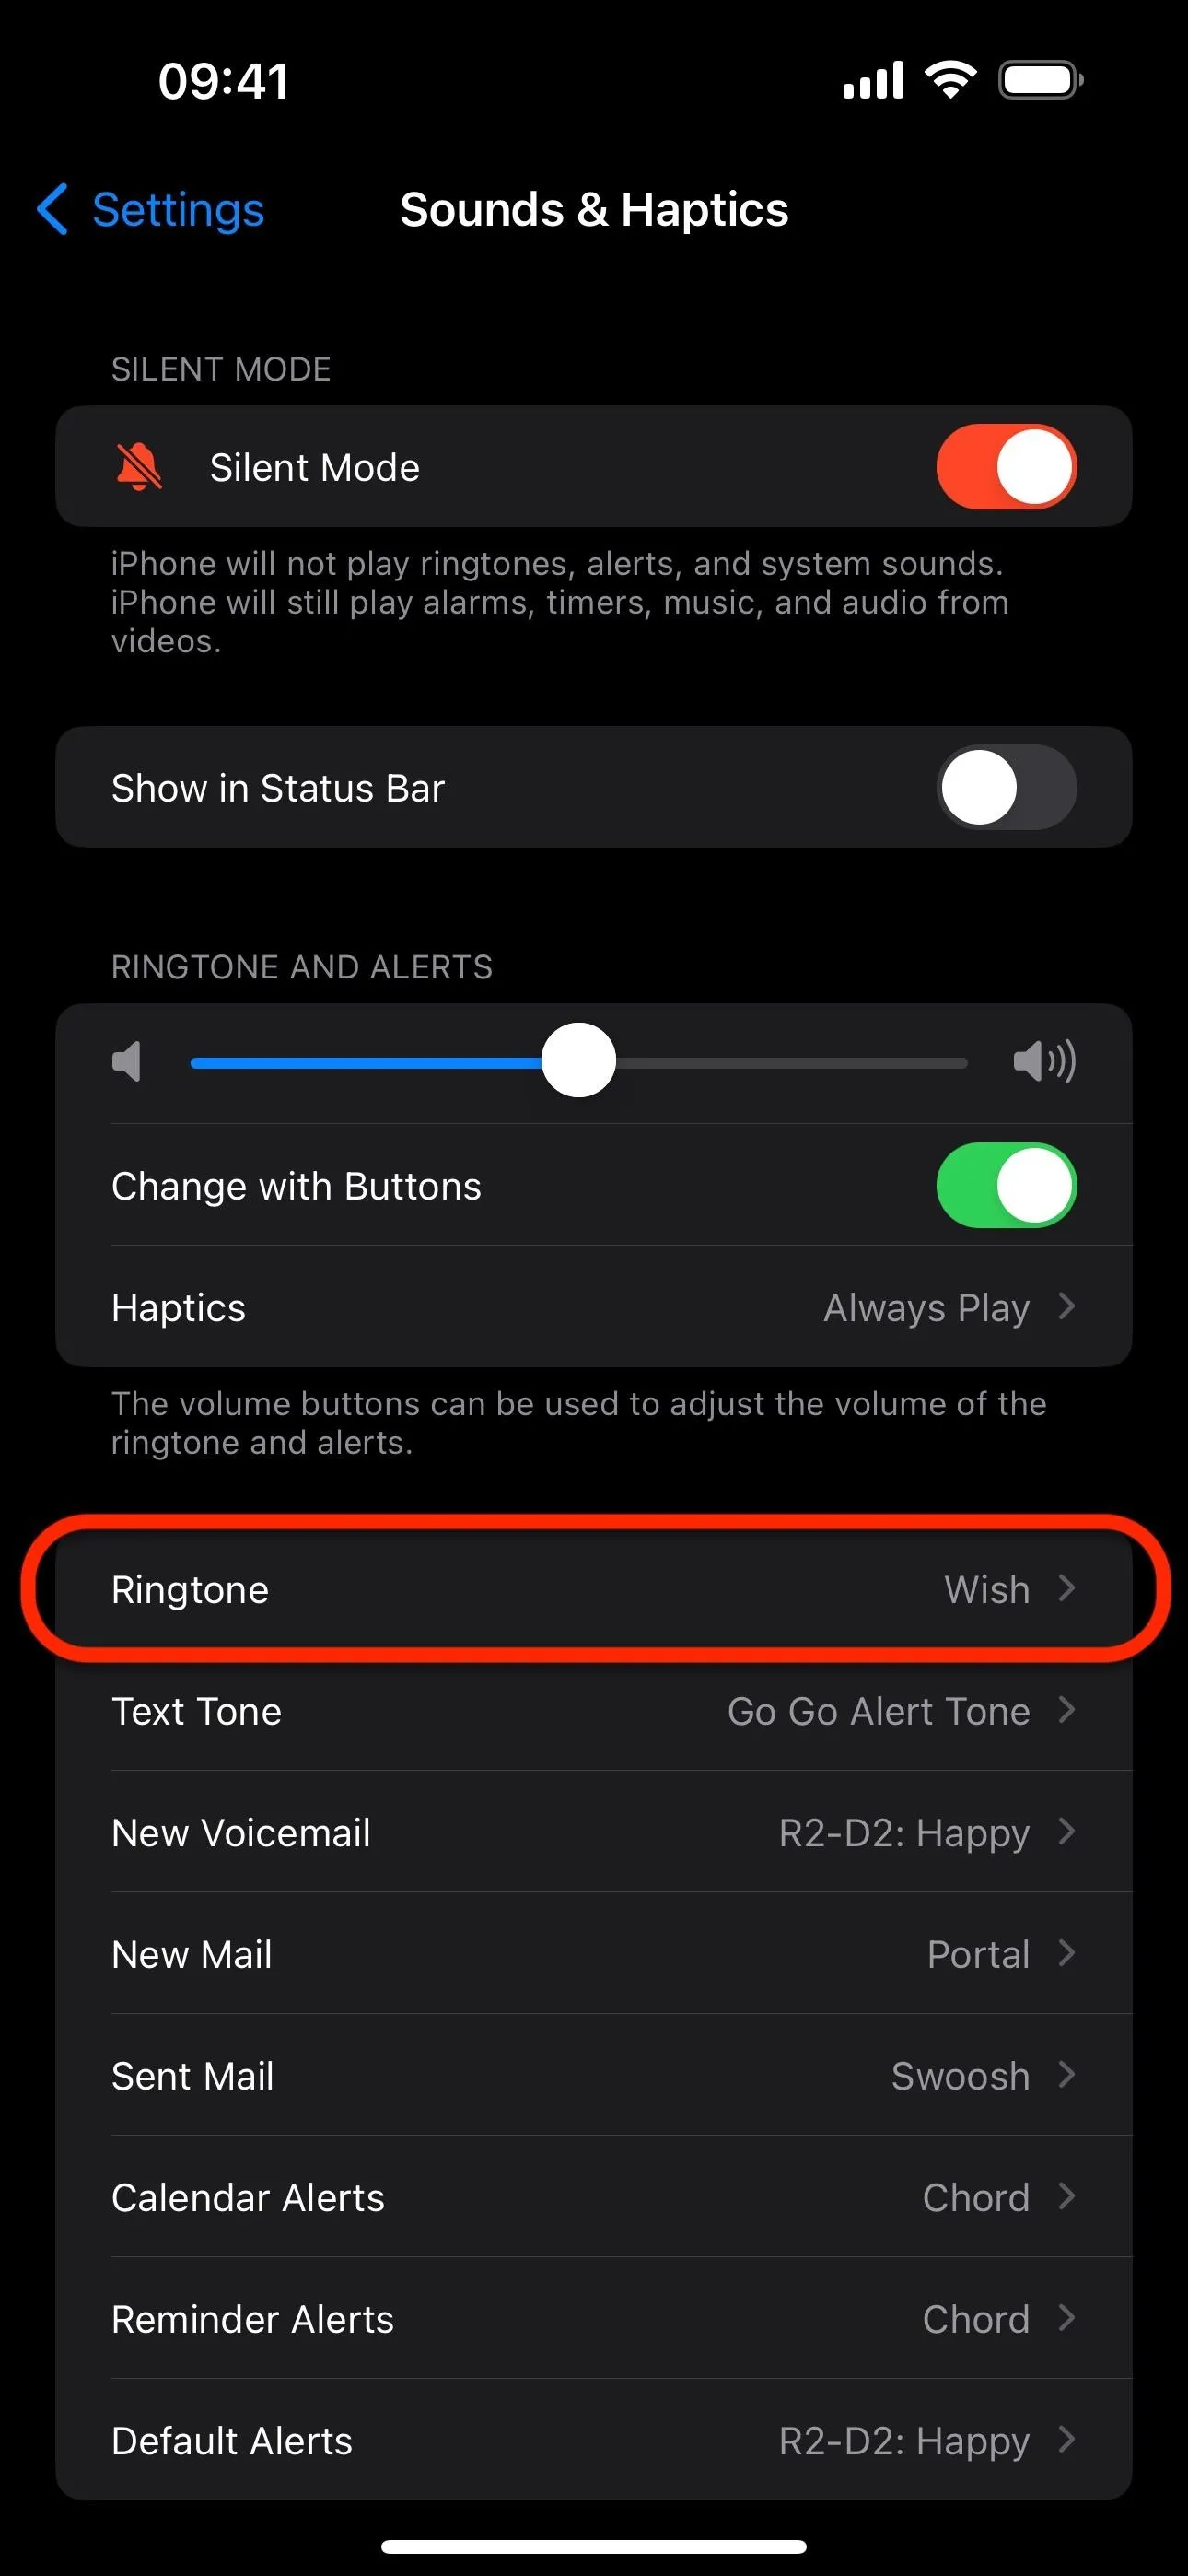
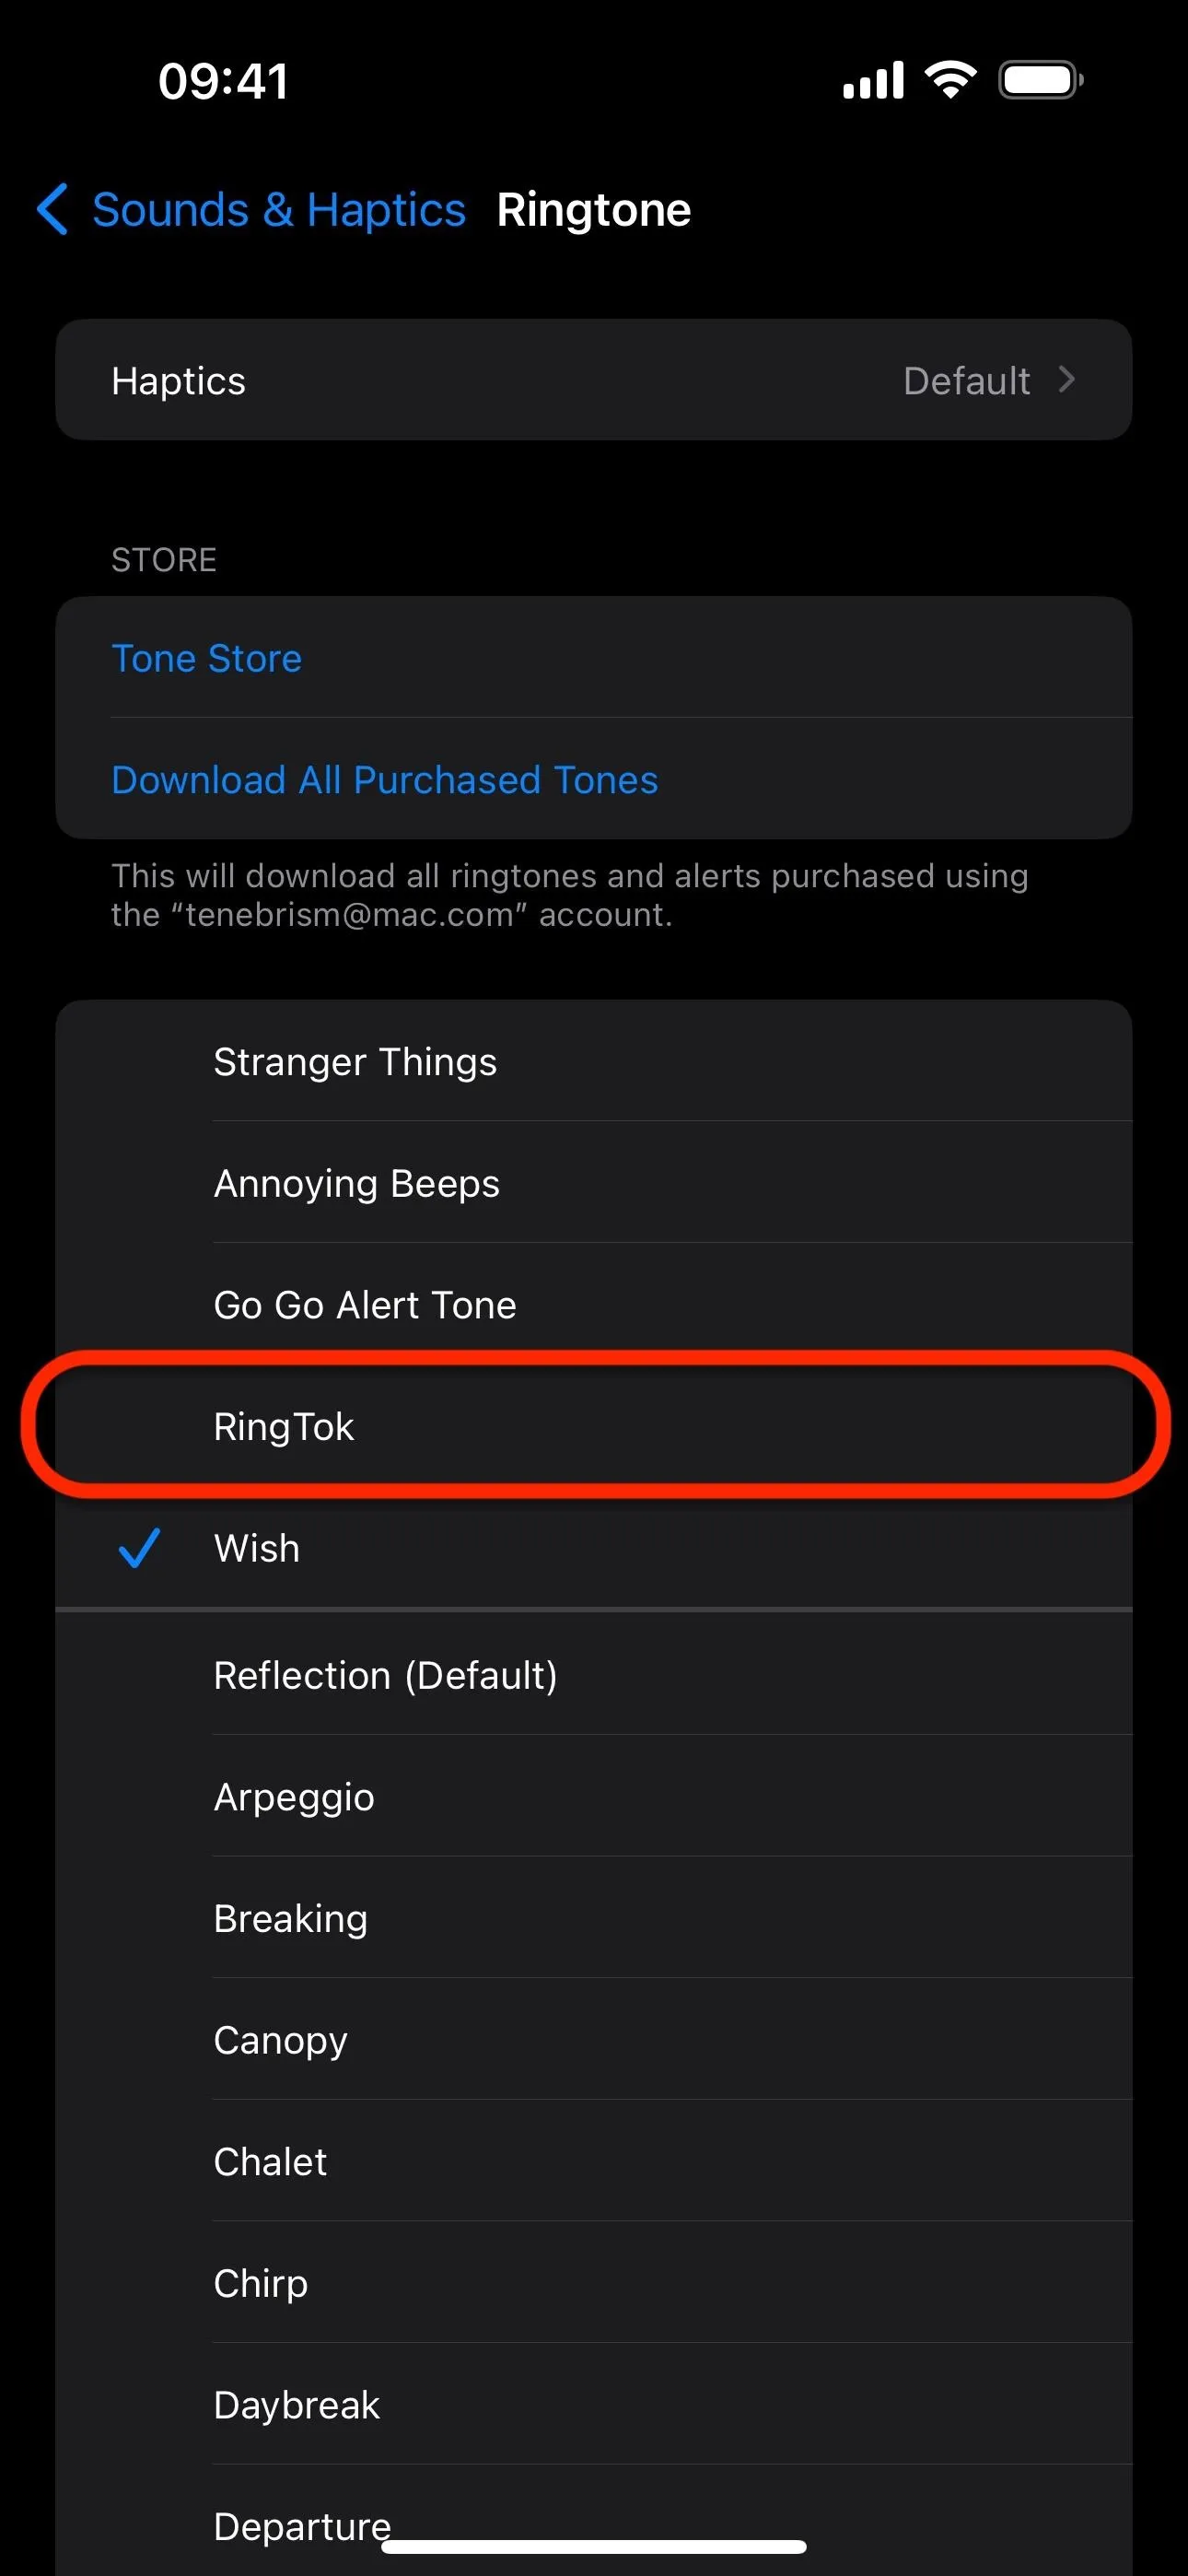
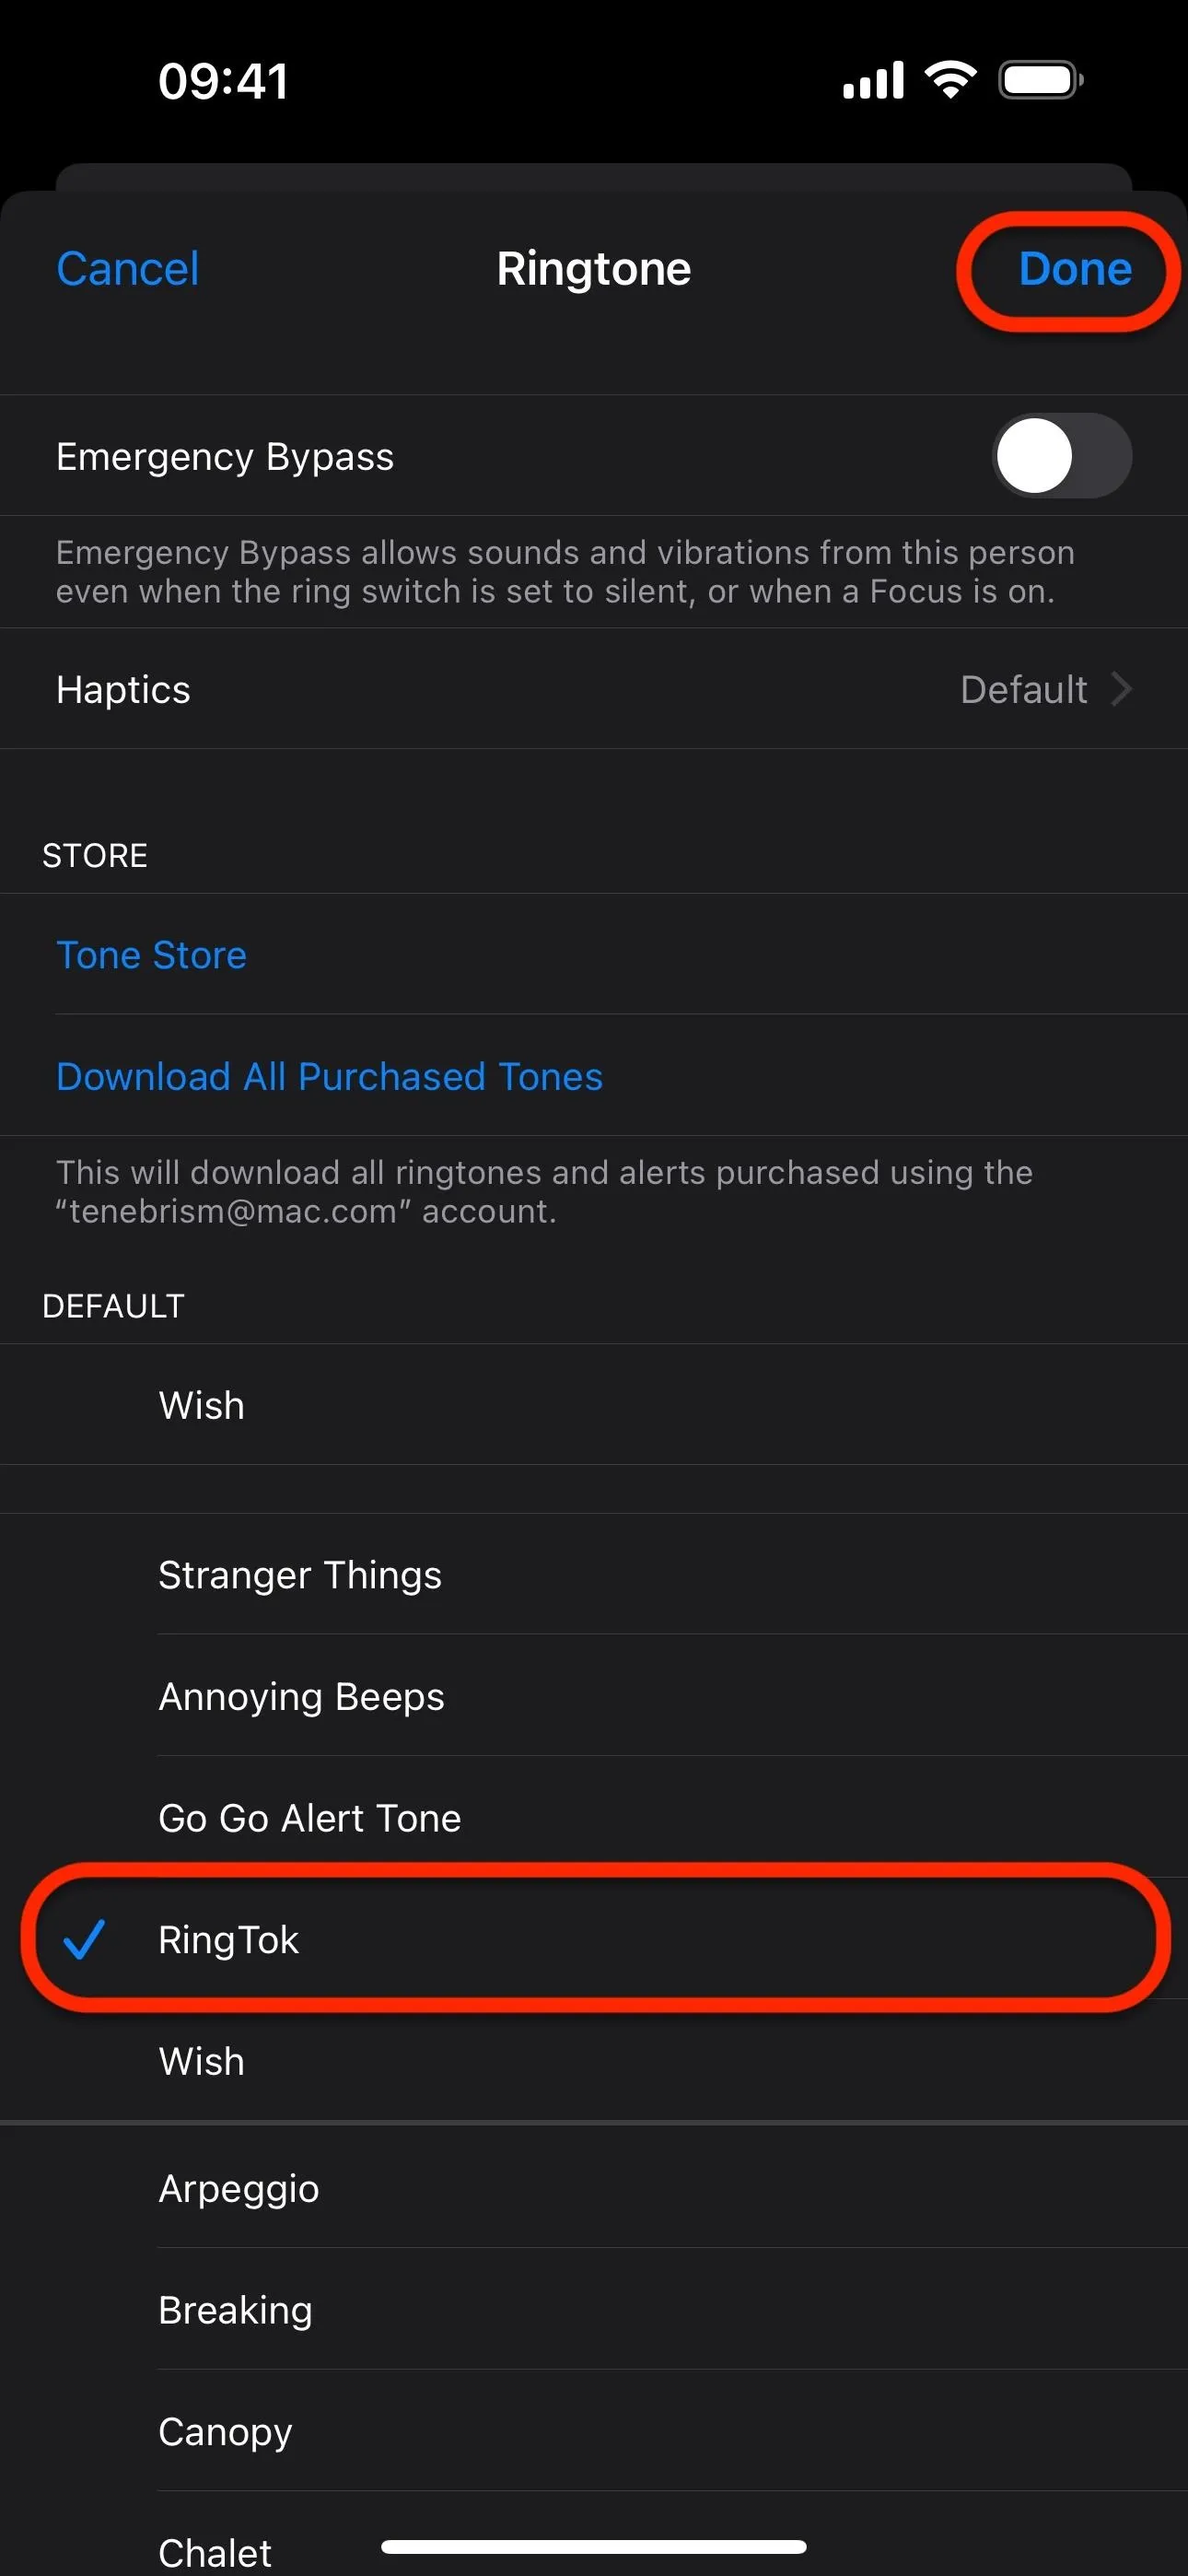
If you pressed "OK" instead, you can assign the ringtone manually. To make it your standard ringtone, open Settings, tap "Sounds & Haptics," and choose "Ringtone." Select your ringtone from the top of the list (all custom and purchased ringtones will appear there, separated by a line from the built-in system ringtones).
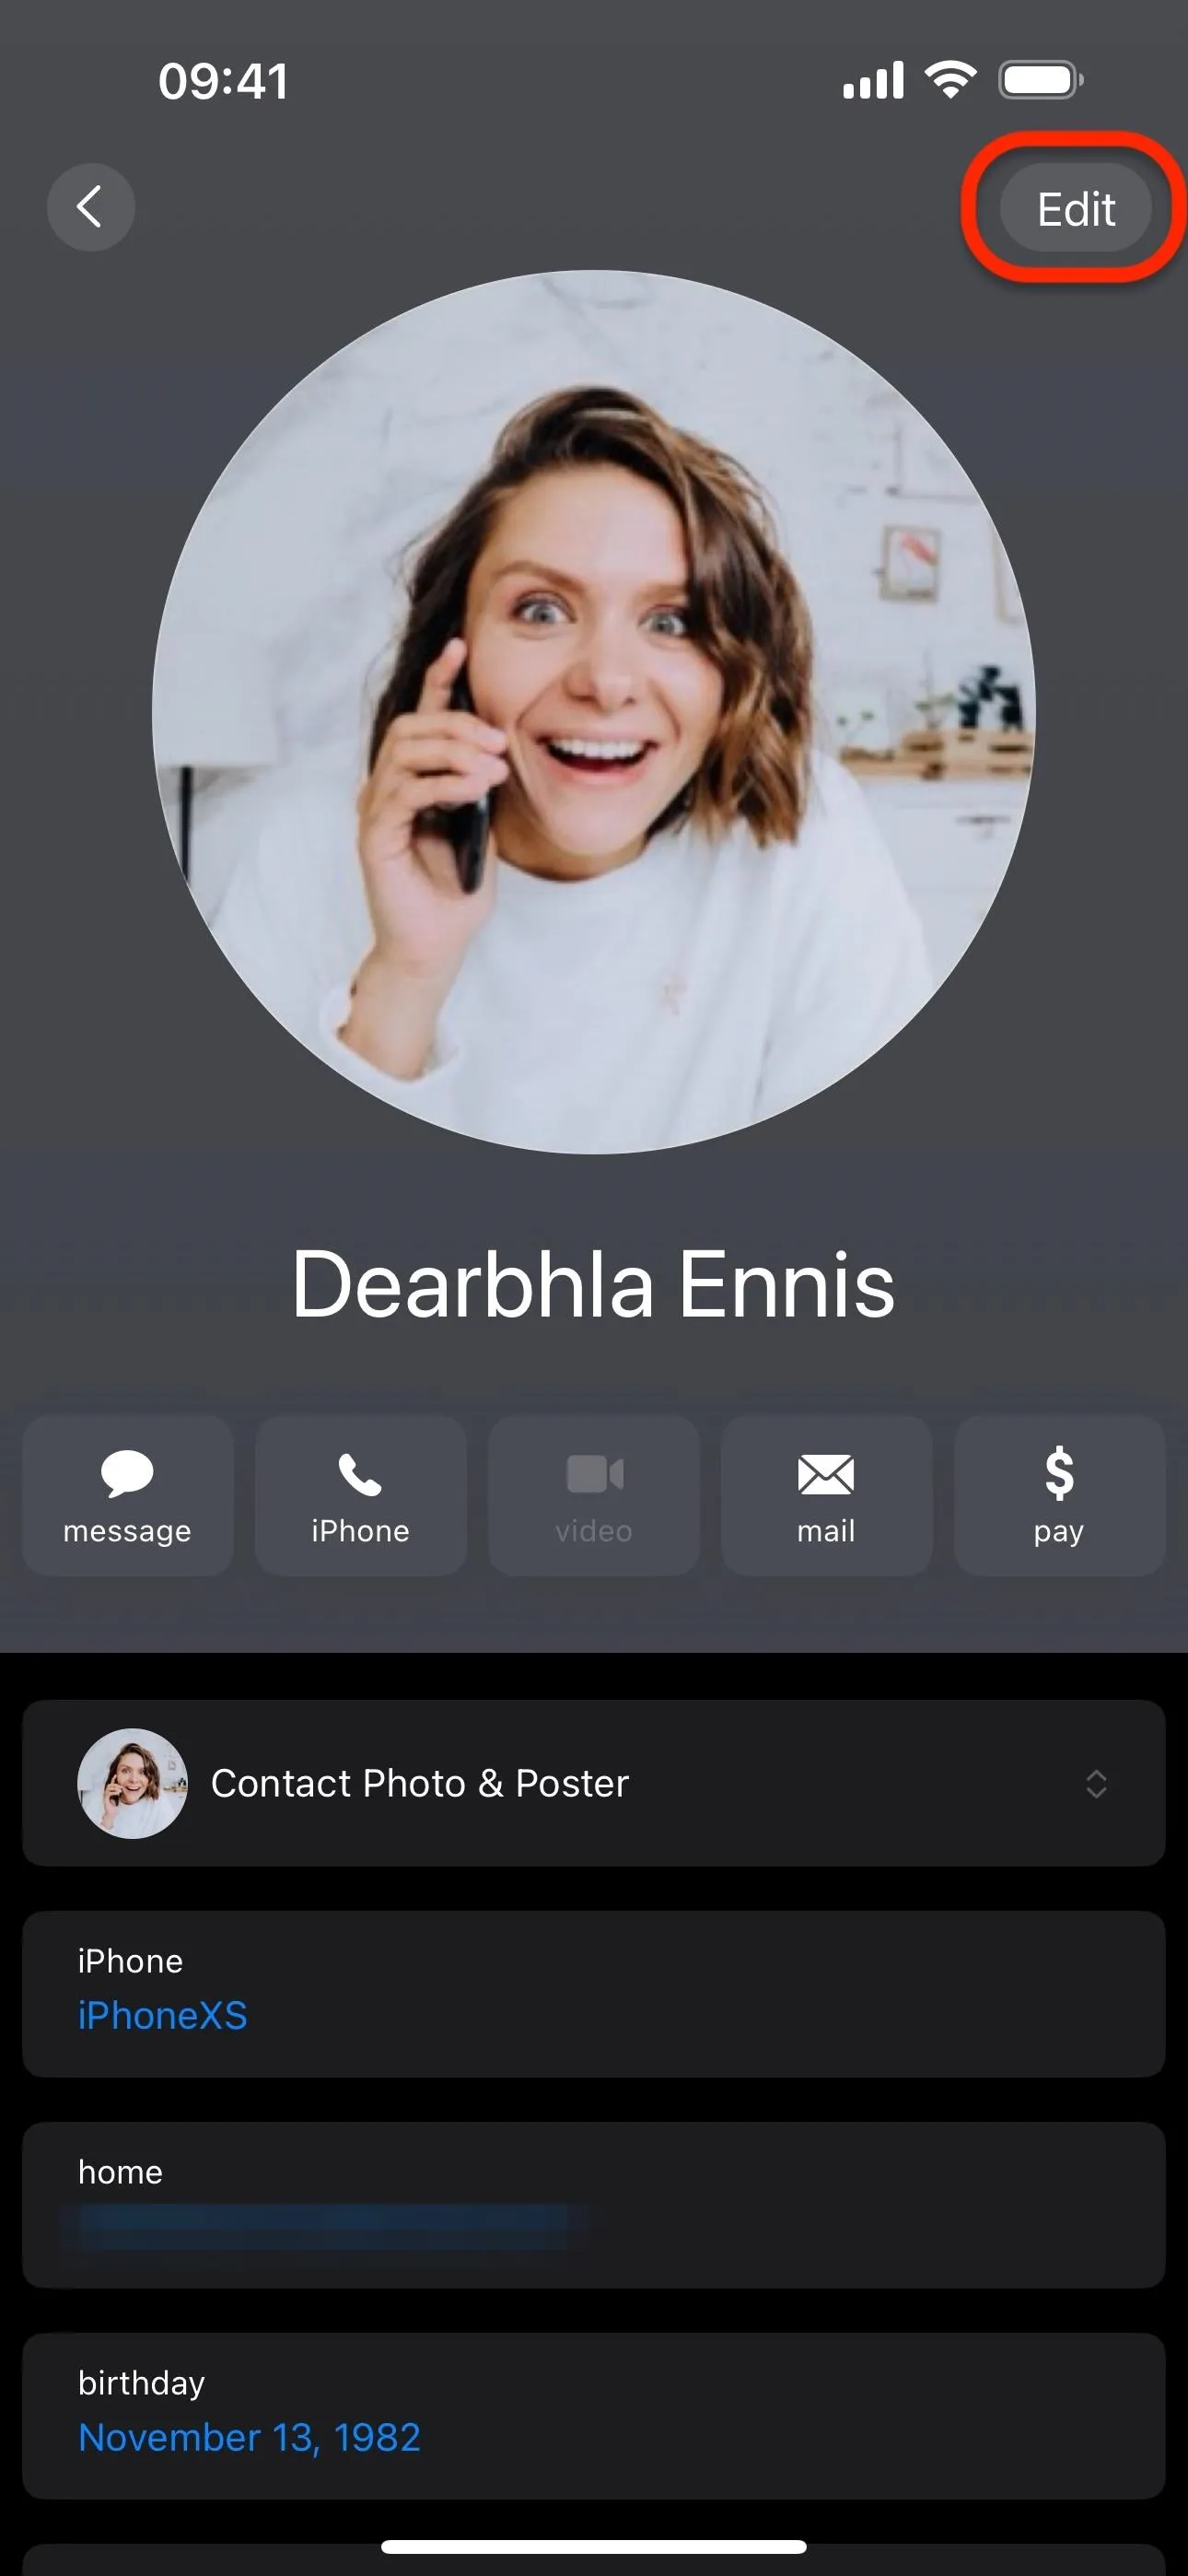
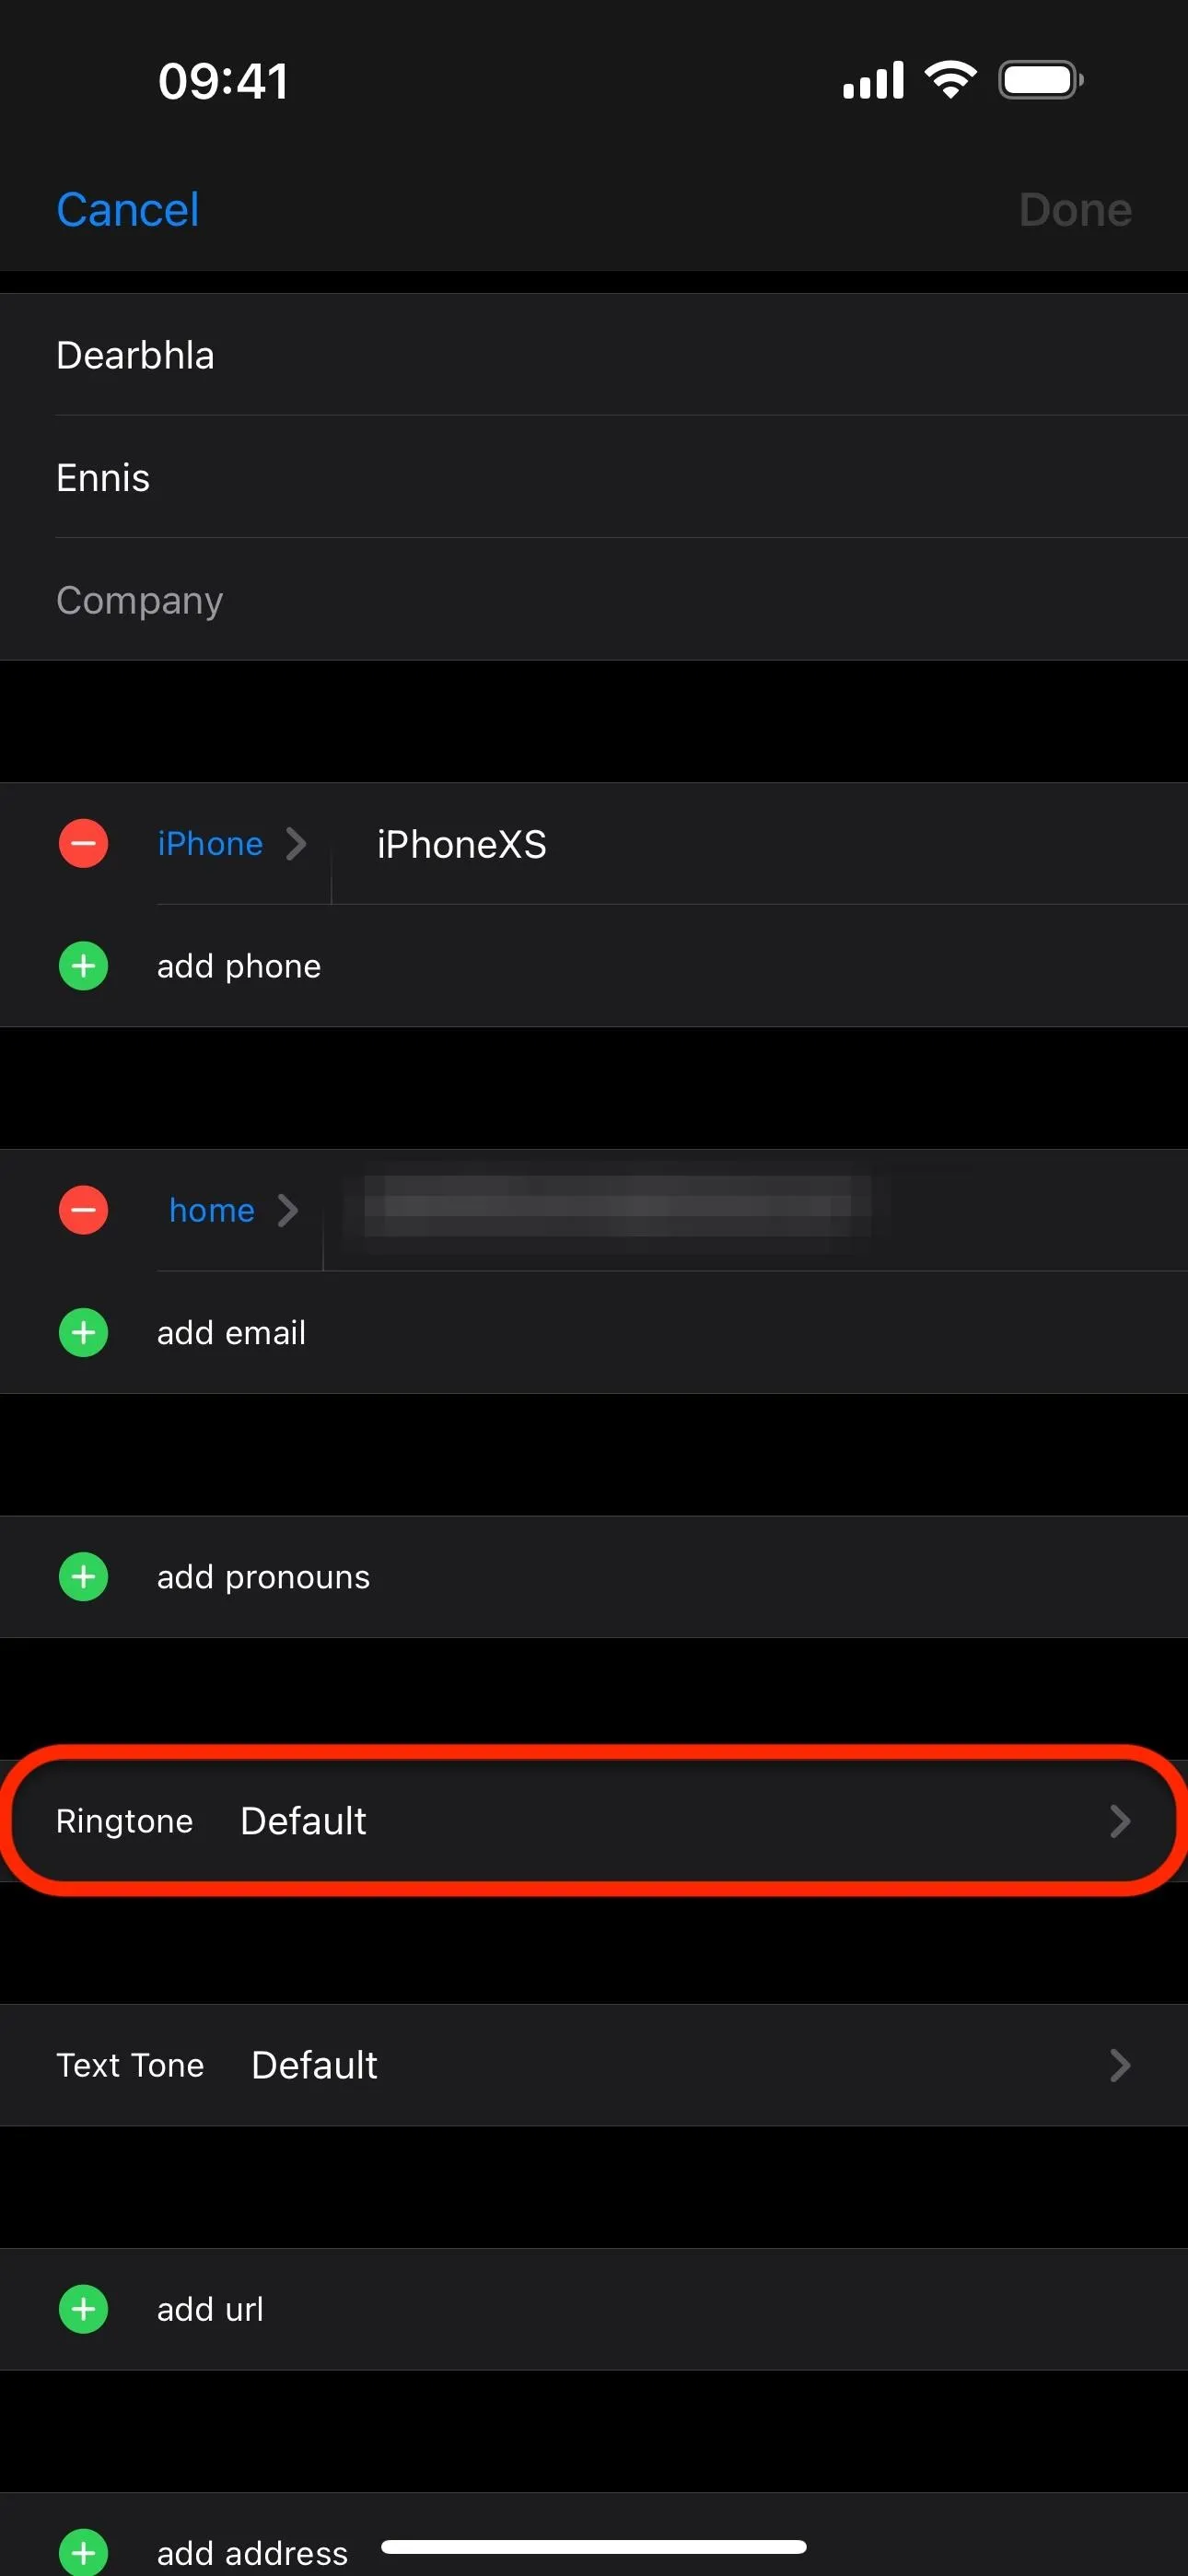
To assign the ringtone to a particular contact, open the Contacts app, select the contact in question, tap "Edit," and choose "Ringtone." Then, select your RingTok ringtone, hit "Done," and then hit "Done" again to save.
Cover photo and screenshots by Justin Meyers/Gadget Hacks


Comments
Be the first, drop a comment!