


Apple's Reminders app is essential for those of us with a forgetful memory. But a standard Reminders entry isn't foolproof. They aren't great if you need to do something right when you get somewhere, since it can be tricky to set a specific time for that reminder. That's why Apple's location-based reminders are so darn useful.
Location-based reminders are nothing new to iOS. In fact, the feature launched alongside the first iteration of Reminders way back in iOS 5. Every iPhone since the 4 has been able to create a geofence around a specific location that triggers a reminder when you either arrive or leave that area.
- Don't Miss: 200+ Exciting New iOS 13 Features for iPhone
Setting Location-Based Reminders from Quick Toolbar (iOS 13)
If you're running iOS 13, you can create location-based reminders faster than ever. If your iPhone isn't running iOS 13, don't worry. You can still enable location-based reminders. Just skip to the next section below to see how.
Create a New Reminder
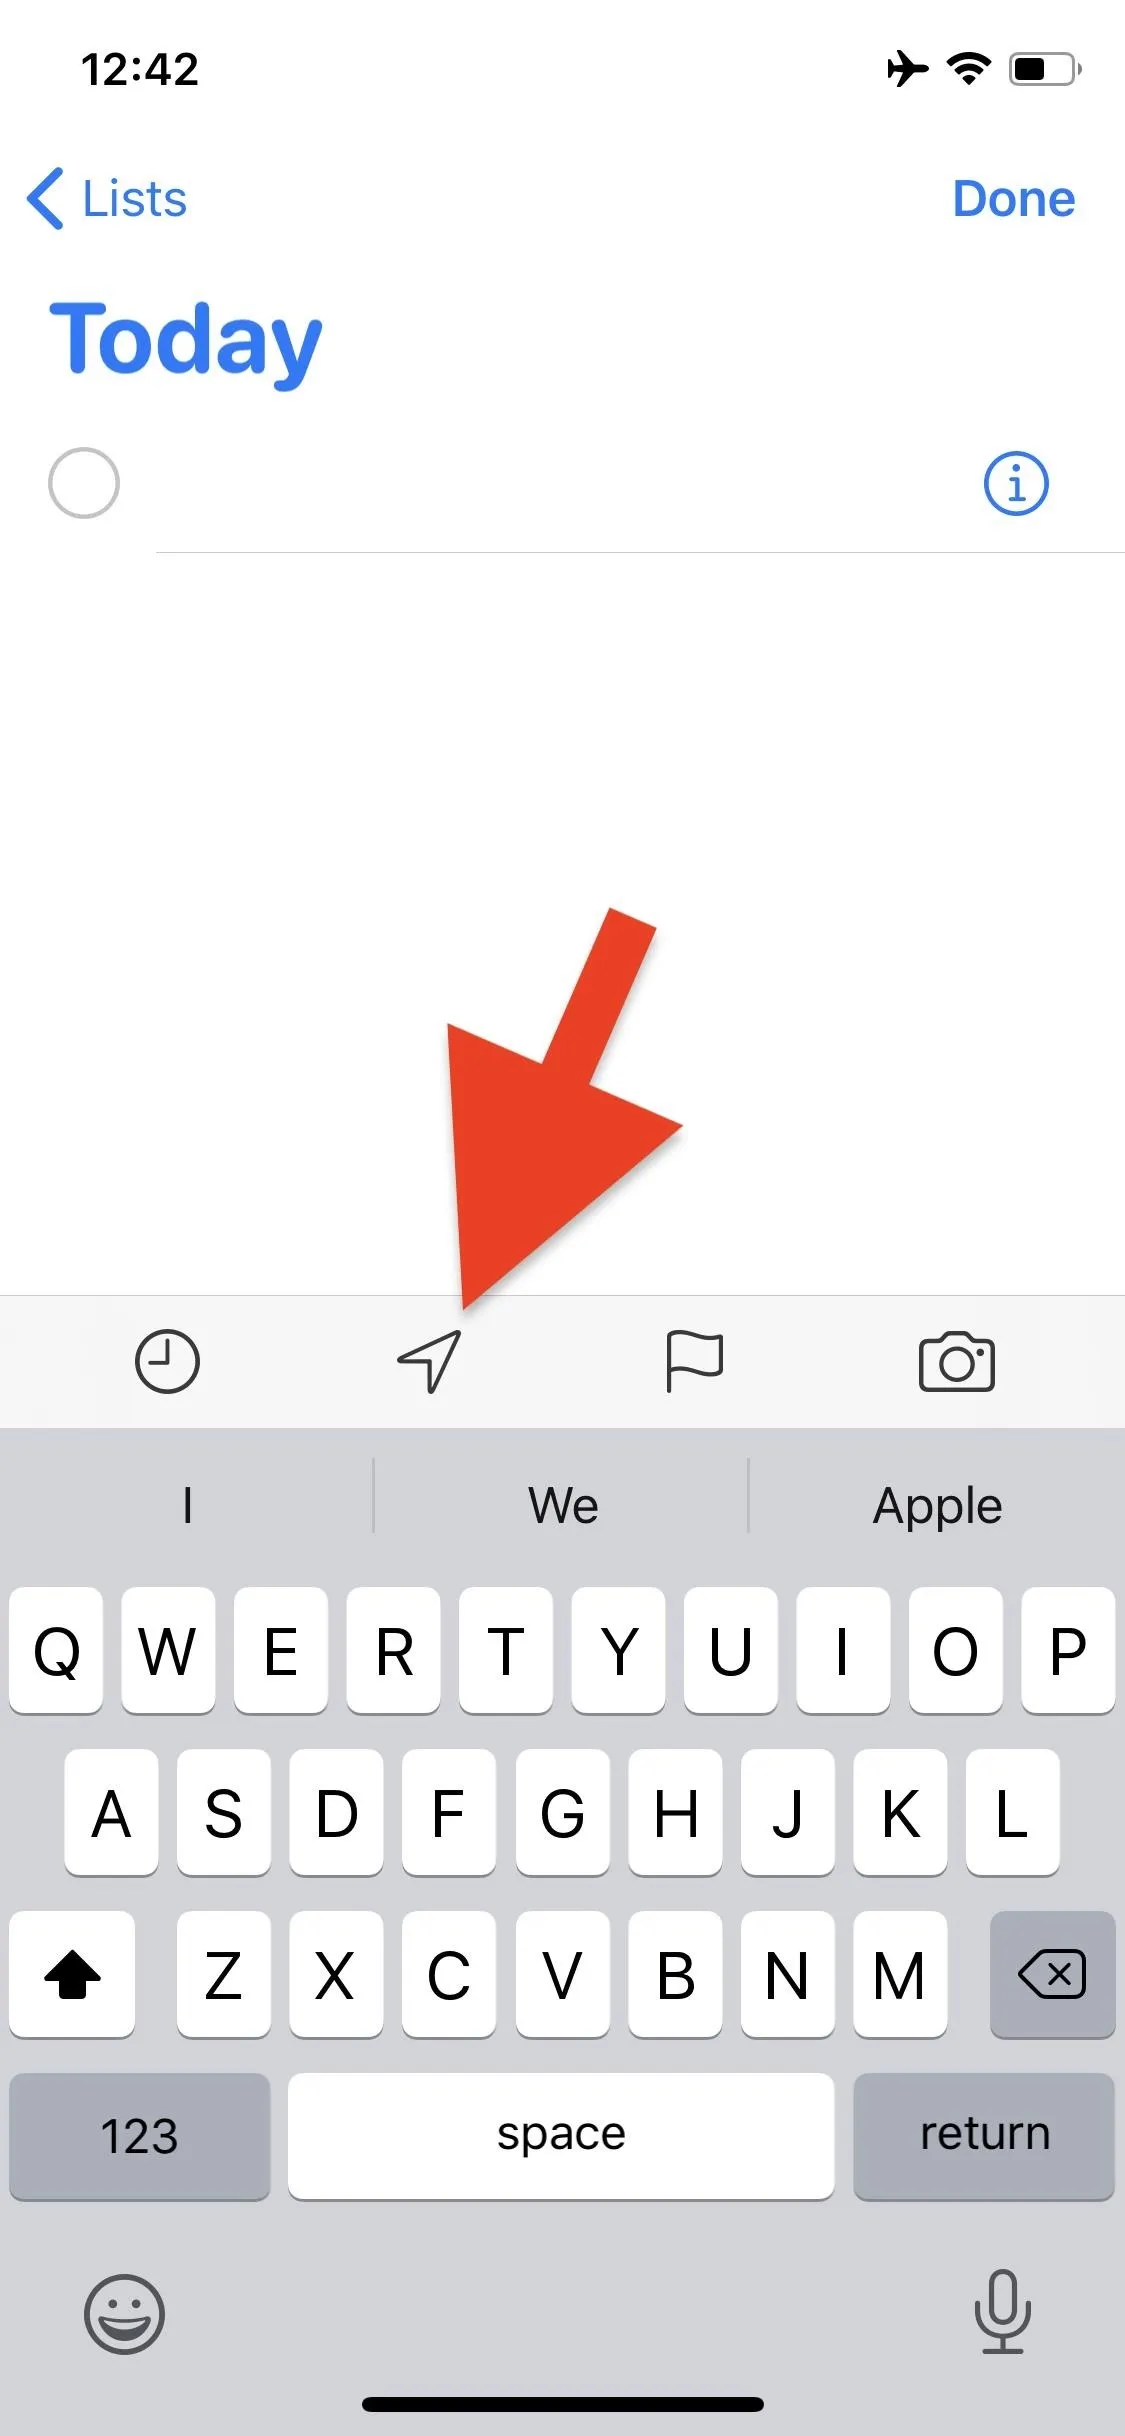
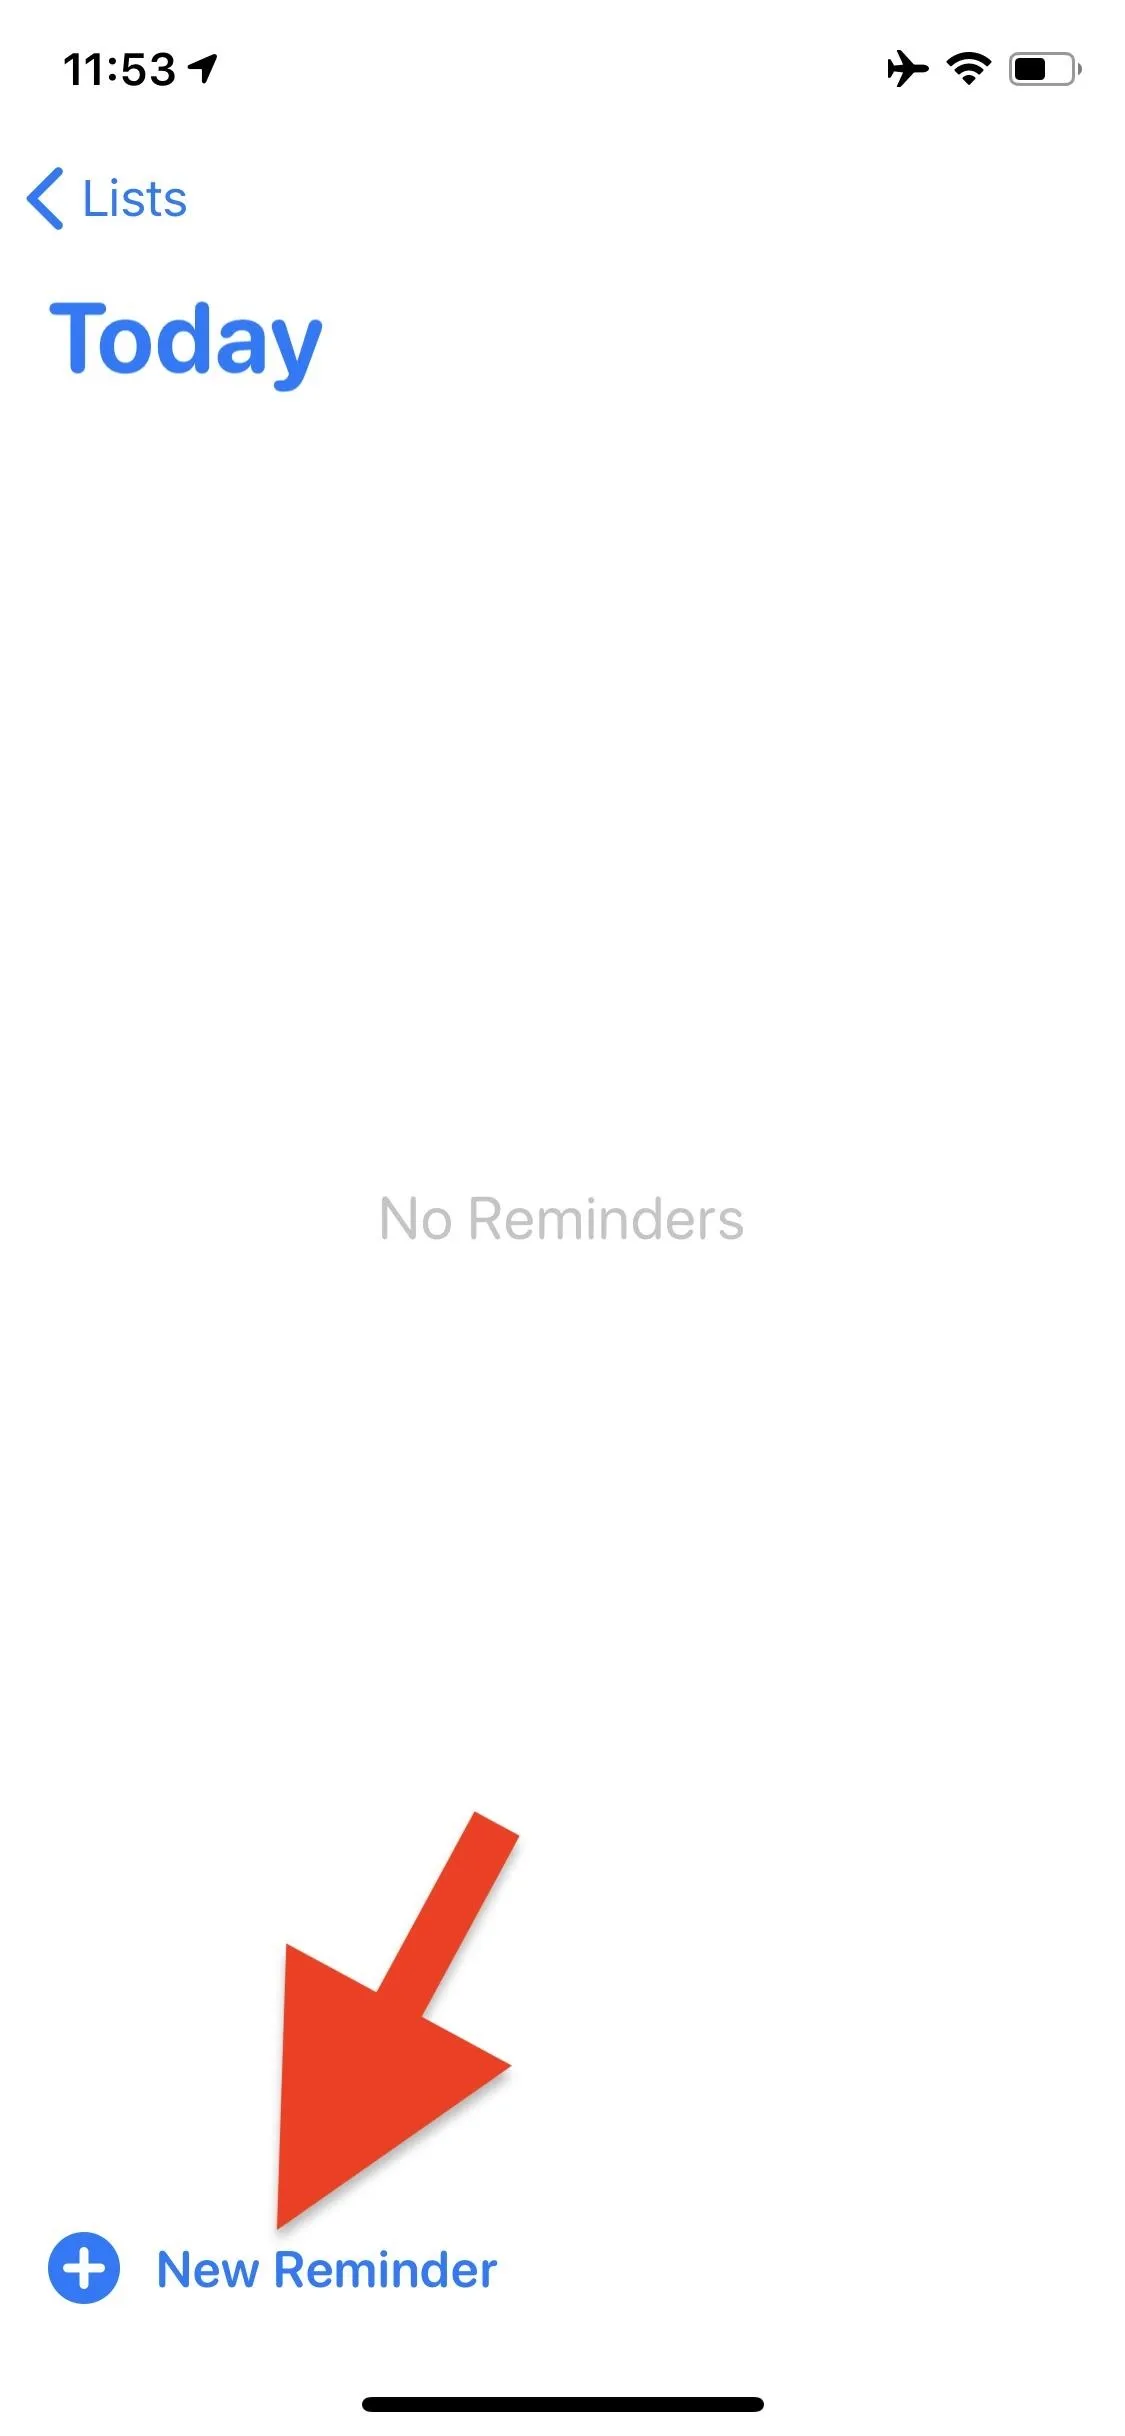
First, open your Reminders app, tap on a list, then tap "New Reminder" in the bottom-left corner of the display. Next, tap the Location icon in the quick toolbar above the keyboard. If you don't have location services enabled, iOS will prompt you to enable it here.


Choose Your Location
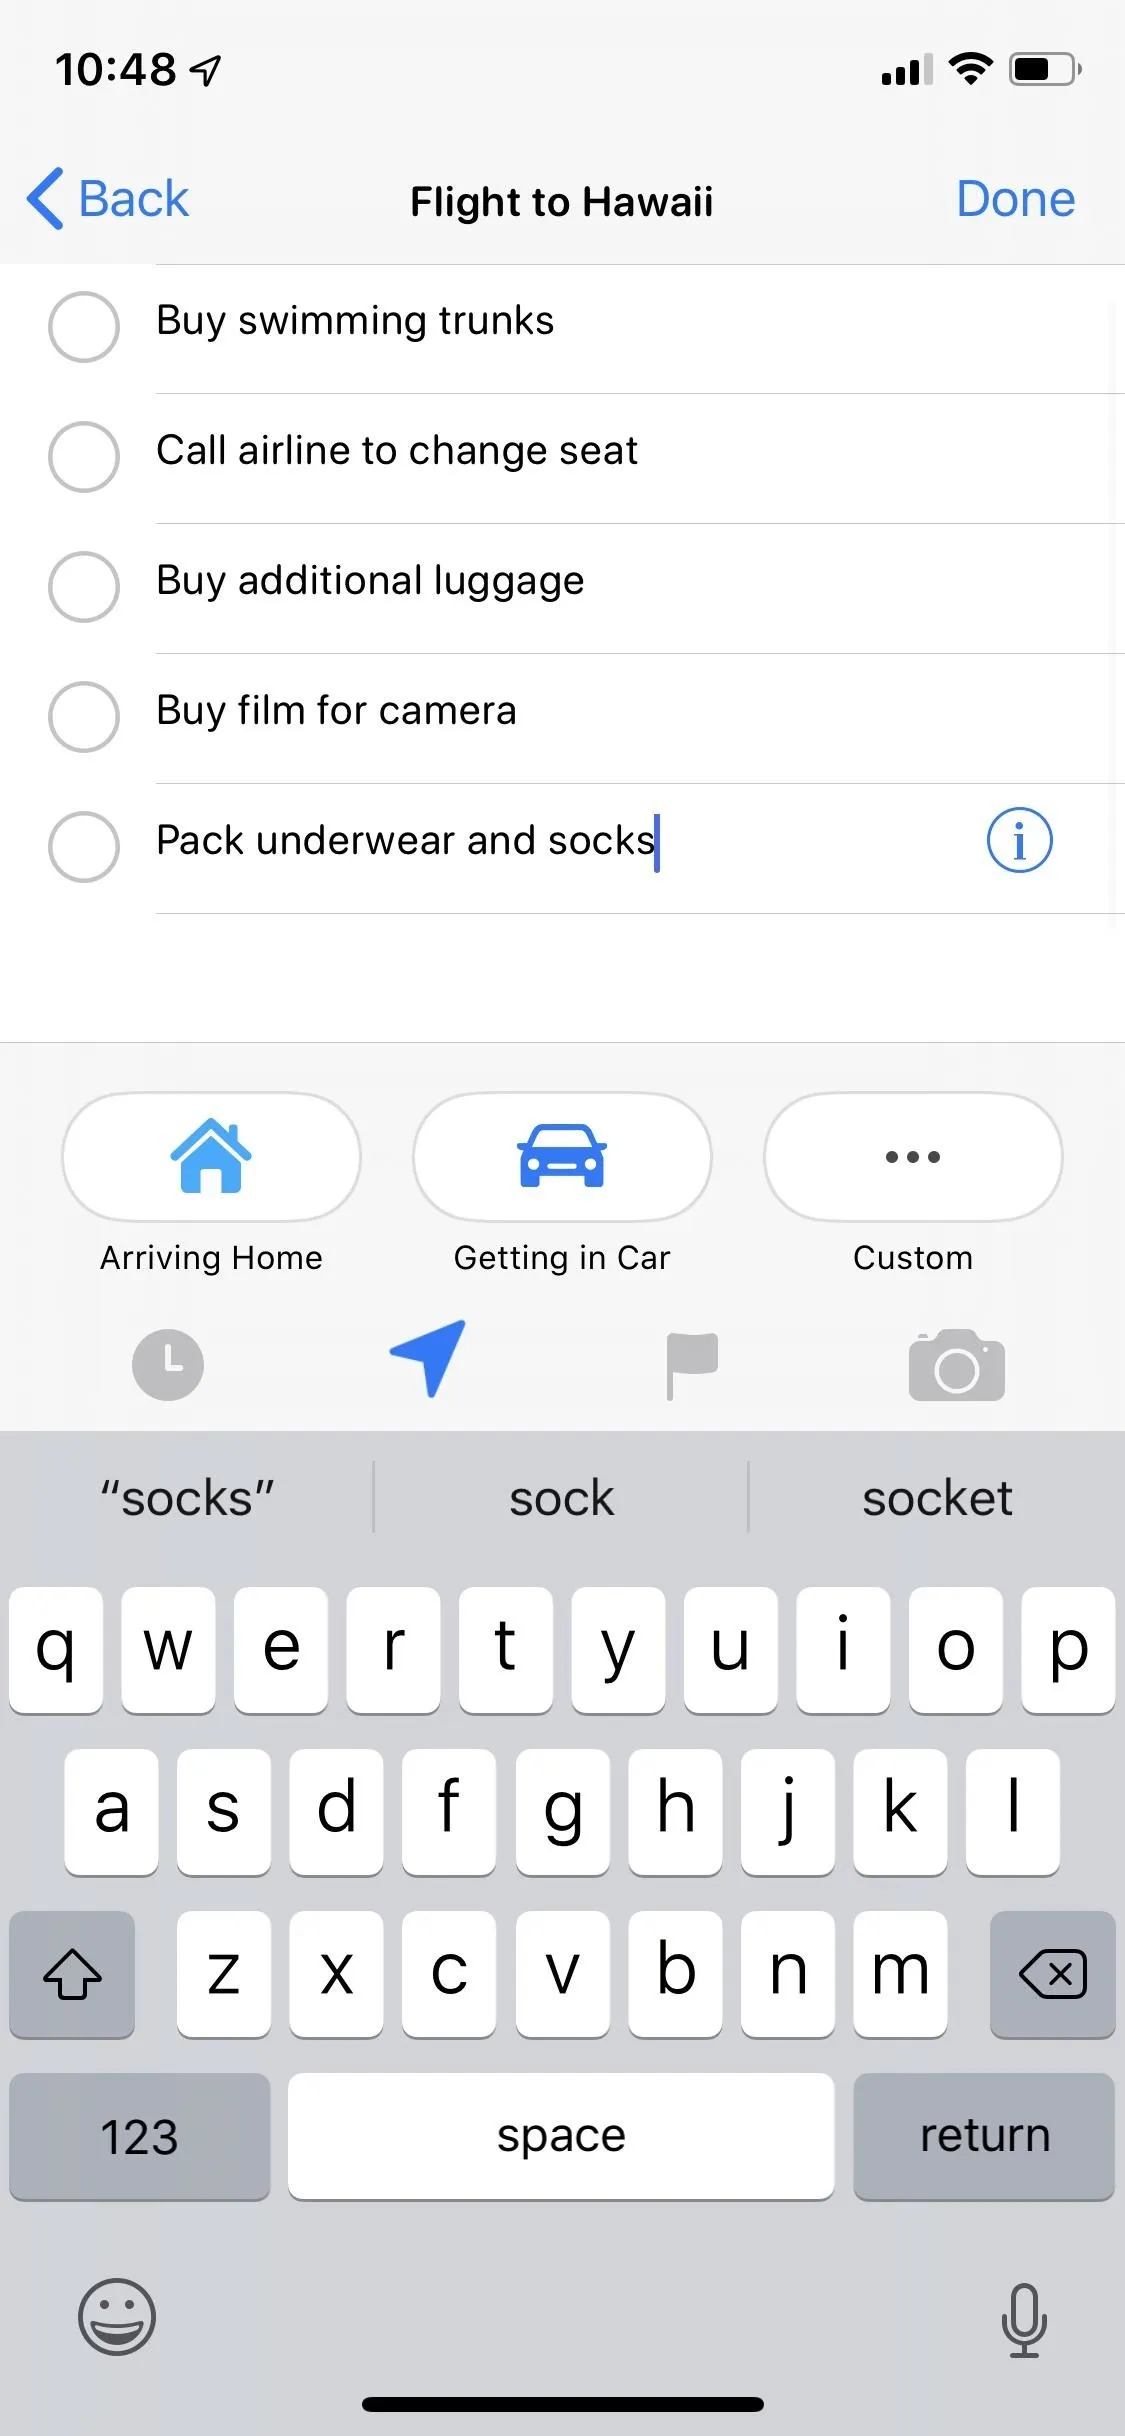
Here, you can choose from "Arriving Home" (pulled from Apple Maps, only if you have your home address set up in Contacts), "Arriving Work" (ditto, but for your work address), or "Getting in Car" (when you connect your car to your iPhone via Bluetooth).
Nelson Aguilar/Gadget Hacks

Nelson Aguilar/Gadget Hacks
Nelson Aguilar/Gadget Hacks
Nelson Aguilar/Gadget Hacks
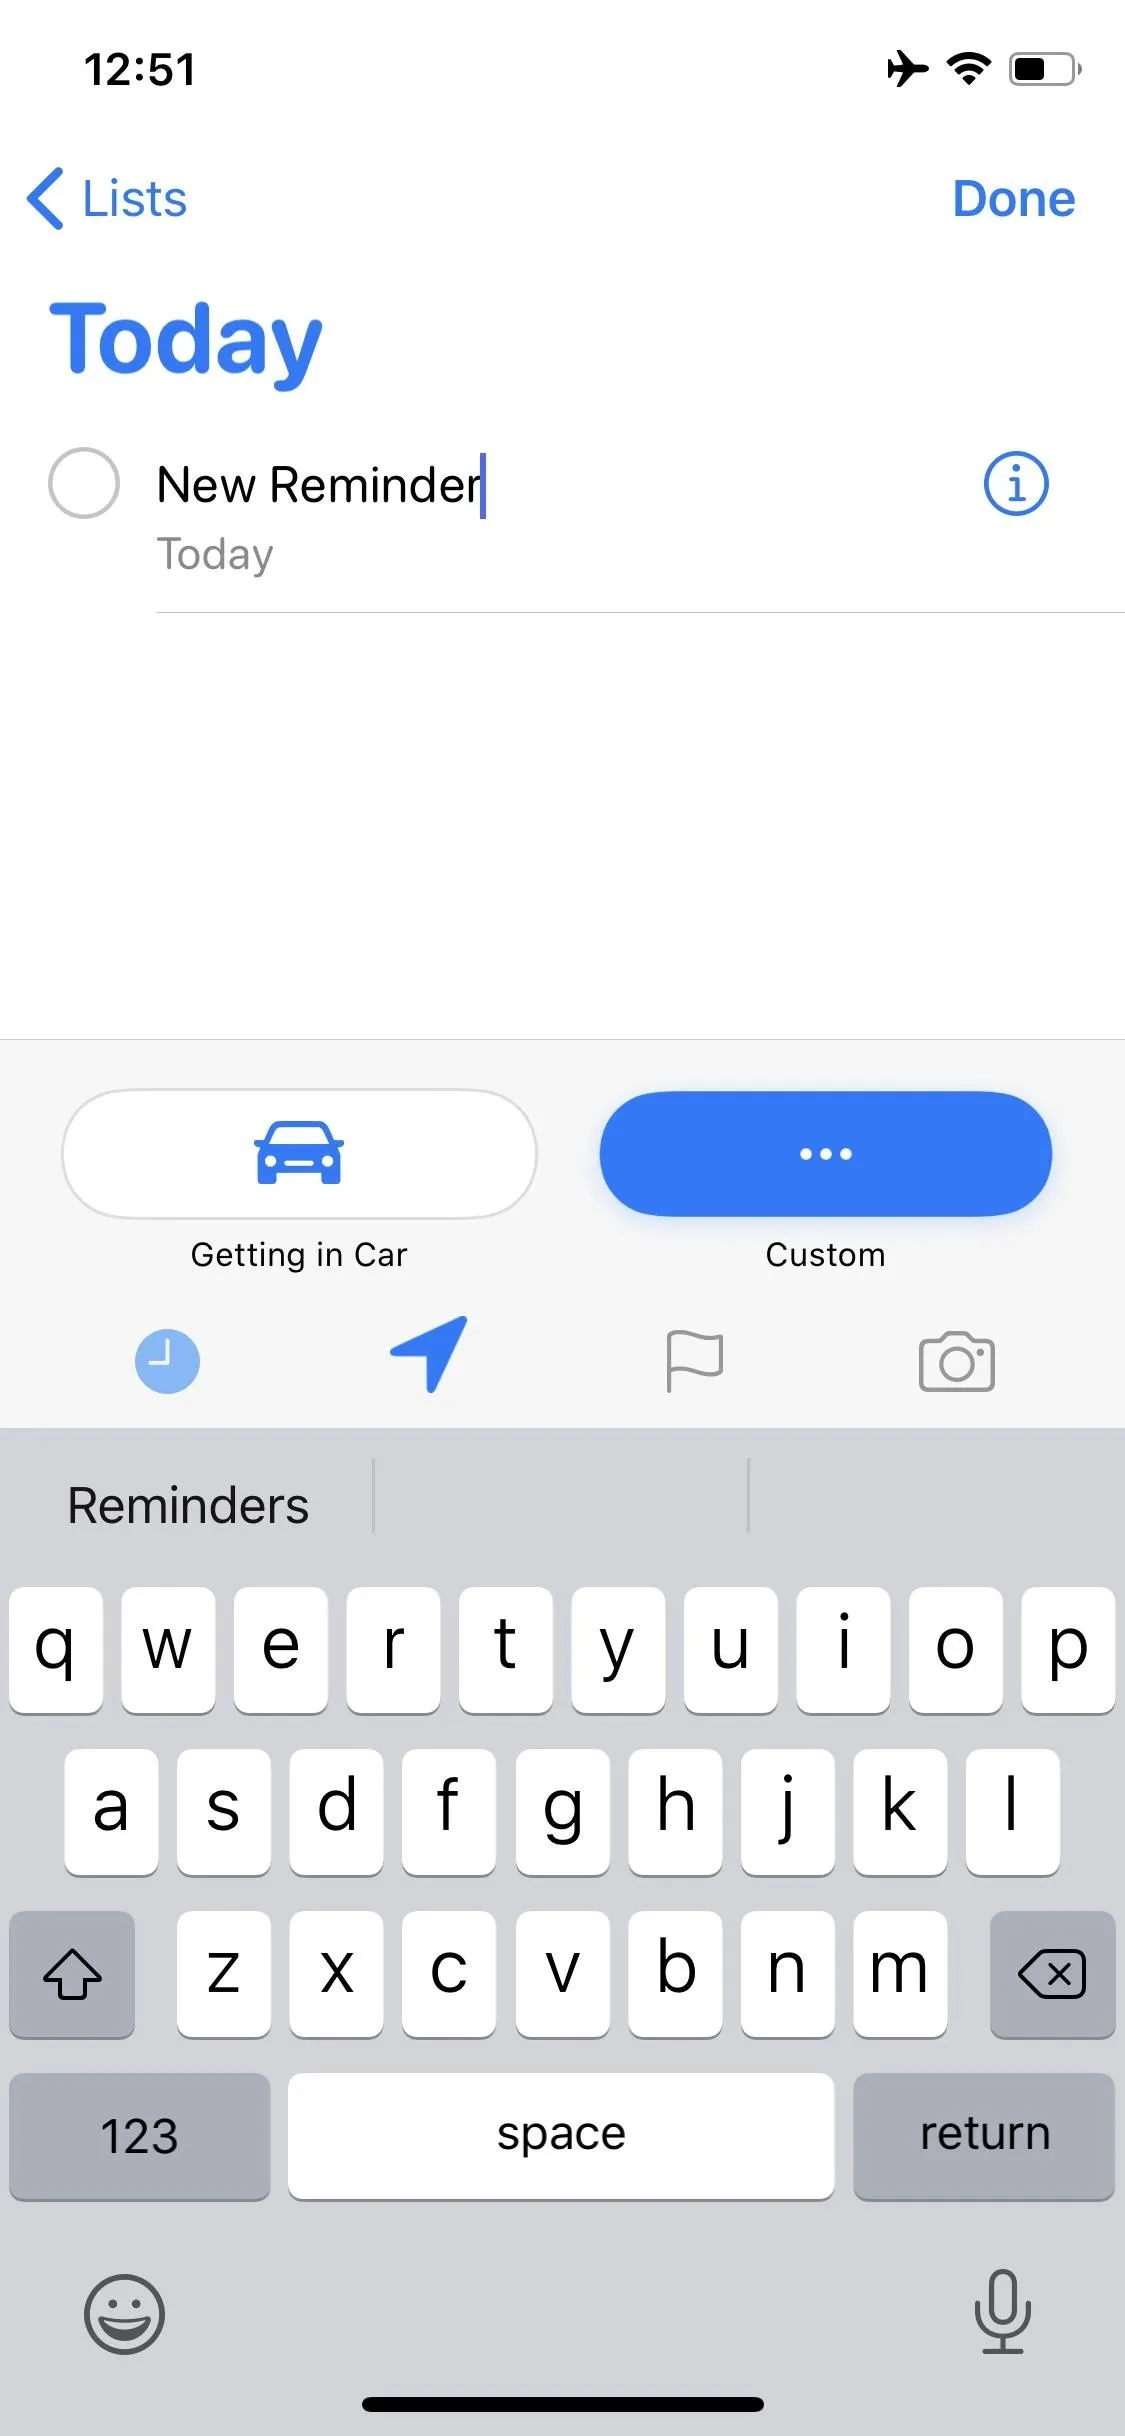
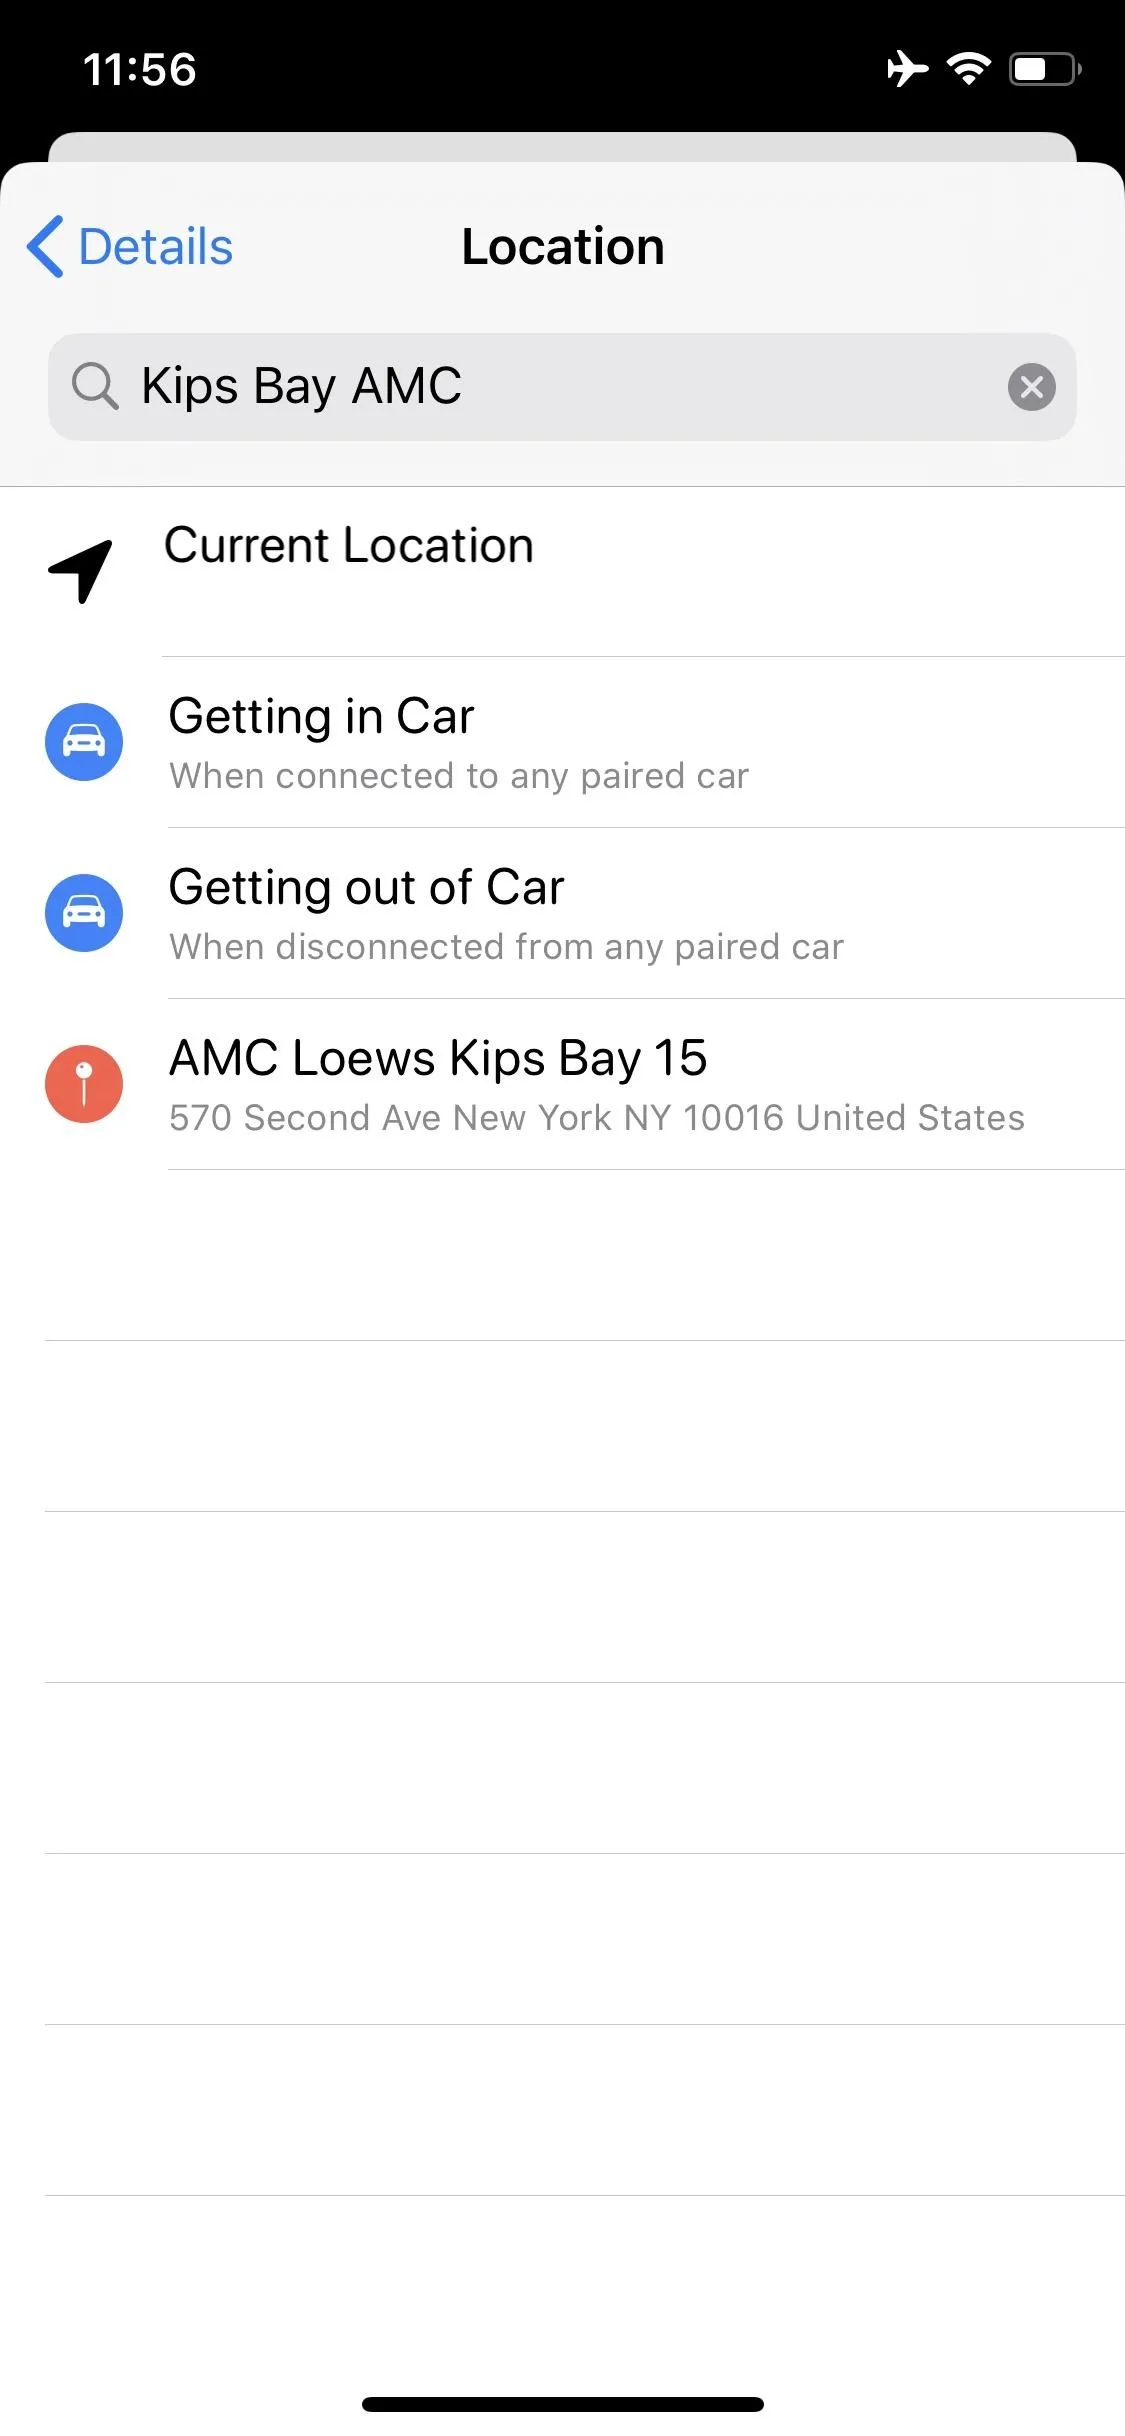
You also have the option to enter a "Custom" location by tapping on the ellipsis icon. You can tap any of the suggested locations that appear (including your current location) or enter a location manually via the search bar.
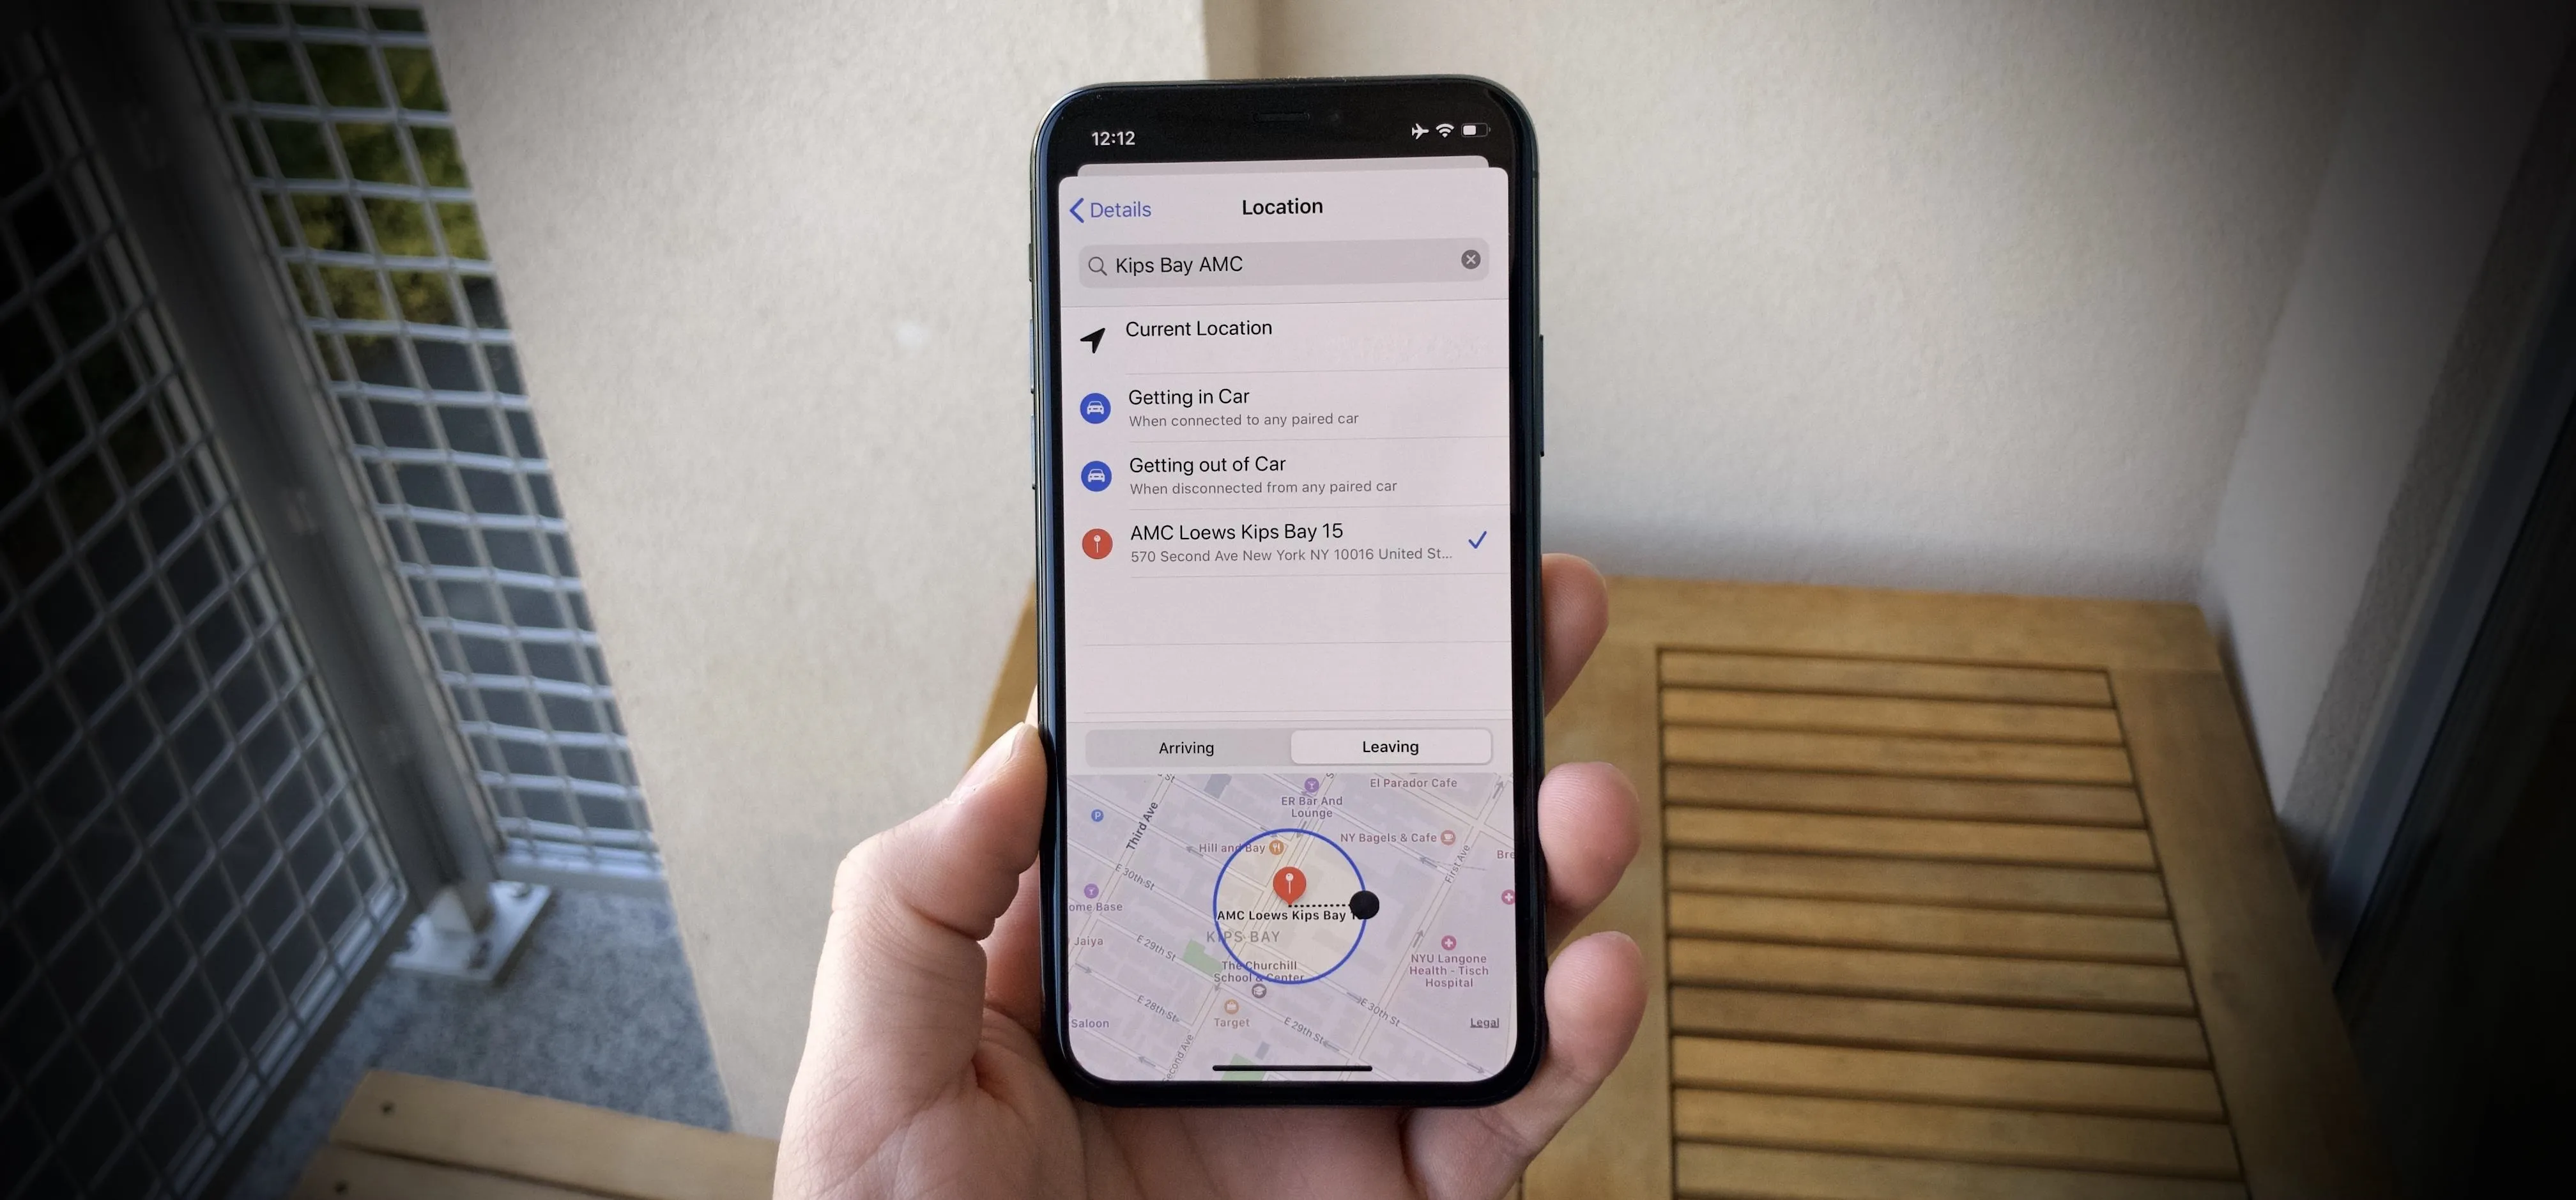
Customize Your Location-Based Reminder
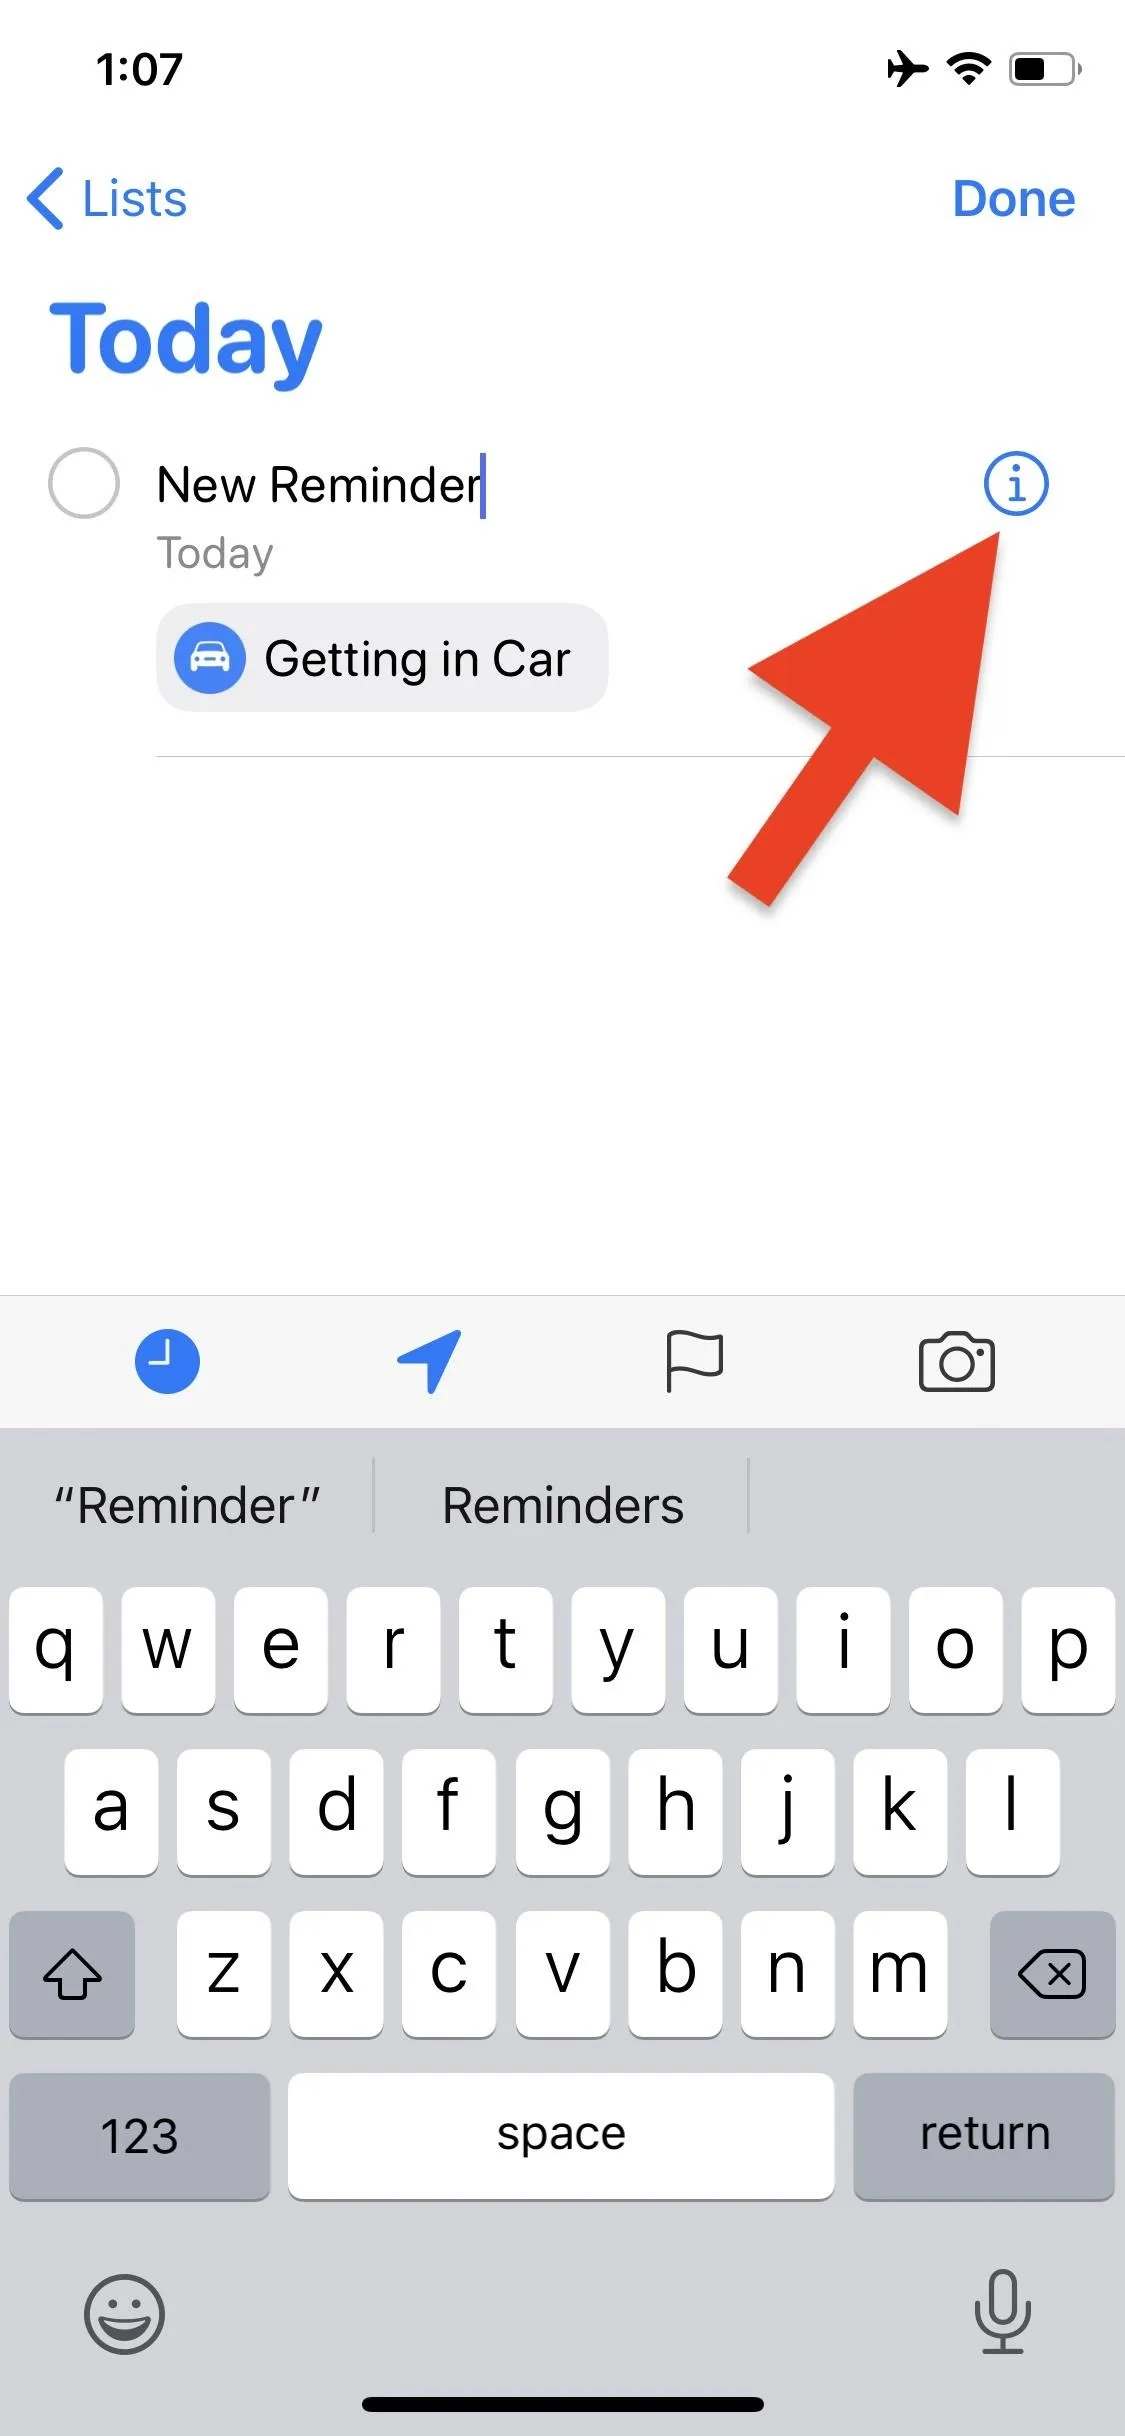
If you chose a custom location, you'll notice new settings appear at the bottom of the display. If you chose one of the preset location options, you can find these settings by tapping the blue "i" next to the reminder itself, then tapping "Location" under "Remind me at a location."
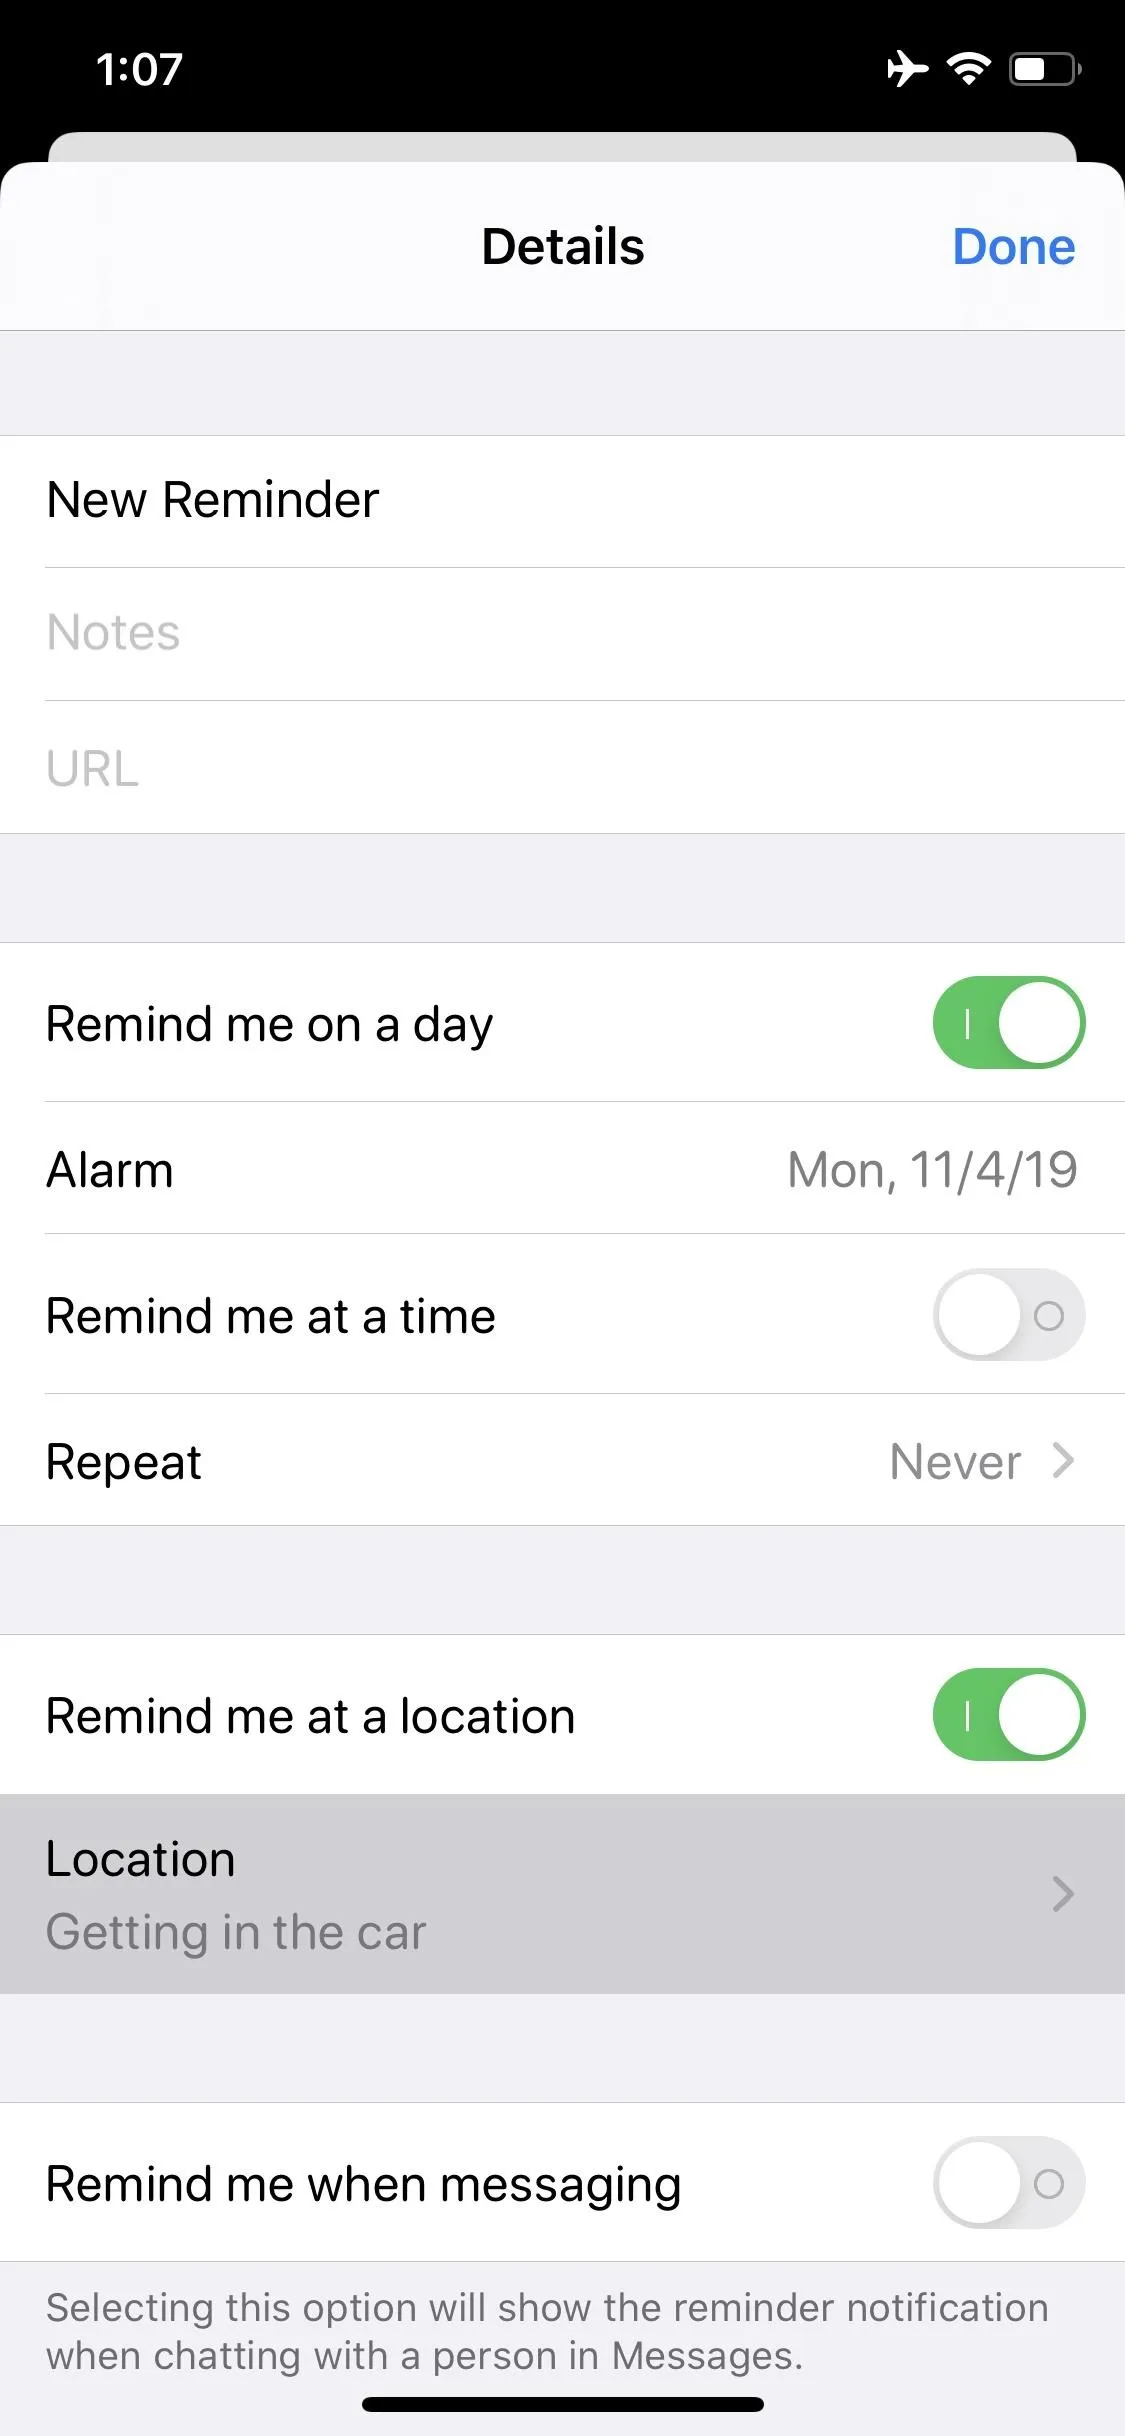
Here, you can choose whether to be reminded when arriving at or leaving the location. The "Leaving" option comes in handy for things like remembering to turn off the lights or pick up dog food once you've left your house, while the "Arriving" option works better for, say, reminders about sending someone an update once you reach a location.
To change your geofence, drag the black dot in or out. You can choose a radius ranging from 330 feet to roughly 150 miles.


Save the Location-Based Reminder
If you chose one of the preset locations, or you selected "Custom," you're all set! Reminder saved and ready for action. If you edited the geofence for the preset locations, however, you'll need to tap "Details," then "Done" to save your reminder.
Setting a Location-Based Reminder the Long Way (< iOS 13)
If you're not running iOS 13, or you just want to know another way to set location-based reminders, this section is for you. While this method is a bit more out of the way when compared to iOS 13's quick toolbar, you'll find it similar in many ways. It's also largely unchanged since its introduction way back in iOS 5:
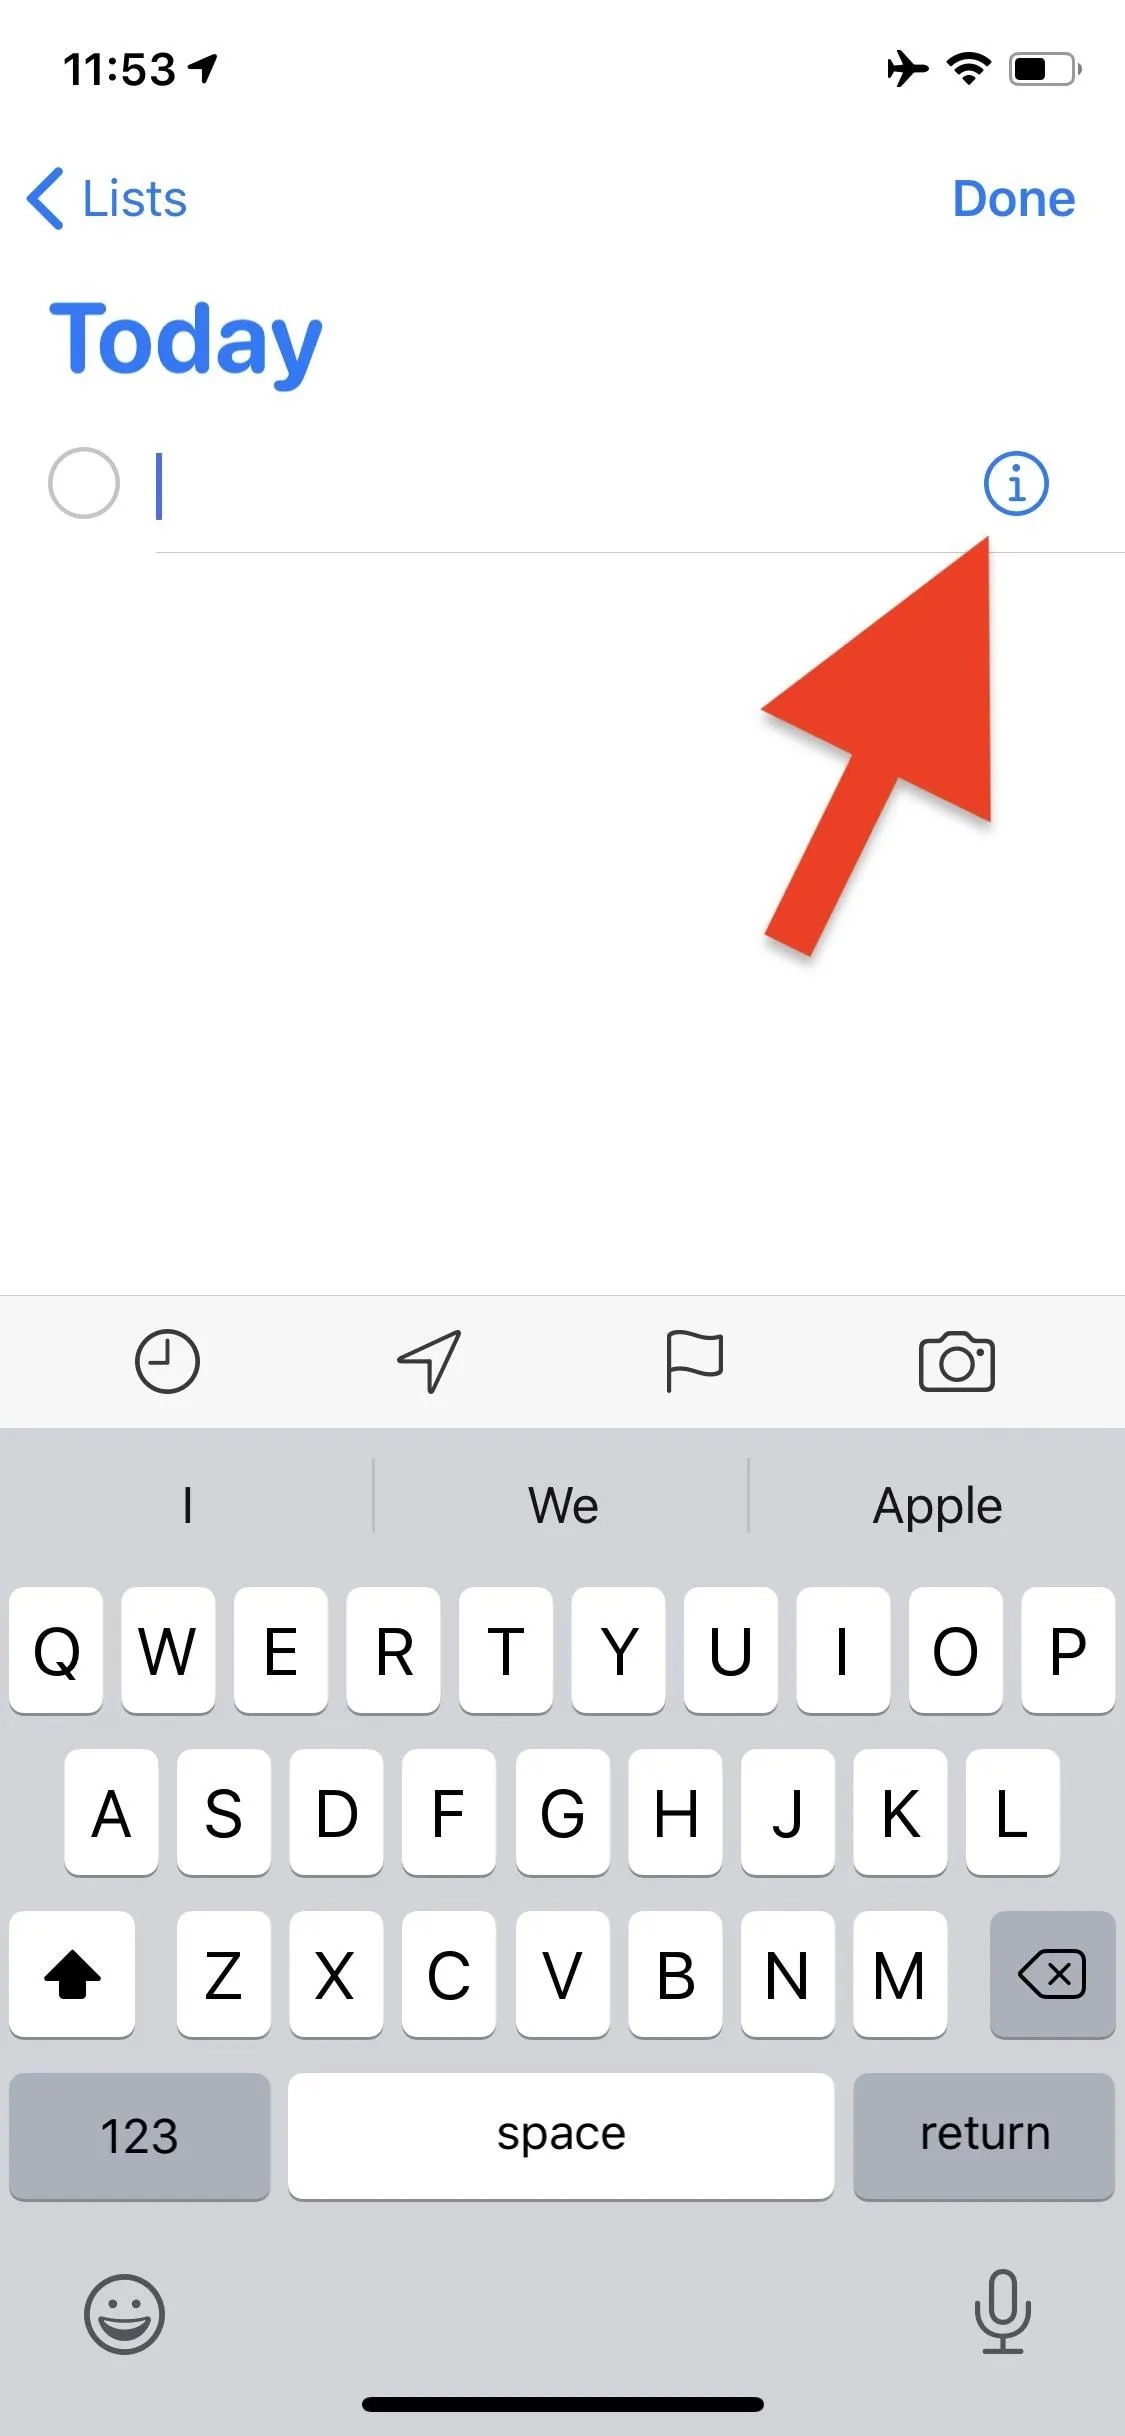
Create a New Reminder
Open your Reminders app, tap on a list, then tap "New Reminder" in the bottom-left corner of the display. Next, tap the blue "i" that appears on the right side of the reminder.

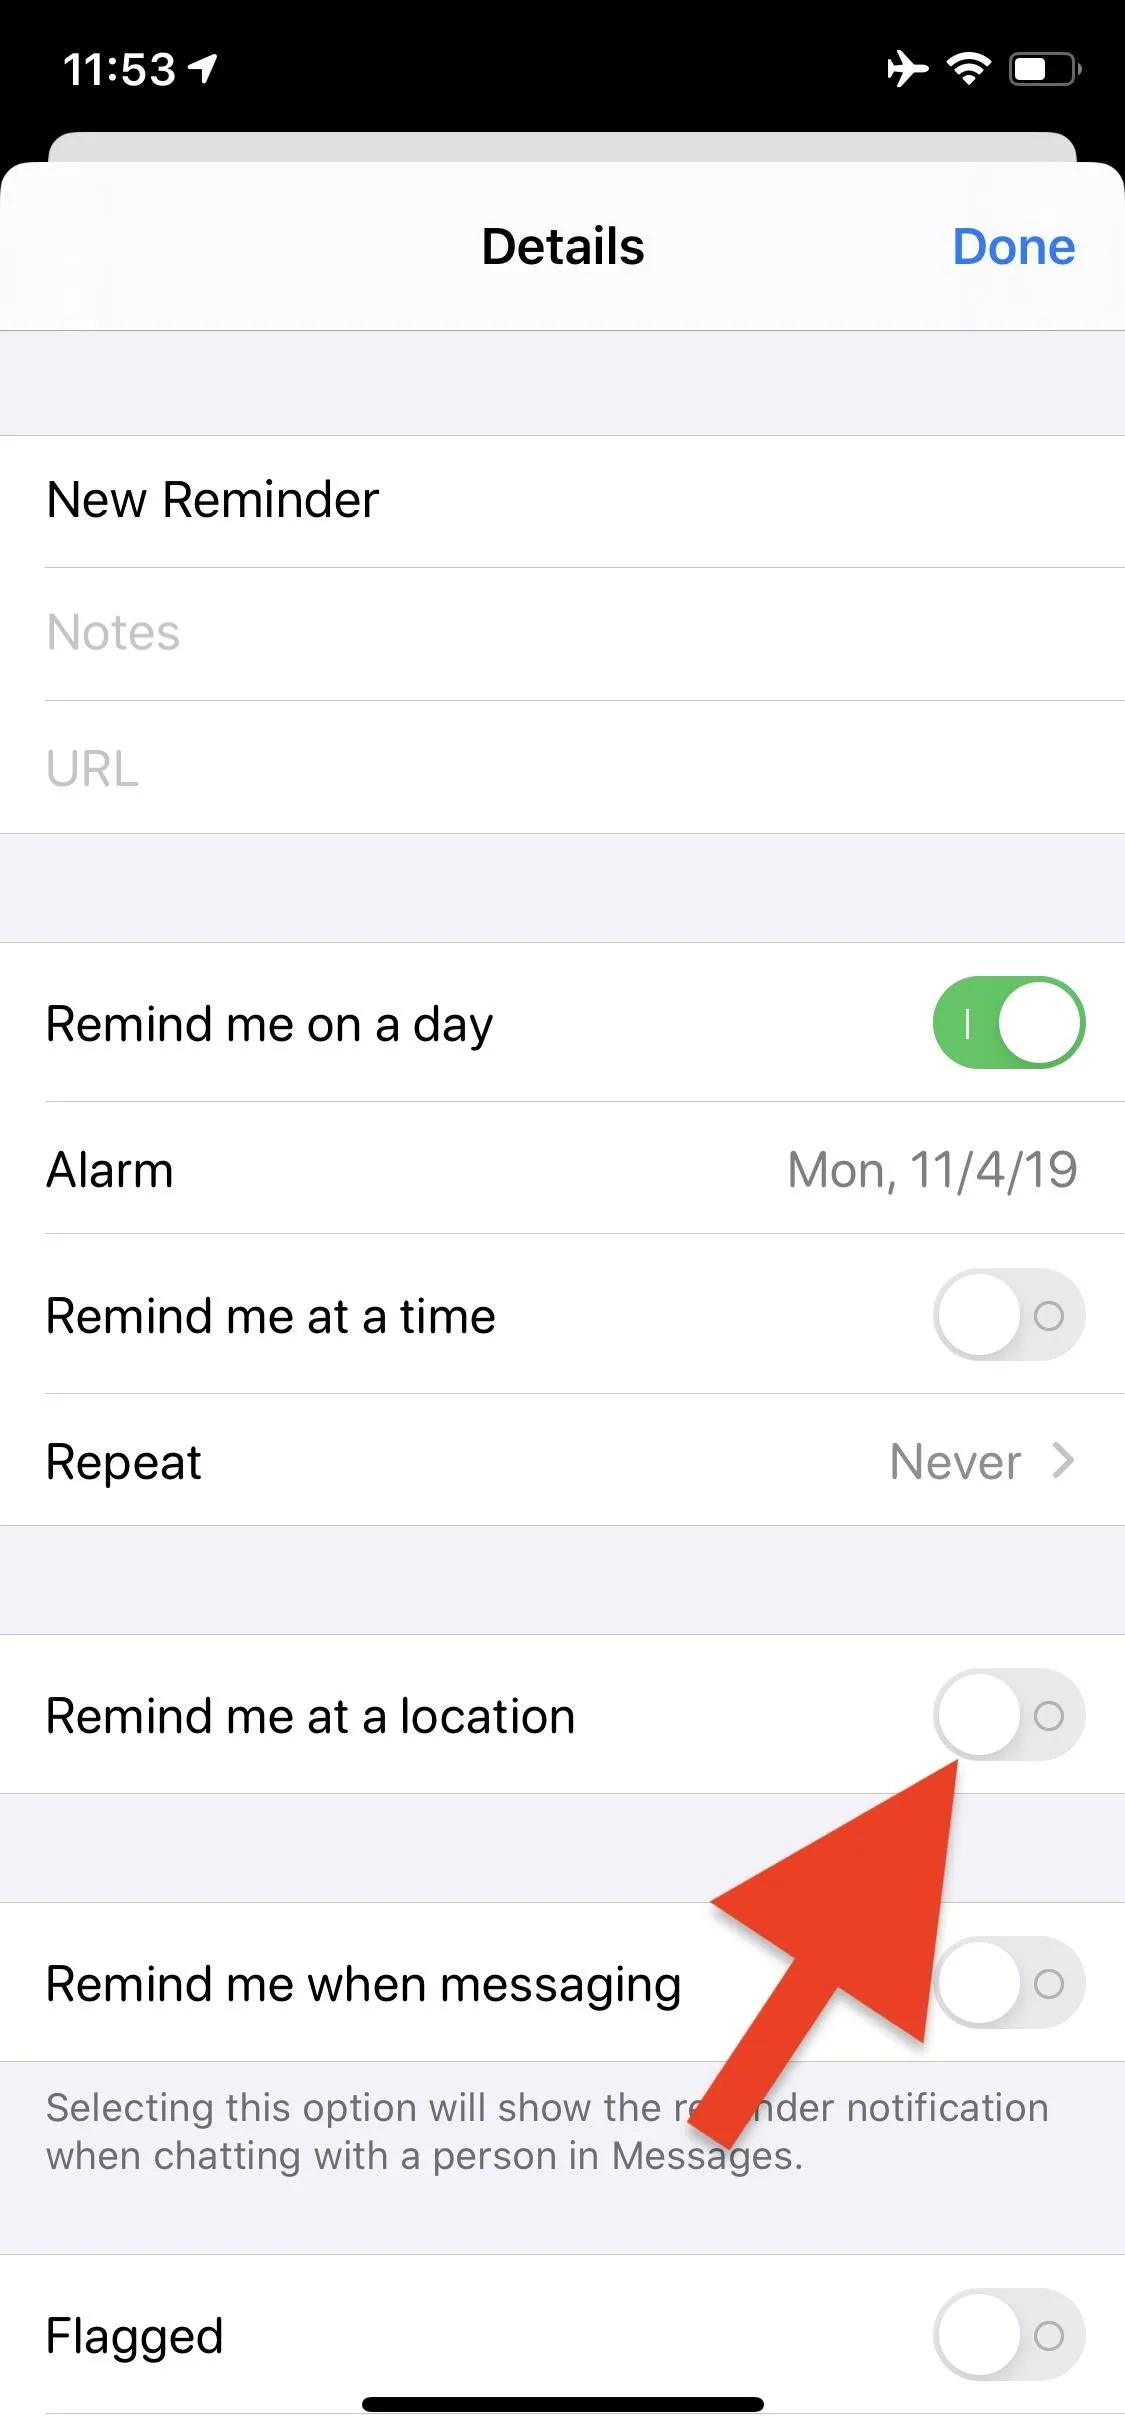
Set a Location for the Reminder
Tap the toggle next to "Remind me at a location," then tap "Location" directly underneath to choose your desired location. You can enter quickly tap any of the suggested locations that appear (including your current location), as well as enter a location manually via the search bar.


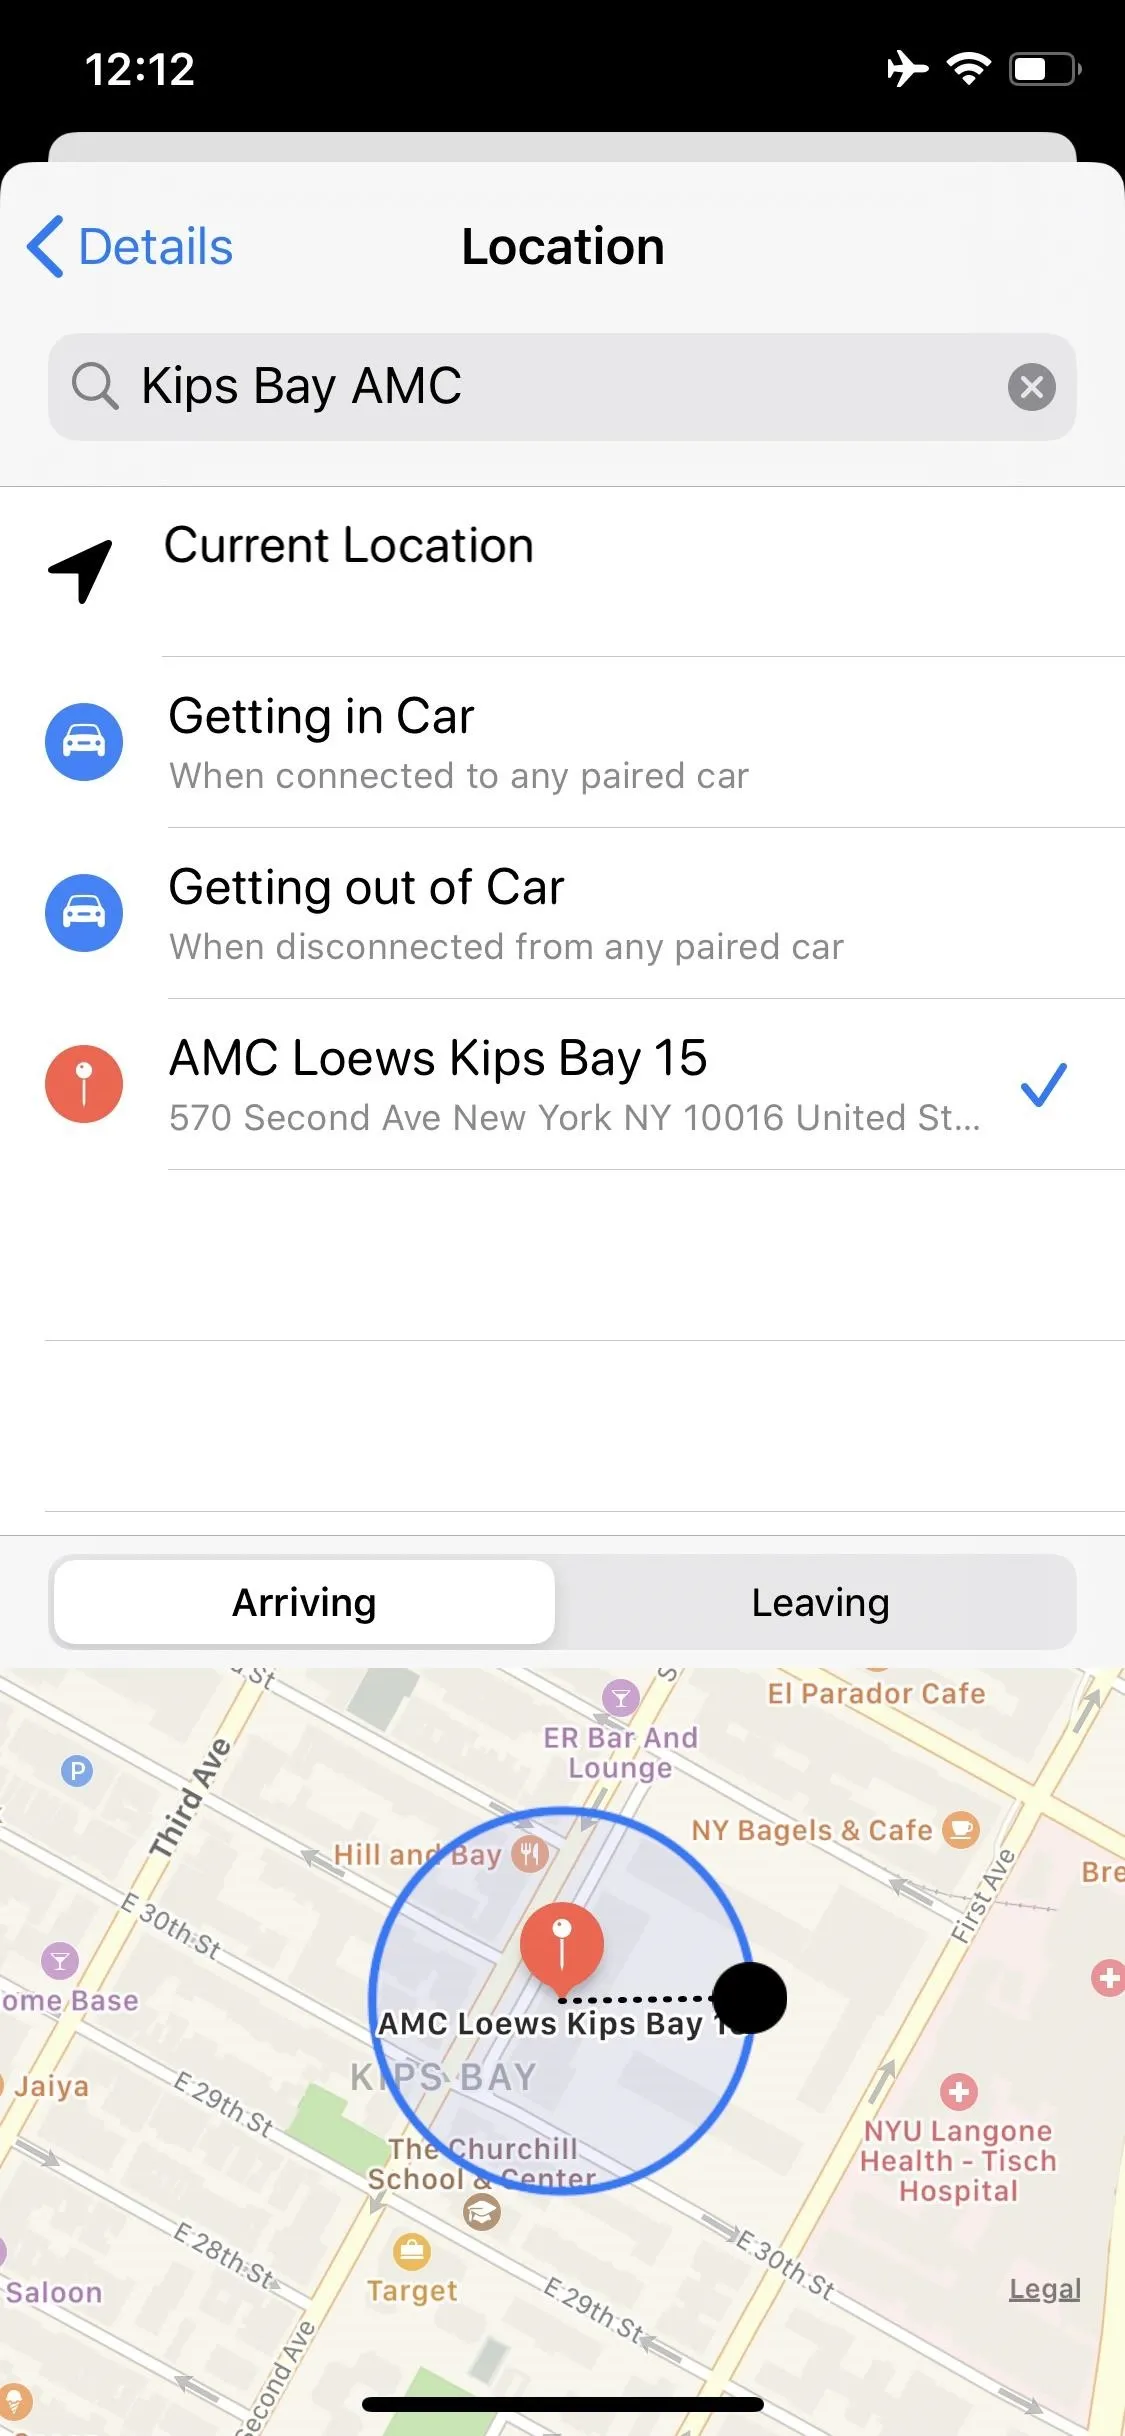
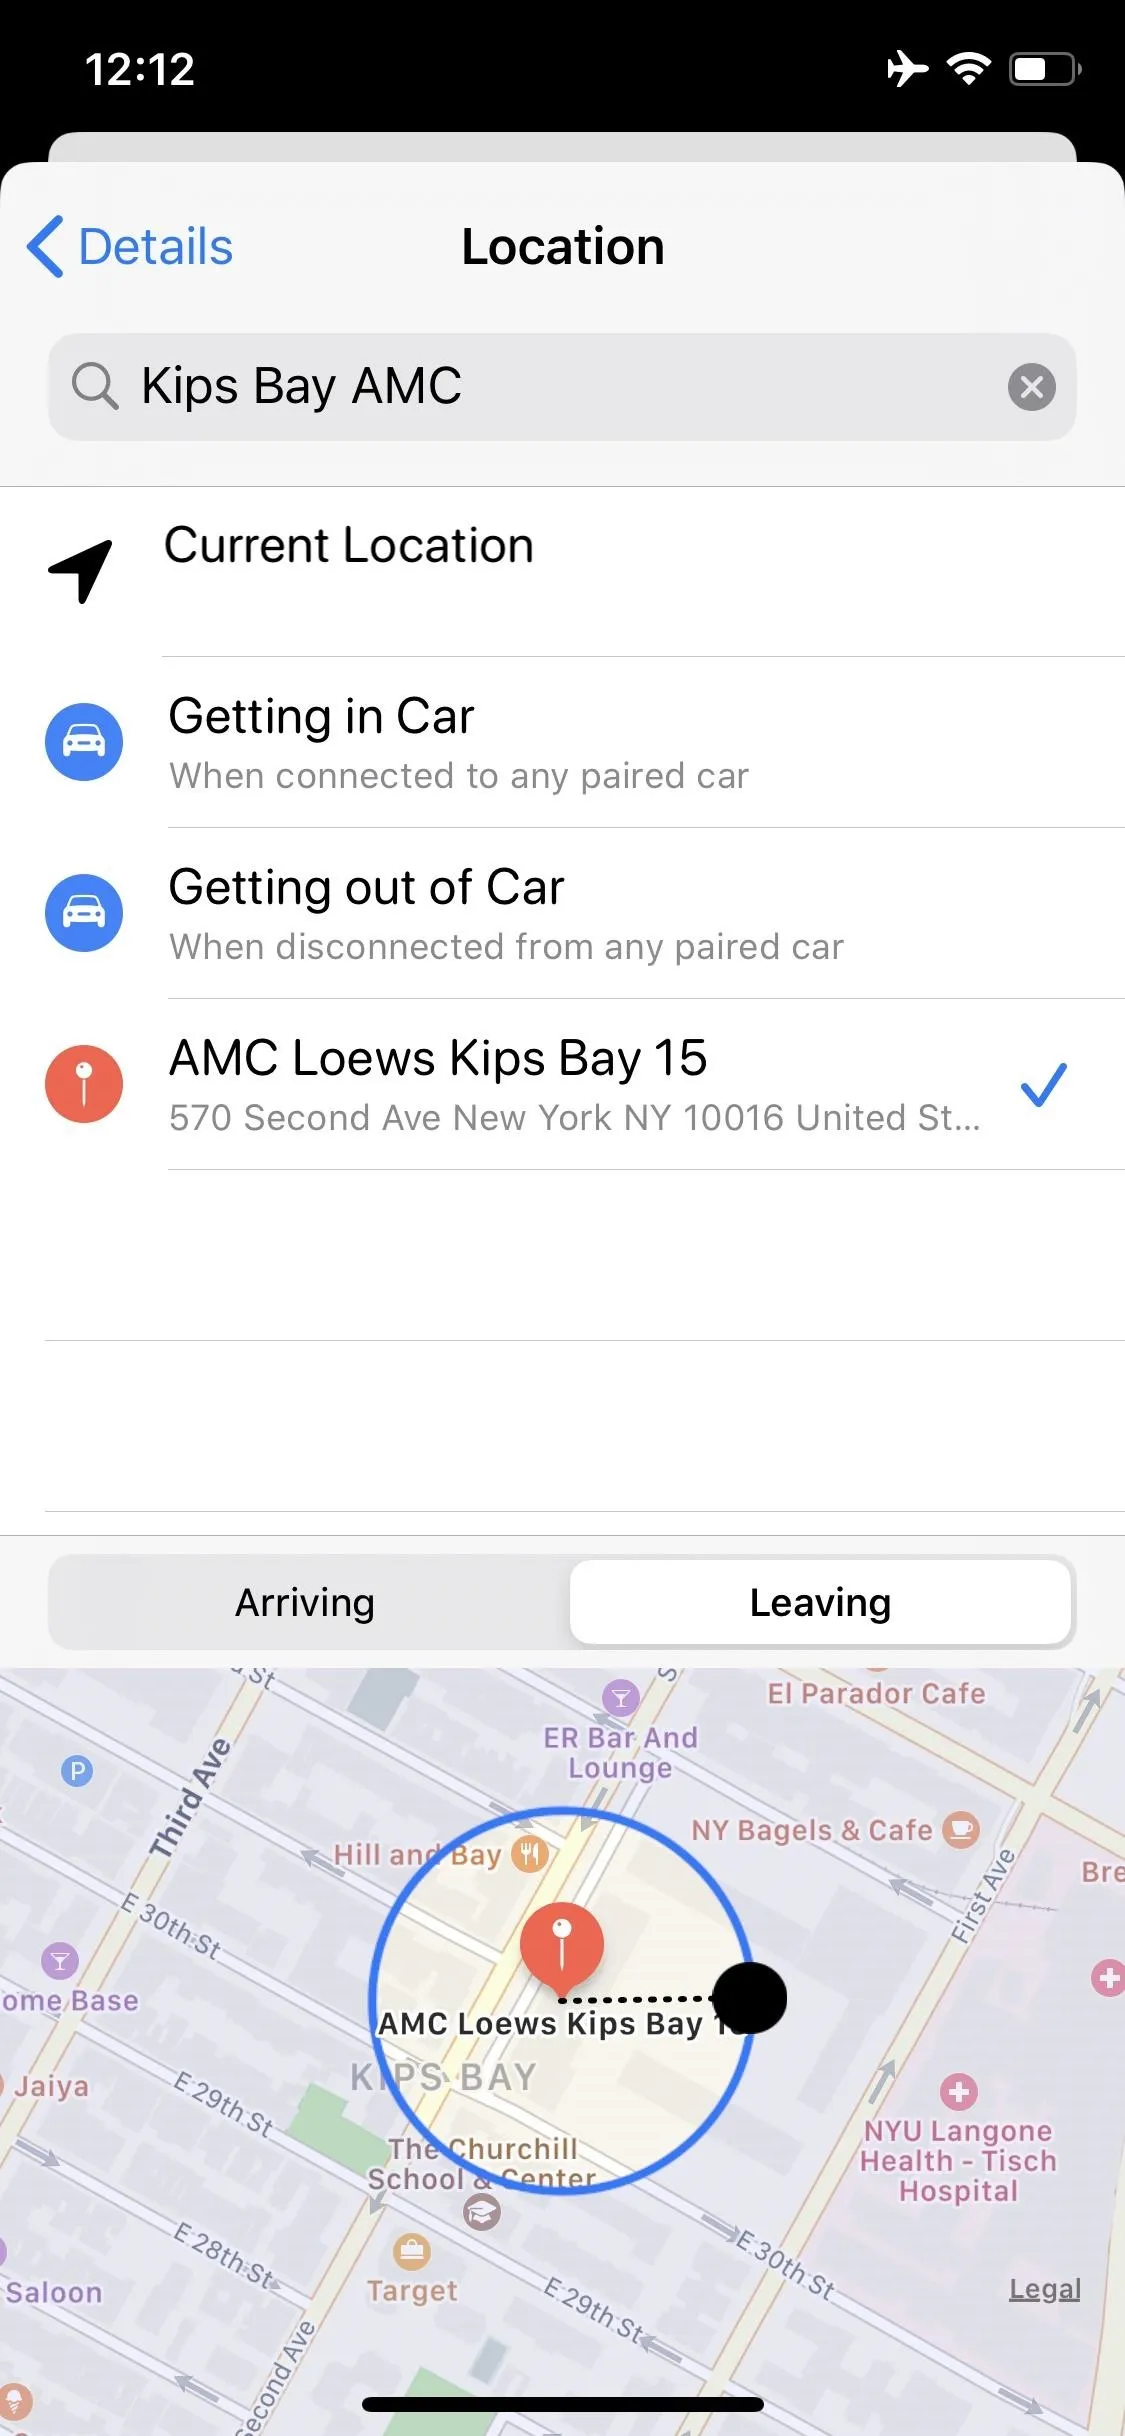
Customize Your Location-Based Reminder
After setting a location, you'll have the option of being reminded when you arrive or leave the address you entered. As stated in the above section, you can choose either "Arriving" or "Leaving" to dictate whether the reminder activates when you arrive or leaving the geofence. You can adjust the geofence via the black dot, creating a perimeter ranging from 330 feet to roughly 150 miles.
Save the Location-Based Reminder
When you're finished setting up the reminder, tap on "Details" to go back. You can take your time to set up the rest of the reminder here, then select "Done" to save all.
Cover image and screenshots by Jake Peterson/Gadget Hacks, unless otherwise noted


Comments
Be the first, drop a comment!