


Even under normal circumstances, it's almost impossible to speak to a representative for a government agency or company in just one try. Many systems will put you on hold for long periods or ask to call you back when someone is available, but there are still some out there that just give you the busy signal over and over again. In those cases, there's a jailbreak tweak that can help.
Aptly named AutoRedial, MrBlackHat's ingenious tweak automatically redials the last call you placed anytime you're disconnected as a result of a busy signal or the receiver not picking up. The tweak also works even if you're redirected to voicemail, as long as you don't end the call yourself.
Whether you're trying to get through to a contest phone line to win a prize or just trying to get a hold of a representative for a company you're a customer of or do business with, if you get the busy signal, AutoRedial can help. It's especially useful for calling the unemployment office, which has become nearly unreachable because of the coronavirus pandemic and the economic fallout because of it.
- Don't Miss: How to Jailbreak Your iPhone Using Checkra1n
For $1.49, AutoRedial also comes with numerous options like setting a delay in between redial attempts and enabling haptic feedback. The tweak can be purchased from either Cydia or Sileo, though, the process is a little more involved than most other tweaks you would buy from those apps.
If you're not jailbroken or don't want to jailbreak, there are still options for you. You can use your iPhone's built-in redialer button or build a shortcut that makes the process just a tad bit faster. There are better options for Android, but on iOS, you need to jailbreak to get the same kind of success.
Install AutoRedial's Repo
To get AutoRedial, you need to install its repository first. In either Cydia or Sileo, from the "Sources" tab, tap "Edit" then "Add" (in Cydia) or hit the plus button (Sileo), input repo.twickd.com, and select "Add Source." Note that any repos you add in Cydia won't be added to Sileo automatically, and vise versa.
- More Info: Add Outside Repos to Cydia | Add Outside Repos to Sileo
Adding the repo in Cydia (the process is similar in Sileo).
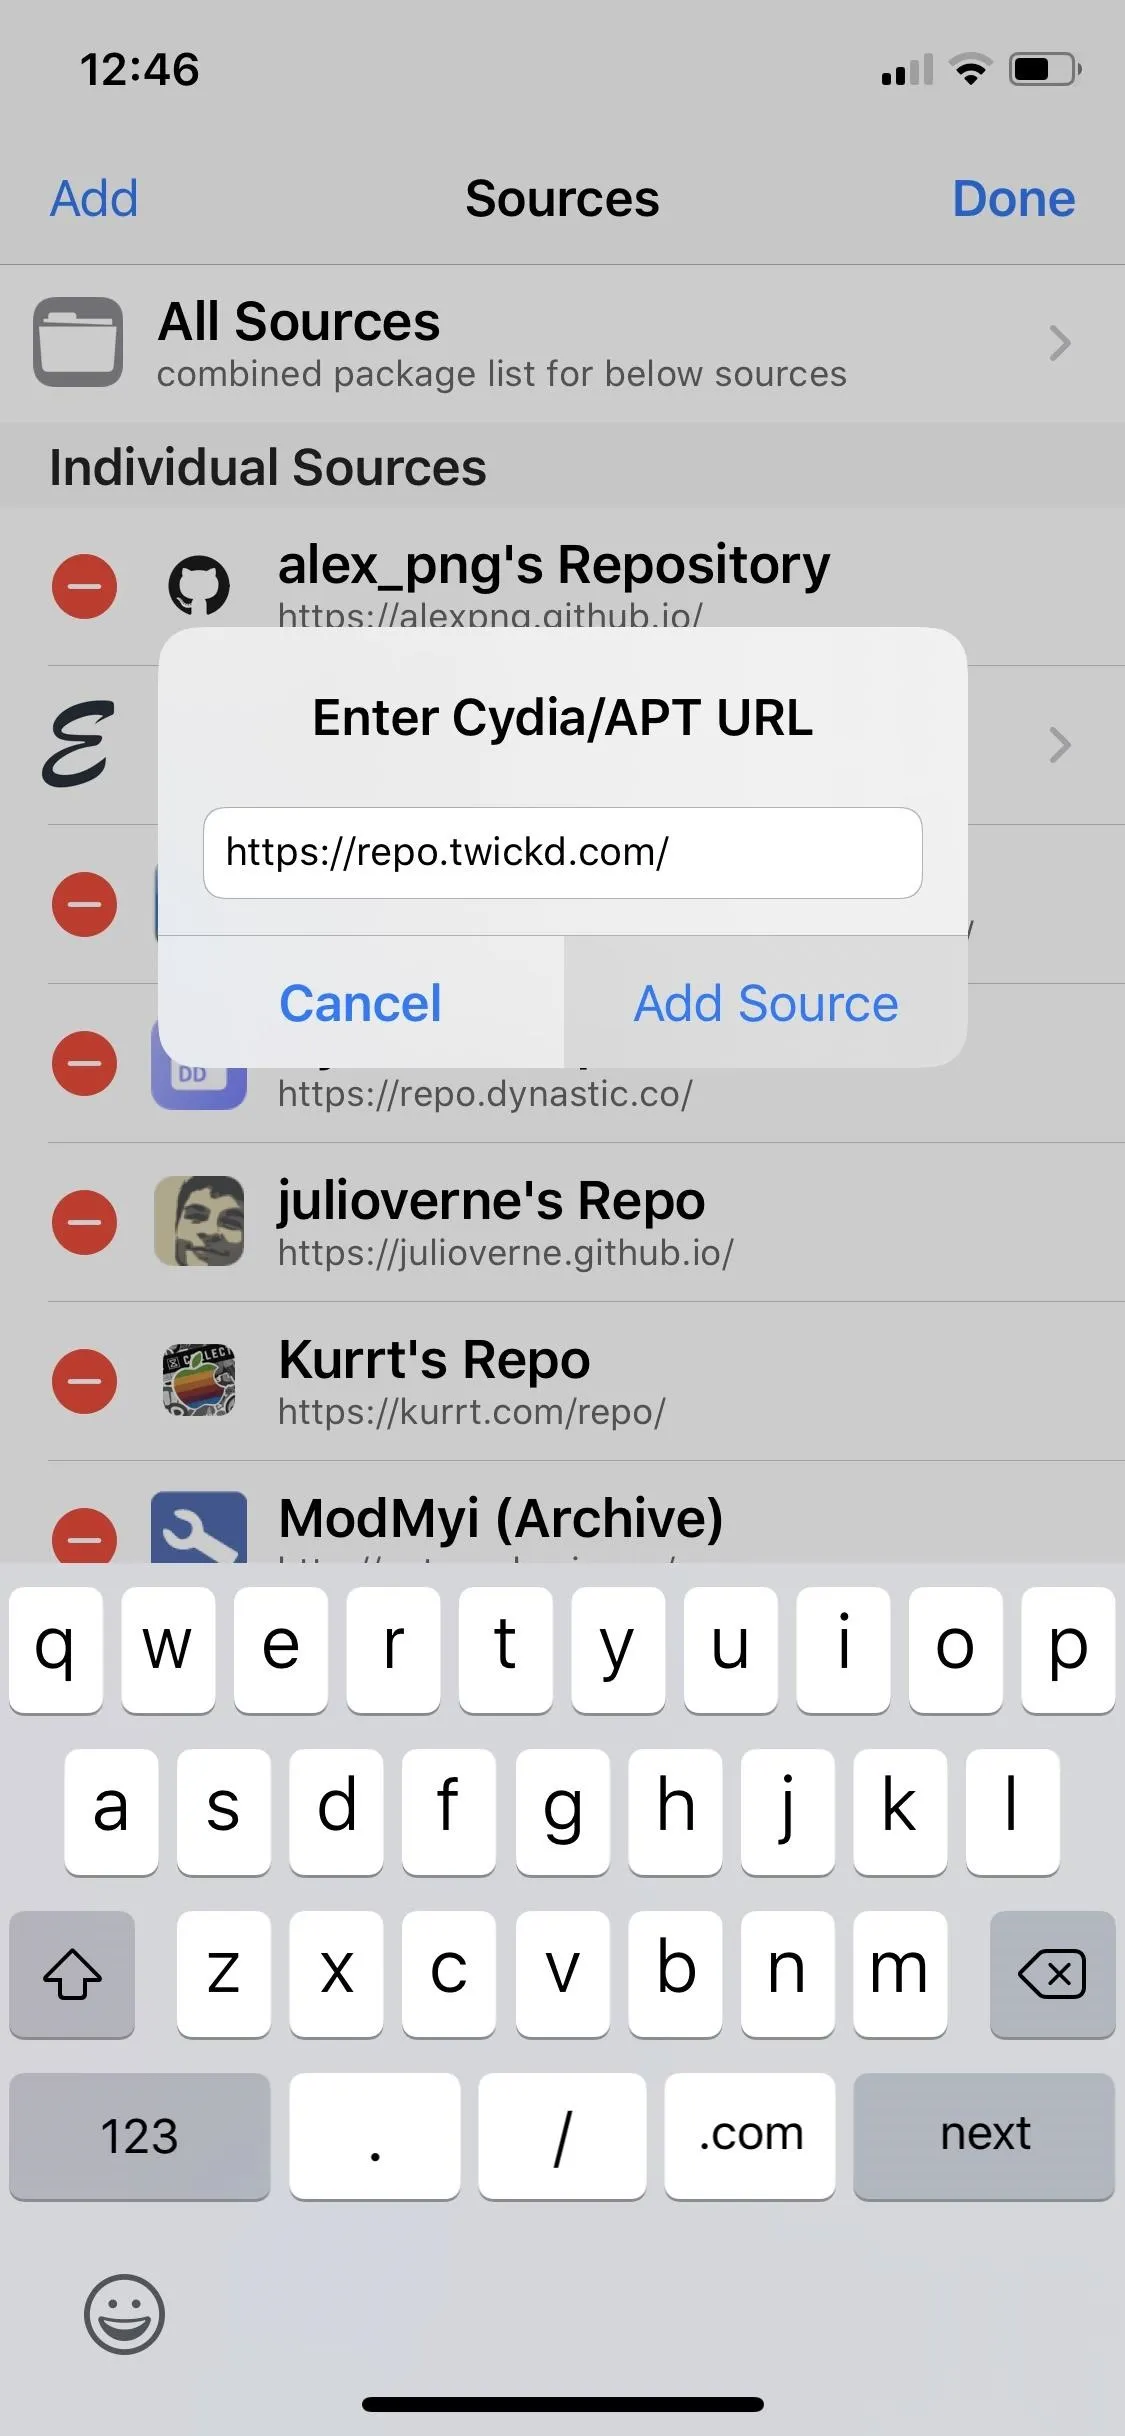
Adding the repo in Cydia (the process is similar in Sileo).
Link Your iPhone to Twickd
Before you can purchase AutoRedial, you need to create an account with Twickd and link your iPhone via its model and UDID. To do so, we recommend using your computer to make the process more streamlined.
1. Retrieve Your iPhone's UDID
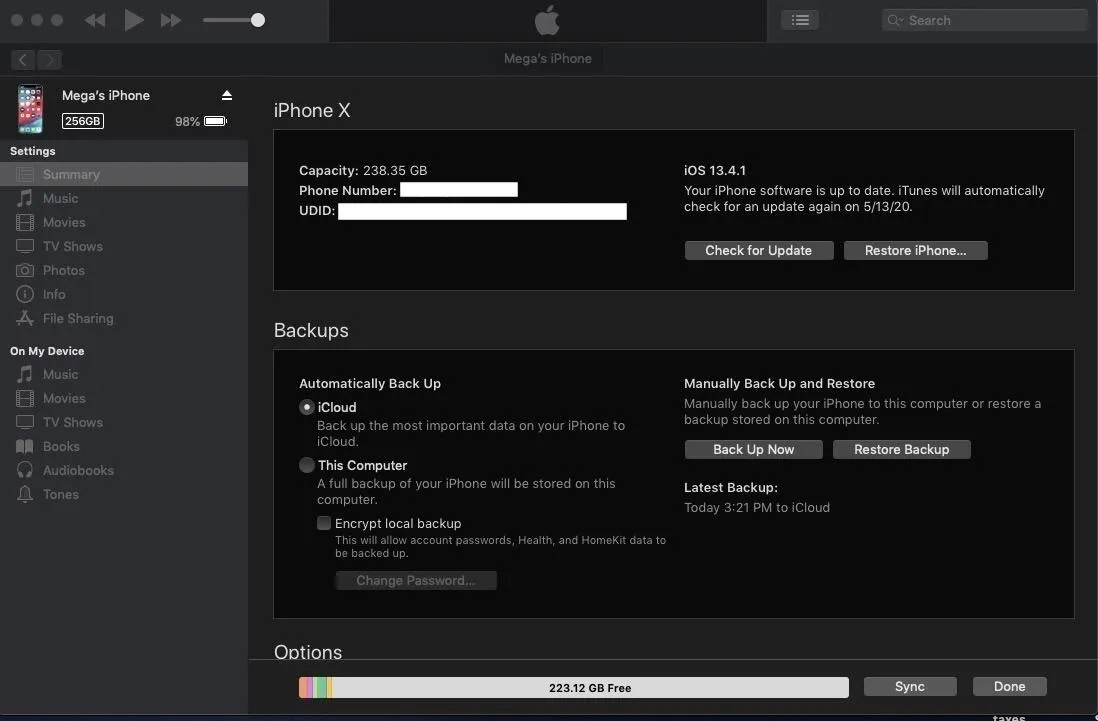
Connect your iPhone to a Mac or PC using a Lightning cable, open iTunes or Finder, depending on your OS version, and click on the iPhone icon to open your device's information page. You may have to "Trust" your computer first, but you can untrust it later if you want.
Now, in iTunes, click on the serial number until the UDID appears. In Finder, click on the line with the model, storage space, and battery life. Copy its UDID and head to the next step.
2. Link It to Your Account
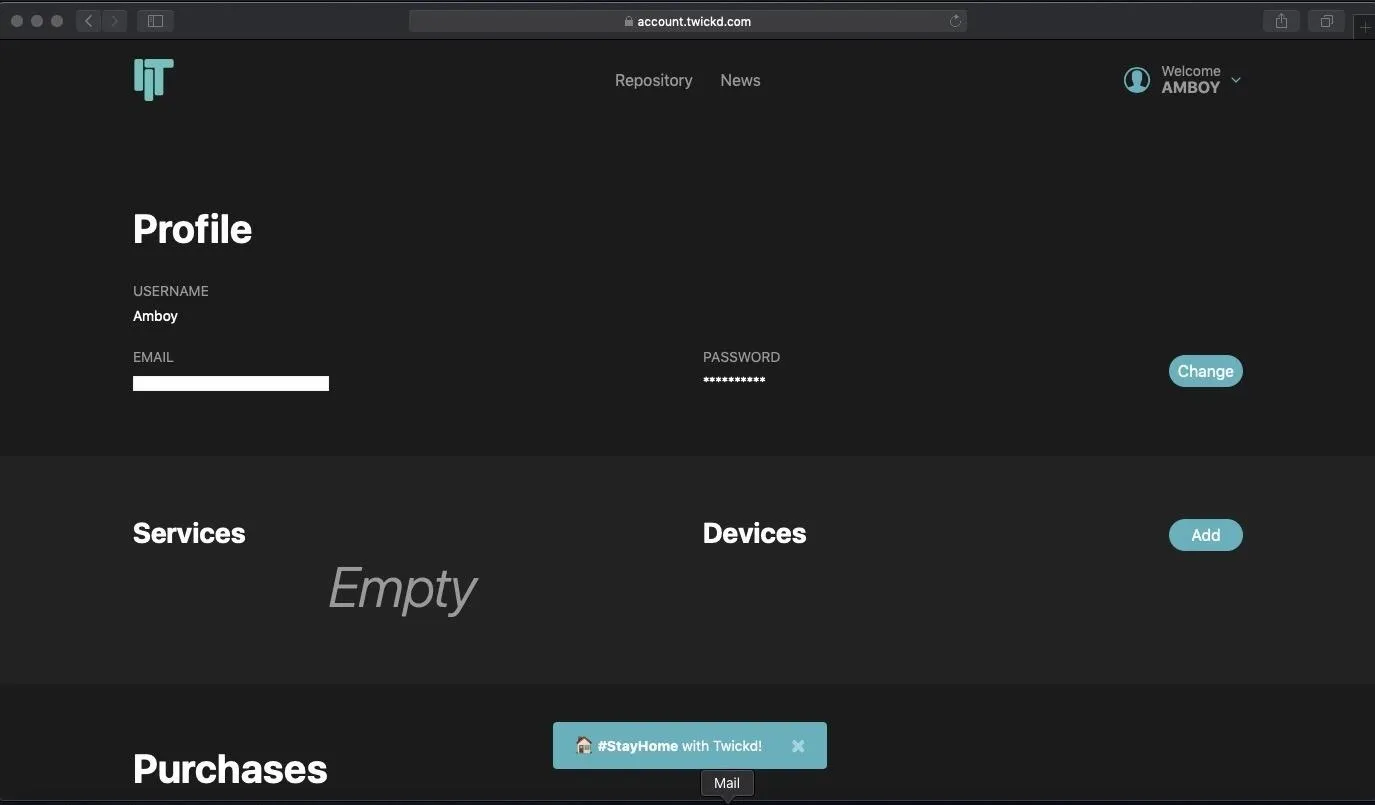
Open any web browser and navigate to twickd.com. Next, click on the "Sign in or Sign Up" link, then follow the prompts to create an account with the site. You'll be redirected to your account page after registering on the site, so select the blue "Add" button found within the "Devices" section, then click on the iTunes icon on the following page to proceed.
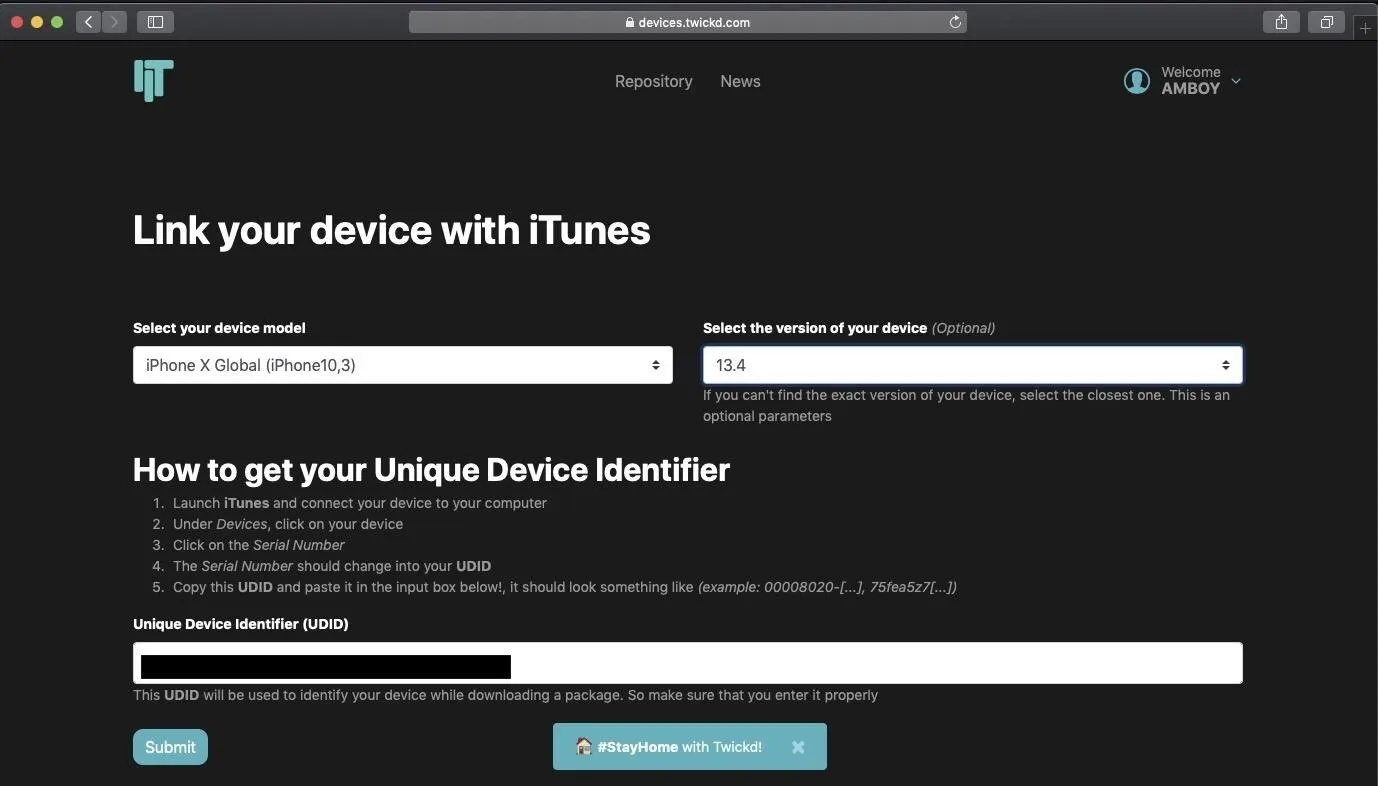
Now, select the iPhone model that matches up with your device within the "Select your device model" field. Here's a list of supported iPhone models running iOS 13 and their corresponding device IDs if you're unsure which variant you may have:
- iPhone 6s: iPhone8,1
- iPhone 6s Plus: iPhone8,2
- iPhone SE (1st gen): iPhone8,4
- iPhone 7 (Verizon, Sprint): iPhone9,1
- iPhone 7 (AT&T, T-Mobile, Factory Unlocked): iPhone9,3
- iPhone 7 Plus (Verizon, Sprint): iPhone9,2
- iPhone 7 Plus (AT&T, T-Mobile, Factory Unlocked): iPhone9,4
- iPhone 8 (Verizon, Sprint): iPhone10,1
- iPhone 8 (AT&T, T-Mobile, Factory Unlocked): iPhone10,4
- iPhone 8 Plus (Verizon, Sprint): iPhone10,2
- iPhone 8 Plus (AT&T, T-Mobile, Factory Unlocked): iPhone10,5
- iPhone X (Verizon, Sprint): iPhone10,3
- iPhone X (AT&T, T-Mobile, Factory Unlocked): iPhone10,6
- iPhone XS: iPhone11,2
- iPhone XS Max: iPhone11,6
- iPhone XR: iPhone11,8
- iPhone 11: iPhone12,1
- iPhone 11 Pro: iPhone12,3
- iPhone 11 Pro Max: iPhone12,5
- iPhone SE (2nd gen): iPhone12,8
Additionally, you can choose to input the current version of iOS your iPhone is on, though, you can leave the field blank since it's optional. That said, paste the UDID you copied from iTunes or Finder earlier in the provided field, then hit "Submit" once you're done to link your iPhone.
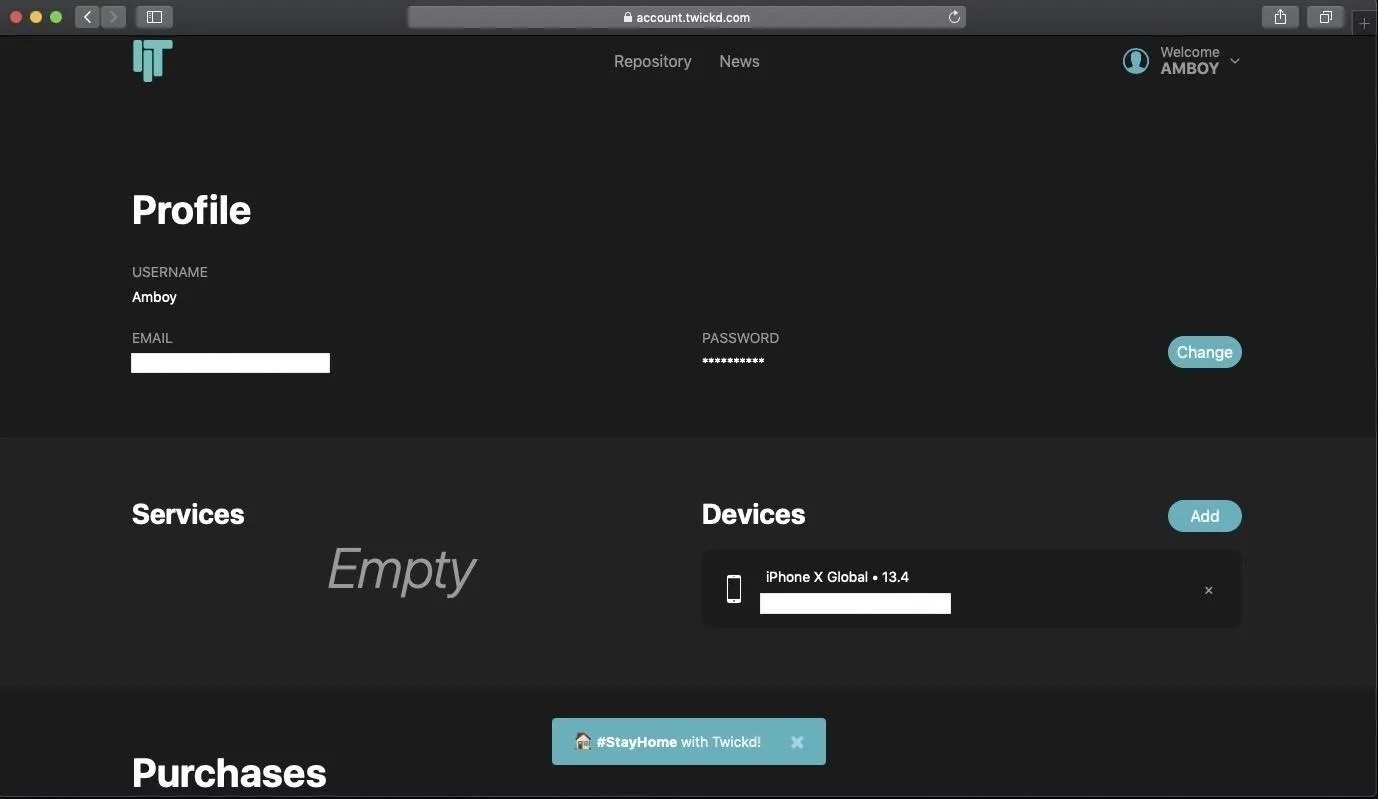
You'll be taken back to your account page, and your recently-linked device will now appear within the "Devices" section. Keep in mind that you can link up to three devices with Twickd.
Purchase AutoRedial
With your iPhone linked to your Twickd account, open up Cydia or Sileo, then perform a search for "AutoRedial" within the "Search" tab. Select it when it pops up, then hit the blue "$1.49" icon.
- Package Link: AutoRedial ($1.49)
You'll now be taken to AutoRedial's PayPal checkout page inside Safari. Enter your PayPal credentials to log in, and follow the prompts carefully to pay for the tweak. Once you've completed the purchase, AutoRedial will appear within the "Purchases" section of your Twickd account.
Install AutoRedial
Go back to AutoRedial's Details page in Cydia or Sileo. Then, for Cydia, tap "Install" and "Confirm." In Sileo, tap "Get," open your "Queue," and hit "Confirm." For either app, select "Restart Springboard" when it's done installing.

Tweak AutoRedial
After respringing, open Settings and navigate to "AutoRedial," then toggle on the switch for "Enabled" if it's set to off. From there, turn on the "Enabled" toggles under User Busy Redial and User Not Picking Redial to redial automatically whenever your call gets disconnected from either a busy signal or the receiver not picking up, respectively.
Furthermore, both of those sections contain more options you can customize. For example, you can set a delay between redial attempts by inputting your desired numeric value (in one-second increments) in the "Delay" field, and enable "Confirm Redial" to add a confirmation prompt before redialing.
If you want a tactile cue whenever a redial attempt is made or your call connects, switch on the toggles for "On Redial" and "On Call Connect" within Haptic Option.

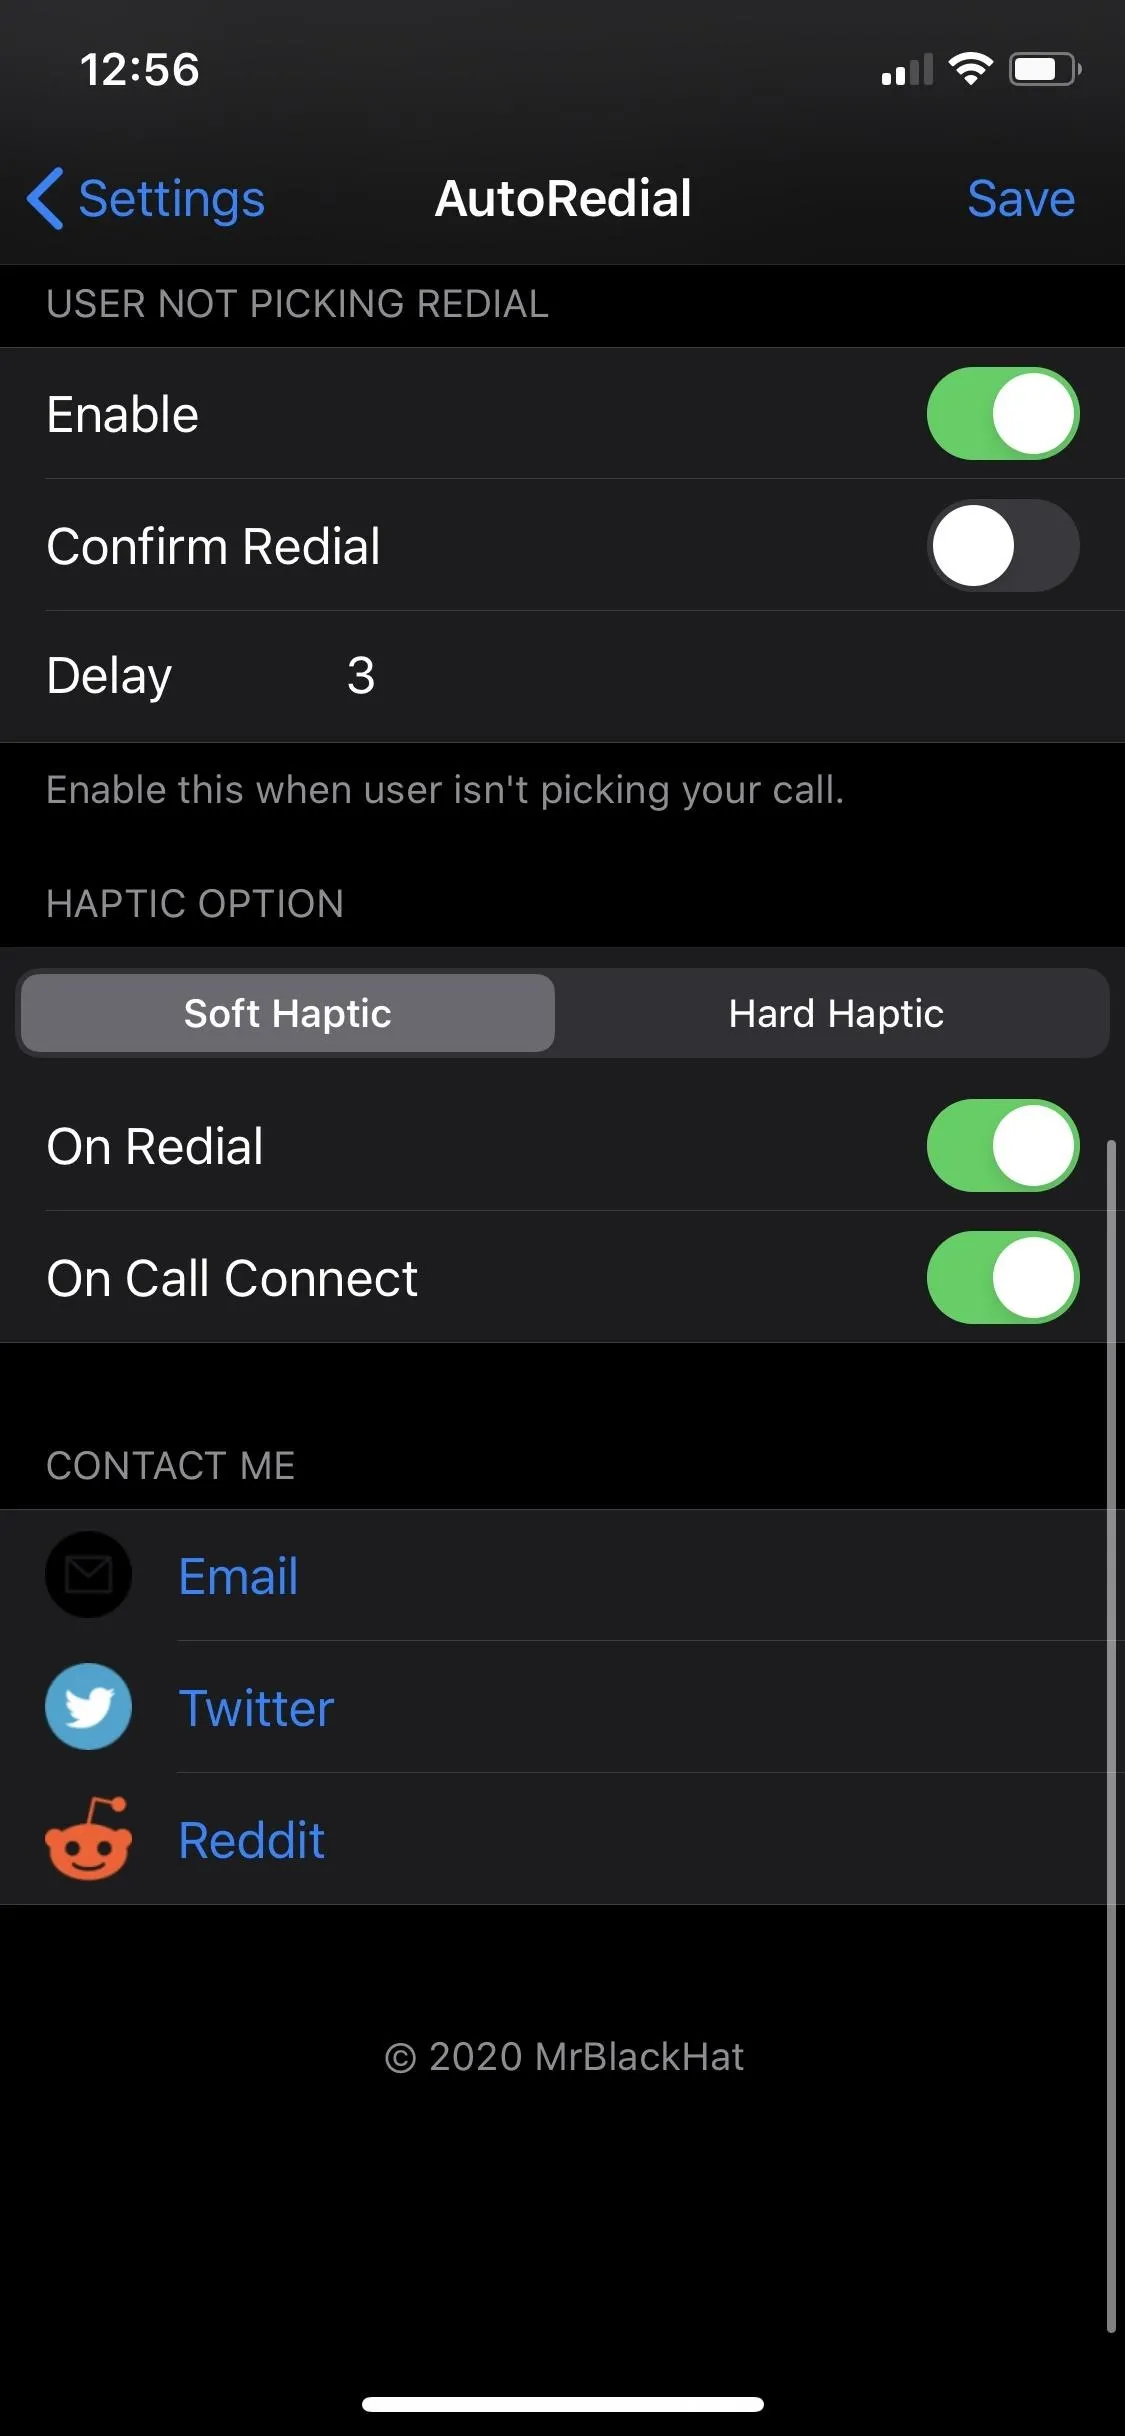
After all of your options are configured, hit "Save" in the upper right to set the changes you've made.
Redial, Redial, Redial
As seen from the GIF below, AutoRedial triggers automatically whenever your call is disconnected due to a busy signal or the receiver not picking up. However, there are some quirks you need to be aware of.
As mentioned before, AutoRedial will not kick in if you end the call yourself. So once you reach a busy signal, you'll need to let it run its course and disconnect on its own for the tweak to work.
Also keep in mind that if you're redirected to voicemail, leave a message or don't — that's up to you — but wait for it to auto-disconnect to trigger the tweak. Finally, it's important to note that even if the receiver picks up, AutoRedial will call back when they end the call. So if you want to minimize that effect, either set a confirmation prompt or disable "User Not Picking Redial."
Cover image, screenshots, and GIFs by Amboy Manalo/Gadget Hacks


Comments
Be the first, drop a comment!