


The only official way to record your iPhone's screen before iOS 11 was to hook it up to a Mac and use QuickTime Player to do the recording for you. If you wanted to record your iPhone's screen without an external device, there were unofficial apps you could use, like AirShou, but they required complicated installations. Now, in iOS 11, iOS 12, and iOS 13, Apple has an official, native screen recording tool.
With the native "Screen Recording" tool, you can not only record a video of your iPhone's screen, but you can also record audio (in some apps) and voiceovers. After recording, it will be saved to your Photos app where you can trim the video down to remove the footage of when you started and stopped the recording. Also, some third-party apps support screen-sharing, which you can use to broadcast directly to the app in question.
- Don't Miss: 200+ Exciting New iOS 13 Features for iPhone
Add the Screen Recording Shortcut
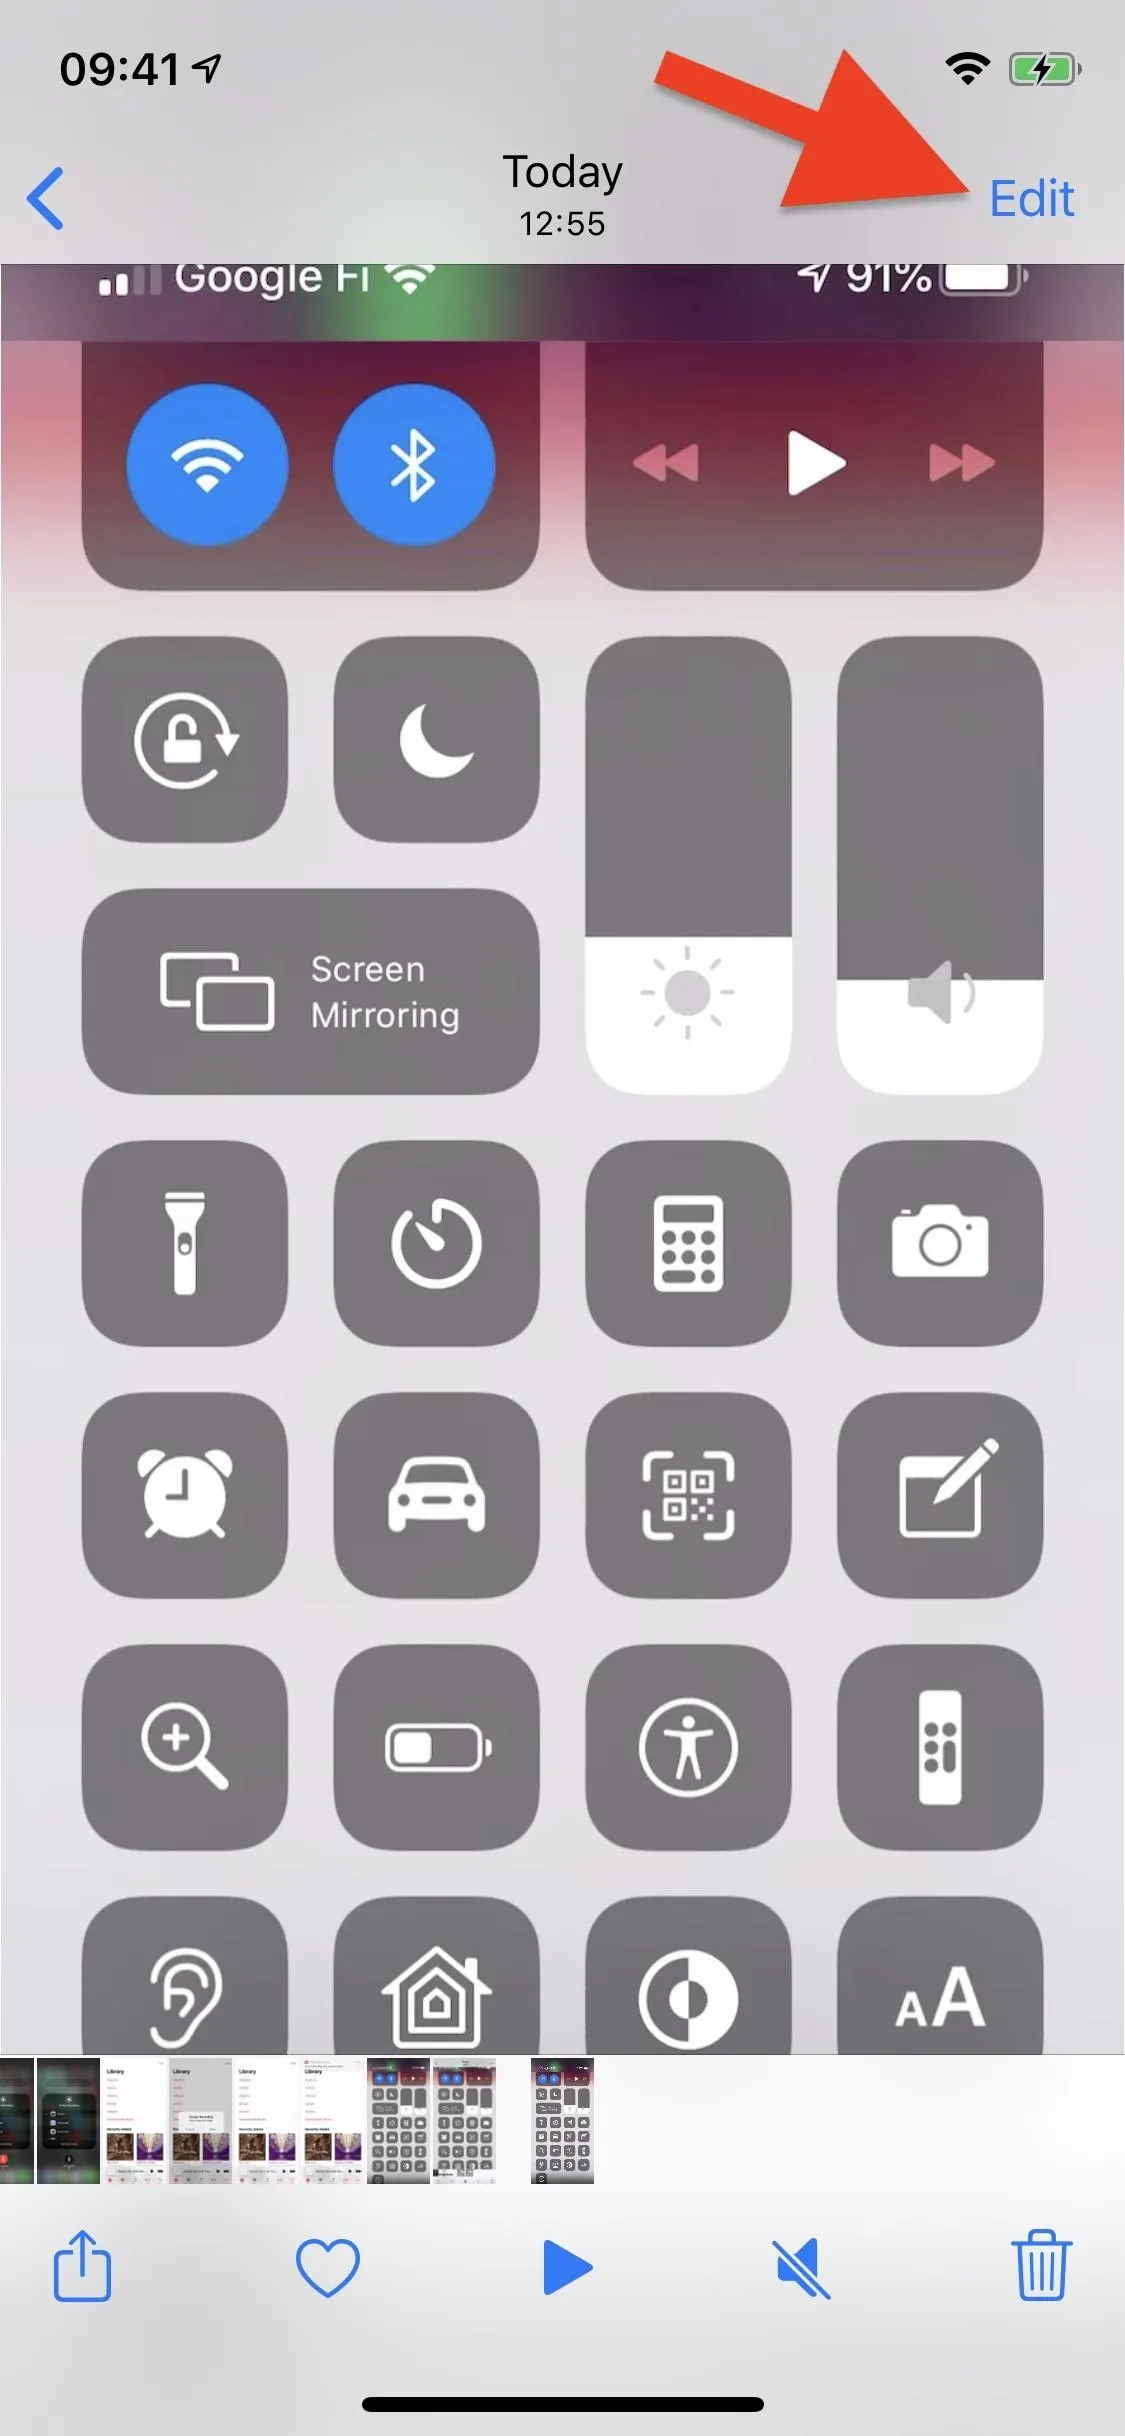
Just like the Flashlight tool, the Screen Recording tool doesn't have an app — just a control option for the Control Center — but it's not enabled by default.
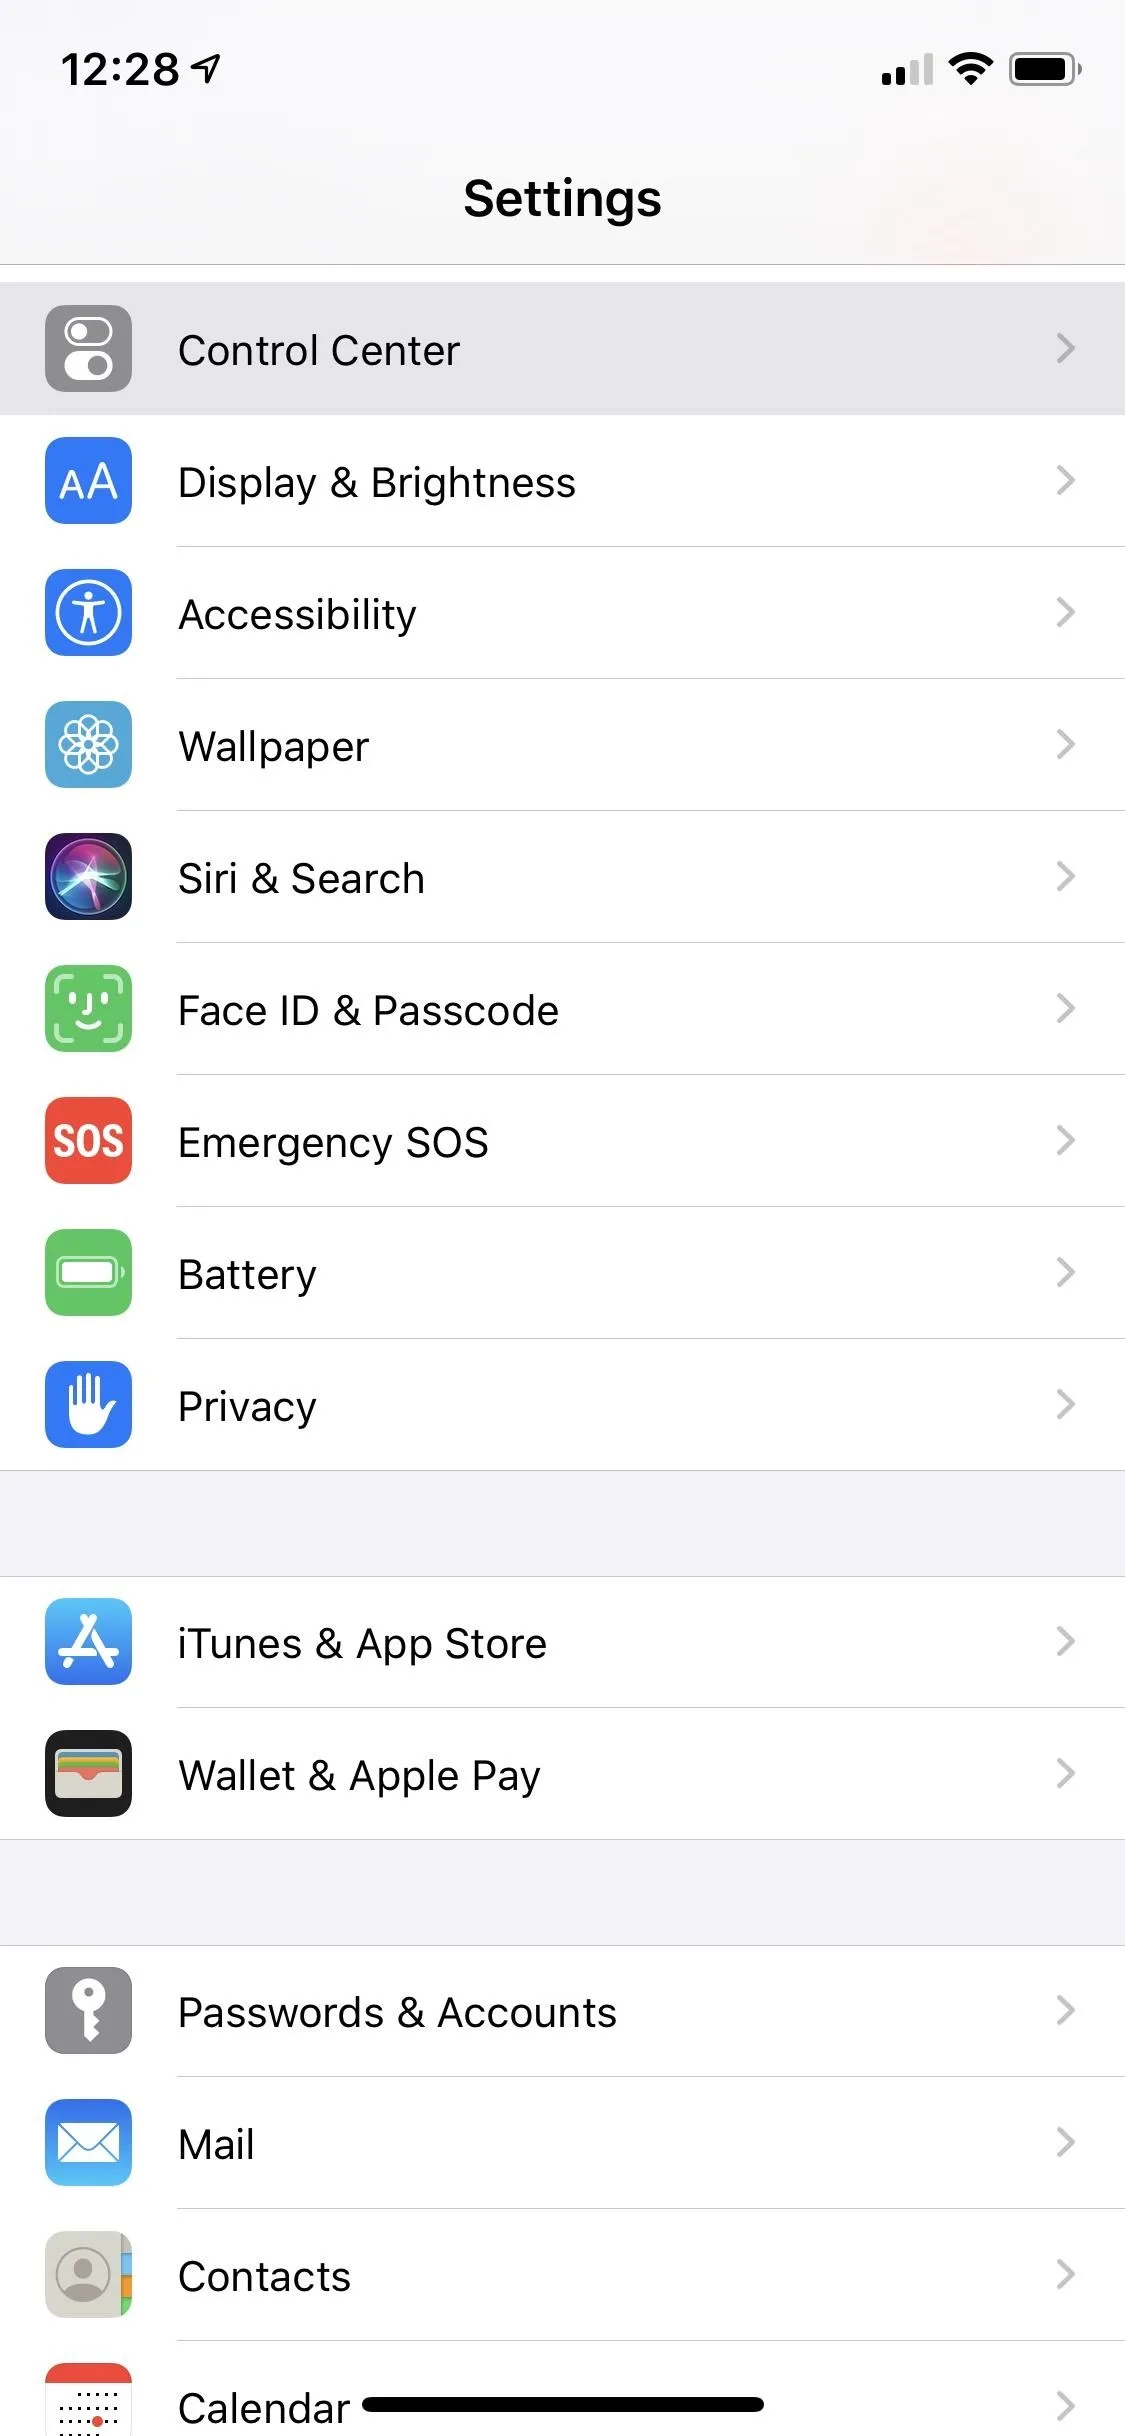
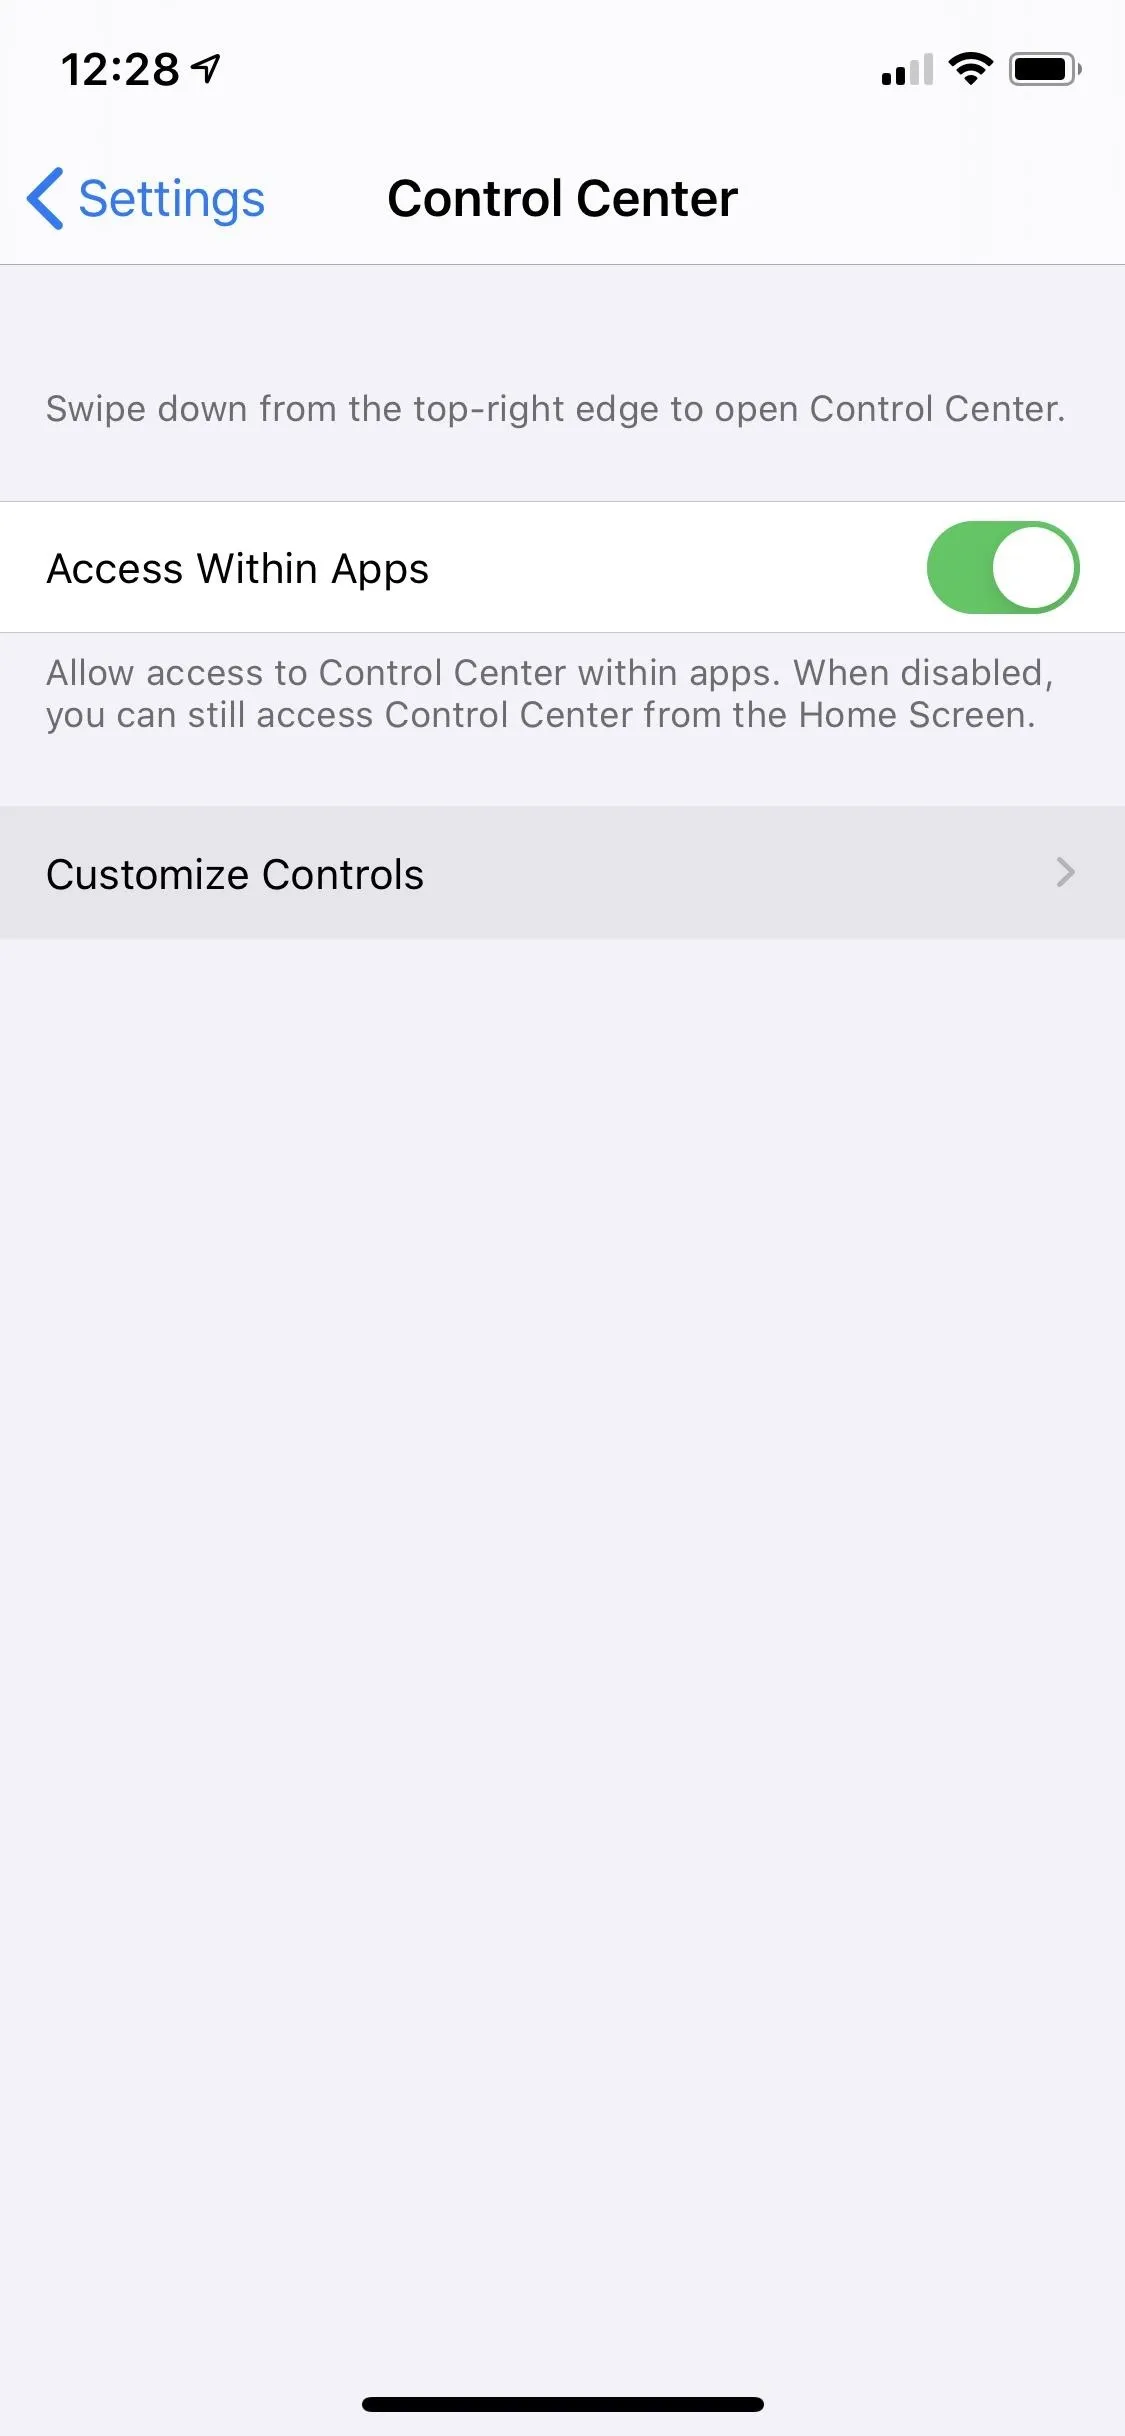
To set it up, head over to your Settings app, then tap on "Control Center." From there, select "Customize Controls," then scroll down to find "Screen Recording" and tap on the green "plus" icon next to it to add it to the Control Center.

Start Recording Your Screen
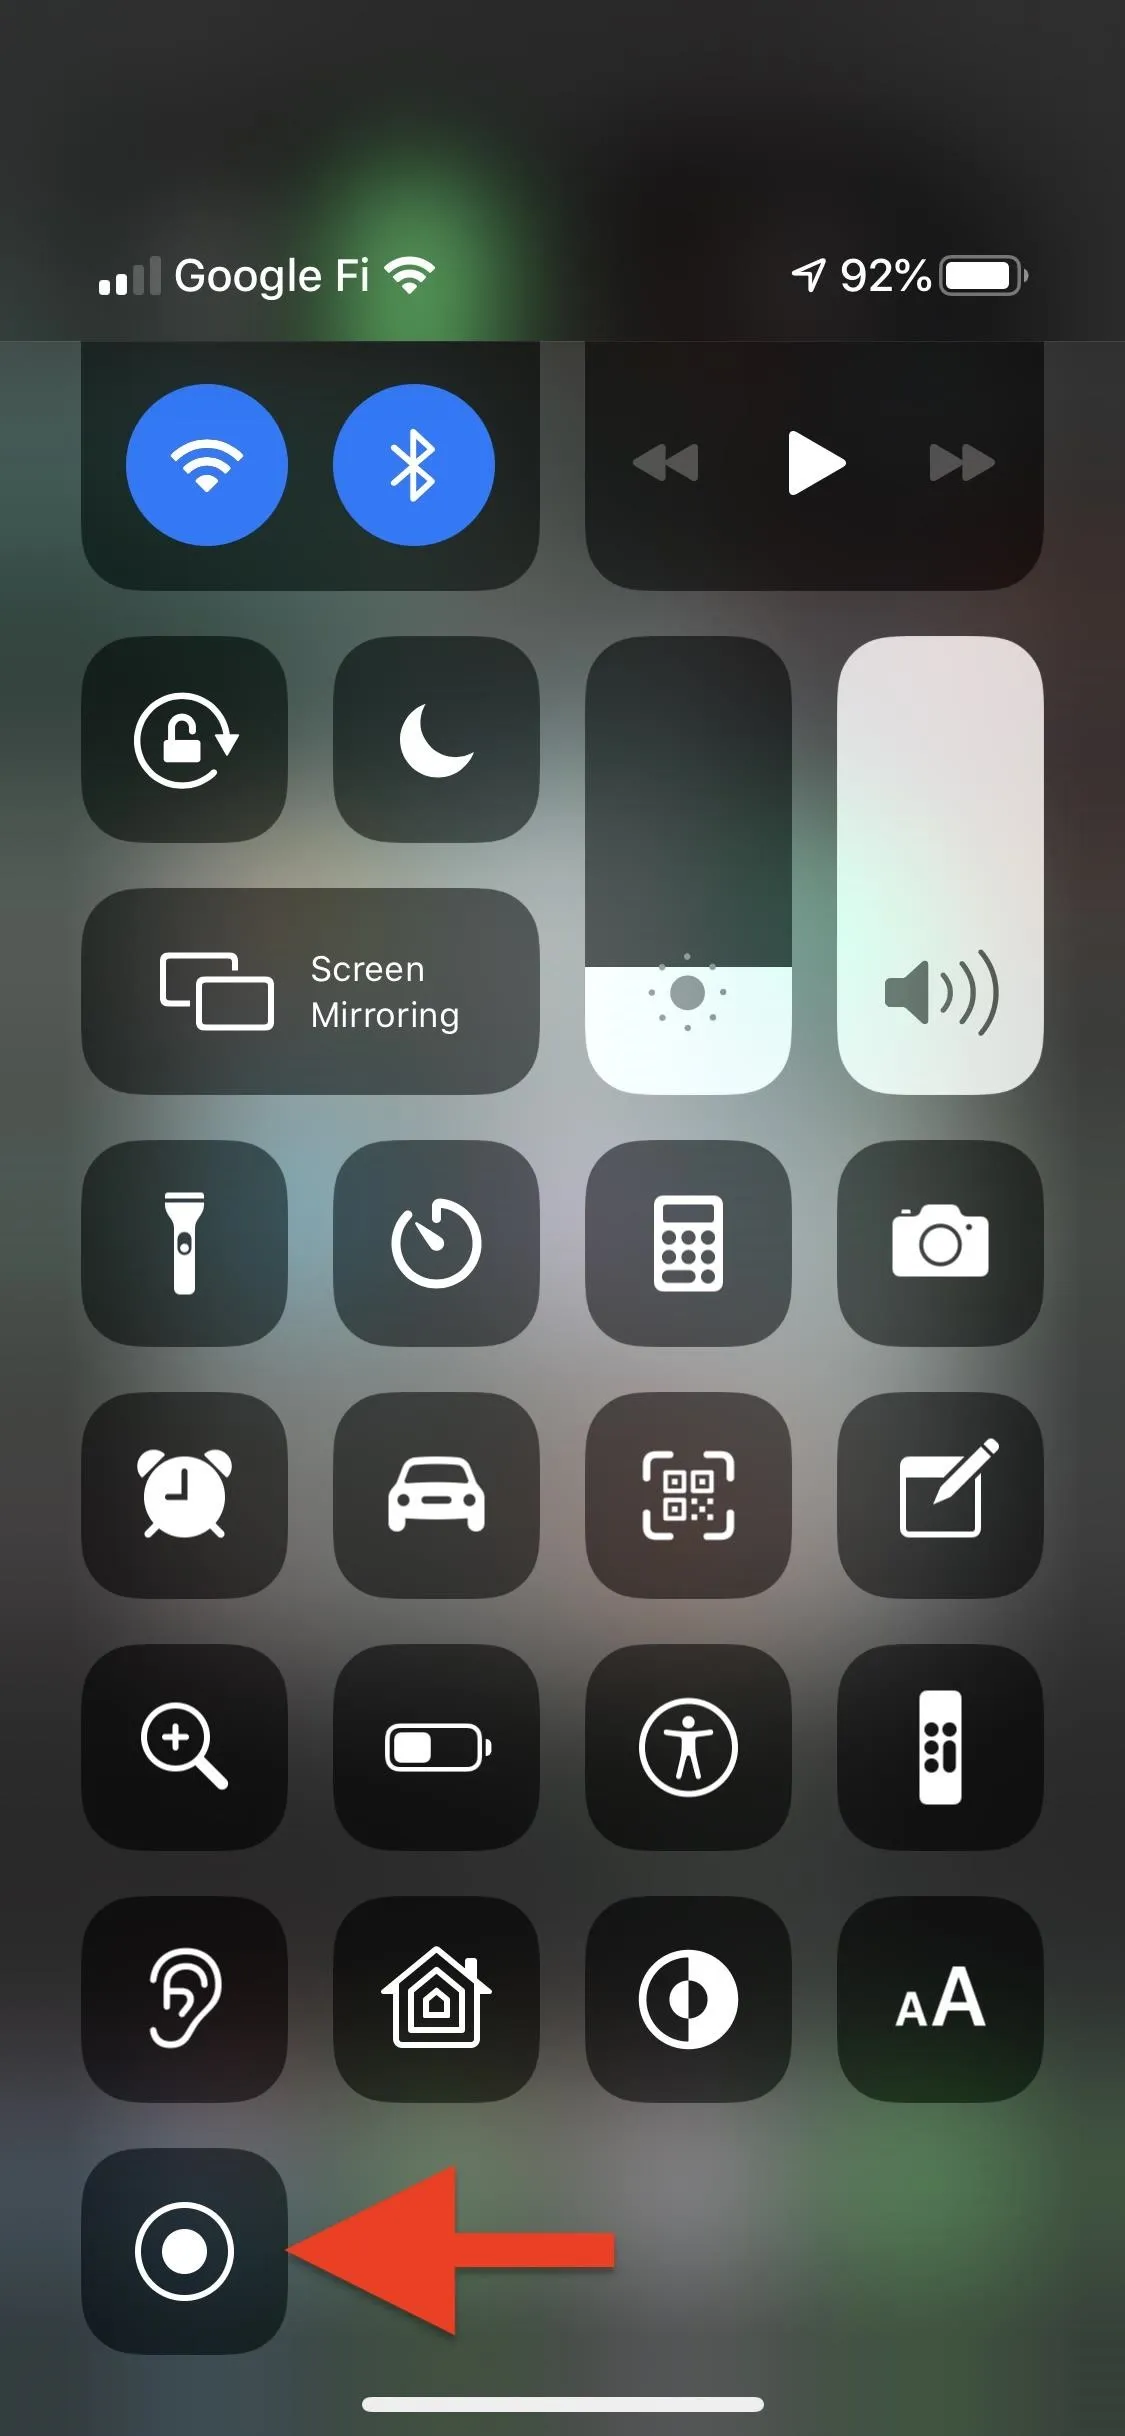
Once you've added the Screen Recording control tile, you'll now see the Screen Recording toggle that you can tap on whenever you want to record your screen.
By default, screen recordings will also record any in-app music and sounds during video recording. However, for some video calling apps, such as FaceTime, only the video can be recorded and not the audio call portion of it. That's to conform to any laws that may prohibit it in your state.
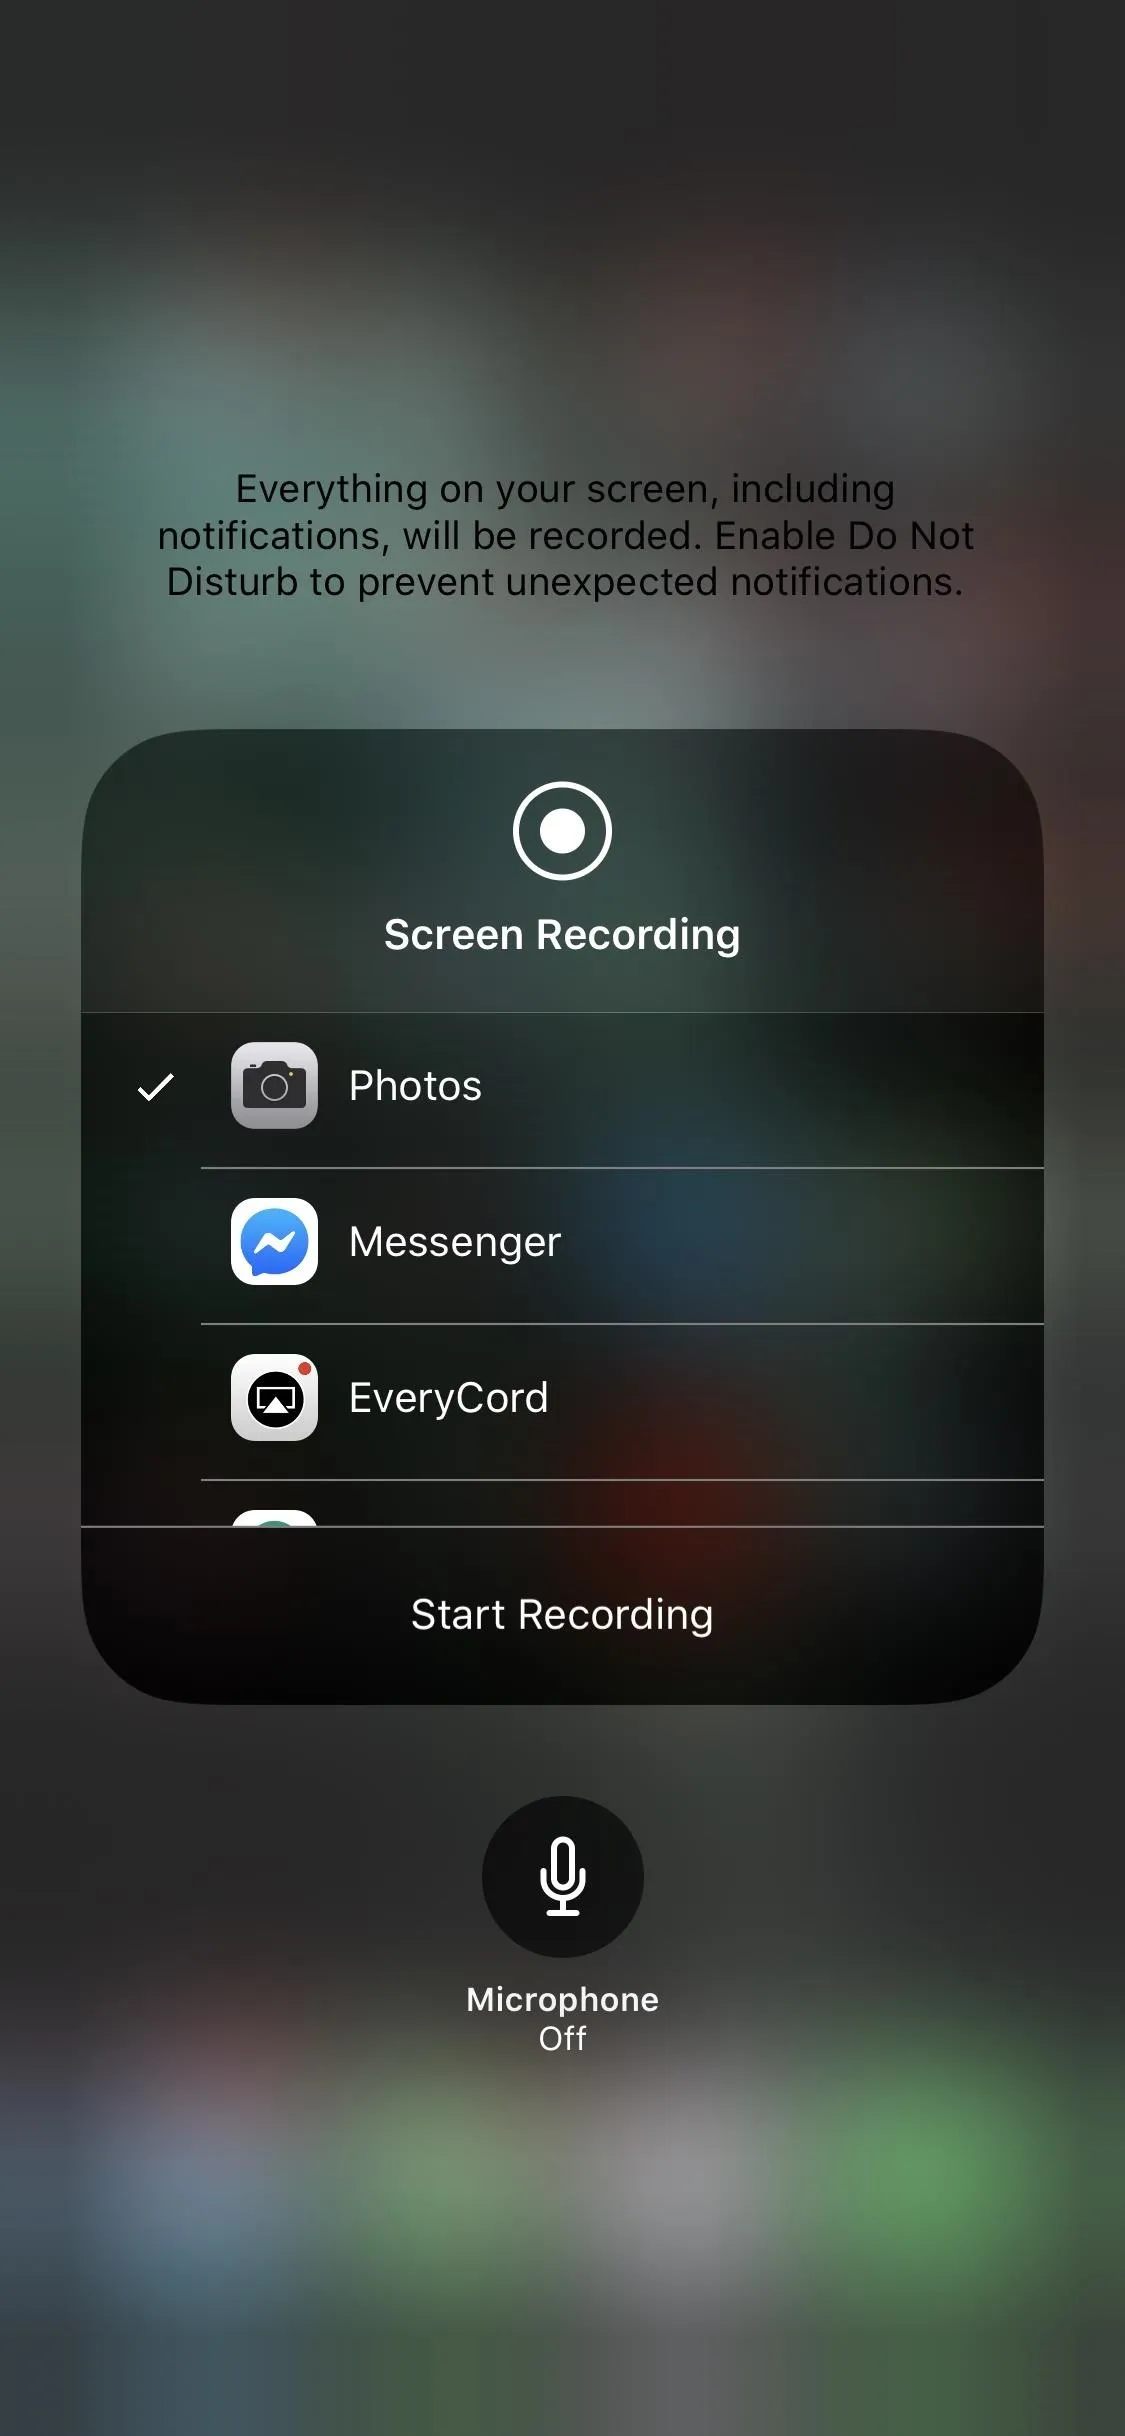
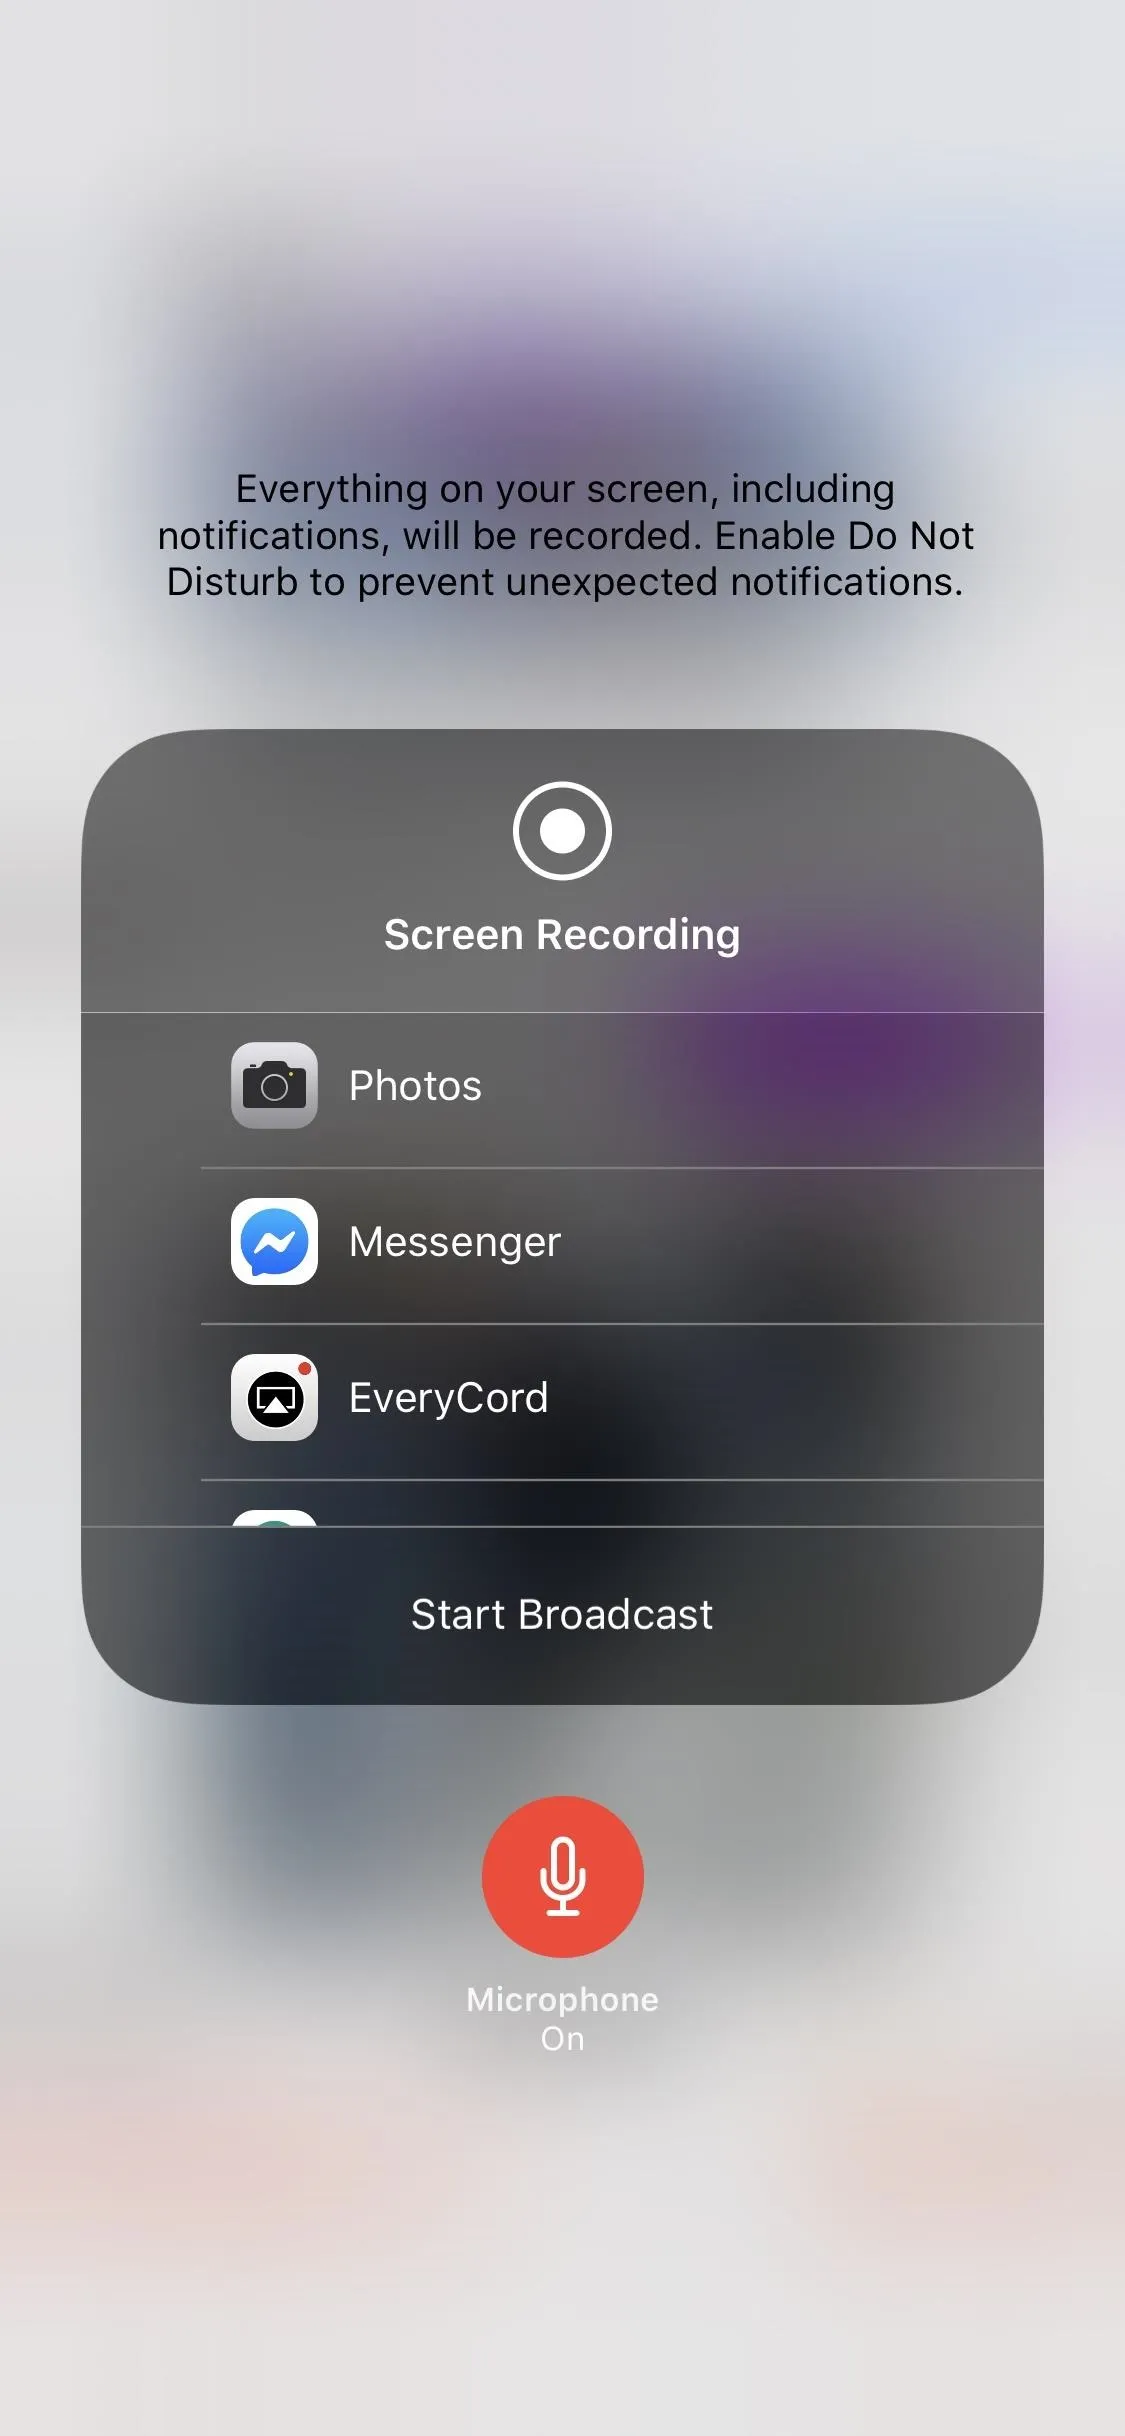
If you want your screen recording to record your voice, simply perform a long-press or 3D Touch on the control tile to open its very own control window, then tap on the mic icon on the bottom before you start recording. Doing so will record both in-app audio where supported and anything caught on your microphone. You can also tap "Start Recording" from this window to start recording, too.
No matter how you initiate the screen recording, you'll have a three-second countdown before the screen recording will start, which helps with less required editing later.
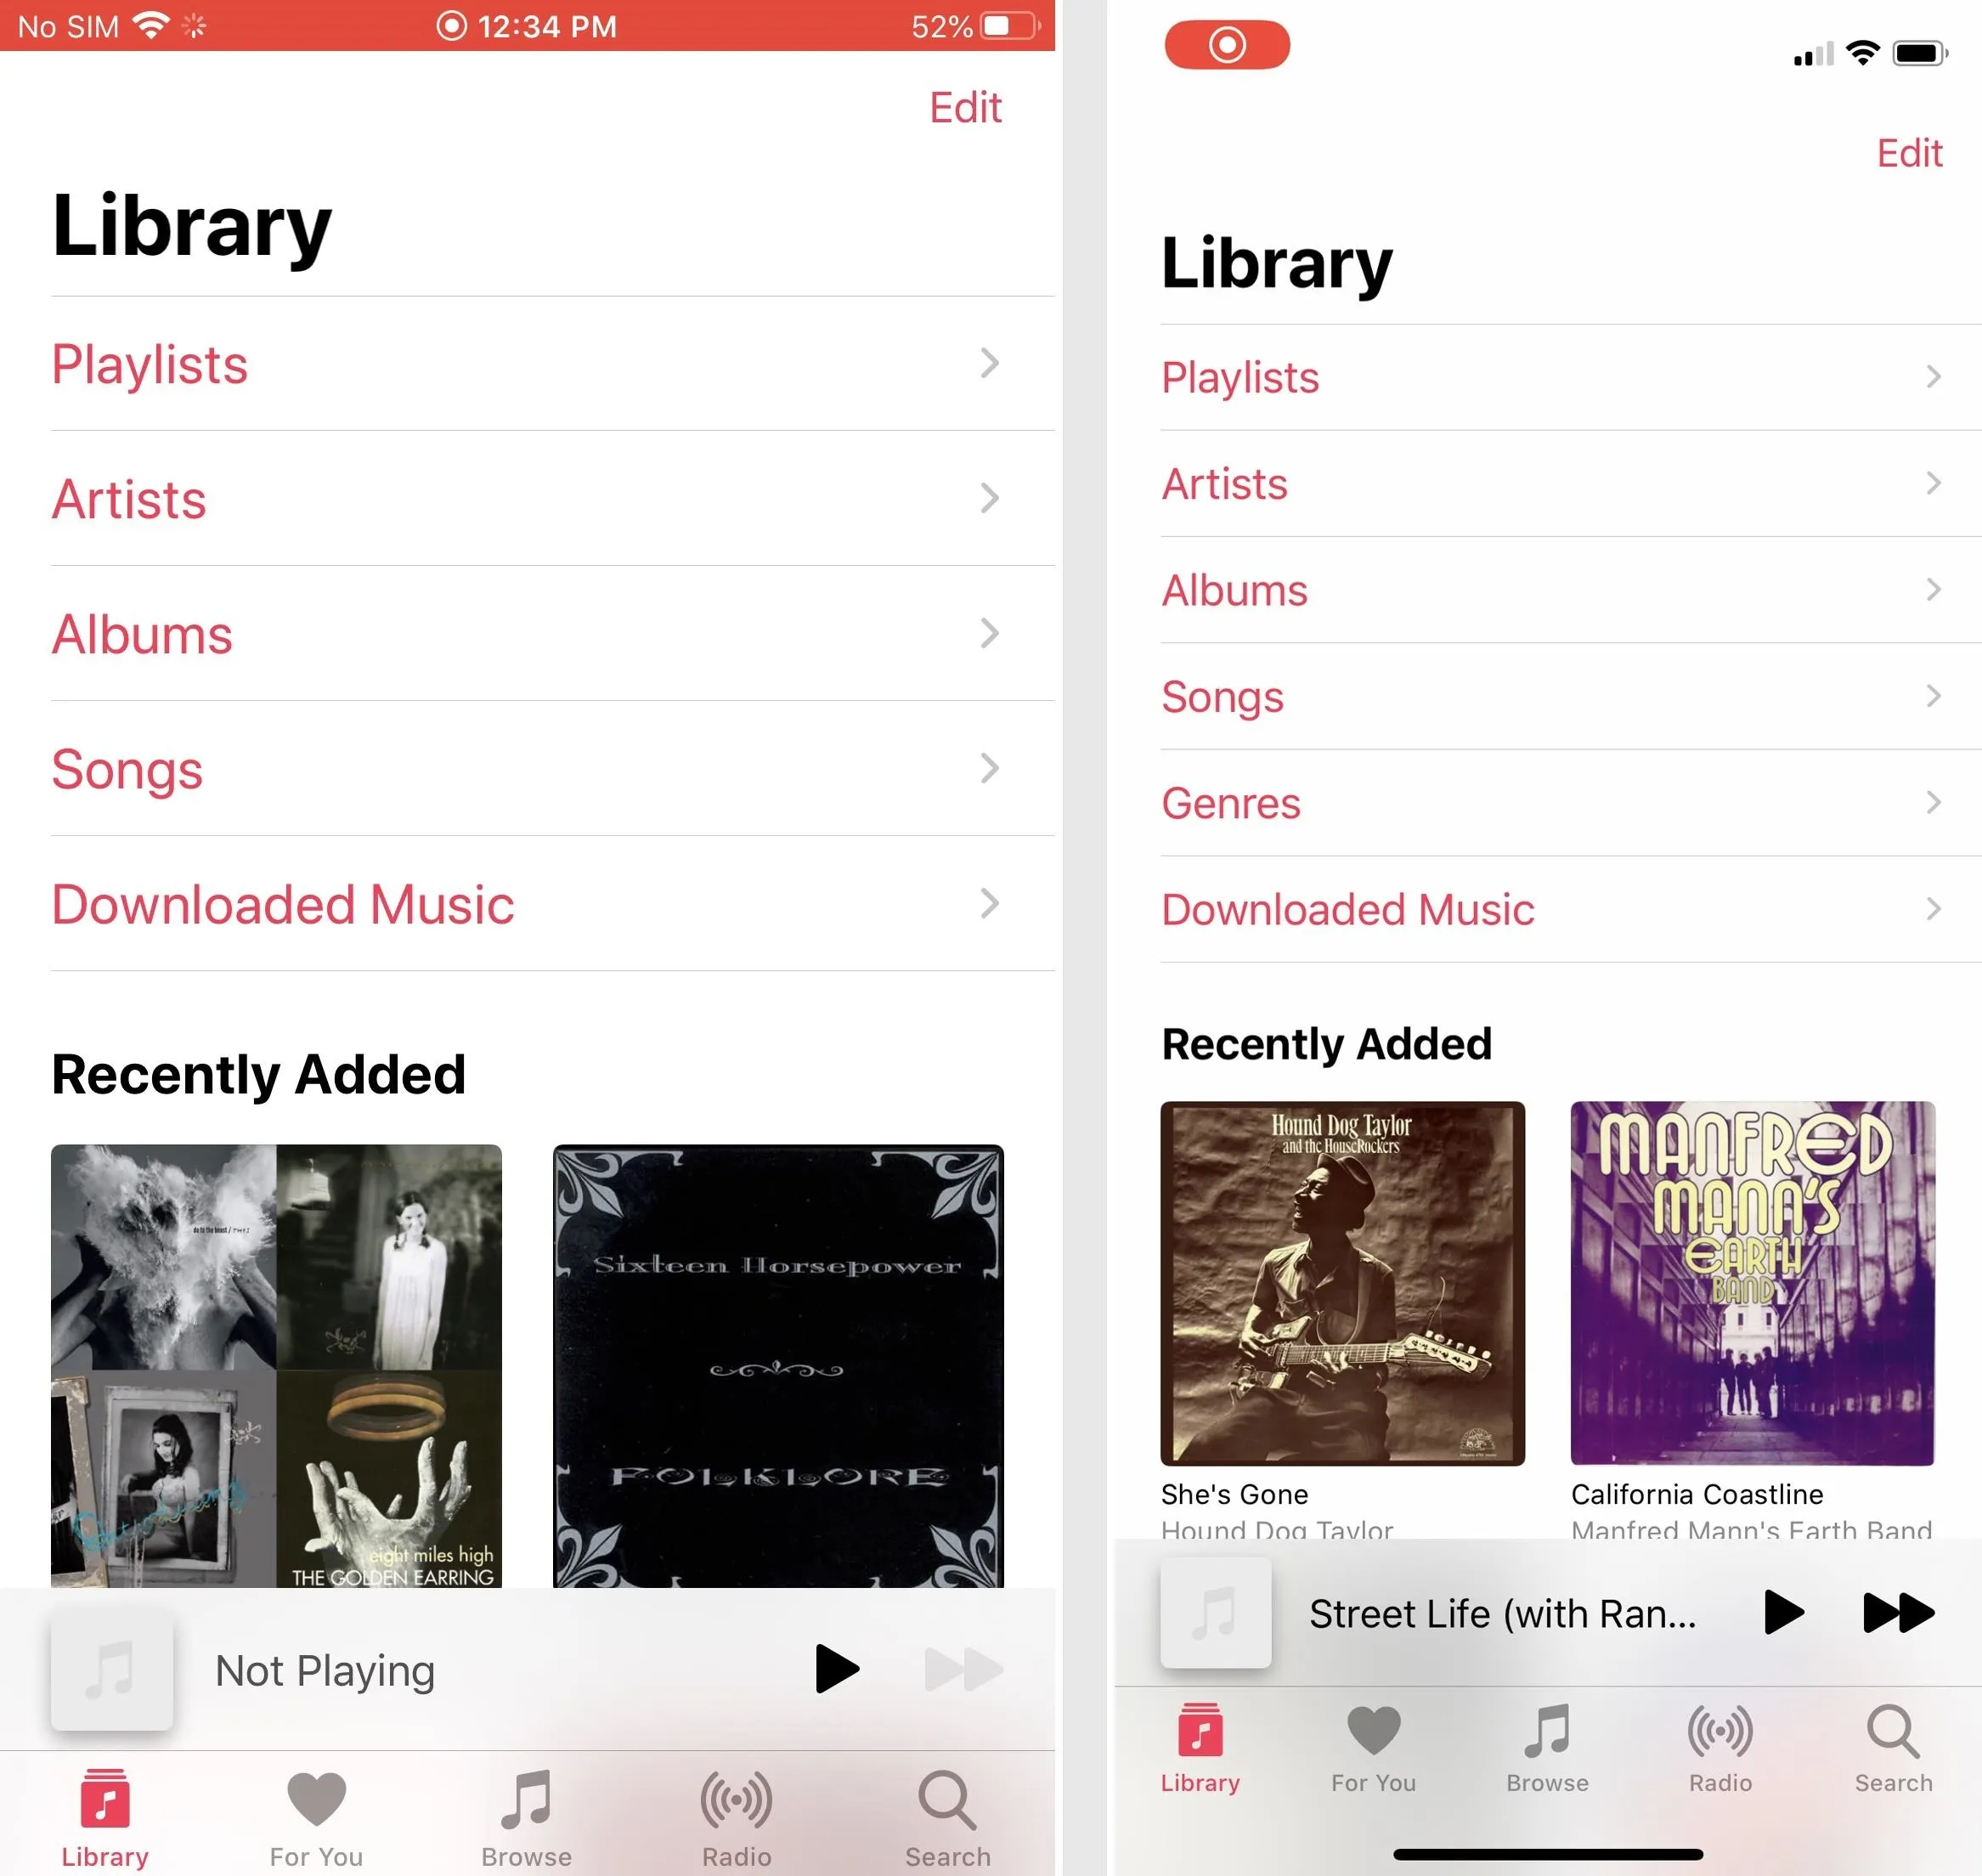
Once a recording is initiated, the status bar will turn red and remain that way until you stop it. The red bar will appear in your recorded video anywhere the status bar is usually seen, and there's no way to turn that off, but it's an easy-to-forgive tradeoff for native screen recording in iOS. If you're recording gameplay footage, the red status bar likely won't be shown, since most games hide the status bar.
Broadcast Your Screen to Other Apps
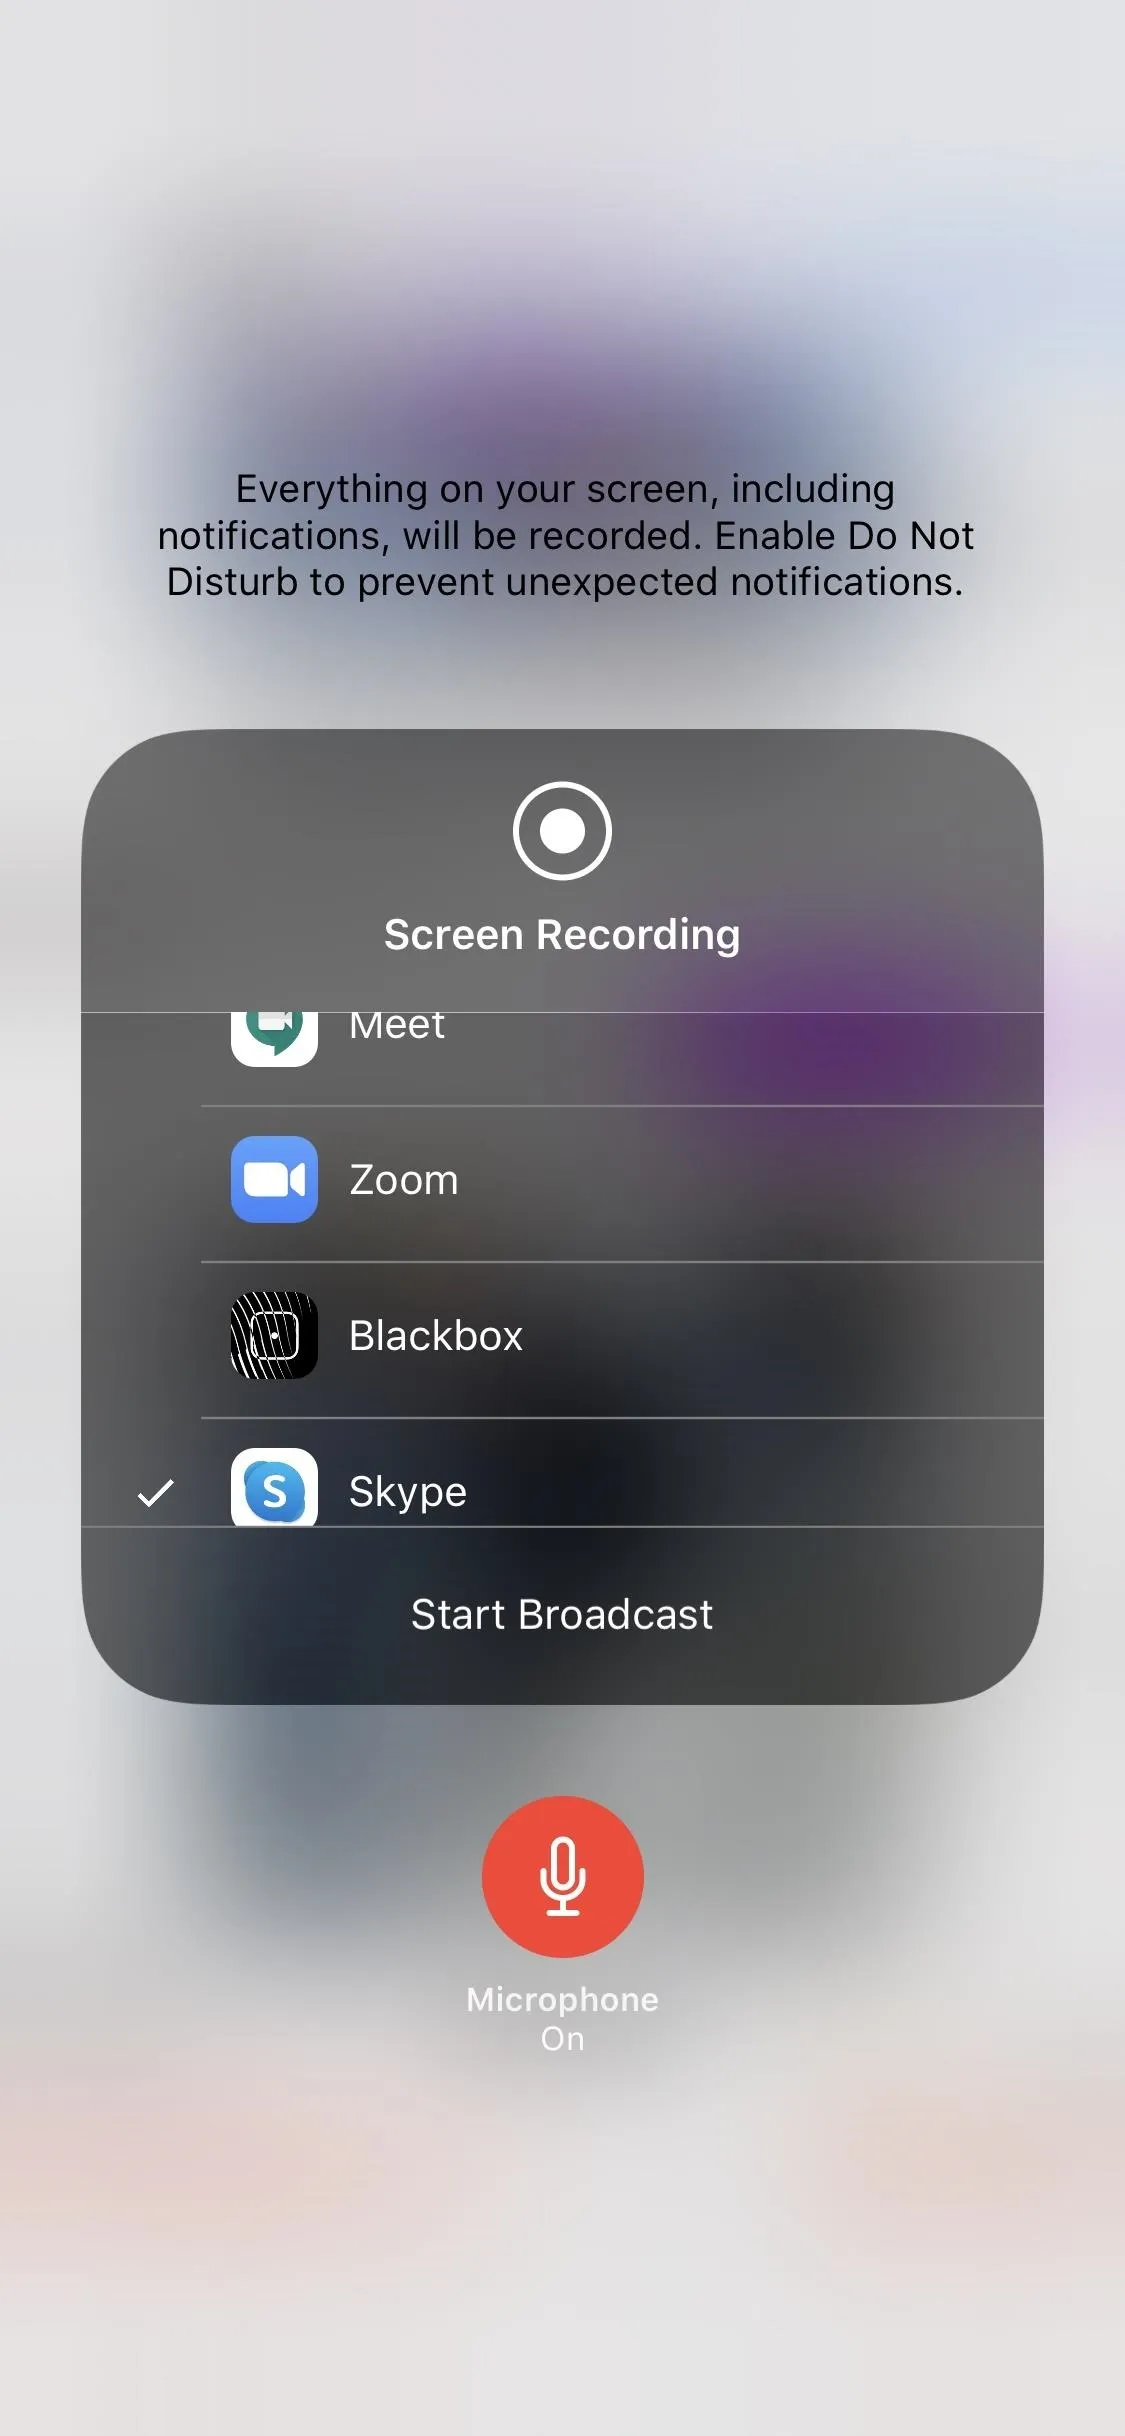
Aside from just recording to the Photos app, if you see more than just "Photos" in the screen recording control window, that means you can broadcast your screen to those apps. For instance, you can use "Messenger" to share your screen during a video call with a friend, "Zoom" to share your screen with colleagues during a conference call, or "Skype" to share your screen just like in Messenger. And these are just some apps that support the feature.
Stop Your Video Recording
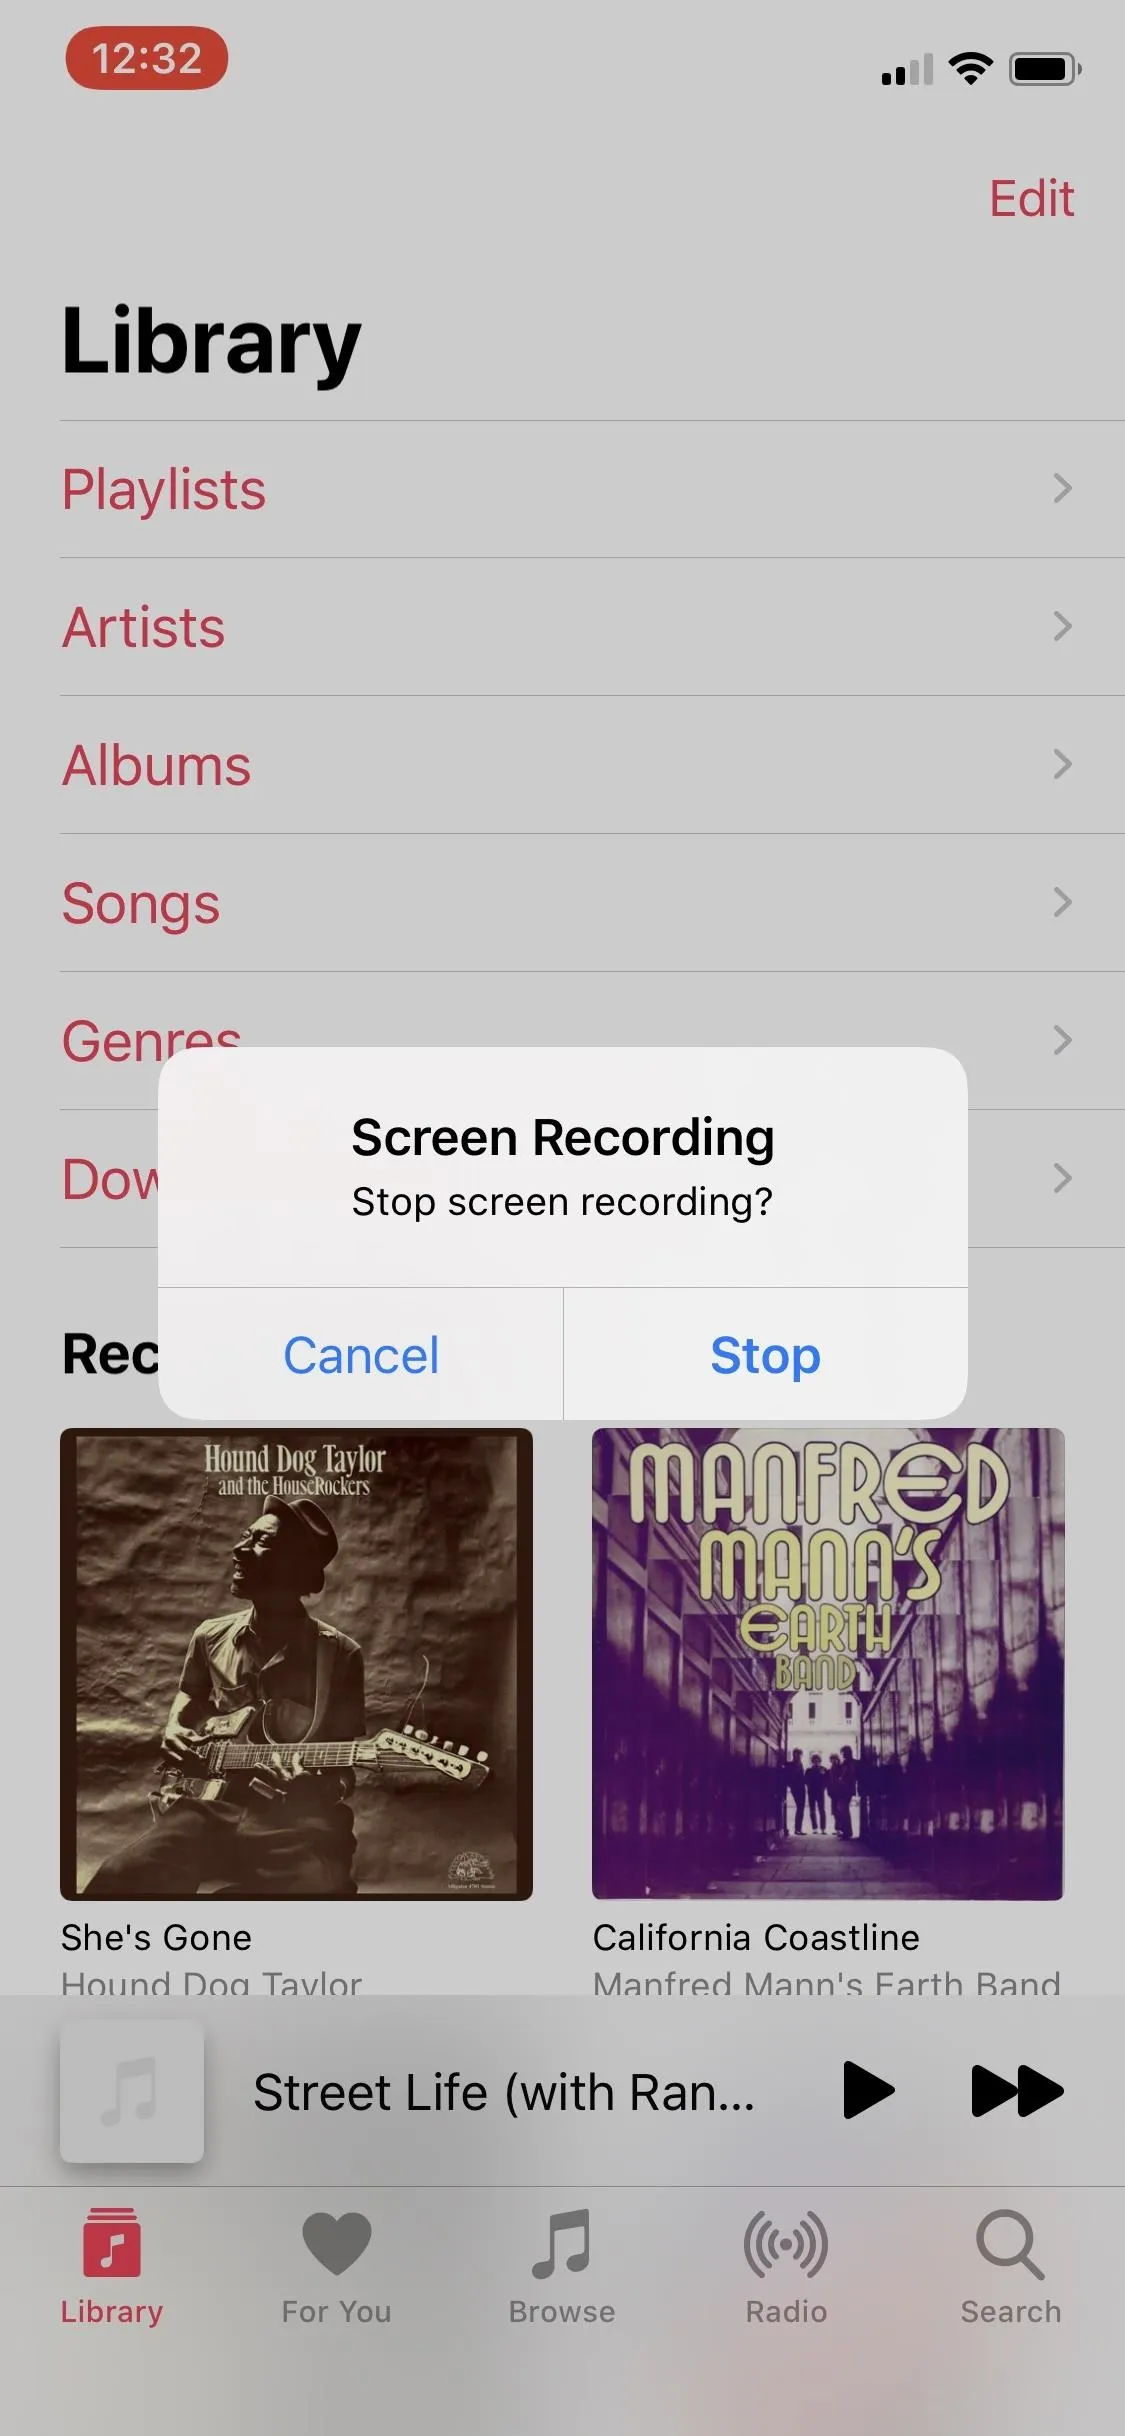
To stop a recording, you can just pull up the Control Center again and tap on the Screen Recording icon or long-press or 3D Touch on it and press "Stop Recording." Alternatively, you can tap on the red recording indicator in the status bar, if you see one, then tap on "Stop."
The indicator will cover the whole status bar (left) or just be a bubble (right).
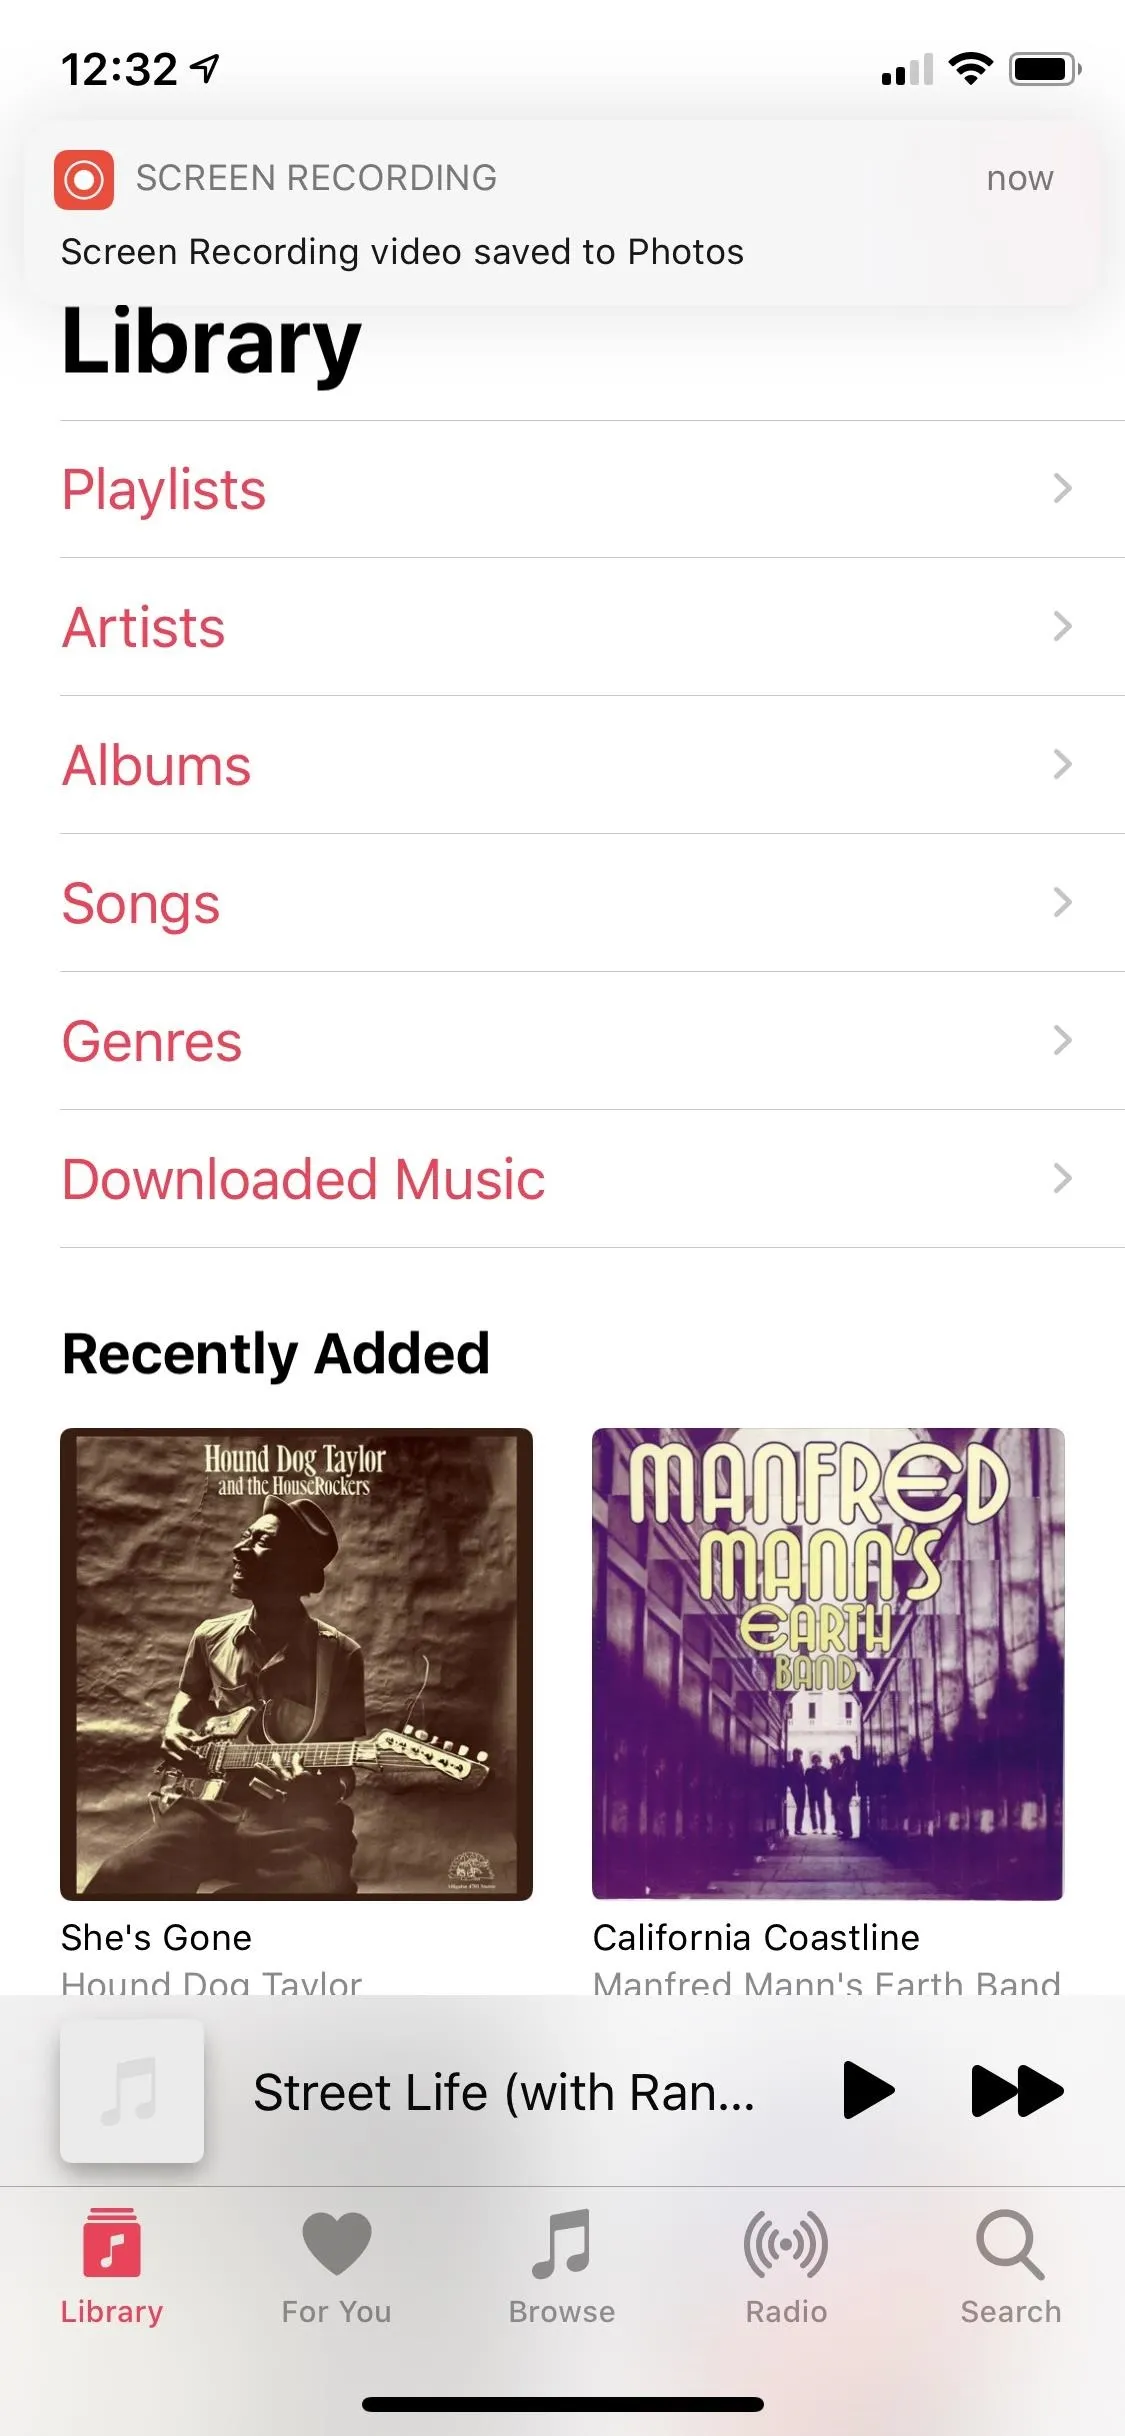
Once you stop recording, you'll get a notification that you can tap on to view the video in the Photos app quickly. You can also just go to Photos directly to find the video in your "Camera Roll" and "Video" albums.
Edit Your Video
In the Photos app, simply select the "Edit" button on your video. To trim it, just tap and hold on one of the black arrows on either side of the frame viewer and move it inward. The yellow cropping indicator will show up to help you see better. You can preview the video anytime by tapping on the play button in the bottom center.
Once you're satisfied with the video's length, tap on "Done" in the bottom right and select either "Save Video" or "Save as New Clip" to overwrite the current video or make a new one, respectively.
Cover photo by Amboy Manalo/Gadget Hacks; screenshots and GIFs by Justin Meyers/Gadget Hacks


Comments
Be the first, drop a comment!