


The standard way to sort your notes and to-dos in Reminders has always relied on you putting them in the correct list and group. Then came smart lists for flagged and scheduled tasks, followed shortly by a smart list for tasks assigned to you. In iOS 15, Apple brings yet another way to find your reminders more easily — tags.
Tags in Reminders work pretty much as you would expect; add tags to tasks, then you can search or filter tasks by those tags. If you use hashtags on Twitter, Instagram, or any other social platform, tags in Reminders will be like second nature to you. However, one big difference is that emoji can be a part of your tags.
Adding Tags to Tasks in Reminders
There are a few ways to add tags to reminders, and it pretty much all boils down to preference. But before we get to those, here are the basic rules regarding tag formatting:
- Tags cannot contain spaces.
- All letters and numbers work.
- You can combine letters, words, and numbers into one tag using dashes, underscores, and other special characters.
- Supported dashes include a hyphen (-), en dash (–), and em dash (—).
- All diacritics (accents) available for letters should work.
- Some special characters that will work include:
$ ₽ ¥ € ¢ £ ₩

’ ‘ ` ” “ „ ^ |

( ) < > [ ] { } » «

_ + = ≠ ≈ ~ - – —- Some special characters that won't work include:
: ; . ? ¿ ! ¡ ...

& § @ # % ‰ * • / \- Typing any unsupported character in will create a tag using everything that can before it.
- Emoji work as one emoji or a bunch of emoji.
- You can combine emojis with any of the supported letters, numbers, and special characters.
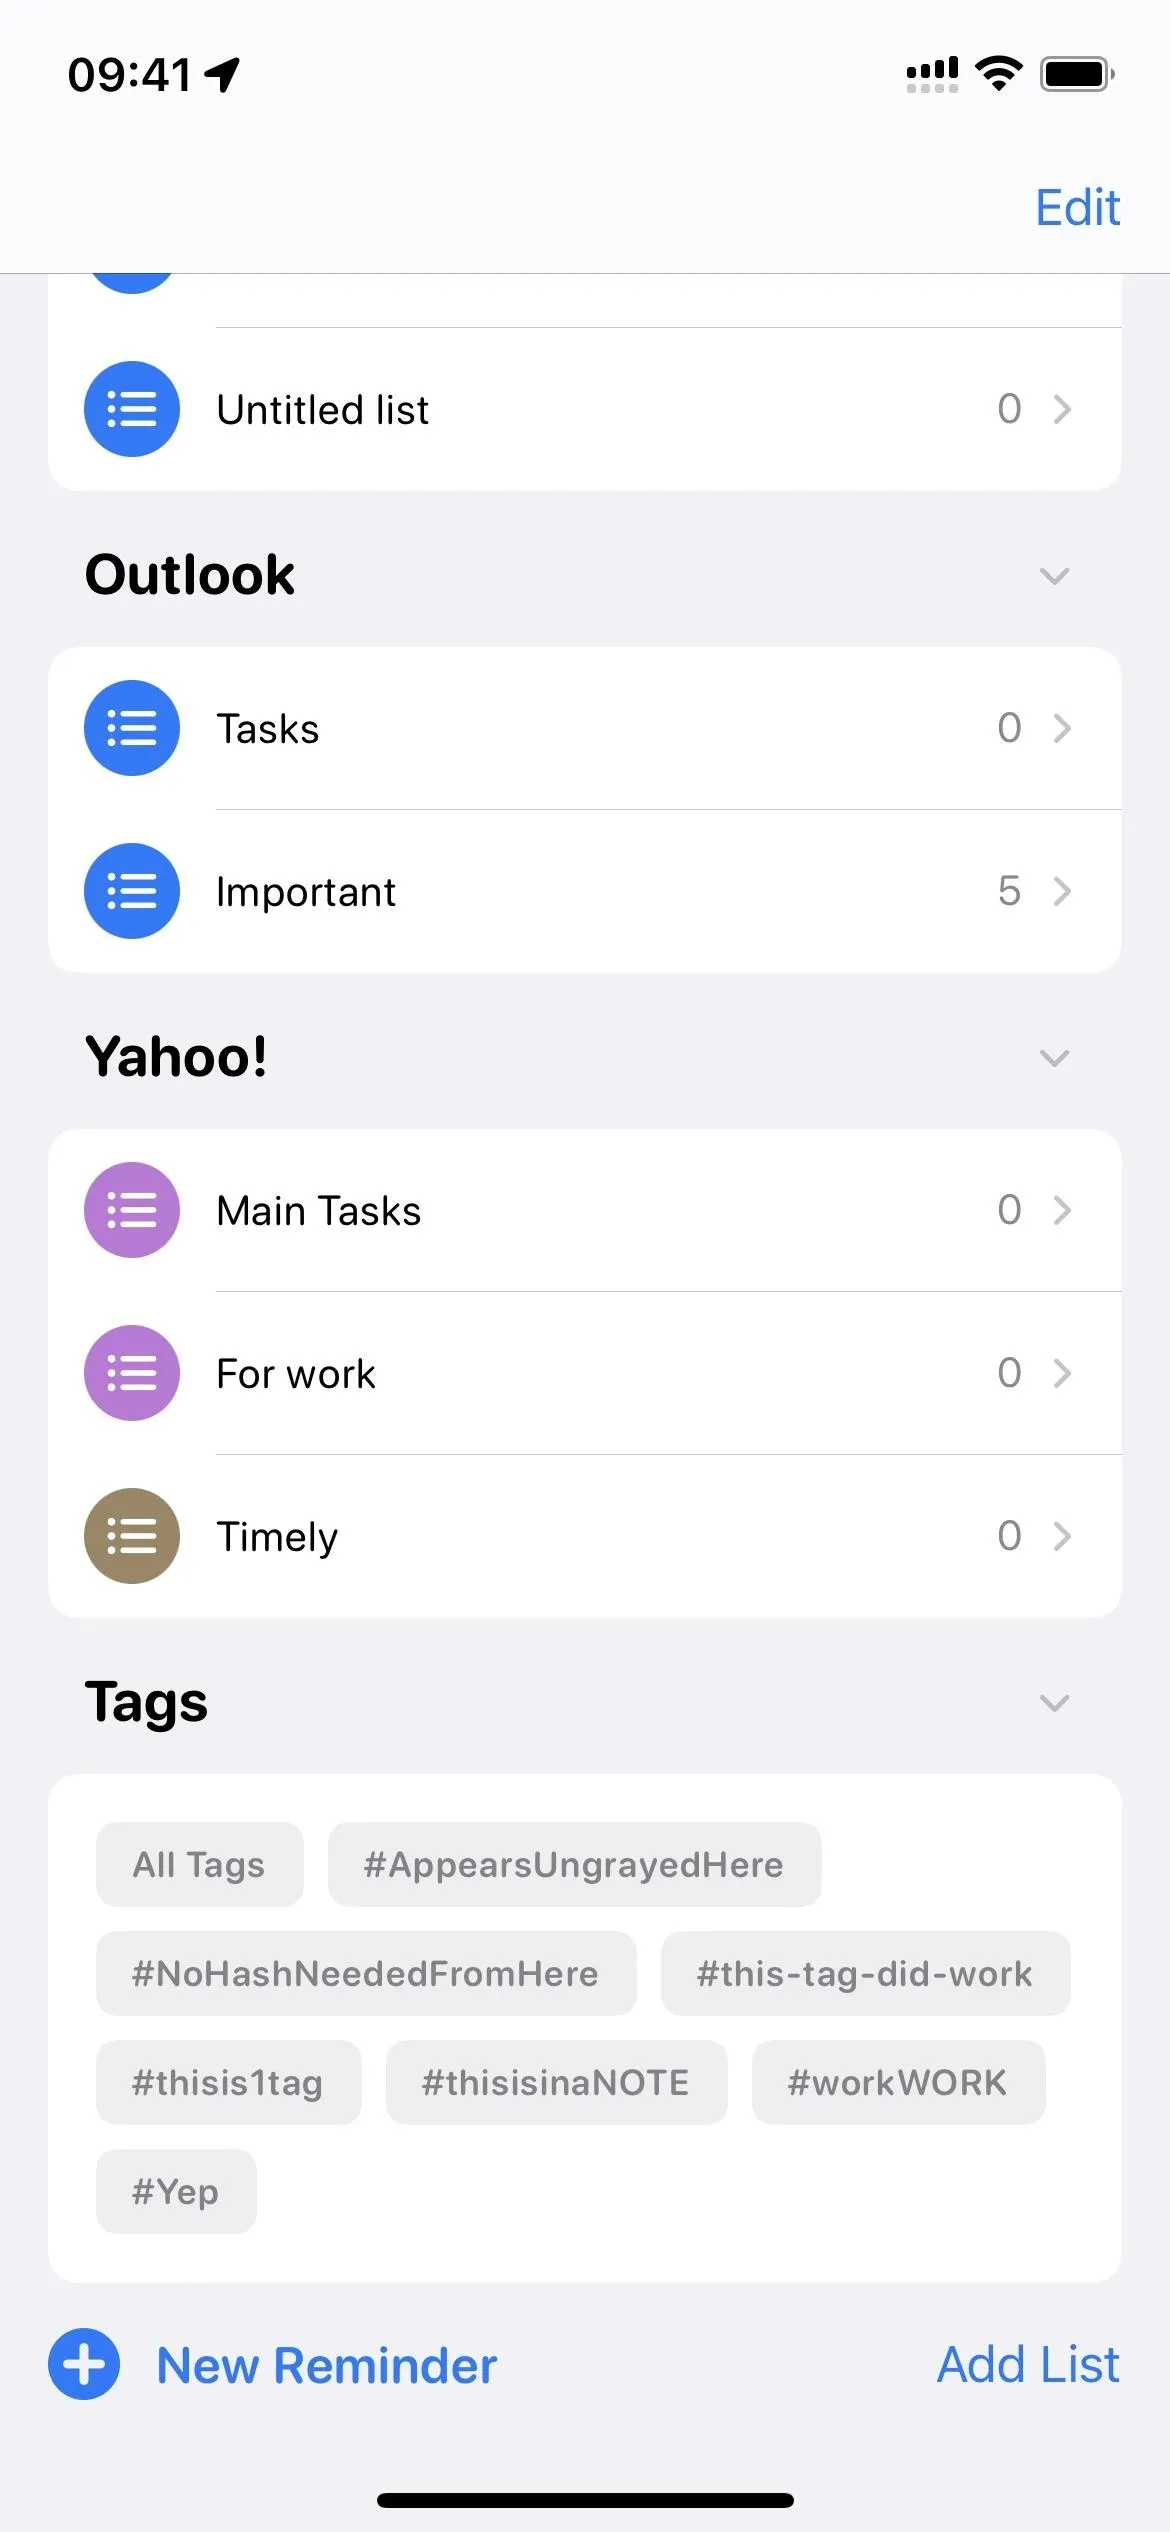
- Tags only work for lists on iCloud, so lists attached to Outlook, Yahoo, etc. won't work with them.
- Tags work in titles, notes, and tag lines.
- All of your devices need to be running the latest Reminders version. If not, you'll see an "Upgrade" button for your iCloud lists. Use that to upgrade to the latest Reminders version. Any devices that have not been updated will not be able to see or use your reminders in the primary iCloud account after upgrading.
Adding Tags to Titles
When you add a new task or edit a reminder you already have, you can include a tag on the main title line. Doing so makes it more evident than with the other options since it stands out big and bold. Start by:
- Adding a new reminder.
- Tapping the title of a reminder.
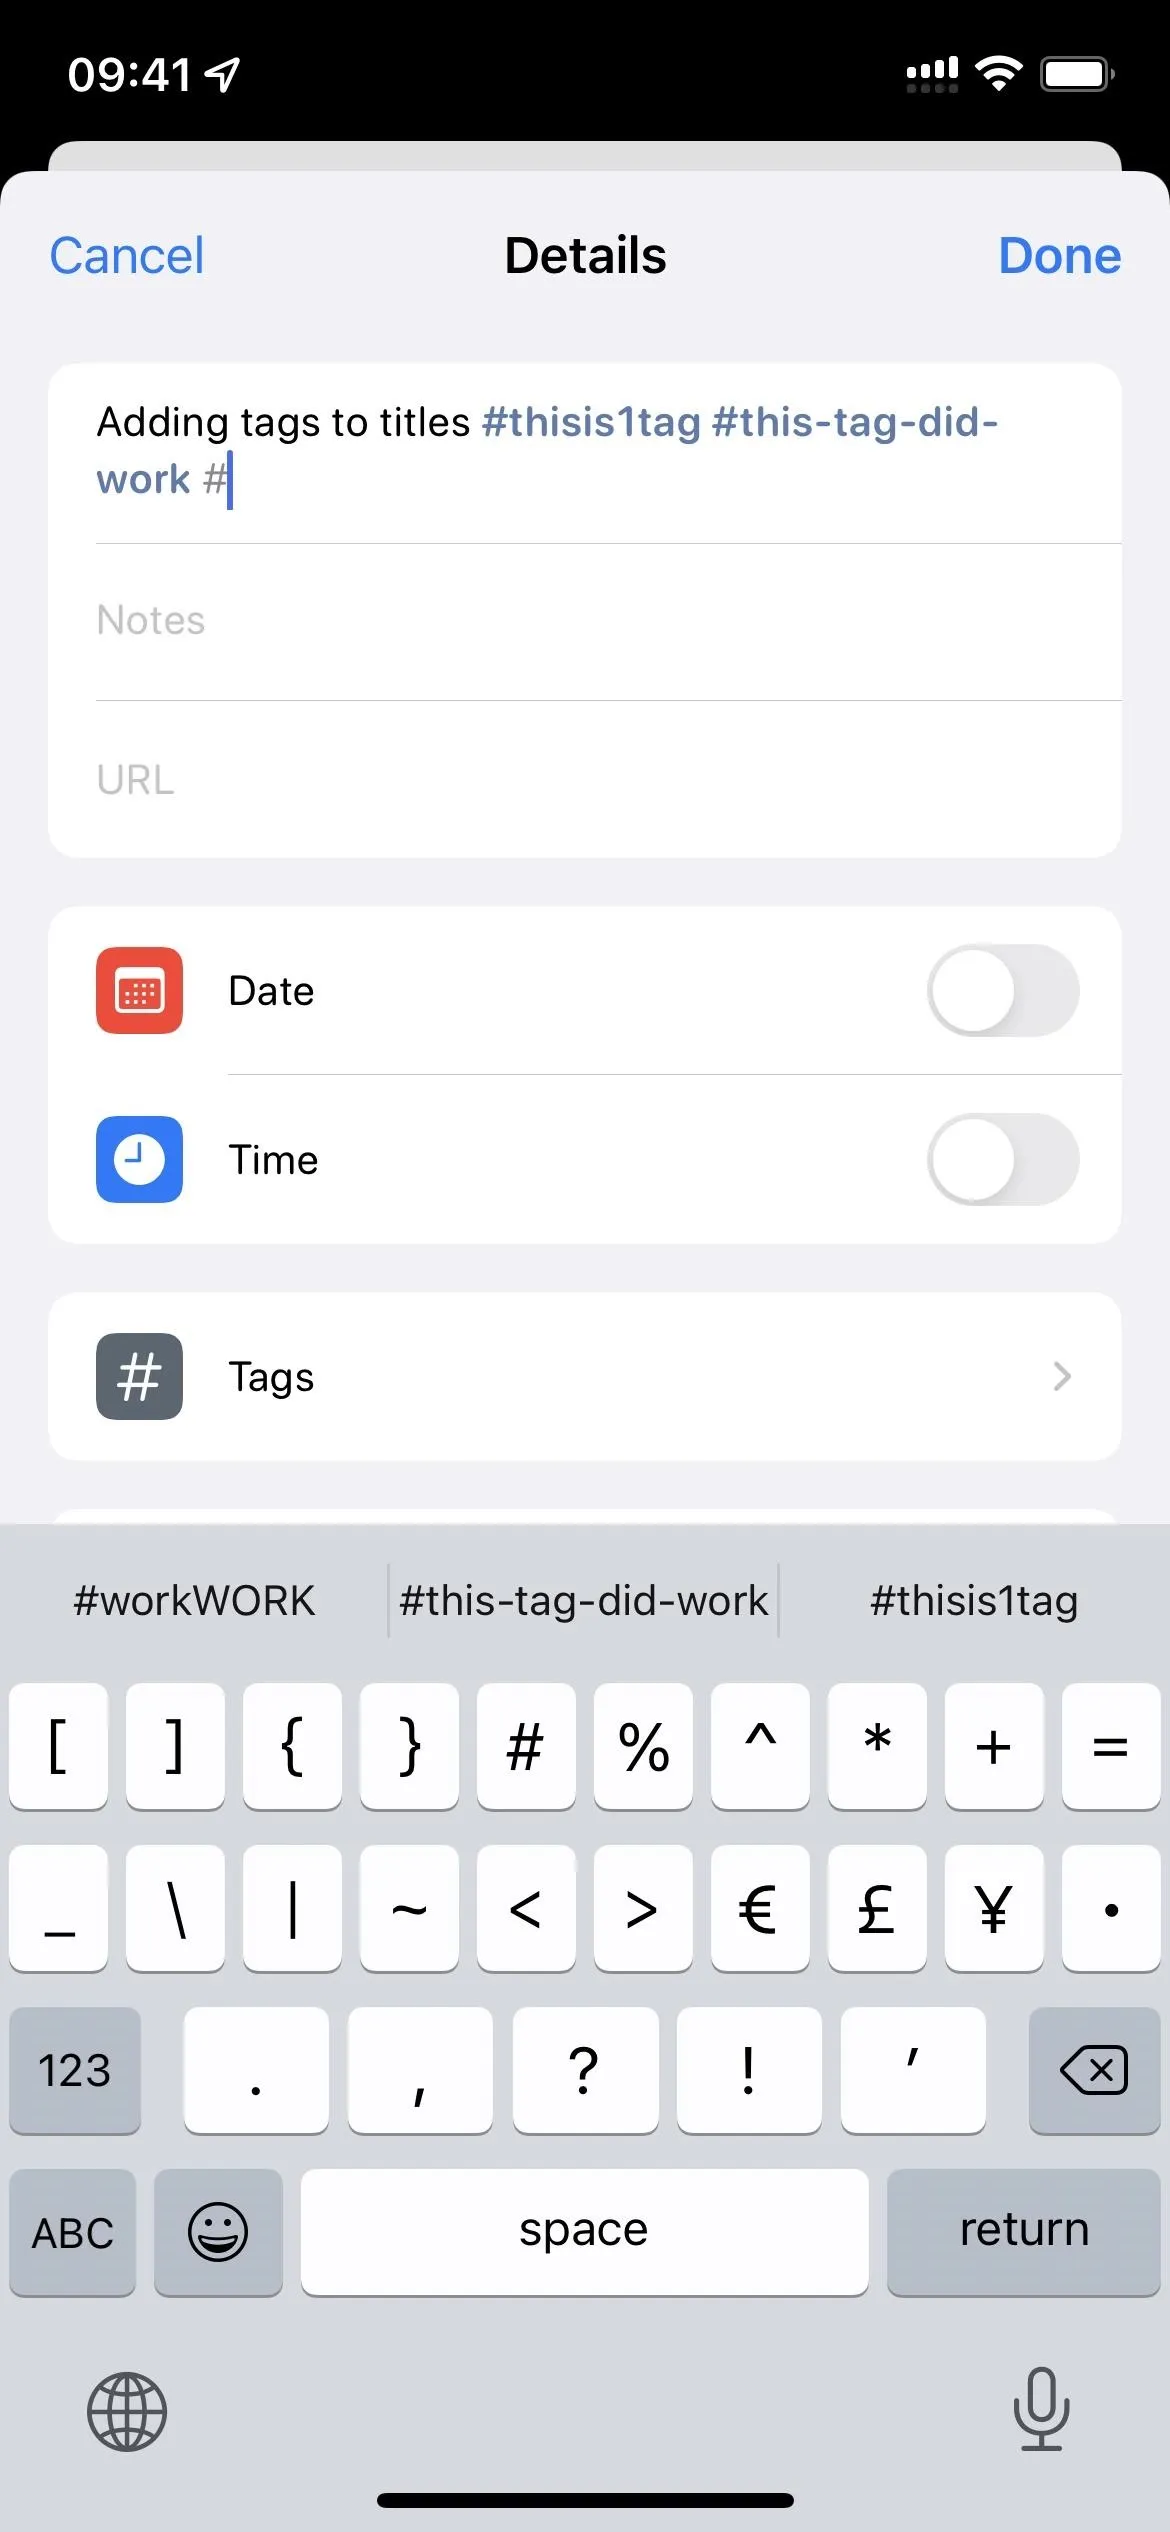
- Tapping the reminder title, hitting the Details (i) button, and placing the cursor in the Title field.
- Swiping left on a reminder, hitting "Details," and placing the cursor in the Title field.
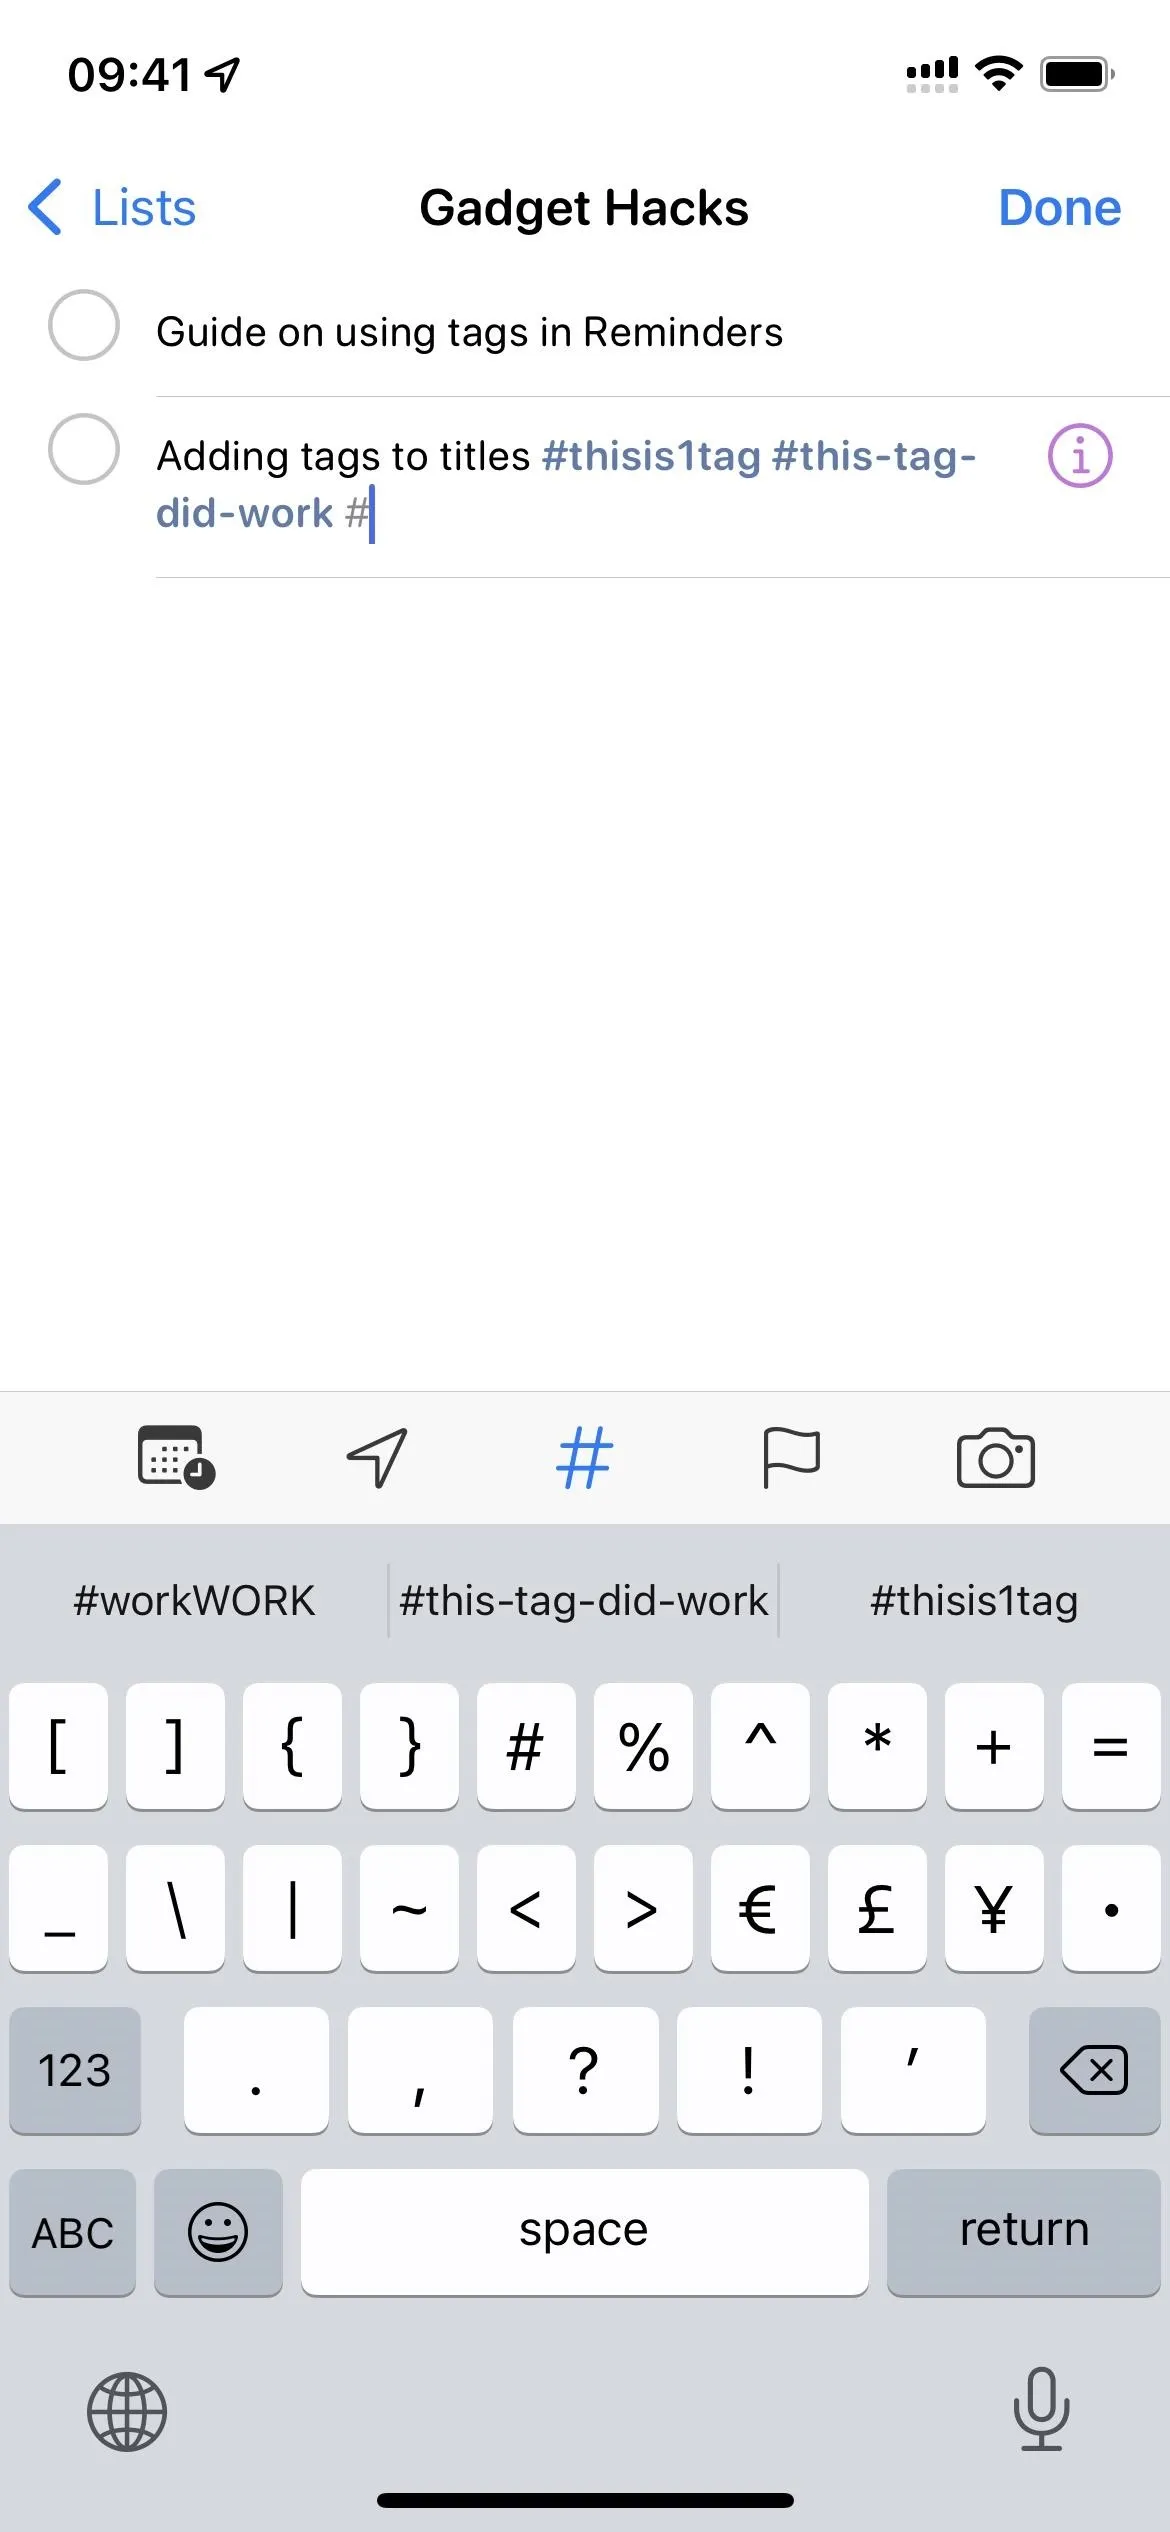
On a task's title, type a # symbol (aka a number, hash, or pound sign), then follow that up with the word, number, special character, emoji, or combination of those that'll be your tag. You'll notice that while you're typing out your tag, it's in a shade of light gray, letting you know that it's still in progress.
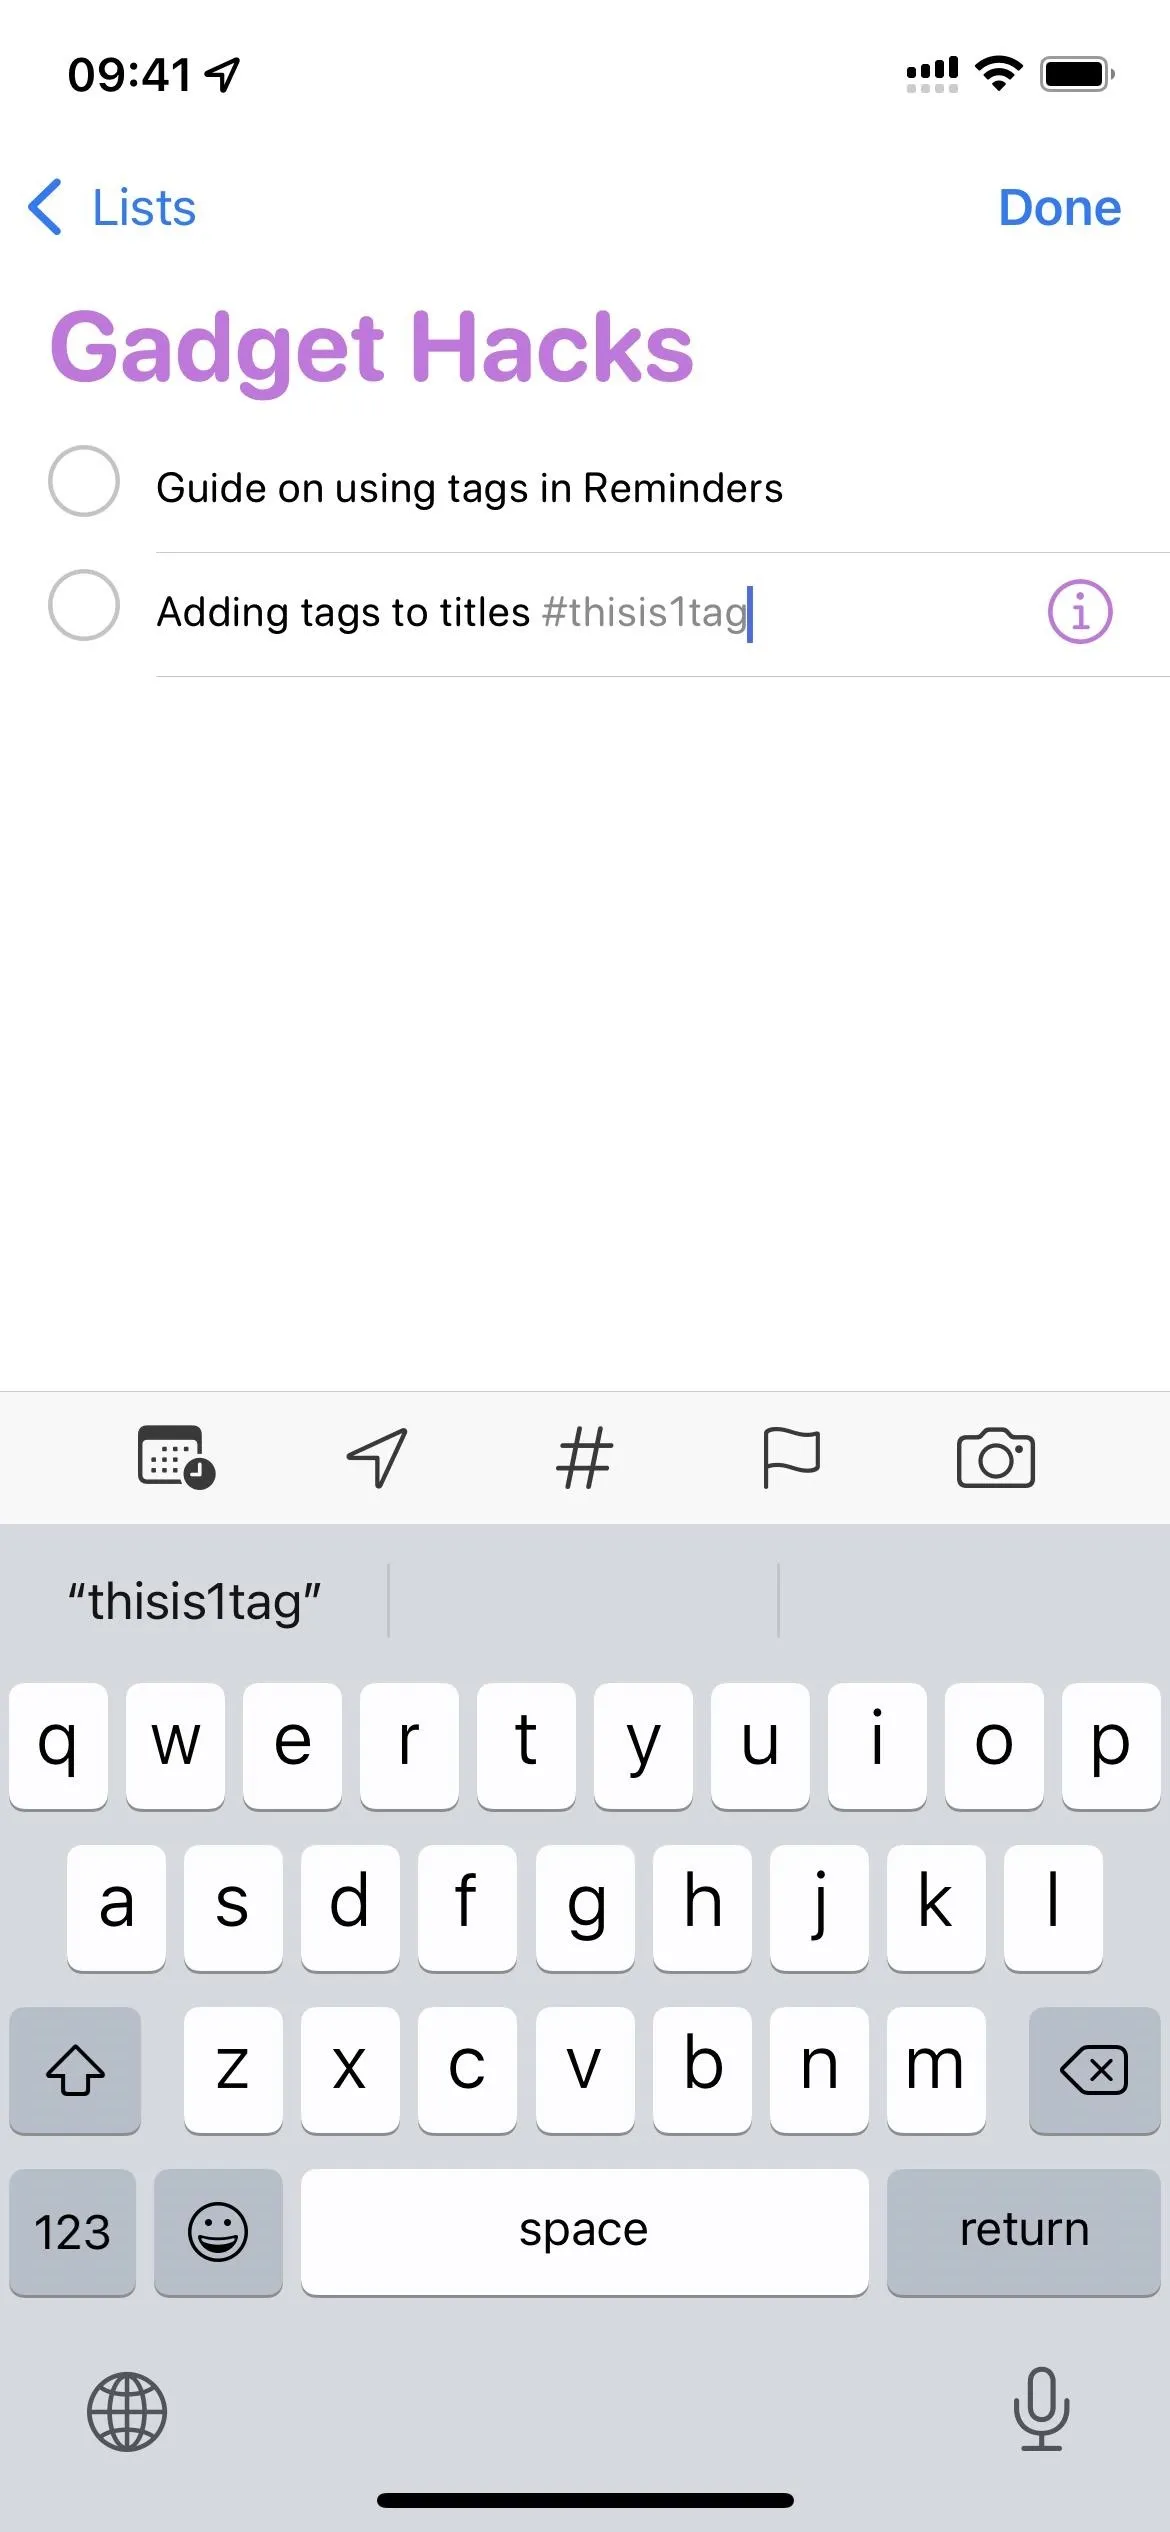
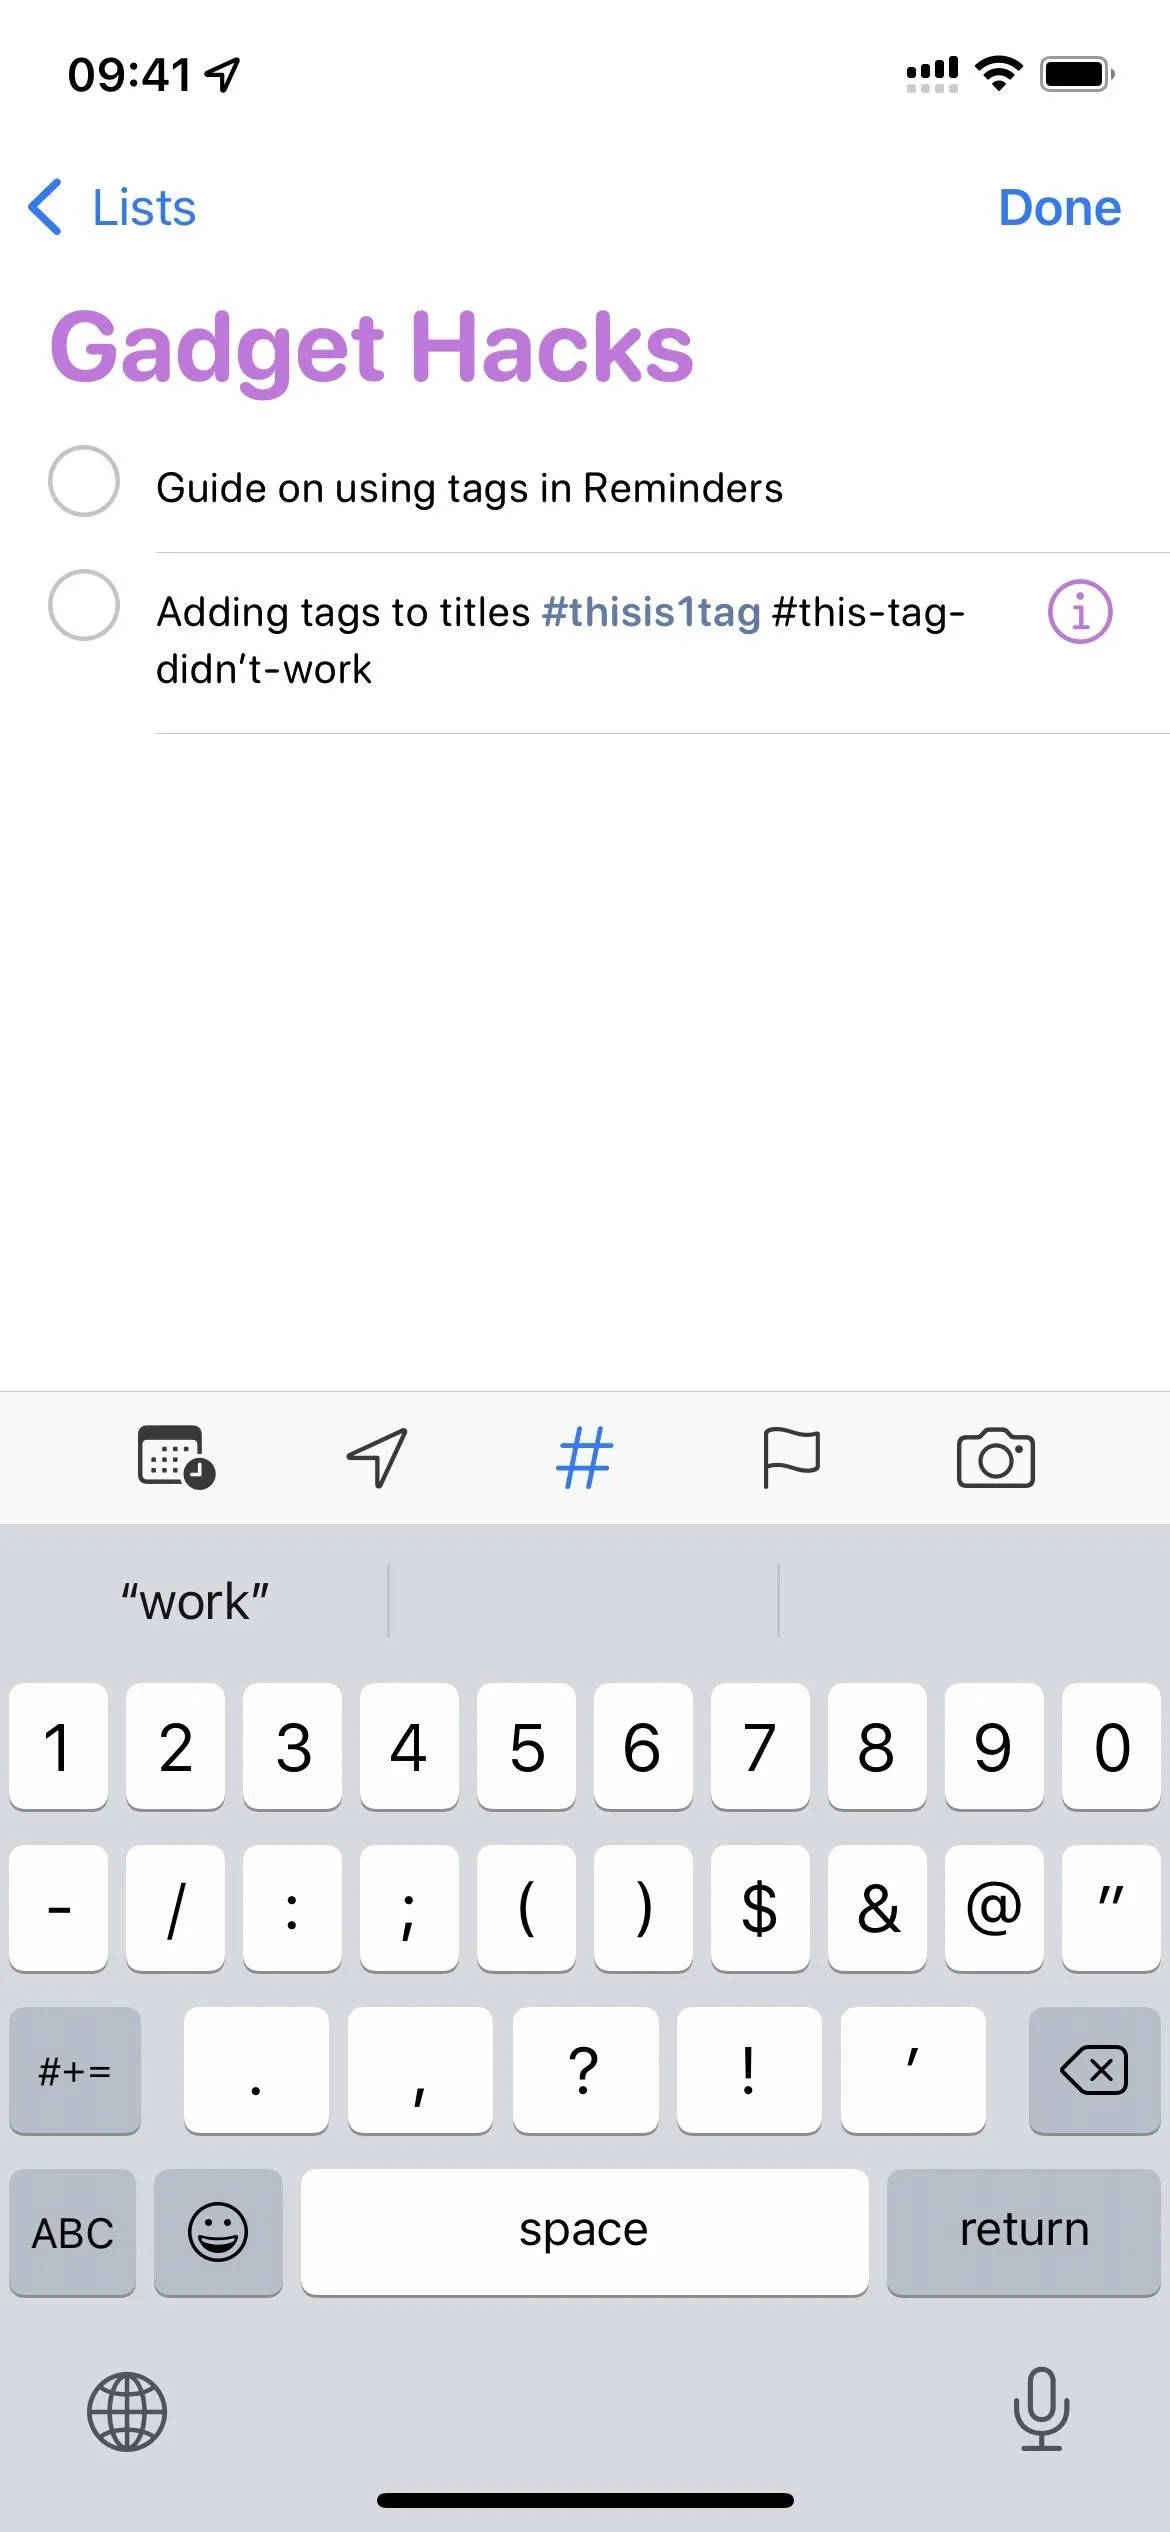
Hitting space, return, or an unsupported character will create the tag. If you see dark black text, it means it didn't work, so it's acting only as regular text and symbols. To fix that, replace the # sign with another # sign, and it'll be back to a light gray.
Alternatively, after you hit the # sign to start a tag, you may see tag recommendations in the menu above the keyboard. If you select one of those, it will add the tag right away.
Adding Tags to Notes
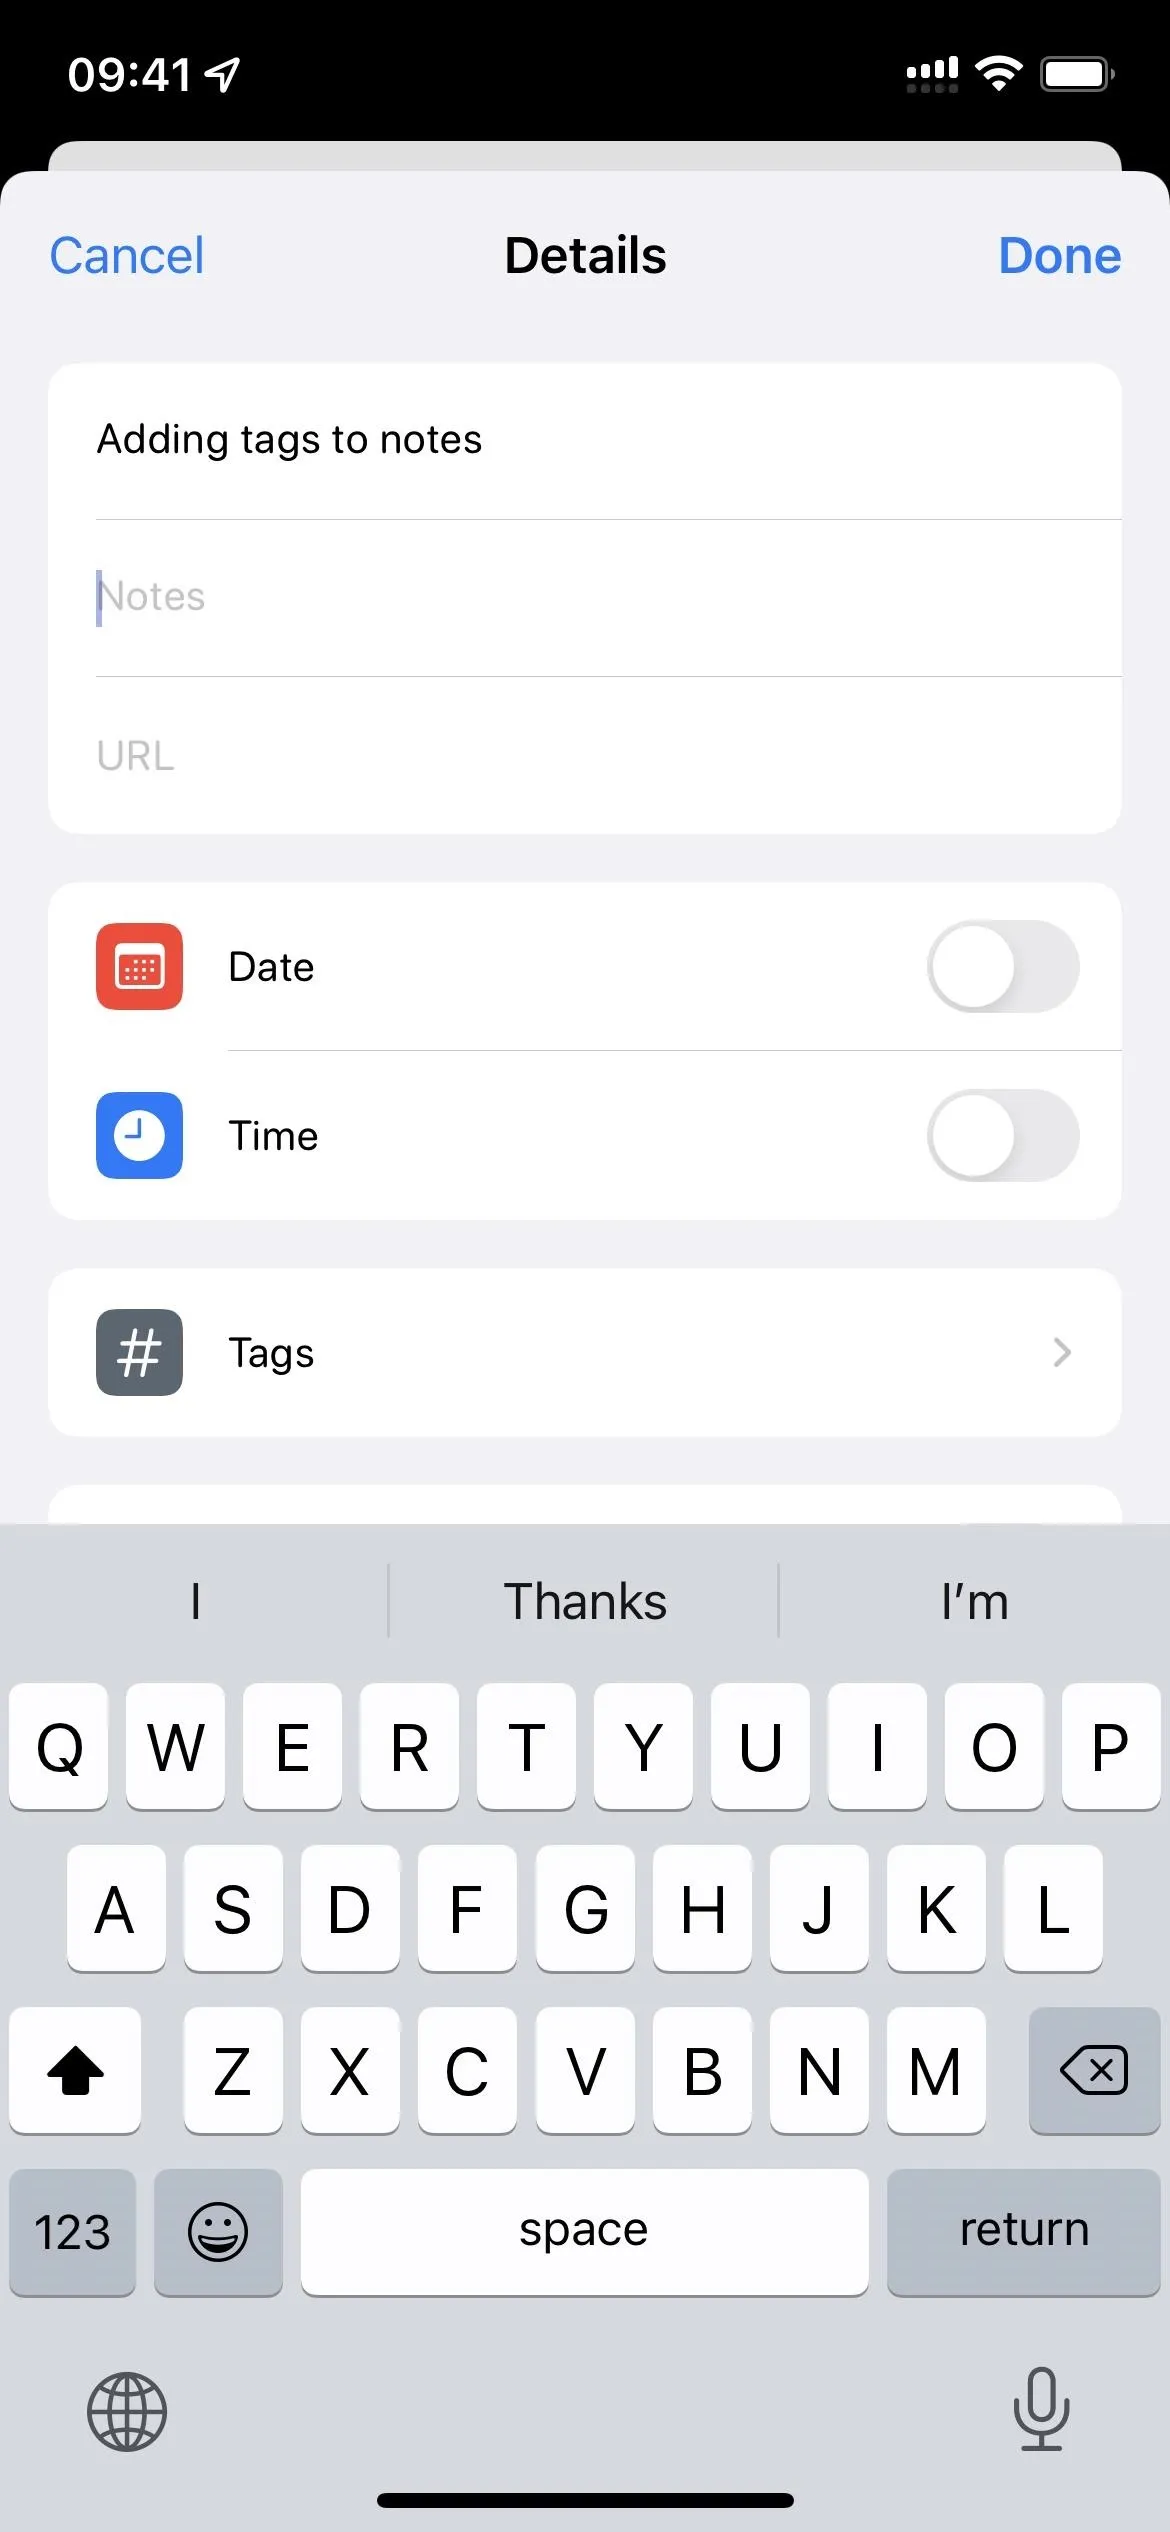
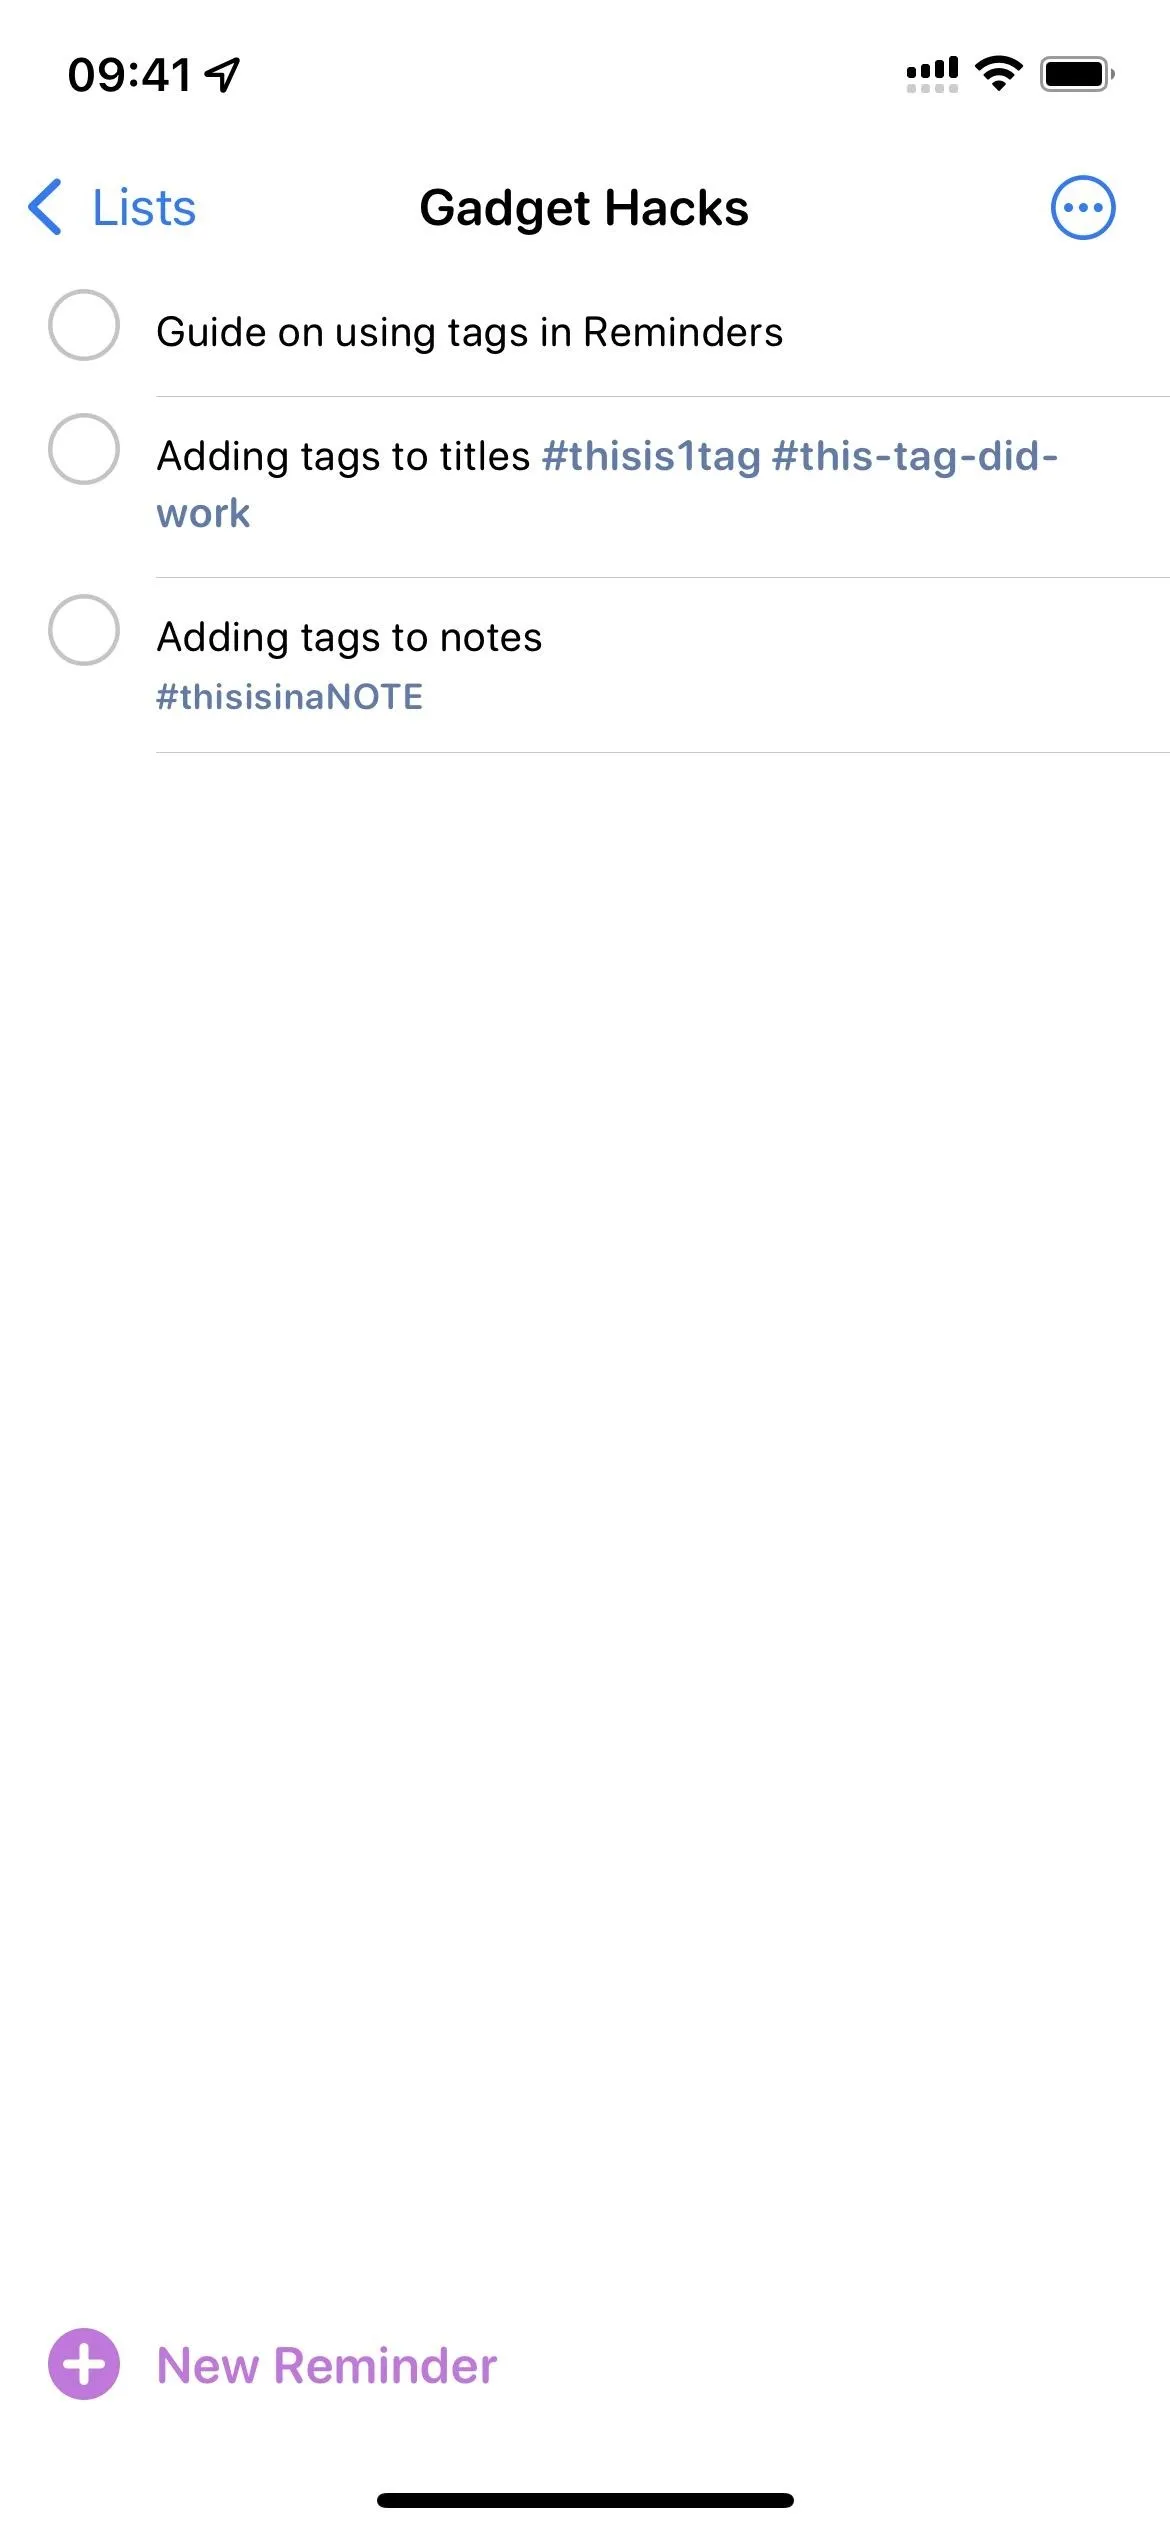
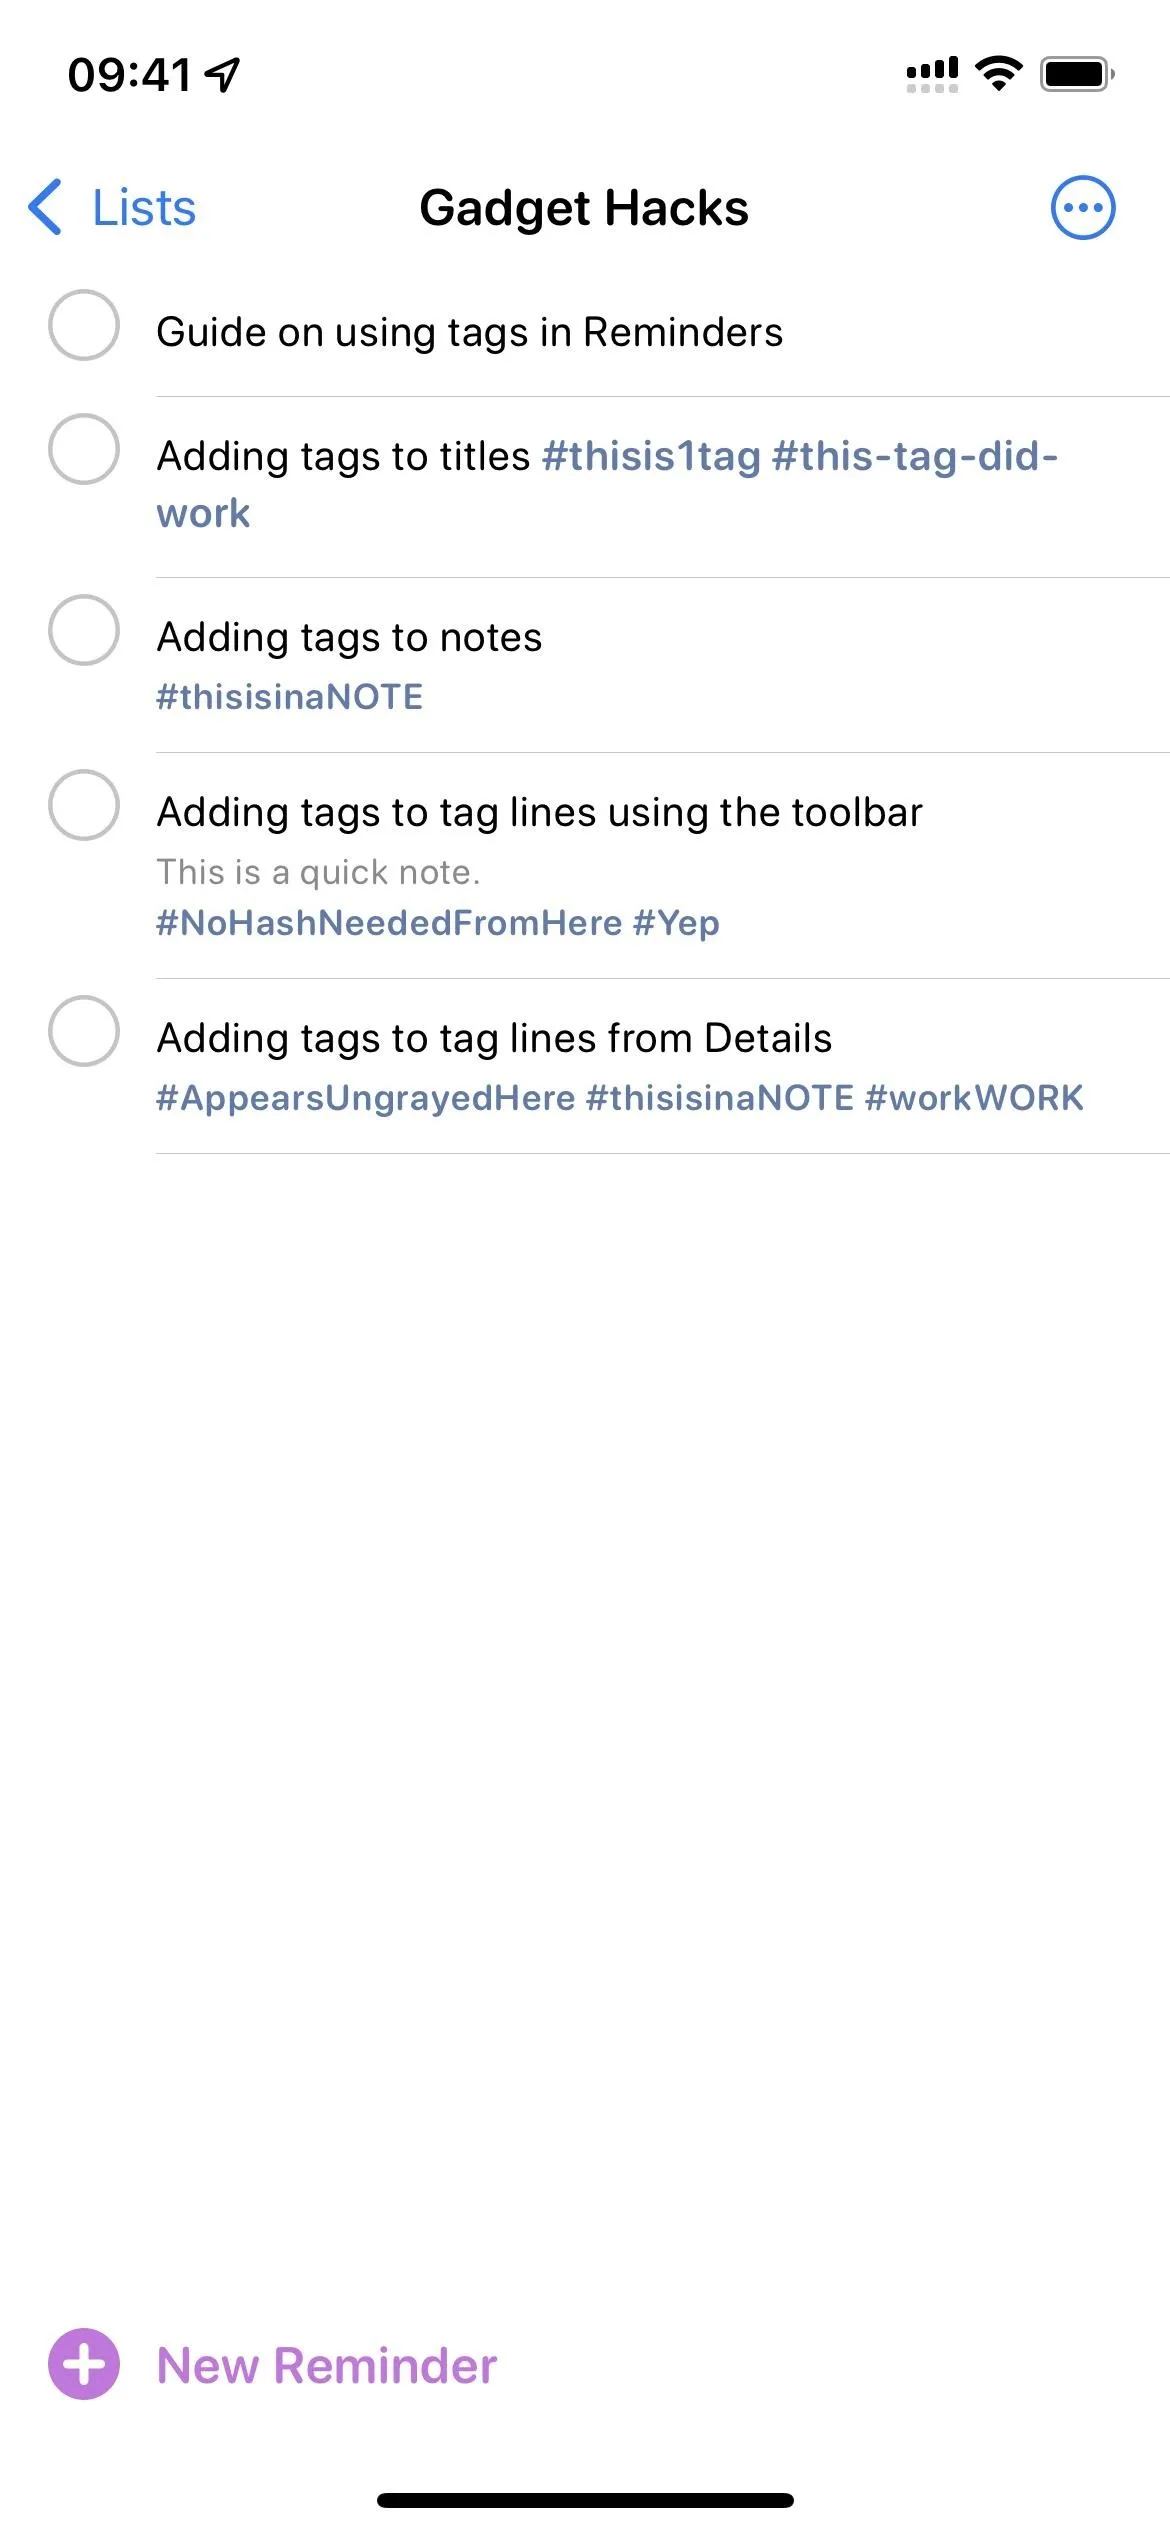
You can also include tags in the notes section of each task. When you do, they'll still be bold on your to-do in the list view; only they'll appear directly below the title in smaller text.
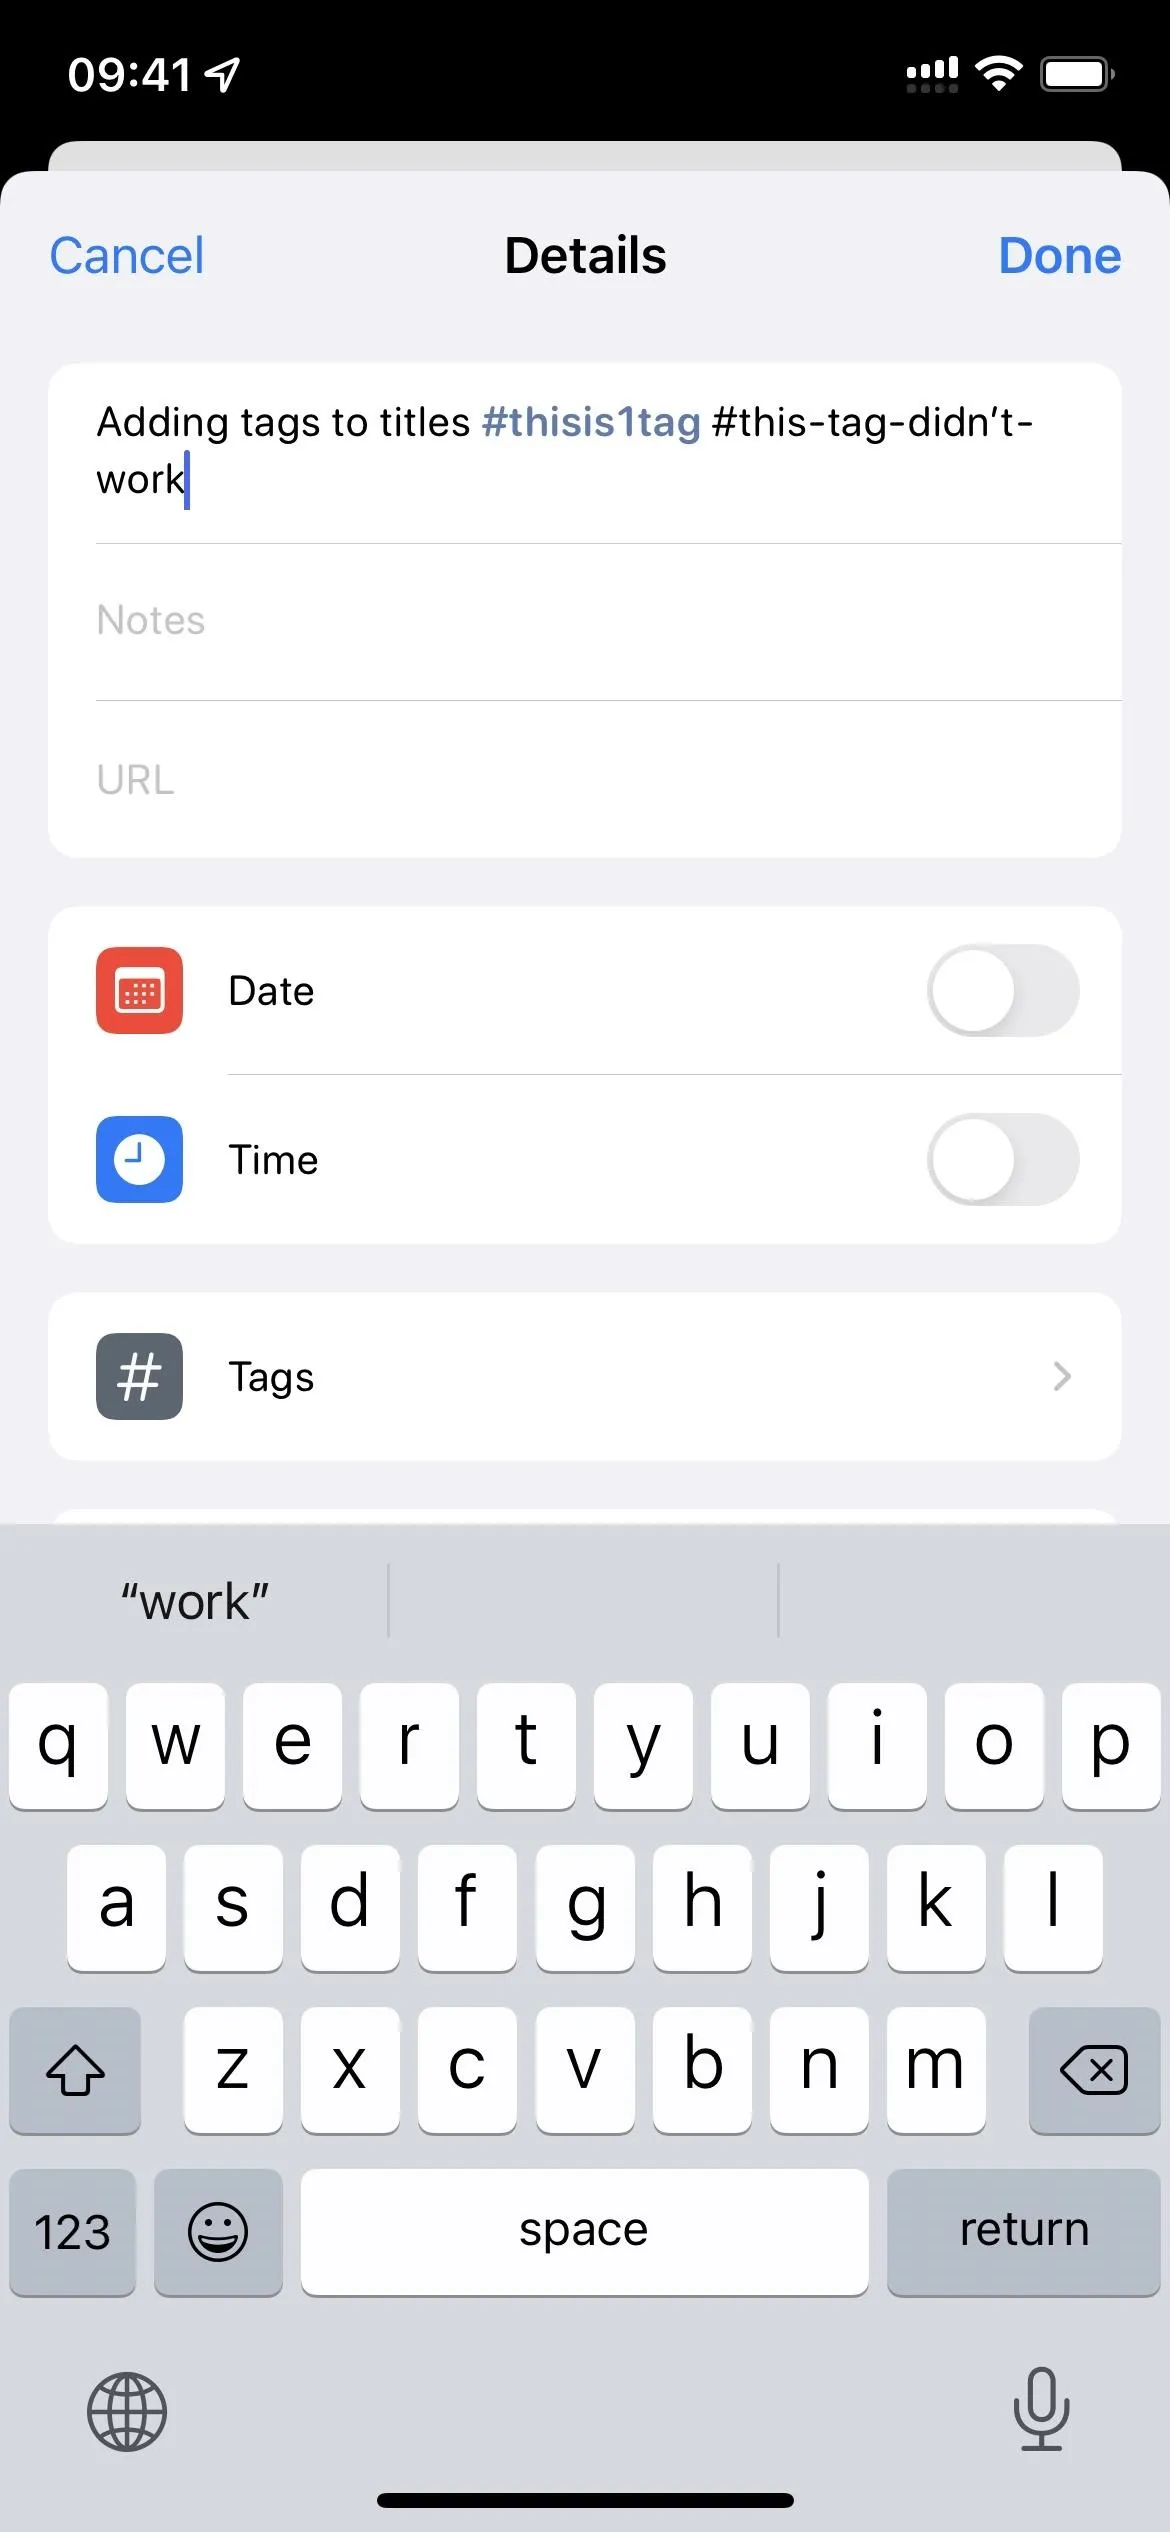
To start, create a new reminder and hit the Details (i) button. Or you can tap the title of a current reminder and hit the Details (i) button, or swipe left on a reminder and choose "Details." Whichever you do, place your cursor in the Notes field. Then, type out your tag, starting with #, as seen in Option 1 above. Hit "Done" on the Details window to close and save.

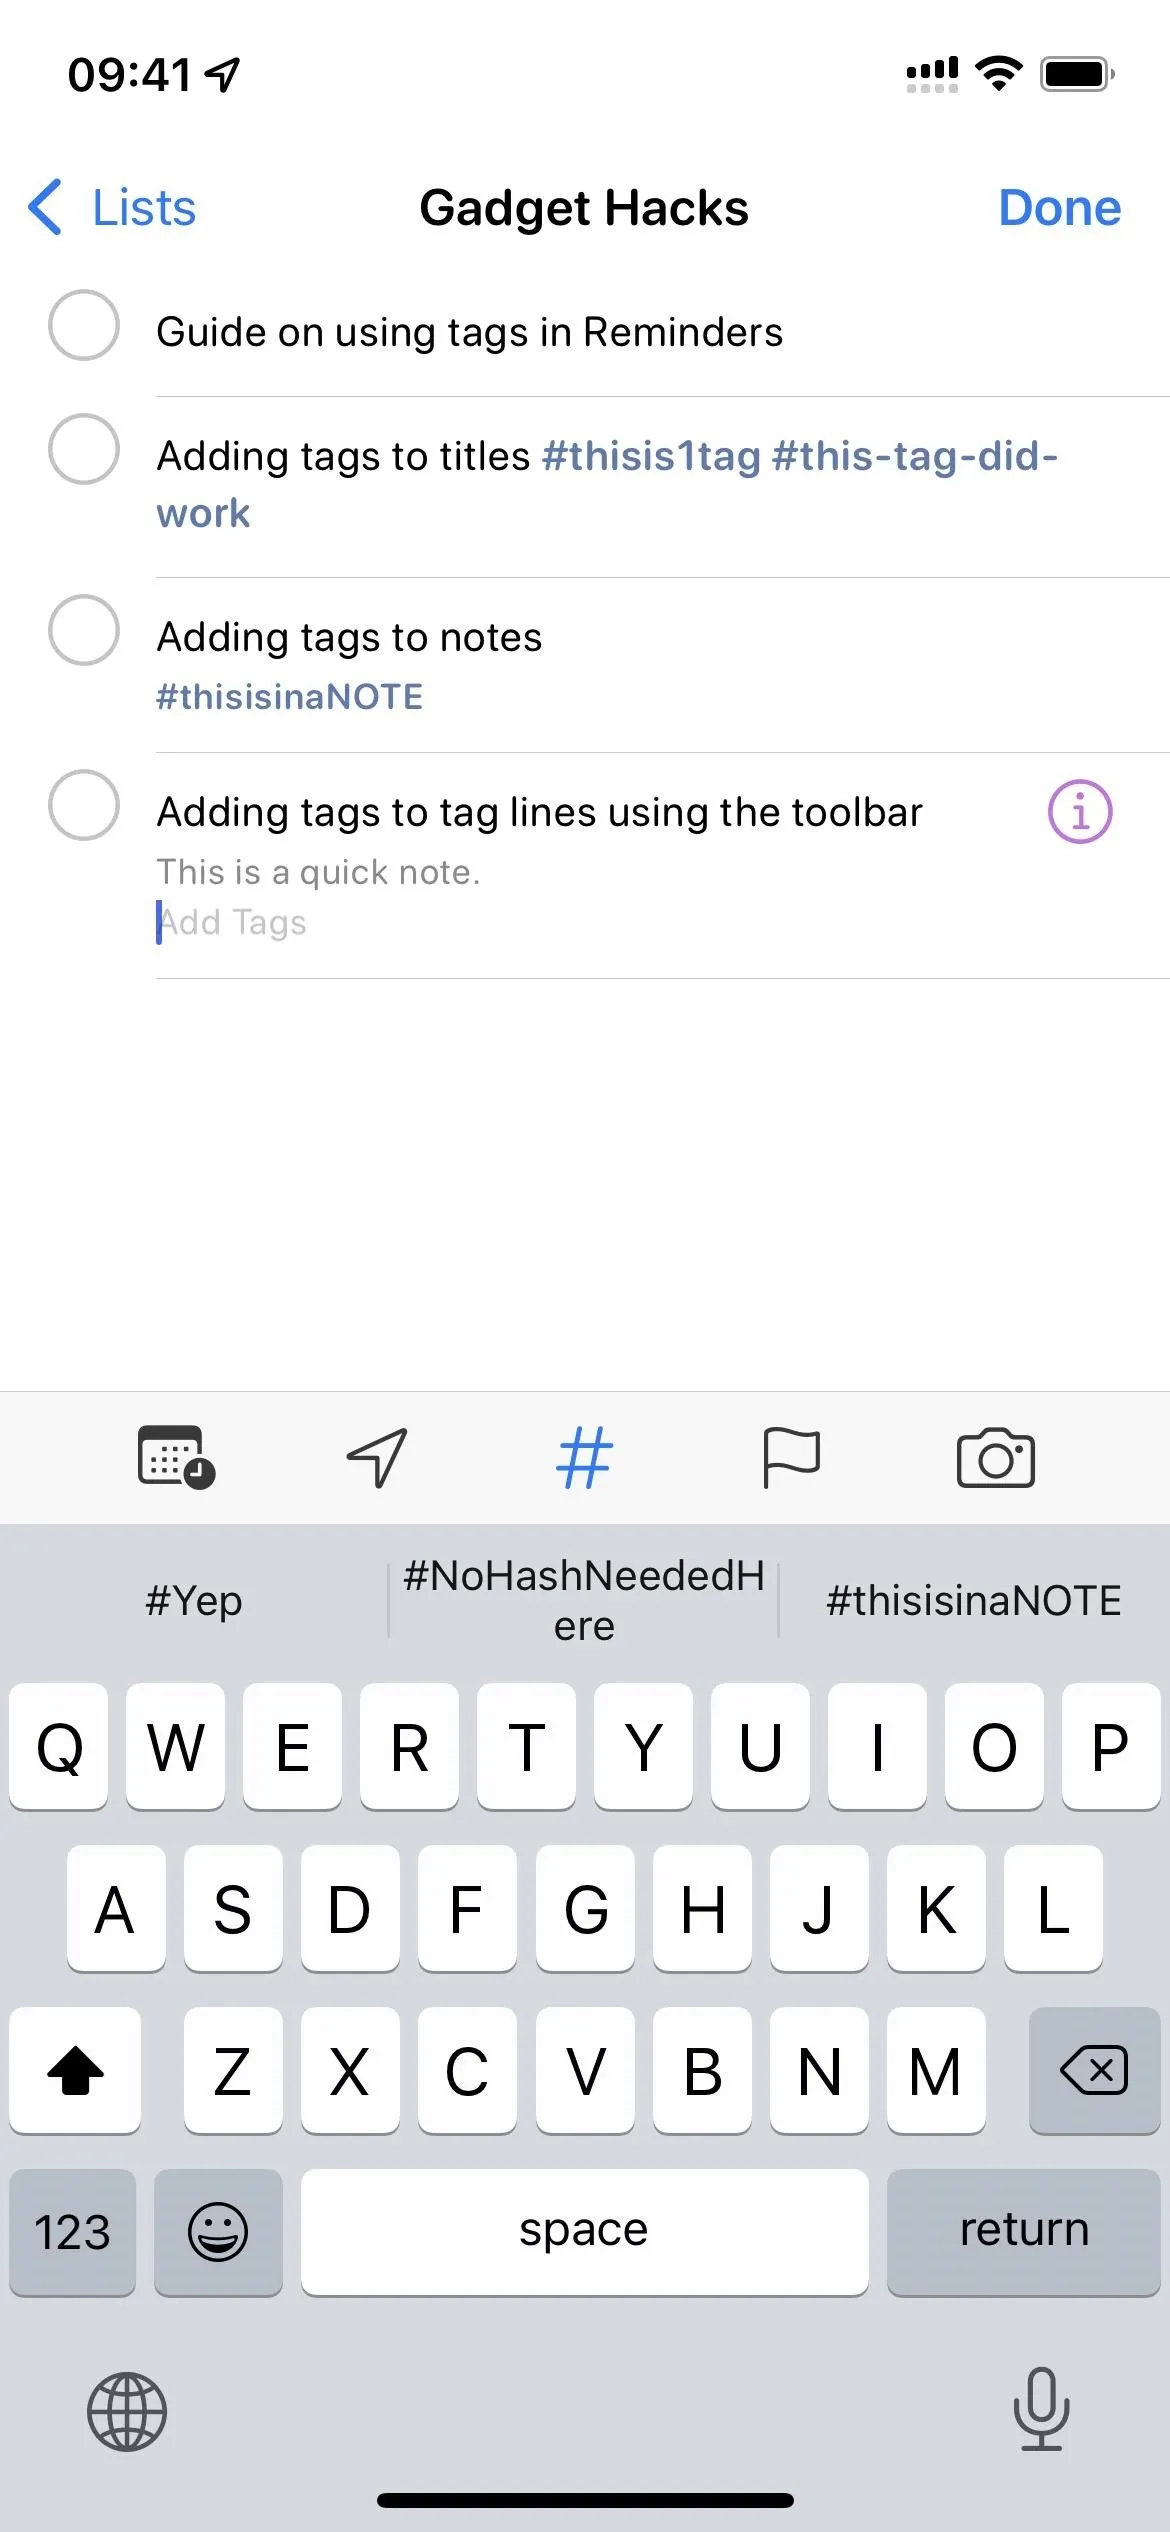
Adding Tags to Tag Lines Using the Toolbar
Yet another way to add tags to reminders is to use the new tag line, which is only for tags if that wasn't obvious. If there are no notes, the tag line appears directly below a task's title. Otherwise, you'll see it below the title and notes. There are multiple ways to get started, but we'll check out the toolbar method first.
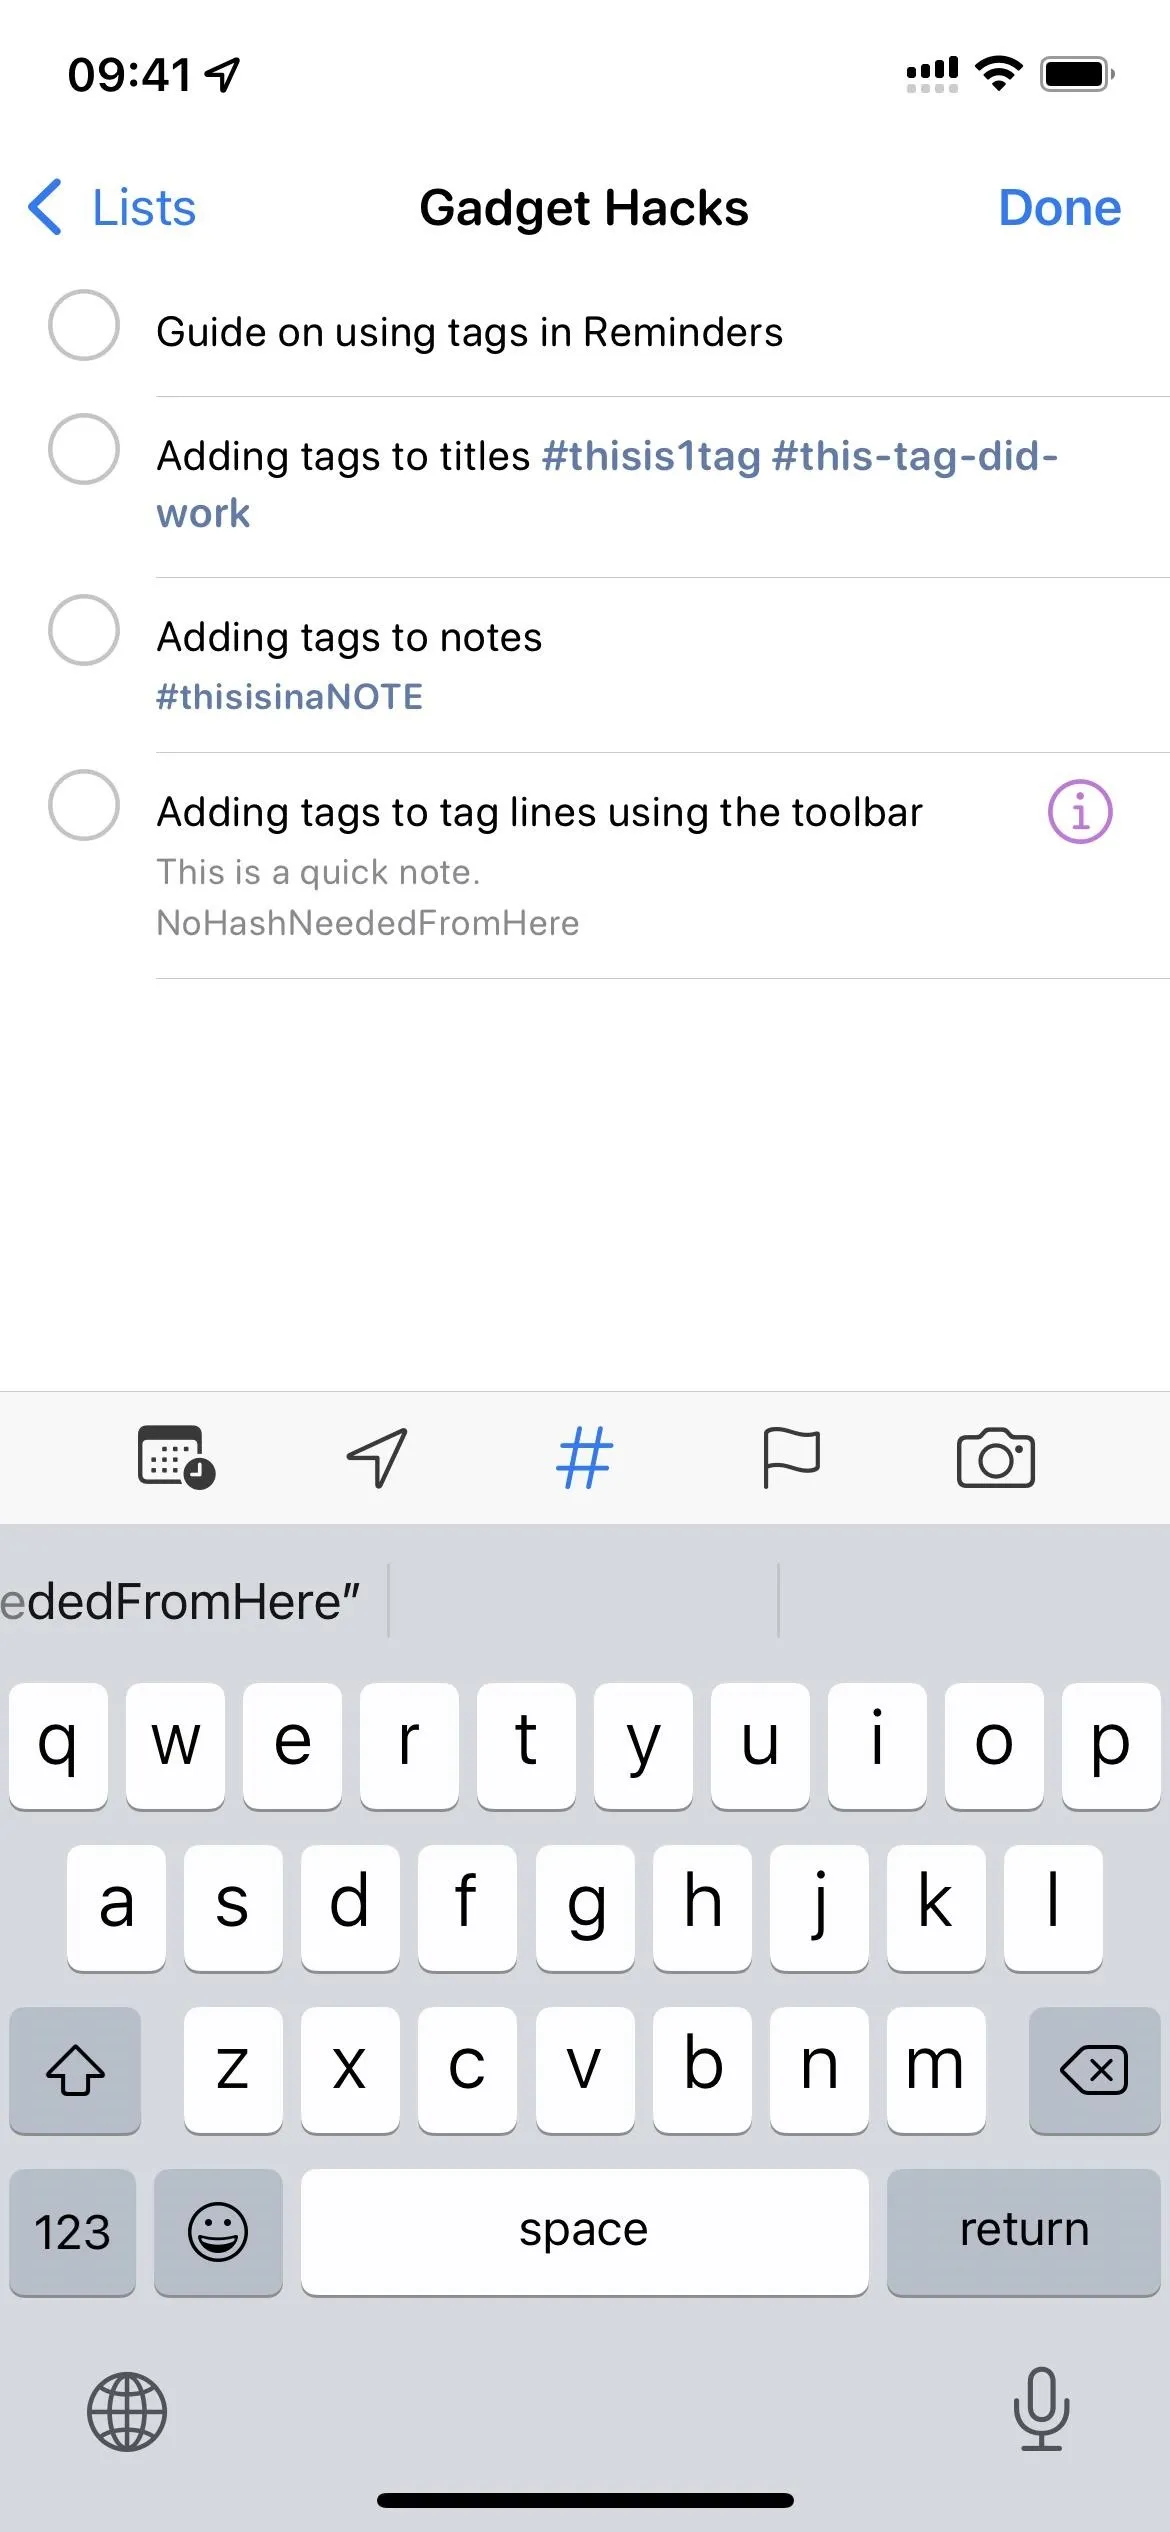
Create a new reminder or tap the title of a reminder. You can put your cursor in the title or on the tag line if you already have tags there. Next, hit the # sign in the toolbar above the keyboard. Then, type out your tag, and use a space, the return key, or an unsupported character to create the tag. You don't need to type a # sign first. You can, but it's not necessary.
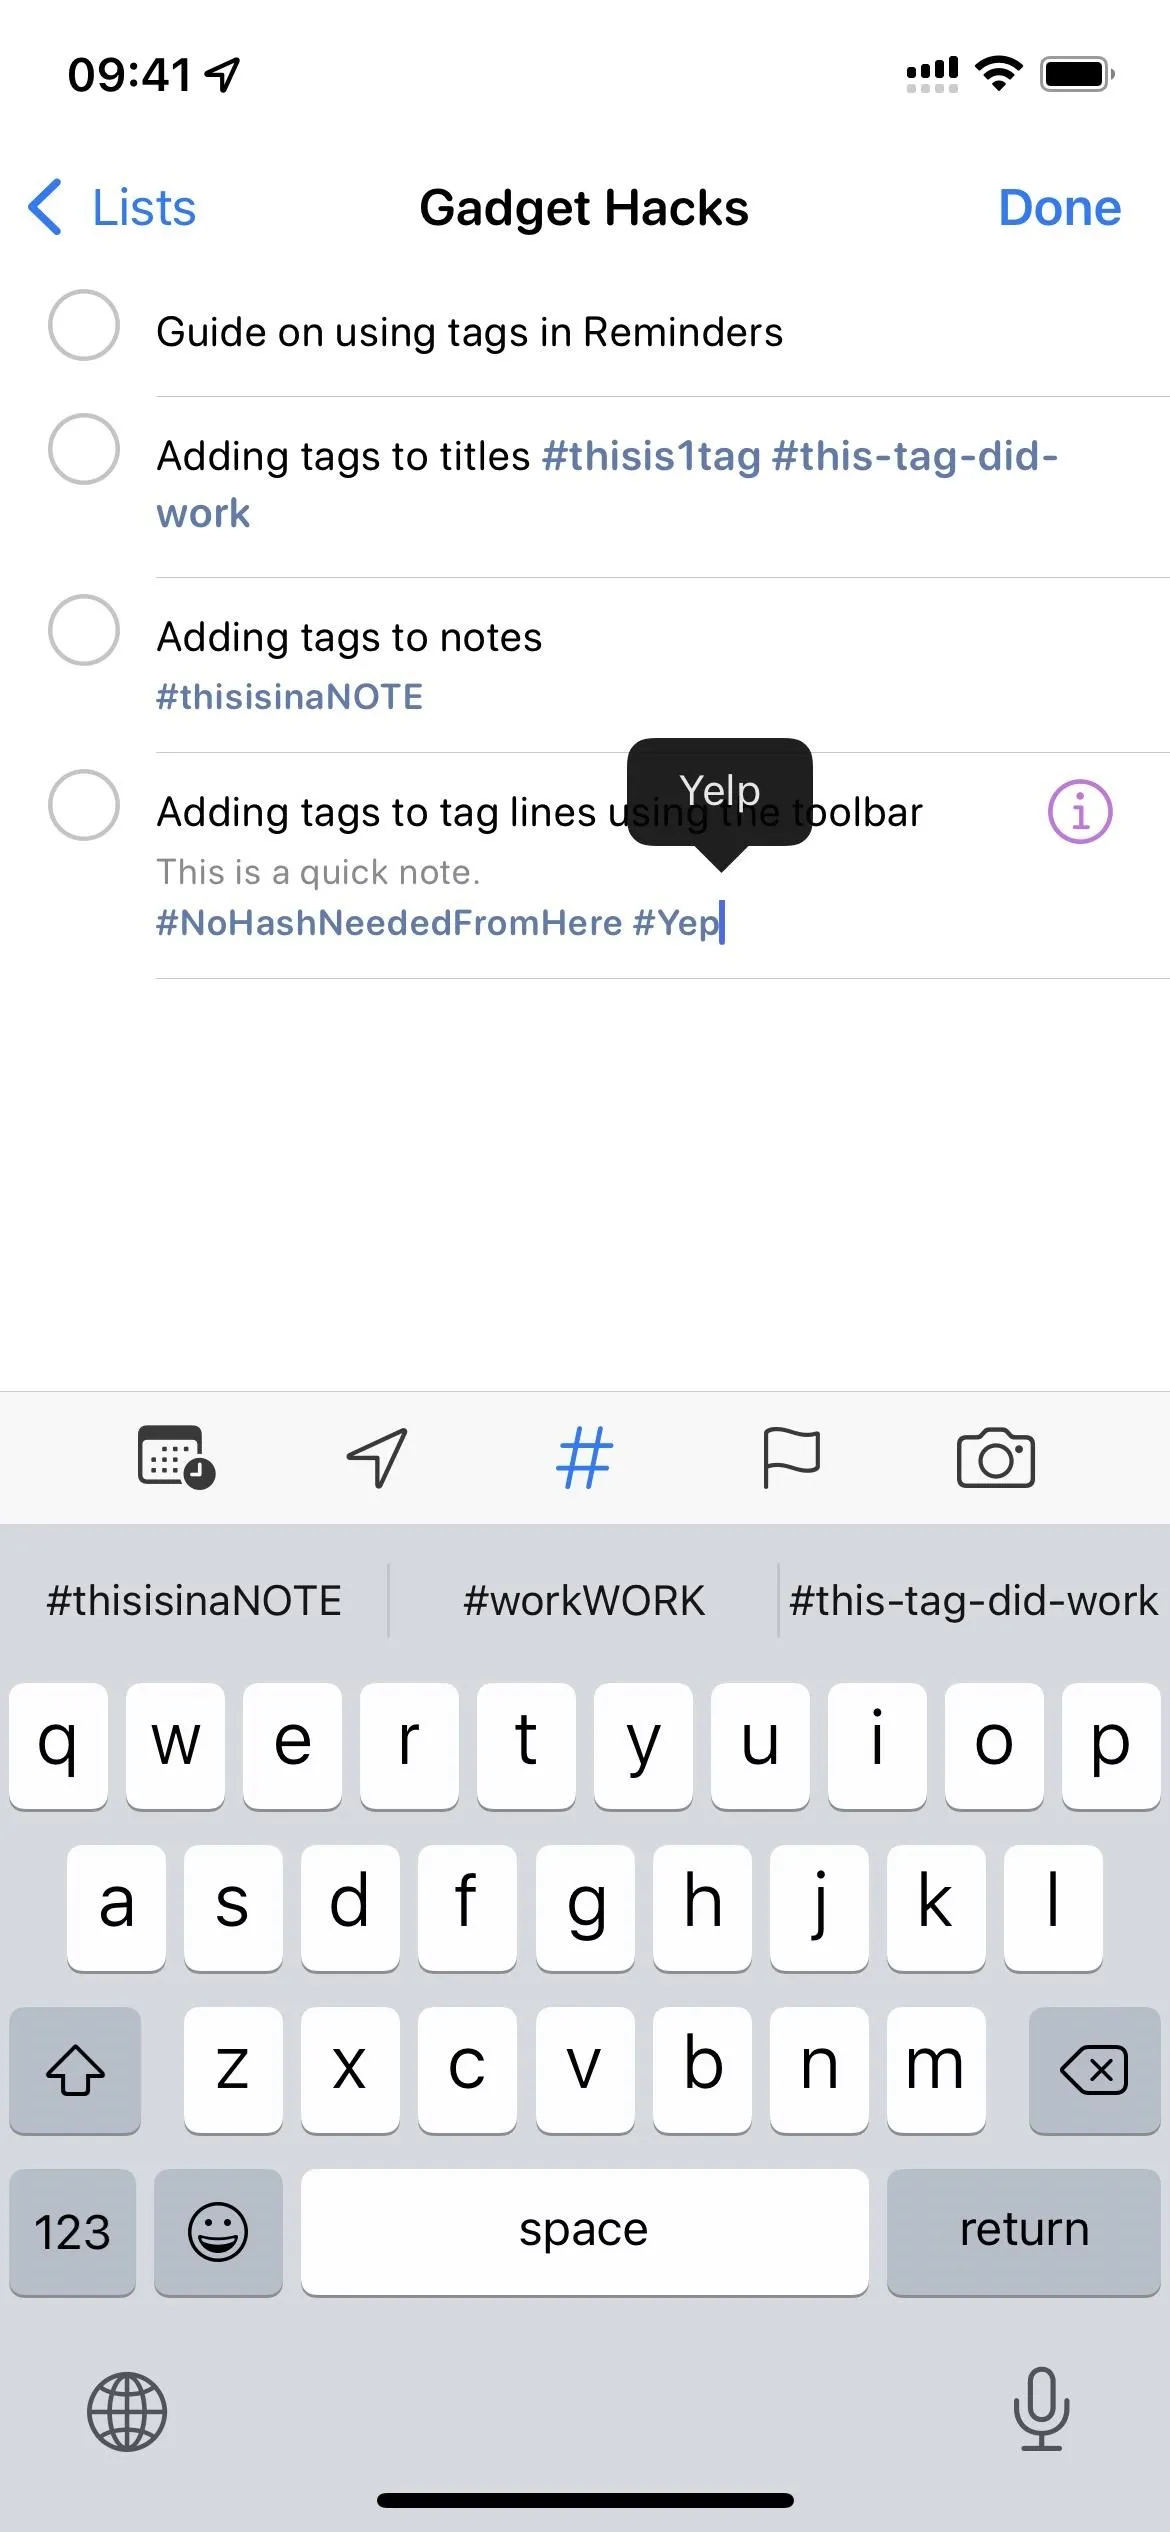
You can also tap a tag recommendation in the menu above the keyboard to add it right away.
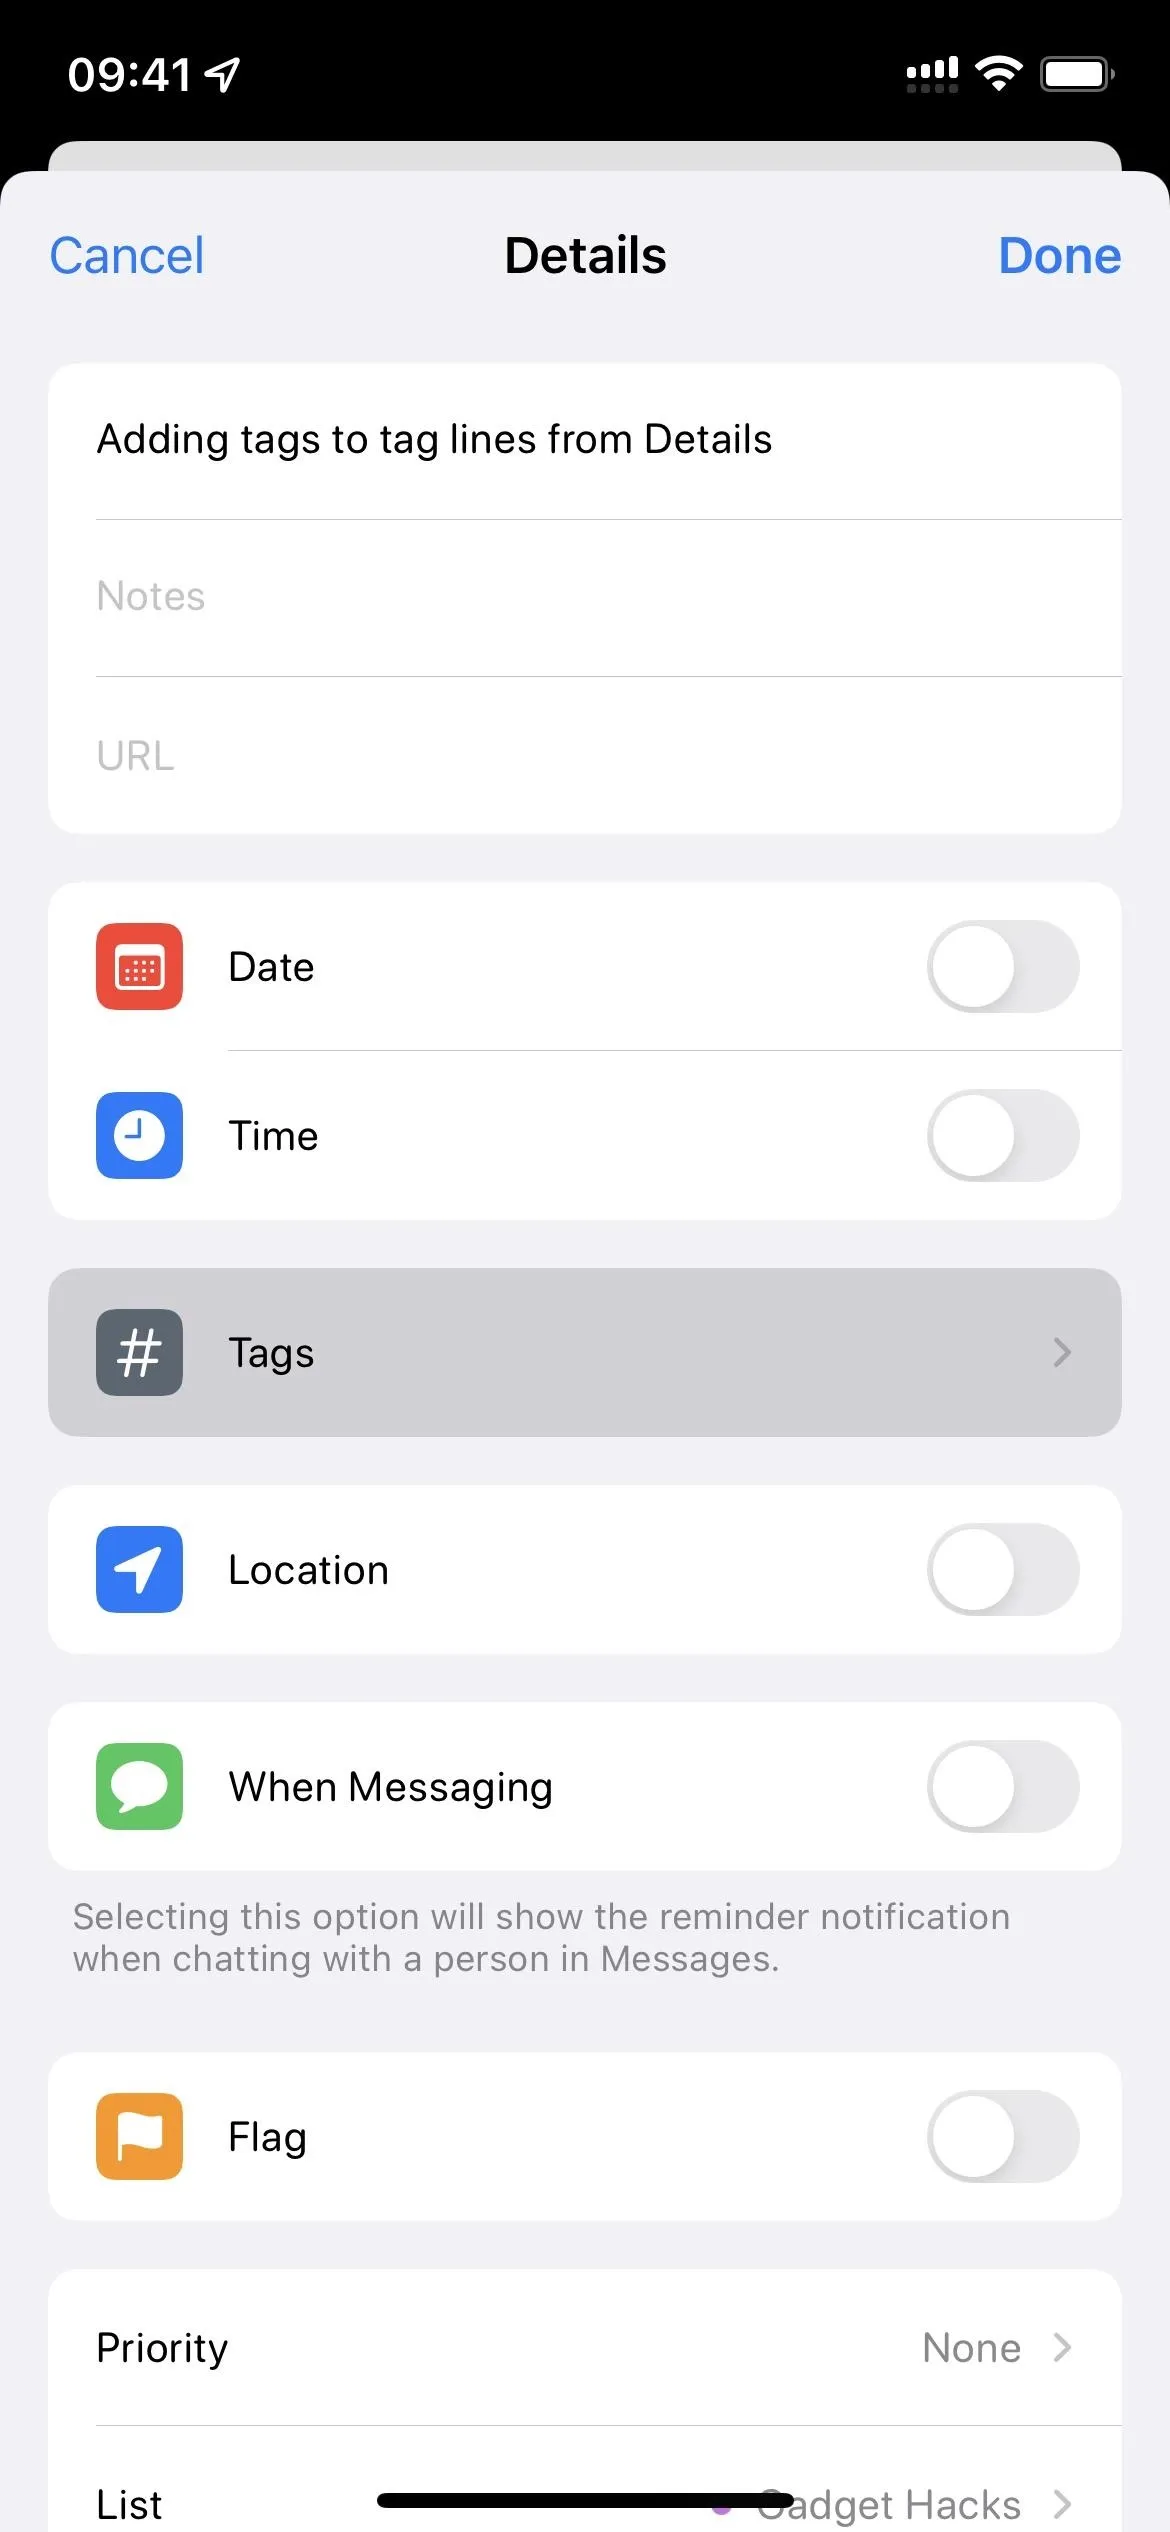
Adding Tags to Tag Lines from Details
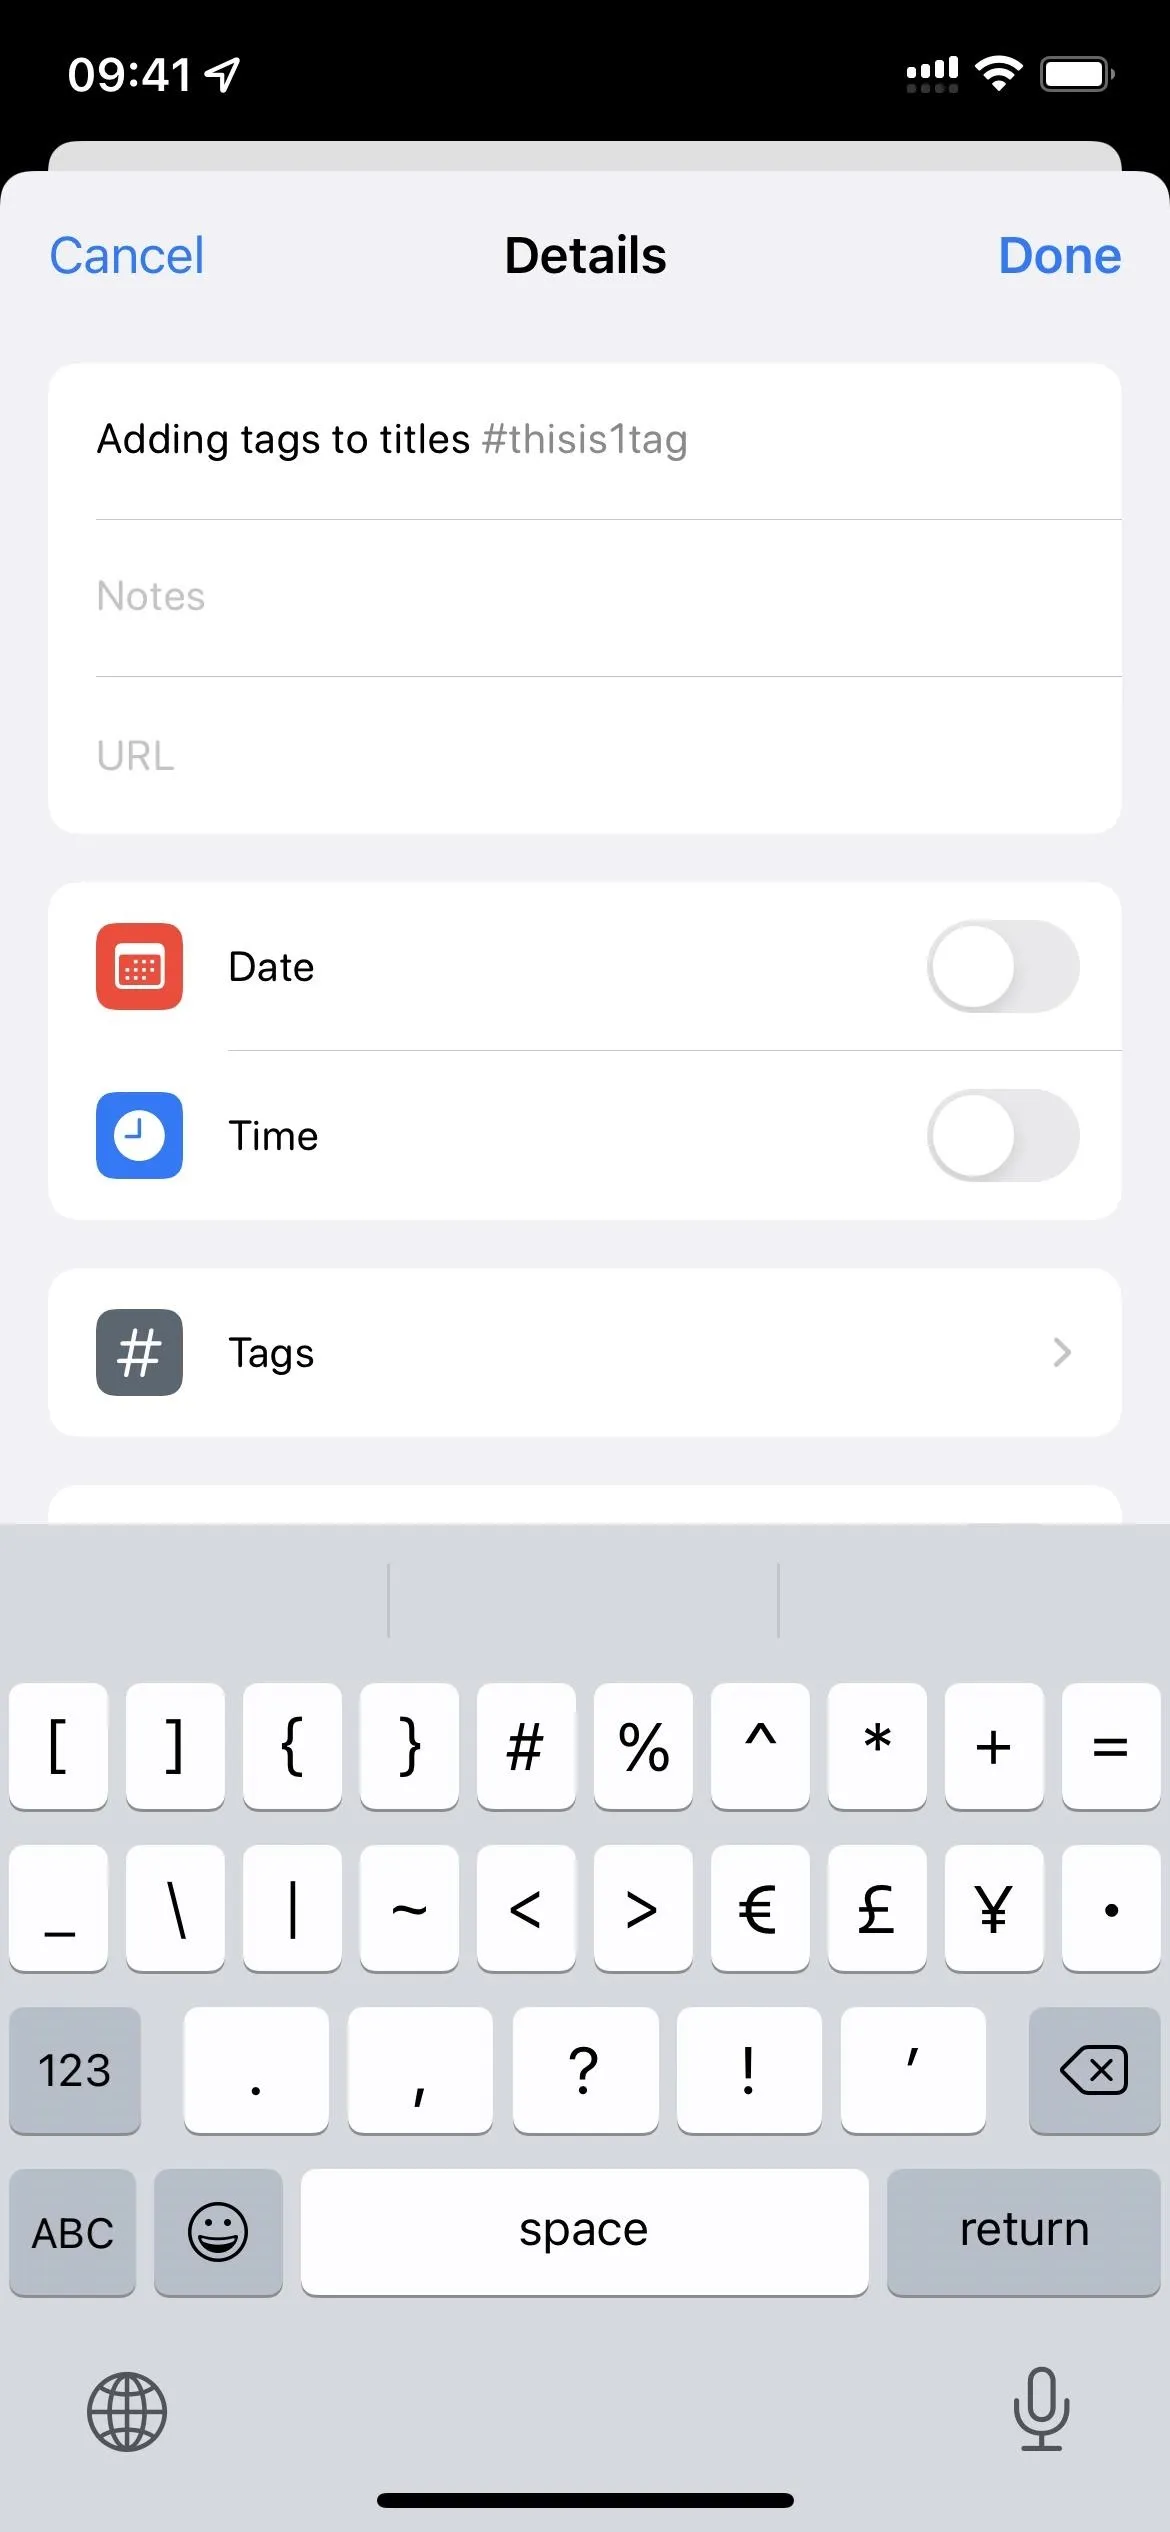
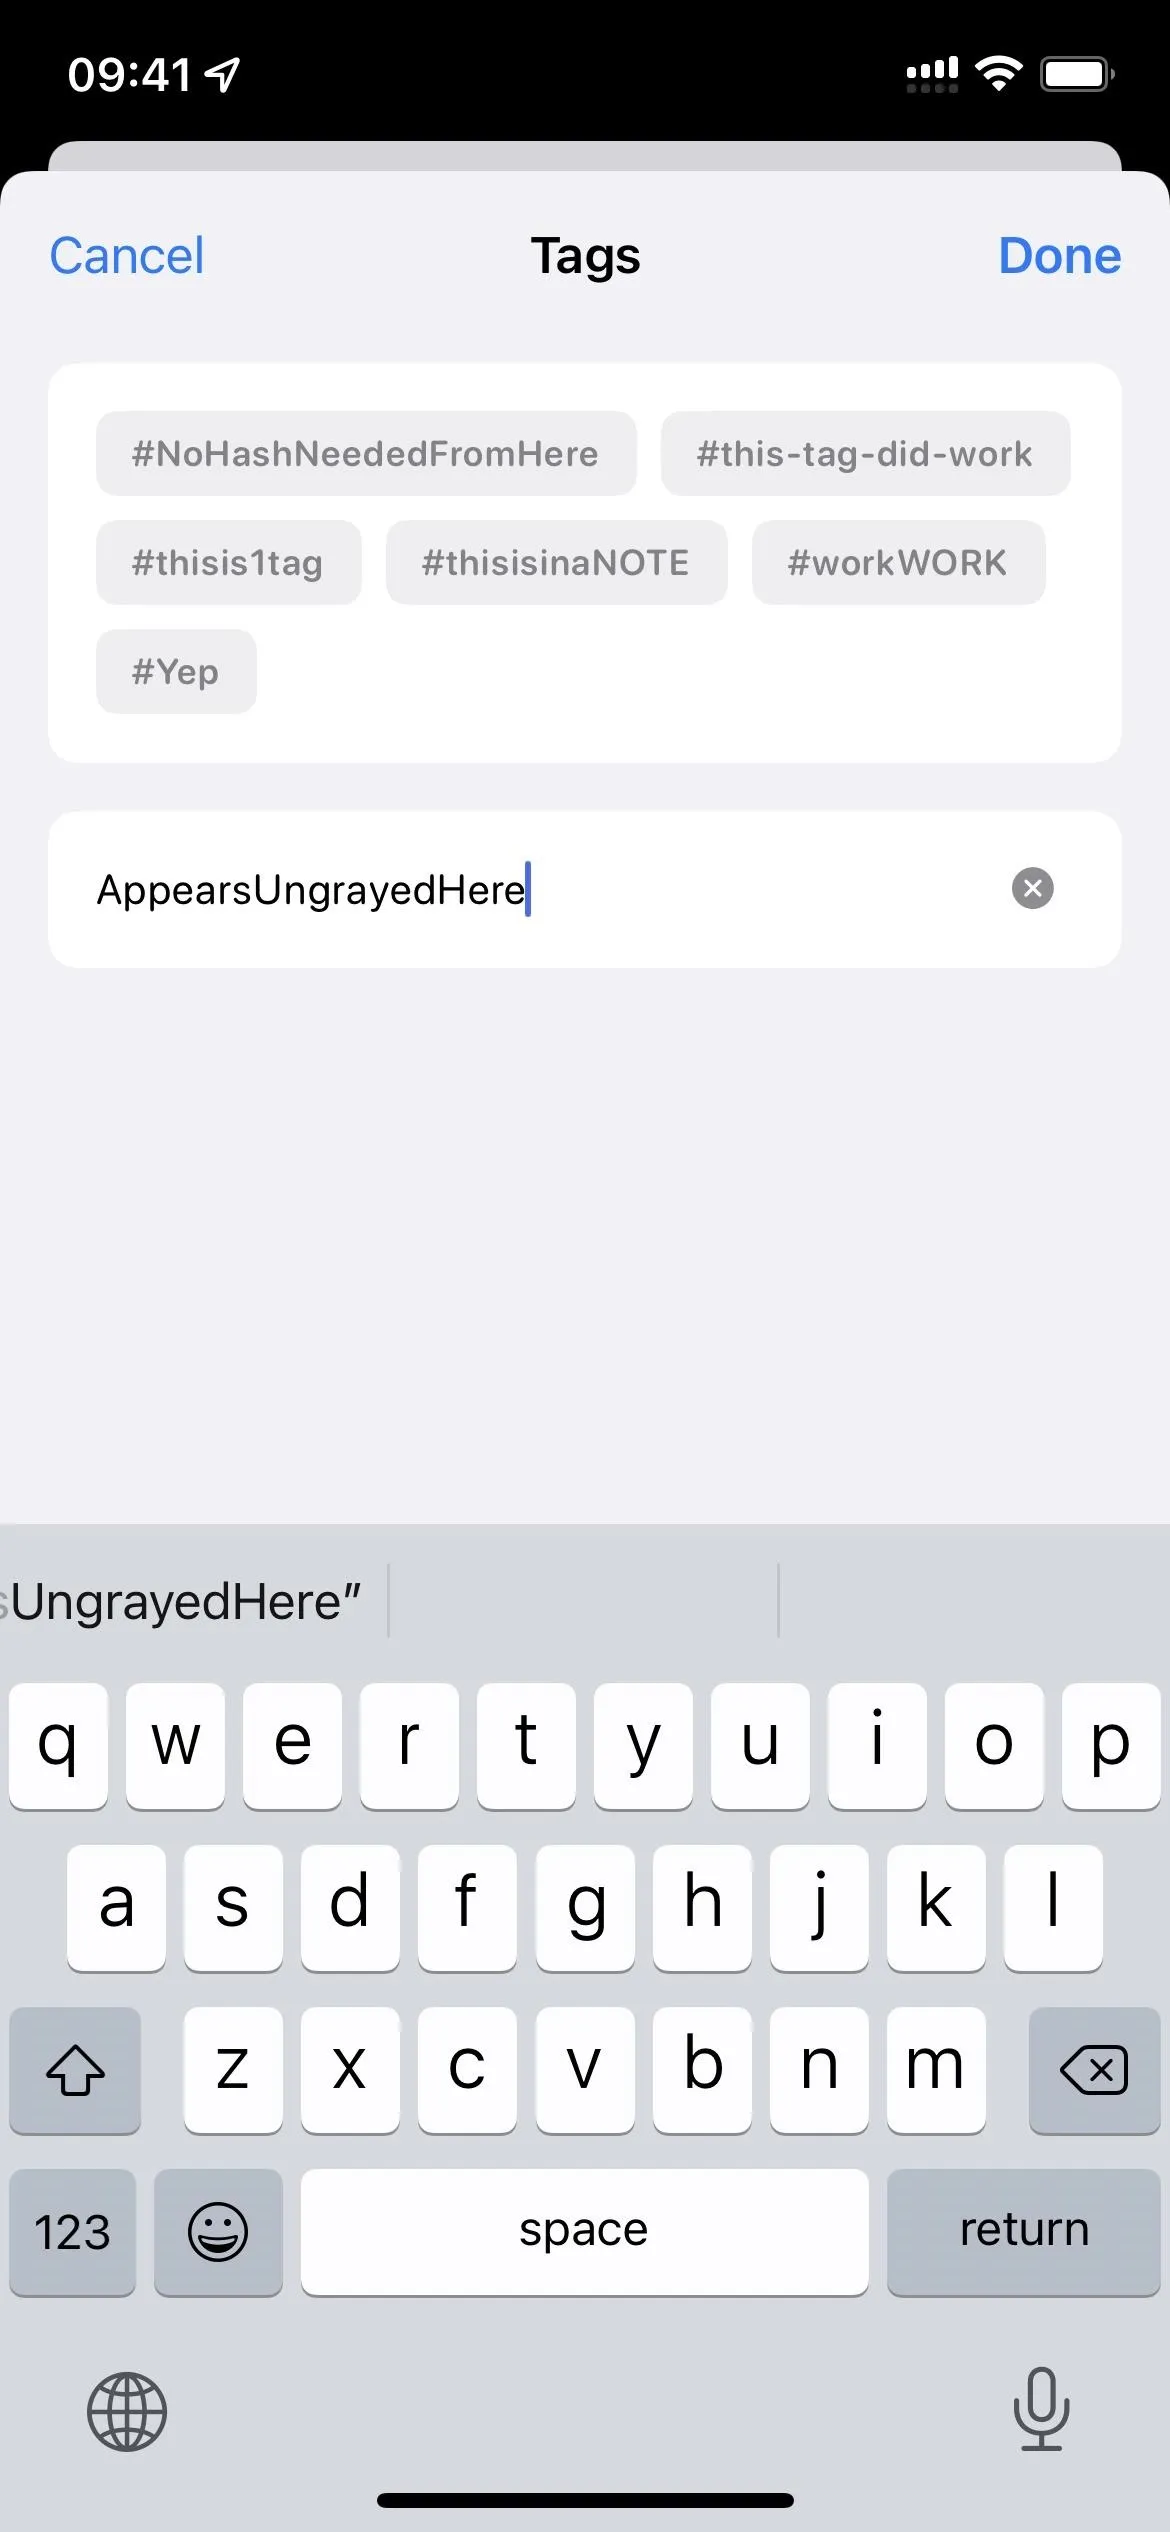
This method's result is the same as Option 3 above; only you add tags from a different area. First, create a new reminder and choose the Details (i) button. Or you can tap the title of a current reminder and hit the Details (i) button, or swipe left on a reminder and choose "Details." Whichever you do, tap "Tags" from the Details pane.
Just type out your tag in the Add New Tag field, then use a space or the return key to create the tag. You don't need to type a # sign first, but unlike all of the above methods, the text appears black as you type, and the only unsupported character that will create a tag is a comma; nothing will happen when you attempt to use another one.

Tag recommendations do not appear in the menu above the keyboard, but regular recommendations do and work the same way — tap one to create the tag immediately.
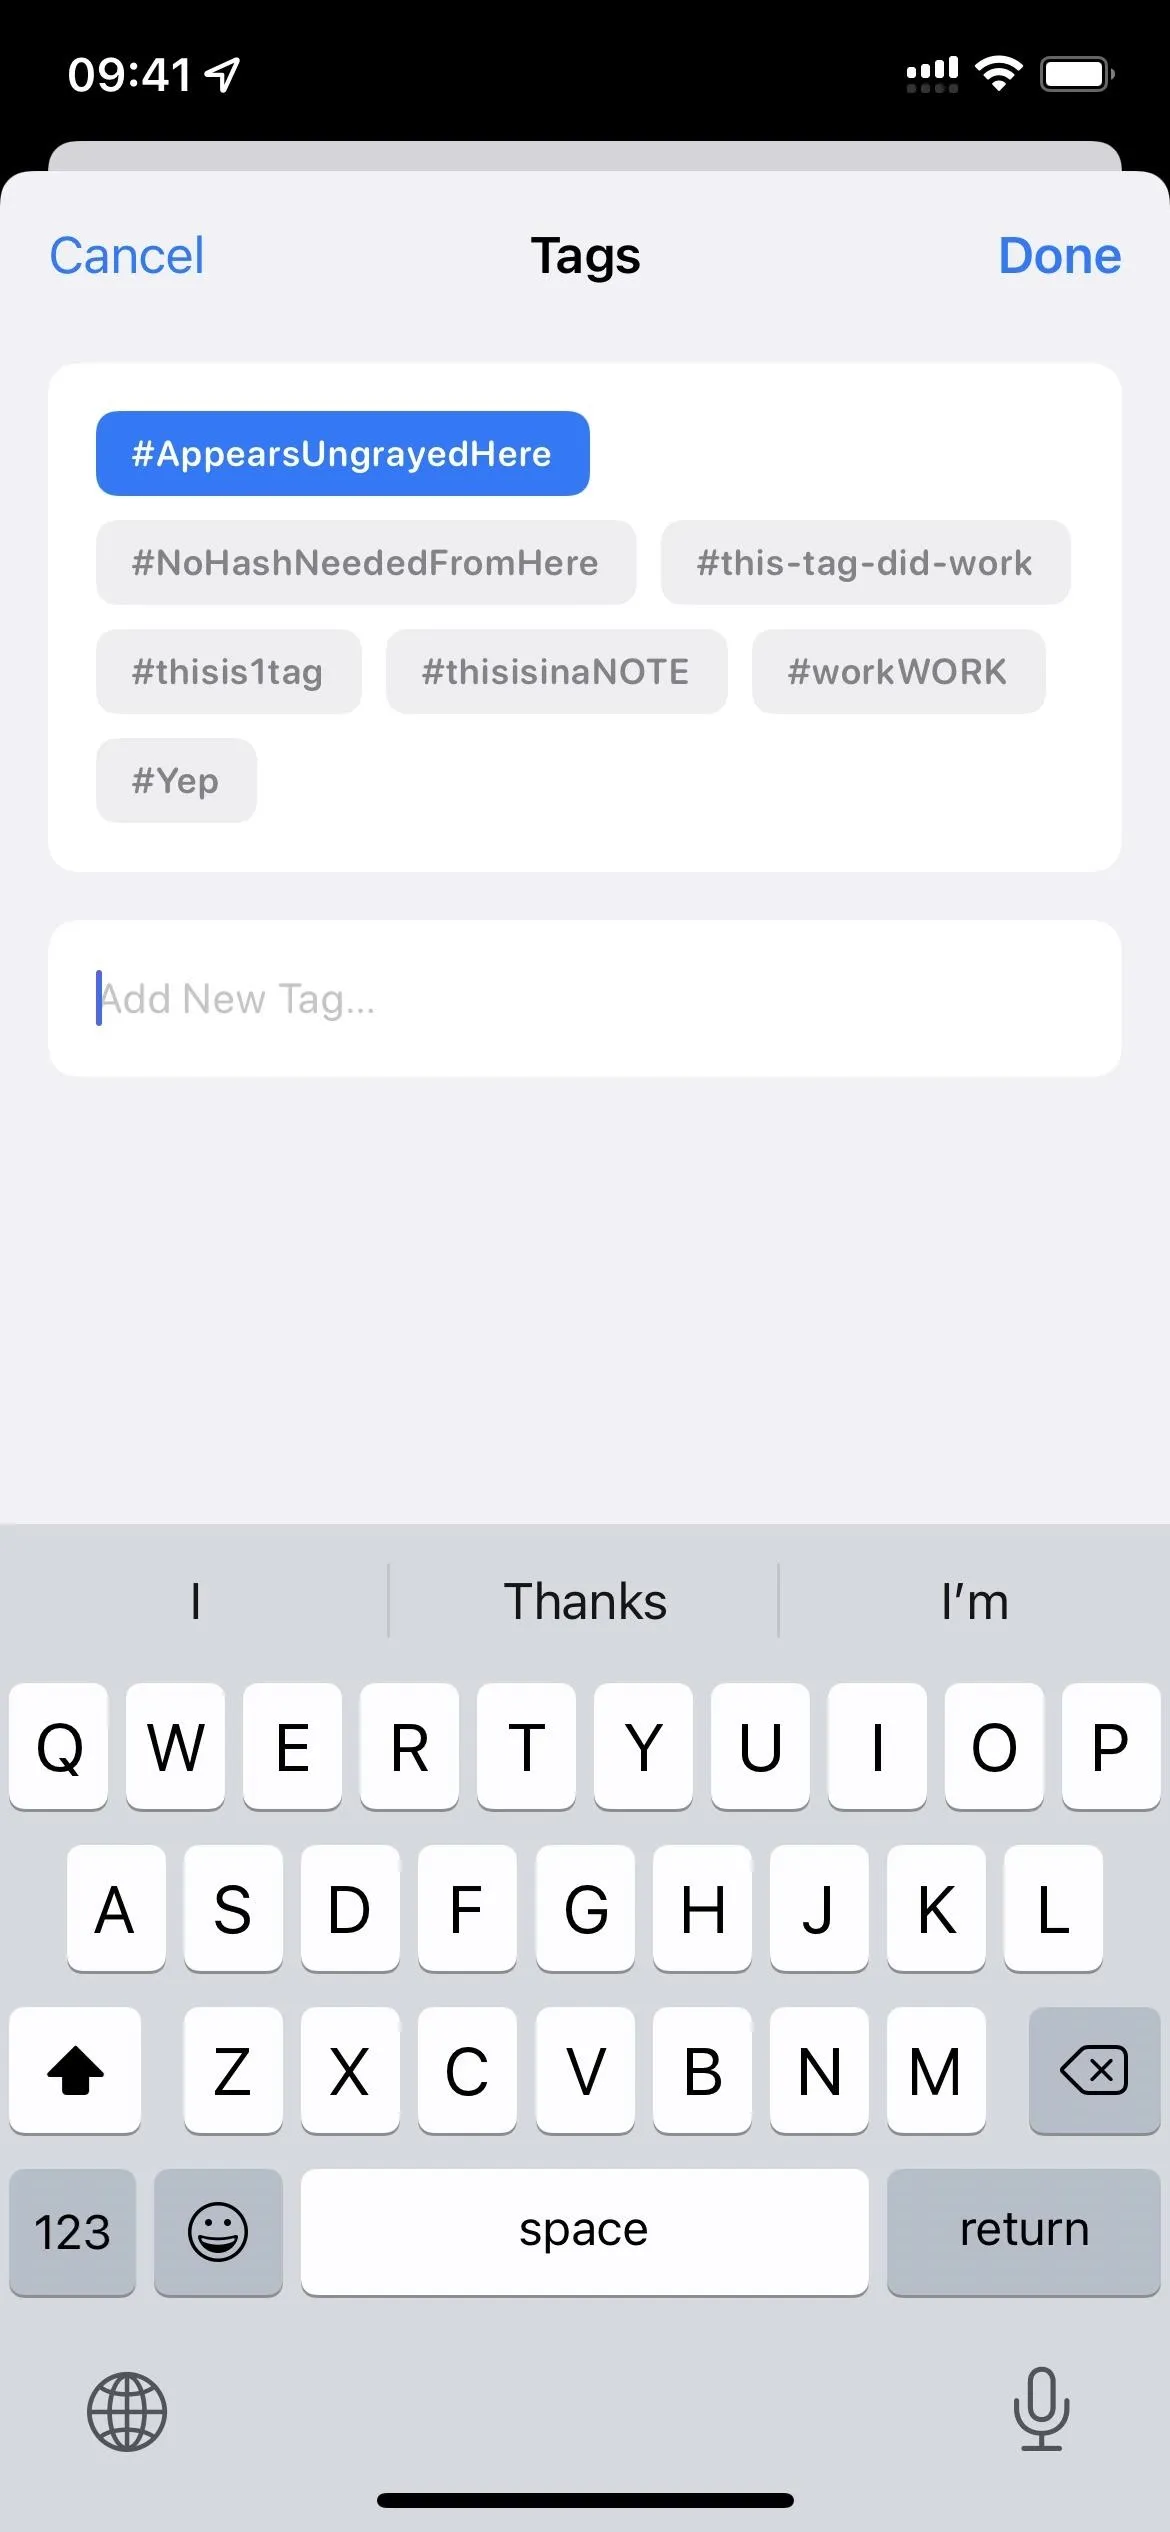
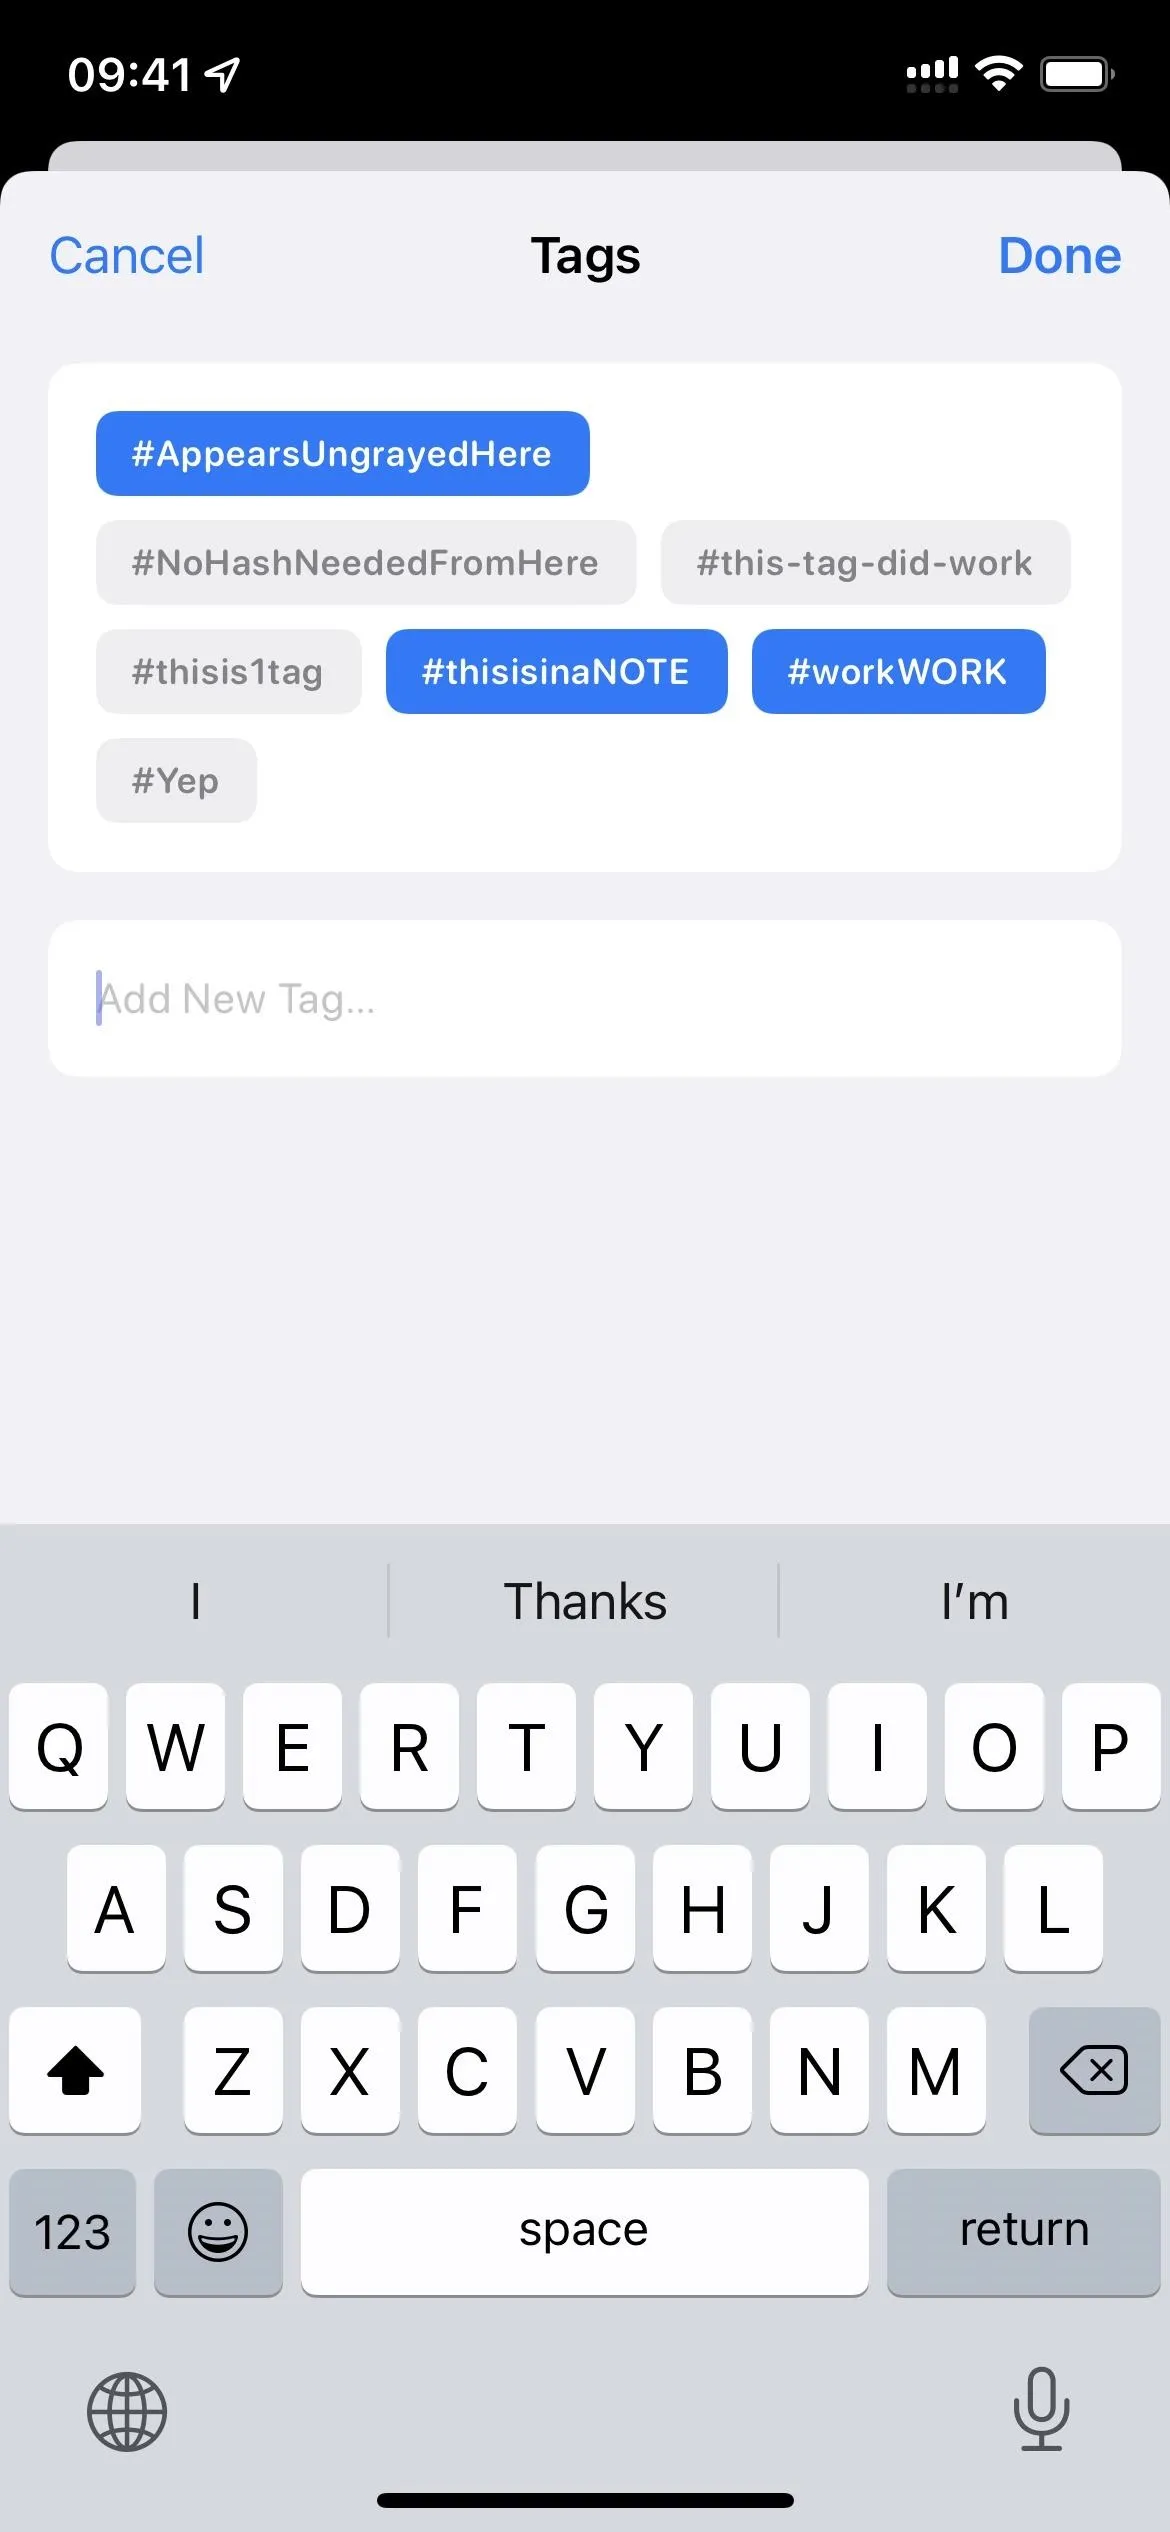
If you already have tags in Reminders, they'll all be listed above the Add New Tag field. Applied ones are in blue, while unused ones are grayed out. To use one you already have, tap the grayed-out tag so that it turns blue.
When done with all of your tags here, tap "Done" on the Tags window, then "Done" on the Details window to close and save.
Removing Tags from Tasks in Reminders
I won't go into a long-winded guide on removing tags because it's basically the reverse of what you see above for adding them.
- Highlight a tag on a title from the list view, then delete it.
- Highlight a tag on the tag line from the list view, then delete it.
- Highlight a tag on the title and/or notes fields from the Details view, delete it, and hit "Done."
- Deselect a tag so that it's grayed out from the Tags view in Details, then hit "Done" and "Done" again.
Browsing Tasks in Reminders by Tags
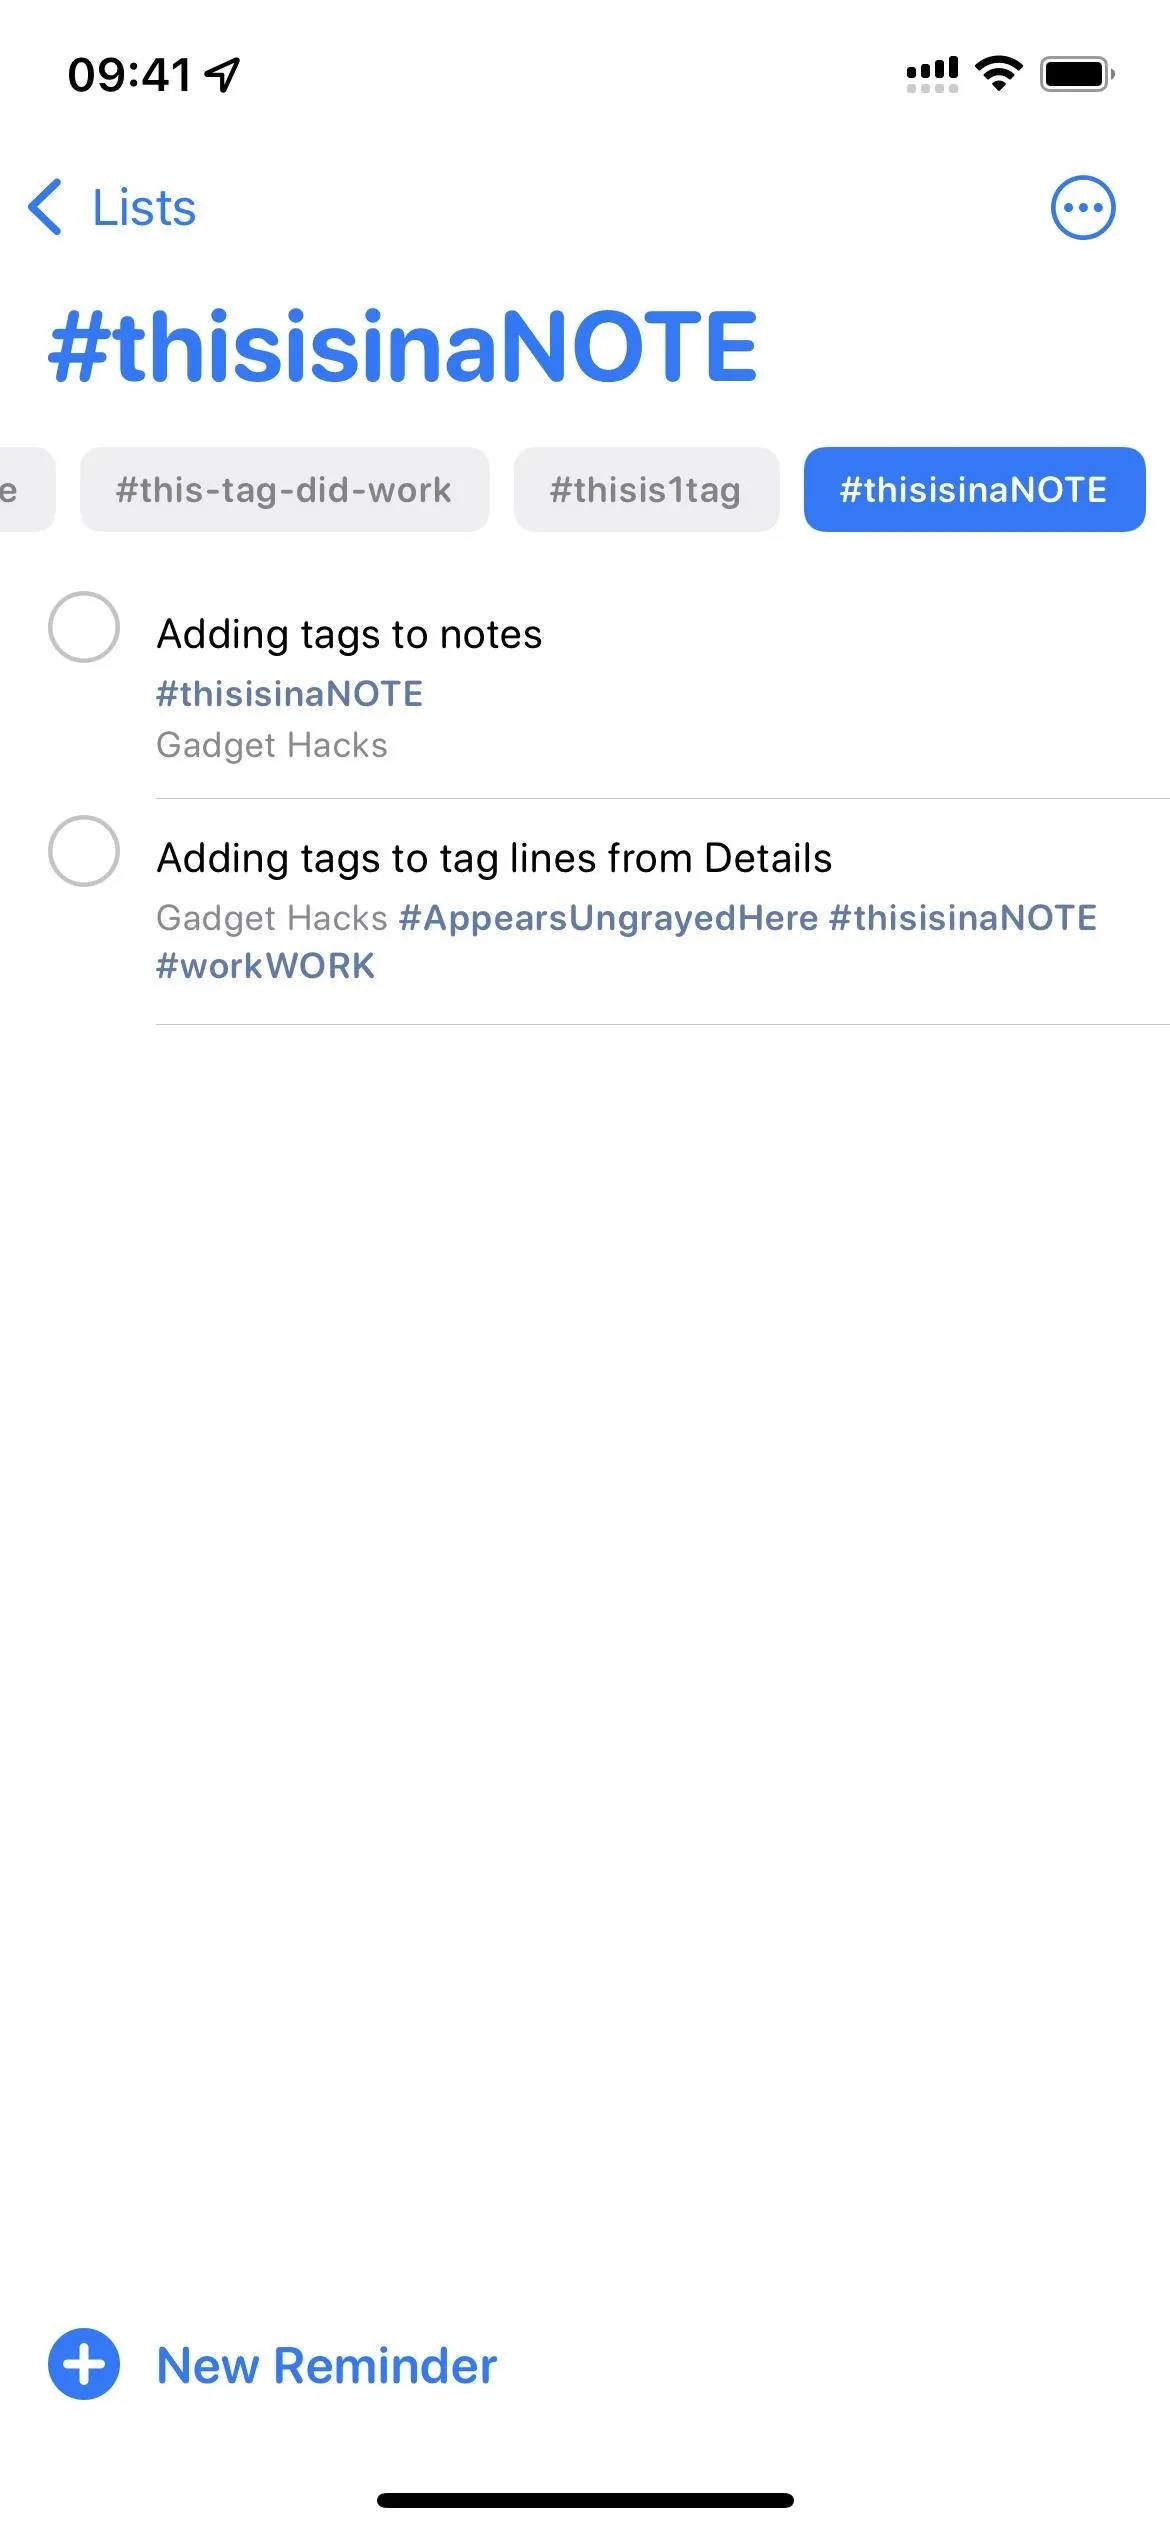
Now that you have tags in Reminders, you can browse them. On the Reminders homepage, scroll to the bottom past all your lists to find the new Tag Browser. Tap a specific tag to view all reminders with that tag, or choose "All Tags" to view all reminders that have a tag or tags.
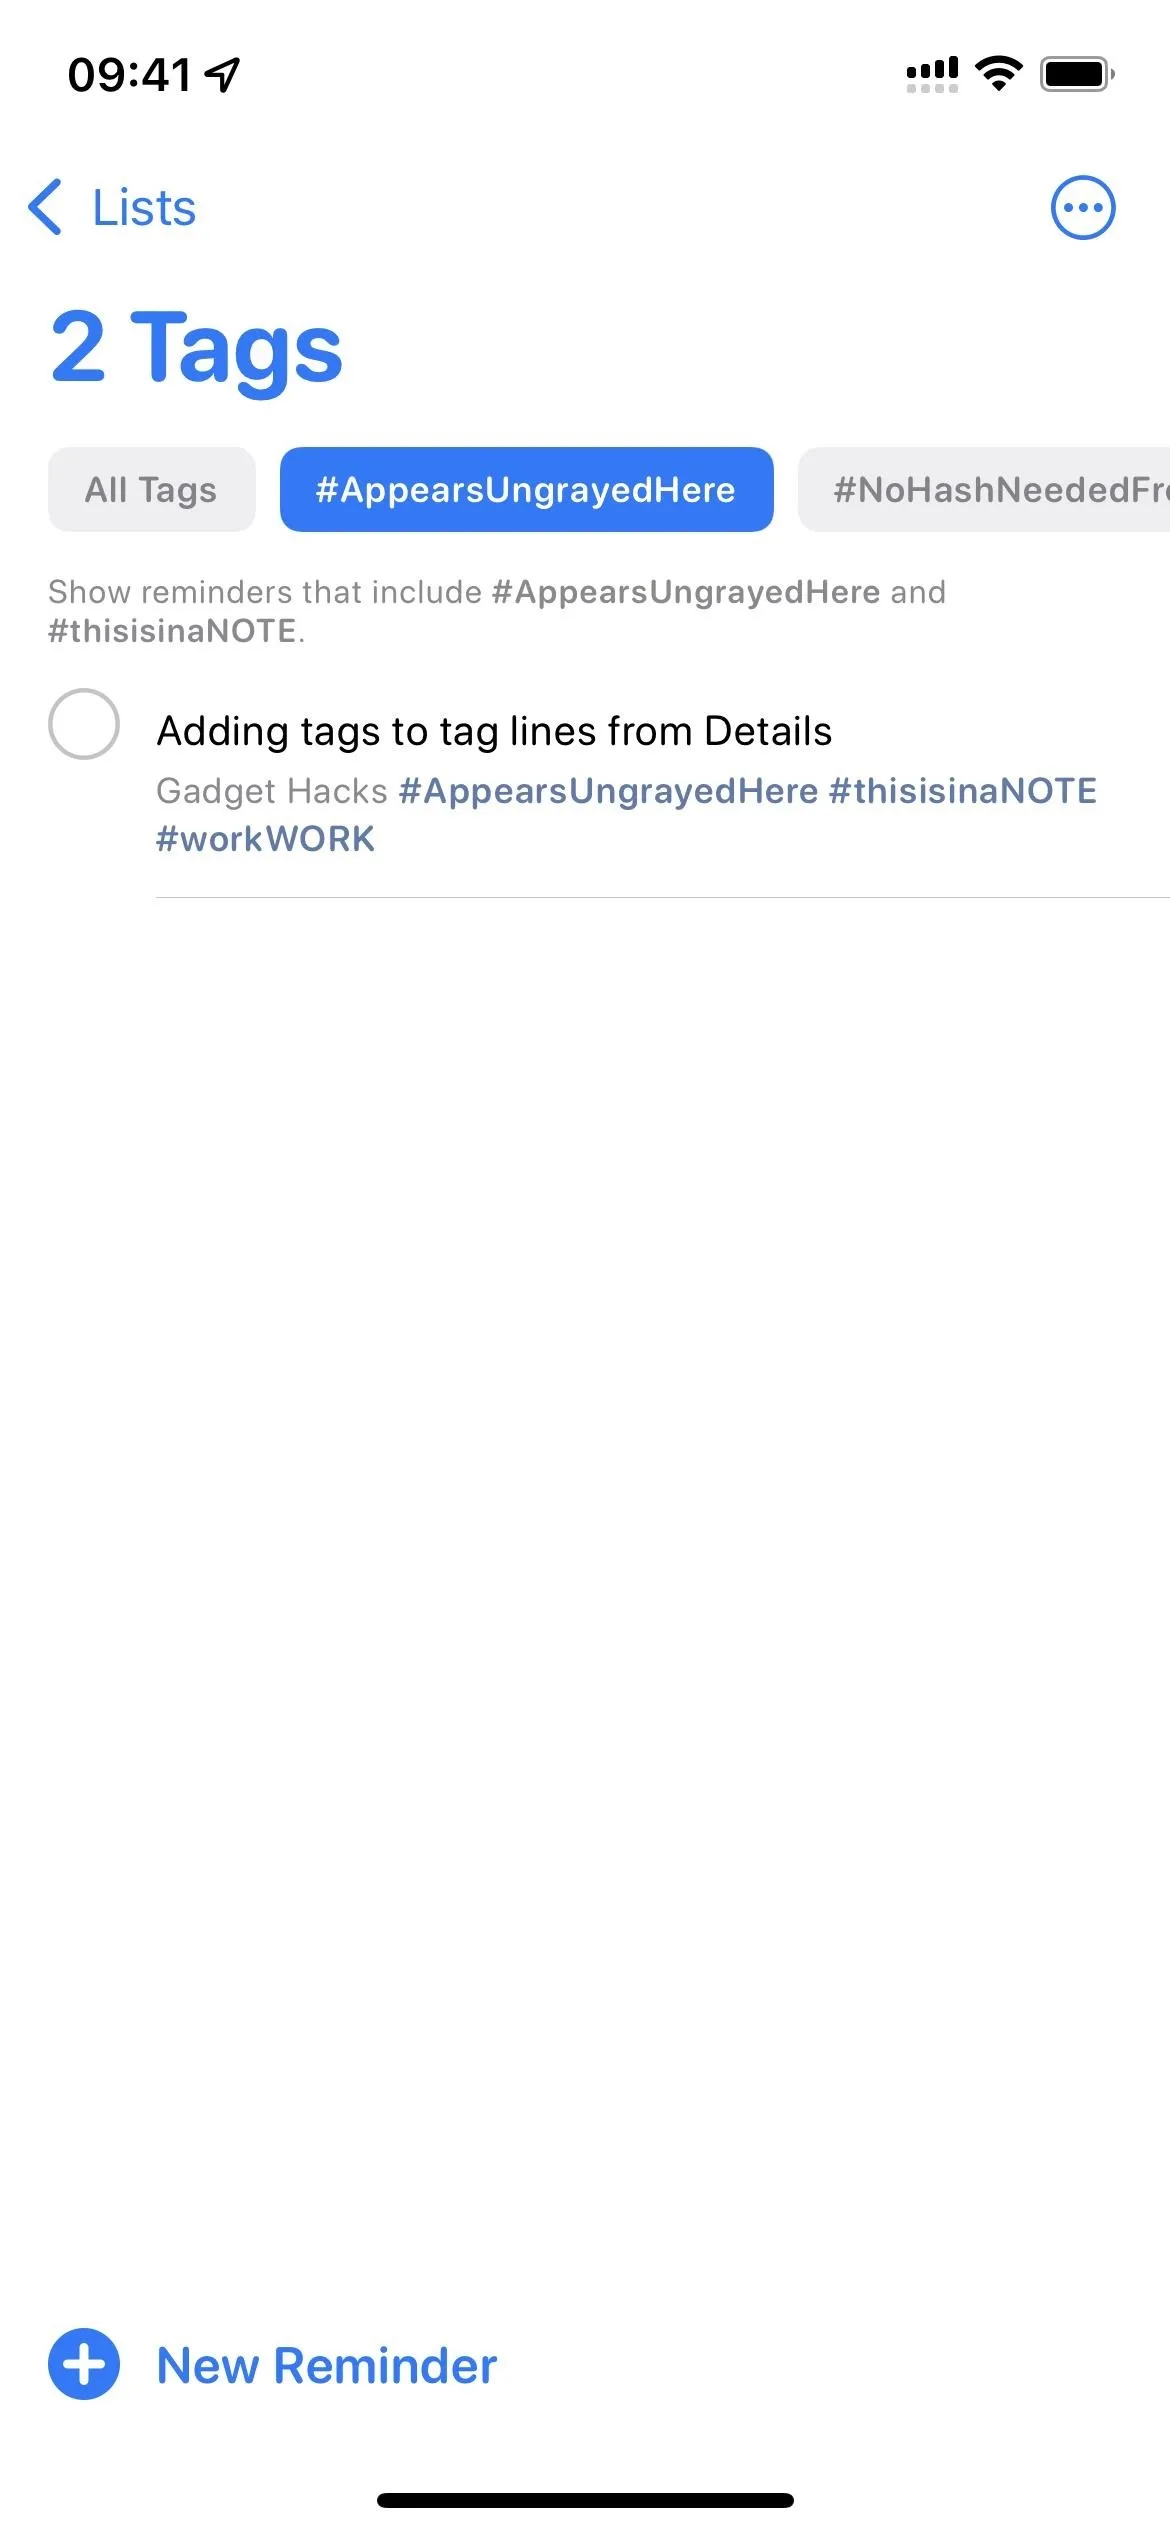
If you choose all tags, you can switch to a specific tag using the scroll menu at the top of the Tag Browser page. And if you want to find reminders that include a set of particular tags, select all tags that apply, and the Tag Browser will show you reminders that have those.
Searching for Tags in Reminders
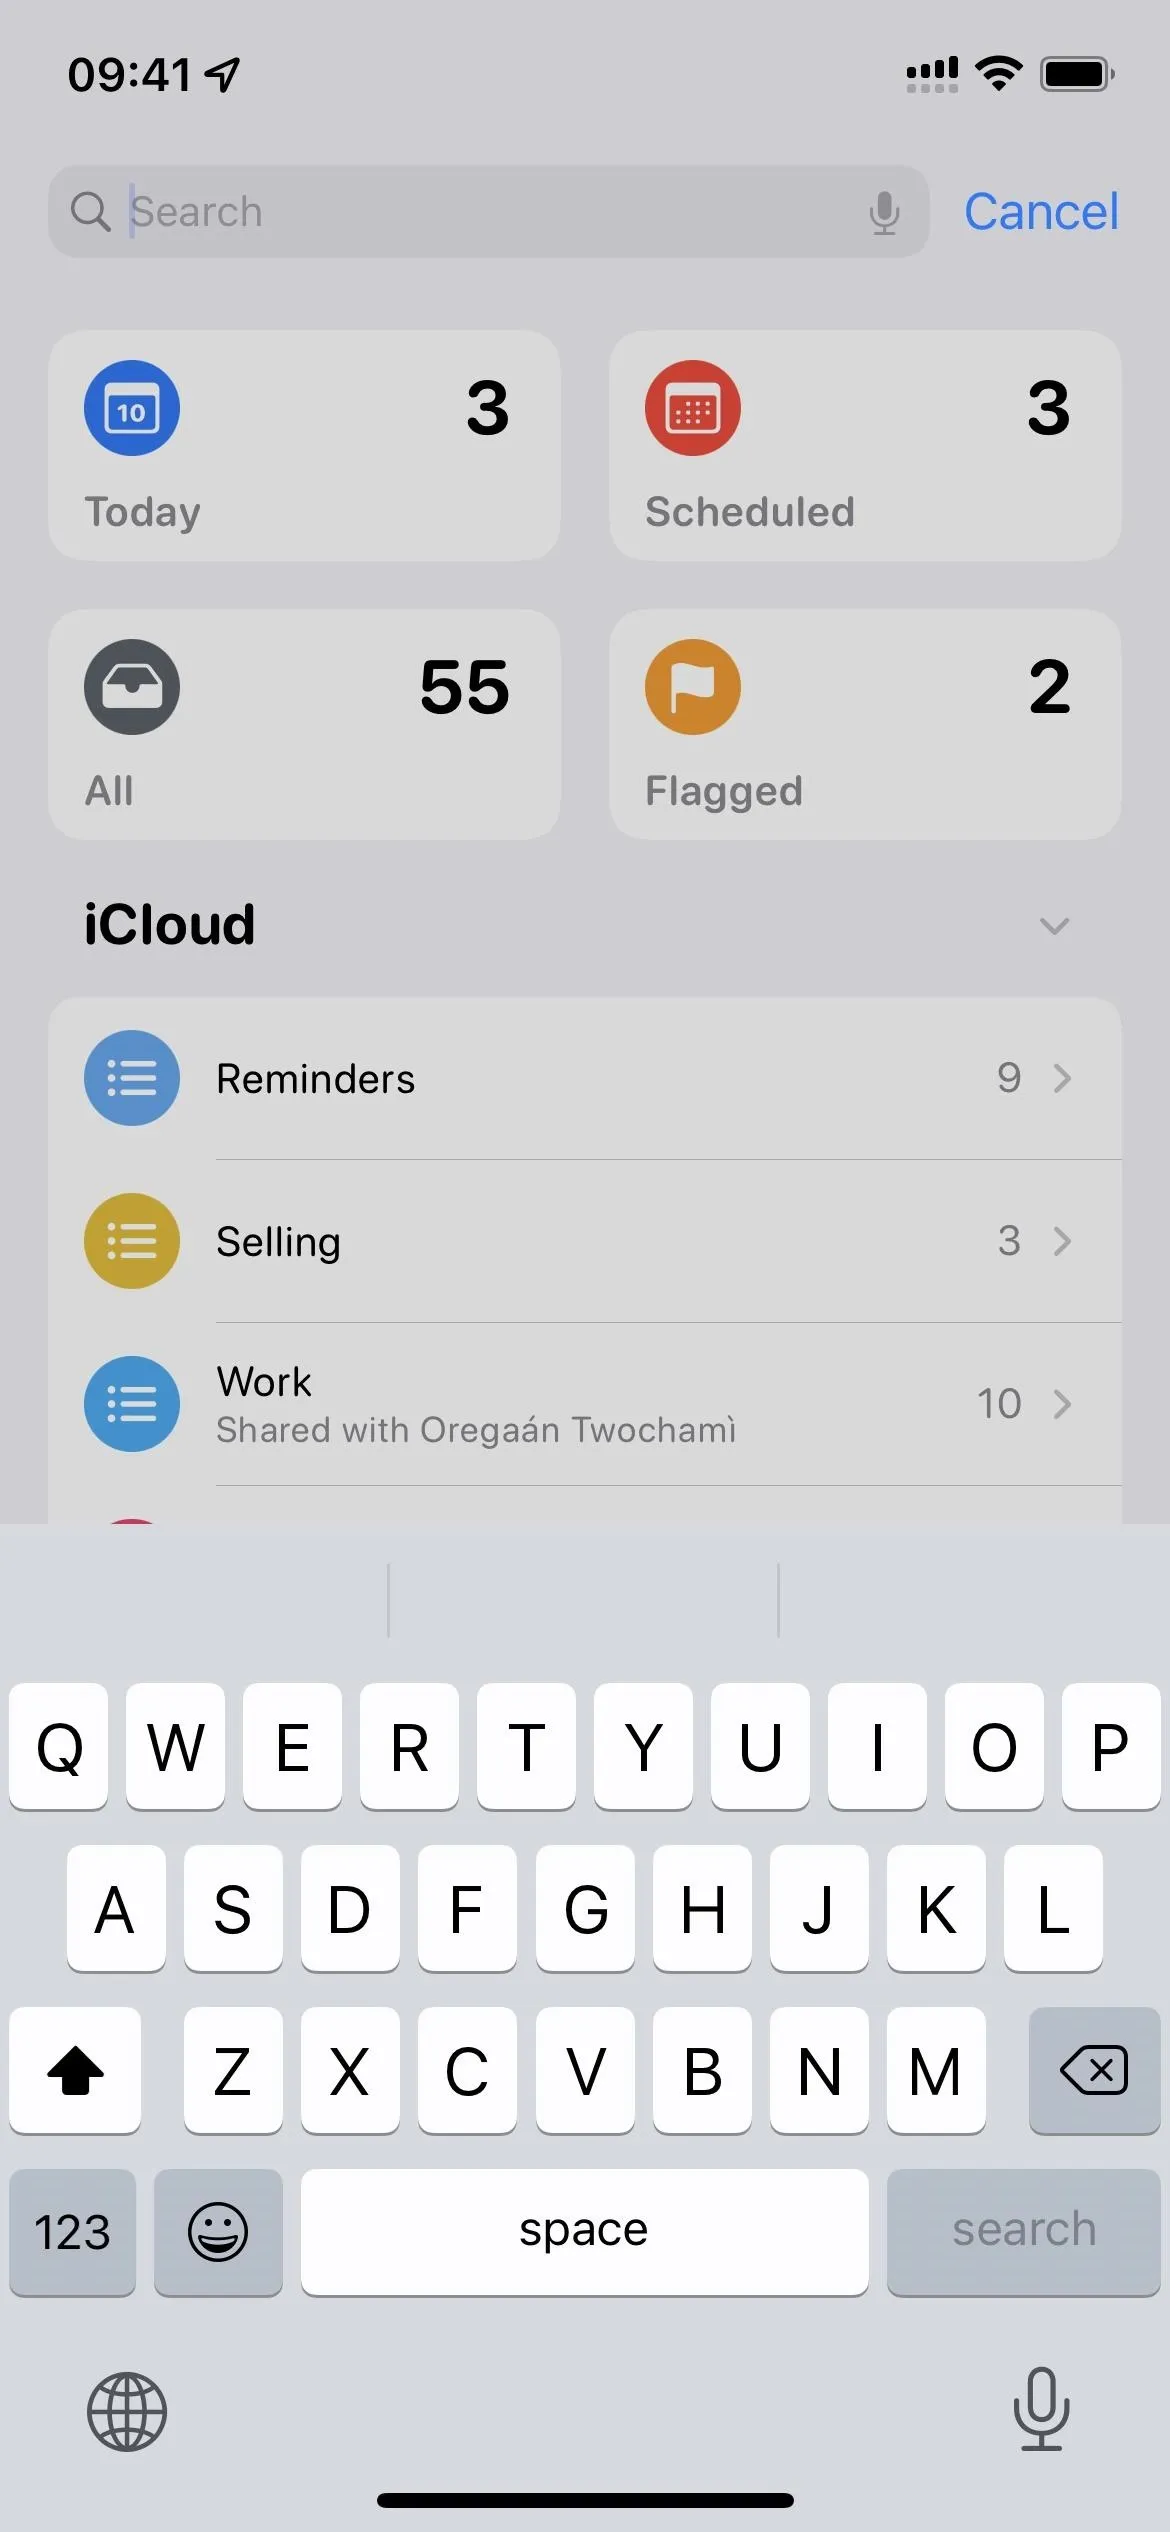
In the search bar at the top of the Reminders homepage, type in a search. It'll look for tags and regular text in the whole task, so you don't have to start your search with a # sign. In fact, the # sign doesn't carry any weight in the search tool, so you'll still see tasks with matching non-tag text if there is any.

Using Smart Filters to Organize Tags in Reminders
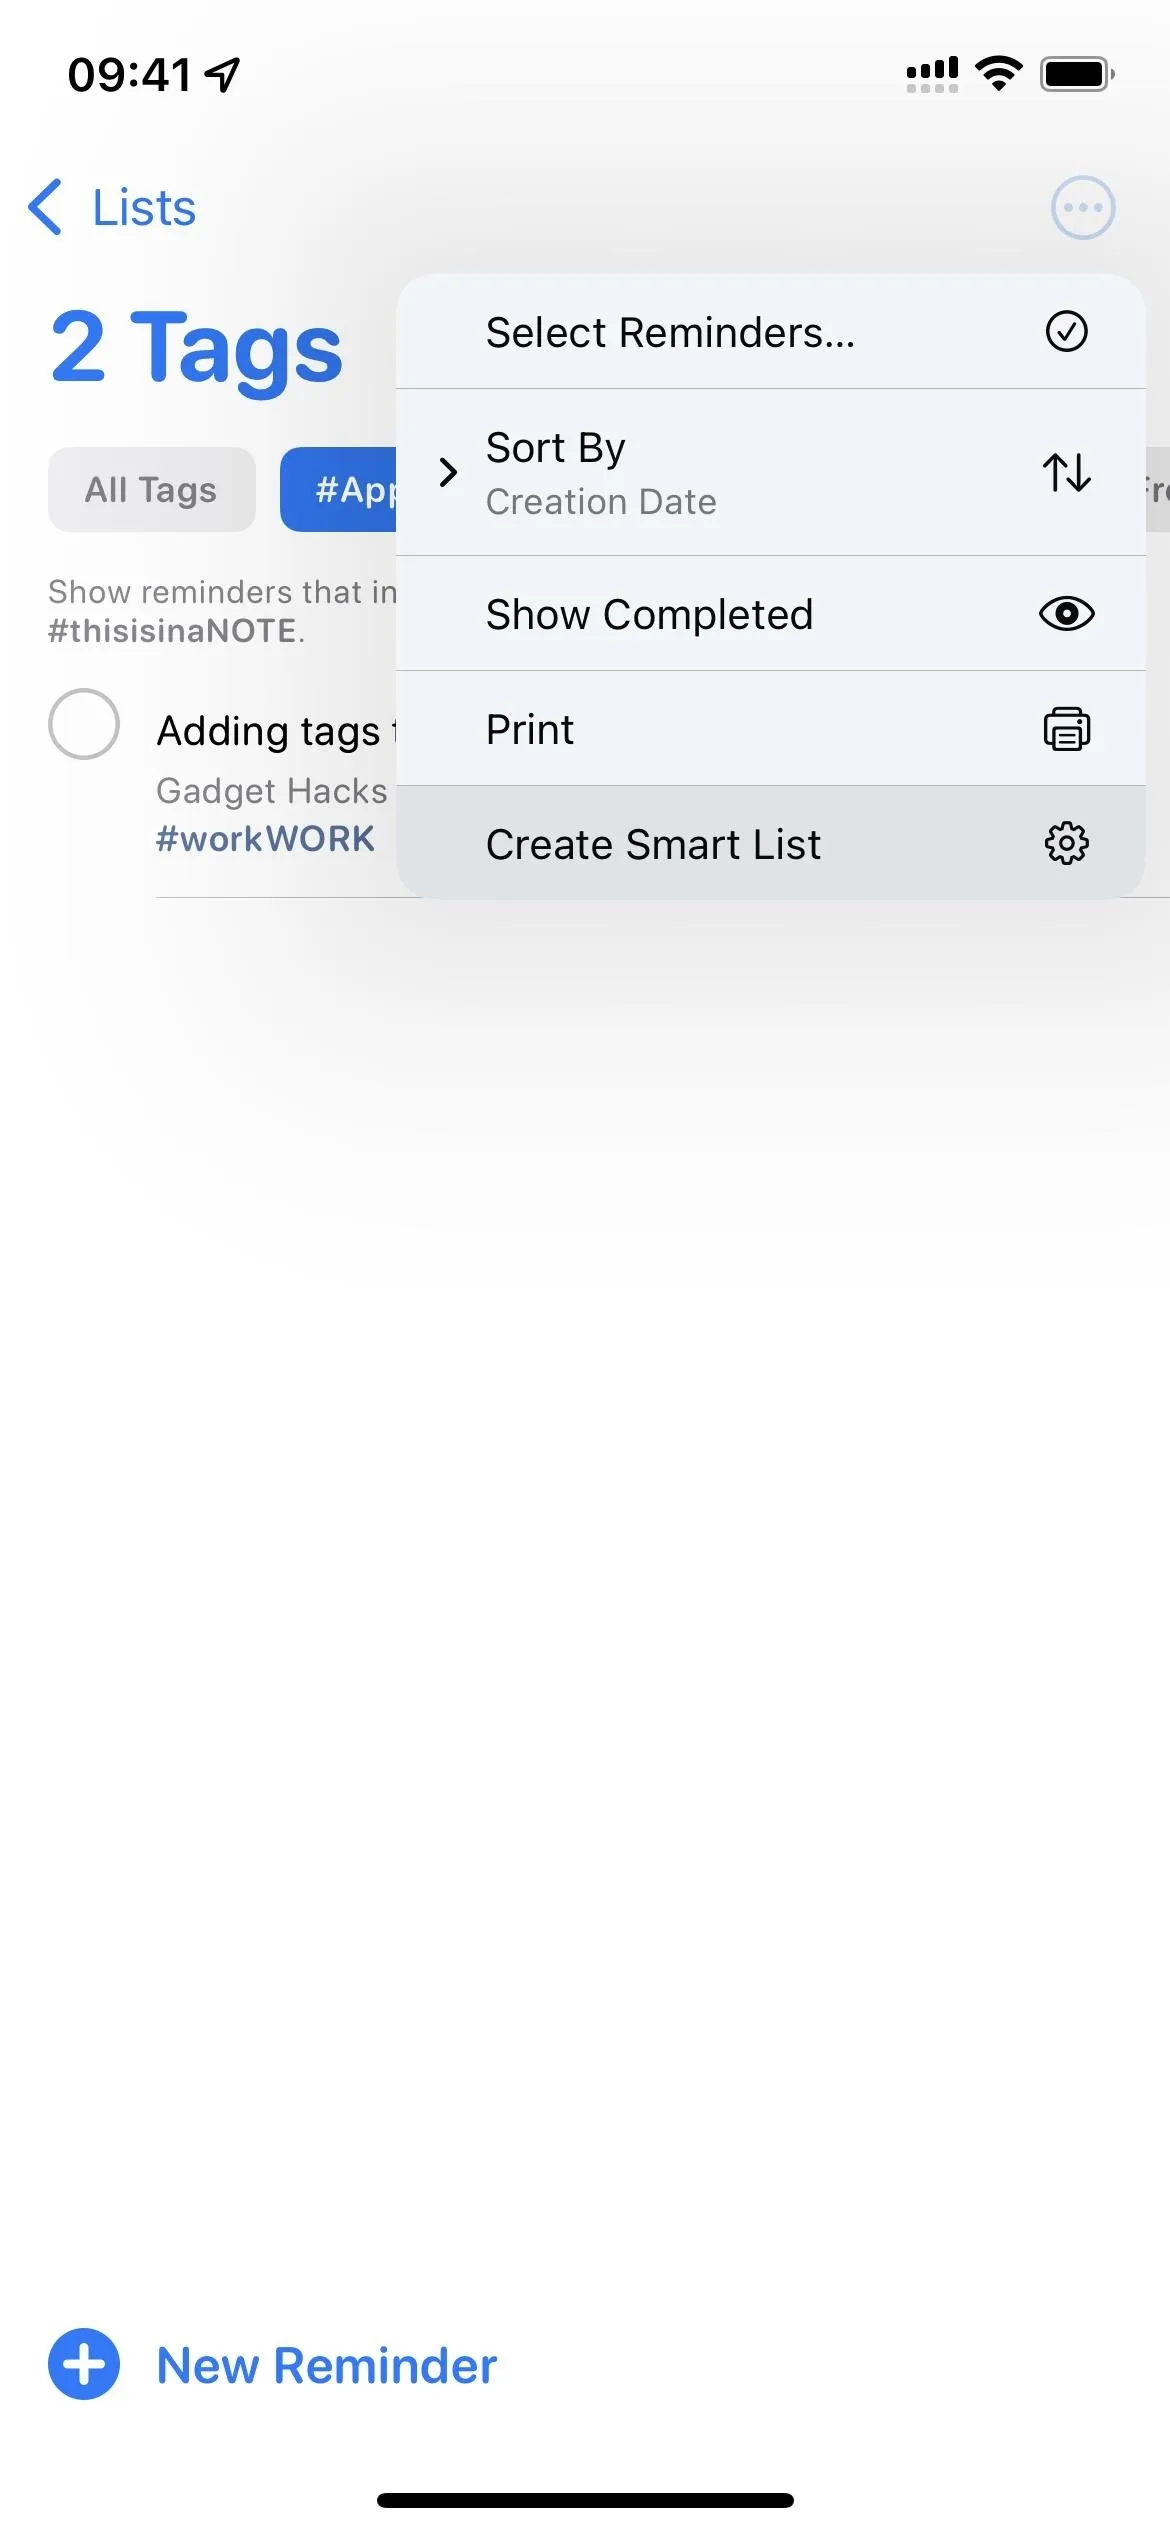
The Tag Browser is the primary way to browse your tags, and the search bar is the simple way to hunt for something directly. But if you want to organize your tags even more, you can create smart lists for them. From the Tag Browser, select the tag or tags you want to create a smart list for, then tap the ellipsis (•••) button in the top right and choose "Create Smart List."
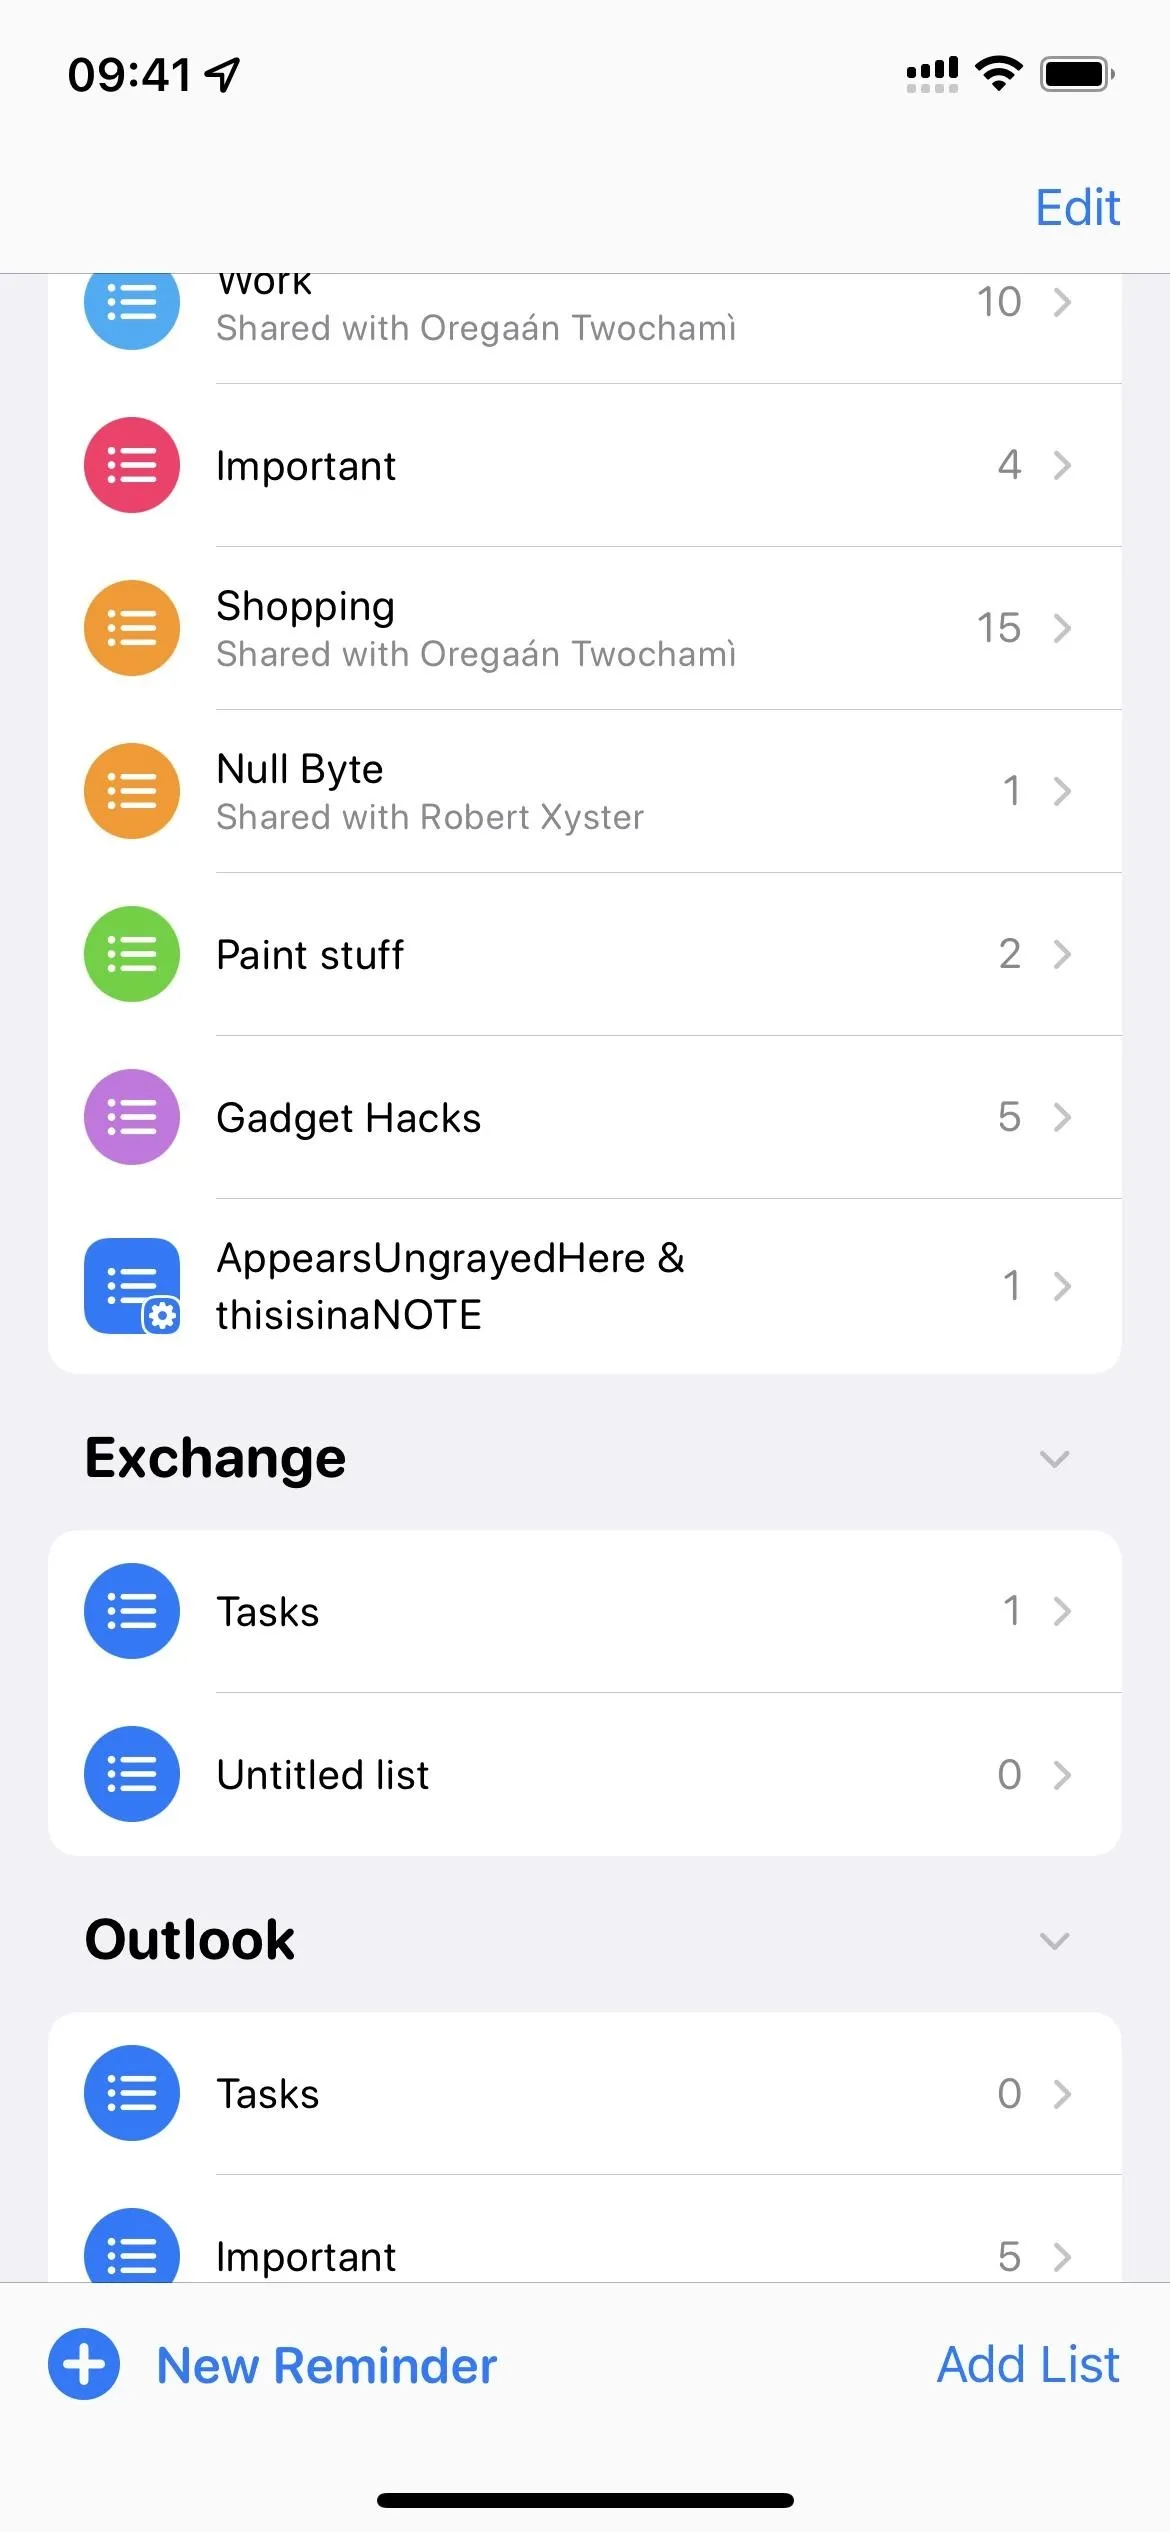
Your new smart list will appear where the rest of your iCloud lists are, and its title will be the tag or tags you selected. Open up the smart list to view all tasks that match.
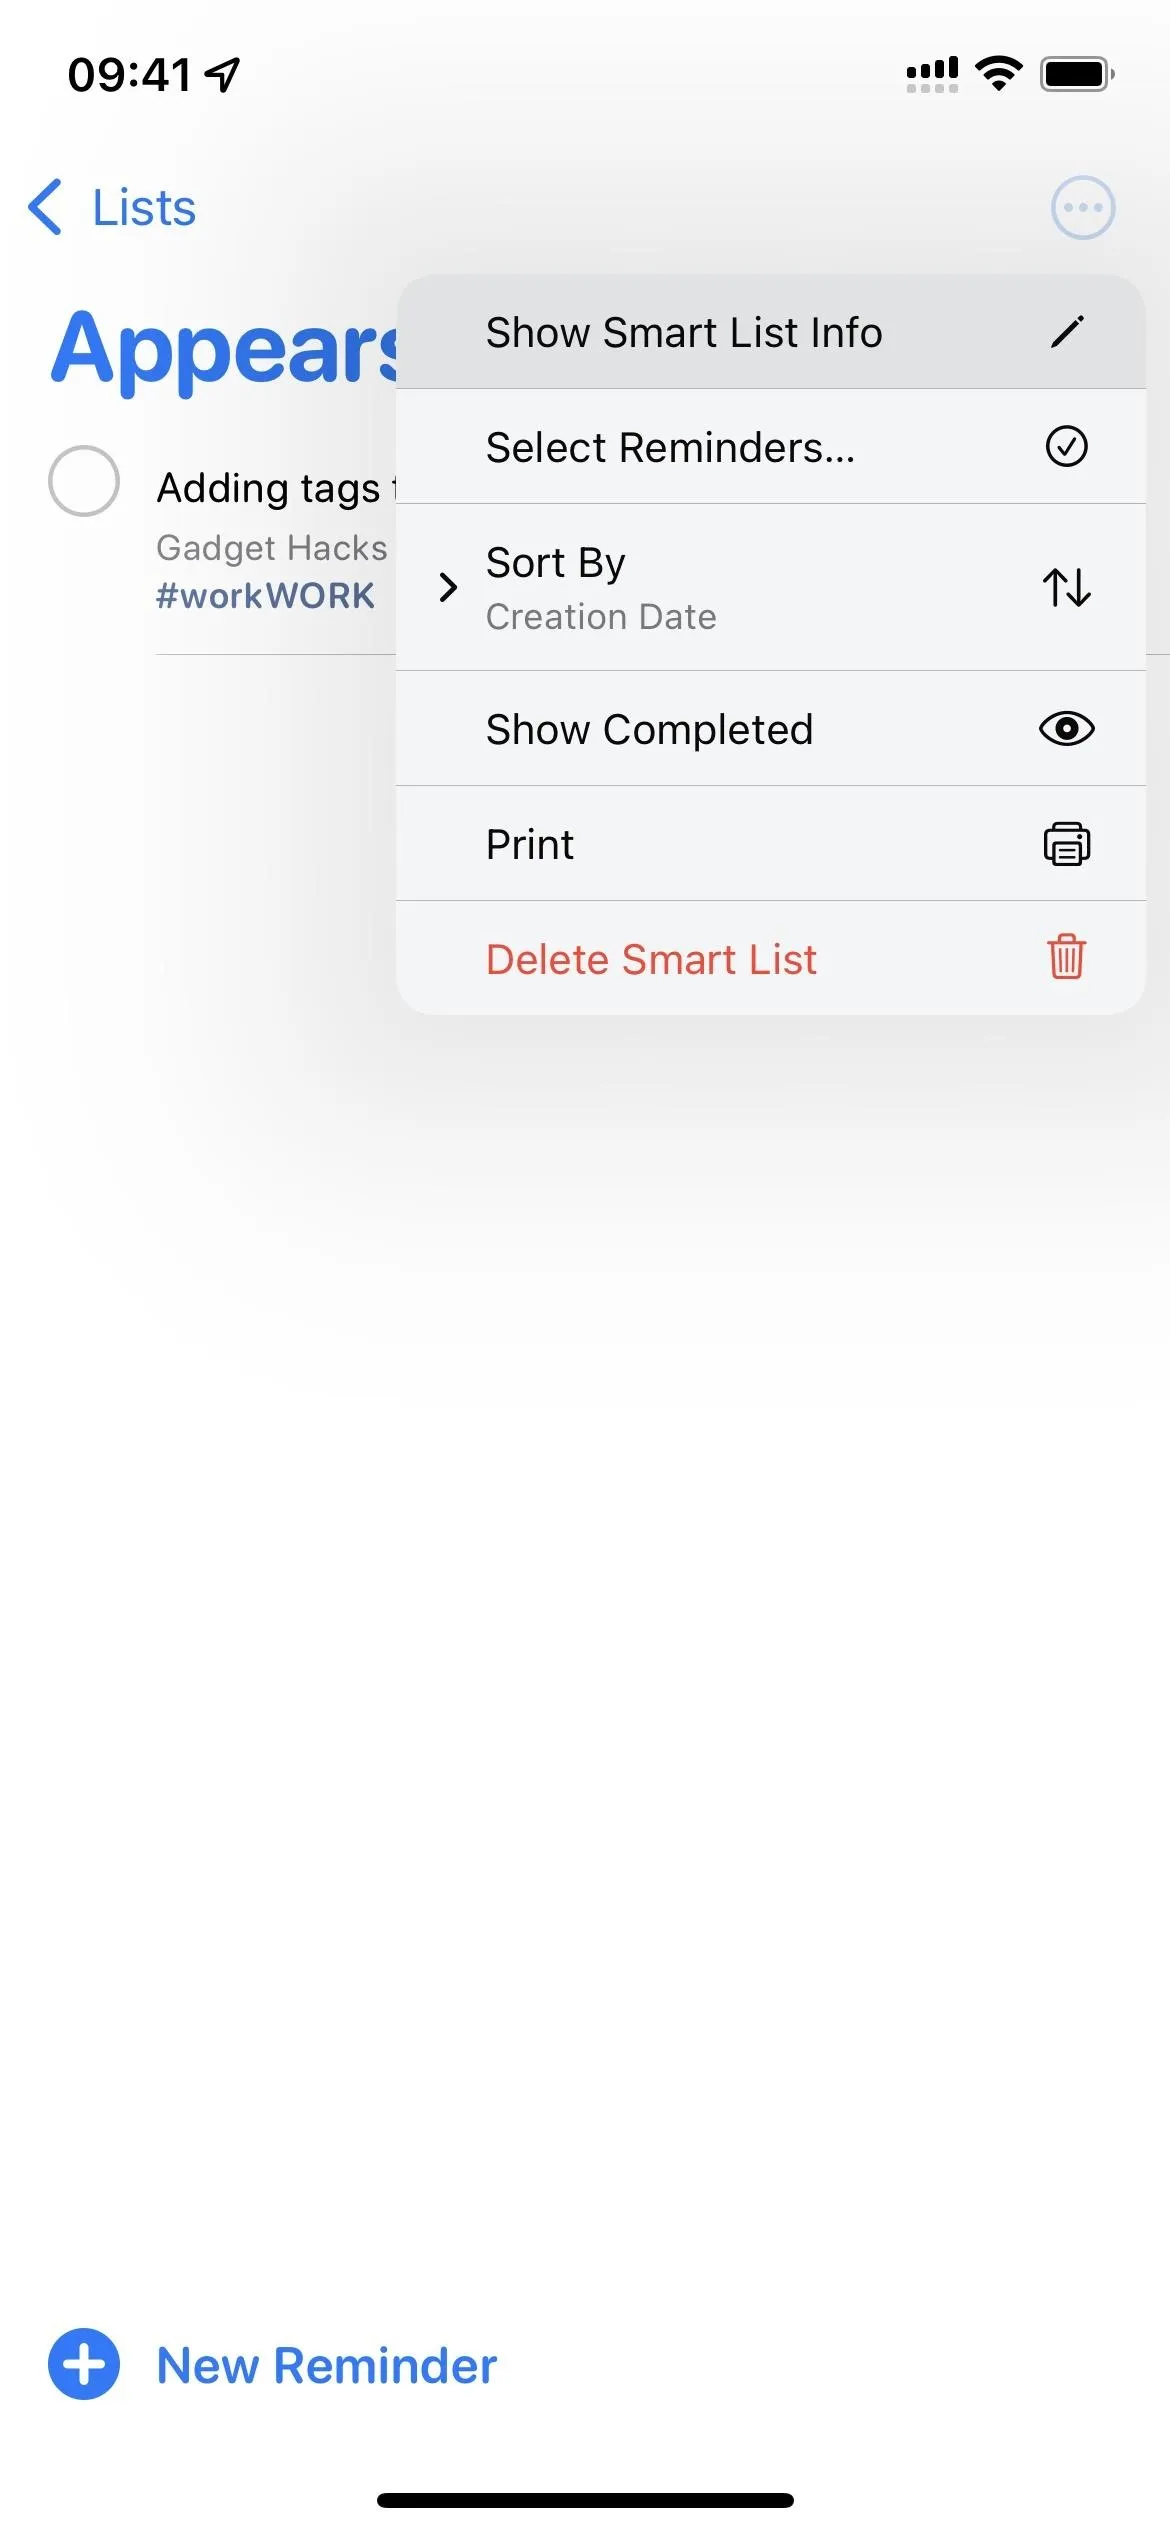
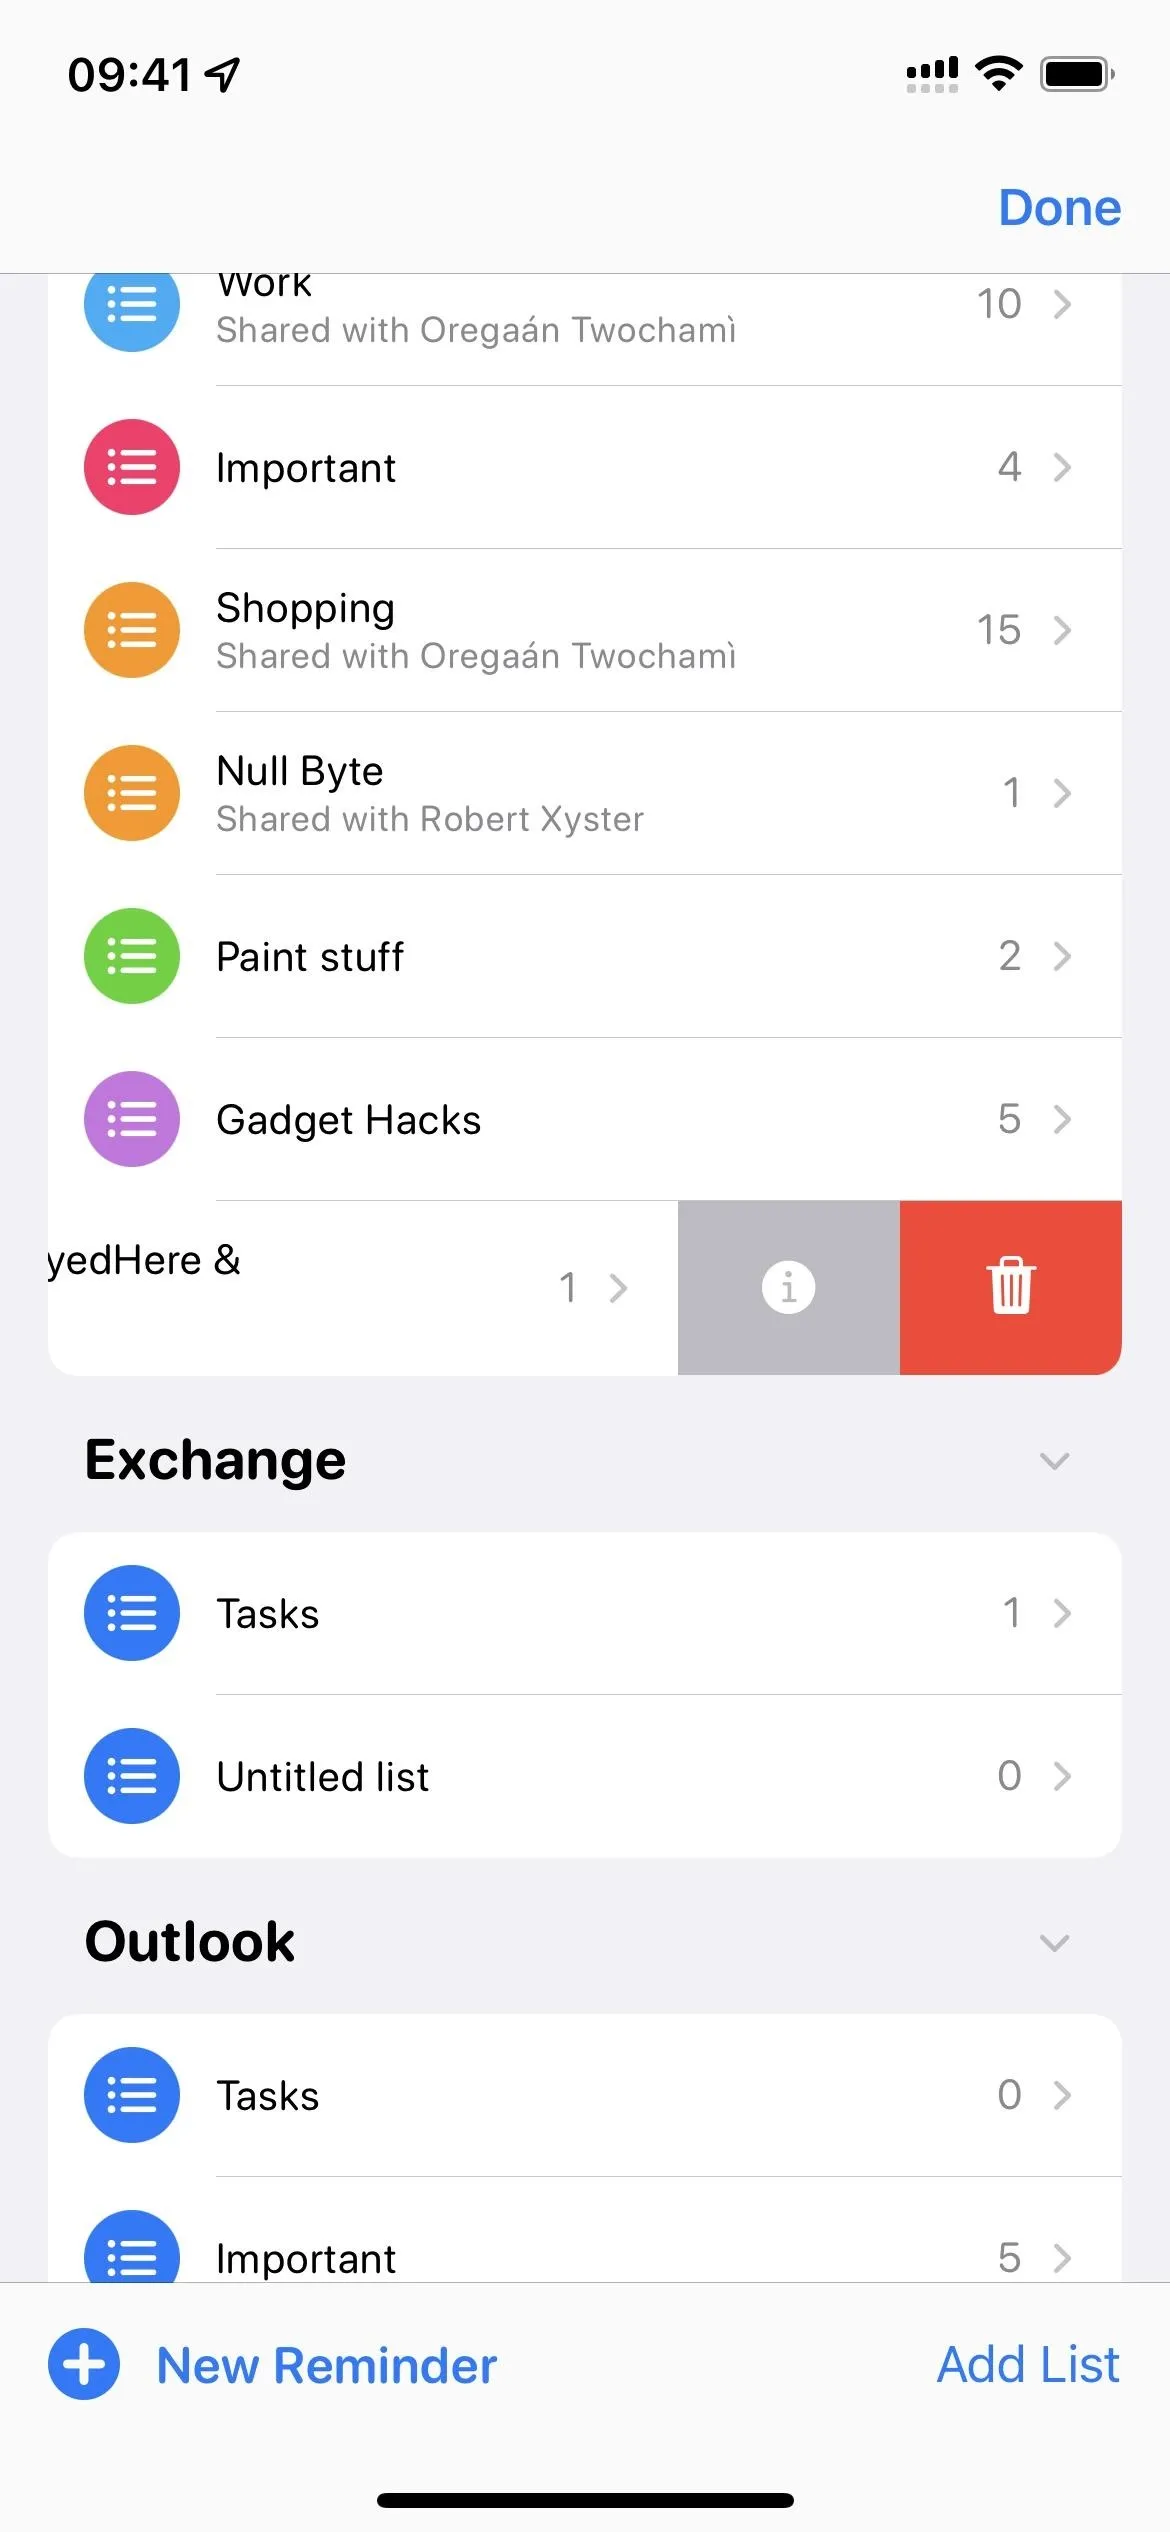
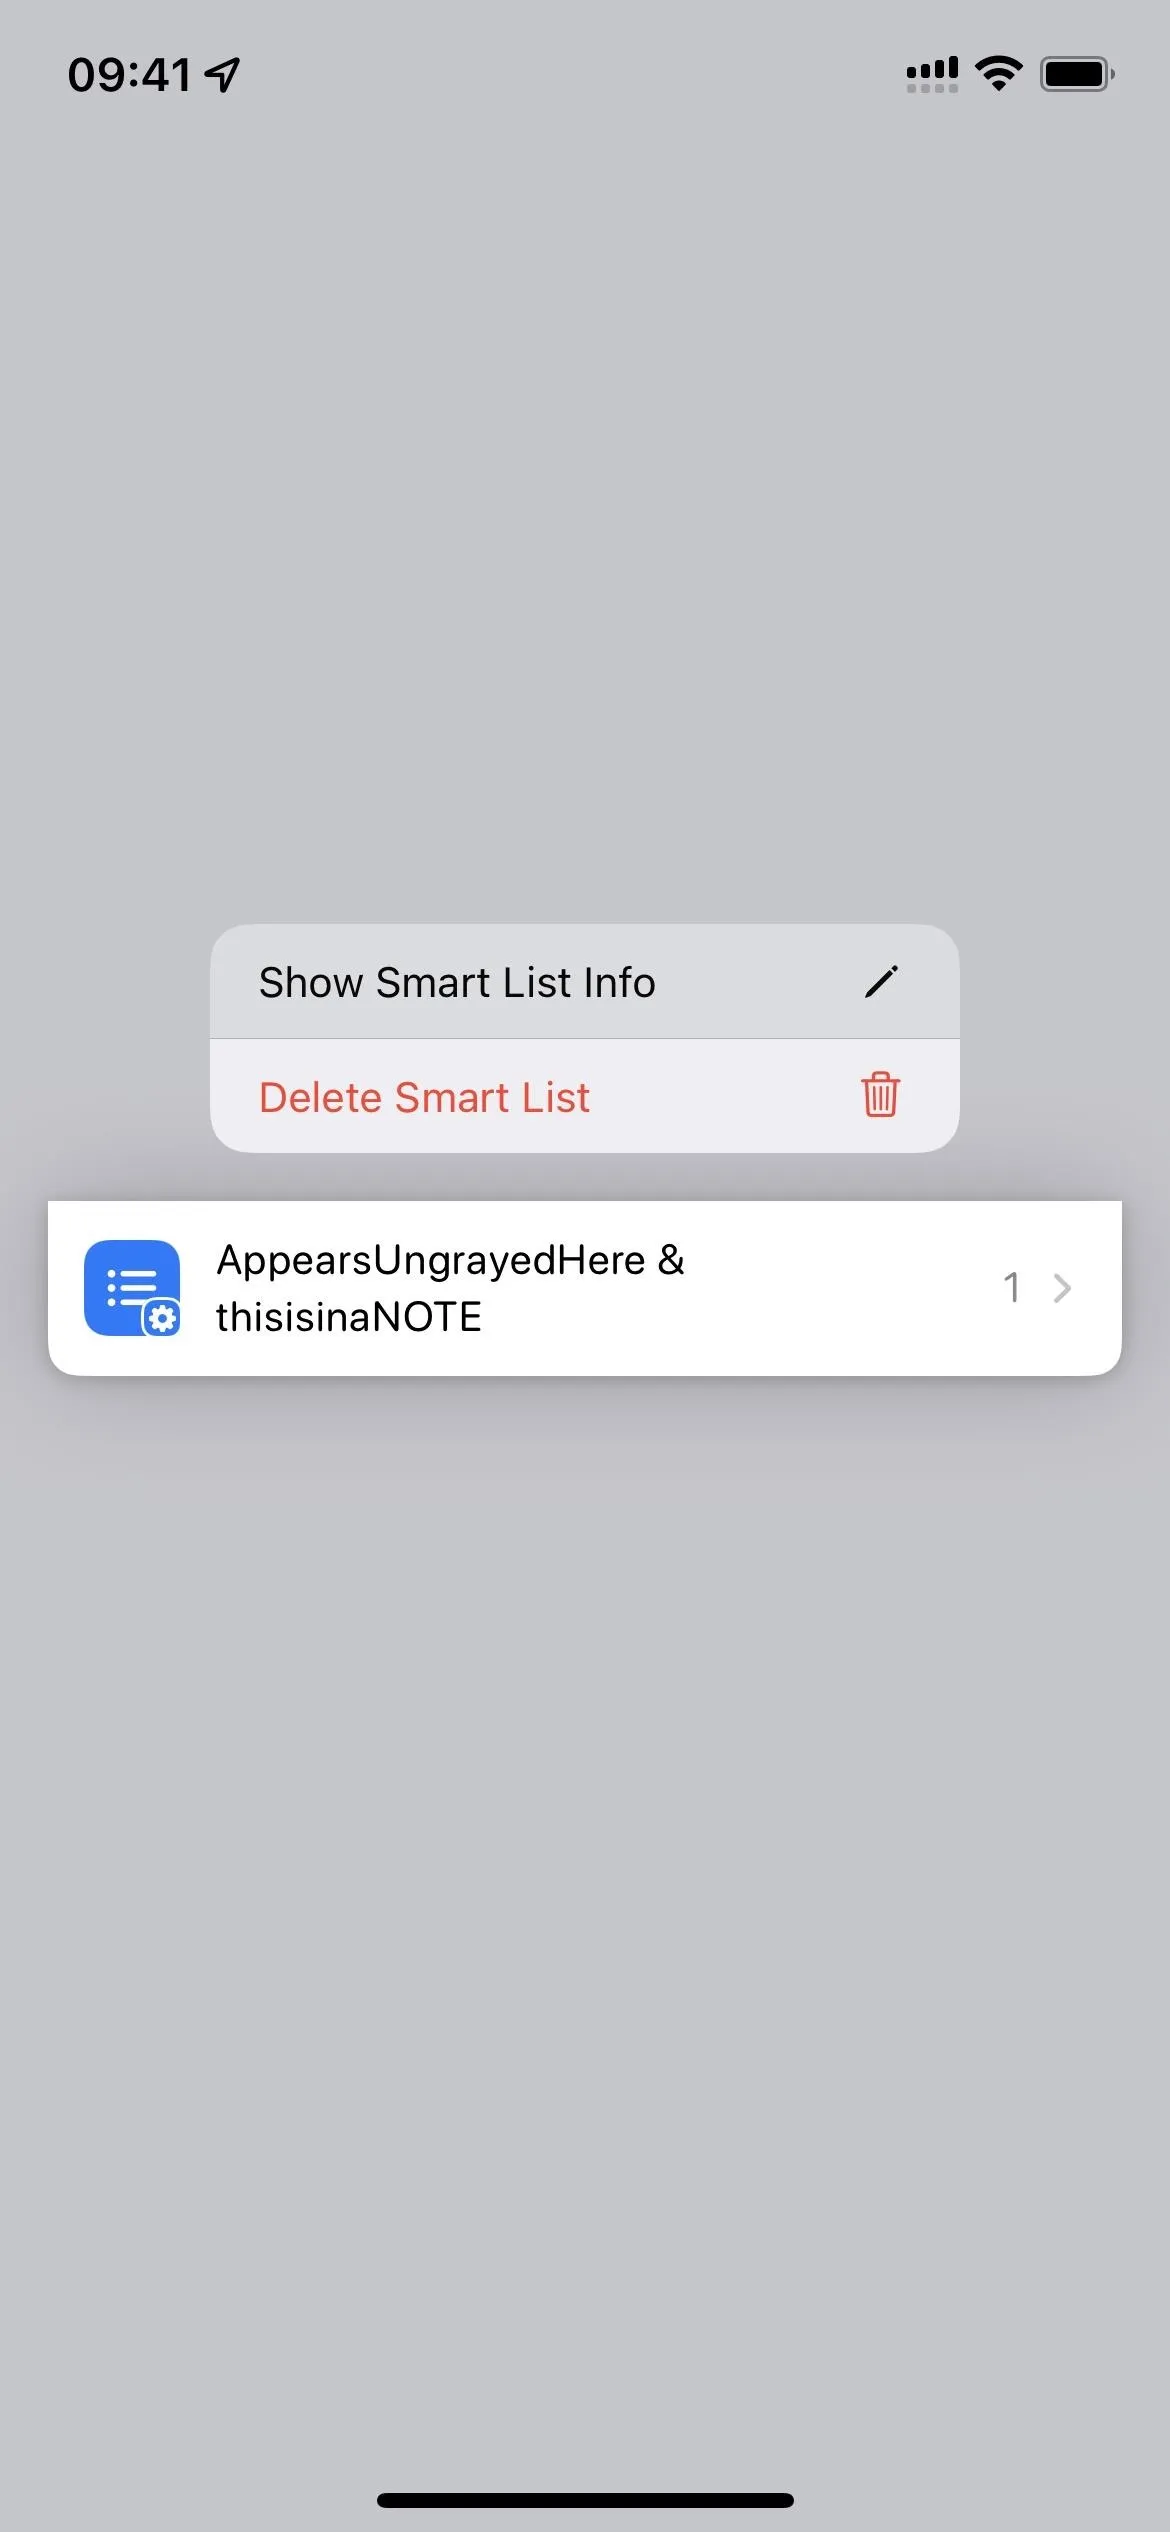
You can tap the ellipsis (•••) in the top right of a smart list and select "Show Smart List Info" to edit it. You can also get here by swiping left on the list itself or long-pressing to open the quick actions.
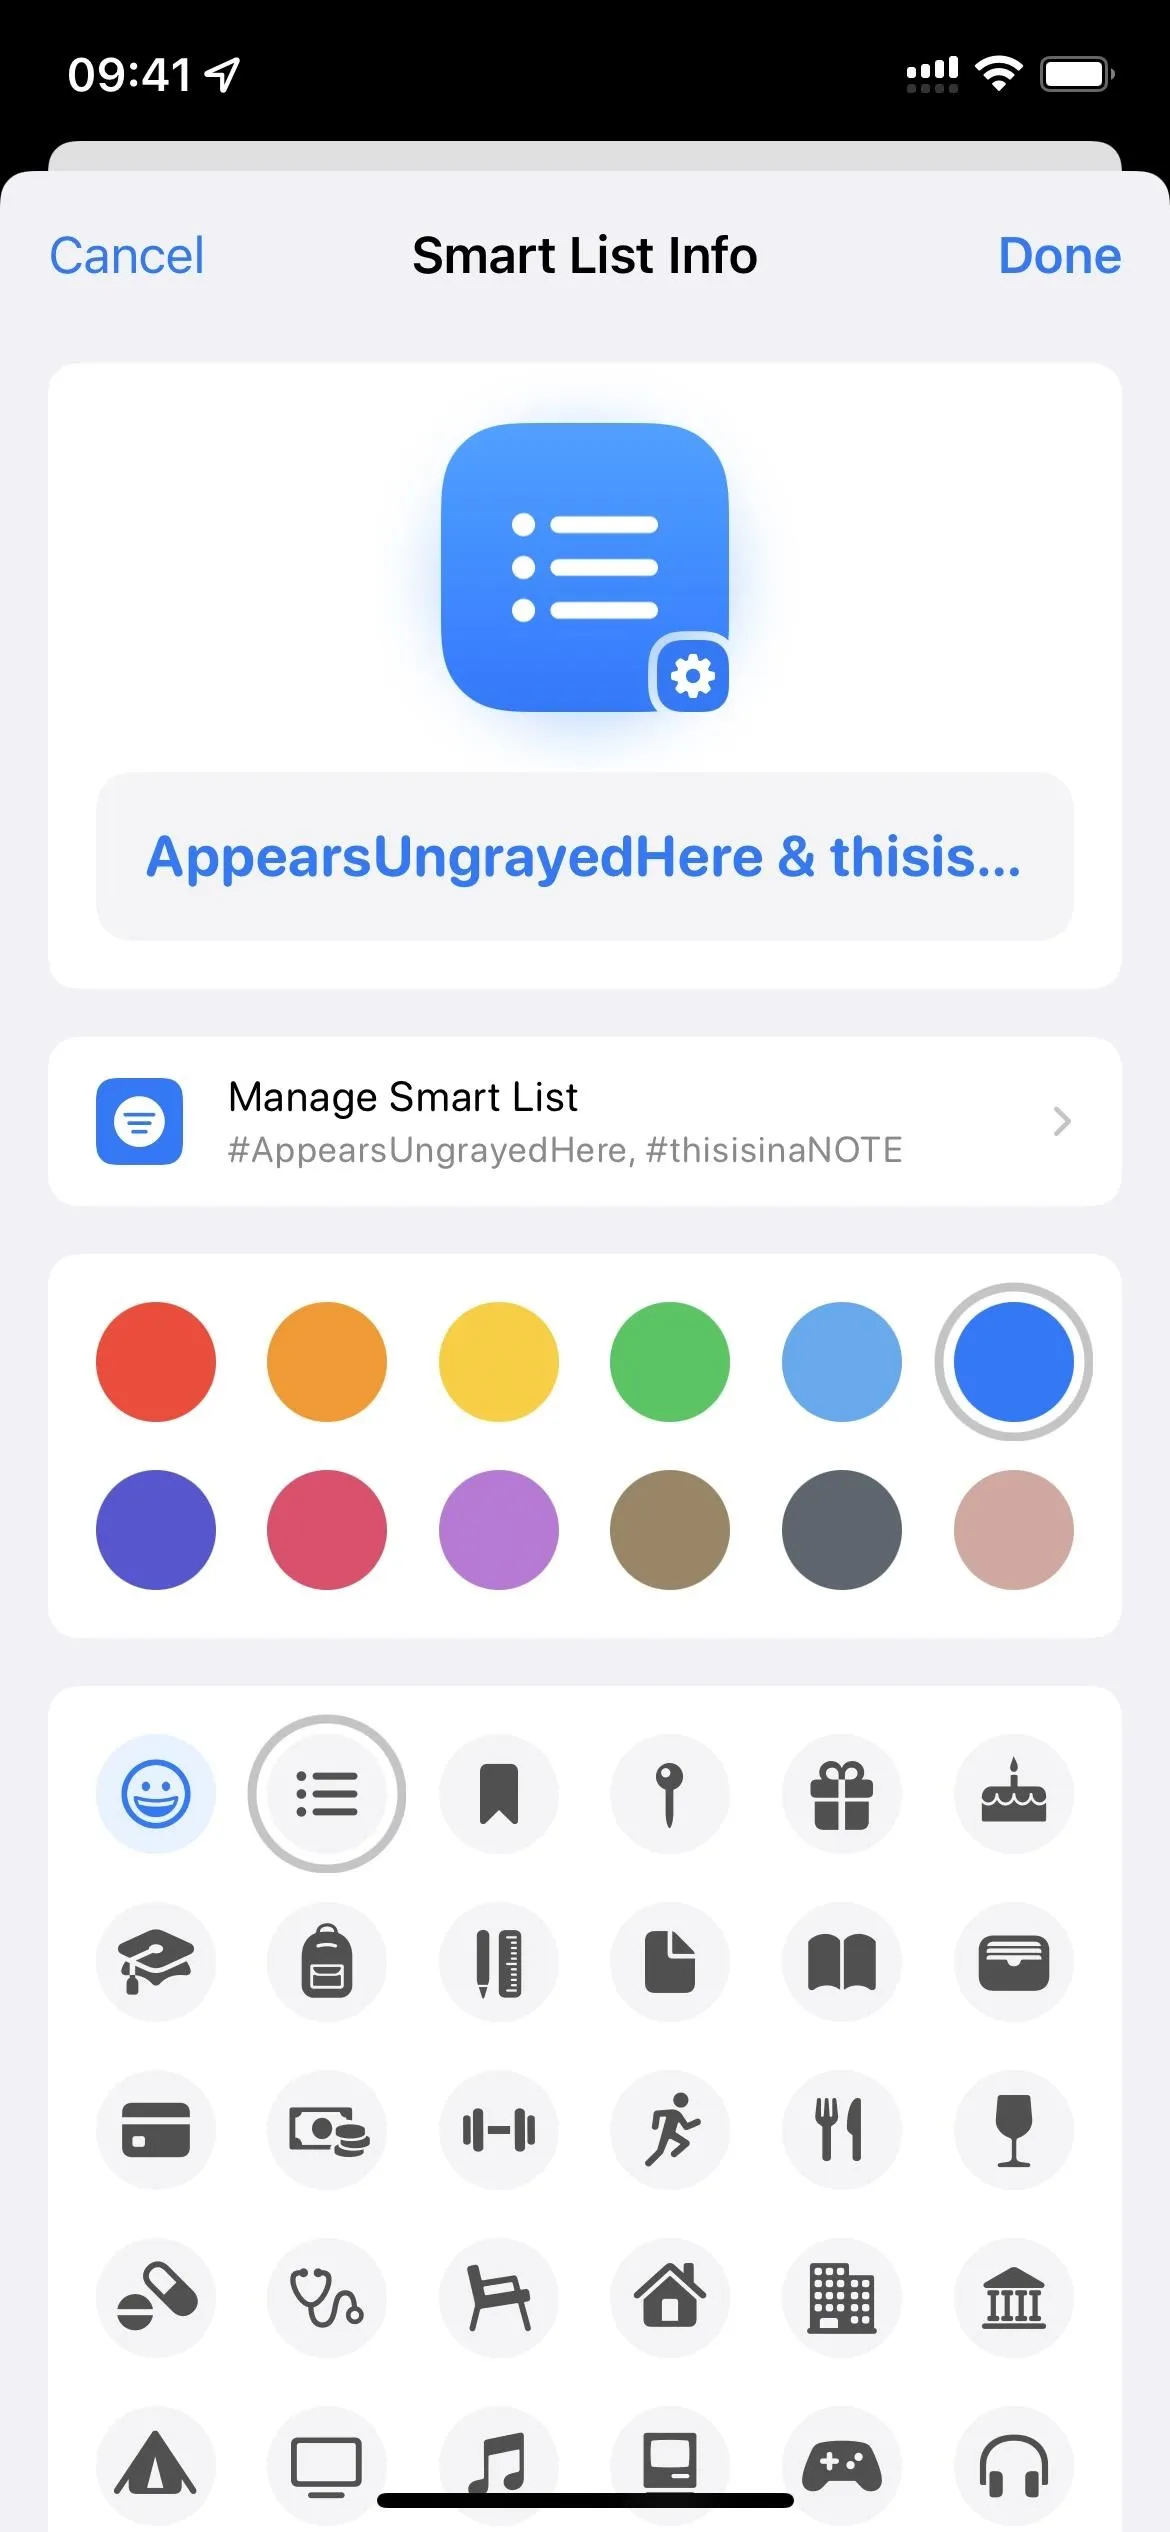
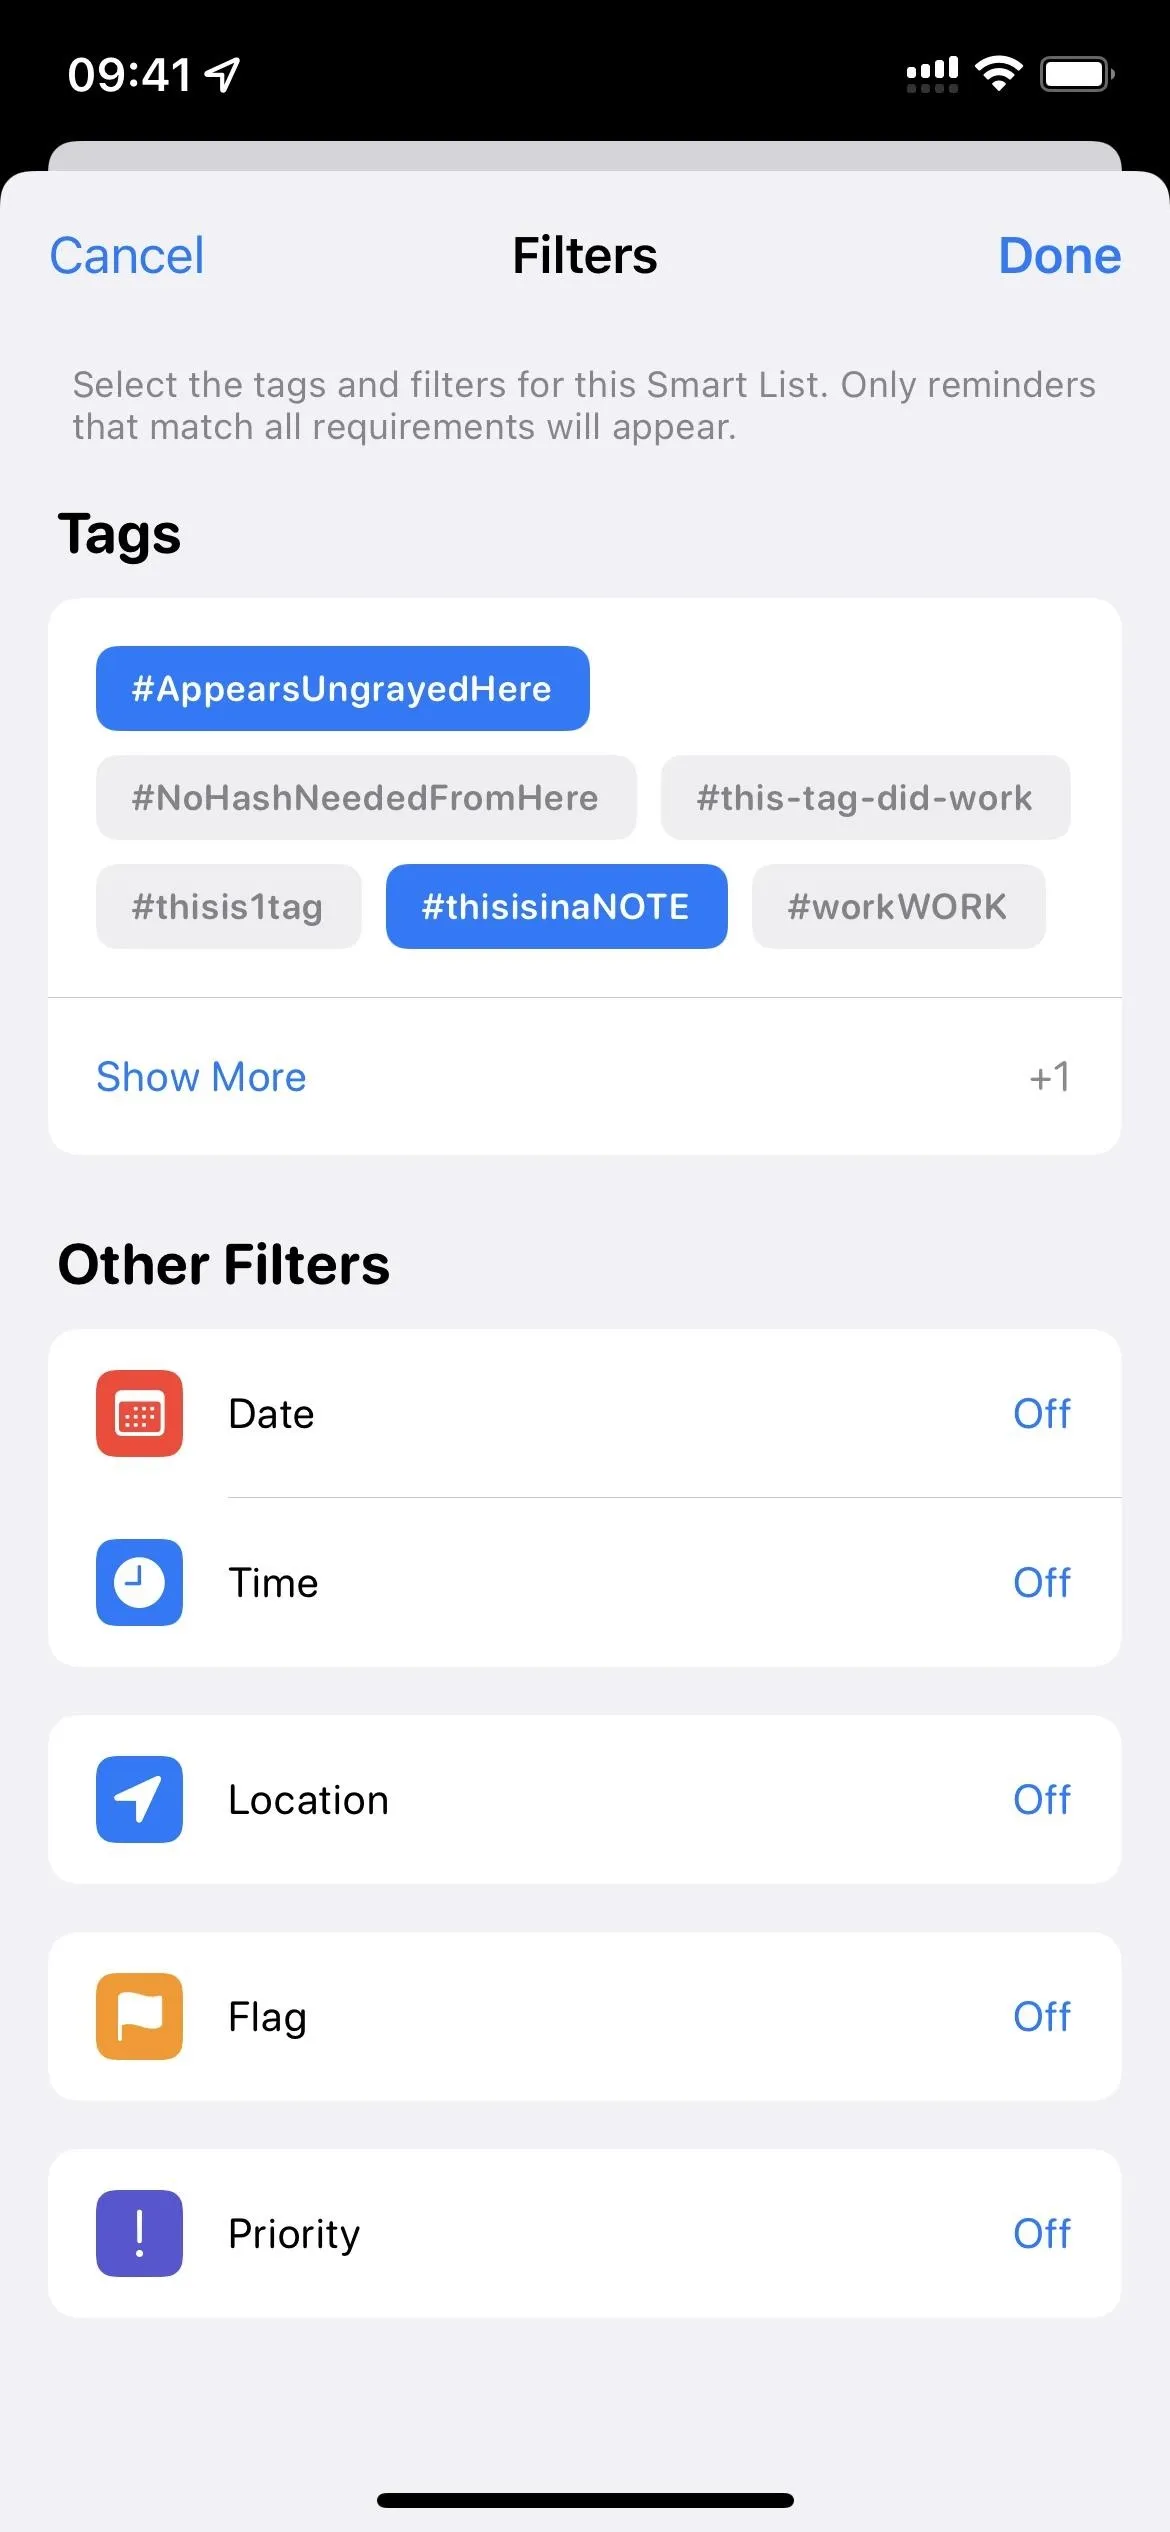
Here, you can change the list name, color, and symbol, but you can also tap "Manage Smart List" to select more tags or deselect ones you don't want anymore. And there are other filters like date and location that you can incorporate. Hit "Done," then "Done" again to save your changes.
Cover photo and screenshots by Justin Meyers/Gadget Hacks


Comments
Be the first, drop a comment!