
We're basically living in the future, so let's work like we are. For decades, we have, without question, opened a word processor like Pages, and clicked or tapped our way to starting a new document. What's wrong with that? It's unnecessary. We all have a digital assistant living in our iPhone, one that can start up a new Pages doc by verbal request.
Well, Siri won't work right away if you ask it to start a new Pages document. If you try asking Siri to do so right now, the assistant will fire up Pages, but nothing else. Sure, you could do that then interact with Pages manually to start a new document, but you can make Siri play ball by setting up the assistant to start a new document type when you say so.
Make Sure You Have Both Apps
To have Siri start a new document on command, we're going to need to do a little programming. And even if you've never written a line of code in your life (like me), you'll be able to follow along. We'll be using Shortcuts, built into iOS 12 and up, to quickly enable Siri's ability to open a new doc.
You'll need both Shortcuts and Pages installed on your iPhone. If you don't have one or both of these apps, no problem. They're free to download from the App Store:
Prime Siri for a Suggested Shortcut
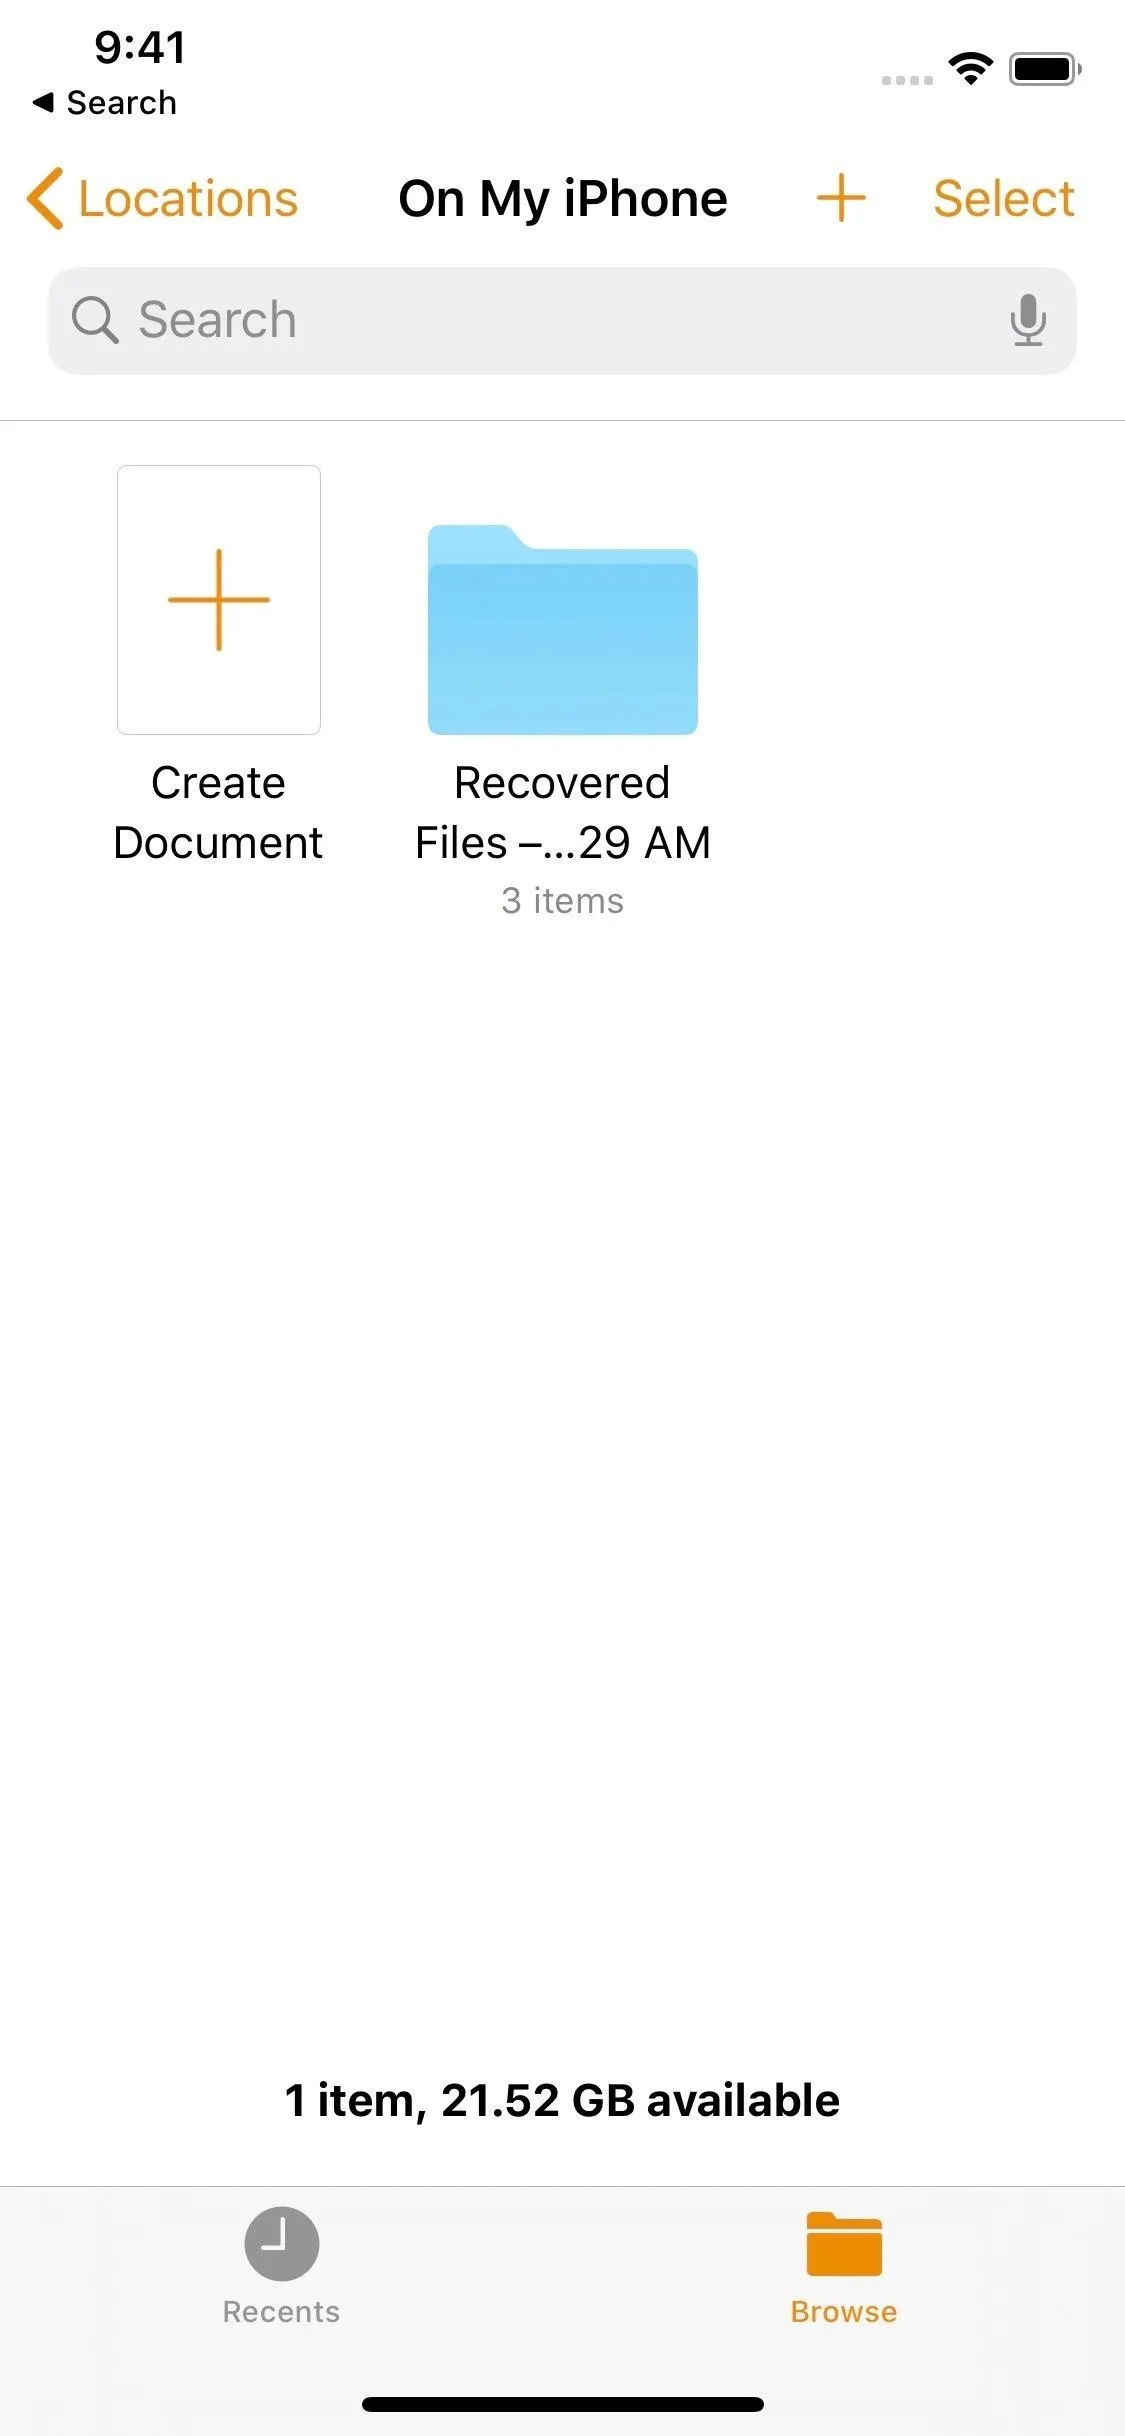
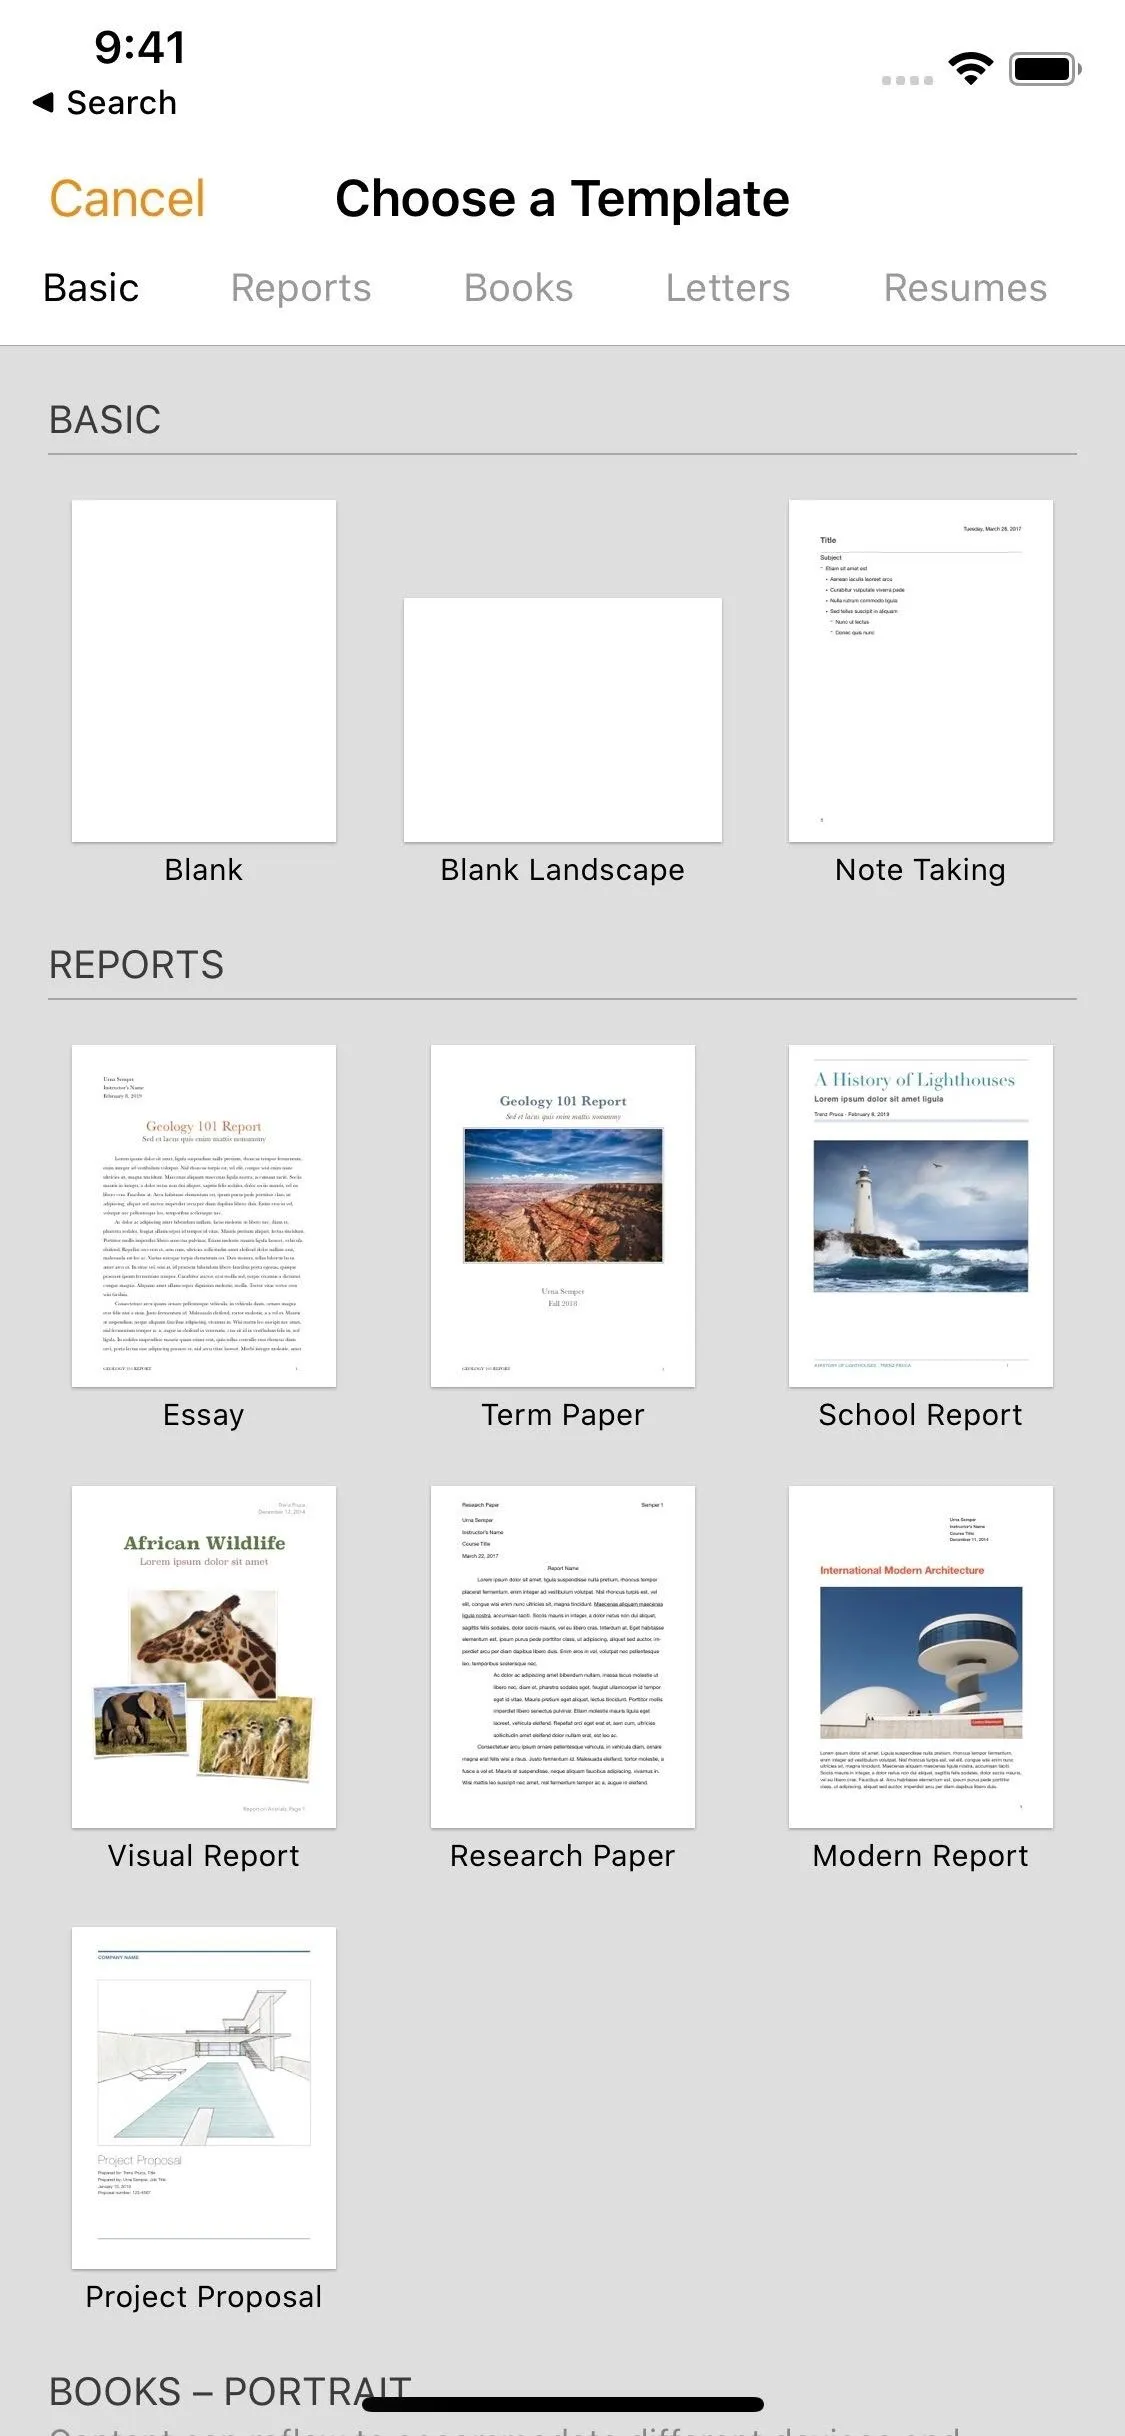
After making sure you have the apps, you'll need to open Pages first, then tap the plus (+) in the top right or "Create Document" if applicable. Tap "Blank," then feel free to leave the app. Doing so will trigger Siri to offer "New Blank document" as a suggested shortcut.
Alternatively, you could do the same for "Blank Landscape," which will give you a Siri-suggested "New Blank Landscape document," or any of the other templates, if you use those more frequently than the stock blank ones. The Siri suggestion that would appear for templates would be "New [Templare Title Name] document."


Create Your Shortcut
Now that Siri has the new document on its radar, you'll be able to create your shortcut. There are two ways to go about it, both options being relatively simple. However, if you'd prefer to skip shortcut-building, know that the first option is definitely the easiest. We'll just be showing the process for the "Blank" document, but the process is the same for the blank landscape doc and other templates, just with name changes.
Siri Suggested Shortcuts
The simplest way to create this shortcut is through a Siri-suggested shortcut. Siri Suggestions analyze your behavior in iOS and offers shortcuts and quick actions to help make your iPhone experience more efficient.
Siri Suggested Shortcuts in iOS 12
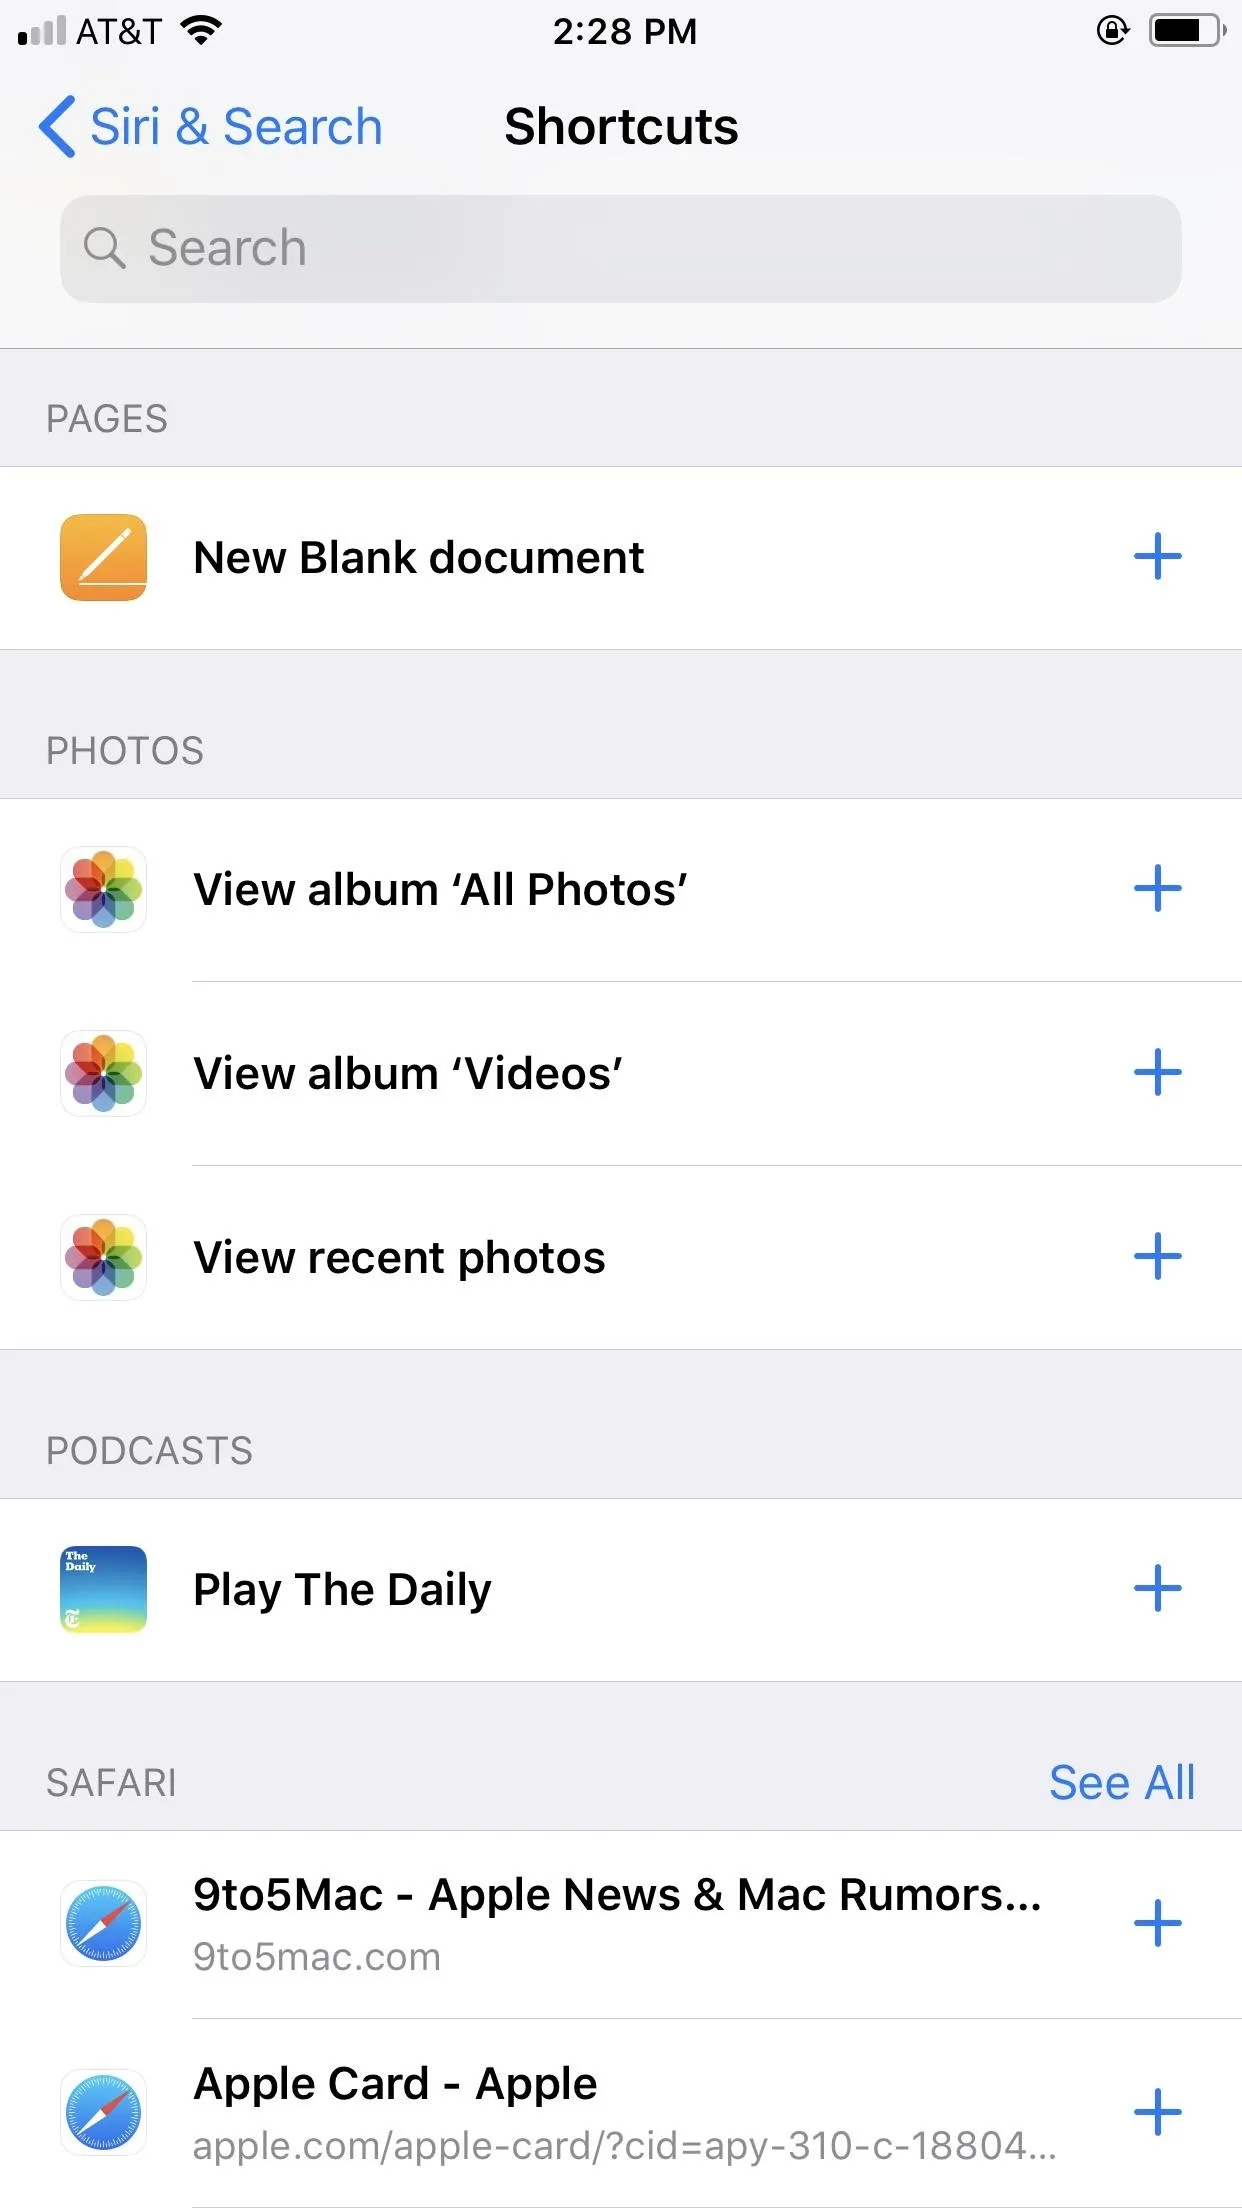
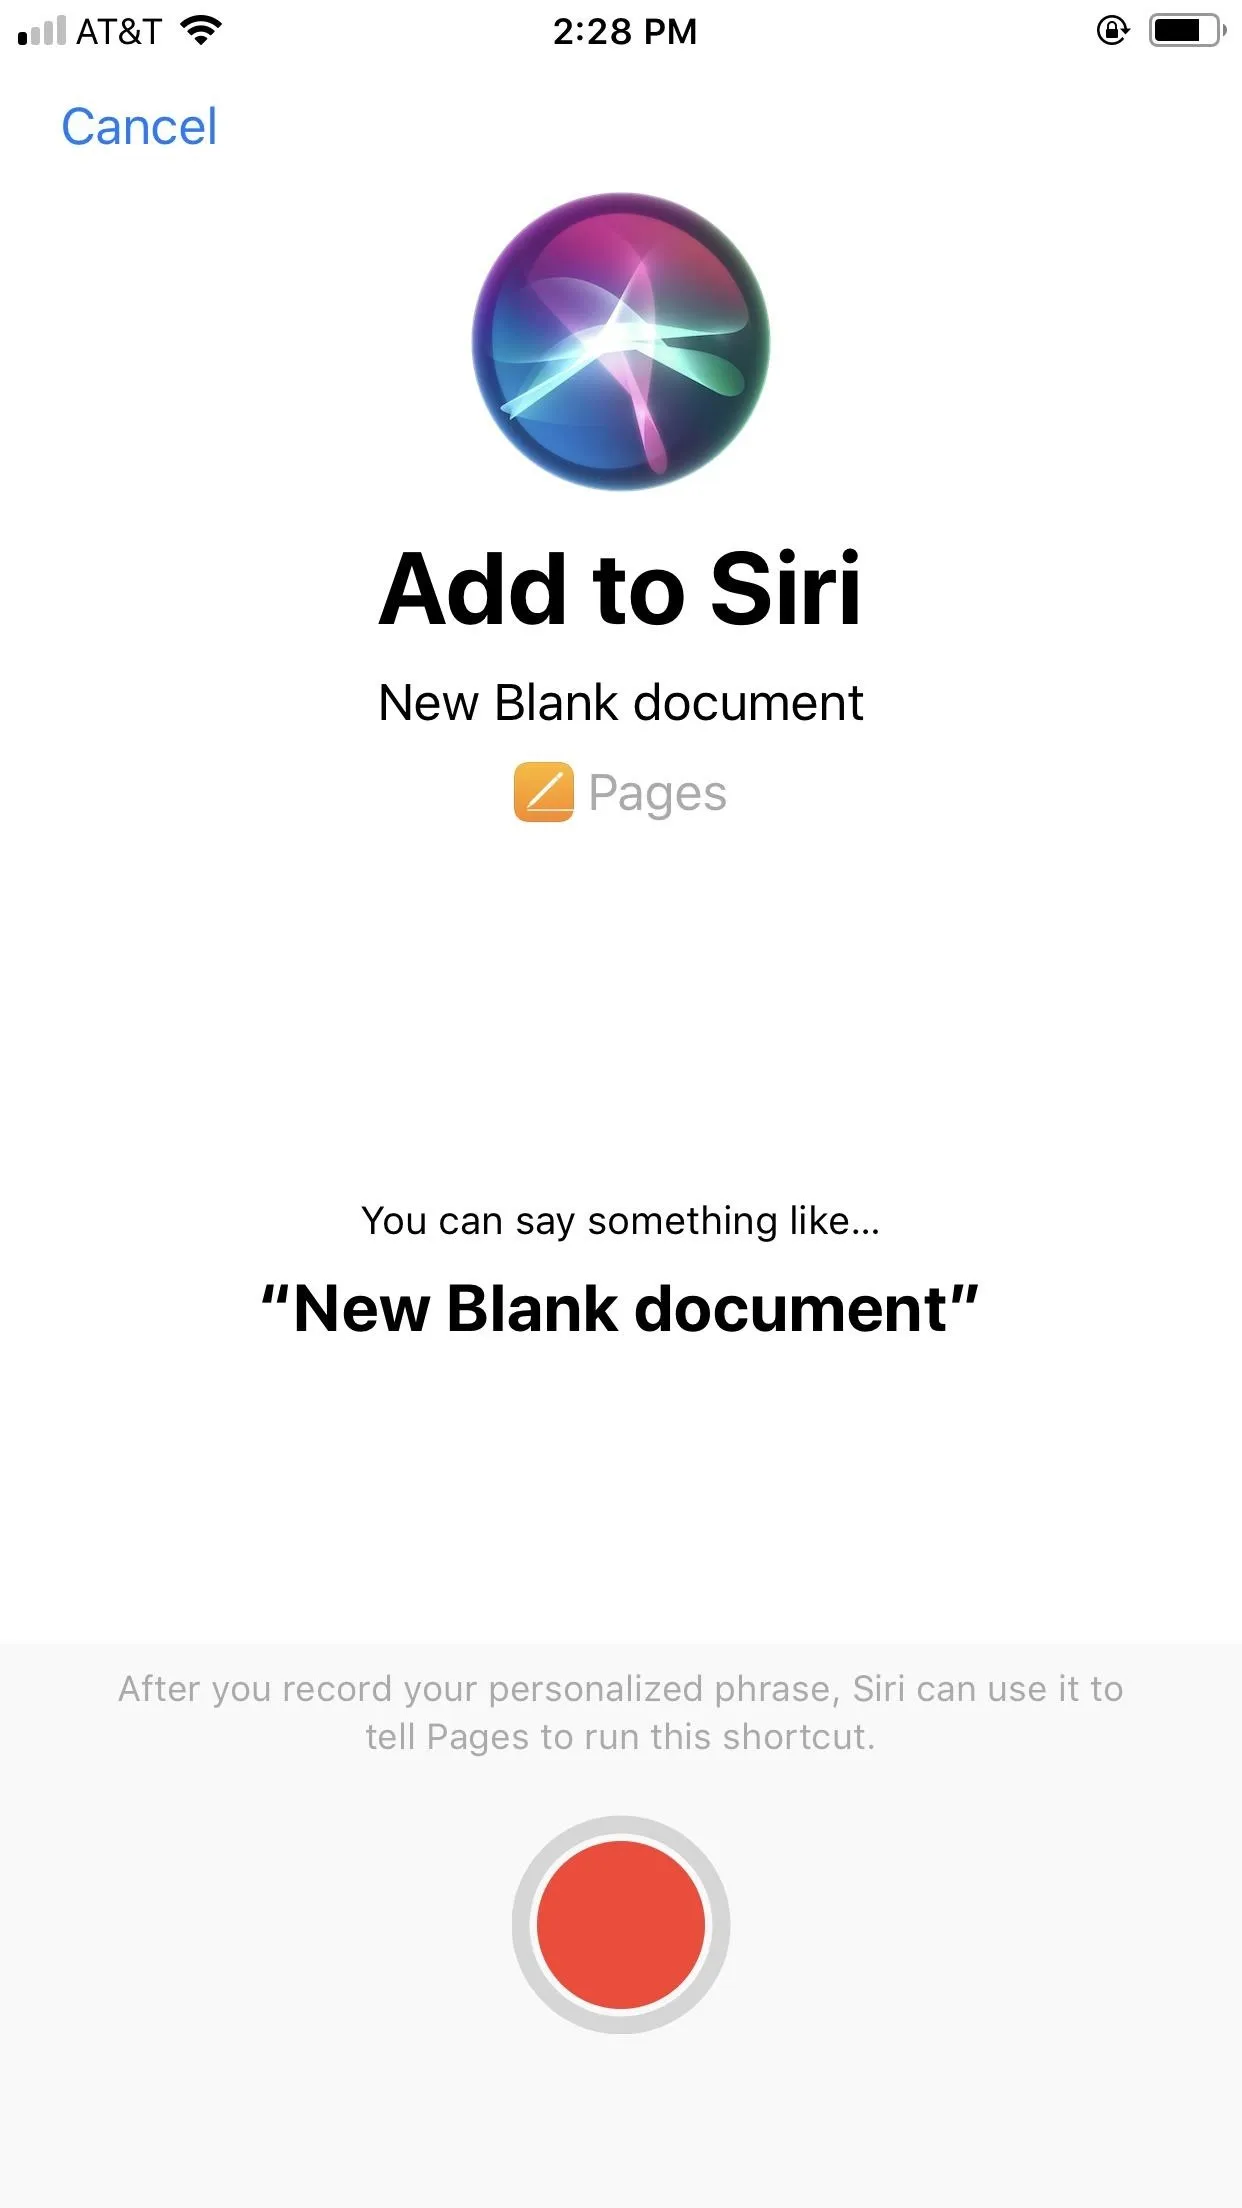
If running iOS 12, open Settings, then tap "Siri & Search." If you see "New Blank document" under Suggested Shortcuts, tap it. If not, tap "All Shortcuts" instead to find and select it. Next, either record or type a command here, depending on whether you have "Type to Siri" enabled or not. If Siri didn't hear you just right, you could tap "Re-Record Phrase" to do just that. Tap "Done" when finished.


Siri Suggested Shortcuts in iOS 13
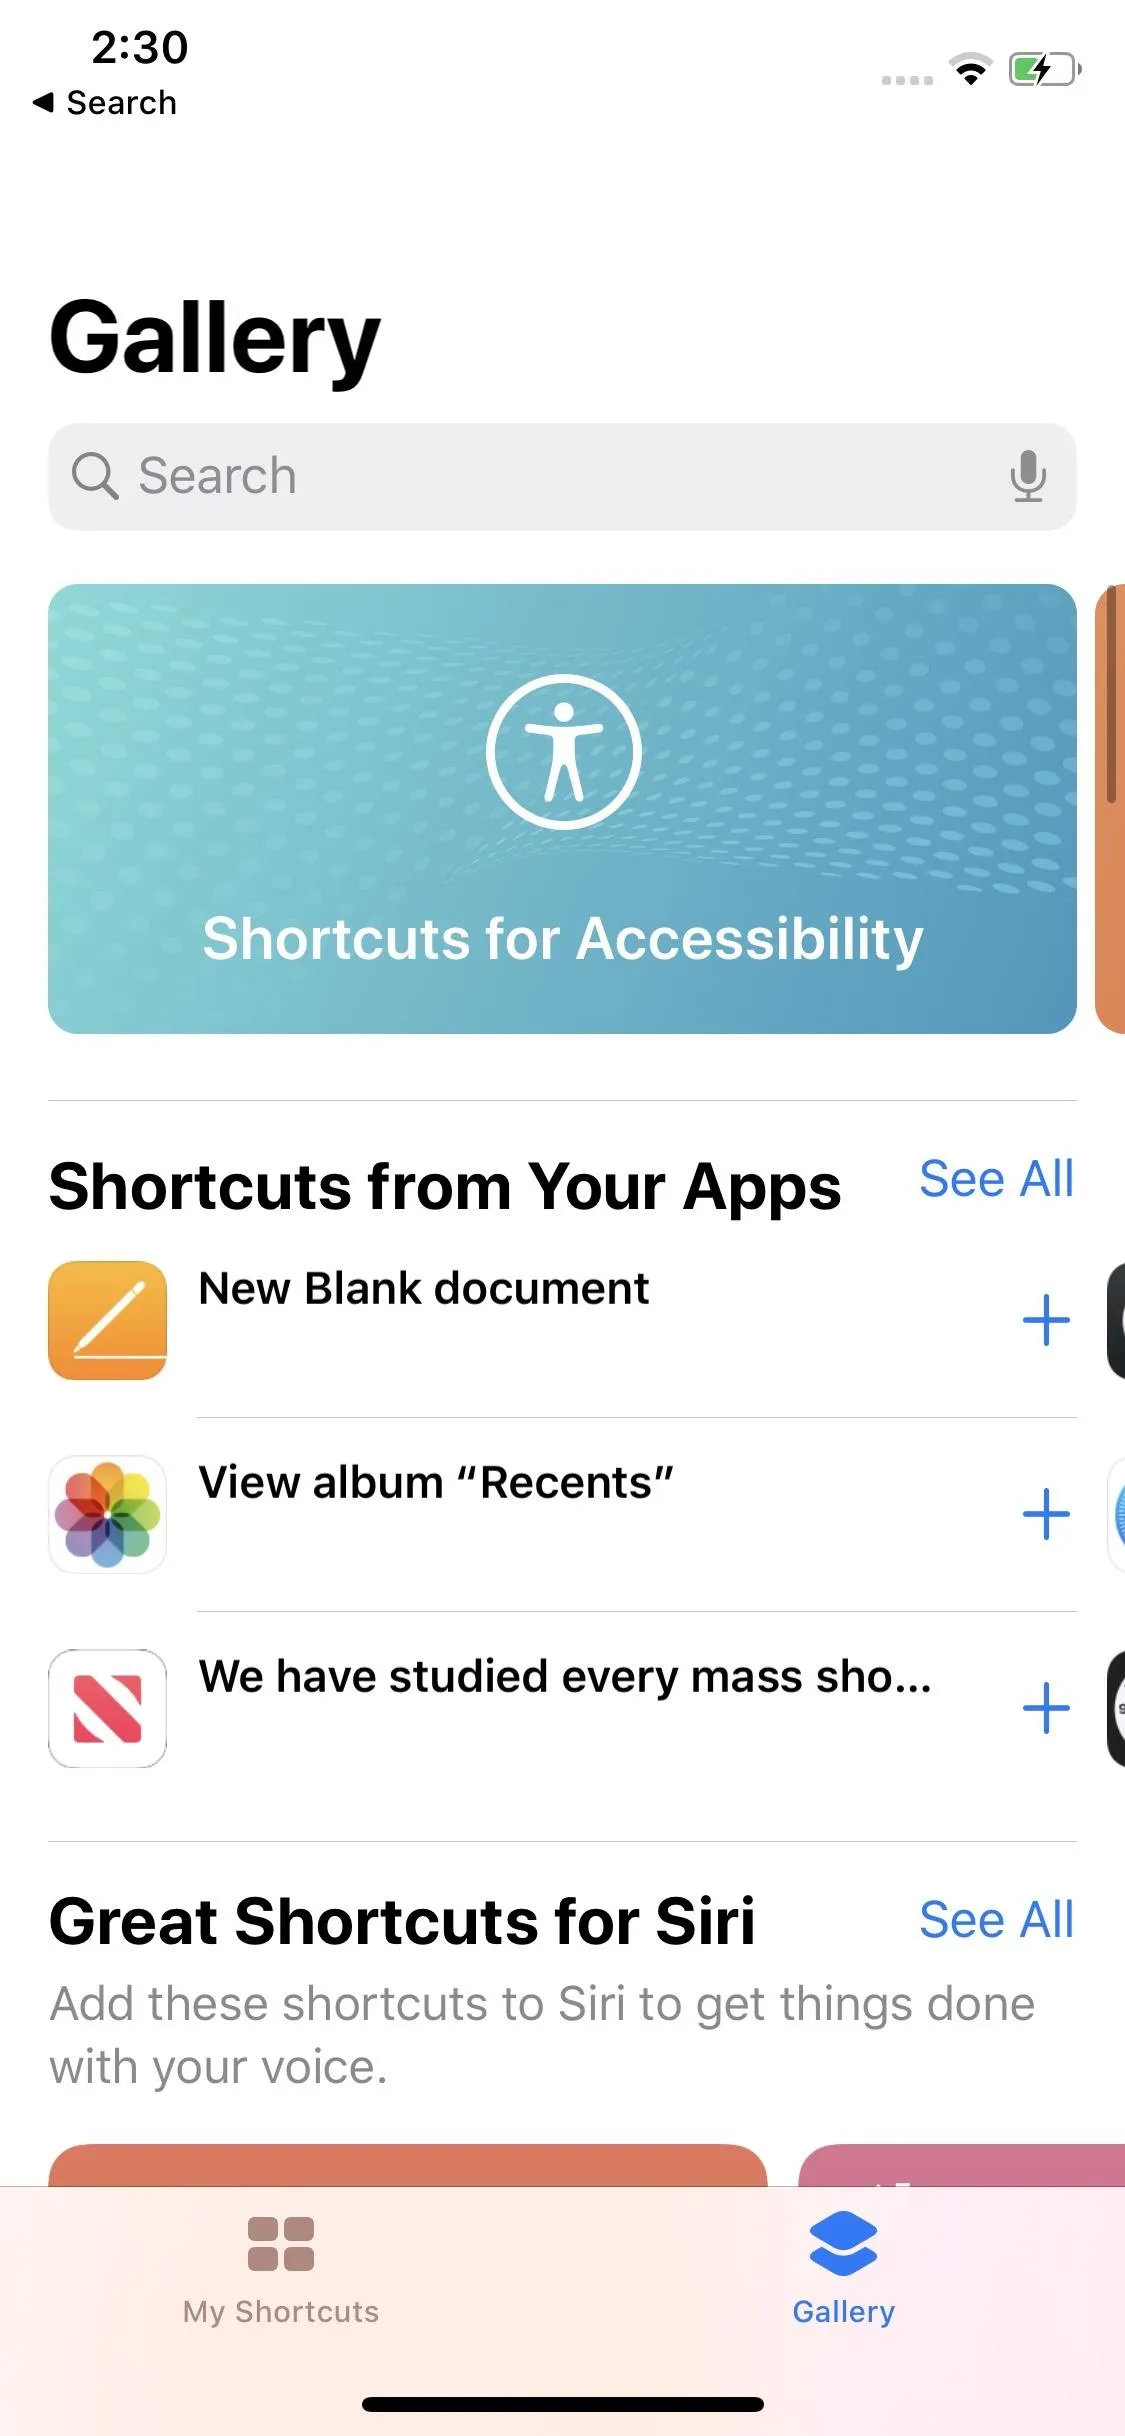
If you're running iOS 13, you'll find Siri Suggestions in the Shortcuts app. So open Shortcuts, then tap "Gallery" at the bottom of the display. You'll see Apple's default phrase for the shortcut "New Blank document" in the Shortcuts from Your Apps section. If you don't see it right away, tap "See All" to find it. Once you have it, select it.
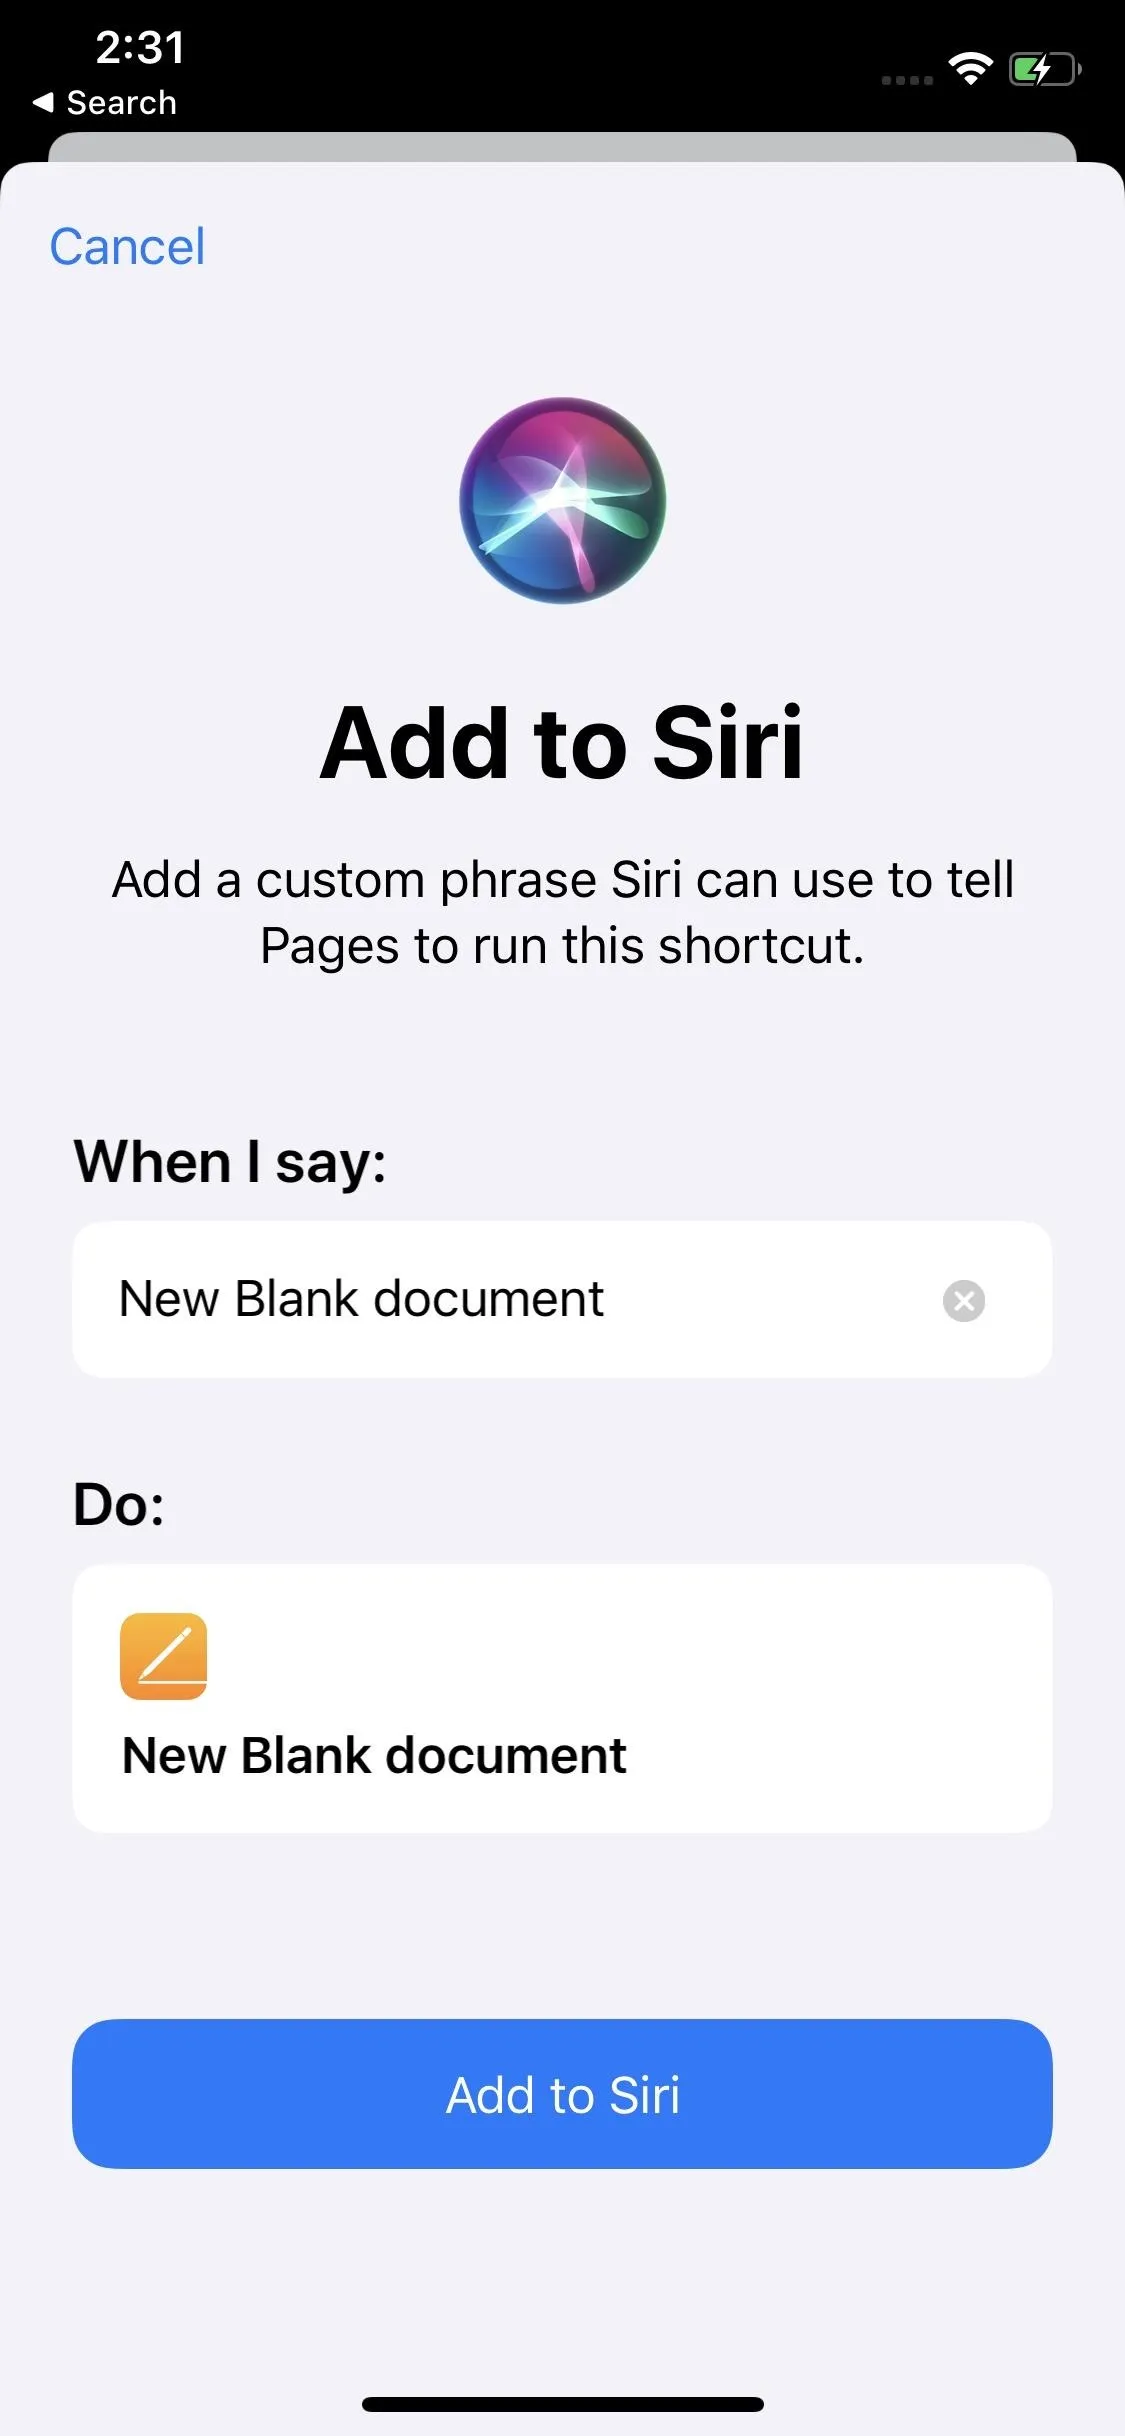
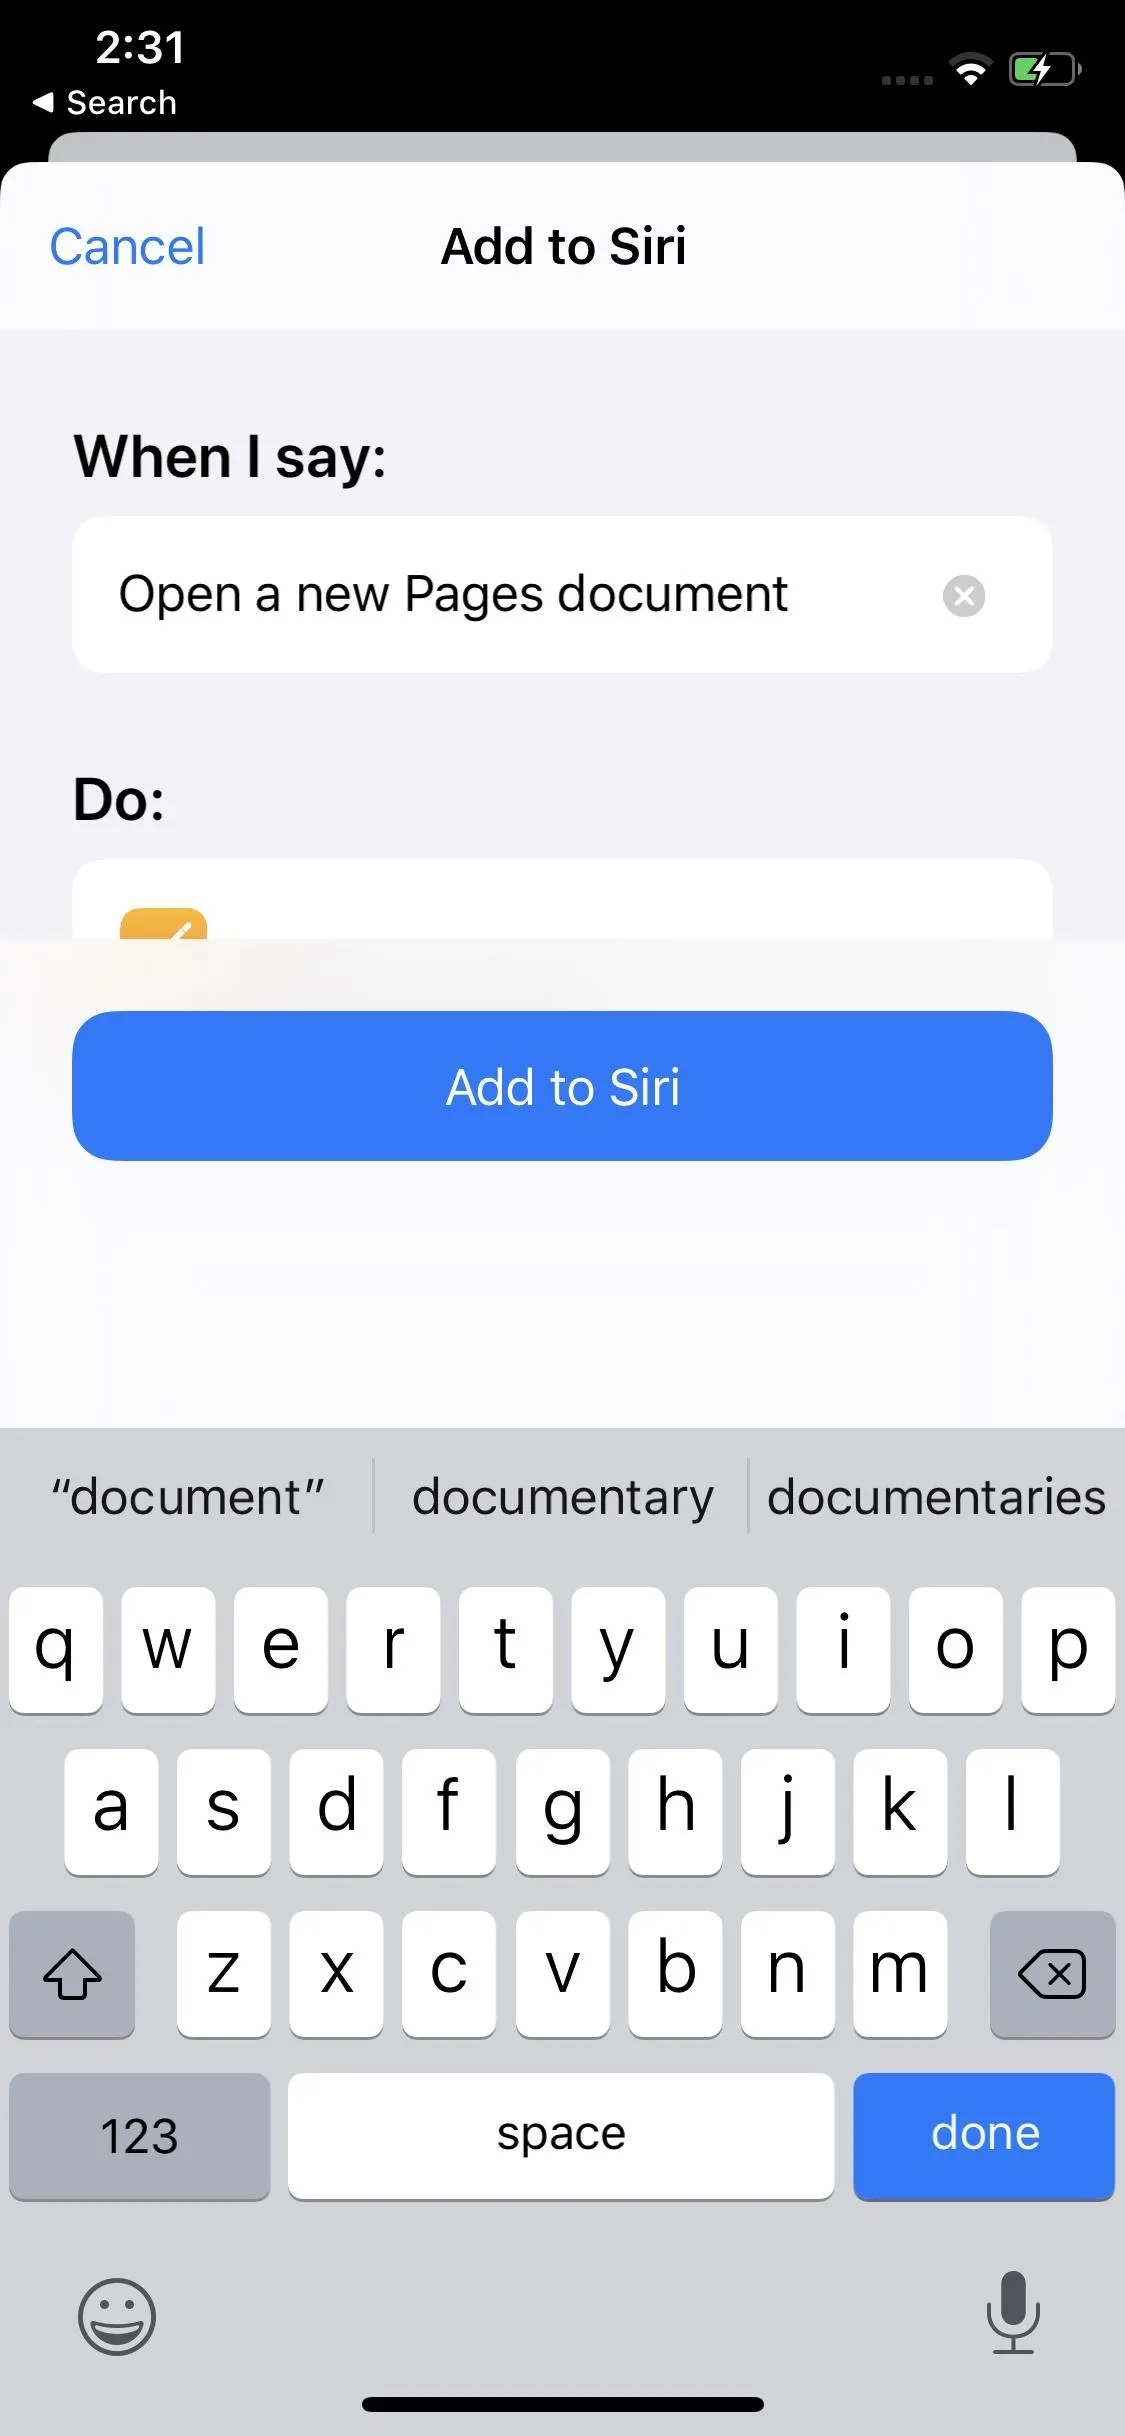
"New Blank document" will, by default, be the phrase you speak to Siri, but you can customize it before creating the shortcut itself. On the Add to Siri pane, tap underneath When I say to customize the phrase to your liking. When happy with your phrase, tap "Add to Siri," and your shortcut will be saved.


Build Your Own Shortcut
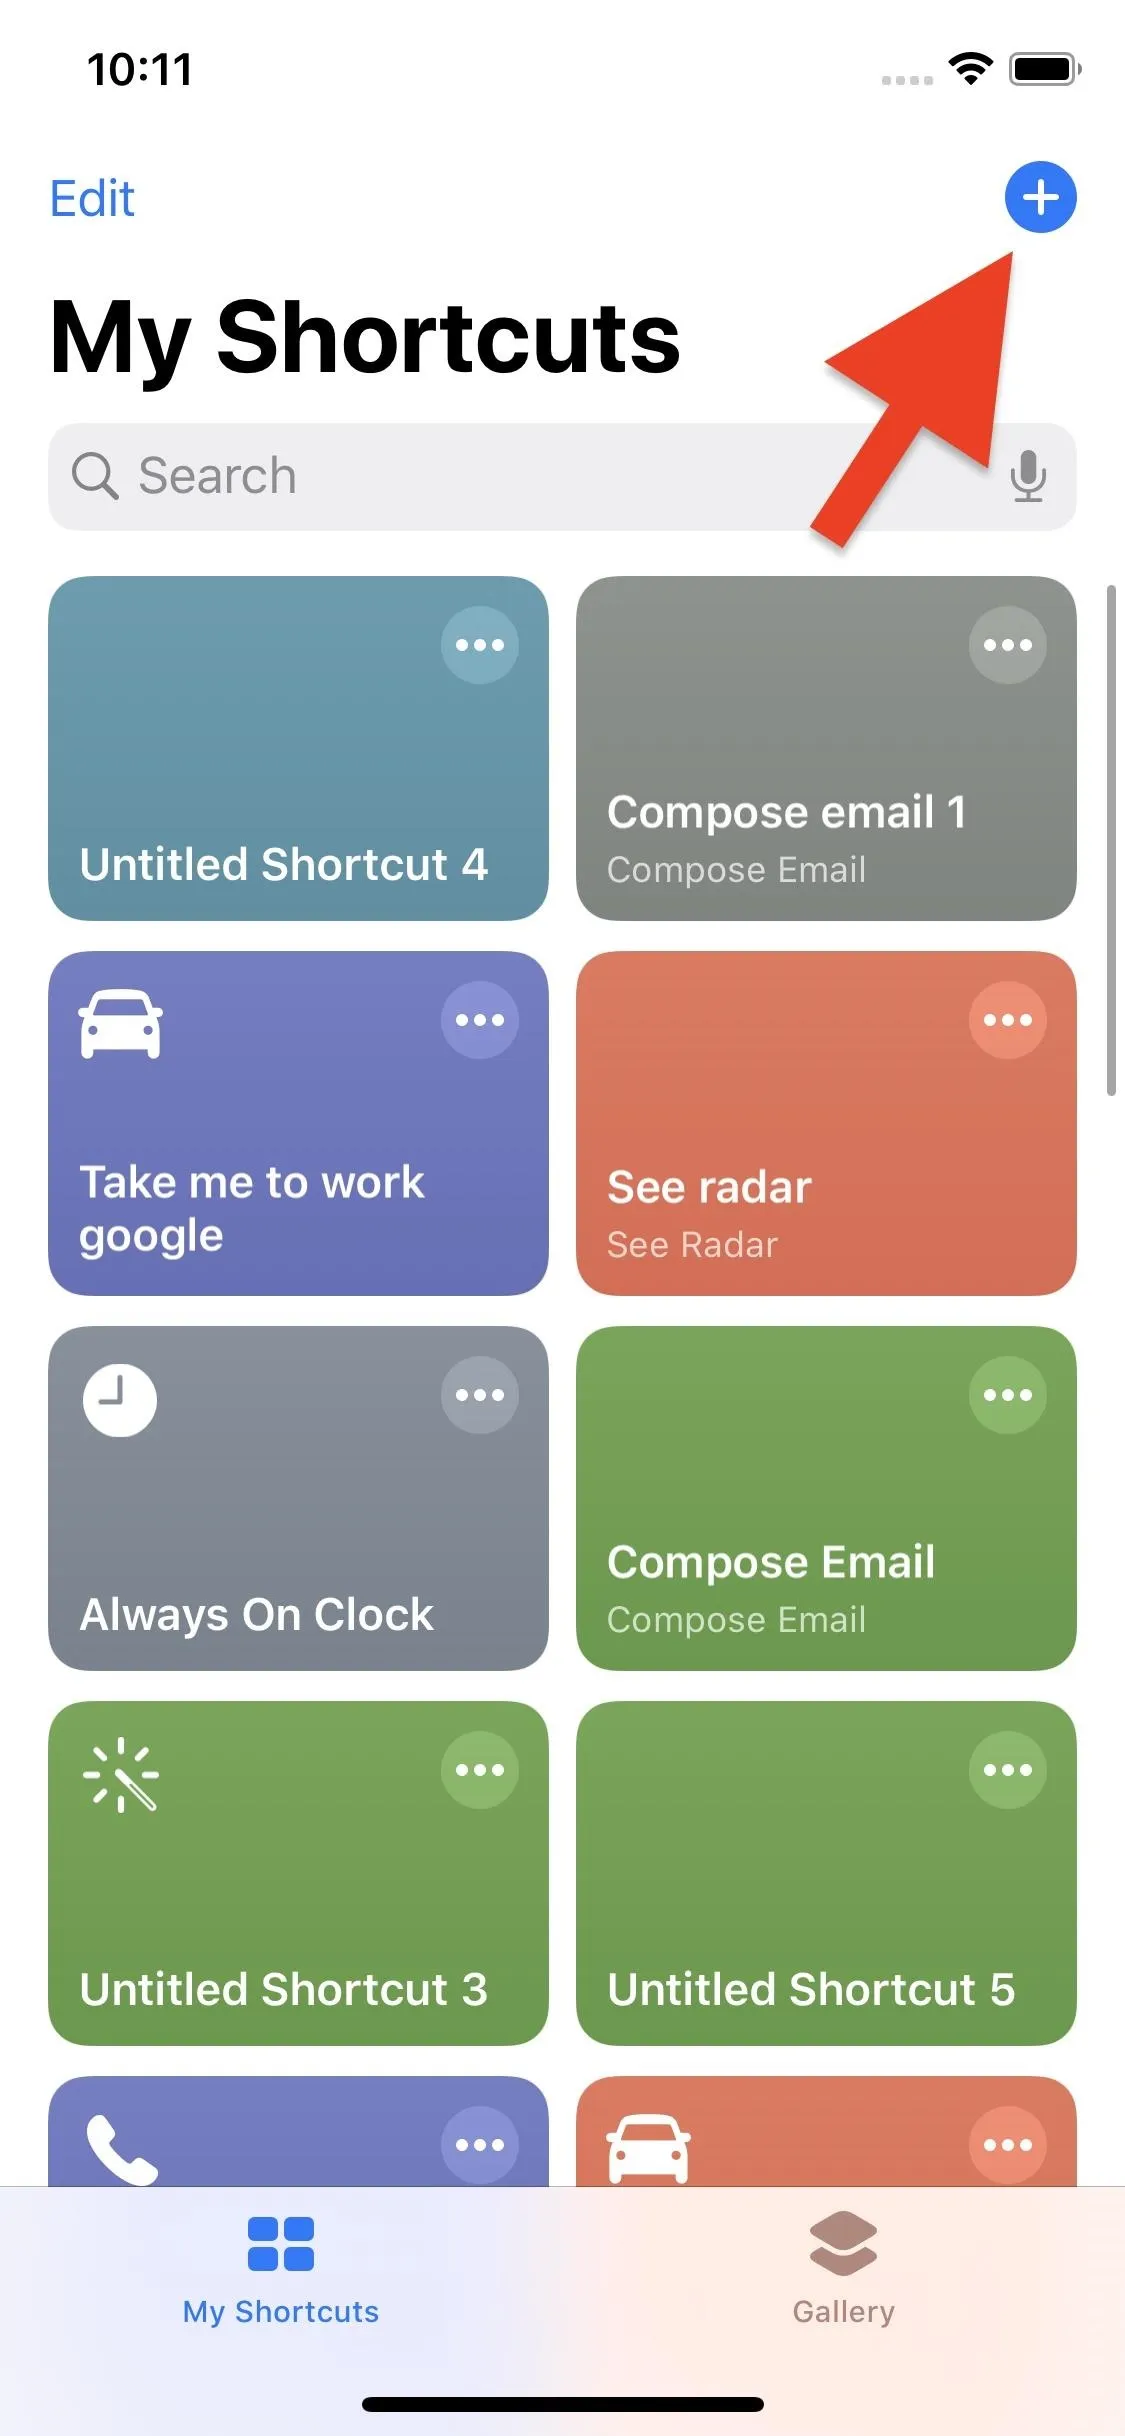
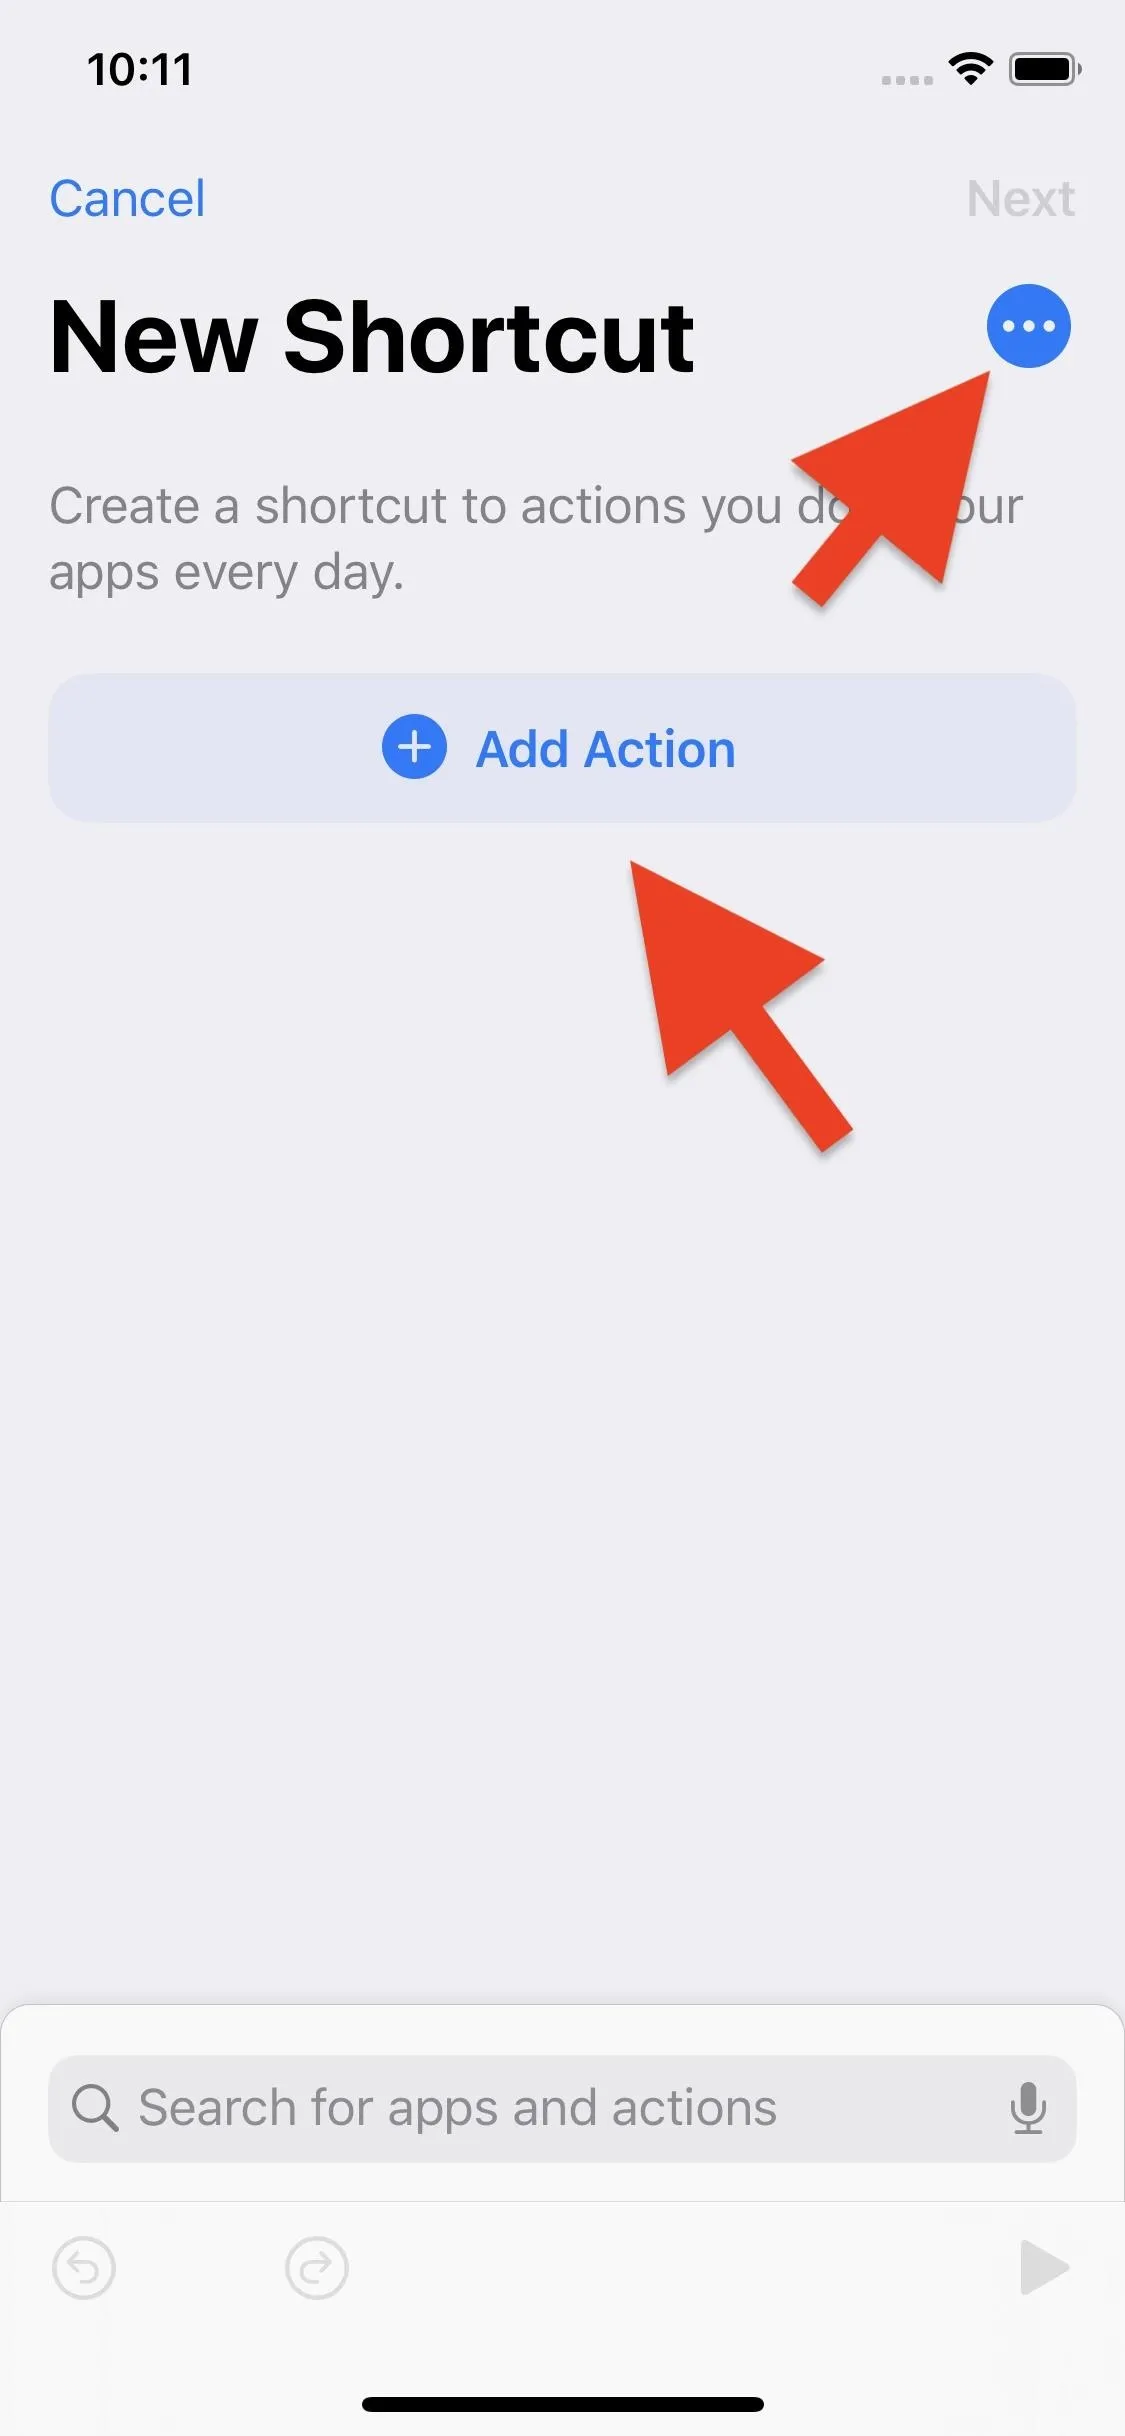
The second way to go is to create your own shortcut from scratch. Whether you're on iOS 12 or iOS 13, you'll need the Shortcuts app to do so. Fire it up, then tap the plus (+) in the top right of the "My Shortcuts" tab. Now, tap the search bar at the bottom of the display. On iOS 13, you can also tap the "(+) Add Action" button.
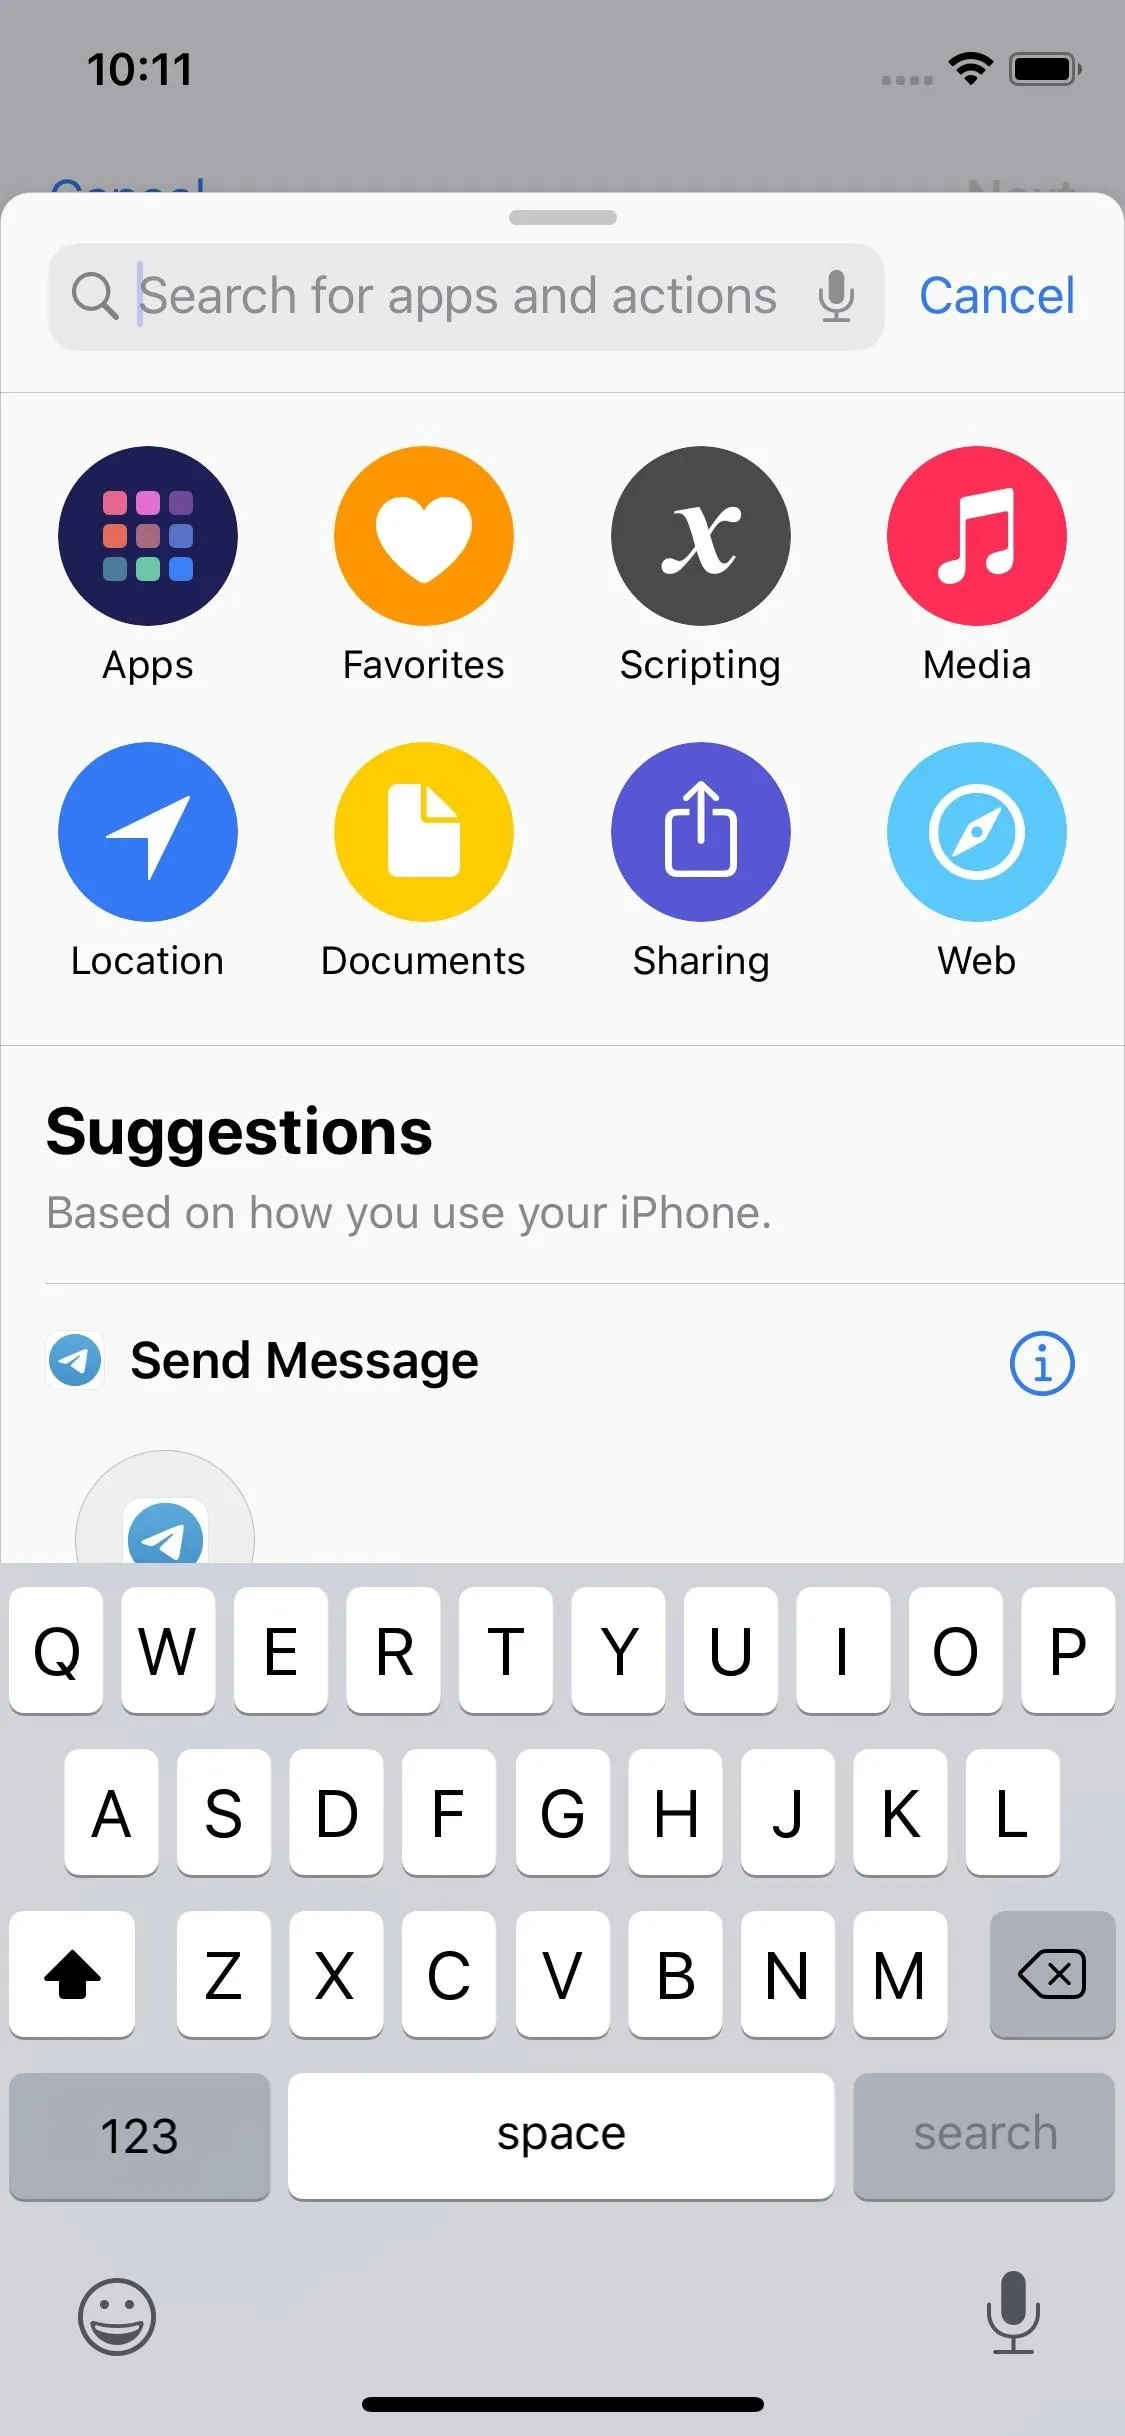


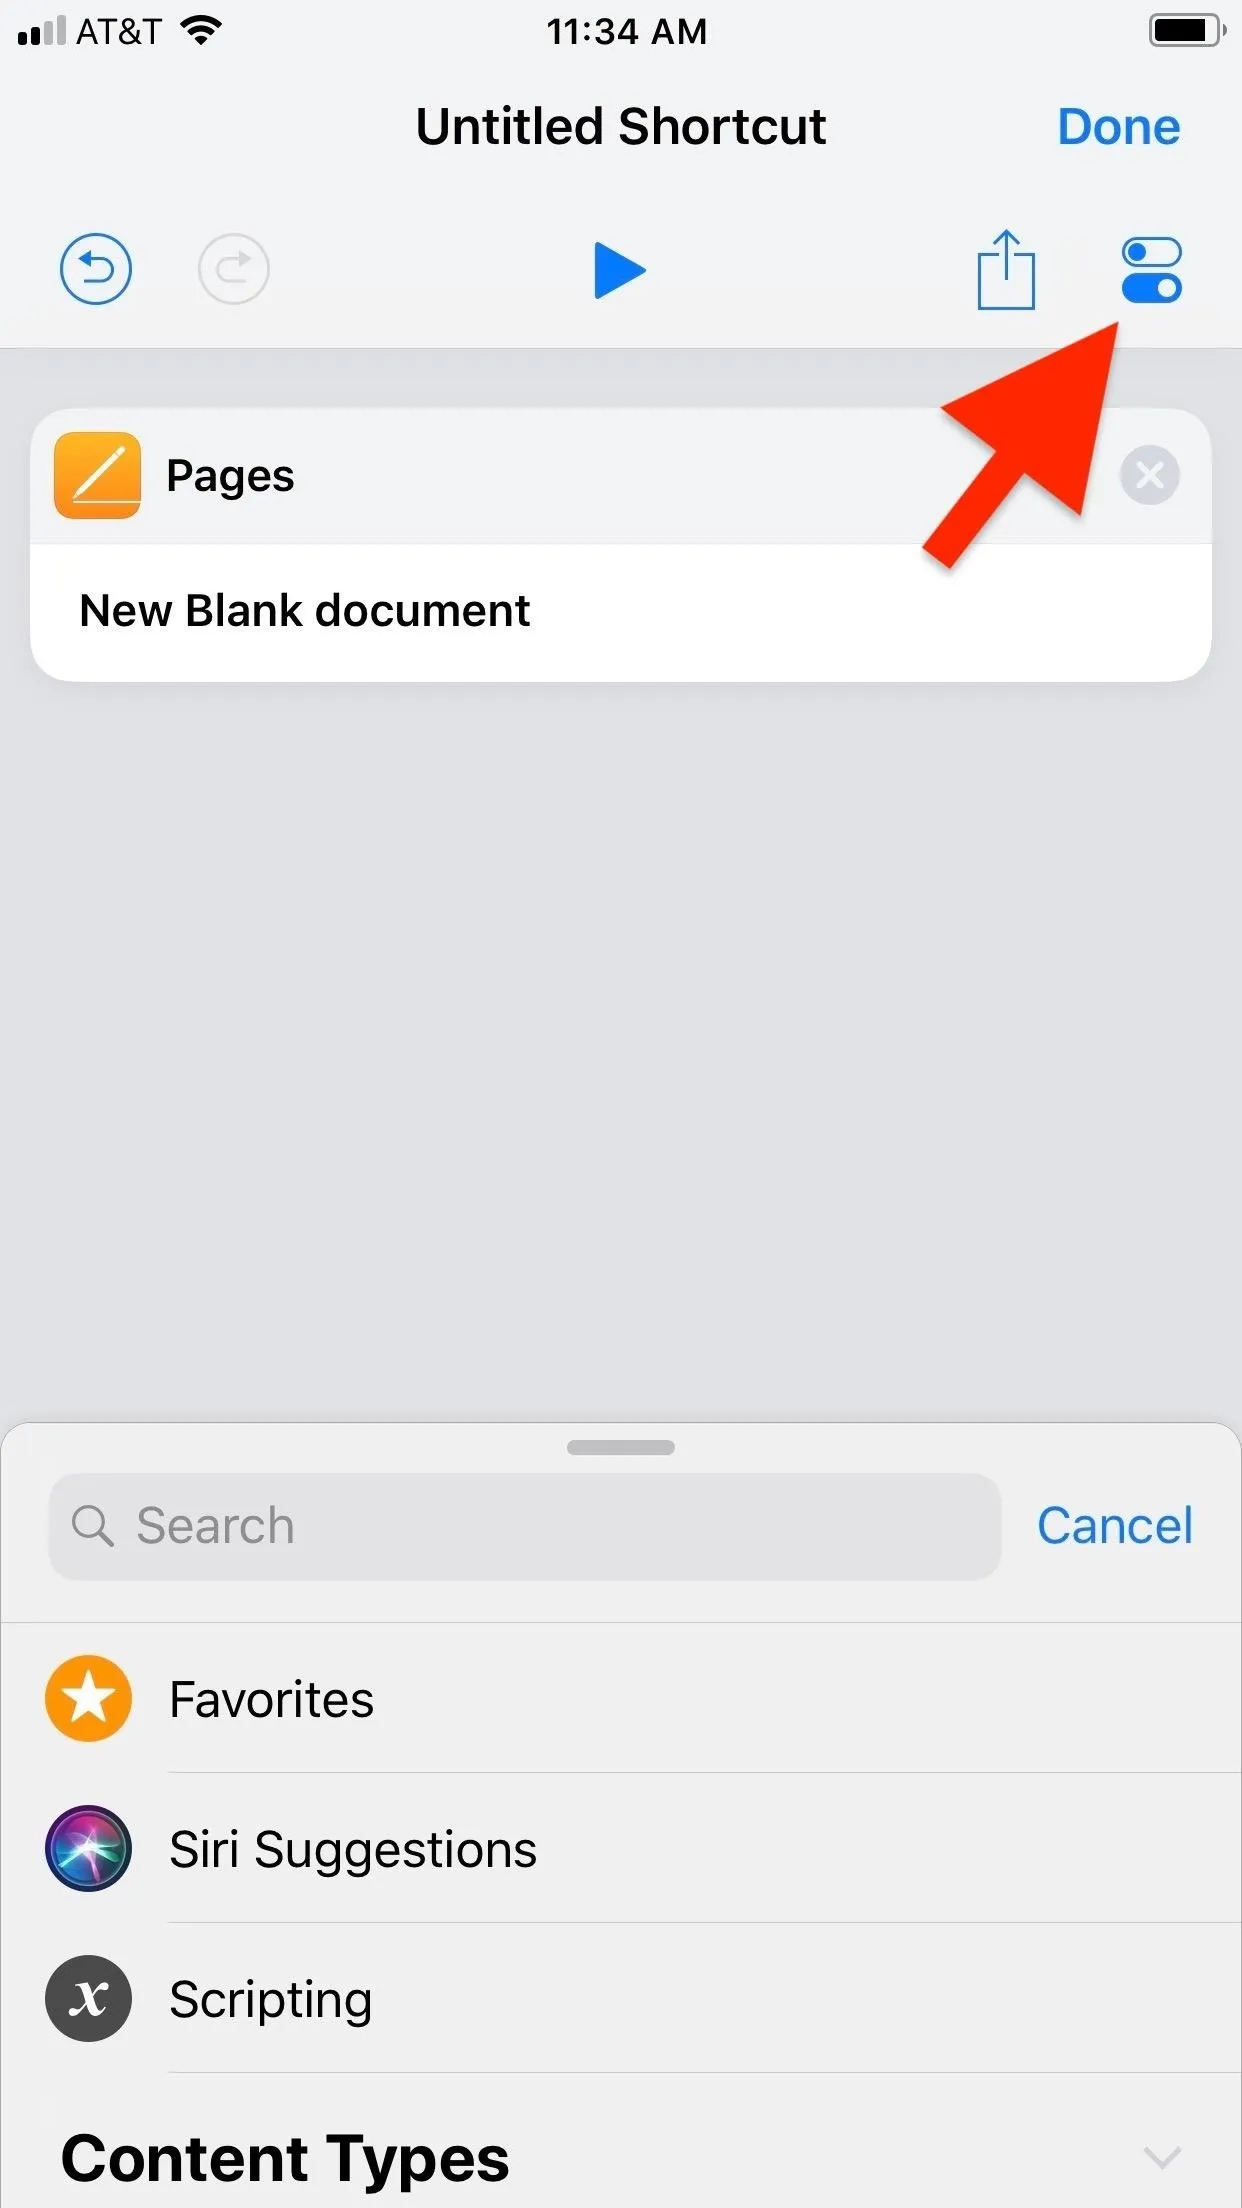
Now, search for "New Blank document." You should see it pop up with a Pages logo on the left side. Tap the action to load the command into the shortcuts editor. While you can string together any number of additional commands and actions here, let's stop now since we've already accomplished the command we set out to create.
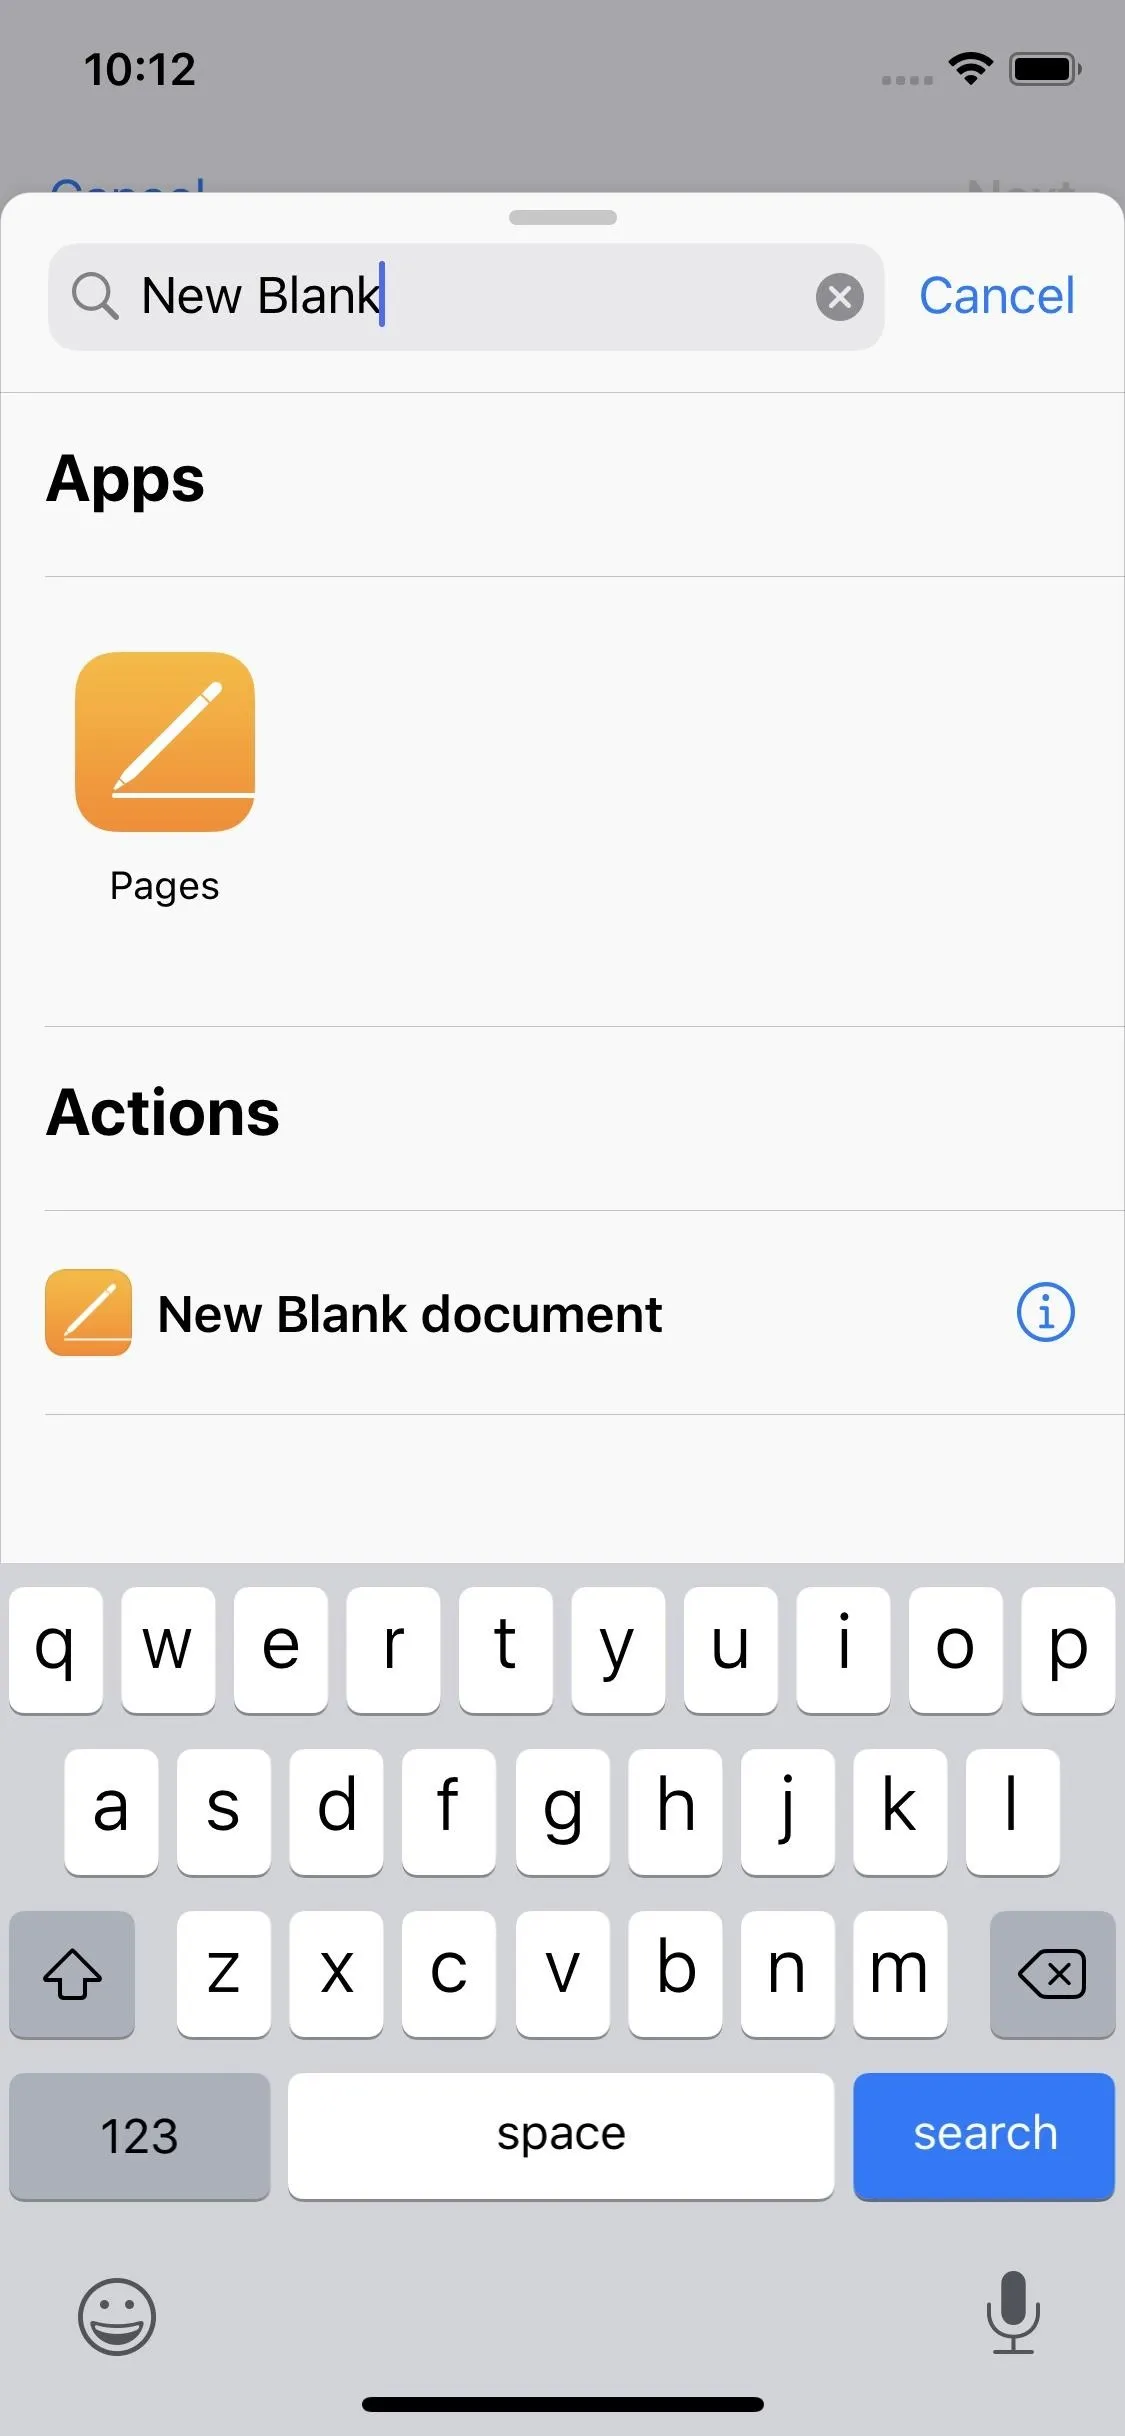
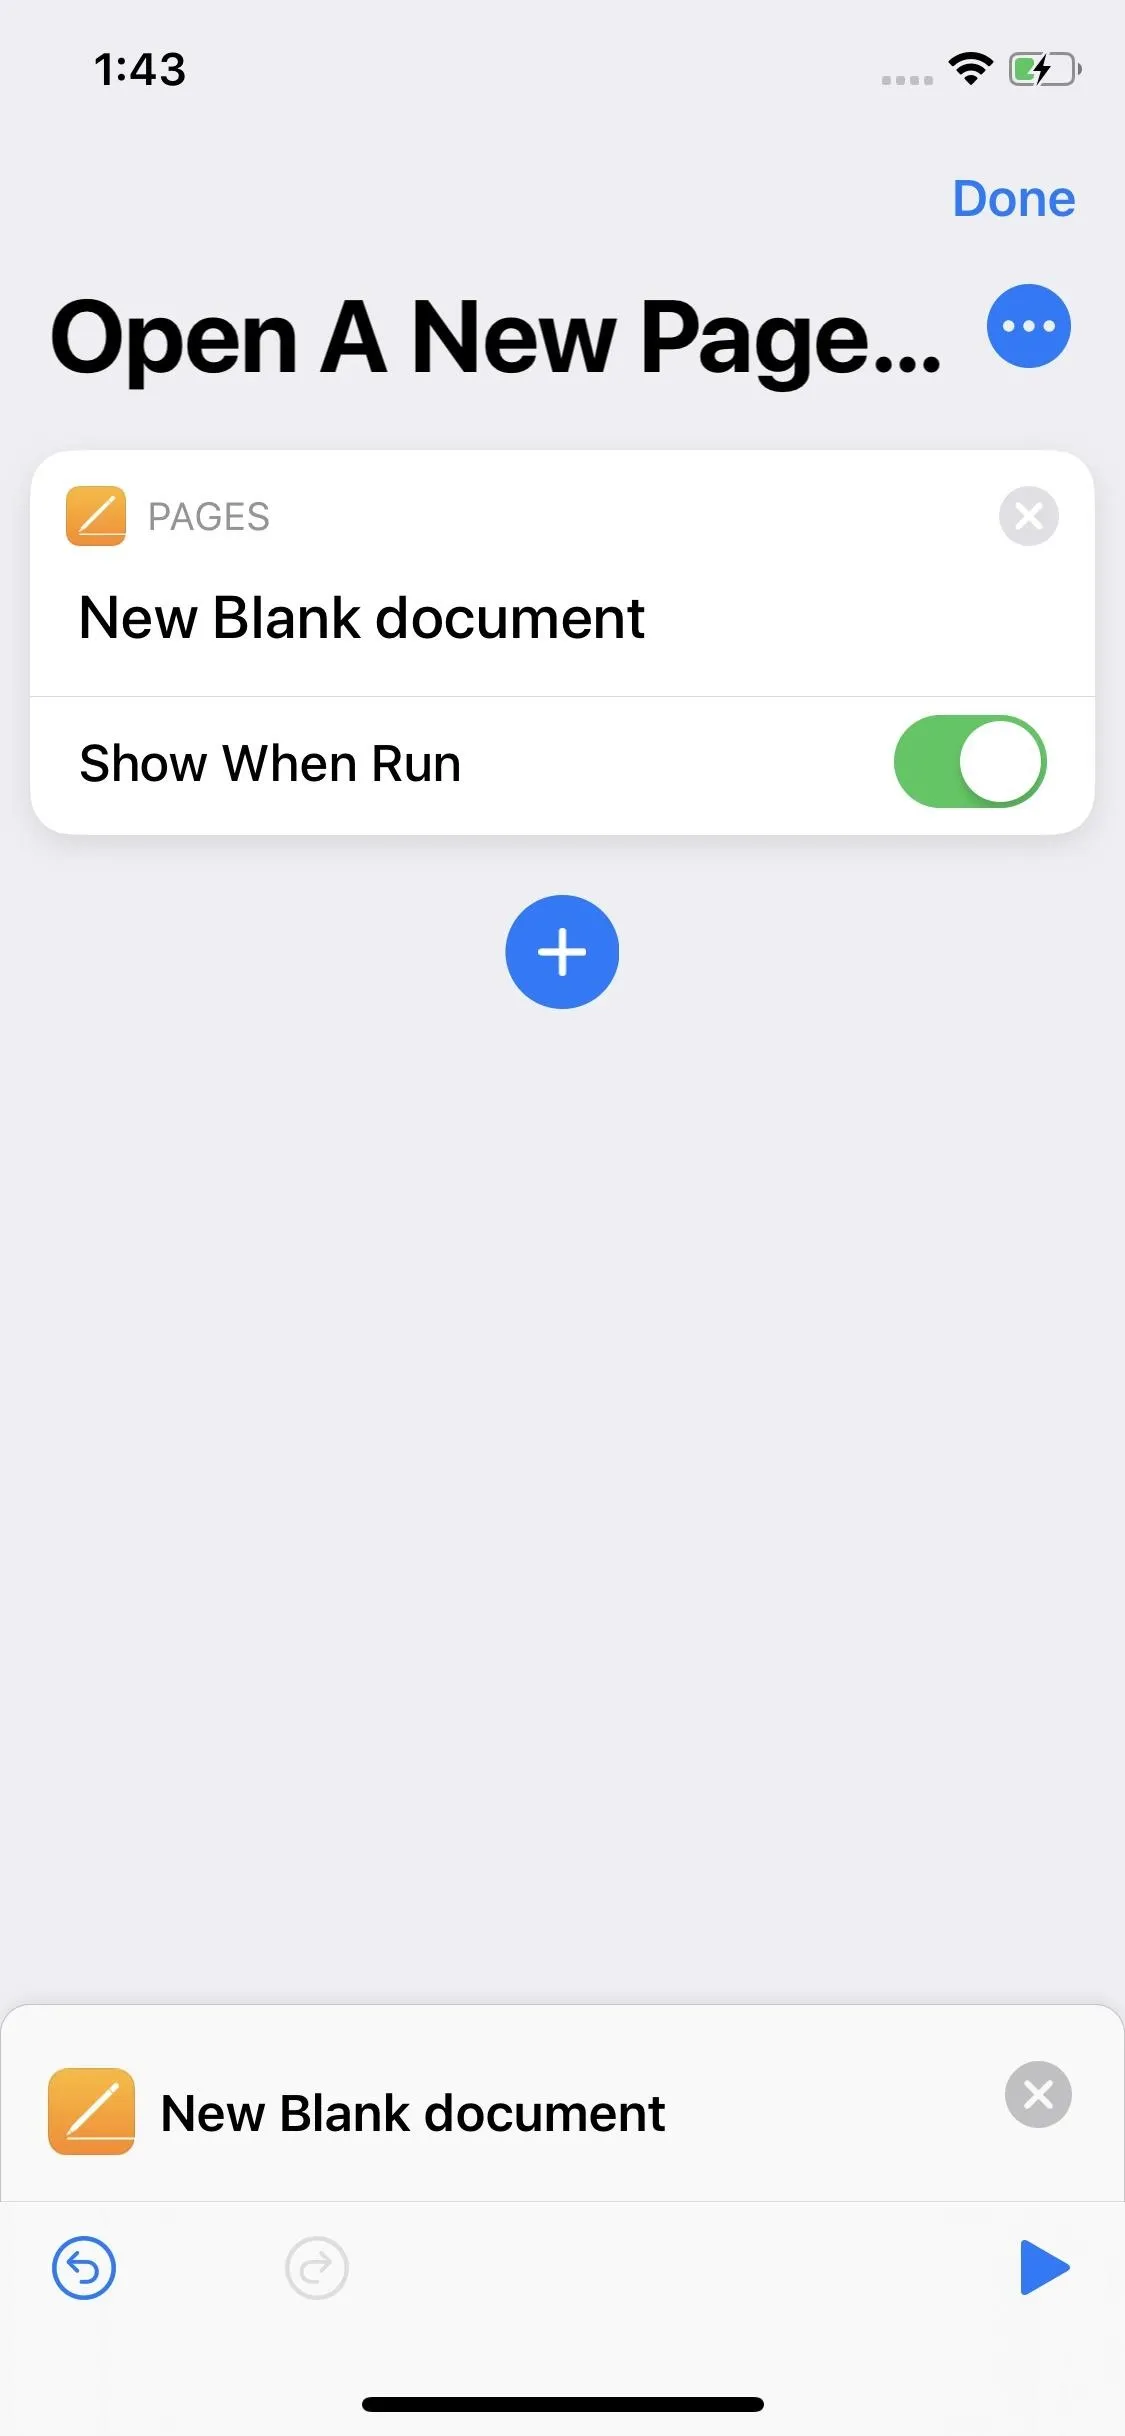


Now, here's where things change up a bit depending on which version of iOS you're running:
If Running iOS 12
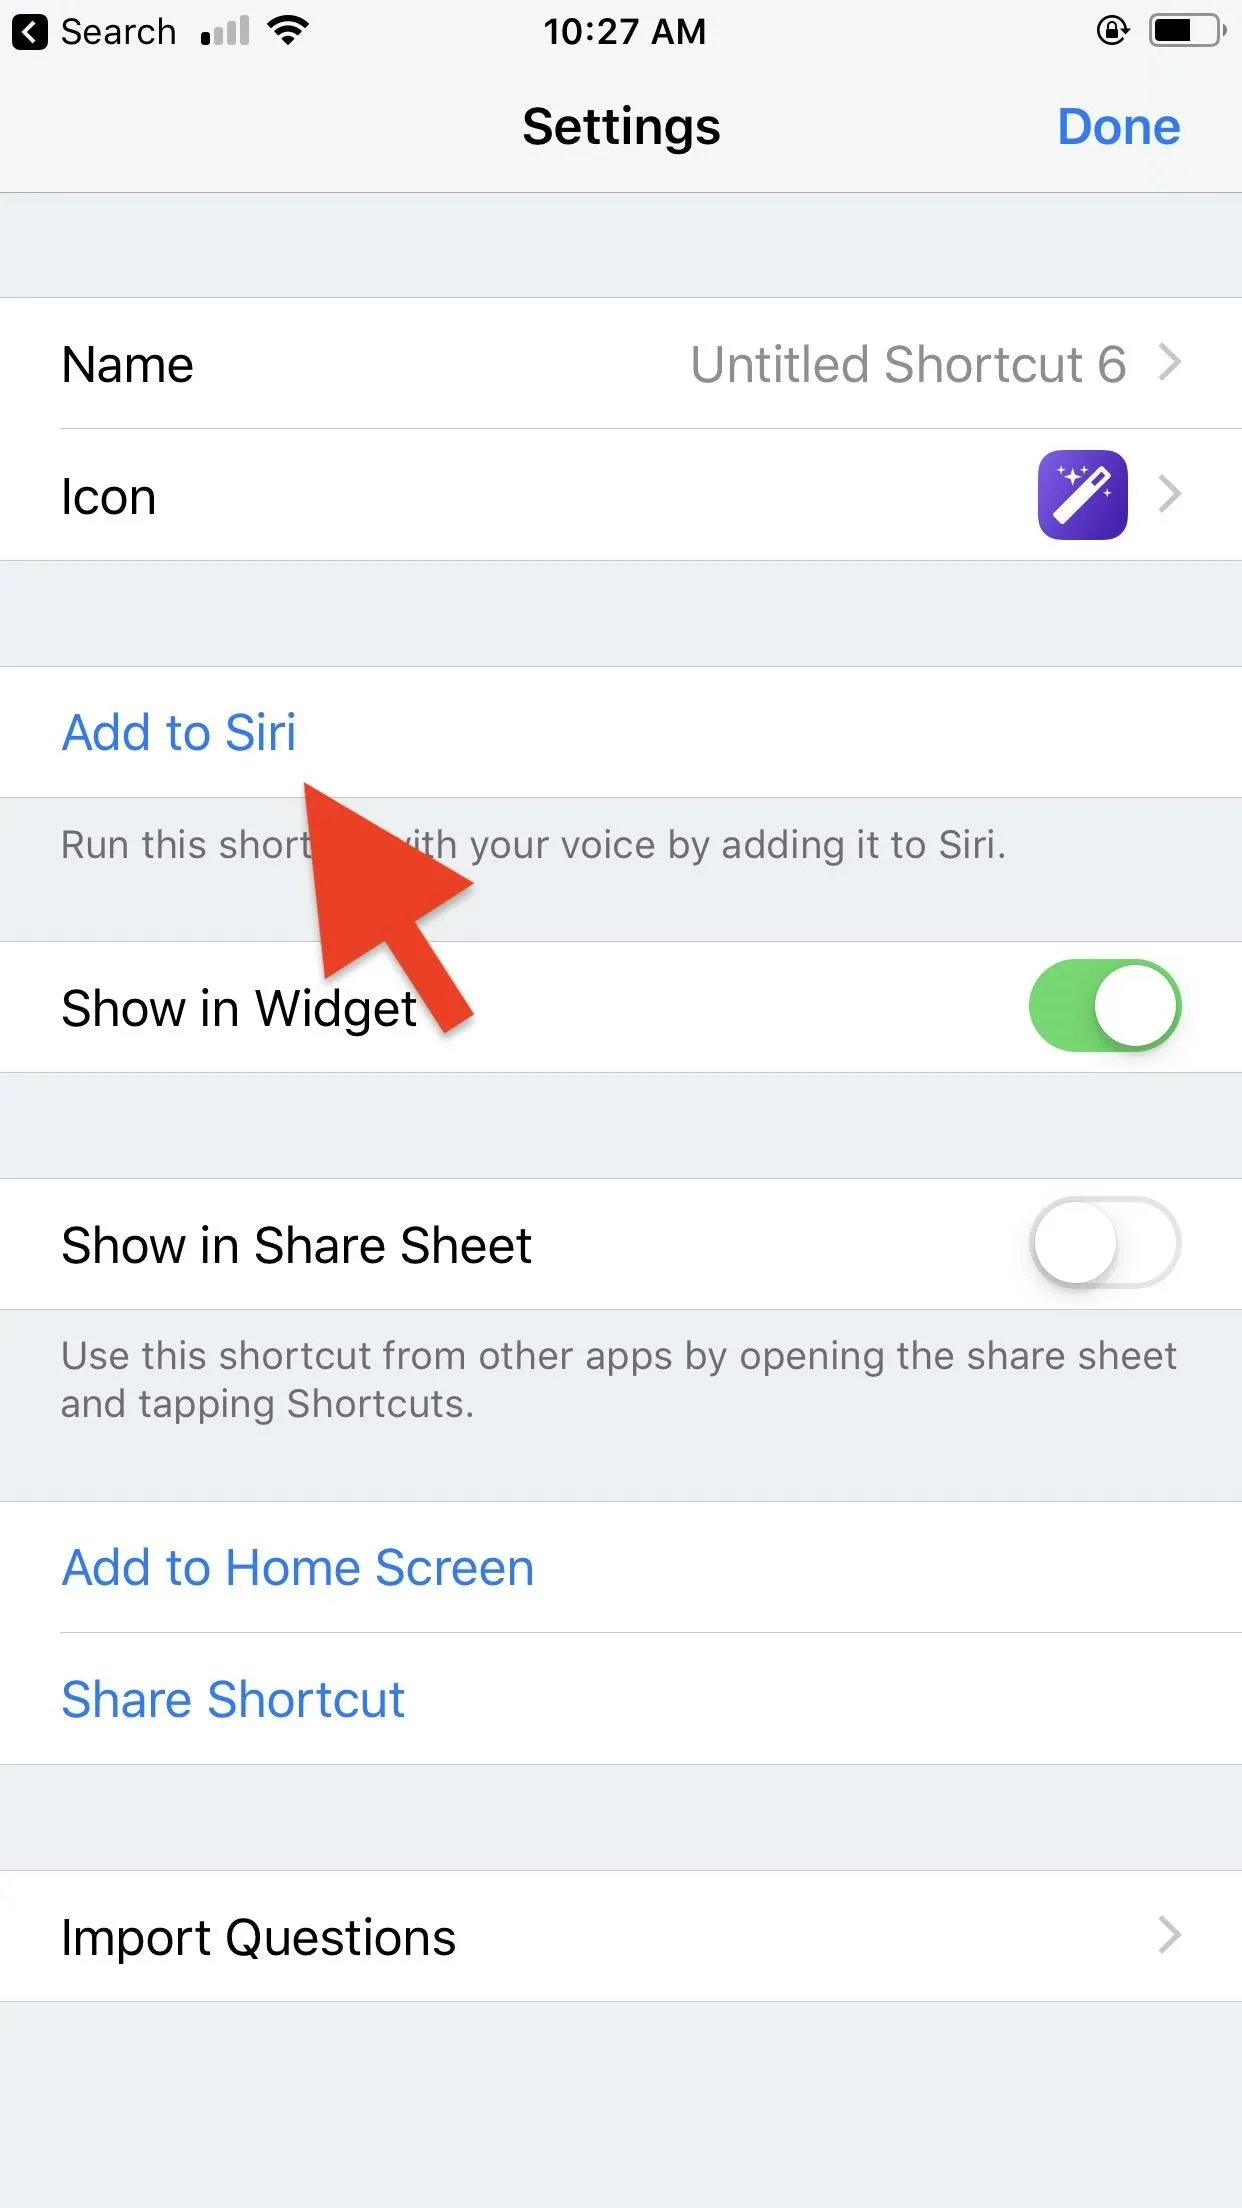
Tap the Settings button in the top right of the editor. Here, you can customize your shortcut with a name, icon, color, etc. The most important item here, however, is choosing a command for Siri to recognize.
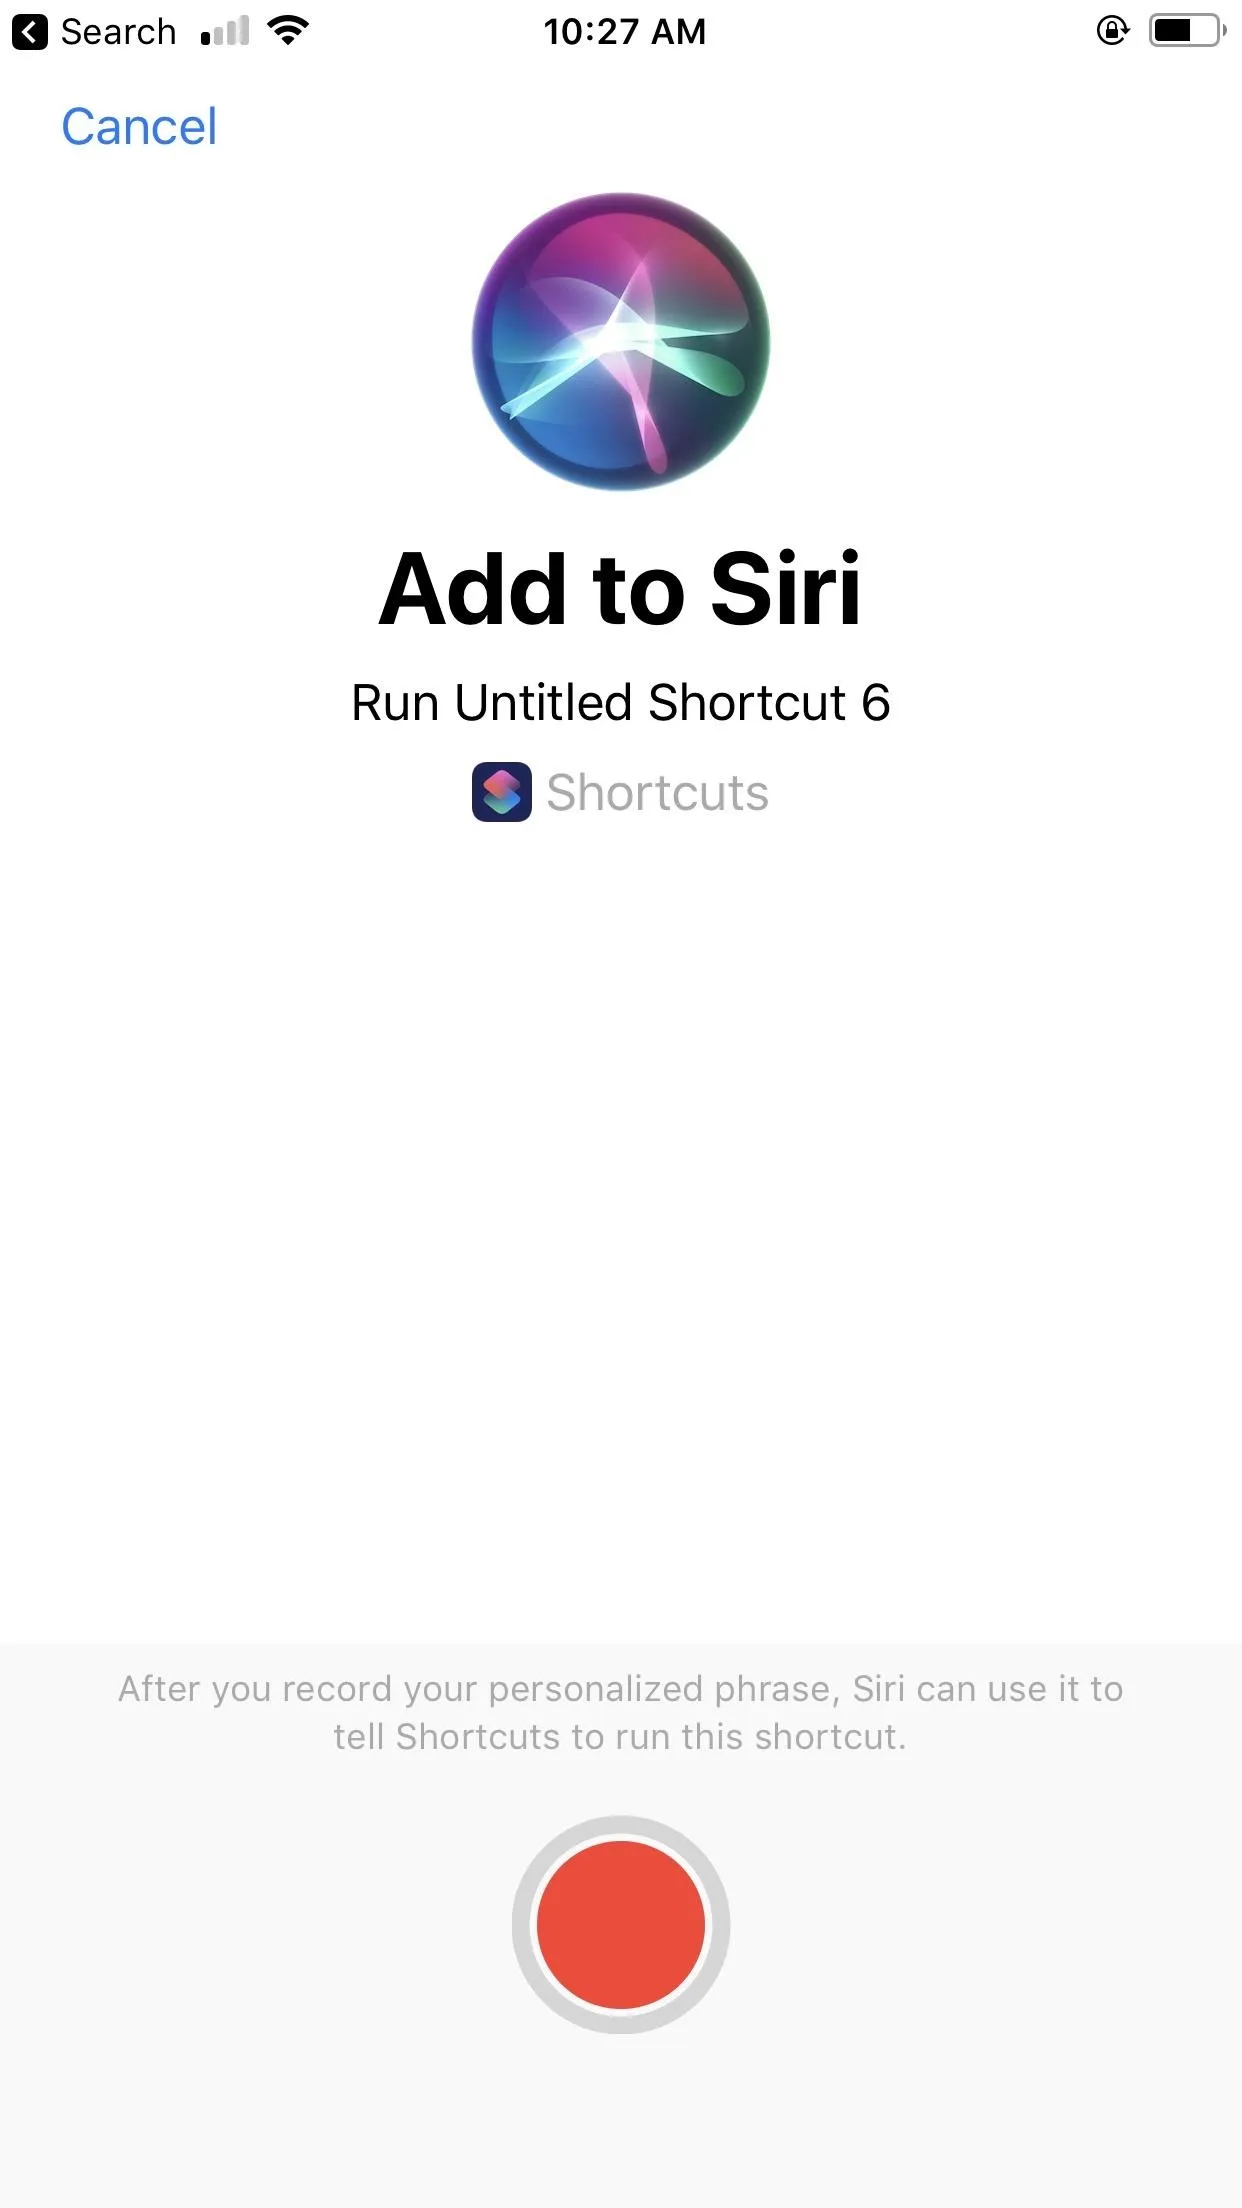
Tap "Add to Siri," then either record or type a command here, again depending on whether you have "Type to Siri" enabled or not. As with Option 1, you could tap "Re-Record Phrase" if Siri didn't get it quite right. When finished, tap "Done," then tap "Done" again to save the shortcut.


If Running iOS 13
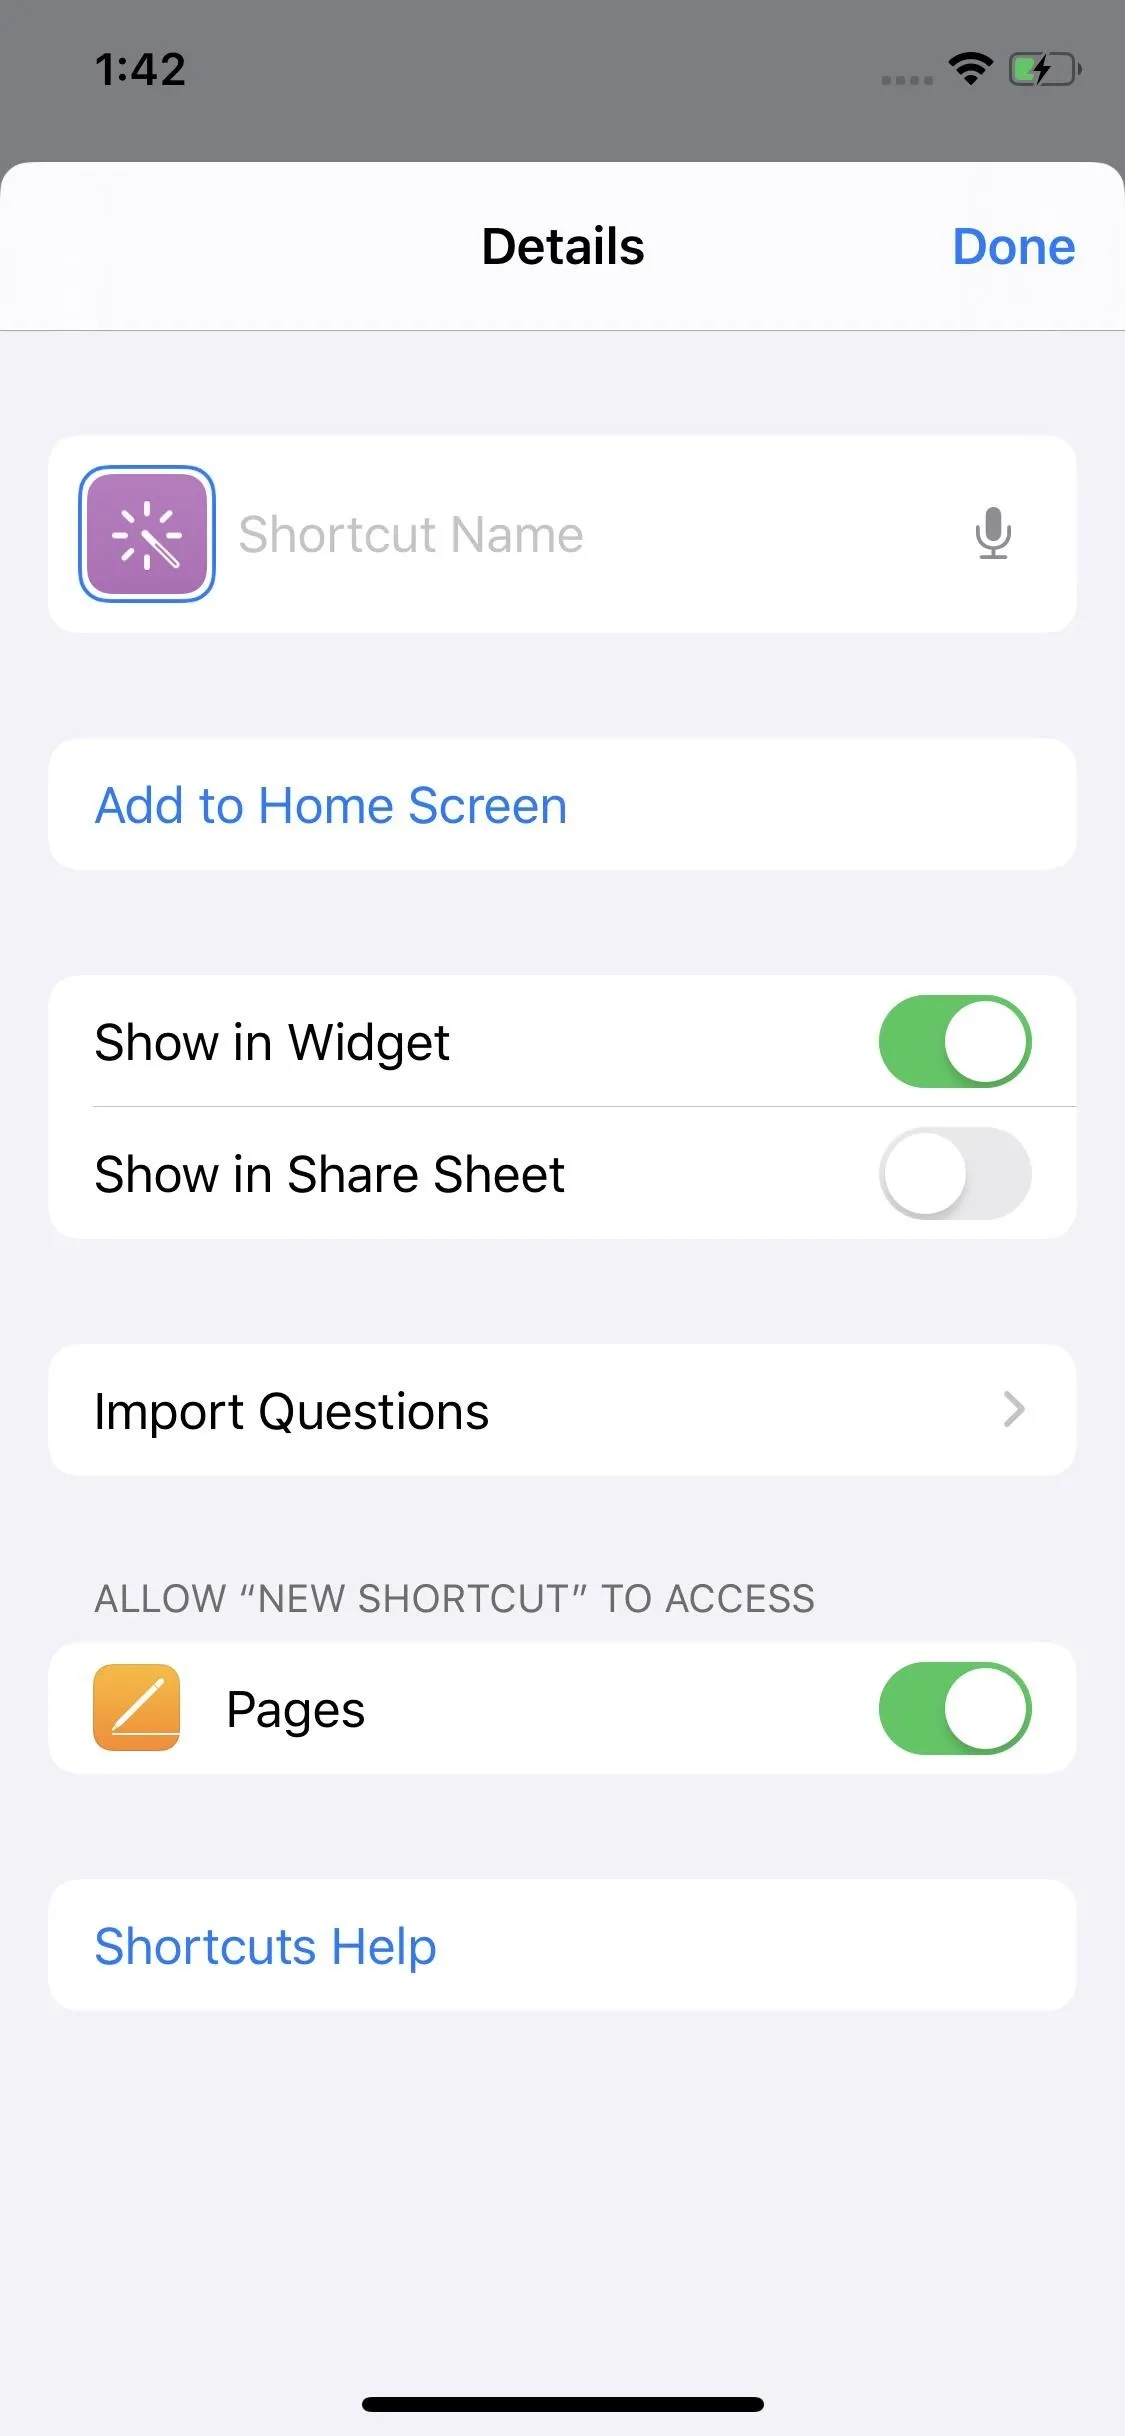
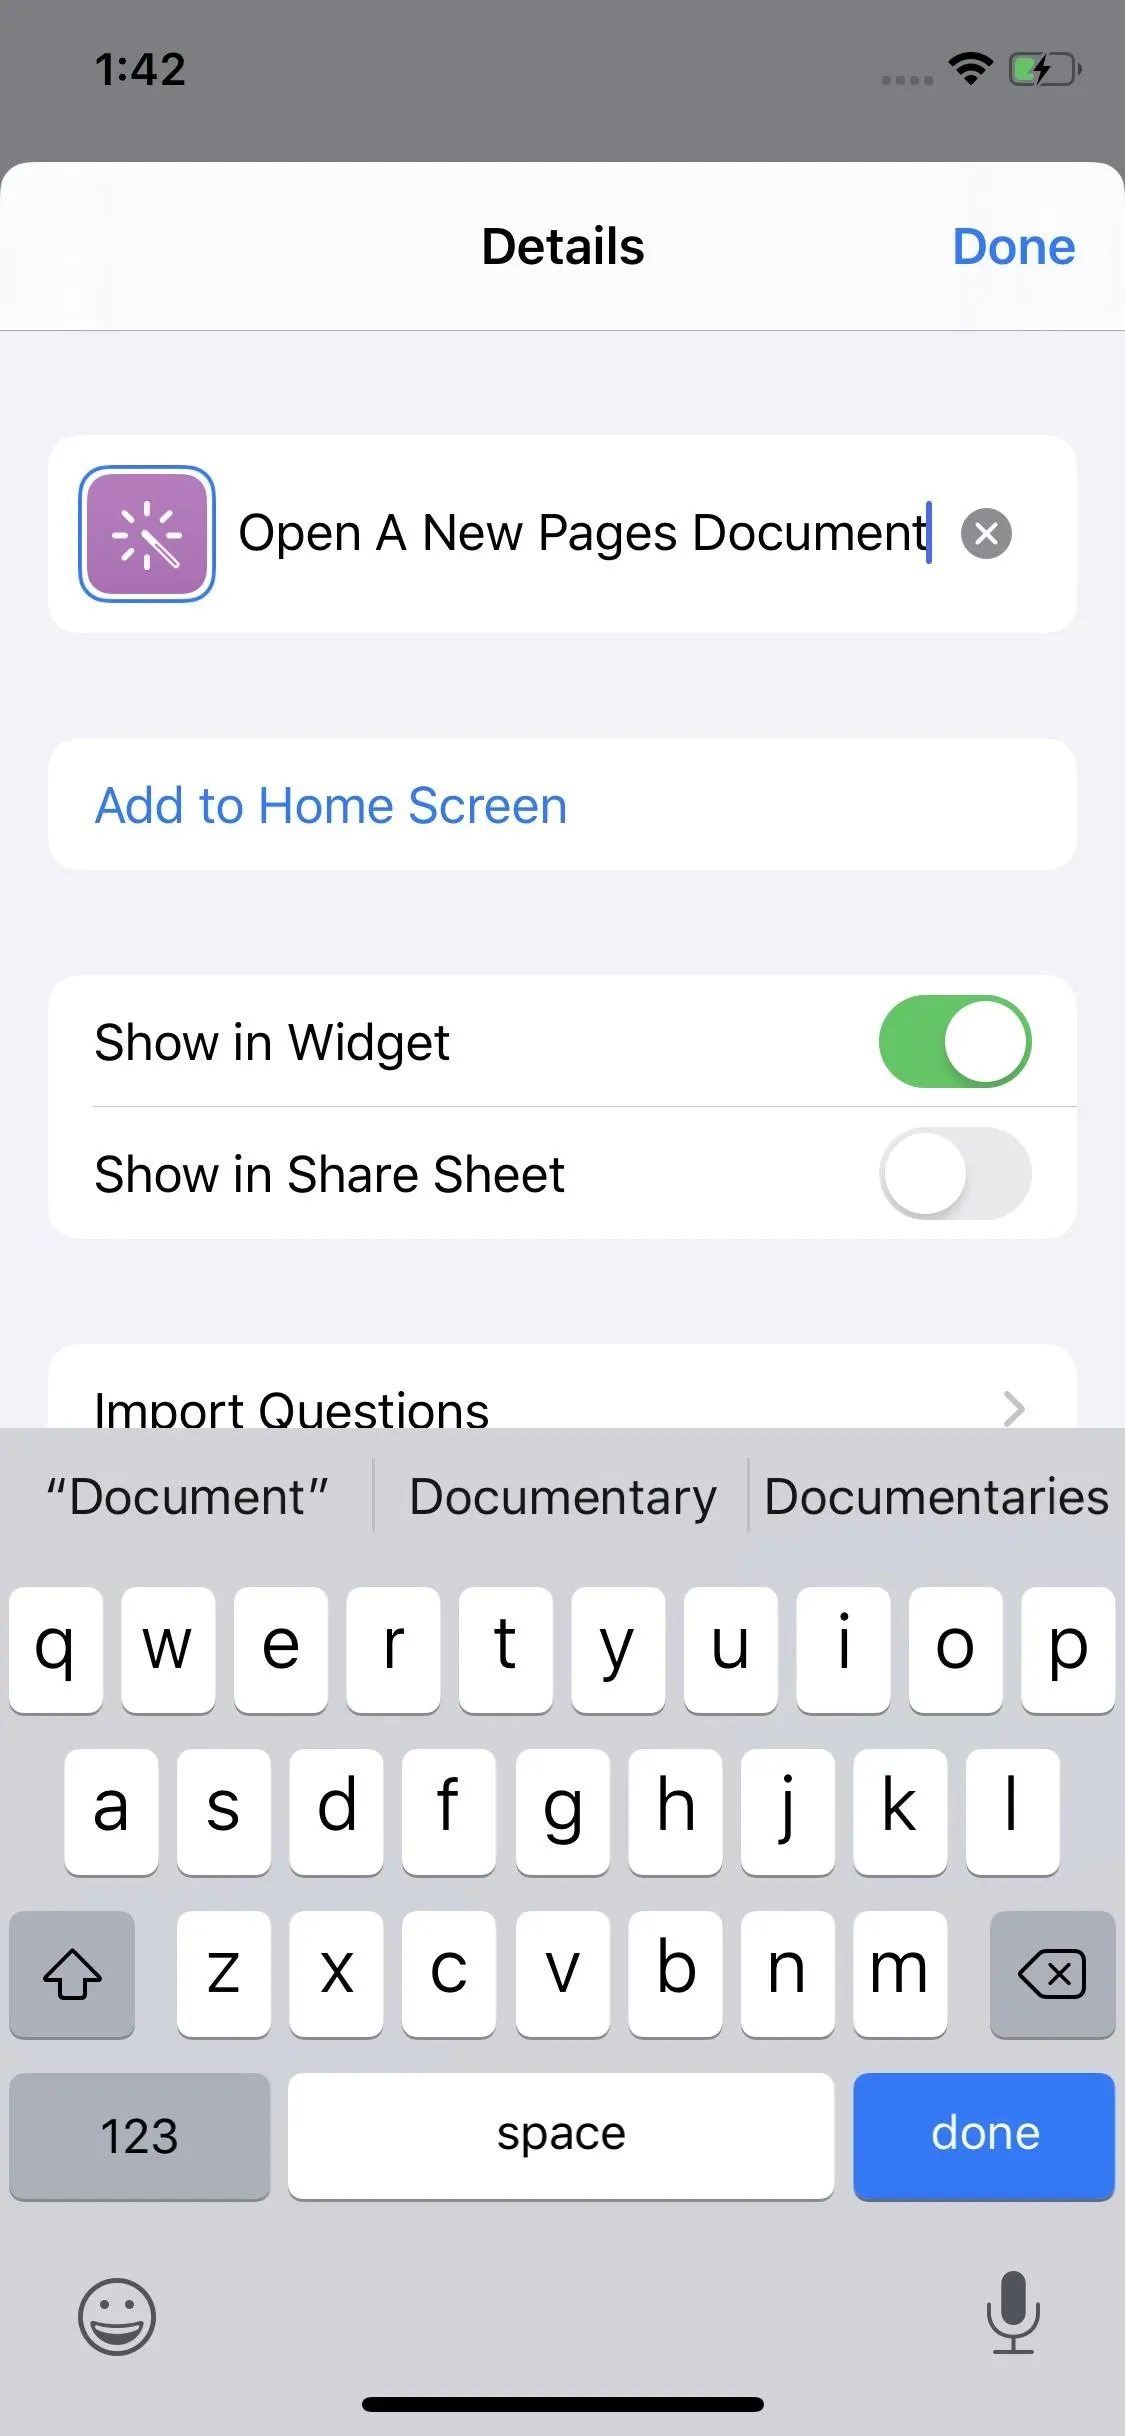
In iOS 13, by default, Siri should recognize the name of the shortcut as the phrase to use it, but you can customize it too. Tap the ellipsis (•••) button in the top right to open the Details view. Here, enter your phrase in the "Shortcut Name" field. You can tap the mic button to record the phrase with your voice, but the end result will be the same. This change cuts down on the steps required to create a shortcut, as your shortcut's name is simply the command used for Siri. When finished, tap "Done."


Use Your New Shortcut
Whichever method you choose, you will give Siri the ability to start a new Pages document for you. Just activate Siri, then speak your chosen phrase. Pages will boot up, and a new blank paper will open. All that's left is for you to start writing. (Or, maybe that can wait until tomorrow.)


This article was produced during Gadget Hacks' special coverage on using your smartphone to boost productivity. Check out the whole Productivity series.
Cover image, screenshots, and GIF by Jake Peterson/Gadget Hacks






Comments
Be the first, drop a comment!