


Full disclosure: I really like Apple's stock ringtones on the iPhone. After all, there are over 50 to choose from if you include the classic ones. With all that choice, why would you ever need more? Personally, I get bored easily, and I'd like my music to play when people call. Apple doesn't let us pick a song from our music libraries, but there is still a way to use our favorite tunes as tones.
In order to make customized ringtones using your favorite songs, you'll need to open up iTunes on either macOS or Windows. But before you panic, we won't be making you purchase anything today — iTunes has all of the tools necessary to do this 100% pro bono. All you need is the songs in your library that you want to turn into ringtones.
However, keep in mind that the process for this in iTunes 12.7 and higher is different than in older versions of iTunes. We'll show you both below, just in case you're running an older iTunes on your computer.
Set Time Parameters for the Song
This is a cool iTunes feature that not everyone knows about. You can set a start and end time for any song, so iTunes will only play that select portion of the track. For our purposes, this is perfect for creating the proper ringtone length.
Ringtones can be up to 40 seconds long. If they're any longer than that, they won't copy over to your iPhone at all. Also, keep in mind that if you want to use your ringtone as an alert tone for texts, emails, calendar events, and more, your ringtone can be no longer than 30 seconds. If it's over 30 seconds, it won't show up as an option for alert tones on your iPhone, only for ringtones.
To play it safe, 30 seconds is the max time you should aim for.
Once you have found that sweet spot, open up the song's info window. The easiest way to do this is to make sure the track is highlighted, then hit Command-I (or Control-I for Windows users) on your keyboard. You can also access the "Song Info" (or "Get Info" in earlier versions) option by right-clicking on the song, clicking the (•••) symbol, or via the Edit option in the menu bar.
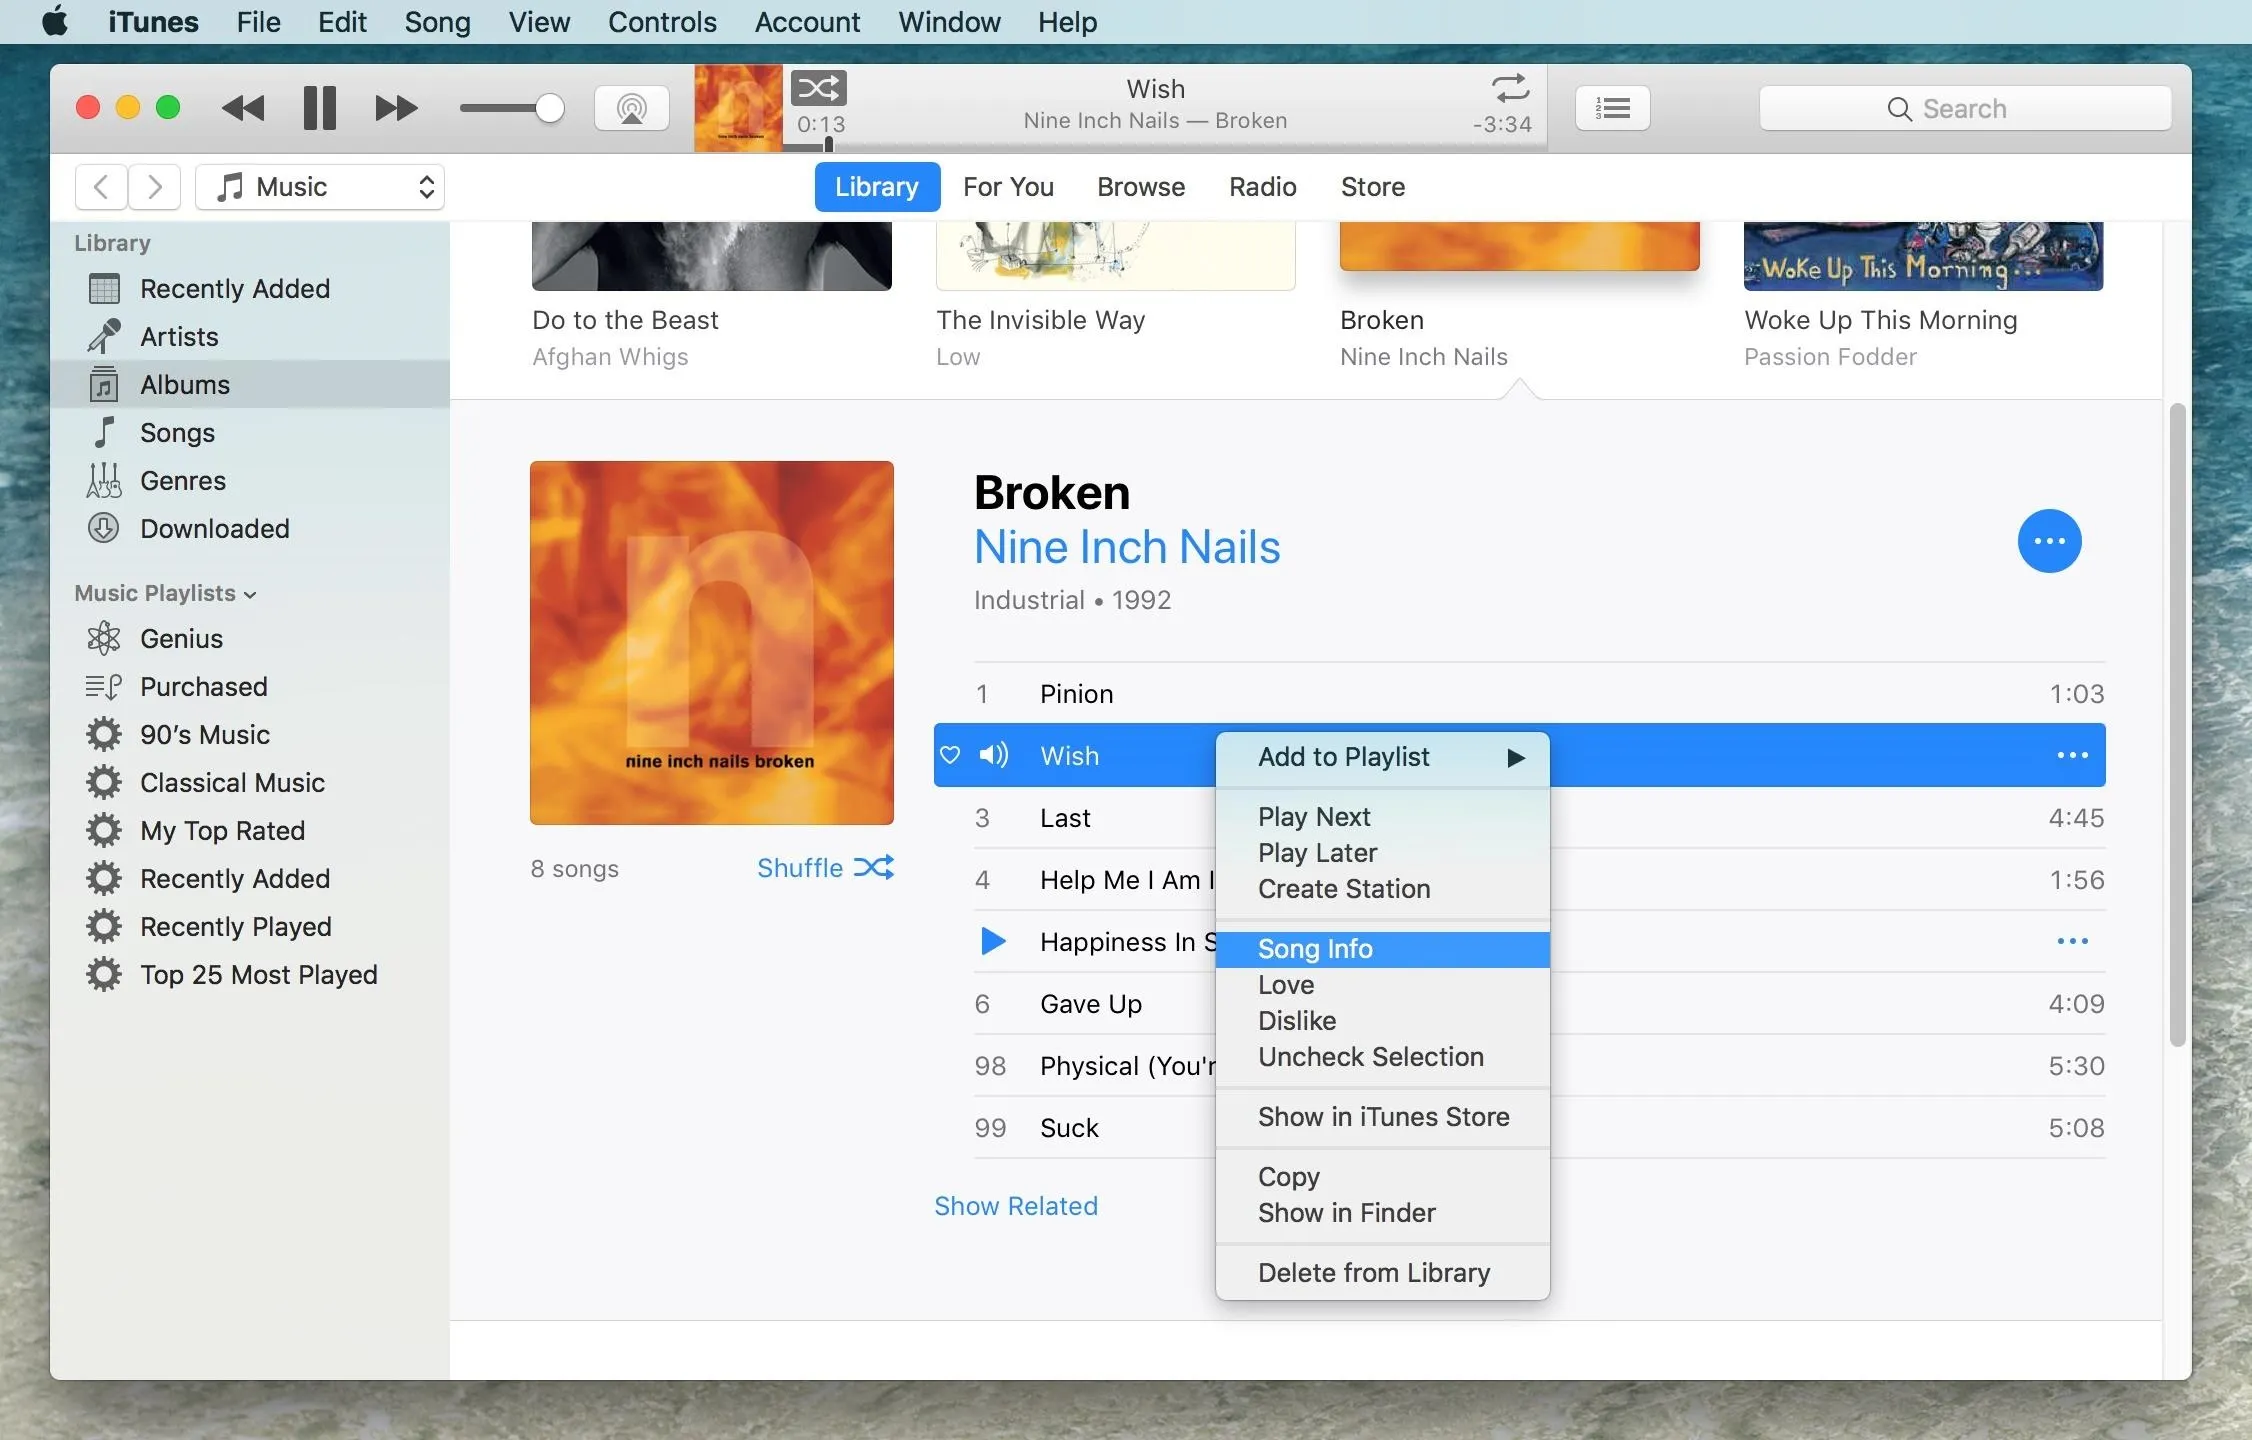
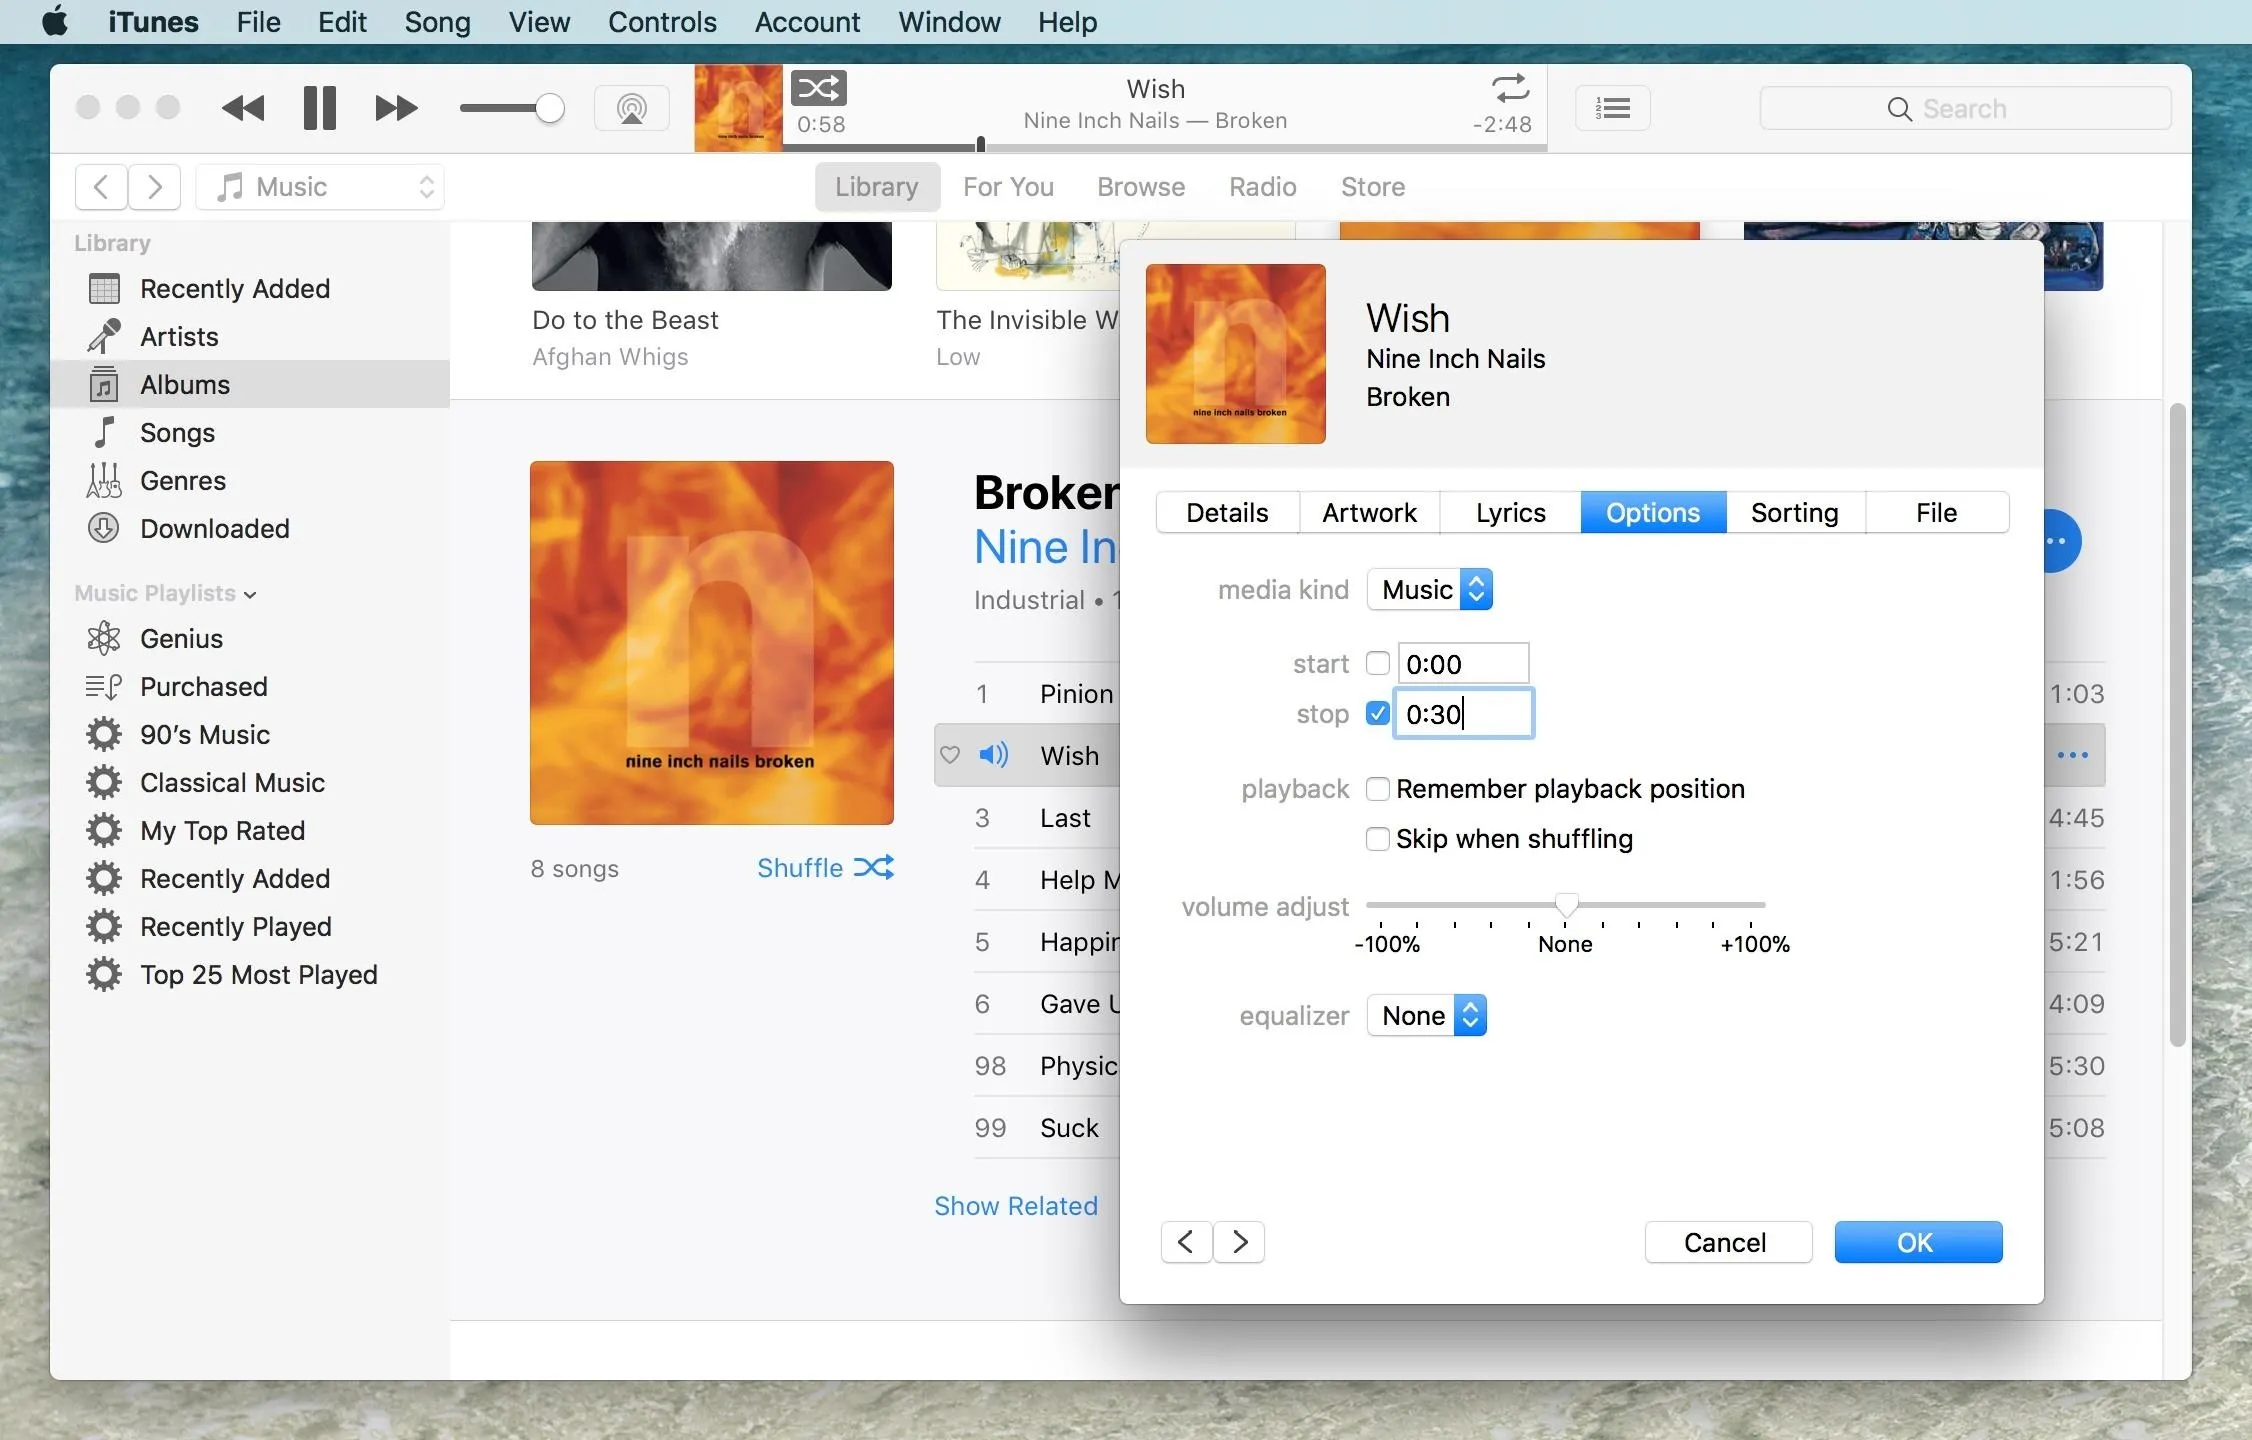
On the info screen, hit the "Options" tab. You will see "start" and "stop" boxes — this is where you enter your start and end times for your ringtone. Just make sure both checkboxes are checked before hitting "OK" at the bottom. (If the start time is zero, it doesn't have to be checked, and likewise, if the stop time is the end of the song, it doesn't have to be checked ... only if you customize those times.)
Convert the Song to AAC
AAC is a file type that was meant to replace the MP3, with higher-quality compression at the same bit rate. It's like if Five Guys charged you the same for their burger as a McDouble (we can only dream).
You don't need to know that in order to do this step, though. What you're doing here is making a copy of the track, but with the time parameter you previously set. Instead of just seeing, say, a three-minute song, you'll also see a 30-second one or however long you set it for.
To convert the song, select "File" from the menu bar, "Convert," and then "Create AAC Version." This will make a copy of the shortened song in AAC format — your original song will be safe.
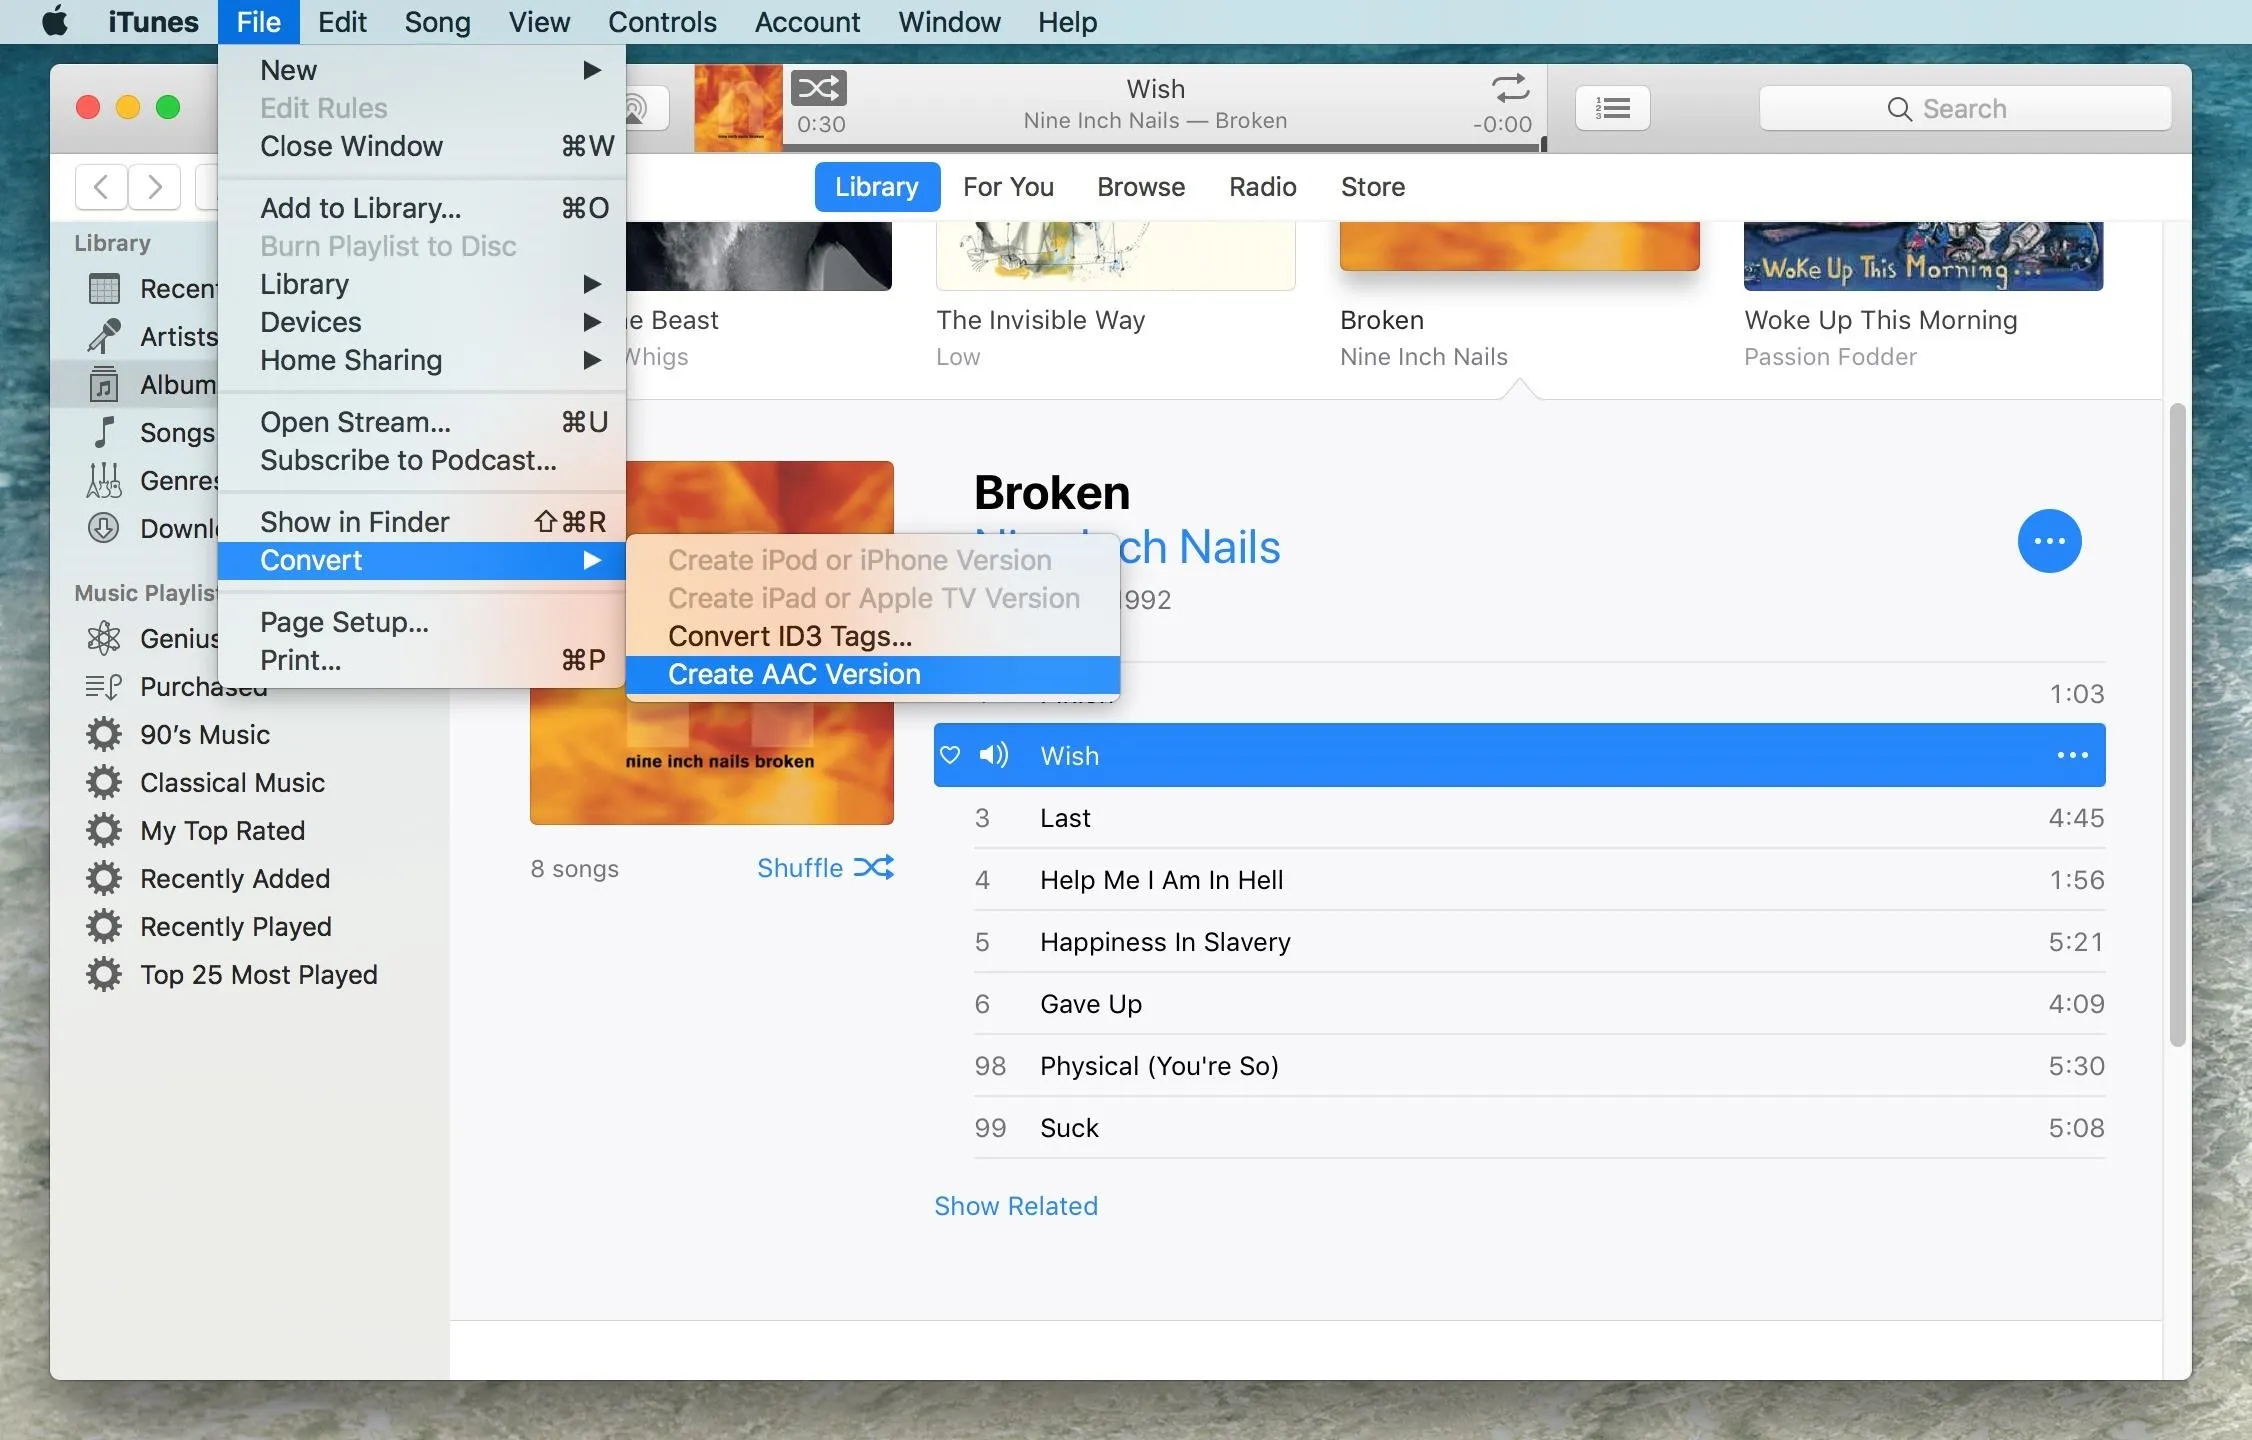
If you don't see "Create AAC Version," you probably have the option set to convert to MP3s or another format. To change that, go to "Preferences" in the menu bar, then hit the "Import Settings" button in the "General" tab. When there, select "AAC Encoder" from the drop-down and hit "OK," and "OK" again to exit the preferences. After that, try converting the song again ... it has to be AAC, or you won't be able to use it as a ringtone.
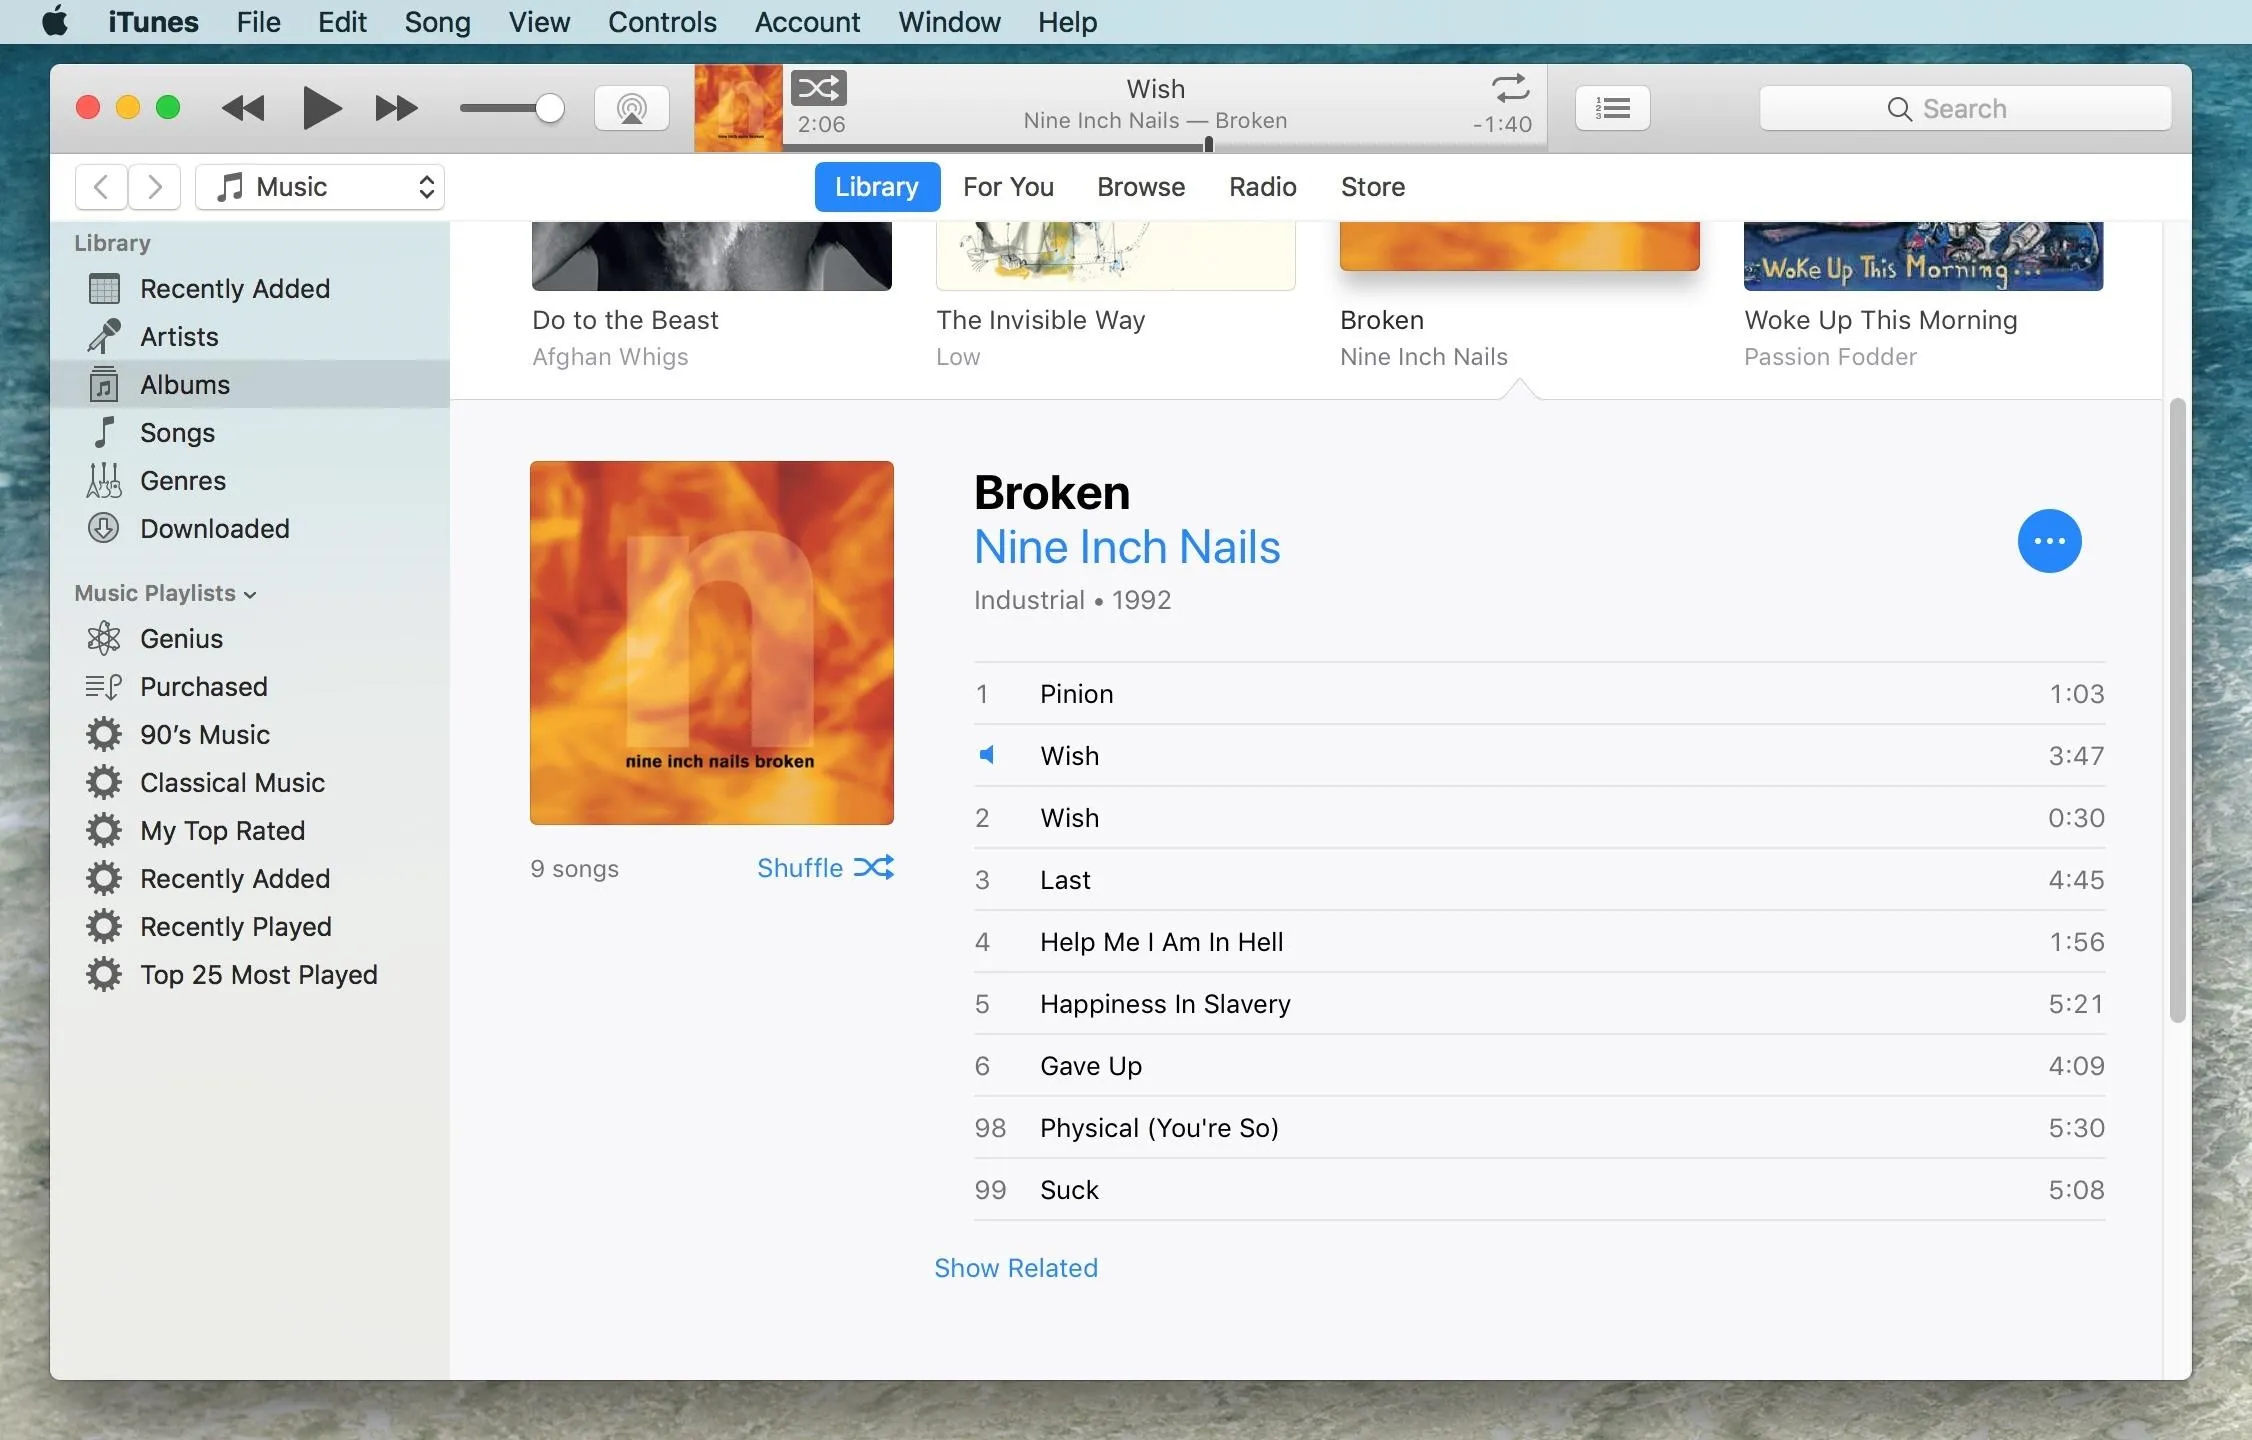
Below, you can see my new 30-second version of "Wish" by Nine Inch Nails. While you're here, go ahead and go back into the original song's info window and reset the start and stop times so you can listen to the song normally. If you sync that song with your iPhone, it'll only play the shortened clip unless you change it back!
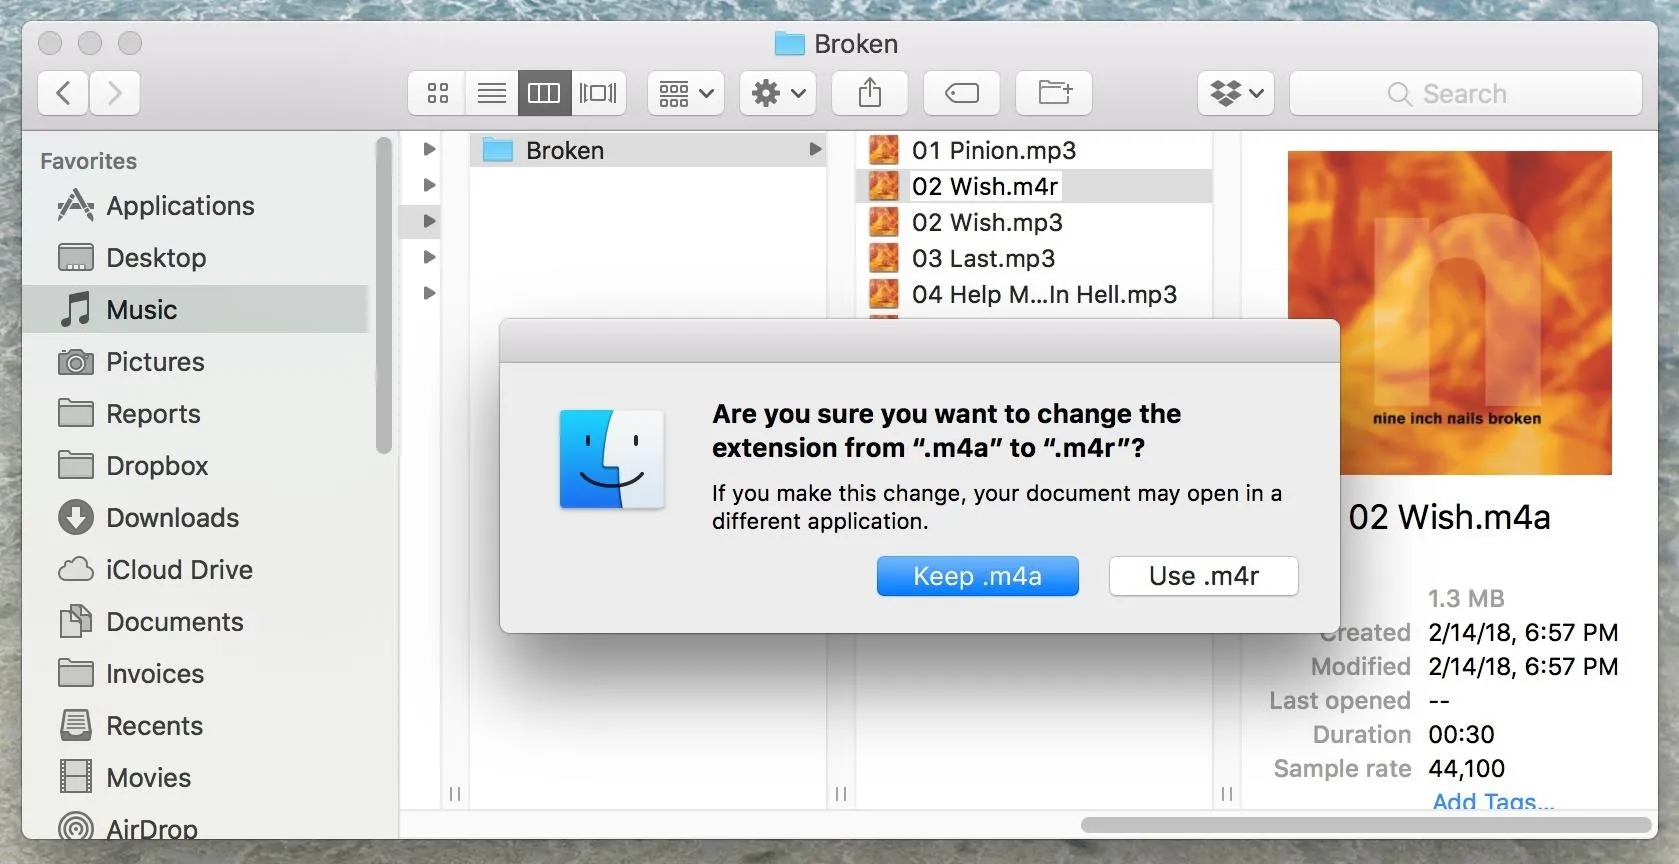
Change the File from M4A to M4R
In order to make this short AAC file a ringtone, we have to change it to another file format that Apple recognizes as ringtones. There are a couple of ways to do this.
You can either drag and drop the file to the desktop or you can right-click on the file and select "Show in Finder," which will bring you to the file directly. Once you have access to the file either on your Desktop or in Finder, proceed to change the file name, then swap the file extension from .m4a to .m4r, and confirm the change on the popup.
Sync Your New Ringtone to Your iPhone
This only applies if you're using iTunes 12.7 or higher. If you're using an old version of iTunes, the process is a little more complicated, so skip to the next step if that's the case for you. You can see which version you have by clicking "iTunes" in the menu bar, then "About iTunes."
If you're running 12.7 or higher, just connect your iPhone to your computer using your USB cable. If you sync with iTunes wirelessly, make sure you're on the same Wi-Fi network as your computer. In iTunes, you should see your iPhone pop up in the sidebar on the left under Devices.
Now all you have to do is drag the .m4r ringtone file you created over from the Desktop or Finder window and drop it on top of your iPhone in iTunes. Once you let go, iTunes will automatically sync the ringtone with your iPhone. Wait for it to finish, and you're ready to start using your new ringtone! Skip down to Step 8 below to see how that's done.
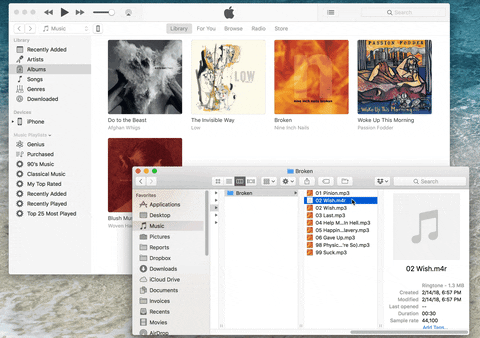
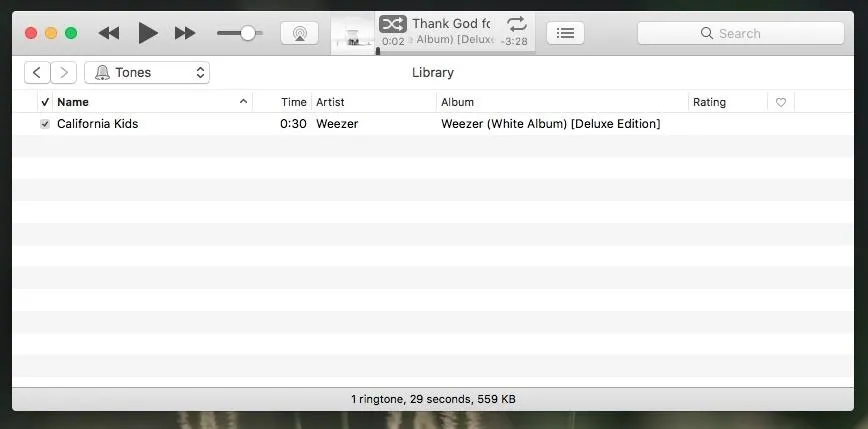
Add the File to Tones (iTunes 12.6 & Under)
If you're running iTunes 12.6 and under, the process isn't as easy as seen above in Step 4. In these versions, there's an actual section in iTunes for "Tones," which houses all of your custom ringtones. You need to add your new file to this. Click on the "Music" button in the top-left corner, then select "Tones." If you don't see Tones, click "Edit Menu" and add it.
![Screenshot of a music application displaying the tracklist for "Weezer (White Album) [Deluxe Edit]" along with a menu options panel.](https://assets.content.technologyadvice.com/636320142087622591_a57d84b6bf.webp)
If you dragged the file to the Desktop, you can drag the file back into iTunes and into the Tones section. If you clicked "Show in Finder," right-click on the file, then select "Duplicate." This will let you drag and drop the tone into the Tones section, otherwise trying it with the original shortened clip won't work since it's already in iTunes as a song.
Tidy Up Your iTunes (iTunes 12.6 & Under)
Okay, before we move onto the next step, you should get things back to how they were before. So, delete the shortened clip in the Music section, then go back into the original song and remove the start and stop times, if you haven't done so already, so there are no issues playing the full song later, either in iTunes or on your iPhone.
Sync with Your iPhone (iTunes 12.6 & Under)
If you want to sync your iPhone with iTunes wirelessly, make sure you're set up for that and connected to the same Wi-Fi network that your computer is, otherwise, plug your iPhone into your computer with your USB cable. If iTunes does not display your device immediately, click the iPhone button in the top-left corner to go to its Summary screen.
Next, click "Tones" in the left-hand sidebar. If you've never synced ringtones to your iPhone, you will have to check "Sync Tones," then either select "All tones" or "Selected tones" from the options. If you did the later, make sure the ringtones you want are checked, then hit "Sync" to finalize.
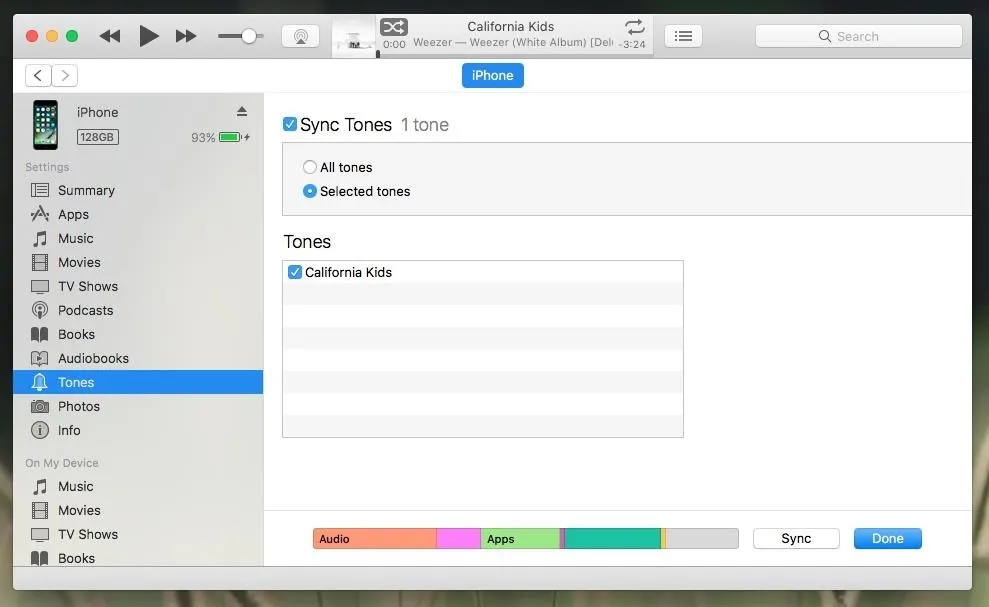
Once iTunes has finished syncing with your iPhone, you can disconnect if you used a USB cable.
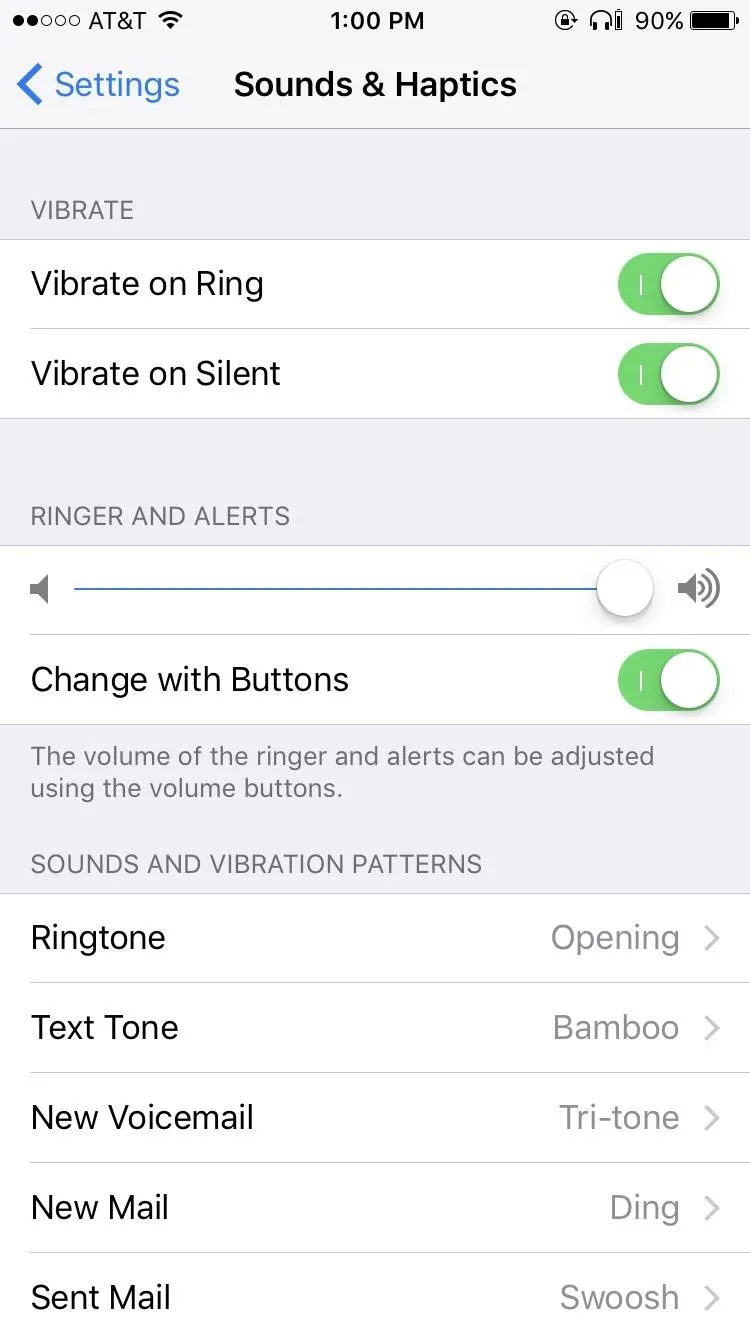
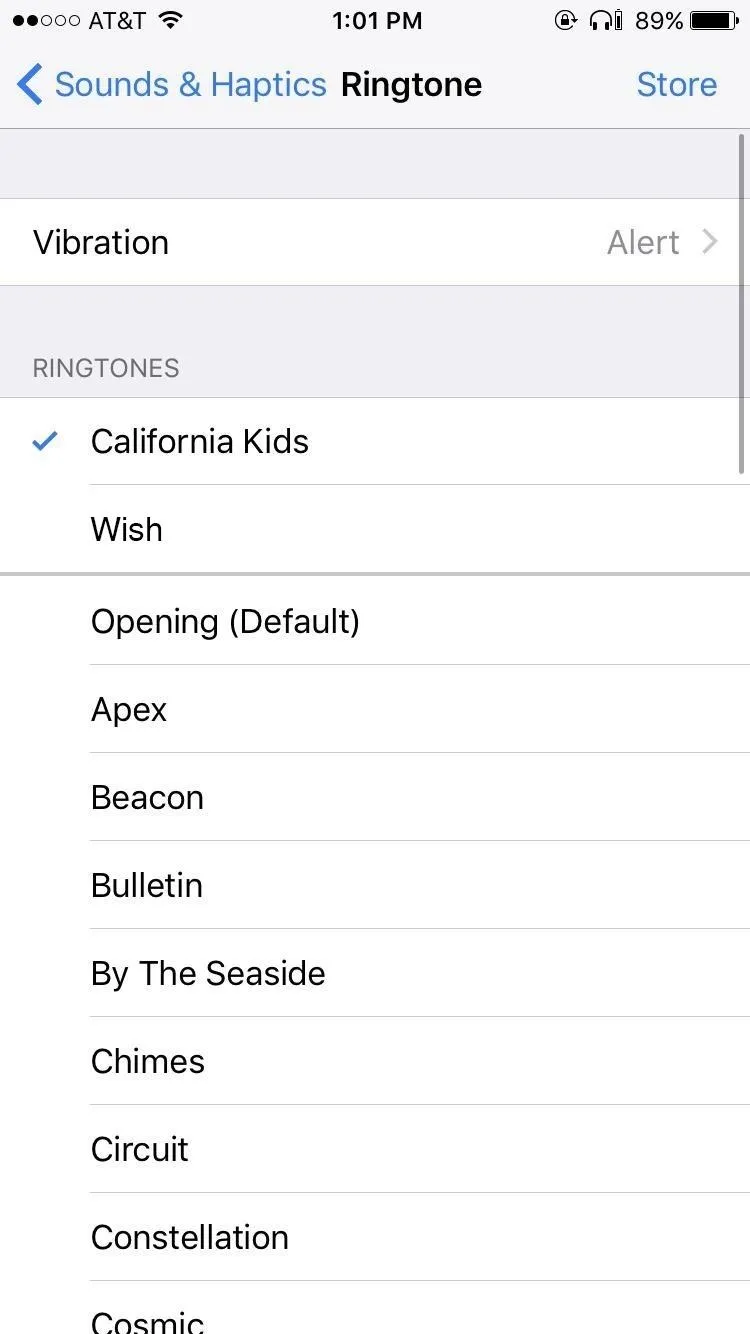
Set Your Ringtone on Your iPhone
If done correctly, your ringtone should now show up on your iPhone. Go to Settings -> Sounds (or Sounds & Haptics for newer iPhone models) -> Ringtone. Your new ringtone should be nestled above the stock options. Just tap it, and you'll be ready to go. That will change the default ringtone for any contacts that haven't already been customized.
You can also use your new ringtone as an alert tone for any of the other options listed below Sounds and Vibration Patterns in the "Sounds & Haptics" page. Just keep in mind, if it's over 30 seconds long, it won't show up as an option in any of these menu selections.
If you want to customize your new song ringtones to individual contacts, just open up each person's contact page, select "Edit" in the top-right corner, then select "Ringtone" and choose the one you want. You can also select "Text Tone" for each contact to use for new texts or iMessages instead, granted it's 30 seconds or shorter.
- Follow Gadget Hacks on Pinterest, Twitter, YouTube, and Flipboard
- Sign up for Gadget Hacks' daily newsletter or weekly Android and iOS updates
- Follow WonderHowTo on Facebook, Twitter, Pinterest, and Flipboard
Cover image and screenshots by Justin Meyers/Gadget Hacks


Comments
Be the first, drop a comment!