


If you use Apple's email services and the "From:" field in your iPhone's Mail app is cluttered with @Mac.com, @Me.com, and @iCloud.com variations of the same address — along with third-party accounts — there's an easy way to declutter things and hide the addresses you don't use anymore.
In January 2000, Apple released iTools to Mac OS 9 users. The service included an @Mac.com email address, along with other free, internet-based services. Over the following years, the service was rebranded as .Mac in 2002, MobileMe in 2008, and iCloud in 2011. At each step, data and email accounts were migrated to the succeeding service.
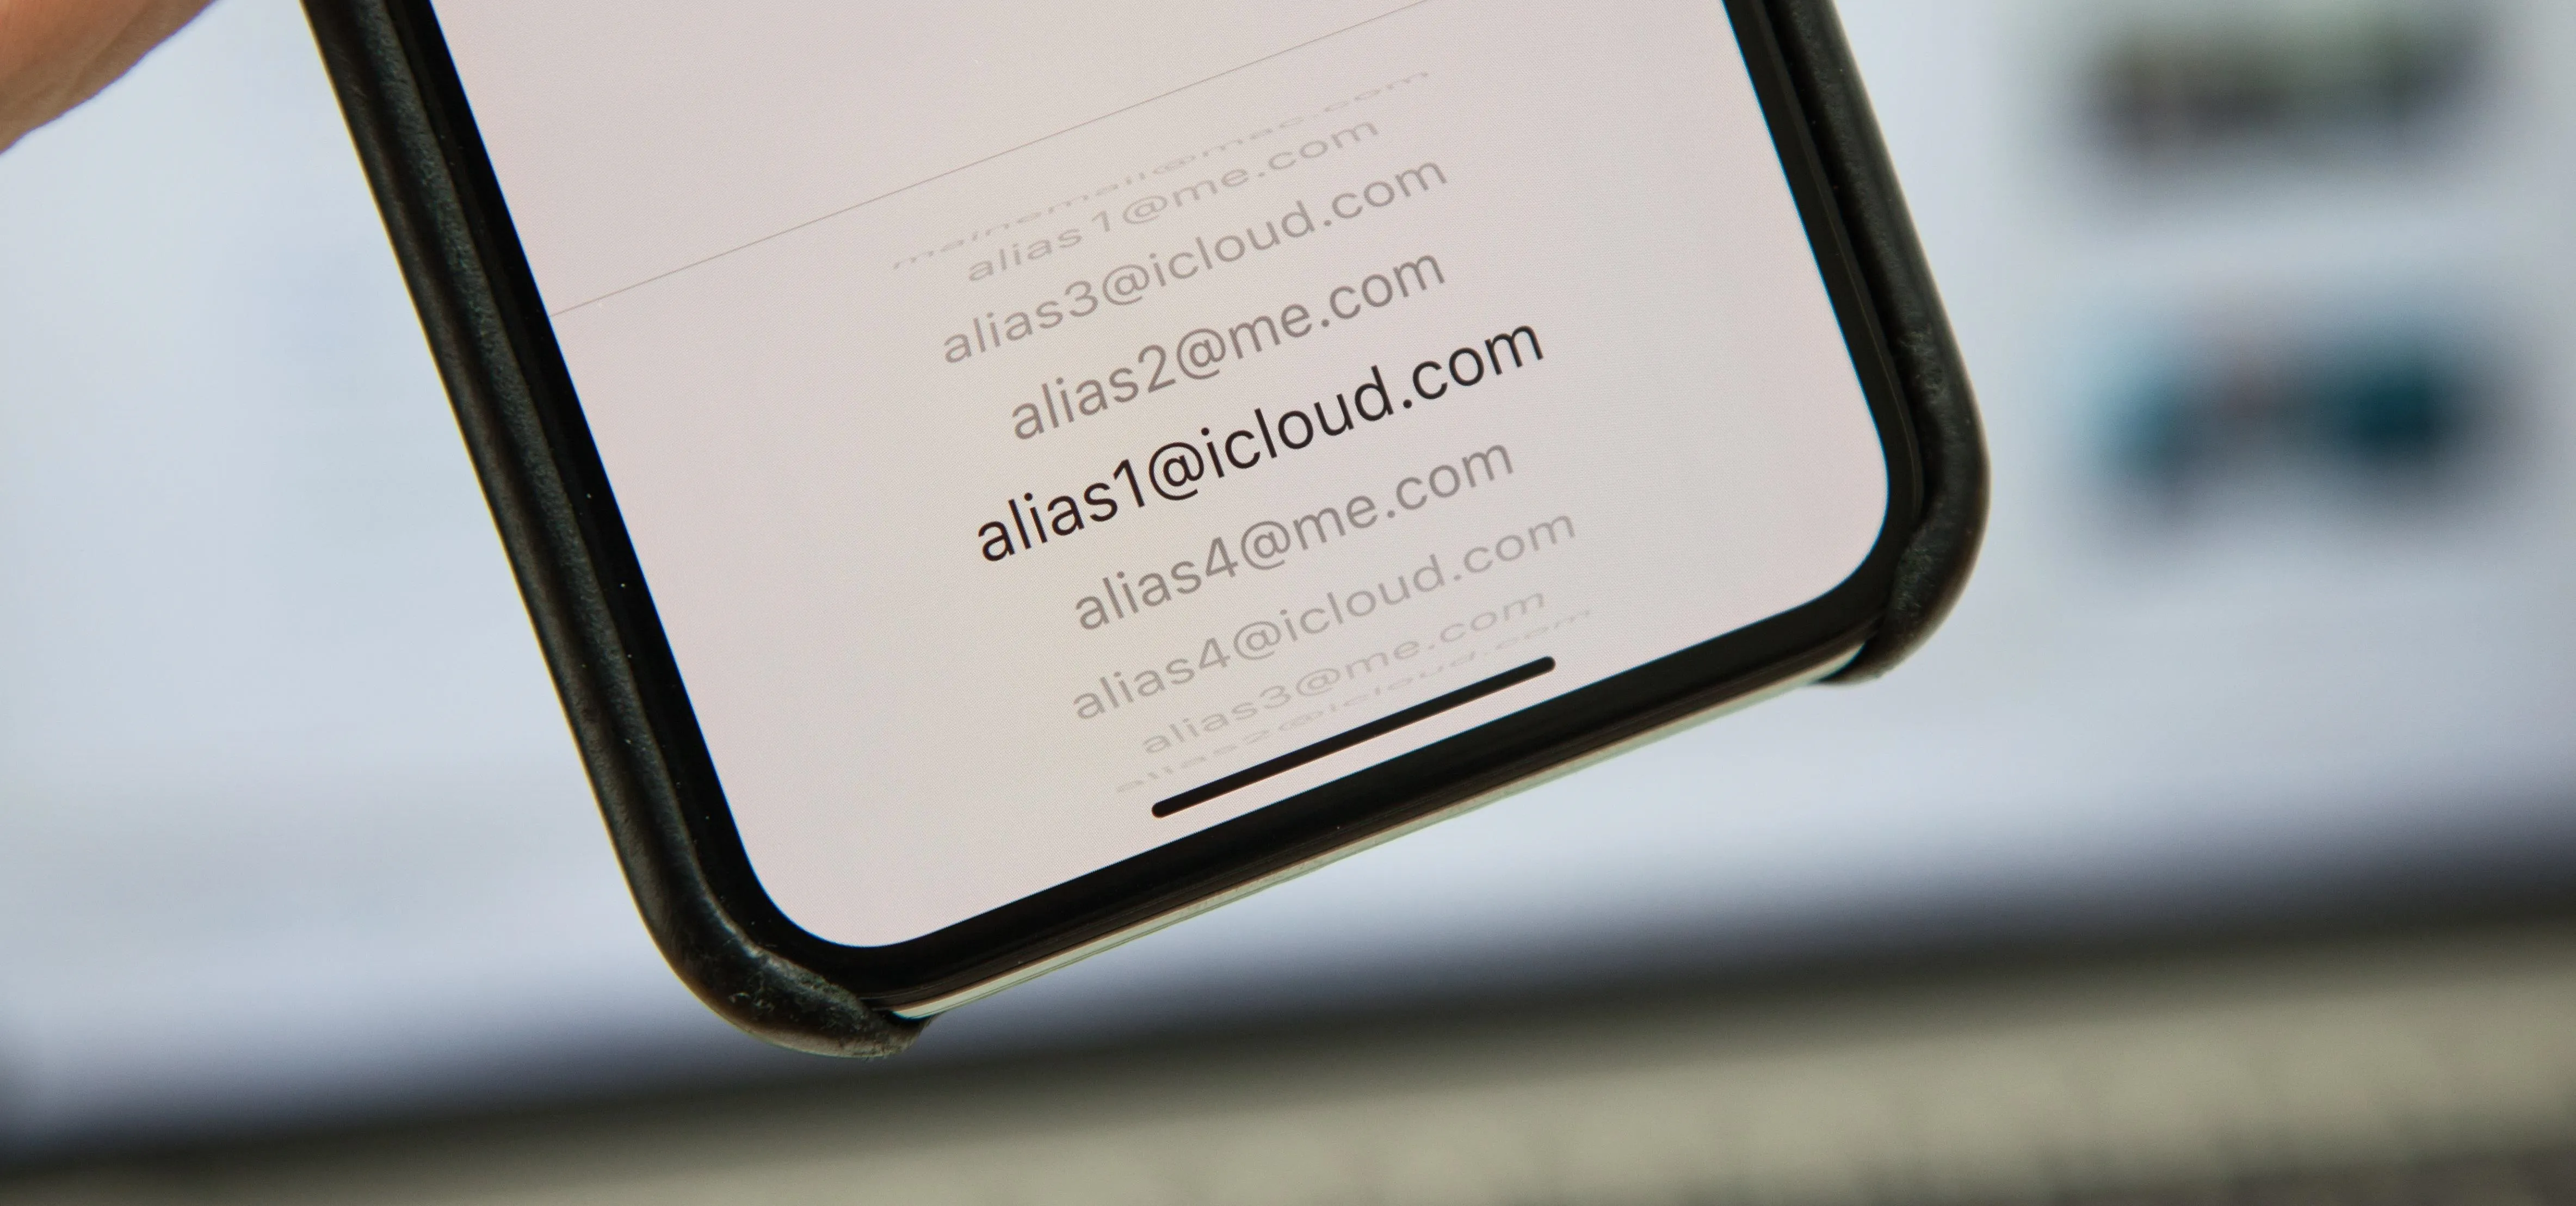
Depending on when you signed up for the service, you may have an @iCloud.com, @Me.com, or @Mac.com email address, along with each iteration that followed. For example, if you were an early adopter of the original Mac.com service, you have access to youremail@mac.com, youremail@me.com, and youremail@icloud.com, with all of them delivering email to the same account.
Further confusing things is the fact that Apple has always allowed individuals to create custom email aliases. These are email addresses that deliver email to your primary address but can be changed or discarded whenever you don't need them anymore. They make a great option when you'd rather not give out your primary address, want to sign up for a mailing list, or when you're worried about receiving spam. Regardless, they still show up in your "From:" field, further cluttering it.
Before and after decluttering the "From:" options.
Before and after decluttering the "From:" options.
While it may be nice to have a choice of which email address you want to use, it can be frustrating to see the "From:" field of your Apple Mail app cluttered with each iteration of your email address, especially if you're in the habit of only using one of them. Fortunately, there's a simple way to hide the aliases you're not using.
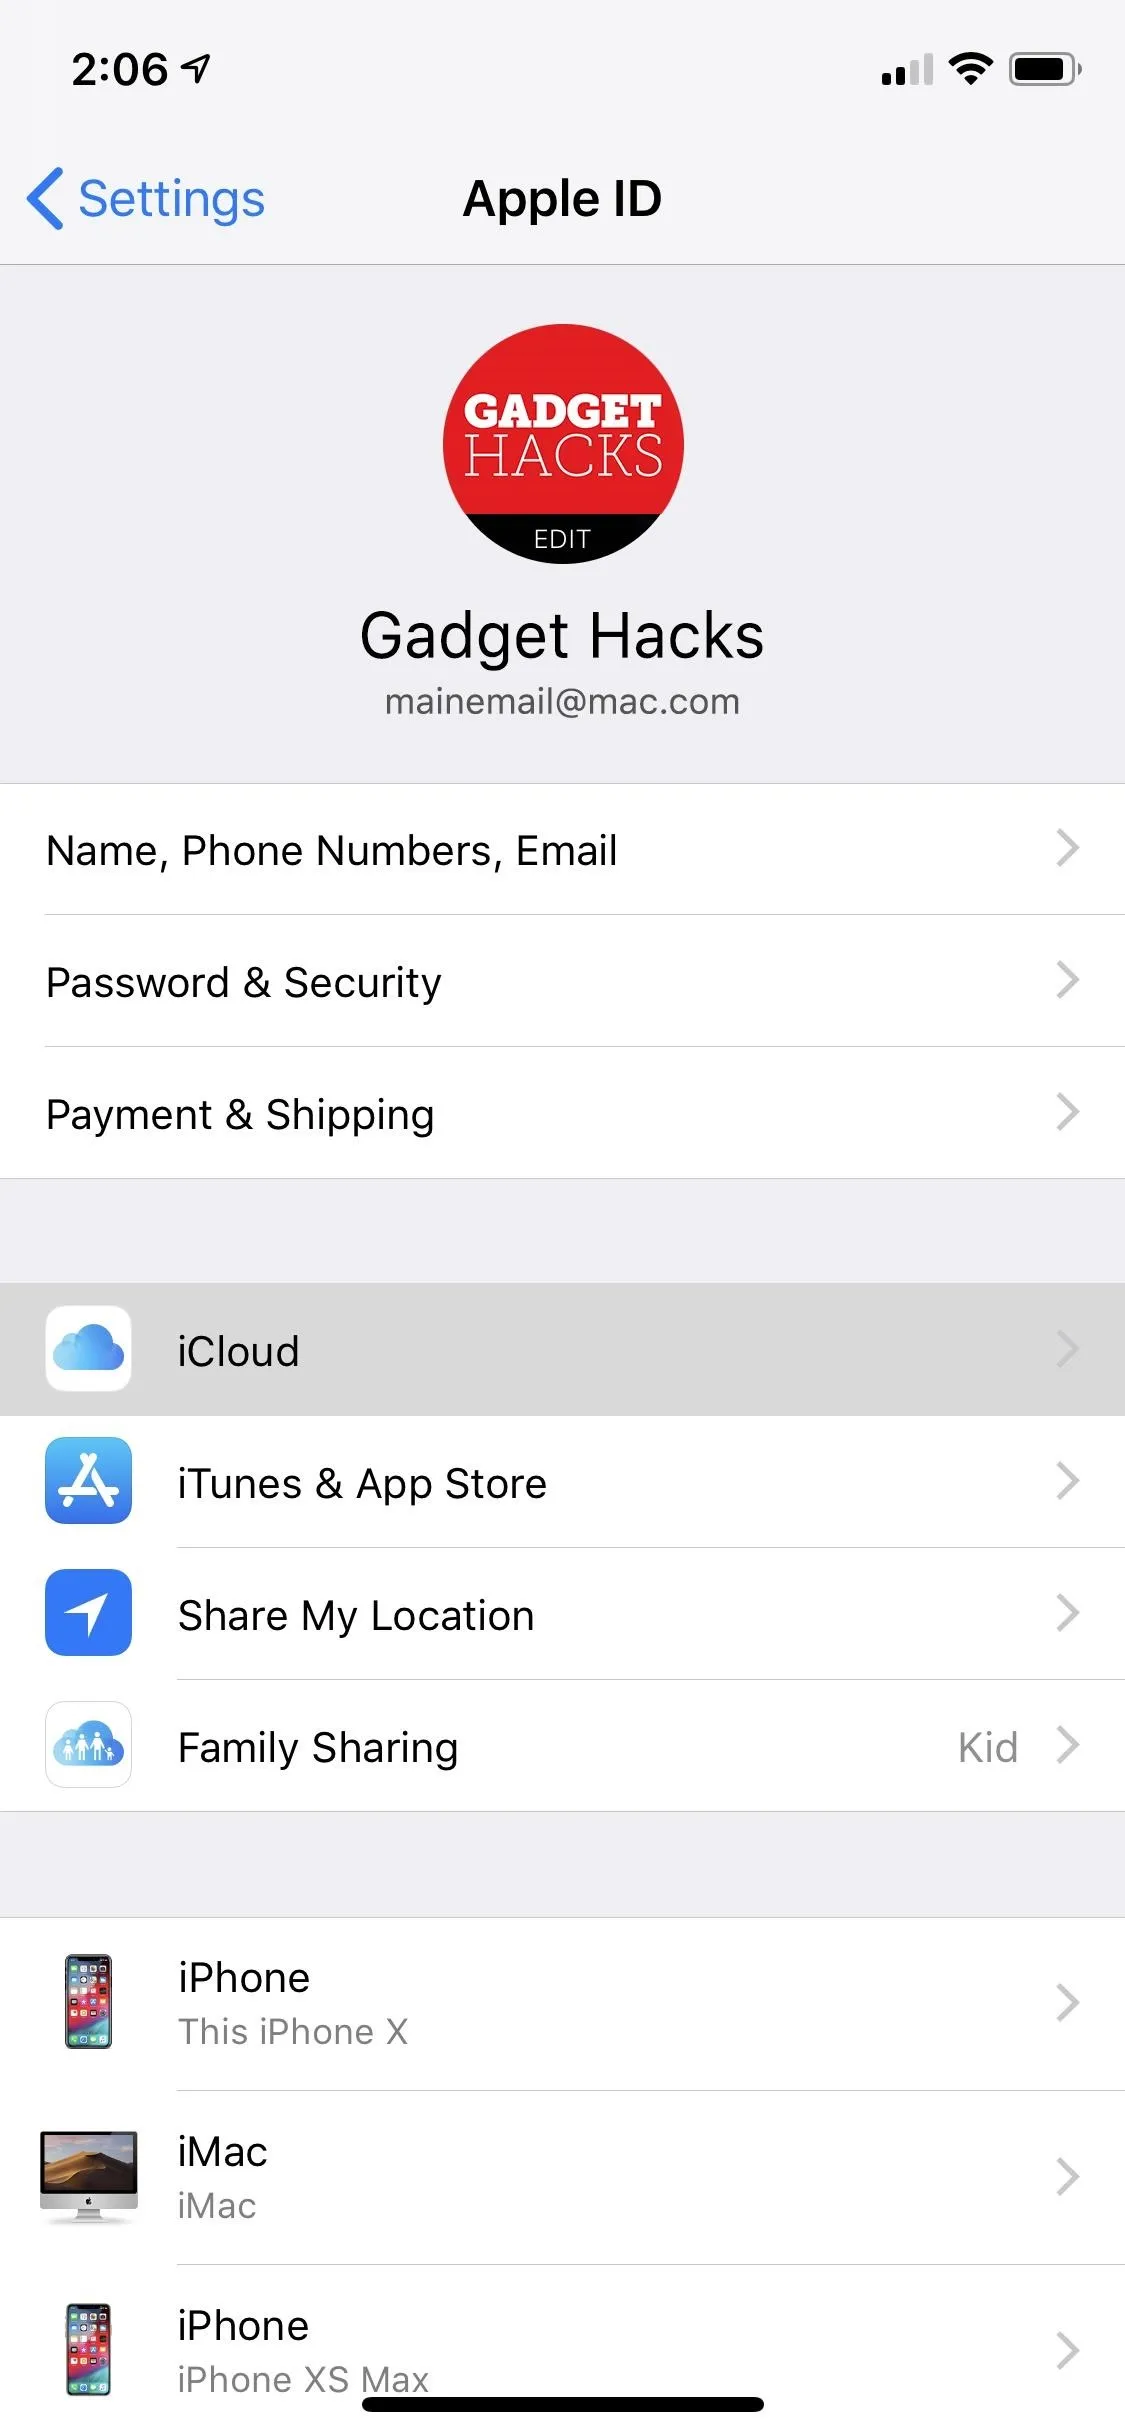
Open Your iCloud Email Settings
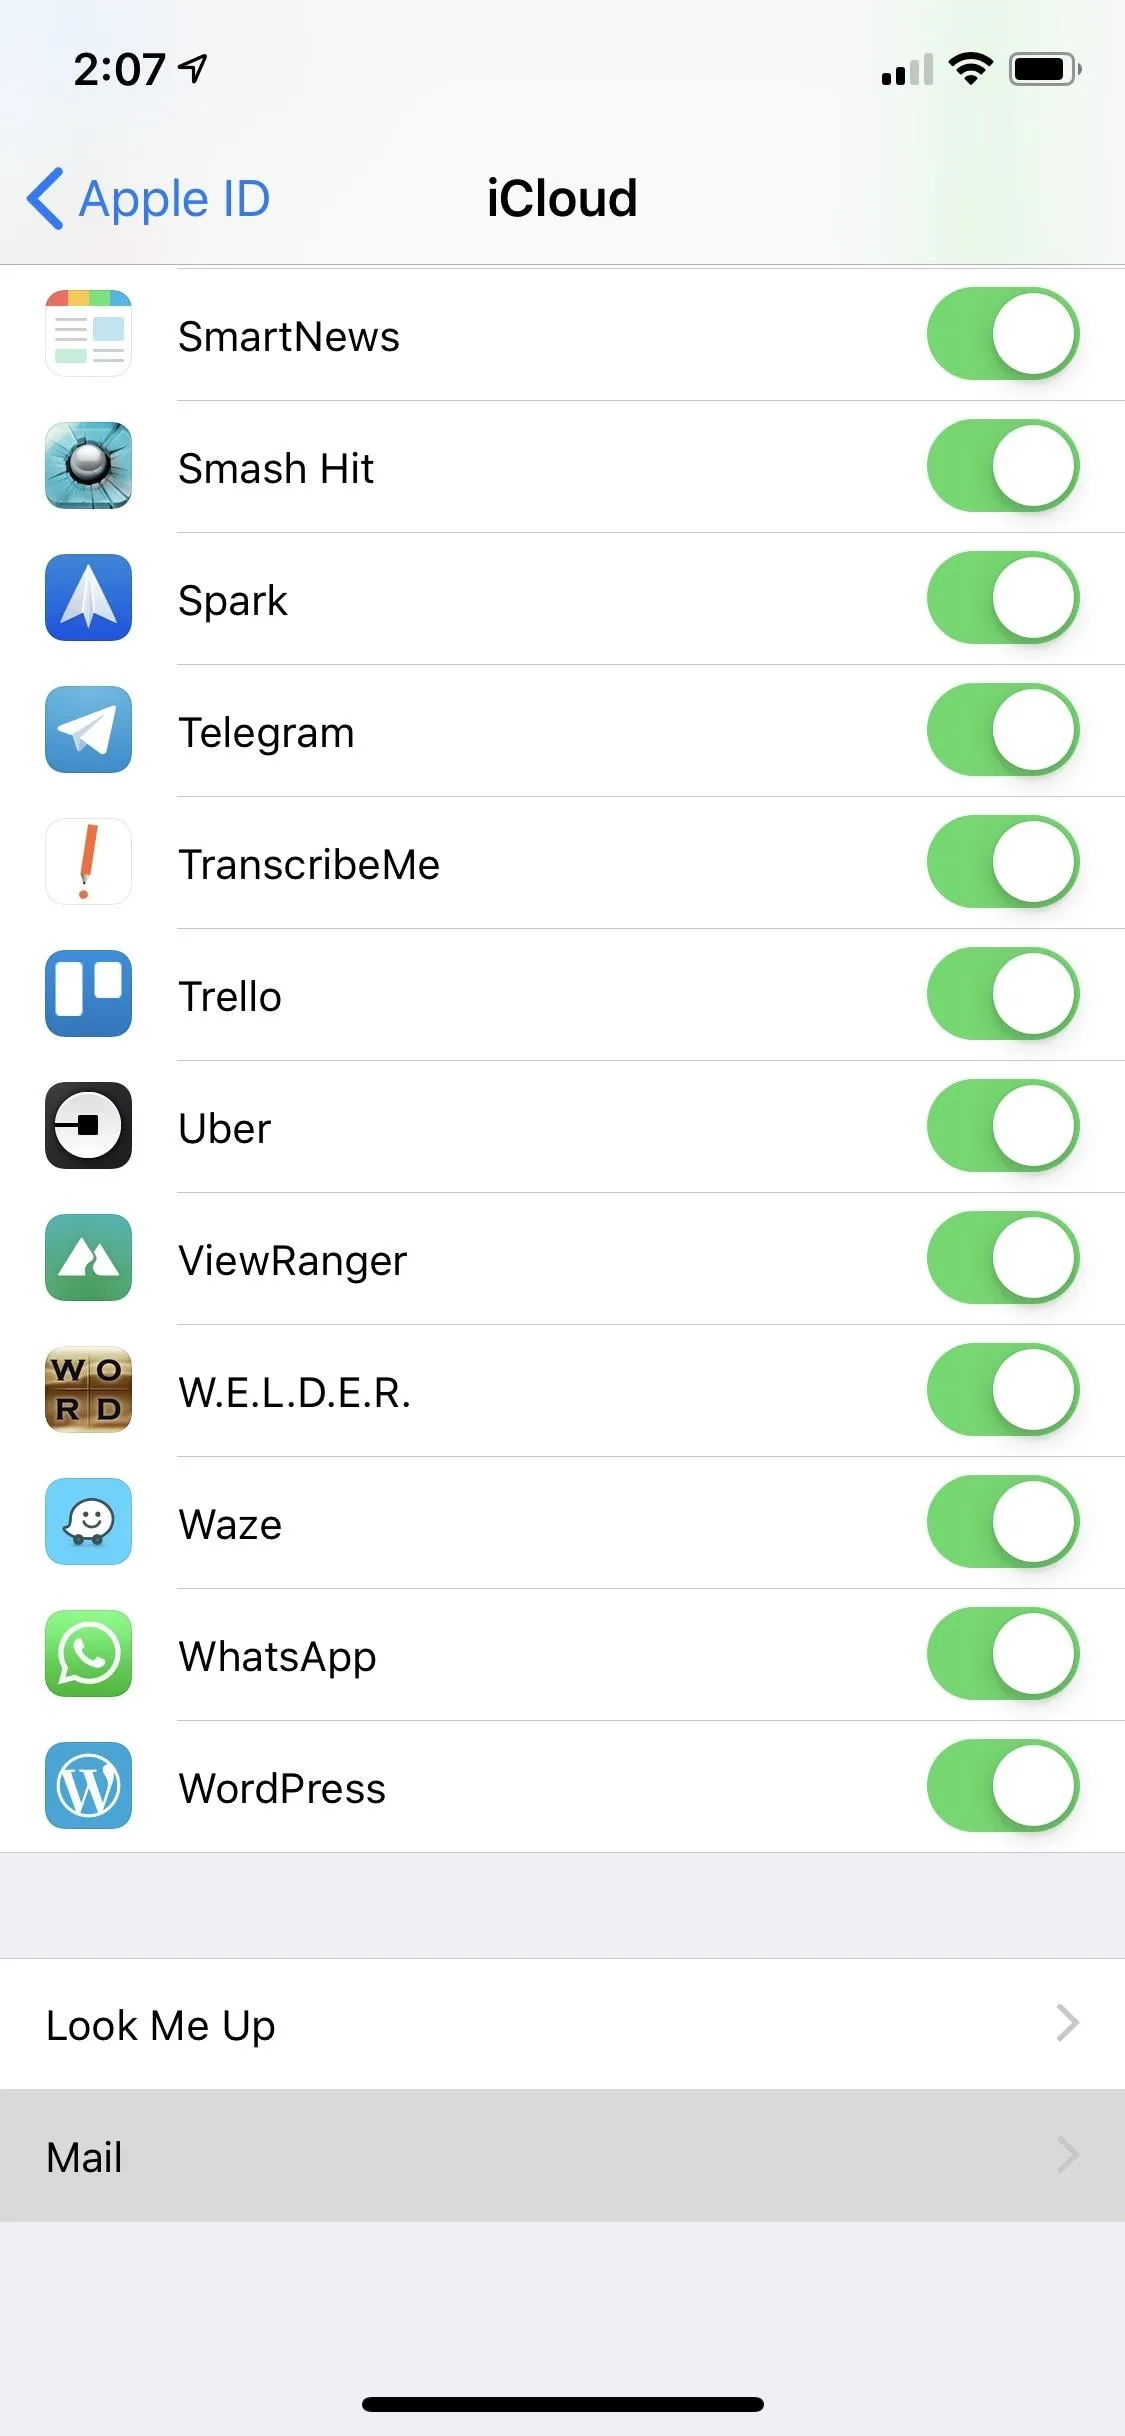
To hide those annoying aliases in iOS 11 or iOS 12, the first step is to open the Settings app on your iOS device and select your name at the top of the list. After that, select the "iCloud" settings, then scroll to the very bottom of the next page and select "Mail" to open the iCloud email settings.
Alternatively, you can get to the same place by going to "Passwords & Accounts" in Settings. Tap "iCloud" one there, then "Mail" from the bottom of the iCloud email settings page.
For iOS 10 users and below, you can get to the same place by opening up "Mail" in Settings, tapping "Accounts," then "iCloud," and selecting "Mail" from the bottom of the list. Alternatively, you could open "Mail, Contacts, Calendars" in Settings, then tap "iCloud," followed by "Mail" at the bottom.
Hide Aliases You Don't Use Much
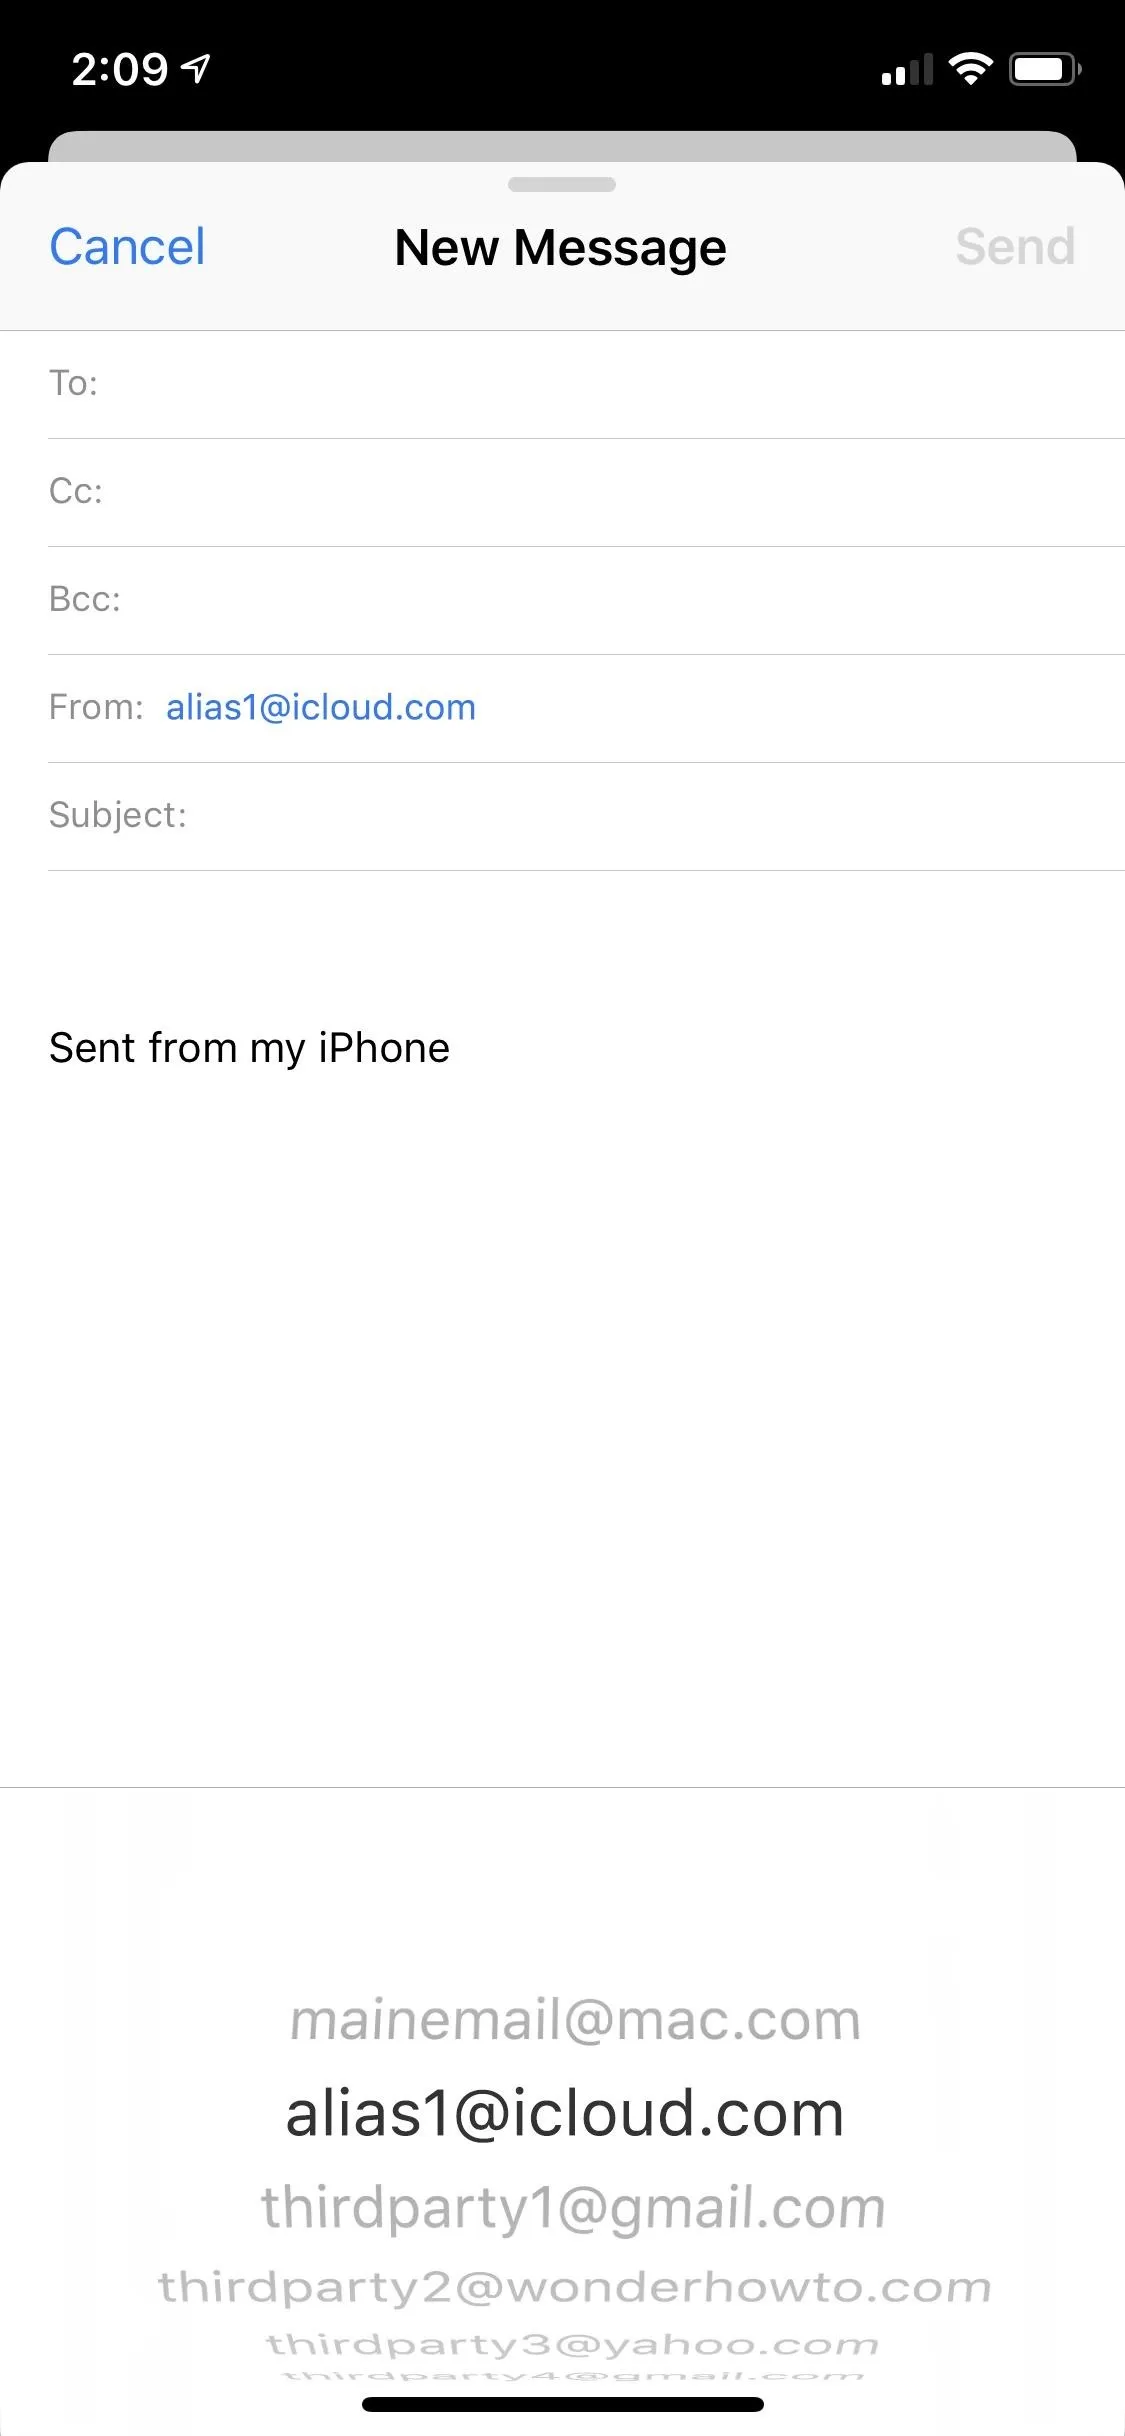
You'll now see a list of email addresses associated with your iCloud account. The list will likely include any previous iterations of the email address that are still being used. What this list does not show are any third-party emails you have connected to Mail, like Gmail, Yahoo, and Outlook.
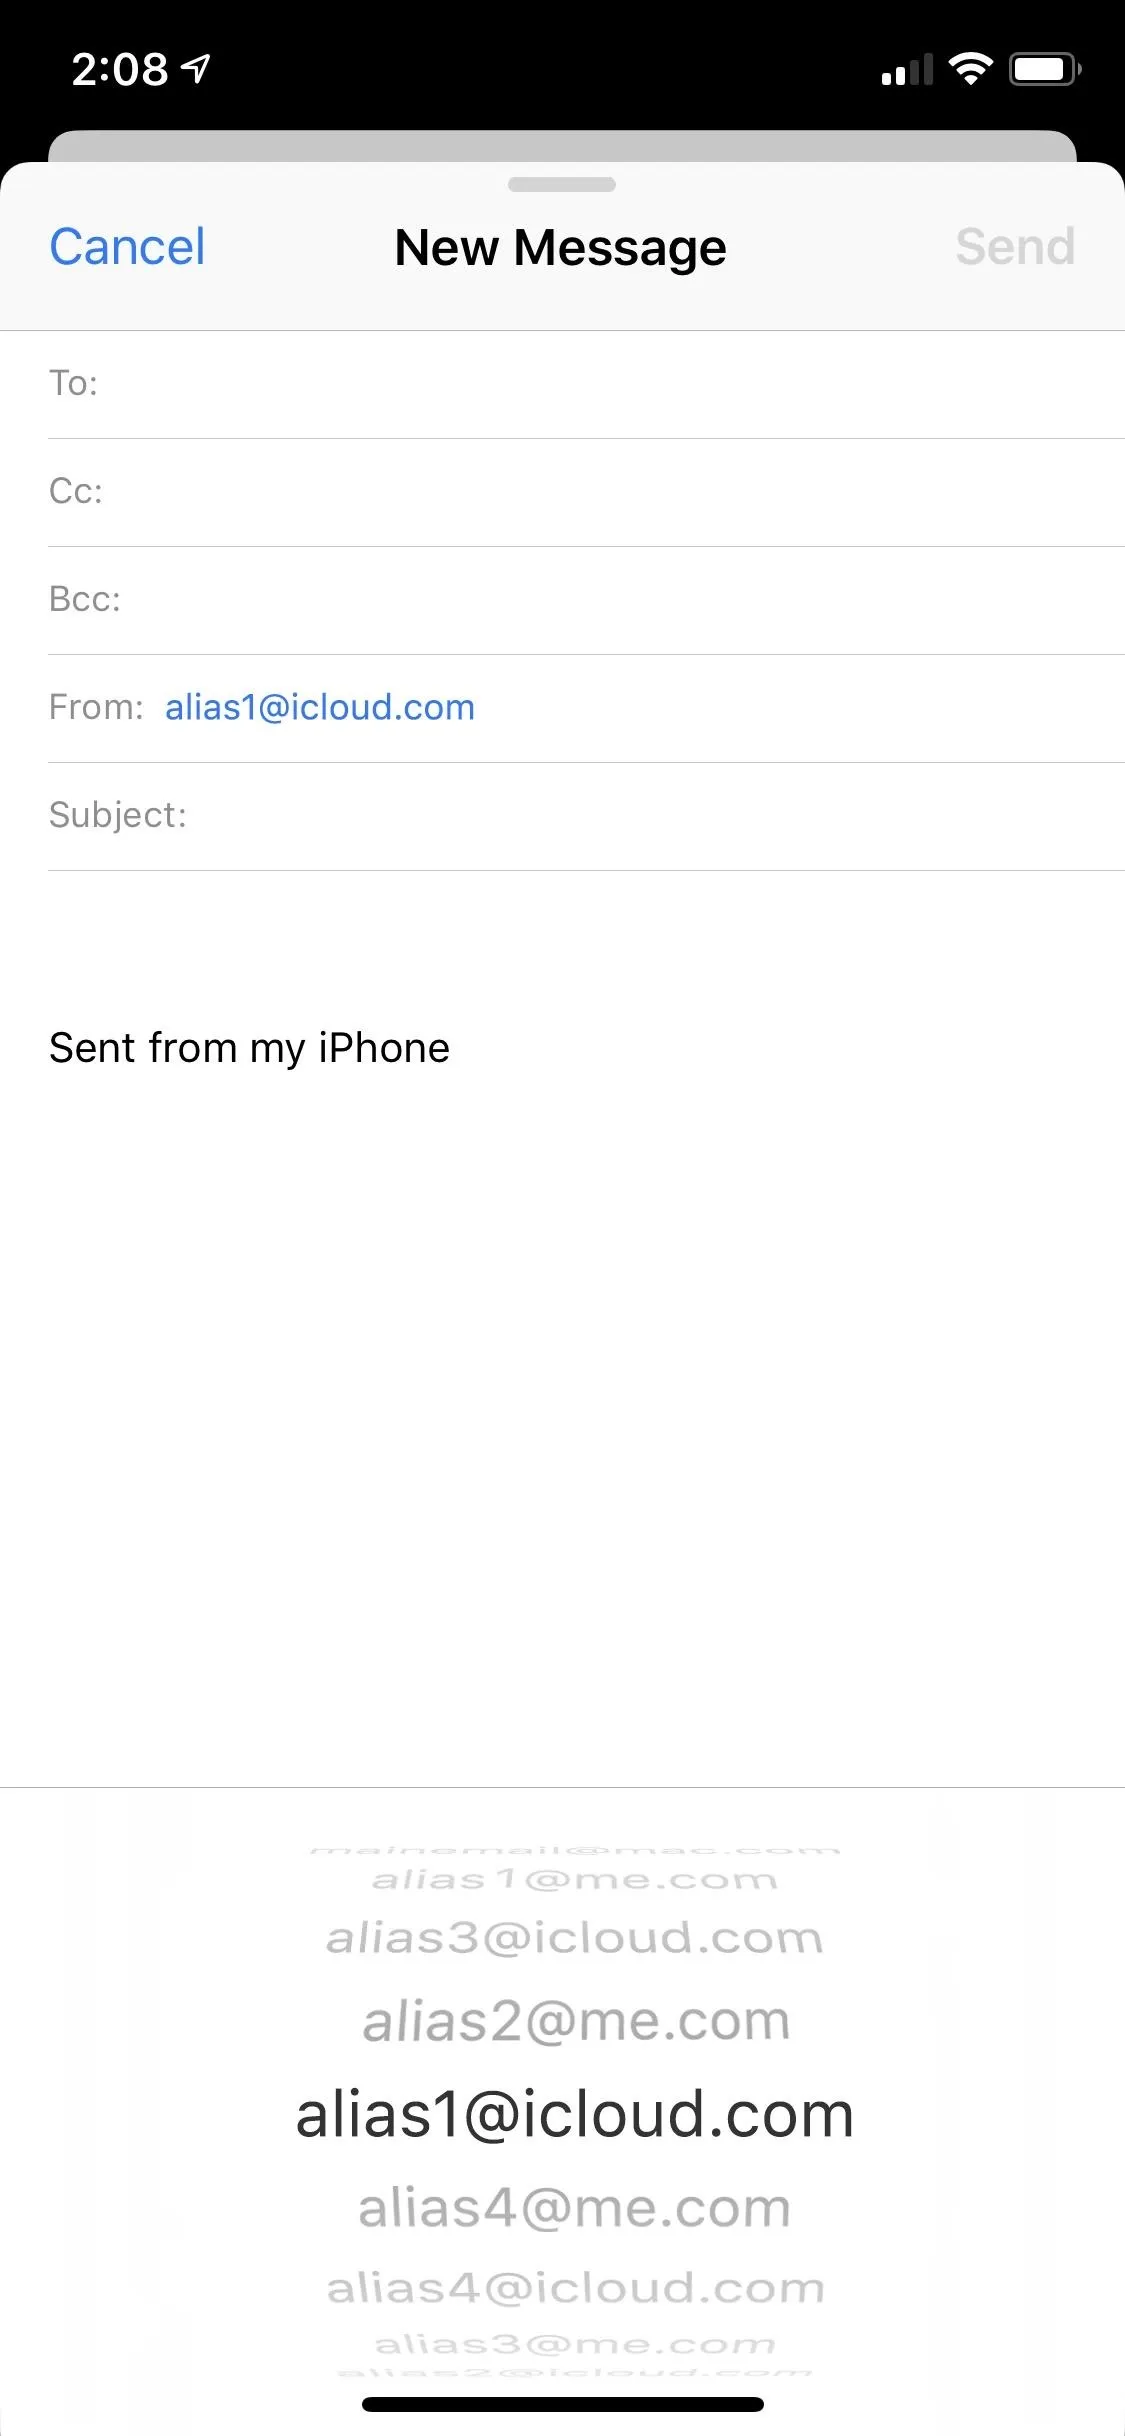
Simply deselect the Apple aliases you don't want showing up in your "From:" field when you compose emails. You won't be able to deselect the email address you use for your Apple ID — that one will be grayed out — but you should be able to deselect all of the others. Tap "Done" to save your settings.
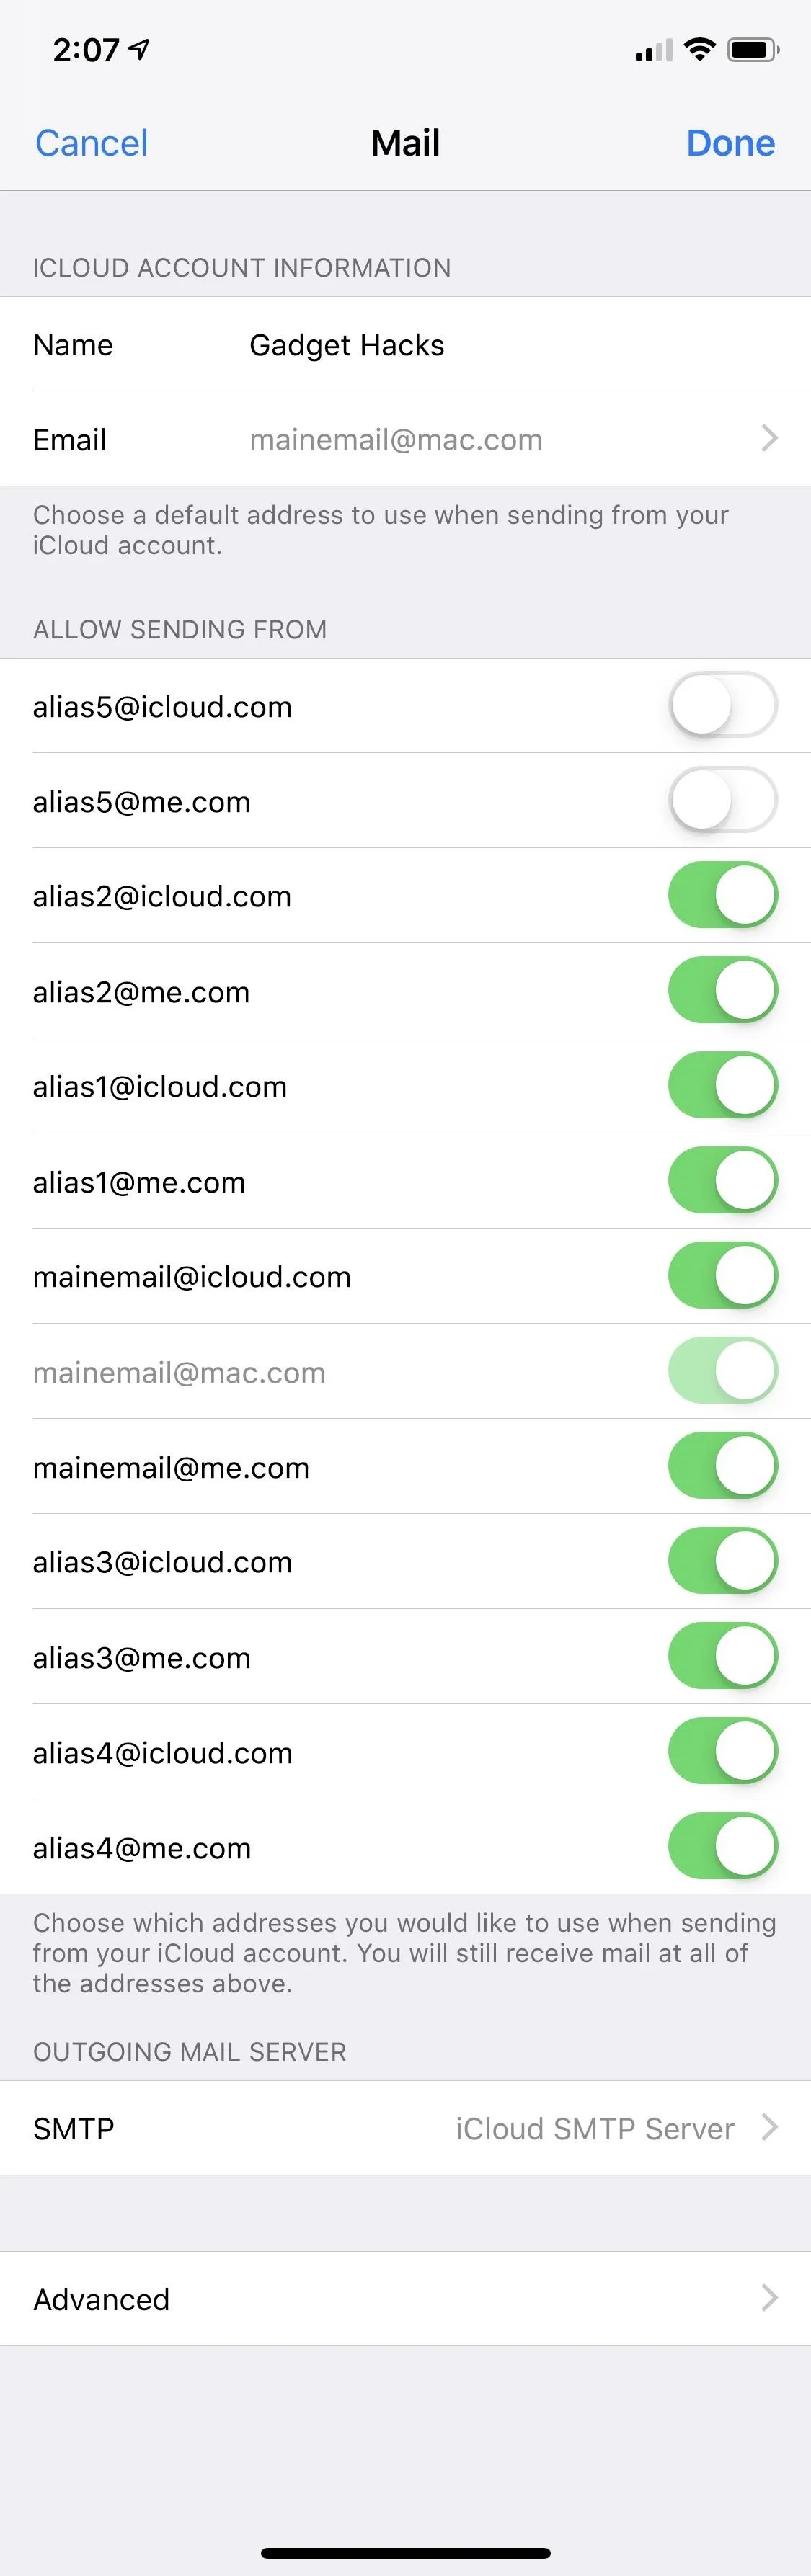
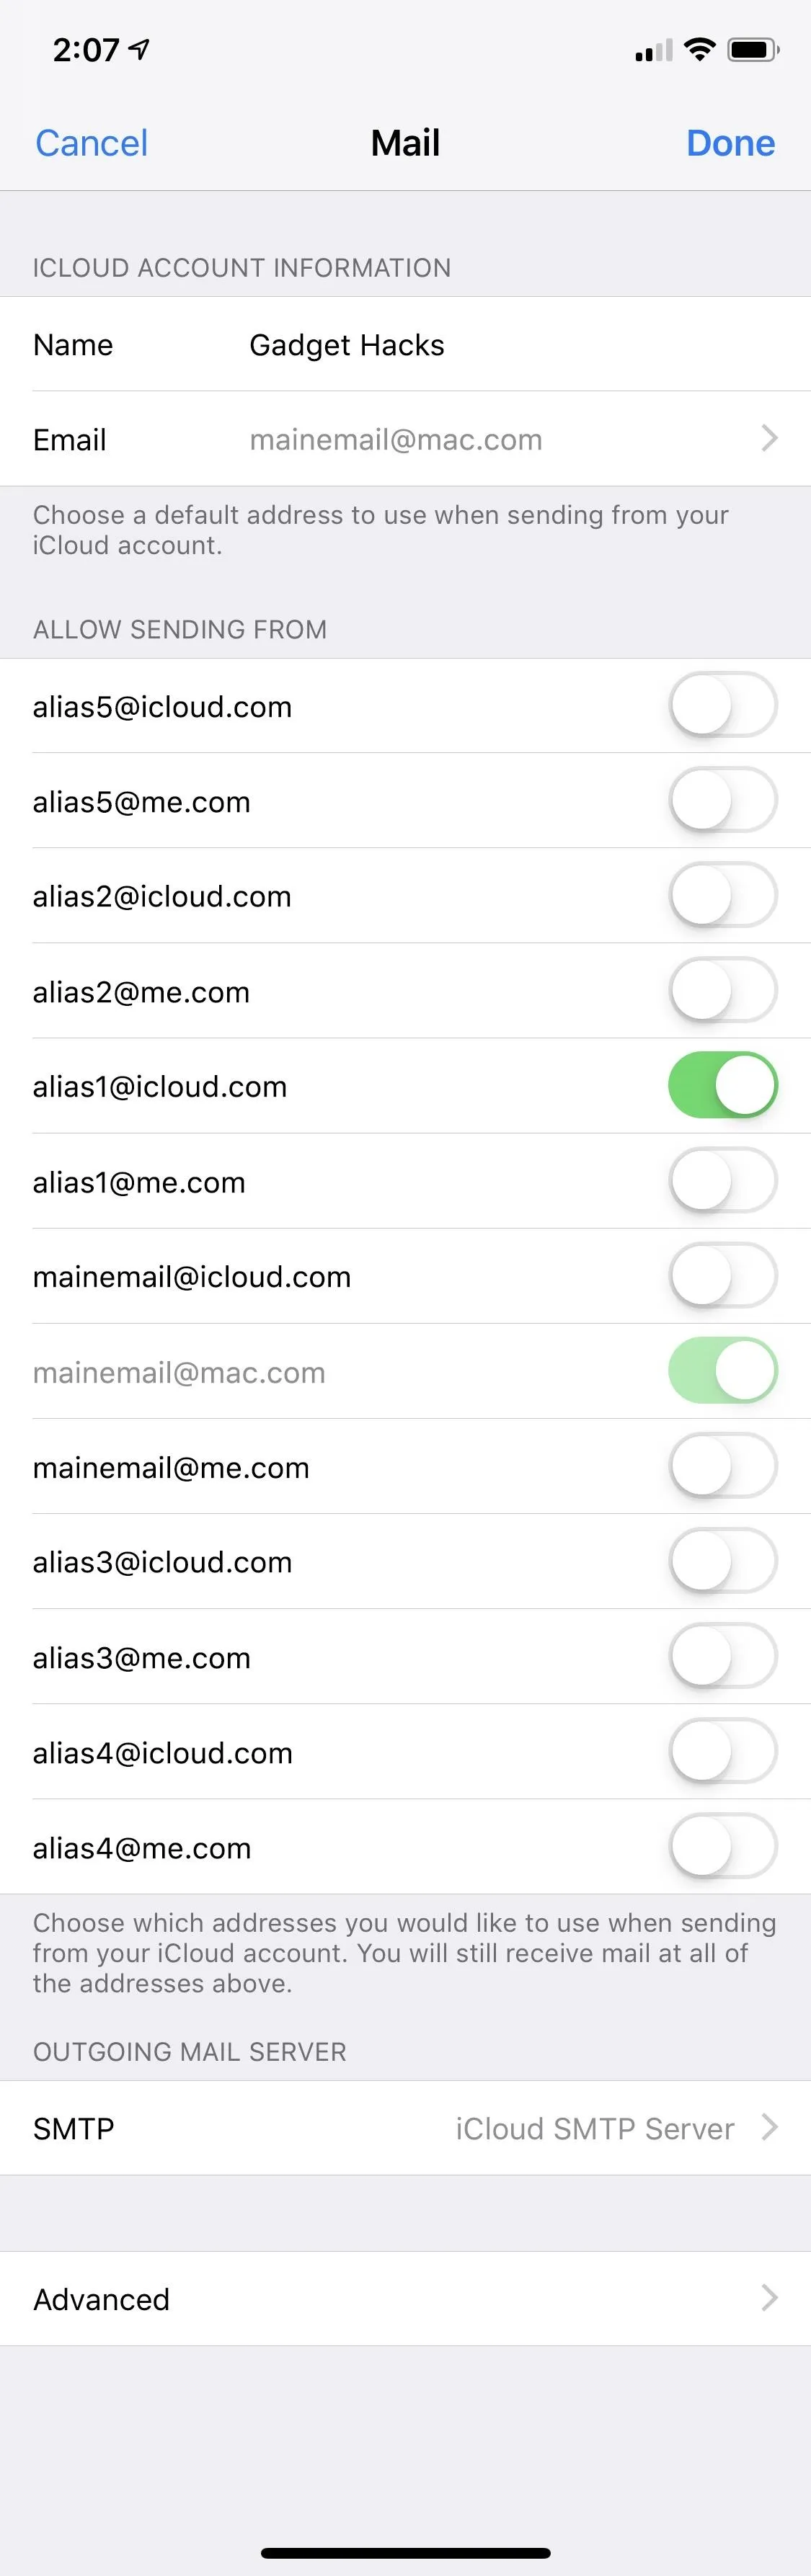
You will still receive emails at the hidden addresses. However, you won't be able to send emails from those addresses as long as they're hidden, and any replies to emails sent to those addresses will be sent from the email address you left visible in the above settings.
This won't impact any other email addresses you use in Mail, such as Gmail, Yahoo, Outlook, or a work address.
If you have an iPhone, iPad, and Mac, you should only have to do this on one device for it to take effect on all of them, as your Mail settings are saved to iCloud. Some users have reported that iOS software updates reset these toggles, so you may have to update these again later. Personally, we haven't experienced this issue and settings persist after every update.
Manage Unwanted Email Addresses (Optional)
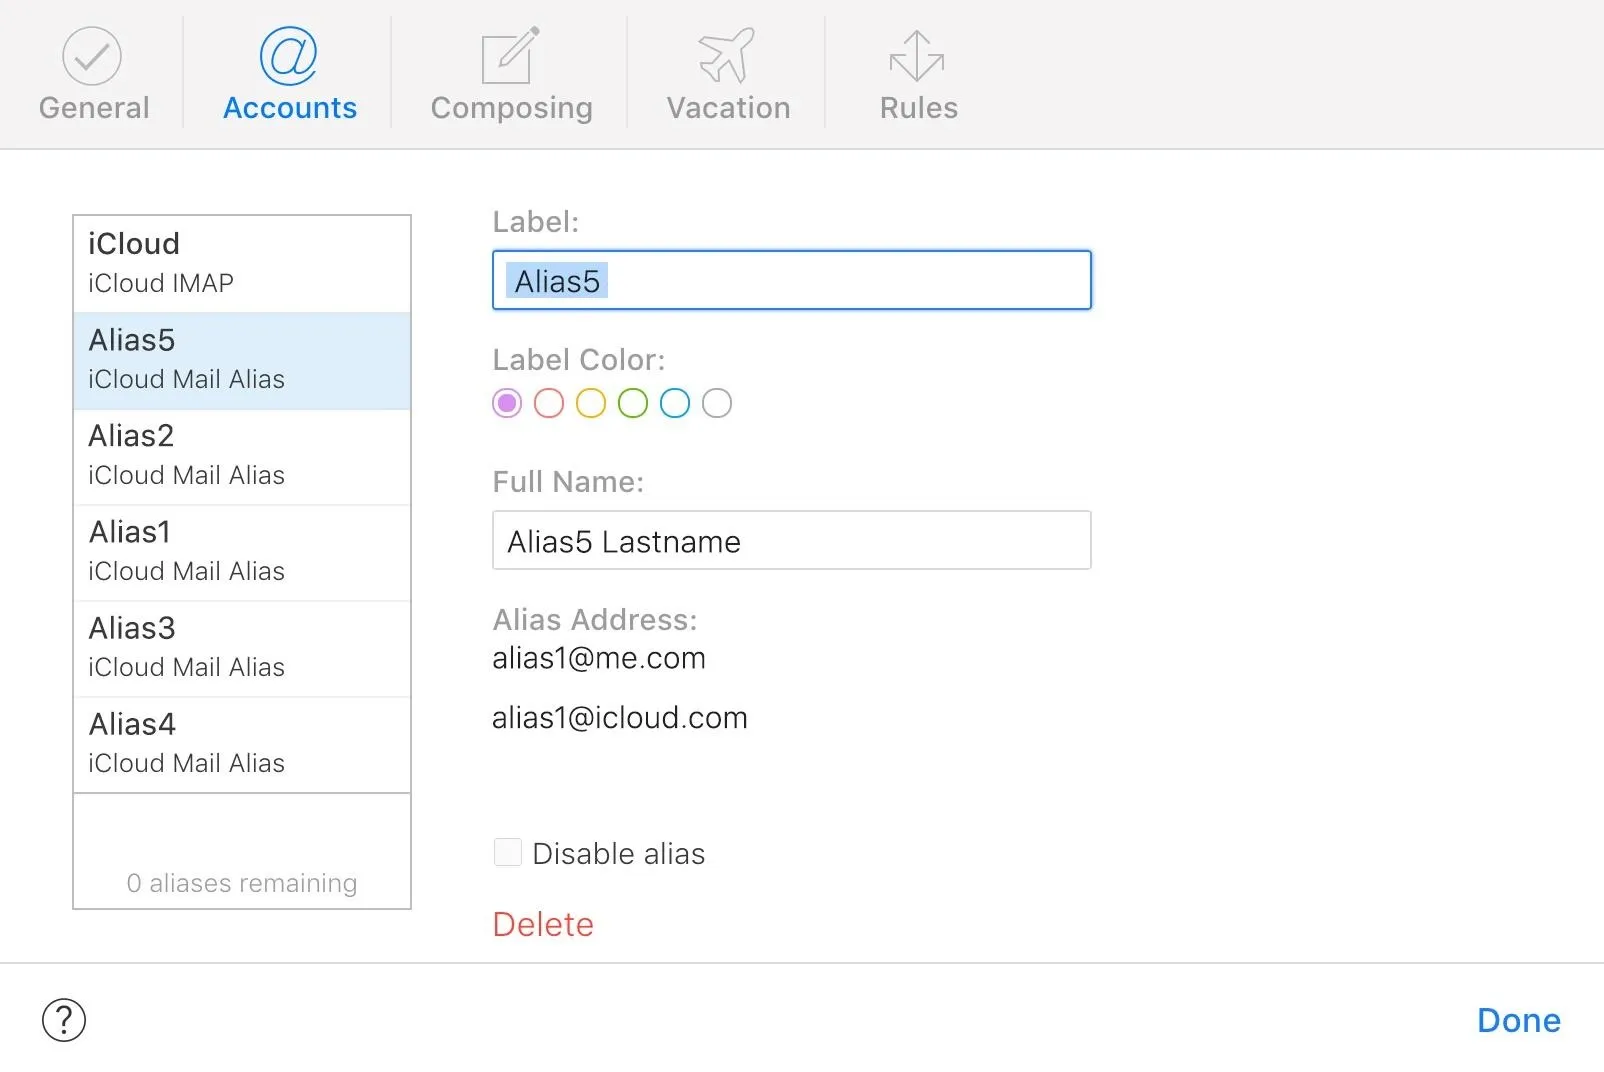
Don't think you'll ever use those aliases ever again? You can actually delete them from your iCloud account for good or just disable them temporarily. However, you can't do this from your Mail app — you need to do it from a browser.
Open up icloud.com in a web browser, sign in with your Apple ID and password, select the "Mail" option, then the cog in the bottom left. From the menu that appears, select "Preferences." Next, select the "Accounts" tab, then choose the alias you want to manage from the left column. On the right, you can check "Disable alias" to temporarily remove it or select "Delete" to get rid of it altogether.
Disabling an alias is temporary, while deleting will remove it entirely and cause mail sent to it to be returned to the sender.
Also note that if you have more than three aliases, and you delete one, you will not be able to create another alias. Apple only allows three aliases at any time now but did allow five total before. If you have five, you're grandfathered in and can keep them, but only if you don't delete them. For those that only have three or less, you can delete an alias and make a new one in its place.
If you want to remove third-party accounts, such as a Gmail, Yahoo, Outlook, or a work address, you'll need to manually delete them from the "Passwords & Accounts" menu in the Settings app.
- Follow Gadget Hacks on Pinterest, Twitter, YouTube, and Flipboard
- Sign up for Gadget Hacks' daily newsletter or weekly Android and iOS updates
- Follow WonderHowTo on Facebook, Twitter, Pinterest, and Flipboard
Cover image and screenshots by Justin Meyers/Gadget Hacks


Comments
Be the first, drop a comment!