


Have you ever heard someone else's iPhone ringing and thought it was yours? Of course you did. iPhone ringtones are iconic, but not varied. If you're using one of the more popular iOS sounds, you'll likely encounter it in the wild multiple times. Why bother, when you can create your own custom ringtones right on your Mac.
Before proceeding, you should know this guide is exclusively for those running macOS Catalina, Apple's latest update to the Mac. If you're running macOS Mojave or have a PC, we have a guide for creating custom ringtones right in iTunes. Since iTunes doesn't exist with Catalina, we need to see how this process works in the new Music app, as well as with Finder's newfound responsibilities.
You should also note that this method doesn't work with DRM-protected song files, meaning you won't be able to use Apple Music tracks to create ringtones. You'll also need to make sure the song in question is downloaded to your Mac. If you see a download icon next to the track you want to use, make sure to click it before following the steps below.
Choose Time Parameters for the Song
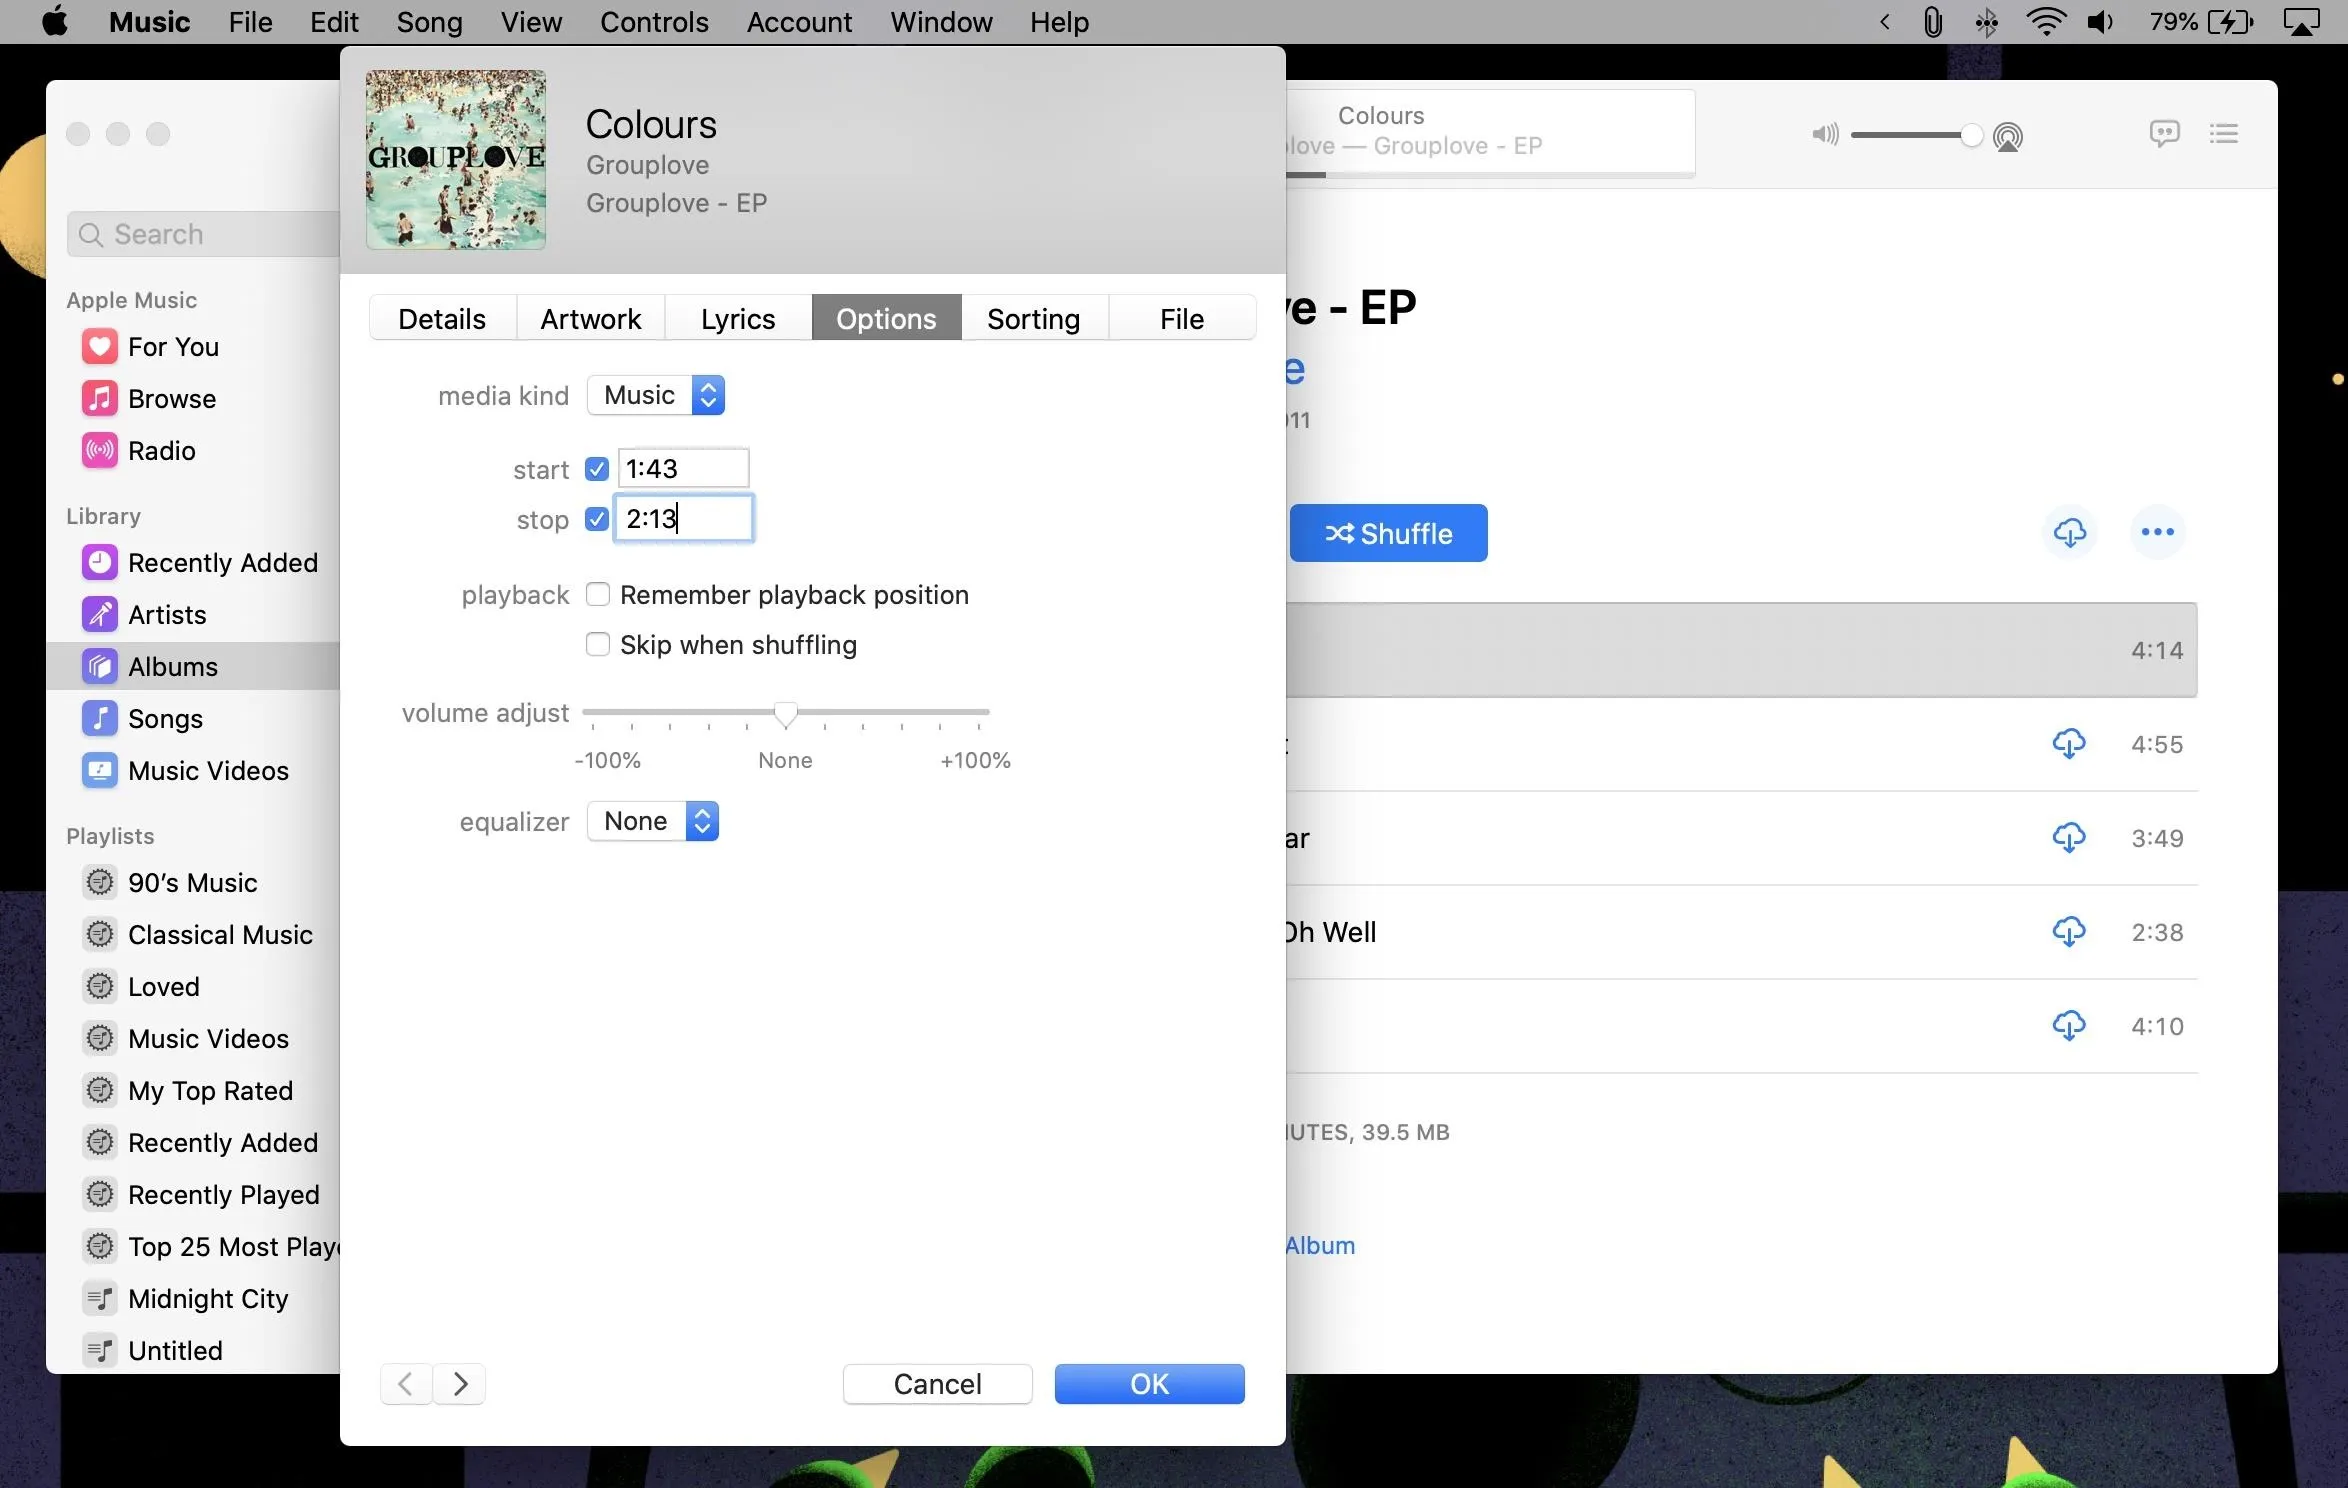
Did you know you can set a start and end time for any song in Music? When you do, Music plays only the selection of the track you've chosen. While this feature isn't expressly for ringtone creation, it's perfect for capturing the right length of a tone-to-be.
We want to be careful with how long we choose our song portions to be. Ringtones are limited to 40 seconds or less. If you make your selection longer than that, the ringtone won't even appear on your iPhone. Not only that, 30 seconds is the cut off for alert tones, including sounds for texts, emails, calendar events, etc. If your ringtone exceeds 30 seconds, you won't be able to choose the sound as an alert tone. It will only appear for ringtones.
We recommend keeping your tones at or below 30 seconds, for maximum compatibility.
When you know how much of your song you want to use, open the song's info window. The quickest way is to highlight the track by clicking it once, then press Command-I on the keyboard. You'll also find "Song Info" when clicking on the (•••) next to the song, by right-clicking on the song, or from the Song option in the menu bar.

Once you're in "Song Info," click "Options." Here, you'll find "start" and "stop" boxes. Enter your specified time in the field next to each, then ensure both checkmarks are enabled before clicking "OK" at the bottom of the window. Just to be clear, you don't need to click the checkmark if the start time is 0:00, or if the end of your ringtone happens to be the end of the song.
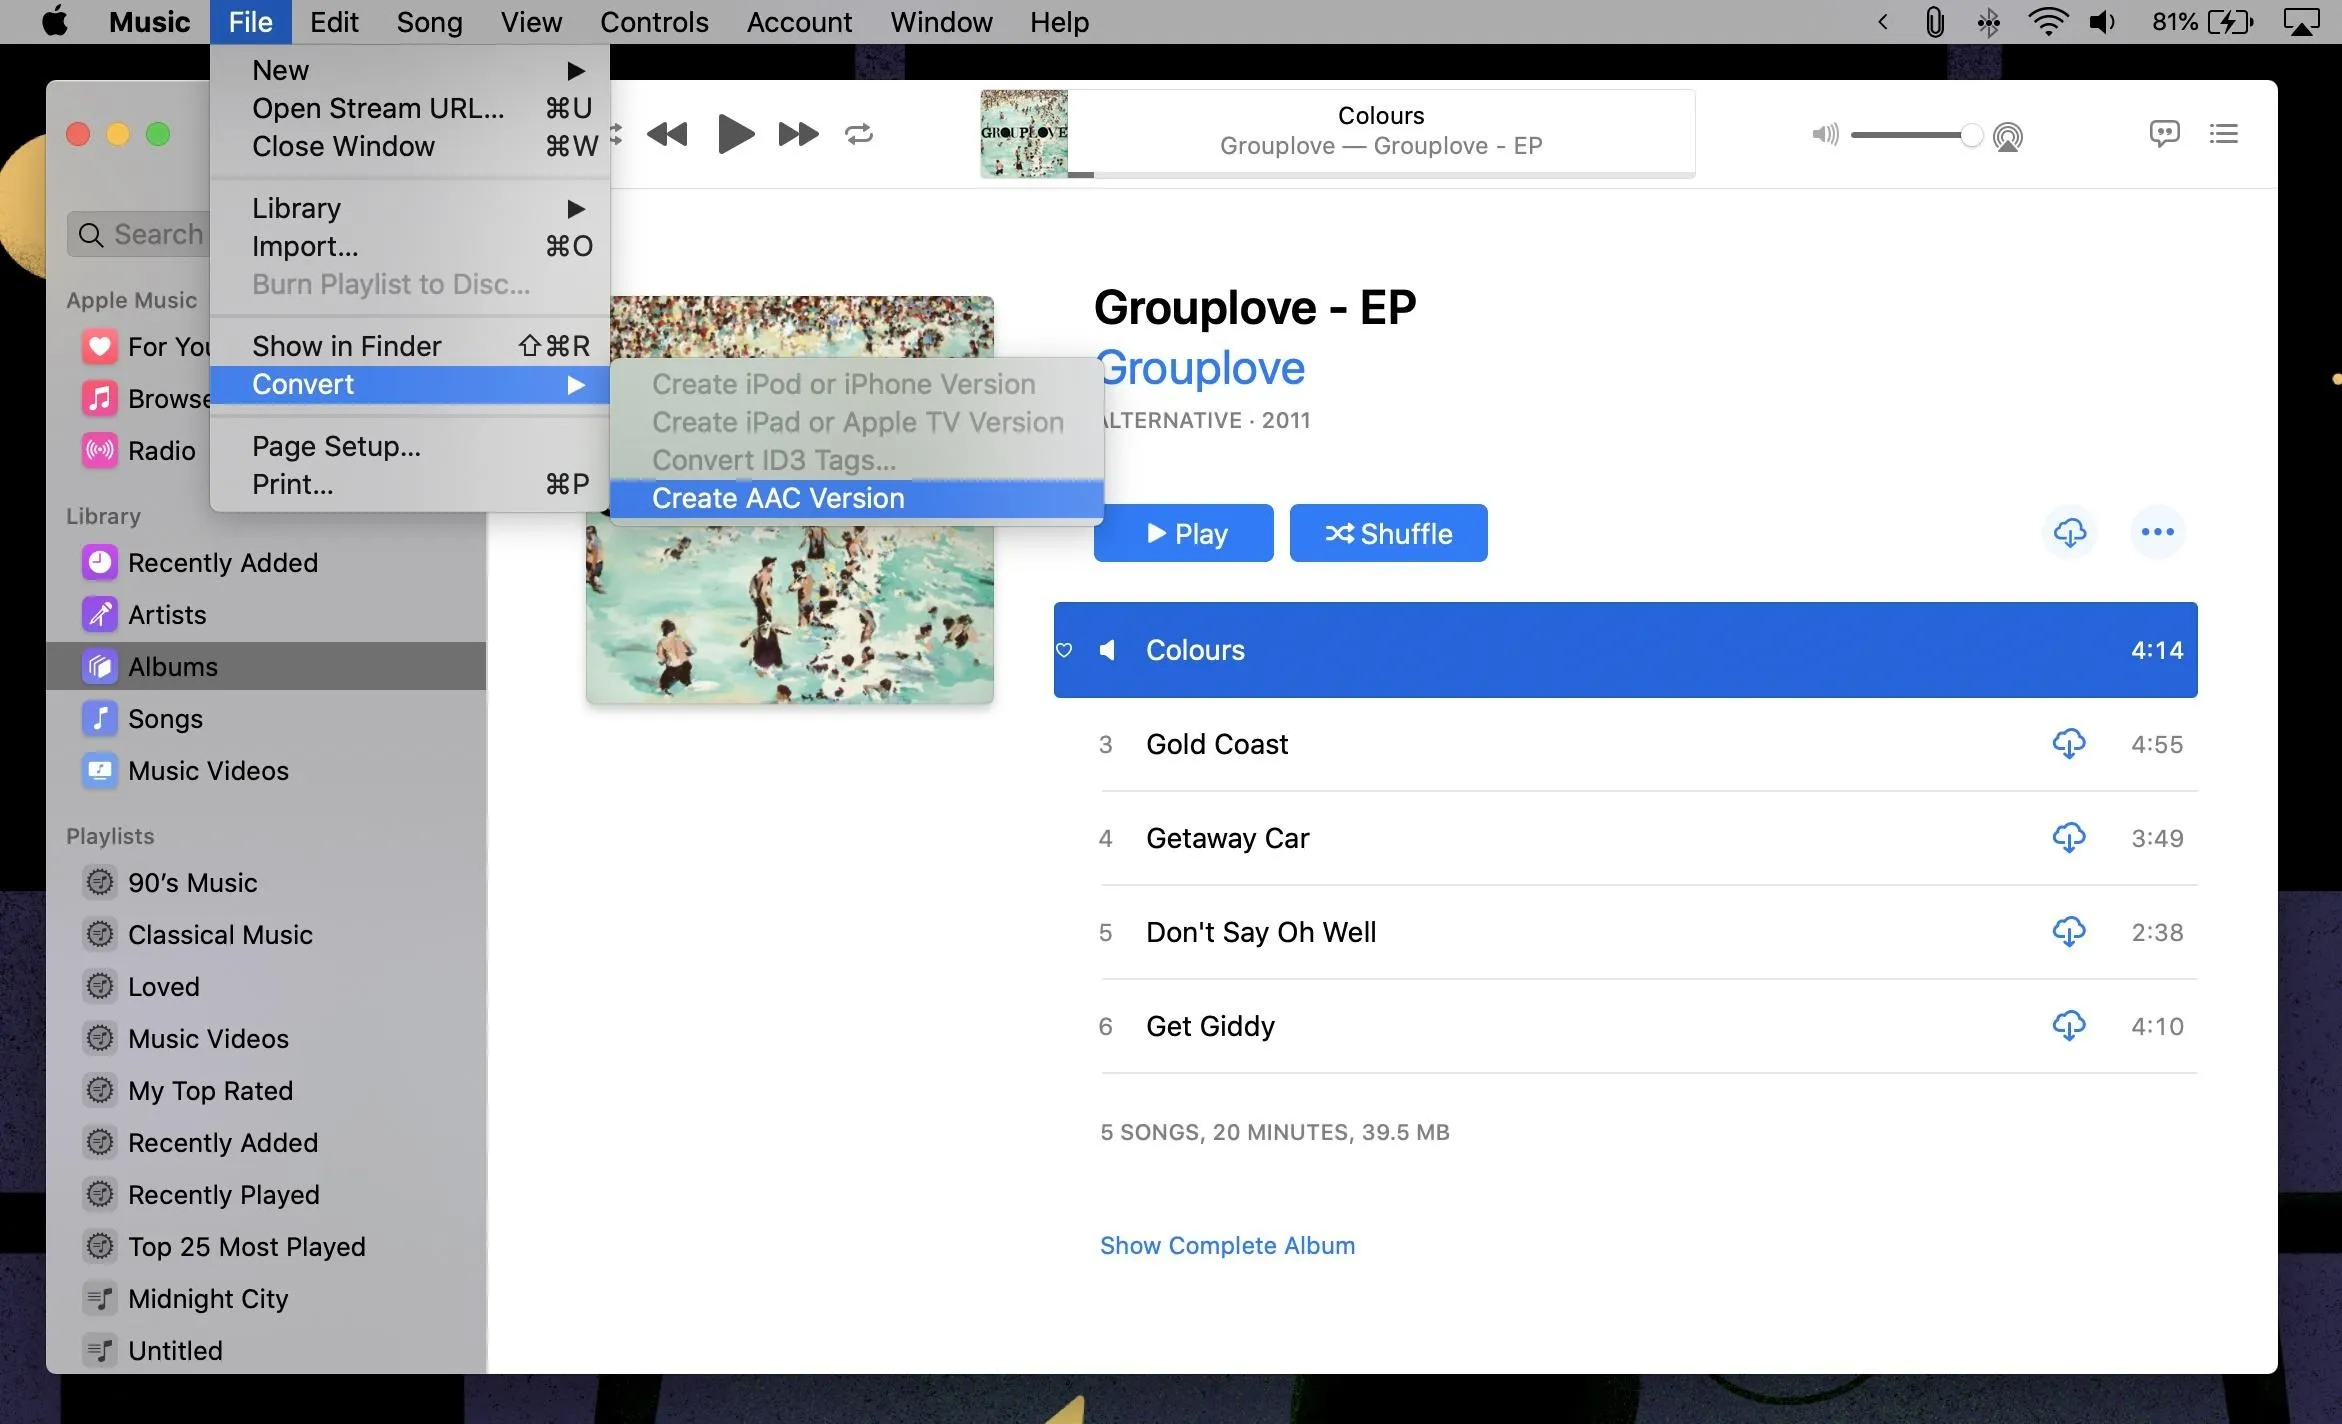
Convert the Song to AAC
AAC is basically a better version of MP3. It's the same bit rate as MP3, but with a higher-quality compression, so your tracks sound better while taking up less space. It's a win-win.
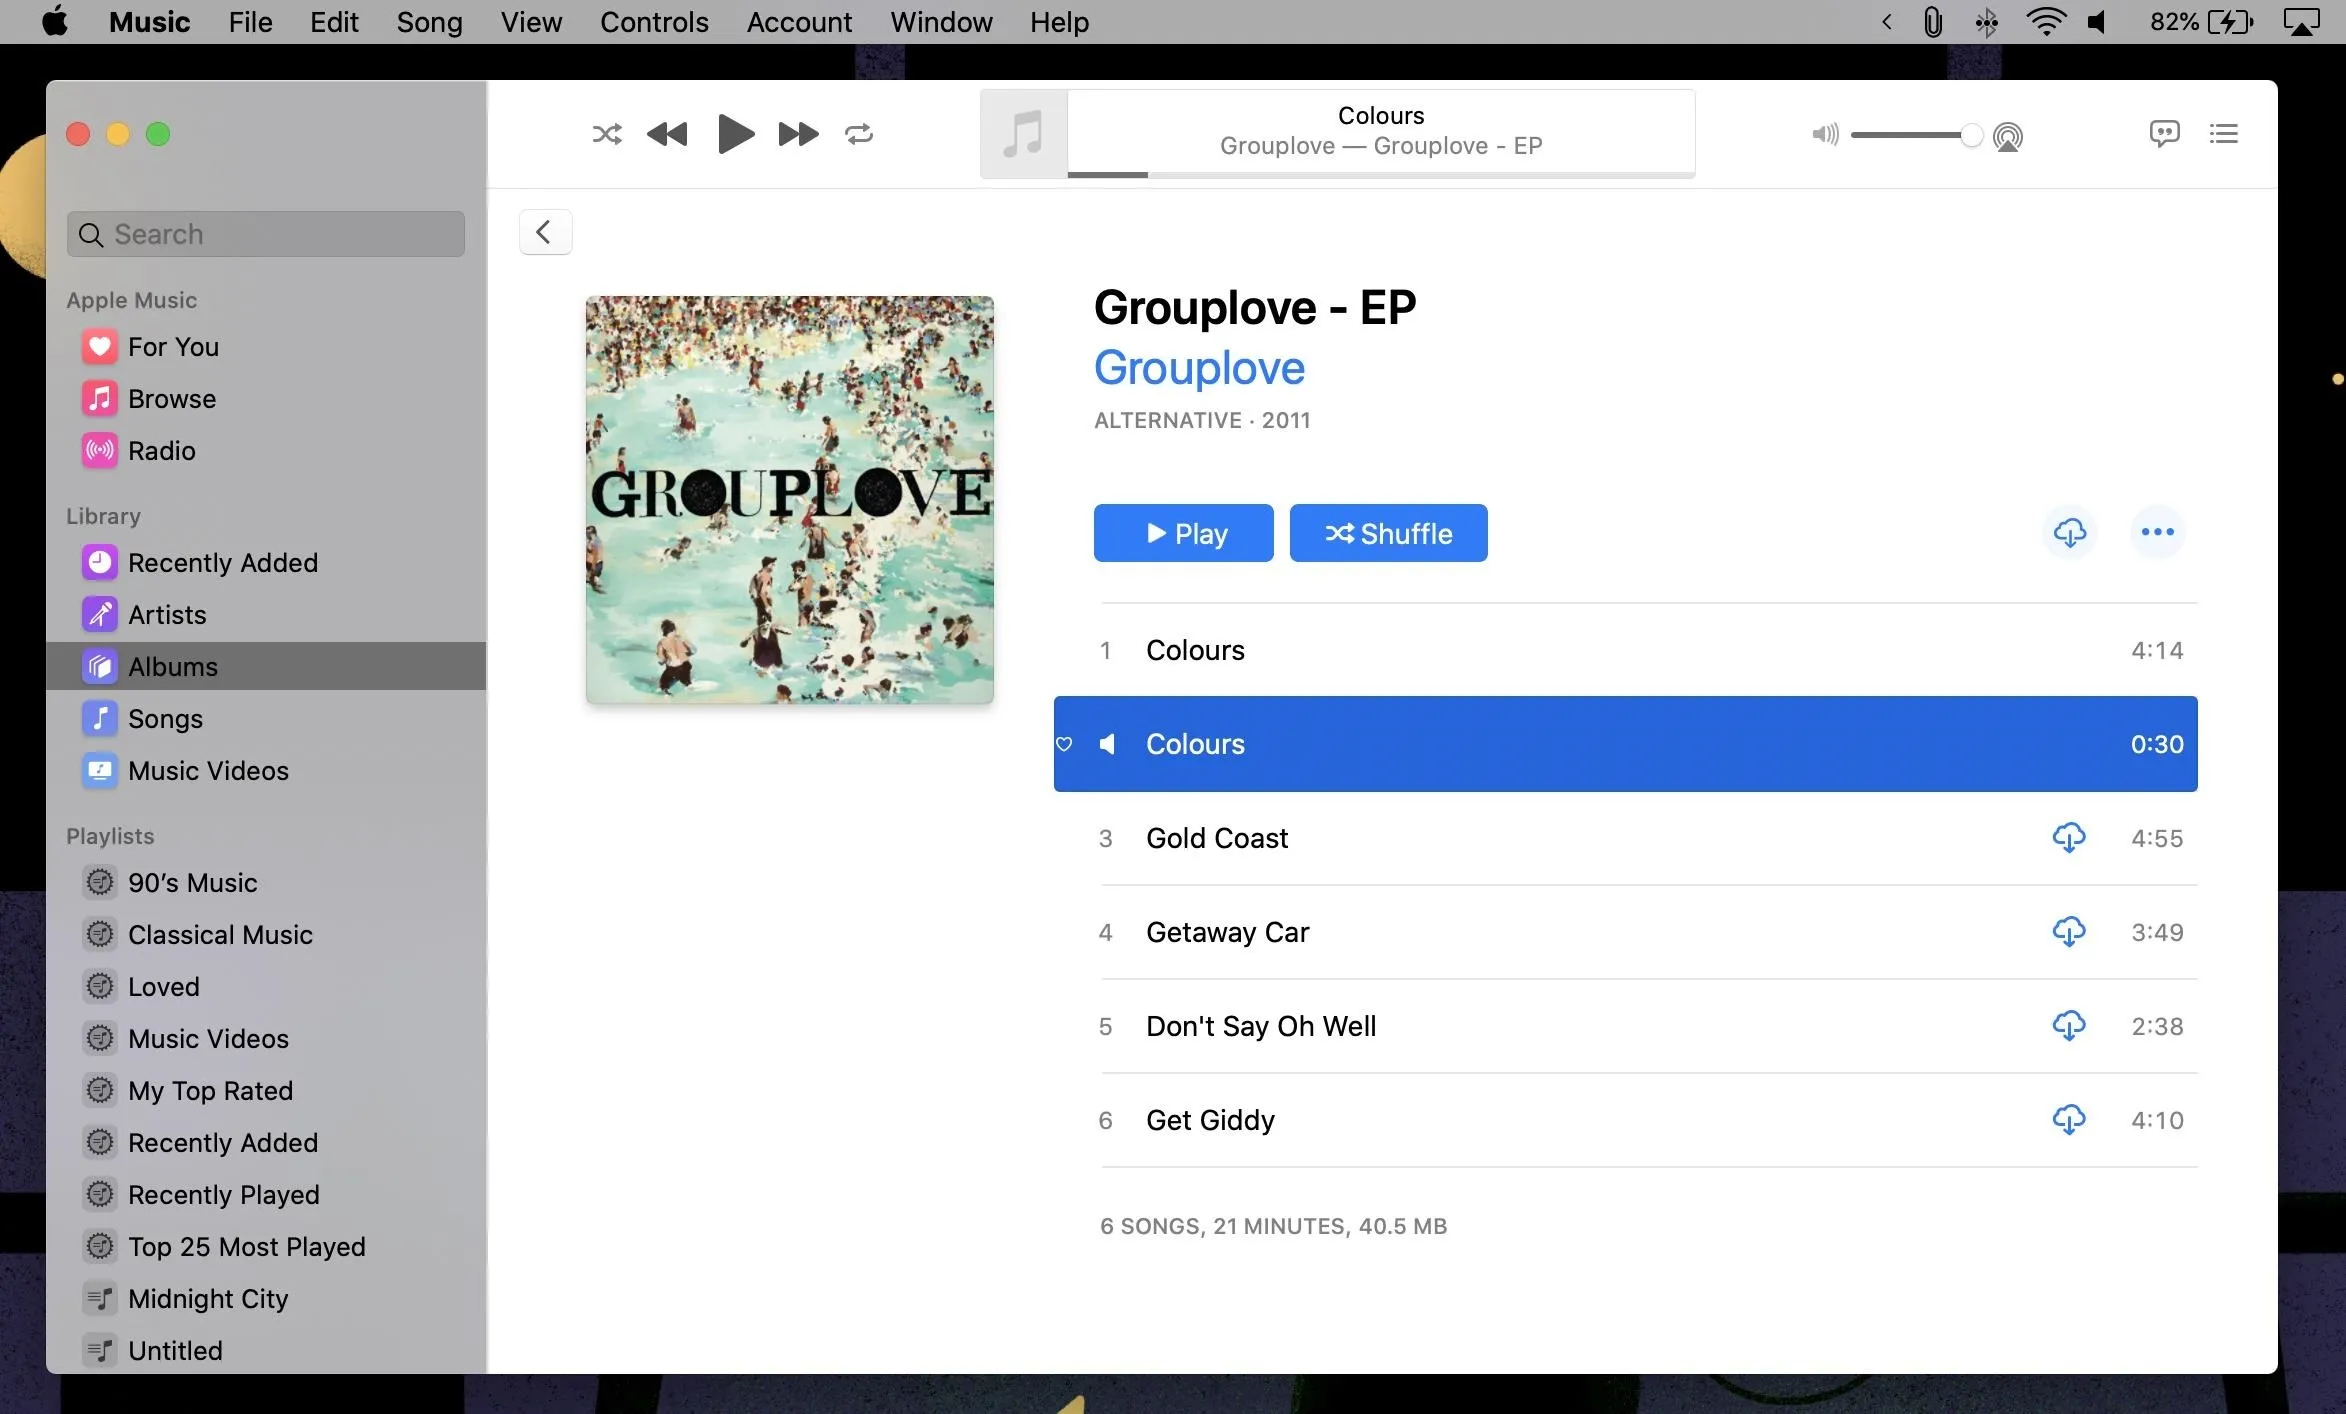
You'll need to convert your song to AAC in order to turn it into a ringtone. When you convert to AAC, you'll create a version of the song that only contains your chosen time parameters. If your original song was 4:26, you'll see the copied version read 0:30, or whatever time parameter you chose.
To get started, click "File" in the menu bar, then "Convert," then finally "Create AAC Version." This option creates a copy of the ringtone-sized song in AAC. Don't worry, the original song stays untouched.
As you can see, Music adds the AAC file directly under the original, with all but the timestamp differentiating the two. Before you go, head back into the original song's "Song Info" page and change the start and stop times back to normal. That way, you won't be caught off guard when you hear what sounds like your ringtone playing in Music.
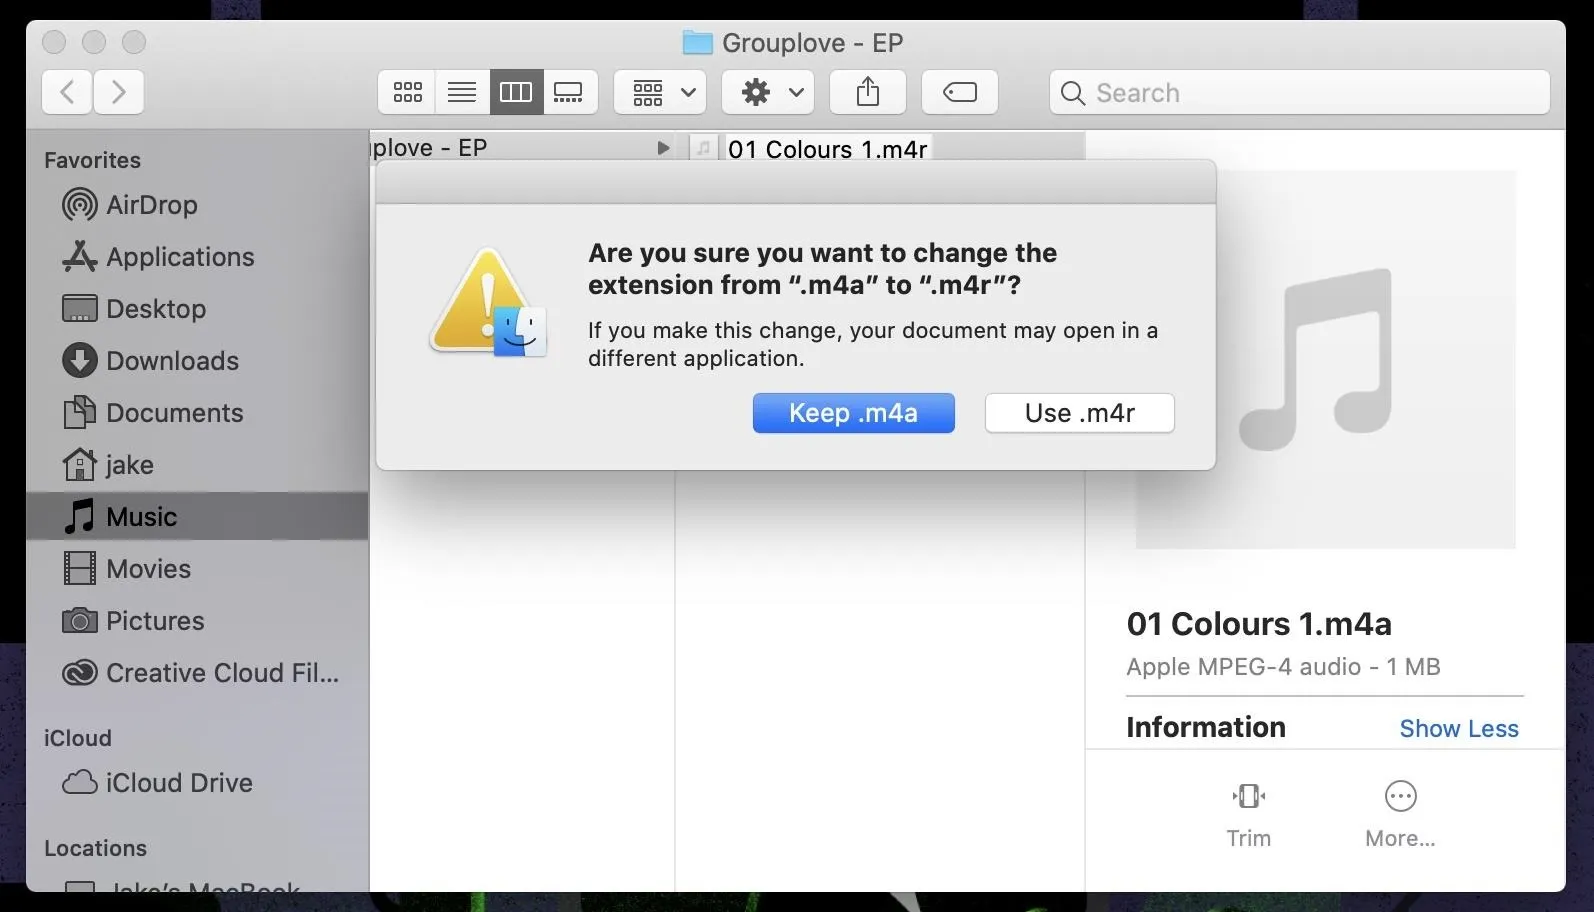
Covert the File from M4A to M4R
Converting to AAC just changed the encoding of the file. We now need to change the filetype to .m4r, the format Apple recognizes for ringtones.
The first way to go about this is to drag and drop the file to your desktop. Alternatively, you can right-click on the file and choose "Show in Finder" to have macOS bring you to the file in Finder. Now, right-click the file and choose "Rename," then change the extension at the end of the file name to "m4r," then choose "Use .m4r" on the popup.
Sync Your New Ringtone to Your iPhone
Now, connect your iPhone to your computer using your Lightning to USB-A or Lightning to USB-C cable. If you sync wirelessly, make to connect to the same Wi-Fi network as your computer. While Finder does take the lead in Catalina when it comes to syncing your iPhone with your Mac, Music has some limited syncing abilities as well. Interestingly, the following can be accomplished in either app, so choose whichever is most convenient to you.
If syncing in Music, all that's left to do is take the .m4r file and drag it over your iPhone under Devices, or over your iPhone's sync window. Music will almost instantly sync the ringtone with your iPhone. Once it's finished, you'll be able to use your ringtone right away.
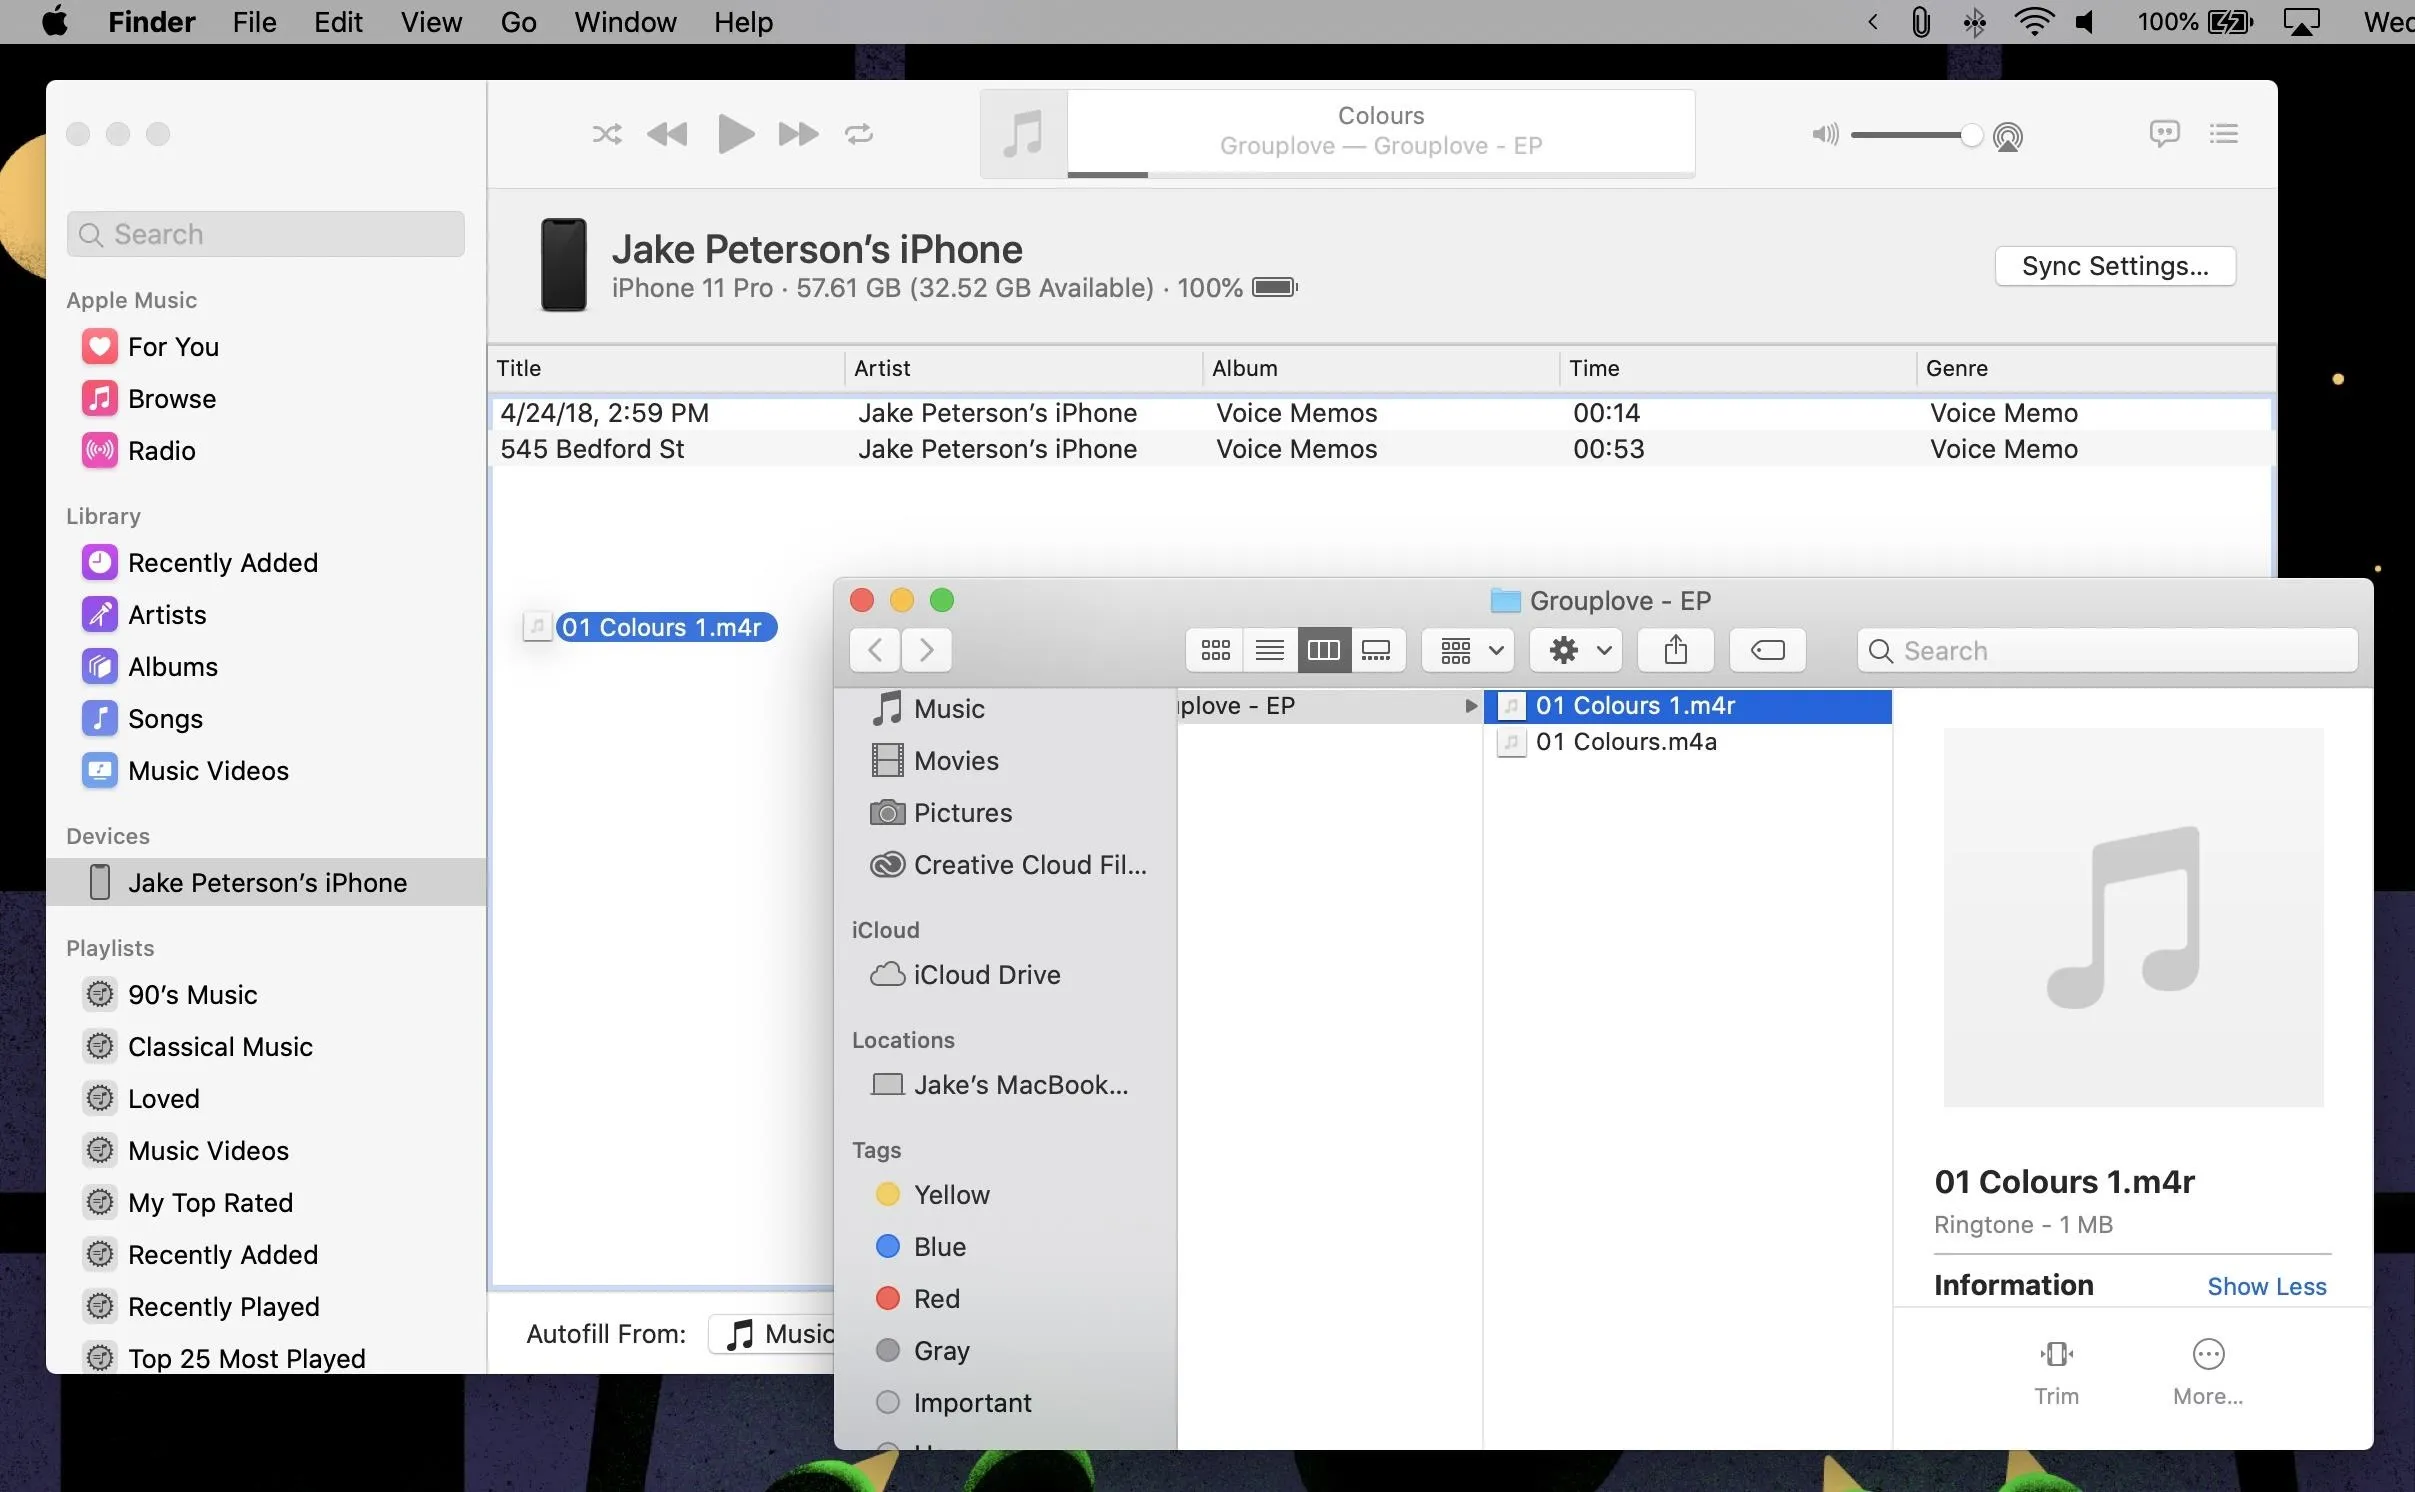
If syncing in Finder, you'll see your iPhone under Locations. If your iPhone doesn't appear, open Music, then click your iPhone under Devices. Here, choose "Sync Settings," and Finder will open accordingly. Now, drag and drop your ringtone file in the Finder sync window, exactly as you would in Music.

Set Your Ringtone on Your iPhone
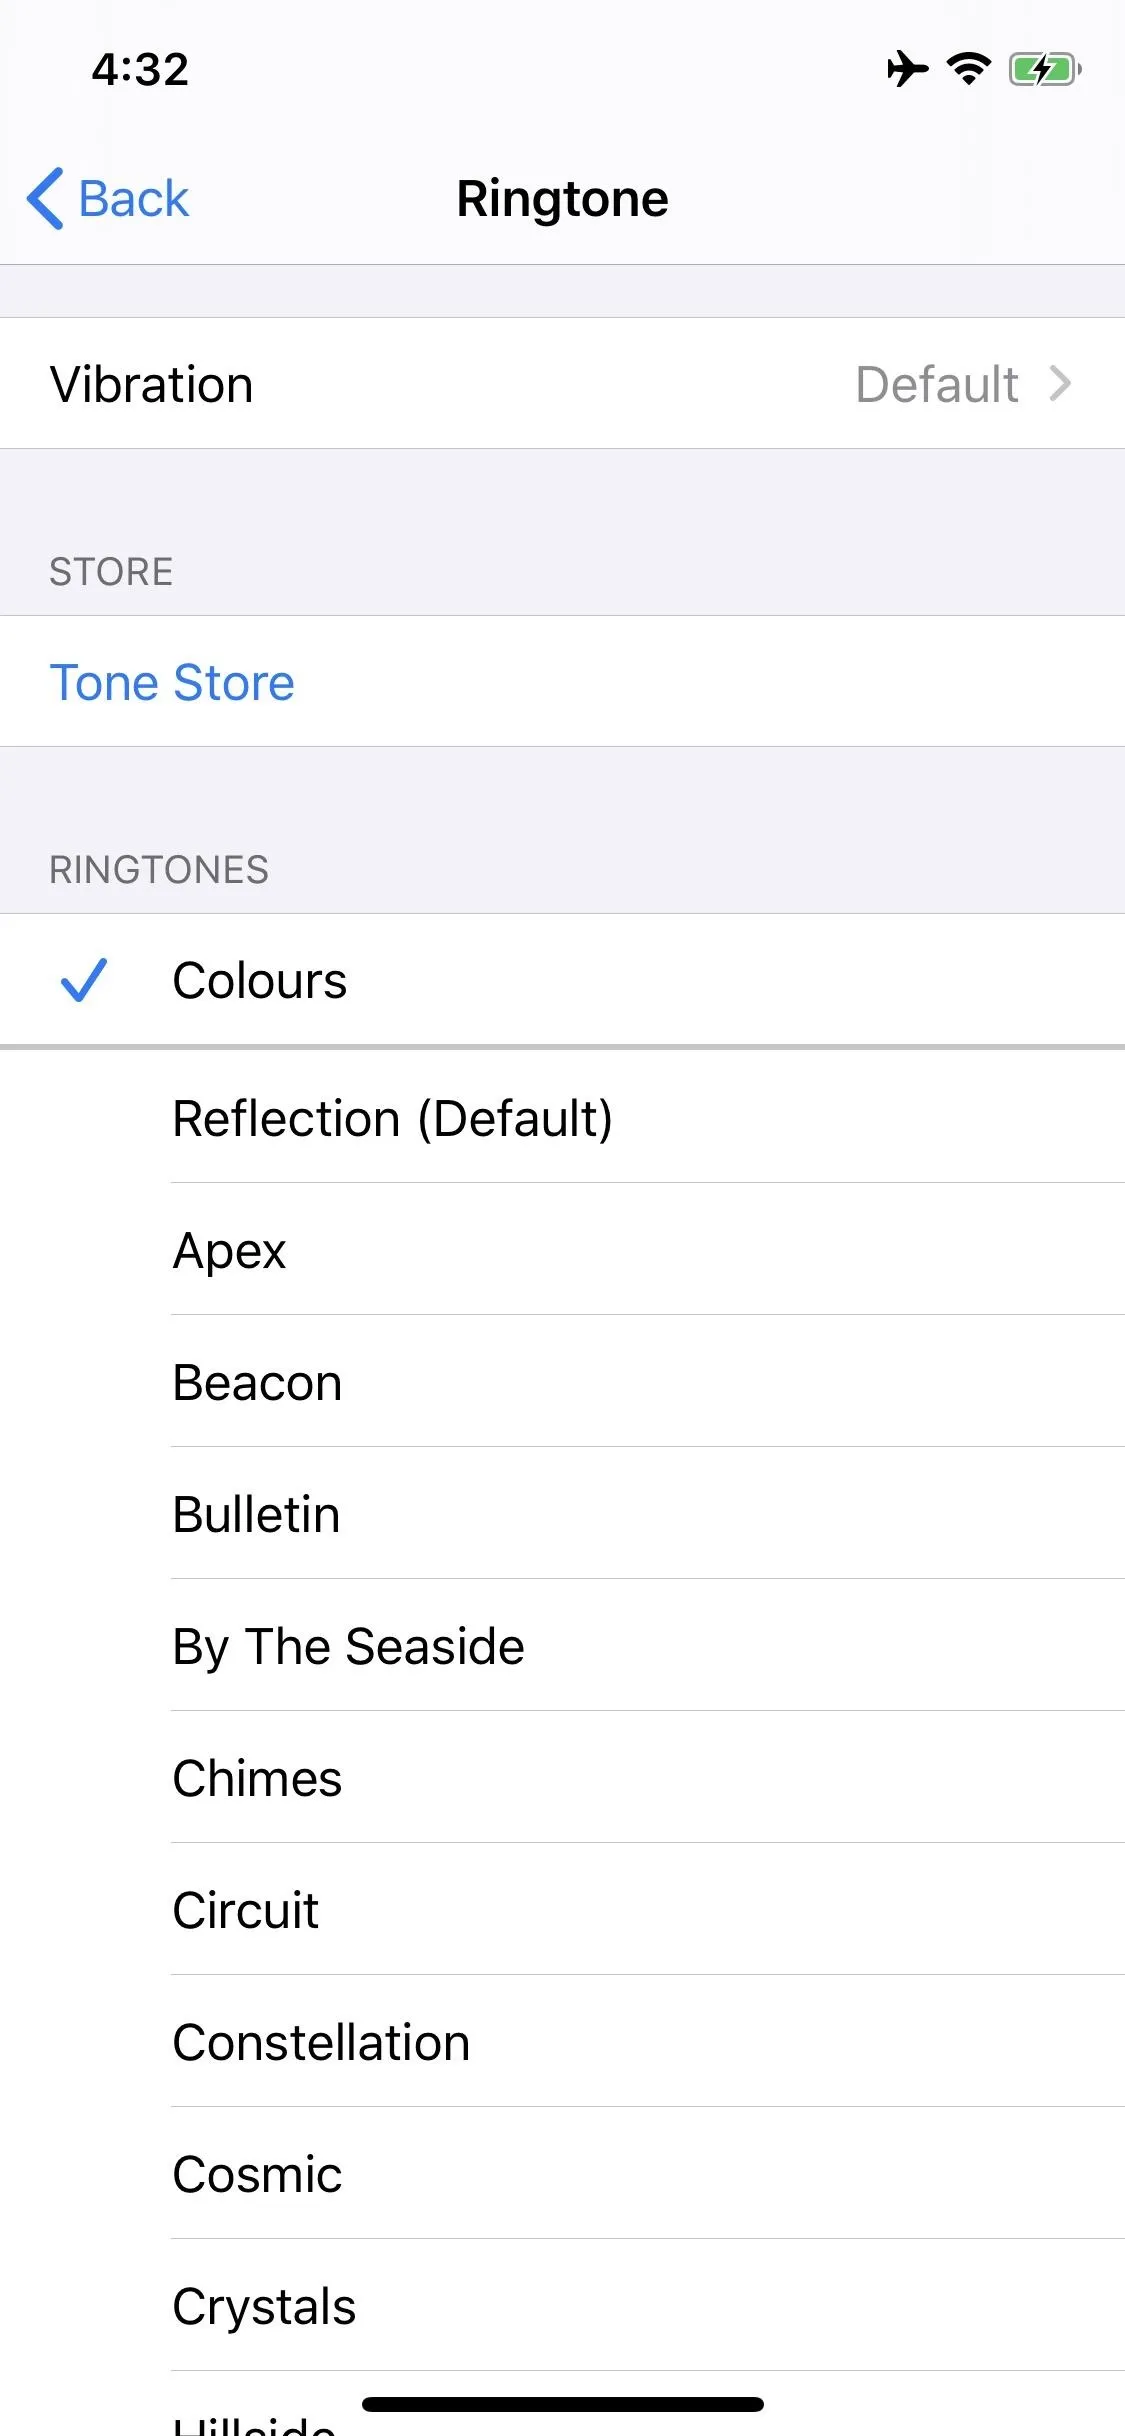
If all goes well, you should find your new ringtone in Settings –> Sounds & Haptics –> Ringtone. You'll find this tone and any other custom ones hanging out above the stock sounds. Just tap the new ringtone, and it will apply to all but any contacts you've designated a custom ringtone for.
Like we mentioned earlier, you can use this ringtone as an alert tone as well as for any of the options listed on this page. Just remember, the tone needs to be 30 seconds or less, or else you won't find it as an option in these sections.

If you just want to apply this new ringtone to a select number of contacts, you can do that, too. First, open the contact page for the person in question, choose "Edit" in the top-right corner of the page, choose "Ringtone," then pick your custom tone. The same goes for "Text Tone," as long as your song is 30 seconds or less.
Cover image and screenshots by Jake Peterson/Gadget Hacks


Comments
Be the first, drop a comment!