


When you want to post a breathtaking landscape or picture-perfect portrait that you just took with your DSLR camera to Instagram, Facebook, or some other social platform, there's an easy way to do so — even if you don't have a computer handy, which is typical when you're out and about.
Even if you're not out and about, there's a good chance you do most of your photo editing on your iPhone or iPad since there are hundreds of paid and free photo editors and filter apps in the iOS App Store. Transferring photos and videos to your computer first, then using AirPlay to put them on your iPhone, is an overly complicated process. Plus, you'd need your computer, and that's clunky.
Most newer DSLRs from Canon, Nikon, and other manufacturers come equipped with Wi-Fi functionality, and with that turned on, you can connect to your DSLR access point via your iPhone's Wi-Fi settings. However, you have to use the same app from the manufacturer of your camera to view and transfer your photos and videos this way. Wi-Fi isn't always fast either, especially if you shoot in RAW.
The Best Way Is to Use a Wired Adapter
Wireless is always preferred, but in this case, a wired adapter makes more sense; It's faster, it's tiny, it uses Apple's own import interface, and it will import directly into the Photos app. As far as adapters go, there are three categories you can choose from that Apple sells, and which one you get depends mostly on what kind of DSLR you have and just general preference. There are cheaper third-party products, but they are not as reliable as Apple's, which aren't all that expensive to begin with.
Lightning to SD Card Camera Reader
Apple's Lightning to SD Card Camera Reader connects right to the Lightning port on your iPhone, and you insert your camera's SD card into the reader slot. If you have a point-and-shoot instead of a DSLR, you can use an SD card adapter with your miniSD or microSD card.
This will not work with CompactFlash (CF) cards.
Once the card is inserted, Photos is automatically opened where you can view, download, and delete files. For iPhones, you get USB 2 data transfer speeds, though some iPad models can get USB 3 speeds.
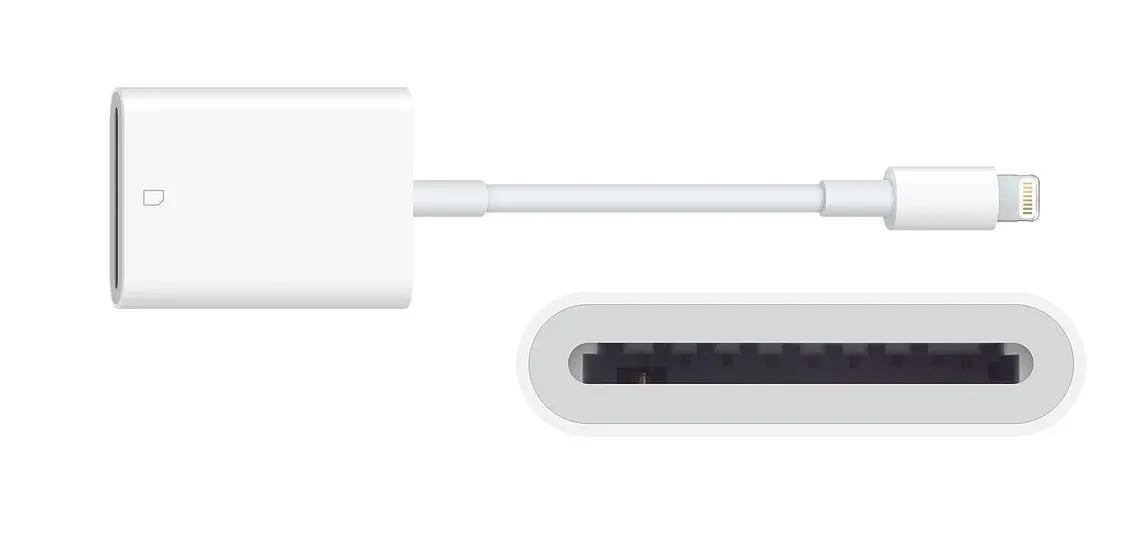
Apple's Lightning to SD Card Camera Reader.
Lightning to USB 3 Camera Adapter
Apple's Lightning to USB 3 Camera Adapter connects right to the Lightning port on your iPhone, and you insert a USB-to-Mini-USB cable into it. That cable would go right into the Mini-USB port on your DSLR.
Once you turn on your DSLR, the Photos app opens where you can view, download, and delete files. If you want to use a third-party card reader instead of your camera to read the card, you'll likely need to plug in a power source to the adapter's Lightning port to power the card reader. One benefit of this is that it will charge your iPhone at the same time.
For iPhones, you get USB 2 data transfer speeds, though some iPad models can get USB 3 speeds.
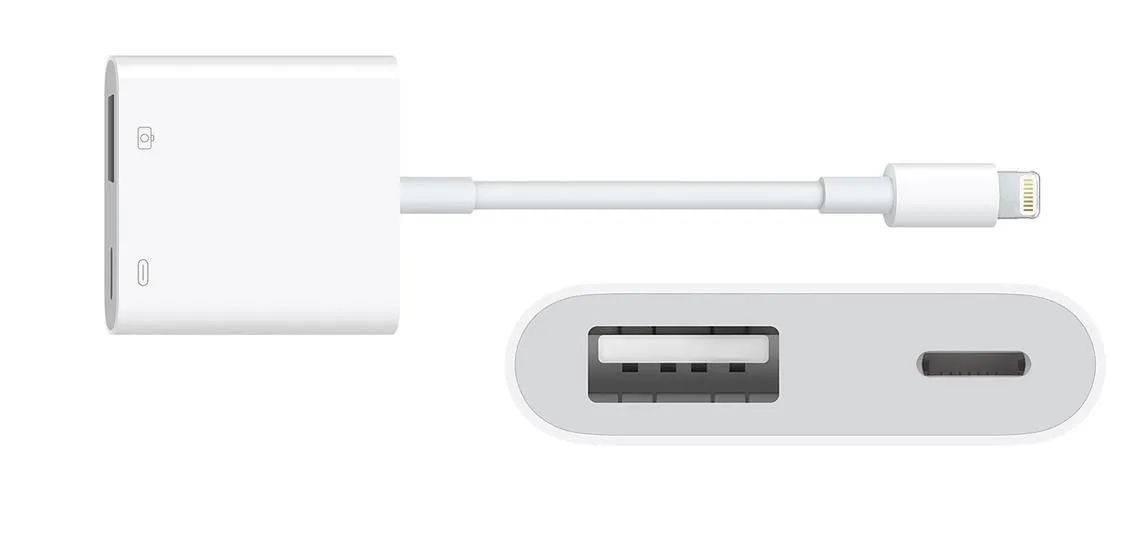
Apple's Lightning to USB 3 Camera Adapter.
Lightning to USB Camera Adapter
Apple's Lightning to USB Camera Adapter connects right to the Lightning port on your iPhone, and you insert a USB-to-Mini-USB cable into it. That cable would go right into the Mini-USB port on your DSLR.
Once you turn on your DSLR, the Photos app opens where you can view, download, and delete files. Unlike the adapter above, you can't connect third-party card readers to this unless they are powered somehow. For iPhones, you get USB 2 data transfer speeds.

Apple's Lightning to USB Camera Adapter.
For all three of these options, you need to be running iOS 9 or higher. Also, each of these adapters supports JPEG, RAW, and other standard photo formats, as well as H.264, MPEG-4, and other SD and HD video formats.
Connecting Your Card to Your iPhone
These cables are all plug-and-play unless you're using a third-party card reader, in which case you would need a power source of some sort. For the rest of this article, I'll be using the Lightning to USB Camera Adapter as an example.
After I connect the adapter to my iPhone, with a Mini-USB cable between the adapter and my DSLR, I would just need to turn on the camera to turn it into a certified card reader. Since my camera uses CompactFlash cards, this is the easiest way for me to work, since the Lightning to SD Card Camera Reader doesn't accept CompactFlash cards.
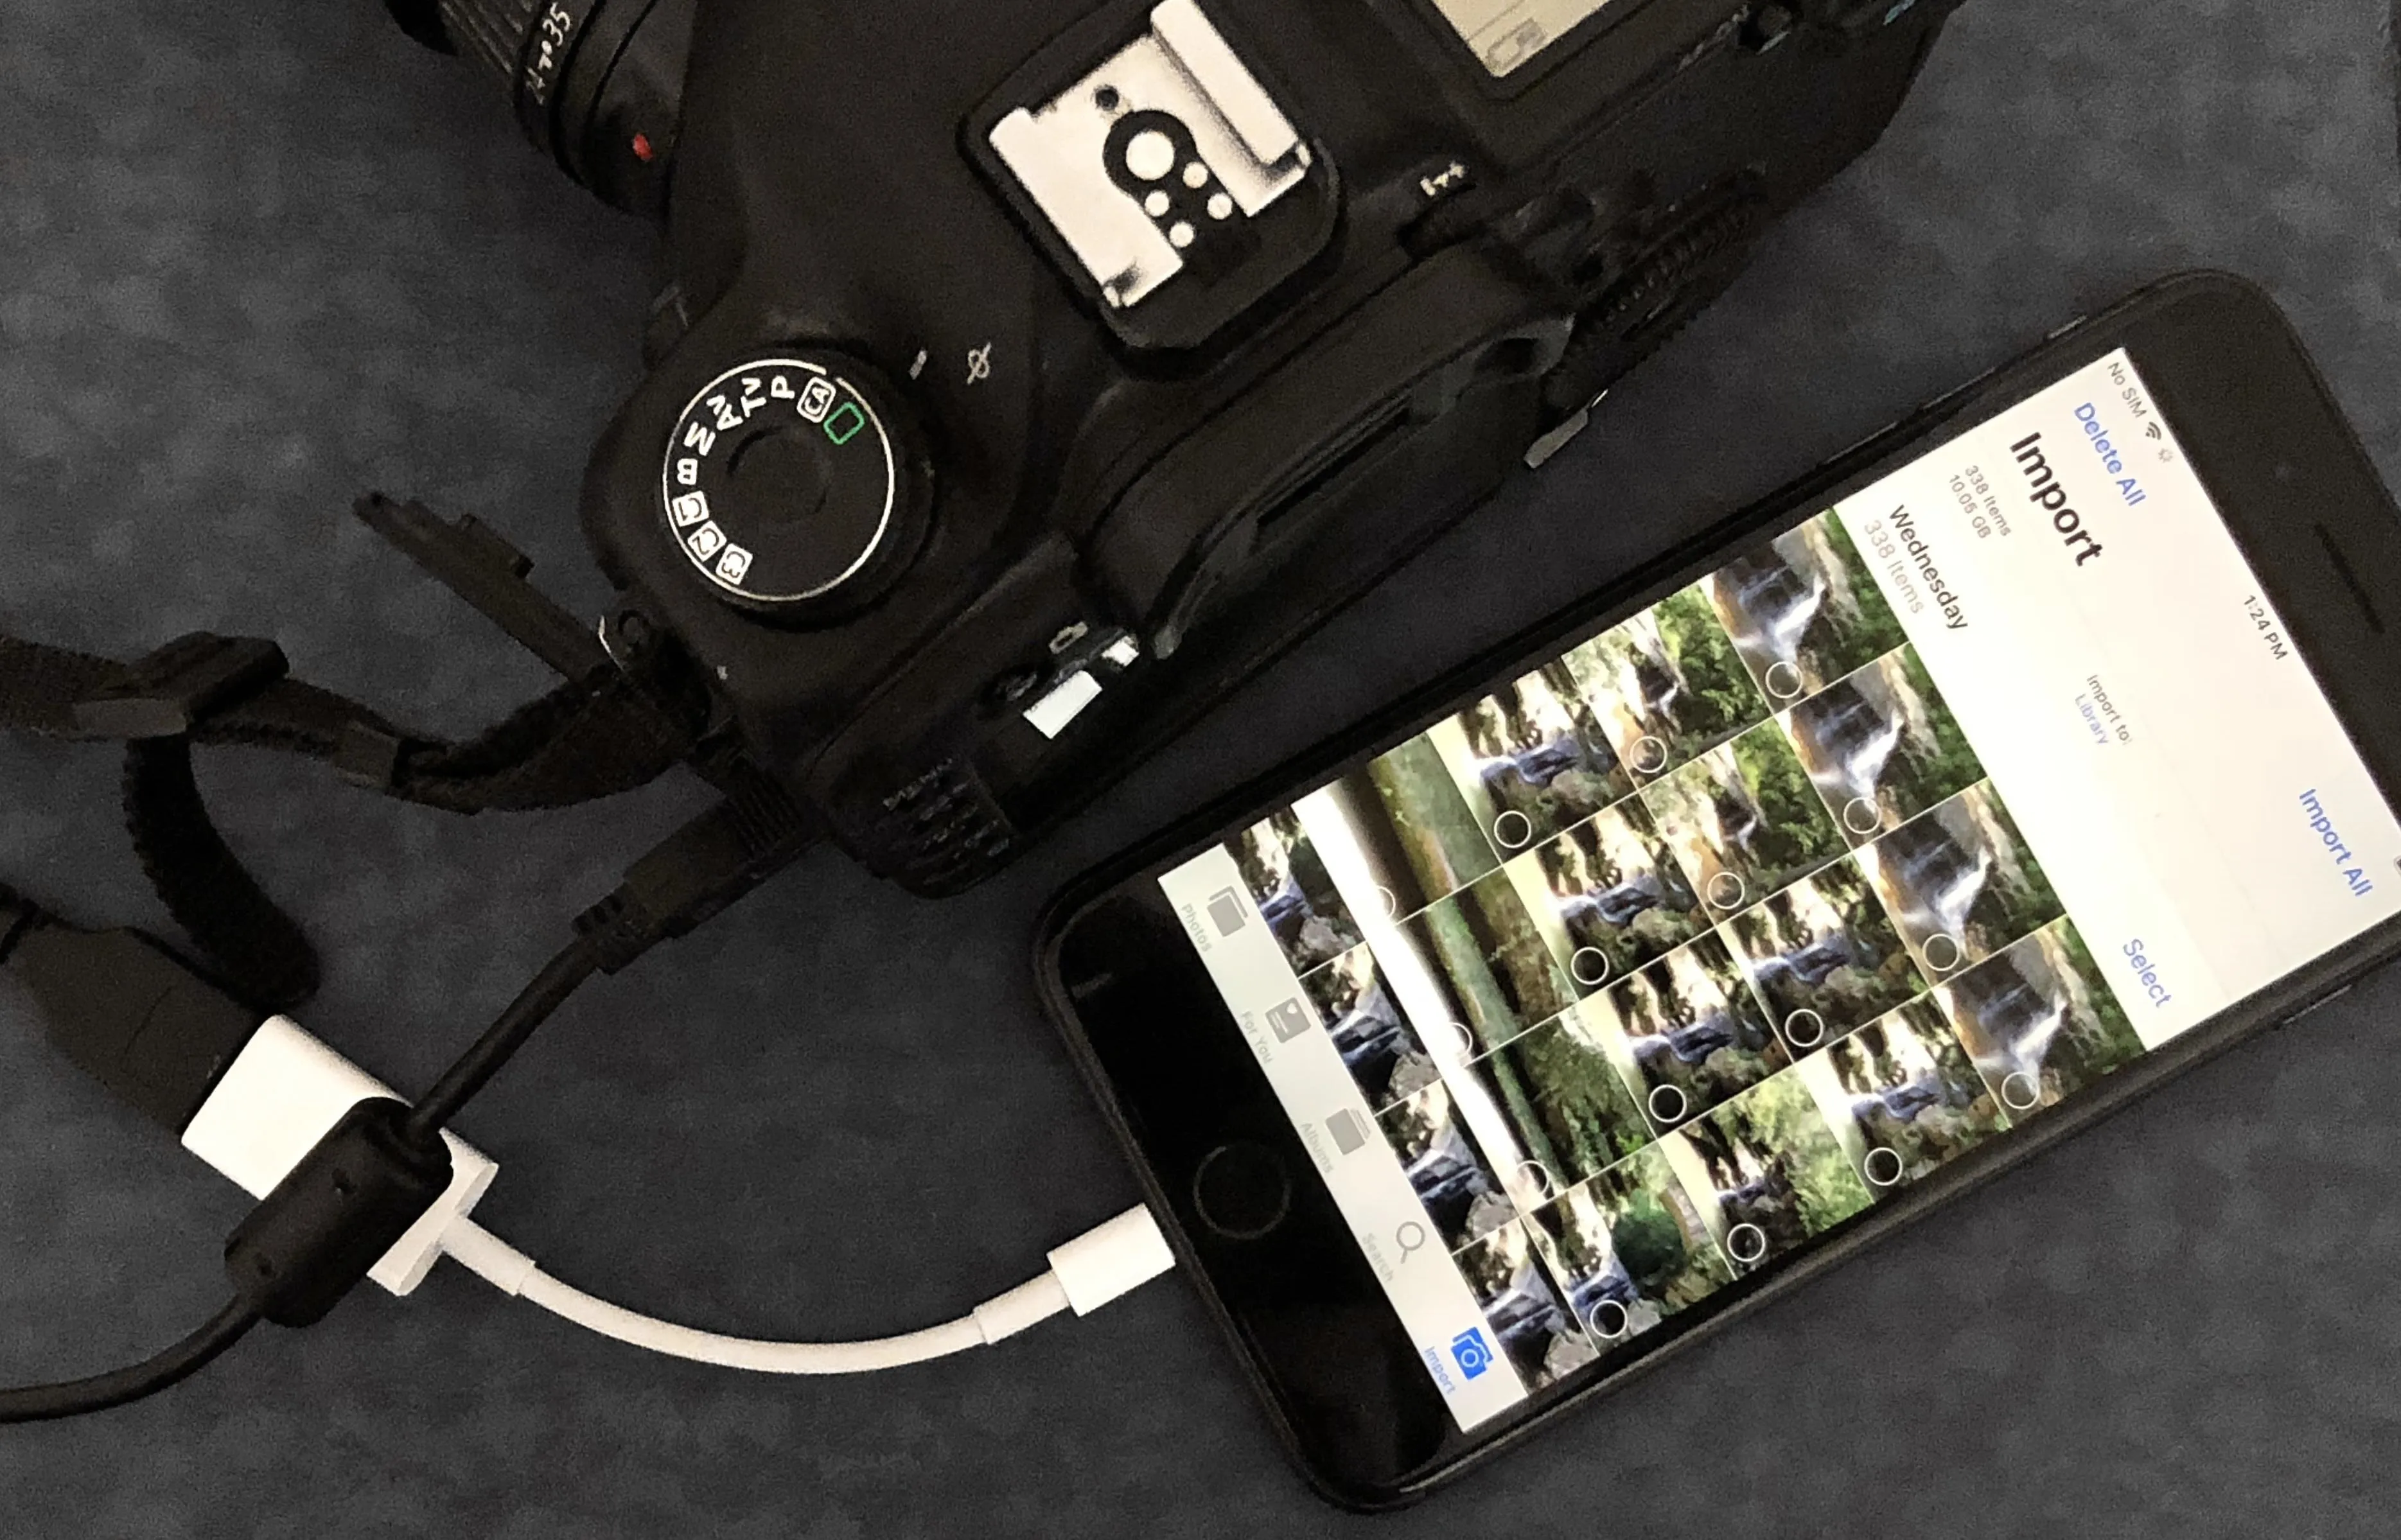
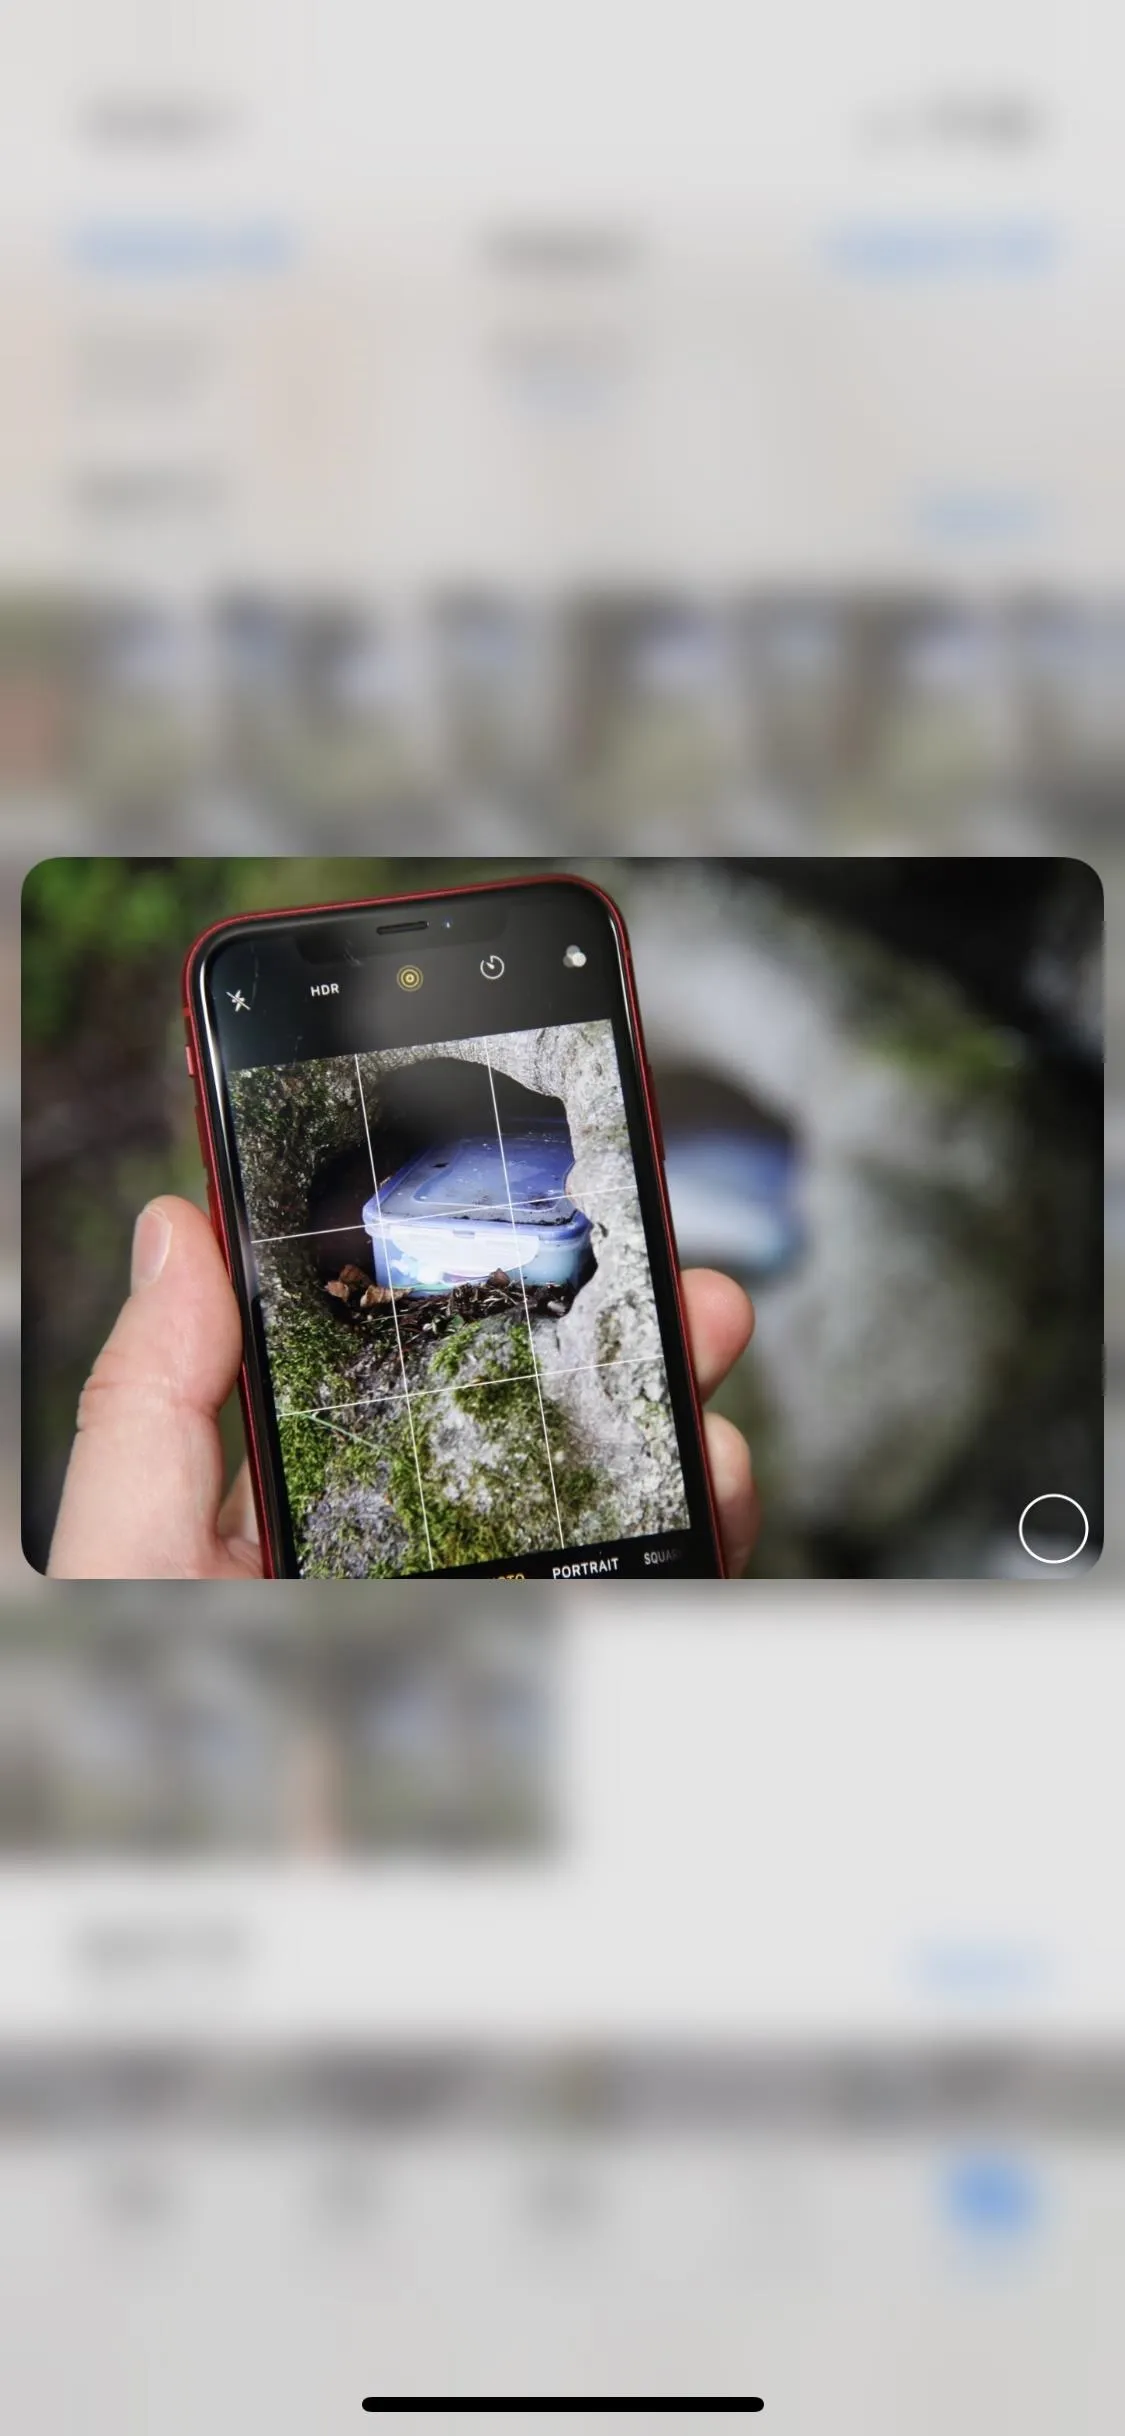
Justin Meyers/Gadget Hacks
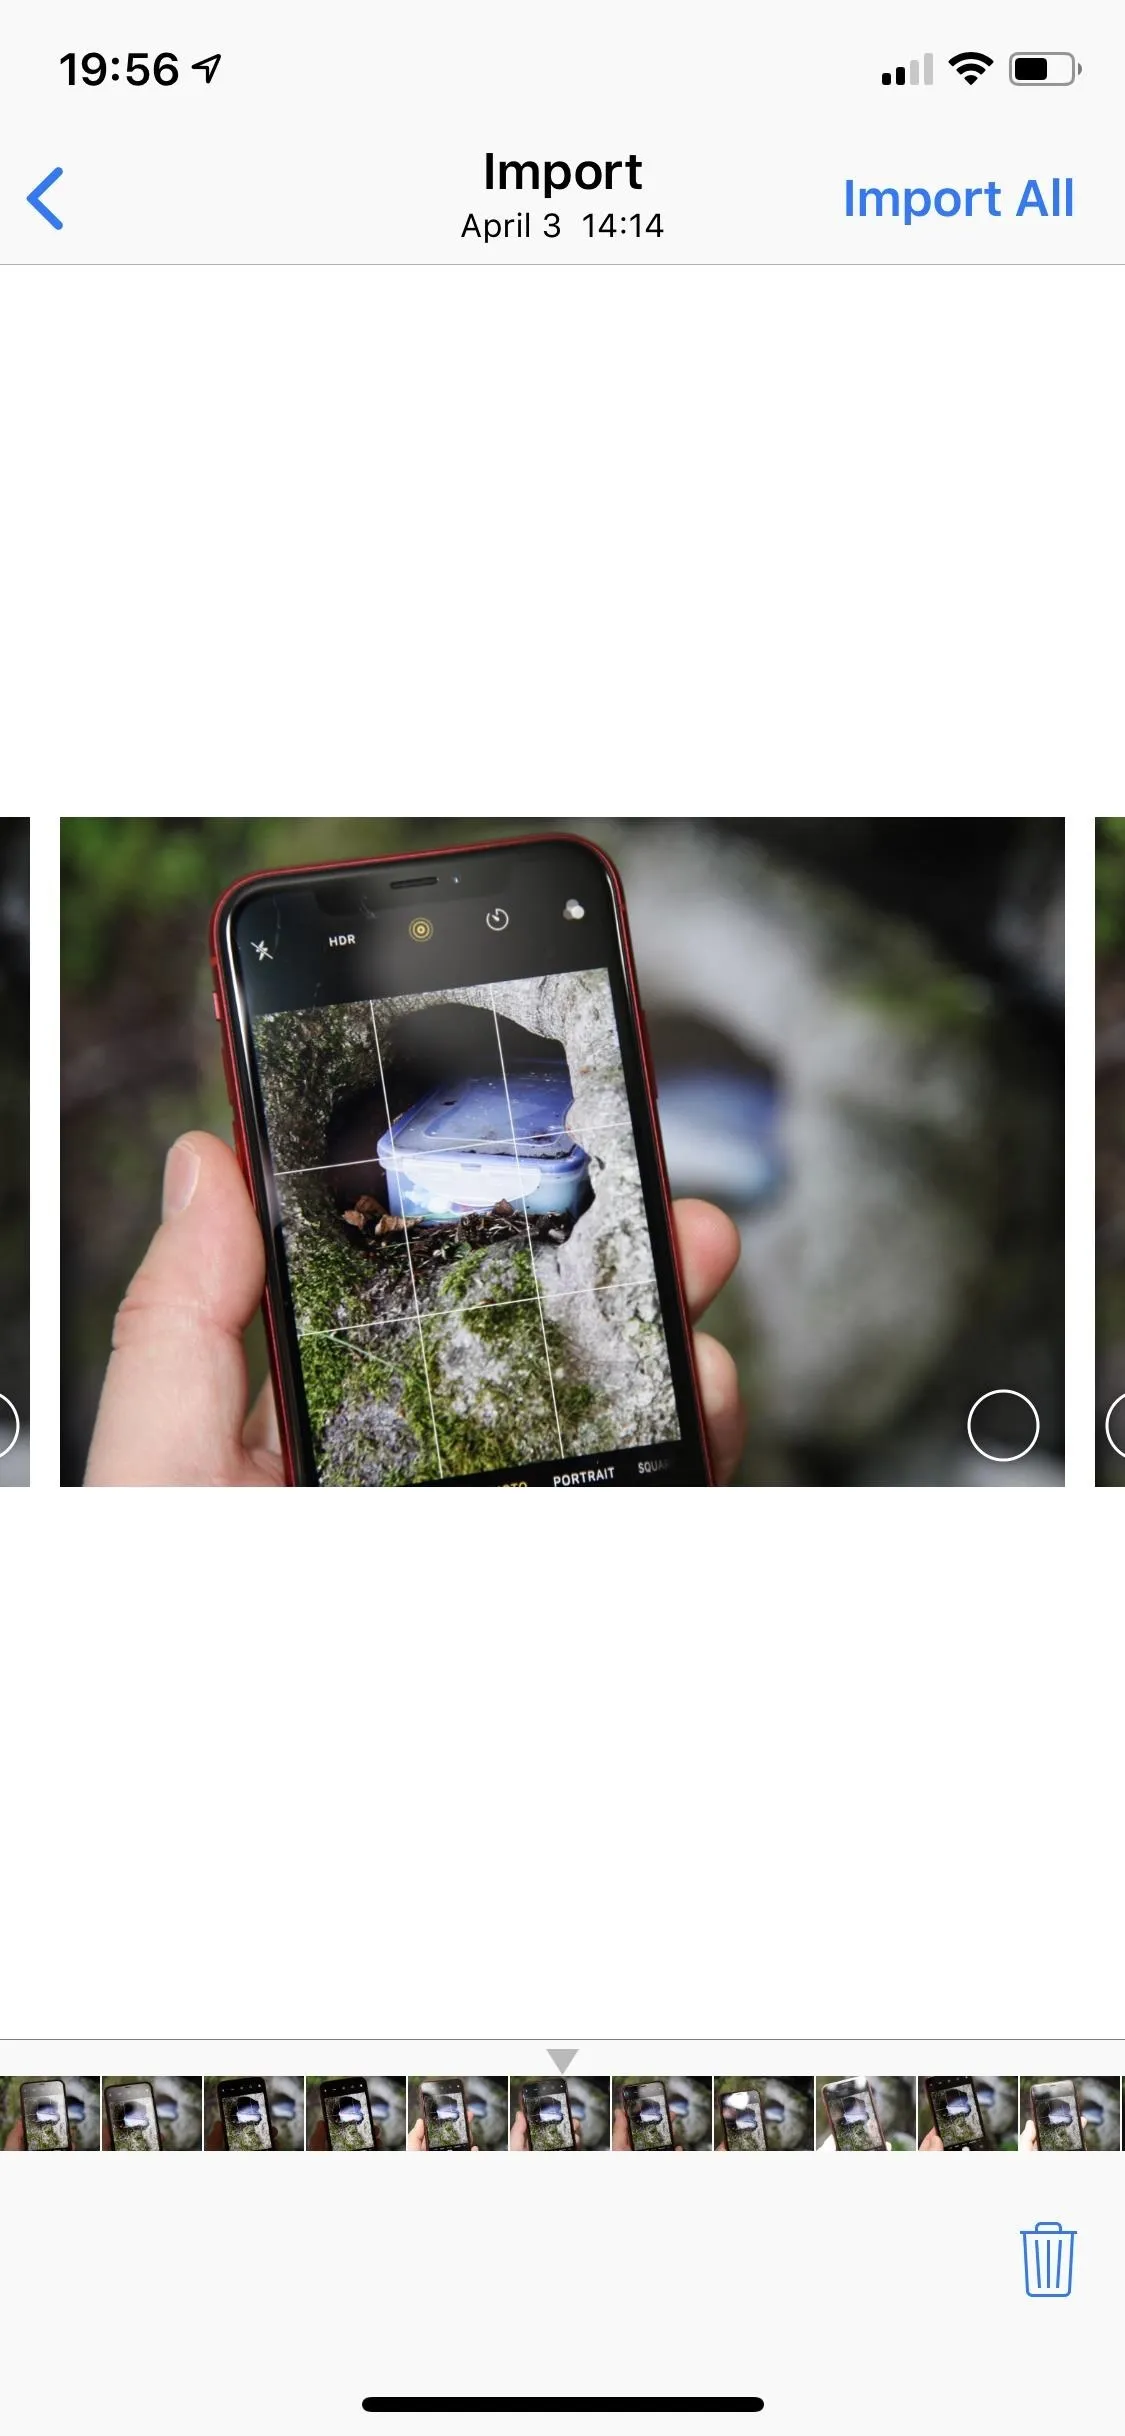
Immediately after powering up the camera, the Photos app's "Import" screen will load on the iPhone. Depending on how many pictures and videos you have on the card and the format you took them in, the media may load right away or take a few moments. Once it's loaded, you can begin importing and deleting files.
Importing Photos & Videos in iOS 9 – iOS 11
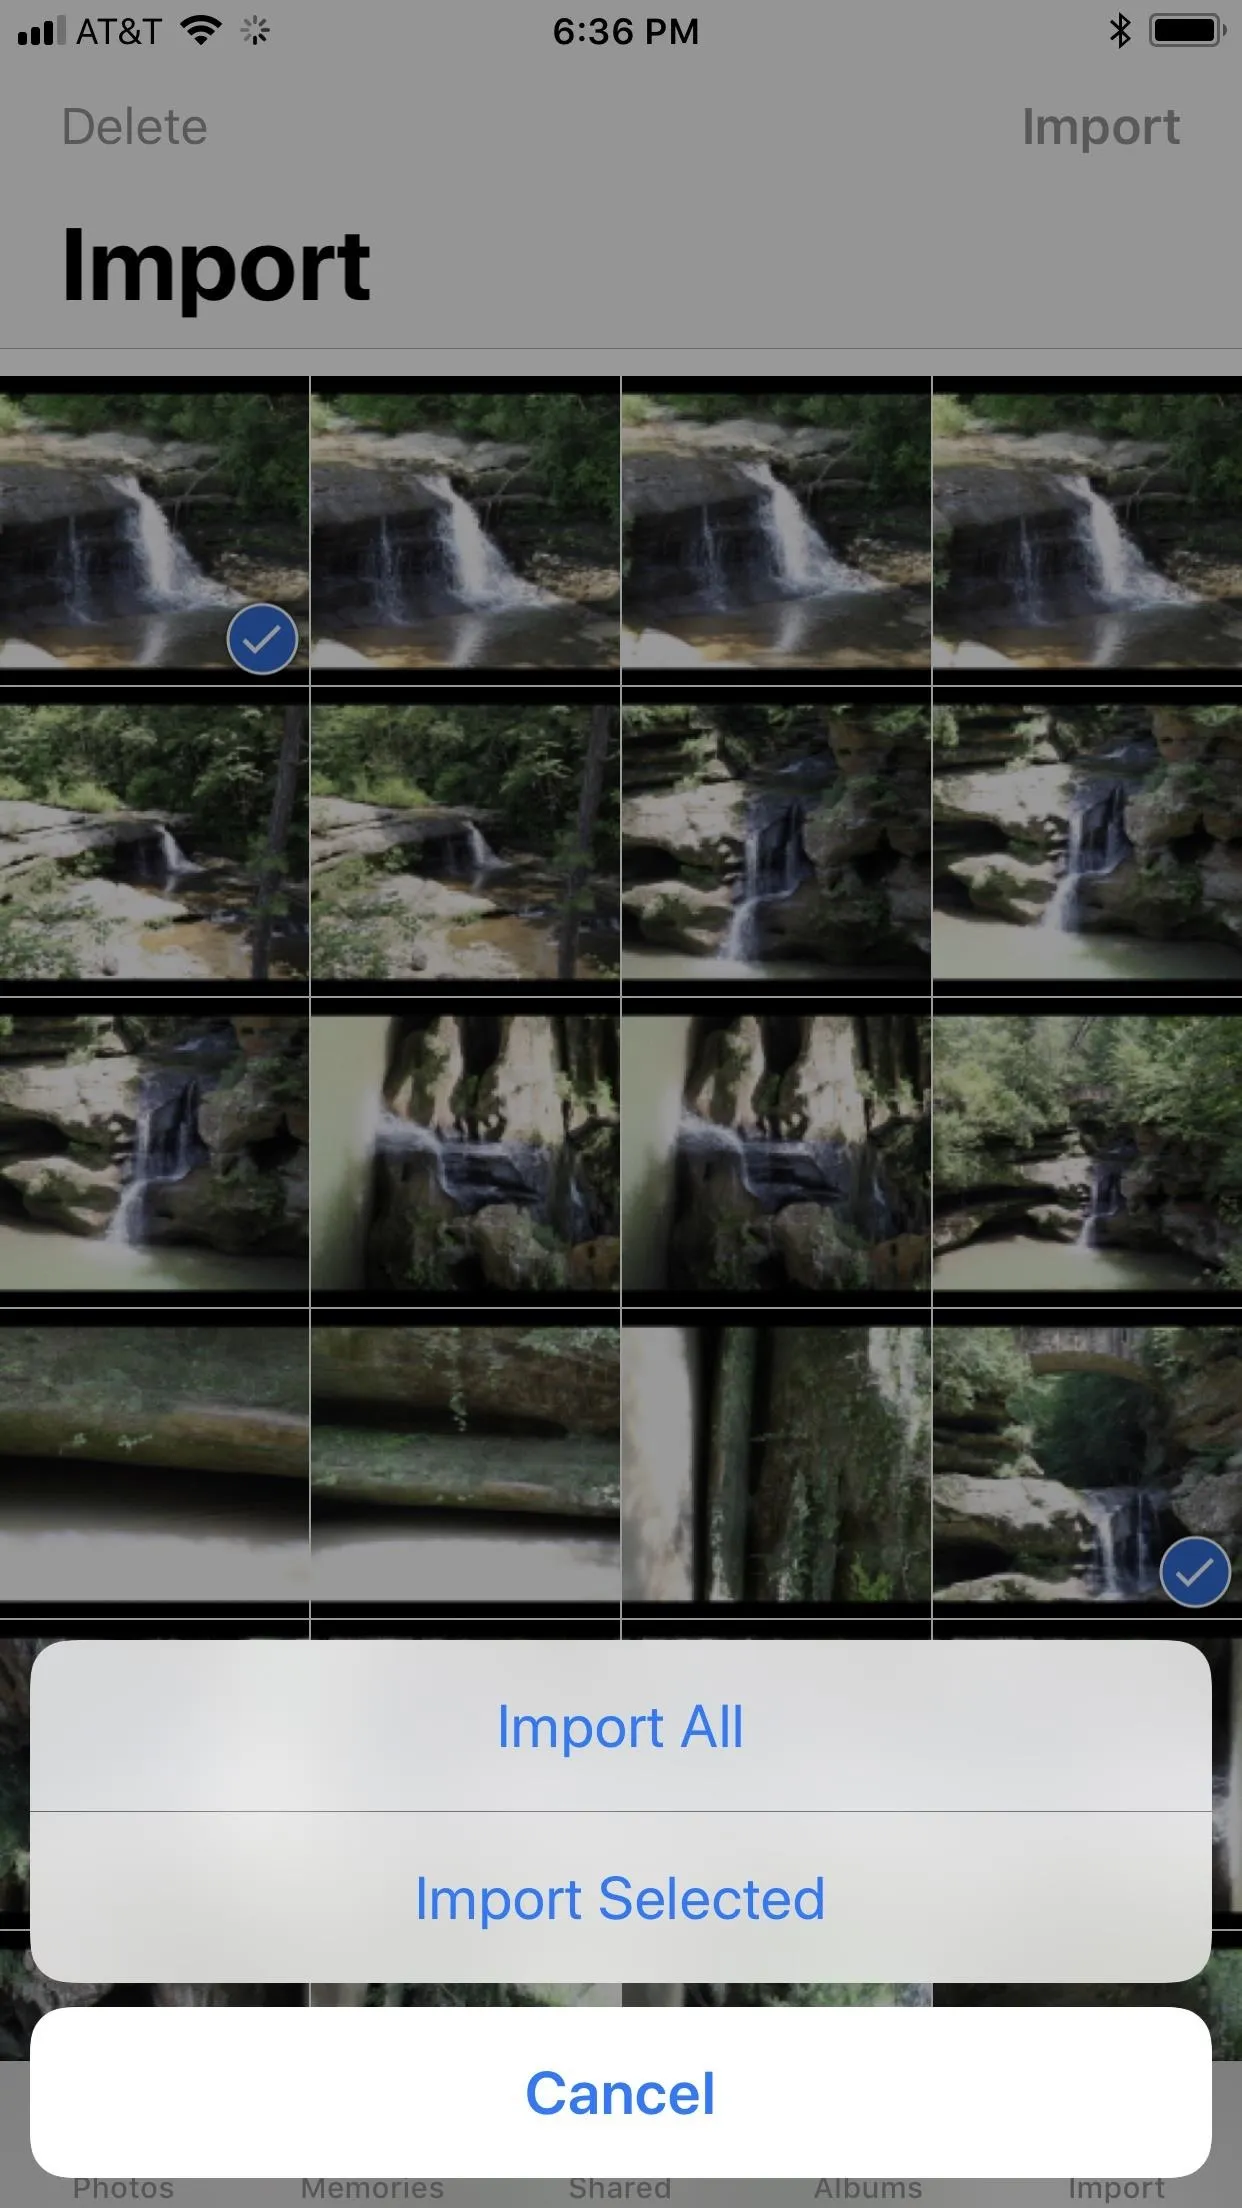
If you're still running iOS 9 through the latest version of iOS 11, the import interface and options are pretty barebones. You can't preview photos in full screen, only as the thumbnails you see right away. Your options are limited to "Import All" or you can tap photos and videos to "Import" just those.
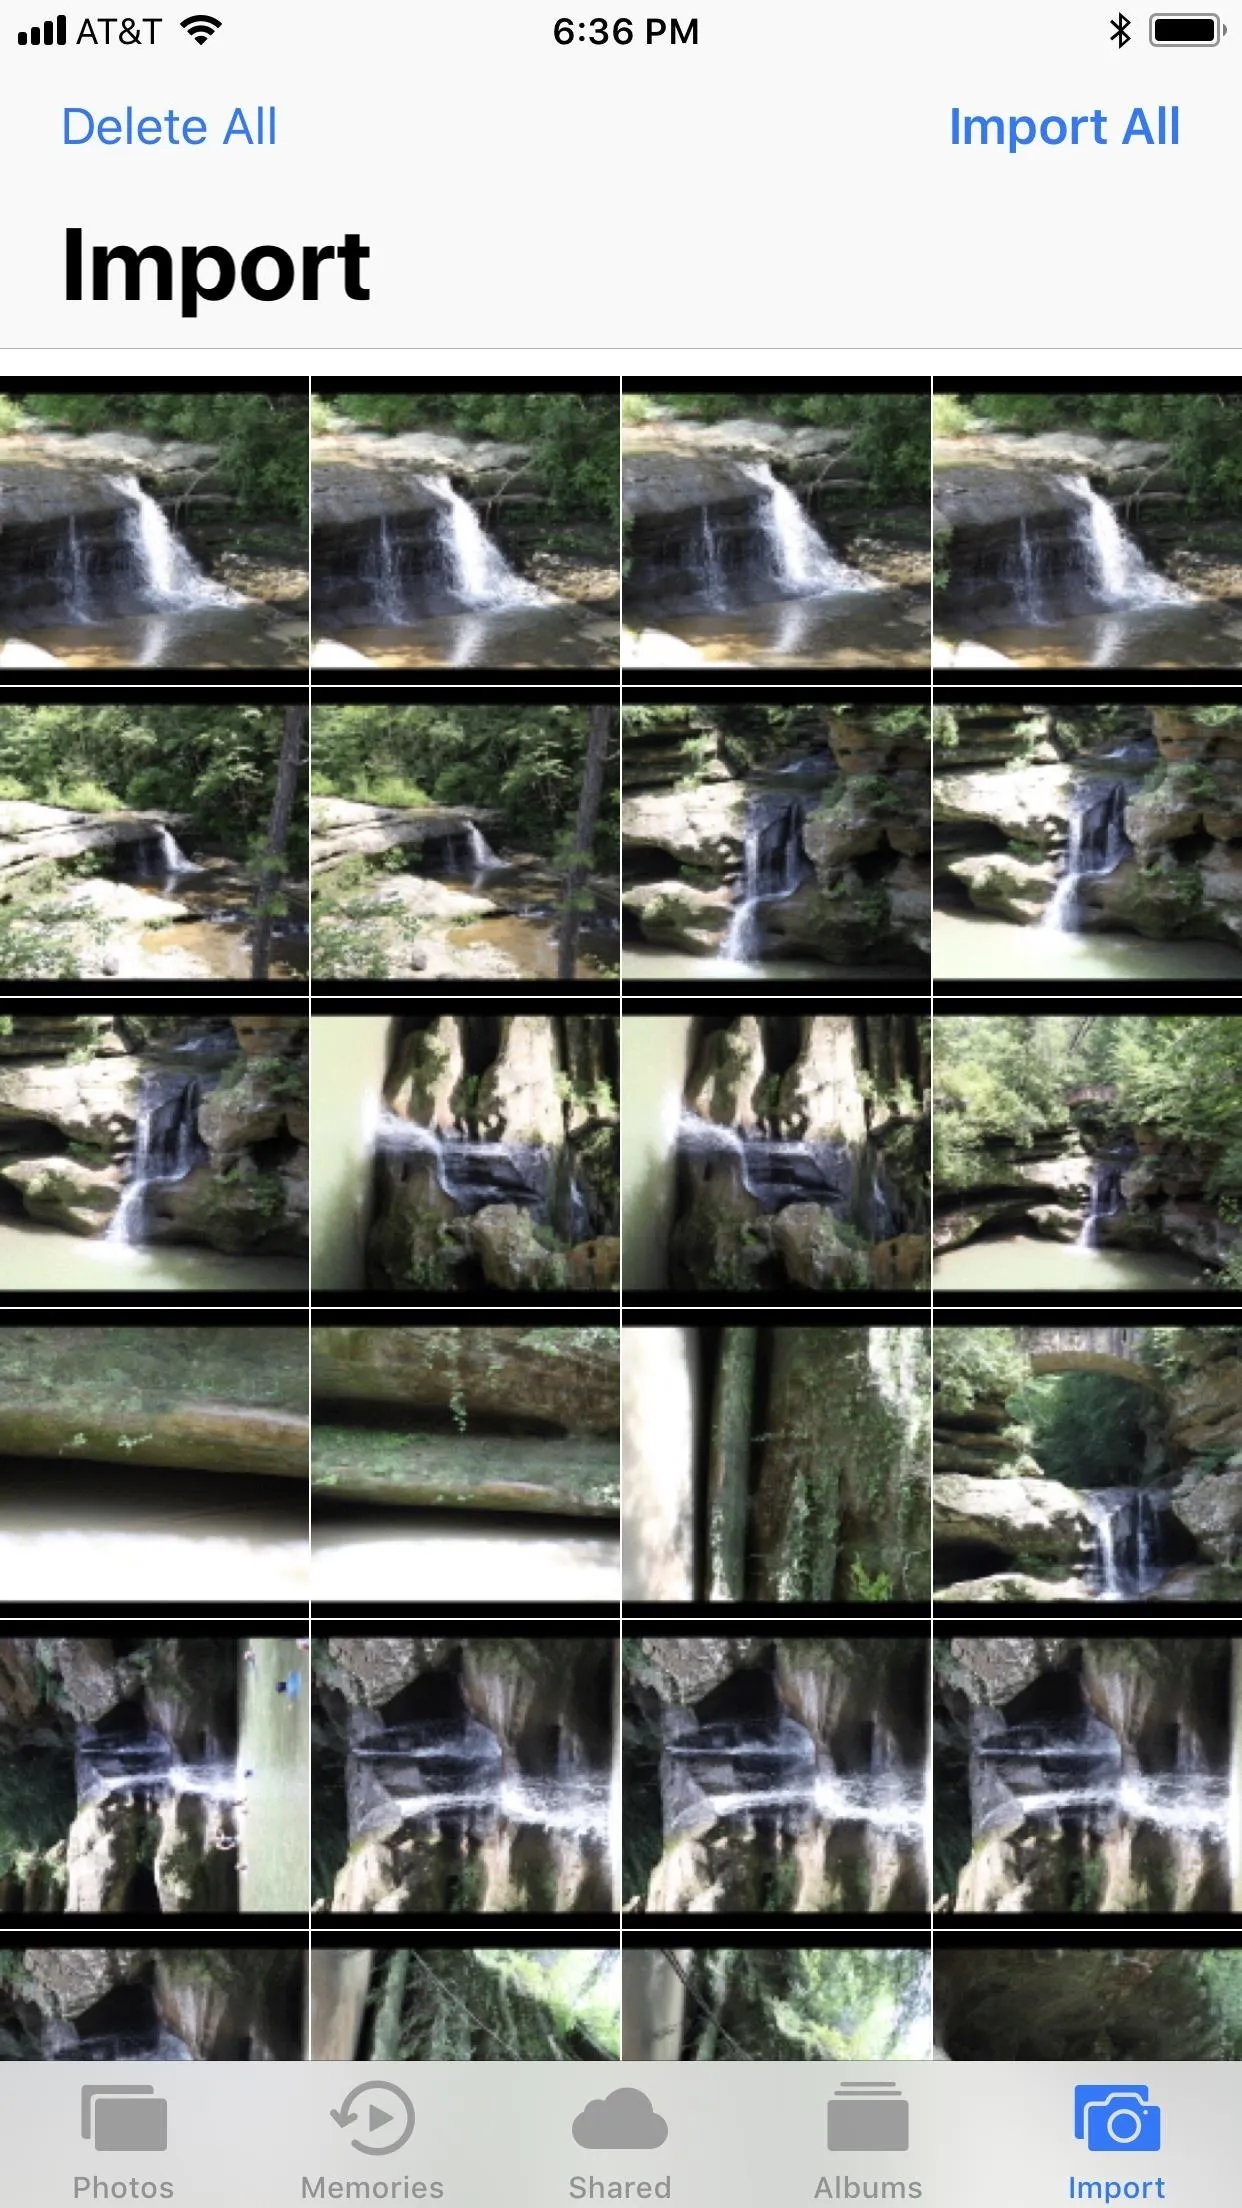
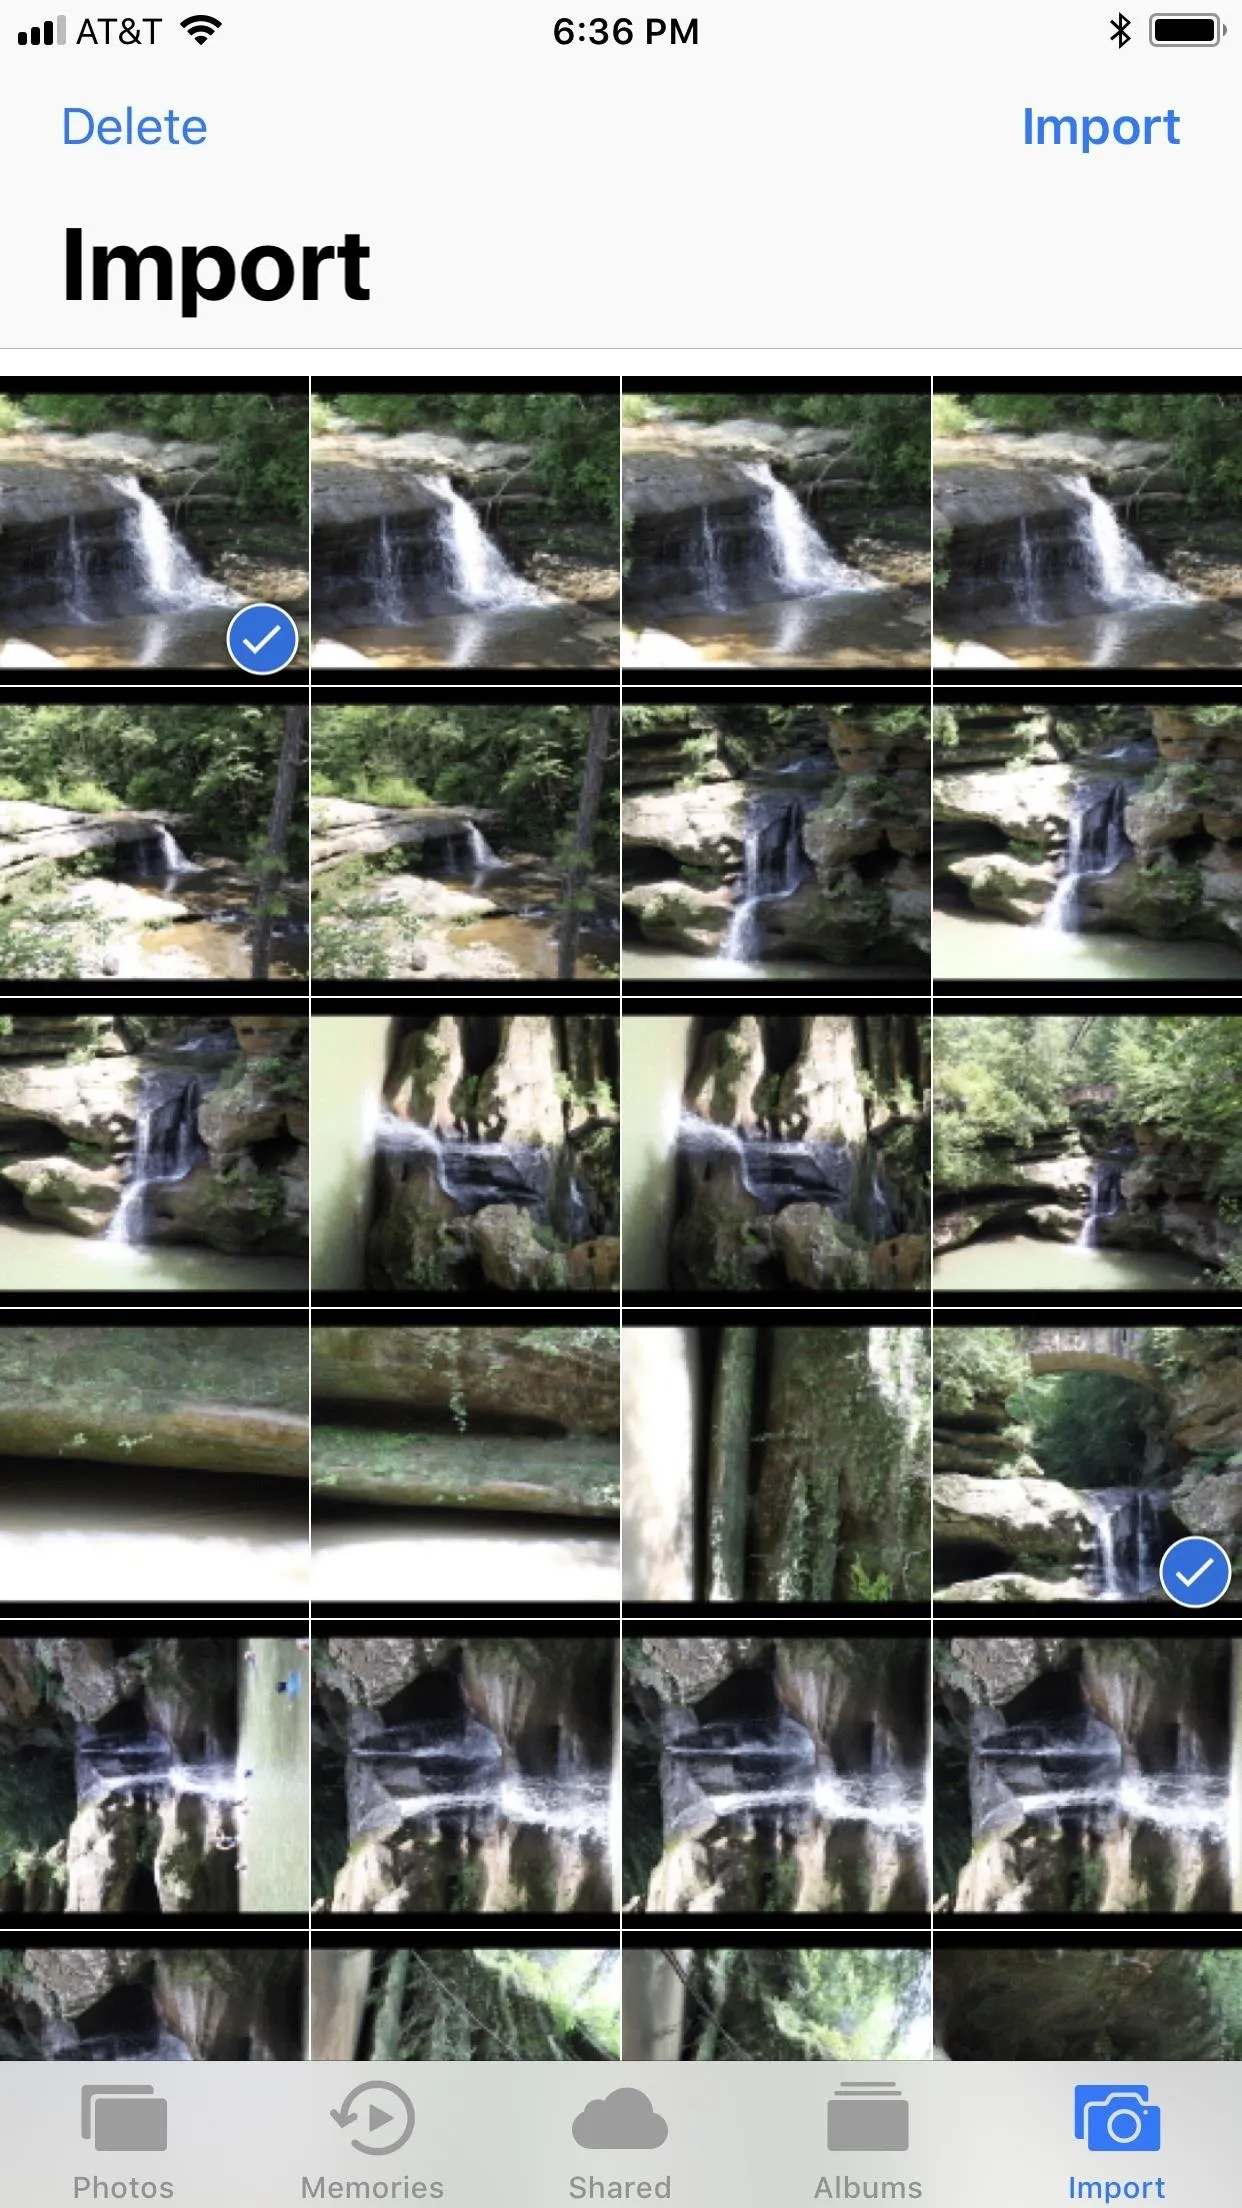
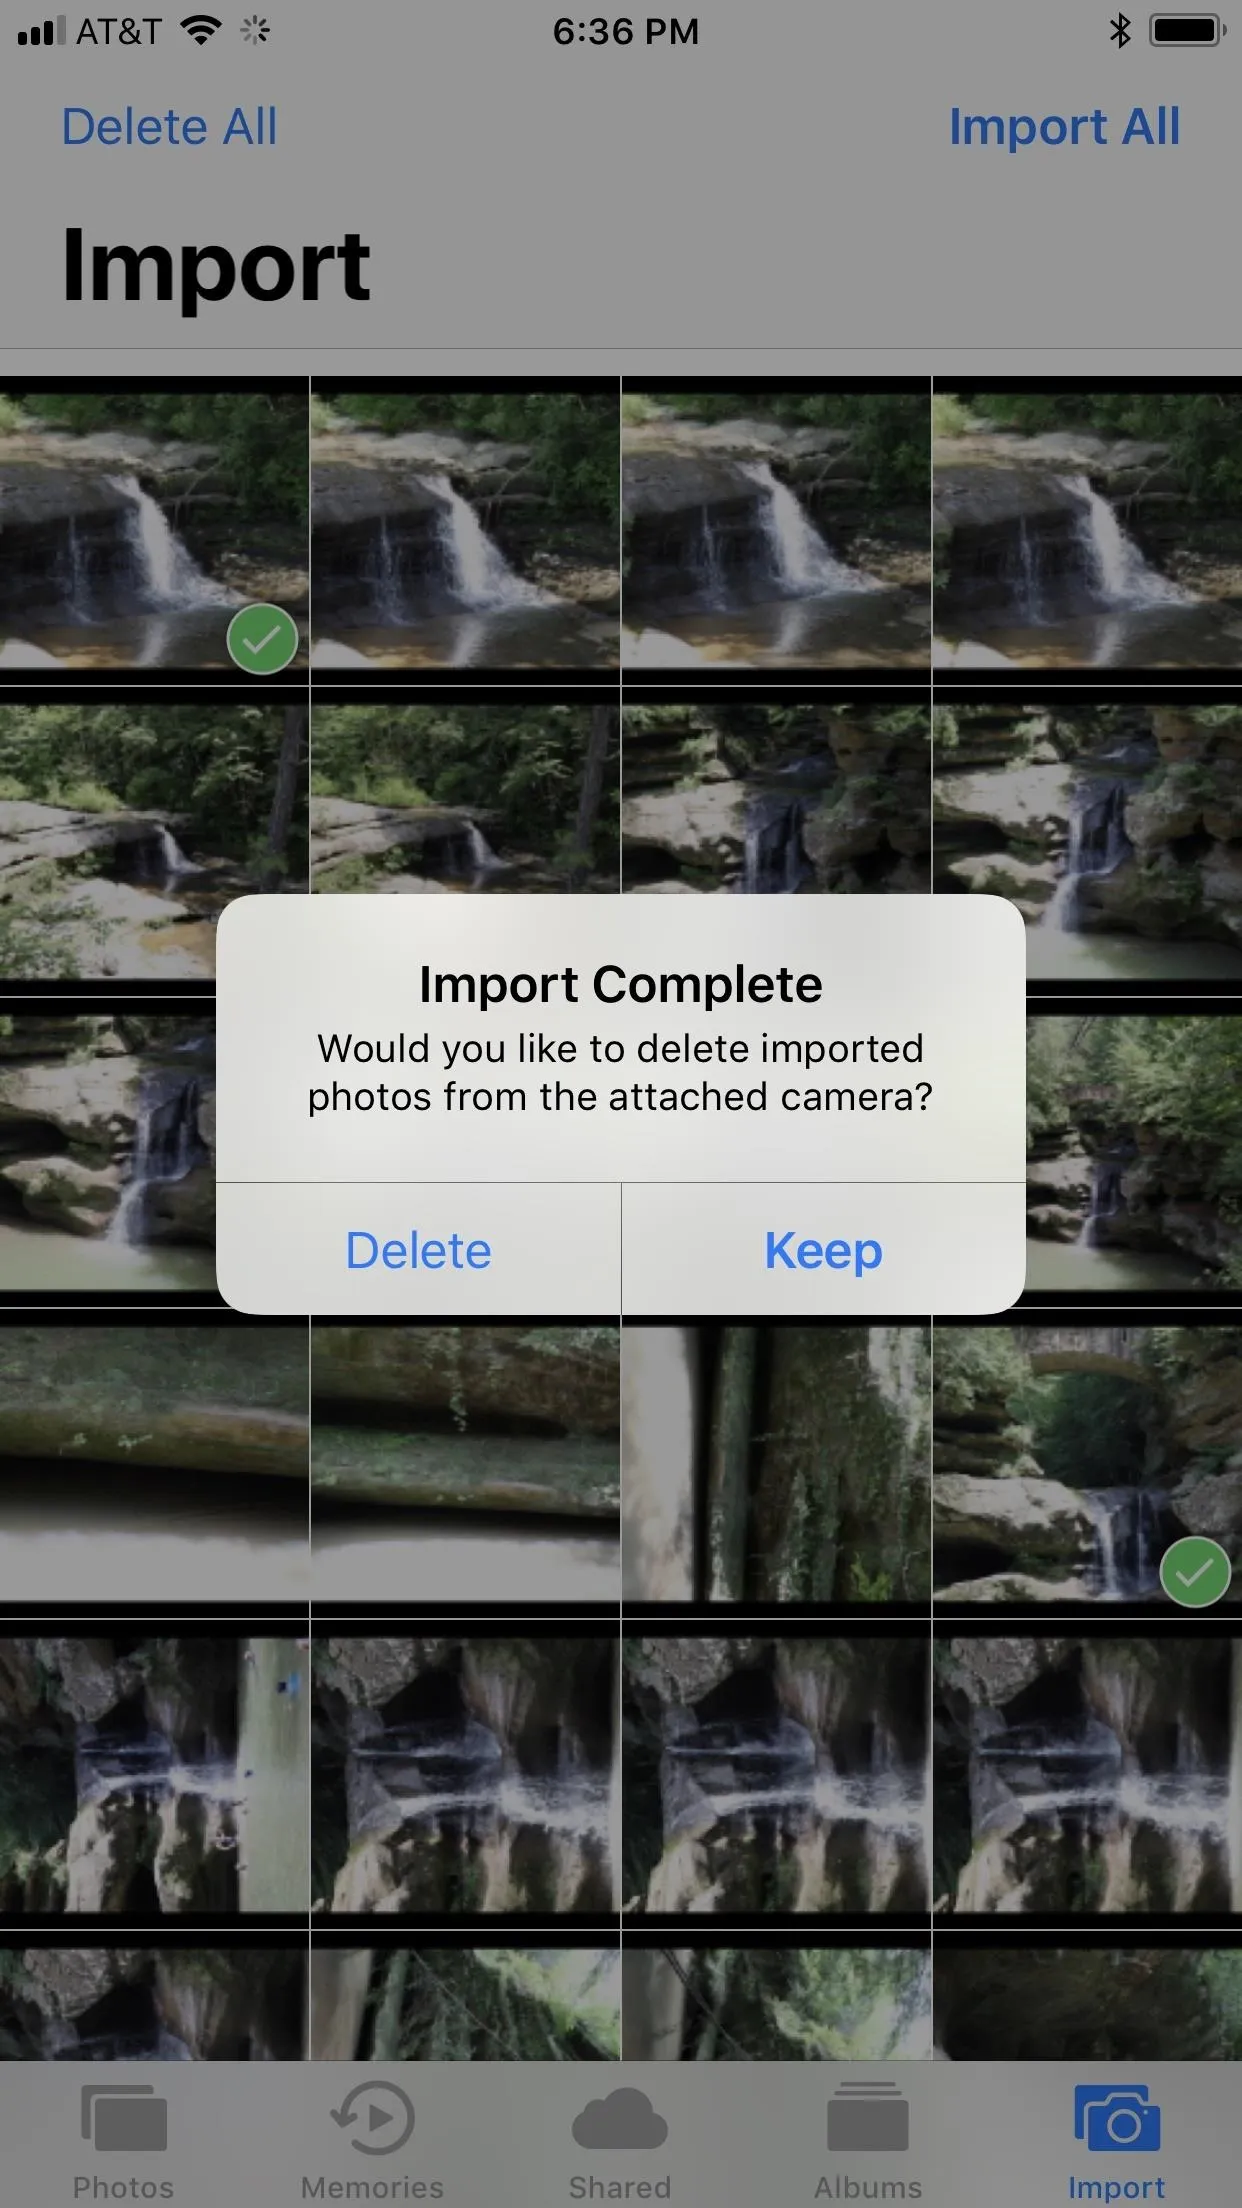
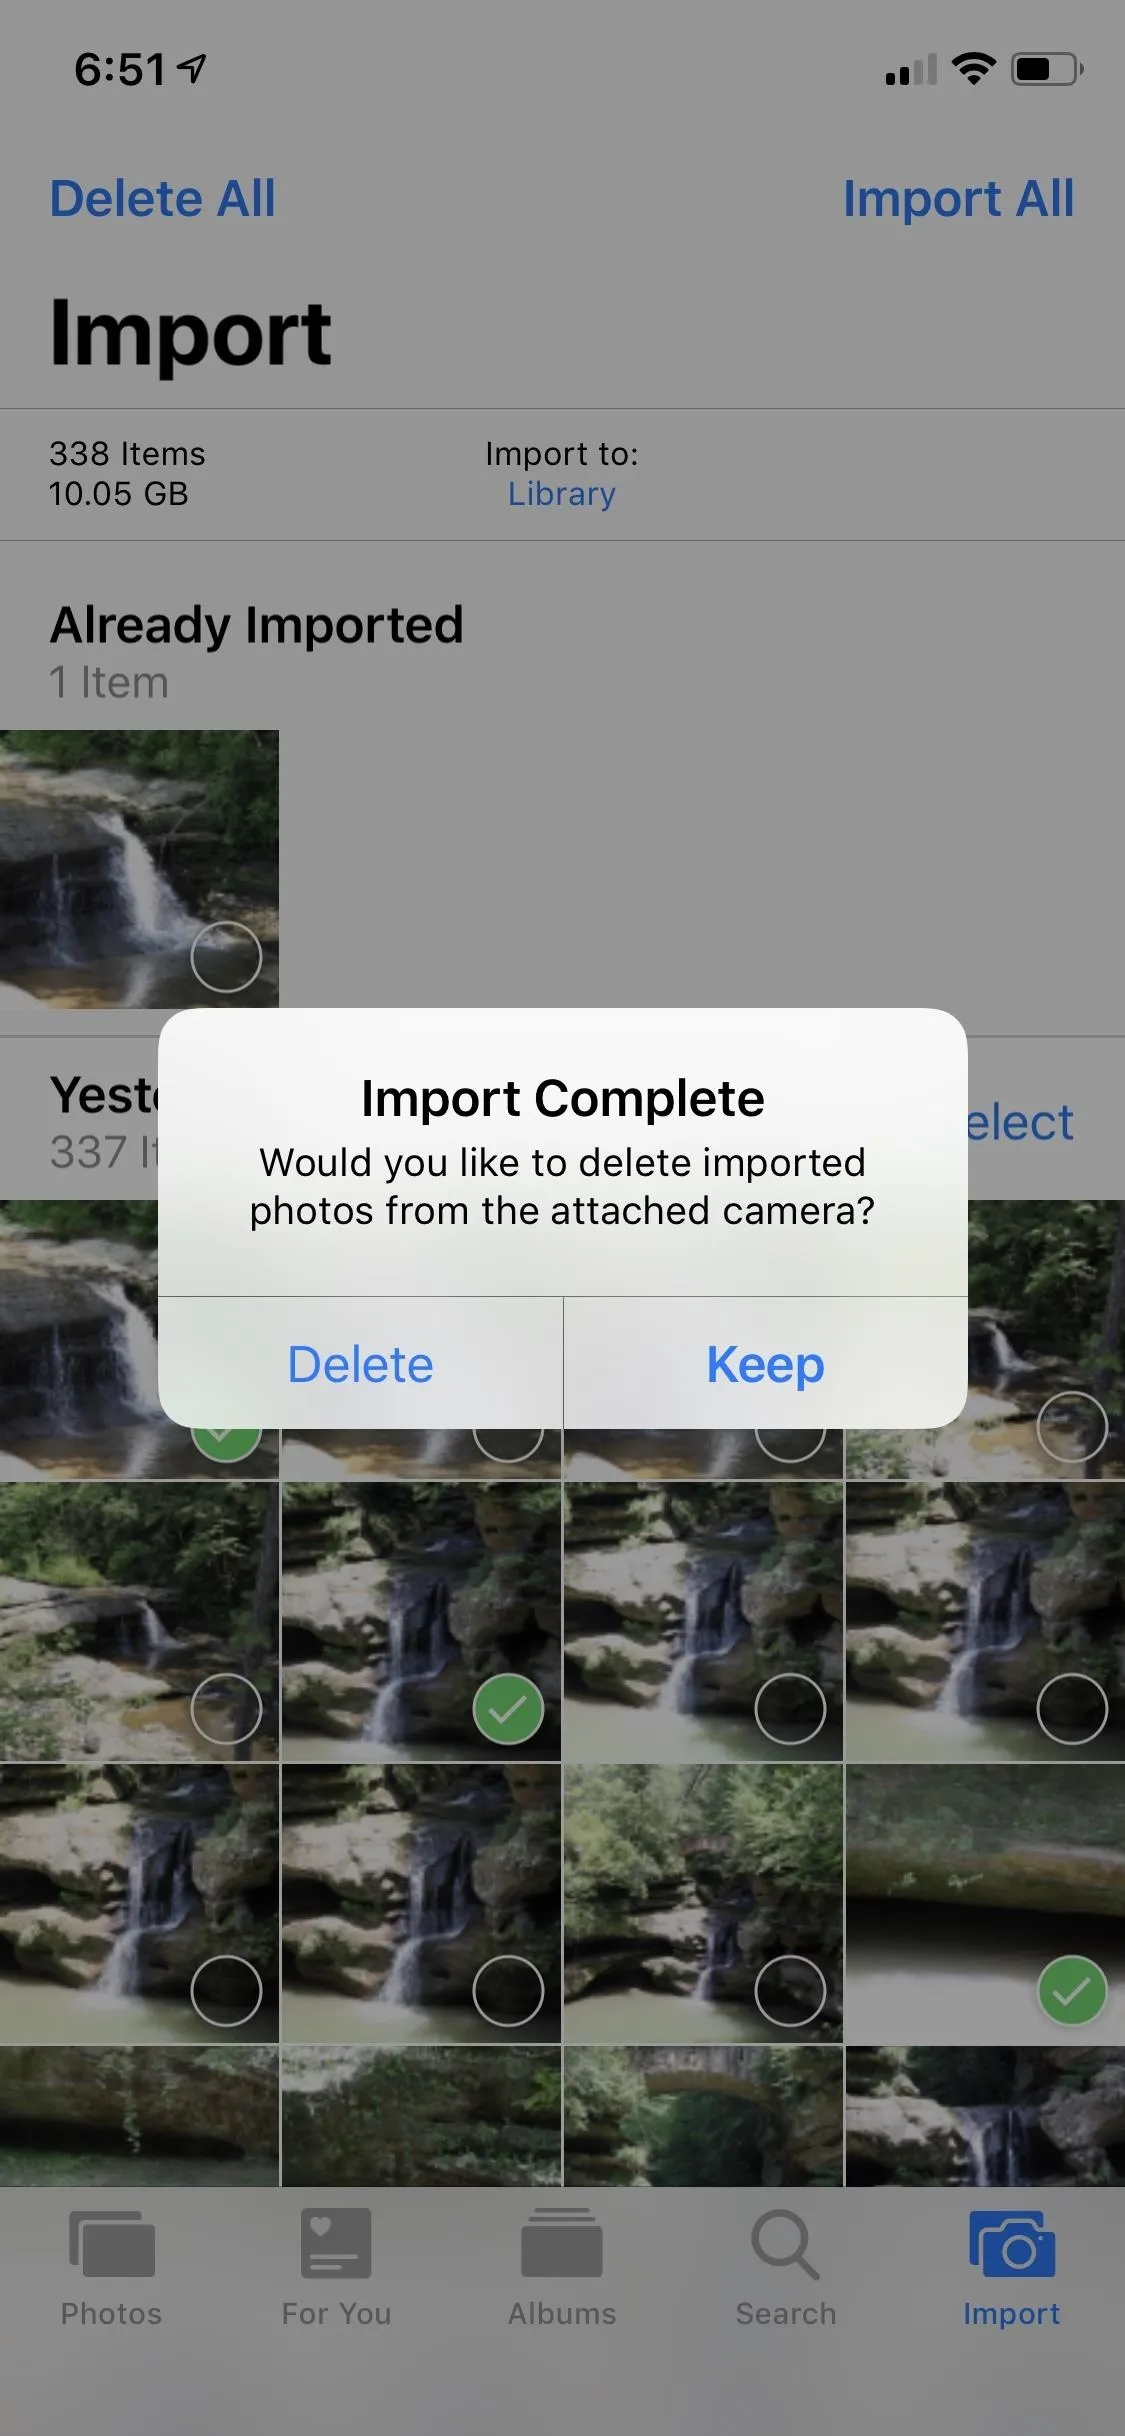
If selecting certain content, after you tap "Import," you'll have to tap "Import Selected" on the pop-up, but you can also choose "Import All" if you changed your mind. Once you've imported them to your iPhone, you'll be presented with the option to either "Delete" the photos off your card or "Keep" them.
If you try to "Import All" media after you've already downloaded a few images or videos from the card, you'll be able to "Skip Duplicates" or just "Import All," including the ones you already imported.
Importing Photos & Videos in iOS 12
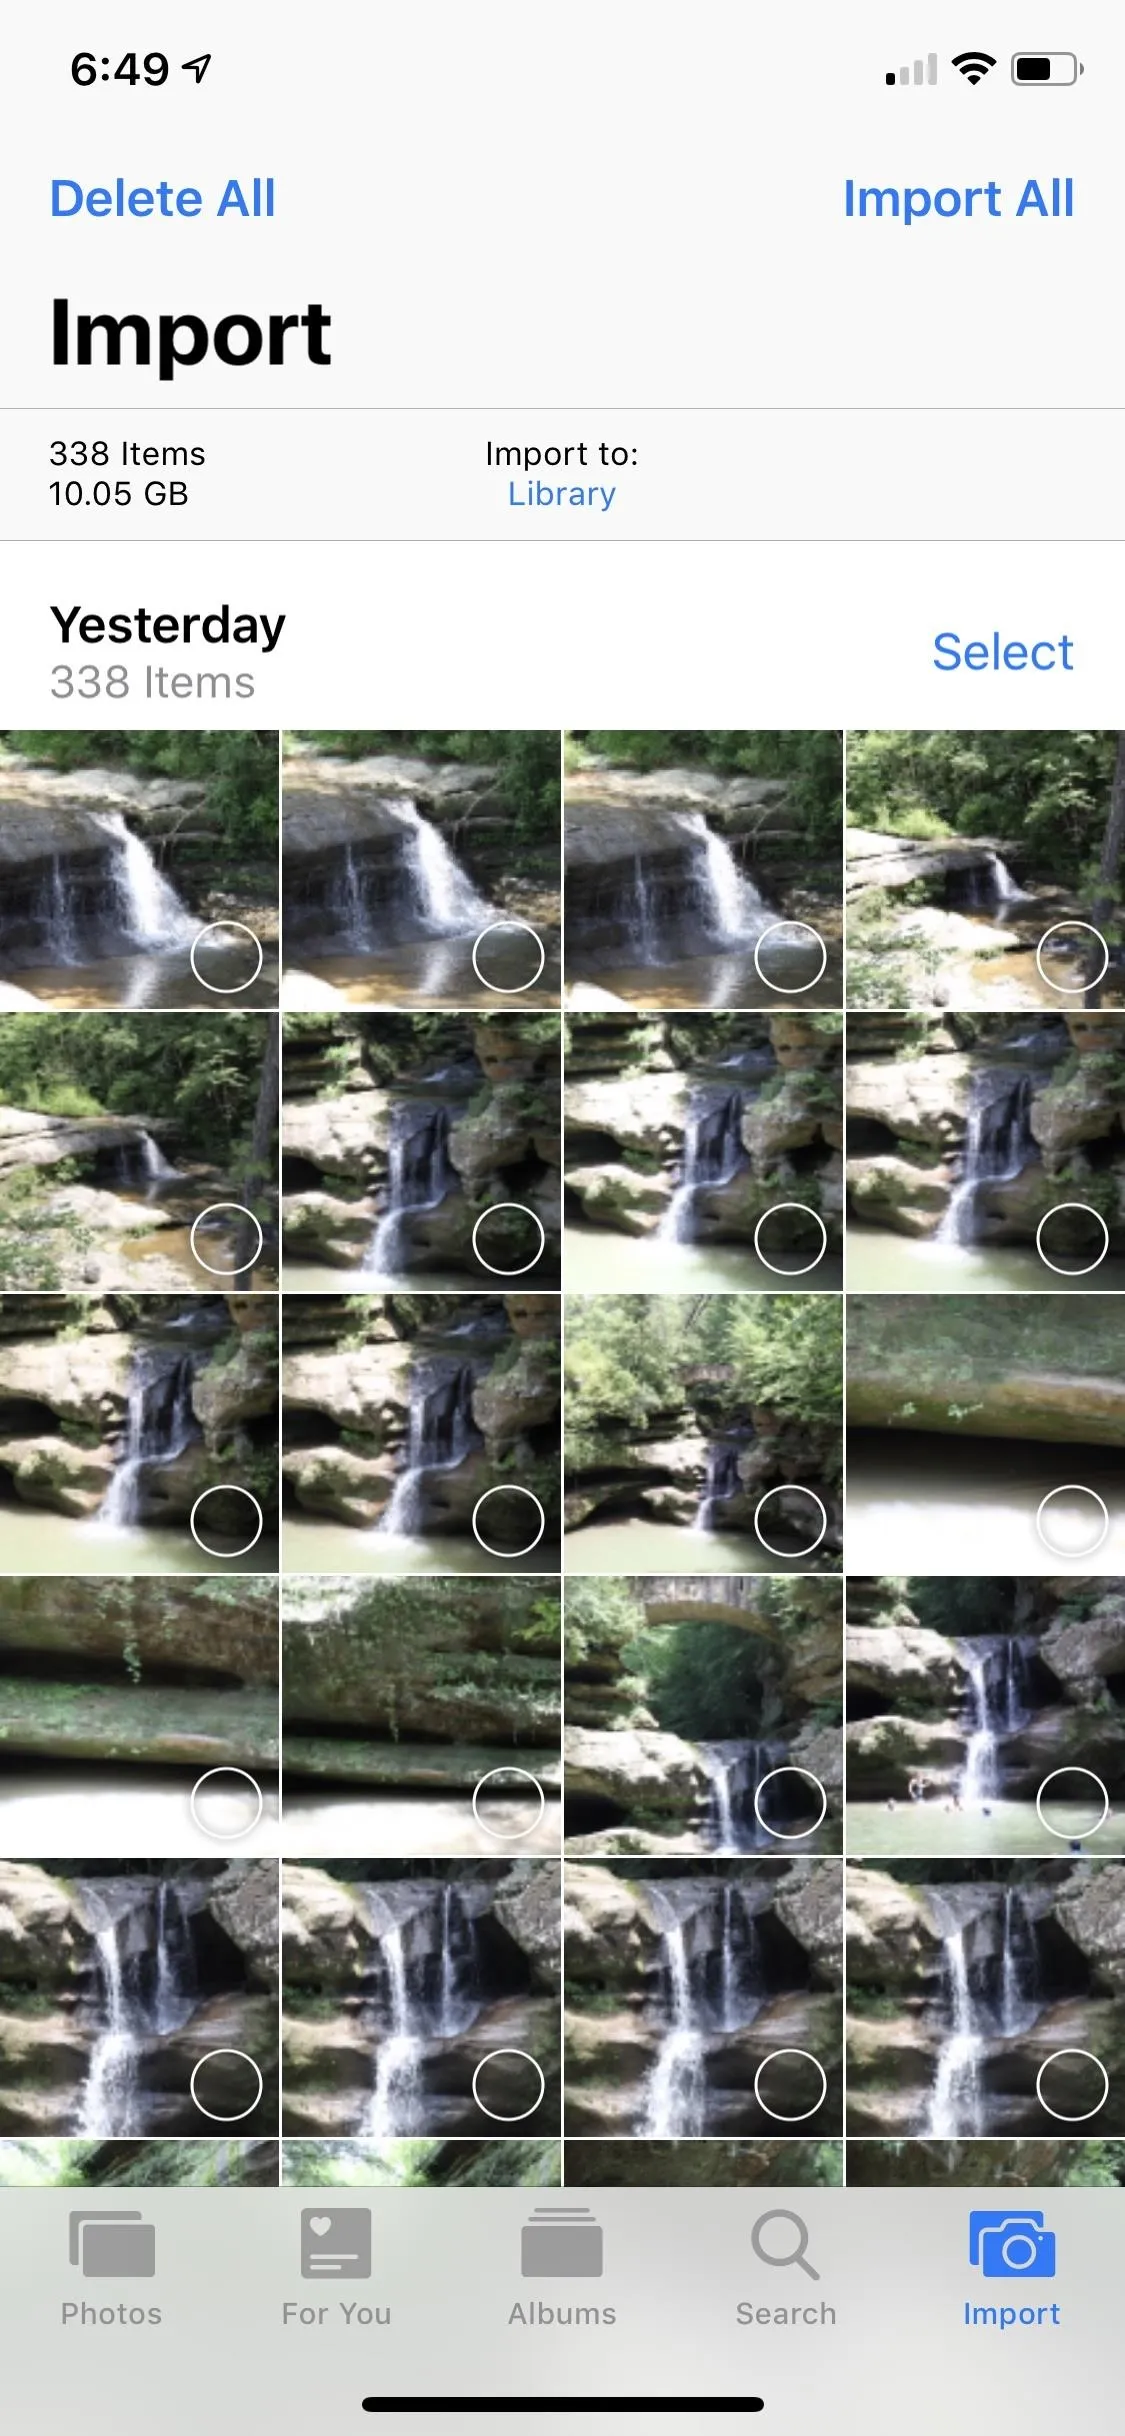
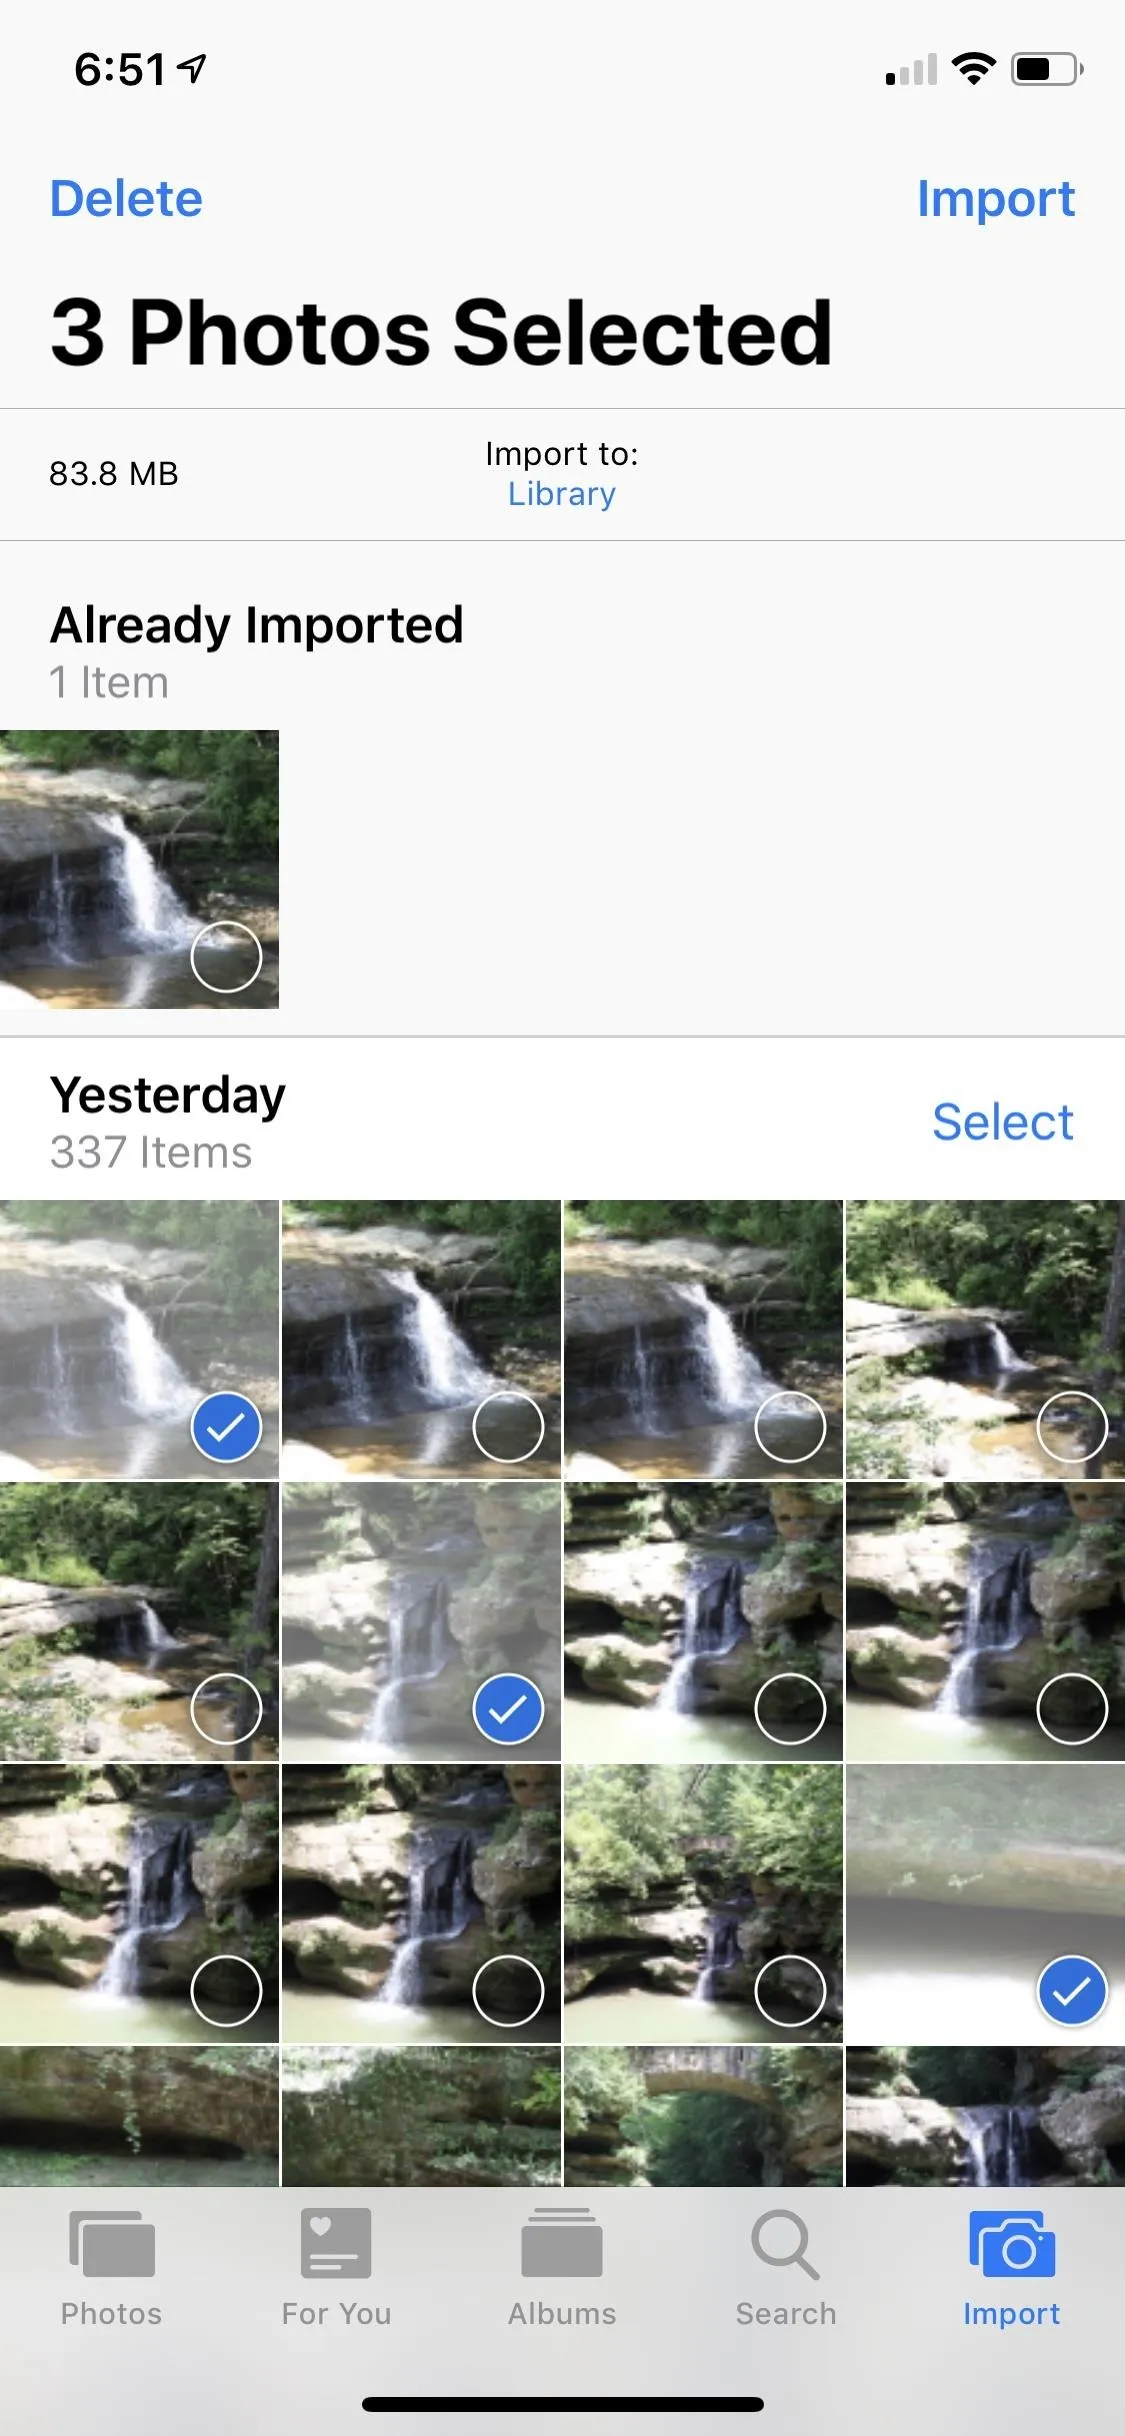
As you can see, there's not much to Photos imported in iOS 9, iOS 10, and iOS 11, but iOS 12 includes a lot of improvements. Photos and videos load much faster in the new importer, plus it makes it easier to see what's already been imported to your iPhone from the card with an "Already Imported" section. Aside from that, photos and videos are organized by date, which is a nice change if you use your card throughout the week or even month.
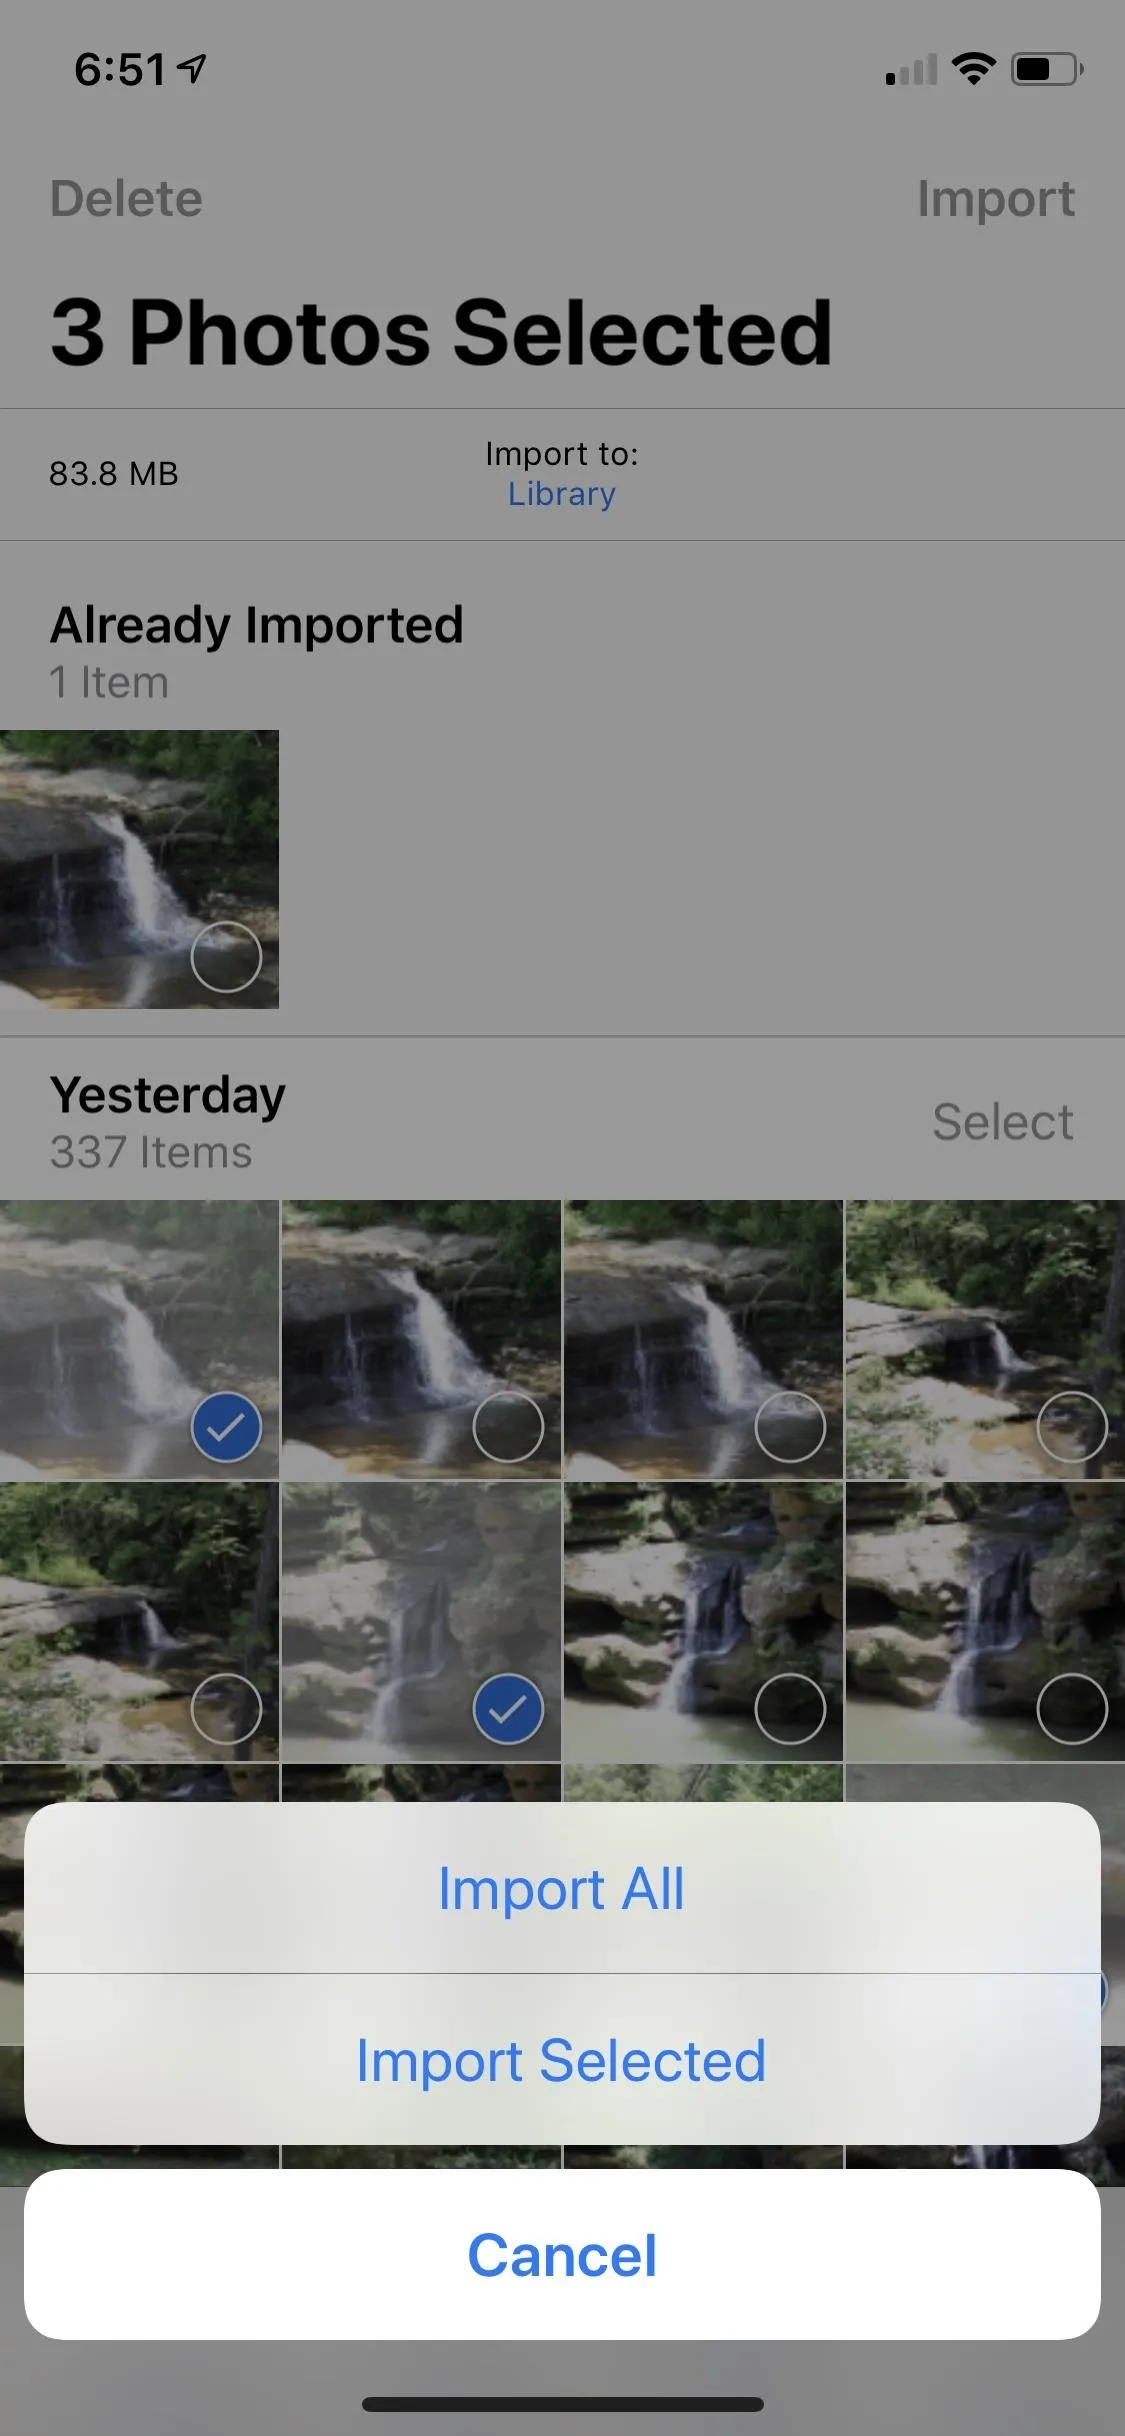
After tapping "Import All," the import will begin, but you can stop it at any time. If you'd rather pick and choose media, you can do like before and tap on the photos and videos you want to download, then tap "Import." Also, like before, you can "Delete" or "Keep" photos and videos on the card after it's finished importing.
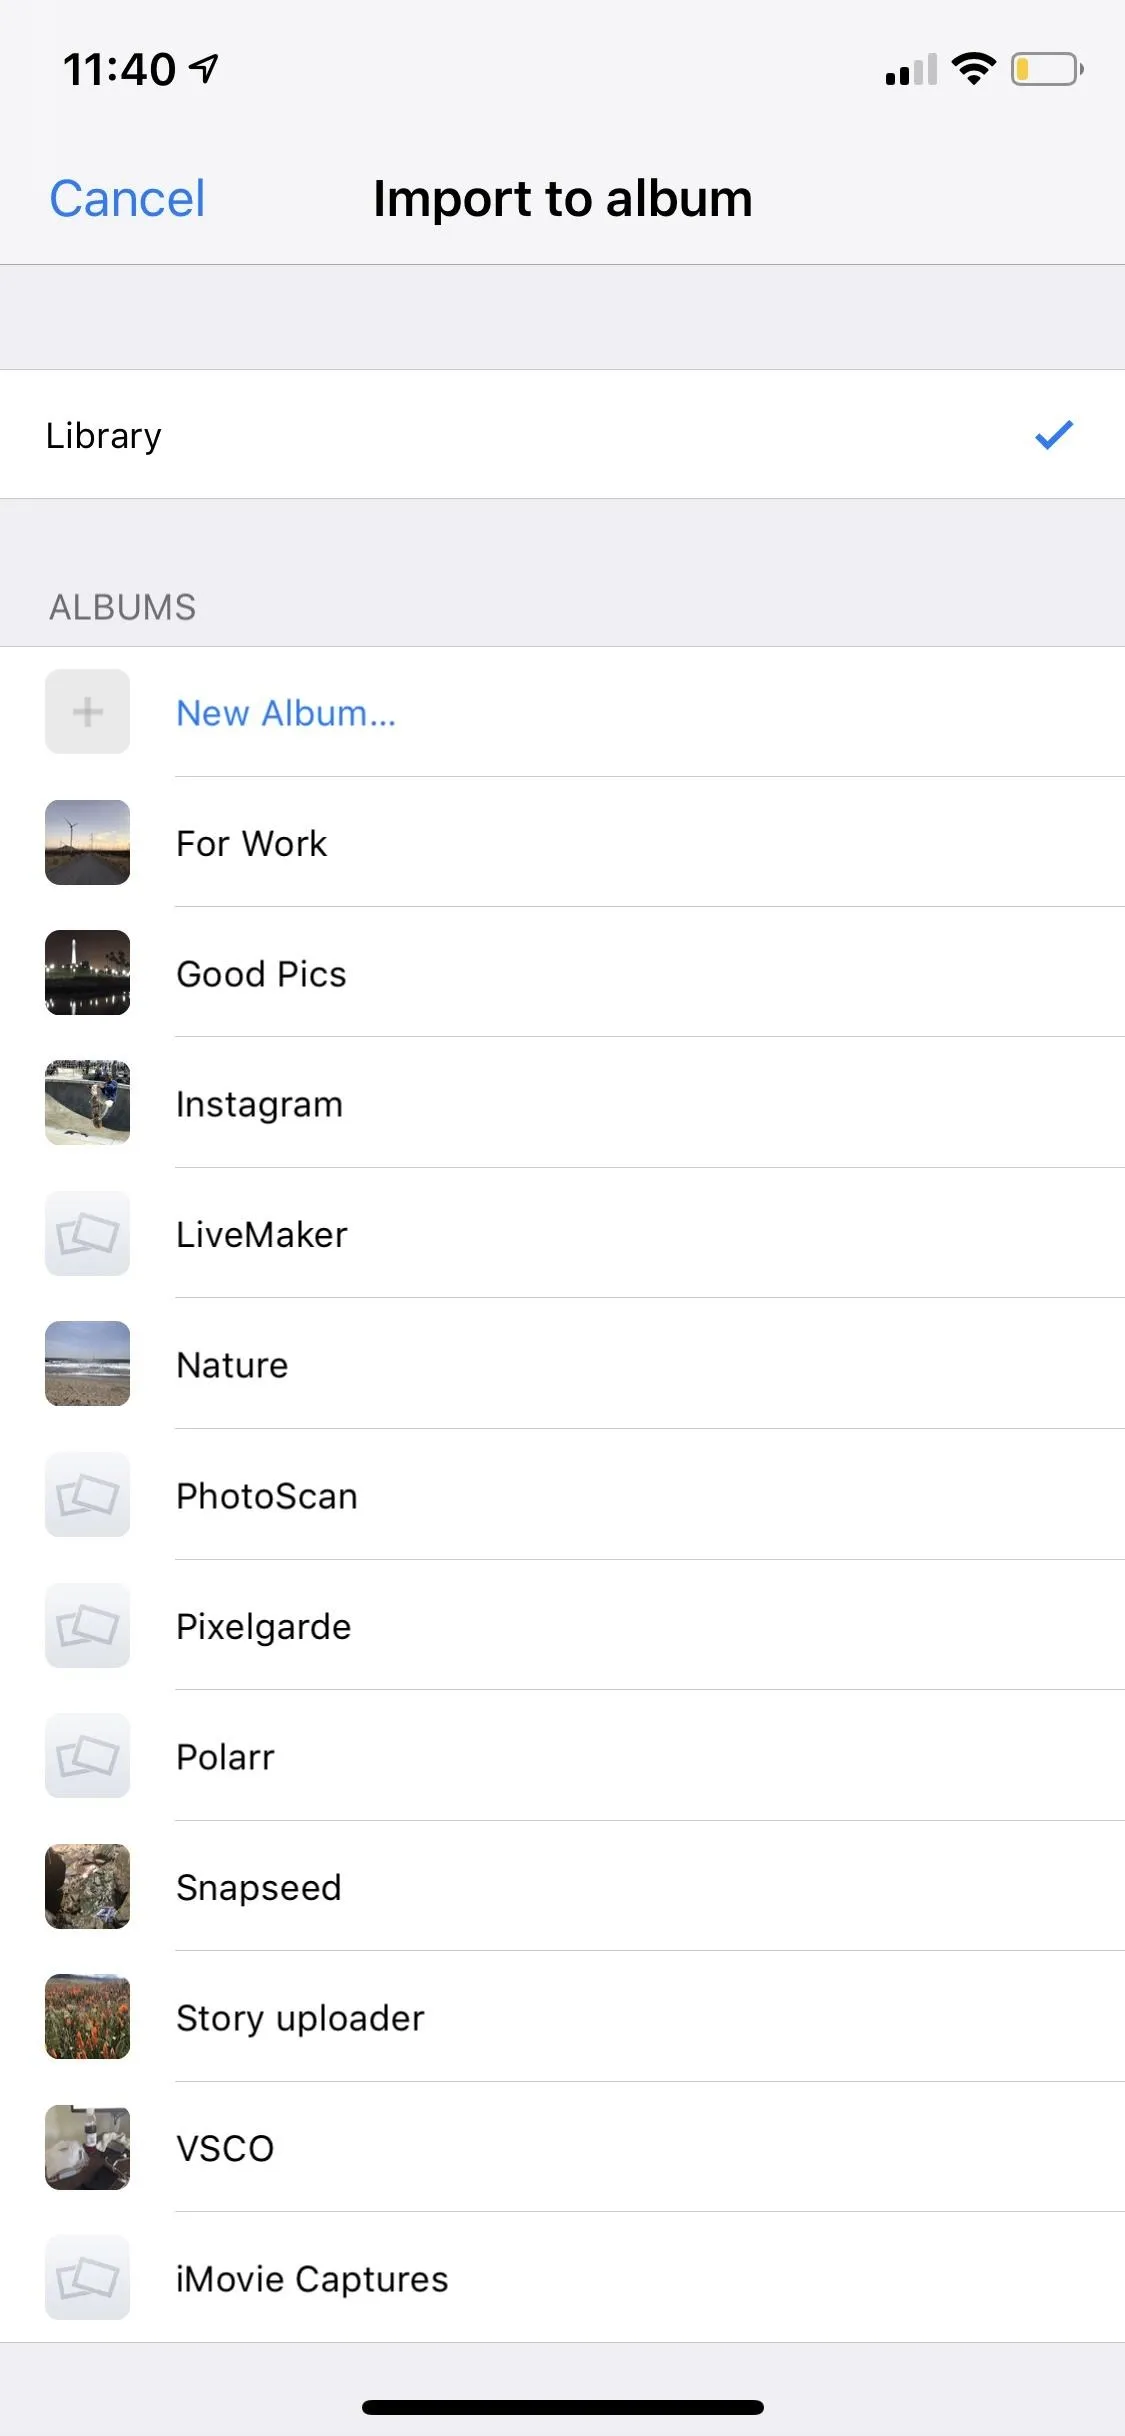
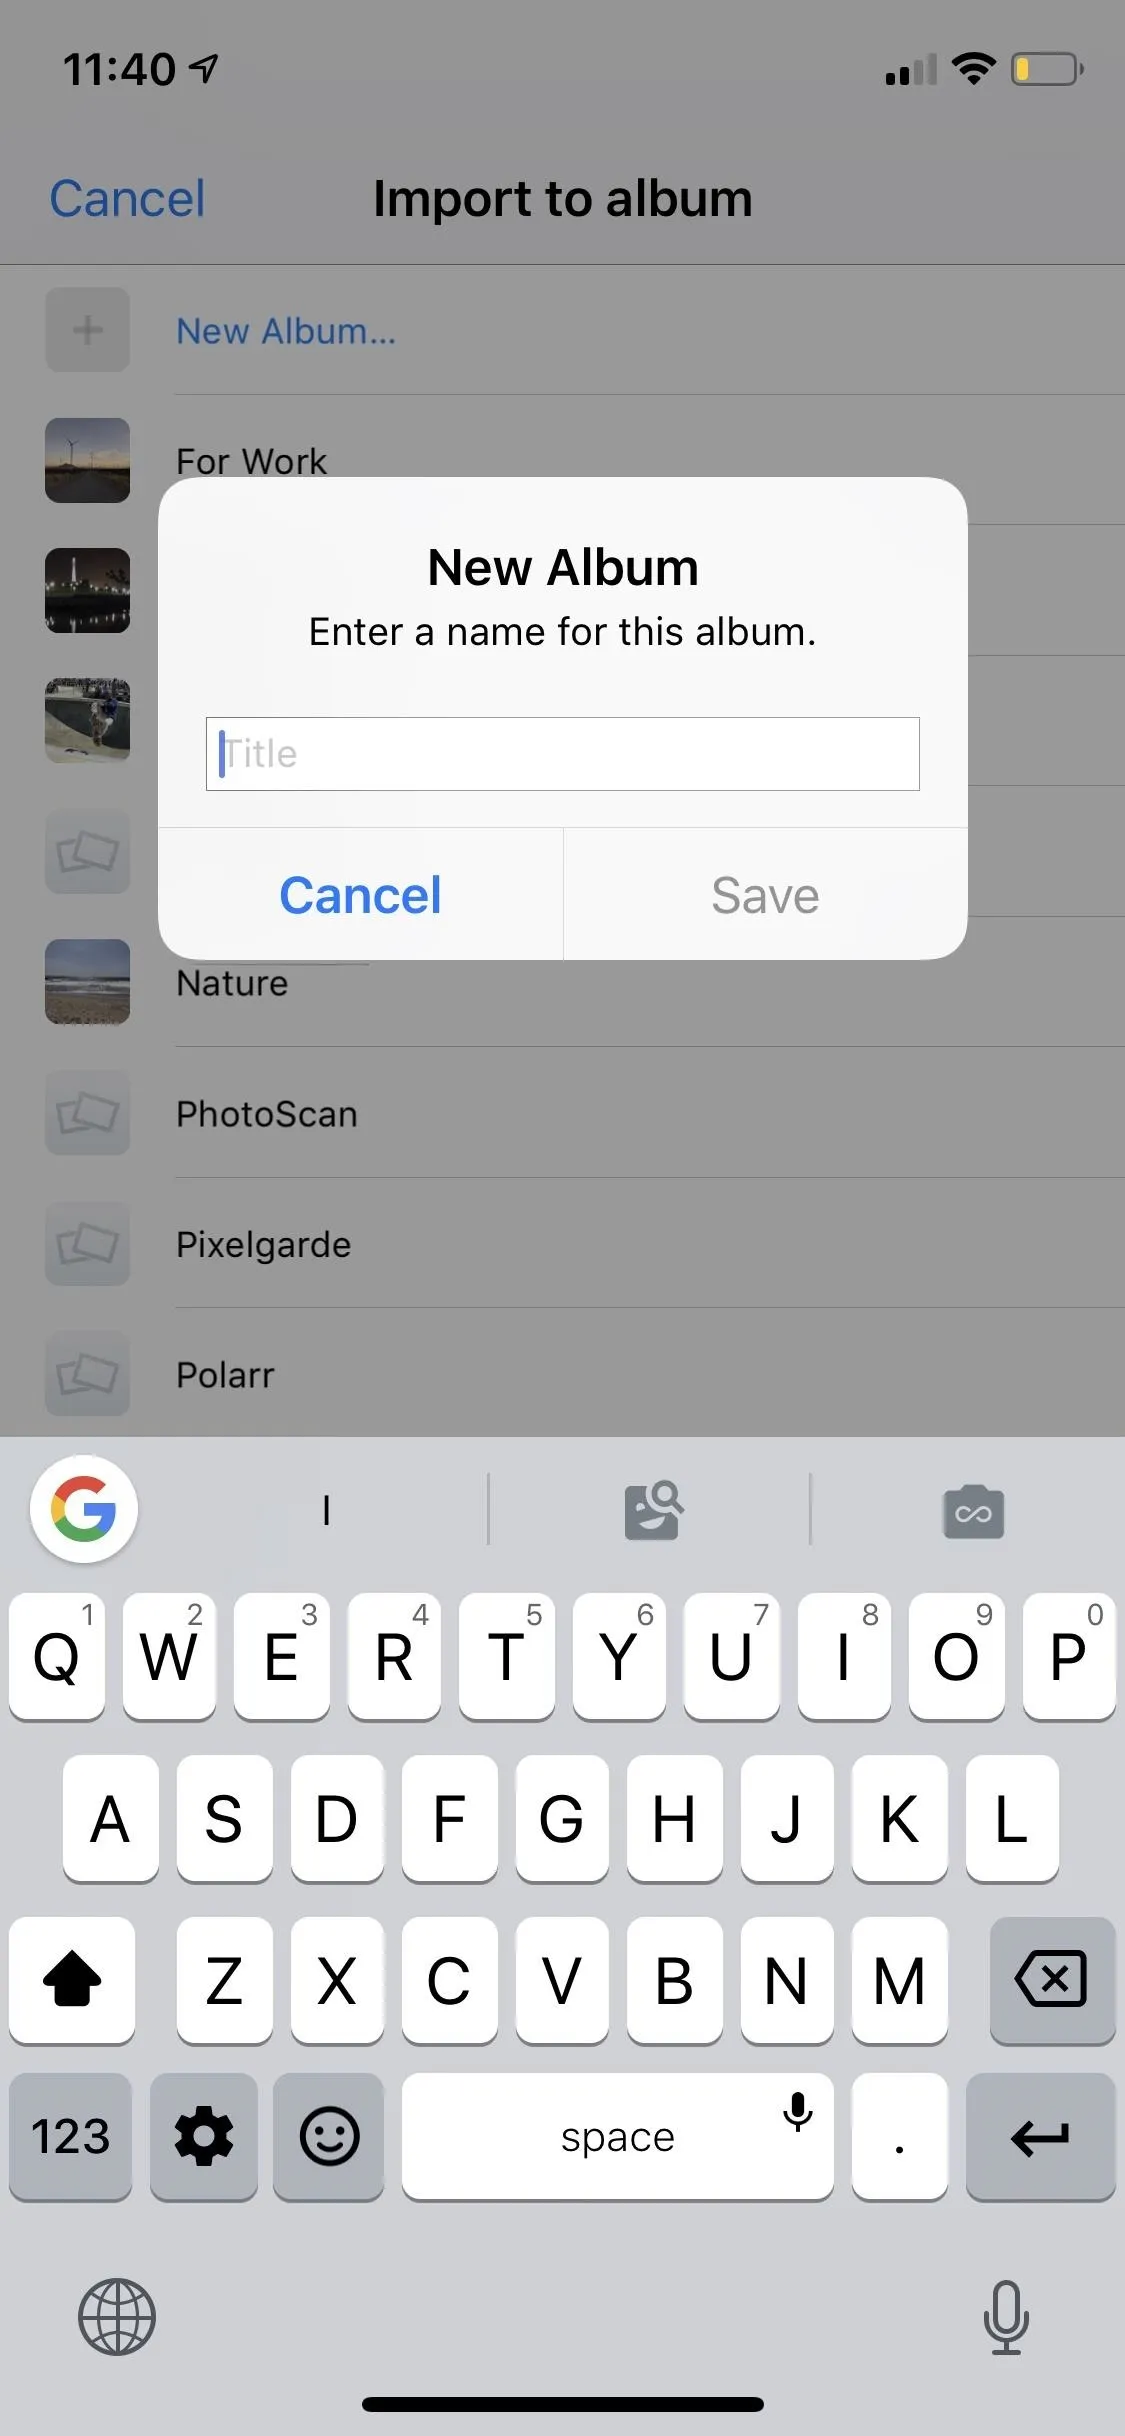
By default, photos and videos that you import will end up in your "Camera Roll" album, which is labeled "Library" in the importer. However, you can change the destination folder by tapping on "Import to." You can choose whatever folder appears in the list or you can create a new album specifically for this import.
If you can't decide which media to transfer to your iPhone, iOS 12's importer includes a new preview mode. Press firmly to peek at an image with 3D Touch, then press deeper to enlarge it. If you don't have 3D Touch (Haptic Touch will not work), long-press to jump into large previews. You can then swipe left or right to browse through all your photos and videos in the bigger view, and tap each one to select or deselect it for importing.
Once you start importing files, you don't have to remain on the importer screen. It works in the background, so you can go read your emails, iMessage someone, check up on the news, or whatever else you want to do.
Another benefit that iOS 12 brings to Photos is the ability to edit RAW photos. It won't be like editing RAW photos on your Mac or PC with Photoshop or Lightroom, but it's a great tool for quick edits before posting to social media or sharing in messages. However, RAW photo editing is limited to iOS devices with an A9 chip or higher. That means no RAW editing on the iPhone 5S, 6, or 6 Plus.
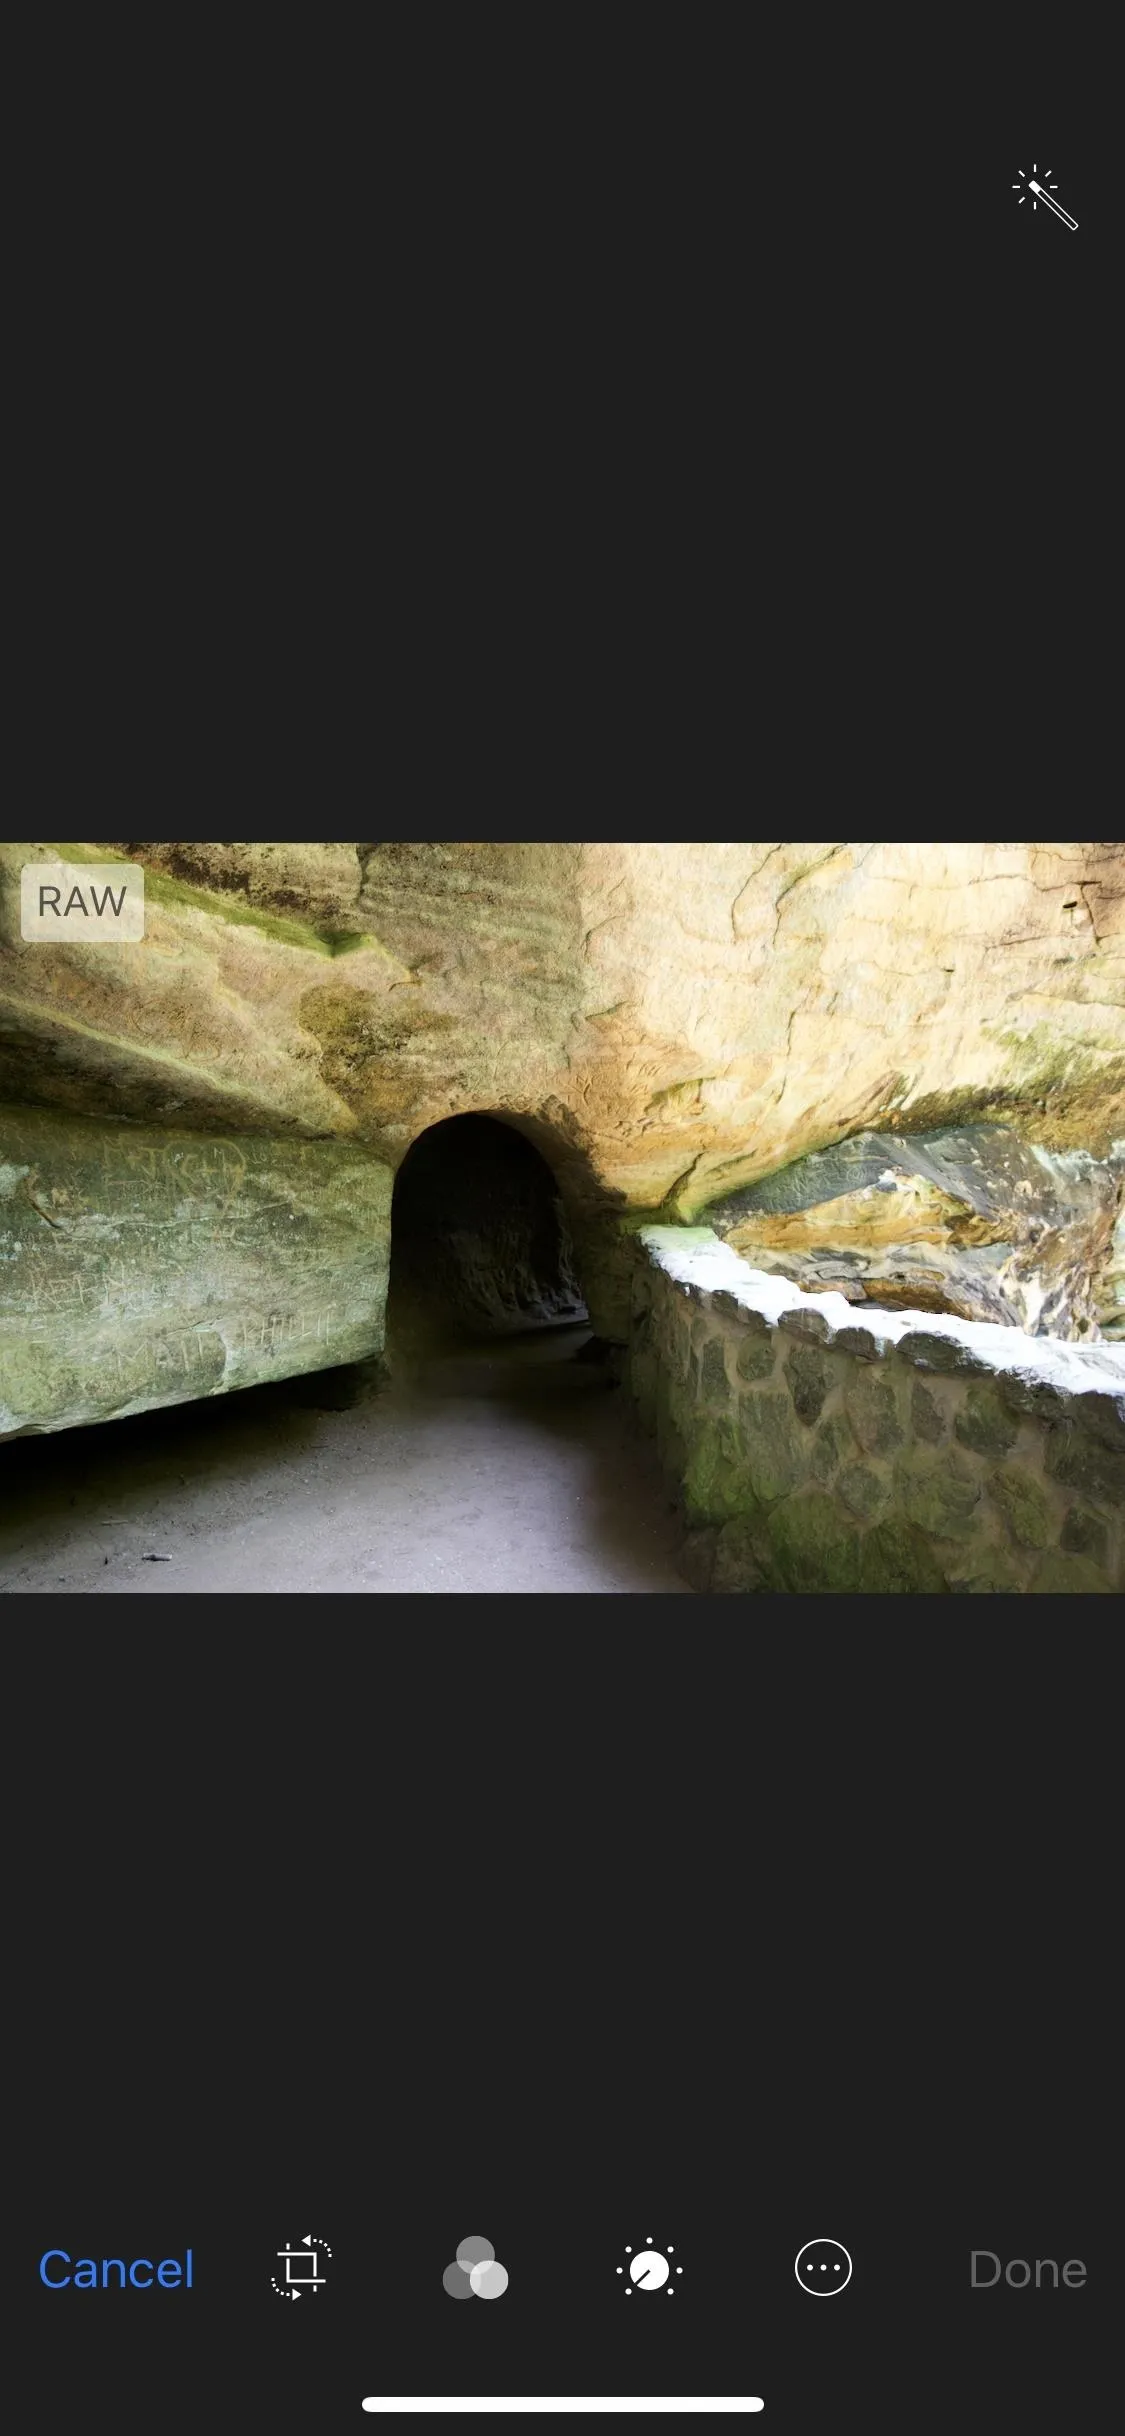


If you AirPlay one of the imported RAW files to your computer, it'll still be in the original RAW format. However, if you edit the RAW file in Photos, then it will instead become a JPEG, so keep that in mind.
This article was produced during Gadget Hacks' special coverage on smartphone-based video creator tips for filming and editing. Check out the whole Videography series.
- Follow Gadget Hacks on Facebook, Twitter, YouTube, and Flipboard
- Sign up for Gadget Hacks' daily newsletter or weekly Android and iOS updates
- Follow WonderHowTo on Facebook, Twitter, Pinterest, and Flipboard
Cover photo and screenshots by Justin Meyers/Gadget Hacks


Comments
Be the first, drop a comment!