


Thanks to iCloud and AirDrop, it's really easy to sync photos between an iPhone and a Mac. But if you have an Apple phone and a Windows computer, this process isn't quite as simple. Thankfully, Microsoft has just released a new iPhone app that makes it a breeze to move photos and videos from your iPhone to your PC.
This app allows Windows 10 users to easily send pictures or videos to their PC without having to deal with compatibility issues between iCloud and Windows. While it's not quite as amazing as AirDrop, this is honestly the fastest method we've found to transfer media between an iOS device and a Windows computer. It takes a little bit of setup to get things up and running, but I'll cover all of that below.
Install Photos Companion
First, you'll need to install Microsoft's new app on your phone, which is called Photos Companion. To do that, you can either search for "Photos Companion" on the App Store or use the link below to jump to it. Tap on "Get" to download and install it. If you're using an iPhone X, you may have to double click to install.

Update Your PC Software
From our testing, we found that this feature wouldn't work on older Windows versions. So press the Windows key on your keyboard, then type "Check for updates" and hit enter. From there, accept all available Windows 10 updates to make sure you're running Windows 10 version 1709 at a minimum.
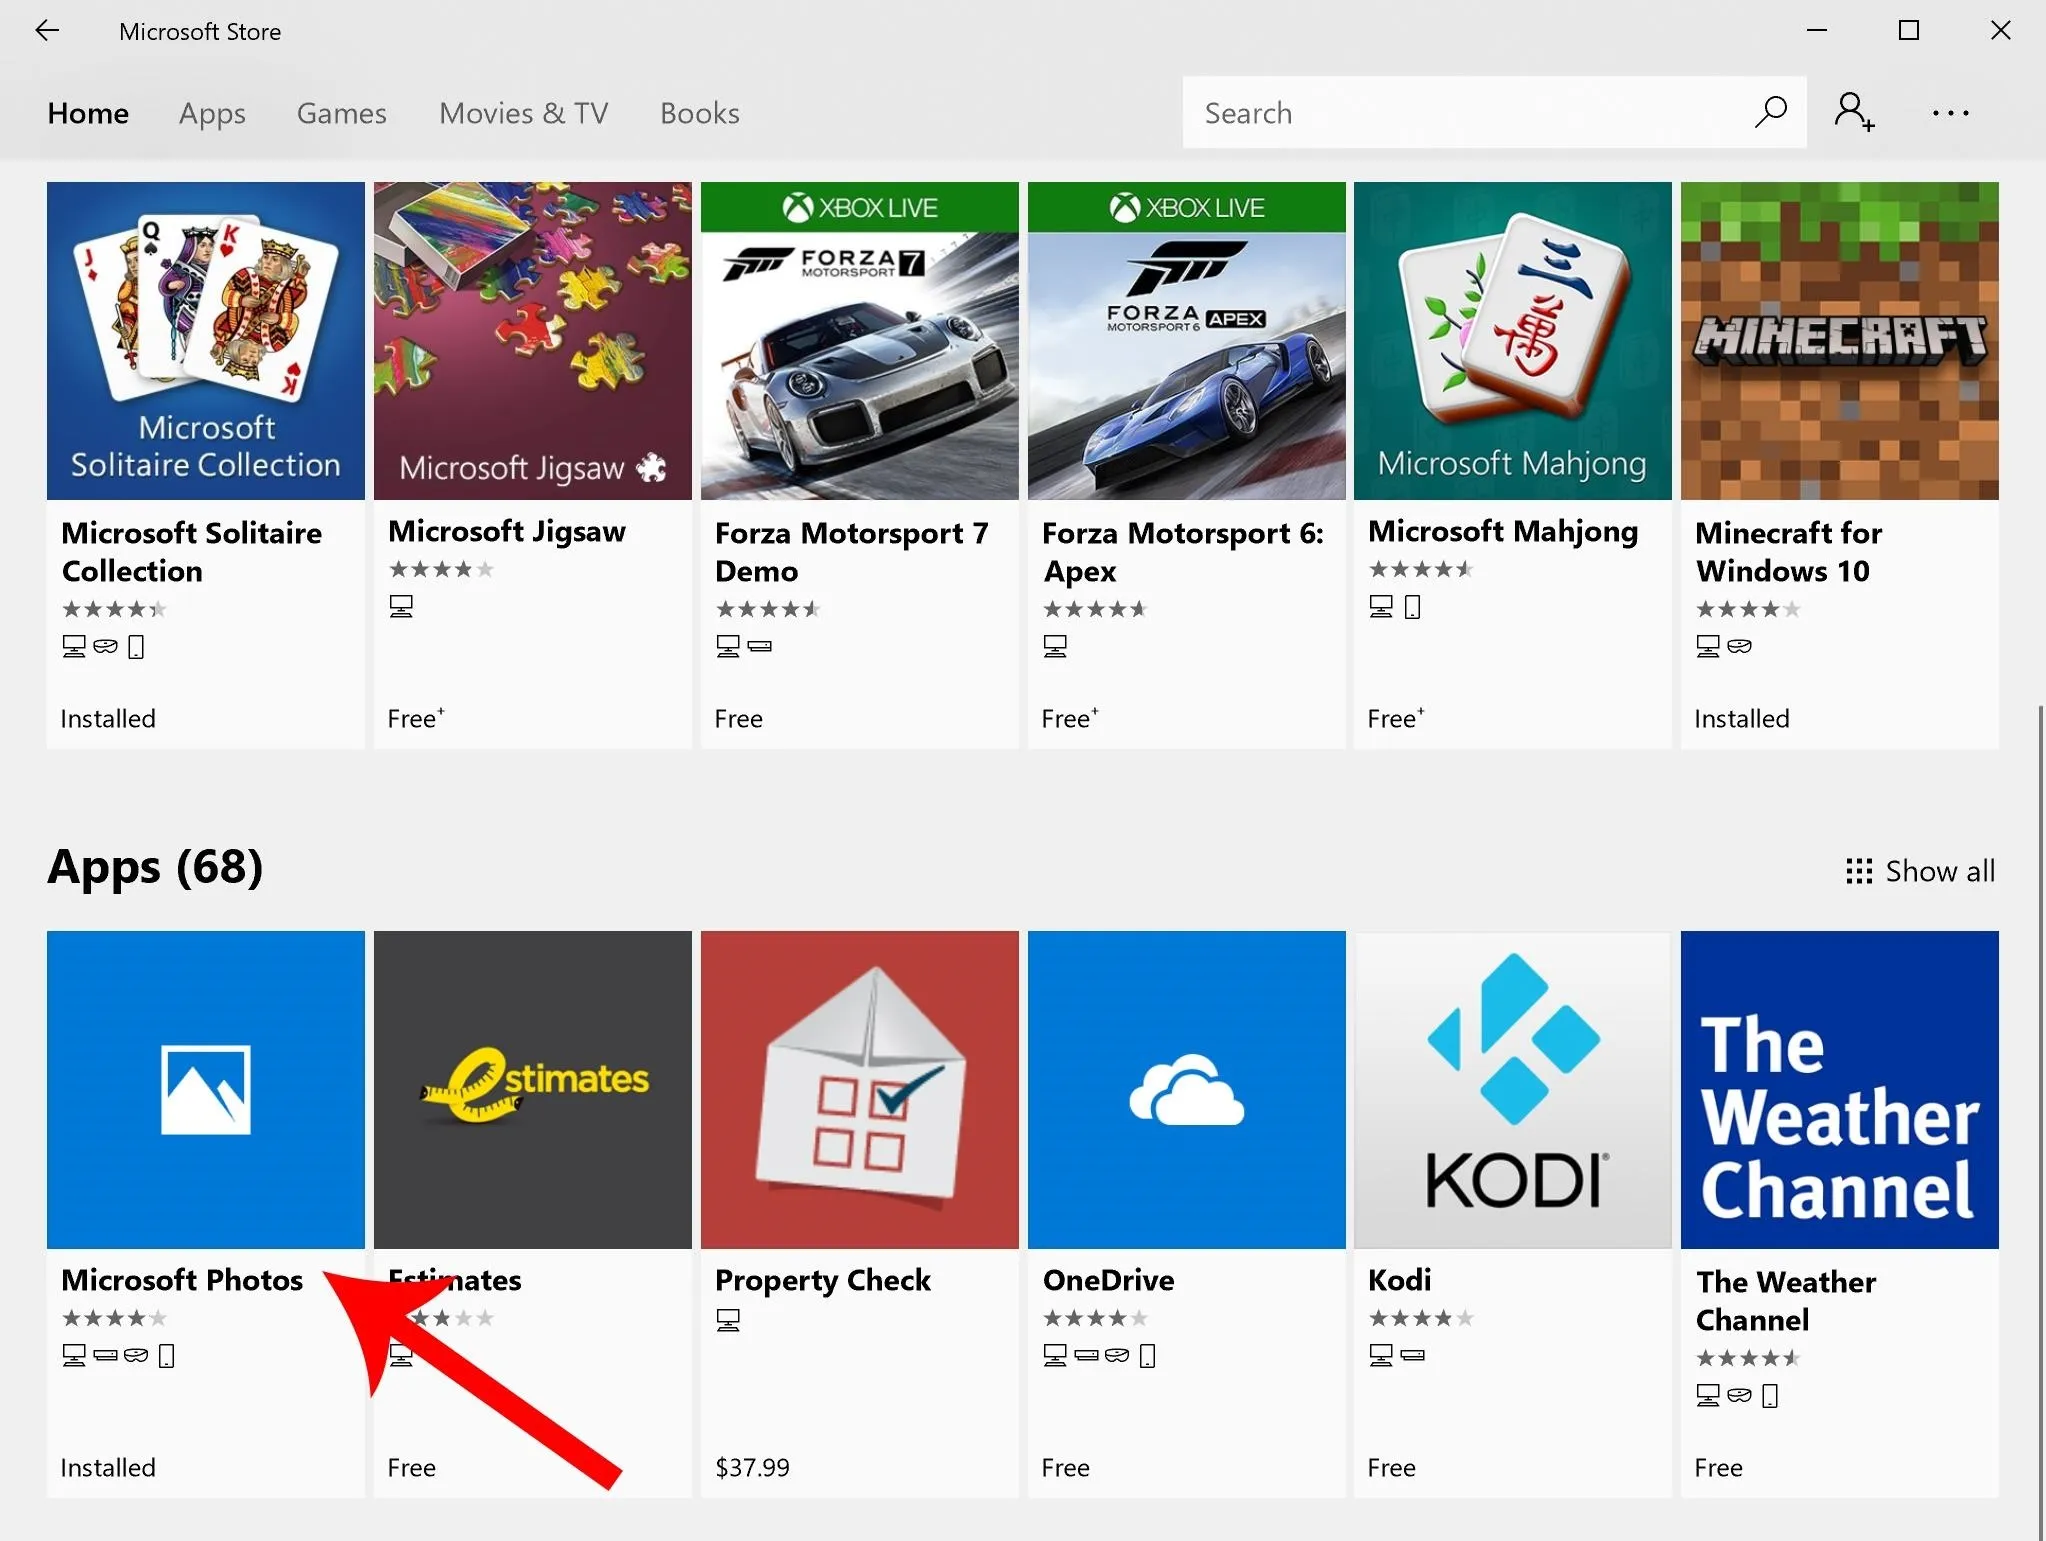
Next, you should update the Photos app on your PC. To do that, press the Windows button on your keyboard, then type "Microsoft Store" and hit enter. From there, search for "Microsoft Photos," then click the first result under "Apps."
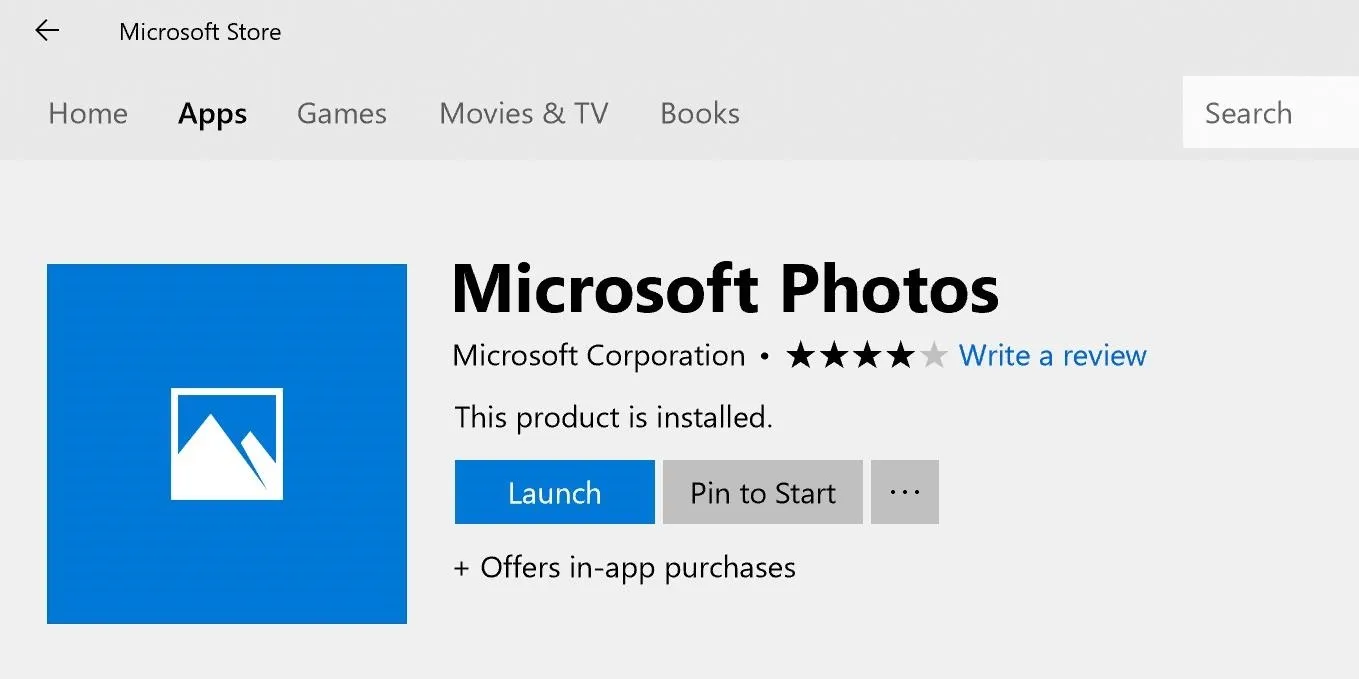
When you make it to the Microsoft Photos page on the Store, just wait a few seconds — if the update hasn't already been installed on your machine, you'll see a progress bar as it updates automatically. When you see the "Launch" button come back, your Photos app has been updated.
Open the Photos App on Your PC
The Photos app comes pre-installed on all Windows machines, but you might not know where it is. To access this app, press the Windows button on your keyboard and type in "Photos," then hit enter.


Enable Preview Settings in Photos
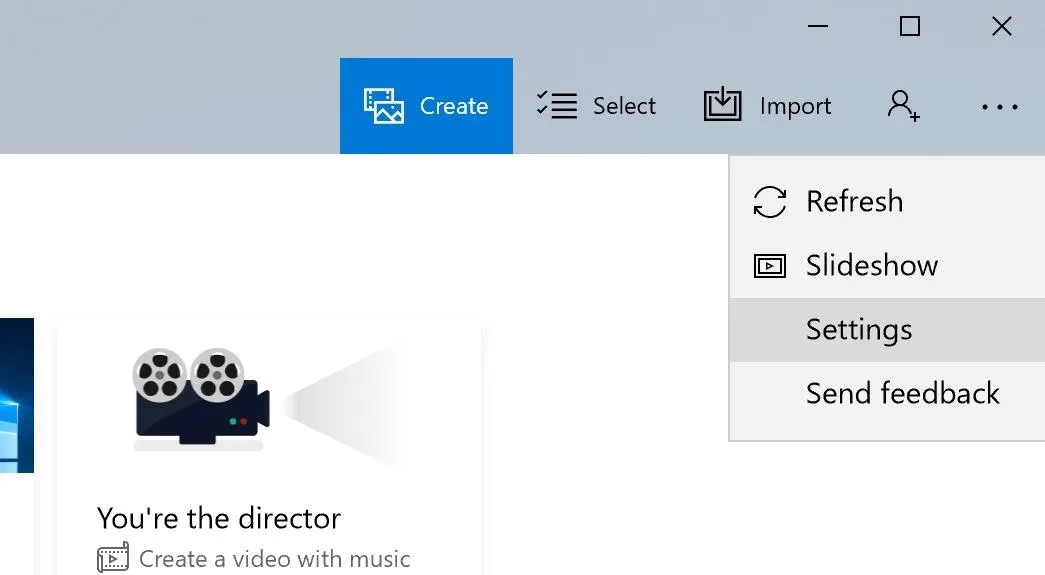
This new feature is still experimental, so you'll need to set your Photos app to use "Preview" features. To do that, click the three-dot menu button in the top-right corner of the main Photos window on your PC, then choose "Settings."
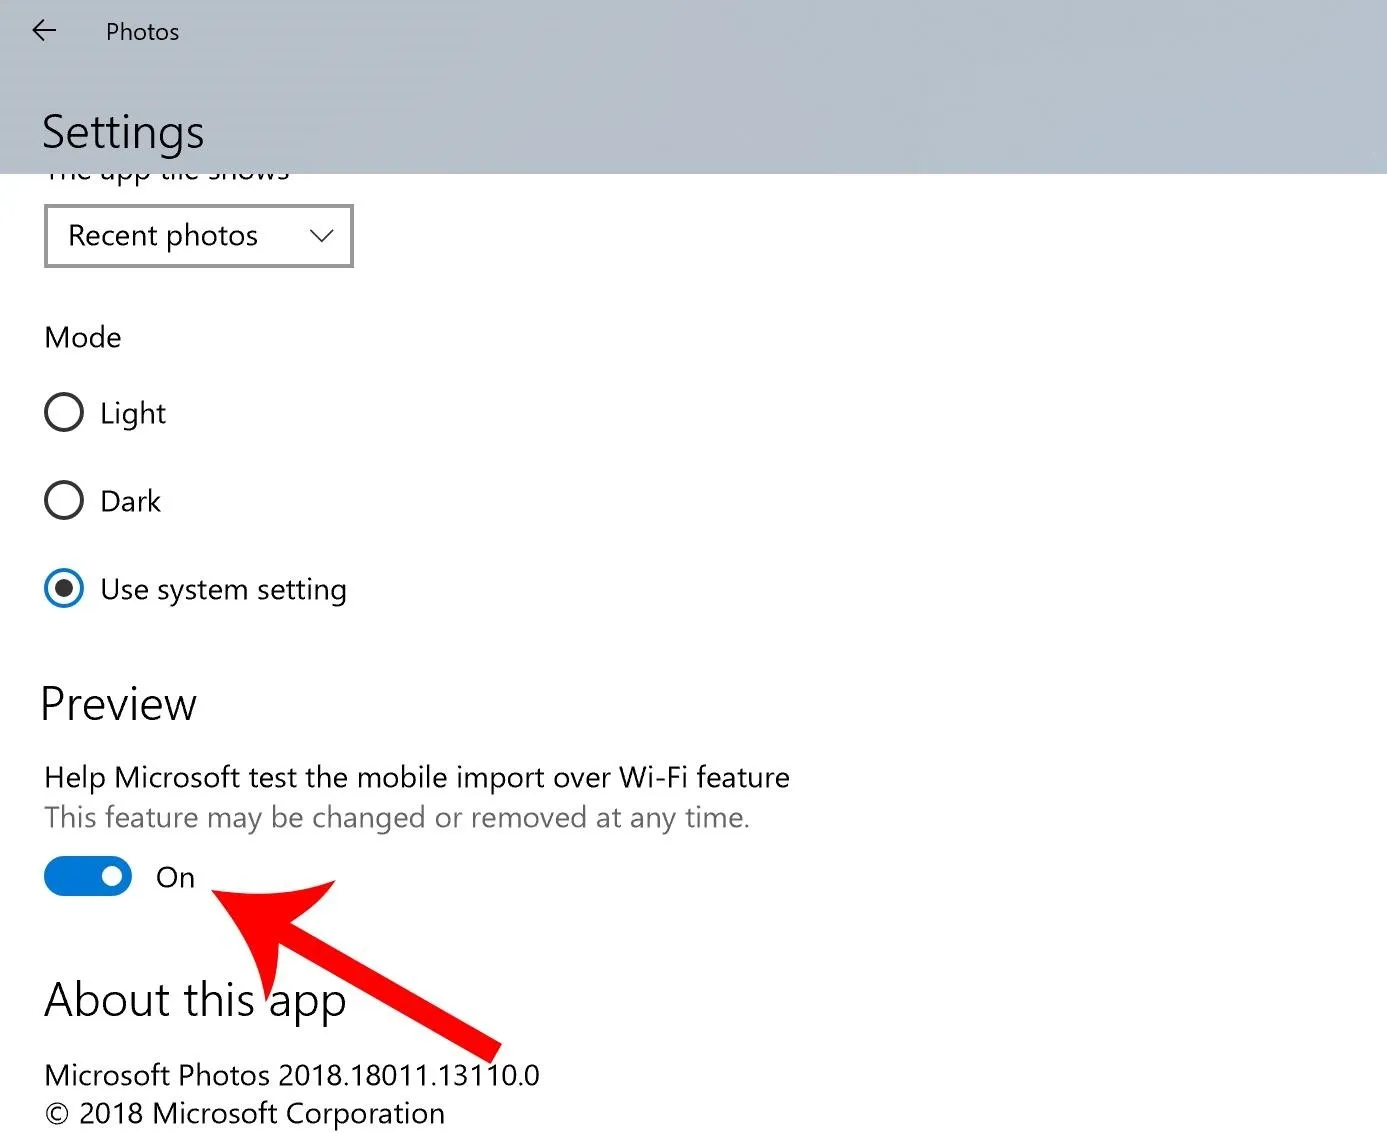
From there, scroll down until you find the "Preview" setting, then enable the toggle switch and make sure it's set to "On." When you're done there, close the Photos app, then reopen it (as outlined in Step 3) so that the changes will take effect.
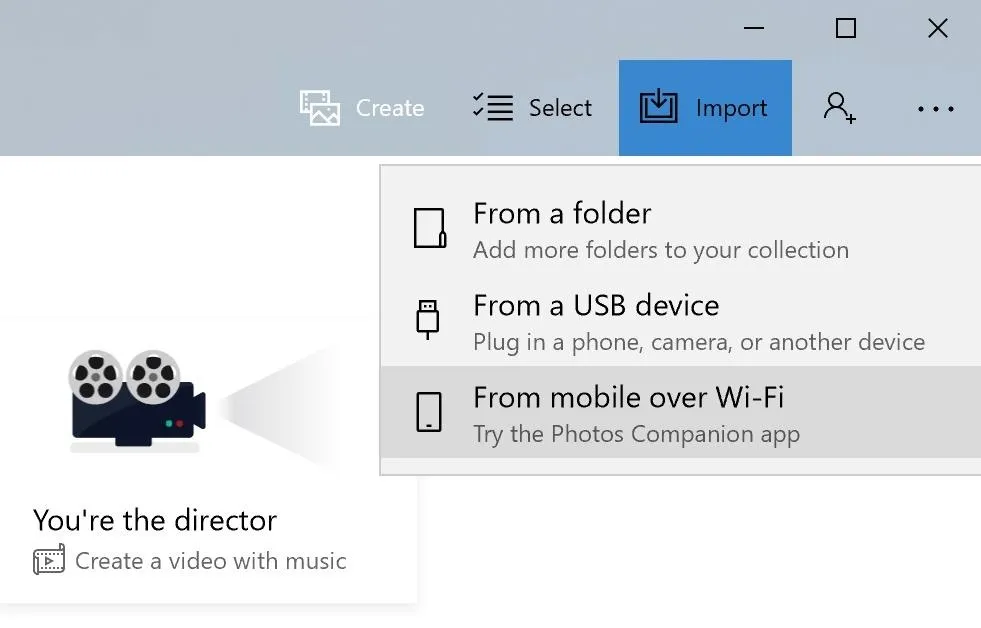
Get Your Computer Ready to Import Photos
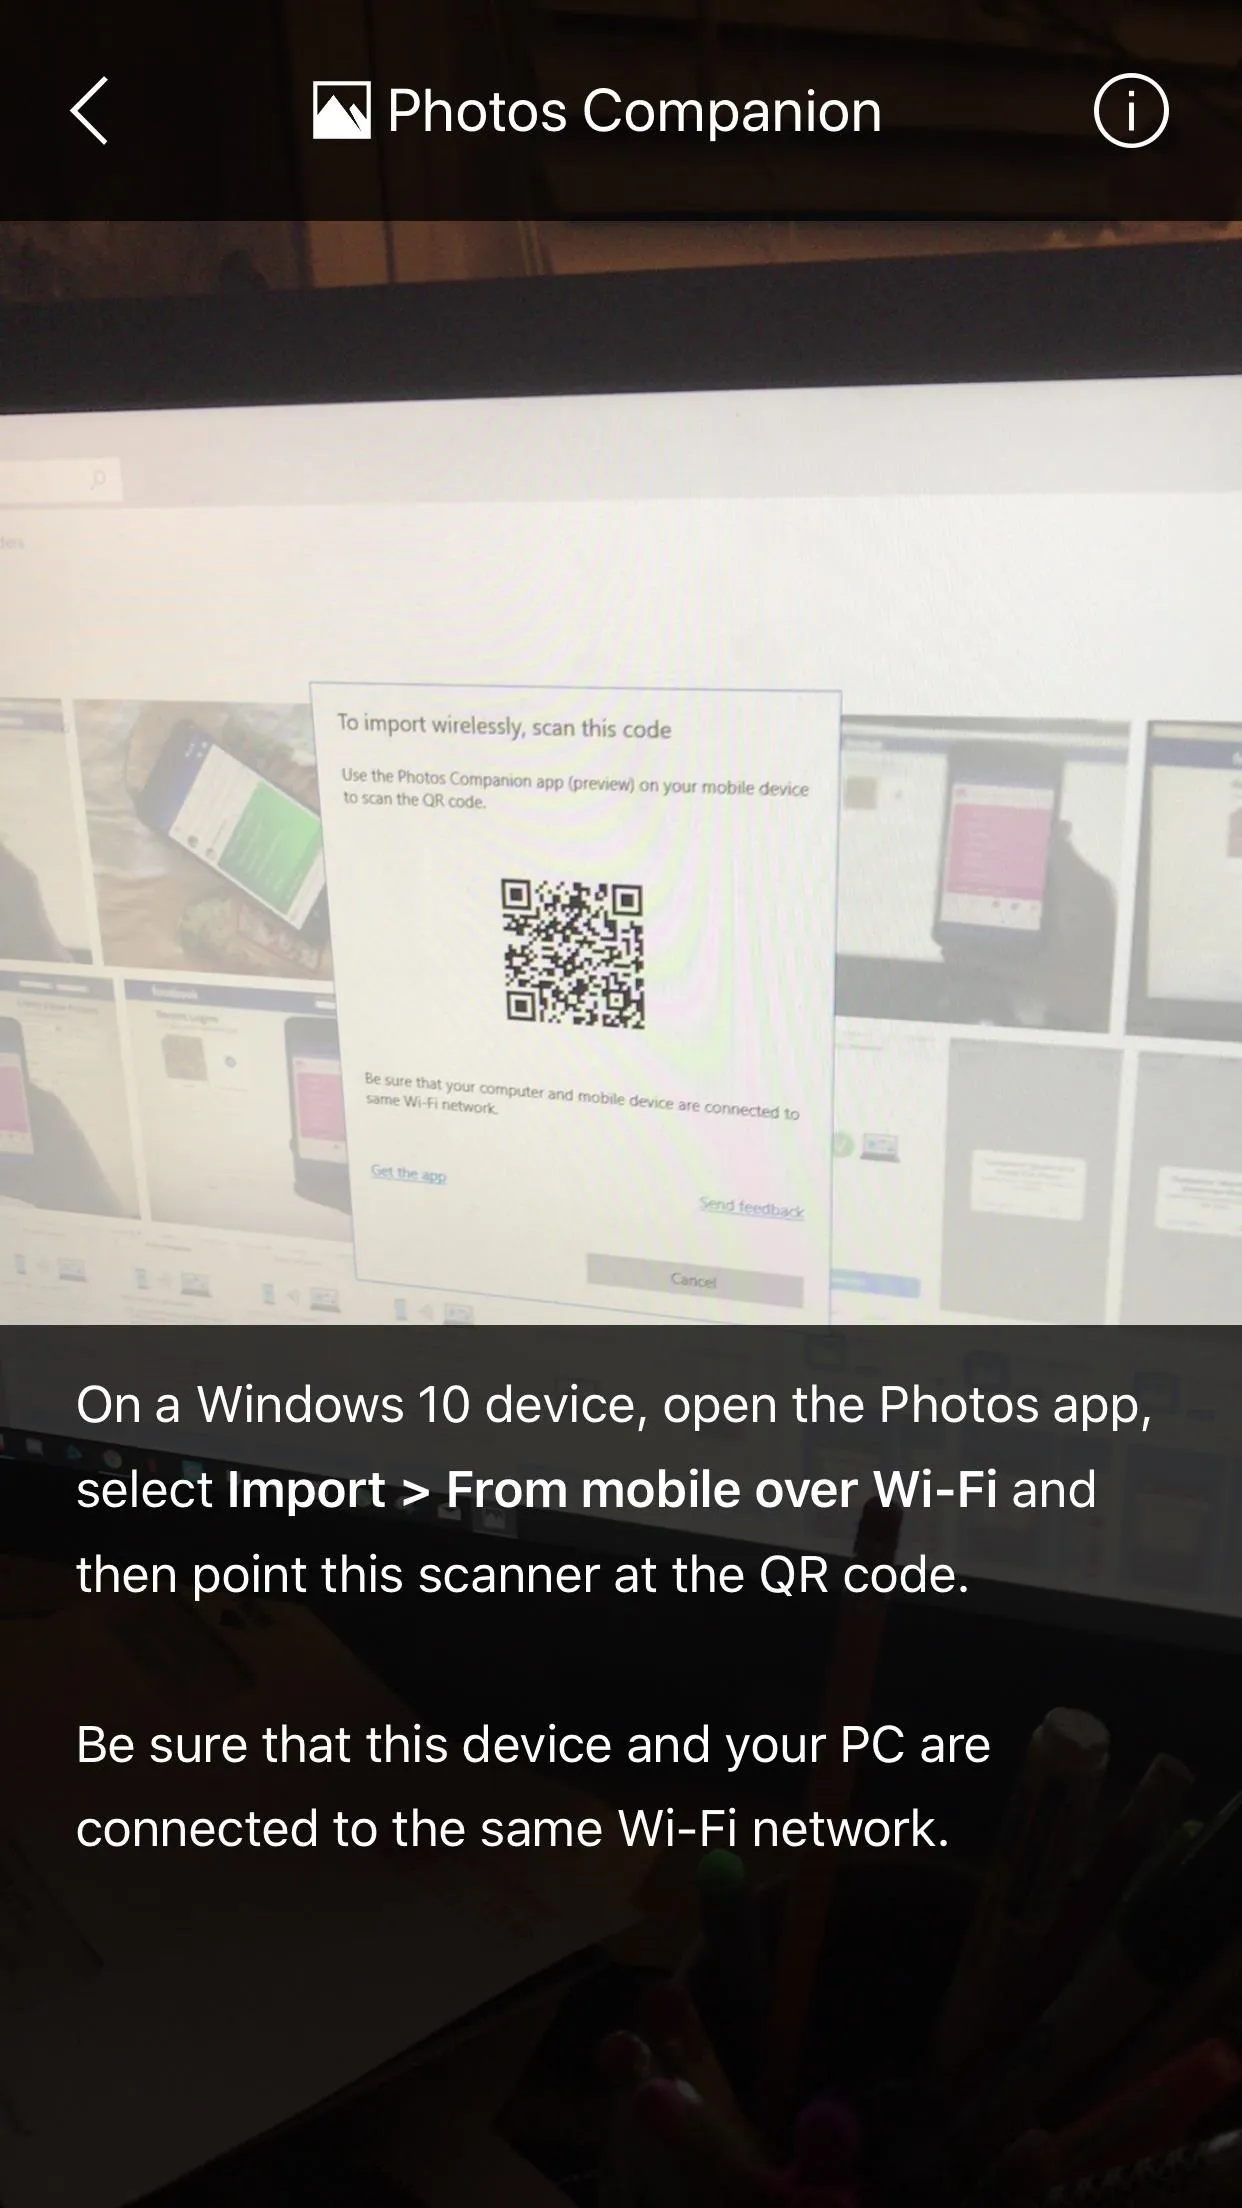
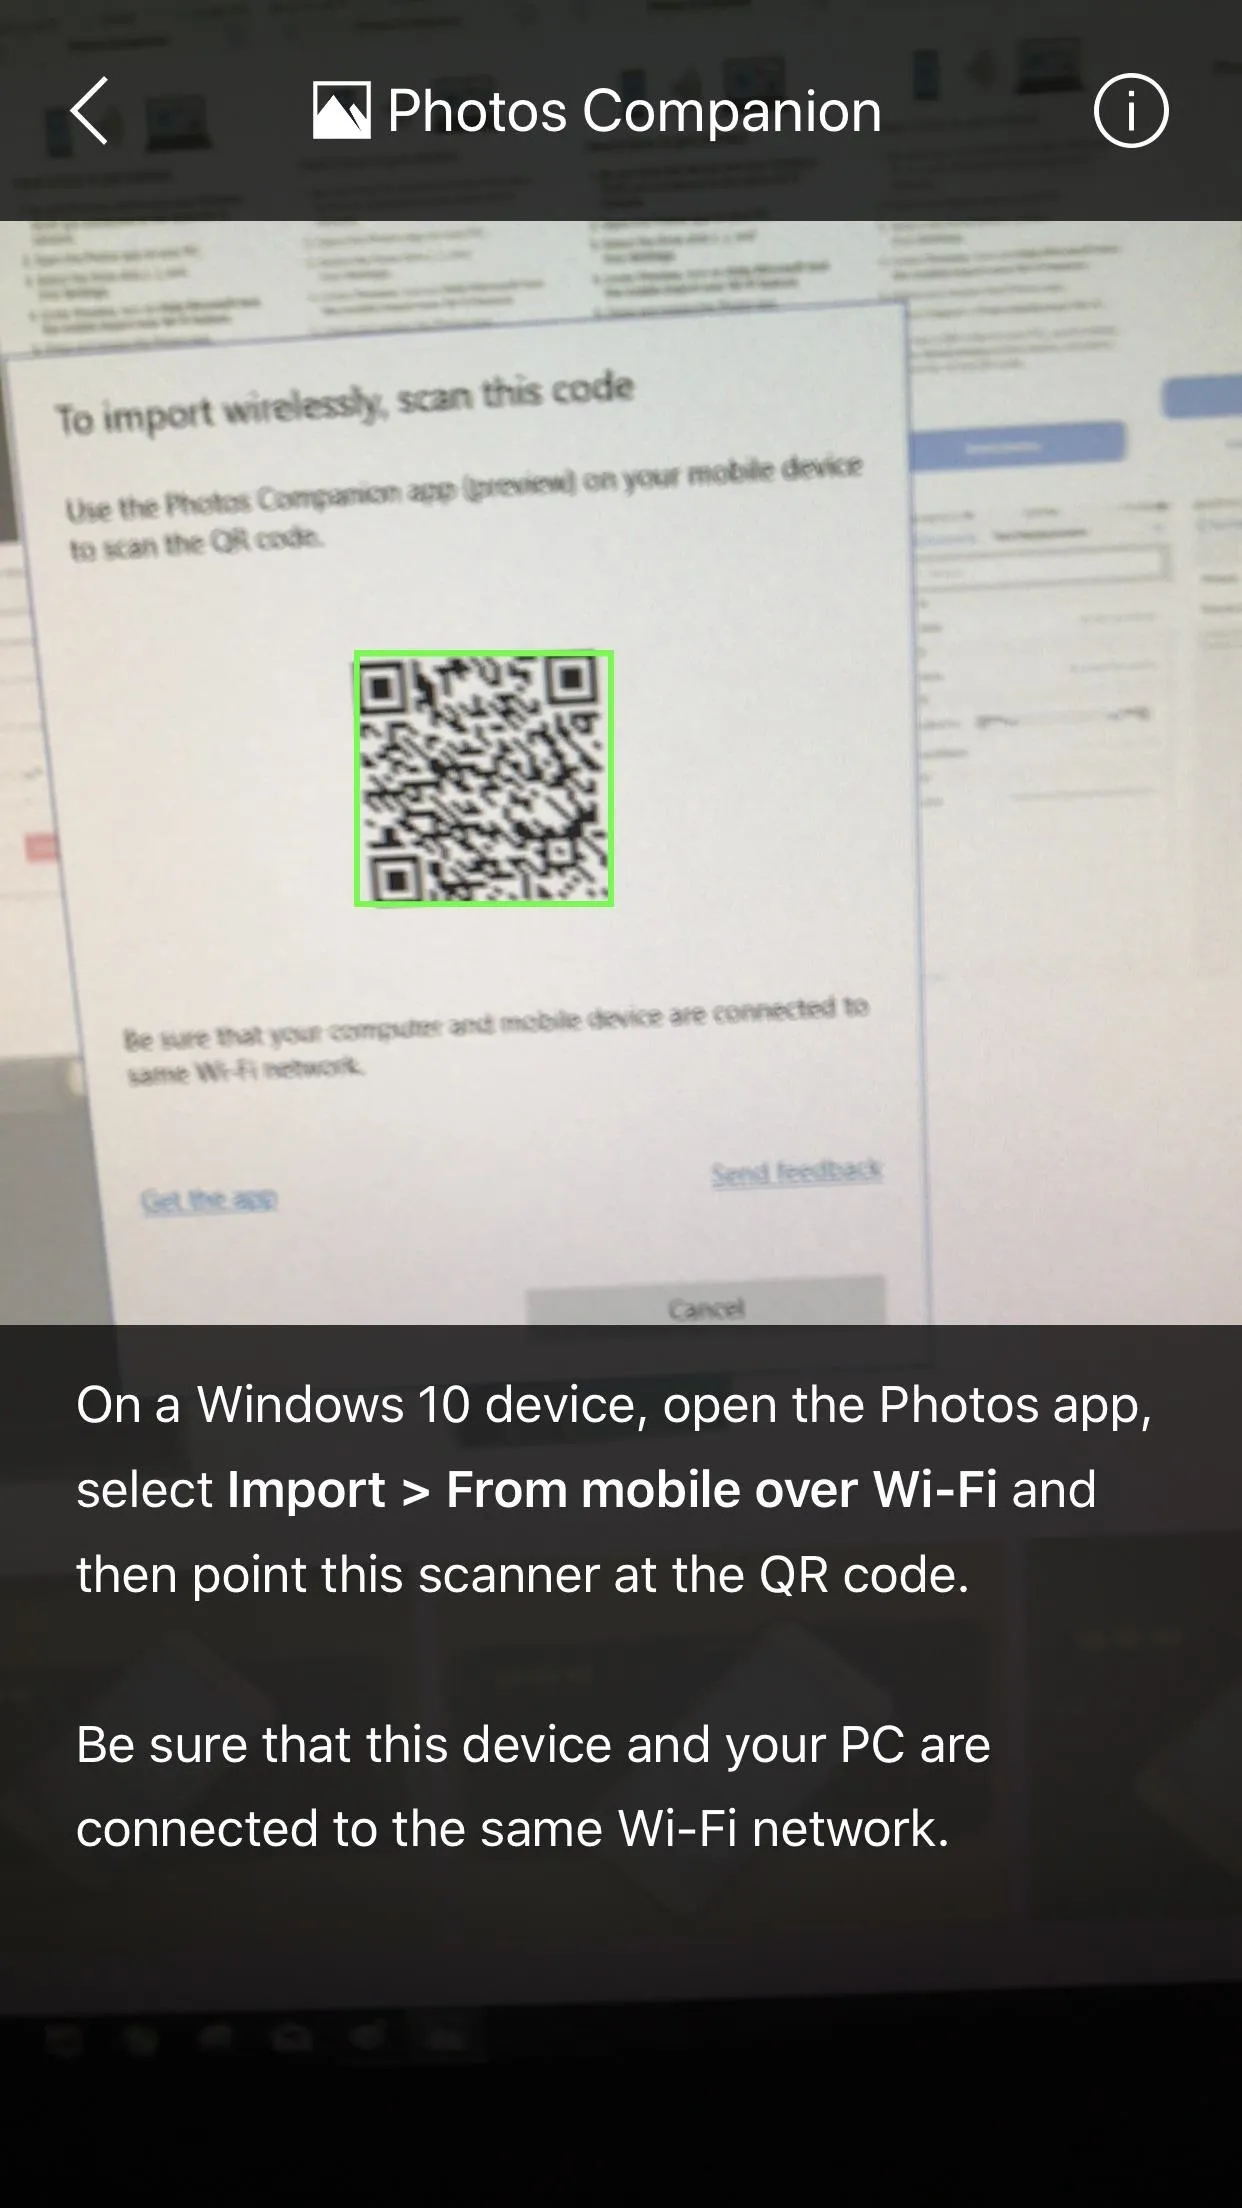
From the main menu in the Windows Photos app, click the tab in the top-right corner that says "Import." Next, select "From mobile over Wi-Fi."
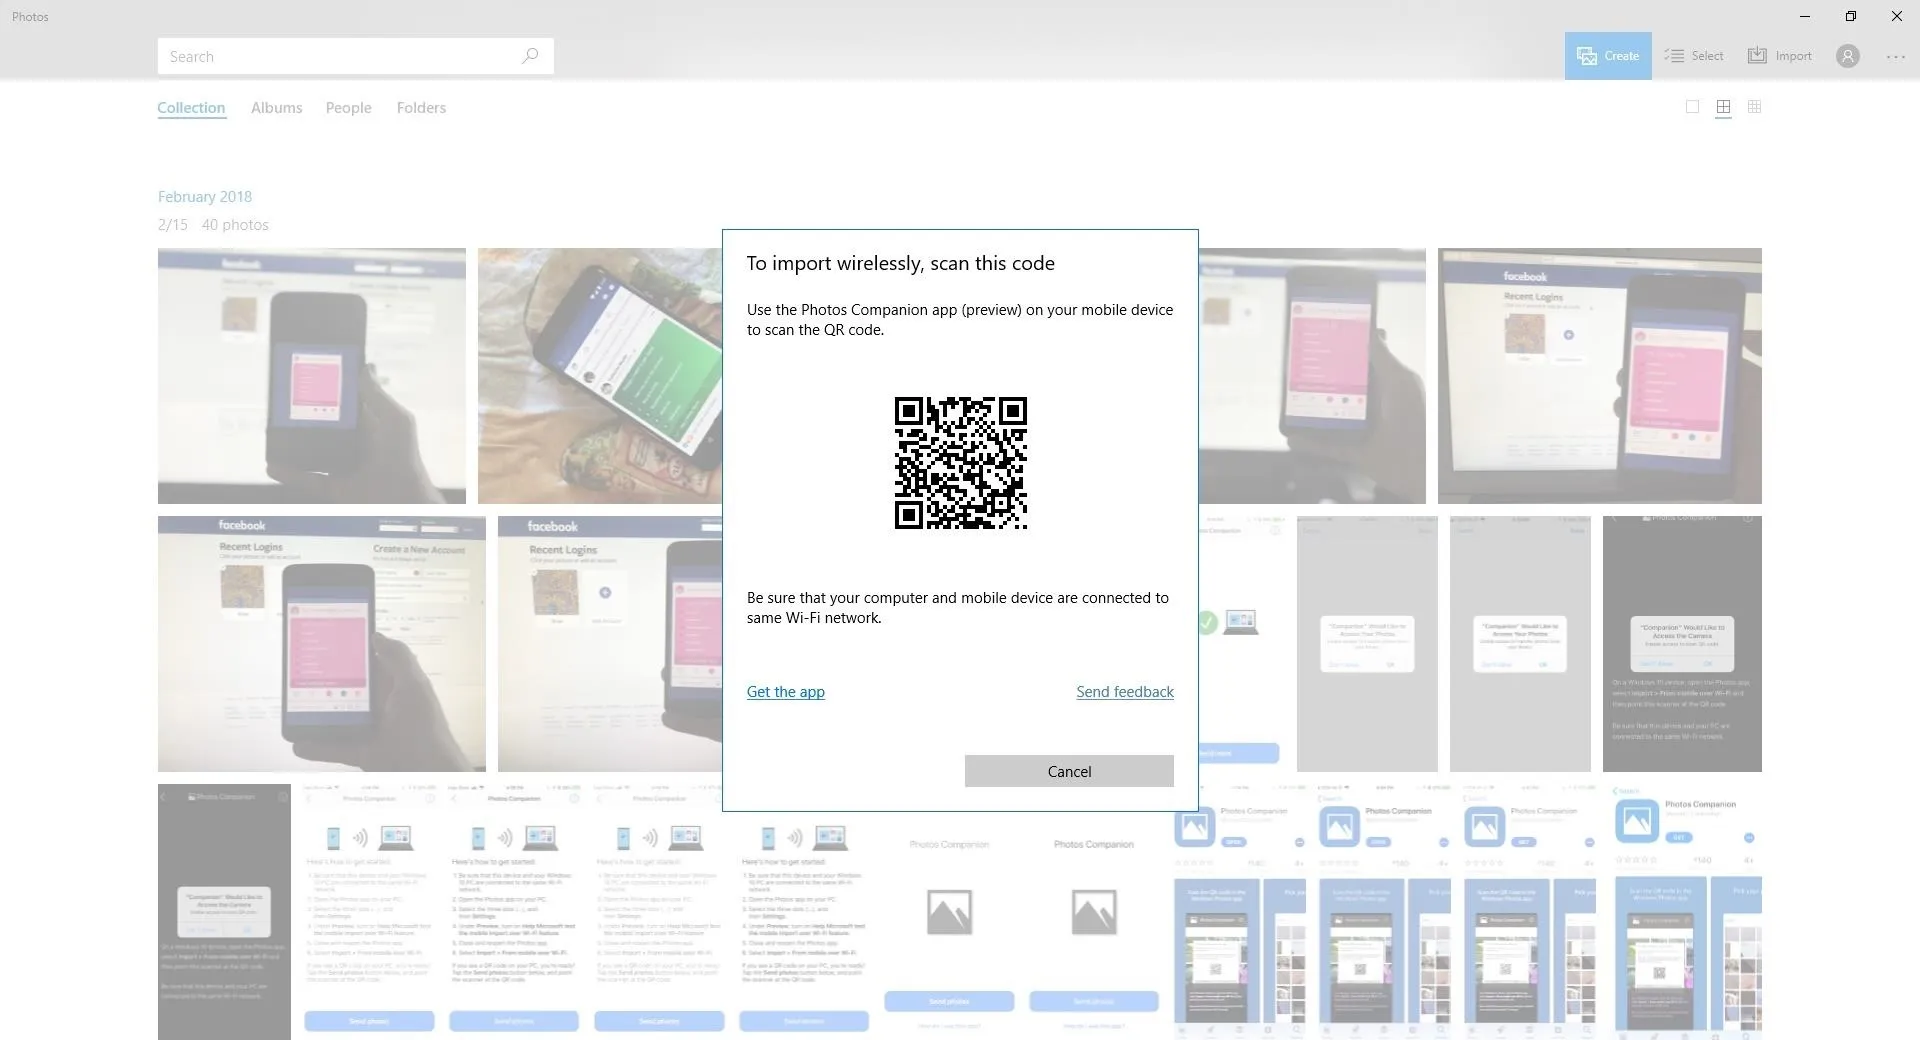
A QR code will appear on your computer that you'll scan with your phone in the next step. At this point, make sure that both your computer and your phone are on the same Wi-Fi network.
Scan the QR Code with Your Phone
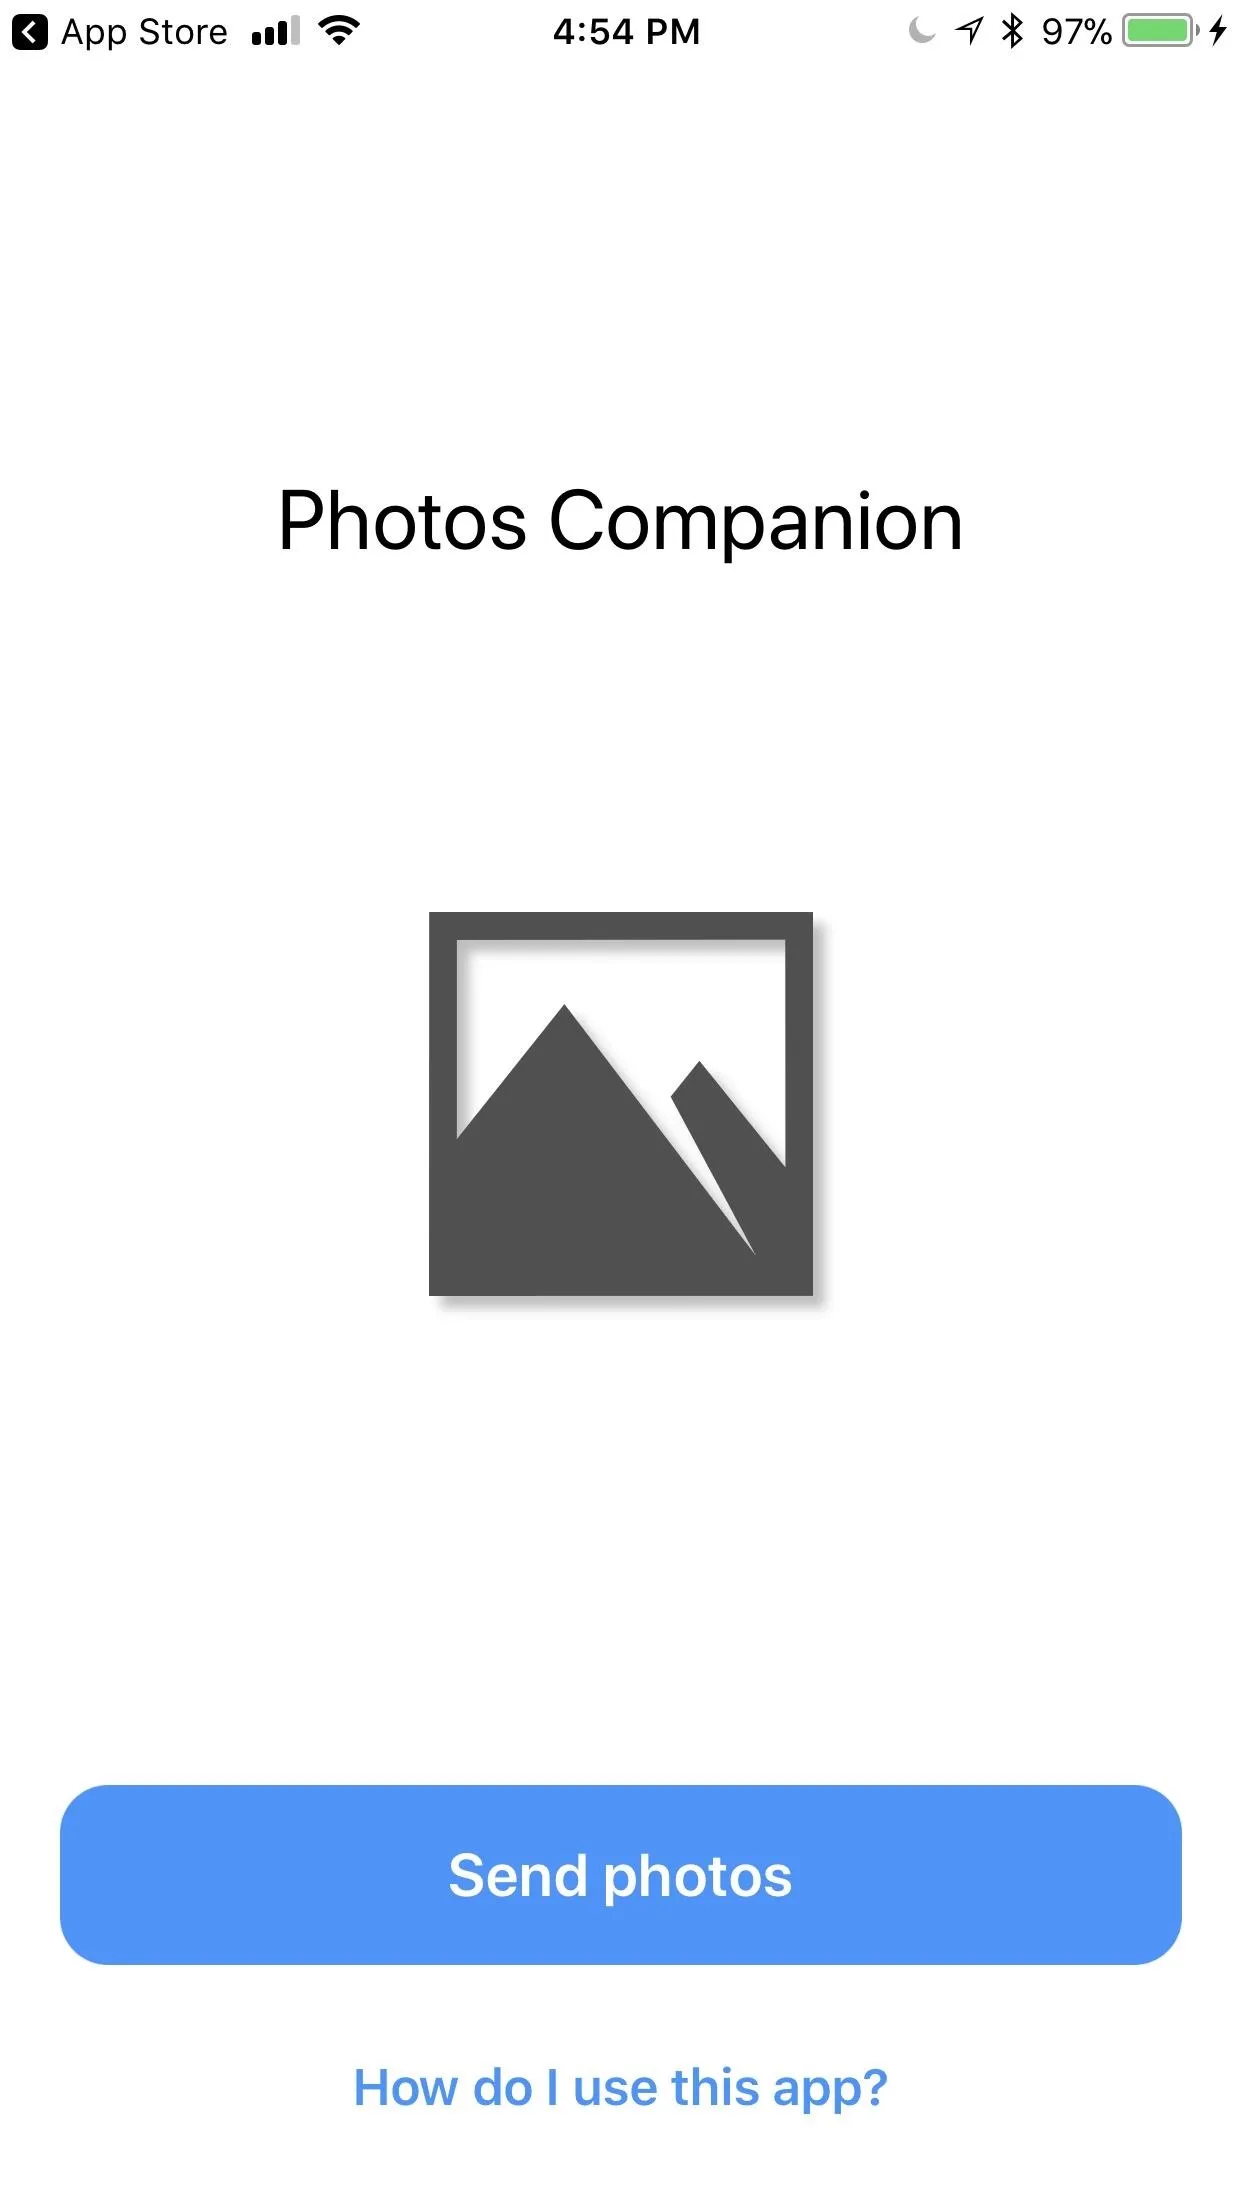
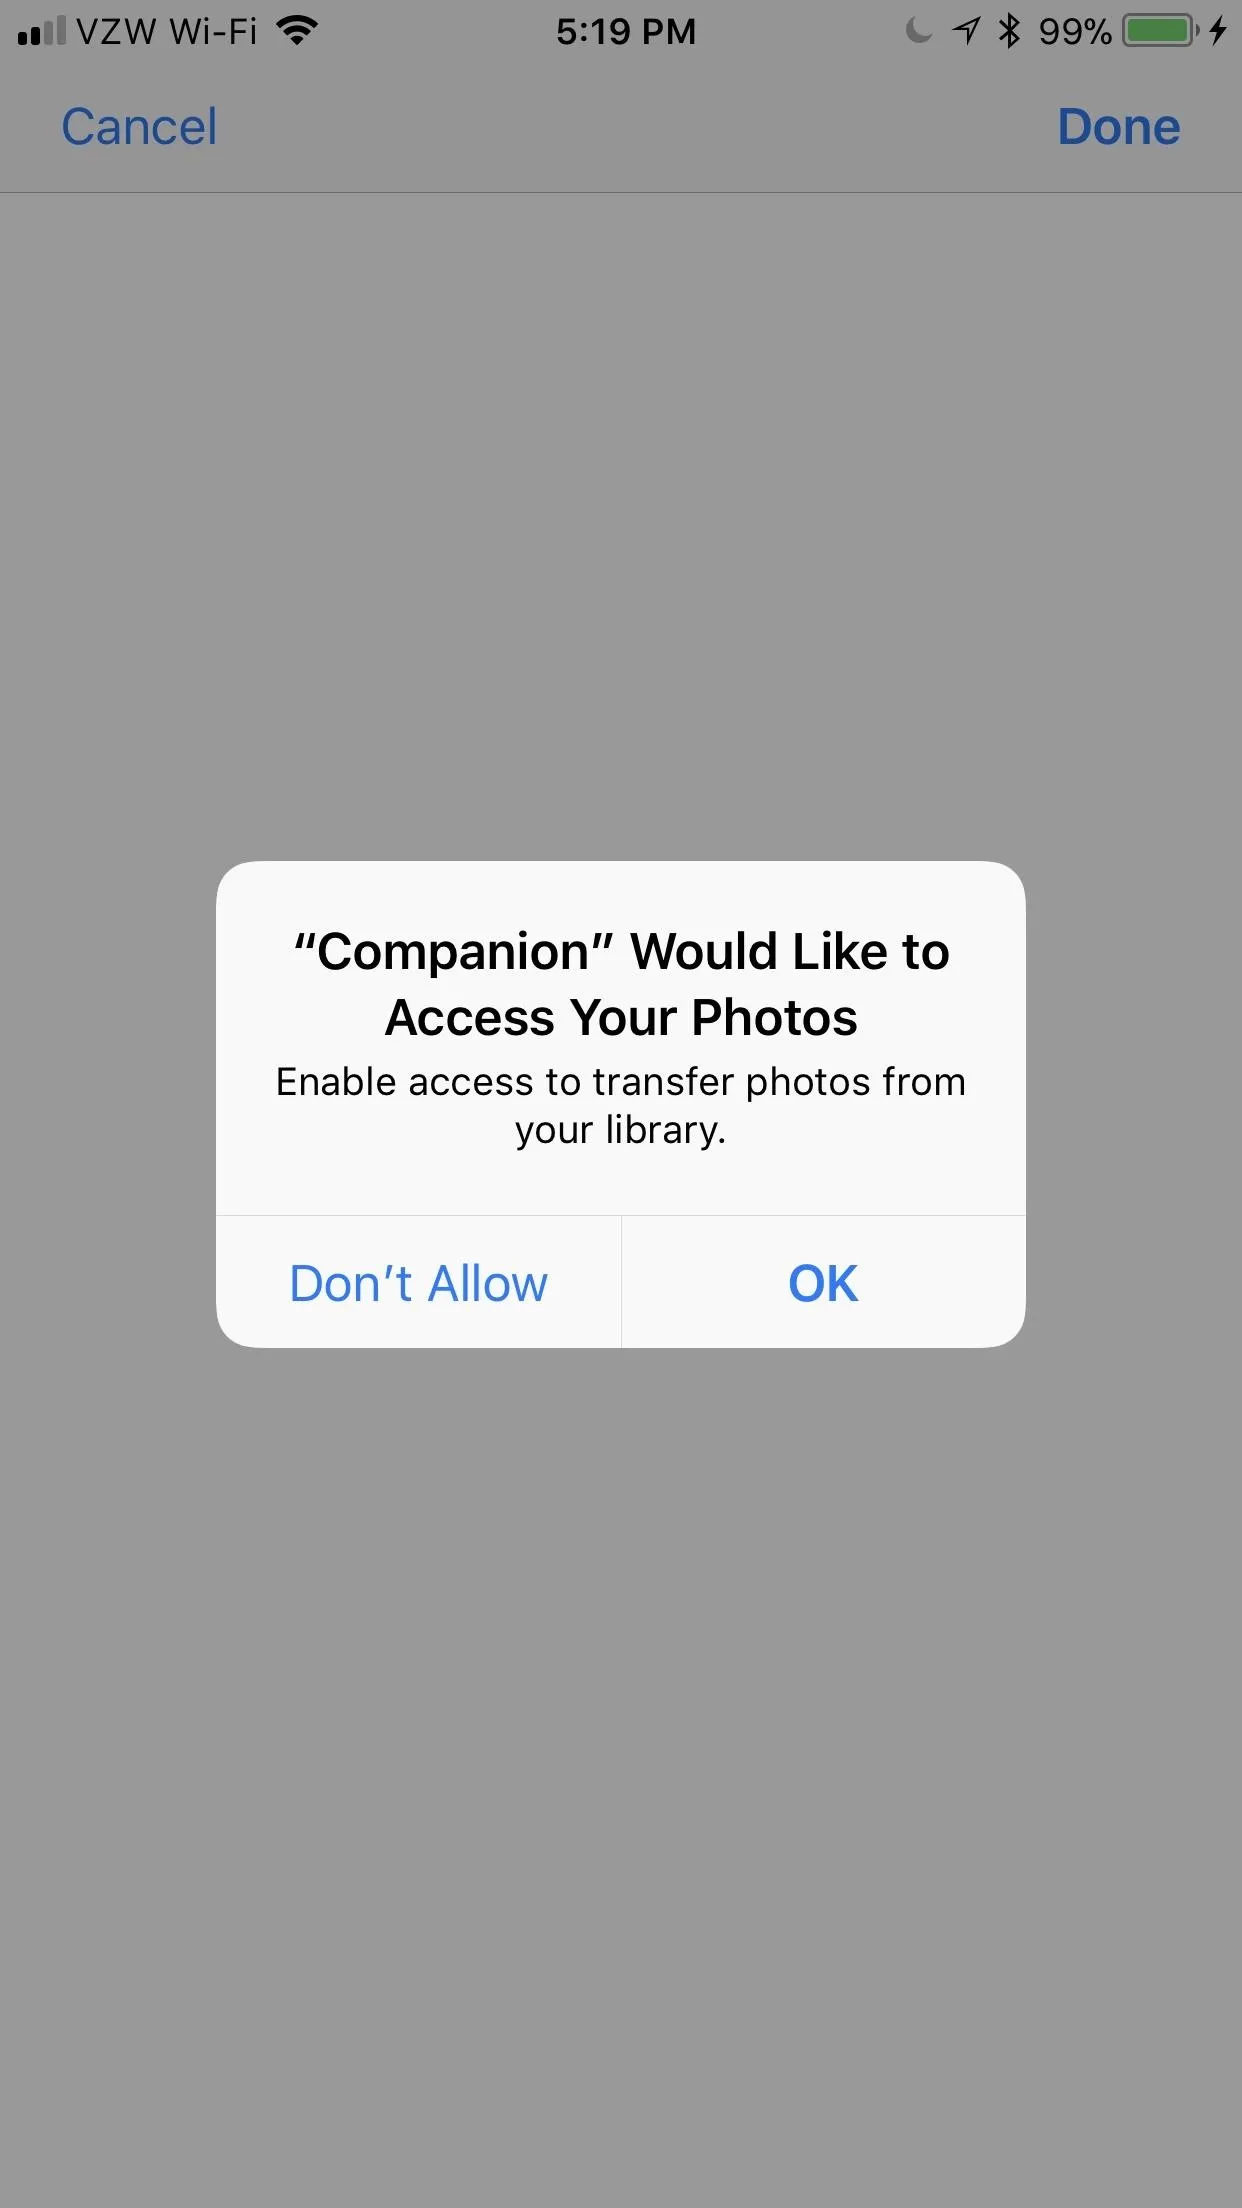
Now, open up Photos Companion on your iPhone. On the main screen, tap "Send photos." You'll need to give the app access to both your "Camera" and "Photos" by tapping "OK" before you proceed.
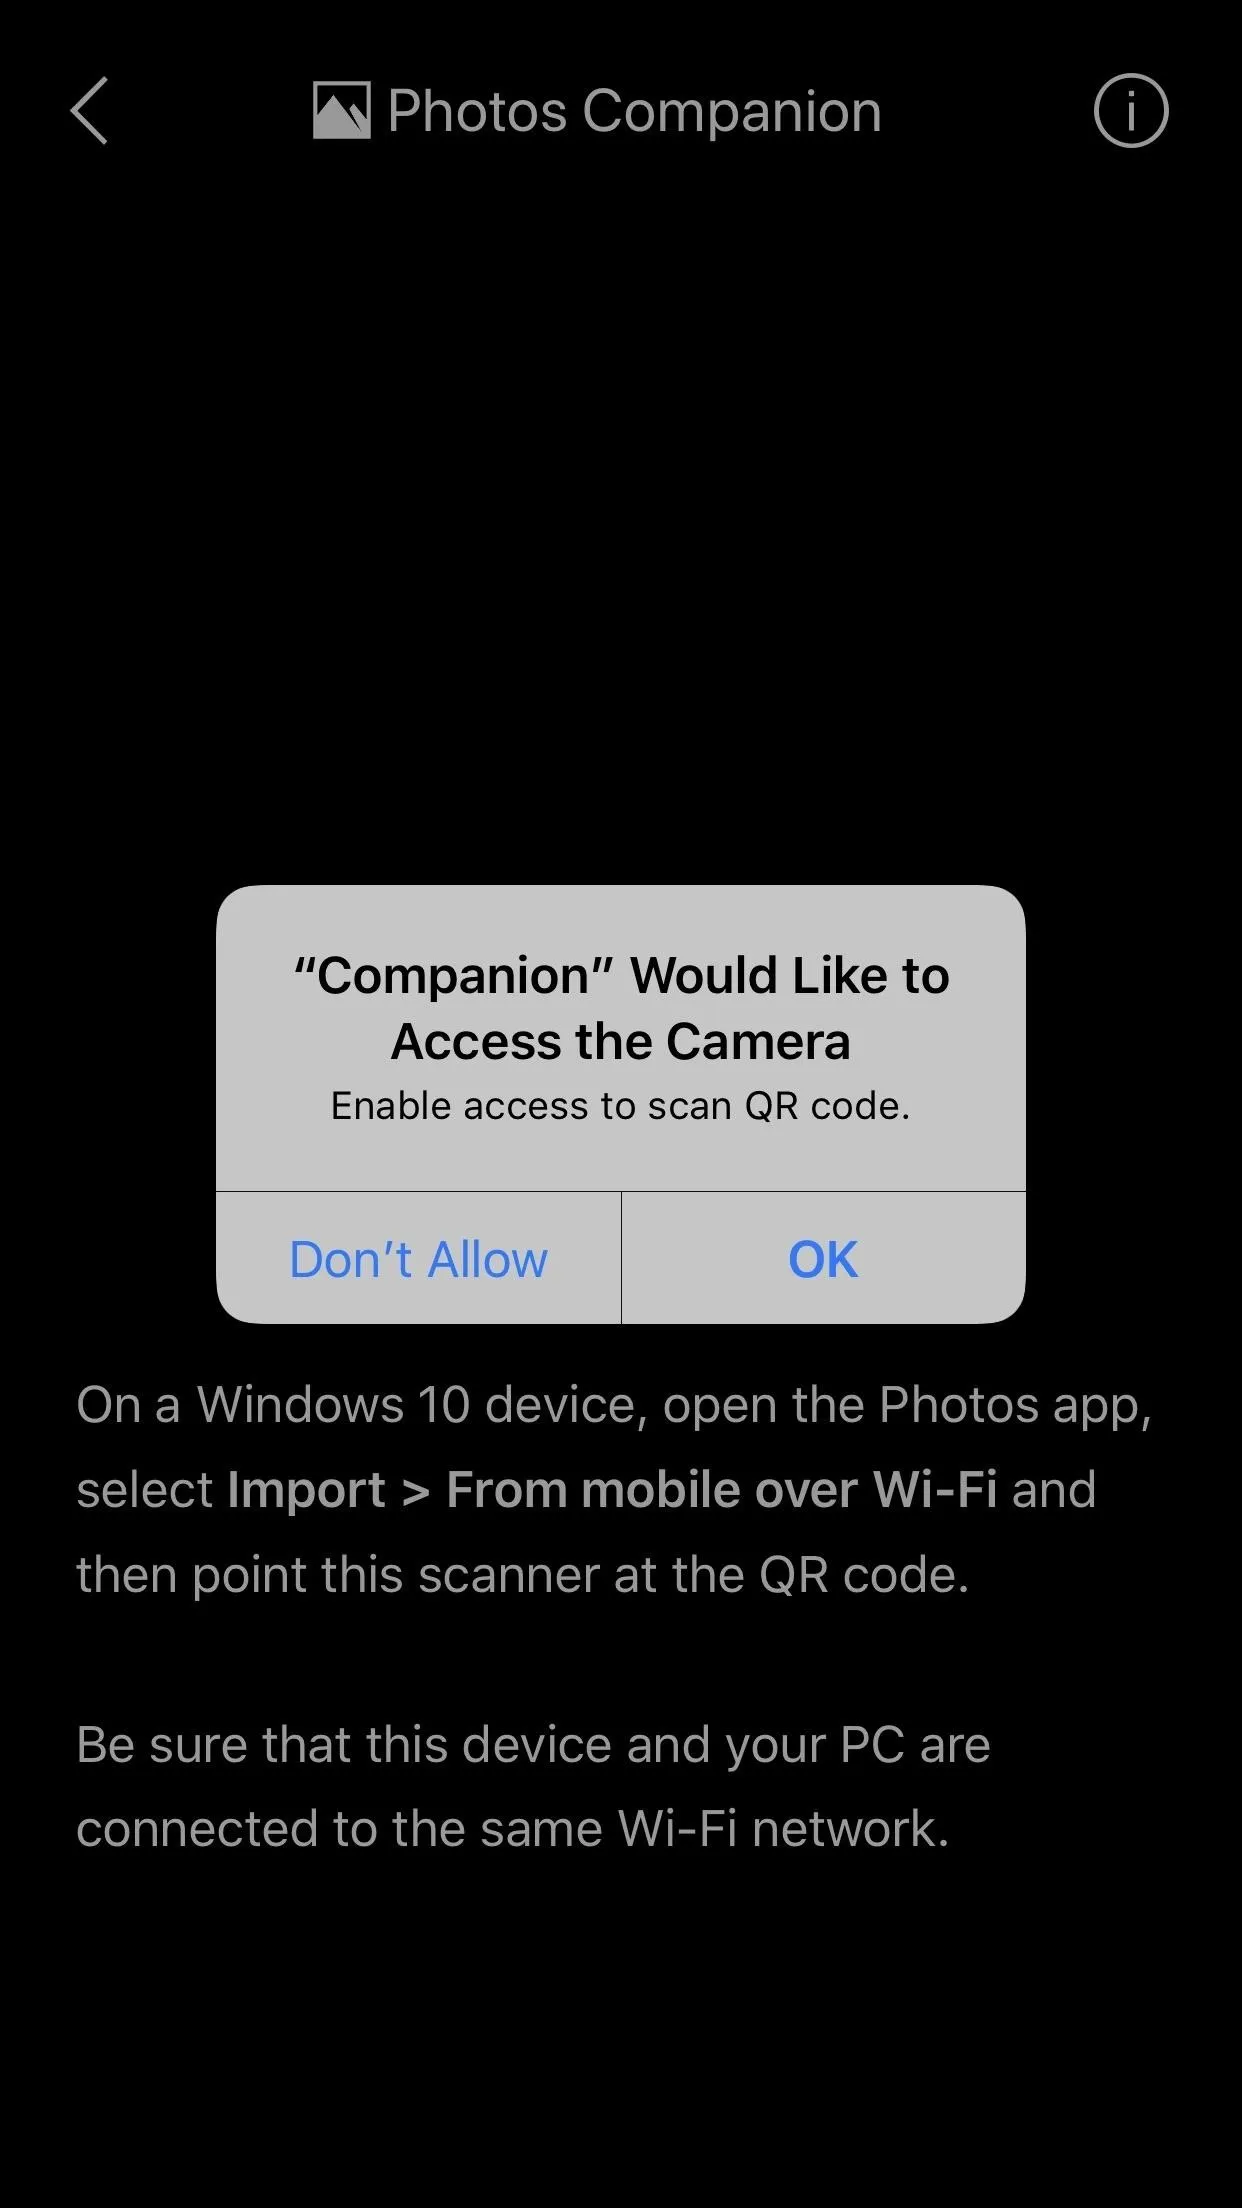
Afterwards, scan the QR code by holding your phone up to your computer's screen. A green box will appear around the code on your phone when it's been recognized.
Select Photos & Videos to Transfer
Now, all the photos and videos from your iPhone will appear inside the Photos Companion app. Scroll through them and tap all the photos and/or videos you want to send to your Windows PC. When a photo has been successfully selected, a blue check mark will appear in the top-right corner of its thumbnail.
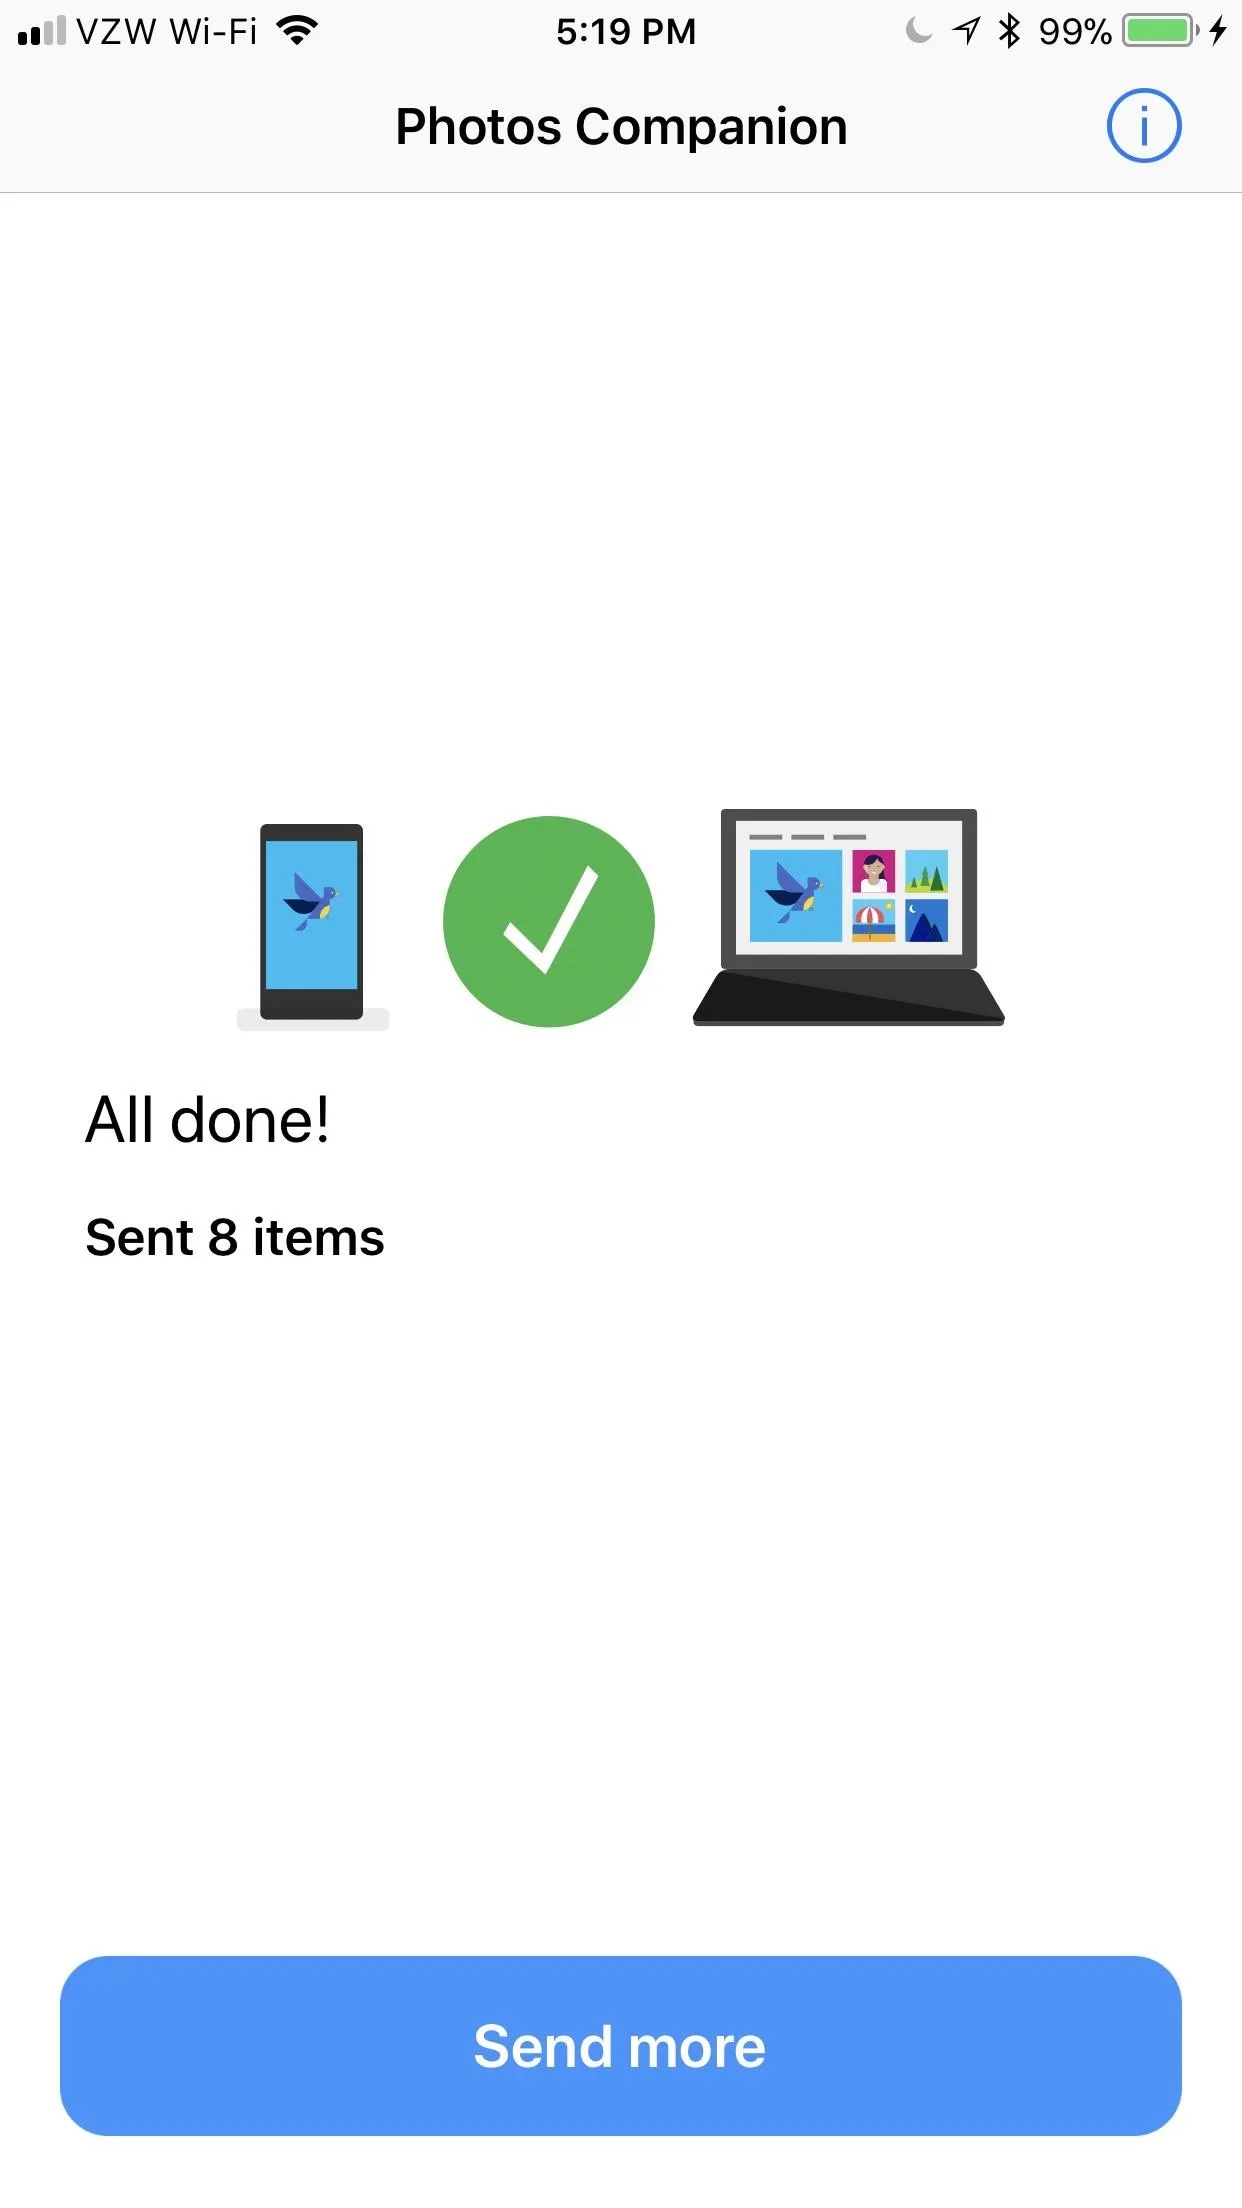
Once you're ready to send your pictures, hit "Done" in the top-right corner. If you want to cancel instead, tap "Cancel." The app will then confirm that all the pictures were sent correctly — and honestly, the sending process is lightning-fast. Tap "Send More" if you want to send more pictures, or just exit the app if you're finished.
Enjoy Your Photos
Your photos should automatically appear on your Windows PC now, and you can do whatever you please with them from here. You'll see them in the main screen of Windows' Photos app, but you can also access these files in Windows Explorer by heading to This PC –> Pictures and opening the "Imported from Photos Companion" folder.
- Follow Gadget Hacks on Facebook, Twitter, YouTube, and Flipboard
- Follow WonderHowTo on Facebook, Twitter, Pinterest, and Flipboard
Cover image and screenshots by Brian Lang/Gadget Hacks


Comments
Be the first, drop a comment!