When iOS 14 was released, the "Favorites" widget, which provided quick access to your most-used contacts, was nowhere to be seen. There's a workaround that brings it back via the Shortcuts app, but the original Favorites widget was better all around. For those of you looking for something better, try turning all your favorite and most-used contacts into apps on your home screen.
Now, they won't technically be "apps" themselves, but they will show up in your App Library, which makes them feel like apps in some ways. Instead, the home screen icons are bookmarks, which are shortcuts that'll open up their Contacts page or start a call or message in your app of choice, like Message or FaceTime.
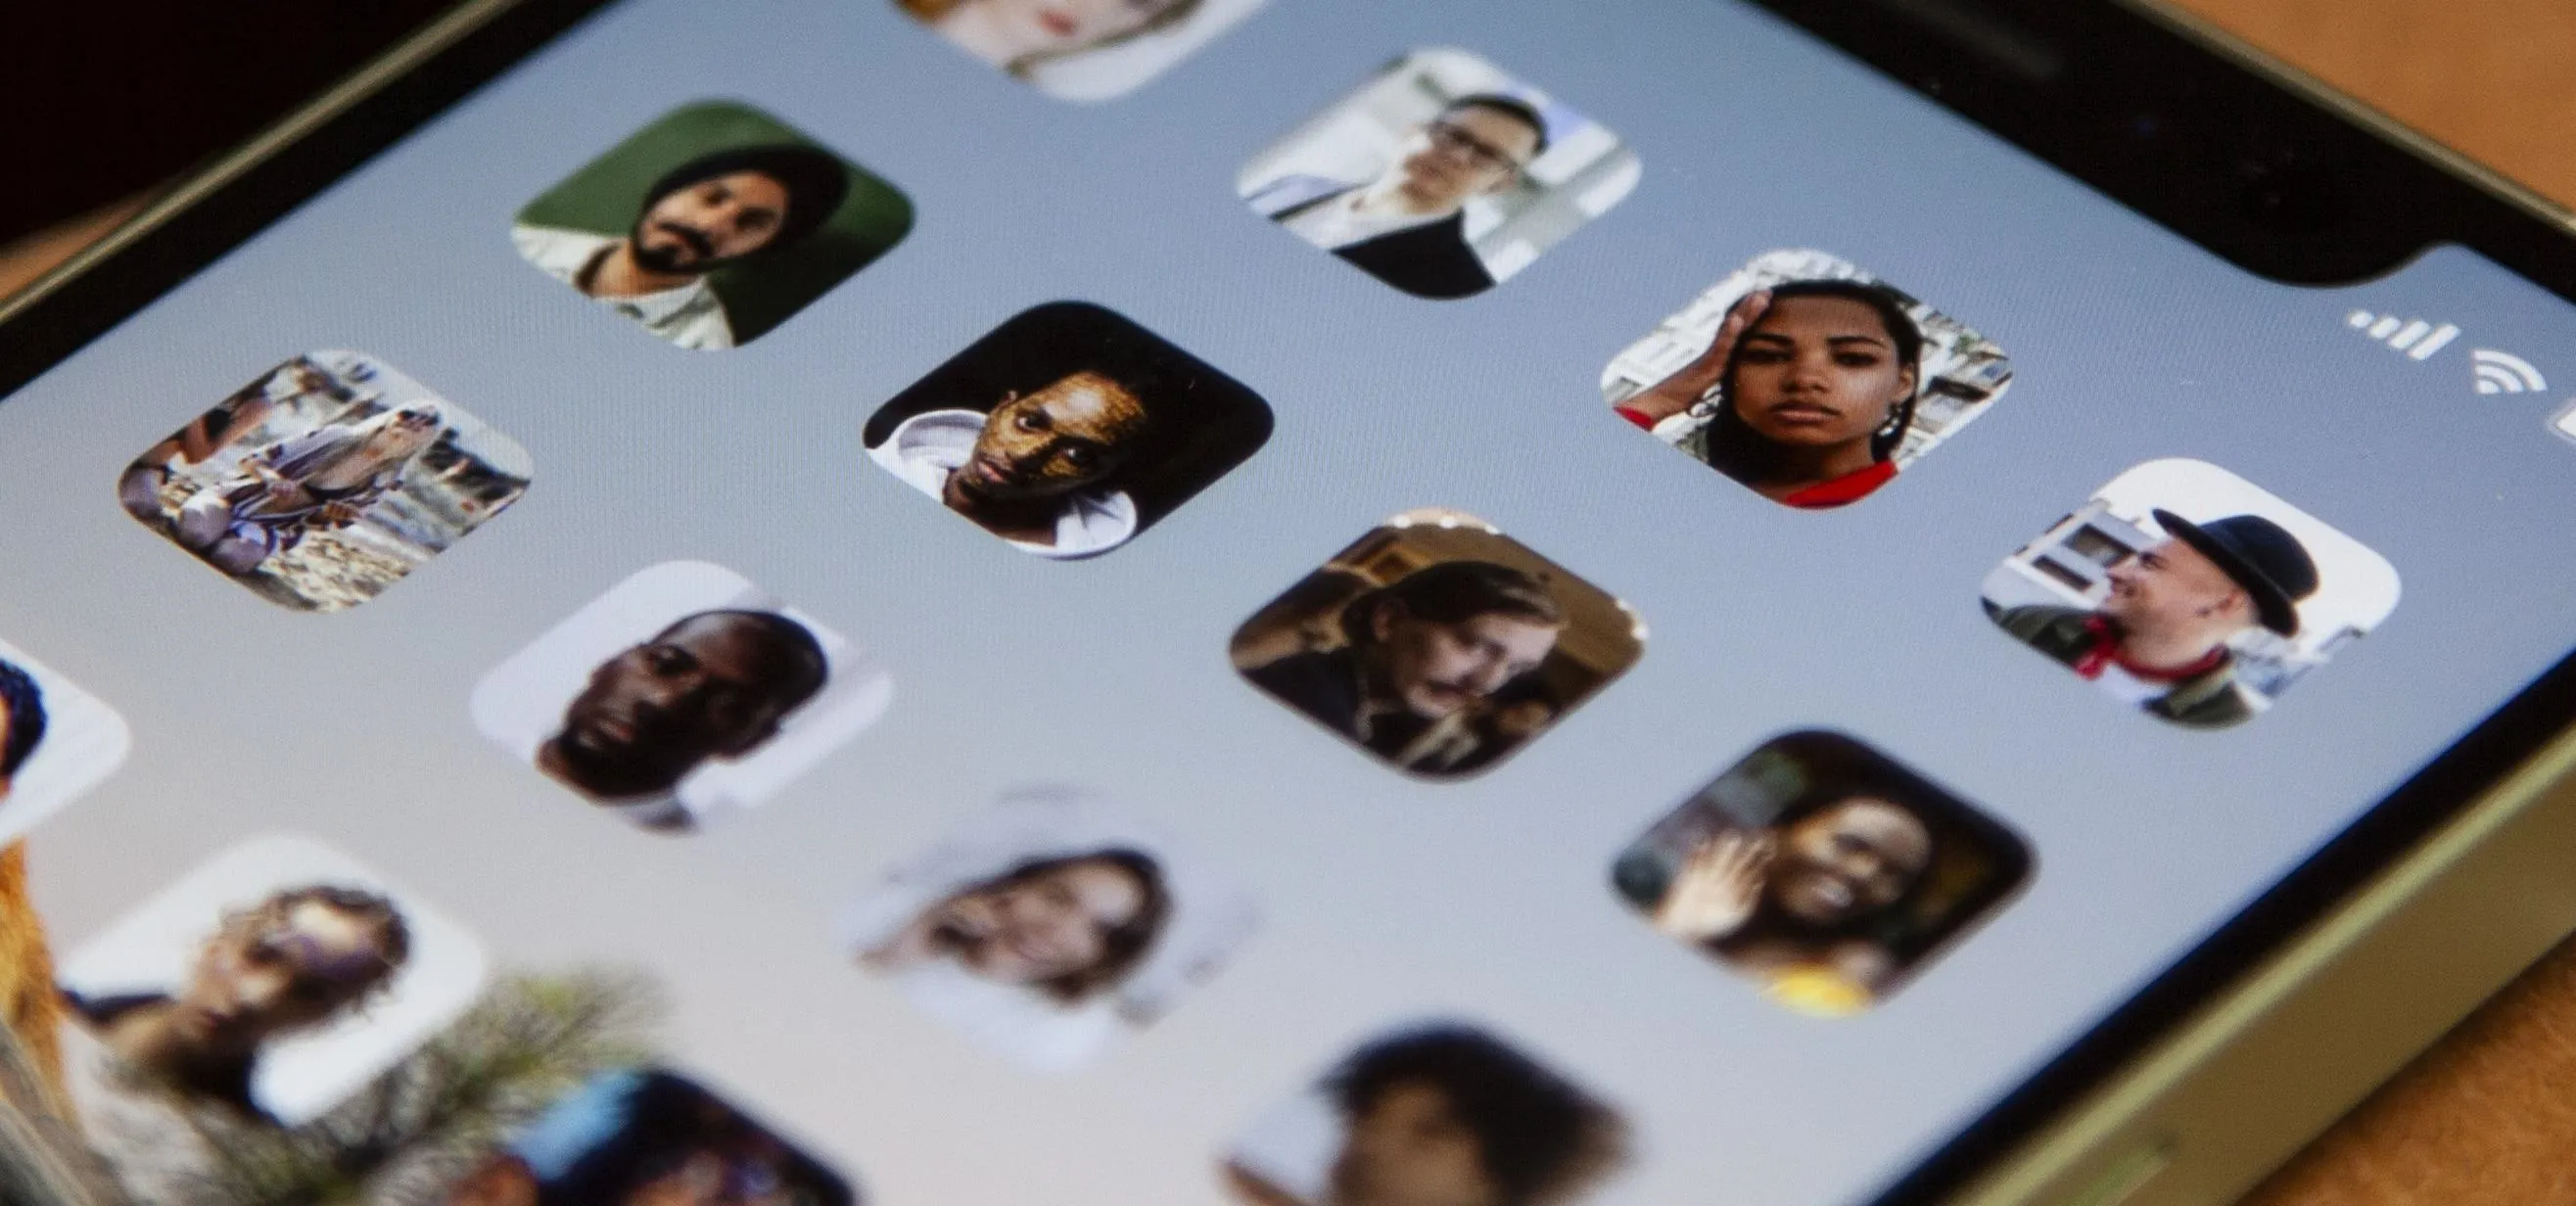
You can assign each contact an image, whether it's a photo of their face or a picture associated with them. You can even put important contacts in the dock for even faster access, make an icon for a group of contacts, set images only, or use this as a way to contact somebody without having them in your Contacts app.
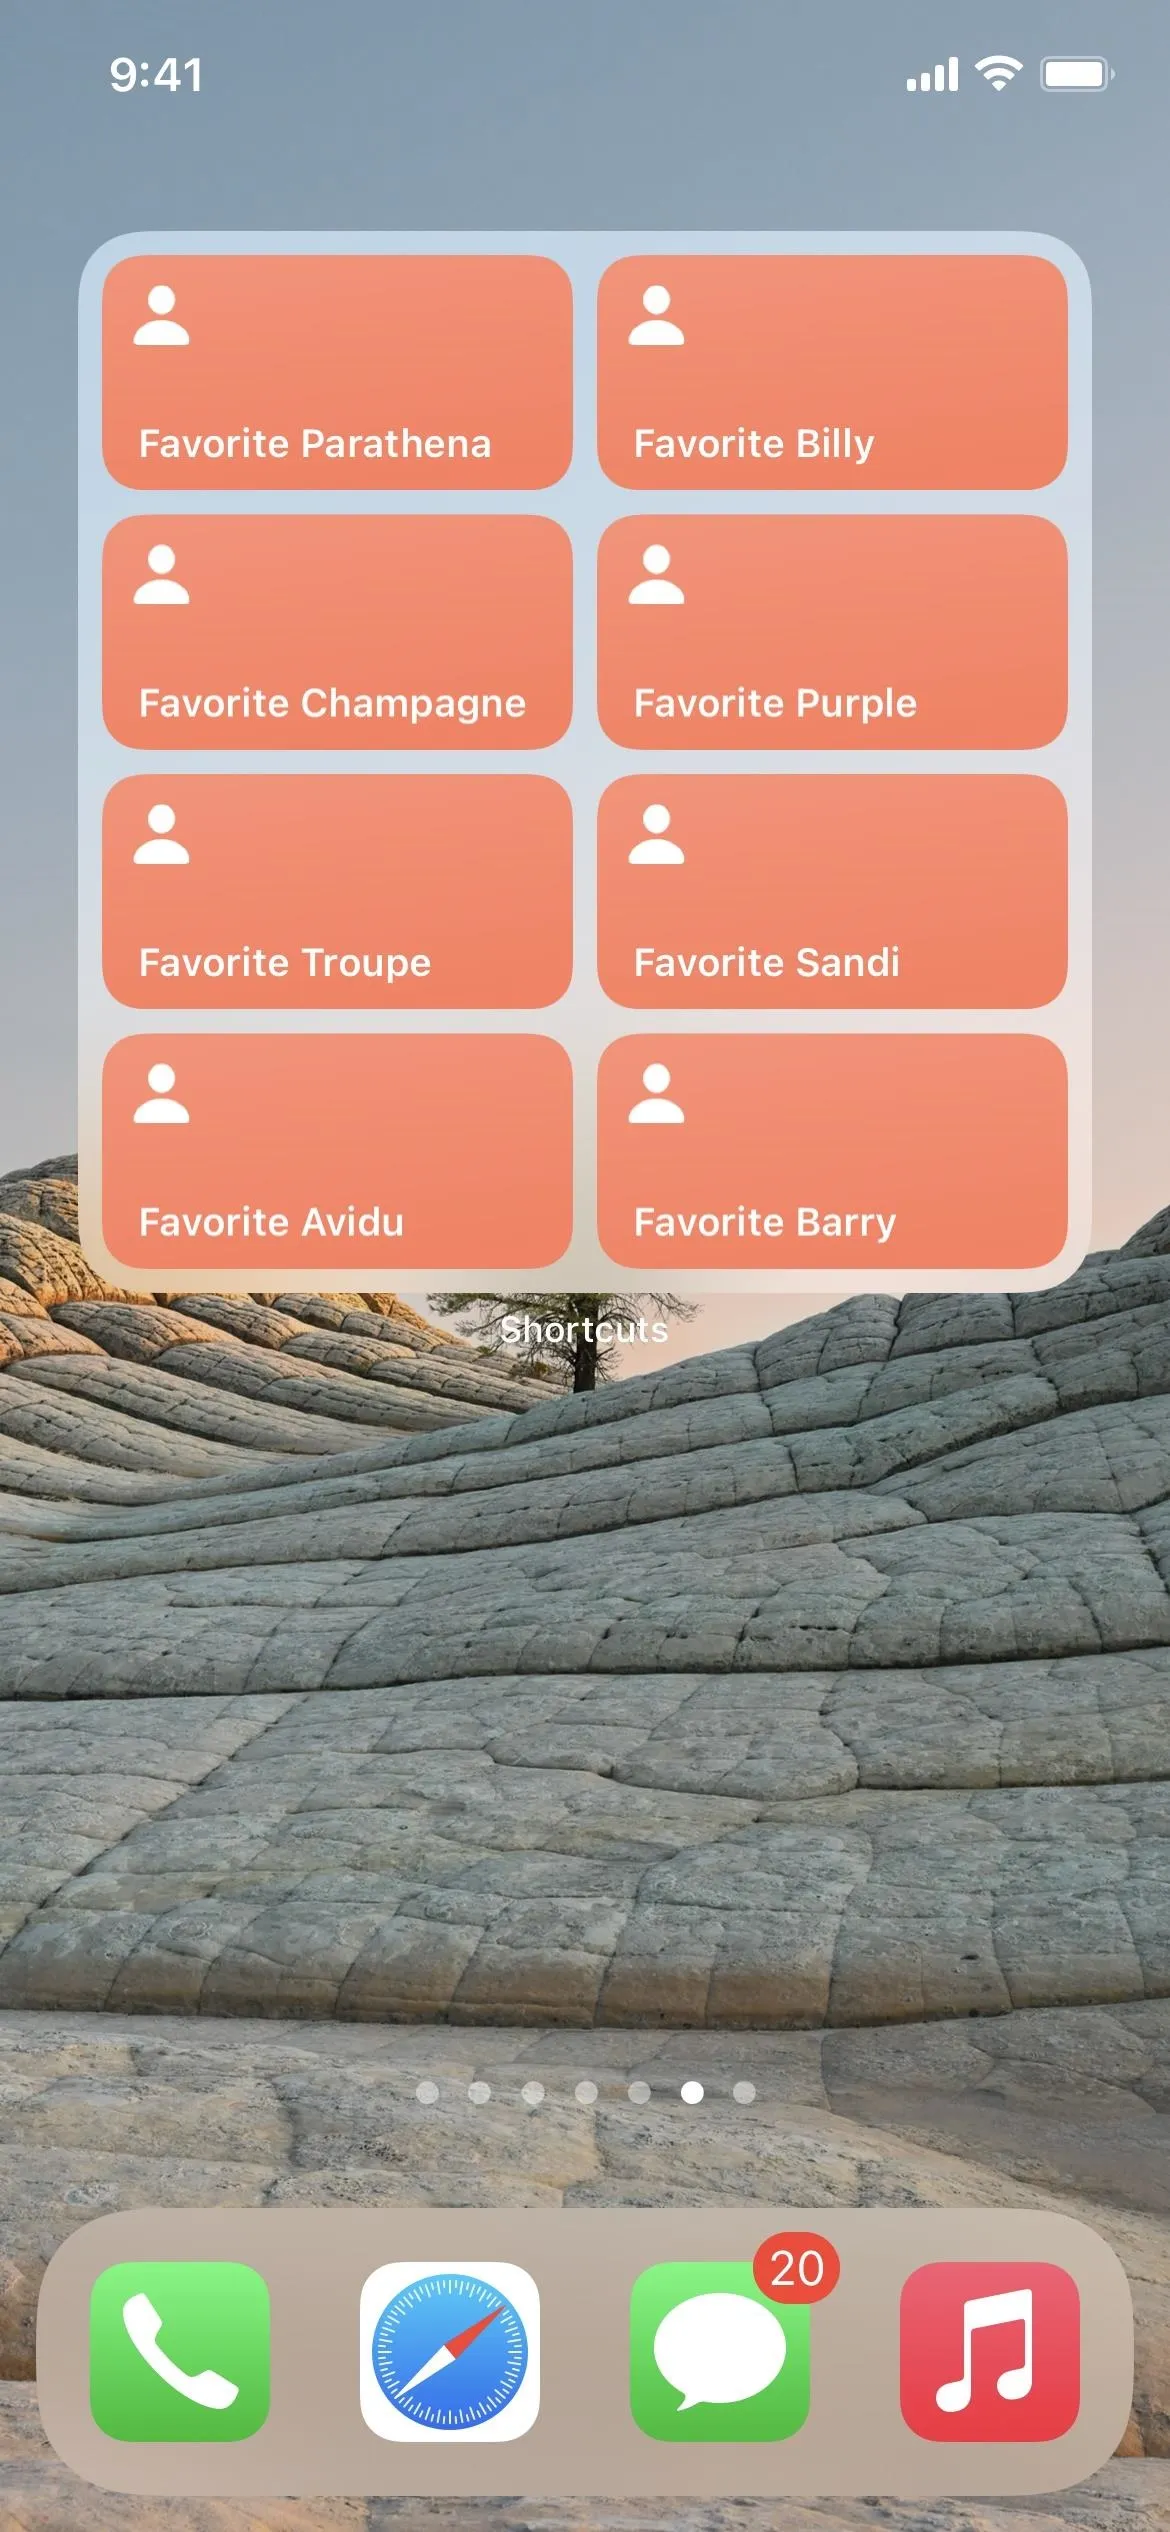
The widget "Favorites" (left) vs. contact icons (right).
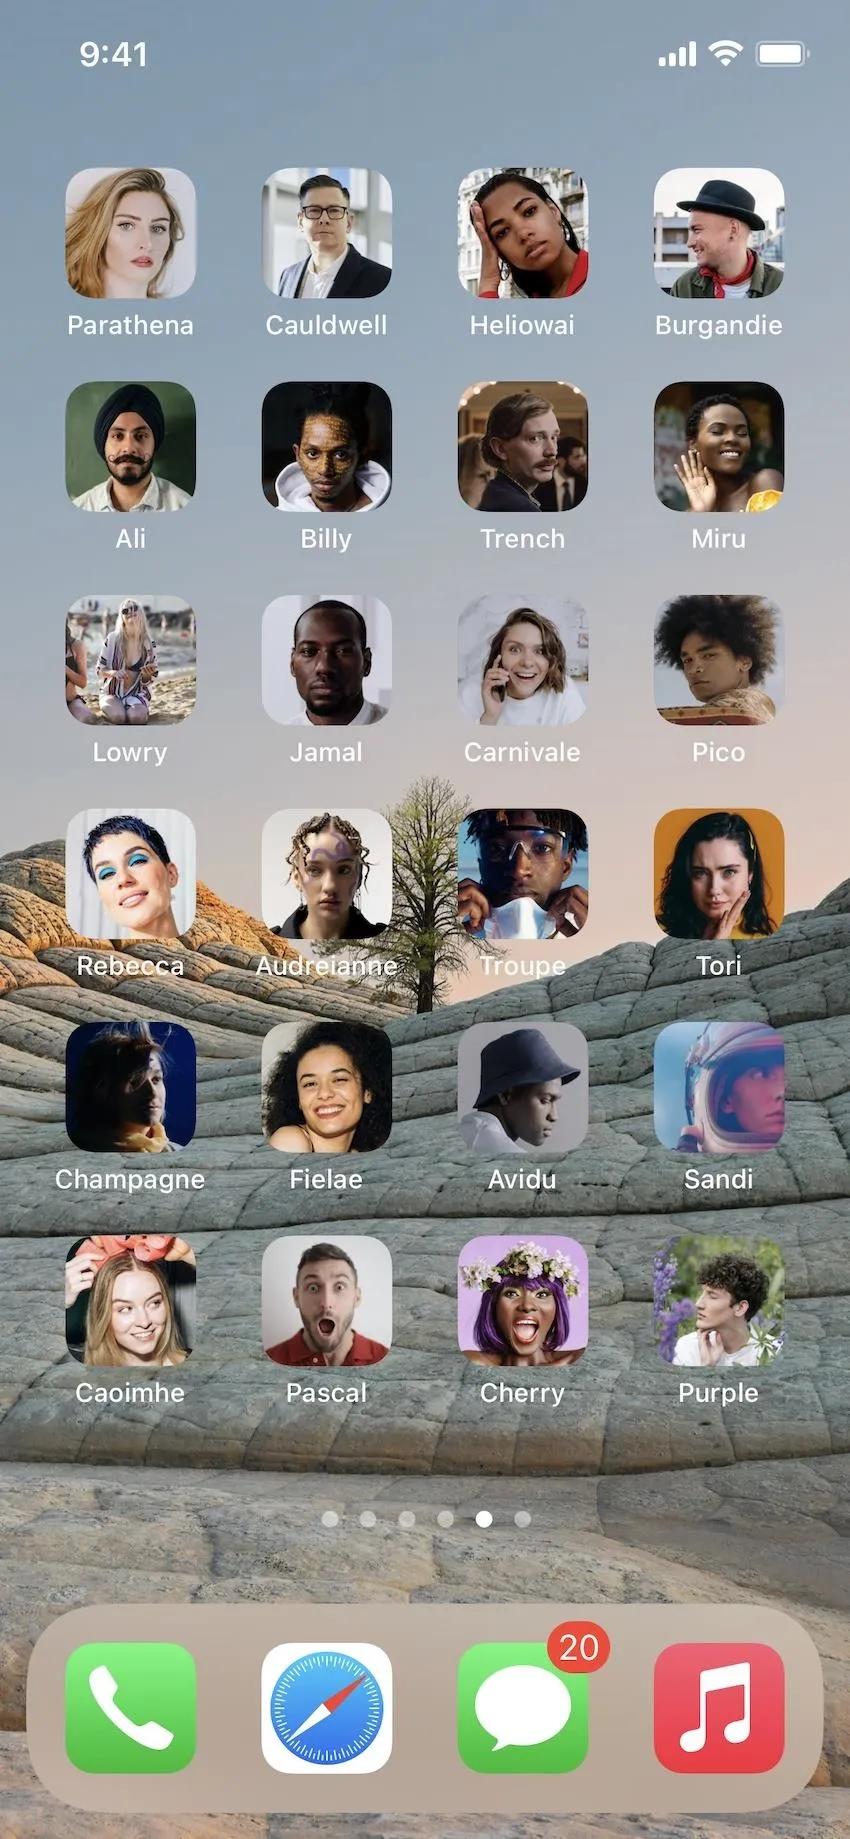

The widget "Favorites" (left) vs. contact icons (right).

Another benefit of using contact icons, or bookmarks, on the home screen instead of a widget is that you'll be able to fit twice as many contacts. I'll go over everything you need to know about customizing each bookmark to your liking, and you can jump to a specific section if you want to skip some areas below.
Jump to a Section
- Requirements
- Downloadable Shortcut
- Step 1: Create a Contact Shortcut
- Step 2: Add the Contact Shortcut to Your Home Screen
- Step 3: Test Out Your New Home Screen Contact
- Further Customization Options Available
- Option 1: Move to the Dock for Even Faster Access
- Option 2: Add More People to Each Bookmark
- Option 3: Add Your Contact Icons to a Folder
- Option 4: Remove the Names from Your Home Screen Contacts
- Option 5: Clean Up Your 'My Shortcuts' Gallery
- Variations on the Contact Home Screen Bookmark
Requirements
- iOS 13 or later: We used iOS 14, but it'll work in iOS 13 too.
- Shortcuts app: If you deleted it for some reason, re-install it.
- Allow untrusted apps: This is only if you're downloading our shortcut below. Go to Settings –> Shortcuts –> Allow Untrusted Shortcuts.
Downloadable Shortcut
To make things easy, you can install the shortcut we're creating below if you just want to jump right to making a home screen bookmark for your contacts. That means you can skip Step 1 below.
- iCloud Link: Favorite Contact
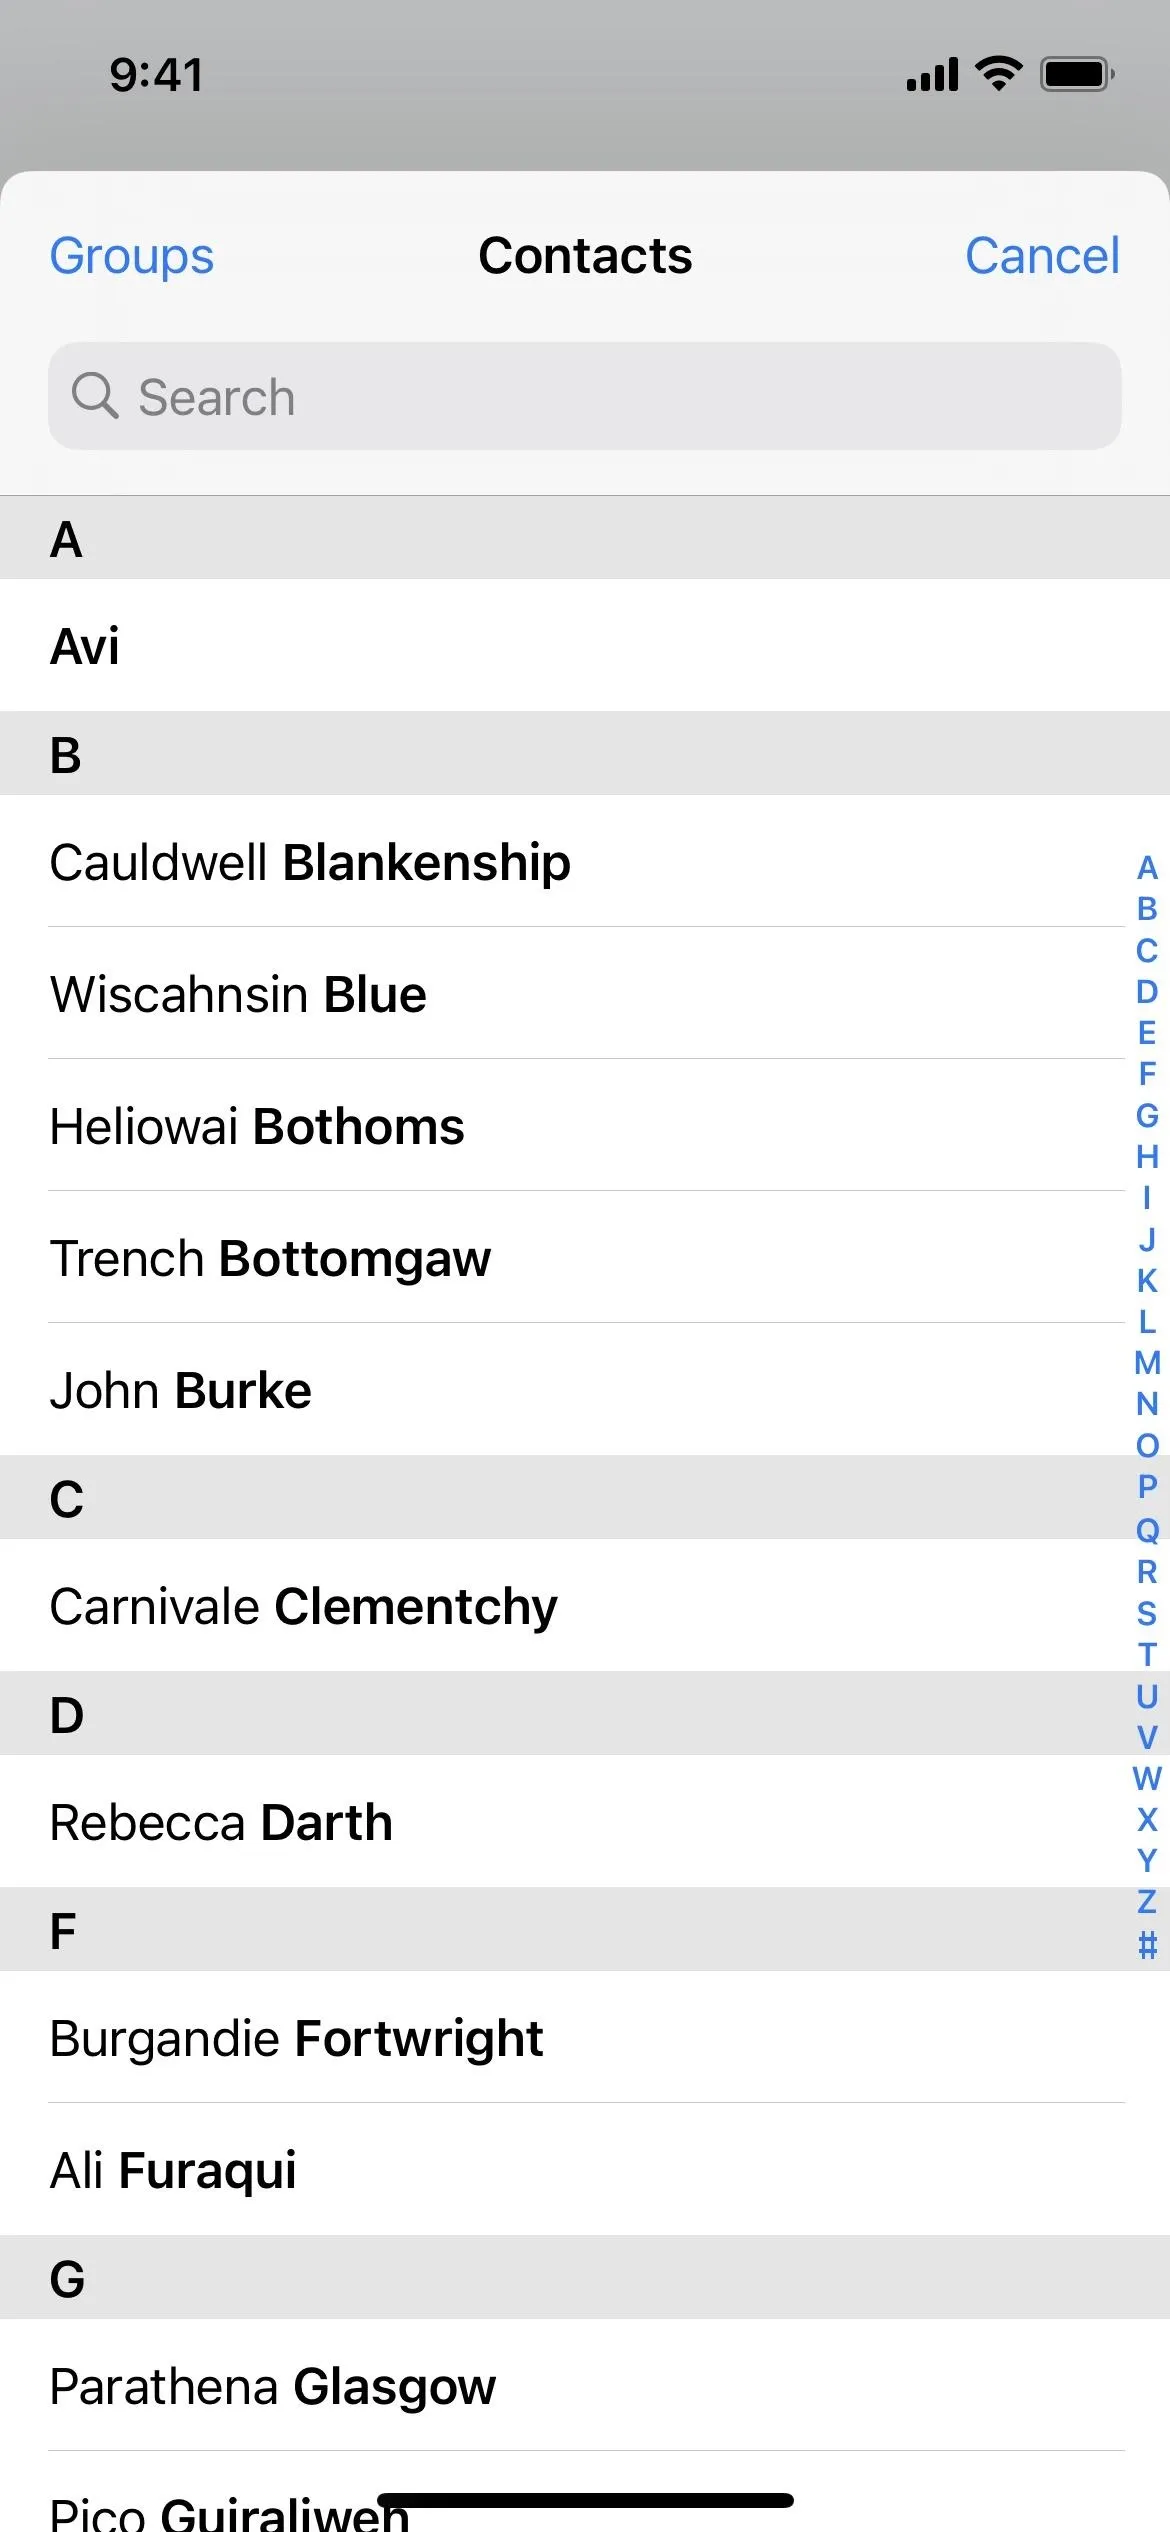
With the iCloud link, you should jump right to the Shortcuts app, where you can preview the actions. Tap "Add Untrusted Shortcut," then tap the plus (+) sign to add a contact. You can add more contacts if you want to make a bookmark for a group, and you can even hit "Groups" on the contacts picker to filter people by any groups you have set up.
After selecting a contact or group of contacts, hit "Done" to finish and add it to your "My Library." When you tap on the shortcut's card, it'll show you the contact's information (or contacts for each person in the grouping), but you'll still need to go to Step 2 below to add it to your home screen.
Create a Contact Shortcut
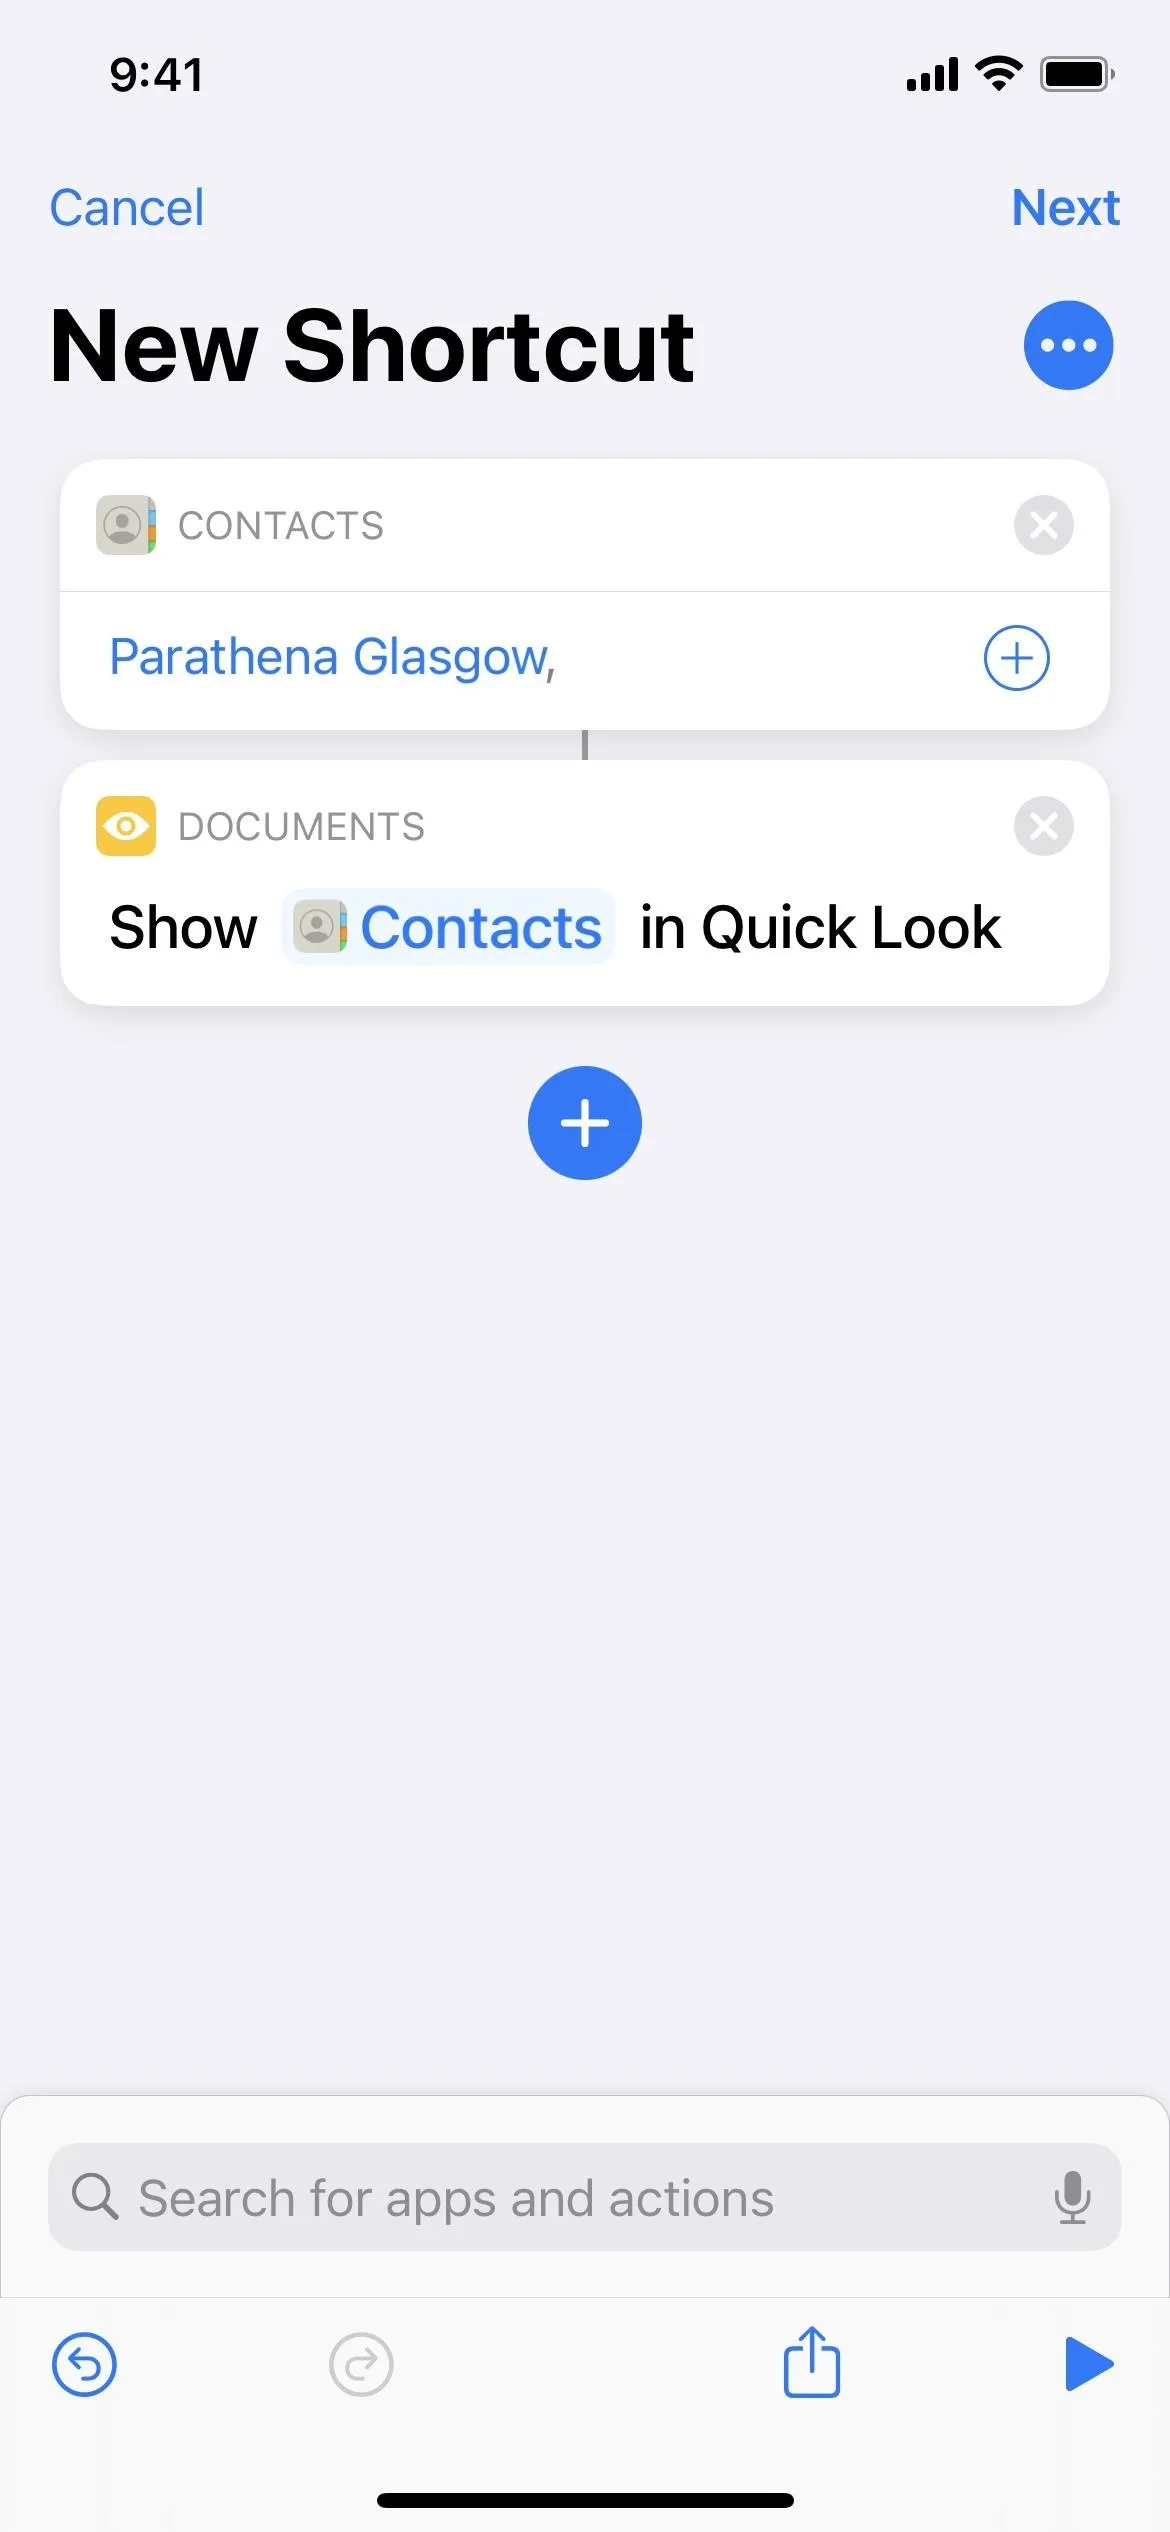
Open up the Shortcuts app and head to "My Shortcuts," then select the plus (+) sign to start a new shortcut. The shortcut will only be two actions, so it's pretty simple. Hit the "(+) Add Action" button or the search bar, then find the "Contacts" action and select it.
If you just want to dial their number without opening up their Contacts page, find and choose "Call" instead. If you'd rather only send a message, find and choose "Send Message" for that. For more ideas, check out the Variations section below for other ways to contact people directly.
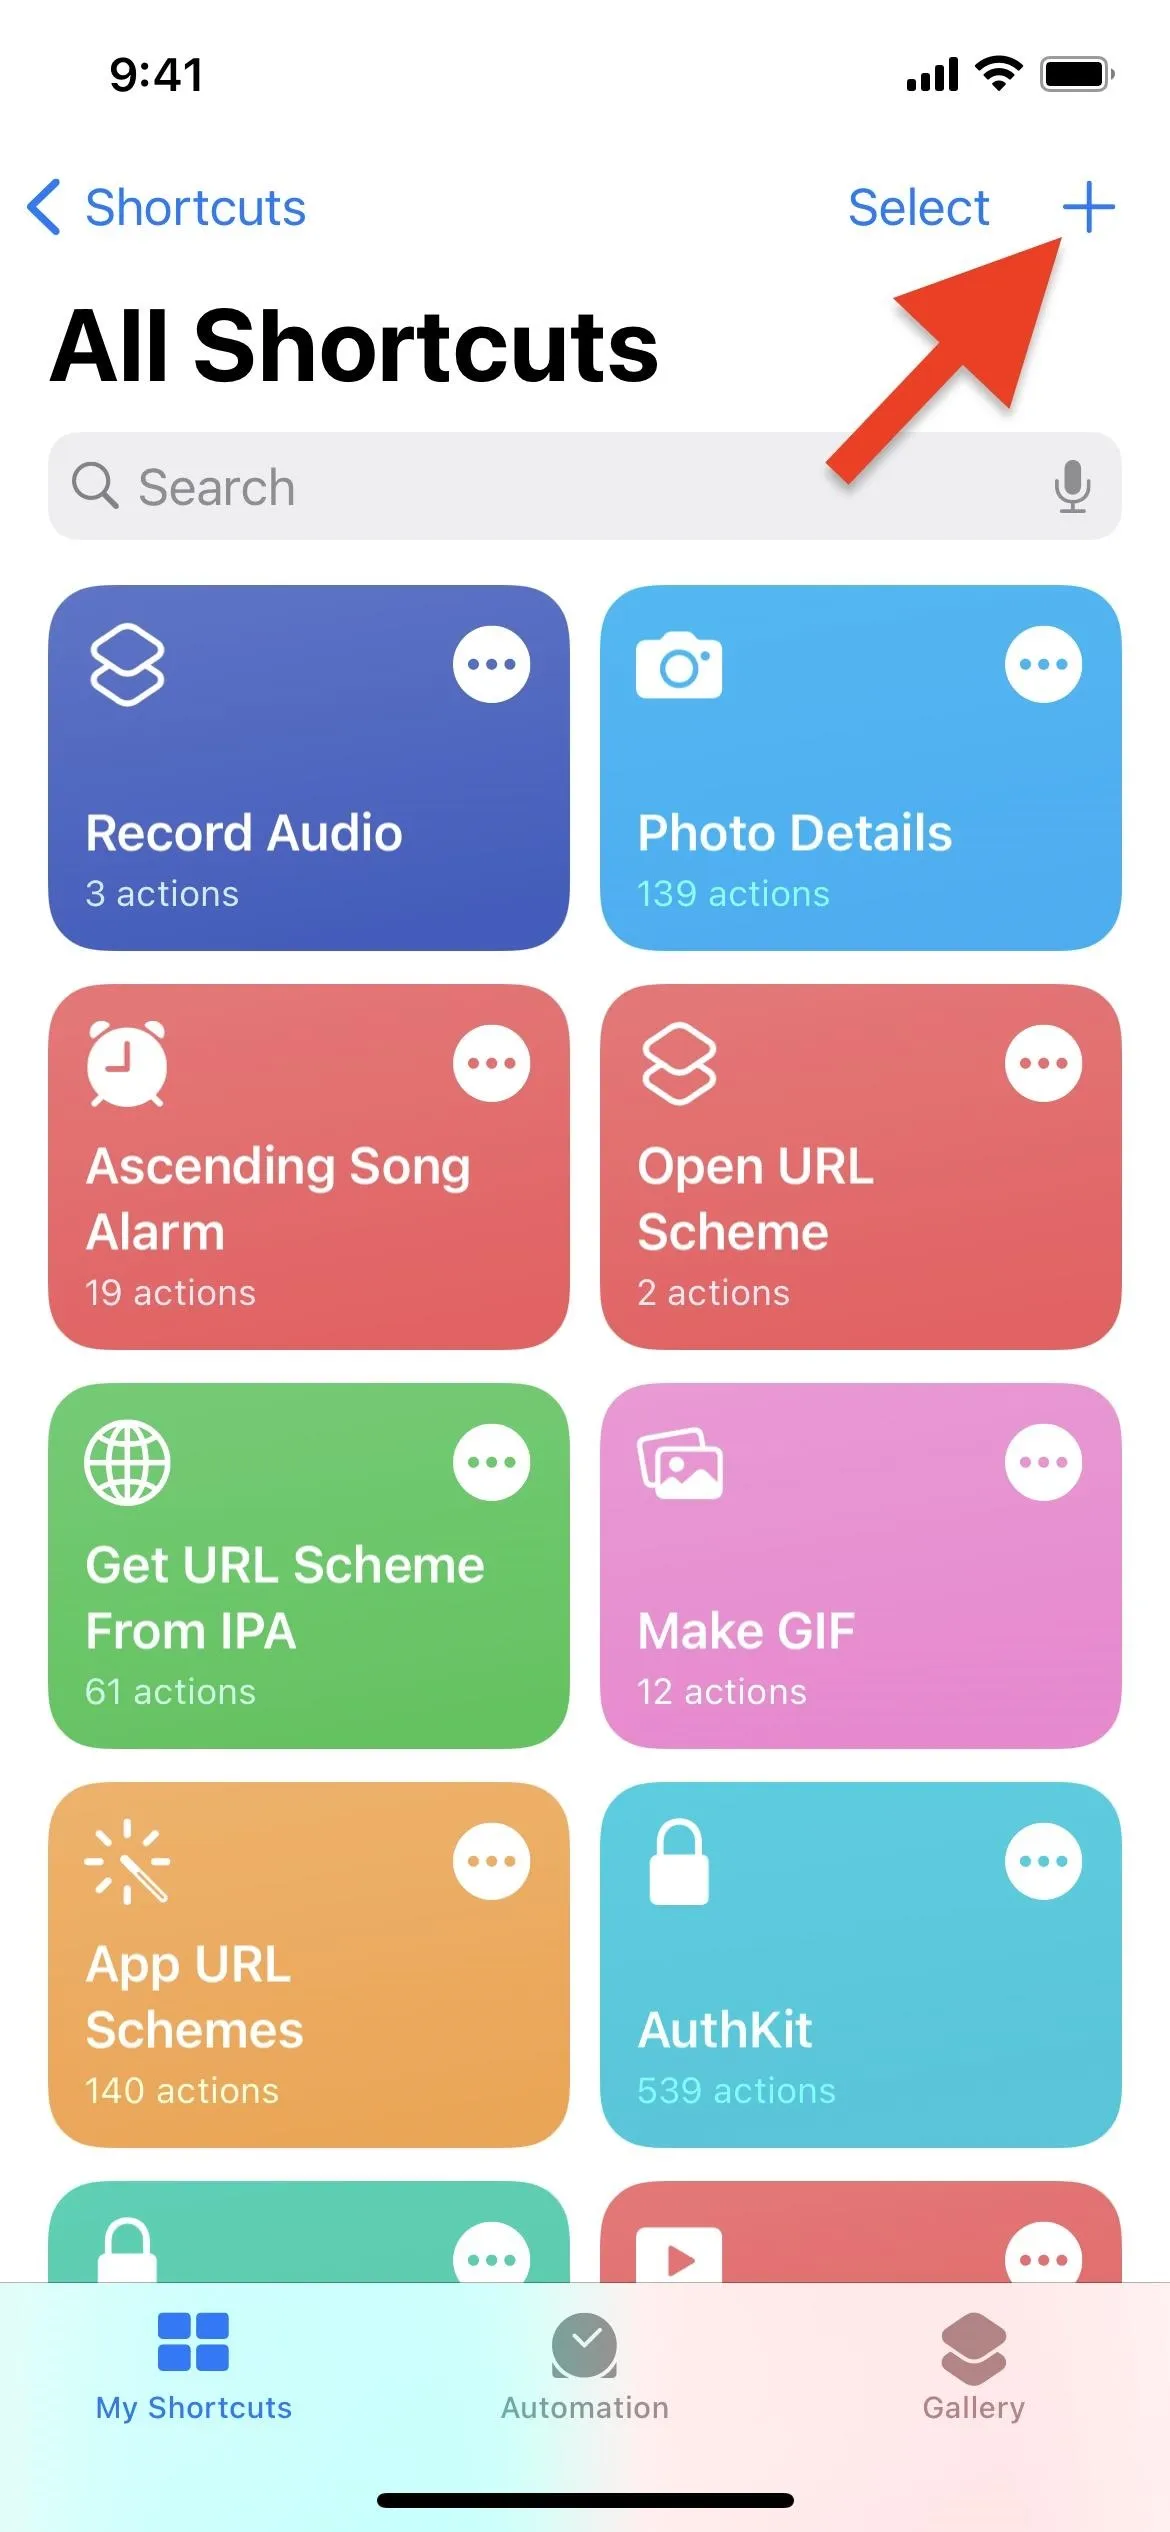
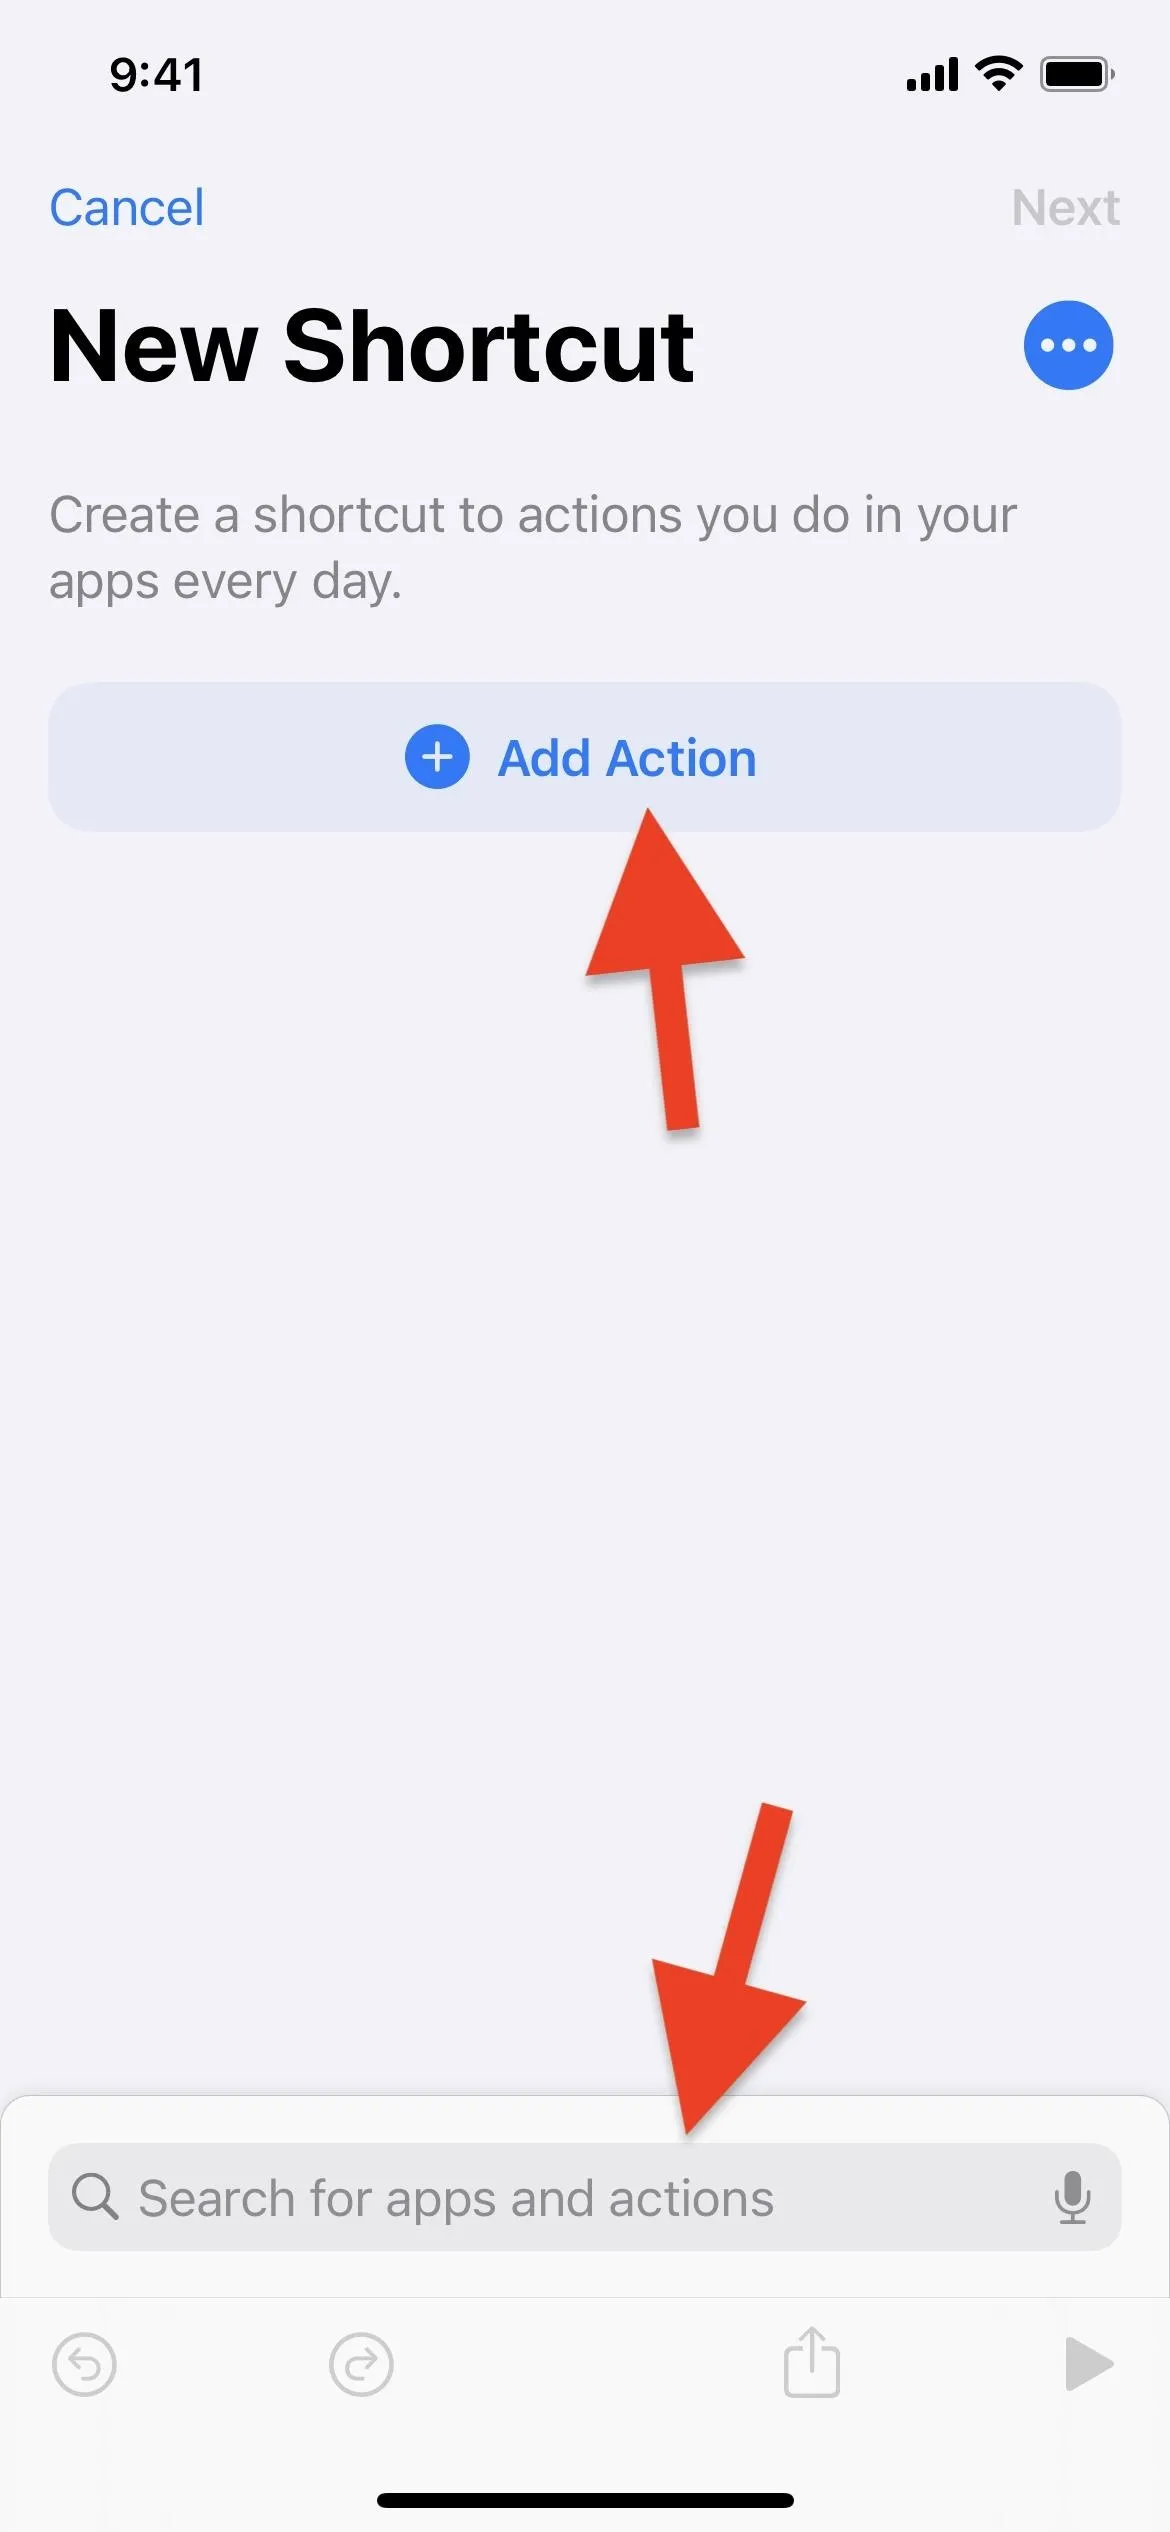
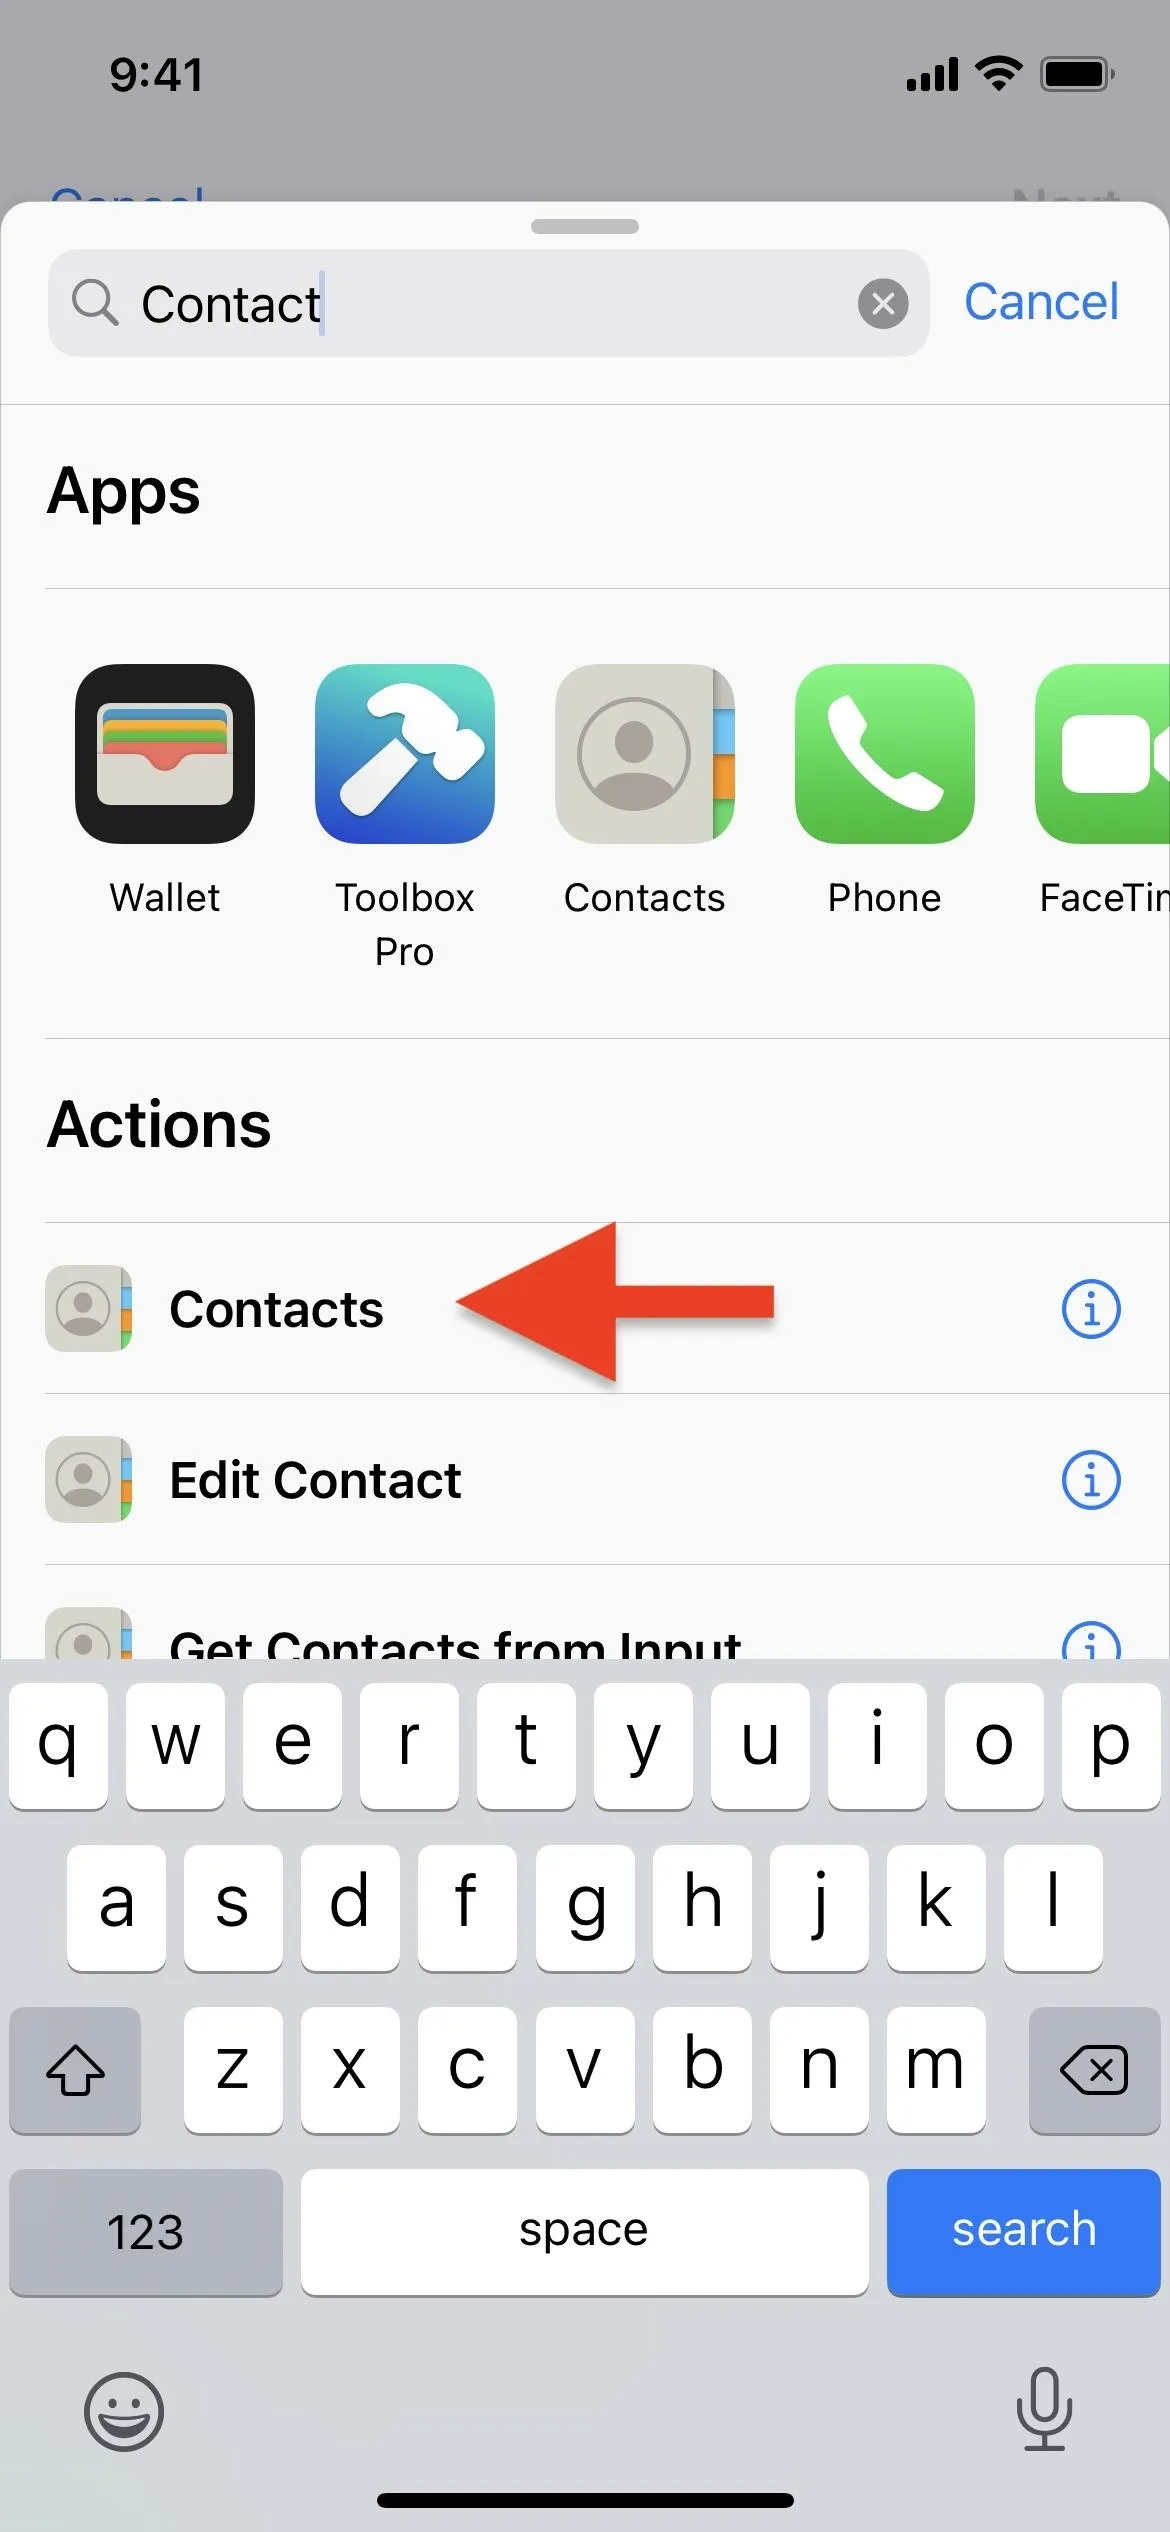


In the "Contacts" action box, tap the plus (+) sign to open up the contacts picker, then find and select the contact you want. You could add more contacts to the action box, but we'll talk about that later.
If you chose "Call" instead, tap "Contact" in the box, and select your contact. Then, you can skip the Quick Look action coming up. For "Send Message," you can leave "Message" blank, but choose "Recipients" and pick the contact. You can also skip the Quick Look action coming up. Again, for more ideas, check out the Variations section below for other ways to contact people directly.
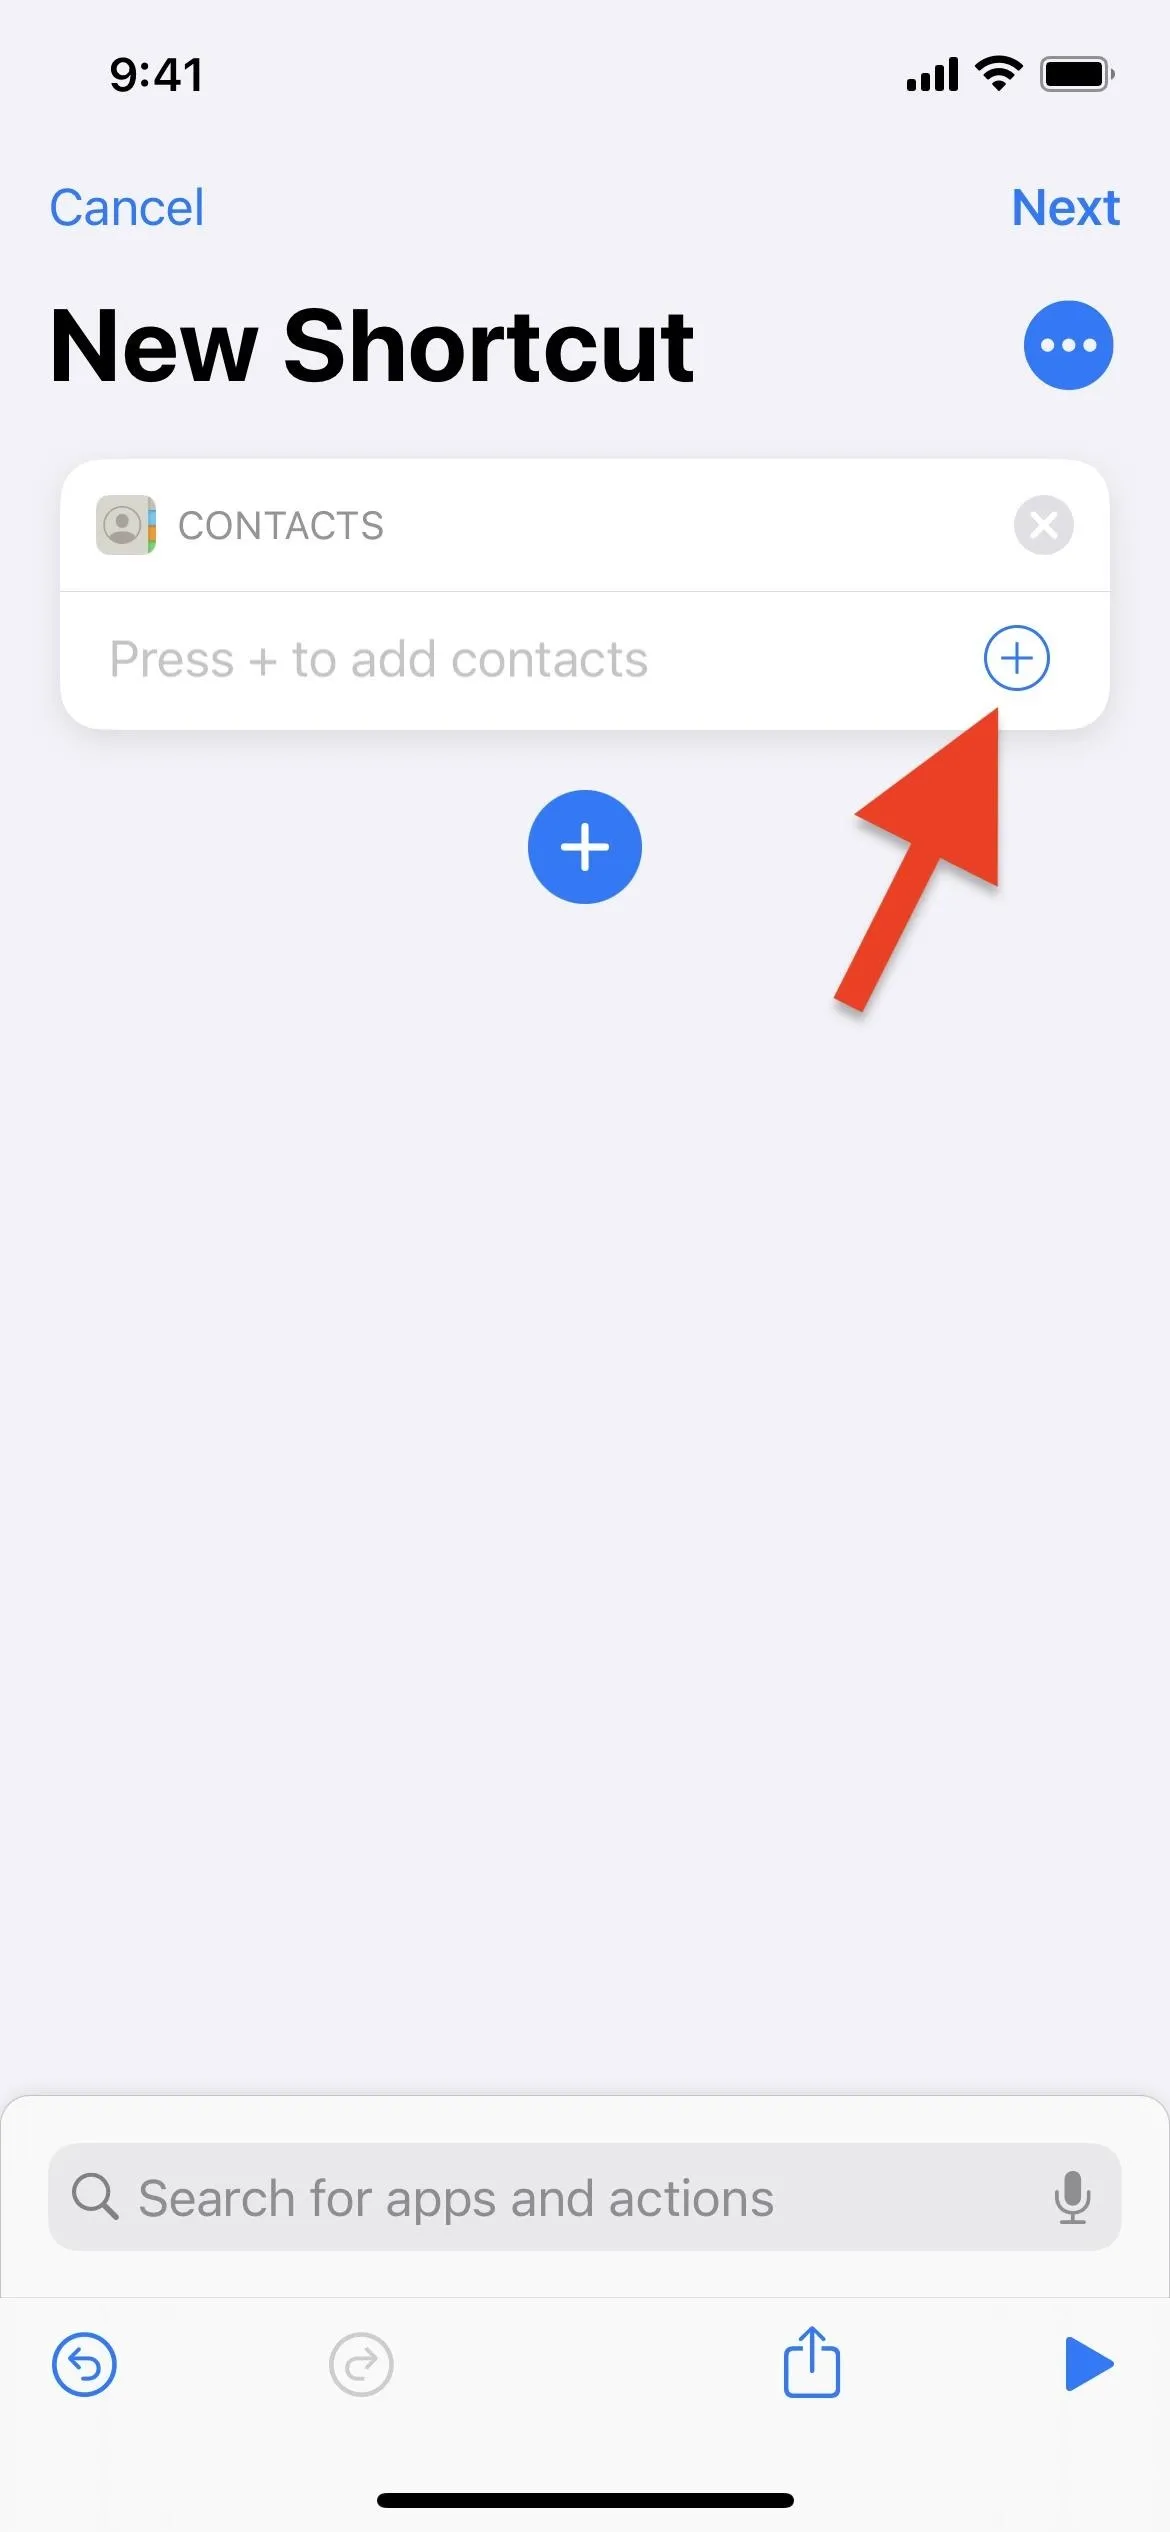
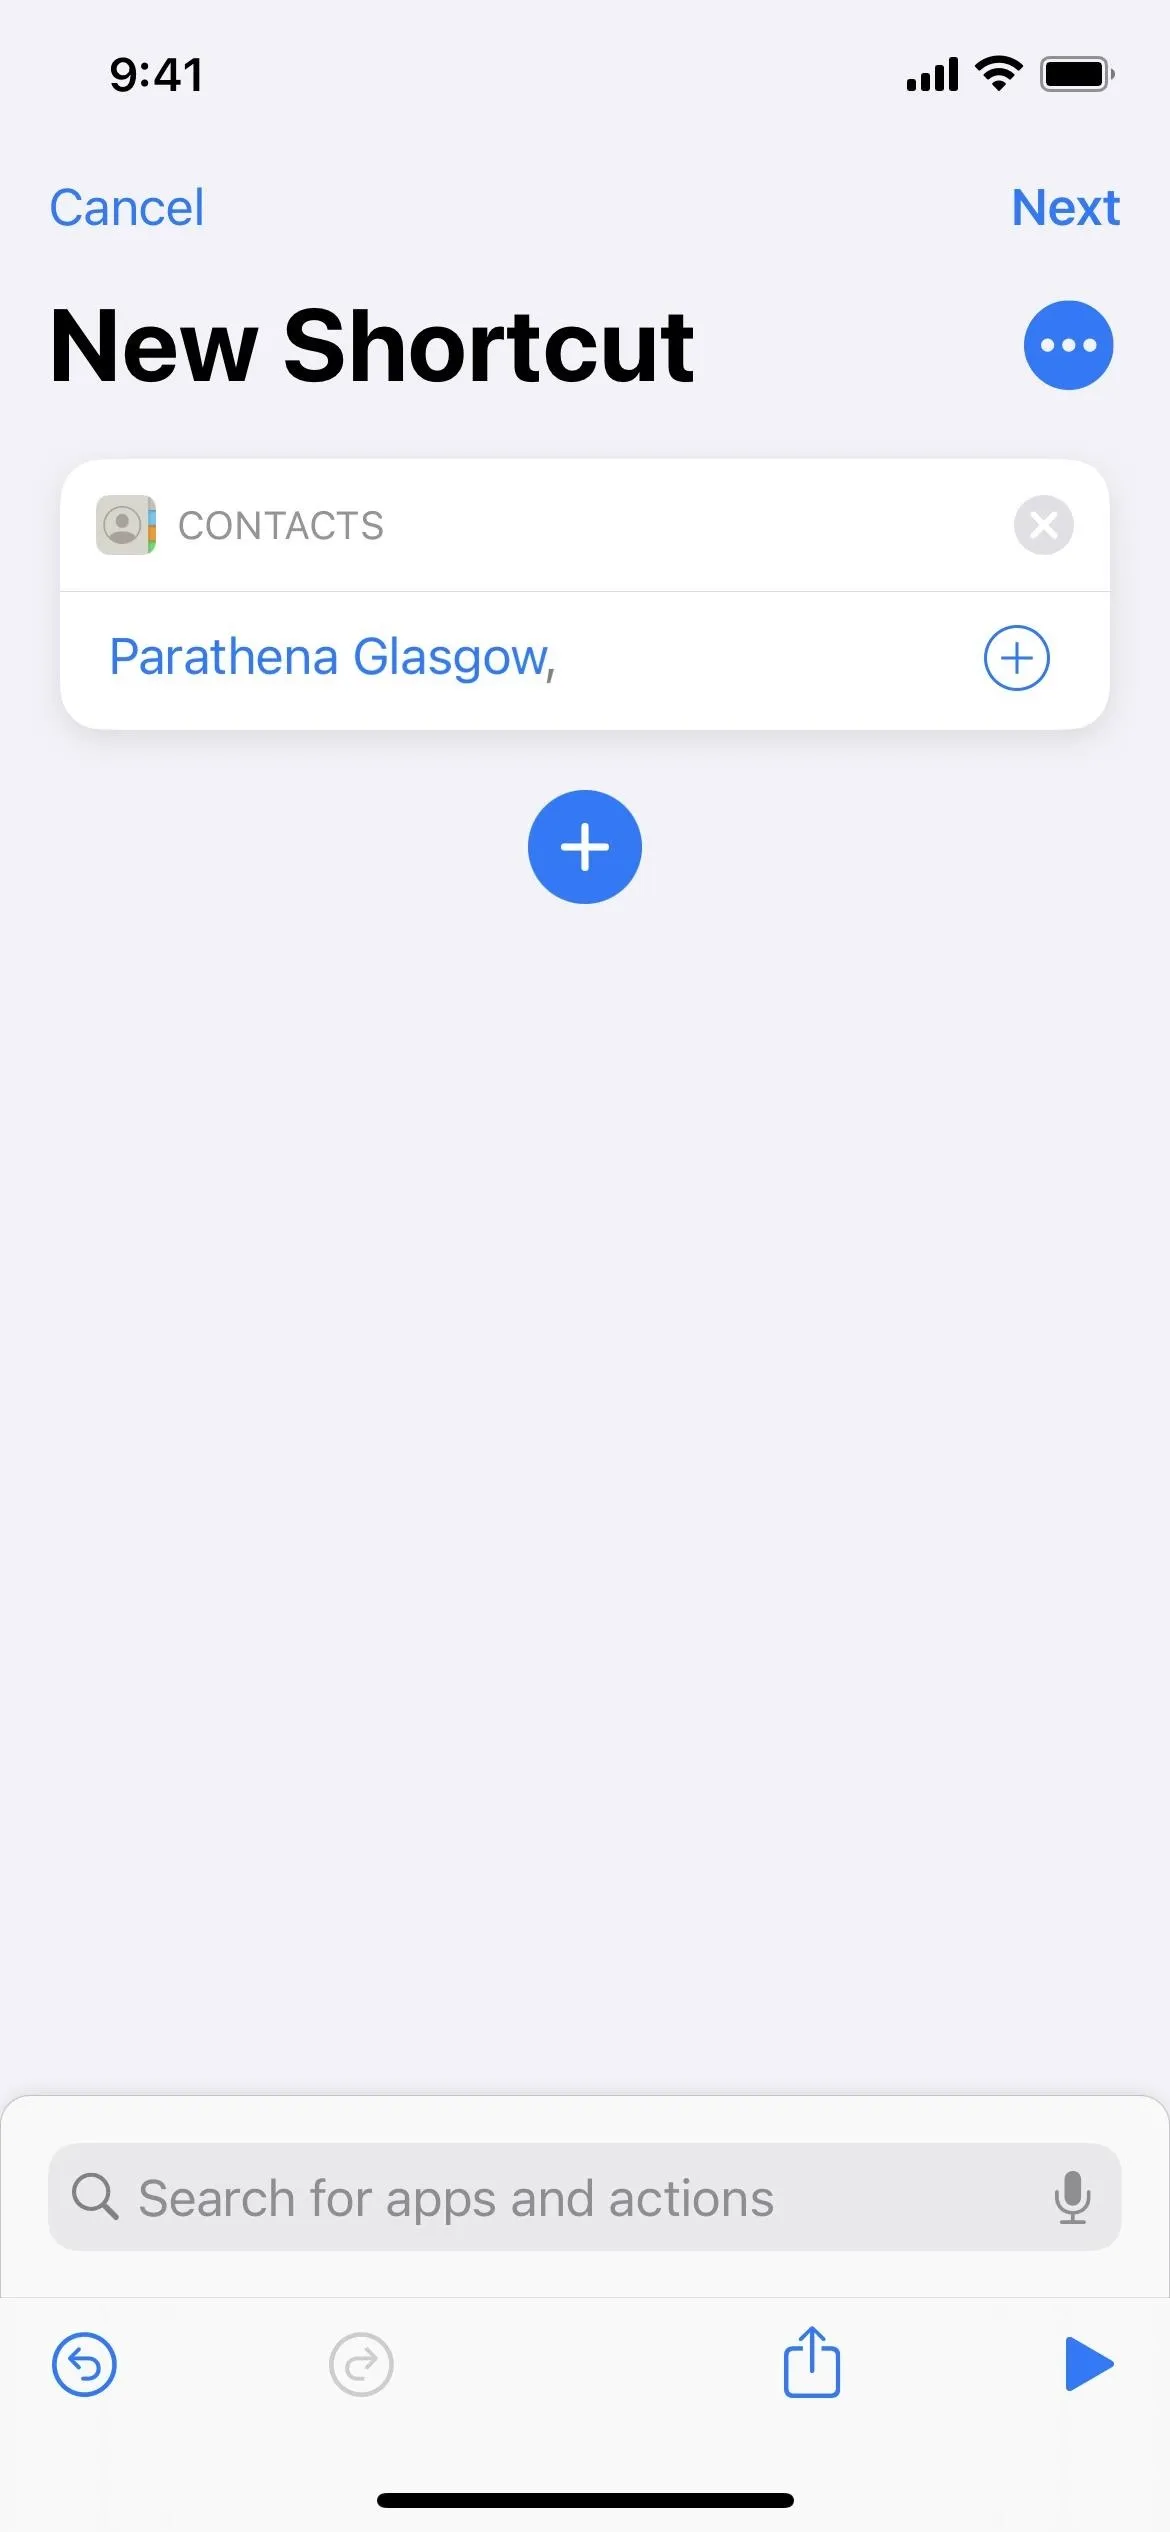


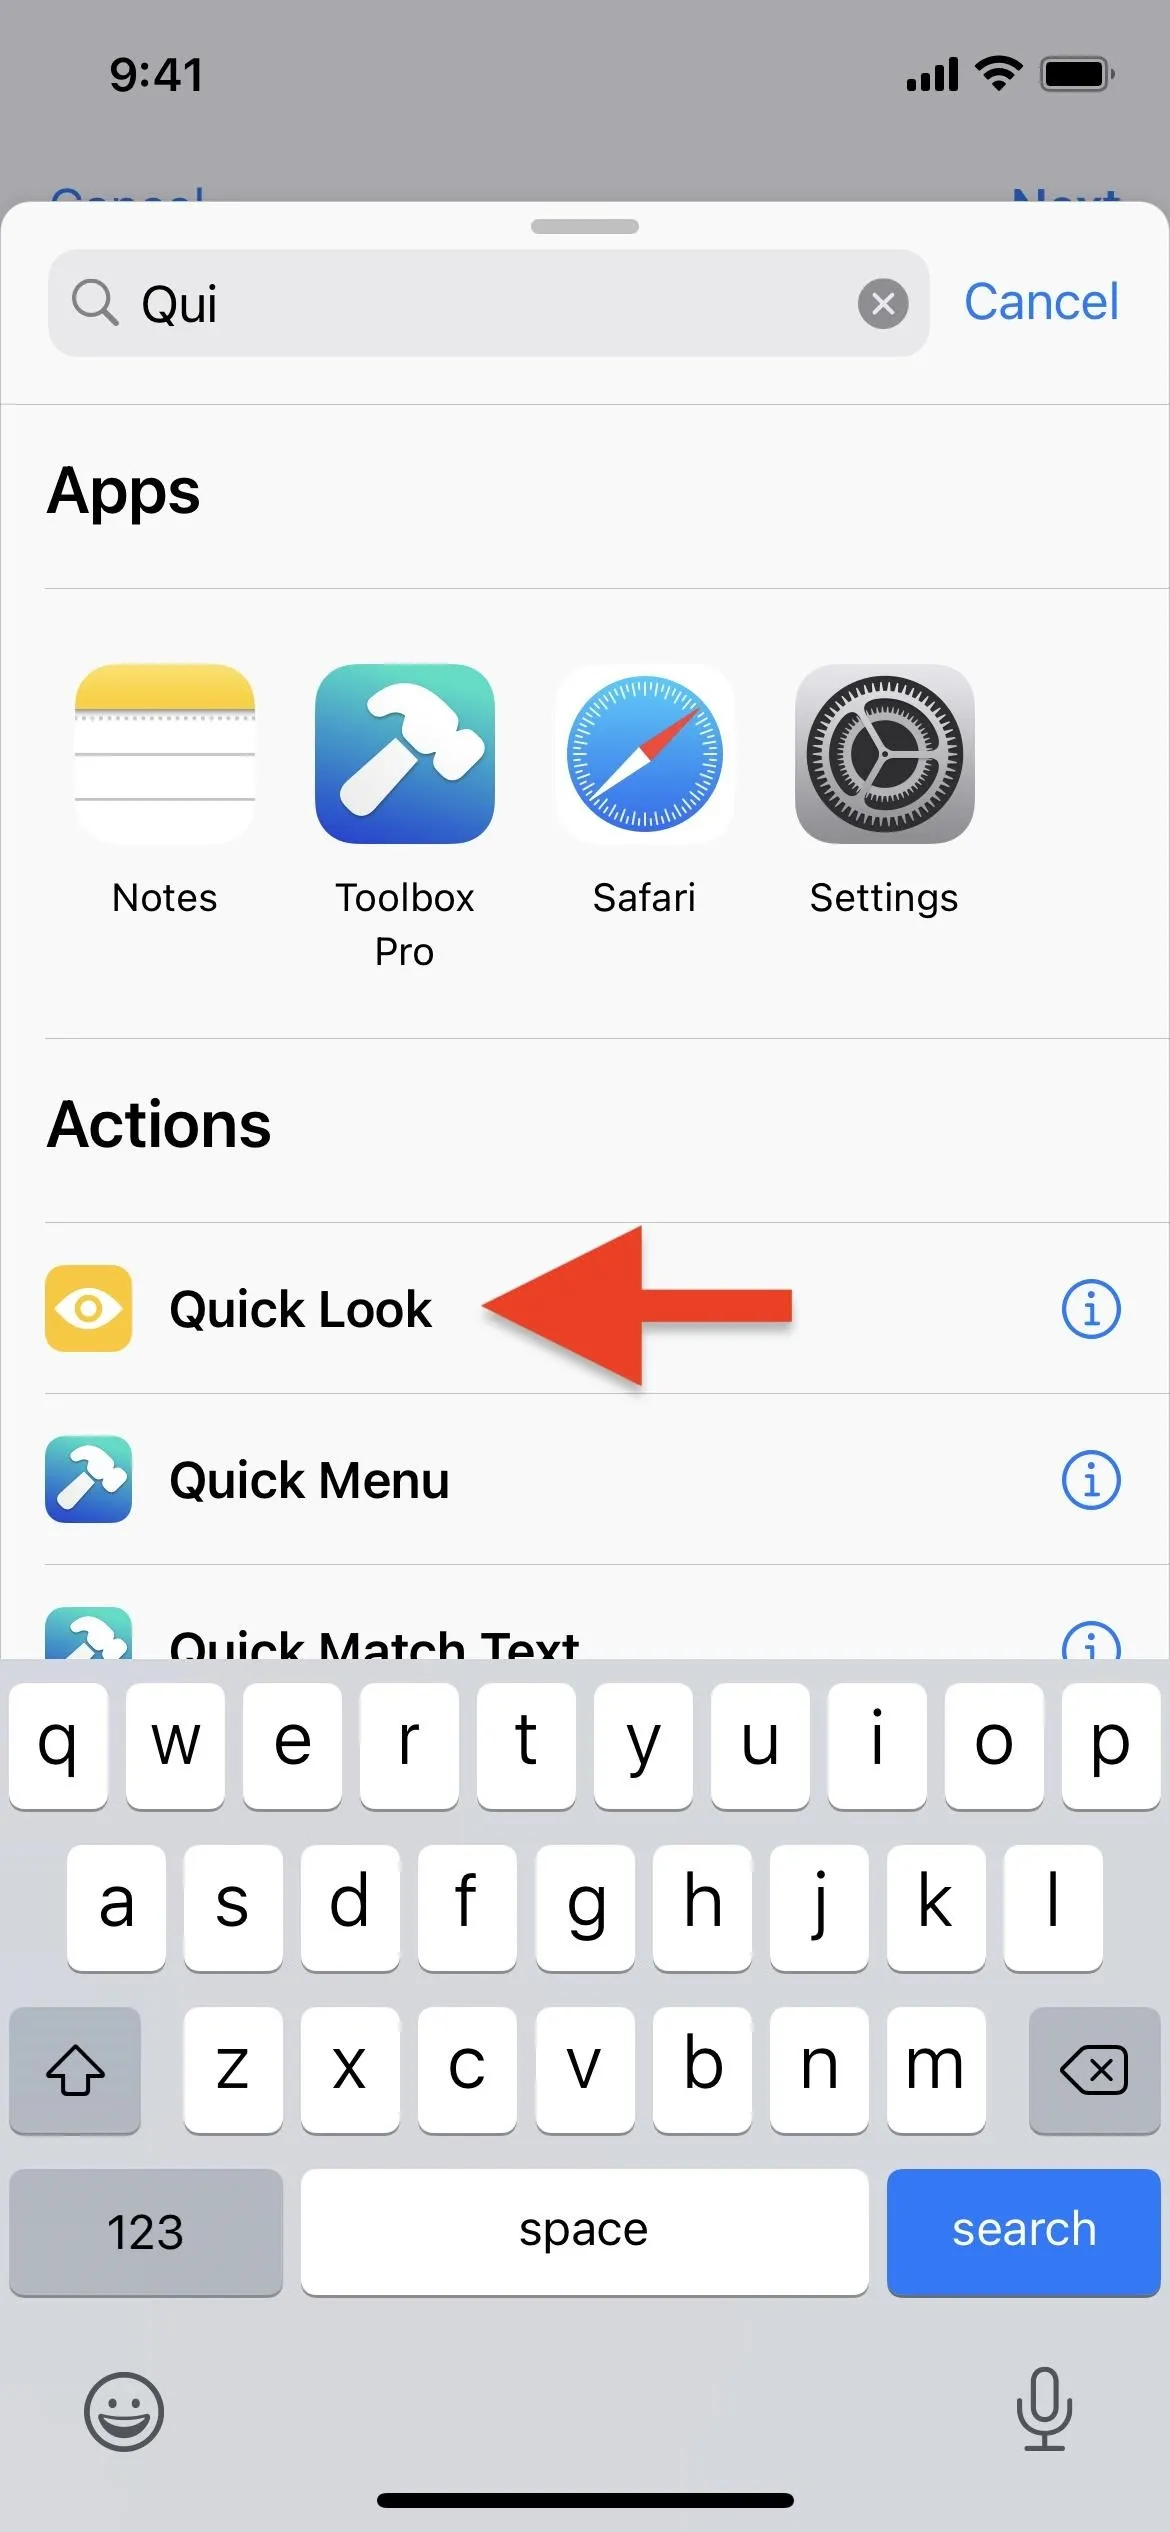
Next, let's add the second action. Search for and select the "Quick Look" action, and when it loads, it'll already be set to show the contents of the "Contacts" action above it.


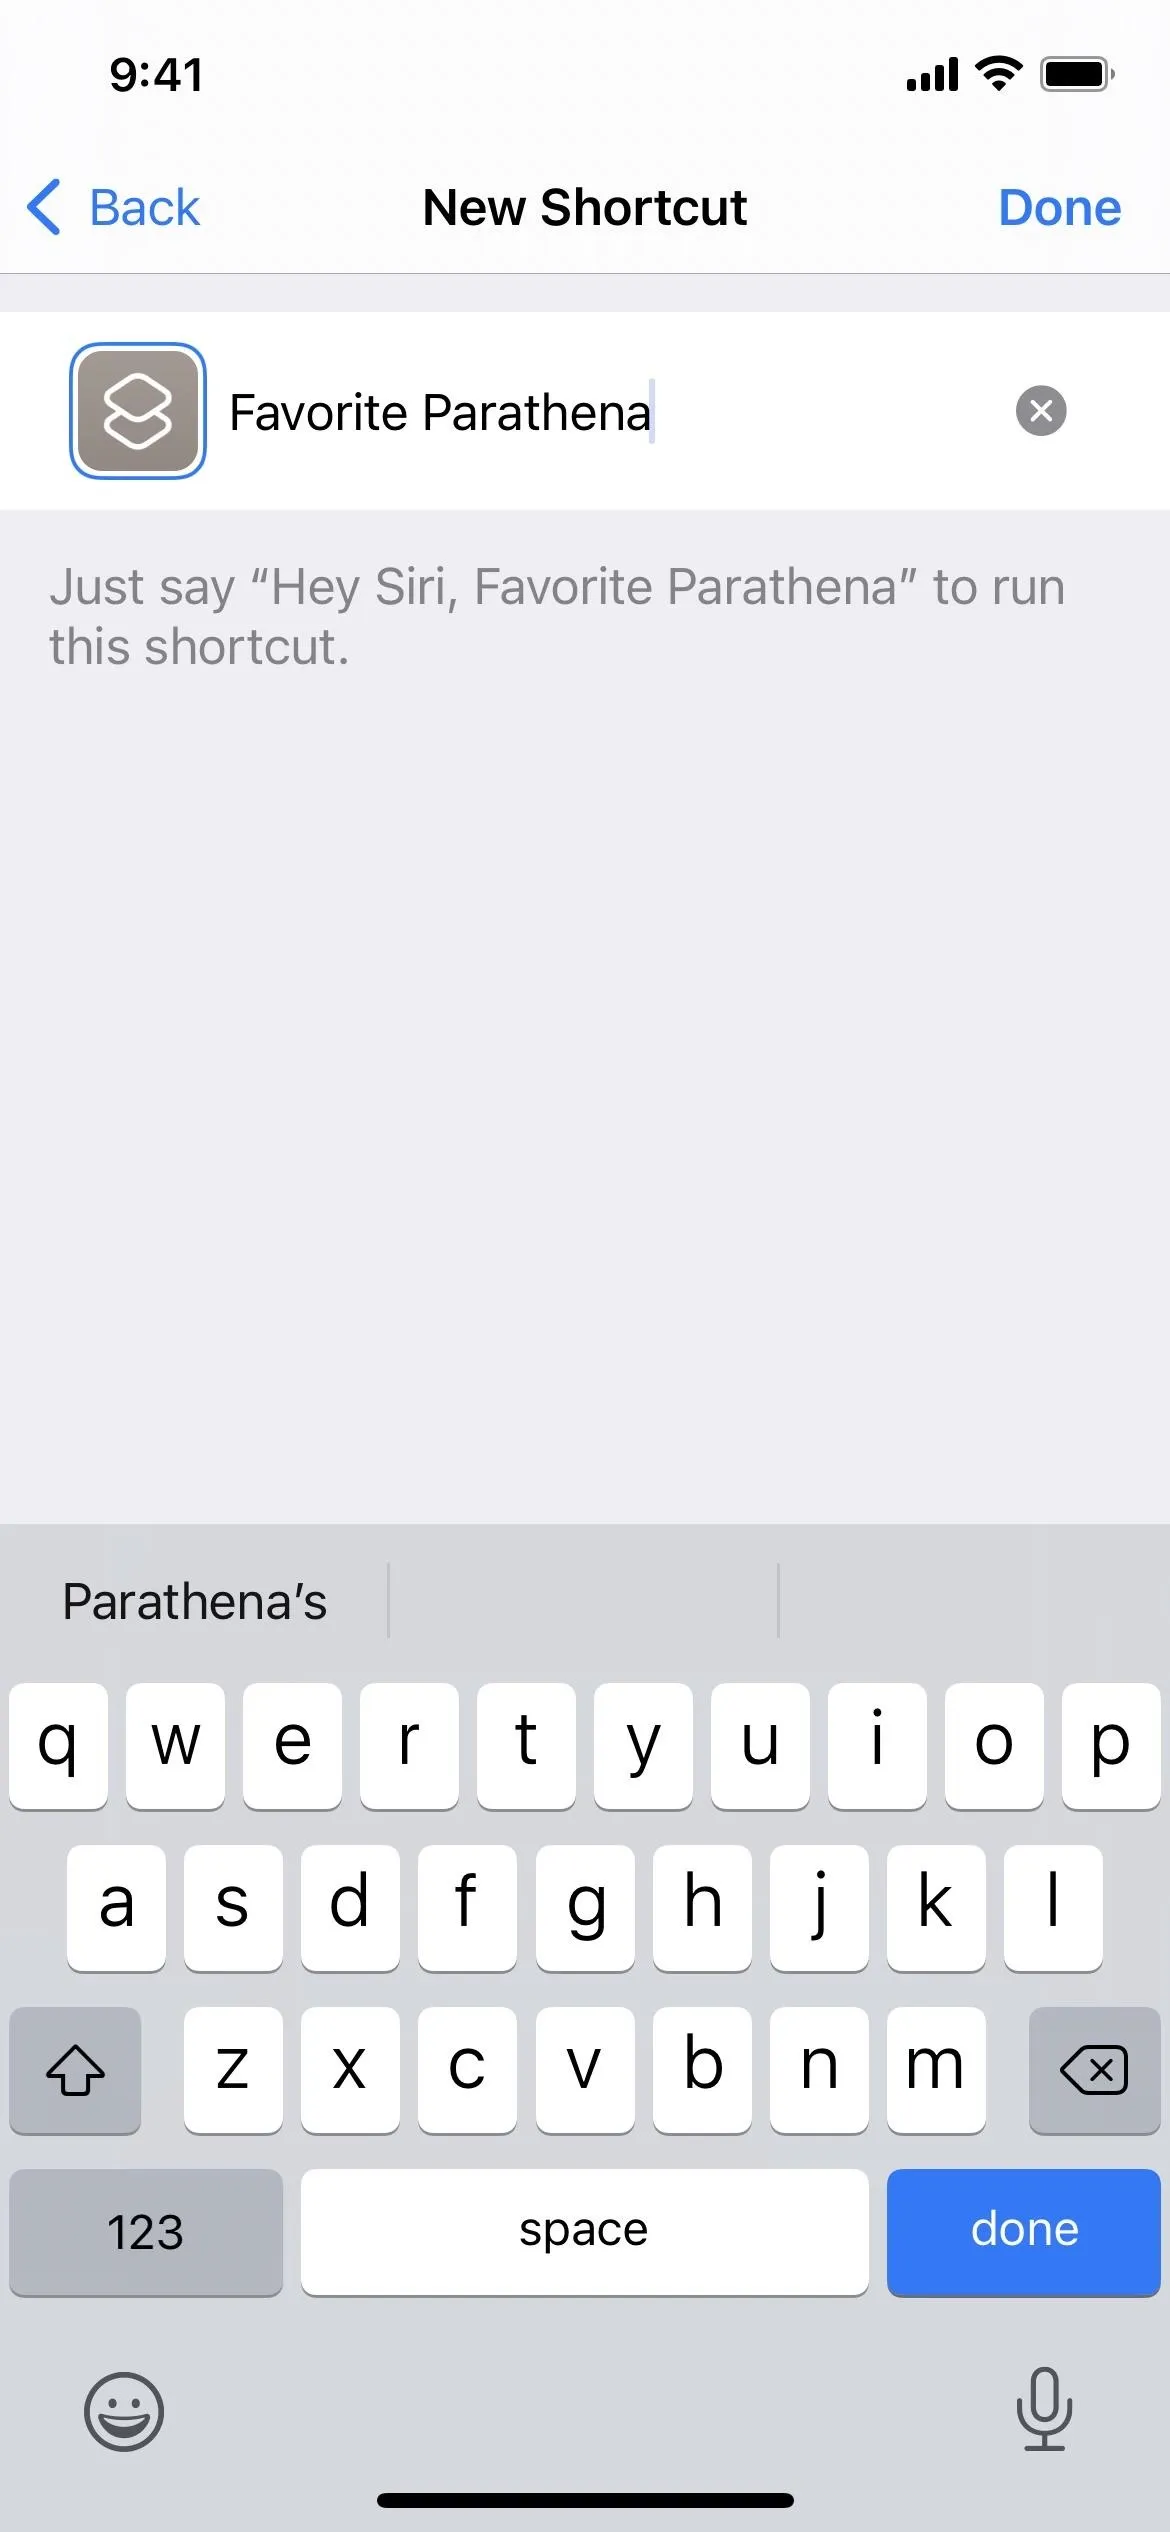
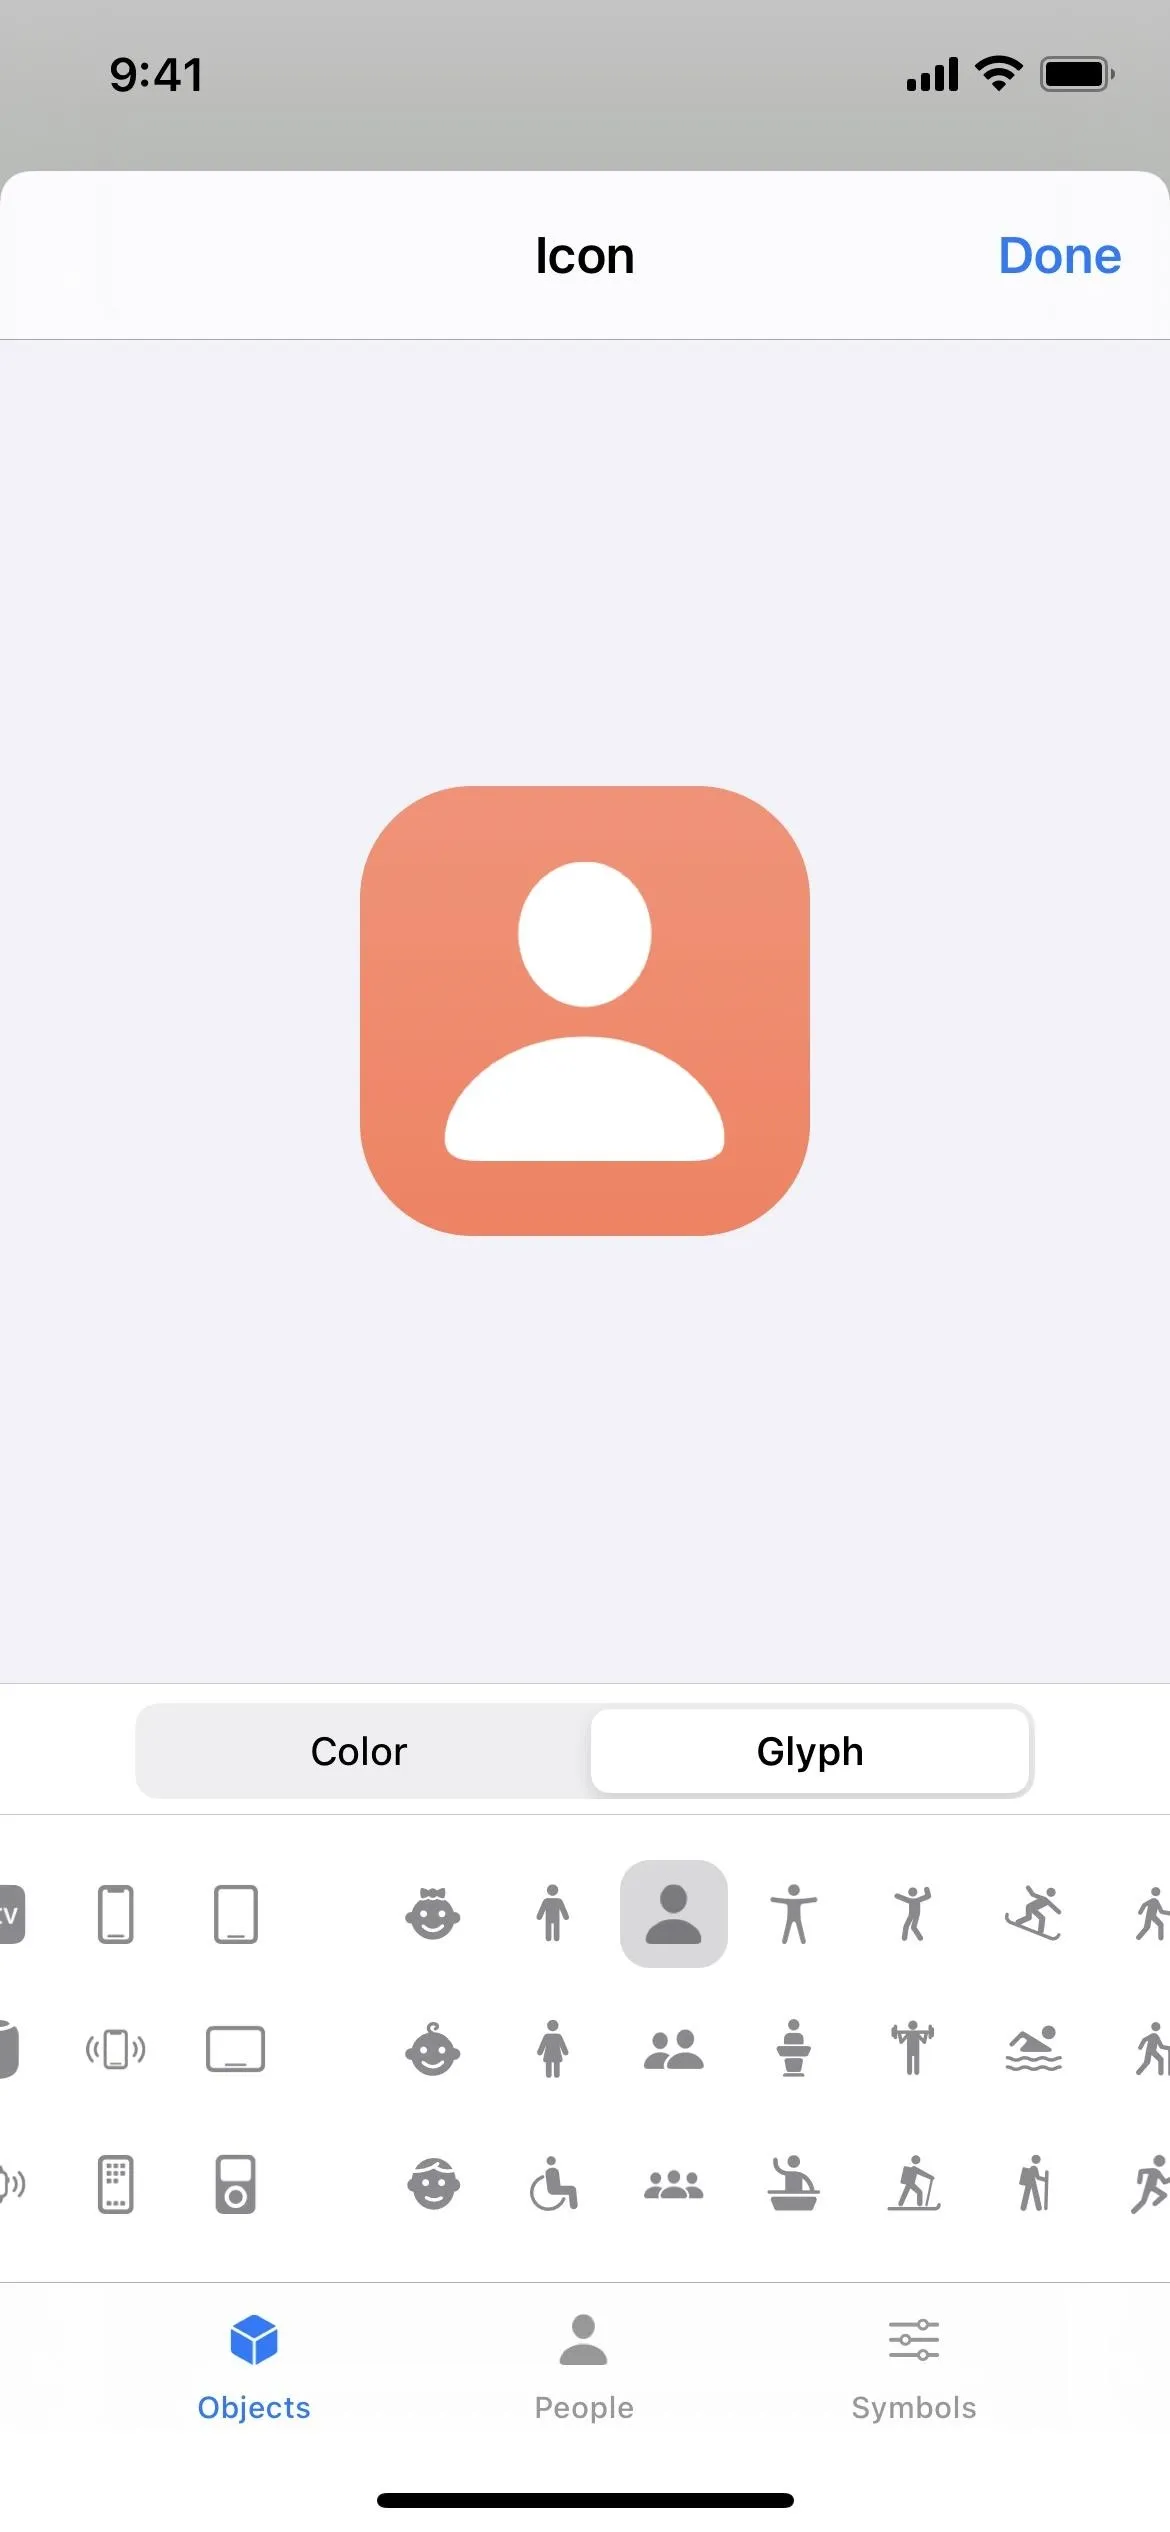
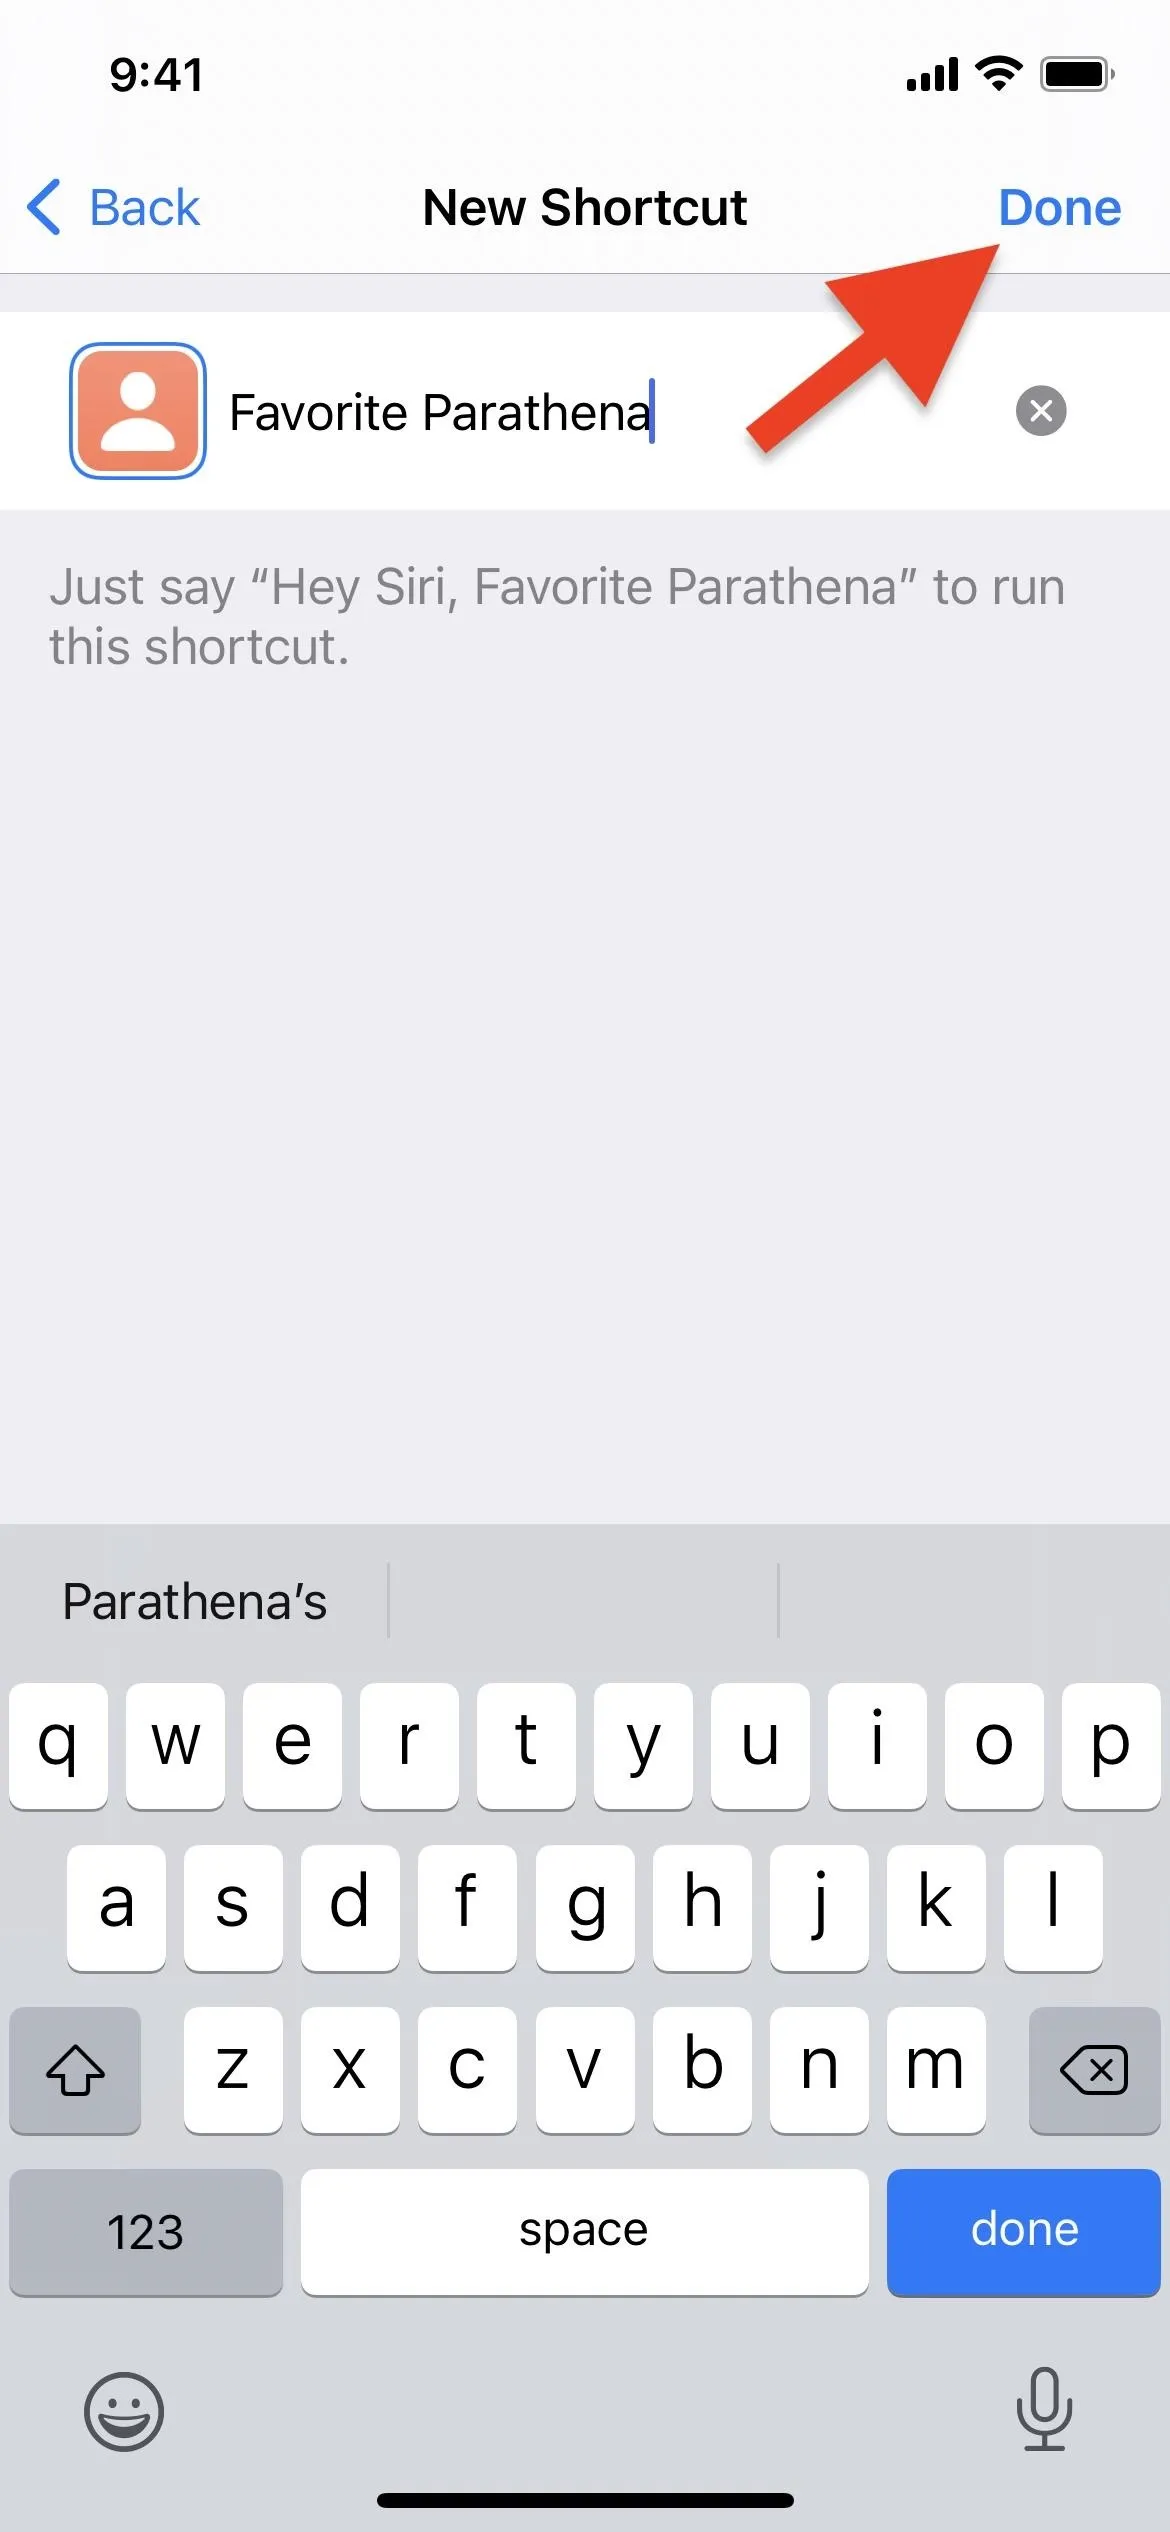
Lastly, tap "Next" in the top right and give your new shortcut a name. This will be the name that appears in the Shortcuts app, not necessarily the name that will appear on your home screen. I chose to use "Contact [Name]" so that I know it's for contacting the person named. You can also tap the icon and choose a new color and glyph if you want. I like to have a person glyph for contacts.


Add the Contact Shortcut to Your Home Screen
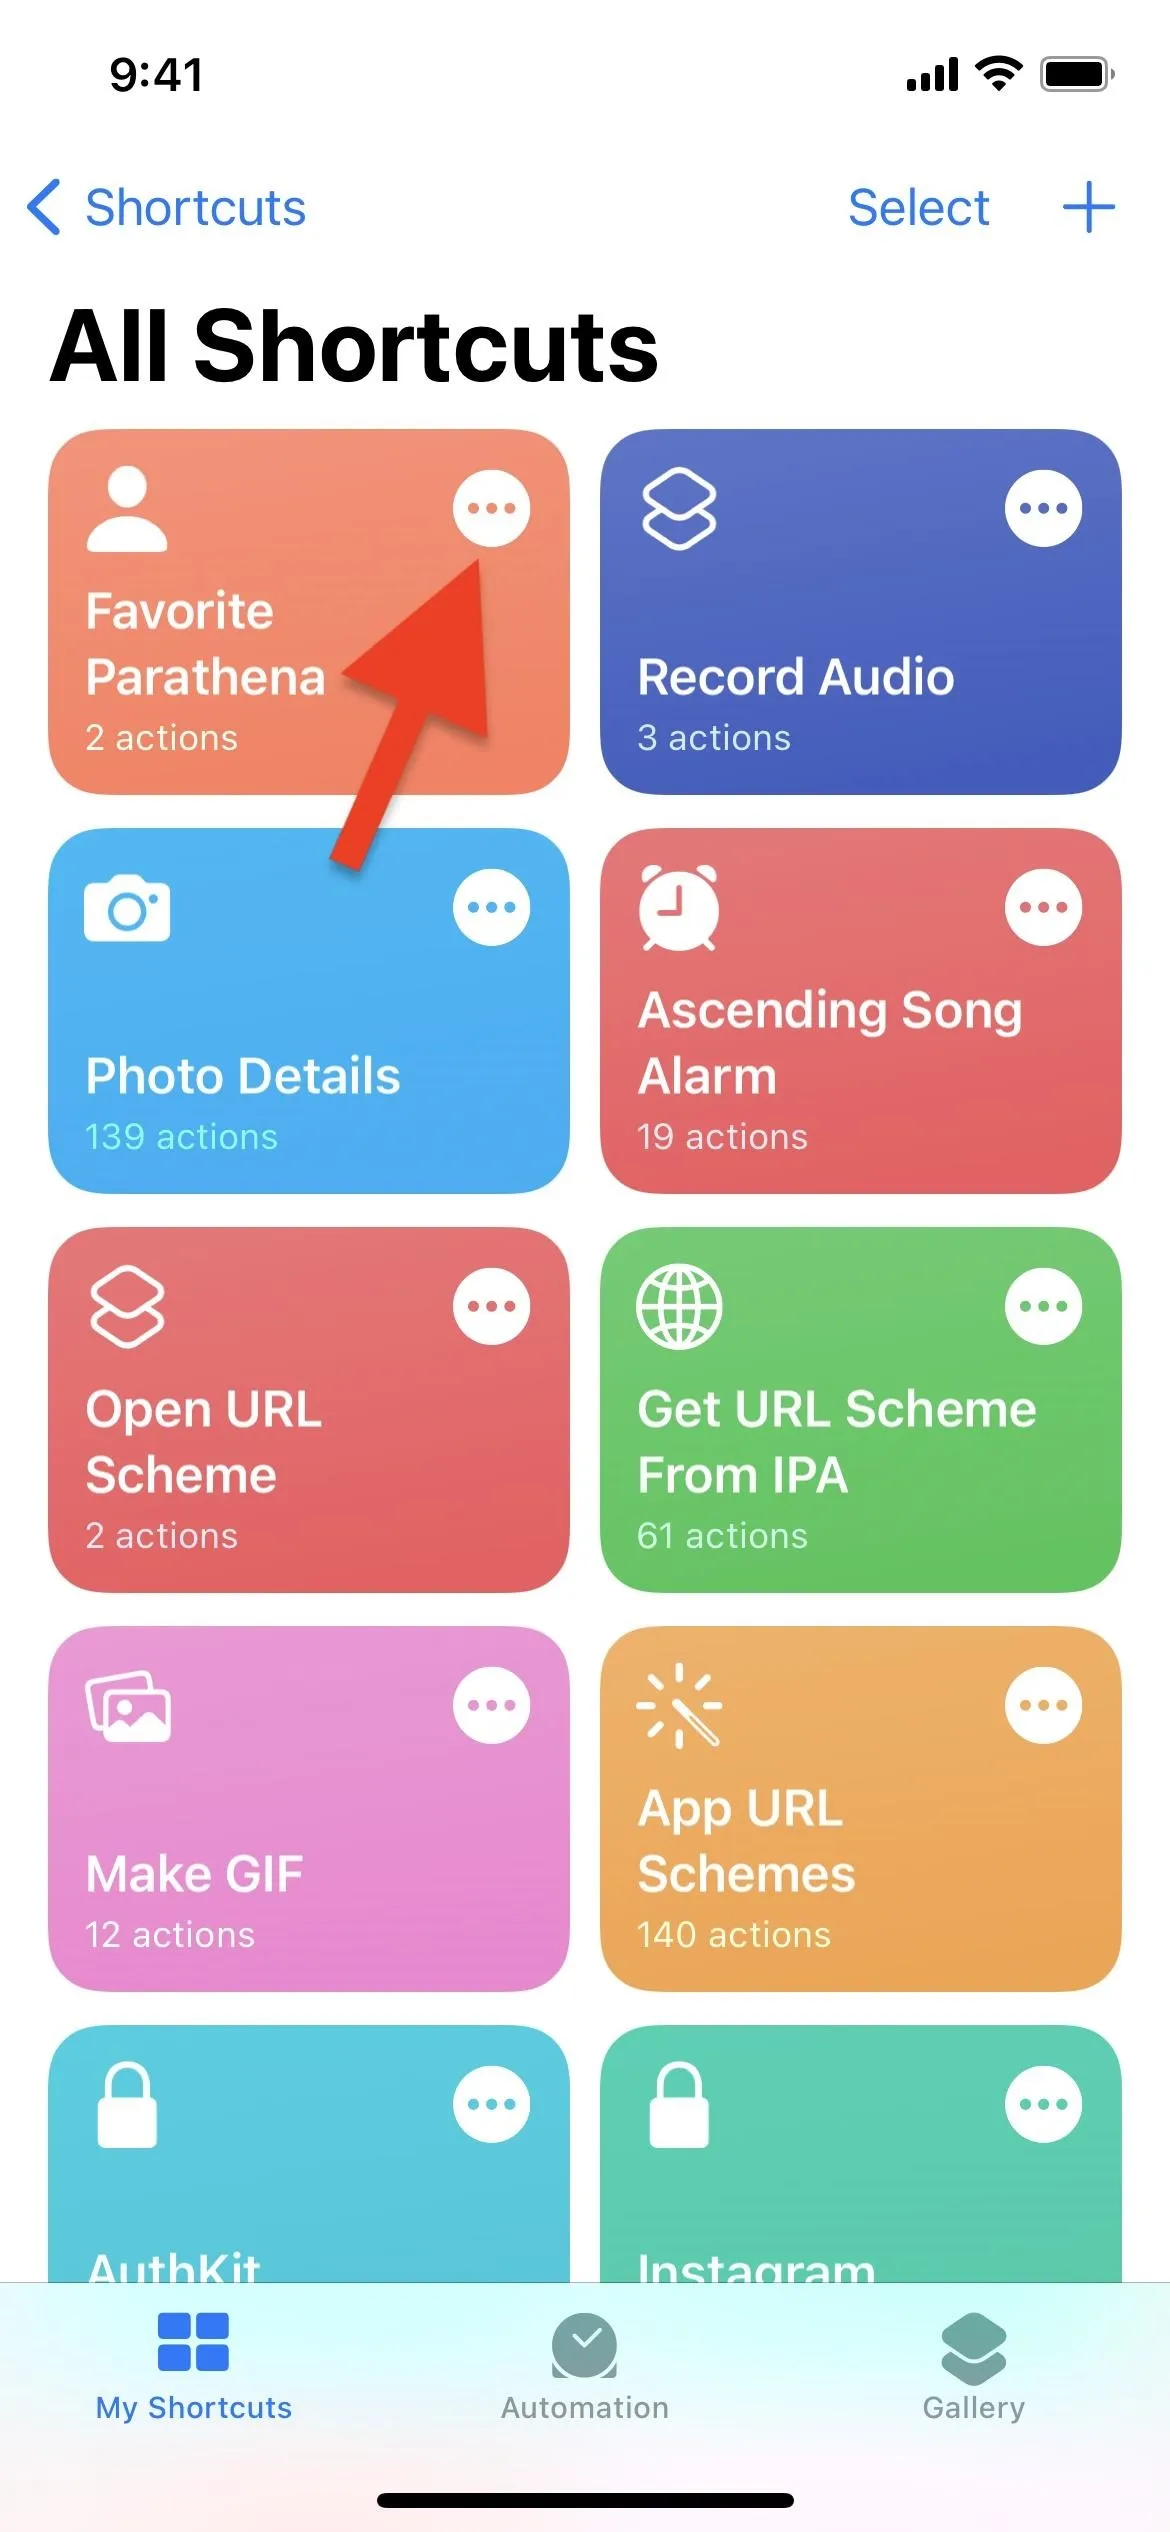
After you create the contact shortcut, you'll be back at the "My Shortcuts" gallery. To get back into the shortcut editor, tap the ellipsis (•••) on the card. Then, tap the ellipsis (•••) icon at the top of the editor to view the options available.
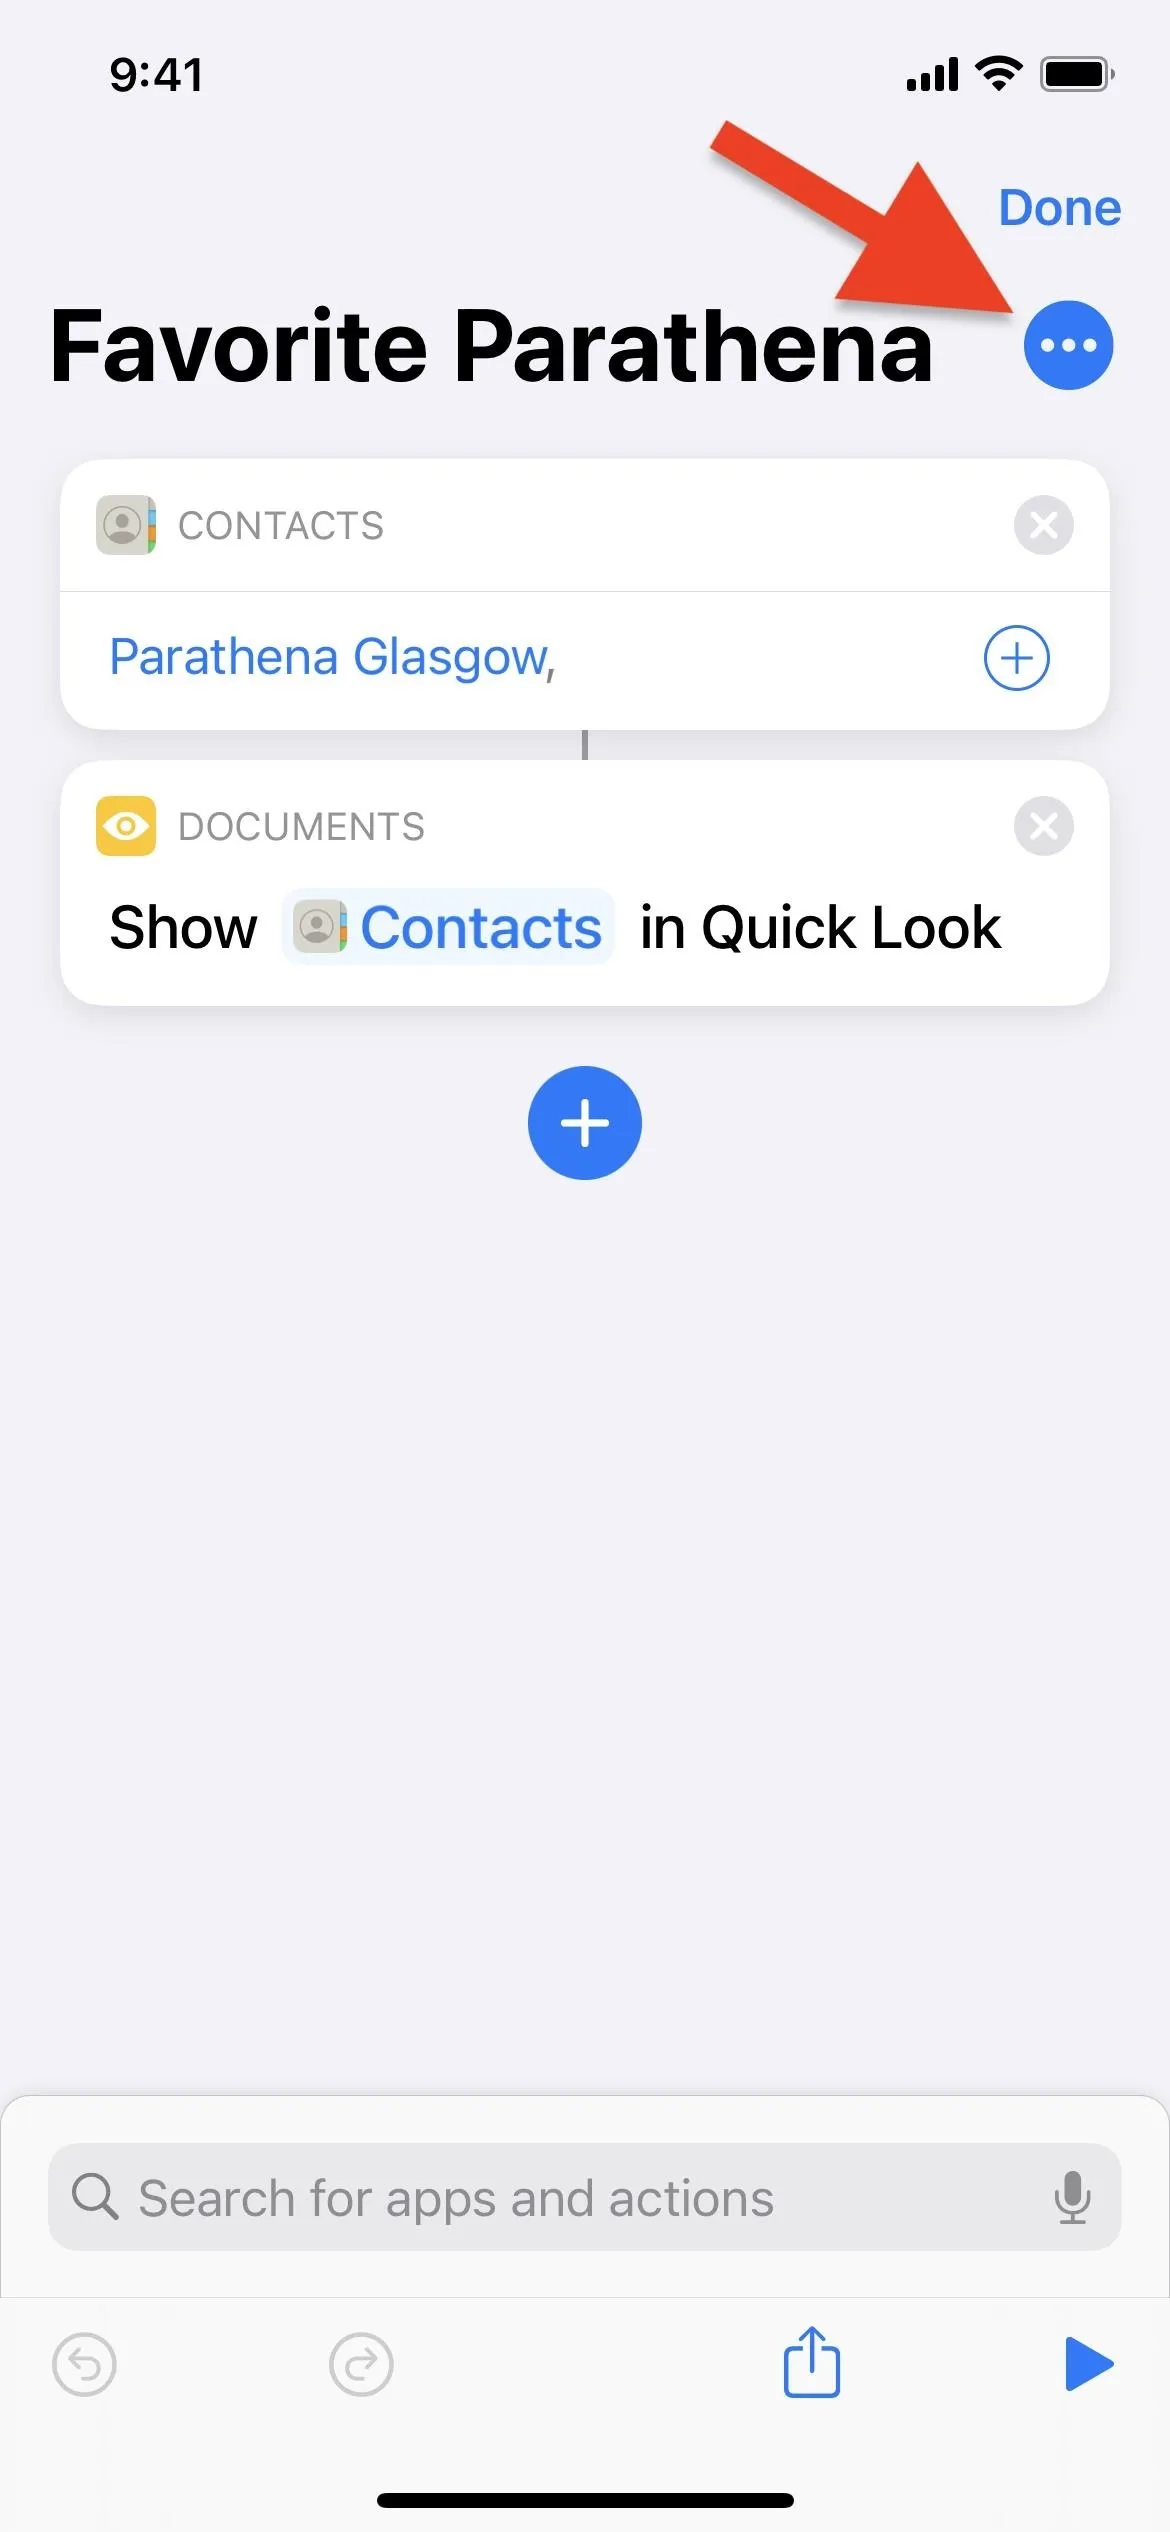


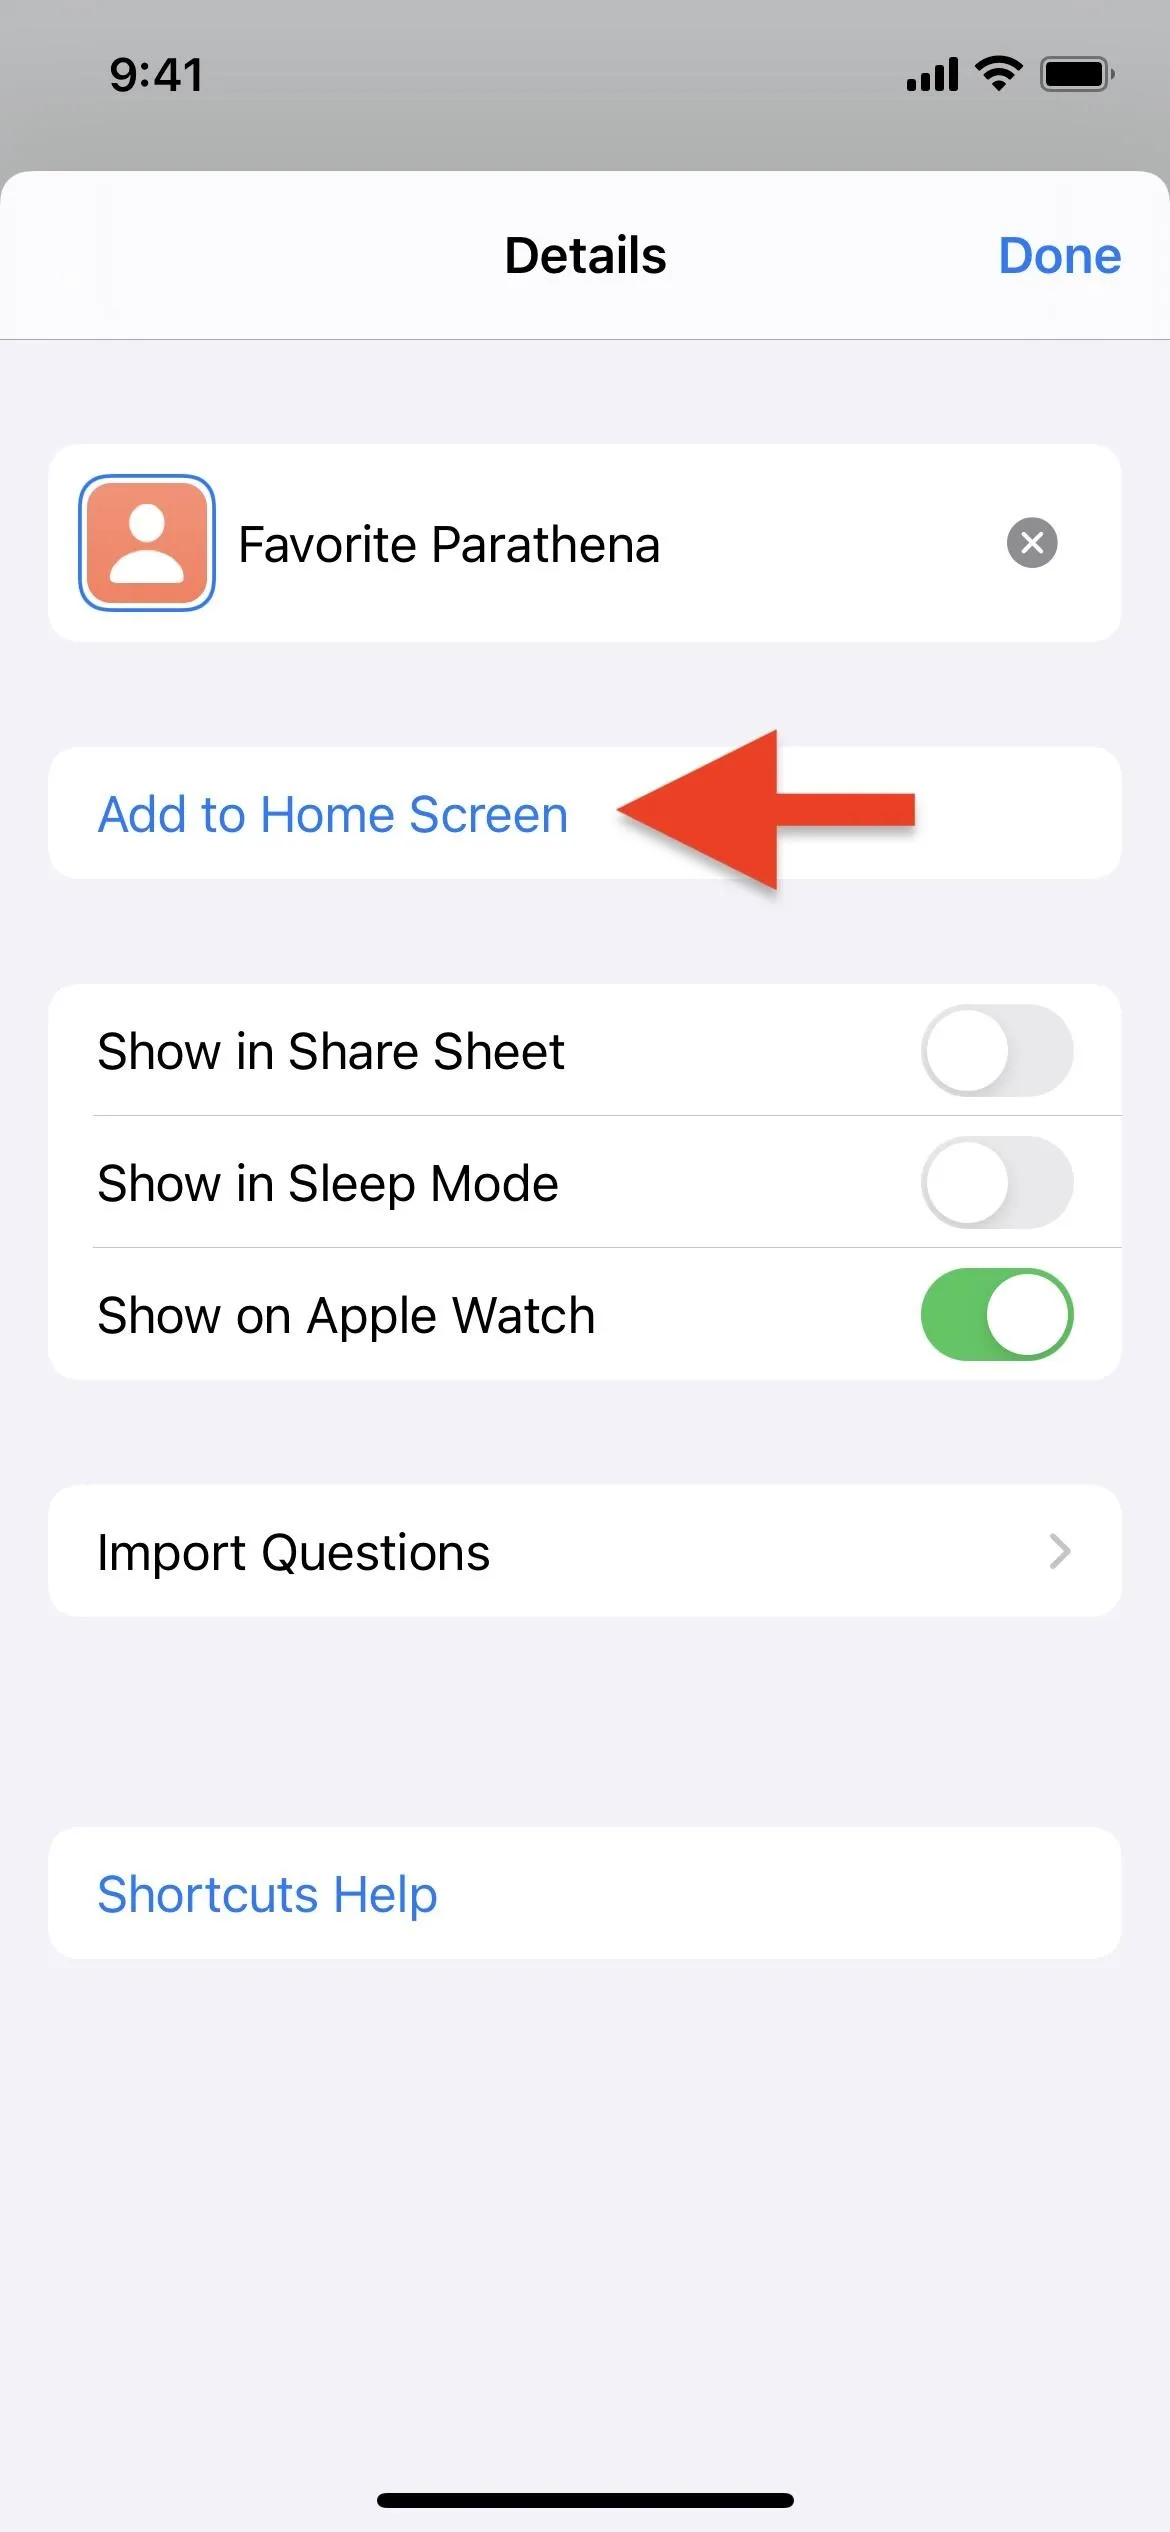
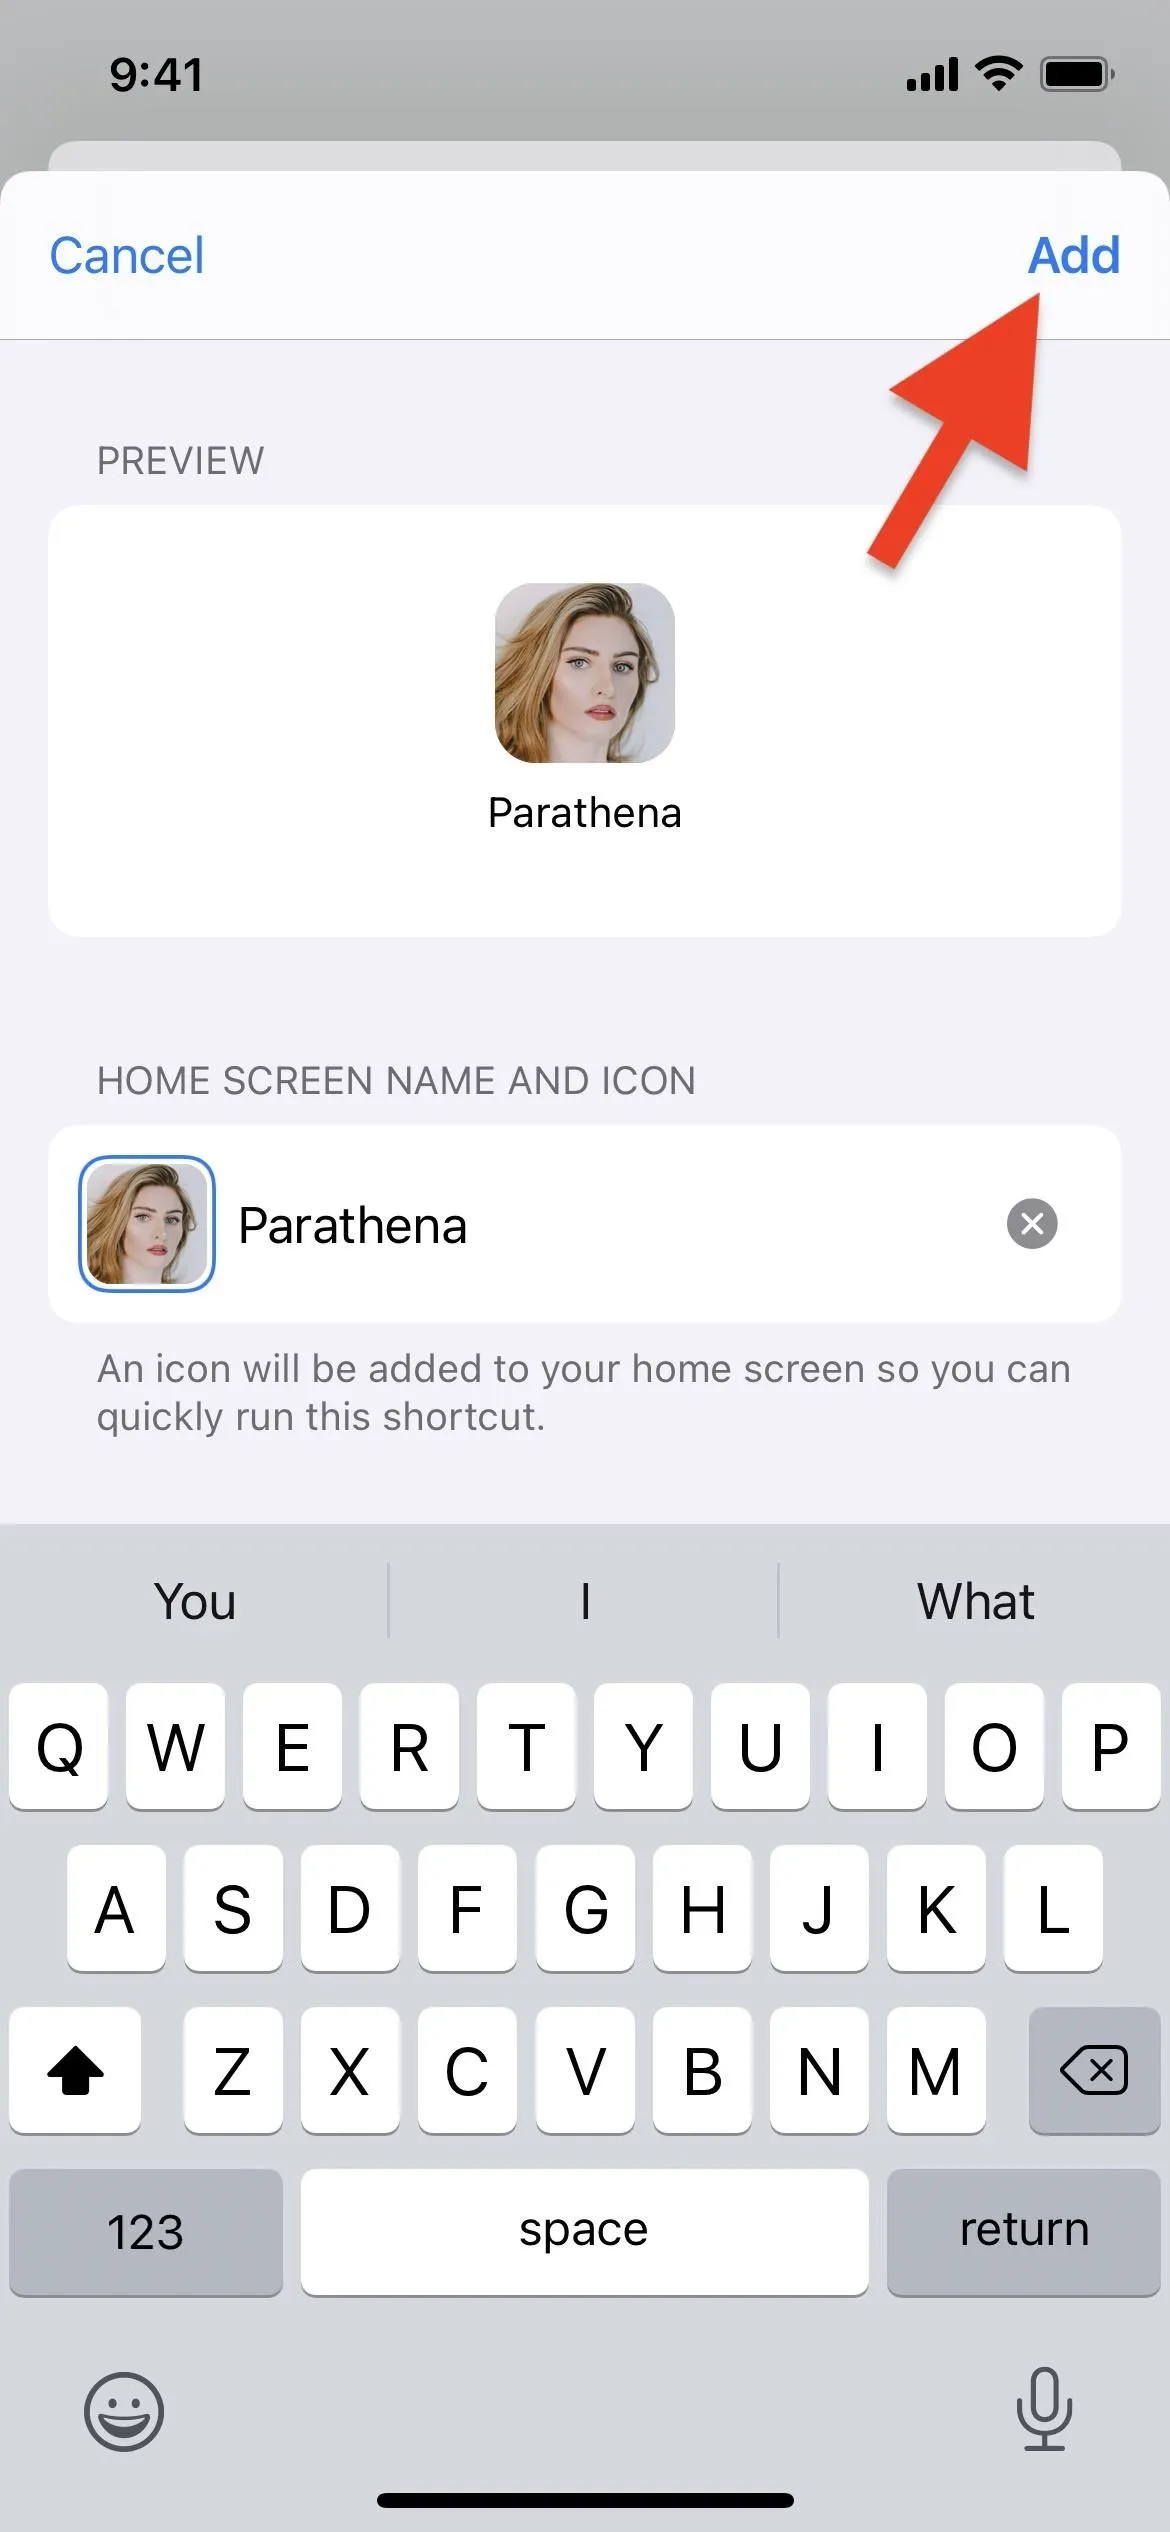
From the options, select "Add to Home Screen," and a preview will appear where you can configure what the icon will look like. You can rename it to be simpler than what you chose for the shortcut earlier; I shortened it to just the first name of the contact. You can also choose a different icon. To do so, tap the current icon.
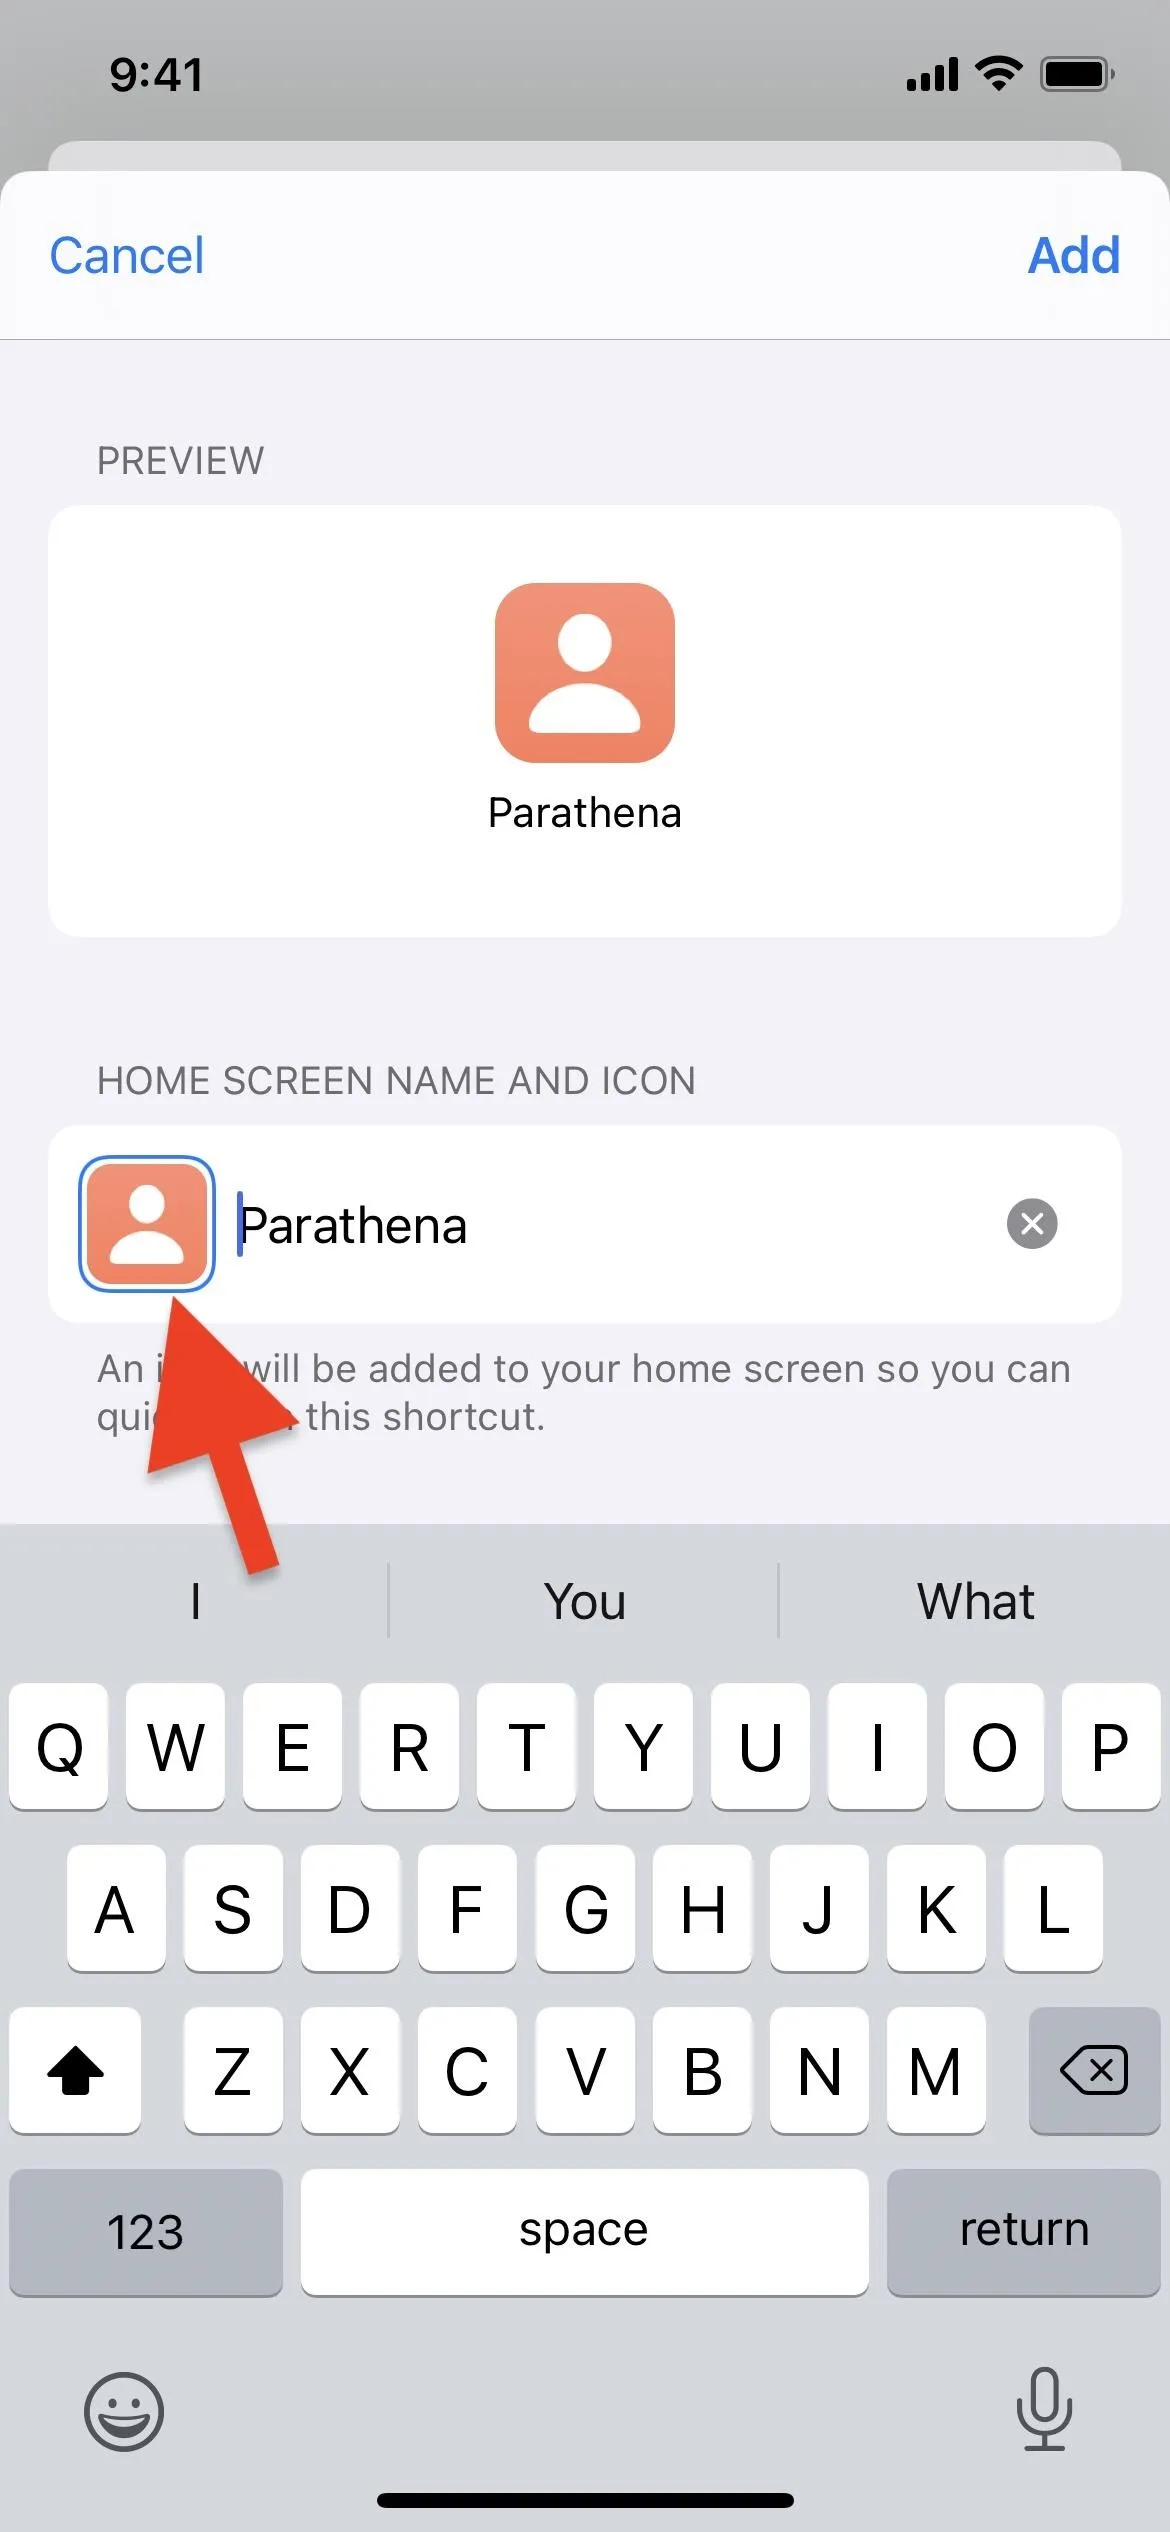
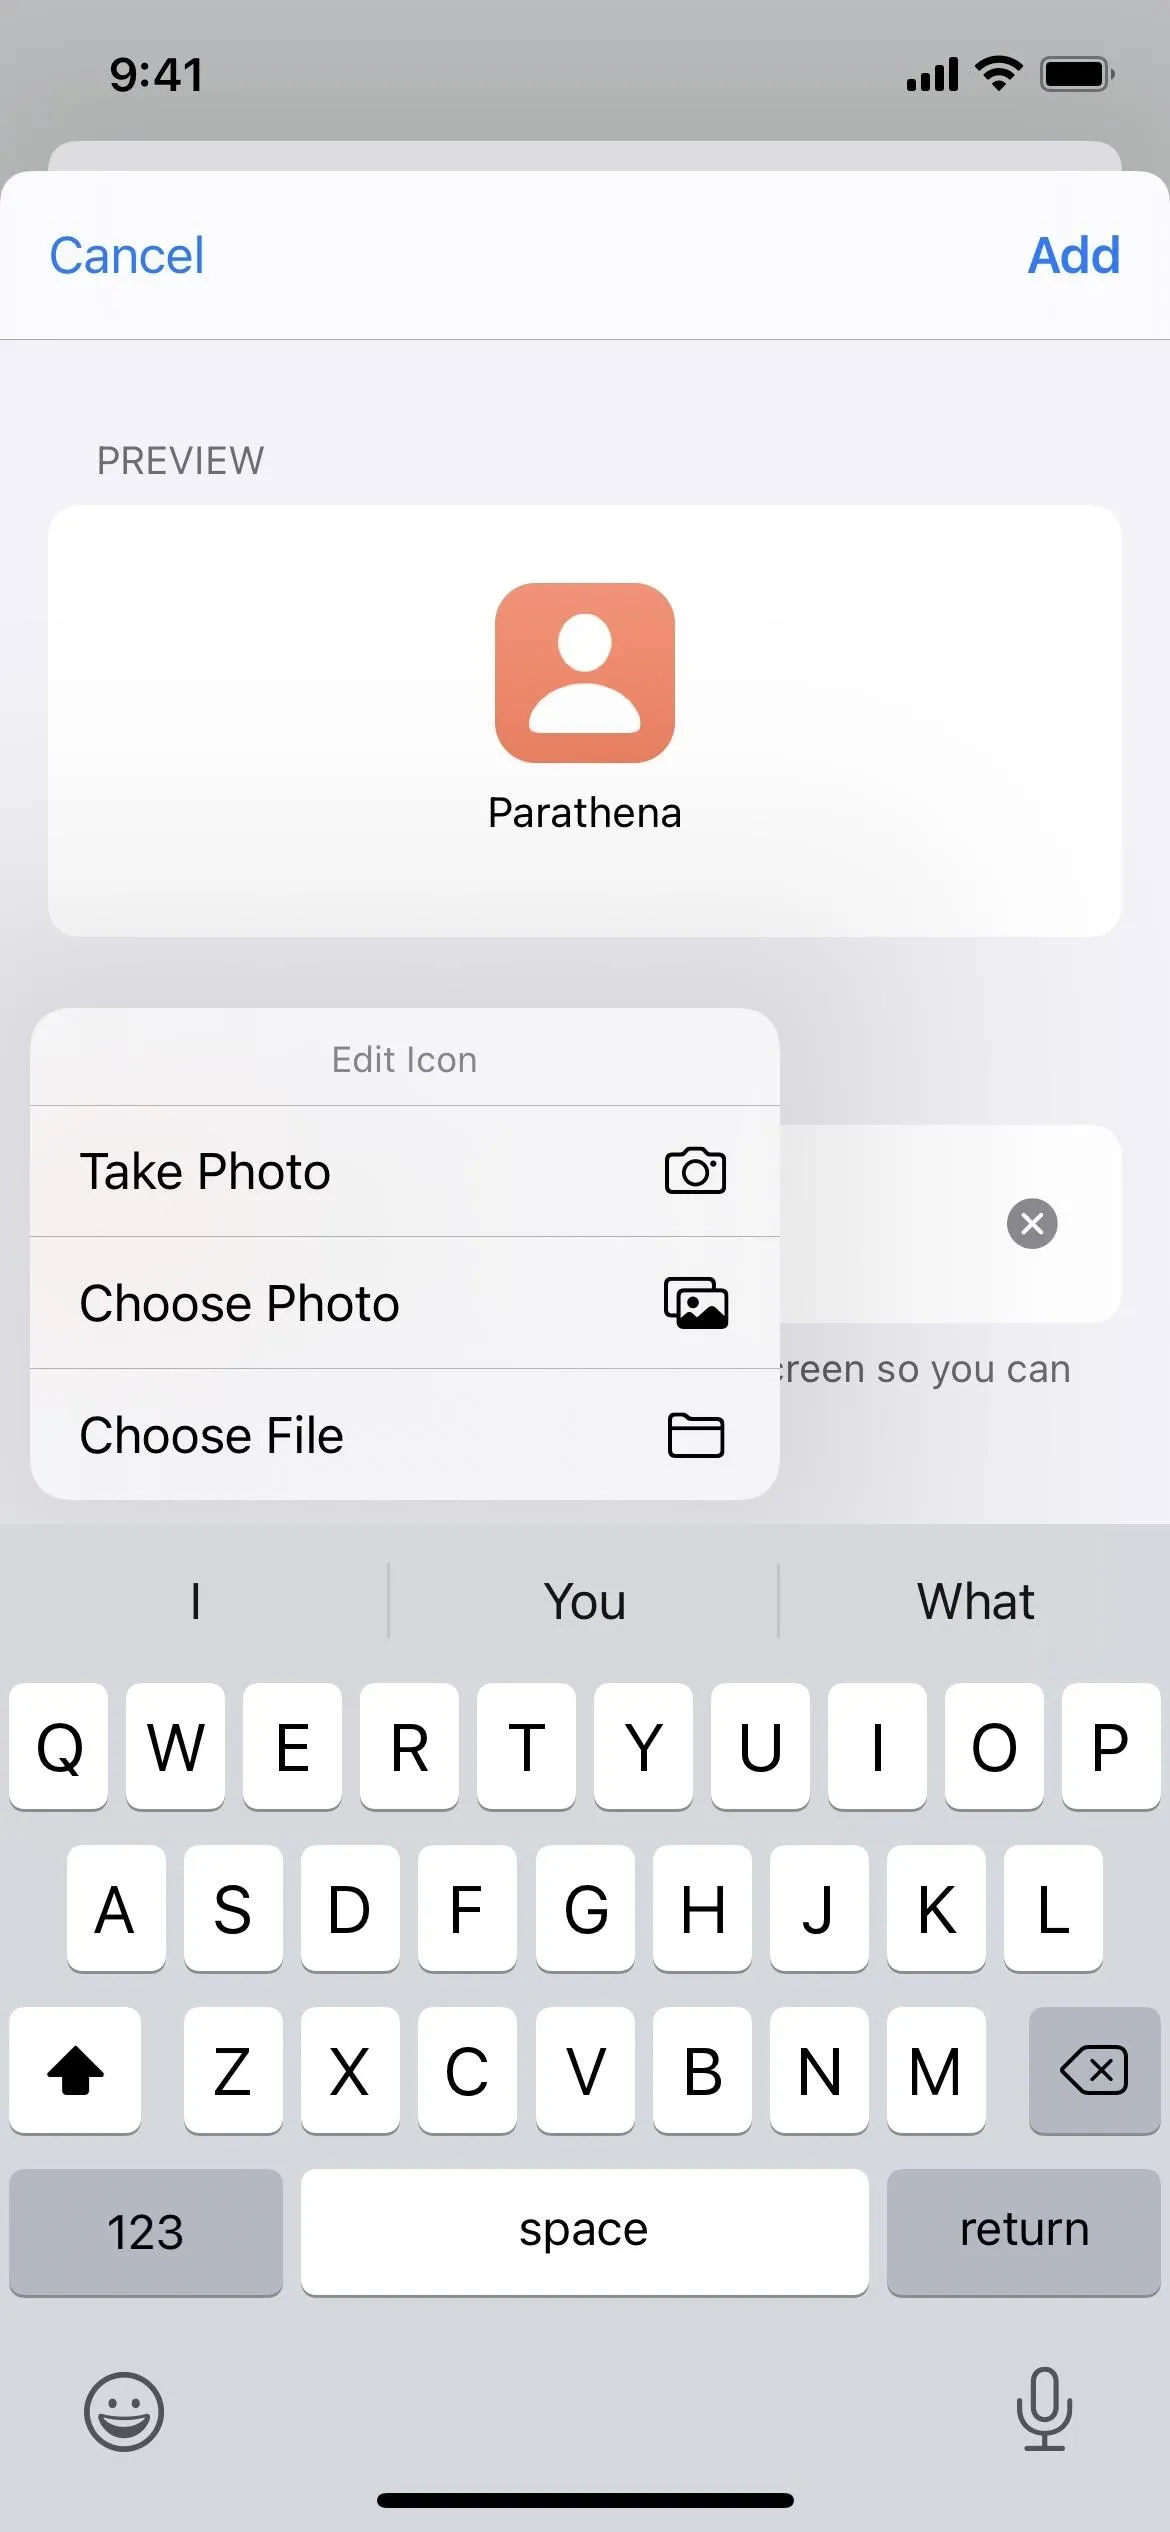


You can choose from one of the following options:
- Take Photo: This will open the Camera so you can take a new headshot or still image. Take the shot, then select "Retake" to try again if you're not happy with it. When you are happy with it, expand and crop it accordingly, then choose "Use Shot."
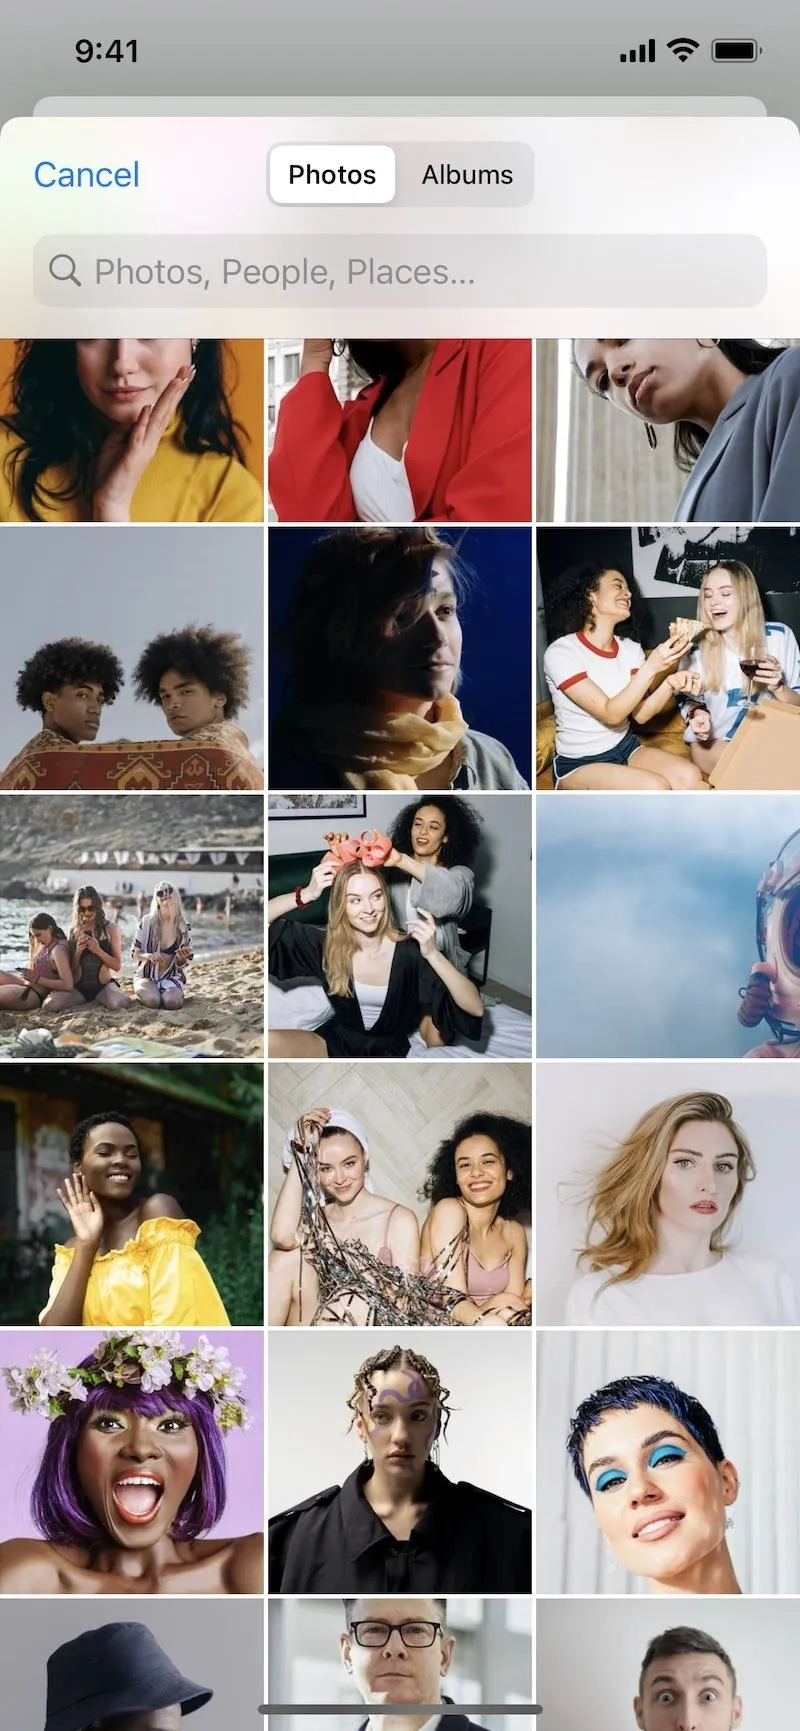
- Choose Photo: This will open the image picker, where you can search for and select a picture already in your Photos app. When you choose one, expand and crop it accordingly, then select "Choose."
- Choose File: This will open the Files app, where you can search for and select a picture that's in iCloud or one of your connected cloud storage services. Whenever you select one, it'll shrink the largest length of the image to the same length of the shorter side so that it's squeezed into a square. For some reason, you cannot crop like you can with the other methods.
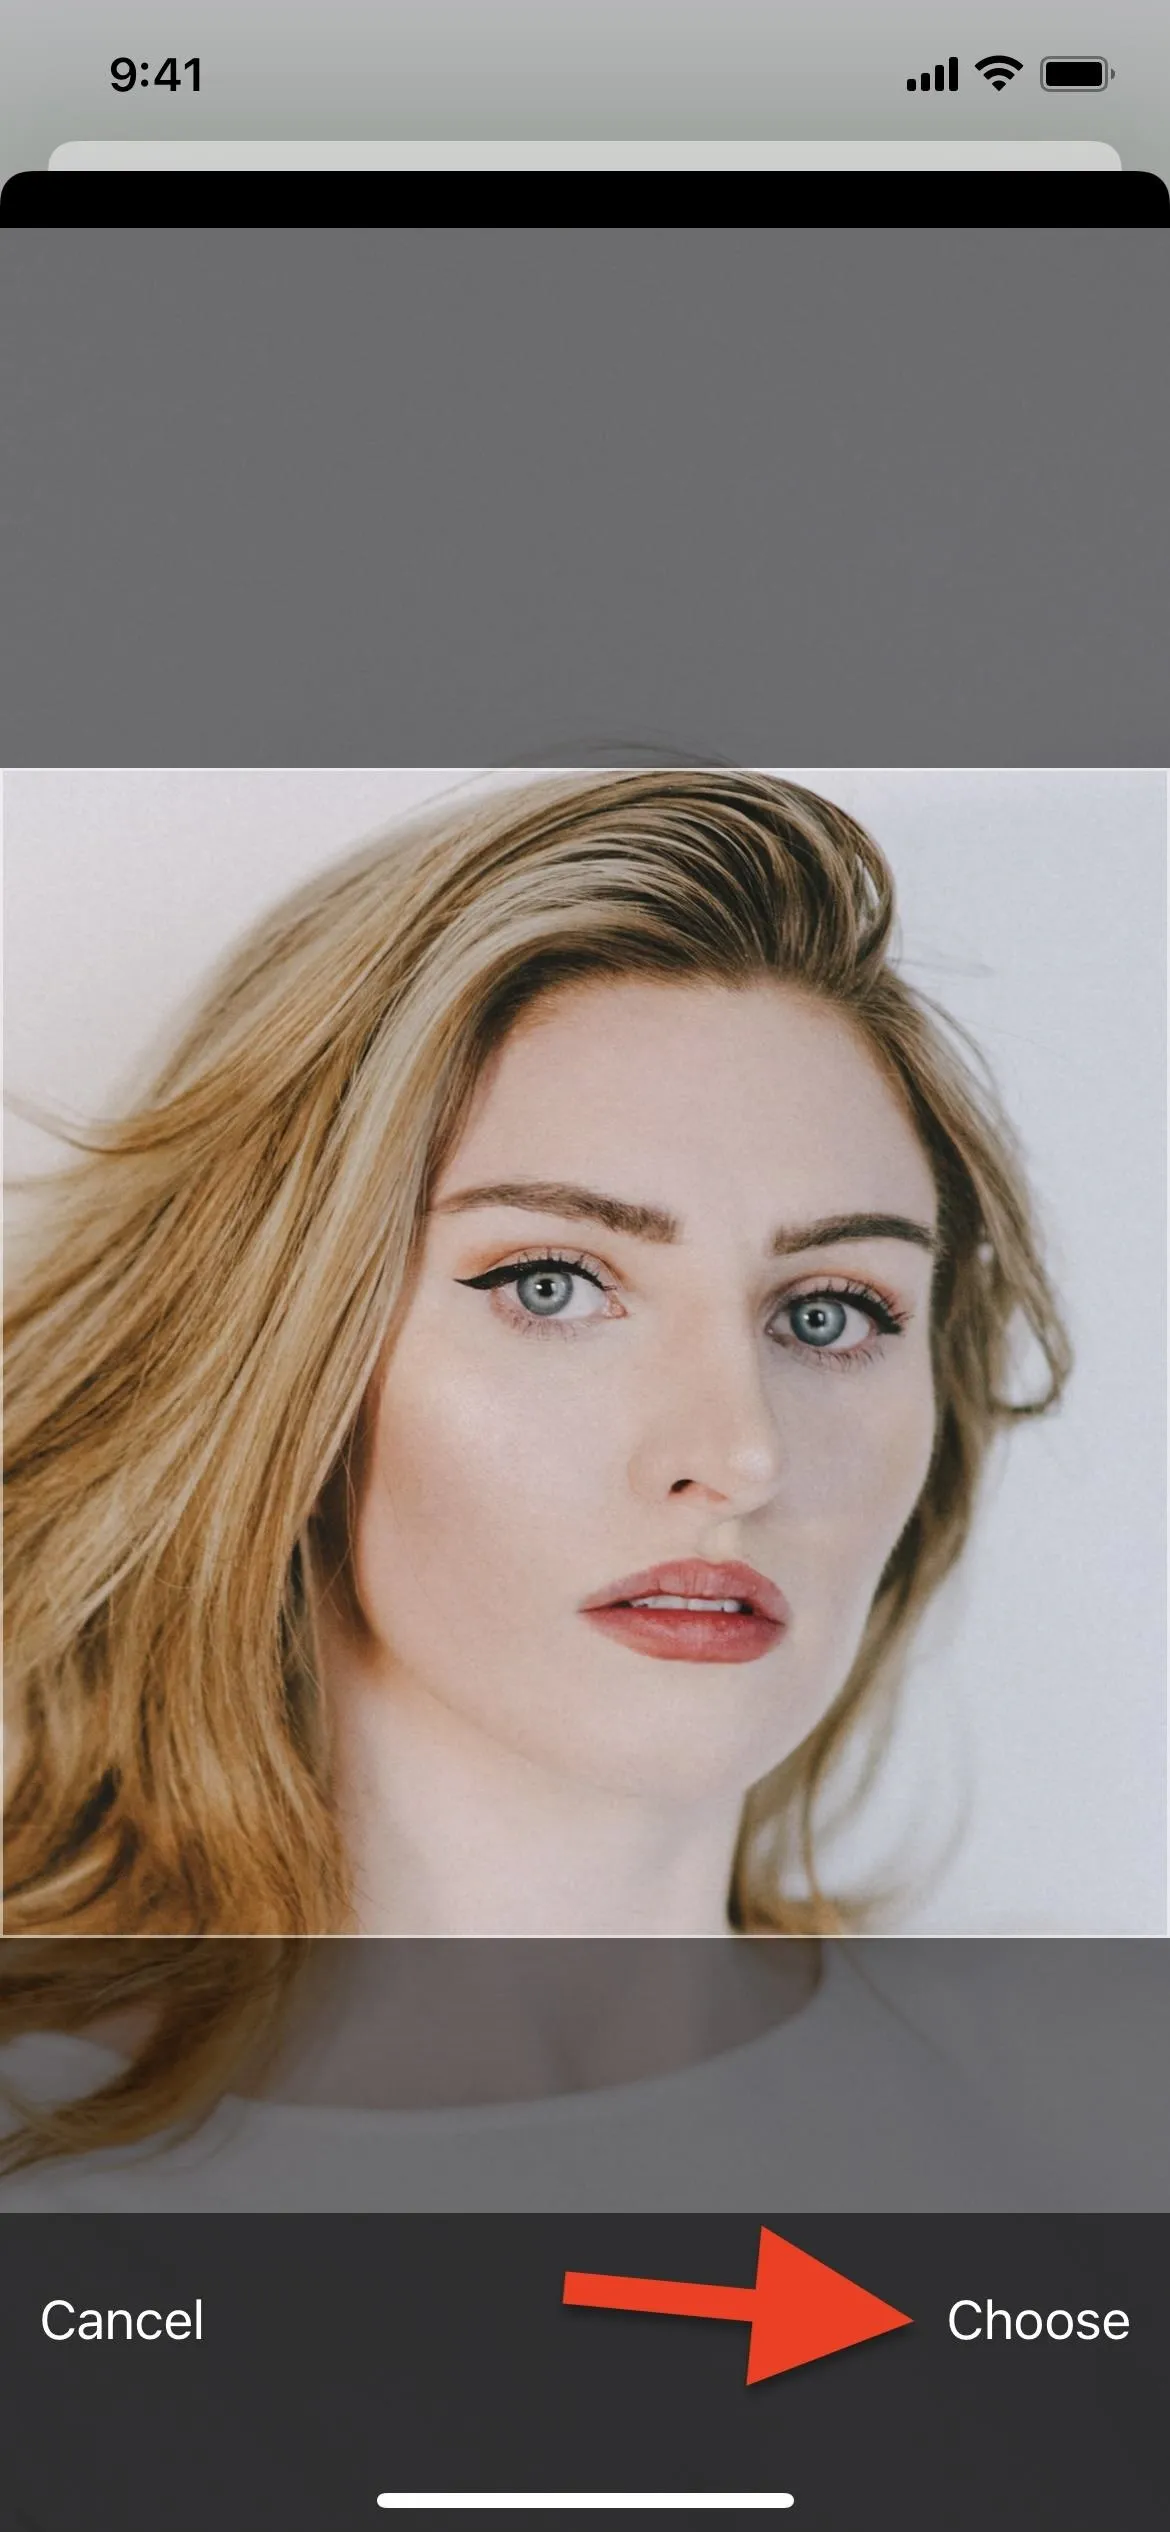


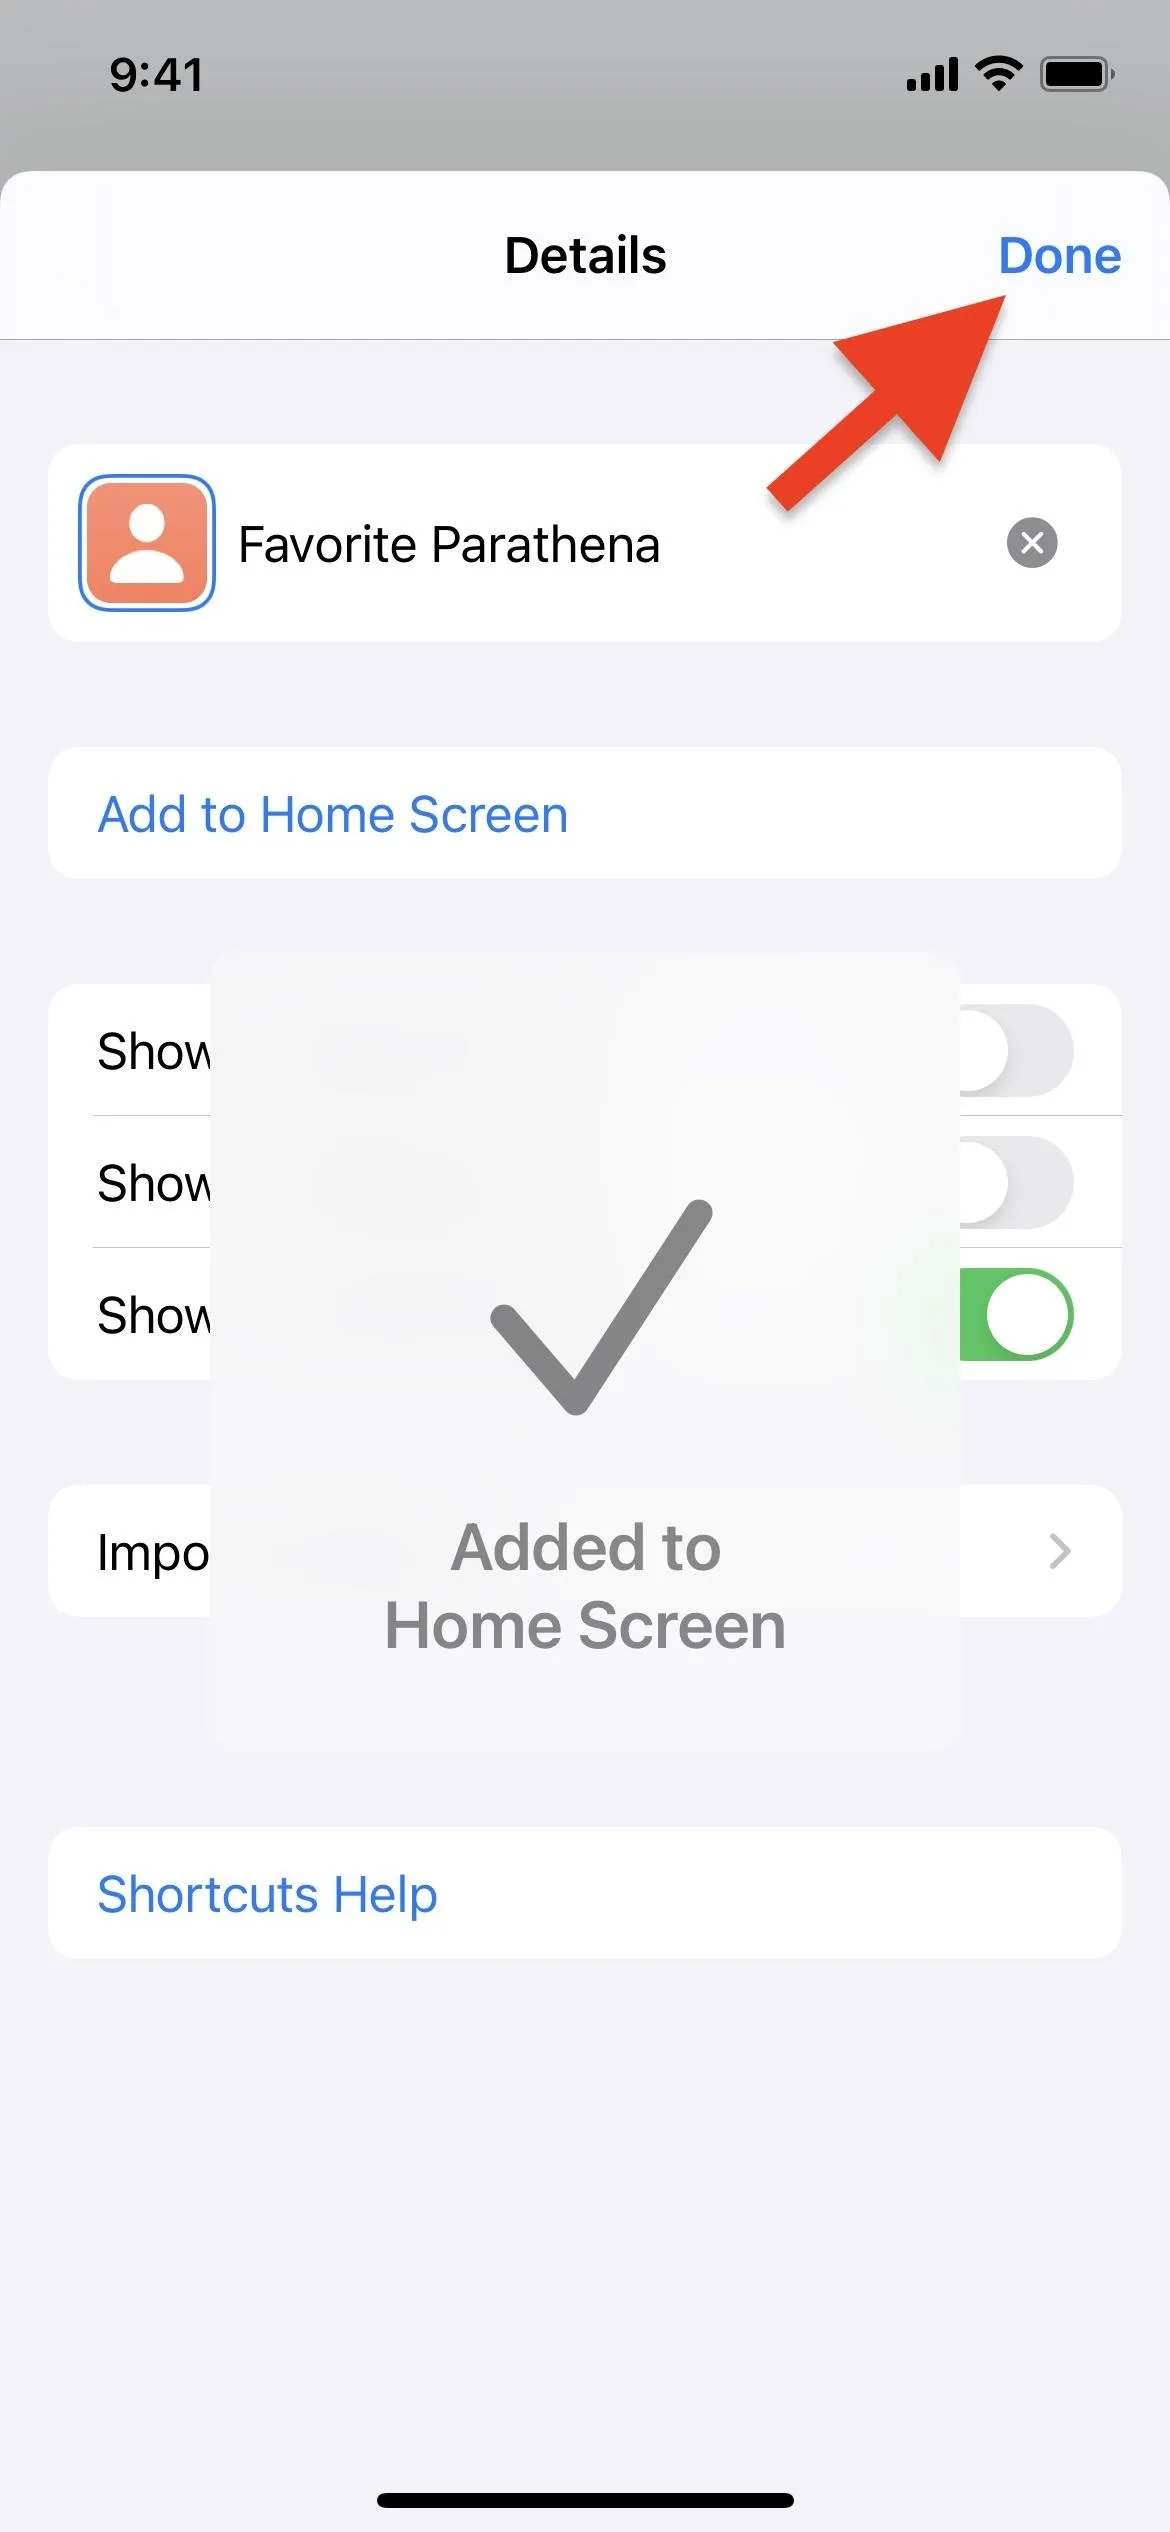
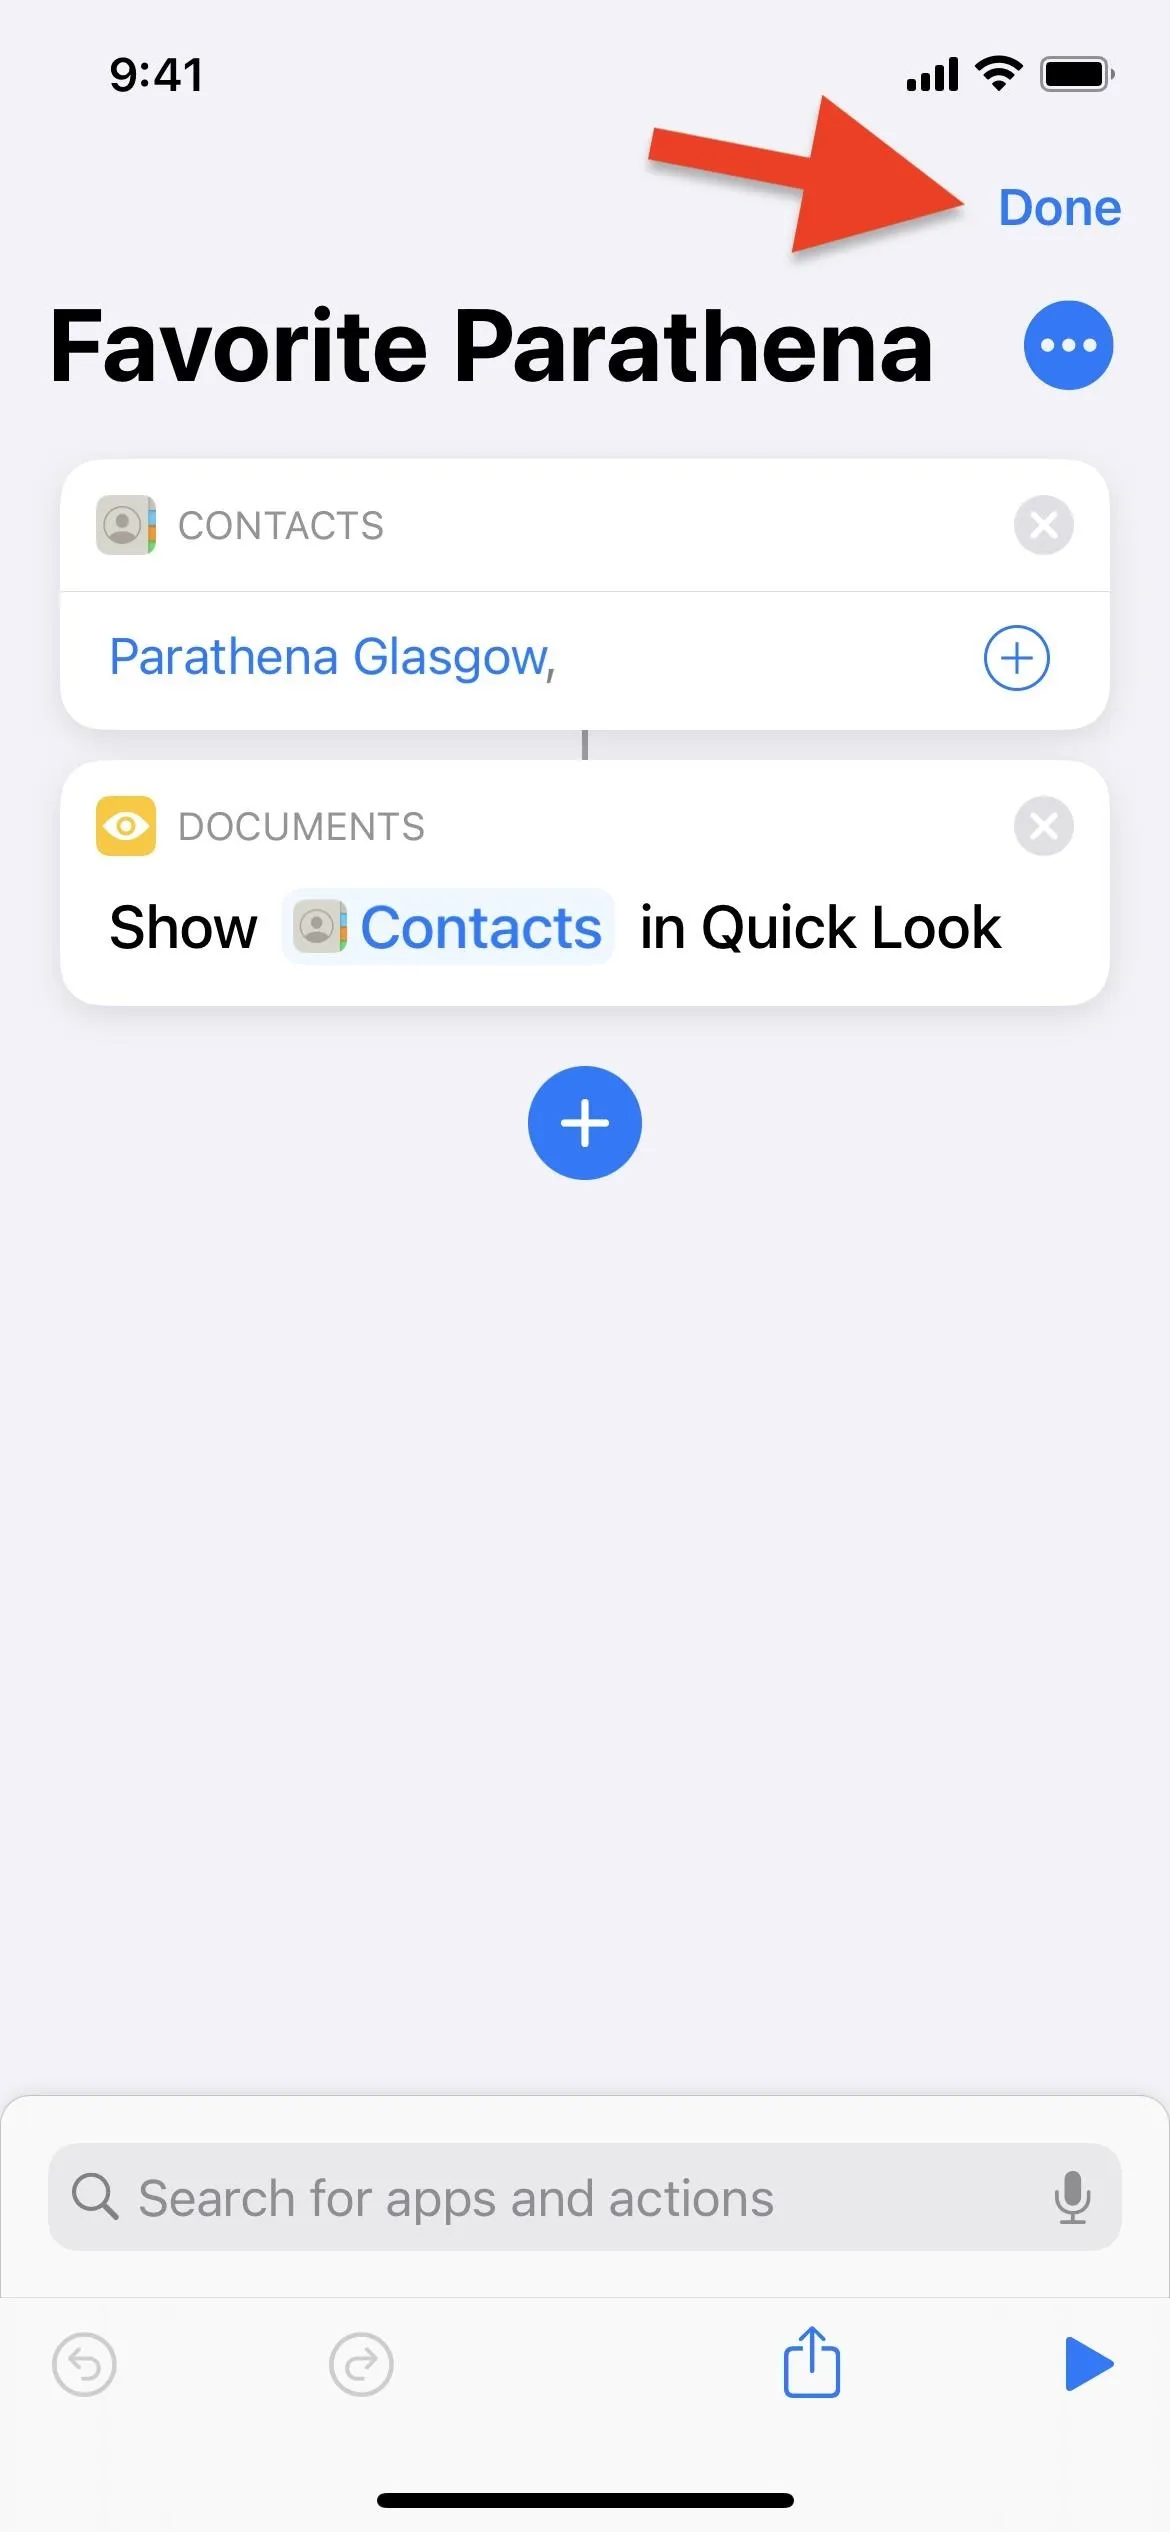
When done, tap "Add;" you'll get an on-screen notice that the icon was added to your home screen. Tap "Done" to close the preview, then "Done" to exit the editor.


Test Out Your New Home Screen Contact
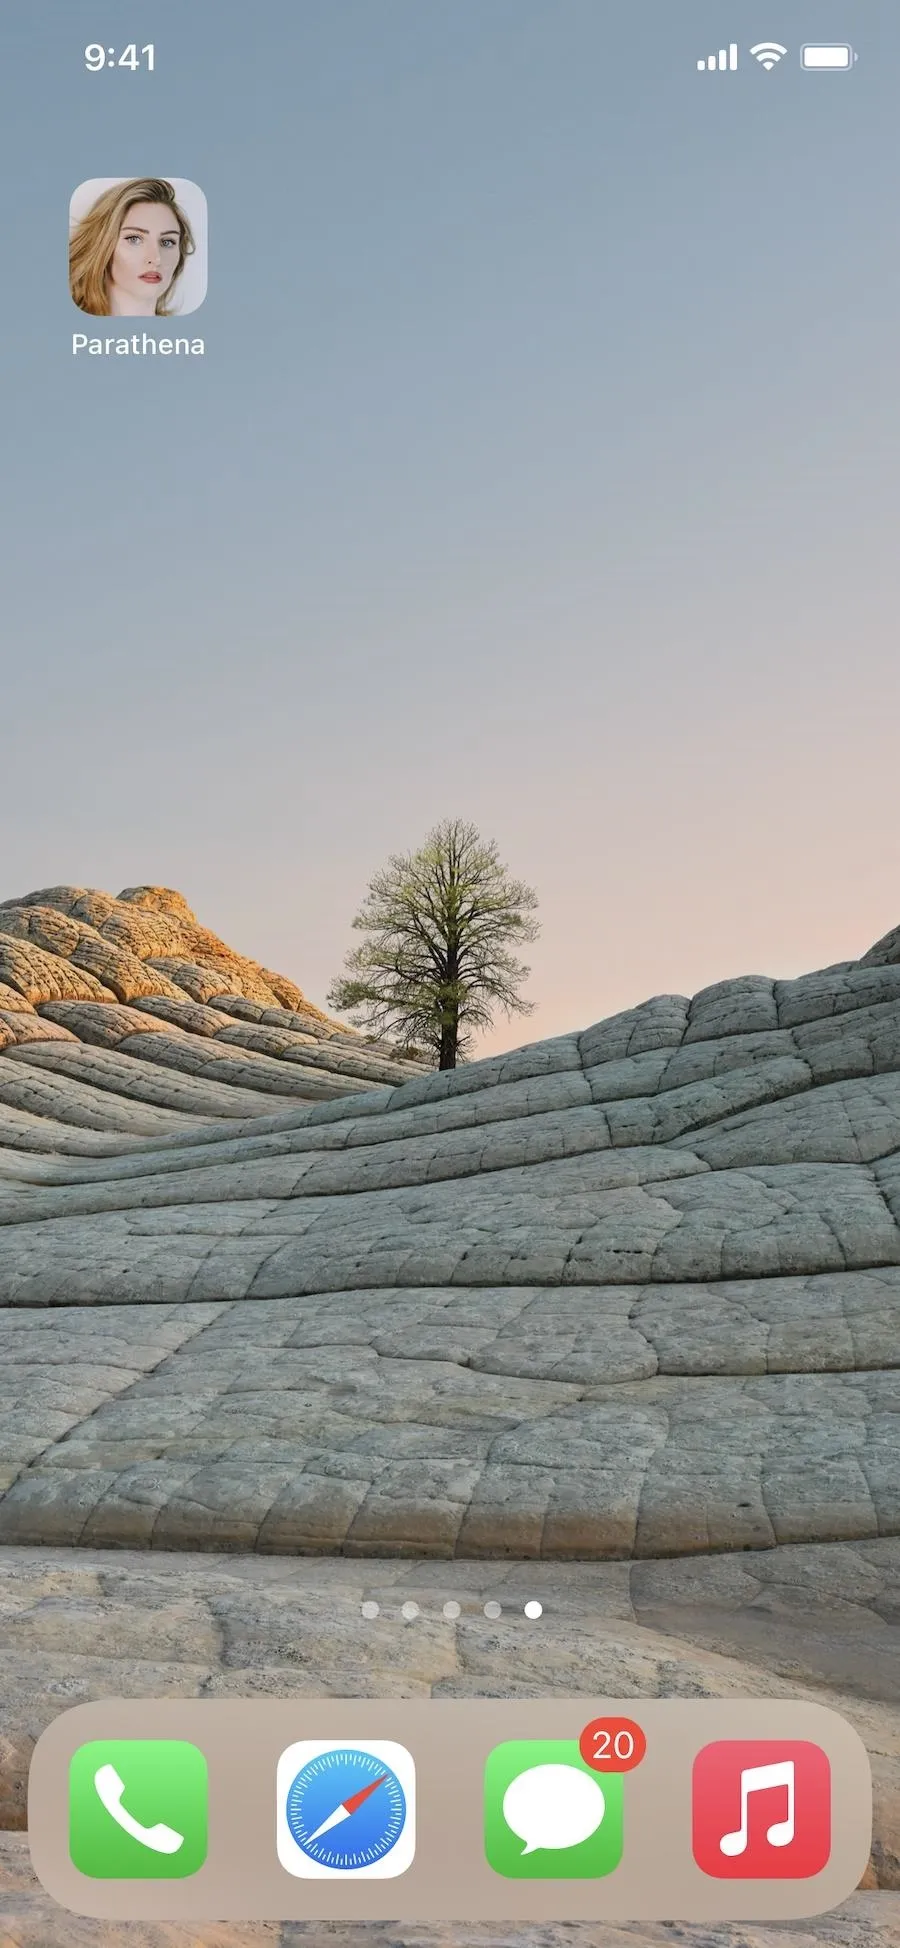
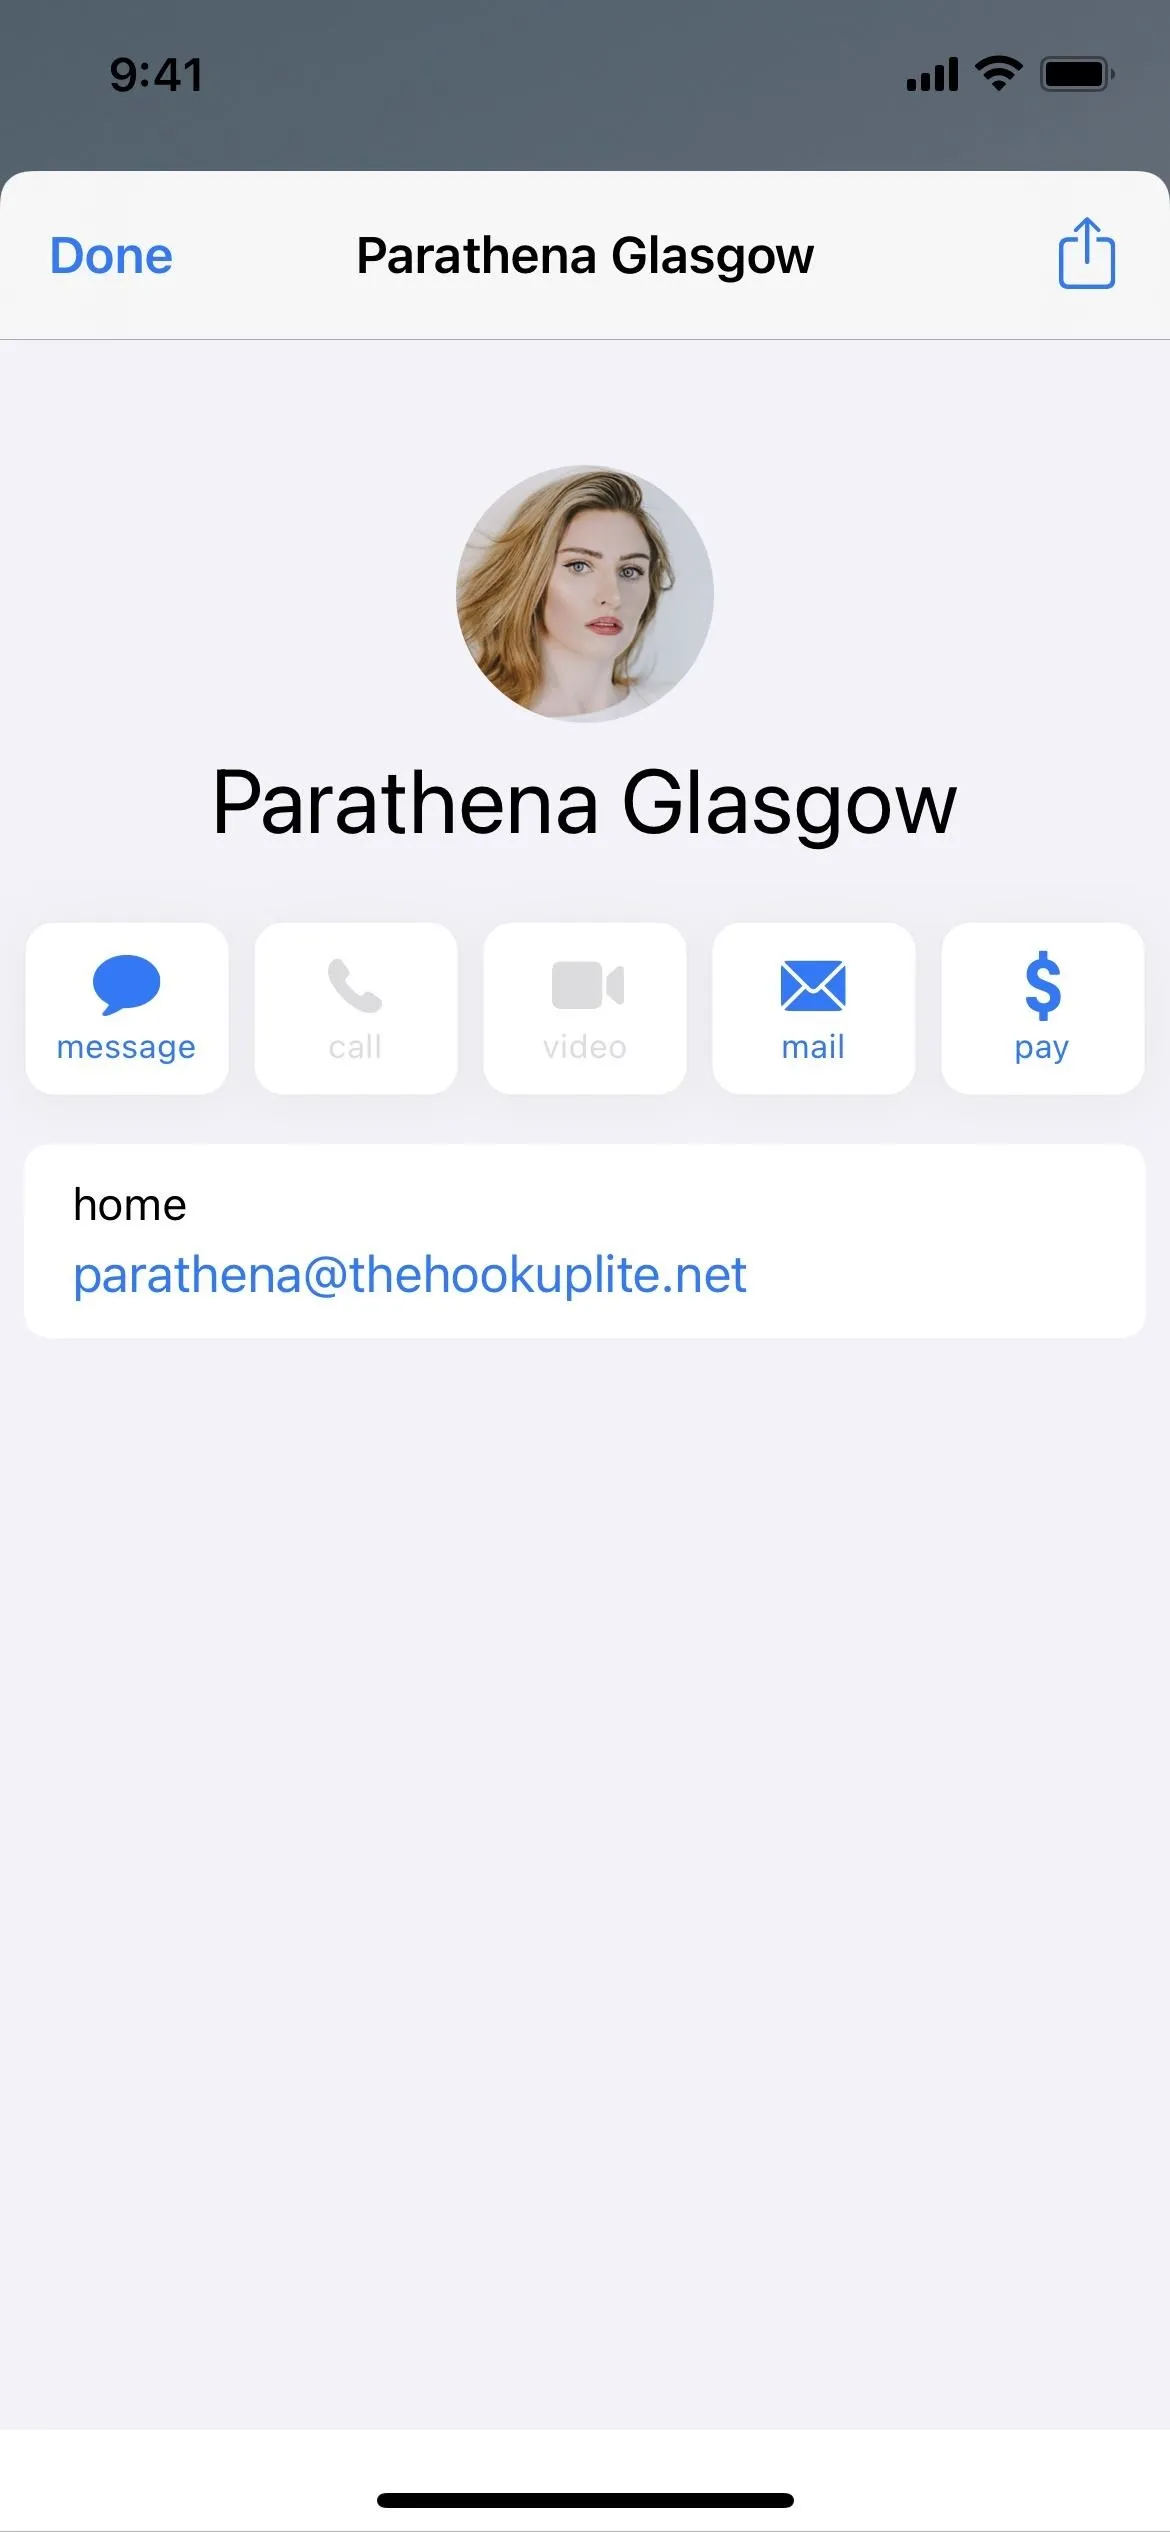
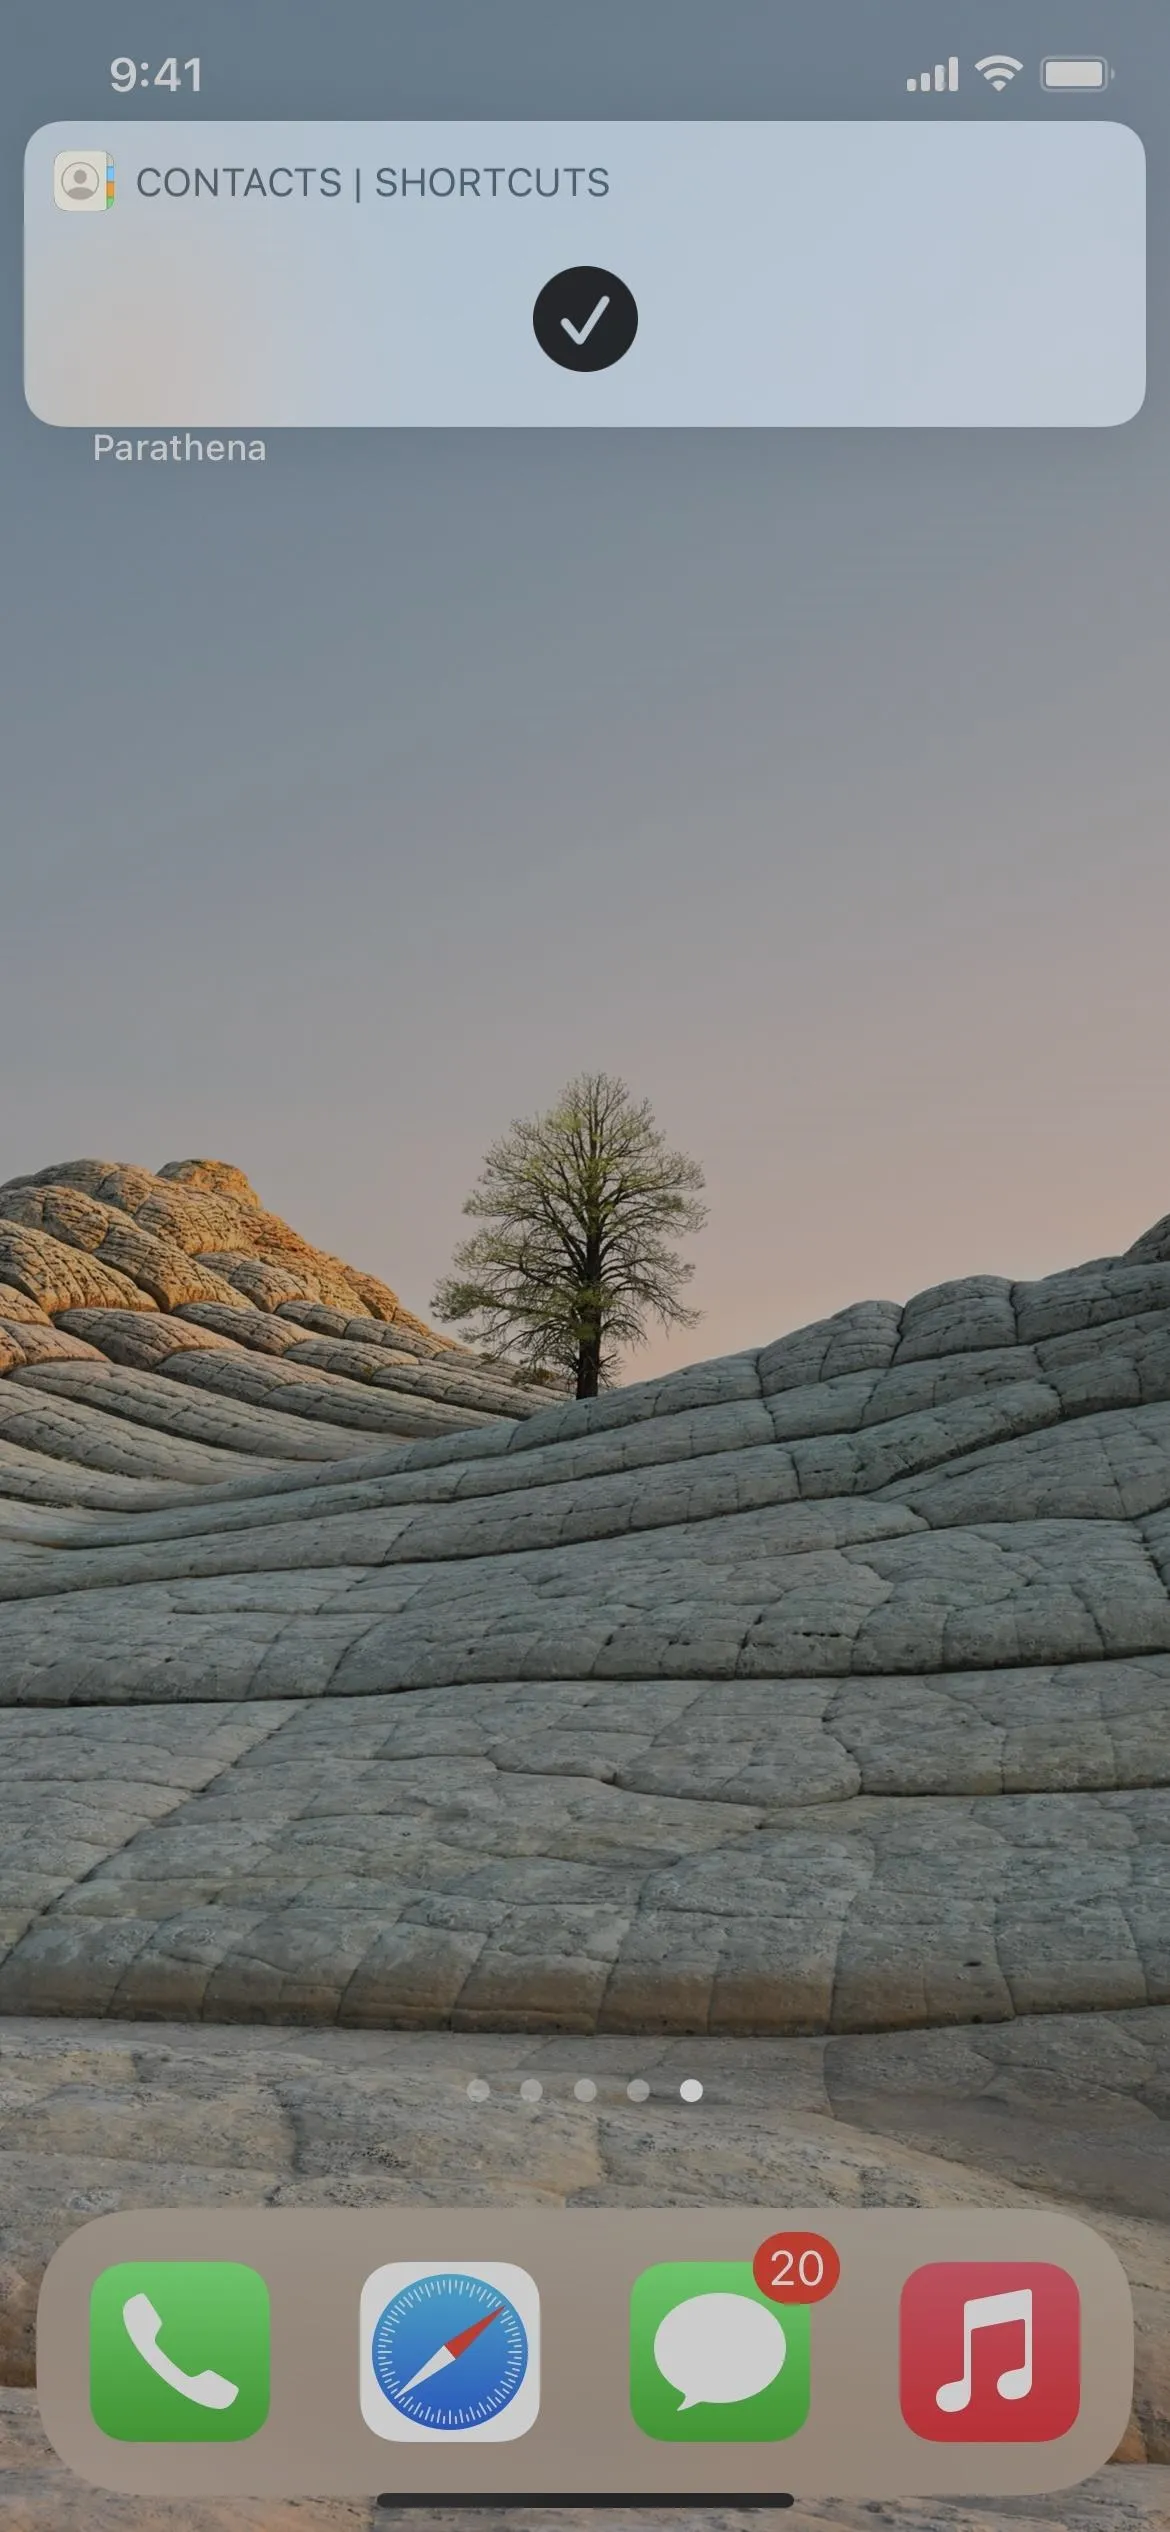
Your contact's icon will now be on your home screen, and you can move it to any home screen page you want. Additionally, the icon can be found in your App Library, even though it's just a bookmark. When you tap the contact's icon, their contact page will appear, and you can call, email, message, FaceTime, or send them money as usual. Shortcuts will give a quick banner alert when you leave the contact's info to let you know it run successfully.


Further Customization Options Available
You have the basics down for creating contact bookmarks on your home screen, but there are some other options you can take advantage of for quicker access, better looks, more contacts, cleaner organization, etc.
Move to the Dock for Even Faster Access
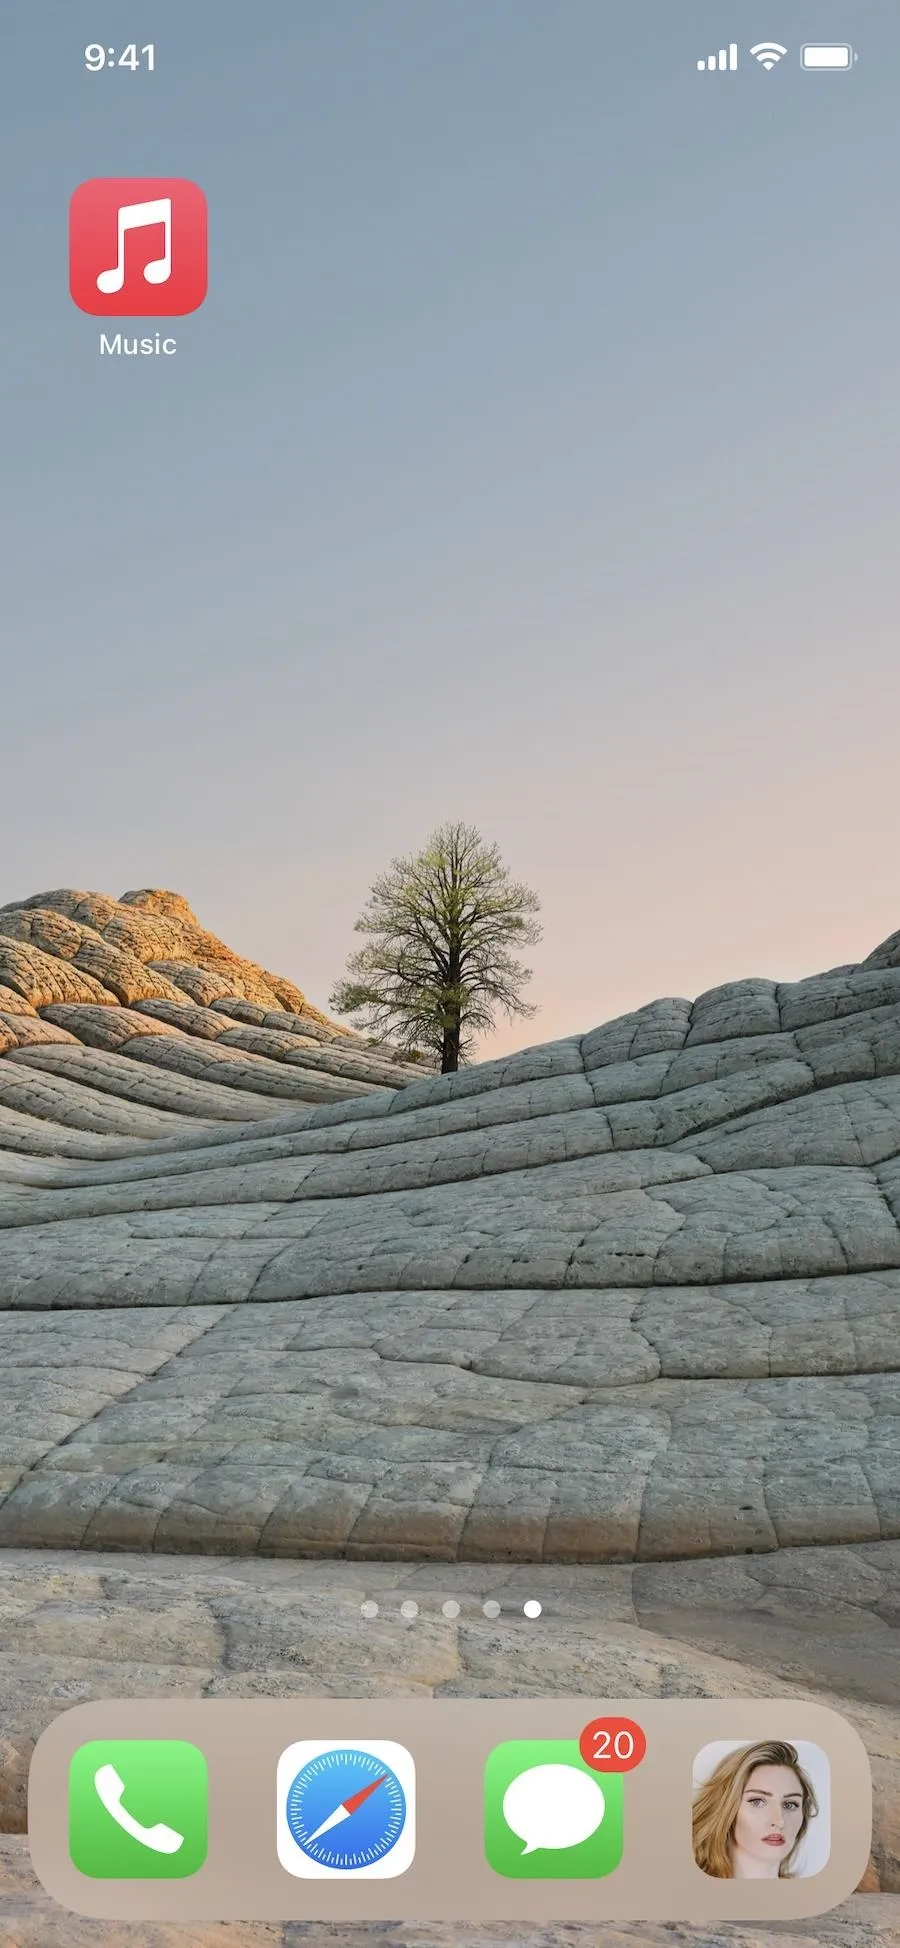
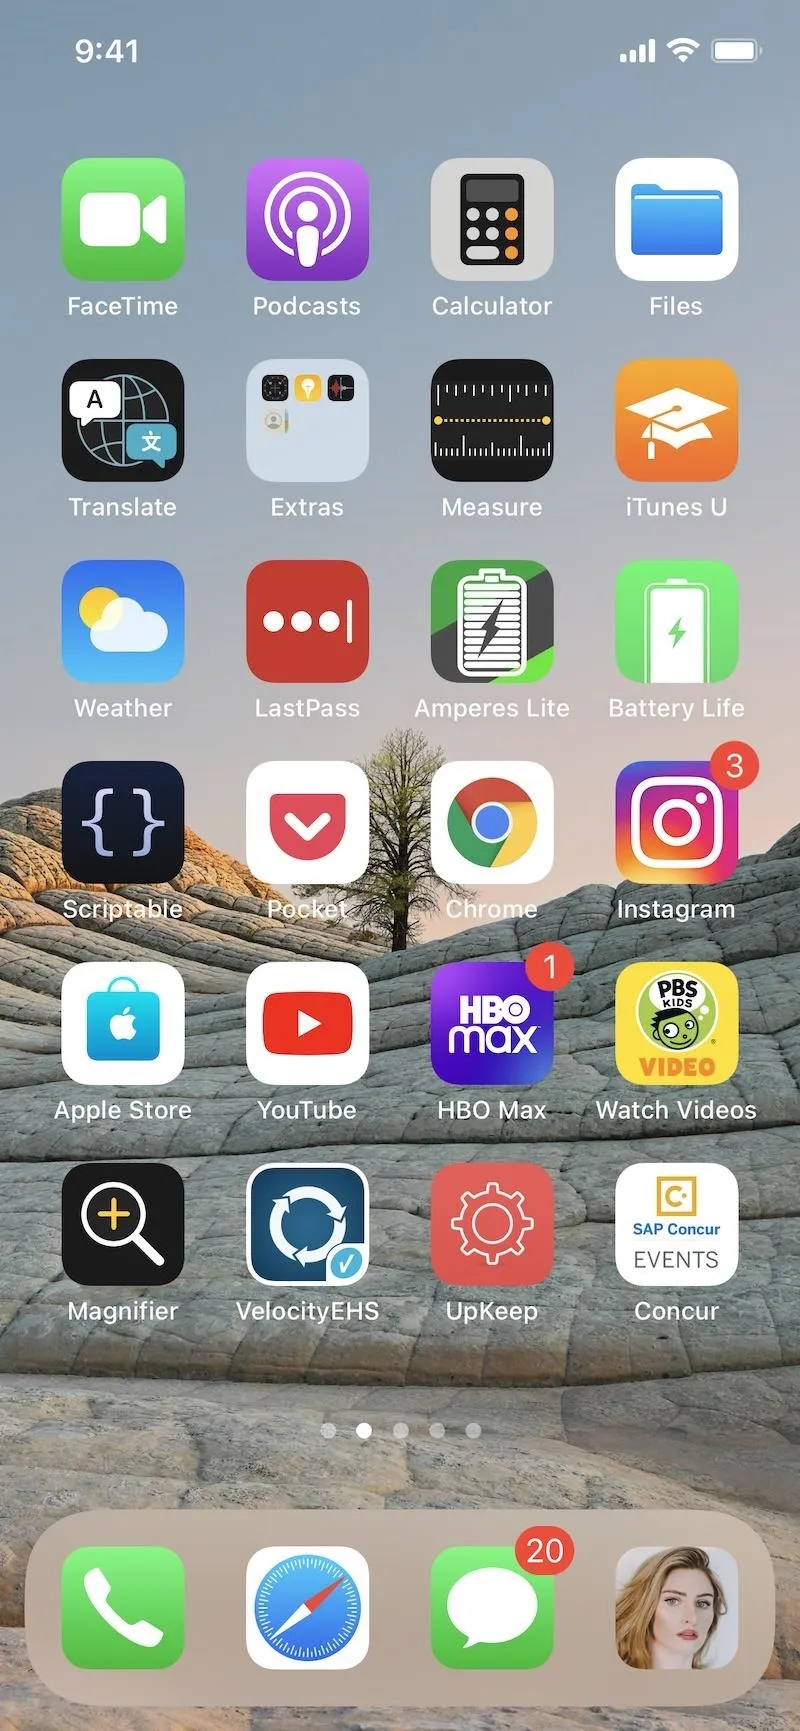
If it's somebody you call, message, or email every day, you could move their icon to your dock, which appears on all your home screen pages.


Add More People to Each Bookmark
Back in Step 1, instead of just adding one contact to the "Contacts" action box, you can add however many you want. So if you want to make a shortcut on your home screen for a certain group of contacts, just add them all in.
When you tap the icon on your home screen, you'll see the contact page for the first person added. However, there's a list icon at the bottom you can tap, which brings up the list of all the contacts in the bookmark. You can then select the contact you need from the list.
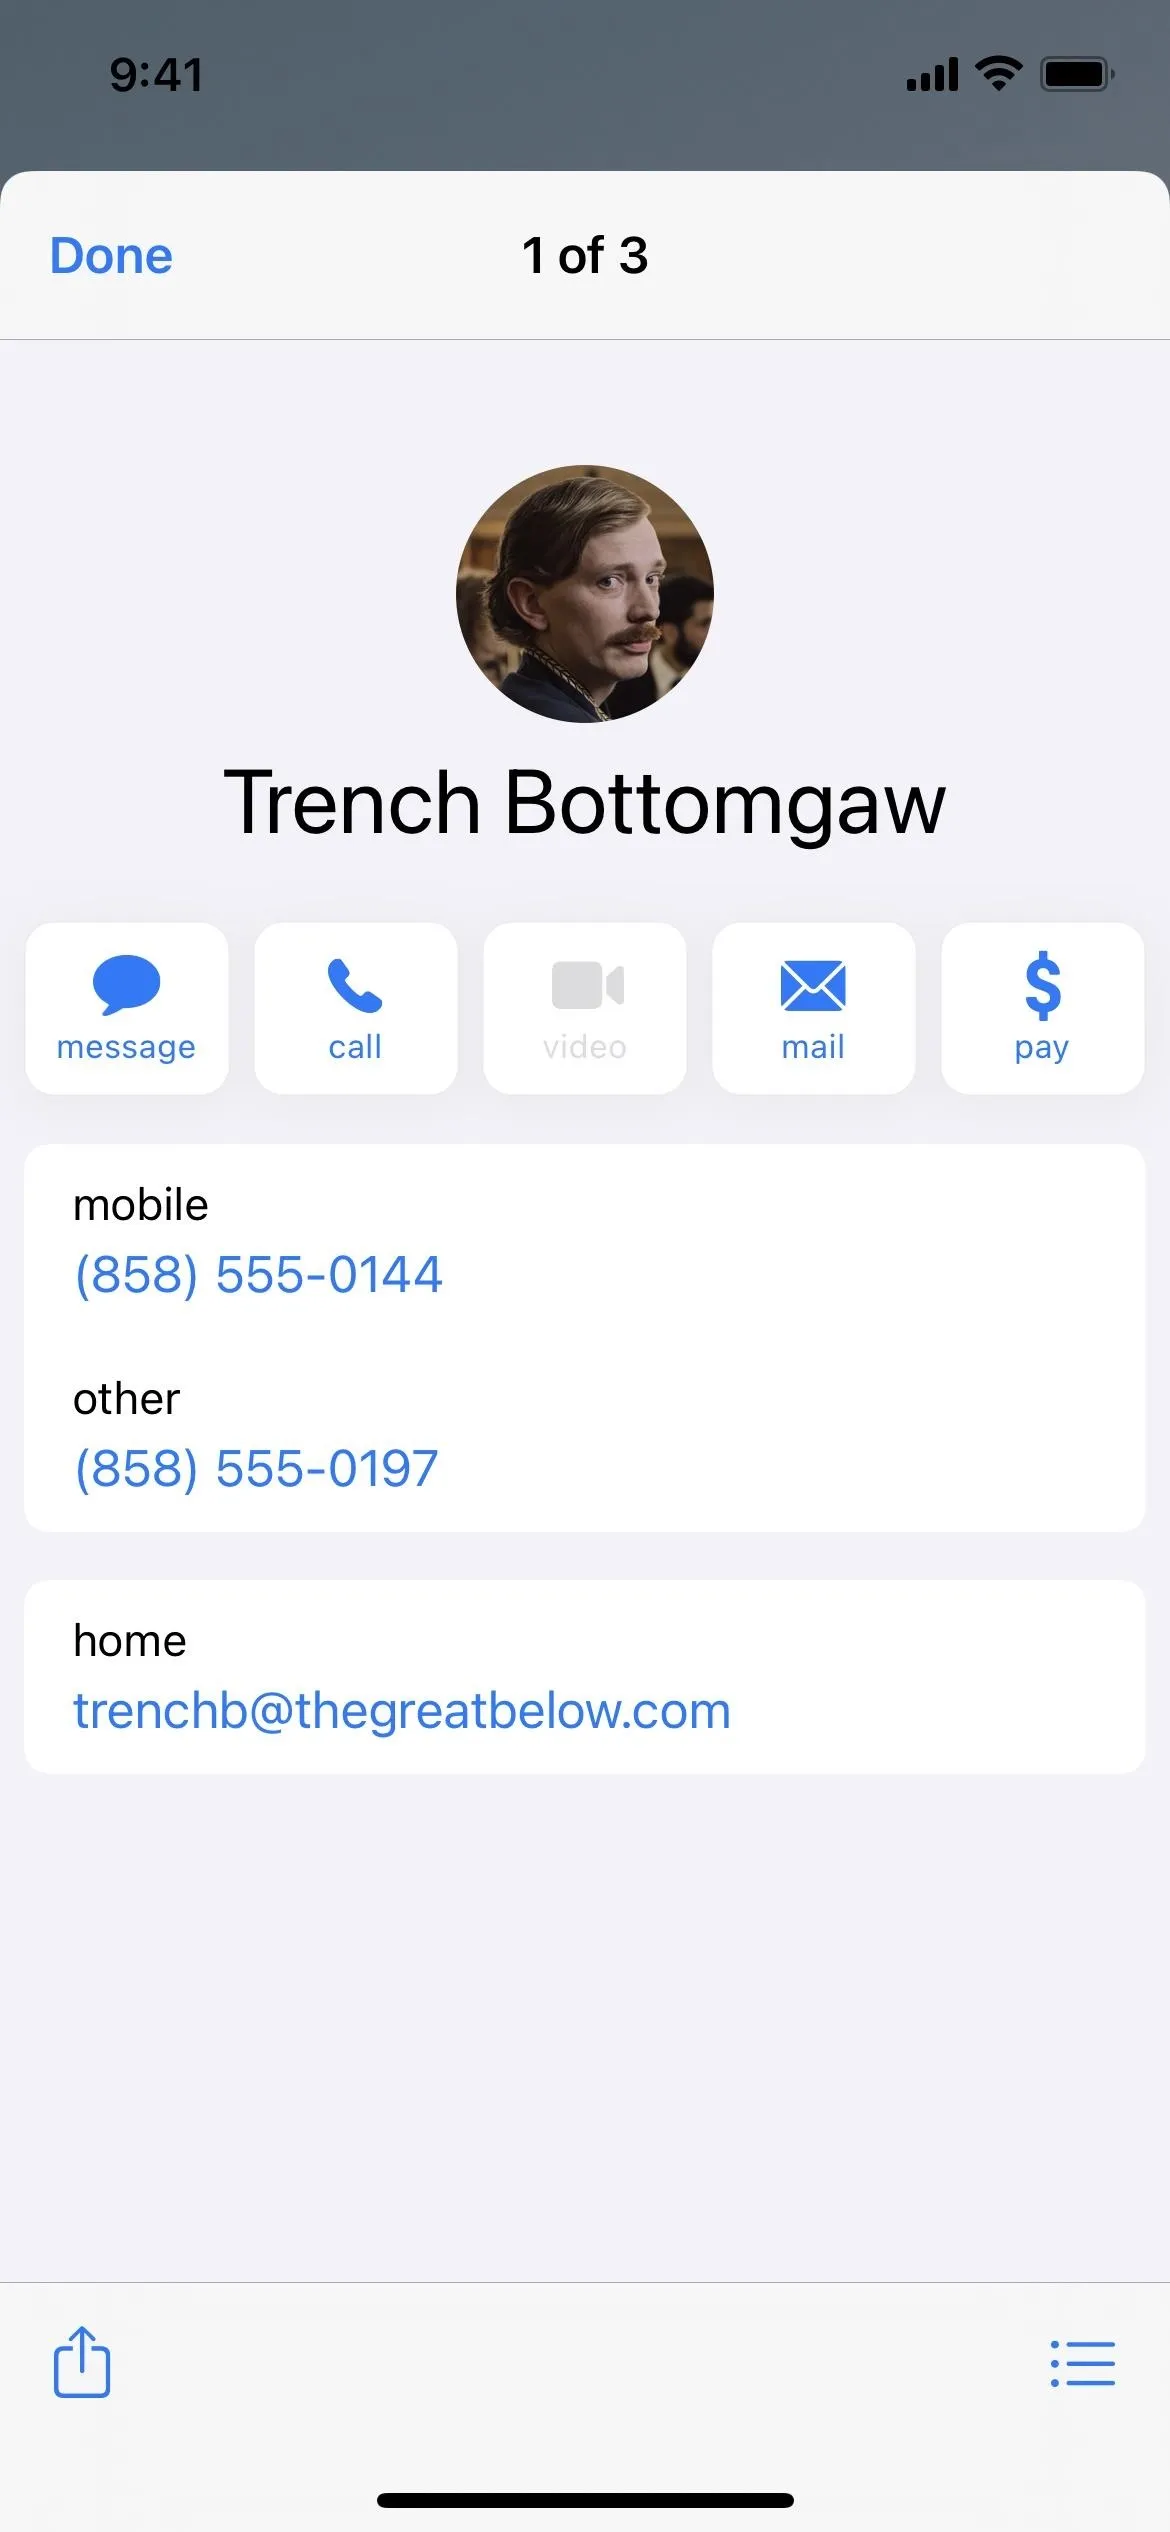
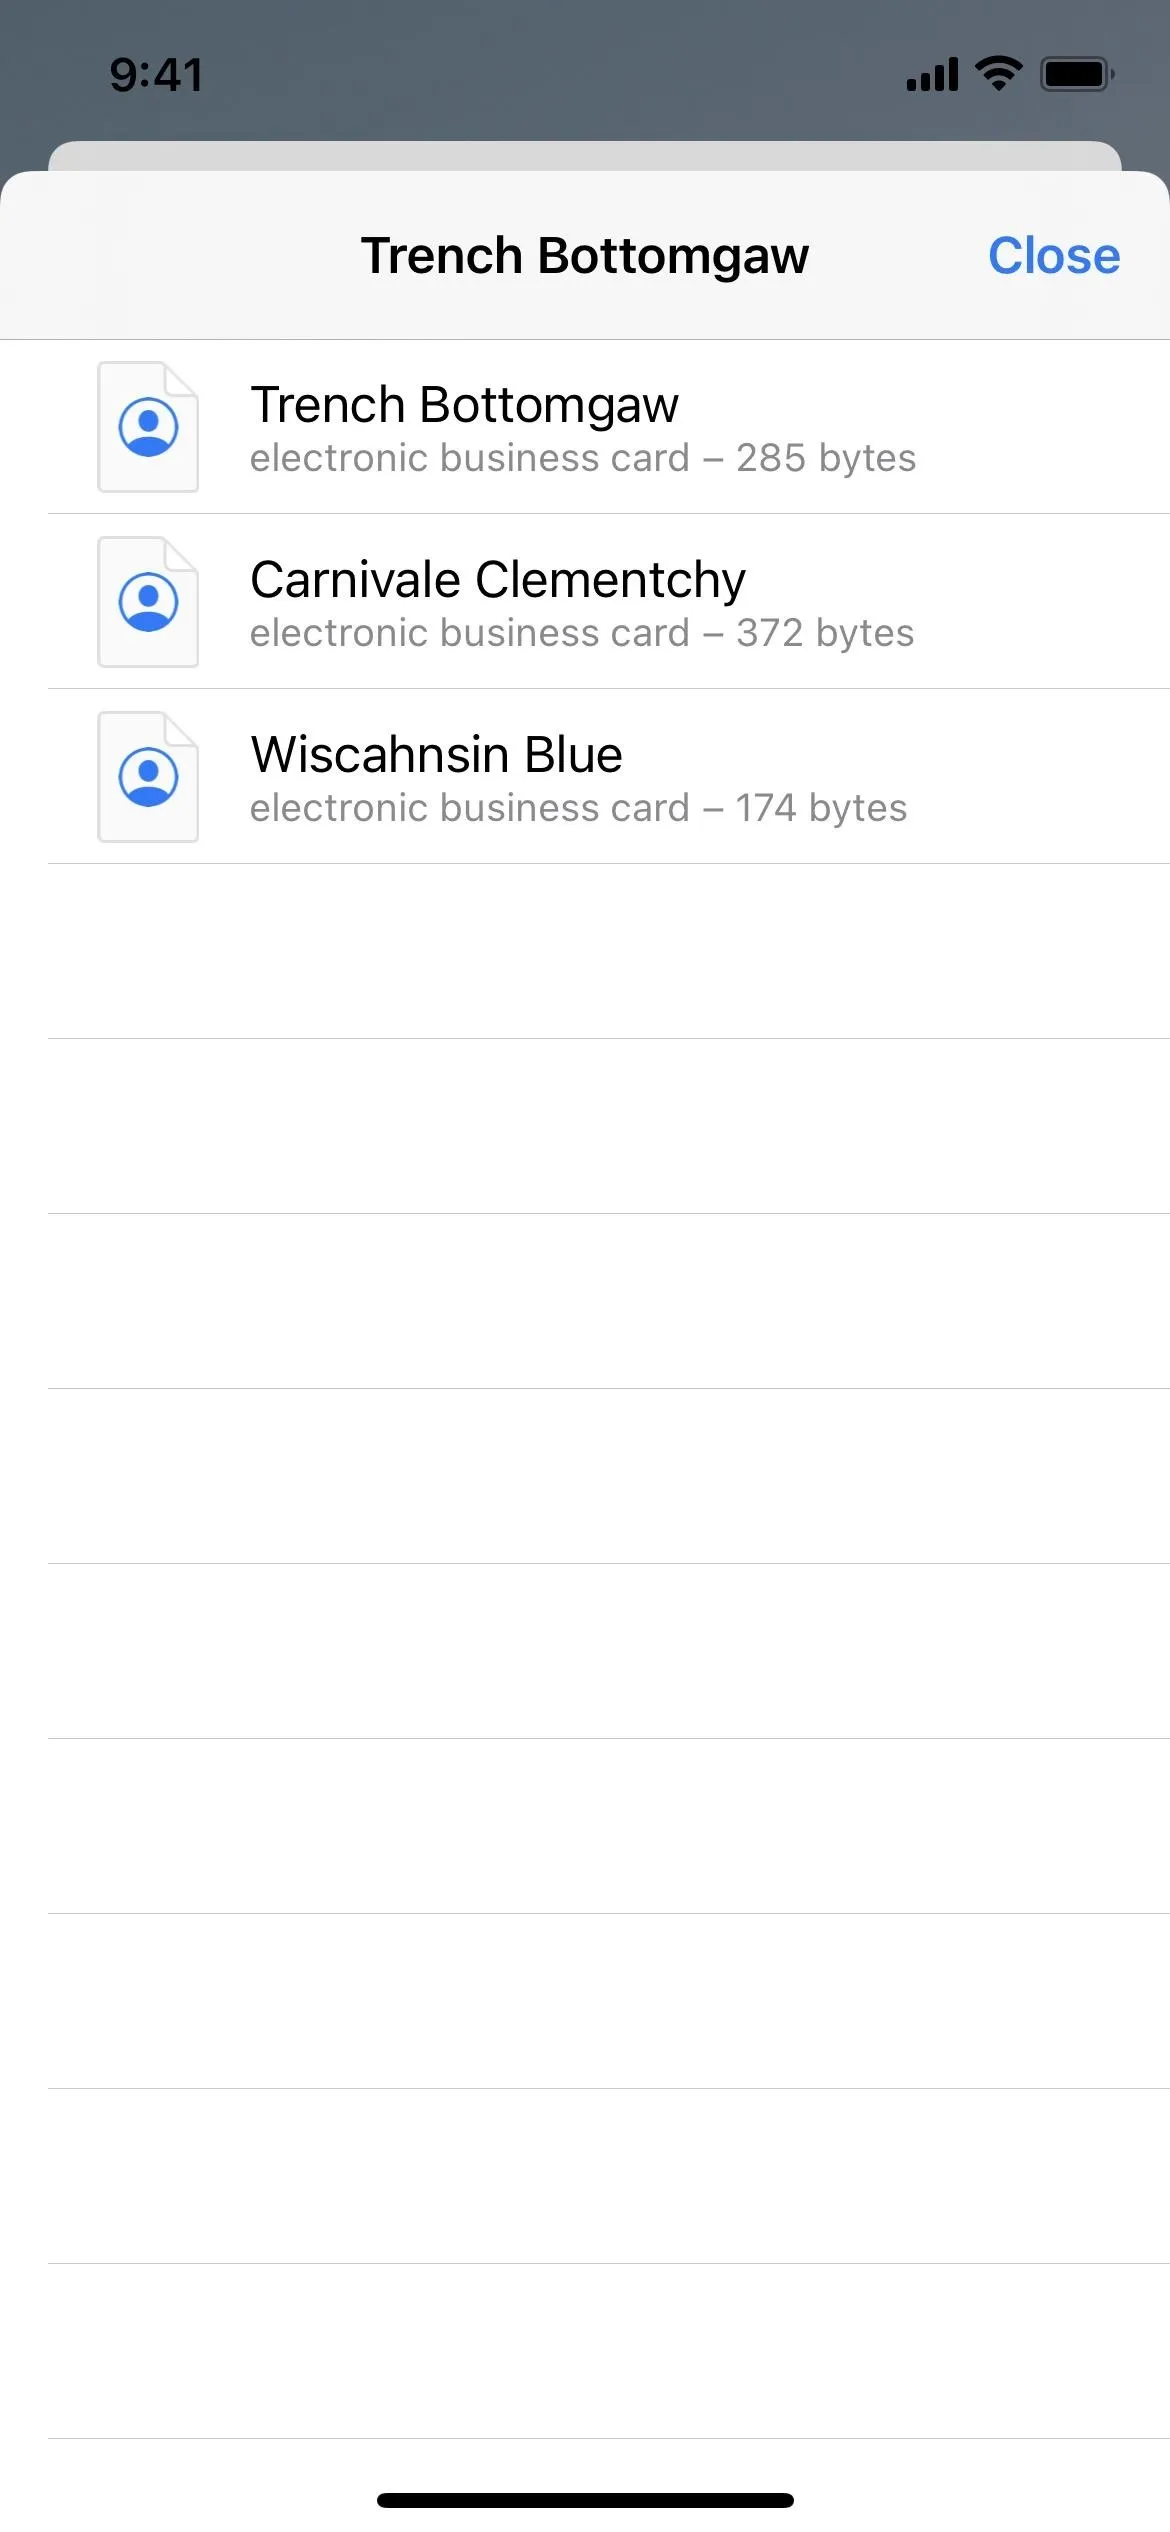
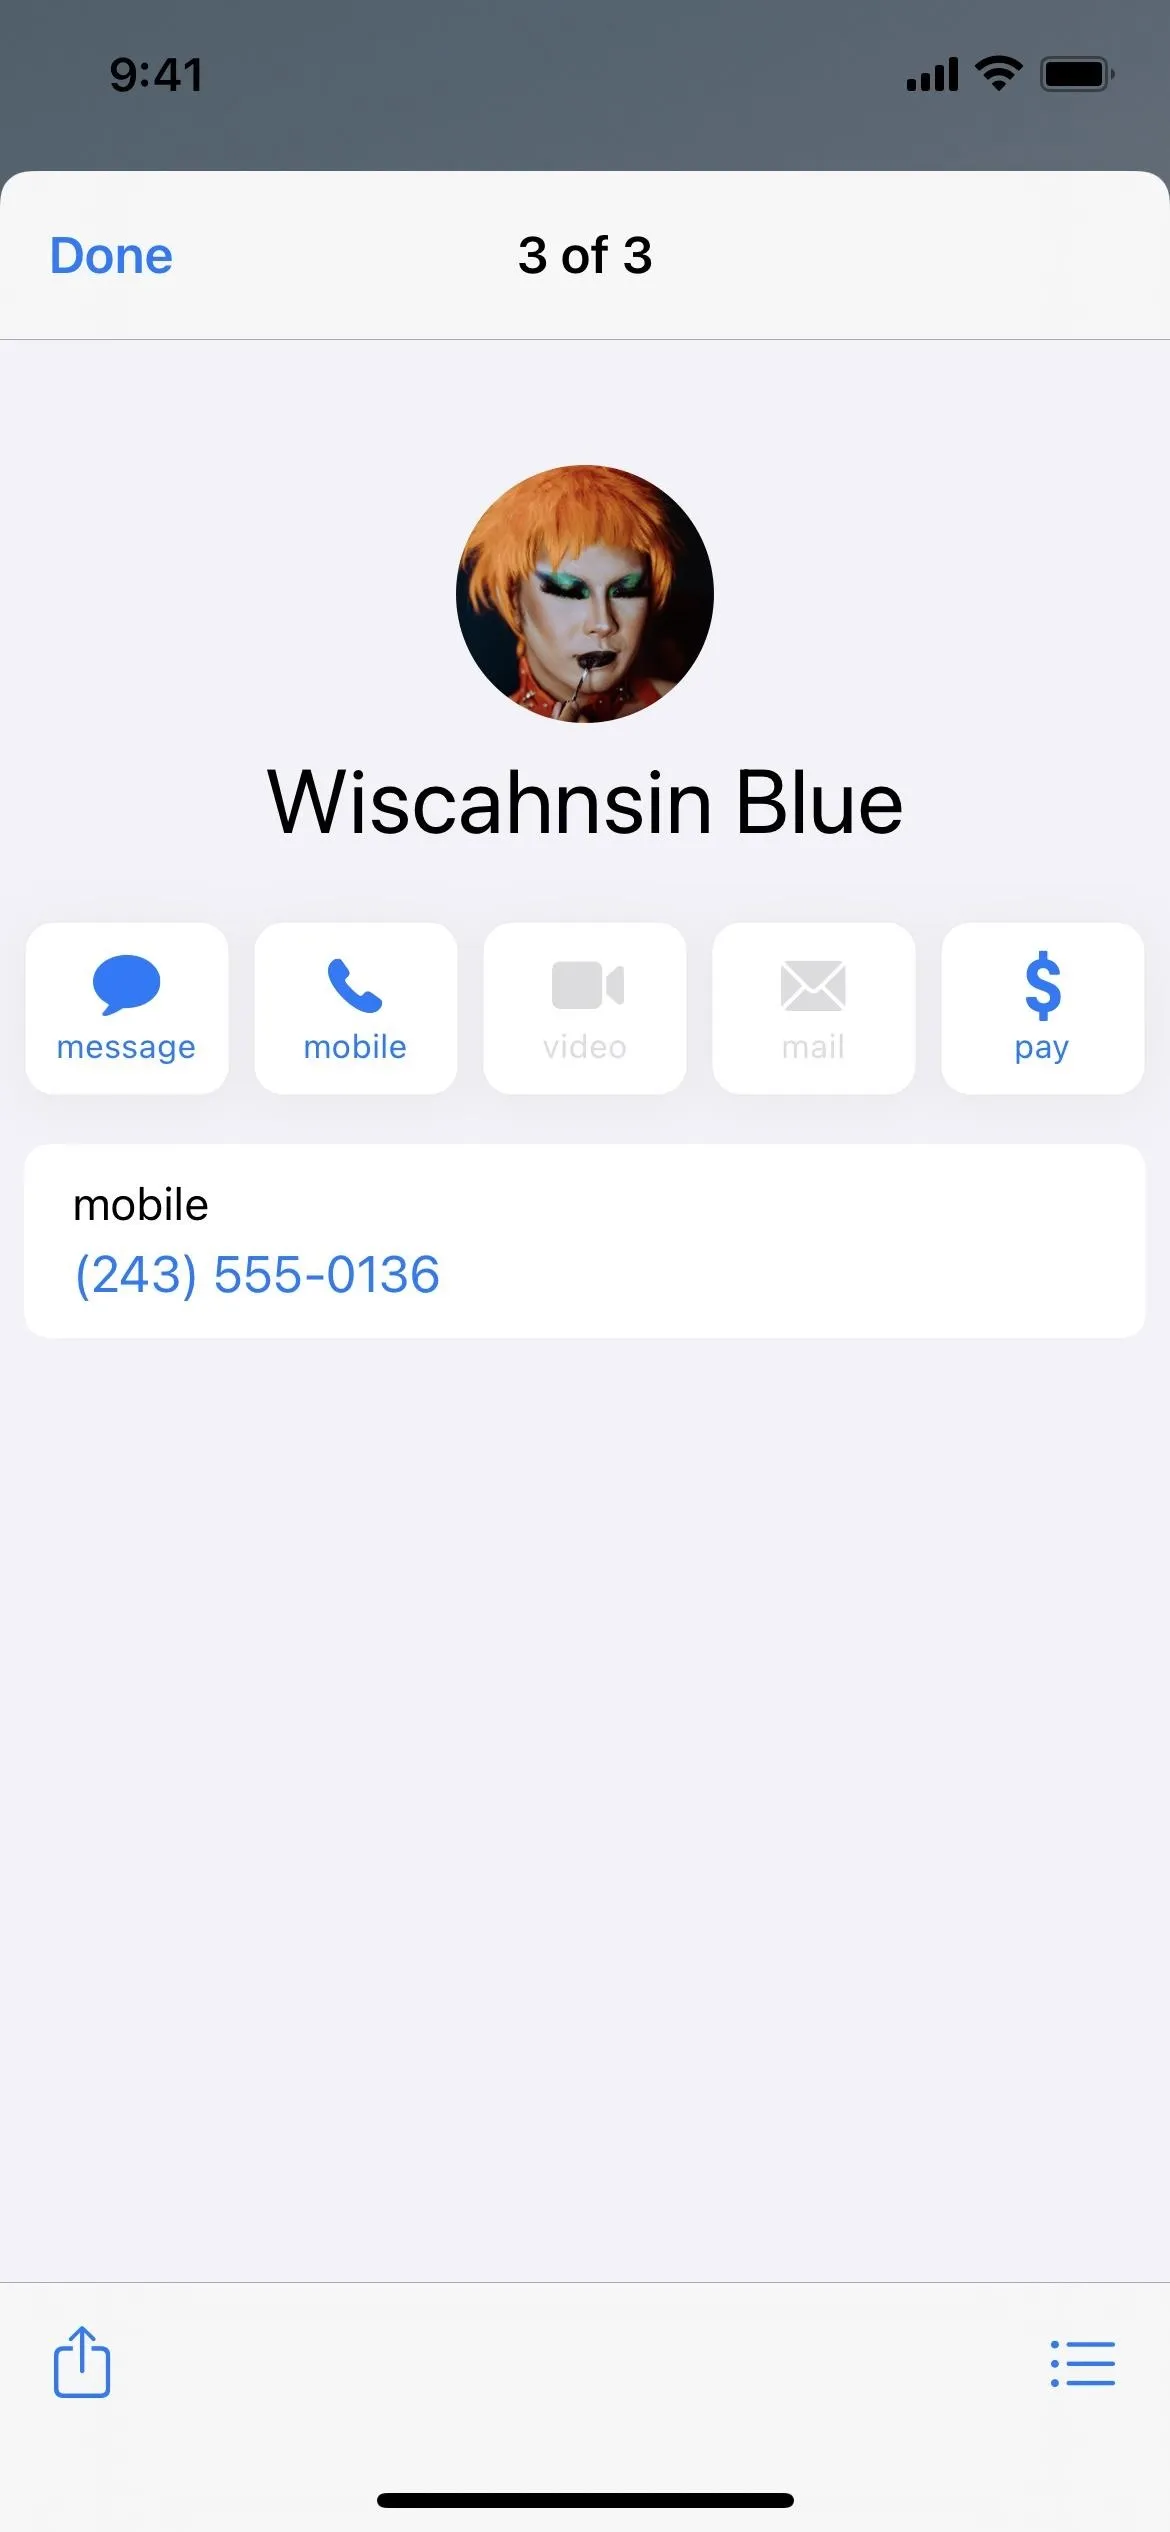


Add Your Contact Icons to a Folder
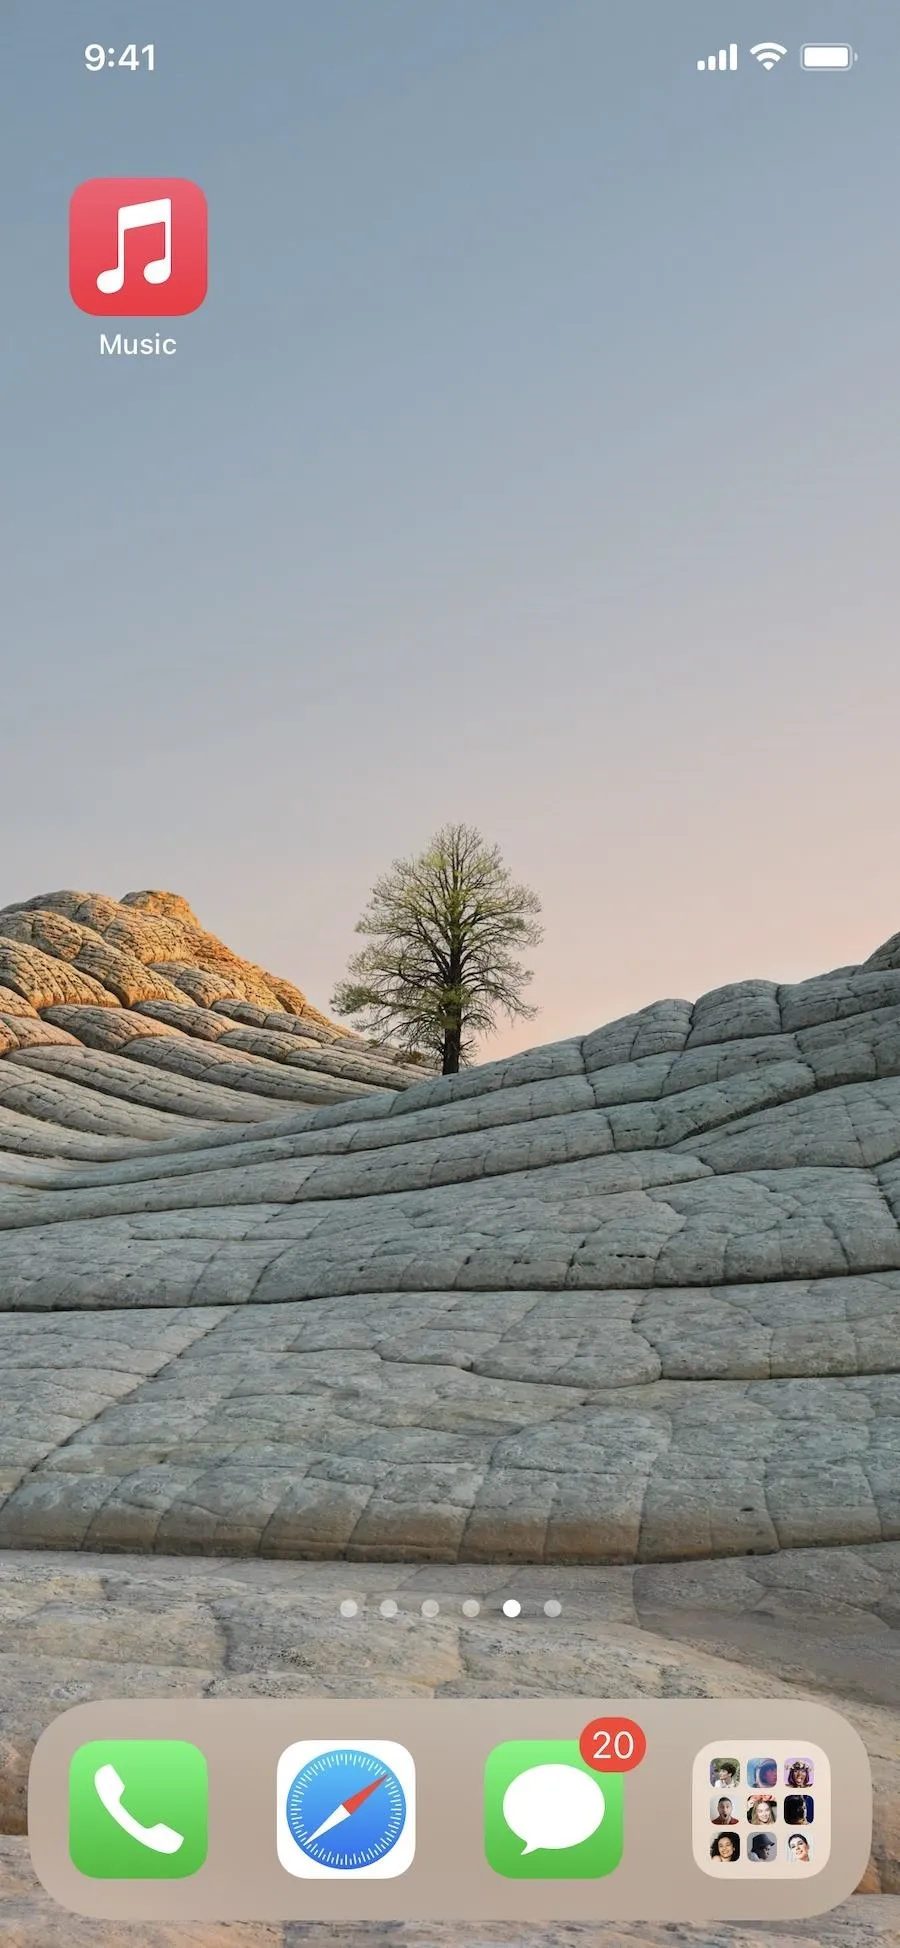
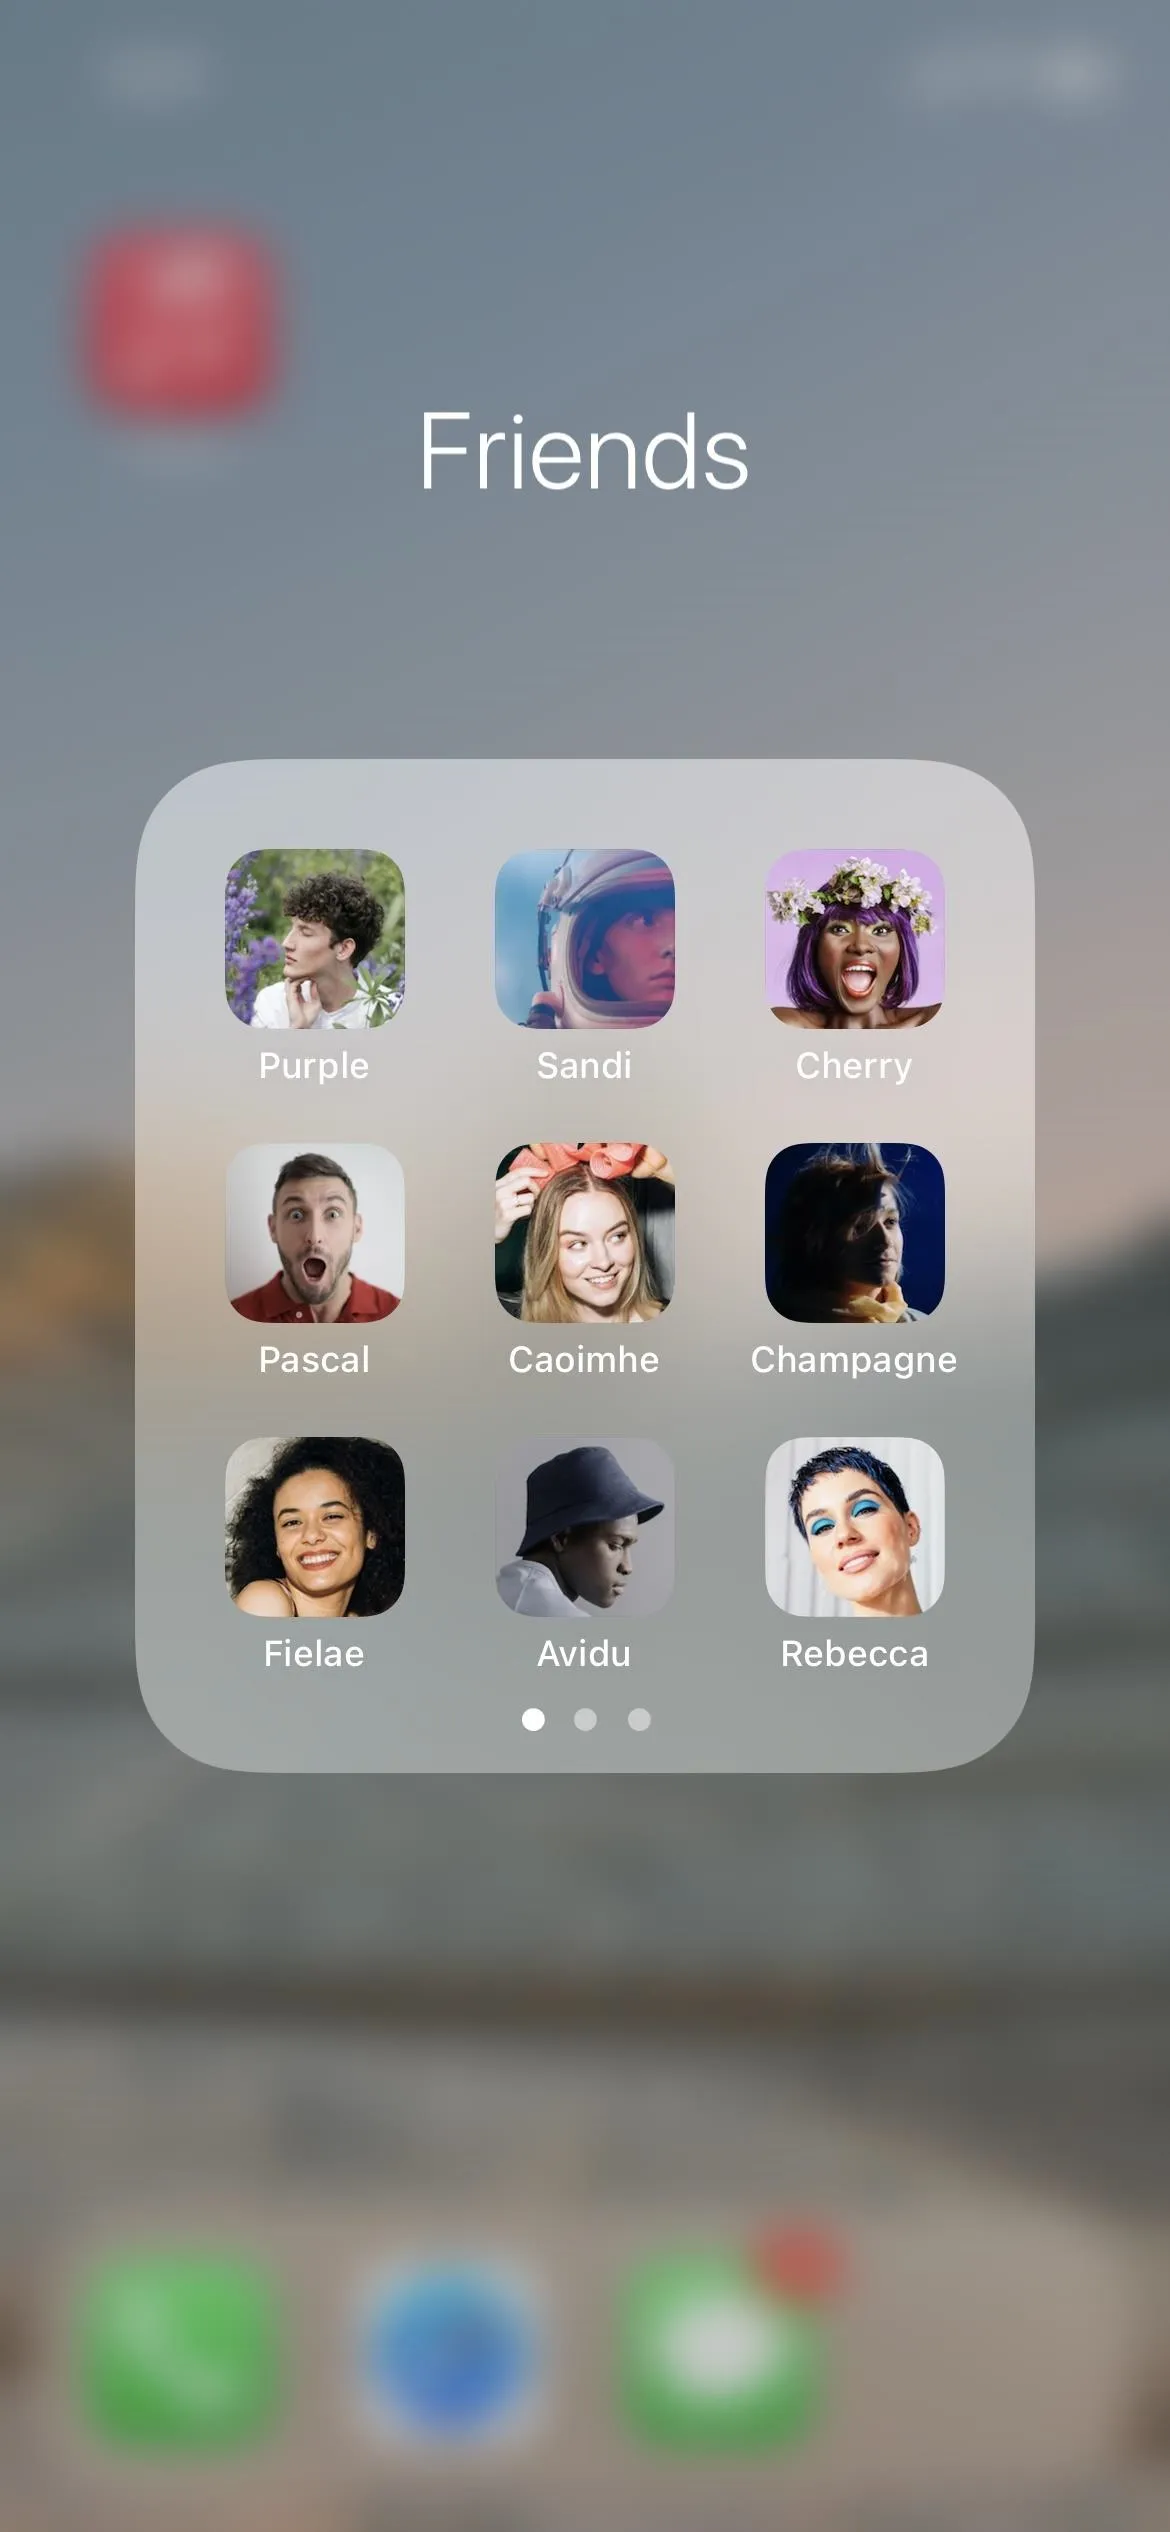
If you don't like the group shortcut above or having contact icons all over your home screen, you can group contacts into a folder. If you put the contacts folder in your dock, the folder's name won't even show up, which is a nice touch.
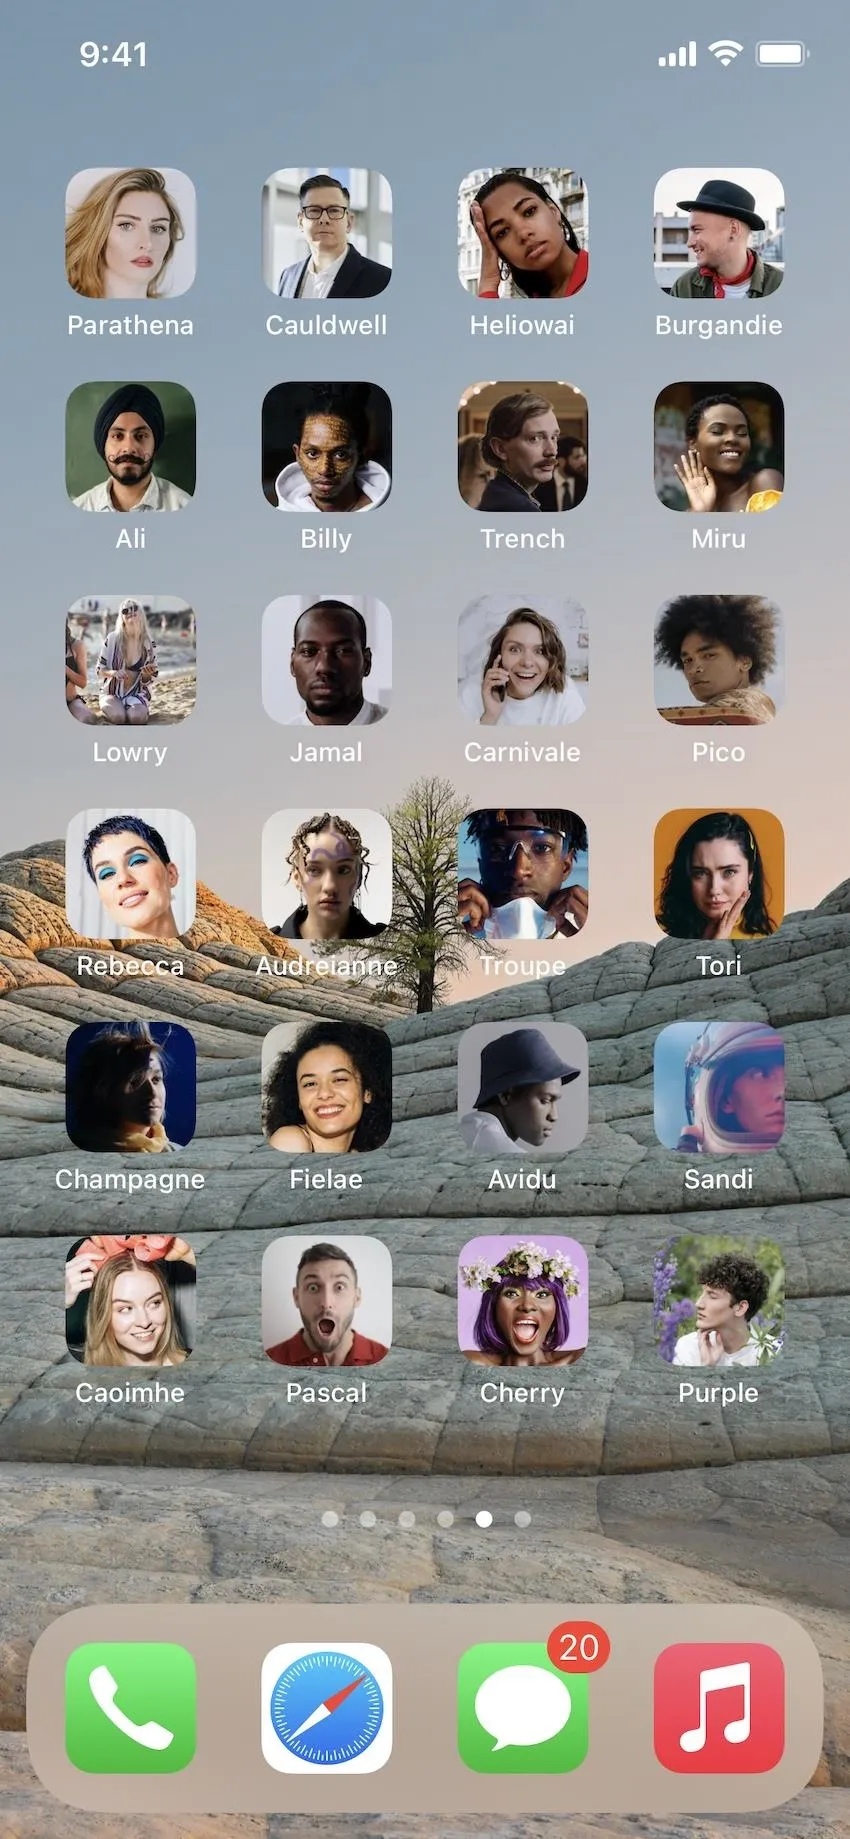


Remove the Names from Your Home Screen Contacts
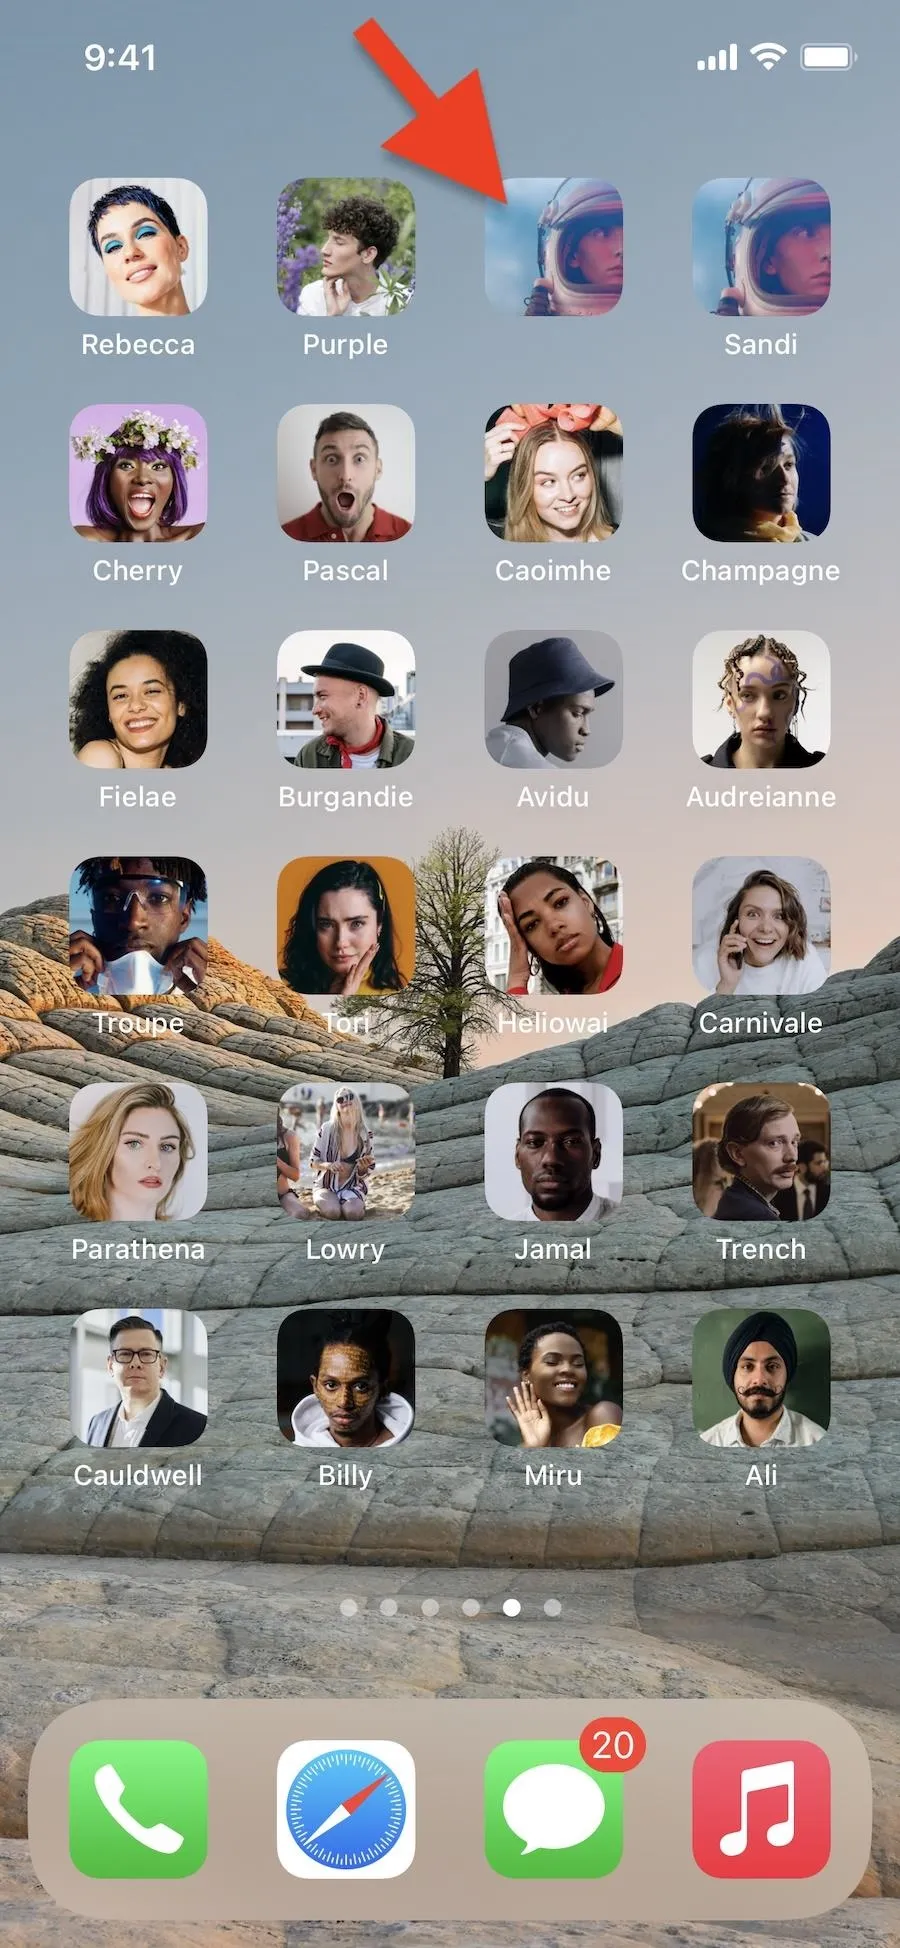
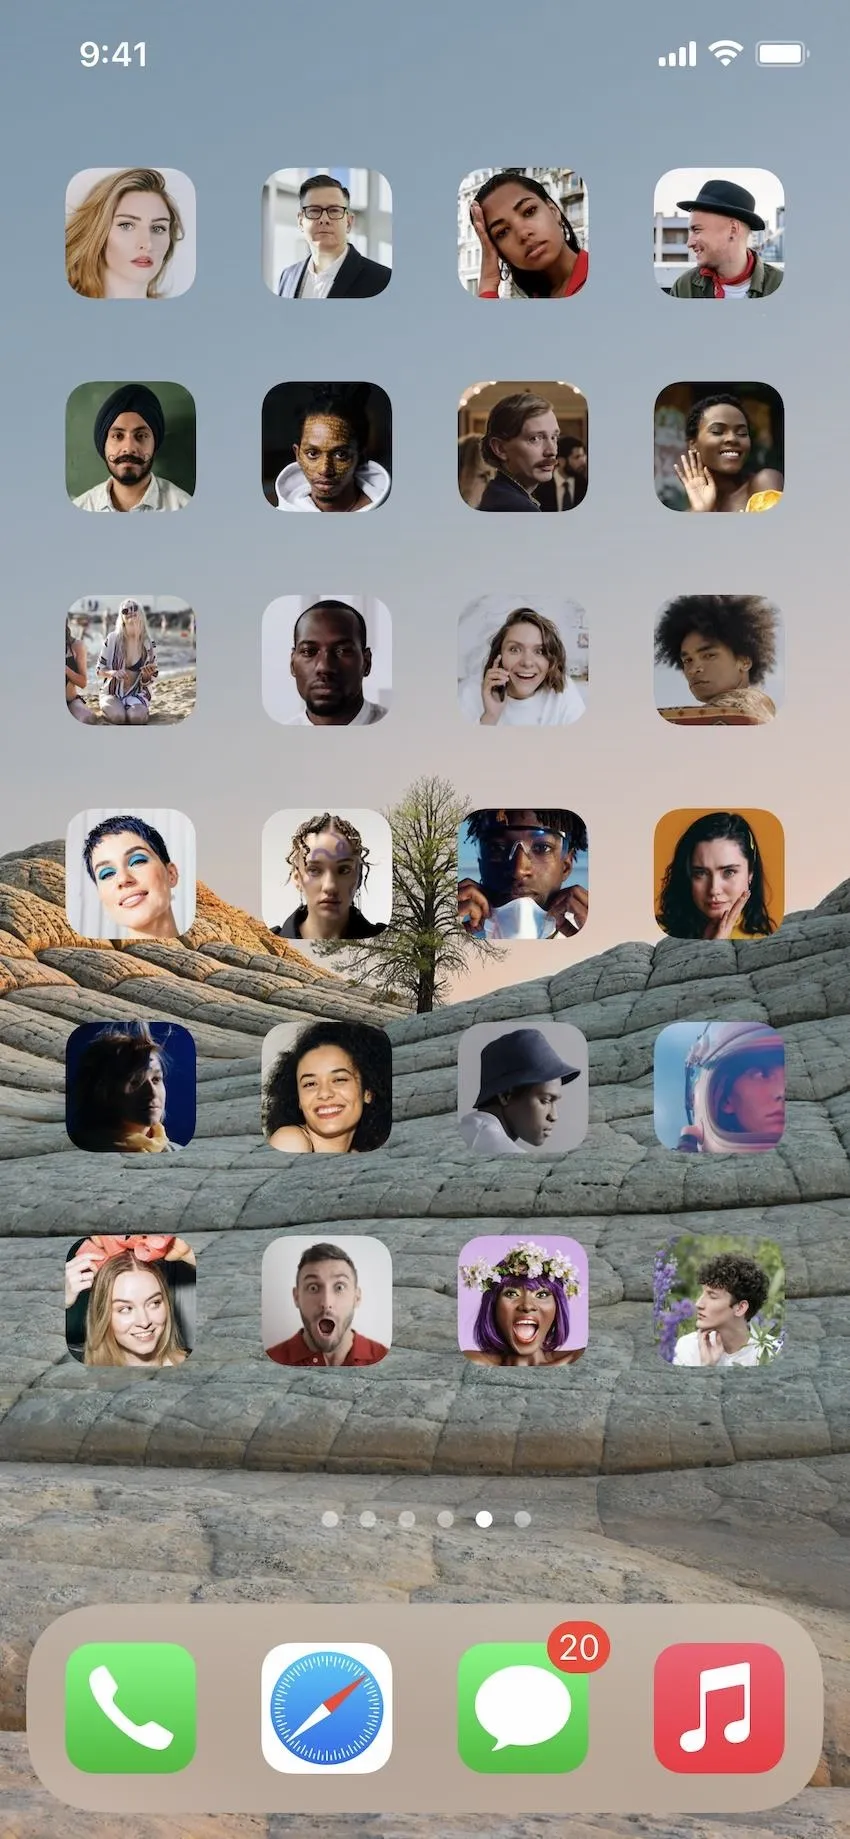
On the home screen, I love having icons only, i.e., no names. To remove app names, you can throw them in a folder and use a special character to make the folder title appear invisible. Likewise, you can make shortcuts with custom icon images to open any app you want, then use the same trick to rename them invisible characters.
For bookmarks, you can use these invisible characters too. If you use the contact's photo for their bookmark icon, isn't that enough to tell who it is? Just be aware that you can't edit the name of a contact after adding them to the home screen. To make them invisible, you'll need to use the special character during the original creation process in Step 2 above.


Clean Up Your 'My Shortcuts' Gallery
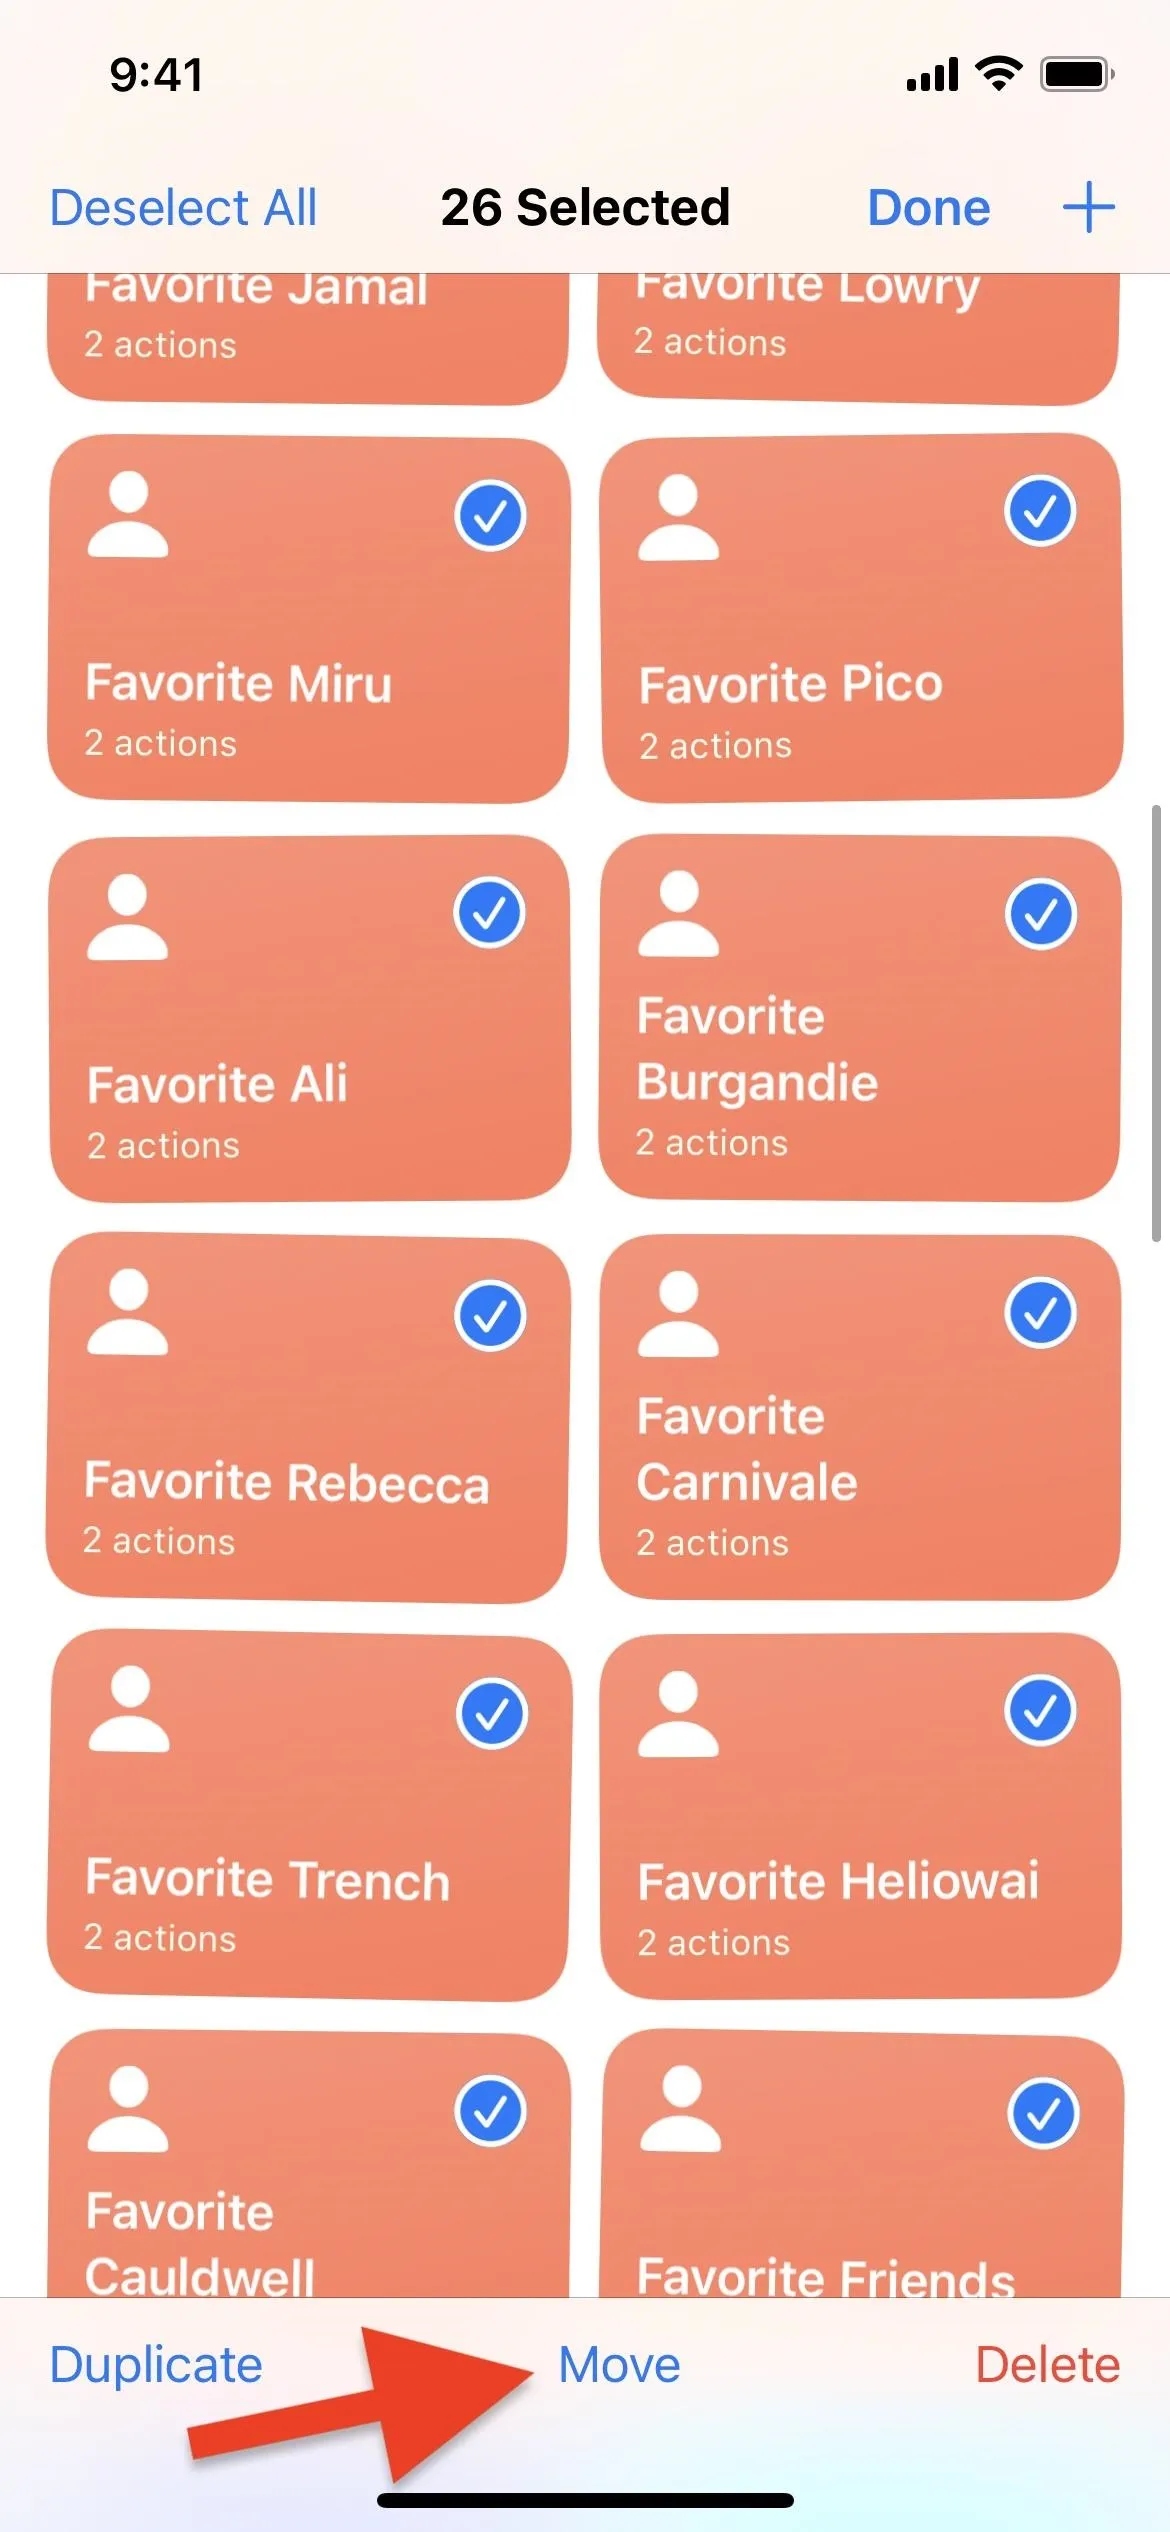
It's messy when you have a shortcut for each person you want on your home screen. I created 26 contacts, which consumes the entire top of my "My Shortcuts" gallery in Shortcuts. To get things back in order, create a folder to put them all into. Then, you can access that folder from the "Shortcuts" main list or at the bottom of "All Shortcuts," the default view. Just like with the shortcuts themselves, you can give the folder a new glyph if you want.
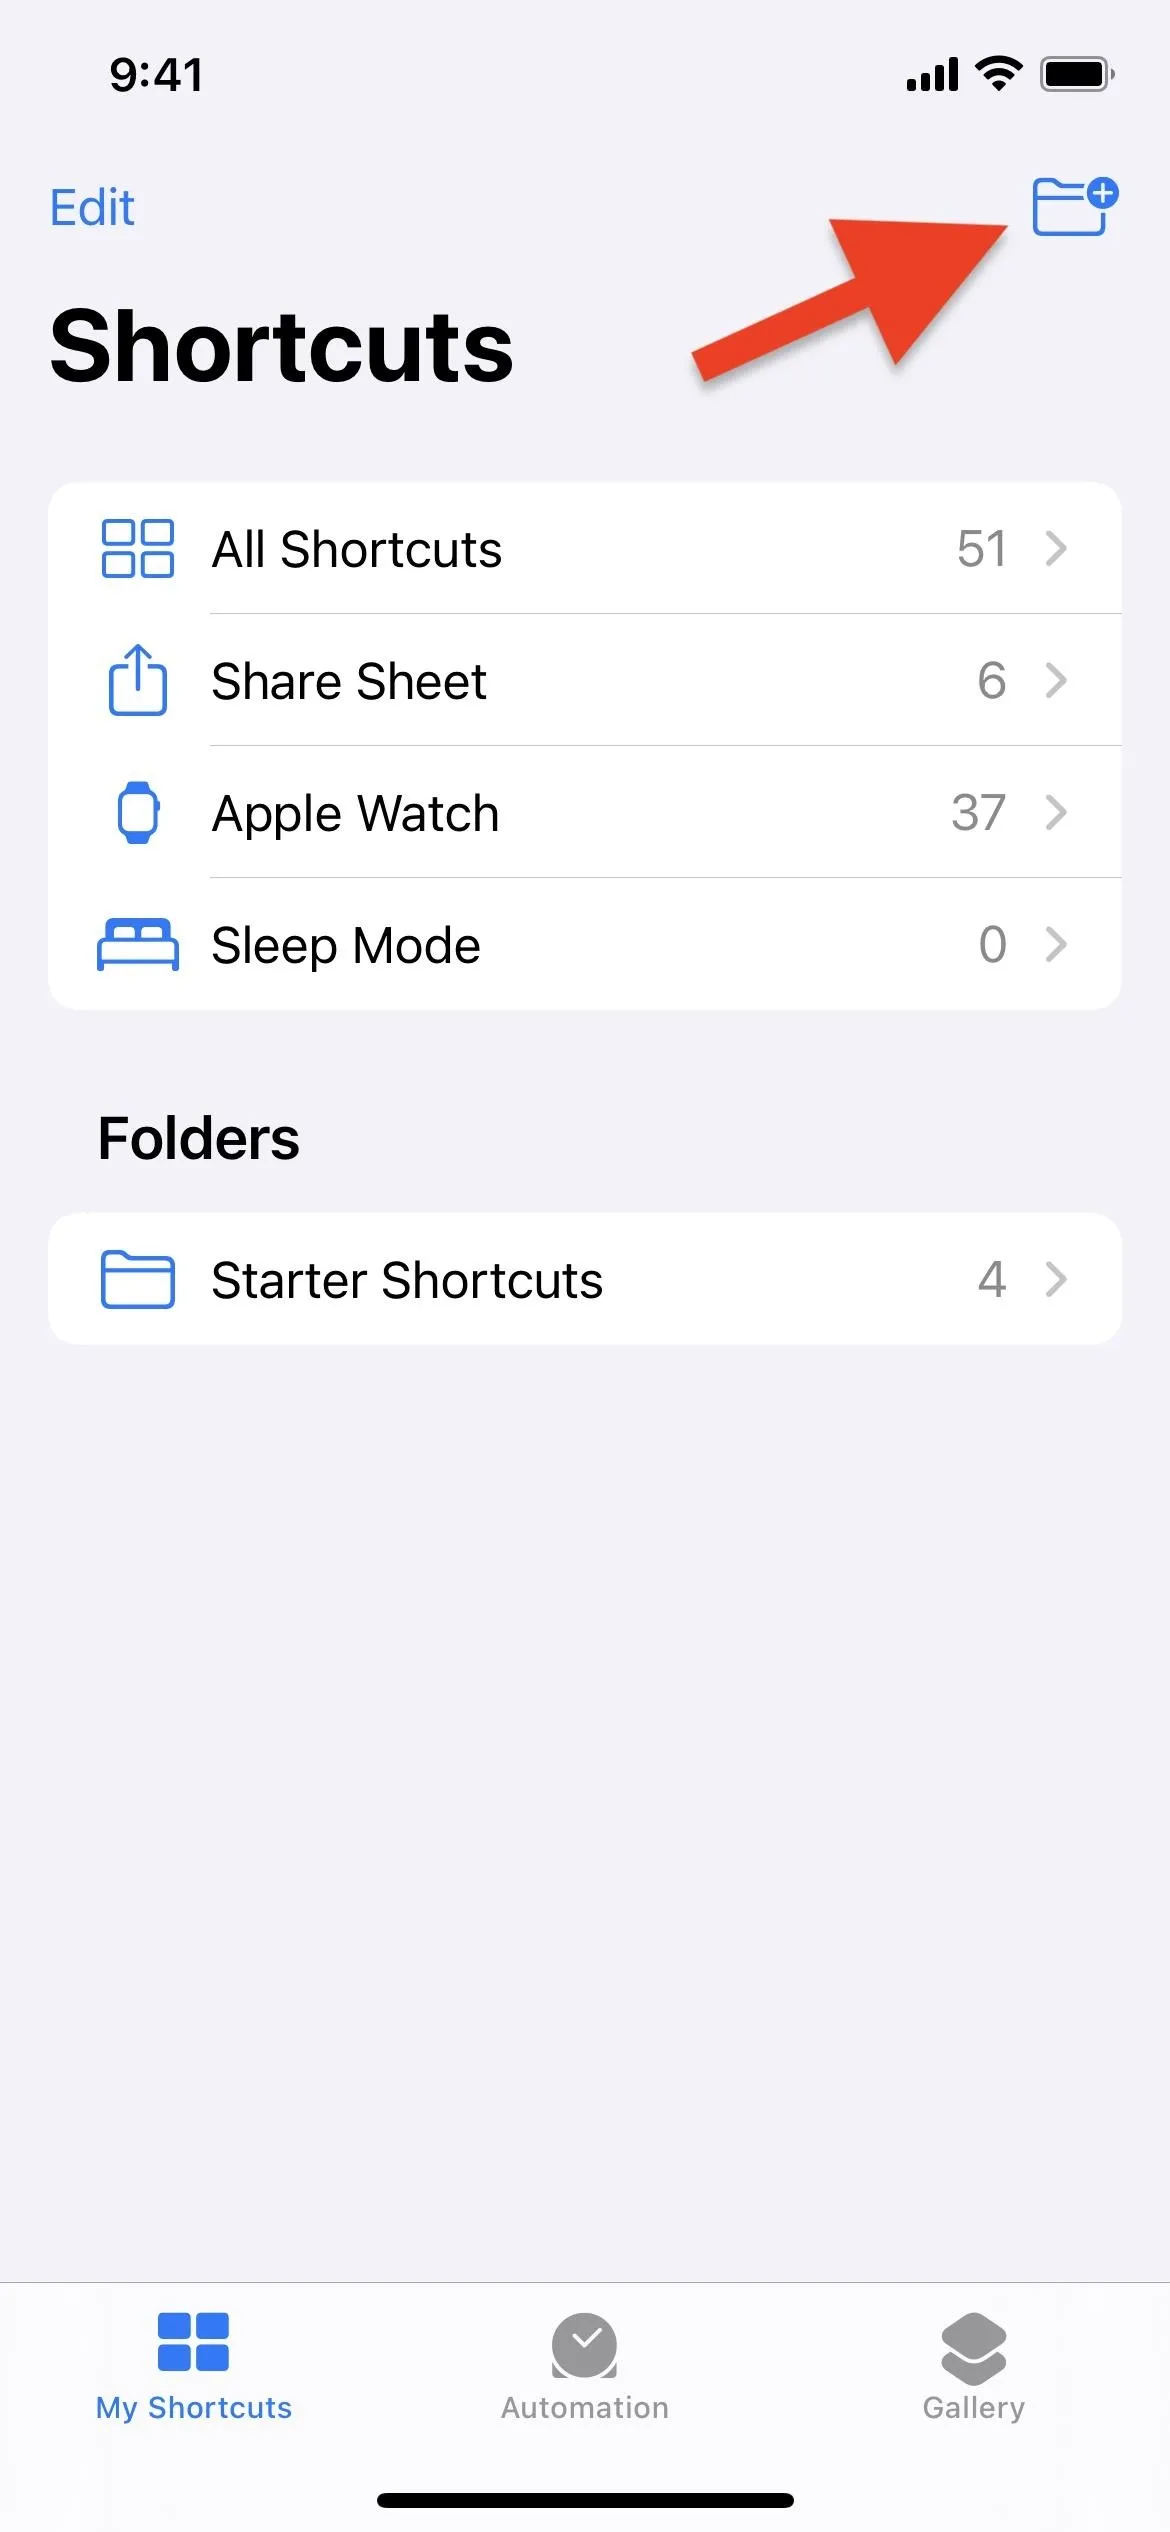
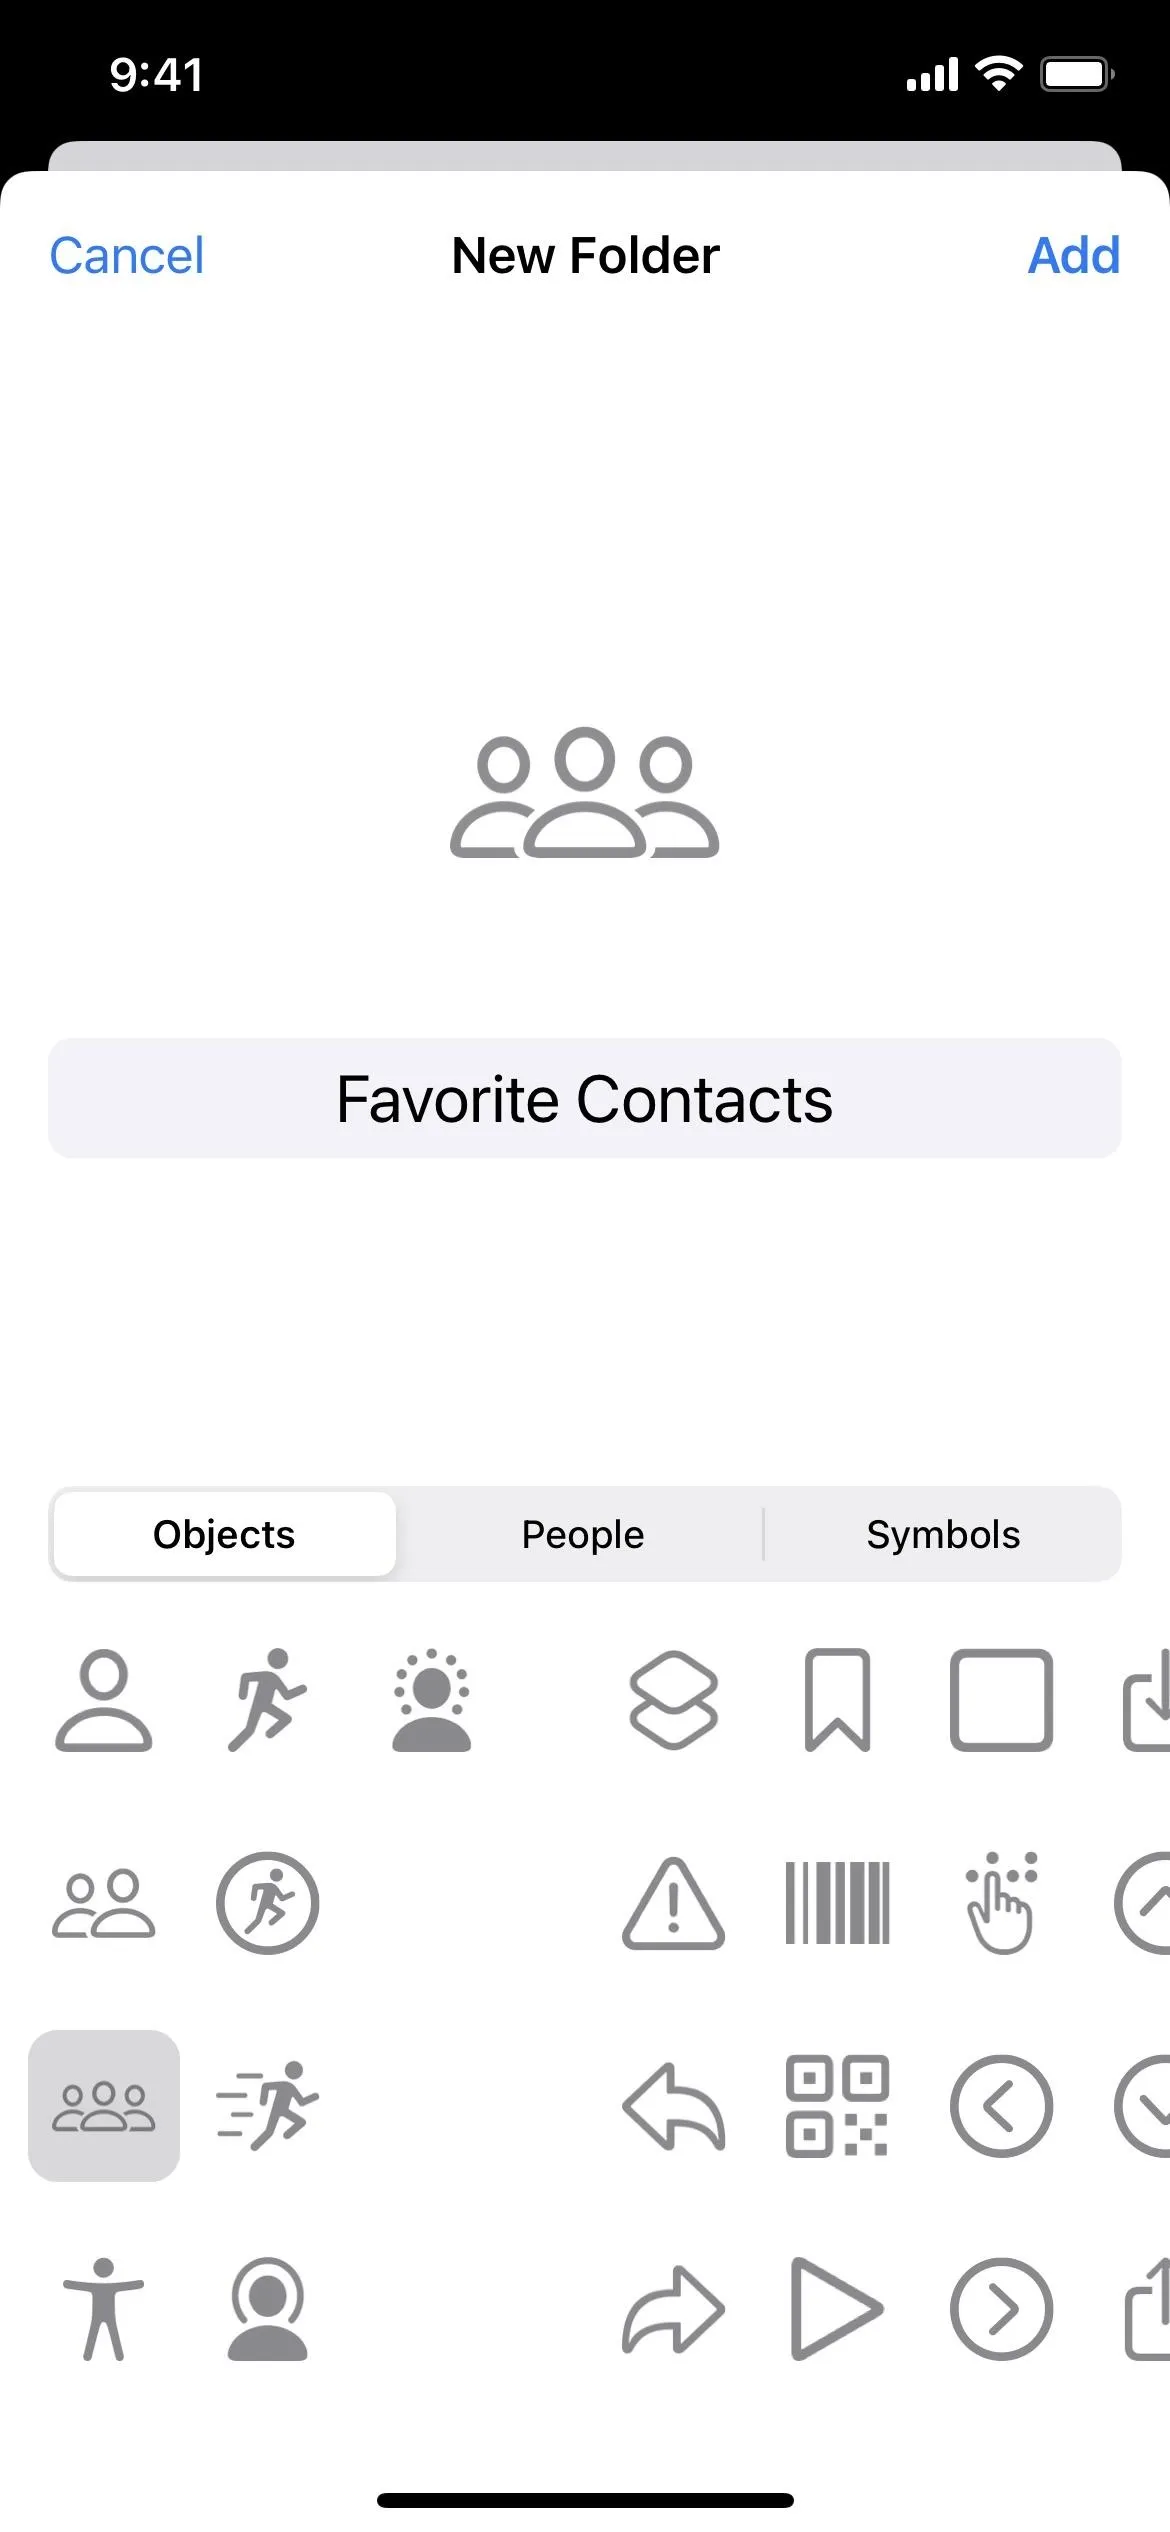
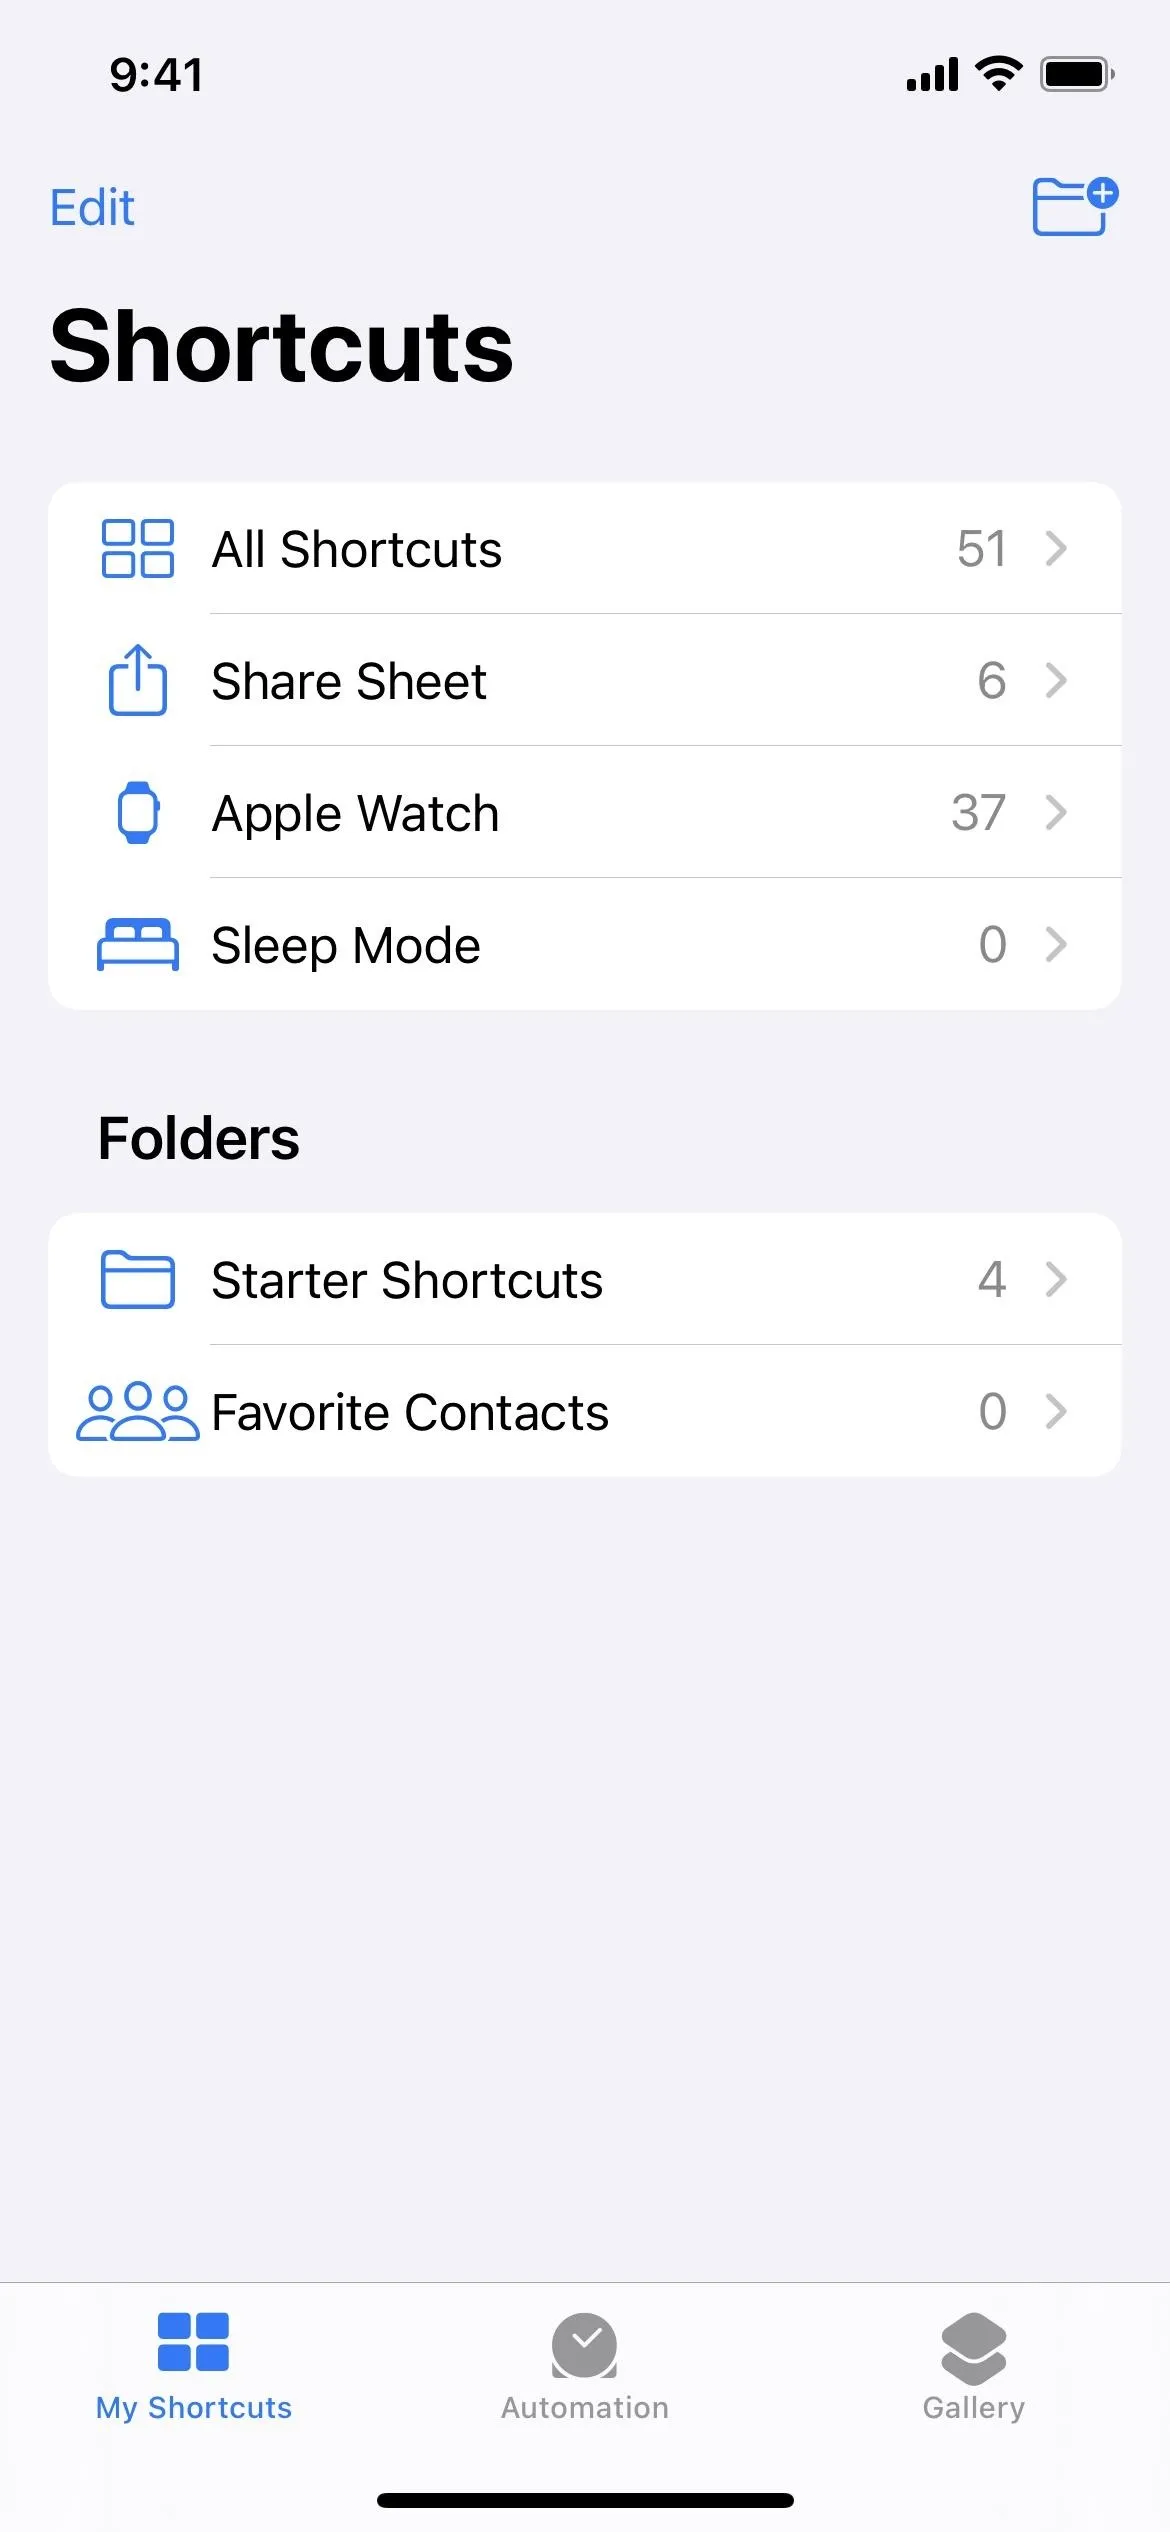
From "My Shortcuts," tap "Shortcuts," then hit the new folder button. Rename it, choose a new glyph if you want, then hit "Add." The folder will then be listed under the Folders header. Alternatively, you can create a new folder when selecting shortcuts, as you'll see in a second.


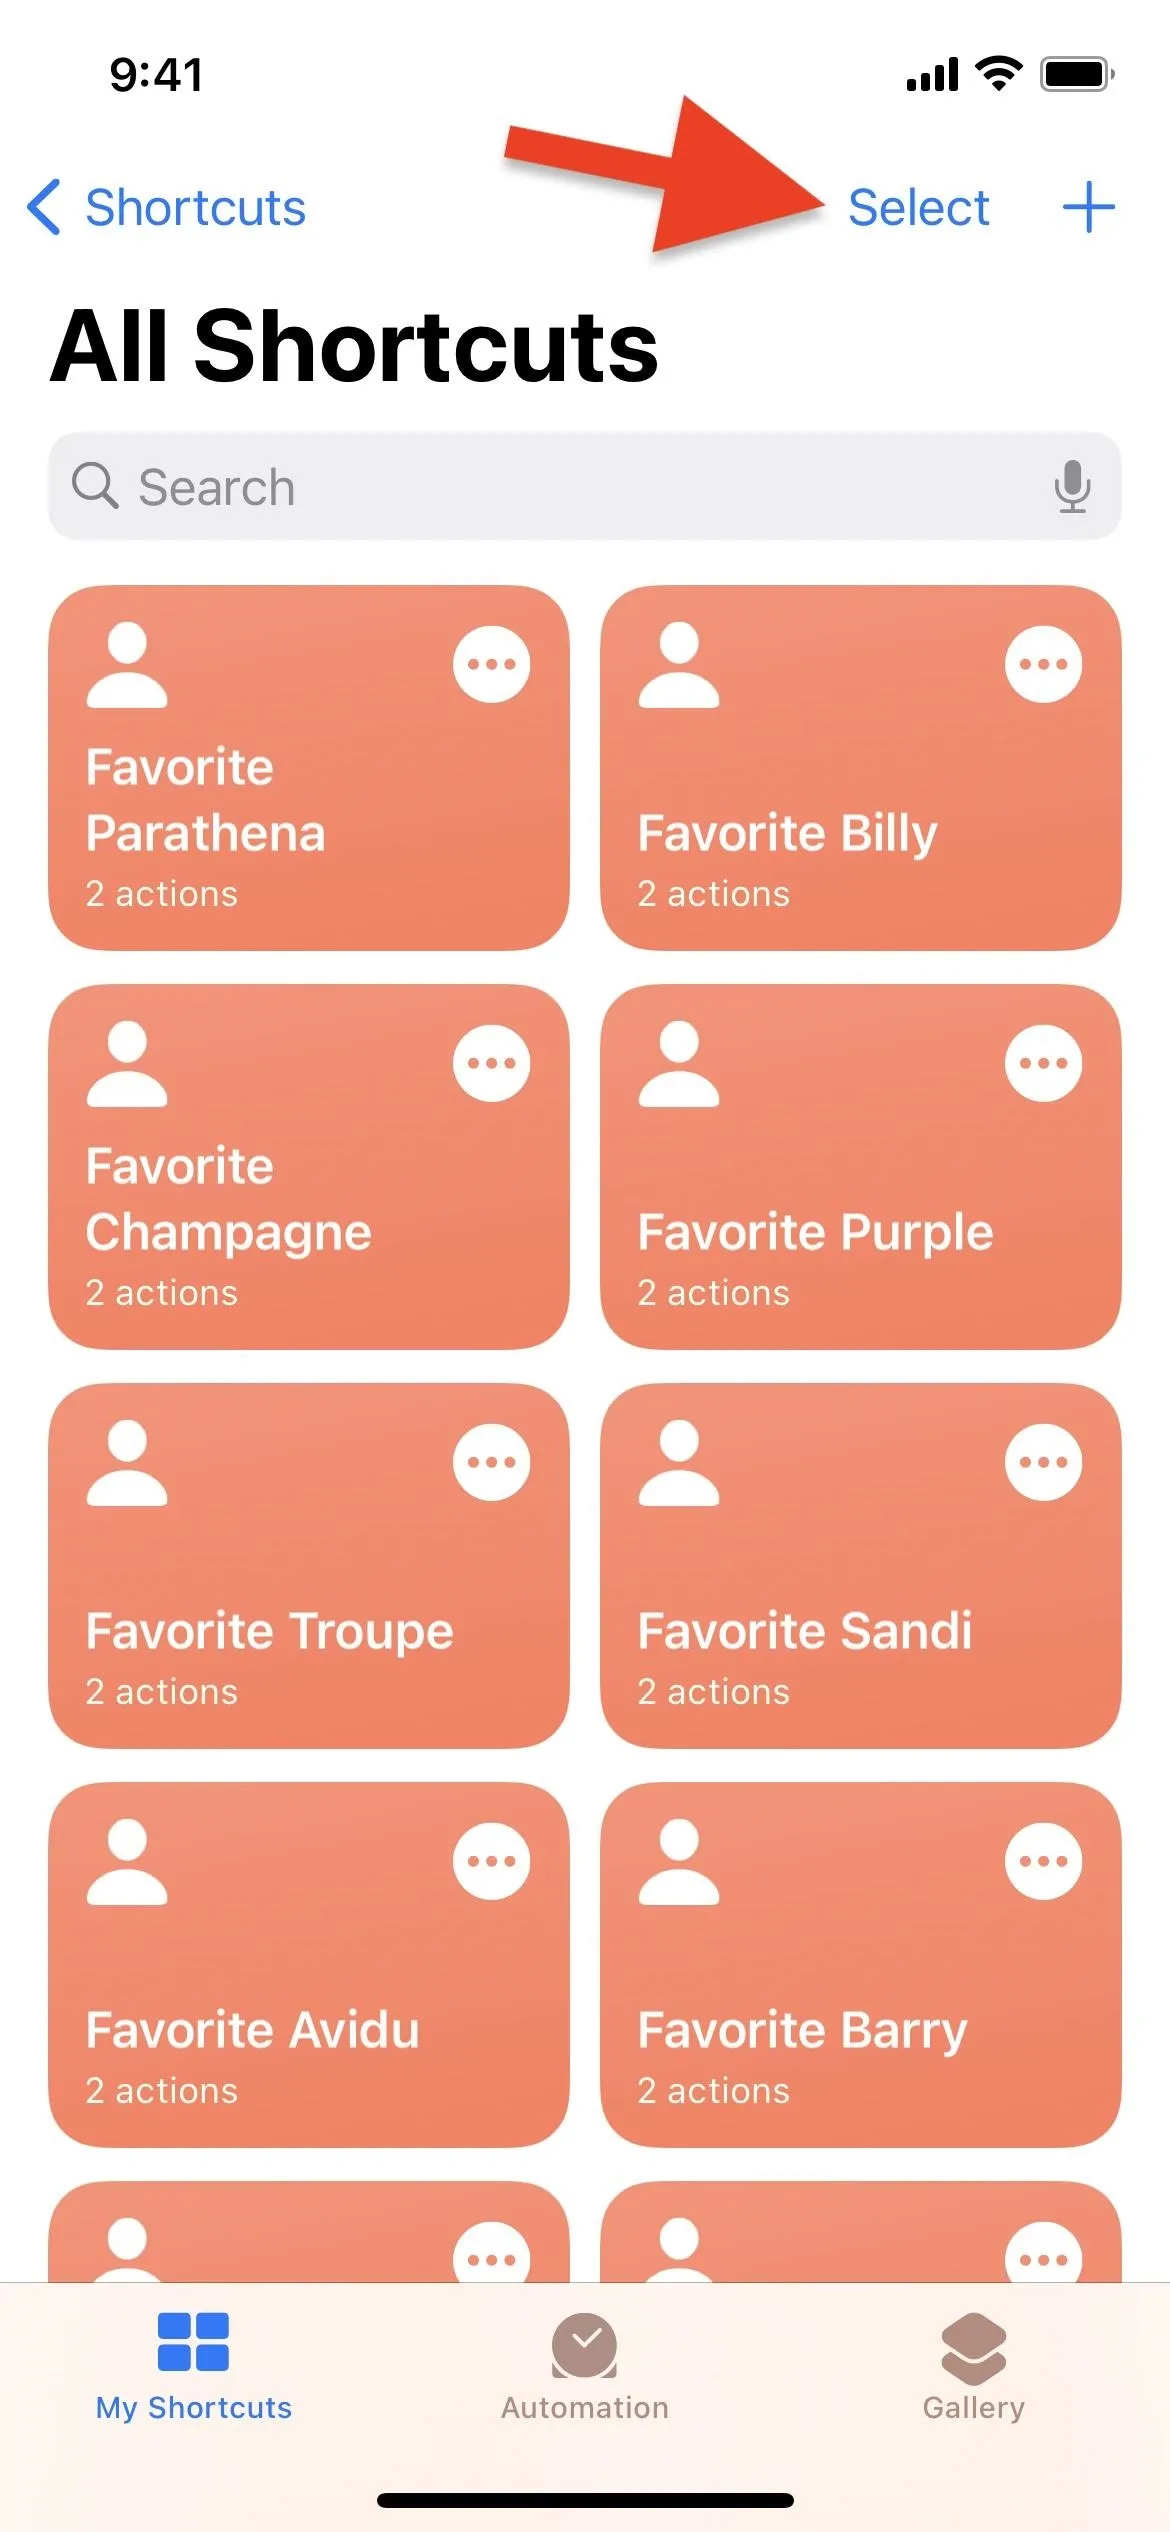
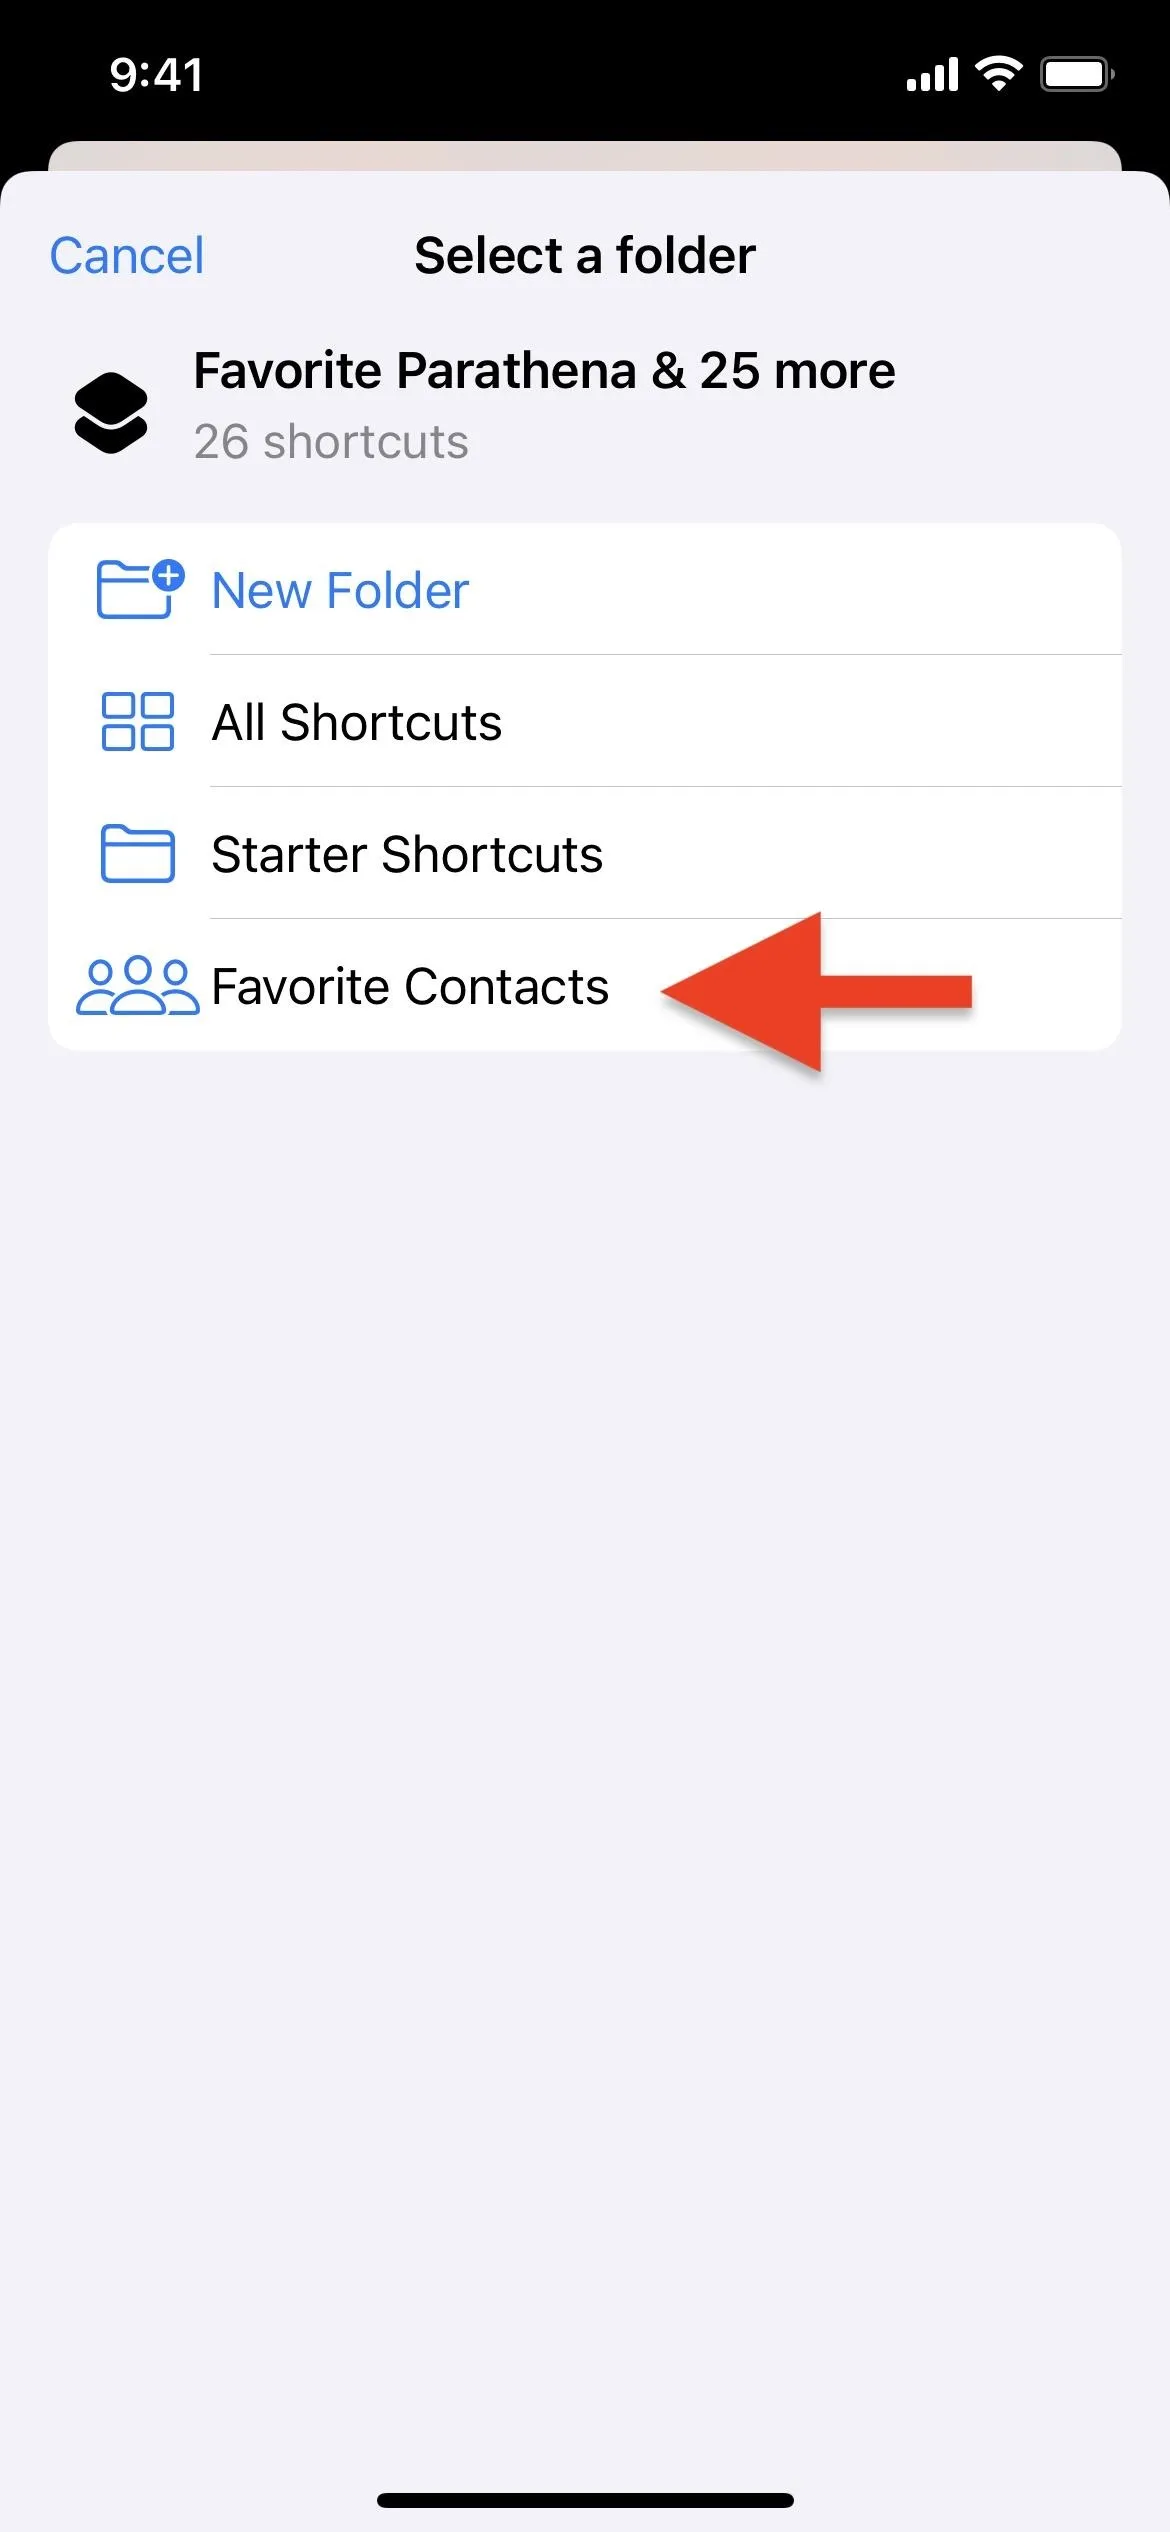
Go back to "All Shortcuts," hit "Select," then check all of the contact shortcuts you created. Next, hit "Move" at the bottom, then choose the folder you just created. As you can see, you can also create a new folder from this menu too, which may be faster for your workflow.


Variations on the Contact Home Screen Bookmark
If you only communicate with somebody using one platform, pulling up the contact card for that person every time you tap their home screen bookmark can be tedious. If you want to jump right to the call, text, email, etc., you can create a new shortcut to do so, and the shortcut requires just one action.
- To call someone: Add the "Call" action; tap "Contact" to select your contact.
- To text or iMessage someone: Add the "Send Message" action; tap "Recipients" to select your contact.
- To email someone: Add the "Send Email" action; tap "Recipients" to select your contact.
- To FaceTime someone: Add the "FaceTime" action; tap "Recipients" to select your contact.
- To Skype someone: Add the "Call via Skype" action; tap "Person" to select your contact.
- To WhatsApp message someone: Add the "Send Message via WhatsApp" action; tap (+) to select your contact.
- To WhatsApp message someone: Add the "Send Message via WhatsApp" action; tap (+) to select your contact.
If the platform you use to communicate with your family, friends, coworkers, and whoever else isn't listed above, just search for the app's name. If there's an option to call, message, email, etc., it'll show up under that app. Not all apps give you customizable options, though, like Messenger, which may only show you a recent contact, and that's it.
For phone calls, you can also use a URL scheme to build your bookmark. This is handy if you don't want the person listed in your Contacts app but want an easy way to dial them. Instead of one of the above actions, add the "URL" action, followed by the "Open URLs" action. Then, in the "URL" box, use one of these:
- tel://TheirPhoneNumber
- telprompt://TheirPhoneNumber
You could also make a direct link to your list of favorite contacts with this:
- mobilephone-favorites://
If you'd rather text or iMessage someone, try:
- sms://TheirPhoneNumber
- sms-private://TheirPhoneNumber
There are actually an endless amount of possibilities here when using URL schemes. For more ideas, check out our full guide on URL scheme names and paths for iOS.
Cover photo and screenshots by Justin Meyers/Gadget Hacks







Comments
Be the first, drop a comment!