


One thing Apple Maps always lacked was the ability to add stops along a route while planning a trip. Navigation would help you travel from the beginning location to the final destination, and the only places you could add between that were pit stops like banks and ATMs, coffee shops, convenience stores, eateries, fast food, gas stations, and parking lots. That all changes in Apple Maps' latest update.
With iOS 16, you finally have tools for multi-stop trip planning, so you can create multiple stops along your route when planning out your trip — and they can be for any location, not just pit stops. It's much more efficient than getting separate sets of directions for each leg of the trip. It's even easier now to make changes to routed trips during navigation.
- Don't Miss: All 350+ New iOS 16 Features for Your iPhone
Get Directions for Your First Location
Locate the first stop along the route that you plan on taking, then ask for directions to it like you would on iOS 15 and older. It's easier to add the first planned stop first since Maps will make it the second stop after your starting point.

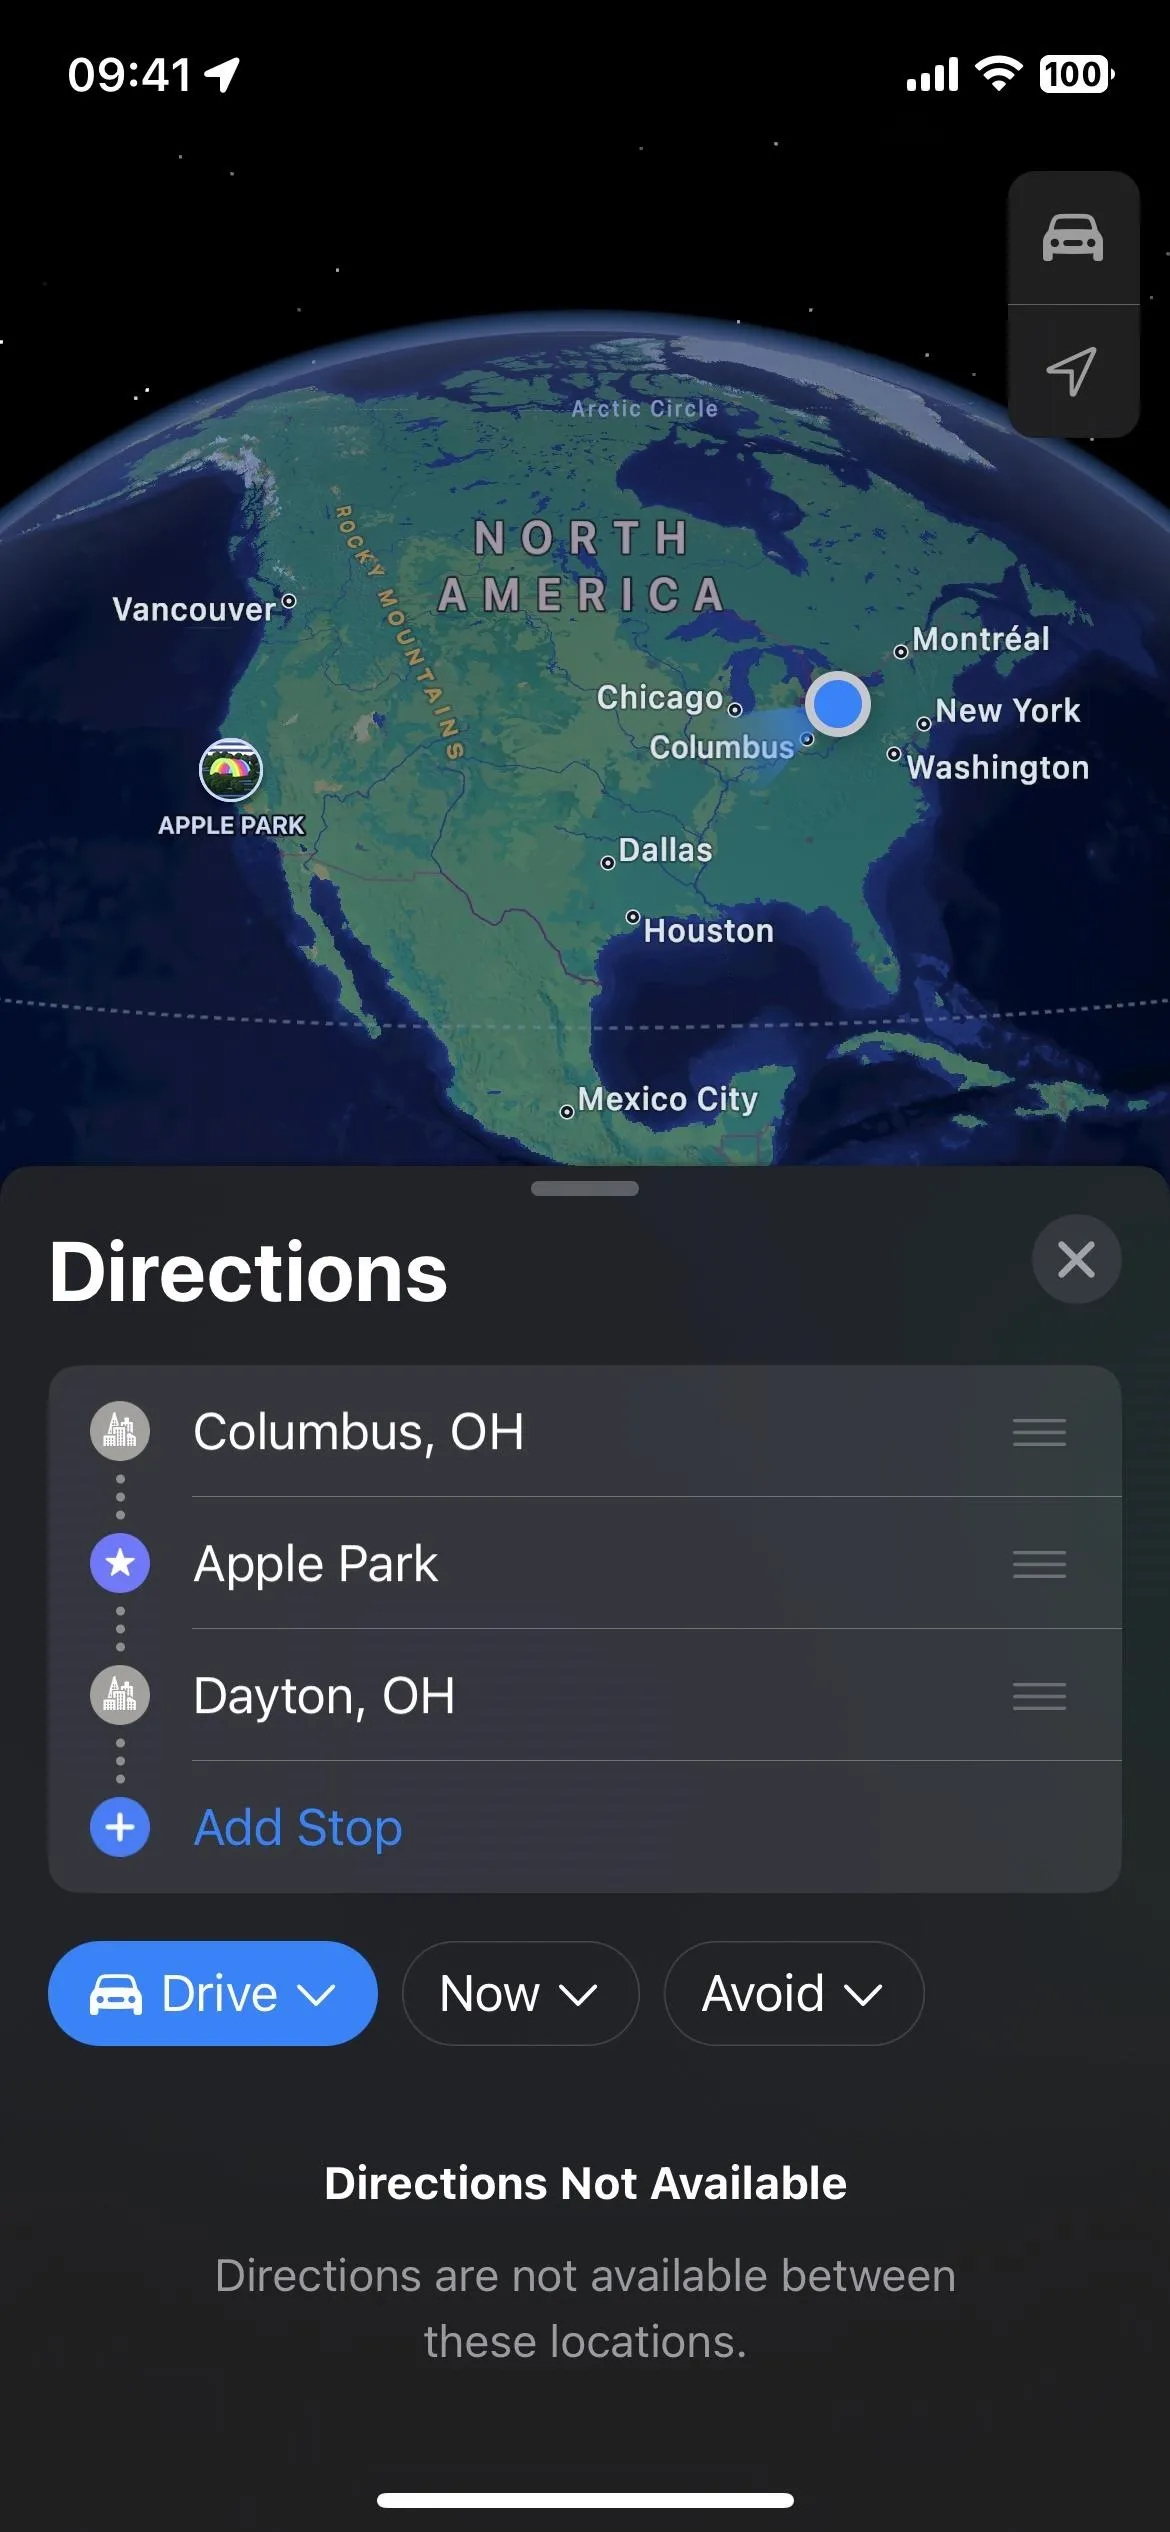
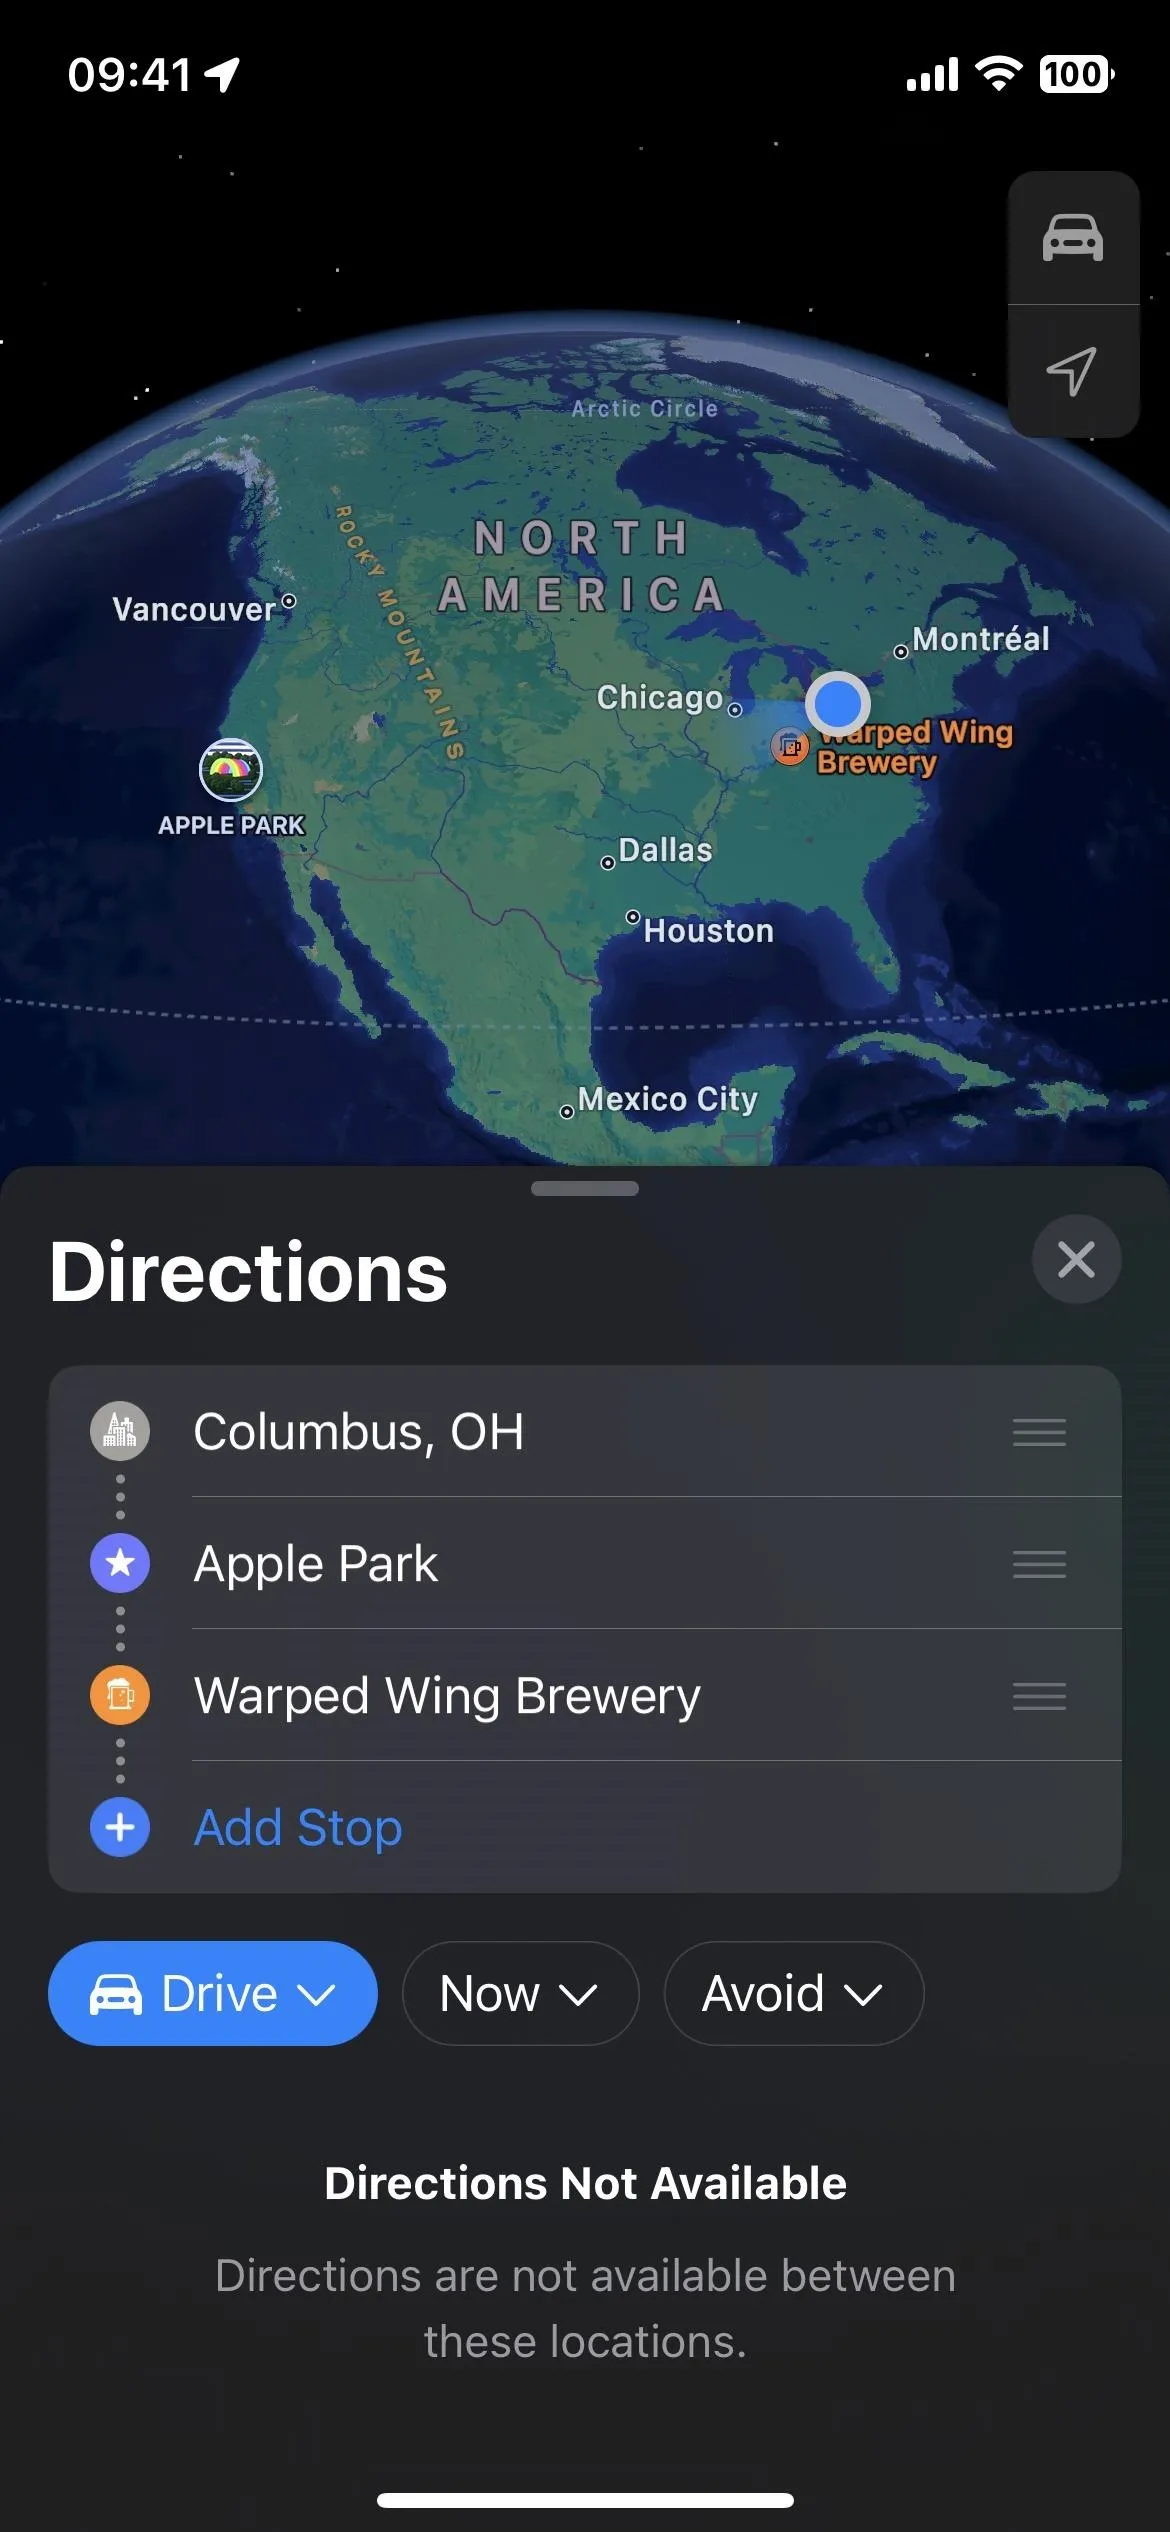
You could choose your final destination or any other spot you want to add to your trip, but you may need to reorder the route (see step 4 below) after adding a third location. Otherwise, Maps may not show any directions.
For example, if your final destination is 1,500 miles away, then you add a stop that's close to your current location, Maps will likely tell you that directions are not available between all of the chosen areas. Reordering the trip should help in that case.
Change the Starting Point if Necessary
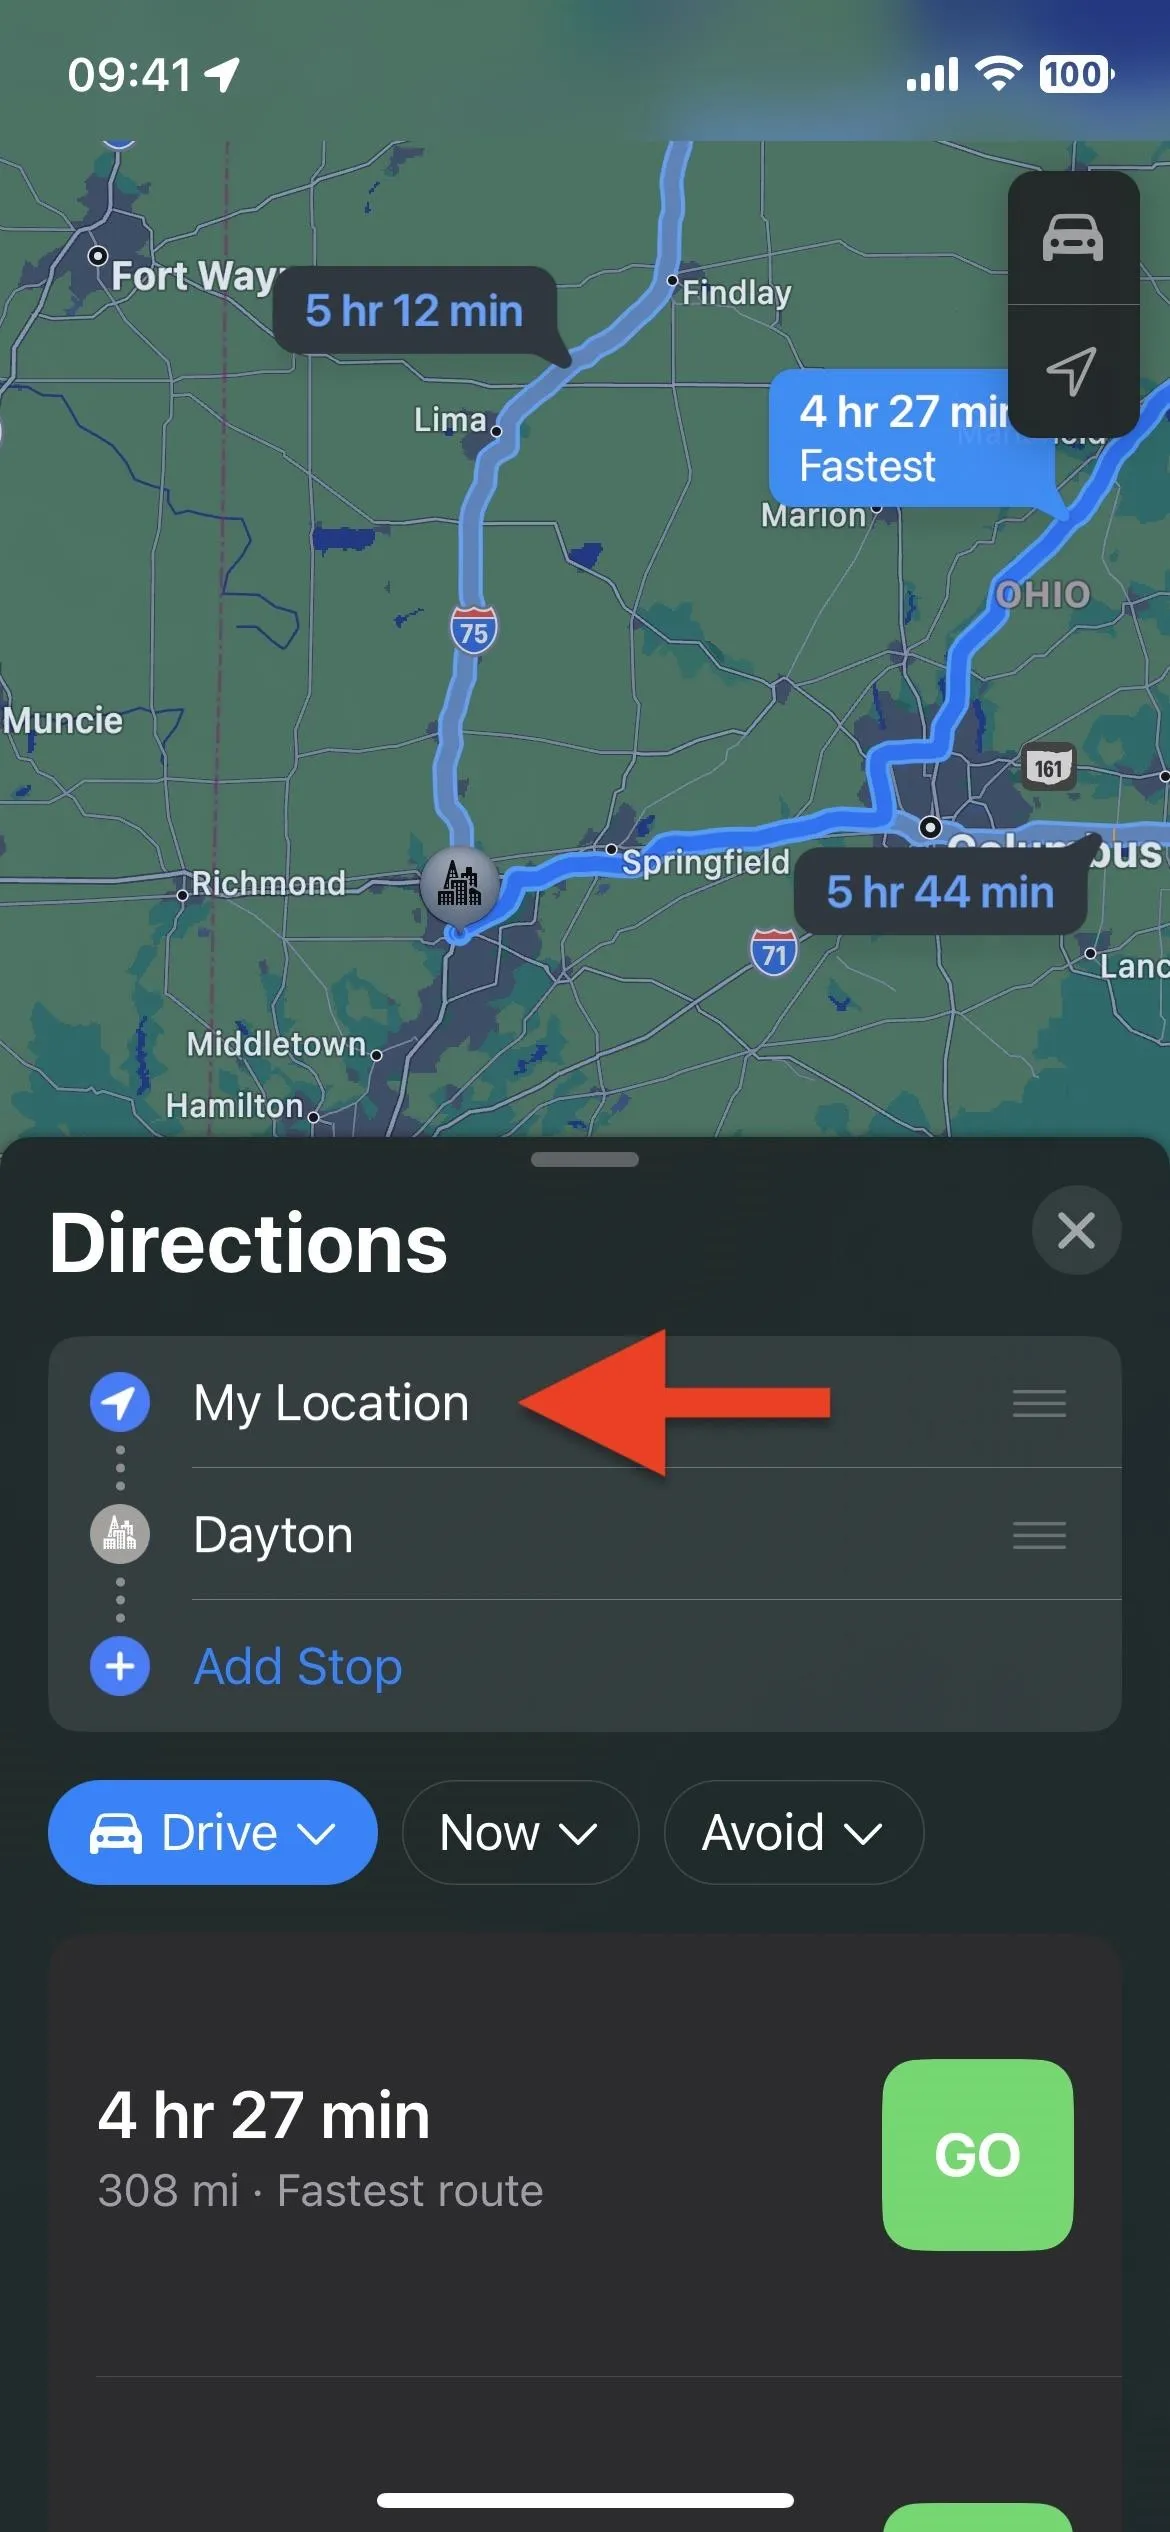
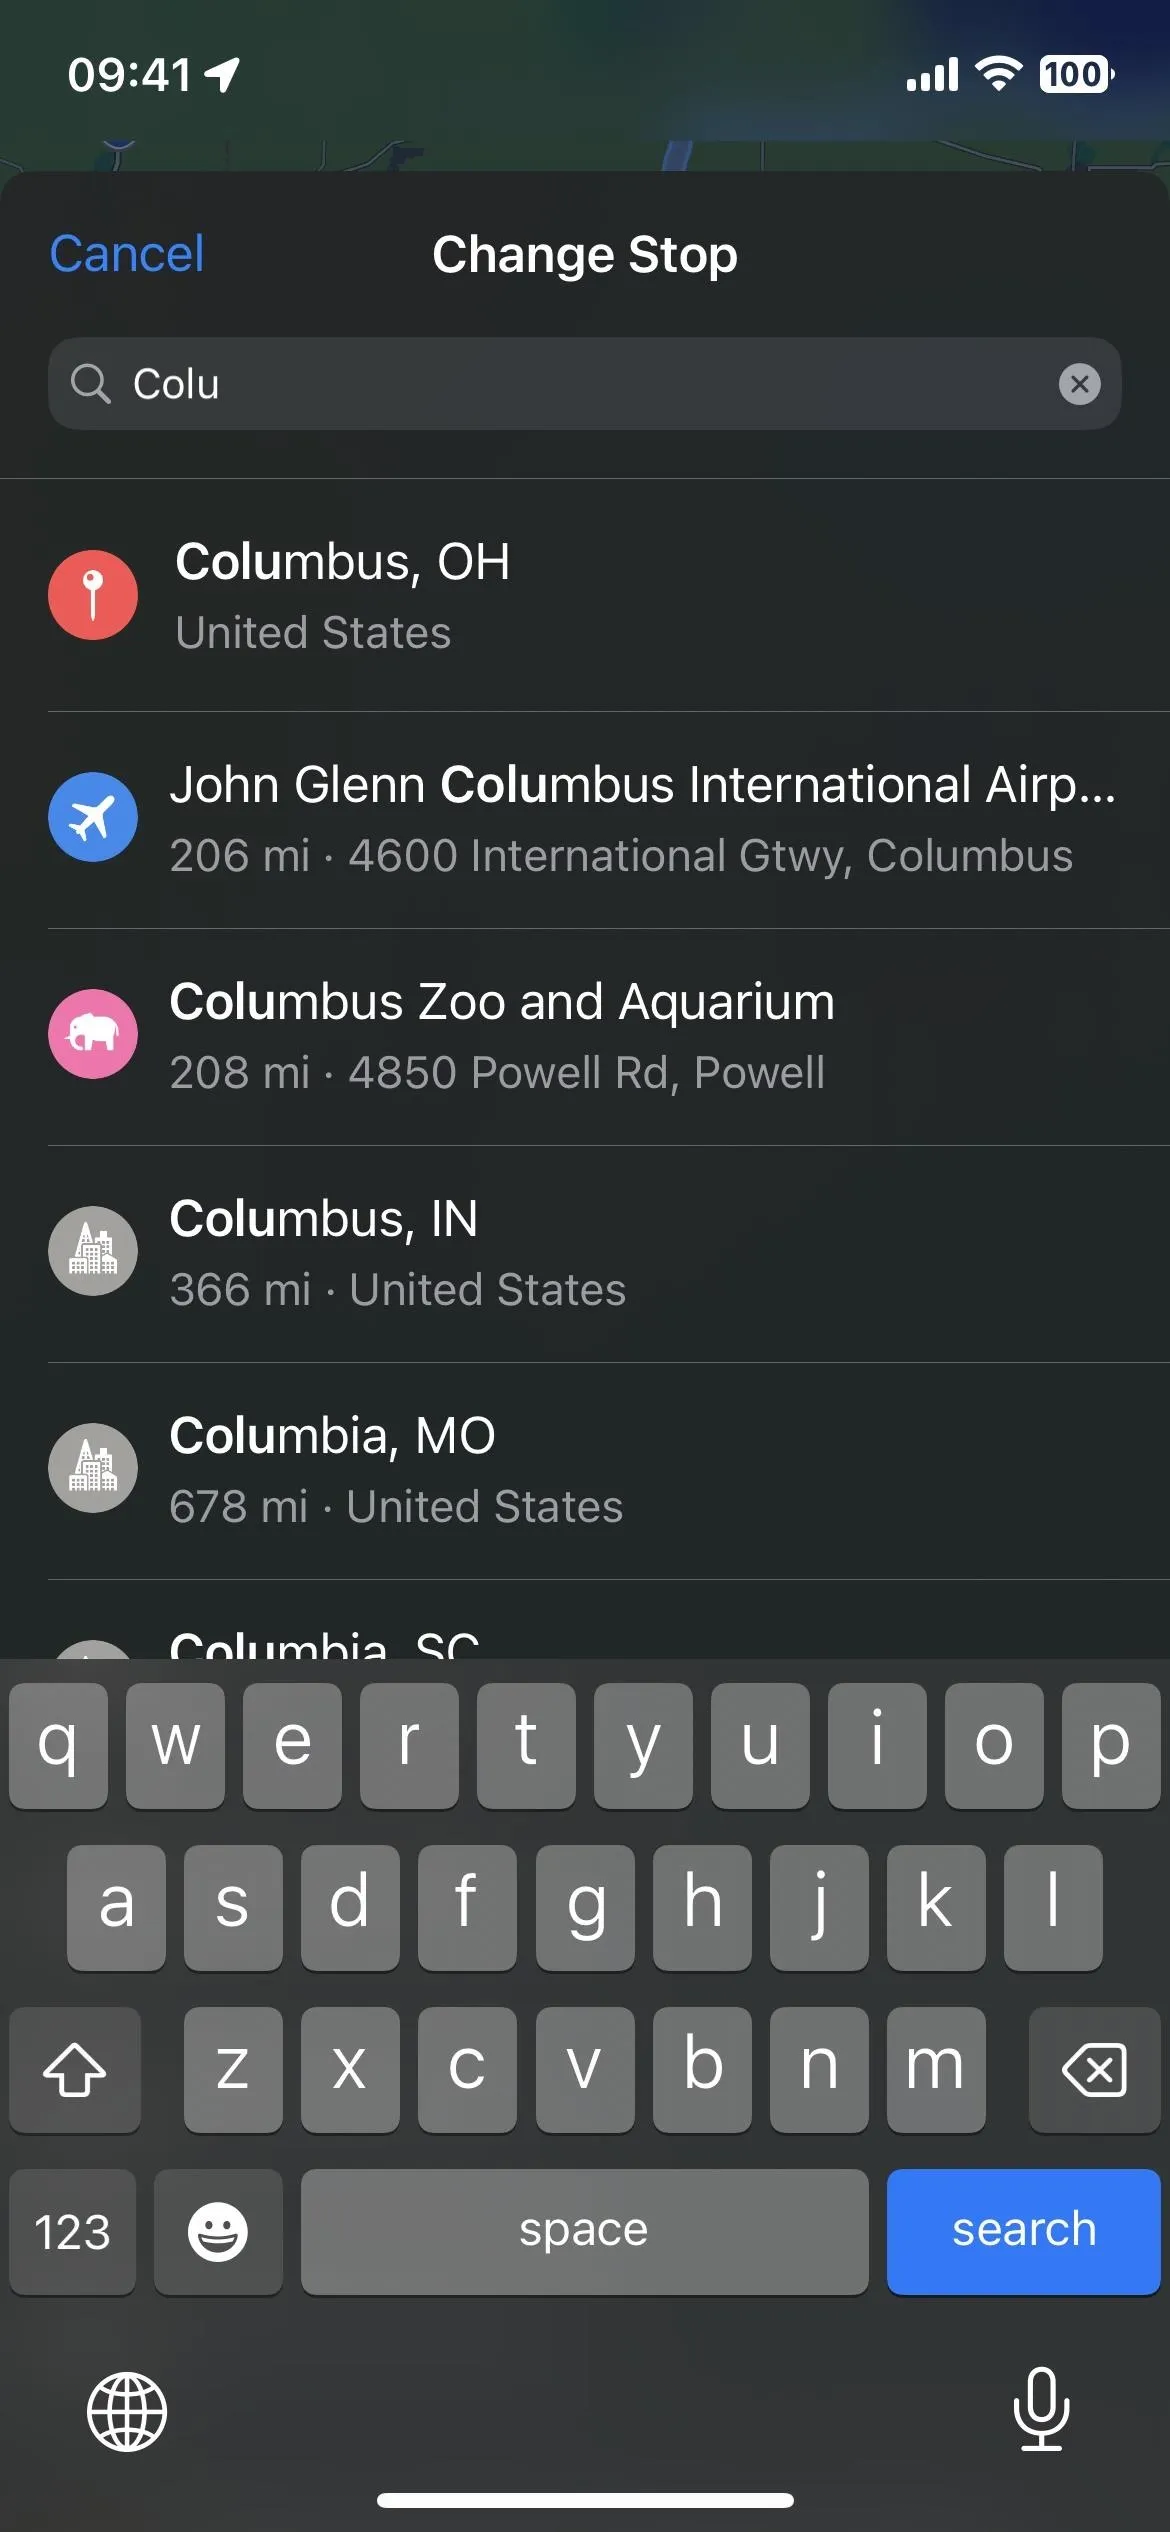
Your starting point will default to your current location, but you can tap "My Location" to search for and select a different starting point. You could also add another stop to be your starting point, delete "My Location," and then move the actual starting point to the top of the list — more on some of that in a bit.
Add Stops Along Your Route
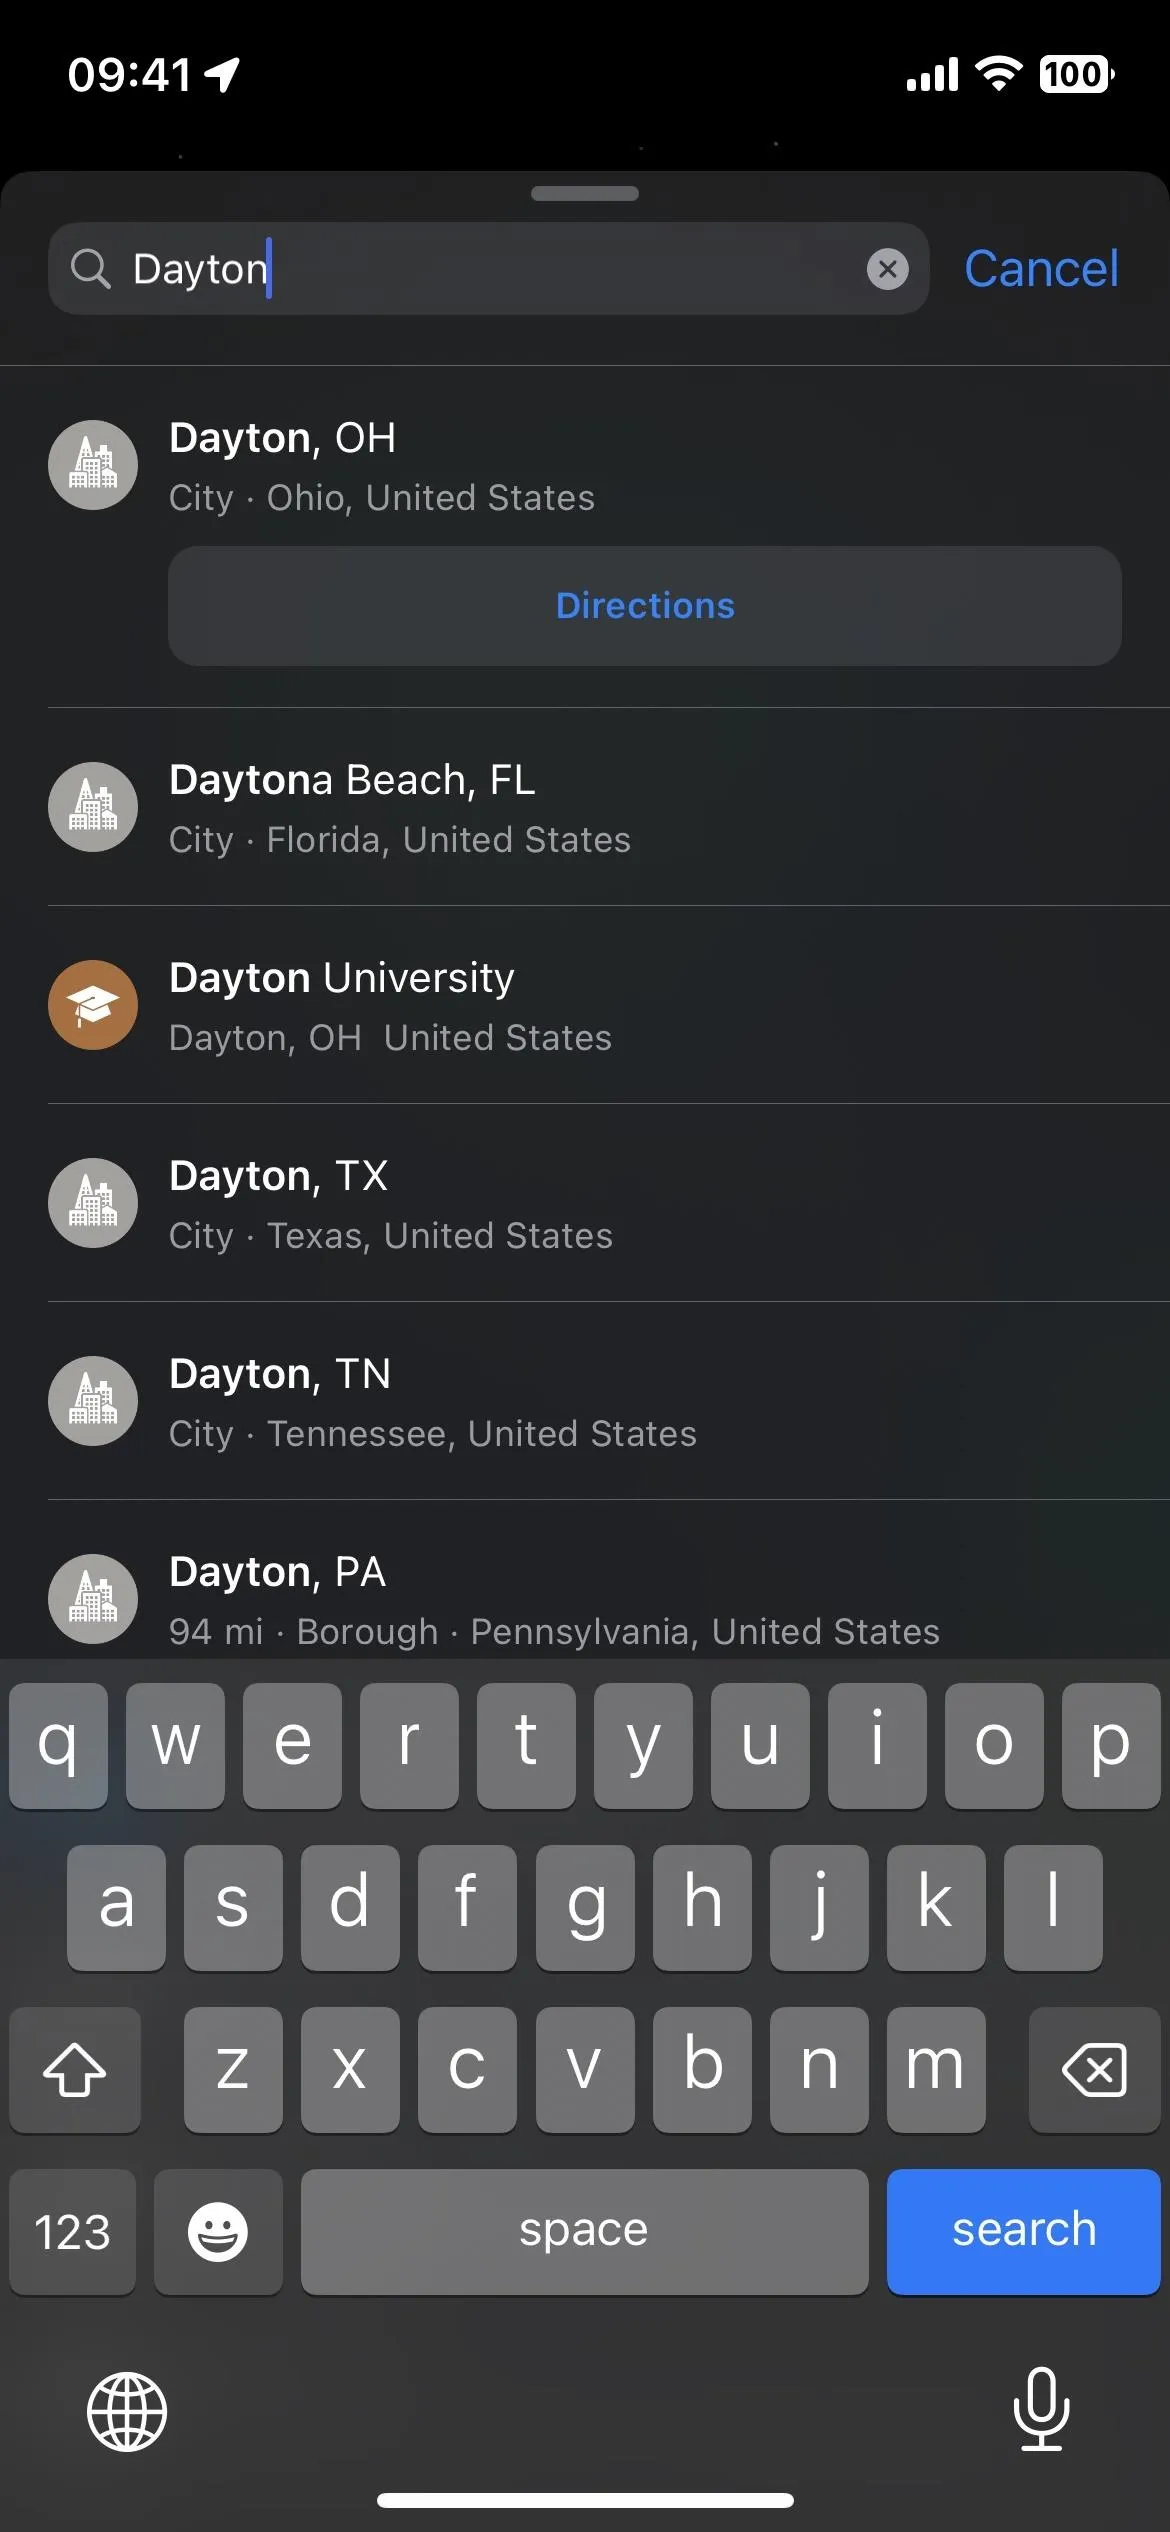
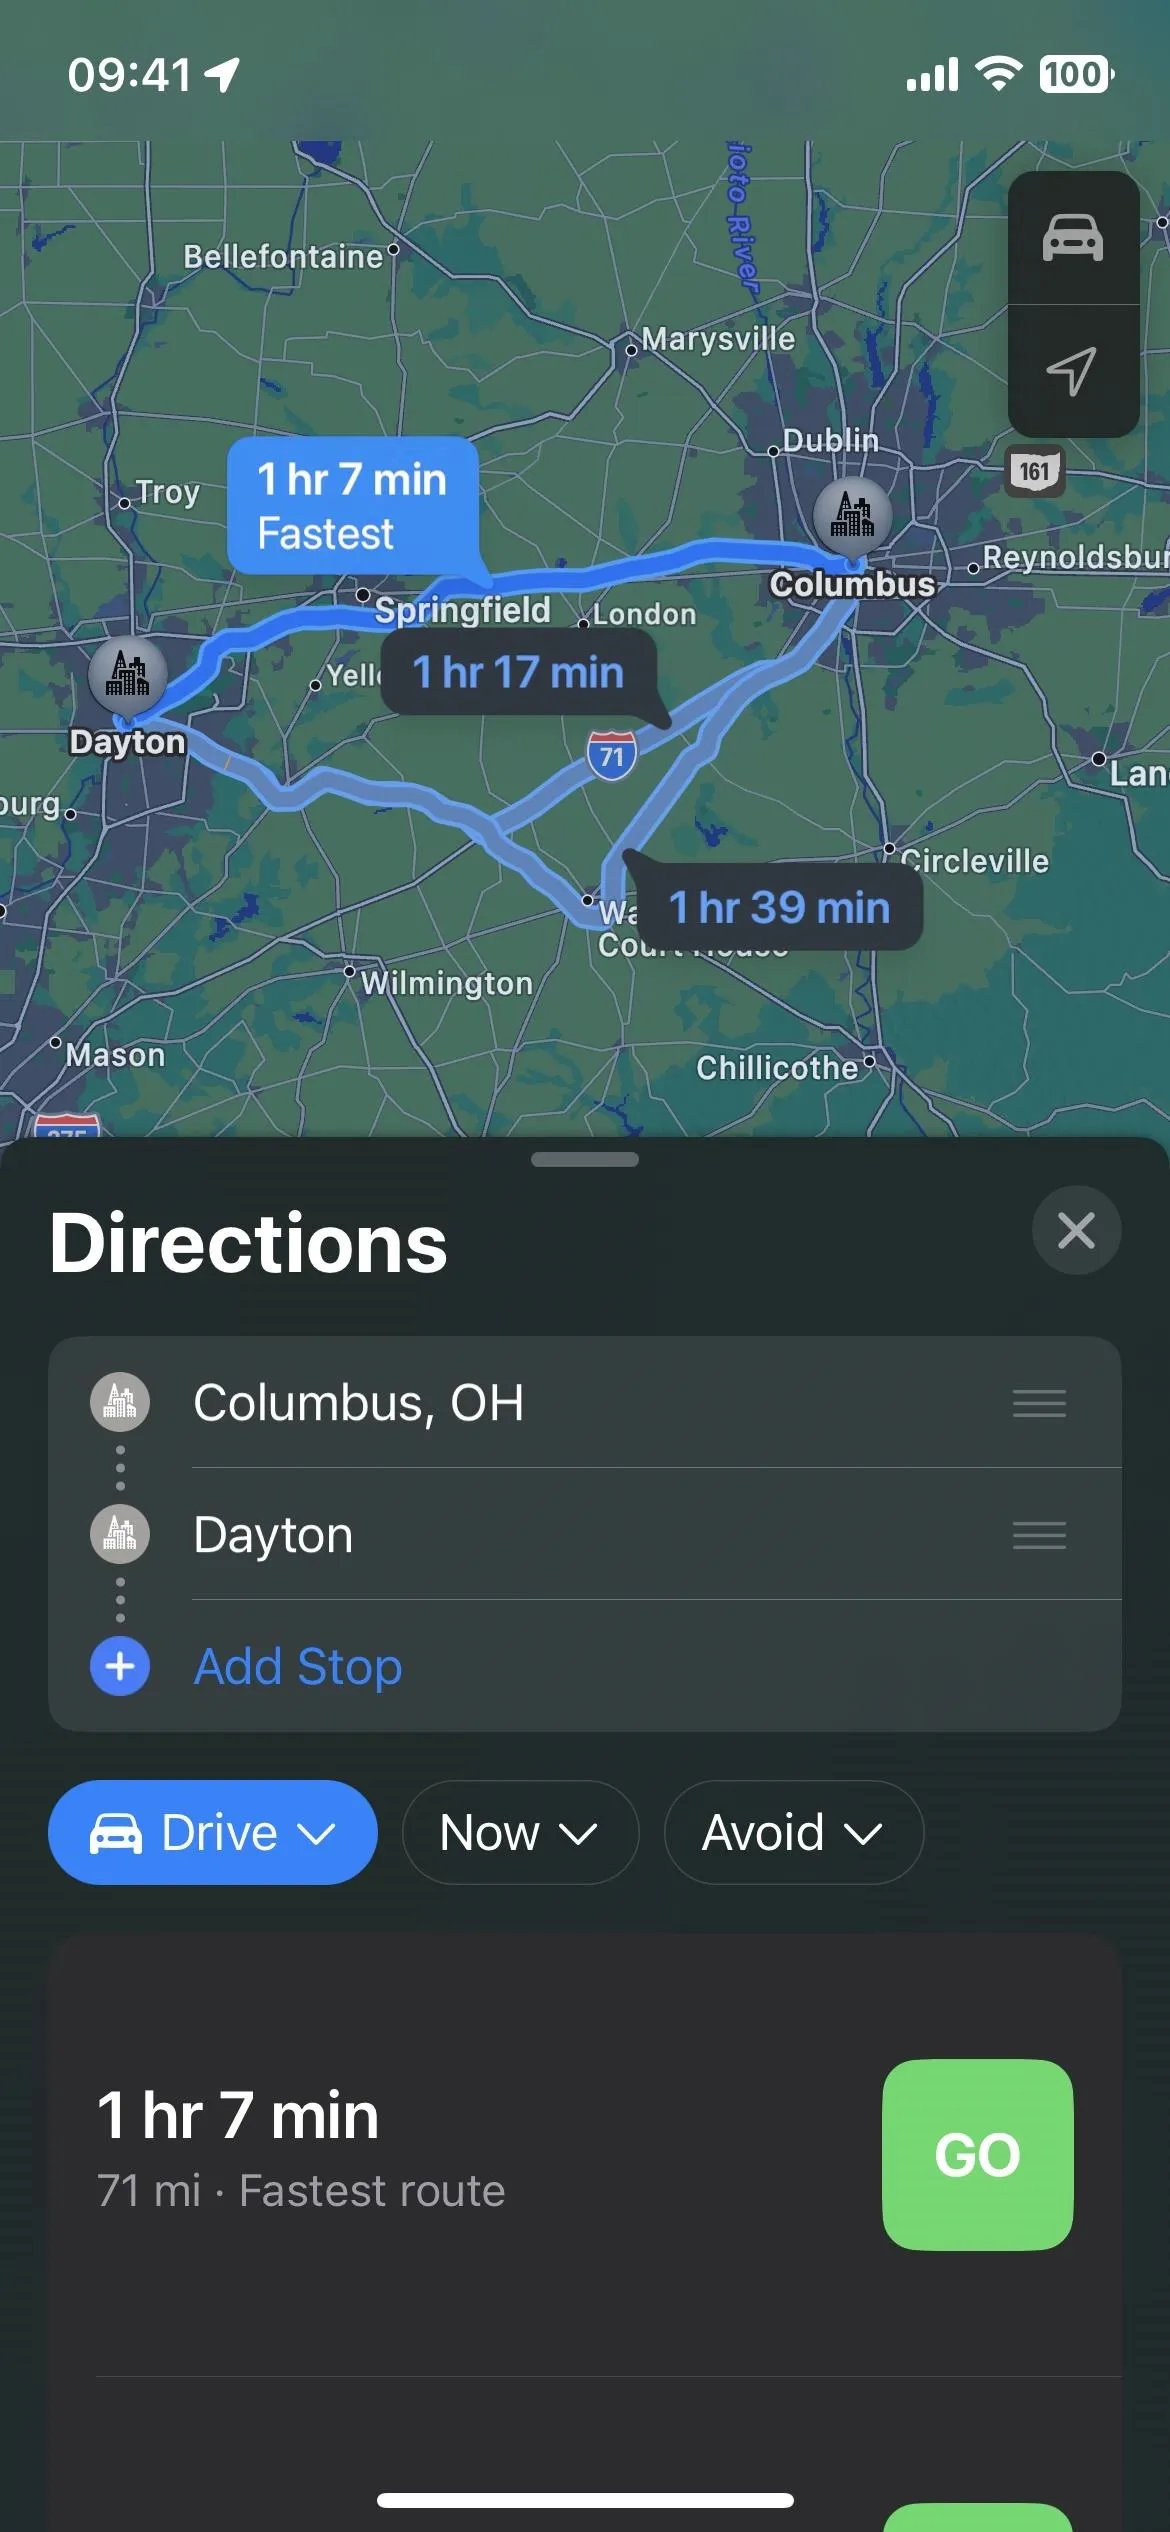
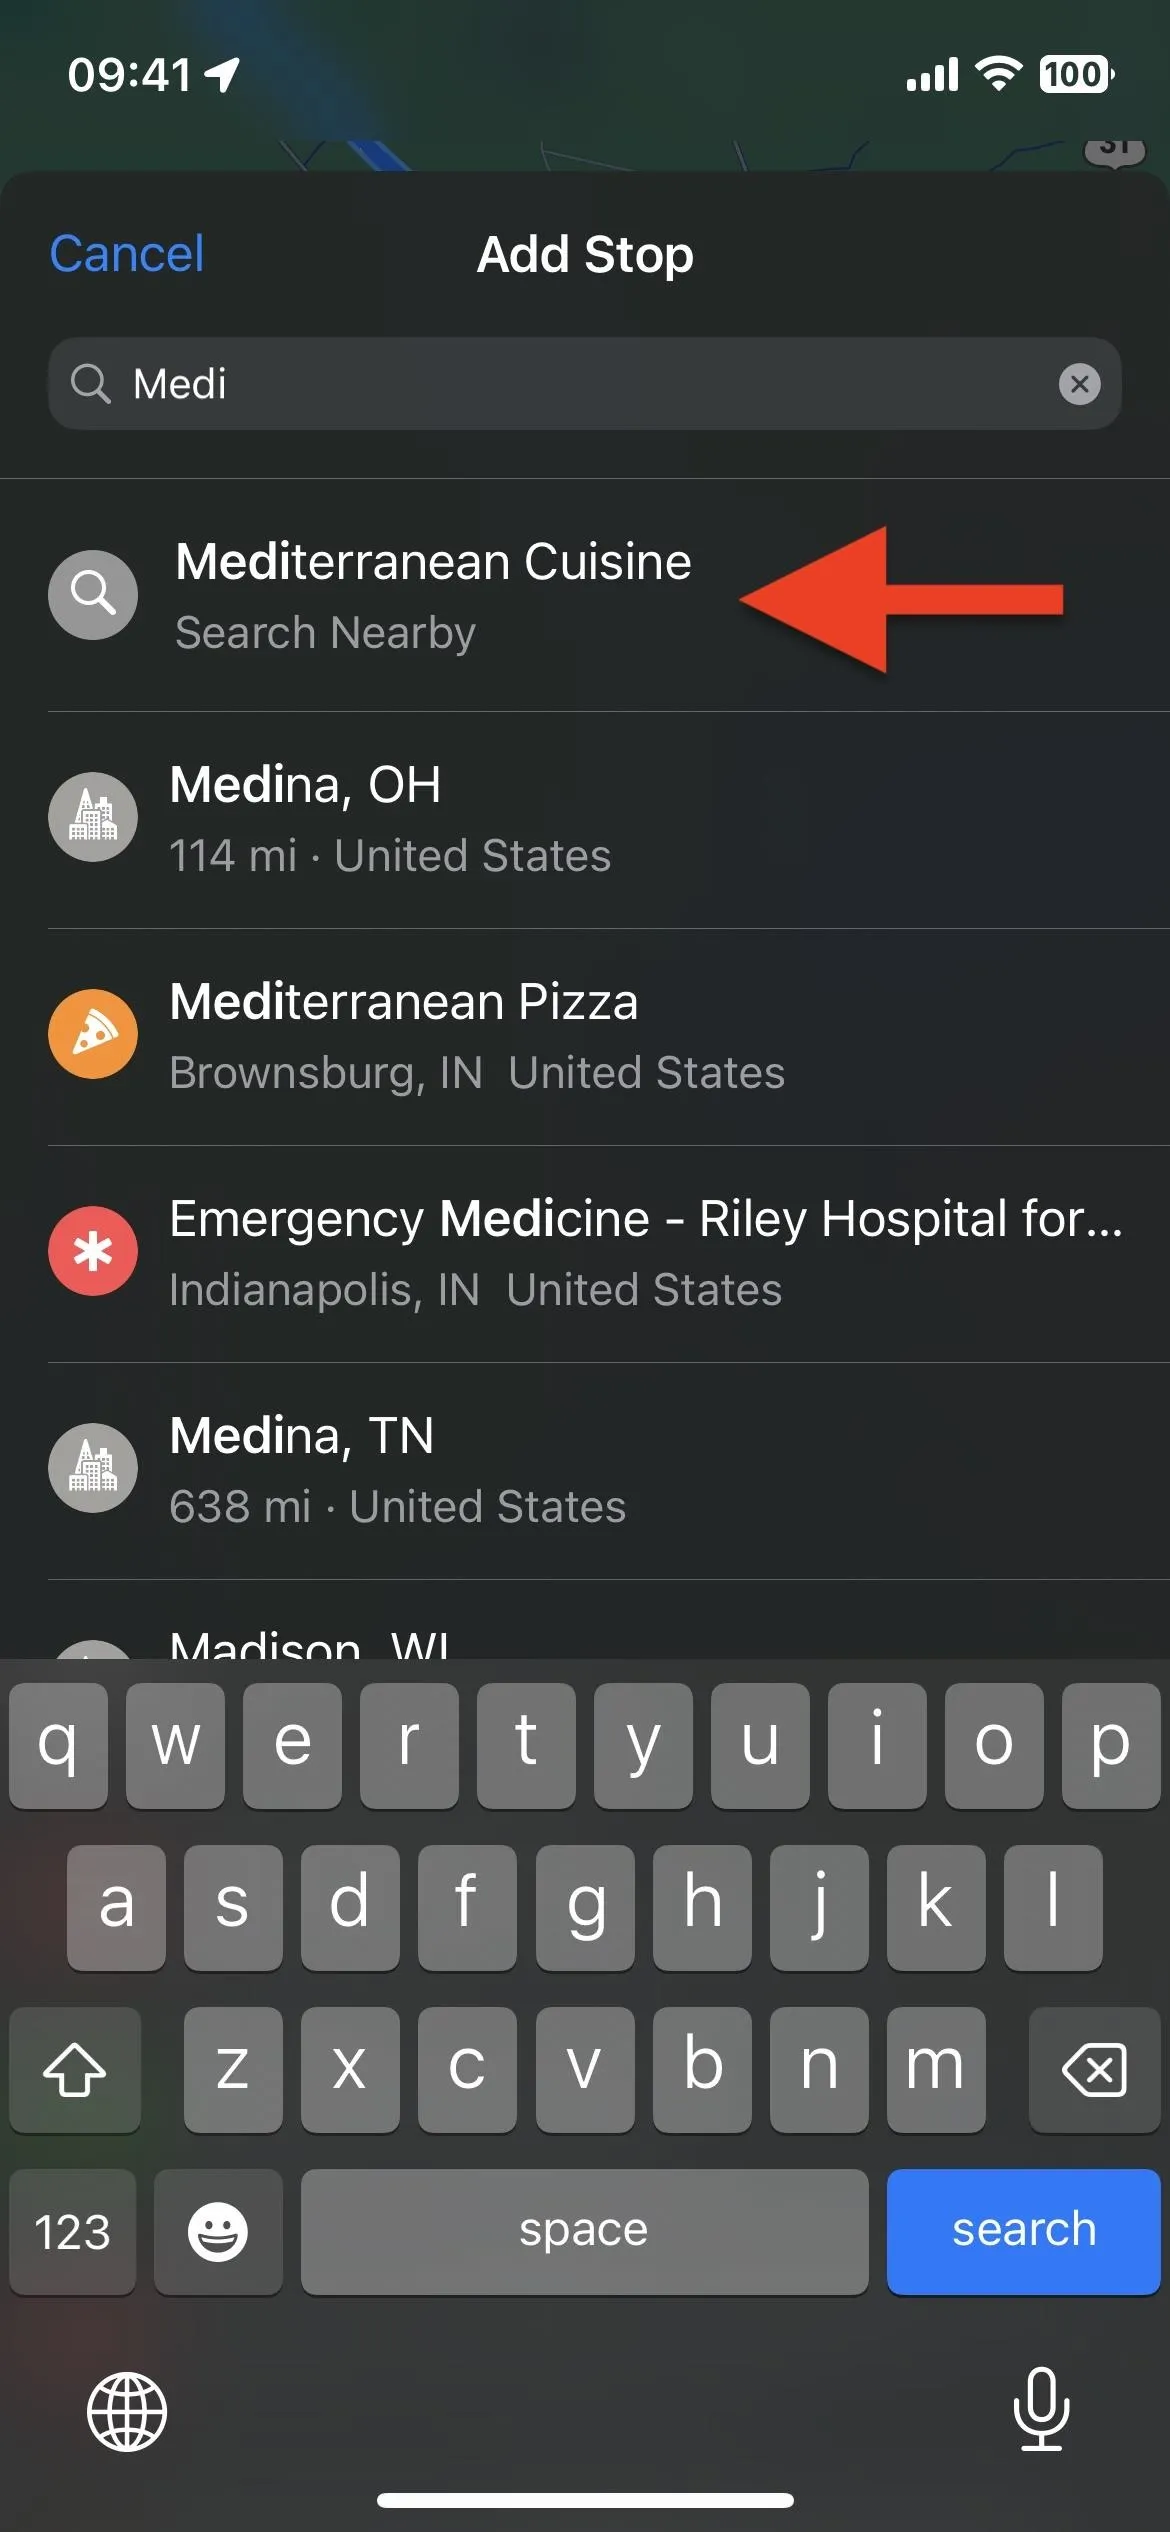
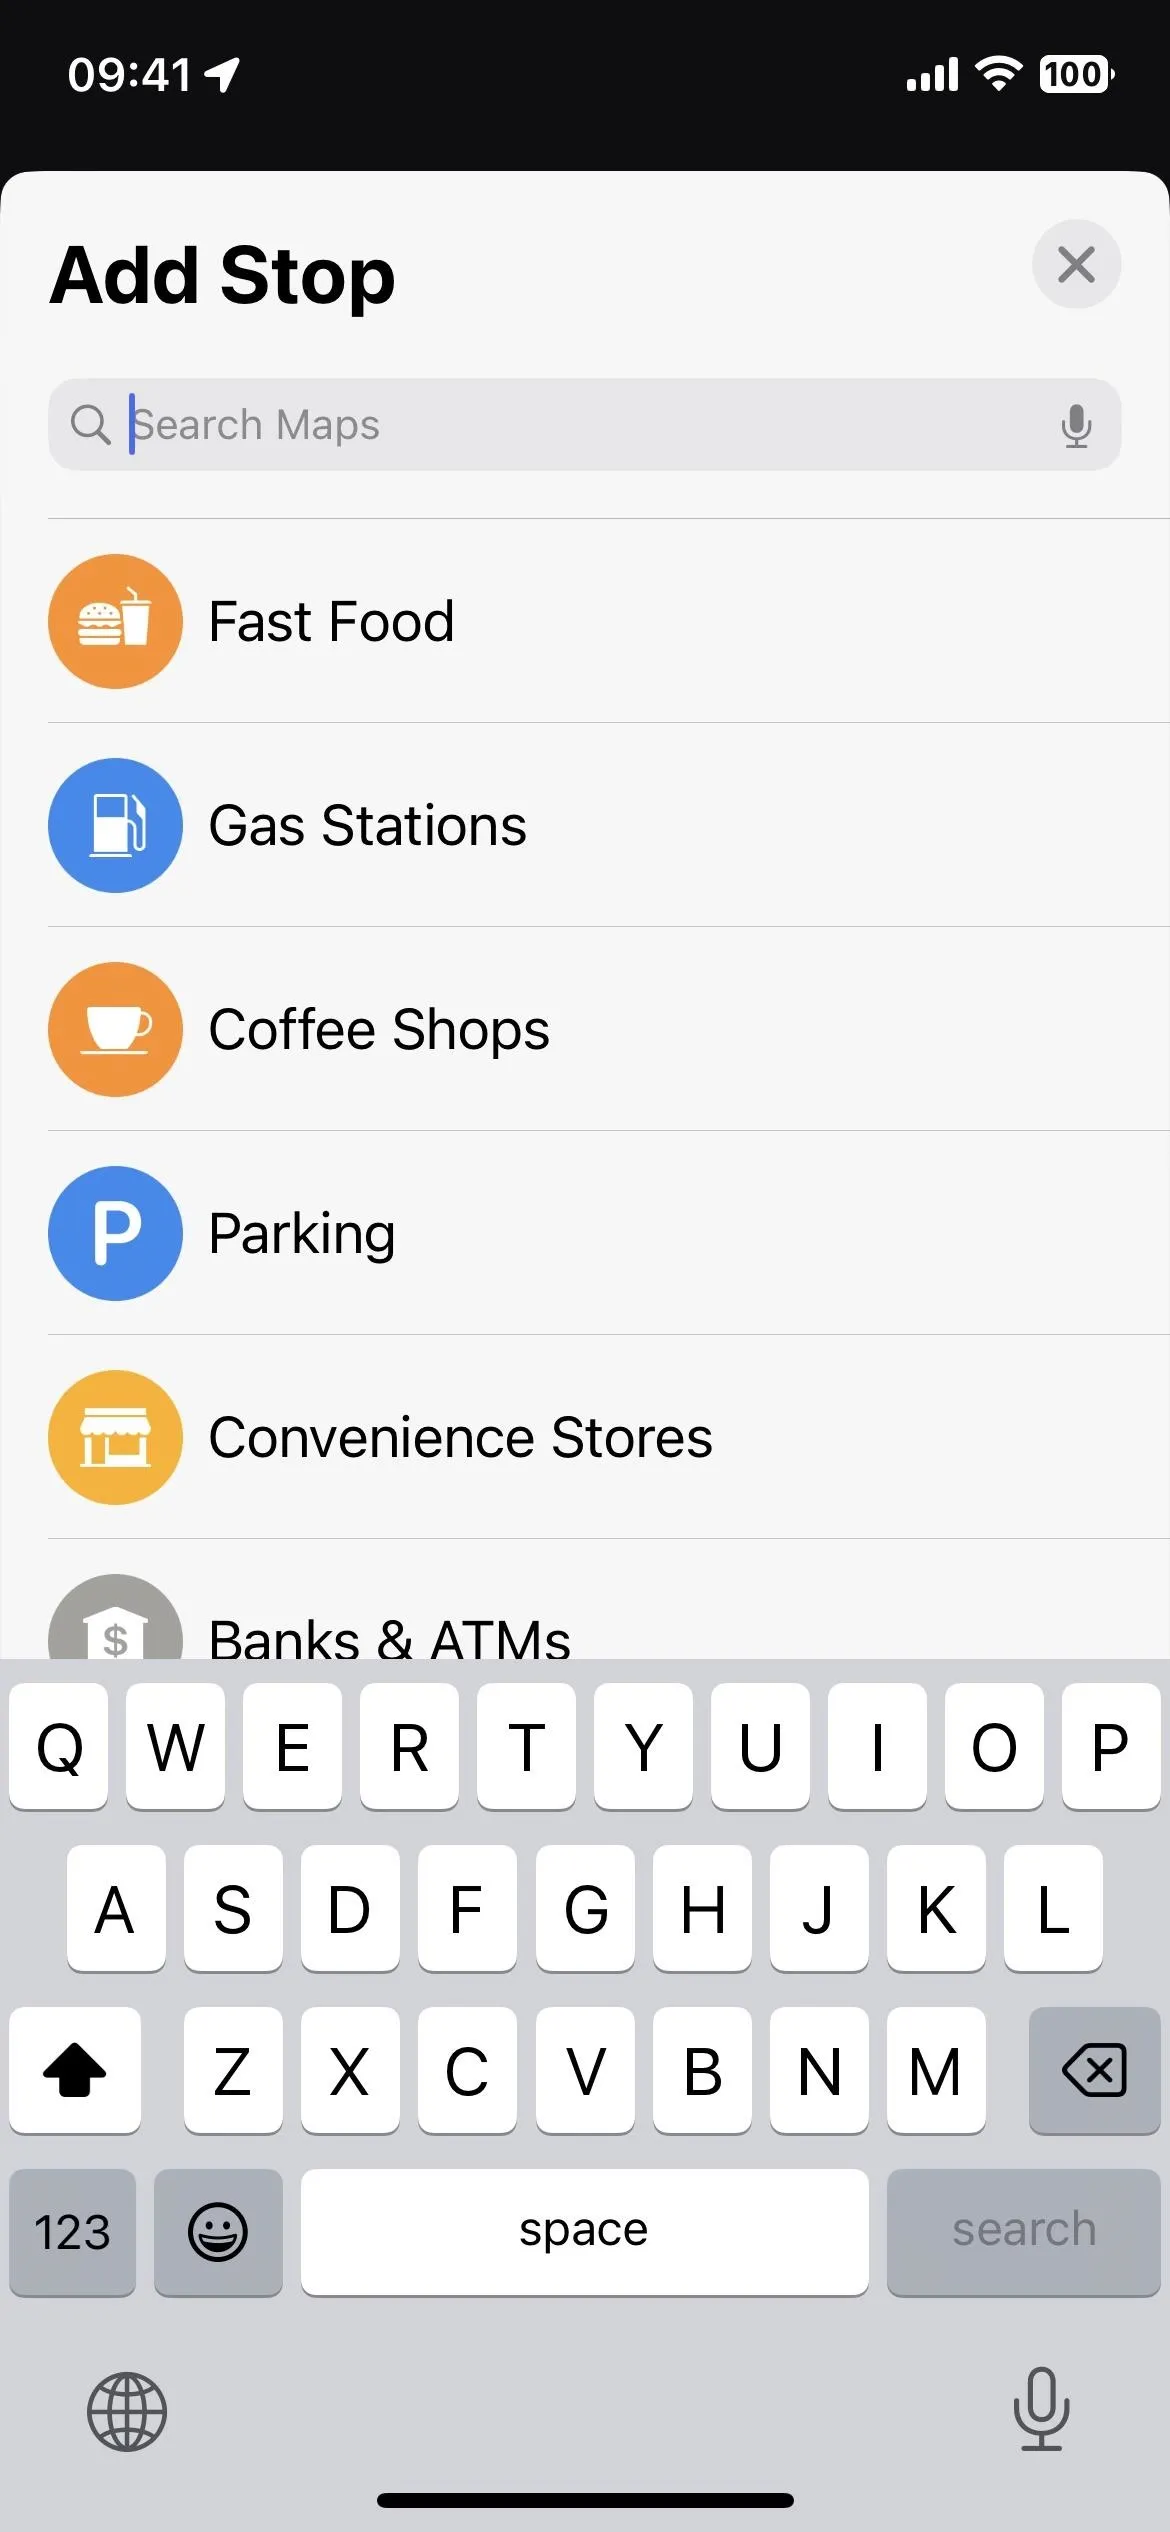
To add a stop to any point on the route, whether between or outside your current planned locations, tap "Add Stop" from the list, then search for and select the wanted location.

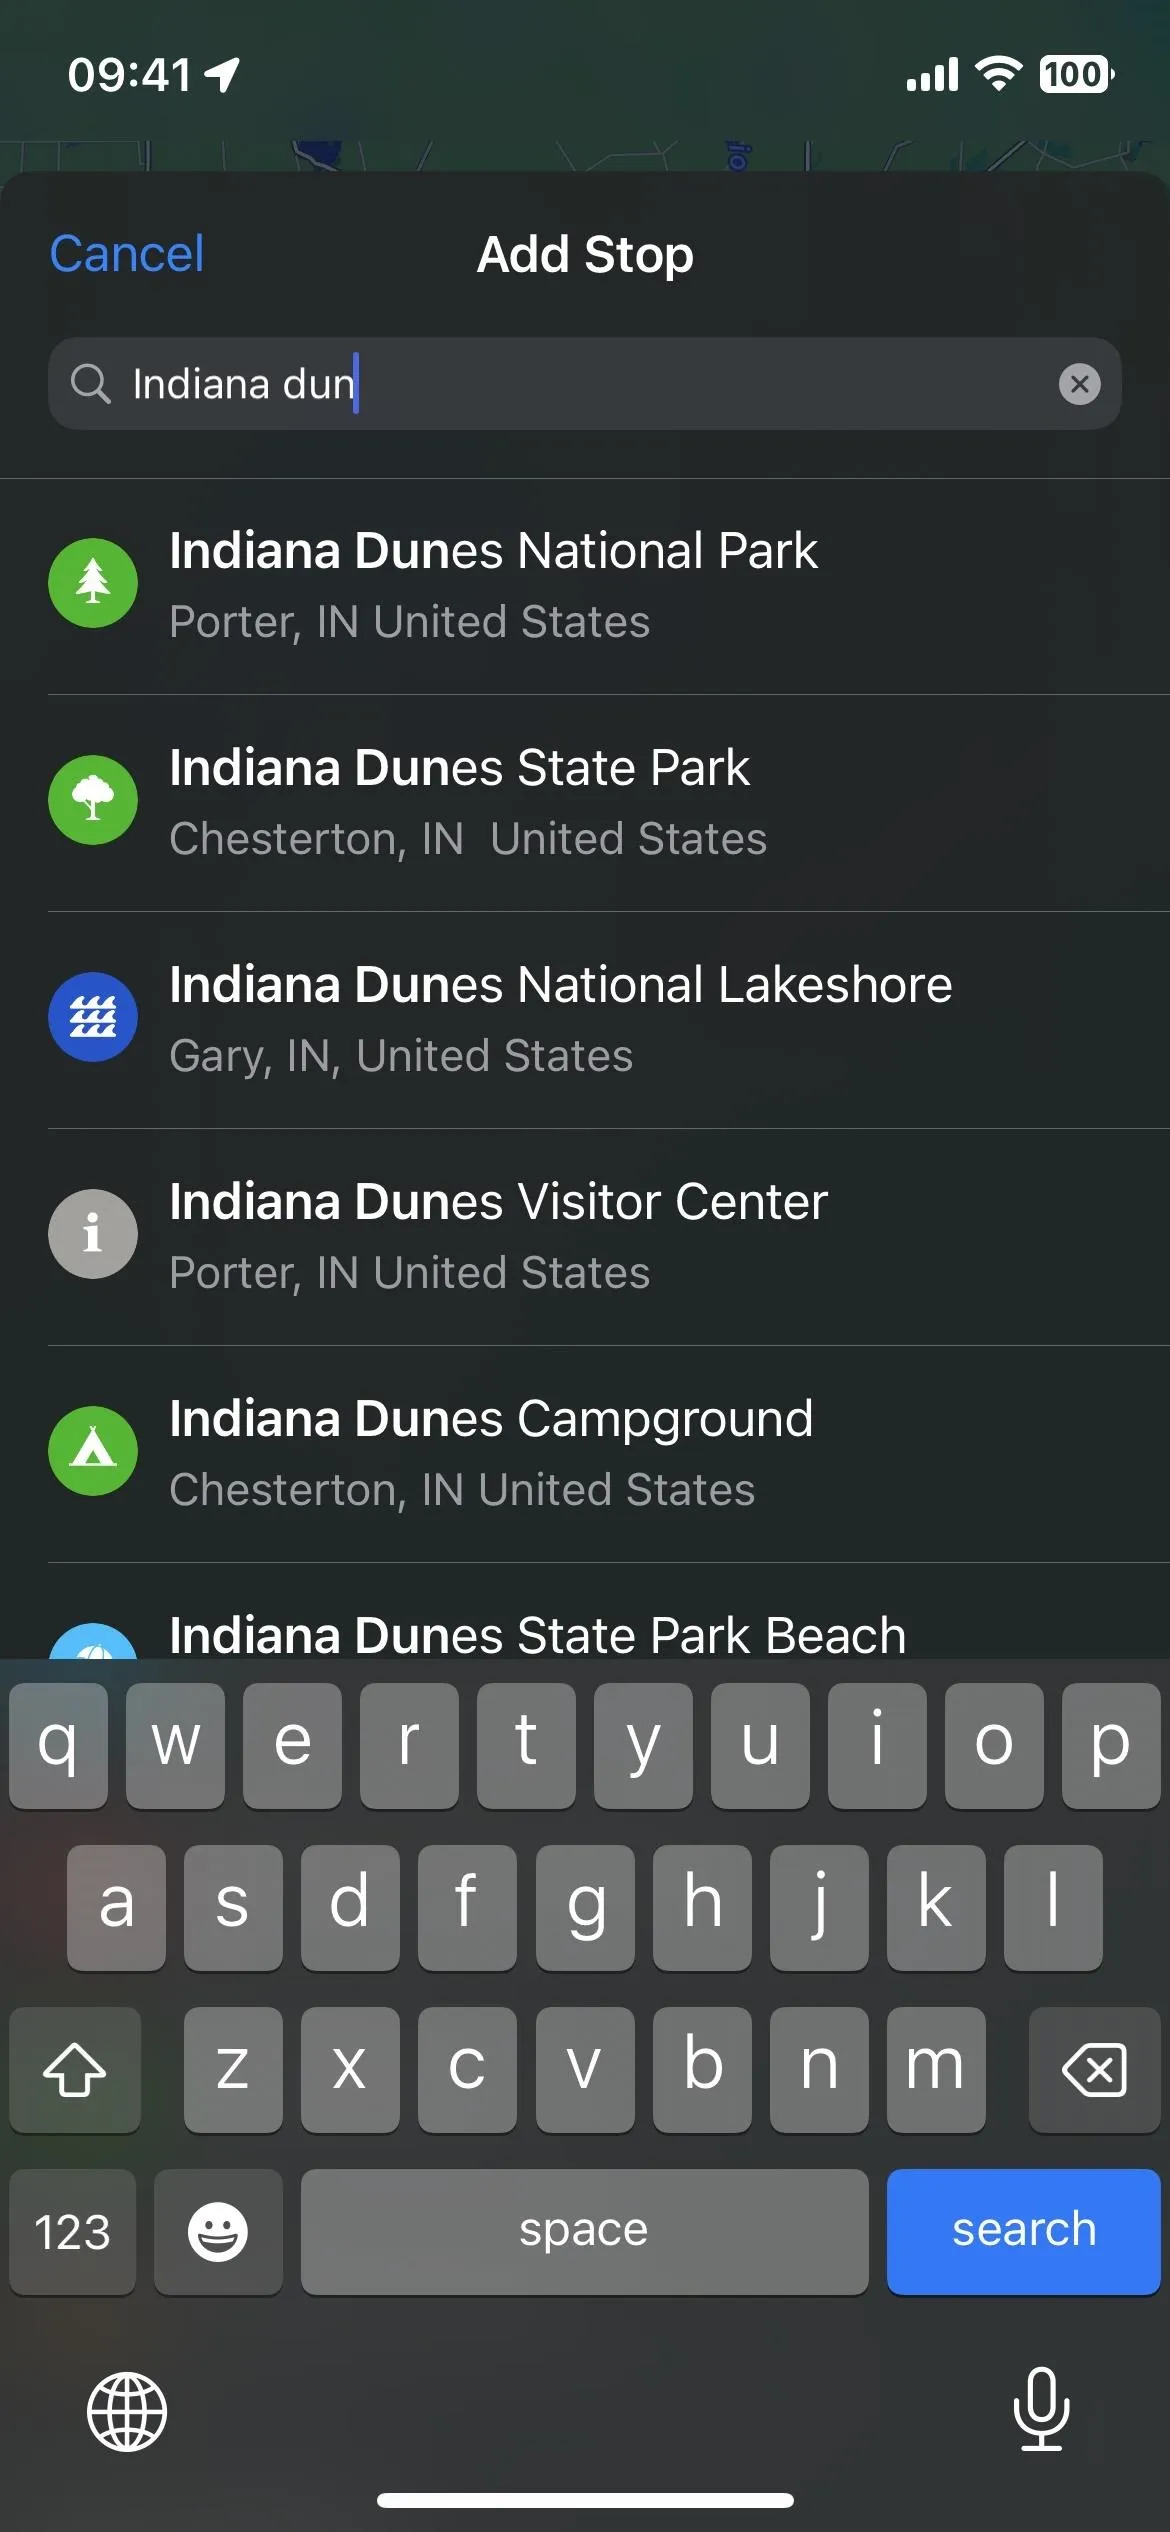
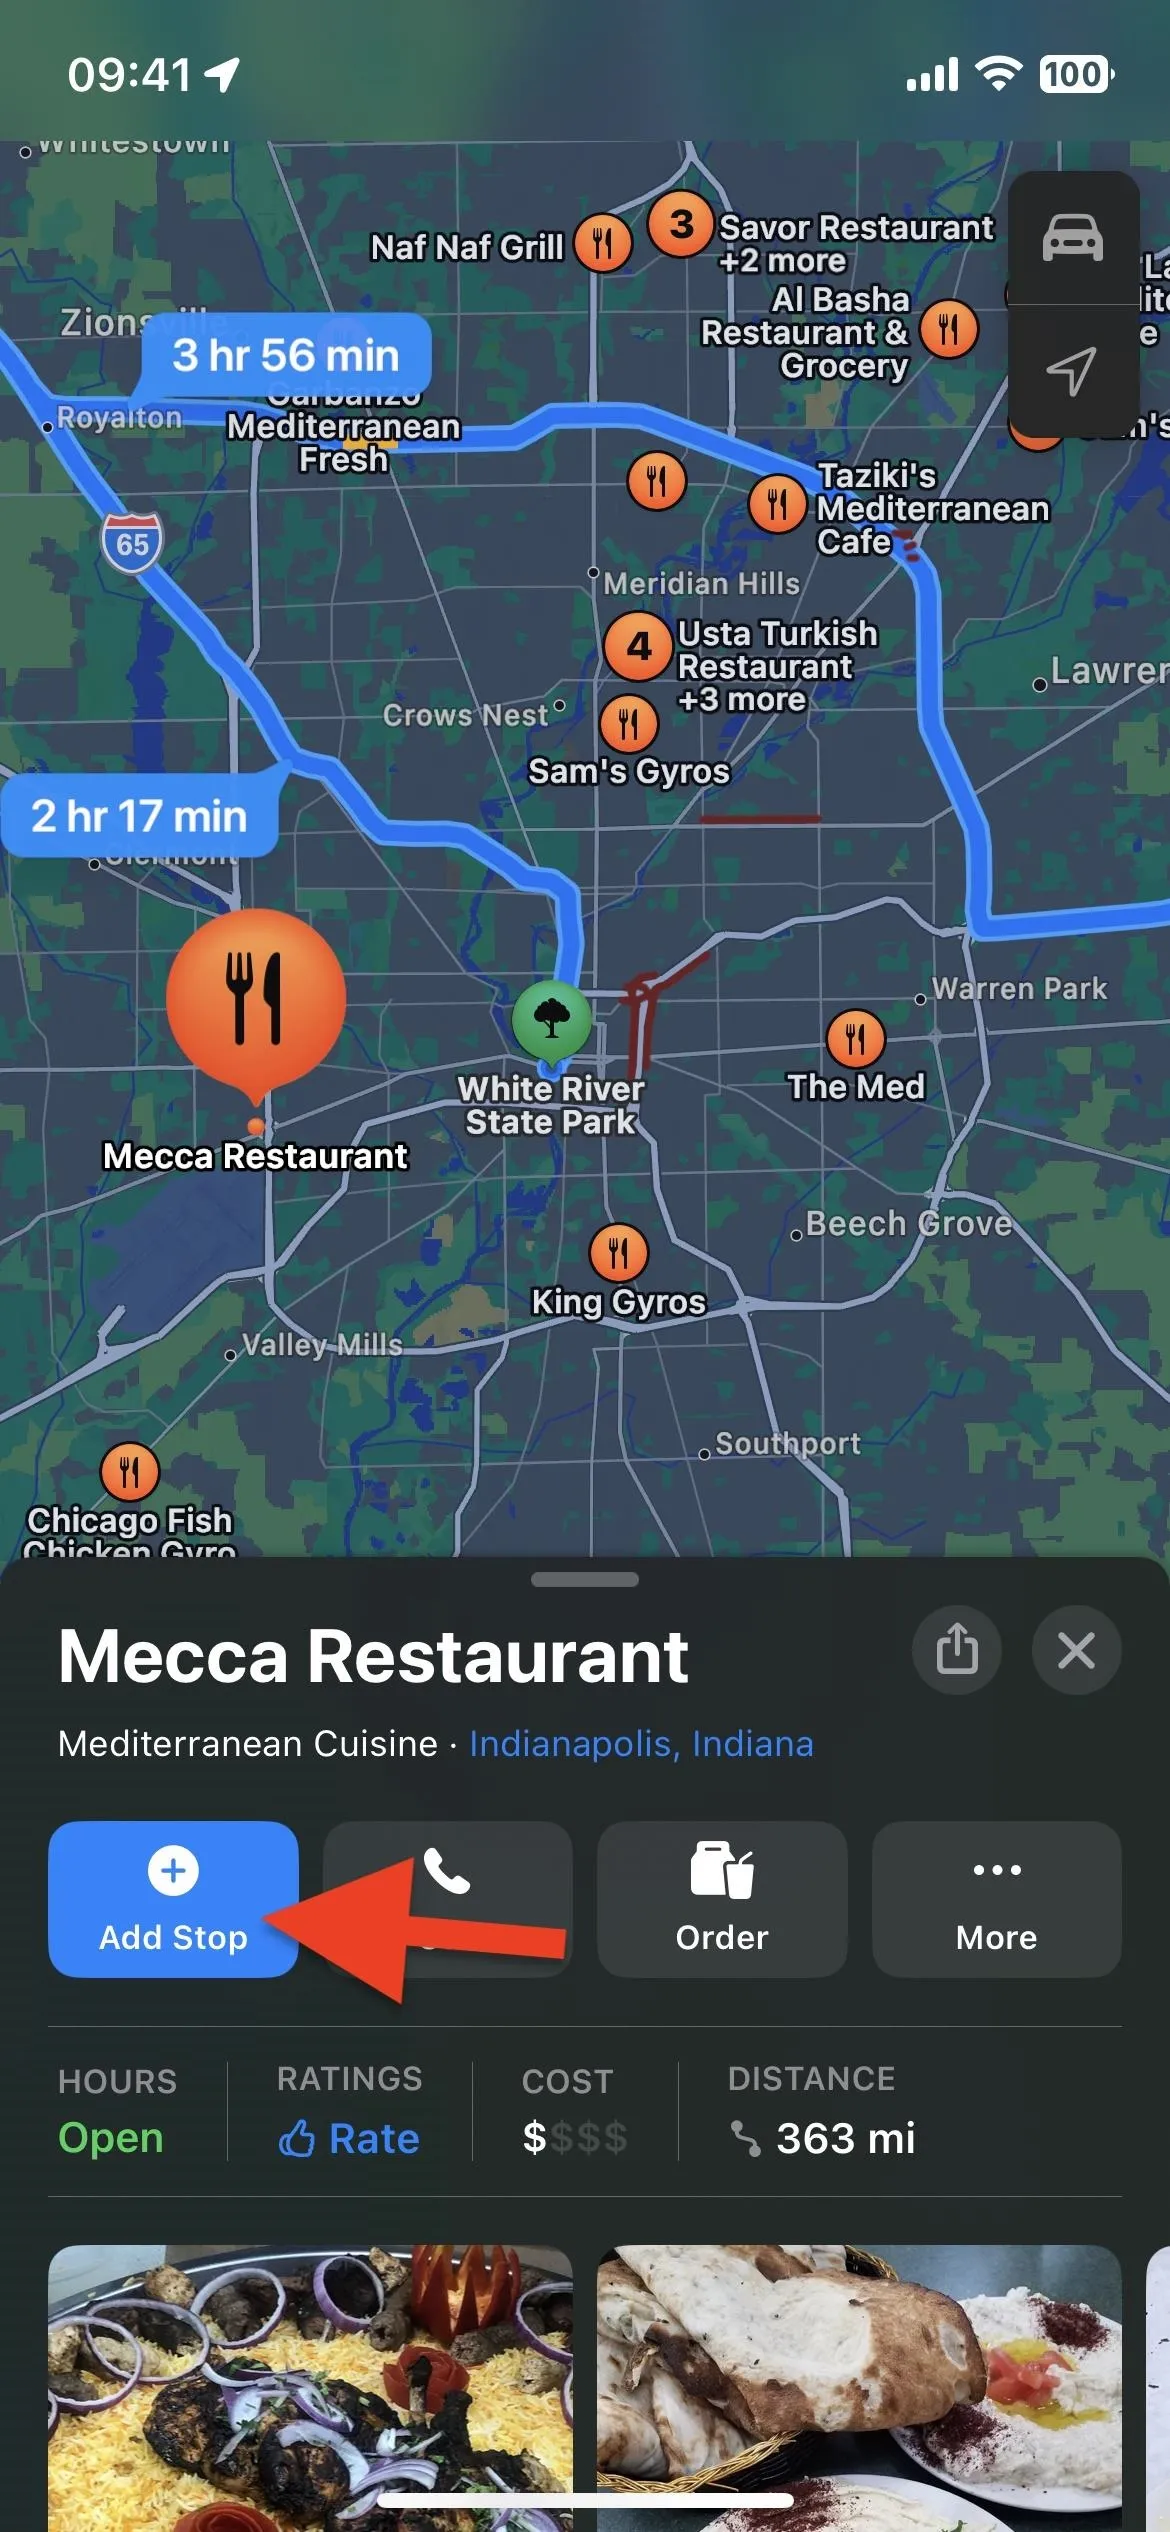
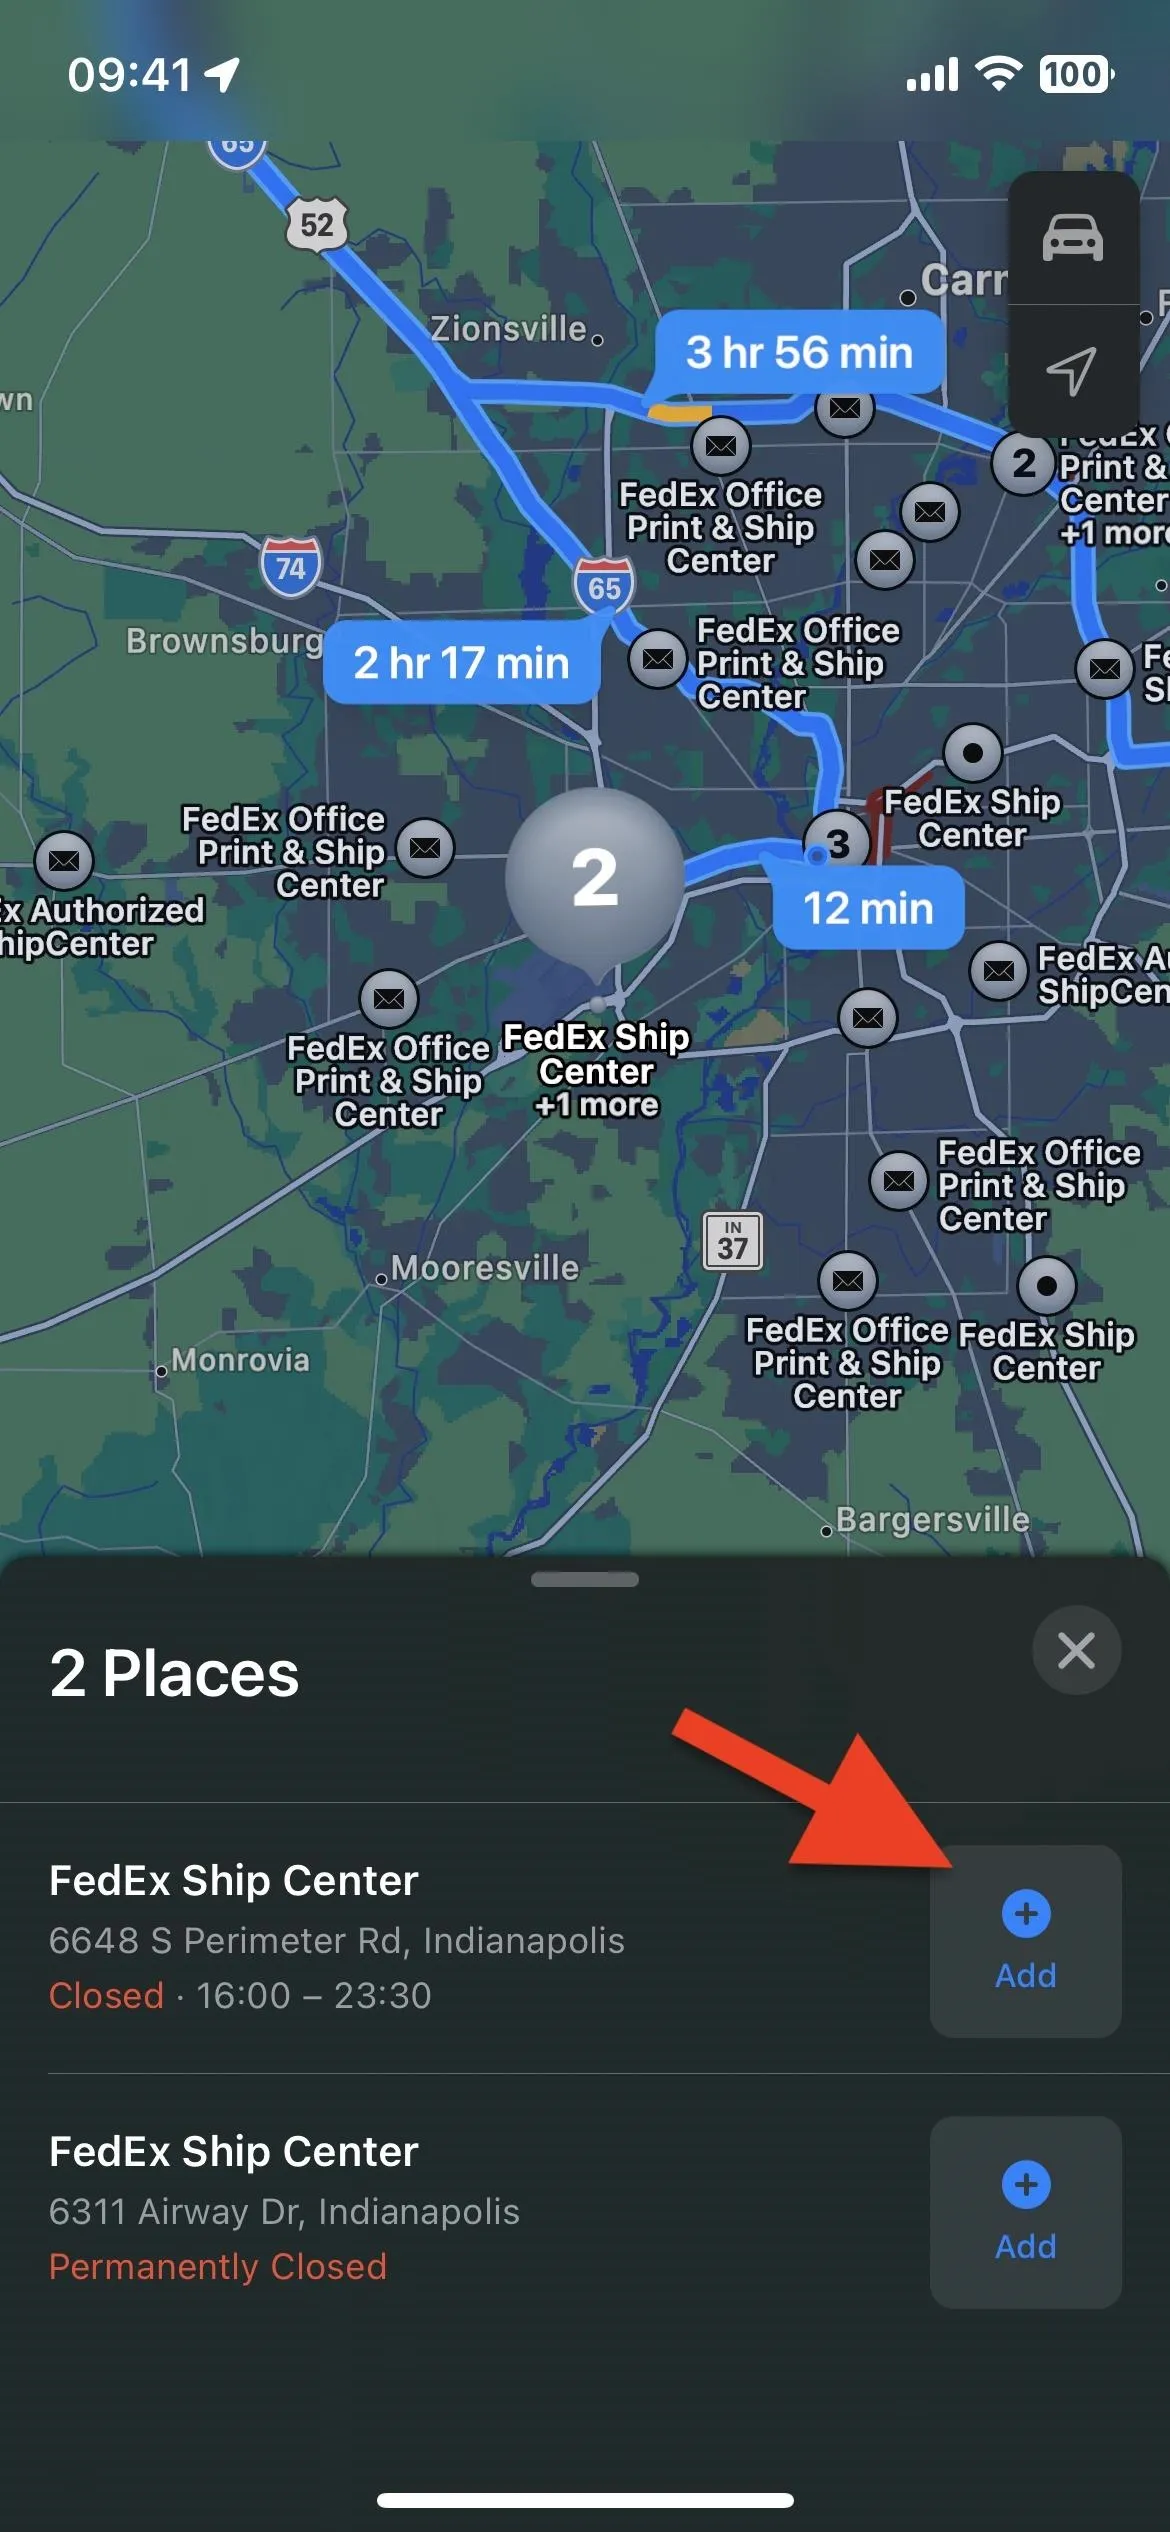
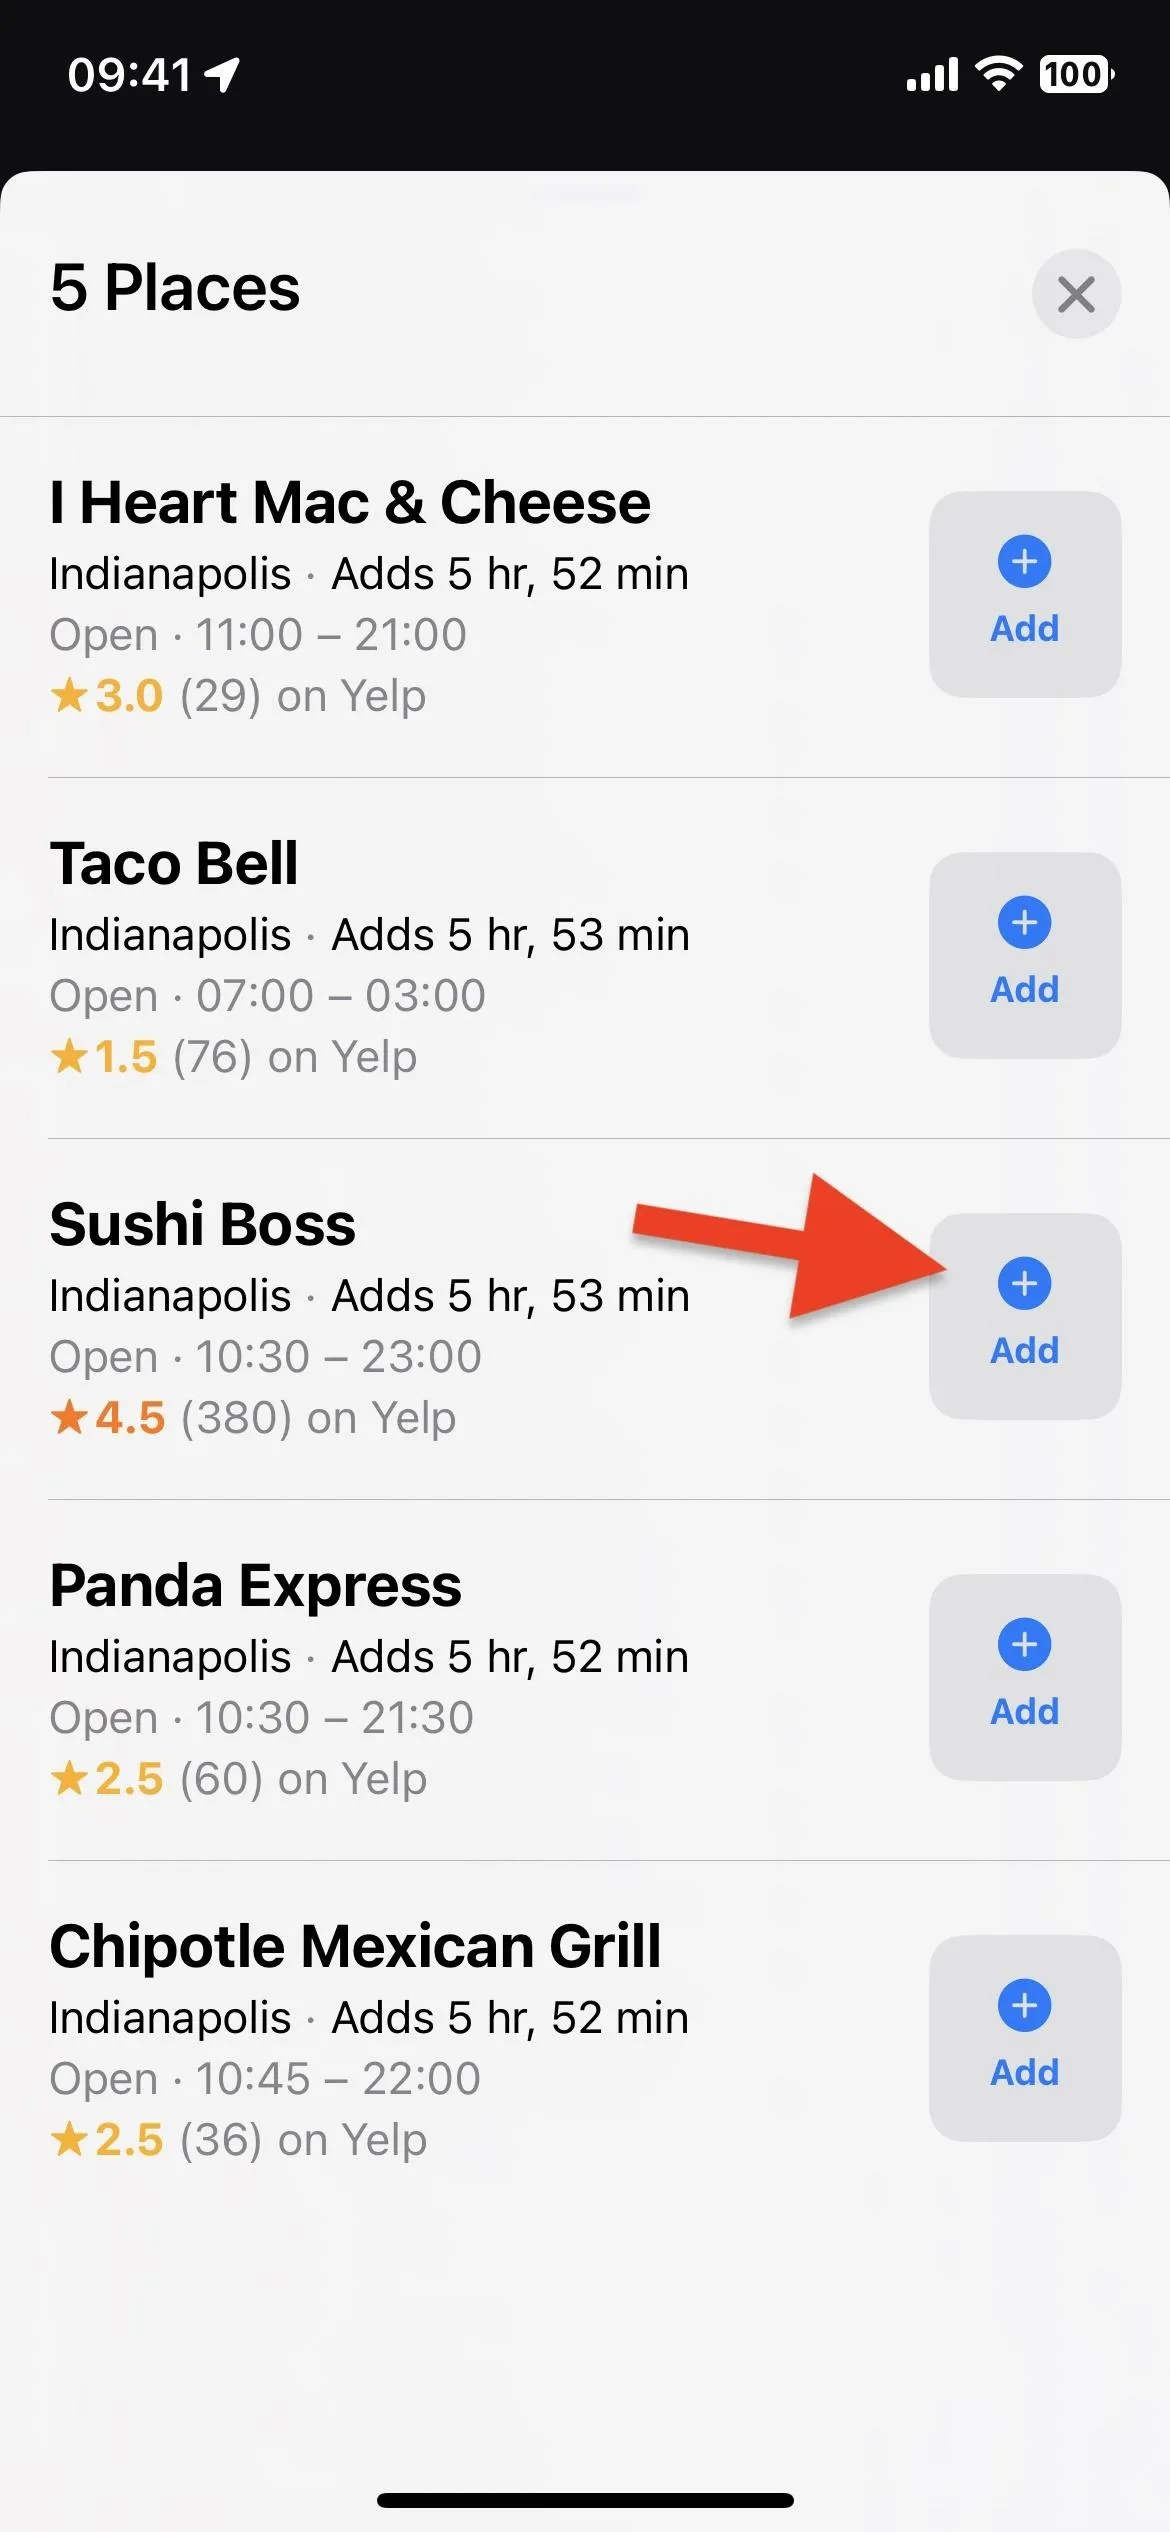
If you're trying to find a pit stop like a FedEx, Mediterranean restaurant, or park, you can search by those terms and select the location you want from the map. When you choose a place, hit "Add Stop" from its details card or "Add" from the list view. Alternatively, you can tap a location on the map without using the search tool, then tap "Add Stop" from its details.
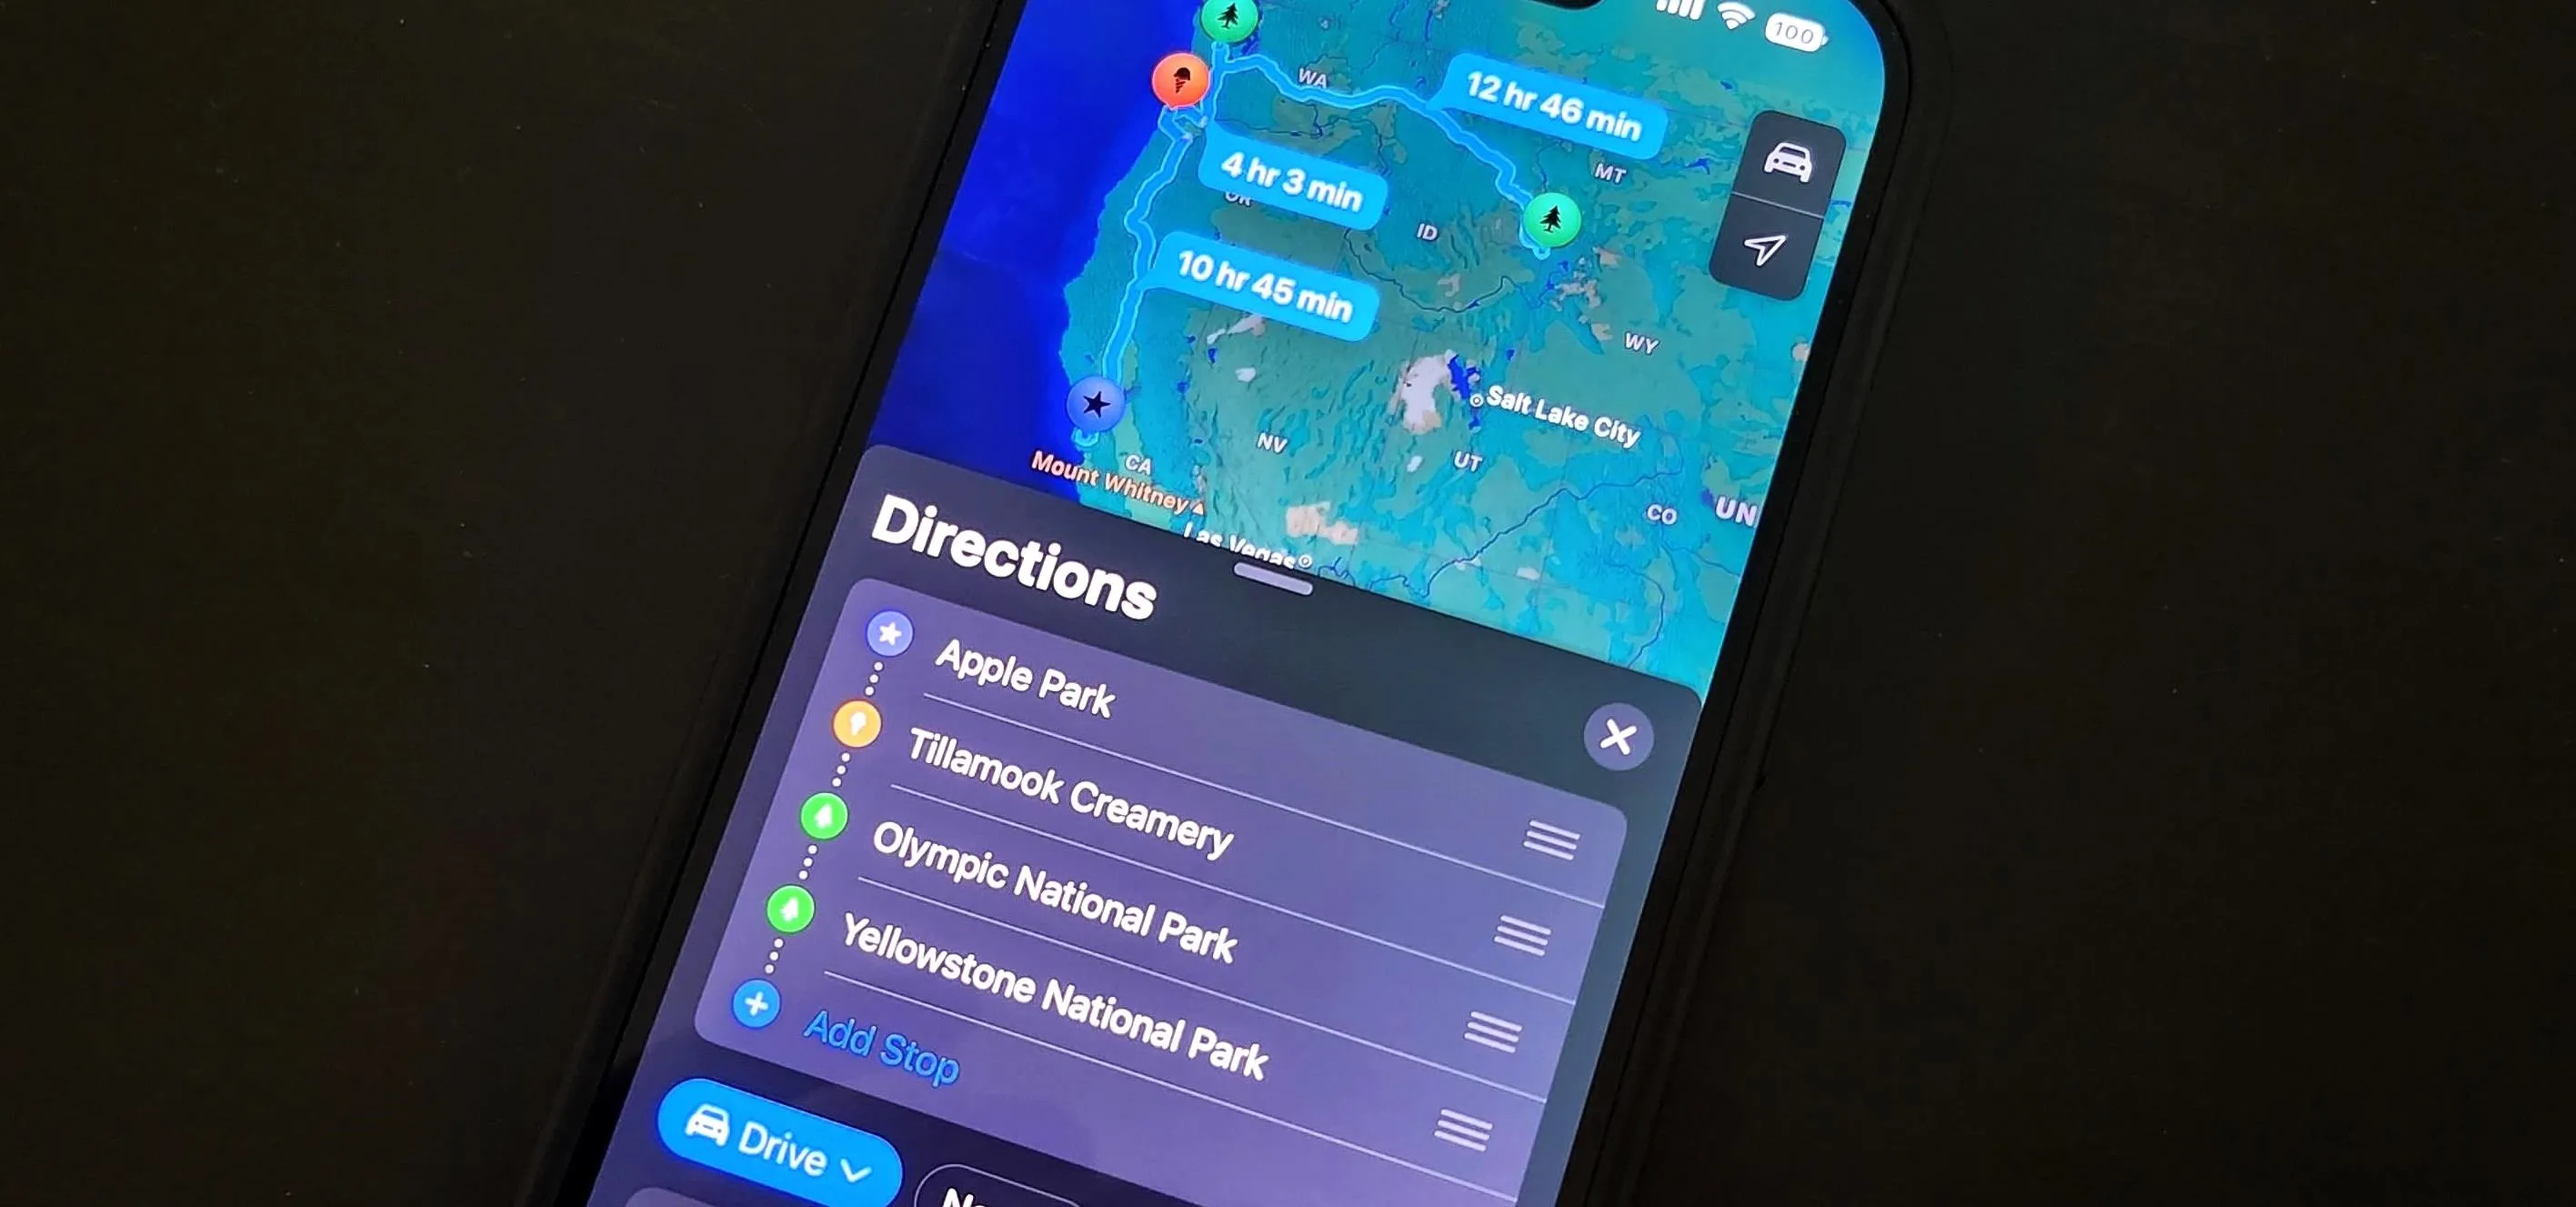
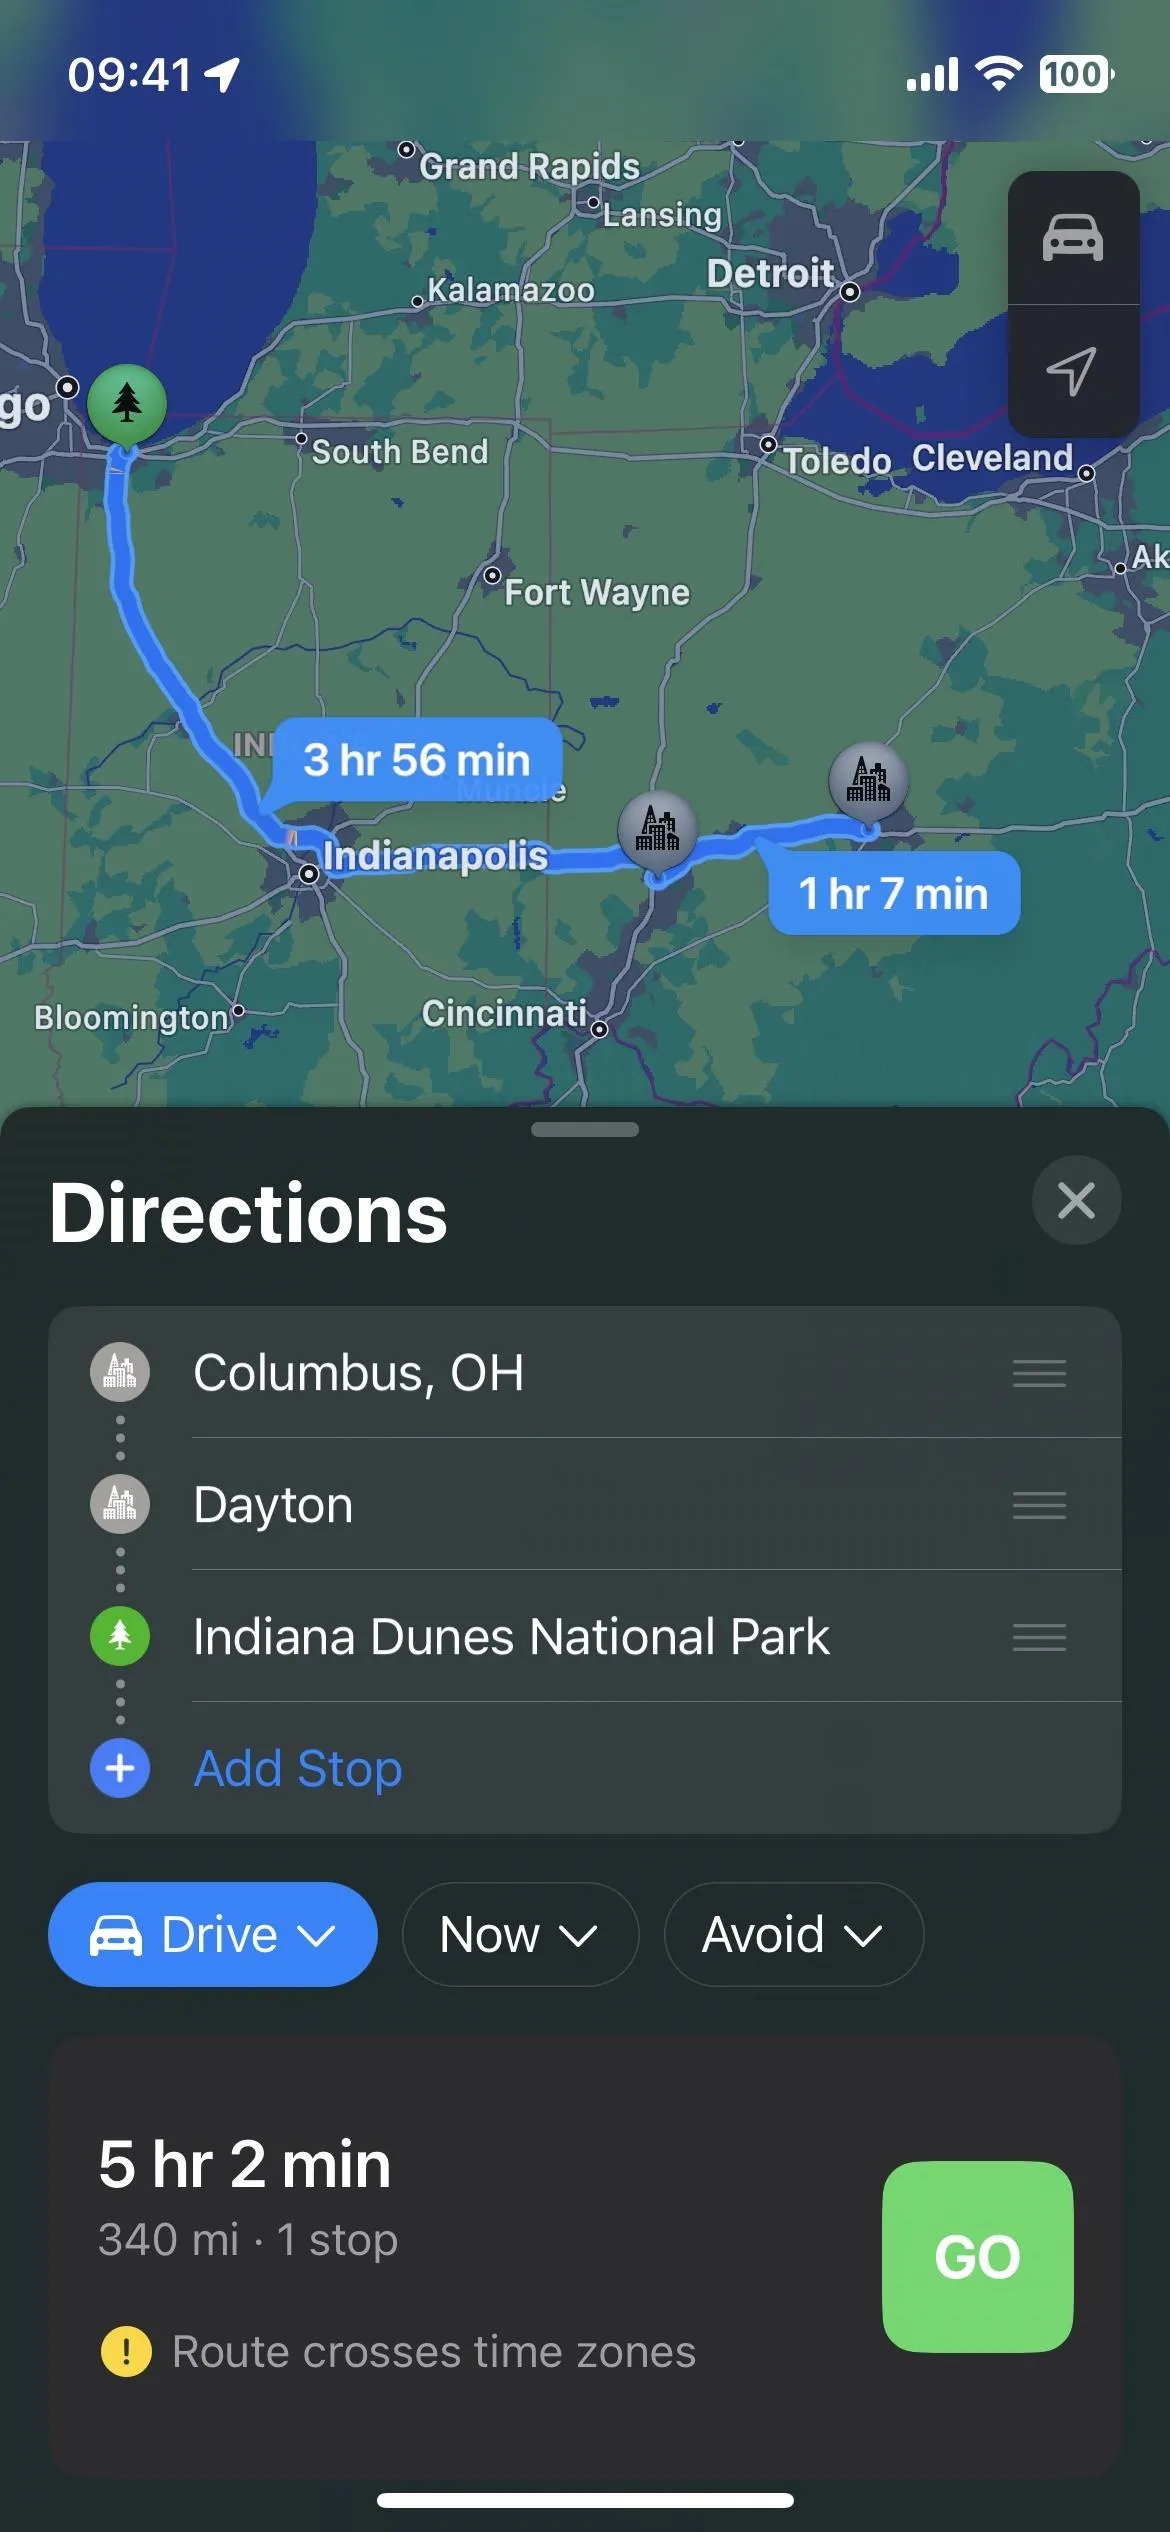
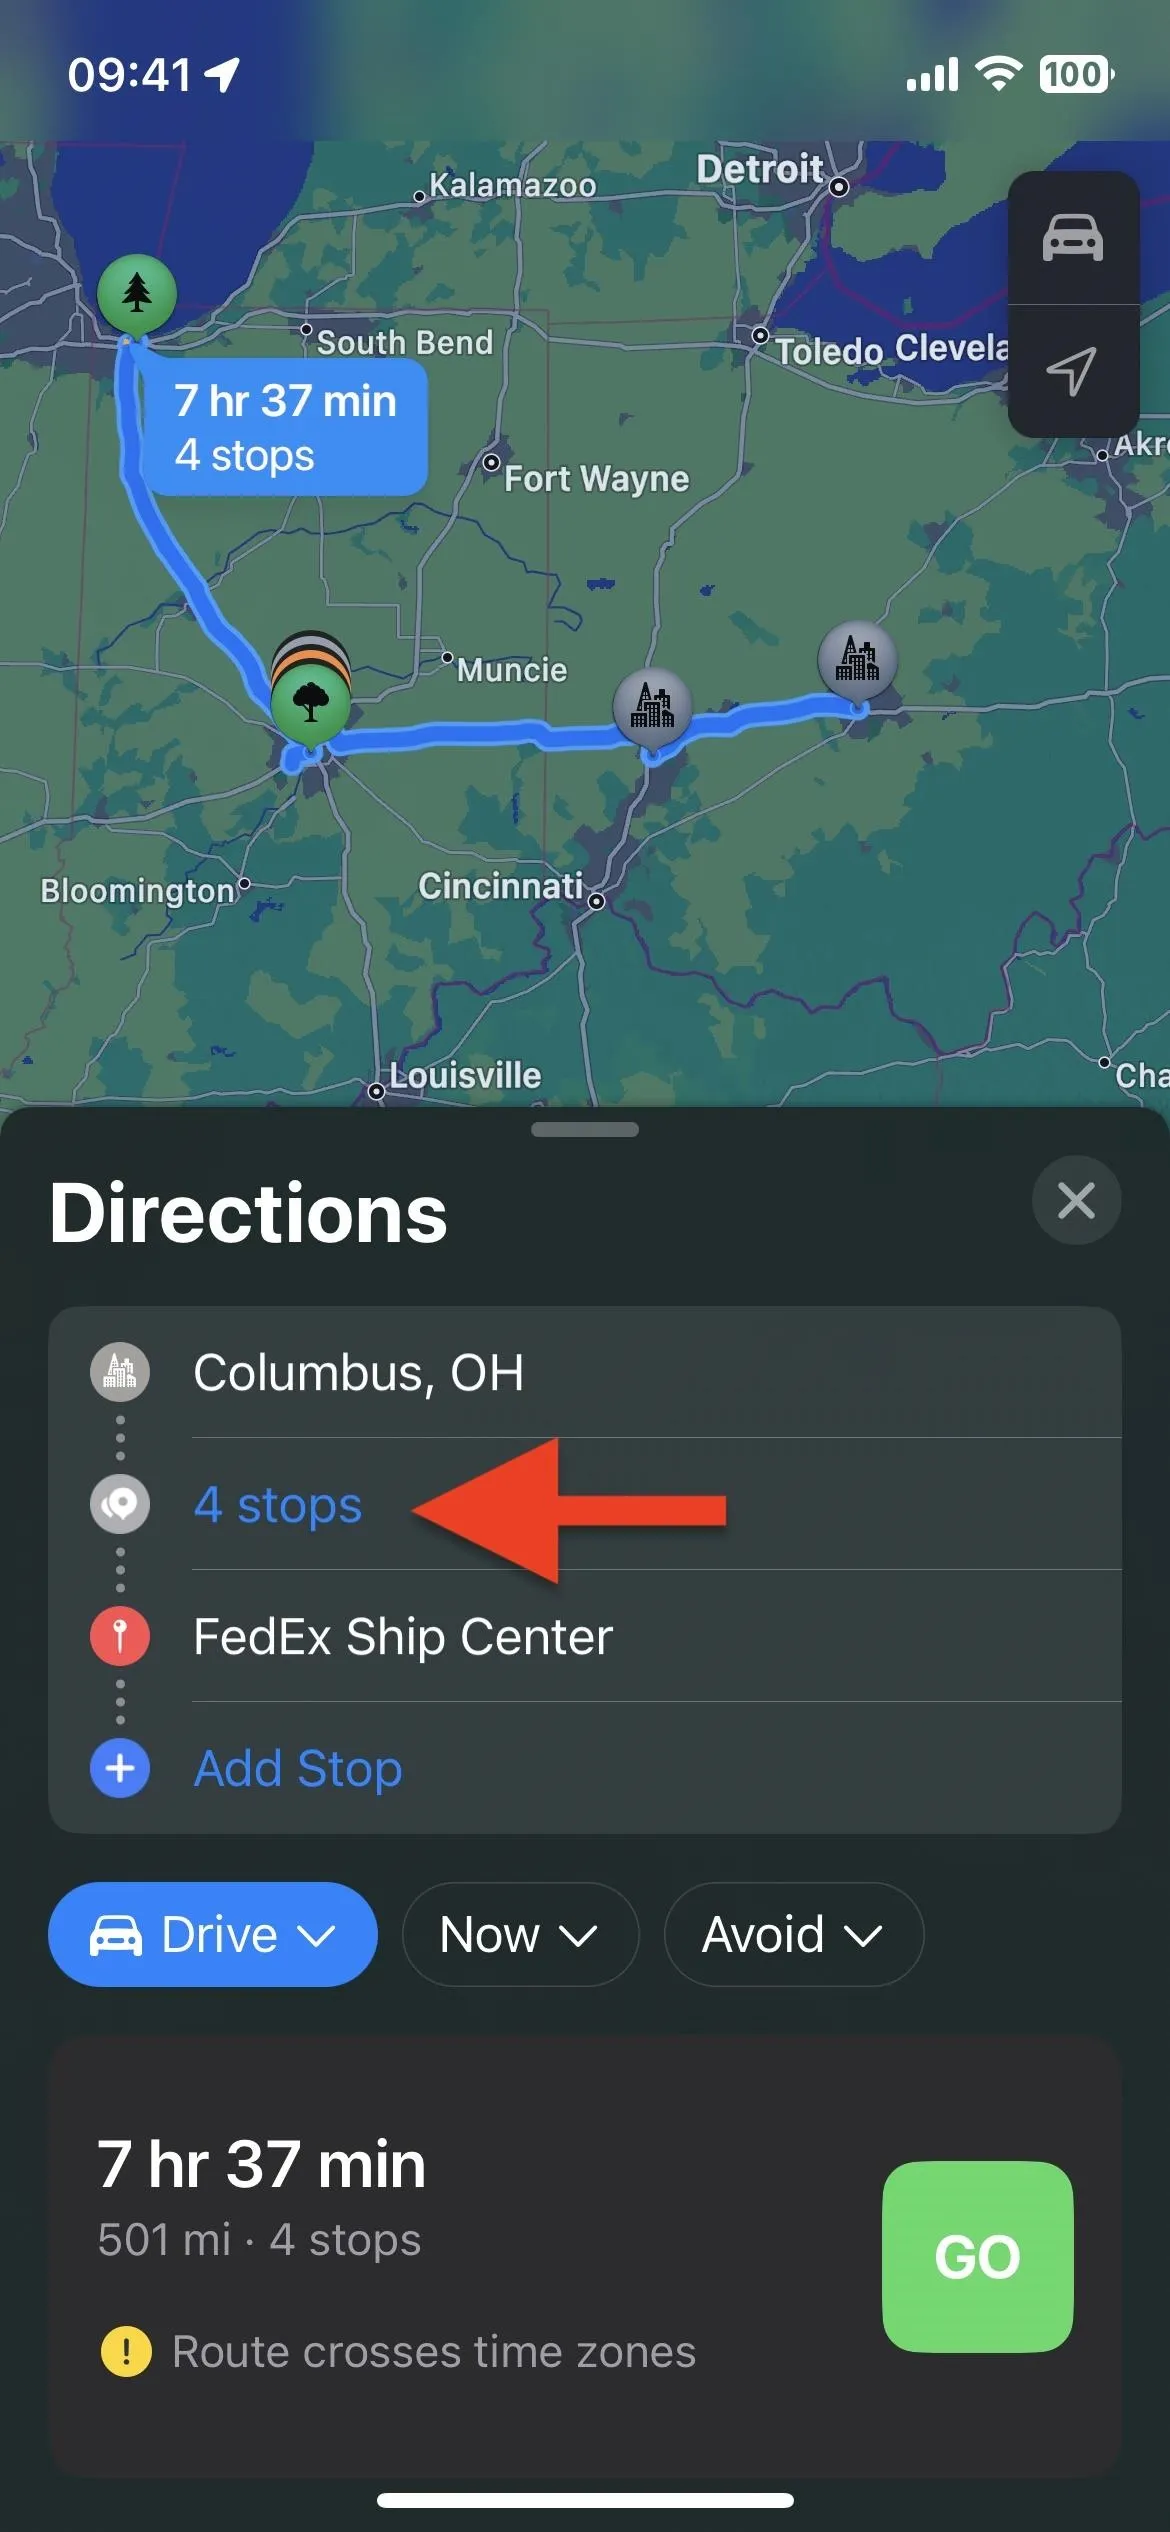
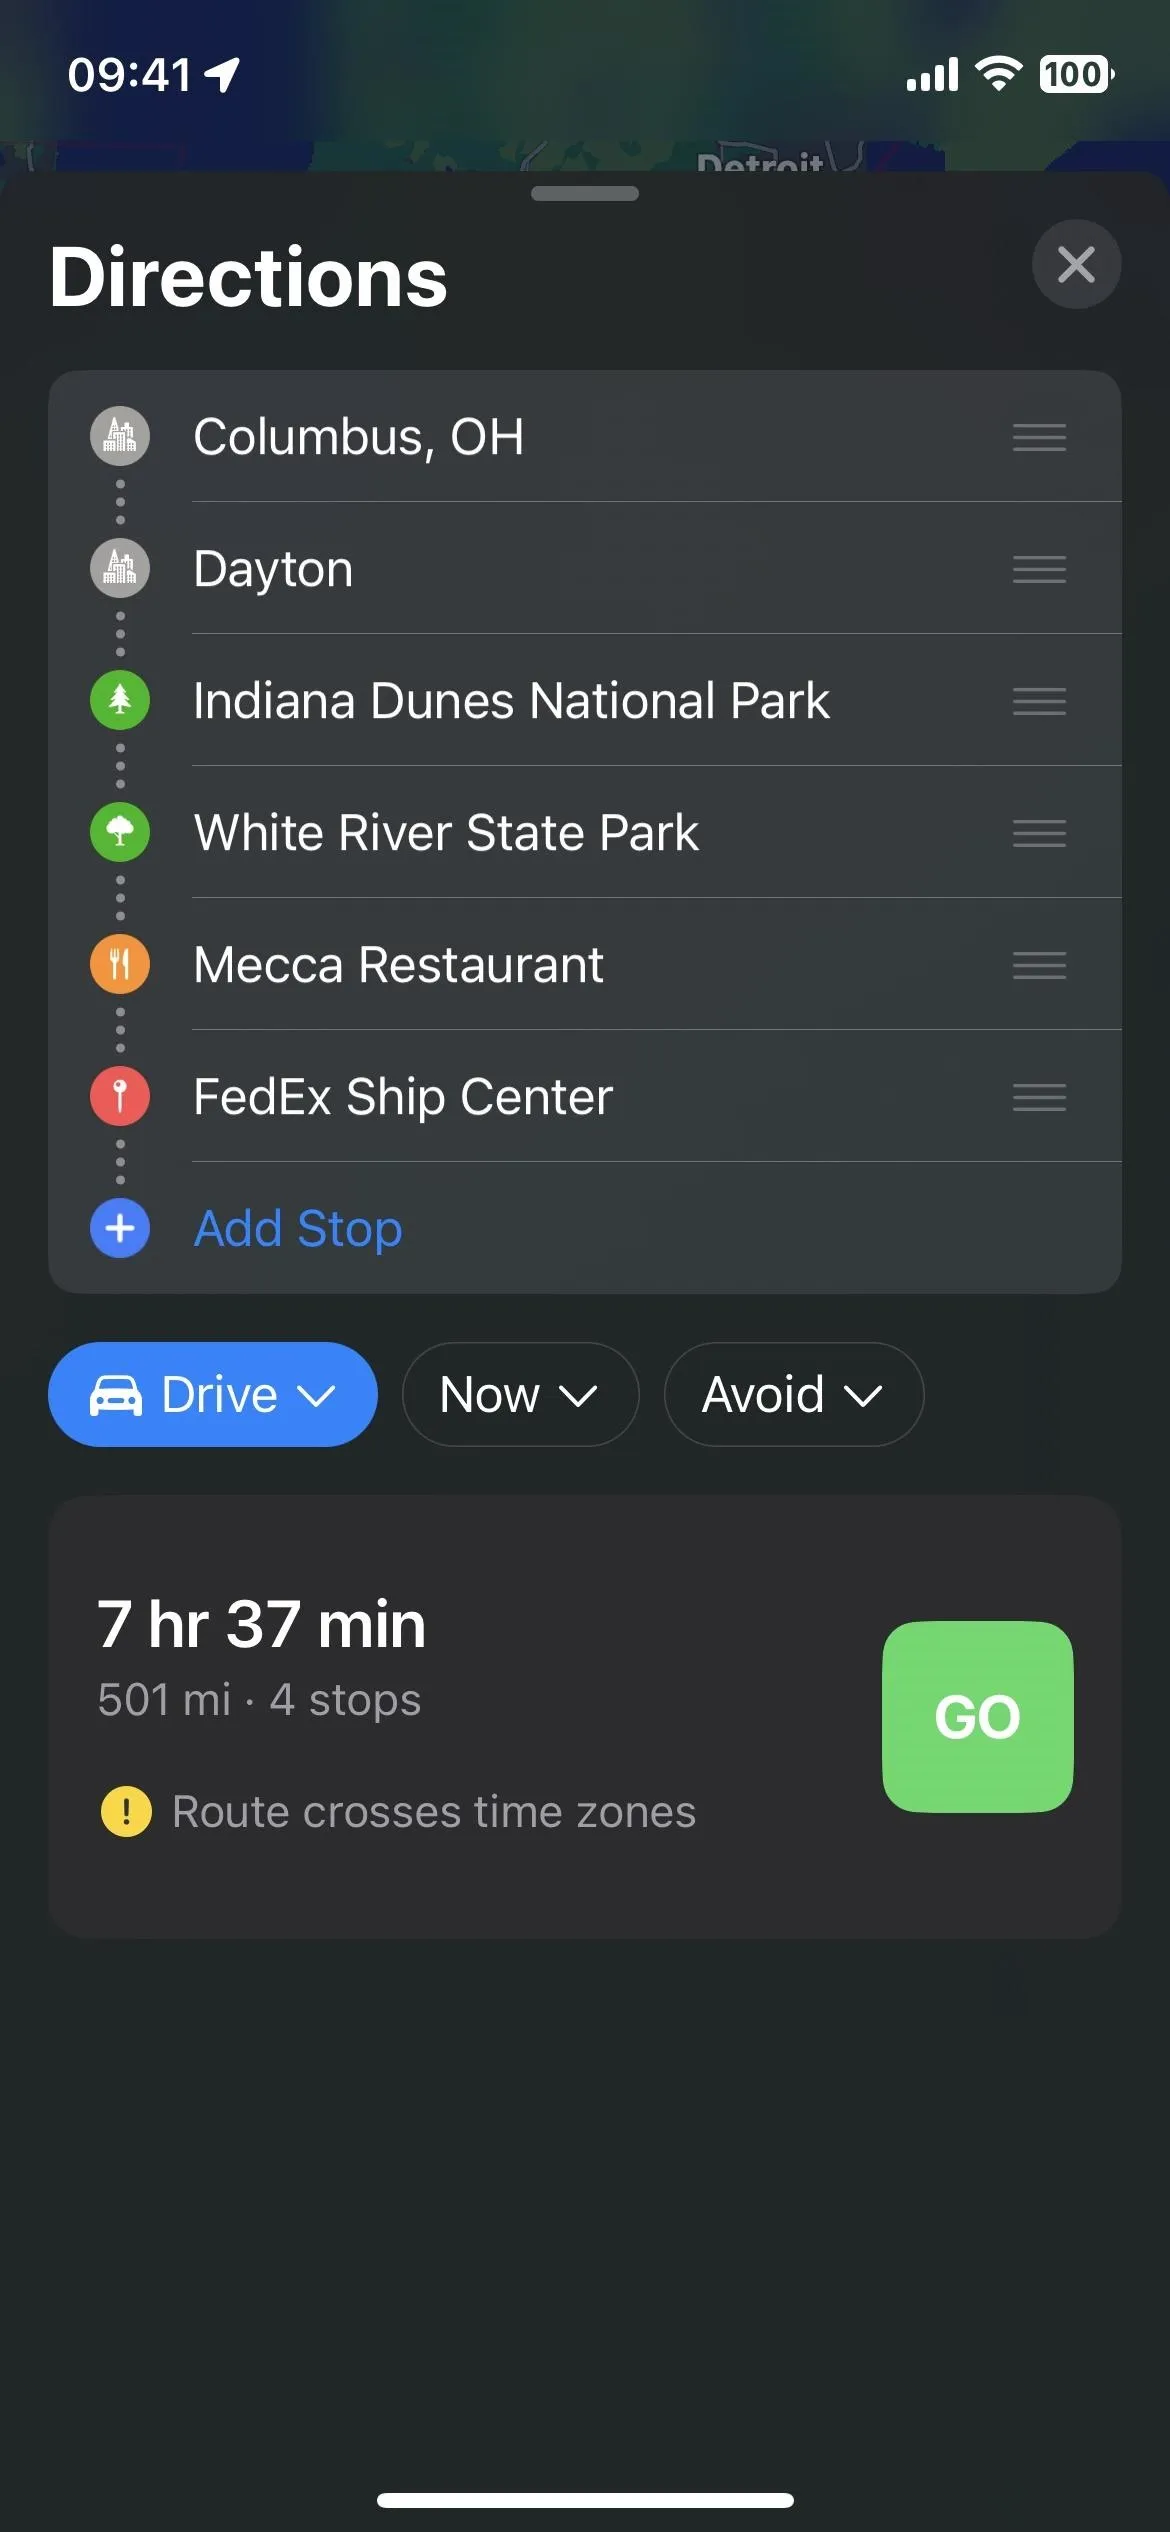
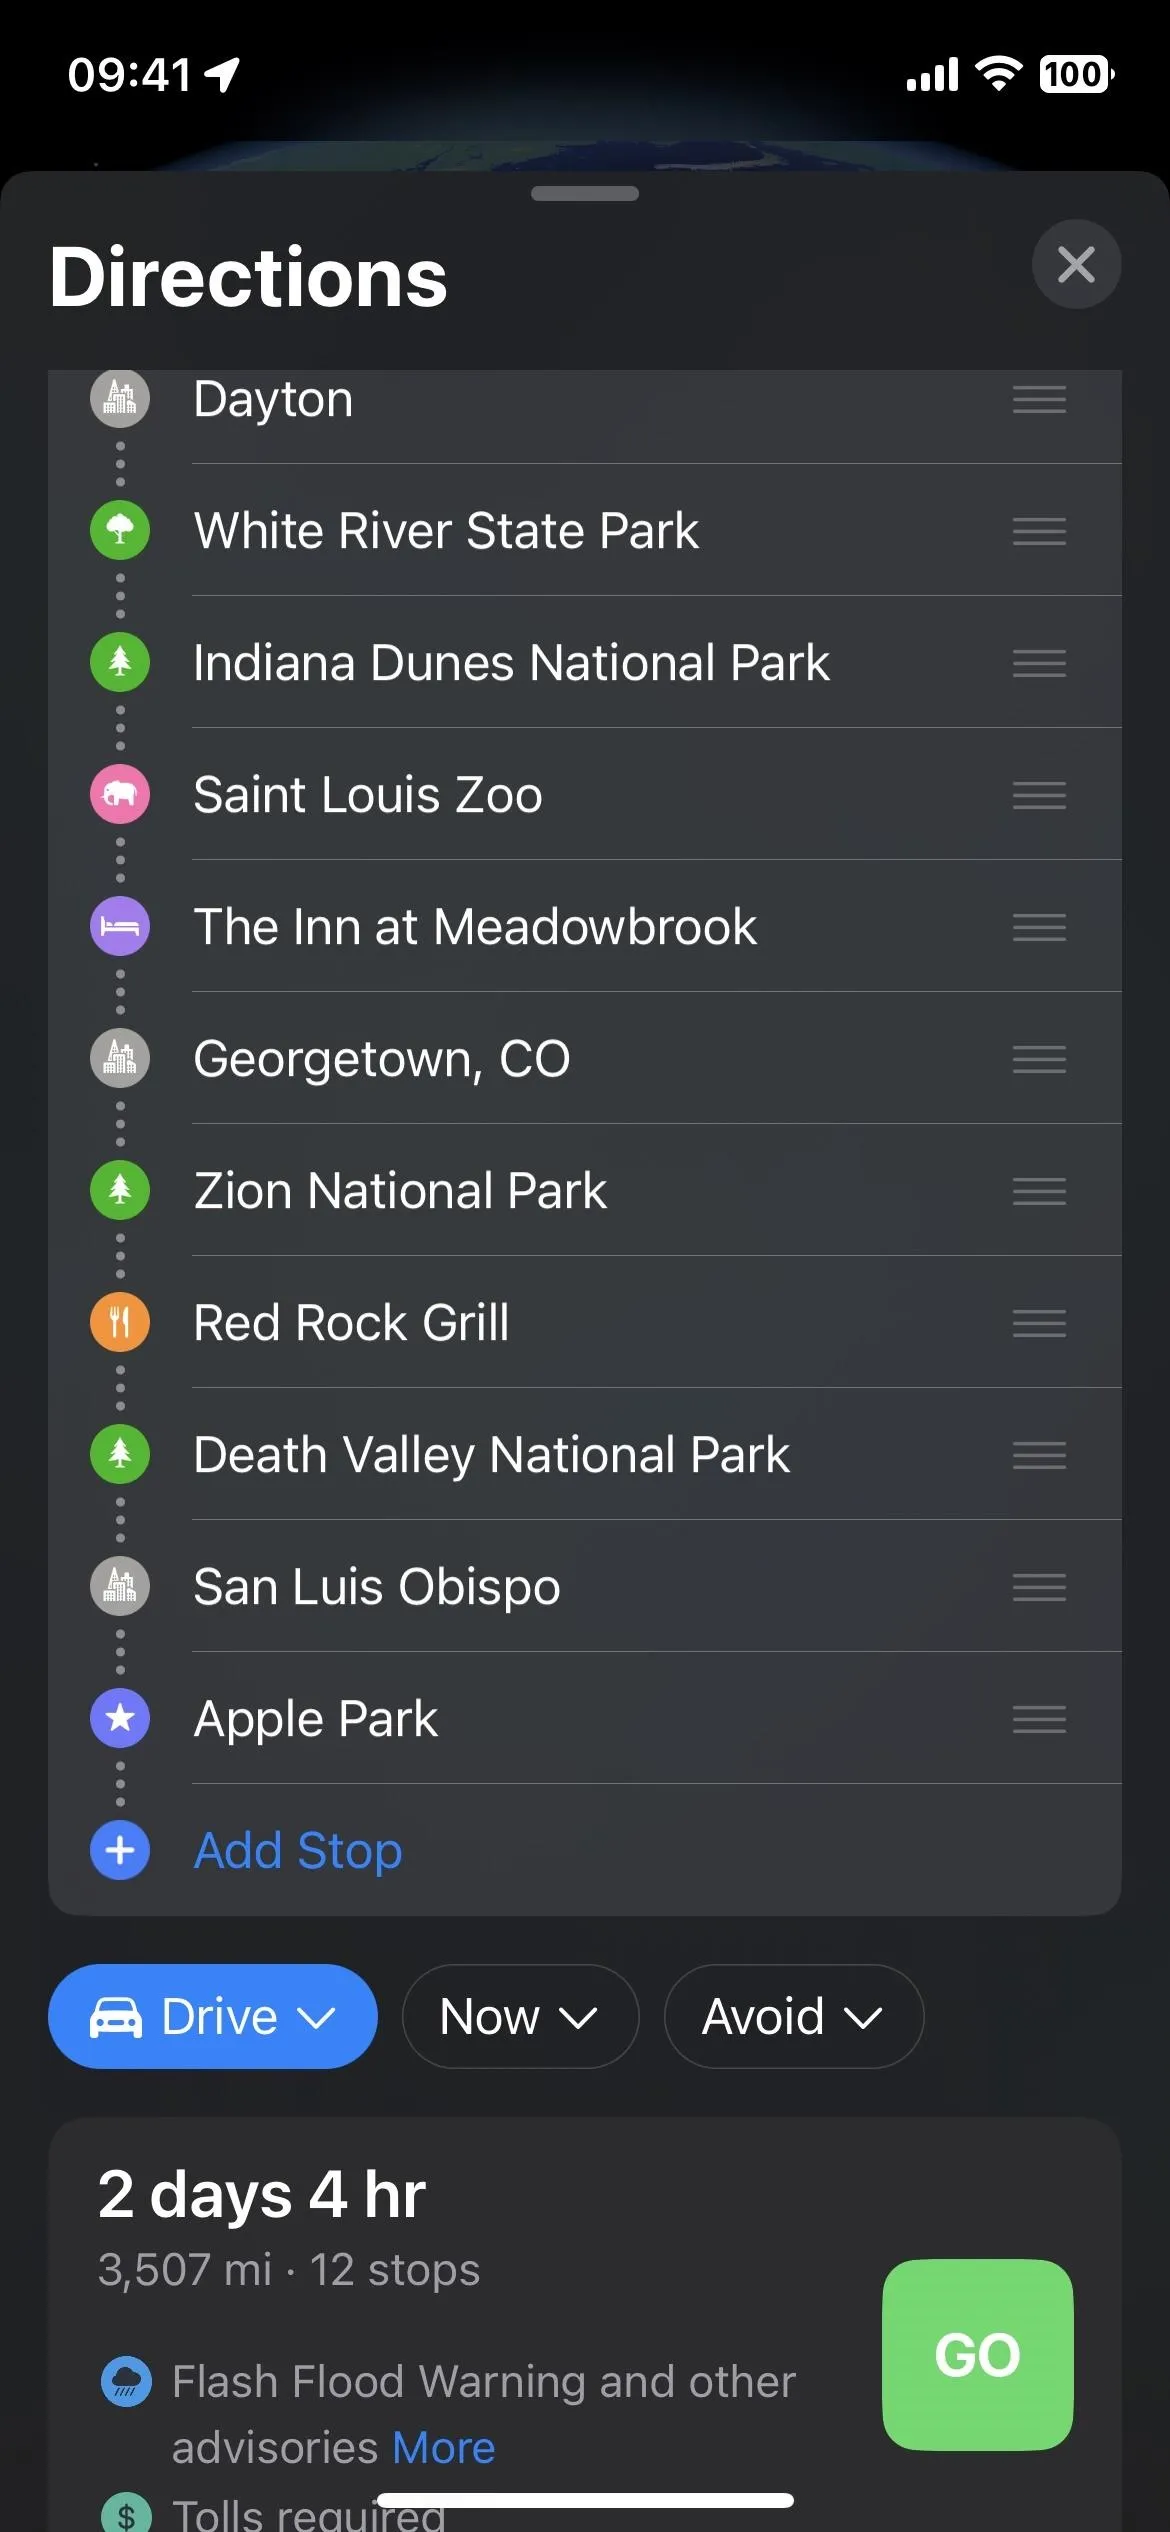
You can add up to 13 stops along your route for a total of up to 15 locations when counting your starting and ending point. When you add five or more total locations, Maps will combine the middle stops into a section that says "[#] stops." Tapping that will expand all the hidden destinations.
Tapping the collapse button (the pill-shaped pull handle) or swiping the window down a tad will take you back to the minimized view.
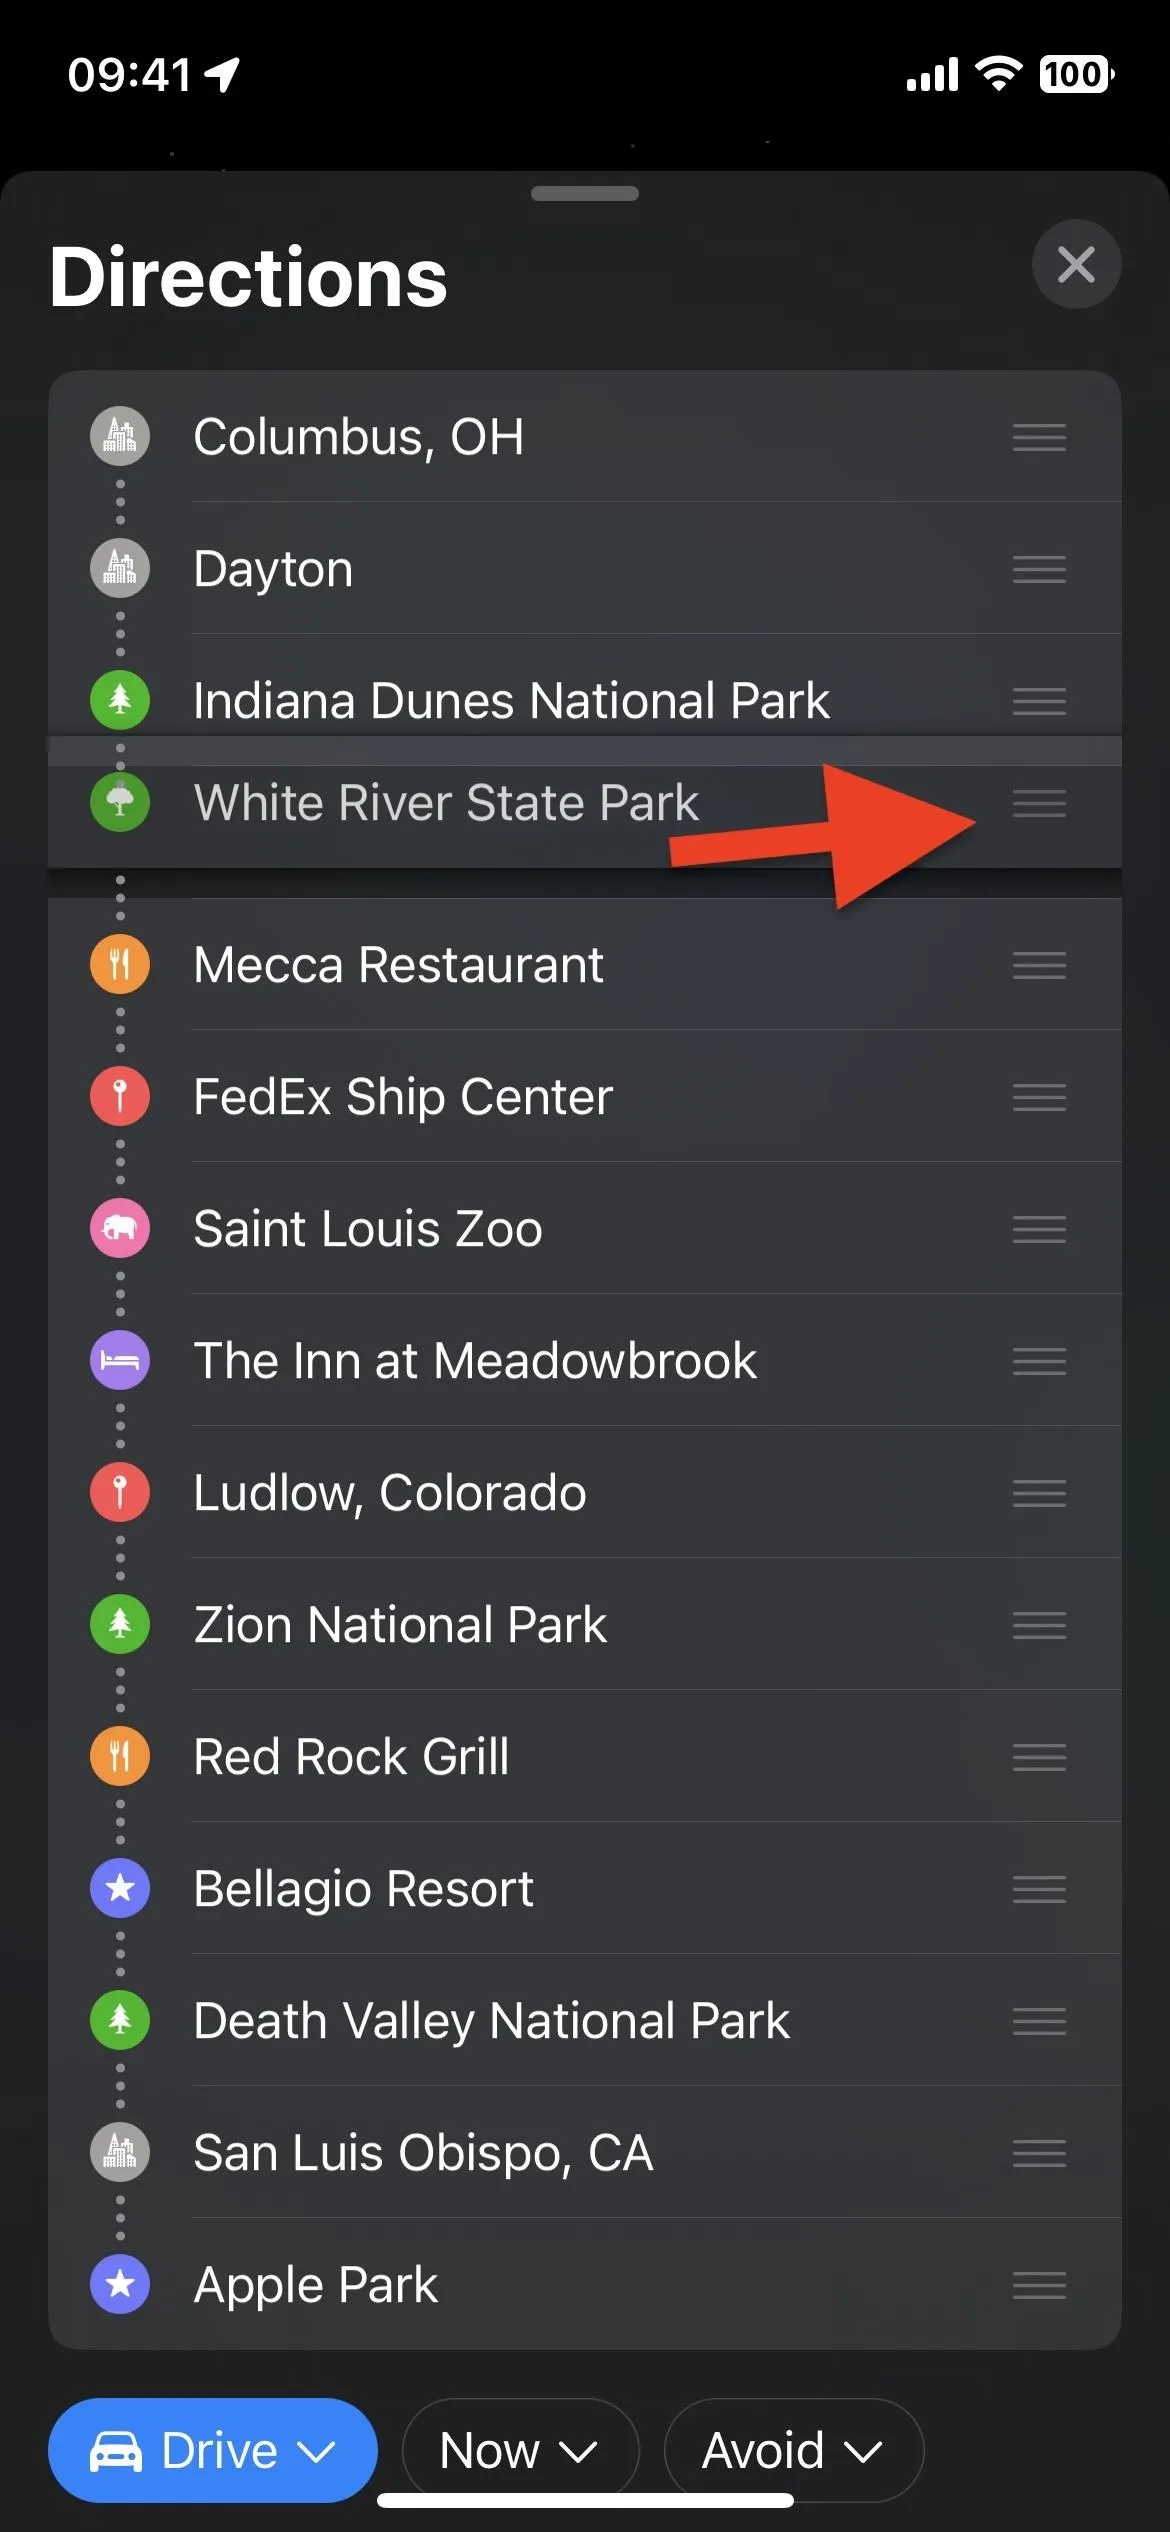
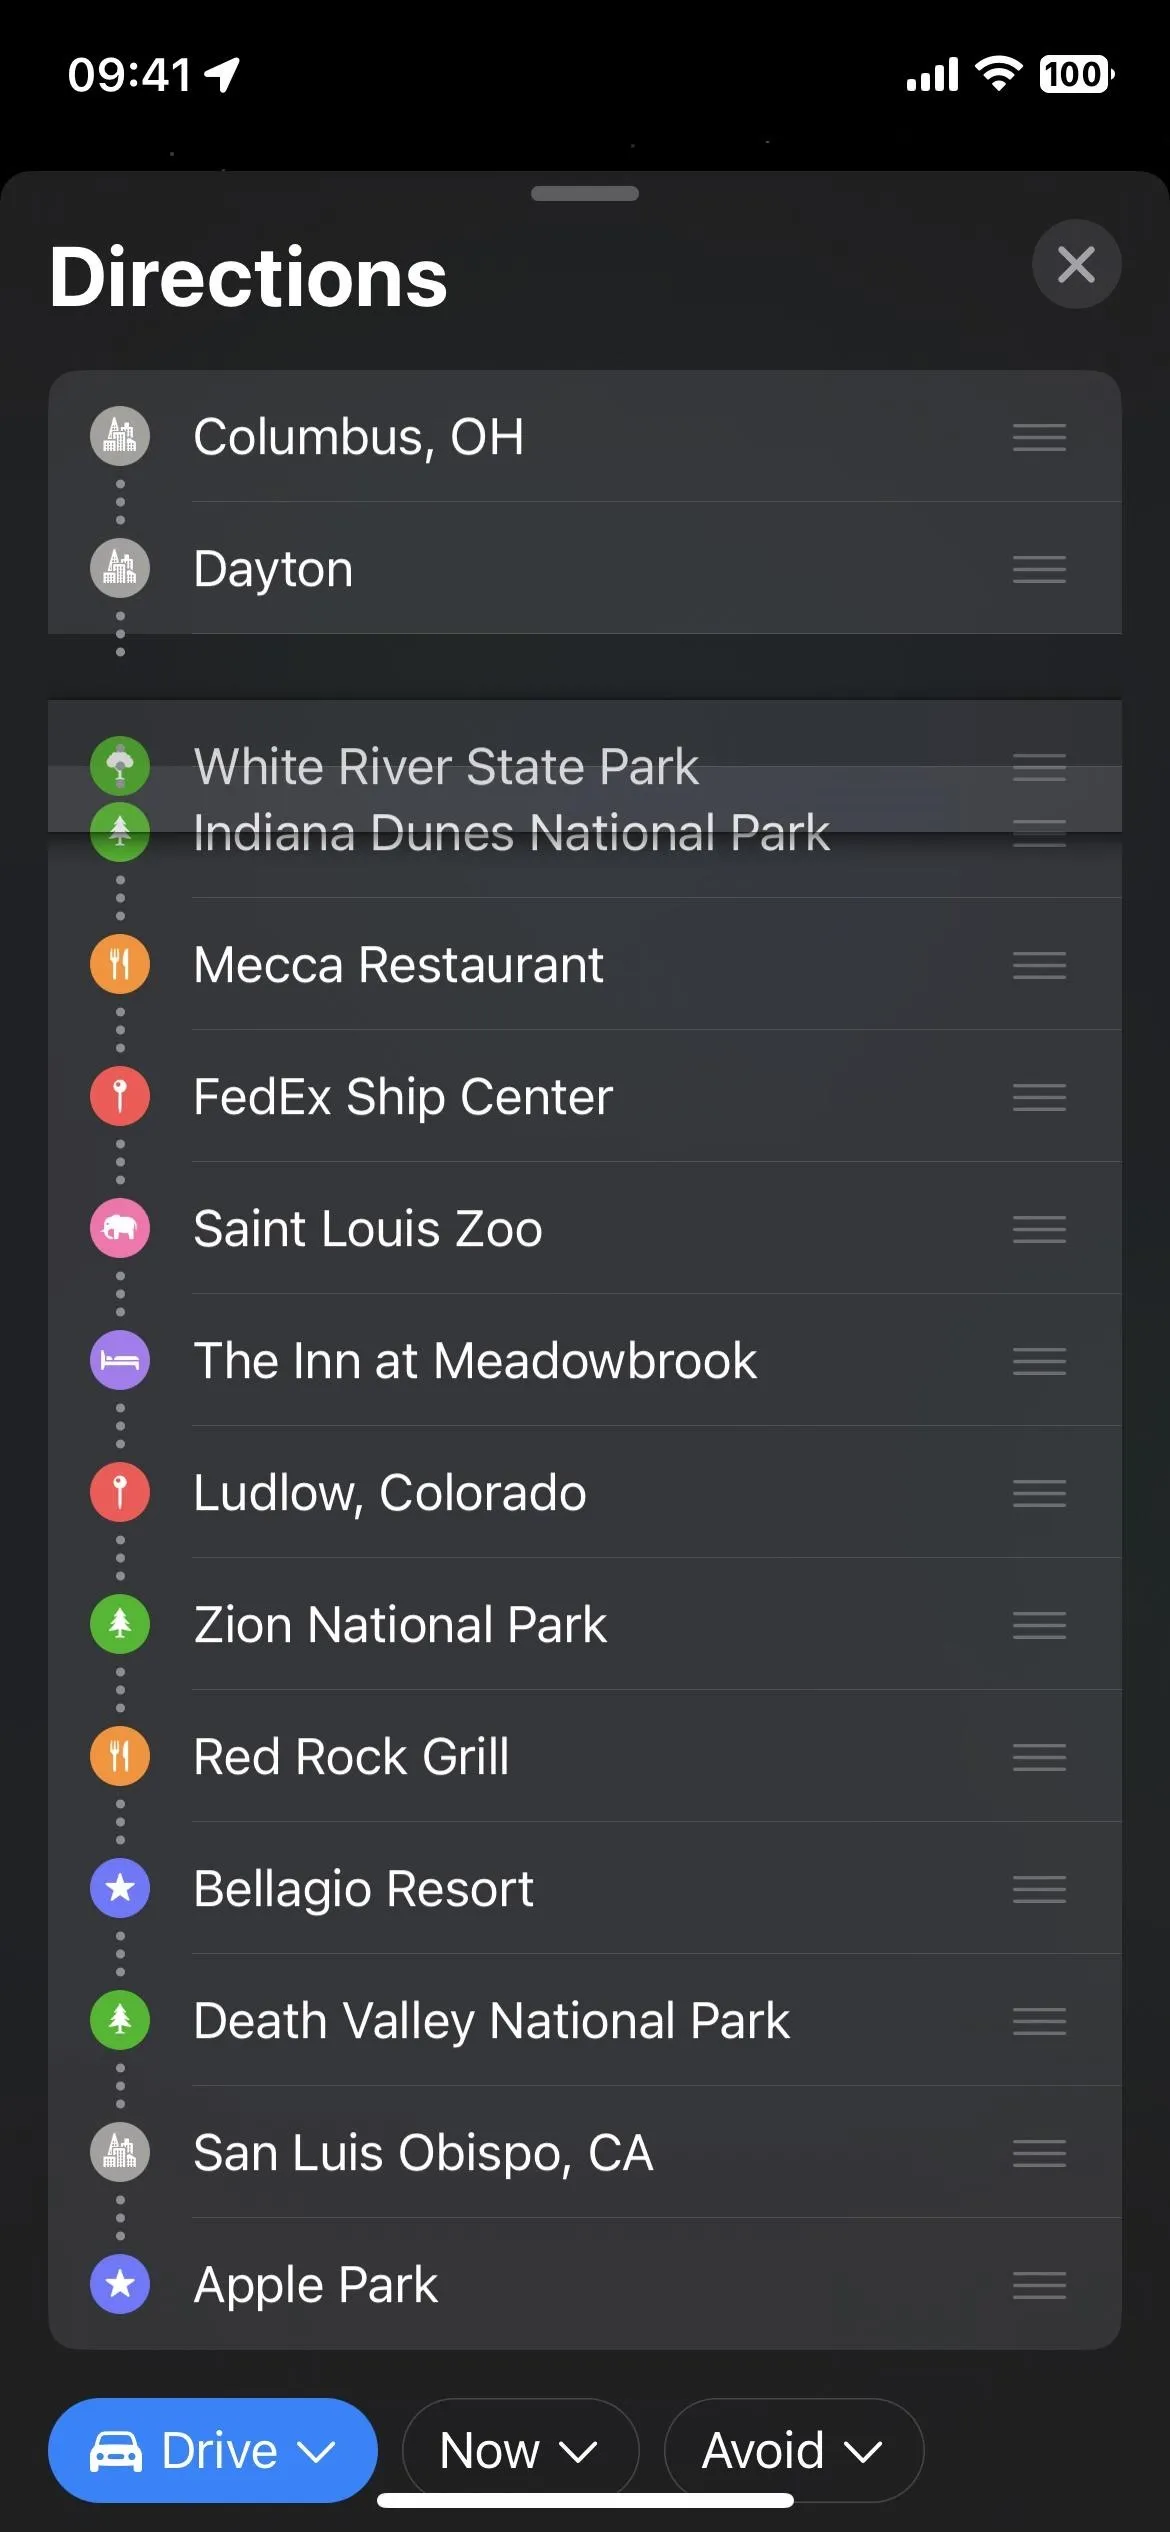
Reorder the Stops if Necessary
If you need to change the order of the stops, including the starting and ending points, tap and hold the three bars to the right of the location, then drag and drop it to a new spot on the list.

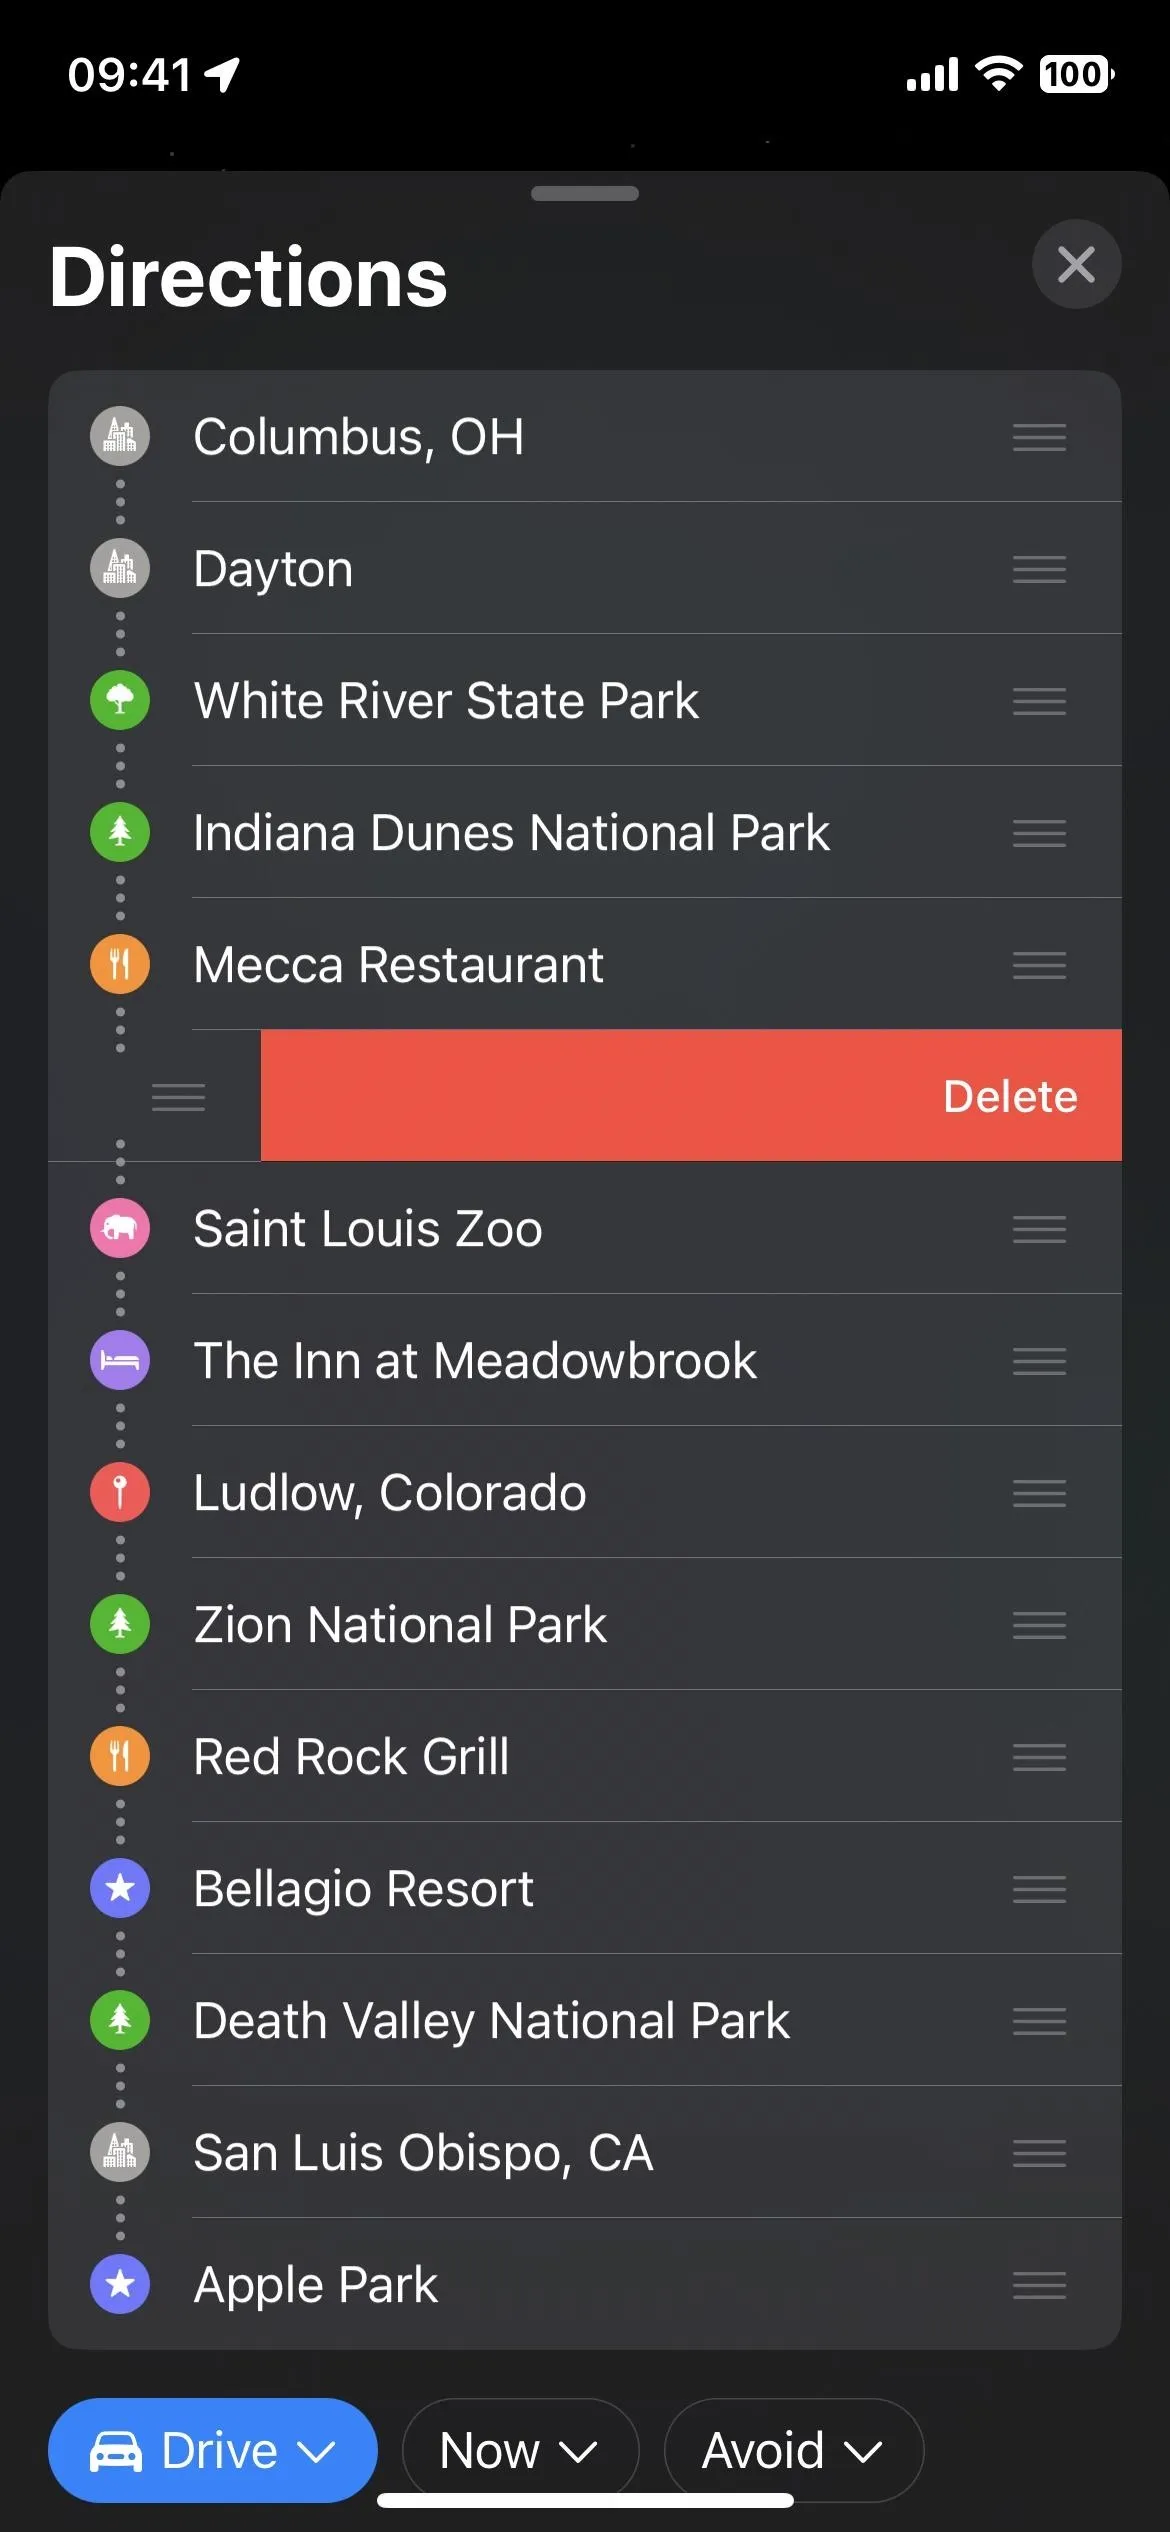
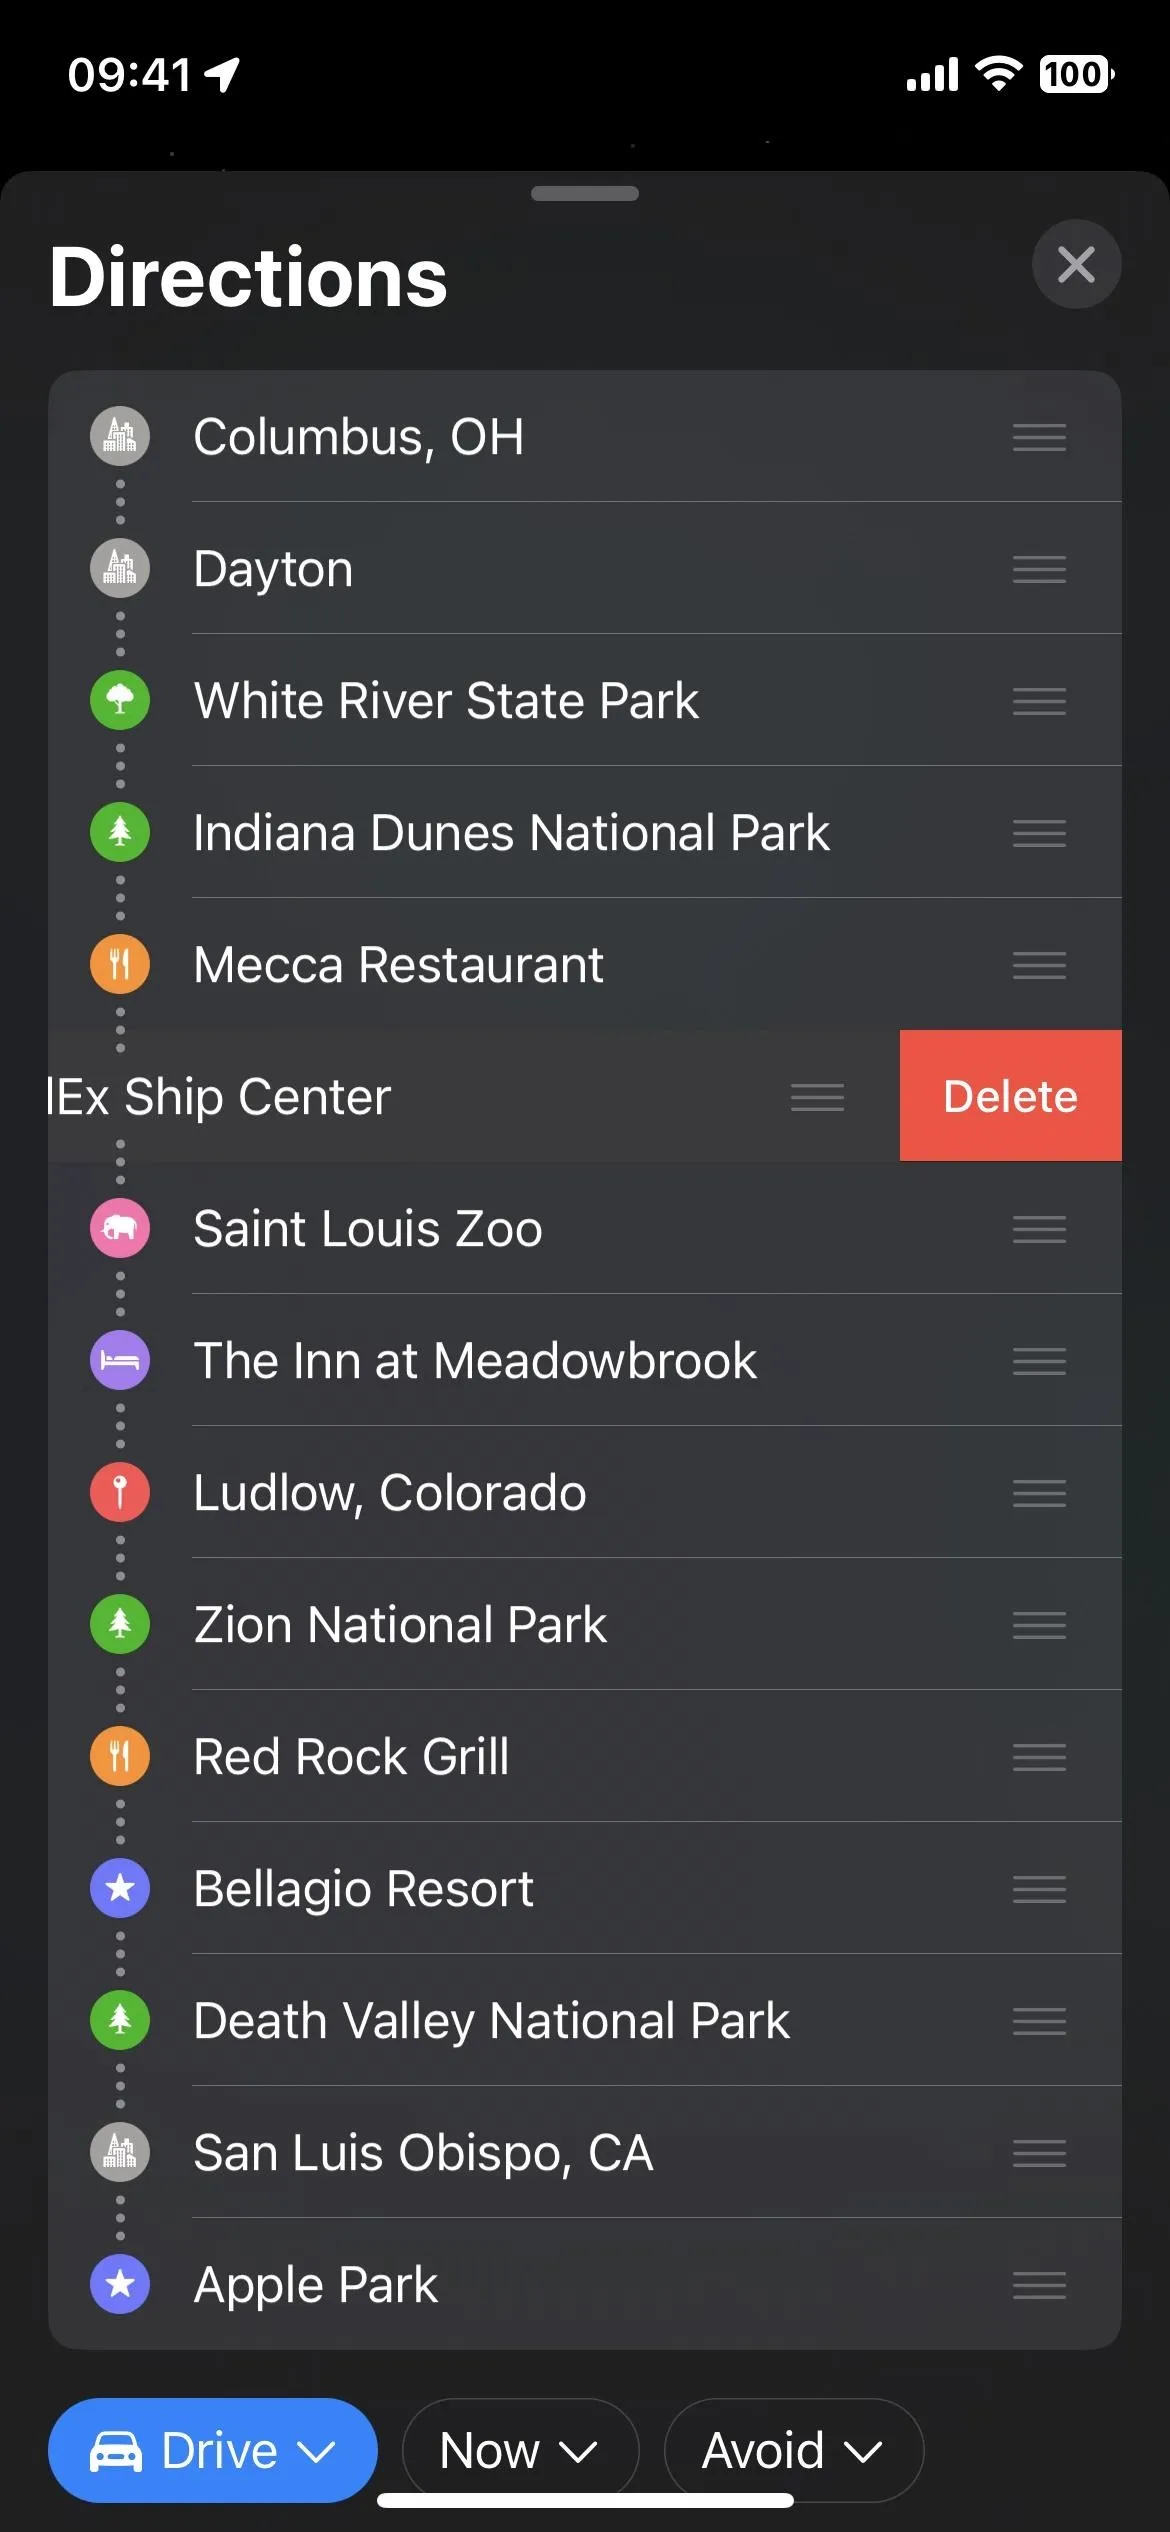
Delete Stops if Necessary
When you no longer want to visit a stop along your route, it's easy to delete it from your planned trip. From the ordered list, find the stop you want to ditch. Then, short-swipe it left and hit "Delete," long-swipe it left until it disappears off-screen, or long-press it and choose "Delete" from the quick actions.

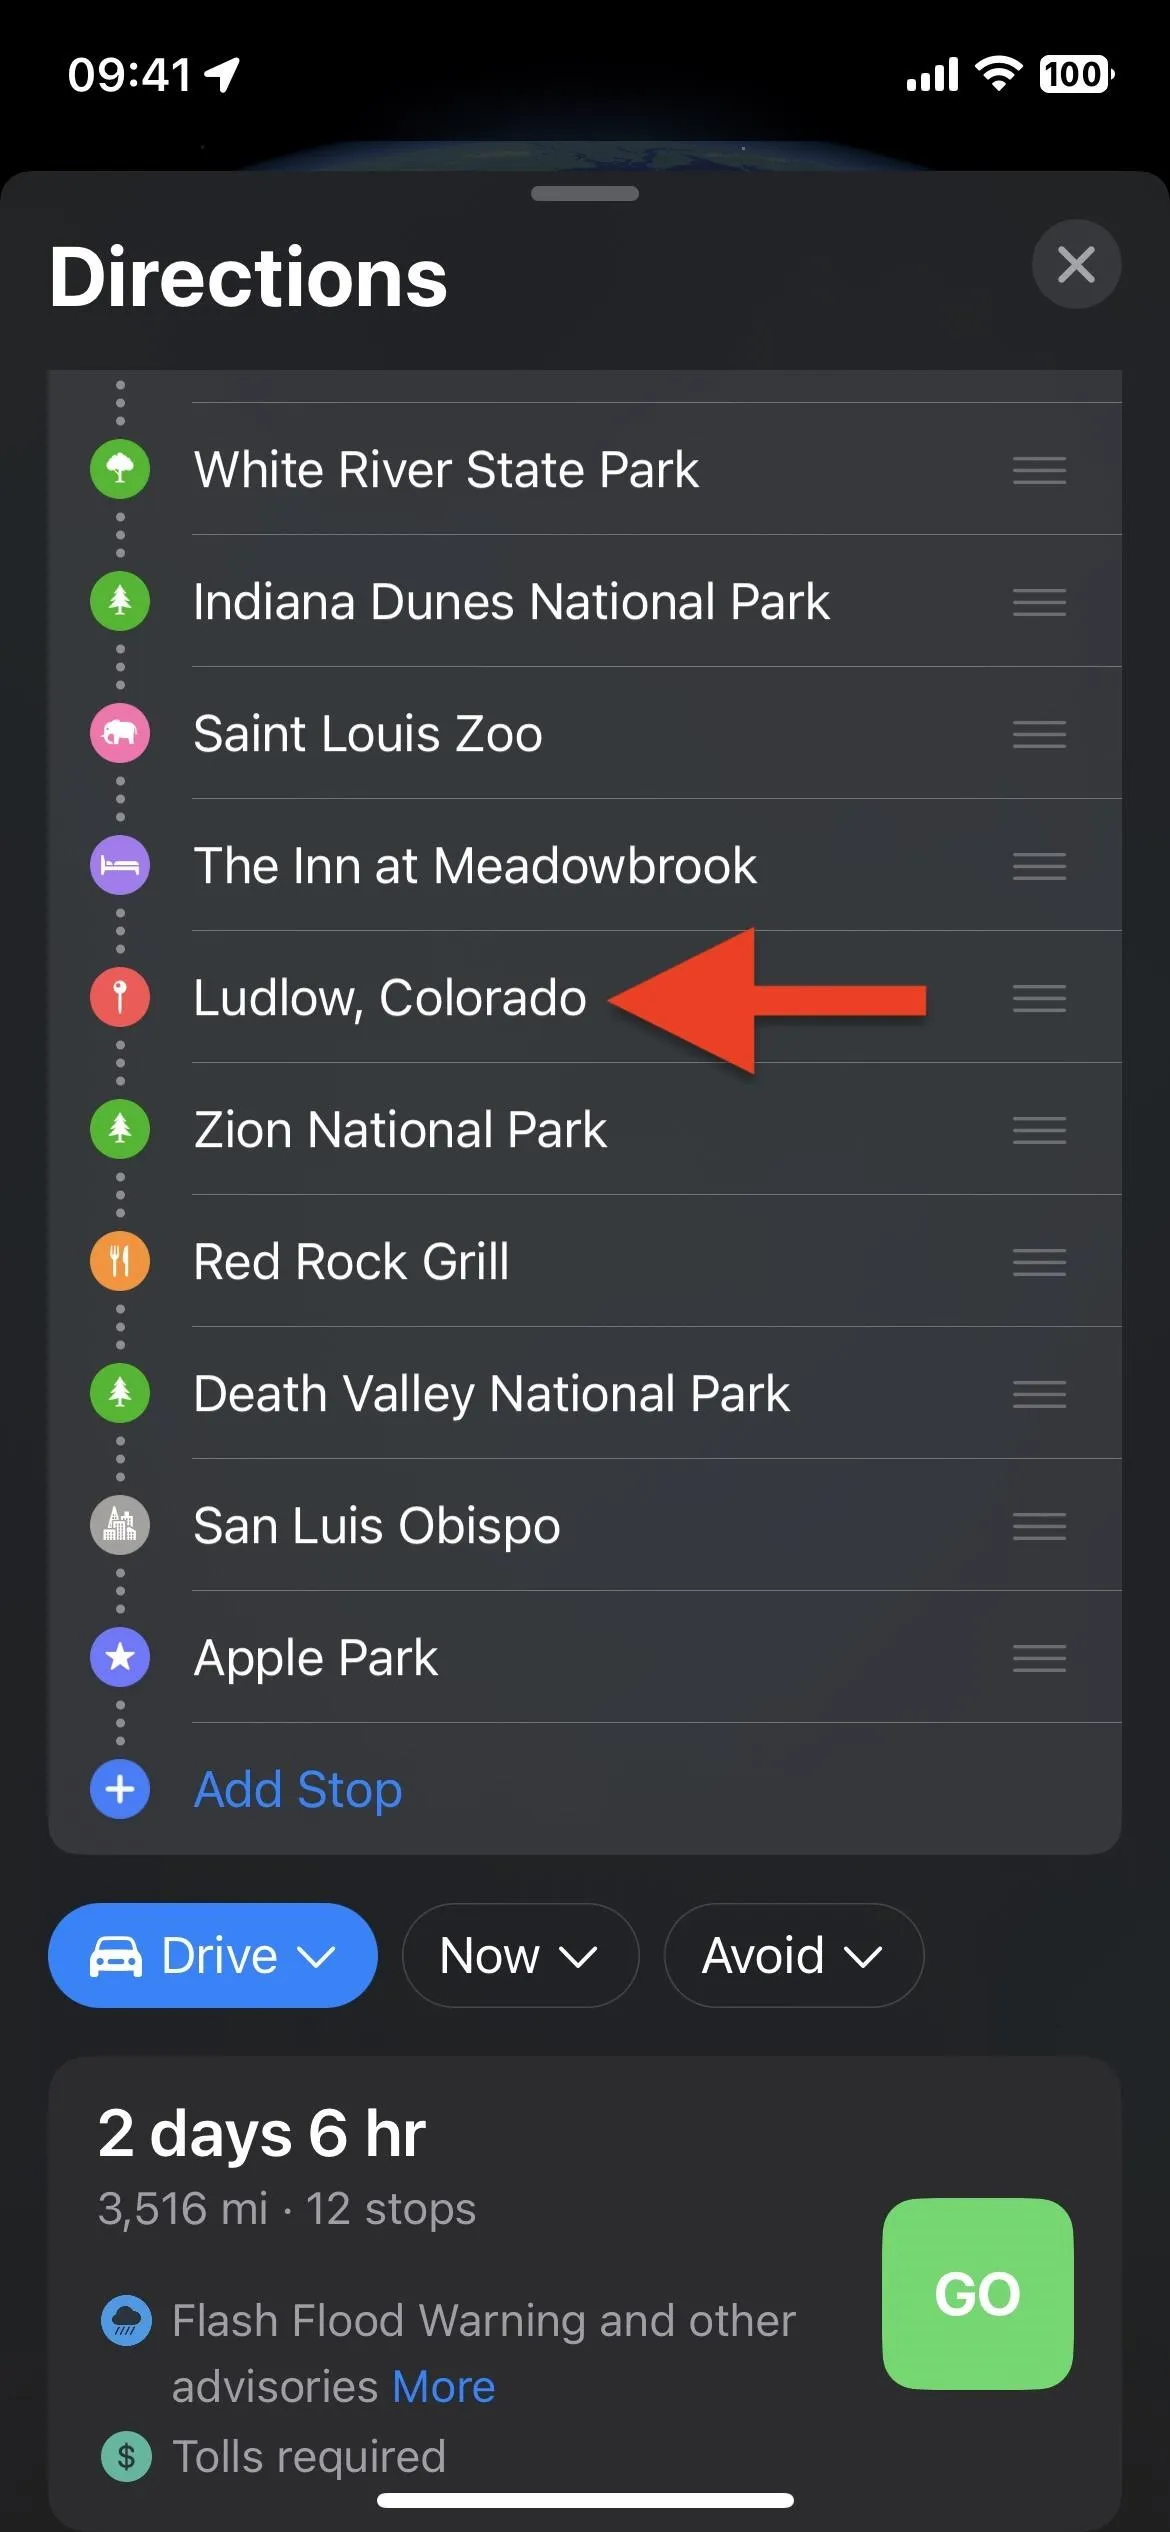
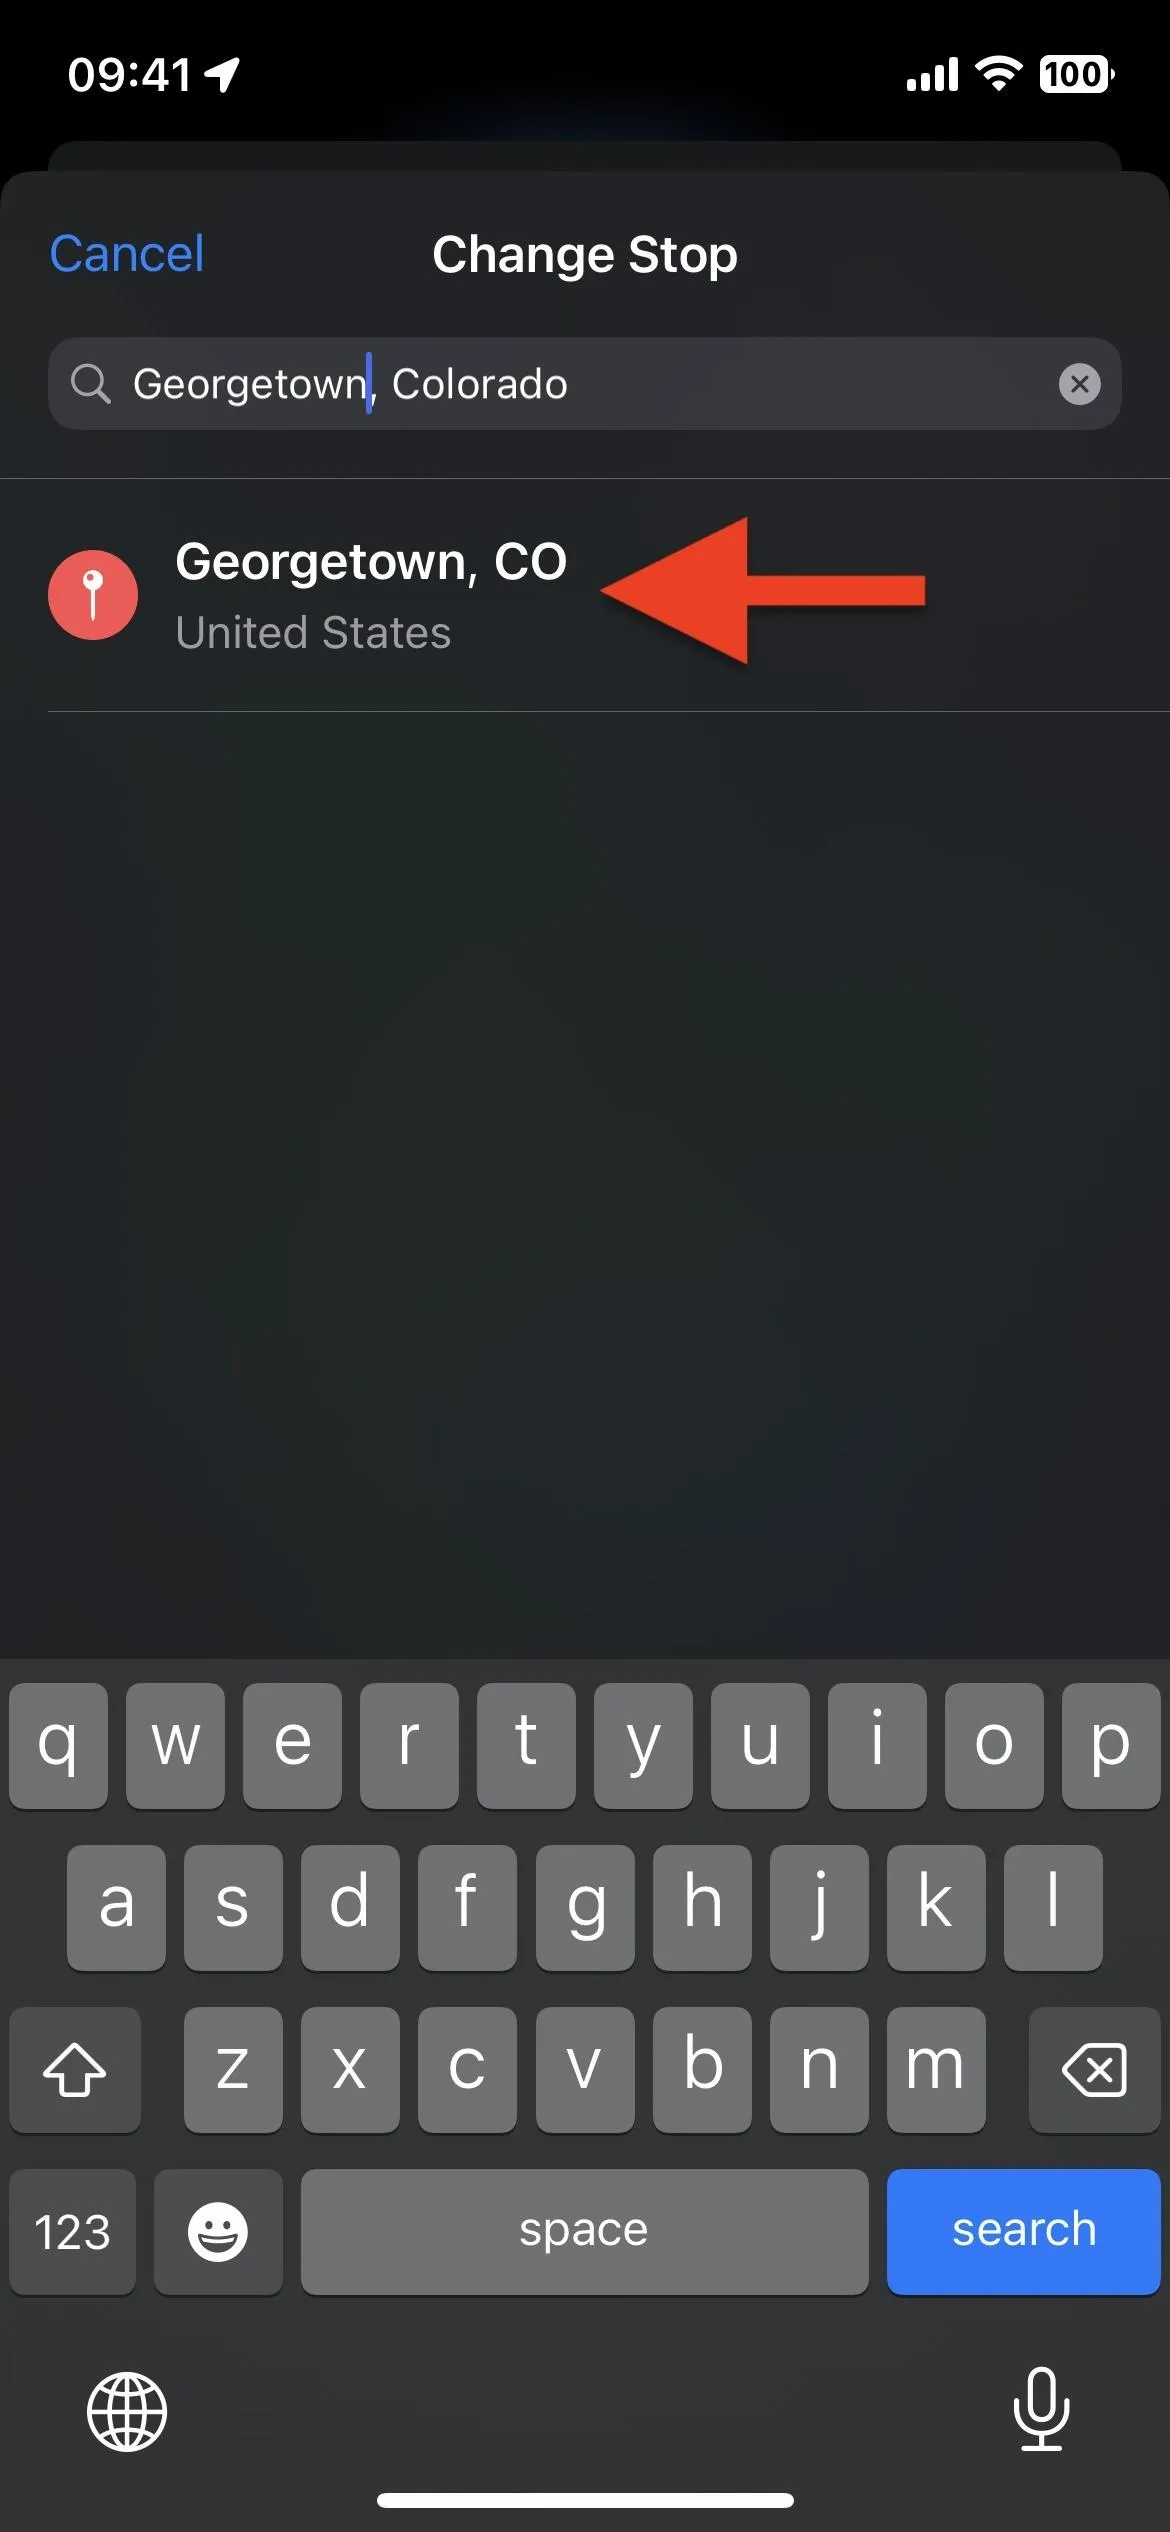
Swap Out Stops if Necessary
Instead of deleting stops you don't want to visit and adding new stops, you can simply tap a place, then find and select a new location from the search tool.
Start Your Planned Trip
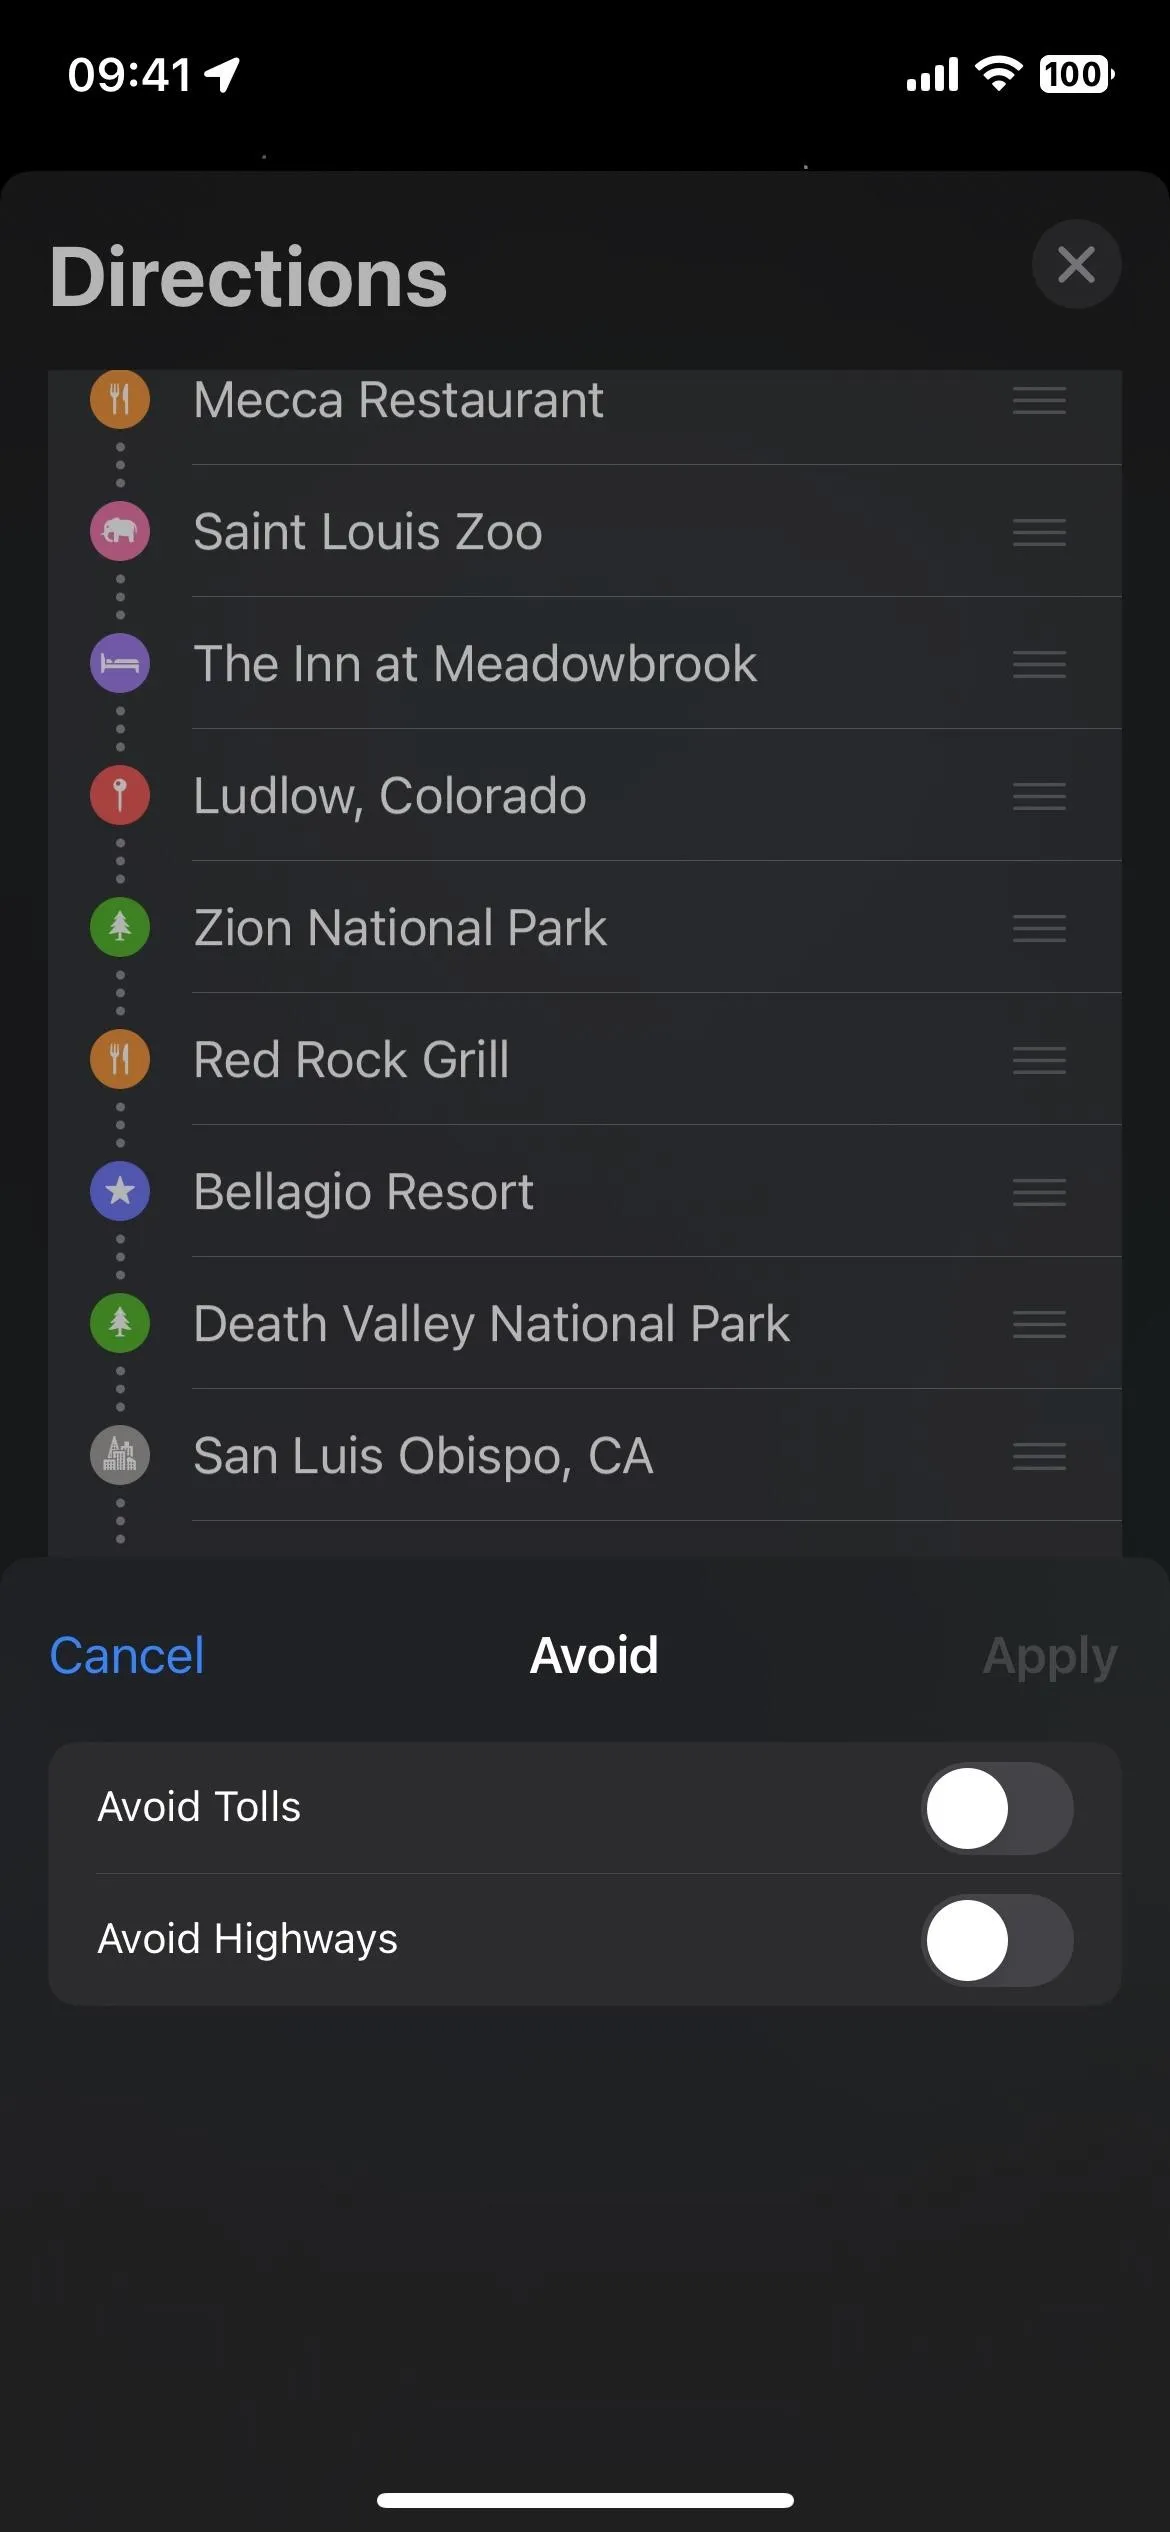
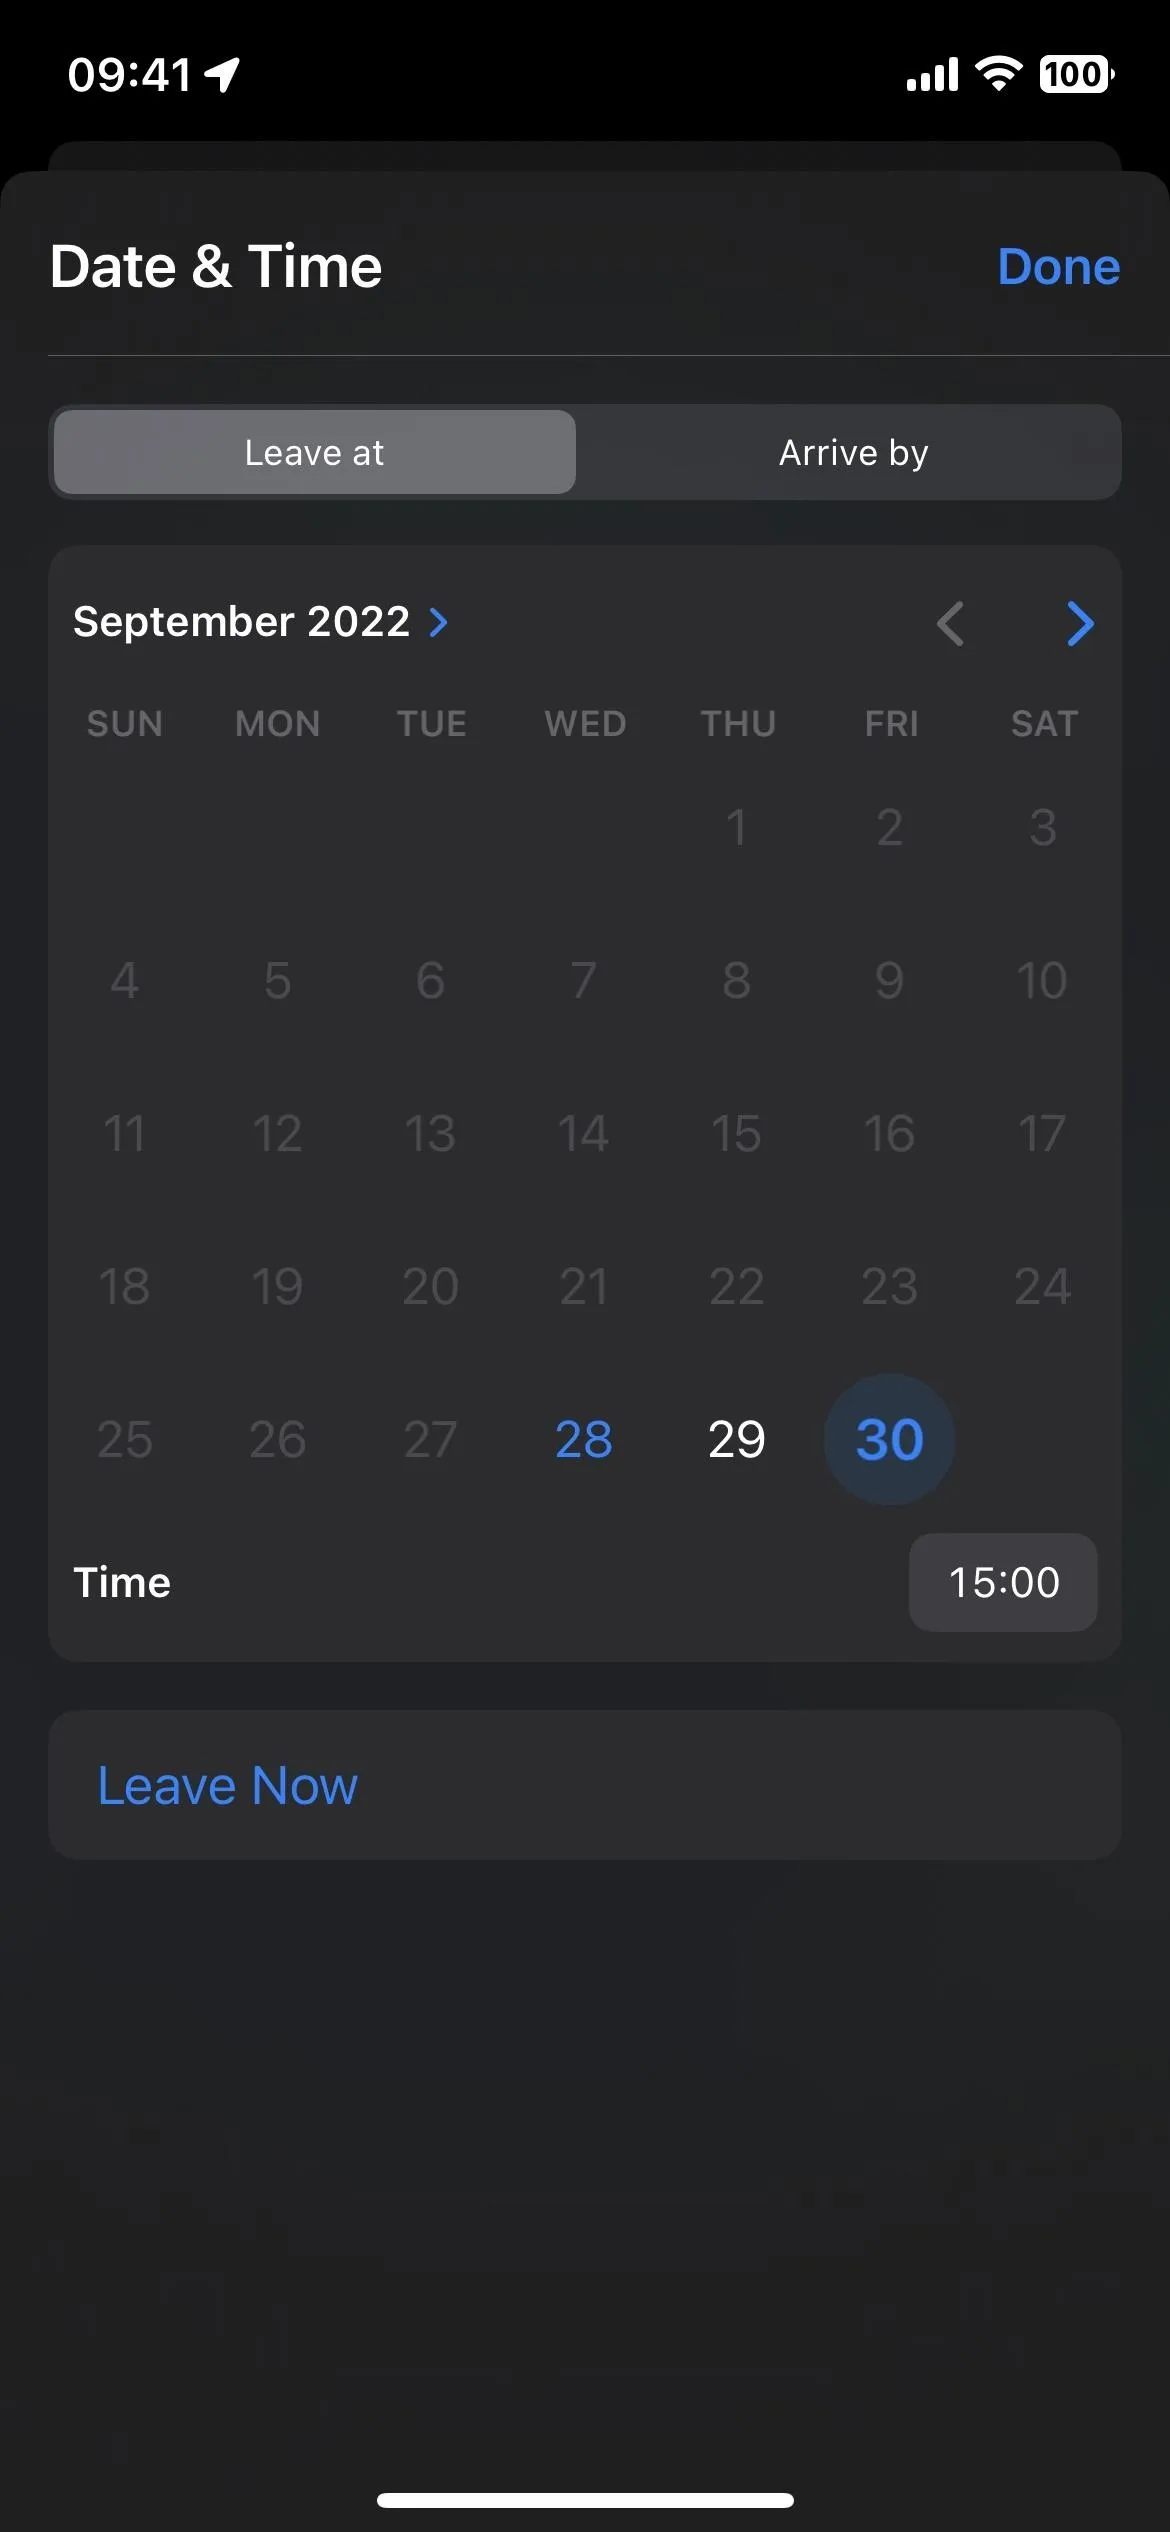
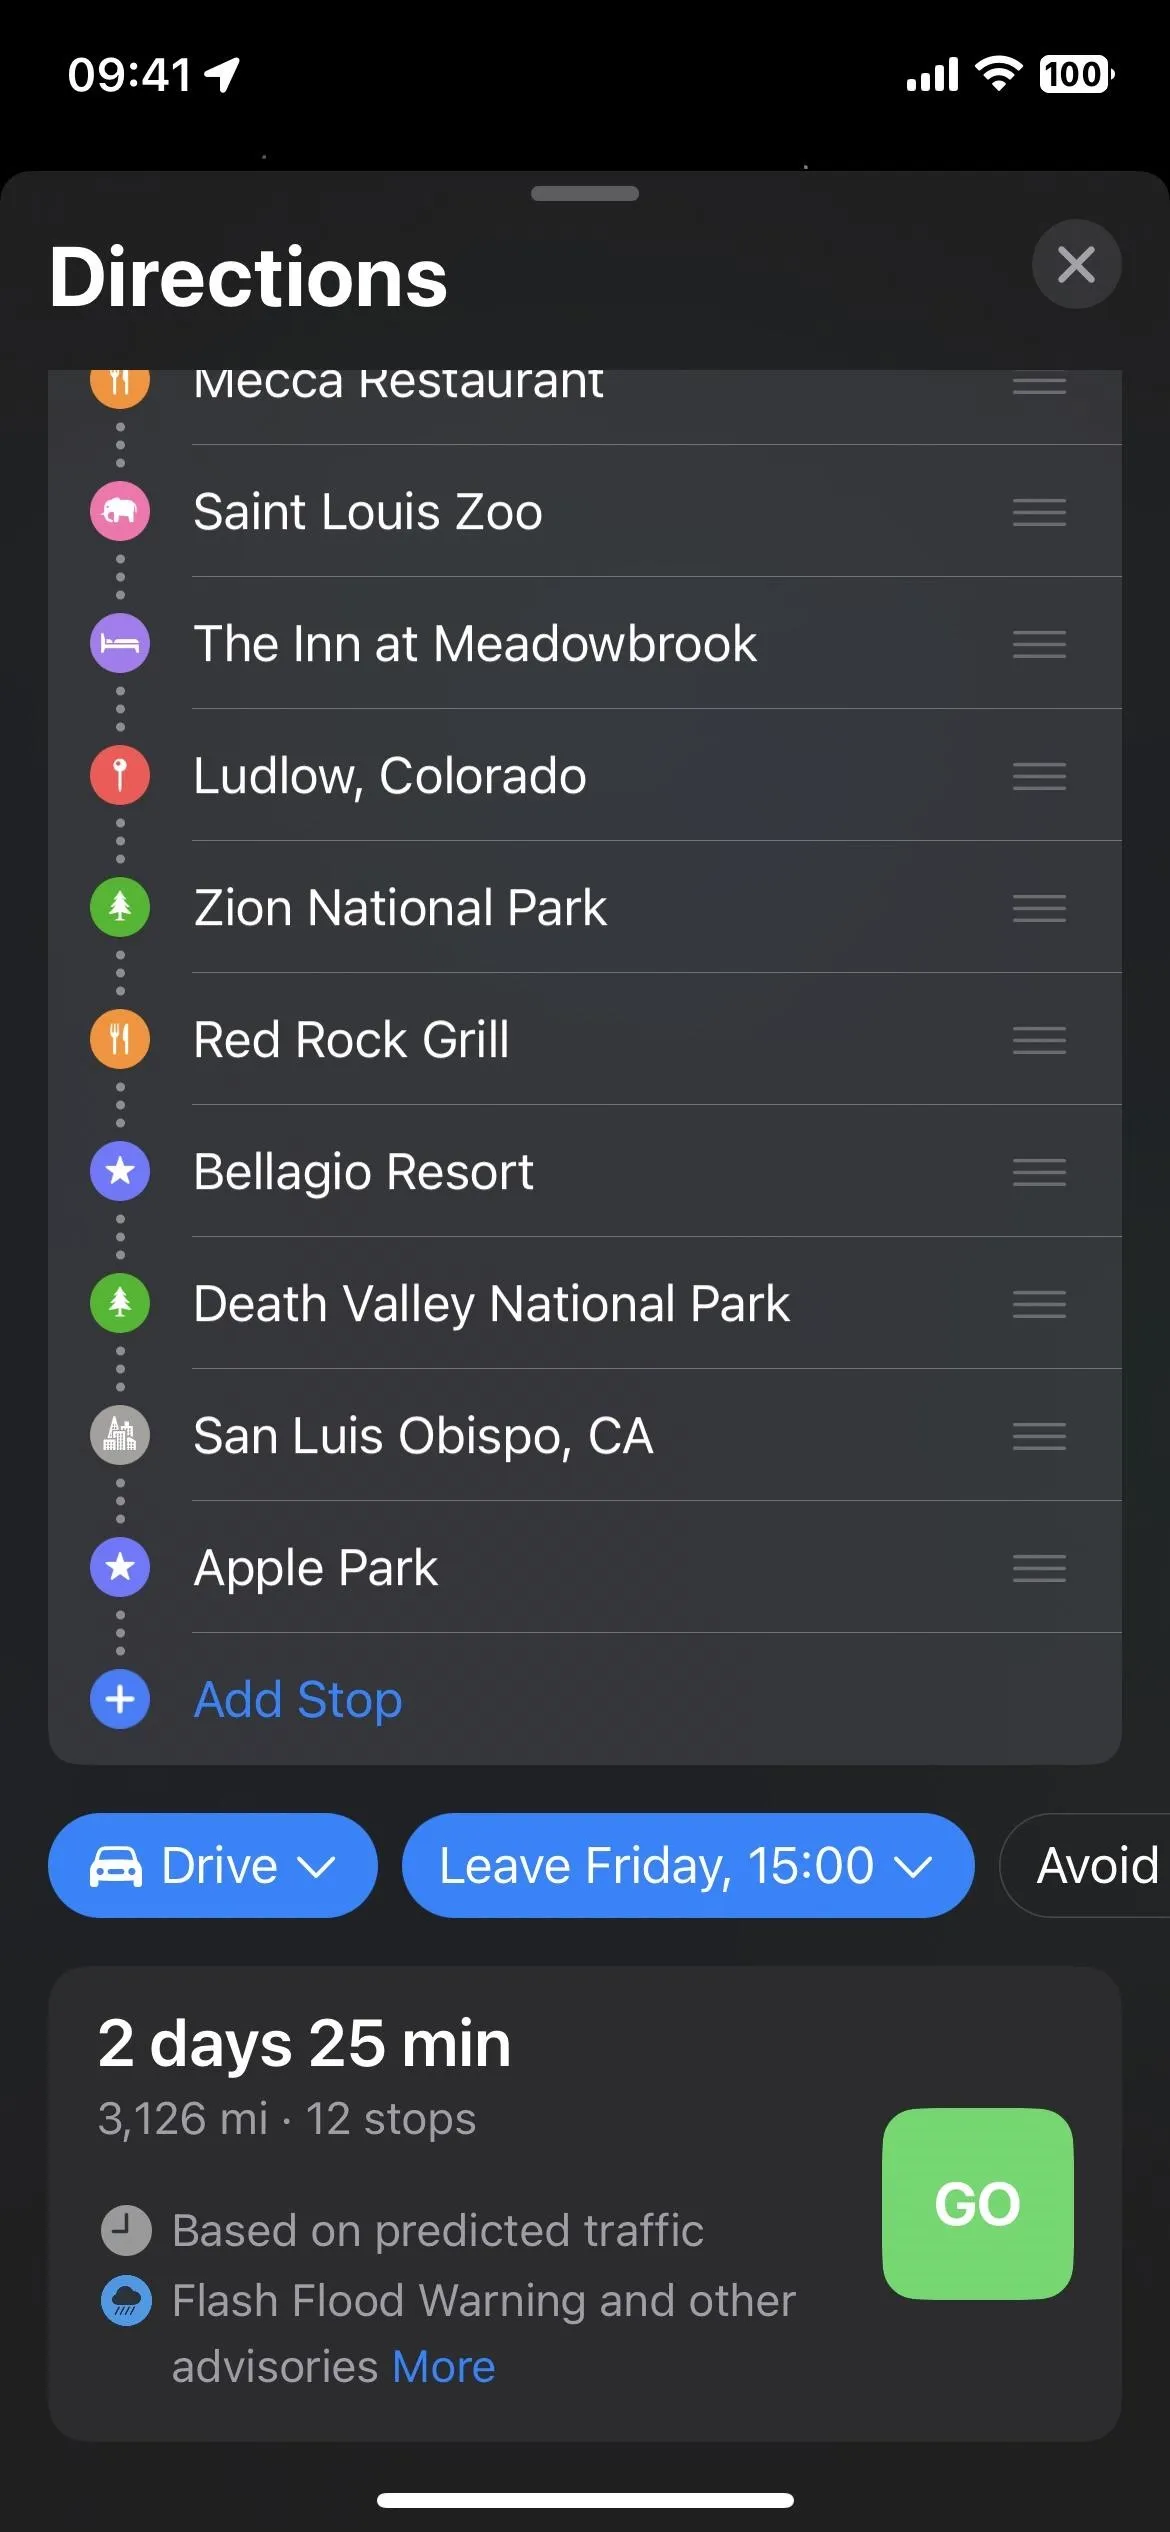
When ready, you can start your trip. You can tap "Avoid" and choose to keep tolls and highways out of your directions, or "Now" to set a leaving or arrival time which helps give a more accurate total time for the trip based on traffic patterns throughout the day. Finally, tap the "GO" button next to the route you want to take if you see multiple options.
Delete Stops During Navigation if Necessary
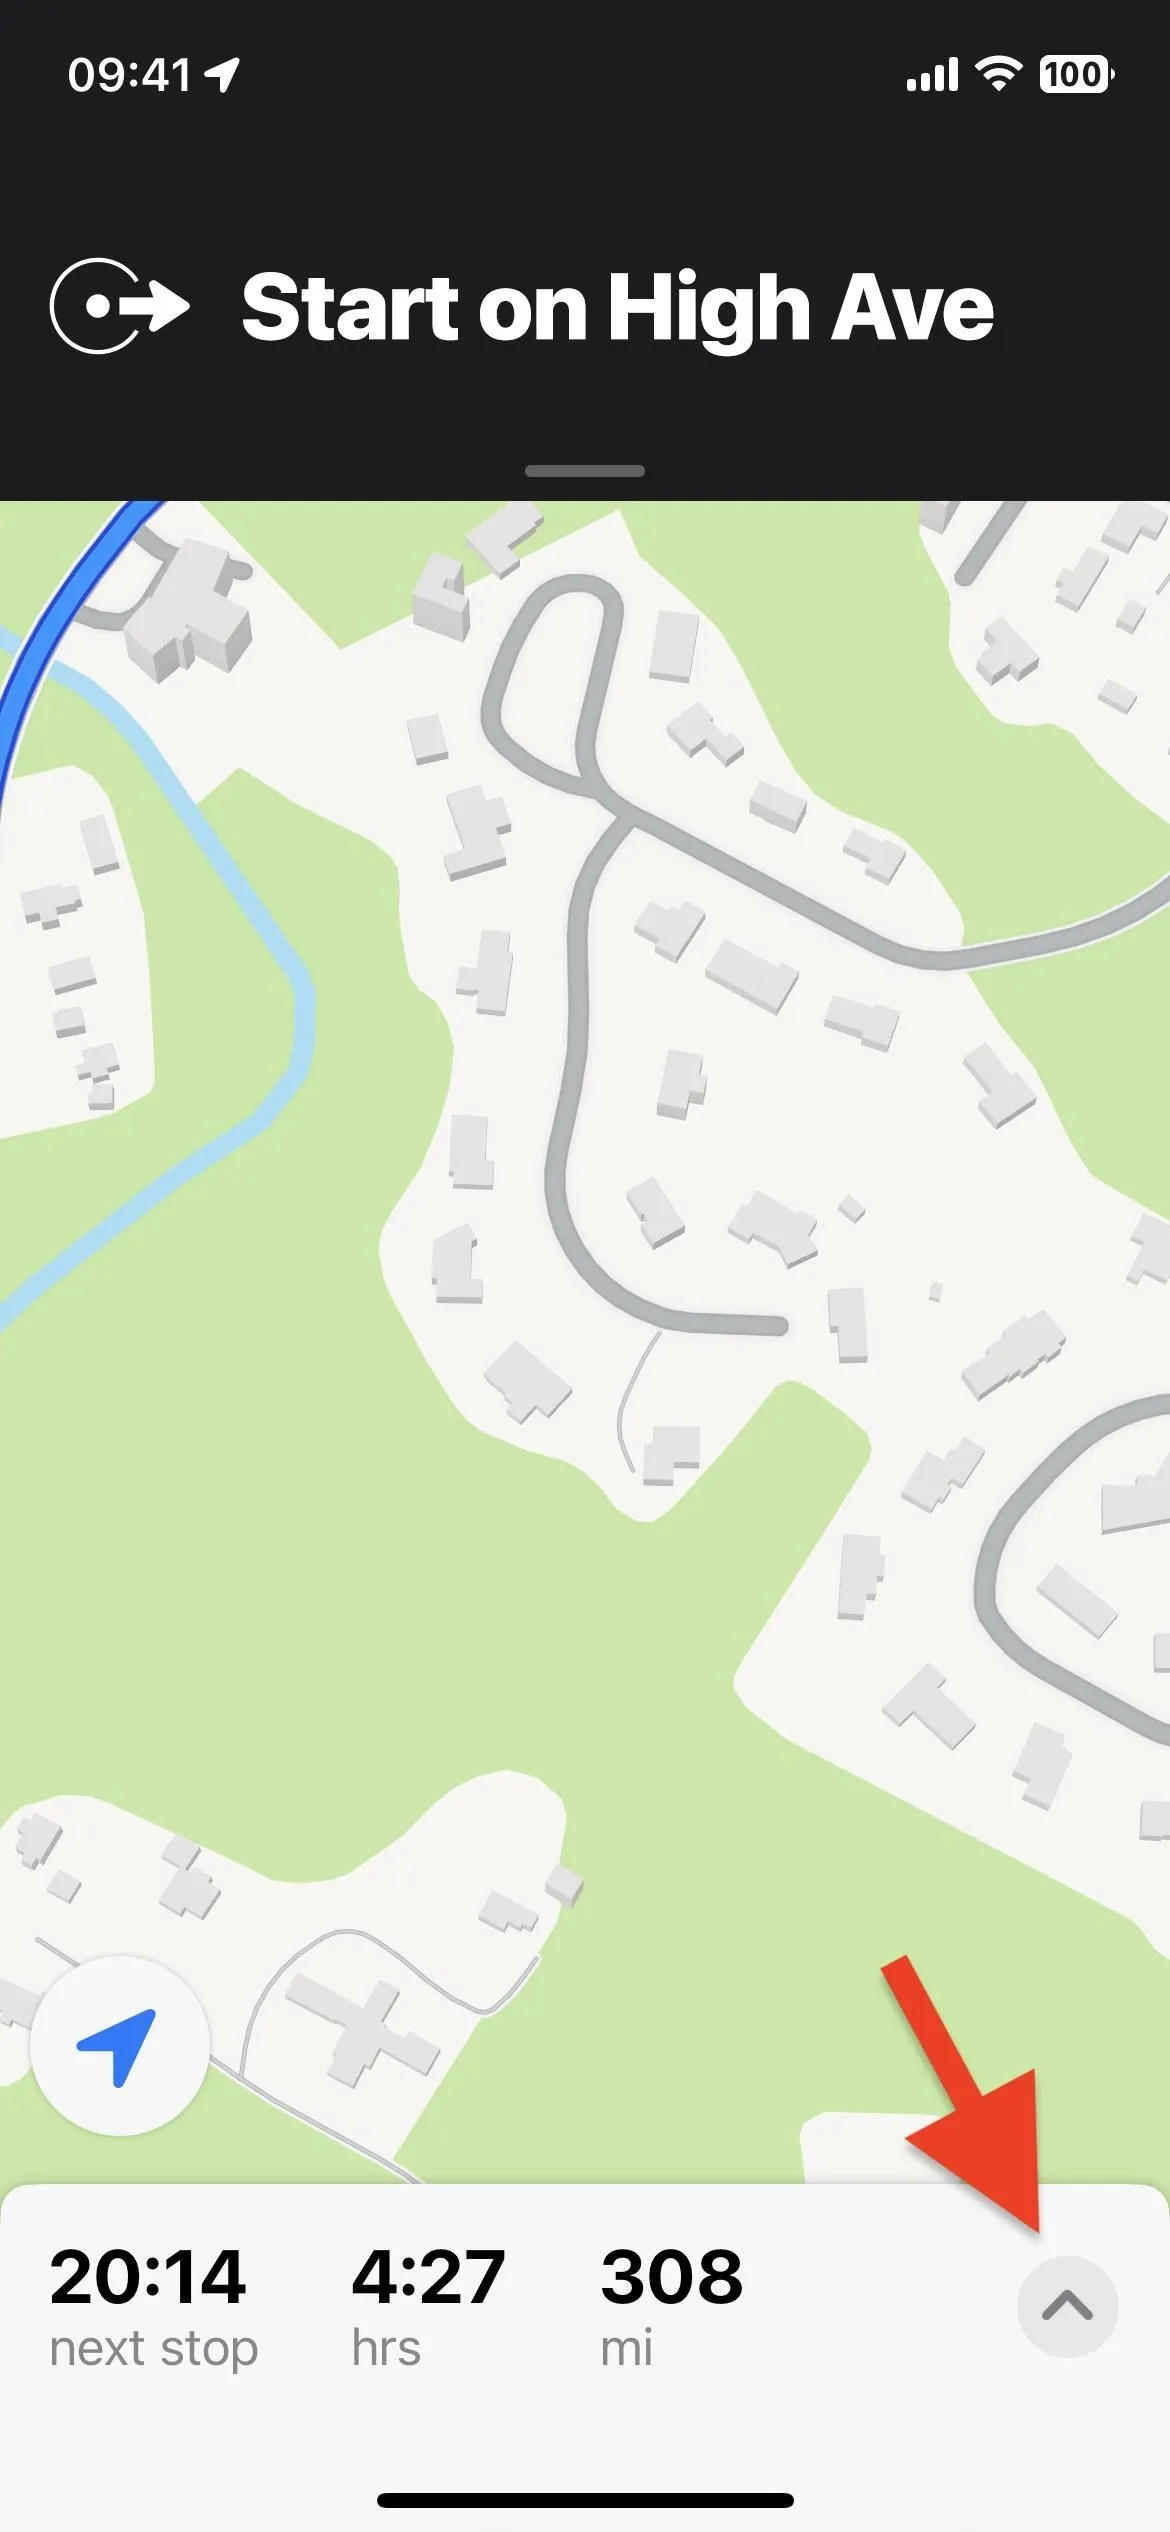
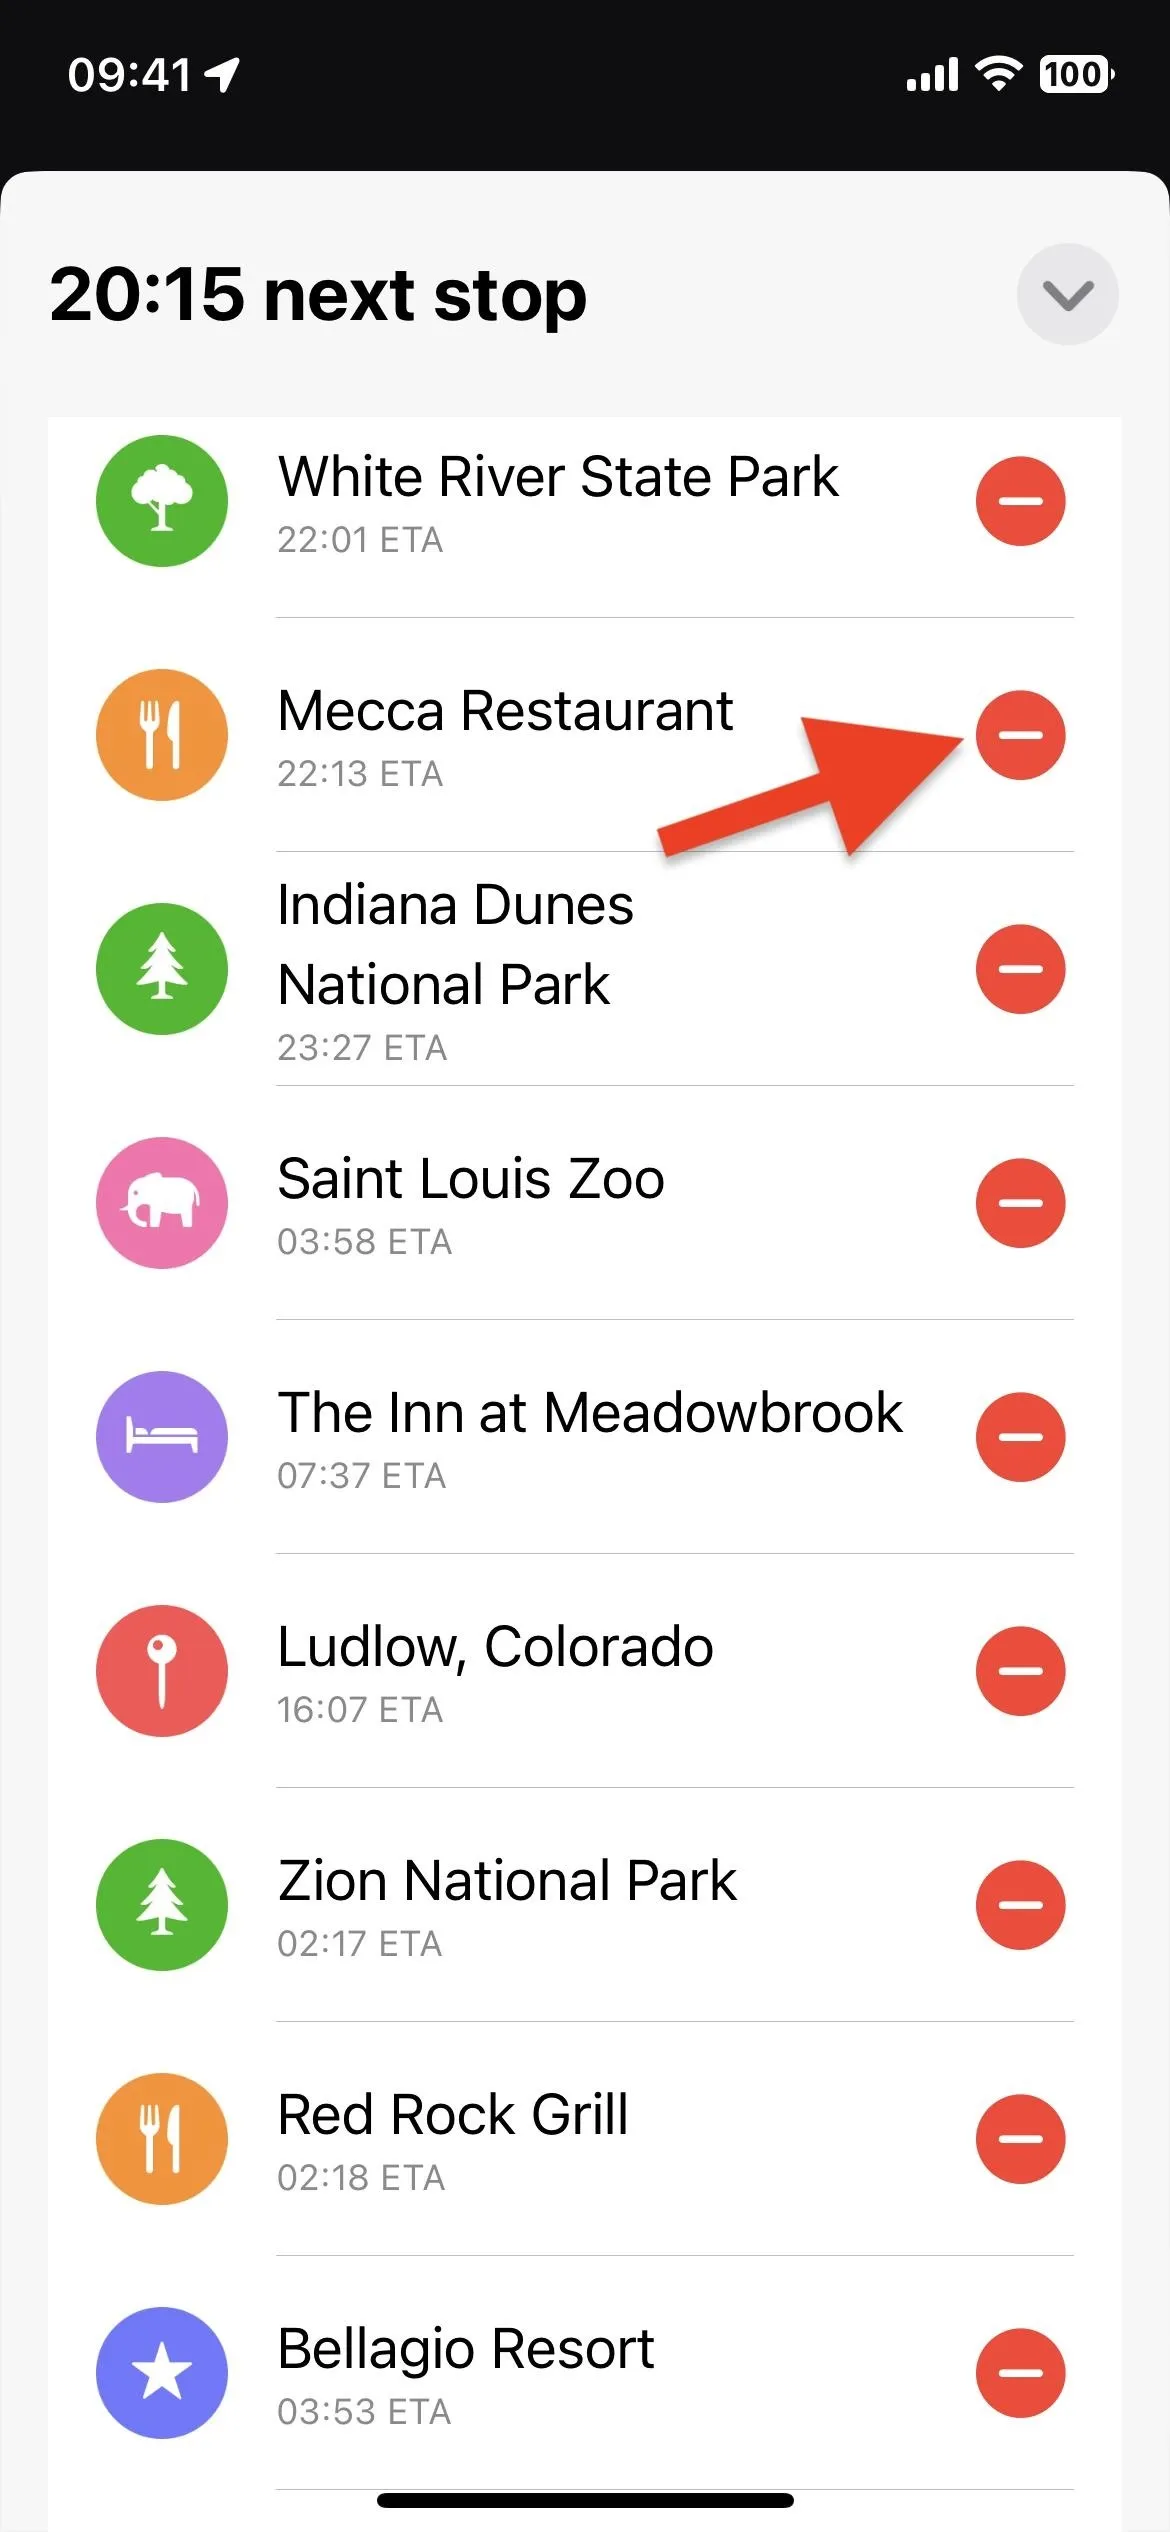
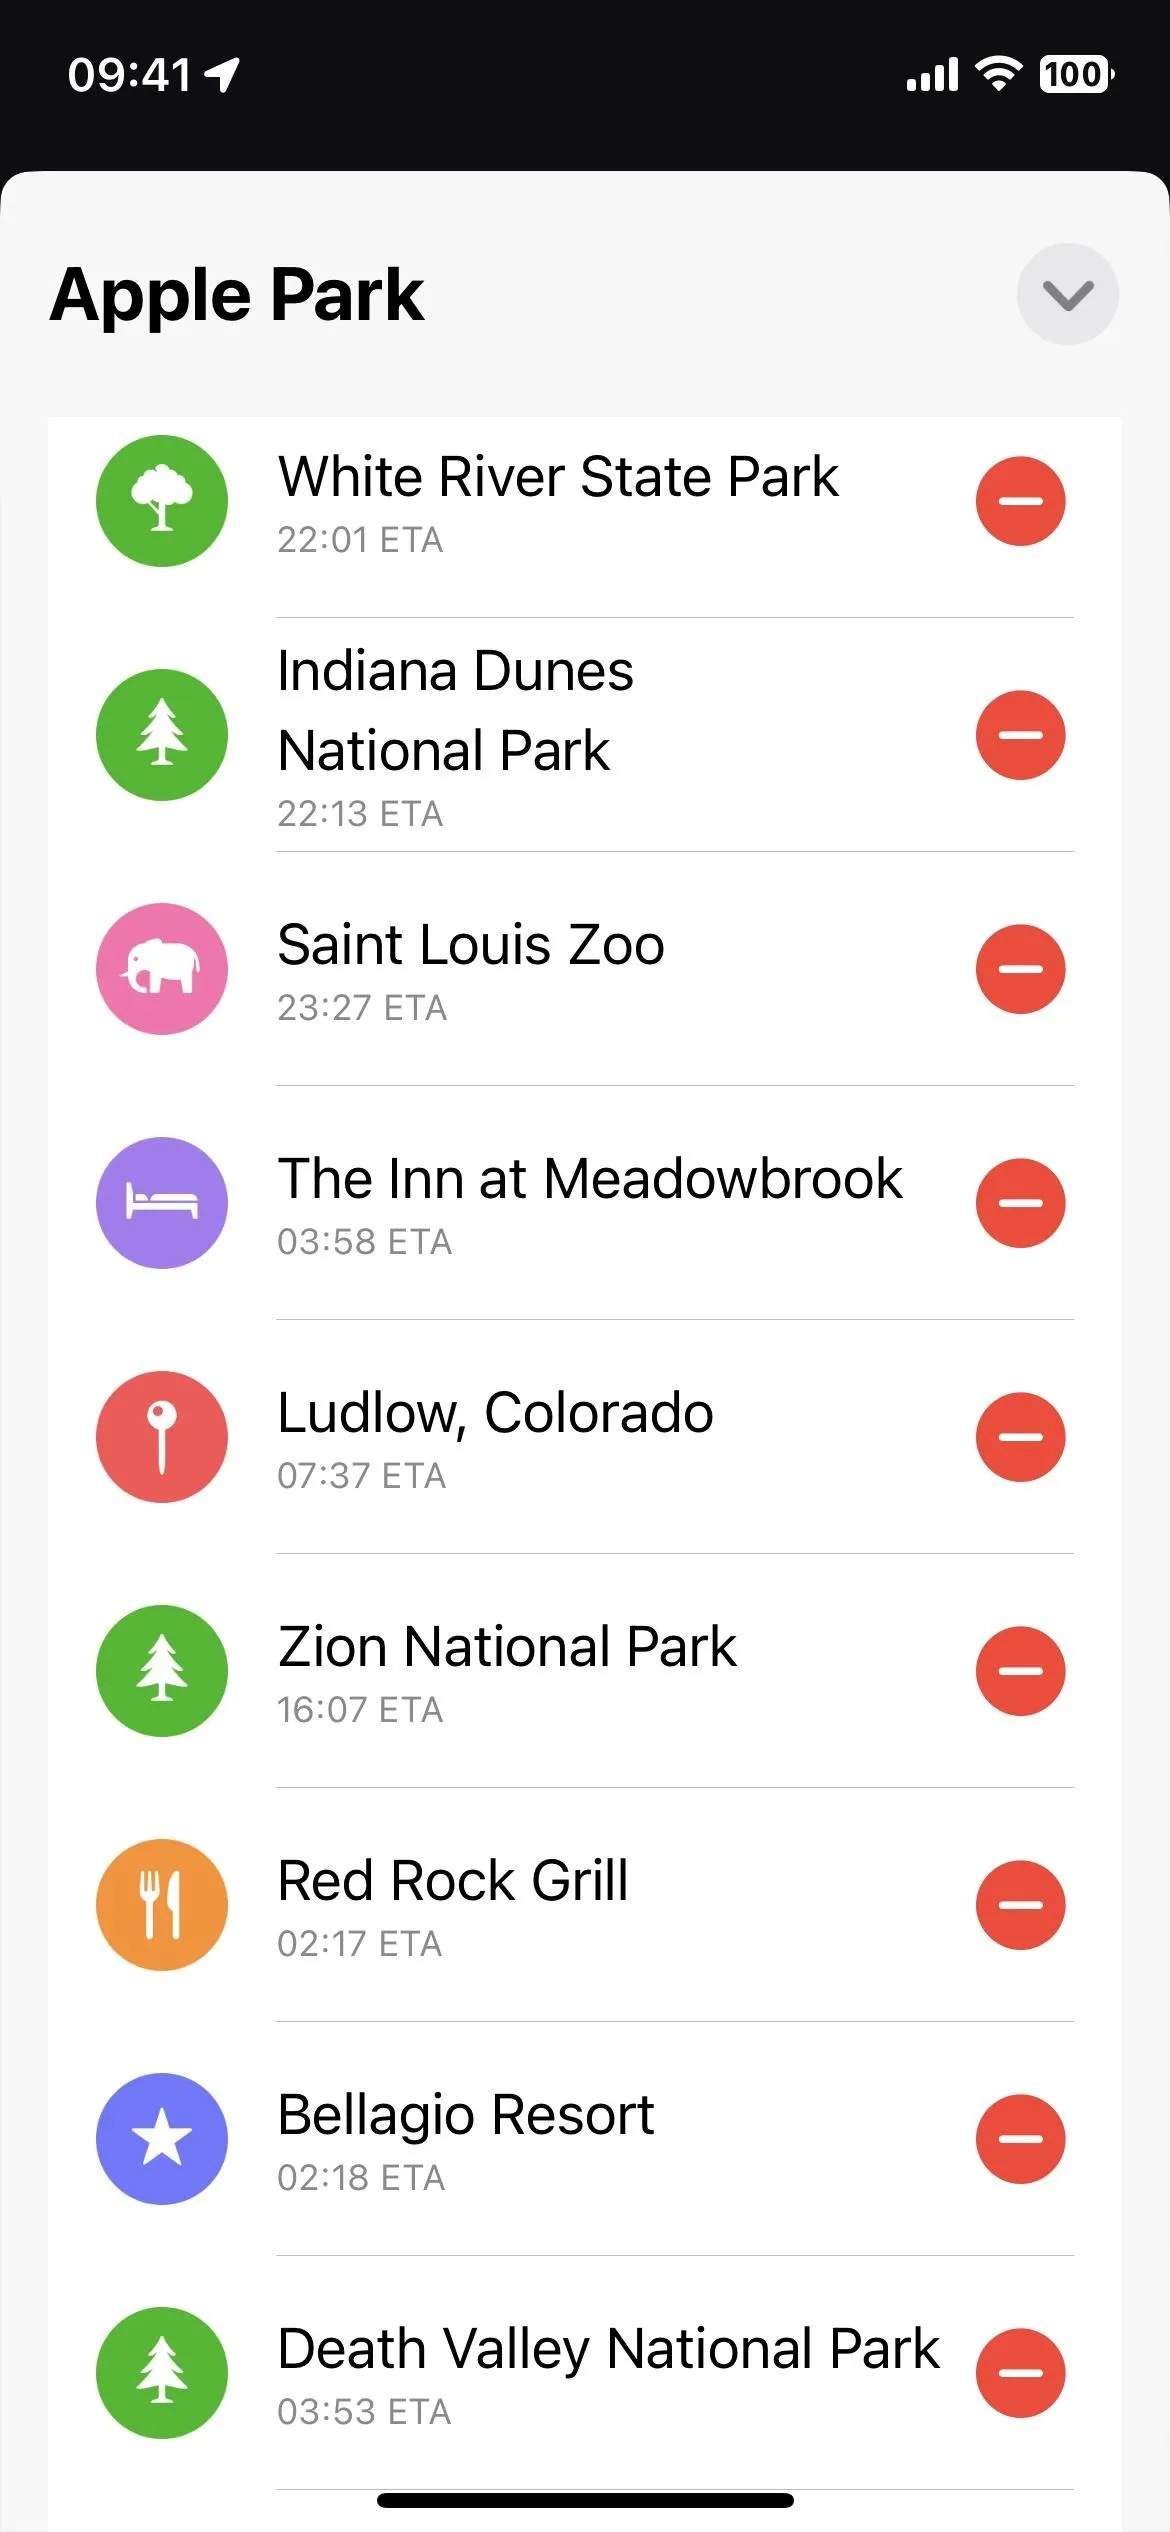
When you no longer want to visit a stop along your route after navigation starts, tap the route card at the bottom, then tap the minus (–) sign next to the place you want to delete.
Add Stops During Navigation if Necessary
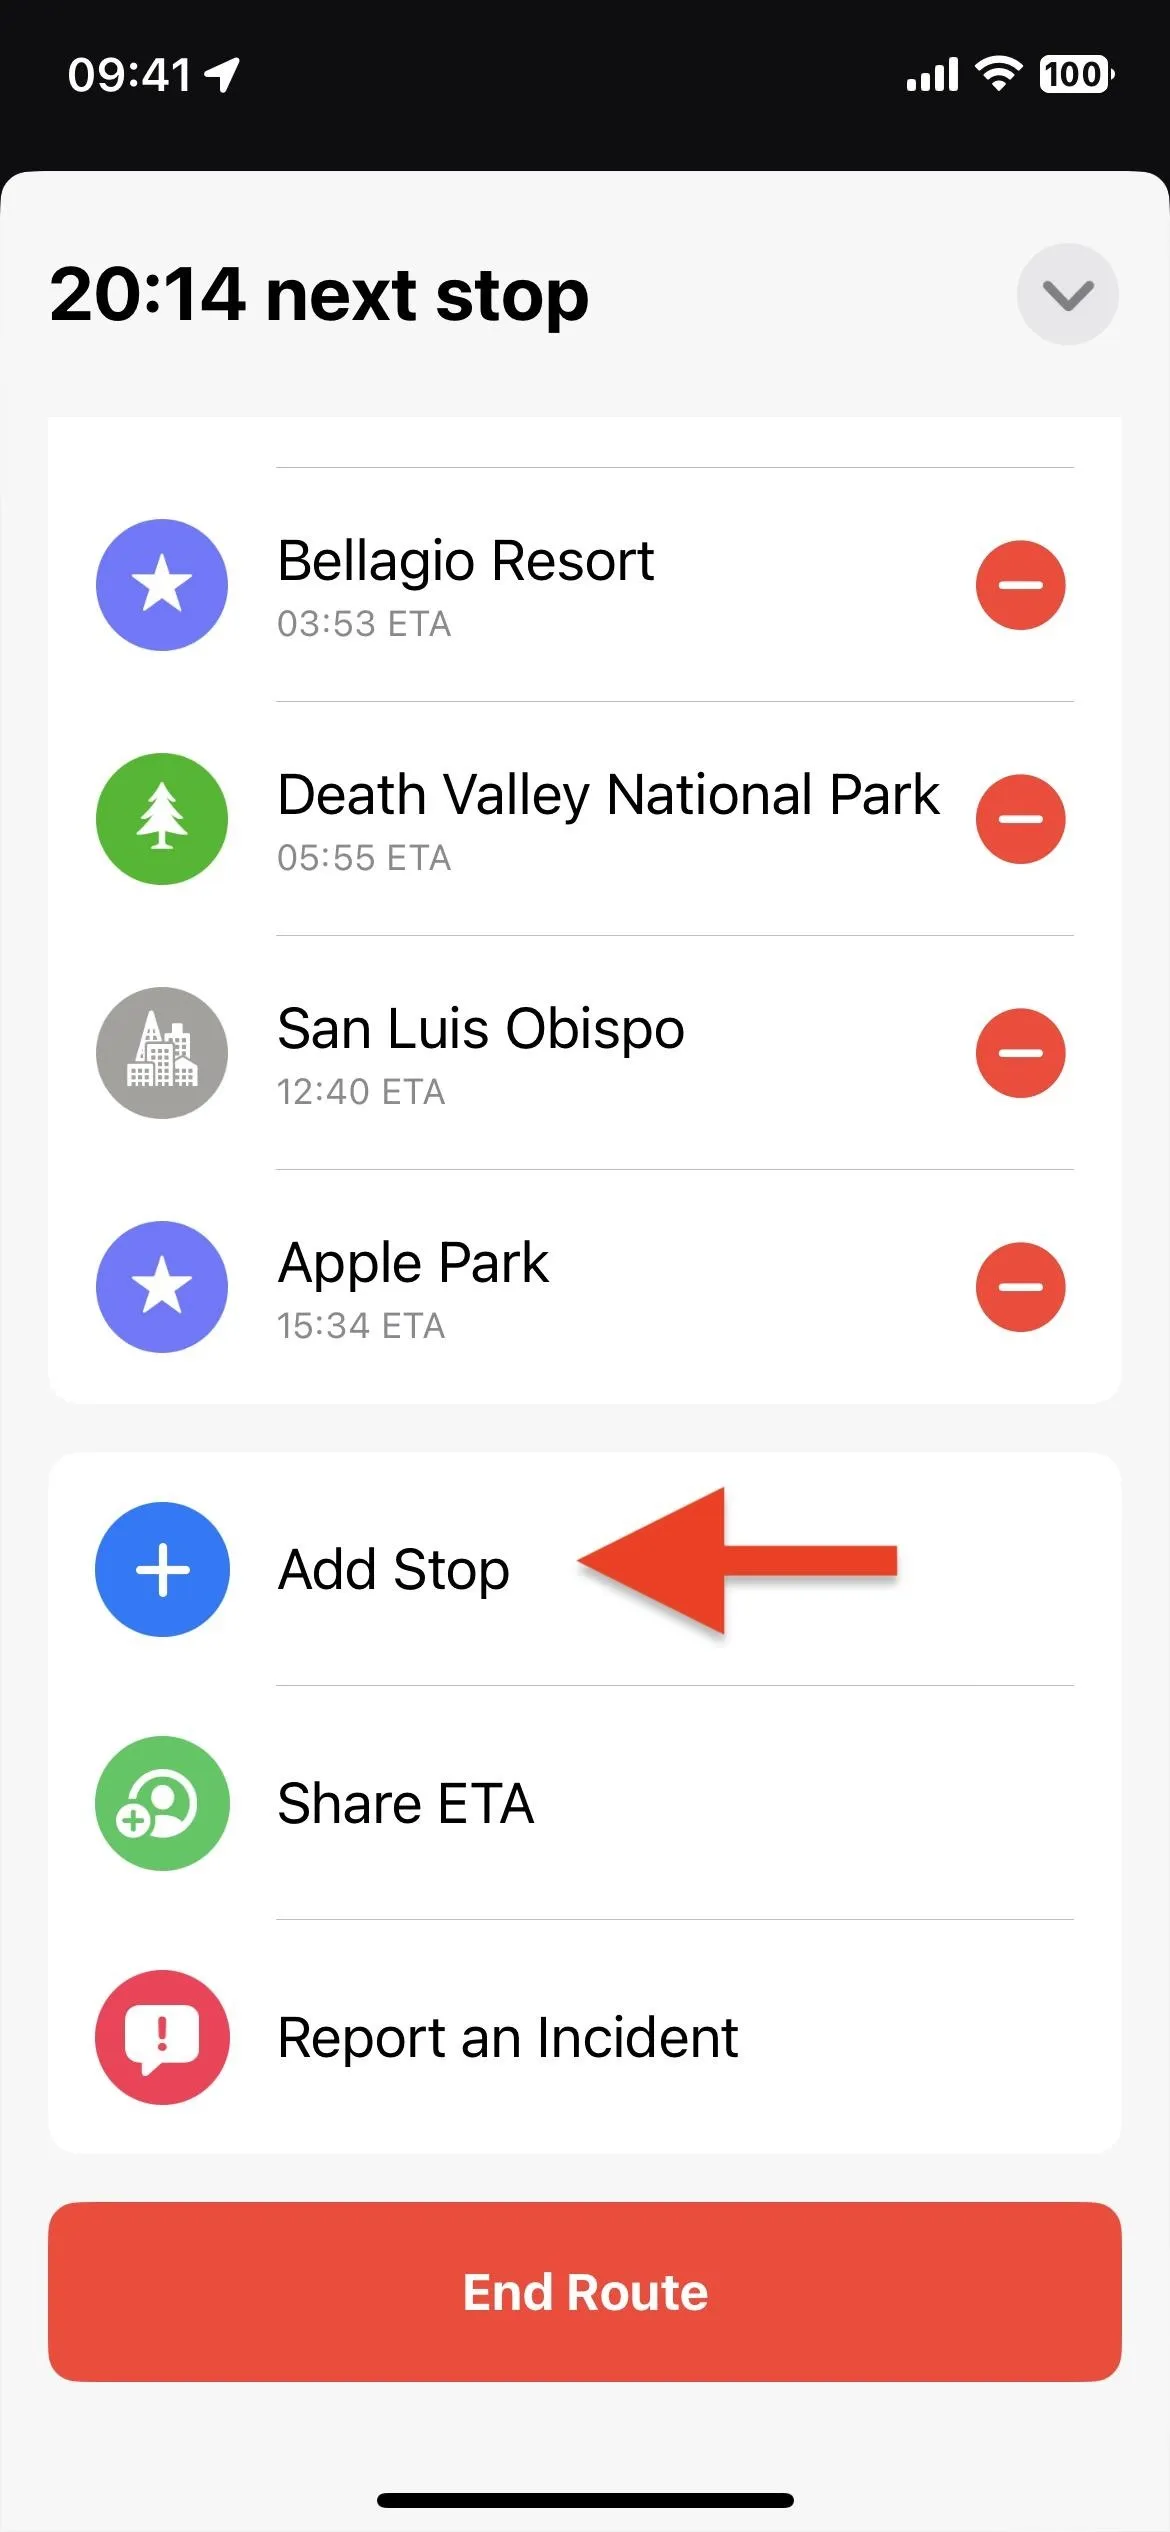
Like before, you can still add stops after driving directions have started. Tap the route card at the bottom, then hit the "Add Stop" button. As on iOS 15 and older, you can choose from any of the categories — banks and ATMs, coffee shops, convenience stores, eateries, fast food, gas stations, or parking lots — to find and select a stop. But now, you can also search for and pick a specific spot not in any of those categories.
Whatever you choose as a stop will be the next destination on the route. You can't reorder stops during navigation, so only add stops this way when you know it'll be the next stop on your trip.
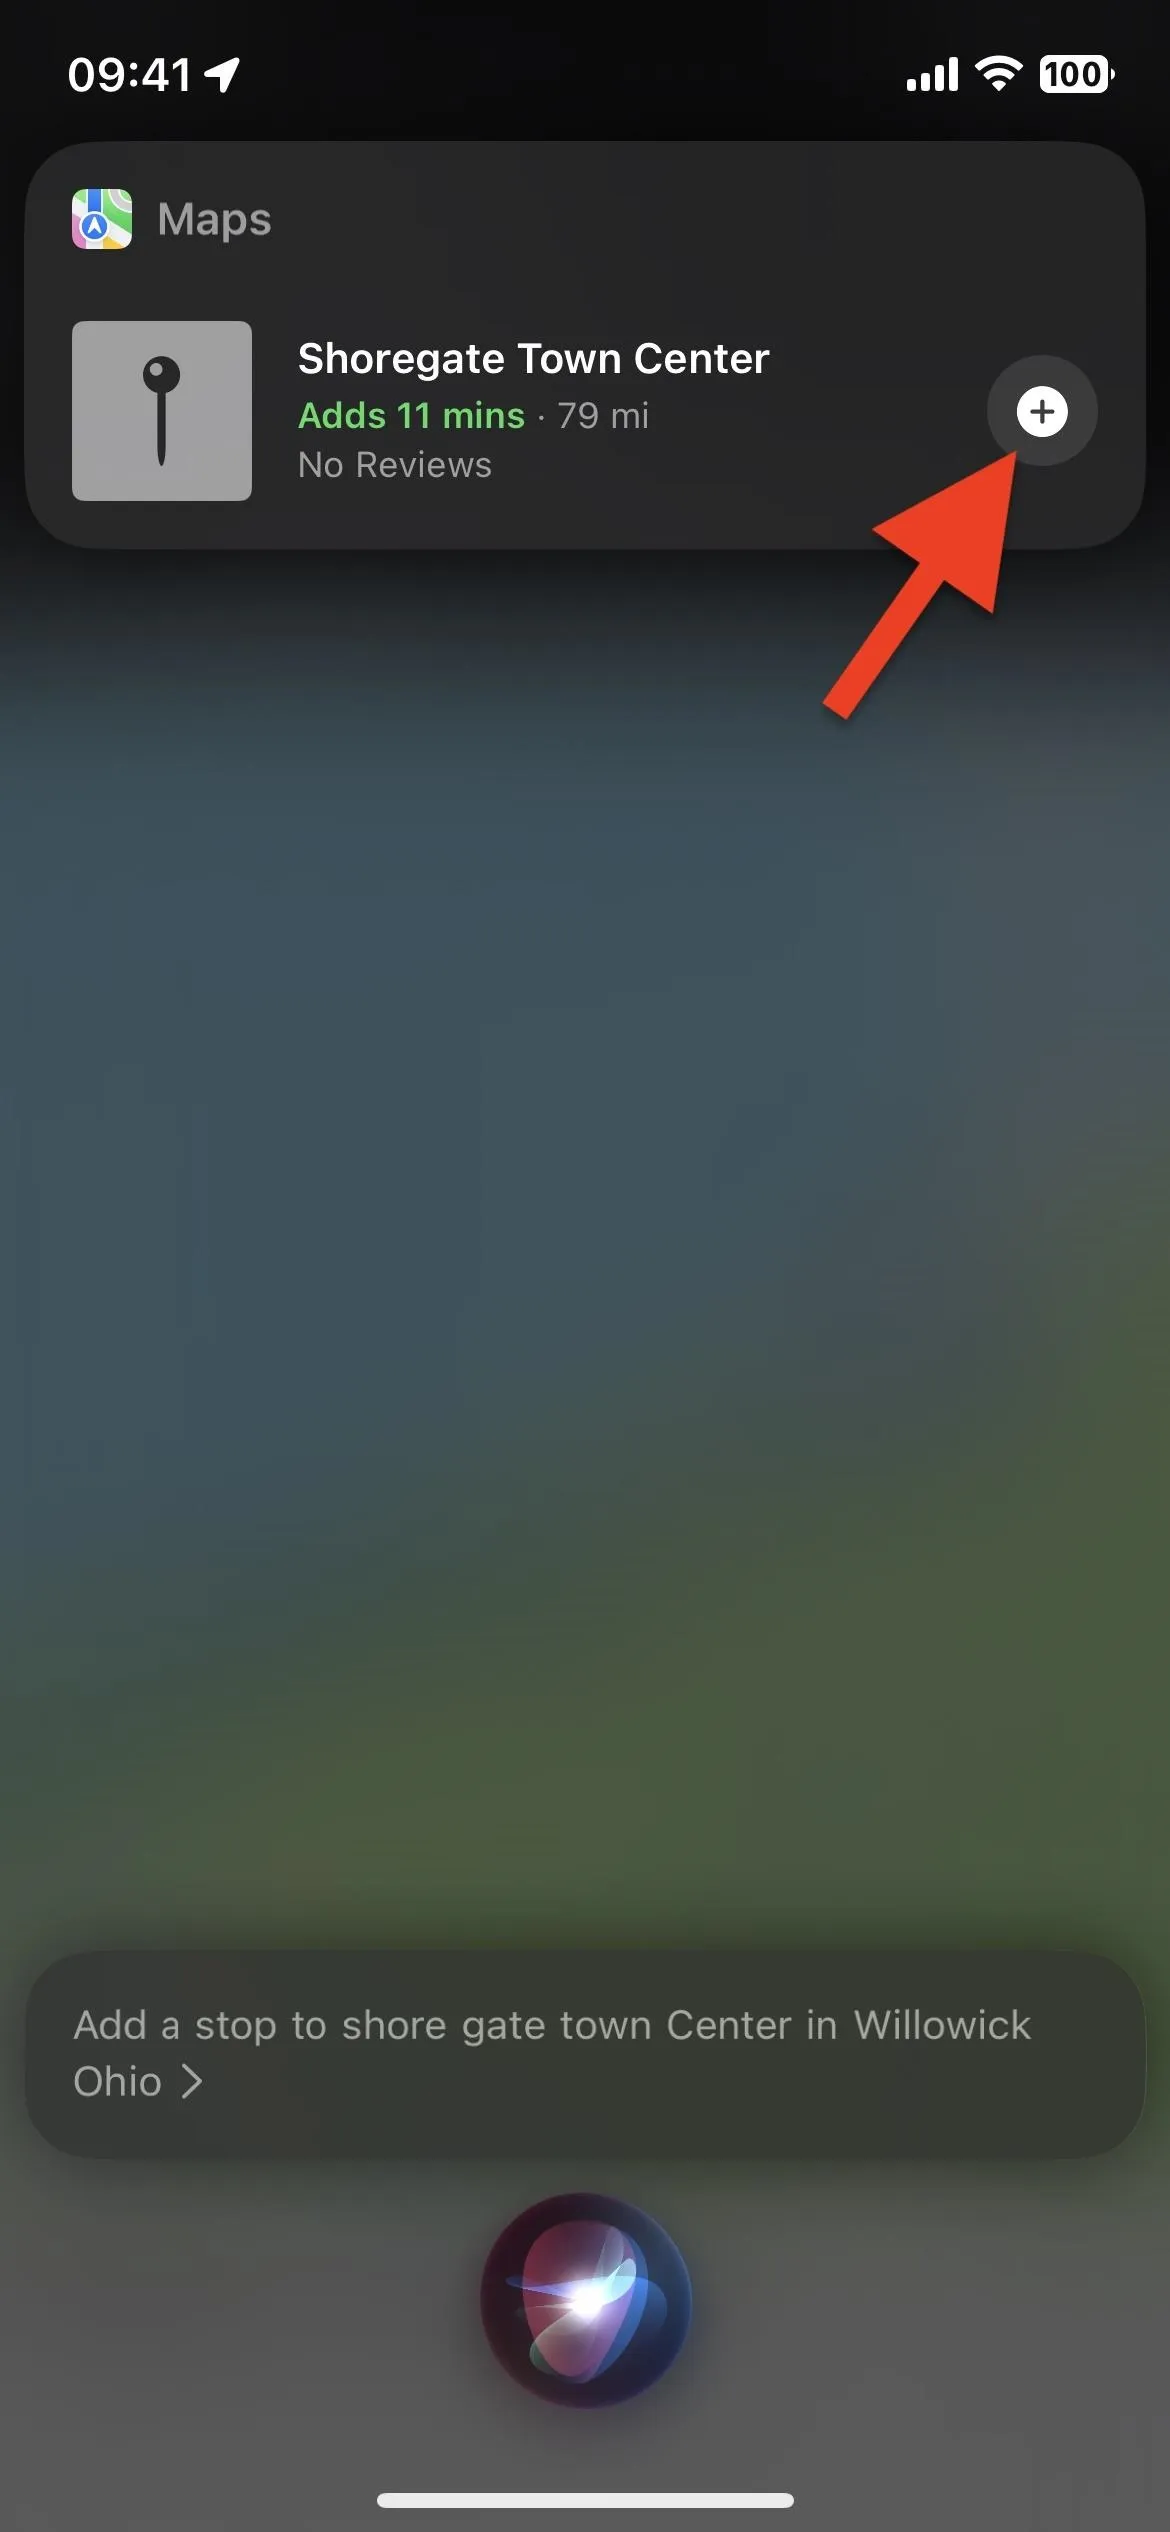
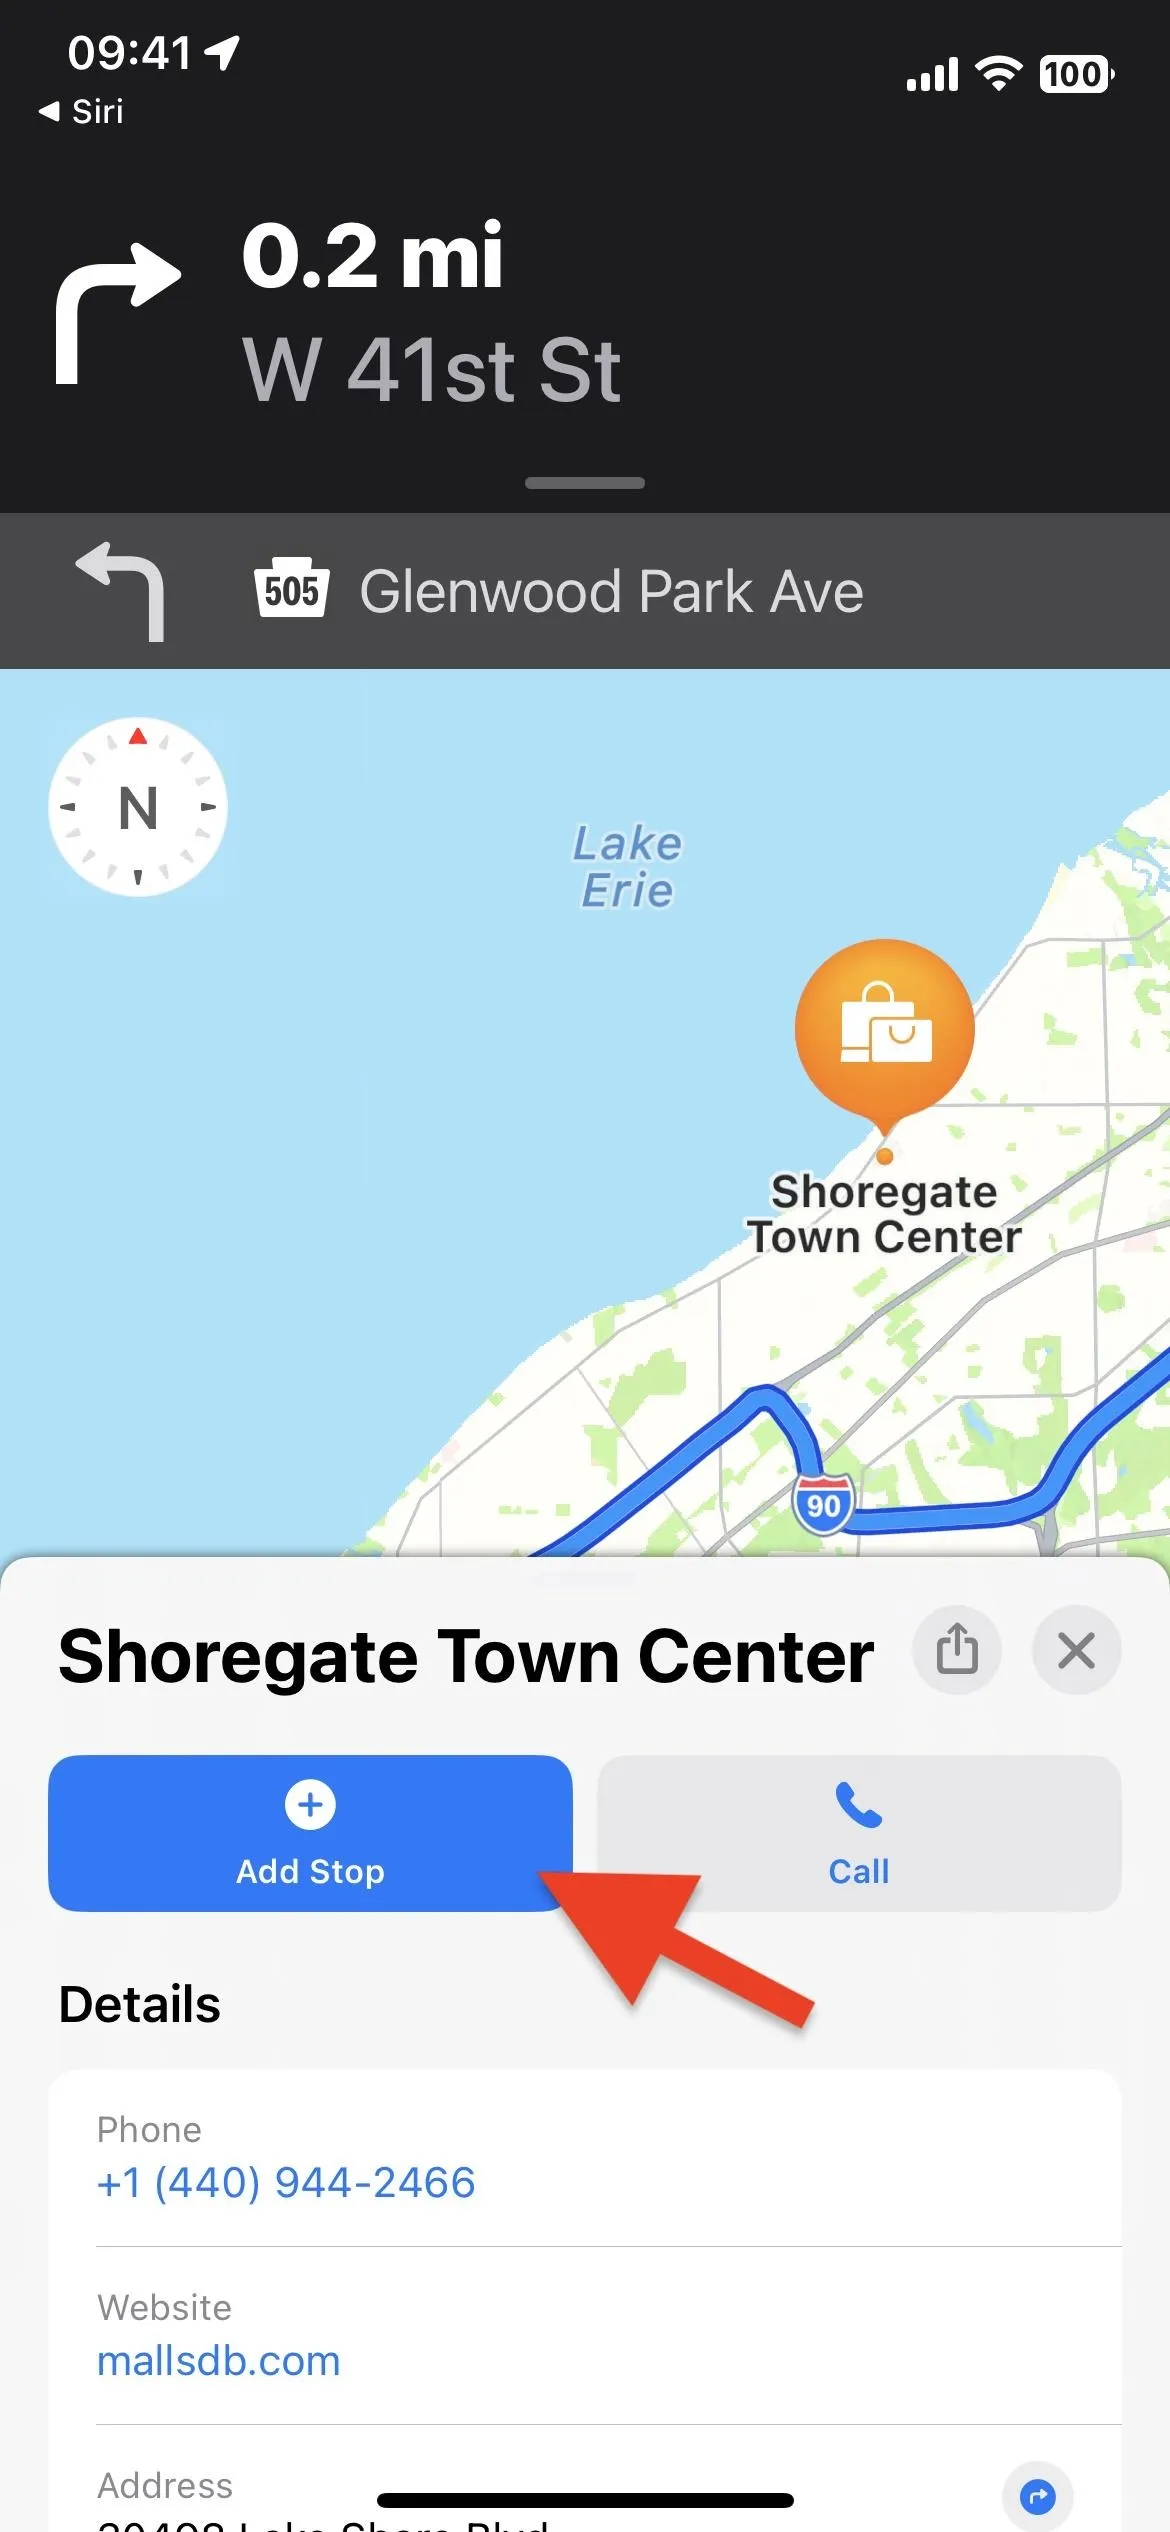
You can also ask Siri to add a stop. Tap the plus (+) icon on the correct spot it finds, then "Add Stop" when the location's card appears in Maps.
Cover photo by Daniel Hipskind/Gadget Hacks; screenshots by Justin Meyers/Gadget Hacks


Comments
Be the first, drop a comment!