


Check In is a new safety feature built into the Messages app that can automatically notify a family member, friend, another contact, or a group the moment you arrive safely at a destination, giving them peace of mind in knowing you're all right. If you never reach your stopping place, it will also send them clues to help them figure out what went wrong.
It's one of numerous changes that iOS 17 brings to the Messages app and totally separate from the Find My app, as it does not require continuous location sharing.
Check In provides the convenience of sharing not only your real-time location but also your expected arrival time and device details. And you're in control of how much information you choose to share in the automated messages during each Check In period. Remembering to use Check In before or during your journey means you don't have to remember to call or text anyone that you're OK when you reach your destination. It could also help save your life during an emergency.
The Check In feature makes it easy to inform your loved ones you have arrived safely at a destination, even before you remember to text or call them. It will automatically share your location and data with the contacts you select, and you can choose which info to send.
Select 'Check In' in the Conversation
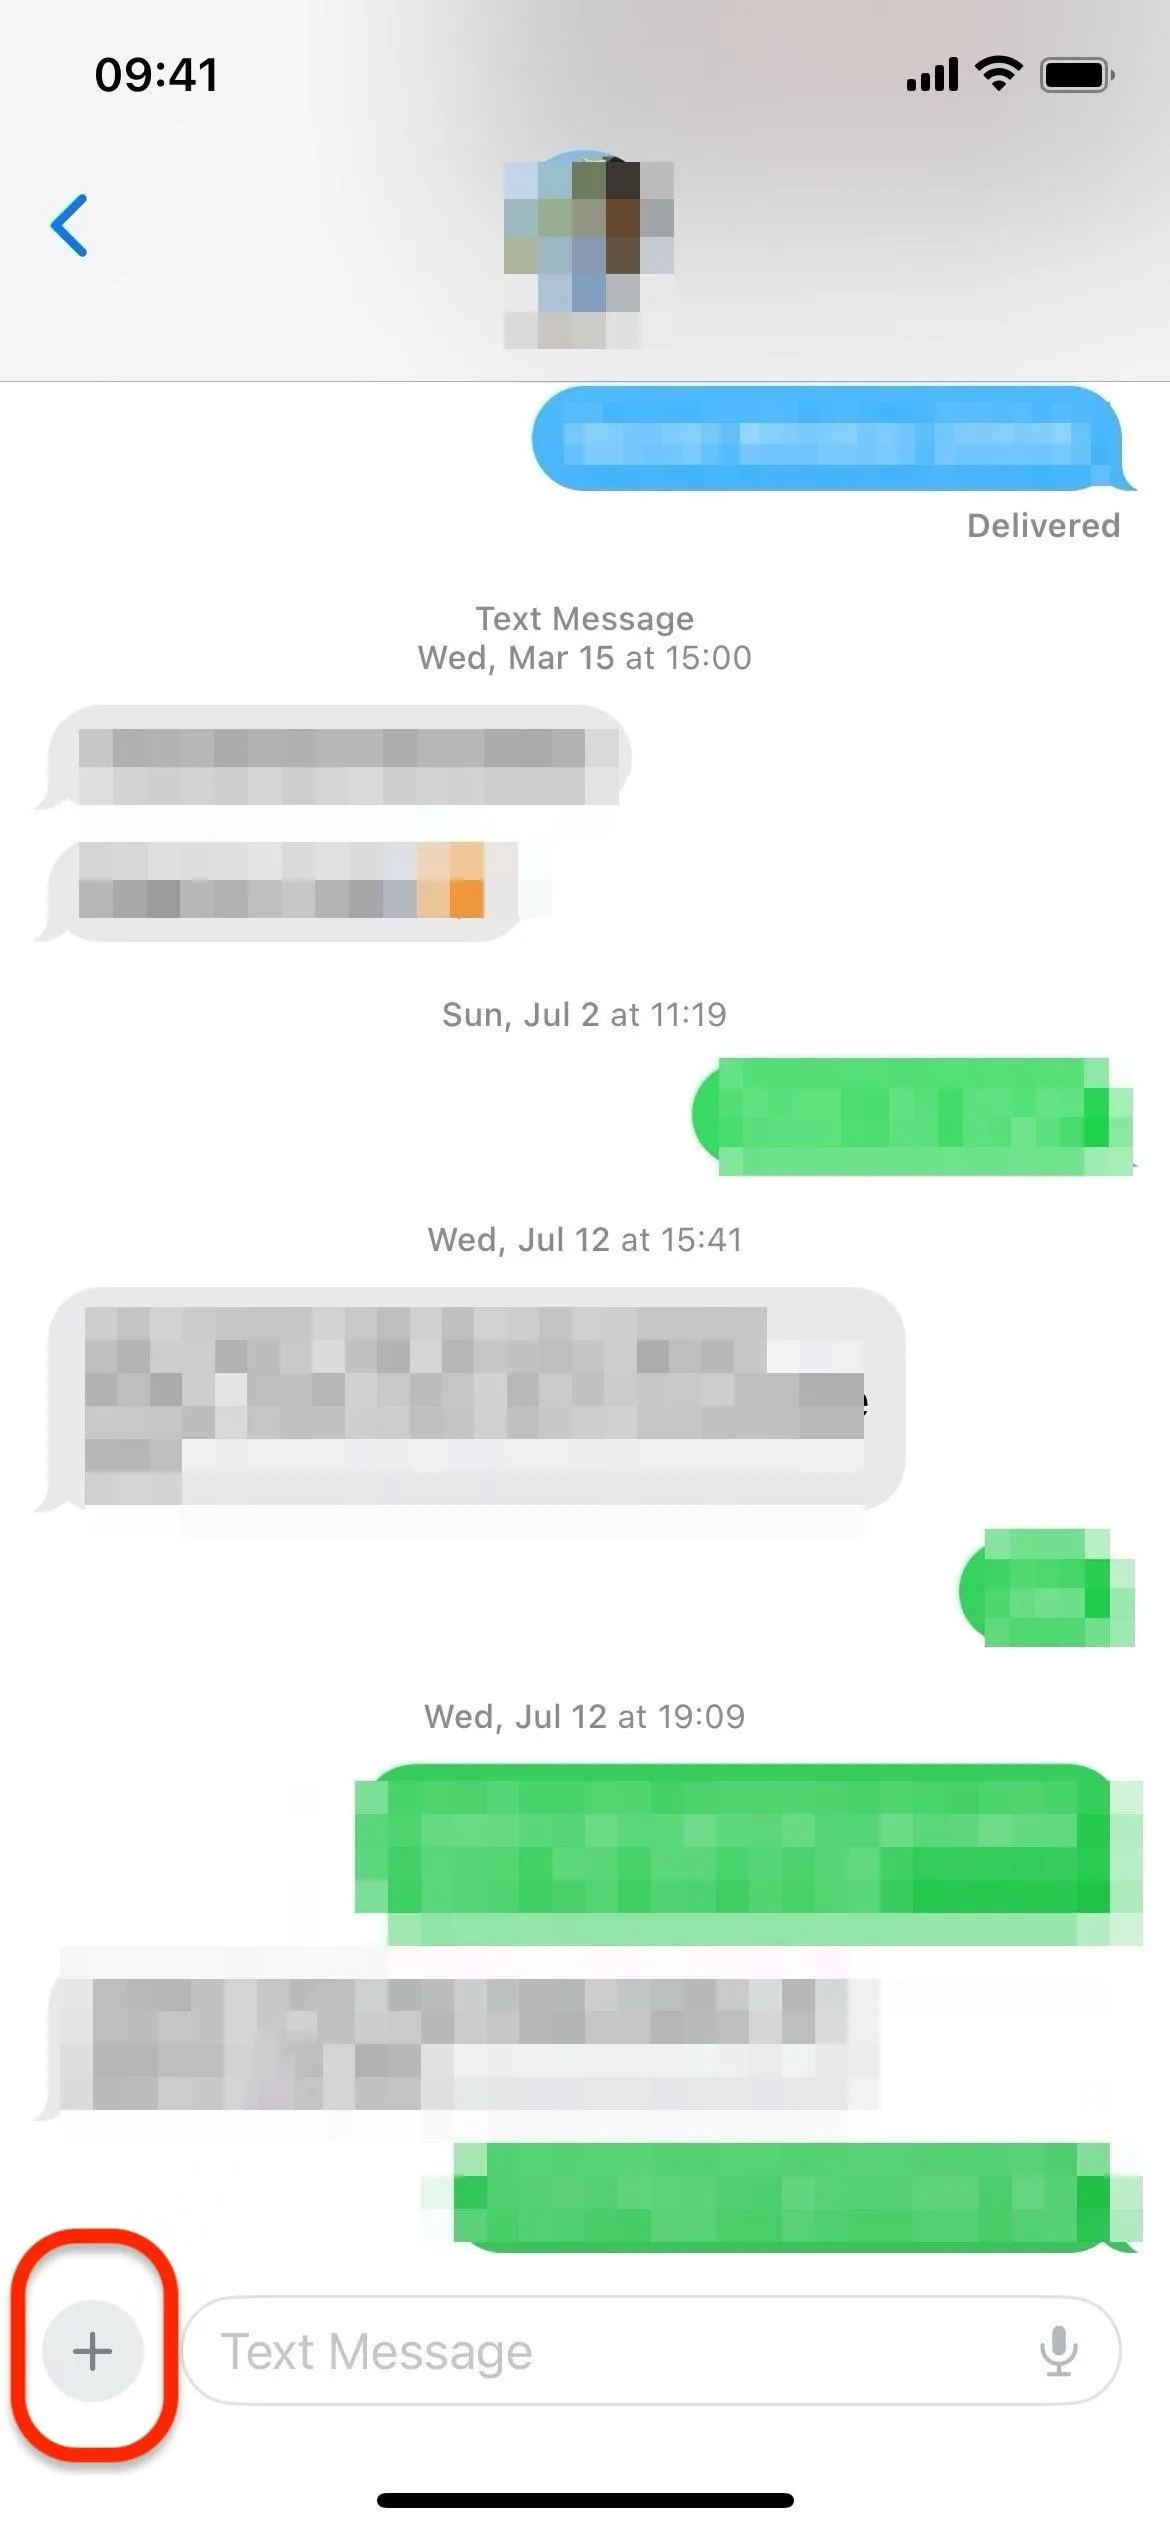
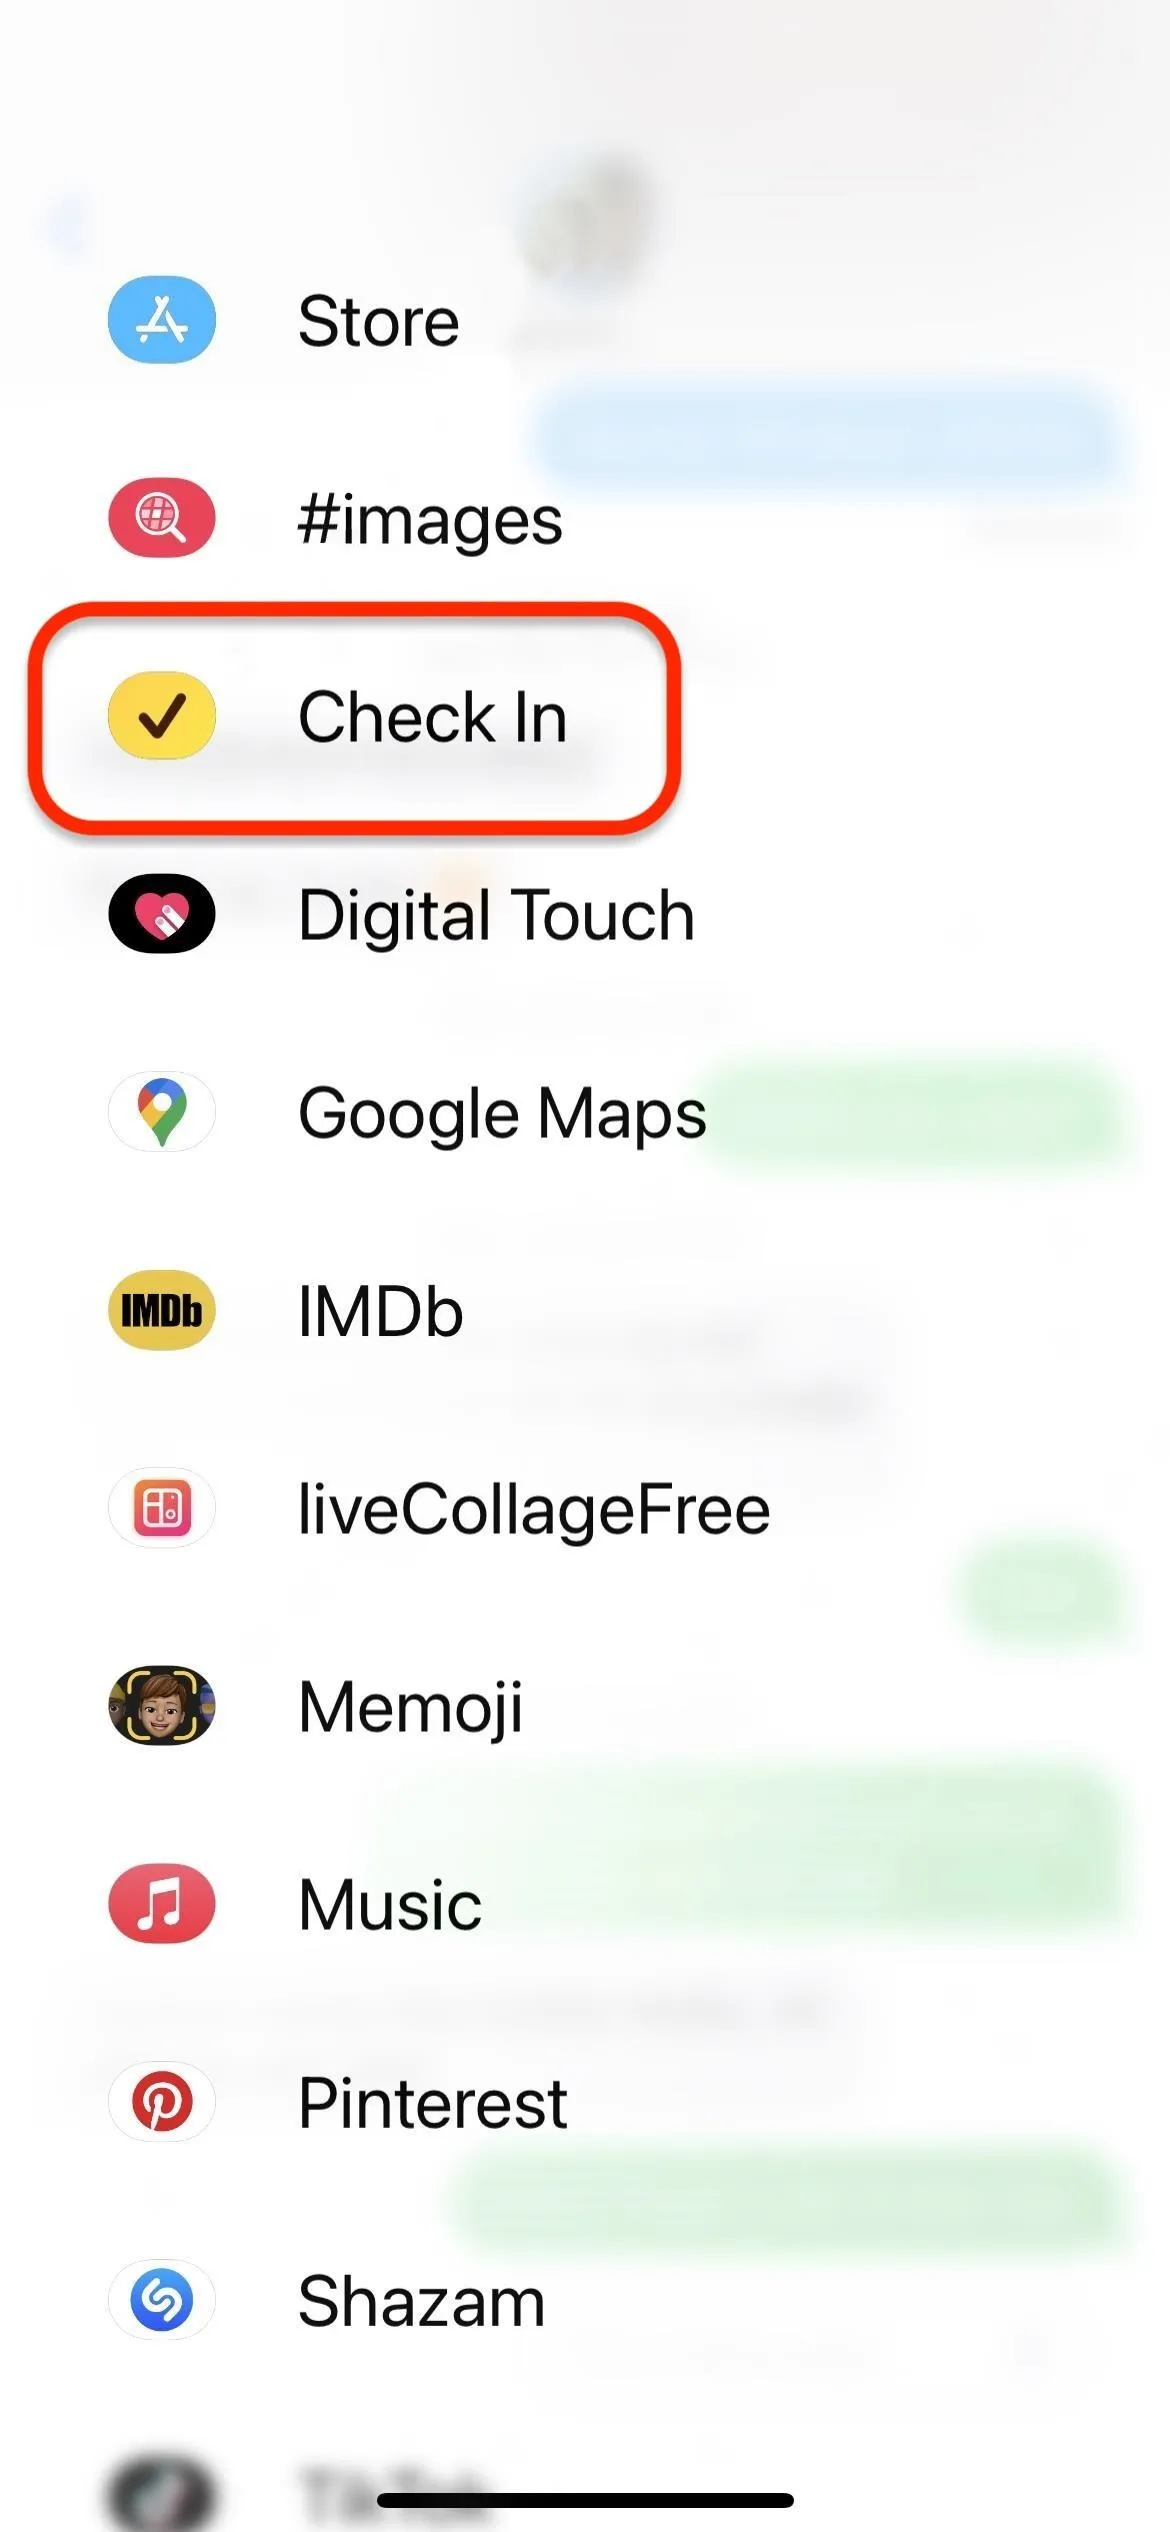
In the Messages app, open the conversation with the person or group of people you want to keep updated. Tap the plus (+) button to the left of the text field, choose "More" from the list, then tap "Check In." If you'd like faster access to it, you can touch and hold "Check In," and then drag and drop it onto the first page of favorites.

View the Walkthrough
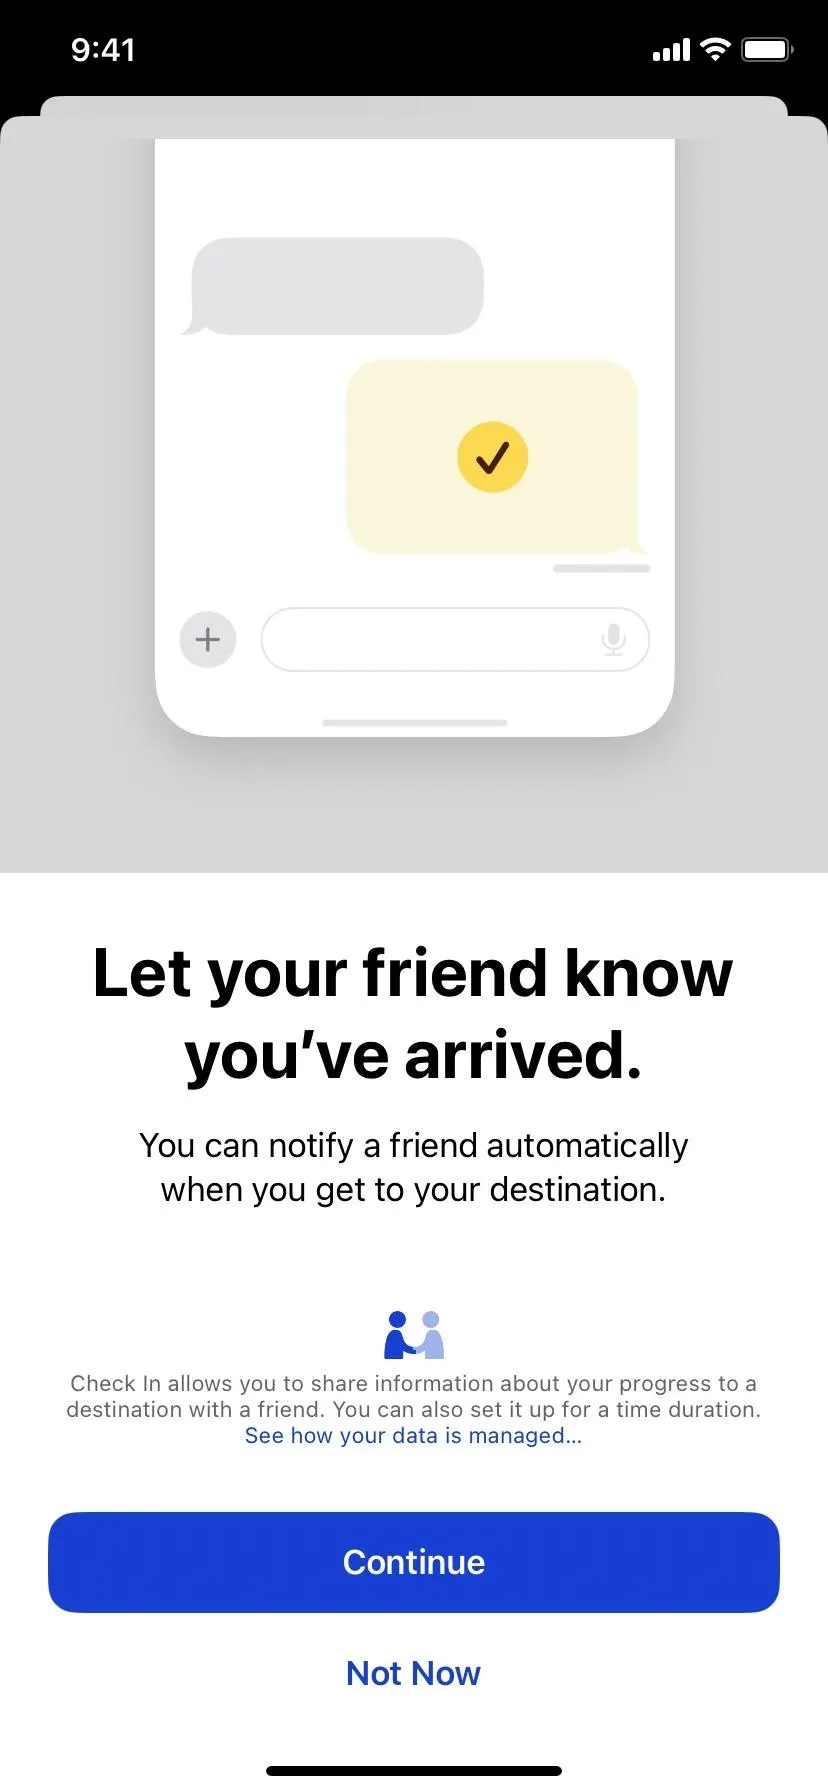
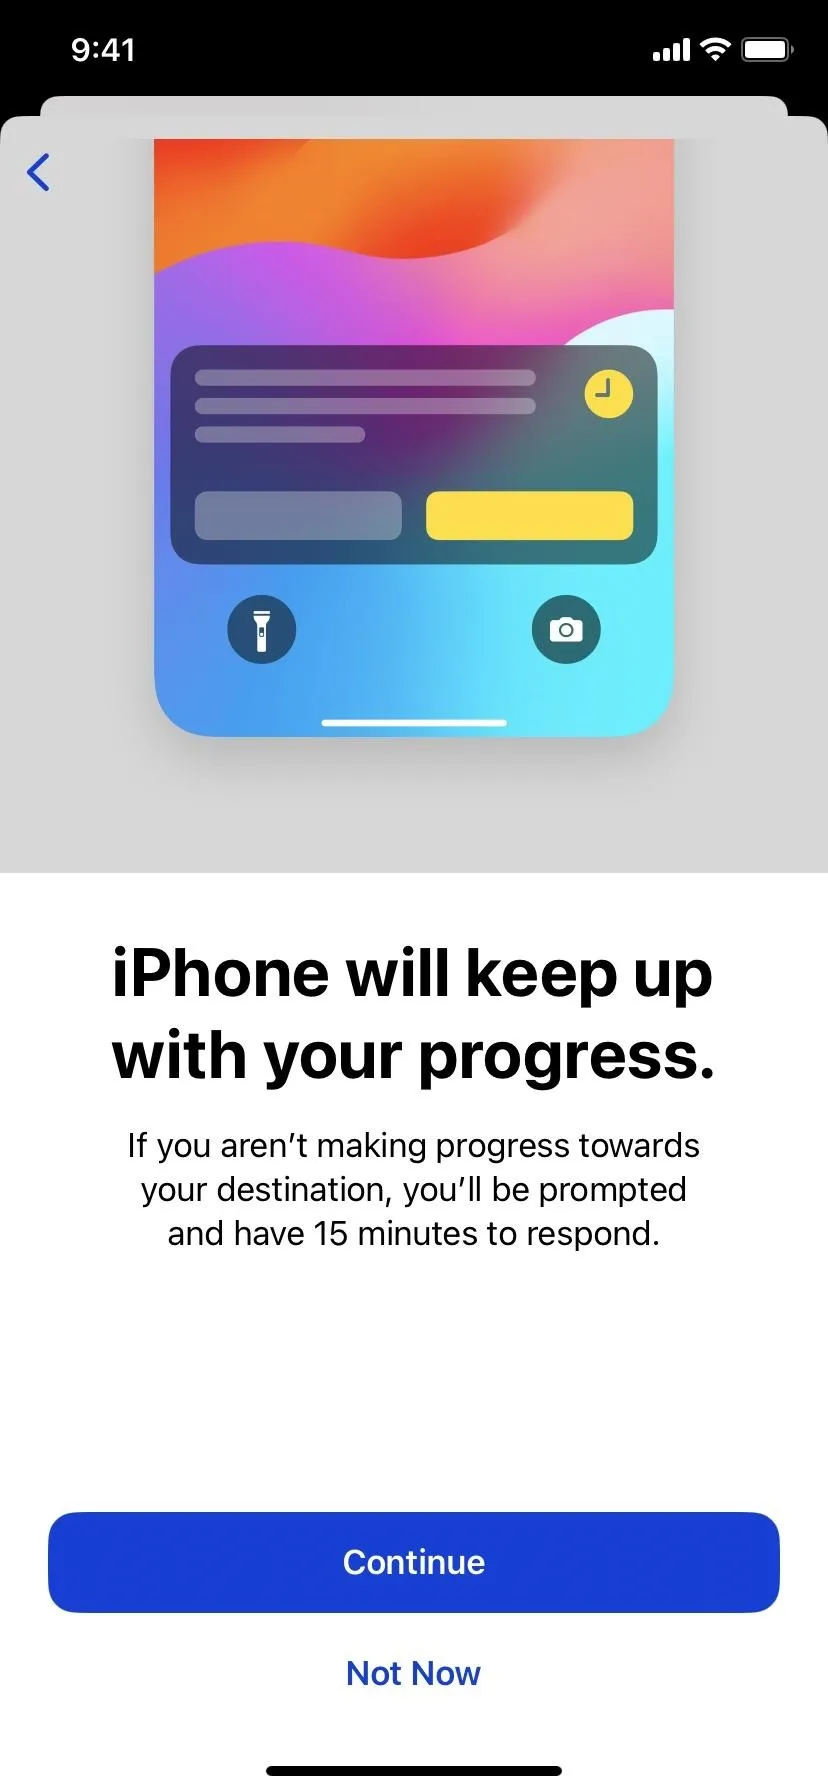
If it's your first time using Check In with the contact or contacts, Messages will give you a quick walkthrough, explaining what it is and does. Tap "Continue" to move on.
Choose Which Data to Share
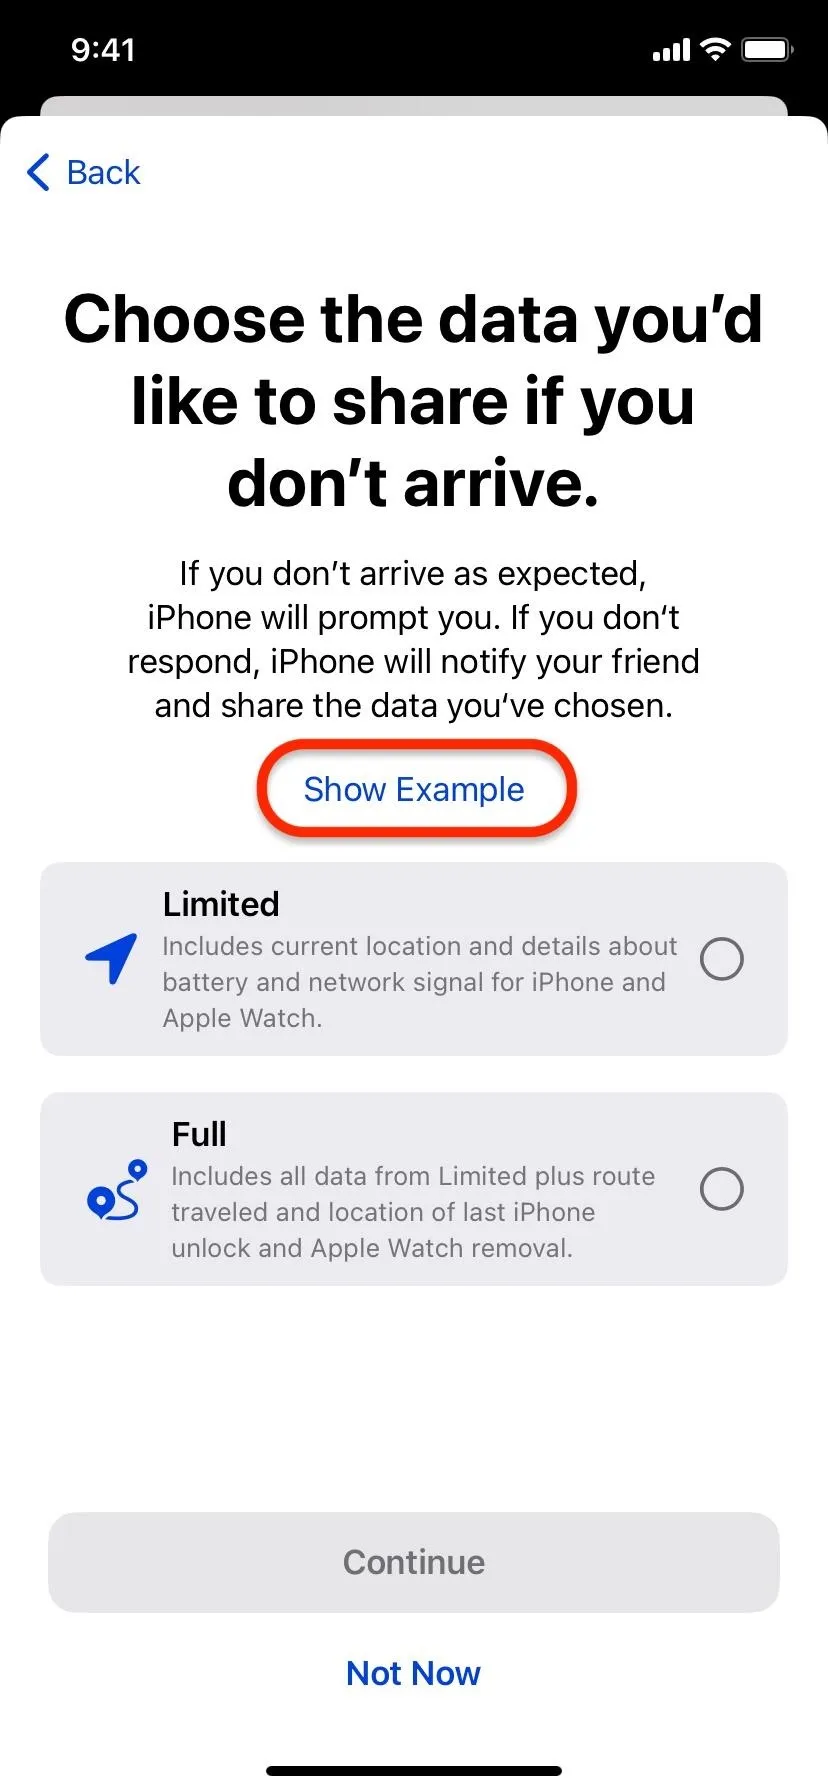
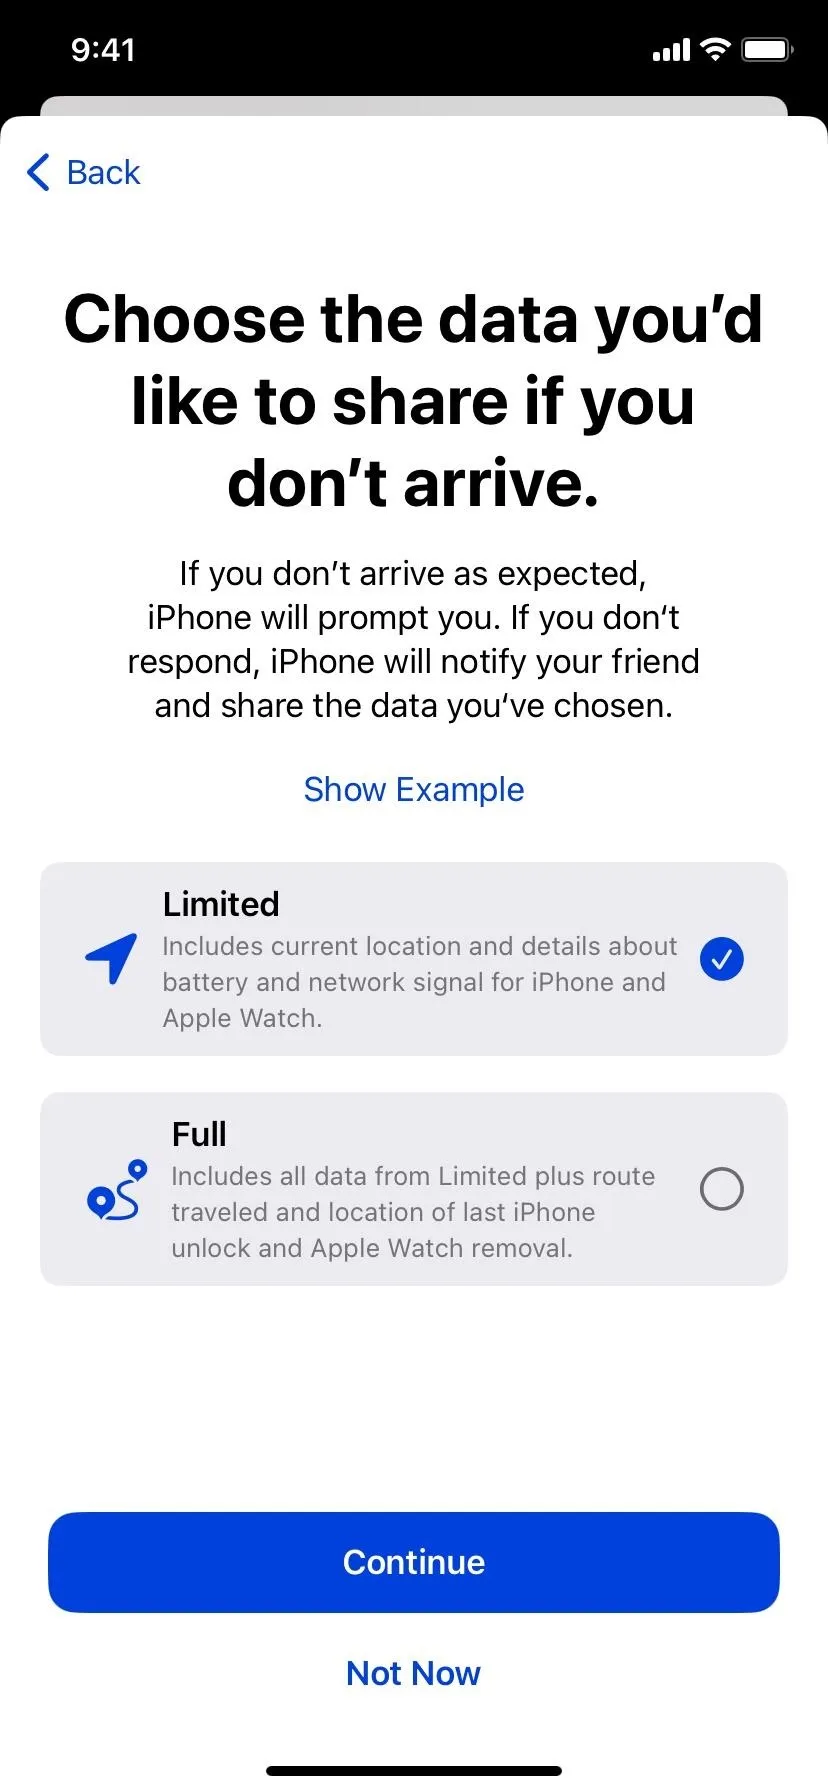
If you haven't yet chosen how much Check In data to share when you fail to reach your destination, you can do that now — either "Limited" or "Full" data. Each data set will use information from your iPhone as well as your Apple Watch if you own one.
This information will be automatically sent to your designated contact or group, but only 15 minutes after you fail to respond to the prompt Check In sends you for failing to make progress toward your destination. It may also send the data if your iPhone is offline for an extended period.
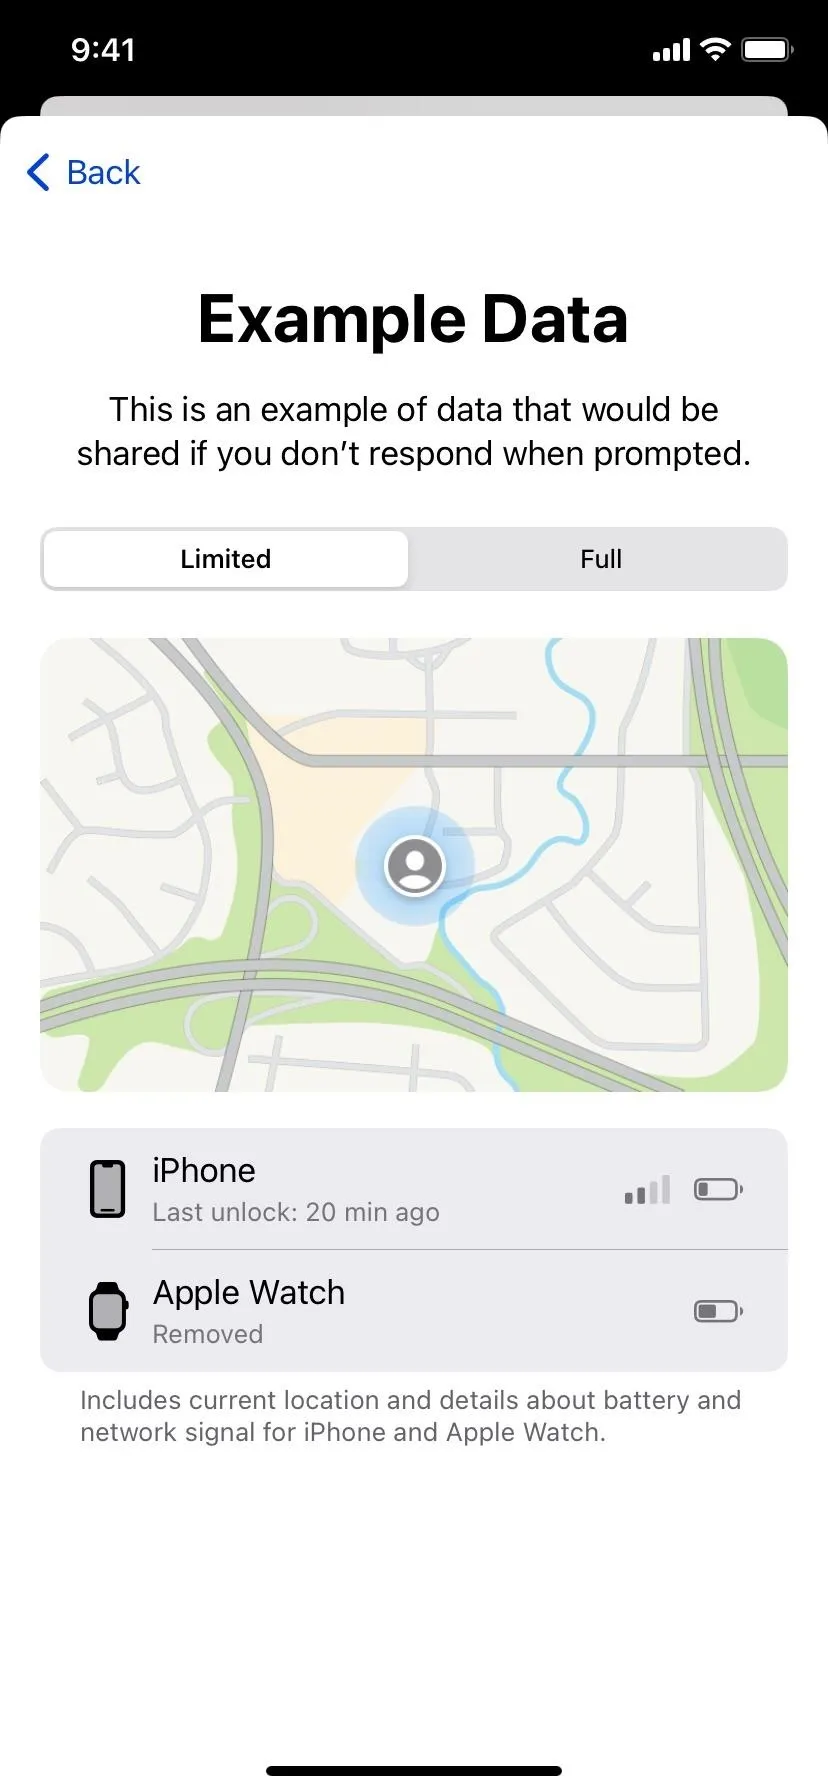
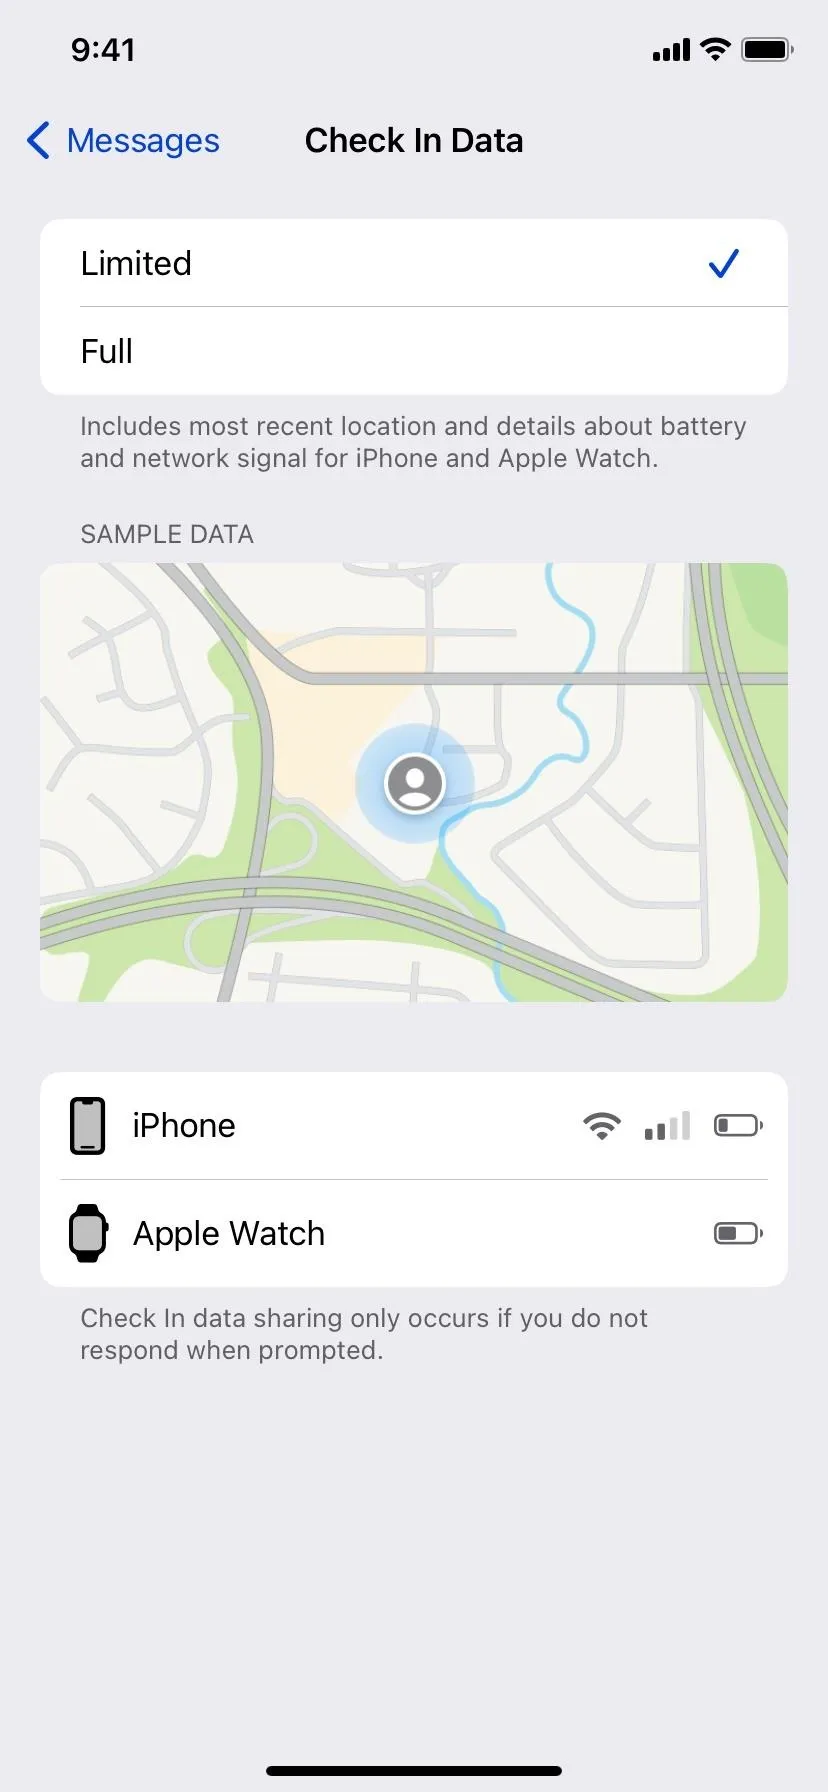
Limited data shares:
- Your current location
- Your last known battery levels
- Your network signal
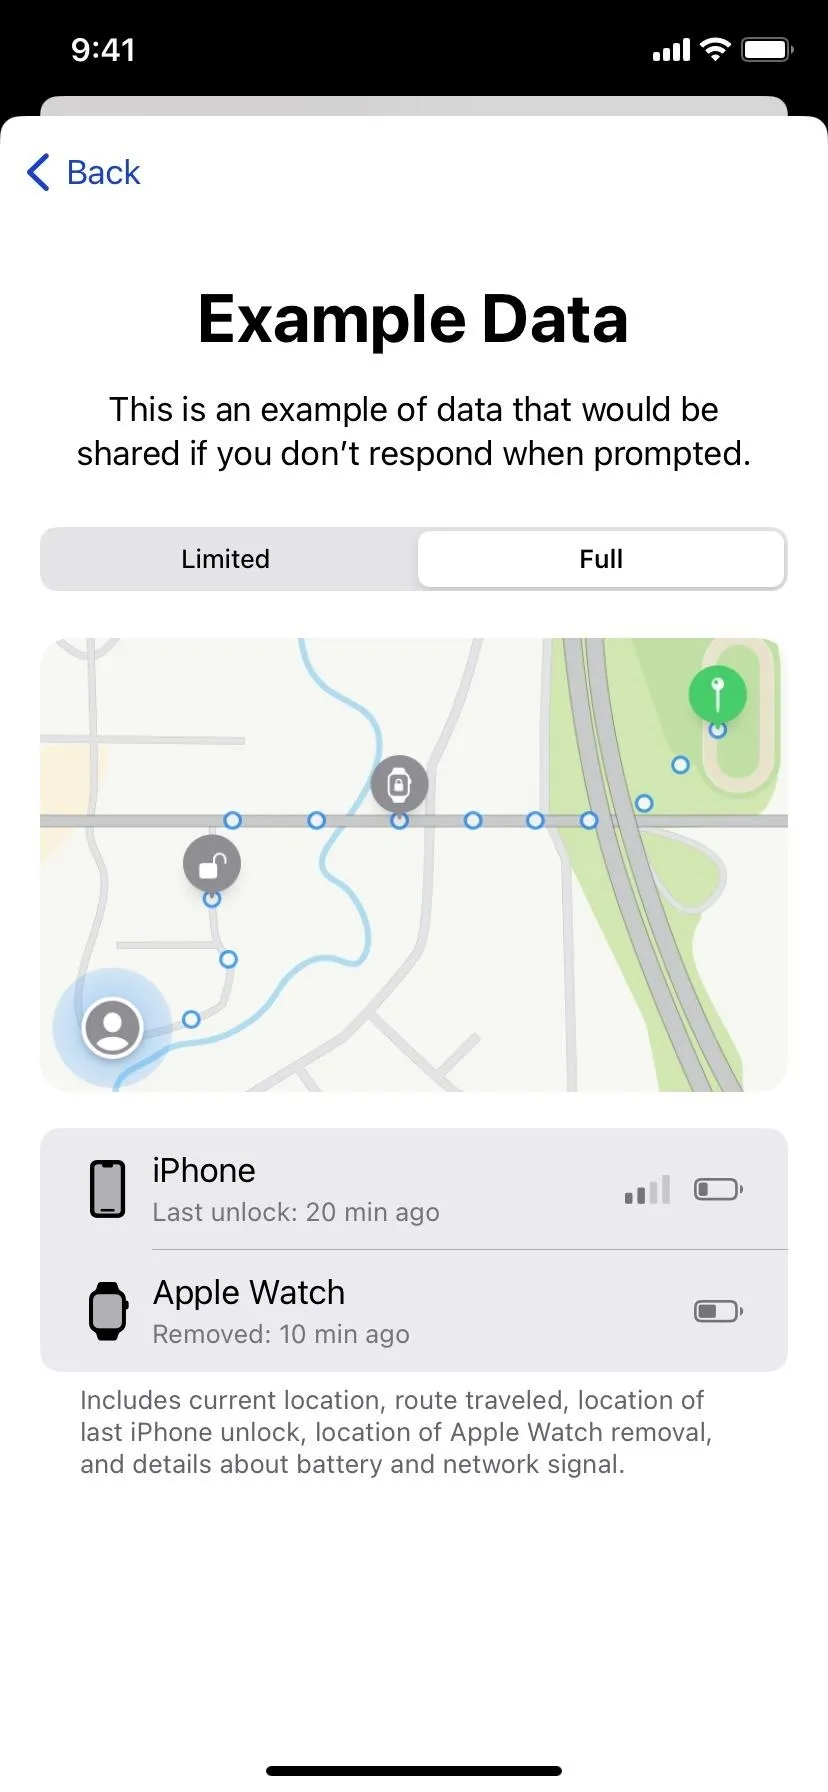
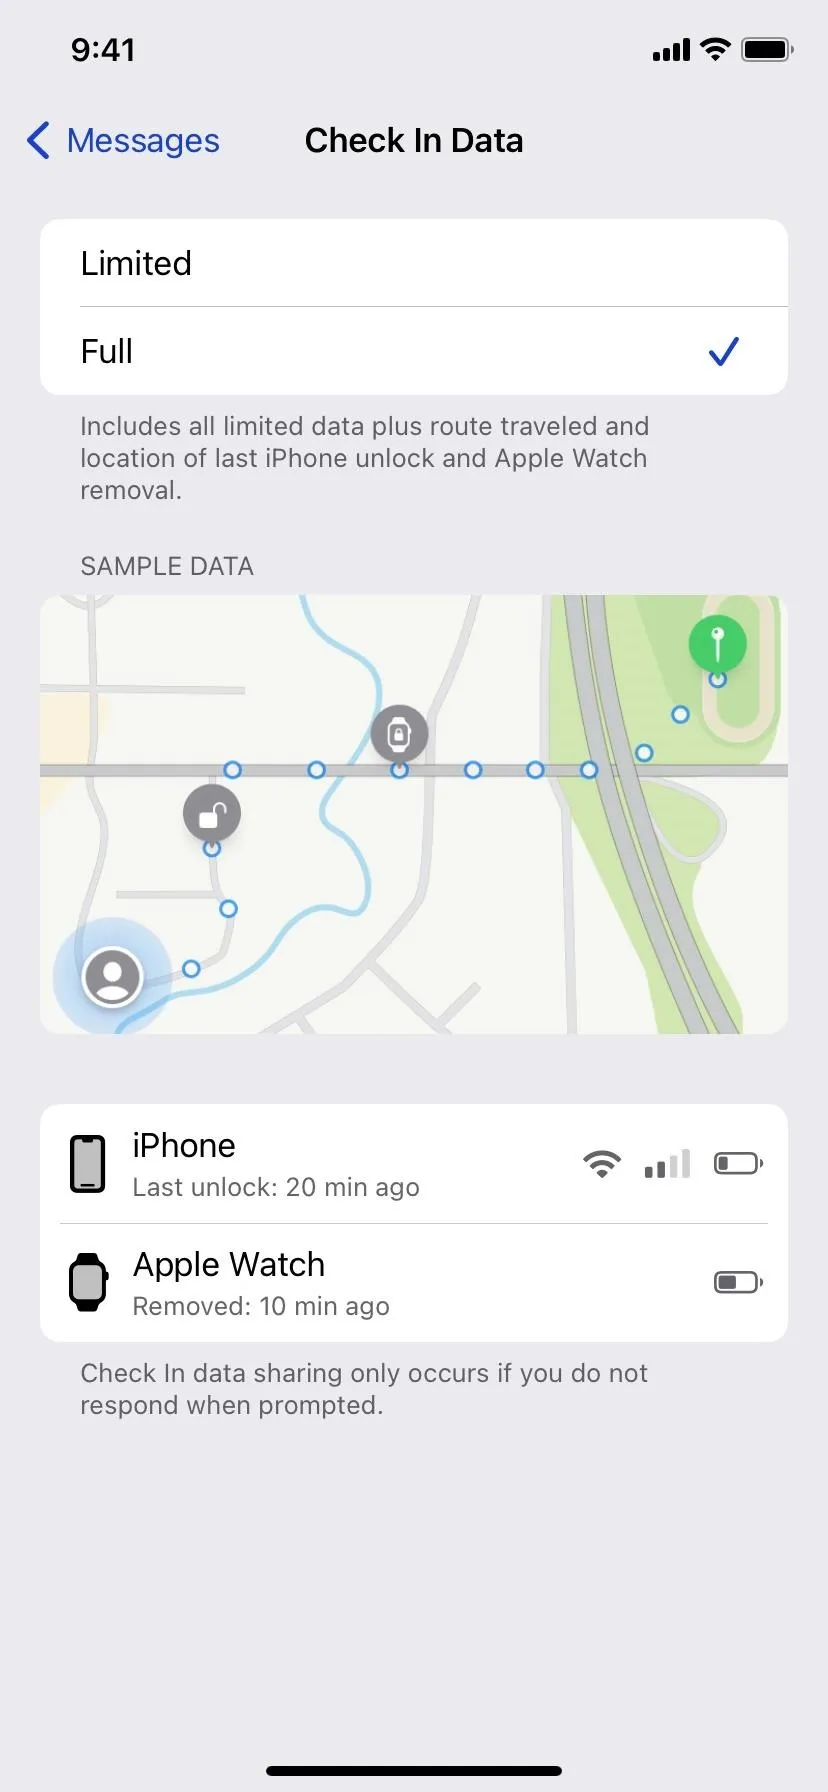
Full data shares:
- Your current location
- Your last known battery levels
- Your network signal
- The route you traveled
- The location of the last known iPhone unlock or Apple Watch removal
The battery levels and network signal indicate if you're late because of a dead iPhone or Apple Watch or a bad reception area. All info you share via Check In is end-to-end encrypted.
After choosing the data shared, hit the "Continue" button, then tap "Send a Check In" to load the Check In onto your draft.
Edit the Check In Information
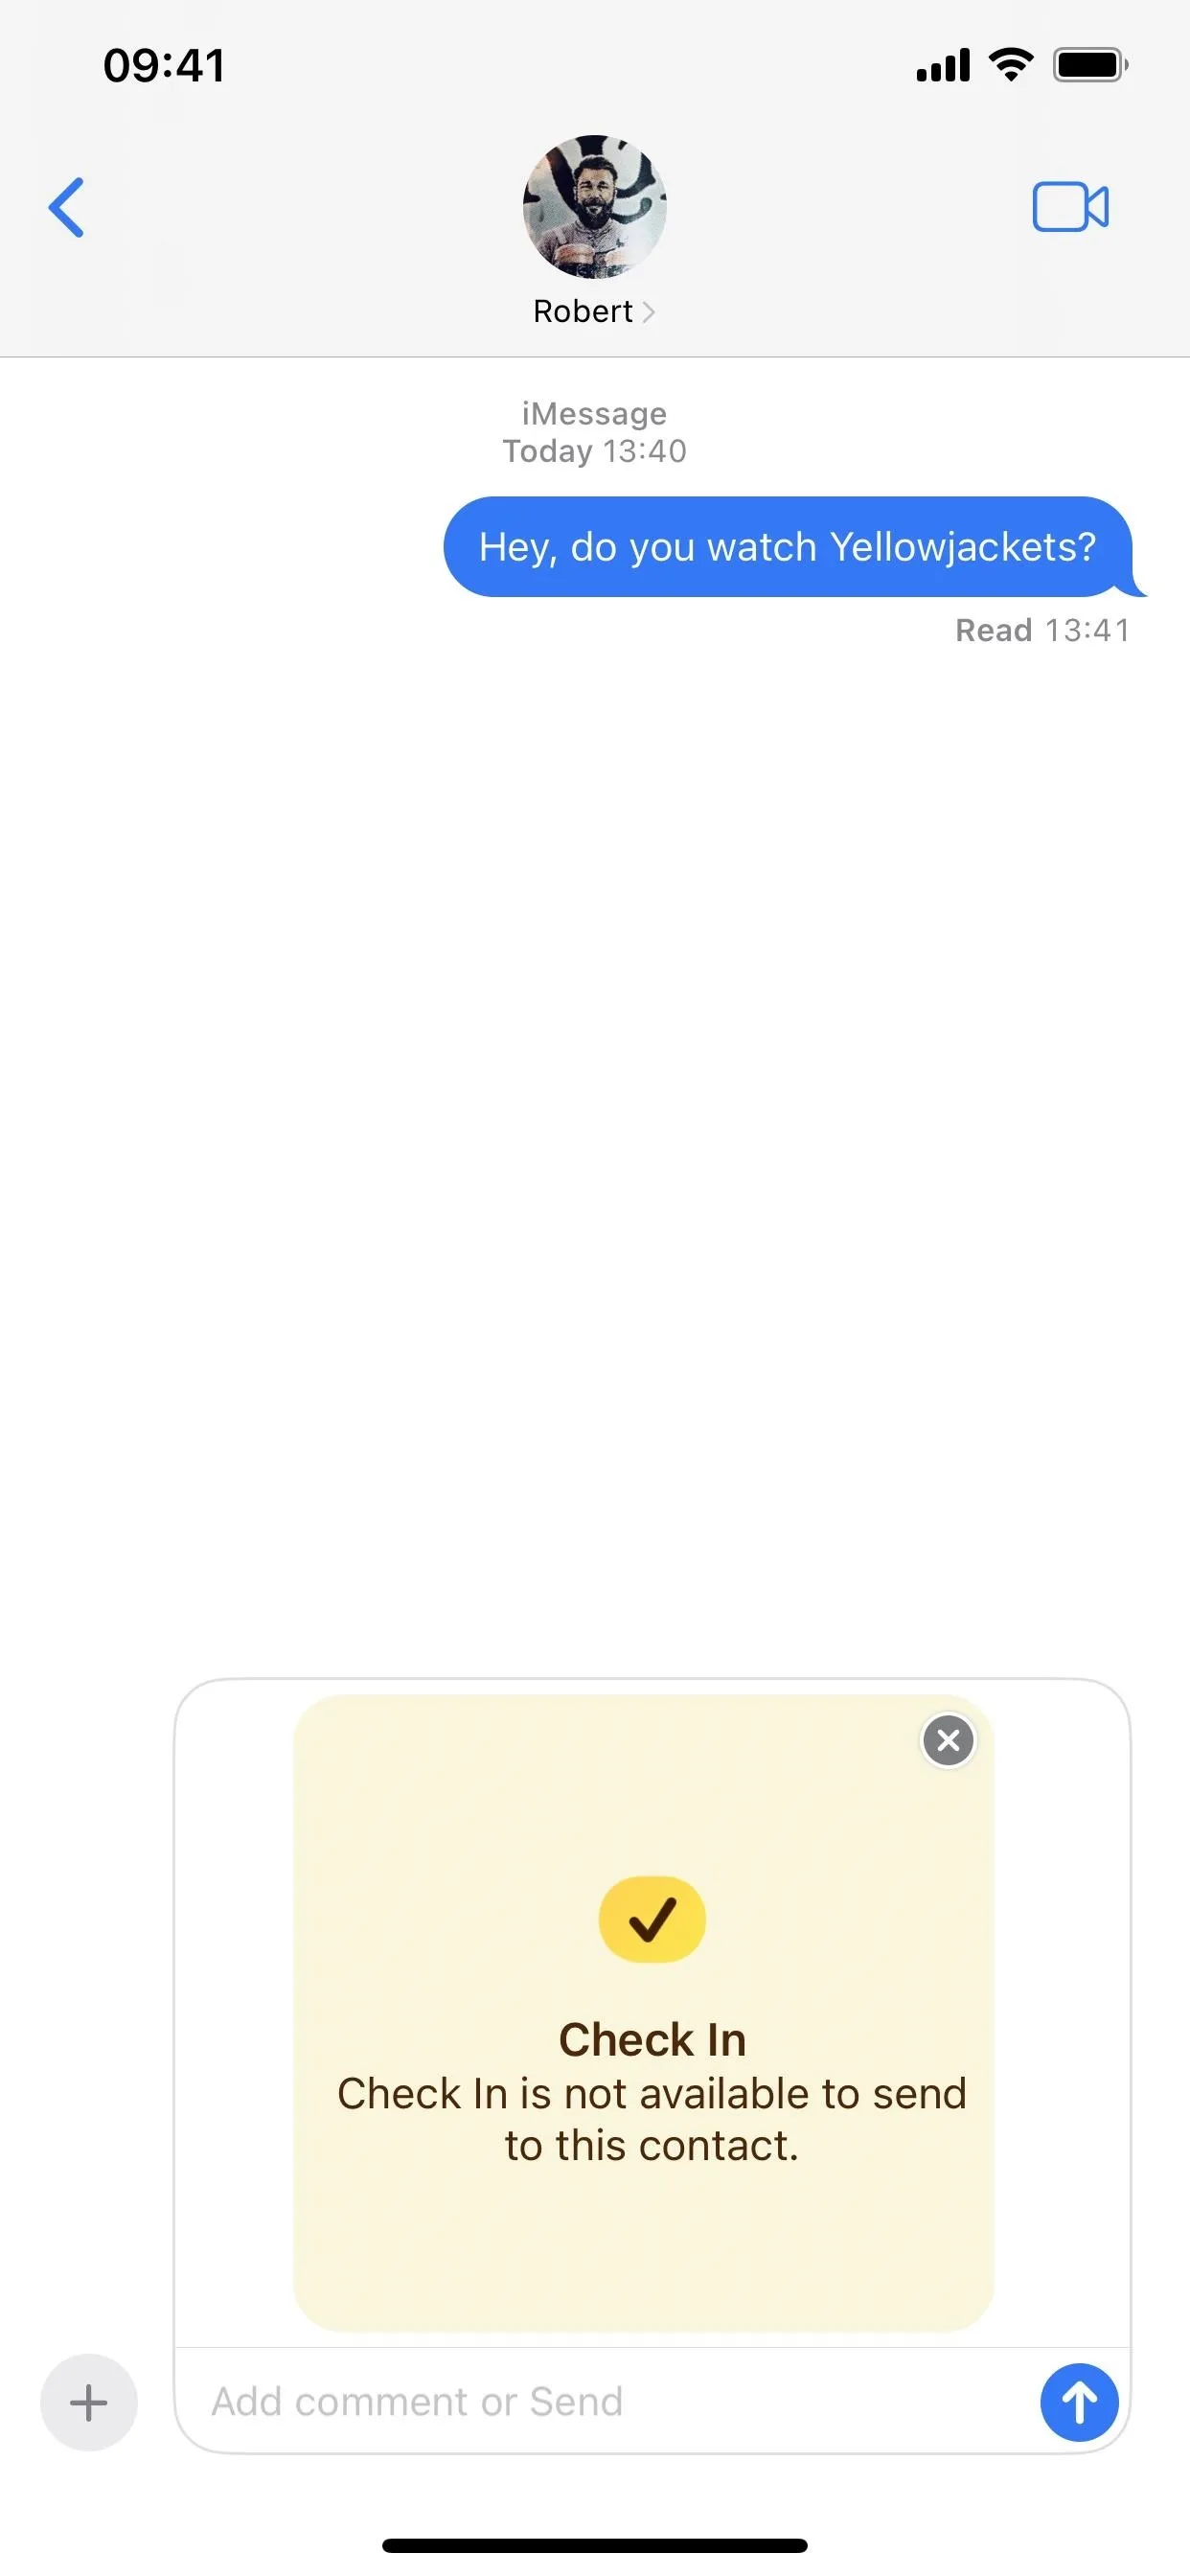
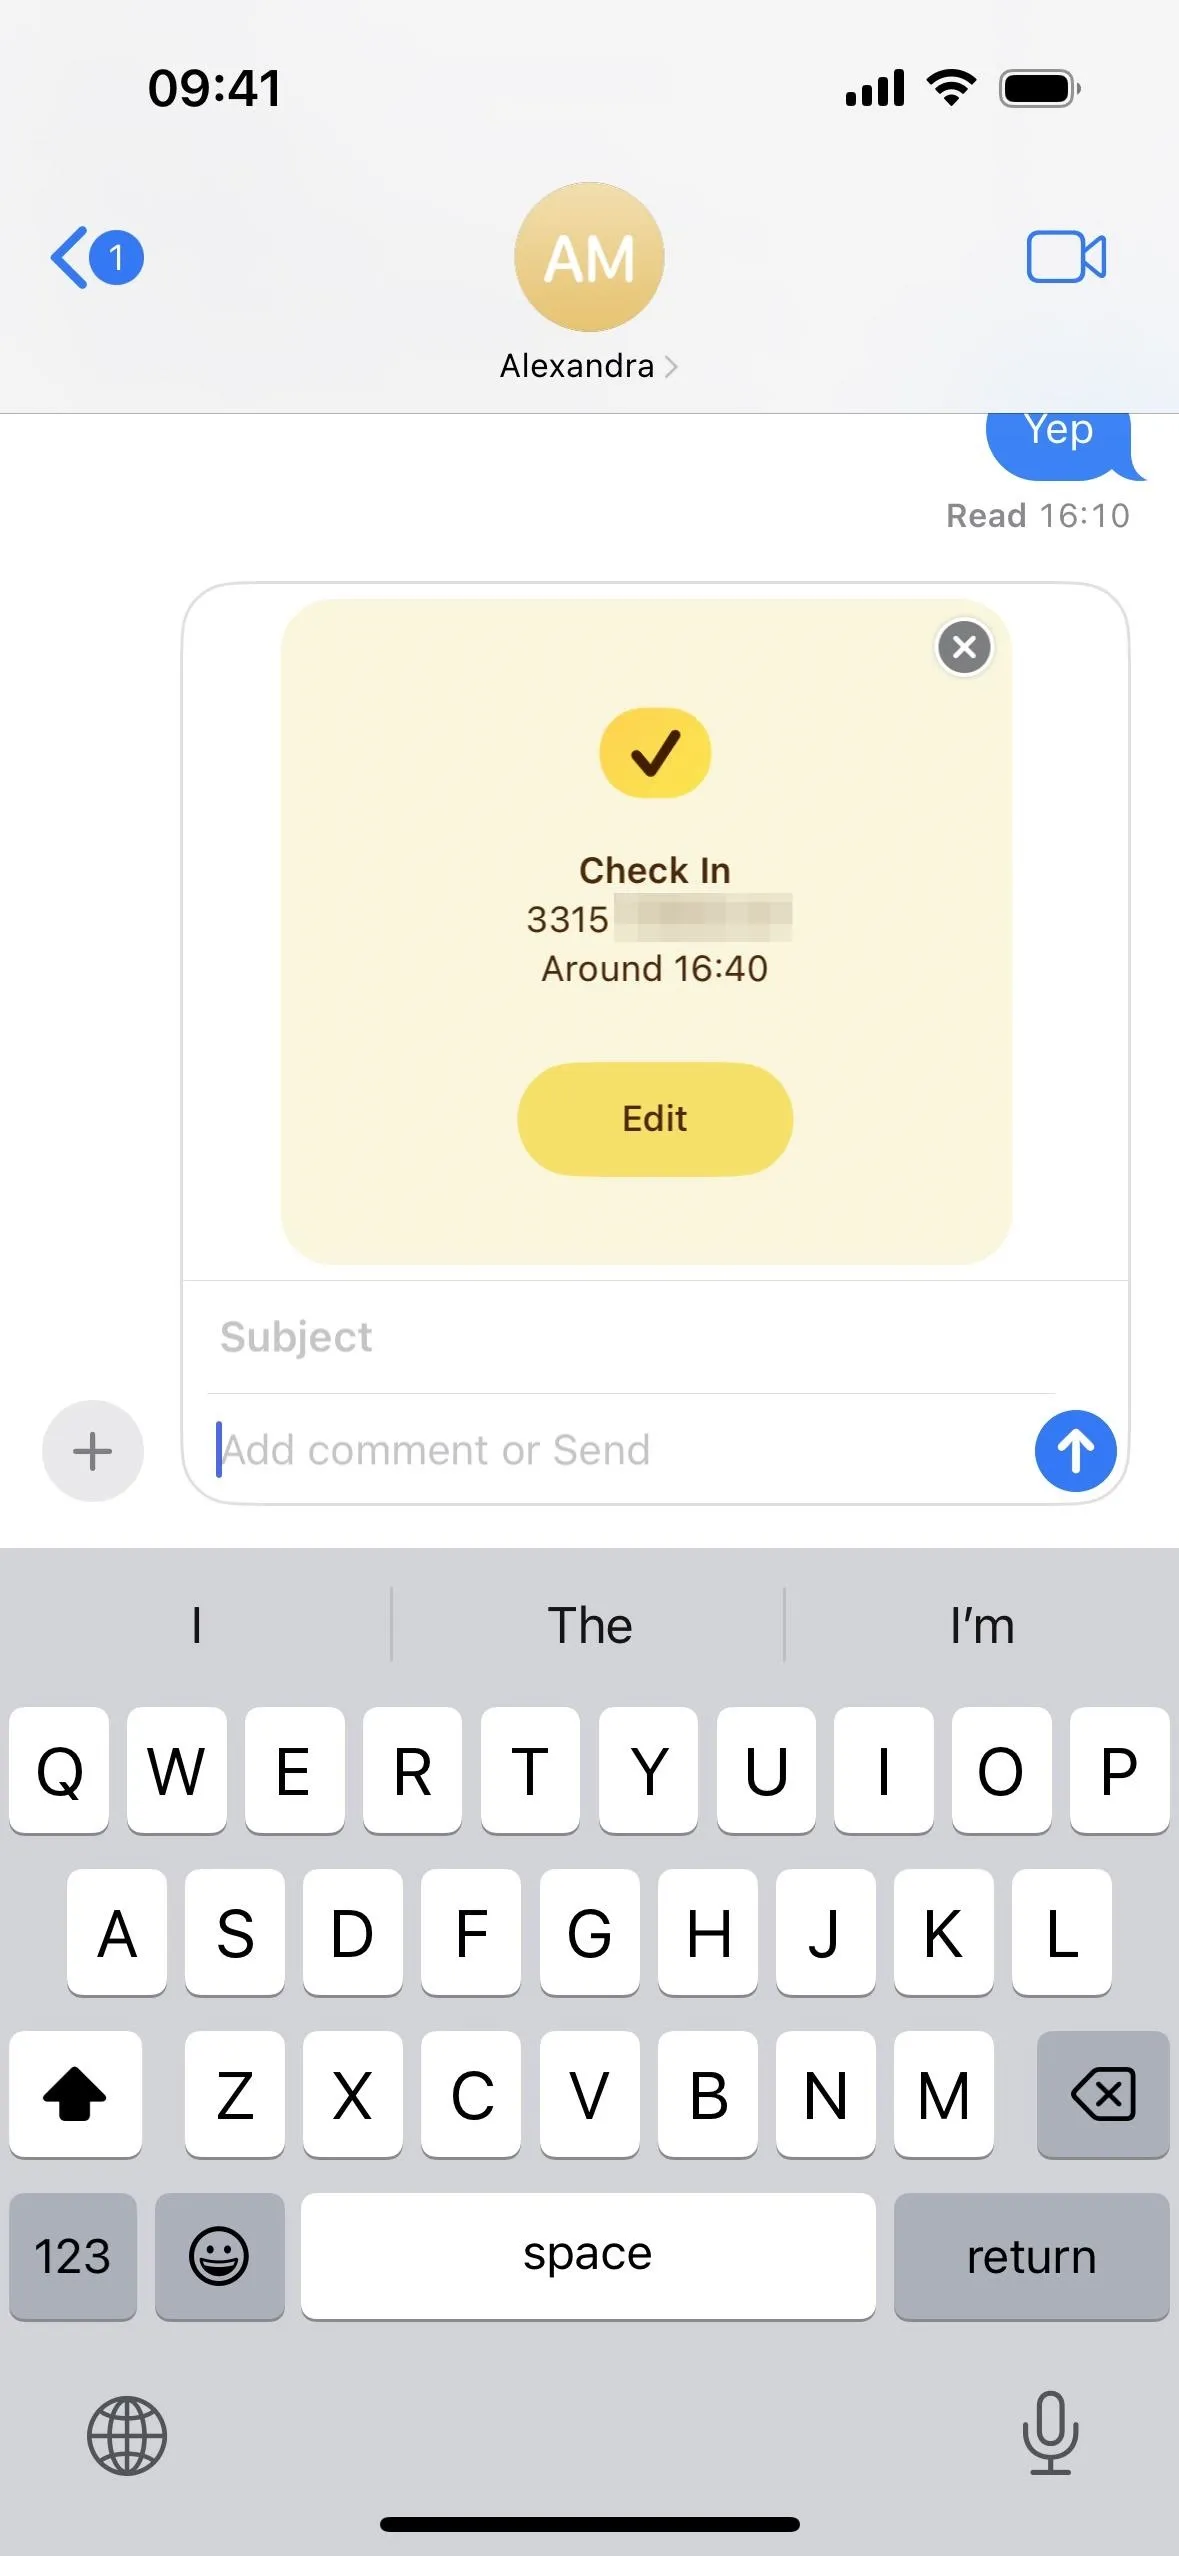
You'll see a Check In box in your message's text field. If the other person or group is not running iOS 17 or later (or watchOS 10 or later), you'll see that Check In is unavailable to them. If they are, you should see the location it thinks you're going to. If it can't determine where you're going, the Check In will default to Timer mode, which we discuss later in this step. You can tap "Edit" if the location is wrong, you want to adjust specific details, or it's using Timer mode.
Change the Location
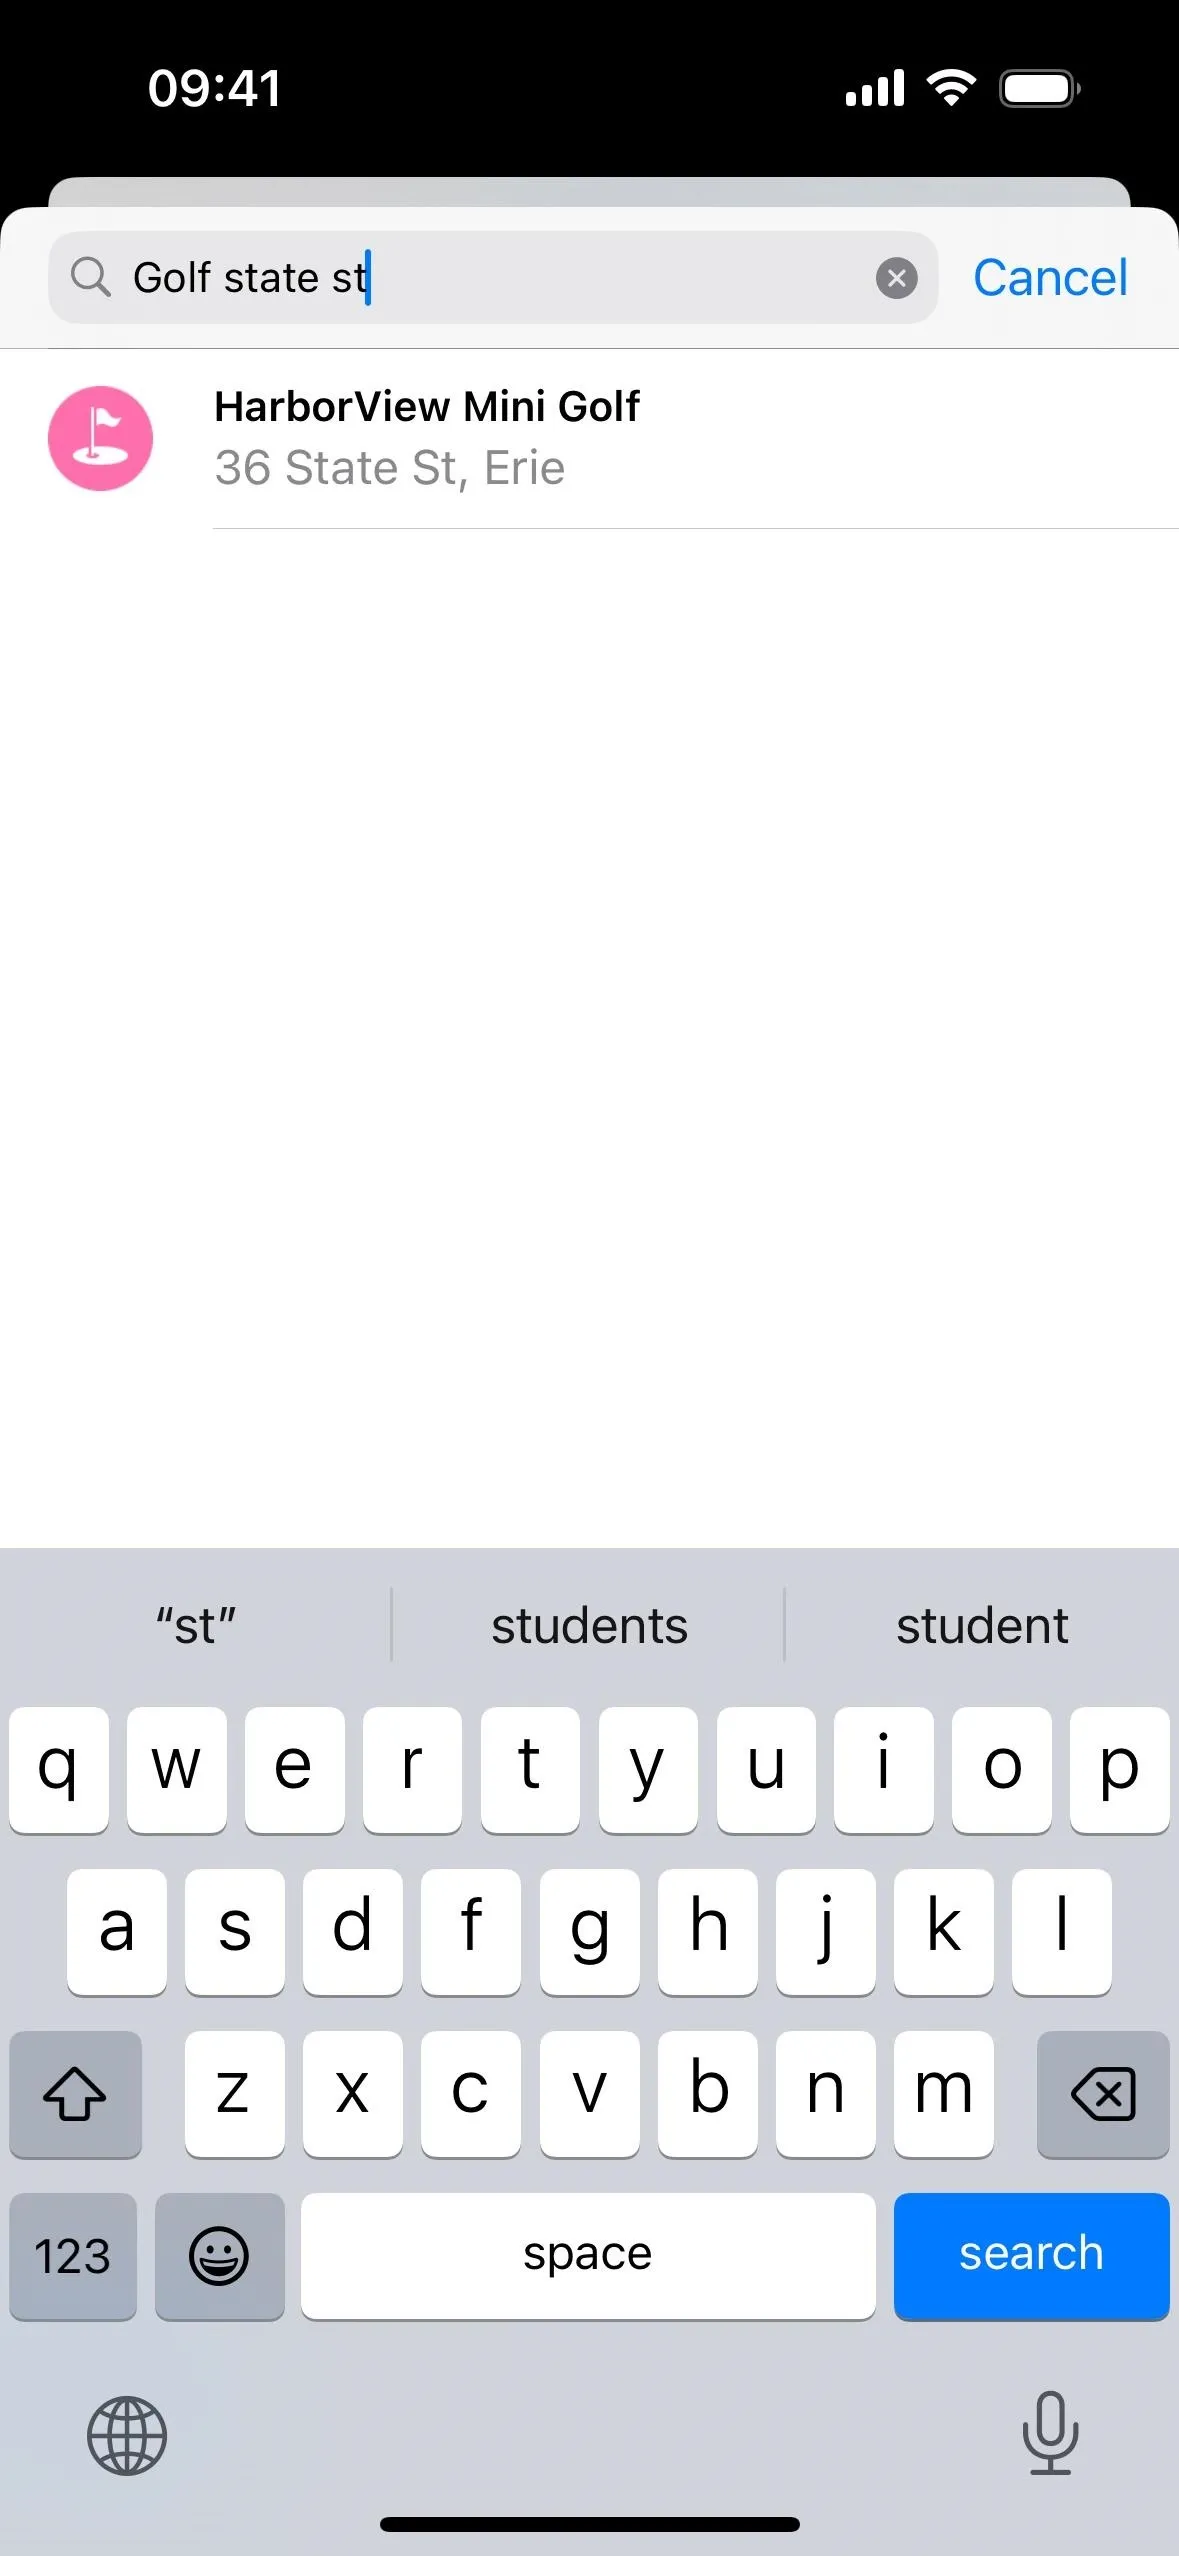
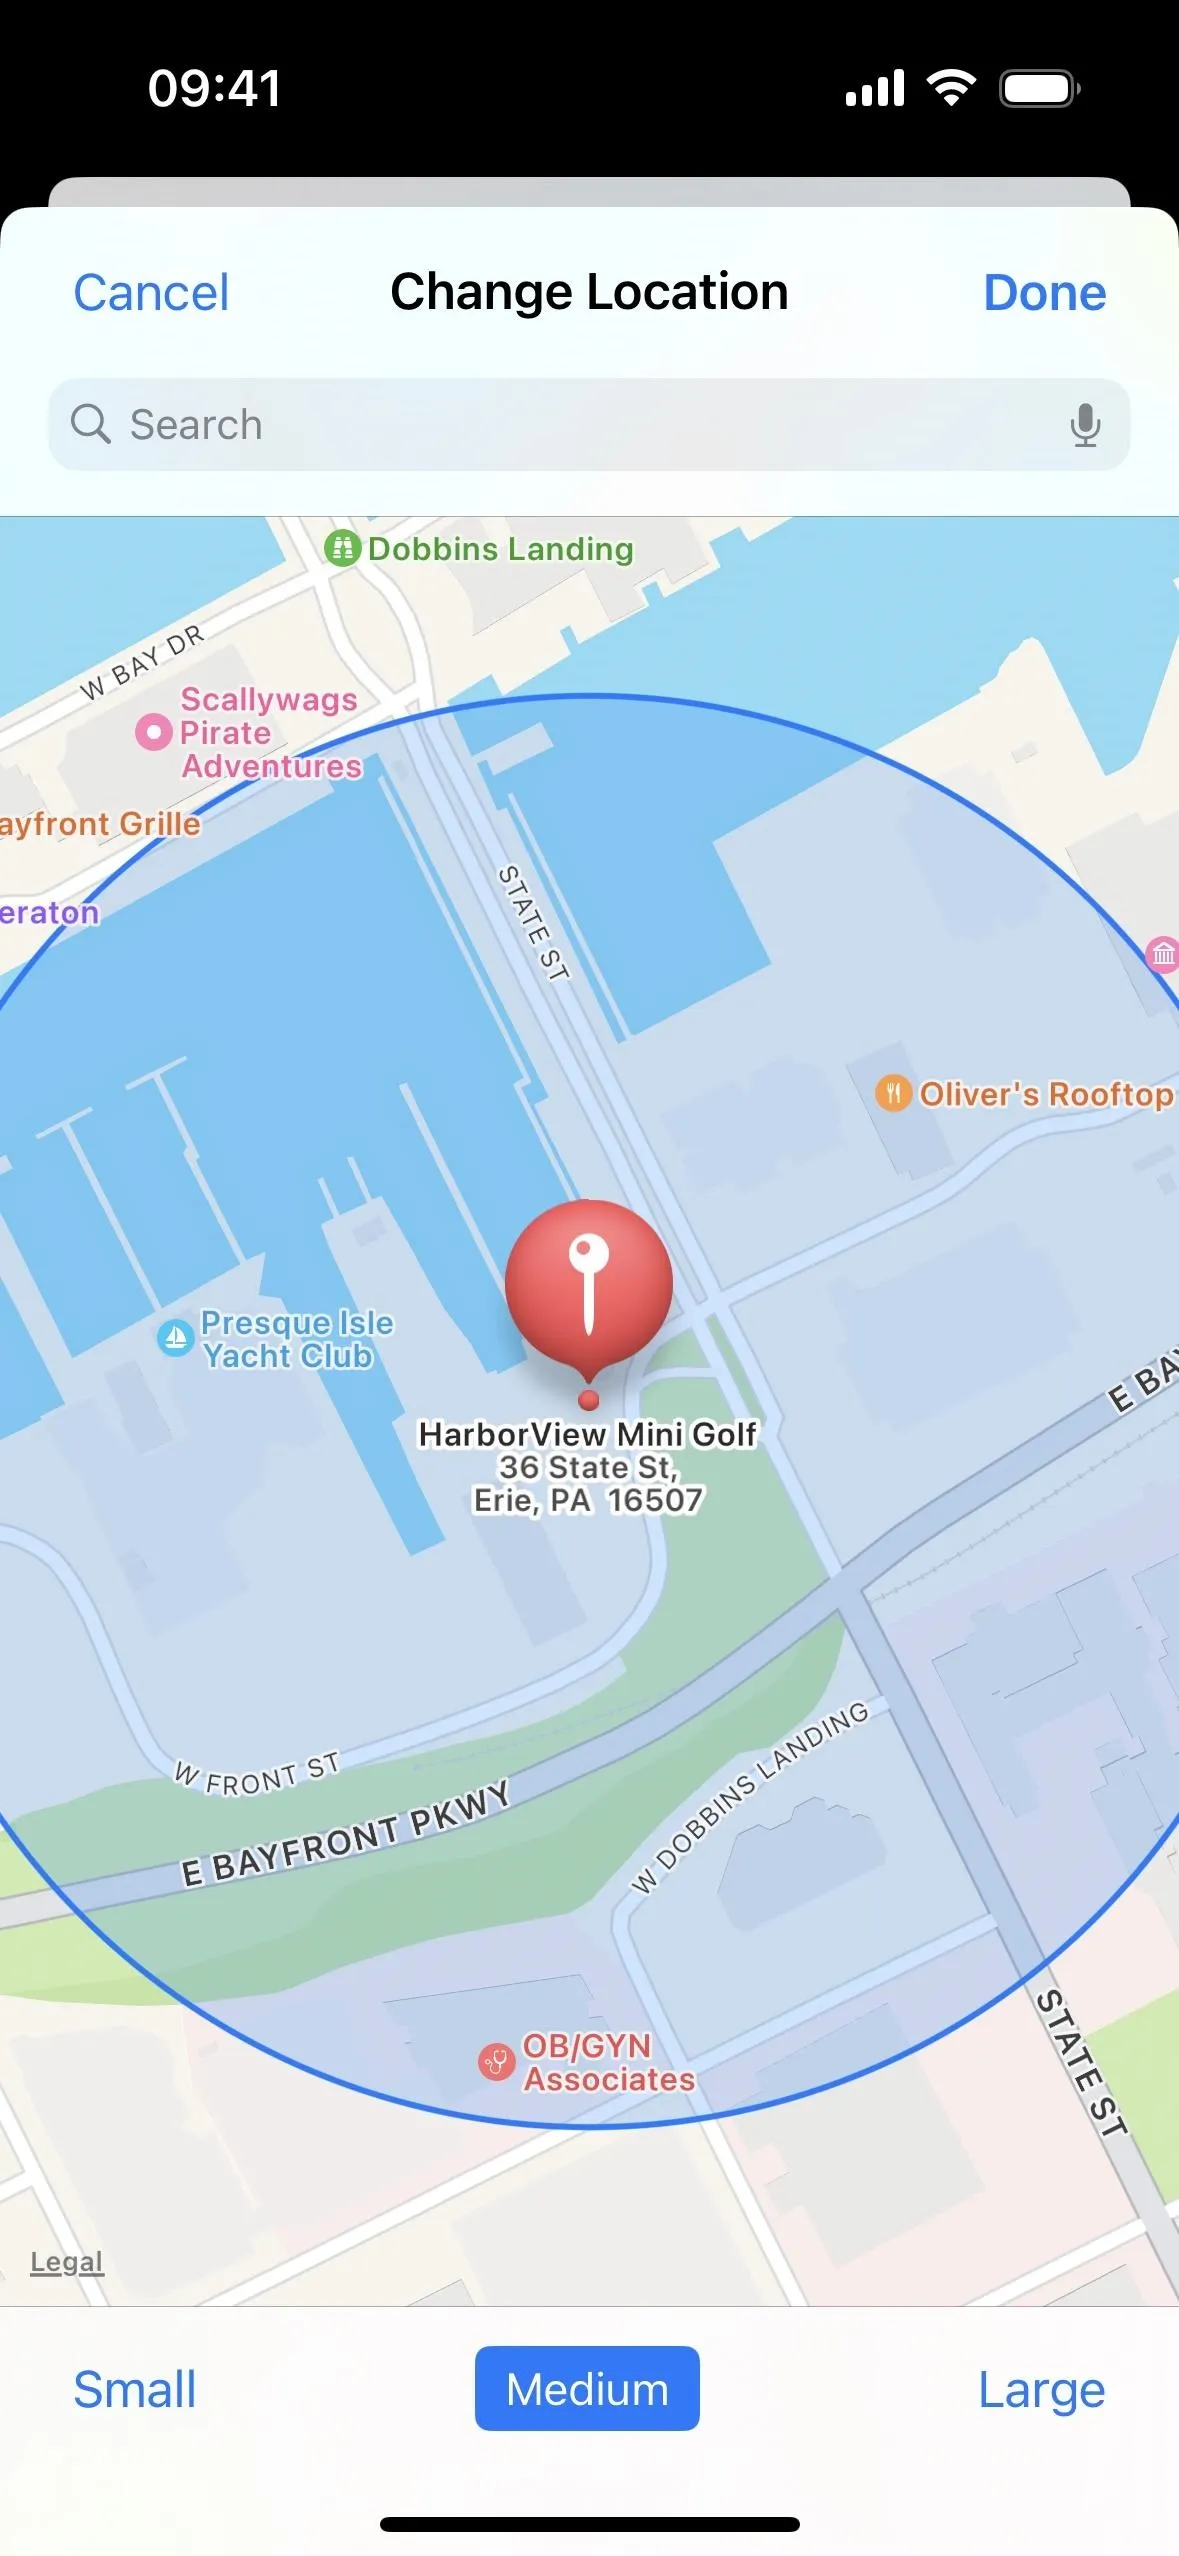
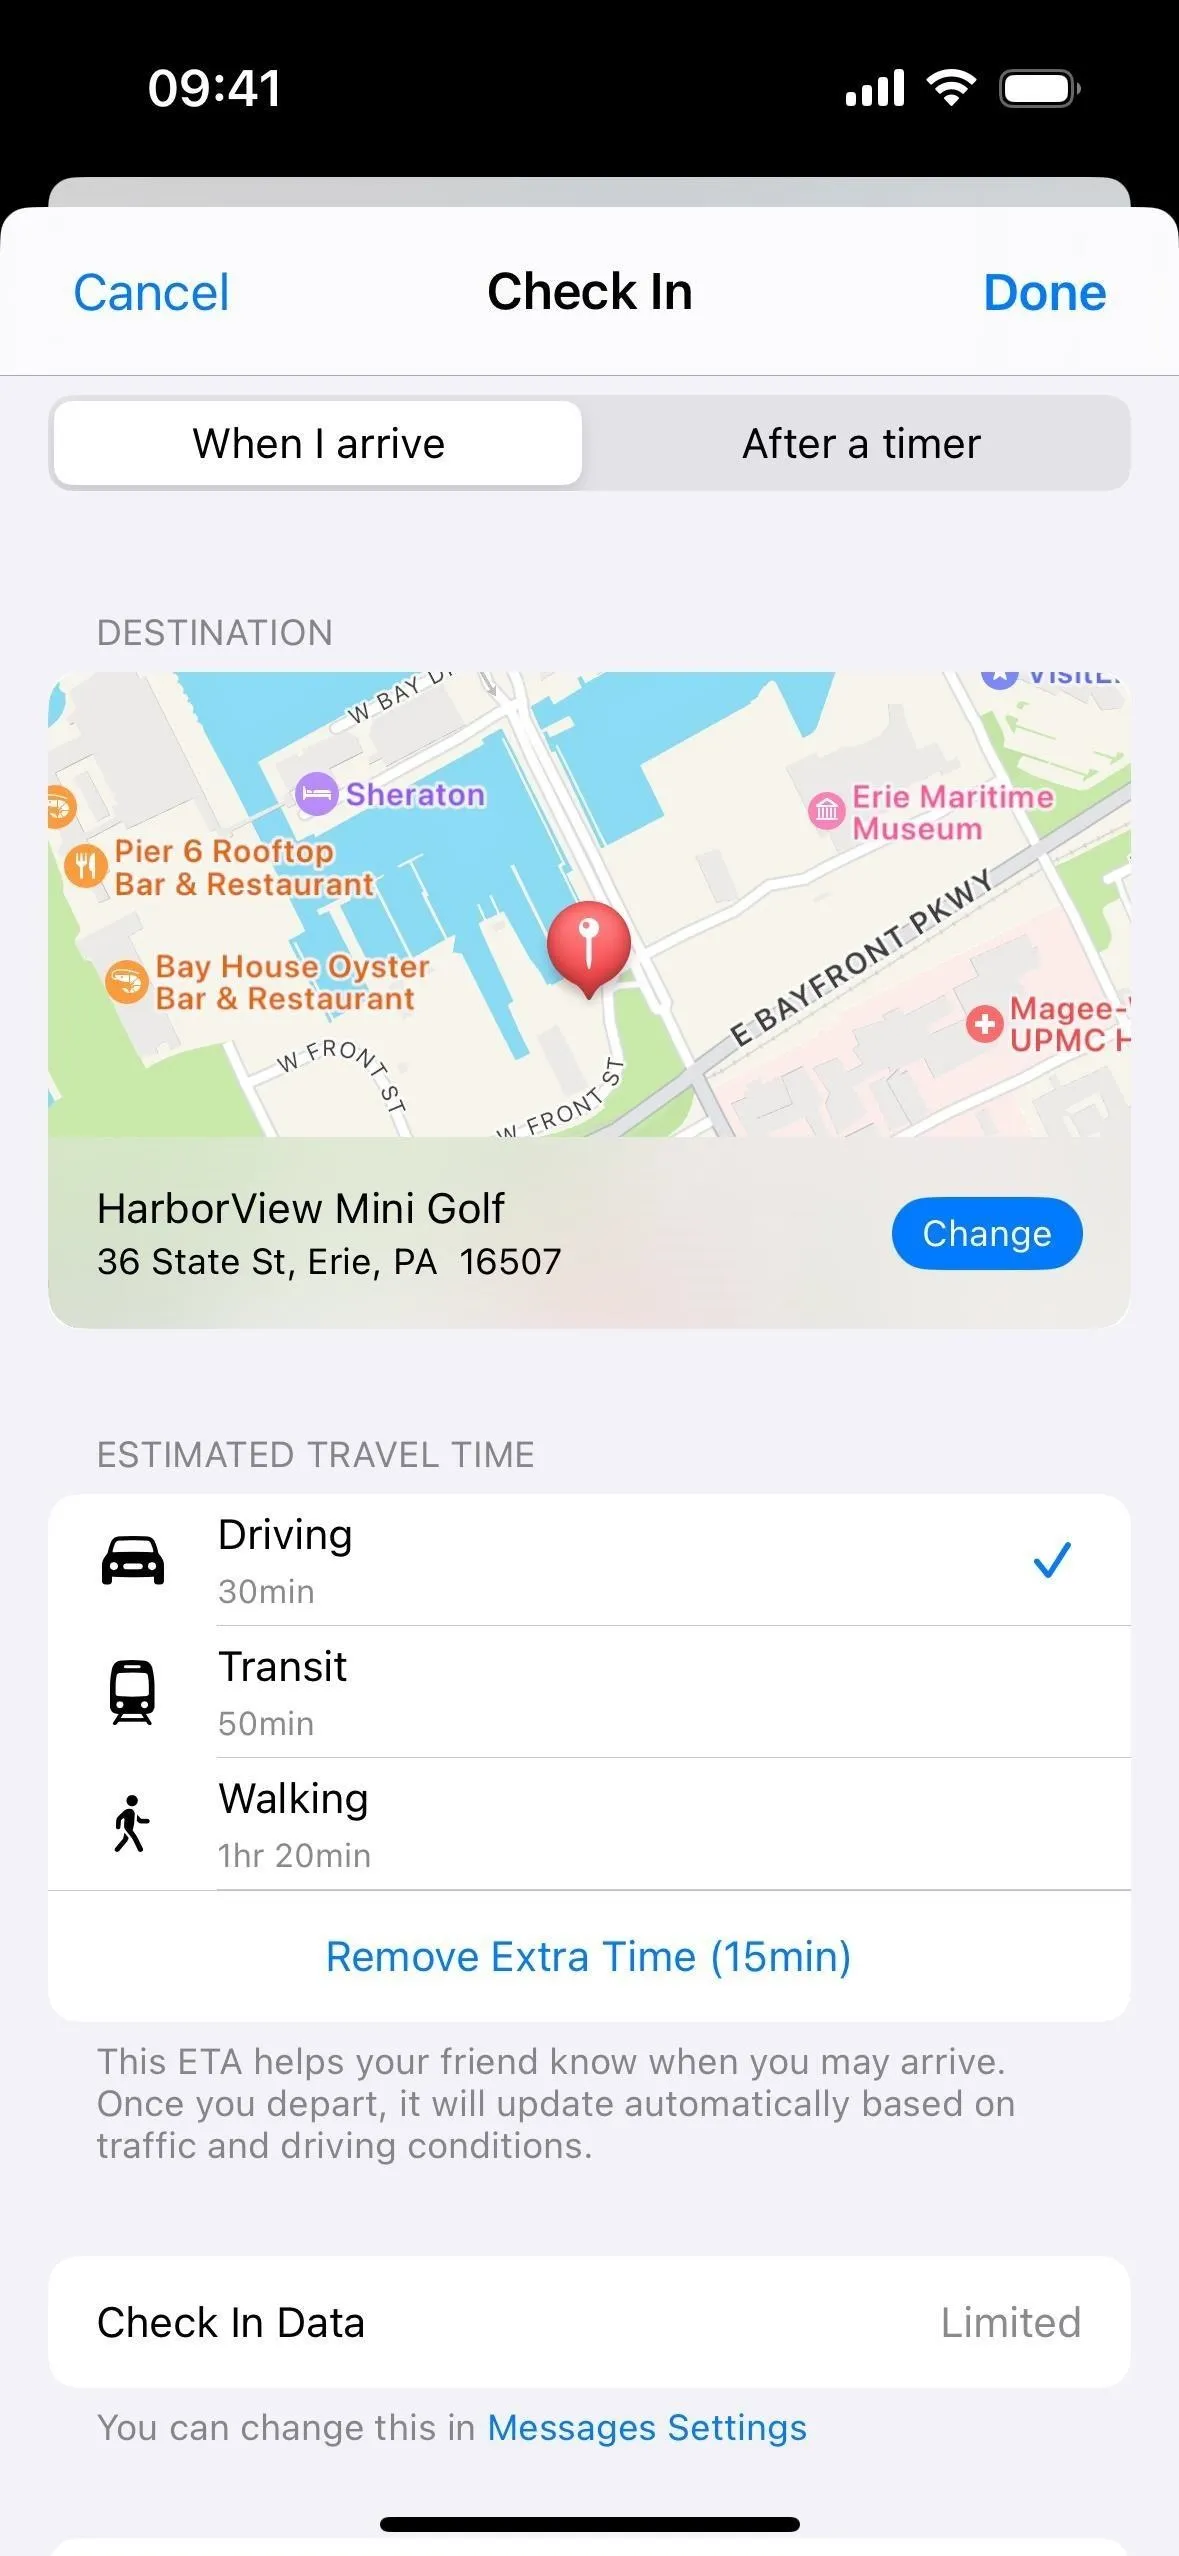
On the "When I arrive" tab, you can tap "Change" for the location to search for and select a new stopping point. Select the location, then choose between Small, Medium, and Large radius to change the perimeter of the "I've arrived" zone. Hit "Done" to save.
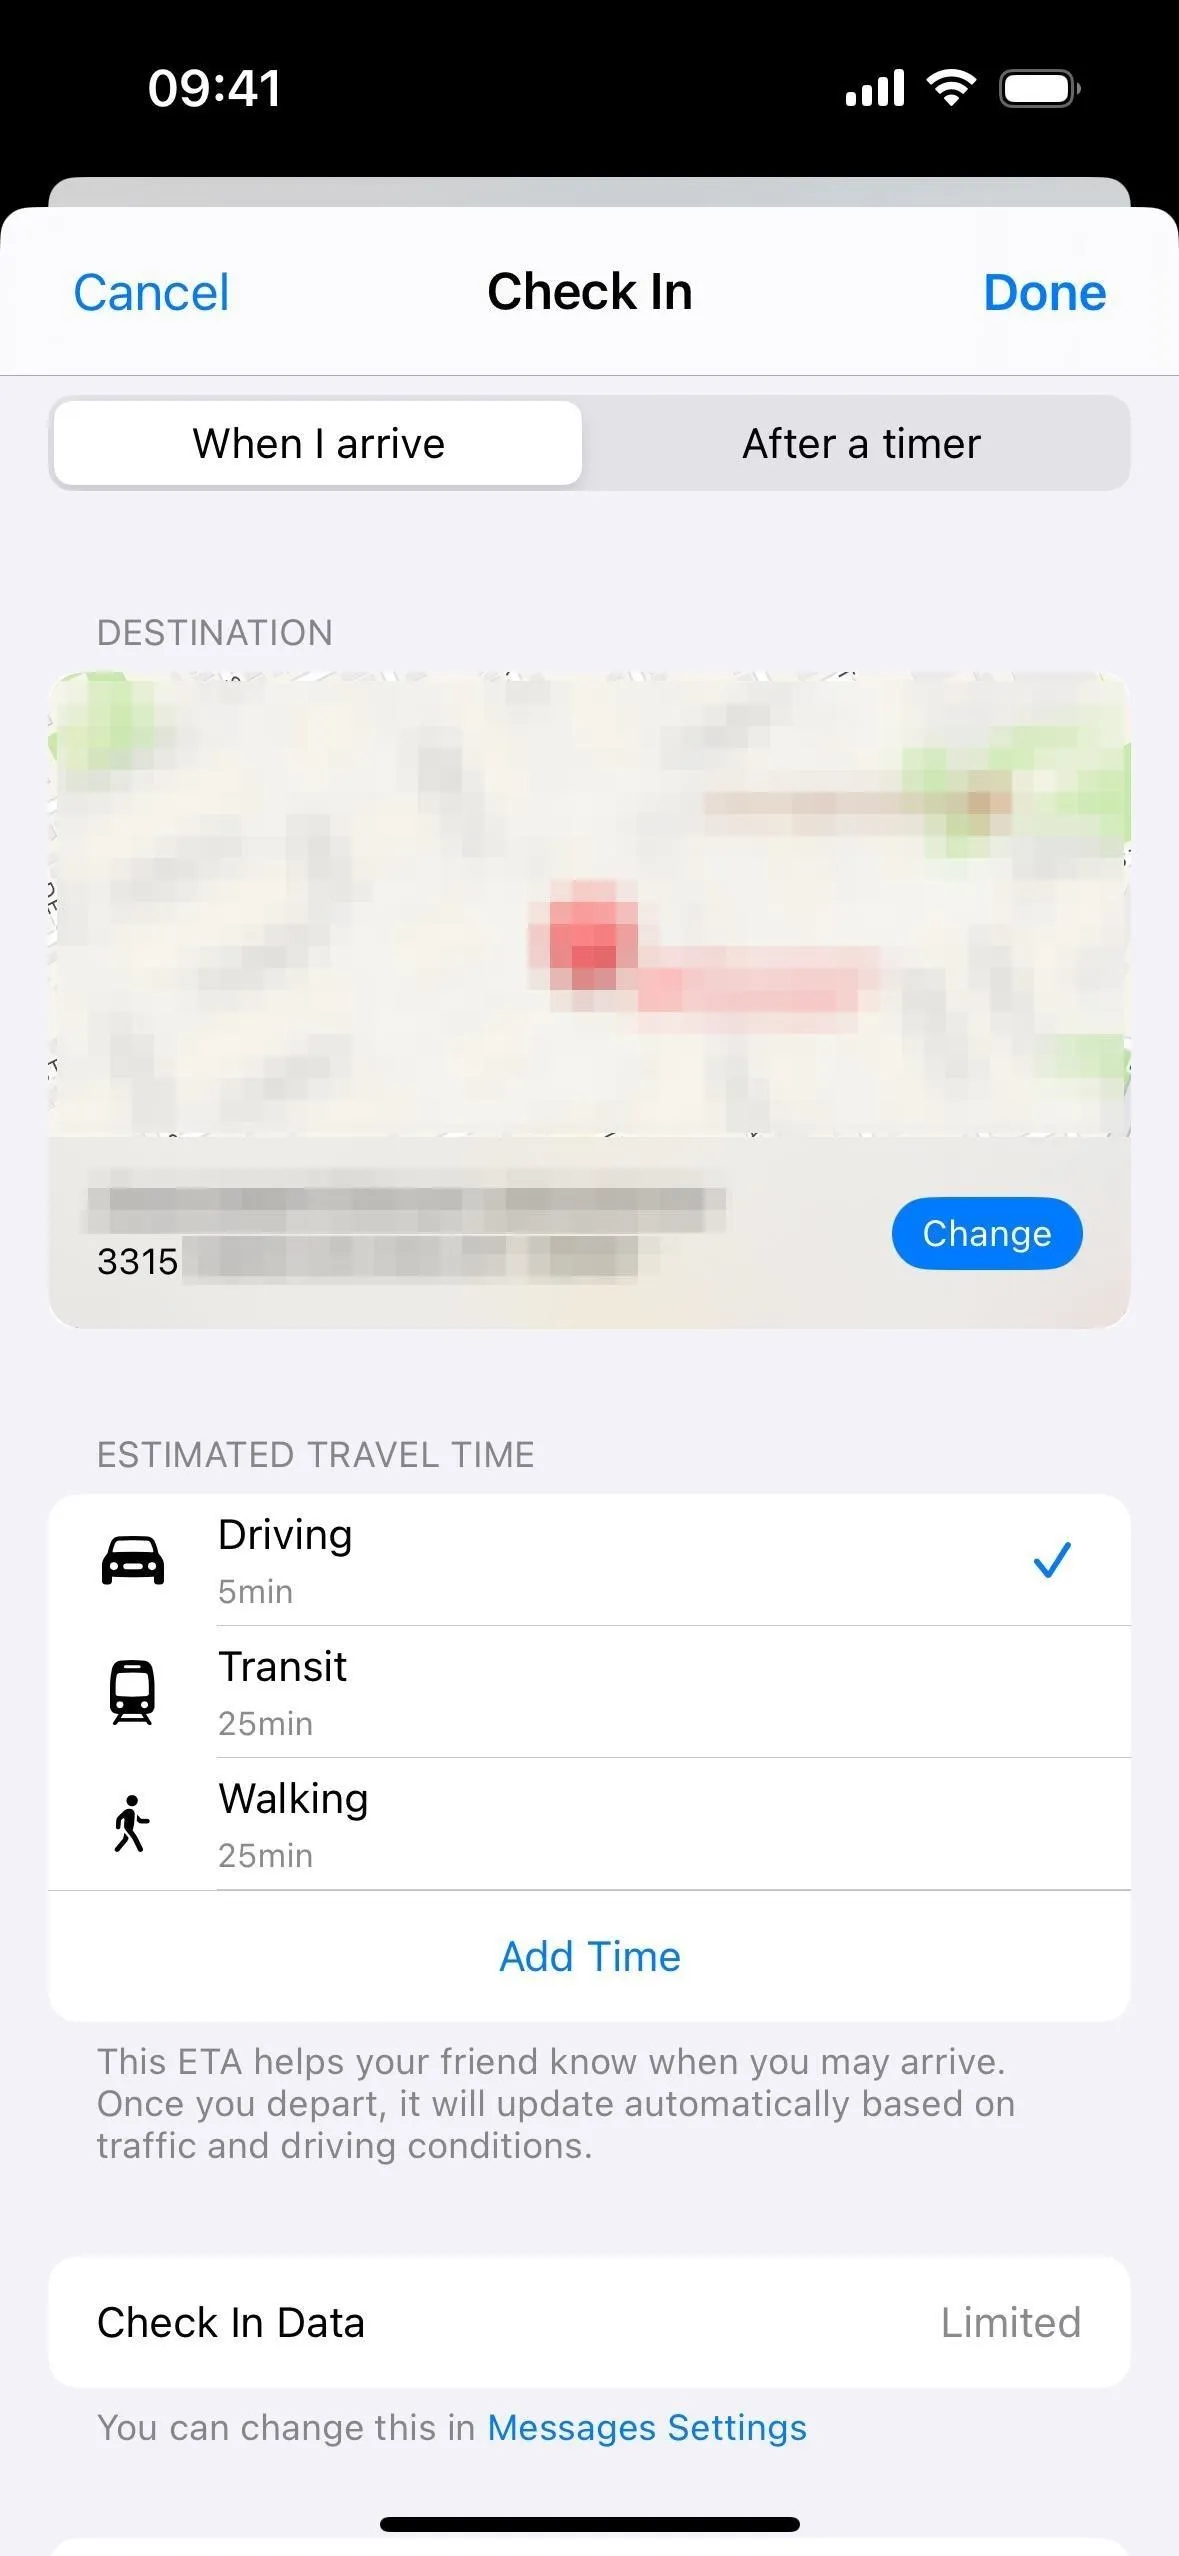
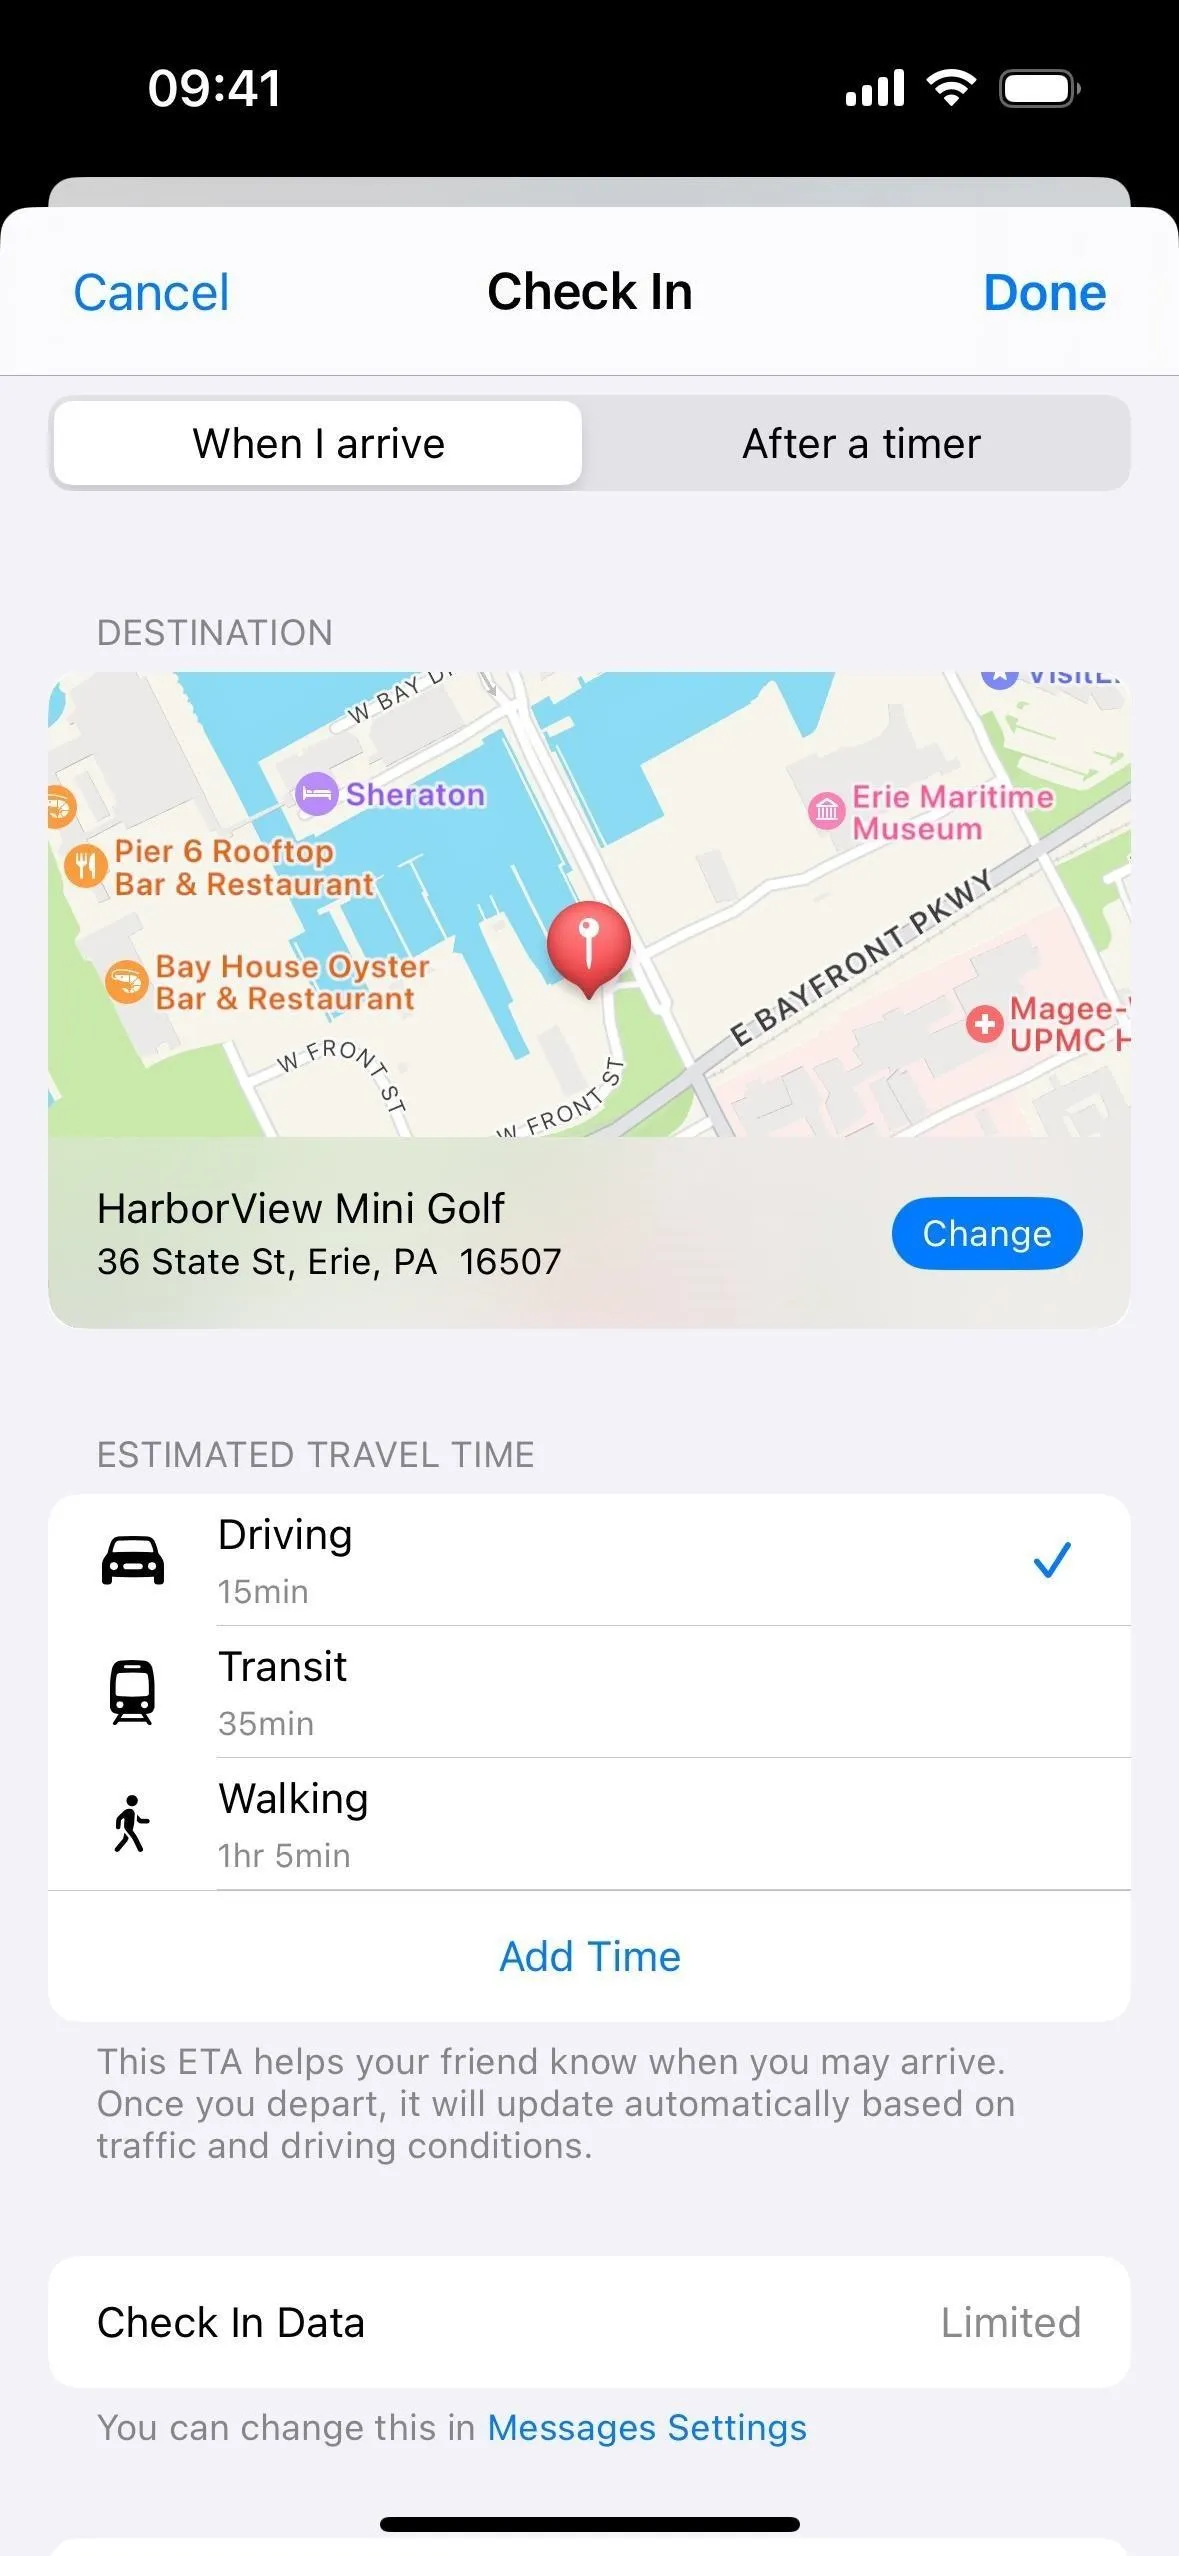
Add Time to Your ETA
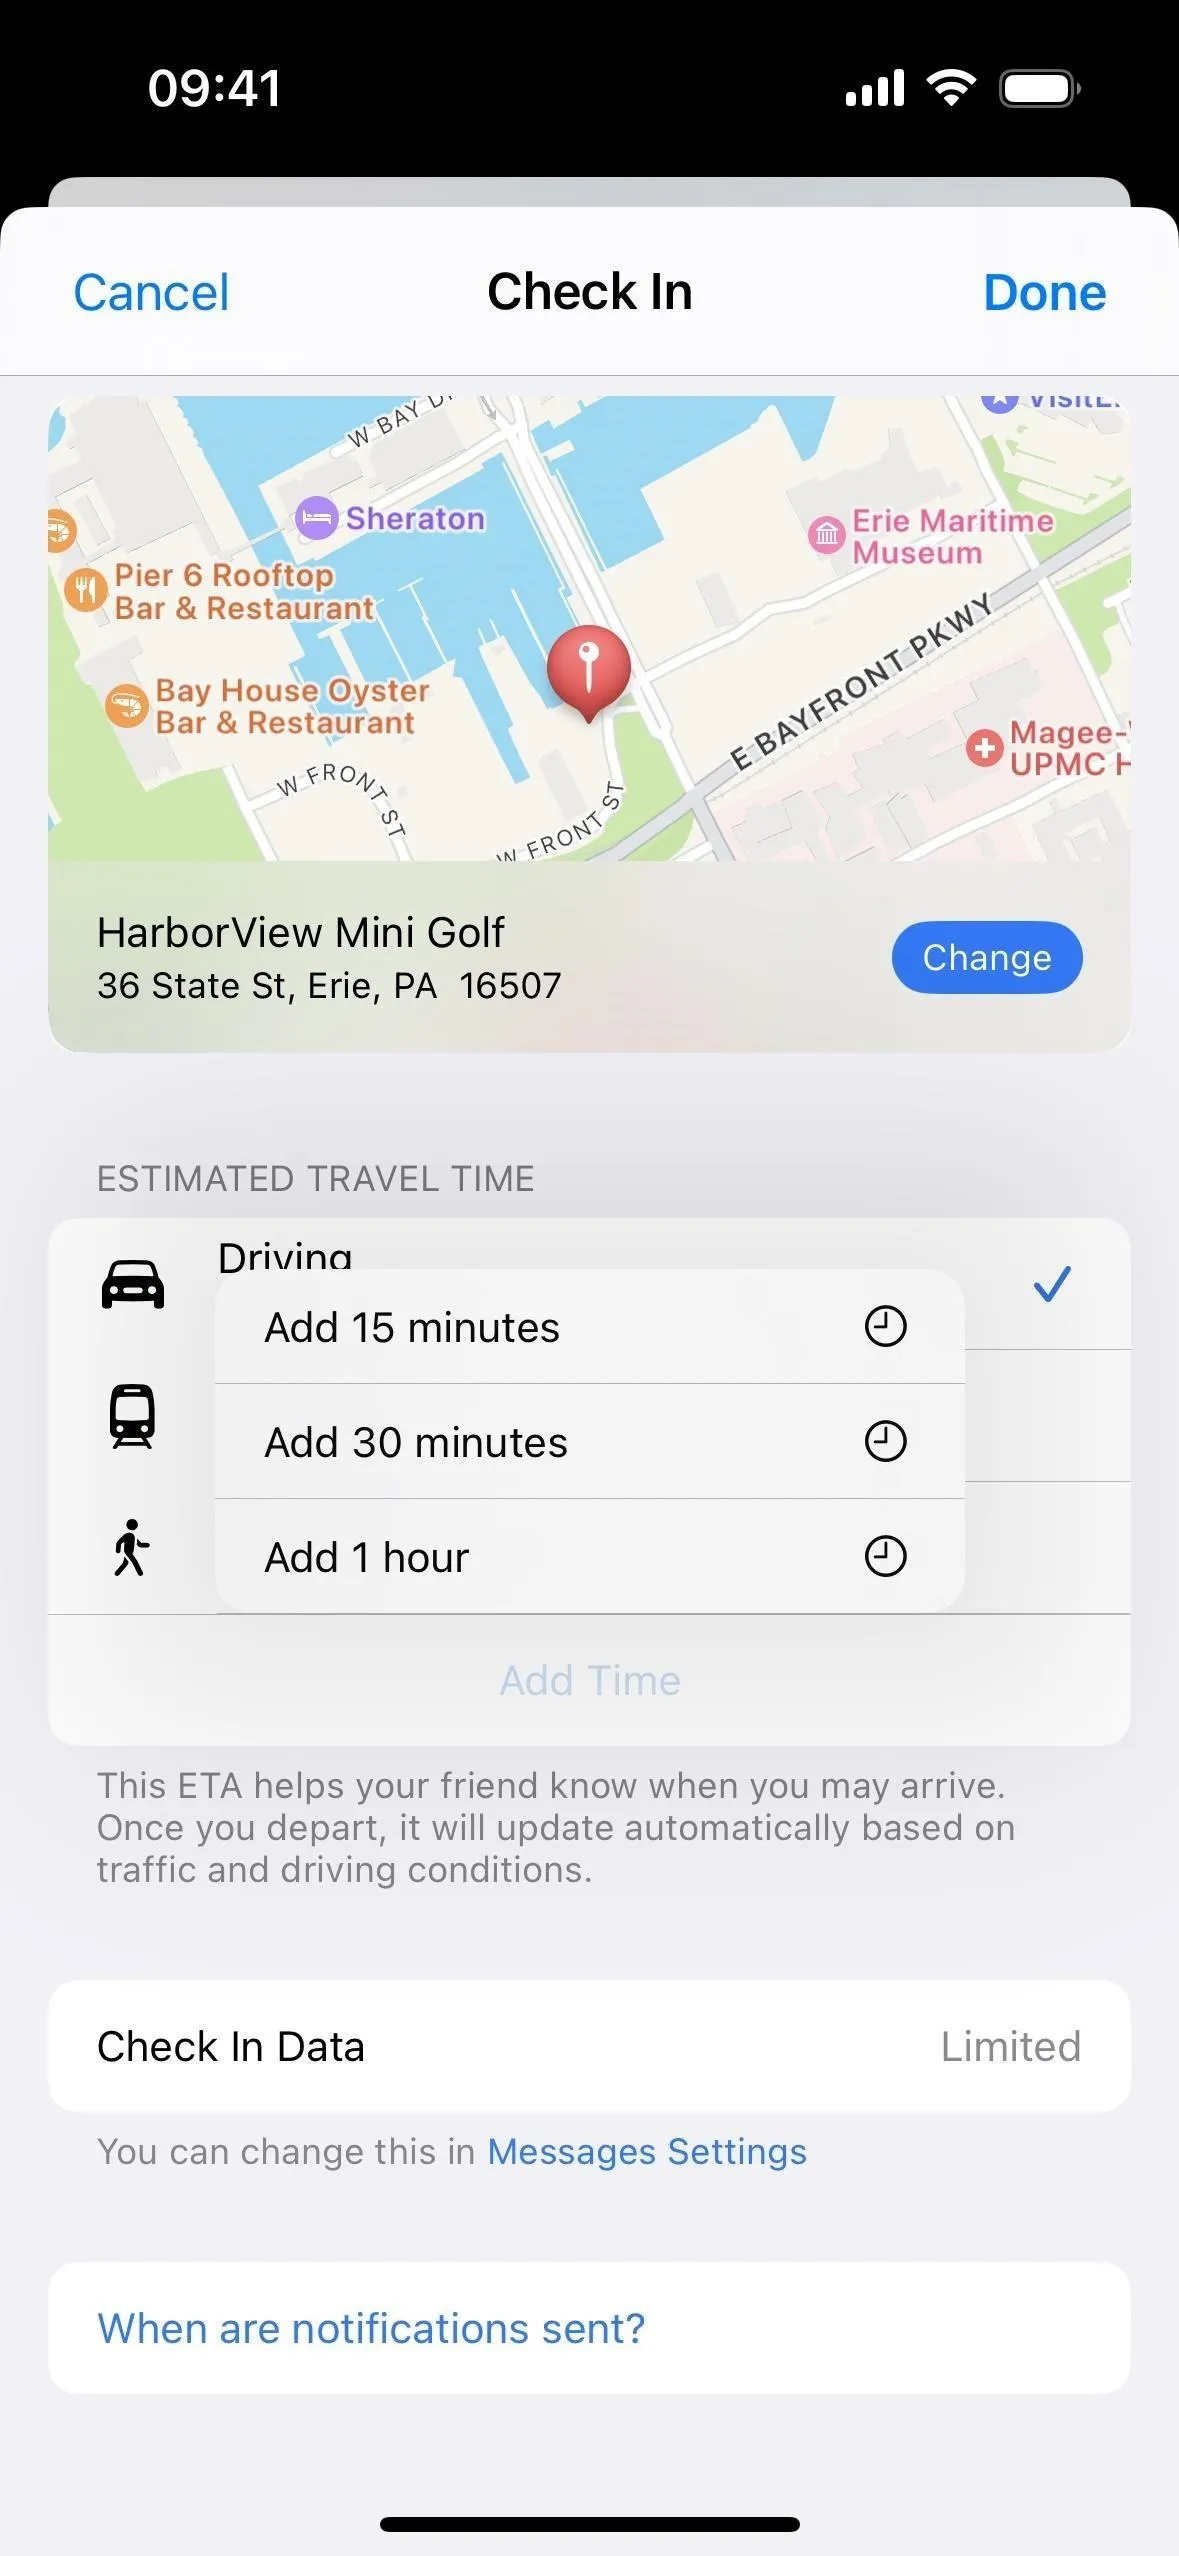
Under the "Estimated Travel Time" section, you can pick between Driving, Transit, and Walking, which adjusts the estimated arrival time accordingly. You can also hit "Add Time" to manually add more time or either 15, 30, or 60 minutes. You can also remove any time you added, if necessary, via the "Remove Extra Time" button.

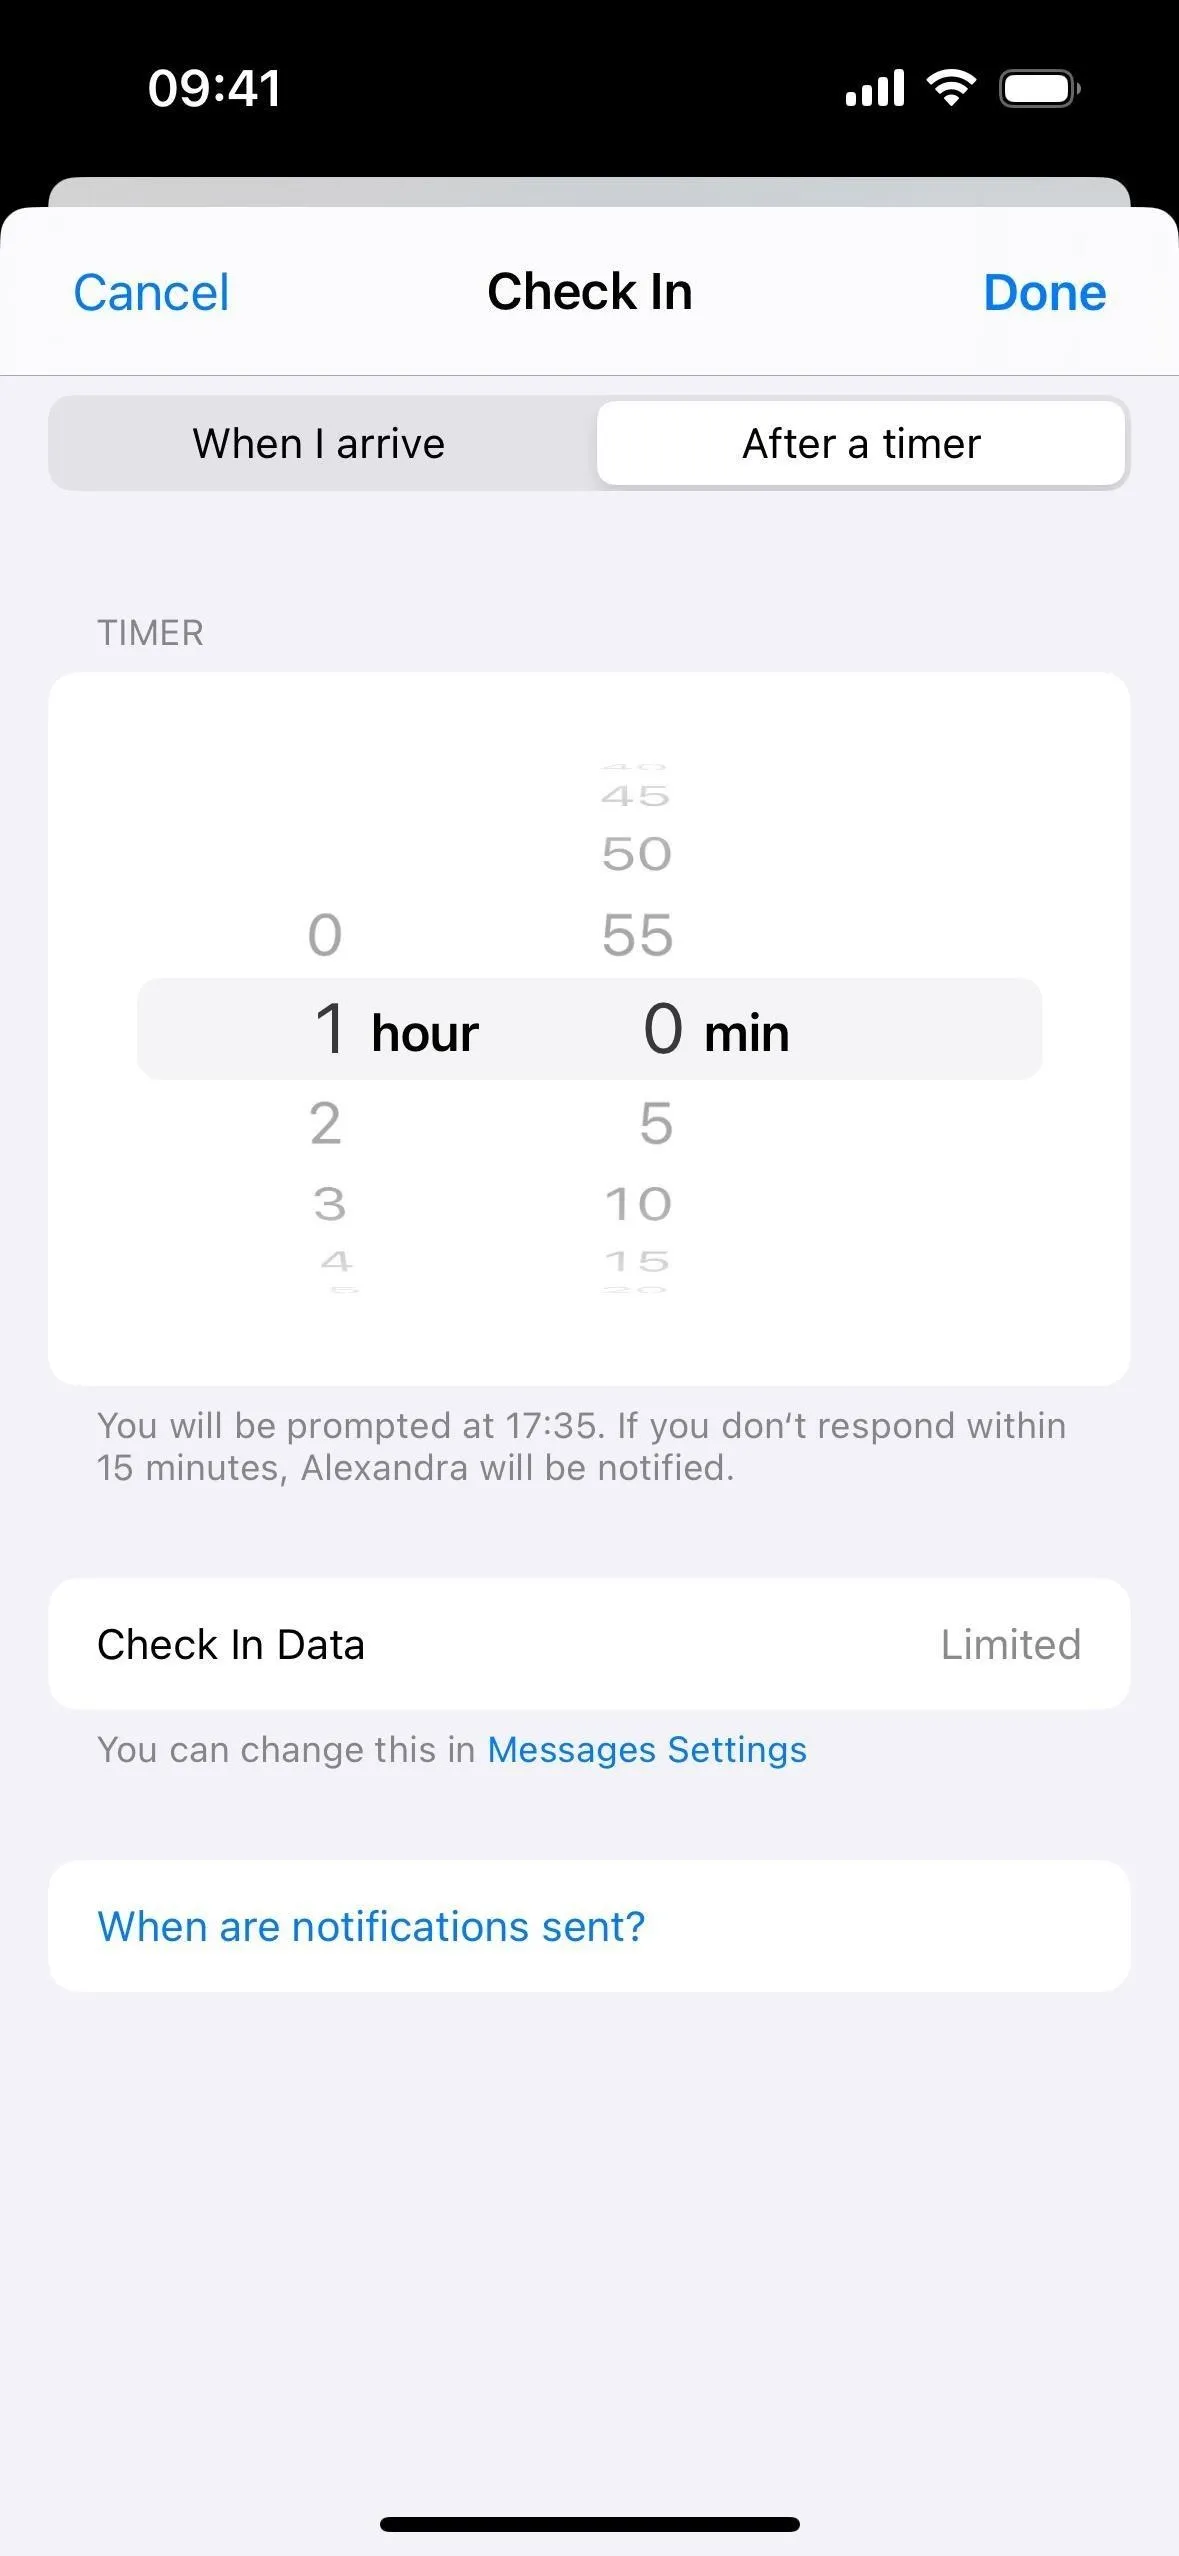
Choose a Timer Instead
If you'd rather set an allotted time instead of an estimated time of arrival at a specific location, open the "After a timer" tab. This is the default Check In mode when Check In can't determine your destination automatically. Select the time you want to expire before Check In prompts you to respond.
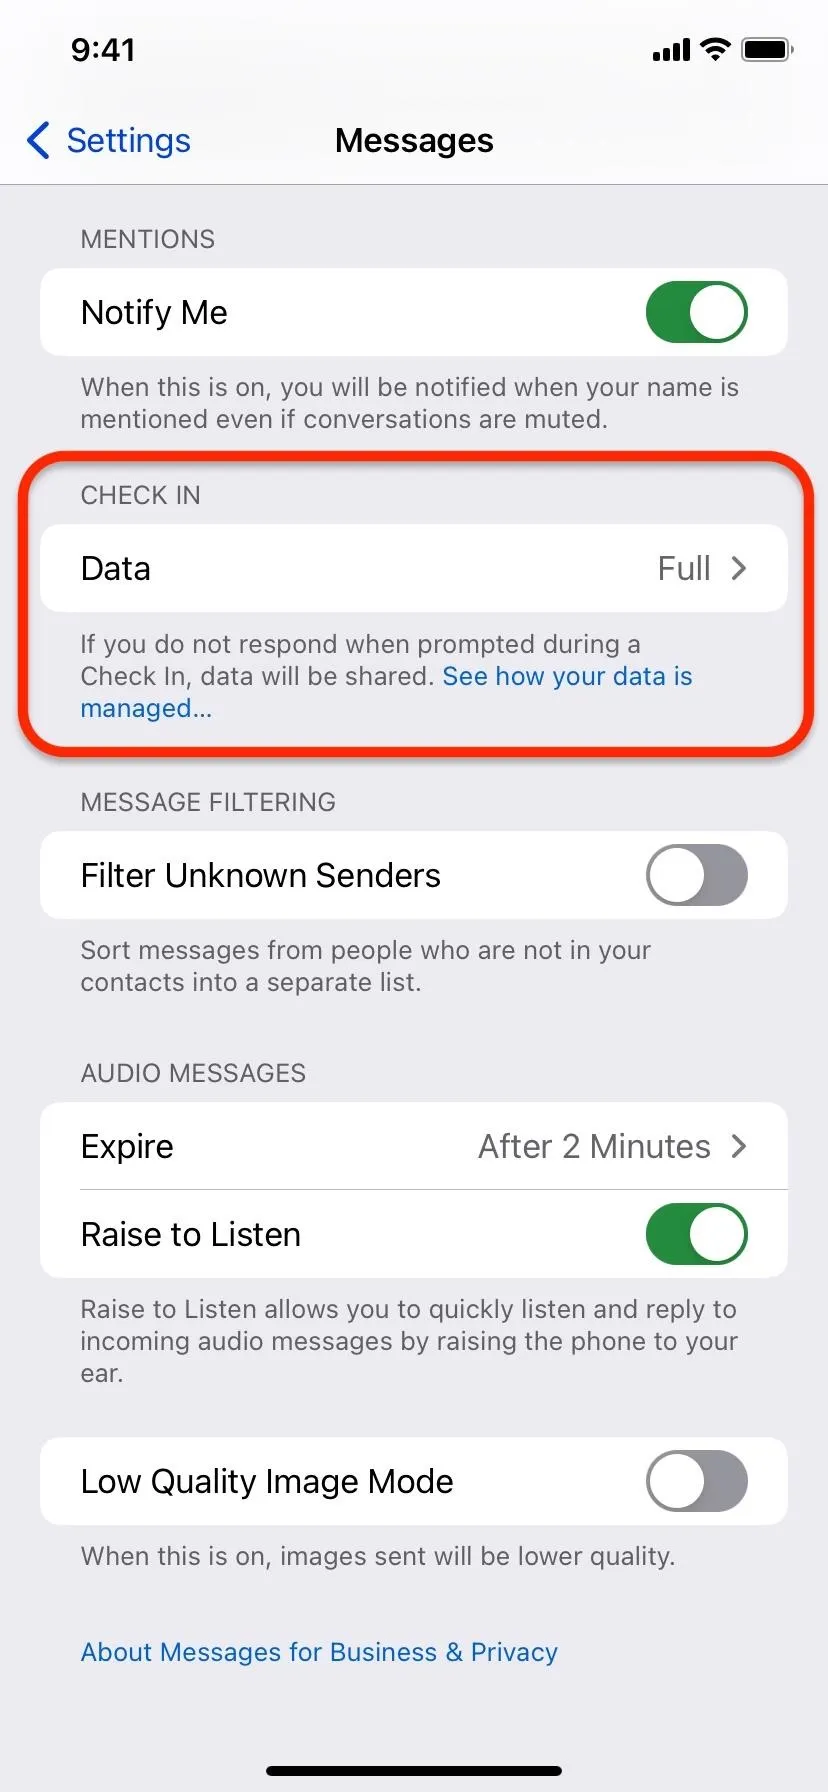
Change the Data Shared
If you want to change between Limited and Full data, tap the "Messages Settings" link to head to Settings –> Messages –> Data. You can also visit that location manually.
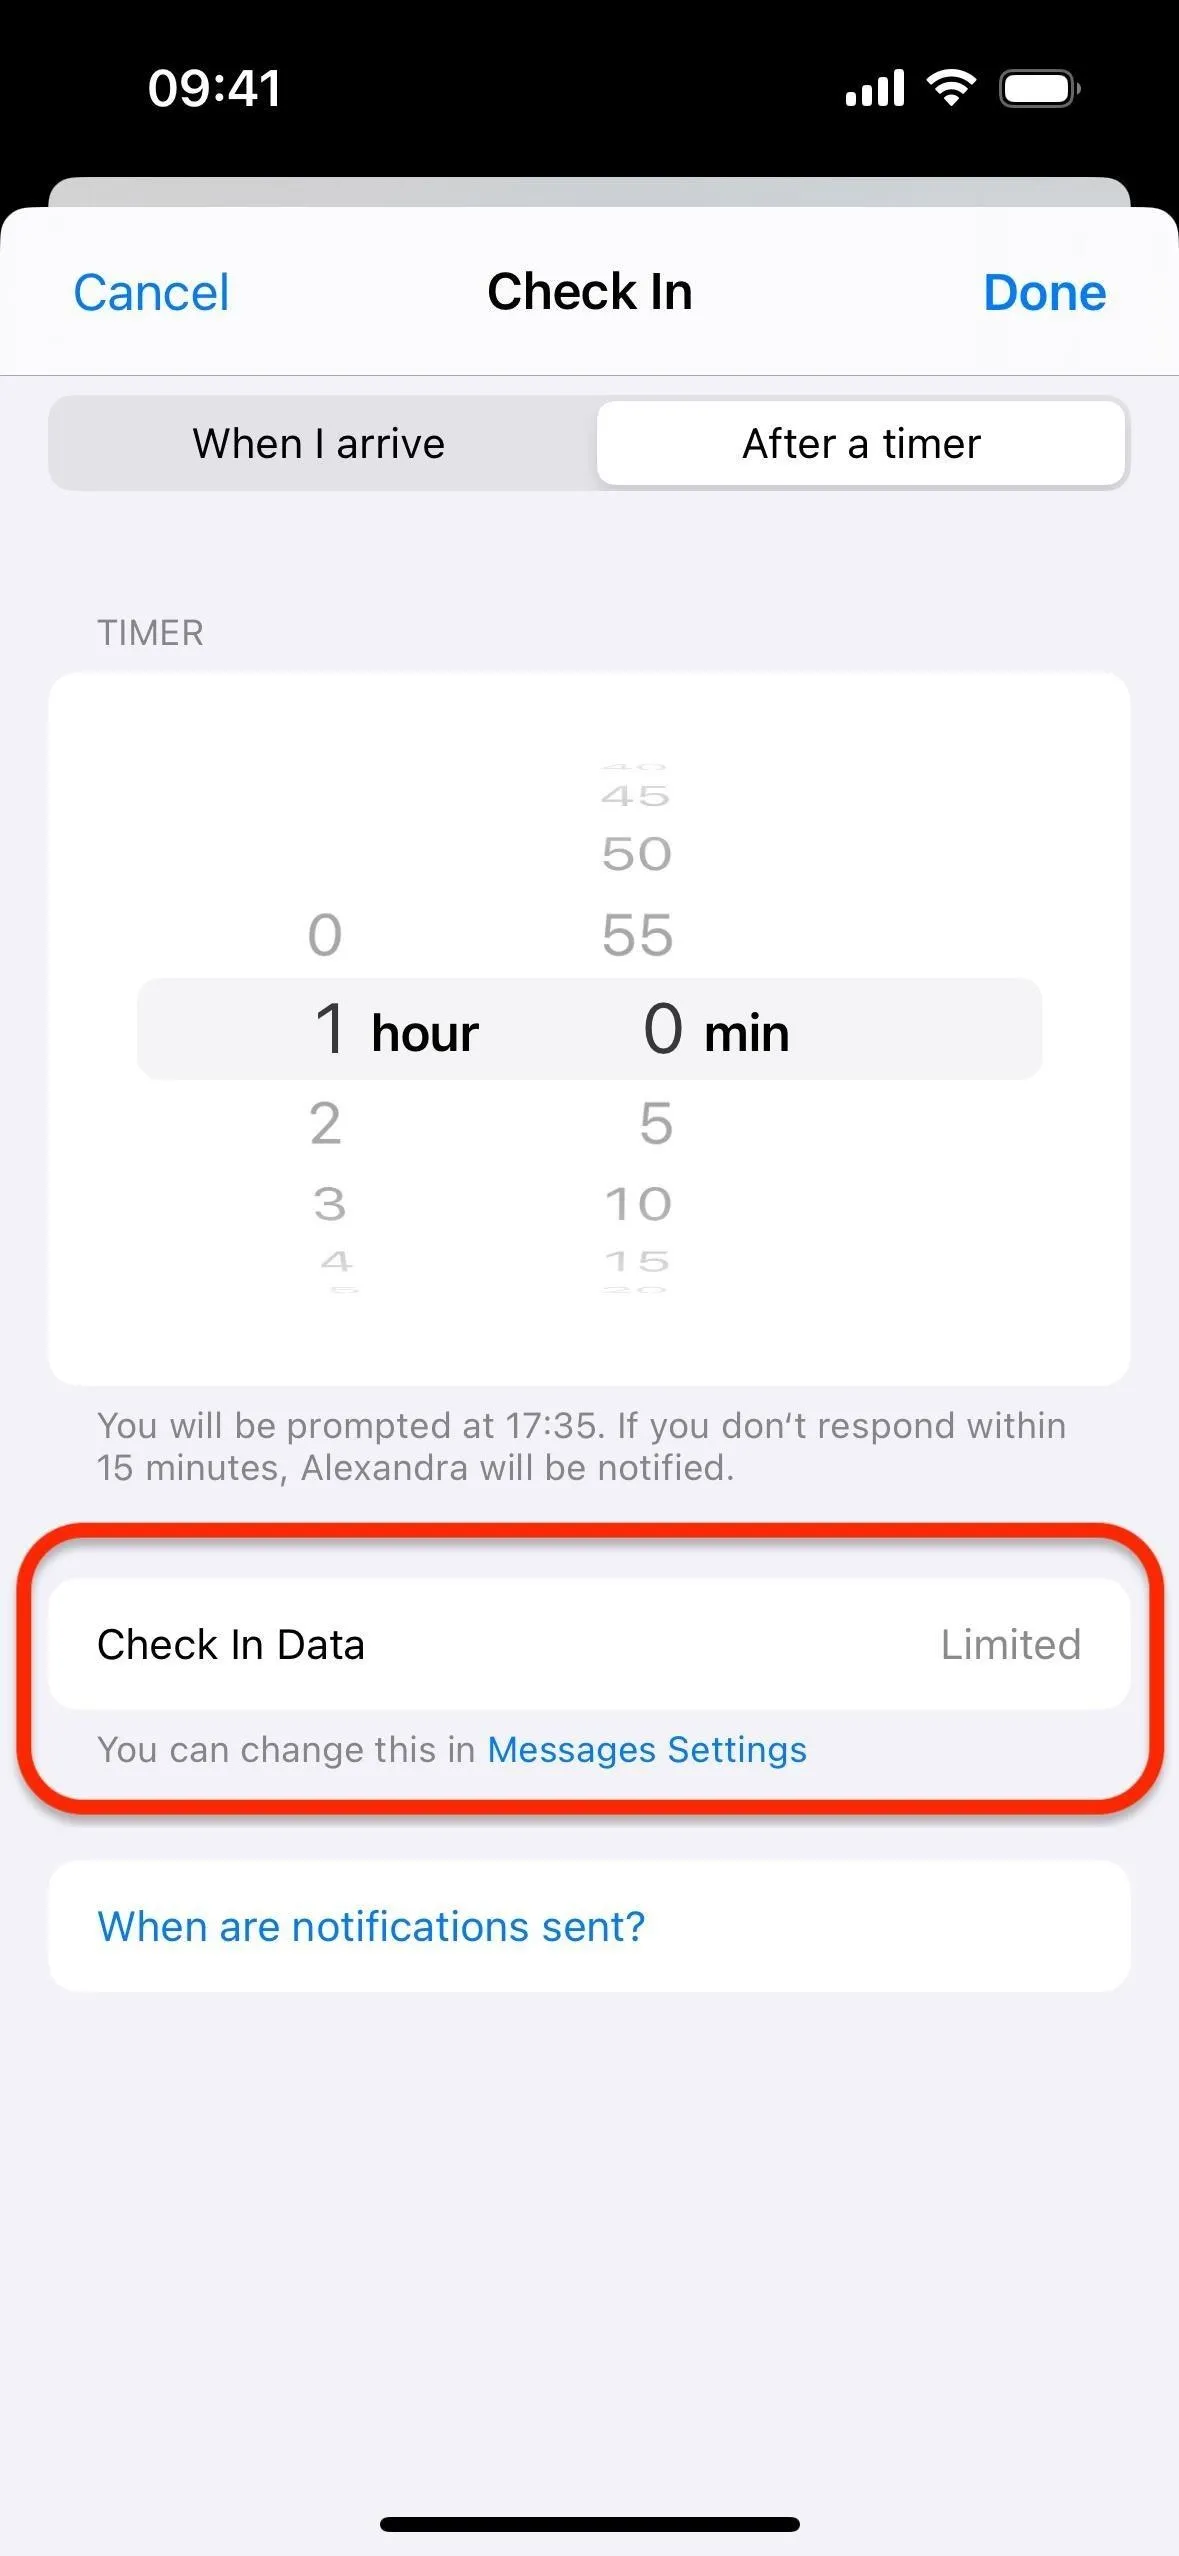

Then, choose between "Limited" or "Full." This will be your new preference for all Check In messages going forward — until you change it again.
Send the Check In
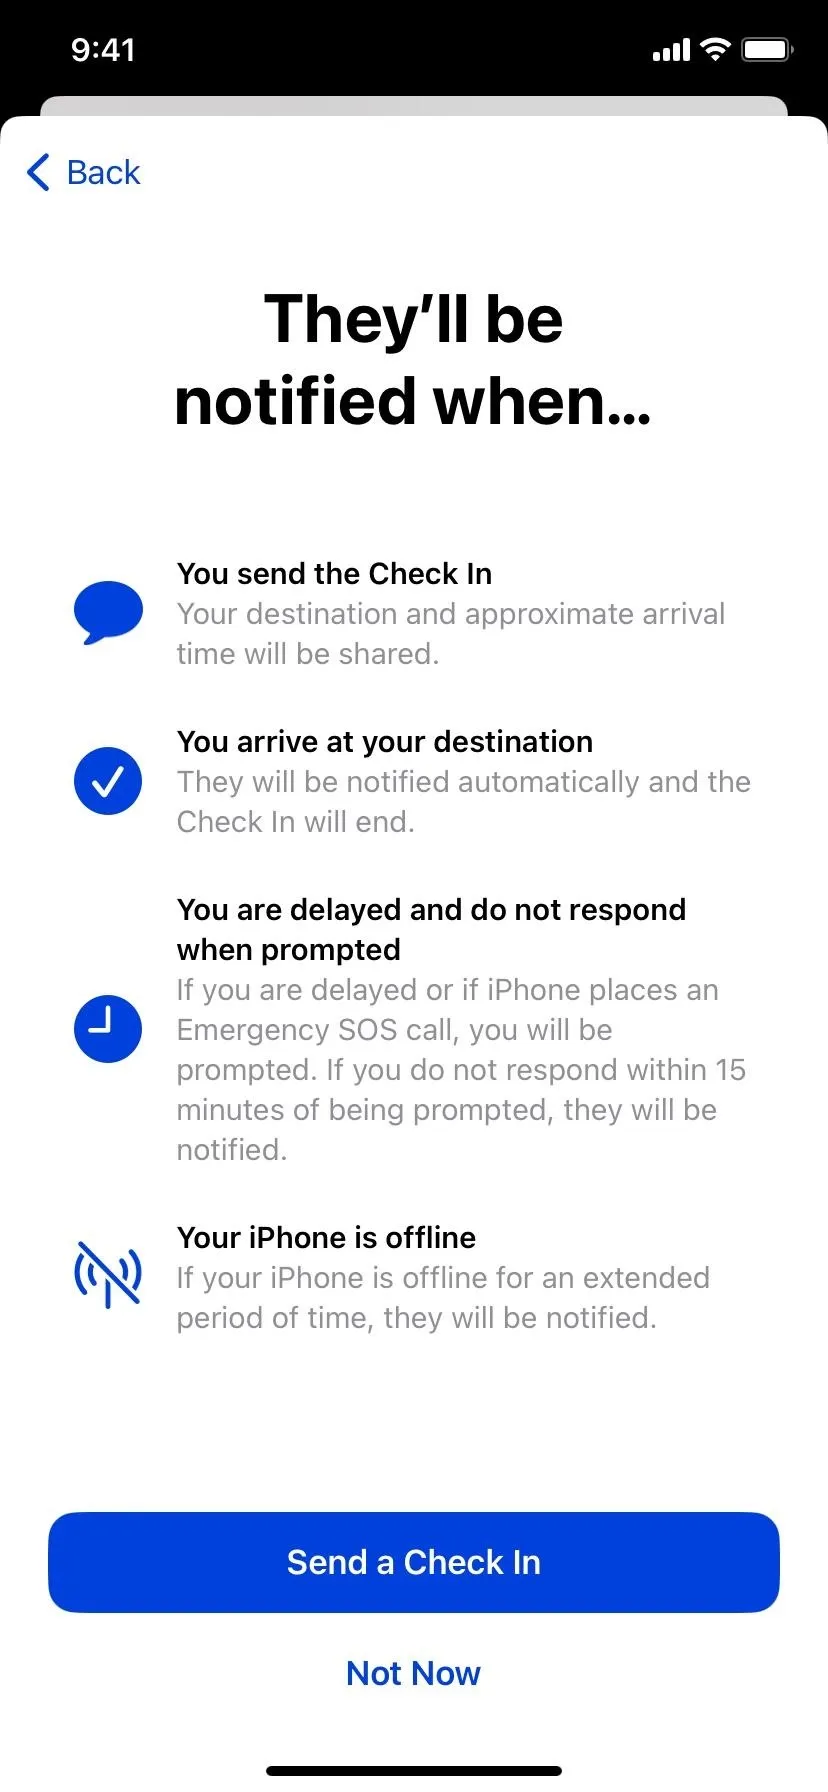
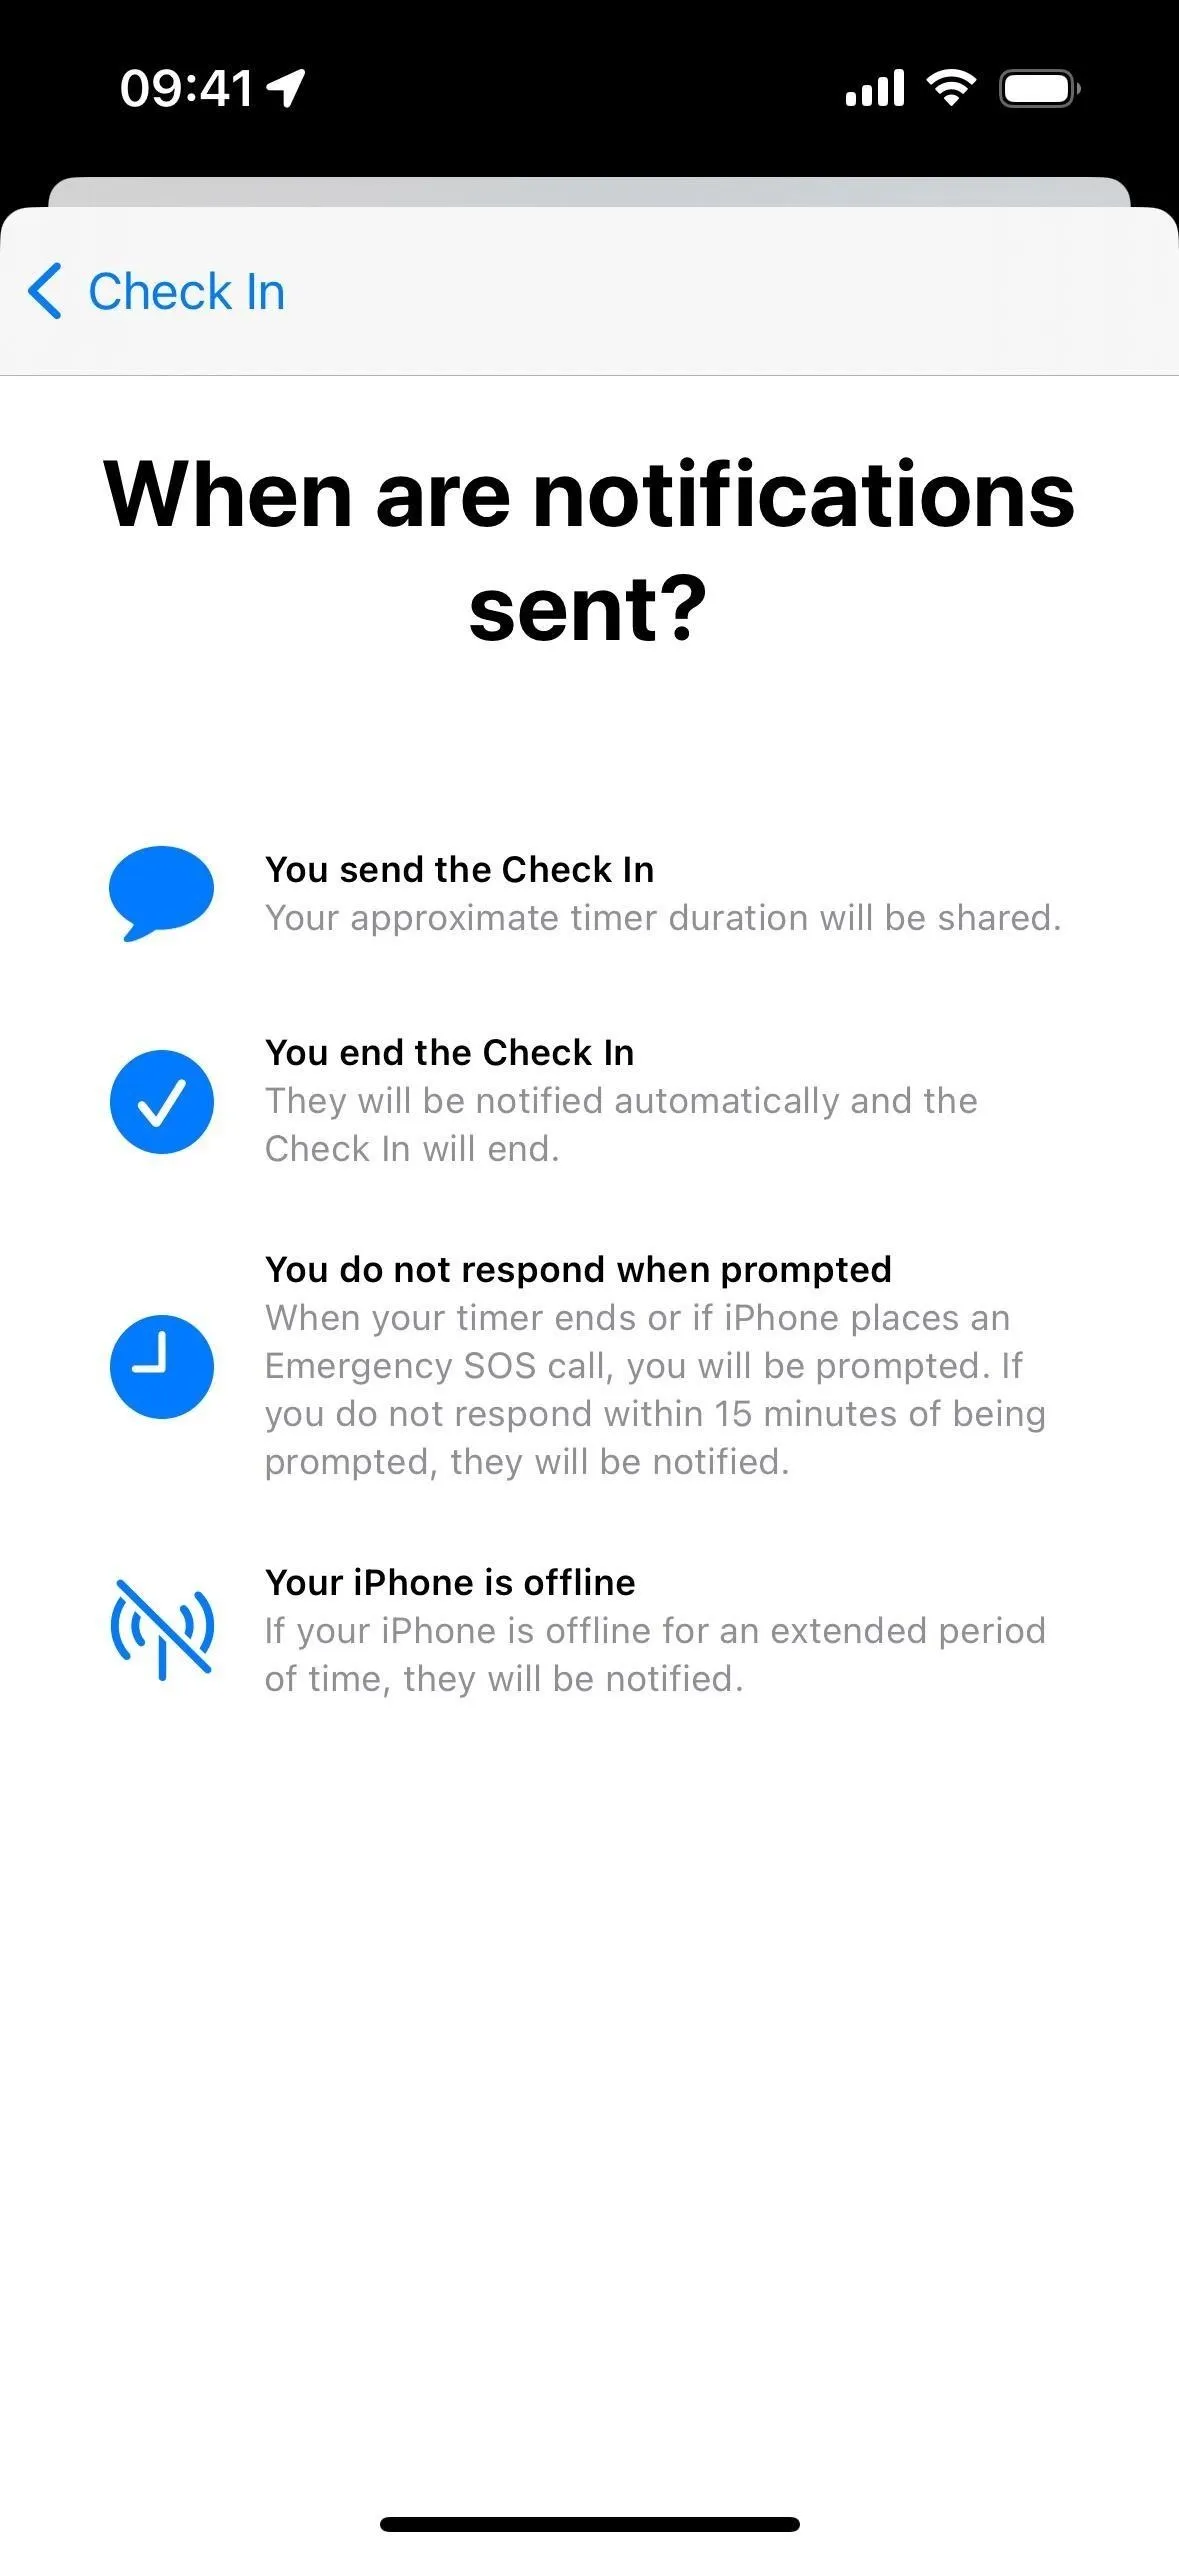
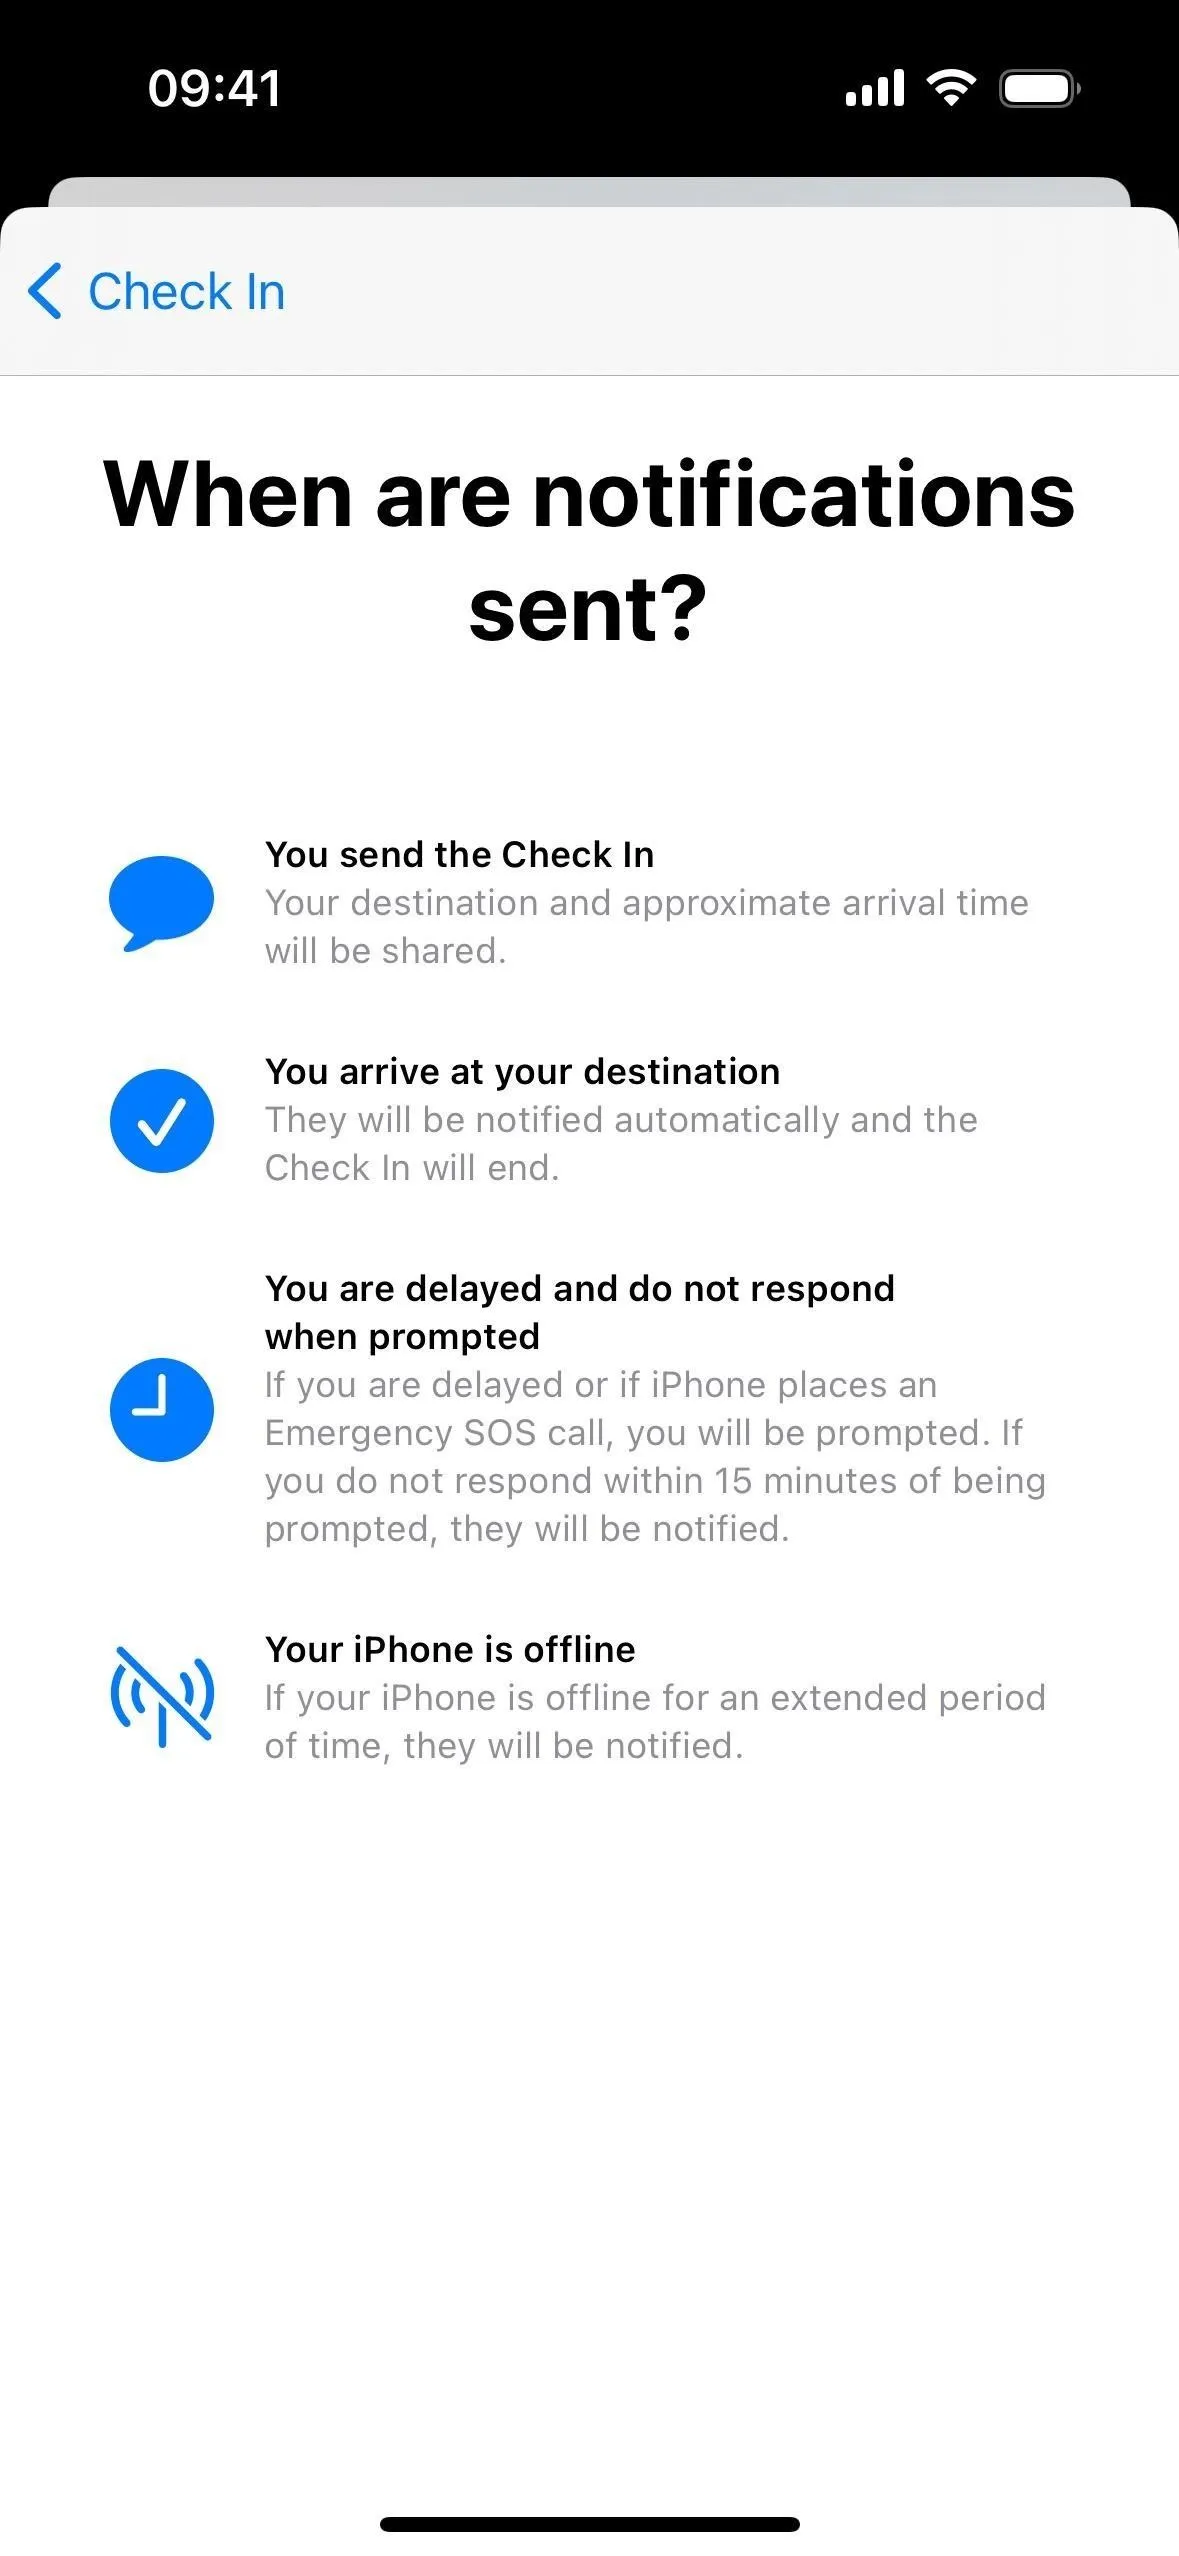
As soon as you Check In, your contact will get a message that includes your destination and how long it's likely to take you to get there. They'll also be notified when you've arrived.
If you manually end the Check In, they will also be notified that you've done so. And if you don't respond to any prompts after making an Emergency SOS call, after no progress has been detected, or after your timer ends, as well as if your iPhone has been offline for an extended period, the data you've chosen in advance will be sent to them.
Interacting with the 15-Minute Prompt
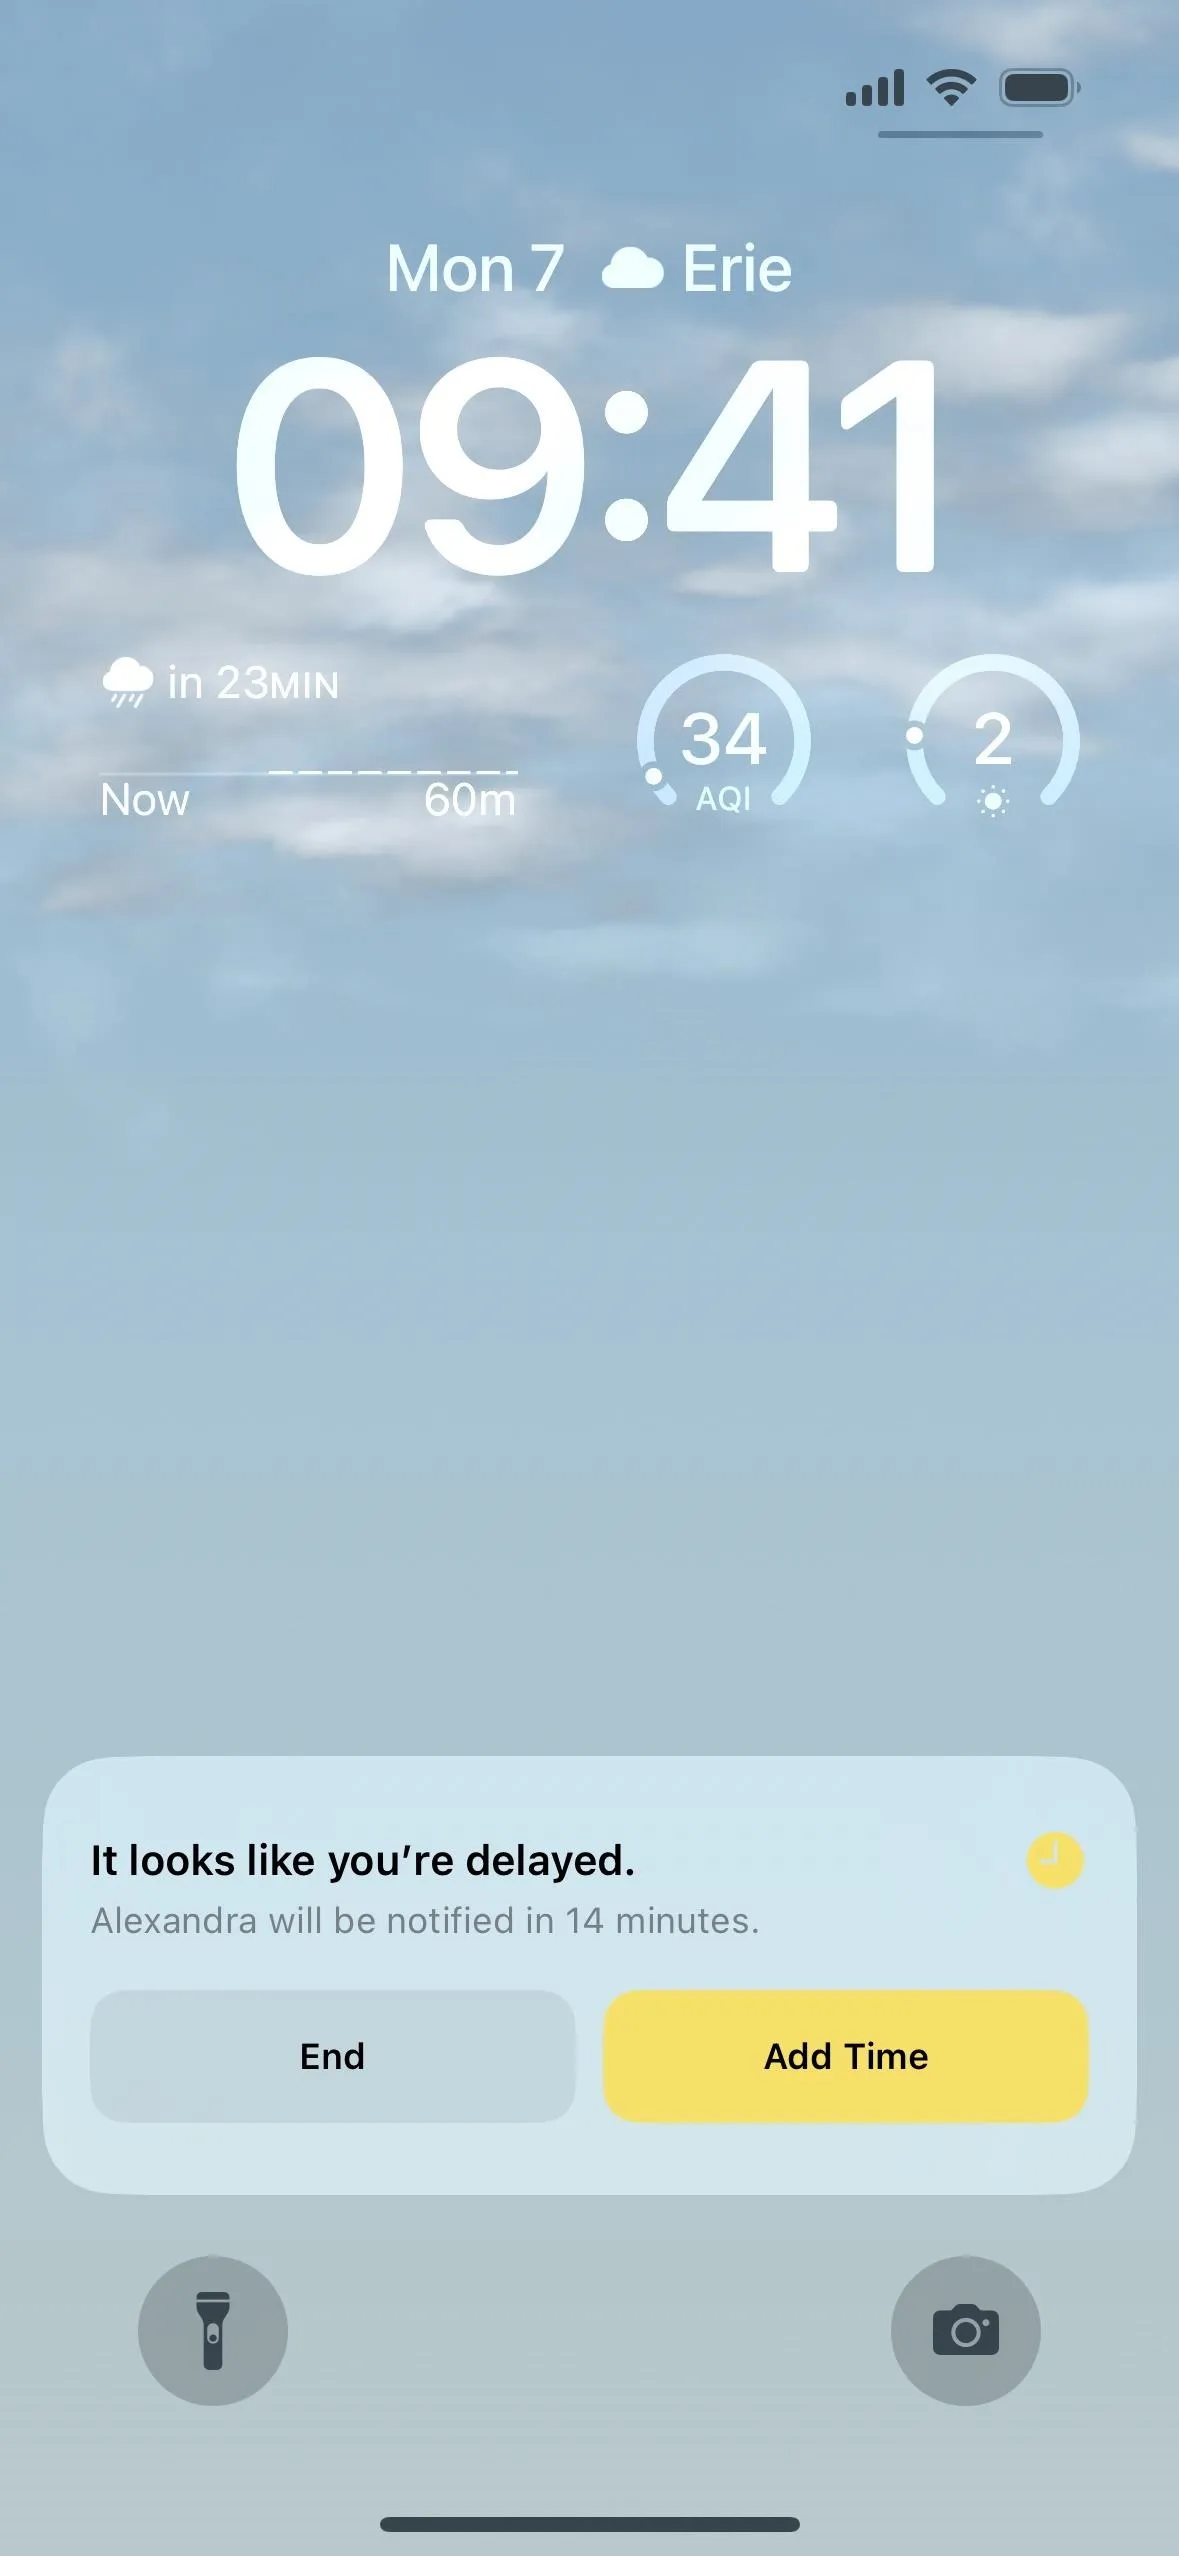
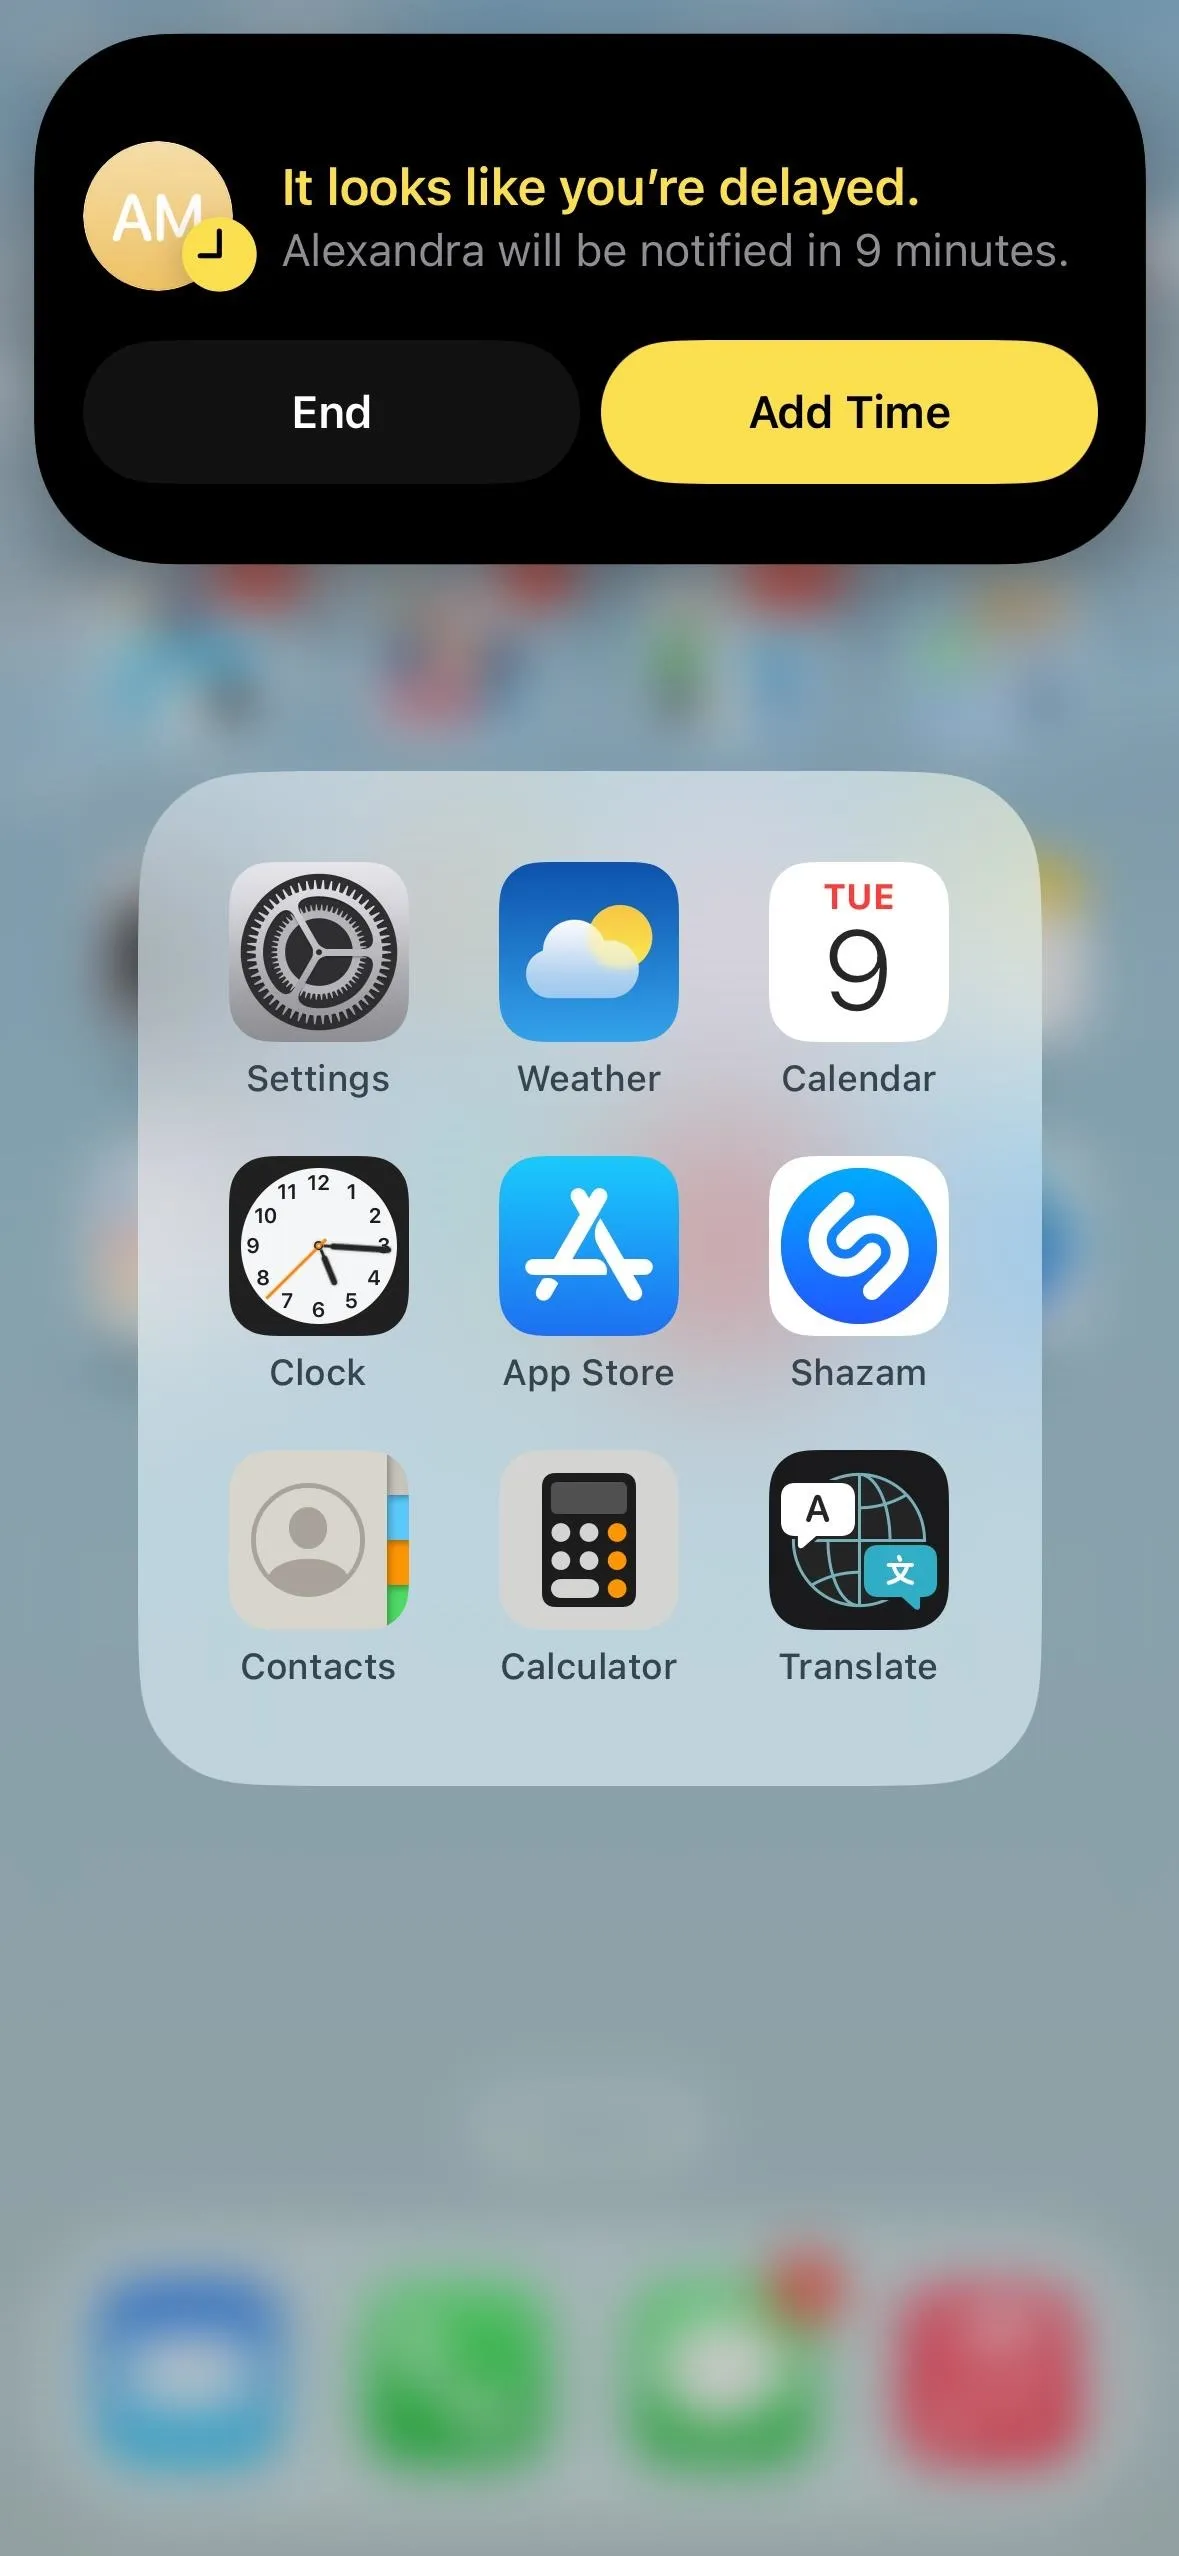
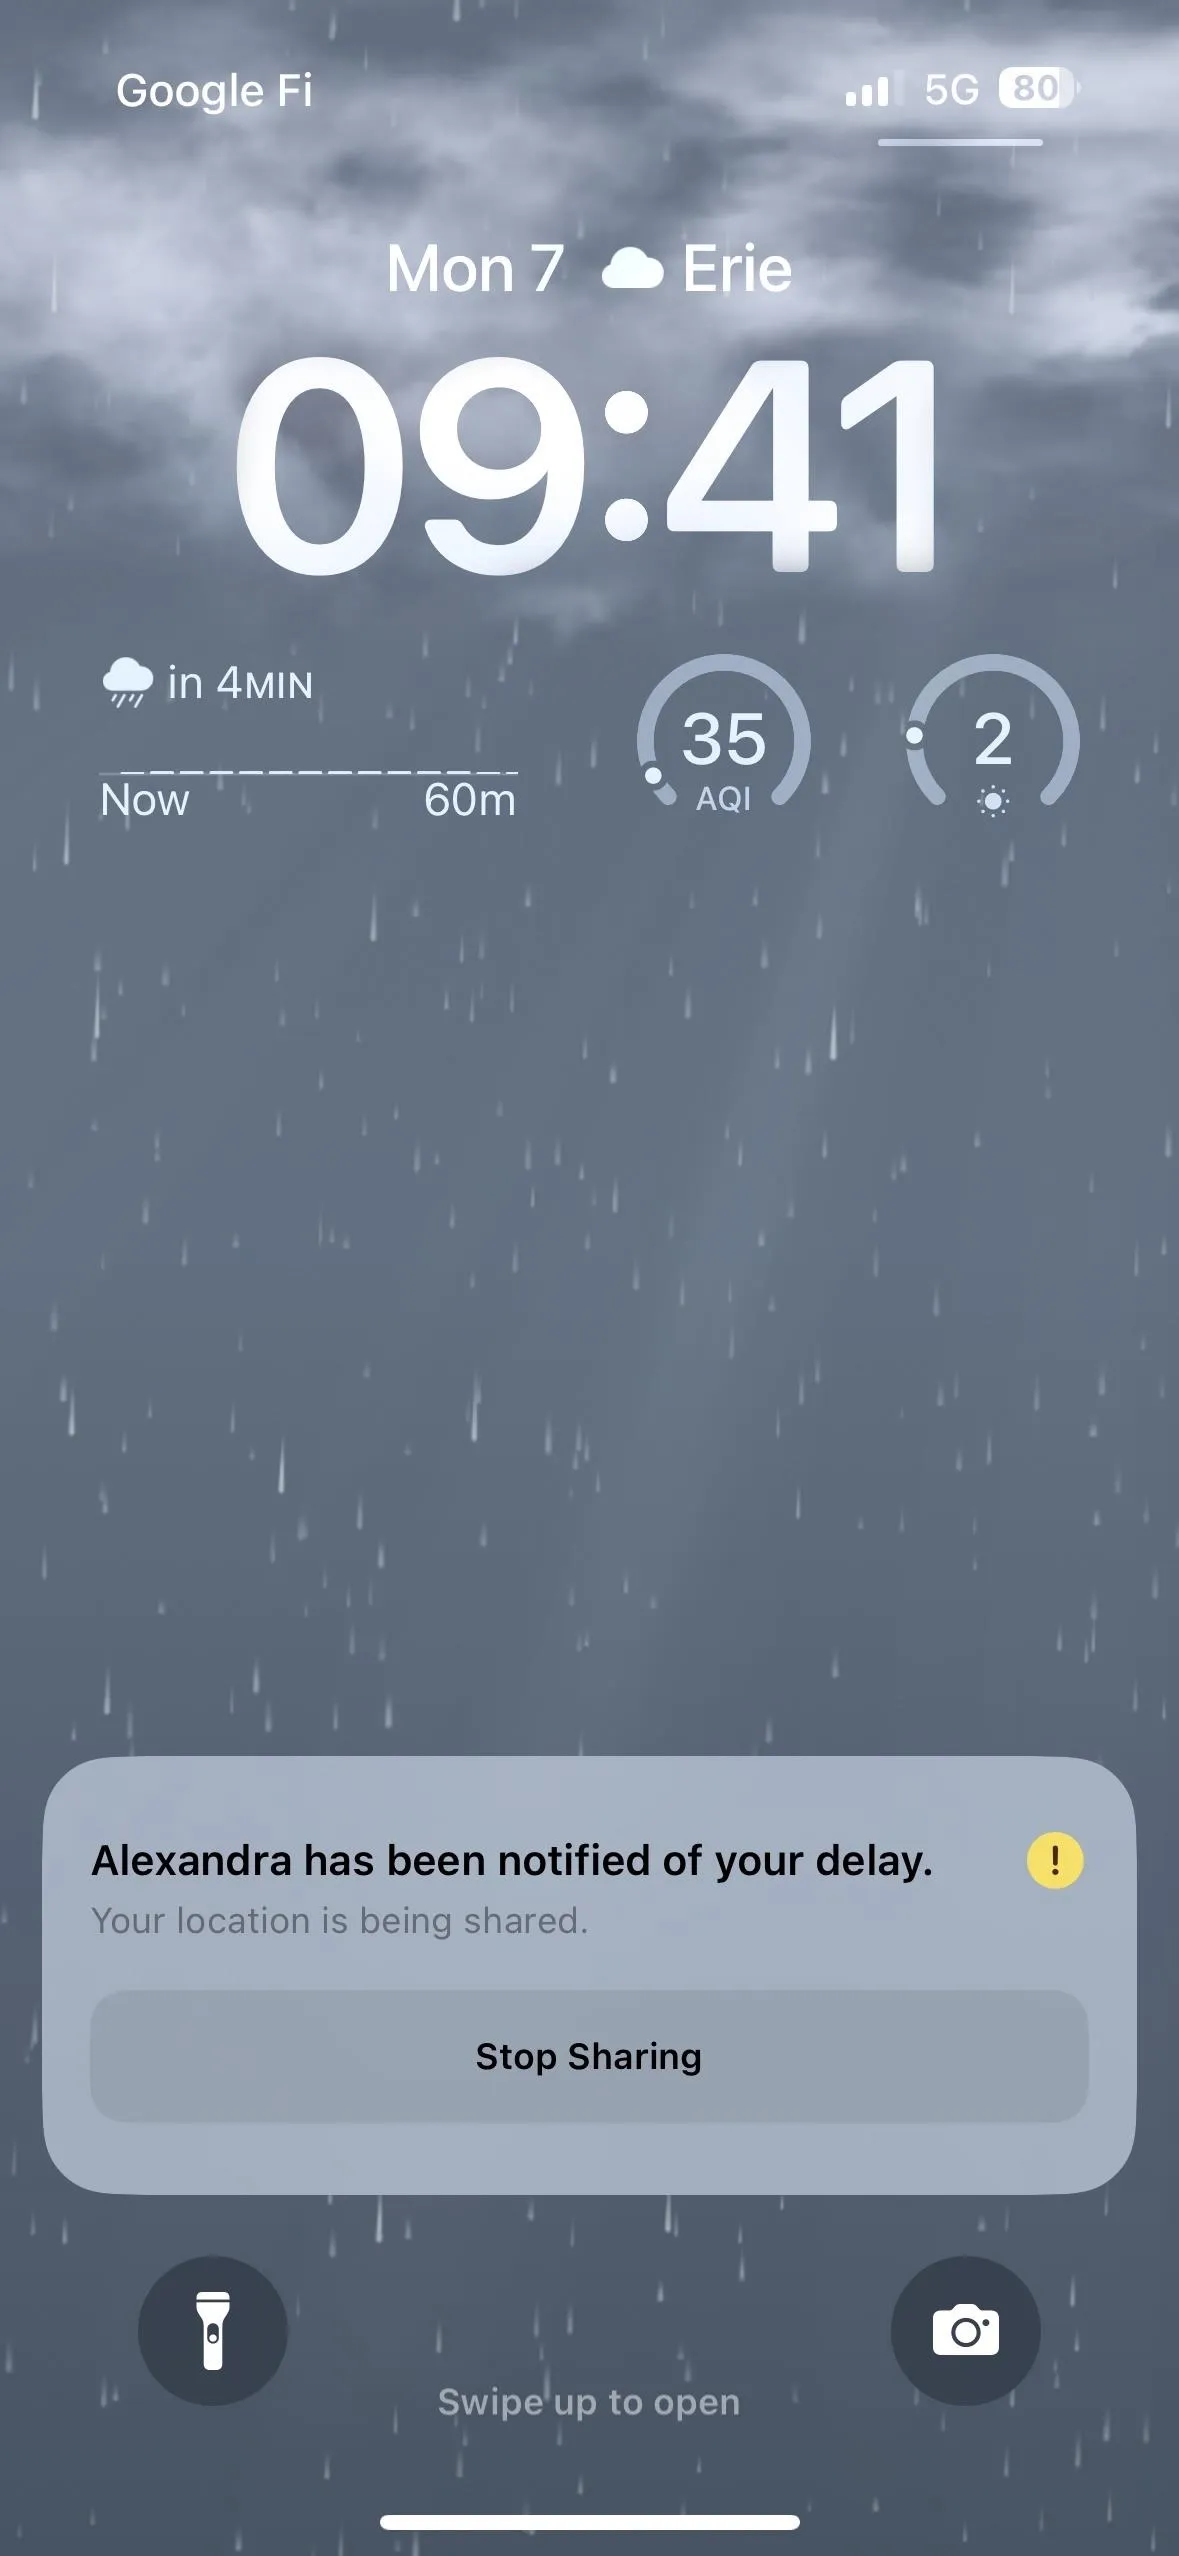
You can see the Check In as a Live Activity on your Lock Screen and in your Notification Center. From there, you can end the Check In, add more time, or view the details. You should get an alert when the first prompt arrives and the 15 minutes starts, as well as others after dipping below 10 and 5 minutes.
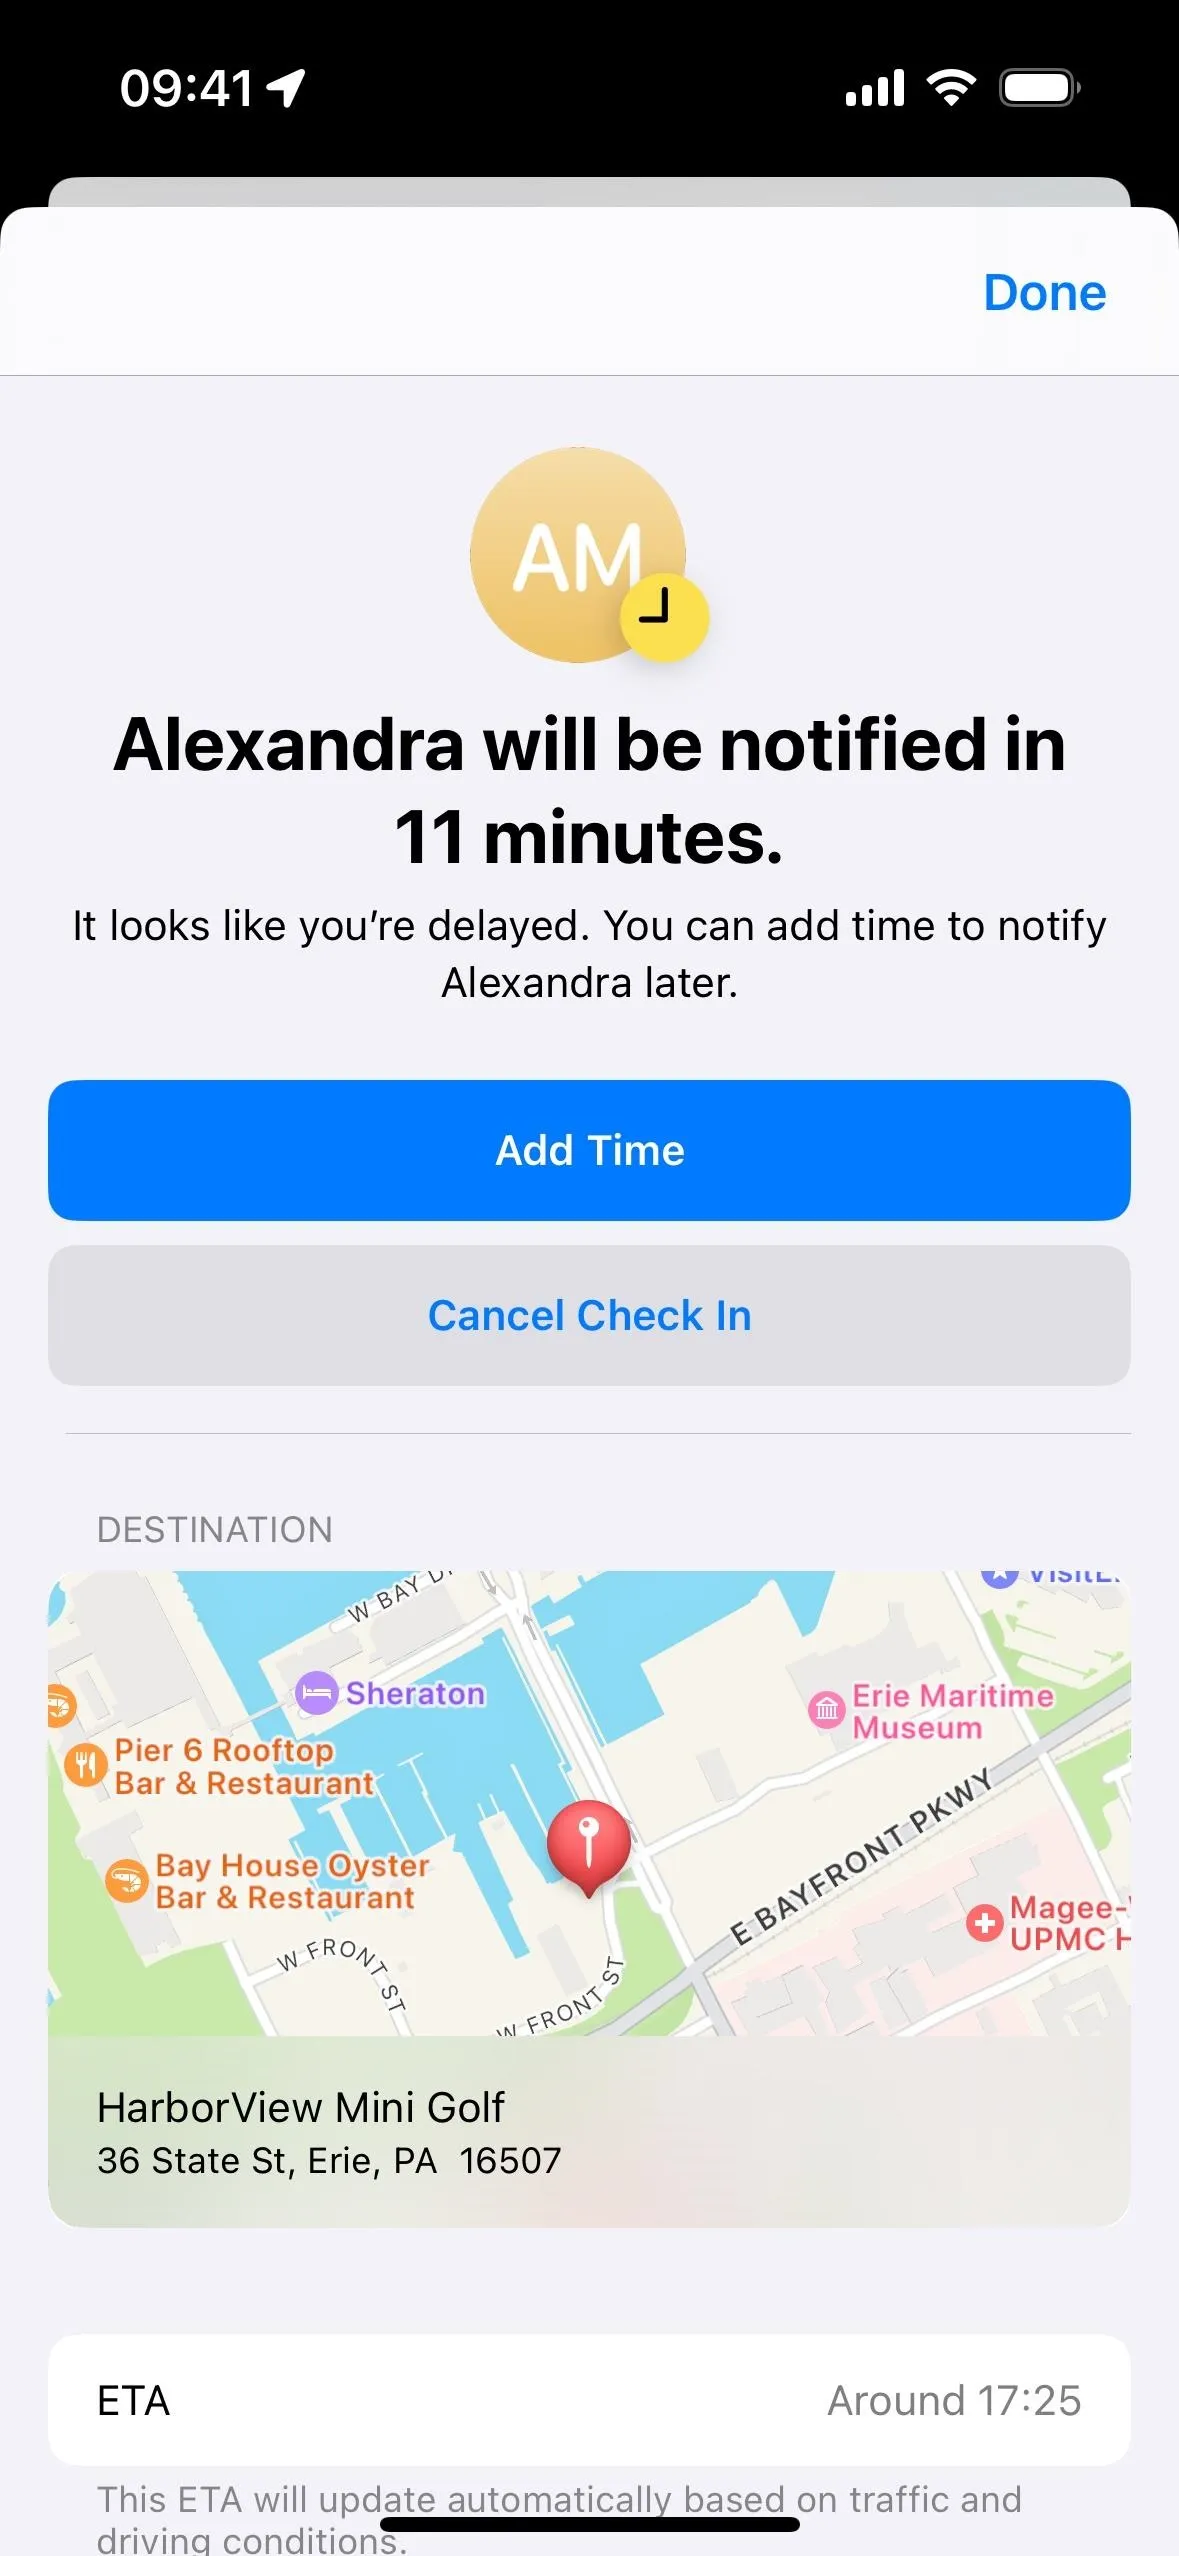
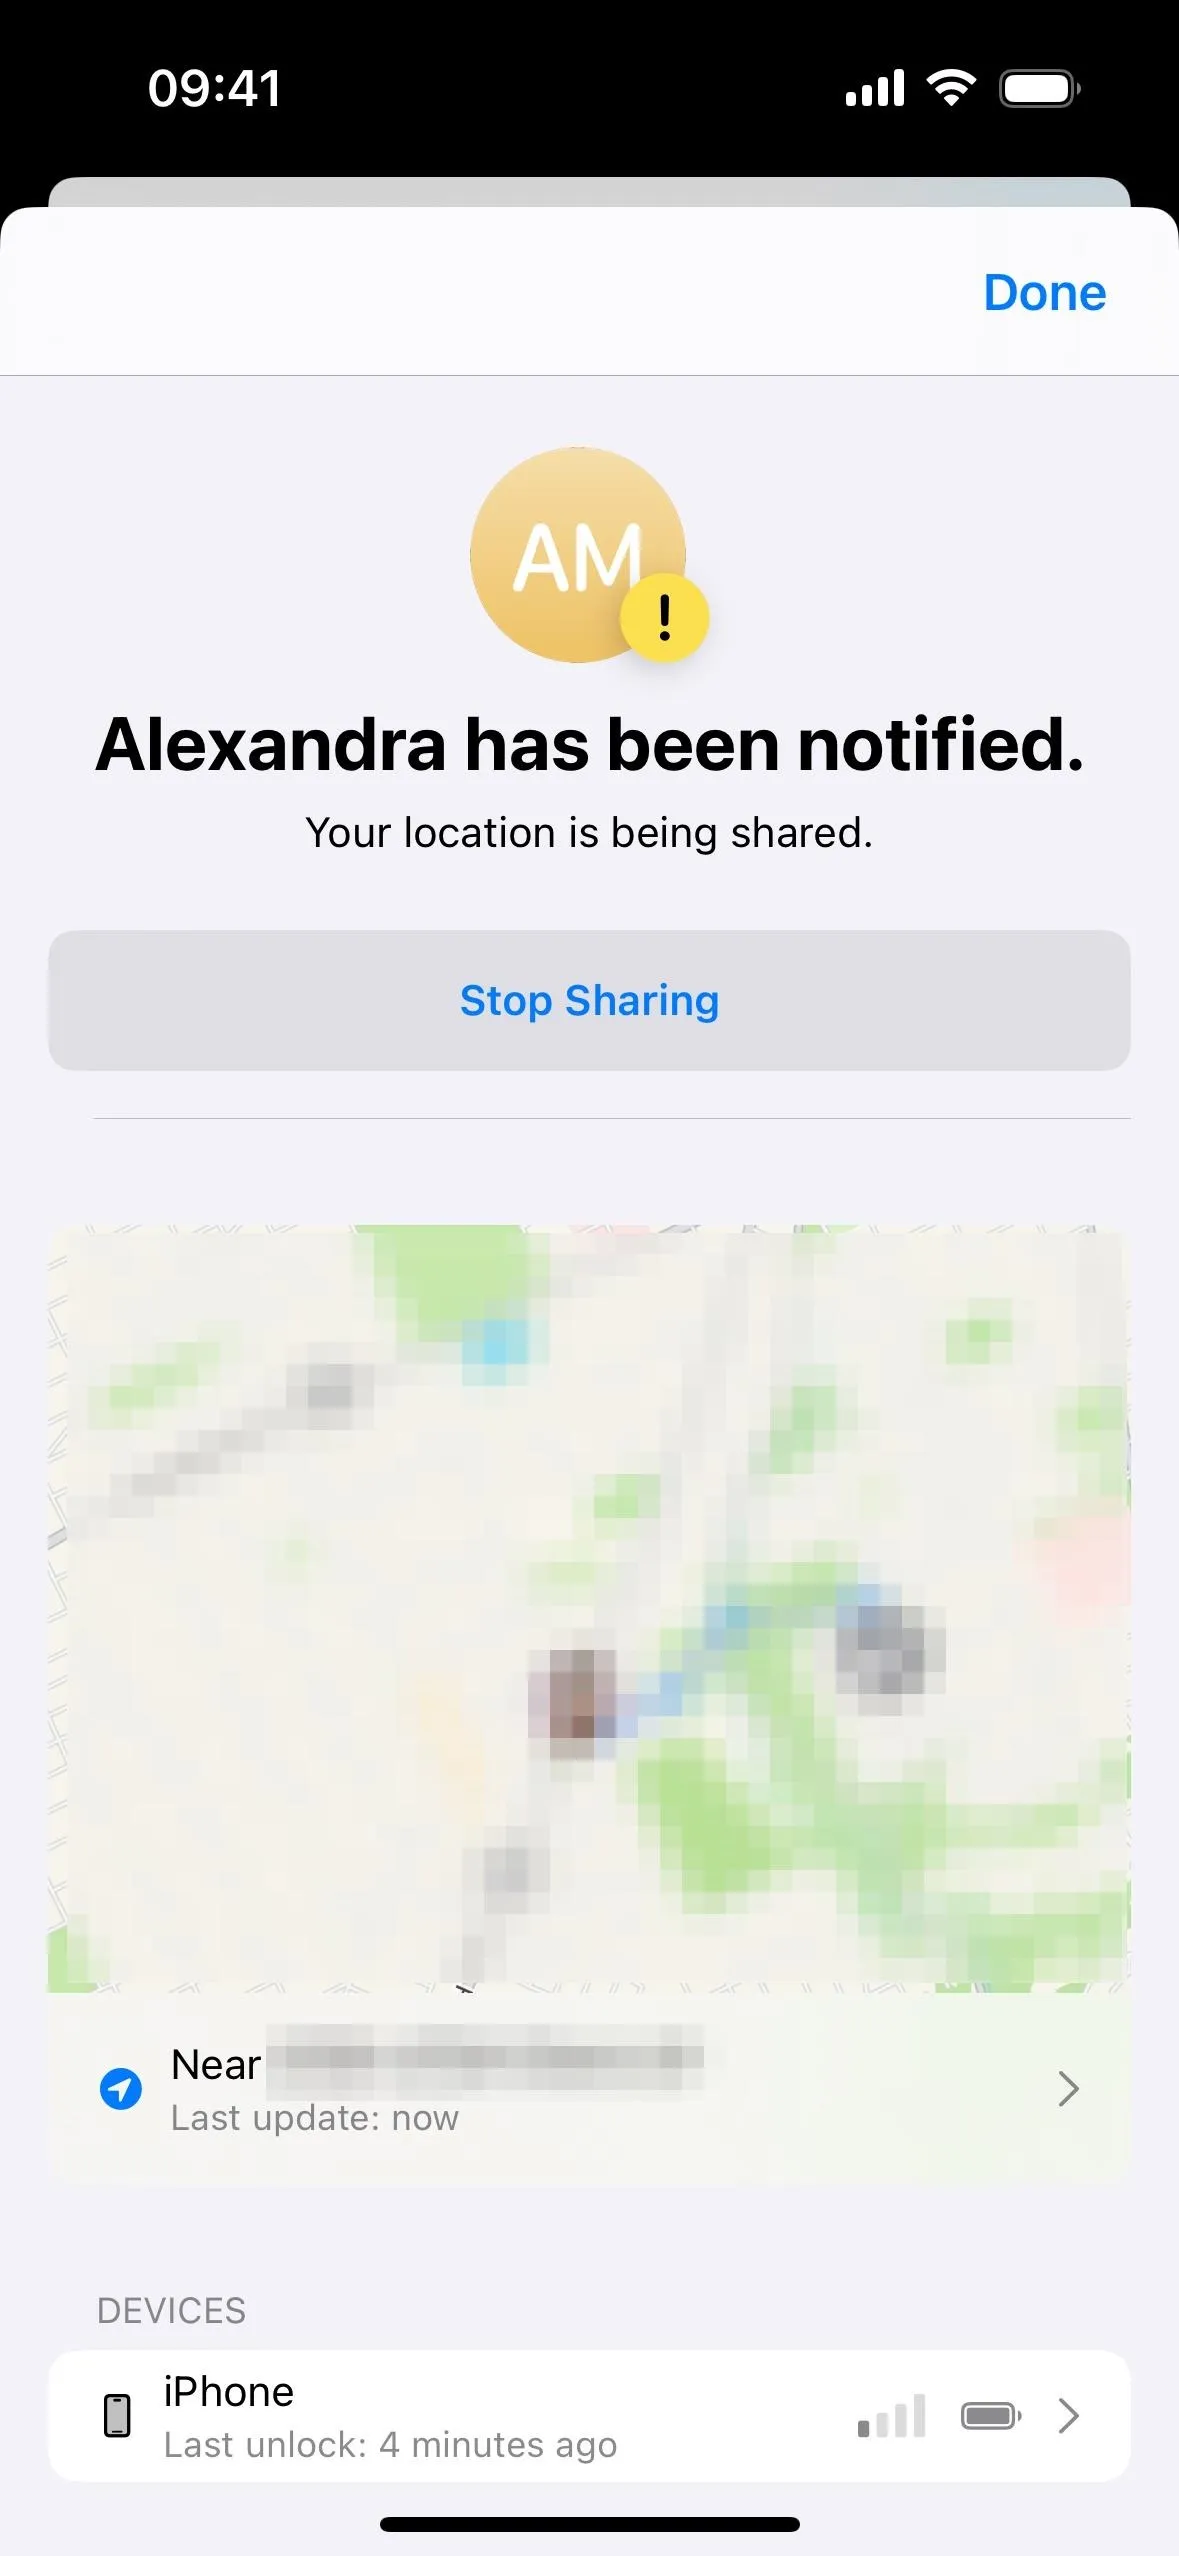
After the recipients are notified of your unresponsiveness to the prompt, you'll get an opportunity again in the Live Activity to stop sharing. Viewing the Check In's details also lets you stop sharing and will show your route taken if you chose Full data.

You can also tap on "Details" in the Check In note in the Messages thread to get options to "Cancel Check In" or "Add Time" if you see the option.
What the Recipient Sees During a Check In
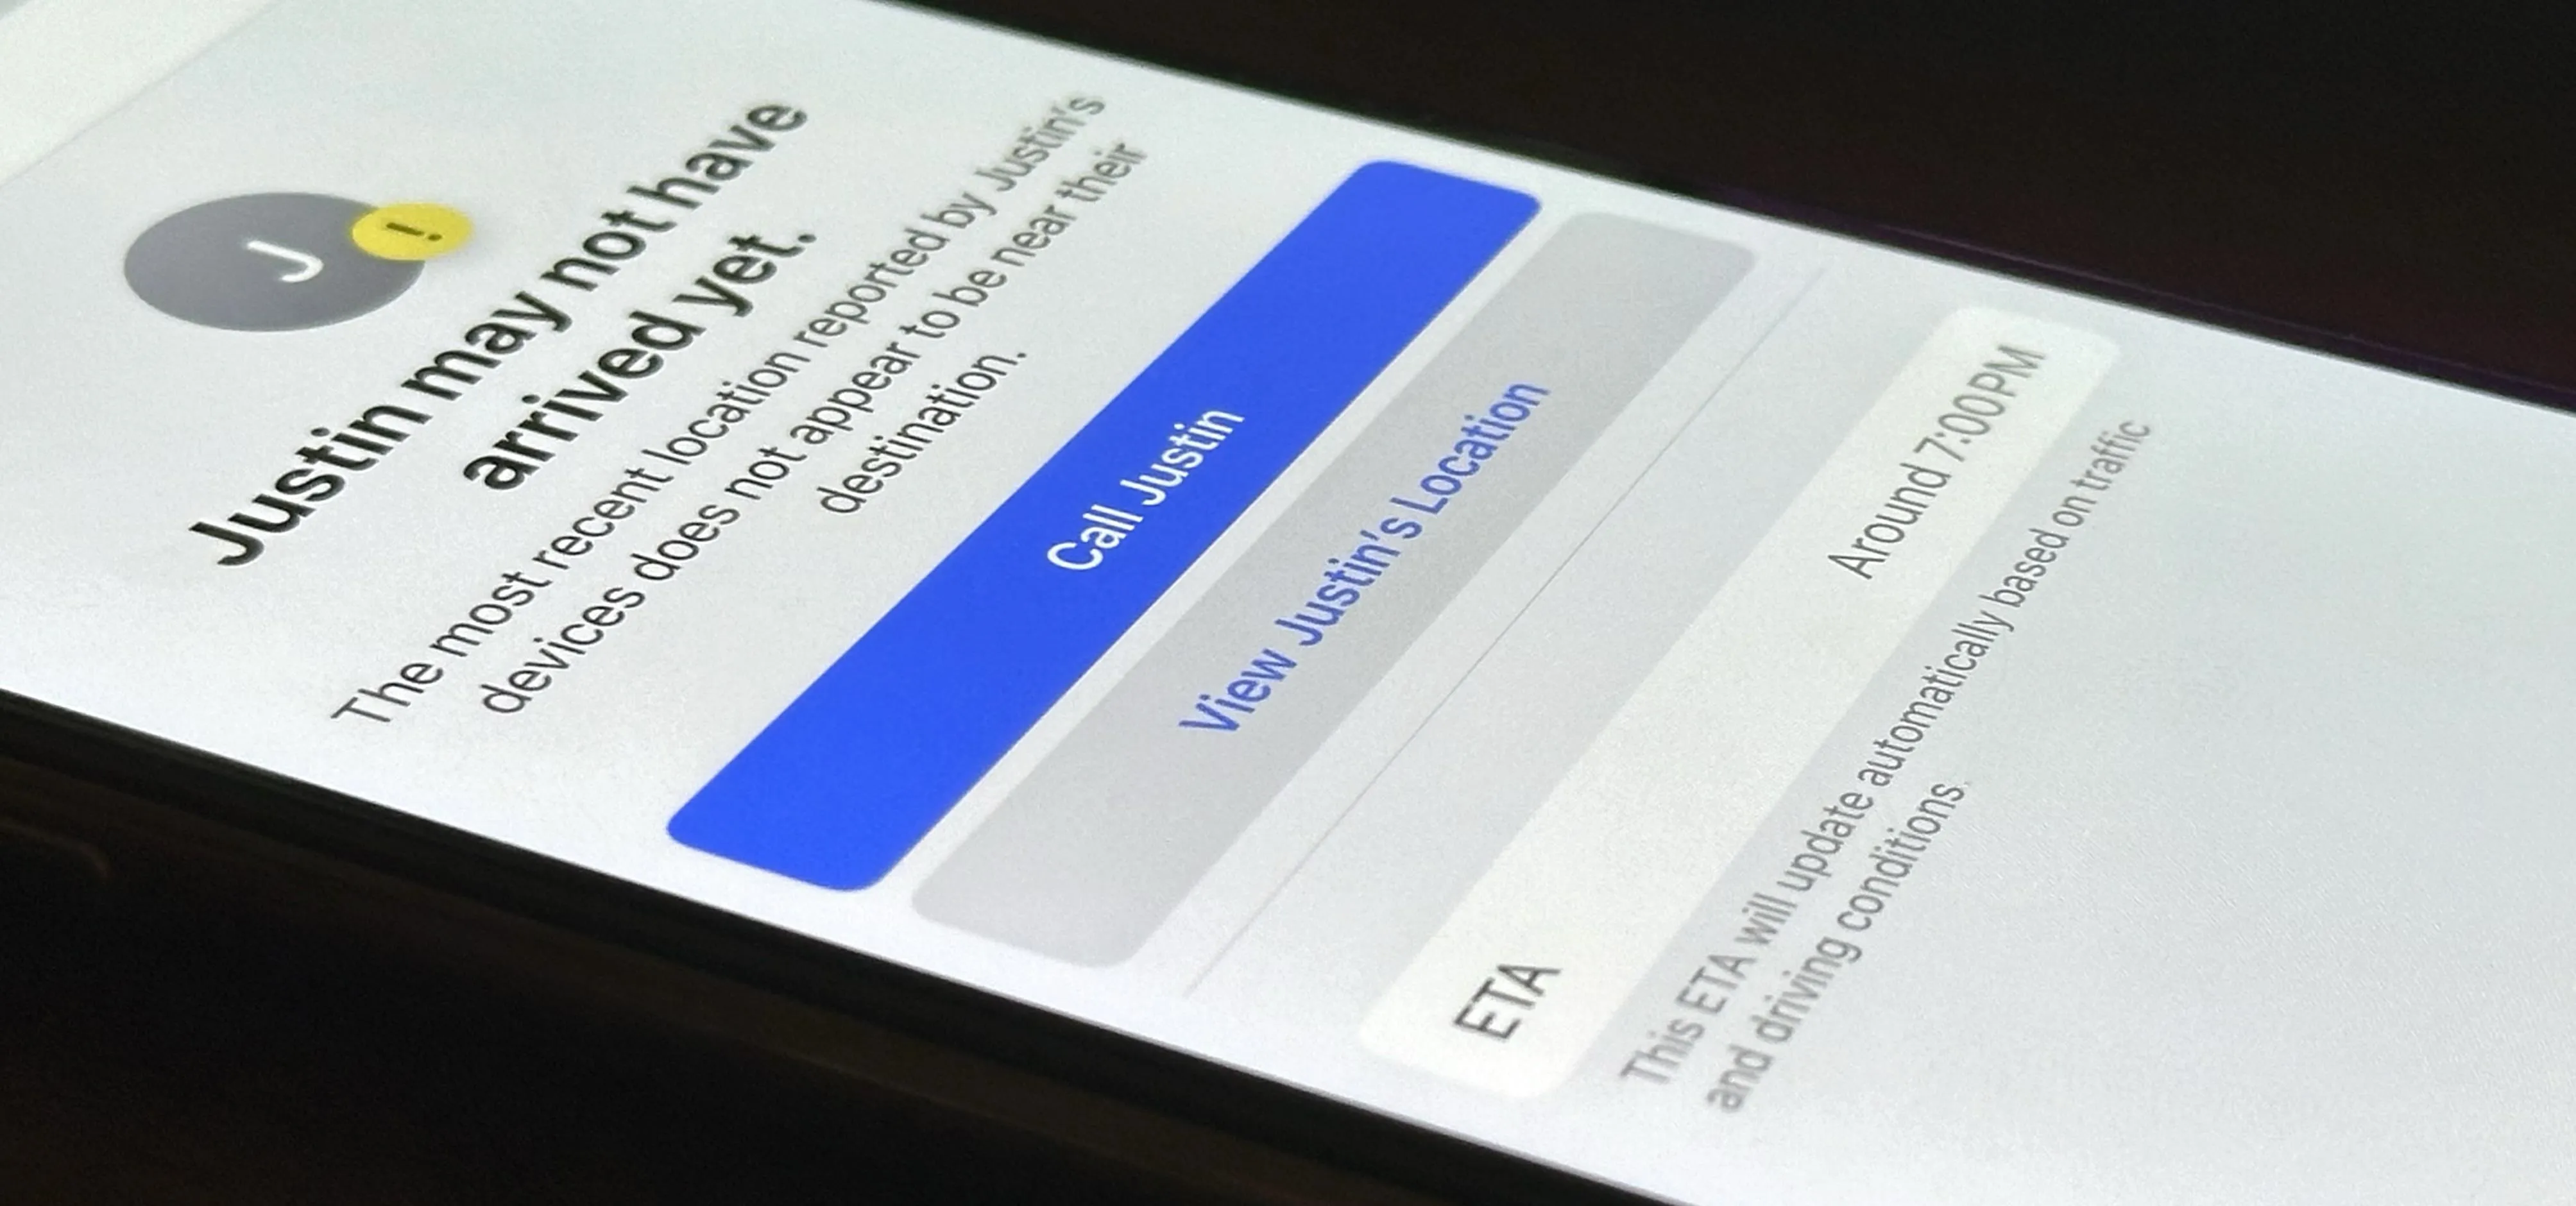
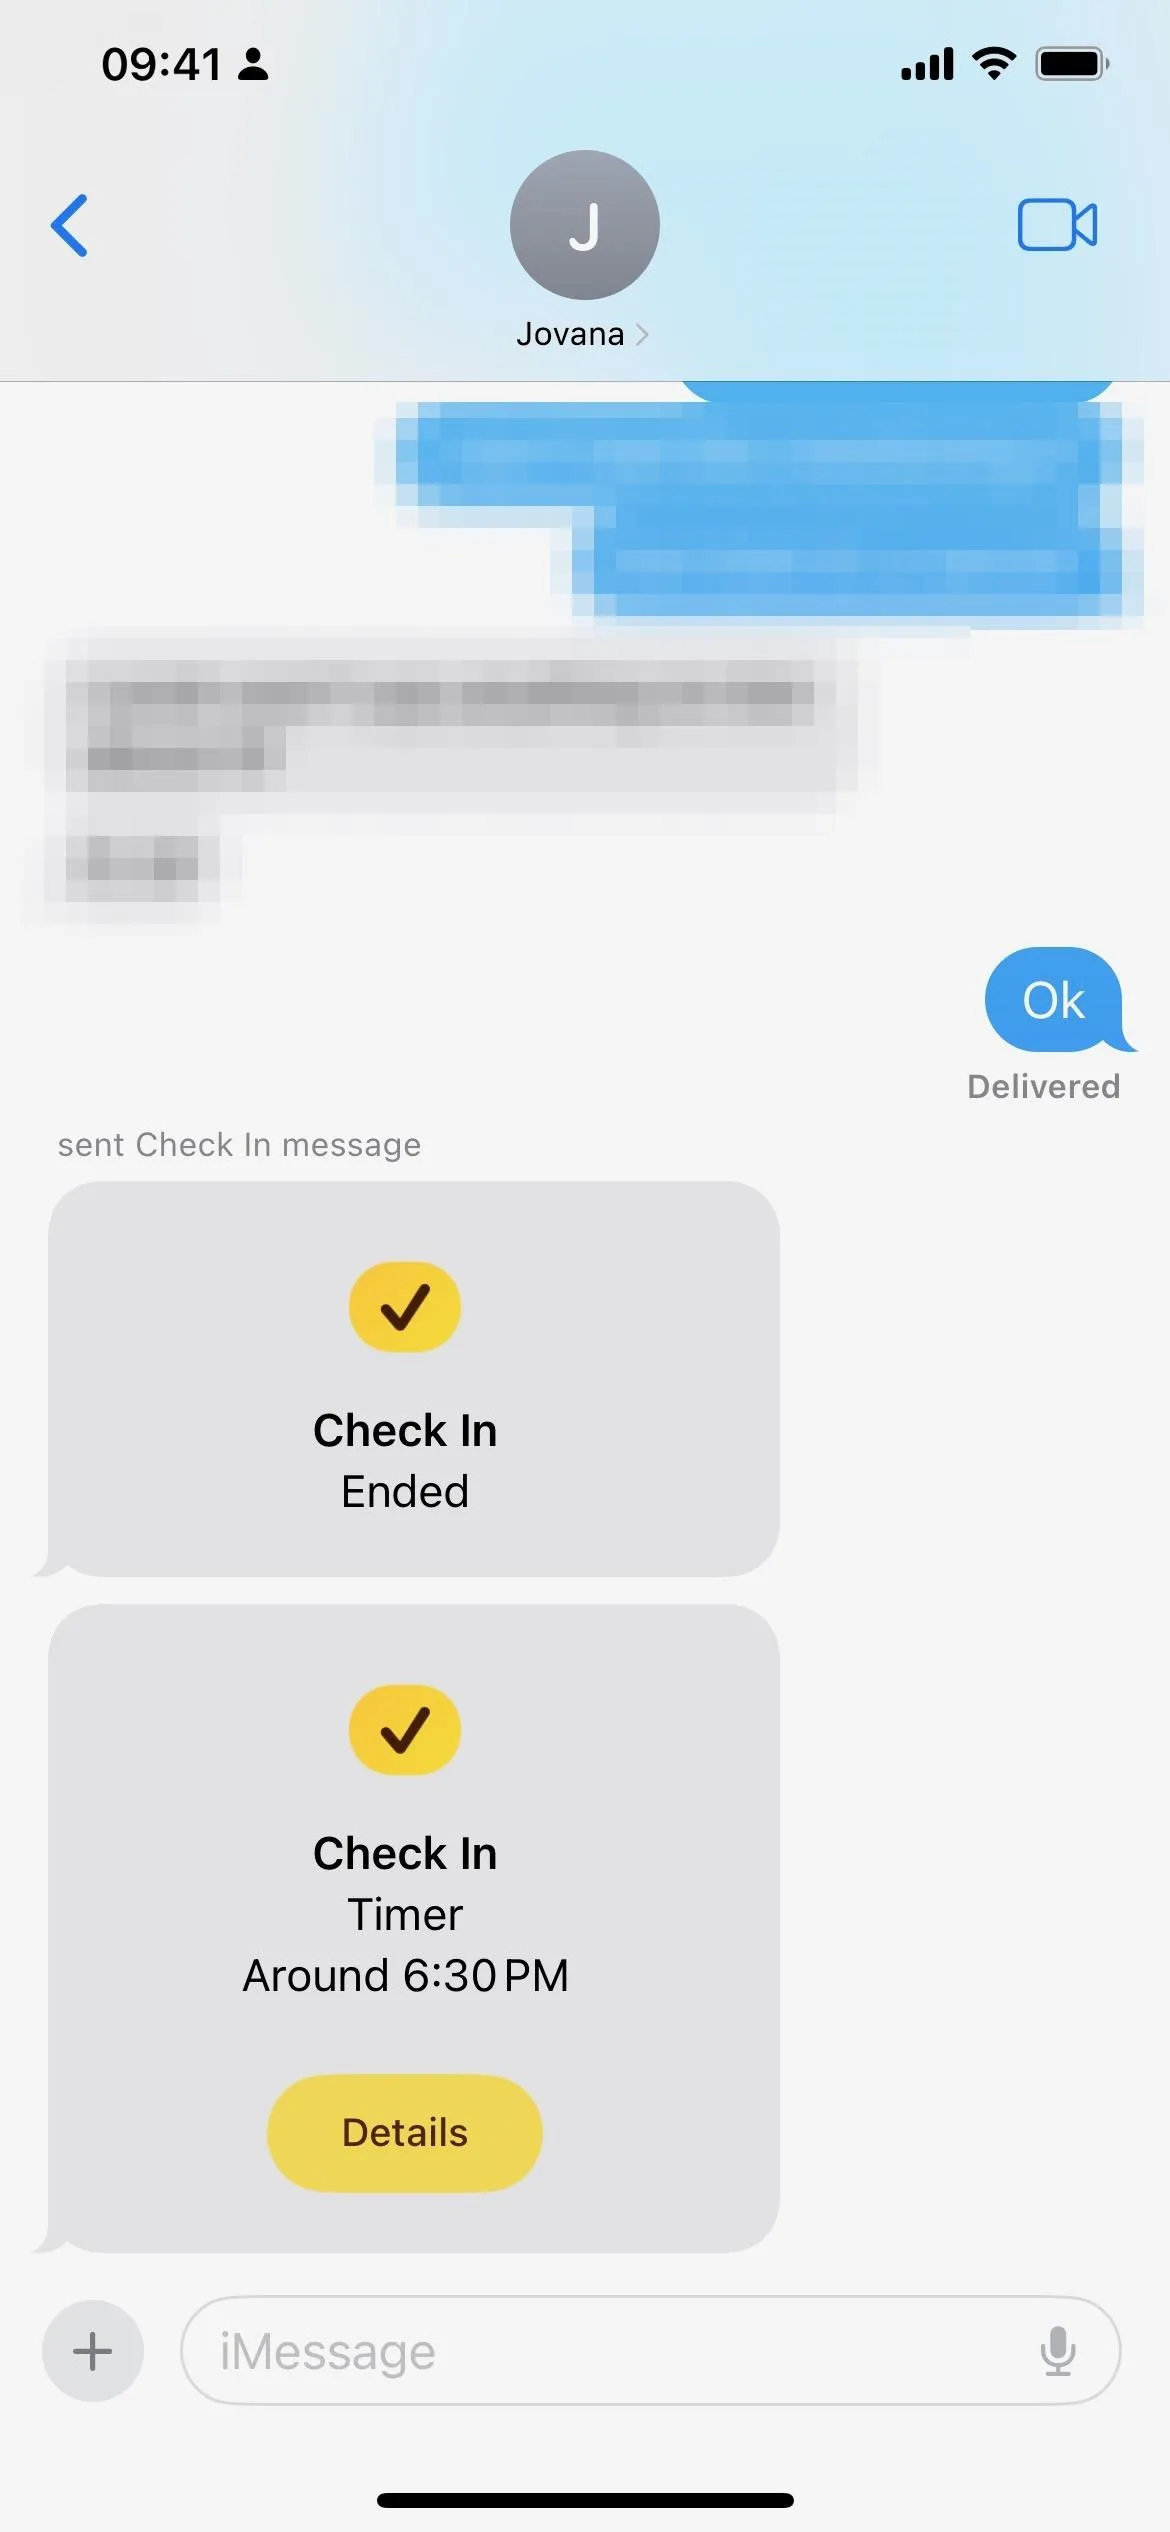
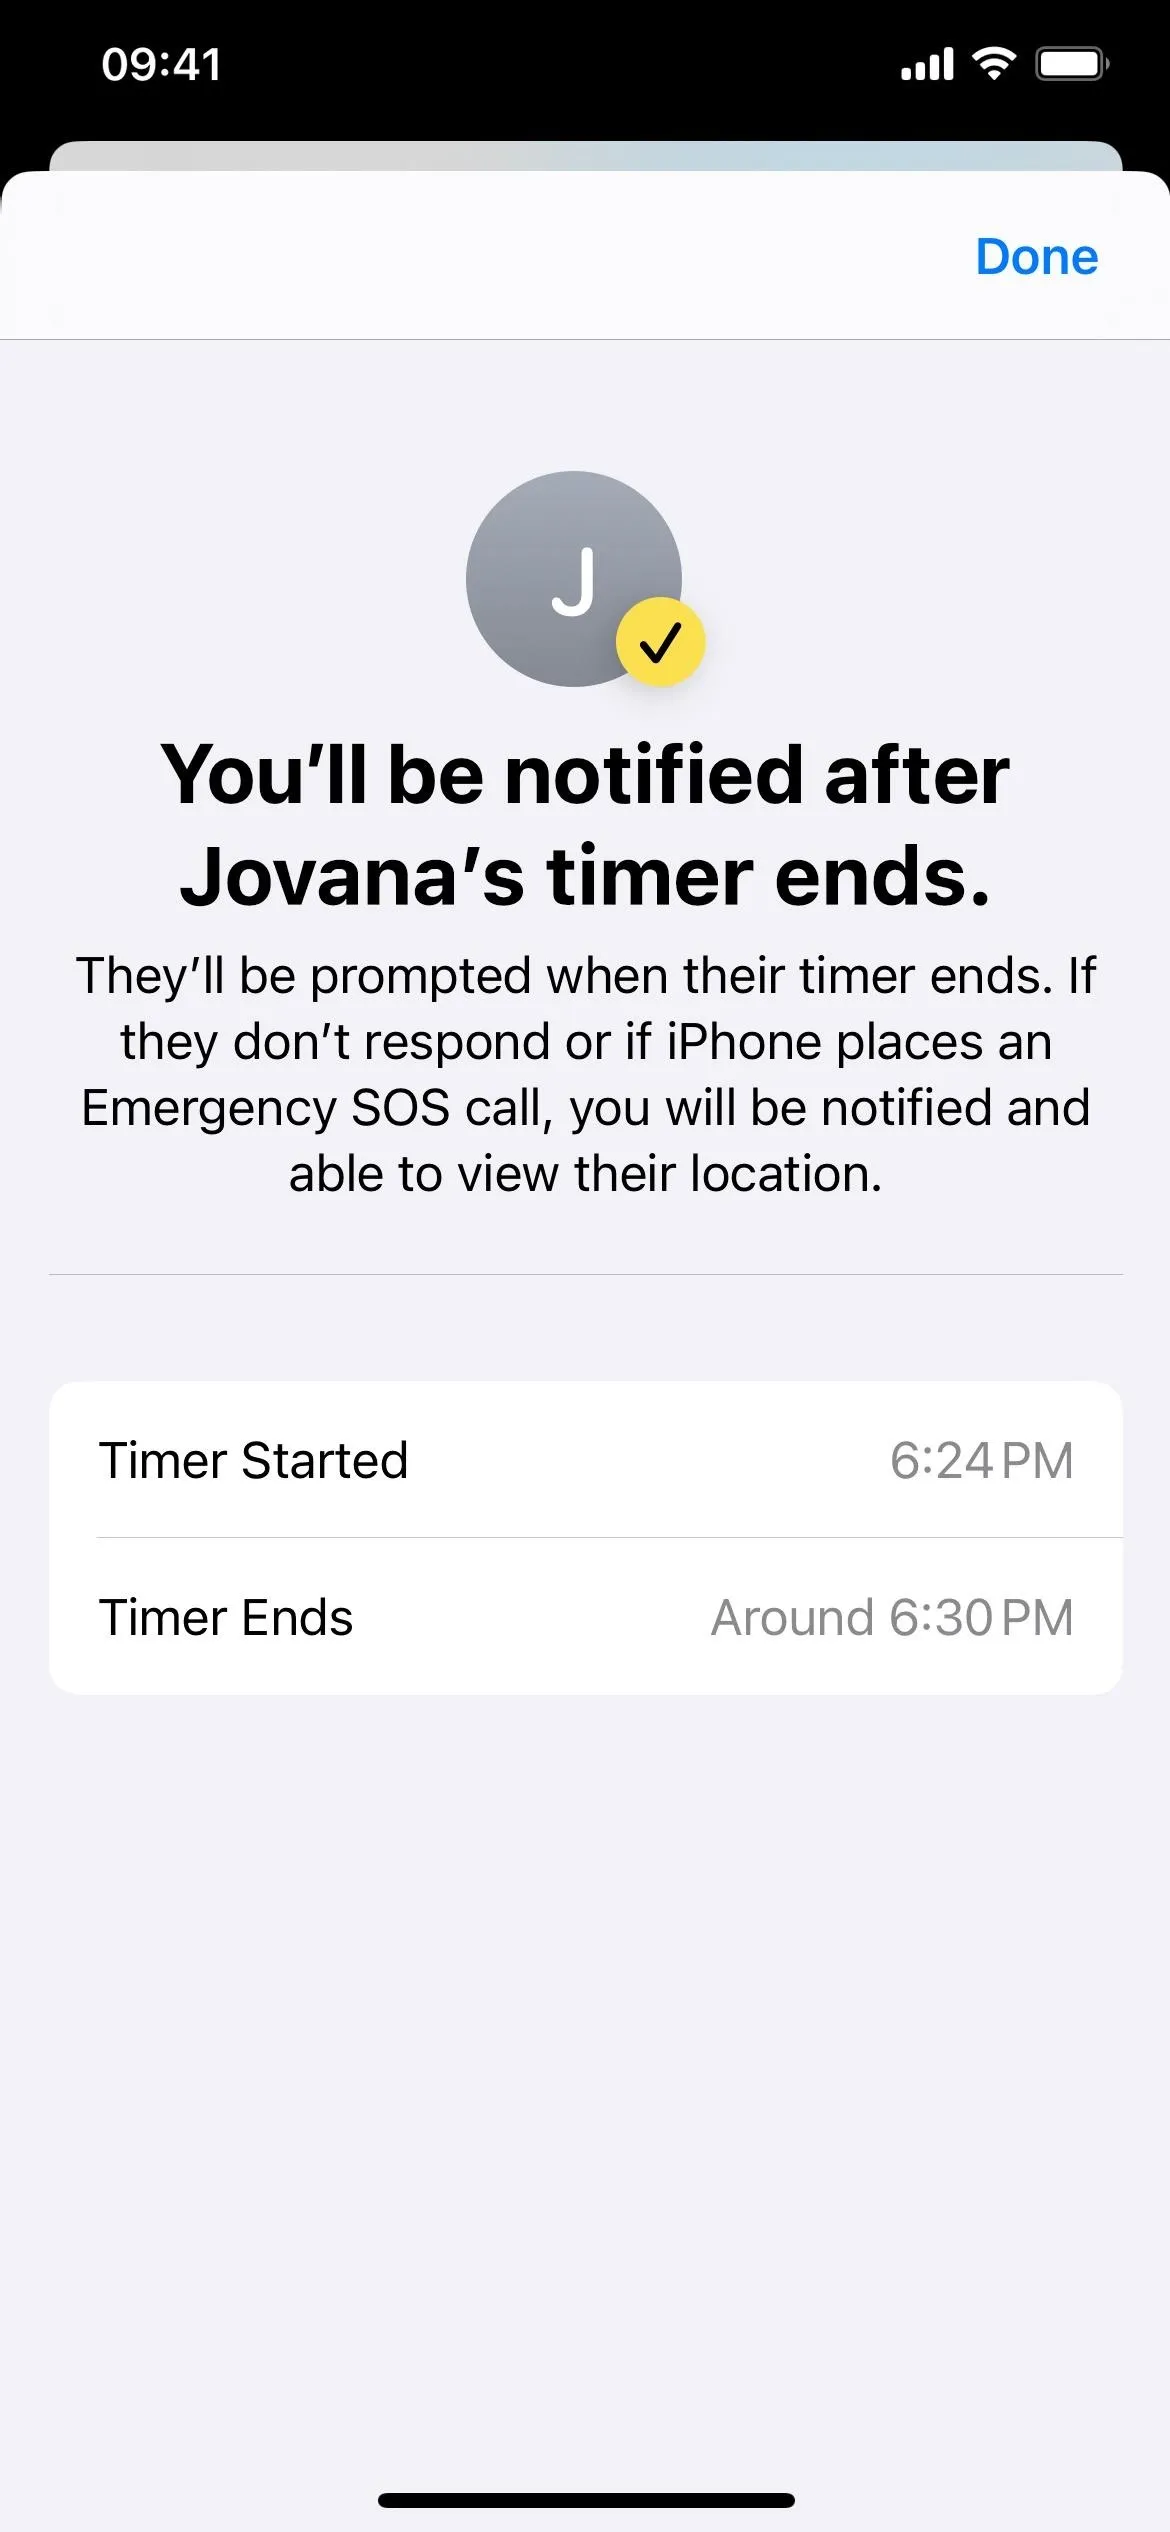
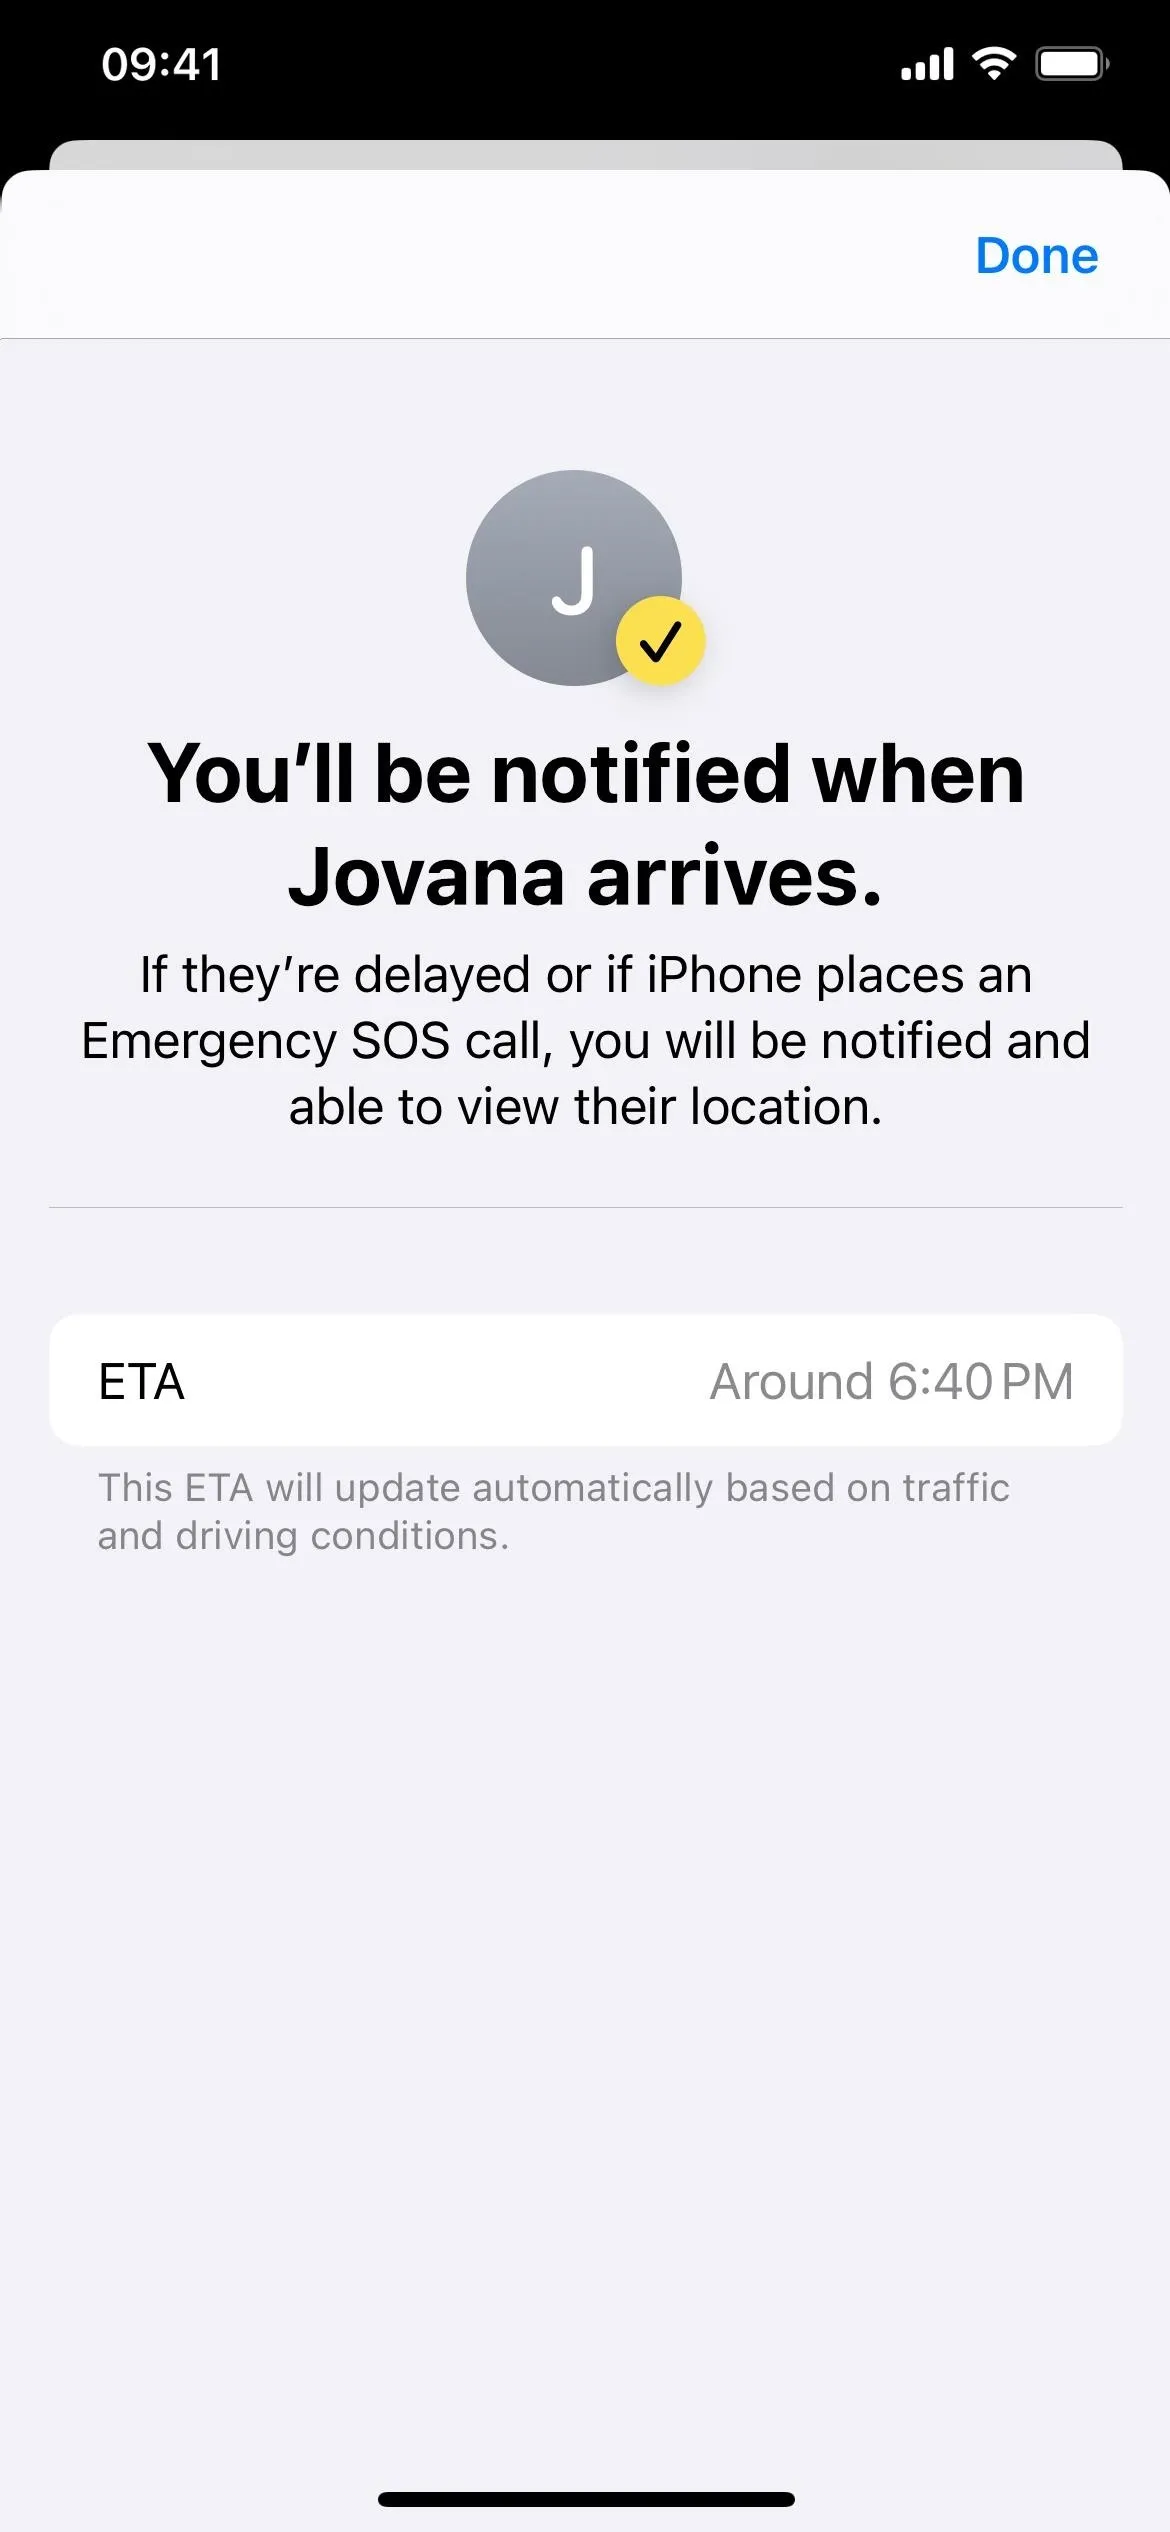
On the recipient's side, they'll see a Check In box in Messages that will update as needed. When everything is going well, it will show them the address and ETA (if you chose an address) or just the ETA (if you chose a timer), and they can tap "Details" to see more information.
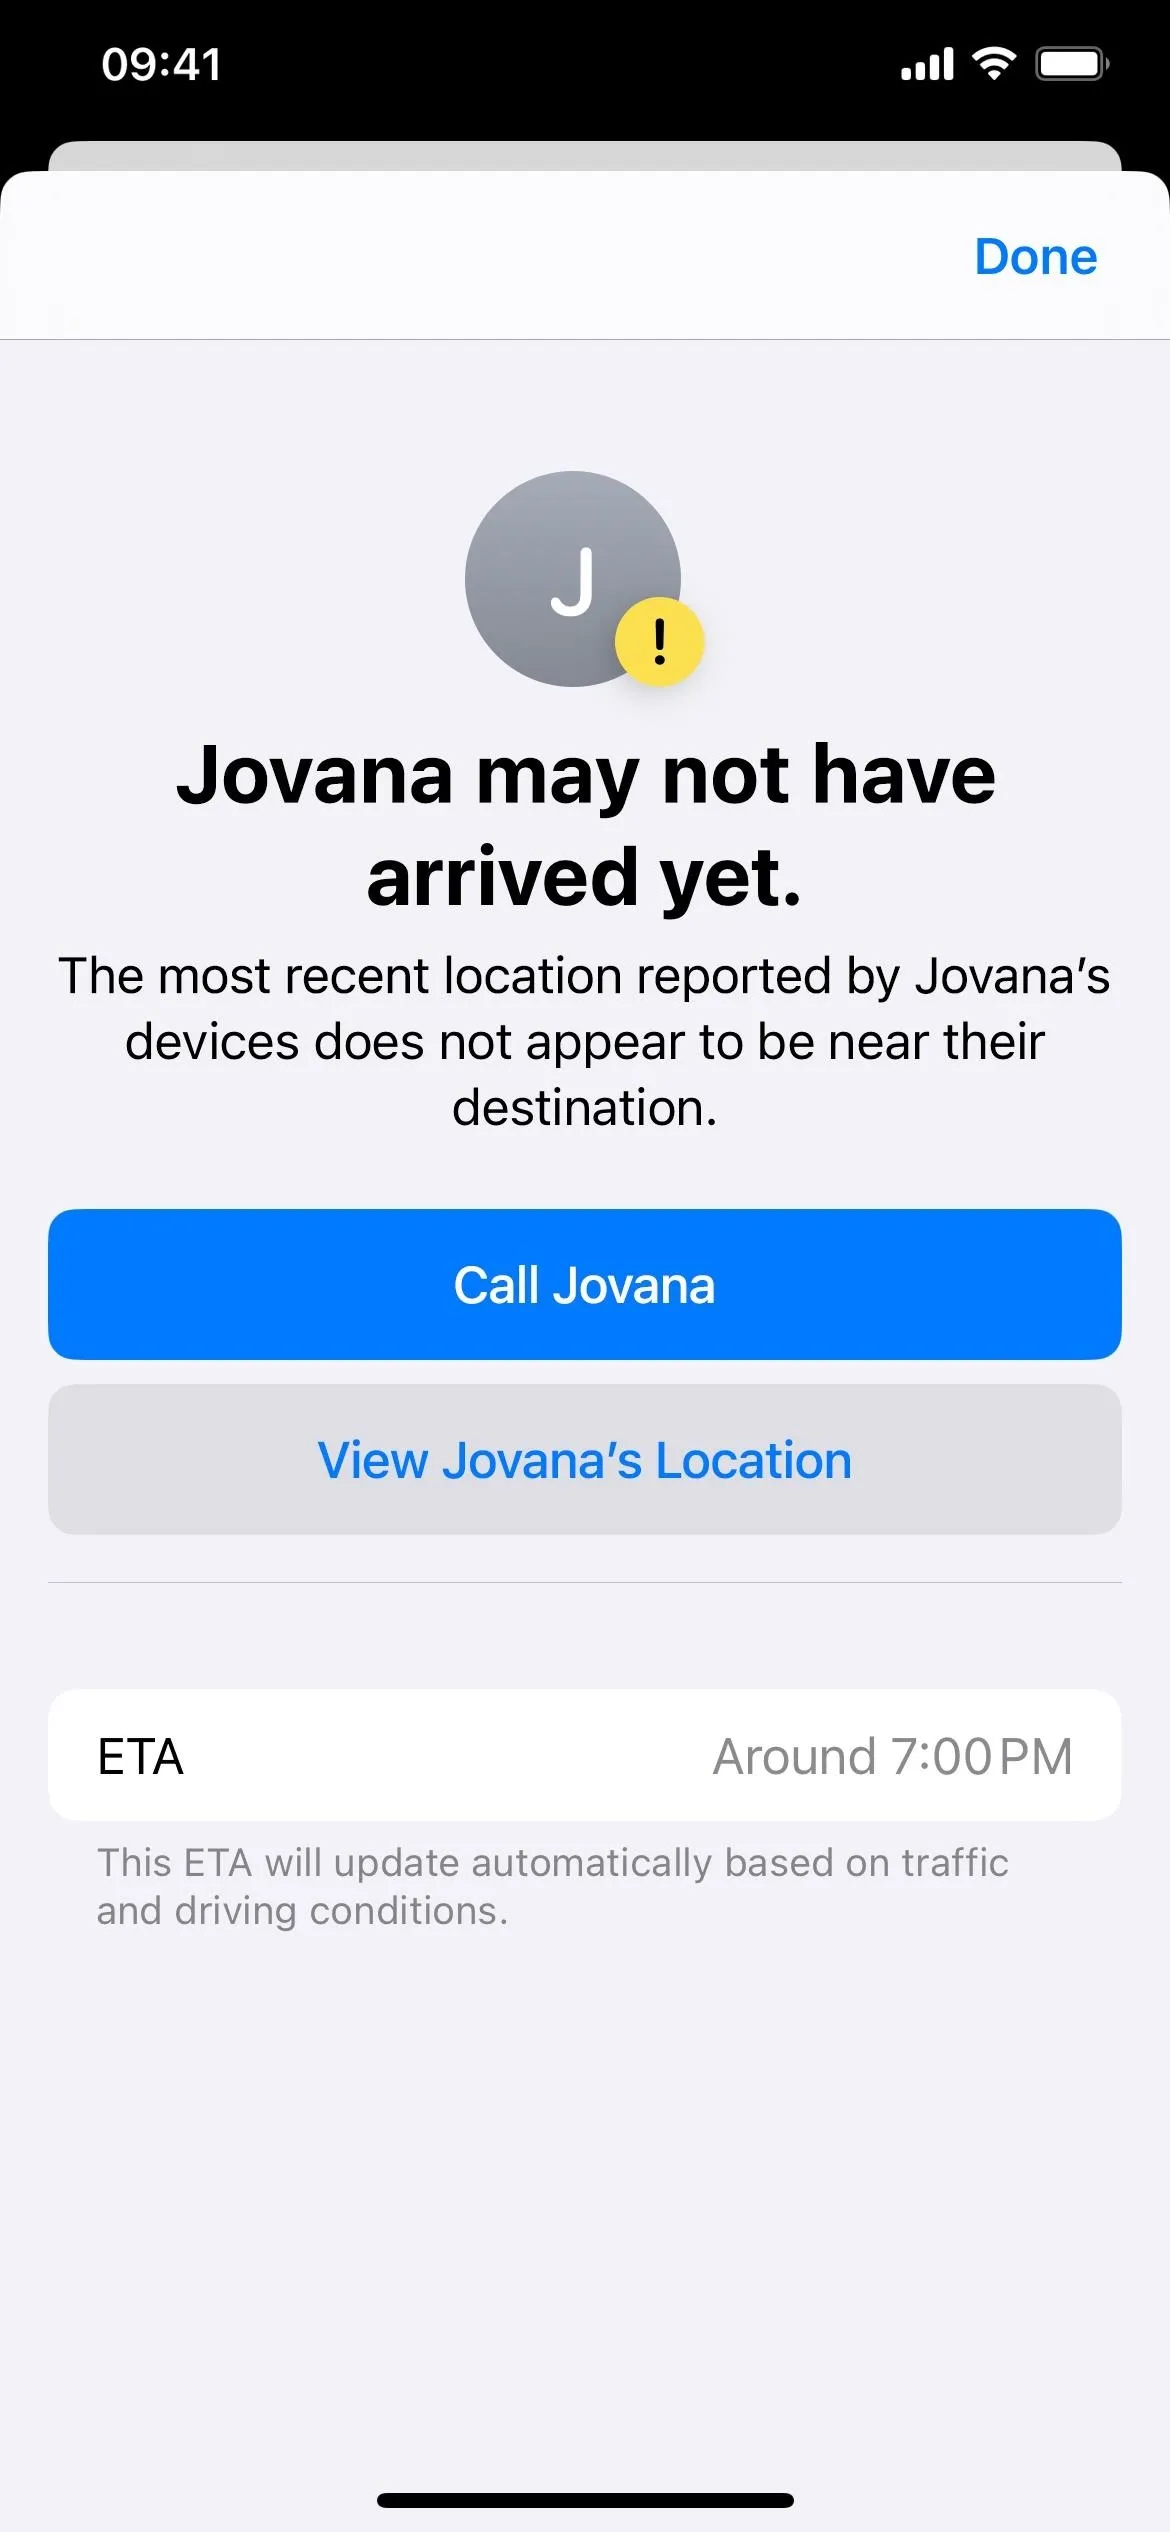
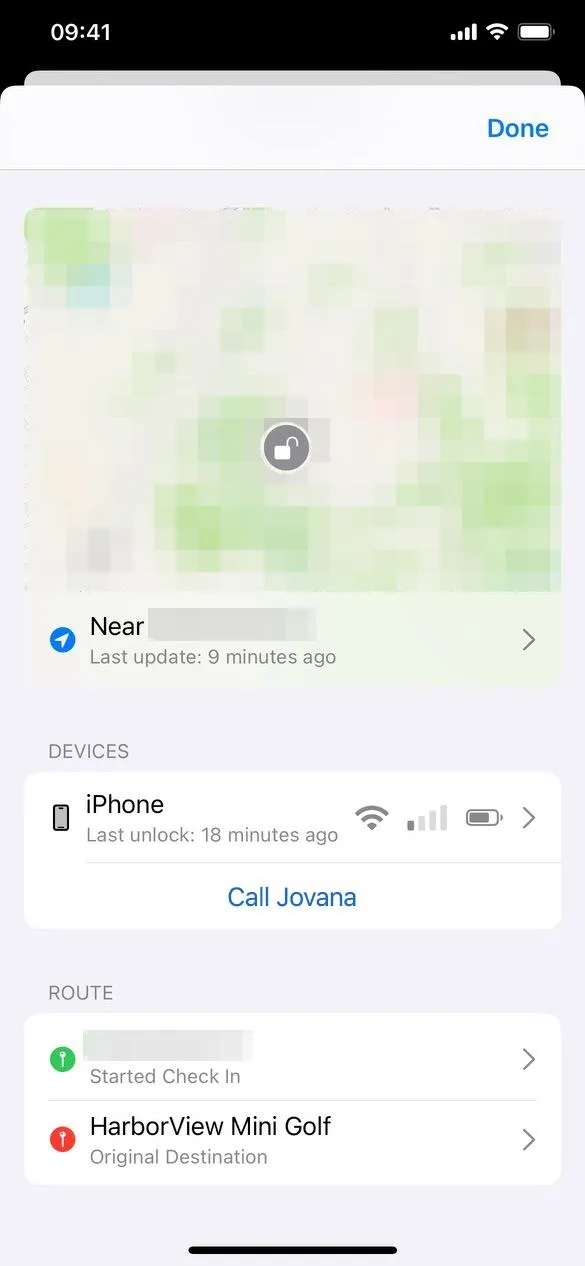
When you don't respond to a prompt, and it expires, their Check In box in Messages will change to "Has not arrived" with a link for more details. They can then call you, see your location, etc.

Cover photo by Justin Meyers/Gadget Hacks; screenshots by Jovana Naumovski/Gadget Hacks


Comments
Be the first, drop a comment!