


Apple introduced Portrait Mode with the iPhone 7 Plus, a feature which utilized the iPhone's dual cameras to create a shallow depth of field around a subject. This effect replicates the look of DSLR cameras, making your photos look more professional. Apple, of course, carries Portrait Mode to the iPhone X and iPhone 8 Plus in iOS 11, however, with it comes a twist — Portrait Lighting.
Portrait Lighting analyzes the scene around your subject, allowing you to manipulate the lighting without the need for any additional tools. You can make your photo appear as if you shot it in a studio under dramatic lighting conditions, while in reality, you simply took a picture of your friend outside.
So, how can you get started today? Keep reading below to find out.
Background
Now, keep in mind — this feature only works for iPhone X and iPhone 8 Plus. Even though the iPhone 7 Plus has Portrait Mode, it is not compatible with Portrait Lighting. You'll have to take that one up with Apple.
It's also worth noting that Portrait Lighting is currently in beta, just like Portrait Mode was when first released last year. Your pictures may look great, or they make come out ... half-baked. It's all in the fun of the beta.
Getting Started
For those with an iPhone 8 Plus or iPhone X, you either can 3D Touch the Camera app and select "Take Portrait," or open the Camera app, then switch to Portrait mode by swiping left or right.
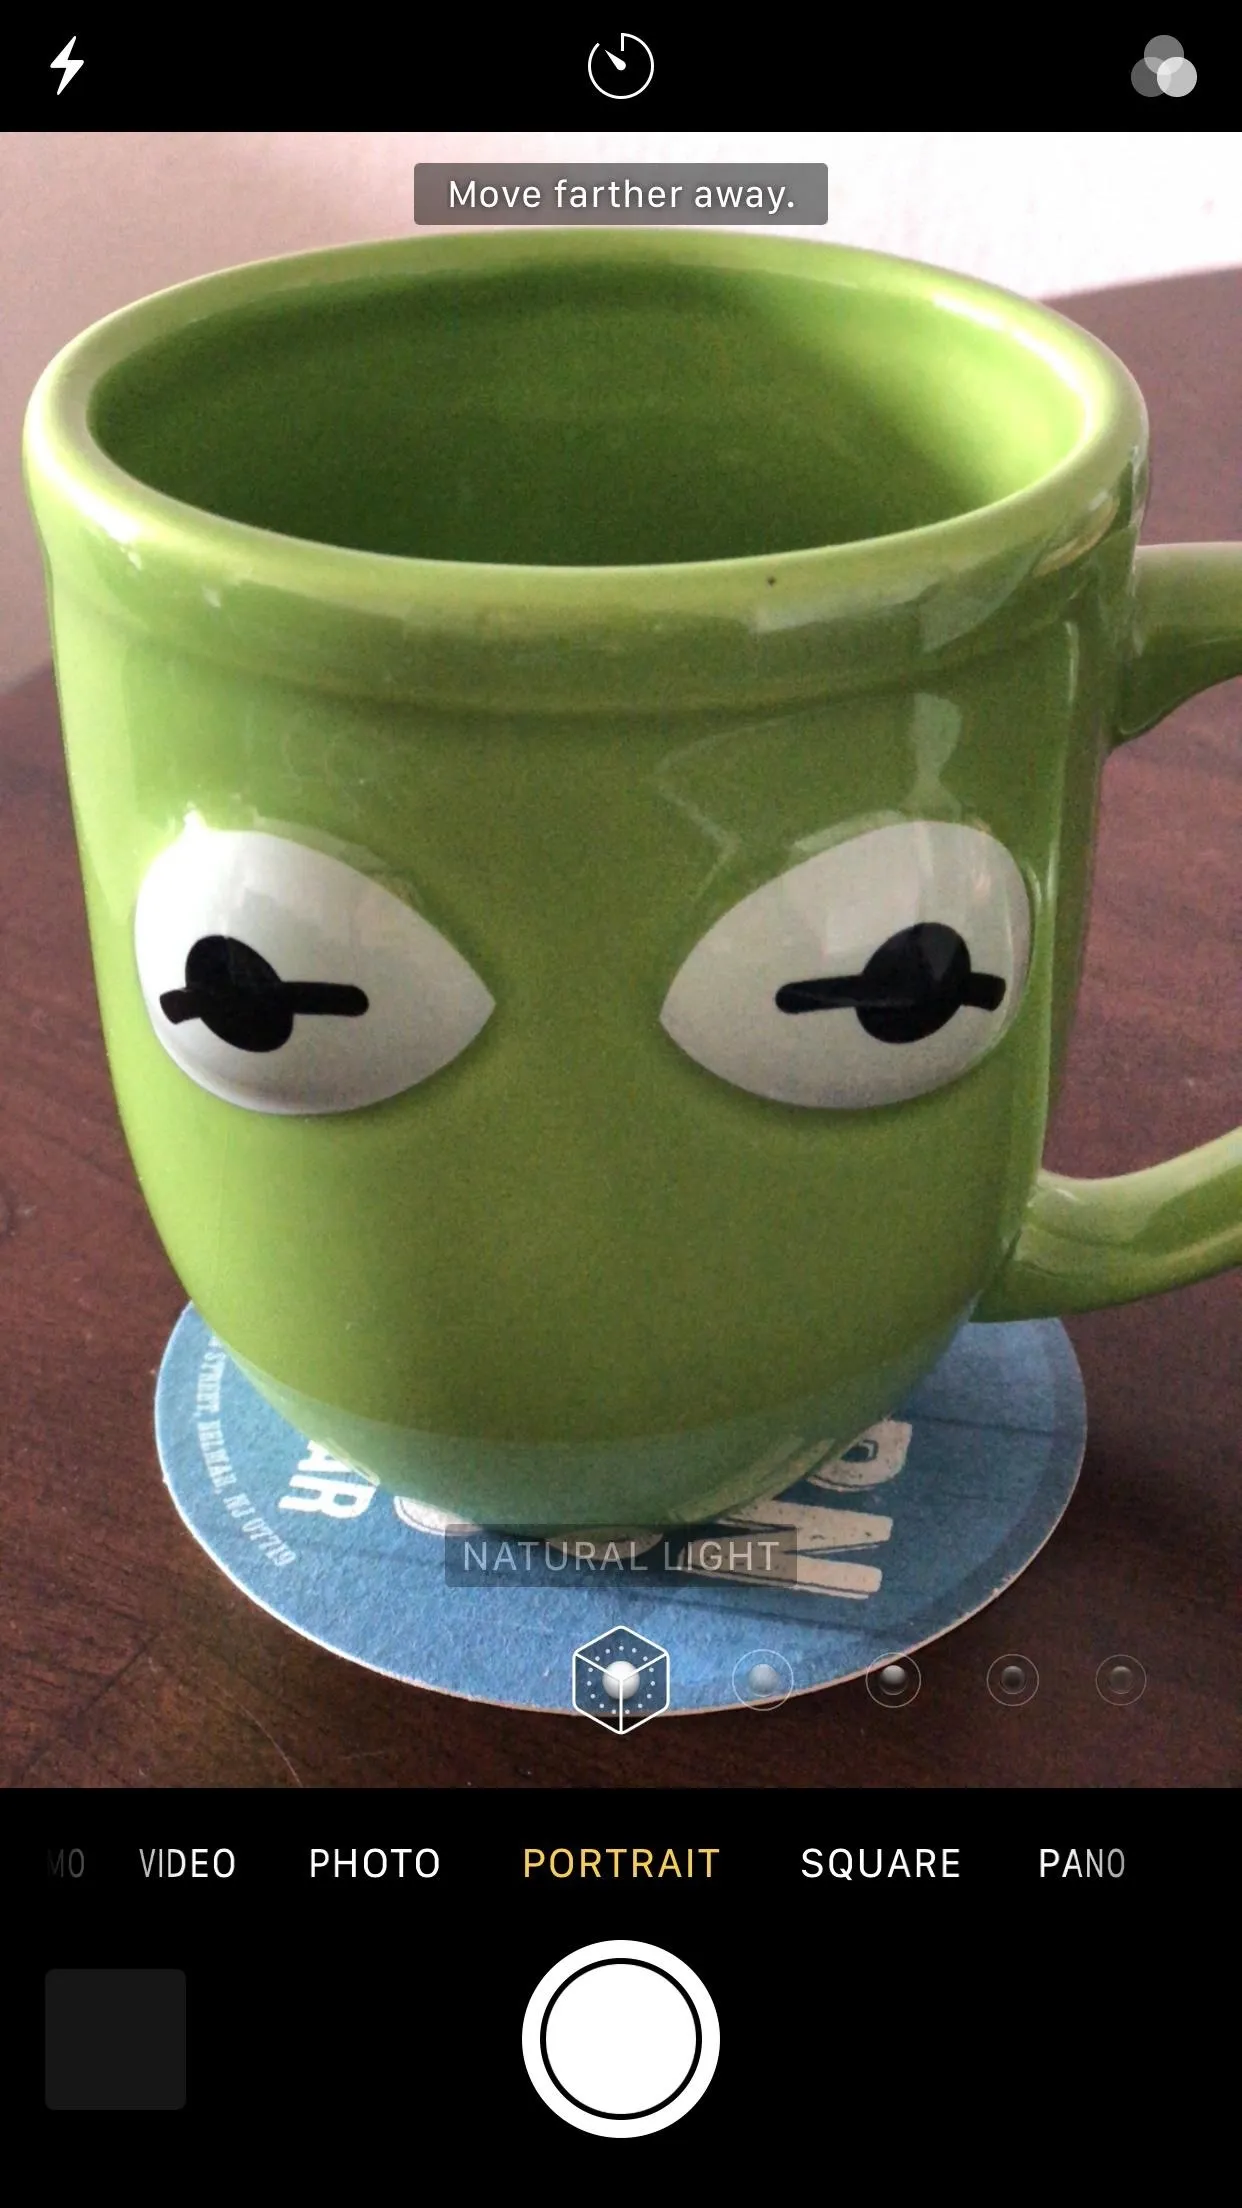
Once Portrait Mode is on, and you point your camera at your subject, your iPhone will begin giving you directions, such as to move closer to or further away from the subject. It's an effective way to make sure you get the most optimal results out of your picture.
Lighting Modes
Once you've selected Portrait as your camera mode, you'll have five Portrait Lighting modes to choose from. These can be selected from the menu at the bottom of the viewfinder (when your phone is oriented vertically):
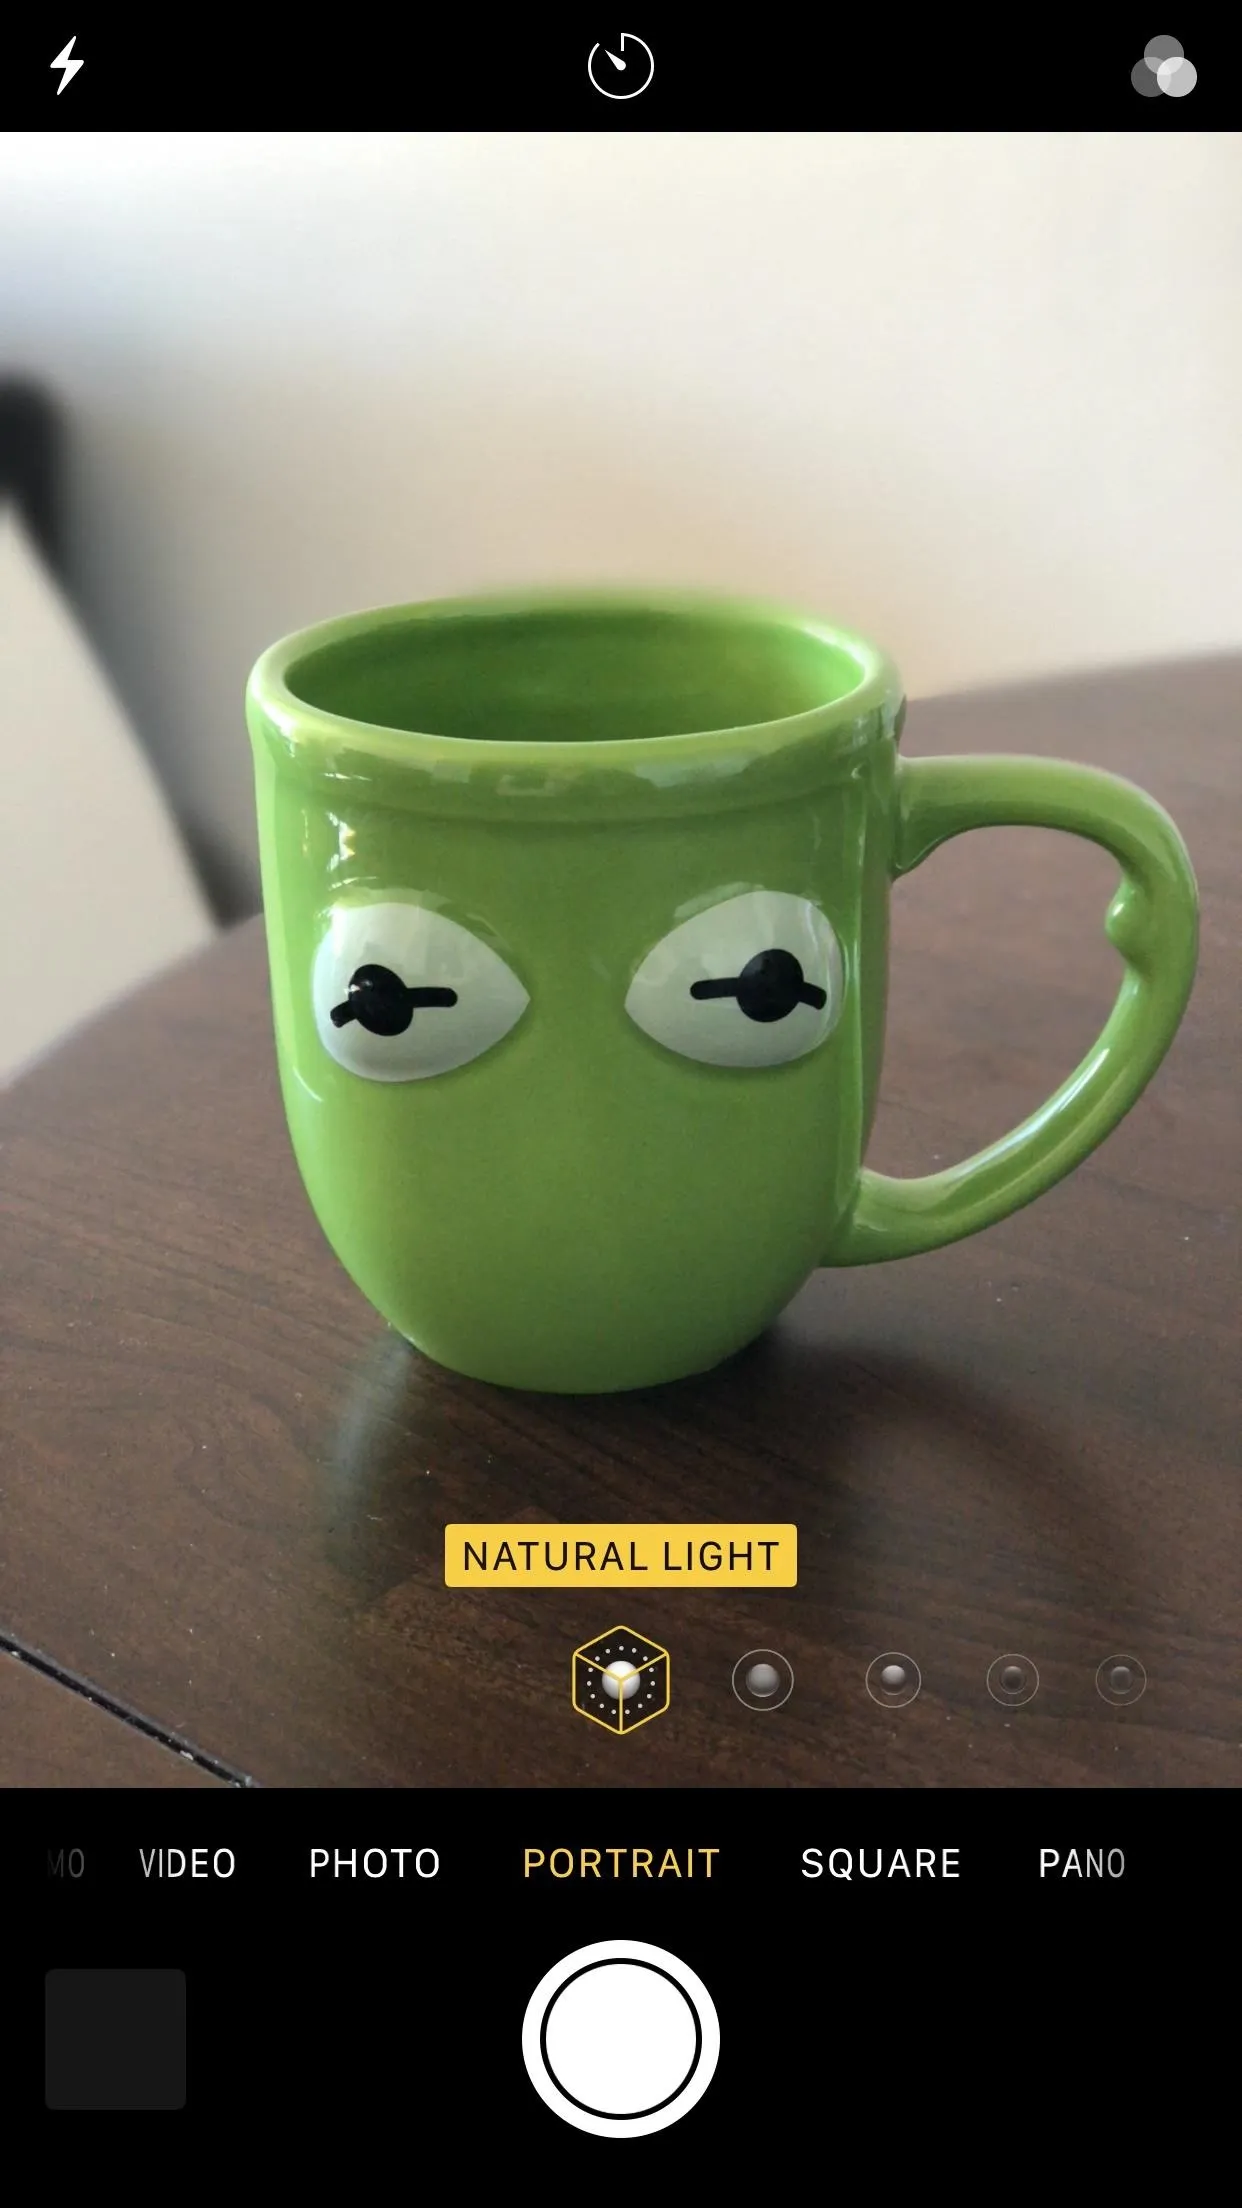
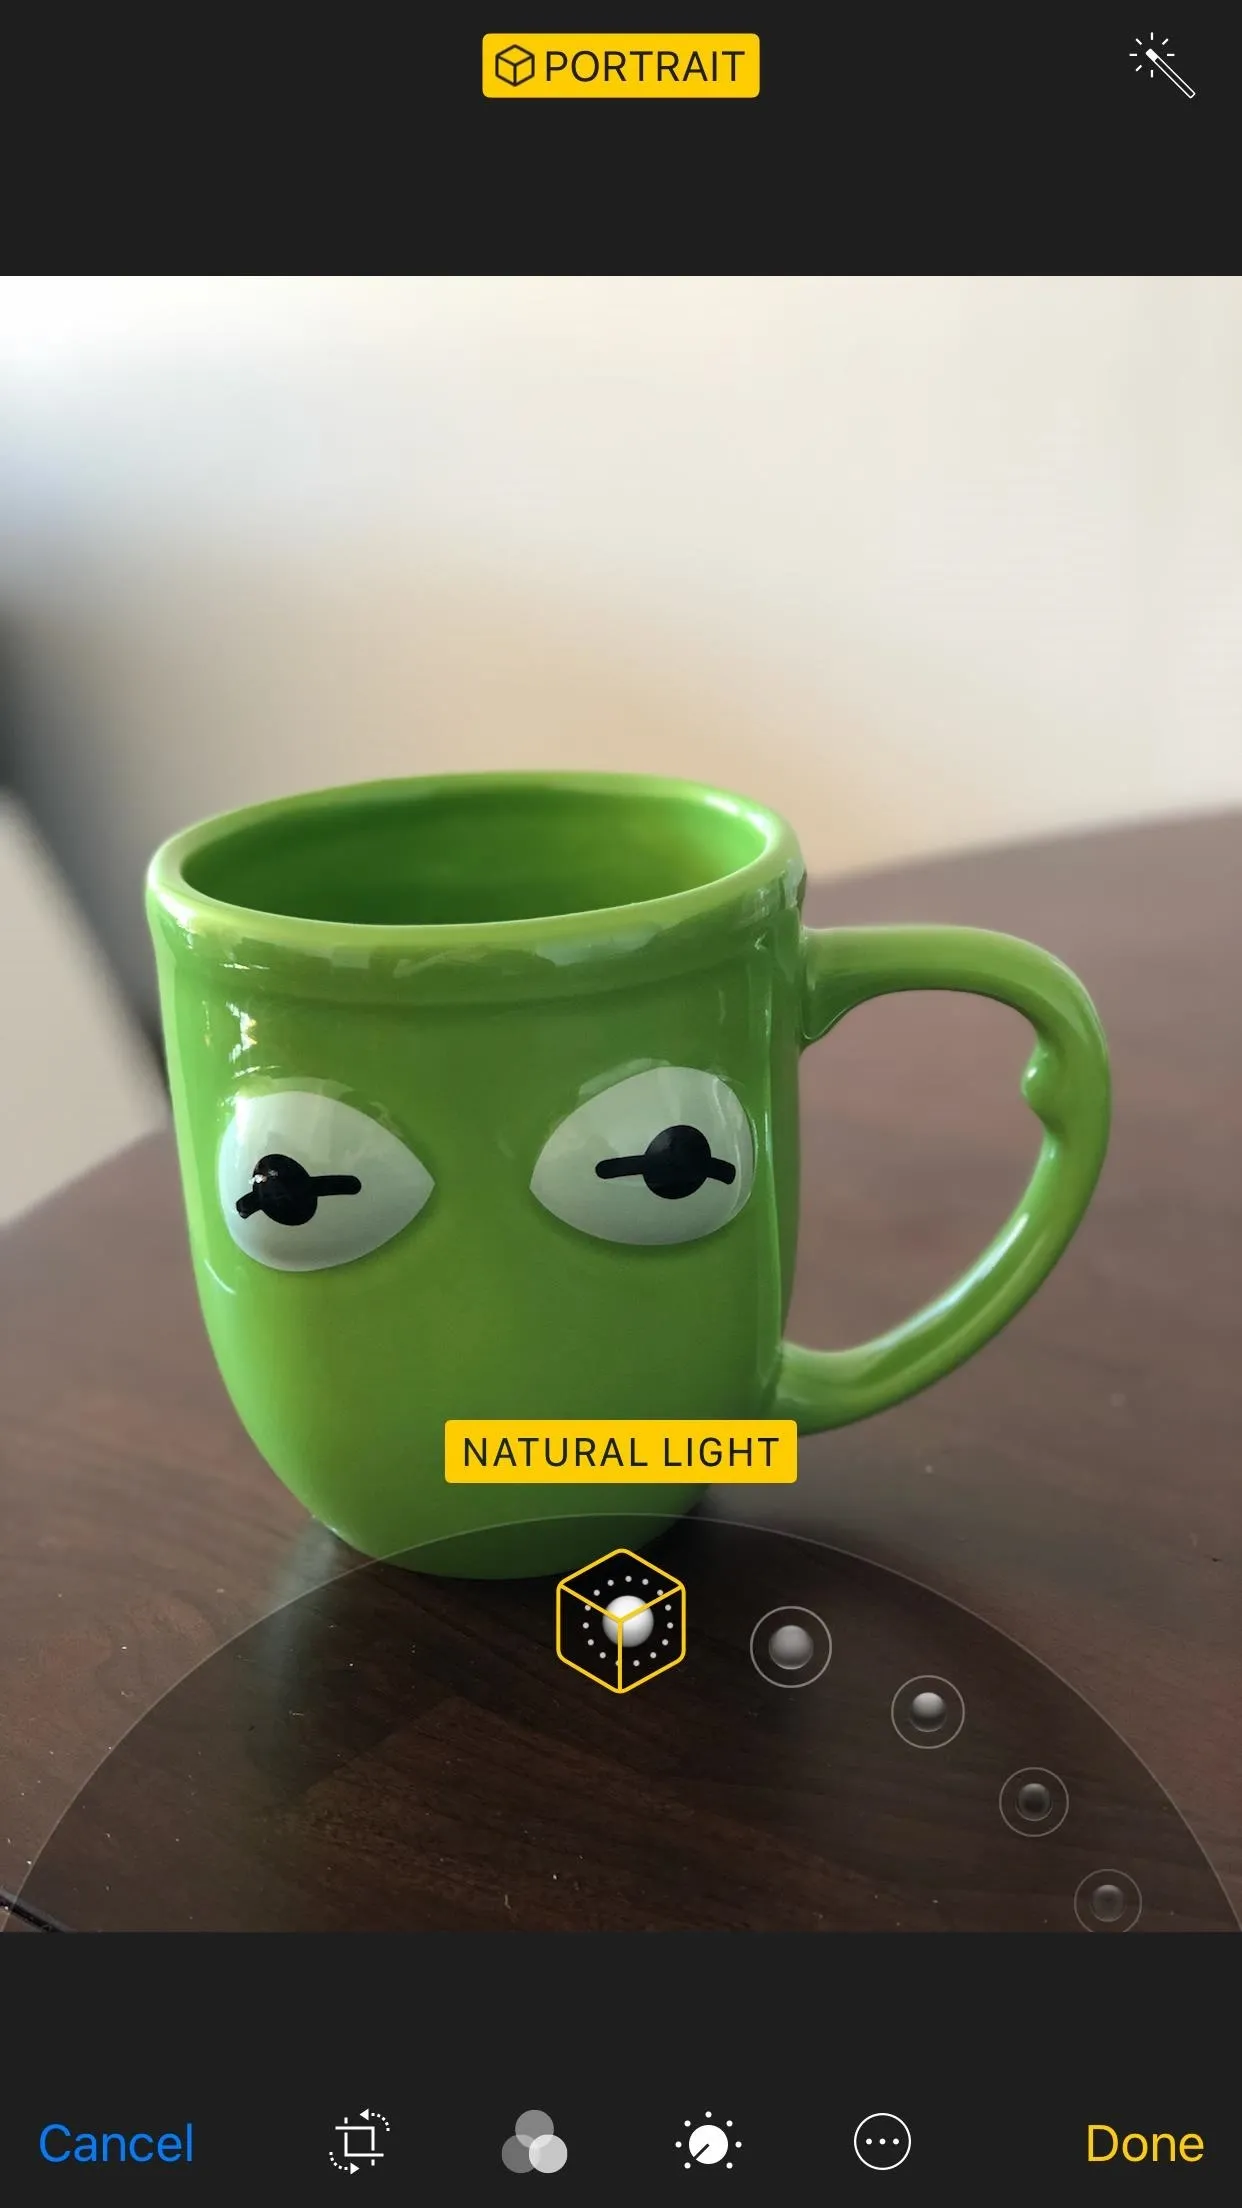
- Natural Light: This setting is the typical Portrait mode you'd find on your iPhone 7 Plus. It doesn't change the lighting anymore than the camera normally would.
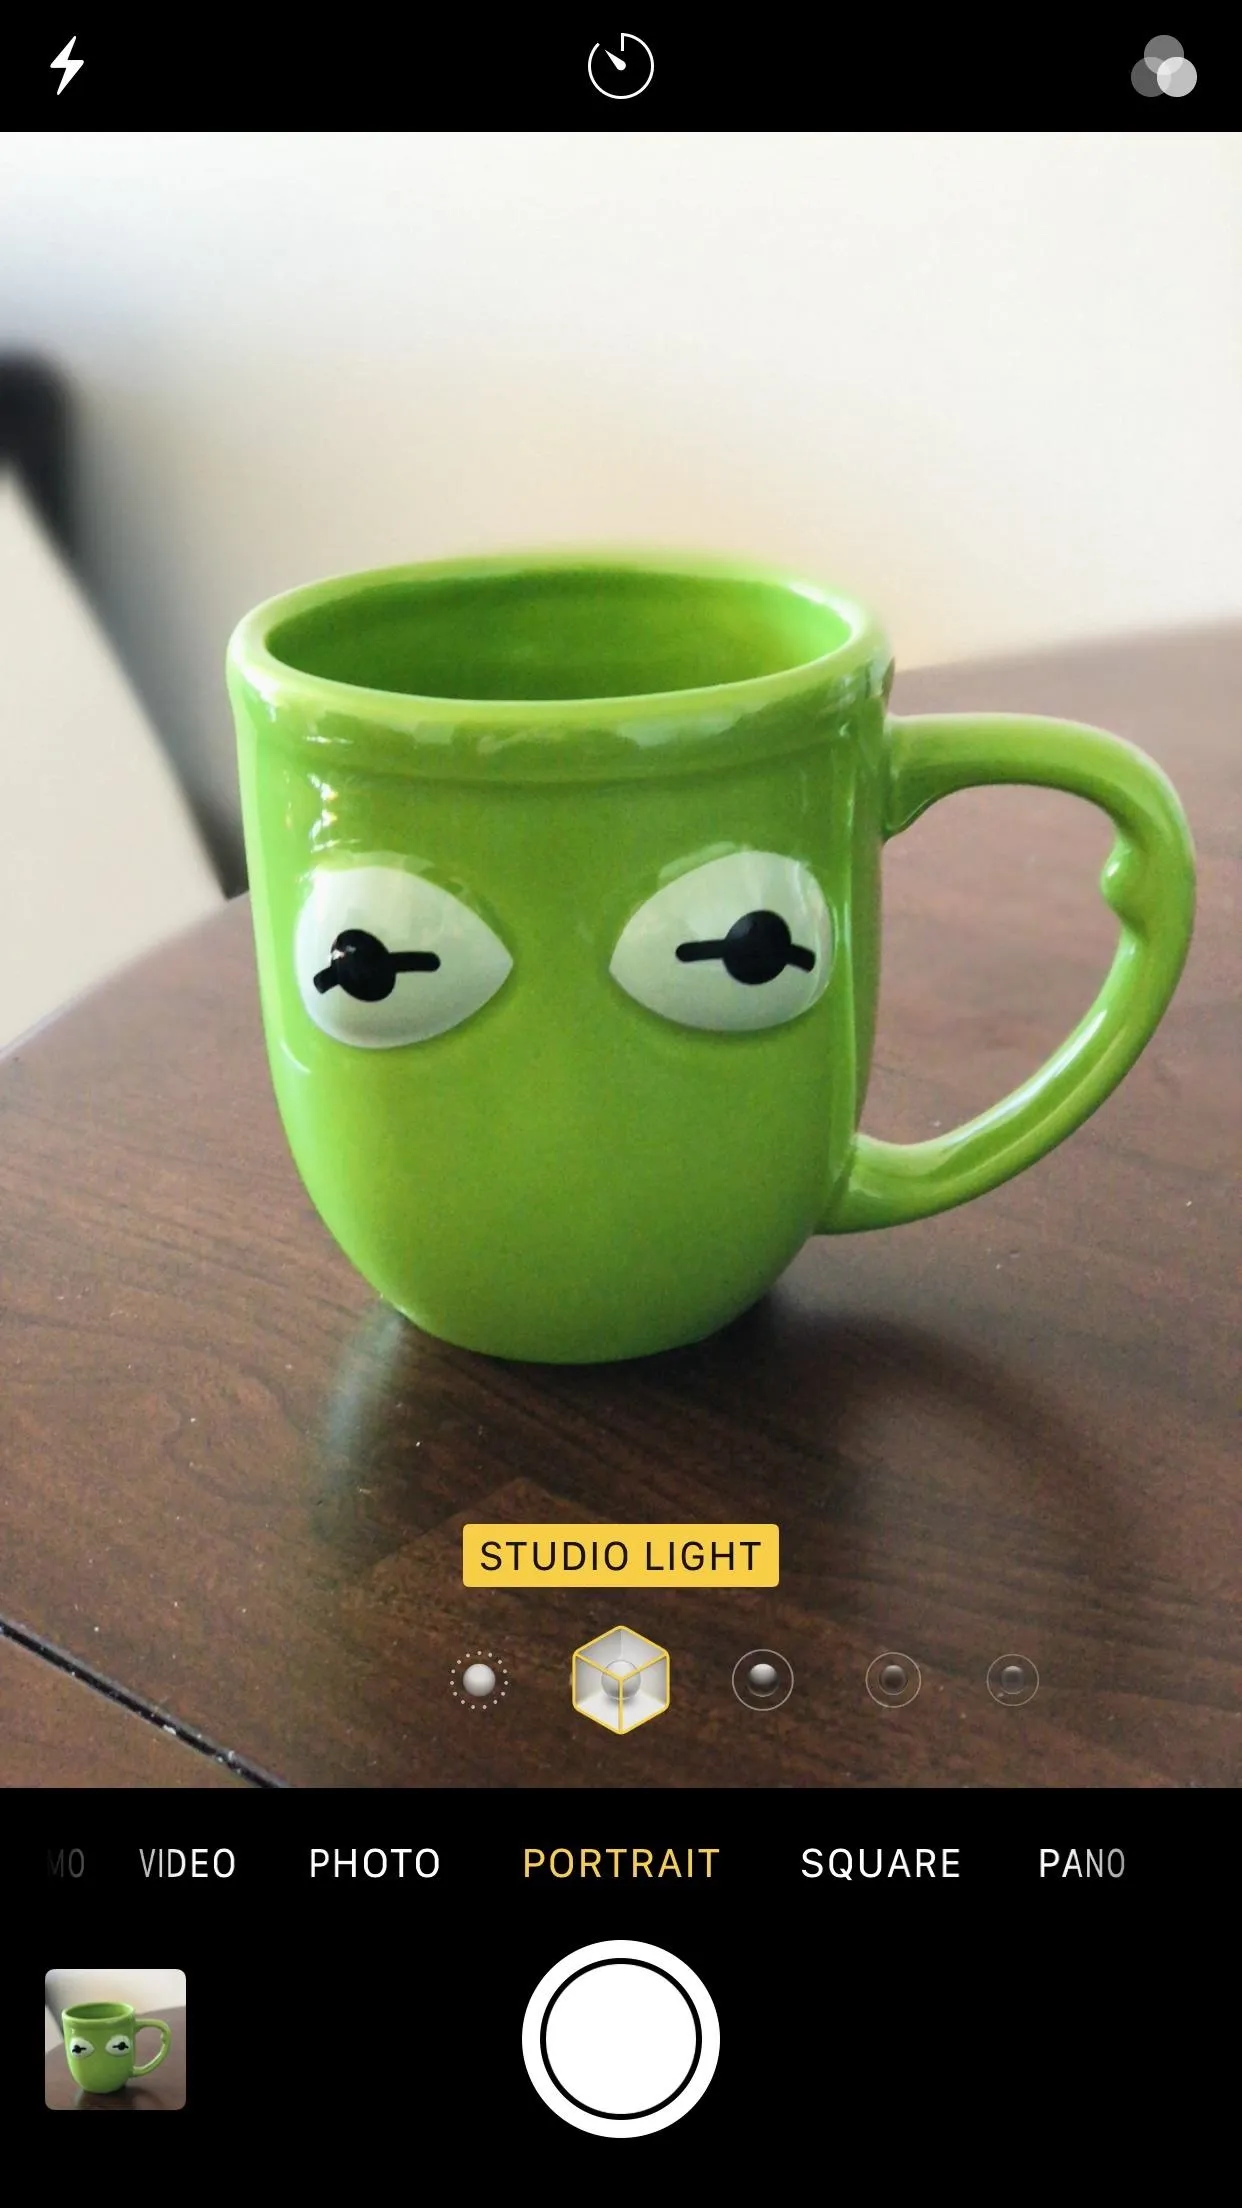
- Studio Light This setting brightens up the subject in the picture, as if your subject is under a bright, studio light.
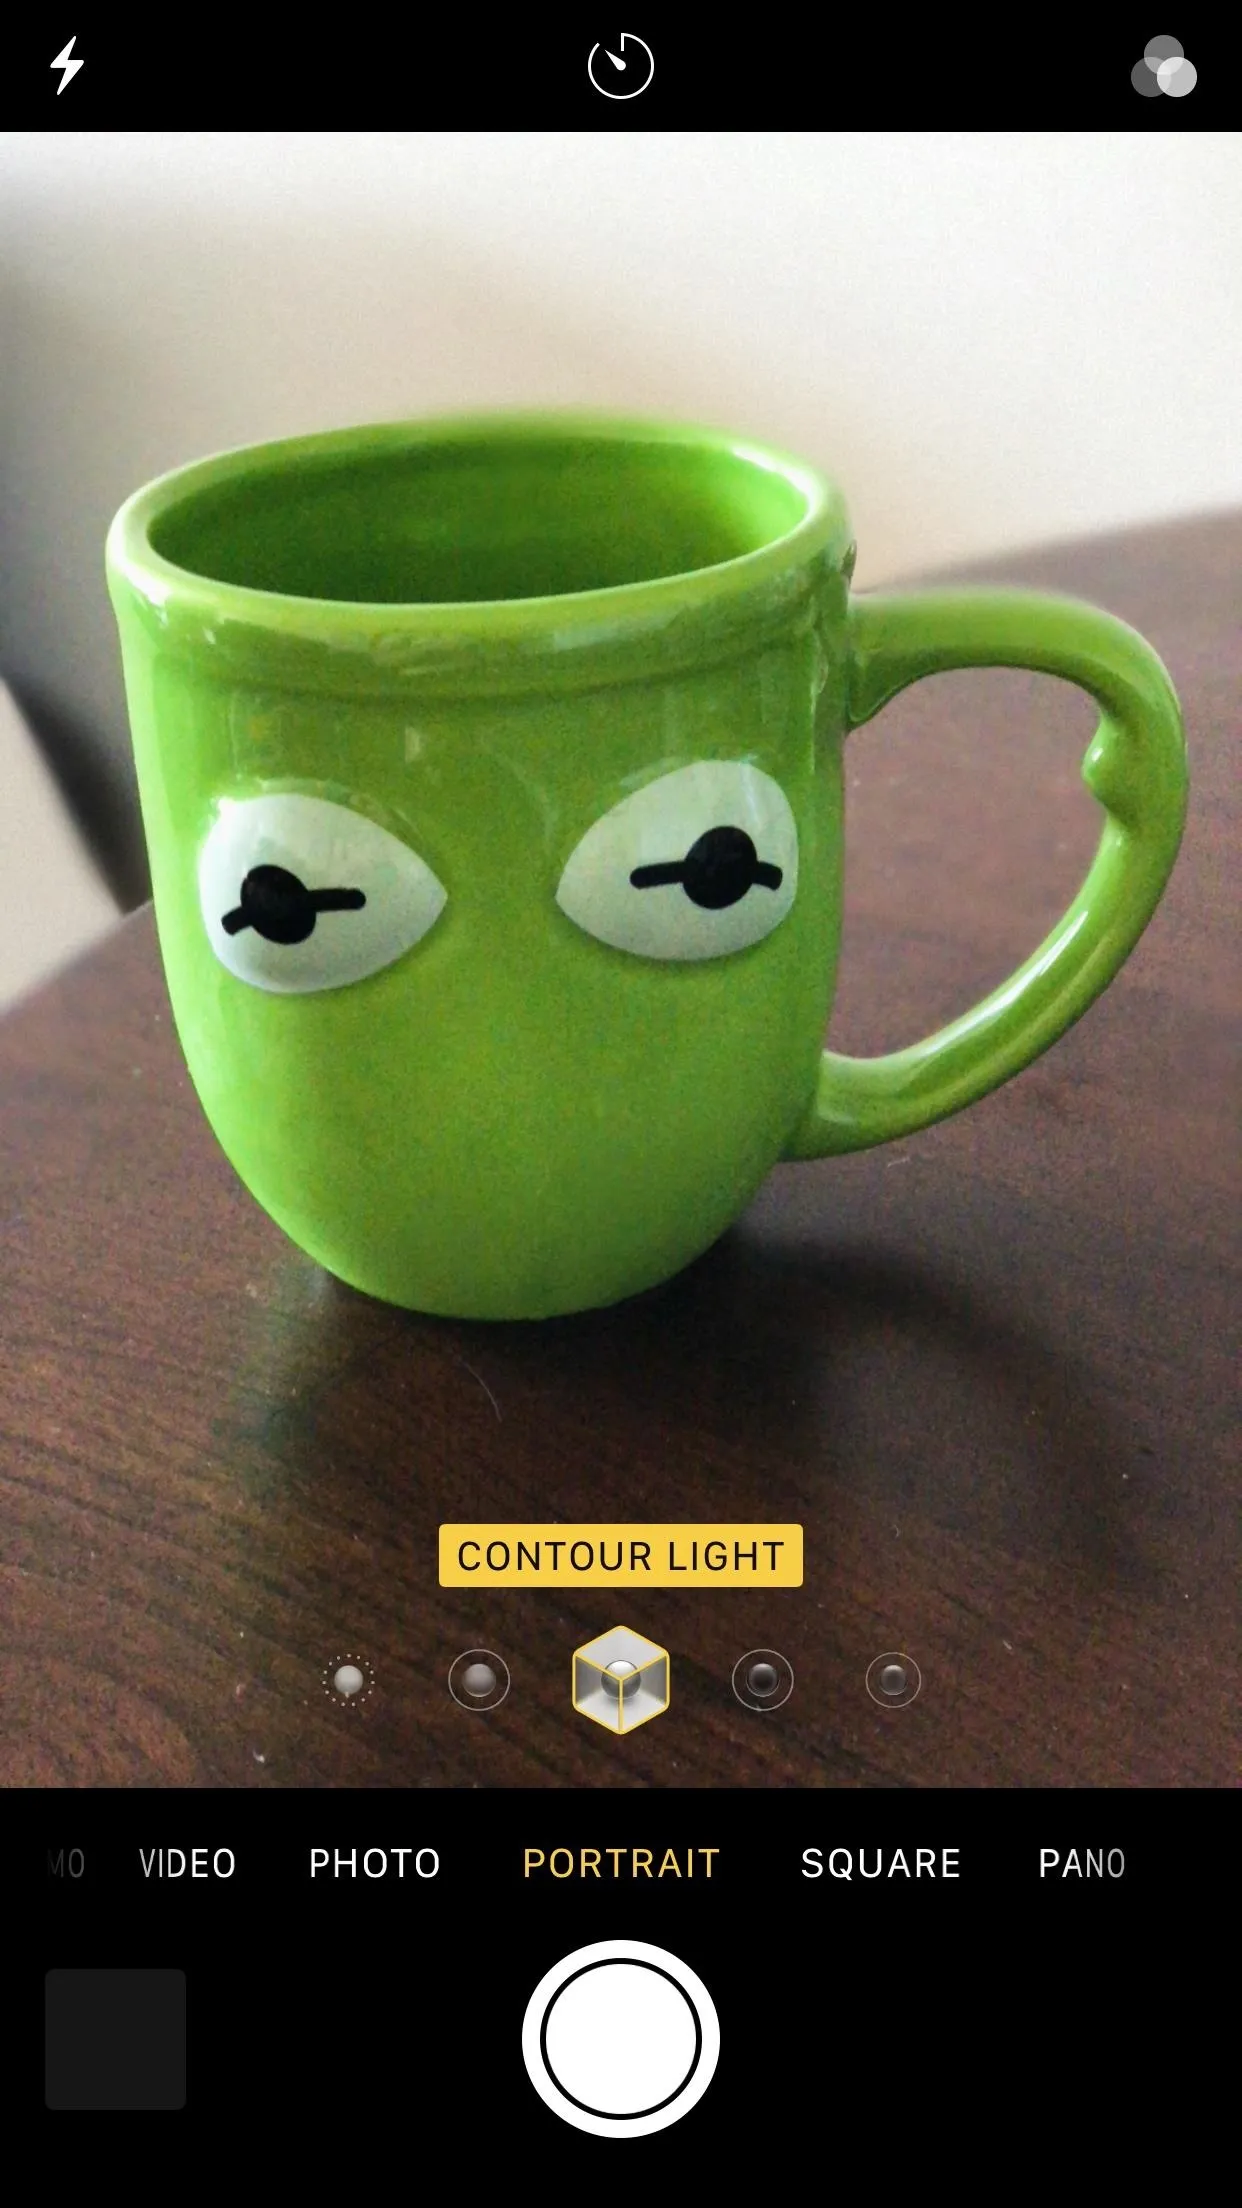
- Contour Light: Similar to studio light, except contour light darkens the light around the edges of the subject, creating a more dramatic look.
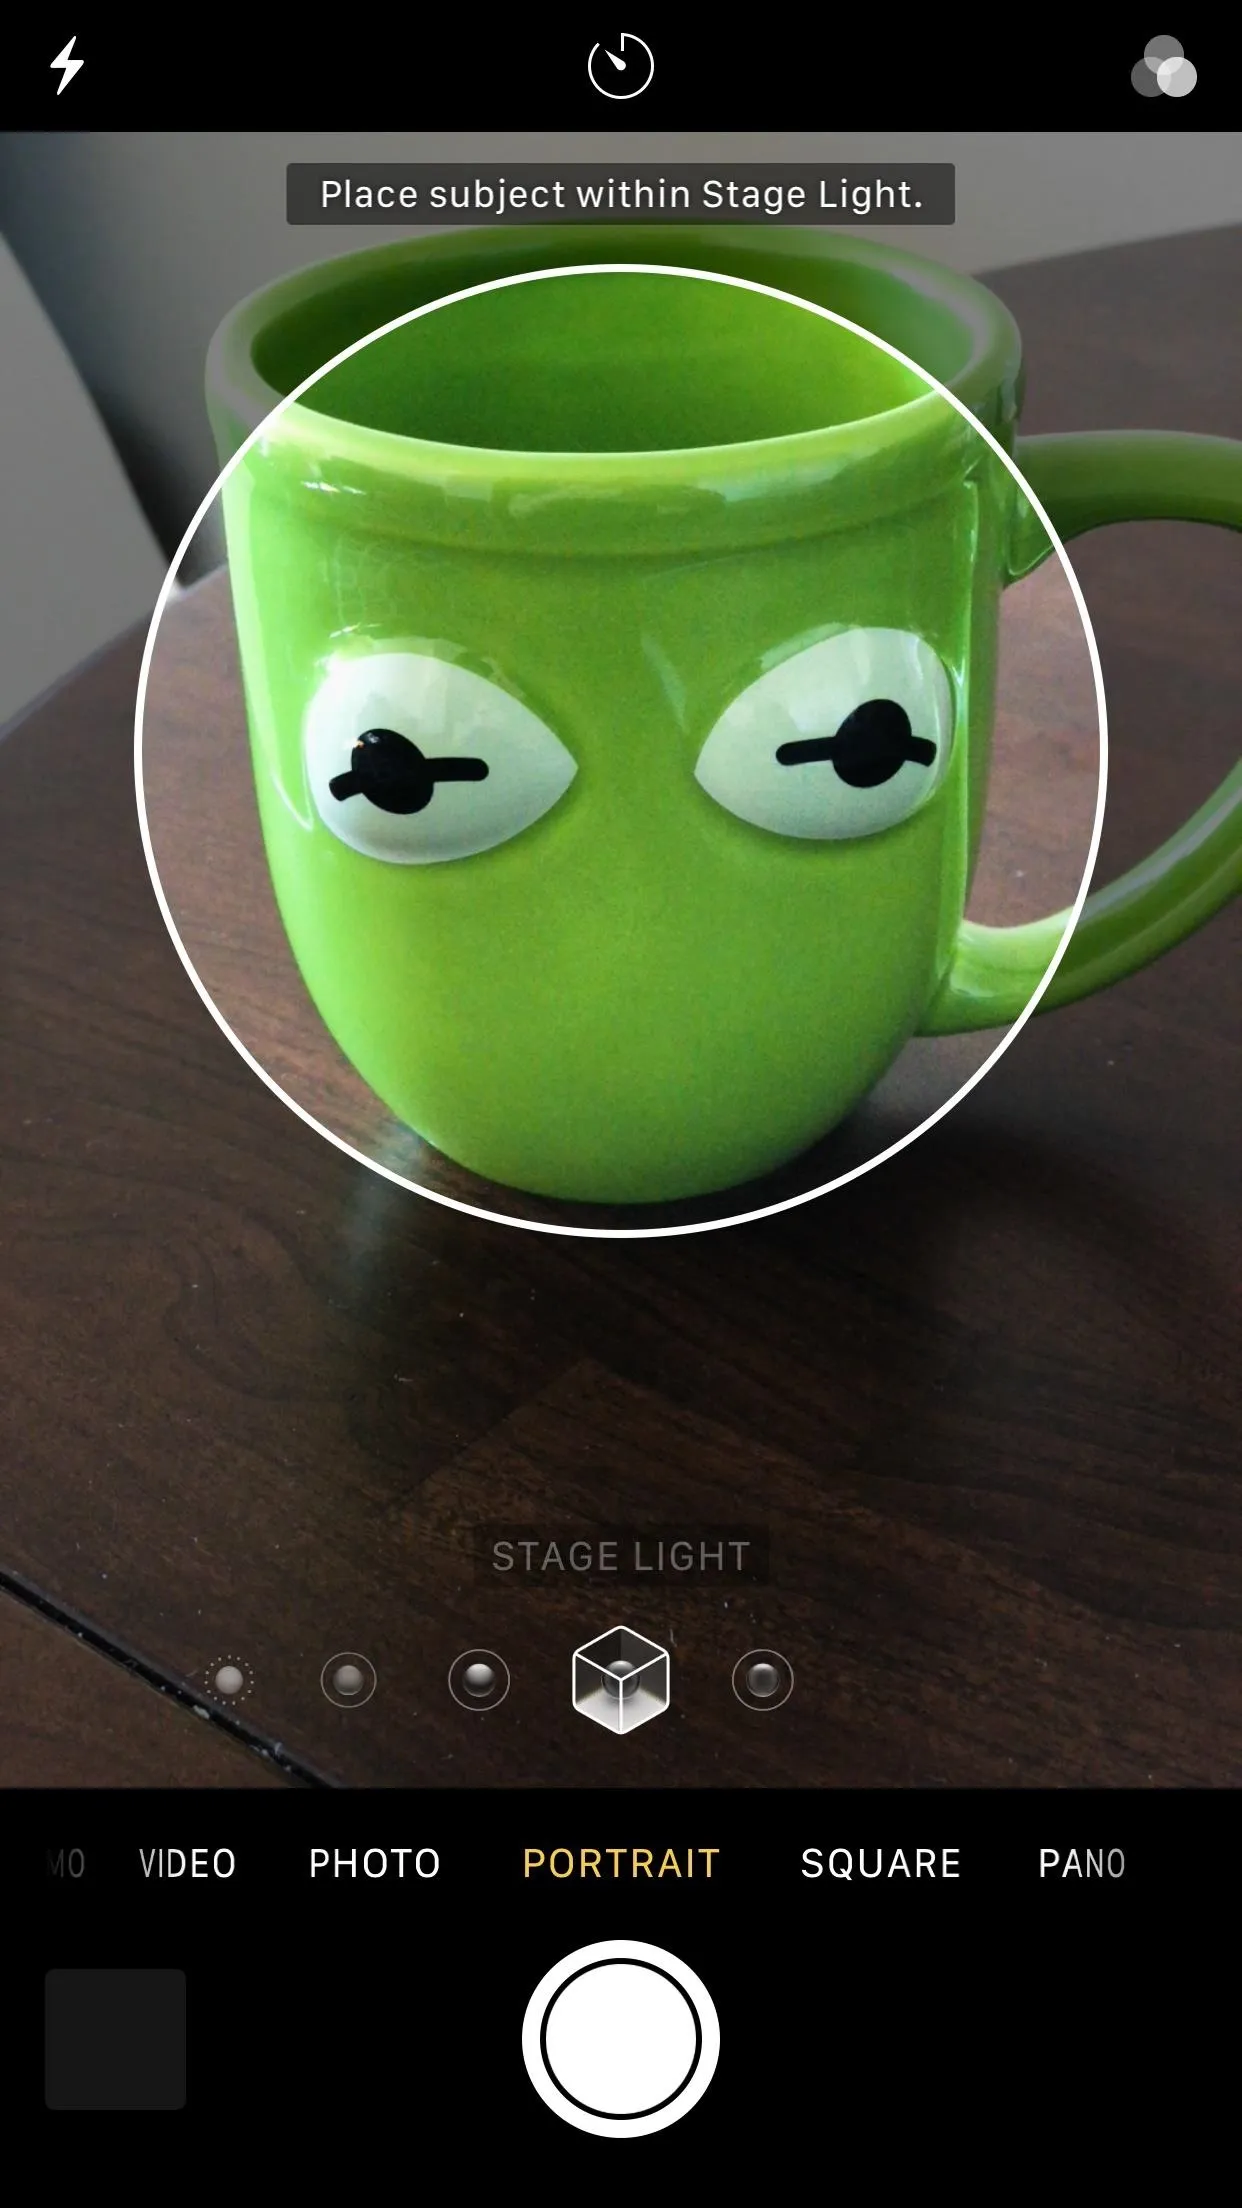
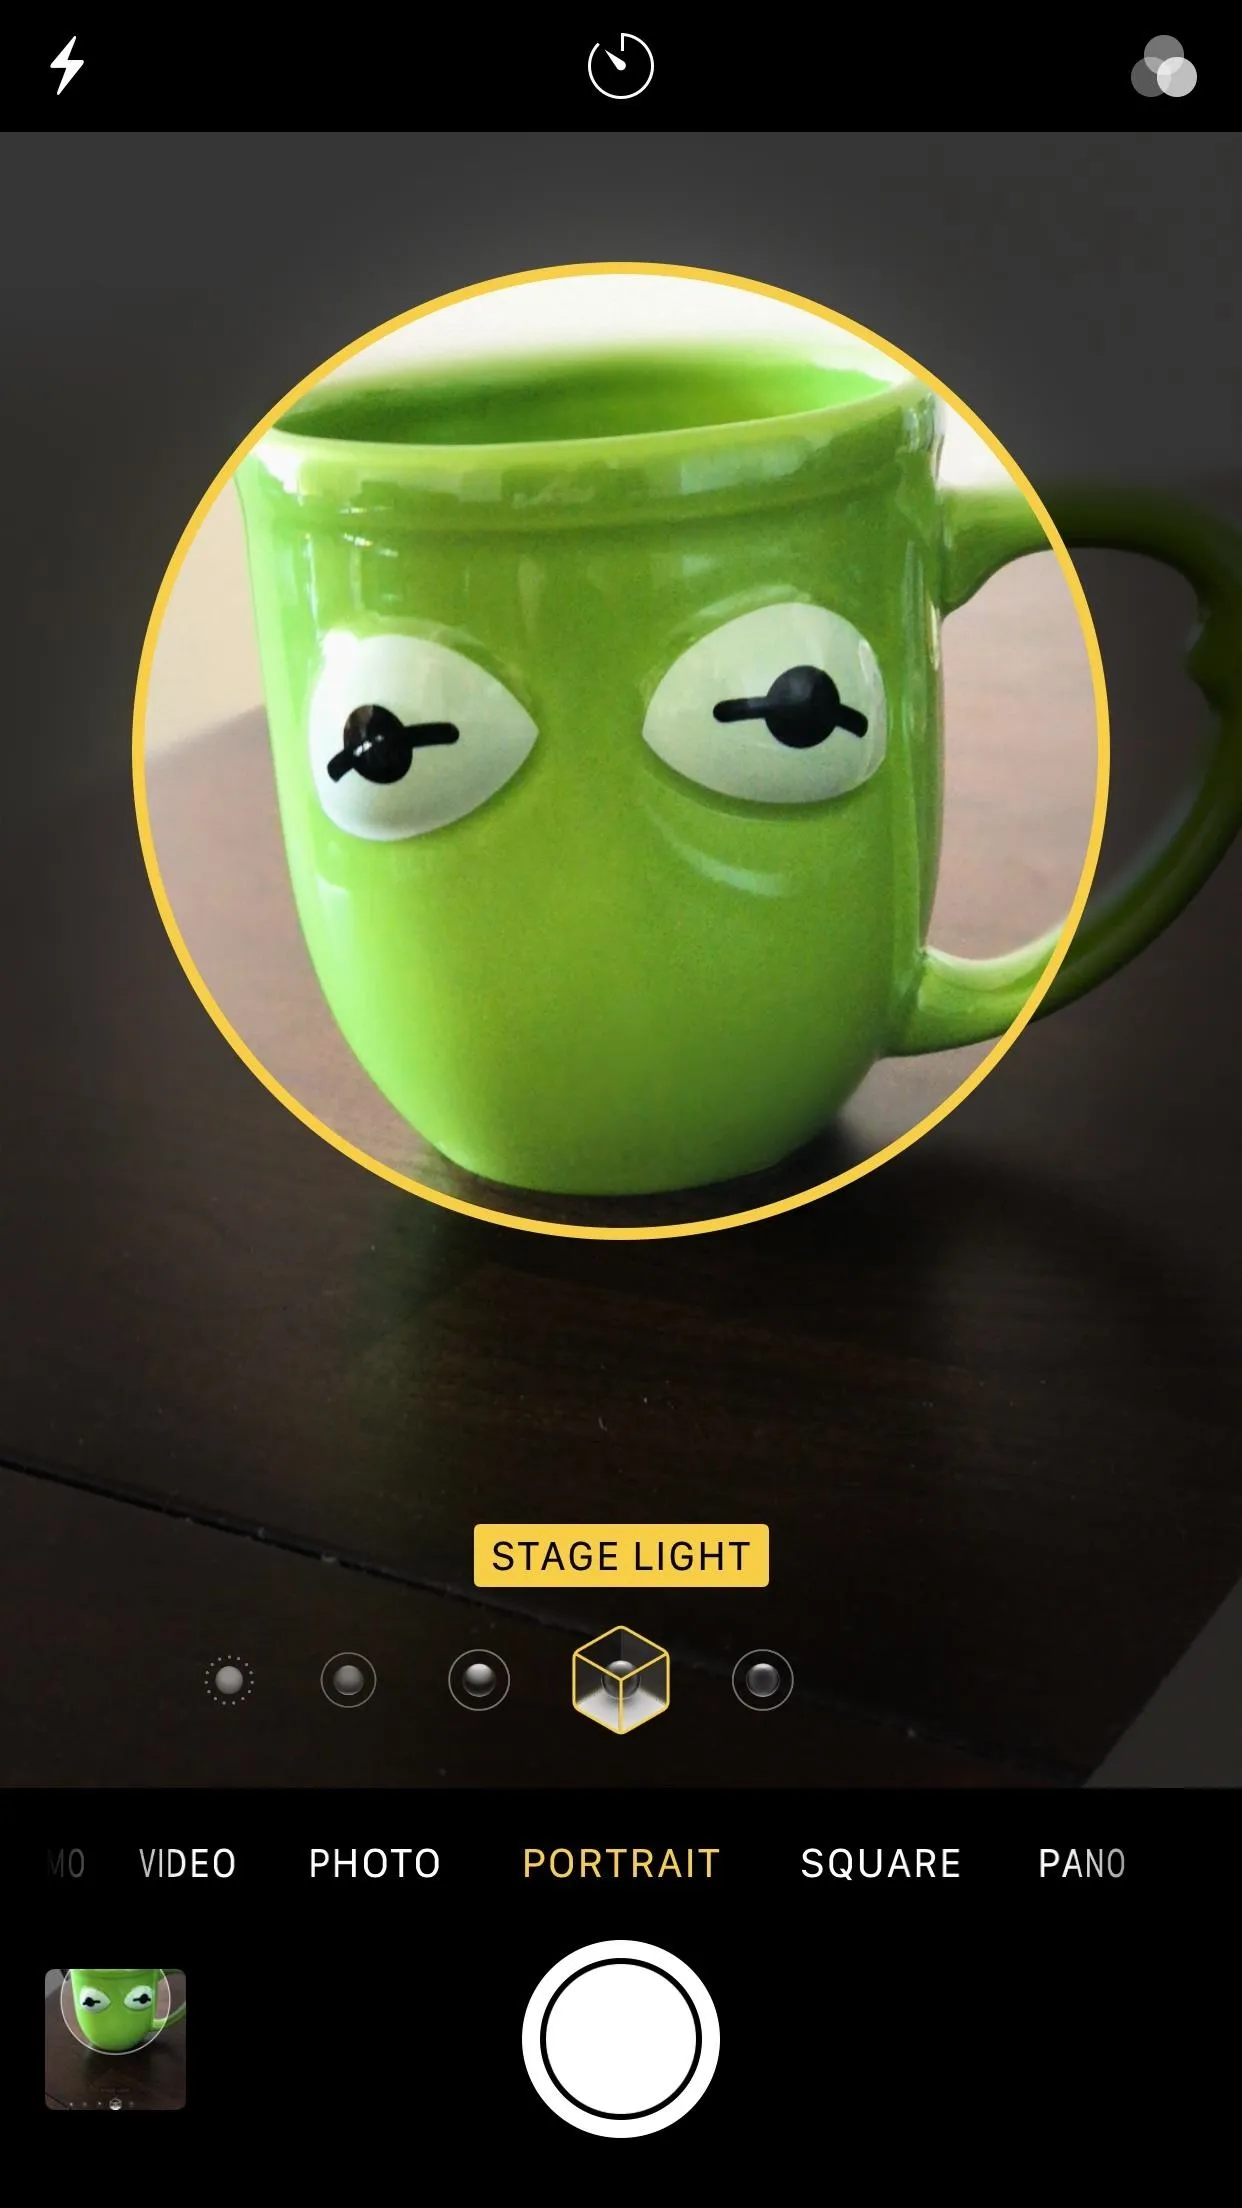
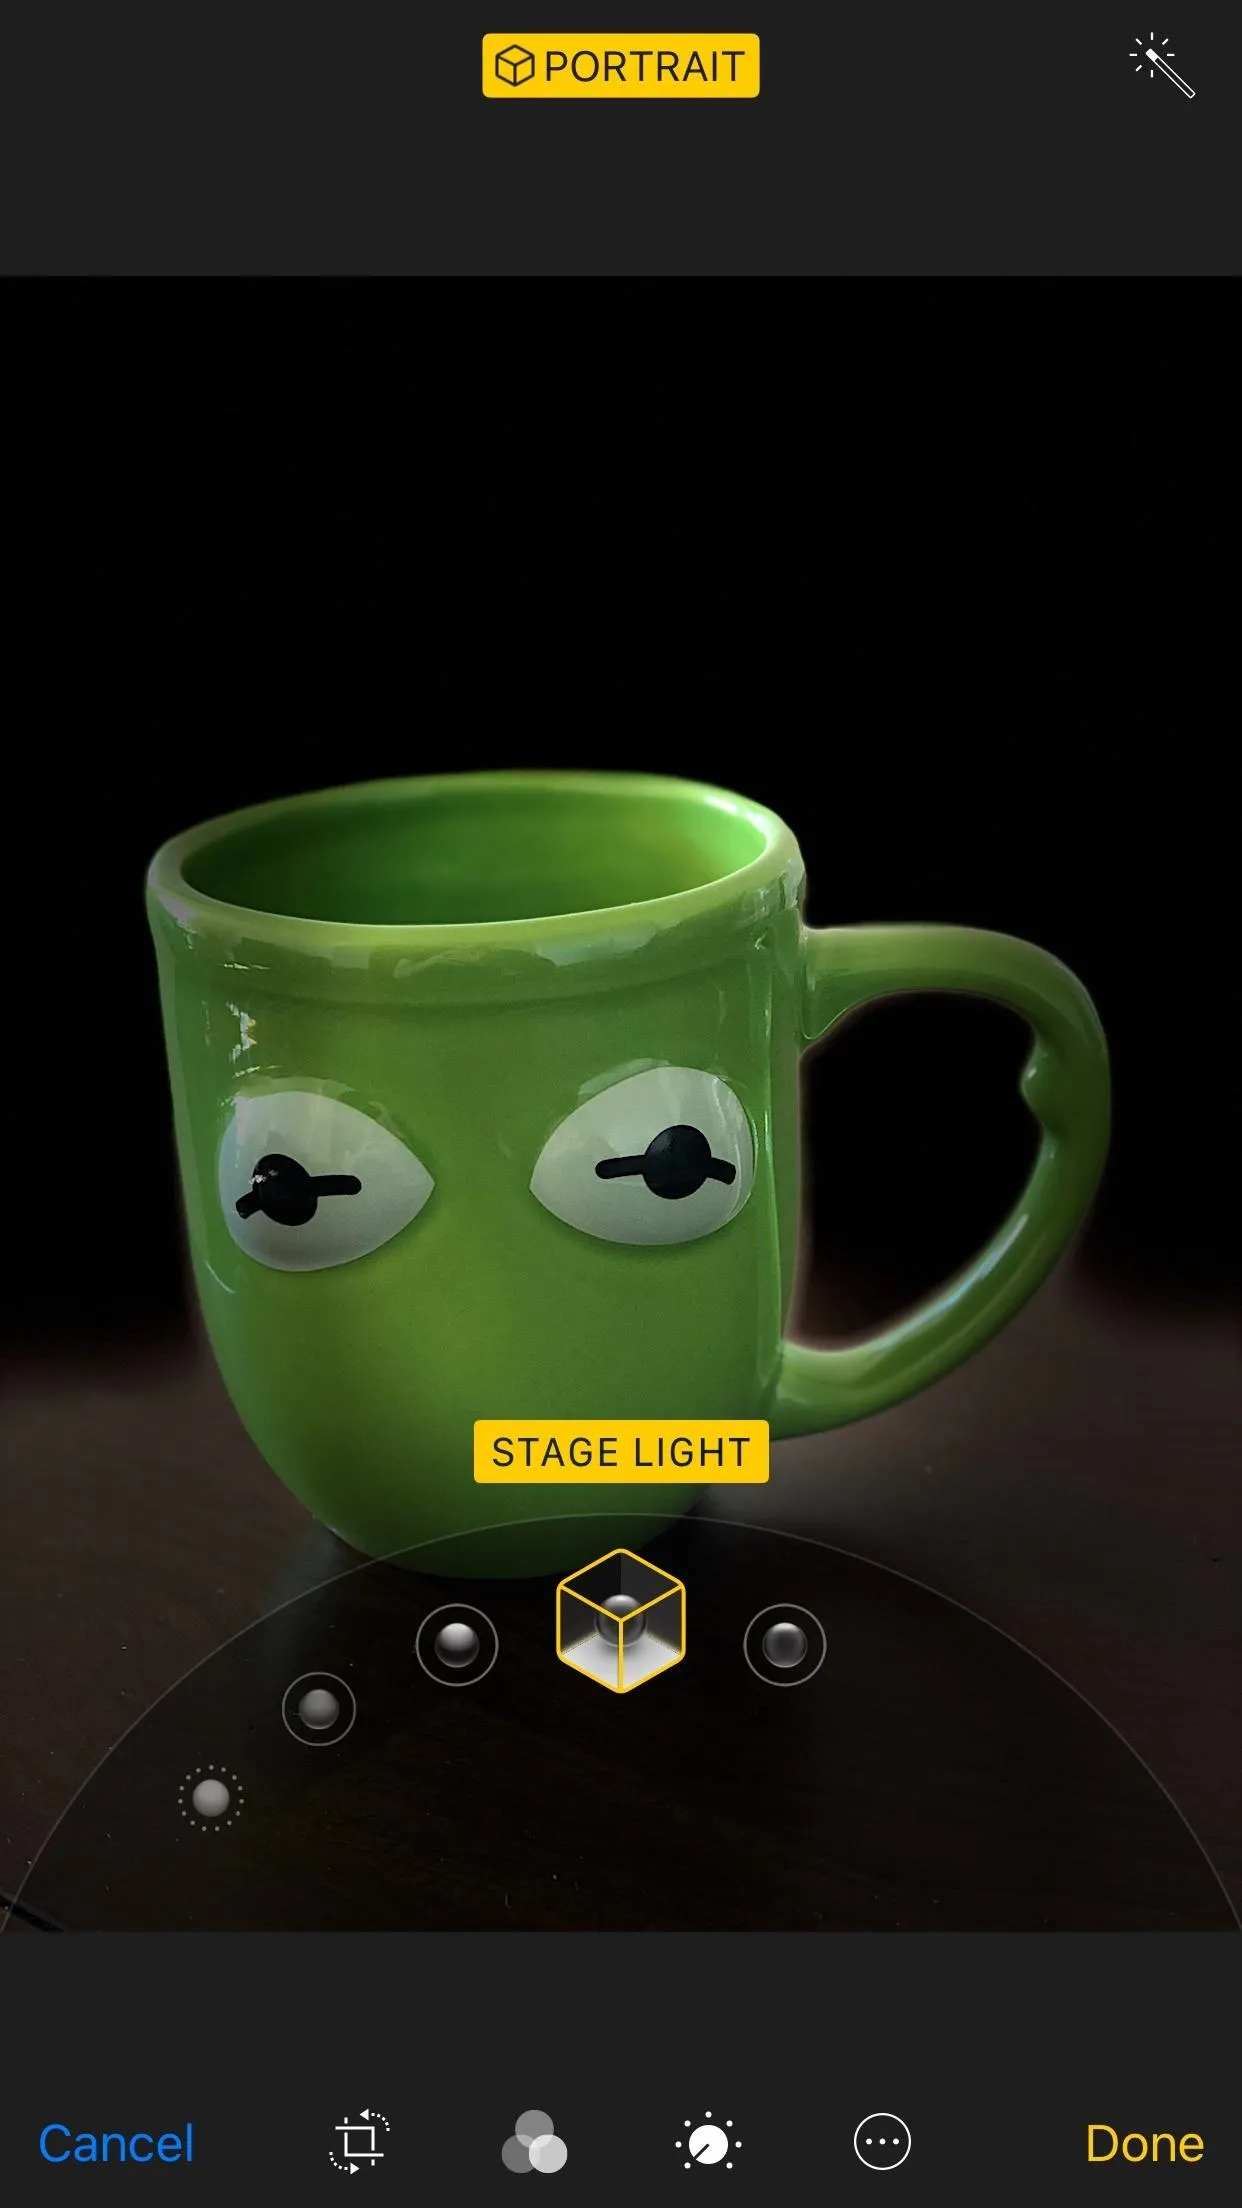
- Stage Light: This setting takes the dramatic look one step further. By focusing on the subject's face, Studio Light eliminates the background of an image. The result is a bright, dramatic face against a black background.
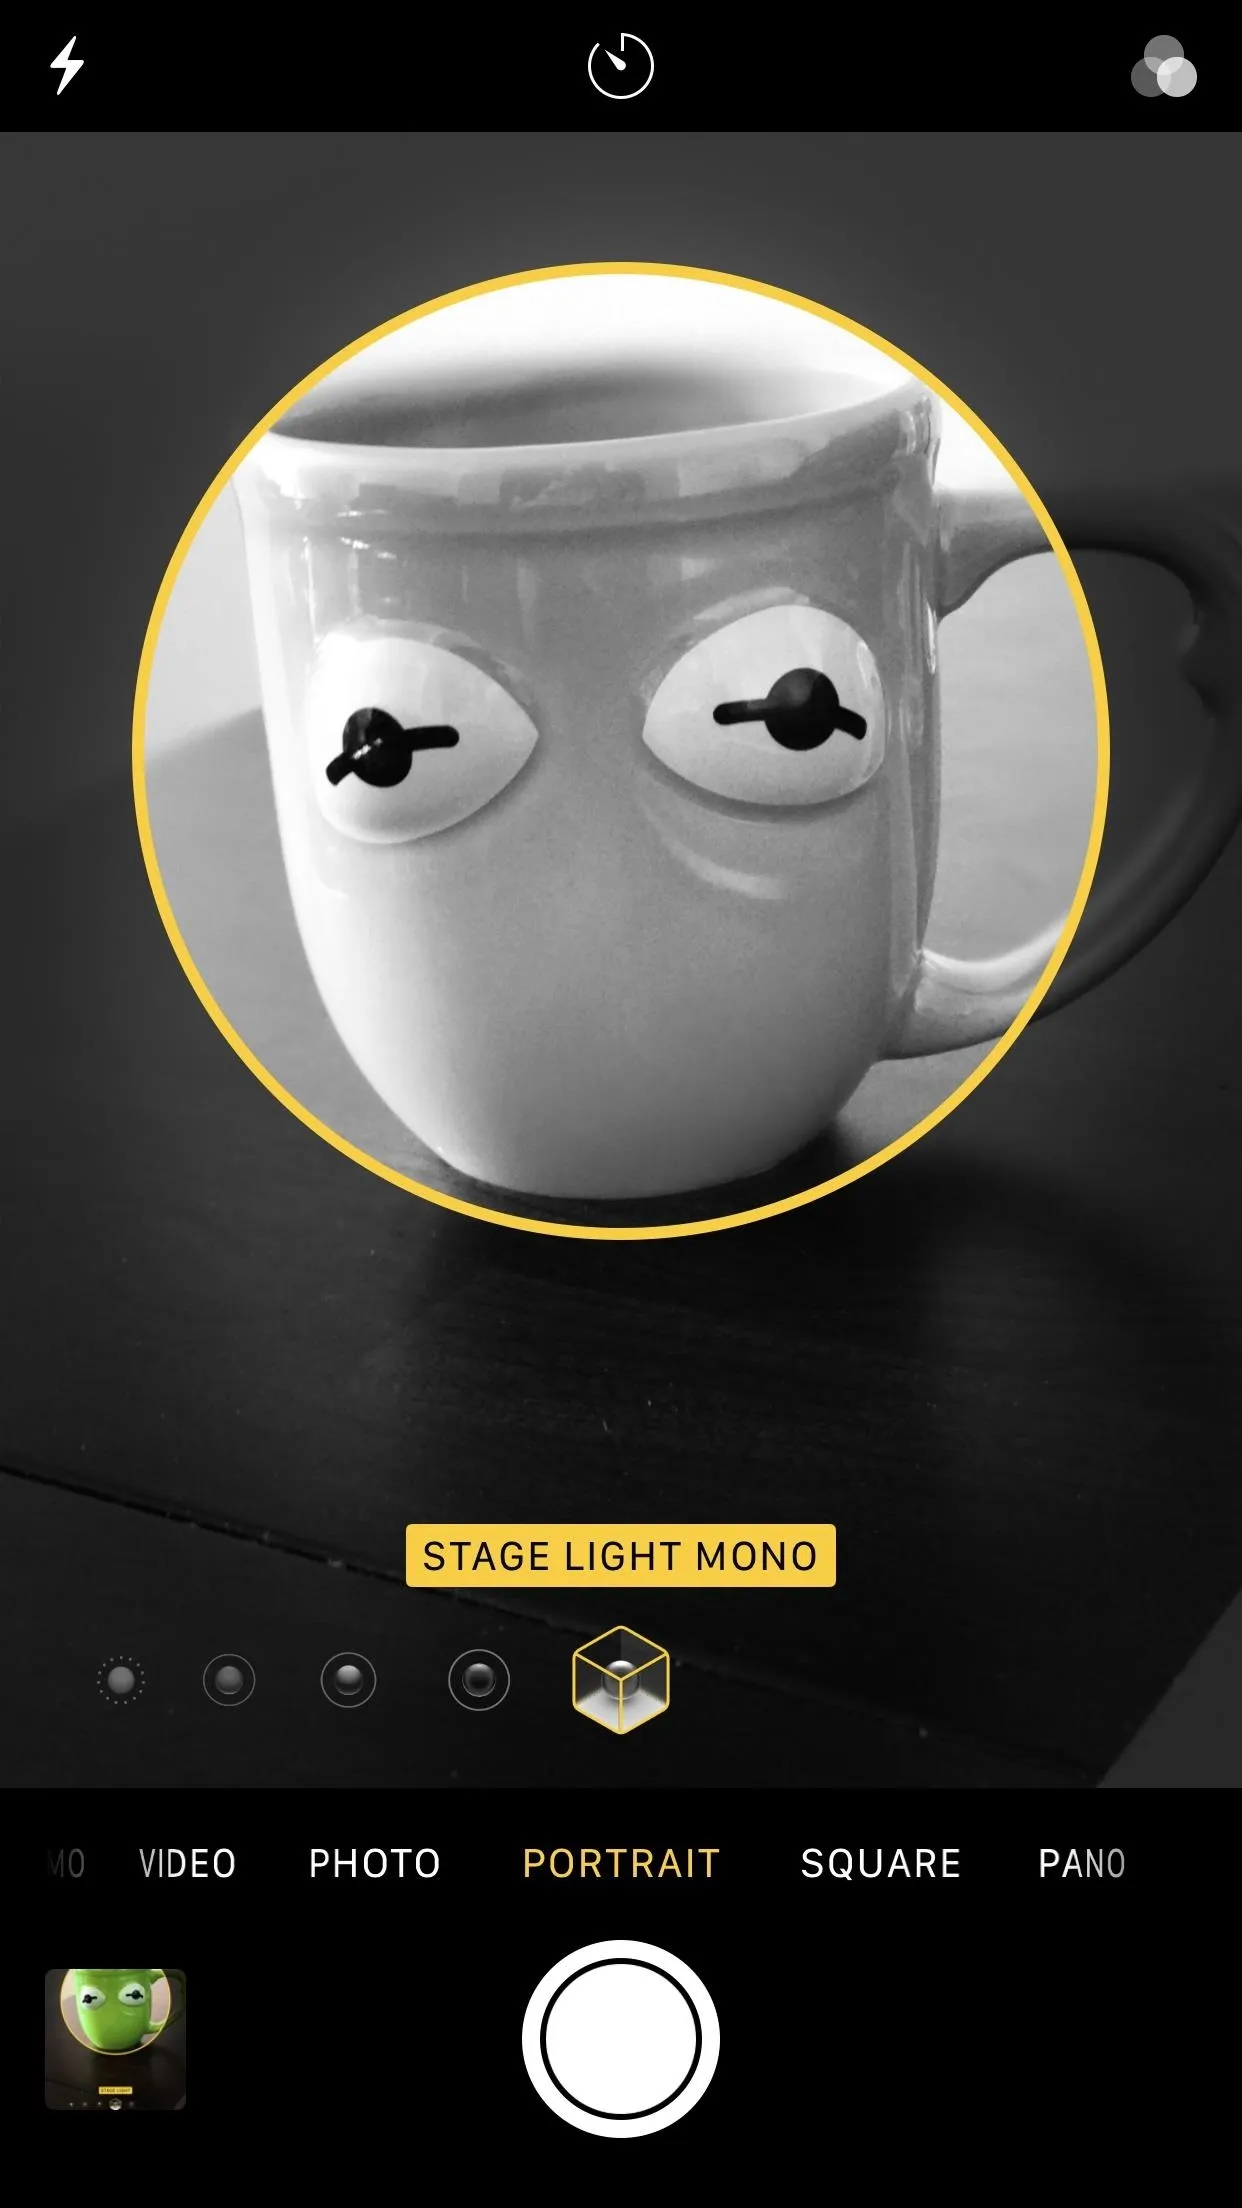
- Stage Light Mono: Exactly the same as Stage Light, except in black and white.
Using the New Portrait Lighting Modes
While you can choose any of these modes from the slider at the bottom of the camera display, you are also able to select any of these modes after you shoot your picture. That means, even if you take a photo using one lighting setting, you can apply any of the other four settings at will.
With that in mind, however, if you want to shoot in either Stage Light or Stage Light Mono, we'd recommend you specifically take your photo with those settings turned on, since your iPhone will give you additional instructions in the process to make sure your photo is as good as possible.

Natural Light

Stage Light

Stage Light Mono
Natural Light
Stage Light
Stage Light Mono
So, how'd your Portrait Lighting photos turn out? Let us know in the comments below!
- Follow Gadget Hacks on Facebook, Twitter, Google+, YouTube, and Instagram
- Follow WonderHowTo on Facebook, Twitter, Pinterest, and Google+
Cover image and screenshots by Jake Peterson


Comments
Be the first, drop a comment!