The fact that the iPhone X, XS, XS Max, and XR don't have Home buttons means that you'll need to learn a few new gestures. There's the home gesture, the multitasking gesture, and even a new way to access Apple Pay, among others. But one less-common action that has issues due to the lack of a Home button is taking a screenshot.
Thankfully, it's still not very hard to do, and there are actually a few ways you can go about doing it. The first one is unique to the iPhone X, XS, XS Max, and XR, and the second one can be done on other iPhones models with just a small tweak.
Use Side + Volume Up
Instead of pressing the Home button and the Sleep/Wake button (aka the power button) like you used to, all you'll have to do is press and hold the new Side button and the Volume Up button simultaneously. By the way, "Side button" is Apple's new term for the power button since it does a lot more than just wake your phone now.
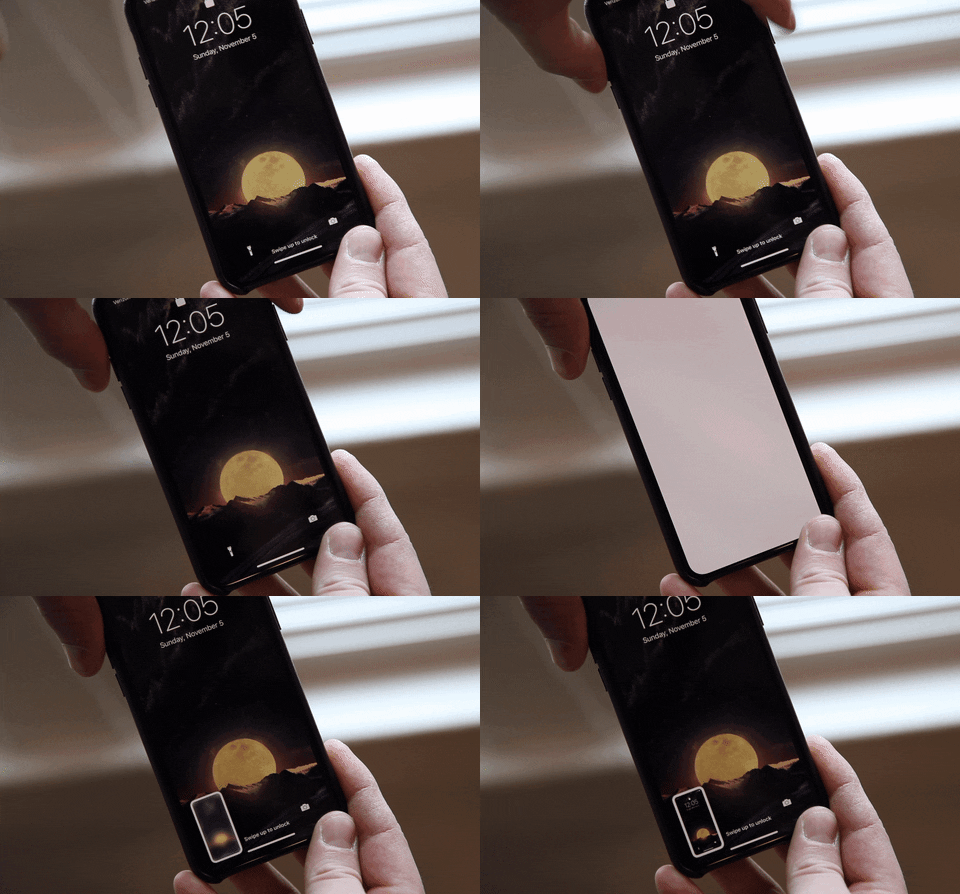
So basically, just squeeze your iPhone X, XS, XS Max, or XR on both sides simultaneously, making sure your fingers are positioned over the Side button and the Volume Up button, then you'll have a screenshot! And because these devices run either iOS 11 or iOS 12, you'll also see the new markup screen after taking a screenshot, which even lets you annotate your image.
Note that if you hold the buttons for too long, you will bring up the screen with the "slide to power off" switch and Emergency SOS option. If you continue holding the buttons past that screen, you will start the countdown clock for Emergency SOS to call 911, so be careful.
It may take a few tries to get used to the new screenshot gesture, but it's very similar to most Android phones if you've ever used one of those.
Use AssistiveTouch
If you find the new button combination to be a bit awkward, you have another option by enabling the triple-click Accessibility Shortcuts gesture and using AssistiveTouch.
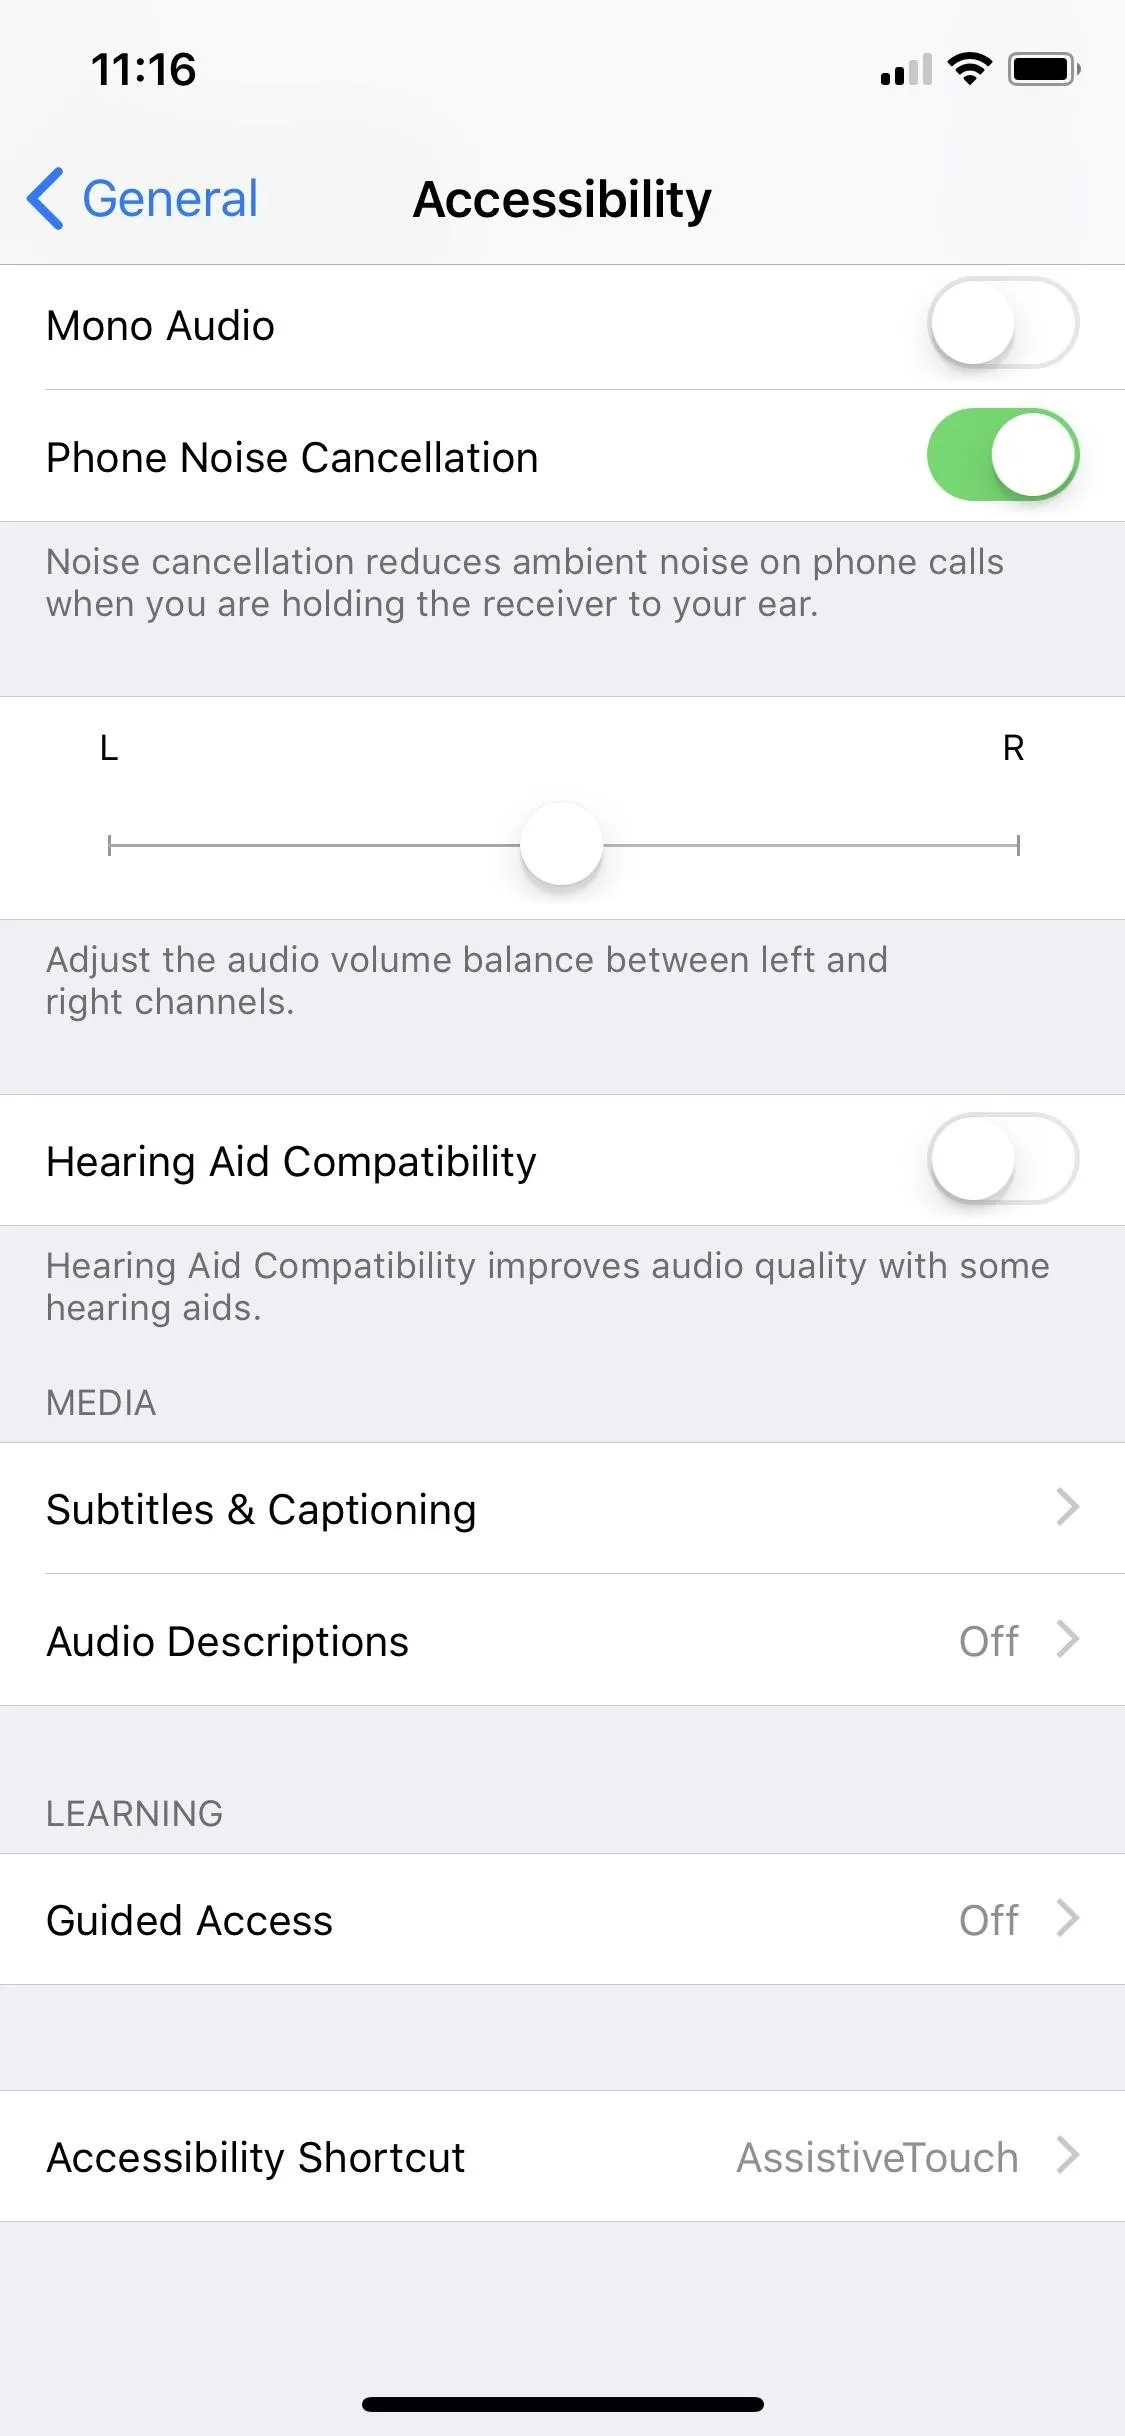
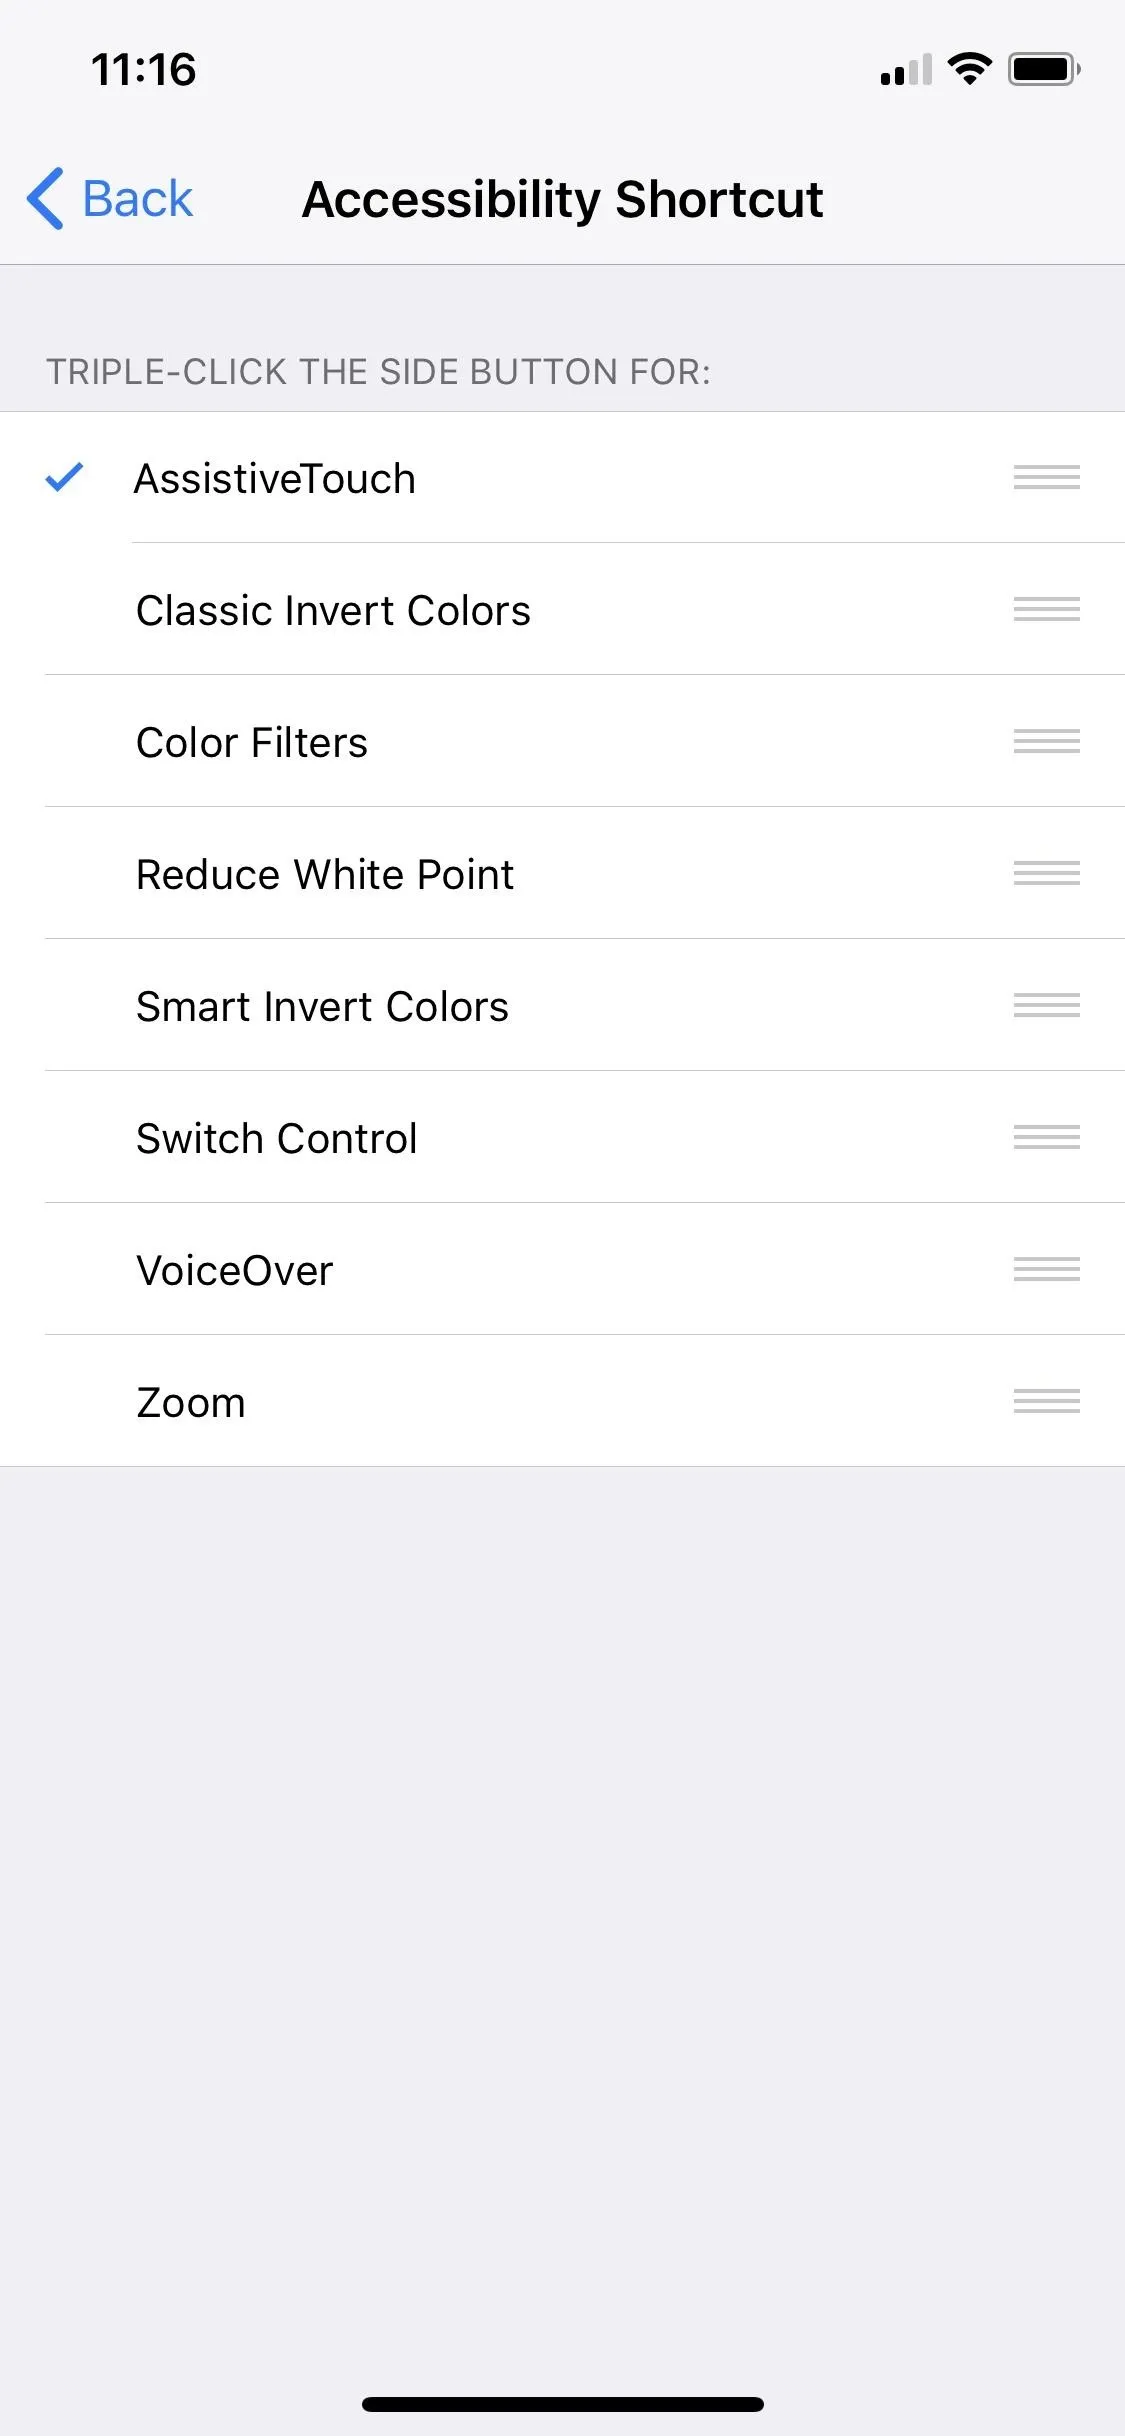
If this is the only reason you'll be using AssistiveTouch, Apple's on-screen tool for those with problems pressing buttons and using swipe gestures, you can make screenshotting the only thing it does. To do so, just make sure "AssistiveTouch" is the only thing checked in the "Accessibility Shortcuts" preferences at the bottom of the main "Accessibility" settings menu.


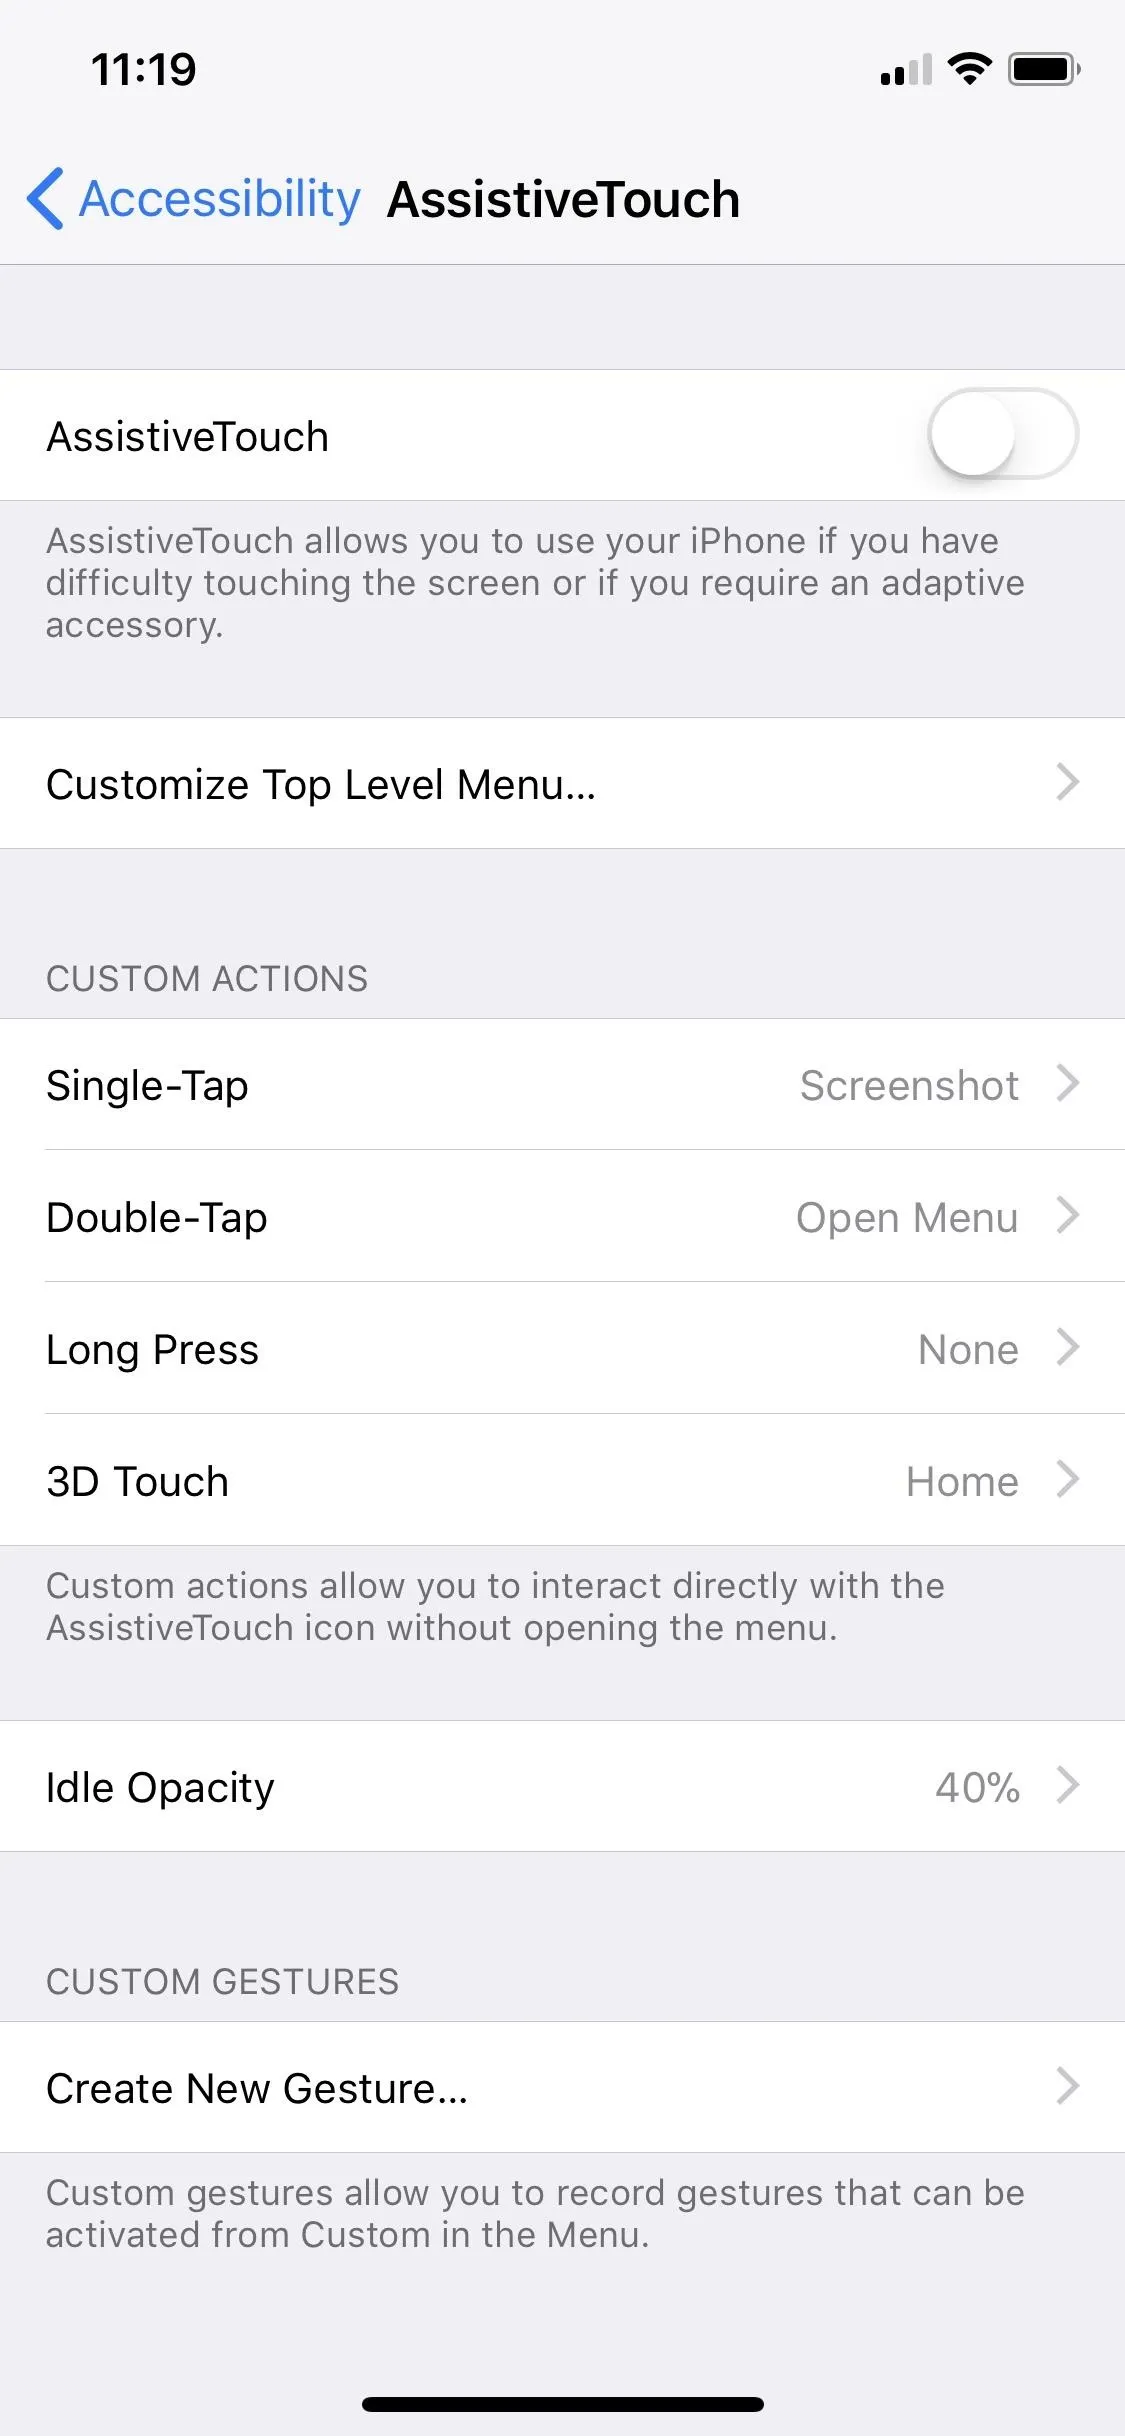
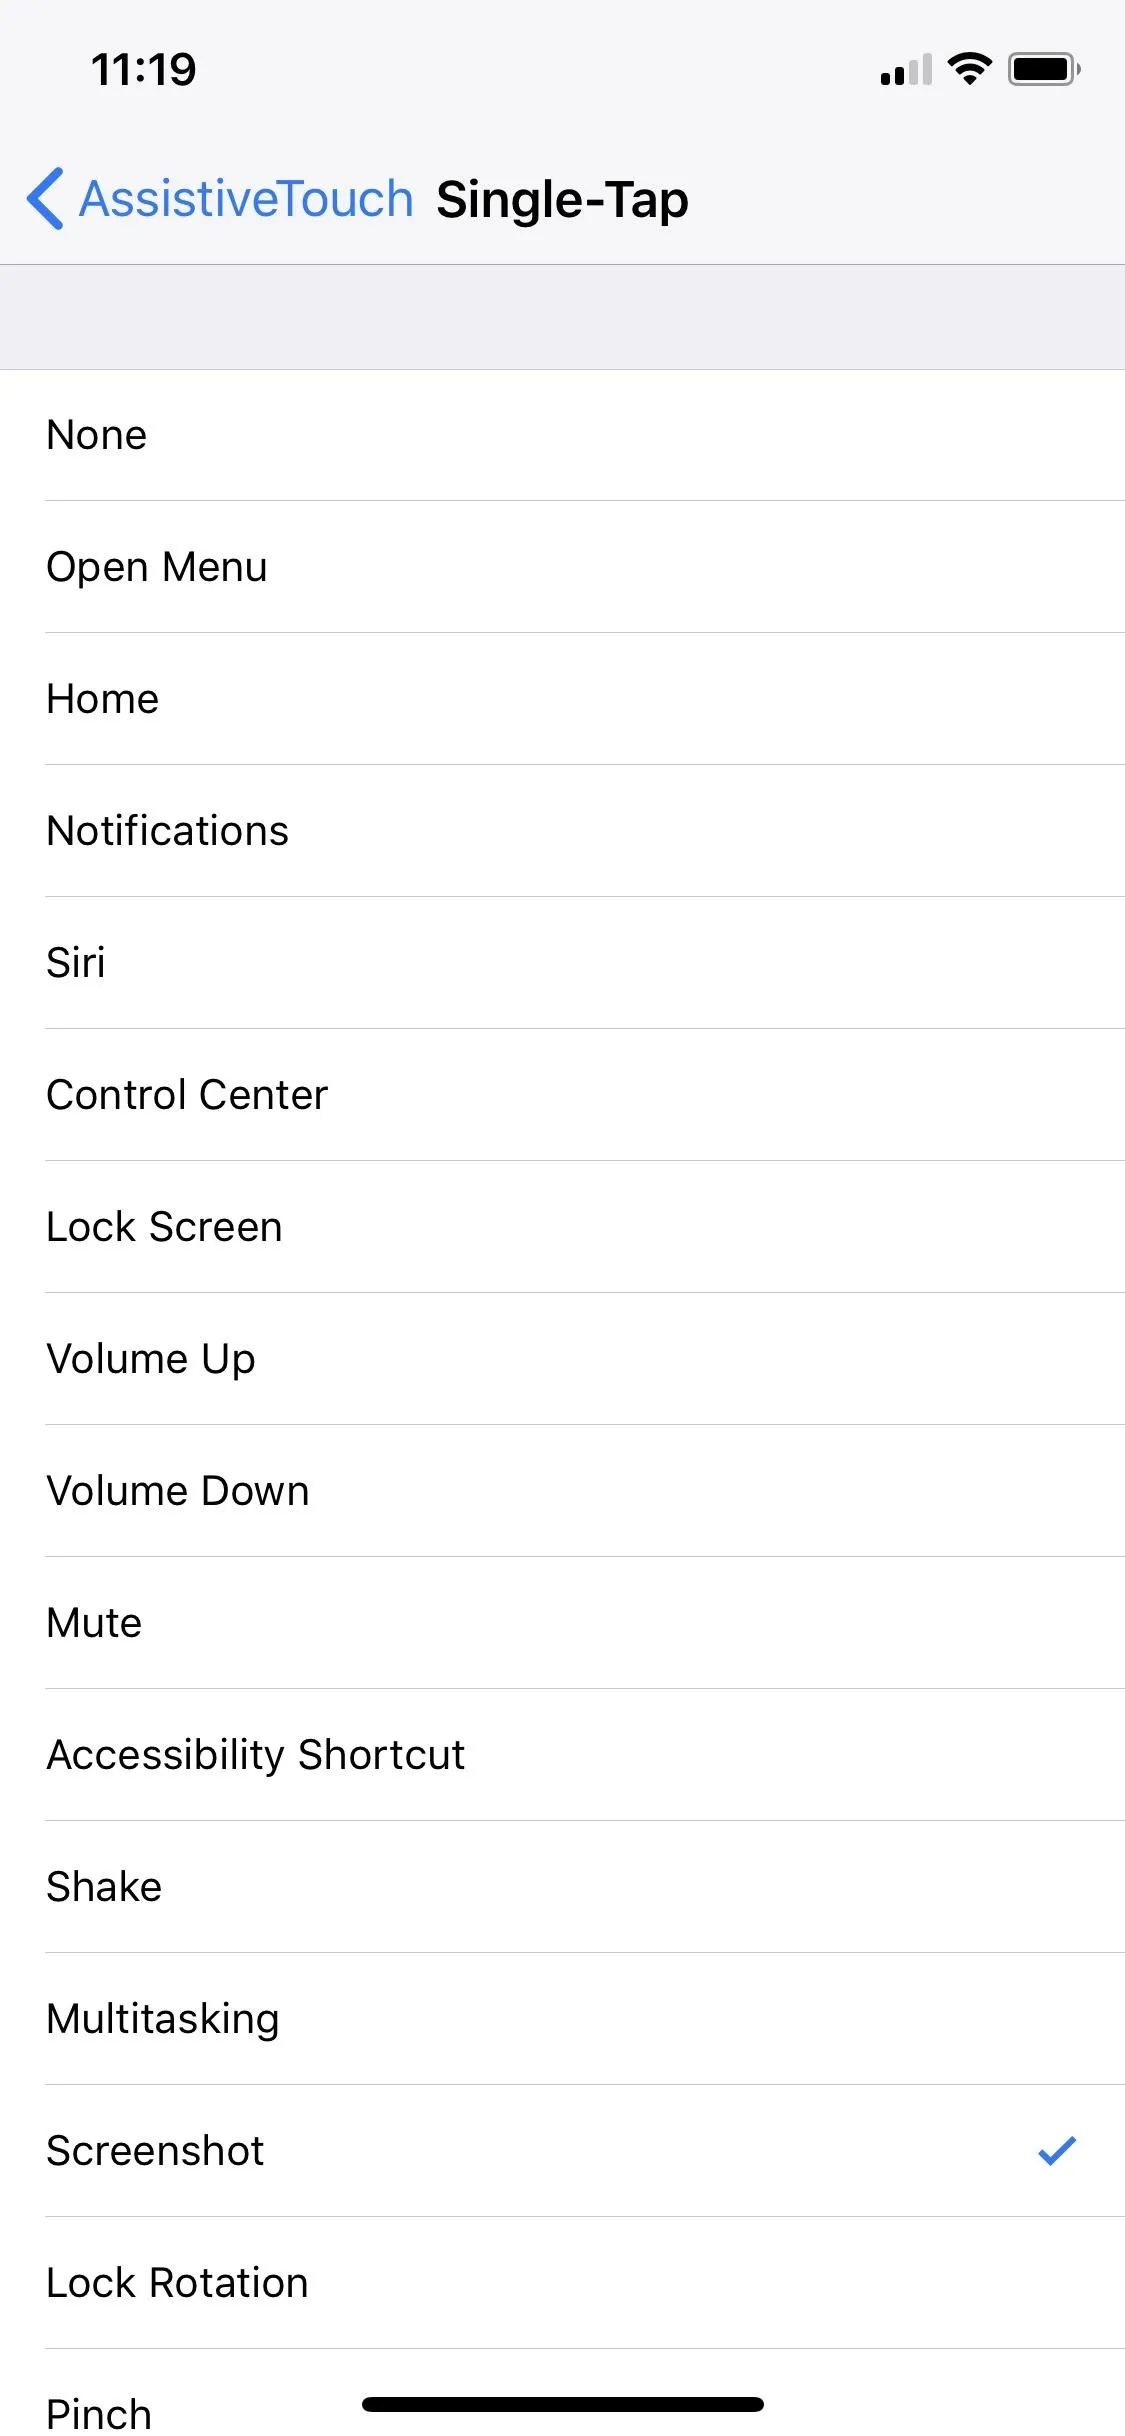
Next, go to the "AssistiveTouch" preferences in the main "Accessibility" settings menu, and choose how you want to take a screenshot. If you're primarily screenshotting with this, change "Single-Tap" to say "Screenshot." And if you'd like to access the main AssistiveTouch menu still, you can change "Double-Tap" to "Open Menu."


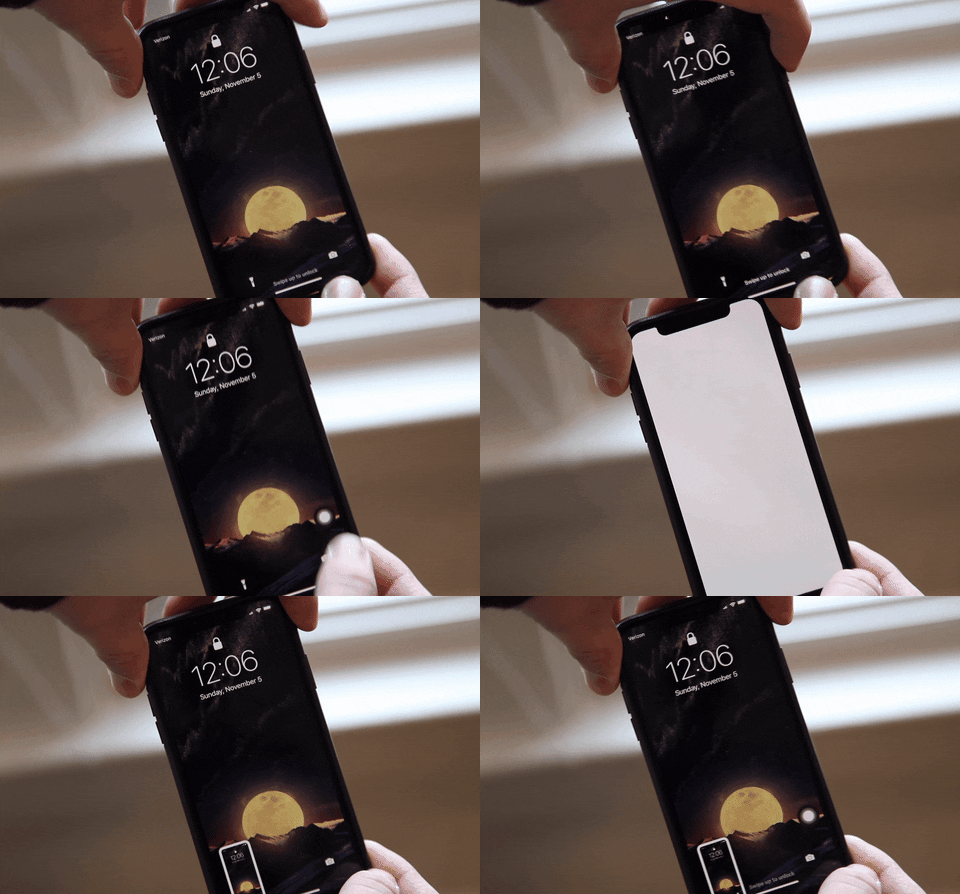
Now, to take the screenshot, triple-click the Side button, and you'll see a gray Home button icon appear on your screen. Tap that once to take a screenshot. The gray icon will disappear temporarily so that it's not in the actual screenshot.
If you don't want to use the triple-click gesture to enabled and disable the AssistiveTouch on-screen button, you can also add "Accessibility Shortcuts" as a control in your Control Center, so you can just swipe down the Control Center, tap on the icon, and select "AssistiveTouch."
While you're here, I'd also like to point out that you can now record your screen without jailbreaking. It's a pretty simple process, but we've outlined how it works with a full guide.
- Follow Gadget Hacks on Facebook, Twitter, YouTube, and Flipboard
- Sign up for Gadget Hacks' daily newsletter or weekly Android and iOS updates
- Follow WonderHowTo on Facebook, Twitter, Pinterest, and Flipboard
Cover photo, screenshots, and GIFs by Justin Meyers/Gadget Hacks


Comments
Be the first, drop a comment!