


Most of us have probably used a GIF at least once or twice to respond to a message, and that's why a lot of messaging services and keyboards have GIF search tools readily available to use. Now, Google wants to take GIF responses to a more personal level, by allowing you to create your own selfies GIFs to instantly sent to family and friends.
While there are plenty of GIF-making apps out there, selfie GIF tools are relatively unheard of in keyboards, but Google has just changed that in their new Gboard update for iPhone. This selfie GIF-making tool, based on Google's Motion Stills app, has not made it to Android yet, so it seems to be an iOS exclusive at the moment.
- Don't Miss: 12 Tips to Help You Master Gboard for Android
Setting Up Gboard
If you've never used Gboard before, you'll need to set it up before you can jump right in. Chances are, after you've tried Gboard, you'll never go back to Apple's stock keyboard, as it has a lot of nice features that Apple hasn't given us yet, such as swipe typing and Google search built right in.
- Download Gboard for free from the iOS App Store
- Go to Settings -> General -> Keyboard -> Keyboards -> Add New Keyboards -> Gboard.
- Tap "Gboard" on Keyboards, then enable "Allow Full Access."
- To make Gboard your default keyboard, tap "Edit" in the top-right corner of the display, then drag "Gboard" to the top of the list of keyboards.
Using the GIF-Maker
This feature is currently iOS only, and we're not sure if and/or when this selfie GIF tool will appear on Android. If they do bring it to Android, it will likely function similarly.
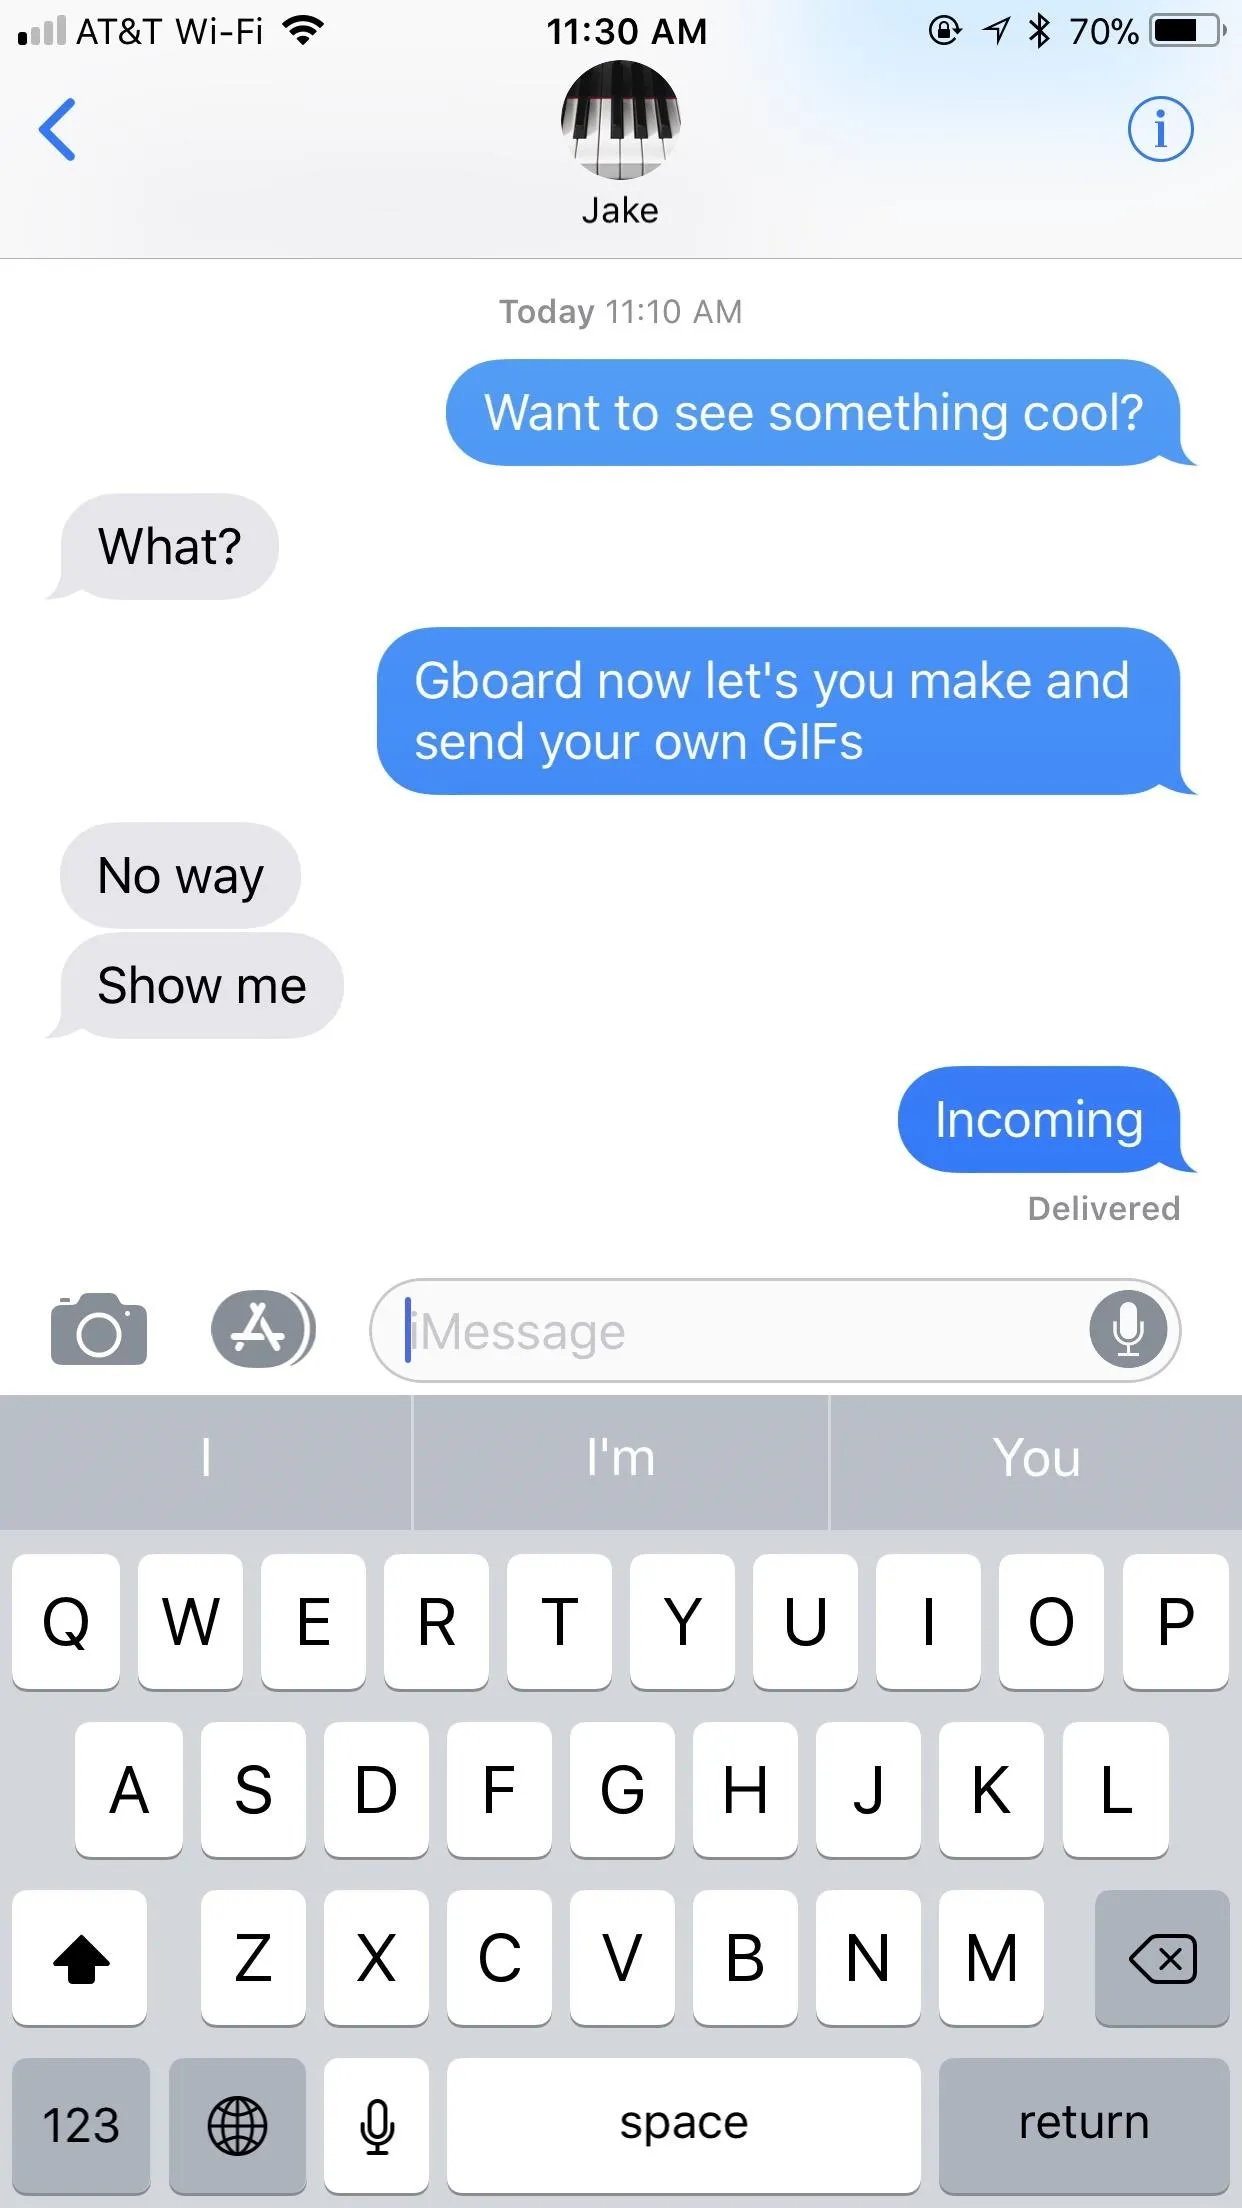
To open the selfie GIF-maker, simply open a messaging app of your choosing. When the keyboard pops up, make sure you're using Gboard. If not, tap and hold on the globe symbol, then select "Gboard."

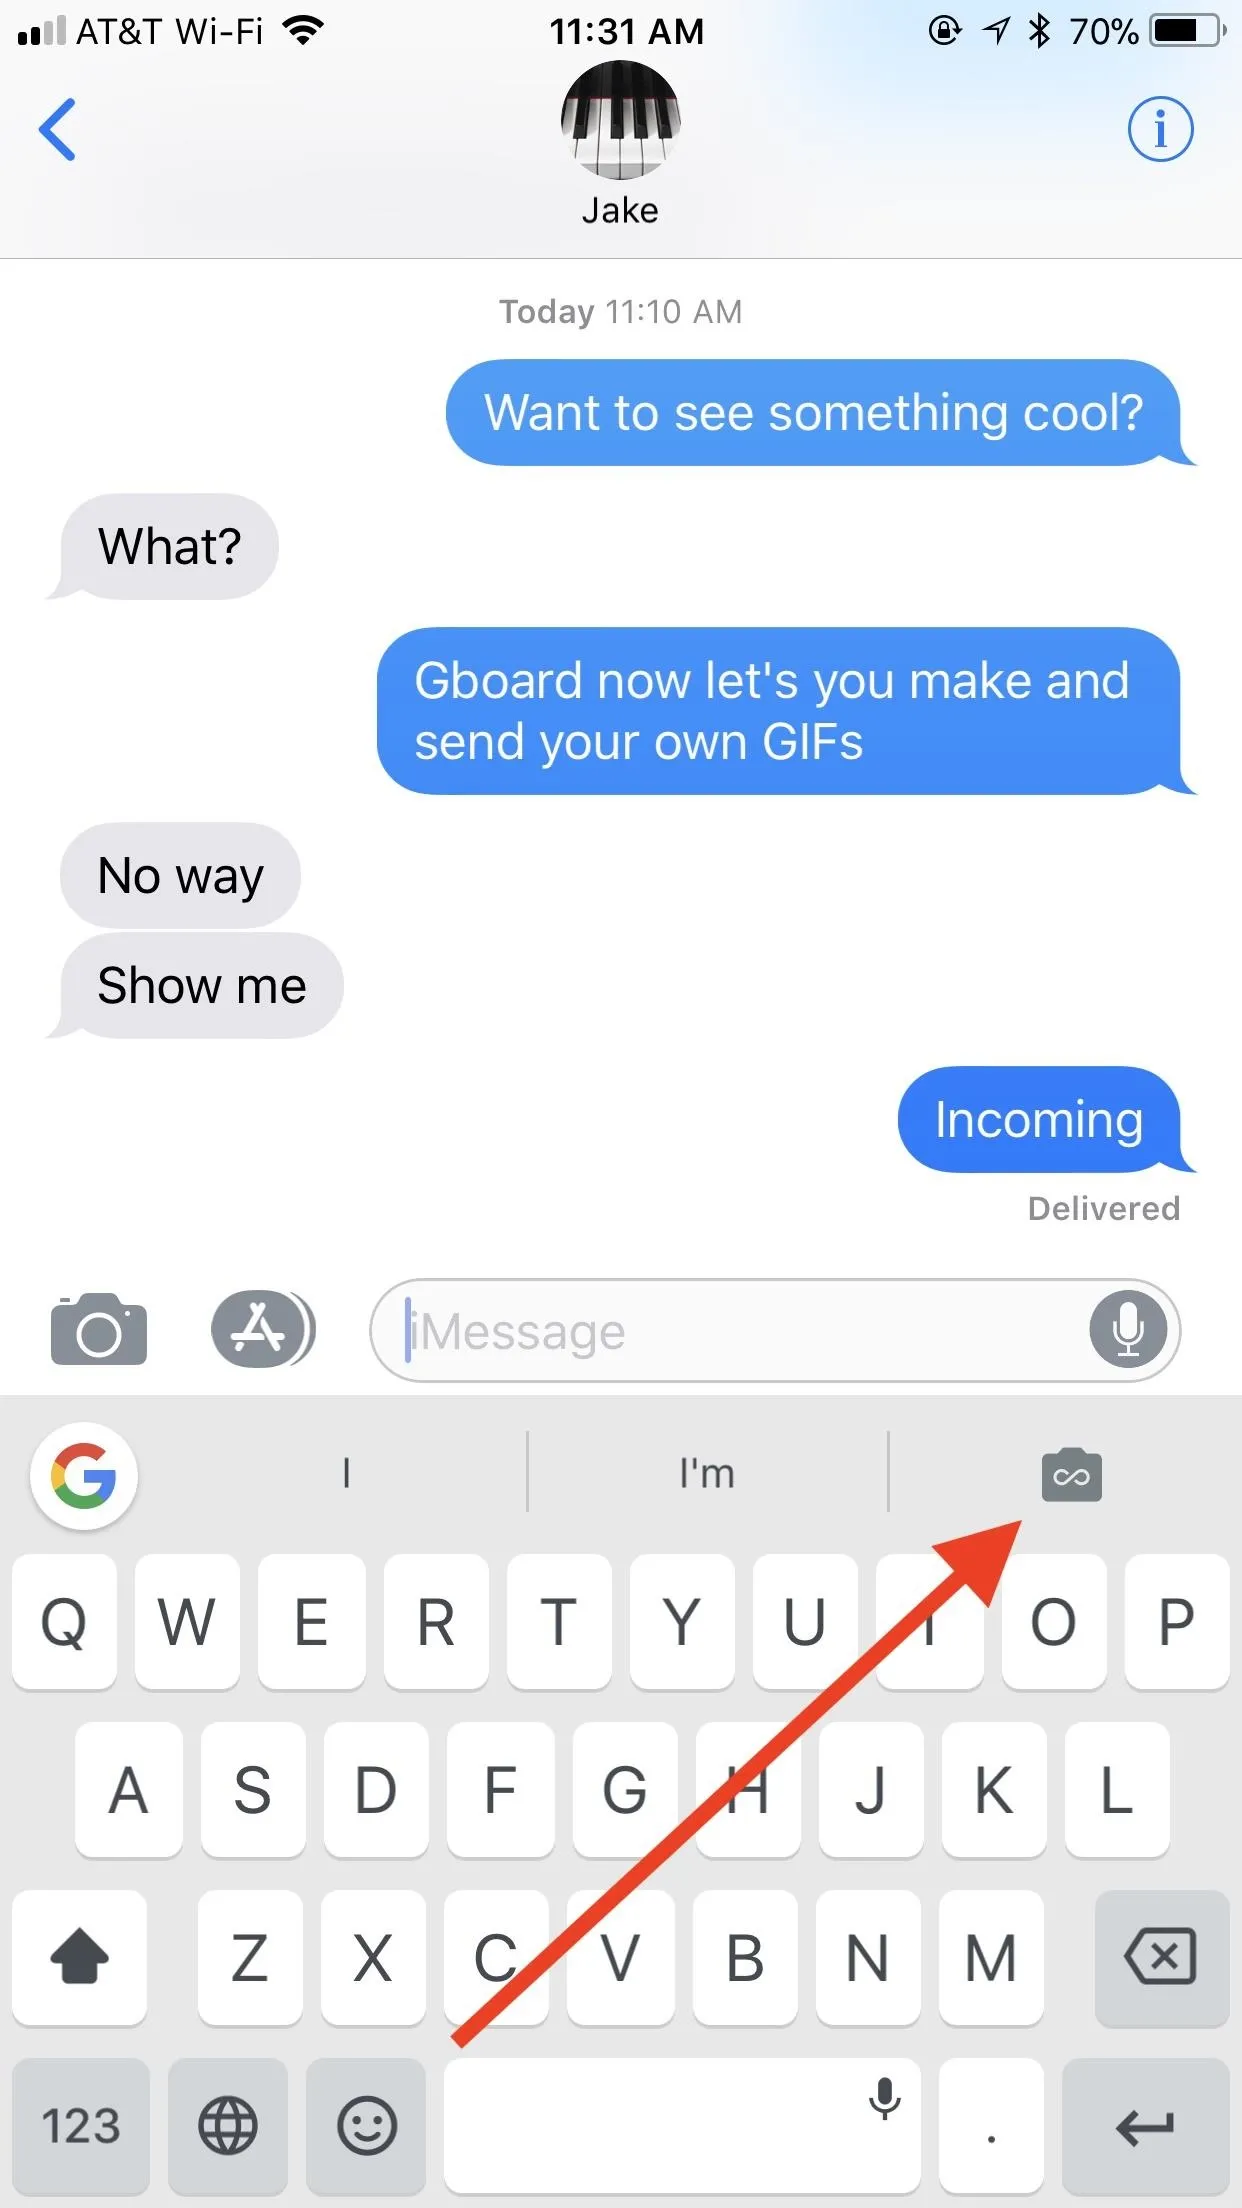
From here, accessing the GIF-maker is easy. Tap the camera loop icon on the far-right side of the word suggestion bar. If you don't see that icon, tap the emoji icon by the spacebar instead, then select "GIF," and hit "Make a GIF."
Gboard will then launch you into the GIF-maker. The rear camera may be enabled by default, but you can easily switch cameras by tapping the camera icon in the top-right corner of the display.
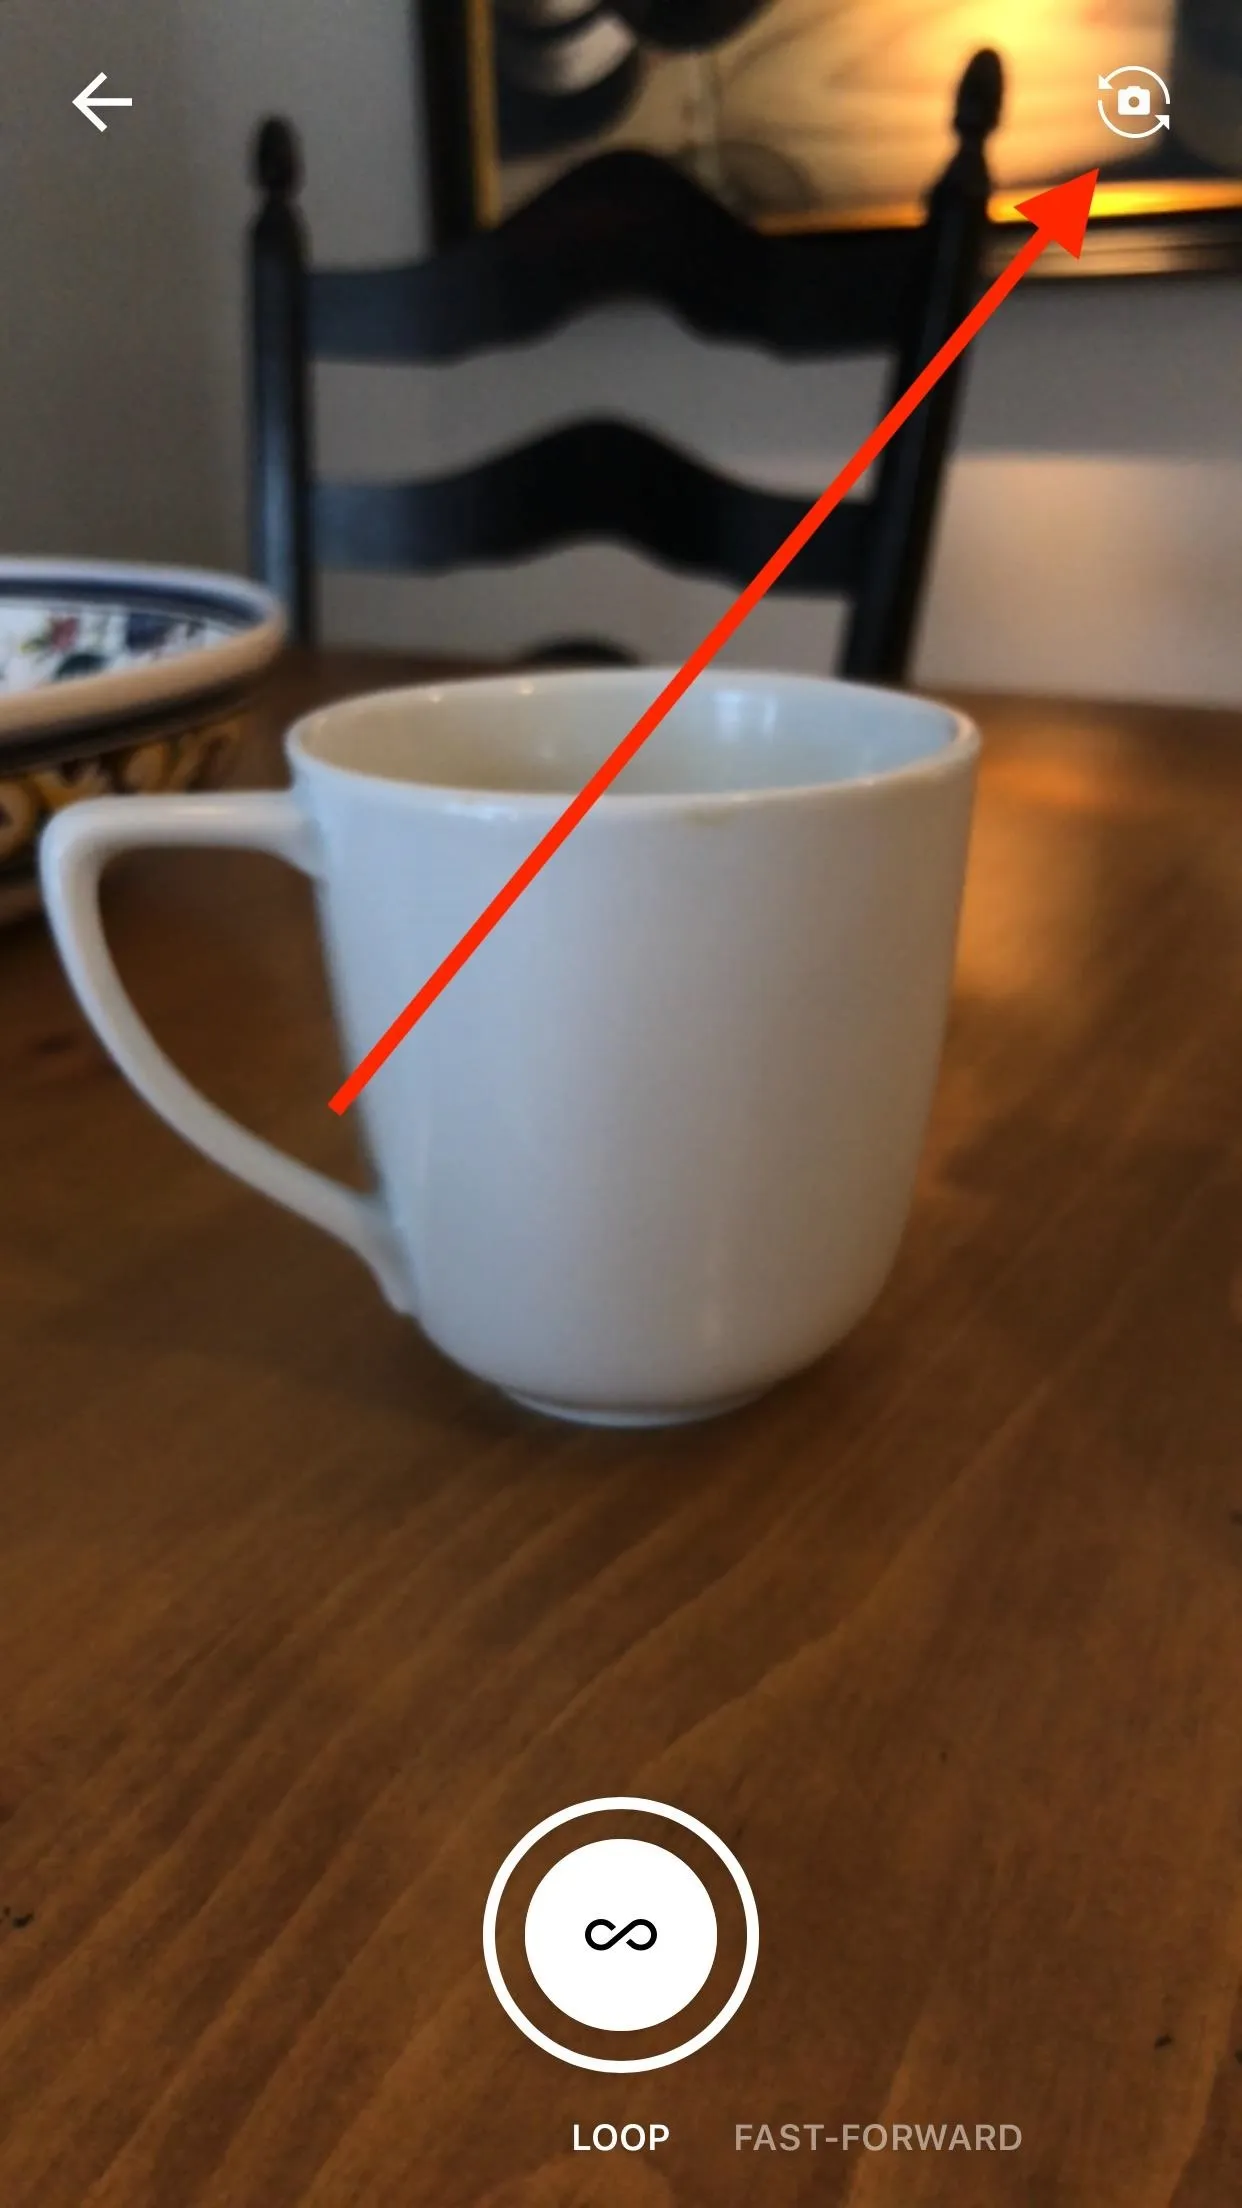
You have two opens when it comes to making GIFs: "Loop" or "Fast-Forward." With the "Loop" option selected, you simply tap and hold the white record button at the bottom of the display. You have up to three seconds to film whatever you want. That recording is then looped, just like a traditional GIF would be.
"Fast Forward," on the other hand, gives you up to thirty seconds to record. Gboard then manipulates your footage to almost eliminate quick movements while emphasizing slow ones. It produces an otherworldly effect, but will also loop as any GIF should.

Loop (left) vs. Fast-Forward (right).

Loop (left) vs. Fast-Forward (right).
Dressing Up Your GIFs
The best GIFs have the best captions. Gboard lets you write and draw on your GIFs with tools similar to what you'd find on Instagram or Snapchat. And, just like in those apps, getting started is quick and easy.
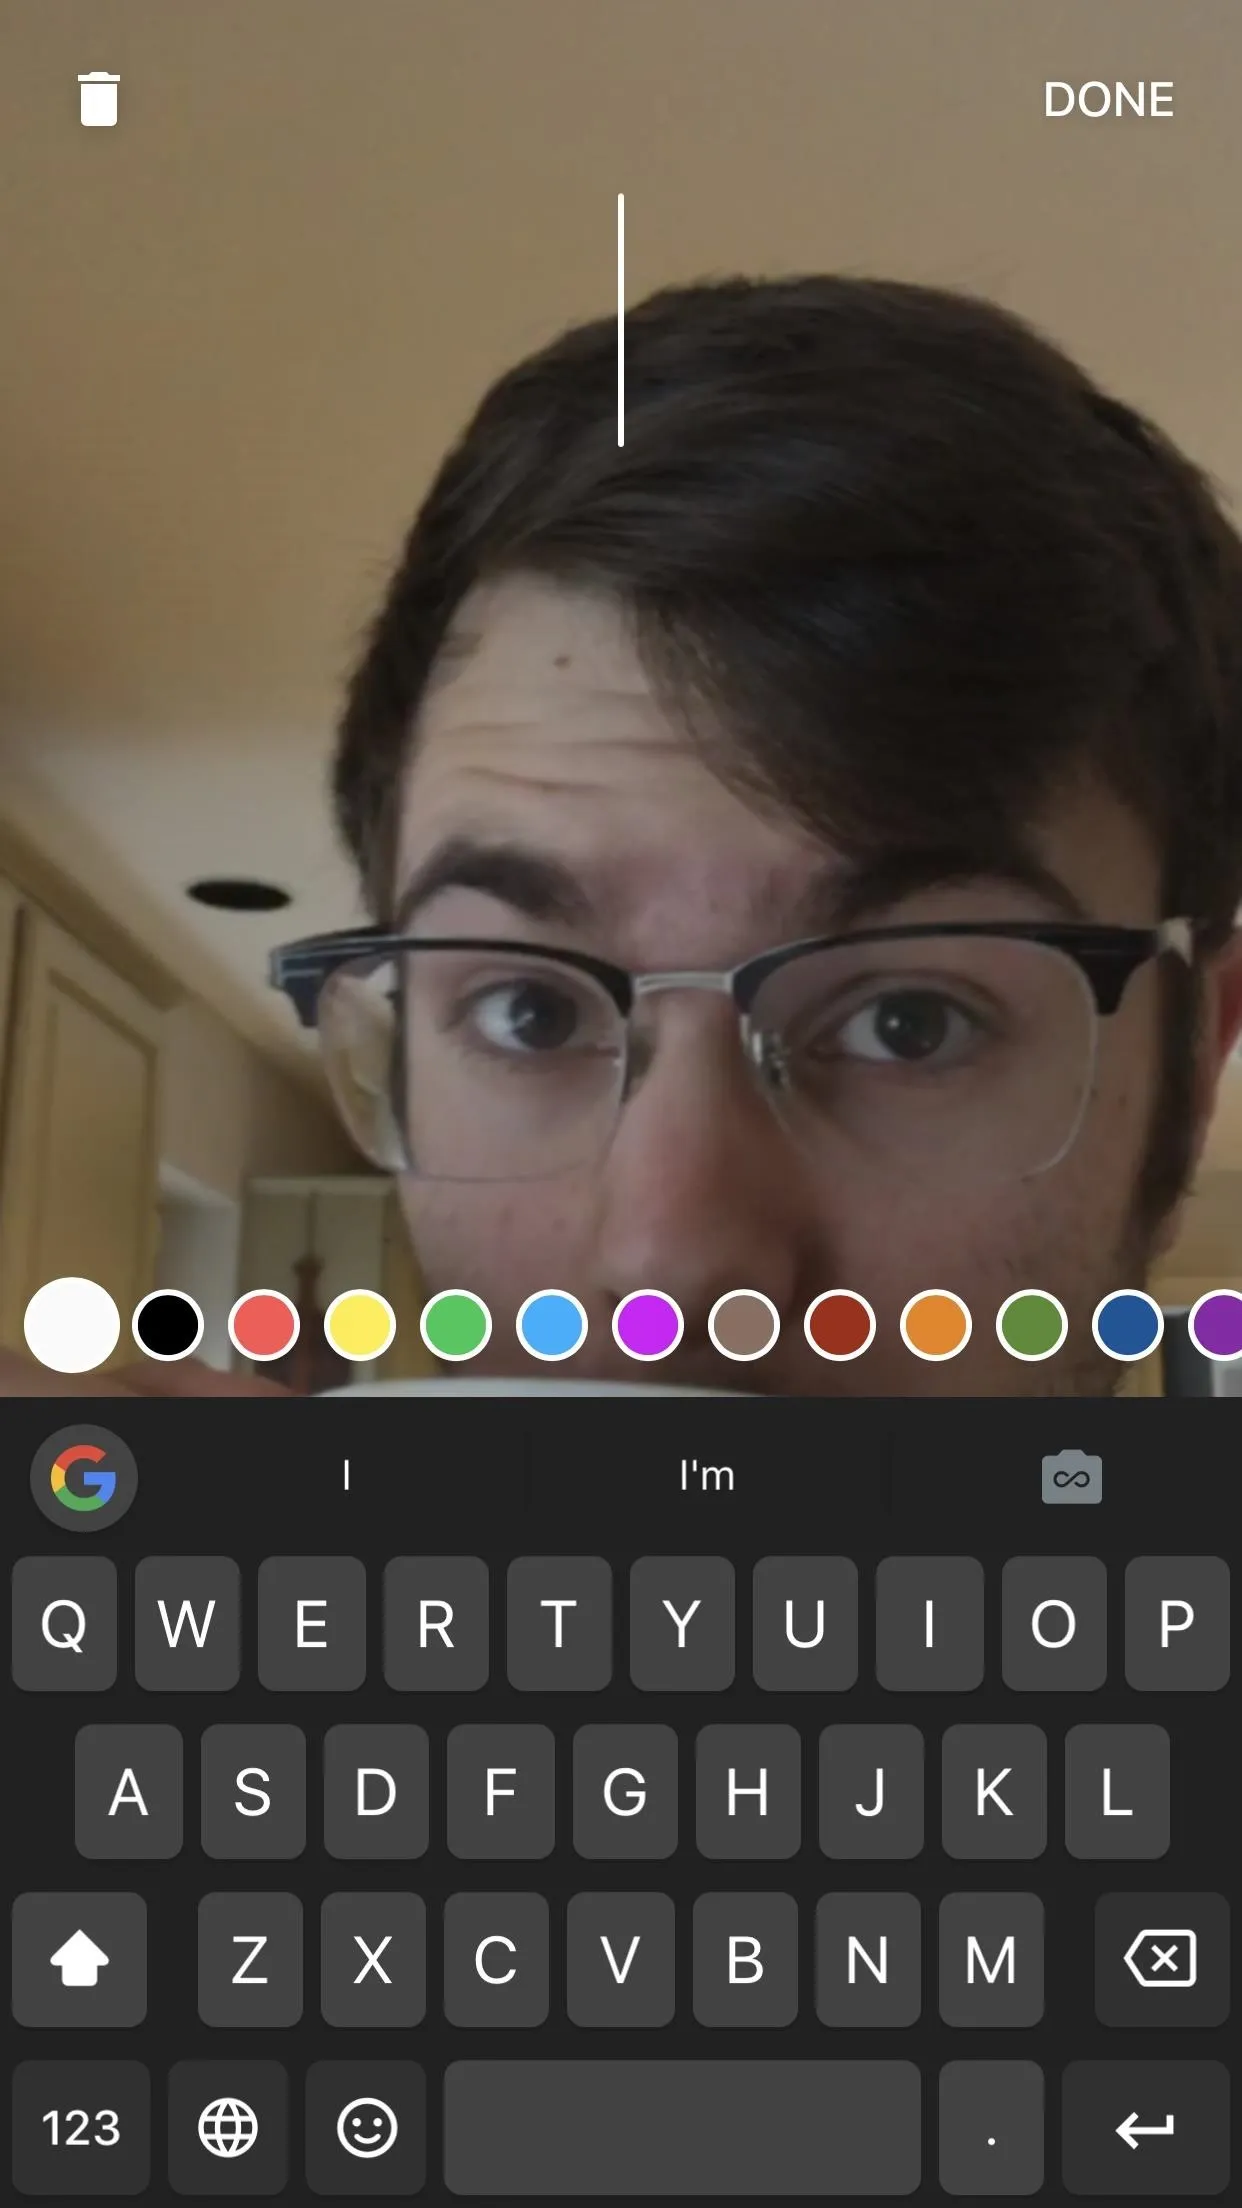
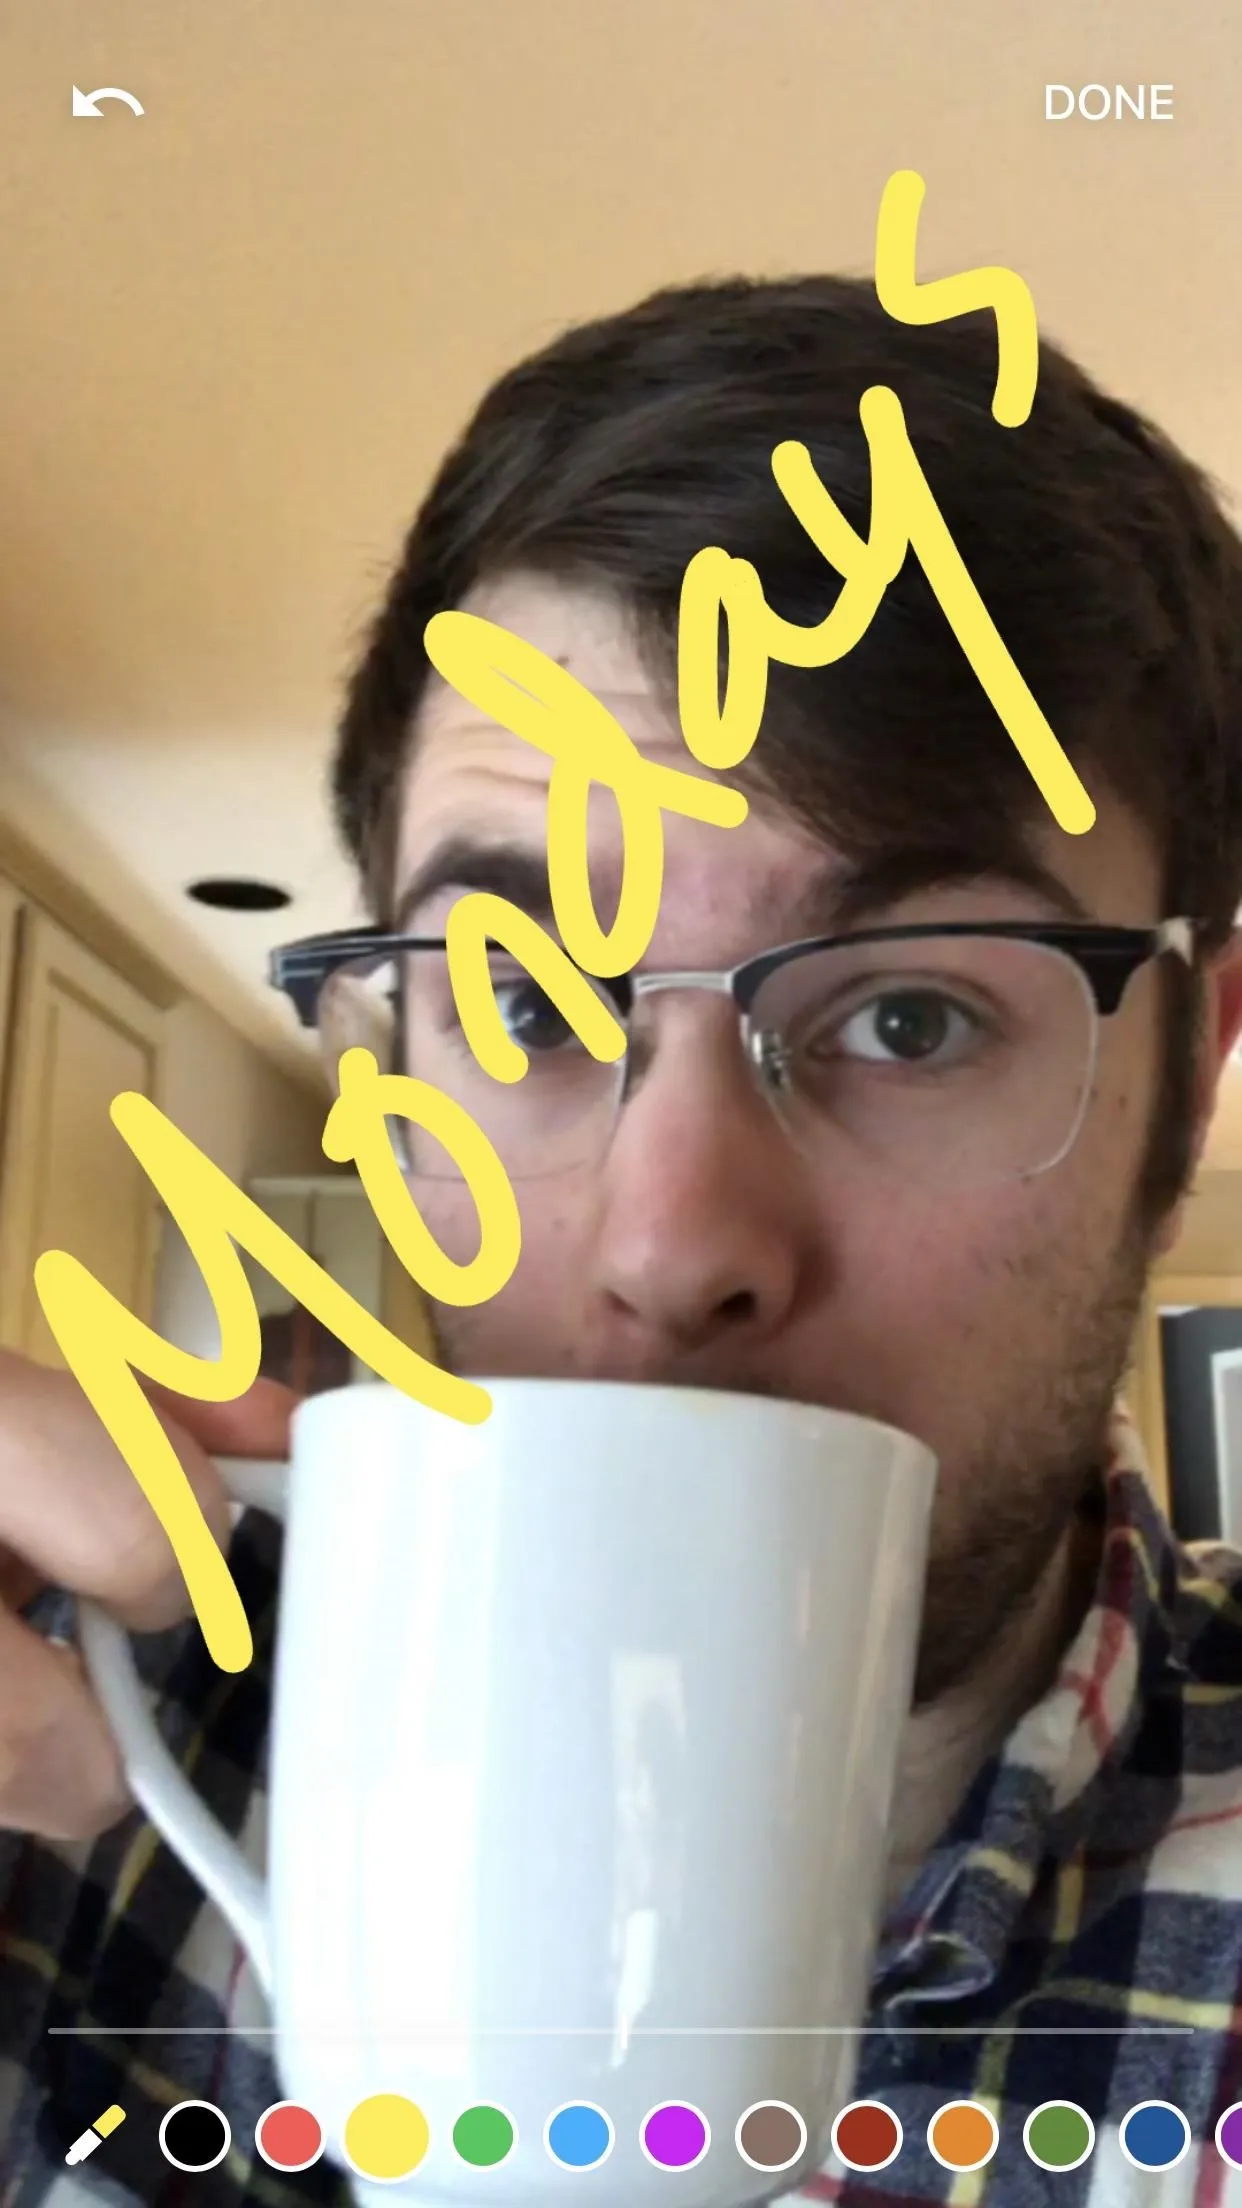
To type on your GIF, tap the "T" at the top of the display (on an iPhone X, it may be slightly obscured by the the notch). Choose a color from the bottom of the display by swiping through the options, then by tapping the one you want. Next, start typing away. When you're satisfied with your message, you can drag it to a desired location on-screen, and change its size by pinching it. When finished, tap "DONE."
To draw, tap the pencil icon to the right of the "T" icon. Like typing, swipe through the colors and tap one to choose it. However, you can also tap on the writing tool in the bottom-left corner to choose between the pencil, pen, or marker, as well as use the slider above the color selector to choose the size of your brush. Finally, write or draw something on the display. If unhappy with any stroke you make, tap the undo arrow in the top-left corner. When finished, tap "DONE."

Saving & Sharing Your GIFs
What's the point of a GIF if no one else is able to see it? Luckily, Google makes it easy to both save and share you GIFs, which, as a messaging feature of a keyboard, is to be expected.
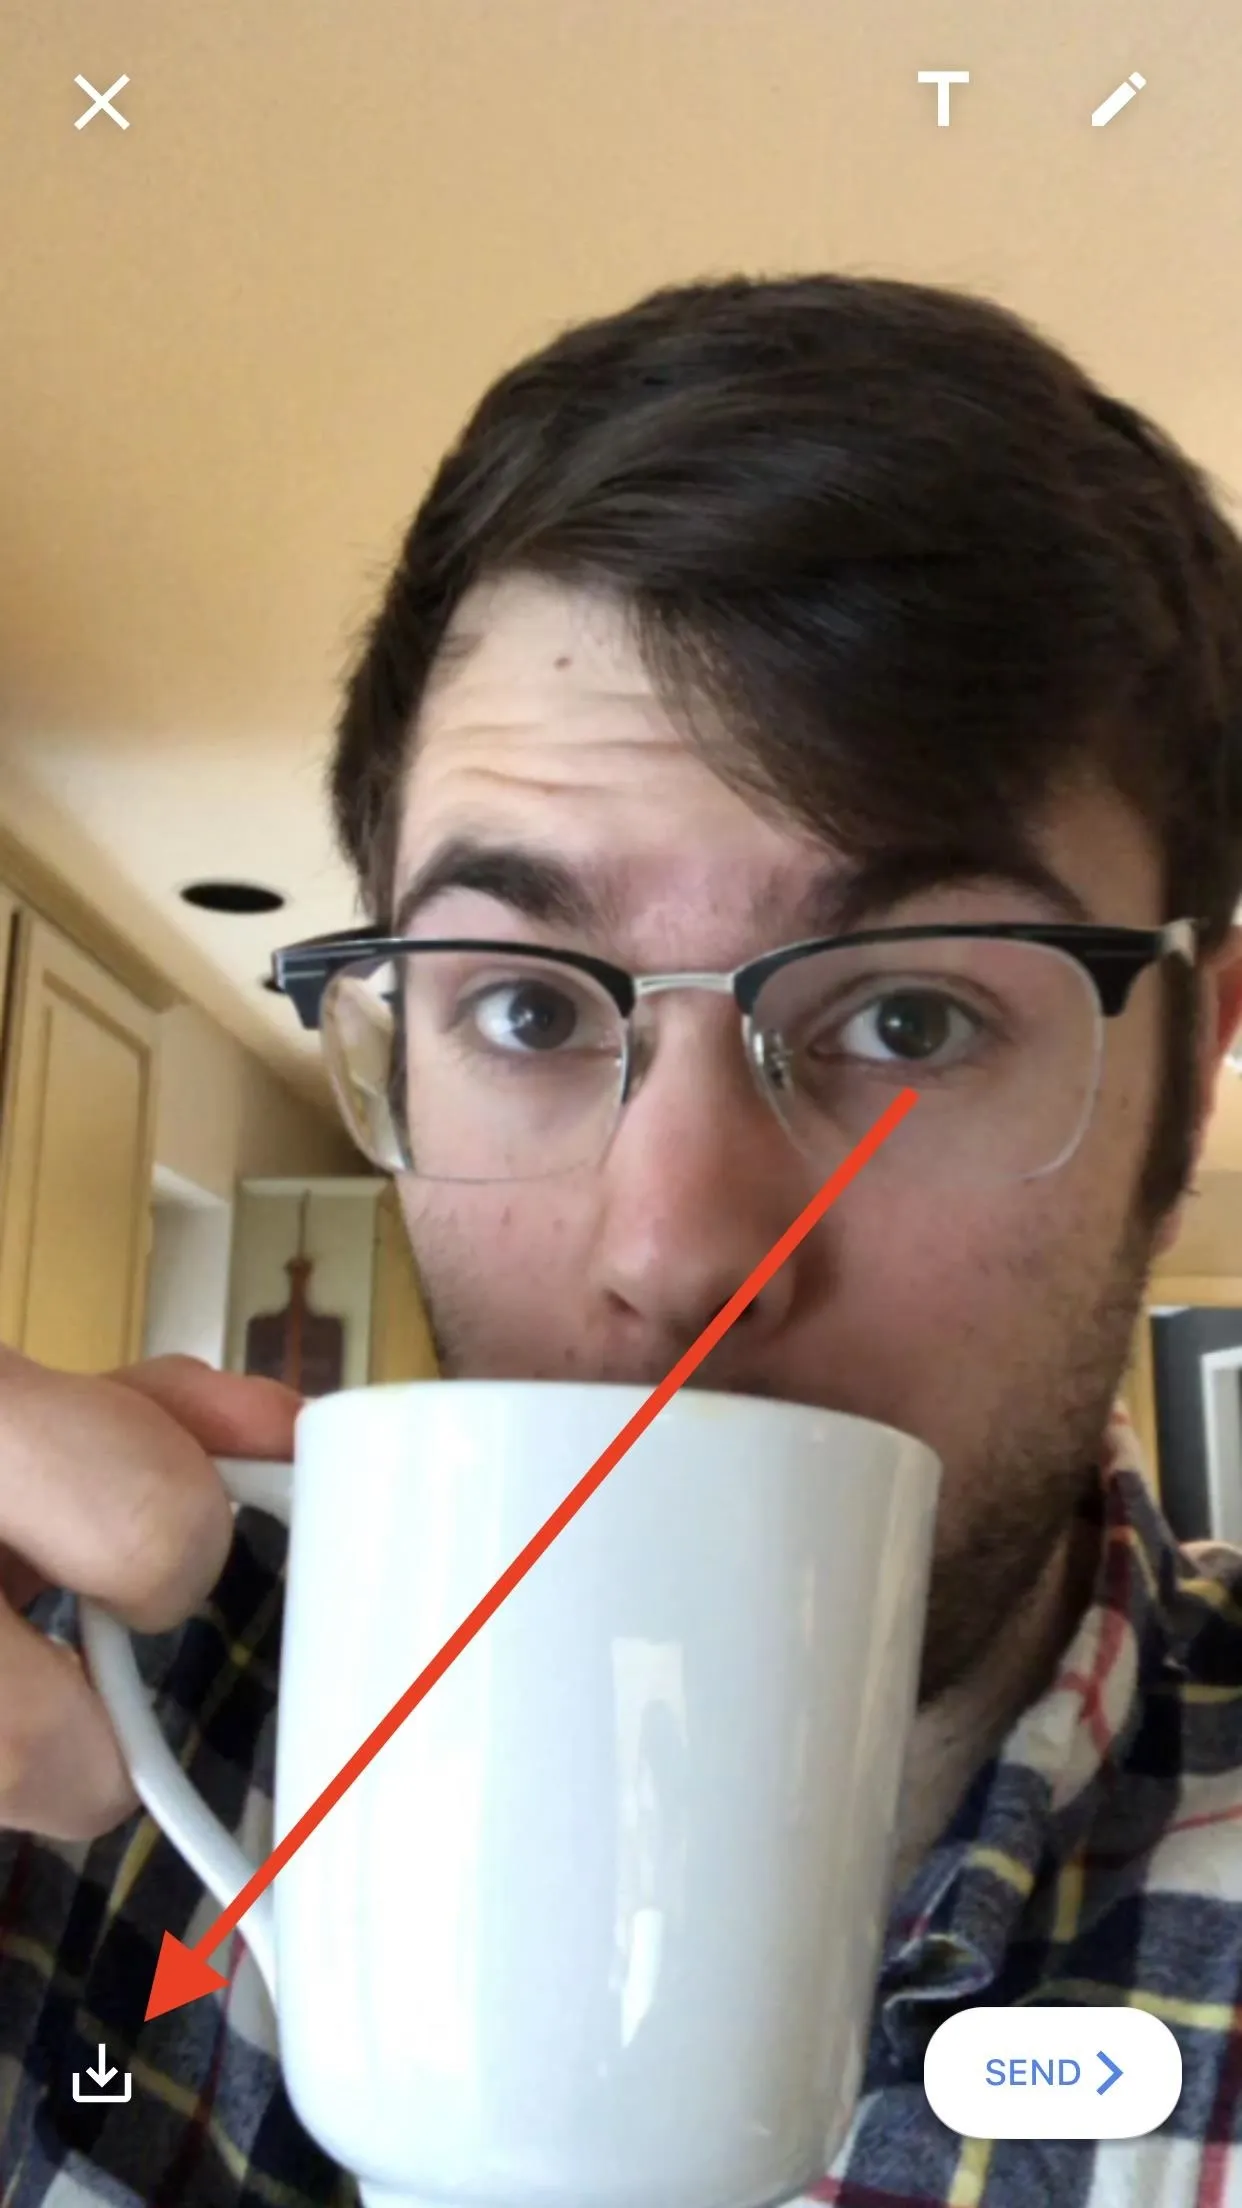
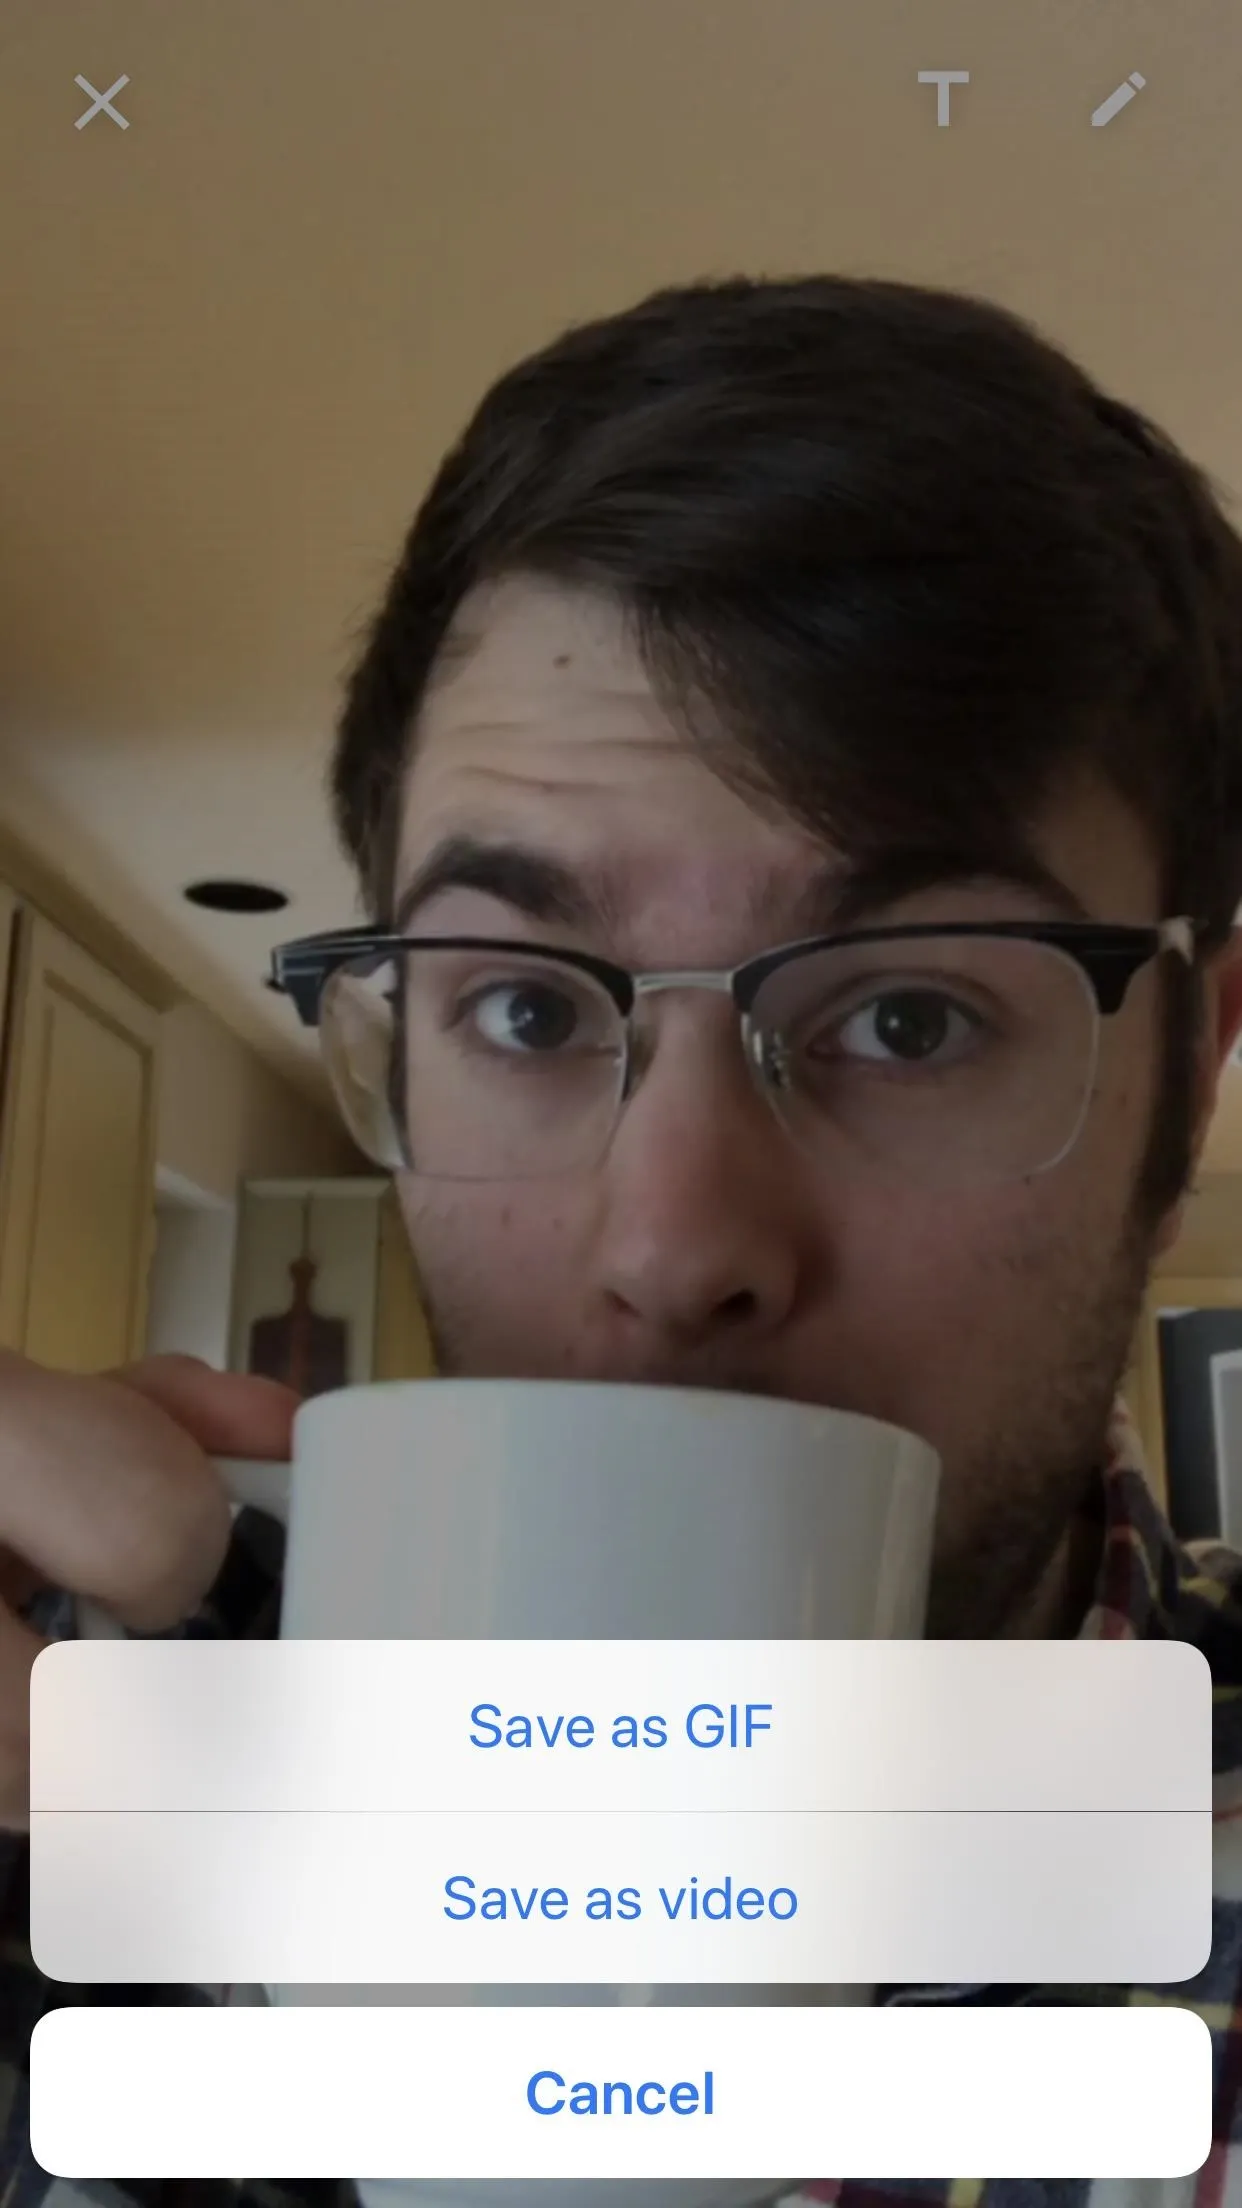
To save your GIFs to your iPhone for later use, tap the save button in the bottom-left corner of the display. When prompted, allow Gboard access to your Photos, then choose to save your creation as a GIF or as a video. Keep in mind that if you save as a video, it will no longer loop.
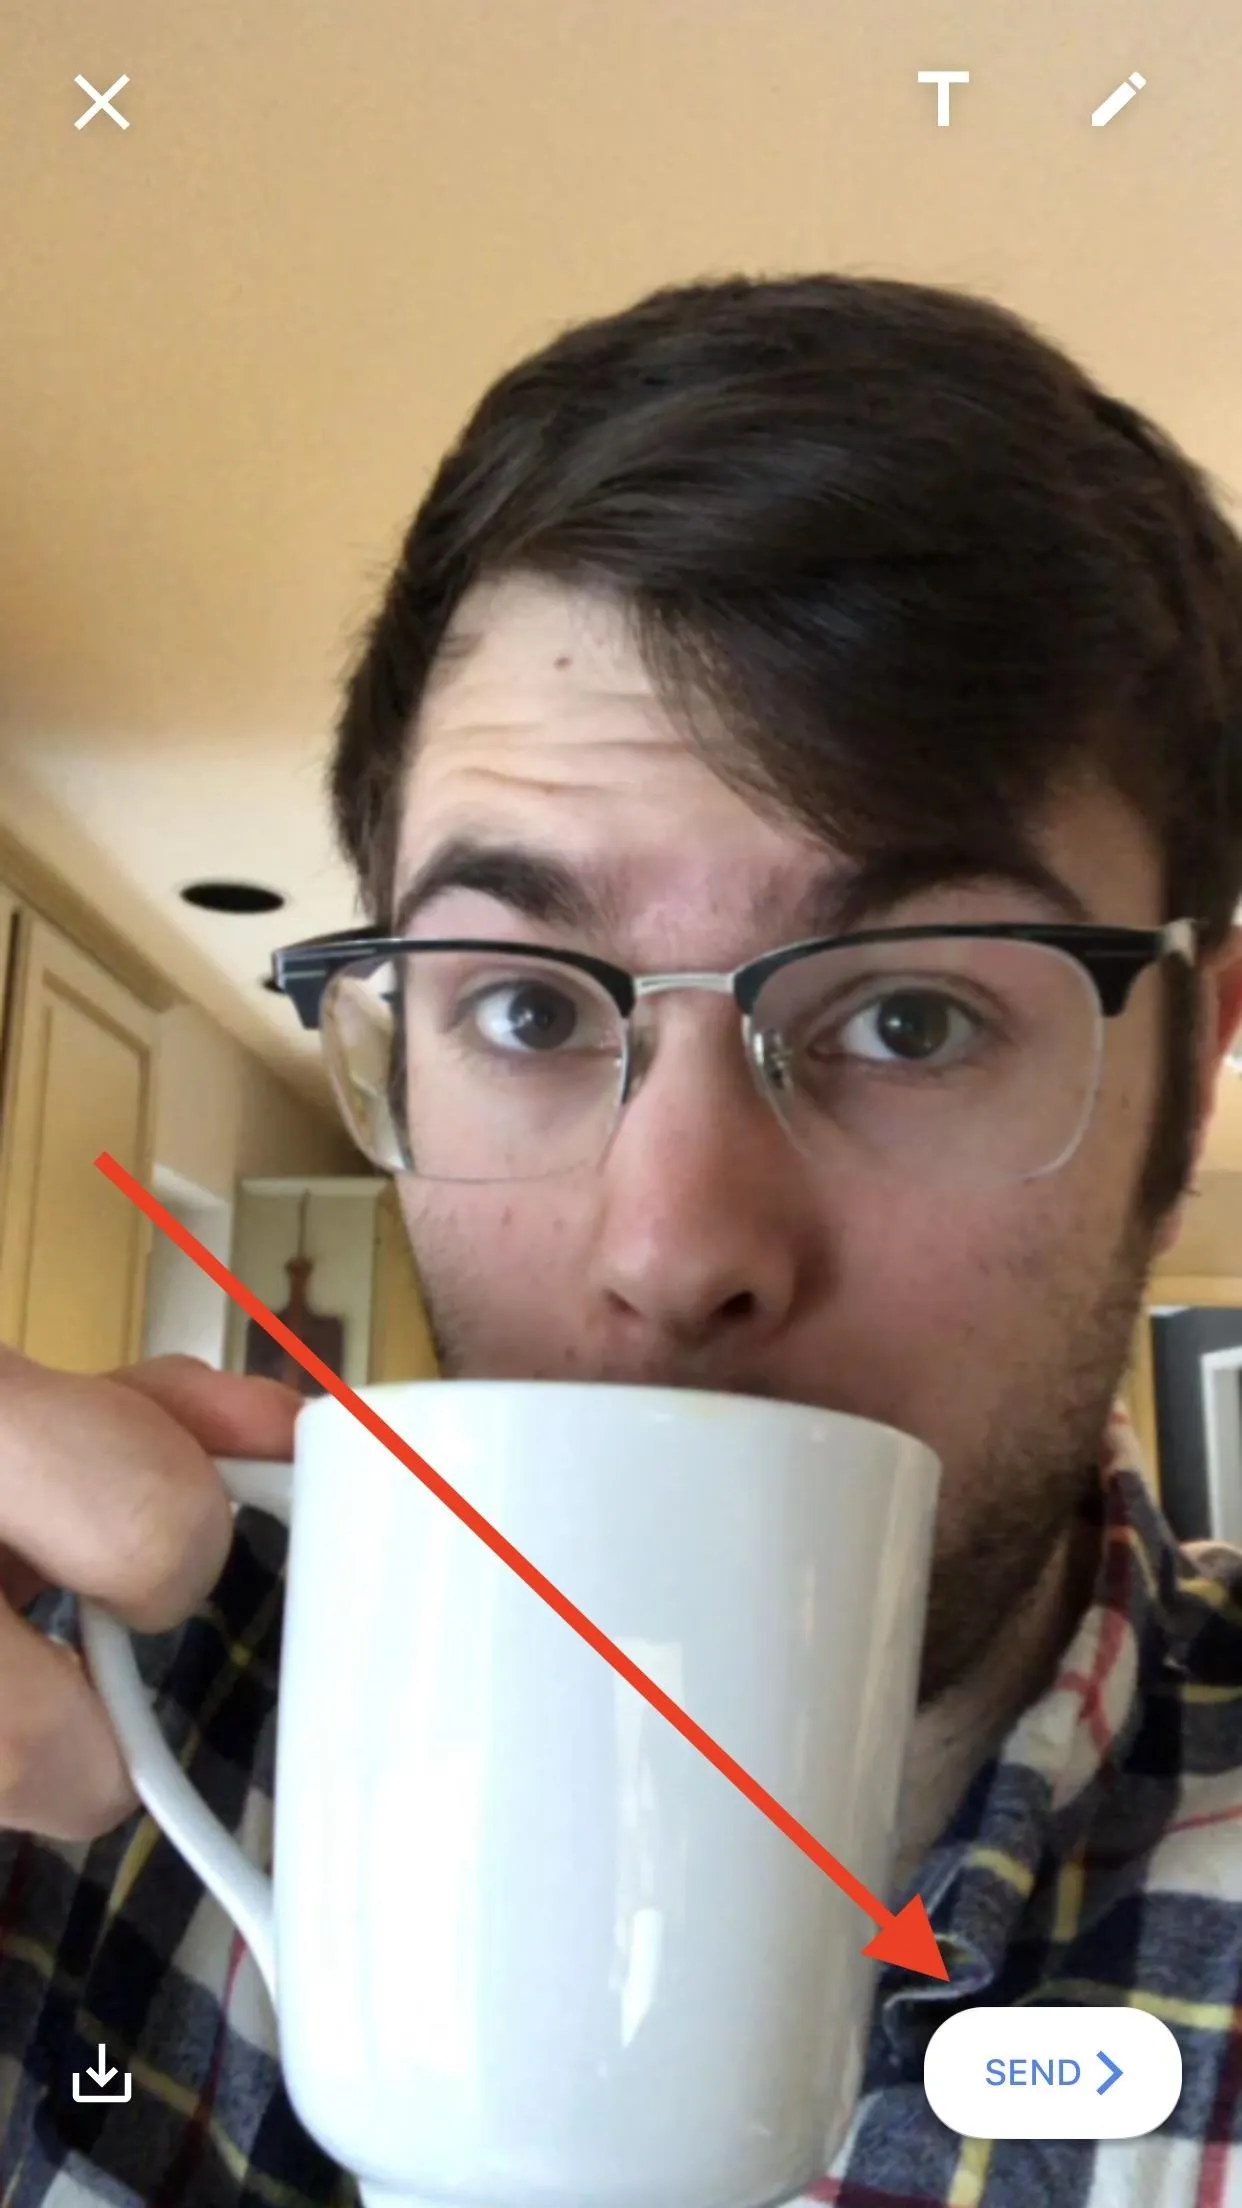
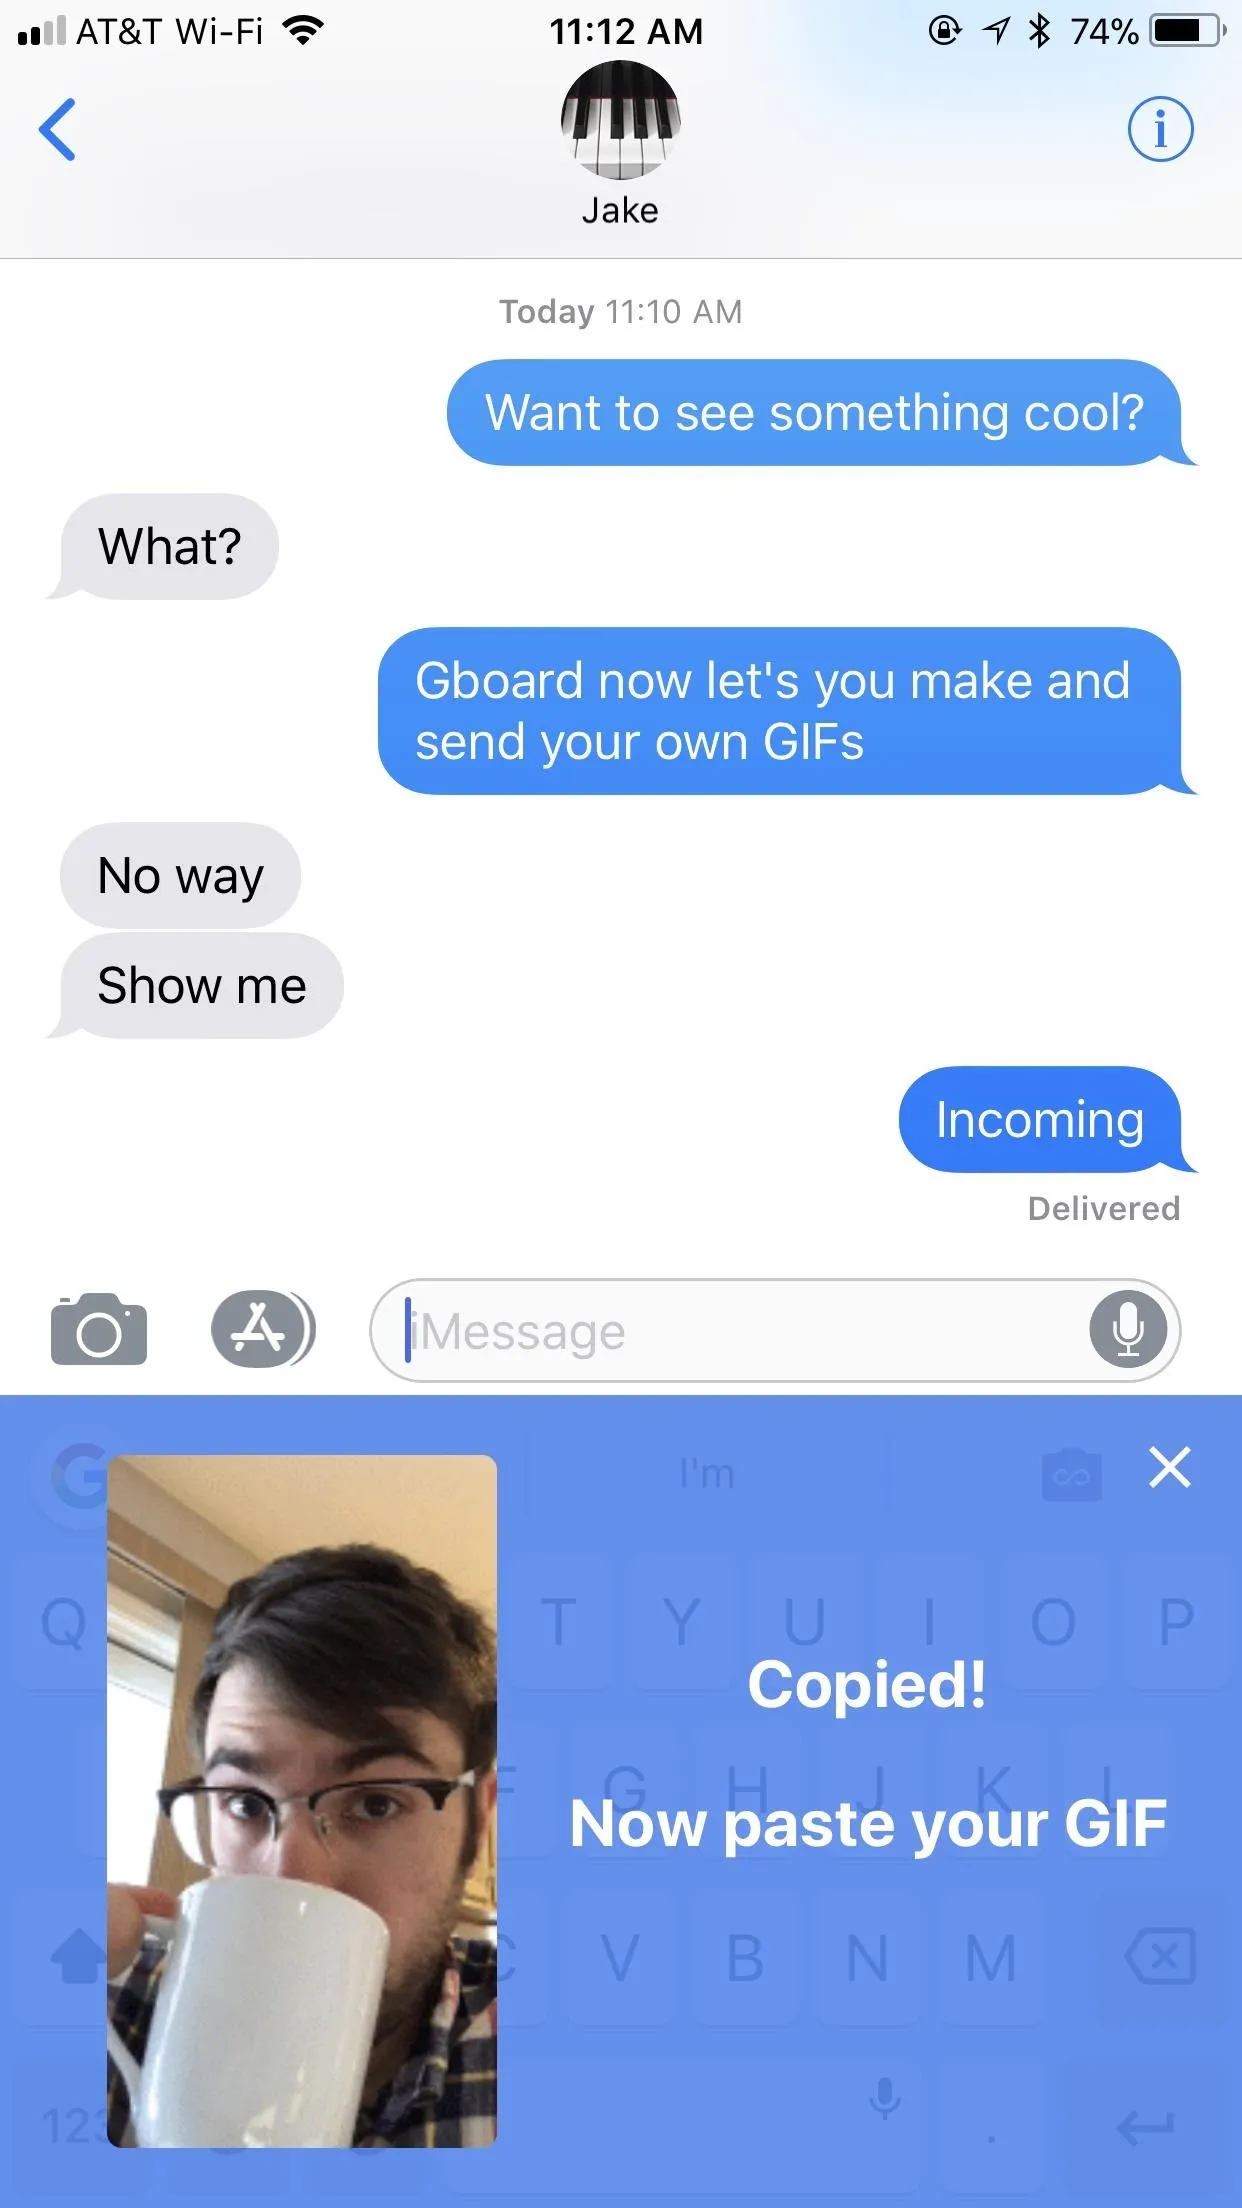
To share your GIF with the world, tap the "SEND" button in the bottom-right corner of the display. Gboard will then copy your GIF to your iPhone's clipboard, but just in case you didn't know that, the app will cover your keyboard with a reminder. Simply paste your GIF into a message, and you'll be all set.
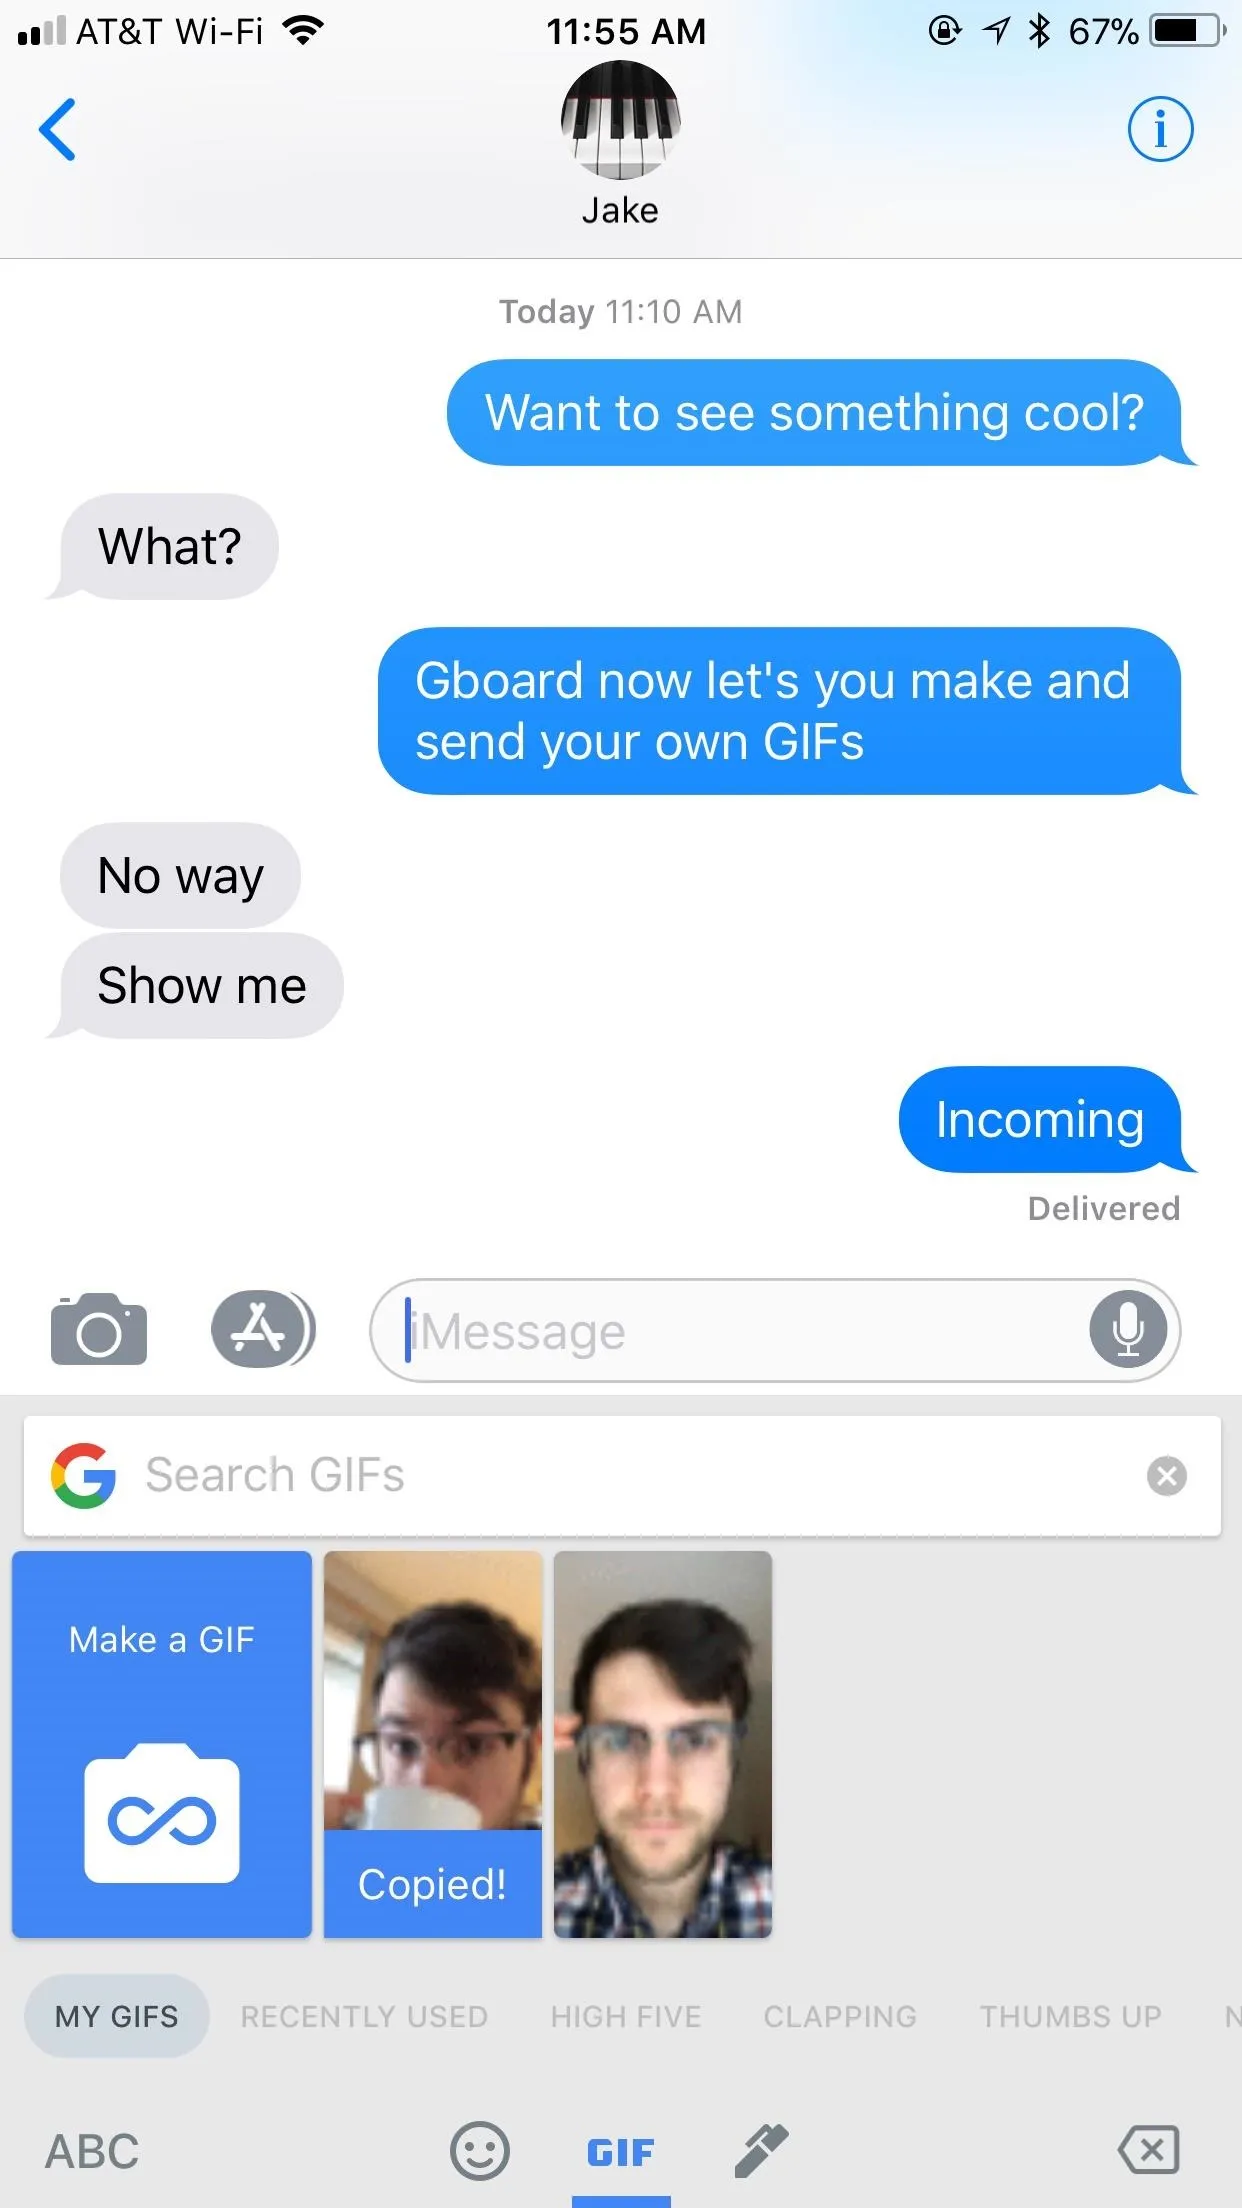
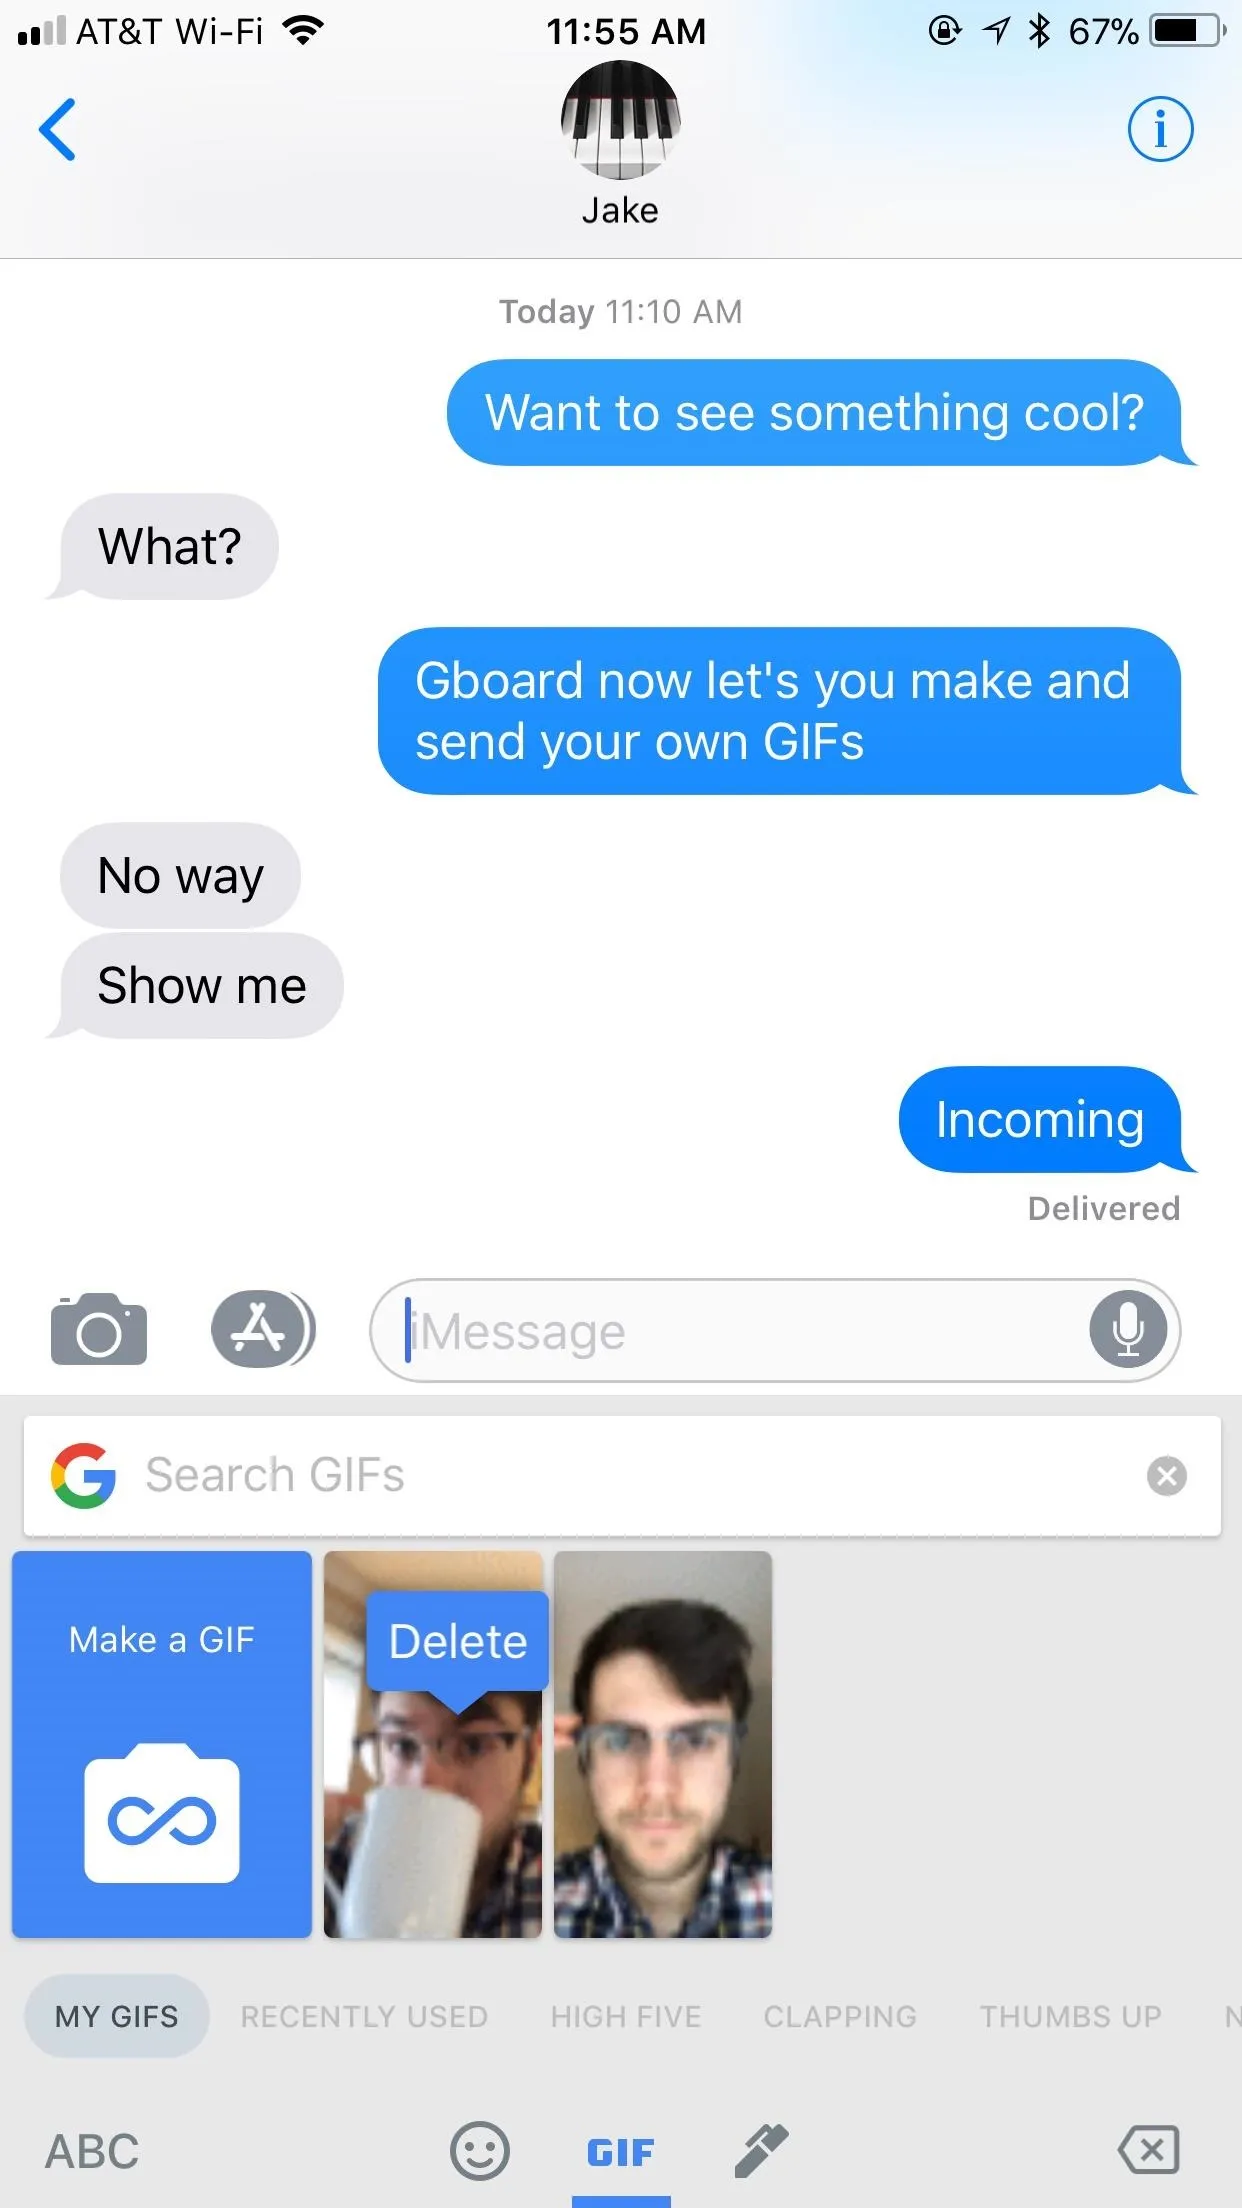
When you choose to send a GIF, Gboard will save it in-app (or in-keyboard). To access your GIF history, tap the smiley face in Gboard, then tap "GIF." Your GIFs will appear under the aptly-named "MY GIFS." Just tap one to copy it again or press-and-hold to present the option to delete.

- Follow Gadget Hacks on Facebook, Twitter, YouTube, and Flipboard
- Follow WonderHowTo on Facebook, Twitter, Pinterest, and Flipboard
Cover image, screenshots, and GIFs by Jake Peterson/Gadget Hacks


Comments
Be the first, drop a comment!