Apple's Reminders app on your iPhone or iPad now comes equipped with a new way to organize your tasks: sections. With sections, you can better sort through reminders in your lists by placing tasks into likeminded buckets or even in kanban-style columns for more efficient workflows.
Sections in reminder lists can help you visualize your to-dos into clear categories, which can help prevent tasks from getting lost in a sea of reminders. The new grocery list template in Reminders will automatically create sections to help you navigate the grocery store by departments such as produce, deli, and pet food.
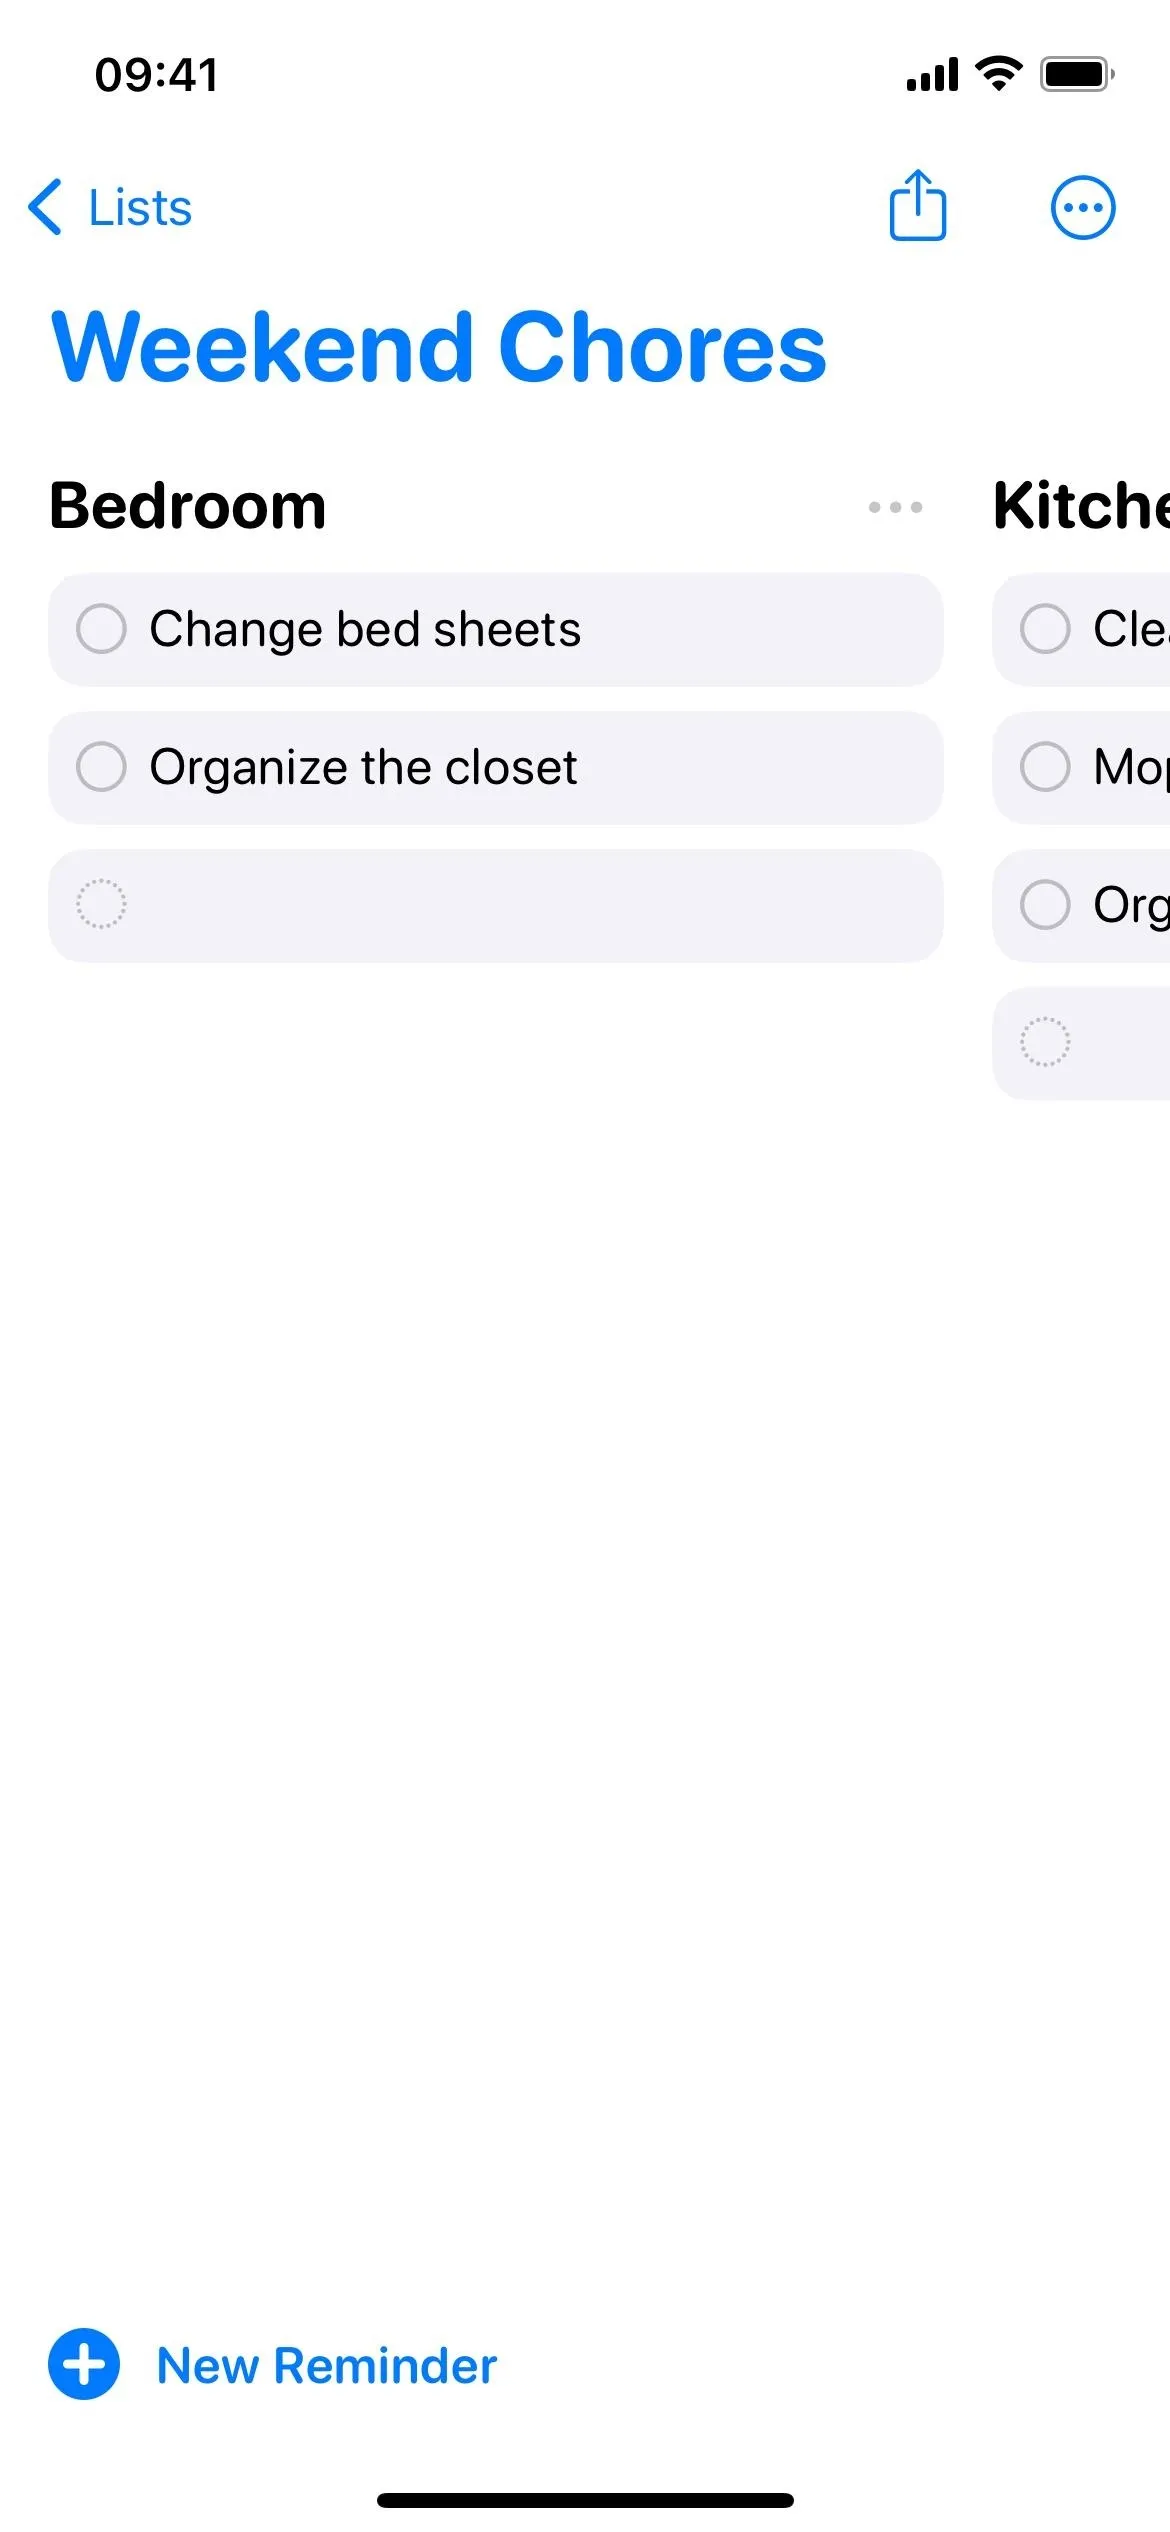
If you view sections in columns, it emulates the feel of kanban boards, which depict tasks at various stages of a work process as they move along from column to column; such is possible in other task managers such as Asana and Trello. Columns view can be helpful to just yourself and even team members if you share your reminder lists as work projects.
- Don't Miss: Apple's Reminders App Has 7 Hot New Features on iOS 17 That Can Help Boost Your Productivity and More
List sections are supported on iOS 17, iPadOS 17, and macOS 14 Sonoma, and they can be viewed on watchOS 10. Sections are unique to each list and will only appear in the "All" smart list, not in others like "Today" or "Scheduled."
Creating Sections in Your Lists
While the grocery list feature in Reminders will automatically organize entries into sections for you, you can create custom headers in any standard iCloud list, adding a personalized touch to task organization. Note that sections are unsupported for lists saved to Outlook, Yahoo, or other third-party accounts.
Create Sections and Add Reminders to Them
- Navigate to any list within Reminders.
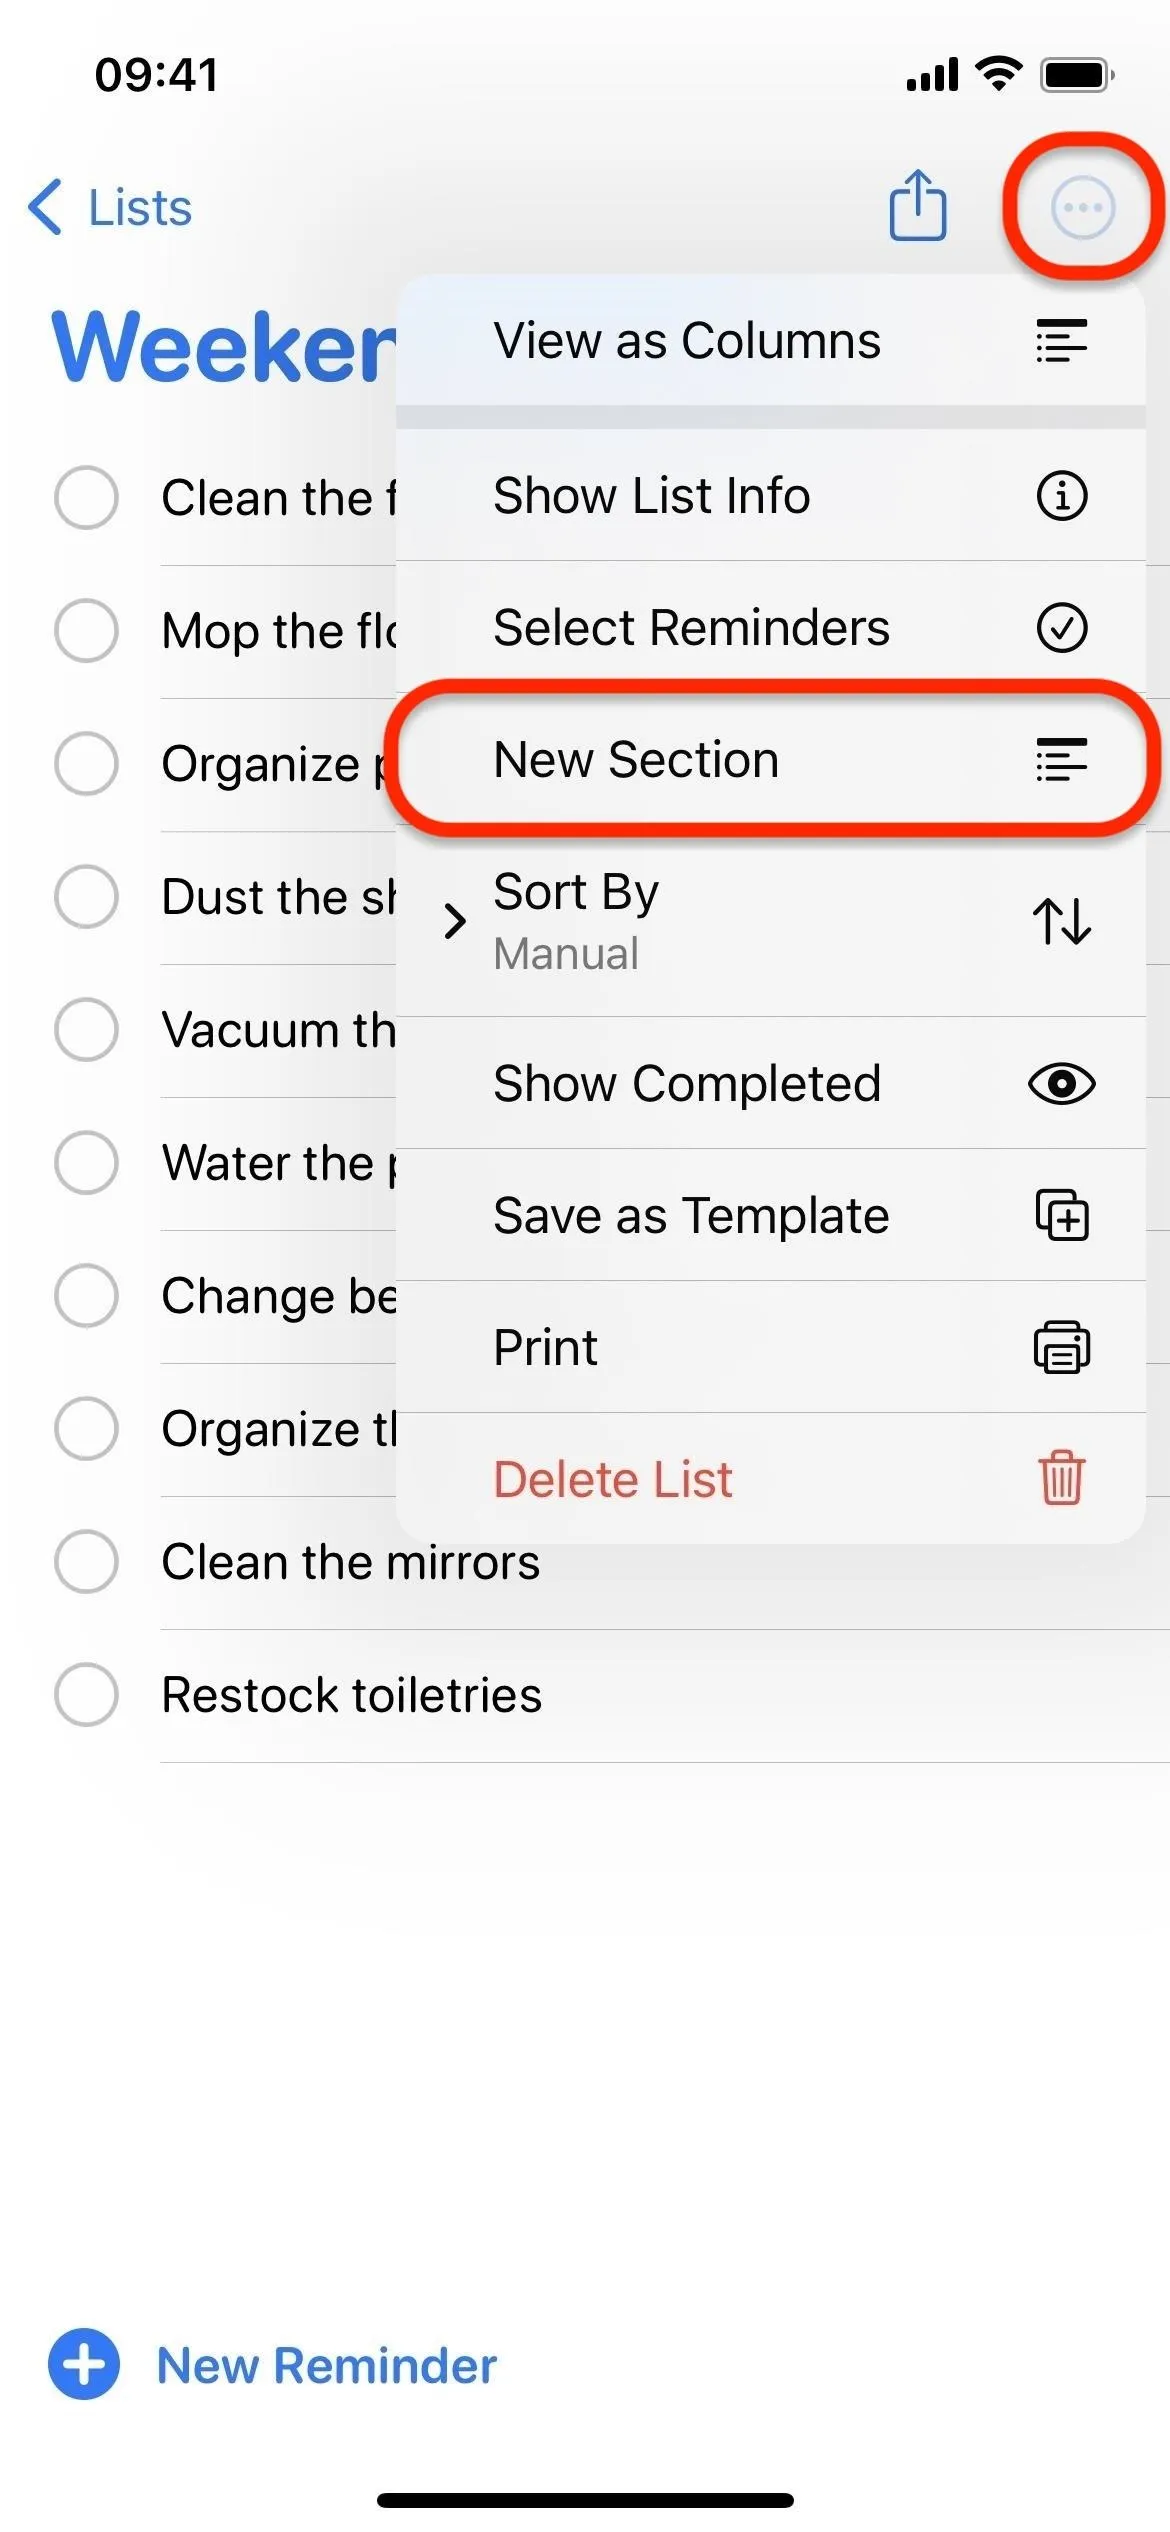
- Tap the ellipsis (•••) to open more options.
- Select "New Section" to add one to your list. If at least one section is already in the list, tap "Manage Sections" followed by "New Section."
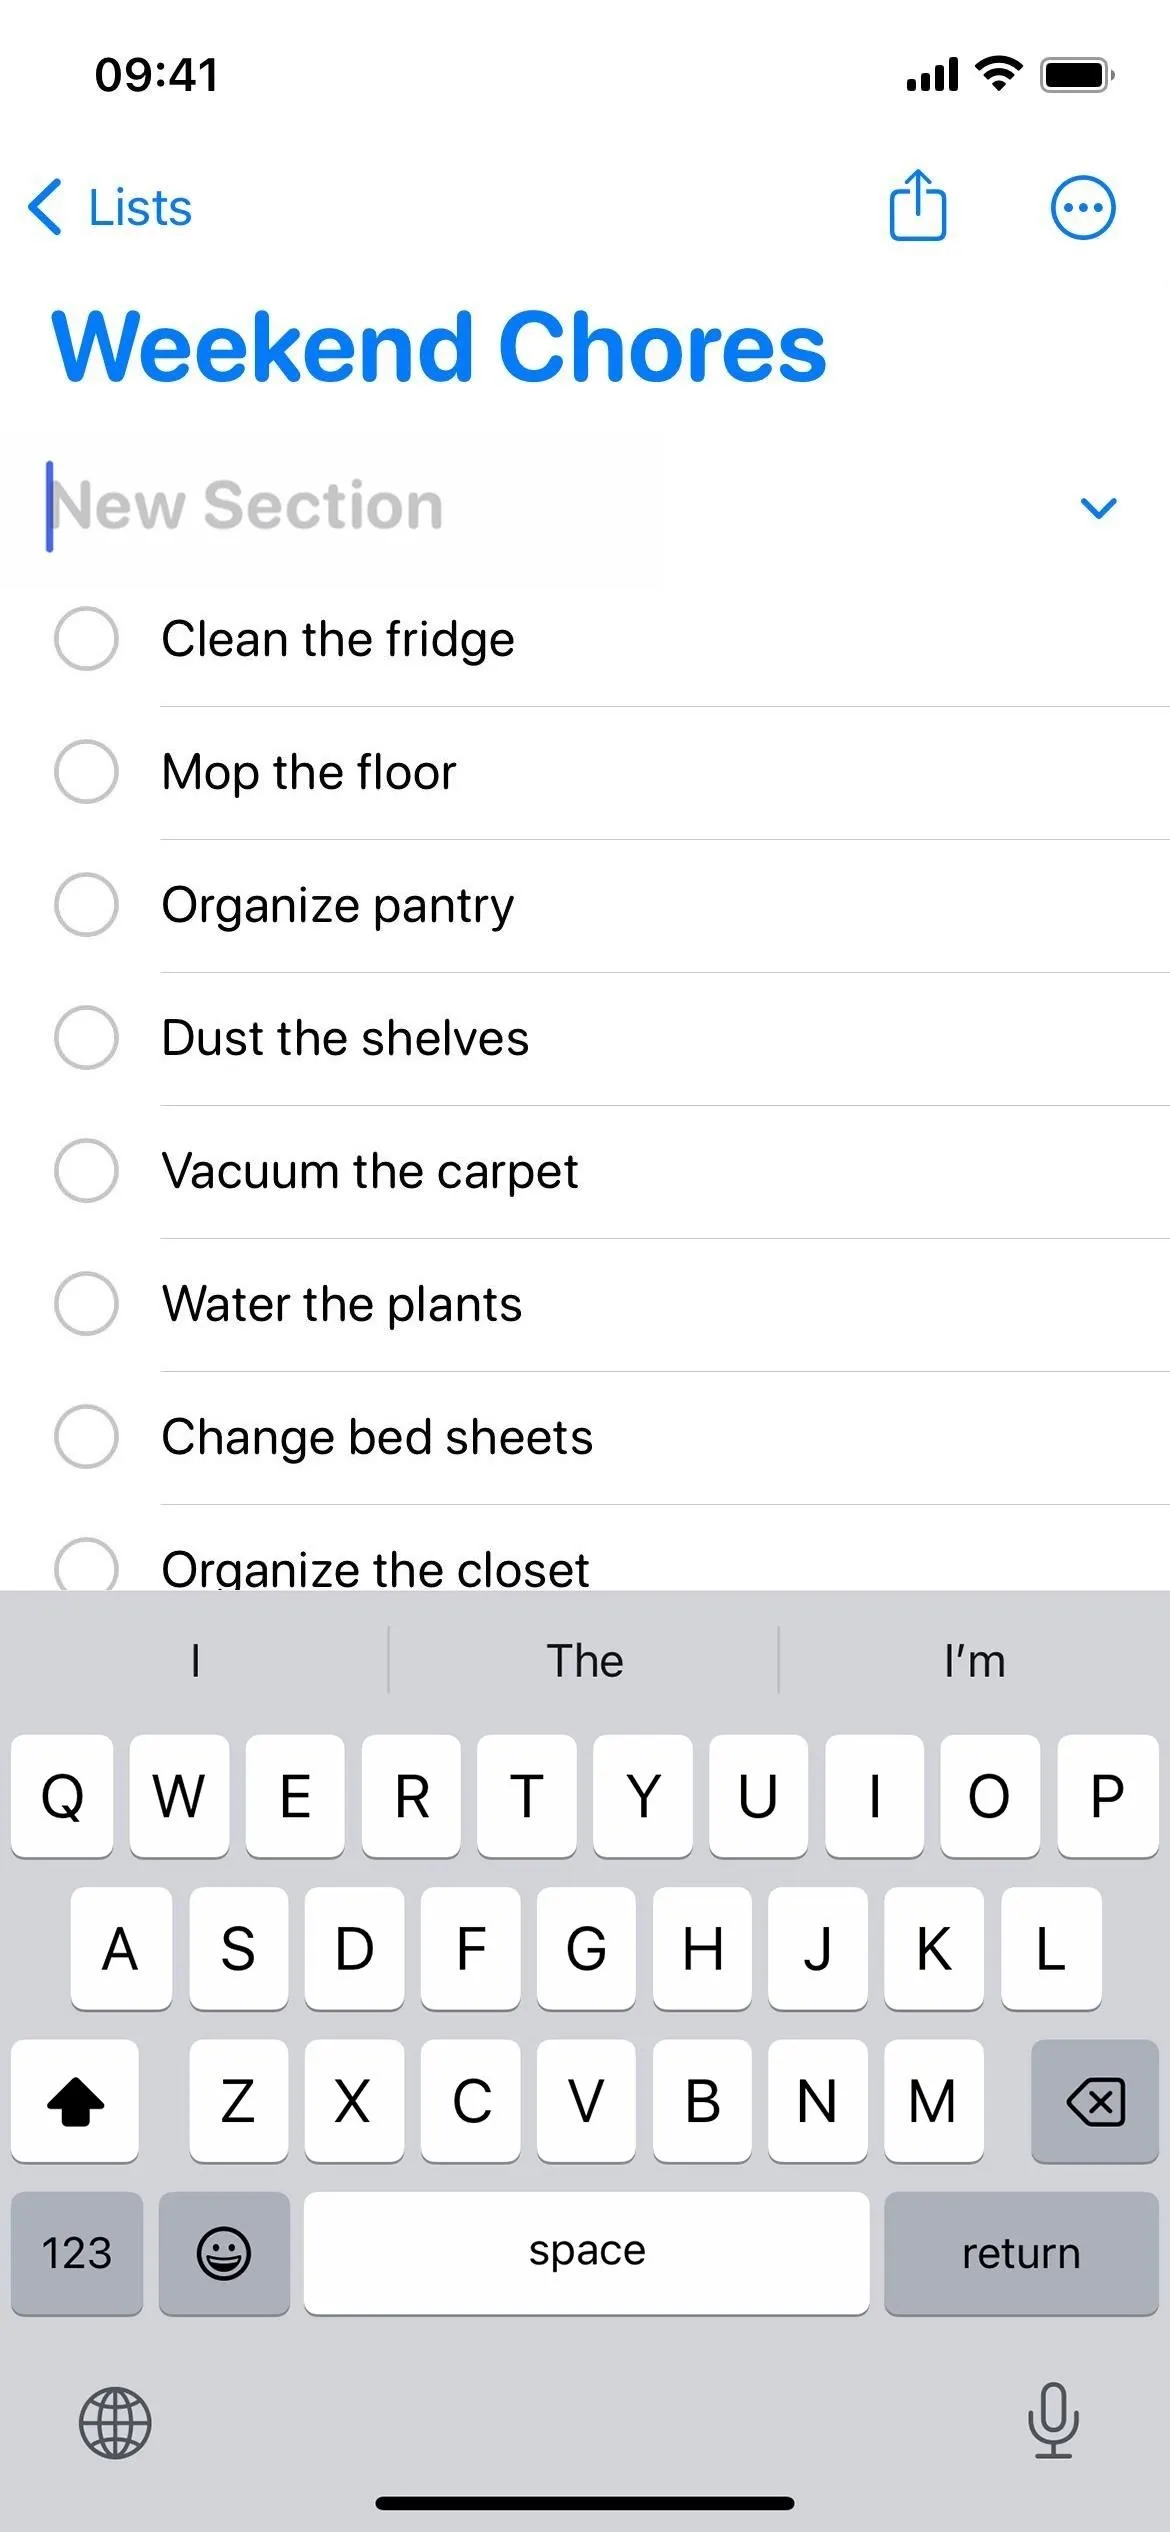
- Type the name of your new section.
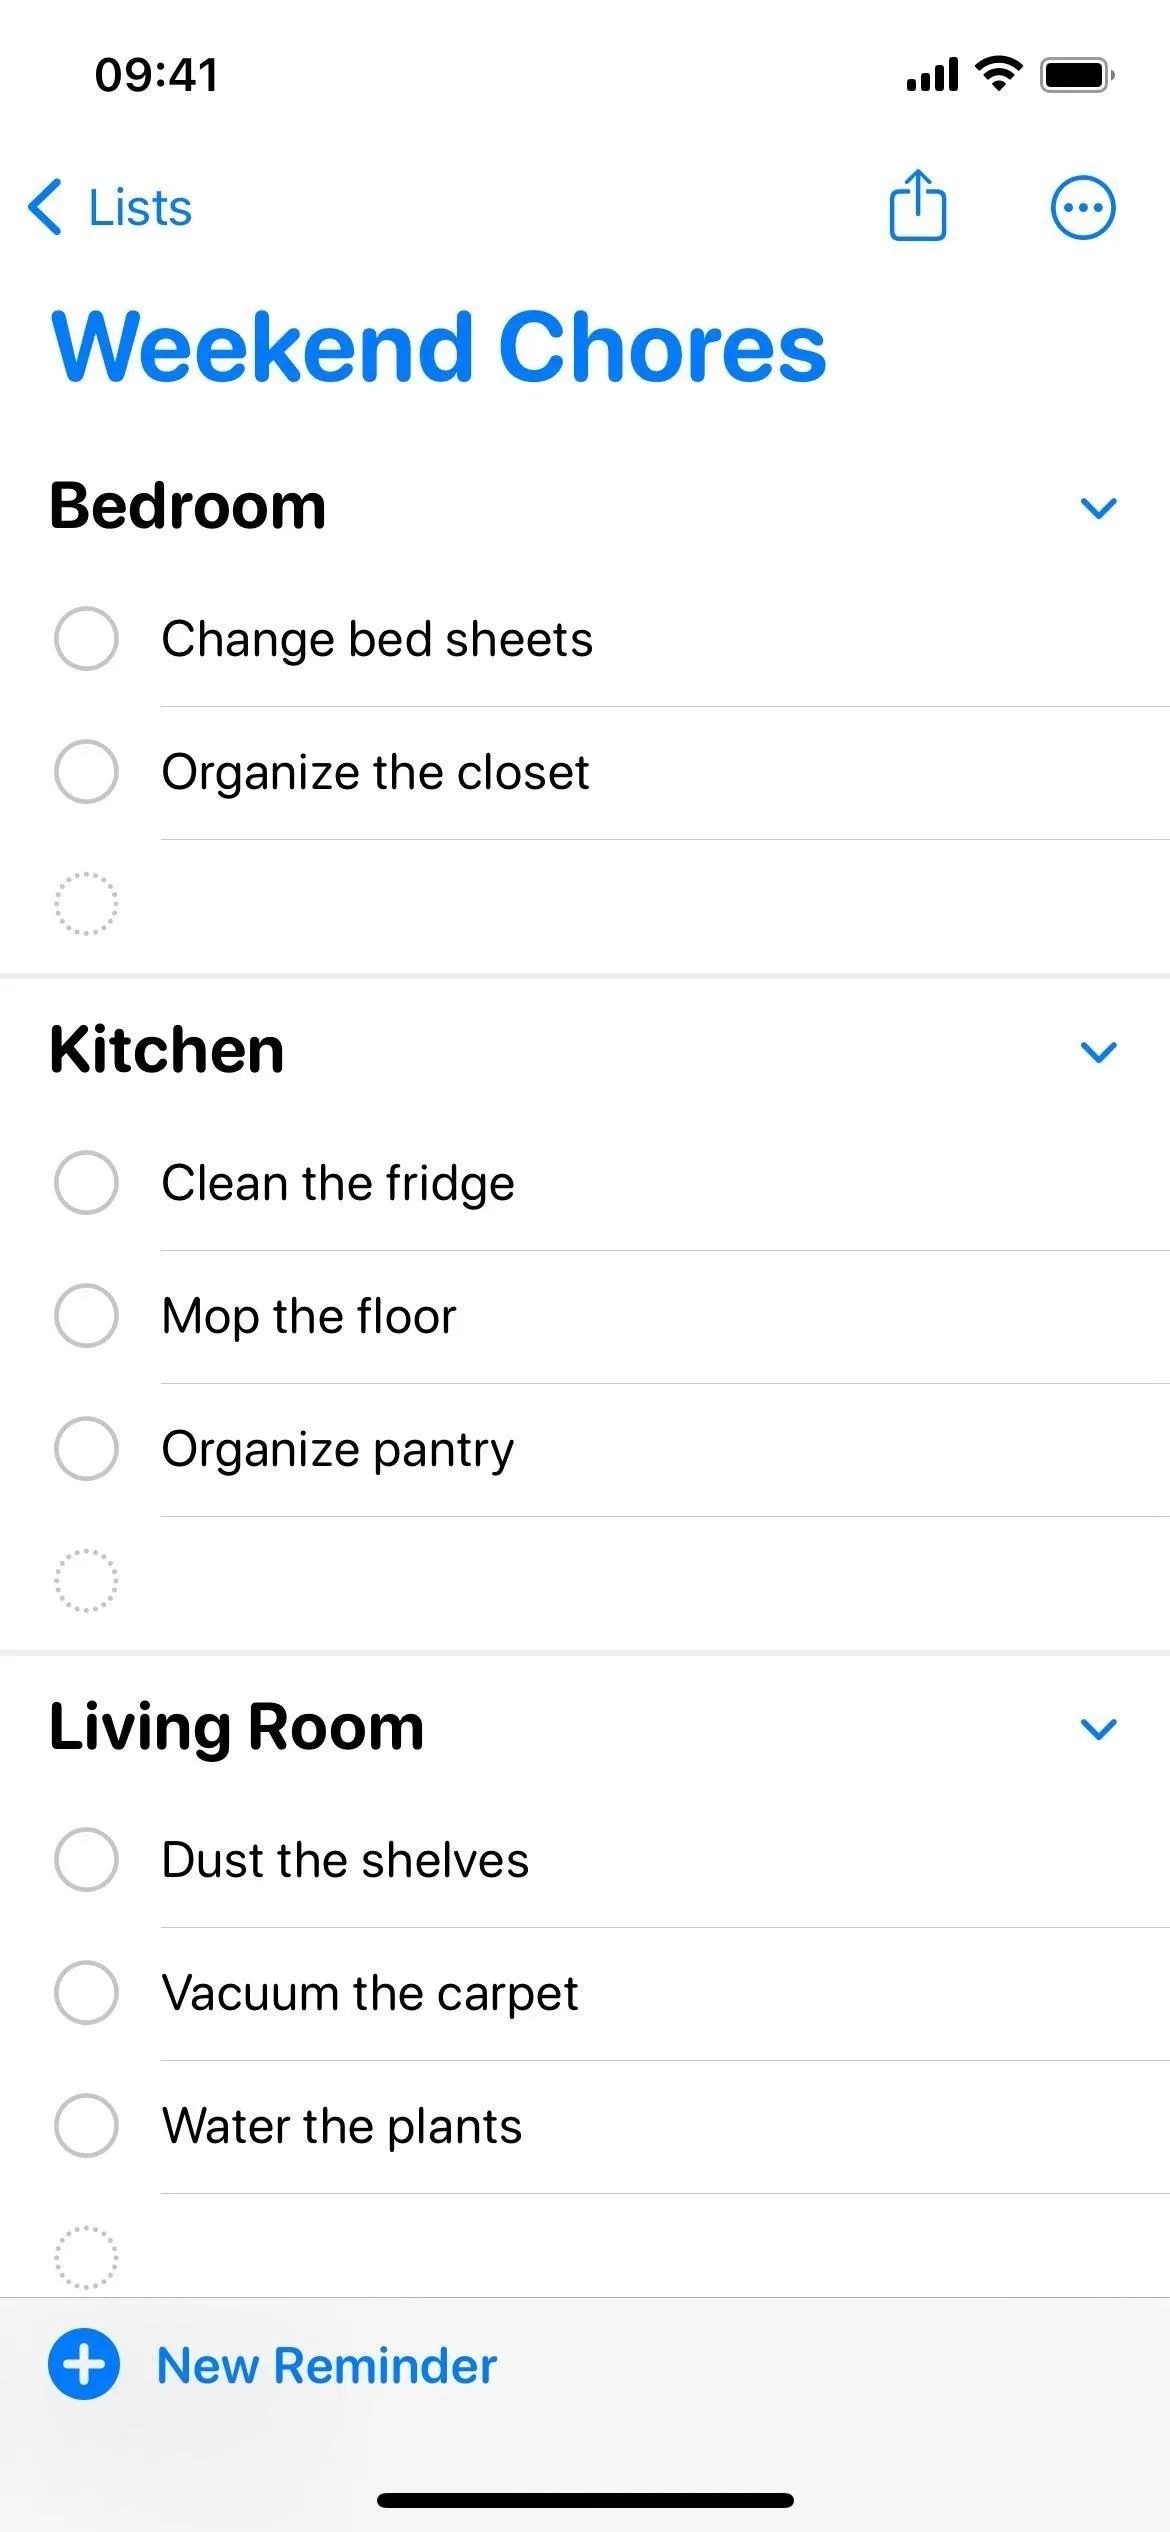
- Create new reminders for the section, drag and drop existing ones to the section, or use Option 2 or 3 below to move reminders to the section.


Select Reminders and Create New Sections for Them
- Navigate to any list within Reminders.
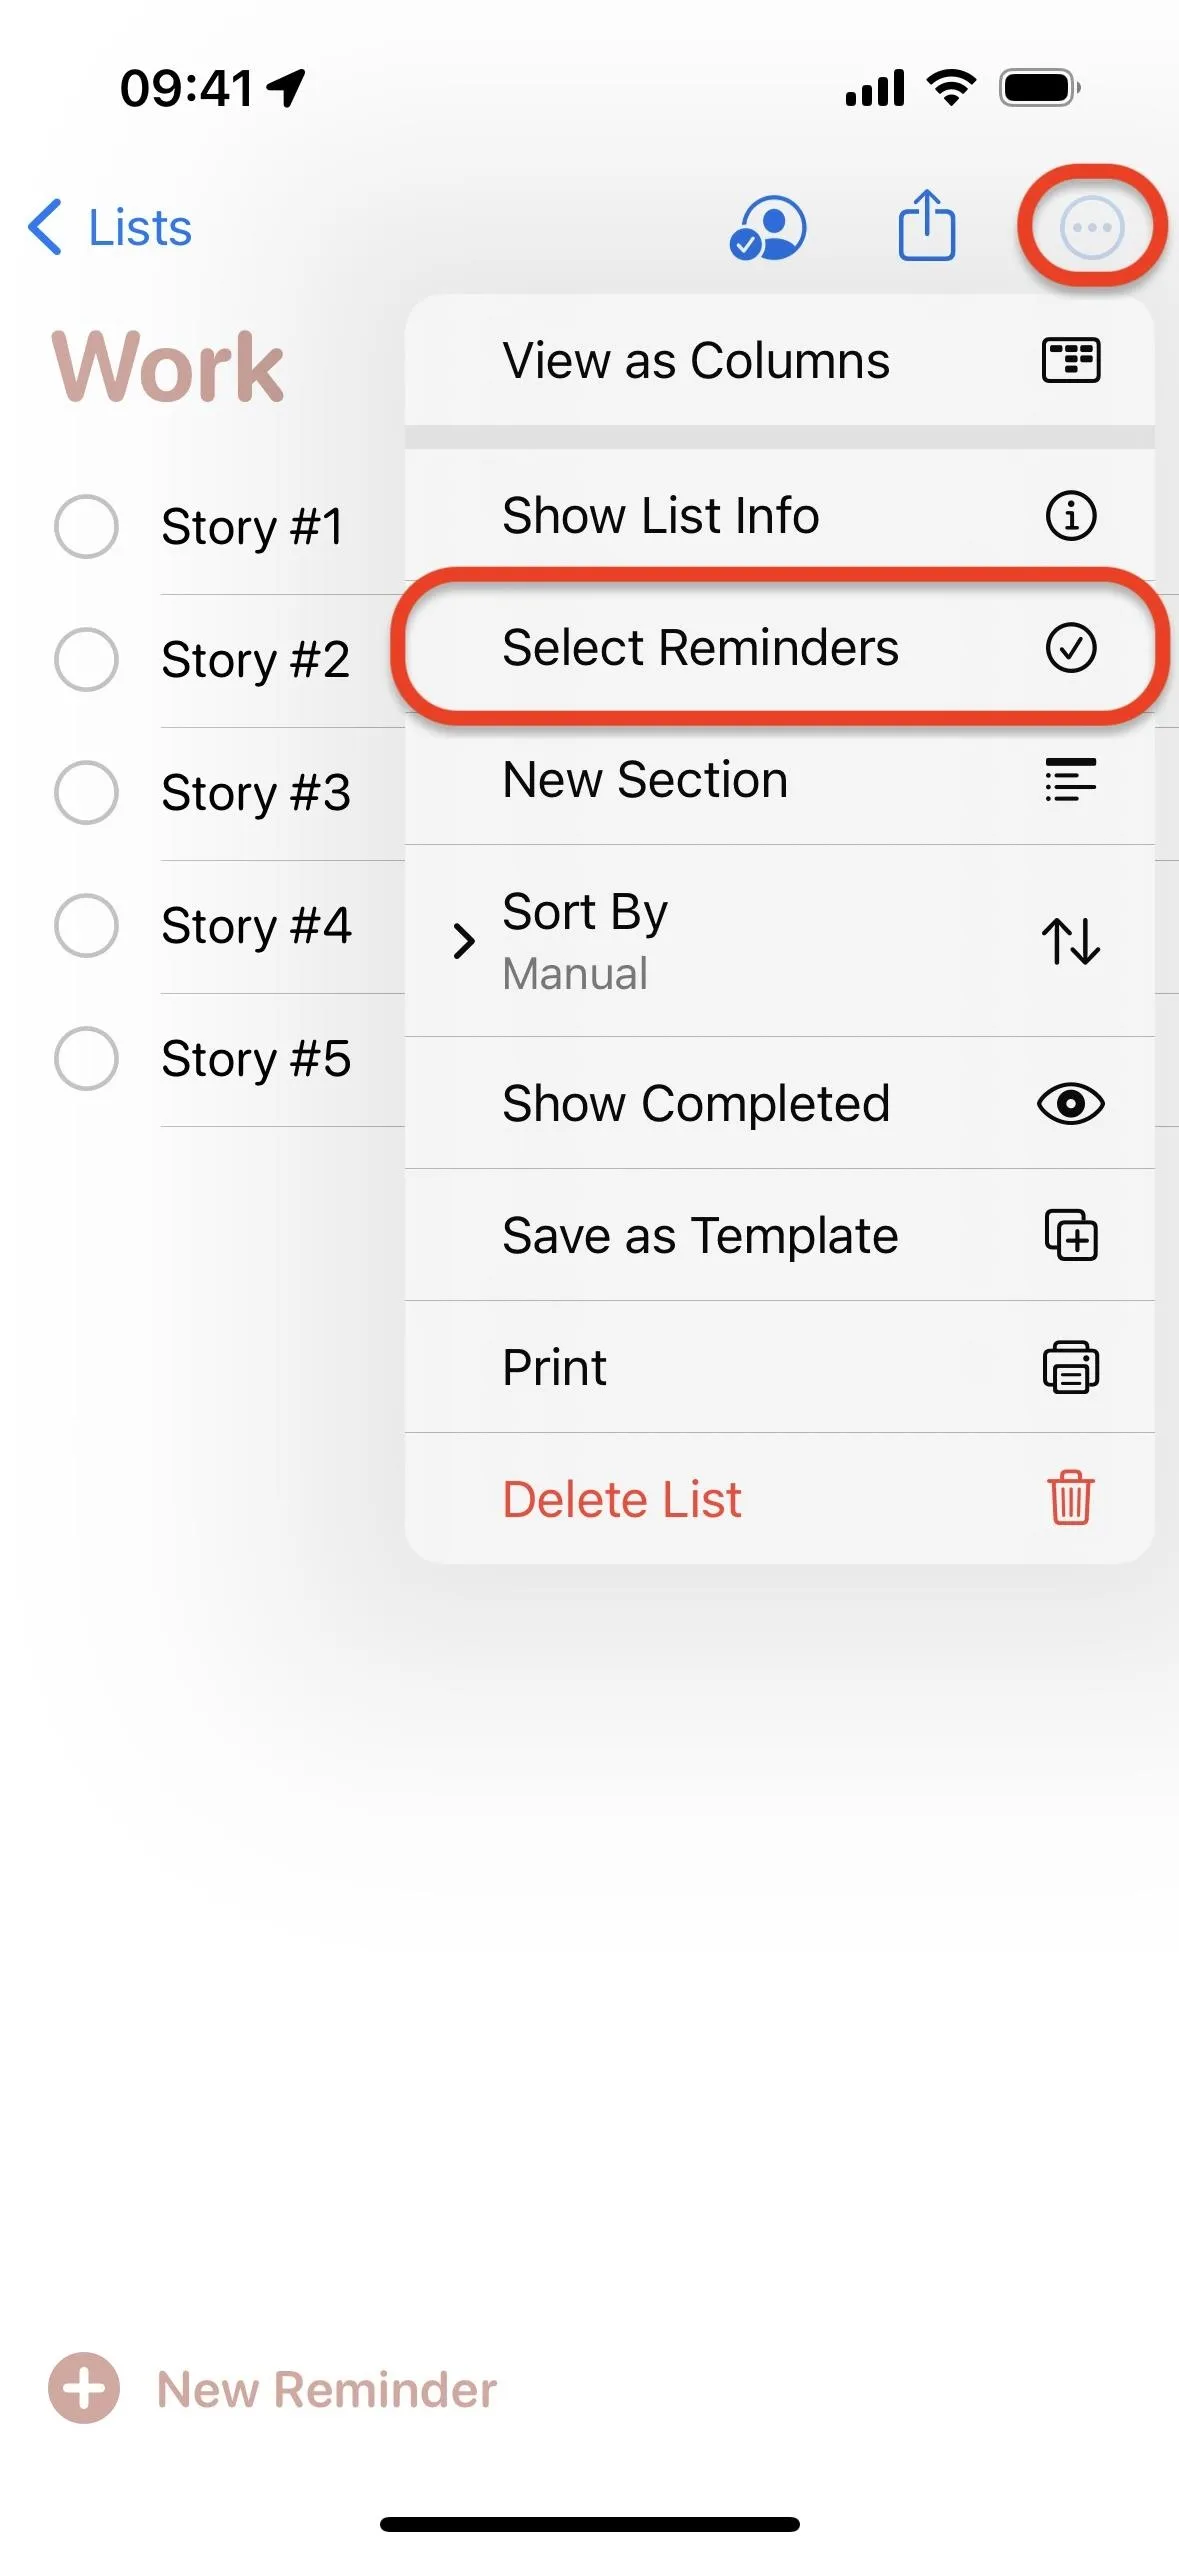
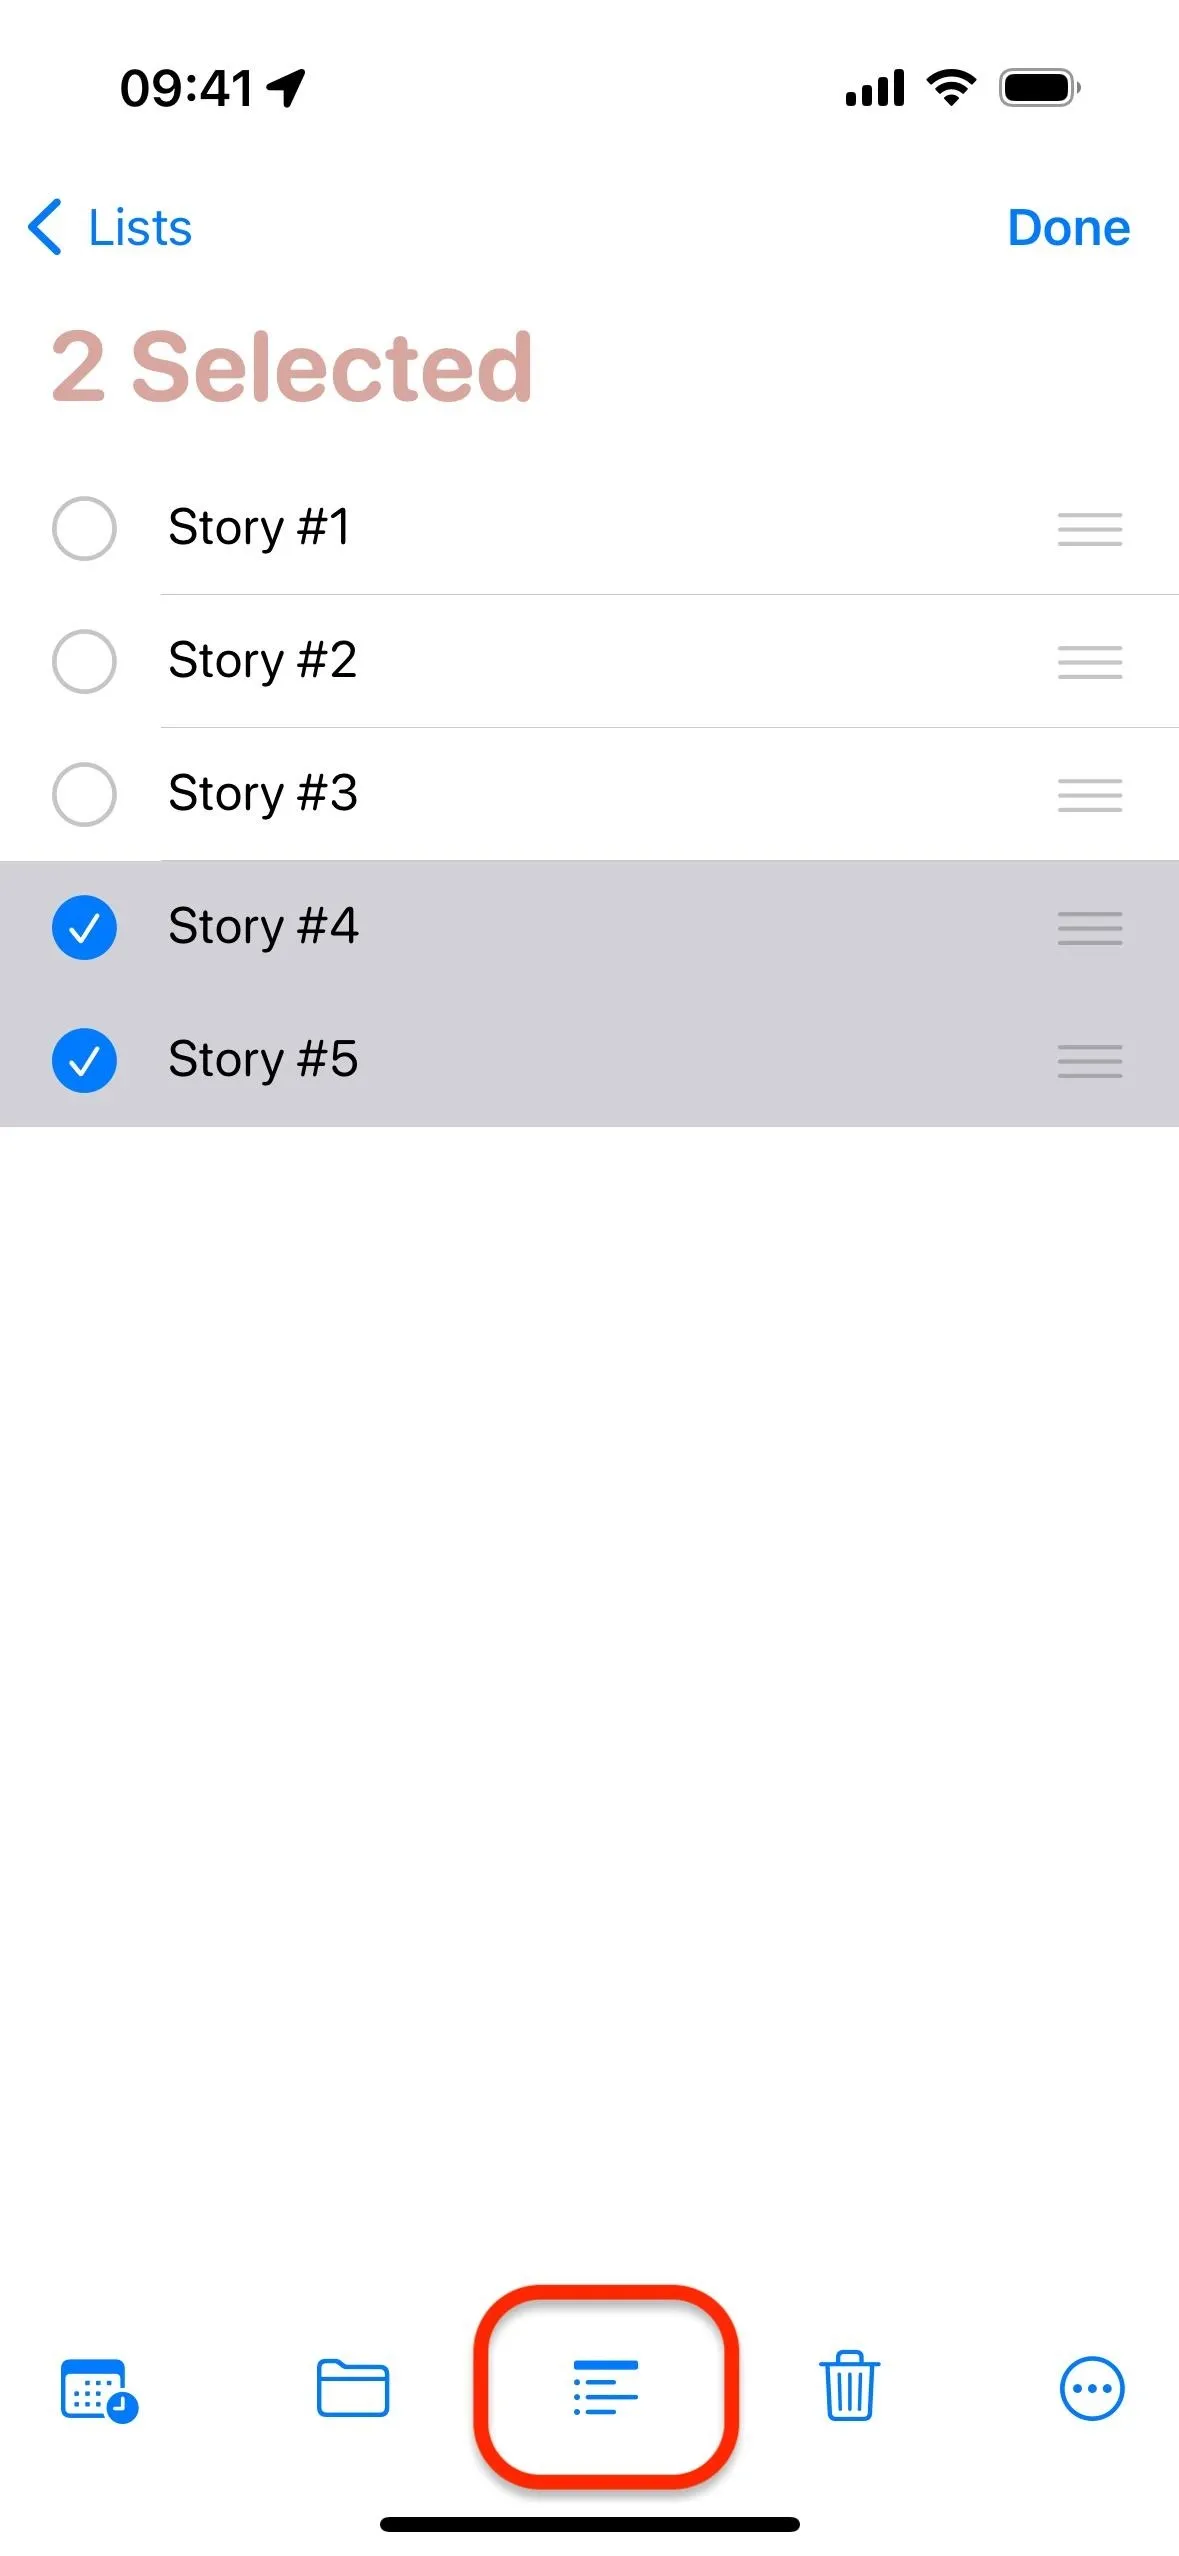
- Swipe up or down the list with two fingers to select one or more reminders. Alternatively, tap the ellipsis (•••) to open more options, choose "Select Reminders," and select the reminders.
- Tap the "Sections" icon in the toolbar.


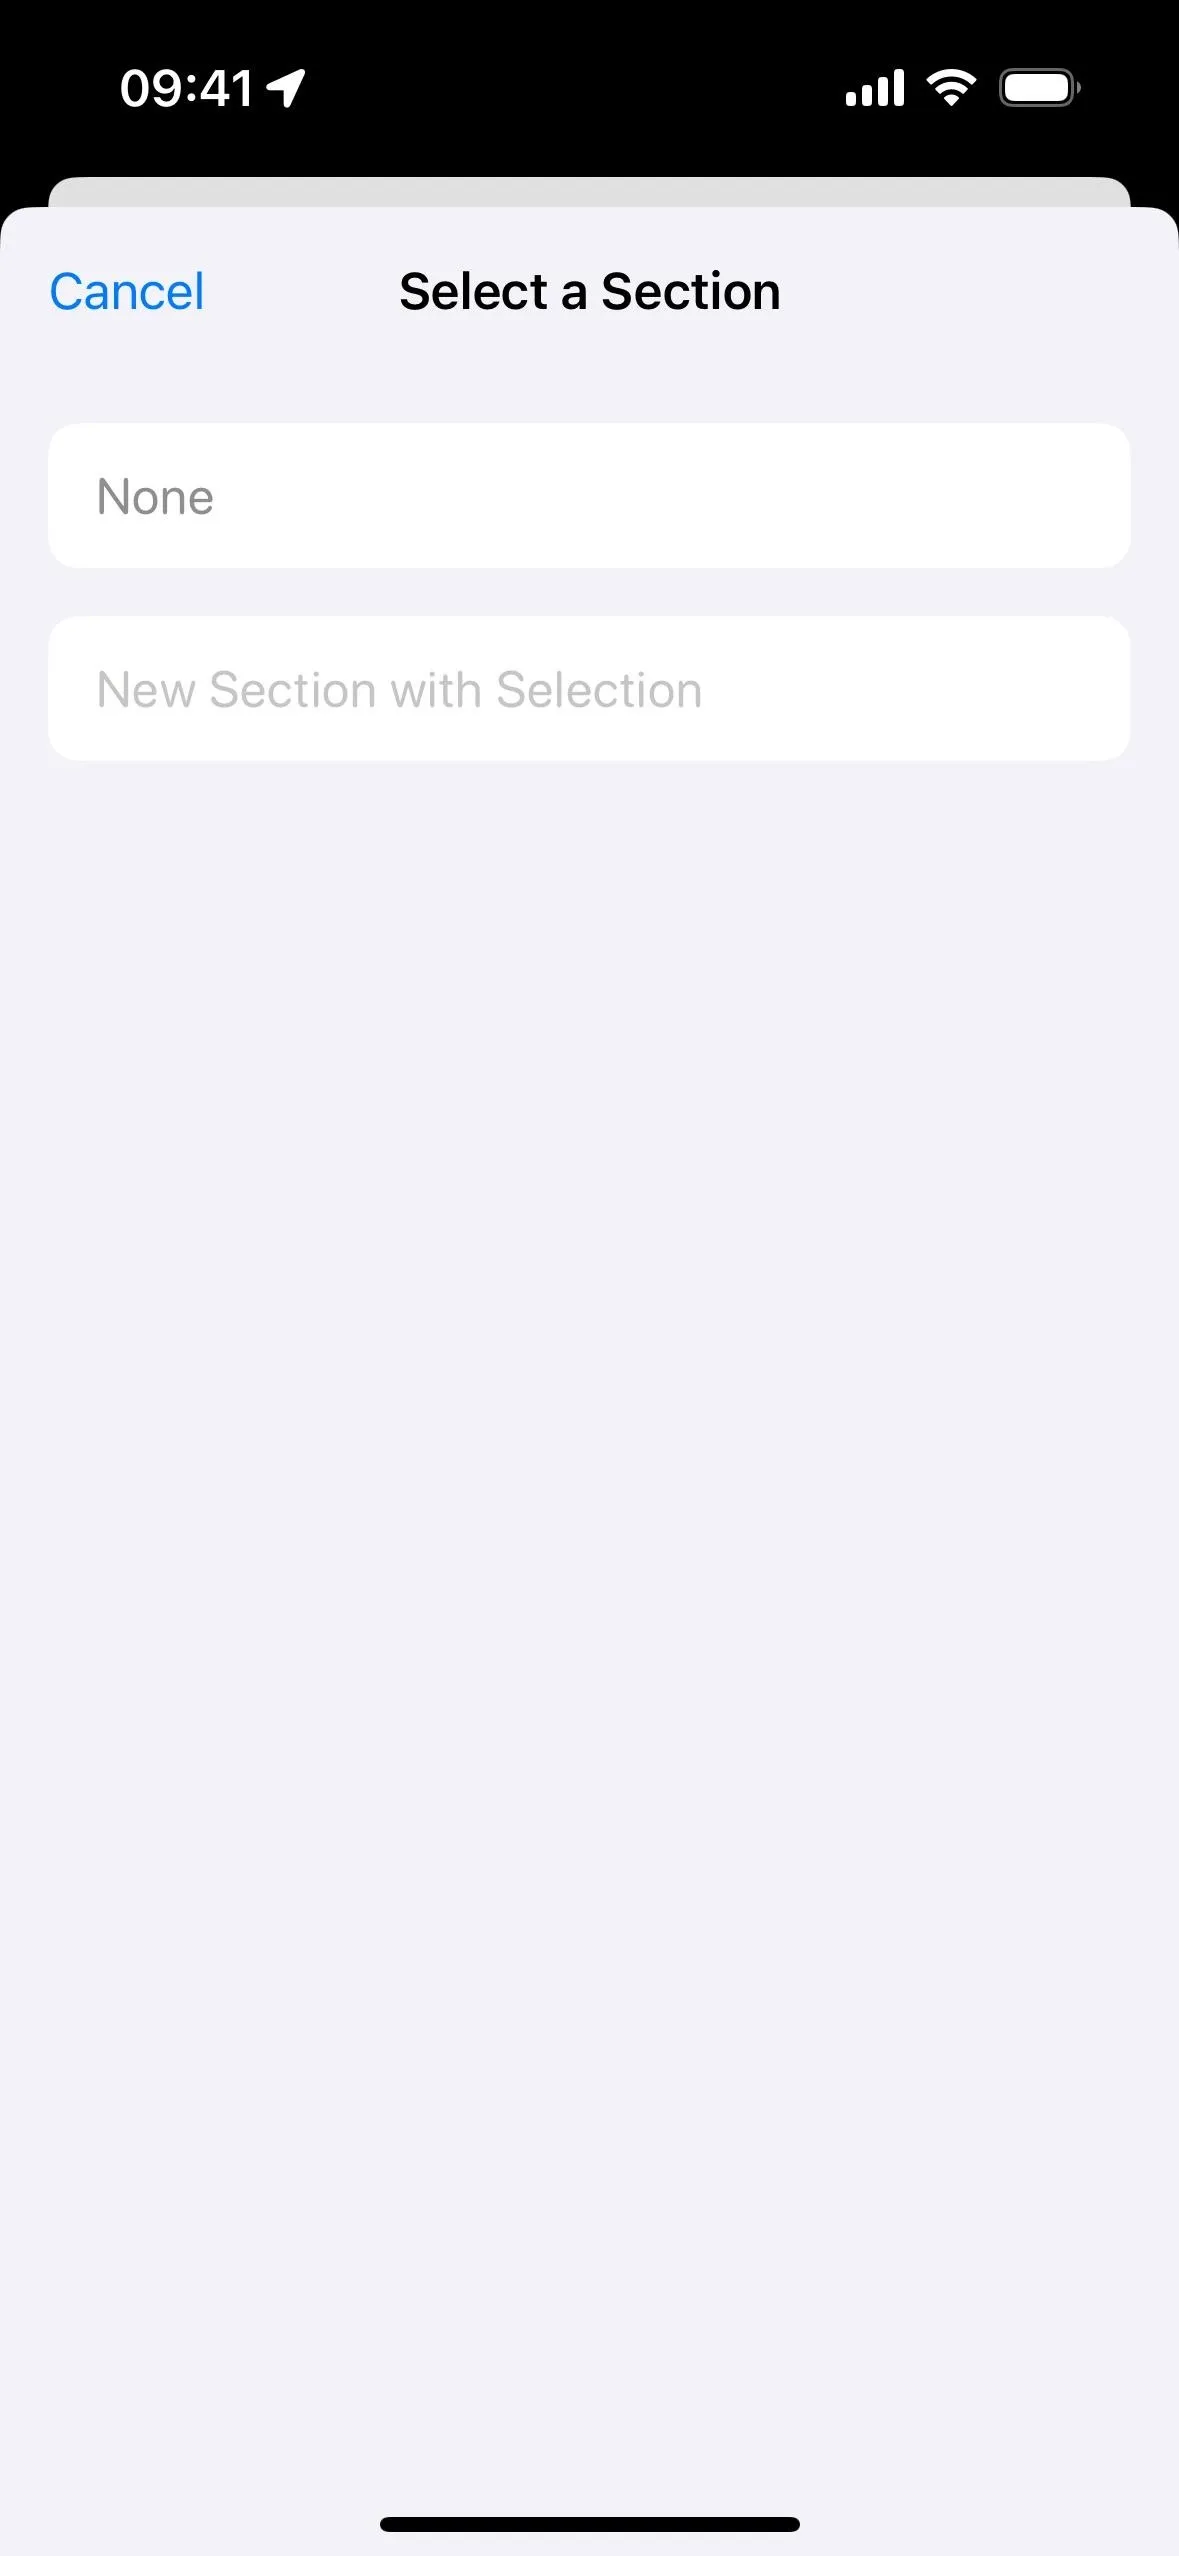
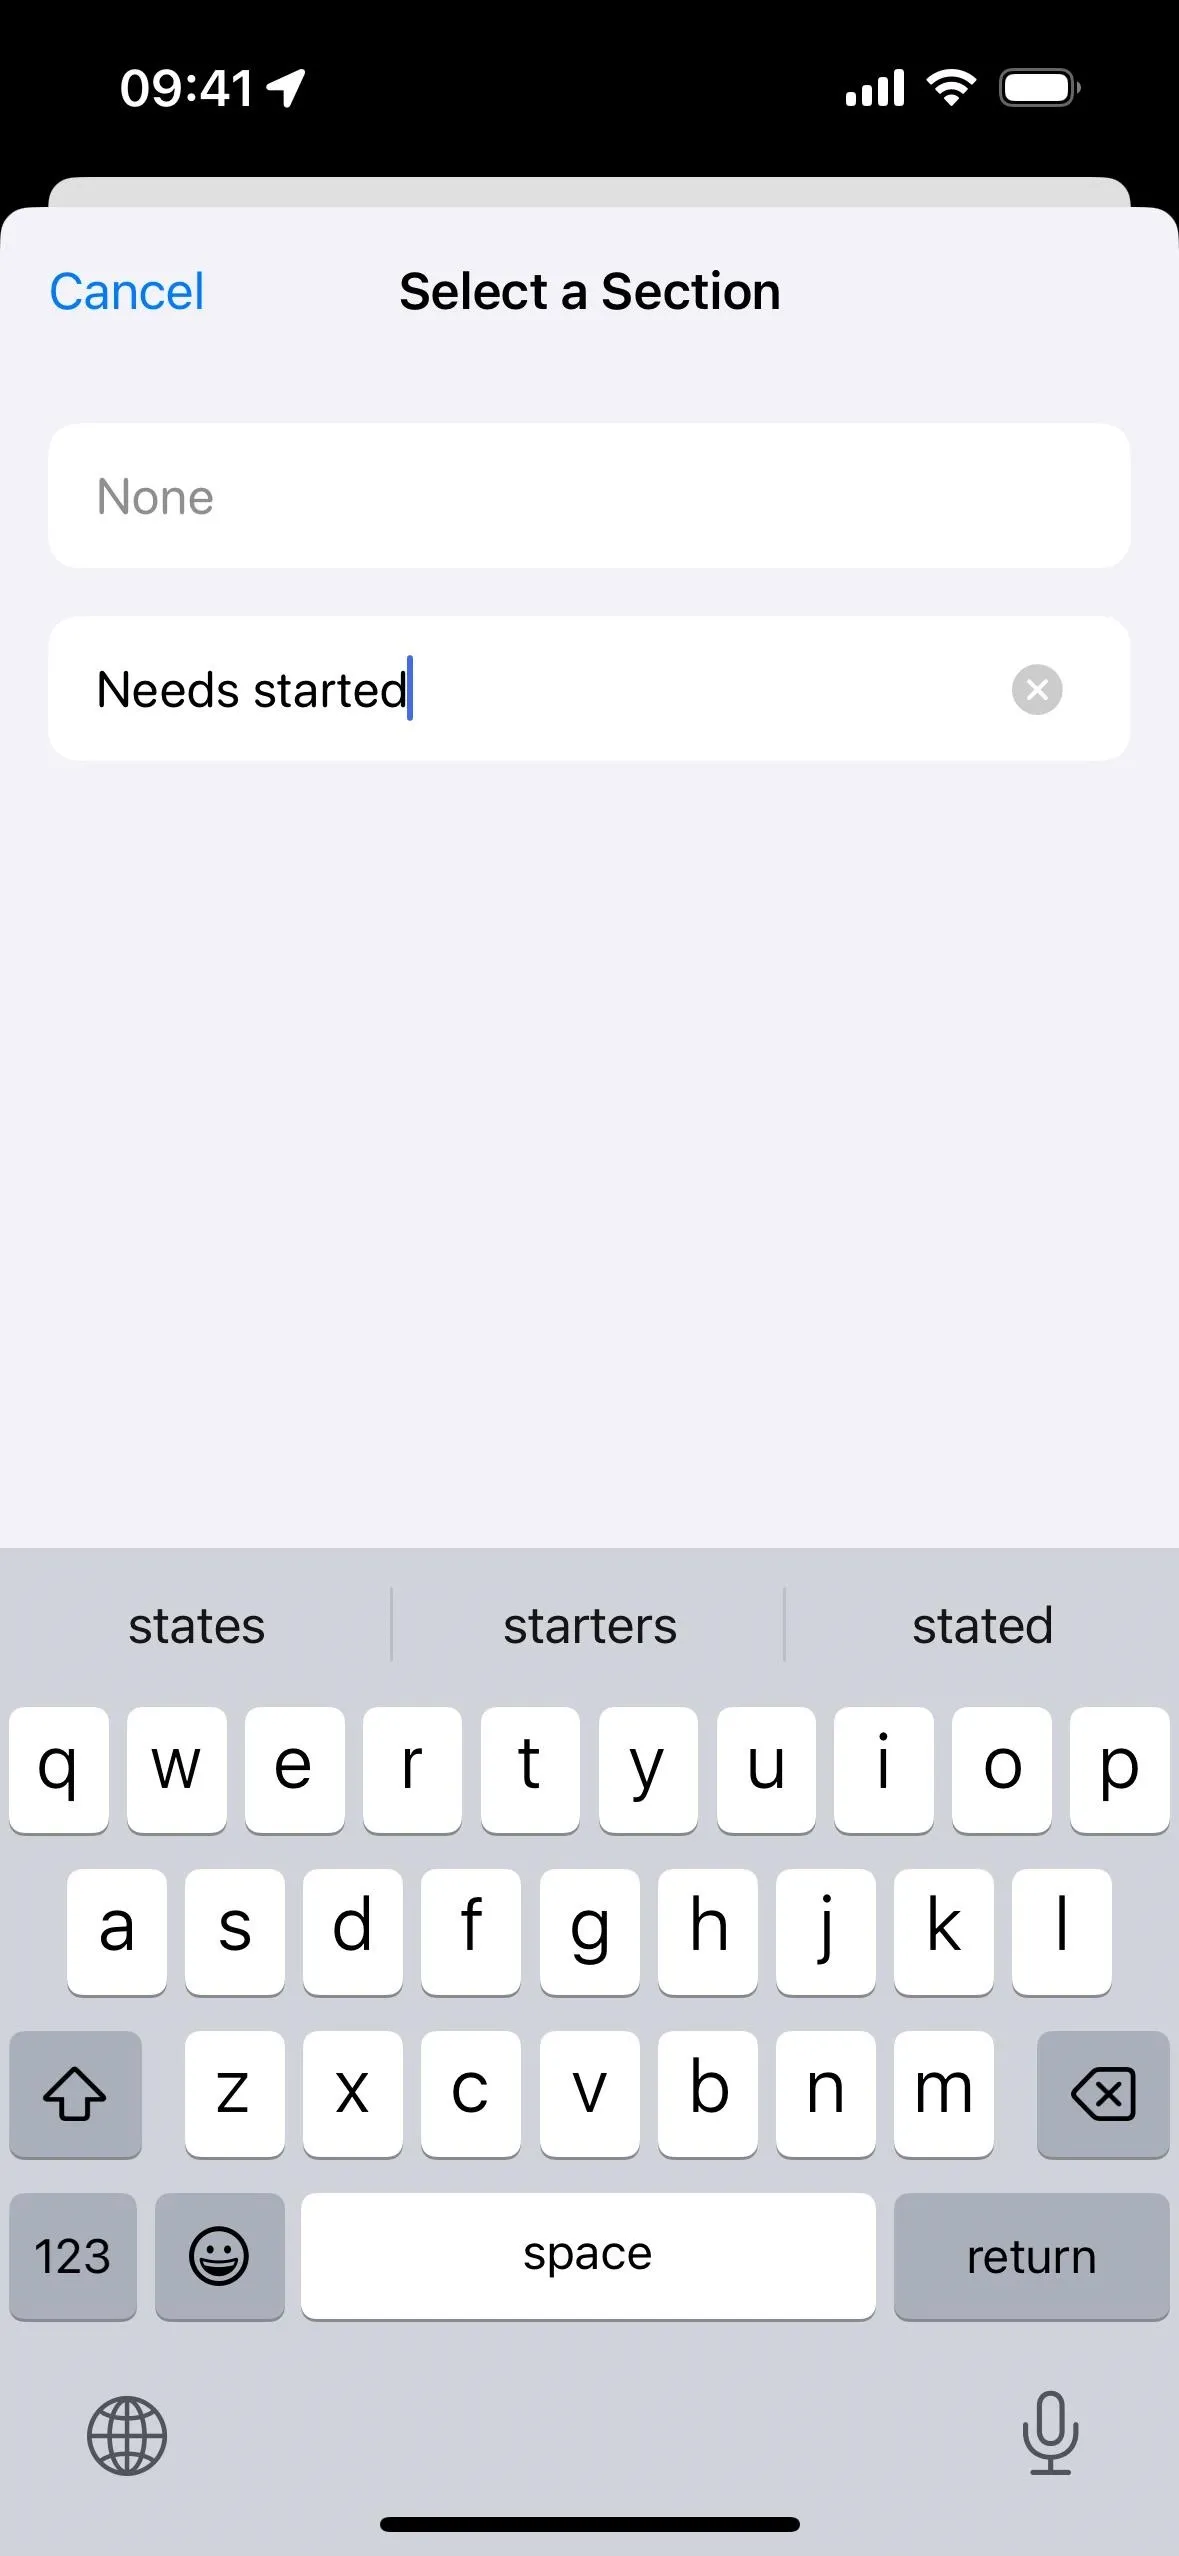
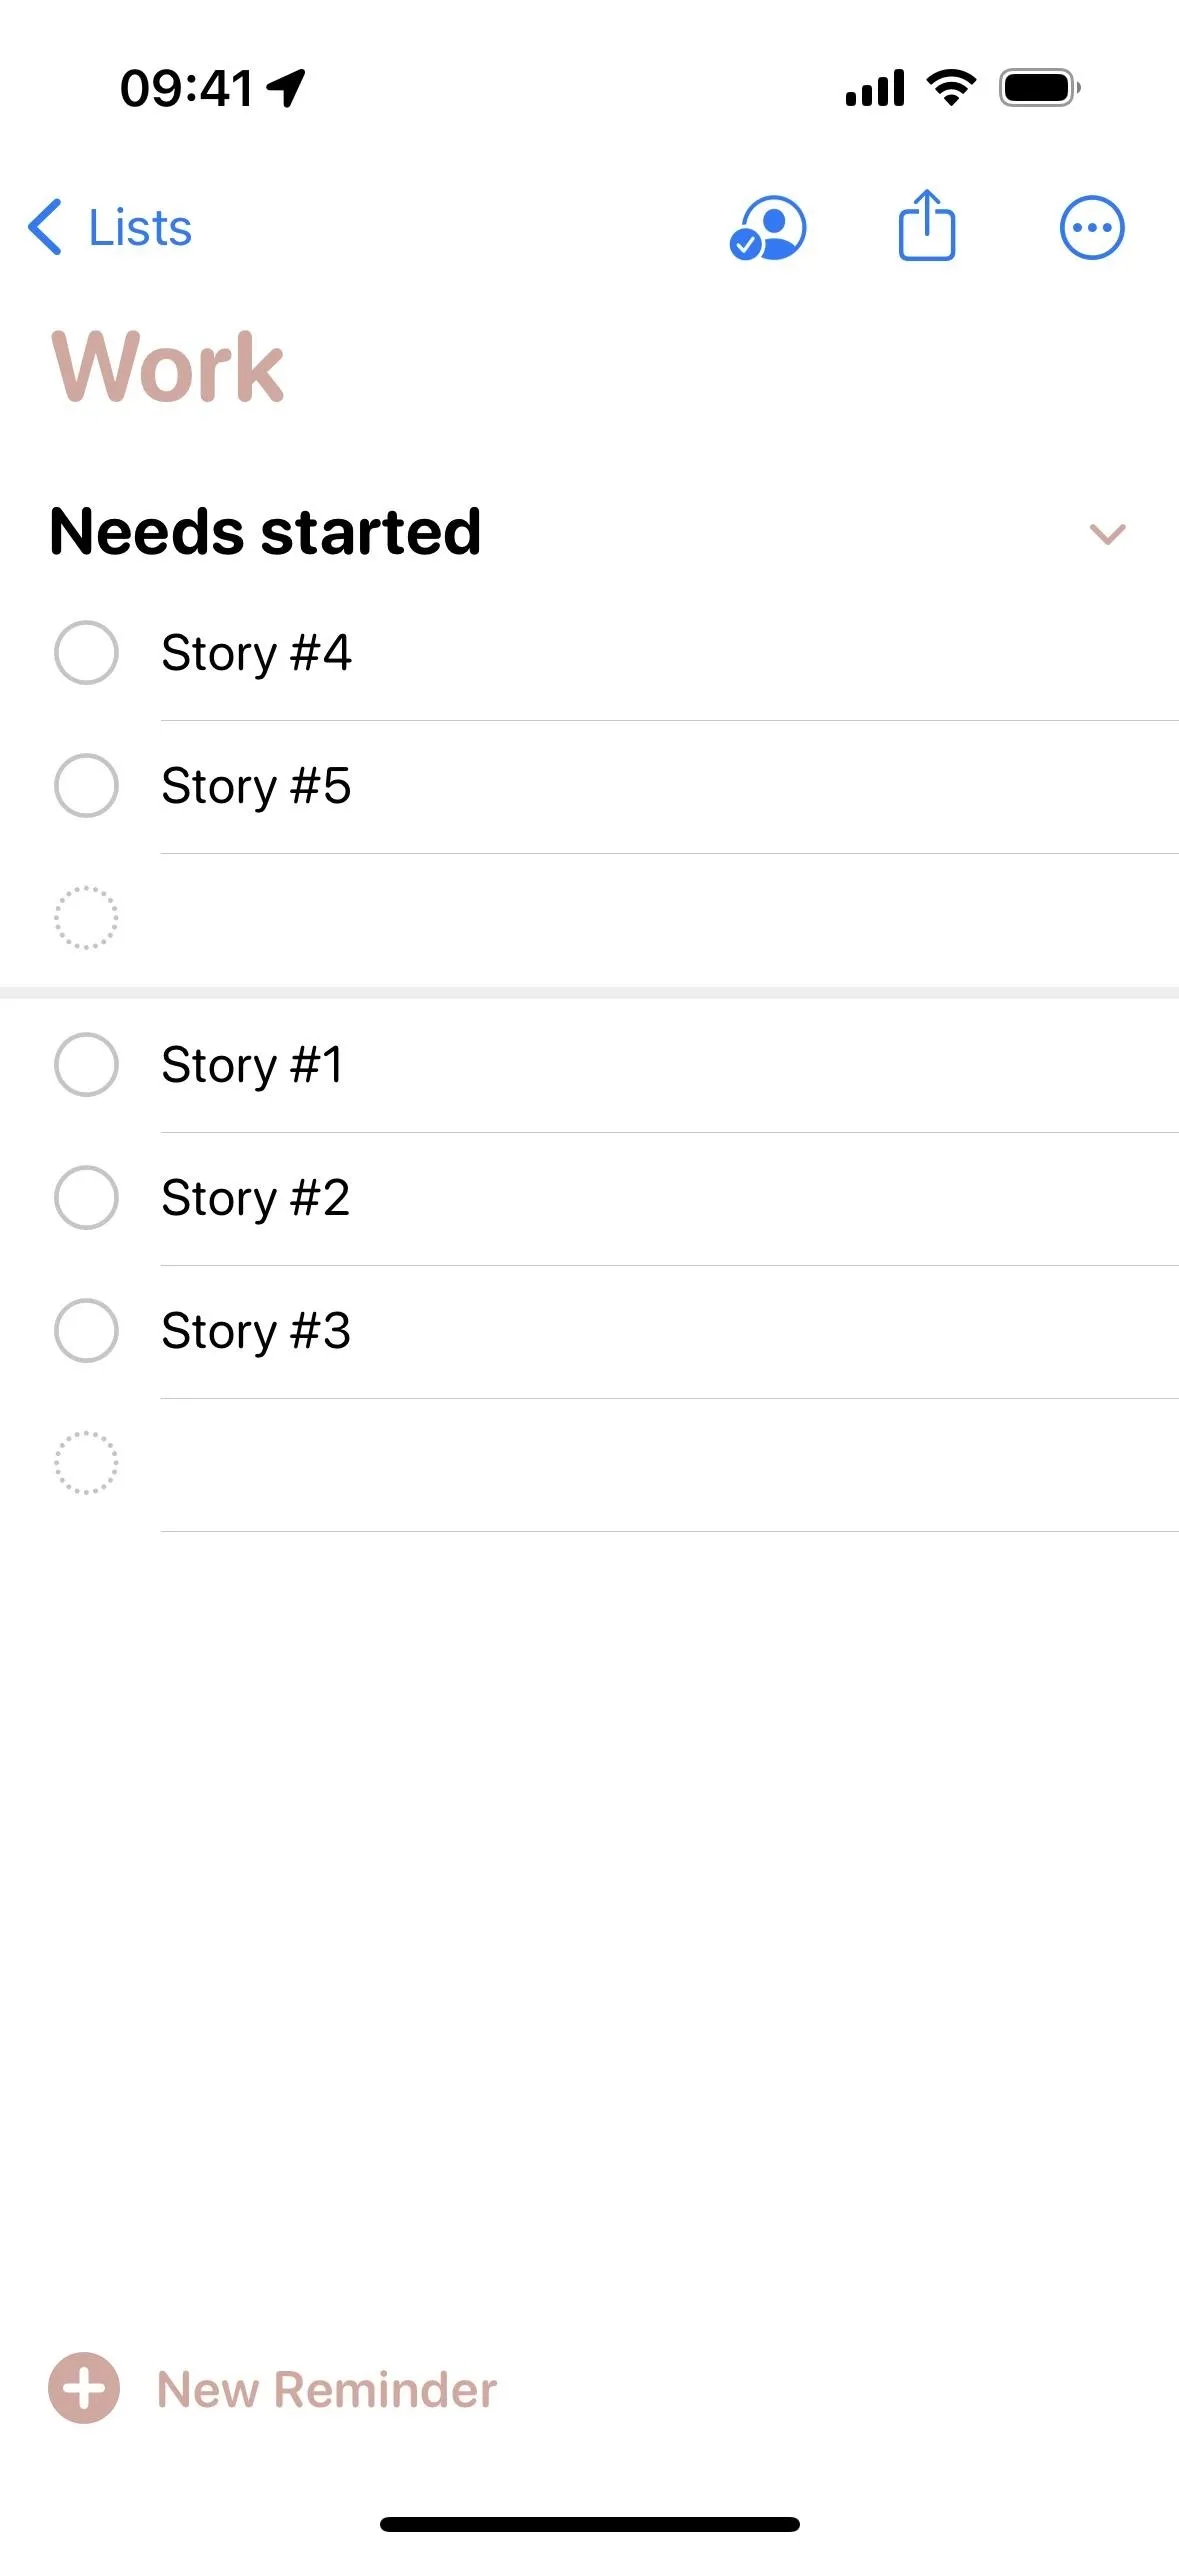
- Select a current section or type the name of a new section and hit the "return" key.
- When needed, create new reminders for the section, drag and drop existing ones to the section, or use Option 2 or 3 to move reminders to the section.


Assign Reminders to Sections from Their Details
- Navigate to a list within Reminders that already has at least one section.
- Select a reminder and hit its info (i) button.
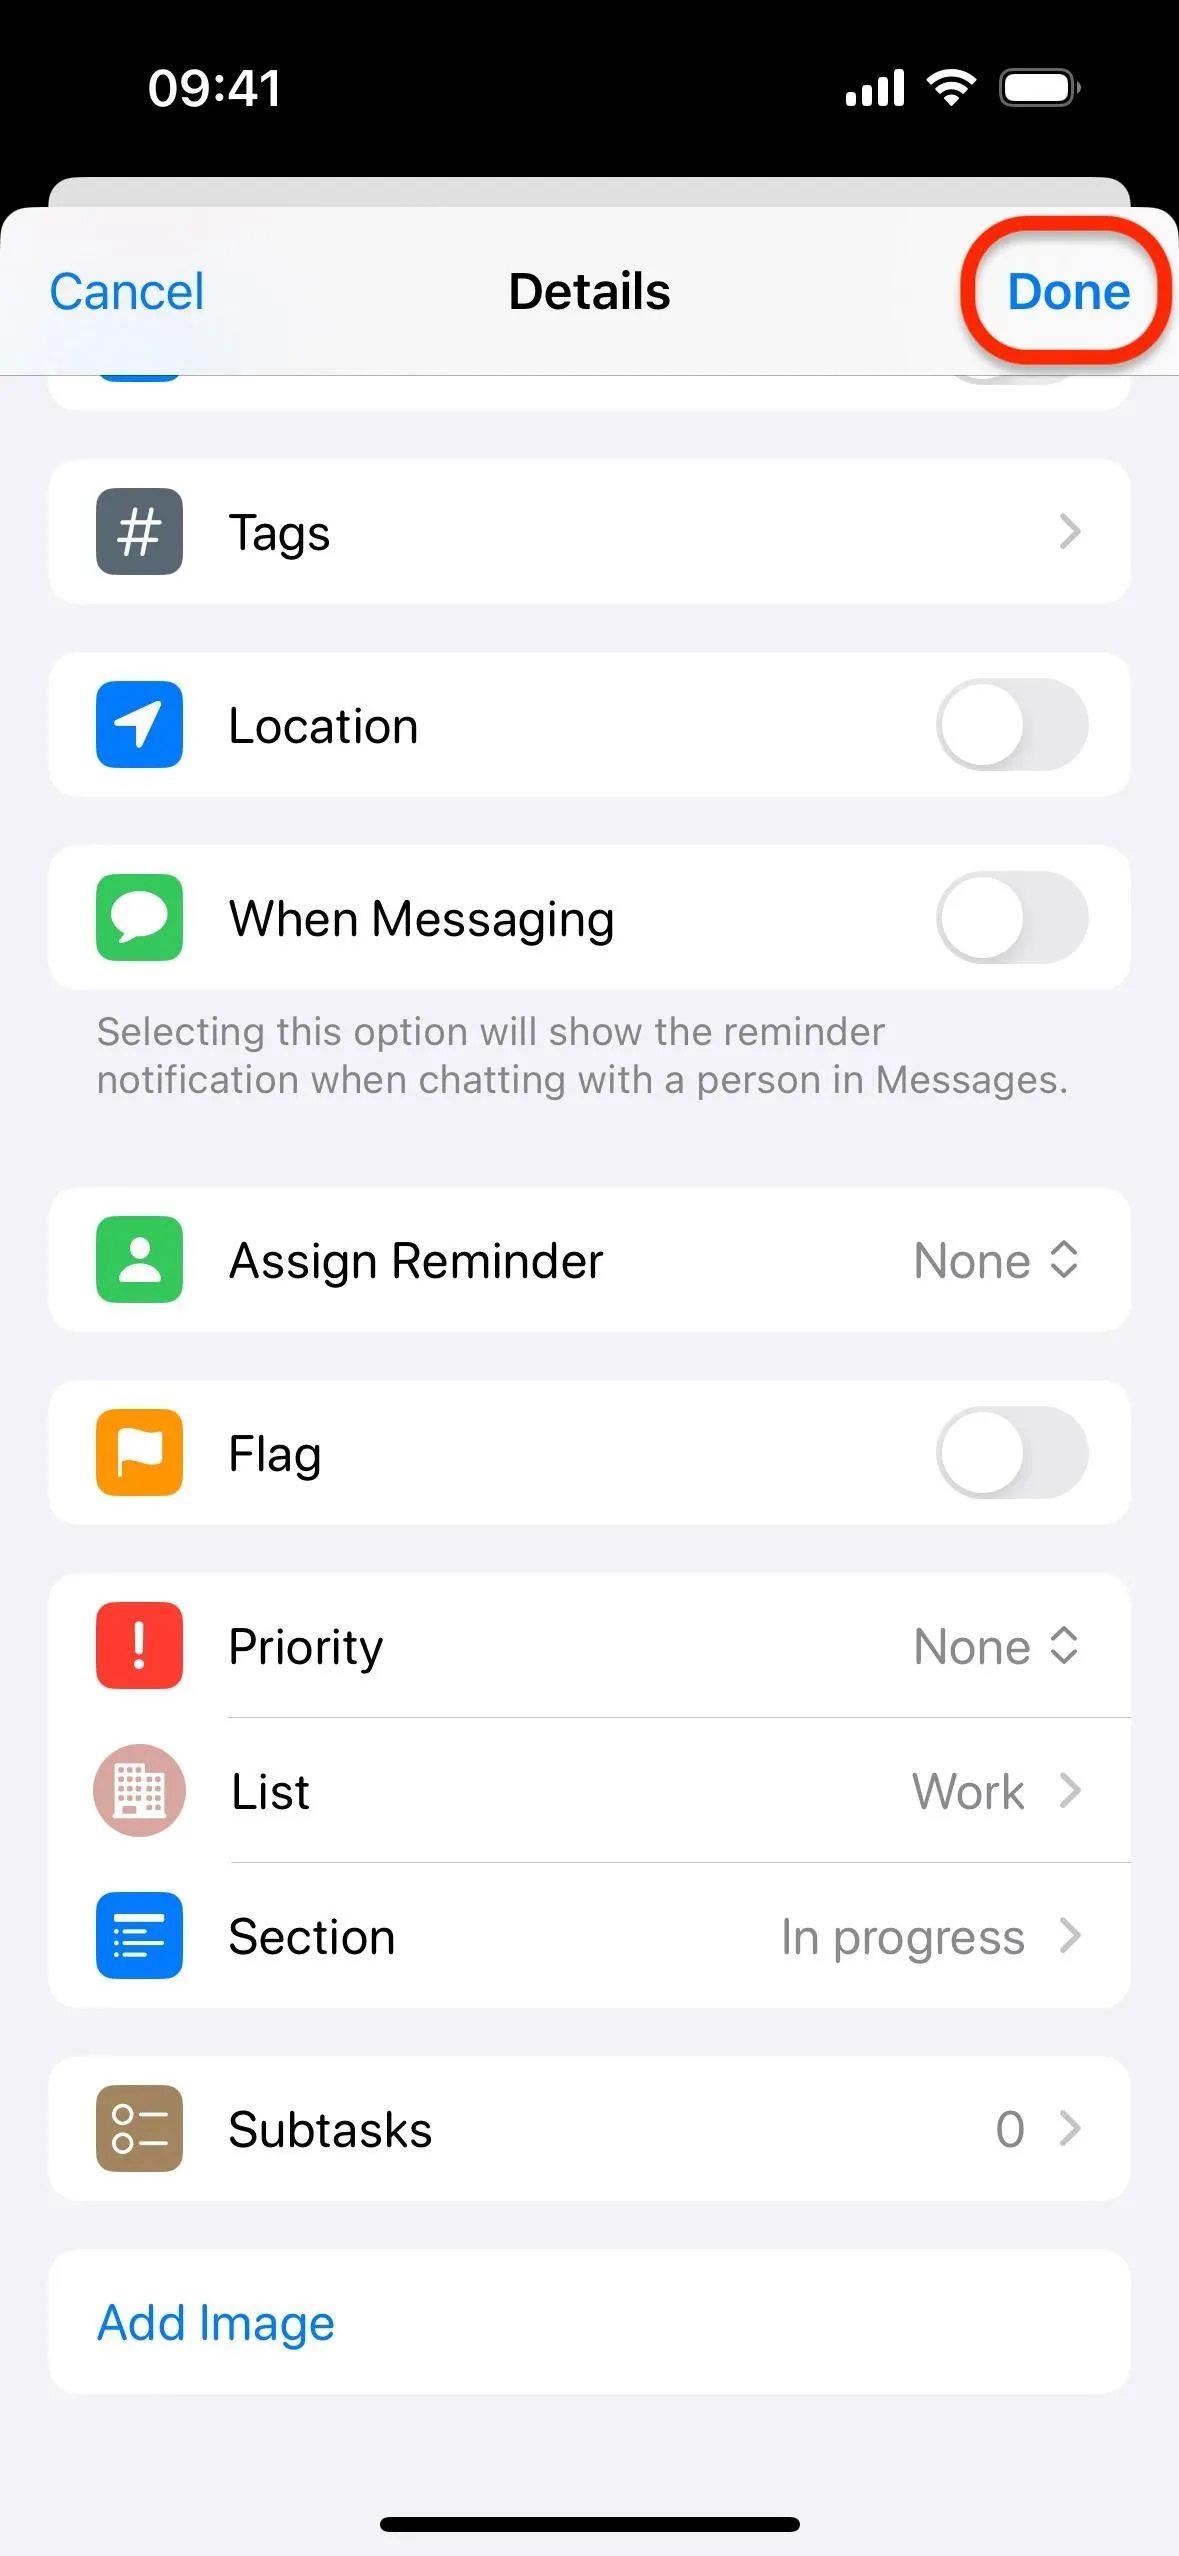
- Open the "Sections" menu. (This may not appear if the list is currently sectionless.)
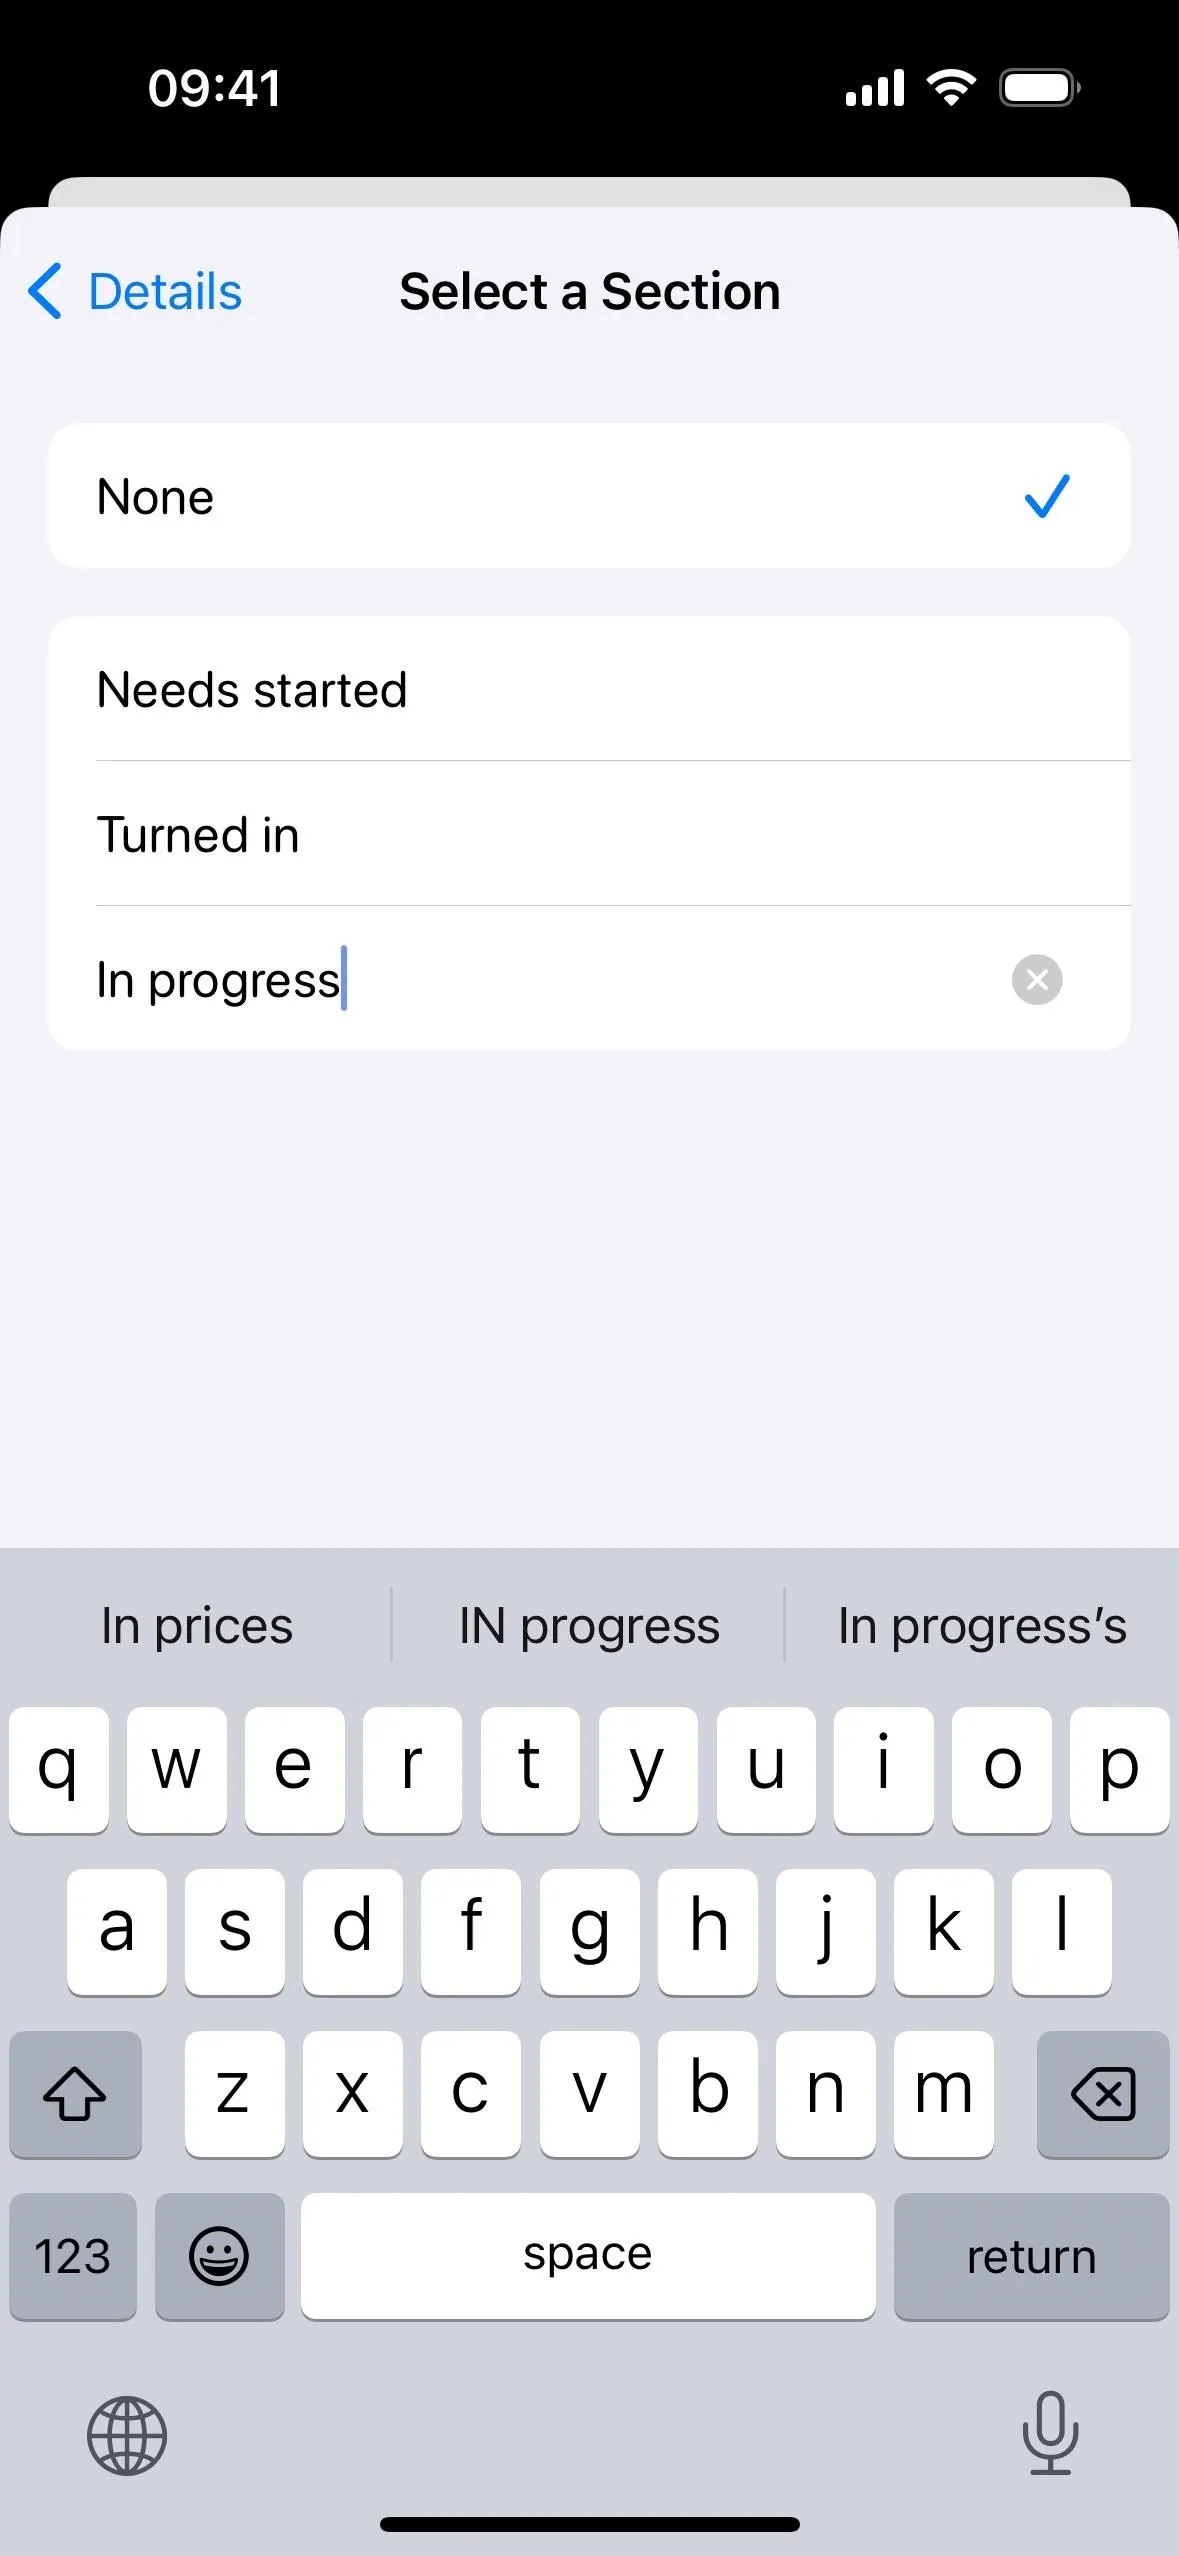
- Select a current section or type the name of a new section and hit the "return" key.
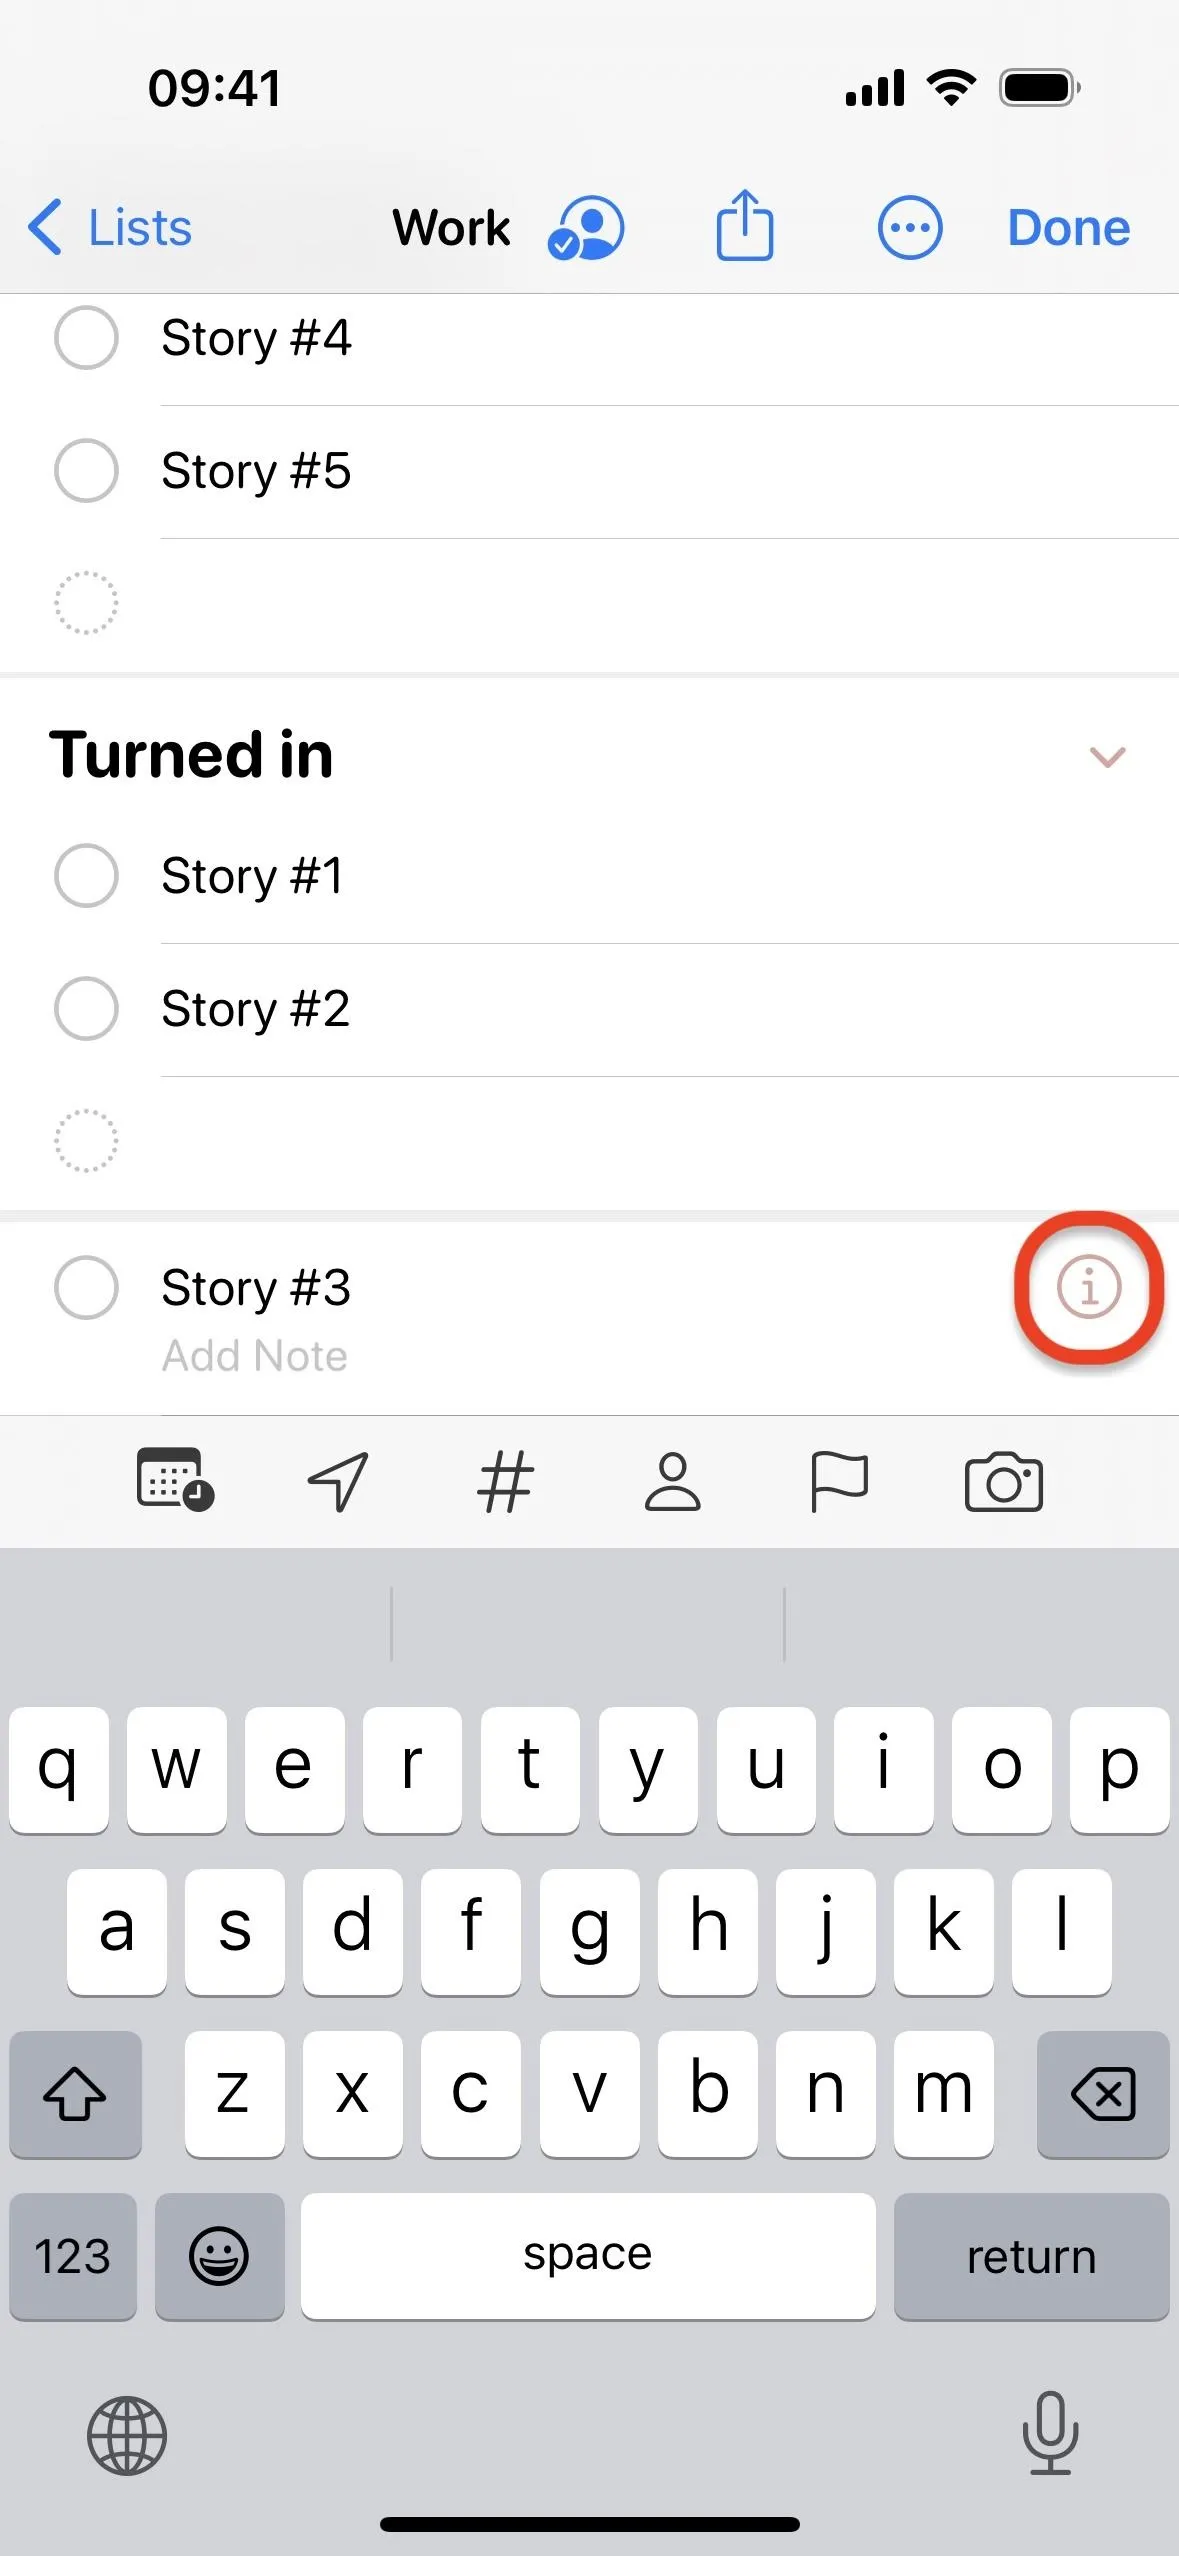
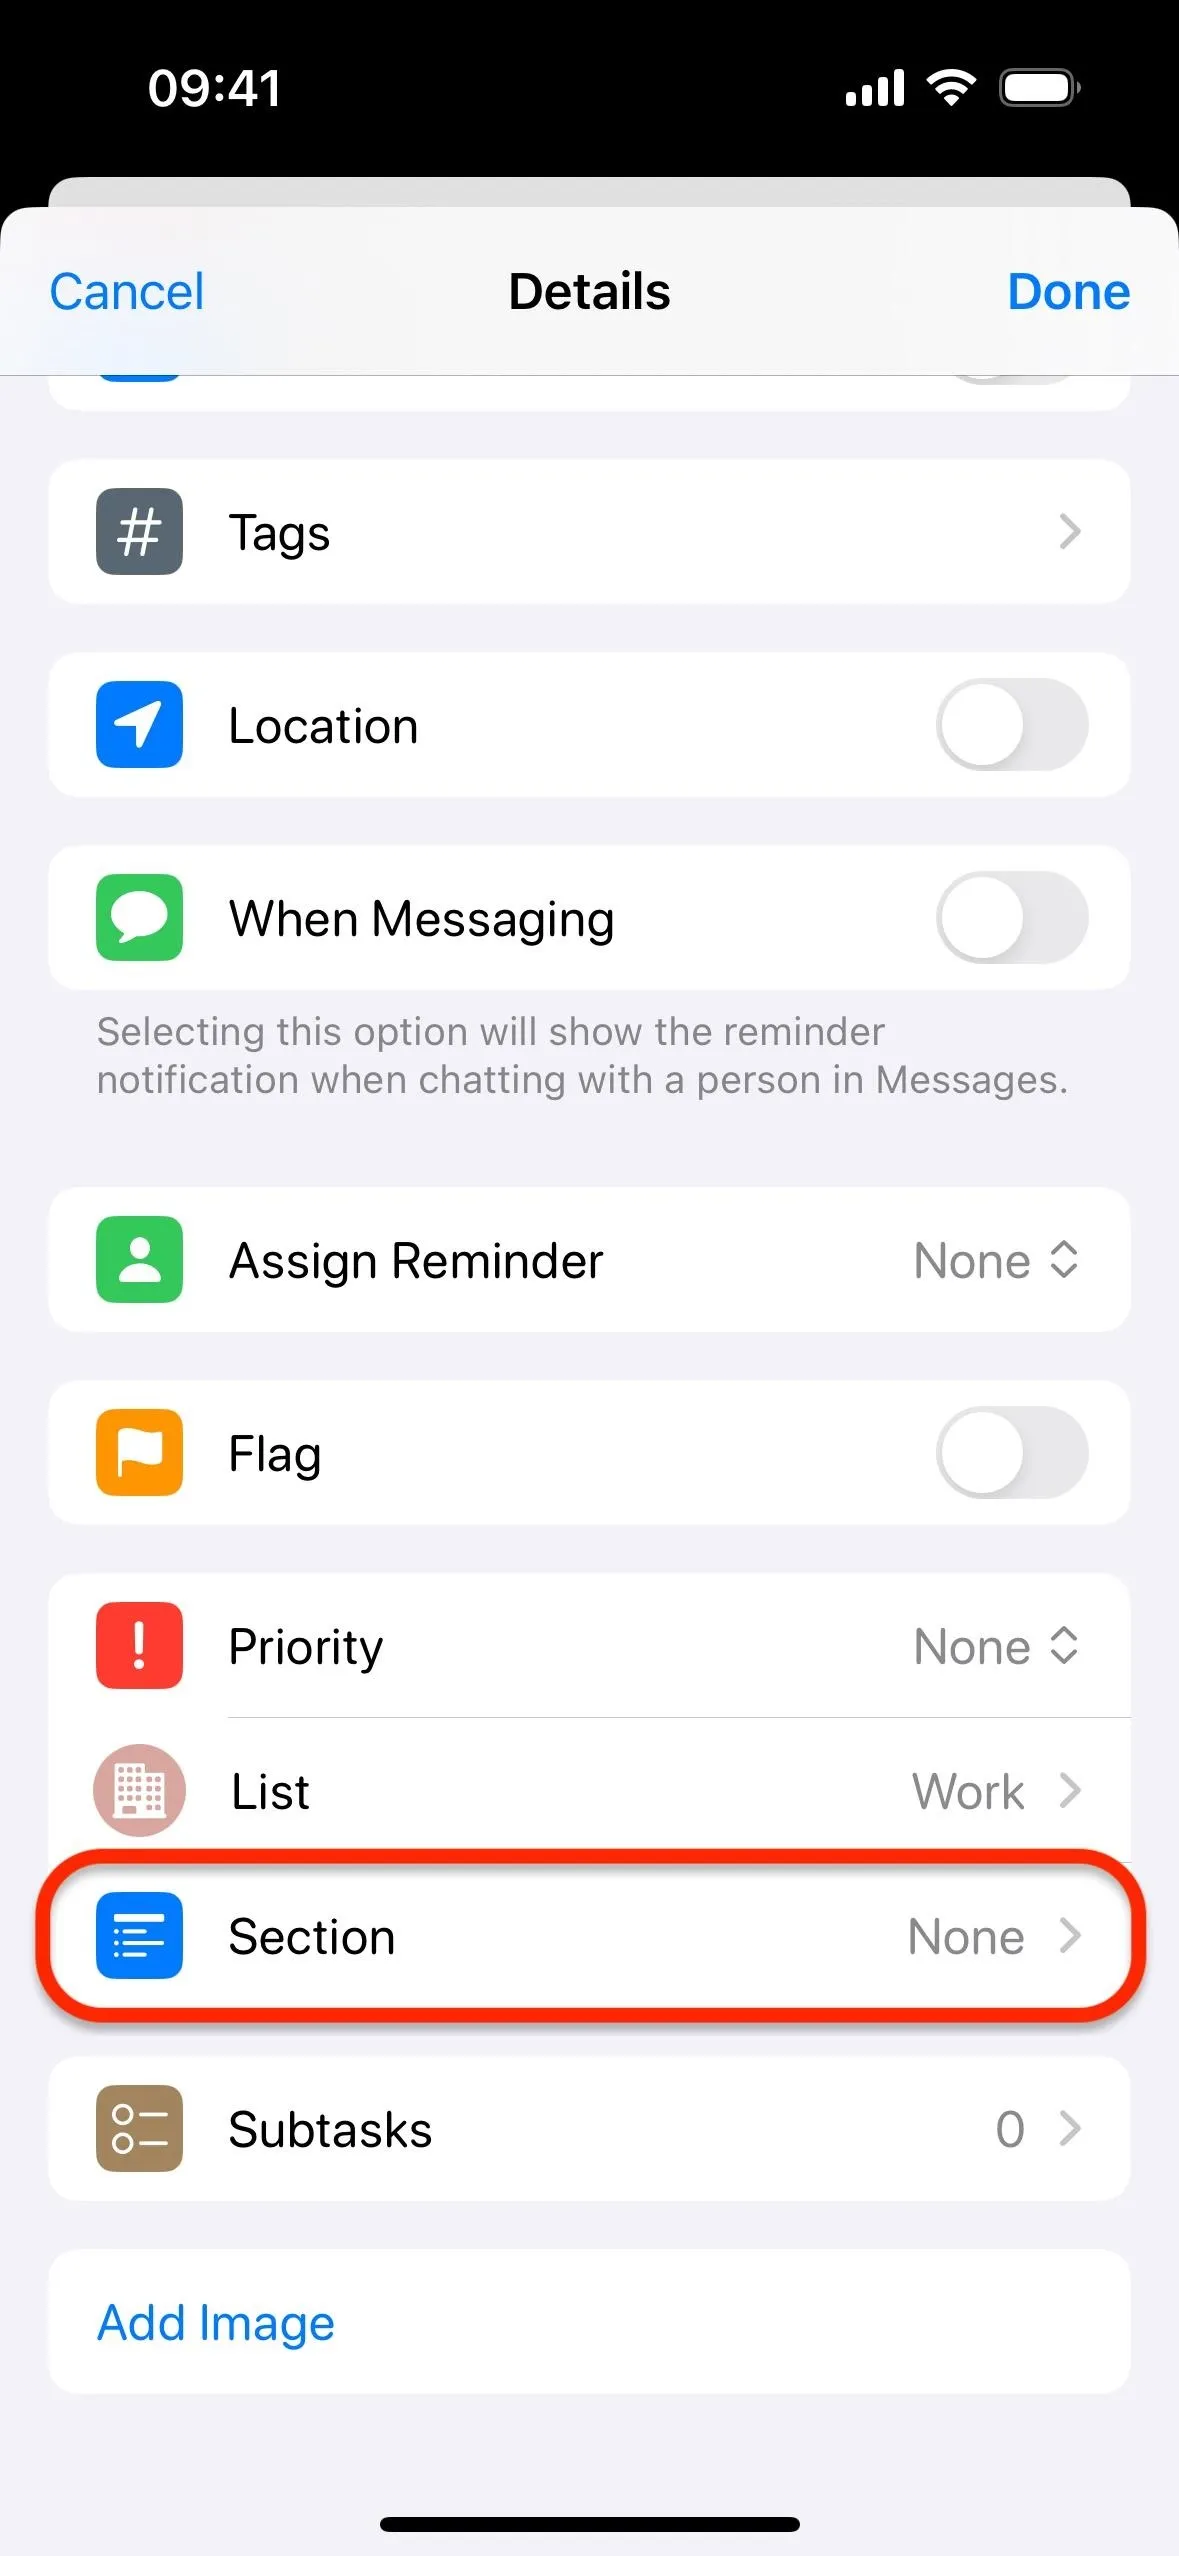
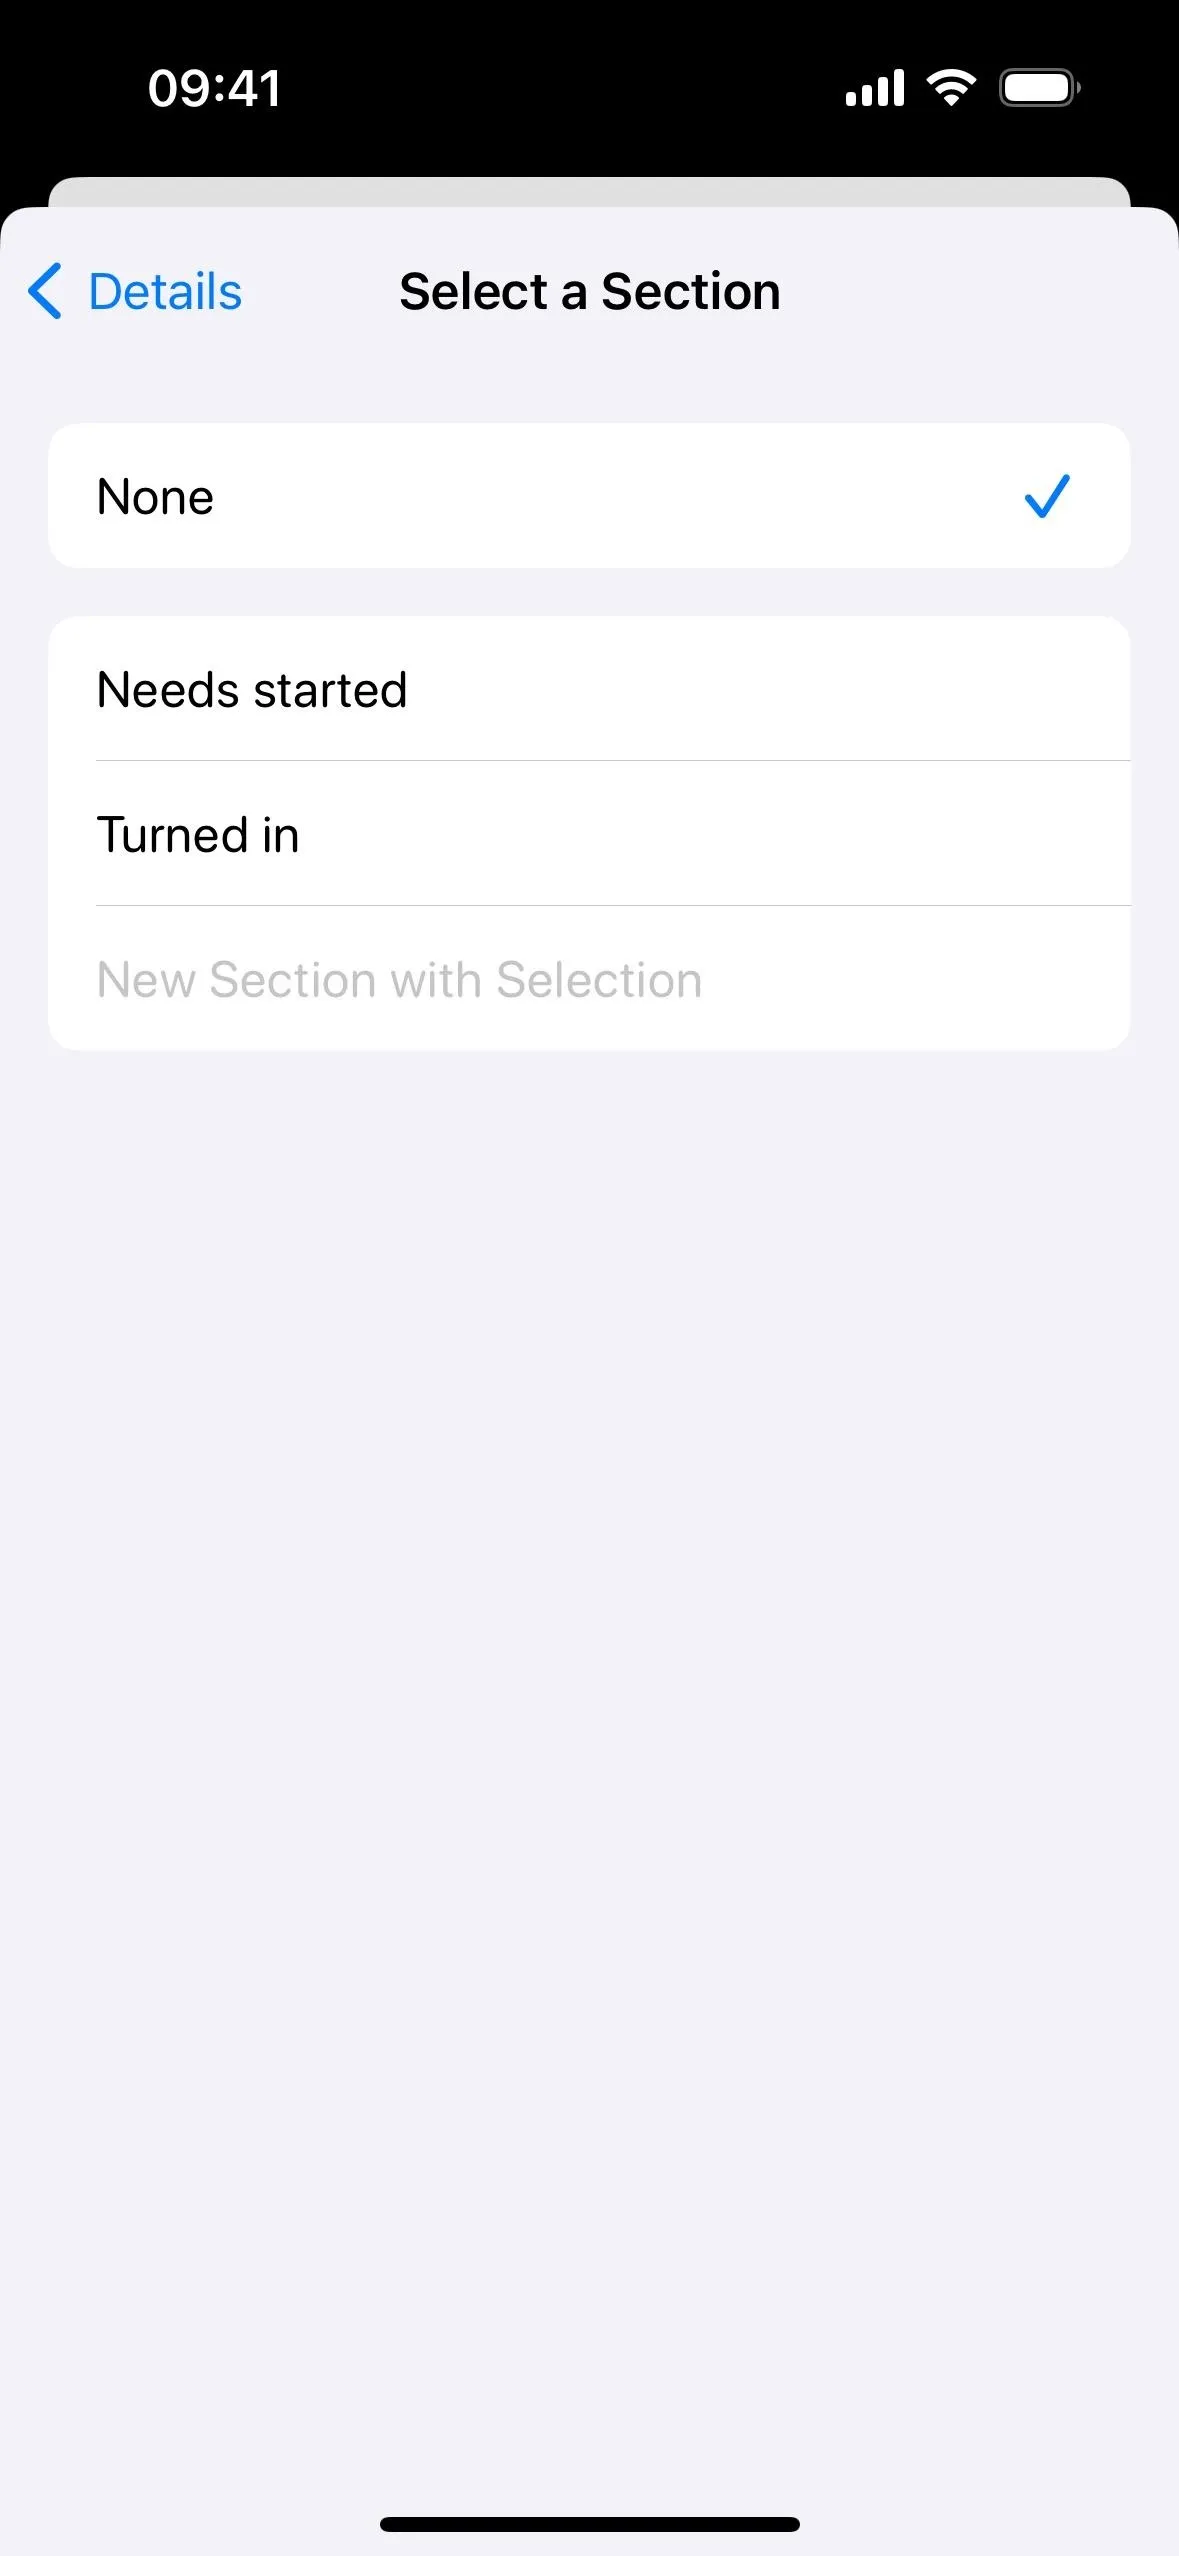


- Tap the "Done" button to save the changes.
- When needed, create new reminders for the section, drag and drop existing ones to the section, or use Option 2 or 3 to move reminders to the section.


Showing/Hiding Sections in Your Lists
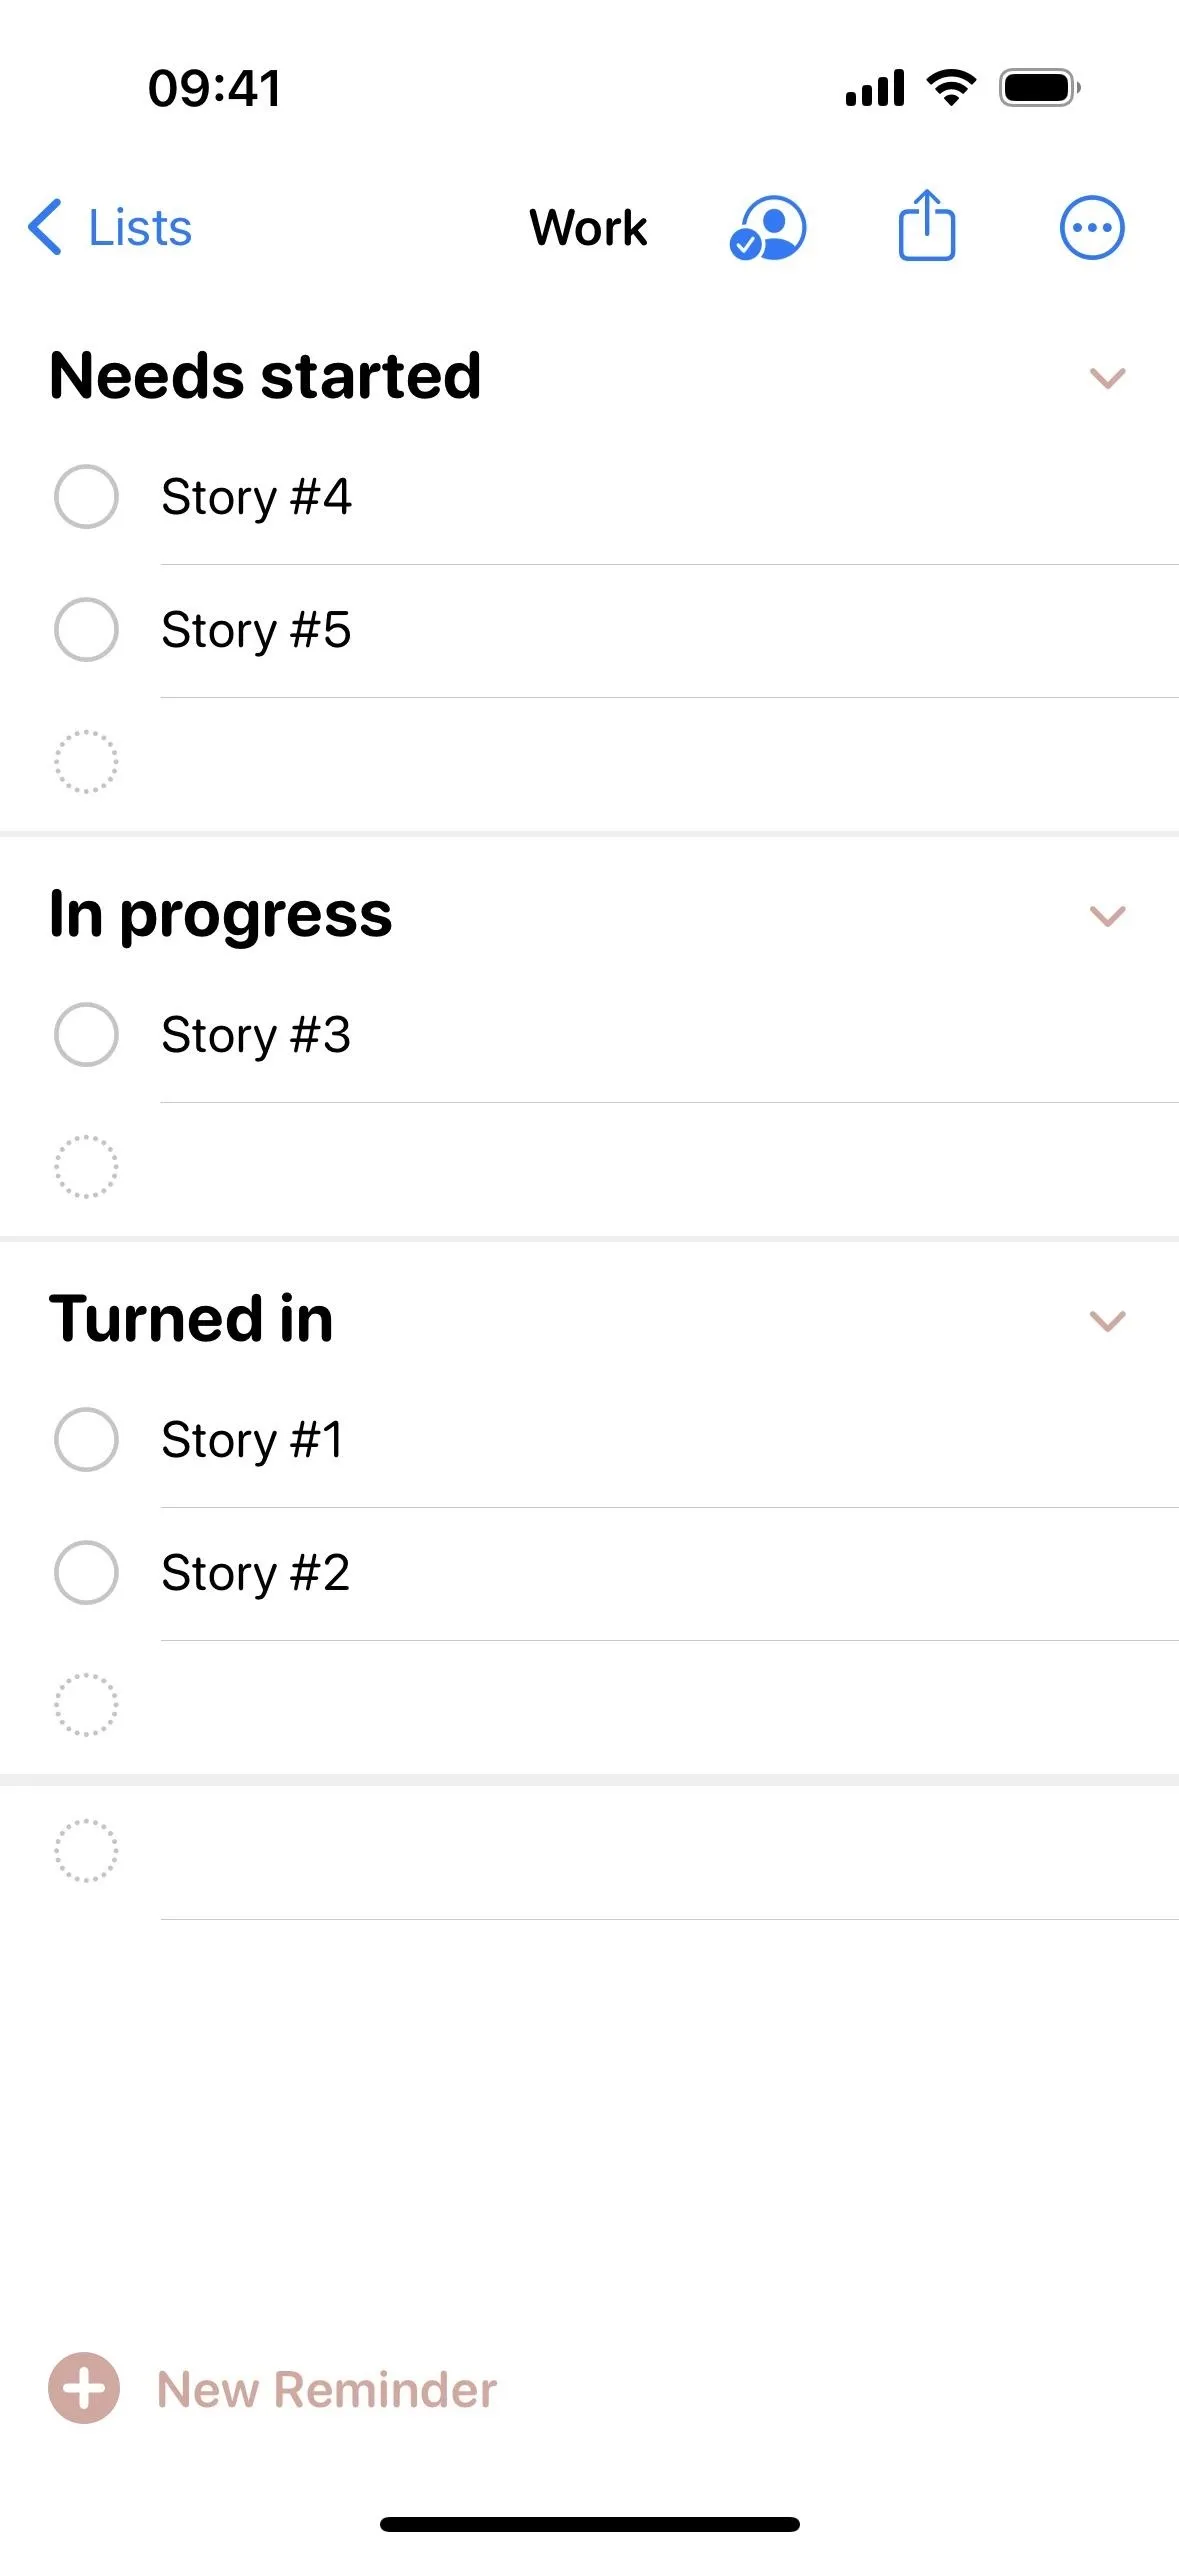
Sections can be collapsed and expanded in lists by tapping the down-pointing or right-pointing chevron next to their names.
Rearranging Sections in Your Lists
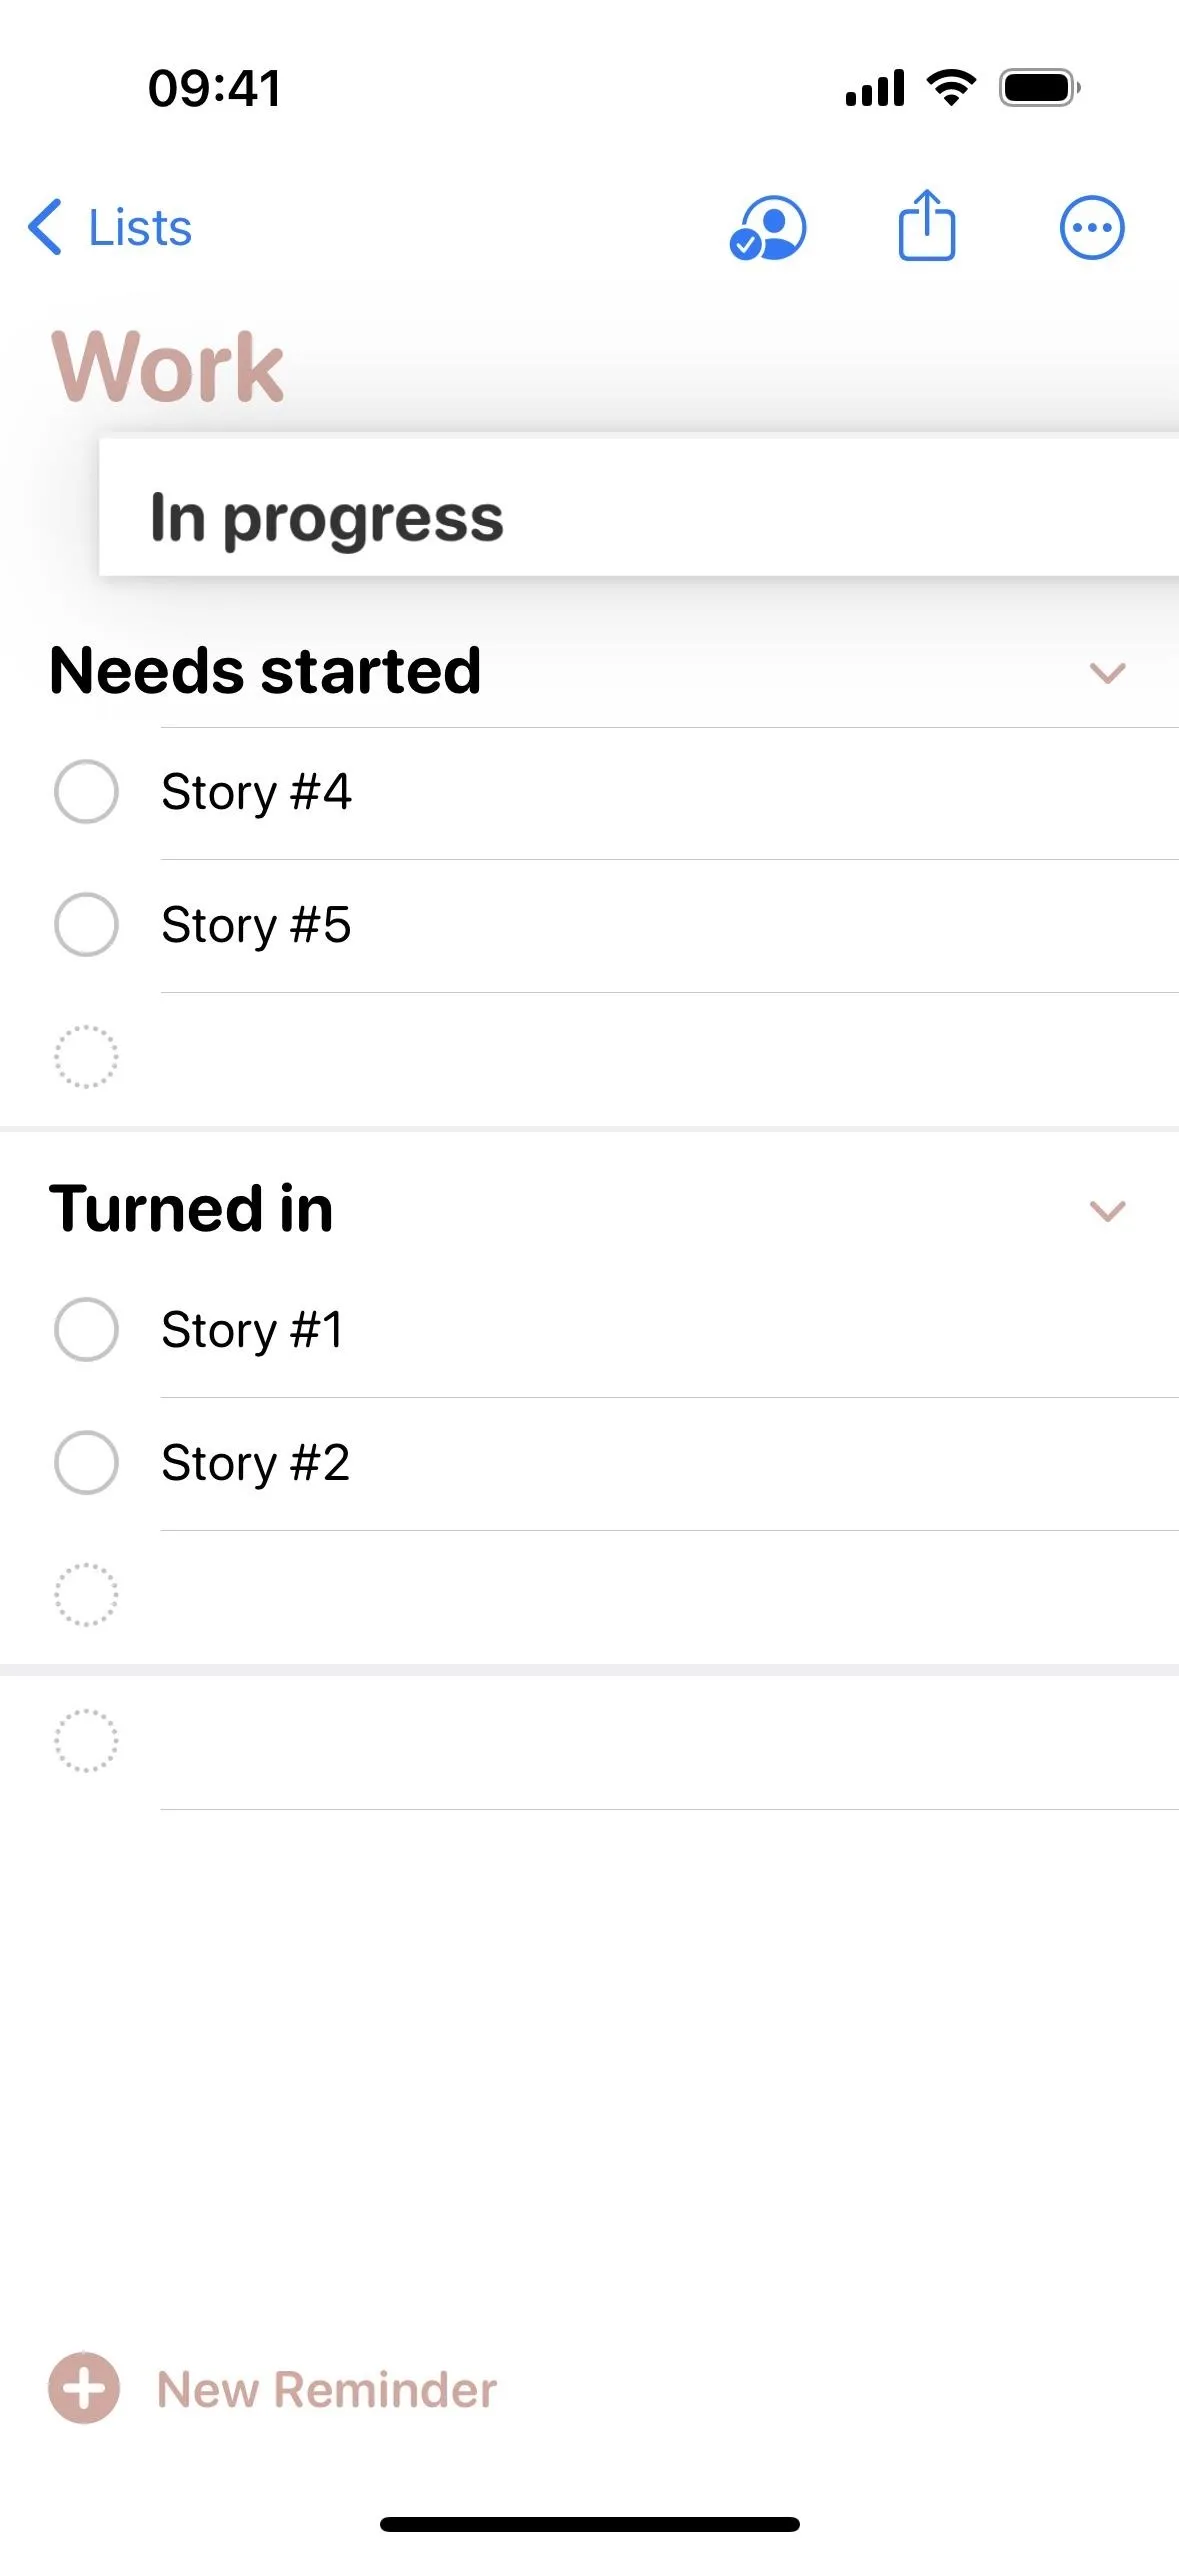
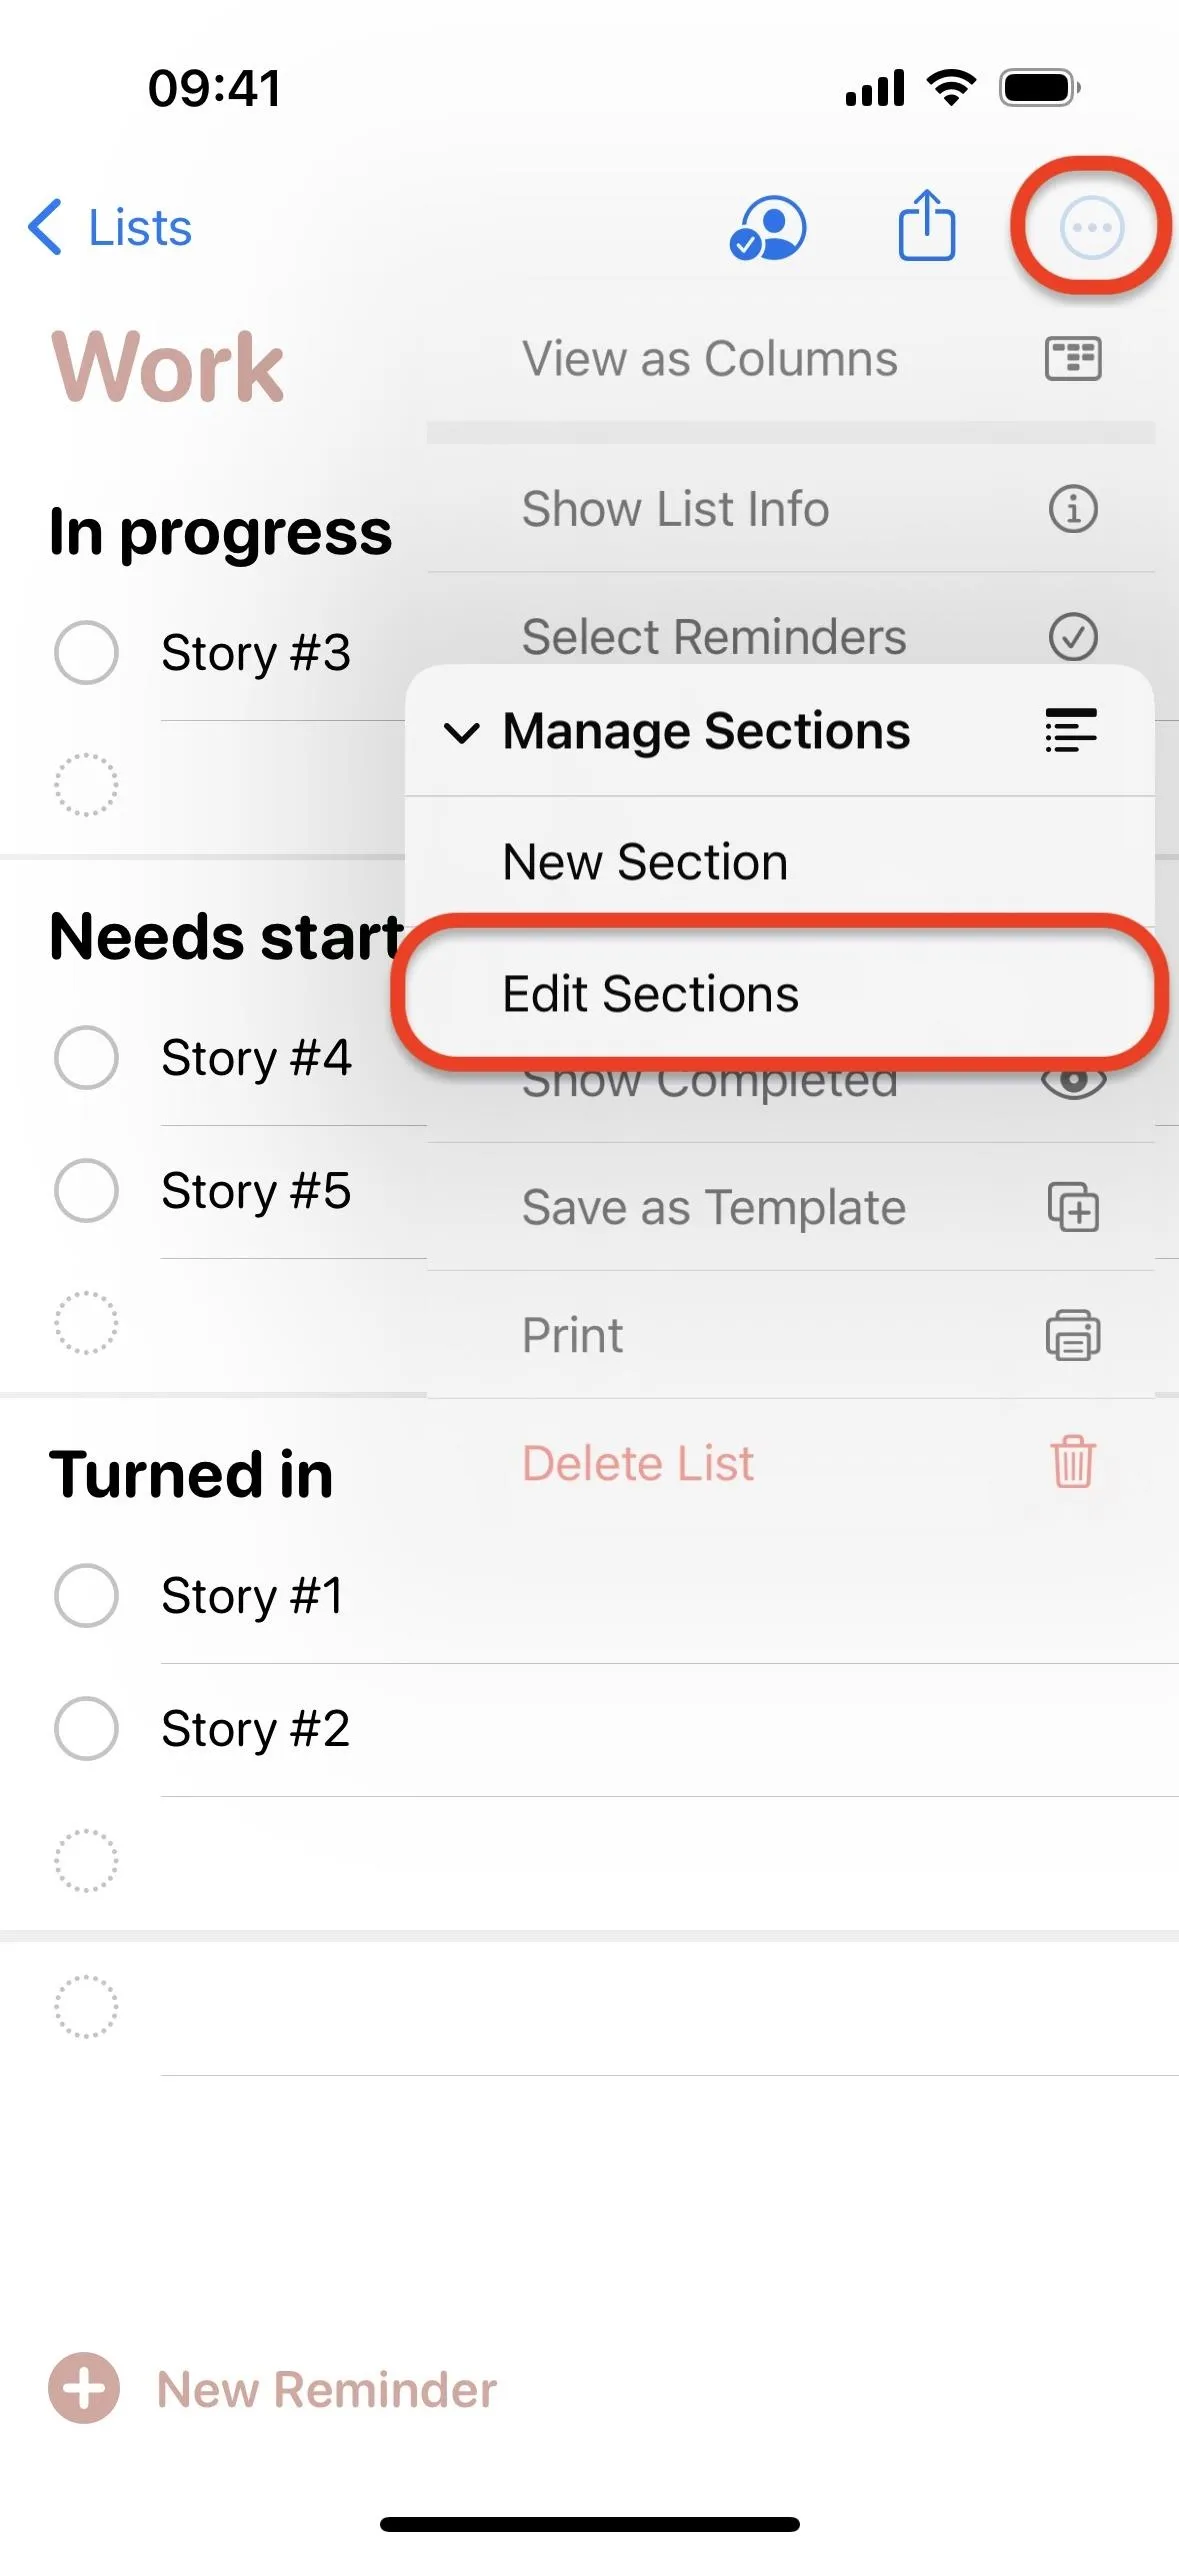
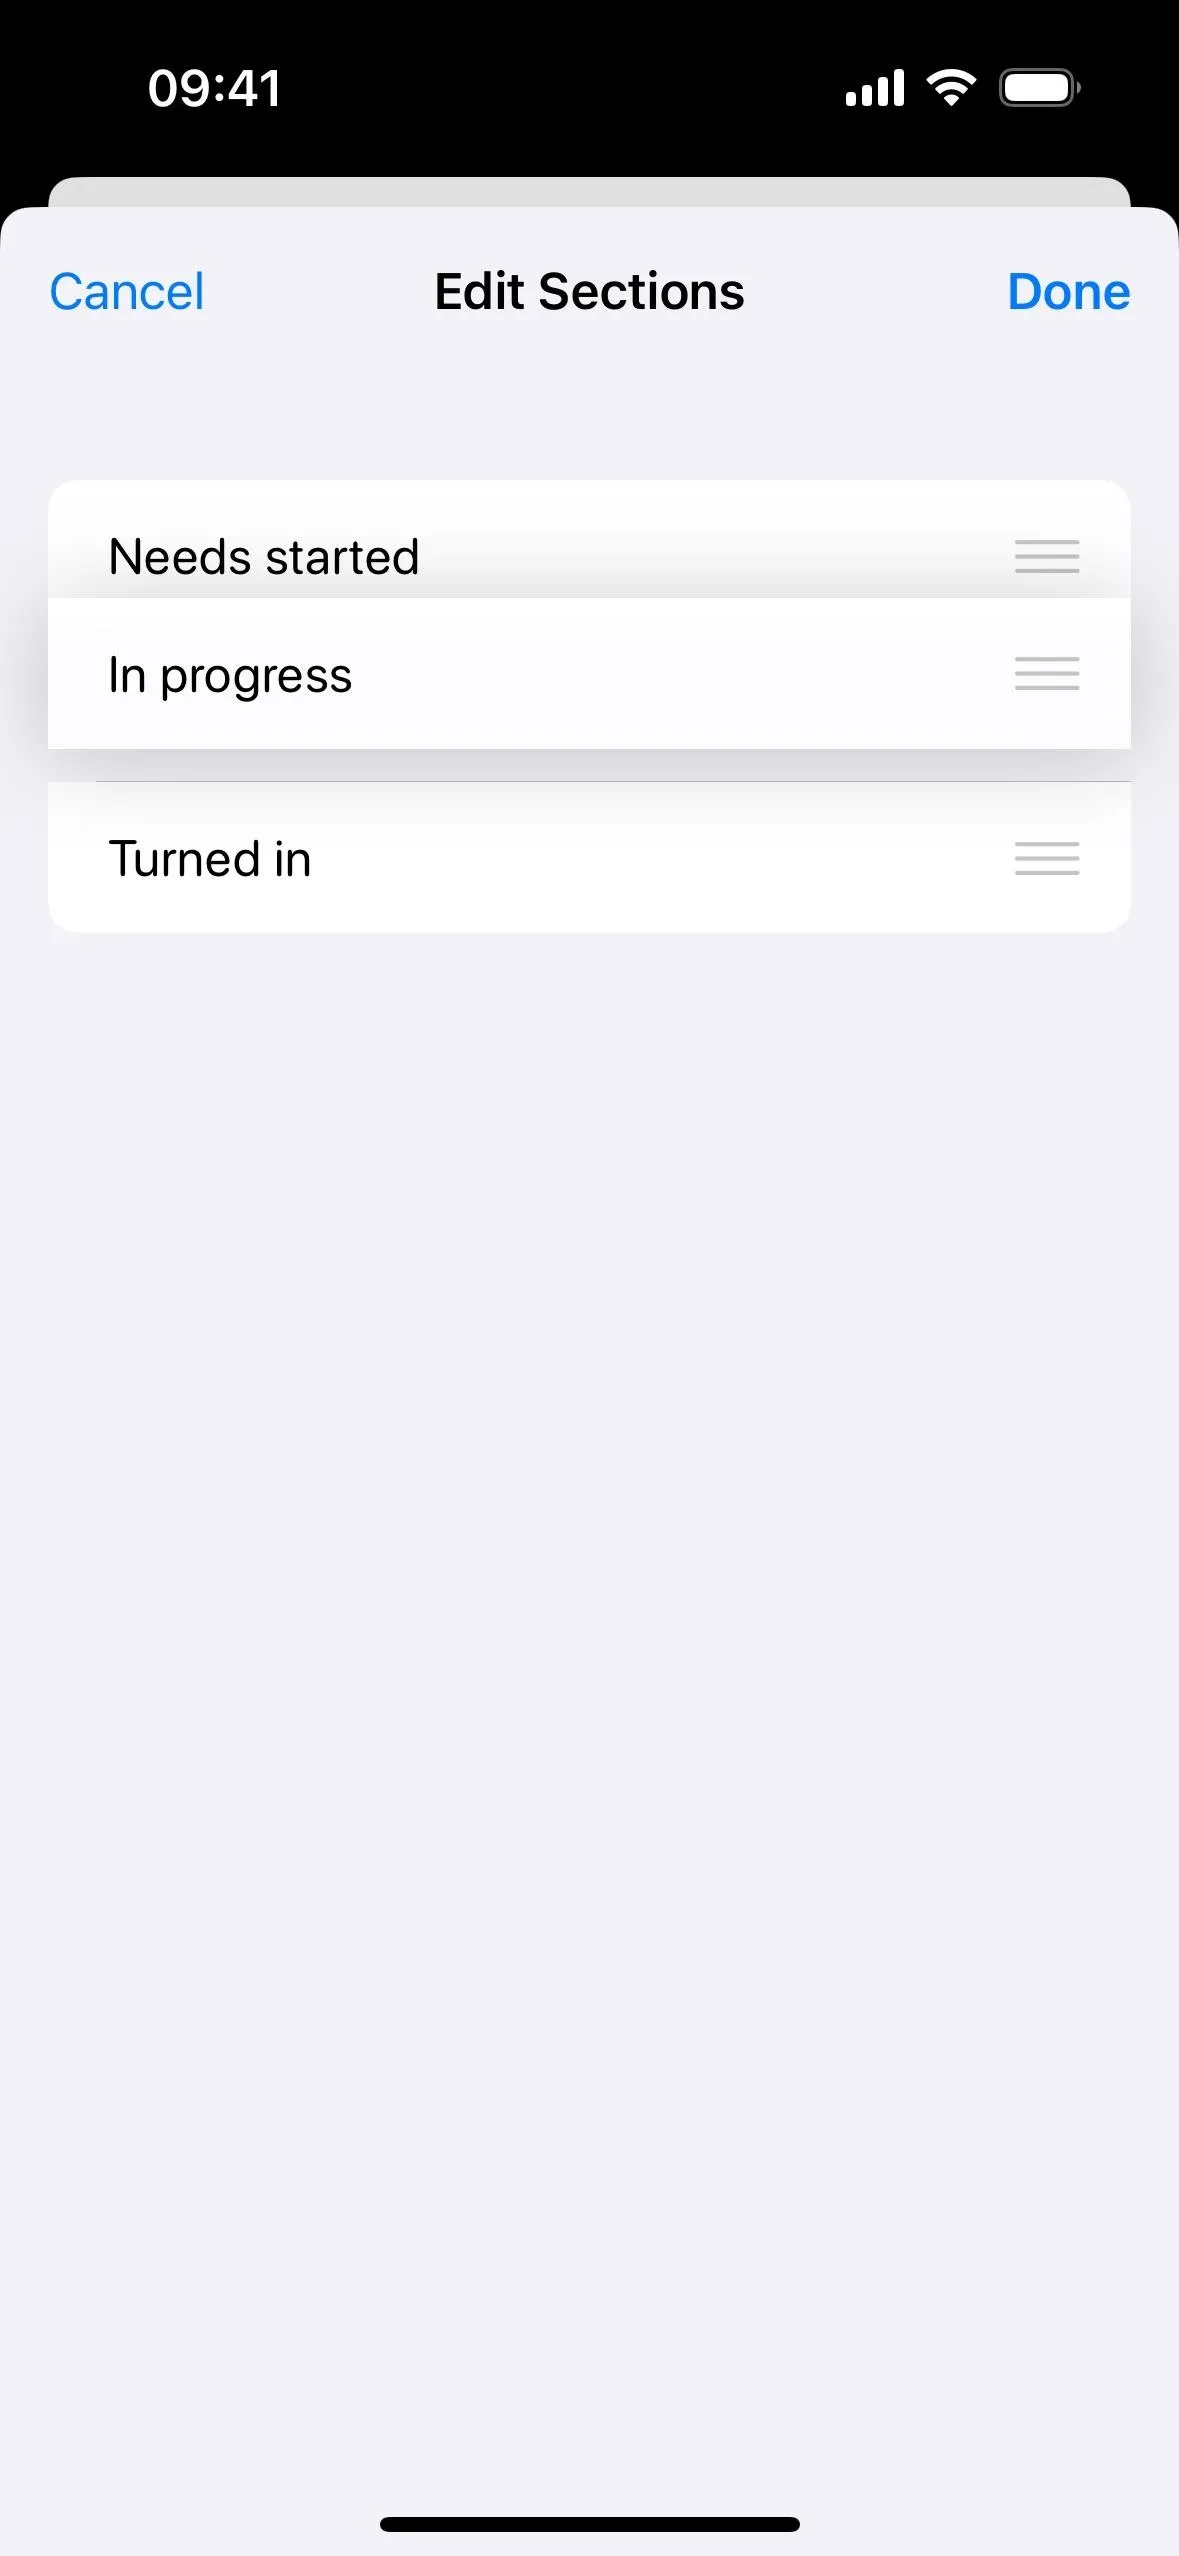
You can also reorder sections in one of two ways. First, you can touch and hold the section name, then drag and drop it to a new location in the list. Second, you can tap the ellipsis (•••) to open more options, select "Manage Sections," choose "Edit Section," drag and drop a section to a new location using the three-lined icon, and hit "Done" to save the changes.


Renaming Sections in Your Lists
At any time, you can tap a section's name to open the keyboard and change its title.
Deleting Sections in Your Lists
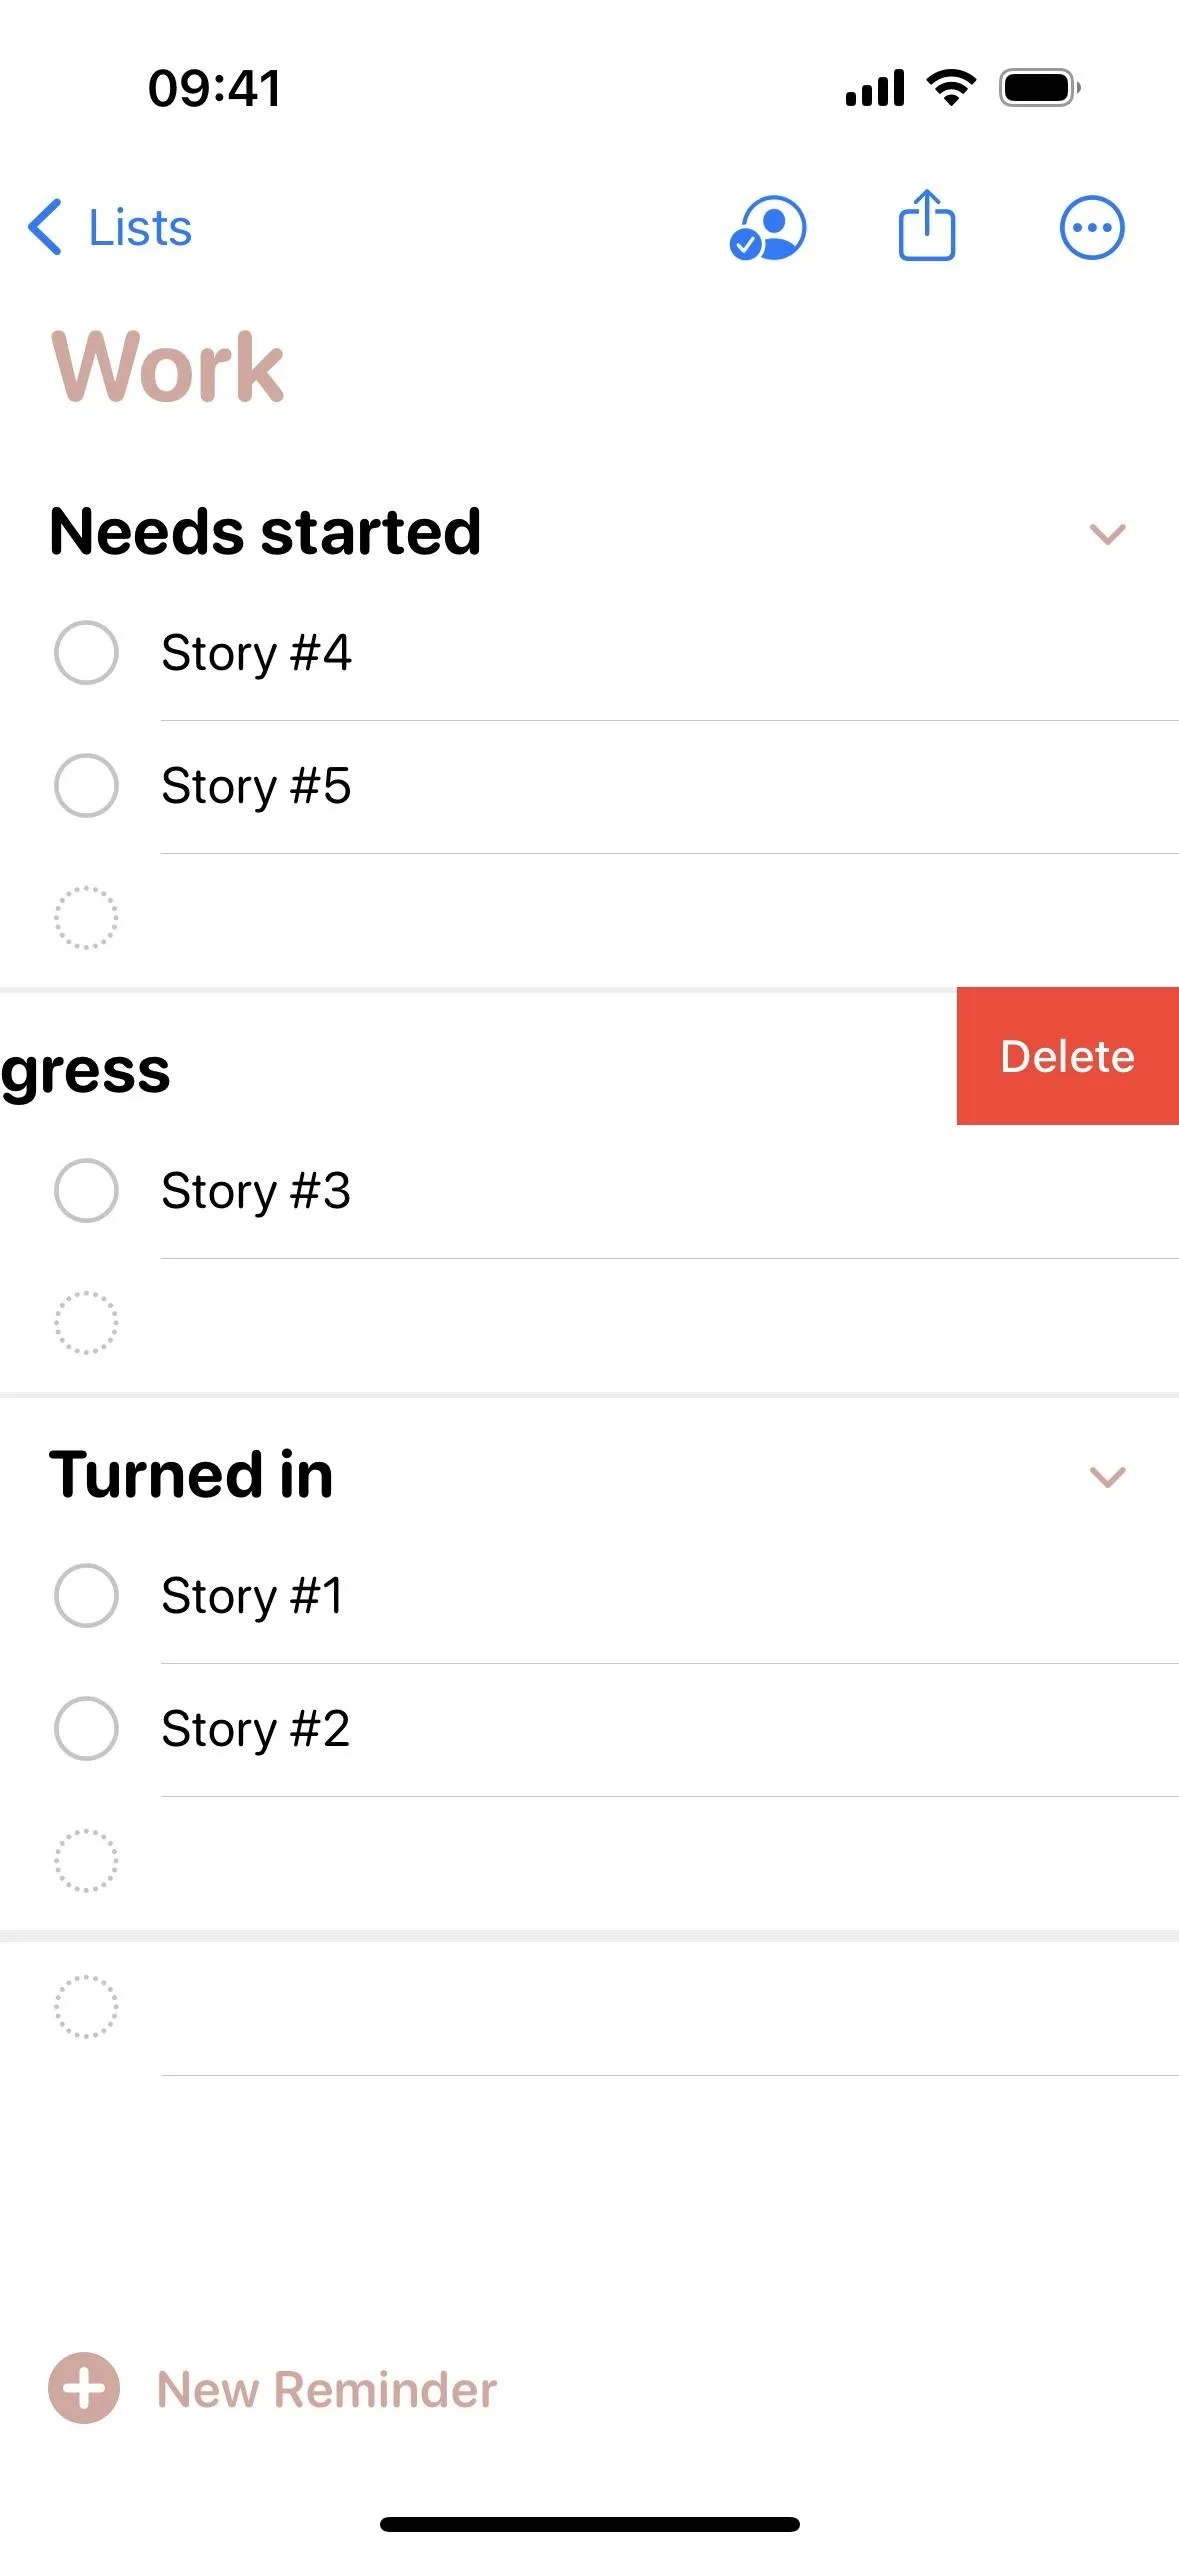
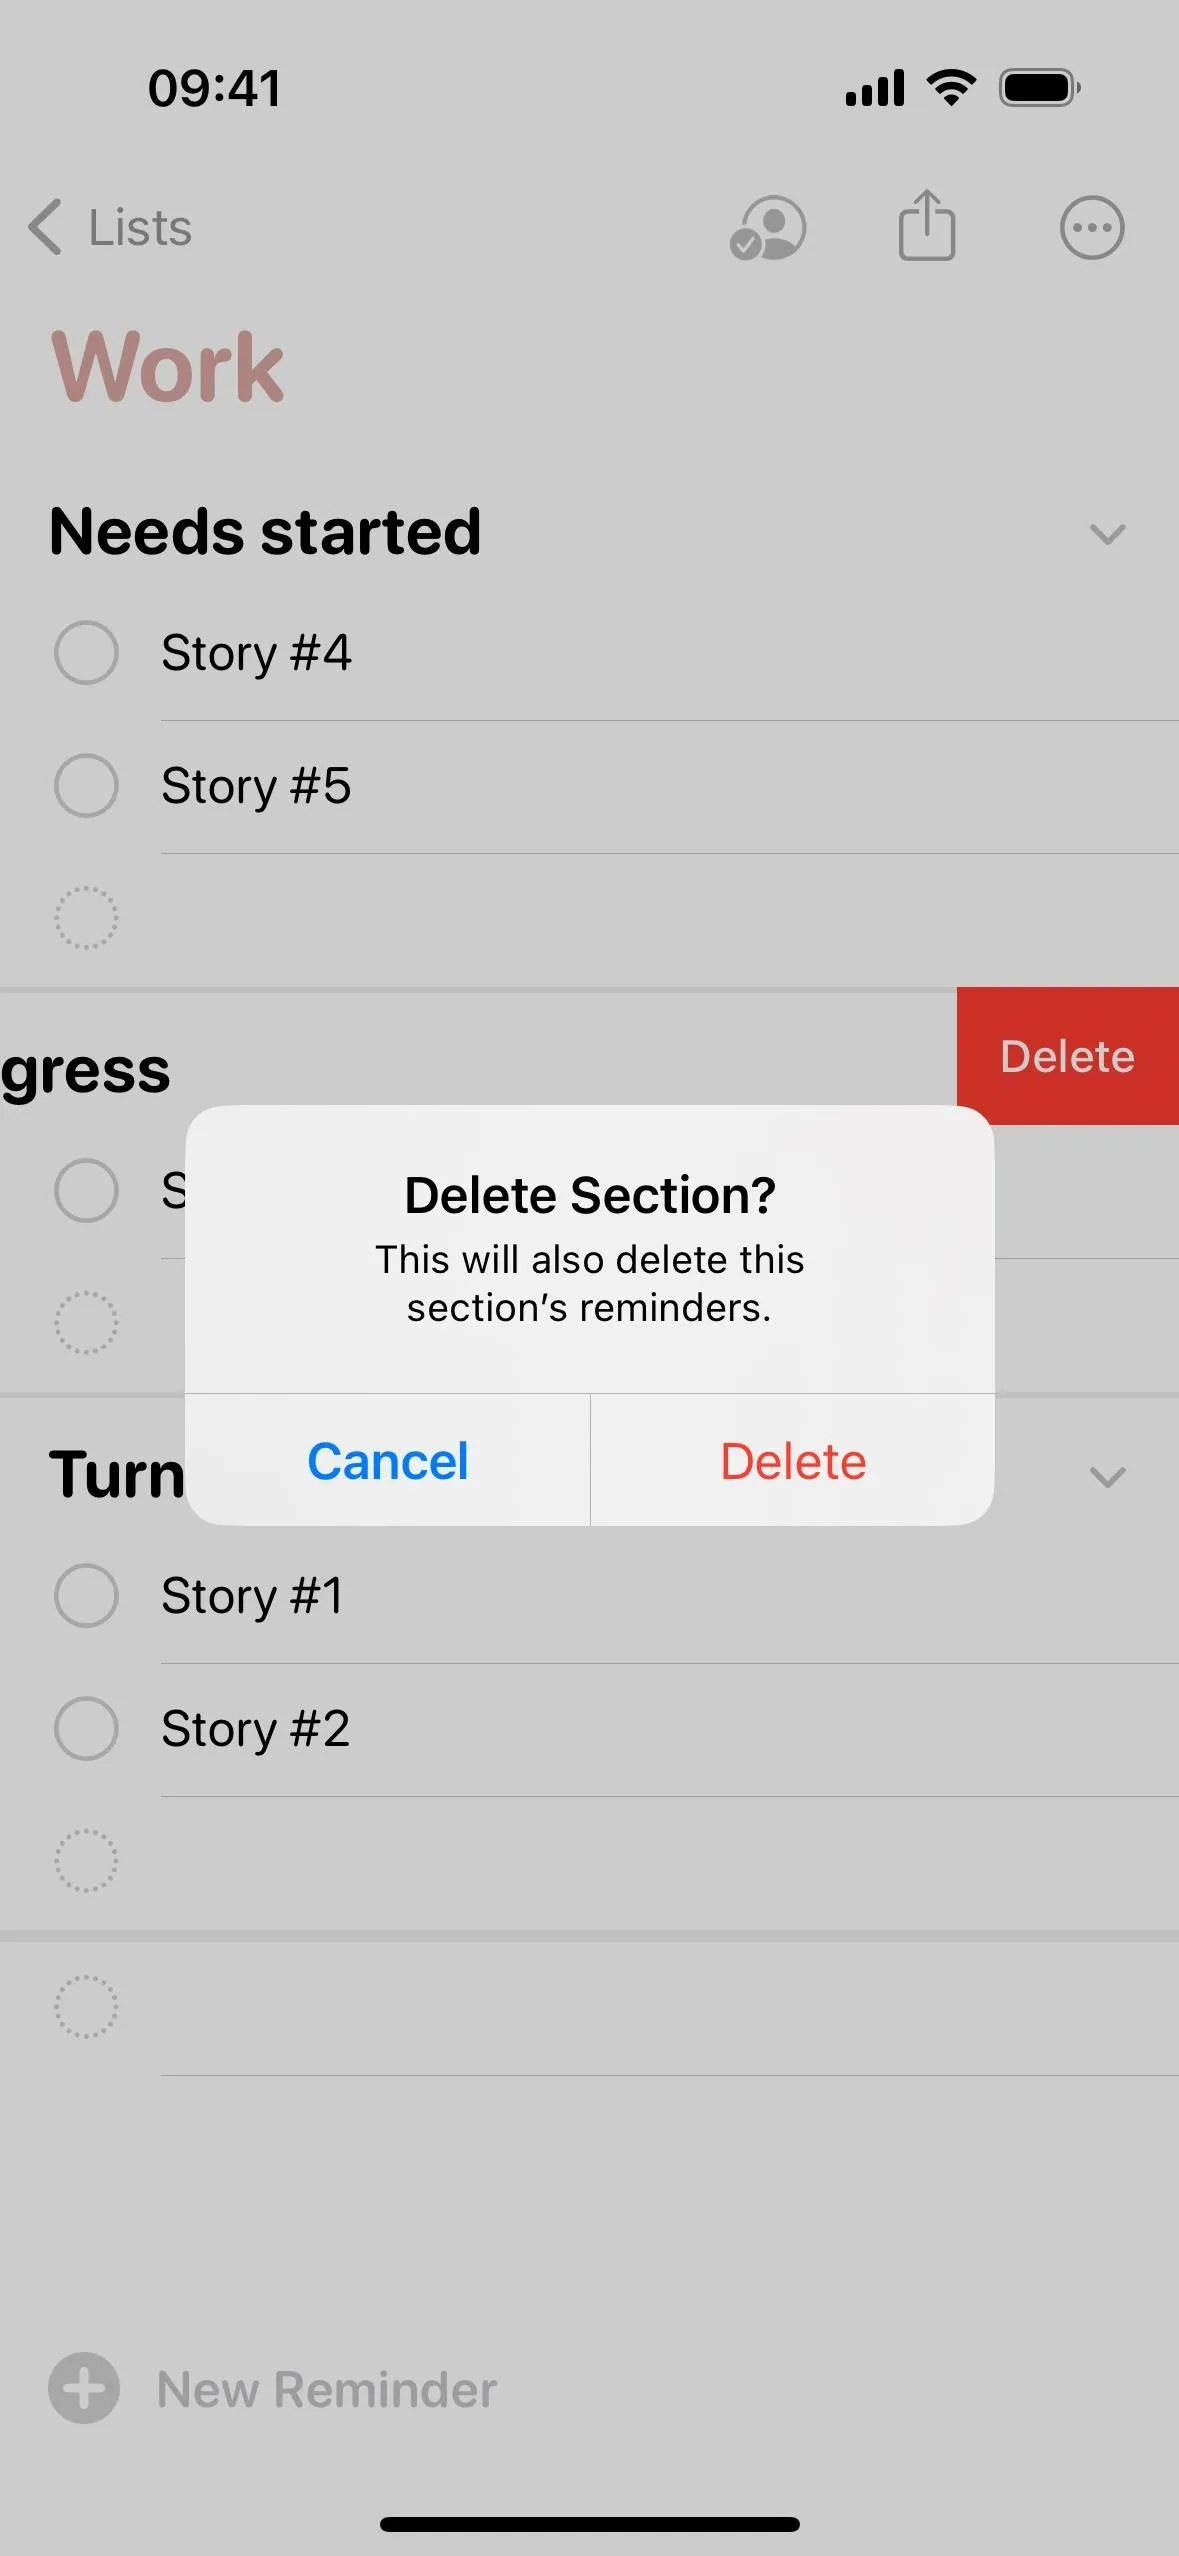
You can delete a section by swiping left on its name until it disappears off the screen, or you can swipe left on it and hit the "Delete" button. Either way, you'll need to confirm the action with "Delete" since it will warn you that deleting the section also deletes all the reminders in it. If you want to keep them, you'll want to move them to another section first.


Switching to Columns View
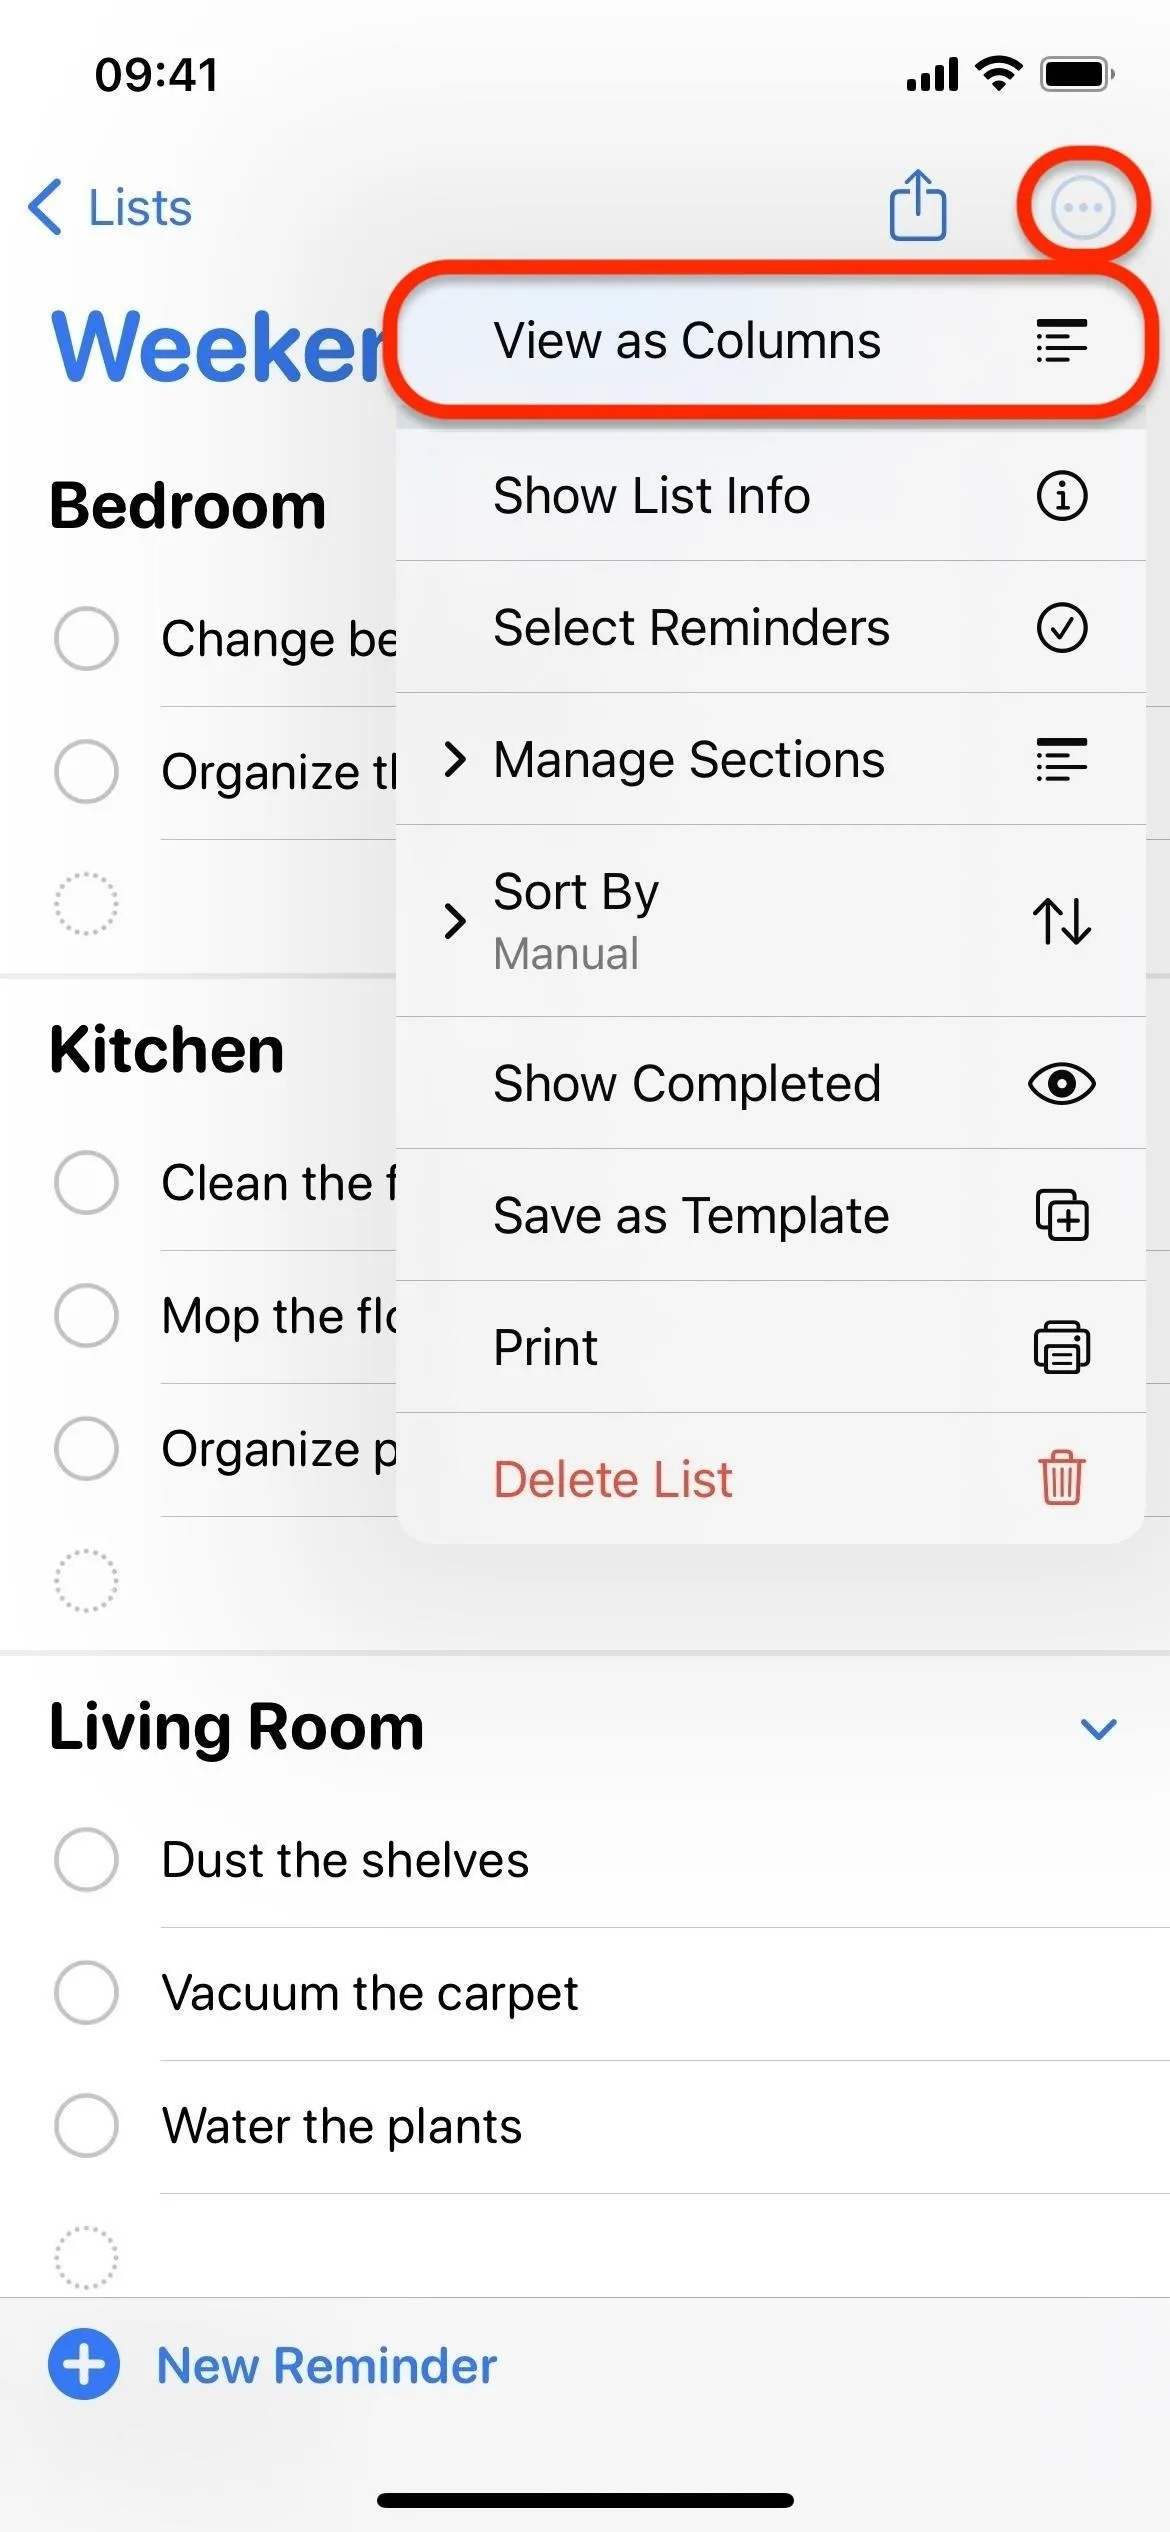
Sections can also be viewed as columns instead of lists to help visualize workflows and processes. For instance, you can convert your task list into a kanban board, showing the status of each task across various stages. For daily tasks like grocery shopping, the column view can help focus on specific aisles or sections of the store, making shopping more efficient. To switch to columns:
- Navigate to any list within Reminders.
- Tap the ellipsis (•••) to open more options.
- Select "View as Columns" to change the layout.
- Swipe left or right to browse sections in your list.
You can toggle between the column and list views whenever needed.


Cover photo and screenshots by Jovana Naumovski/Gadget Hacks


Comments
Be the first, drop a comment!