


It's been a long time coming, but Apple Maps finally has cycling directions for your iPhone. Google Maps has had cycling support for ten years now, though, many of its more useful features had been incorporated within the last few years. Well, with iOS 14, Apple has caught up, and it's done a fantastic job.
You might even say Apple's version is more advanced for bicyclists, complete with indicators for bike lanes and bike-friendly roads, as well as settings to avoid steep hills and busy streets. For now, the feature is only available in the San Francisco Bay area, but it will be expanded to at least Los Angeles and New York City this fall. Whether you're a seasoned veteran or a newbie to bike riding around your city, the new cycling feature is a welcomed addition to Maps.
- Don't Miss: 16 New Apple Maps Features for iPhone in iOS 14
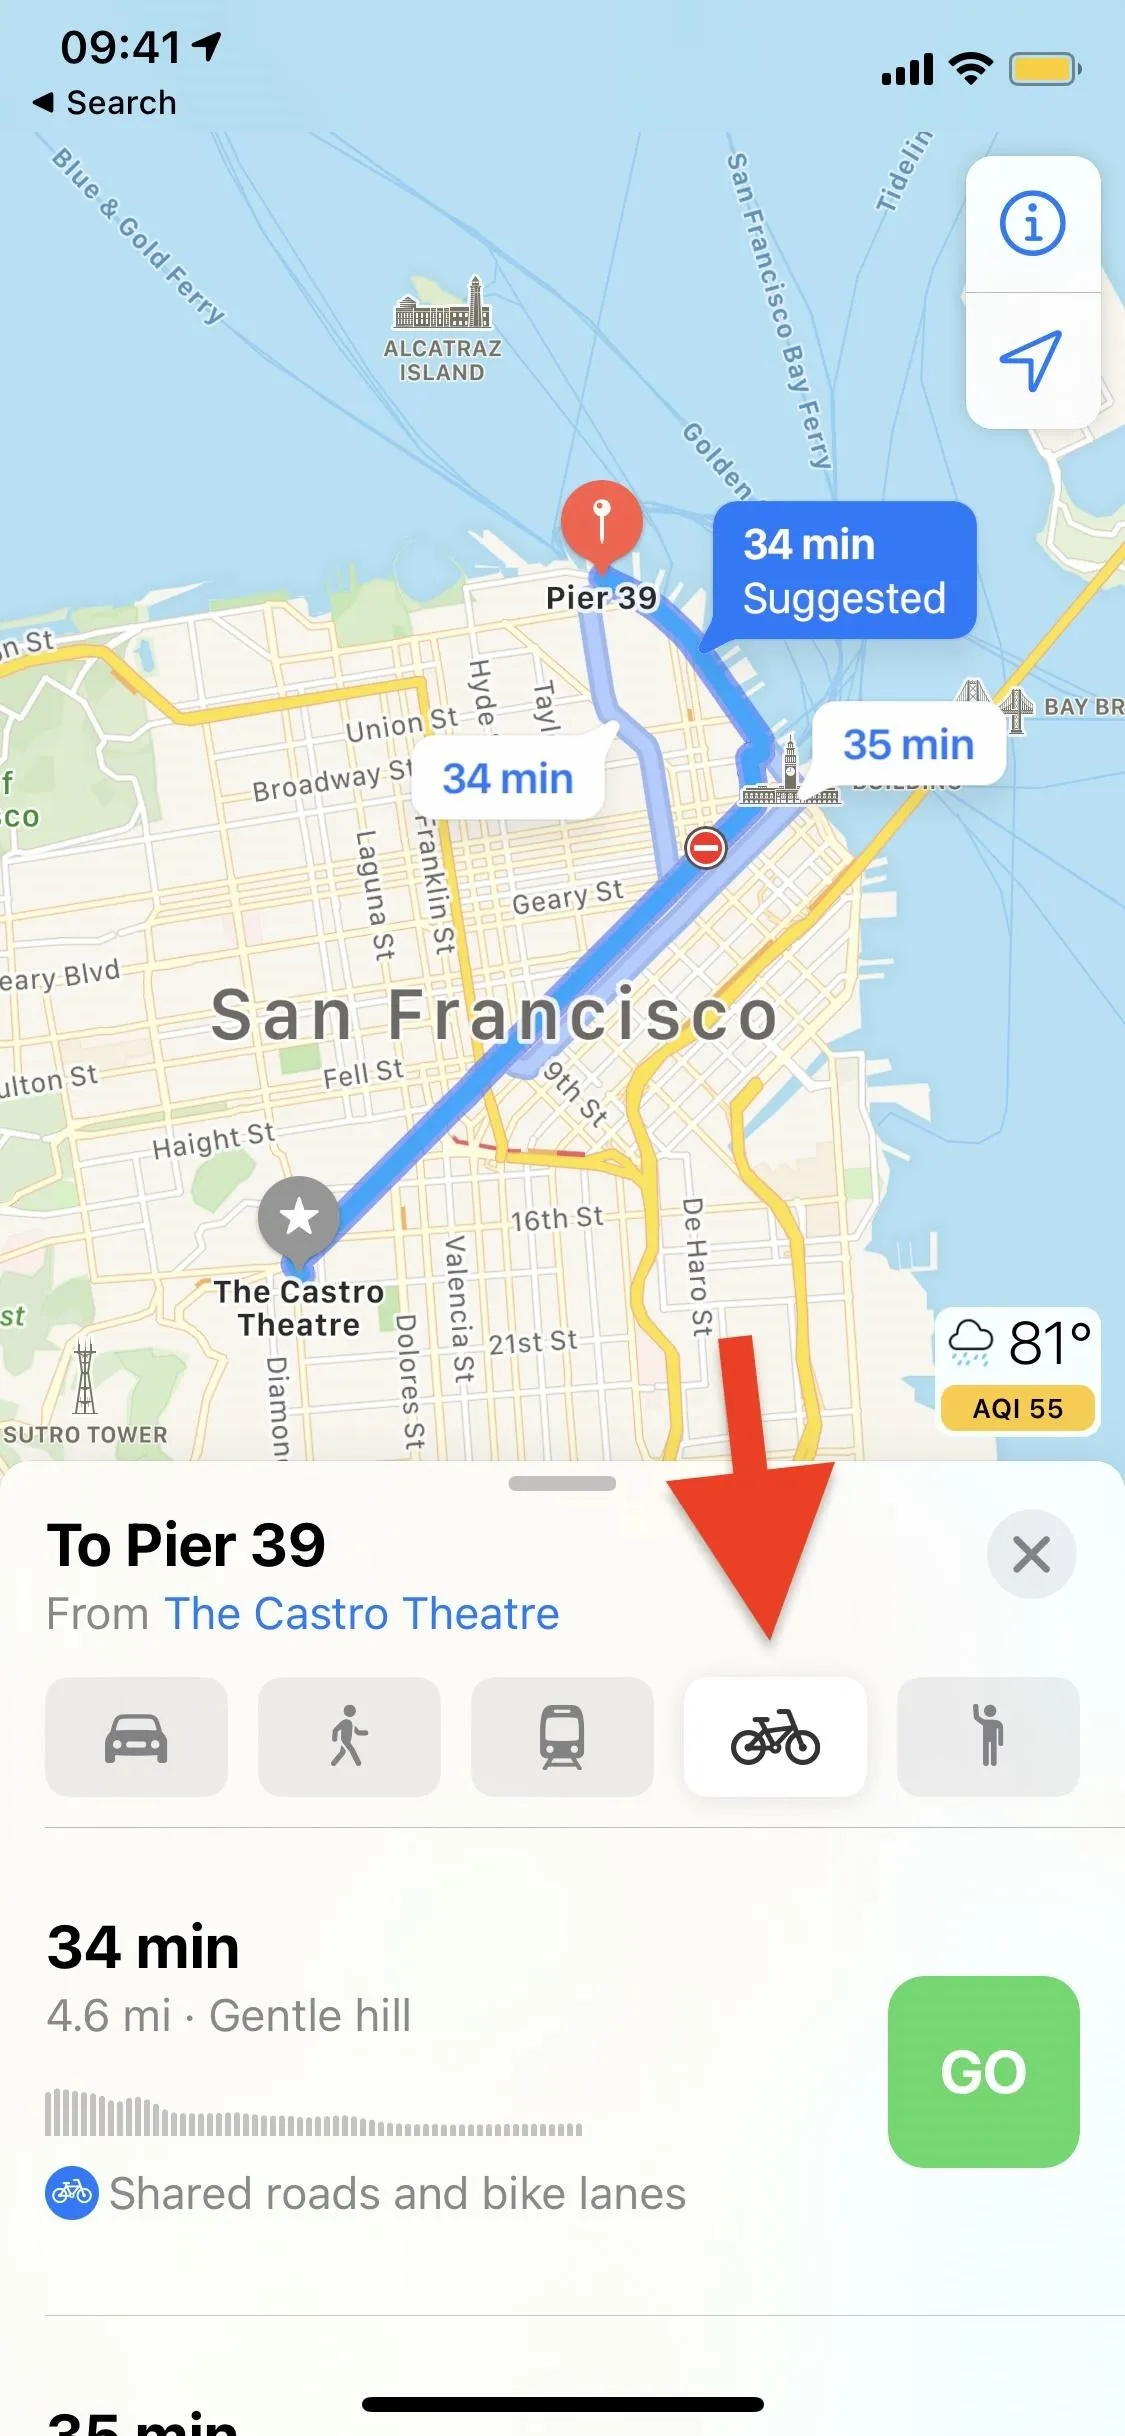
Using the cycling directions in Apple Maps is as easy as using the general driving directions to get from point A to point B. In the app, enter your location and destination as usual. Once the two coordinates are set, you'll notice a brand new bicycle icon sandwiched between the public transport and walking options — tap that.
Viewing the Routes Directly on the Map
If cycling directions are available in your area, you may get one or several routes to choose from. On the map itself, it will recommend which path to take and identify routes with labels such as "Suggest," "Fastest," "Includes busy roads," or "Less busy."


You might also see icons on the map to warn you off certain conditions. Specifically, there are new icons for where stairs are in a route, where there's a steep incline, and when you'll need to get off your bike and walk.


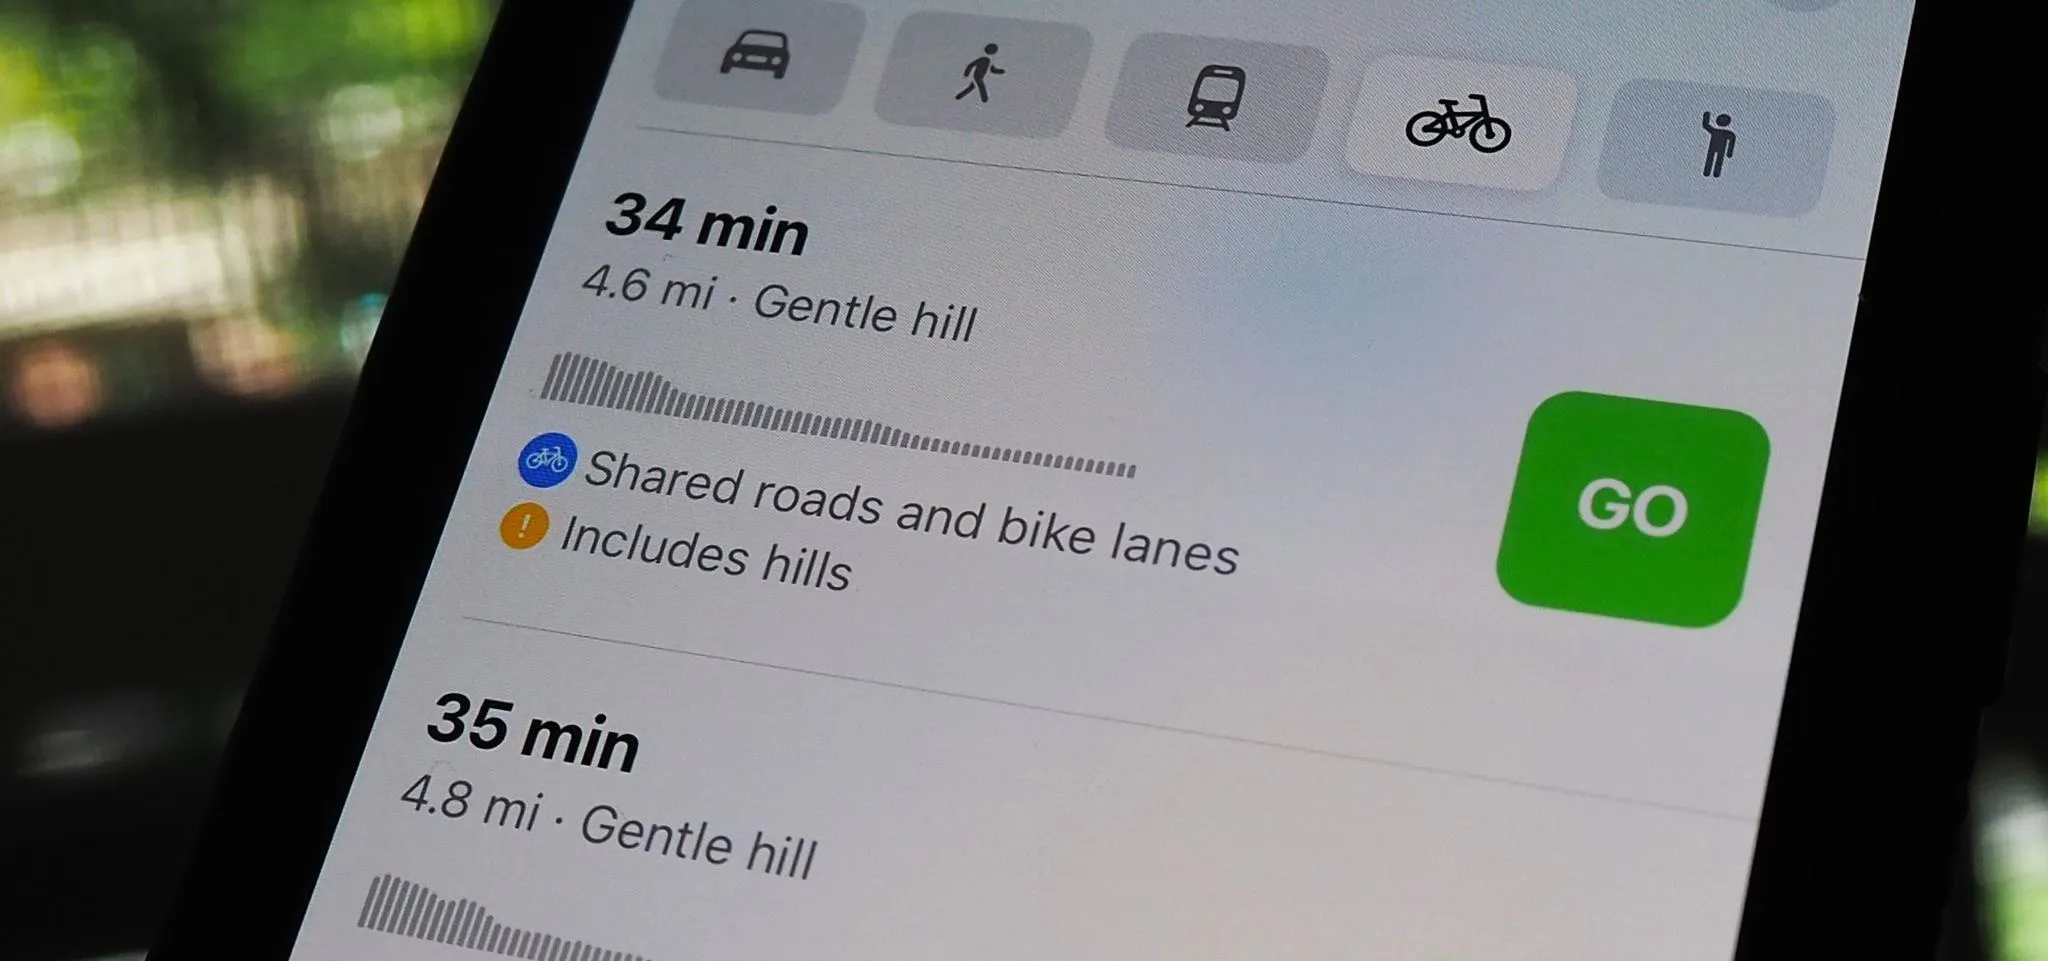
Viewing More Info About Each Route on the Card
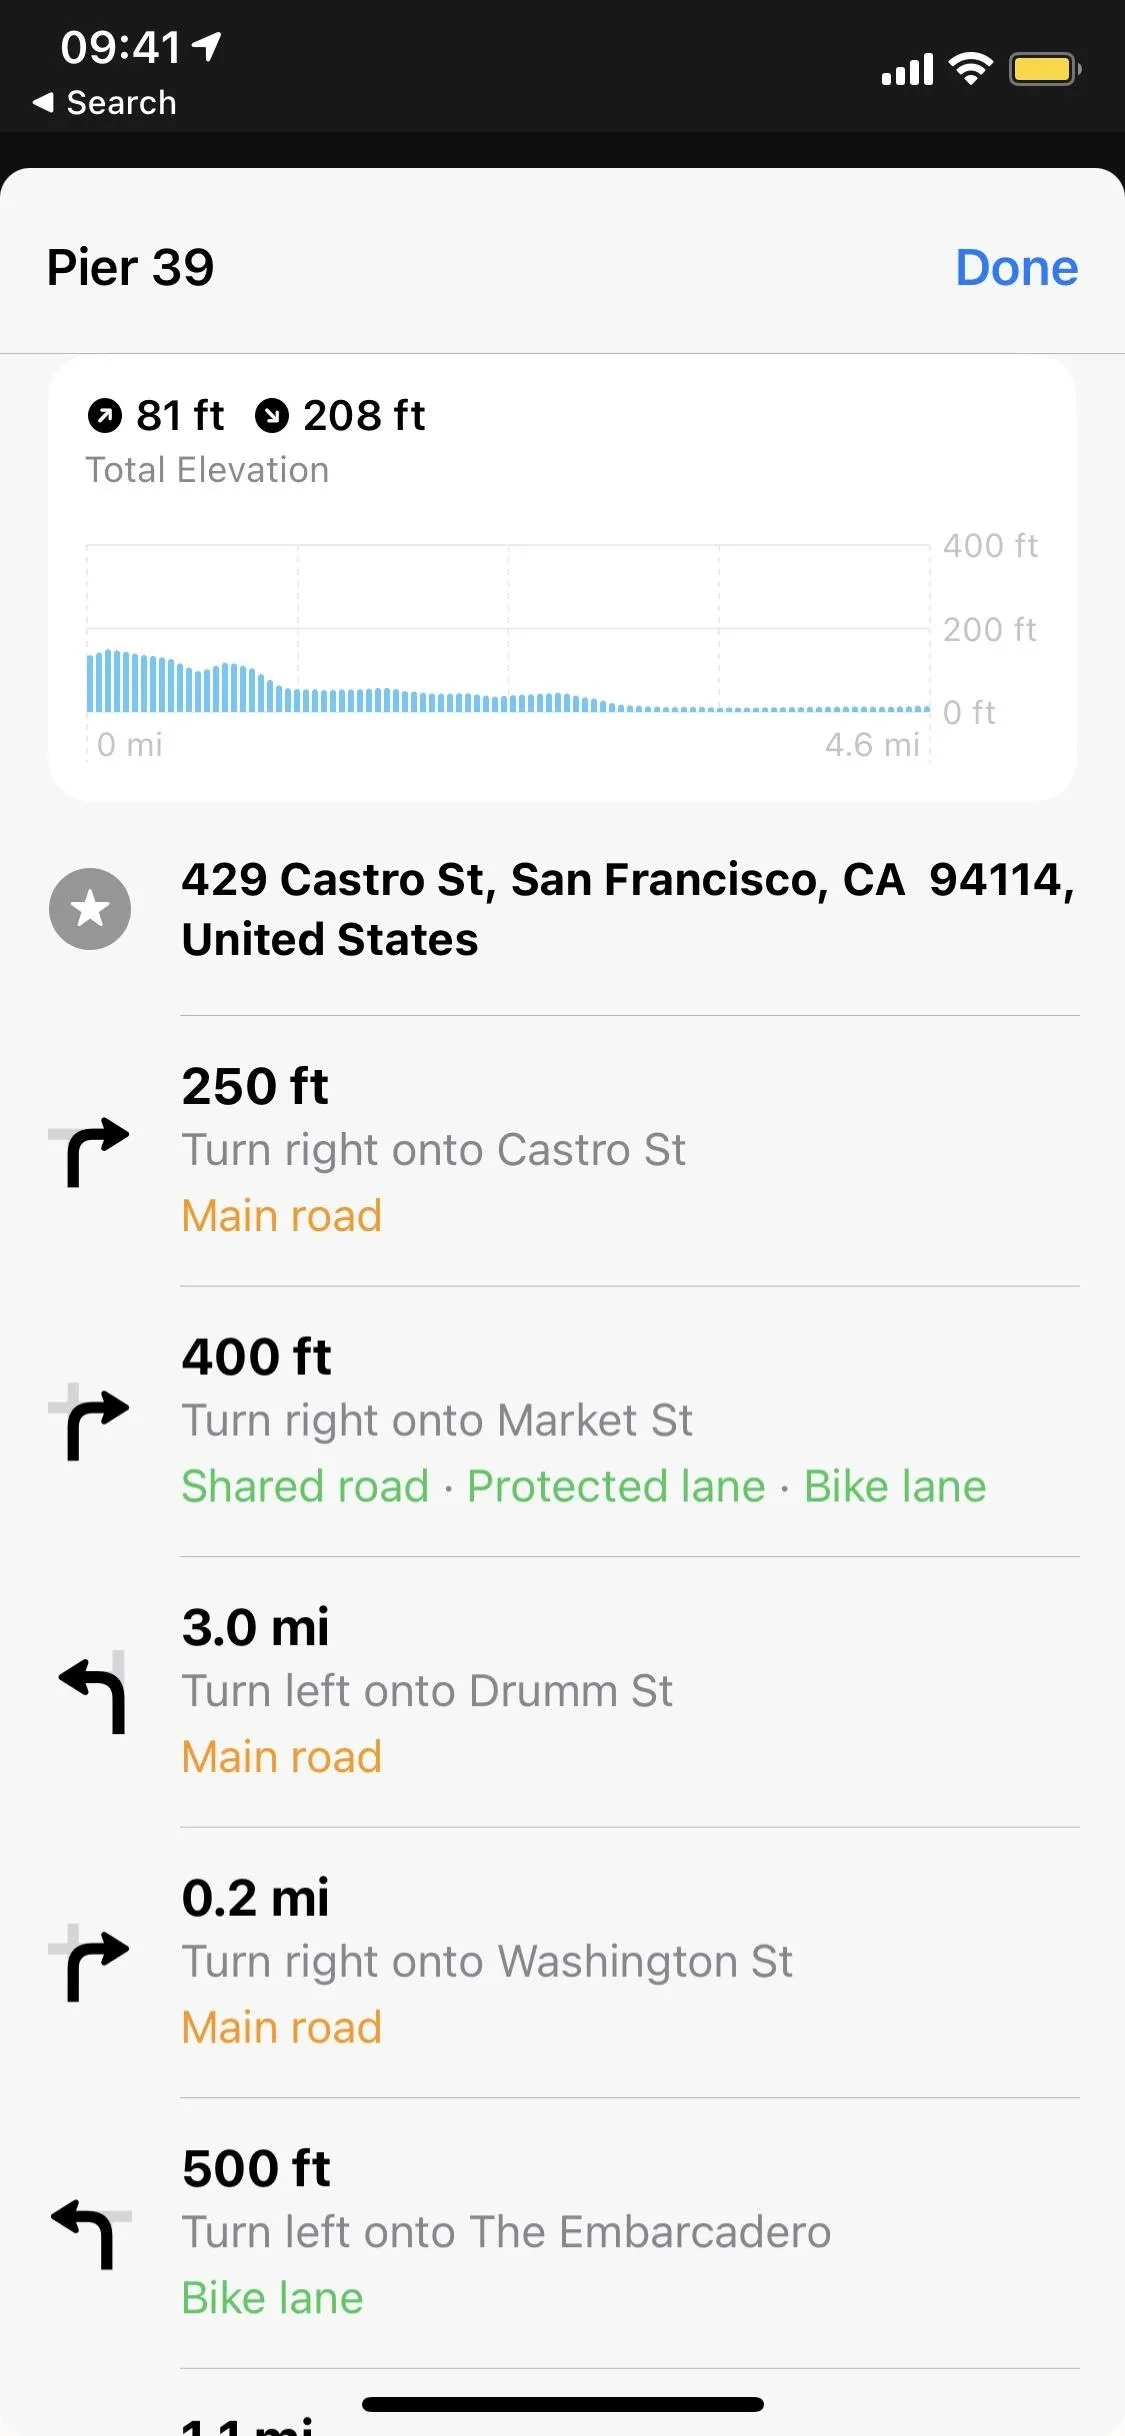
To view more information about the routes, swipe up the card of results. Each option shows the estimated travel time, distance, graphed elevation, and a short description of the ride (gentle hill, 150-foot climb, etc.). One of the neater features is that visual of the elevation overview; the higher the bar, the steeper the slope. Any flat roads will be shown as very short bars.
It also shows if you'll be using bike lanes, shared roads, main roads, or a combination of them. If that wasn't enough, it could also tell you if the route has roads shared with pedestrians and if you'll need to walk or take a ferry for any portion of it.
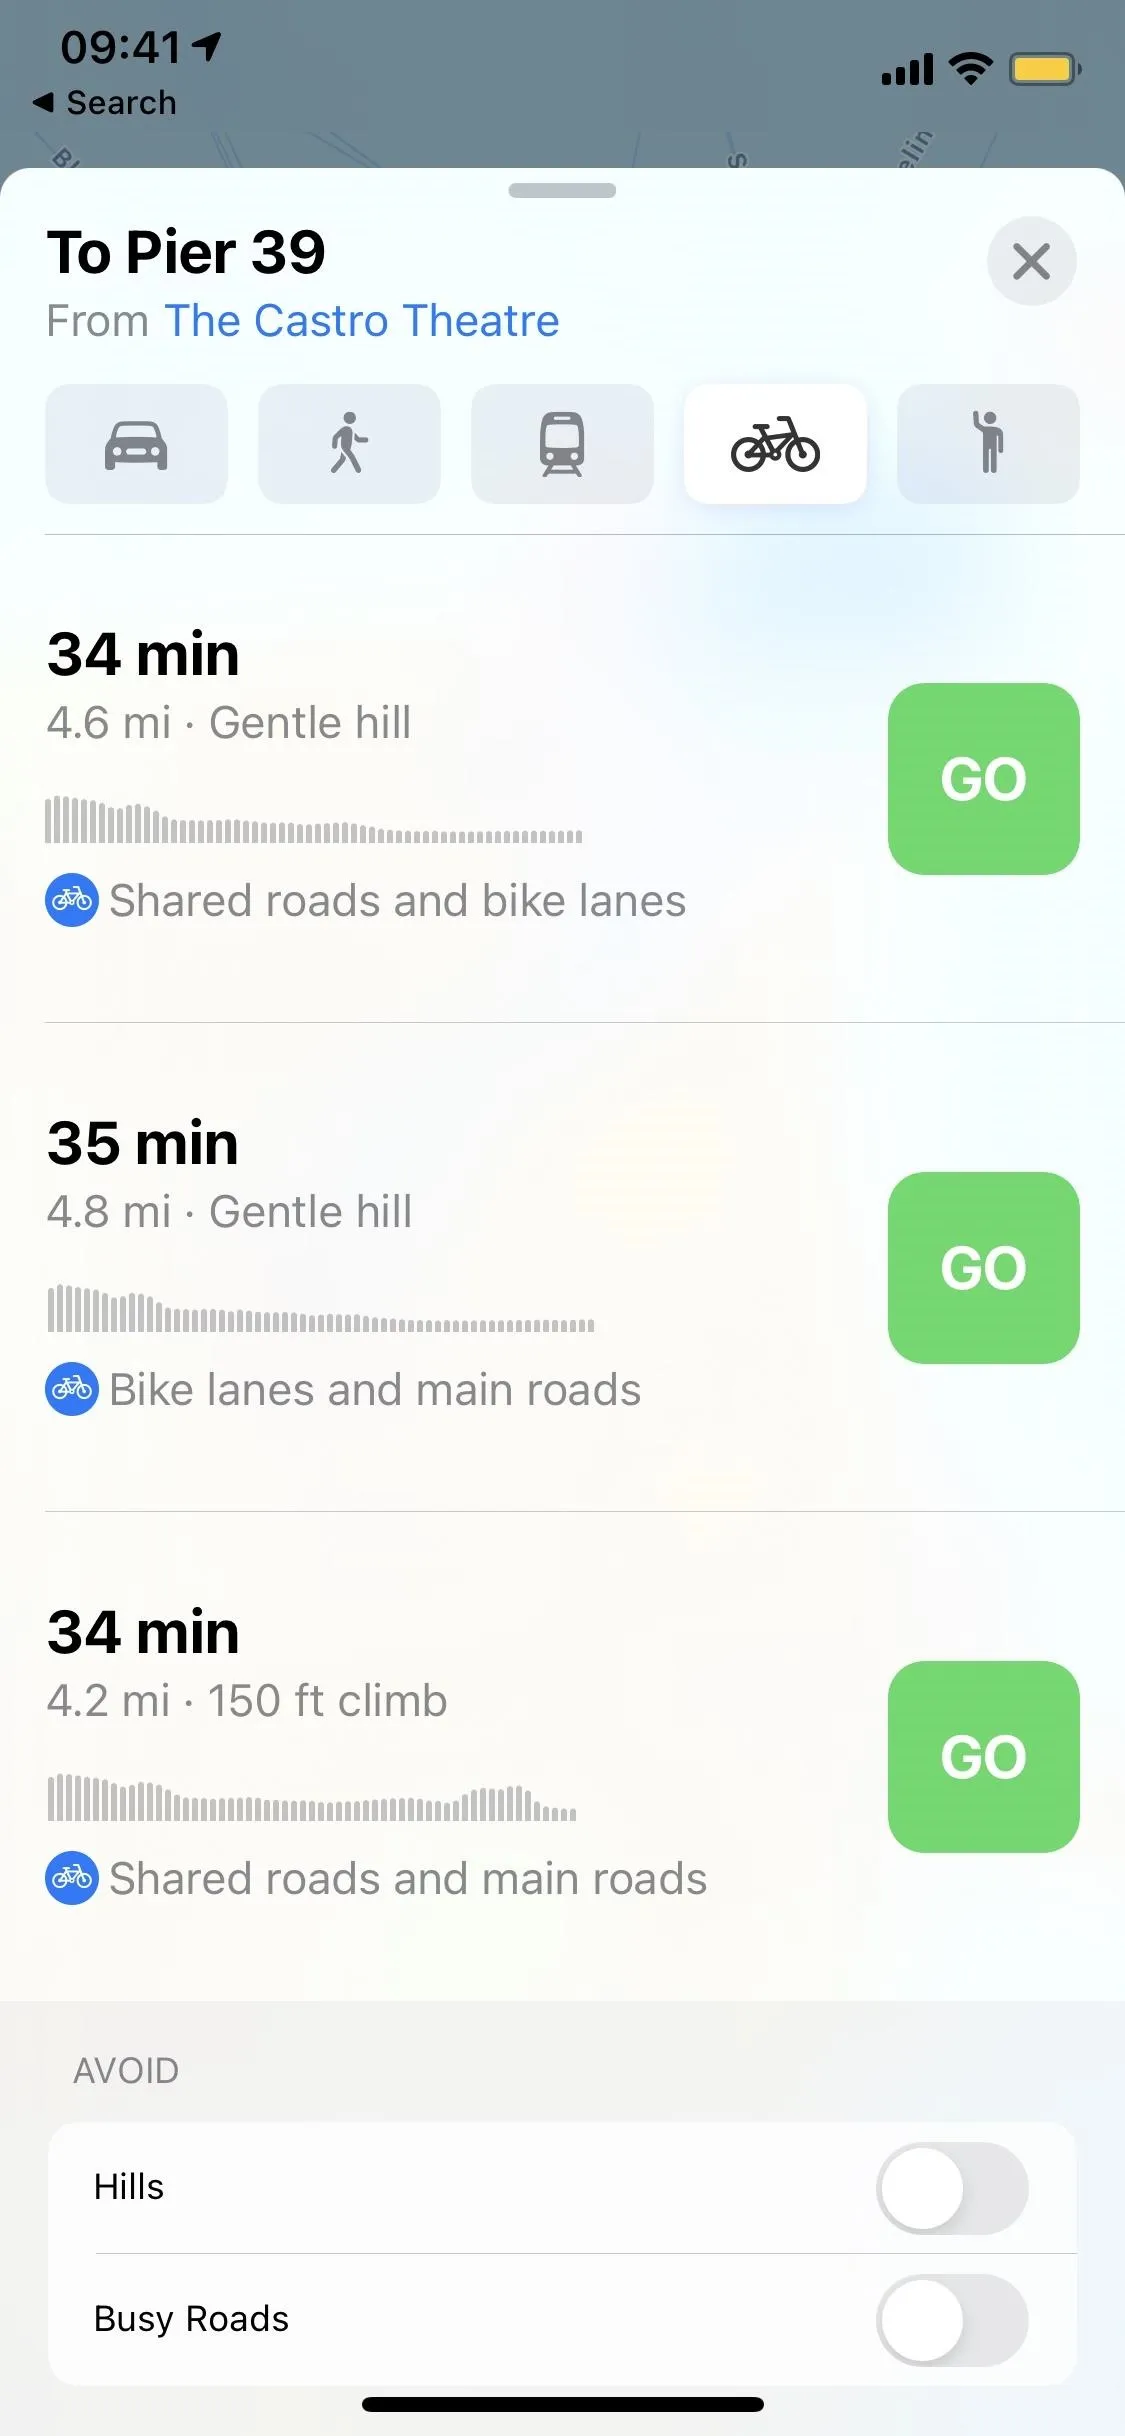
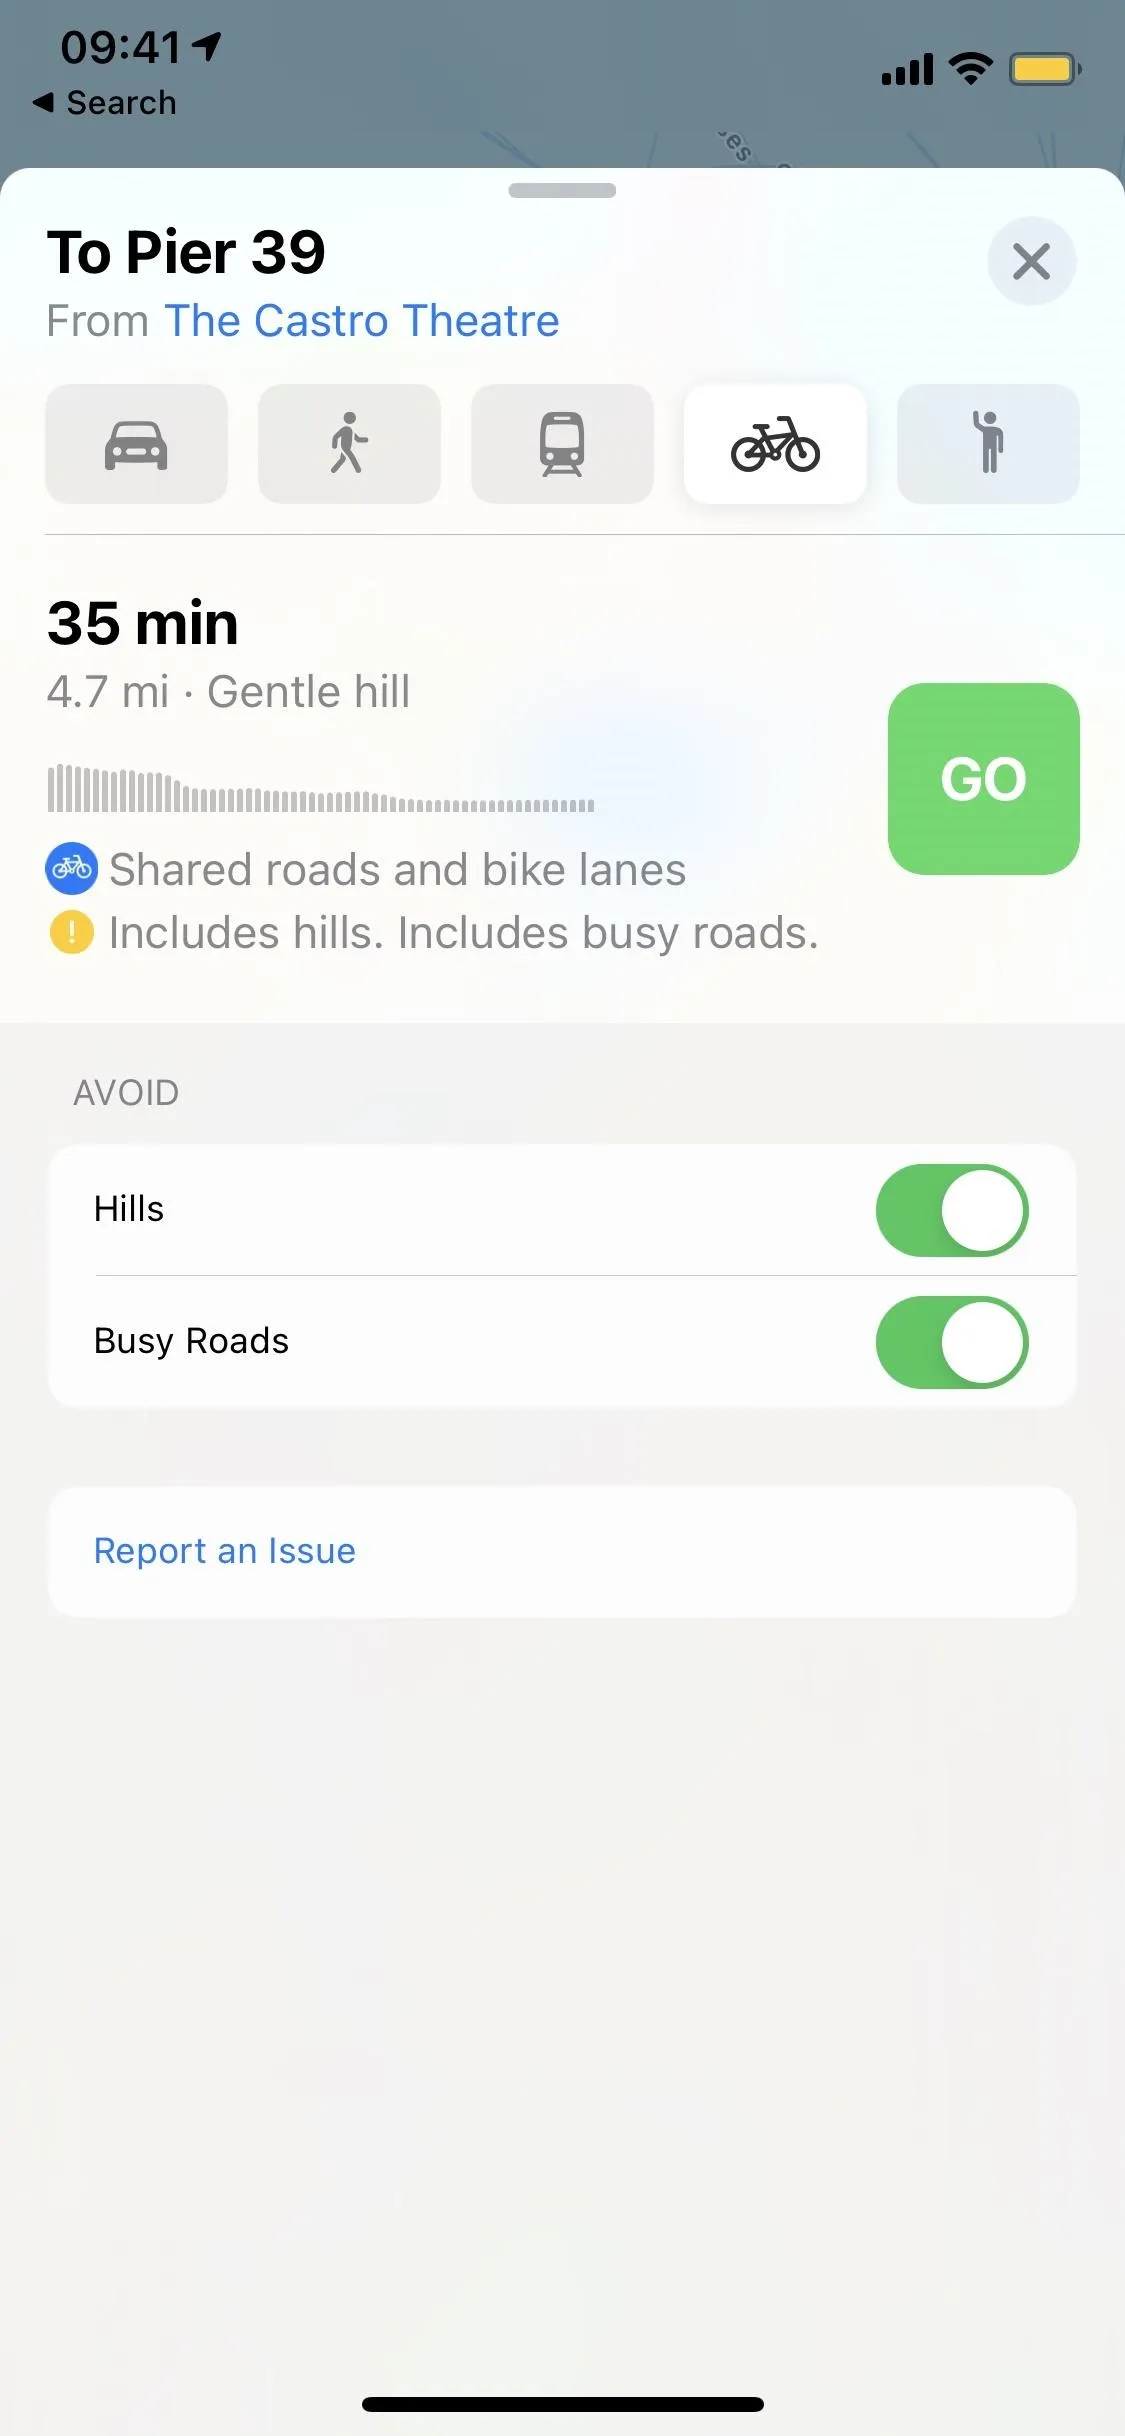
Avoiding Hills & Busy Roads
If you want to avoid any hills or roads, you can toggle on those options at the bottom of your cycling directions options. However, there may be no choice but to ride on hills and roads, so Apple will let you know that with a warning underneath your options, although they'll have fewer hills and busy roads than if the options weren't toggled on. You can also toggle these options on and off in the settings for Maps, but we'll get to that in a second.

Navigating Your Cycling Routes
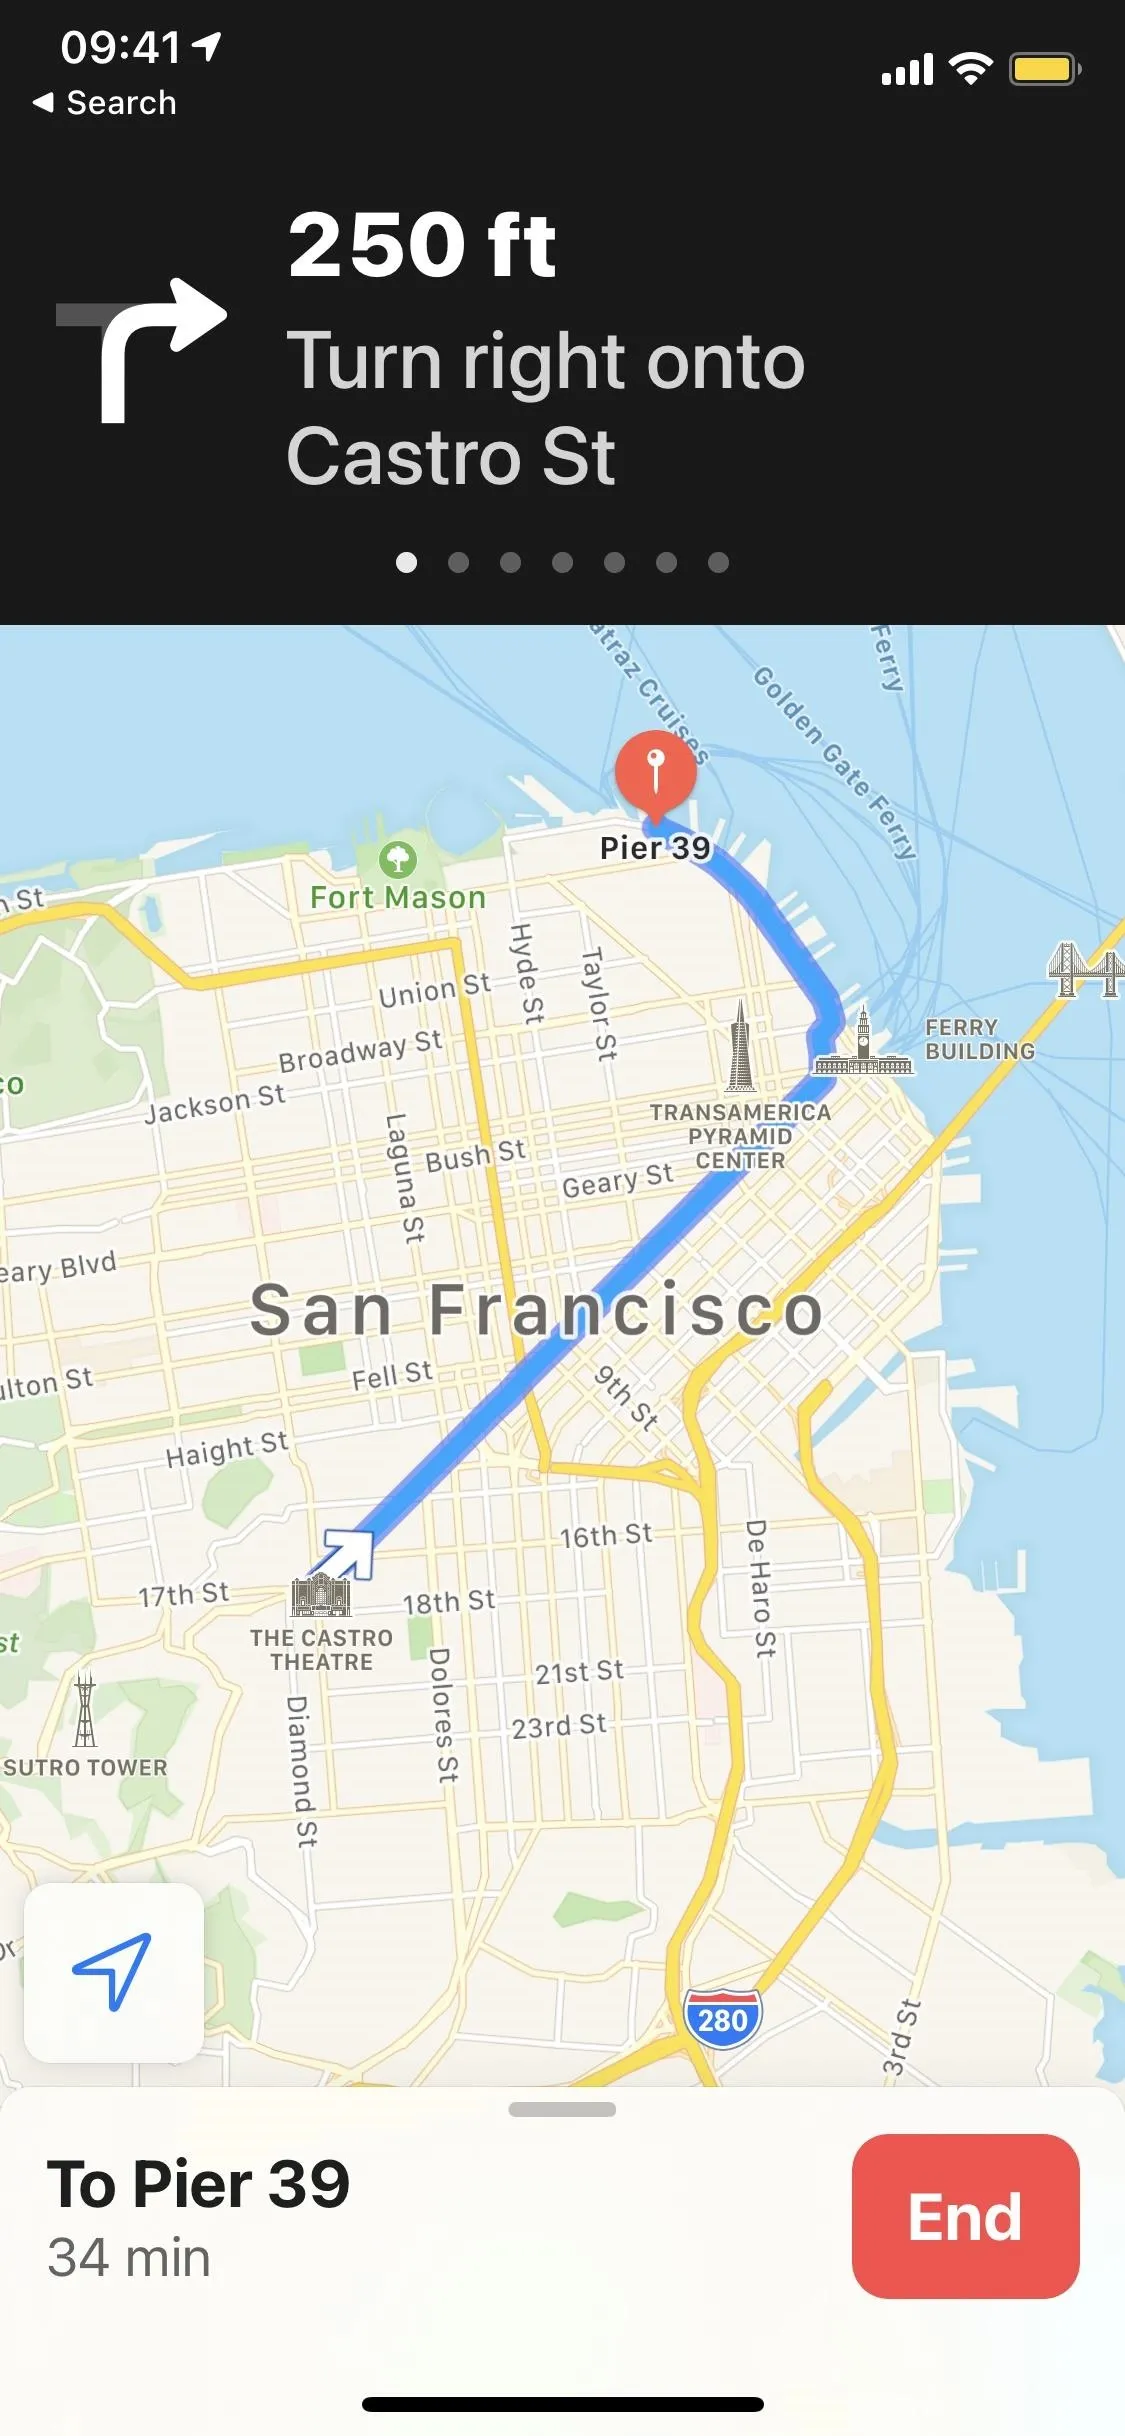
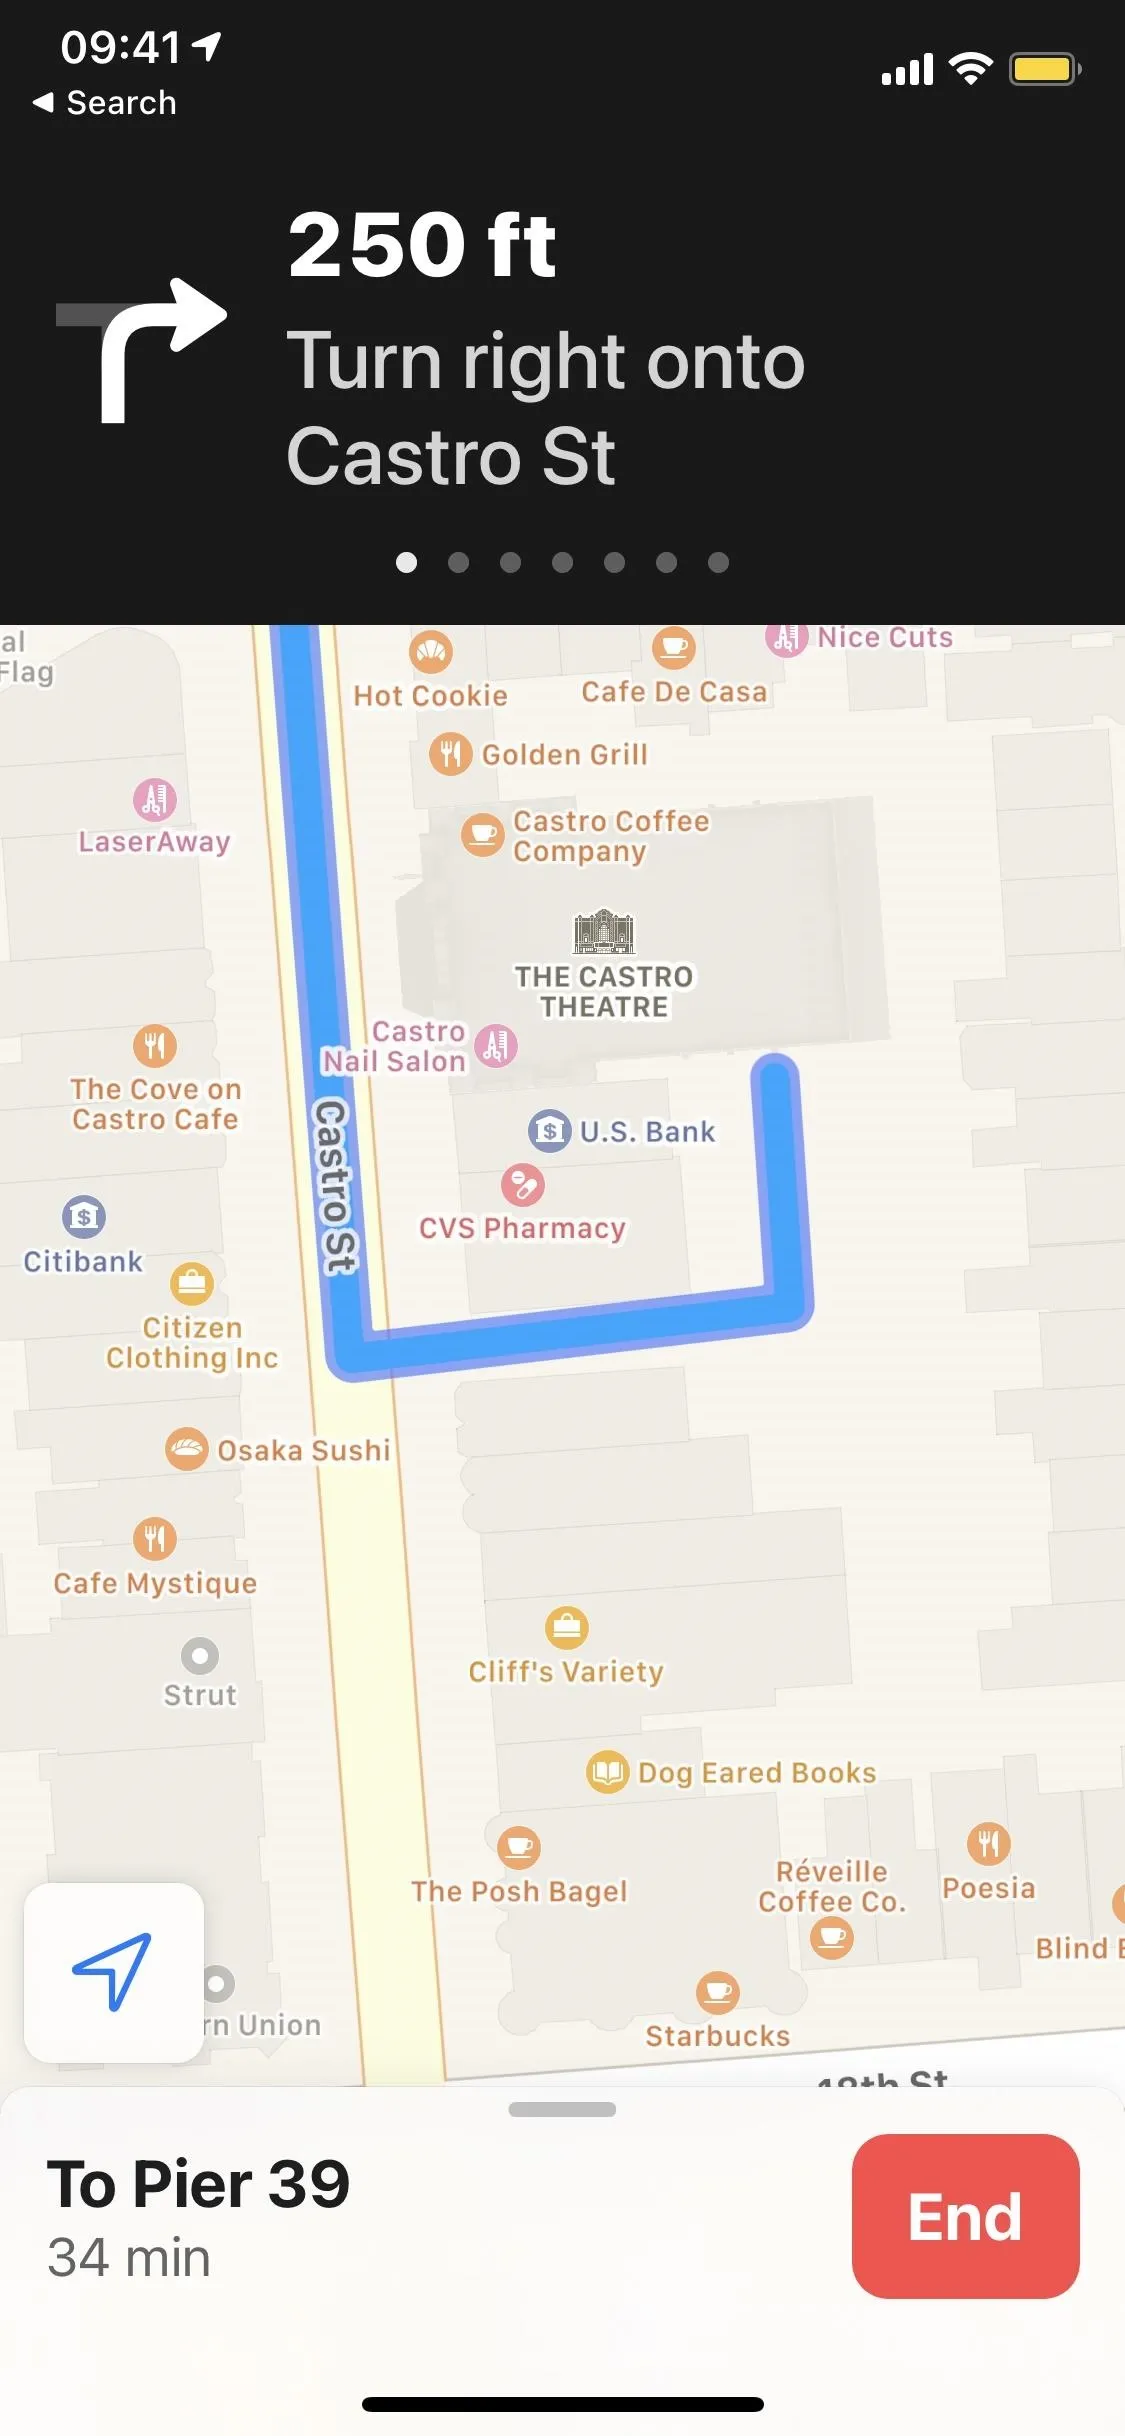
Once you're ready to begin your trip, hit the big green "GO" button. On the map, you'll see your cycling directions, and on the top, you can view the turn-by-turn directions. Swipe right on the top section to view your upcoming turns.
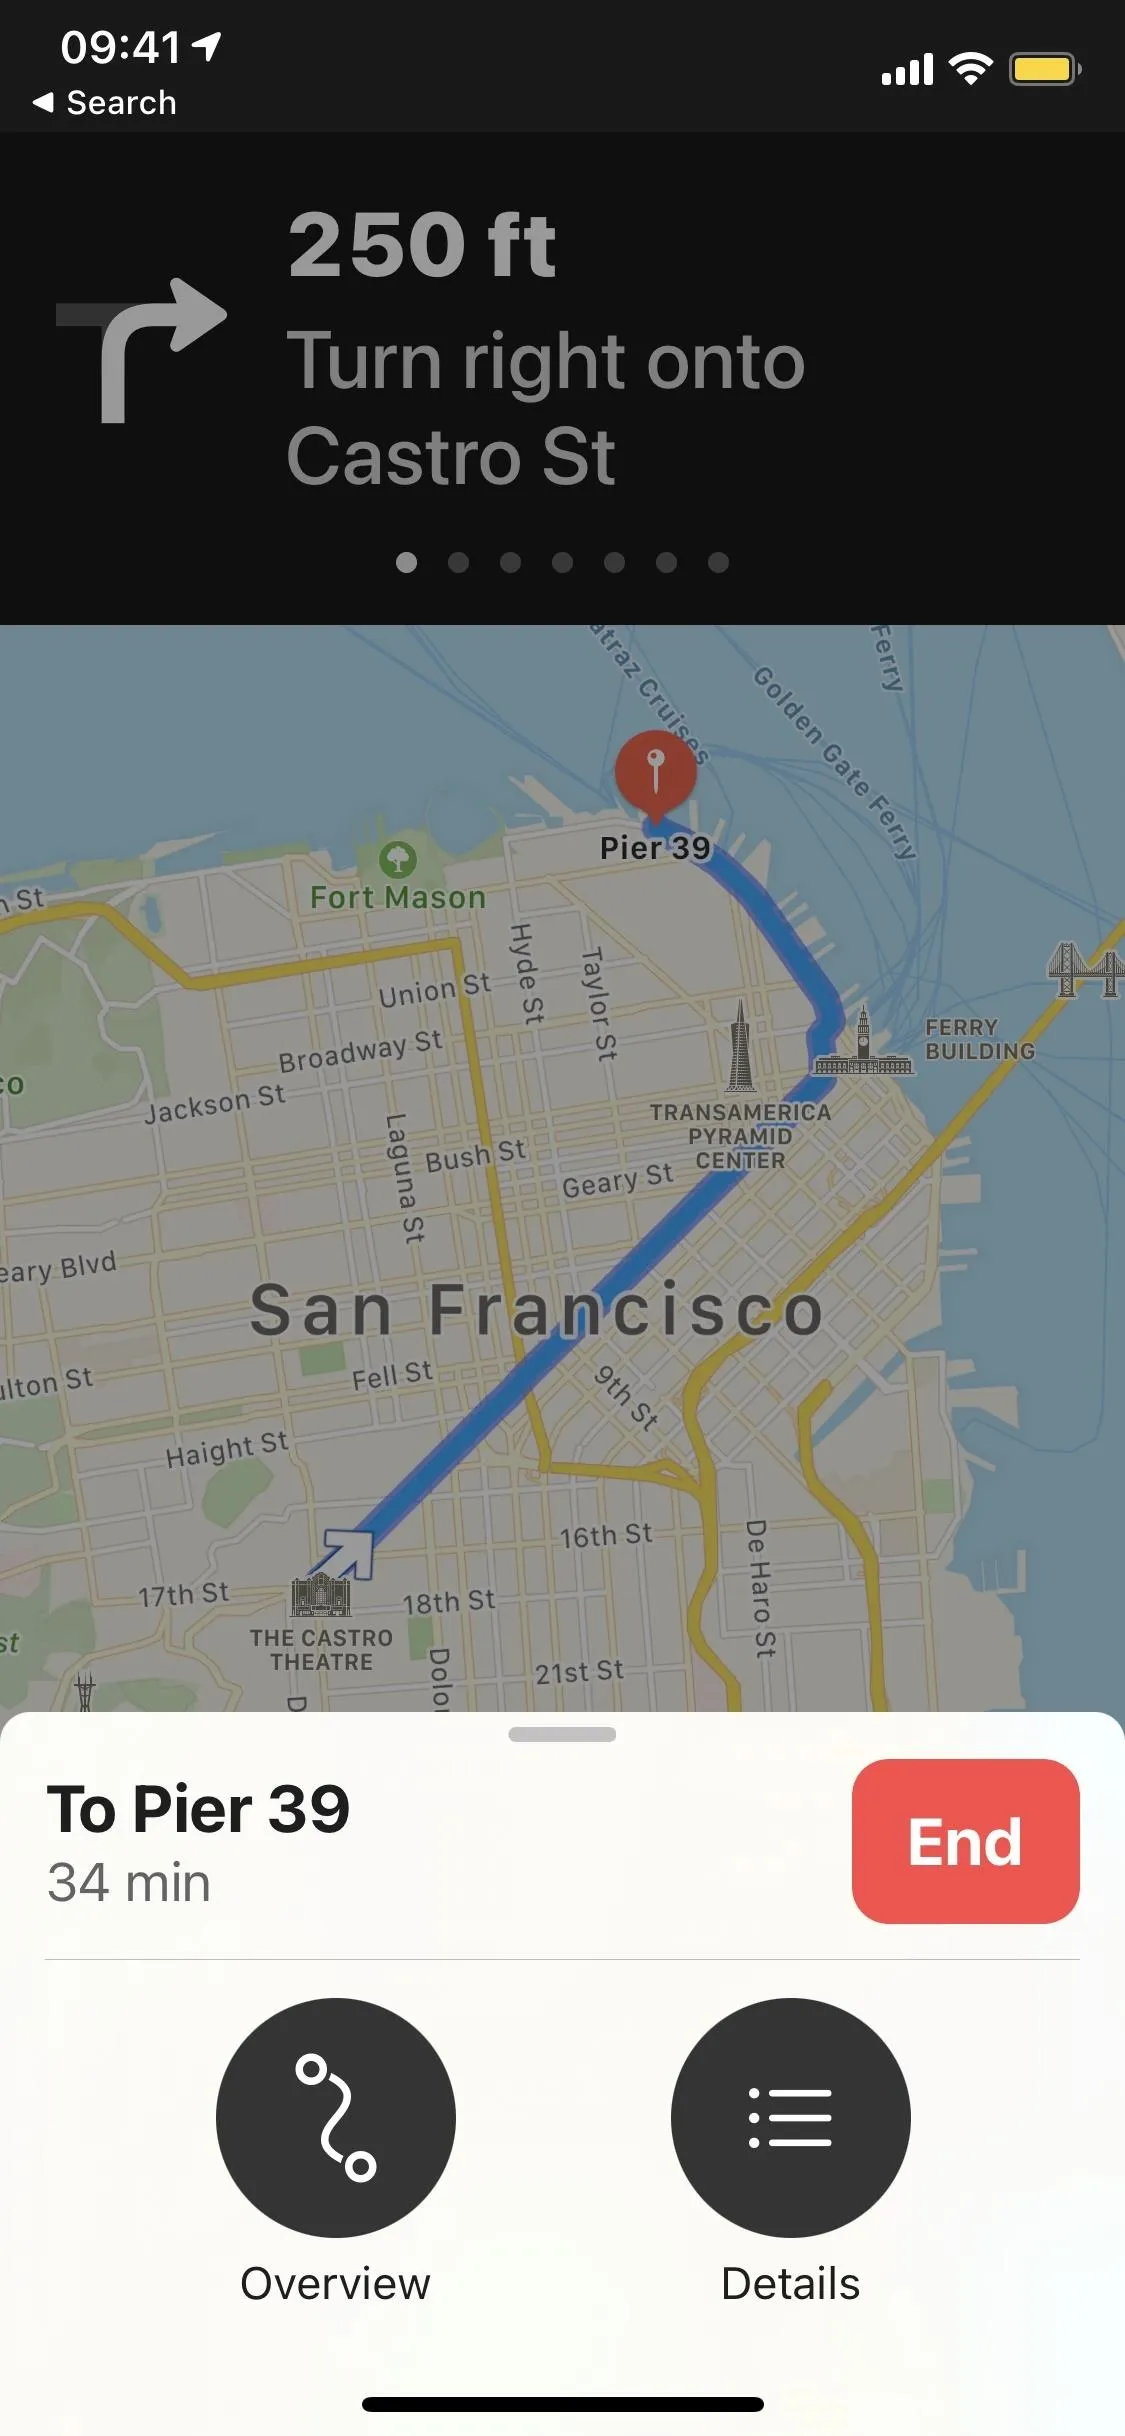
Swipe up on the bottom card to view an "Overview" or more "Details." In the "Overview" section, you'll see the entire route at once. In "Details," you'll see a more in-depth look at your cycling directions, like which roads are main ones, shared ones, or bike lanes. At the top, you'll see a more detailed elevation overview that includes the highest and lowest (in feet or kilometers) you'll have to bike, along with a numbered chart.
Changing Settings for Cycling Directions in Maps
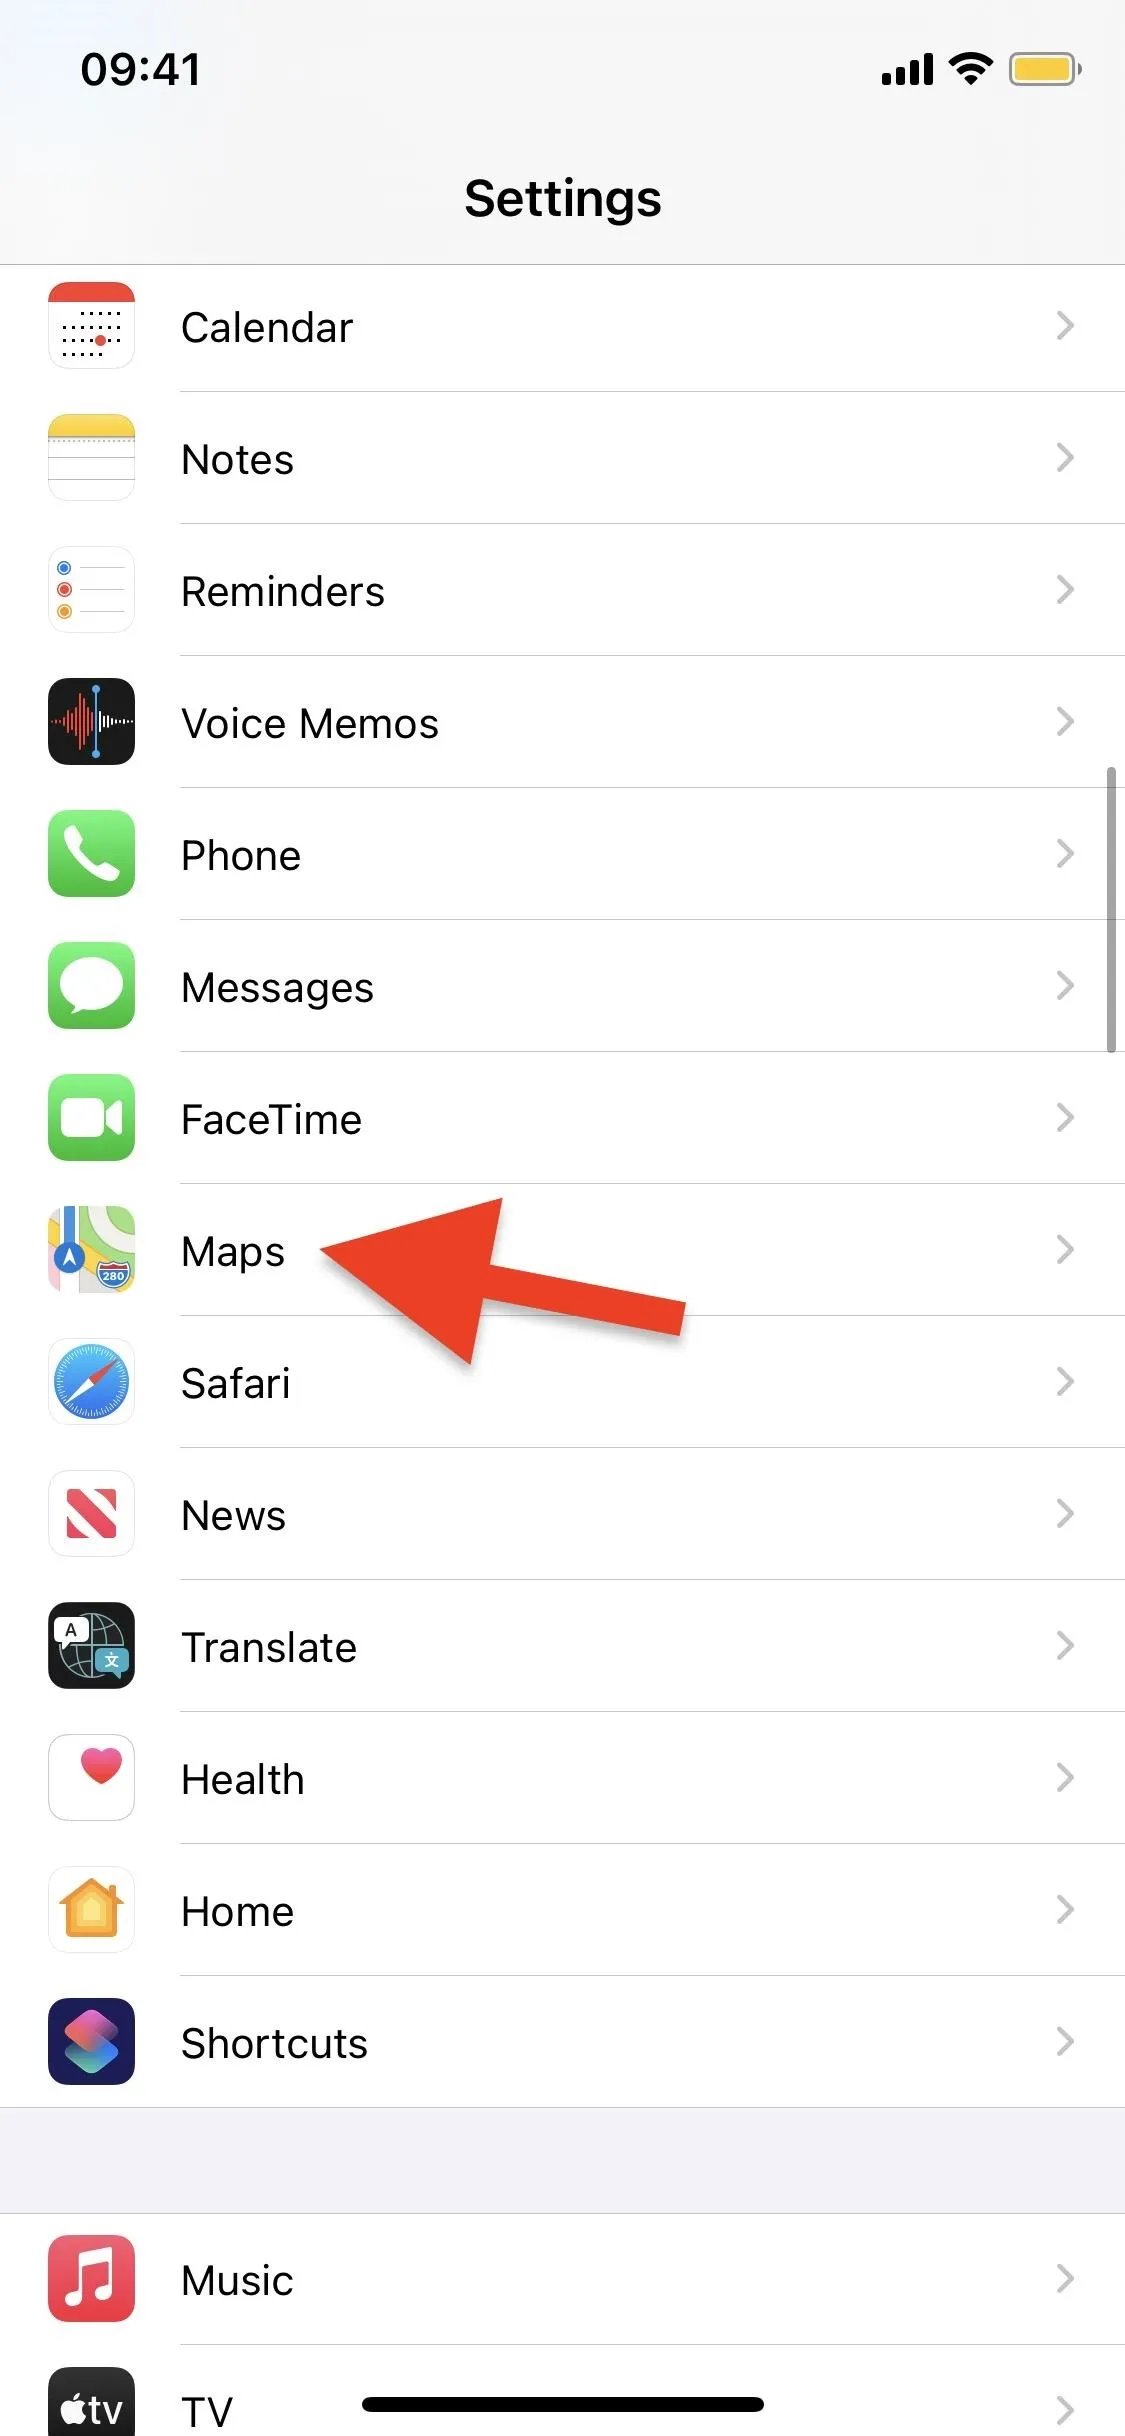
Aside from the settings within Maps, there are a few cycling options you can change in the Settings app. Open Settings, then choose "Maps." Here, you'll have a couple of cycling options to choose from, starting with your Preferred Type of Travel. If you bike more than you drive, walk, or use public transit, tap on "Cycling." Then, anytime you enter directions into Maps, you'll always be shown cycling directions first.
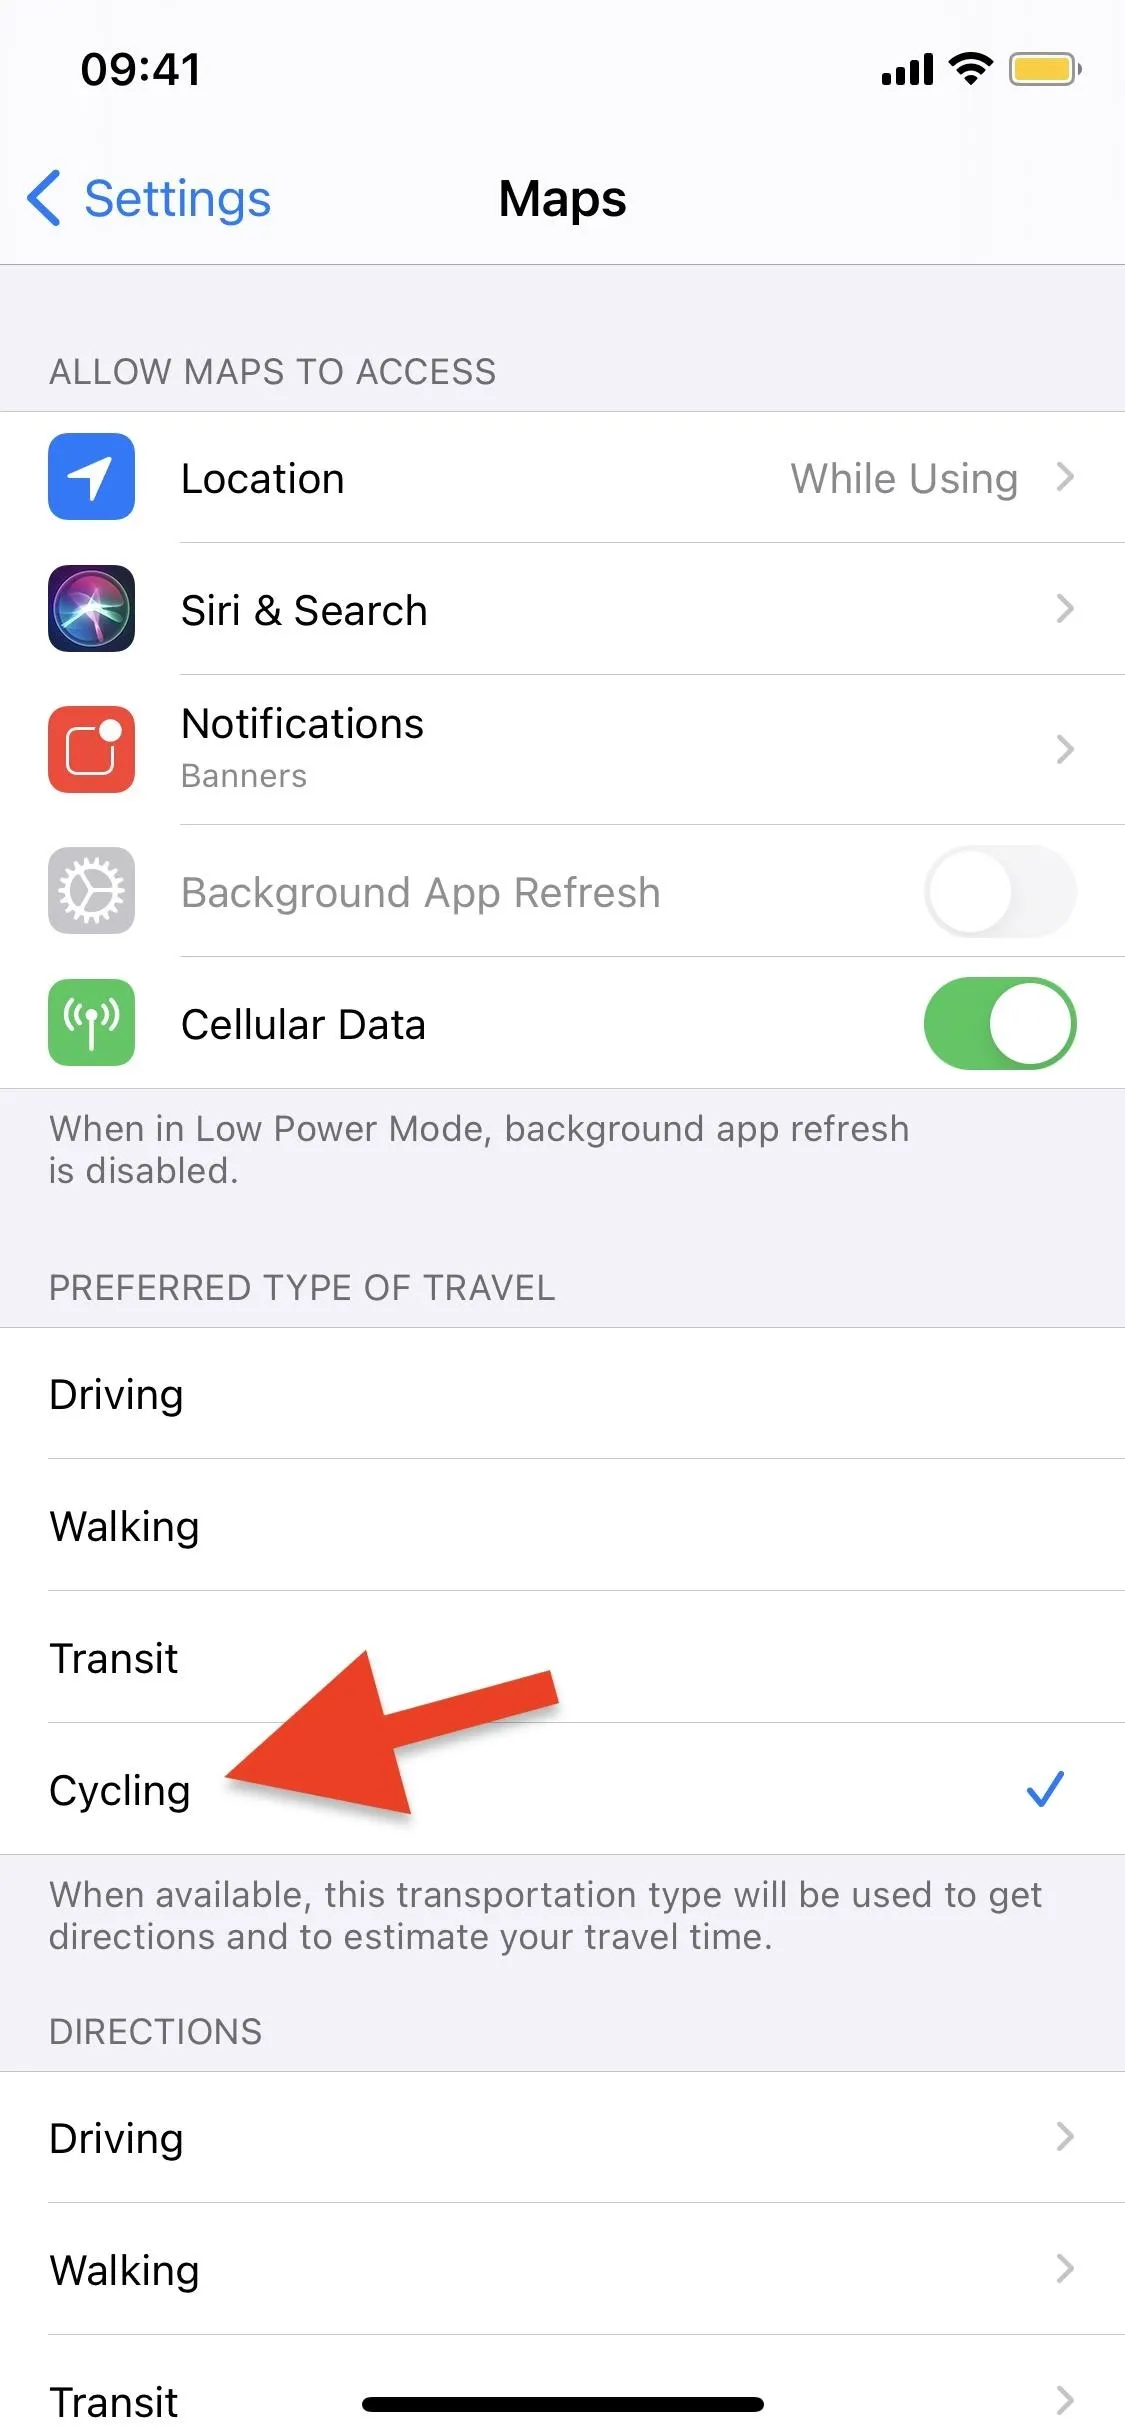
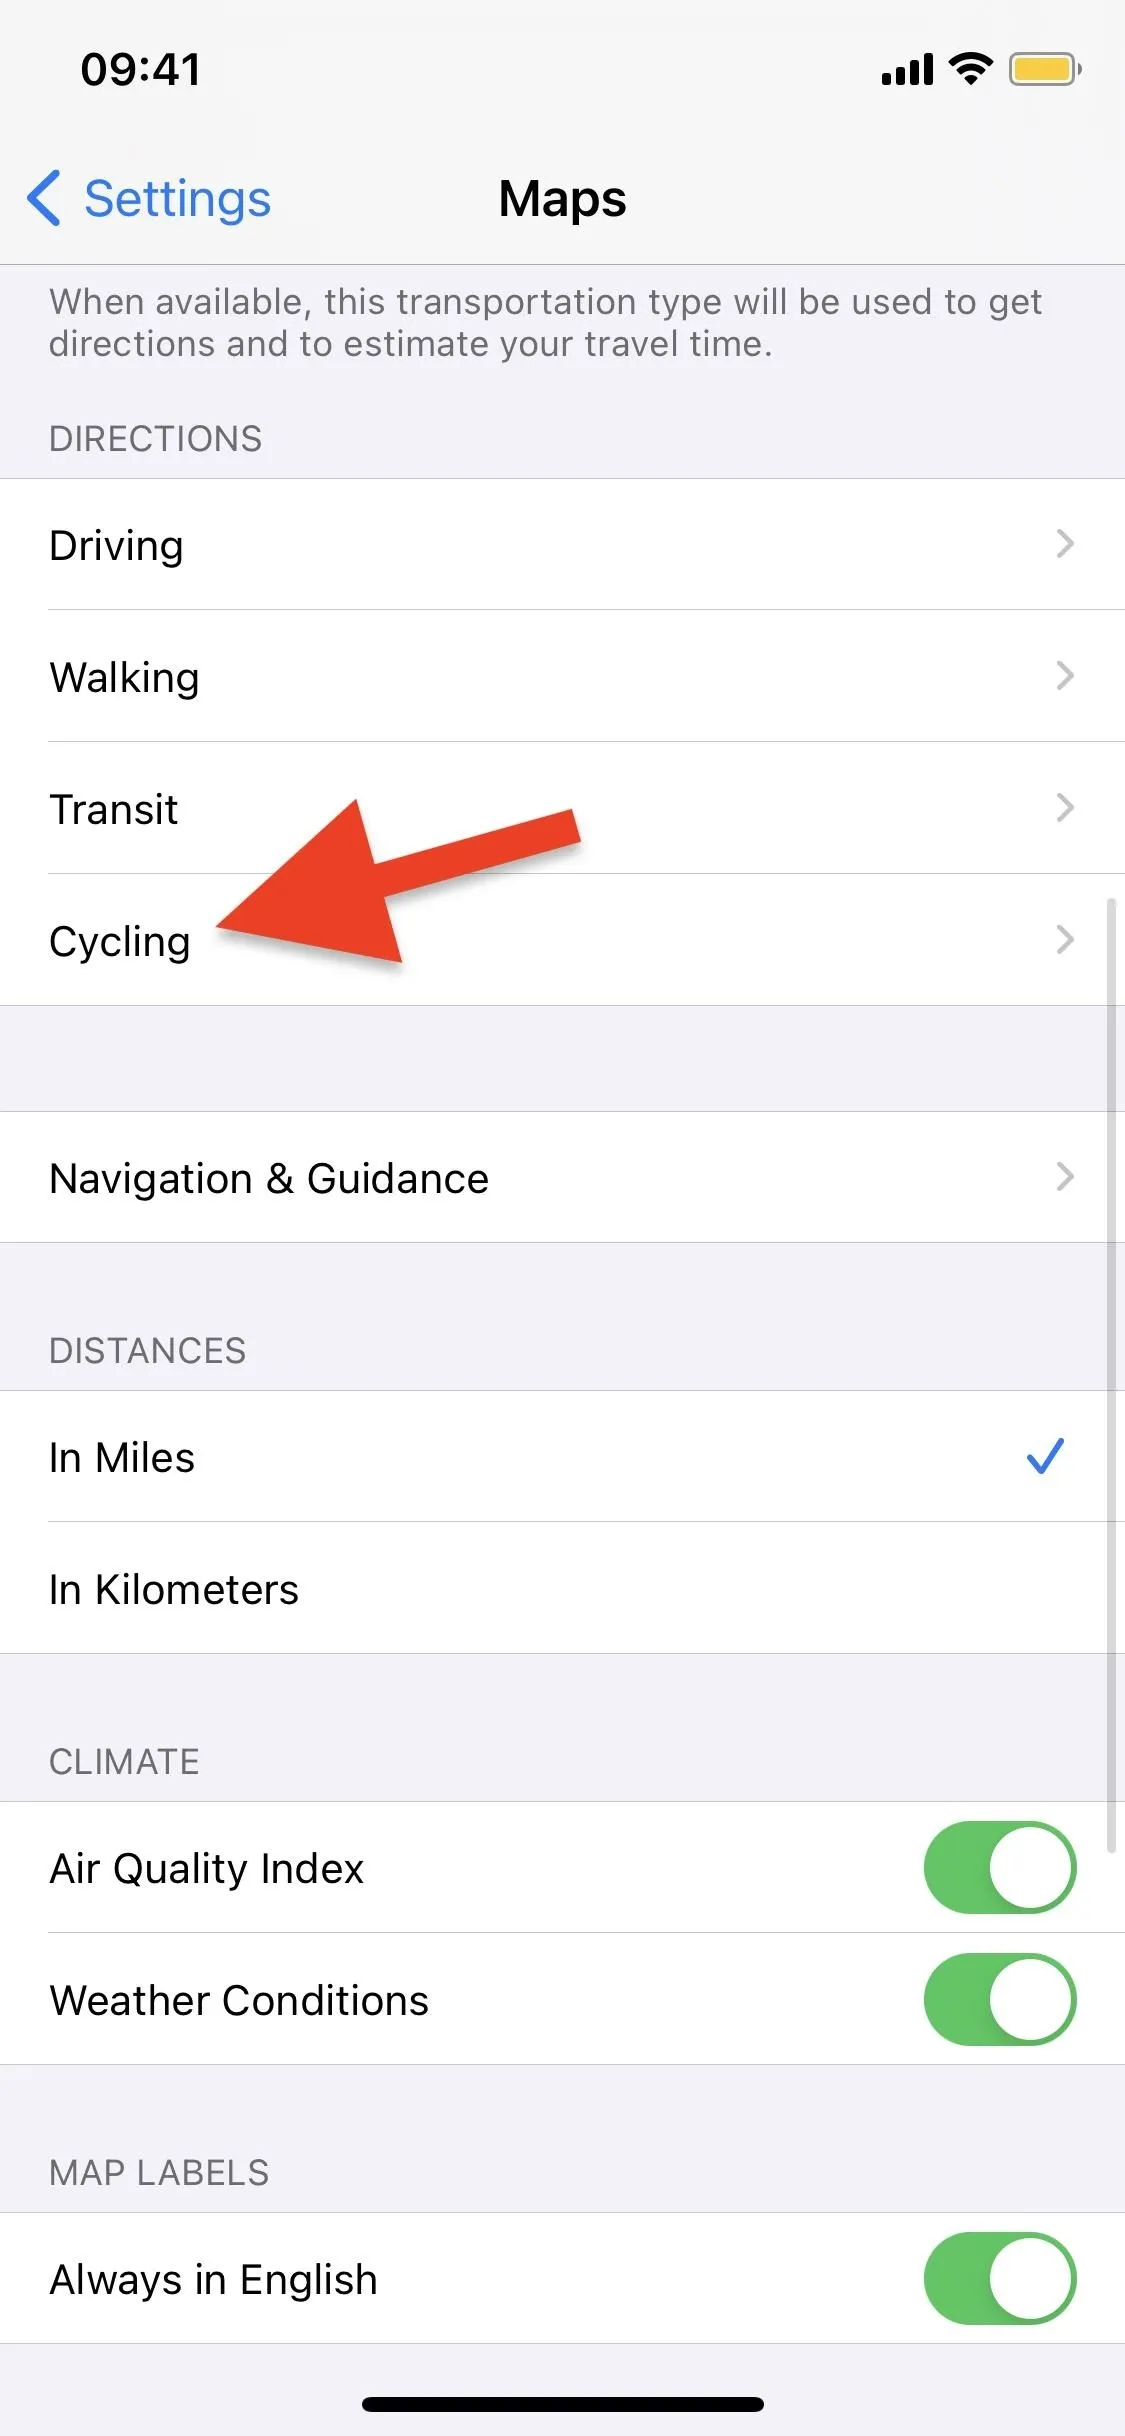
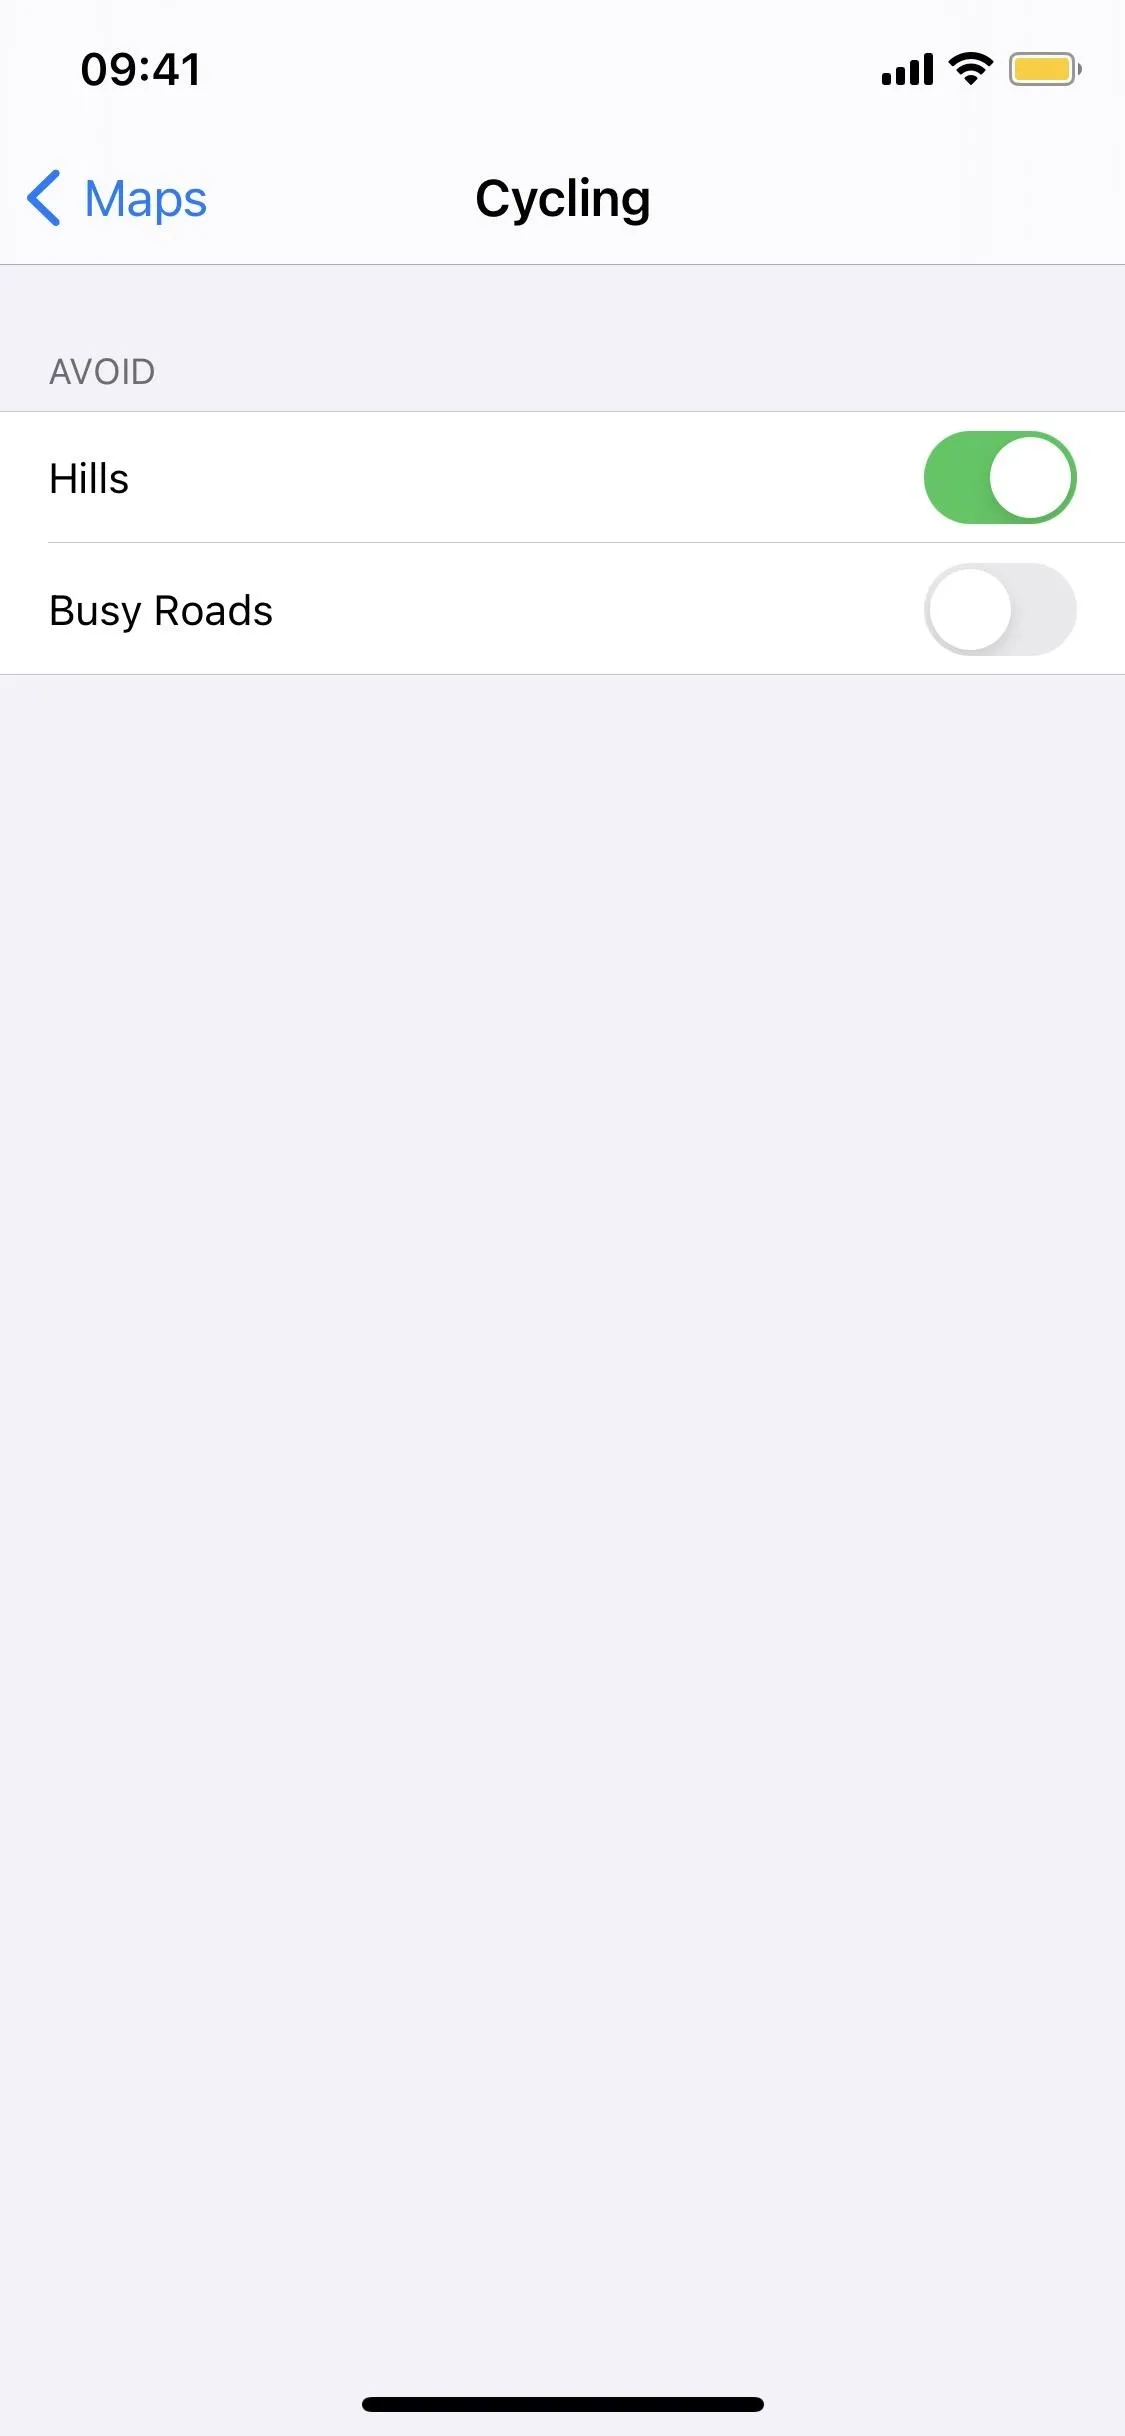
If you scroll down a bit more, you'll see a "Cycling" option under Directions. Here, you can toggle on "Hills" or "Busy Roads" to avoid them anytime you get cycling directions in Maps. Apple used to have "Stairs" listed too but removed it for some reason (hopefully, it comes back).
Using Cycling Directions with an Apple Watch
If you're an Apple Watch user, Maps in iOS 14 "offers custom cycling voice guidance and a rich experience on Apple Watch that makes it easy to navigate with a glance." So you likely enjoy tracking your biking via the Workout app.
Cover photo and screenshots by Nelson Aguilar/Gadget Hacks (unless otherwise noted)


Comments
Be the first, drop a comment!