


You might think your photo is amazing, but in the midst of editing it and getting ready to post it on social media, you notice something in the background. Maybe it's an unwelcome stranger or a wide-open dumpster, or it's the entire backdrop, but suddenly you realize that it's bad. Although you look good in it, the background just doesn't work — which is why you can always get rid of it.
On your iPhone, there are a ton of third-party apps that can easily remove the background from your photos, and they work great. The only problem is that these apps might be riddled with advertisements, cost money, or simply take up too much space on your device. Instead of using a third-party app, you can remove photo backgrounds with a tiny shortcut for iOS.
Before You Begin
- Make sure iOS is updated: While it might work on previous versions, the shortcut is intended for use on iOS 14 or higher.
- Install the Shortcuts app: Download it again from the App Store if you've deleted it.
- Allow untrusted shortcuts: Go to Settings –> Shortcuts, then toggle on "Allow Untrusted Shortcuts" to allow user-created shortcuts.
Add the Background Remover Shortcut
"Background Remover" from RoutineHub user TarasovSM allows you to easily cut out and remove the background in any photo. Using the Adobe API, which grants the shortcut access to Adobe's official features, you can keep anything in the foreground, such as a person, completely getting rid of the background.
- iCloud Link: Background Remover v1.1 (free)
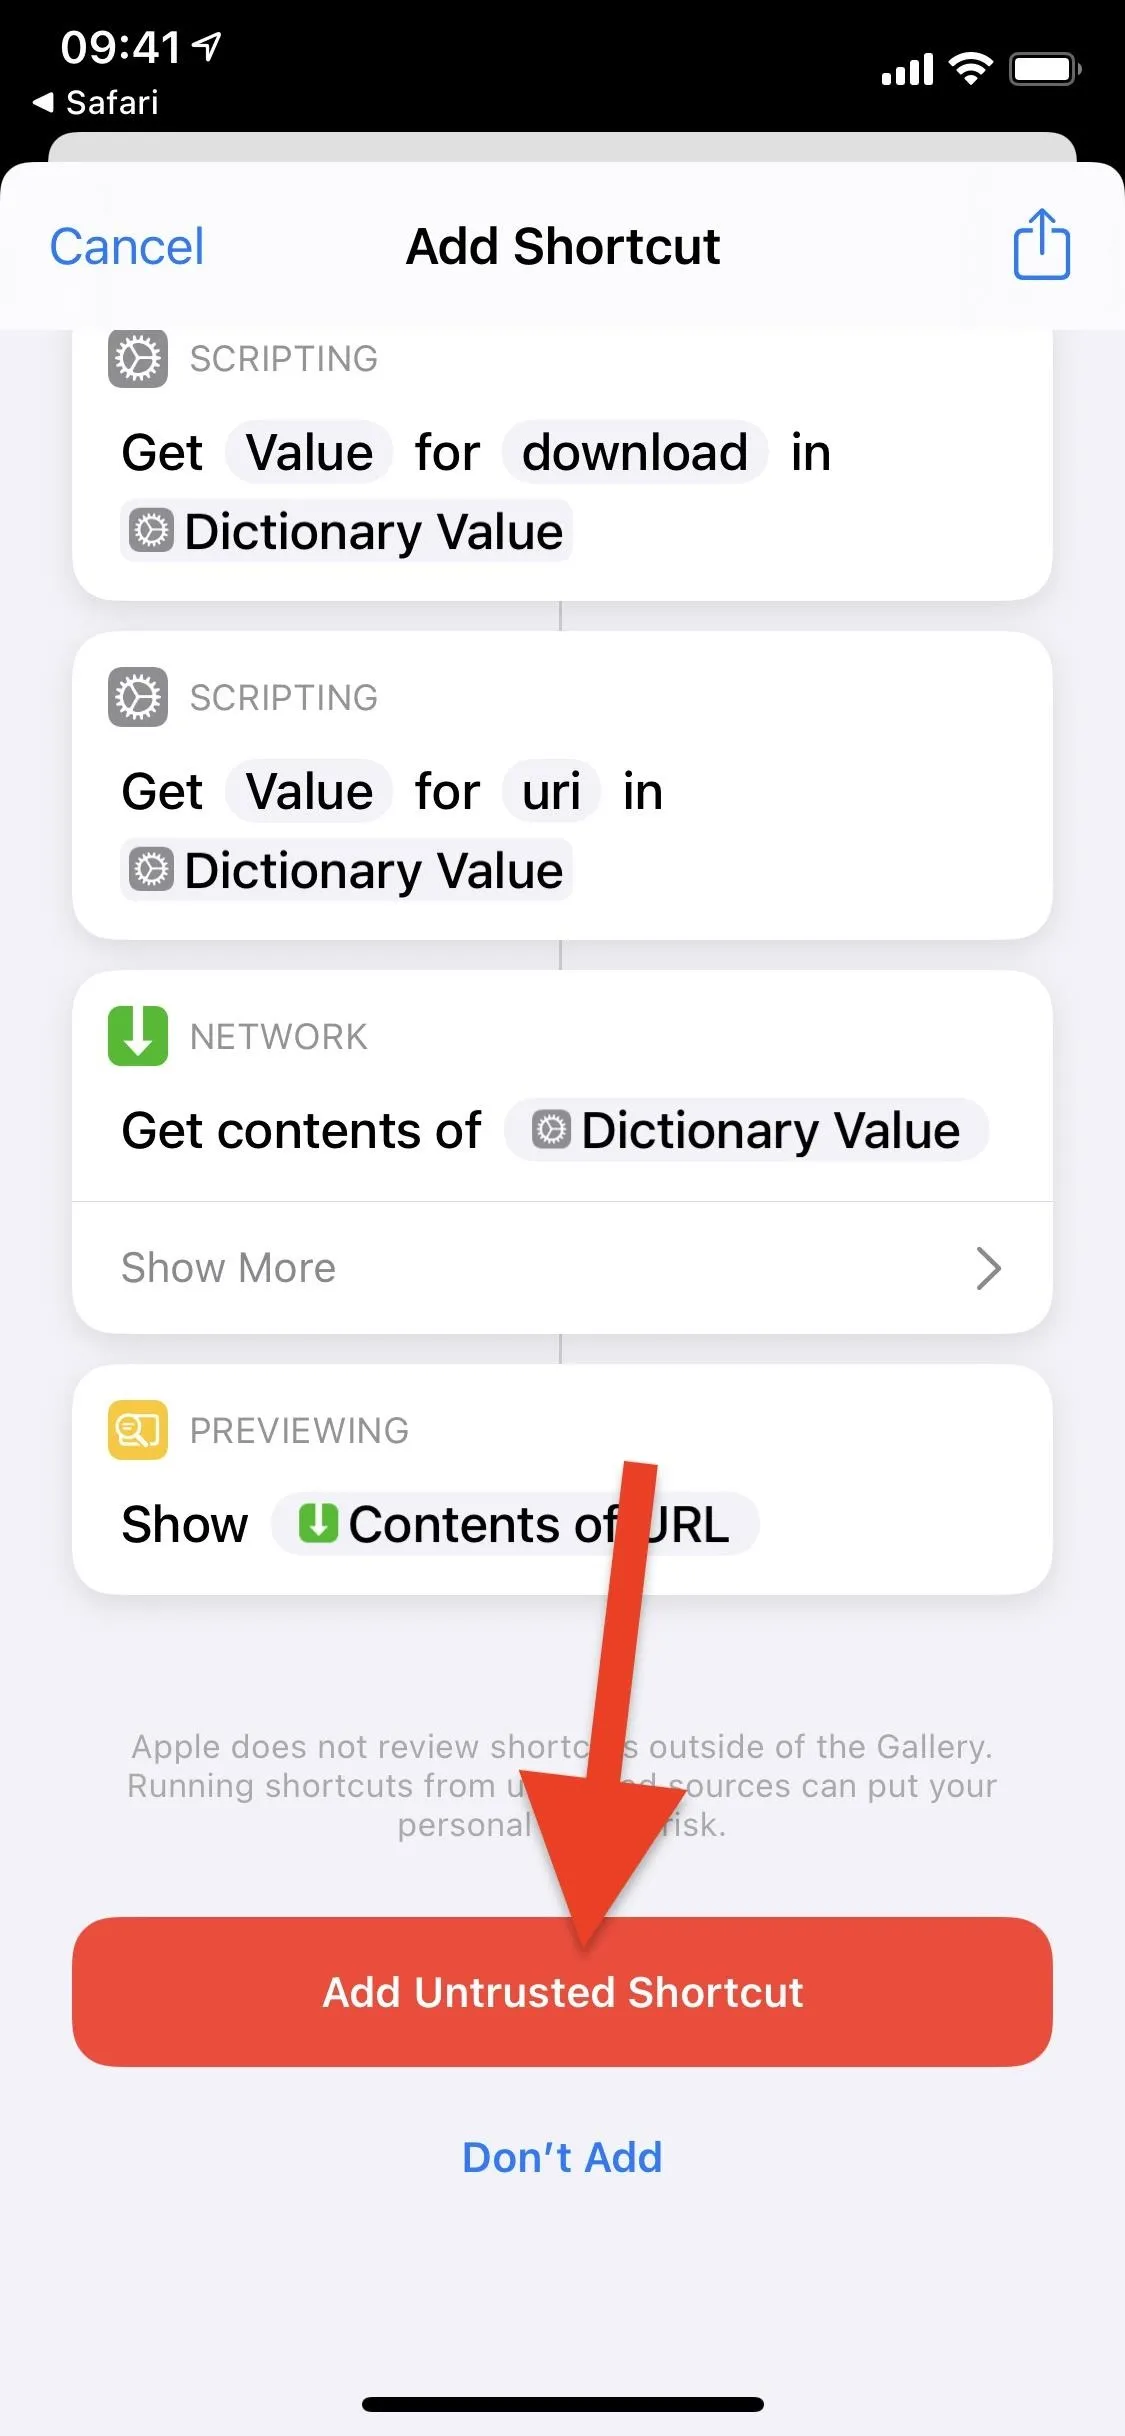
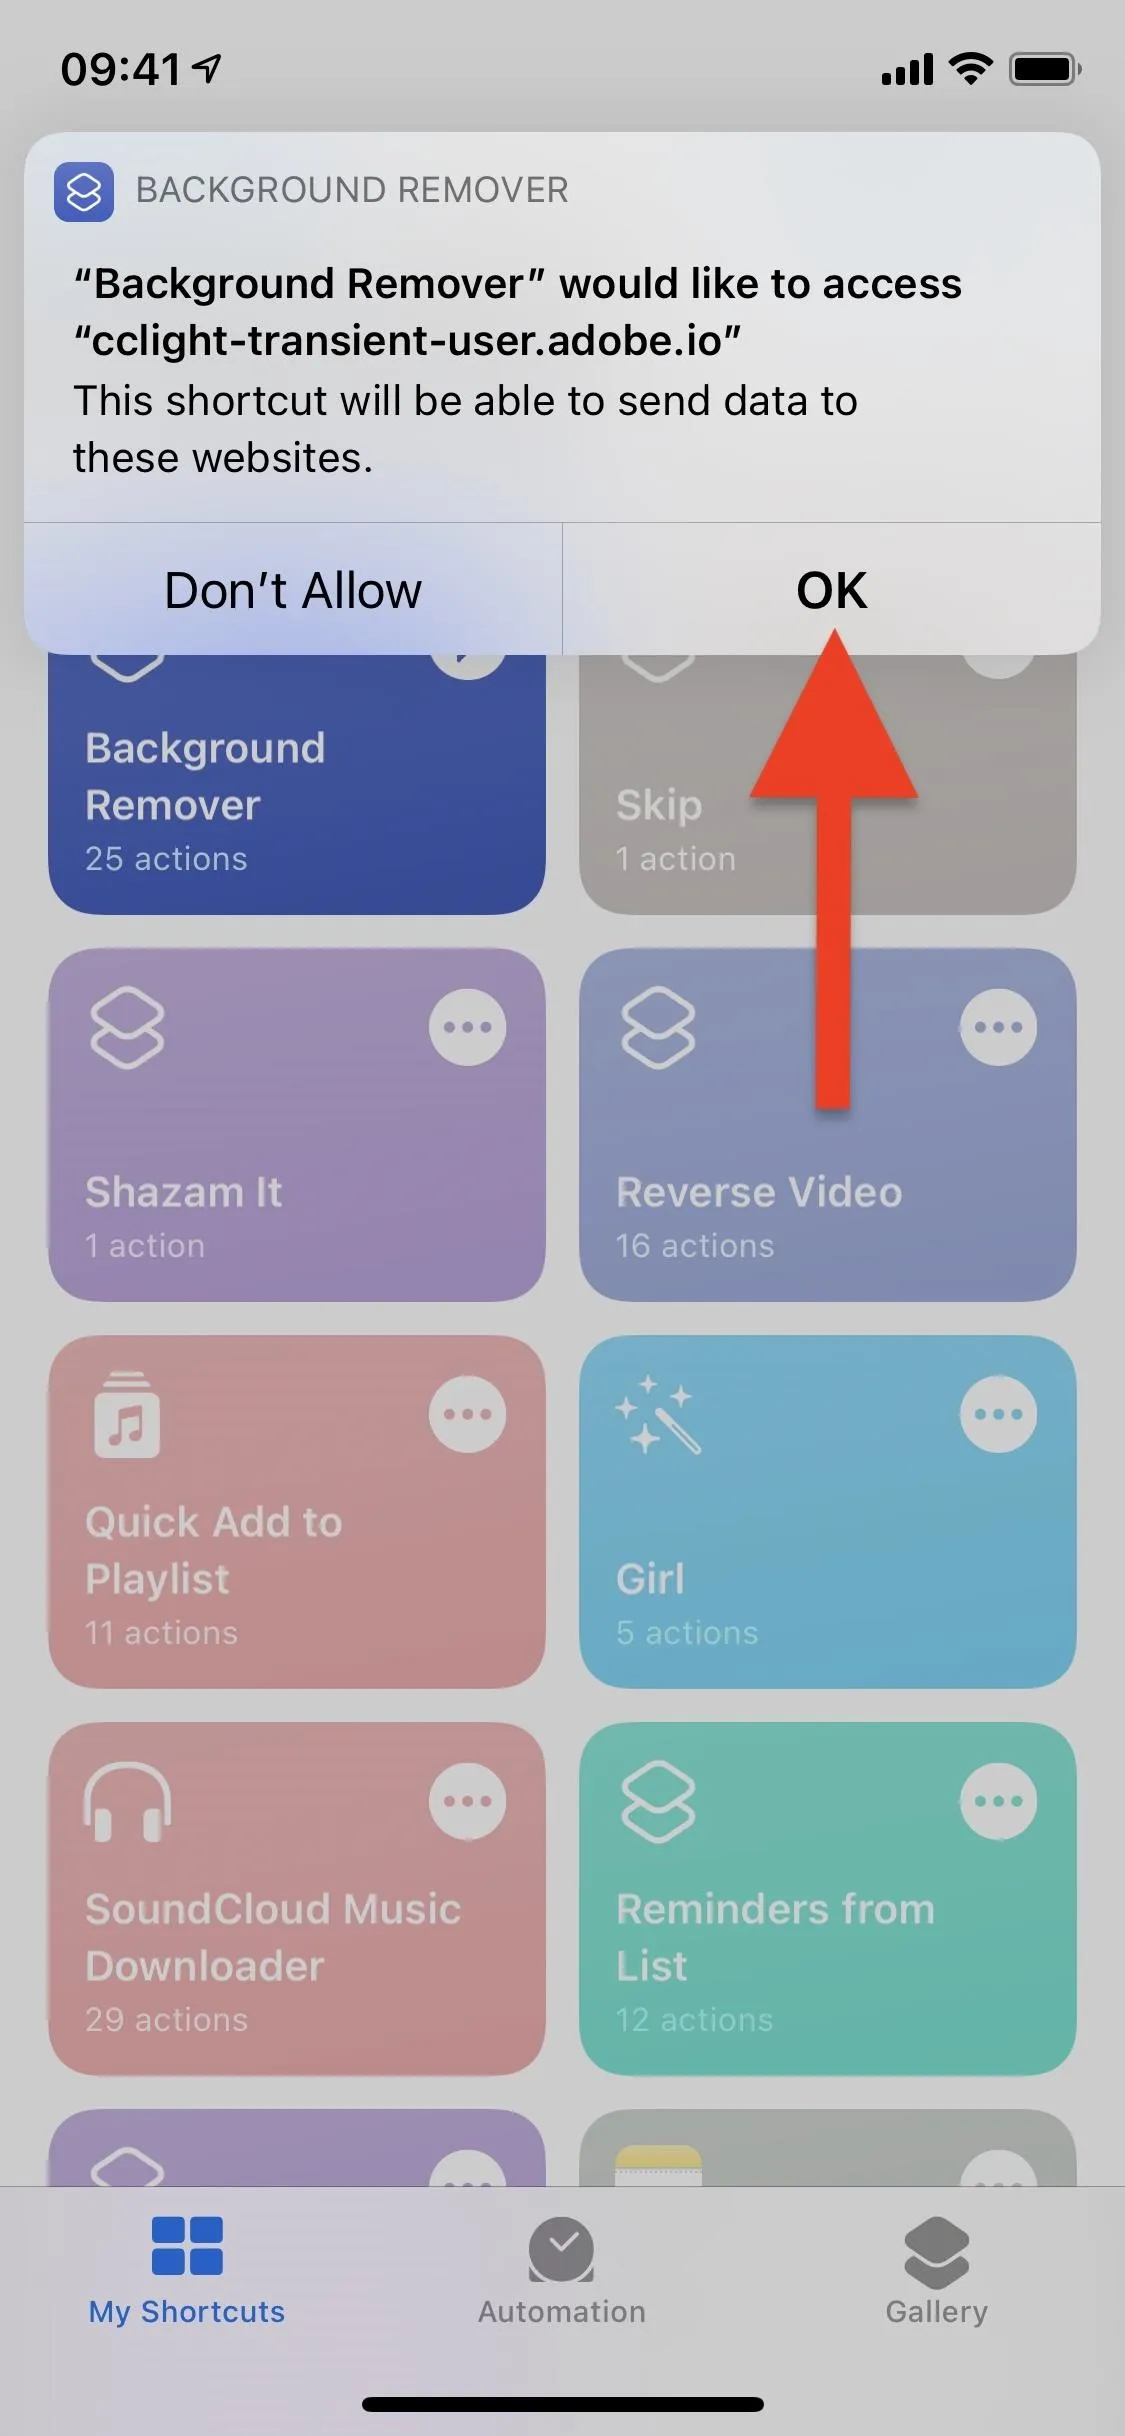
Download the shortcut using the direct iCloud link above or from the official RoutineHub page (for the latest version). Once you download the shortcut, you'll either be redirected to Shortcuts or asked to tap on "Get Shortcut" first. To add the shortcut to your library, scroll through the shortcut's actions and tap on "Add Untrusted Shortcut."
Note: The shortcut's original name is in Russian, but you can easily change it while you're in the shortcut's actions under When I run.

Remove the Background from Your Photo
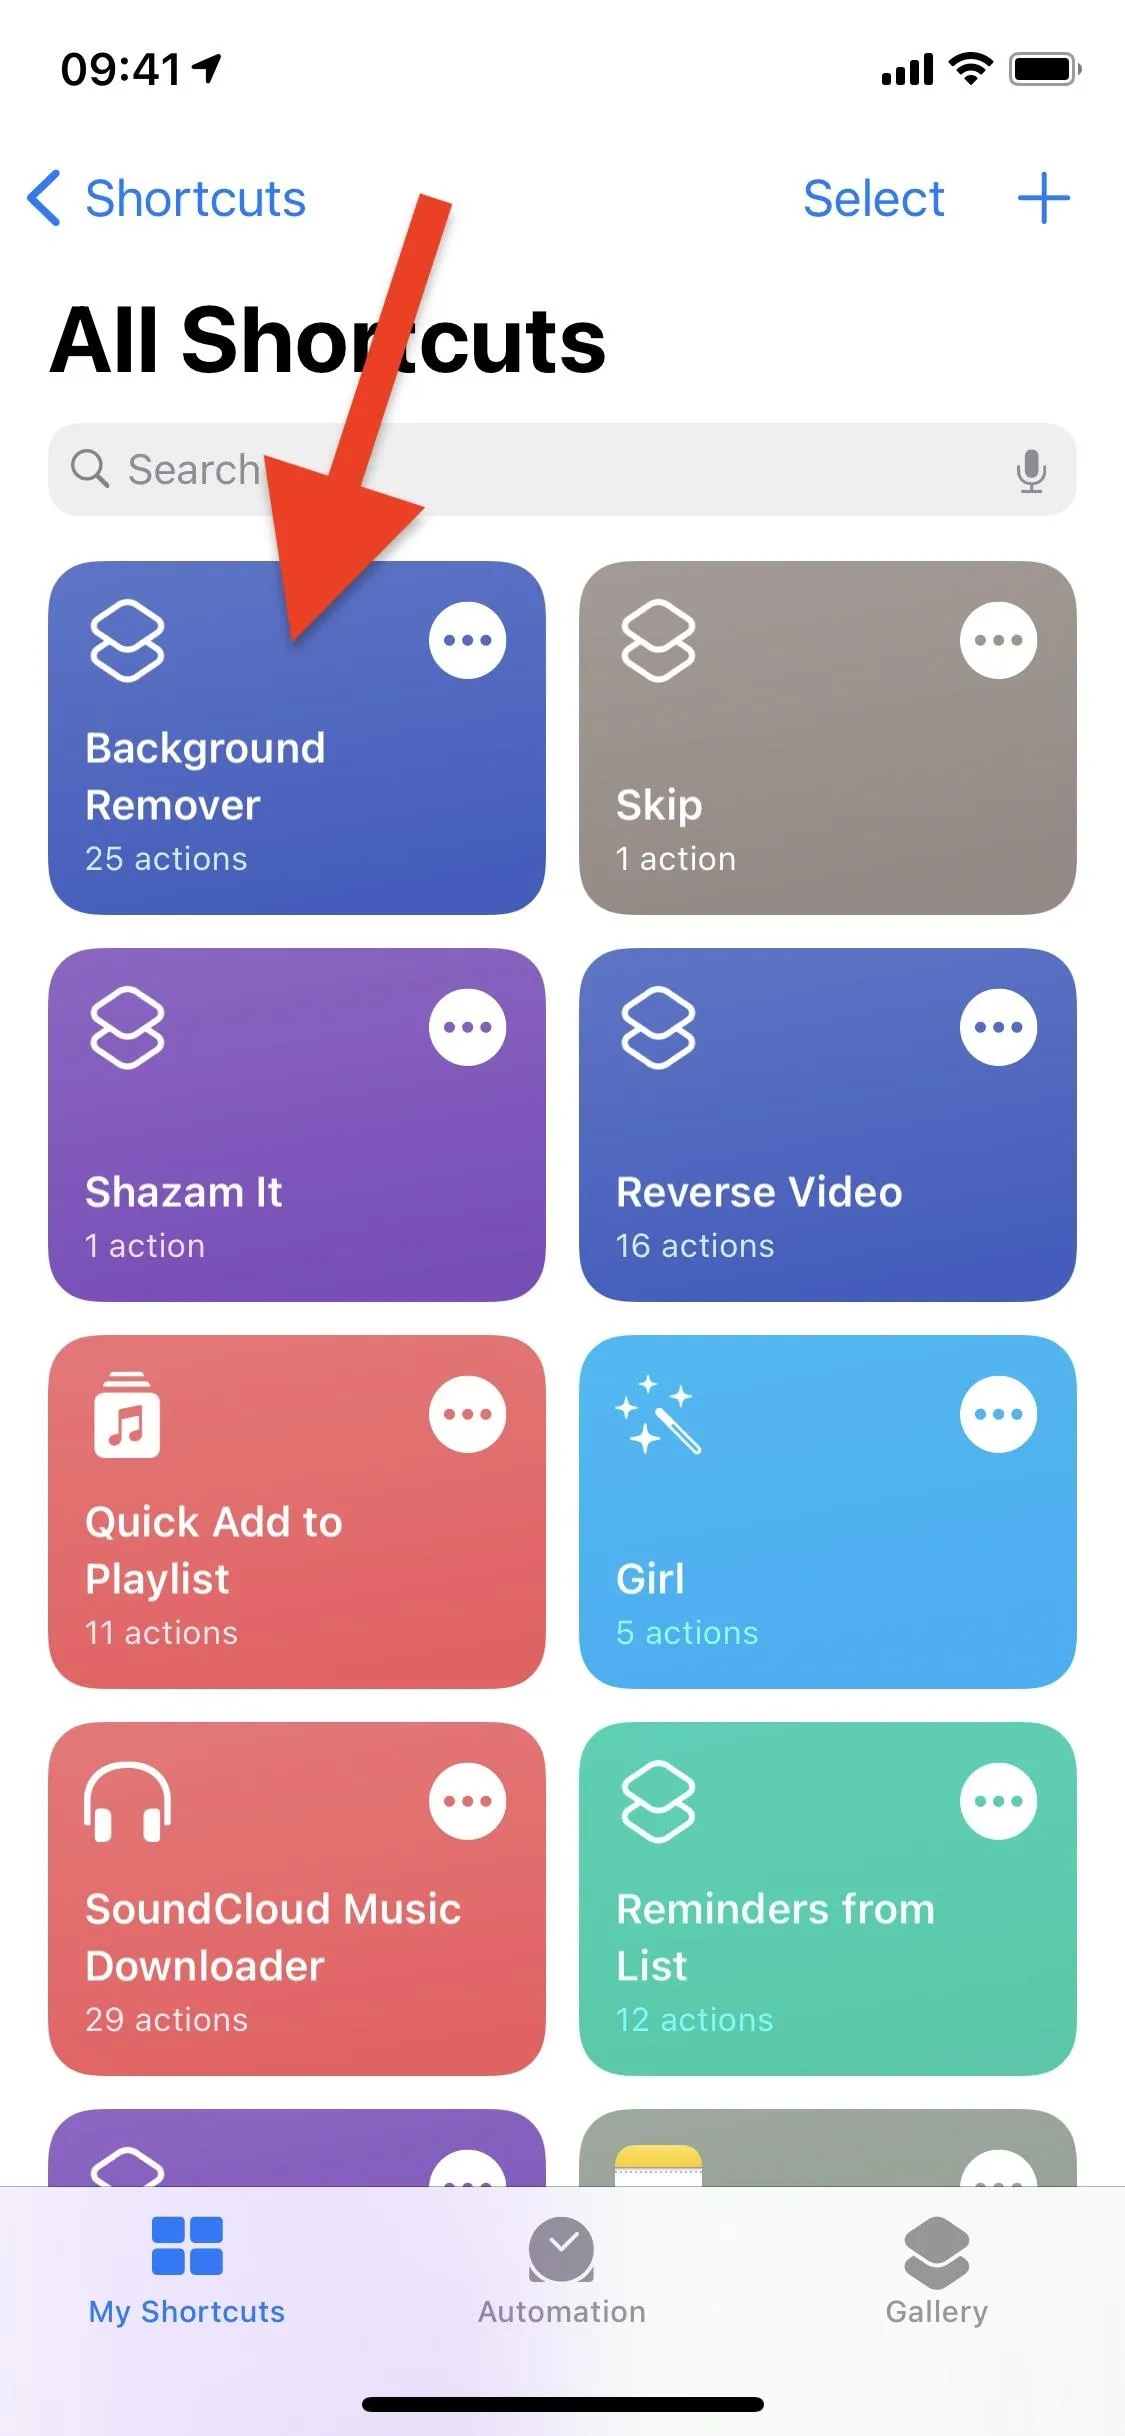
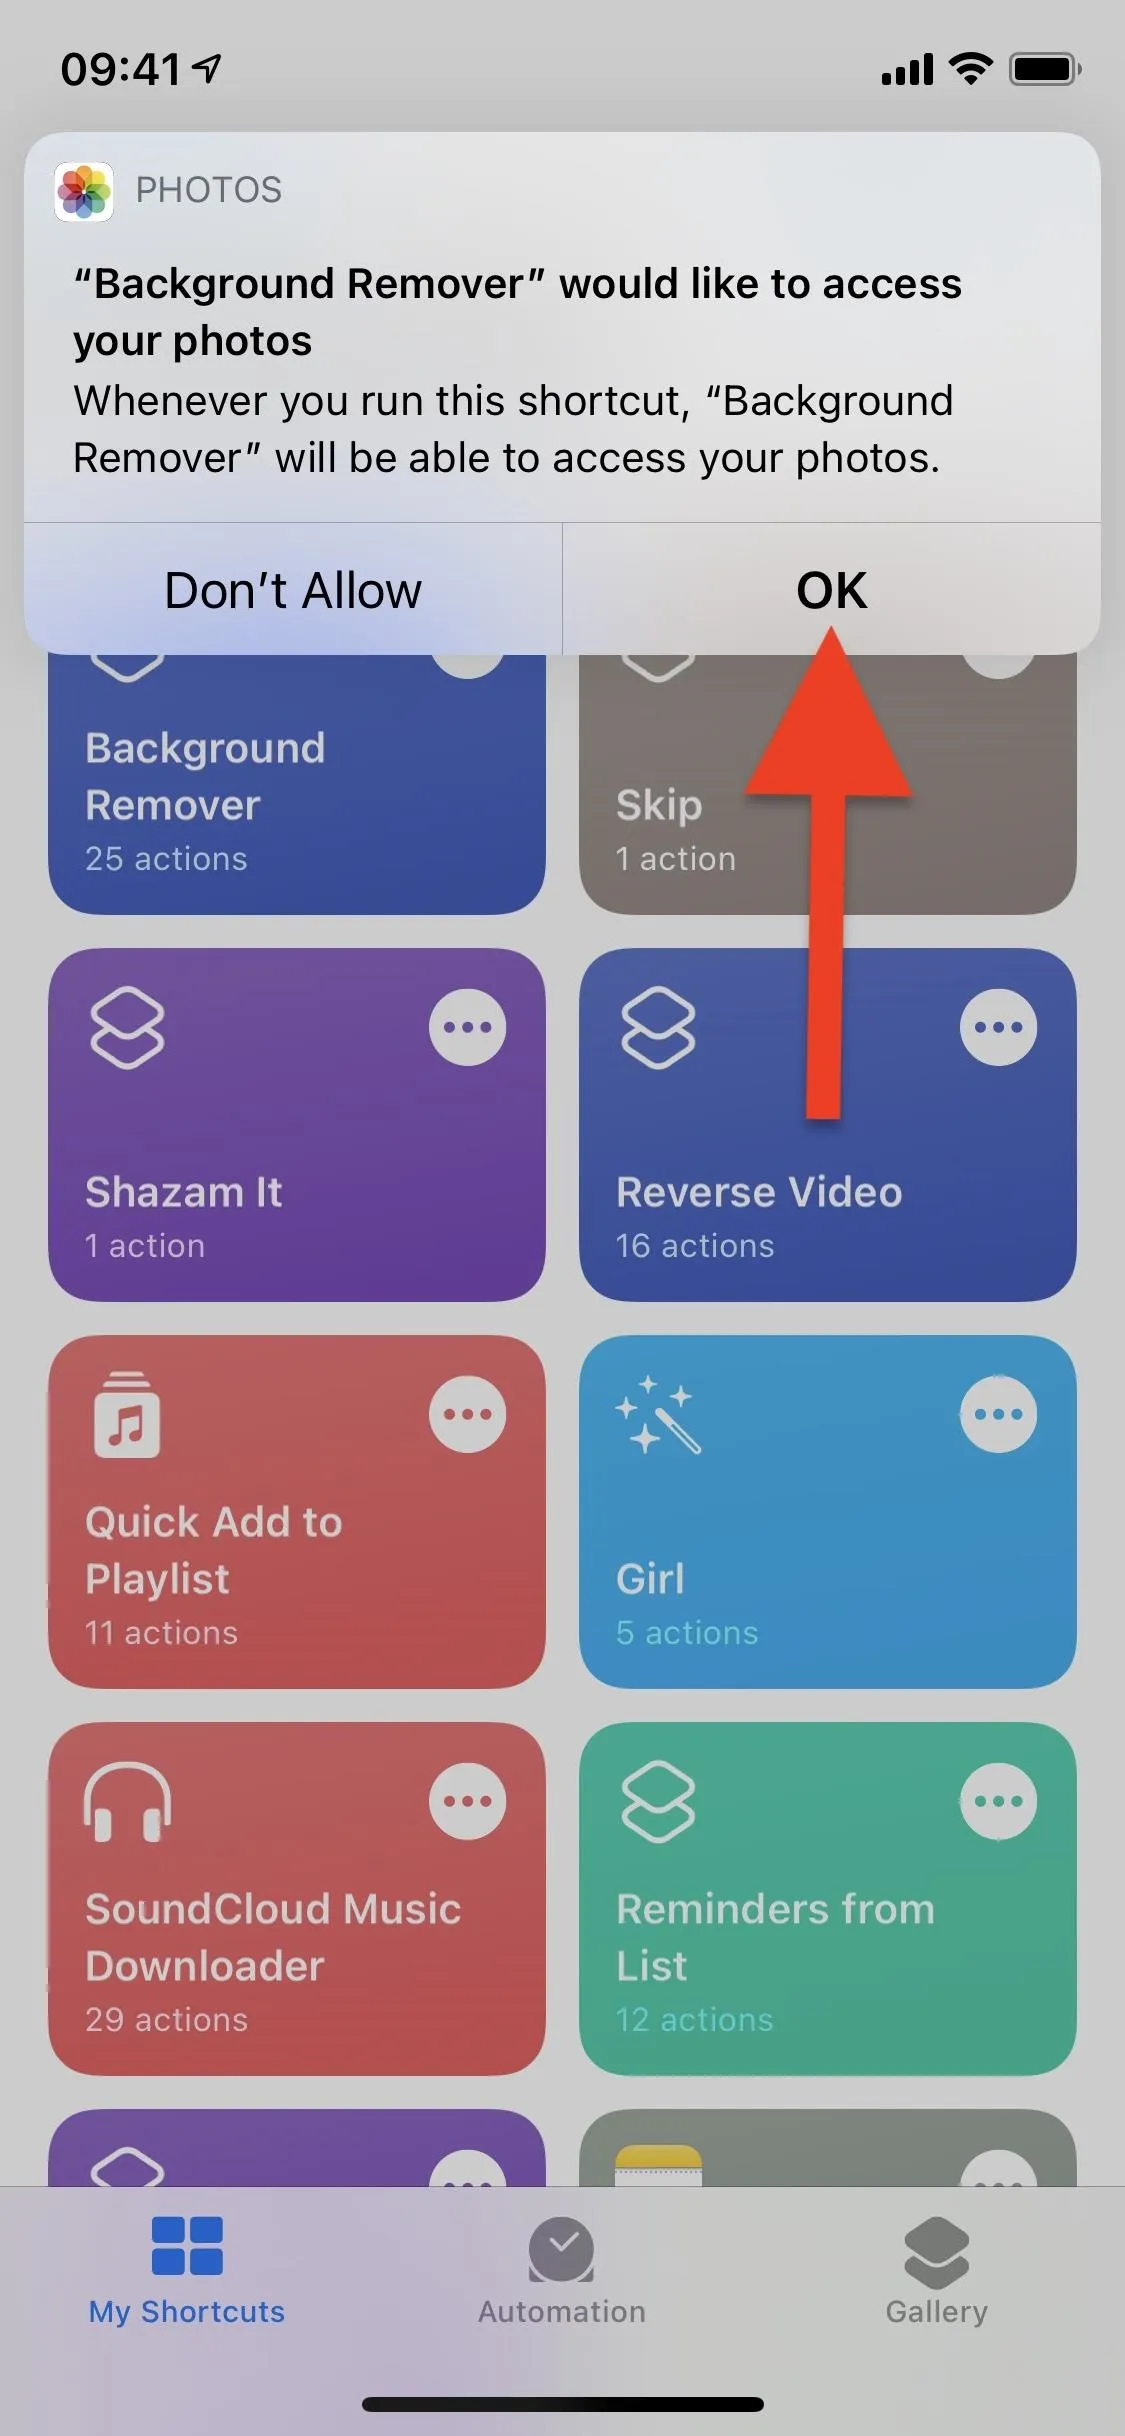
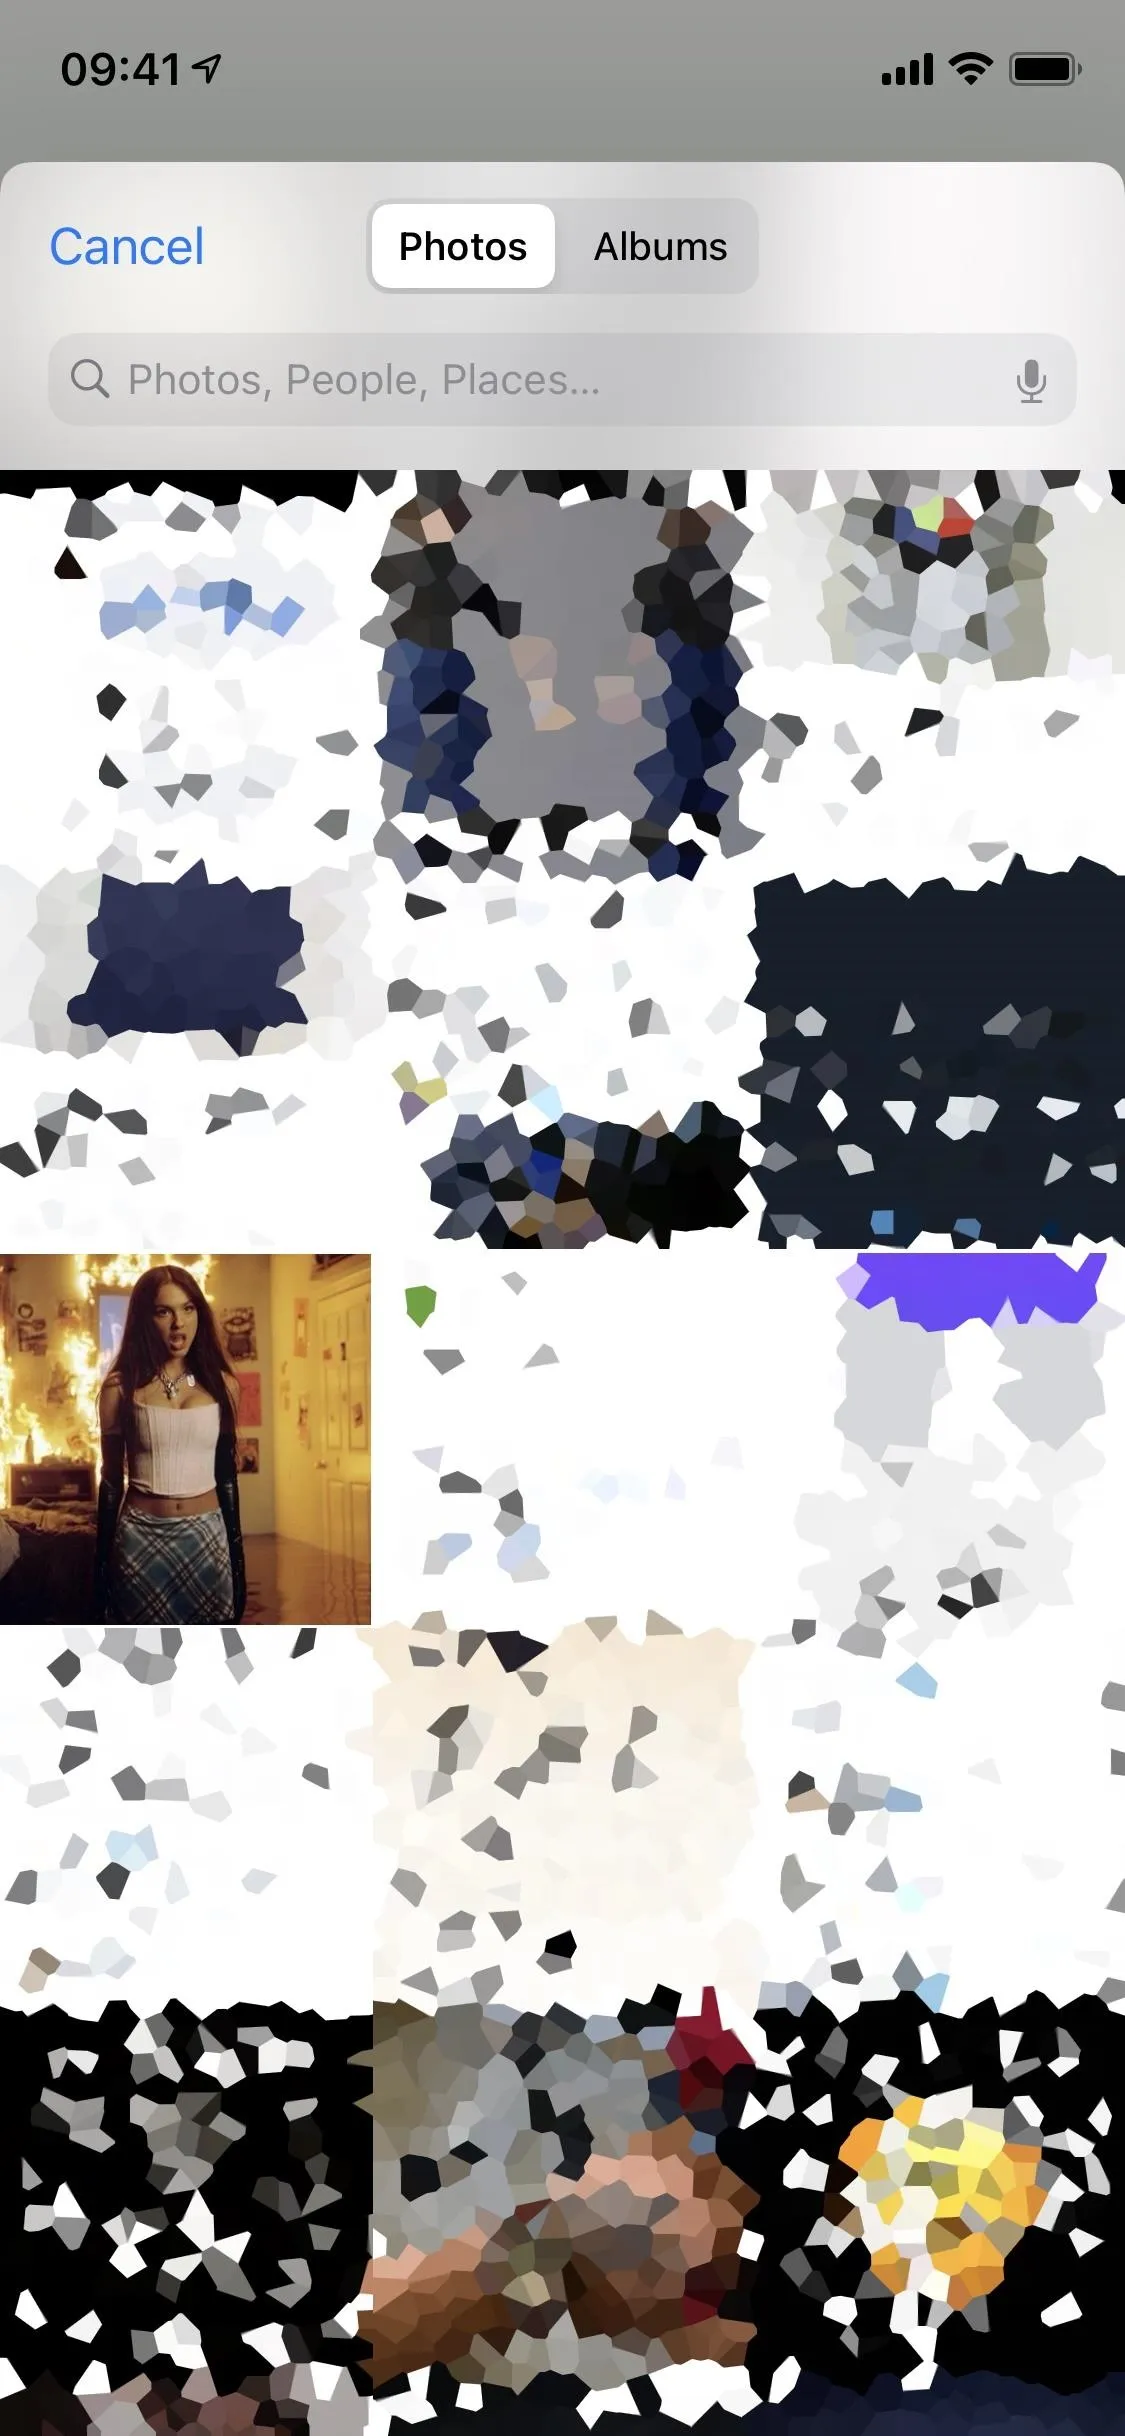
In the Shortcuts application, find the Background Remover shortcut and tap on it to run it. The first time you run the shortcut, you'll be asked to grant it access to the Photos app. A Photos picker window will then appear, where you can browse through your photos and albums. You can remove the background from photos, live photos, portraits, panoramas, GIFs, and more.
When choosing a photo, select one with a specific foreground, such as a person or a couple, and a somewhat simple background. You can experiment with photo options, but portraits should work best. The more complicated the background the more difficult it may be to separate the foreground from it, and vice versa. Once you choose a photo, the shortcut will get to work at removing the background. However, you must first grant the shortcut access to Adobe's API and more.
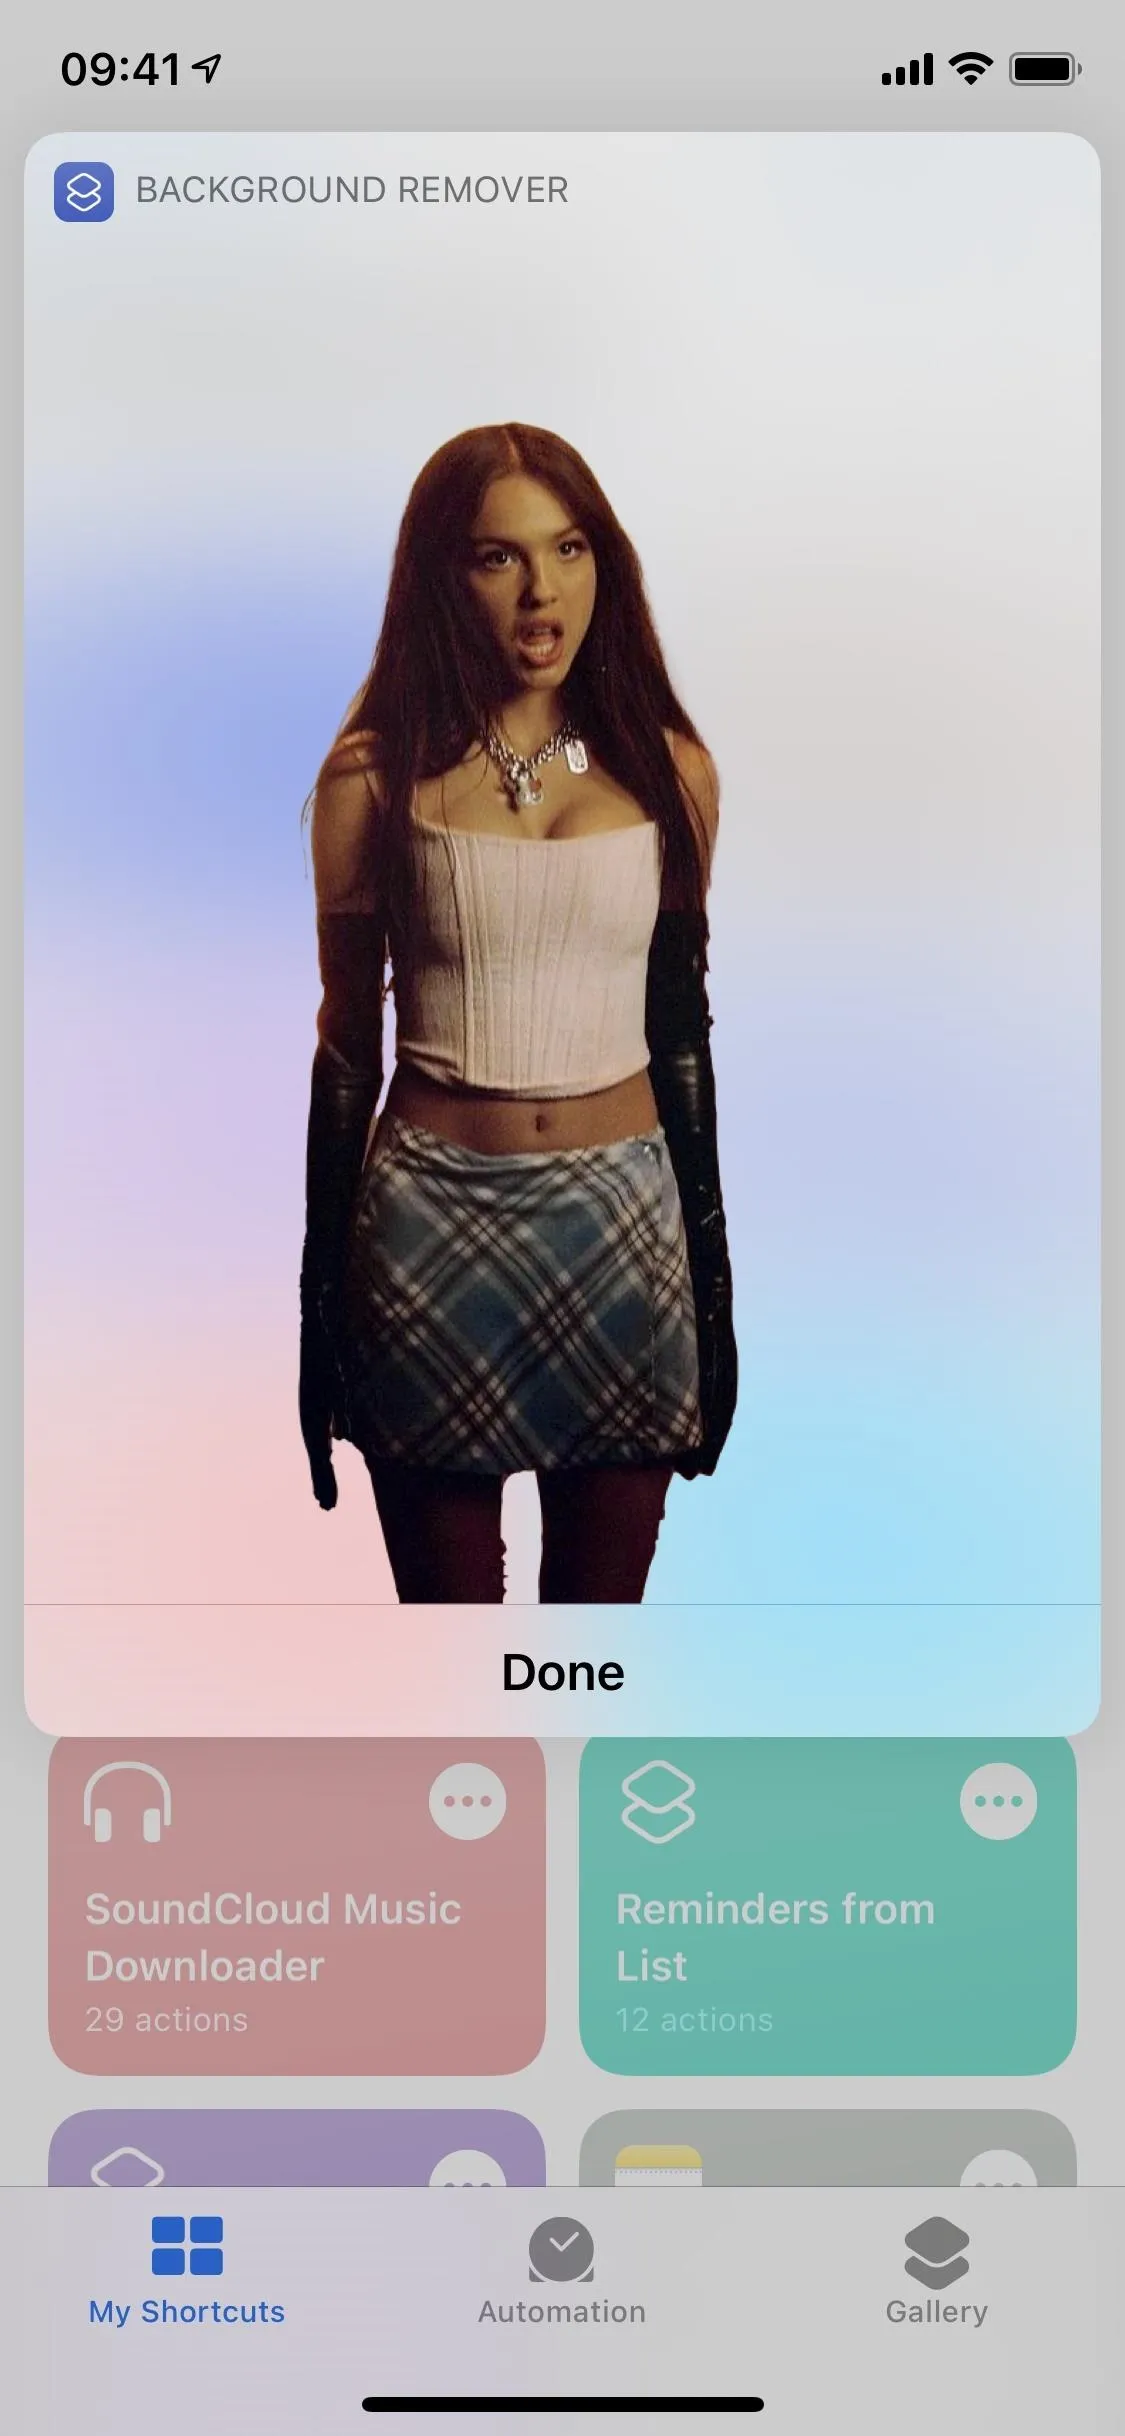
Finally, after granting access and waiting a few seconds, your new image with a transparent background will appear. To save the newly edited photo, tap on it, then on the share button in the top right, and finally on "Save Image" to save it to Photos.
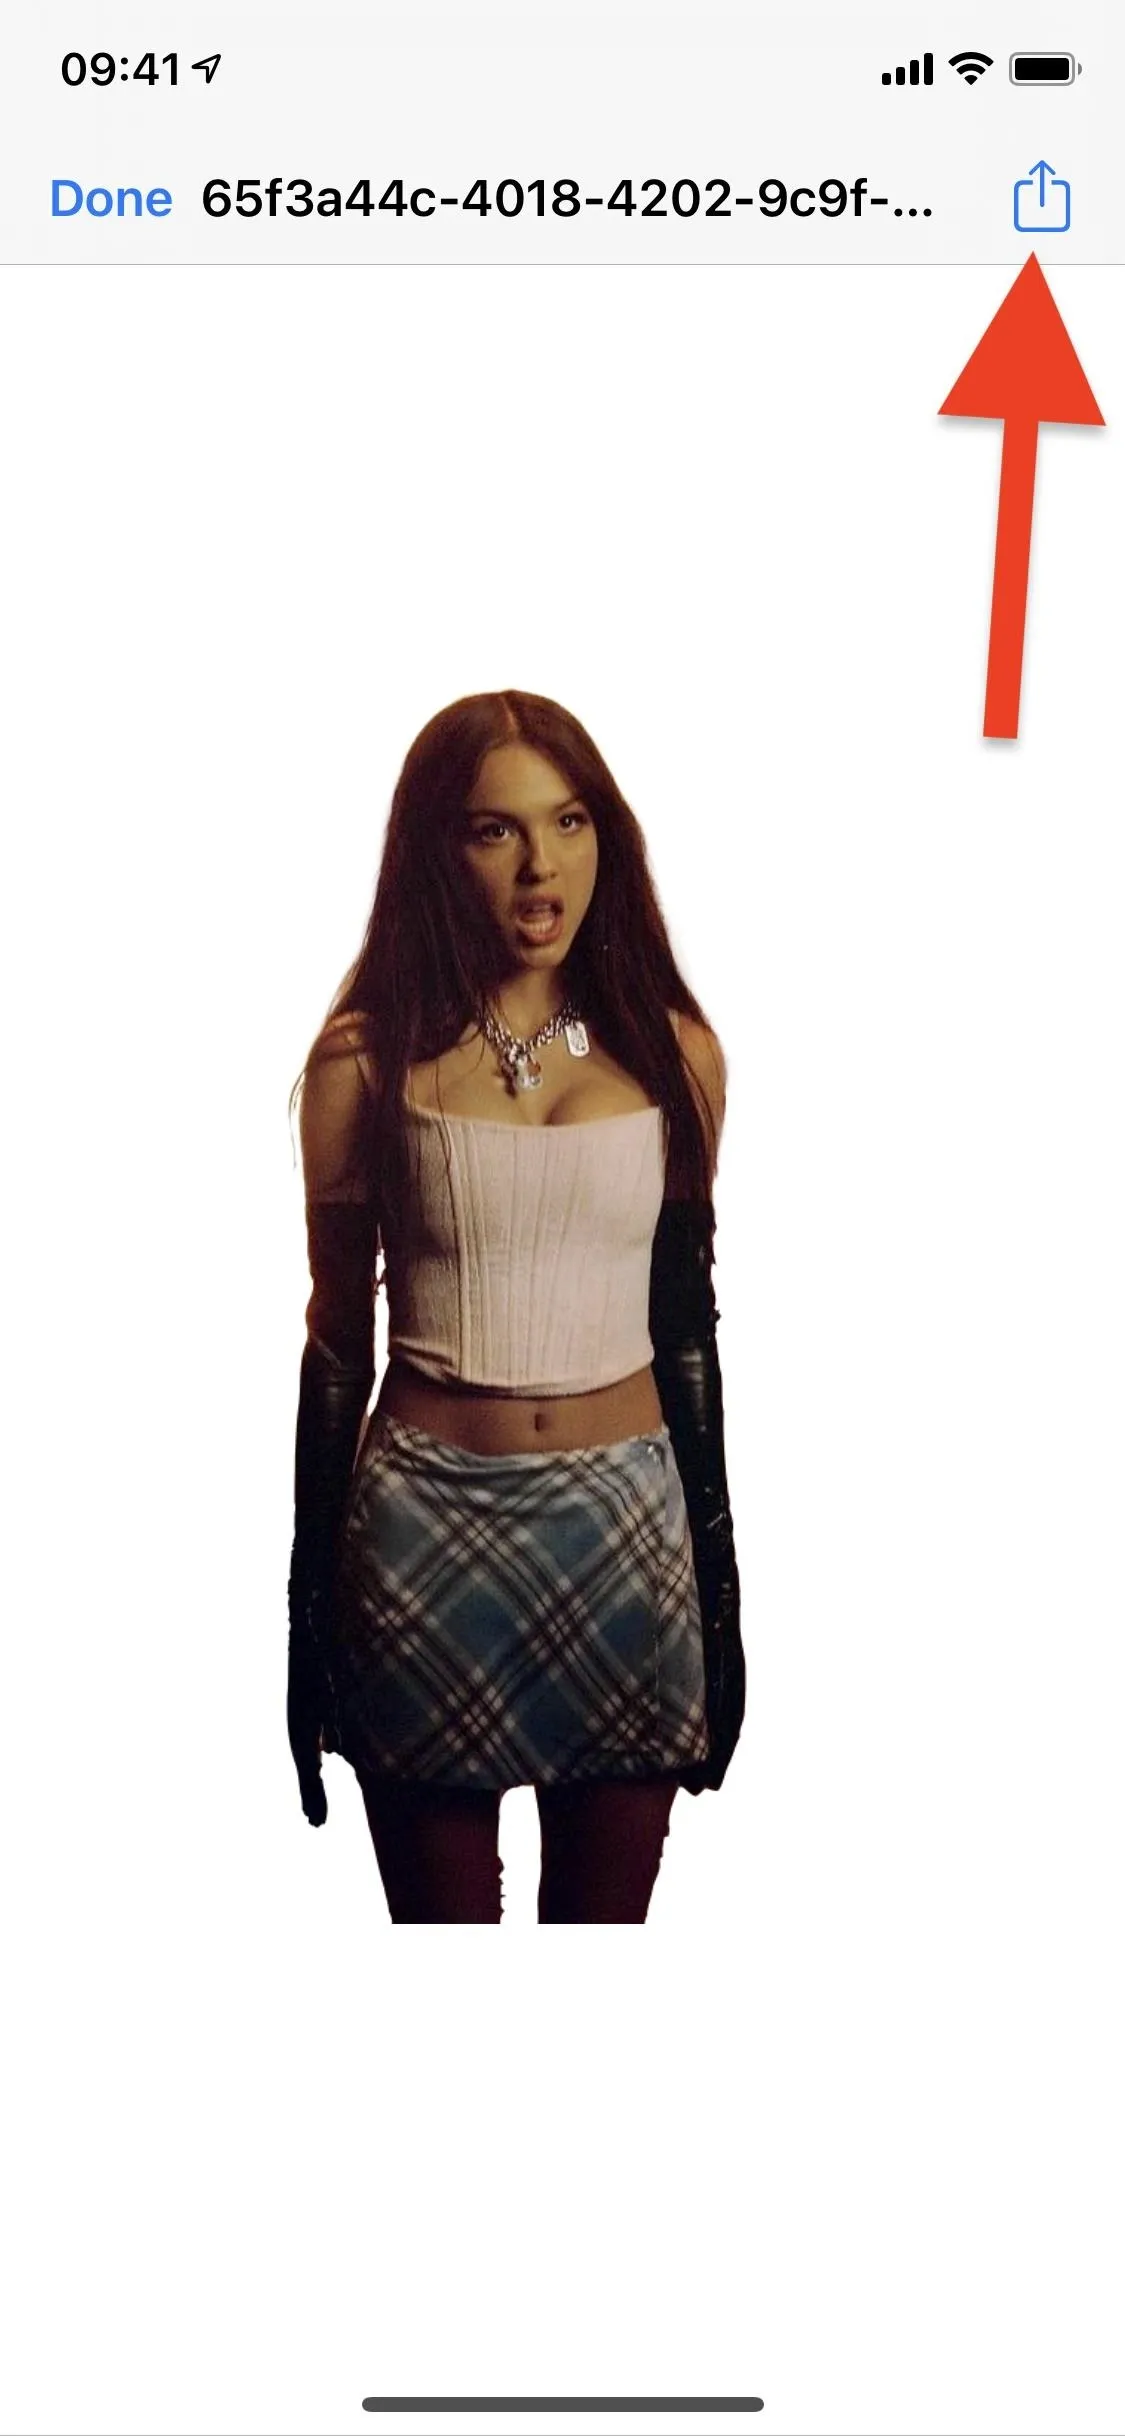
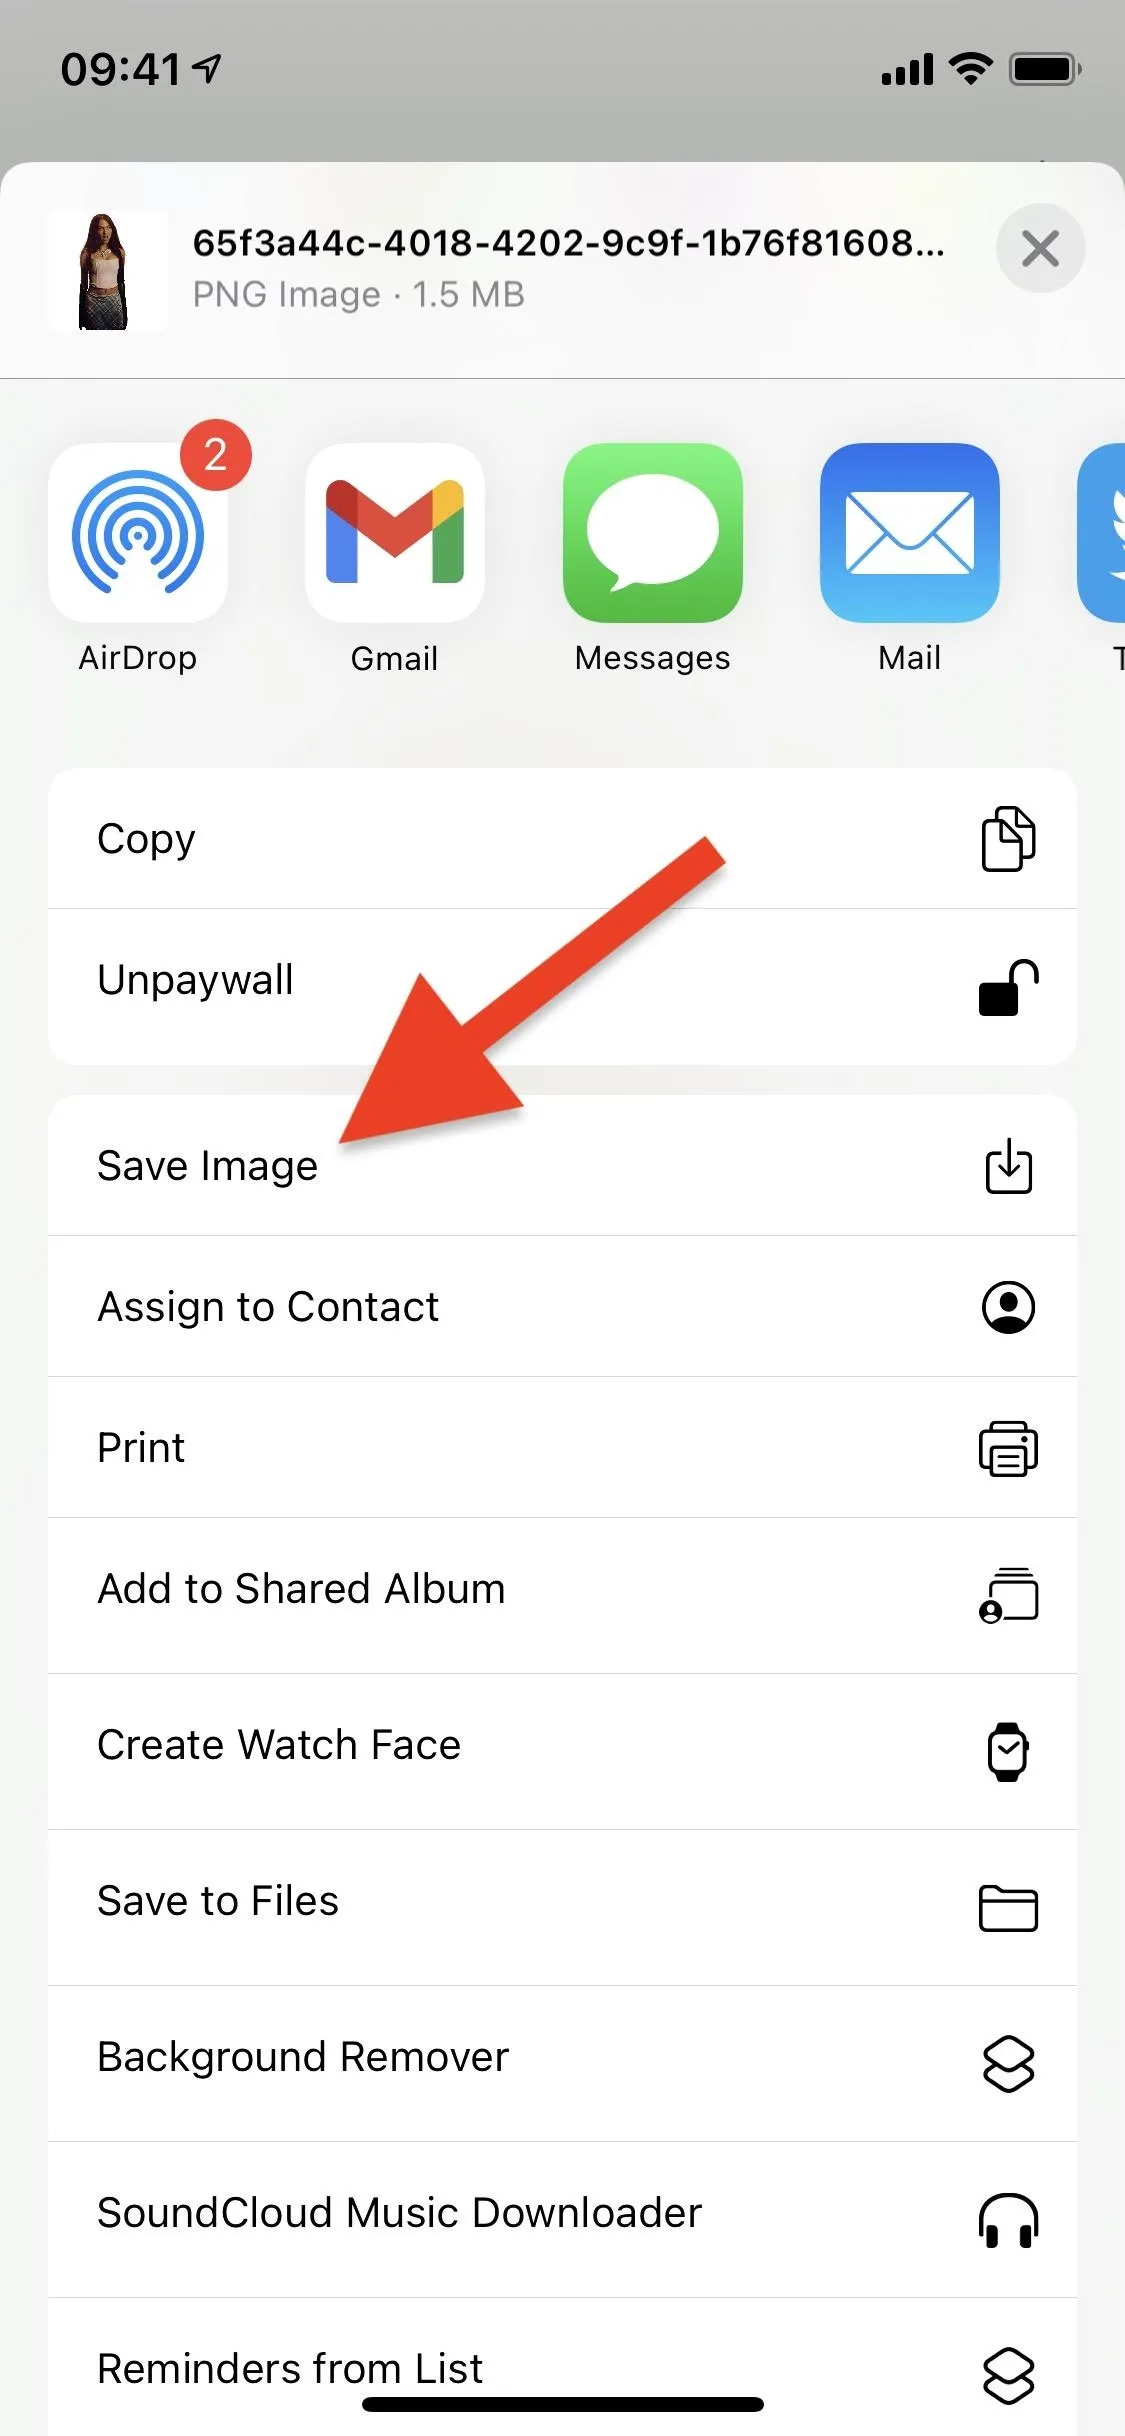
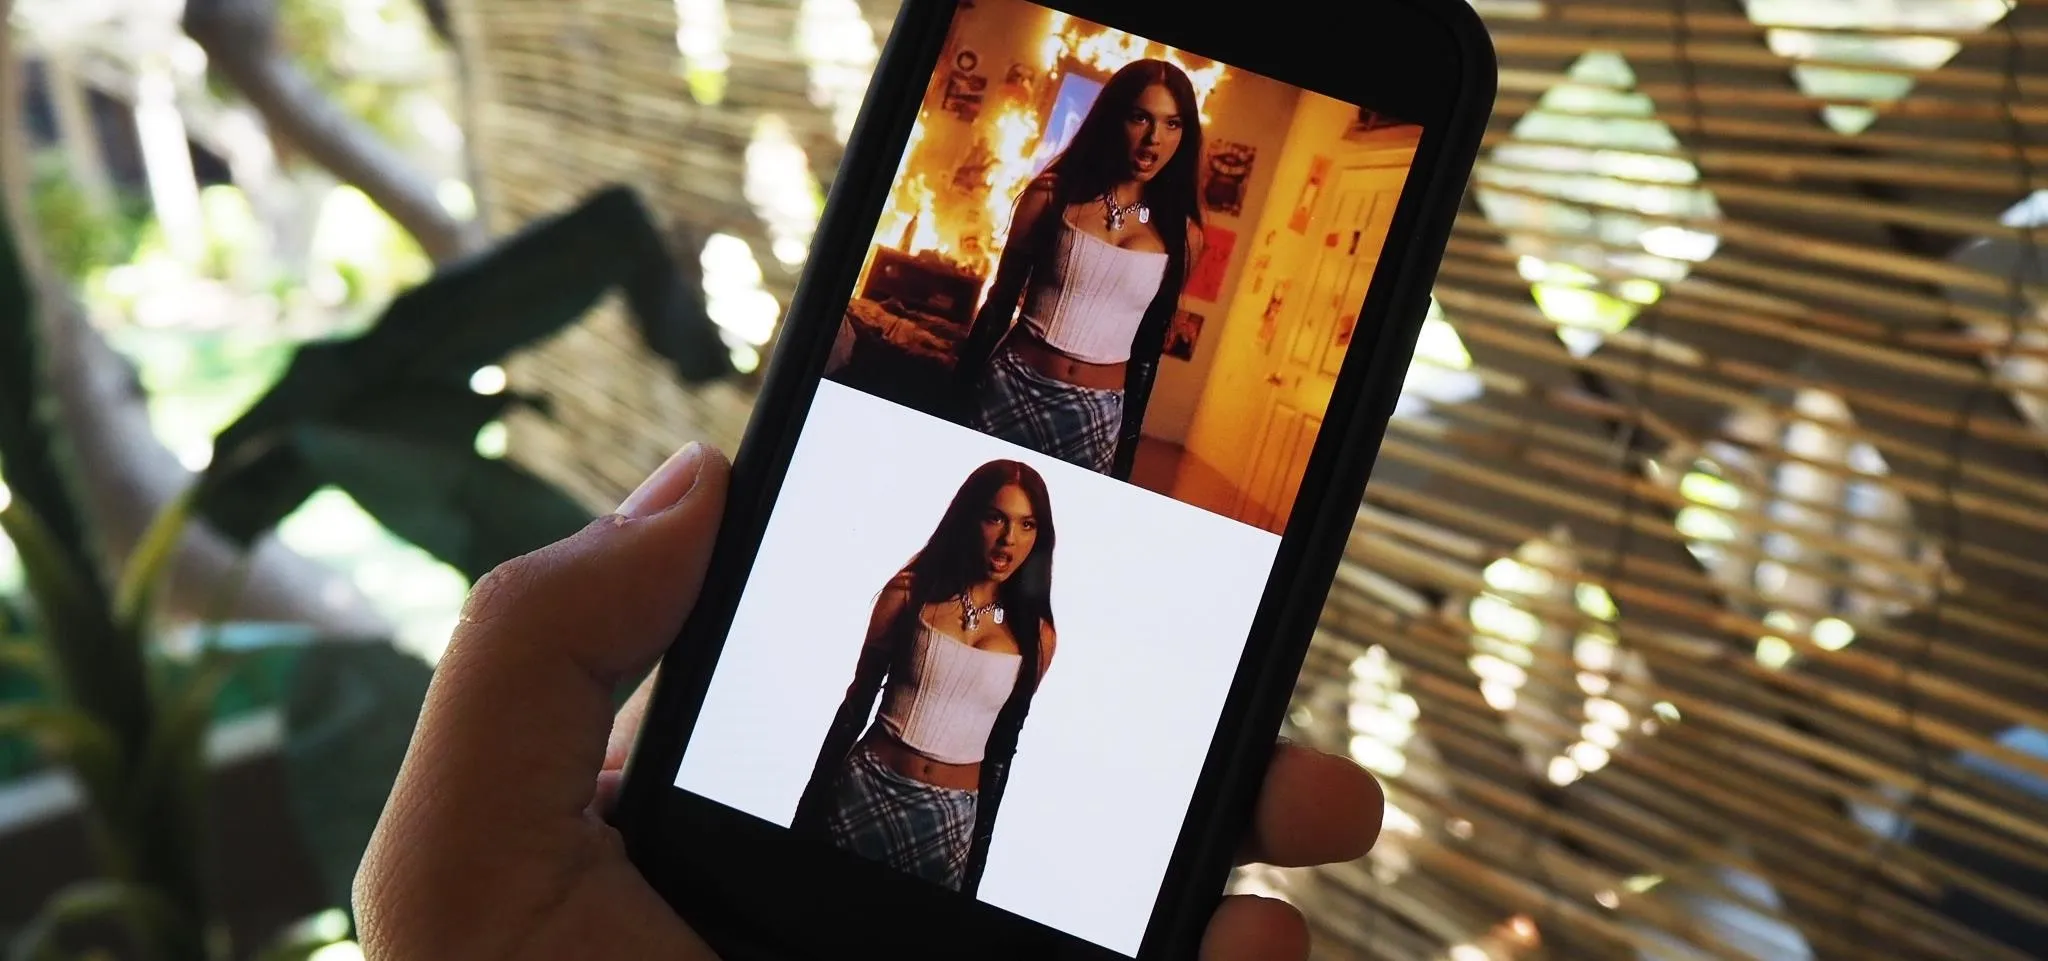
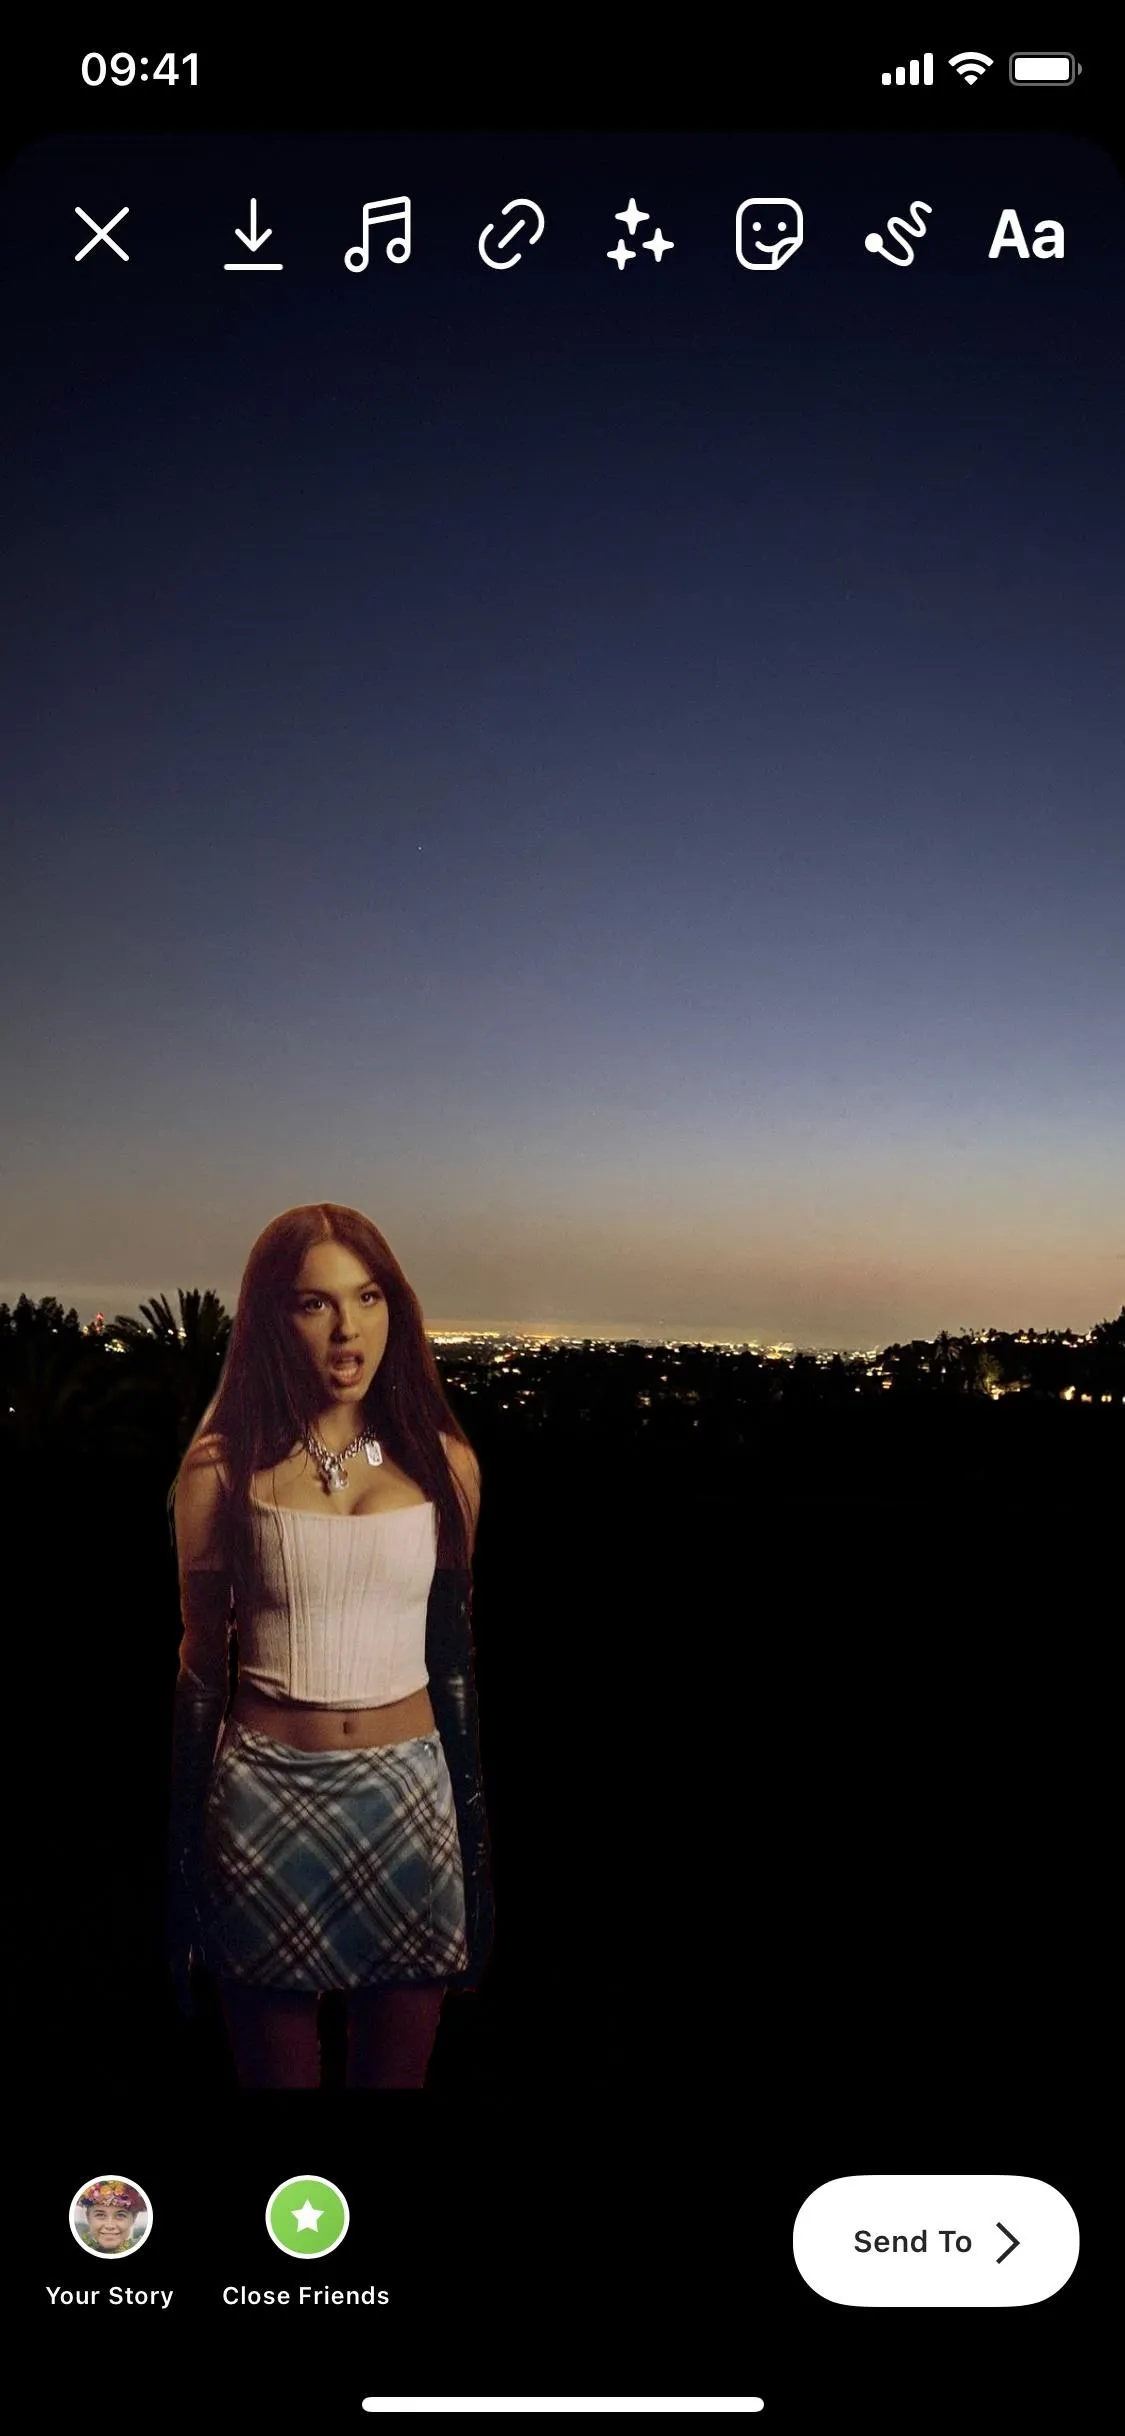
In Photos, you should see the image saved as a PNG with a transparent background. Below you can see the original image with the background (left) and the image run through the Remove Background shortcut, sans background.


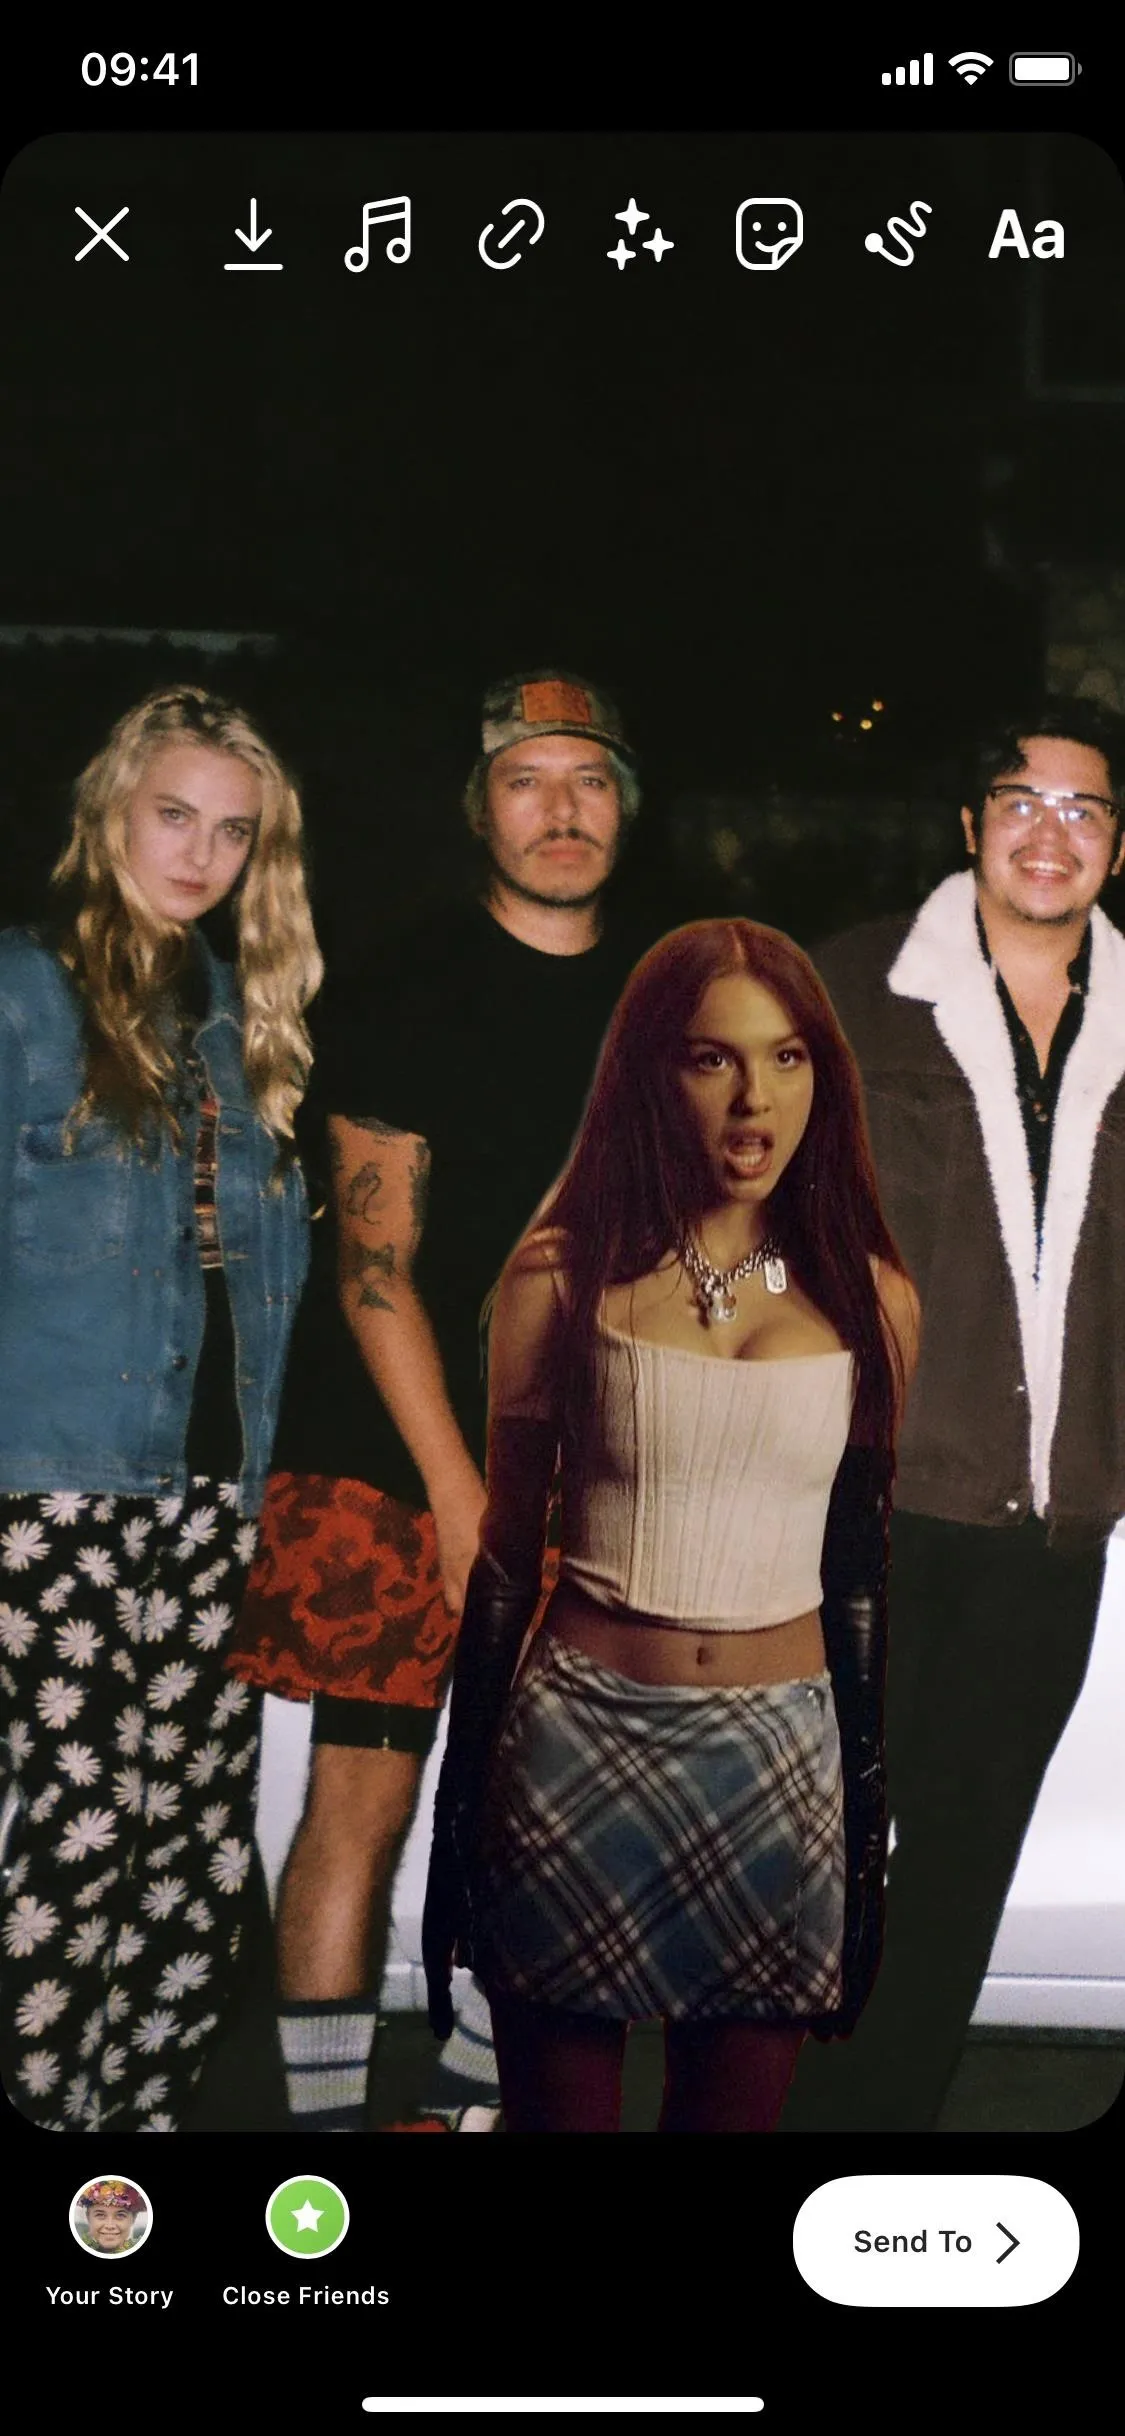
You can then add the transparent PNG to pretty much any photo, or add any background to it, using any number of photo editing tools, like Photoshop. Fortunately, there are many built-in editing tools on social media, like on Instagram, that allow you to easily add images to other images, like below.
Cover photo and screenshots by Nelson Aguilar/Gadget Hacks


Comments
Be the first, drop a comment!