


Apple hasn't refreshed its text tones on iPhones since iOS 7. That's six years of the same sounds. And while text tones like Bamboo and Hello have undoubtedly aged like fine wine, that's still too long to live with the same old sounds day after day. Let's take matters into our own hands — let's make our own text tones, right in Music on macOS 10.15 Catalina.
Why the distinction with macOS Catalina? Because Apple removed iTunes with its latest Mac update. That means most of its features were moved to Music, with some key syncing responsibilities added to Finder. This guide is designed to help you add text tones to your Mac running Catalina, but we also have a guide if you're running a version of Mac with iTunes, or on any PC (iTunes is still king there).
Just a note before you get started: this method only works on non-protected song files. That means you cannot use Apple Music tracks downloaded to your computer.
Add Your Sound File to Music
First thing's first, your sound file needs to be in Music before anything can happen. If the file isn't already in the app, no problem. Just drag and drop it over your Music window, and Music will automatically import it. Once imported, you're ready to start making your text tone.
- Don't Miss: 200+ Exciting New iOS 13 Features for iPhone
Set Time Parameters (If Applicable)
If you're going to use a song for your text tone, you'll likely want to make it as short as possible. After all, most of us want text tones to be short and sweet, not as long as a ringtone by any means.
You might be surprised to learn Music lets you adjust time parameters for songs (and sound files). That way, you can control when a song starts and when a song ends. For text tones, we recommend keeping this range short. While you can technically create ringtones as long as 40 seconds, Apple won't show them as an option for text tones unless it's 30 seconds or less. Plus, you might find it gets old to hear such a long alert every time you receive a text.
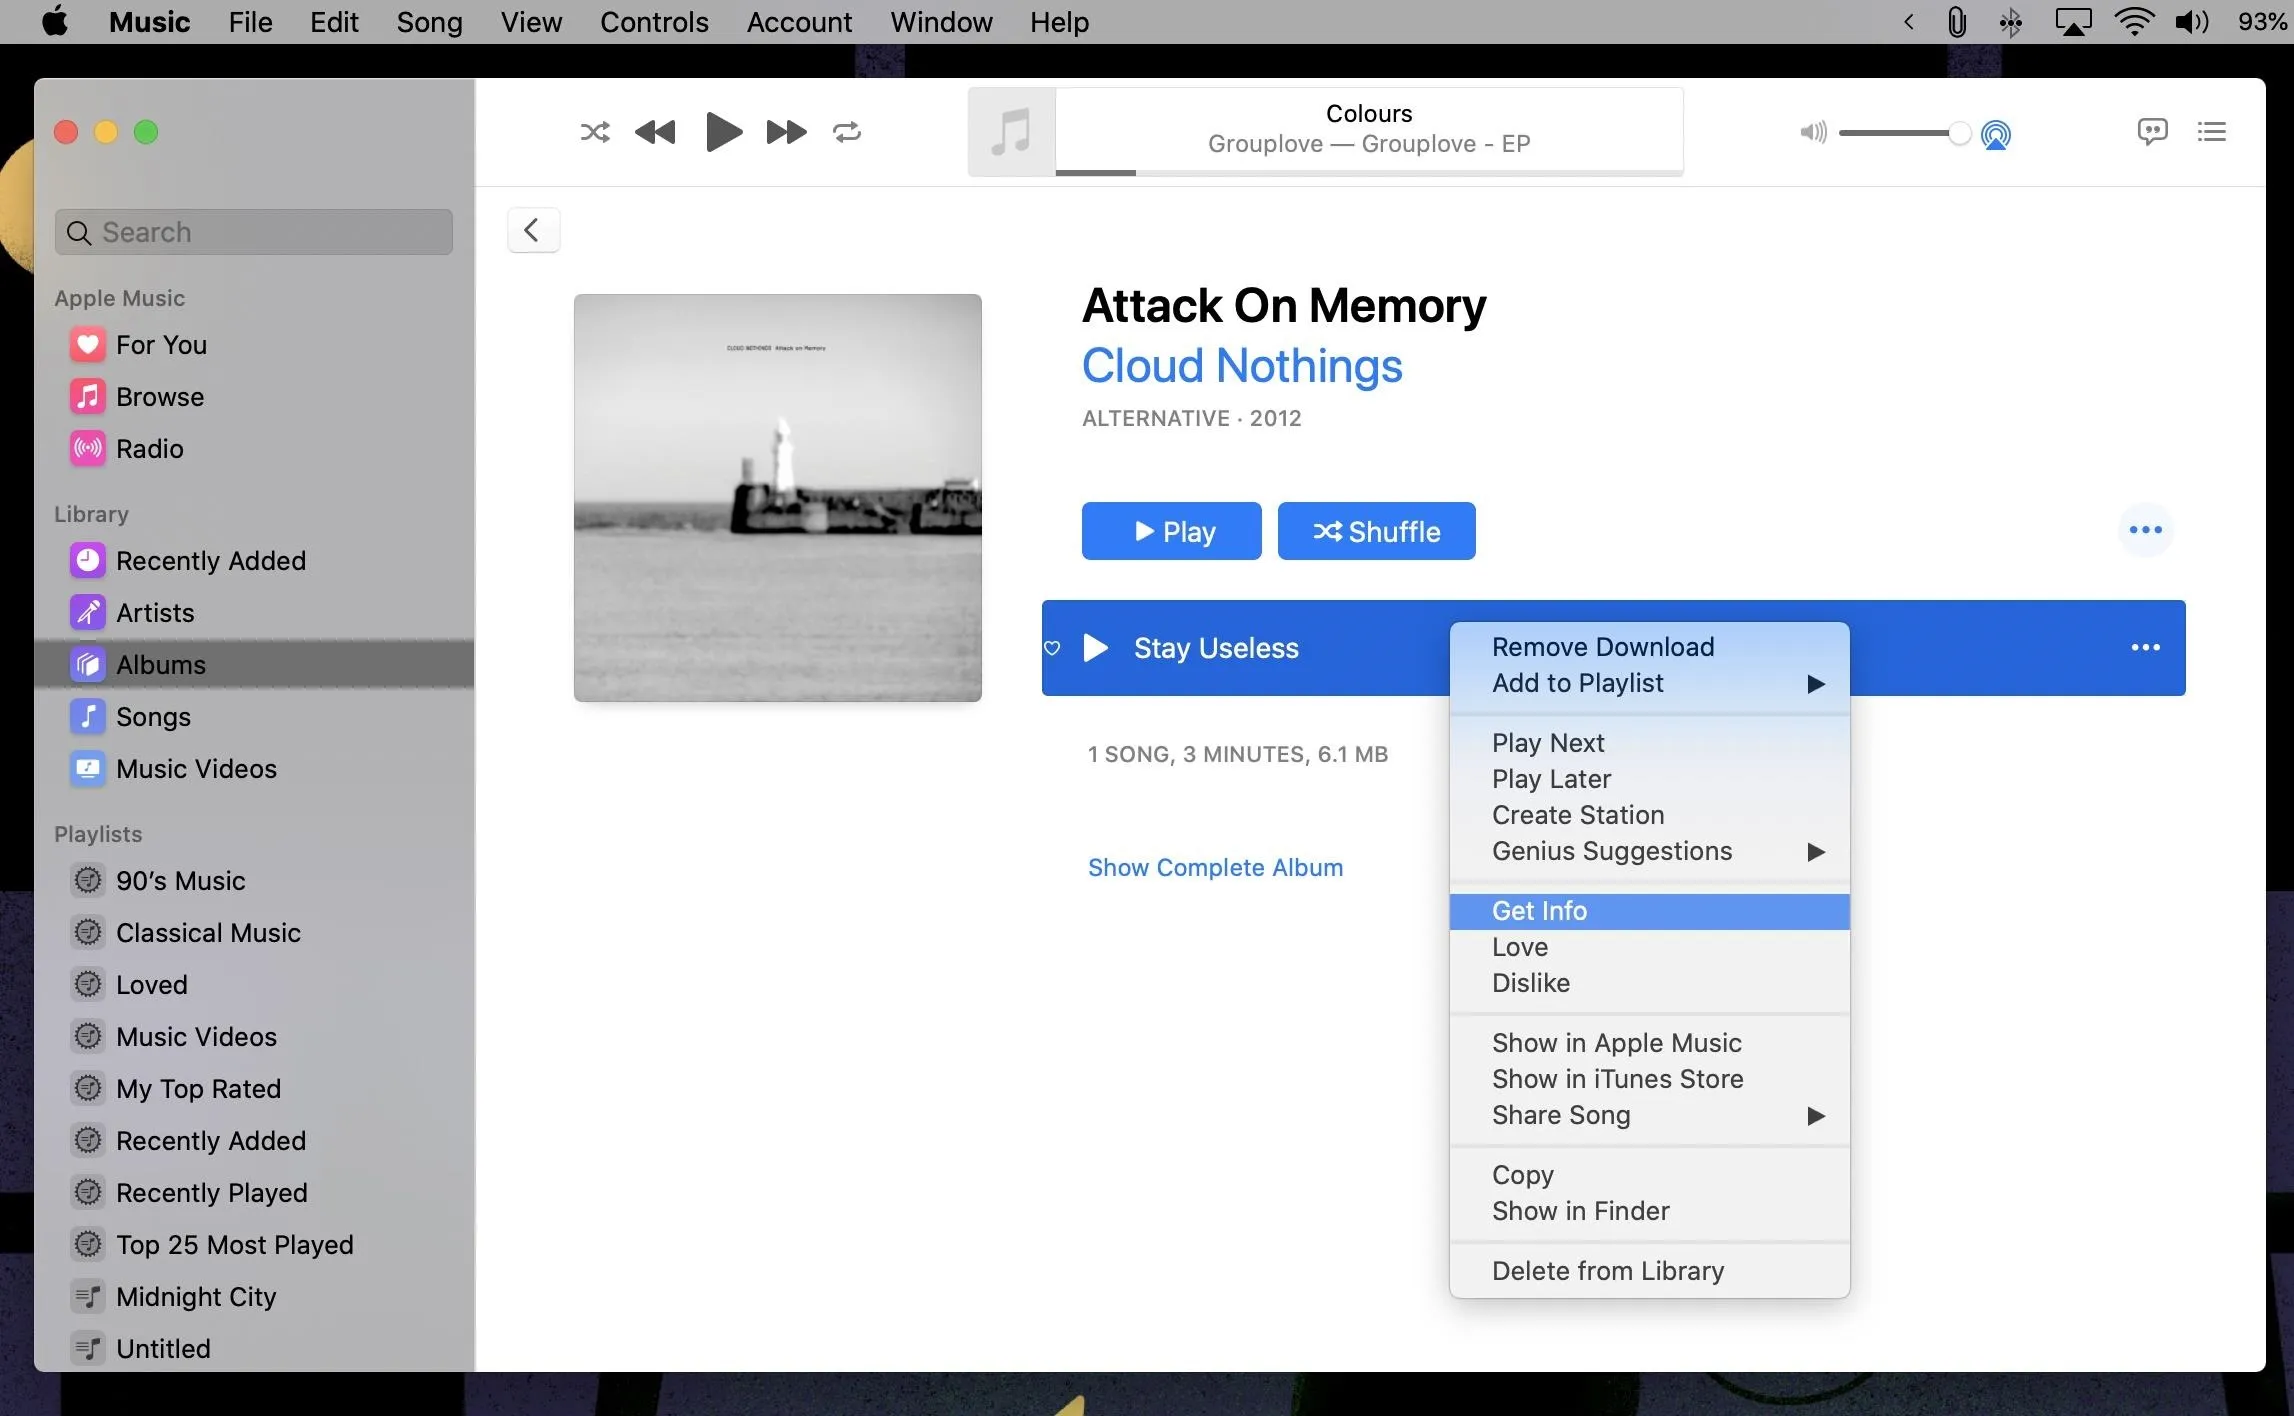
Highlight the song in Music, then hit Command-I. Here, you'll find the "Get Info" window. You can also find this window by right-clicking on the song, then selecting "Song Info;" by clicking the (•••) to the right of the song; or by clicking the "Edit" button on the menu bar.
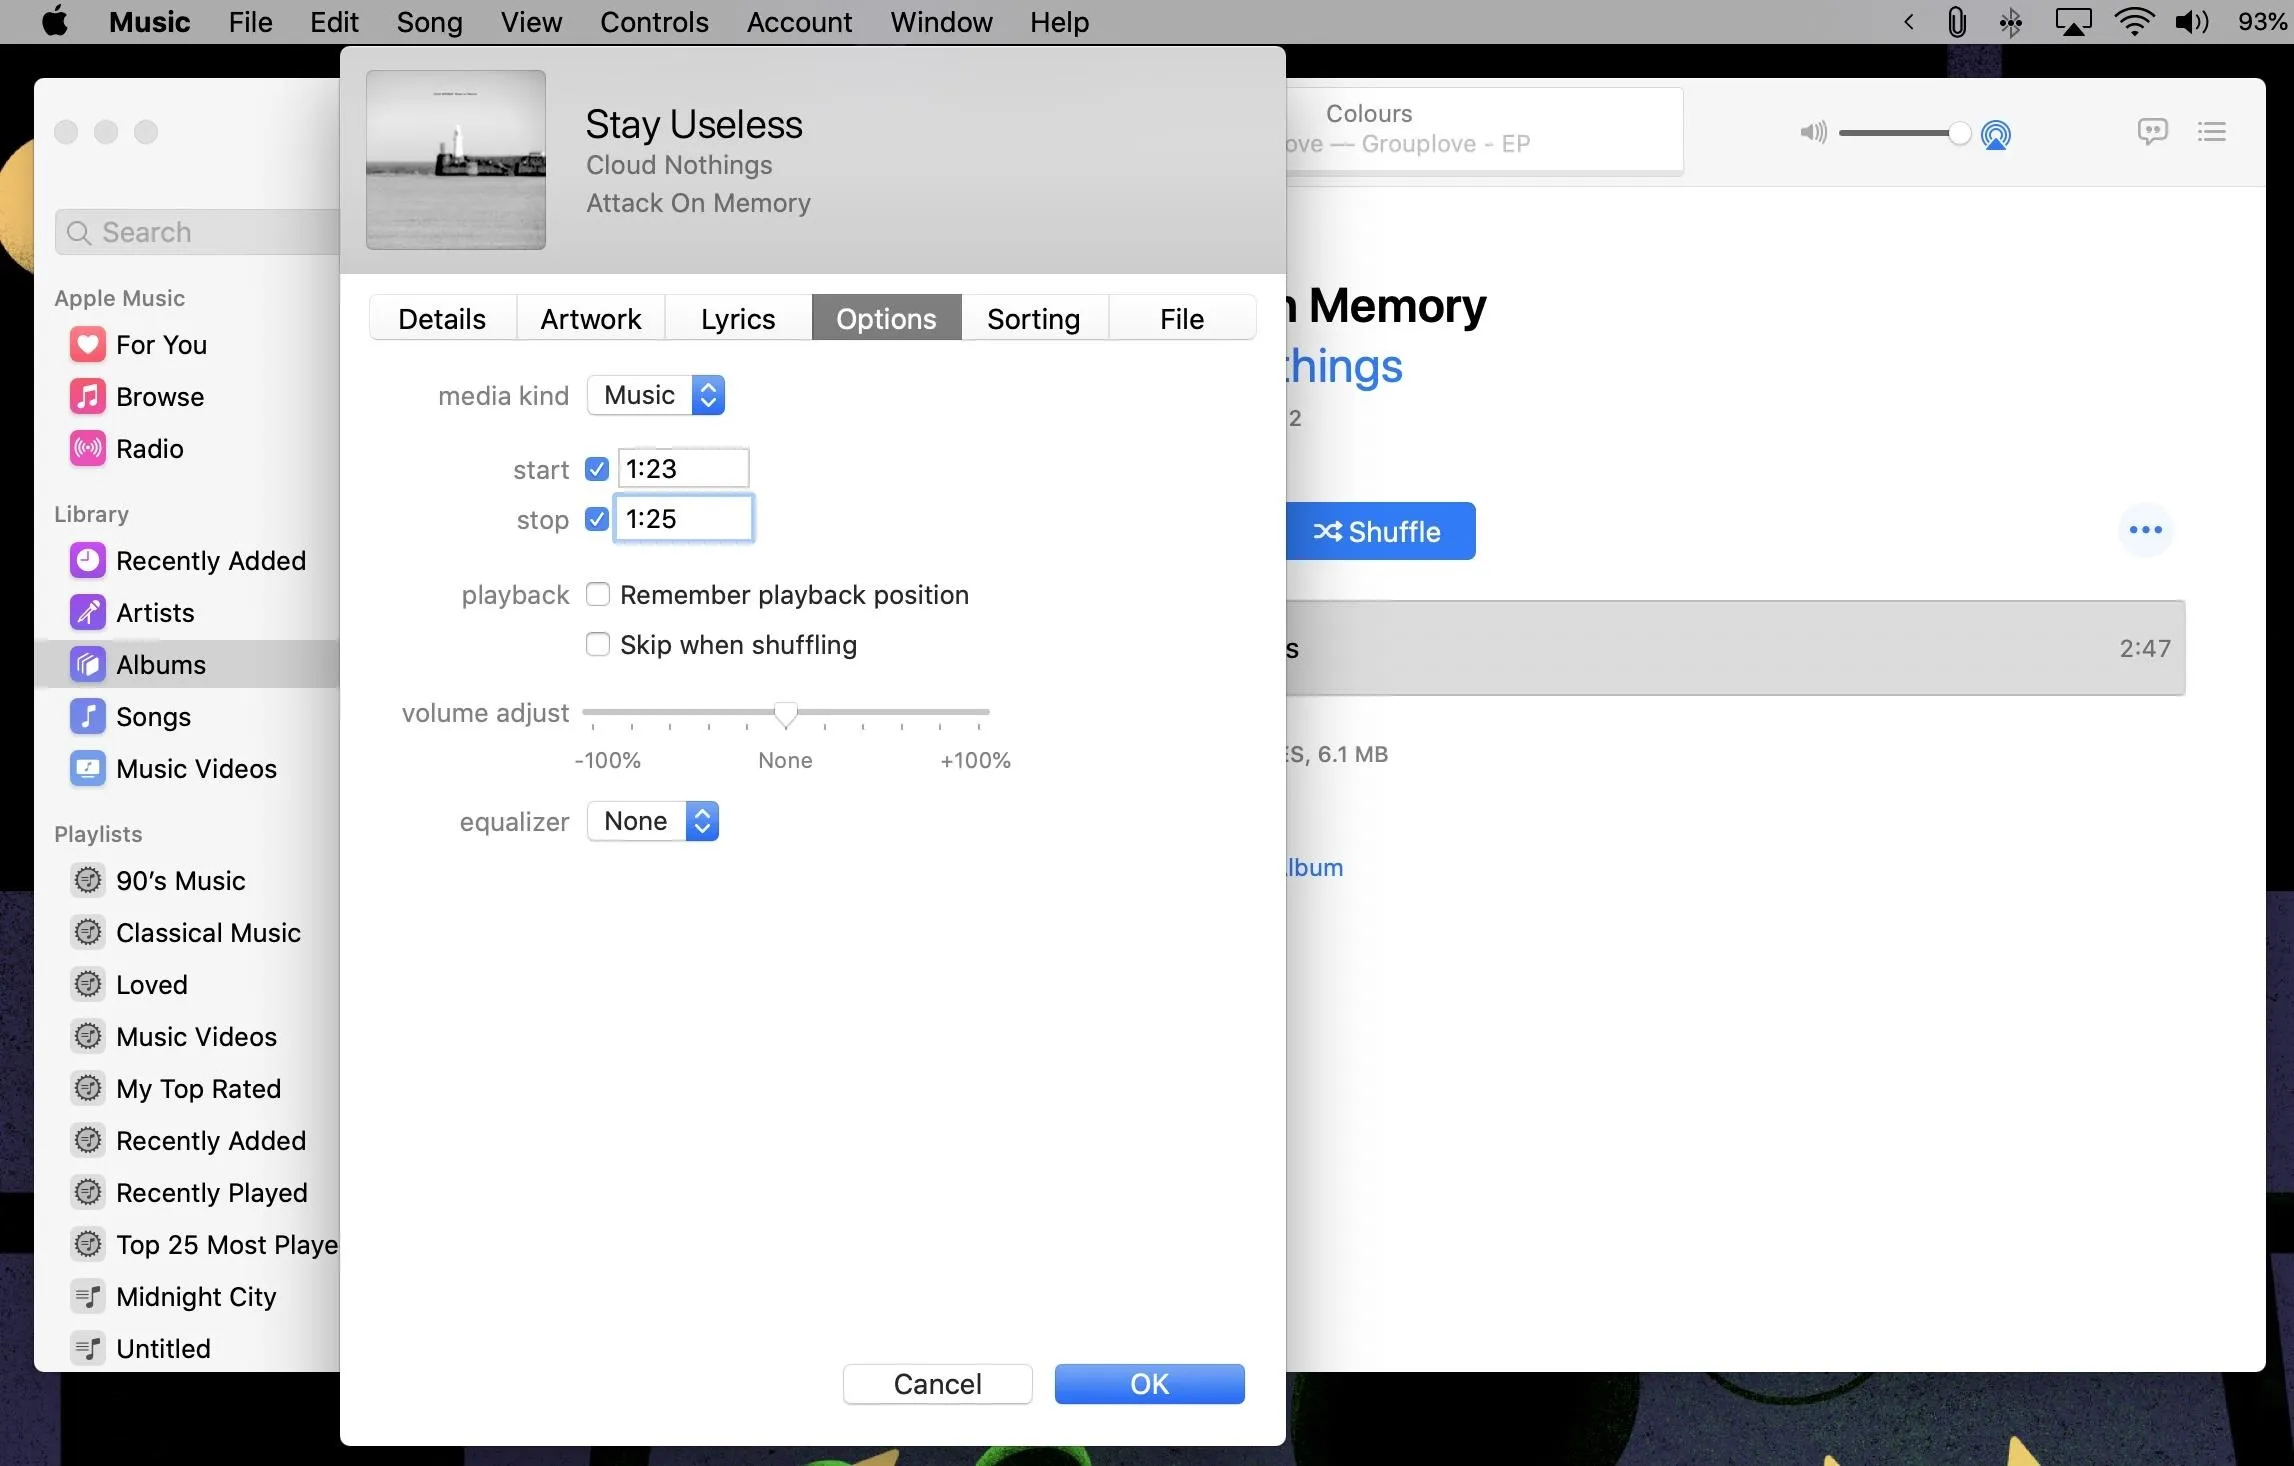
Now, click "Options," then locate the "start" and "stop" boxes. Enter the timestamp for each, so that it encompasses the section of the song you want for your text tone. If using any start or stop time aside from the beginning or end, make sure the checkboxes are marked before proceeding. If you leave the box unchecked, it will ignore your timestamp and play the song from the beginning or until the ending. Click "OK" to save your options.
Convert Your File to AAC
Whether you're using a song or a sound file you added to Music, you'll need to convert the file to AAC before turning it into a ringtone. AAC is essentially a better version of MP3, taking up roughly as much space but at a much higher quality.
You don't need to worry about this process overwriting the original file — your original stays intact, while Music simply makes a copy of it in AAC. If you're converting a song with custom time parameters, this AAC copy will only include that specific length of time. For example, if the original song was 3:46, and you included 1:46 through 1:48, your AAC copy will read as 0:02.
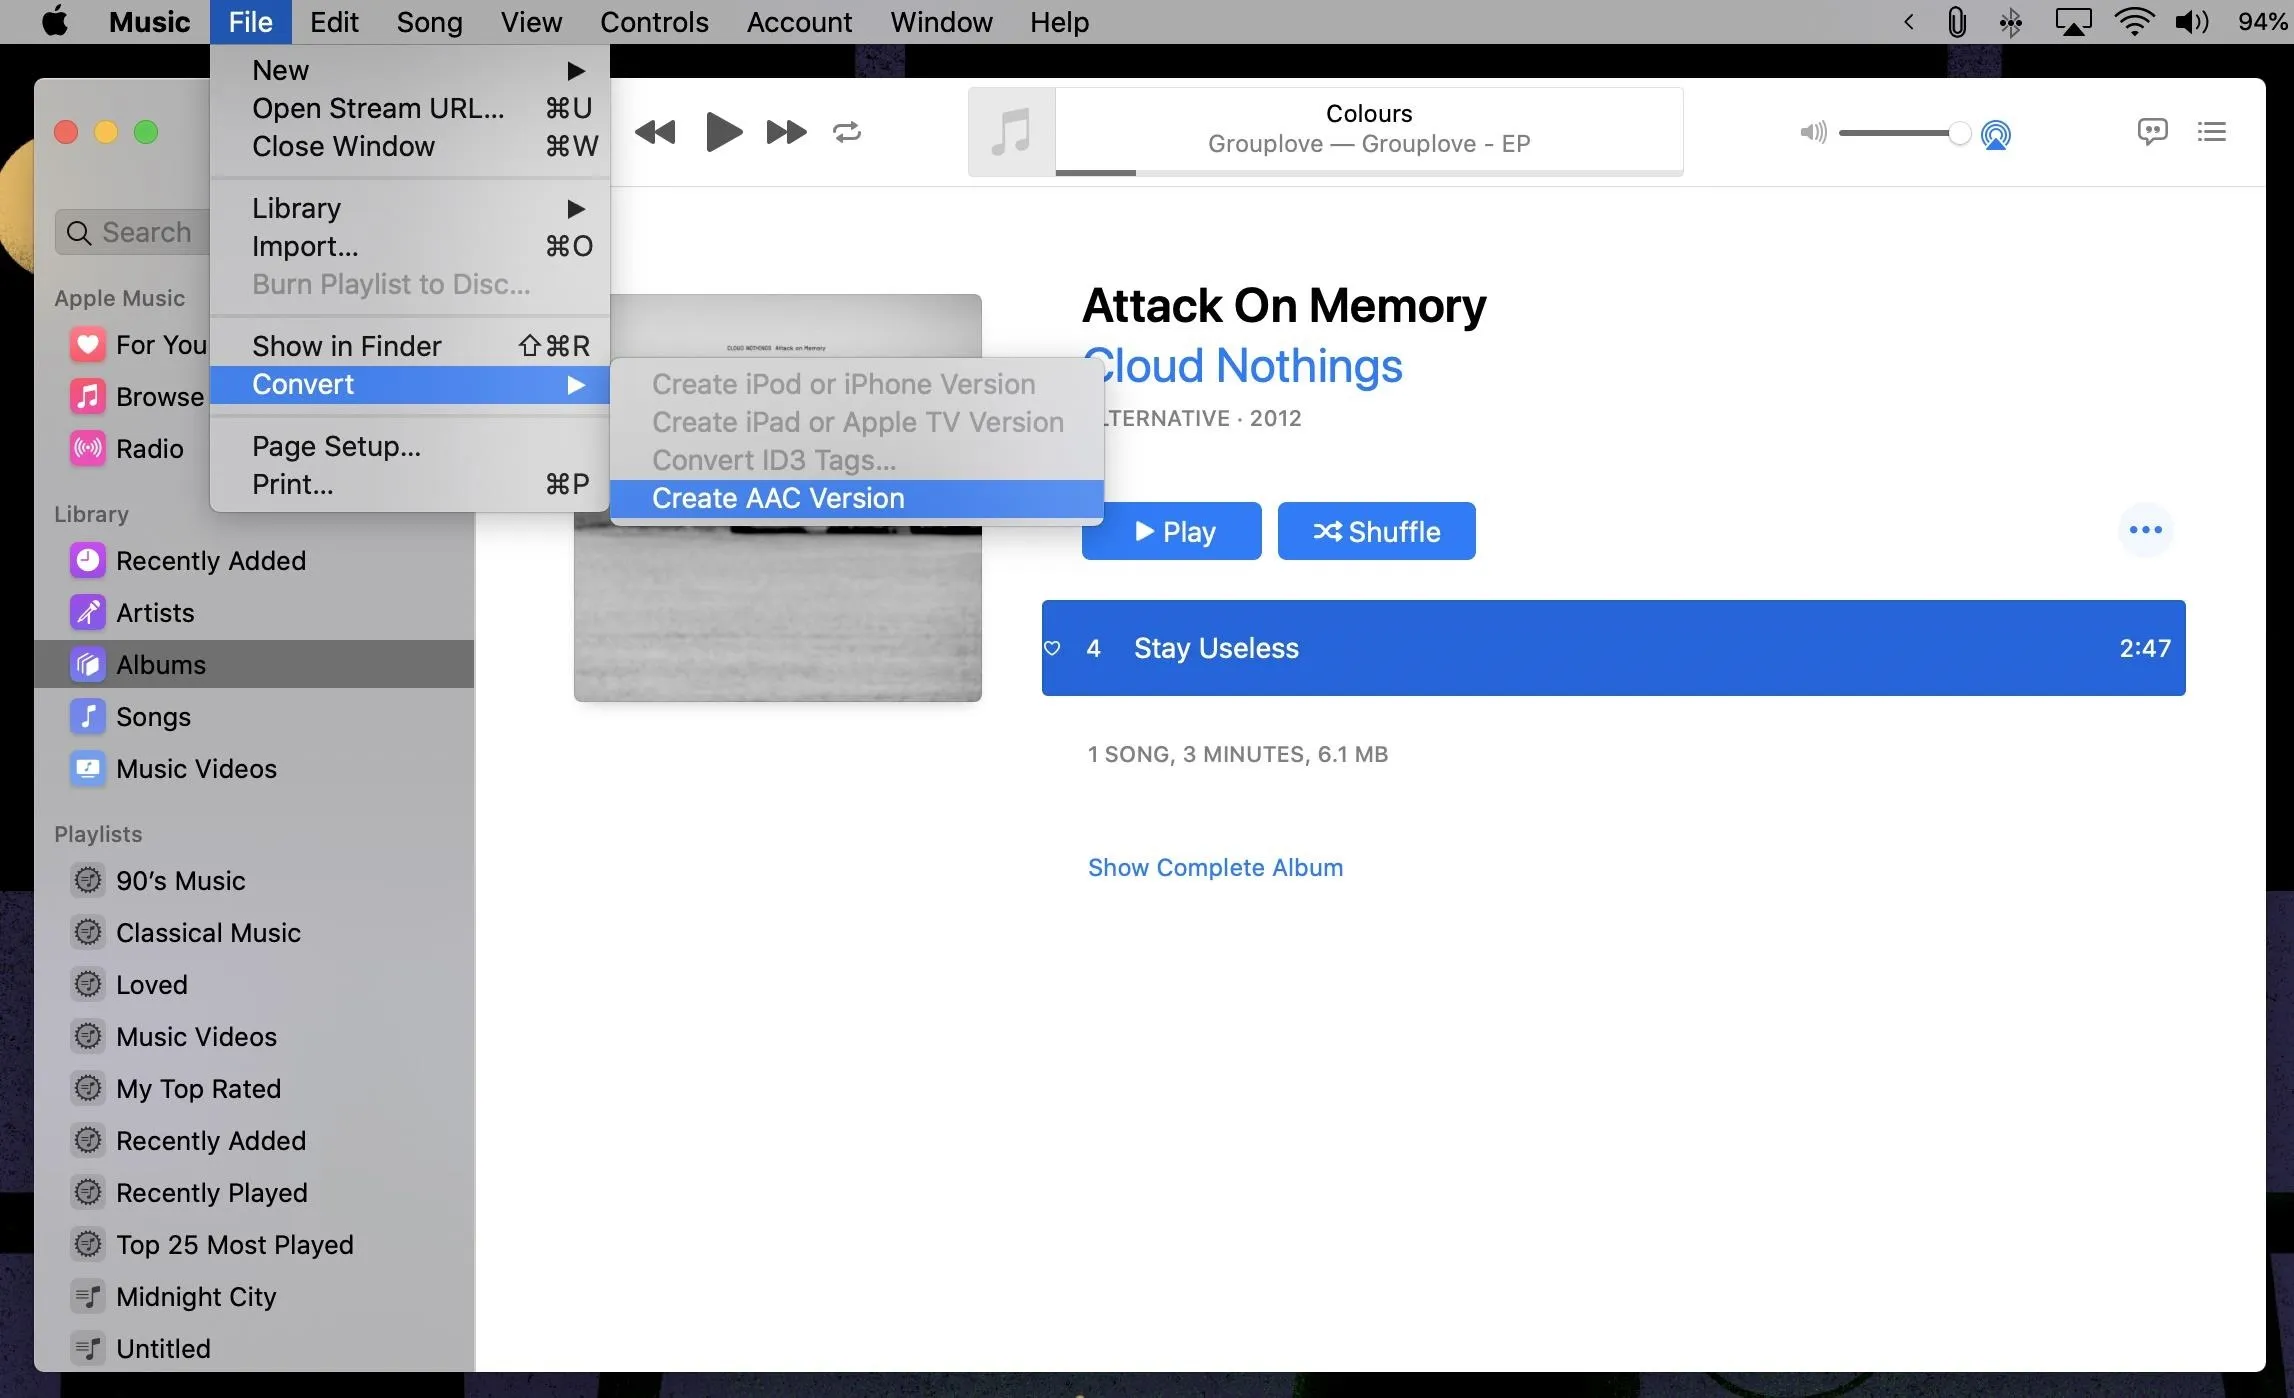
To start, choose "File" in the menu bar, then click "Convert." Then, click "Create AAC Version." If you receive an error message, your song is likely a protected file, and thus cannot be used.
Music will then create a new AAC copy. If the song is tied to an album, the copy will appear directly beneath the original sound file. If you're using a standalone sound file, however, you might not see the copy appear. In that case, just check "Recently Added" to find the copy.

If you changed the time parameters for a song in your library, remember to go back and reset them. You don't want the original song to only play your "text tone" each time you listen to it.
Convert Your File Type from M4A to M4R
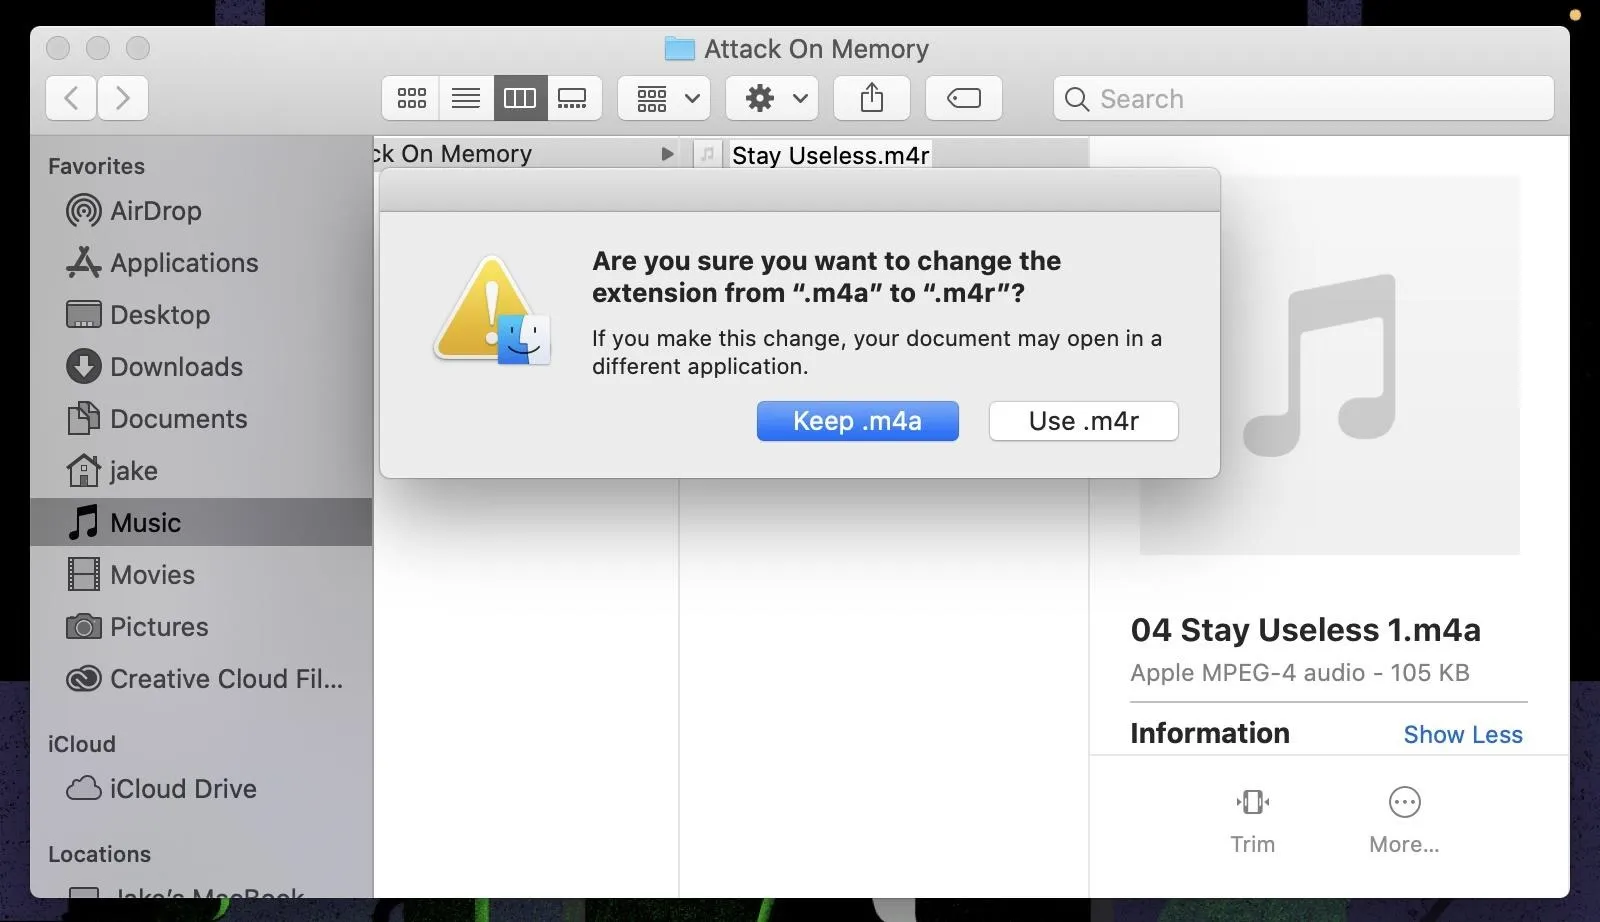
Sorry to say that converting to AAC isn't enough for iOS to recognize it as a tone file. Right now, it's a .m4a file, when it needs to be .m4r, the standard file type for iOS tones.
To get the conversion started, drag the AAC file to your desktop, or right-click the file in Music and choose "Show in Finder." In either case, click on the name of the file to enter the editor, then change the extension from .m4a to .m4r. You can also change the name of the file to reflect what you'd like the tone to be called in iOS. Finally, confirm the change on the popup to complete the conversion.
Sync Your Text Tone to Your iPhone
Now, connect your iPhone to your Mac using a Lightning to USB or Lightning to USB-C cable, or, if syncing wirelessly, make sure your iPhone is on the same Wi-Fi network as your Mac. Locate your iPhone in Music under Devices.
Now, drag and drop the new .m4r file onto your iPhone in Music. If done right, your tone should sync with your iPhone instantly, without you needing to do another thing.
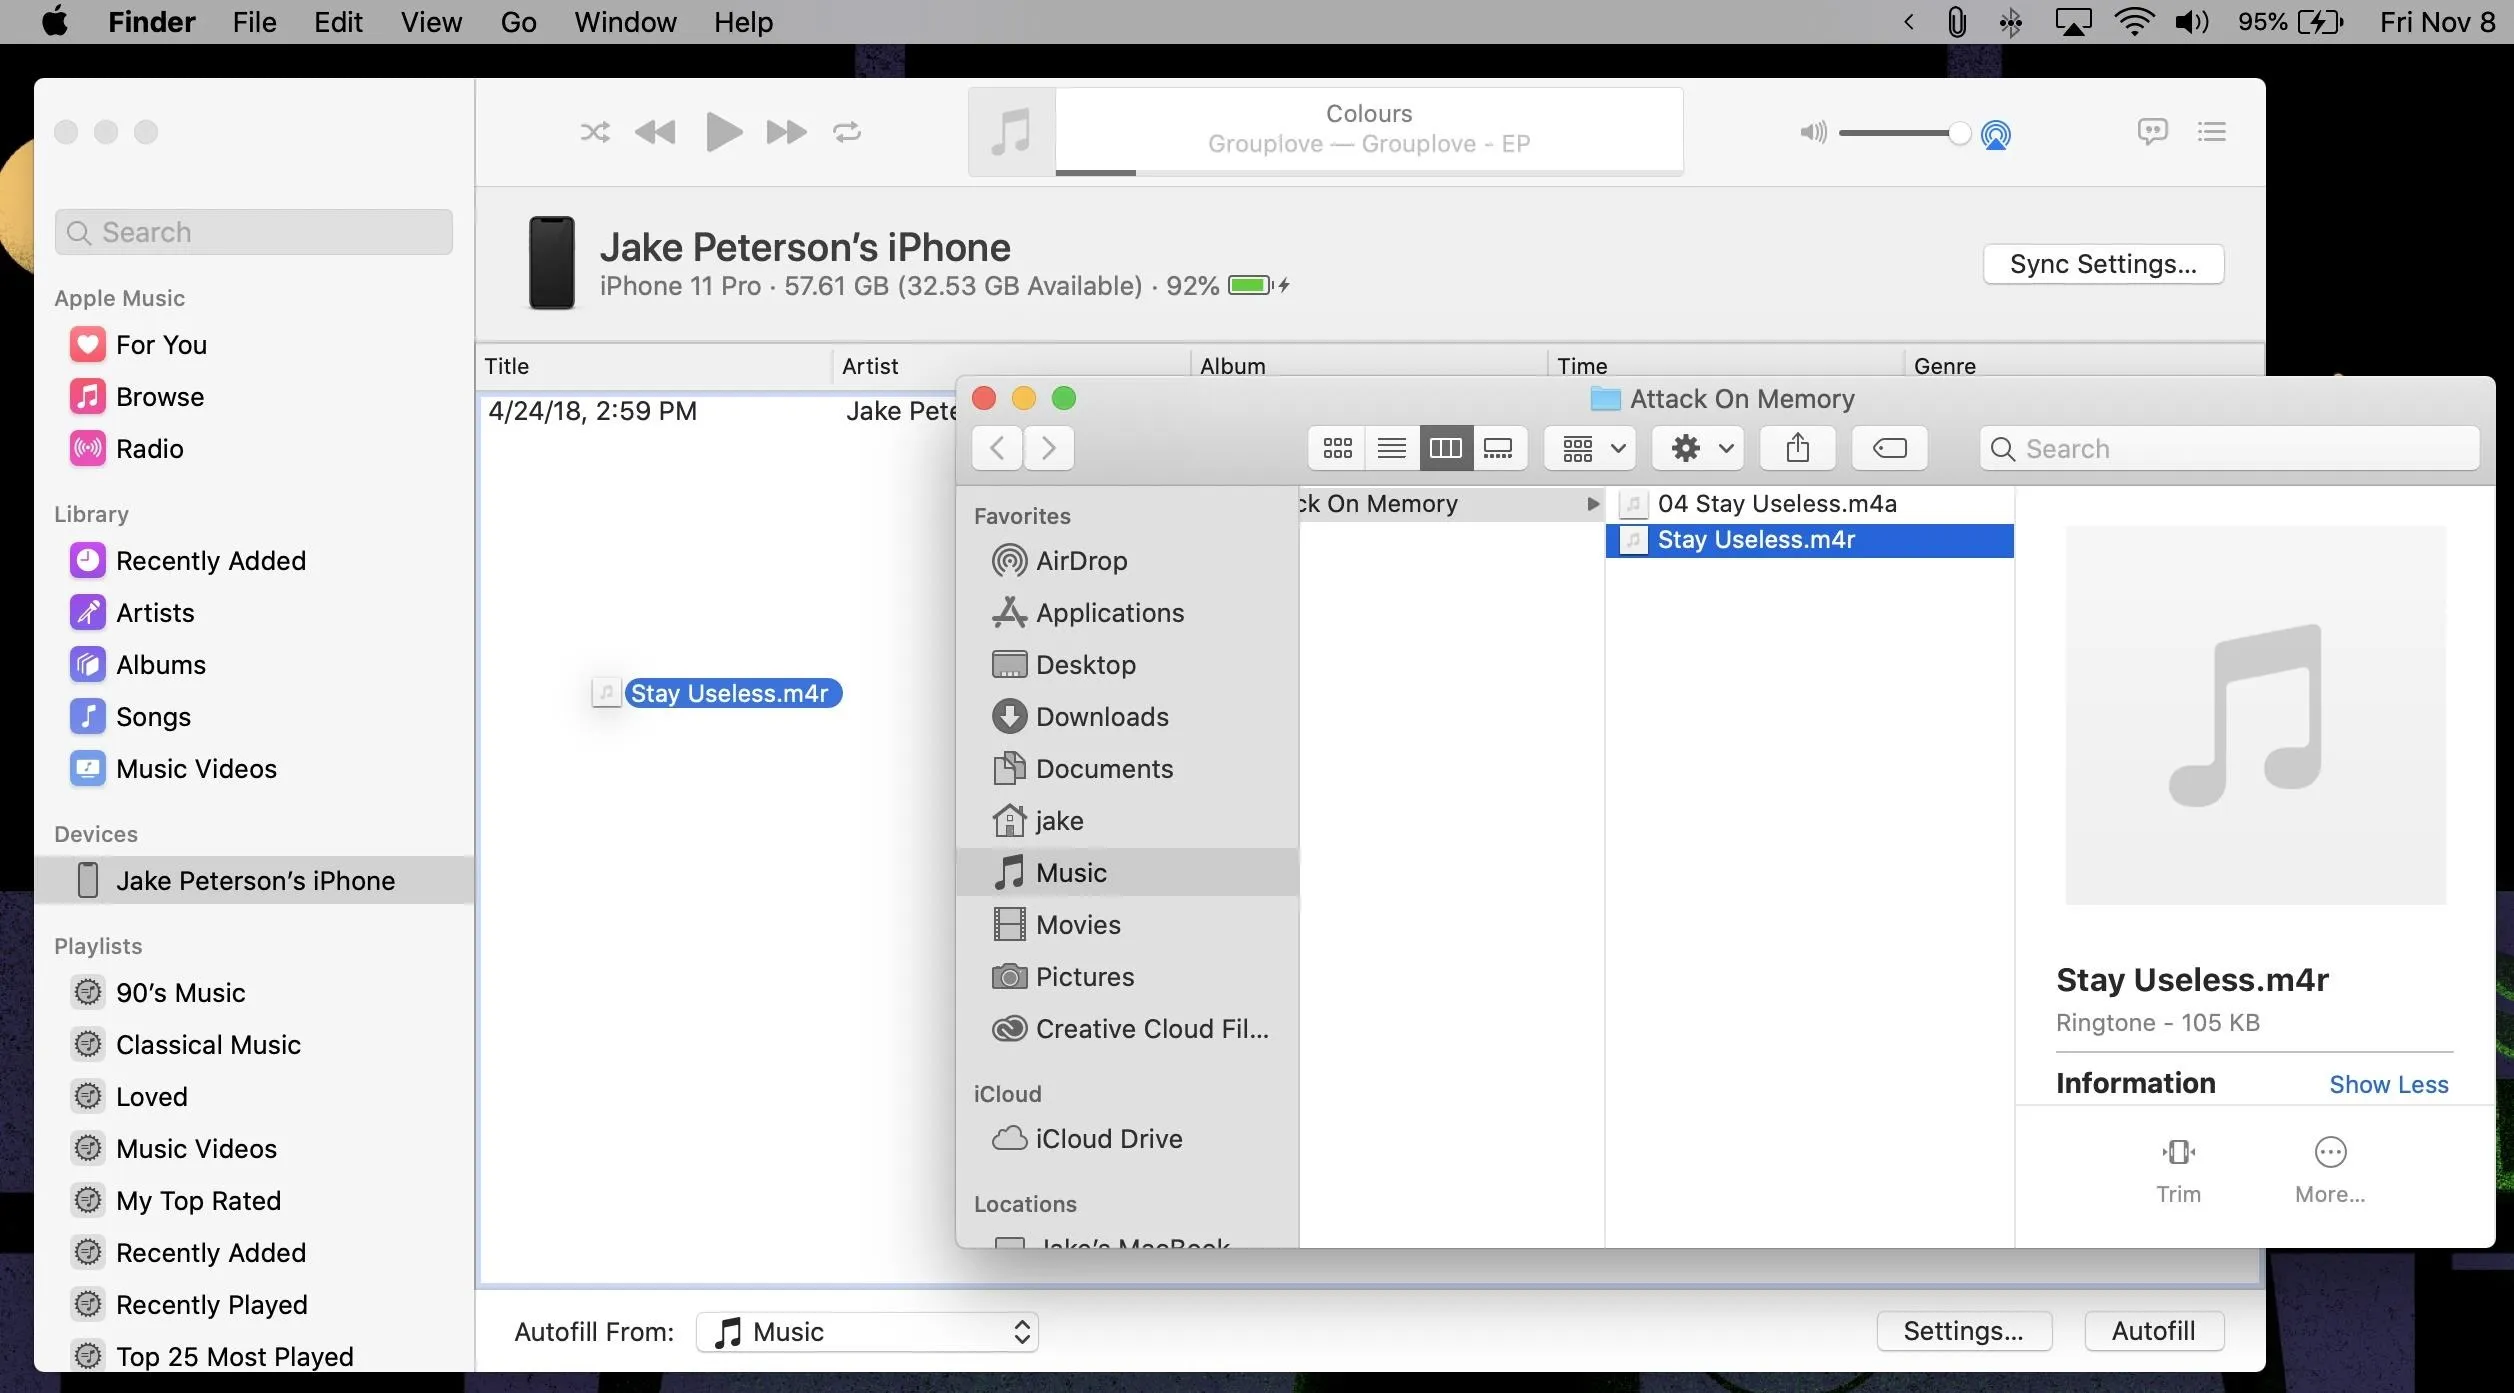
You can also accomplish this with Finder, as it takes over most of iPhone's syncing responsibilities in Catalina. Open Finder, then drag the file over your iPhone under Locations. If your iPhone doesn't appear here, pull it up in Music, then click "Sync Settings" to bring it up in Finder.

Set Your Text Tone on Your iPhone
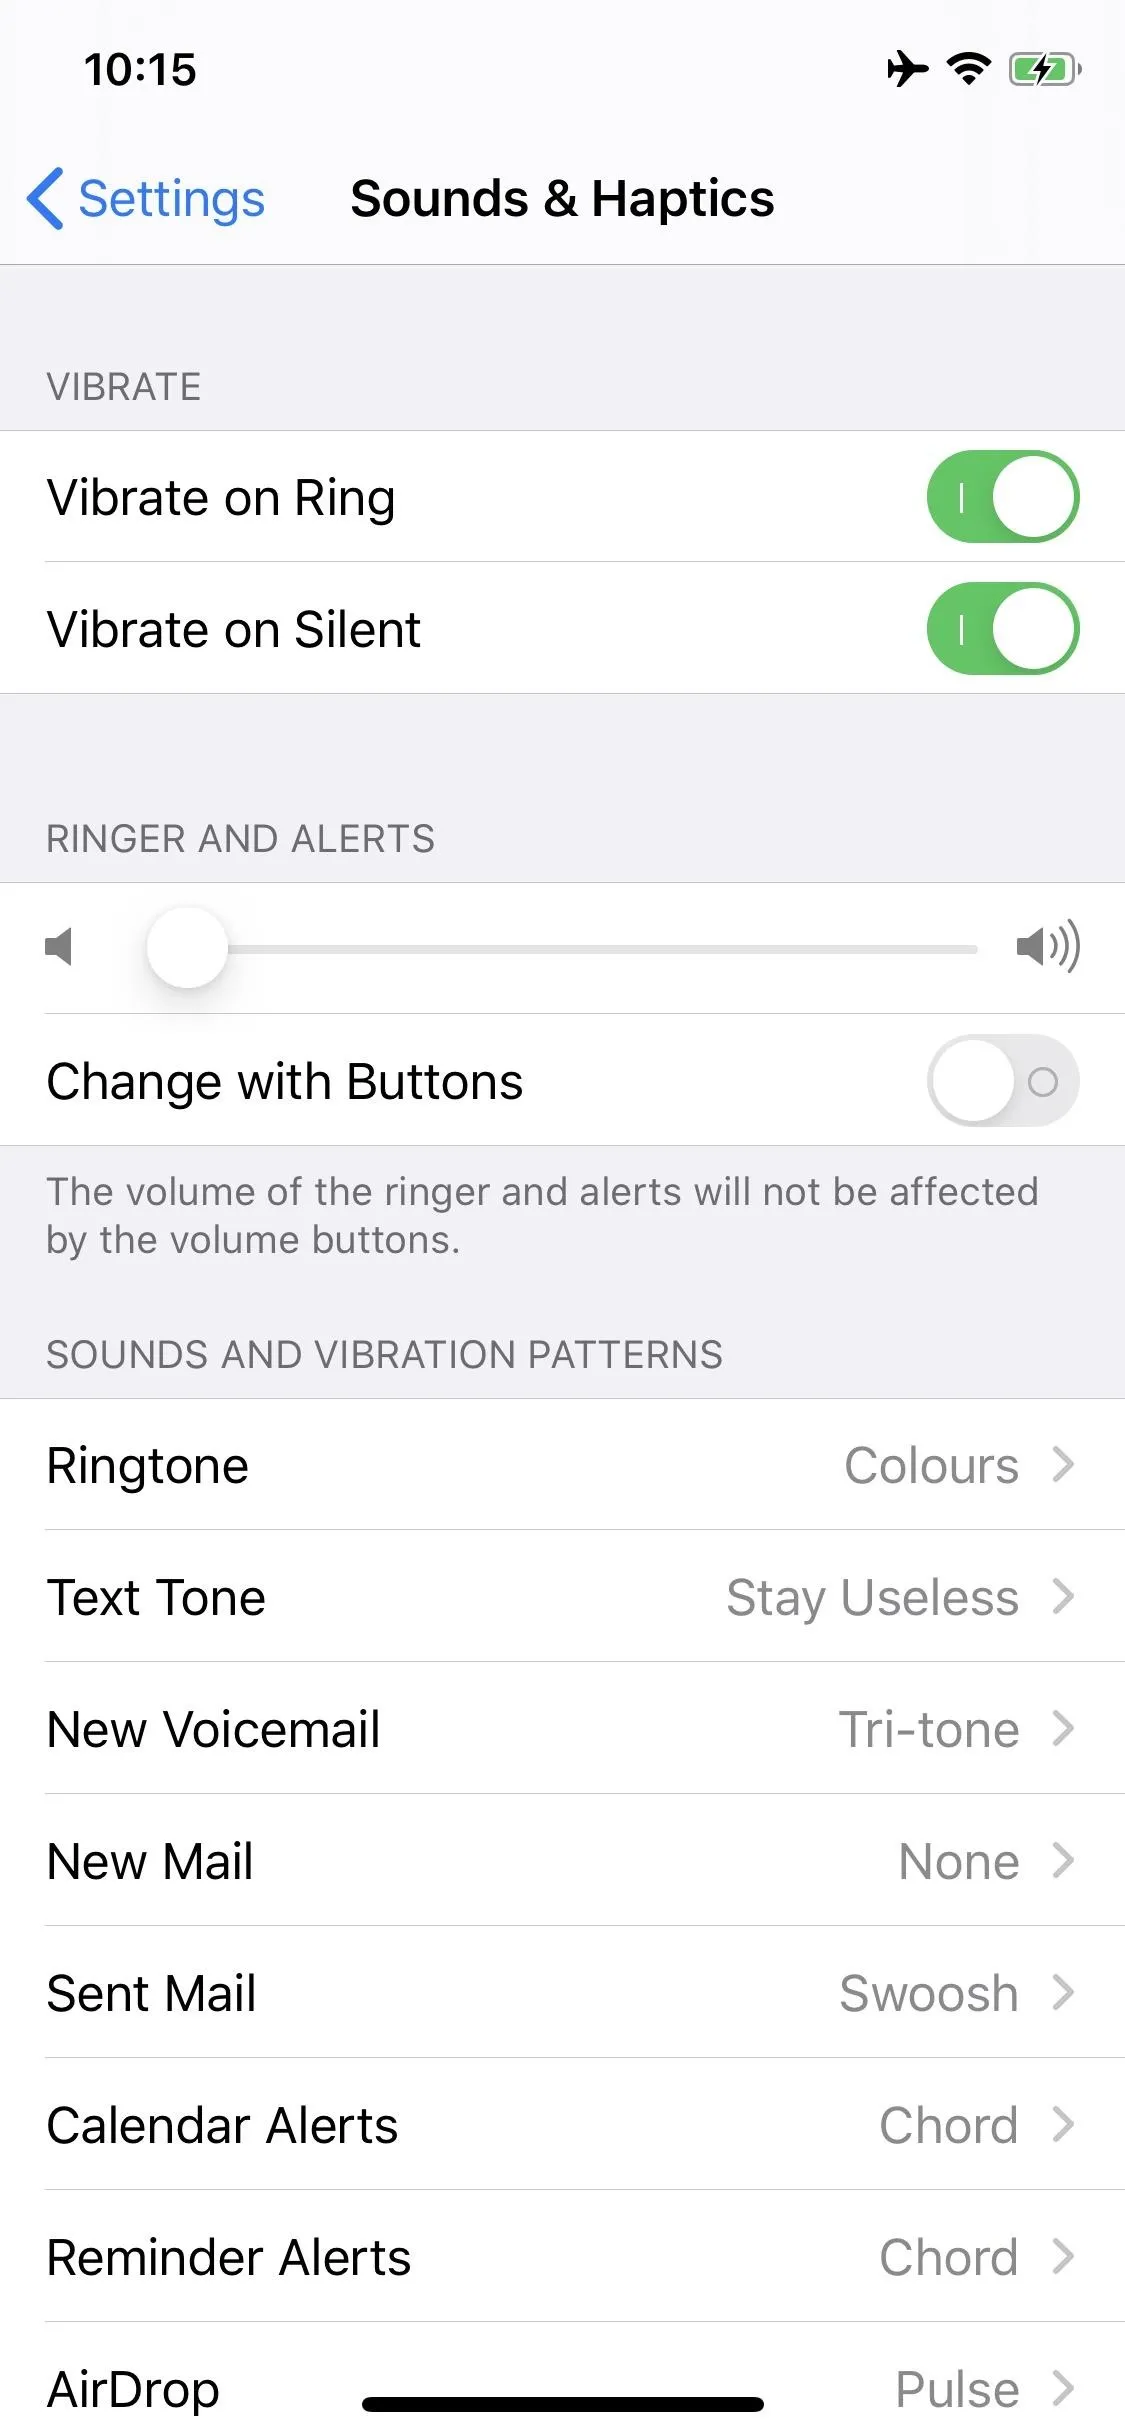
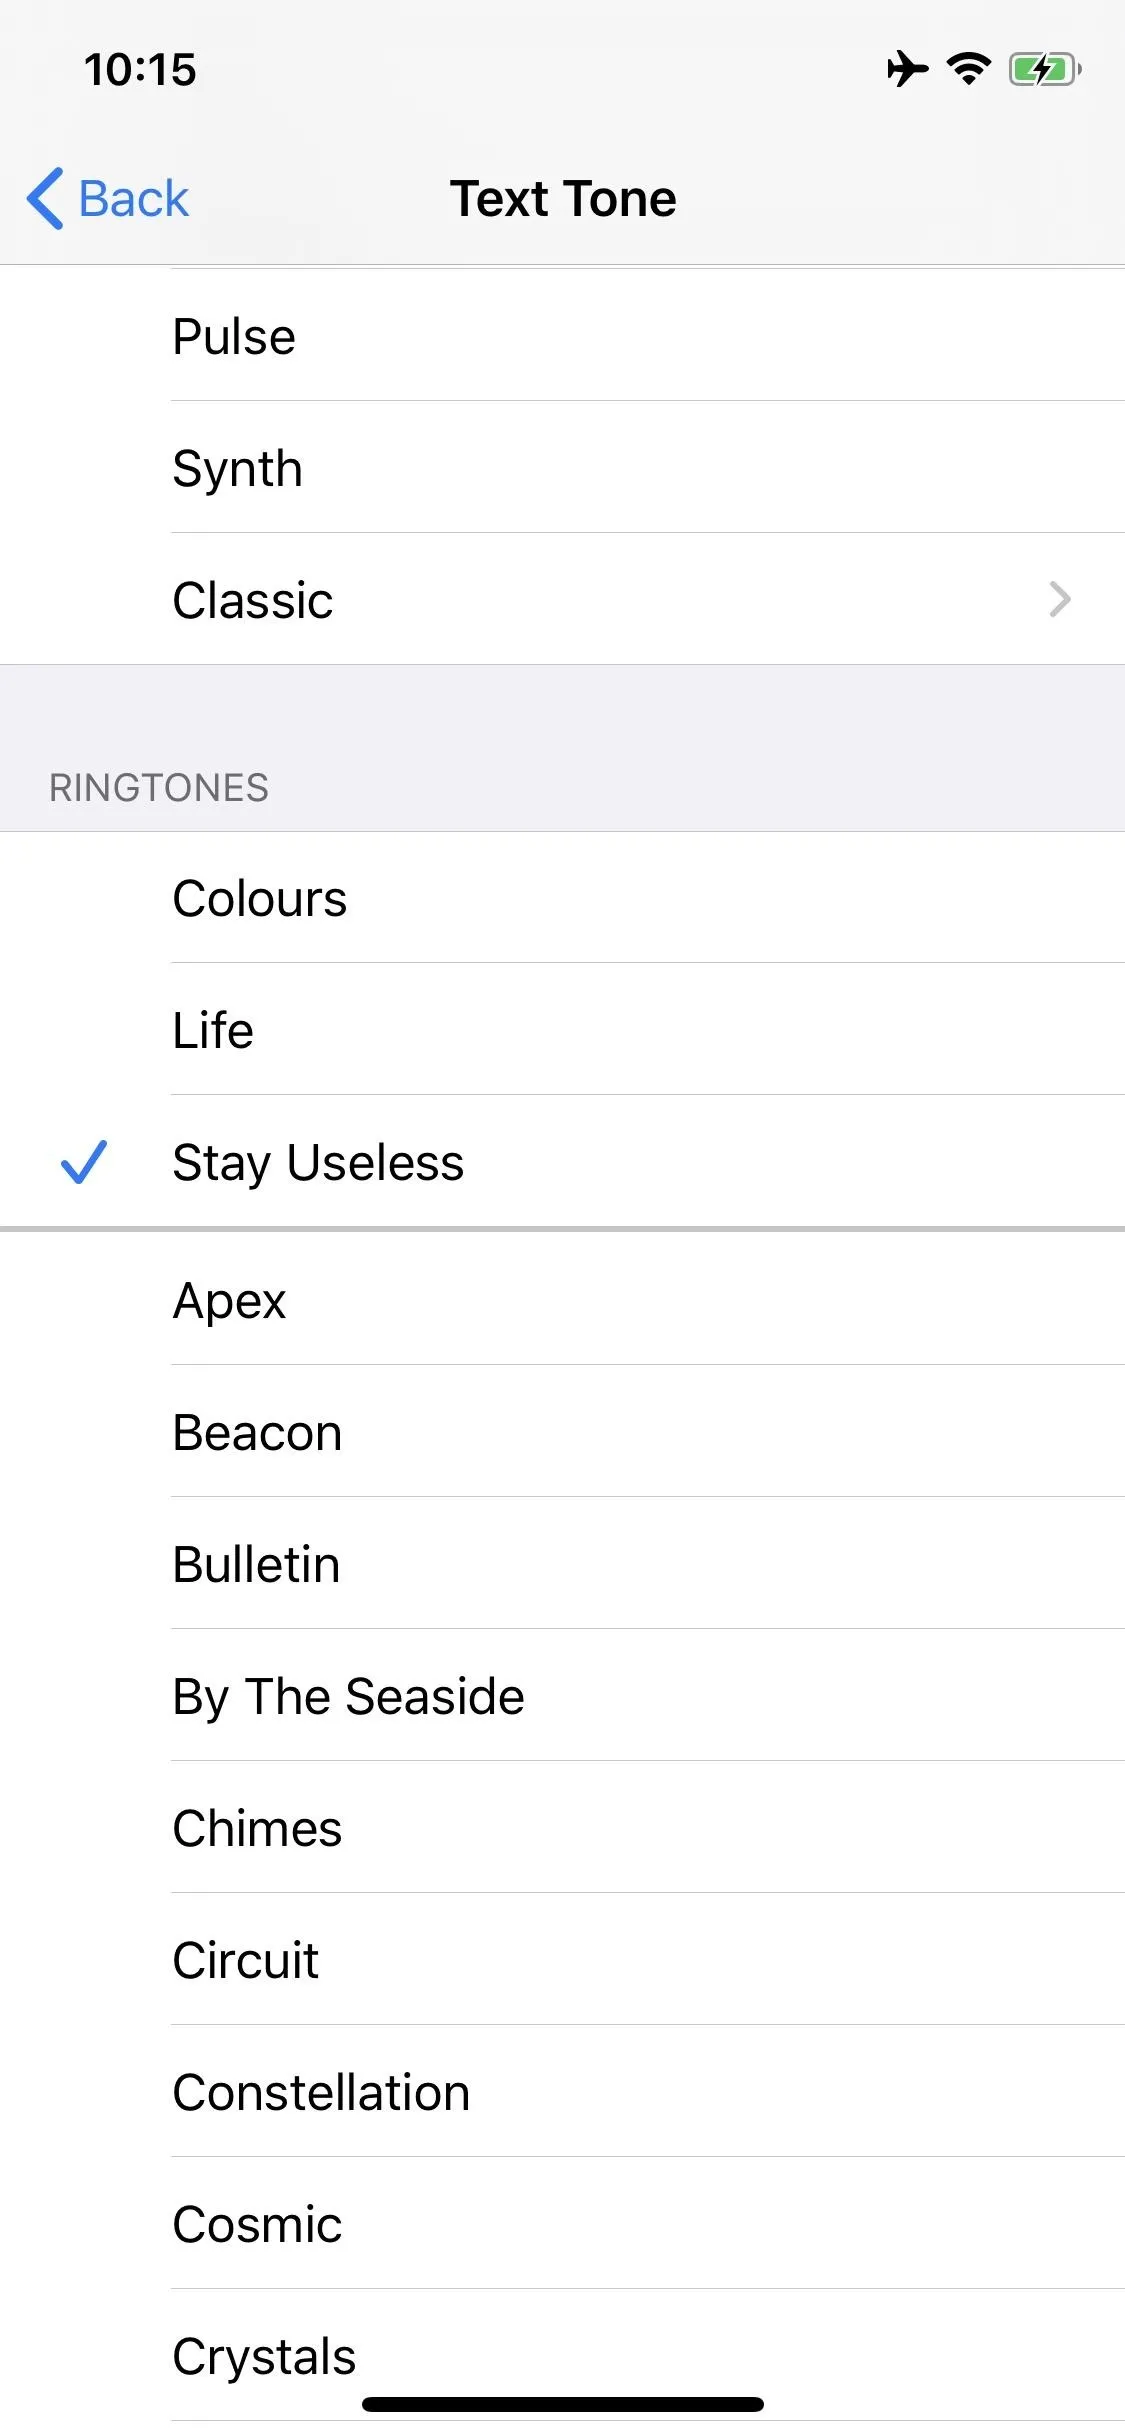
To find your new text tone, head to Settings –> Sounds & Haptics –> Text Tone on your iPhone. Apple being Apple, your text tone won't be sorted into Alert Tones where it clearly belongs. Rather, it will be placed above the Ringtones section. Apple has never offered us a way to distinguish between custom ringtones and custom text tones. Regardless, you can easily tap your option here to enable it for any alert type you want.
If you want, you can set this custom text tone for specific contacts. Open each contact page, choose "Edit," tap "Alert Tone," then select your custom sound.
Cover image and screenshots by Jake Peterson/Gadget Hacks


Comments
Be the first, drop a comment!