If your iPhone has a Home button, such as either iPhone SE model, old or new, then it has a secret triple-click gesture to activate a suite of shortcuts. These options, dubbed accessibility shortcuts, can work wonders for folks that are hearing impaired, have limited use of their hands, or have vision problems. Still, the shortcuts have plenty of everyday applications that everyone should know.
The built-in accessibility shortcuts are not enabled by default, which means it's up to you, as the user, to activate them. So triple-clicking your Home button won't do anything yet; you need to set these shortcuts up manually ahead of time before you can start clicking away. Let's check out what these shortcuts do and how to enable them in the first place.
Enabling an Accessibility Shortcut
In iOS 13 and later, to assign an accessibility shortcut to the Home button's triple-click gesture, start by opening "Accessibility" in Settings, then scroll to the bottom and select "Accessibility Shortcut." In iOS 12 and older, you'd get there via Settings –> General –> Accessibility –> Accessibility Shortcuts.
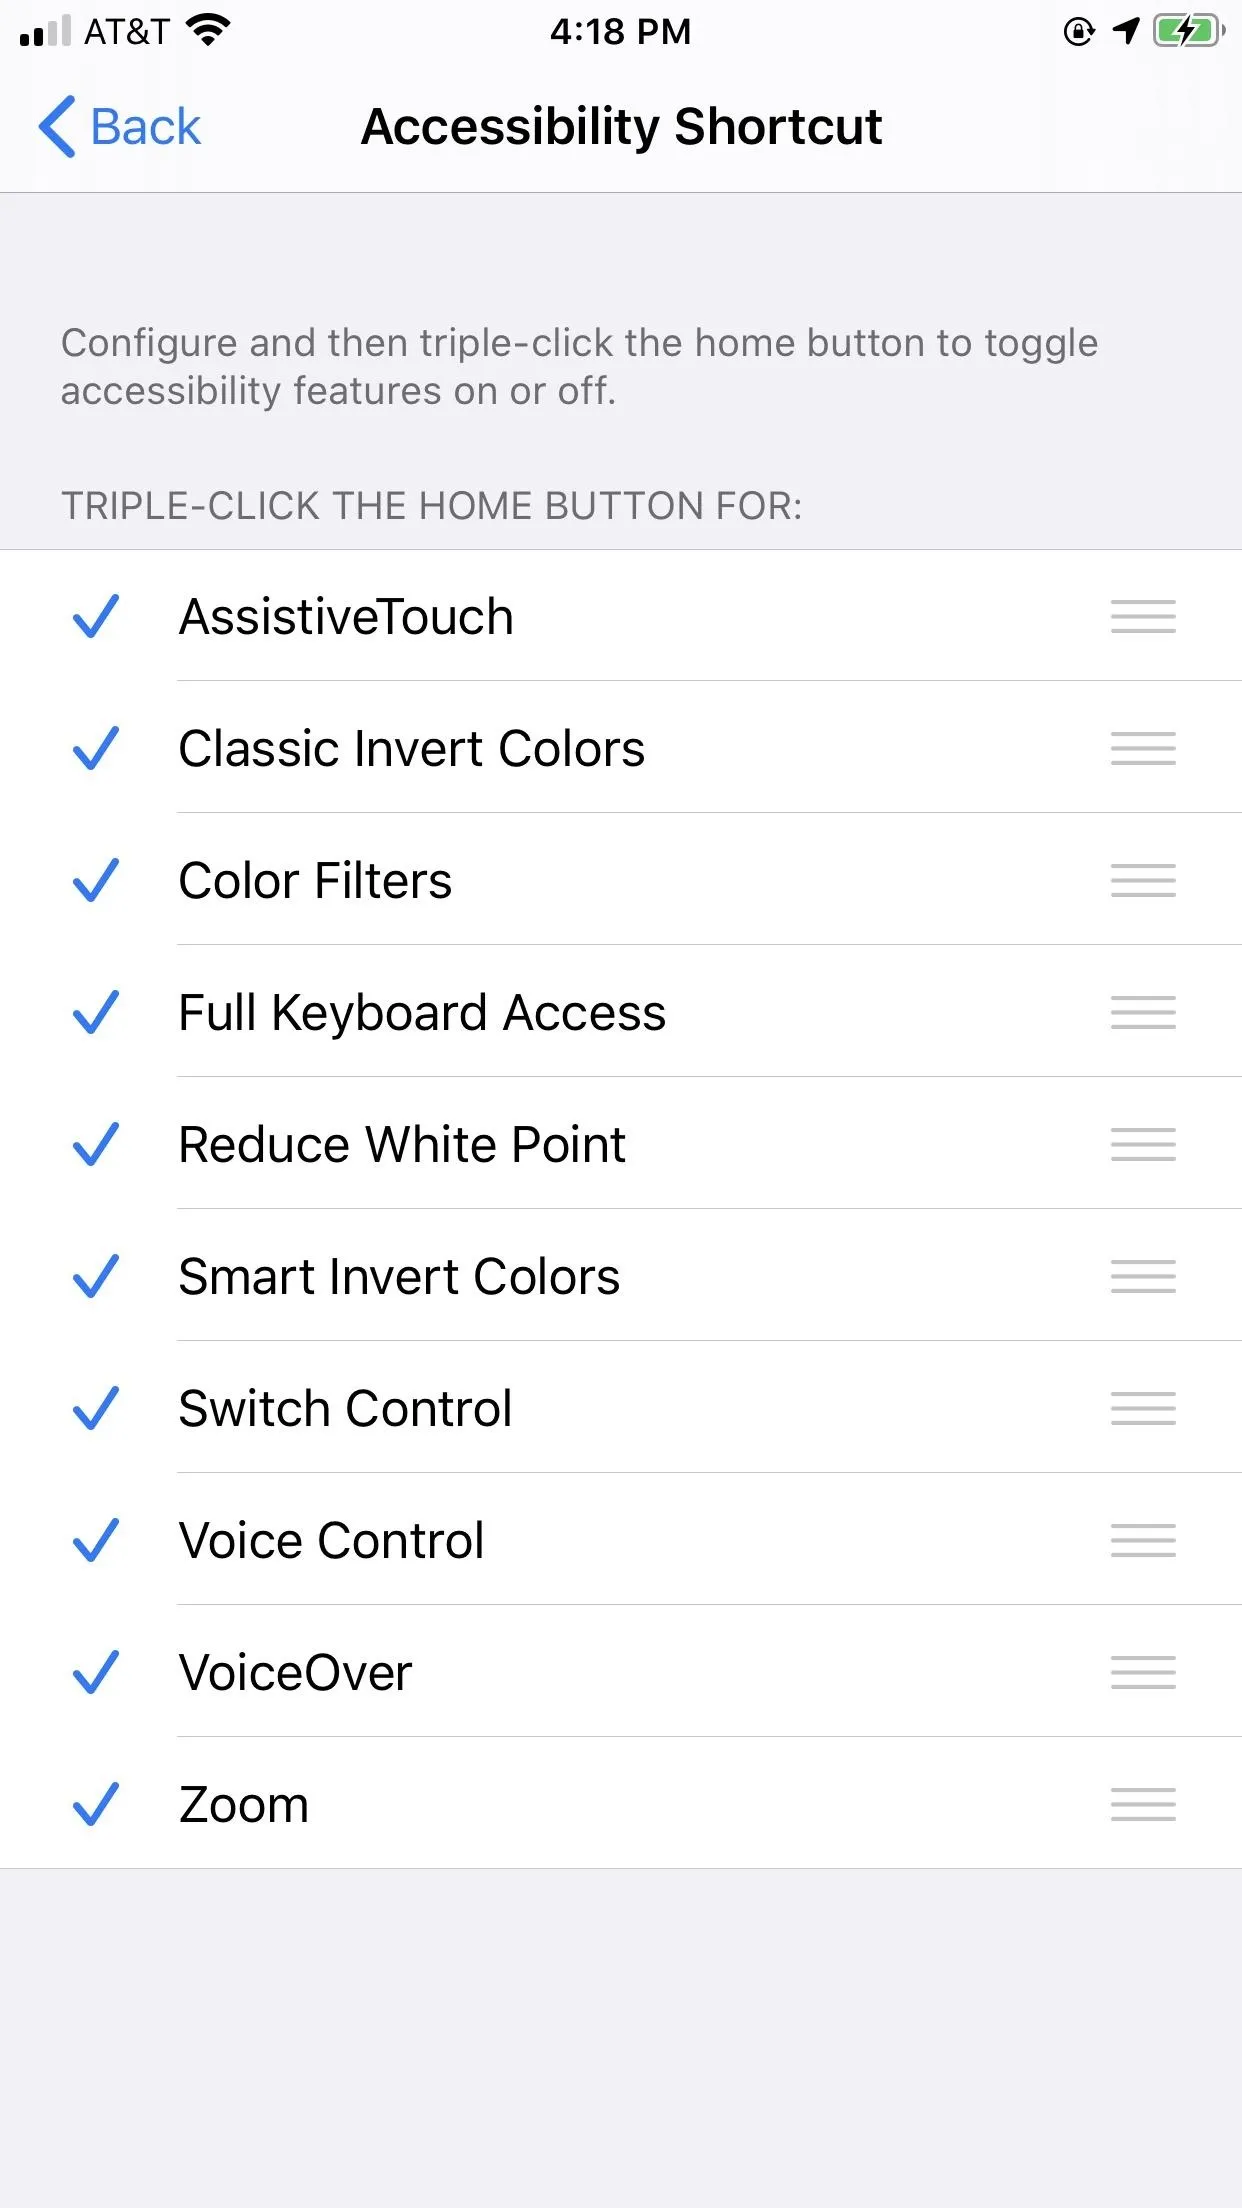
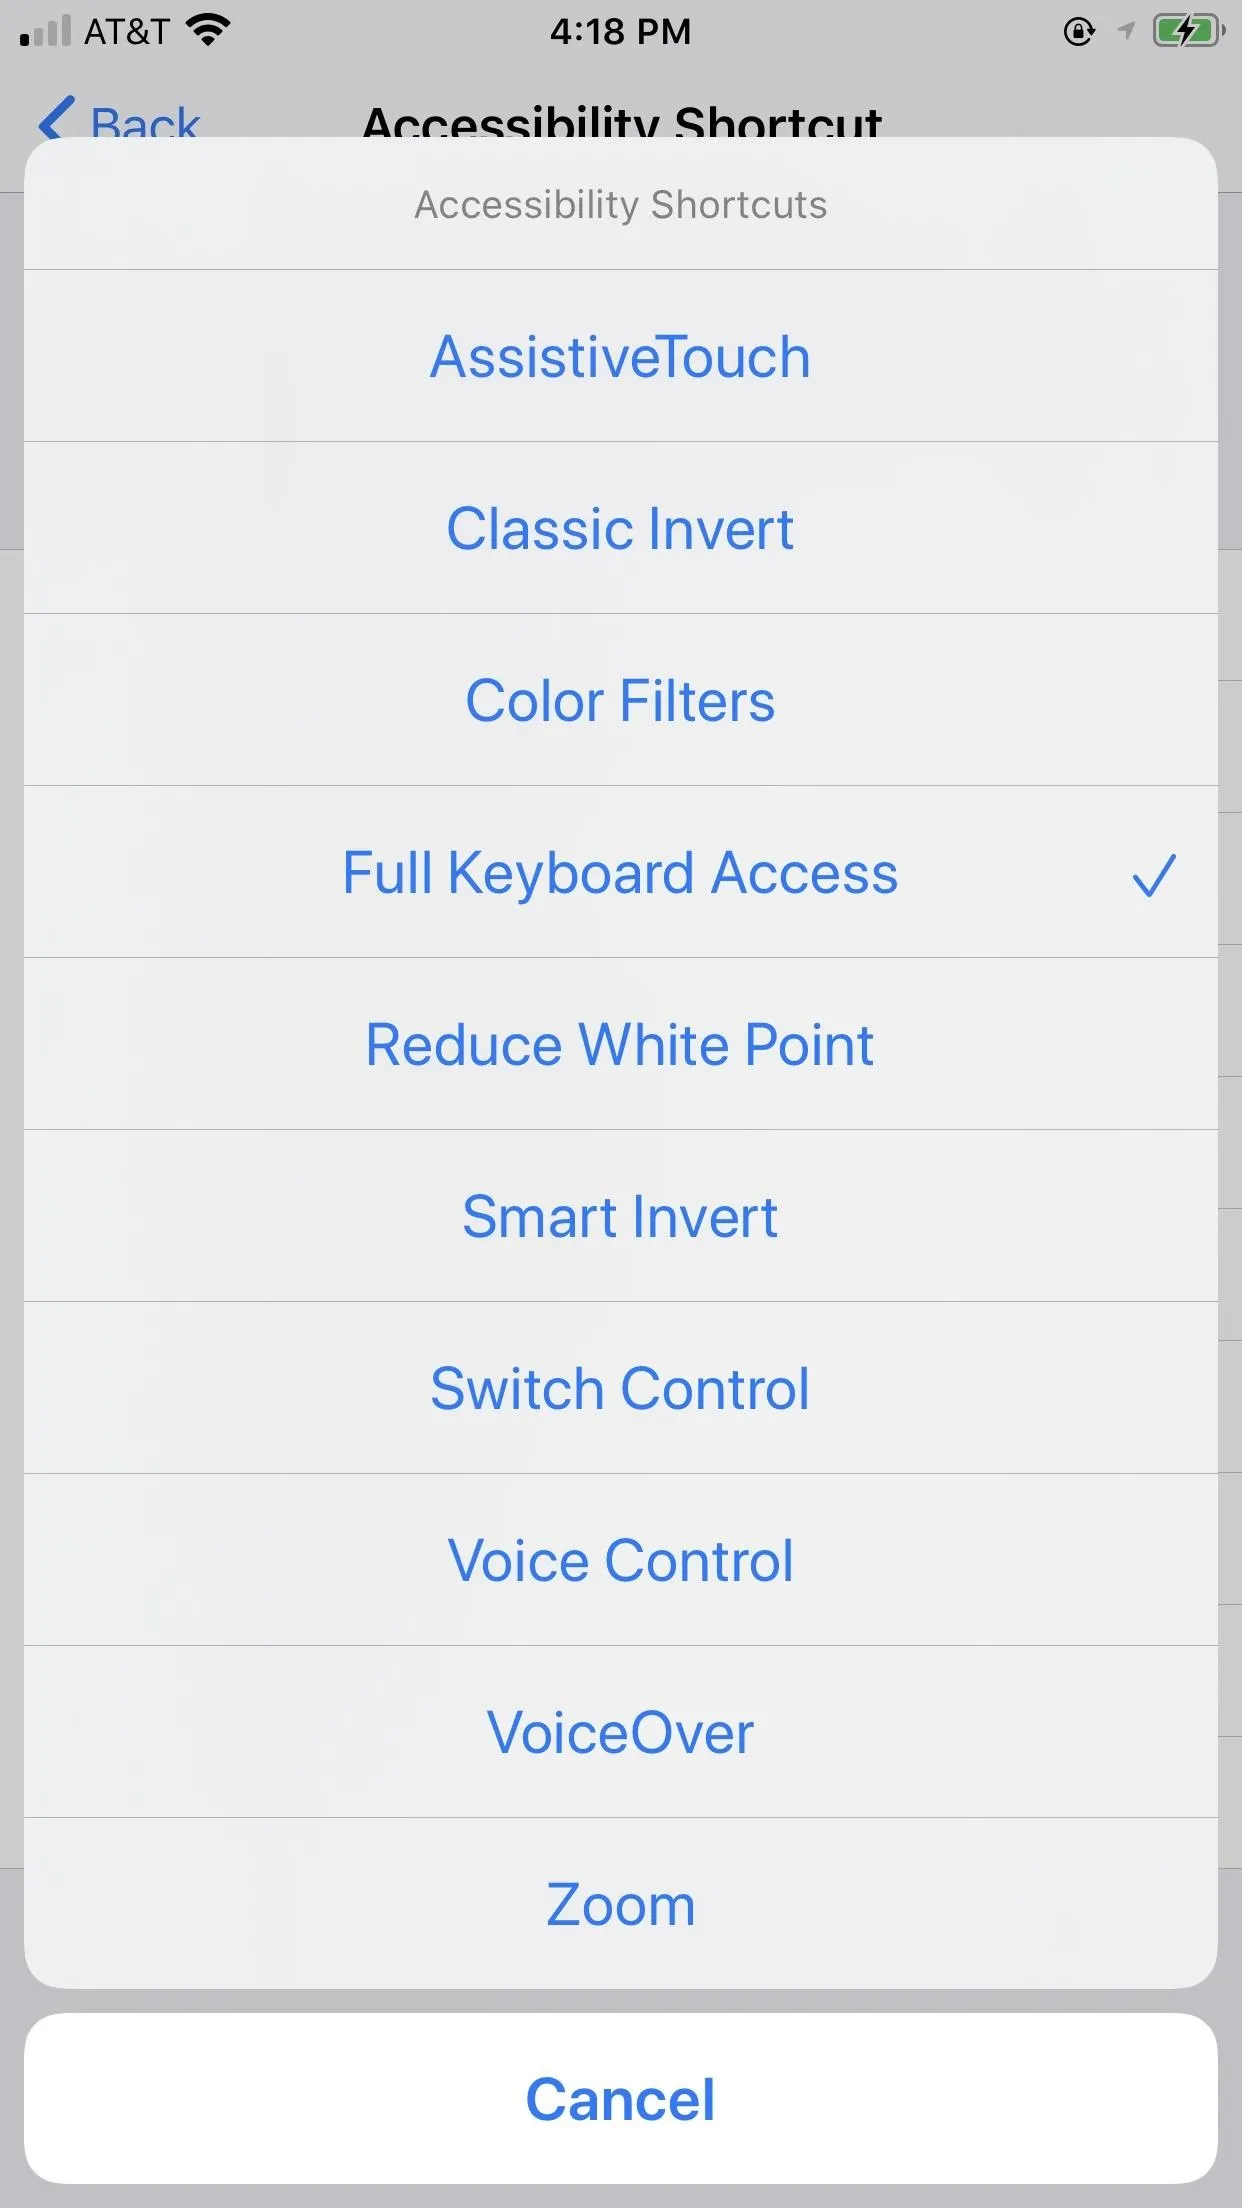
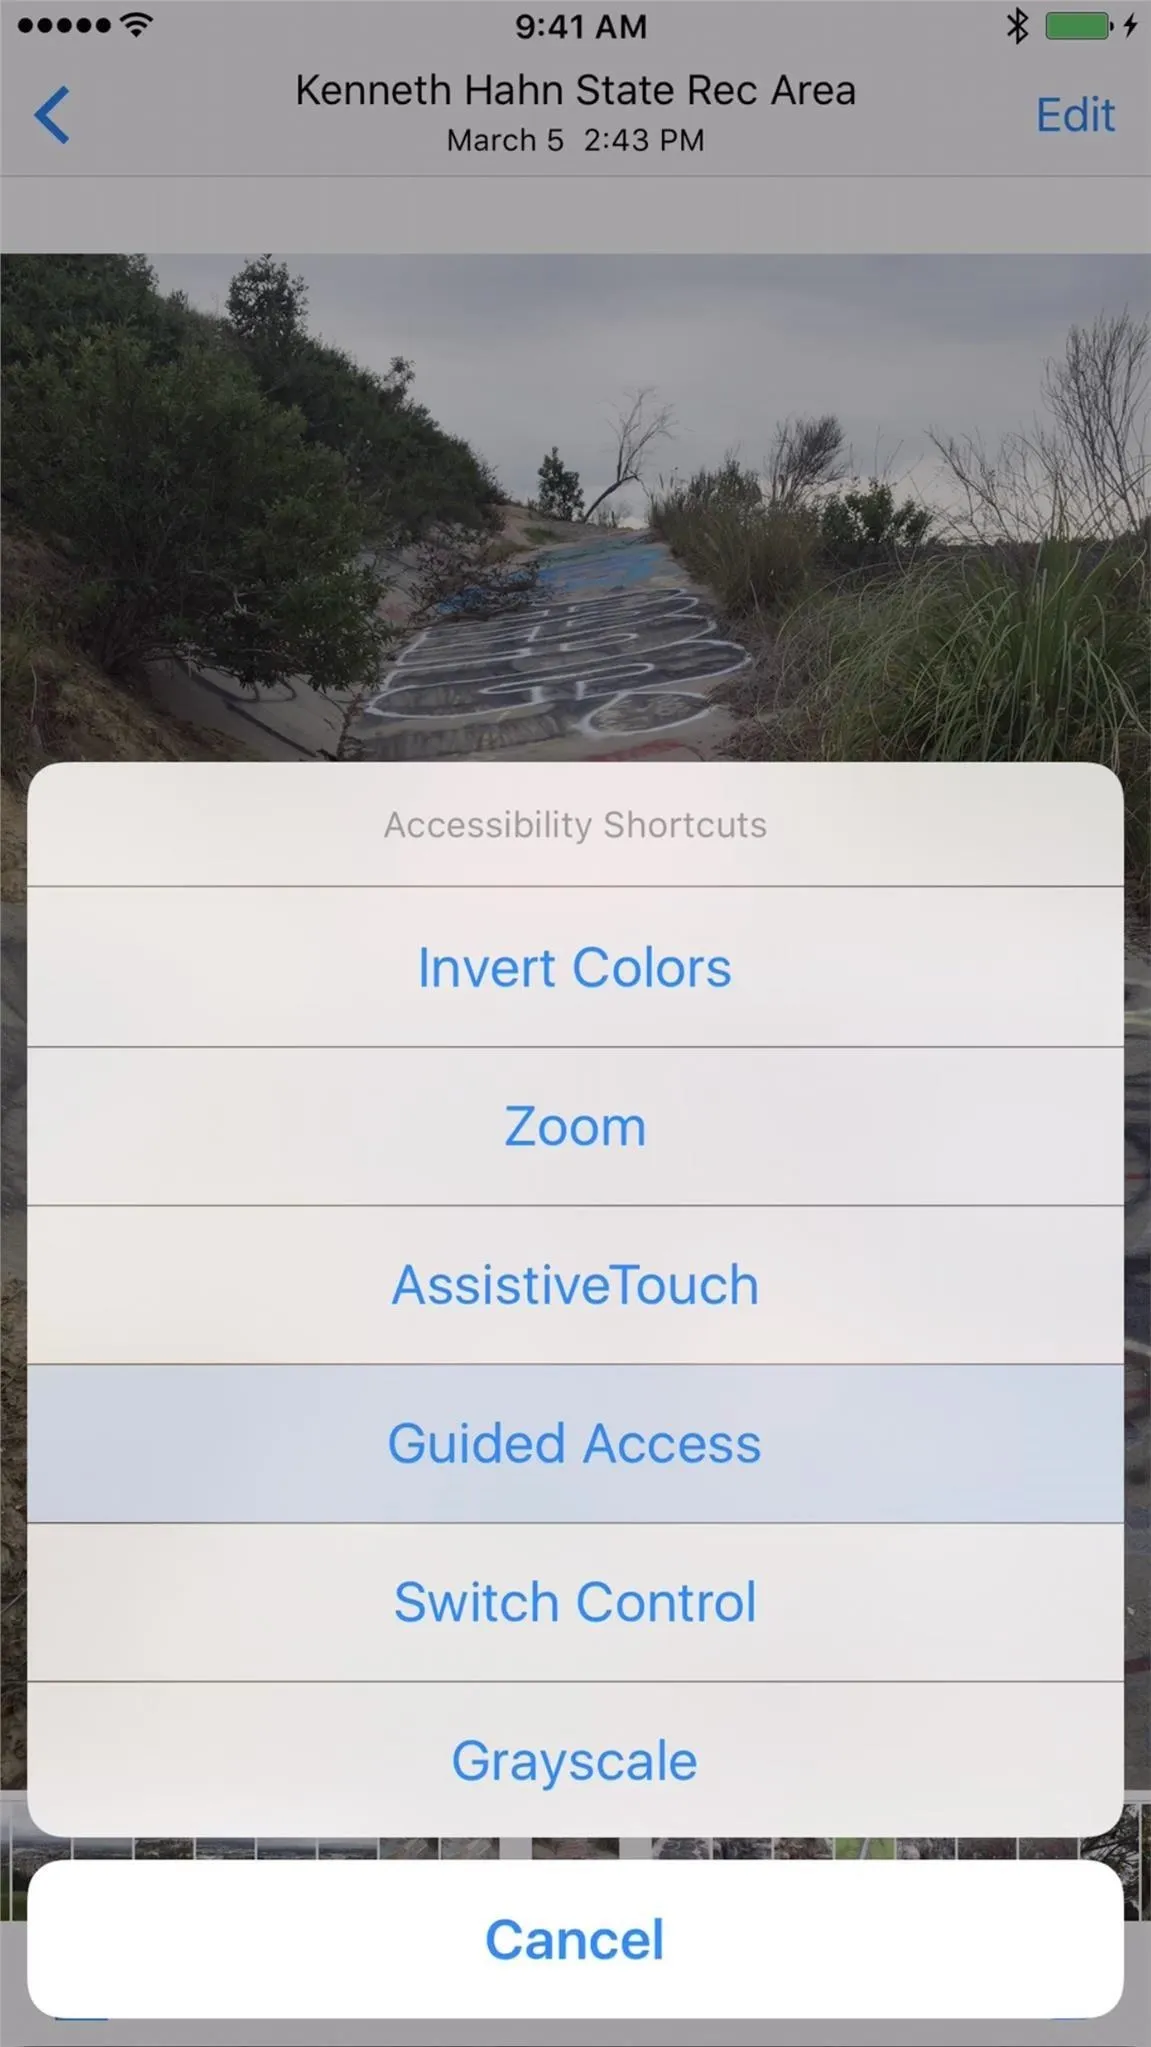
Now, use the following menu to select any shortcut you would like to control with a triple-click of the Home button. If you choose only one, that action will activate as soon as you triple-click your Home button. When you assign two or more, an action menu will appear on the screen first, where you have to tap the accessibility feature you want to use at that moment.
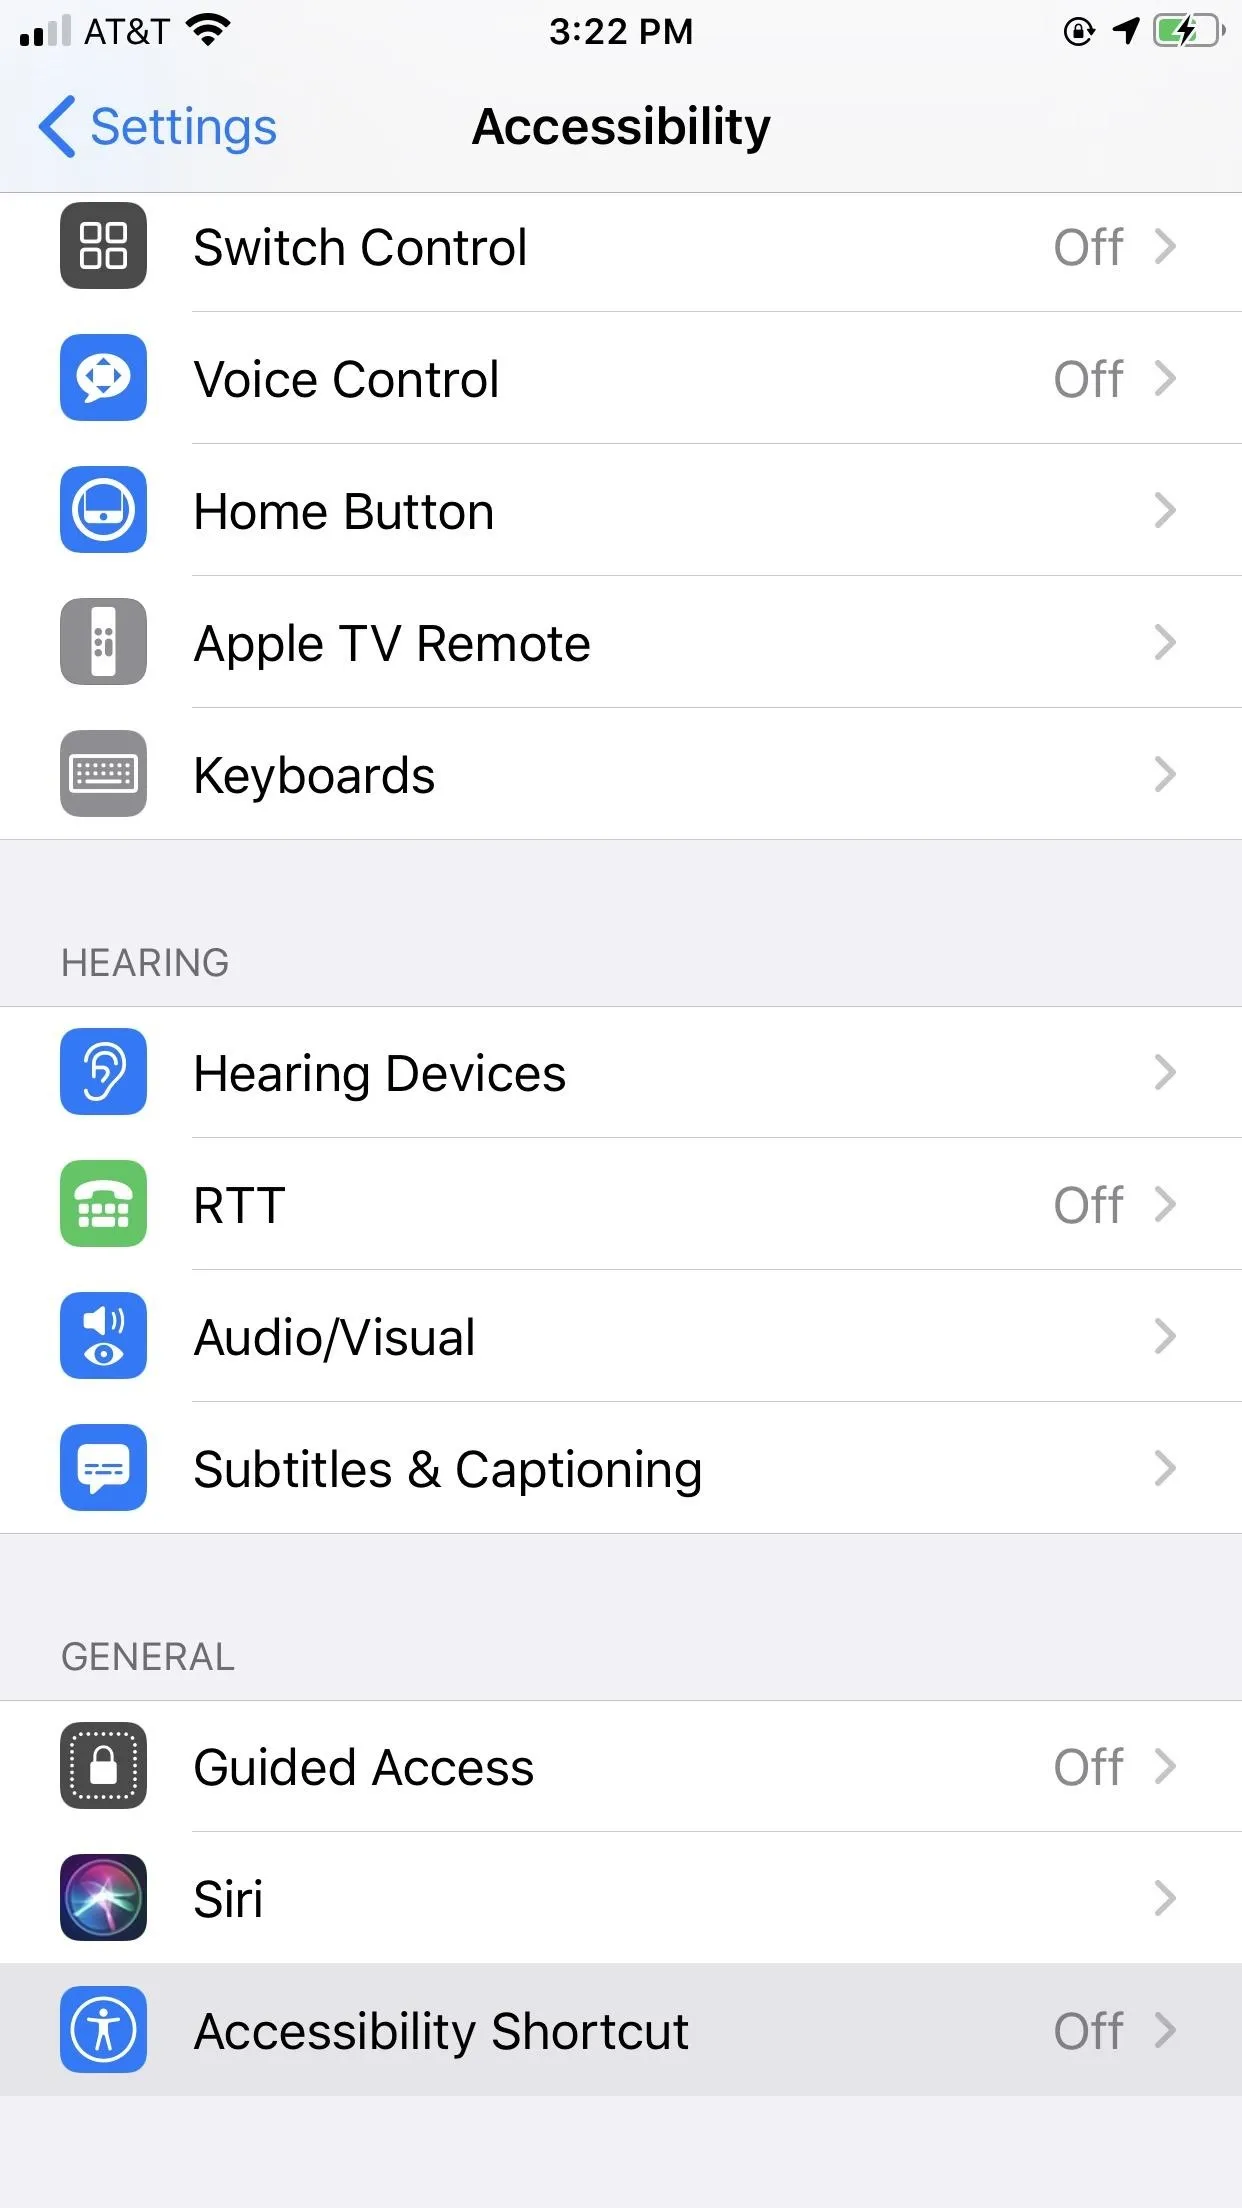
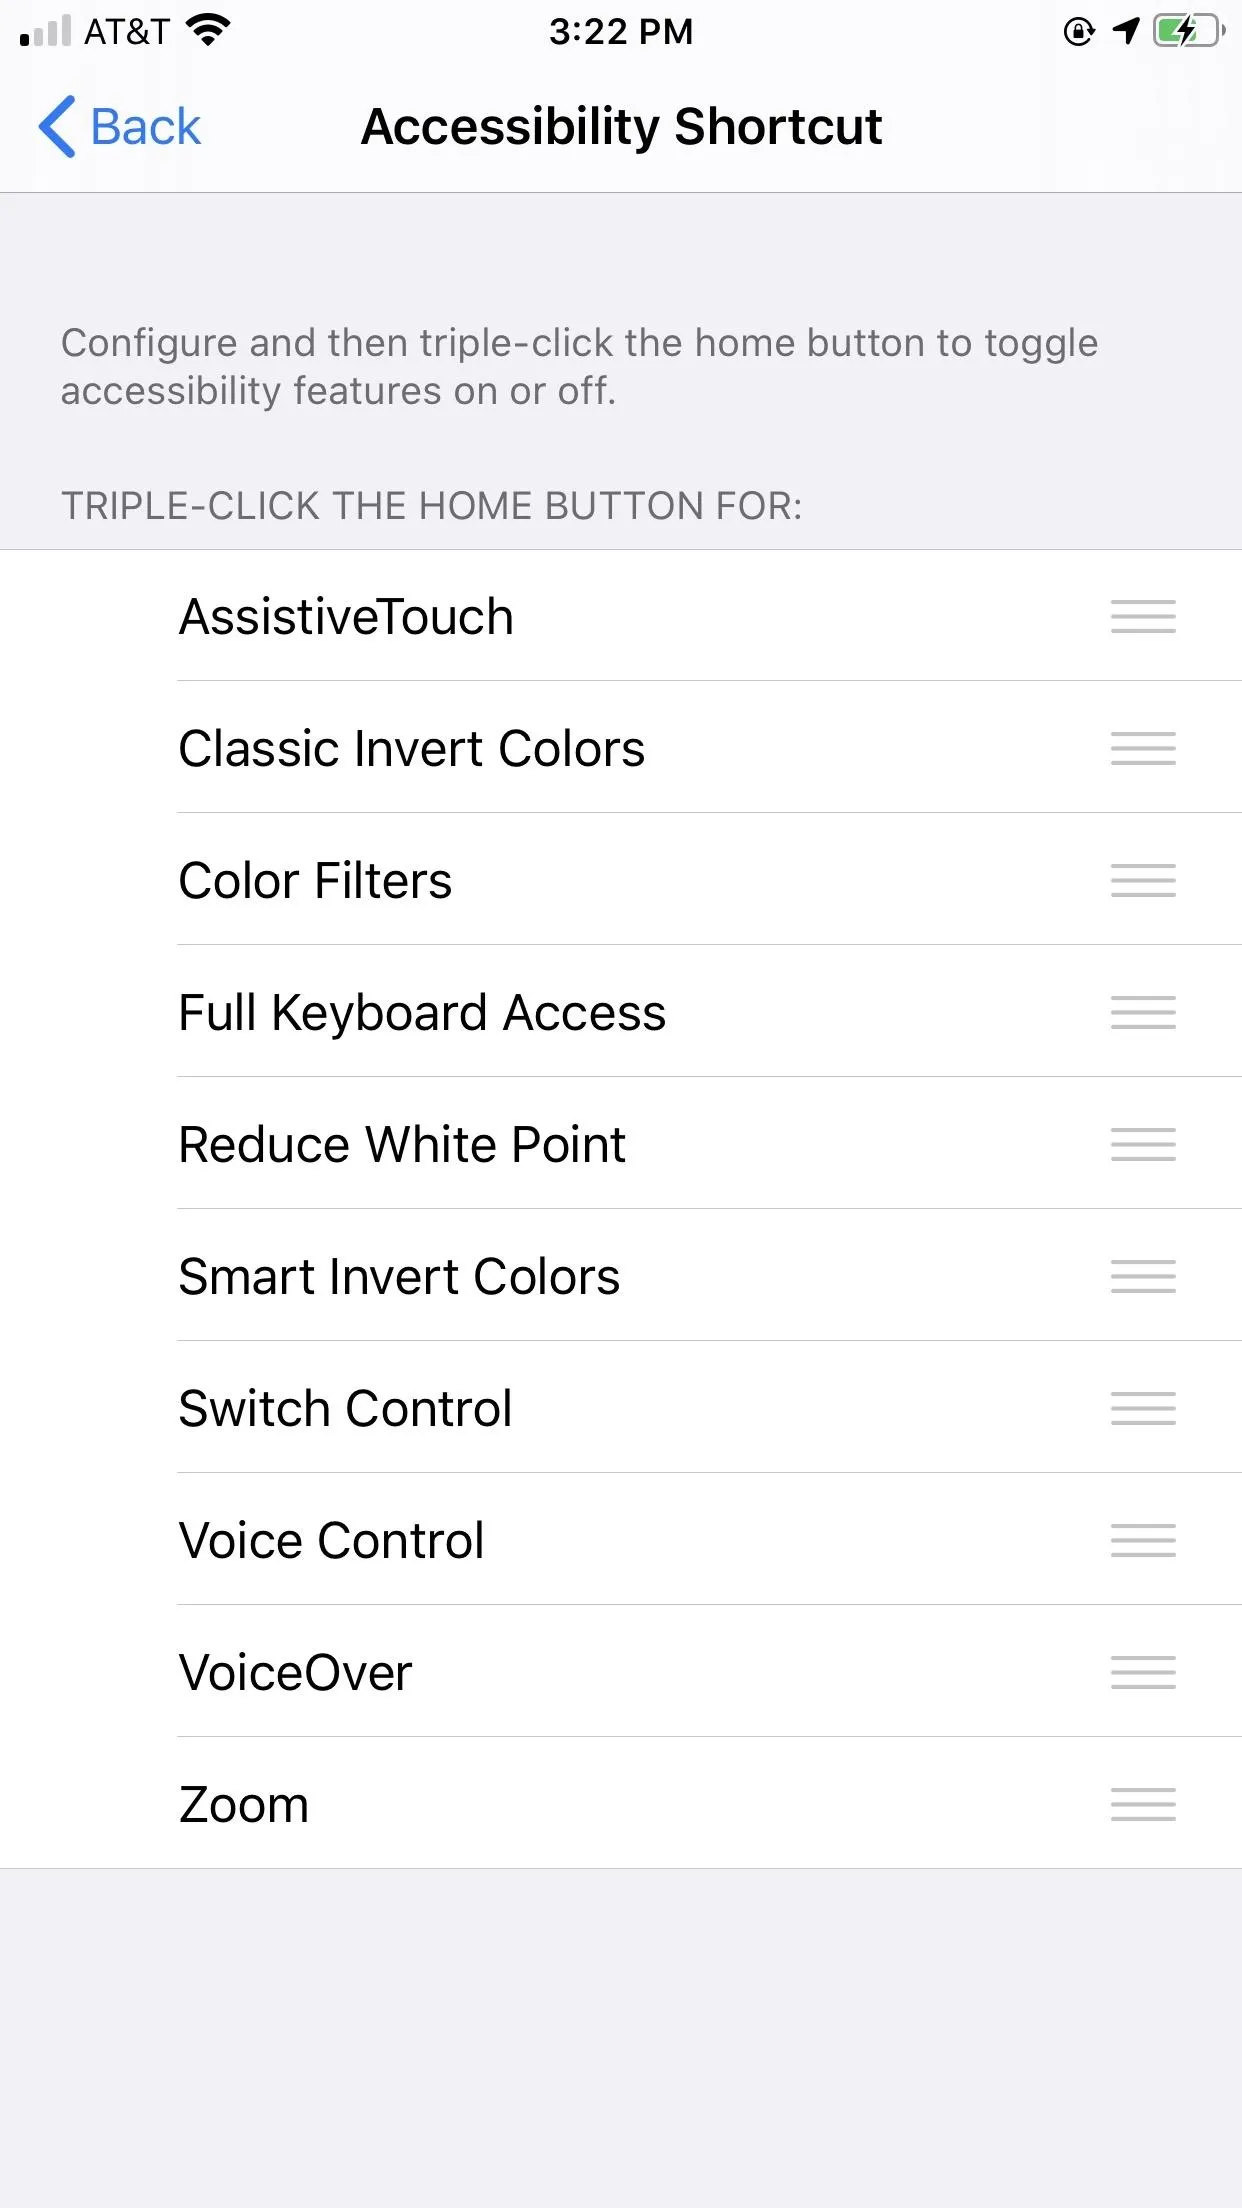


Turning off the accessibility shortcut via the Home button works the same; triple-click the Home button to either disable it right away or, if you assigned multiple features, bring up the actions menu so you can tap to disable the right one.
All of the Accessibility Shortcut Options Explained
If you're not sure what each accessibility feature is on the list of the Accessibility Shortcuts page, below is a quick breakdown of what each option will do for you. All options work across iOS 12 and iOS 13, unless otherwise noted as iOS 13 only.
- AssistiveTouch:adds a virtual Home button to your display, which does a whole lot more than simply go home, such as allowing you to restart your iPhone.
- Classic Invert Colors:turns all colors into their opposites (black to white, blue to yellow, etc.).
- Color Filters:adds a color filter to your display (e.g., turns the whole screen blue, red, etc.).
- Full Keyboard Access (iOS 13 only): allows you to control your iPhone with nothing but a connected keyboard.
- Reduce White Point:lowers the intensity of white colors, effectively reducing the brightness of the display.
- Smart Invert Colors:reverses the colors of the screen, except for images, media, and apps that use dark colors.
- Switch Control: lets you control your iPhone via an automated cursor.
- Voice Control (iOS 13 only): allows you to control virtually any part of your iPhone with just your voice, and you can even restart your iPhone using it.
- VoiceOver:reads aloud areas of the display in case you can't see it.
- Zoom: allows you to magnify your entire screen (which comes in handy for lowering screen brightness below the set default), in addition to other visual accessibility aids.
- Guided Access: see below.
- Magnifier: see below.
Enabling Multiple Accessibility Shortcuts at the Same Time
Thankfully, iOS doesn't take an all-or-nothing approach with its accessibility shortcuts, which means you can choose to have multiple shortcuts triggered by the triple-click Home button gesture. We've already mentioned it above, but to reiterate:
Select as many of the shortcuts as you'd like from the Accessibility Shortcut menu. Then, when you triple-click your Home button, you'll see an action menu asking which accessibility feature you'd like to launch. Just select the function you'd like to use, and when you're done, triple-click your Home button again and toggle the feature off.


Apple's 'Hidden' Accessibility Shortcuts
While we covered all of the options Apple lists as accessibility shortcuts above, there are technically two more shortcuts out there that Apple doesn't highlight always. Once you enable them, they will show up in the list, only grayed out. That's because you can only enable or disable them as triple-click shortcuts from their respective settings, not from the Accessibility Shortcuts settings page.
1. Guided Access
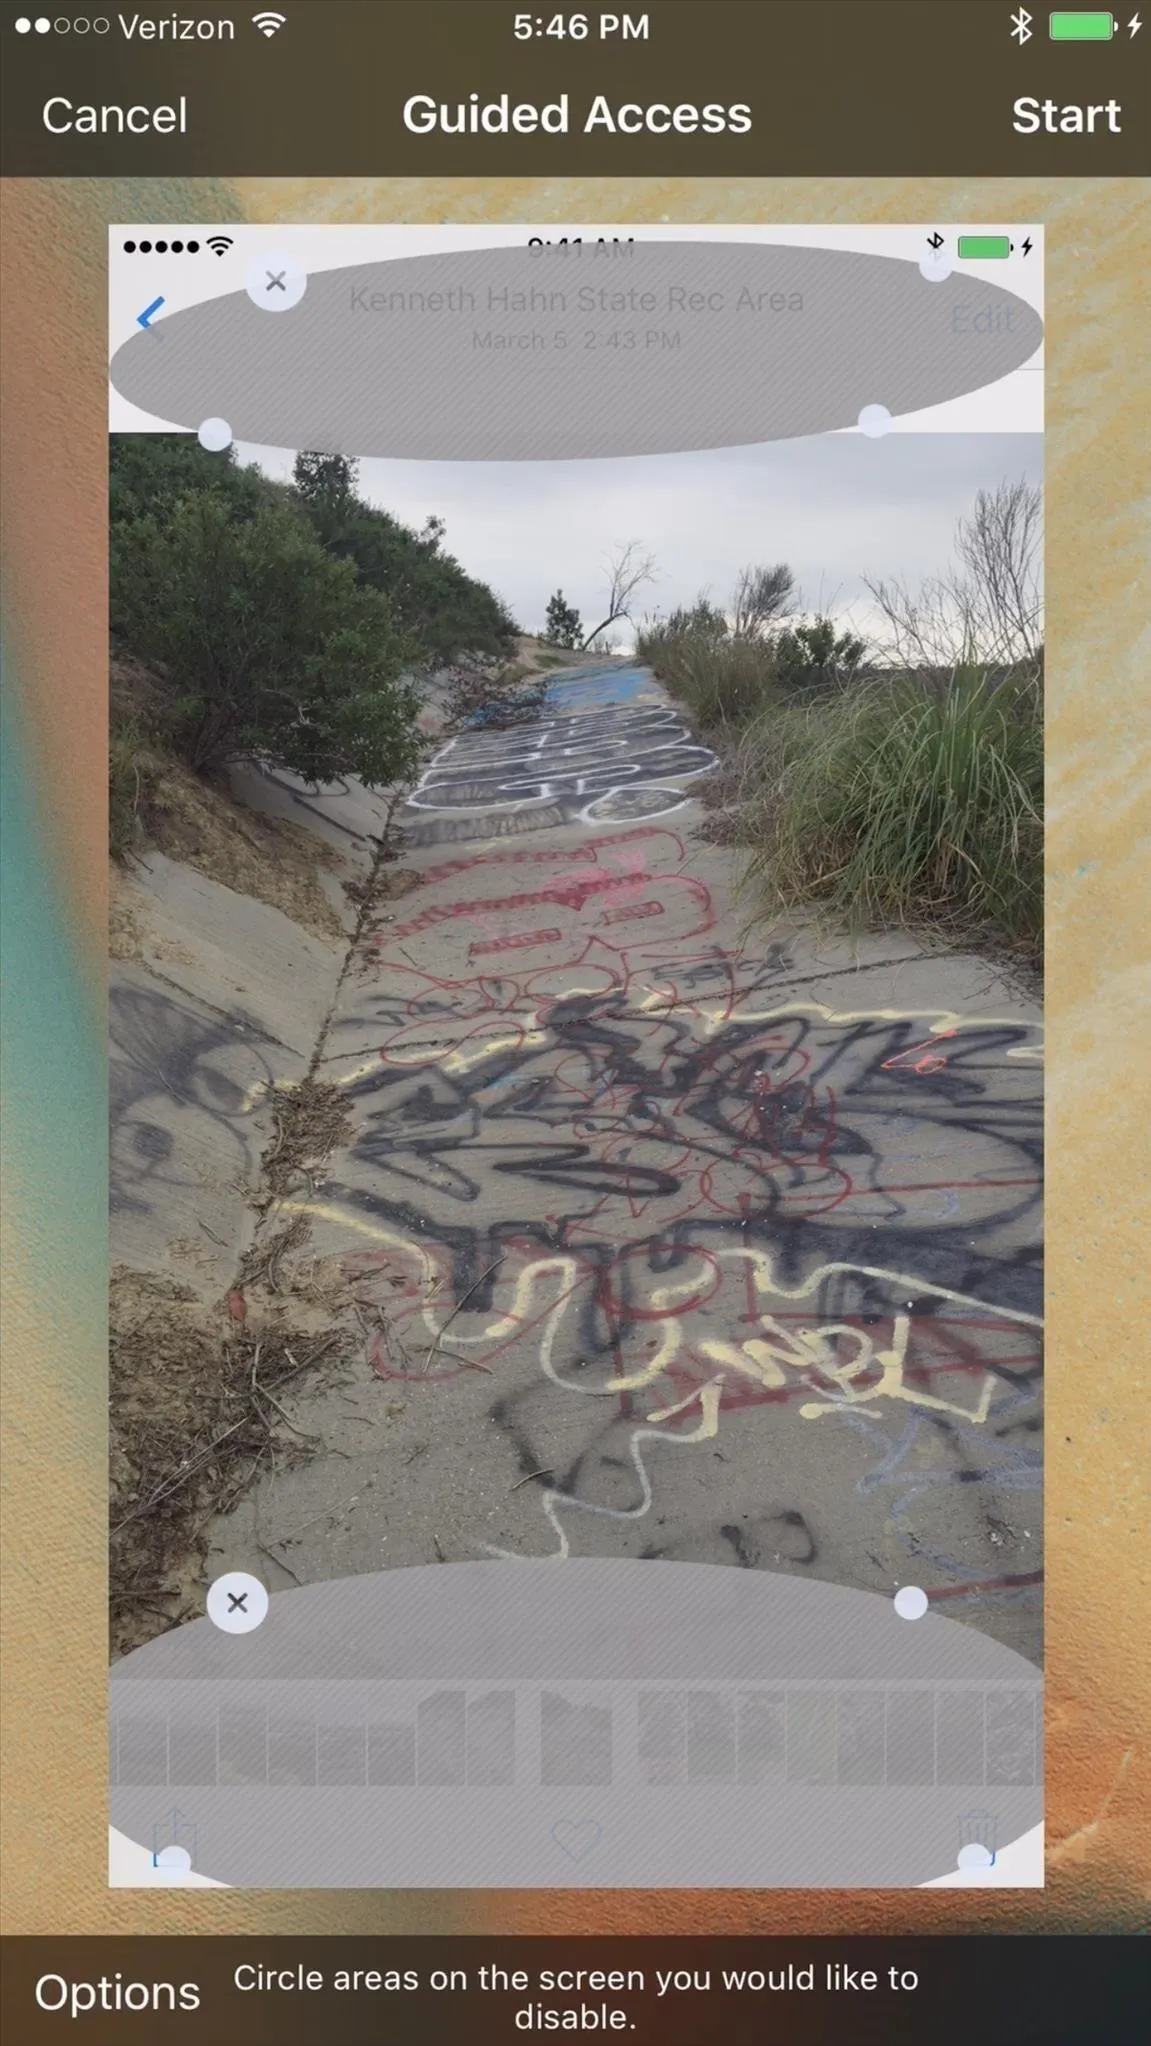
Guided Access is your iPhone's secret weapon against friends and family swiping where they shouldn't. When you show someone a photo on your iPhone, there's always the risk that they'll pretend the phone is theirs and start looking through everything. I can't imagine anyone liking that invasion of privacy, and Guided Access can ensure it doesn't happen.
How? Guided Access allows you to choose which of your iPhone's functions and which areas of its display are interactive. Any areas you don't set as interactive are then dead zones — no matter how much friends and family try to swipe, go home, or put your iPhone to sleep. Guided Access can put a stop to it all until you enter your passcode and restore things to normal.
Justin Meyers/Gadget Hacks
Justin Meyers/Gadget Hacks

Justin Meyers/Gadget Hacks

Justin Meyers/Gadget Hacks
2. Magnifier
Depending on your iPhone's camera, you might be able to zoom in on a subject using 2x optical magnification and up to 10x digitally. Did you know, however, that your iPhone is capable of digital zoom much further than ten times? You just won't find the feature in the Camera app.
It's called "Magnifier," and it lets you zoom in really far. Just check the comparison below if you don't believe us. The photo on the left is using Magnifier at its maximum zooming distance, while the picture on the right is using the Camera app at the maximum zooming distance. The difference is night and day and shows you just how useful Magnifier can be for getting a closer look at something.
You can take photos using Magnifier, too (as if it wasn't already useful enough).
Cover photo by Dallas Thomas/Gadget Hacks; Screenshots by Jake Peterson/Gadget Hacks (unless otherwise noted)




Comments
Be the first, drop a comment!