Eventually, your voicemail inbox on your iPhone will get full, and you'll have to delete some messages in order to make way for new ones. If all the voicemails you currently have are super important, you're not going to want to delete them before saving them first, of course. Luckily, this is a super simple task, and you can even forward them to someone else if needed.
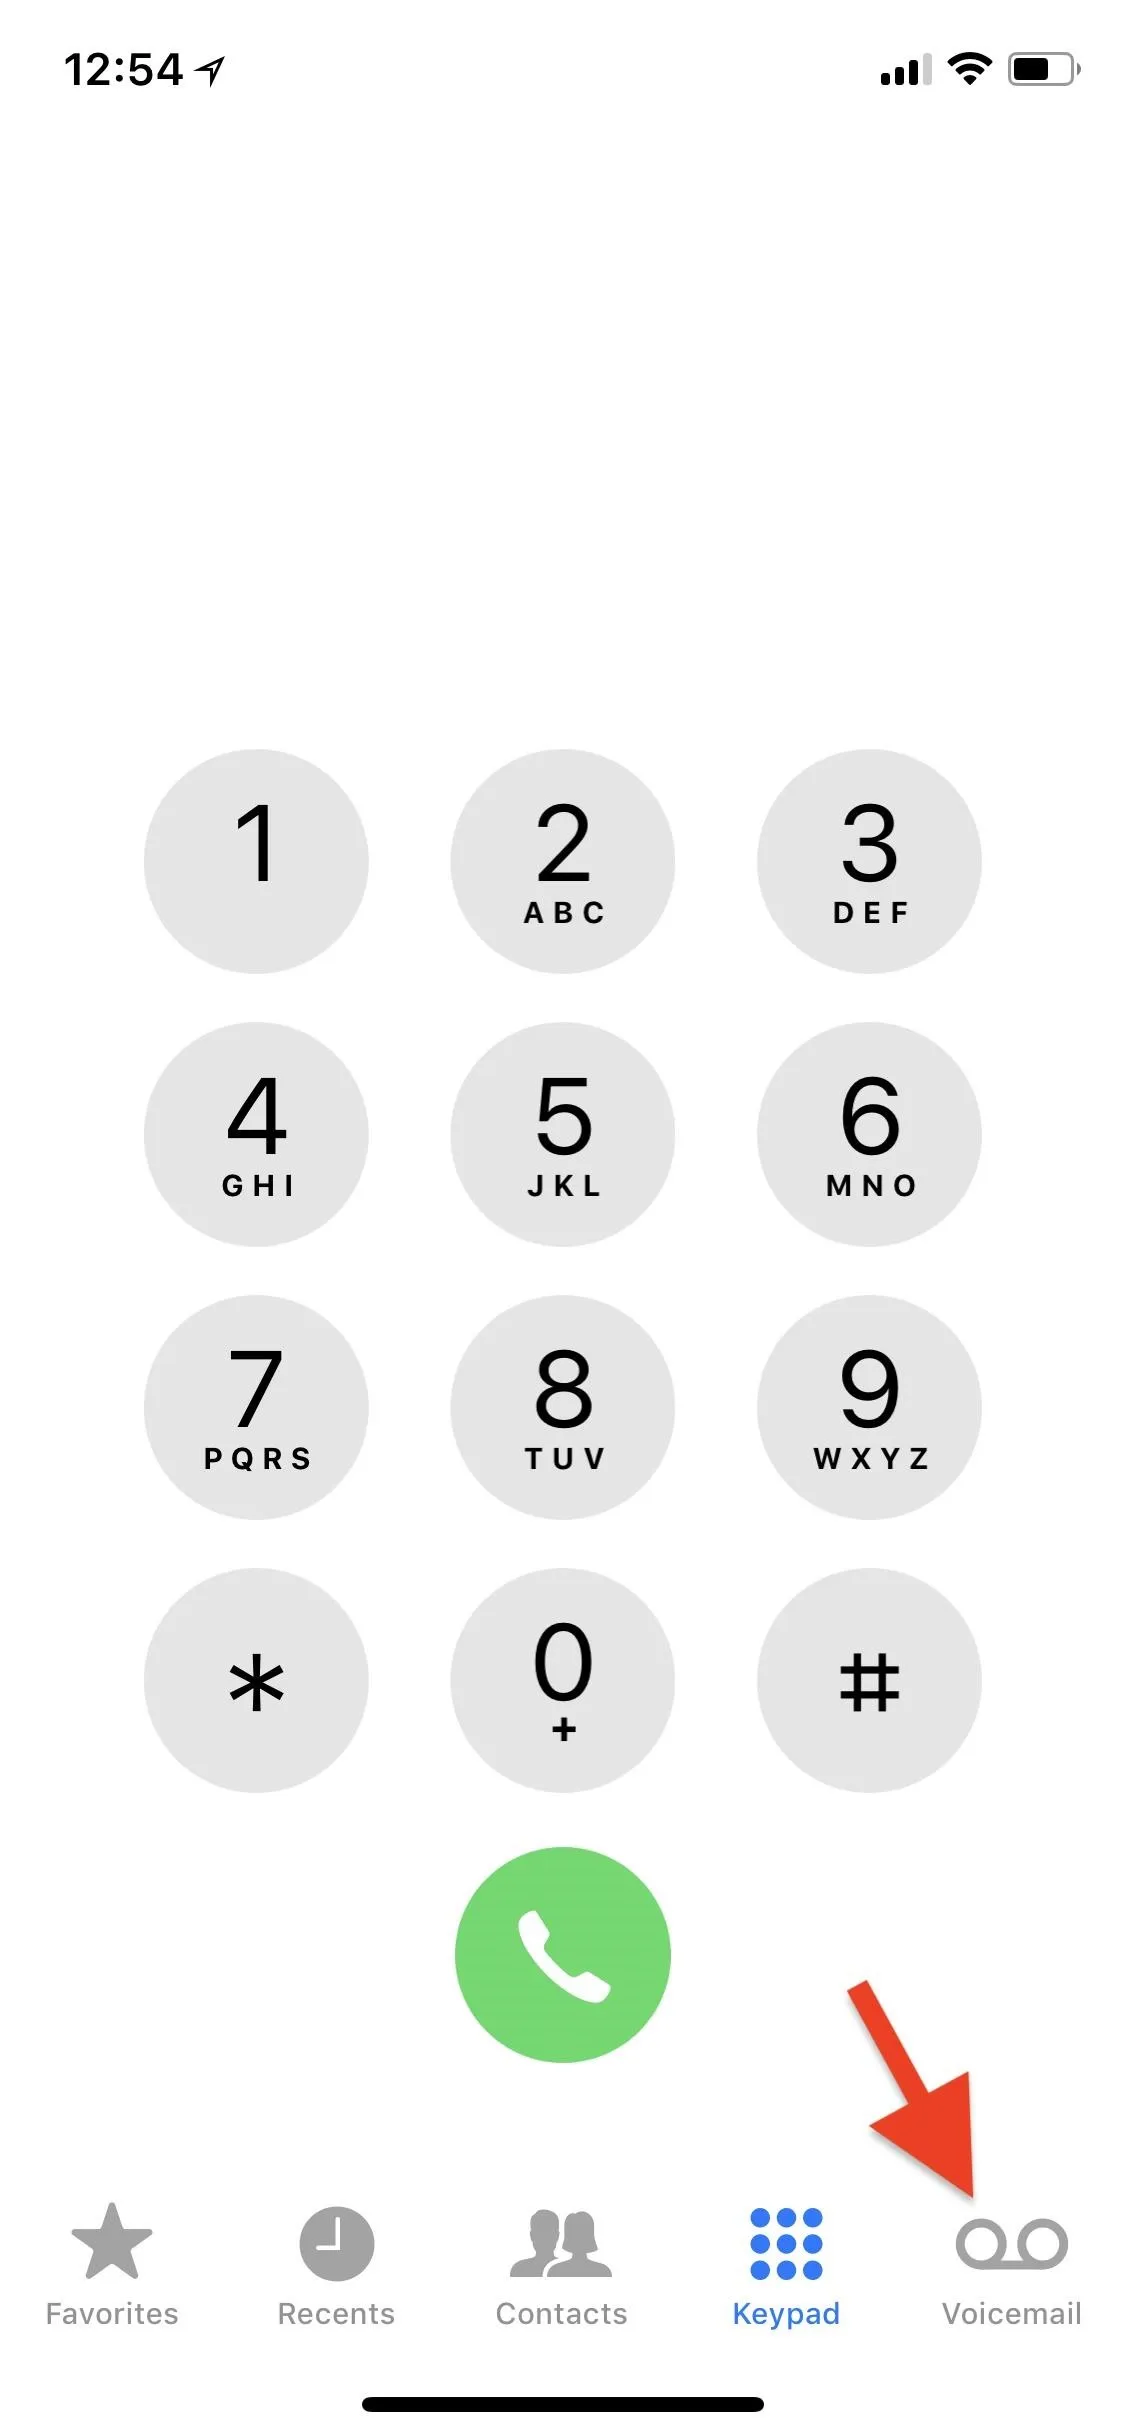
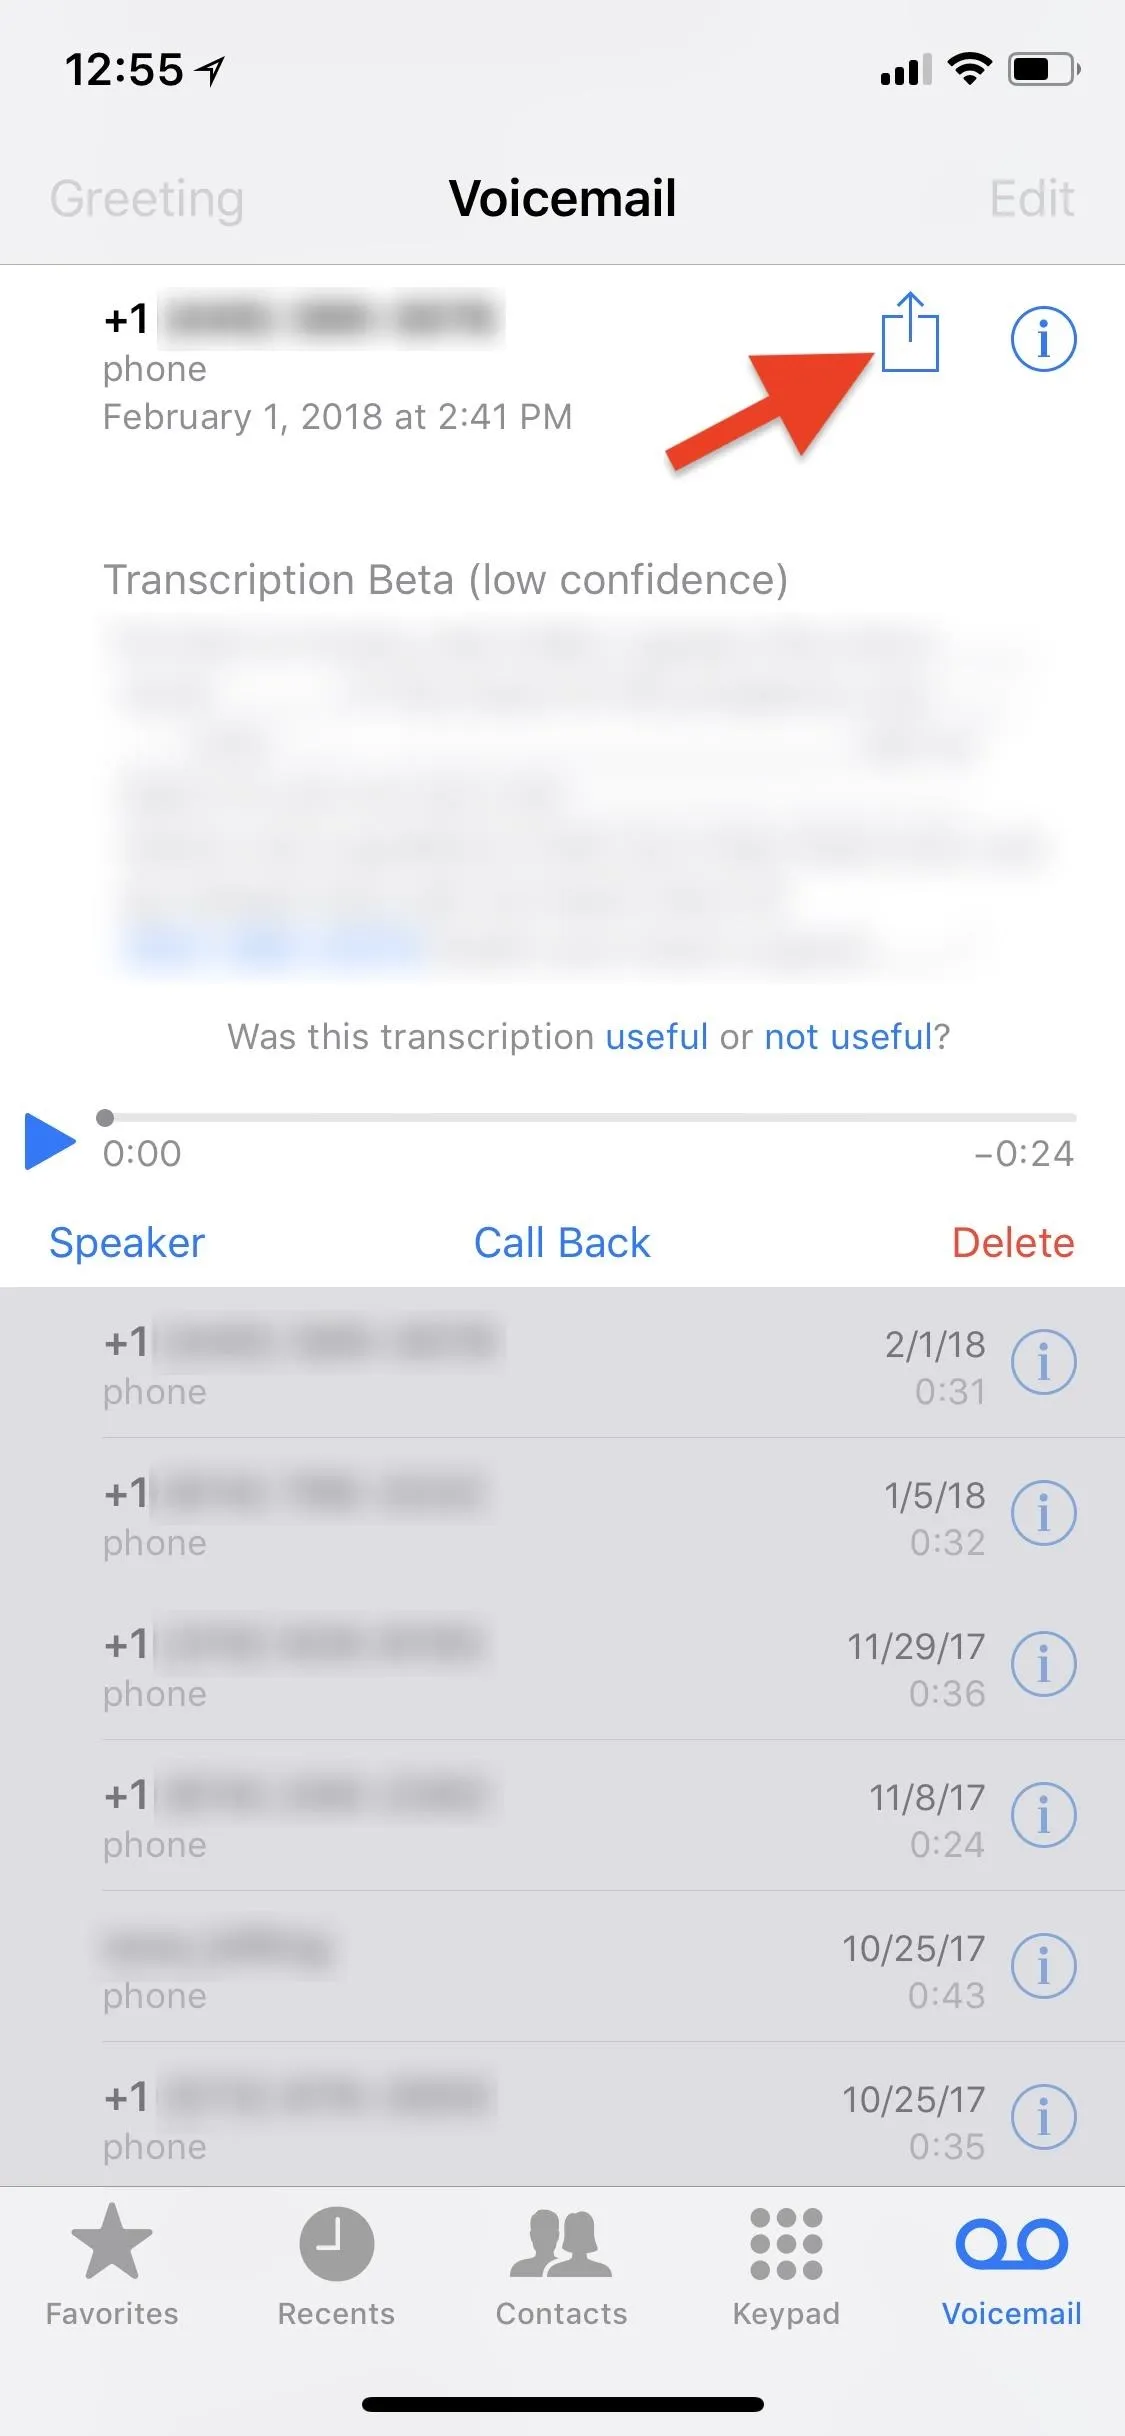
Ever since iOS 9, Apple has included a default way to share, forward, and save voicemails on your iPhone, and it really couldn't be easier. Plus, it works the same way in iOS 11 than it did when the feature first appeared. Just open up your Phone app, go to the "Voicemail" tab like you normally would, then select the voicemail you want to share or save.
- Don't Miss: How to Make Anonymous Calls from Your iPhone


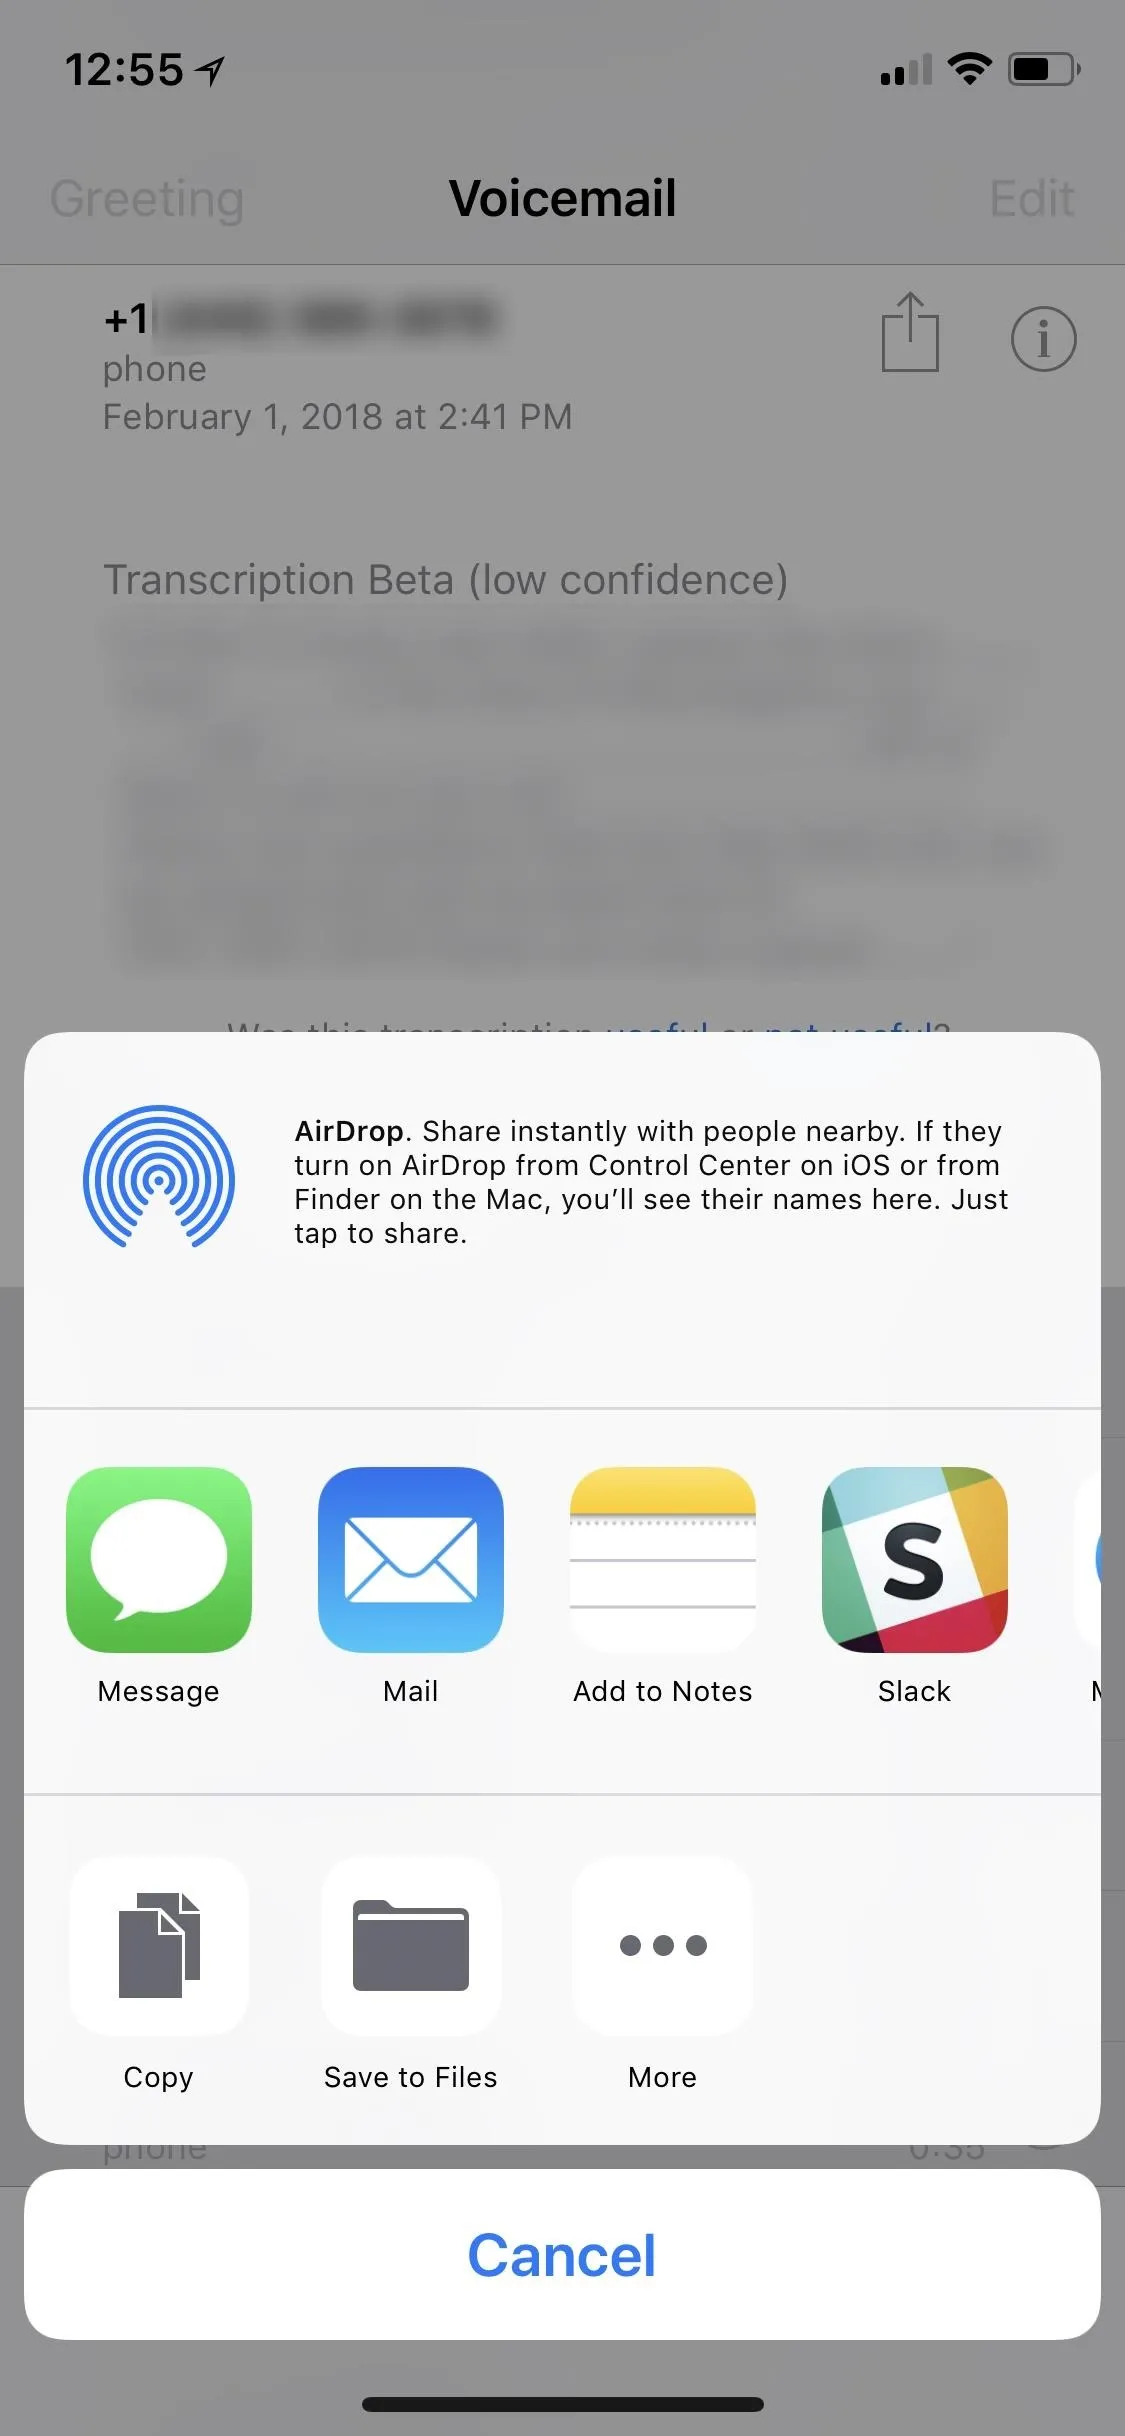
Once an individual voicemail is selected, you should now see the share sheet icon. Tap on that icon, then choose which way you want to share or save the file. When it comes to default Apple options, you can select any of the following.
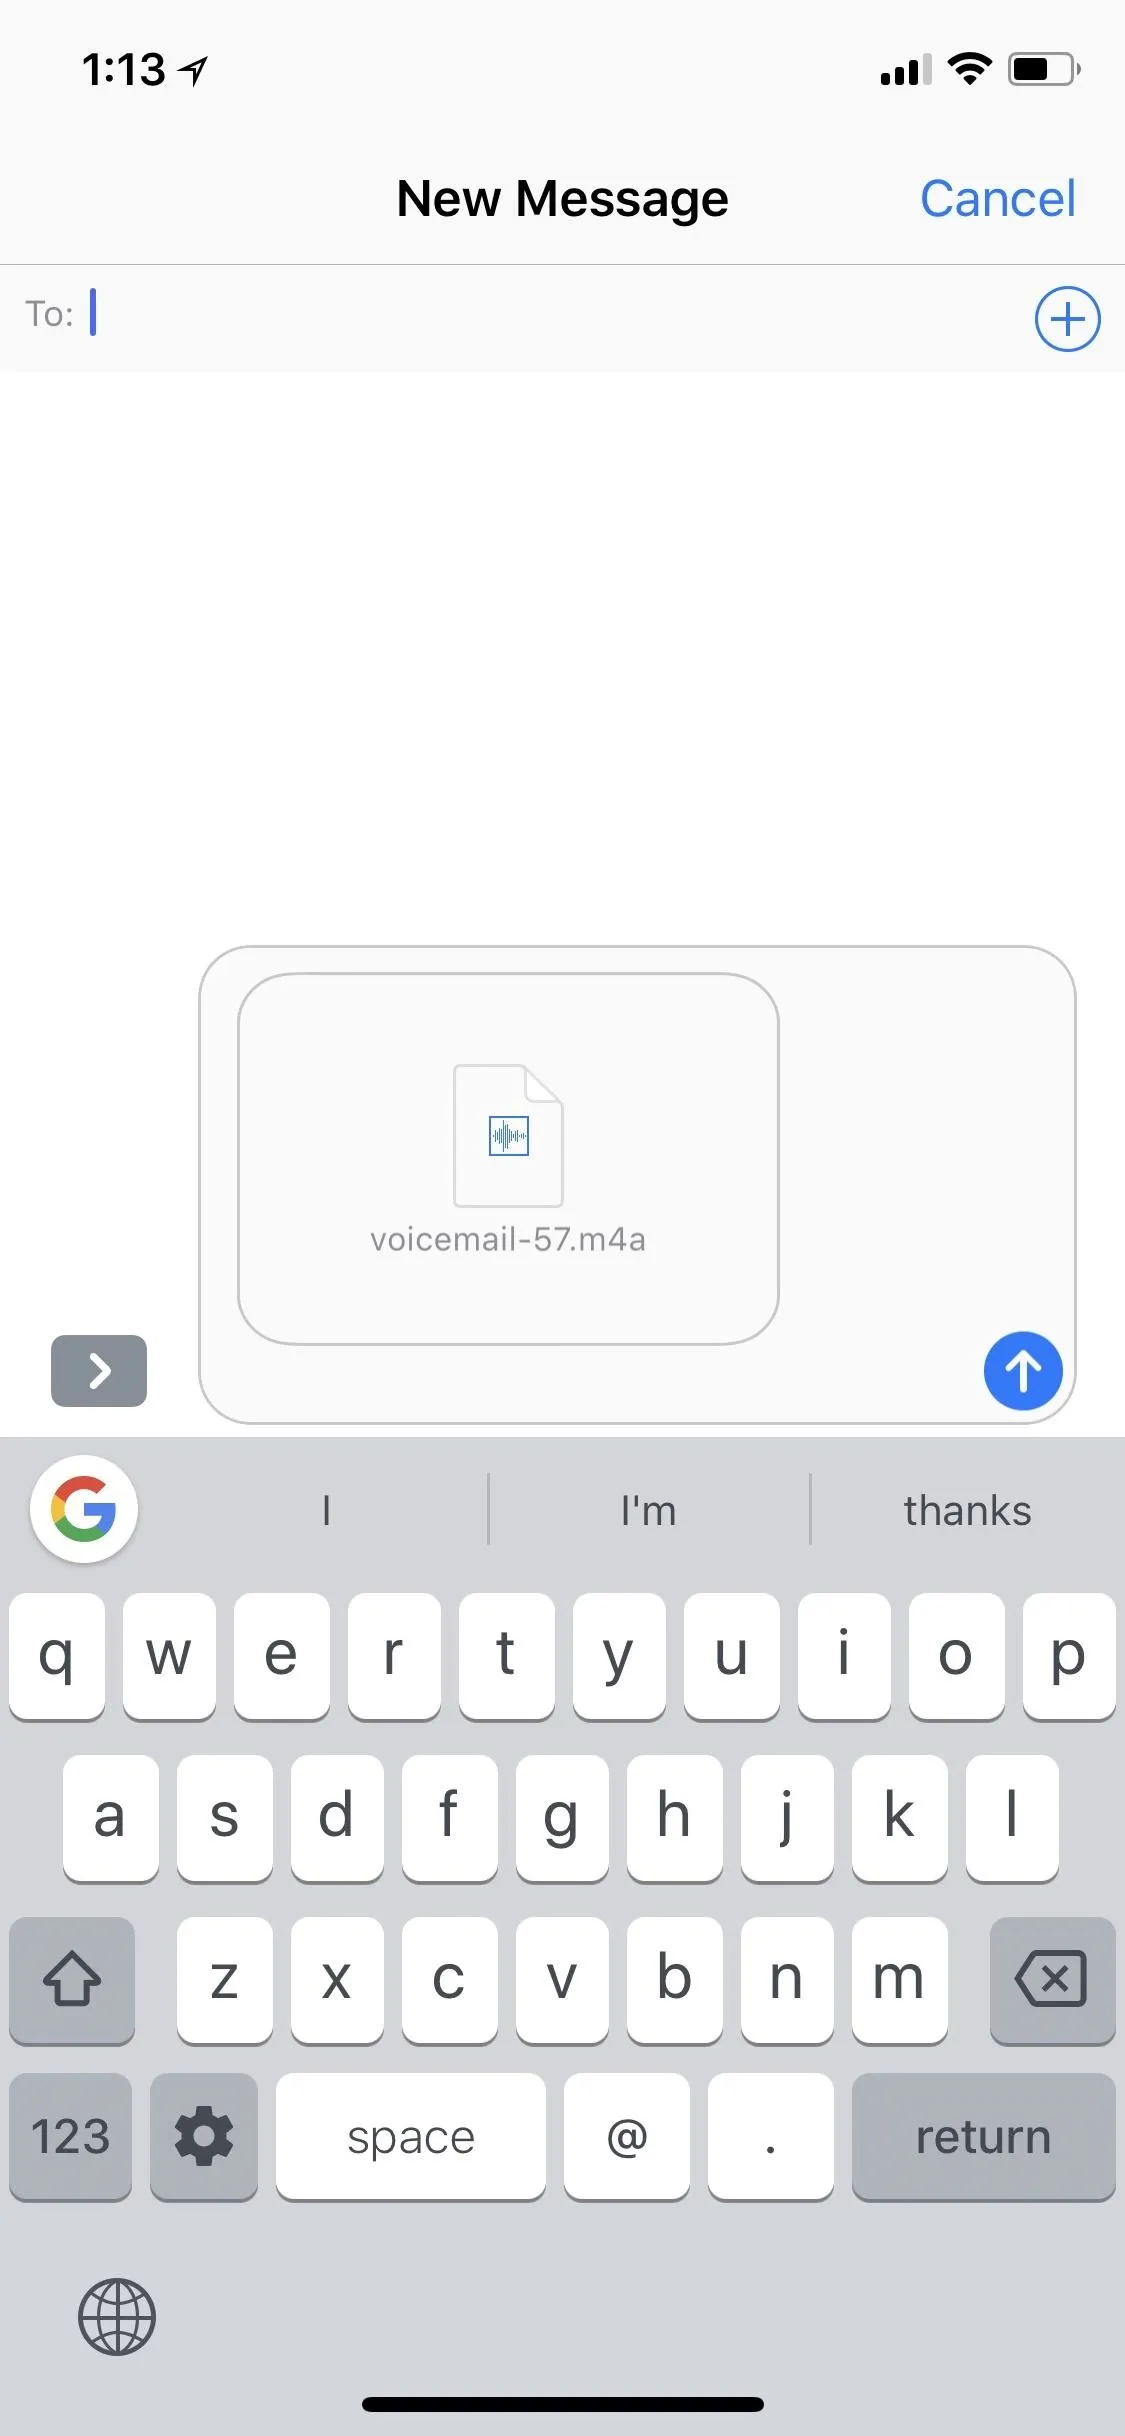
- Message (to share it as an .m4a audio text or iMessage).
- Mail (to add it as an .m4a audio attachment in a new email draft).
- Add to Notes (to attach the .m4a file to a new or existing note).
- Voice Memos (to add it as an .m4a file in your Voice Memos app).
- Copy (to copy the .m4a file to your clipboard so you can paste it anywhere).
- Save to Files (to download it to iCloud Drive, your iPhone's storage, or third-party apps like Google Drive that are connected to your Files app).


You can also choose to share or save the .m4a voicemail file with apps you've installed from the iOS App Store, such as iMovie, iTunes U, Slack, Pocket, Wunderlist, Trello, WhatsApp, Telegram, Facebook Messenger, Google Drive, Dropbox, Box, Outlook, and the list goes on.
If your choice isn't visible in either row of the share sheet, try tapping "More" in either row at the end to enable your app in the share sheet from now on.
- Follow Gadget Hacks on Facebook, Twitter, YouTube, and Flipboard
- Follow WonderHowTo on Facebook, Twitter, Pinterest, and Flipboard
Cover image and screenshots by Justin Meyers/Gadget Hacks


Comments
Be the first, drop a comment!